achuck49
-
Posts
129 -
Joined
-
Last visited
Content Type
Profiles
Forums
Gallery
Events
Everything posted by achuck49
-

Preprinted lines
achuck49 replied to achuck49's topic in Building, Framing, Planking and plating a ships hull and deck
Sincere thanks for the incredible responses. I should have waited but had an idea and proceeded. I have some clear 'Gorilla' tape which I lightly applied to the keel. This type of tape is thicker than usual. I used a sharp blade and traced a line, moved the cut tape to some heavy paper and cut again. I had a good copy, placed the paper against the keel and with a sharp pencil copied the line. Repeat process and mission accomplished. I do want to thank everyone Chuck -
Good day, I am starting to work on a model of a schooner. On one side of the keel is a printed set of lines indicating rabbit lines, placement of other parts and information of this sort. How can I accurately transfer this information to the reverse side of the keel which is blank? TIA
-
Such a simple idea Thx
- 7 replies
-
- 1
-

-
- serving
- syren ship model
- (and 1 more)
-
A couple of more questions. Example only I have fastened a block to a 'rope' that is 8" long. I put the block in the alligator clamp, but how do l handle the other 8"??? If I use a second clamp then the excessive rope winds and it gets twisted into a mess. So confused
-
A couple of more questions. Example only I have fastened a block to a 'rope' that is 8" long. I put the block in the alligator clamp, but how do l handle the other 8"??? If I use a second clamp then the excessive rope winds and it gets twisted into a mess. So confused
-
I am bidding on this model now and am reviewing your log with interest. Why didn't you plank the deck before installing the bullworks?
- 131 replies
-
- 3
-
-
- finished
- artesania latina
- (and 1 more)
-
Good morning,
I have read your tutorial concerning proportional dividers at least a dozen times. 1. When on some models, there will be a curve to the deck that will cause the center of the deck to be lower than the ends. How do I handle this?
2. Should I ignore deadwood areas? Is there a way to handle this situation?
Thank-you for taking the time to help out.
Chuck
- Show previous comments 1 more
-
-

Chuck - for measuring the frame edges the best method is also the hardest. You'll need to mark where the top edge of the upper most plank will be. Do this on each frame. Then mark where the bottom edge of the bottom most plank will be. This might be a frame or it could be deadwood depending on your build and where the bands end.
Next you need to measure the between the upper and lower mark on each frame. I take a piece of string, put one end on the frame edge at your top mark then run the string down, following the edge, to the lower mark. Do something to notate the bottom spot on the string. Then take the string and stretch it out and measure the distance. Do this for each frame. Note doing this eliminates some (but not all) of the curvature error. Someone the other day used tape instead of string to do this. That might be a good idea just make sure whatever you use stays flush with the frame edge. It's important to get an accurate read for this.
Once you have the total distance for each frame edge, divide that number by the number of bands and you get the width of a band for each frame. If you used tape, you can mark the bands on the tape, put the tape back on the frame edges and then mark the edges. What you want to end up with is something like this
-
-
Thanks!!! Doing it now
-
Good Afternoon, S In a week or two I plan on building a plastic paddle wheel model. I believe that this is the correct order for painting wash all of the parts in something like Dawn dish soap spray primer over everything remove pieces as necessary, assemble, and then paint. Have I got it right??? Should I paint the parts while still attached to the (forgot the word) large collection of parts, then assemble? Is enamel paint better/same/worse then acrylic? Should I get a bunch of rattle cans containing the appropriate color paint? Chuck
-
Glad to see you posting again, will start on mine in a few months.
-
Thanks for the information. It is incredible that they could do this without a chain saw. Chuck A
-
According to a Wikipedia article... Niagara was constructed from 1812 to 1813 to protect the vulnerable American coastline on Lake Erie from the British and played a pivotal role in the battle for the lake. Along with most warships that served in the war, Niagara was sunk for preservation on Presque Isle in 1820. Raised in 1913, it was rebuilt for the centennial of the Battle of Lake Erie. I would never have thought that a ship this size could have been built in one year given the conditions of the time. Chuck A
-
How long would it take to build this type of ship given the conditions? Chuck A
-
Hello I have this model in a box. I will follow very closely. Chuck A
- 162 replies
-
- 2
-
-
- america
- BlueJacket Shipcrafters
- (and 1 more)
-
I'm following closely. Your work area is the same size as my will be after we make our move in two weeks. Curious to see if your area is adequate. Chuck A
-
Model Shipway's Paints
achuck49 replied to Worldway's topic in Painting, finishing and weathering products and techniques
Thanks for the information. I will abandon latex...except for those special evenings. Chuck A -
Model Shipway's Paints
achuck49 replied to Worldway's topic in Painting, finishing and weathering products and techniques
Confusion continues for this novice. In another section in this category, I asked about using paint samples from Lowes or Home Depot. I received several answers describing that paint pigment's will be to large and cover detail. I specifically mentioned latex, which is also mentioned above. Does thinning reduce pigment size? Chuck A -
Latex paint?
achuck49 replied to achuck49's topic in Painting, finishing and weathering products and techniques
It is hard enough to assemble the easiest model. I think I will pass on water features. Thanks Chuck A -
Latex paint?
achuck49 replied to achuck49's topic in Painting, finishing and weathering products and techniques
Oh Makes sense -
Off topic but congratulations on hanging in long to retire. Thanks for your service.
-
I've posted odd questions before, so I feel comfortable posting another one. Hardware stores can replicate nearly any color paint and sell small sample containers. So why not use latex paint? Maybe everyone is and I am the last to figure it out.
-
As stated earlier, start a build log. I would like to follow along.
-
On payday I will get a closet dowel Thanks
-
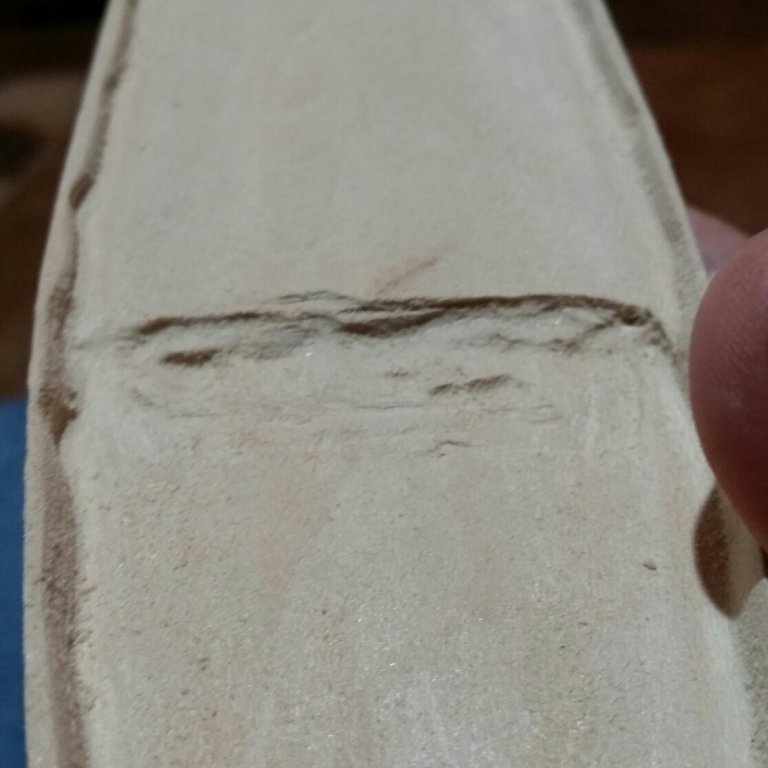
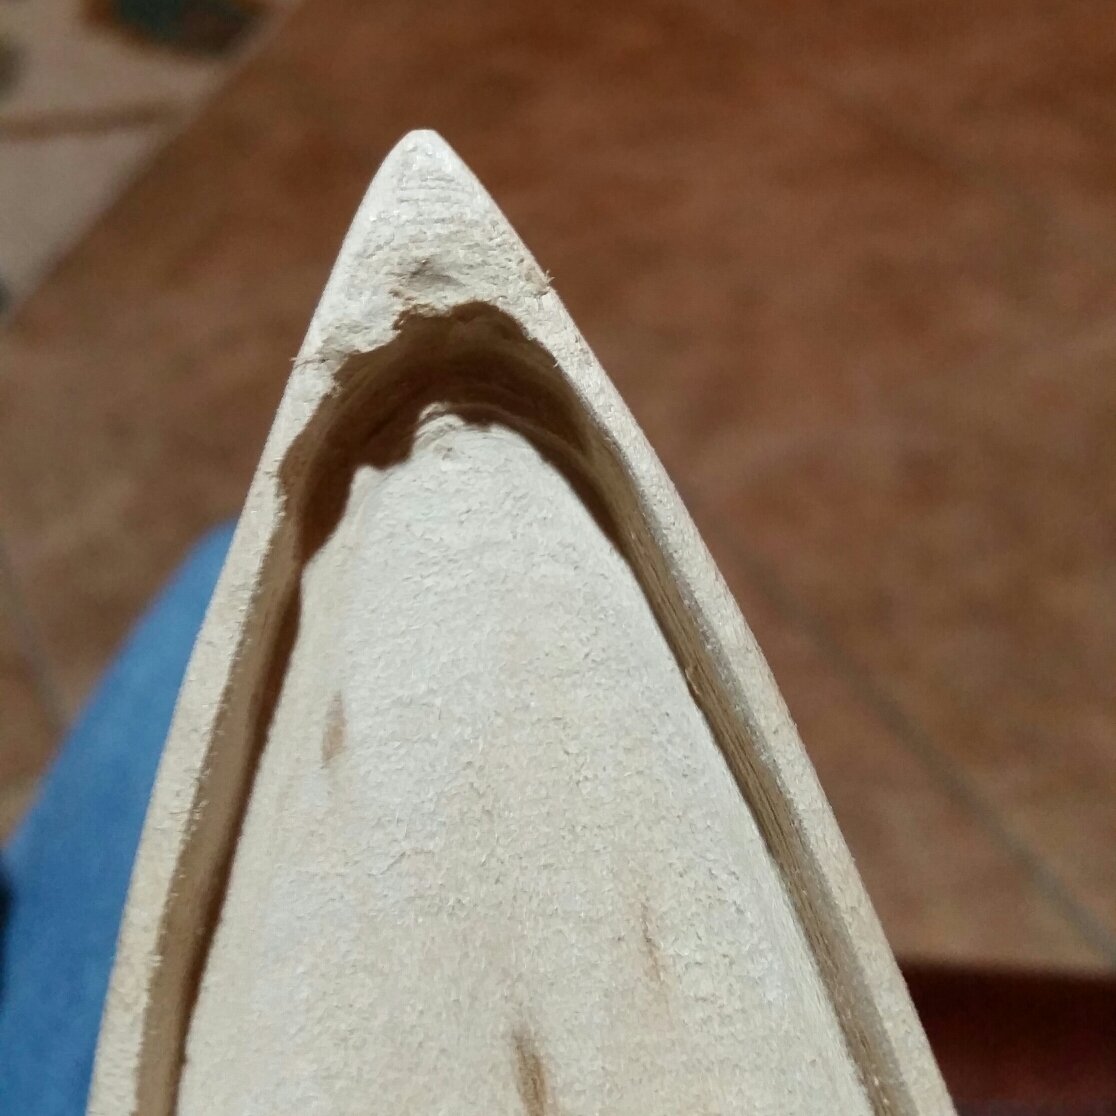
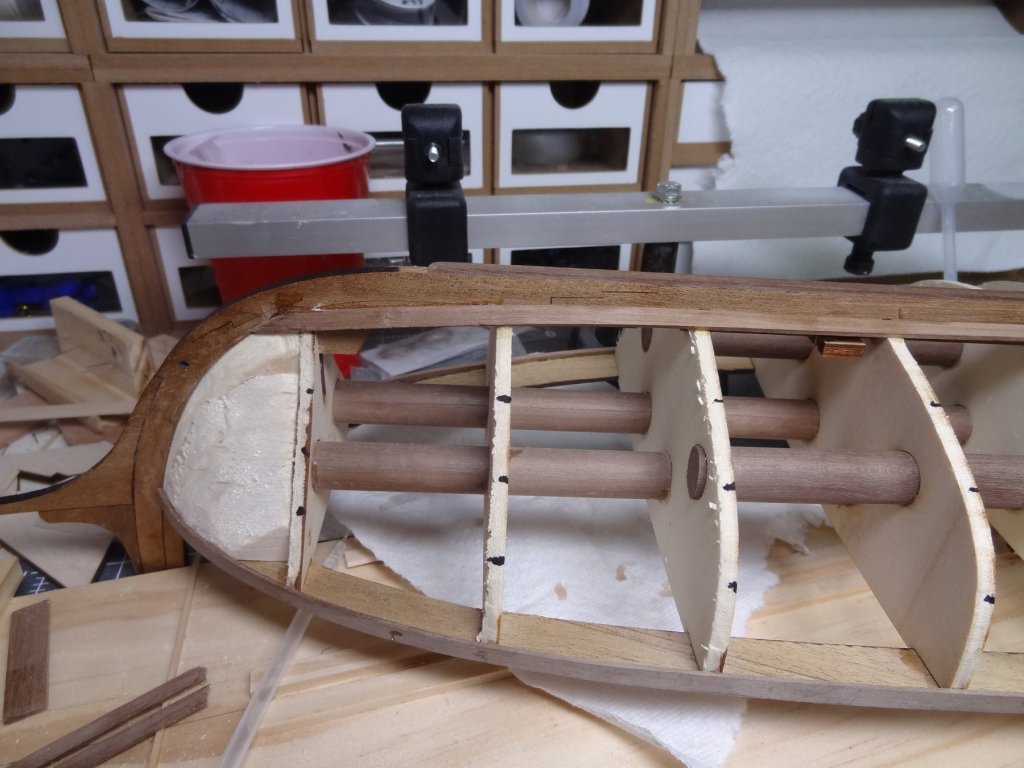
To all Thanks for the info. I absolutely have the wrong chisels, payday is next week. I will get what is required to keep the tools sharp. I will book mark this section and use the photos to help with rigging. As far as securing goes, I spent a large part of the day trying to find anything to attach to the bottom of the hull so that I could use a vise. We are moving to Oklahoma City which means that stuff is getting packed or my Commander in Chief tossed stuff out. I did consider sawing a small piece broom handle, but feared that if caught the boss would make me use it. Thanks the advice will be used. ChuckA
-
I hope you can see from the photos there are areas that a Dremel cannot handle. The bow needs to be thined, how? This is between decks. I believe the distance between decks is 2mm. There is an area at the end of hull that requires the same type of work. (Photo will not upload) I hope that I am clear inow my request for knowledge. Chuck A