John Clements
-
Posts
63 -
Joined
-
Last visited
-
 John Clements reacted to a post in a topic:
Le Soleil Royal by John Clements - Heller - 1/100
John Clements reacted to a post in a topic:
Le Soleil Royal by John Clements - Heller - 1/100
-
John Clements reacted to a post in a topic:
Le Soleil Royal by John Clements - Heller - 1/100
-
John Clements reacted to a post in a topic:
Le Soleil Royal by John Clements - Heller - 1/100
-
Again I have to apologise for a long gap in postings and I'm afraid it's likely to continue for some time. I don't see myself returning to this project any time soon. For some months we've been concerned about my wife's health and now we know she has had two strokes and has cancer, so you'll all understand I have other priorities. I don't know how or when I will be able to pick it up again but I hope I'll be able to come back here eventually. I'll just sign off for now and say thanks for all the comments, help and inspiration from this community, and wish you all the very best with your own projects.
-
shipman reacted to a post in a topic:
Soleil Royal by Hubac's Historian - Heller - An Extensive Modification and Partial Scratch-Build
-
T. Alex reacted to a post in a topic:
Le Soleil Royal by John Clements - Heller - 1/100
-
T. Alex reacted to a post in a topic:
Le Soleil Royal by John Clements - Heller - 1/100
-
John Clements reacted to a post in a topic:
Soleil Royal by Hubac's Historian - Heller - An Extensive Modification and Partial Scratch-Build
-
Jeff T reacted to a post in a topic:
Soleil Royal by Hubac's Historian - Heller - An Extensive Modification and Partial Scratch-Build
-
druxey reacted to a post in a topic:
Soleil Royal by Hubac's Historian - Heller - An Extensive Modification and Partial Scratch-Build
-
 Hubac's Historian reacted to a post in a topic:
Soleil Royal by Hubac's Historian - Heller - An Extensive Modification and Partial Scratch-Build
Hubac's Historian reacted to a post in a topic:
Soleil Royal by Hubac's Historian - Heller - An Extensive Modification and Partial Scratch-Build
-
yancovitch reacted to a post in a topic:
Soleil Royal by Hubac's Historian - Heller - An Extensive Modification and Partial Scratch-Build
-
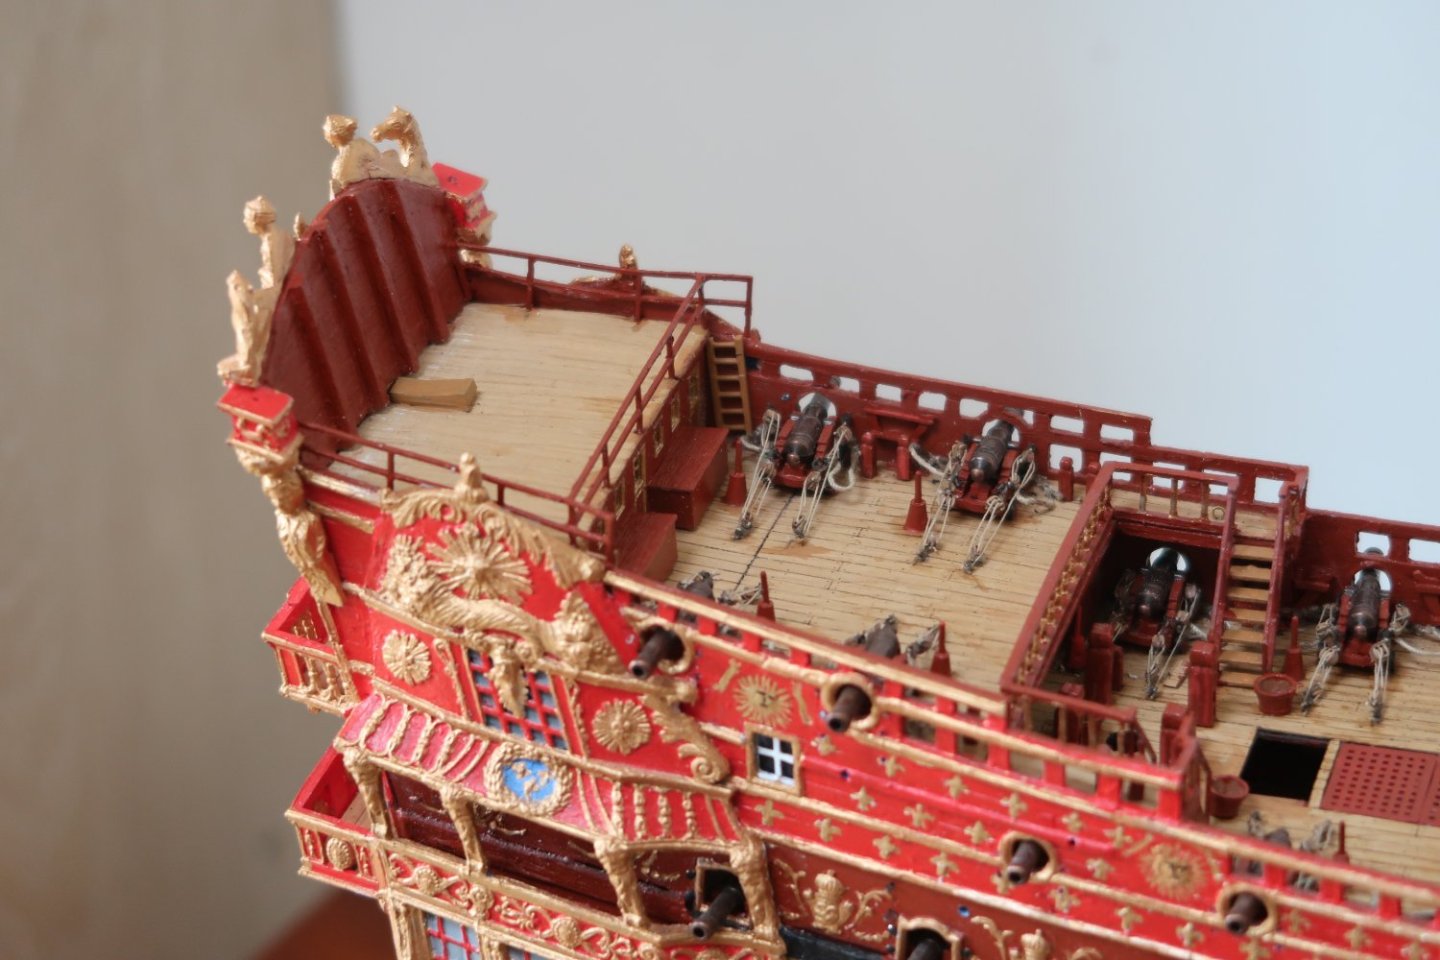
Looking at your Sunday post and colour photo of the stern to date, I am just speechless! The colours are so striking and your painting skills second to none. Getting that absolutely clear definition of highlight detail over background in the contrasting shades is quite beyond me, and I suspect many others. Something we all strive for but rarely achieve. It's a real tonic seeing your progress. I hope you and your family have a restful and enjoyable Christmas and wish you continuing success and pleasure in your project in the new year (and in everything else too, of course)
- 2,432 replies
-
- 5
-
-
-
- heller
- soleil royal
- (and 9 more)
-
John Clements reacted to a post in a topic:
Soleil Royal by Hubac's Historian - Heller - An Extensive Modification and Partial Scratch-Build
-
 John Clements reacted to a post in a topic:
Soleil Royal by Hubac's Historian - Heller - An Extensive Modification and Partial Scratch-Build
John Clements reacted to a post in a topic:
Soleil Royal by Hubac's Historian - Heller - An Extensive Modification and Partial Scratch-Build
-
Knocklouder reacted to a post in a topic:
Le Soleil Royal by John Clements - Heller - 1/100
-
Bill, if you go back to June 2021 on here, you'll see the difference between the 2, 2.5 and 3mm blocks as I tried all three before taking the middle path, and why I did so. It's not an easy call. The 2mm blocks are really difficult to thread, and to attach the hooks as they are just so small. As I said before, to me the main issue is the size of the hooks which are overscale at 1/100 making the run of the ropes very short and difficult to get all straight and looking anything like the real ones I saw on the Victory. The run of the tackle was taken from the diagram in Mondfeld's book, page 169, the continental system where both the gun and train trackles are attached to the same eyebolt at the rear end of the carriage (getting both hooks through that tiny loop is another strain on one's patience). Warning - this part of the project will drive you crazy!
-
Hubac's Historian reacted to a post in a topic:
Le Soleil Royal by John Clements - Heller - 1/100
-
Sorry, Bill, to have been so tardy in replying to your message. I've just been really tied up with other stuff, and also dealing with a close family health issue which is diverting a lot of my time, and haven't looked at this site for some time. The short answer is that I only rigged the visible cannon as you saw in my photos. If you go back, you'll see the different size blocks I tried and what they look like. I ended up using 2.5mm blocks from HisModel all round. I did find that the very short gaps between the blocks were a problem as the short lengths of rope make it hard to tighten everything up, which is why some of them look a bit loose - they are. The real issue there is that the hooks are inevitably overscale and make the tackles shorter than they should be as the hooks take up too much of the length between the eyebolts. I hope that makes sense. In the end, you just have to do what you think is best. The thread is 0.1mm. The other issue is not being able to tighten them enough as doing so can pull out the eyebolts from their locations in the plastic bulwarks or deck. Even with CA glue, the bond between metal and plastic is not good enough to take the strain of trying to pull the thread tight to make it look better. I'm just about to turn in, so I'll do the photo you ask for tomorrow but hopoe this helps in the meantime. I have to say it was not a job I enjoyed, although I was reasonably pleased with the result.
-
John Clements reacted to a post in a topic:
Soleil Royal by Hubac's Historian - Heller - An Extensive Modification and Partial Scratch-Build
-
John Clements reacted to a post in a topic:
Soleil Royal by Hubac's Historian - Heller - An Extensive Modification and Partial Scratch-Build
-
John Clements reacted to a post in a topic:
Soleil Royal by Hubac's Historian - Heller - An Extensive Modification and Partial Scratch-Build
-
John Clements reacted to a post in a topic:
Soleil Royal by Hubac's Historian - Heller - An Extensive Modification and Partial Scratch-Build
-
EJ_L reacted to a post in a topic:
Le Soleil Royal by John Clements - Heller - 1/100
-
Thanks! I stuck to doing one gun a day to keep my sanity. In fact, getting the eyebolts secured to the inside of the bulwarks was the worst part, and trying not to pull them out when tightening the lines. I used the 2.5mm blocks from HisModel. Glad it's over and done.
-
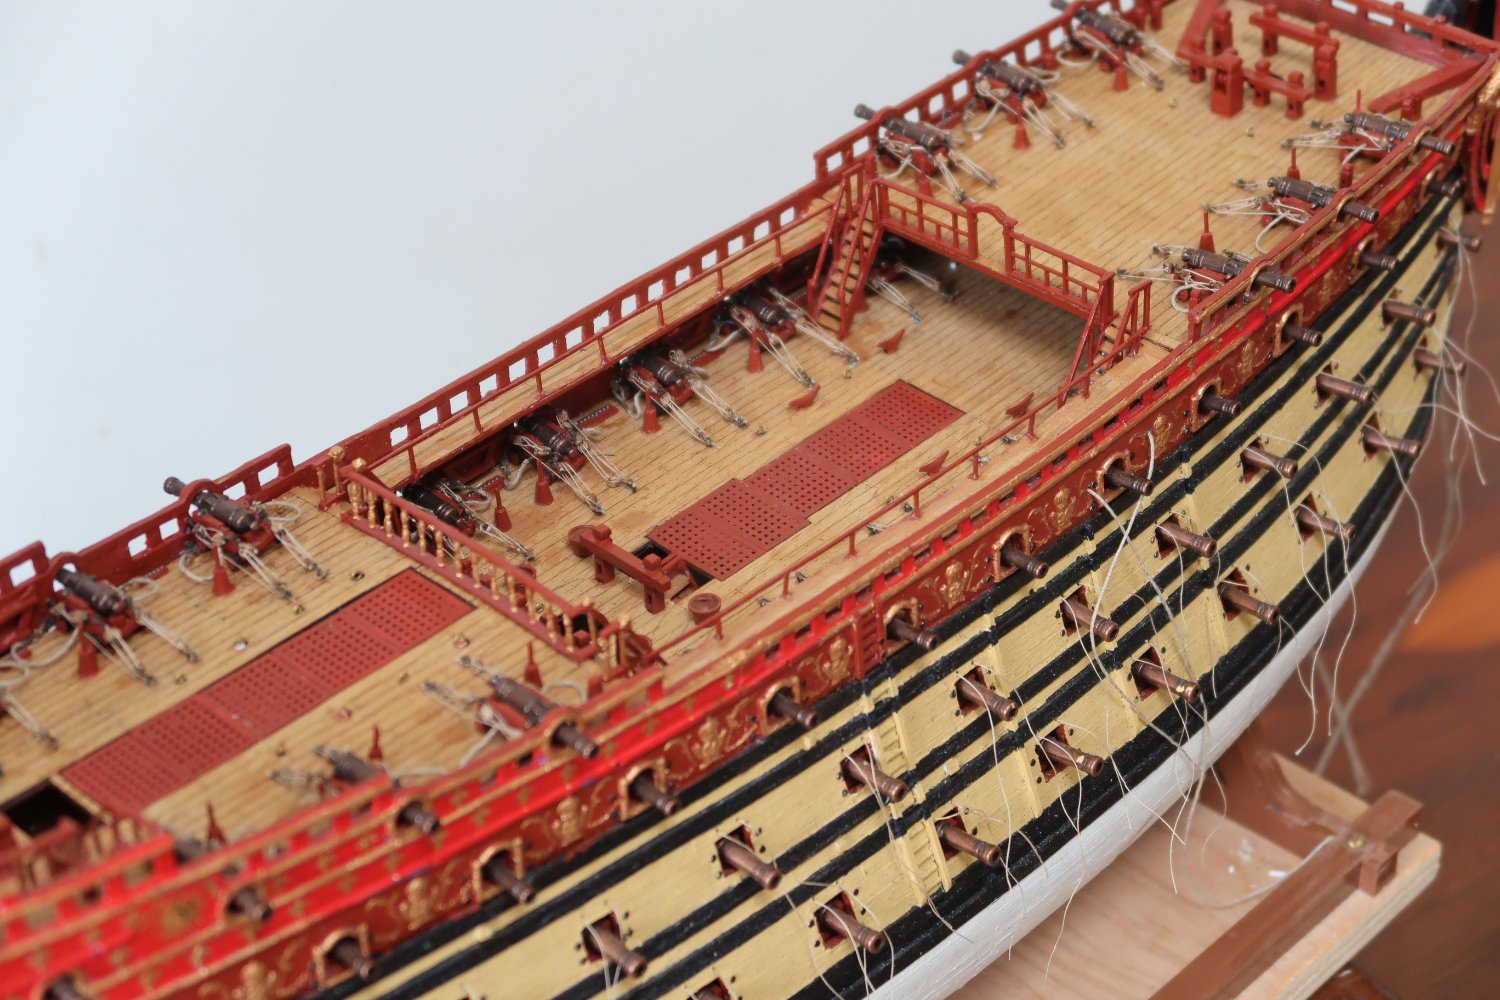
HI BIll. Some wise comments here from more experienced modellers than I. I agree with everything Marc and Henry have said. There are fit problems but with care you can sort them out, and doing the extra work on the stern galleries is well worth the effort. Like you, I feel I can get away with some oddities as no-one who will view the completed model (and heaven knows when that will be!) at home knows enough about the subject, as I've discovered with my previous large sailing ship model. You commented about replacement parts. So far, I have replaced all the gun barrels and also the visible carriages with those from HisModel, wooden channels also from HisModel, and will replace all the plastic blocks with wooden ones, and the hooks, eyes, etc, with brass ones. I have bought some Amati chain plates to see if they can be adapted to fit. In the meantime, I have fitted the channels to one side and amended my decorative scheme to look better, so I've removed the home-made sun emblems, extended the ribs right to the stern and filled the spaces with fleurs. I've just discovered that Amati do an etched set of fleur-de-lys but they are 3mm high so a bit on the small side. If they were 4-5mm, they would have been perfect as the gap between the ribs is 6mm but they could be useful for a different configuration. Next up is to do the same on the other side, then fit the deadeyes and chainplates, which starts to get more exciting............


-
Hi BIll. I'm lucky enough to live not too far away and when I visit my brother who lives near Portsmouth we always spend the day in the dockyard. I have always loved ships; my mother's family were merchant seamen, and she worked in the Admiralty during WW2, so I heard a lot about ships when I was a boy. I found even visiting the Victory without her masts and rigging gave me a lot of inspiration, seeing how the crew lived, stores shipped, etc., and using my imagination. Transatlantic language problems - 'not a patch on' something means 'not nearly as good as', so it is a compliment on your excellent model, which I have had a brief look at and will do so again when I have more time. I am just fitting the channels now on the SR, an exciting step forward (wooden ones, not the kit plastic). It's led me to re-consider some of the external decoration as the channels are very prominent and have quite an impact on how it all looks, especially the long sweeping decorative lines which border the coloured sections.
-
Hi Bill. Thanks for your comment on my SR. Not a patch on your Victory, I have to say. Have you been to Portsmouth and seen the original? Quite an experience. My kit had the original paper instructions and certainly not in full colour. I printed off the English (Aurora) version as I don't know enough French, and have looked at the Imai instructions too, which are different again. Like others, I also refer a lot to the St Phillipe monograph to clarify things. I'd be doubtful if Heller have changed the kit at all. They are constantly re-issuing old kits and never seem to update them - I have many of their French and German modern ship kits, most of which are many years old, and they just change the box art. I am building the SR for fun; it's not at all my main model-building hobby, just the odd half hour now and then. It's not meant to be a museum piece, so whilst I am following Marc's build with amazement and respect, there's no way I could replicate his skill or patience. And you are right, being able to exercise one's imagination and judgement I think adds a lot to the interest. I'll follow your own build with interest. I like to think we all have something to bring to the table.
-
Too quick off the mark with that last comment, as usual. There are a few annoying paint repairs to be done first and I've spotted the bolt heads for the gun tackles on the upper decks have yet to be installed. As the holes I originally drilled for those are now occupied by the eyelets on the inside, they'll most likely be a blob of acrylic moulding paste then painted. I am inclining towards not altering the bowsprit angle. Apart from having to redo work already done, I did a bit of research which leads me to think it might not be so far out after all.. My measuring showed the actual angle to be about 32-33 degrees. The St Philippe plans show that angle to be 40 degrees. Mondfeld says that around 1650 the angle would be c30, then in 1665 40, but by 1675 reducing to 35, so whilst 32-33 is on the low side, it is potentially not that far out. If Mondfeld had stated that bowsprits were 40 degrees from 1650 to 1700 then I would alter it but it seems there is room for manoevre there over the period of the ship.
-
Thanks for that very full explanation. Like so much, it immediately makes sense when you explain it whereas it was utterly opaque before. If you do manage to get all this information together and in one easily accessible place, it will be a source of inspiration to many. And it does show how minimal the decoration on the Hller kit is, compared to what might have been.
- 2,432 replies
-
- 3
-
-
- heller
- soleil royal
- (and 9 more)
-
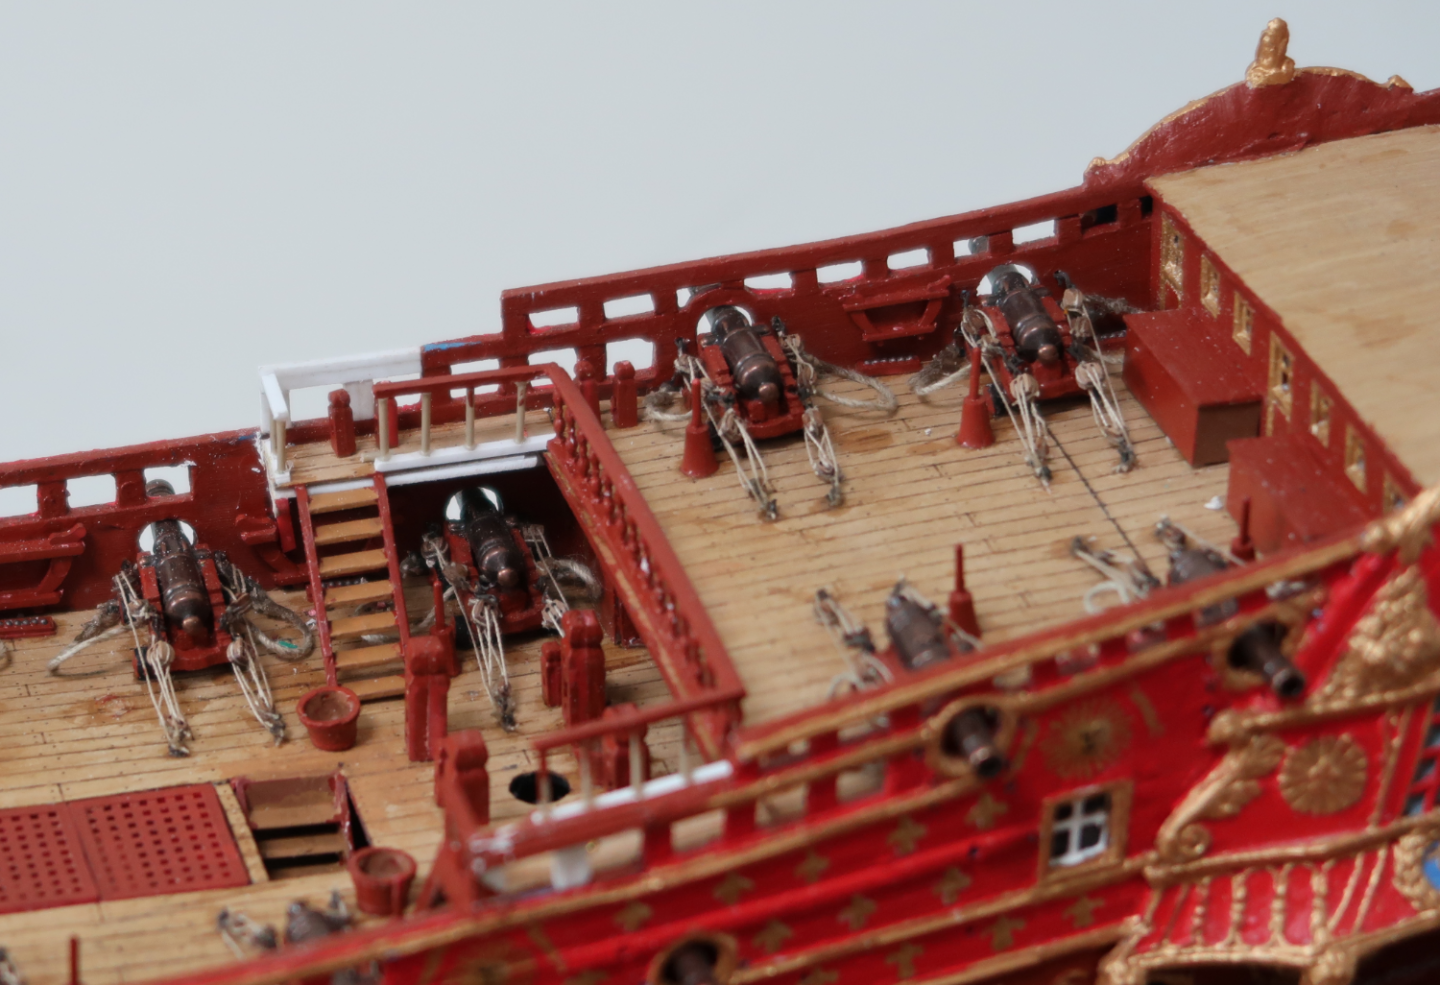
I see it's been over two months since I last posted. I was away from home for the whole of June, but have been slowly working away since I got back on the various access stairs and ladders as I mentioned before. We know there are lots of details missing from the Paris model which must have been present, so it isn't really a guide for these. Mondfeld's book is pretty clear that ladders had handrails and I'm happy to follow him. There is a photo in his book of the model of the Royal Louis which shows the light handrail round the edge of the uppermost deck, so I feel that is supported too. That photo also shows a lot of decoration on the inside of the ship which I would have loved to replicate to some degree but I lack the skill, time and patience to do all that from scratch, so red oxide with a bit of gilt here and there will have to do. Next steps: deciding whether or not to alter the bowsprit angle and making a start on the channels, so plenty to think about.


-
Catching up after months off-line.....your continued research is fascinating and you are doing us all a great service by putting it all on here too. The idea of a book at the end of it (but is there ever an end of research on ones' main interest?) is definitely welcome. It would be something to treasure, I'm sure. I was also interested to see your proposed gun layout. It seems to mean squeezing another pair of guns on the lower two decks which, if you use the Heller hull length, I think means having one gun on each deck firing through solid sections of the quarter galleries. Is that what you intend, or have I misunderstood?
- 2,432 replies
-
- 4
-
-
- heller
- soleil royal
- (and 9 more)
-
Have a great trip. Having just come back from a month away myself, I can see that some time away from the work bench really helps to de-clutter the mind so that one can focus on what's important when you return to work and hobbies (or just hobbies in my case). And leaving the plastic to set itself in the light whilst you are away is just genius.
- 2,432 replies
-
- 3
-
-
-
- heller
- soleil royal
- (and 9 more)
-
Awesome indeed. Although I don't intend to - and indeed couldn't - emulate your dedication and craftsmanship, these detailed posts are fascinating and an inspiration to continue my own efforts with this particular kit with all its imperfections and question marks. I can see I'm going to have to try my hand at plastic carving at some stage; your step by step pictures are so useful. Thank you for being so generous with your time in writing all this up. Won't it be interesting in some years time to see all these different versions that are being worked on in a hopefully complete state?
- 2,432 replies
-
- 7
-
-
-
- heller
- soleil royal
- (and 9 more)
-
As I am going to be away from home for a month and not taking SR with me. I thought I would do a brief update. As mentioned before, I've been pondering the lack of access to the upper decks and have decided on a way forward which, for the poop deck, is in the picture below. It solves the problem of the guns being in the way nicely, I think, and is aesthetically pleasing (to me at least). I don't make any claims as to historical accuracy but that's true of a lot of the detail on this ship. I will be adding handrails to the steps. For the uppermost deck, I will have movable ladders stored against the bulwarks by the end doors. I've also made a start on the masts, making the wooldings and painting them, and am taking my books and plans away with me to try and work out the rigging more clearly so hopefully when I get home I can order what I need for that mammoth task. And I've decided that I will change the angle of the bowsprit, which I think is do-able even at this stage. Part of that will be to slightly reduce the height of the head rails at their terminus behind the figurehead which looks too high compared with the Berain drawing. Incidentally, the spar itself looks much smaller and frailer compared to that on the Saint Philippe. I wonder if the SR spar is another error.