Iseaz
-
Posts
35 -
Joined
-
Last visited
-
 Cmm4000 reacted to a post in a topic:
Montanes by Iseaz - OcCre- 1/70
Cmm4000 reacted to a post in a topic:
Montanes by Iseaz - OcCre- 1/70
-
 mugje reacted to a post in a topic:
Montanes by Iseaz - OcCre- 1/70
mugje reacted to a post in a topic:
Montanes by Iseaz - OcCre- 1/70
-
BikerMart reacted to a post in a topic:
Montanes by Iseaz - OcCre- 1/70
-
GrandpaPhil reacted to a post in a topic:
Montanes by Iseaz - OcCre- 1/70
-
chris watton reacted to a post in a topic:
Montanes by Iseaz - OcCre- 1/70
-
Montanes by Iseaz - OcCre- 1/70
Iseaz replied to Iseaz's topic in - Kit build logs for subjects built from 1751 - 1800
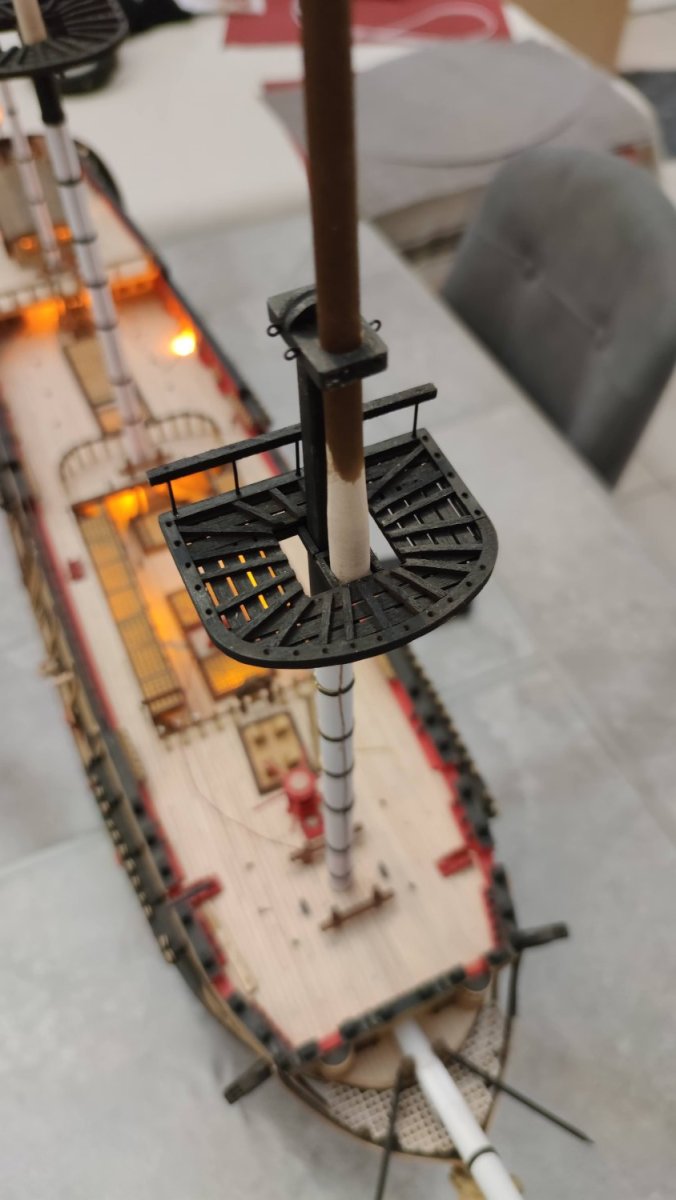
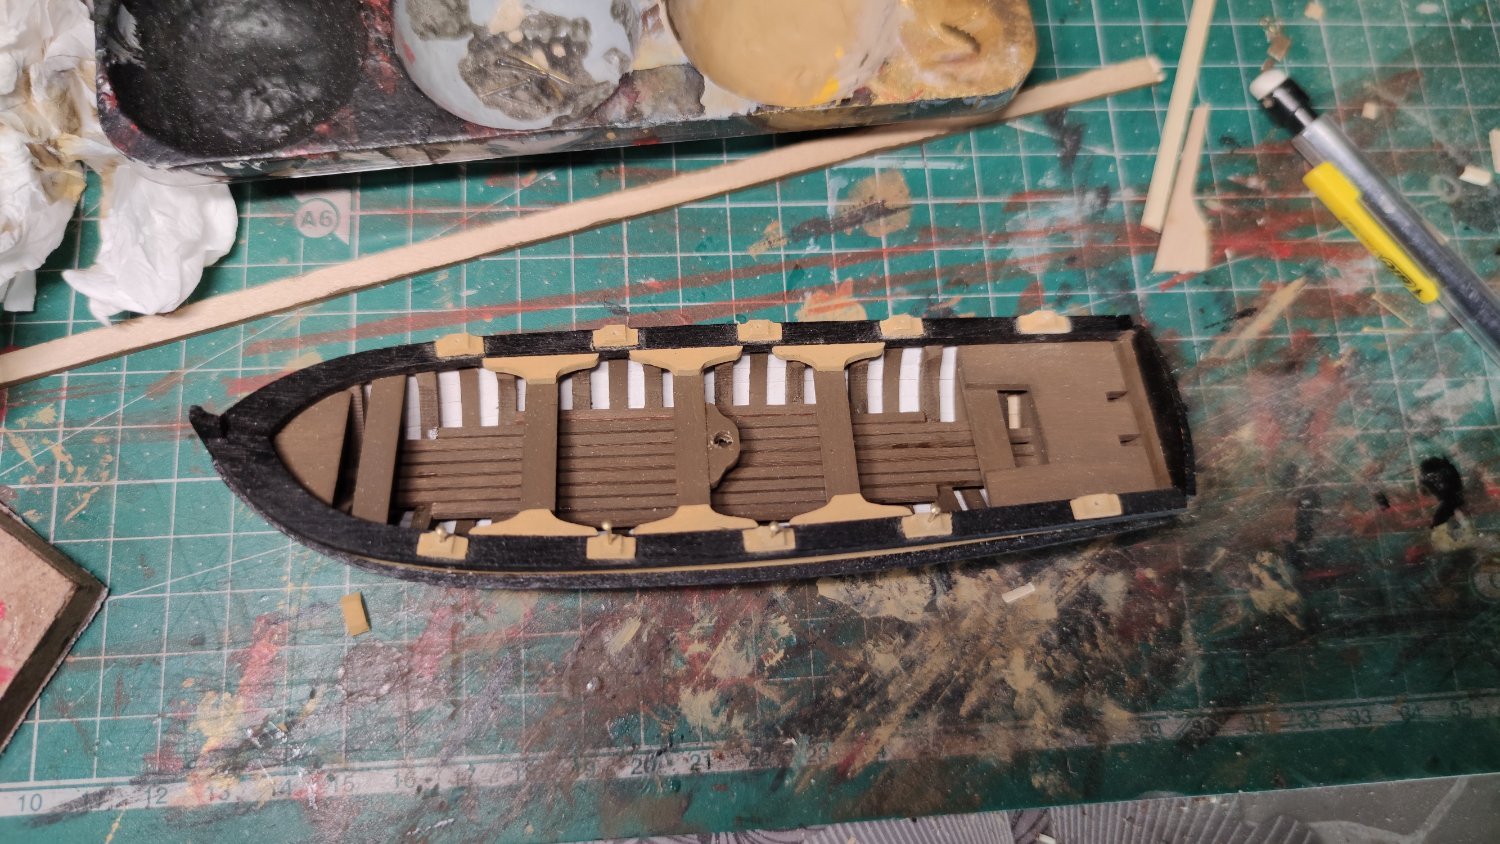
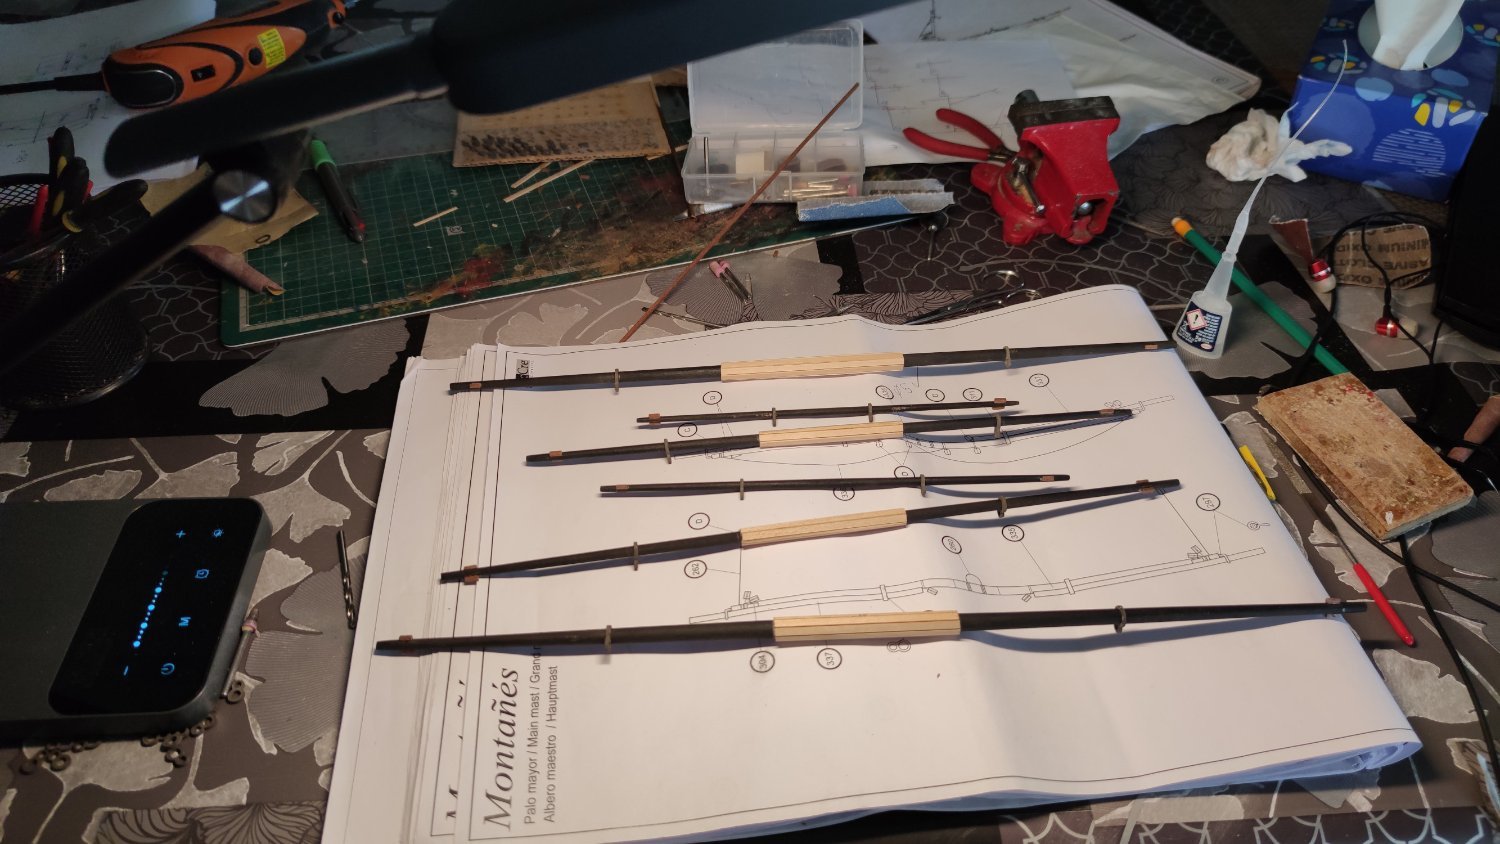
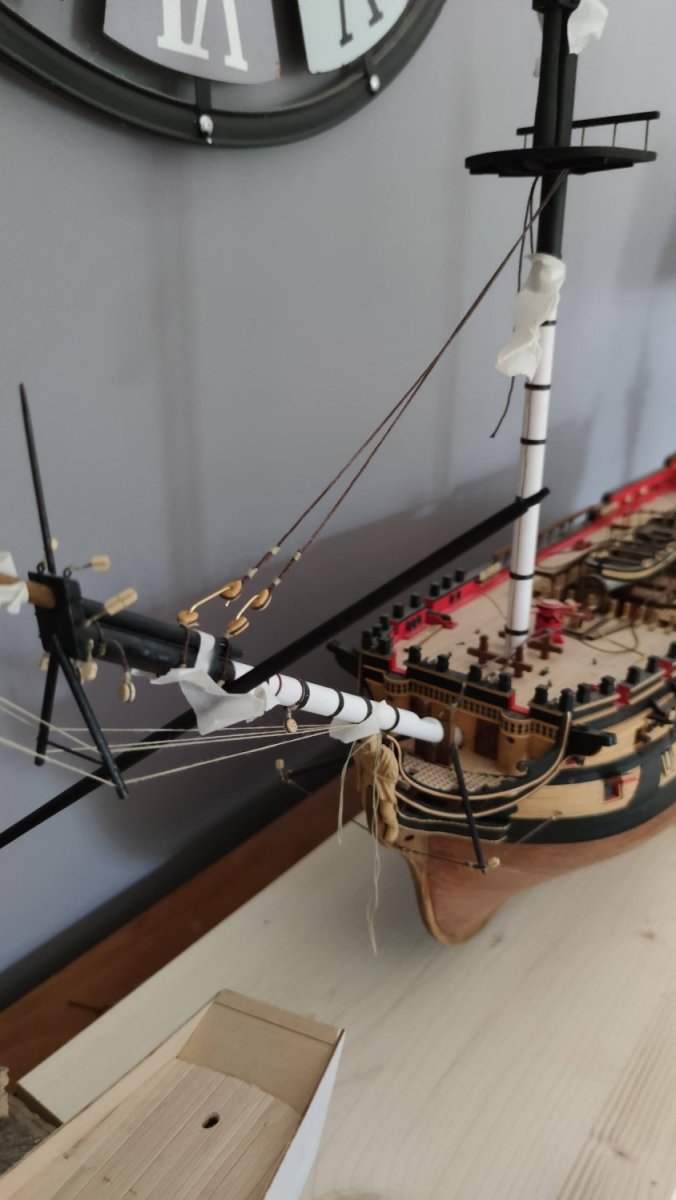
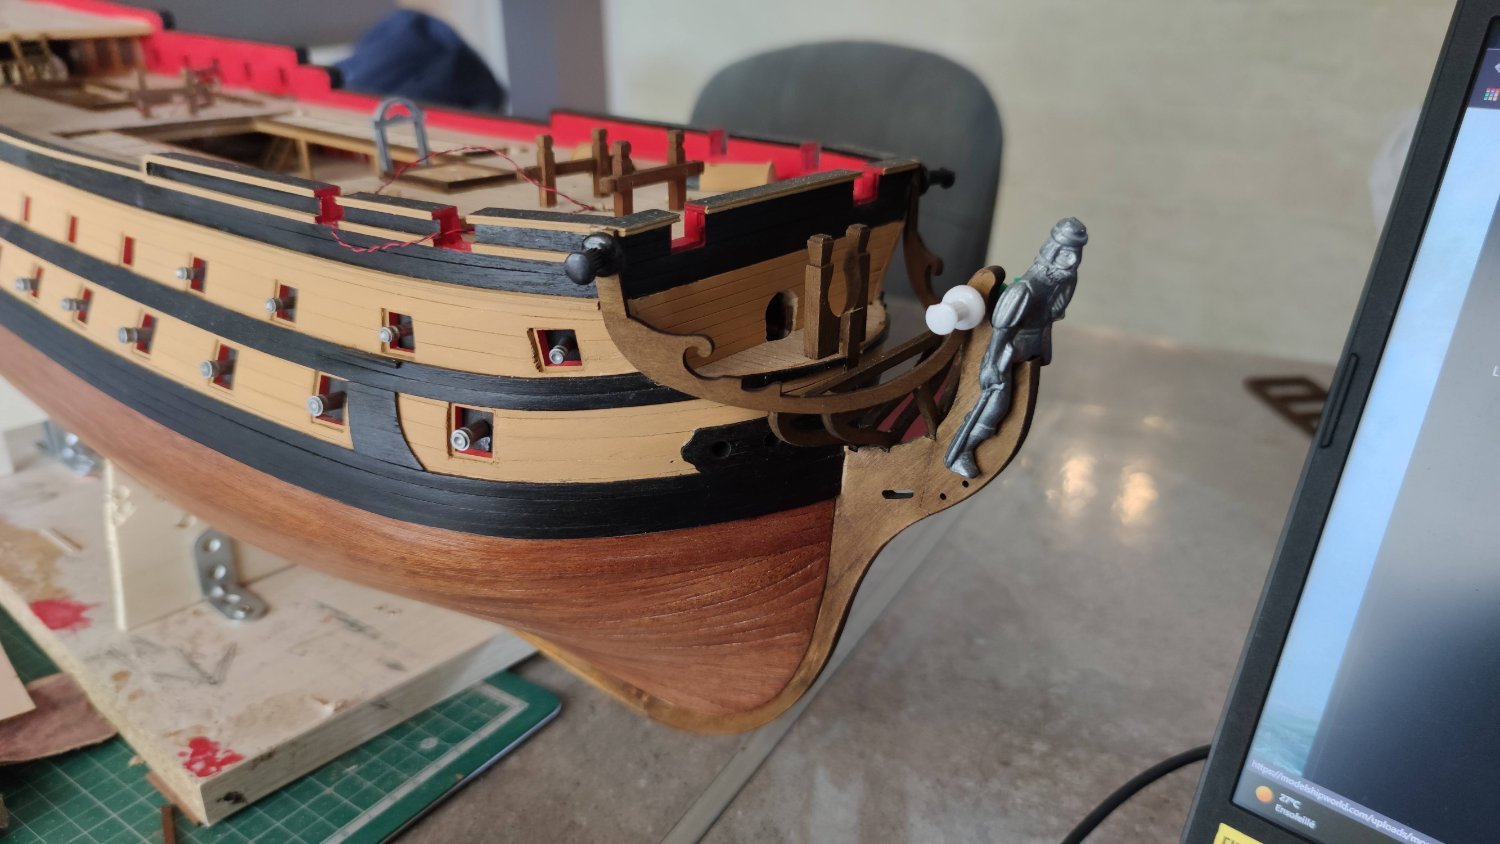
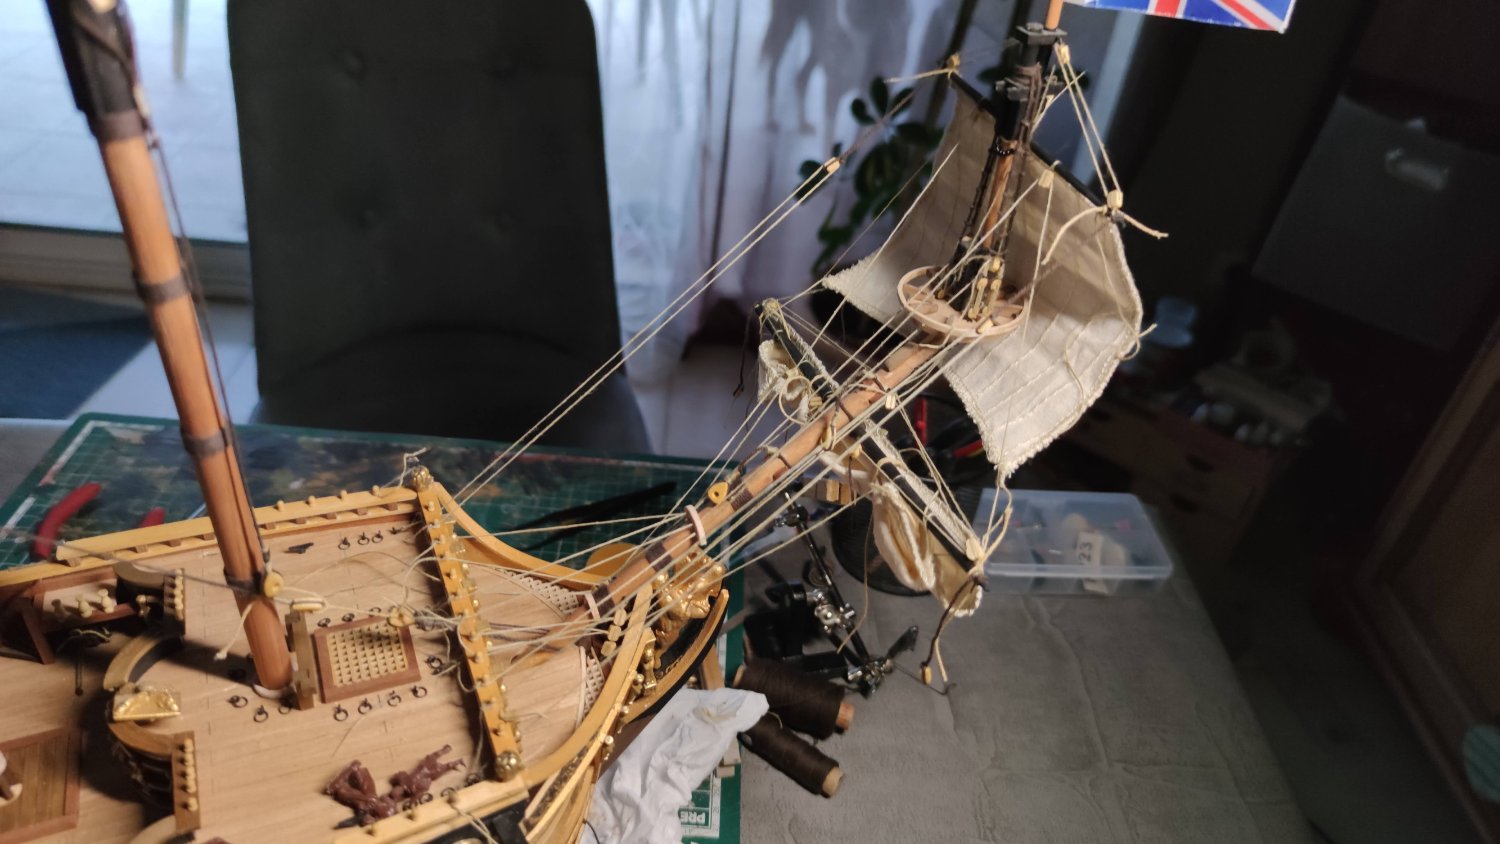
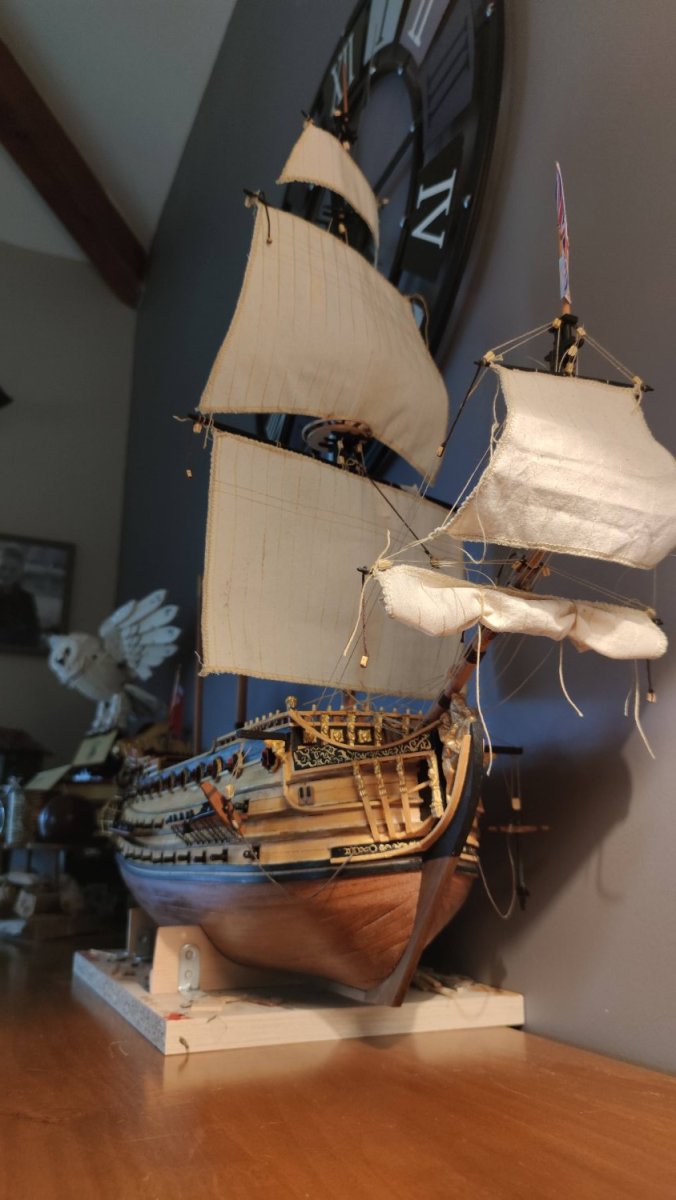
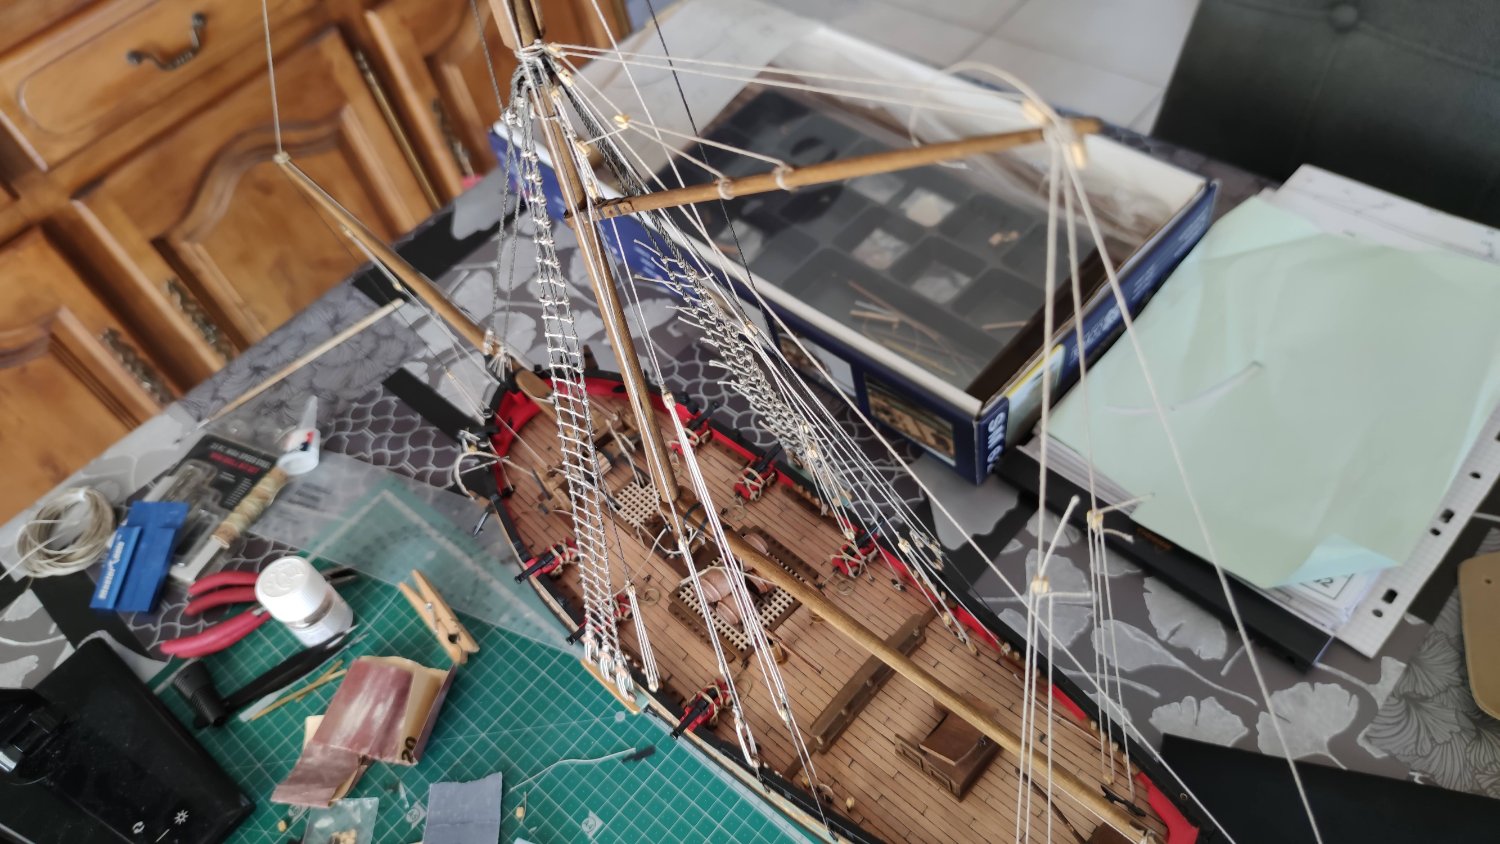
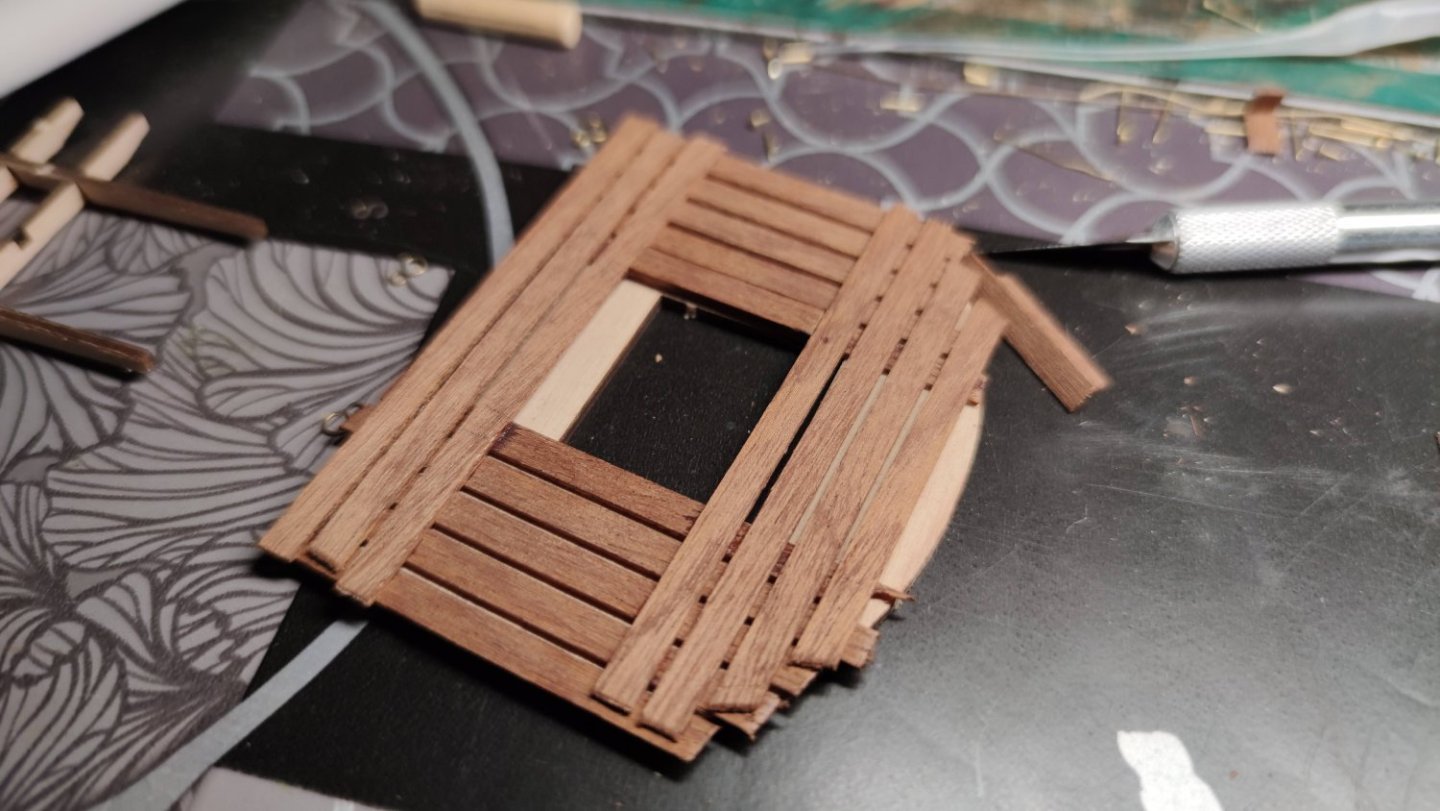
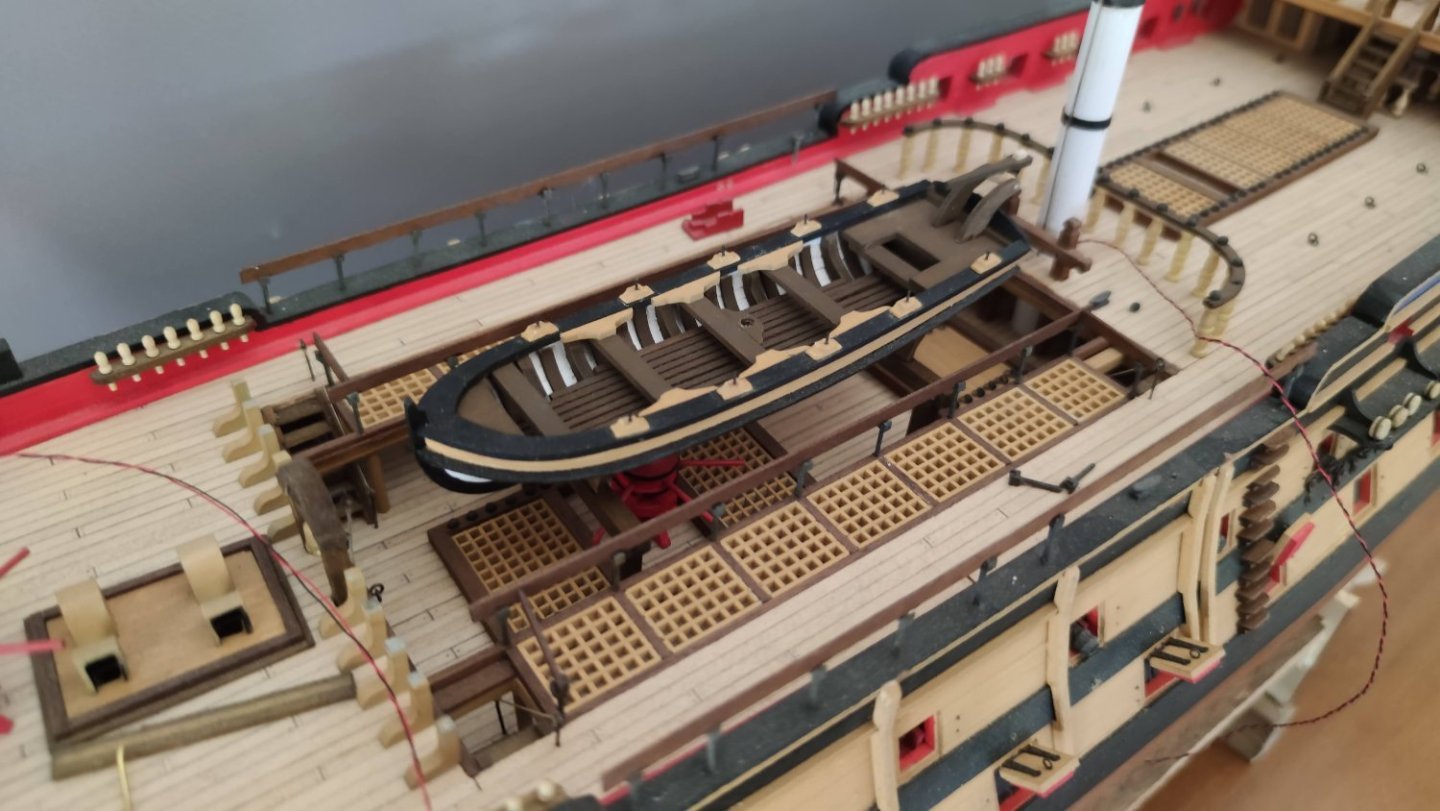
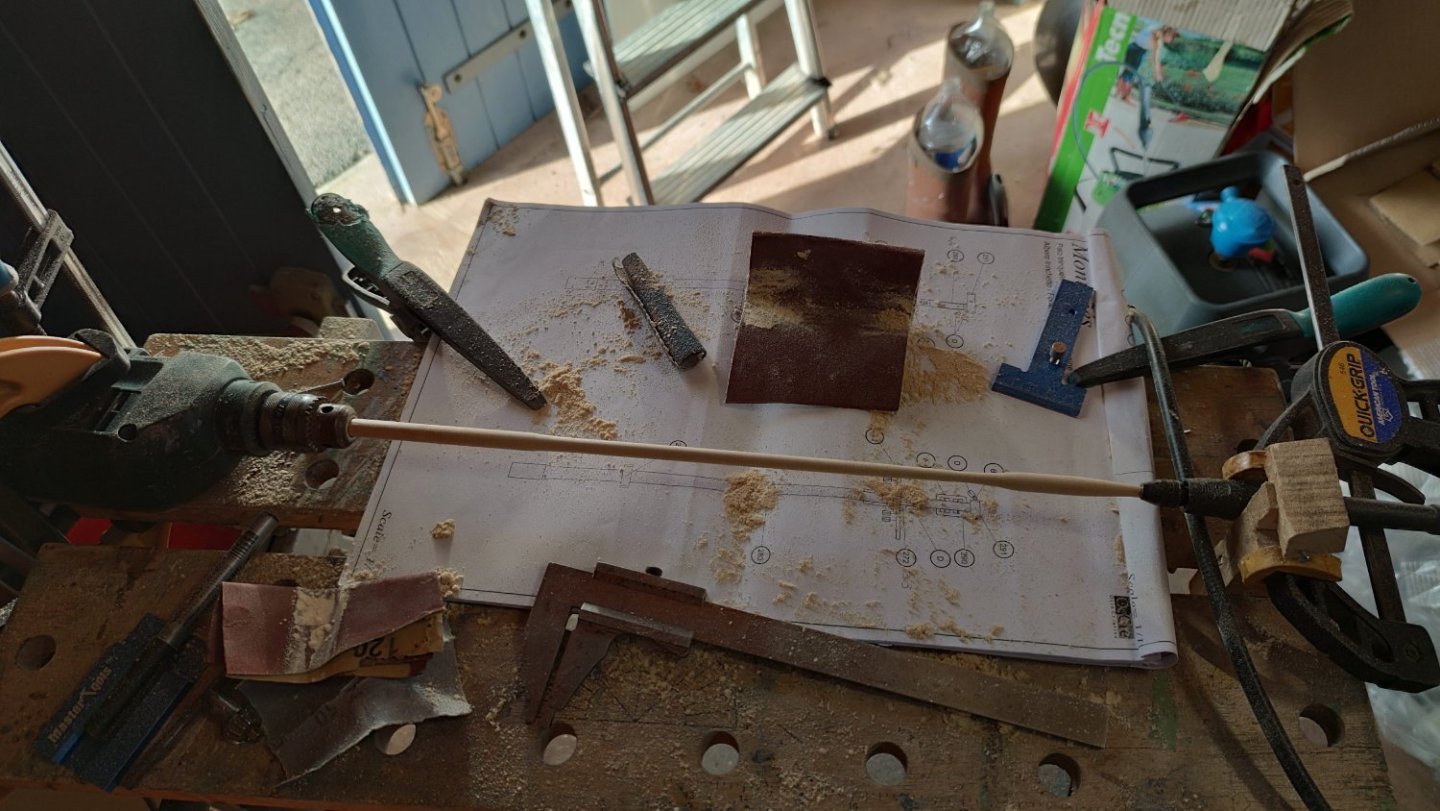
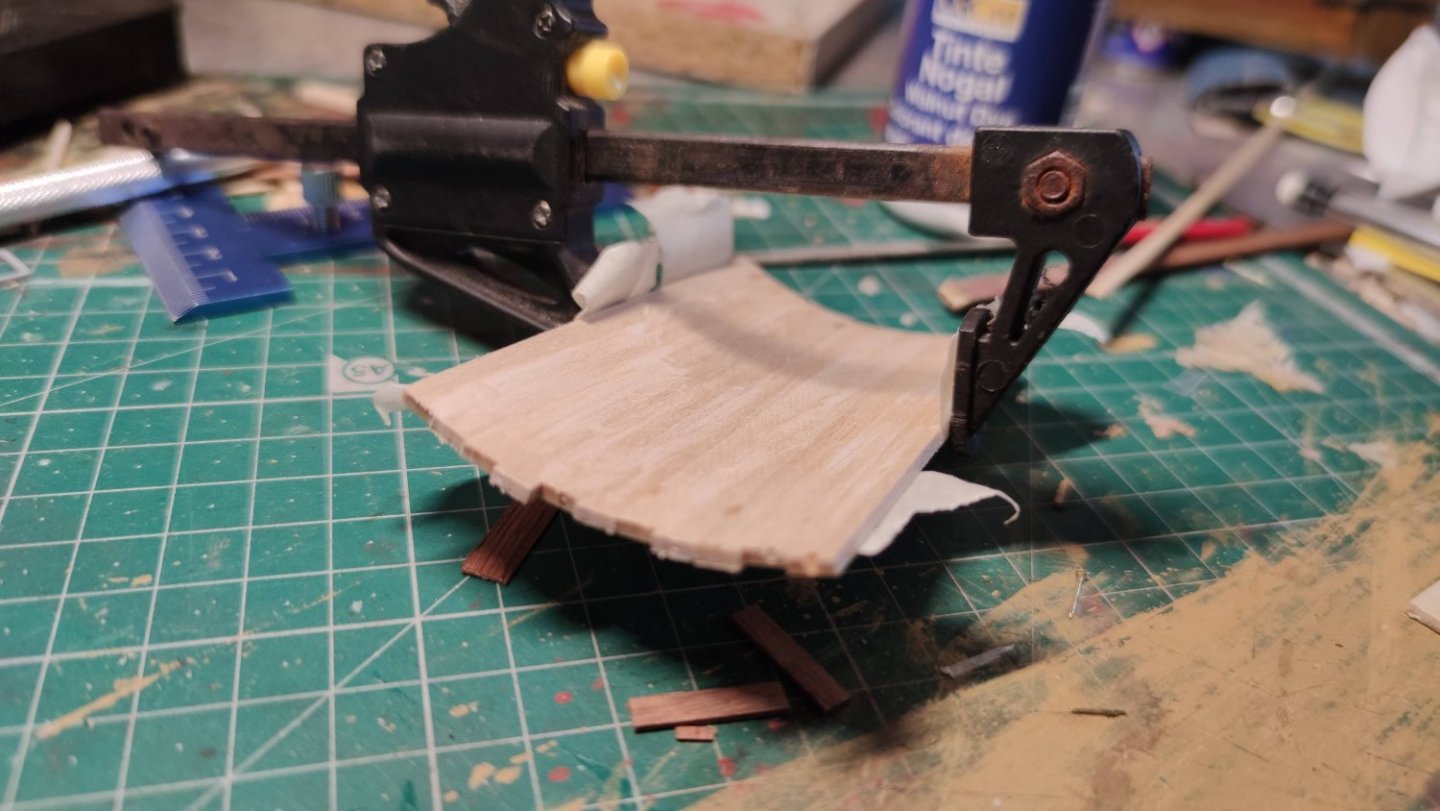
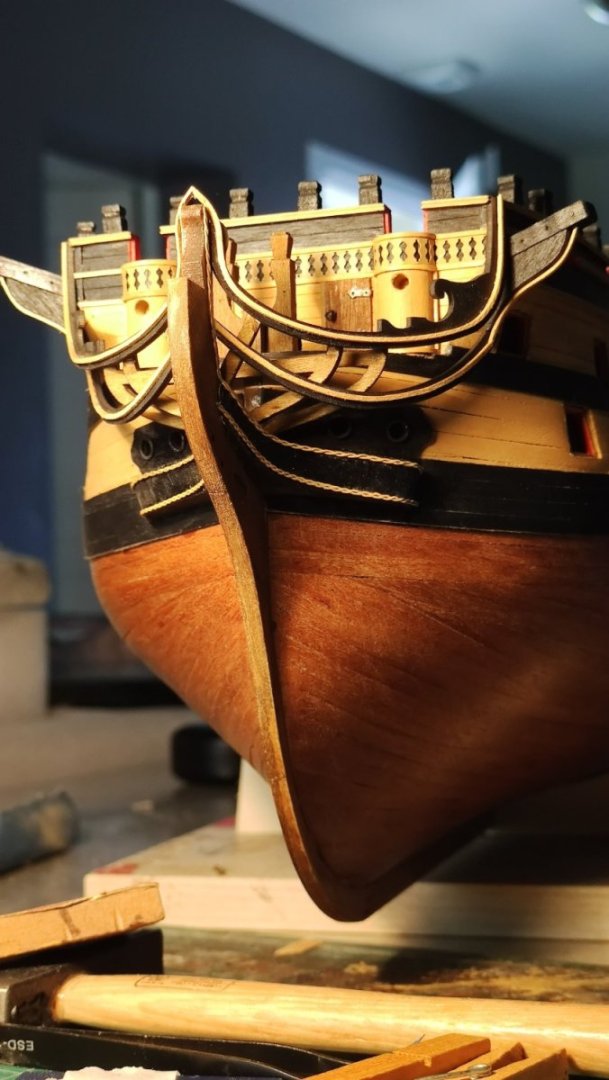
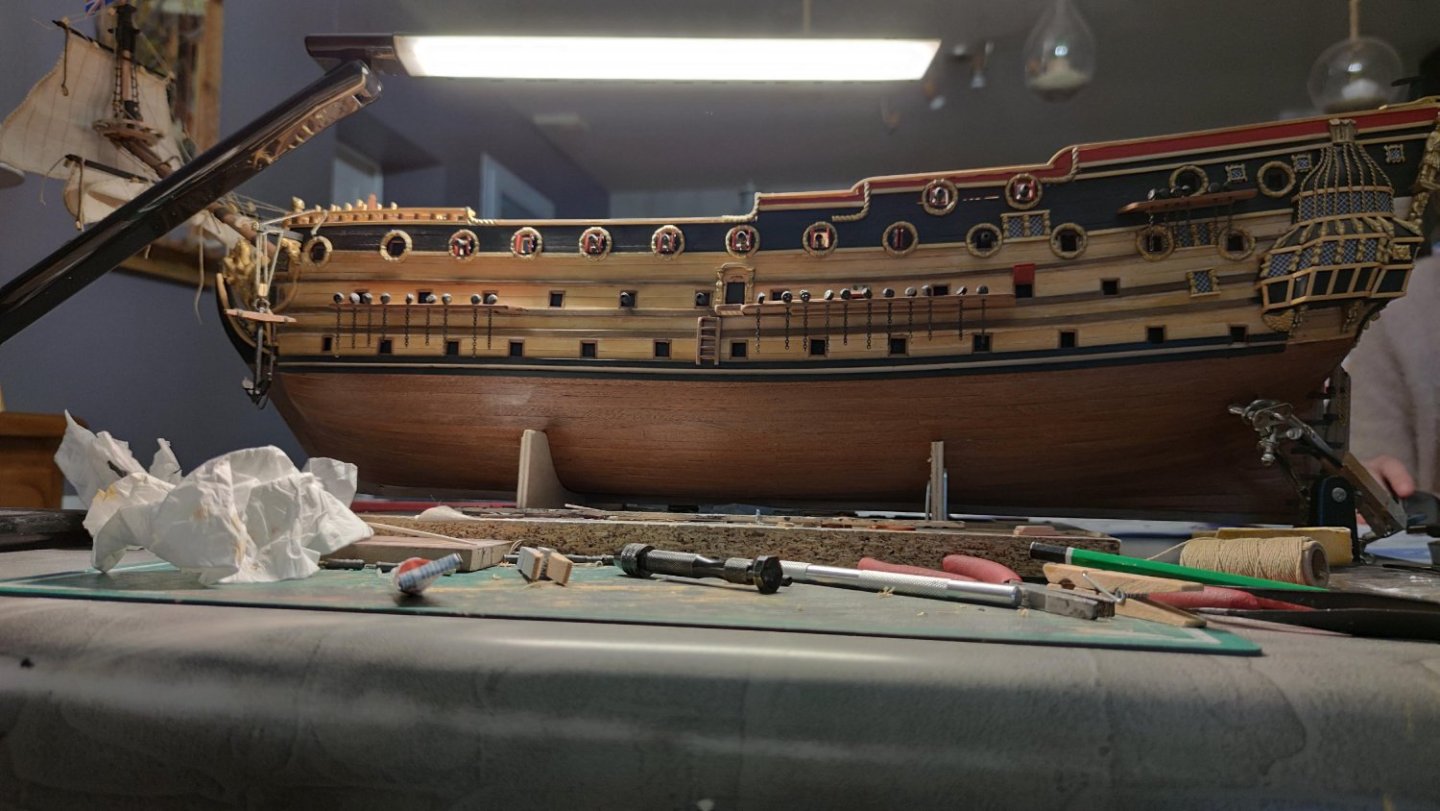
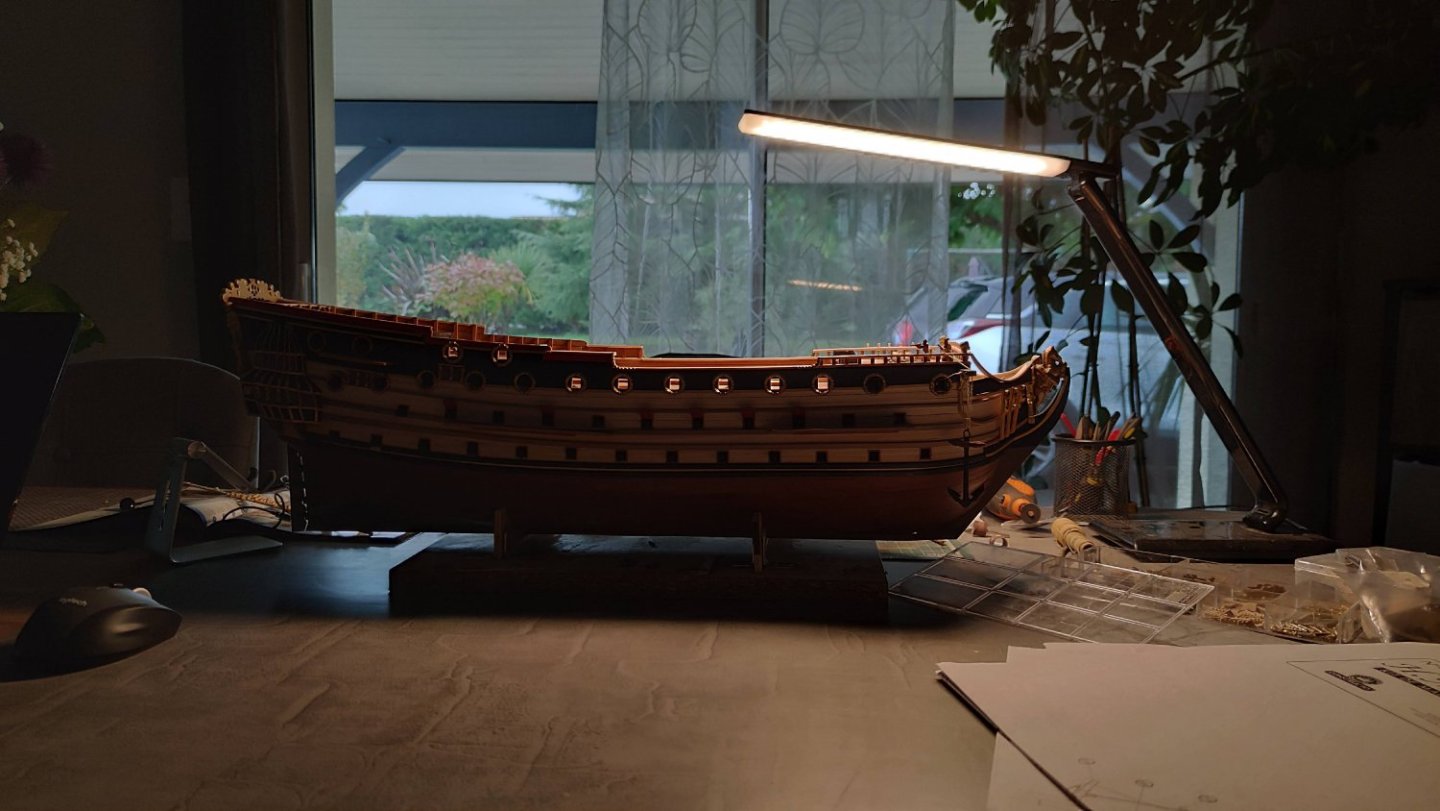
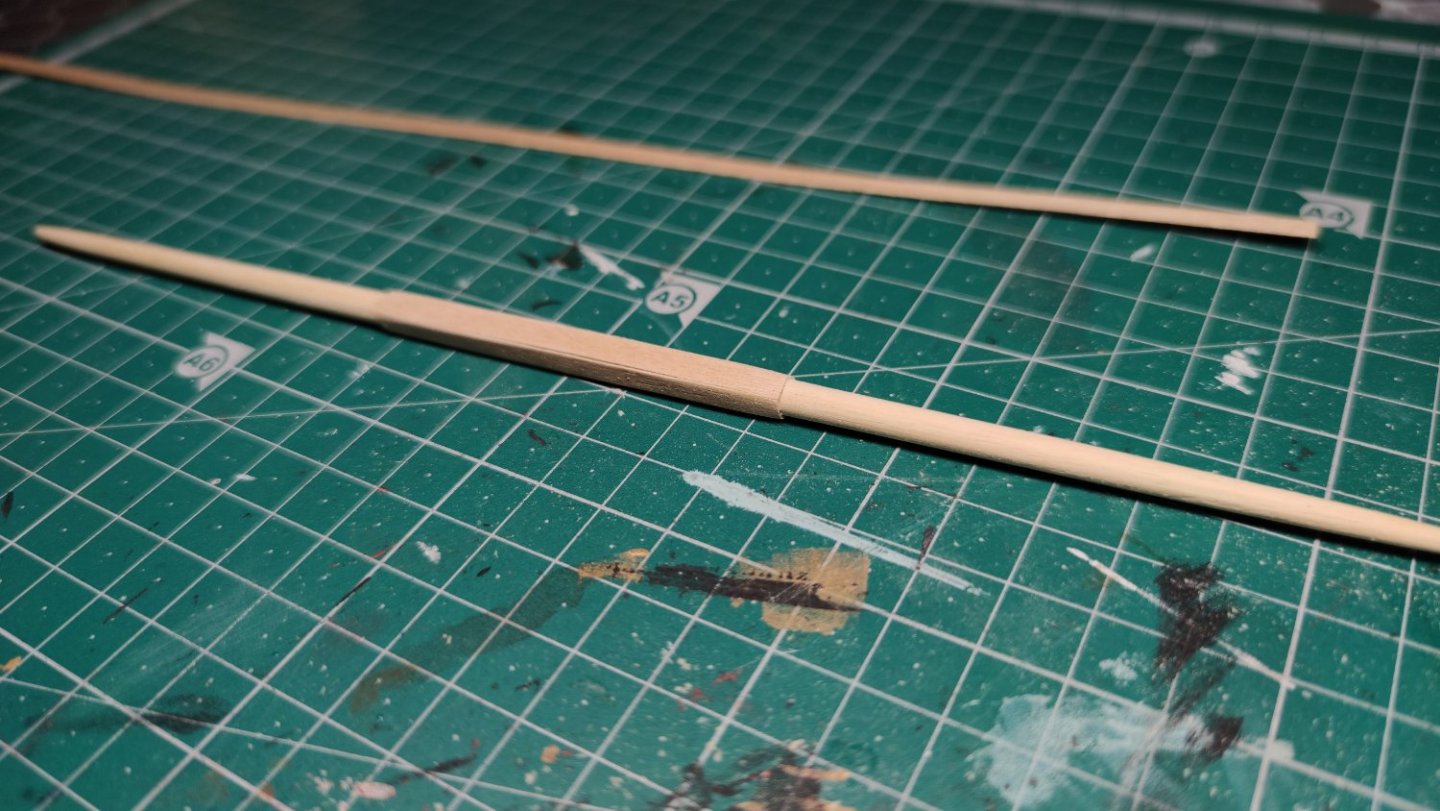
Hi, it's been a long time! Not many posts but the work continues, slowly... I've made good progress on the hull, the shroud supports, the bow and the stern I've also done the longboat, which was harder than I thought! I'm very happy with the improved crow's nest, which looks much better than the solid part supplied in the kit! I've also made good progress on the mature, all the elements have been cut, except for a few yards, as there aren't enough parts in the kit (and I should have optimised the rods to make 2 masts...). I improvised a tool to turn the wood... not incredible but it helped me a lot Nothing's glued yet because there's one big subject I'm undecided about: the cannons and their carriages. I don't really want to fit the masts before the cannons, it would be too much trouble...


-
EricWilliamMarshall reacted to a post in a topic:
HMS PRINCE by Iseaz - FINISHED - Constructo - 1/61
-
EricWilliamMarshall reacted to a post in a topic:
HMS PRINCE by Iseaz - FINISHED - Constructo - 1/61
-
EricWilliamMarshall reacted to a post in a topic:
HMS PRINCE by Iseaz - FINISHED - Constructo - 1/61
-
EricWilliamMarshall reacted to a post in a topic:
HMS PRINCE by Iseaz - FINISHED - Constructo - 1/61
-
EricWilliamMarshall reacted to a post in a topic:
HMS PRINCE by Iseaz - FINISHED - Constructo - 1/61
-
Montanes by Iseaz - OcCre- 1/70
Iseaz replied to Iseaz's topic in - Kit build logs for subjects built from 1751 - 1800
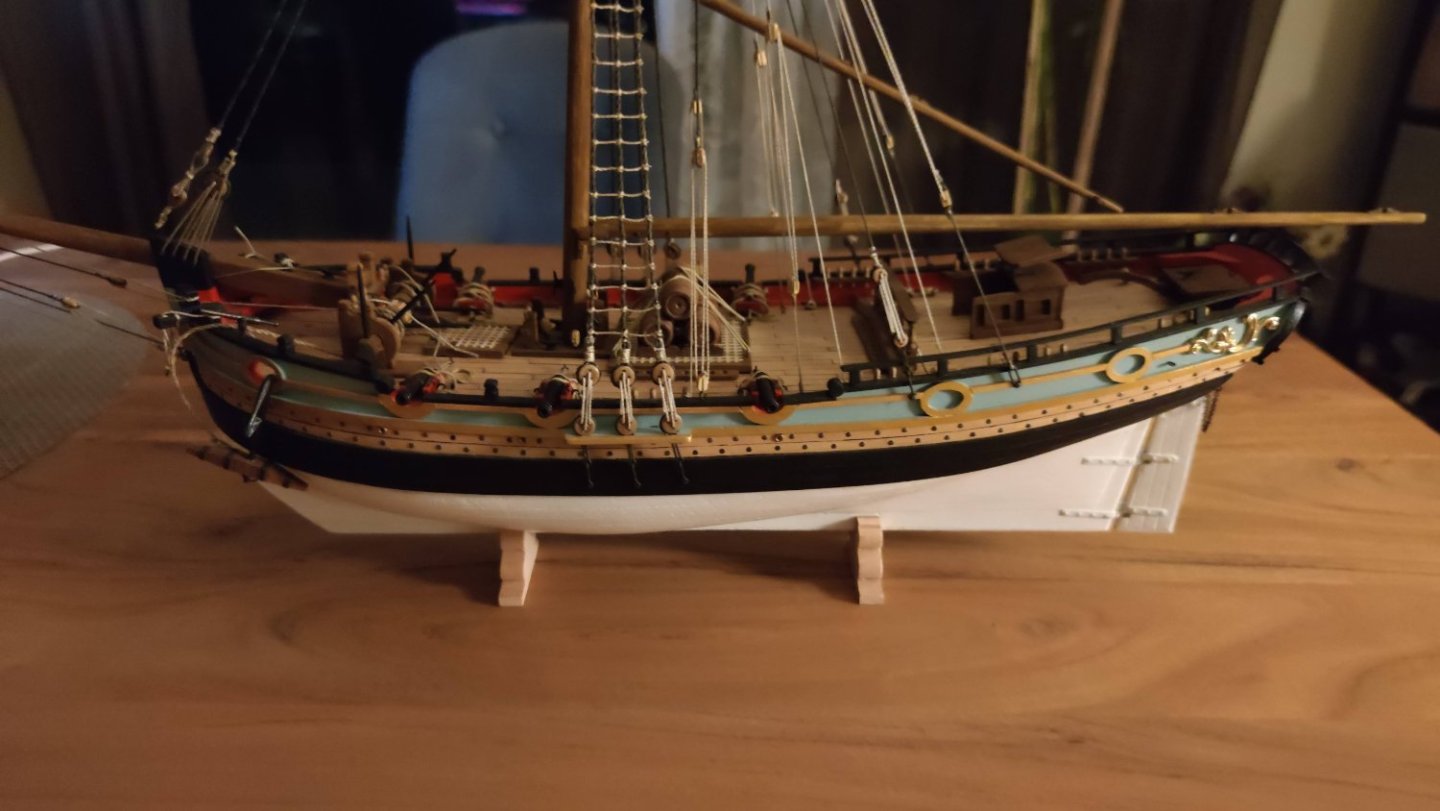
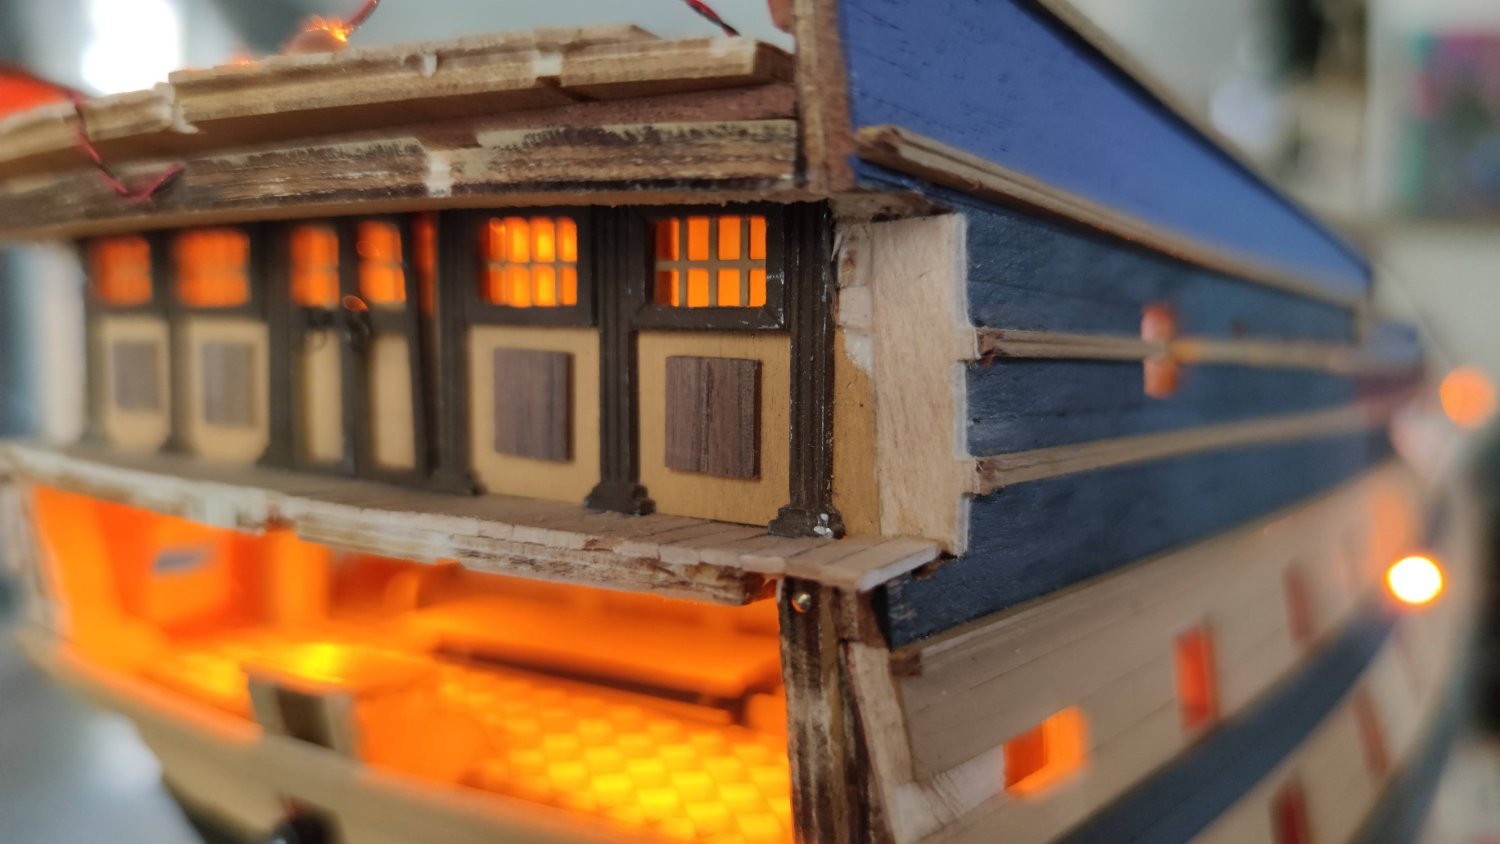
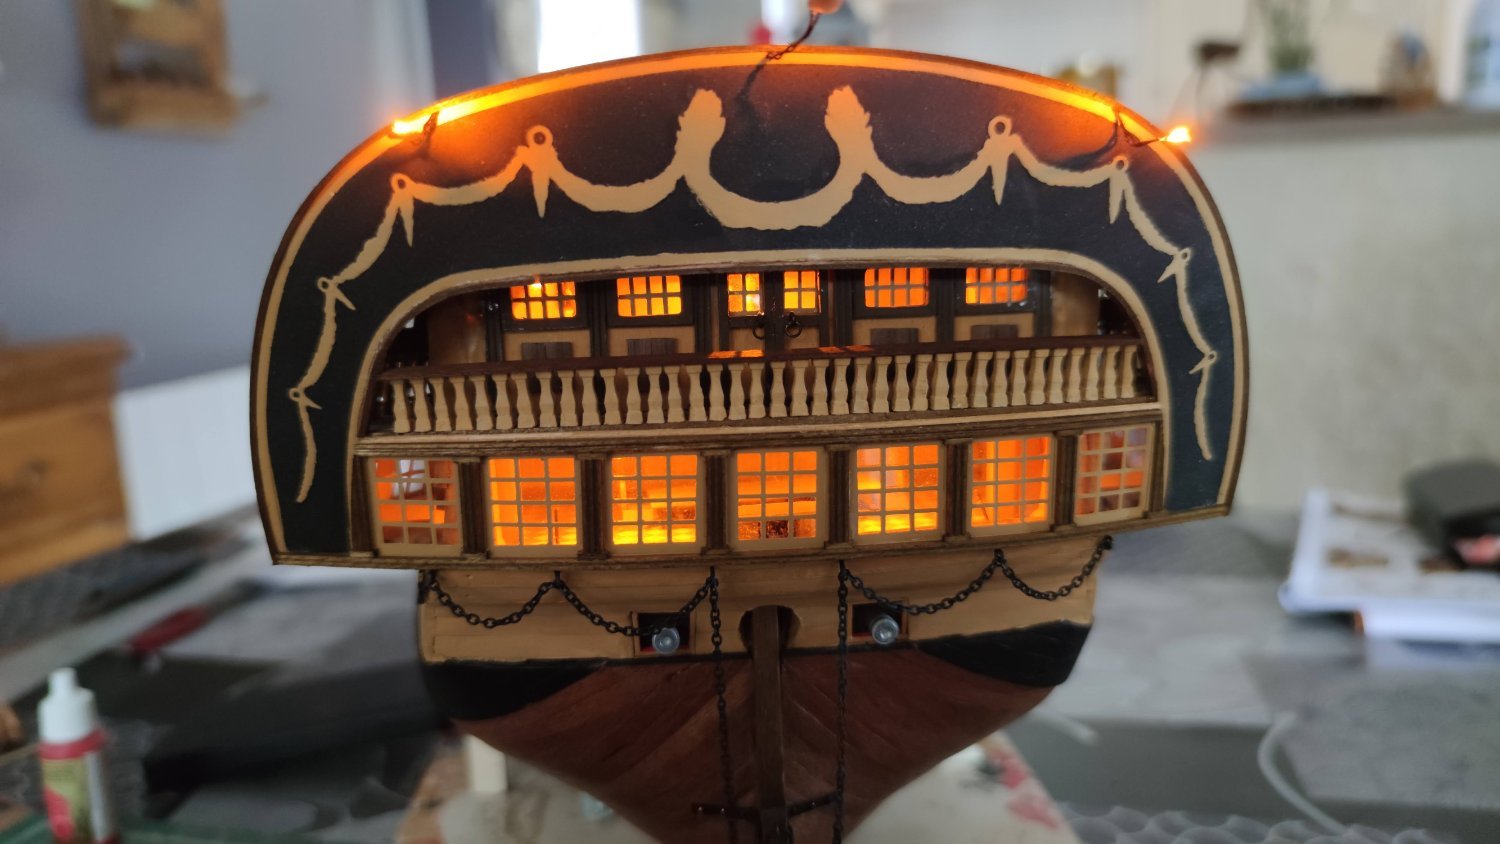
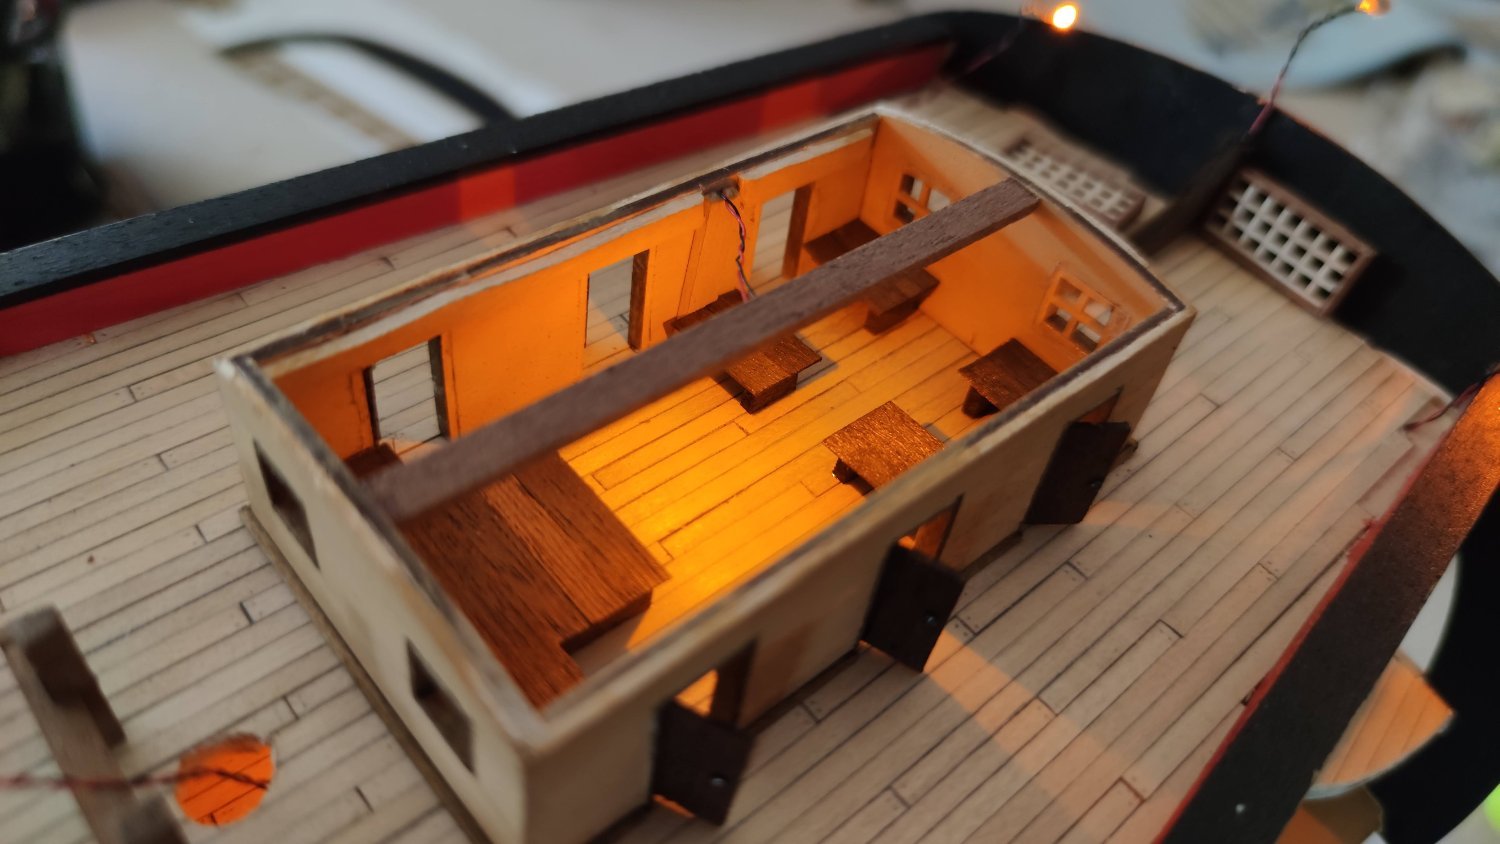
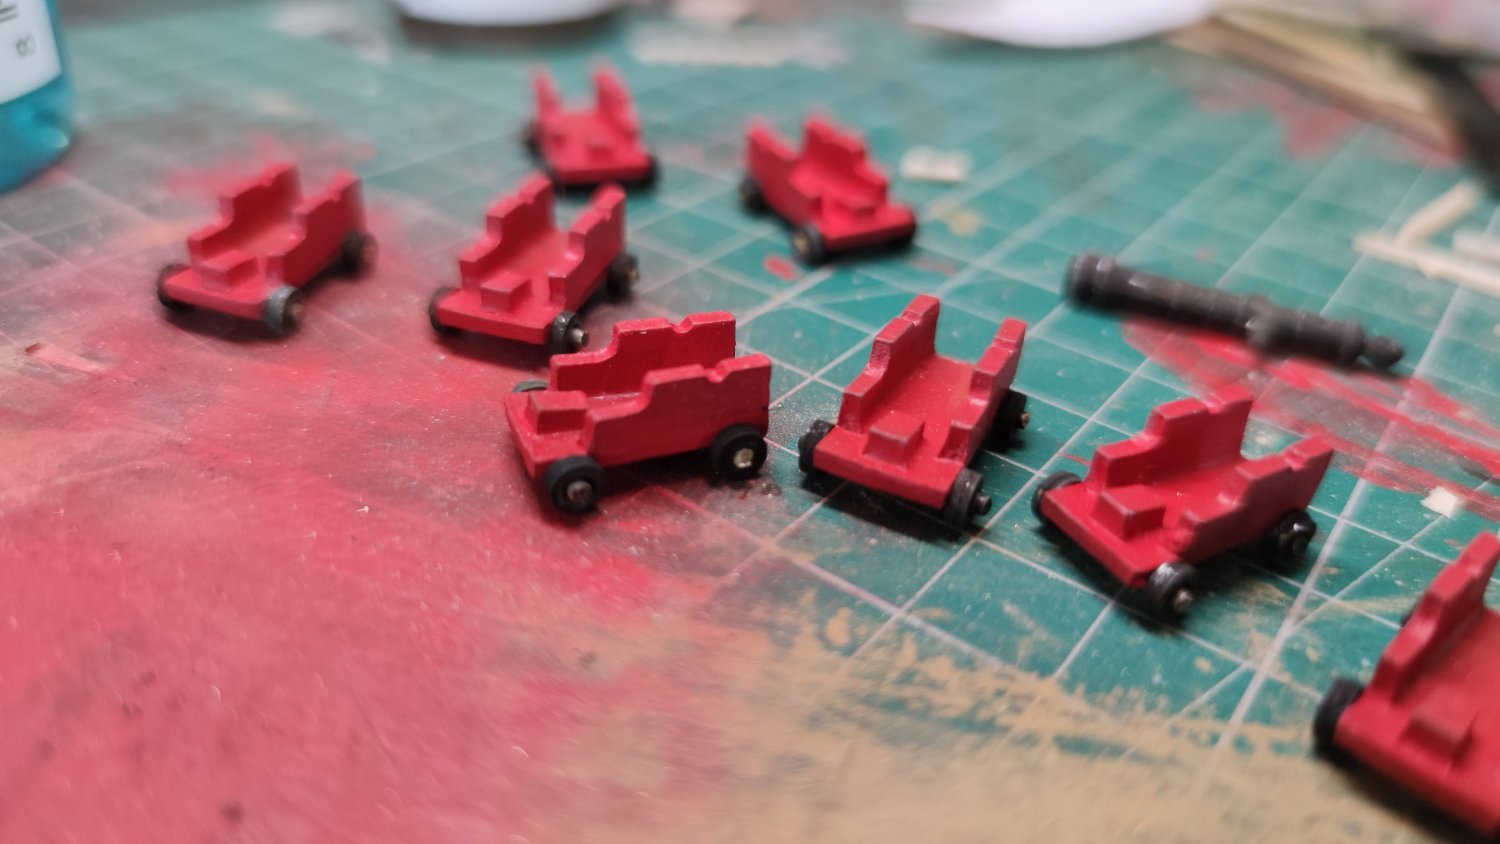
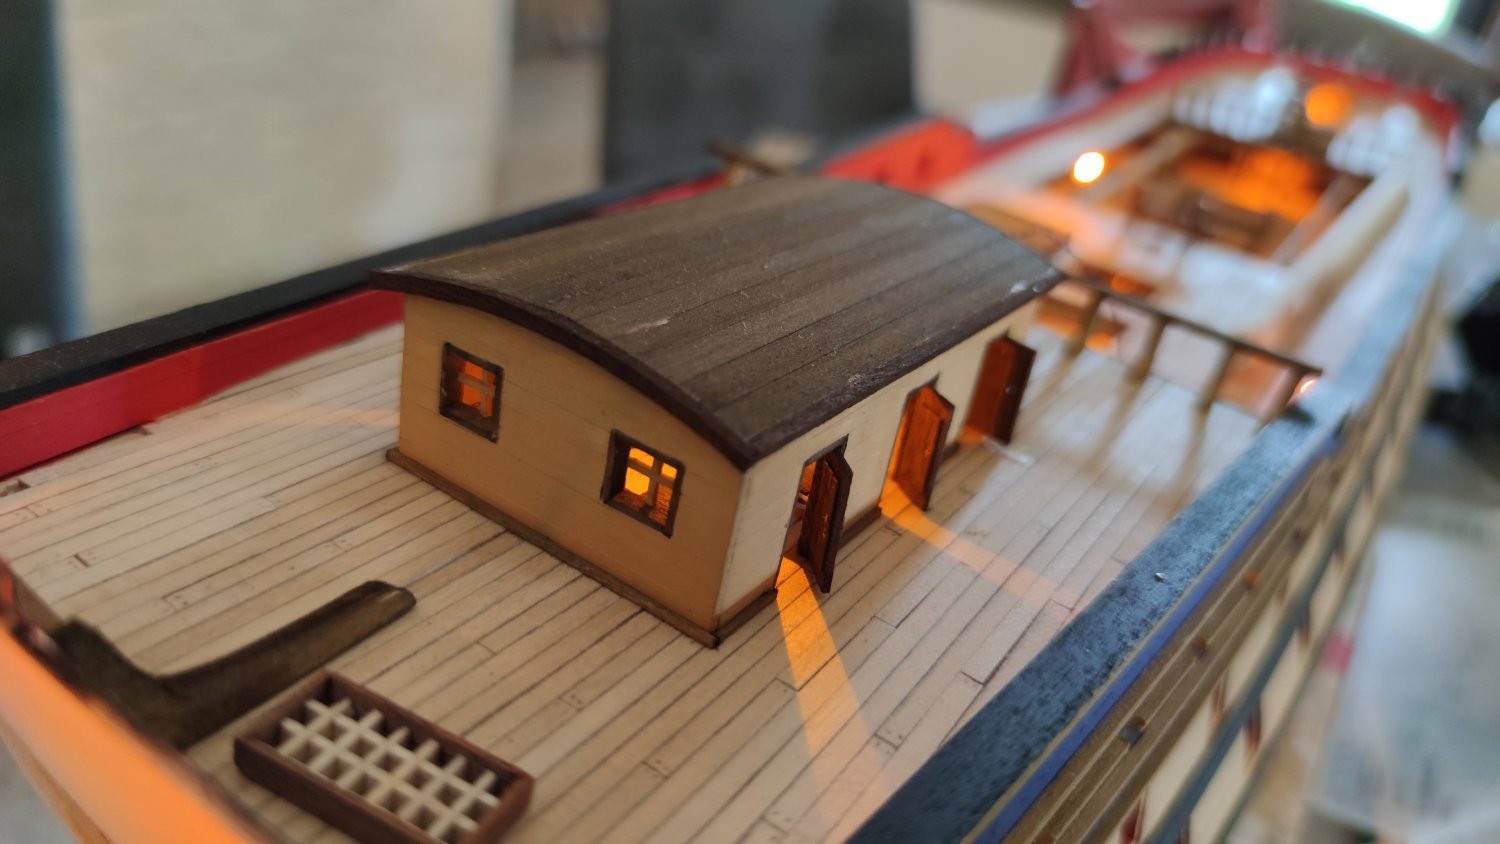
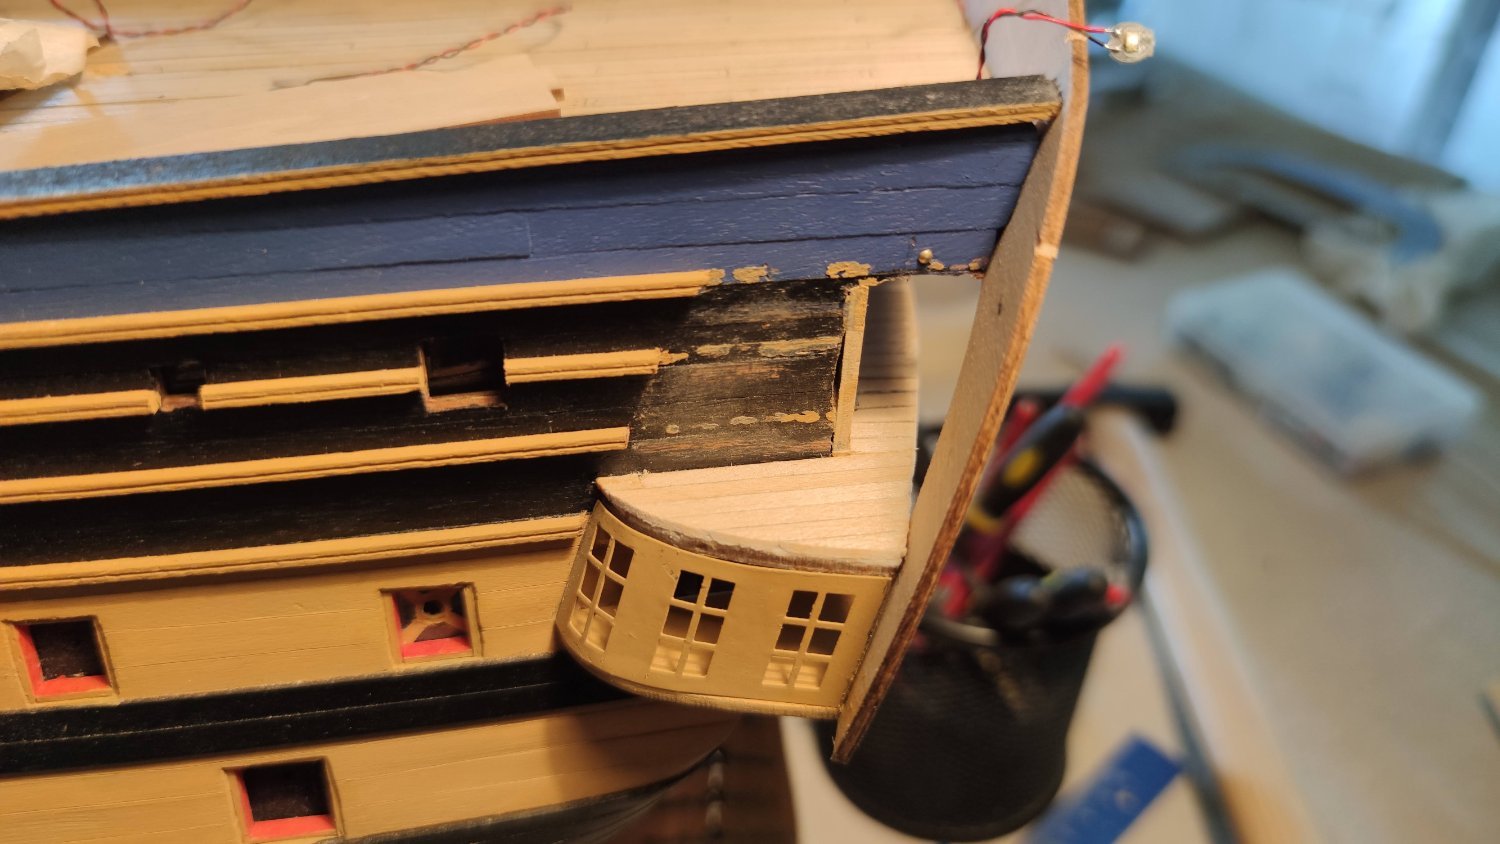
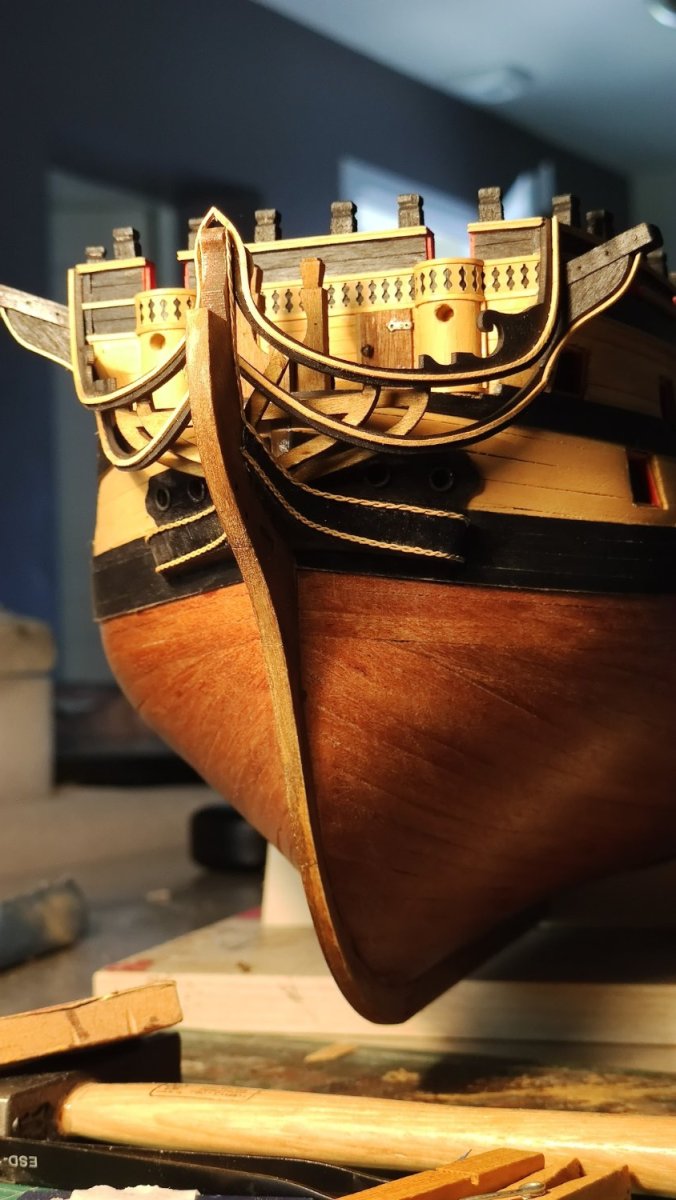
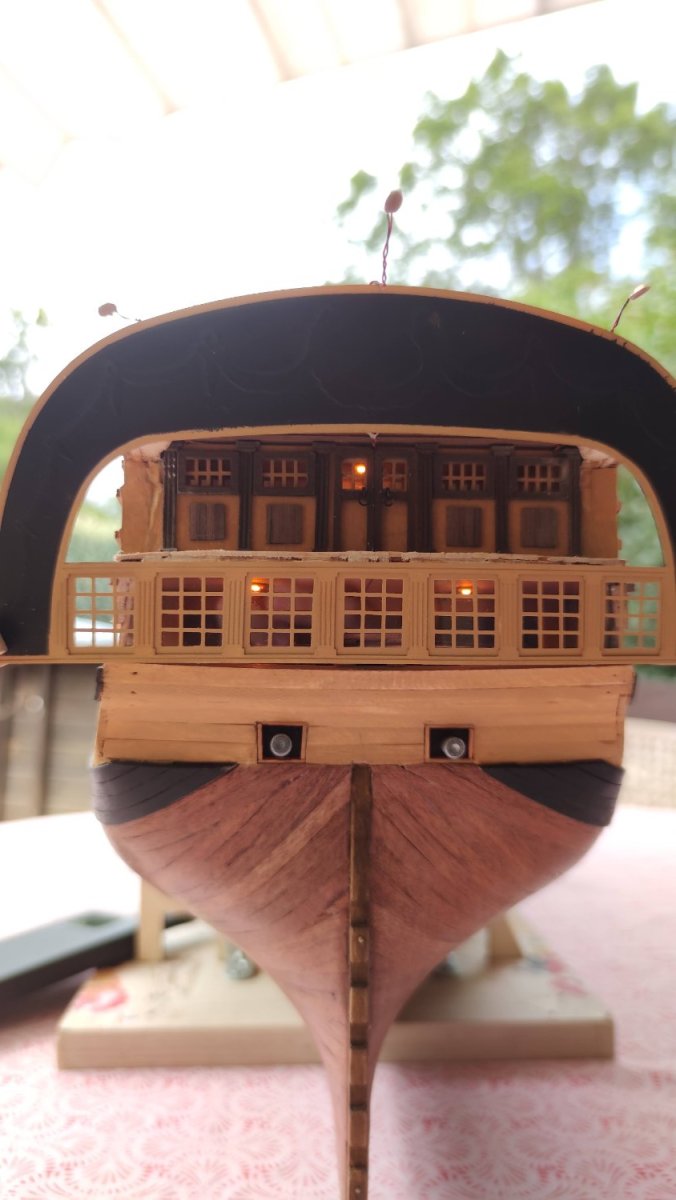
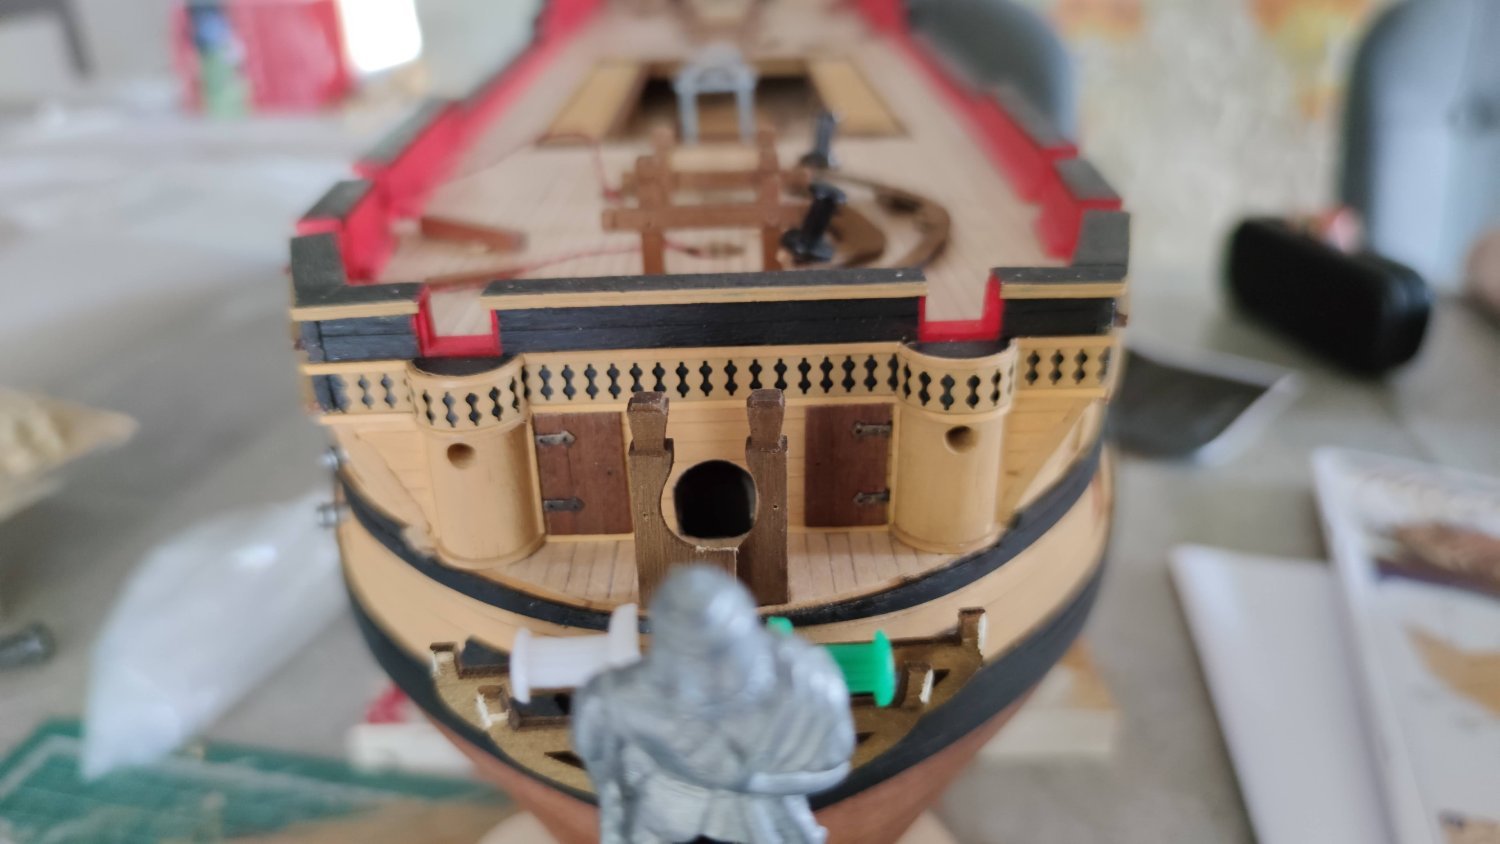
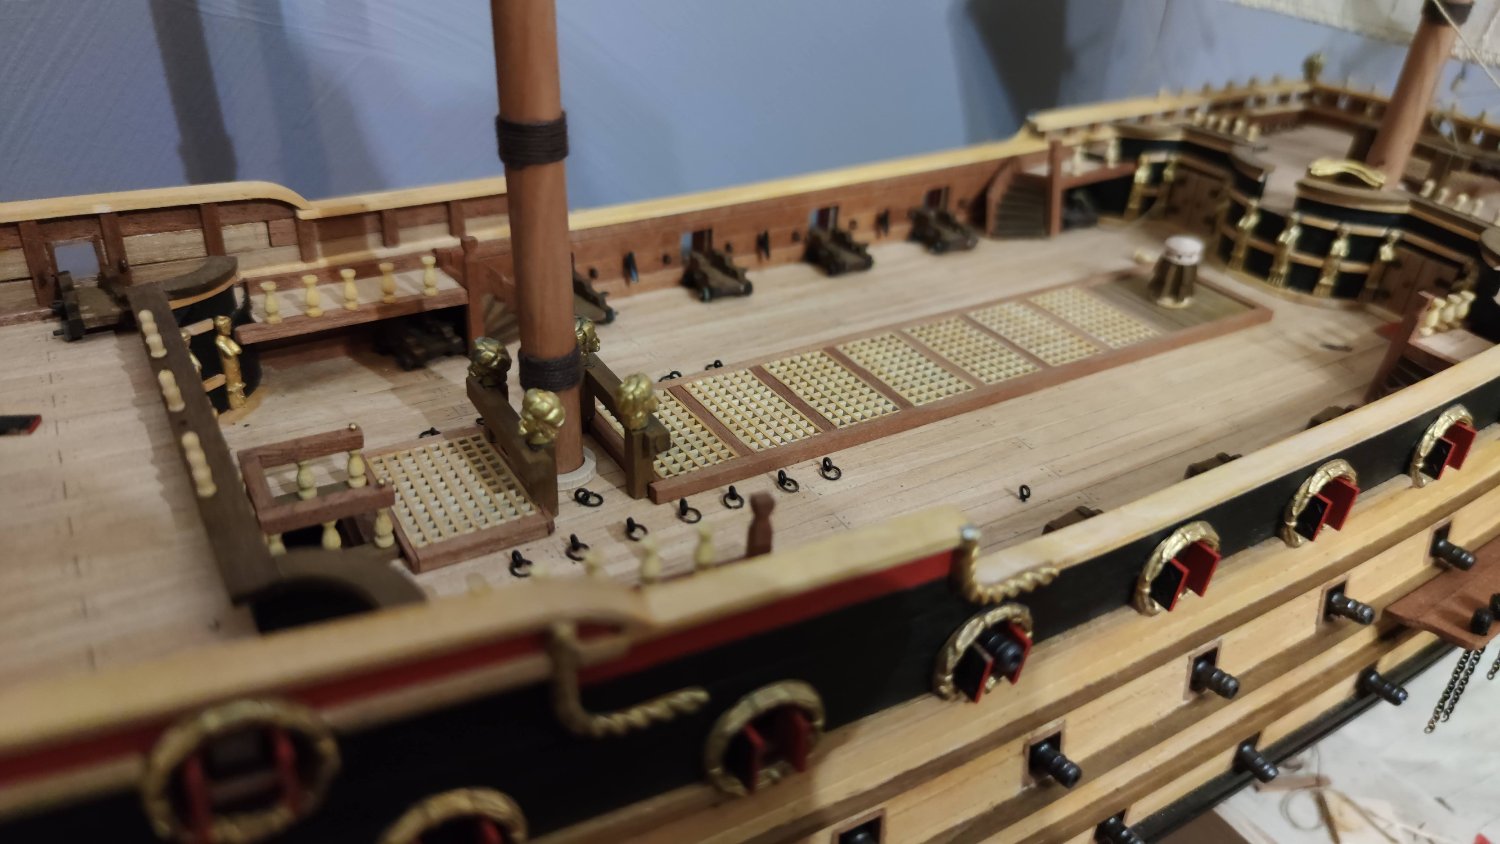
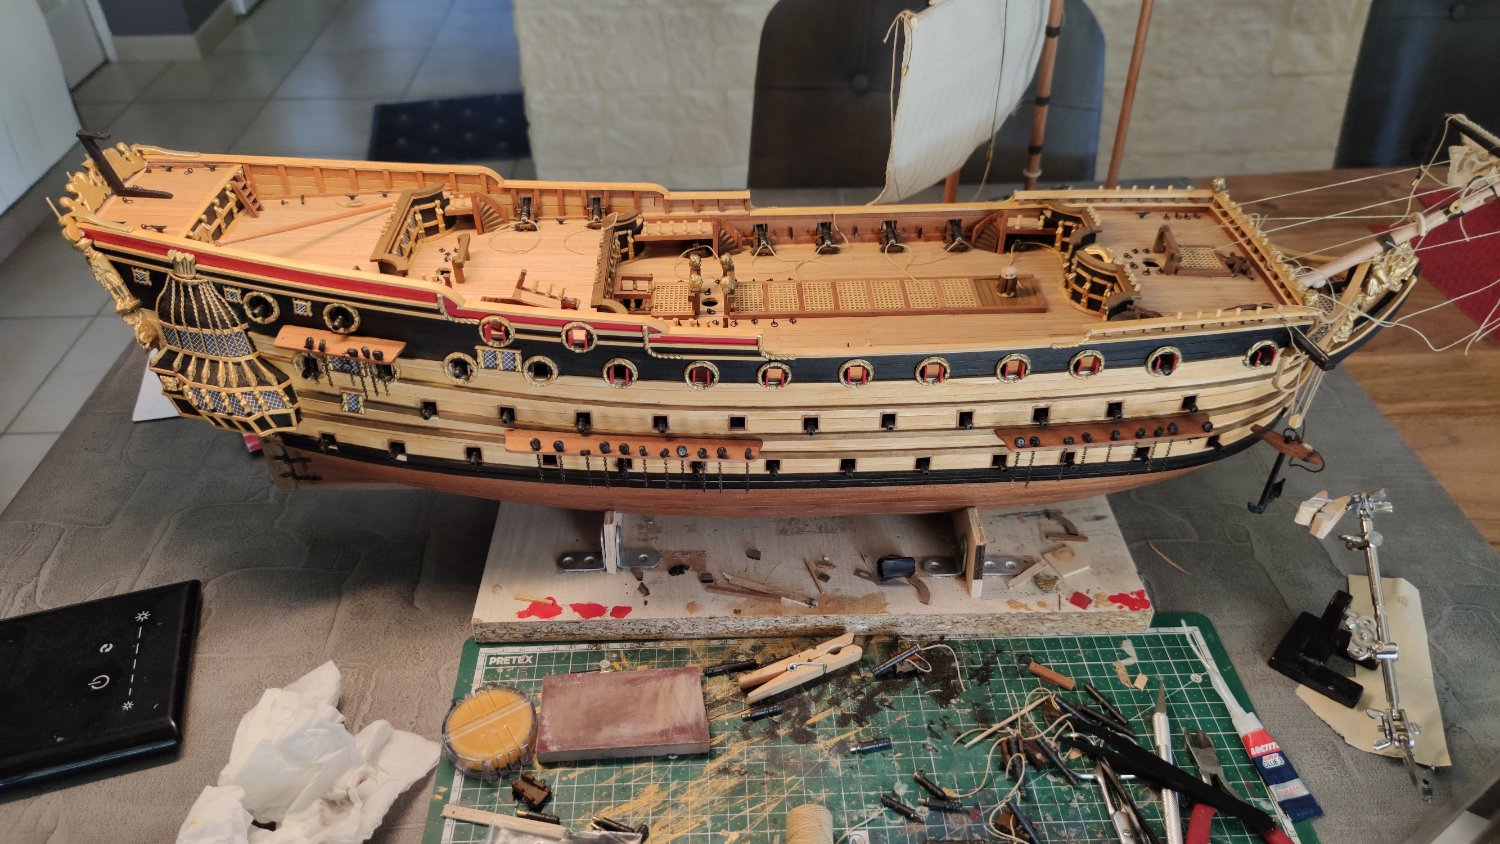
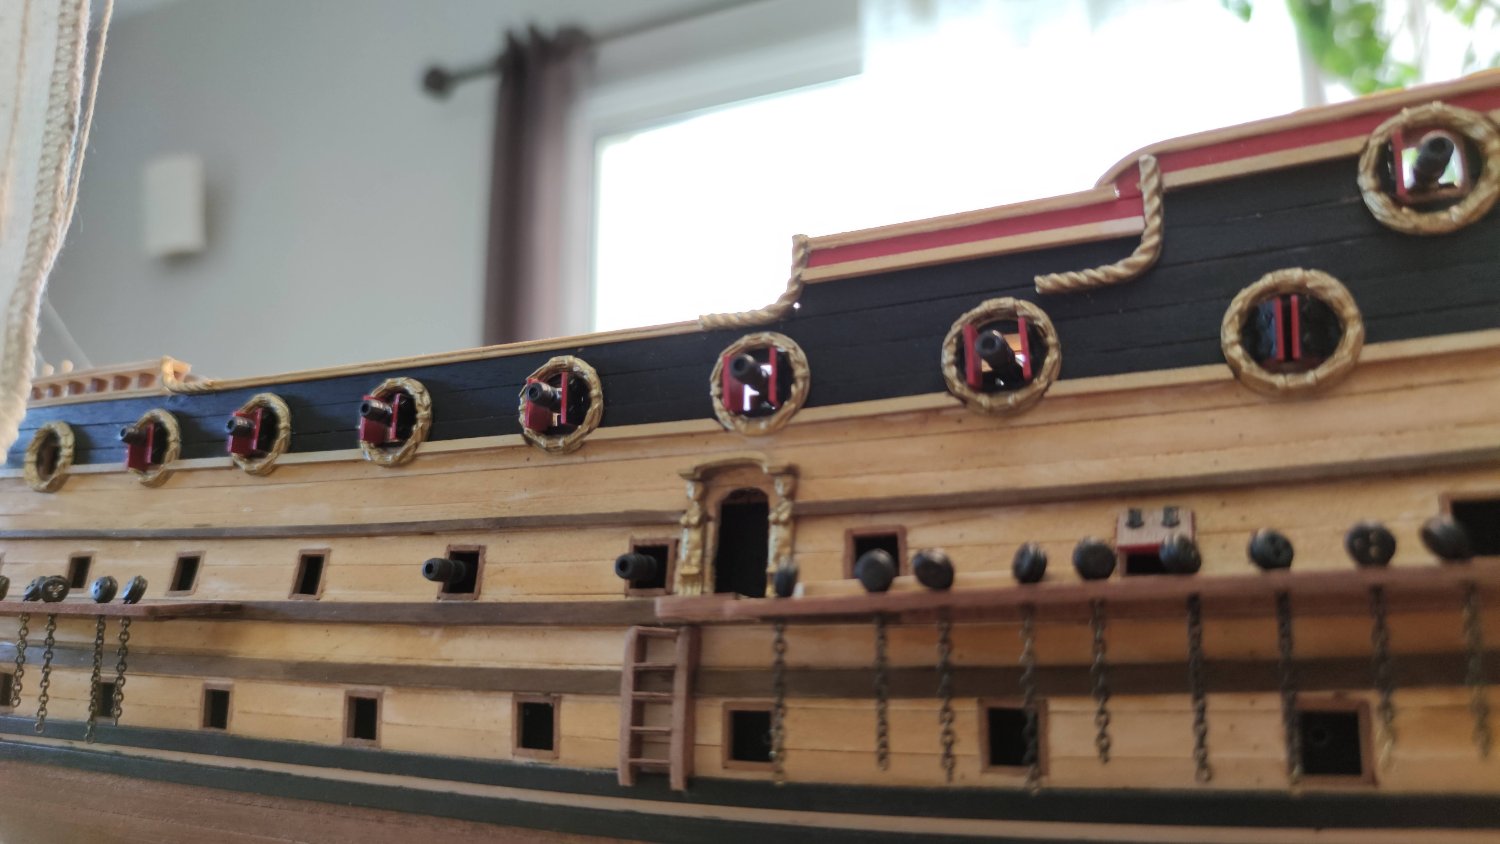
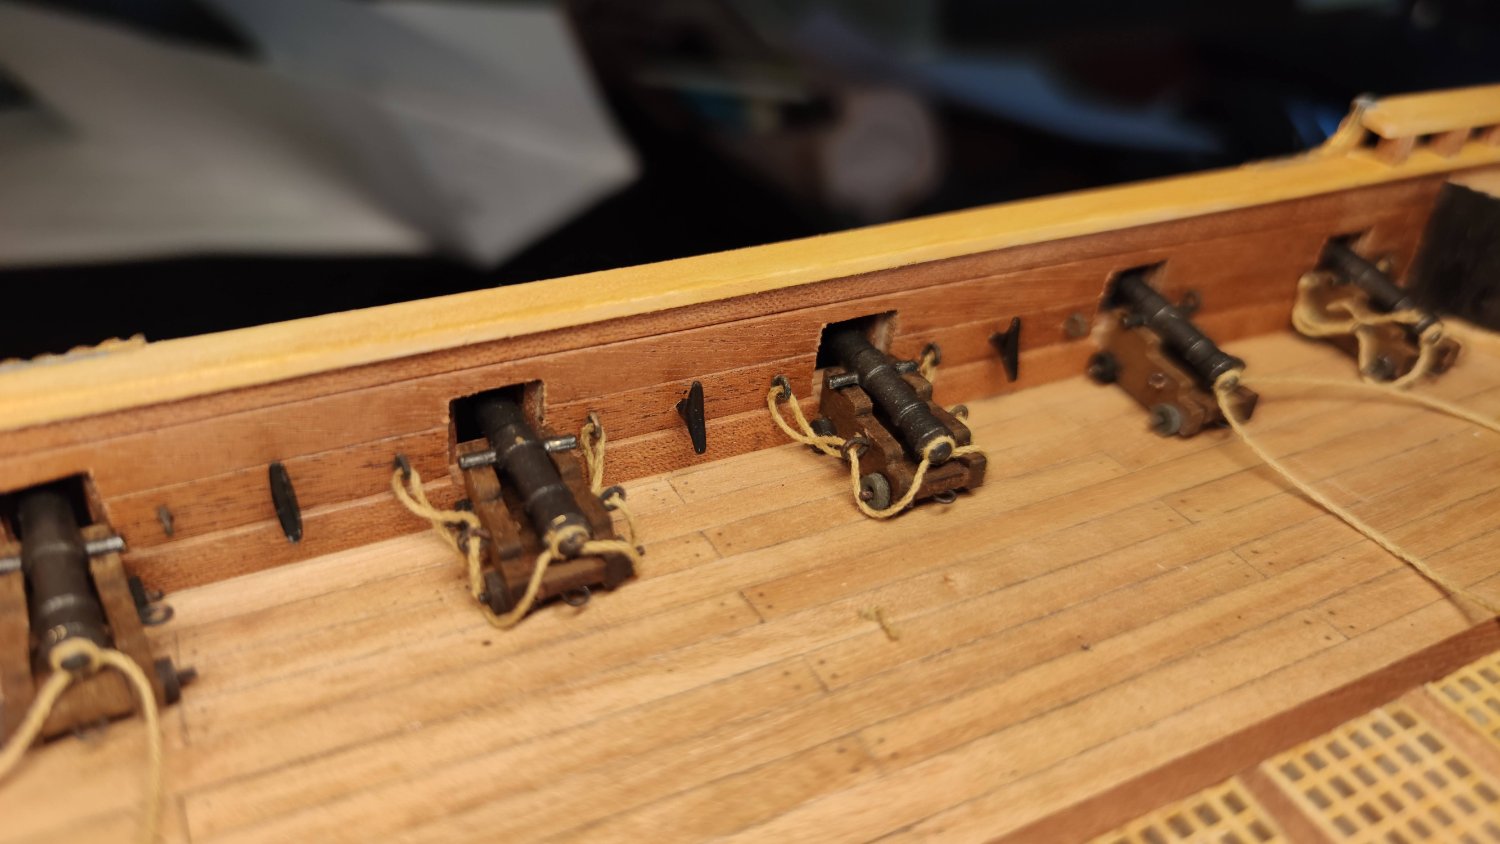
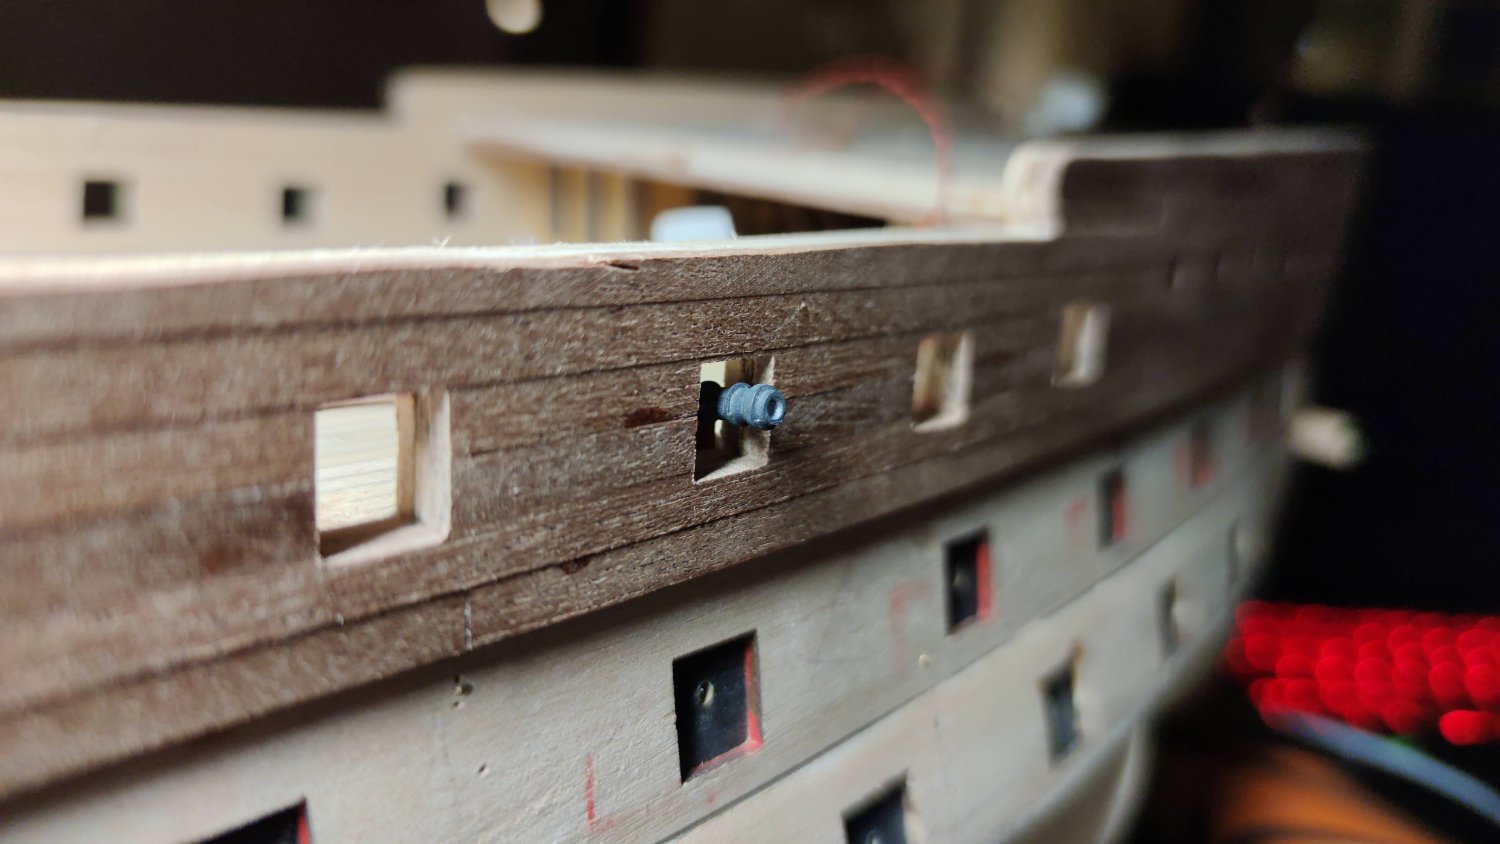
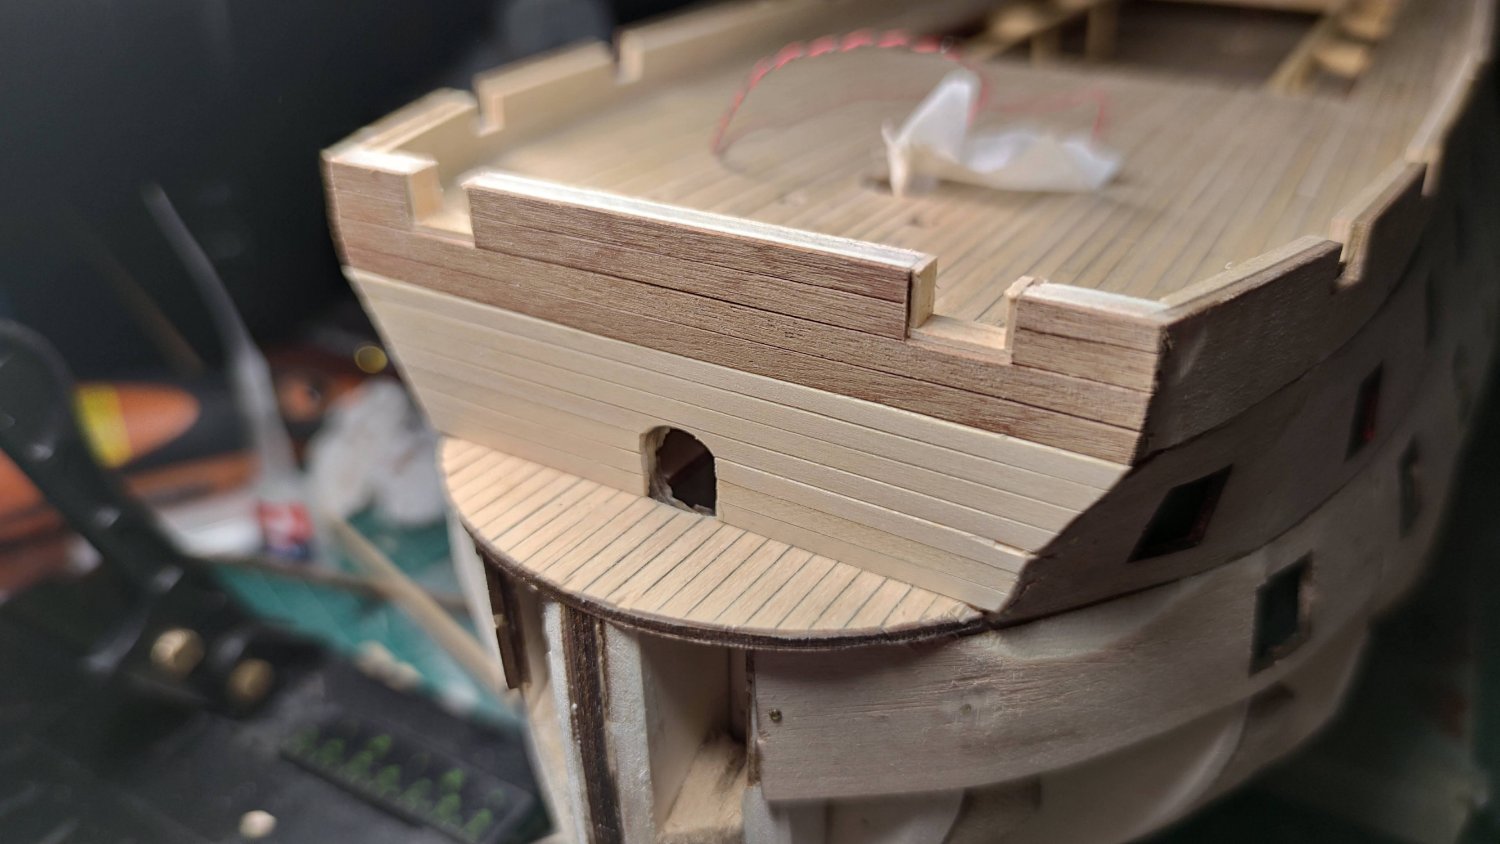
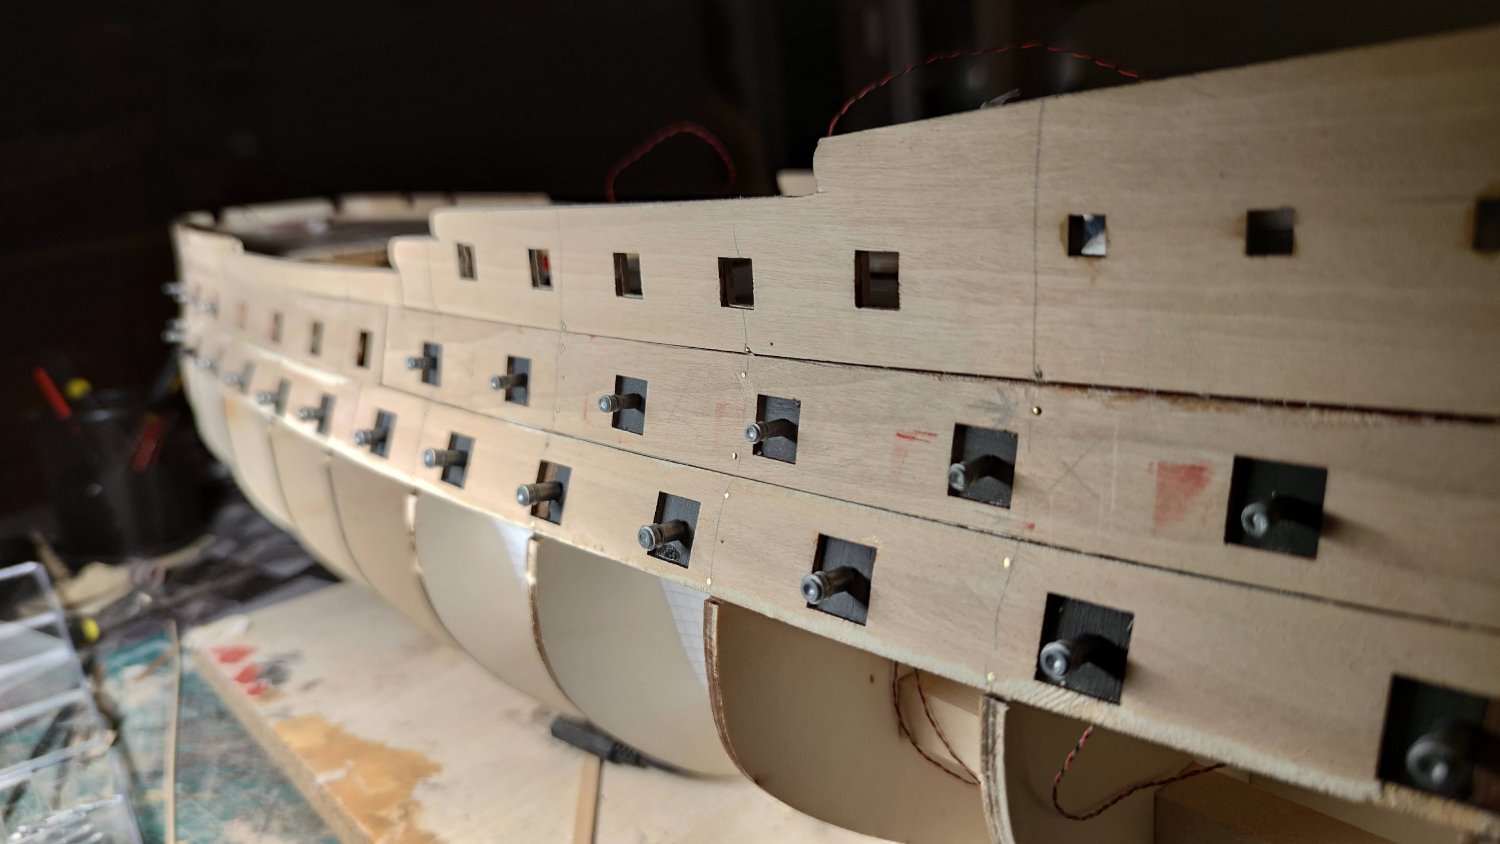
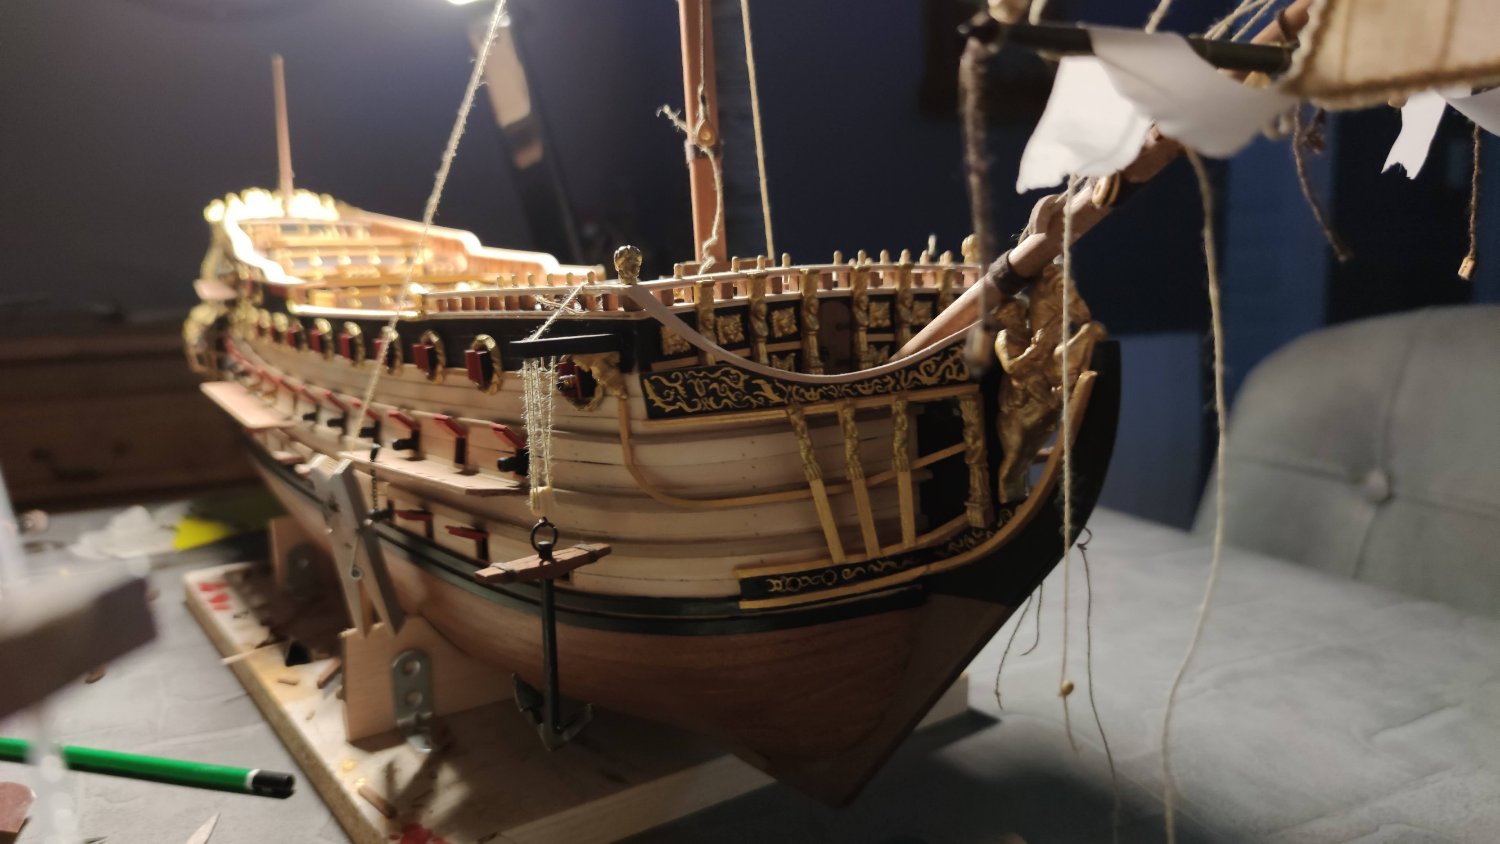
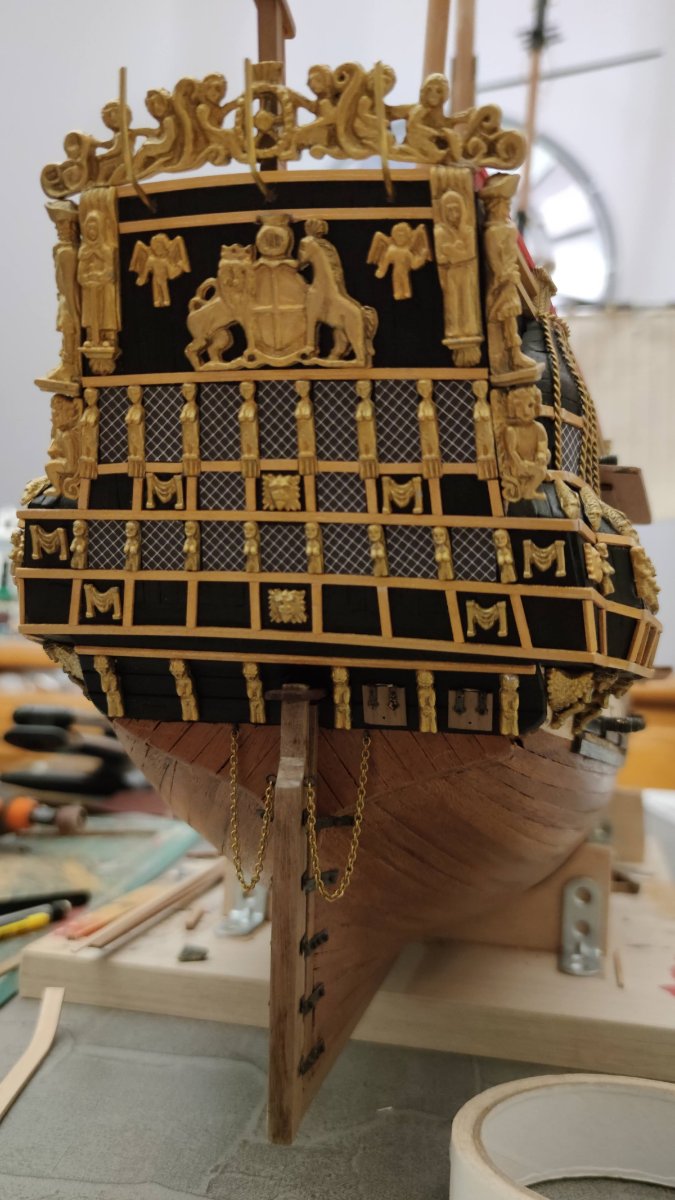
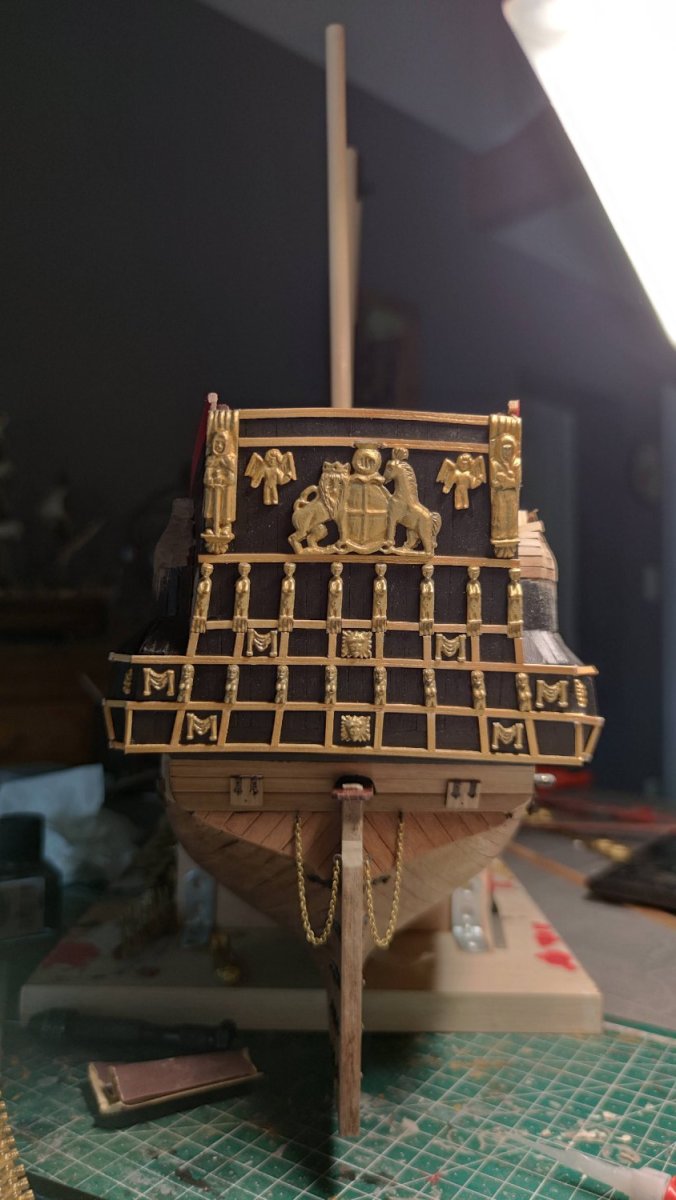
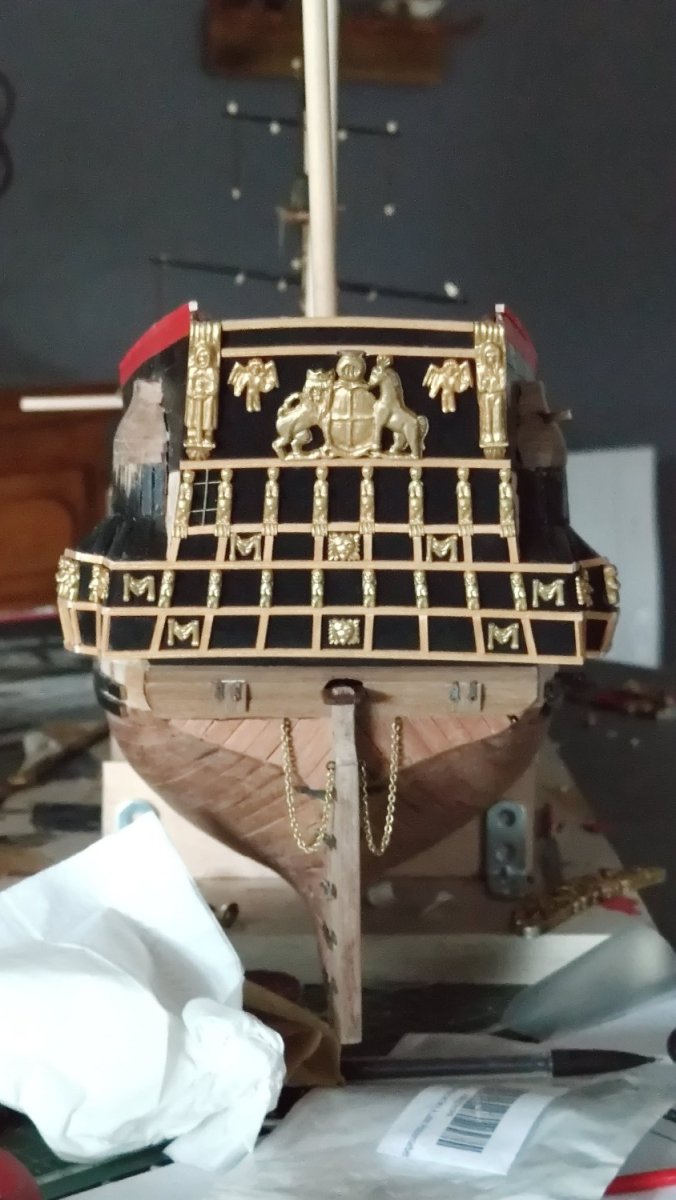
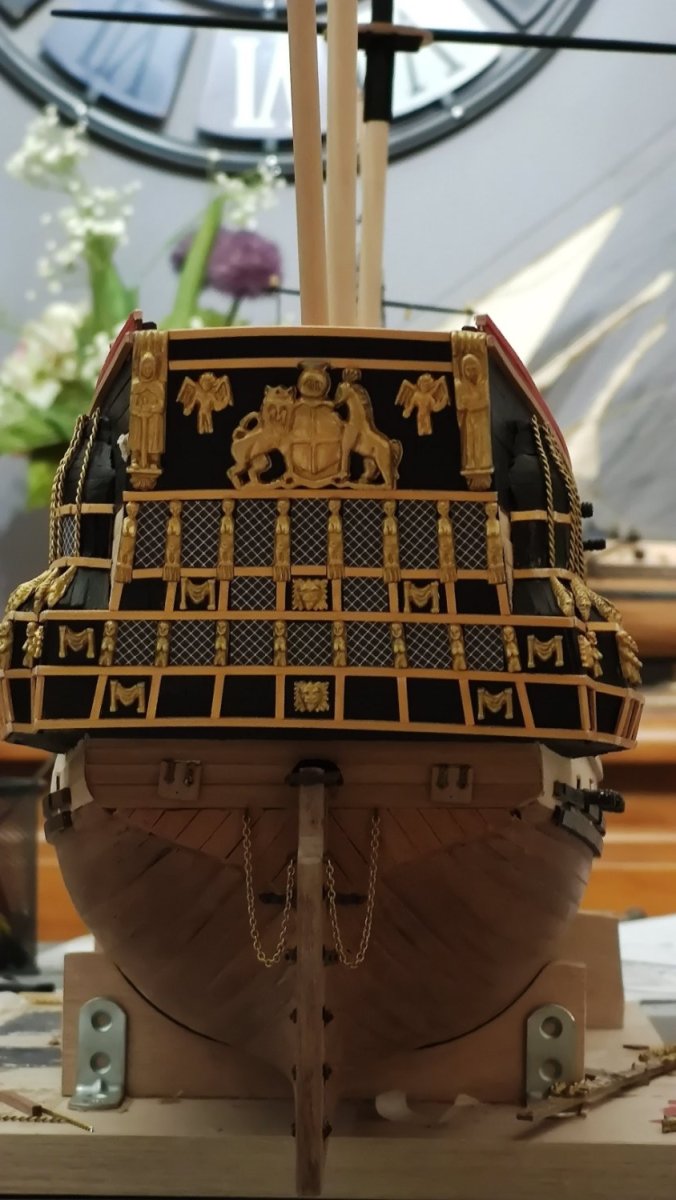
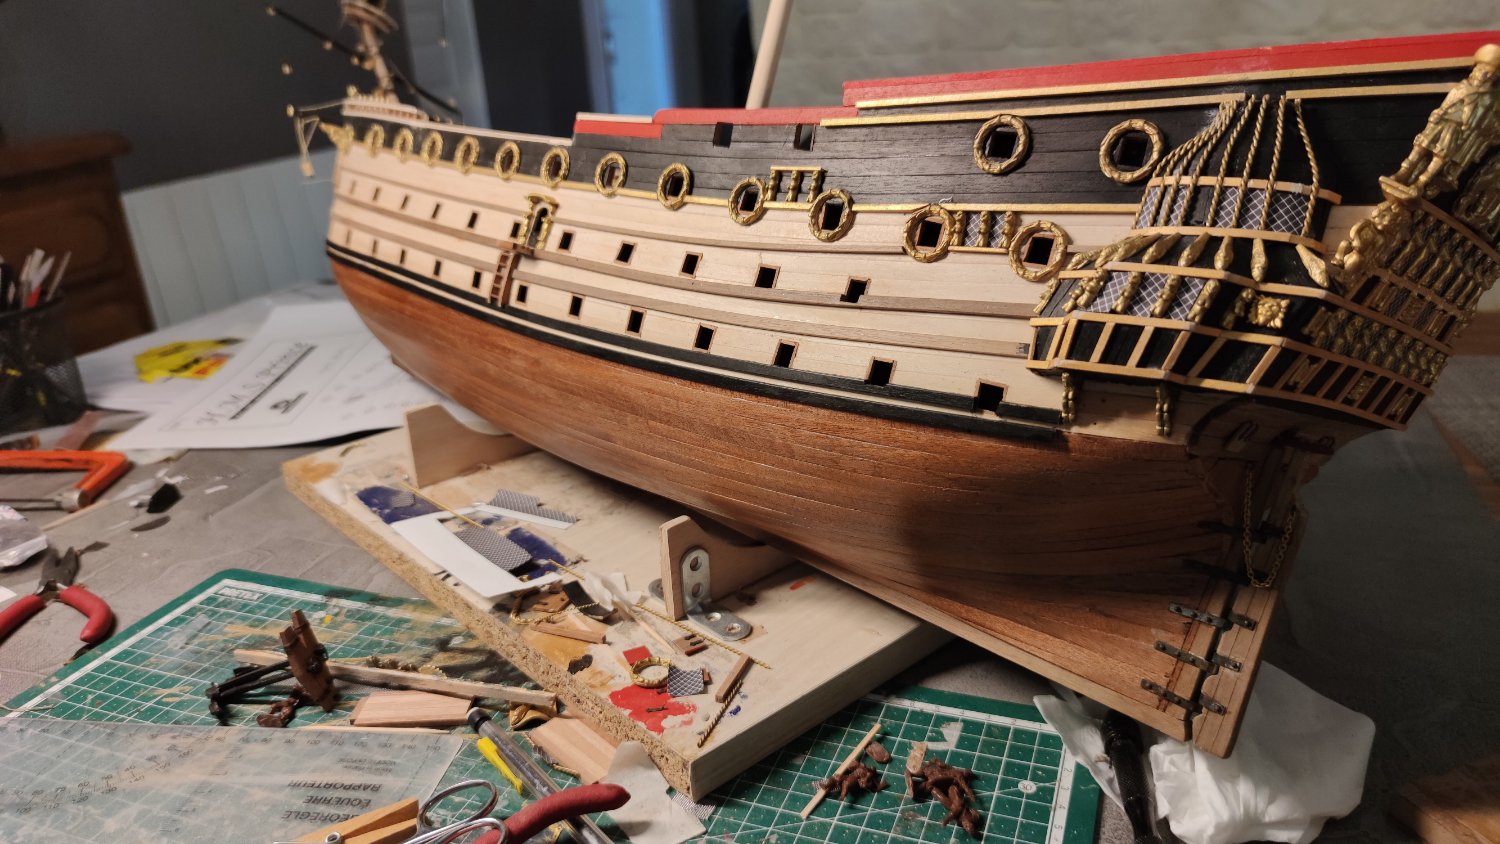
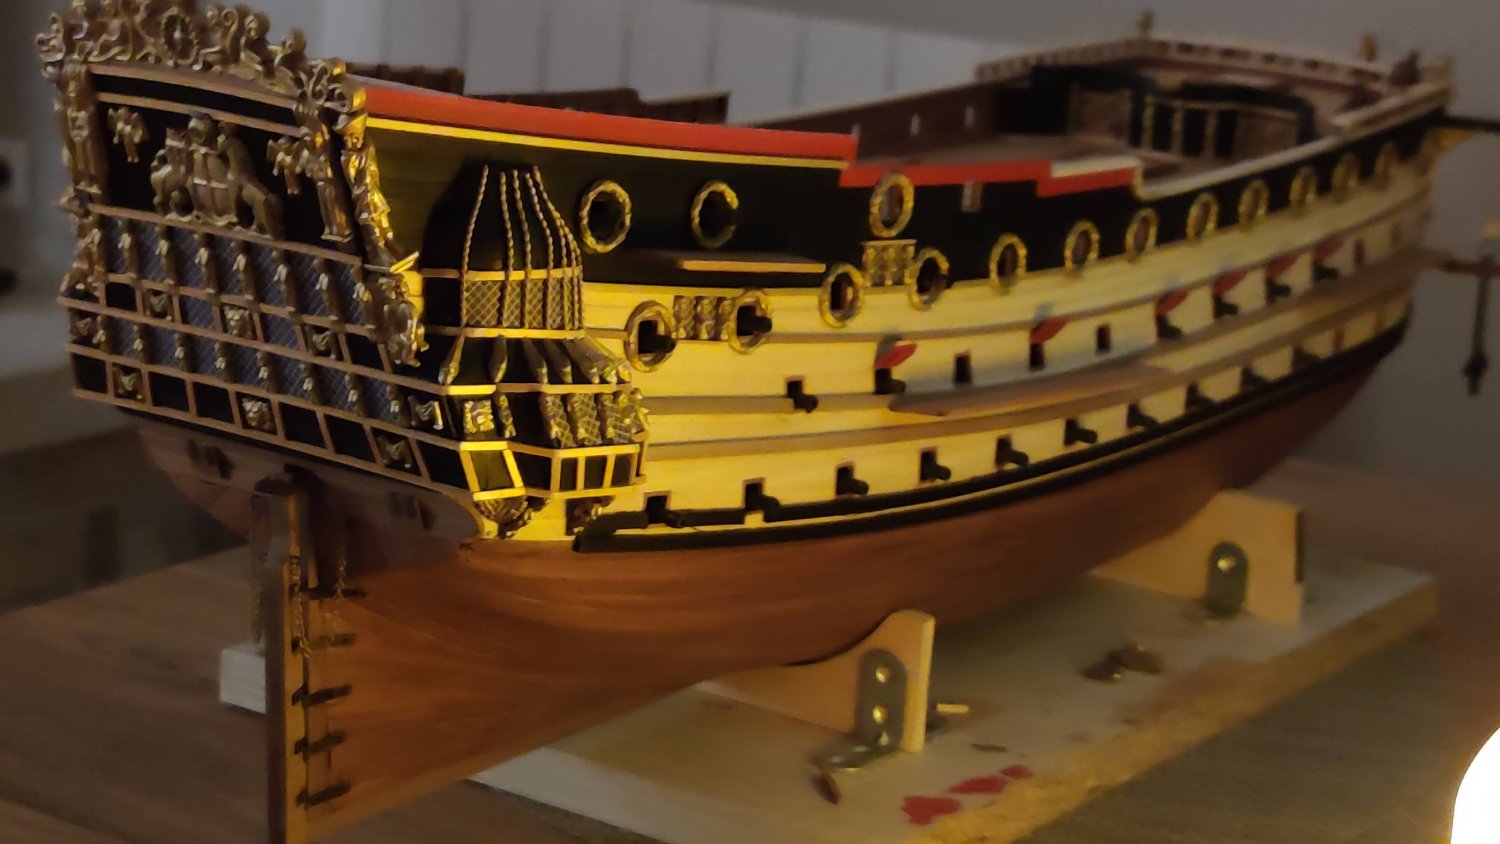
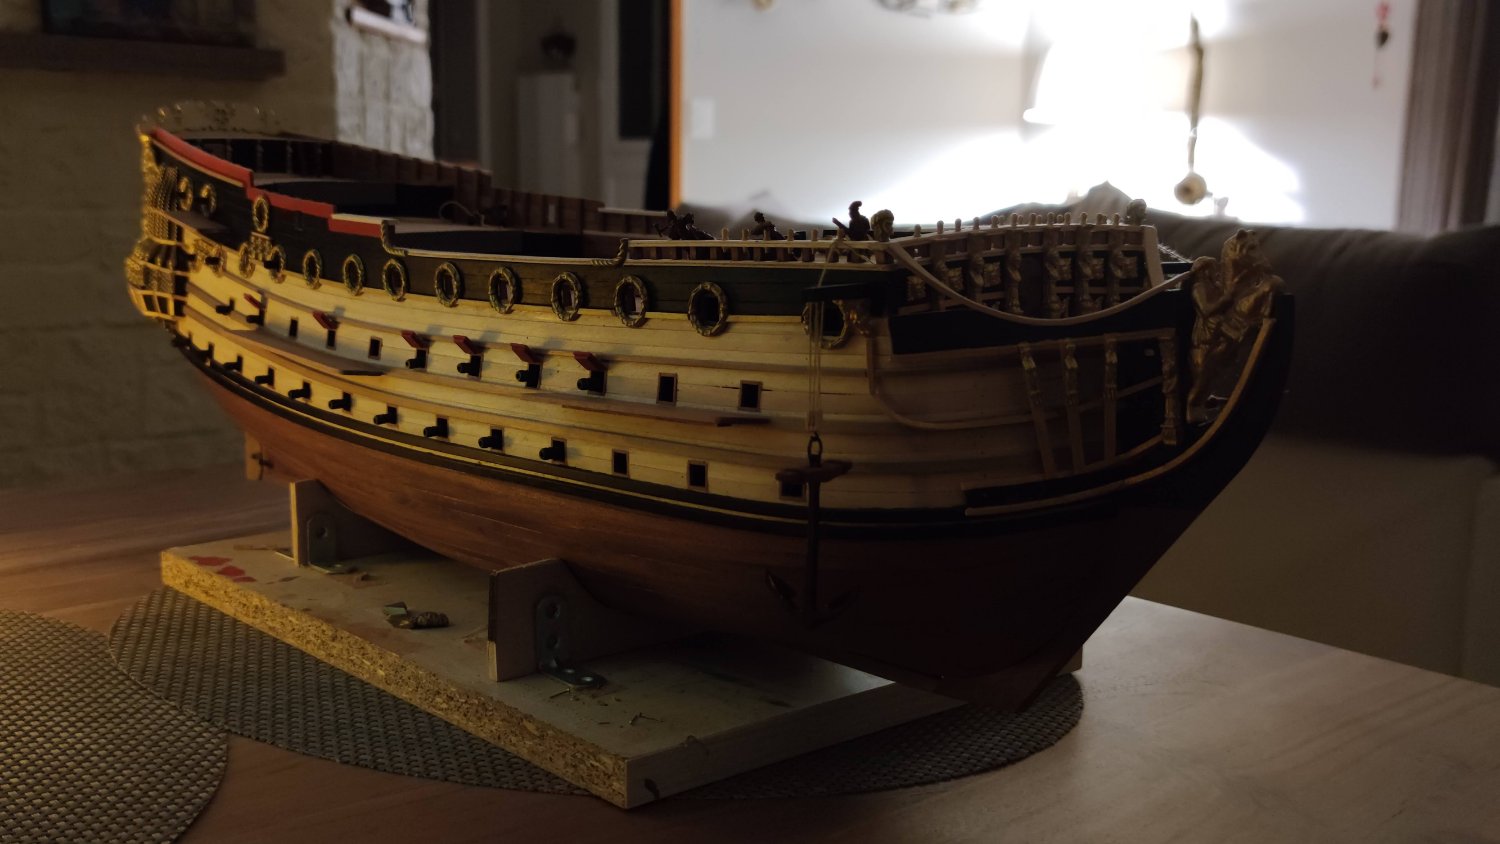
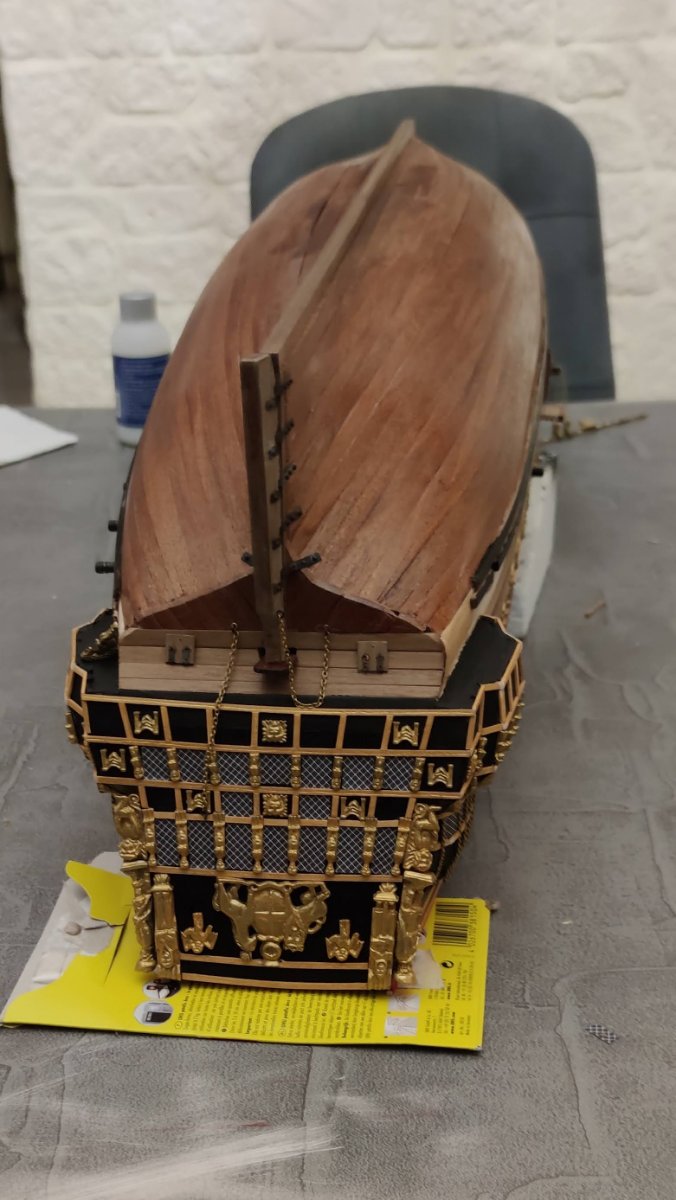
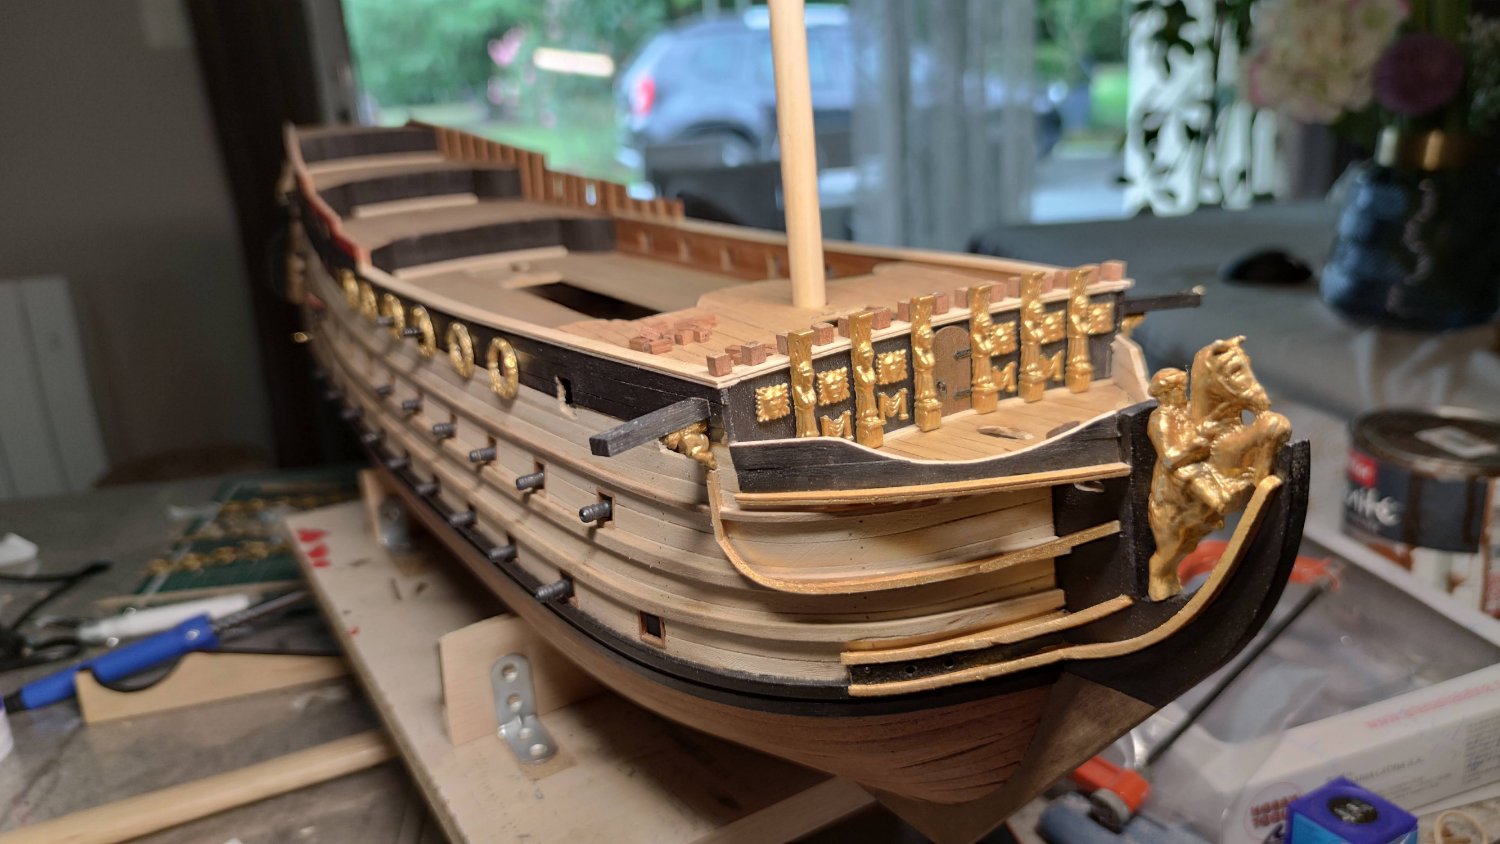
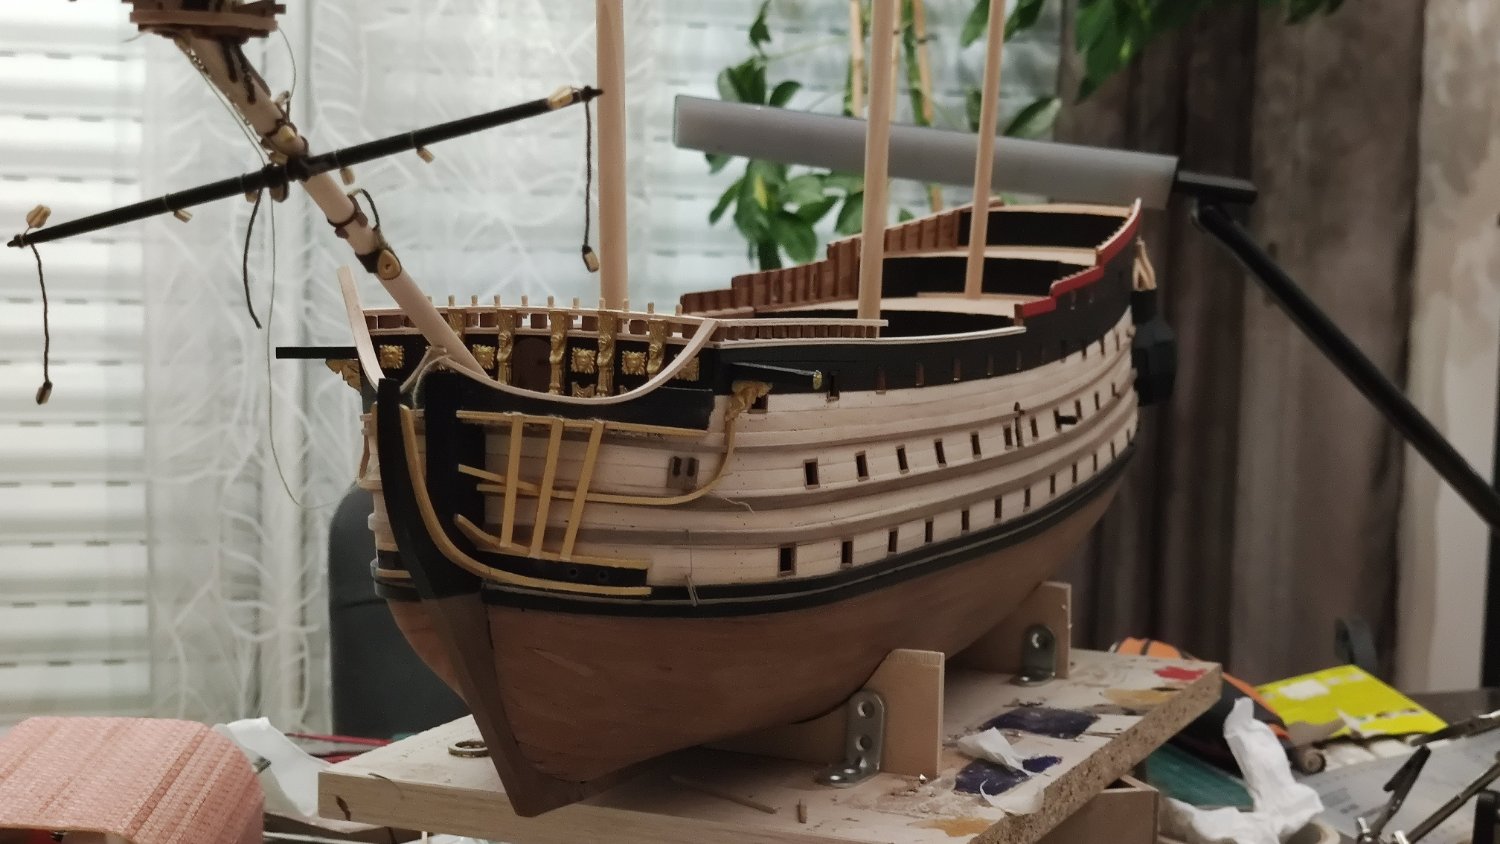
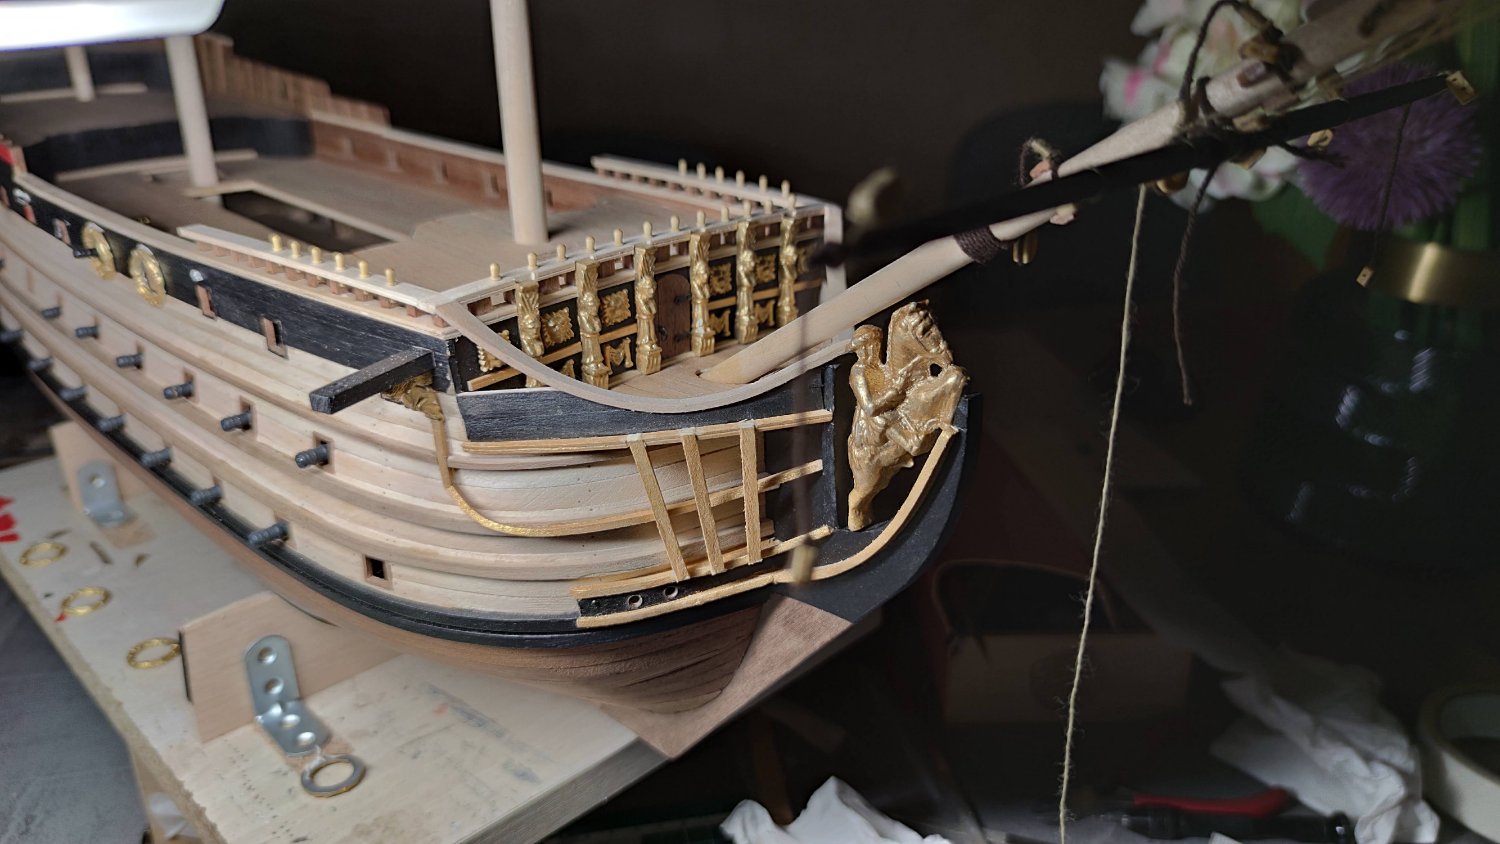
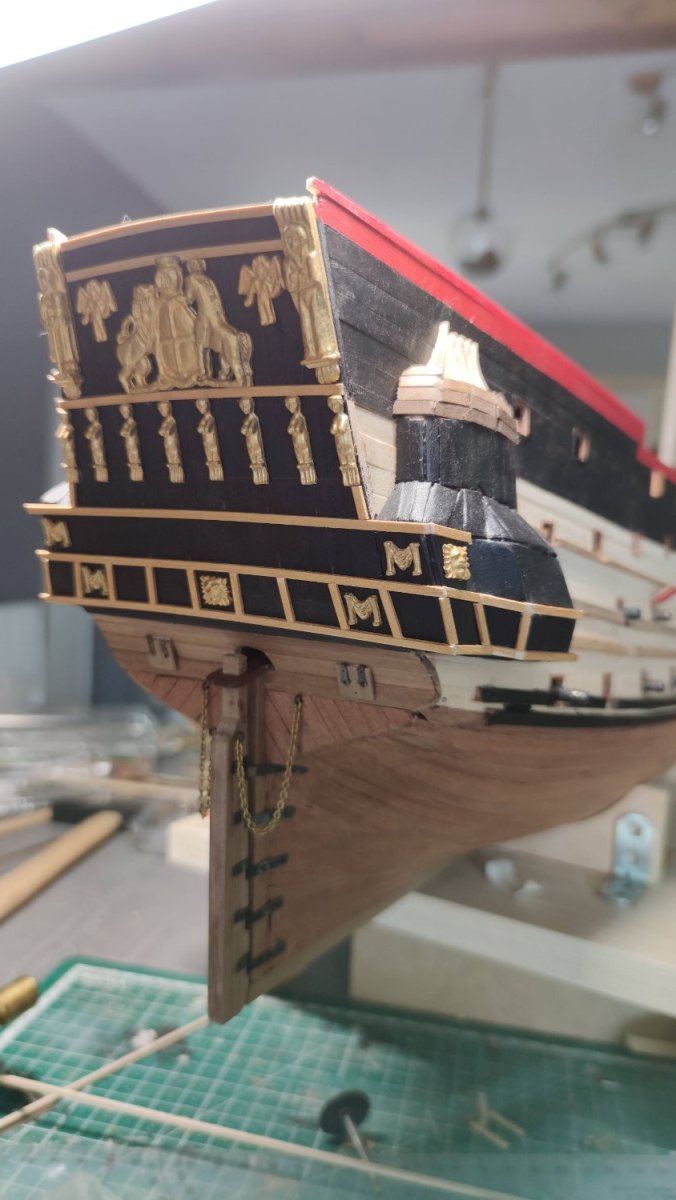
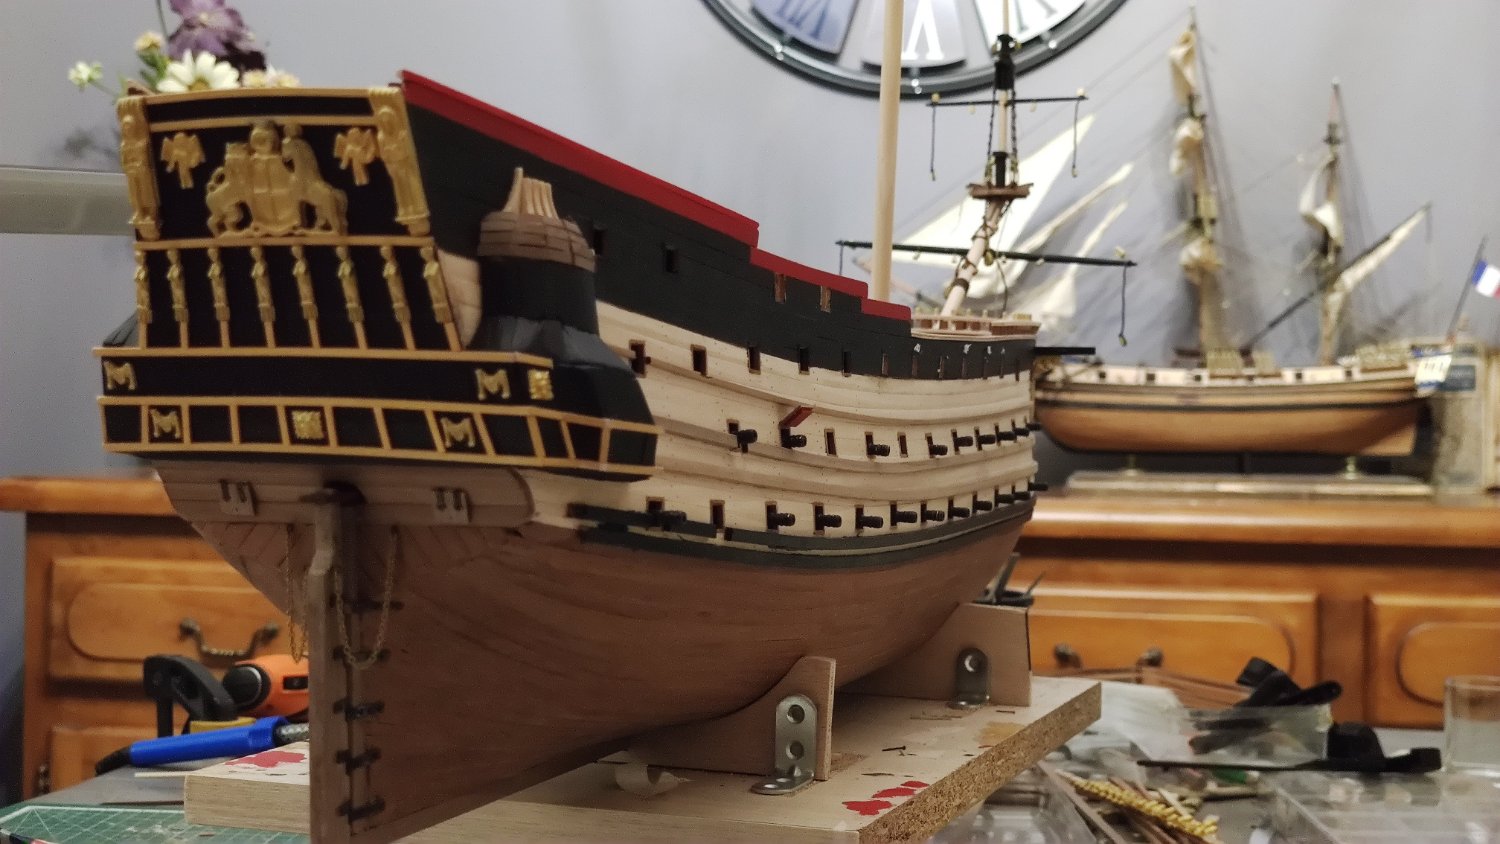
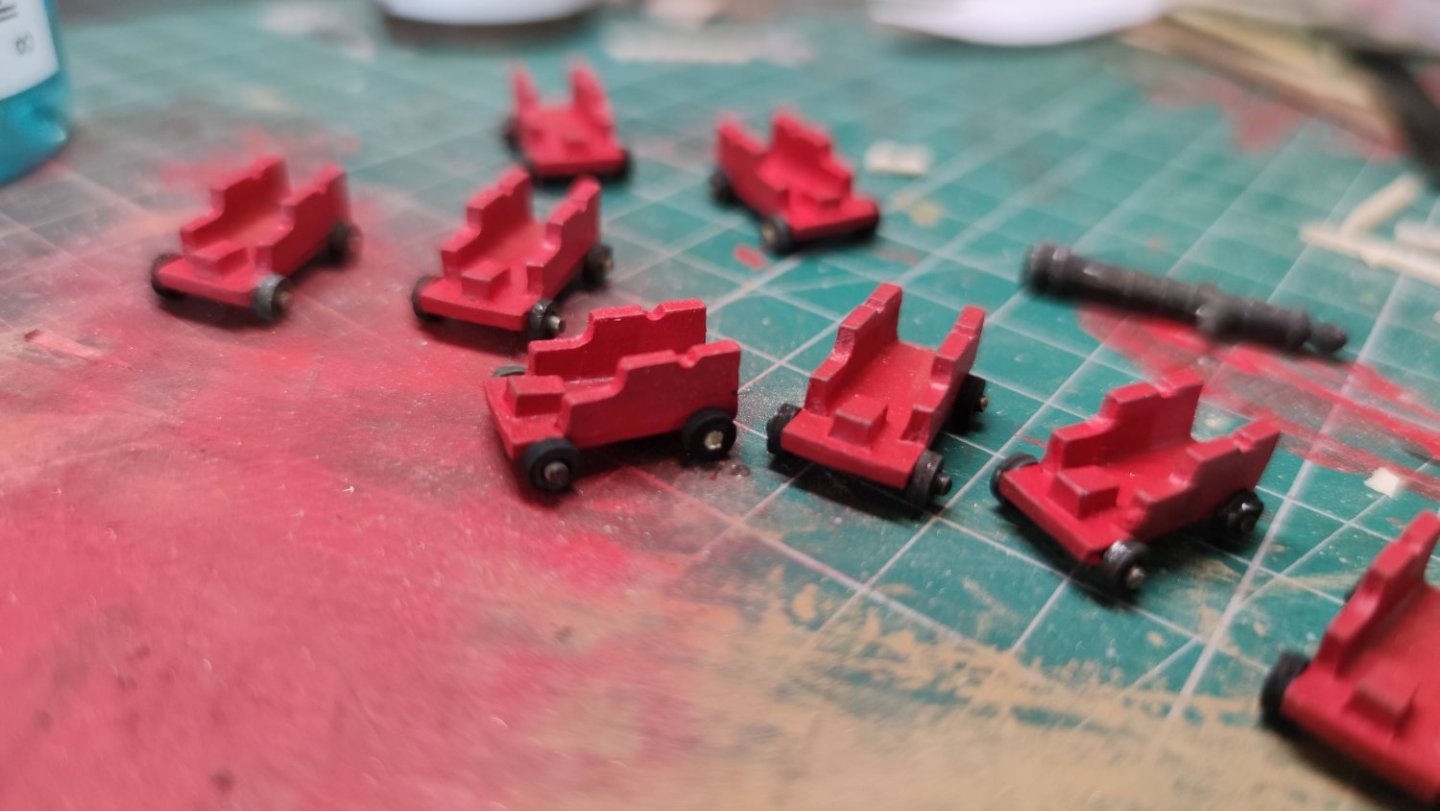
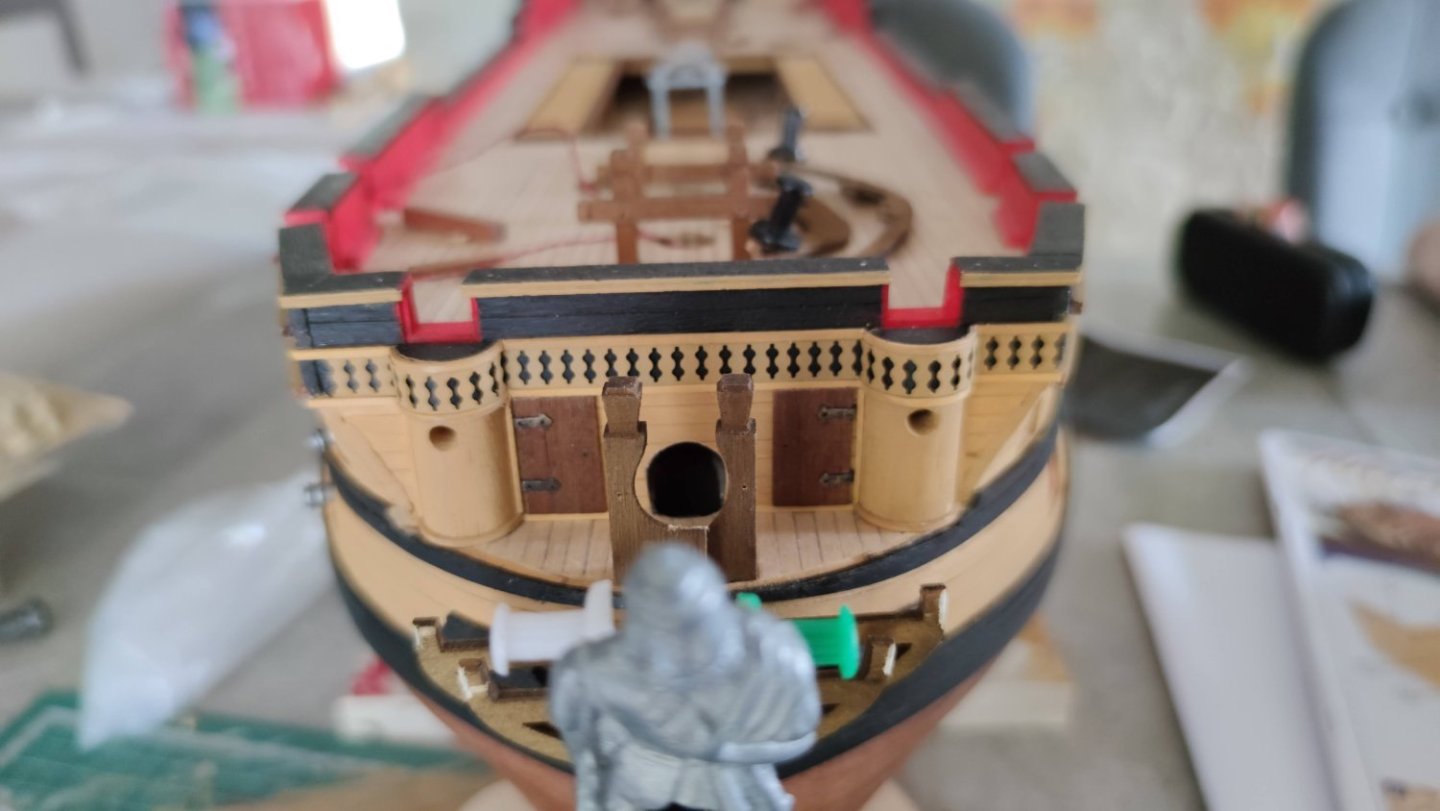
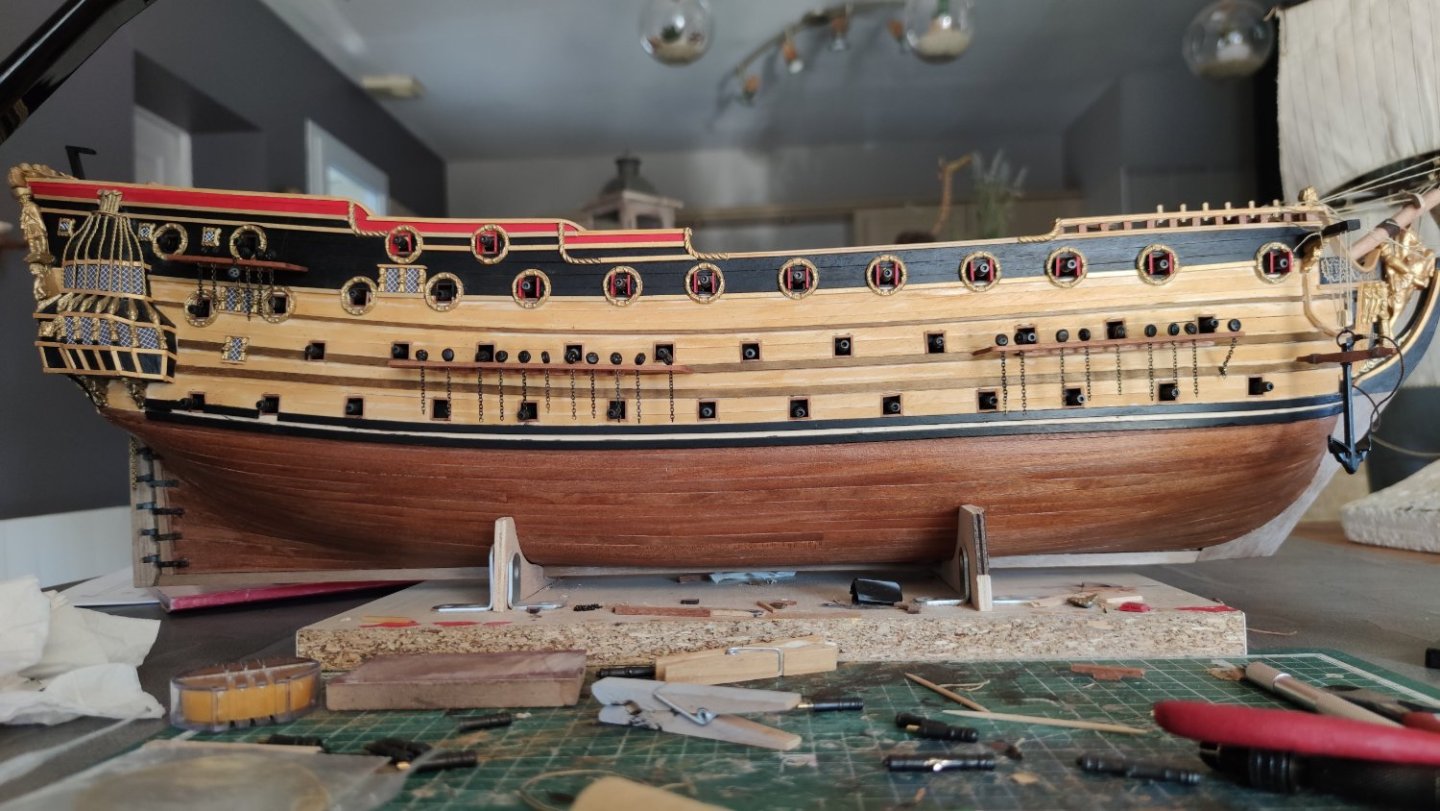
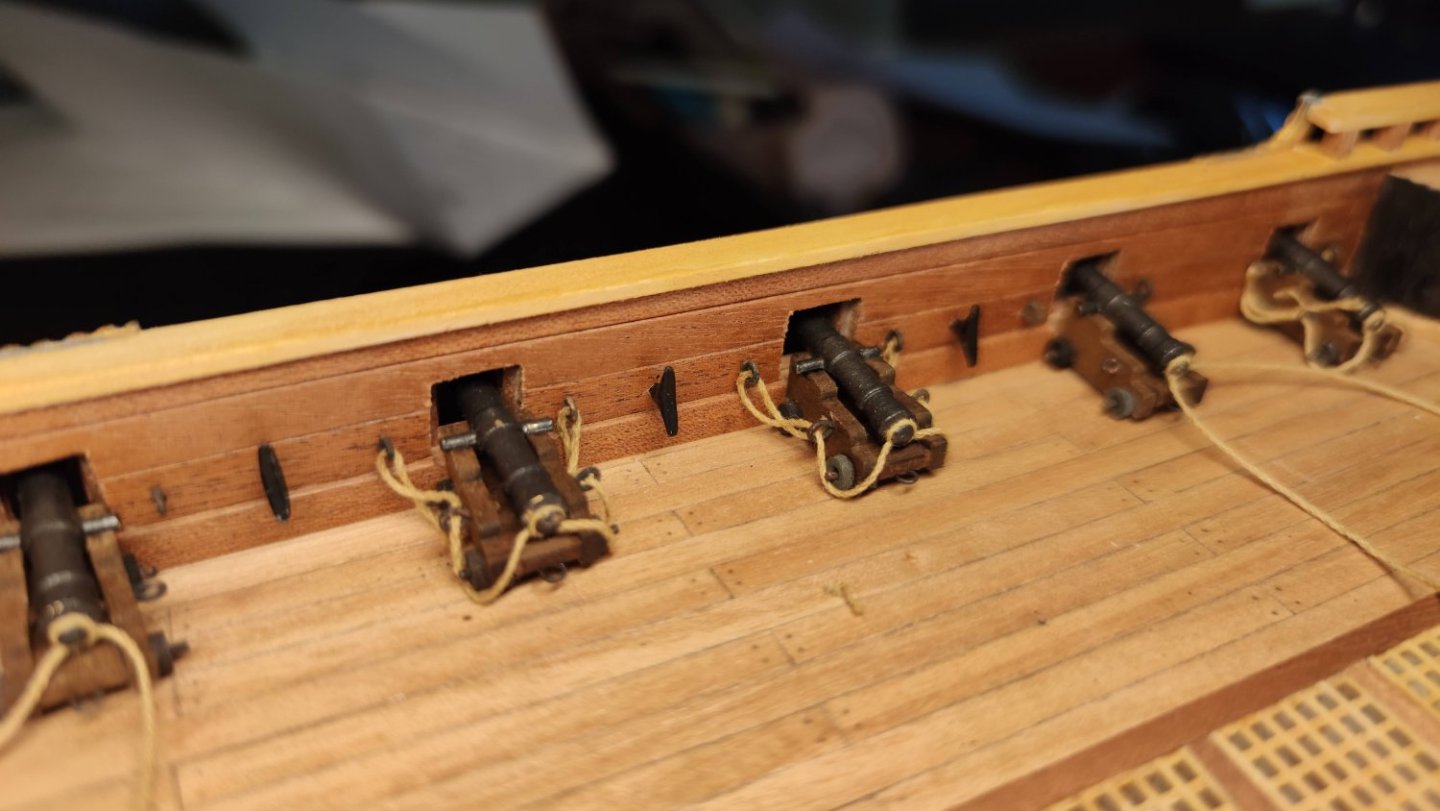
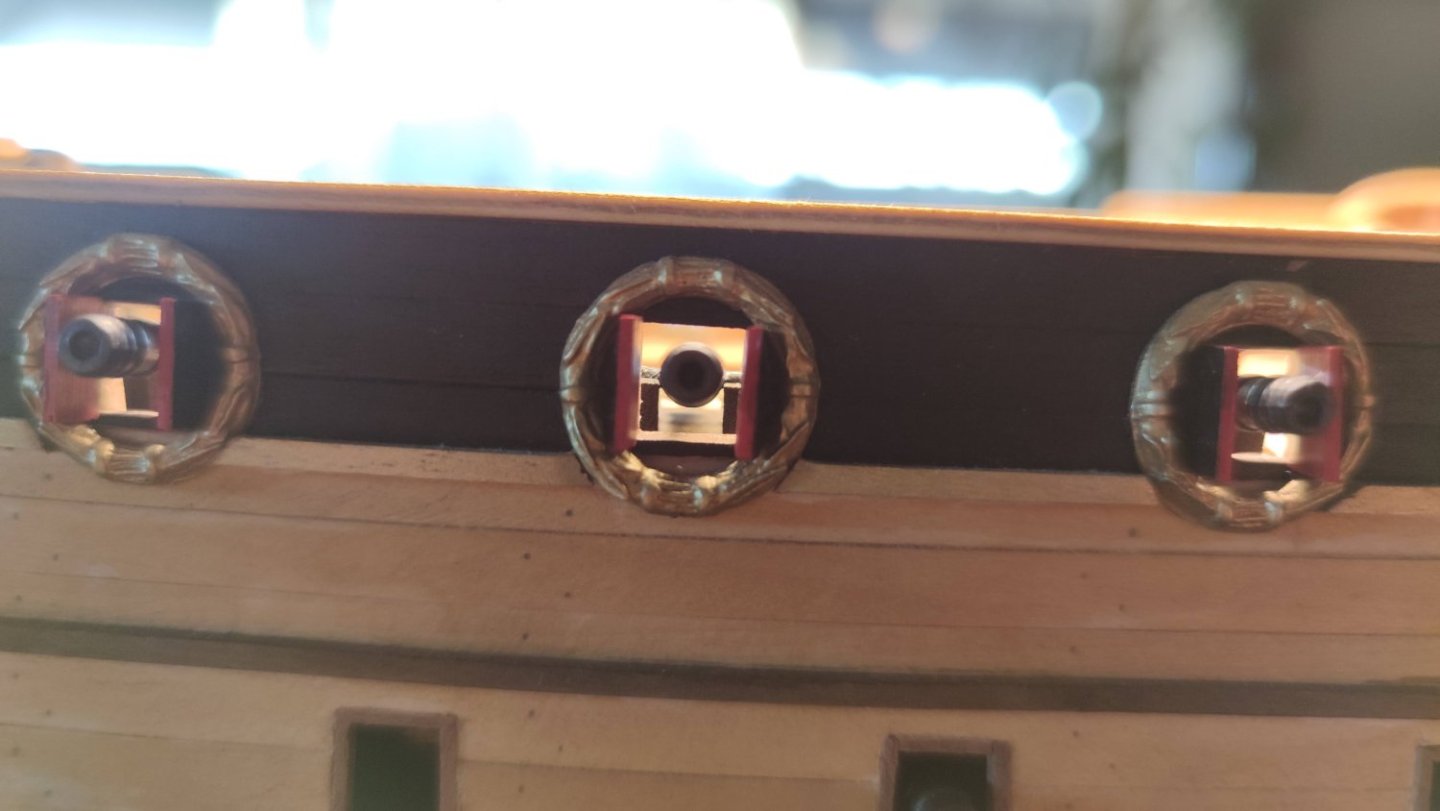
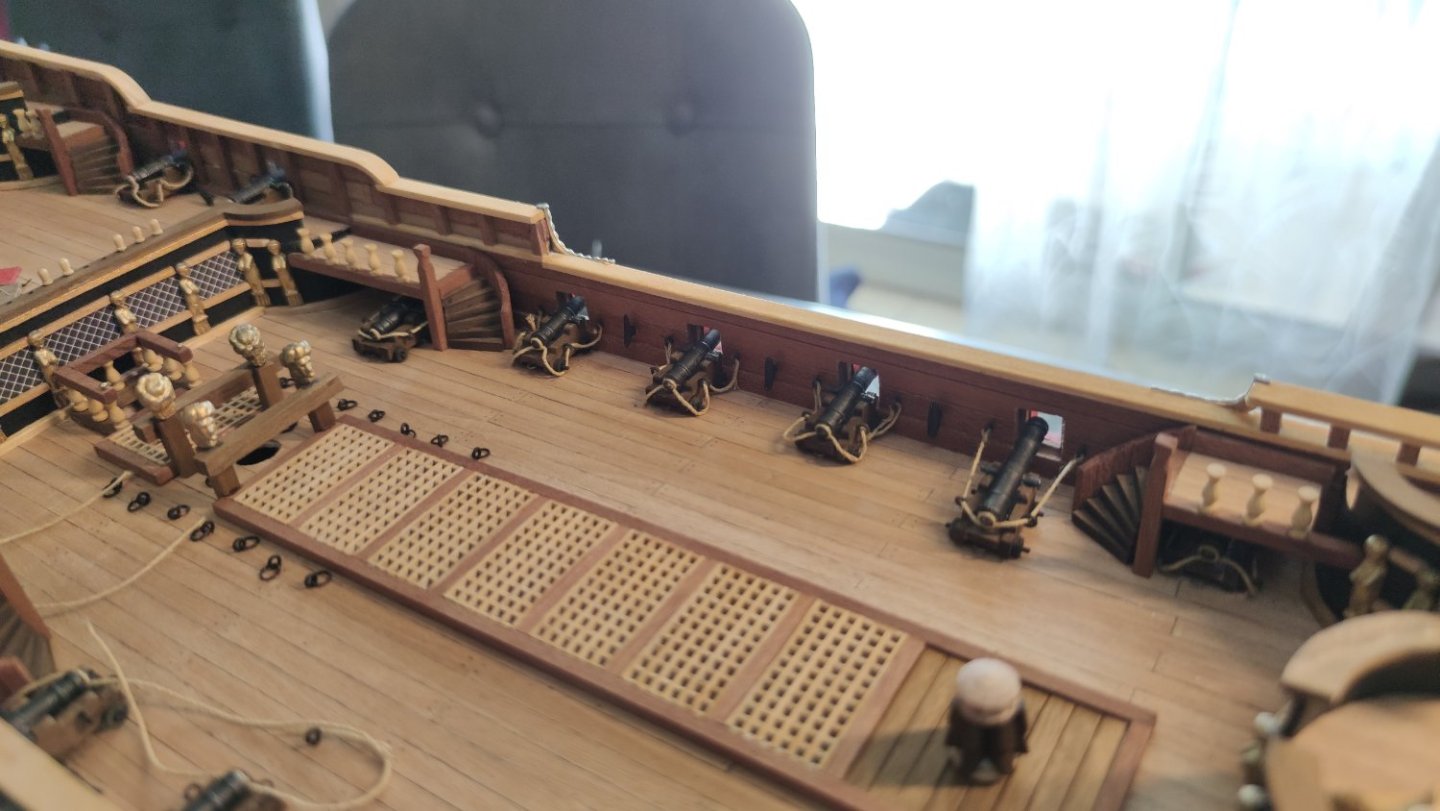
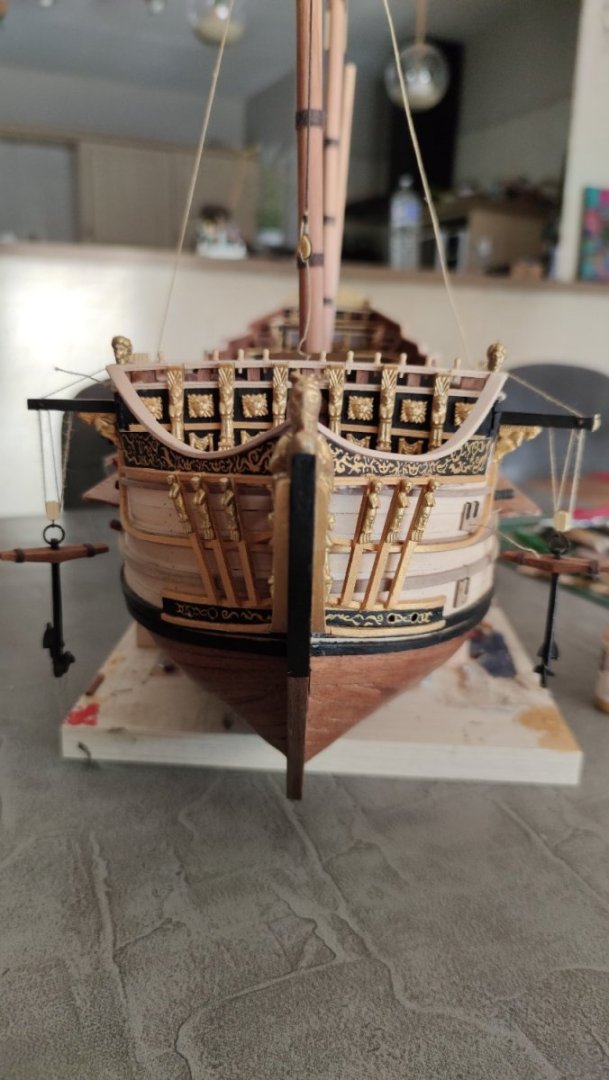
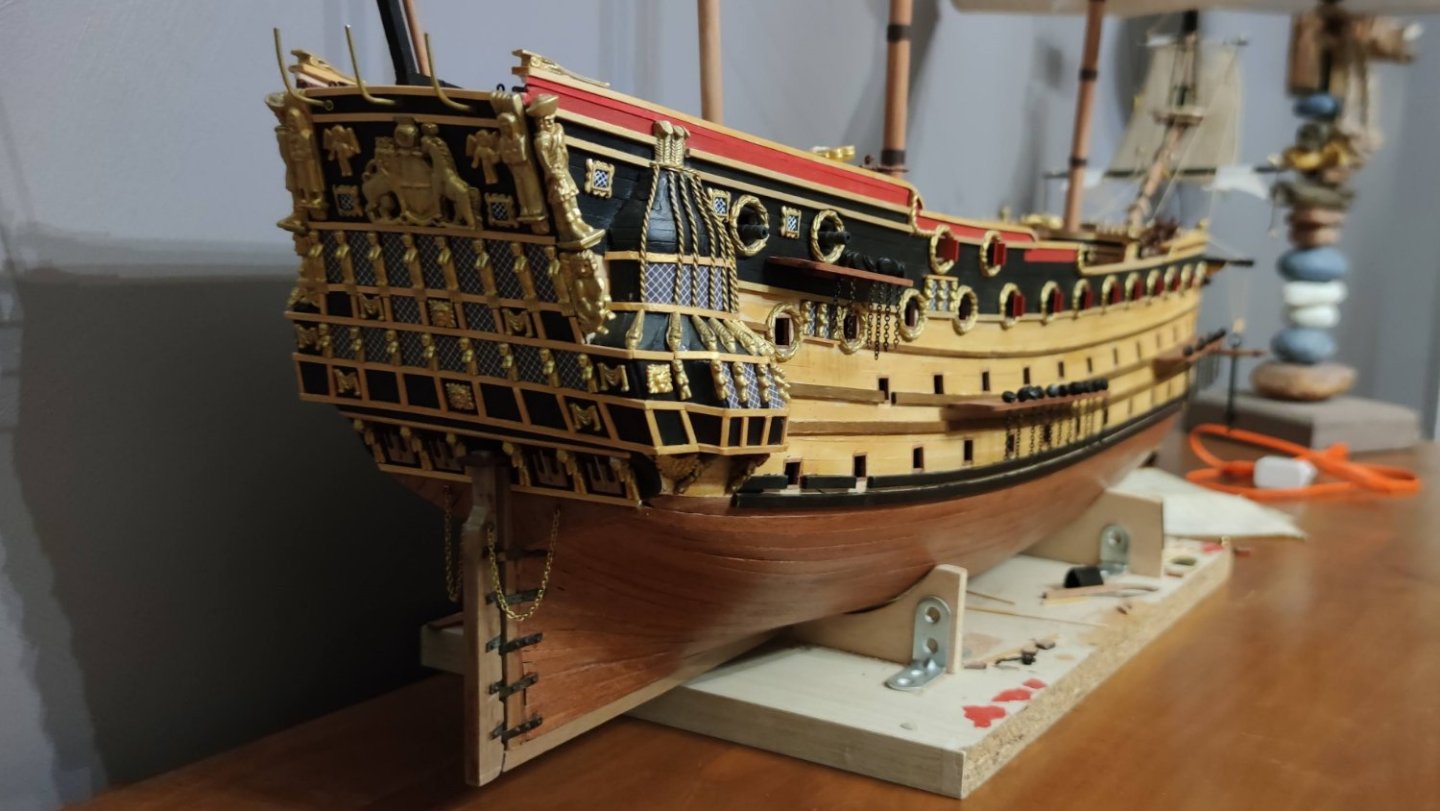
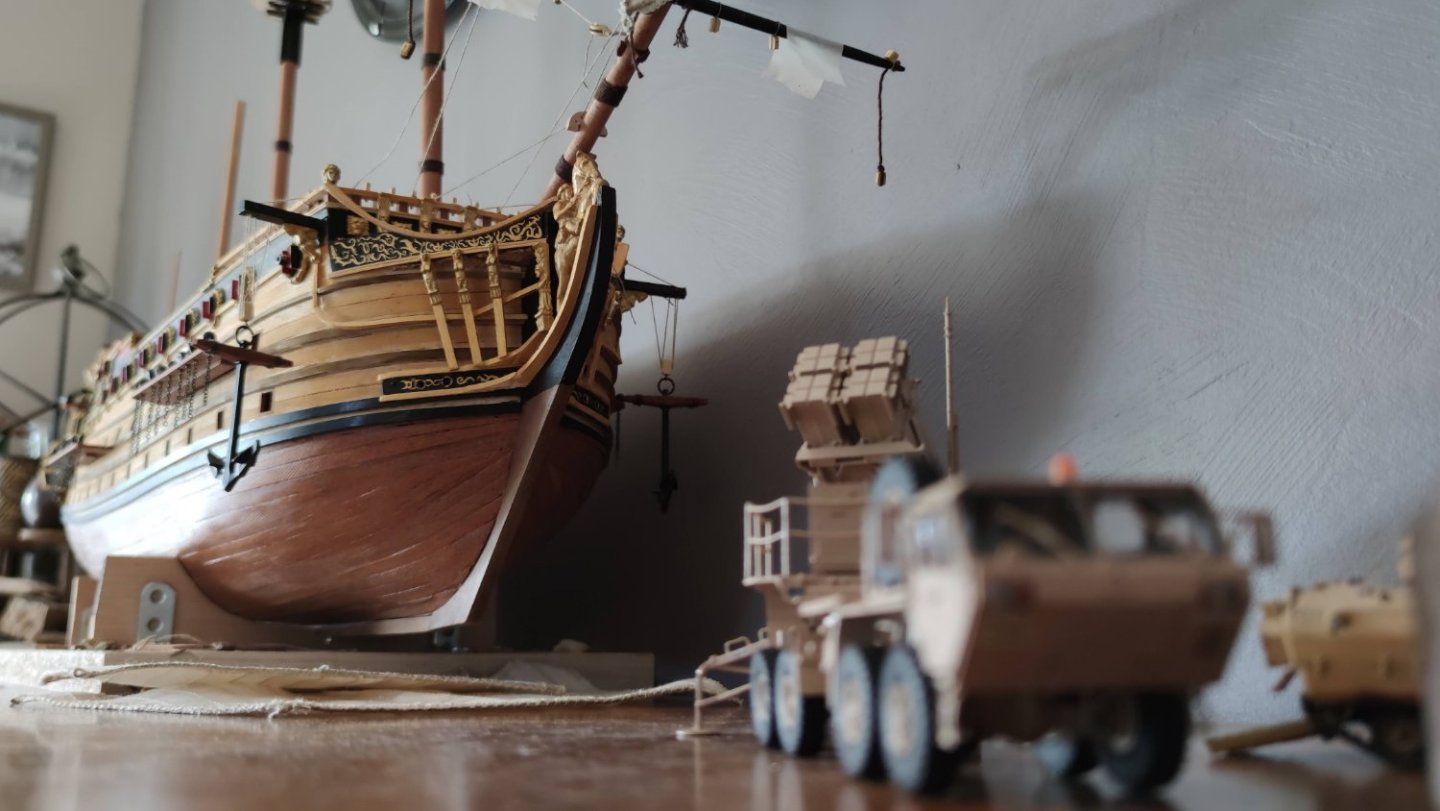
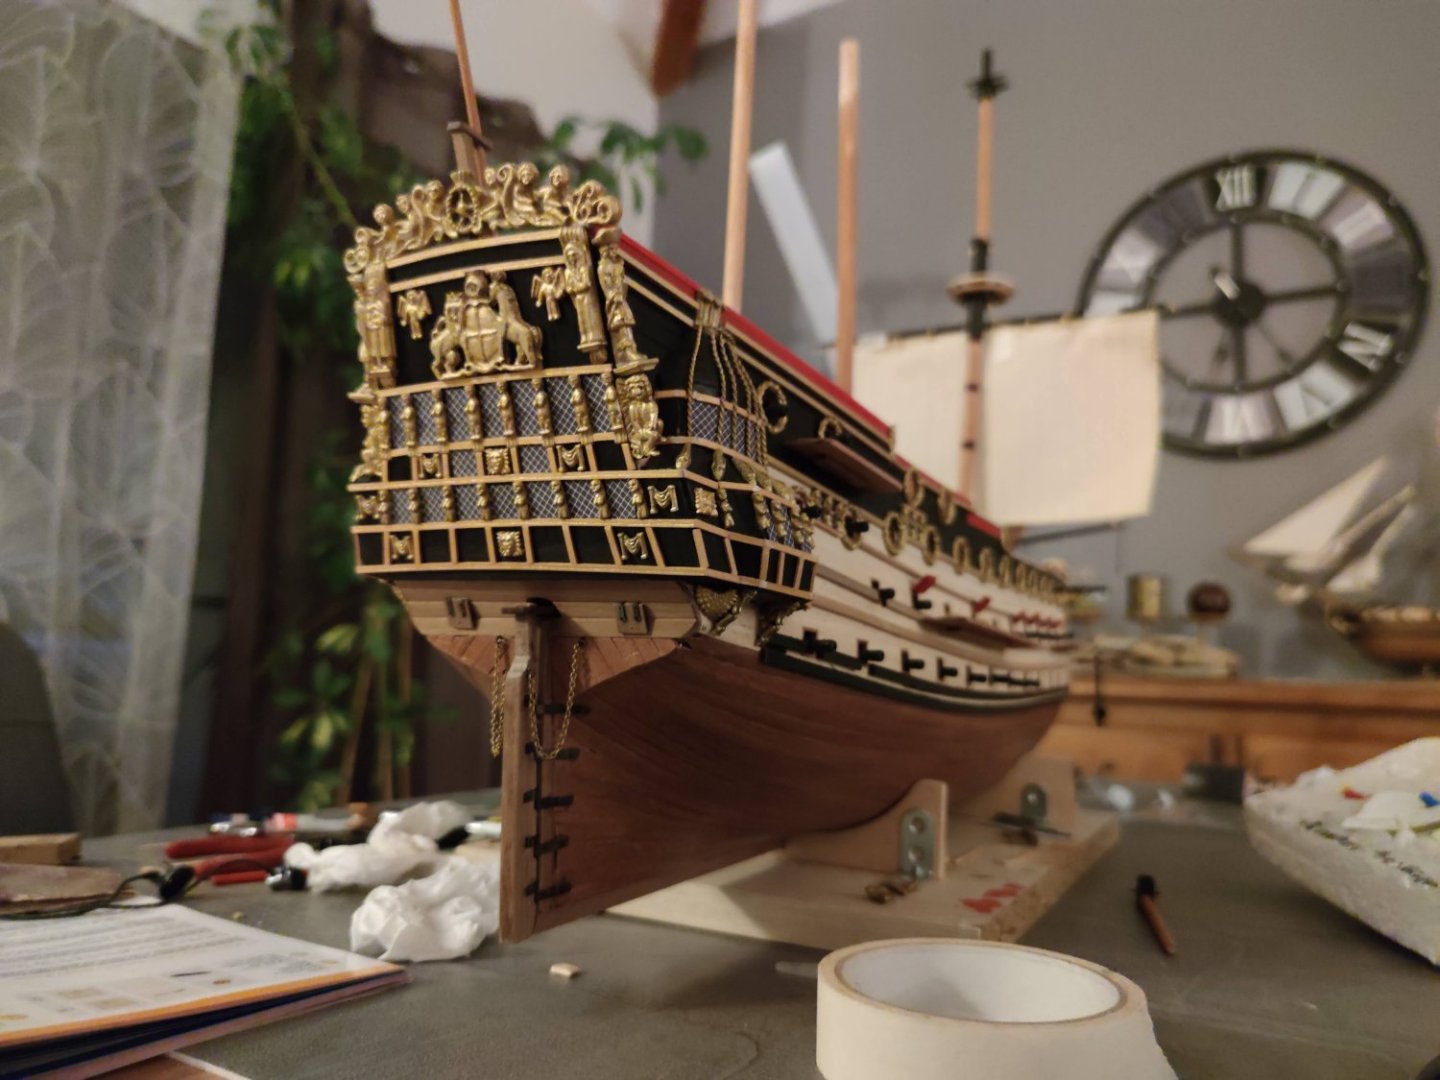
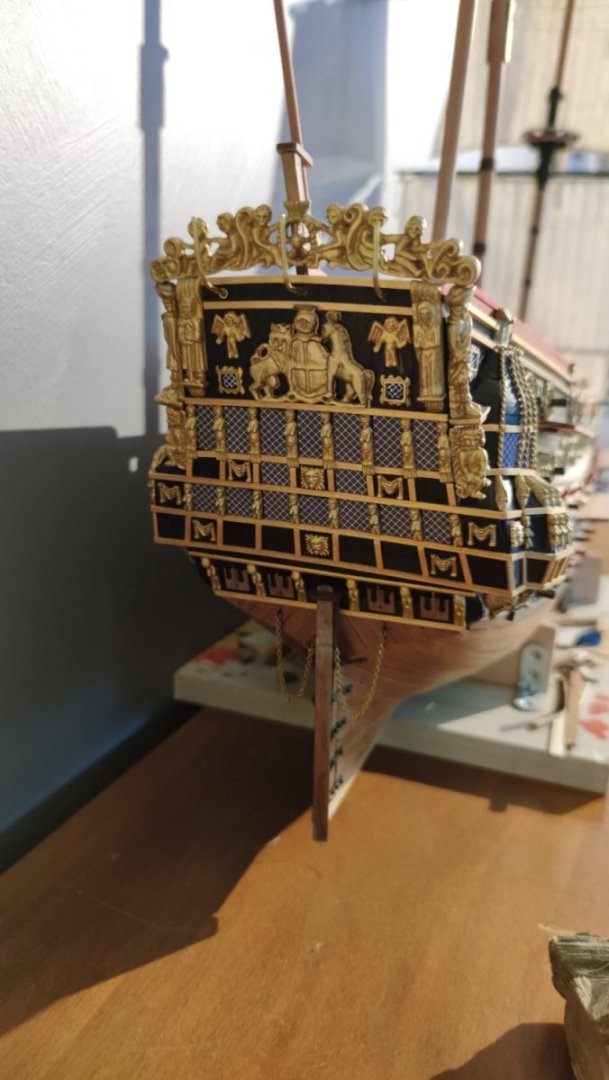
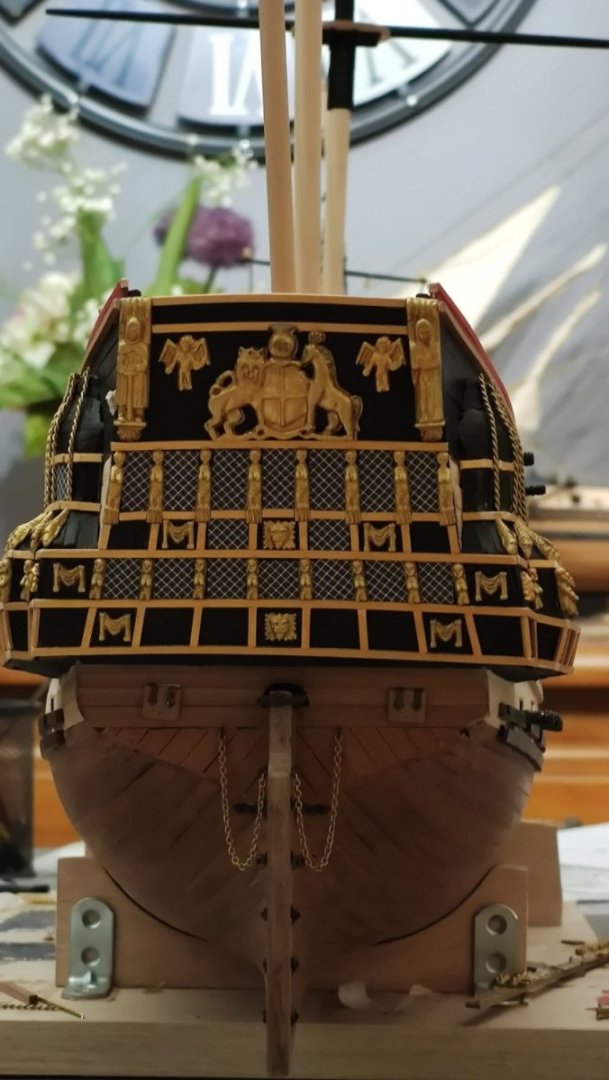
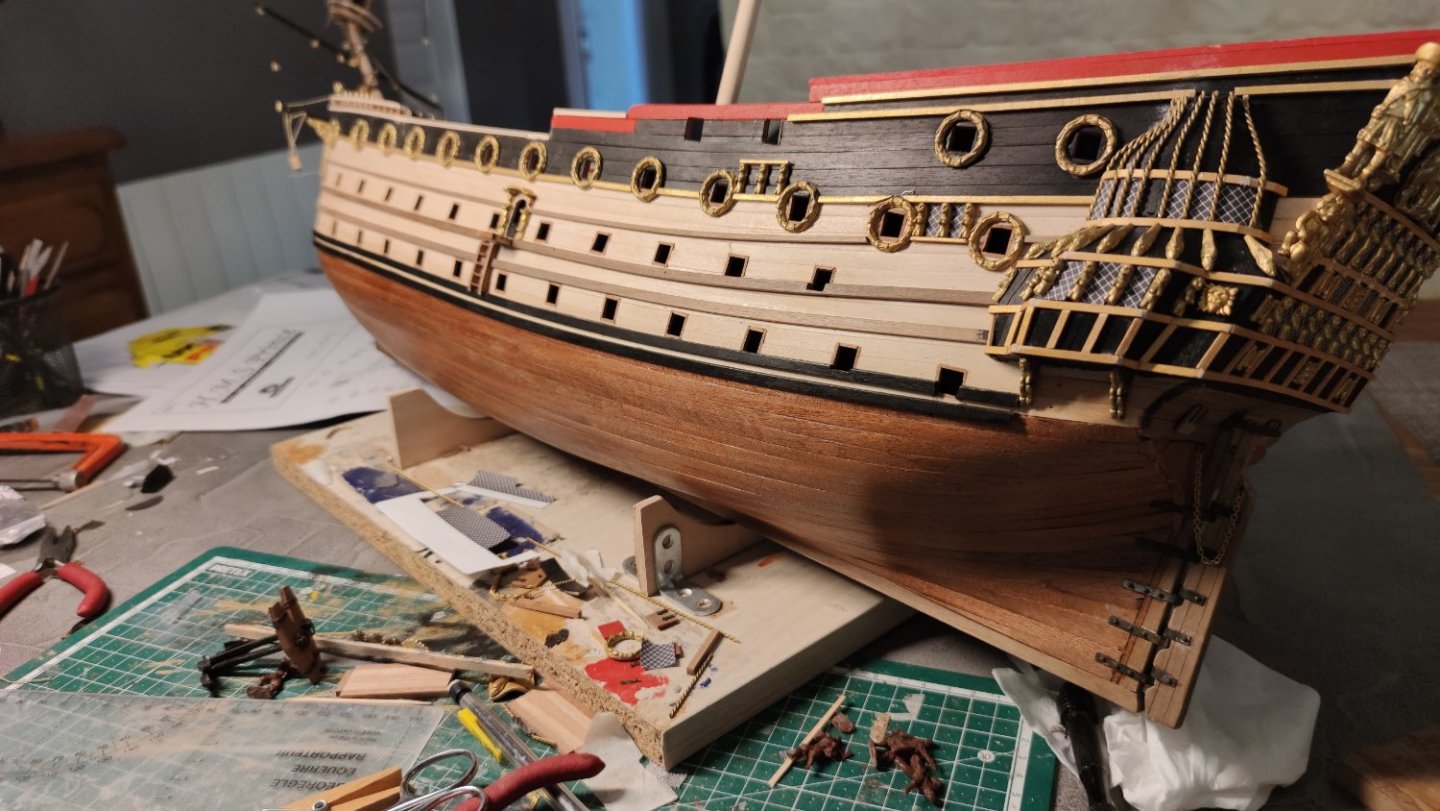
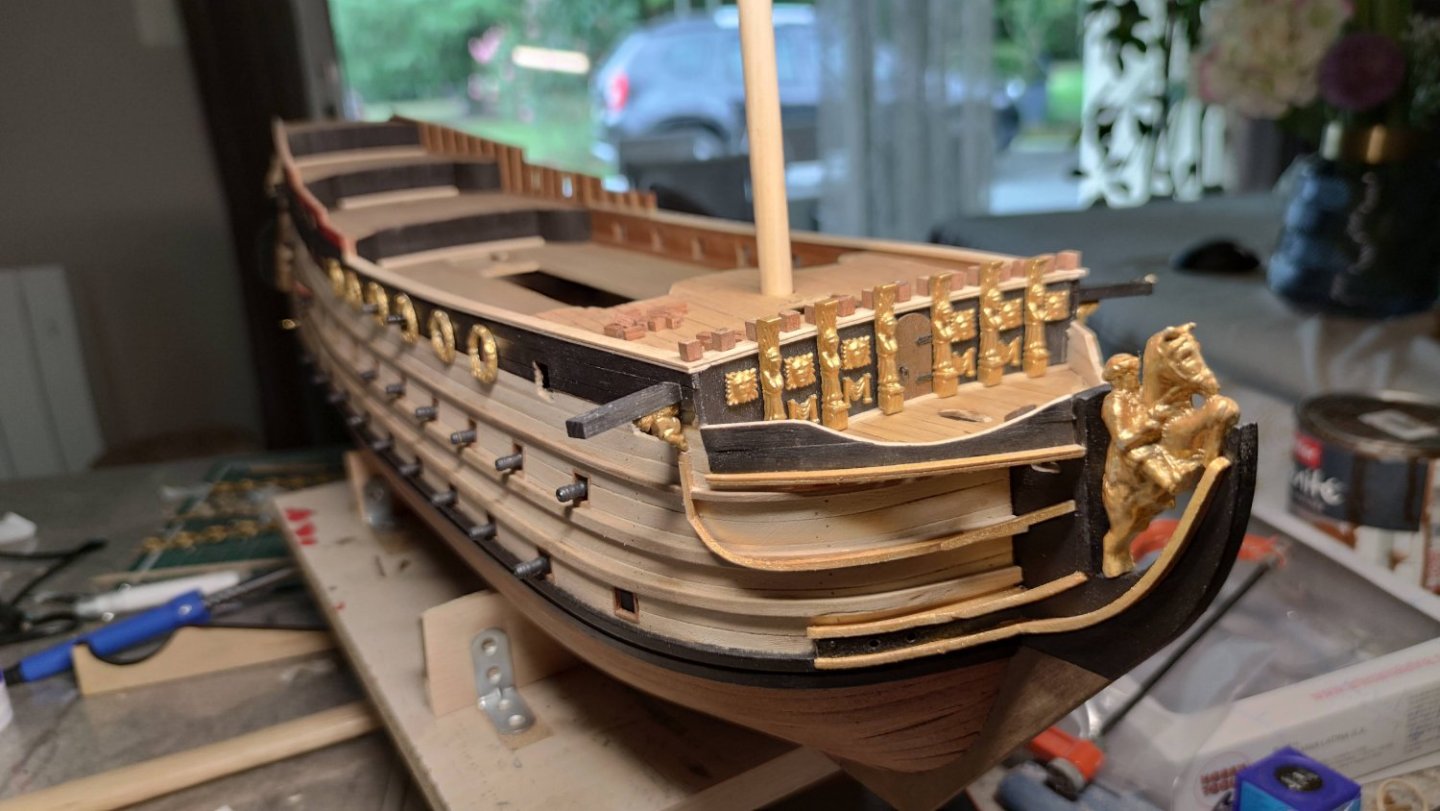
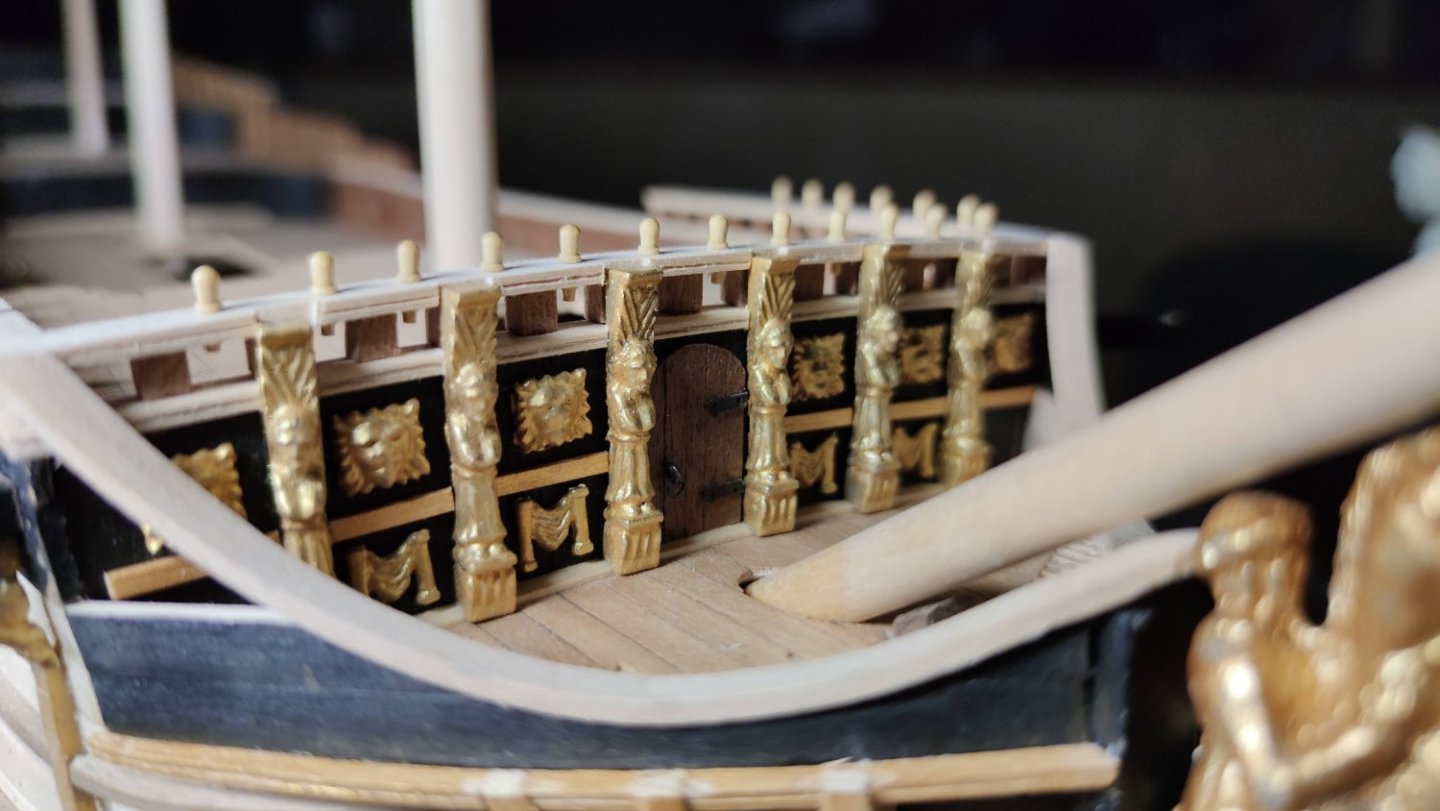
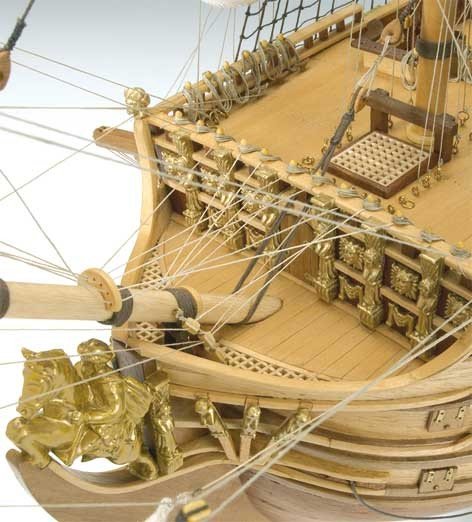
Hello again, I've spent a long time without posting but I've made good progress on the hull. I've already finished the outer lines, and I've got a spiral decoration using a 2mm thick piece of round wood with holes carved in it, which looks better than twisted brass wire. Bow : I hesitated for a long time about the colour of the wooden elements, between black or the "natural" colour. The occre-coloured curves are 1x1mm, extracted from the remaining 3x1mm strips. I love working with 1x1, it allows me to add a lot of relief on a small scale, like on the frieze above the doors. For the anchor holes, I added blackened brass circles, also to add relief, and the result is superb! Below, I used a twisted decoration: 2 brass wires wound with a drill, then flattened with a hammer, then painted in occre. I'm really pleased with the way the bow looks - the curves are magnificent! Stern: For the balcony, I started by cutting the hull right up to the wall, and added a plate for a cleaner result (it was very difficult to cut in this space). The bottles are very complex to make because of the general shape, and the photoetched parts had to be adjusted to follow the curves correctly. The back panel was delicately painted and placed on the wooden piece. As there's very little relief, I added walnut-coloured 3x1 columns on the windows, and strips around the panel, for a clean finish. After struggling to paint all the columns, I glued them in place and the result is superb! Cabin: I have no idea what this cabin is for. It's not planned in the kit, but I've opened doors and windows to get a look at the illuminated interior. If I get the inspiration, I'll add some details on the outside walls... Cannons: Certainly the biggest flaw in this kit... badly moulded, undrilled cannons, simple carriages that are impossible to drill, and no wheels for the 8 cannons on the 2nd bridge, which don't even look like the other dummy cannons on the 2nd bridge. Using scraps from other models, I was able to fit the missing wheels. Unfortunately, if I wanted to replace them with brass cannons, it would have cost too much... The gun ports took a long time to make, fortunately only the first bridge has them! I still don't know what angle I'm going to give them. I've also added scratch rings to attach the rope to the gunport


-
Montanes by Iseaz - OcCre- 1/70
Iseaz replied to Iseaz's topic in - Kit build logs for subjects built from 1751 - 1800
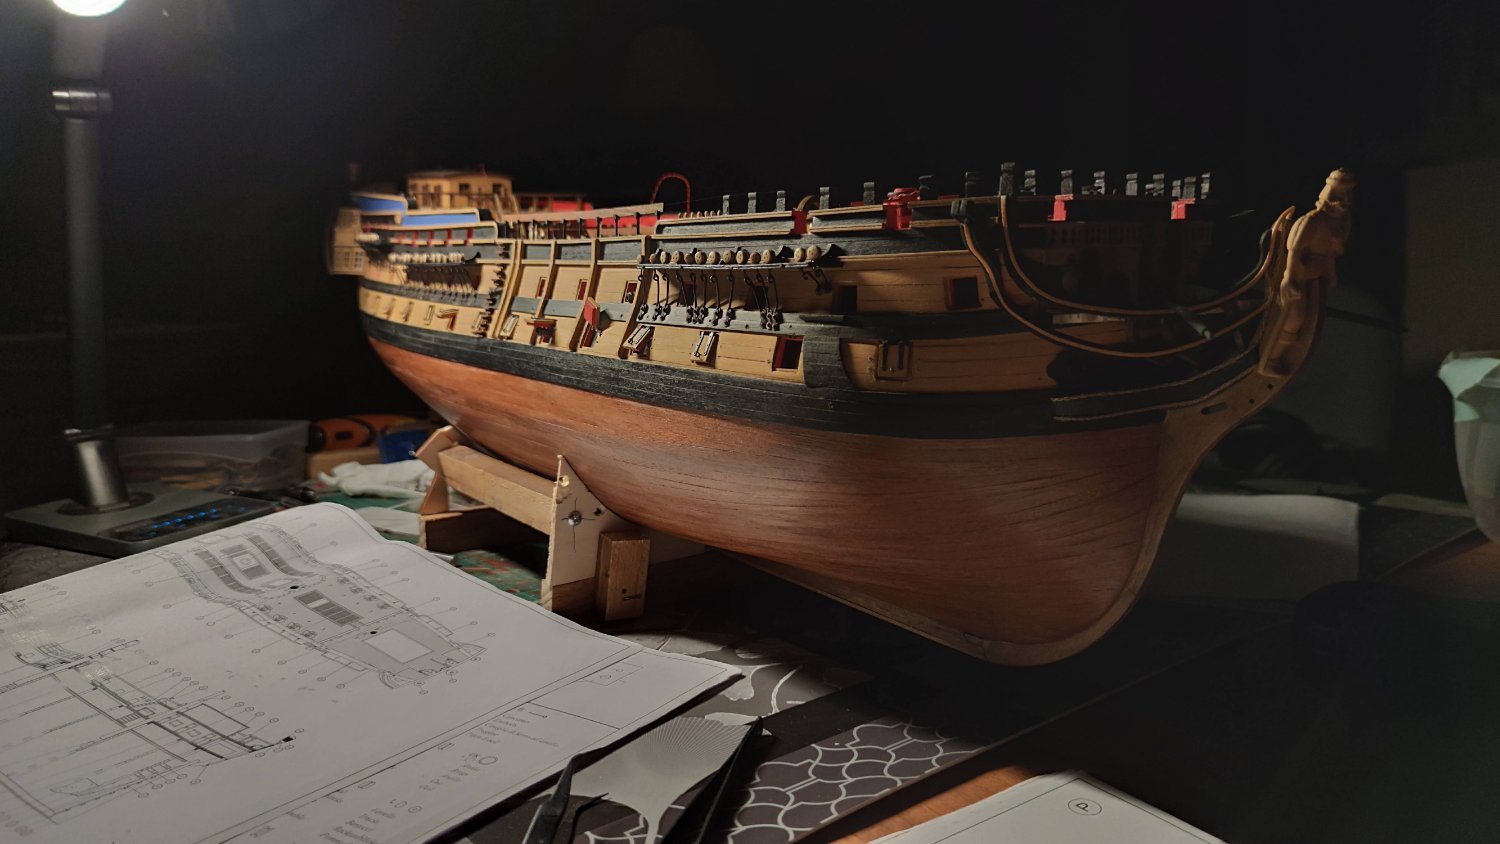
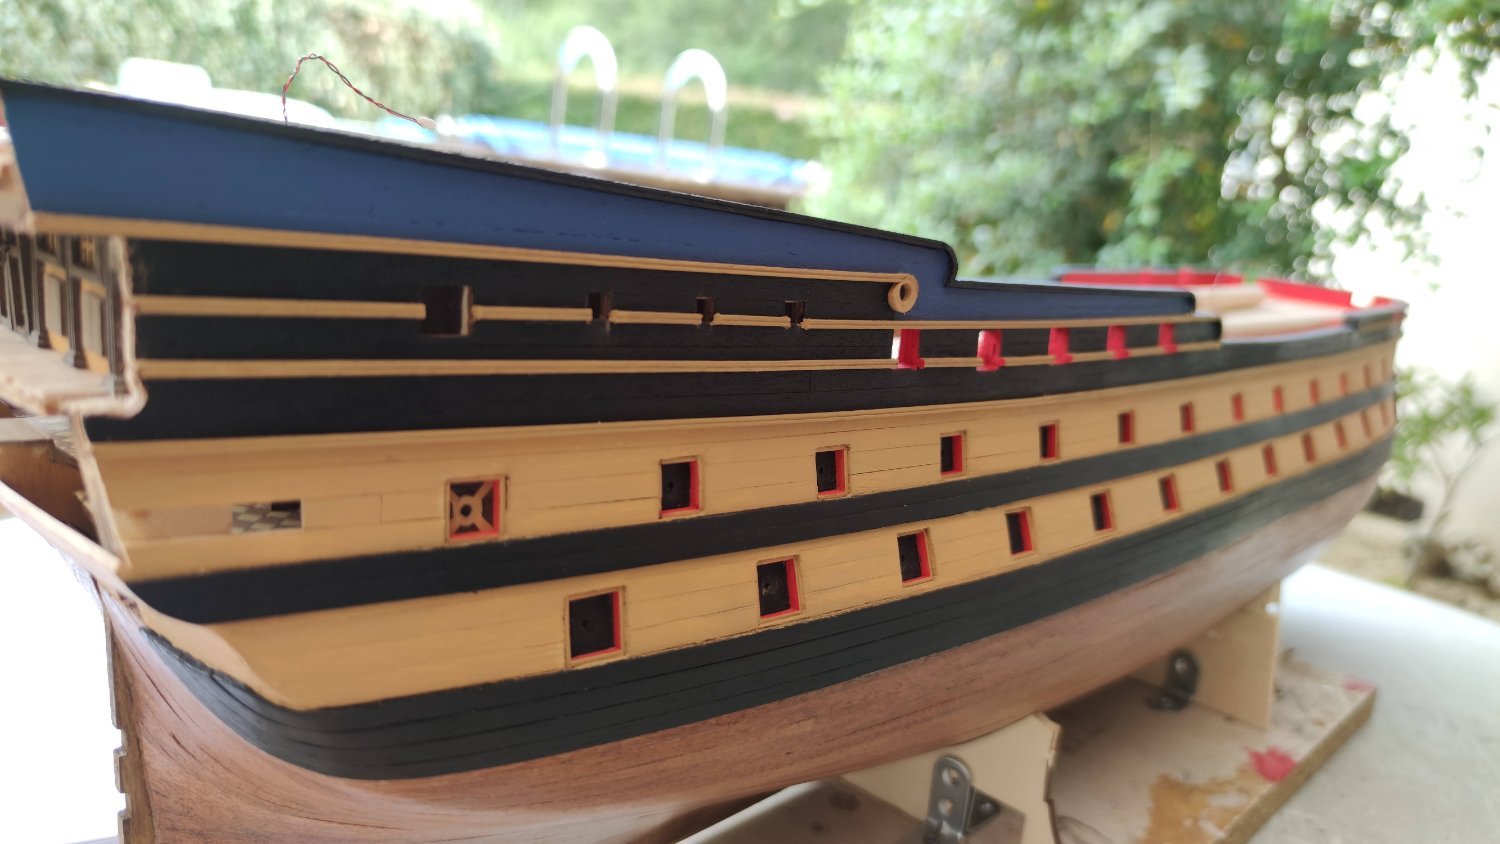
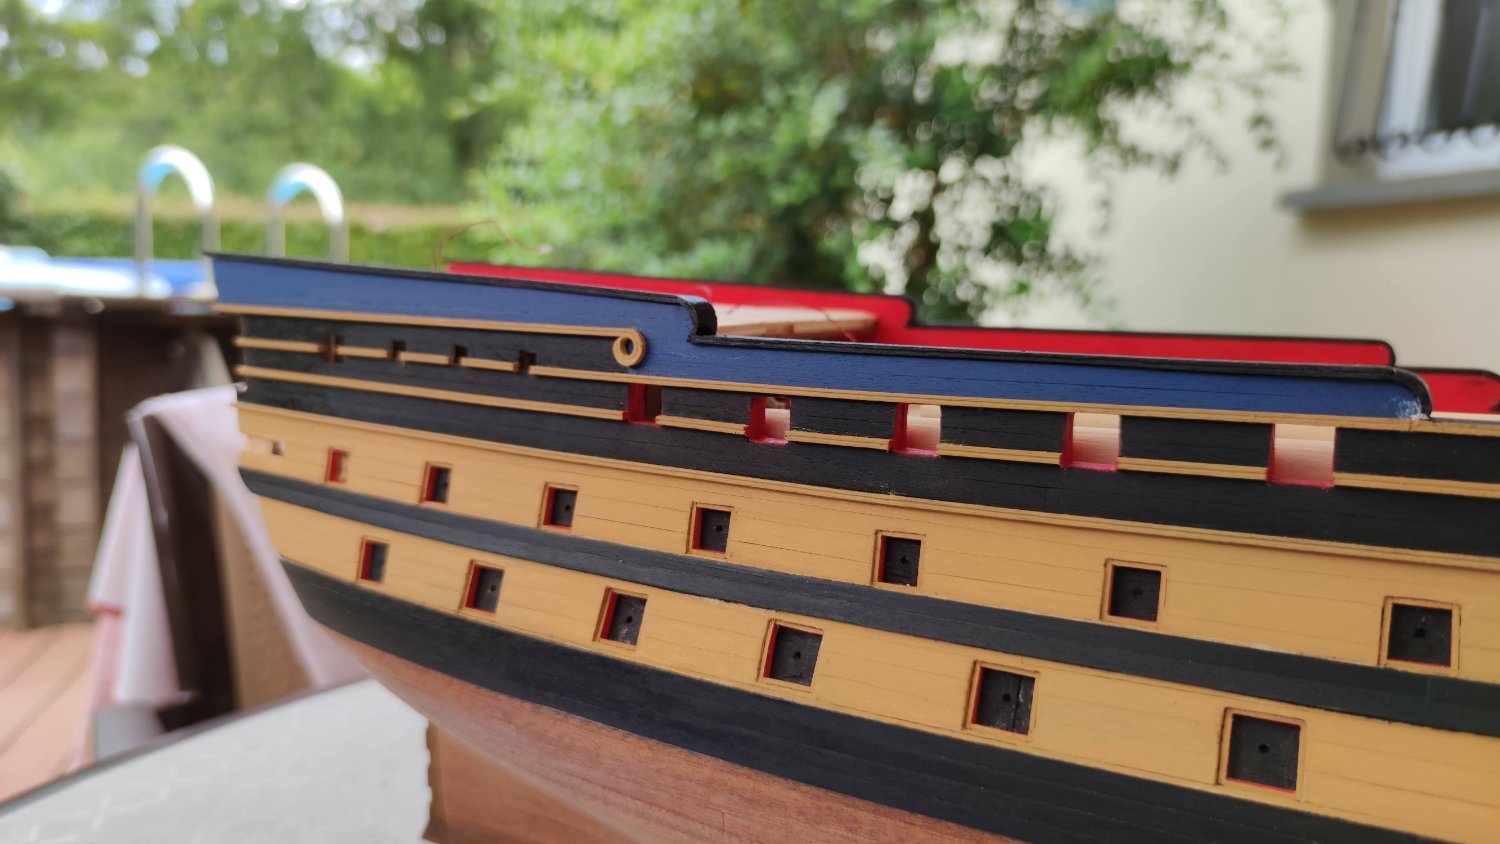
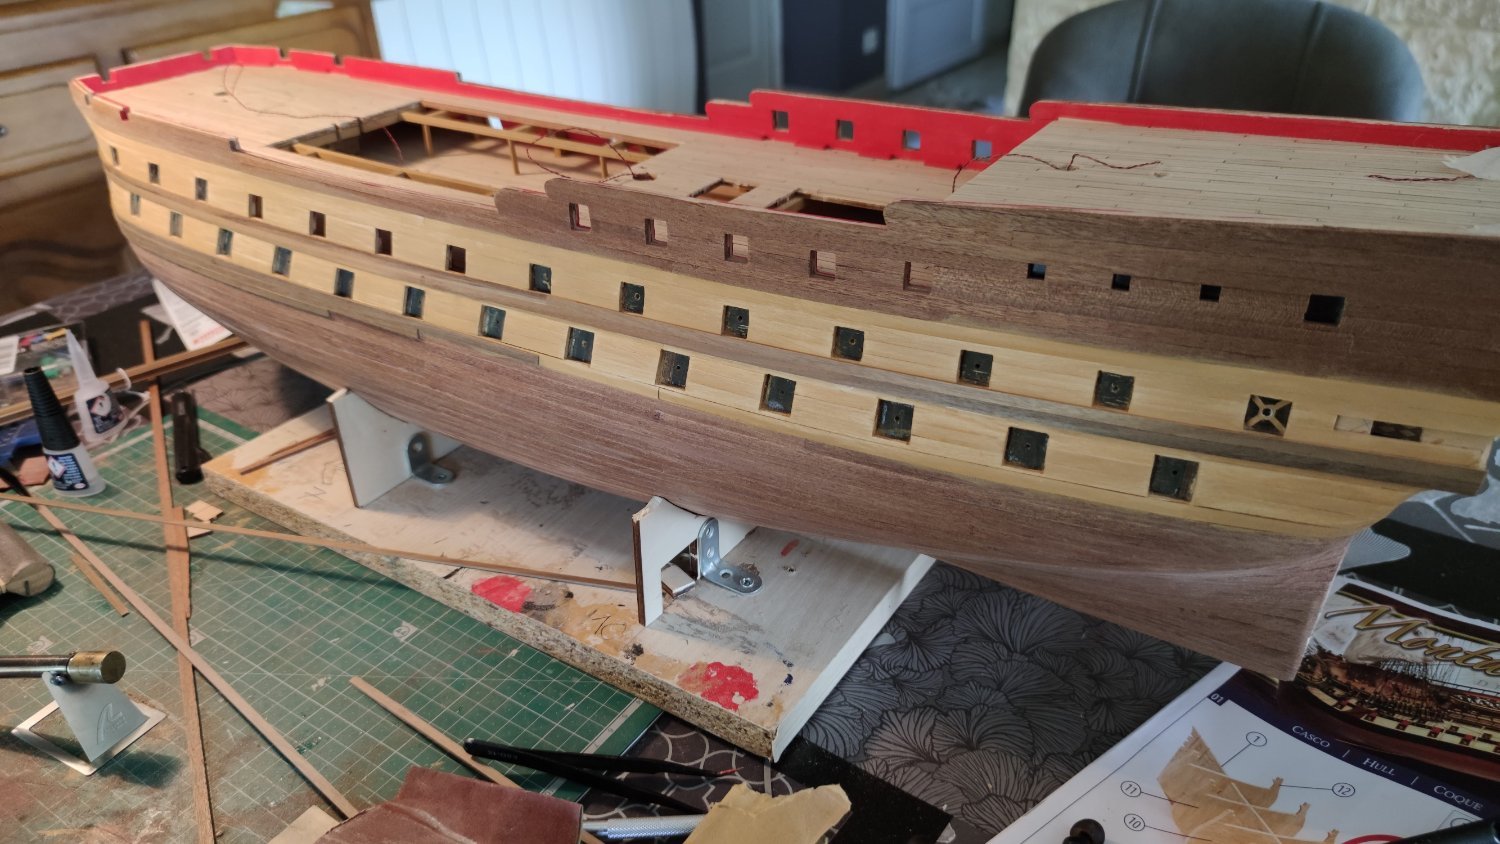
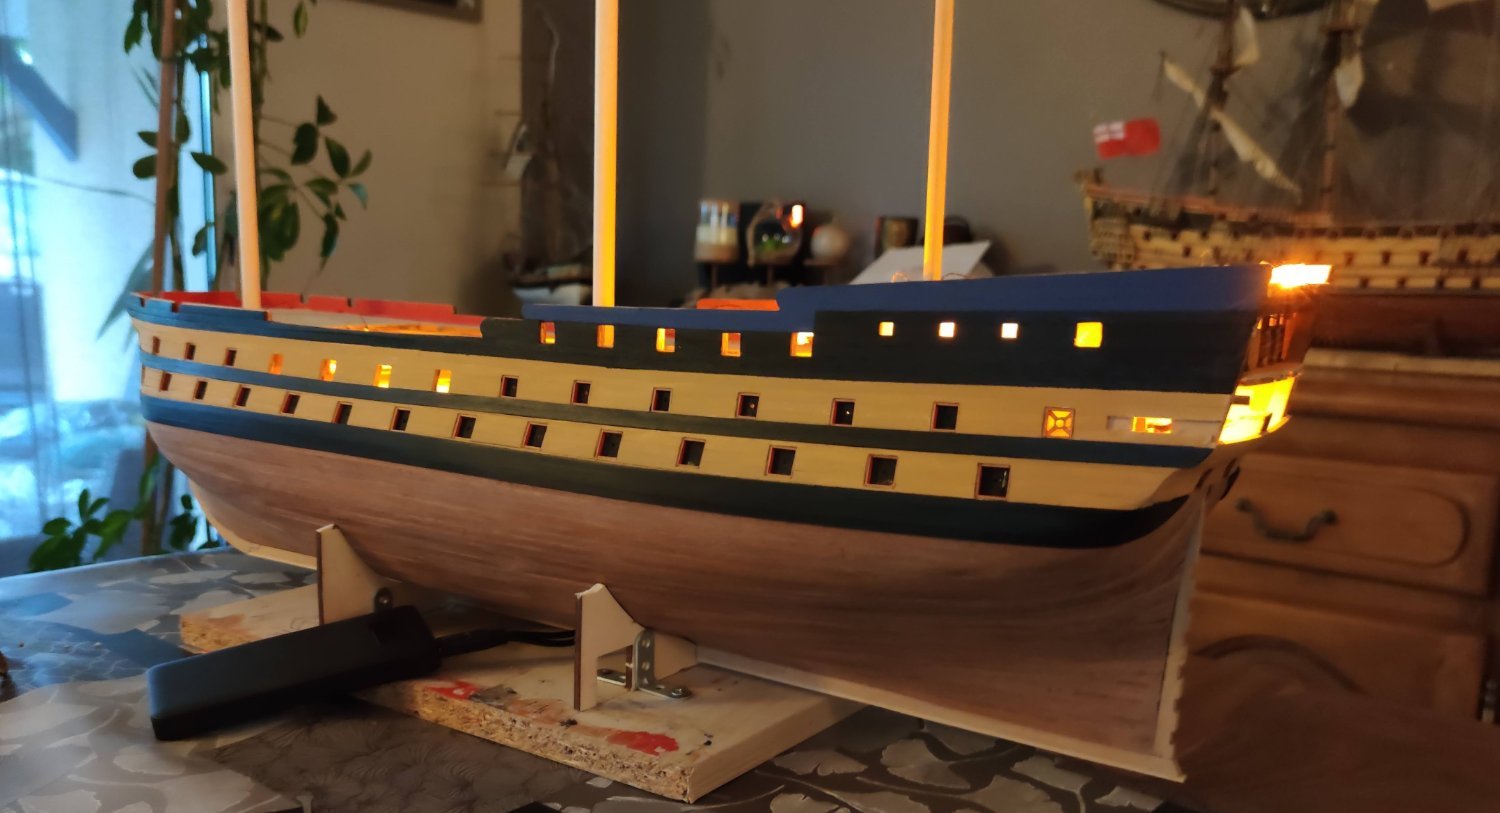
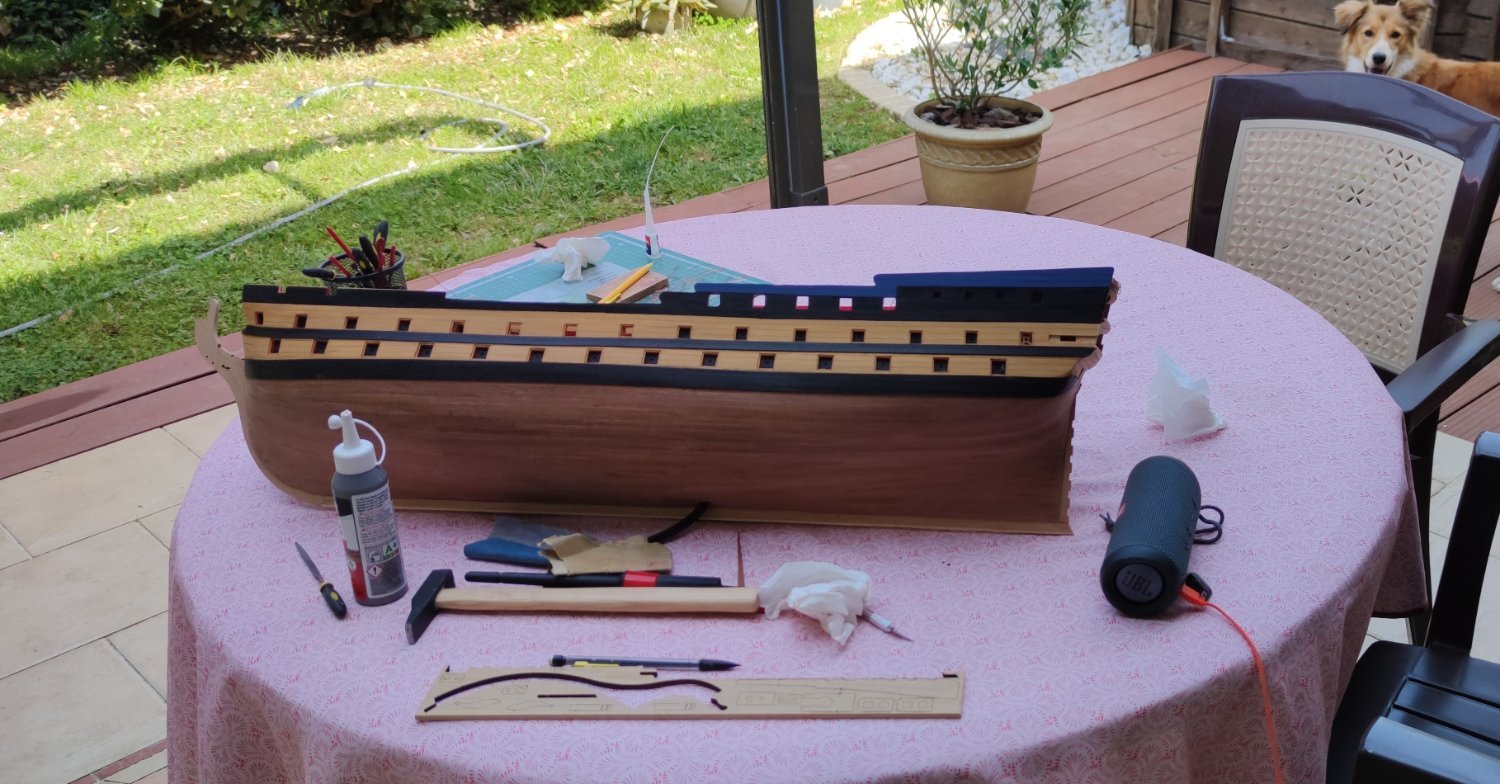
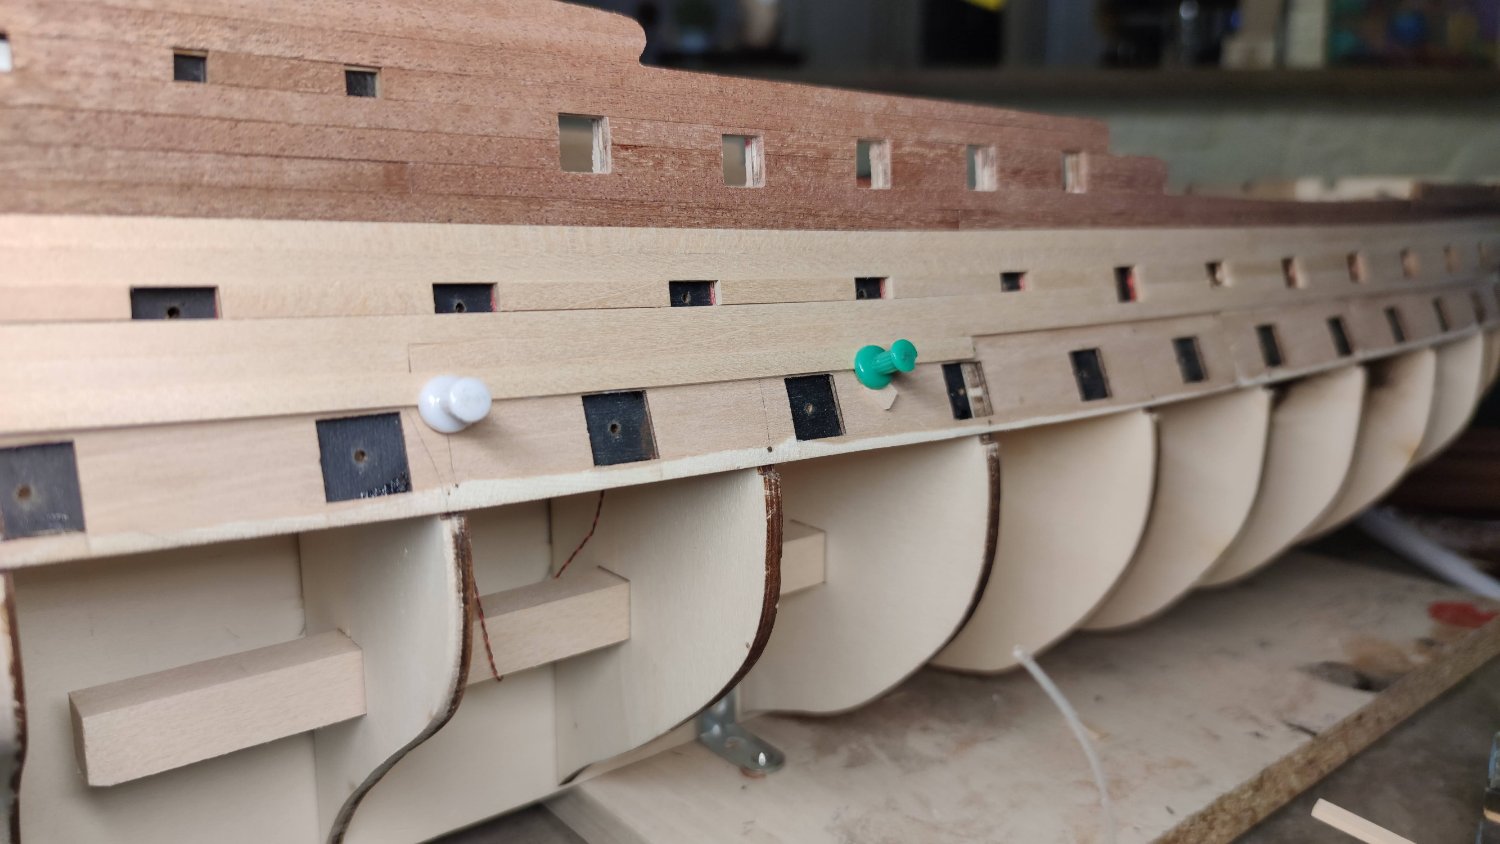
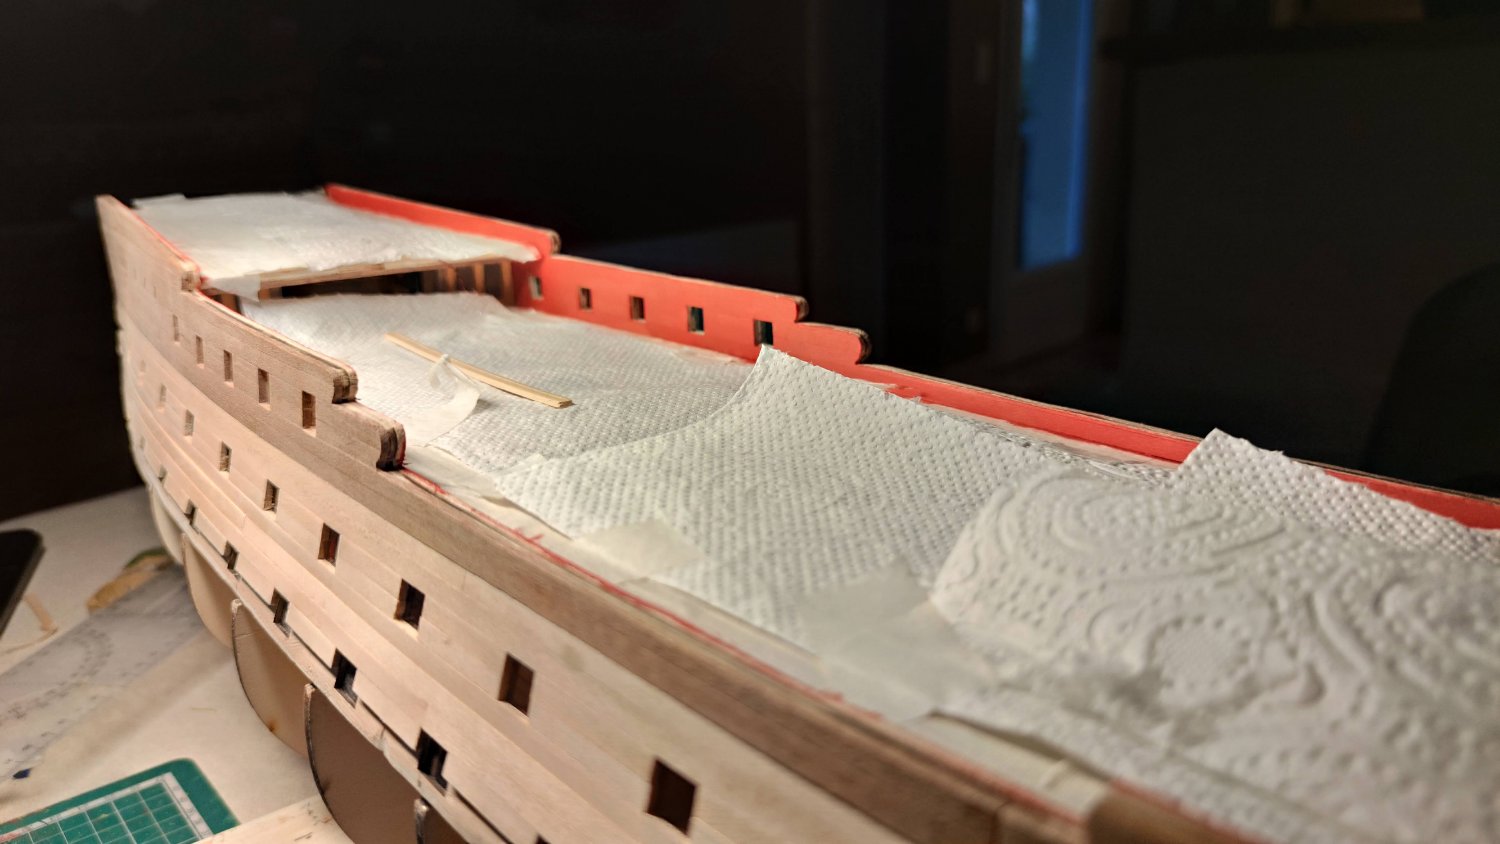
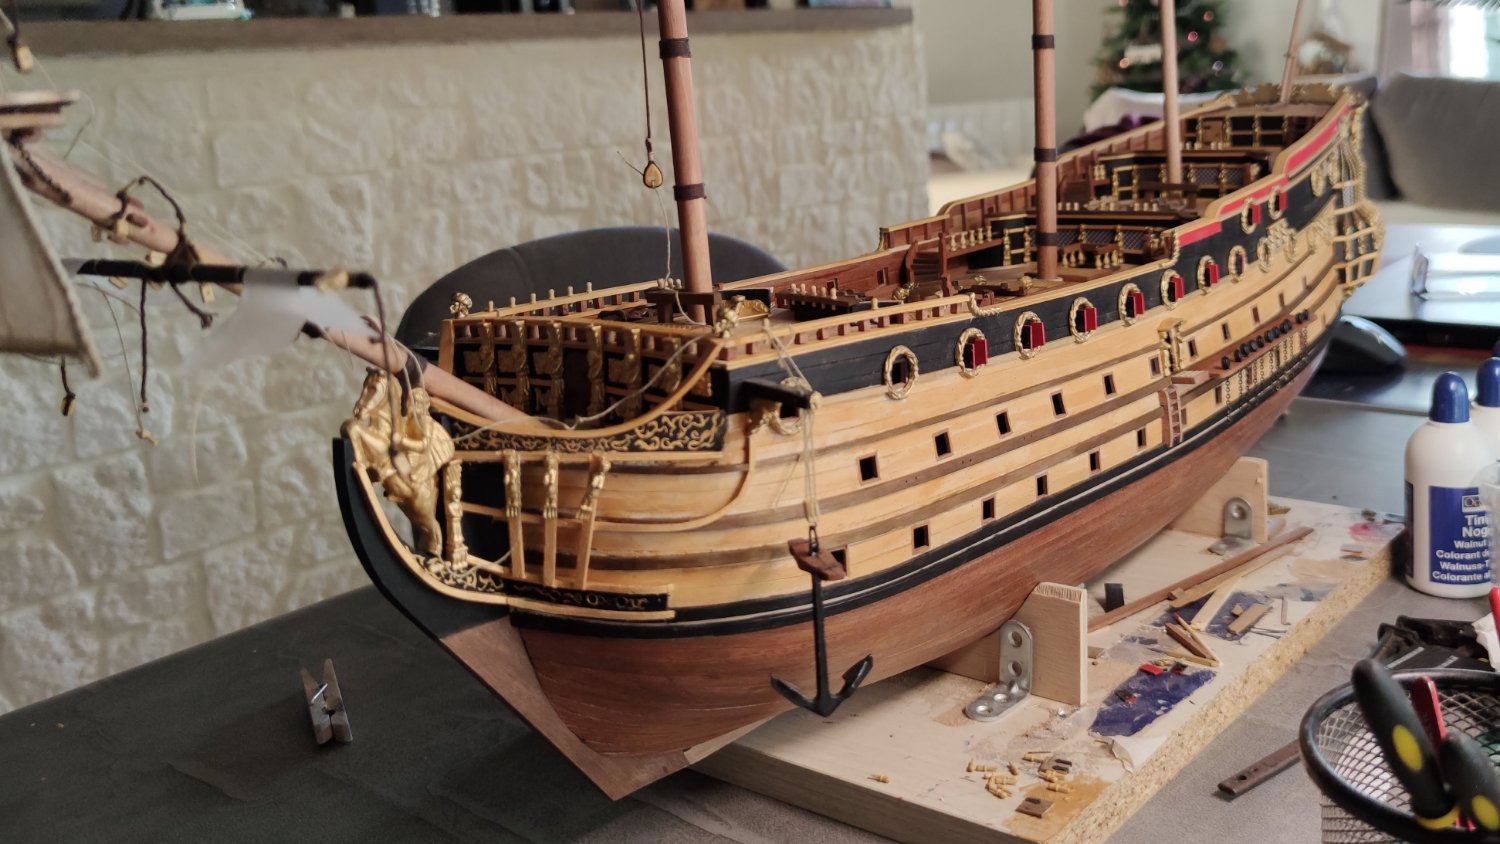
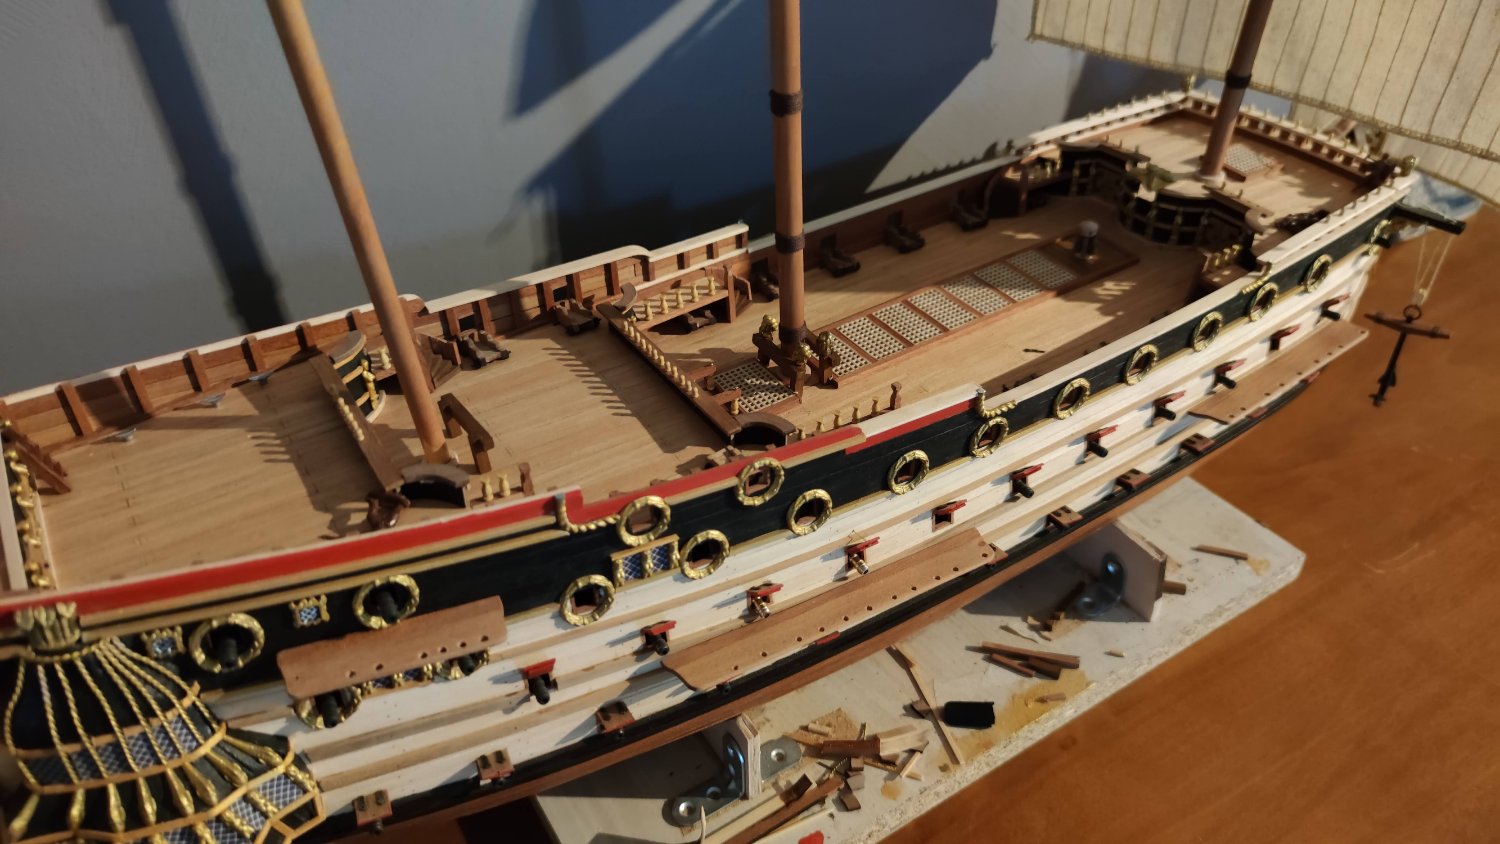
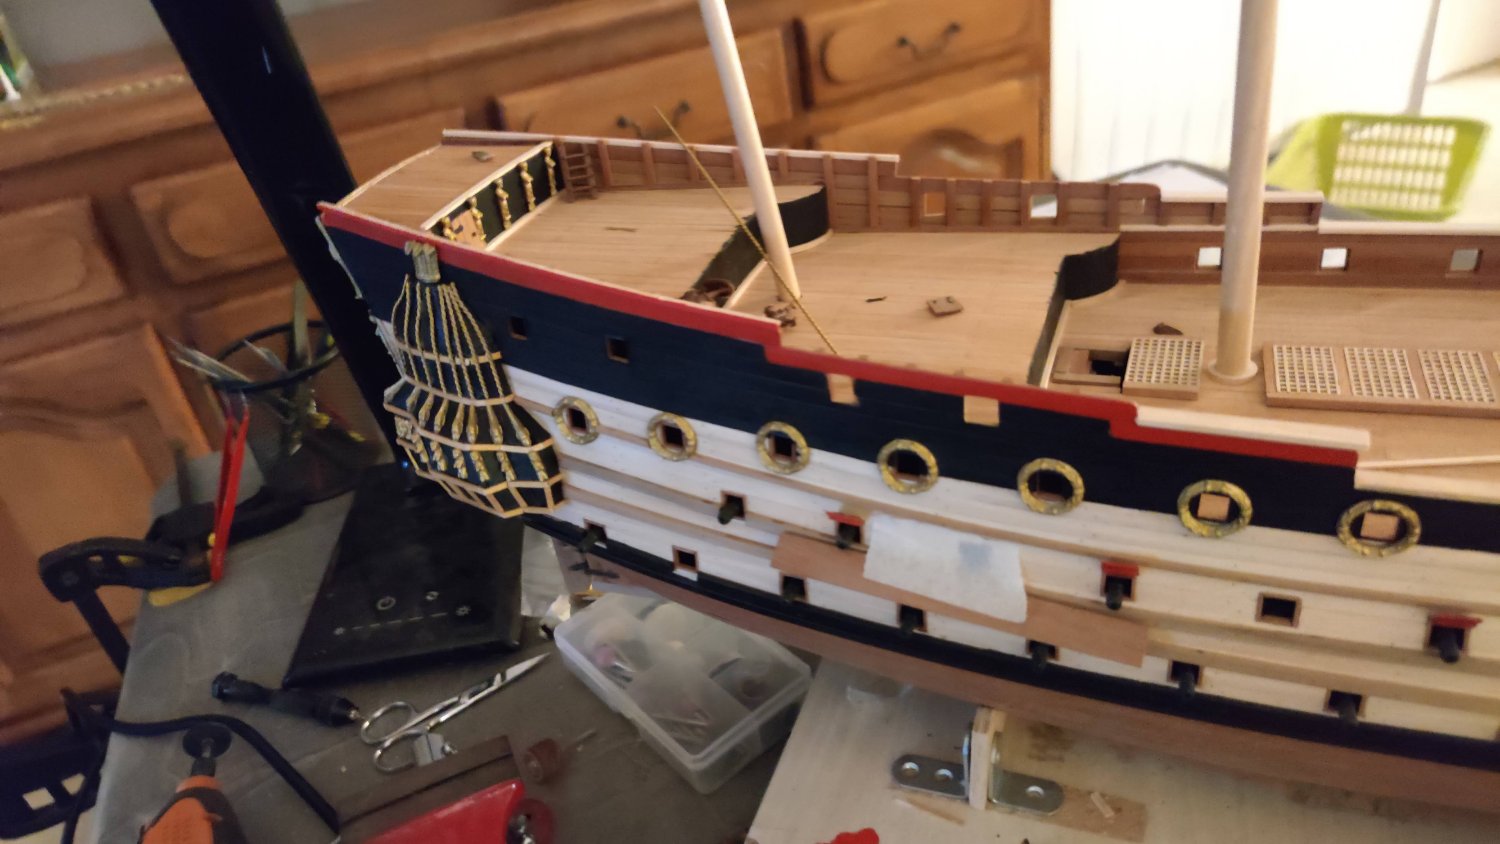
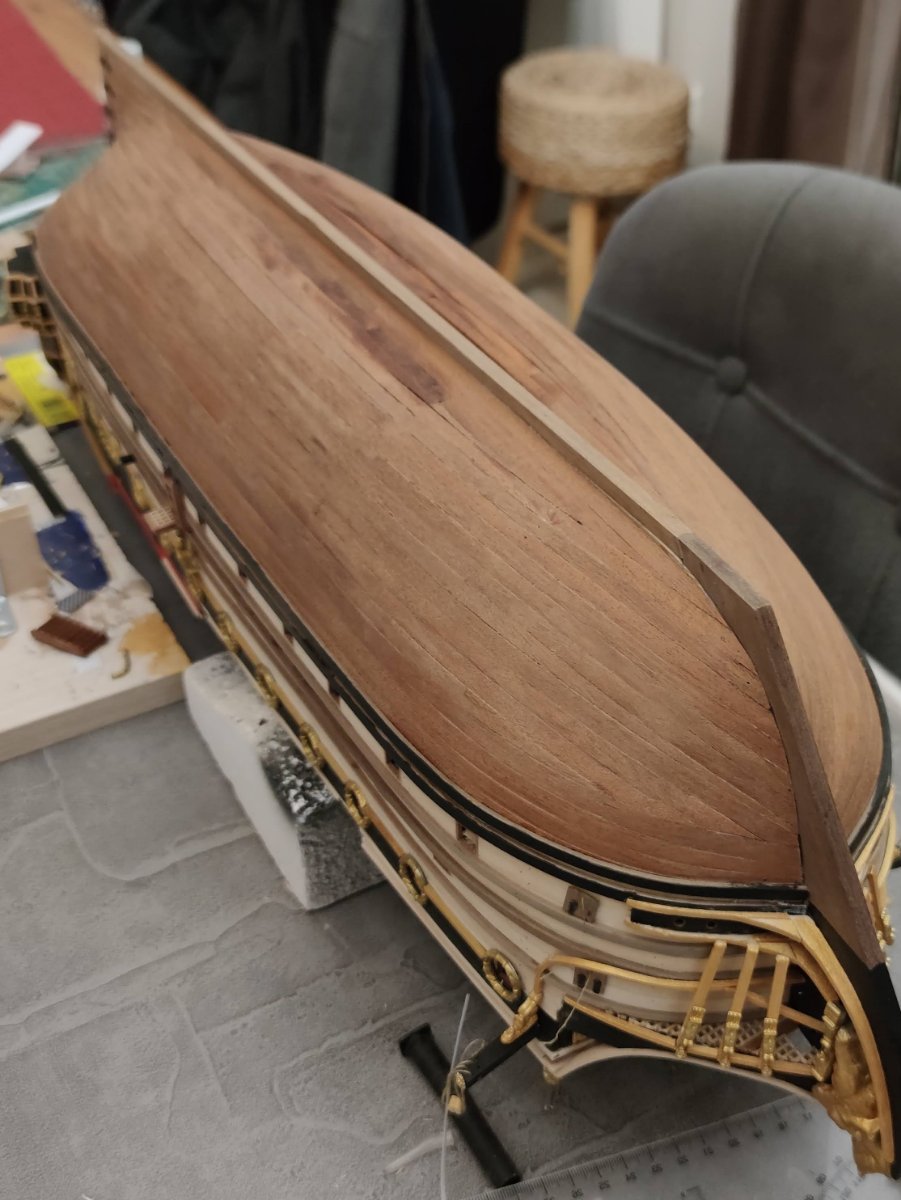
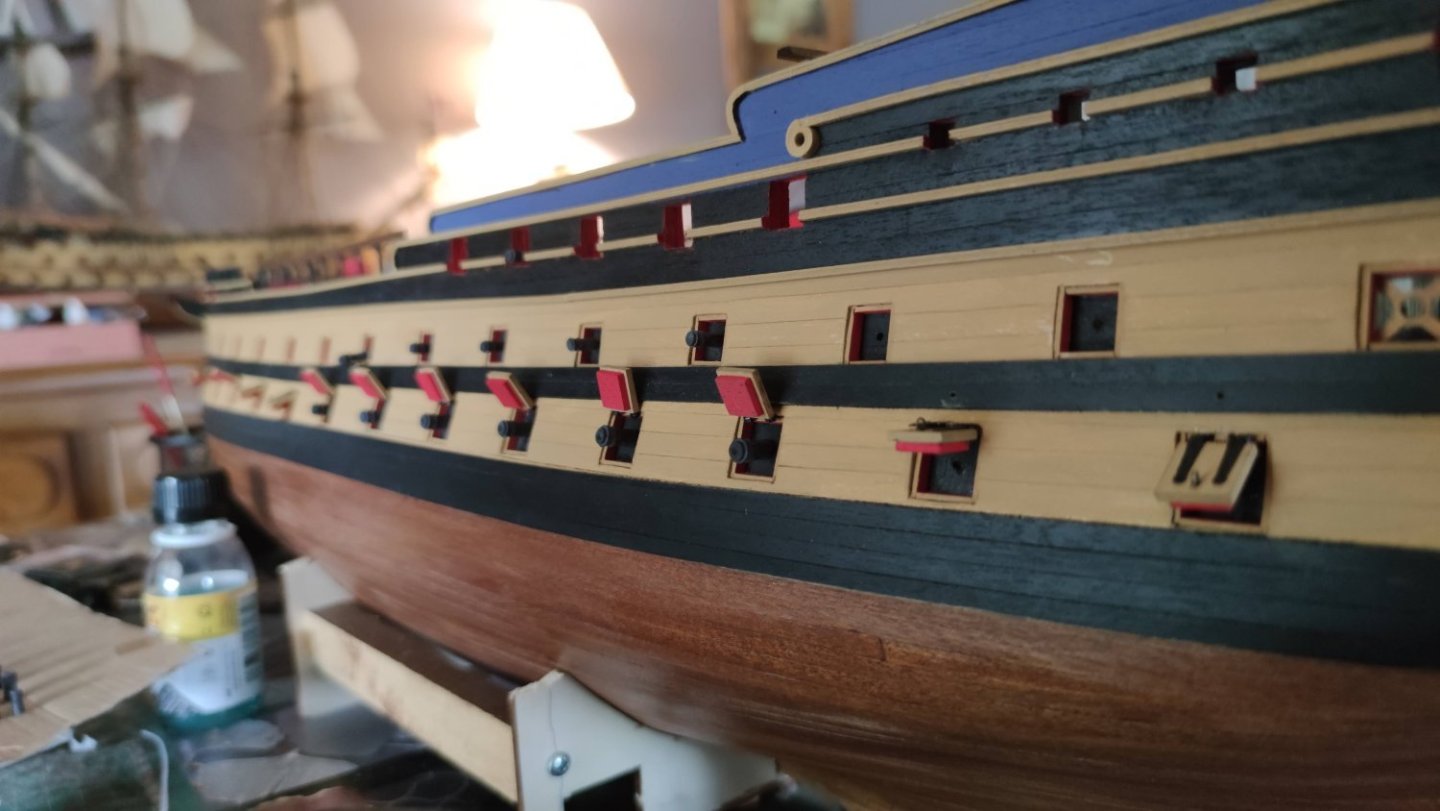
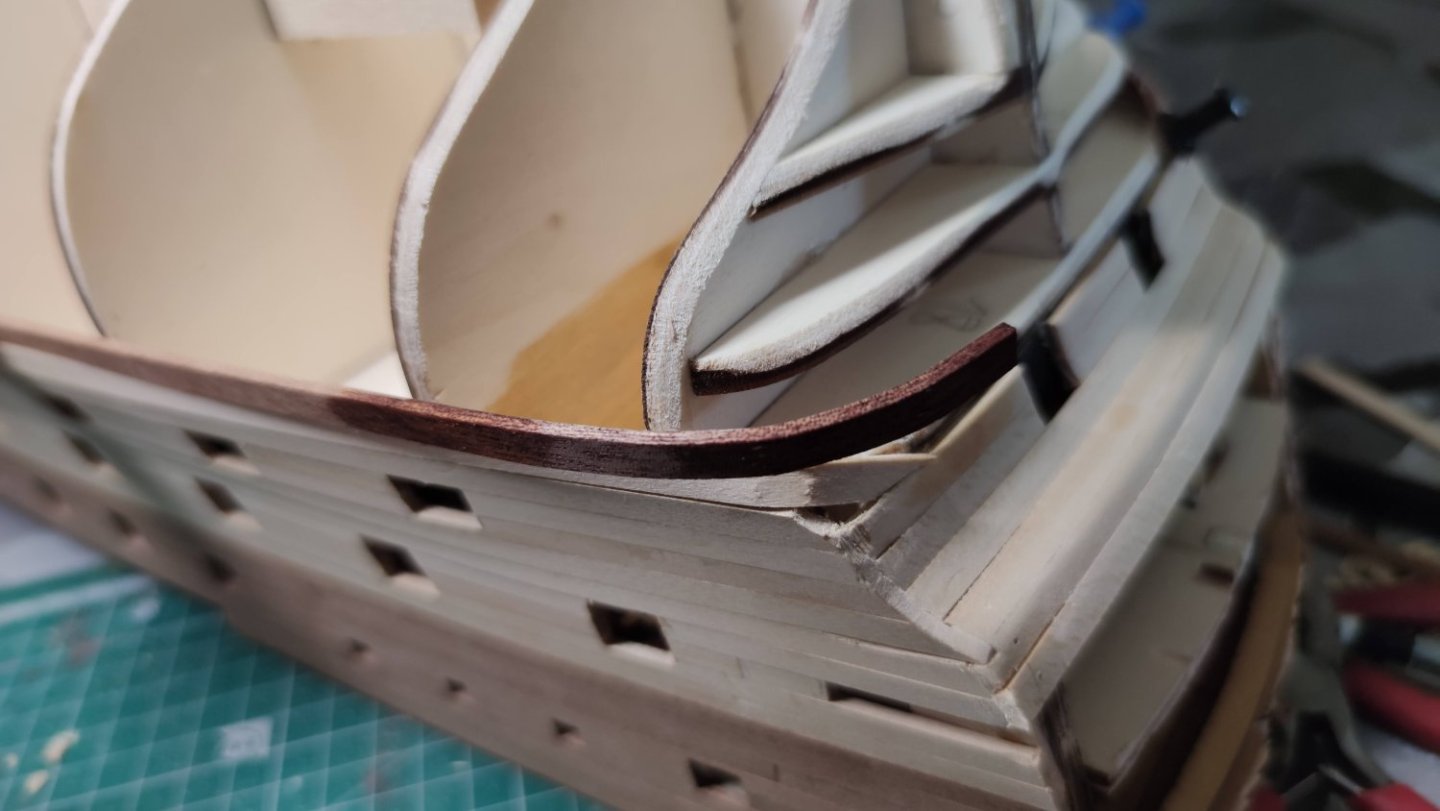
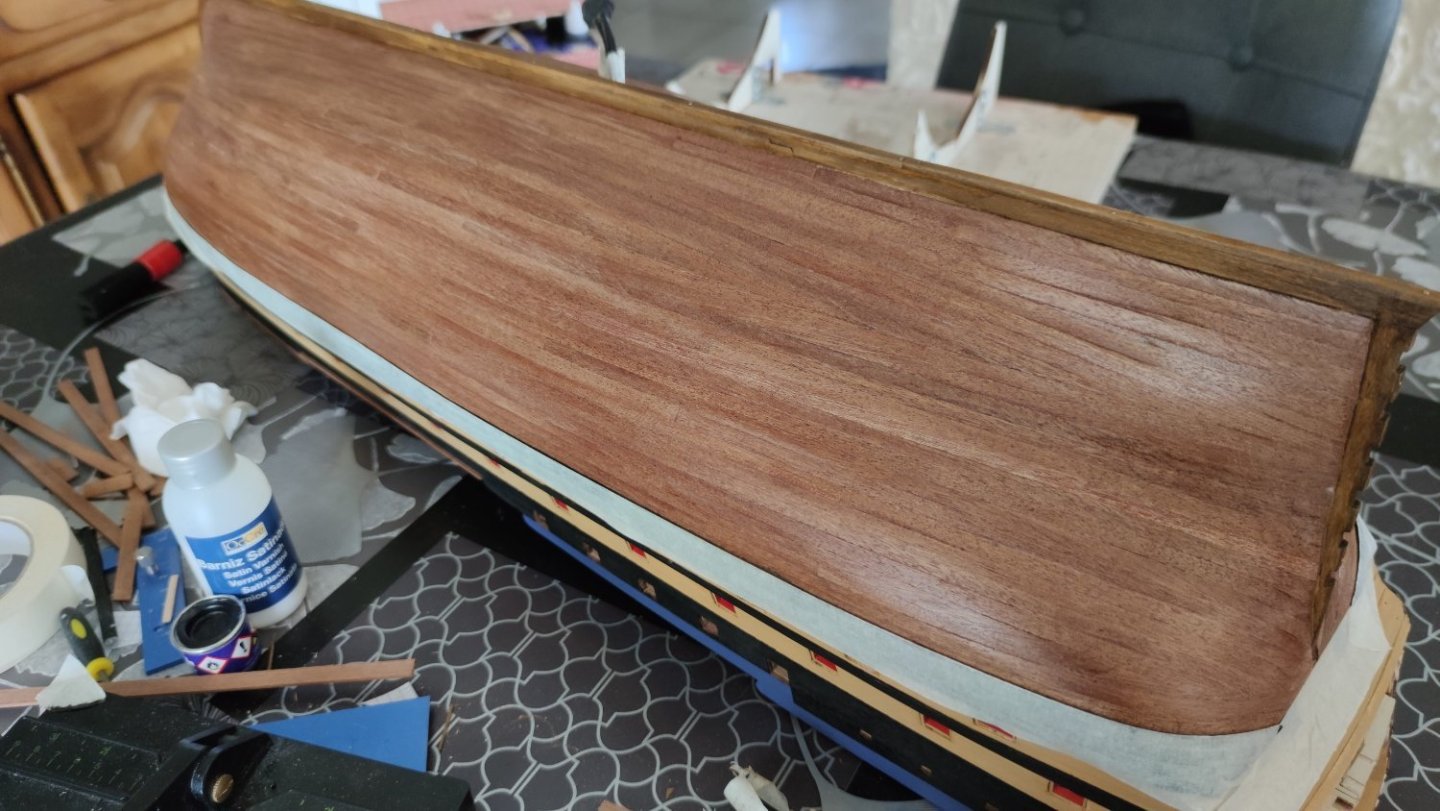
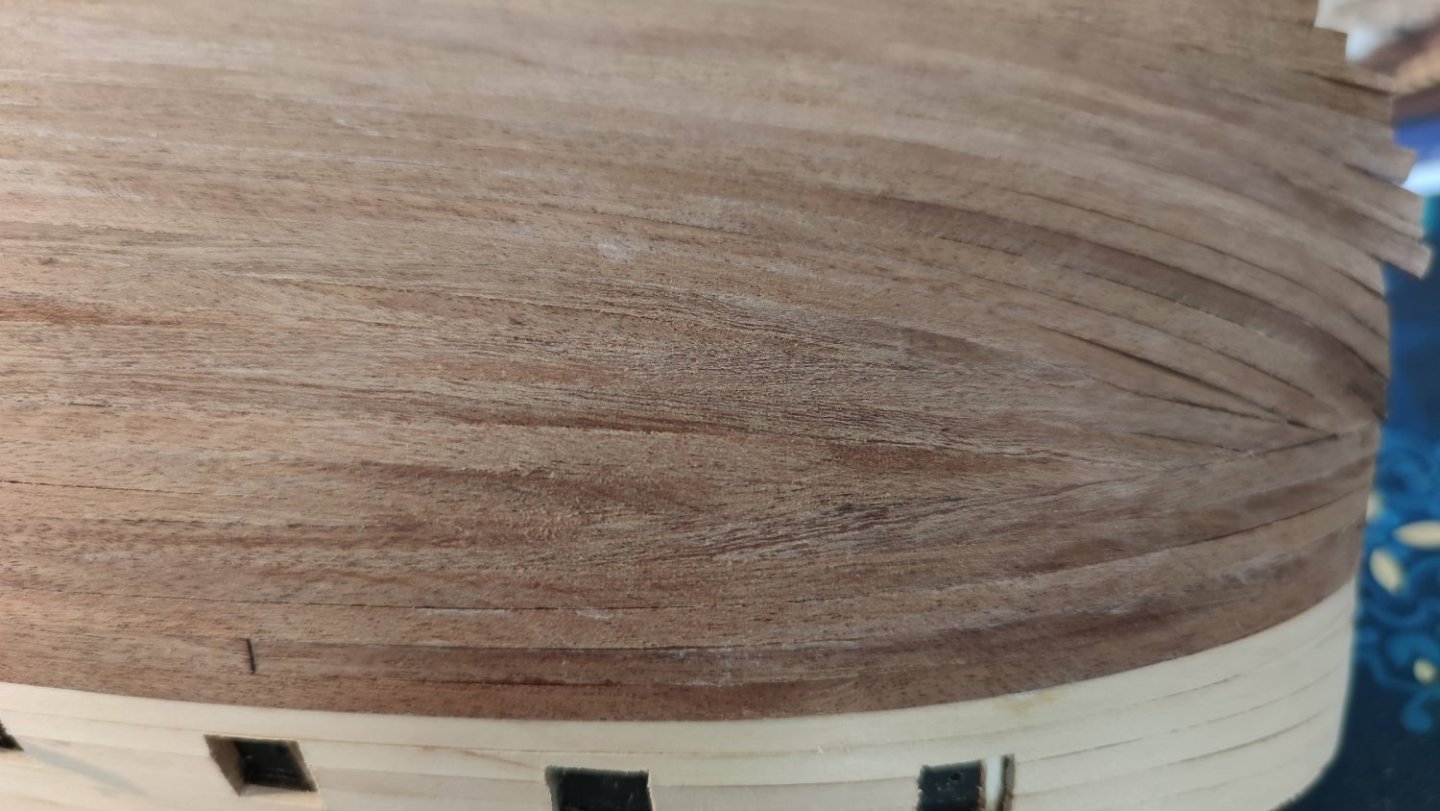
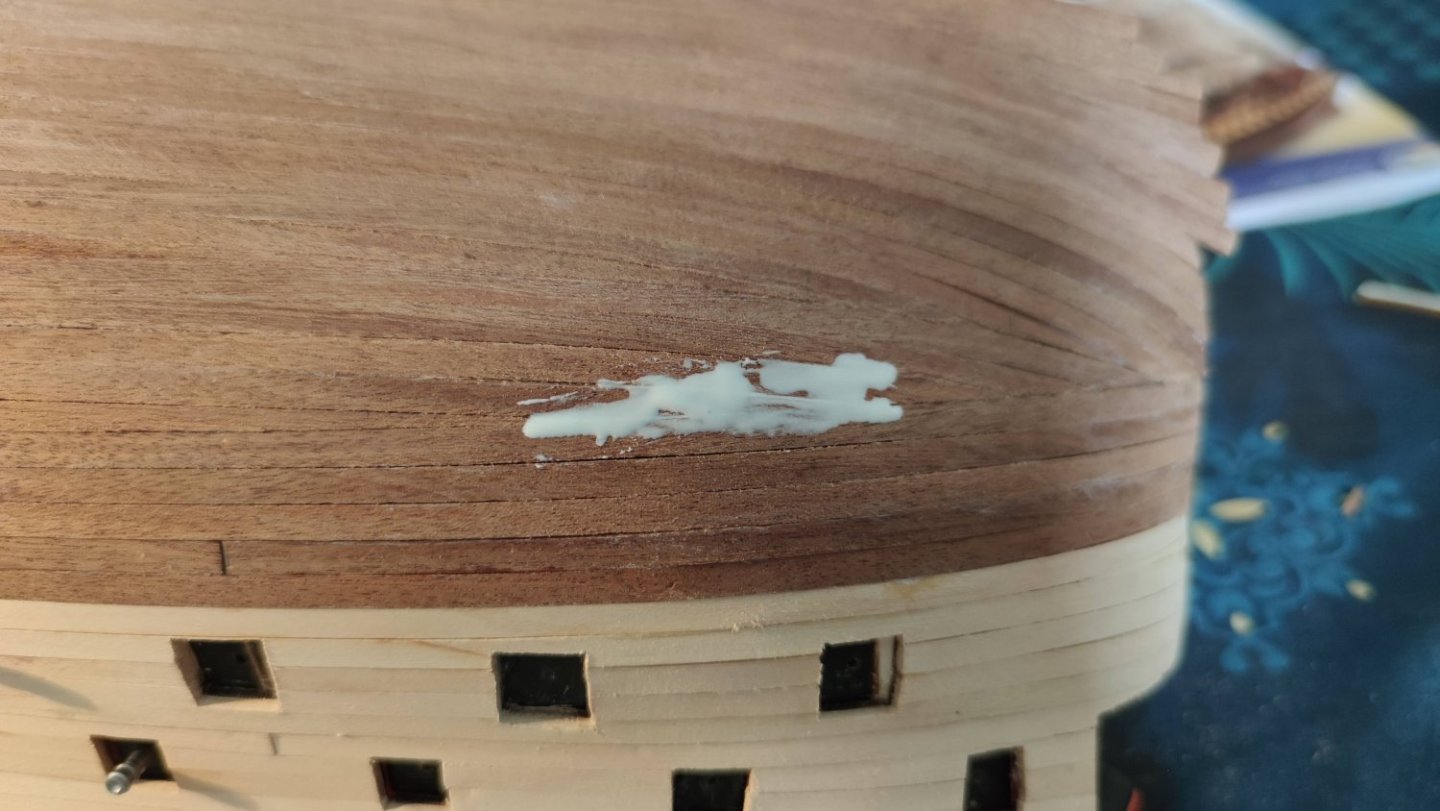
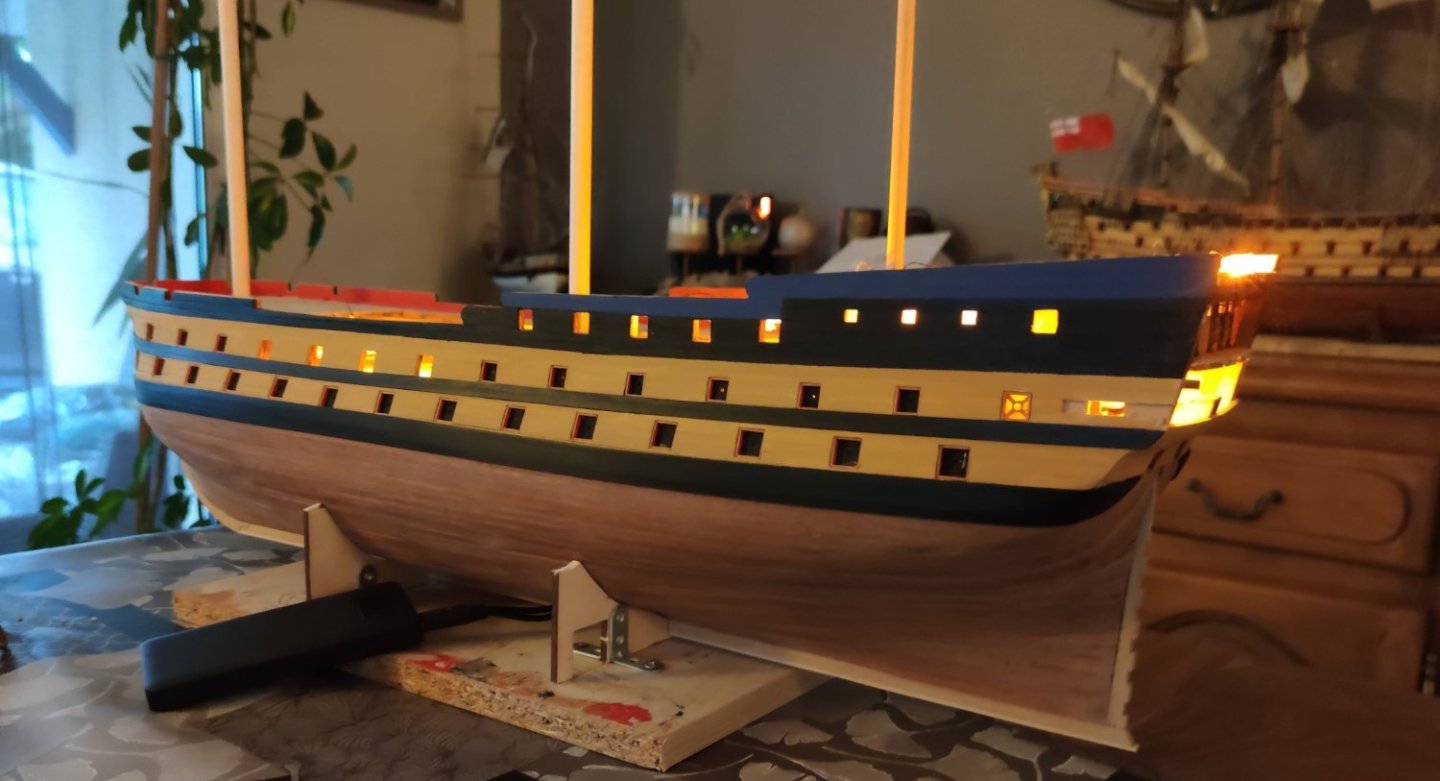
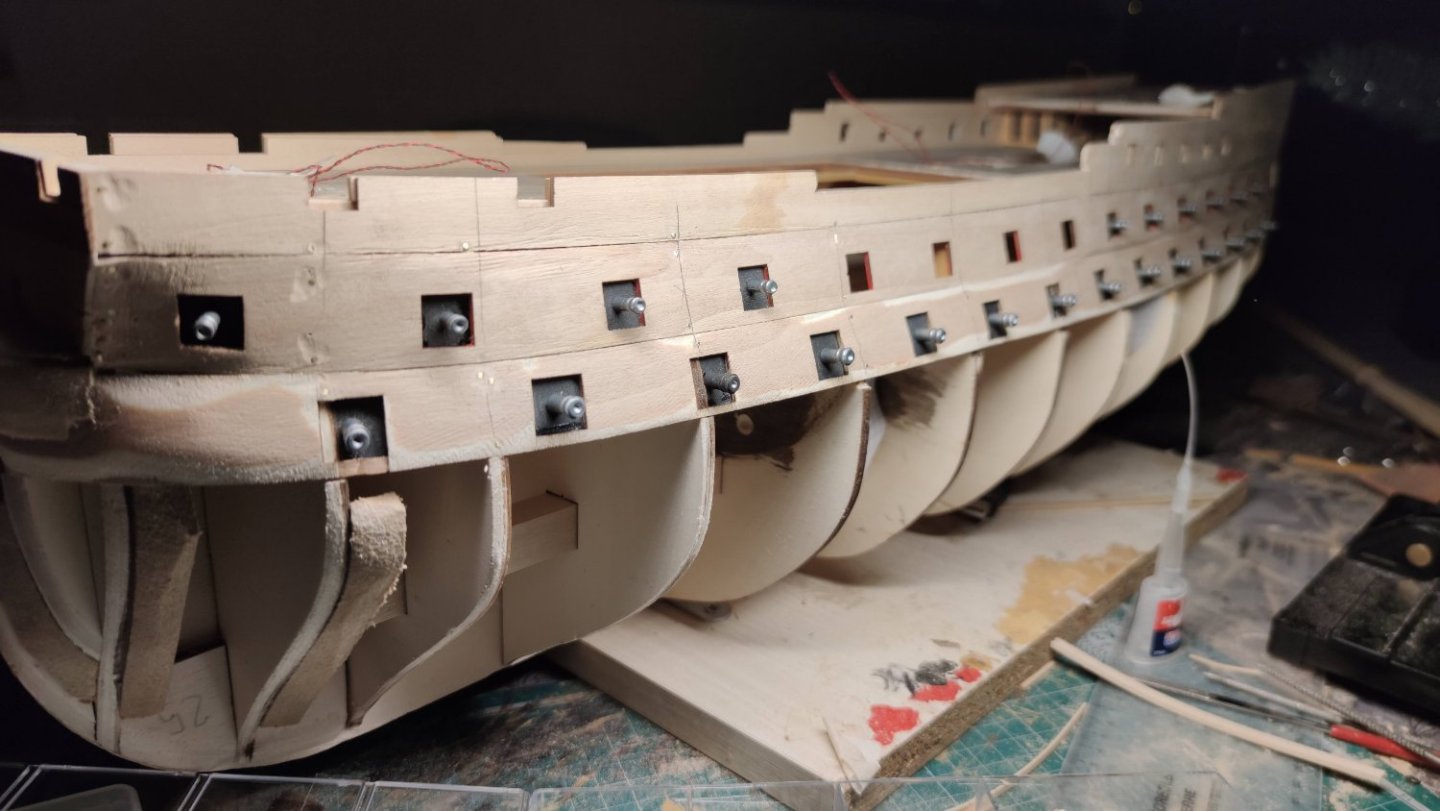
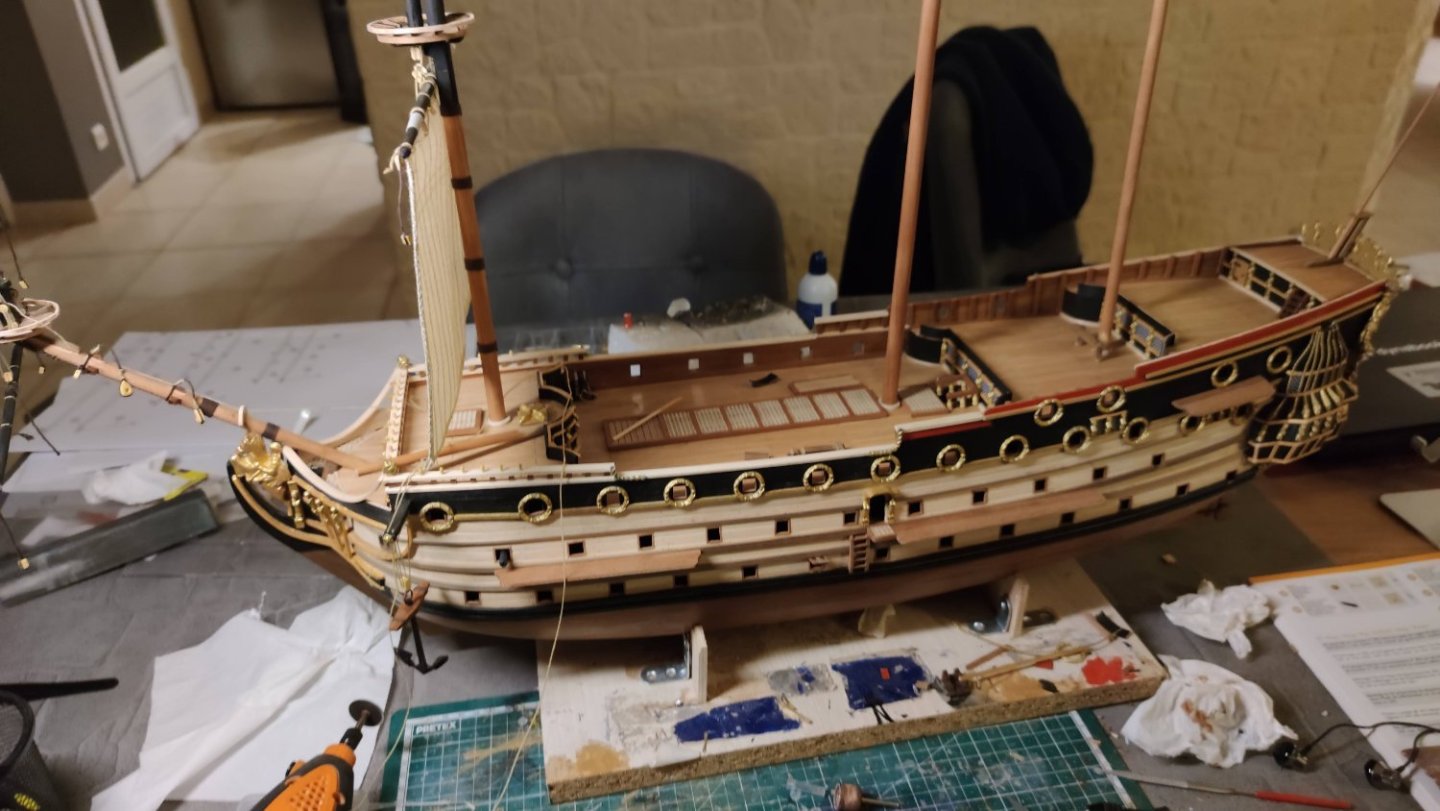
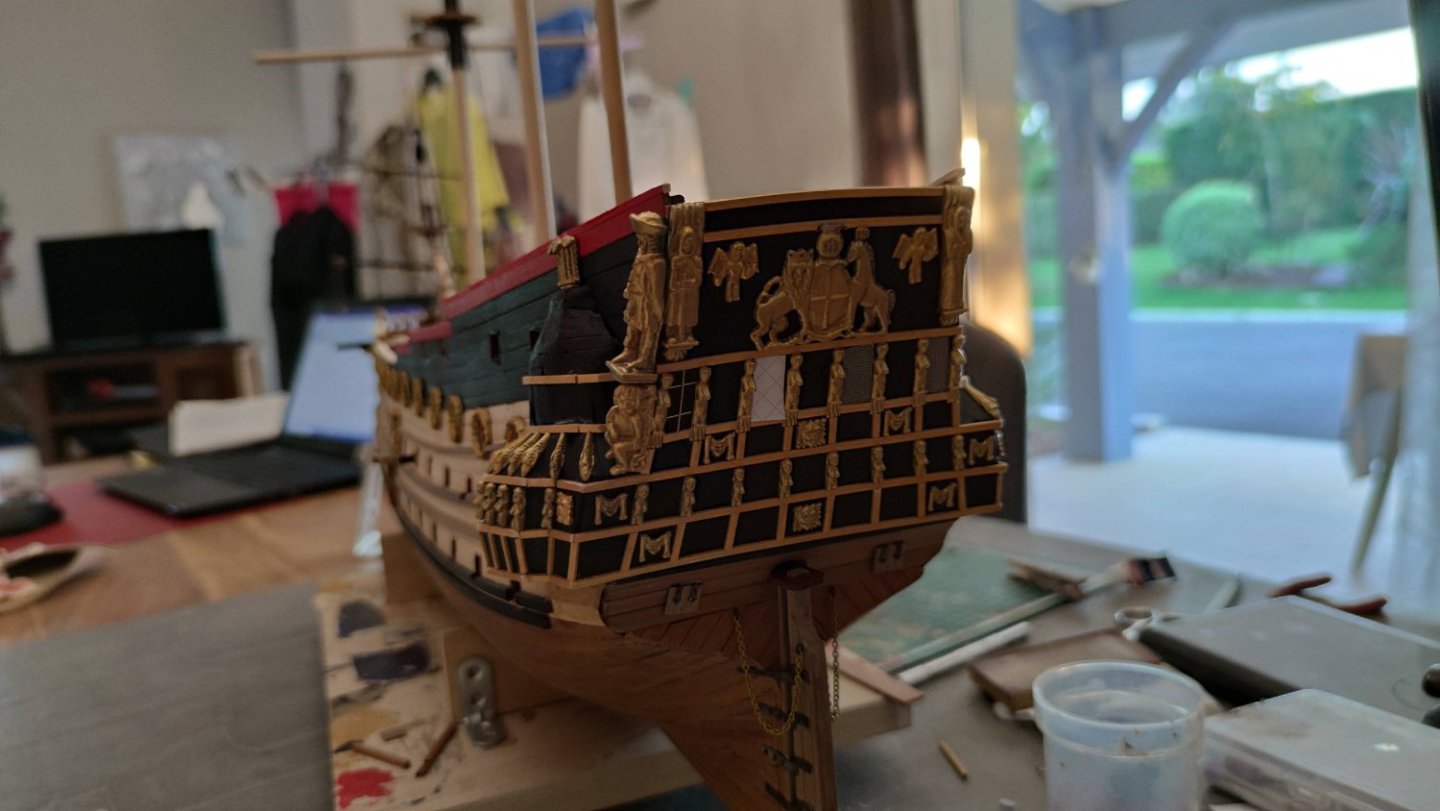
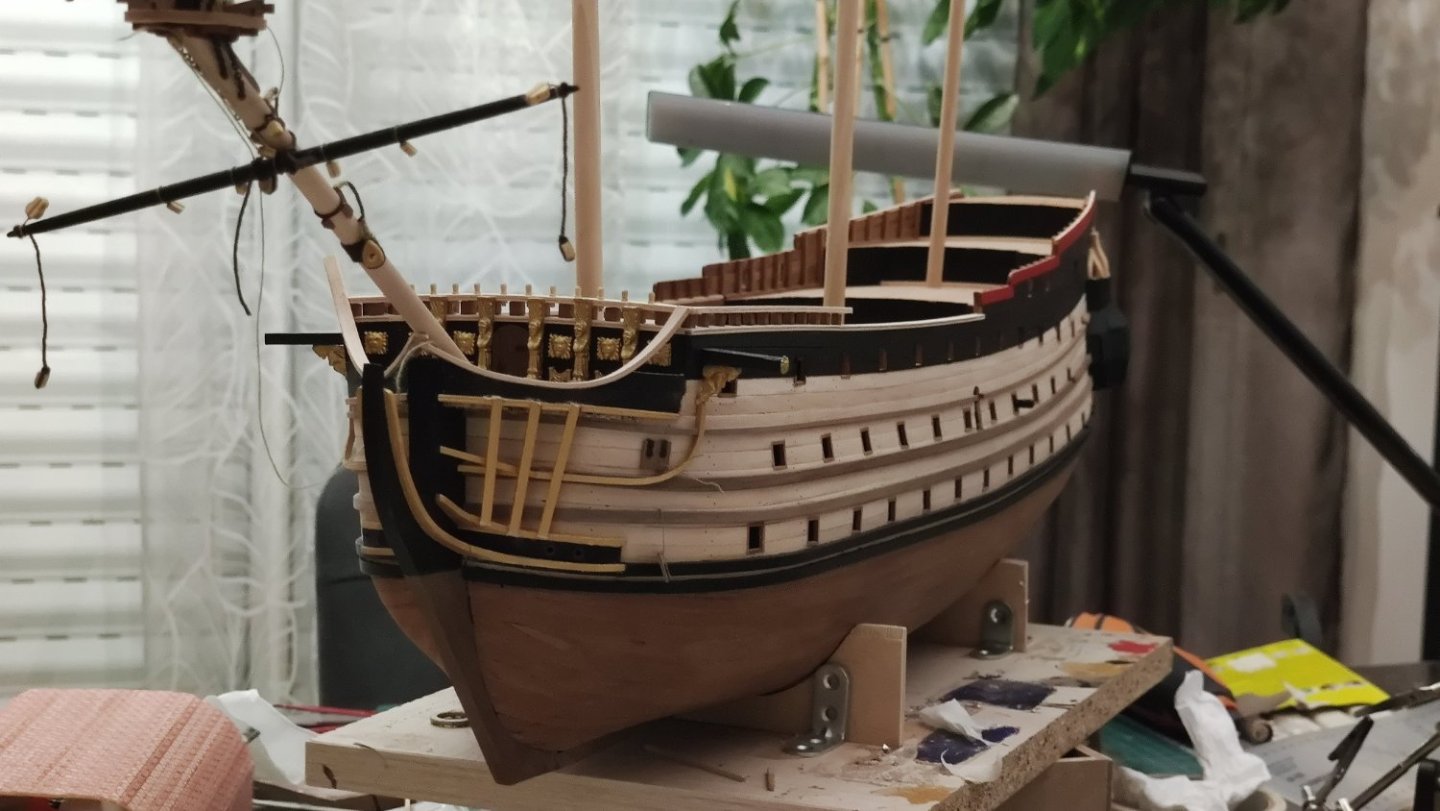
Hello everyone, It's been a long time since I've posted anything, but I've made a lot of progress on my ship! I've finished planking the entire hull, which was EXTREMELY time-consuming, as it's very large. The instructions don't describe how to do it, so I had to improvise the planking to get a nice hull. At the stern, an electric bender is necessary, as the curve is very pronounced. To avoid gaps between 2 planks, I apply wood glue to the edge, removing the excess after fitting. If any holes remain, I fill them with wood glue and sand around them, so that the dust goes into the glue. Once the hull was finished, I painted the upper part in occre and made the wales. The kit includes 2x4 rods, but this seemed too wide to me, so I used leftovers from a previous model, in 1x4. The result seems much more realistic, and the installation was much easier! Next, I painted the model in the classic blacks of the era, and then took the liberty of painting the upper part in royal blue. To add realism to the breakwater, I used a cutter to simulate the wood joints. For the gunport frames, I swapped the 1x4 sapele for 1x3 deck leftovers, which adds depth and is much easier to paint and trim. I also used a cutter to mark the space between the occre-painted planks. Finally, the hull was varnished. Please let me know what you think, and if you have any tips!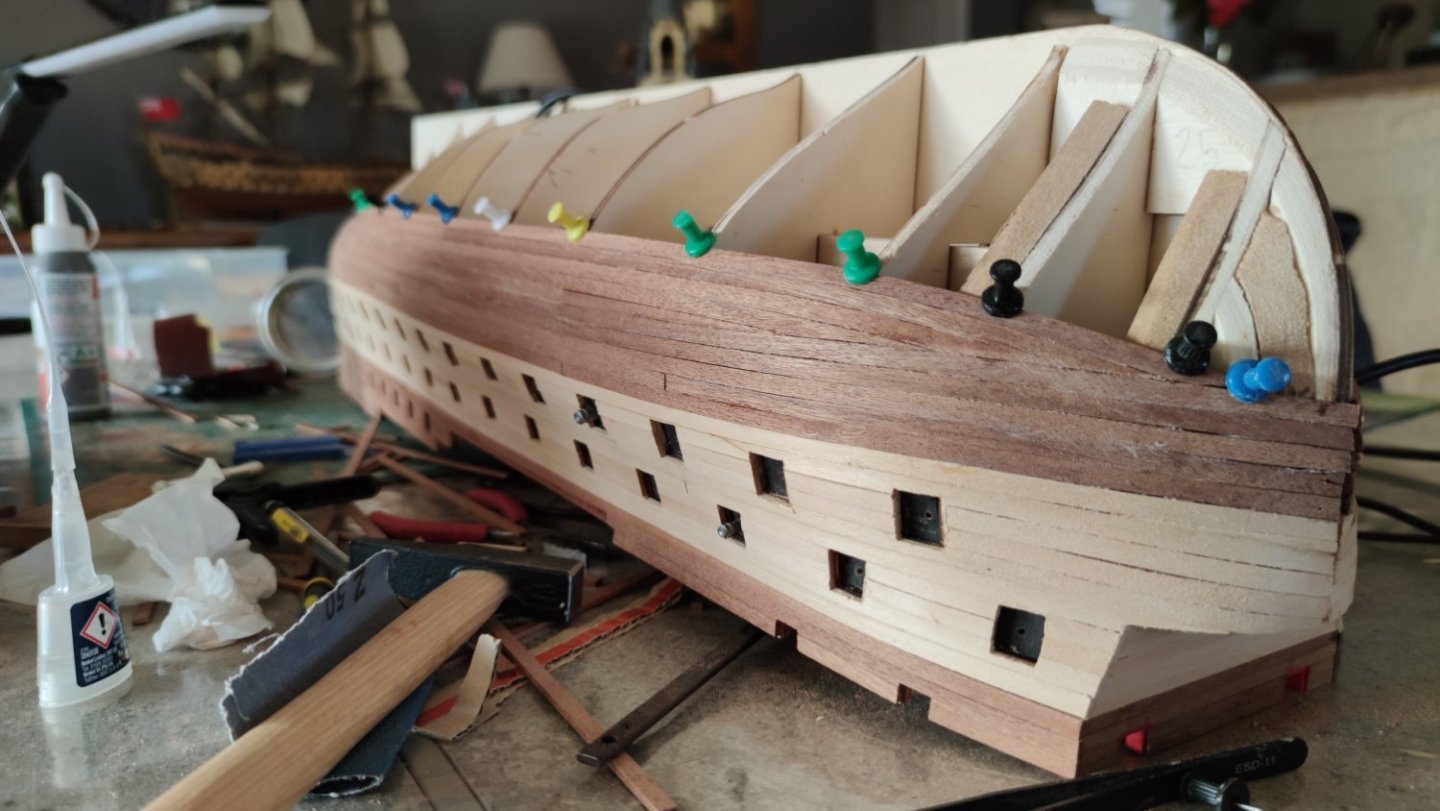


-
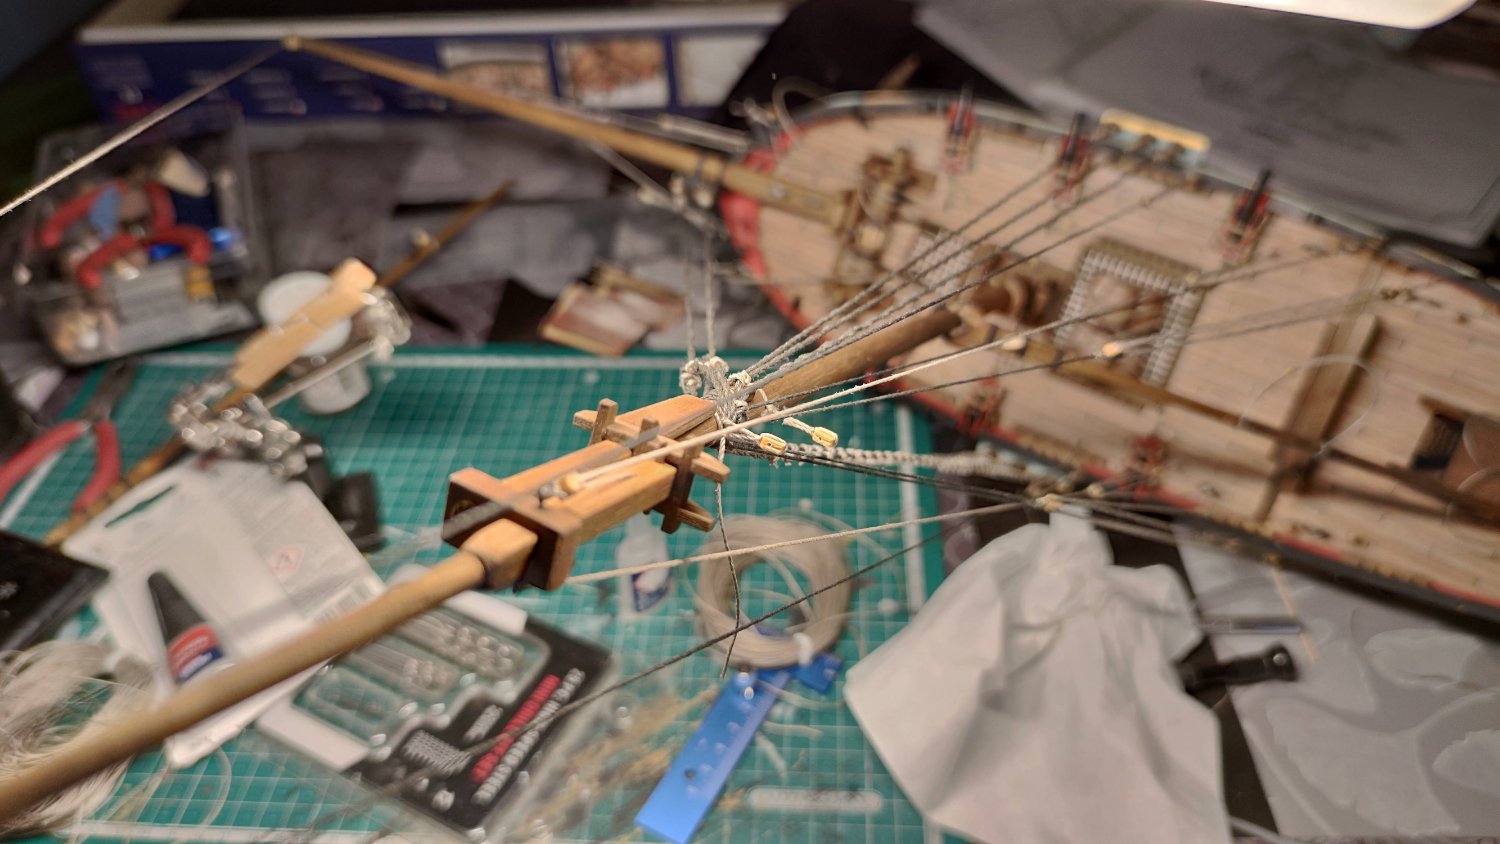
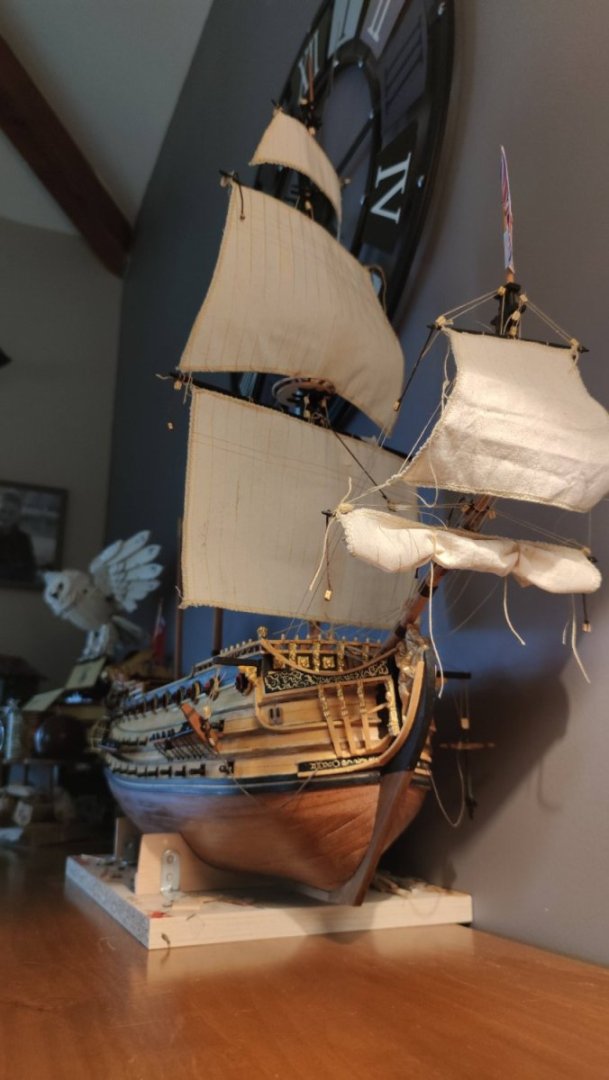
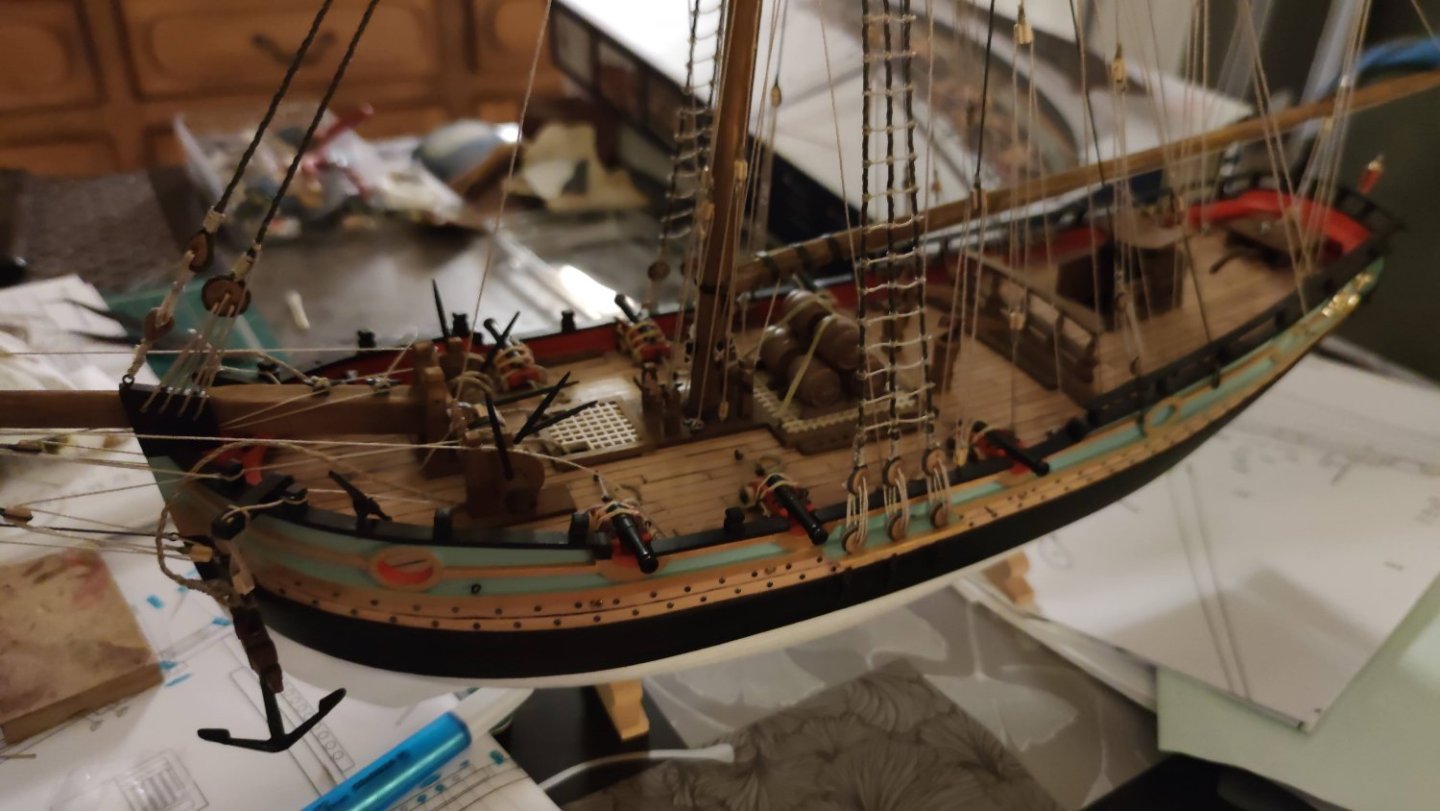
MONTH 8: January 2022 The cannons were finally all drilled with a dremel, with many failures. Constructo sent me back the 16 visible cannons, but not the dummy cannons. Many of the cannons were lost because it was very difficult to drill into the brass while remaining in the centre. The result is that only one side of the ship can have all its cannons visible. On the other side, the ports are semi-closed. On the deck, I improvised a loose rigging on the supports, adding some occre rings to attach. To paint the guns, I mixed a black colour with a metallic colour, to give texture and reflection. Finally I was able to start the definitive rigging of the masts, starting with the bowsprit and following the indications of the plan. Tests were done on the foremast to check the inclination of the yards in the wind.


- 13 replies
-
- 4
-
-
- constructo
- prince
- (and 1 more)
-
Montanes by Iseaz - OcCre- 1/70
Iseaz replied to Iseaz's topic in - Kit build logs for subjects built from 1751 - 1800
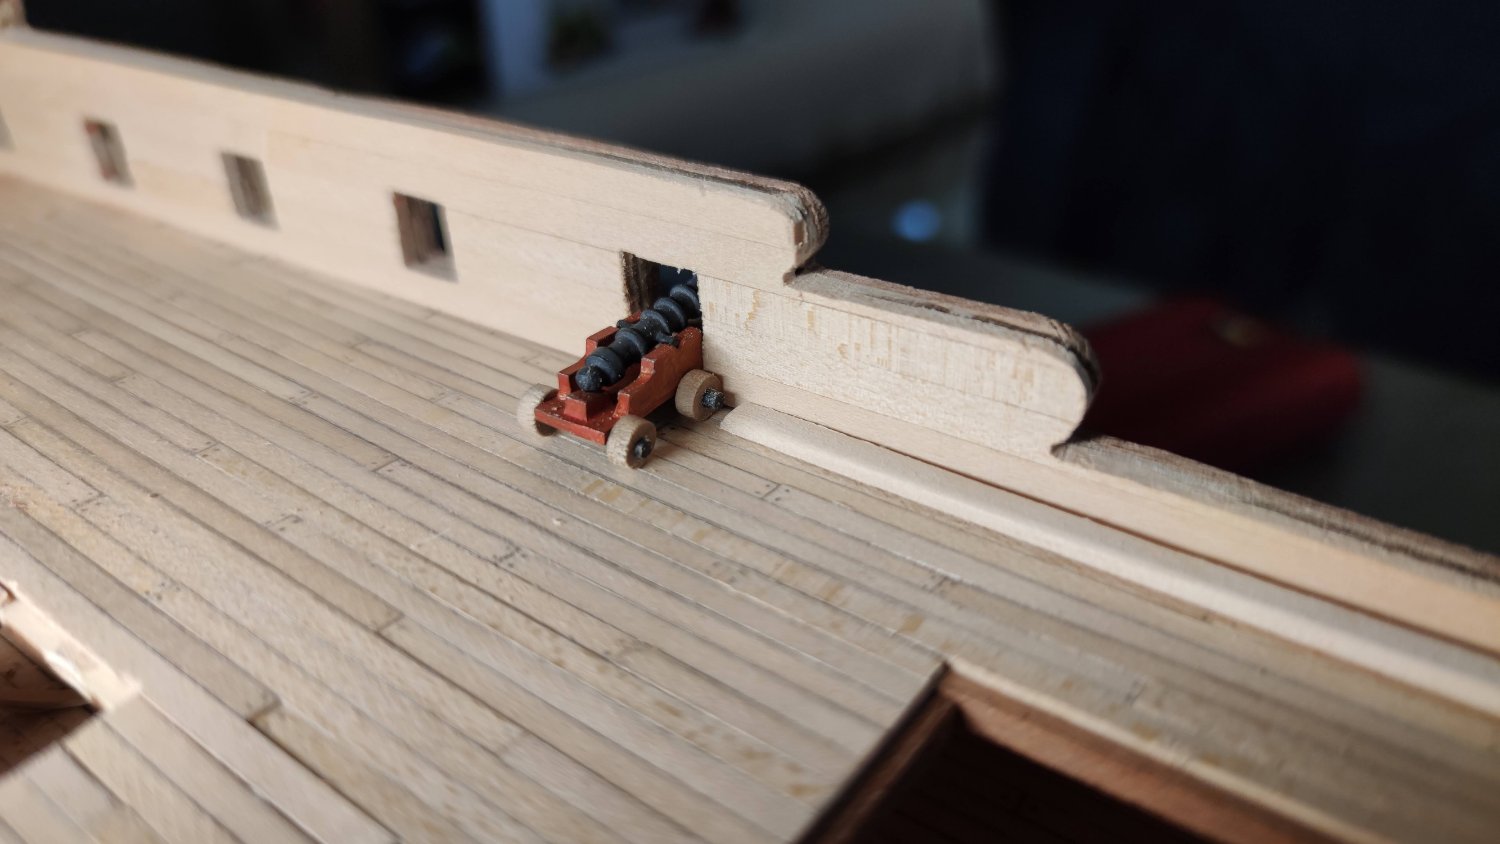
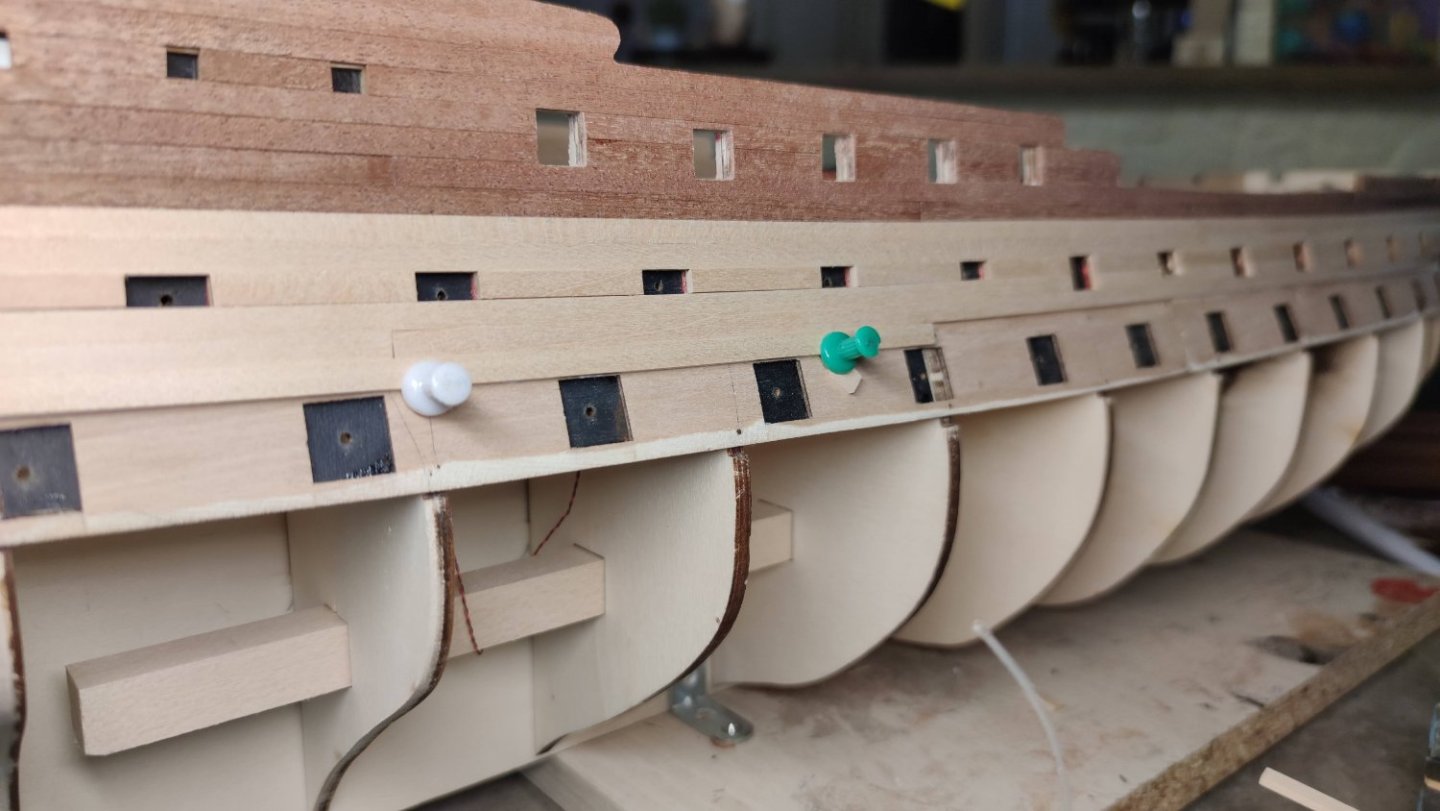
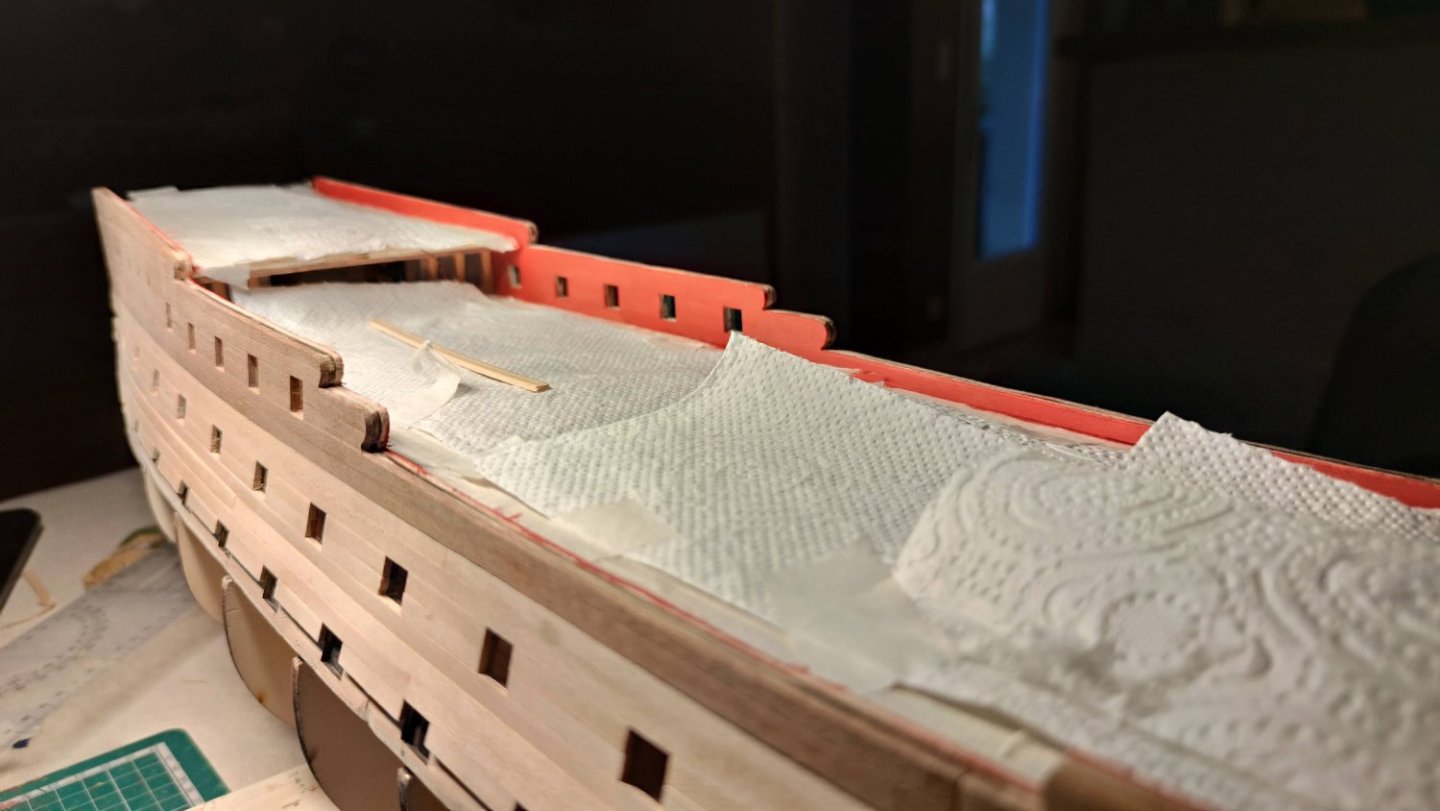
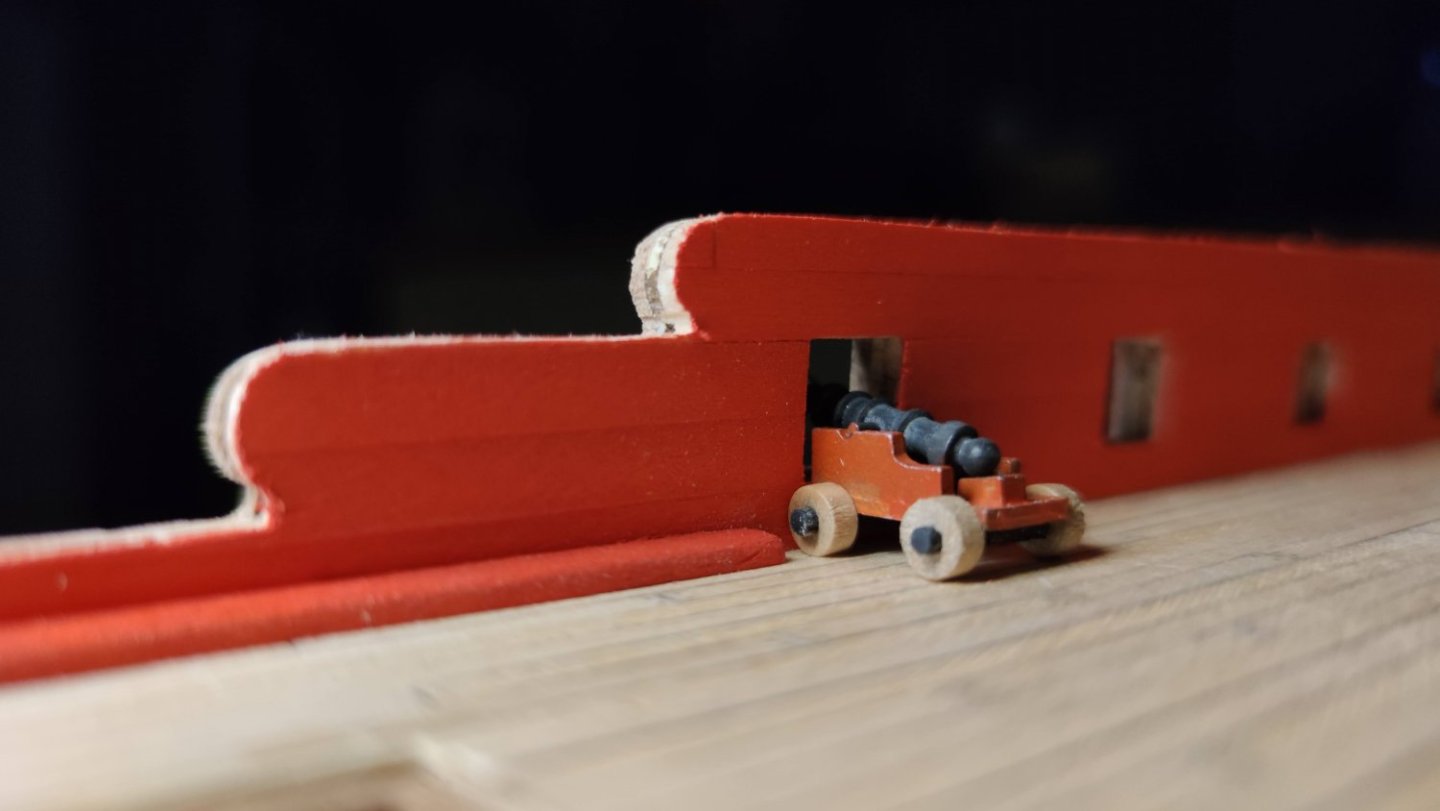
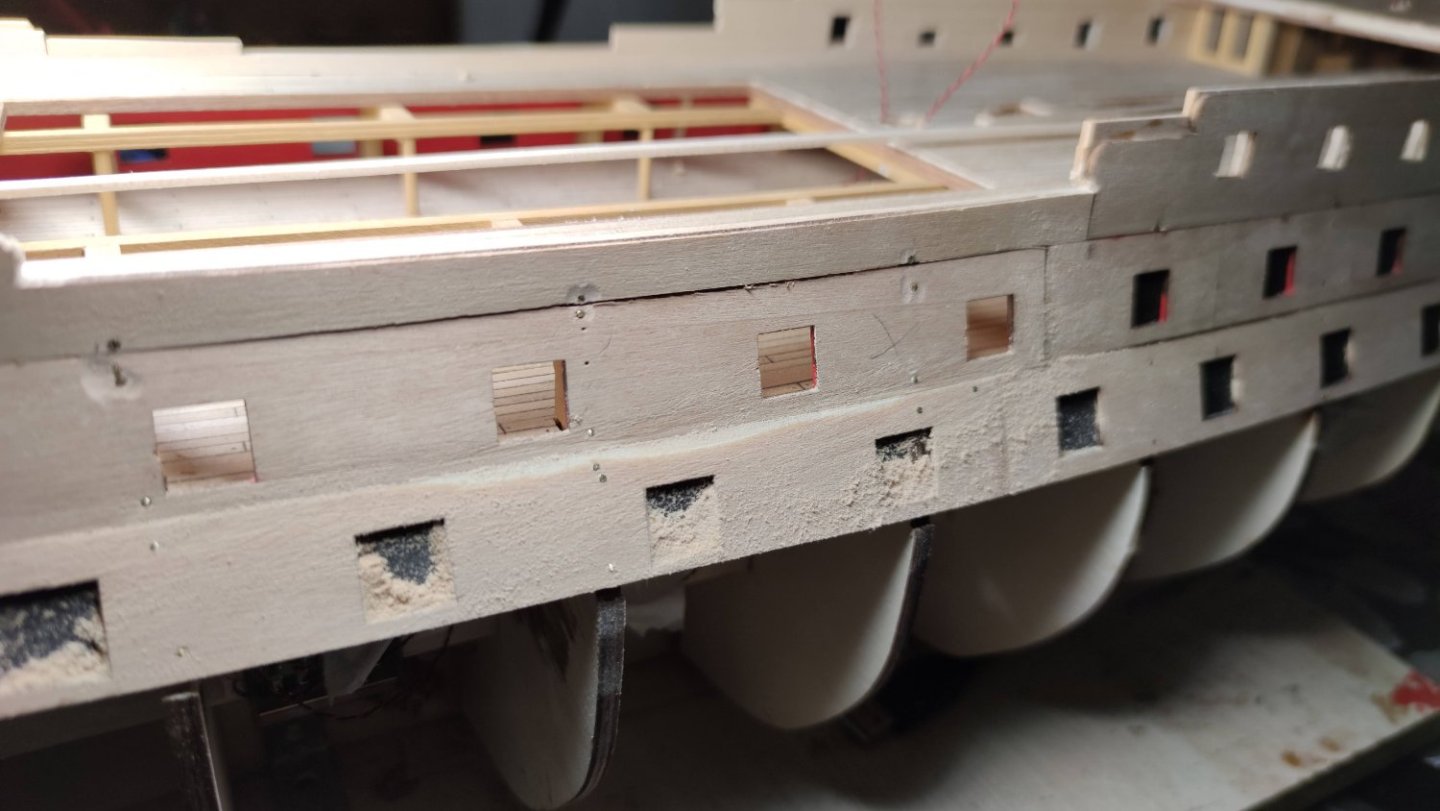
After a lot of sanding to adjust the gunports guides I started the planking. It was quite hard to align the first plank, which is crucial for the rest of the planking. I also had to think about the placement of the stringers on the deck: I like the guns to pop out of the hull, but the stringers prevent the carriage to be against the wall. So I improvised by cutting the stringers at the position of the guns. The inside of the walls was painted with the iconic red.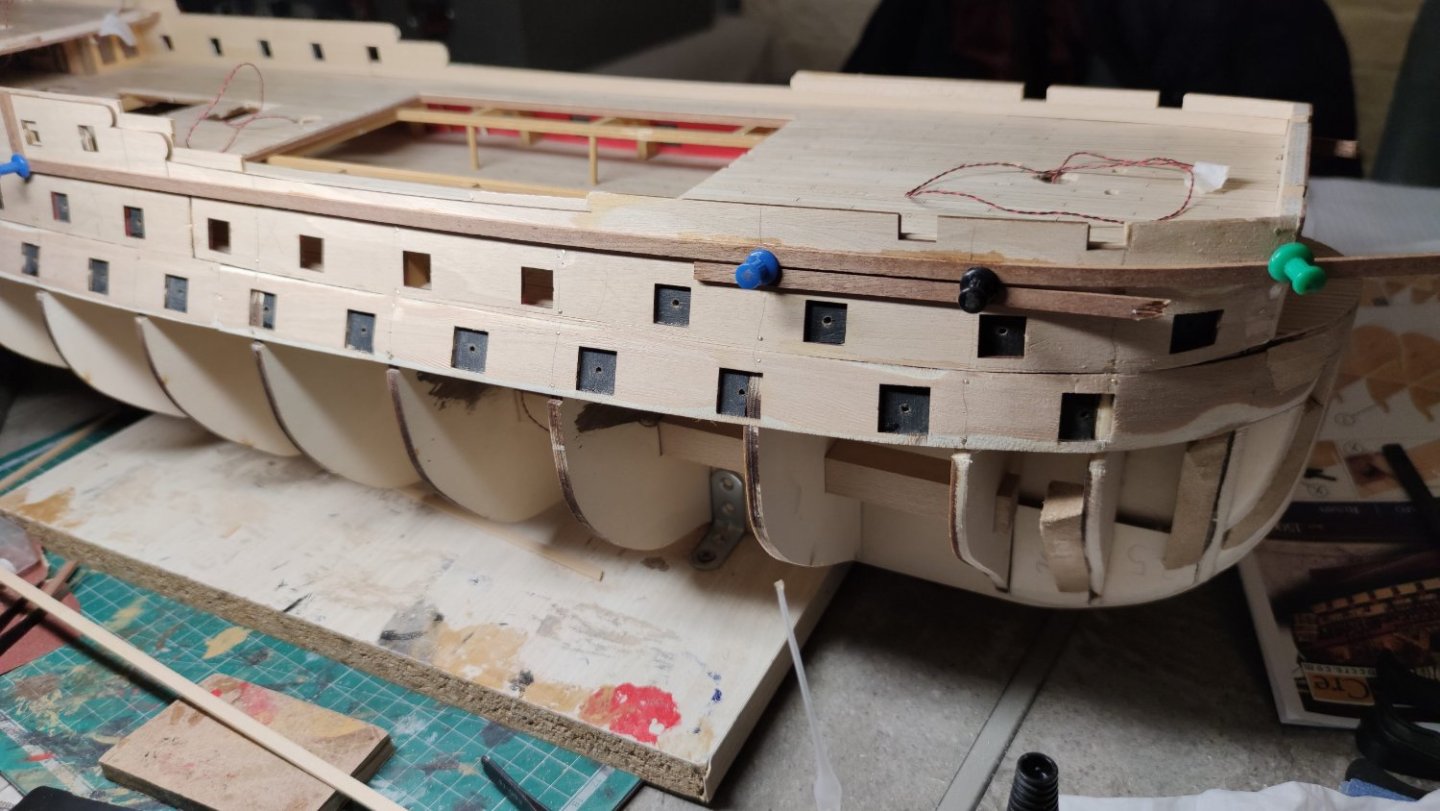


-
Montanes by Iseaz - OcCre- 1/70
Iseaz replied to Iseaz's topic in - Kit build logs for subjects built from 1751 - 1800
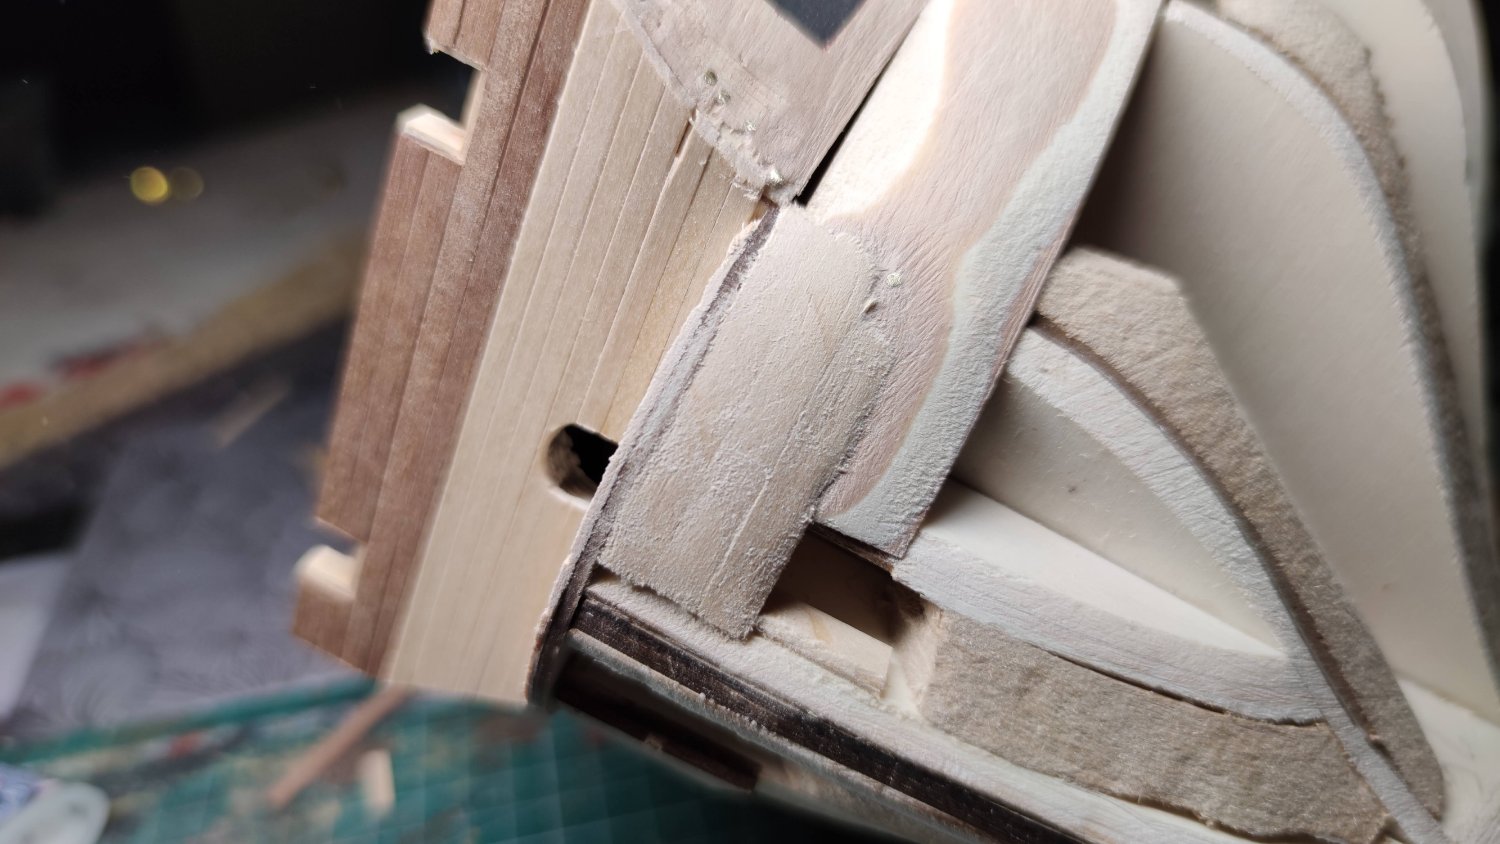
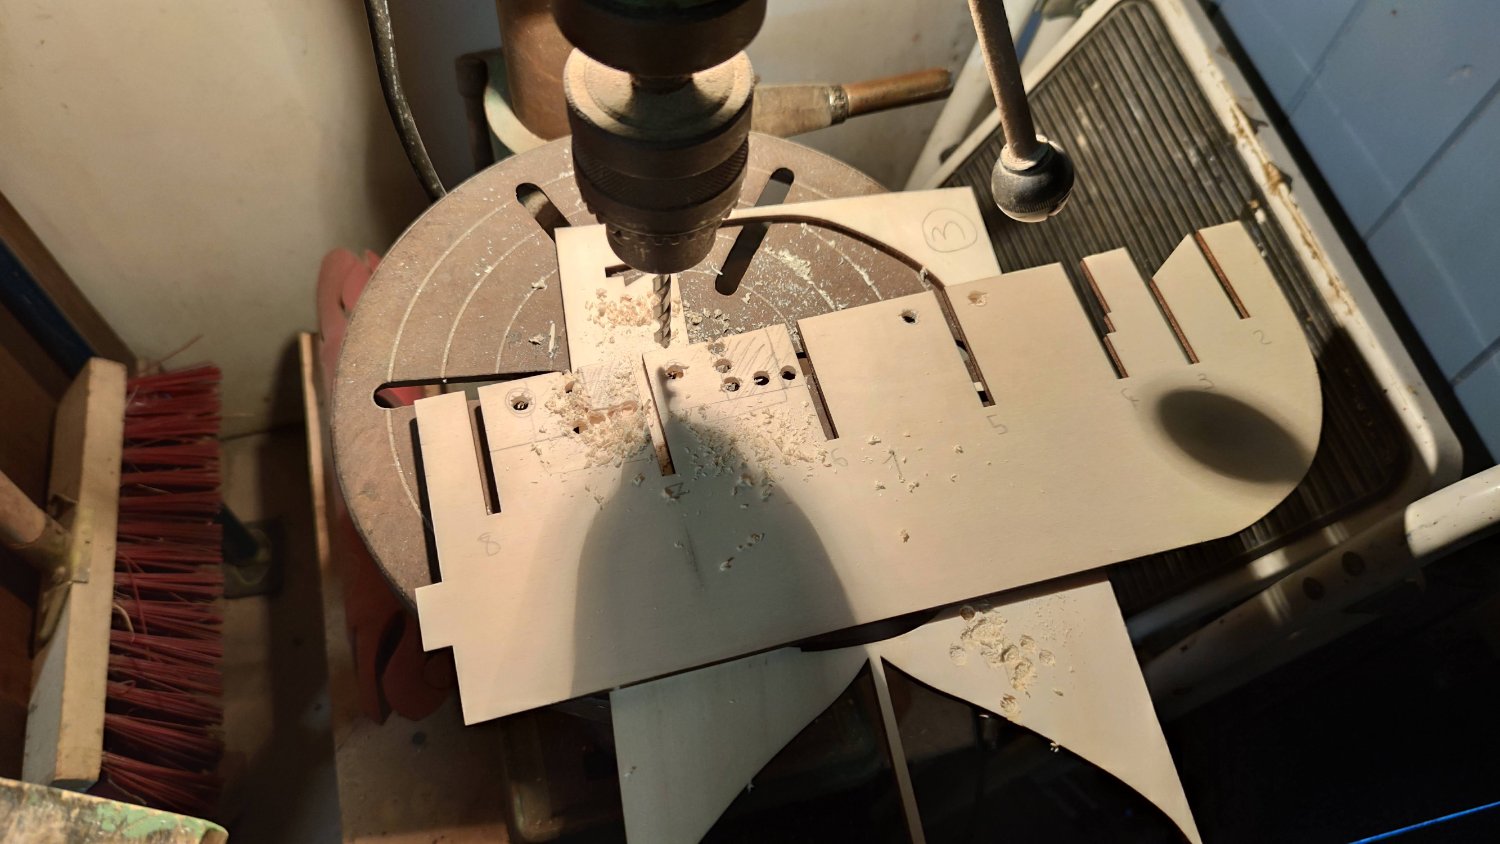
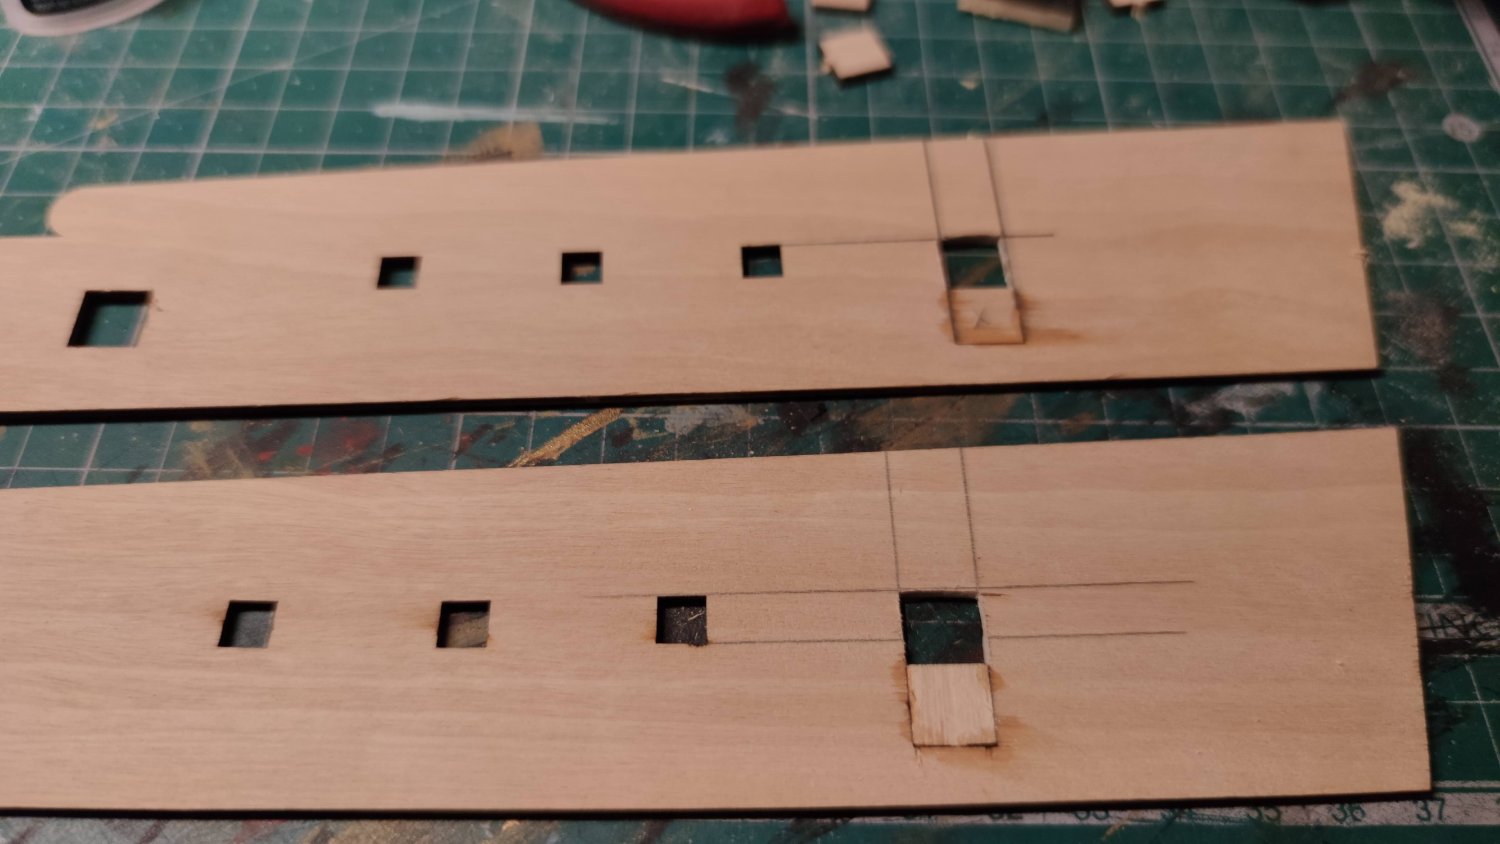
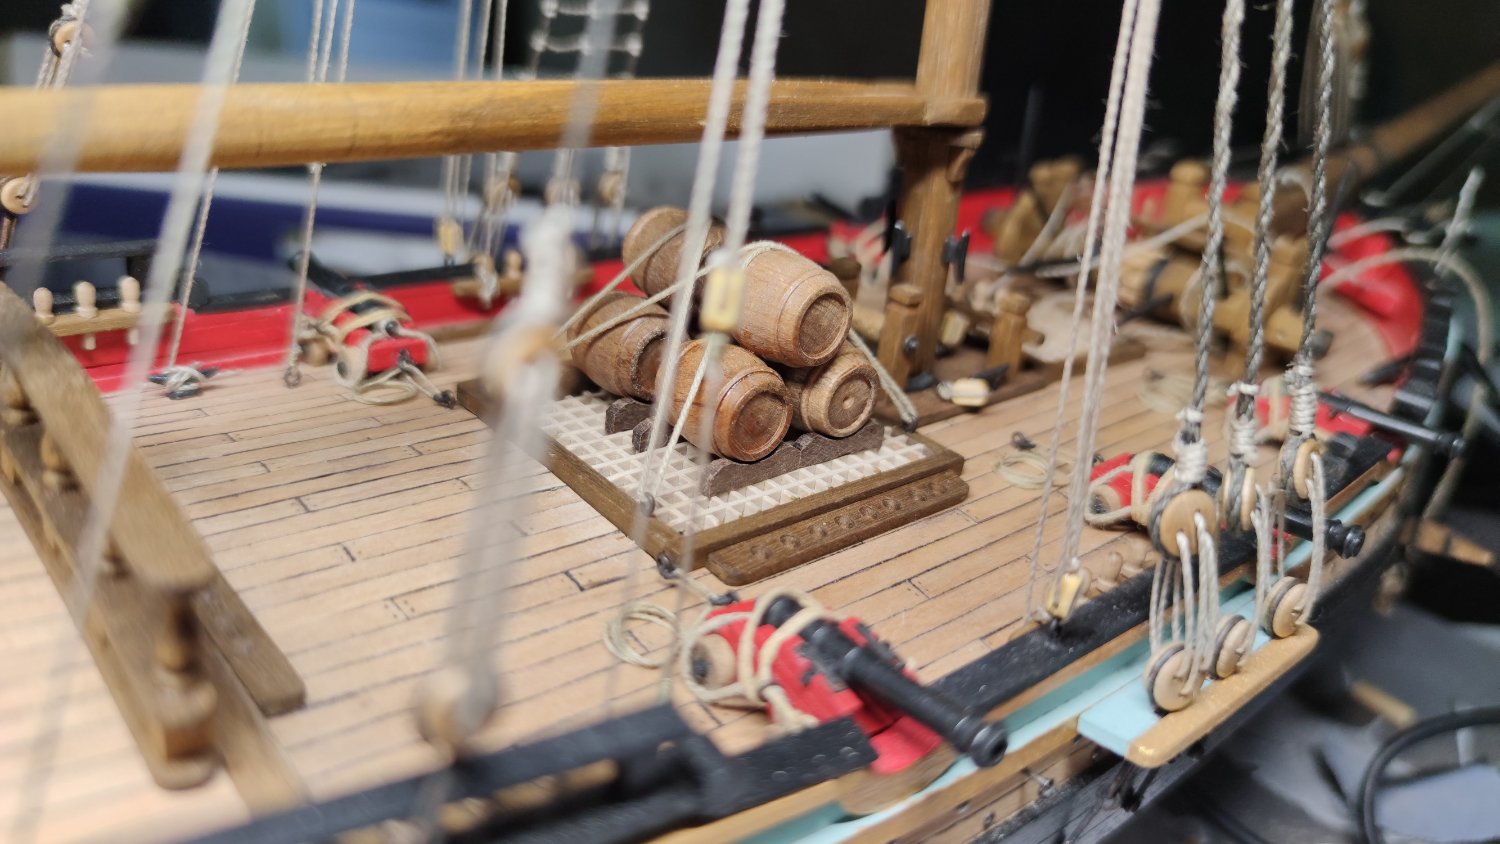
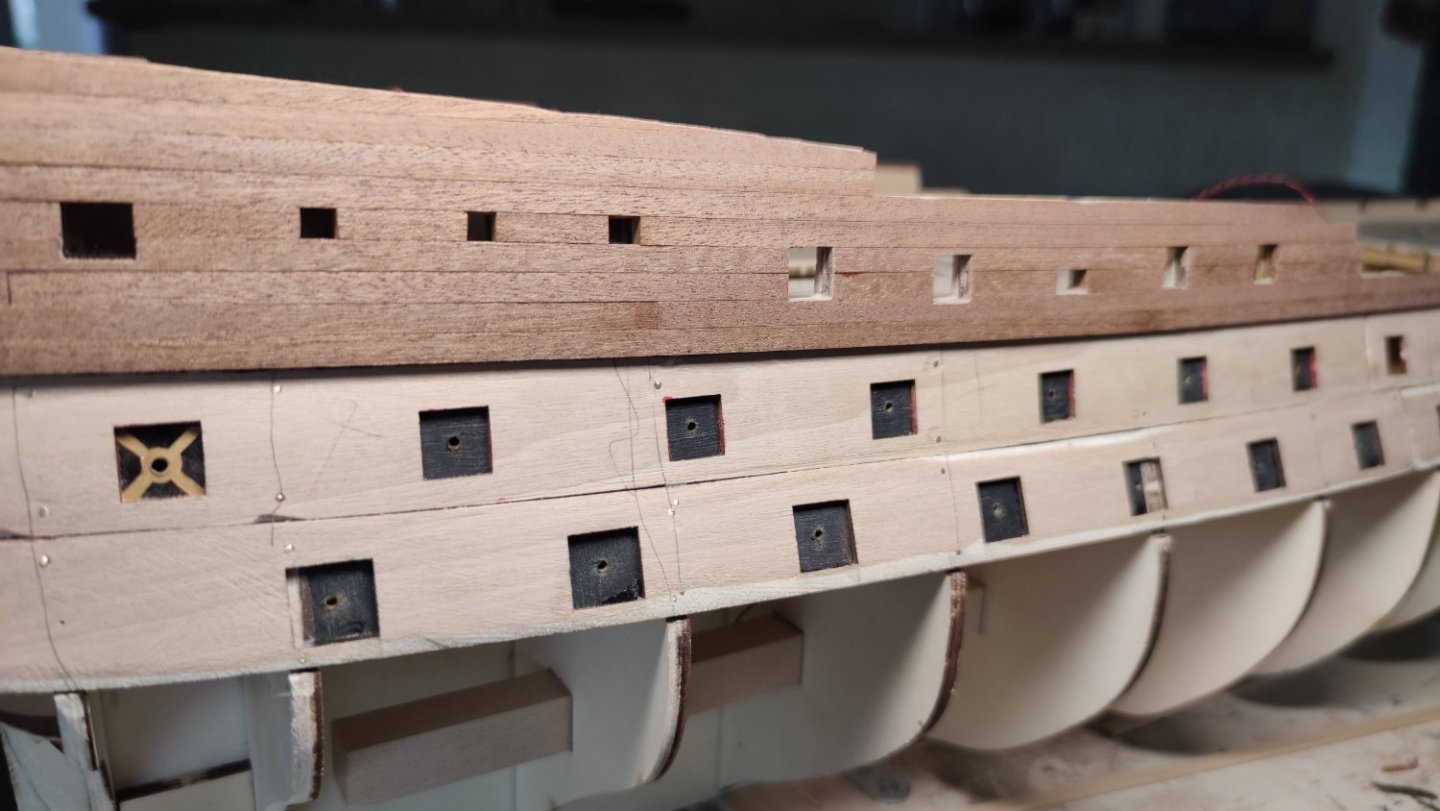
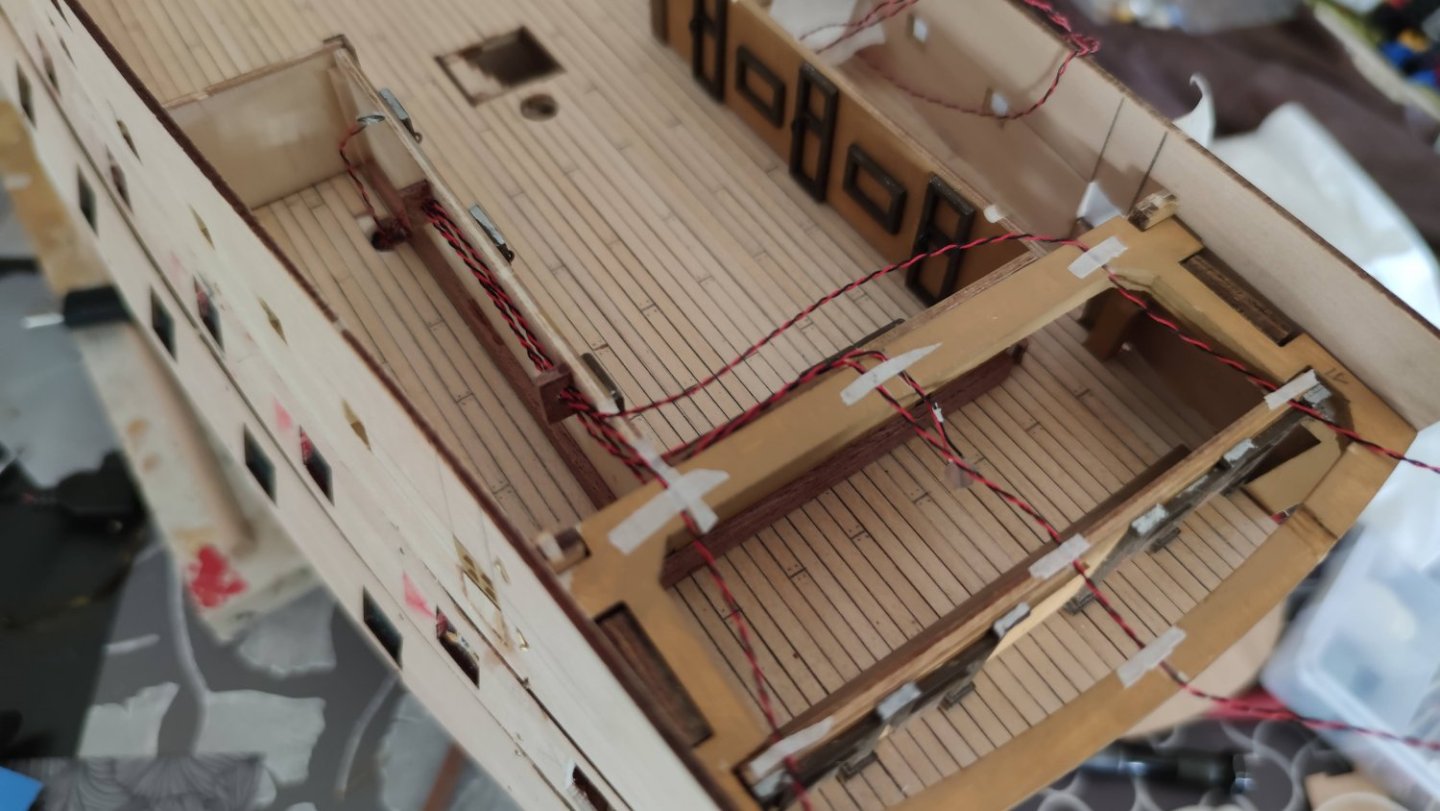
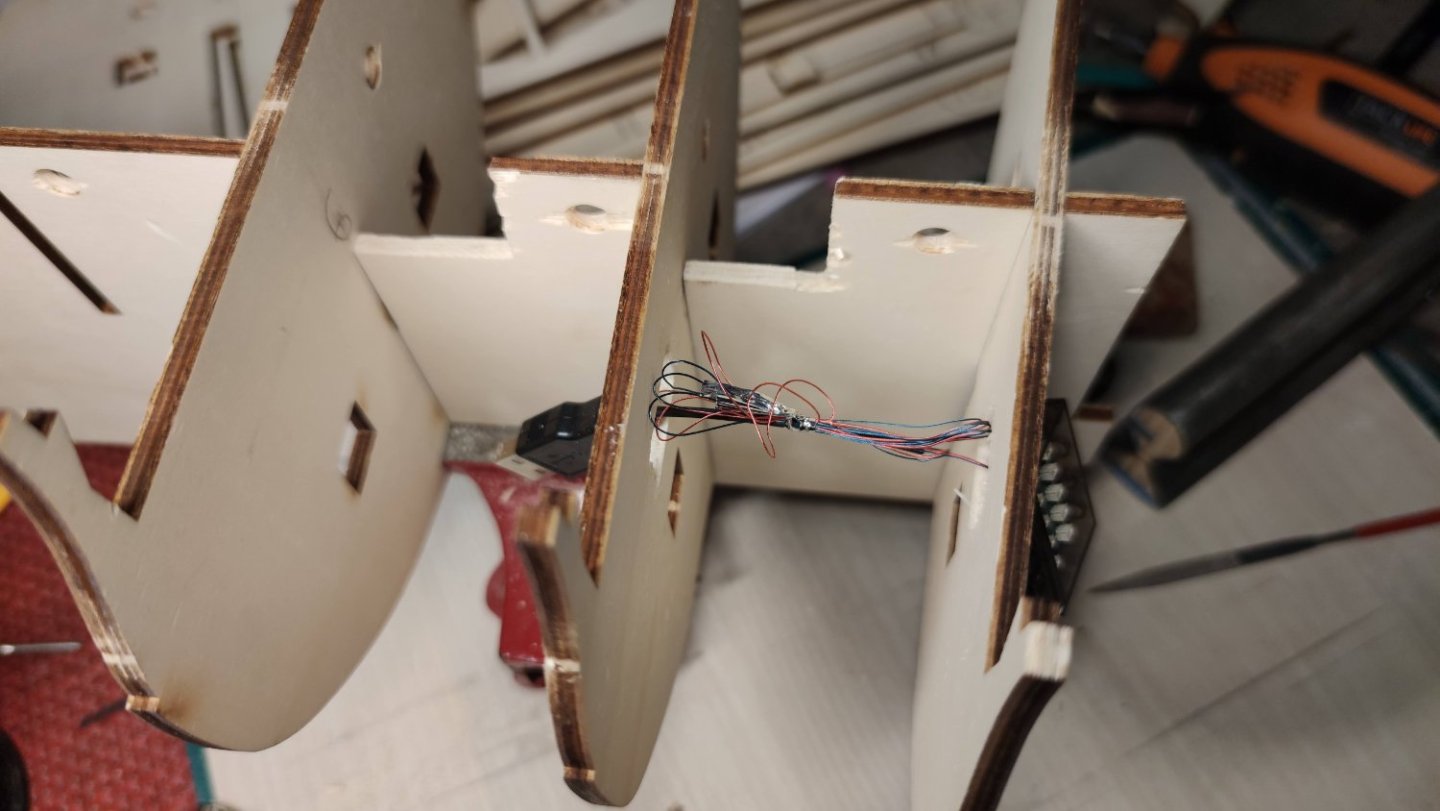
Thank you Gary ! On the stern, the posts were ruining the view and were not really useful to support the upper deck, I removed them to the base to keep a point of attachment to the sternpiece. The bulkheads required some extra work to run and hide the cables, but the result is worth the effort. Work has progressed on the bow, with the planking (+ walls on the ports to add some depth). You can see here that the pre-cut deck piece is not aligned with the gunport guide. I chose to add some material to compensate for this. The surface for guiding the gunports needed a lot of sanding before planking. One day to sand everything is very long ... I finally designed guides from the pre-cut leftovers to drill the false walls in the middle. Here's the epic result with the raw barrels : I hope to start soon the planking, the step I'm fearing the most, especially since it's a single planked kit...


-
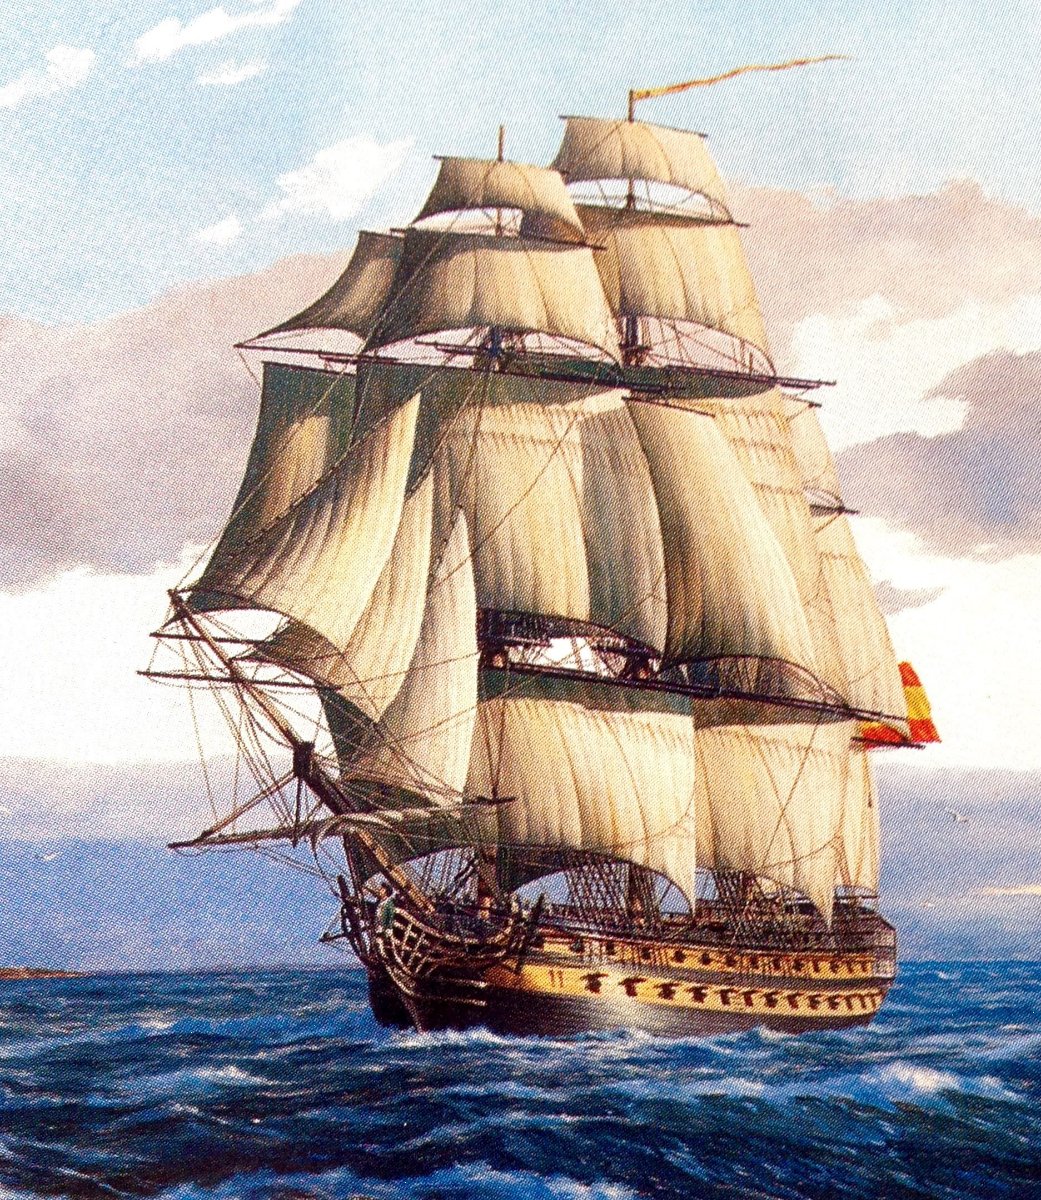
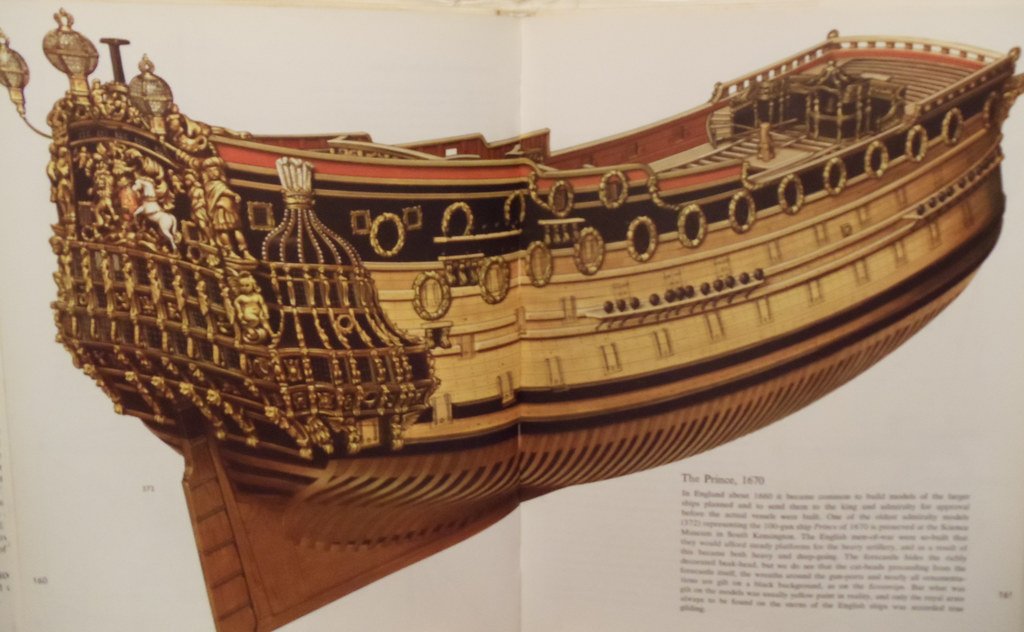
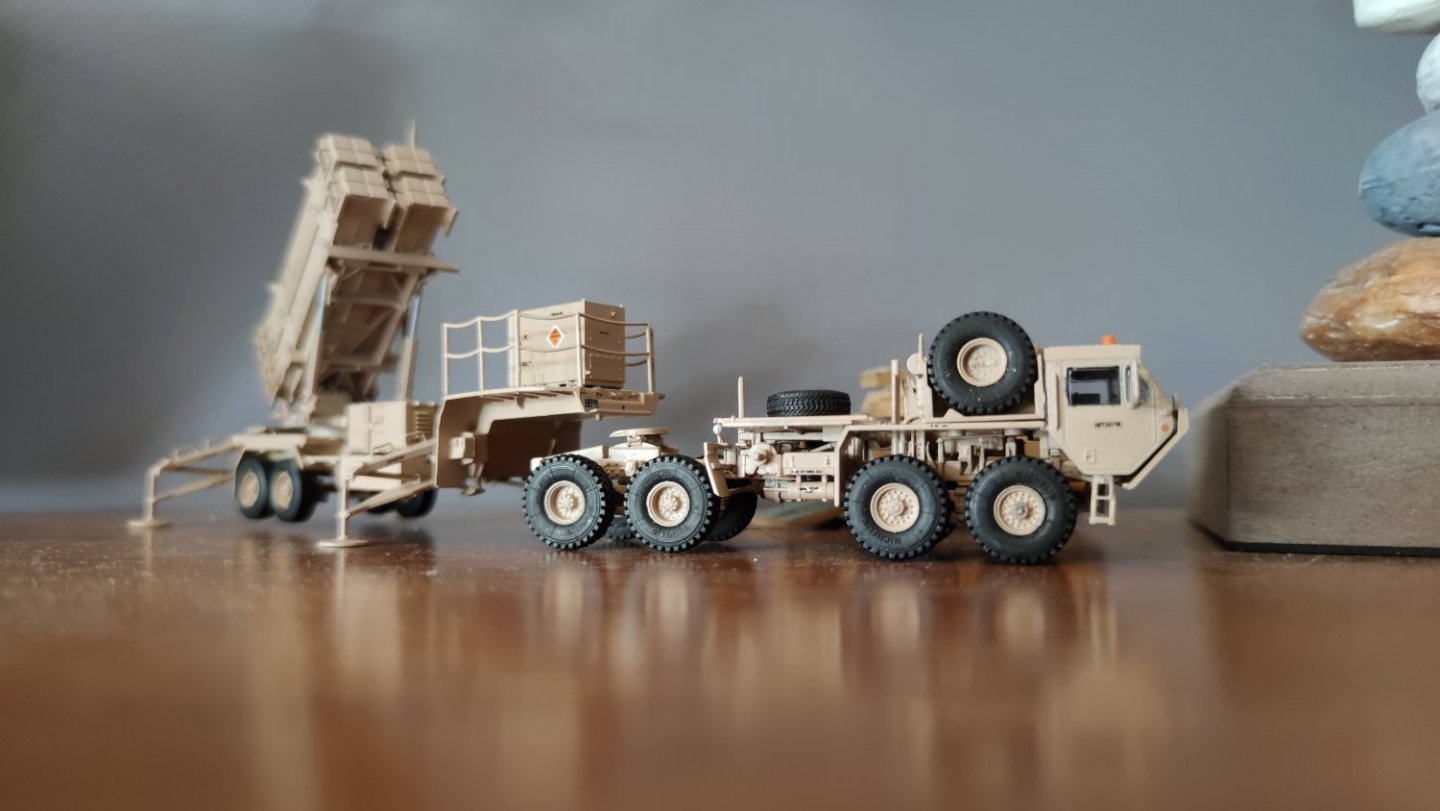
MONTH 7 : December 2021 As the bow is very simplified and boring, I decided to paint abstract patterns in the black parts. It was a very long and complex job, hand painted in 2 layers. The result is surreal but I think it is beautiful. Also, I wasn't a fan of the white color of the wood, after much thinking I opted for the yellowish pine color, to look like this illustration. During the Christmas vacations, a lot of work was done on the details and the masts. I also took a break for a few days to work on a 1/72 plastic model, which is quite a change of scale!


- 13 replies
-
- 4
-
-
- constructo
- prince
- (and 1 more)
-
Montanes by Iseaz - OcCre- 1/70
Iseaz replied to Iseaz's topic in - Kit build logs for subjects built from 1751 - 1800
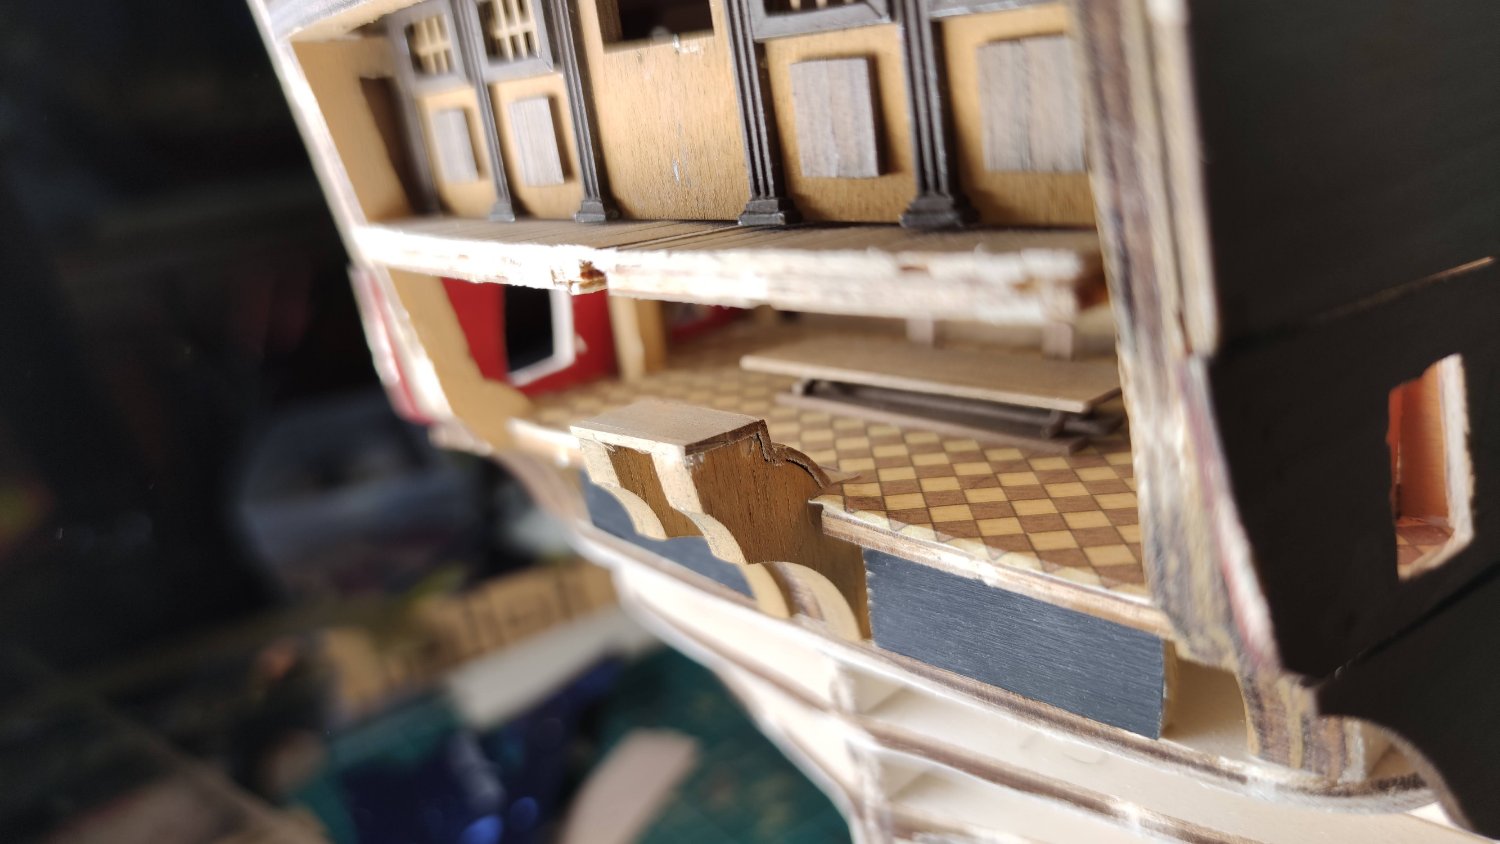
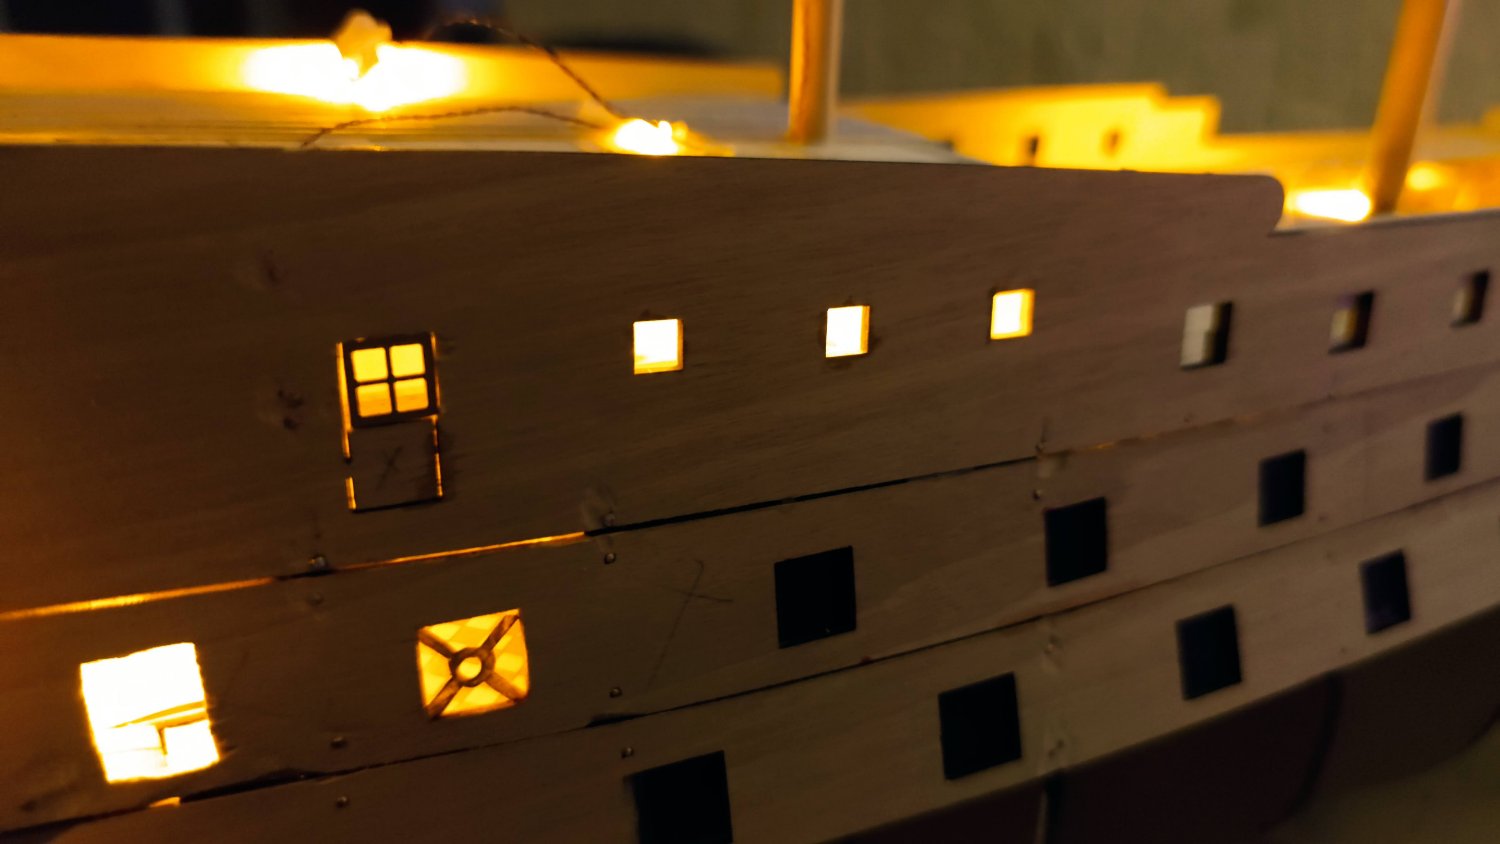
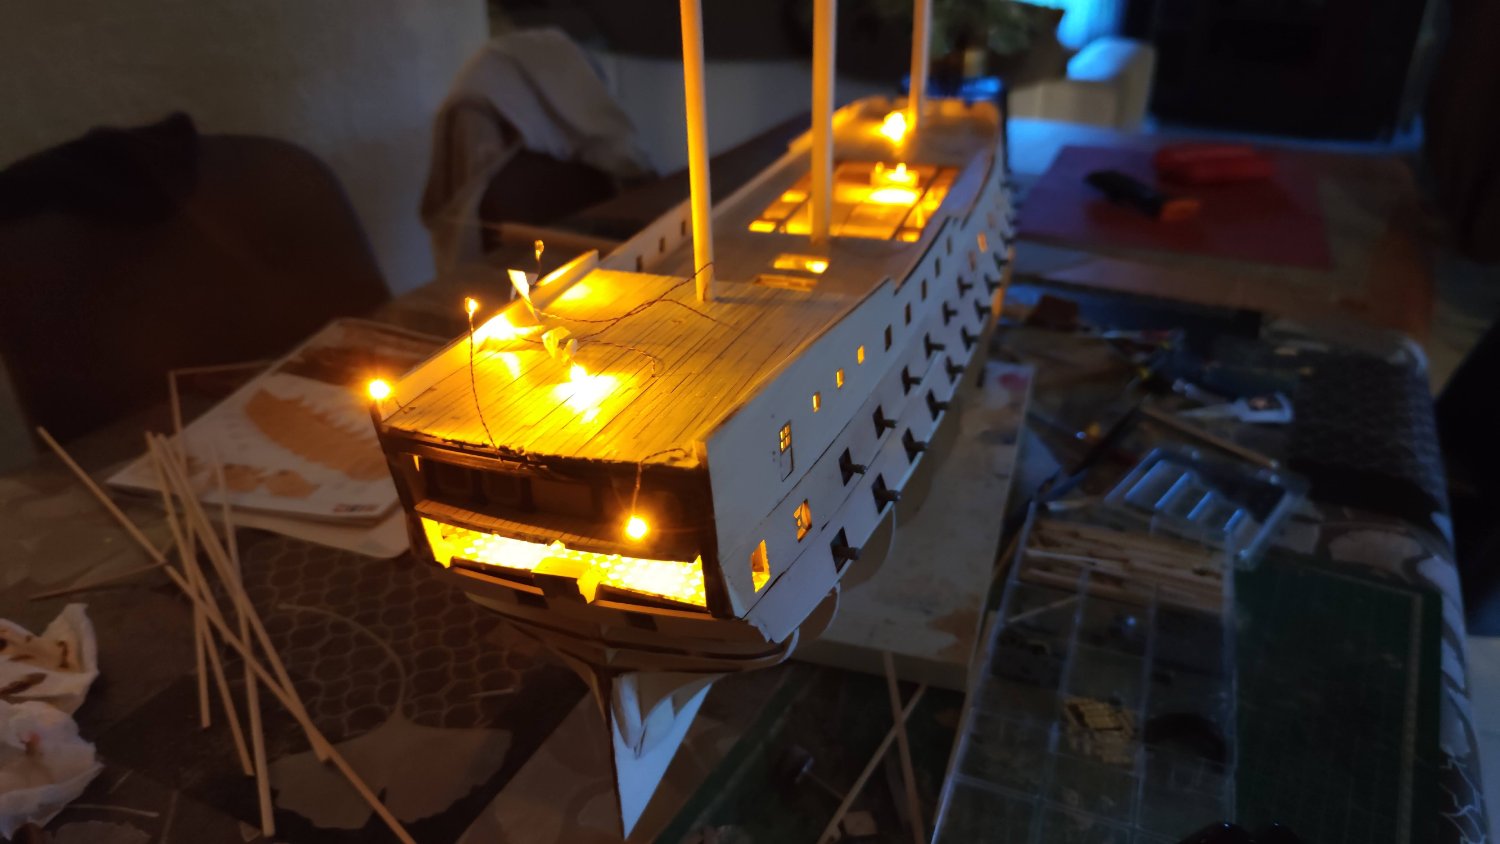
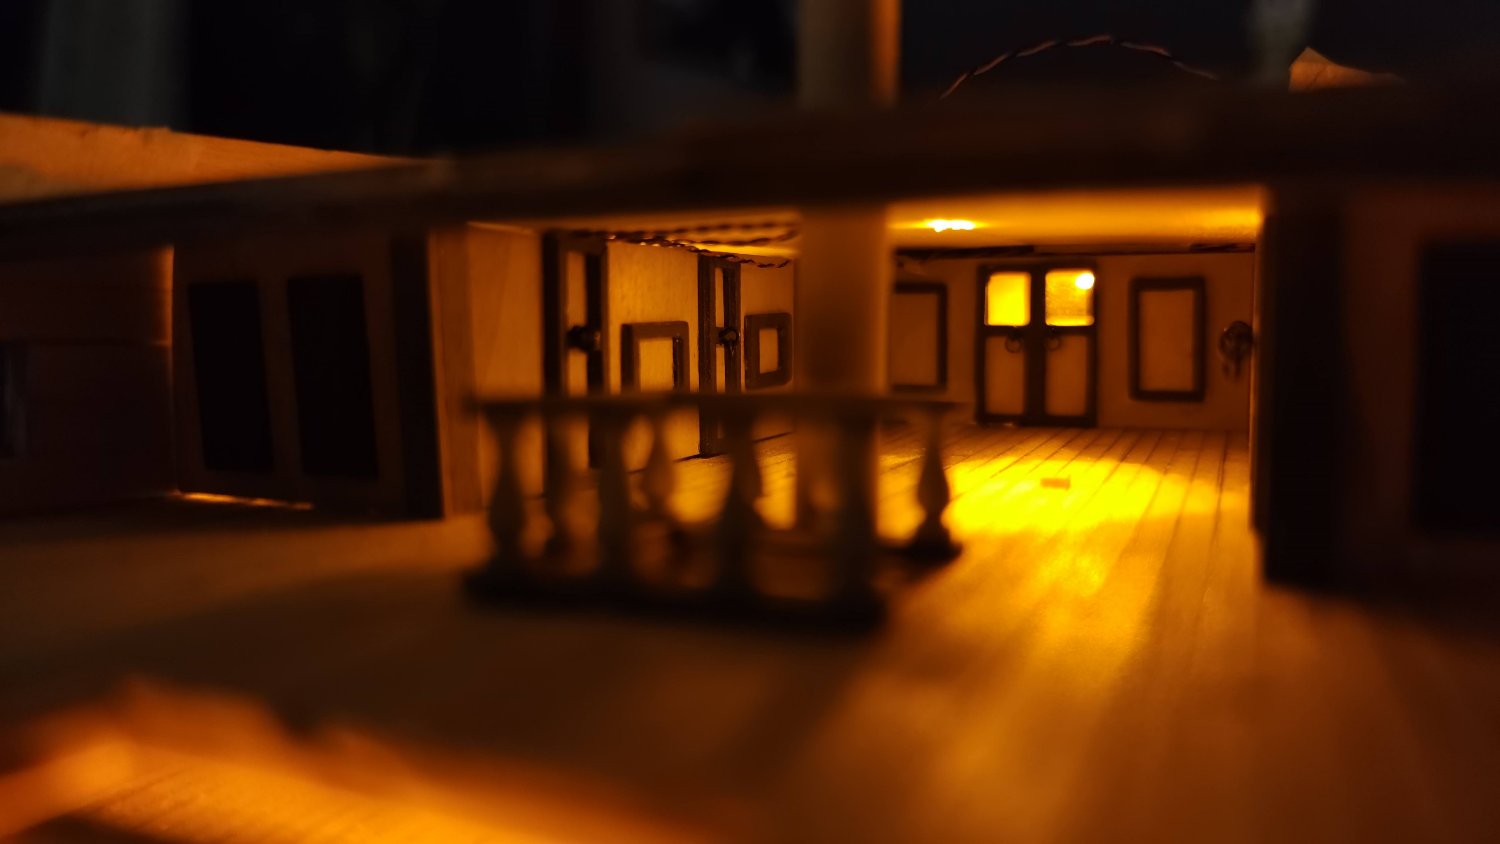
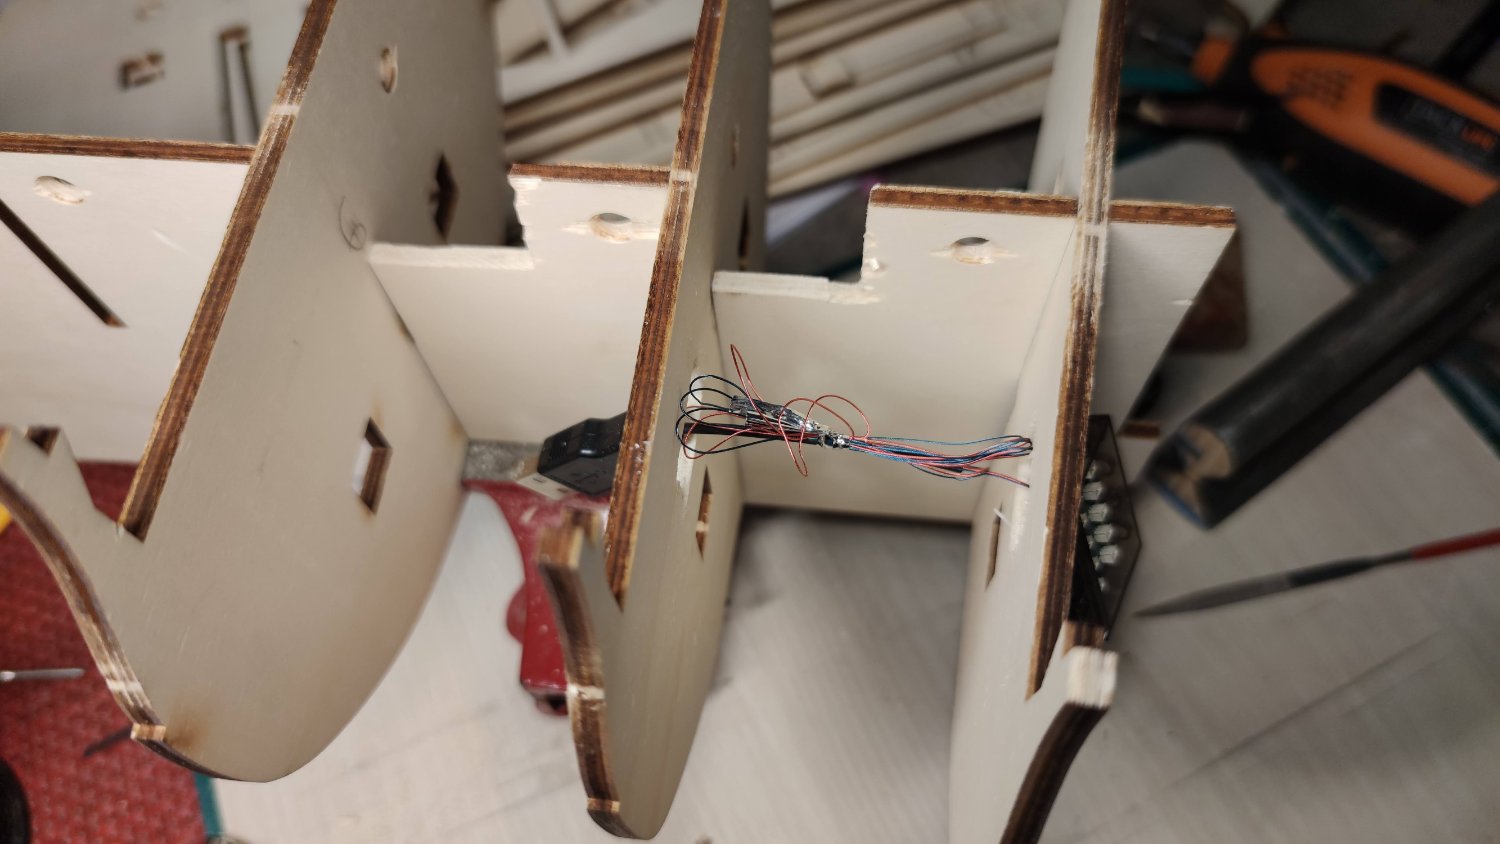
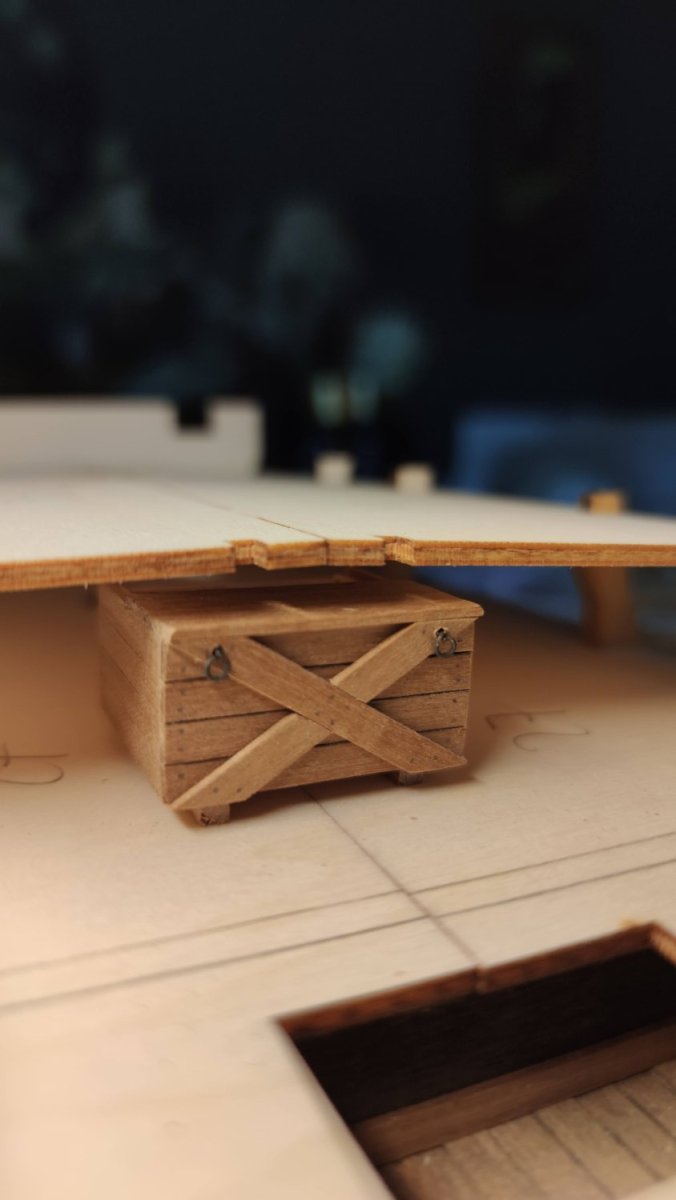
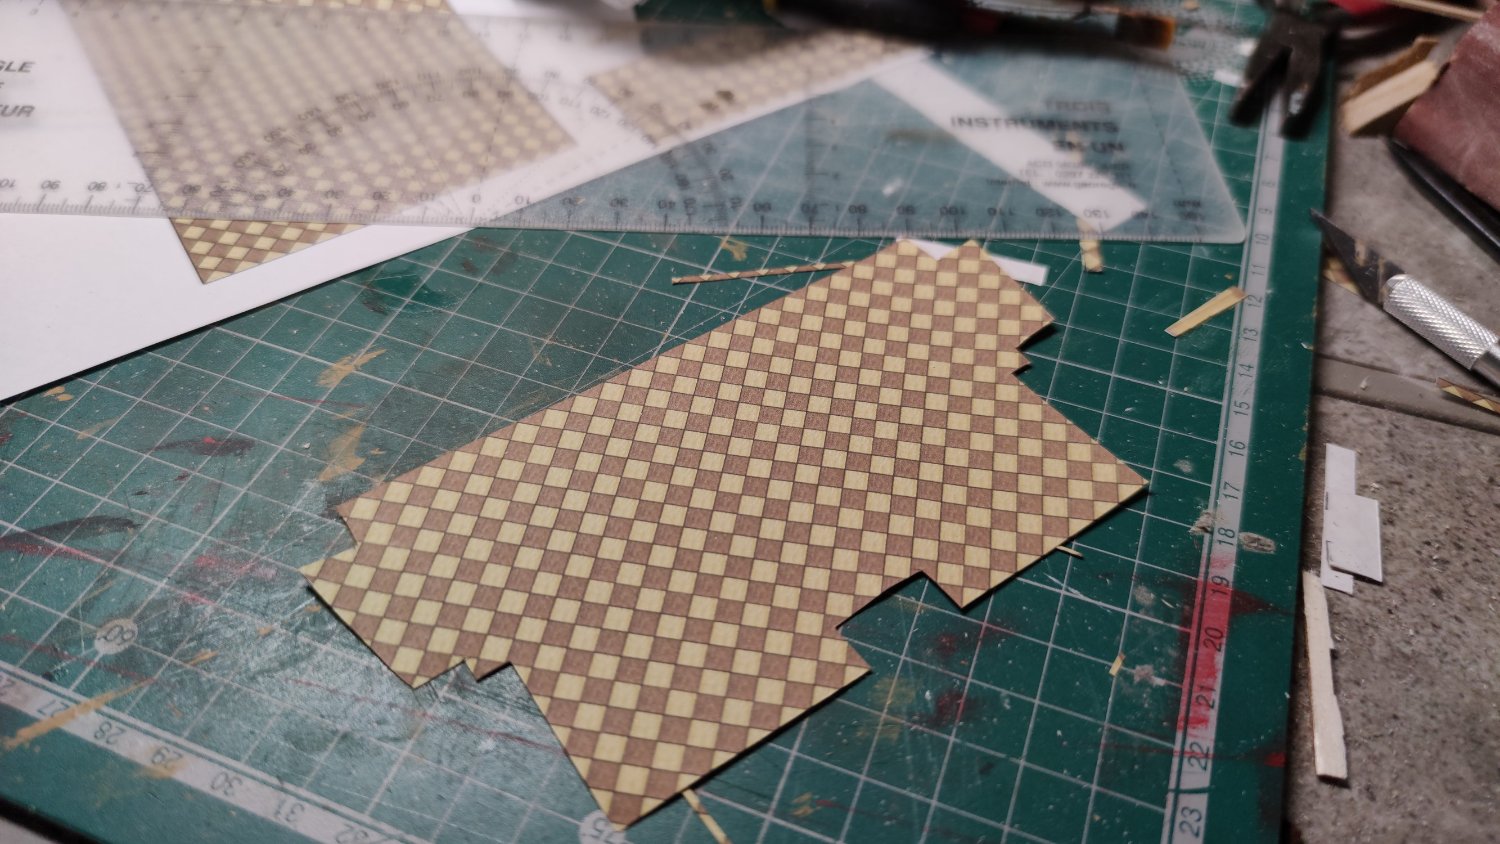
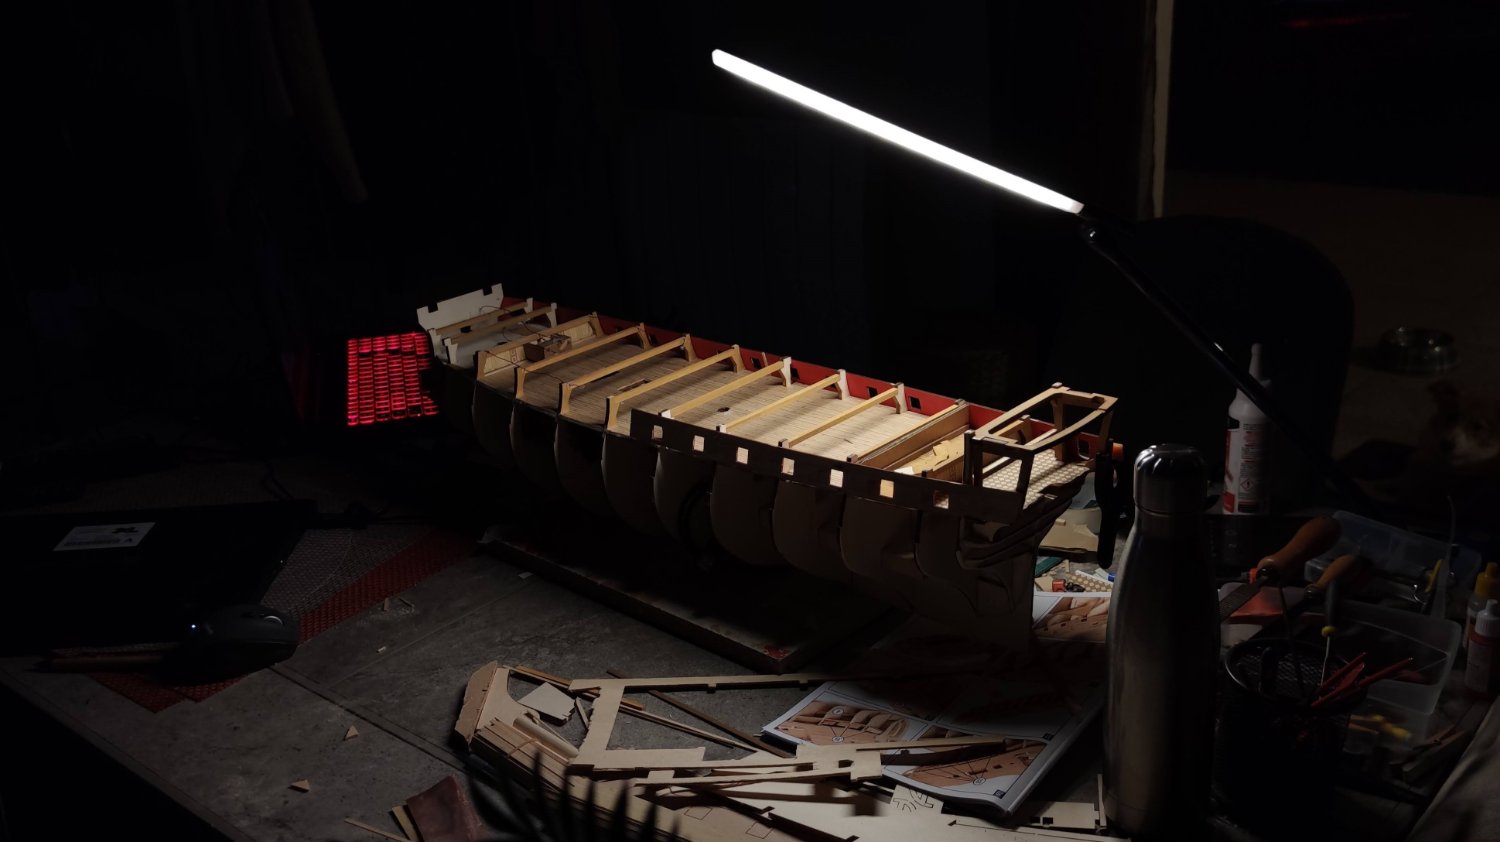
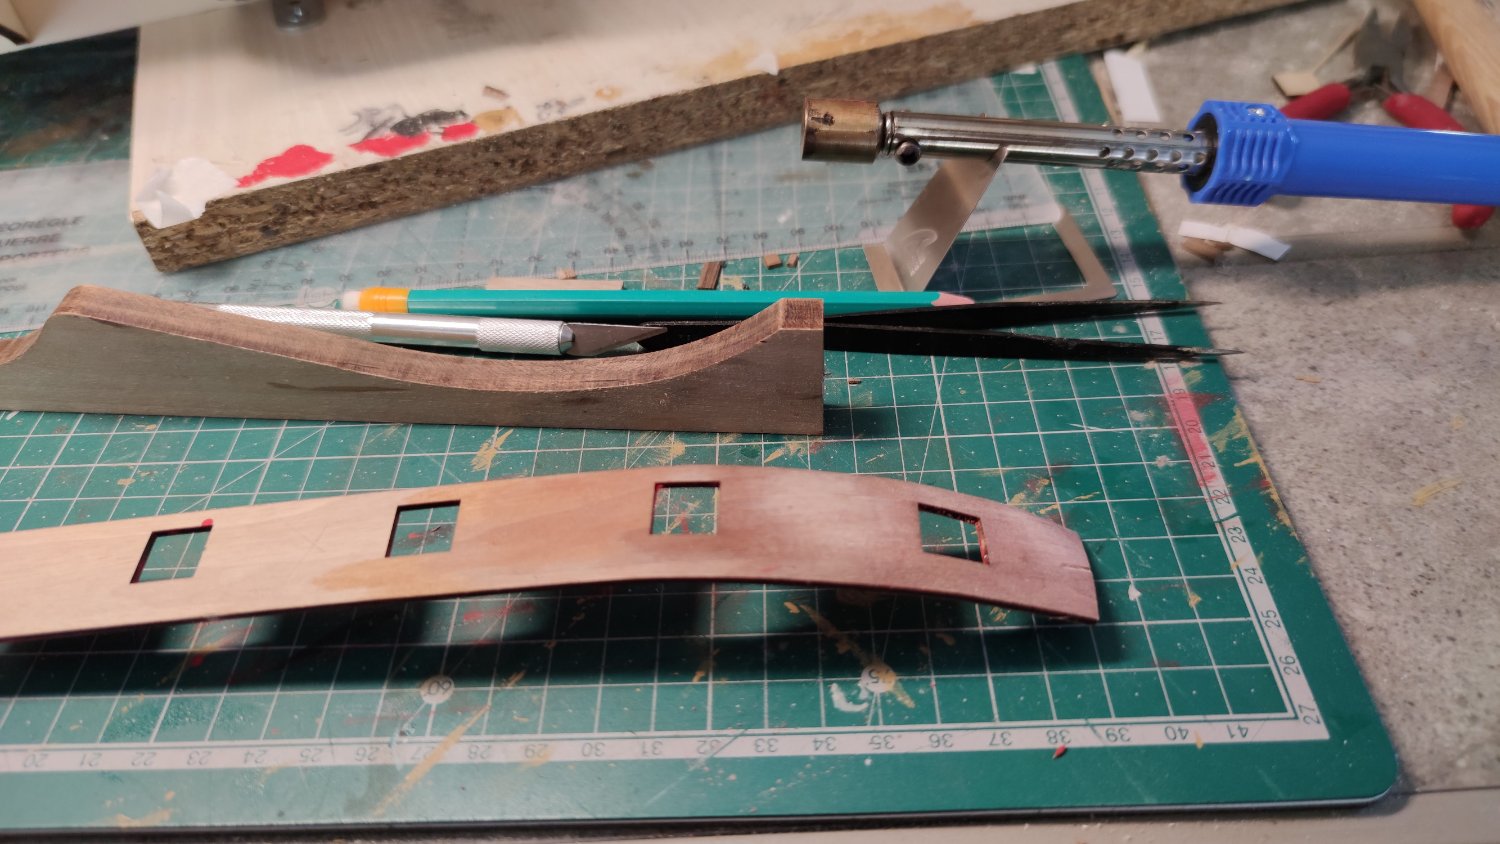
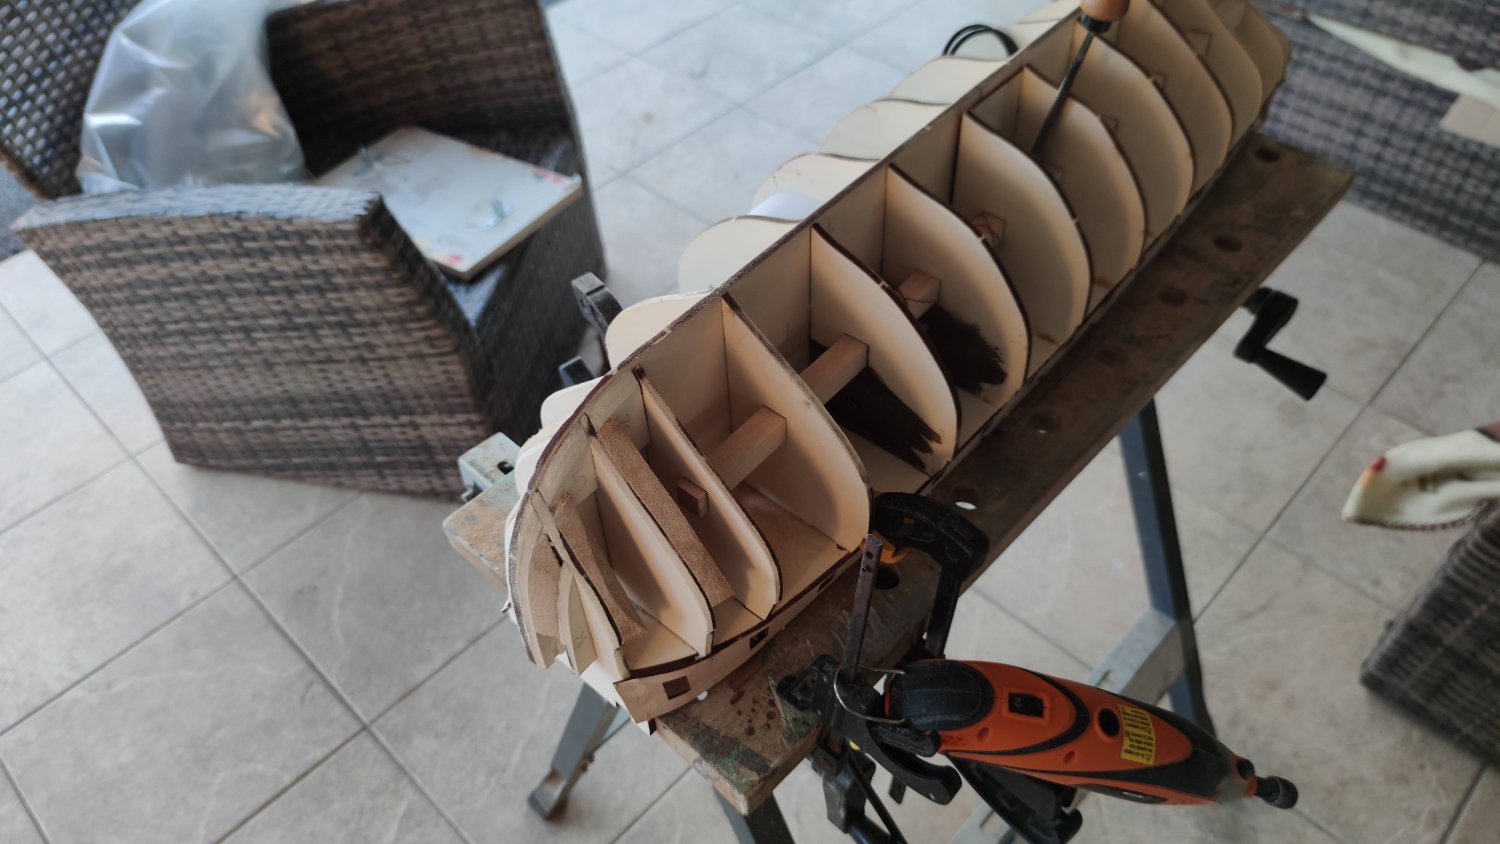
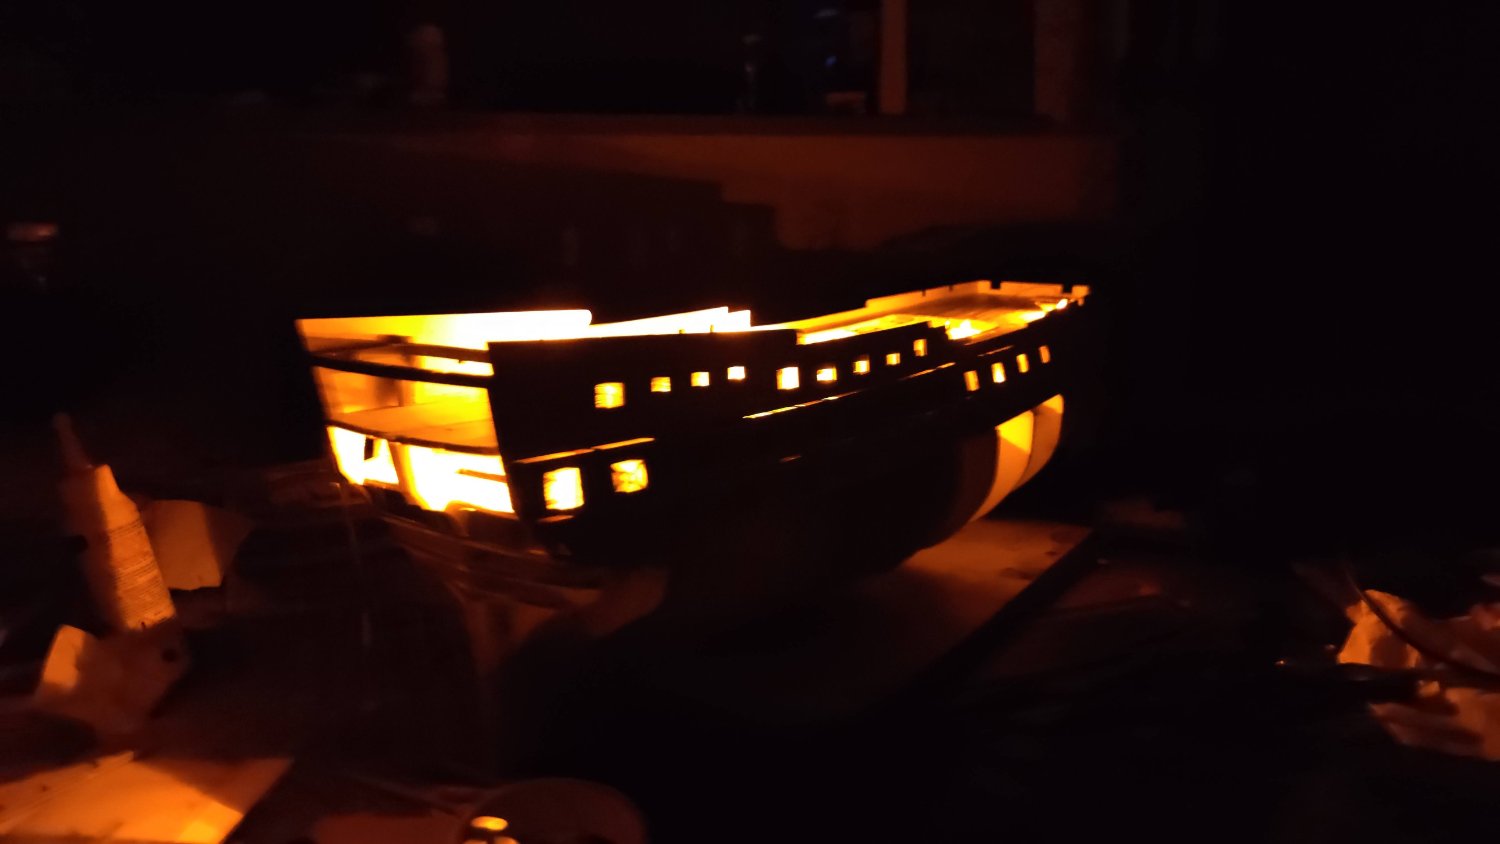
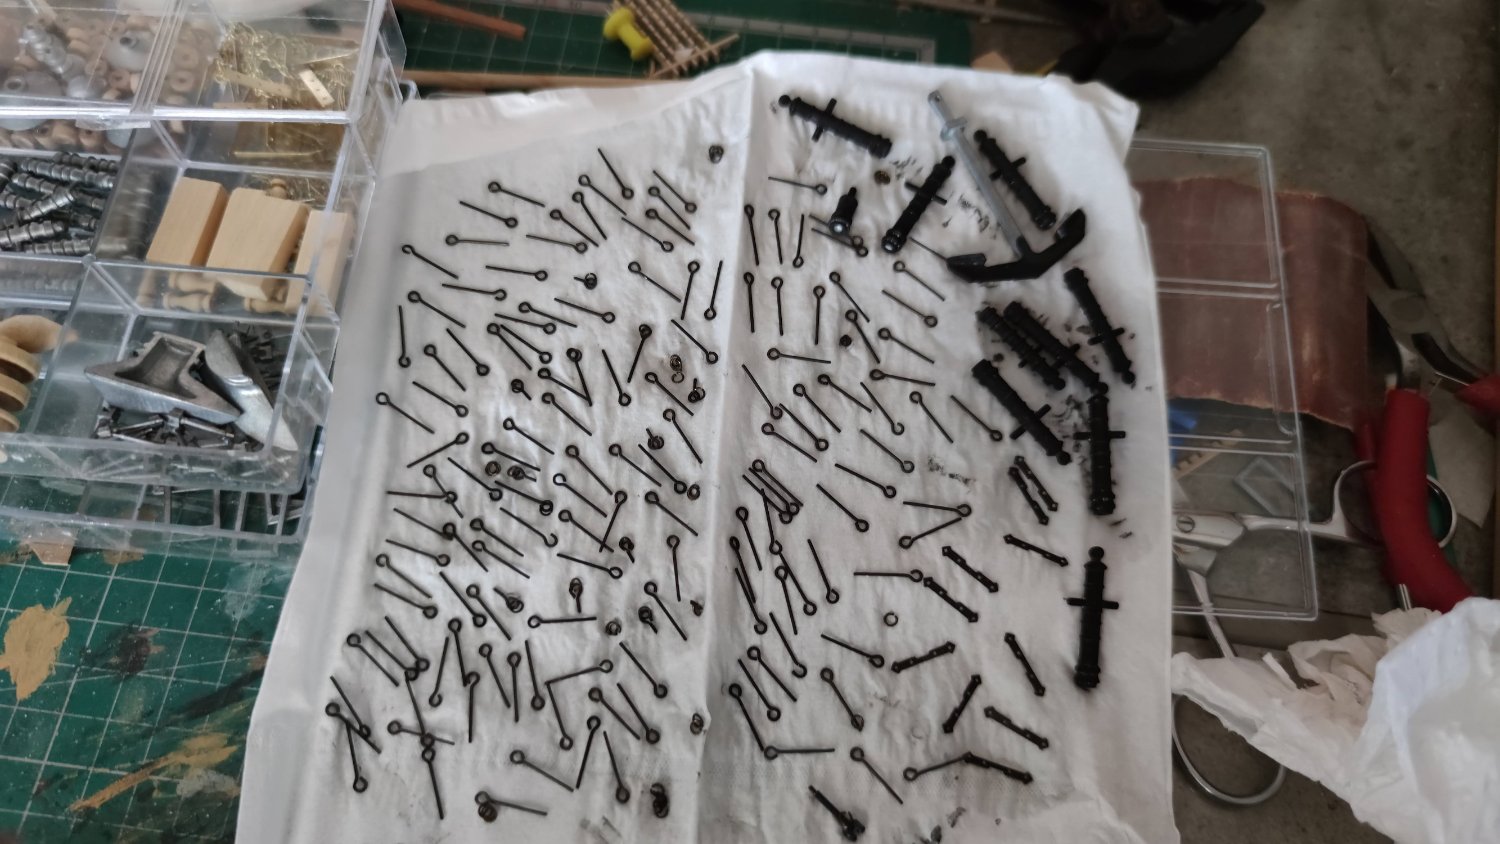
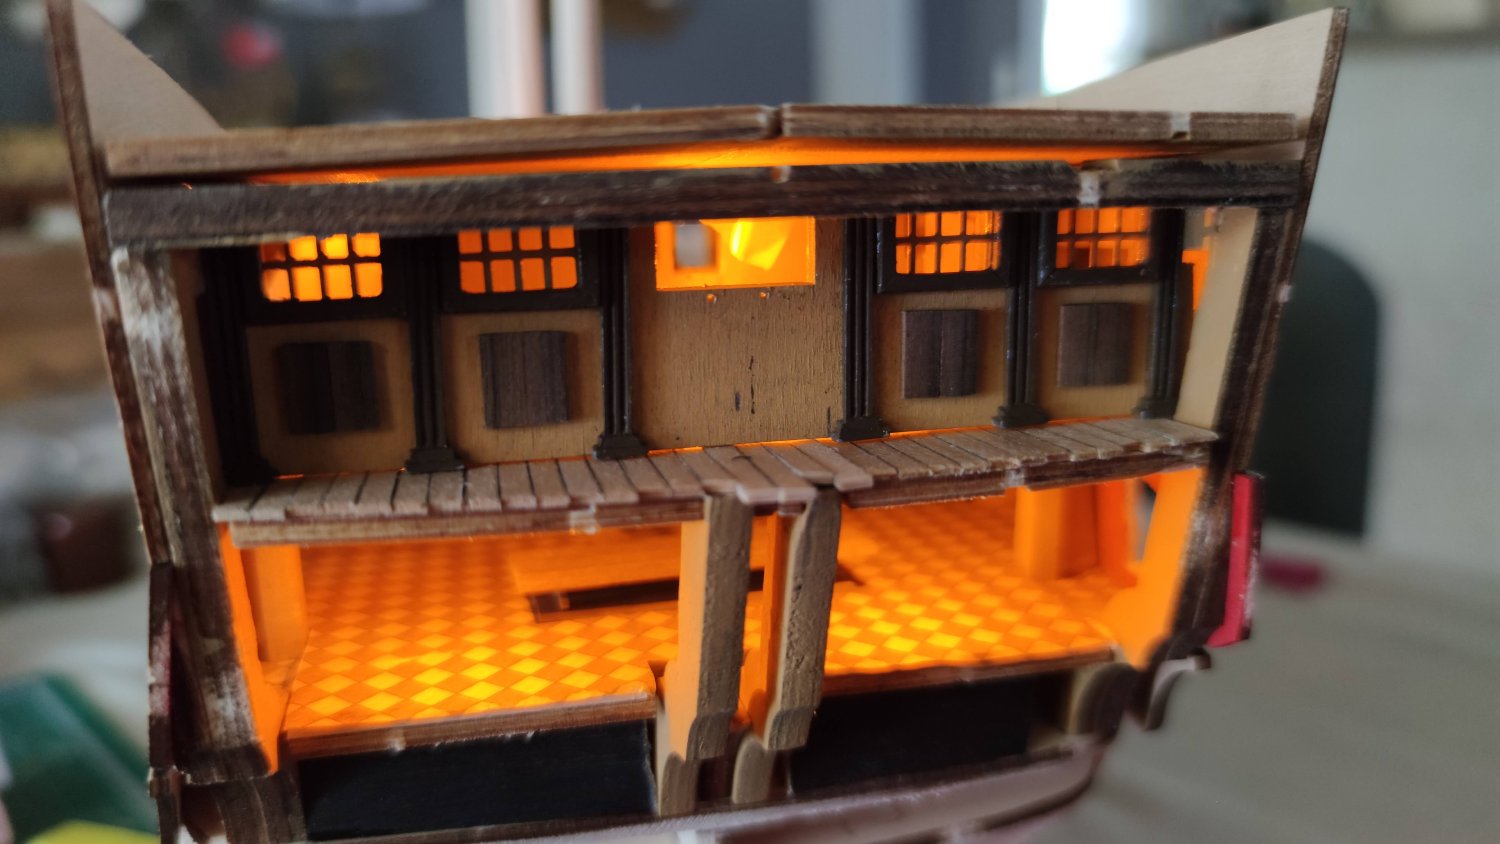
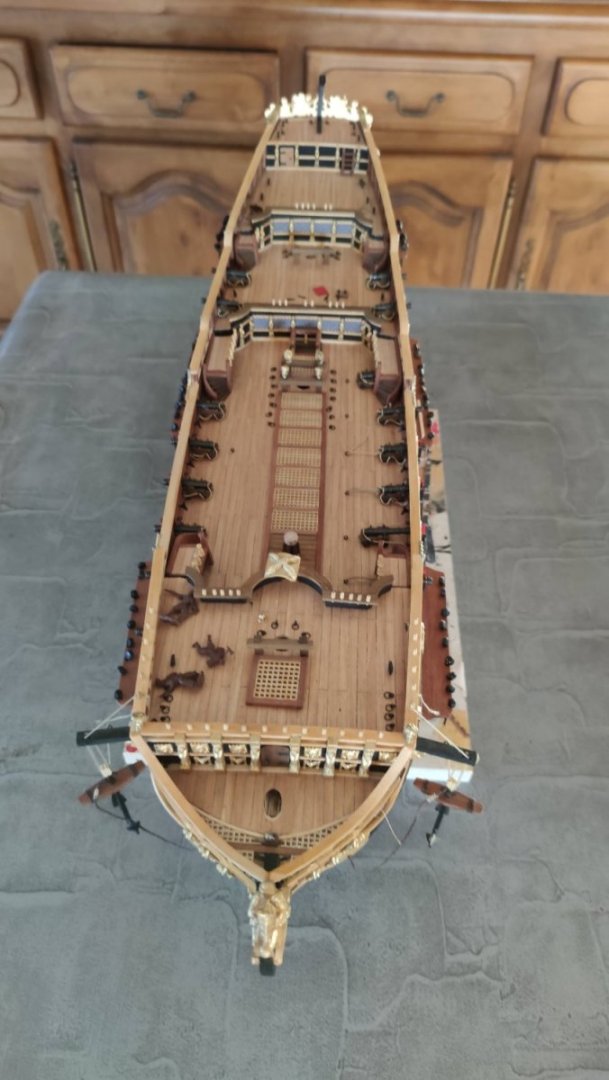
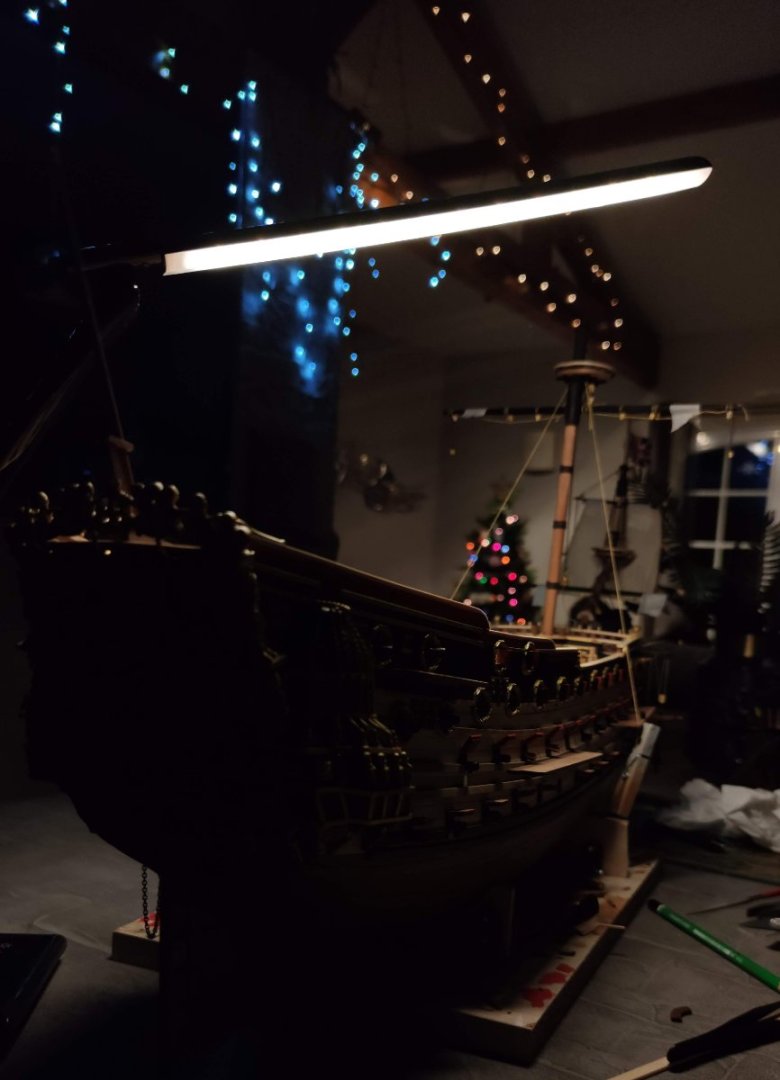
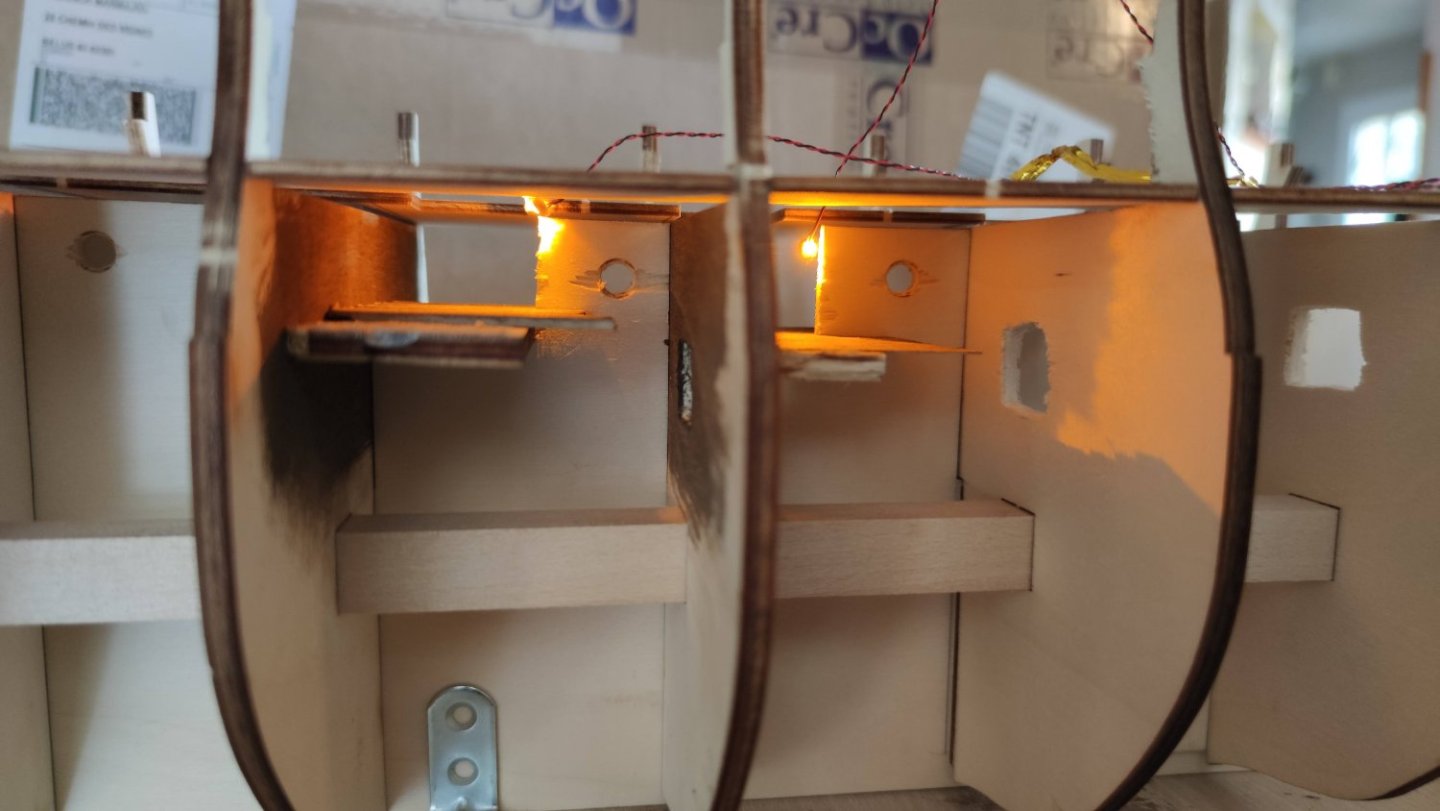
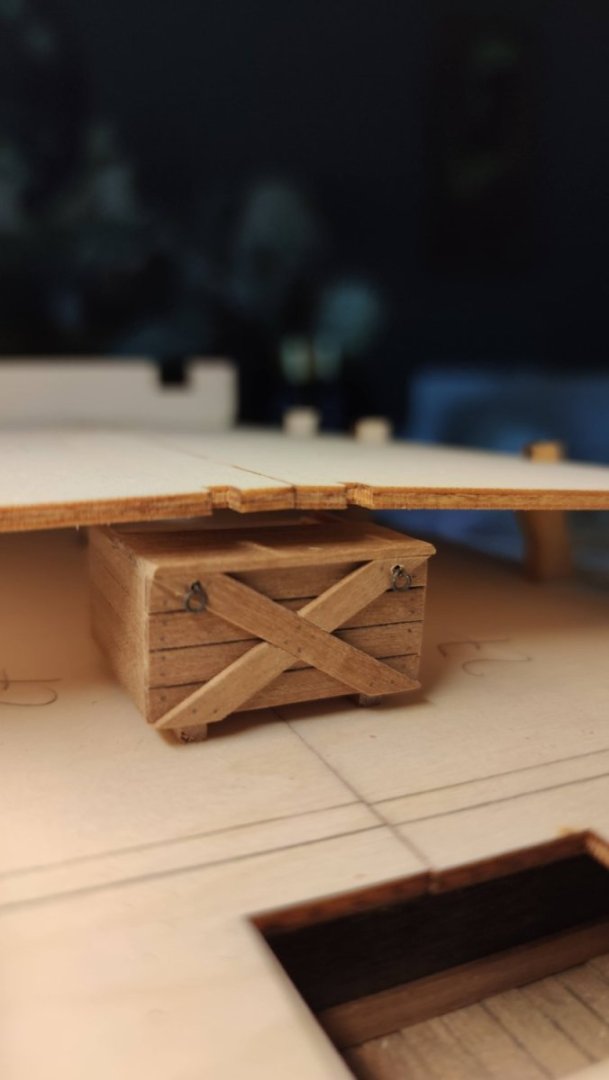
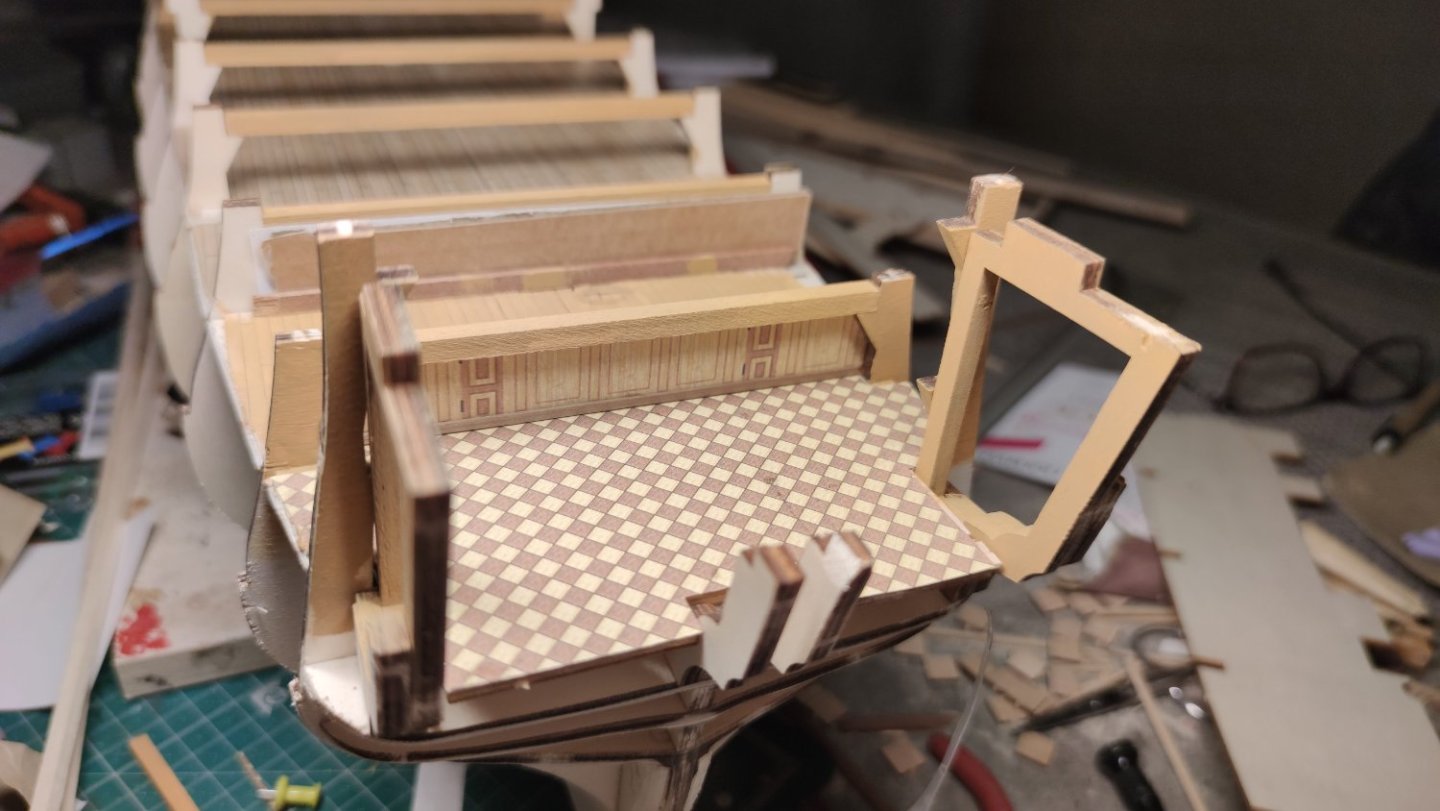
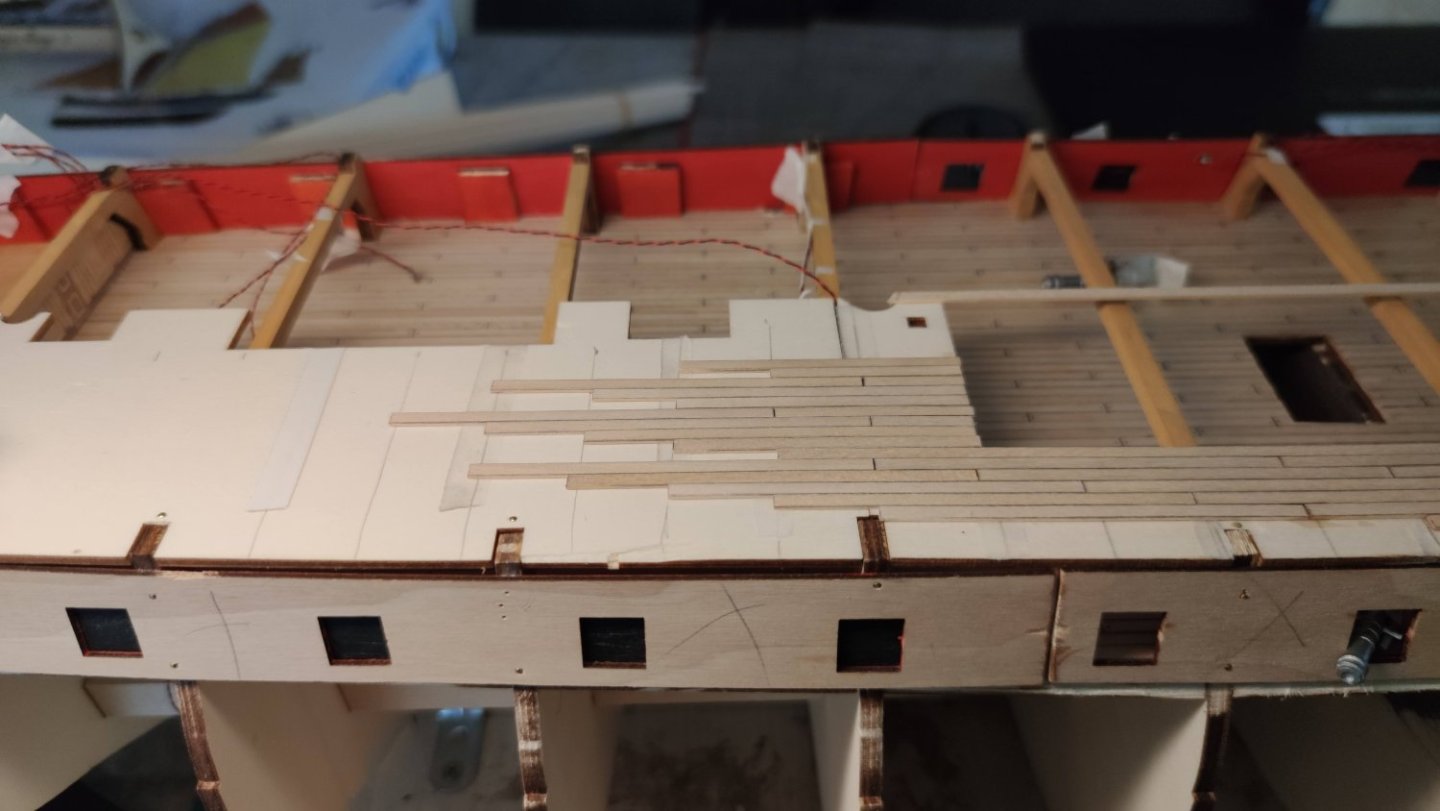
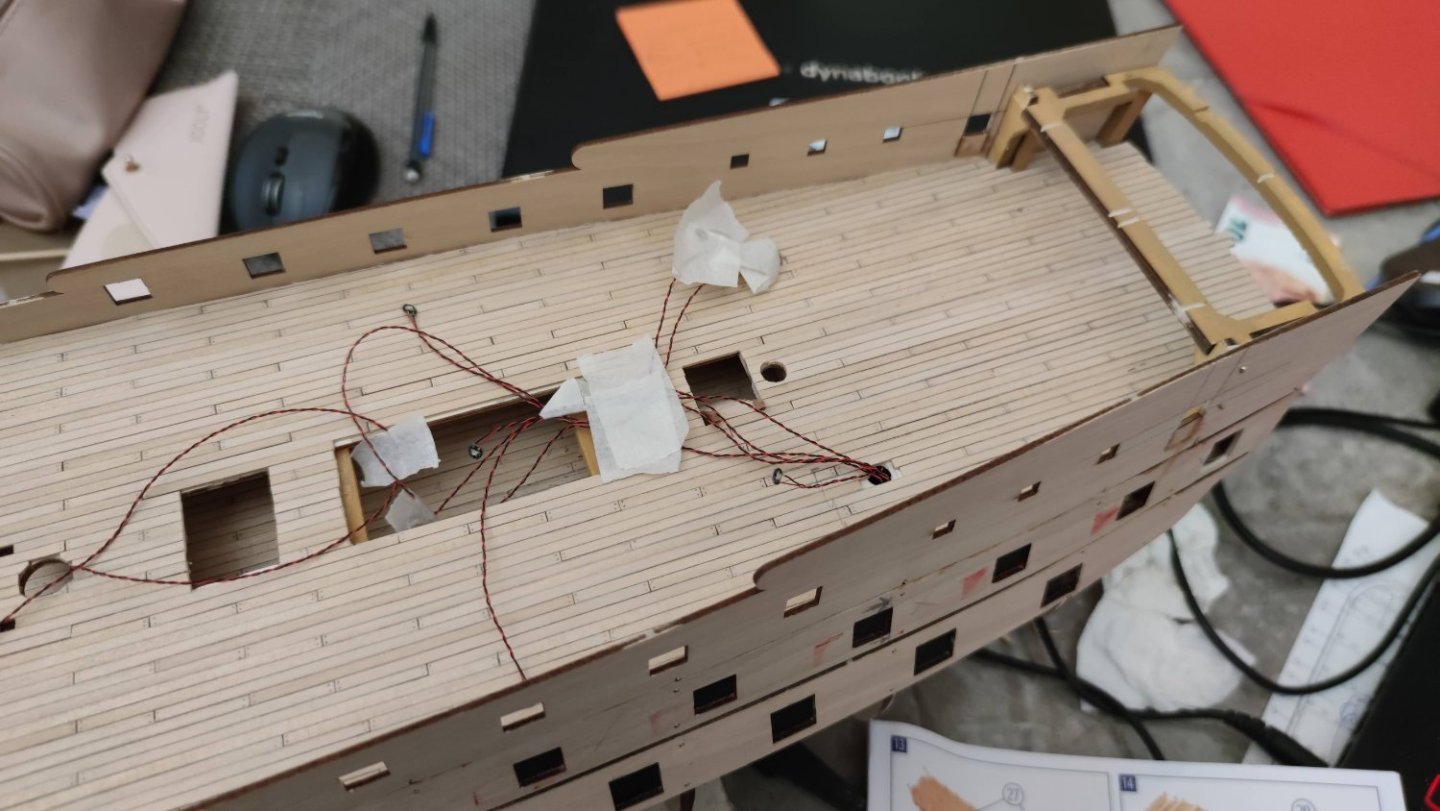
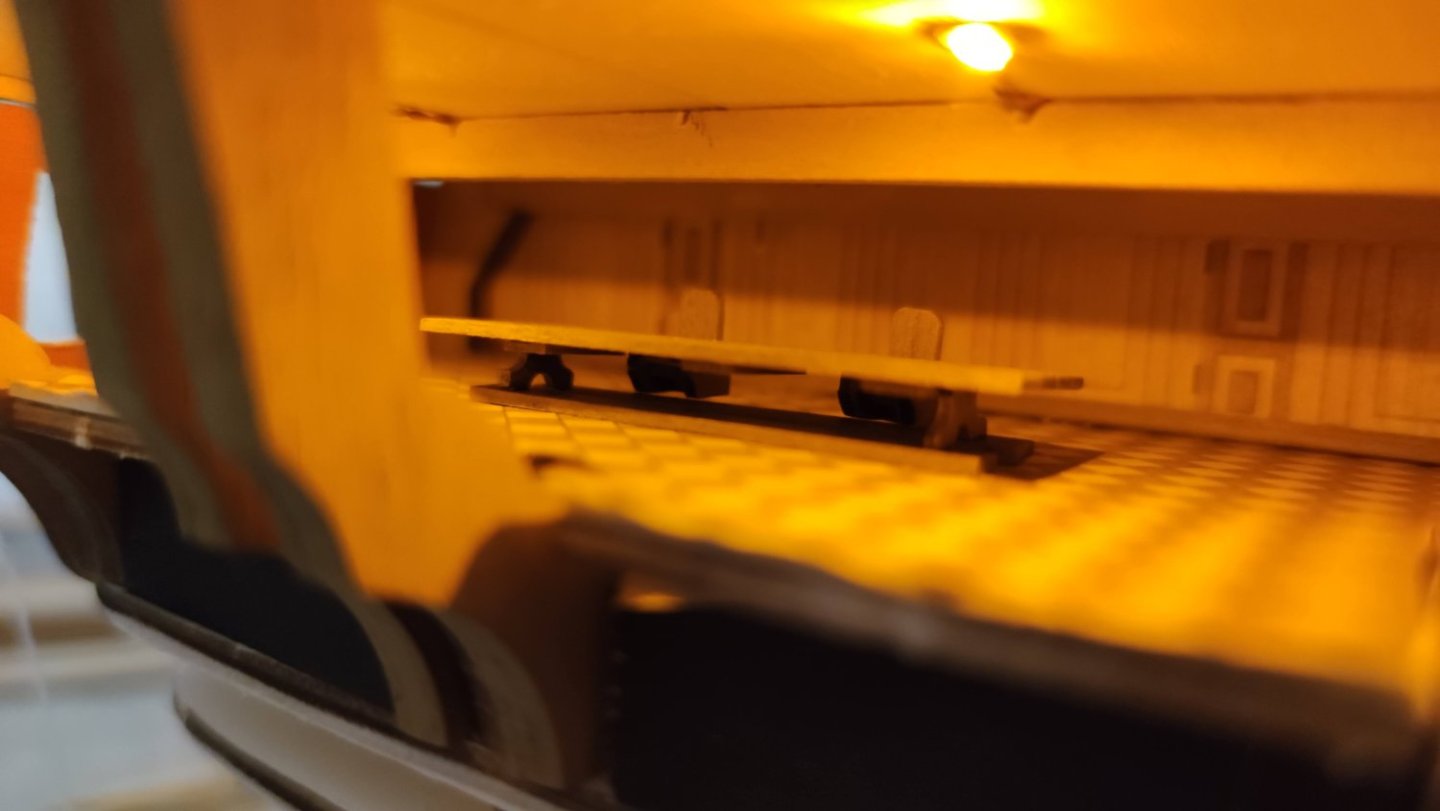
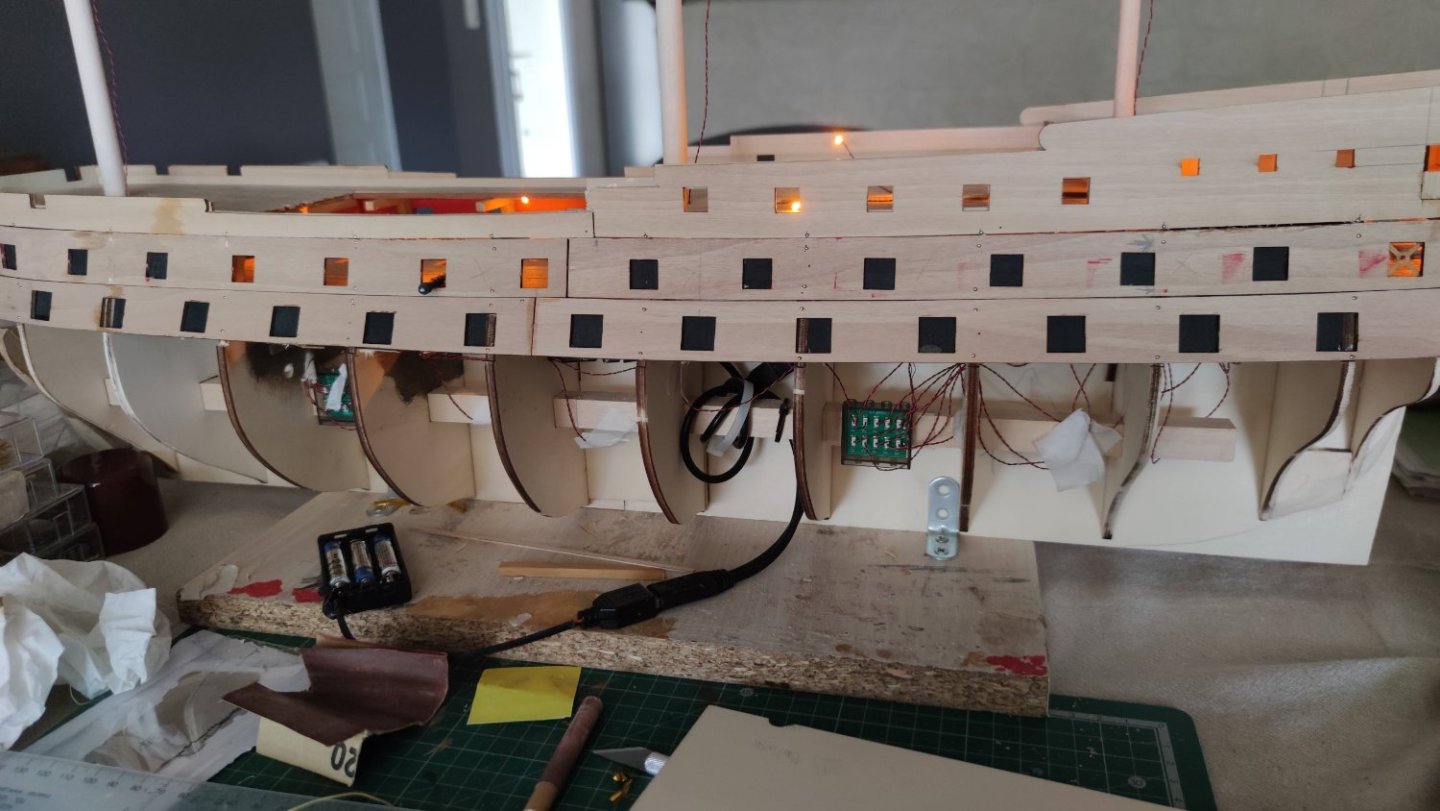
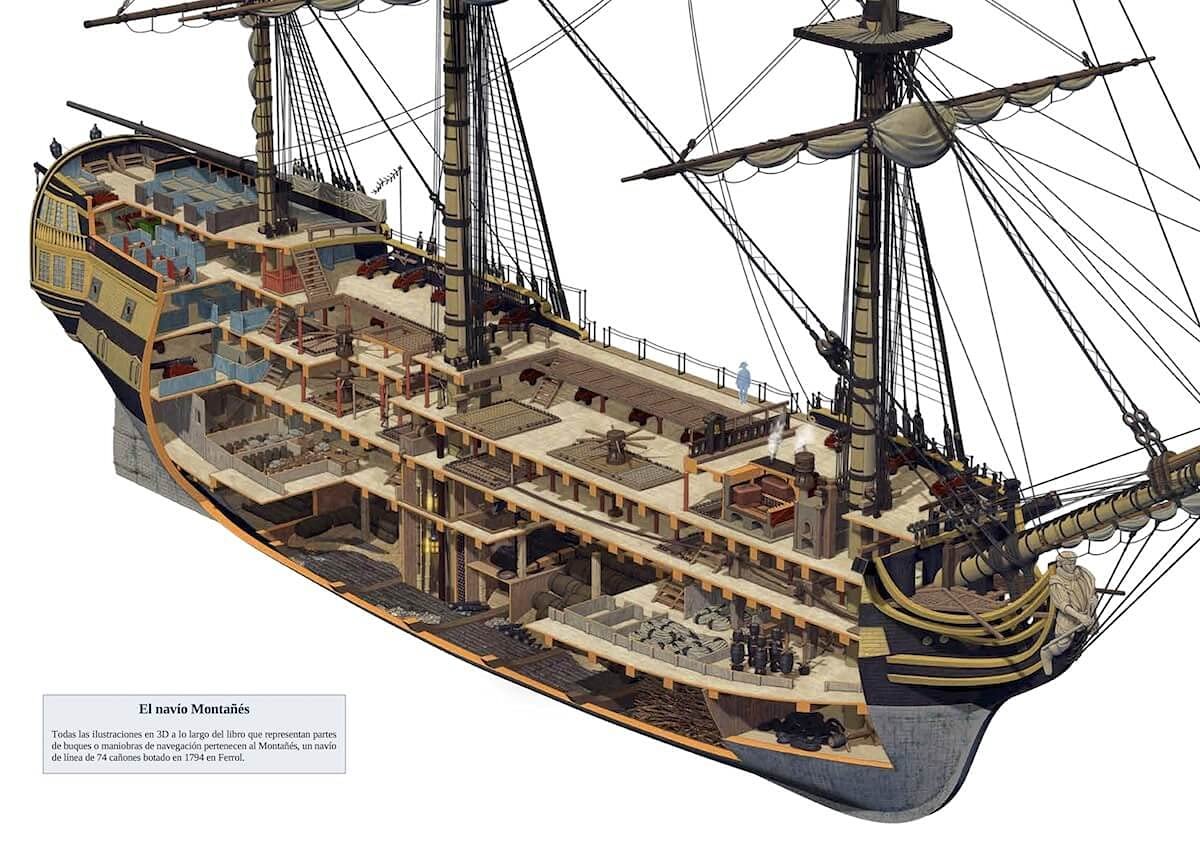
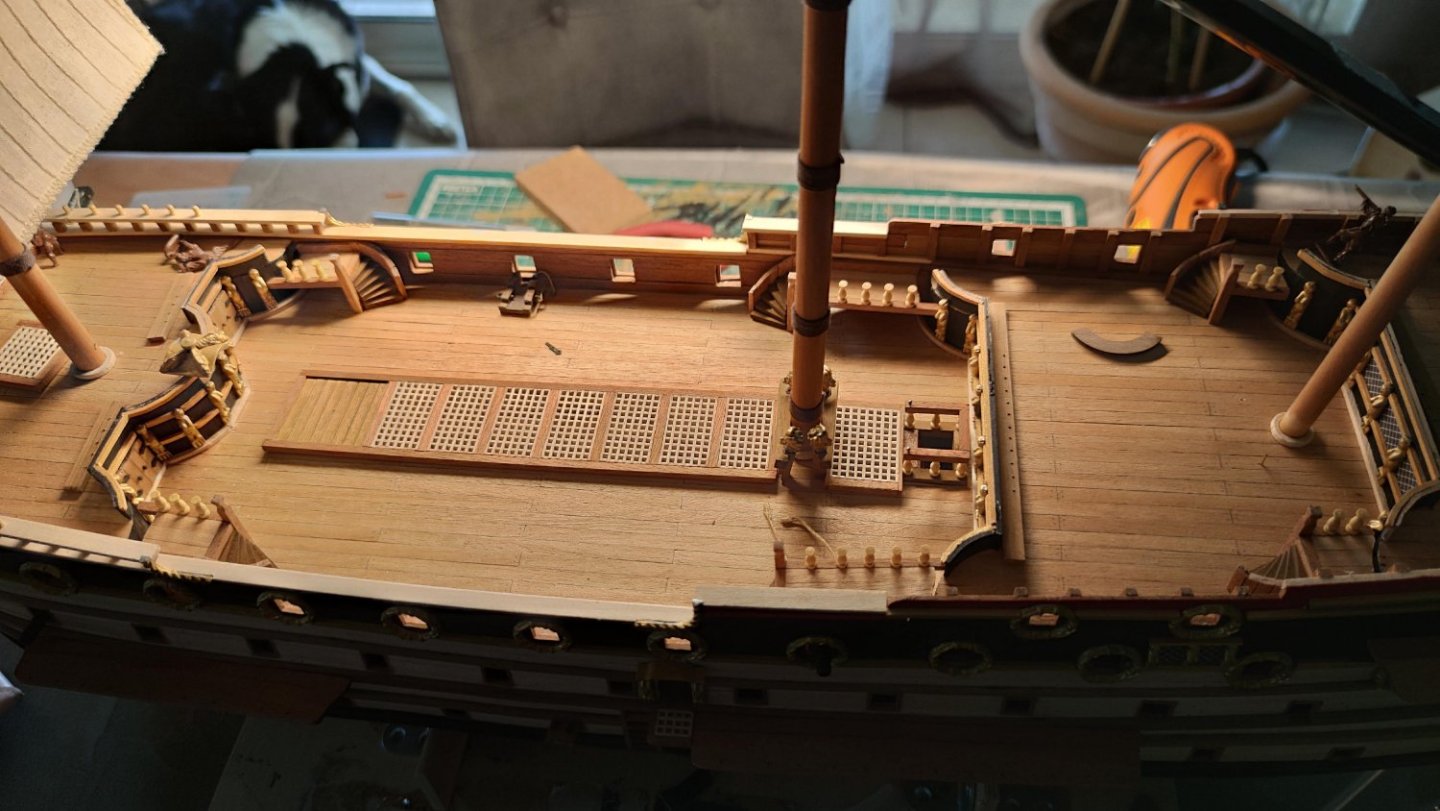
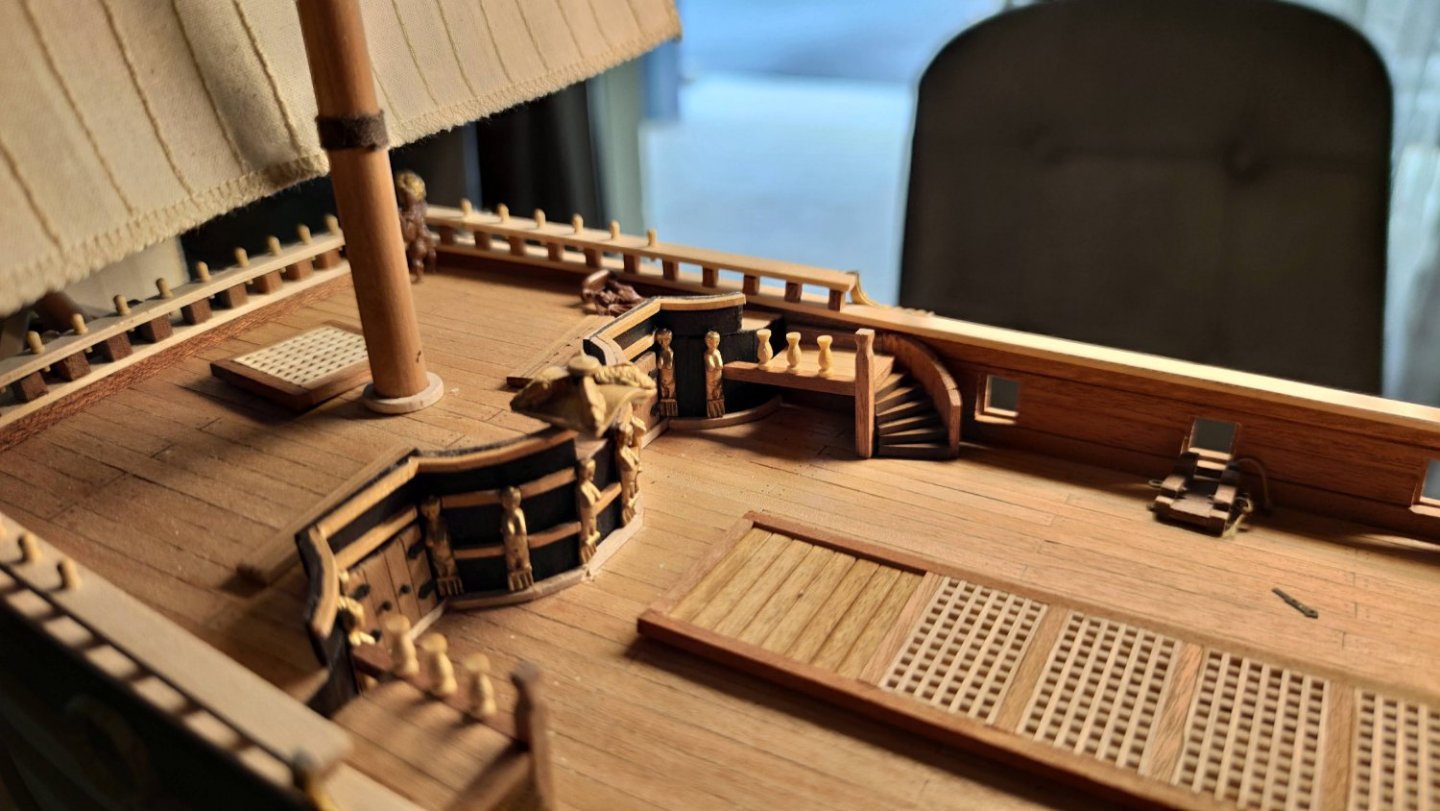
The Christmas holidays were very productive, I was in a rush to get as much done as possible before going back to school, so here is a summary. I started by carving the structure before gluing everything, to make 2 false decks under the gratings which will be illuminated. I drilled a lot of holes for the wire runs. The protection of the oven was scratch built. To save glue for the decks, I tried double-sided tape, with a few dots of glue, and it works! The joints were simulated with a pencil, but for the most visible bridge, I cut 8 cm planks, to show the joints and to have different textures between 2 planks end to end. It was very long but the result is much more realistic. As the stern will be illuminated and visible, I printed a tile pattern (drawn on Sketchup), as well as bulkheads, which won't be too visible. This result works perfectly for me! I added a small table with 2 chairs, and I replaced the portholes in windows on each side. The bow structure was reinforced to have a better support for the planking, which required a lot of sanding... I relocated a window in the stern by raising it, which was low to the deck ( just like on the real ship) and I didn't like it, so I aligned it with the other smaller ones. Also, I have started to build the interior bulkheads, but I am stuck because I have lost a window... To blacken the brass, I used AK burnisher. The reaction is a bit slow but with only a little bit of product, I was able to burnish all 140 rings as well as some diecast parts! Here is the progress in 2 weeks, I'm very happy with the result with the LEDs, I'm sure it will be the future masterpiece of my collection!


-
Montanes by Iseaz - OcCre- 1/70
Iseaz replied to Iseaz's topic in - Kit build logs for subjects built from 1751 - 1800
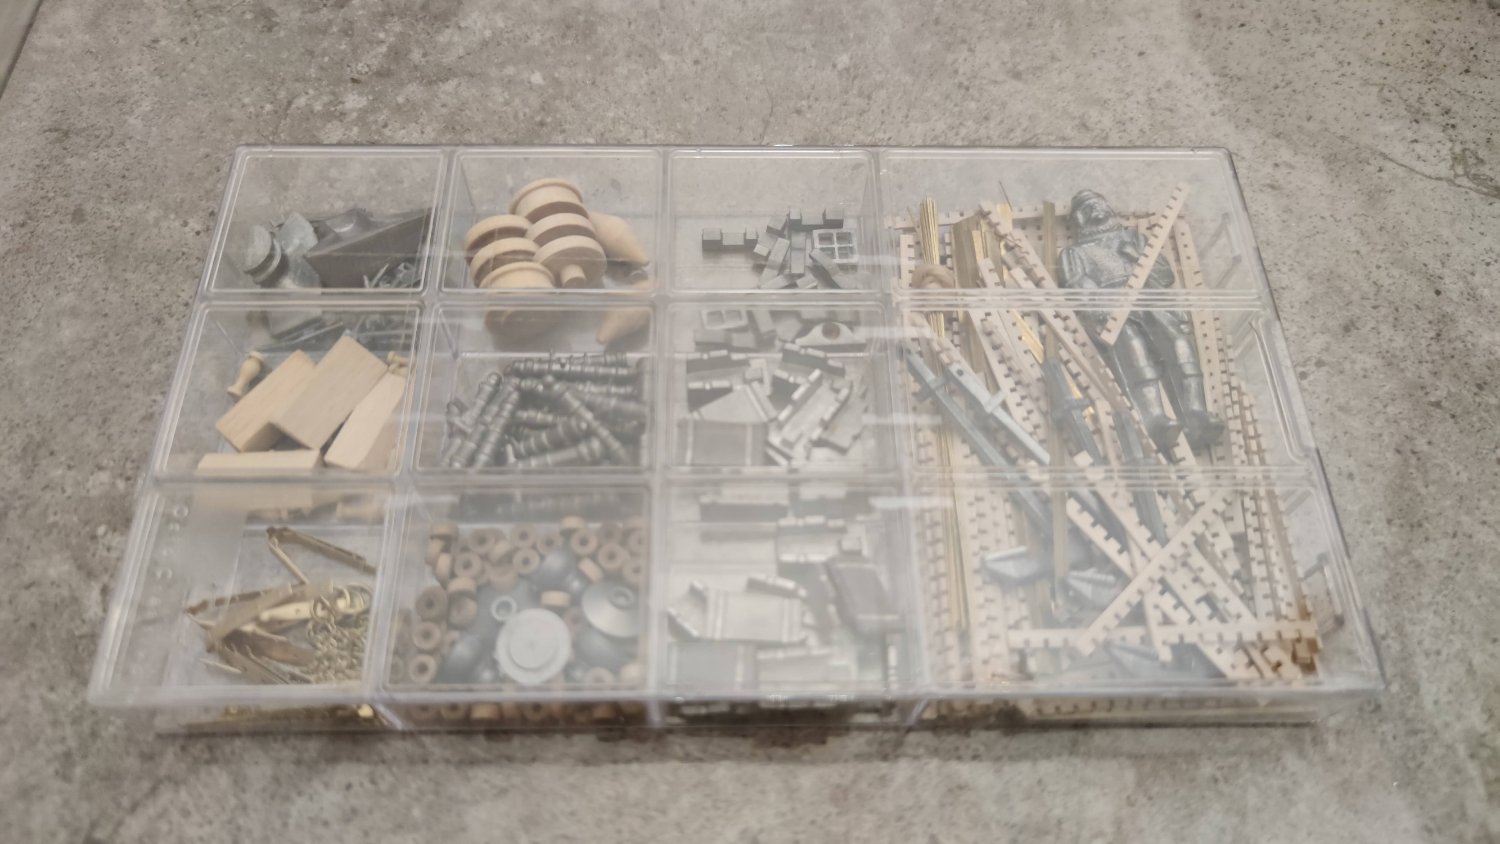
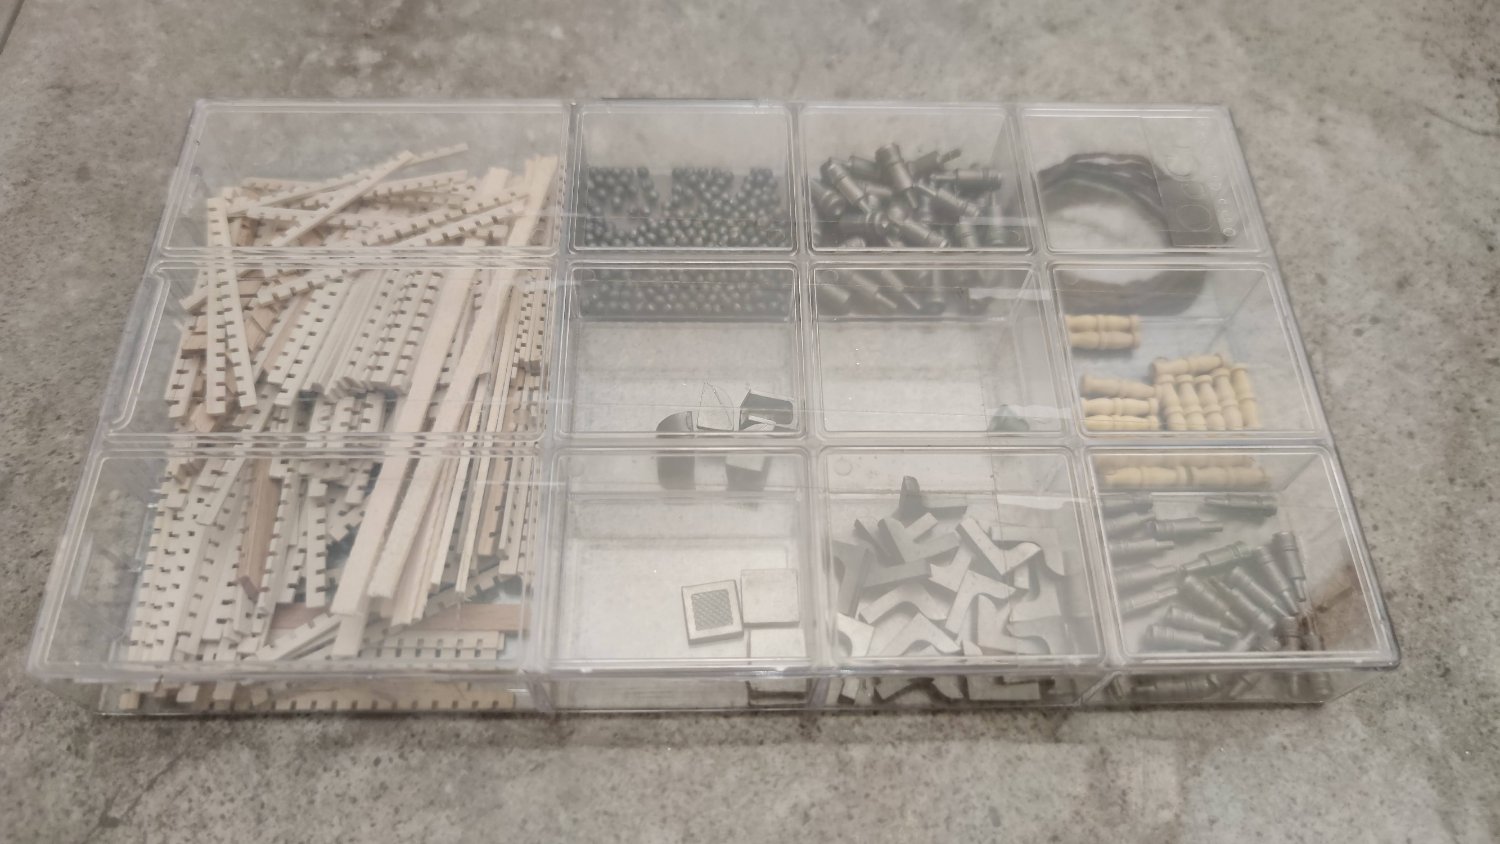
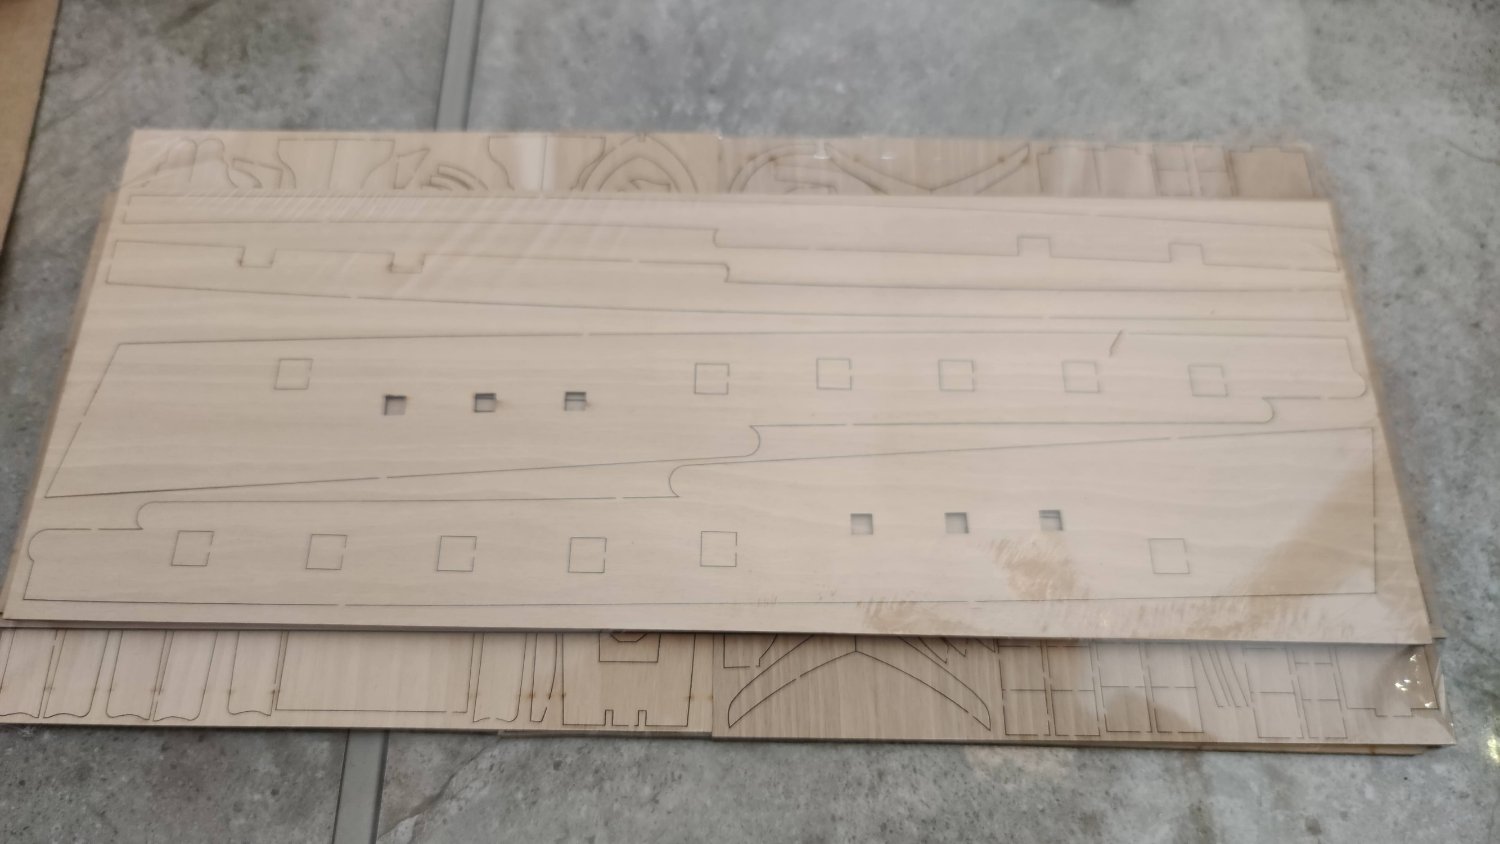
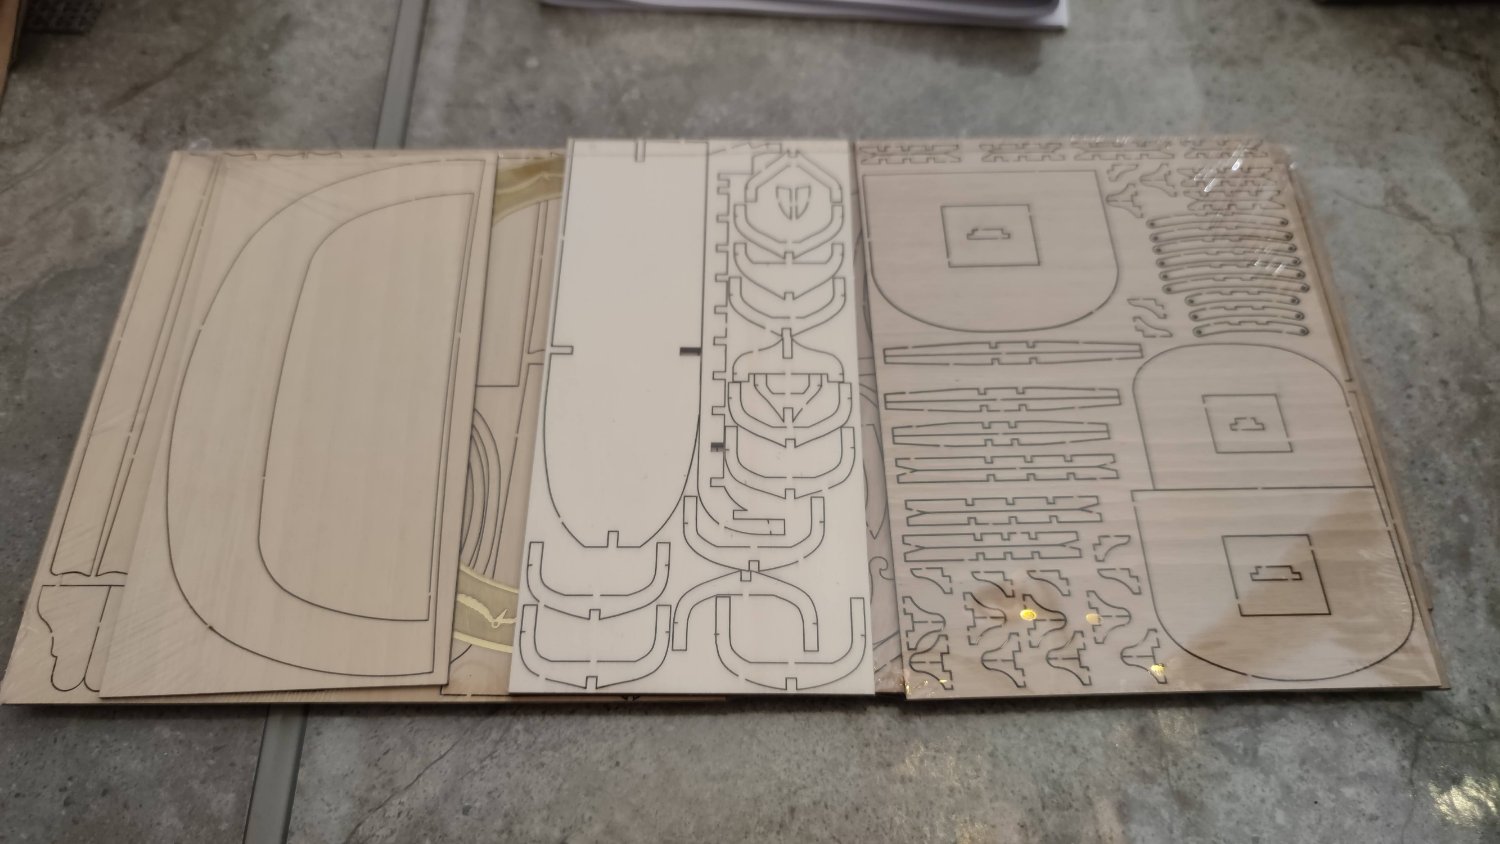
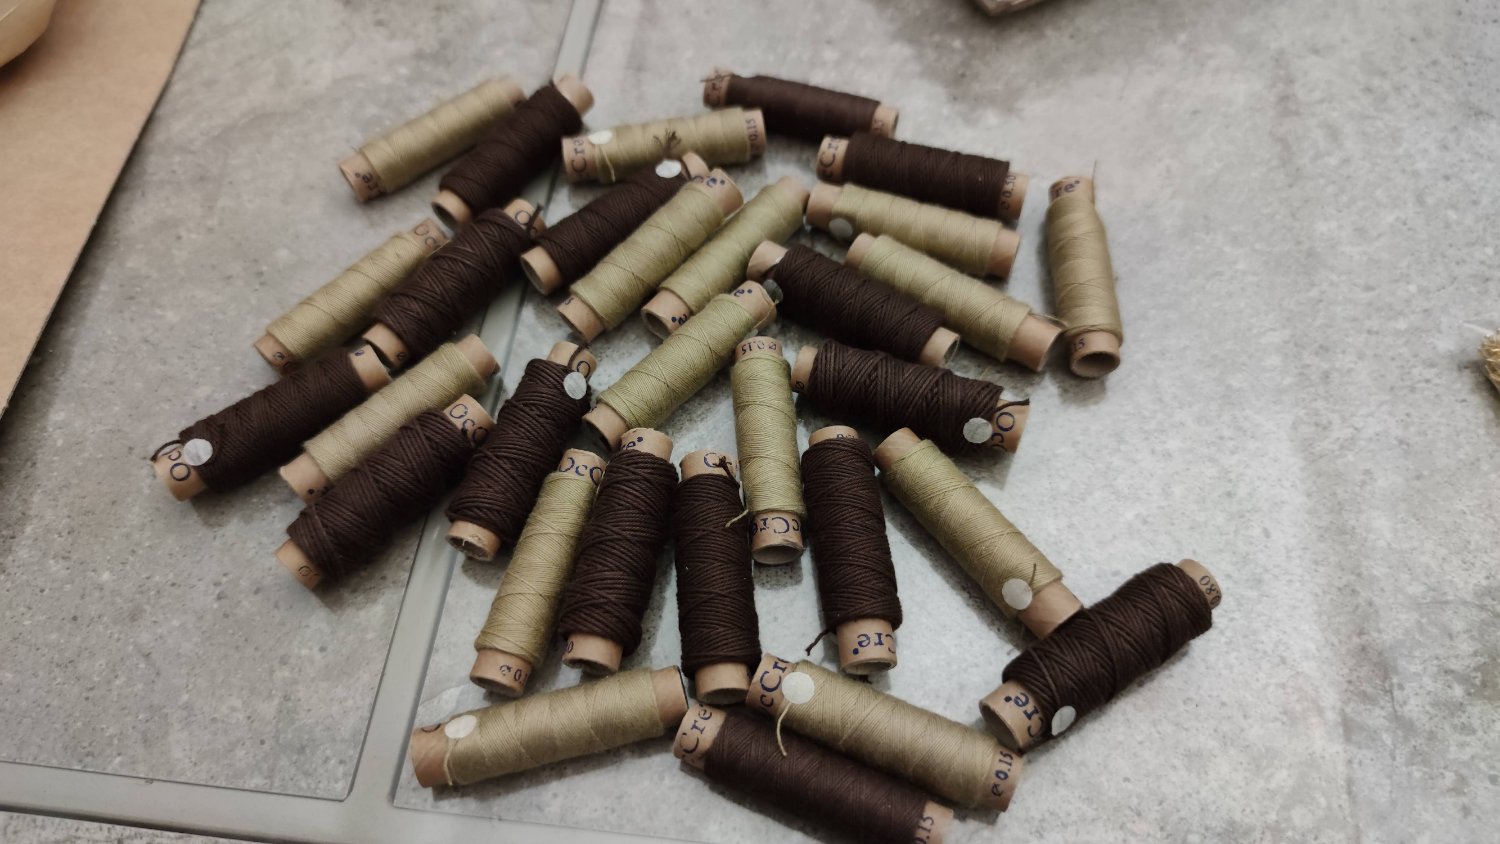
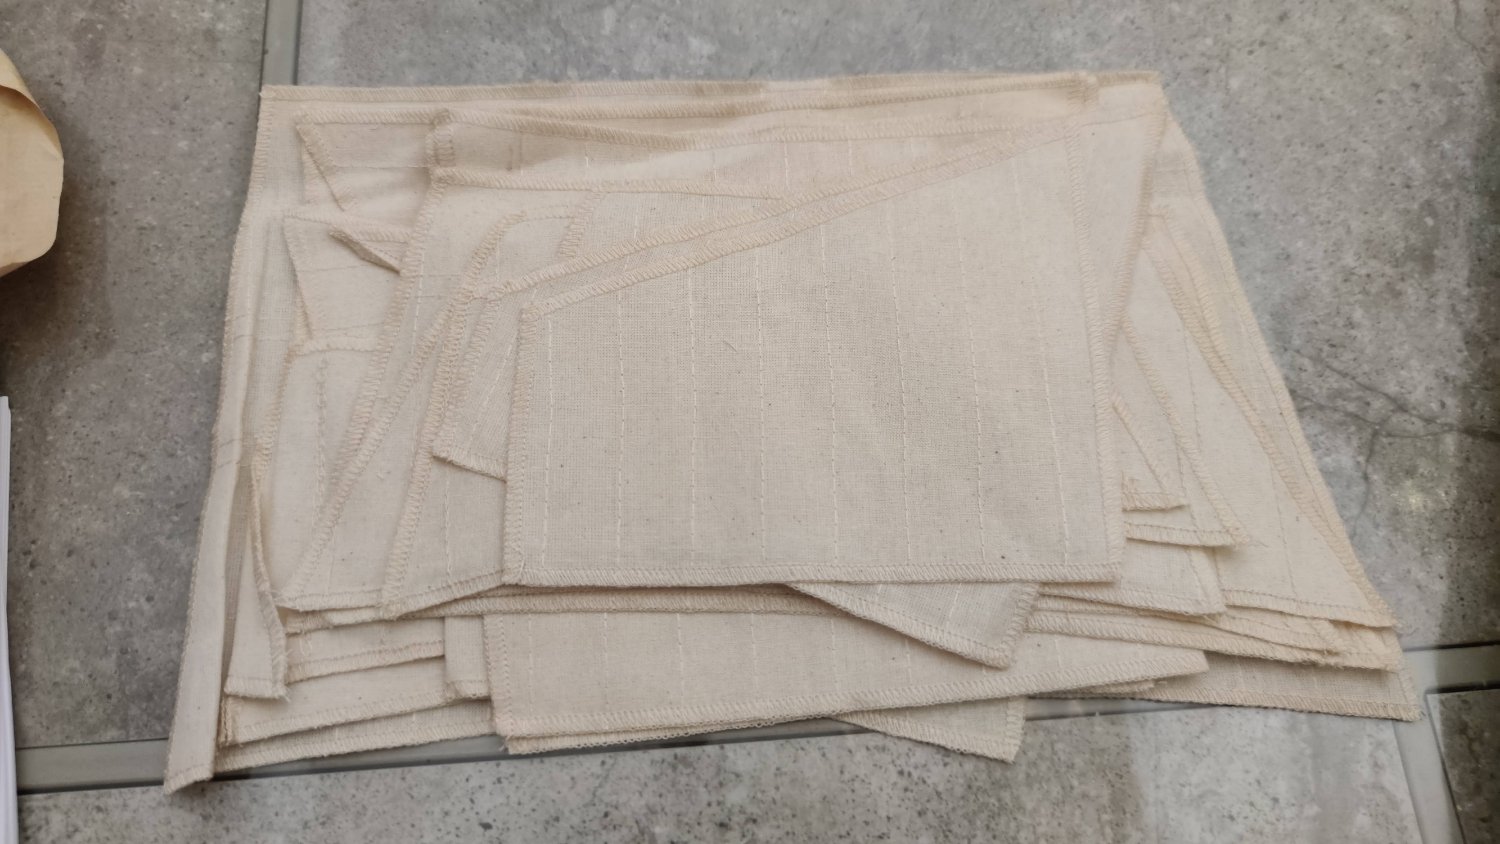
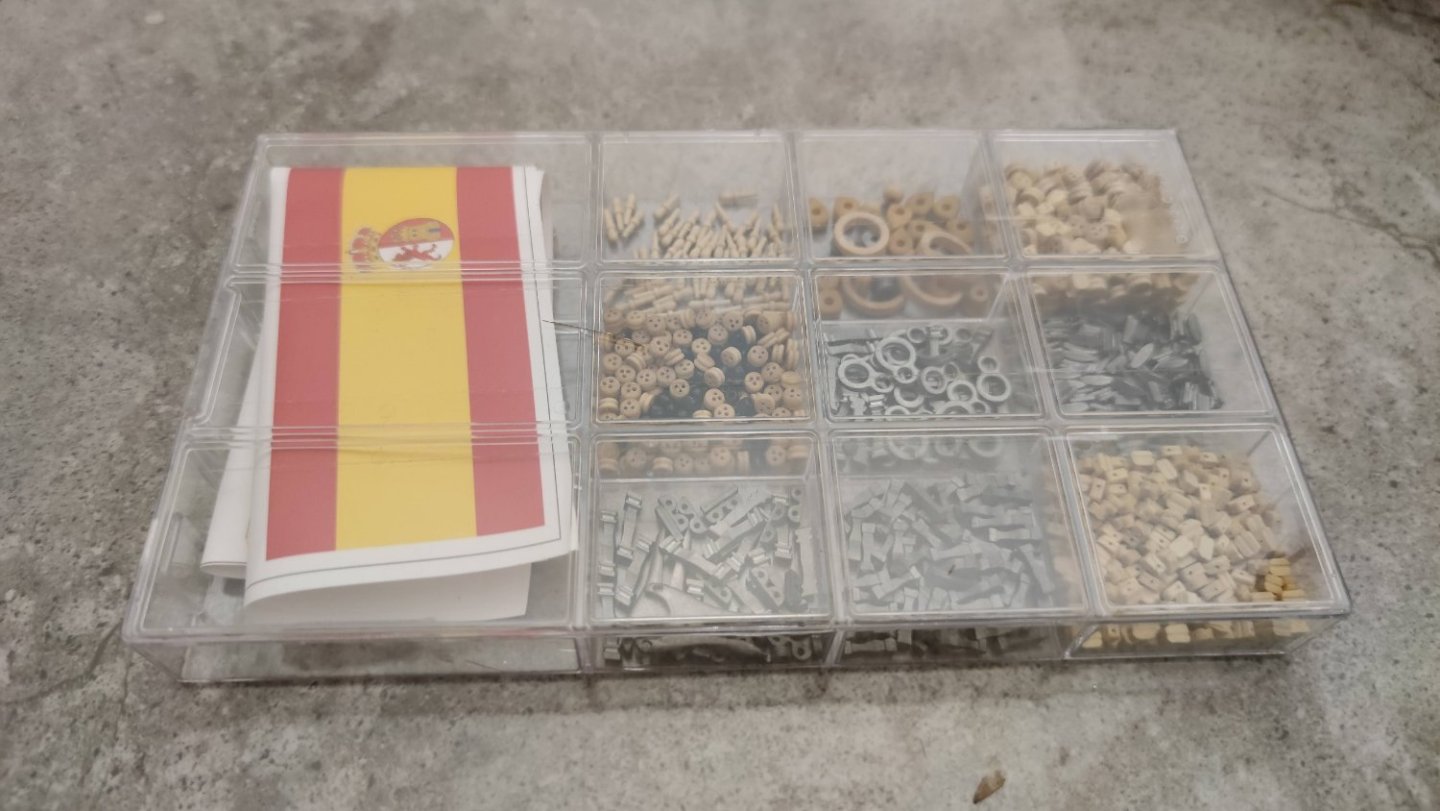
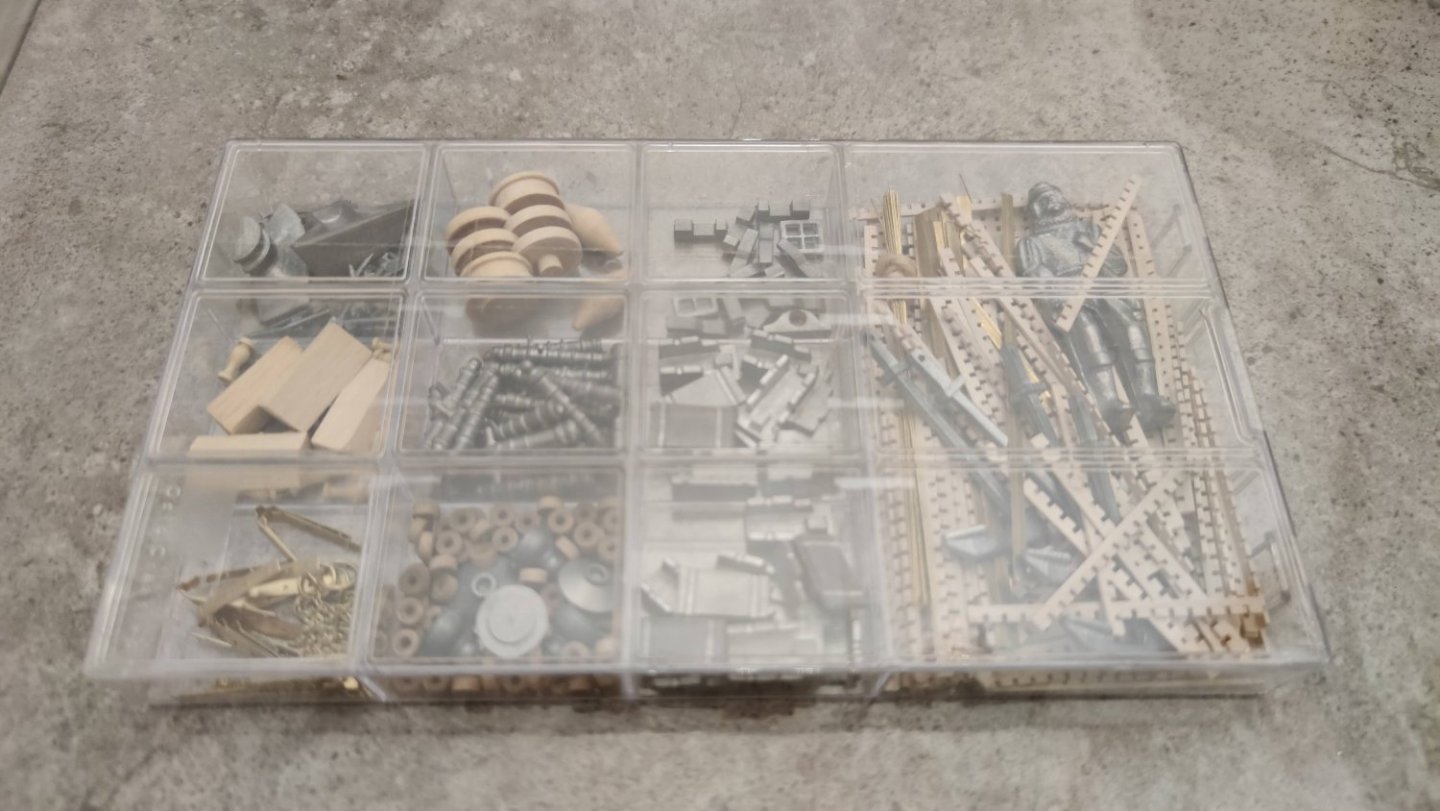
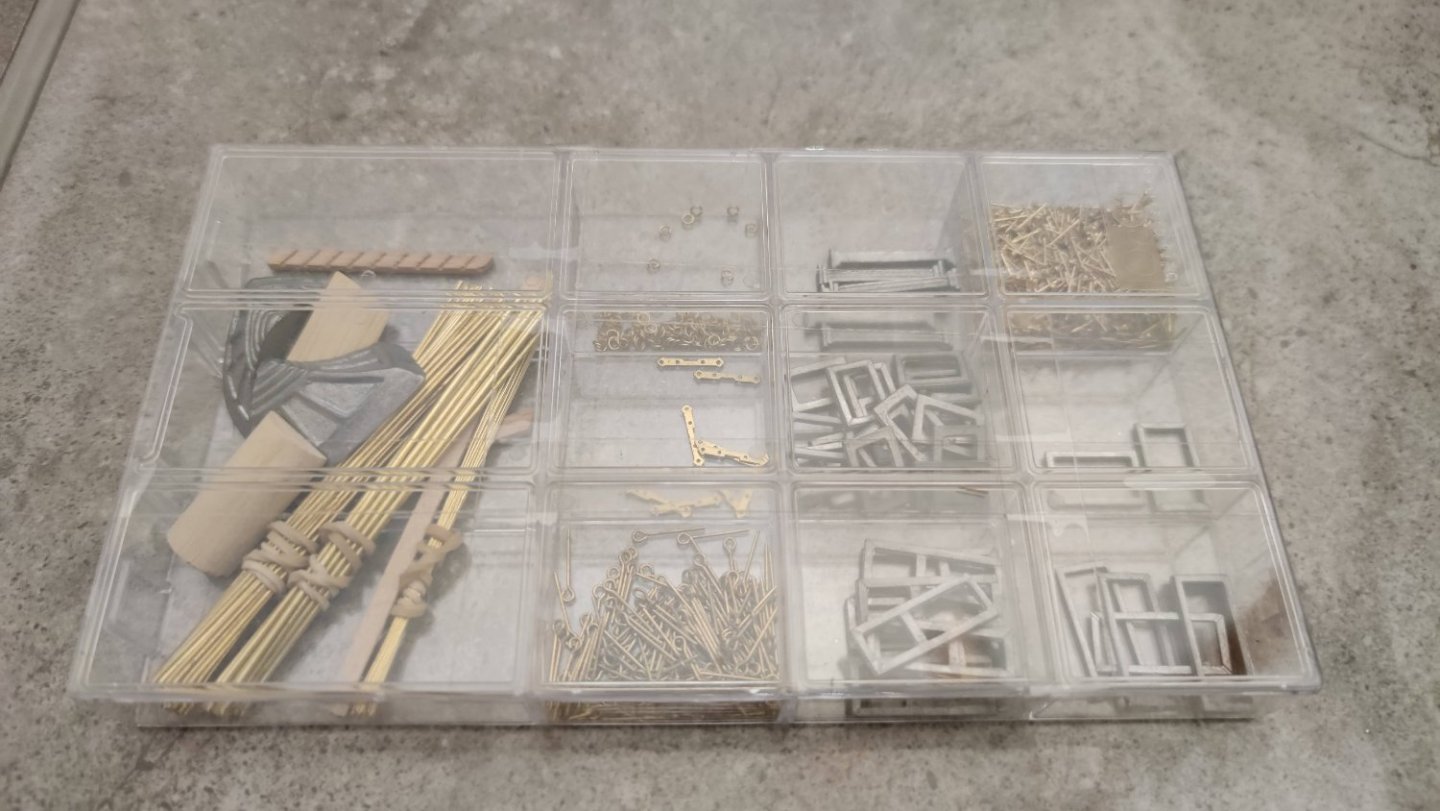
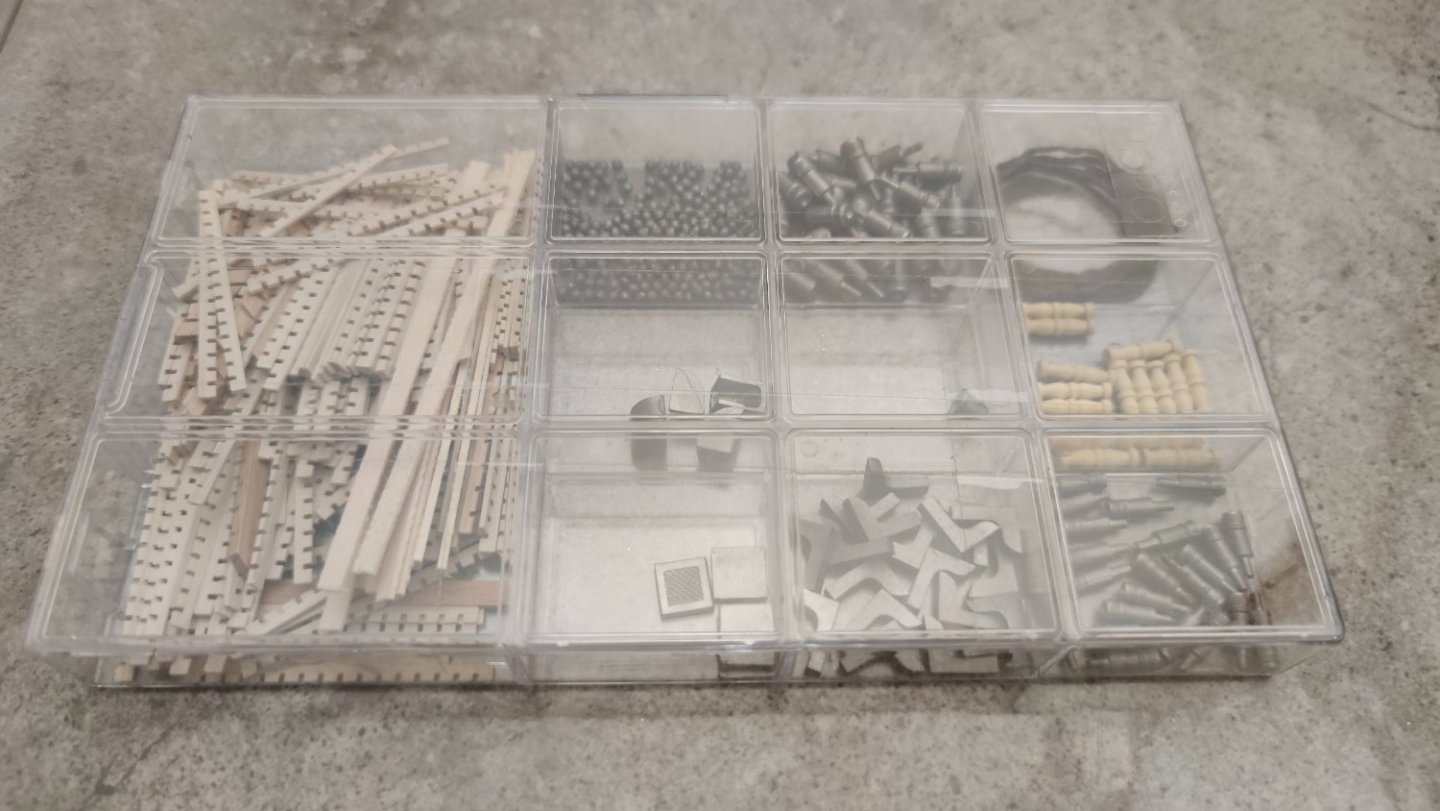
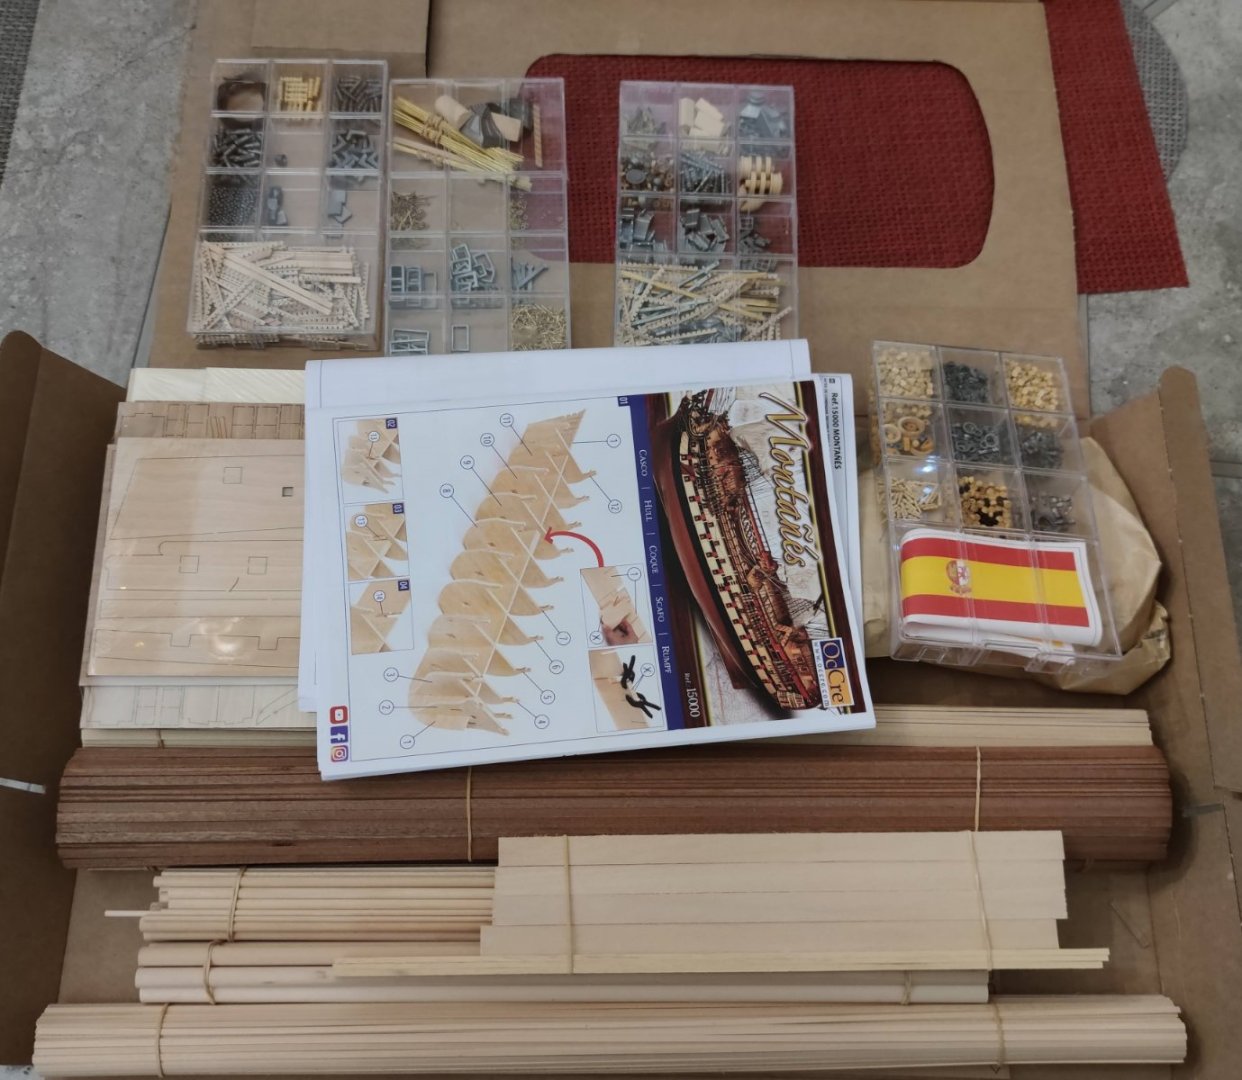
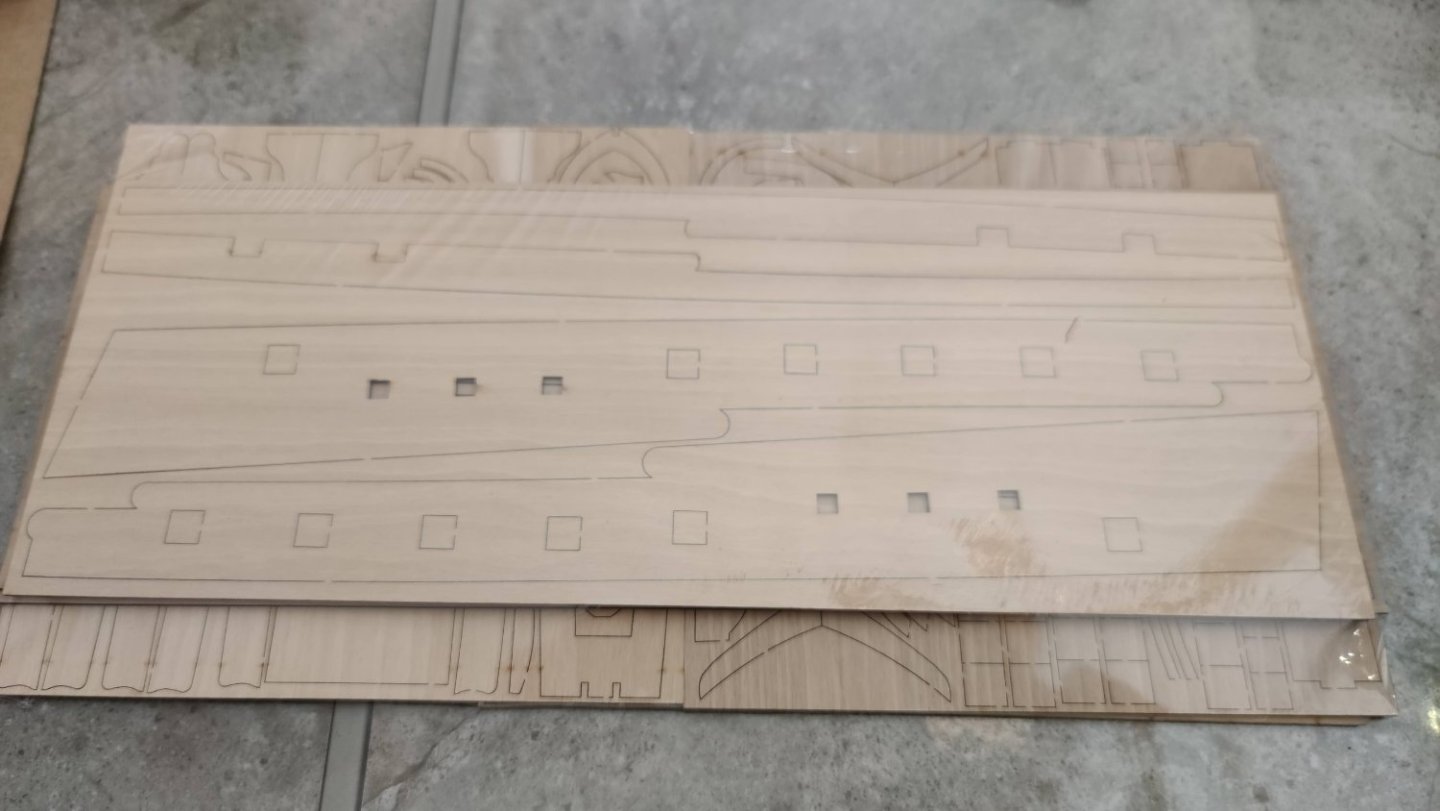
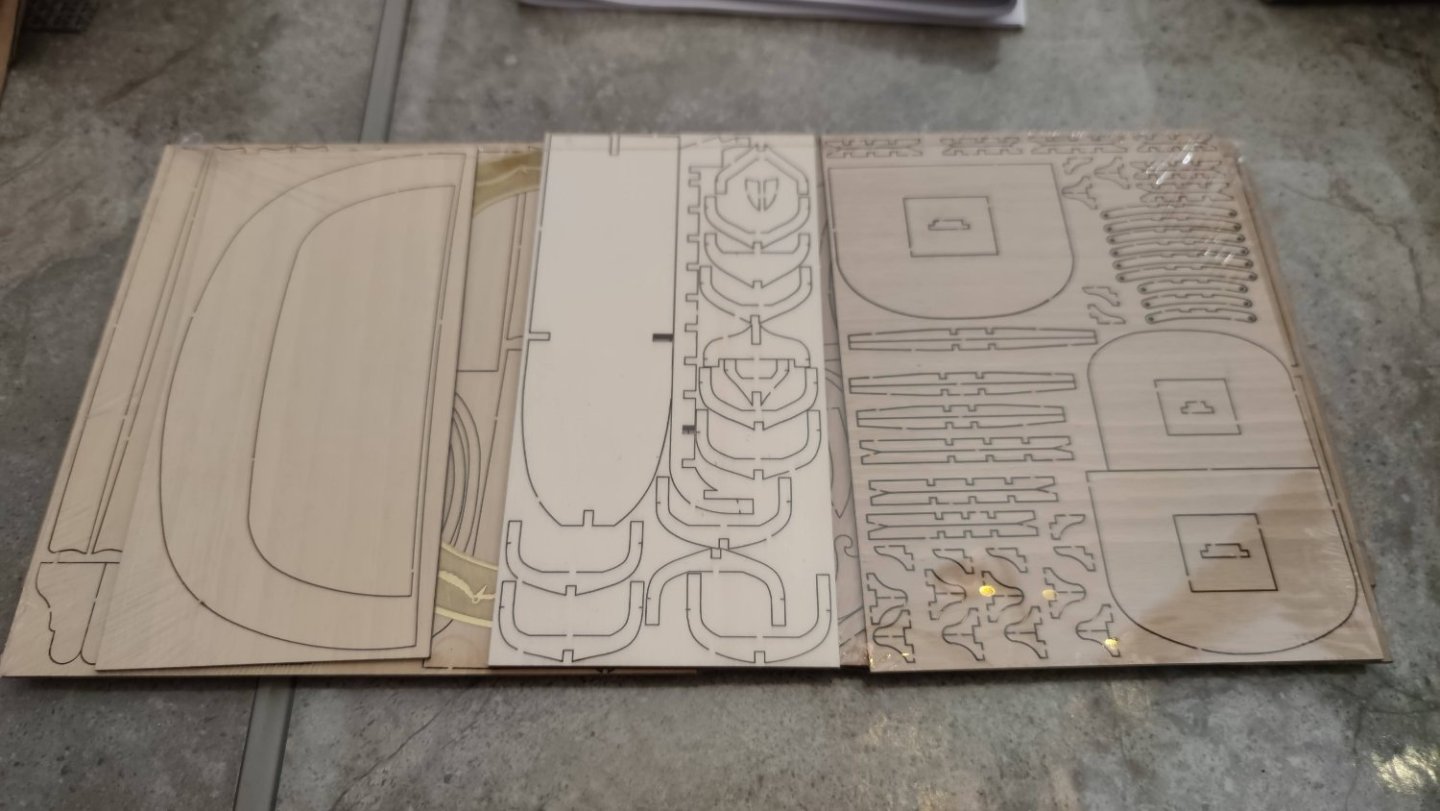
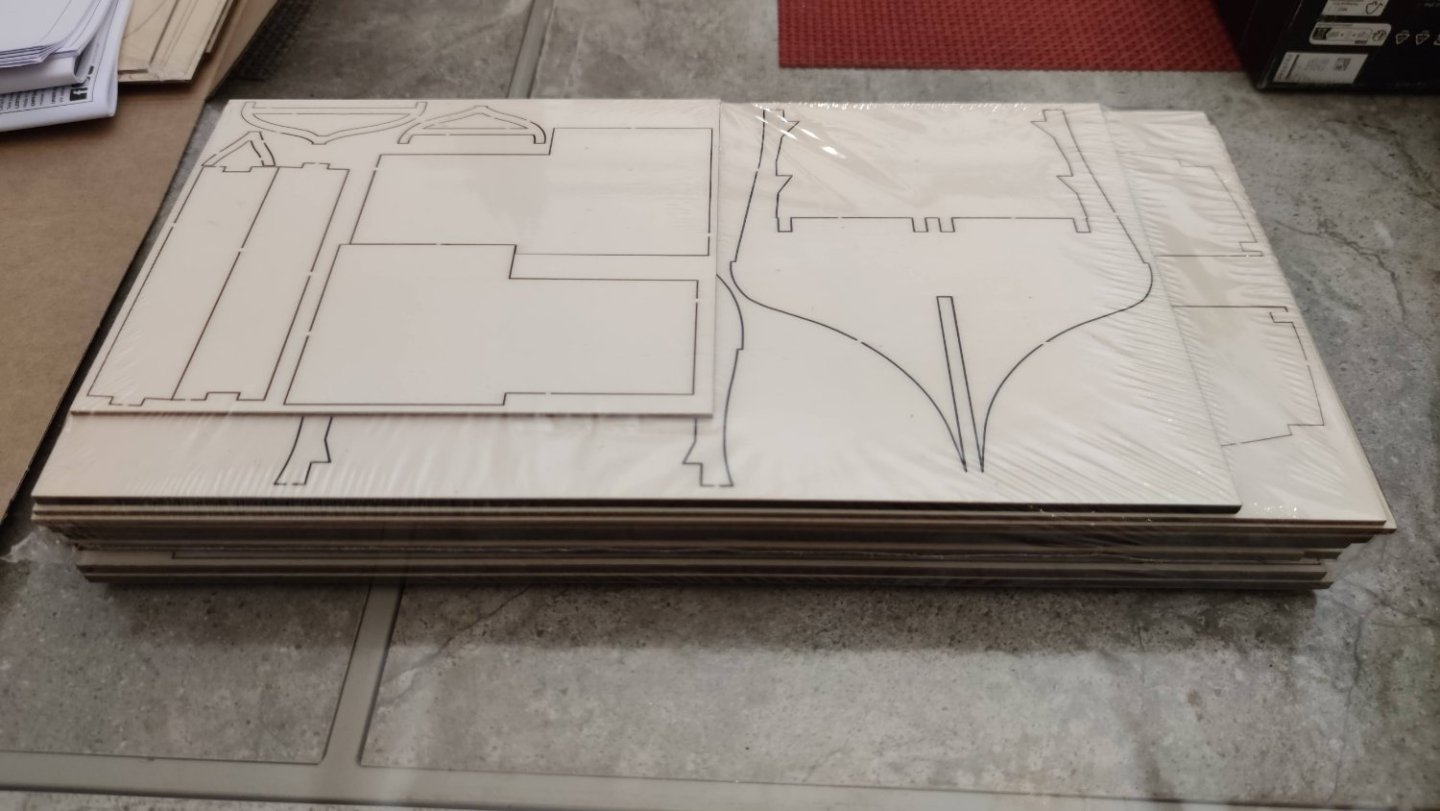
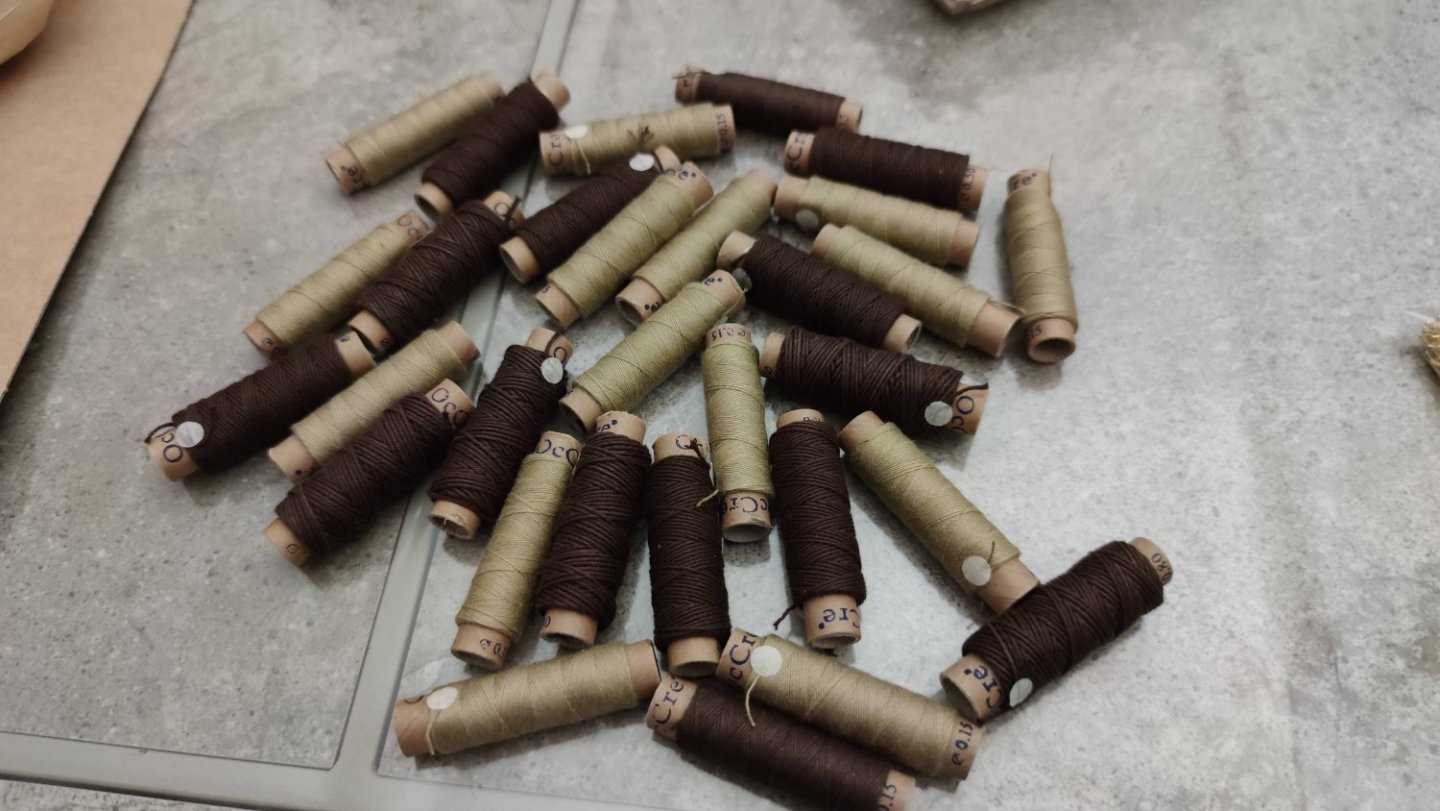
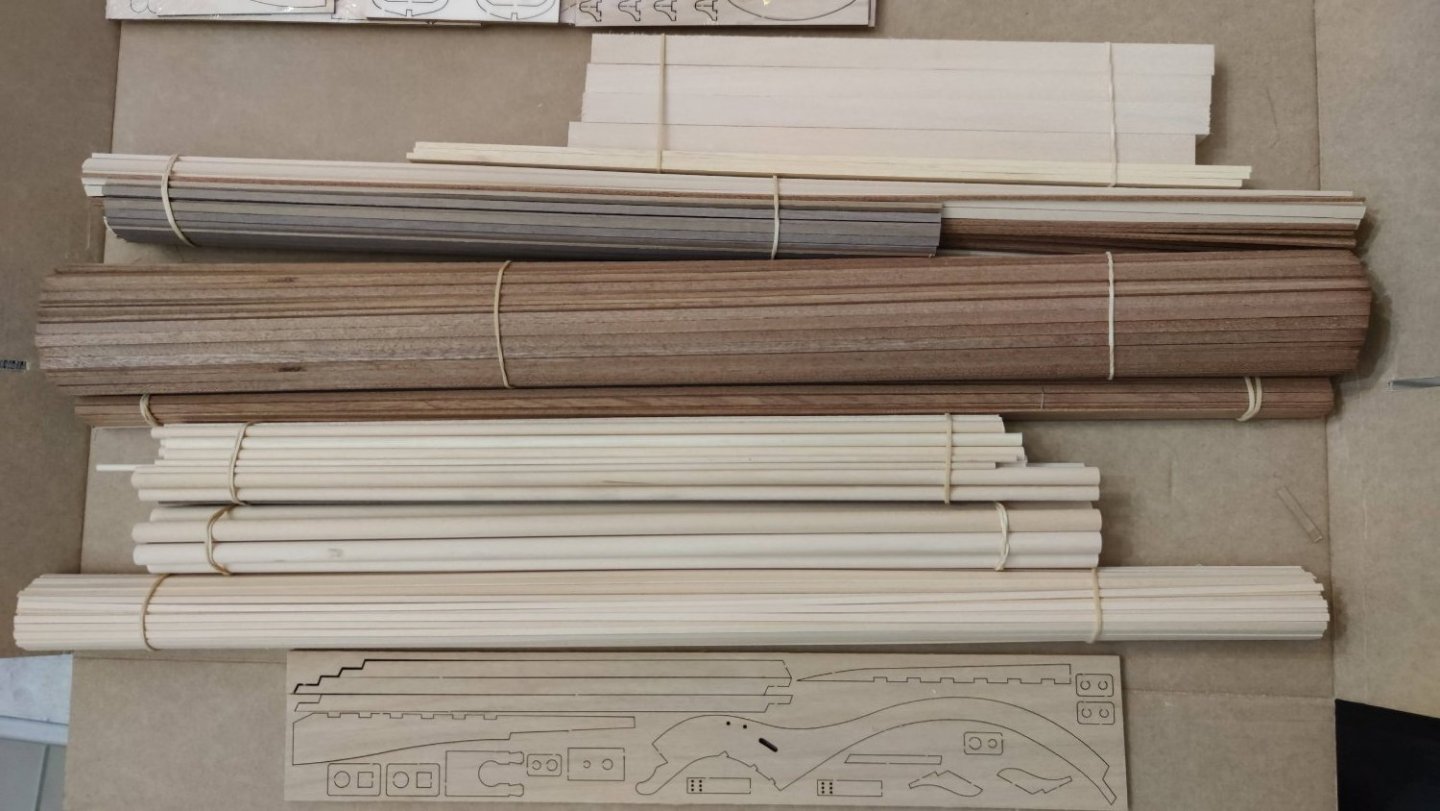
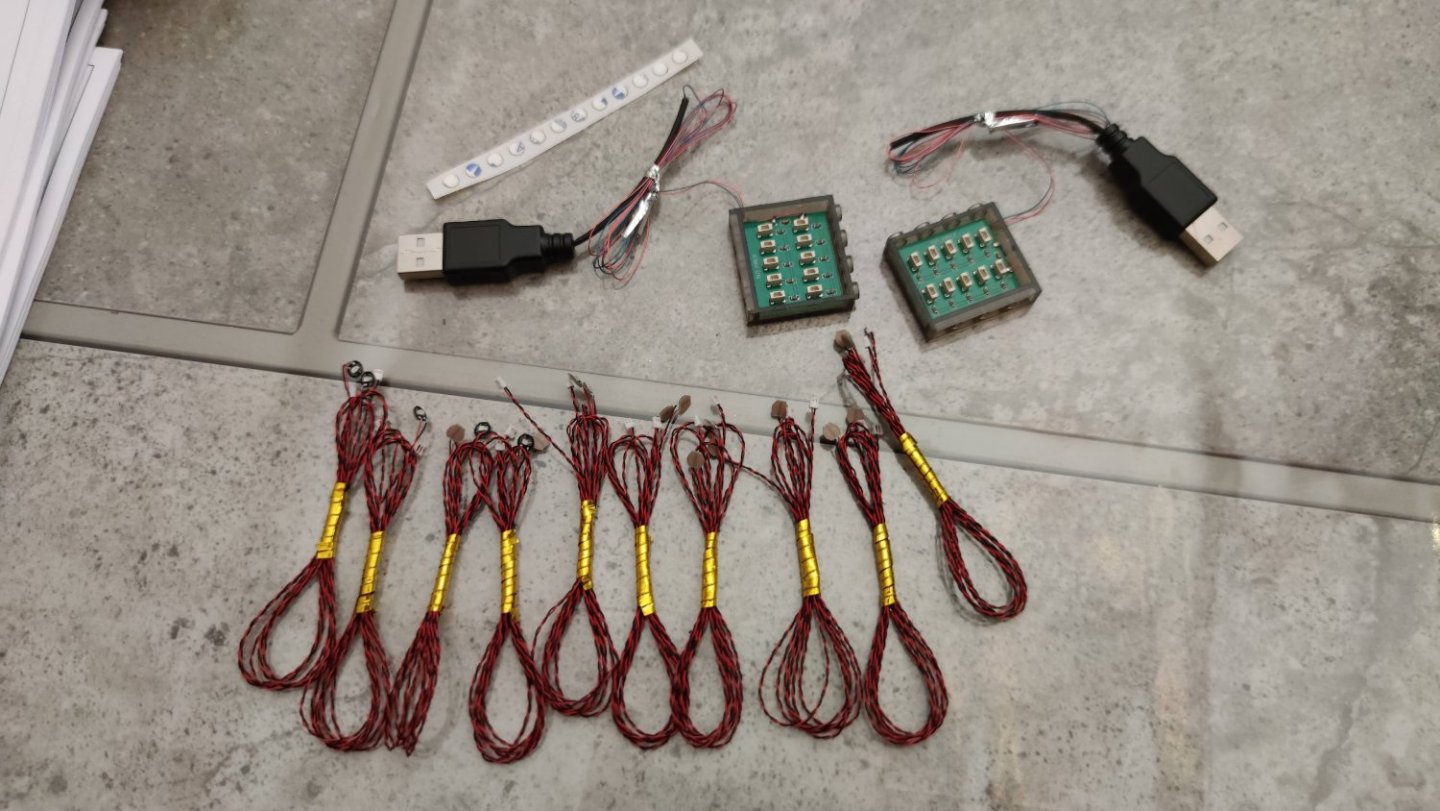
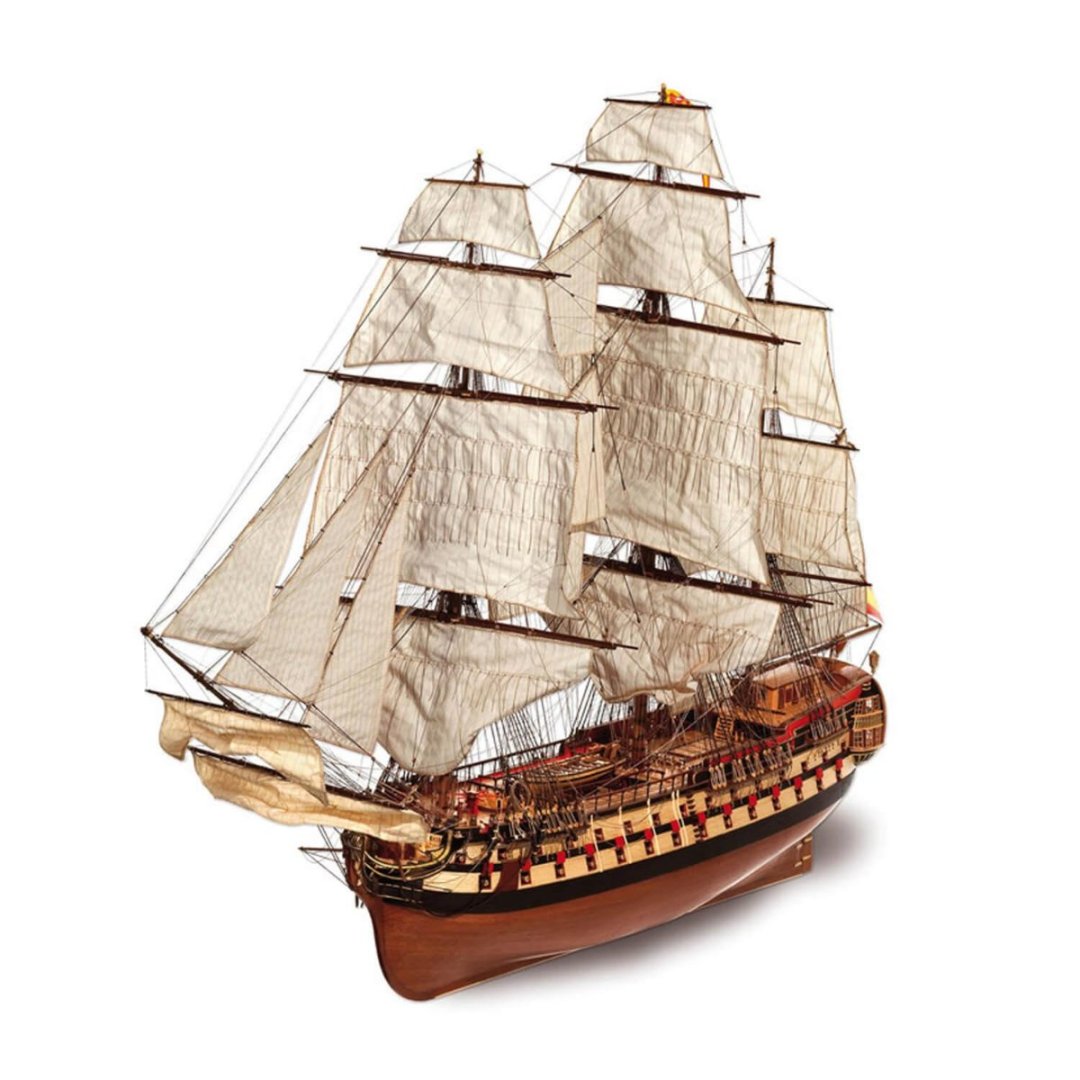
Unboxing First of all, I don't find the box very interesting, it's just a picture printed and glued on a cardboard box. Inside, everything is well organized. There are 4 plastic boxes inside : + Lots of details, the pieces are quite clean, in wood and diecast. The door and window frames may be replaced in wood. - The cannons and carriages are in diecast, which is not very good. Moreover the barrels are not completely drilled, I think about buying better barrels. Good surprise, the pulleys and pins are made of wood! Occre uses a lot of composite on other kits, but it's not very nice. There are a lot of pre-cuts, and a big pack for the hull structure. And here's the bunch of ropes, different colors and sizes, I hope there's enough 😅! Then the set of wood rods, lots of basswood, sapele for the submerged hull and some walnut: Finally, the set of sails (over 20 sails!) Hand sewn: And as a bonus, the led kit I found on Aliexpress, 2 receivers of 10 led each, and so 20 led color yellow/orange. It's basically for Lego, but their small size and ease of use are ideal for model making! It cost me less than 20 €, and will not require soldering.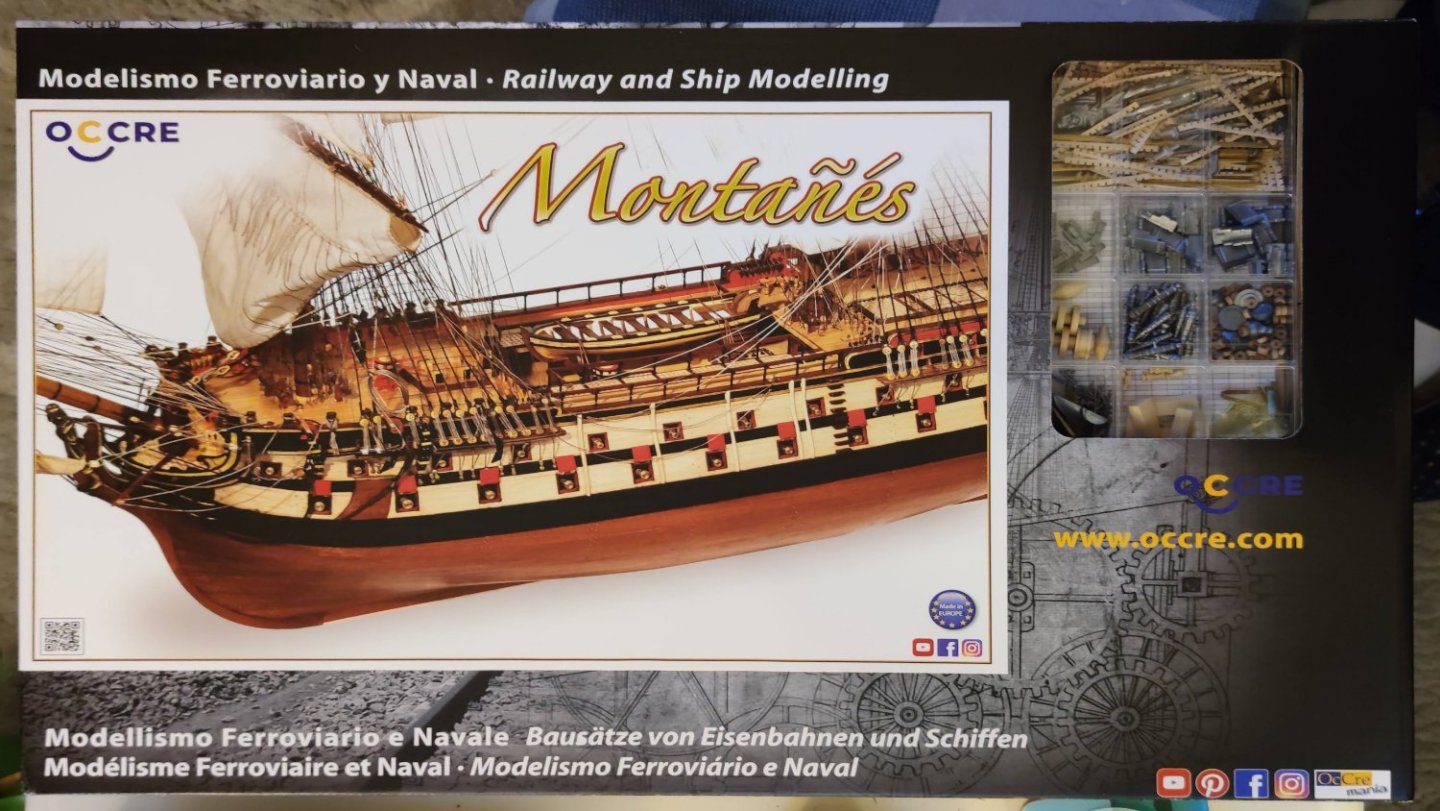

-
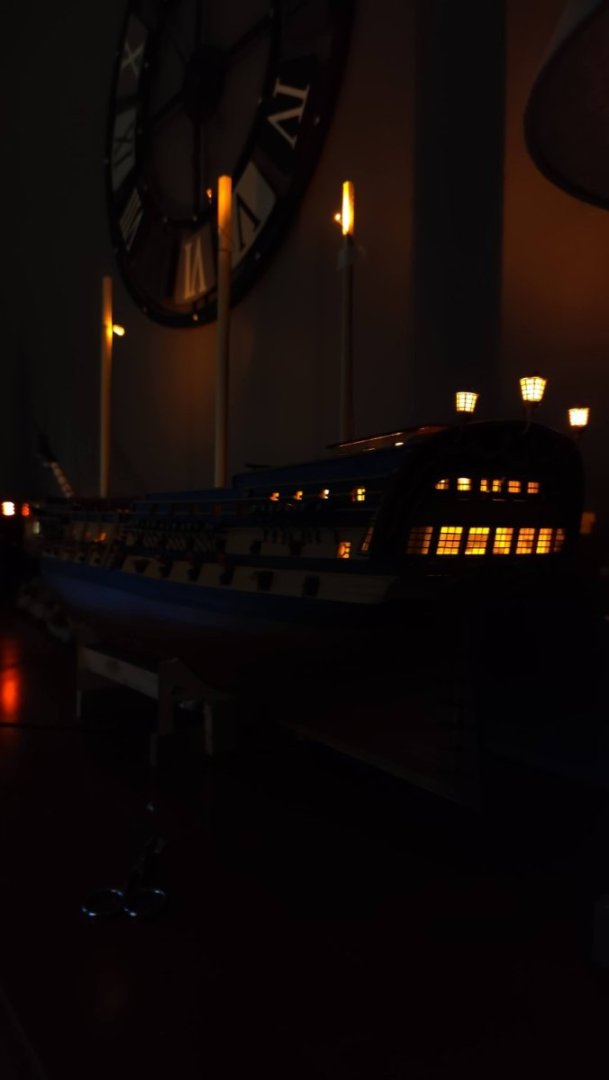
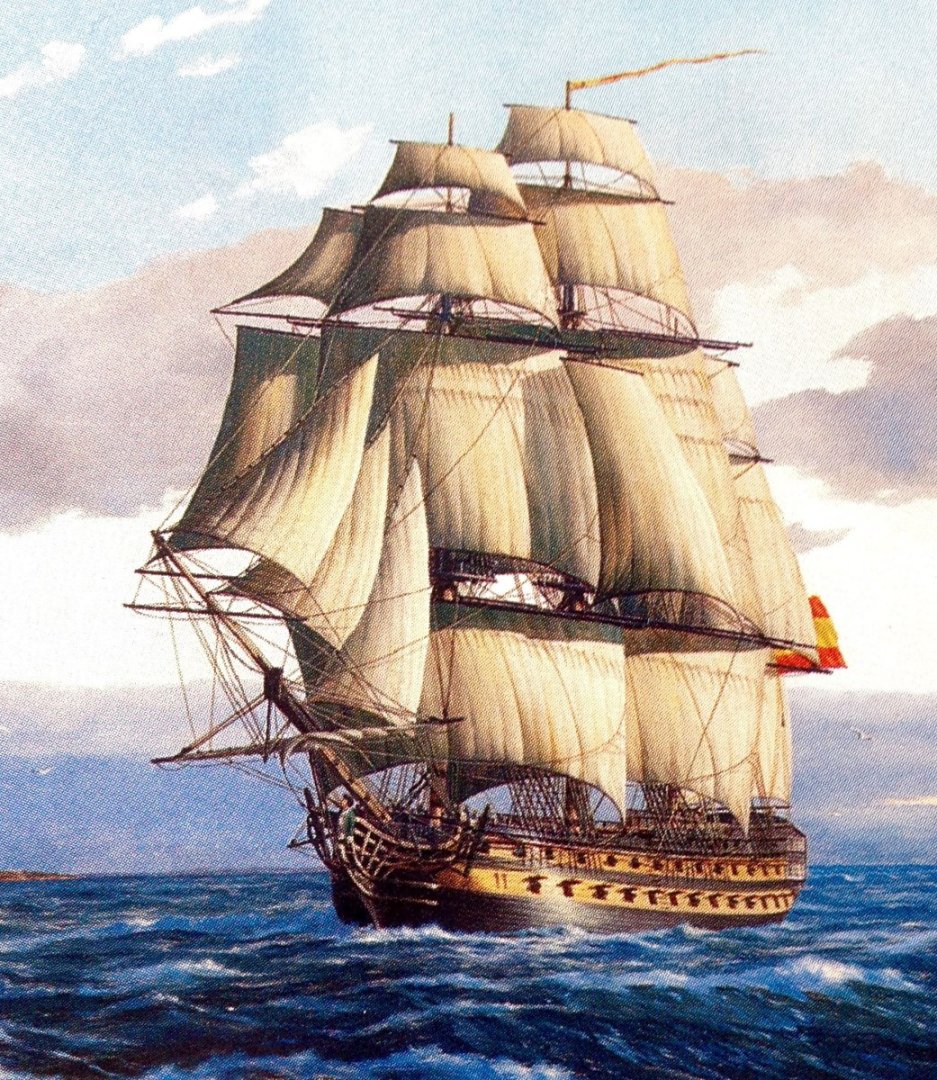
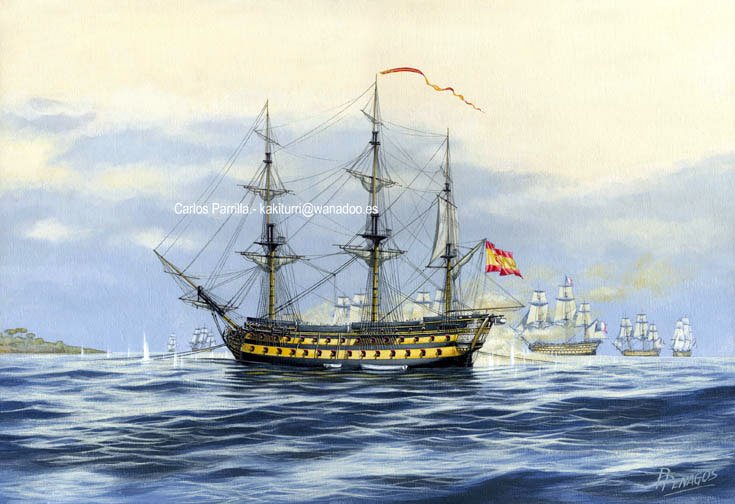
Hello everyone ! Today I'm glad to present you my new project for the upcoming months (years?). Context: I may have been too ambitious ... 🤔 My initial plan was to choose a medium size kit after finishing my King of Prussia from Corel, for less than 300€. But there was the black friday at Occre, I saw this beautiful kit at -30%, at 370€ instead of 530€, I could not resist the temptation. I am now building the most complex ship from Occre, while I am a student in last year of civil engineering school 😅 For the historical point, the Montanes was a 74 guns Spanish ship launched in 1794 and wrecked in 1810. It participated in the battle of Trafalgar but was only slightly damaged and managed to return to Cadiz. Objectives: Besides finishing this model, I have set myself a few other goals. The first one will be to illuminate the model with a method I've never seen before in model making, using LEDs designated for Lego sets. Secondly, I would have liked to have a french 74 gun ship, but I only know one kit, Le Superbe from Mantua, which does not seem to be of such good quality. So, the goal will be to modify this model to be closer to a French ship, while keeping some details specific to this model, making a hybrid Spanish/French ship. The model as a whole will be a fictional ship, but I will try to make historically accurate modifications of some elements. I will base my work on pdf's from Jean BOUDRIOT's collection "le vaisseau de 74 canons' ' and many other build logs (Montanes, san ildefonso or Superbe) , especially on John Aliprantis' video series of the Montanes. I hope this log will be interesting !! The next post will be the unboxing.
-
Thanks a lot! Keith, this Royal William is on a whole other level, amazing, can't wait to see more! MONTH 6 : November 2021 Work progressed everywhere, especially on the deck and the lower part of the stern, the kit provided only 2 gunports, instead of 4 on the original design. As I knew I had some gunport parts left, I simply added 2, on a black background. On the deck, there were some problems with the stairs and landings that didn't look like the instructions. In fact, they were too short to pass over some of the cannons properly. I fixed this problem by adding steps between the landing and the upper deck. The solid railings had to be bent to follow the walls, which was impossible without an electric plank bender. In the end, the curve was different from the railings (made of pre-cut wood). So I had to trim them, refine them to correct their curve. The masts are also beginning to take on more detail, with the foremast jib.


- 13 replies
-
- 7
-
-
-
- constructo
- prince
- (and 1 more)
-
Iseaz reacted to a post in a topic:
HMS PRINCE by Iseaz - FINISHED - Constructo - 1/61
-
MONTH 5 : October 2021 The beautiful stern was finished this month. To align the grid, I made a small plan on sketchup, to know all the dimensions. Then I had to make the windows: the kit provided a very thin mesh, not very practical to cut and not very pretty. I did a first test with brass rods, but it was not convincing. Finally I tried to print a pattern on paper, and to my surprise, the result is very good! In the meantime, the bottles were built, filled and painted and the many decorations were put up. I started to think about the shroud holders: the kit provides a 1cm wide board, but when testing a wire, you realise that it touches the top of the hull (on the railings). Indeed, the particularity of this ship is that the shroud doors are at the level of the 2nd gun deck (and not the 3rd). I therefore enlarged them by 6mm and sanded them to adapt to the curve of the hull. A varnish from OCCRE was applied under the hull, which brings out nicely the wood grain.


- 13 replies
-
- 7
-
-
-
- constructo
- prince
- (and 1 more)
-
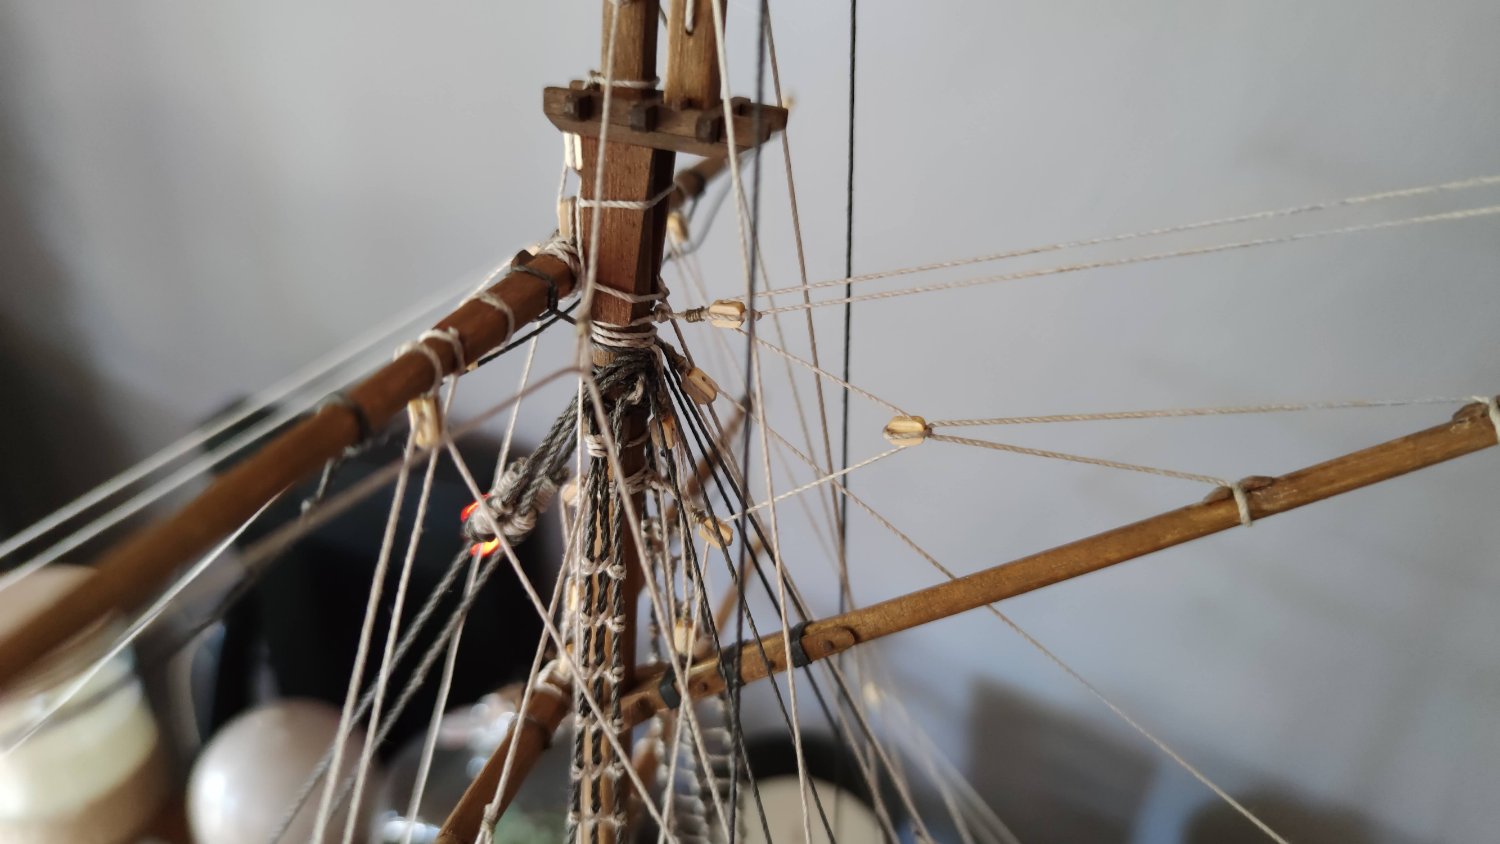
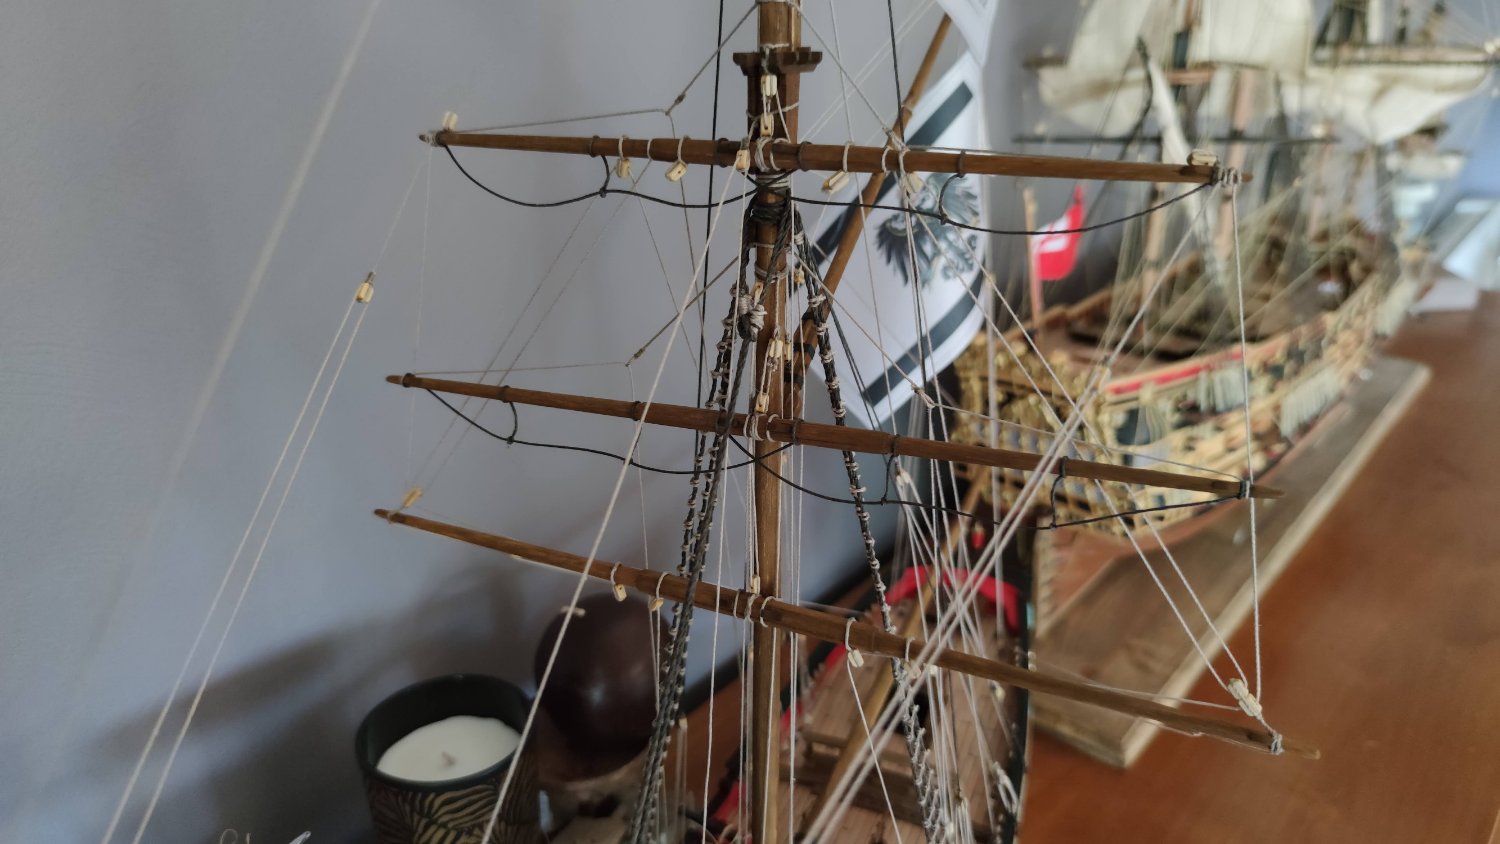
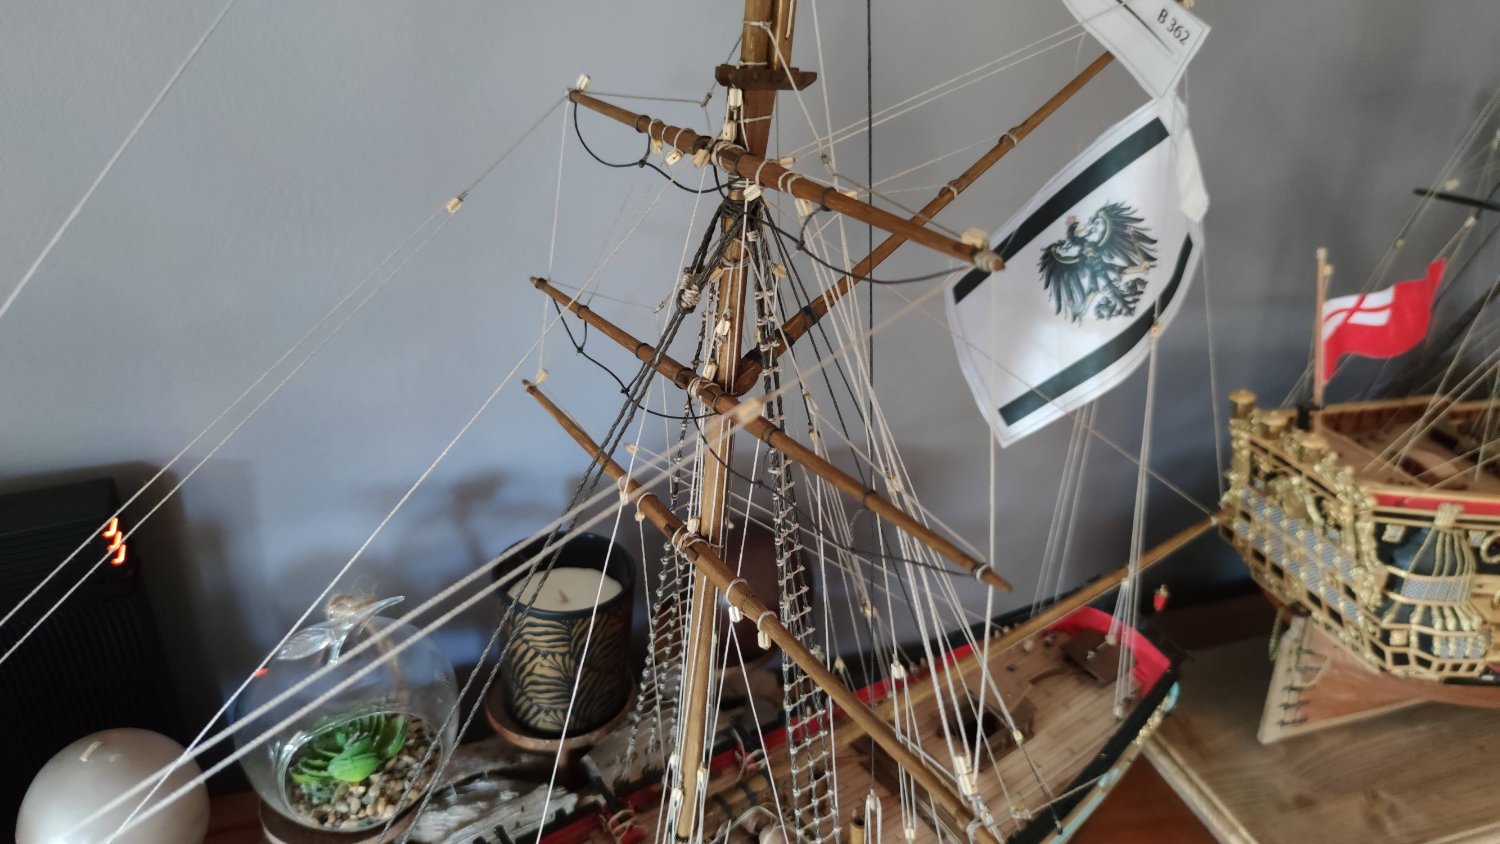
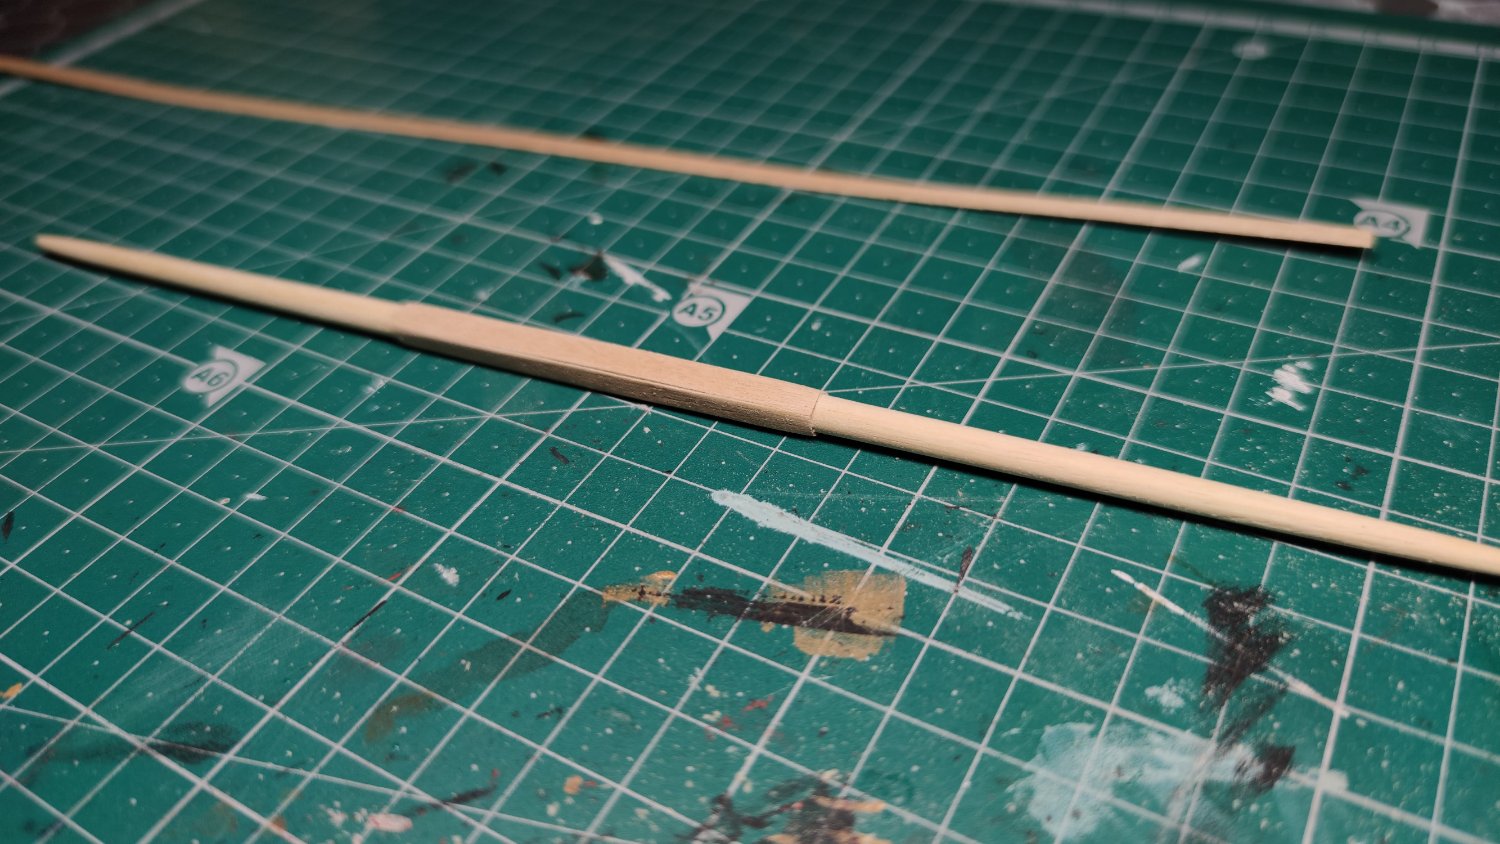
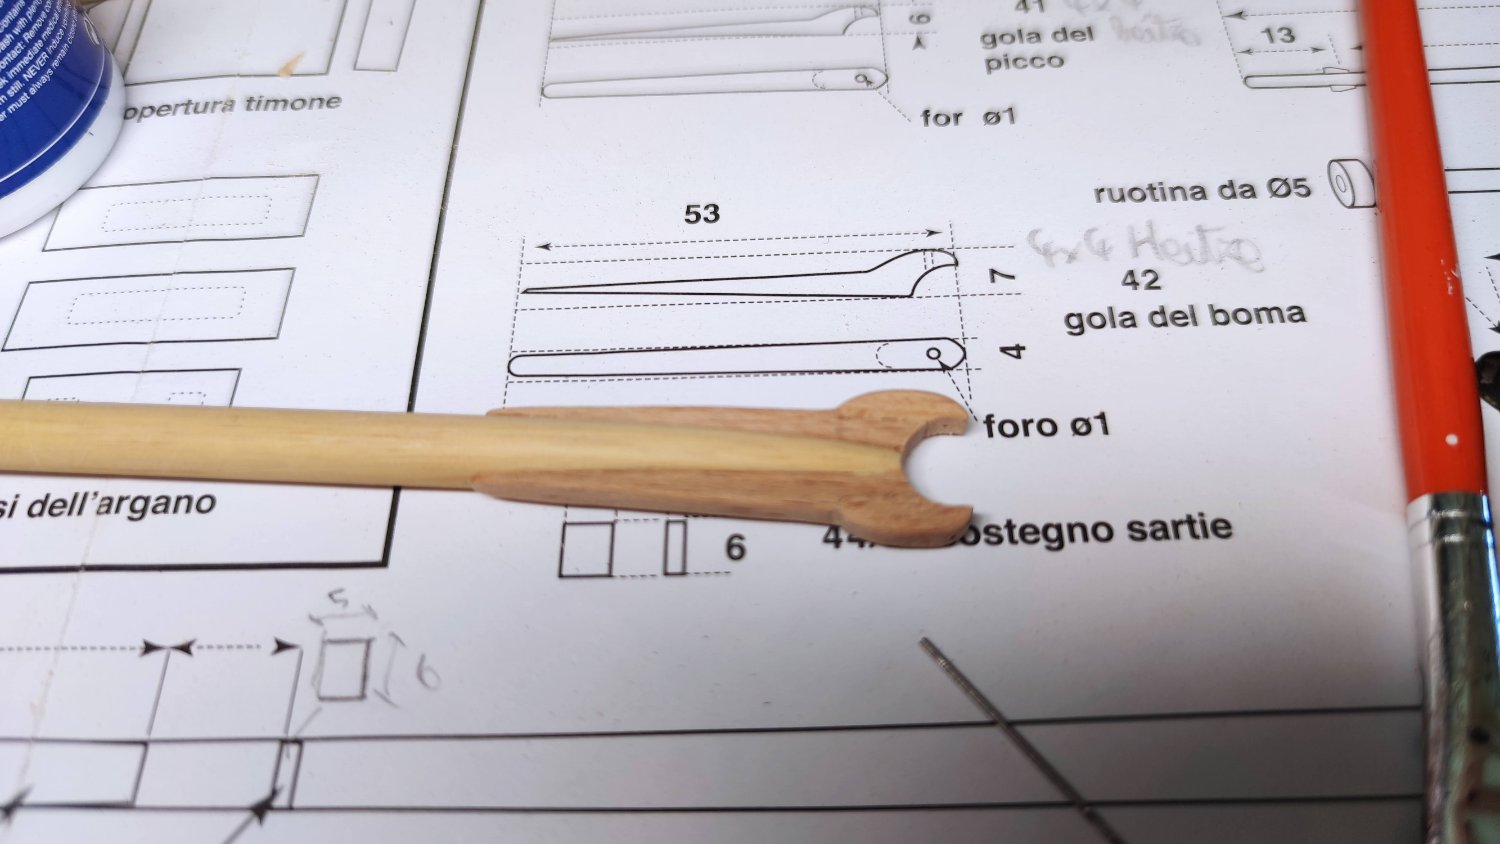
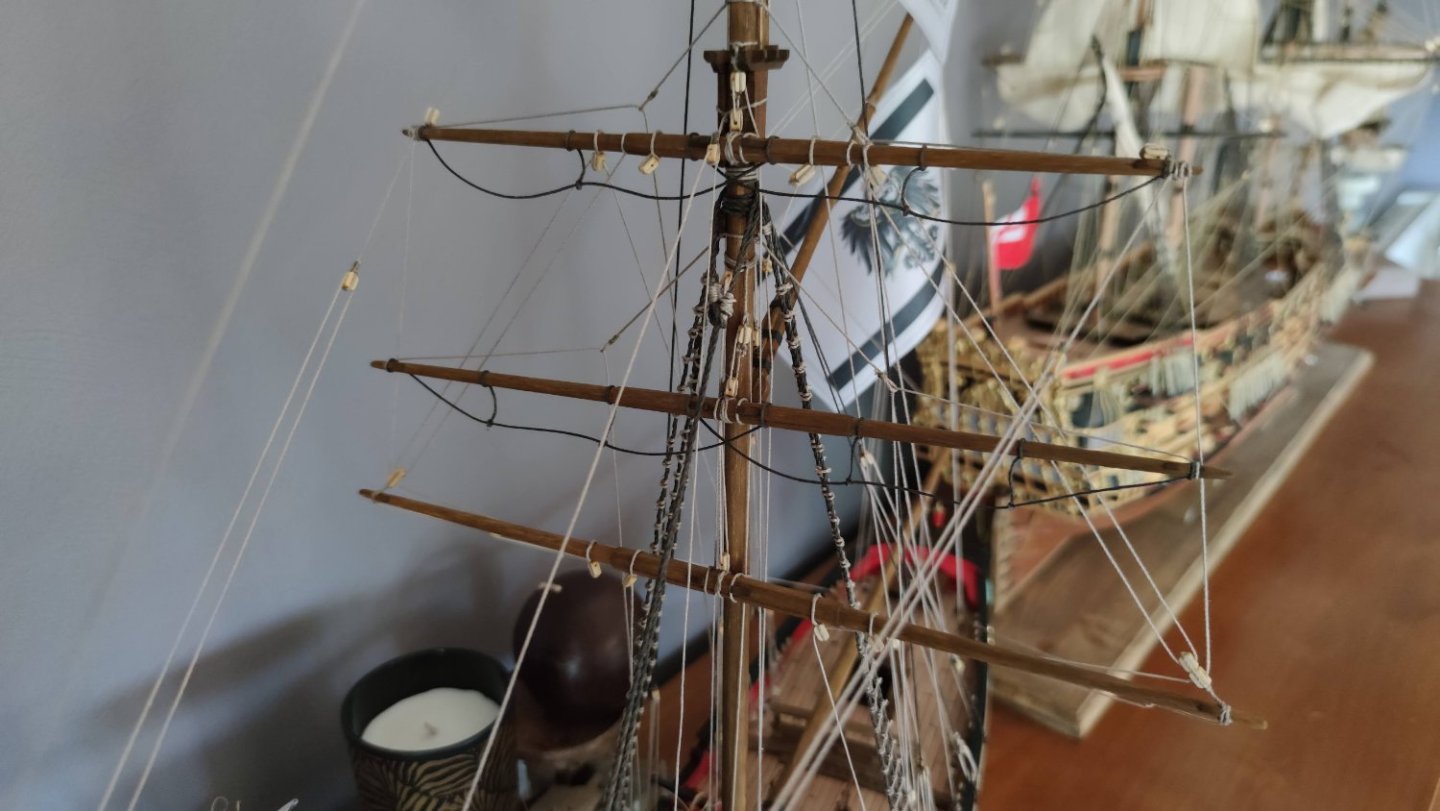
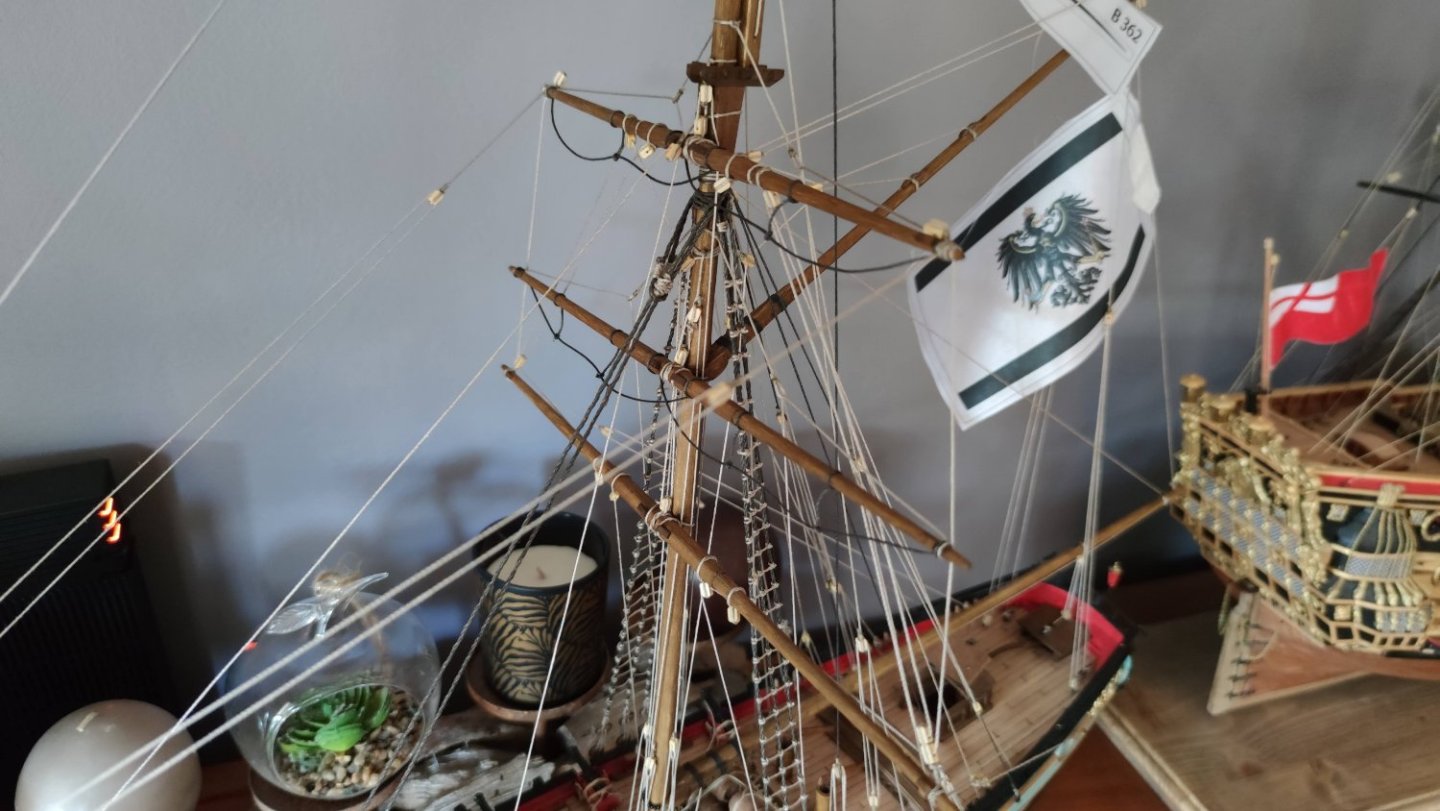
The next part of the model consists of the rigging and the making of the yards. I made them by inserting the wooden rod in an electric drill and sanding progressively. On the central part, I covered with 0.6x4 wood to create a hexagonal section. Then I sanded, painted, added the details and blocks, and attached them to the mast one by one. The end of the construction is approaching, there are still a lot of rope knots to place to finalize the detail work. The future model has already been ordered during this black friday, I hope not to receive it before finishing this one ...😅


-
Thanks a lot, I hope this thread will help you avoid some mistakes, if it's the same model! MONTH 4 : September 2021 The first decorations are installed, the gold paint was a nightmare to paint with a paintbrush... A first small improvement was the orientation of the "legs" on the bow, for a more realistic look even if the design of the bow remains very simplified. The most impressive part is the stern, with a large amount of miniature. I improved the model by slightly bending the grid (horizontal lines) to follow the decks. You can also see the final stage of the bottle, with lots of bits of wood to form the dome.


- 13 replies
-
- 6
-
-
-
- constructo
- prince
- (and 1 more)
-
Iseaz reacted to a post in a topic:
HMS PRINCE by Iseaz - FINISHED - Constructo - 1/61
-
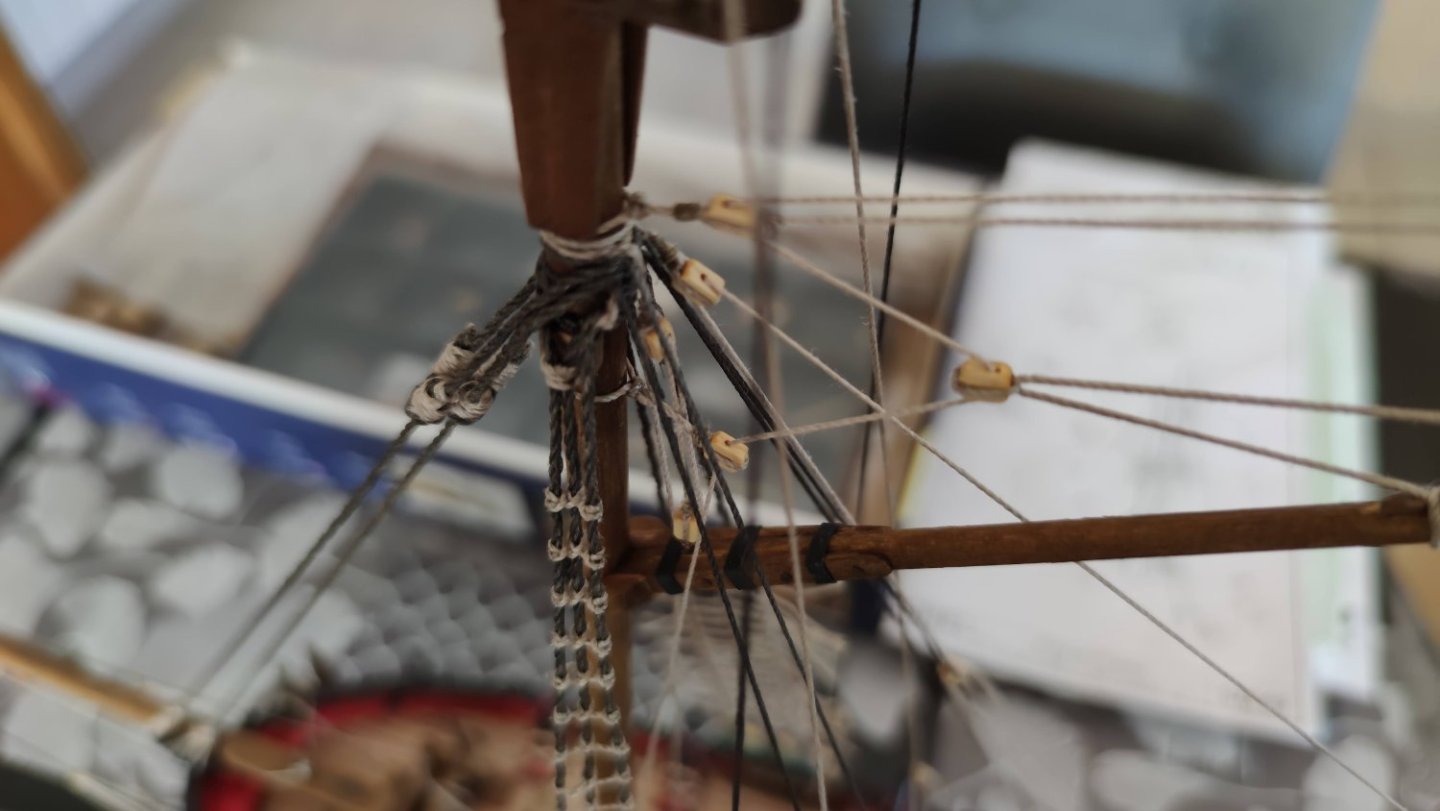
The rigging continues with the start of my construction of the yards (gaff-sail boom?). The gaff jaws had to be cut out of 2 blocks of wood, then the dye was applied. In the same time, I also started the installation of the shrouds. With only 2 shrouds in 3 parts, this boring step is quite fast (even if I still haven't finished...). Despite a few mistakes on the plan numbers, the rigging is a very pleasant step on which I like to take my time.