FlyingFish
-
Posts
457 -
Joined
-
Last visited
Content Type
Profiles
Forums
Gallery
Events
Everything posted by FlyingFish
-
 Oh the many hours I've wasted just tinkering around in CAD - fidgetting about lines being a hair out here and there. Not to mention the abject fear of deleting the files by mistake. Then the magic of 'copy as a mirror' or 'snap to vertices' command seduces me again...! I still have a pot of sharpened H pencils on my desk just in case the power goes off one day. Ha! My 'dry' January is still going, so that excuse is out as well!
- 88 replies
-
- 4
-

-
- Vigilance
- Sailing Trawler
- (and 1 more)
-
Enjoying your thought processes, Keith. I'd not heard of filing buttons - what a clever idea. Logged for future use.
-
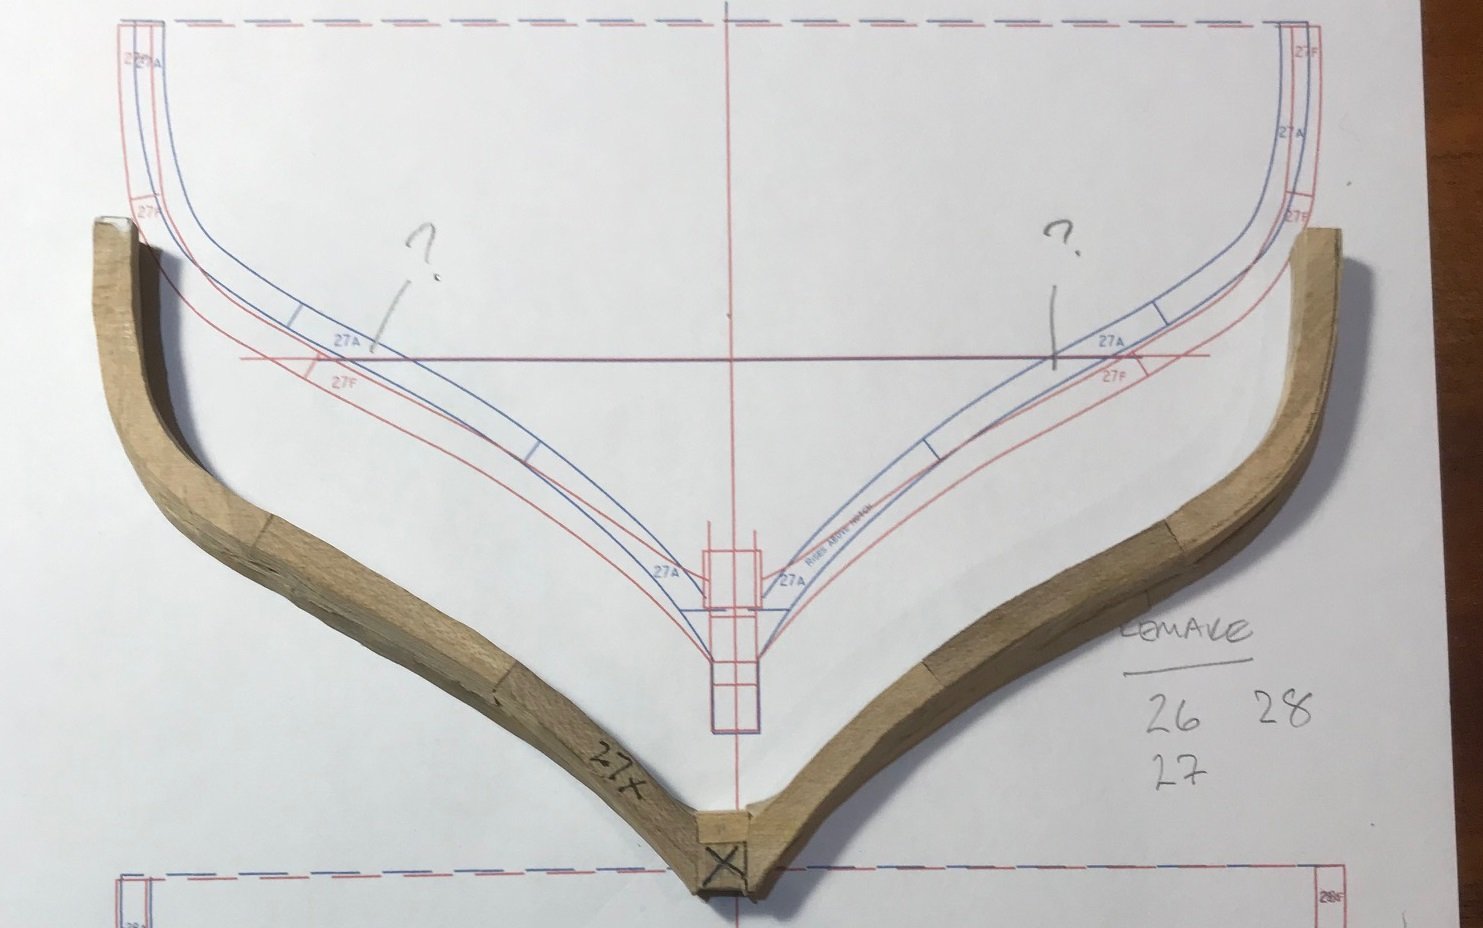
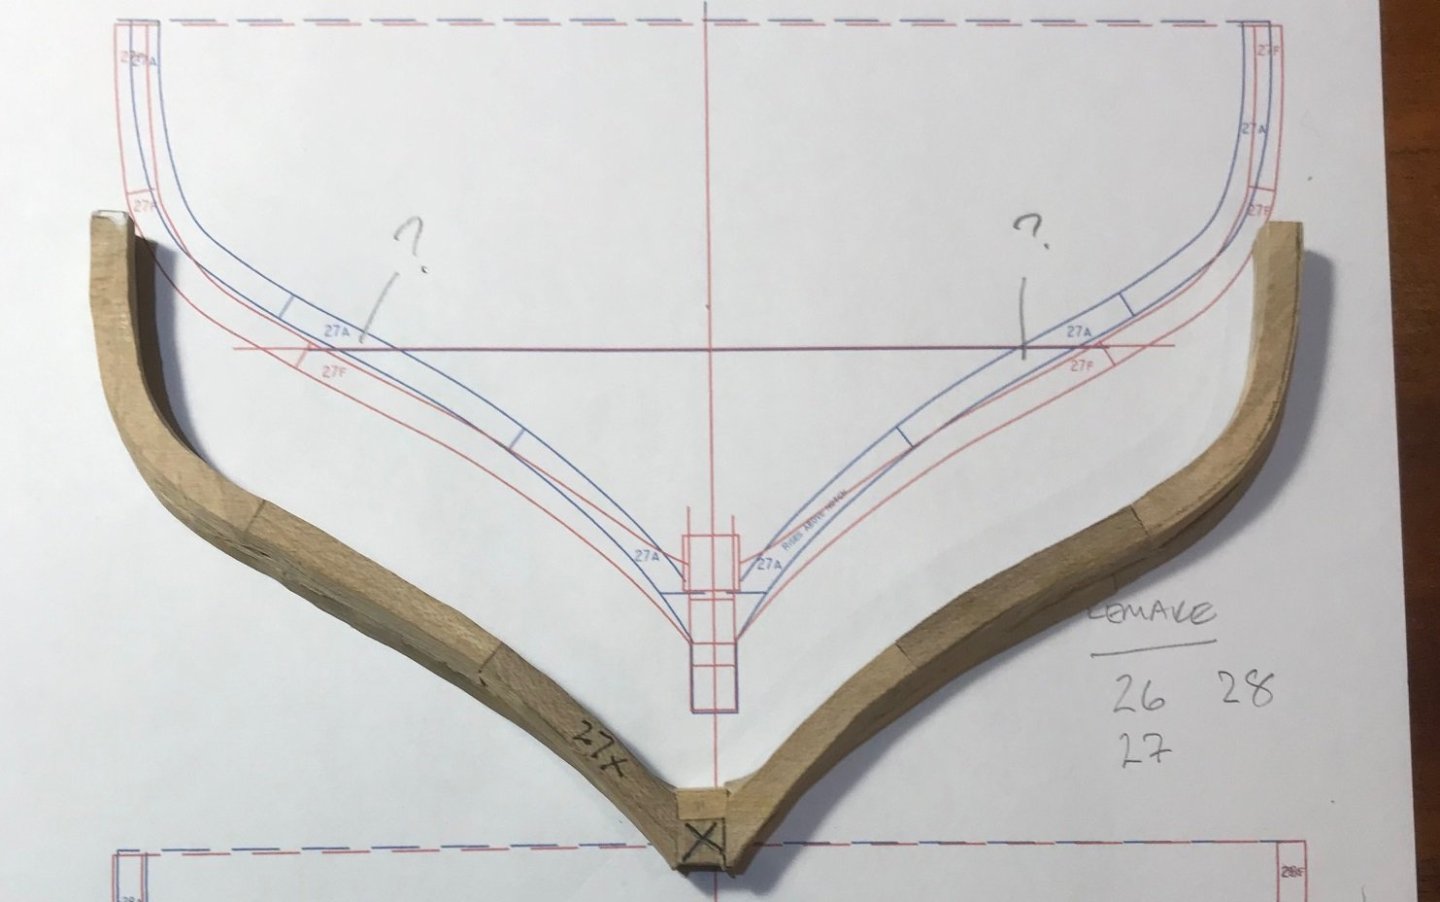
Thanks Scott and Keith - I'm very fortunate to be able to visit occasionally, with the Vigilance Trust's permission, to record the shipyard's progress - it makes the build come to life, and I'm pleased you are enjoying it. An example of why they are master shipwrights, and I am a very lowly journeyman is demonstrated in the following example of a costly mistake. A frame pair #27 was built using the templates lofted in CAD, and it was only when the frame was offered up that I could immediately see a problem... The aft frame (in blue) looked too far away from the Fore frame (red) to fit in this section of the boat - turns out it was in fact frame 29, incorrectly transposed by me (probably late in the evening). The frame looks OK, but it's trash, and in the waste pot. I'm also remaking #26 and #28 for similar reasons all caught in the same dozy moment. So another lesson learned. Copying and pasting in CAD may be quicker than the old school methods, but it's not without it's 'gotchas'!
- 88 replies
-
- 6
-
-
- Vigilance
- Sailing Trawler
- (and 1 more)
-
Thanks to all for likes and comments. A brief update - not much time to dedicate to Vigilance at the moment but I am making slow painstaking progress on the forward frames. The pace is dictated by the curvature of the rake which makes these challenging to say the least. However, despite a growing pile of rejects, it is taking shape. The state of the workbench says it all....
- 88 replies
-
- 10
-
-
- Vigilance
- Sailing Trawler
- (and 1 more)
-
Even if your hand is very, very small, that's one amazing piece of work Valeriy. Your turn Keith! 😉
-
Looking good Johnny! I wondered if you have tried soaking the rope in a 50/50 white glue and water mix for a minute or so, then coiling? The rope behaves itself around a former in this state, and application of a little warm air from a hair drier soon sets it in place. It has the added advantage of not changing the rope colour or texture, and allowing stains to be applied afterwards, if required for weathering, to give it a natural shape and appearance.
-
Two possibilities: they fitted the boiler backwards, or they changed the prop prior to a passage to the southern hemisphere. The water goes down the plughole anti-clockwise there, I hear.😉
-
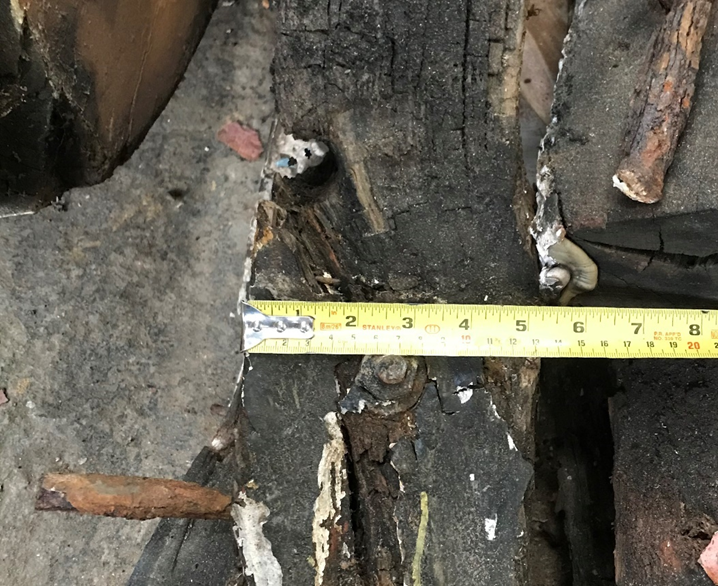
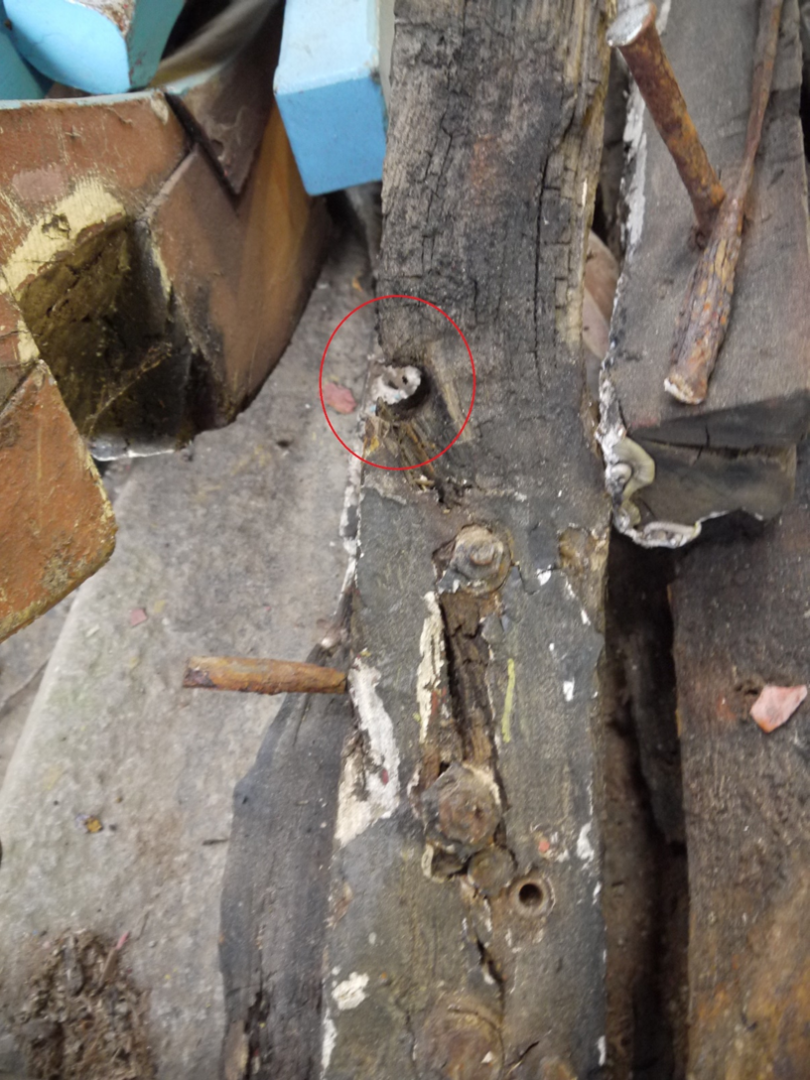
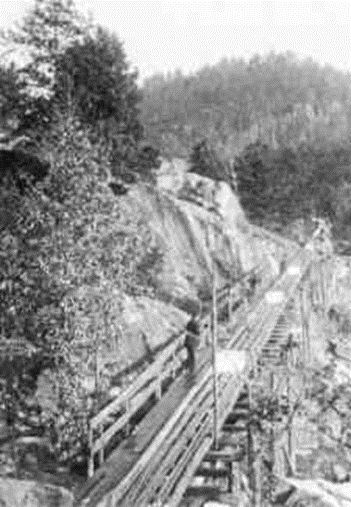
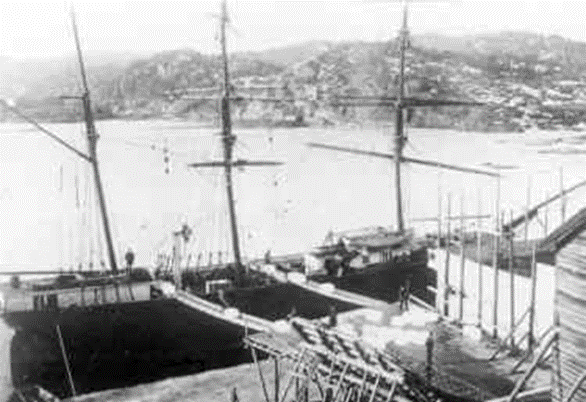
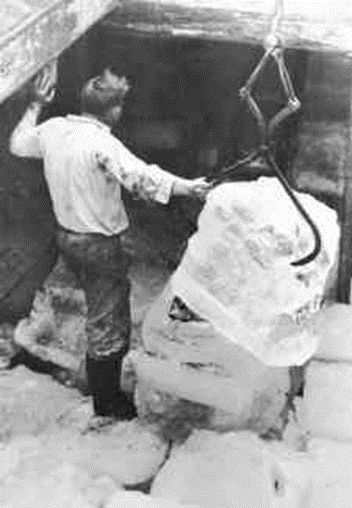
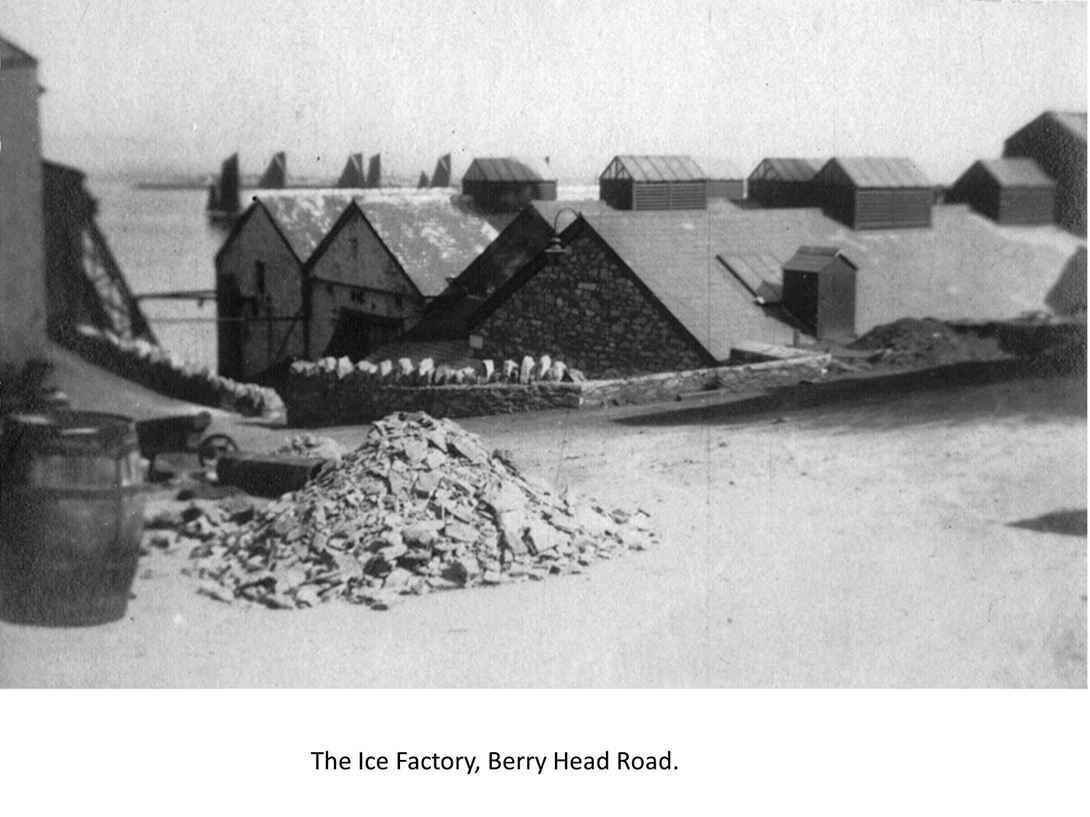
A fishing trip prevents progress currently - and Spring chores call. However thought this might be of interest until I can get back in to the workshop. A Treenail detective tale. Whilst looking over the boat as it was being disassembled, Peter Brown of the ‘Friends of Vigilance’ noticed some treenail holes in some frames that seemed oversize. On probing them he found that they did not go into the original timber below, and some were on the edge of the beam as shown below. Treenail diameter increases with the length of a ship, and consequently the plank thickness. Vigilant at 76 ft would not be expected to have a treenail of no more than 1”, and more probably ¾” inch or thereabouts. The treenail holes Peter found were 1 ¼”. Also, the wood looks older than even the 1926 original oak in the boat. His explanation is worthy of inclusion here because it’s a clever piece of deduction and starts with the ice trading industry. In the late 1800's Brixham relied on ice brought in ice-carriers from Norway. Peter’s Grandmother was Swedish and married to a Devonshire man. The family owned two ice carriers which plied the passage to and from Norway to Brixham supplying the fishing fleet at the end of the 19th Century. The largest company in Britain, Leftwich always kept a thousand tons of ice in store, and by 1900 a million tons had been exported from Norway – it was big business, and its history is a fascinating example of the use of man and horsepower to get the blocks of hand-sawn ice from frozen lakes down wooden slides to the boats. 7 This all changed in 1900 when Hayman’s of Brixham built an icemaking plant at Dewdney’s Cove – run by the National Provincial Ice and Cold Storage Co. It was installed by Listers of Dursley Gloucester – a place I know well, as I once visited them to get an antique Lister water pump restored. This made the ice carriers redundant. Peter’s Grandparents resettled to England, and their ships were adapted to carry cargo along the South coast for a few more years before being retired. They ended up at Uphams Yard and were broken up. The useful timber from the boats was stacked in the yard in 1926 when Vigilance was built. So, here’s the thing - Peter thinks some of the timber was reused in Vigilance, hence the large treenail holes. I’ve no doubt Uphams would have used the old timber to save both them and George Foster a few quid. It’s a splendid link for his family to the boat; explains what he found, and a clever piece of deduction on his part.

- 88 replies
-
- 9
-
-
- Vigilance
- Sailing Trawler
- (and 1 more)
-
Interesting project - will you solder the parts then mill the taper and cutouts? I don't have a mill (but spend far too long window shopping for one) so I would probably have to tackle this in hardwood, or maybe use thin brass plate and laminate with a tapered styrene or wood filling... just thinking aloud...
-
Can understand this Gary. However on a future build you should go for it - I have a feeling you would do an outstanding job!
-
Indeed you would think so - however the Royal Horticultural Society (RHS) suggest cutting back lightly infected plants, but removing badly infected ones altogether, and sadly burning them to avoid spread. I fear this has been the fate of most with bad blight. There is some English boxwood for sale still, but it's hard to find anything longer than a foot. I have some castello boxwood in my stash, which is a different family altogether. Never used it so don't know how it differs.
- 88 replies
-
- 4
-
-
- Vigilance
- Sailing Trawler
- (and 1 more)
-
I made one of his sliding height calipers with a view to using it later. Yes I must get a set of plans mounted that way with a straight edge fixed on the datum. Both maple and holly are pretty hard, holly the most. They sand OK, and scrape even better. As you say the advantage is that it's hard to overdo it! I would like to have used apple or pear, but over the last decade UK has lost most of its orchards to intensive farming, and the wood is hard to find. To think we used to burn it on the fire!
- 88 replies
-
- 4
-
-
- Vigilance
- Sailing Trawler
- (and 1 more)
-
You could shave with that Keith! It looks a very satisfying job making all that balsa dust- a clever idea to support the planking. I have found with frames models like mine that the planks can can spring as the glue dries even when edge glued, and that unevenness can really spoil the lines. Will you edge glue your planking?
-
No, Gary - can't claim that. I built most of my building jig stuff using ideas from Ed Tosti's incredible build of Naiad on this forum here. I don't recall him using the scale tapes. I'd recommend his log as a masterclass, and I think he has a couple of books on the build that detail each step. Lists are very dangerous. I'd steer clear if I were you.
- 88 replies
-
- 4
-
-
- Vigilance
- Sailing Trawler
- (and 1 more)
-
Looks an interesting project - good luck with your first scratch build - you seem to be off to a good start.
-
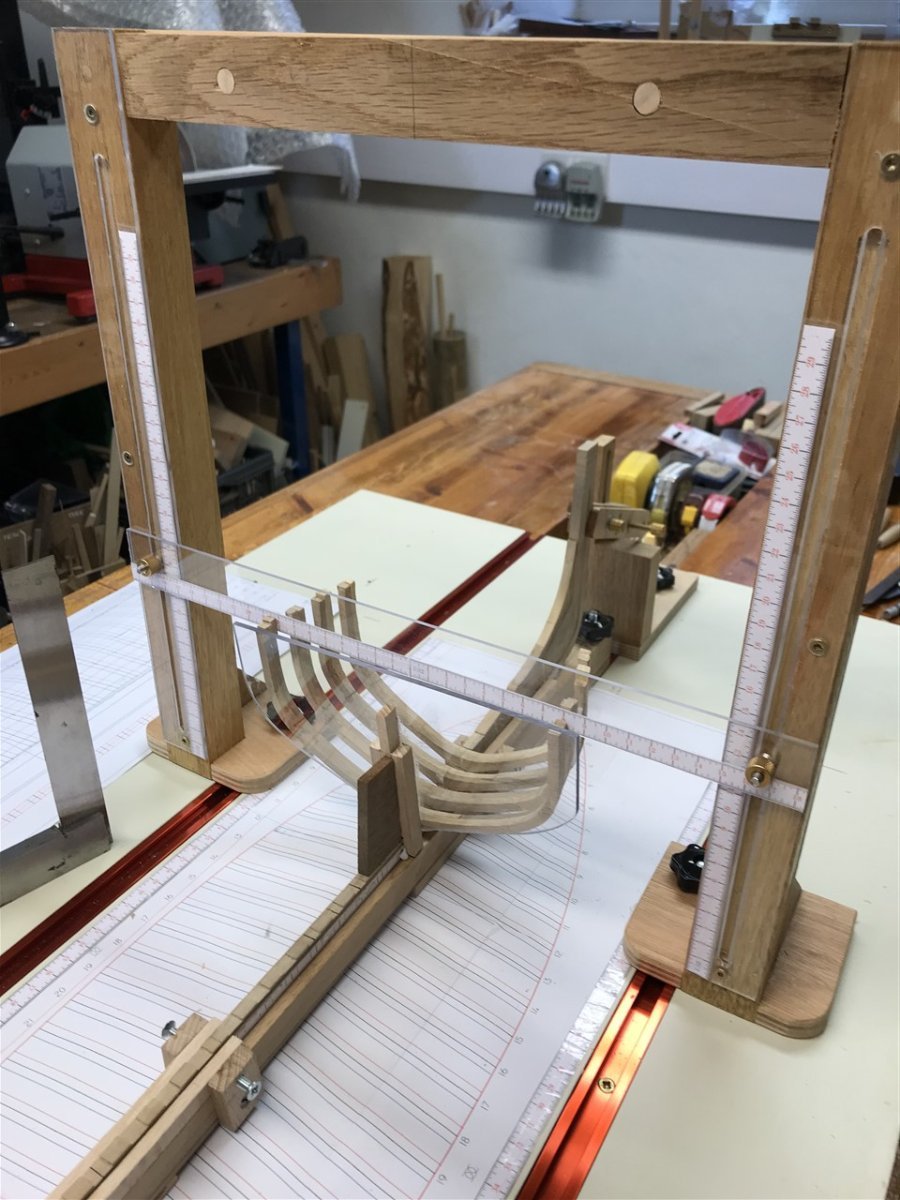
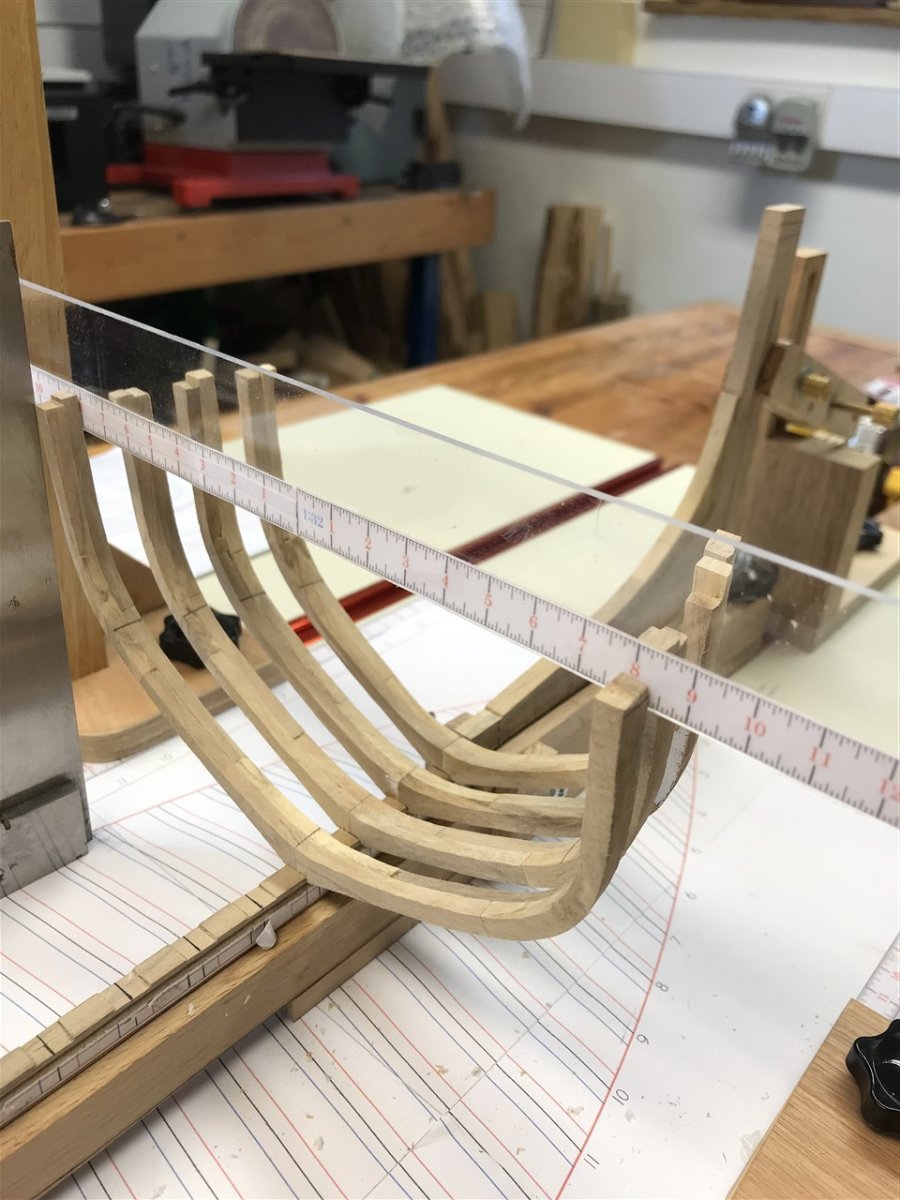
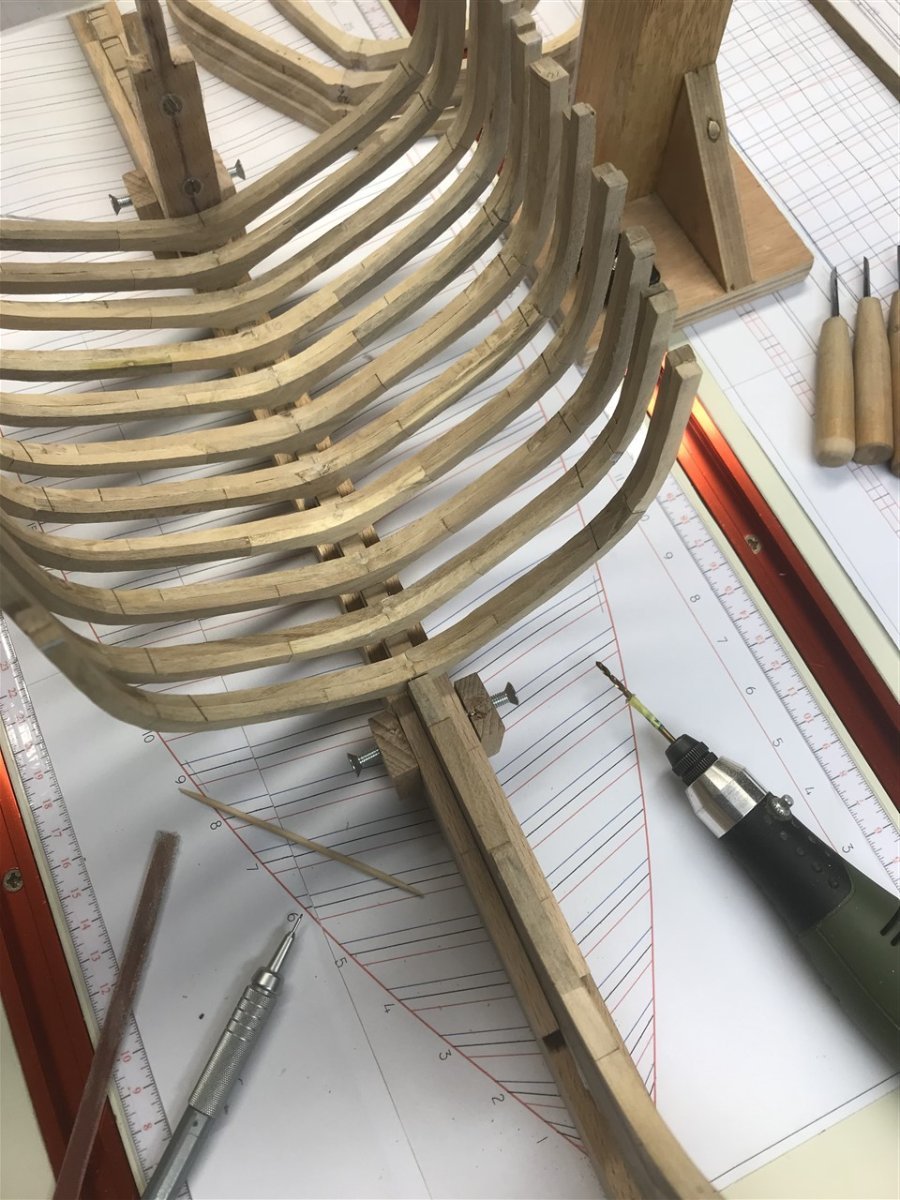
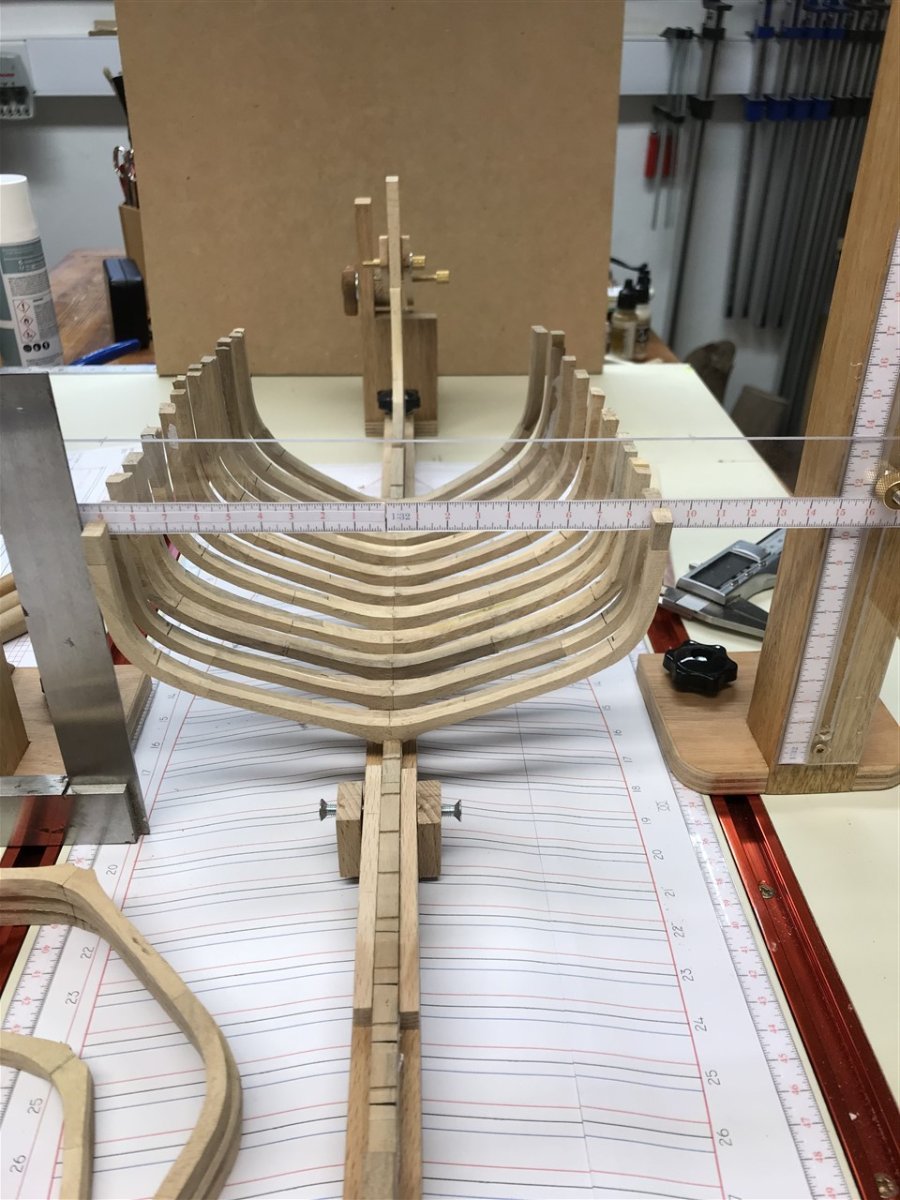
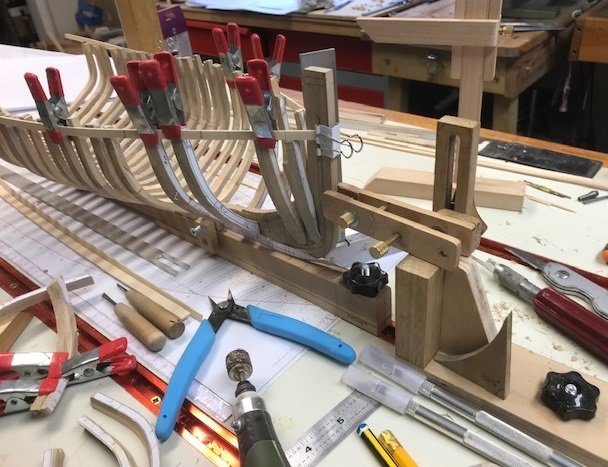
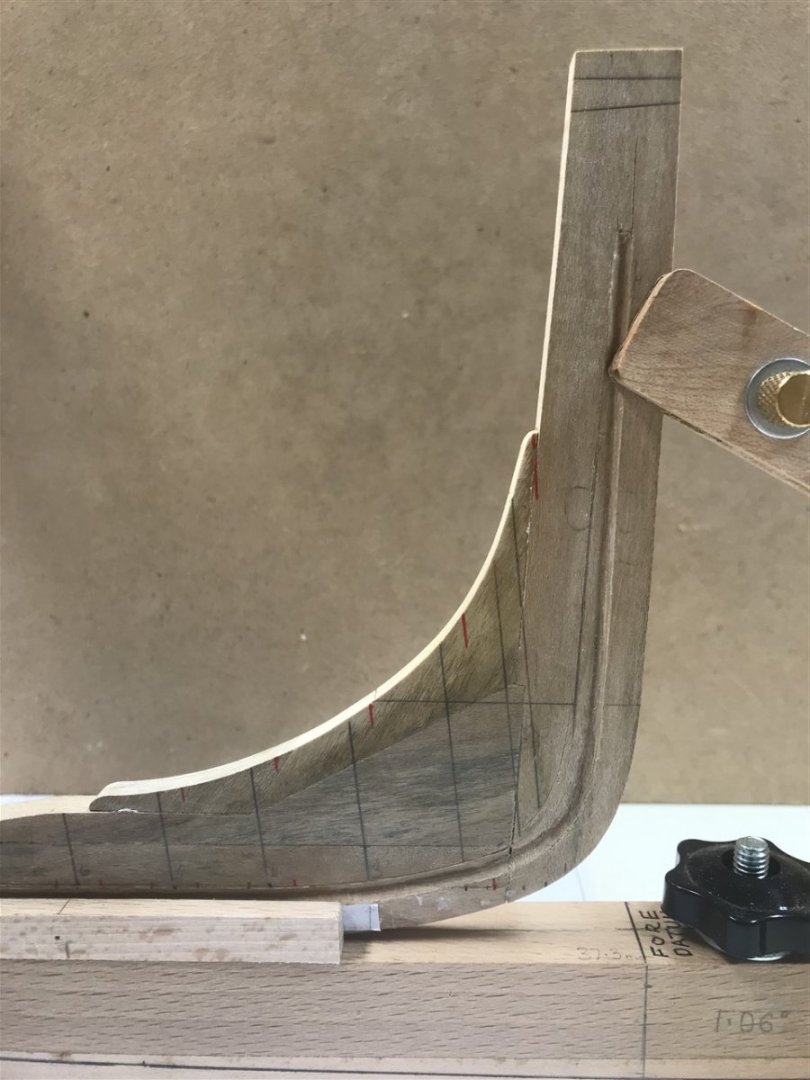
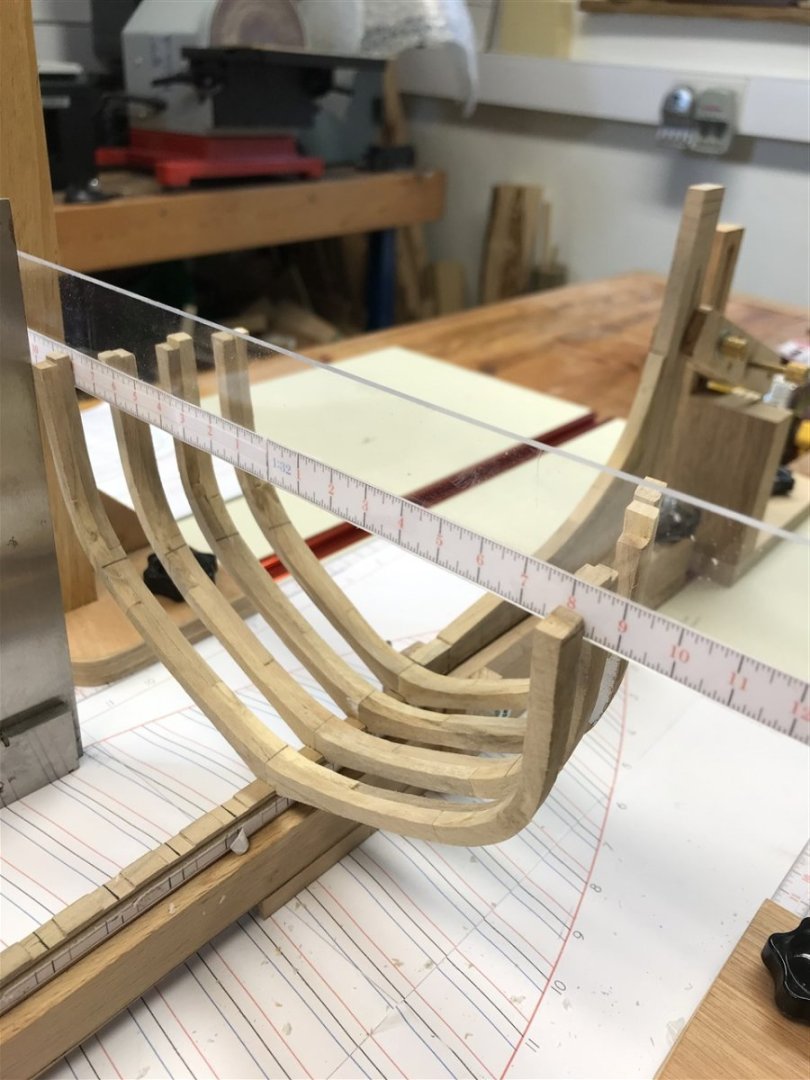
Frame setting. The rabbet is cut and the bearding line will be extended as planks are dry fitted to get the angle right. That 6.5° rake shows clearly in this image. It really throws your eye. The gantry has lateral and vertical scale tapes to set the sheer and the beam correctly. The square is used to align the tapes to the plan. Temporary cross spalls will be used if the frame needs tweaking for width. The frame is set against a perspex support to get the 6.5 °angle right. The frames are glued and dowelled with cocktail sticks to the keel. These will not be seen as the keelson will cover them up. The frame heads look uneven, but they are oversize and will be shortened when the clamp is put on. They will have a coverboard over them eventually. The outside edges have a margin for sanding and are still a little uneven. I'm making progress slowly, time is limited in the workshop - domestic chores are calling now the weather is improving, and of course the fly boxes must be refilled. At least the boat starts to take shape now.


- 88 replies
-
- 10
-
-

-
- Vigilance
- Sailing Trawler
- (and 1 more)
-
Thanks for all the comments and likes folks. I've considered the Byrnes - maybe that will be possible if the company are going back into production some day. I do have a larger one, and made the mistake of getting a disc/belt combined. Seemed like a good idea at the time, but being direct drive the faces of the disk and belt are at 90 degrees to one another - so really needs to be positioned on a corner. It can really eat though the work though. The rabbet is finished, and framing underway. I'll post more shortly.
- 88 replies
-
- 5
-
-
- Vigilance
- Sailing Trawler
- (and 1 more)
-
It's a good question Håkan - as with everything, it depends on the quality - they few I have bought are all from well known high quality tool makers, and use the same materials as their bigger relatives. Of course they are only useful for tasks at scale, like scoring the rabbet - and the small palm planes I have are simply indispensbile to those fine shavings on small stock. Do I really need them? Probably not, but don't tell the Admiral! Thanks Roger!
- 88 replies
-
- 4
-
-
- Vigilance
- Sailing Trawler
- (and 1 more)
-
Work of art Gary!
-
Well they would be if I could match your wonderful joinery skills, Hakan. I rely on white glue and sawdust! Glad to have you on board; I'm enjoying your Atlantica build enormously. I looked at the Gratitude when researching. It's interesting that she survived the war, unlike so many others. She survived a dreadful storm in 1911, then continued working until 1932. I see she went to Lowestoft before crossing over to Bohuslän. It's wonderful that she is still sailing, and teaching youngsters the art of navigation and sail handling. She is seriously fast, and won the Tall Ships race in 1978. Someone should build her one day...
- 88 replies
-
- 6
-
-
- Vigilance
- Sailing Trawler
- (and 1 more)
-
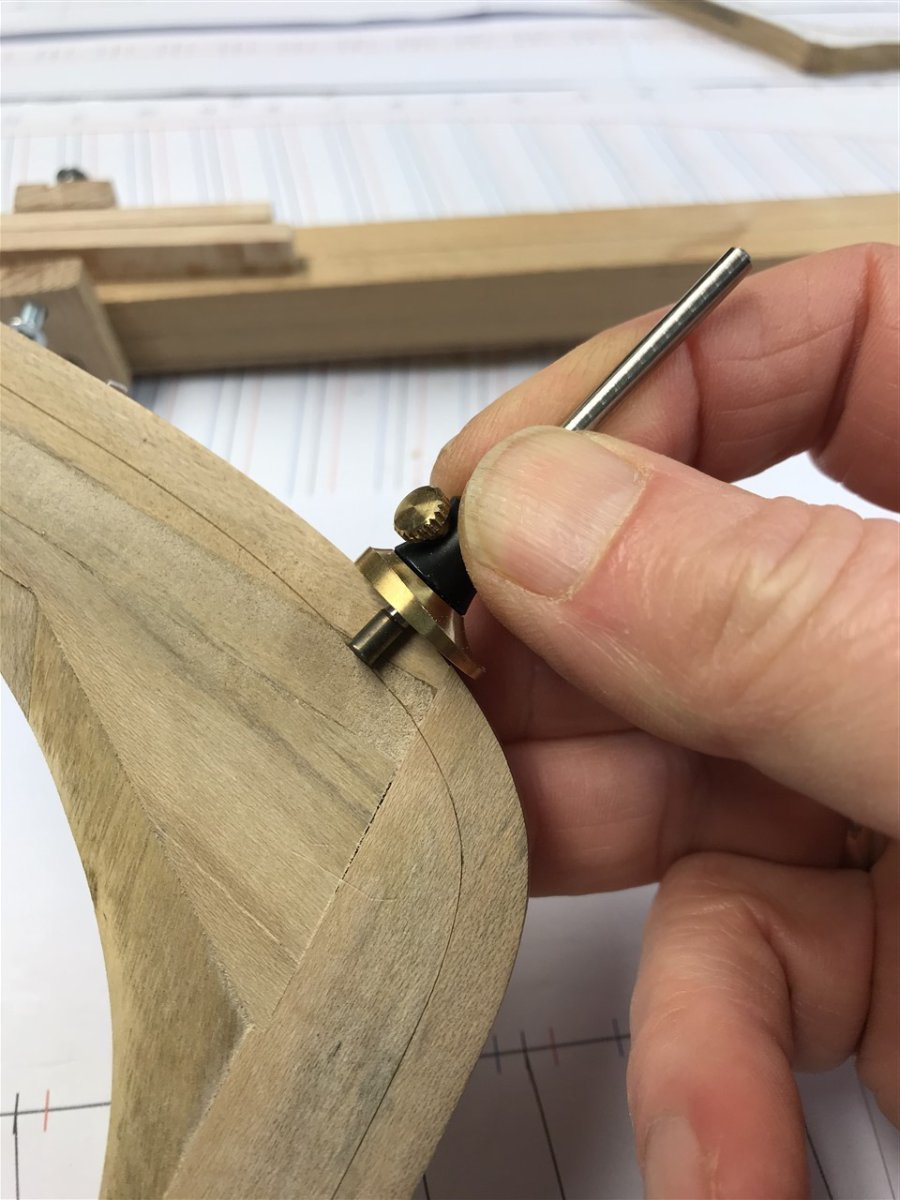
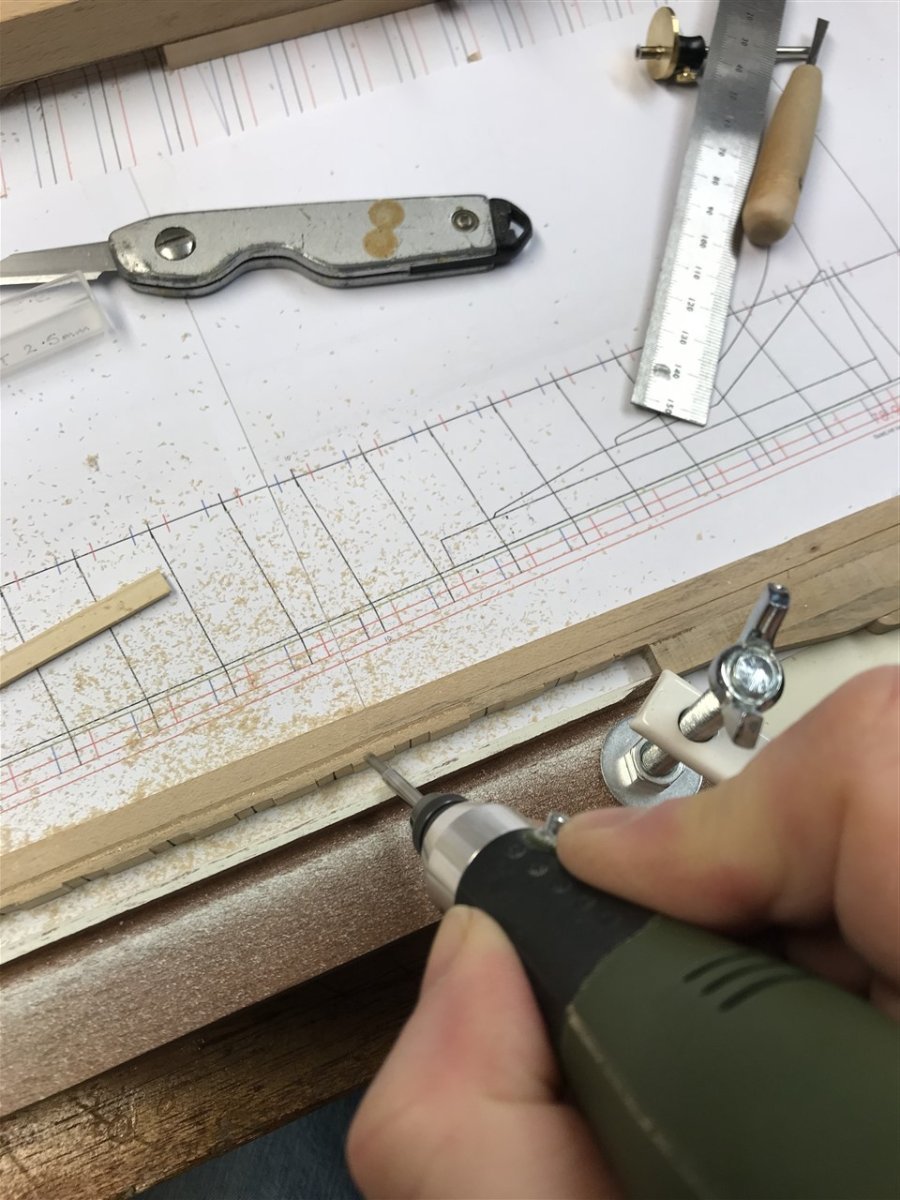
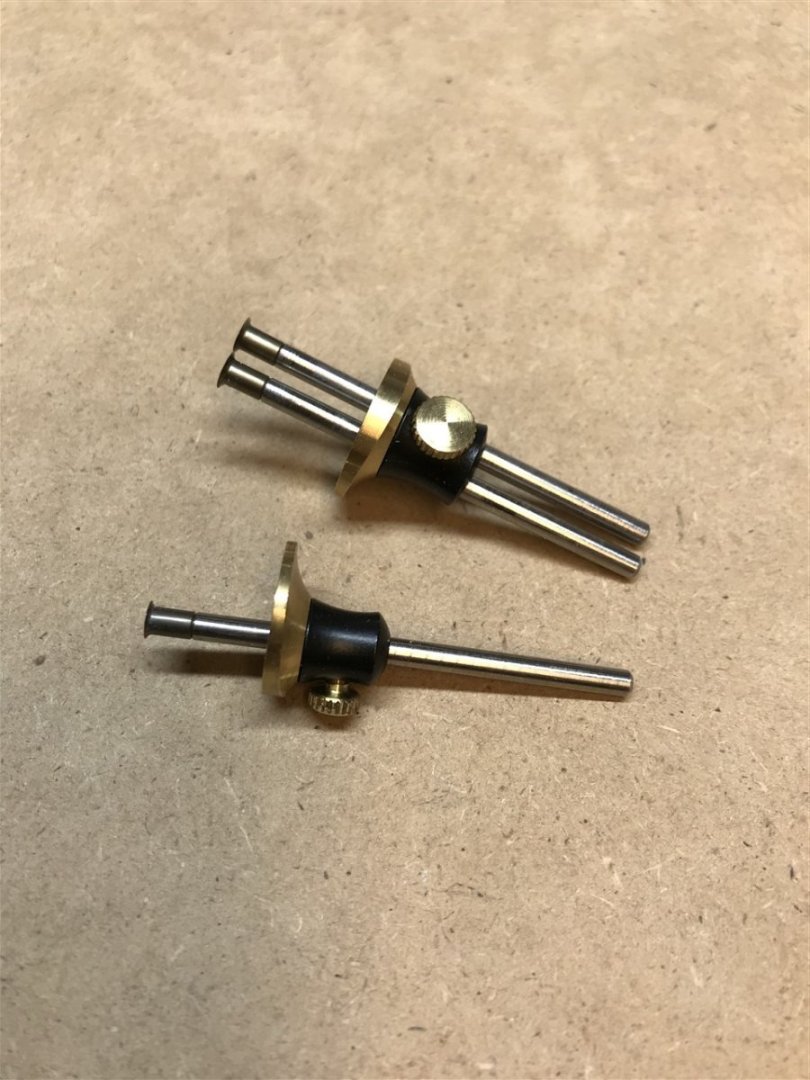
The rabbet and bearding lines are marked with a tiny marking gauge (a present from my children who know my weakness for these things Then some careful work with a 2.5mm upcut bit in the hand drill against a straight edge to establish the rabbet, using a section of planking to check depth, followed by some carving and scraping with the tiny chisels I made last year for Orca. The stem and stern post rabbets will be refined as they are planked. This is how it’s supposed to be done.


- 88 replies
-
- 14
-
-
-
- Vigilance
- Sailing Trawler
- (and 1 more)
-
I have put a note in the first aid tin to that effect. The floor was spectacular.
- 88 replies
-
- 4
-

-
- Vigilance
- Sailing Trawler
- (and 1 more)
-
Great progress, despite the eye patch. Your Grandson looks a spendid chap. Though from your third photo I think you should increase the milk ration now.
-
I could lock it in a safe and it would still get me!
- 88 replies
-
- 4
-
-
-
- Vigilance
- Sailing Trawler
- (and 1 more)