


ERS Rich
-
Posts
660 -
Joined
-
Last visited
Content Type
Profiles
Forums
Gallery
Events
Posts posted by ERS Rich
-
-
Hello, like this ship and decided to follow along....thanks....
-
Finished up the wales and did some smoothing....
Started smoothing with sandpaper....it’s seductive....however the long flat file does the best job and it’s faster....
Gearing up to plank the rest of the hull......
In the back of my mind is stopping and pausing Constitution on 5/31.....would rather build 2 at the same time...start Amati Vanguard, get it to the same stage as Constitution and complete both in parallel. Planking simply takes too much time.
Or stop sailing ship construction and move on to one of the Great White Fleet battleship kits I have from Bluejacket.
We’ll see.....


-
Just found this and decided to follow along....feel free to send a message if you have a question...
-
Just a couple of shots of a stern plank, with the twist and bend.....
- GuntherMT, mehdi.bj19, JeffT and 3 others
-
 6
6
-
Congrats Bro!
A pleasing rendition of aGrand Banks Dory.
Certainly your next project will be even better after incorporating your experience!
Cheers
- Ryland Craze, Keith Black, lraymo and 1 other
-
3
-
 1
1
-
blazing a path for others to follow....thanks
-
You got through it. Like the Tung Oil.
Looking at the work, may I suggest taking a look at using a wood file to clean up the board ends, rather than sand paper. Gives tighter control and crisper edges than sandpaper.
Next one will be even better. Cheers!
-
Welcome aboard! Cheers!
- mtaylor and Keith Black
-
2
-
Welcome aboard! Looking forward to seeing more of your work.
- Keith Black and mtaylor
-
2
-
Welcome! Being from Norristown, now living in Massachusetts, please value your ability to get a good cheesesteak hoagie and Italian pizza. Philly has the best anywhere and I really miss it.
My advice is to build something with one mast square rigged, then two....checkout Model Expo Armed Virginia Sloop....if you can swing it get the practicum from Robert E Hunt for the Armed Virginia Sloop, does a good job of leading the student through the rigging.
Please feel free to contact me if you need a hand.
- Keith Black, mtaylor and nehemiah
-
3
-
-
Take a look at Neolube....it’s alcohol based so dries almost instantly....it’s very thin, graphite colloidals in alcohol, and inexpensive. Available from Micromark. Brushes on, no need for soaking, less mess.
Just checked price, maybe not inexpensive but competitive with Casey gun blueing products.
Non hazardous waste, is a big benefit for me....
- mtaylor and Keith Black
-
2
-
Hello, if I may offer a suggestion that works for me....
Apply carpenters glue along the plank edge of the previously installed plank with a toothpick.
At the bulkhead a dot of CA.
Install new plank by butting it up against the previous plank from left to right. Pressing down on each bulkhead in succession from left to right.
CA dries fast, holding the board. Carpenters glue squeezout fills seams, and open time allows adjustments of the edges.
More on my USS Constitution build page...
Thanks
-
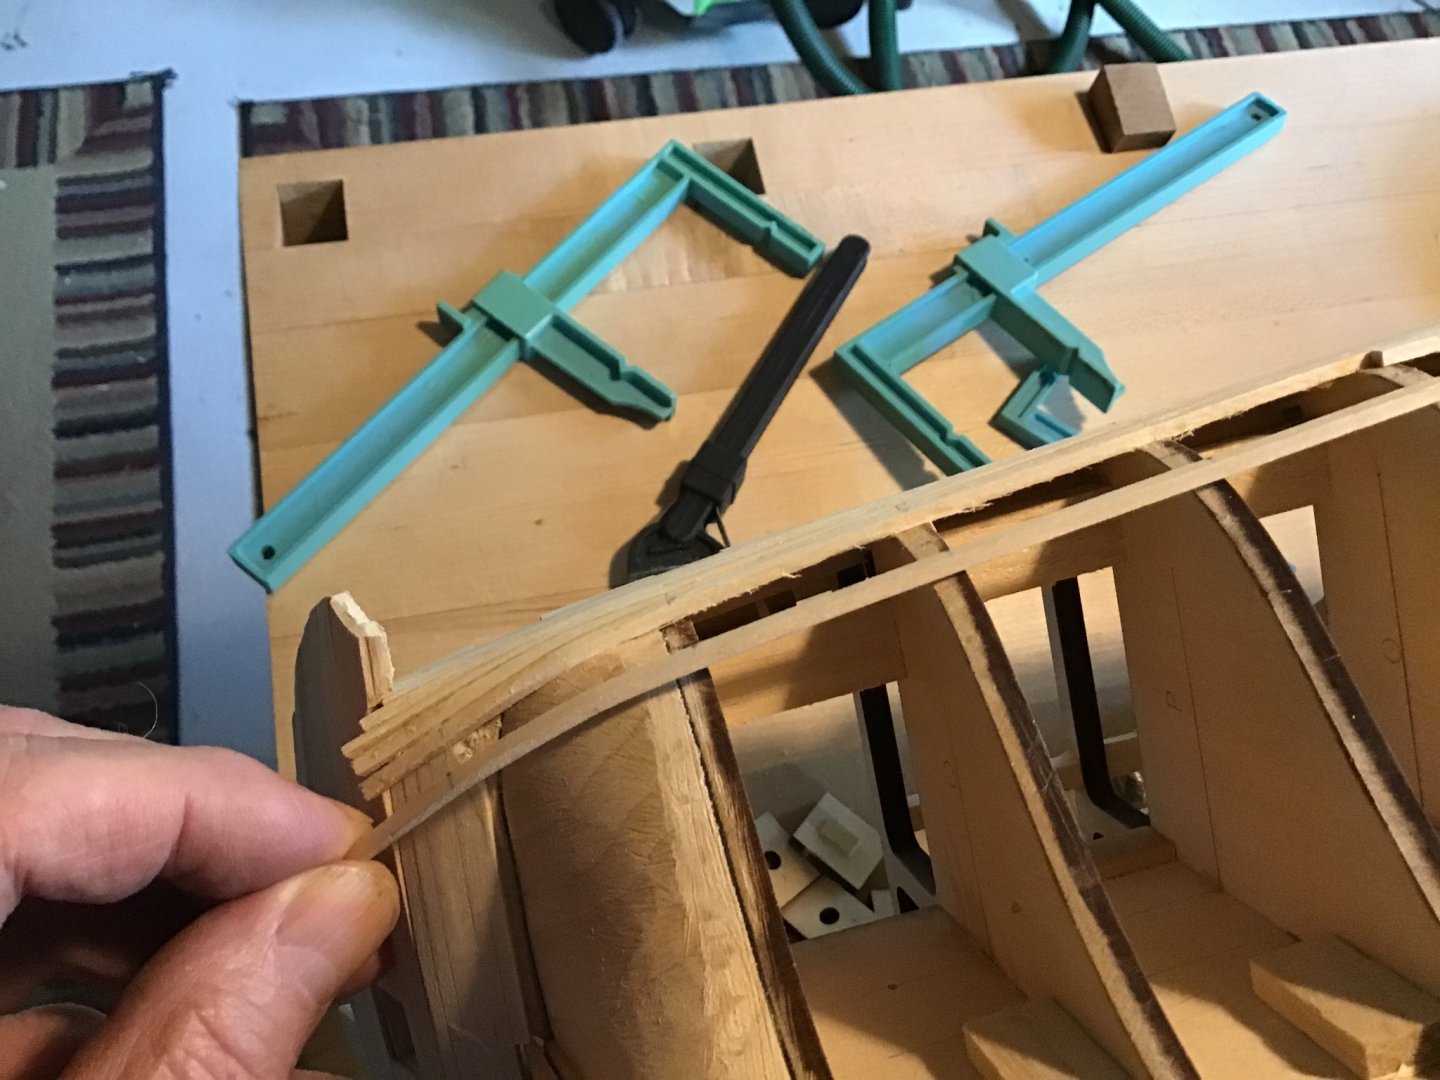
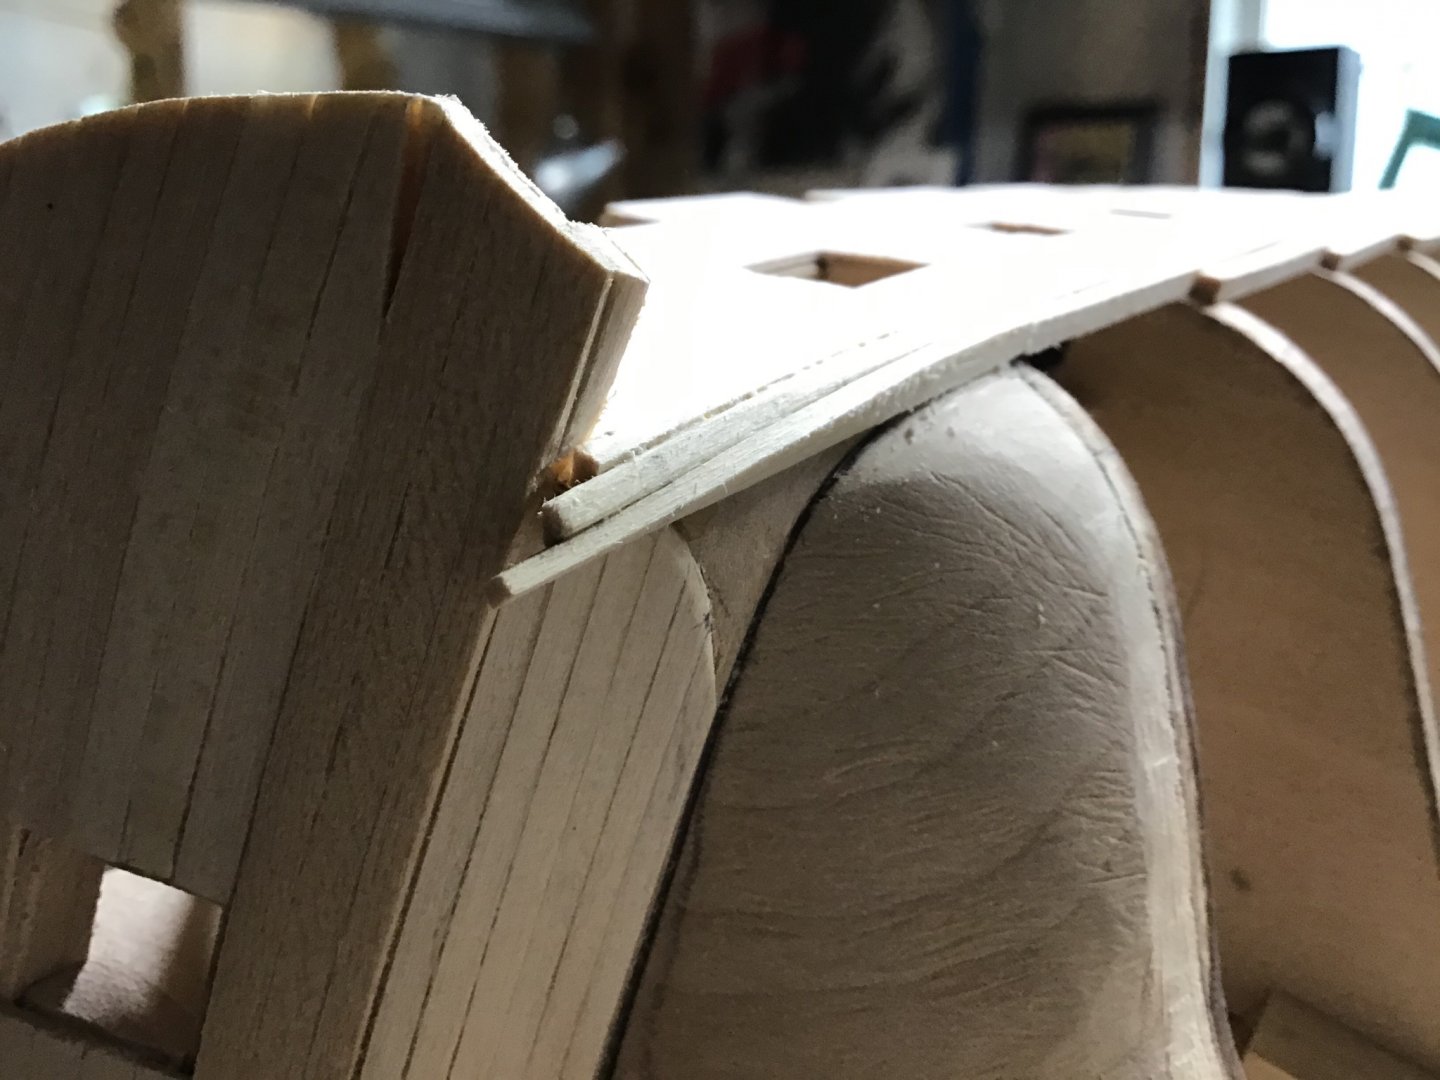
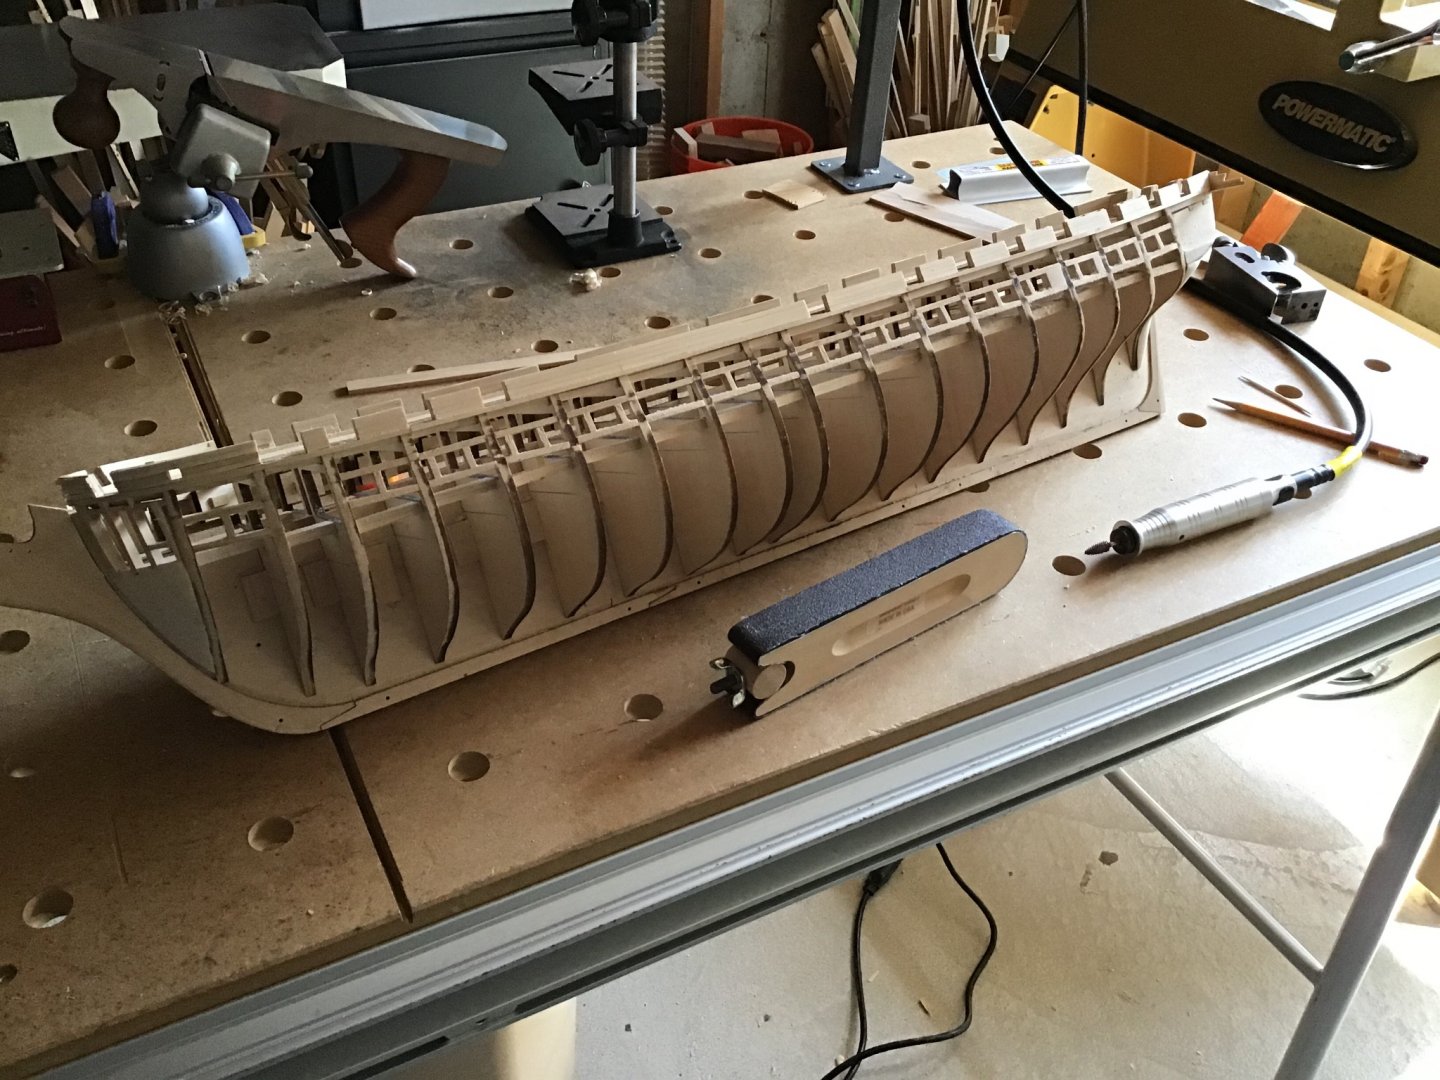
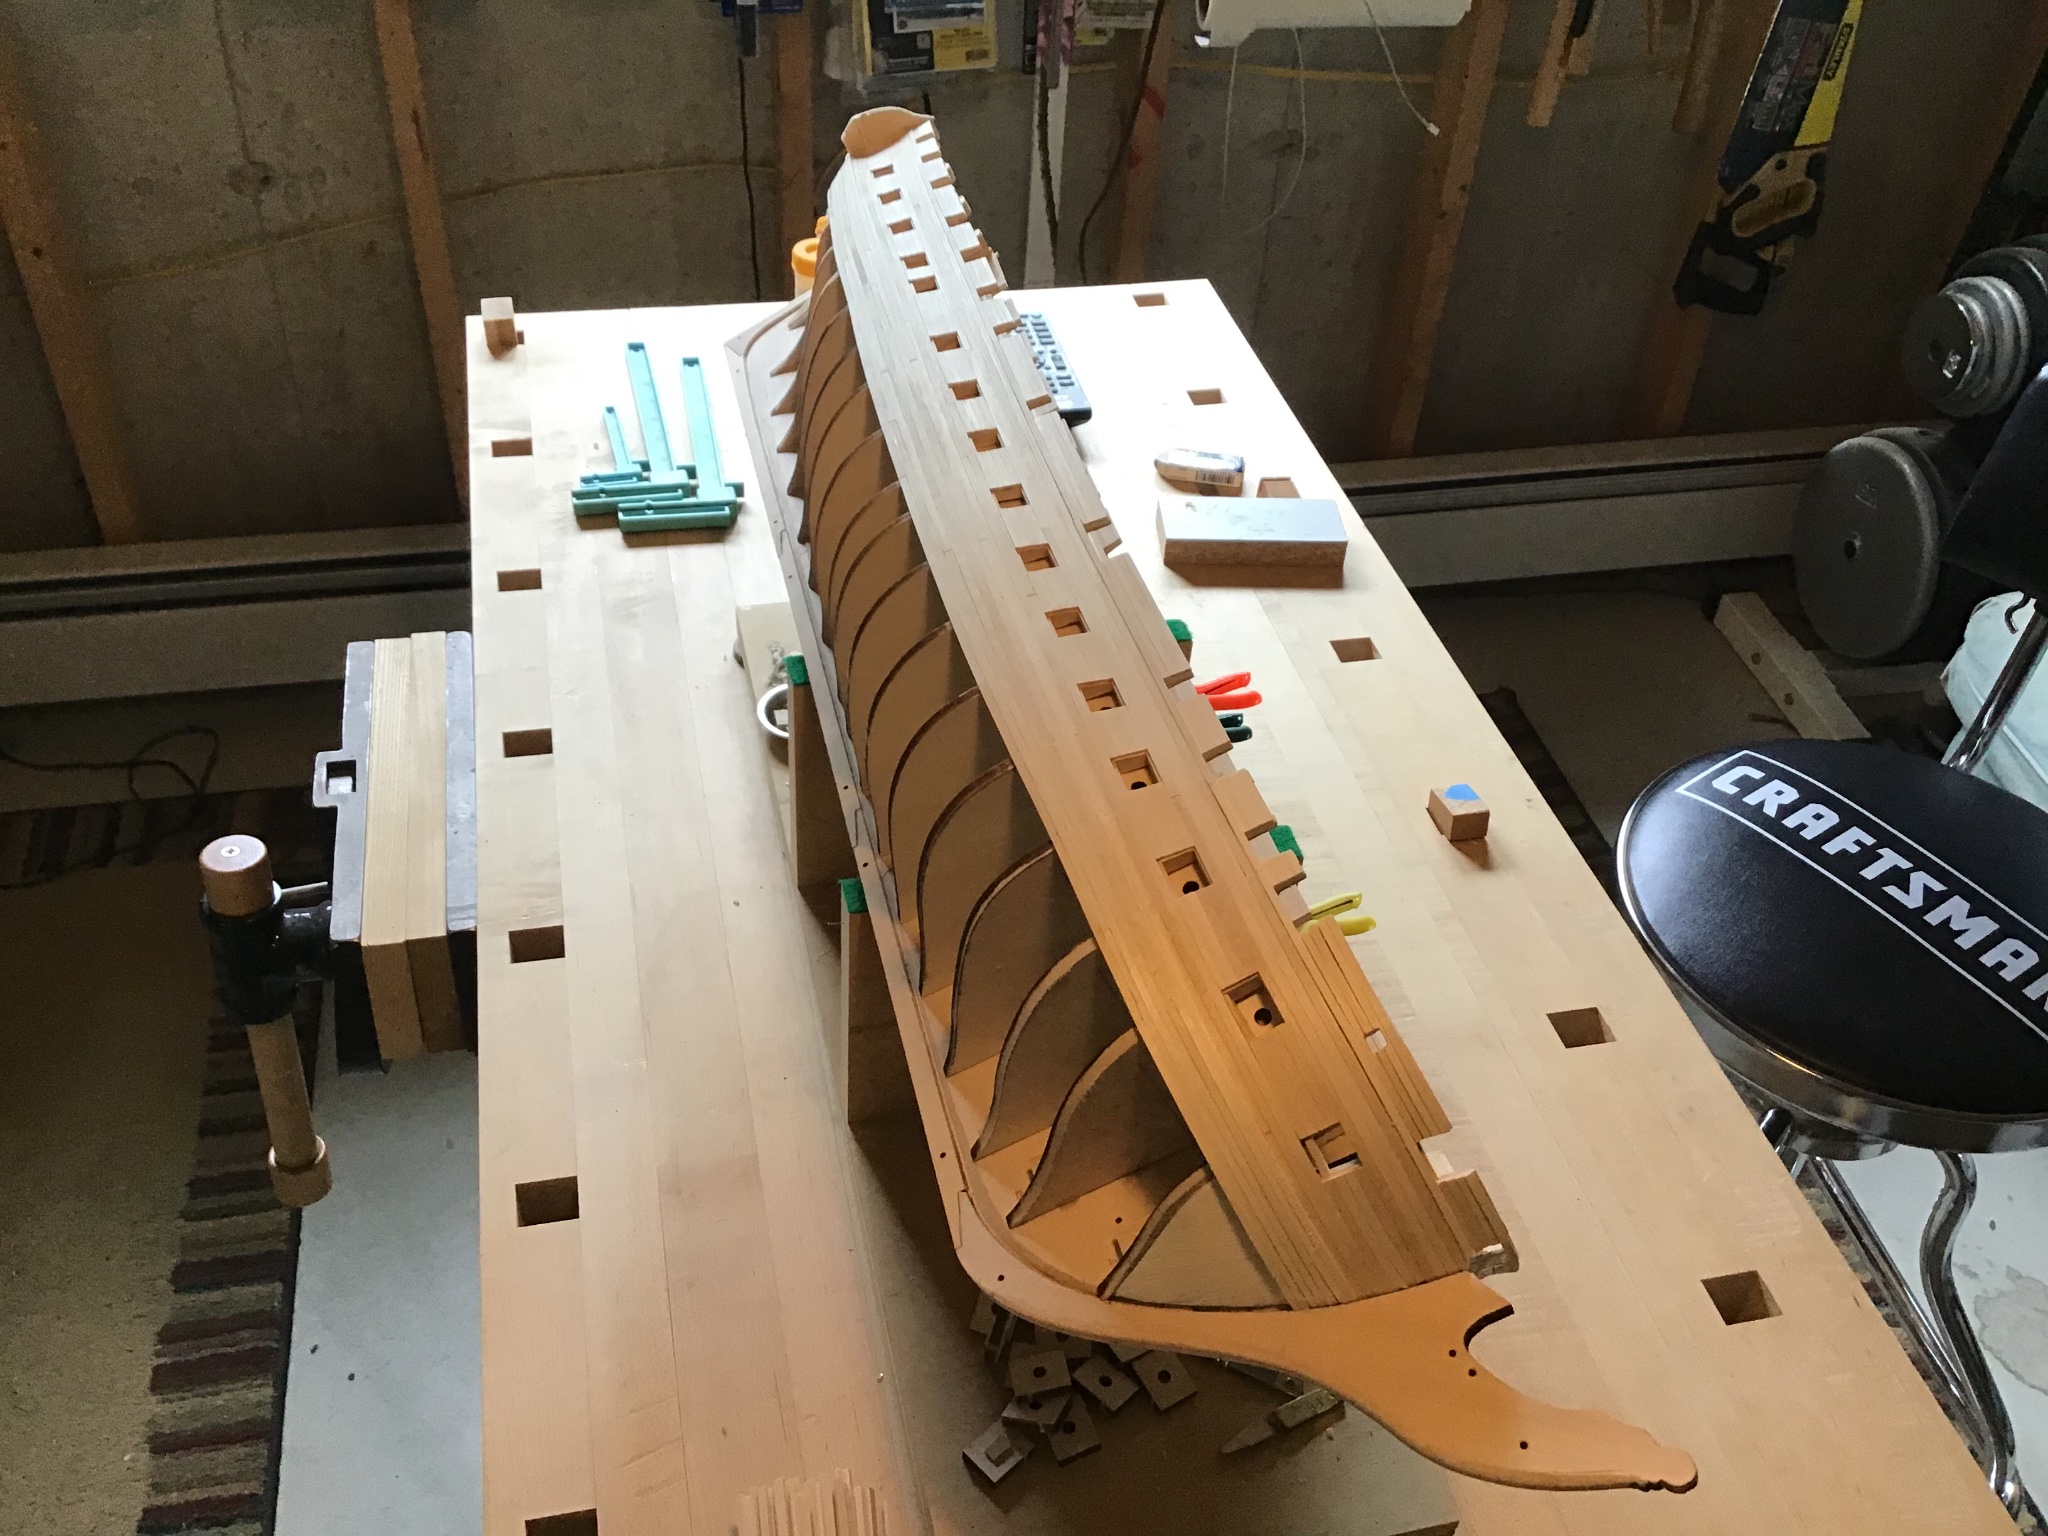
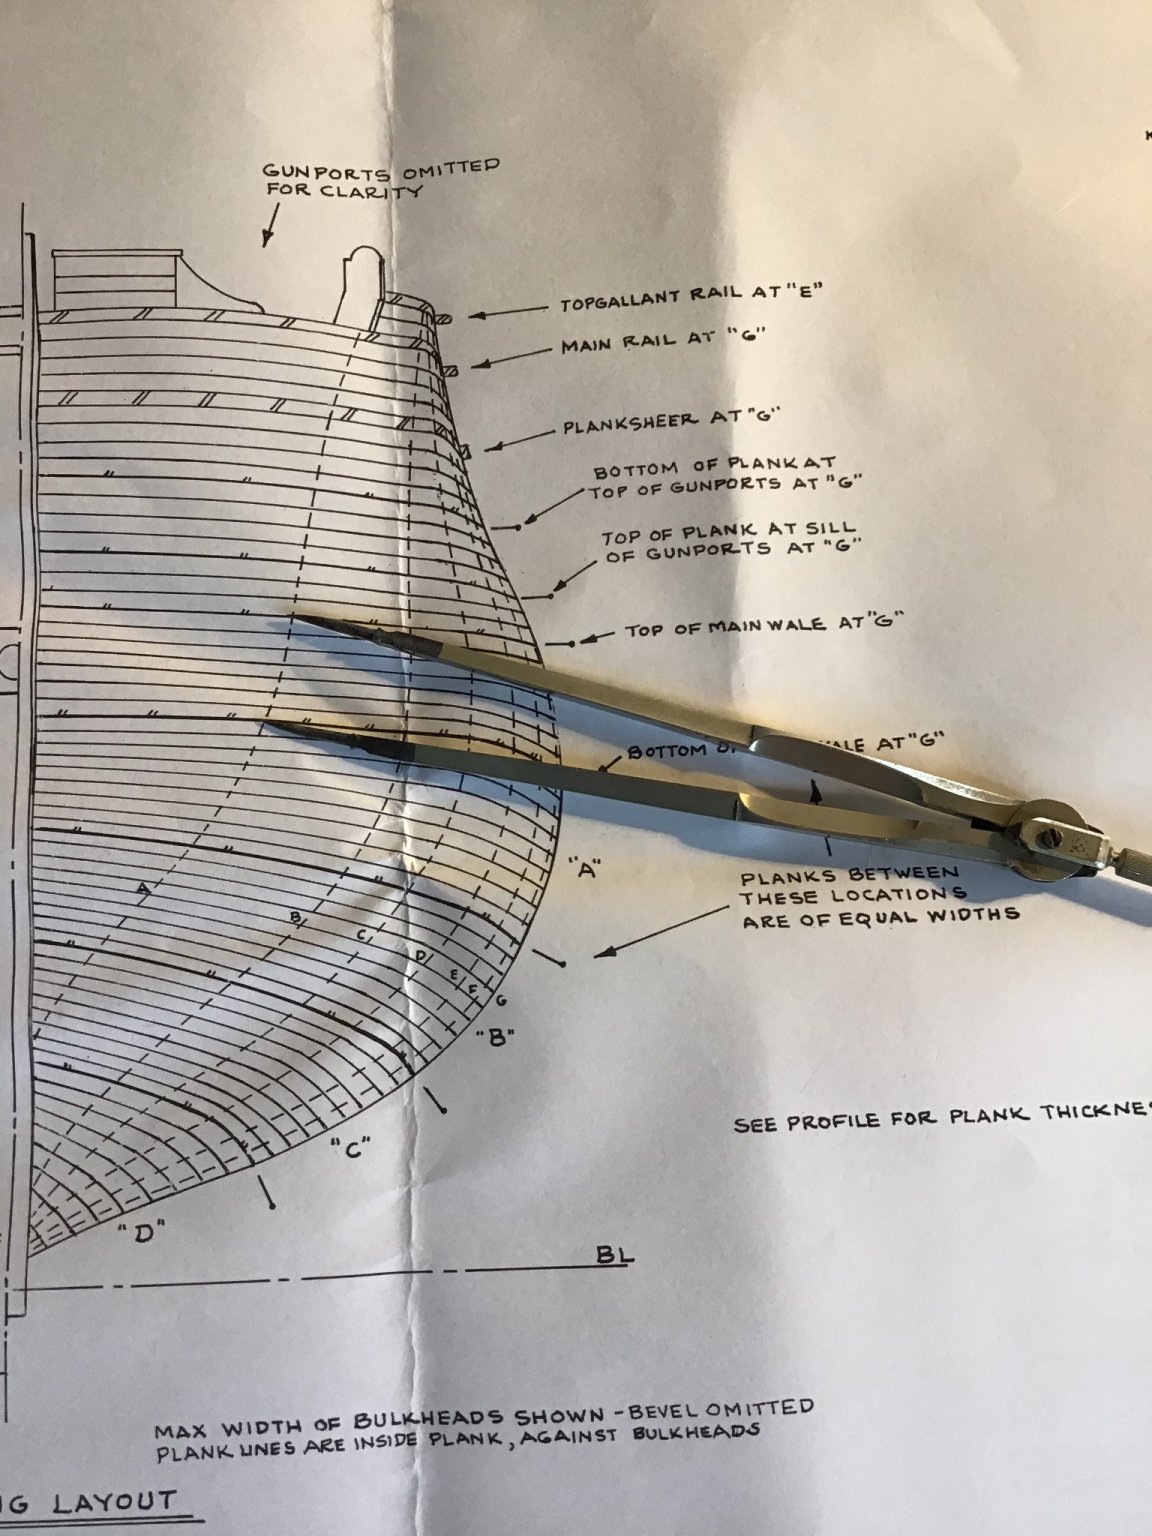
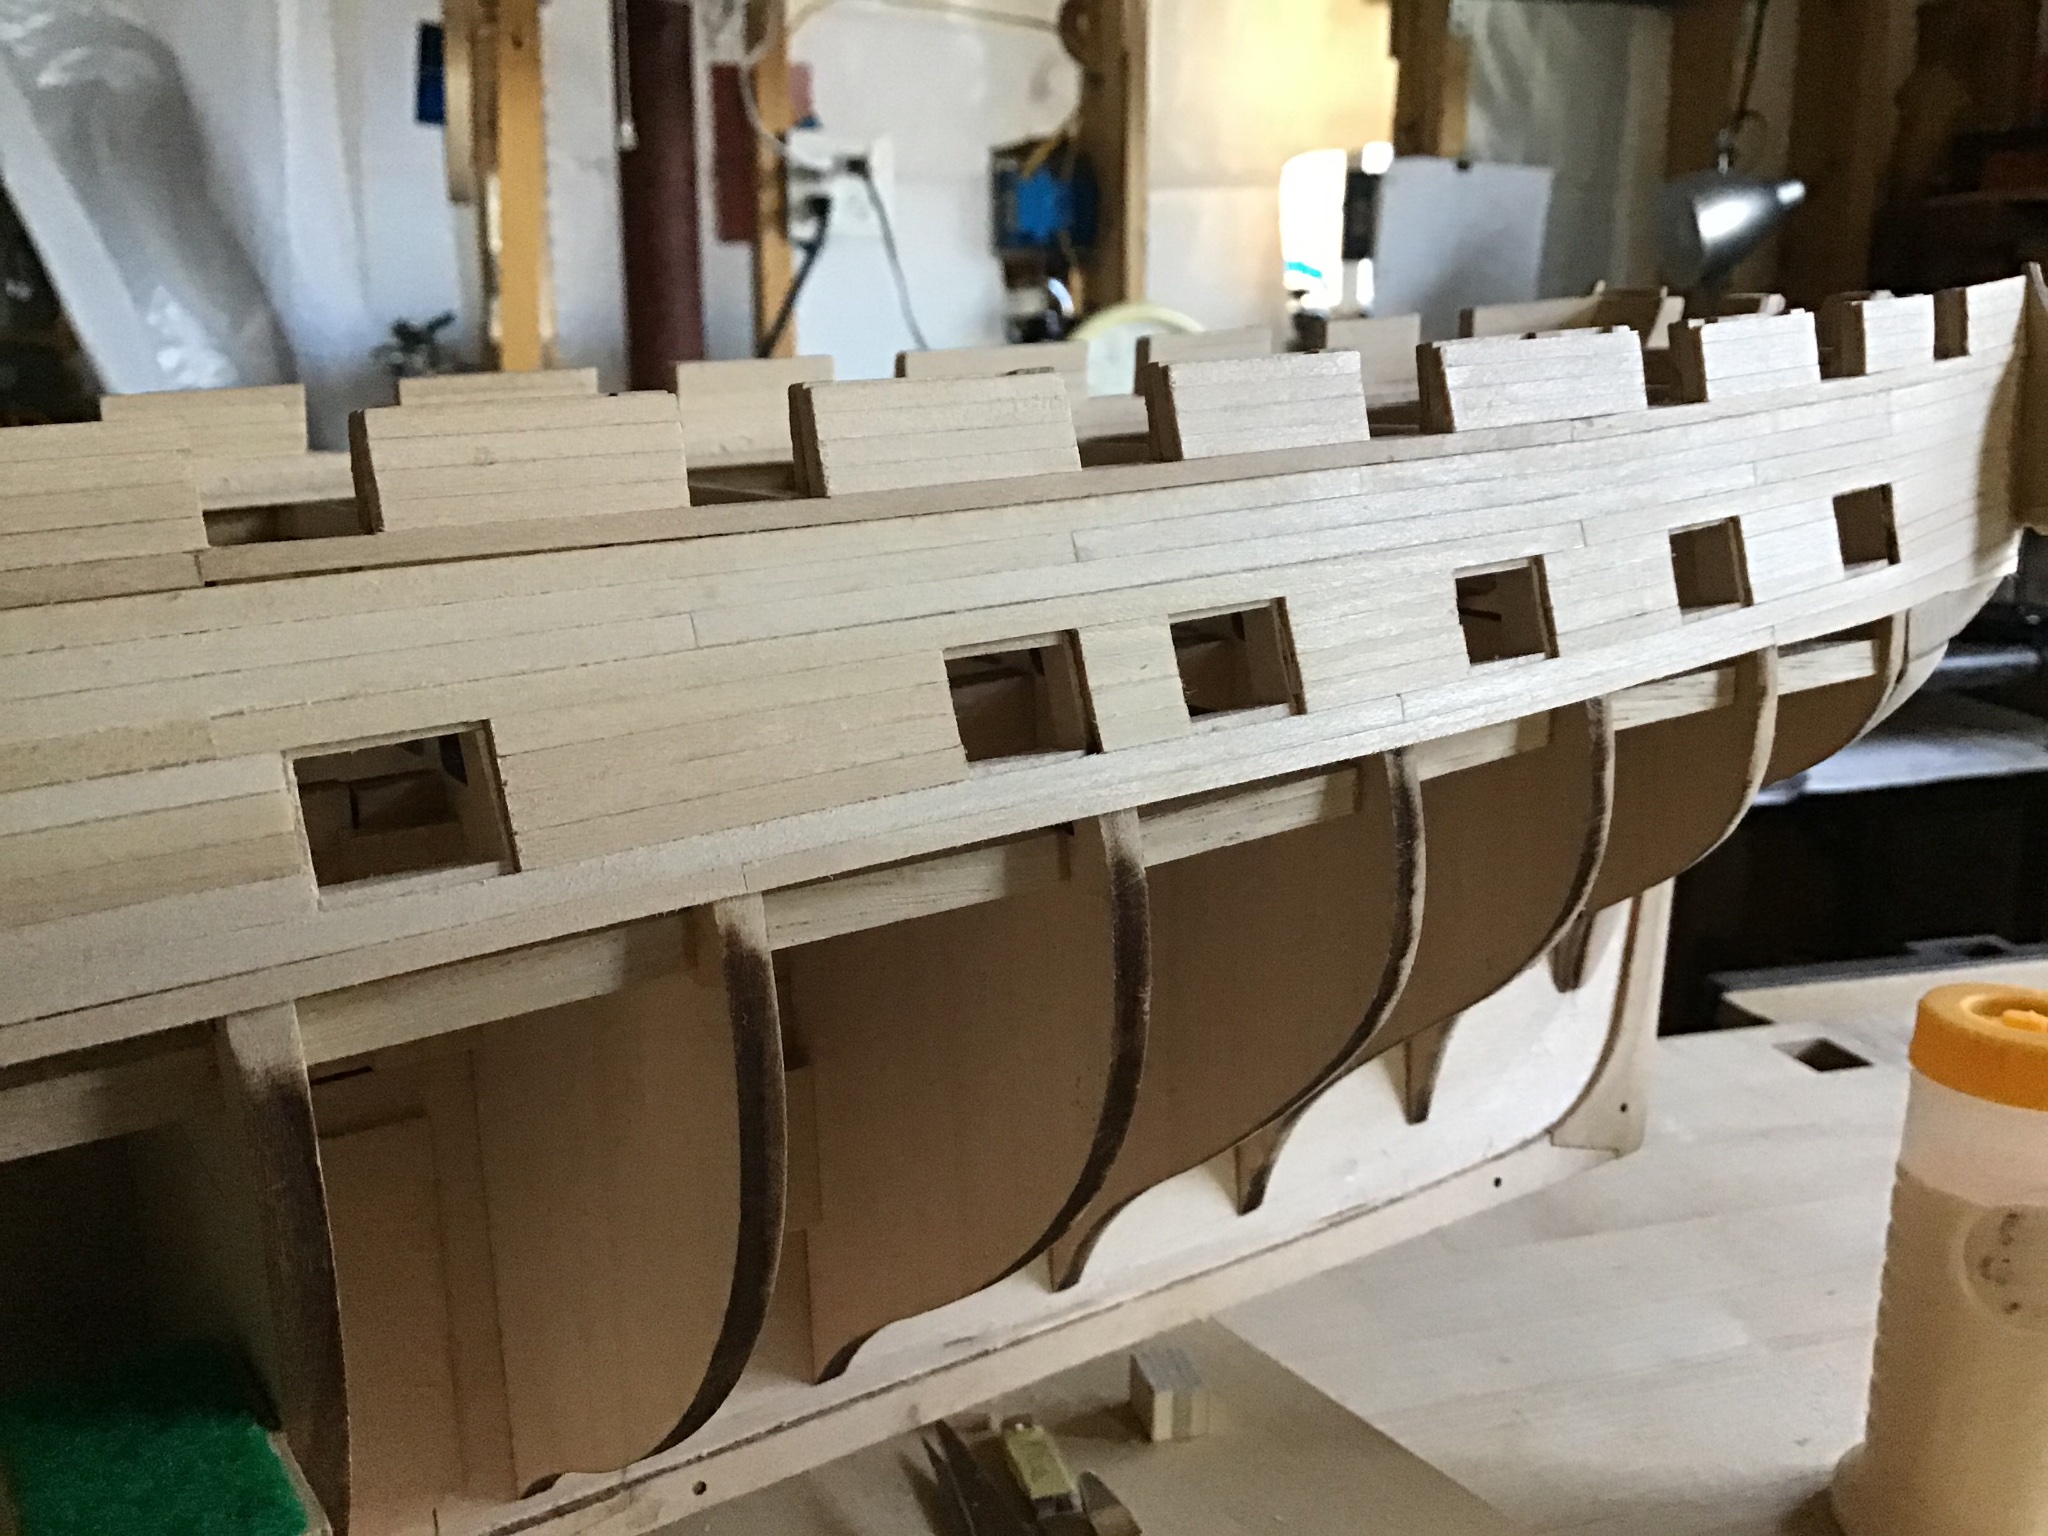
Planking Starboard Wale
The wale consists of about 35 planks per side. Pretty straightforward, the action is at the stern where the board twists about 90 degrees and bends around the stern blocks to reach the counter.
4 steps to process a stern plank: cut to length, taper, soak in water 10 minutes or so, twist end 90 degrees, bend to fit shape of stern block.
Picture 1 shows clamp used to close gap between bulkheads. Picture 2 shows working from amidships, aft, I like starting amidships, where planks are full 1/8” width.
Picture 3 shows stern planking. Looks intimidating, however, understand that the long thin wood fibers don’t mind twisting after a soak, and after twisting the plank will easily bend around the counter.
Should mention the plank edge faces do need to be worked by easing the inside corners with a file, and removing material along the stern edges changing the rectangular cross section to a trapezoid.
Last picture shows progress after some smoothing. Finally seams are tight because of generous carpenters glue on the plank edges during assembly. No squeeze out means not enough glue. Using a carpenters glue that is sandable and paintable. Also good as wood filler to fill any seam gaps.


- Tidbinbilla, JeffT, usedtosail and 2 others
-
5
-
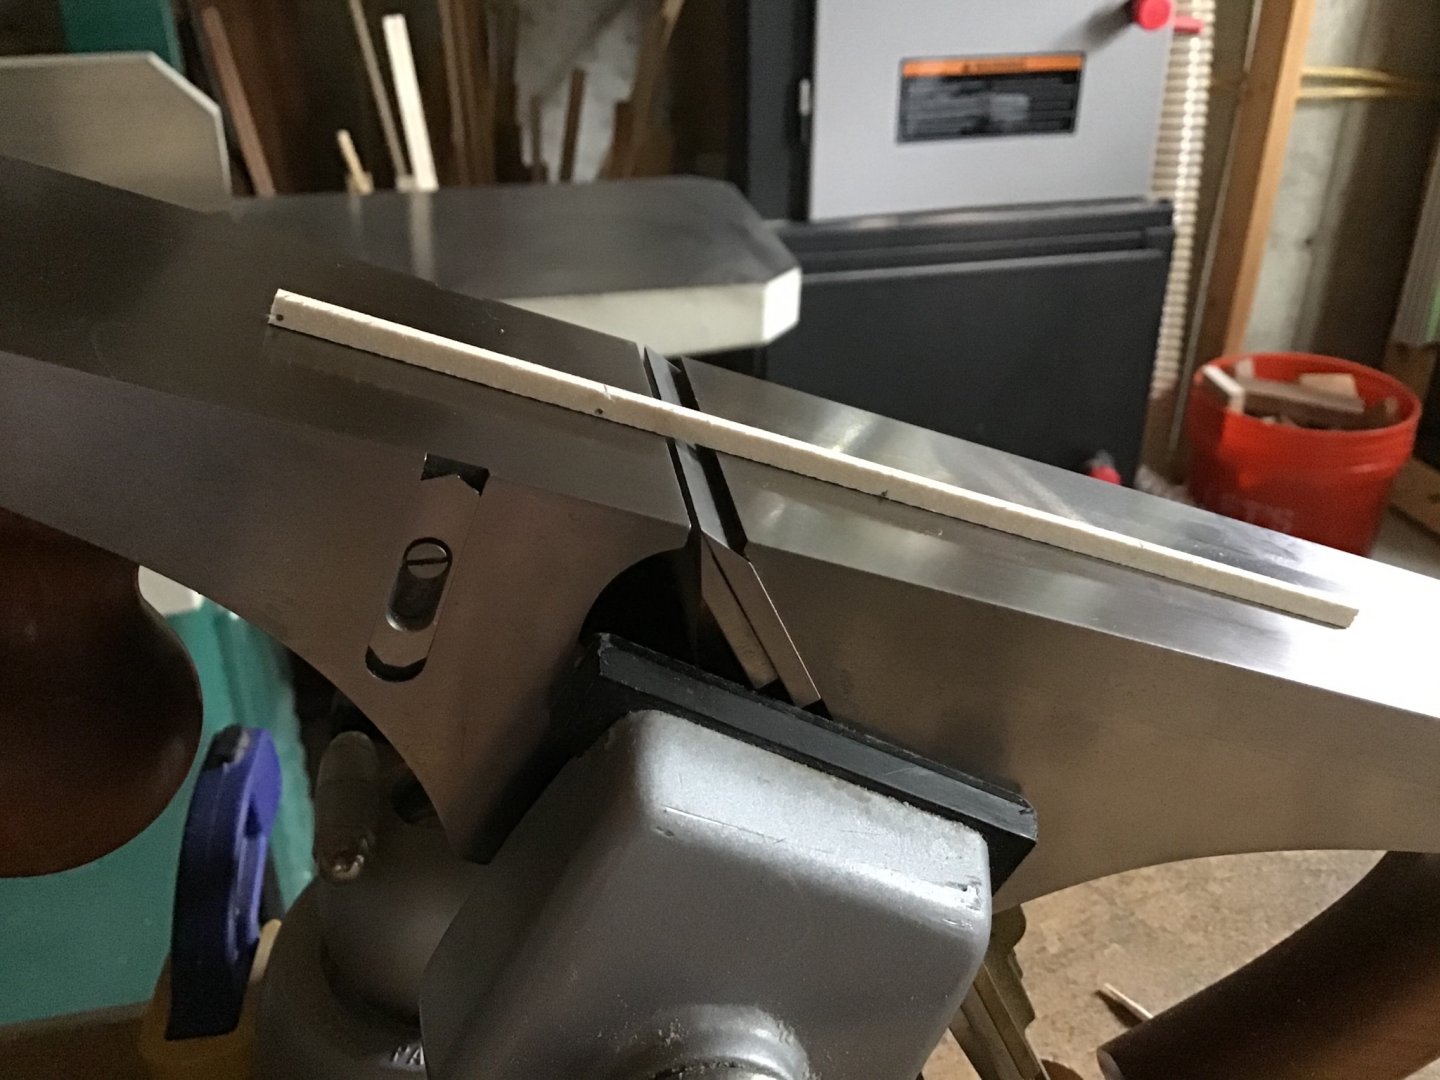
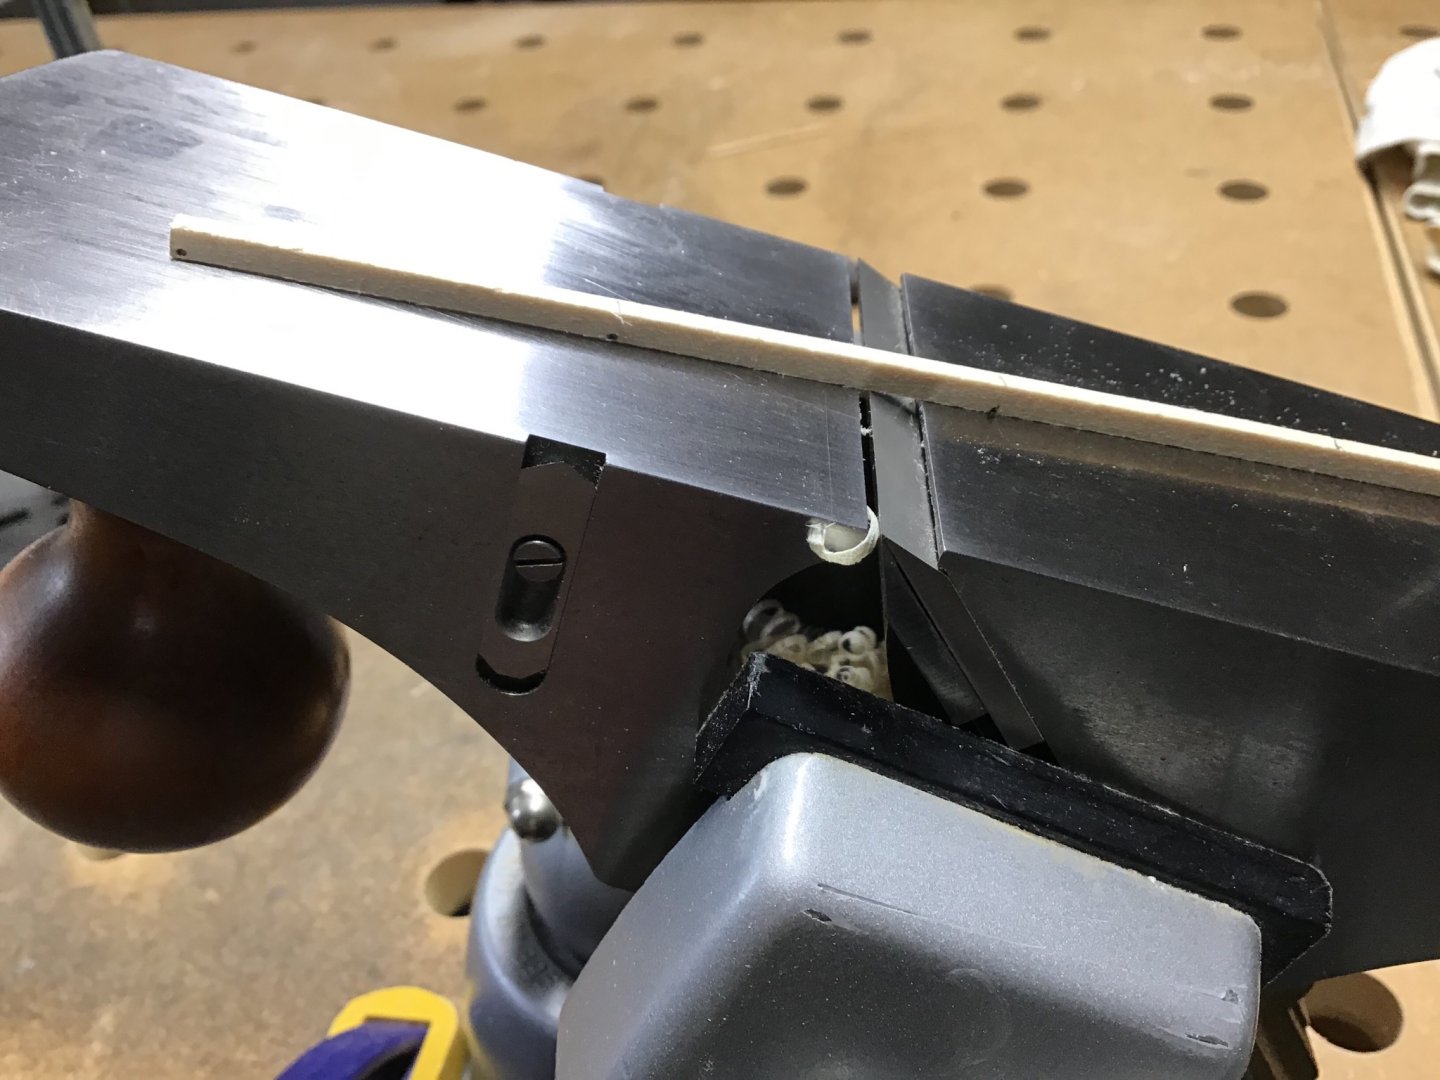
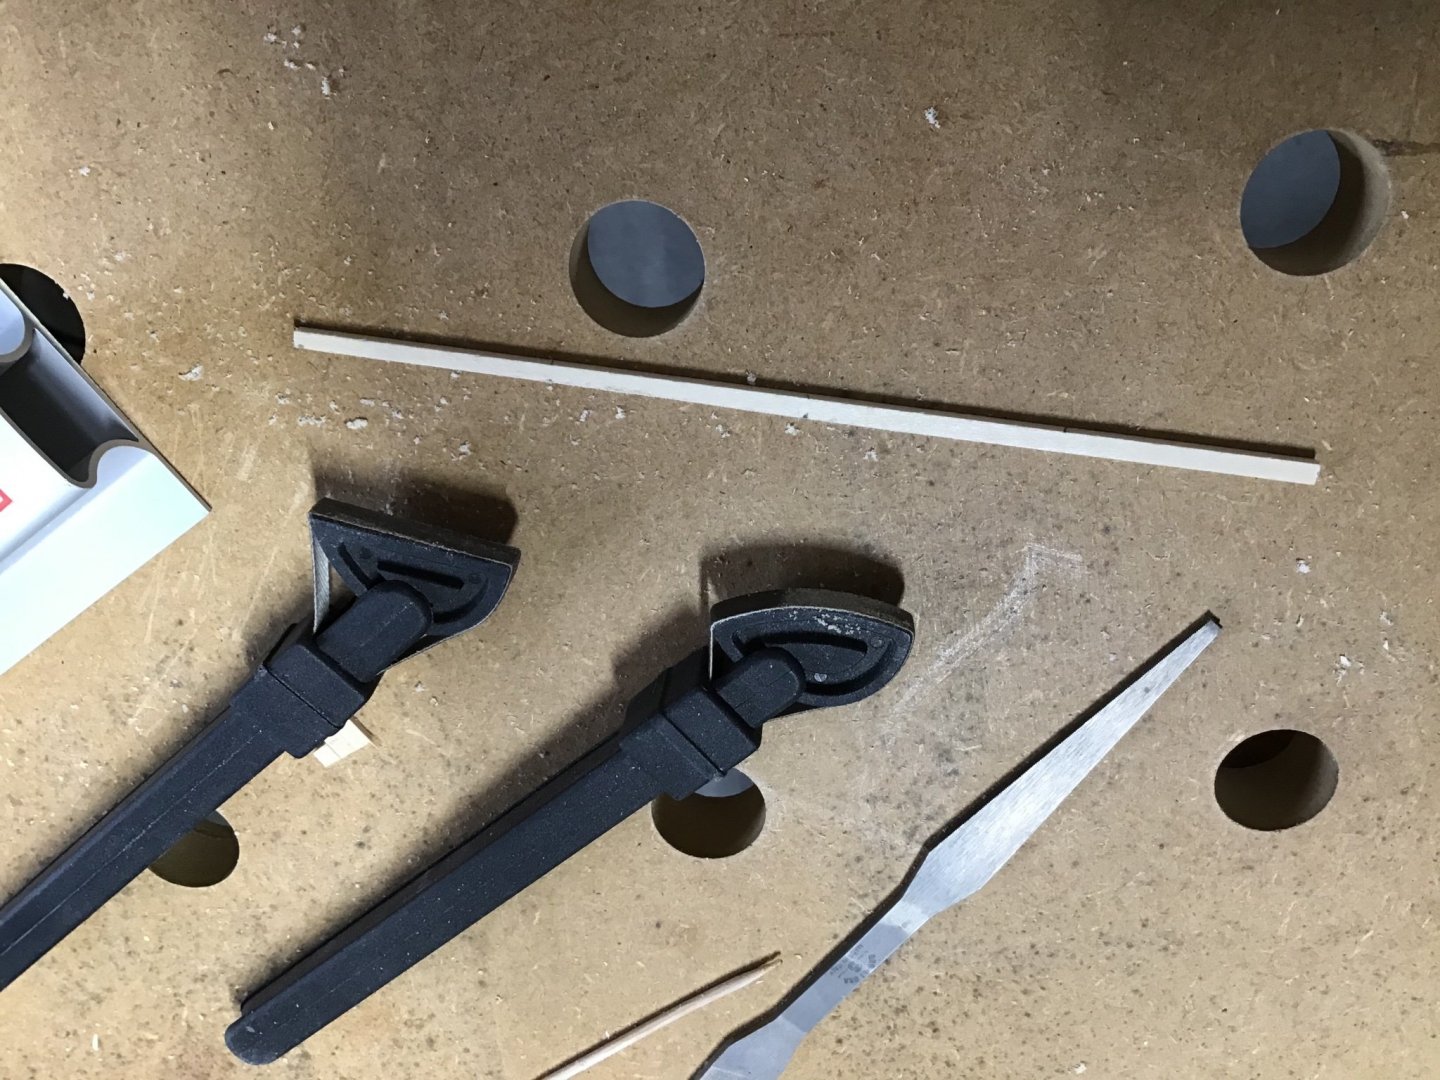
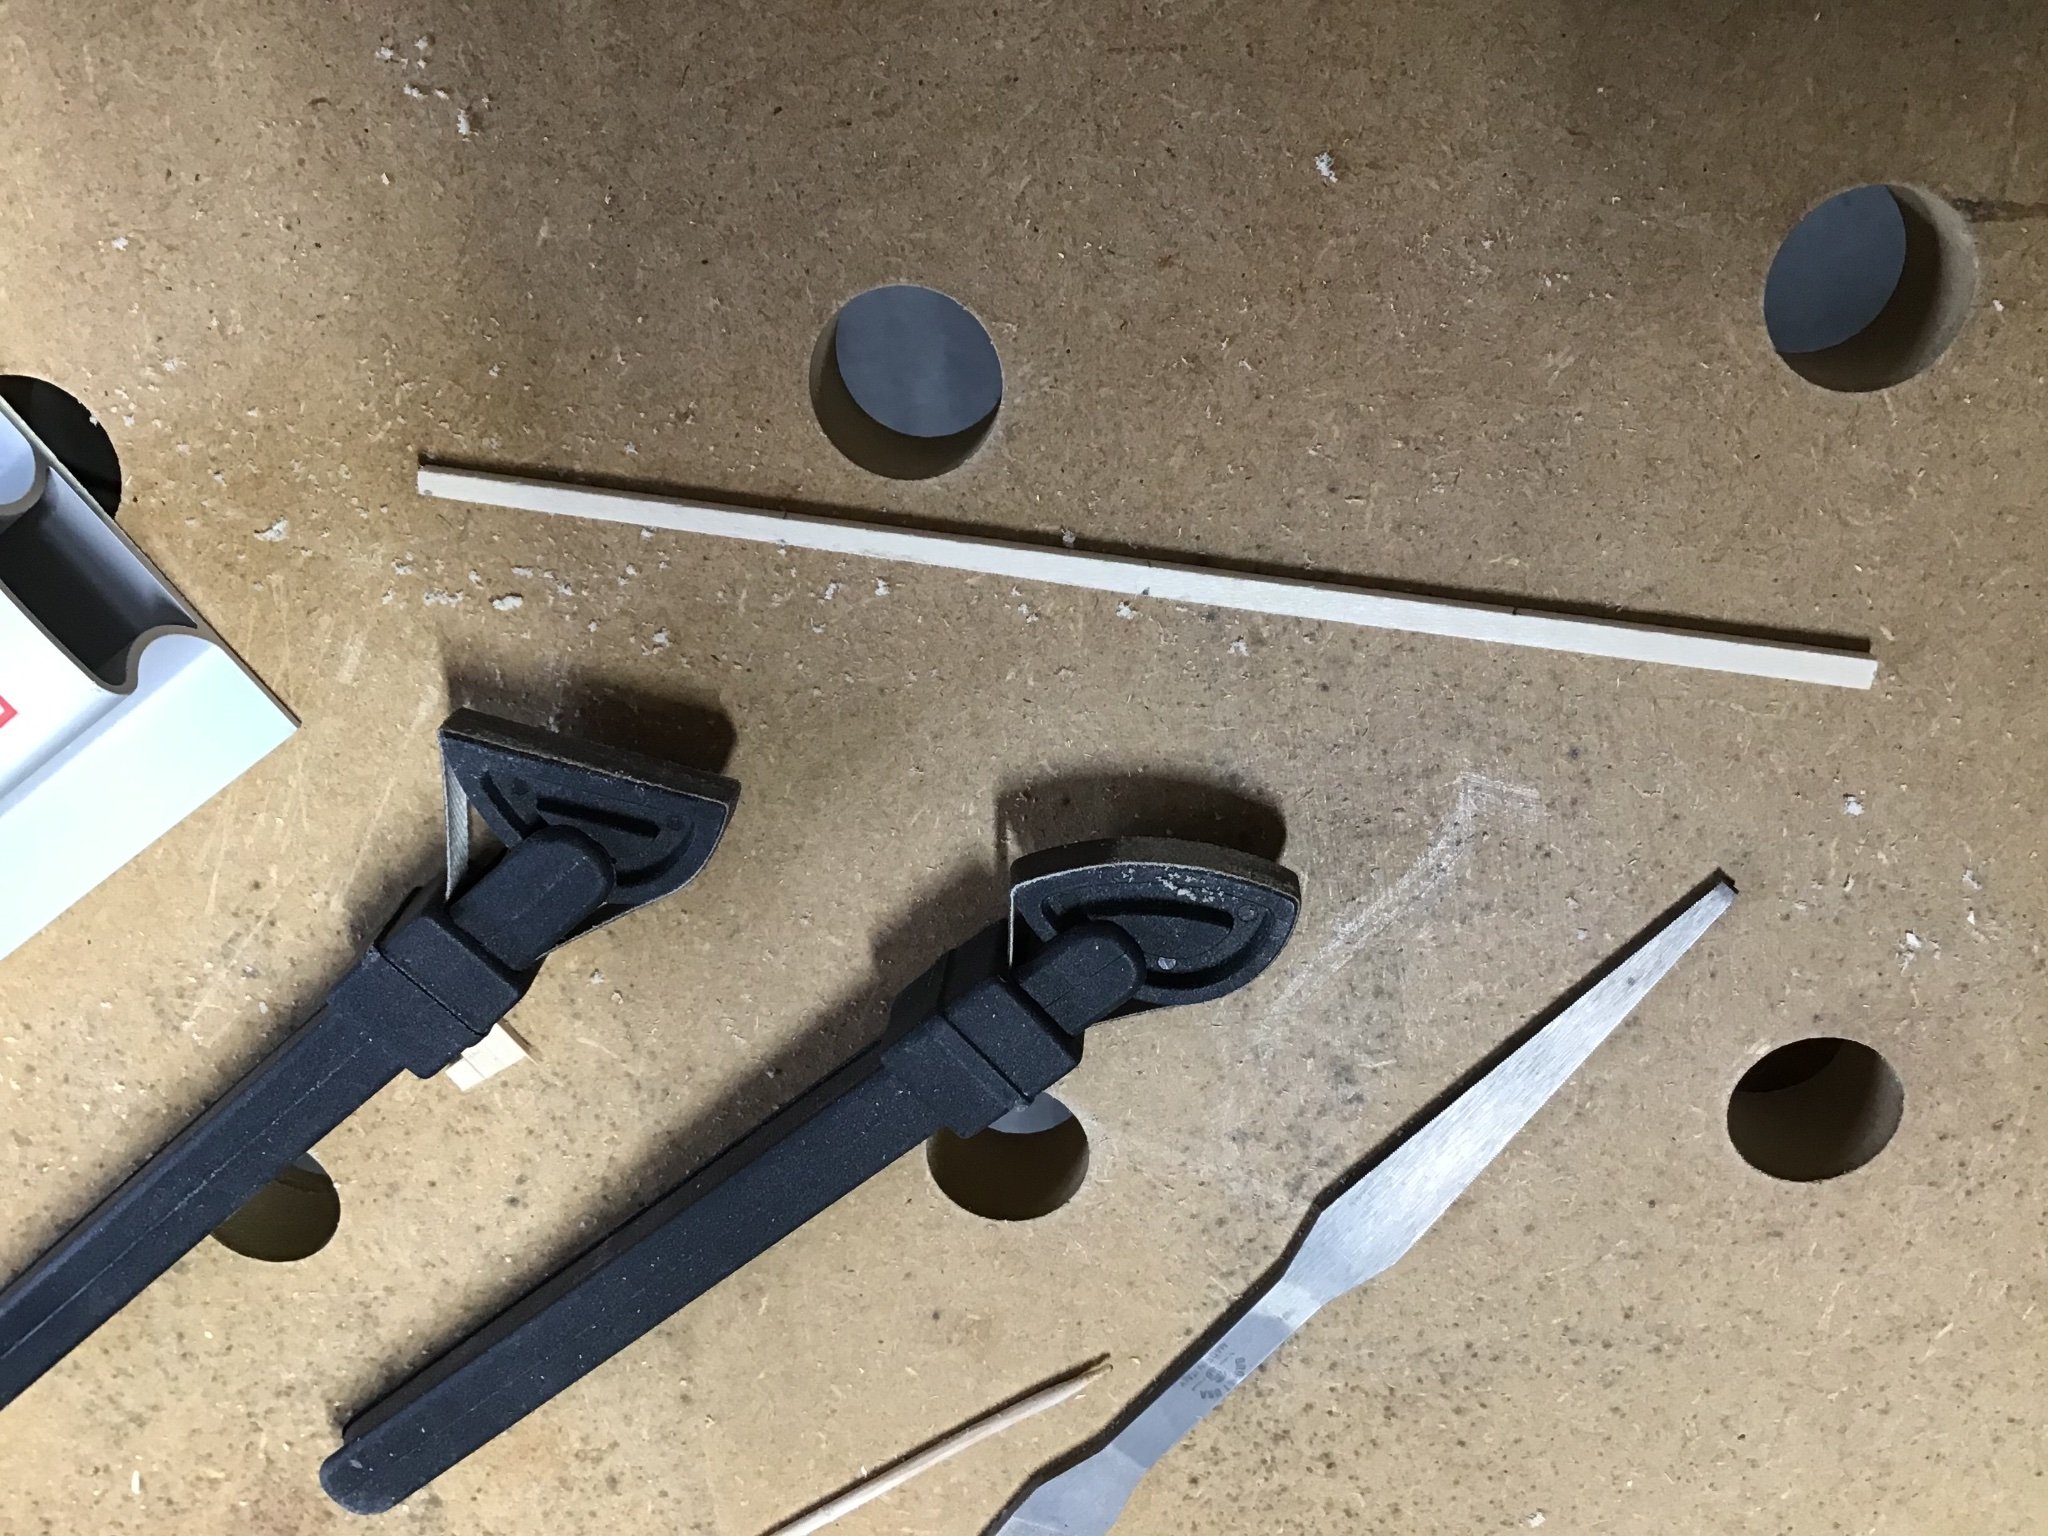
Tapering a Plank
This plank runs from bulkheads H to D and is tapered in width from F @1/8” to D @ 3/32”.The first picture shows a plank, marked with dots, indicating required width, at bulkheads F, E, and D locations, using the proportional dividers (search this site for purpose and use info), on the hand plane bed, setup with a vice. Wale consist of 7 strakes so dividers set to 7.
Use the plane to remove the waste material under the dots. Small shavings can easily be removed. Hold the plank in a way that maintains a right angle to the bed. Picture 2 shows the result.
Picture 3 shows the tools used to cleanup and smooth taper. Test fit the plank on the model.
Picture 4 shows the plank installed. Note, next plank from bulkhead D to the bow, is not tapered. Will rip stock to 3/32” wide.
Completed this plank in less than 10 minutes.
-
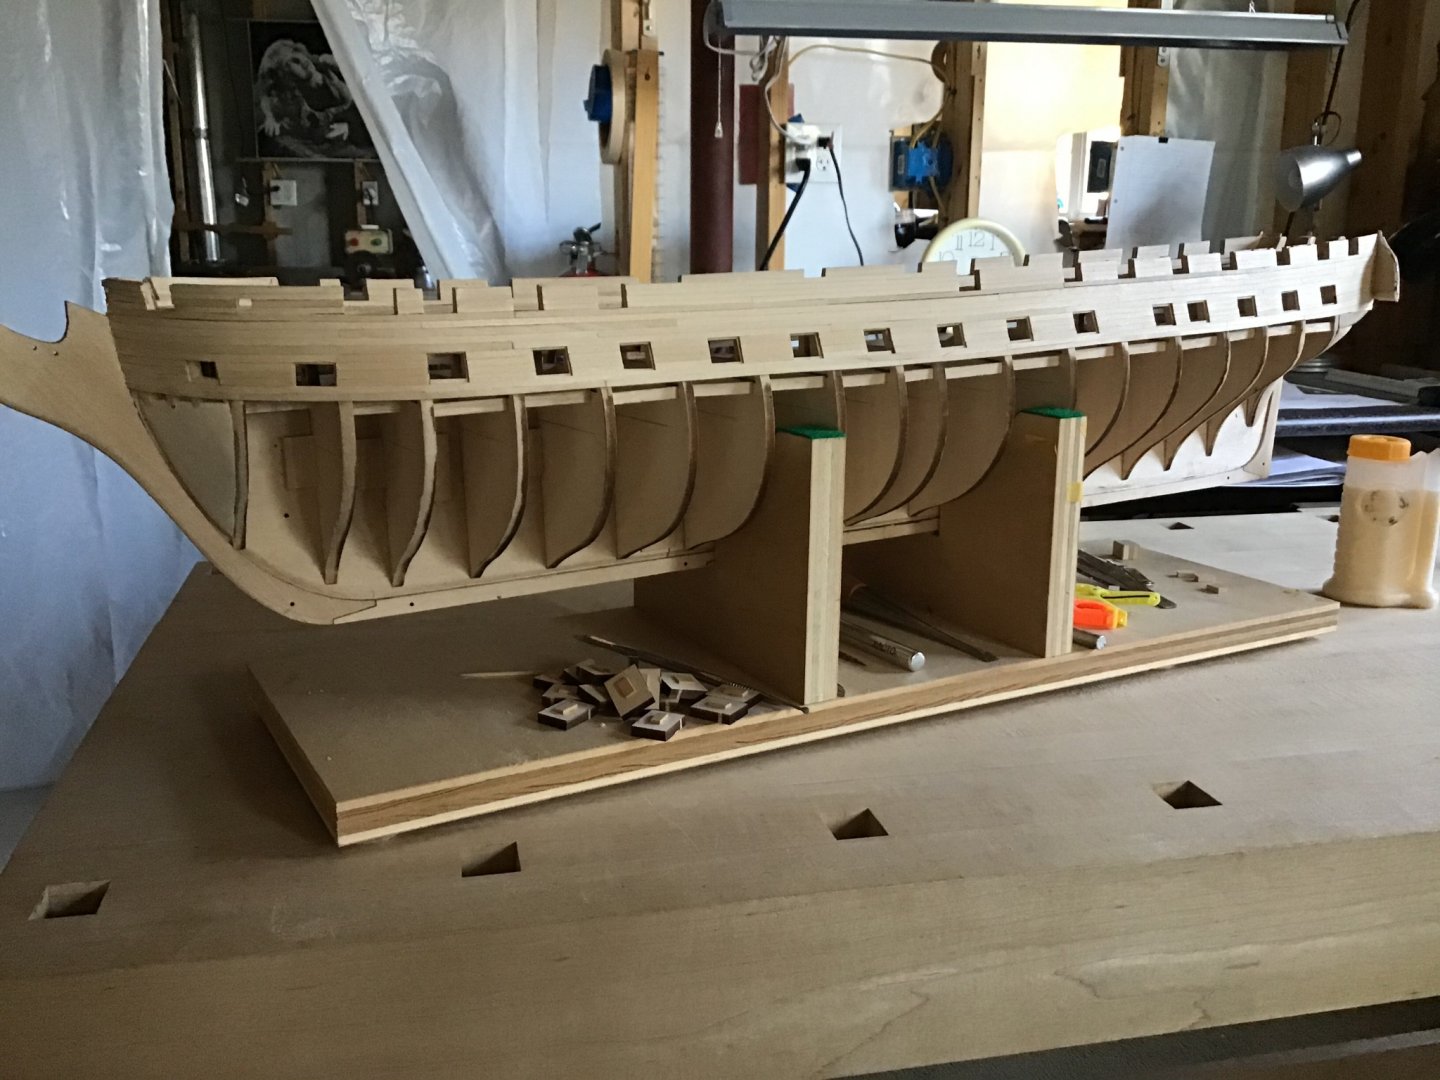
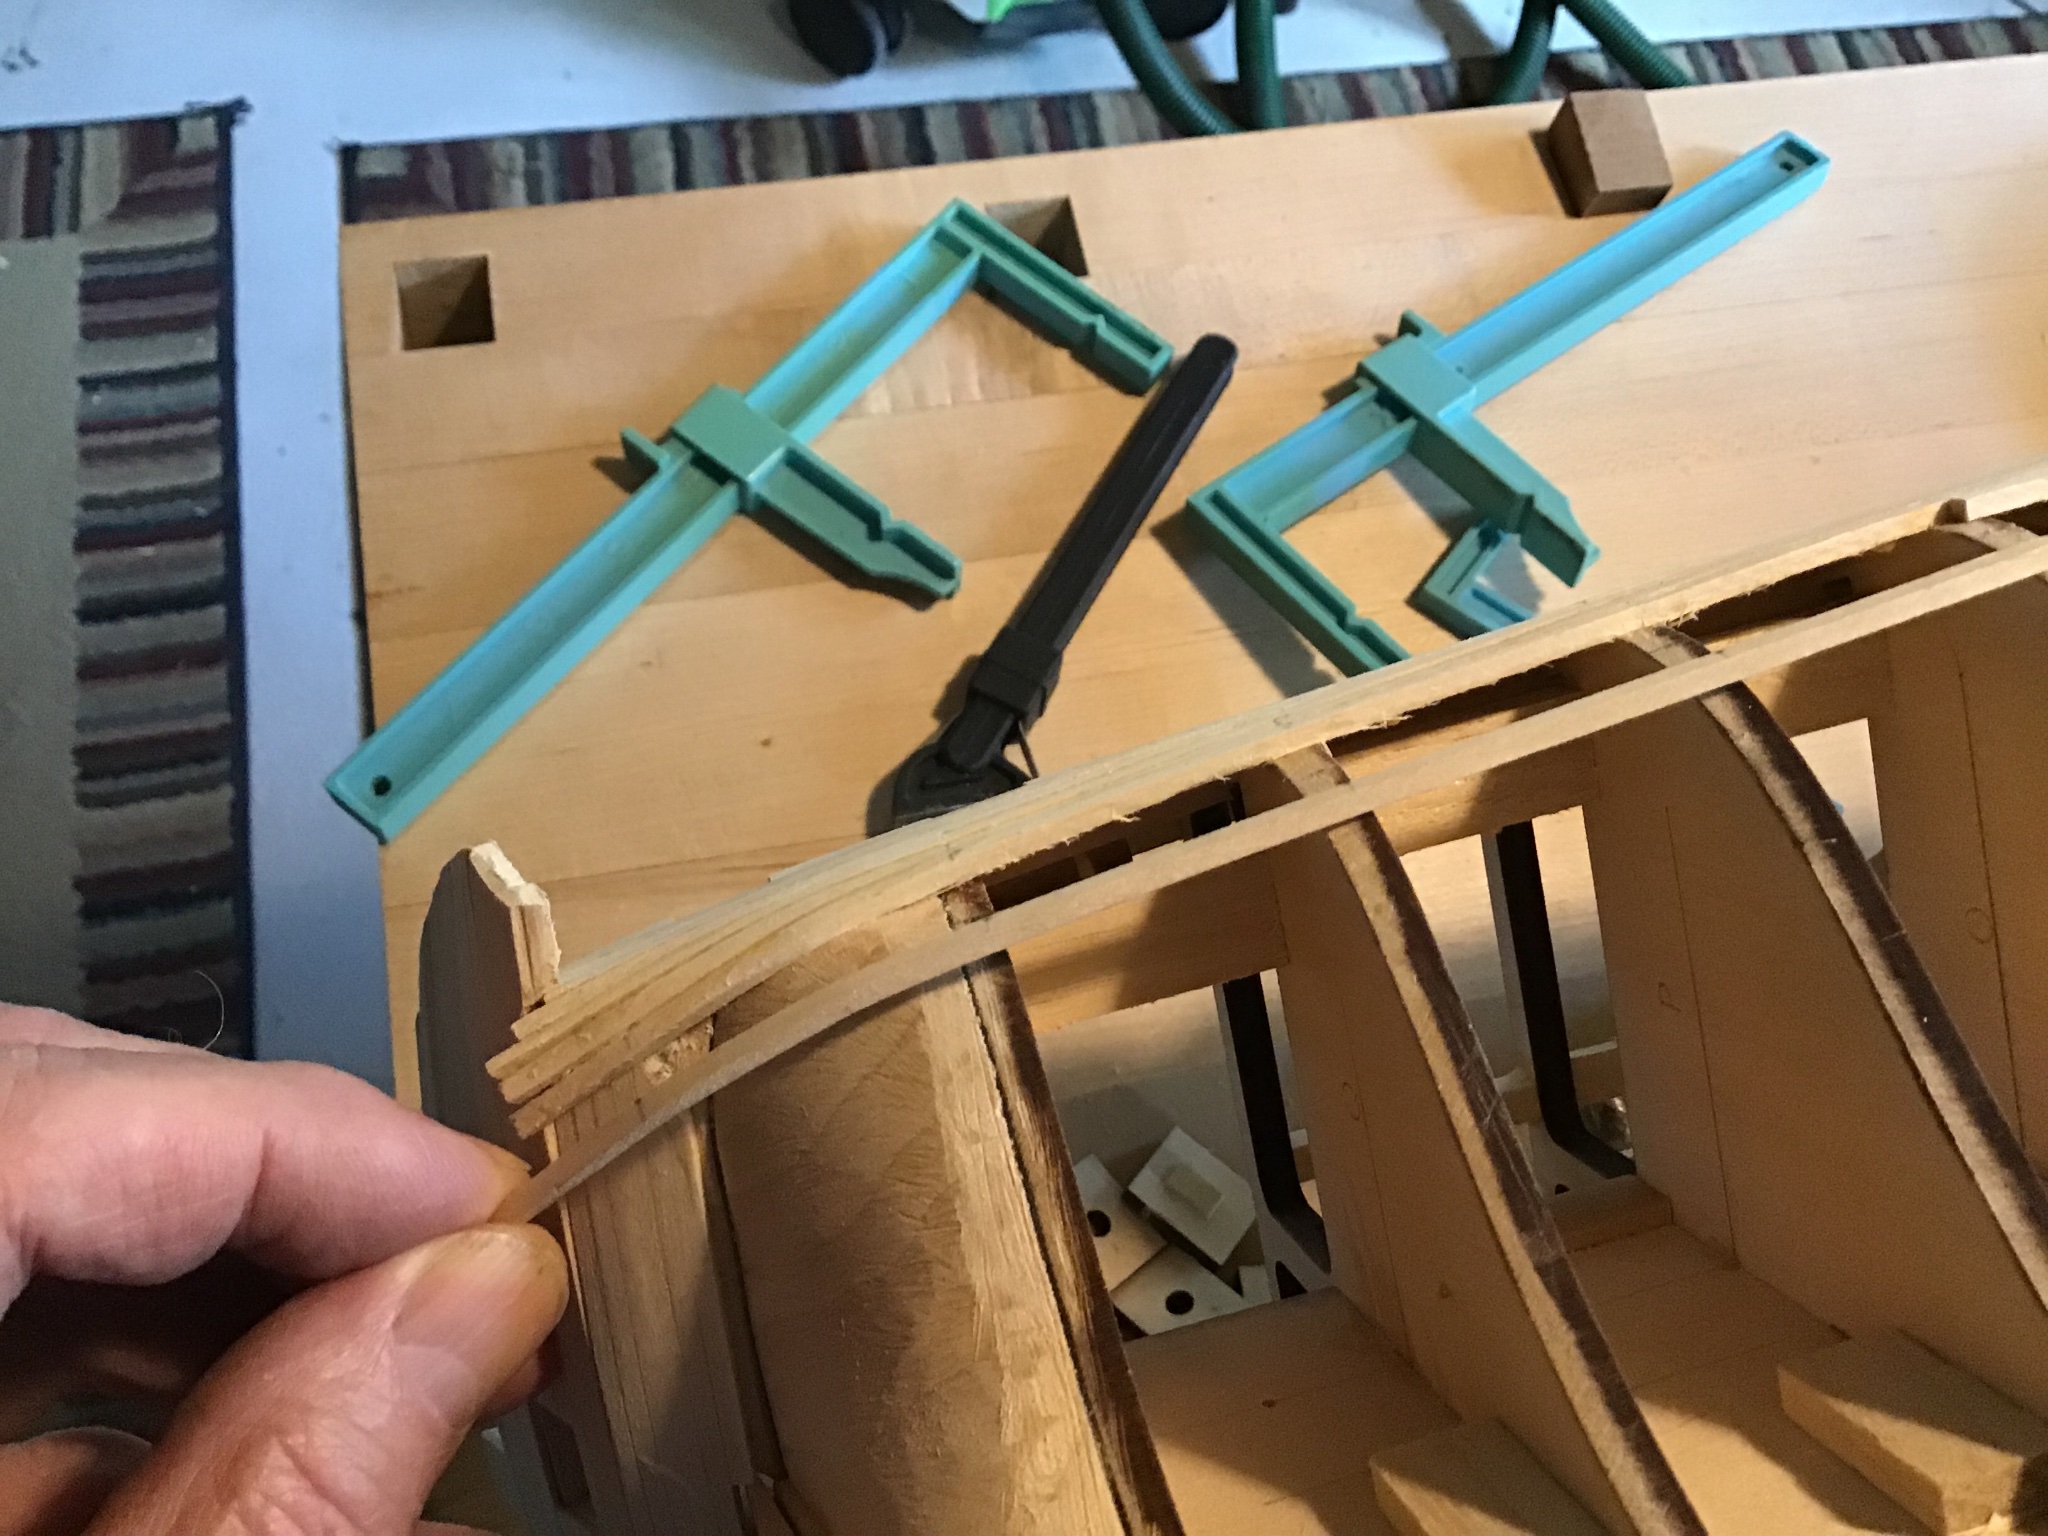
Planking the Wales - Planking Without Clamps or Pins
First off mark the bulkheads with the width of the wale at that bulkhead with the plans and the dividers. Pictures 1 and 2.
Compare the widths at the bulkheads and look for equivalence. In this case the width is the same from bulkheads A-D, and G-L. This means plank widths are the same amidships between bulkheads G-L - 1/8” and 3/32” from bulkhead D forward. Tapering occurs between bulkhead D and G, and from bulkhead L to the stern. Will use proportional dividers to mark the widths on planks and a hand plane held in a vise upside down to taper.Next use the pattern file to ease the back edge of the previous plank and the lower edge of butt joints. Pictures 3 and 4.
Apply carpenters glue with a toothpick to the lower edge of the previous plank and a dot of fast glue to the bulkheads. Picture 5.
Install plank, apply pressure up along the plank to close any gaps, and down on the bulkhead. Fast glue grabs and holds the plank while carpenters glue is slowly drying. Look for squeeze out of the carpenters glue and the fast glue. Cleanup with a toothpick.
Note there shouldn’t be any gaps, and little force should be needed, if so spend more time prepping the plank for good fit. Or preping the previous strake lower edge.
If needed, use the fast glue squeeze out on the bottom of the plank, on the bulkheads, to close any gaps, by pressing a block into it with upward pressure. Later the block will easily pop off with a little side to side wiggle. Picture 6.


-
When building anything, there is the plan....then the modification of that plan with “as built”....
How can anyone know with absolute 100% certainty what a wooden ship from over a hundred years ago looked like at one point in time?
A modern plan of a period ship is just an approximation of the real thing based on impressions, compromise, research good or bad, taste, and bias.
The state or configuration of a ship is never static. Skippers changed the rig, the location of cannon, ballast, paint color, just about anything to suit themselves. The captain of the ship is god.
To sum it all up, you are the skipper, it’s your ship, feel free to do it as you like.
Have fun with it....
-
1 hour ago, Sea Hoss said:
Nice looking hatches! This is going to be a great looking model.
Thanks Sea Hoss. Much to learn with this one.......a real challenge.
-
54 minutes ago, JSGerson said:
Looking very nice. You might want to consider looking at Ken Foran's Constitution build. He is a professional model builder and kit designer. He created the Model Shipways cross-section kit of the Constitution with very impressive instructions. With your skills, you should be able to do many of his techniques with ease.
Thank you JS for the recommendation. Have to give credit to the Robert E Hunt practicum. Will definitely checkout Ken’s work. I like seeing how others do it and figuring out how to do it in my shop. Also this is the first project fully using the Byrnes table saw, the sliding table takes it to another level - safely and precisely cutting small pieces of wood.
-
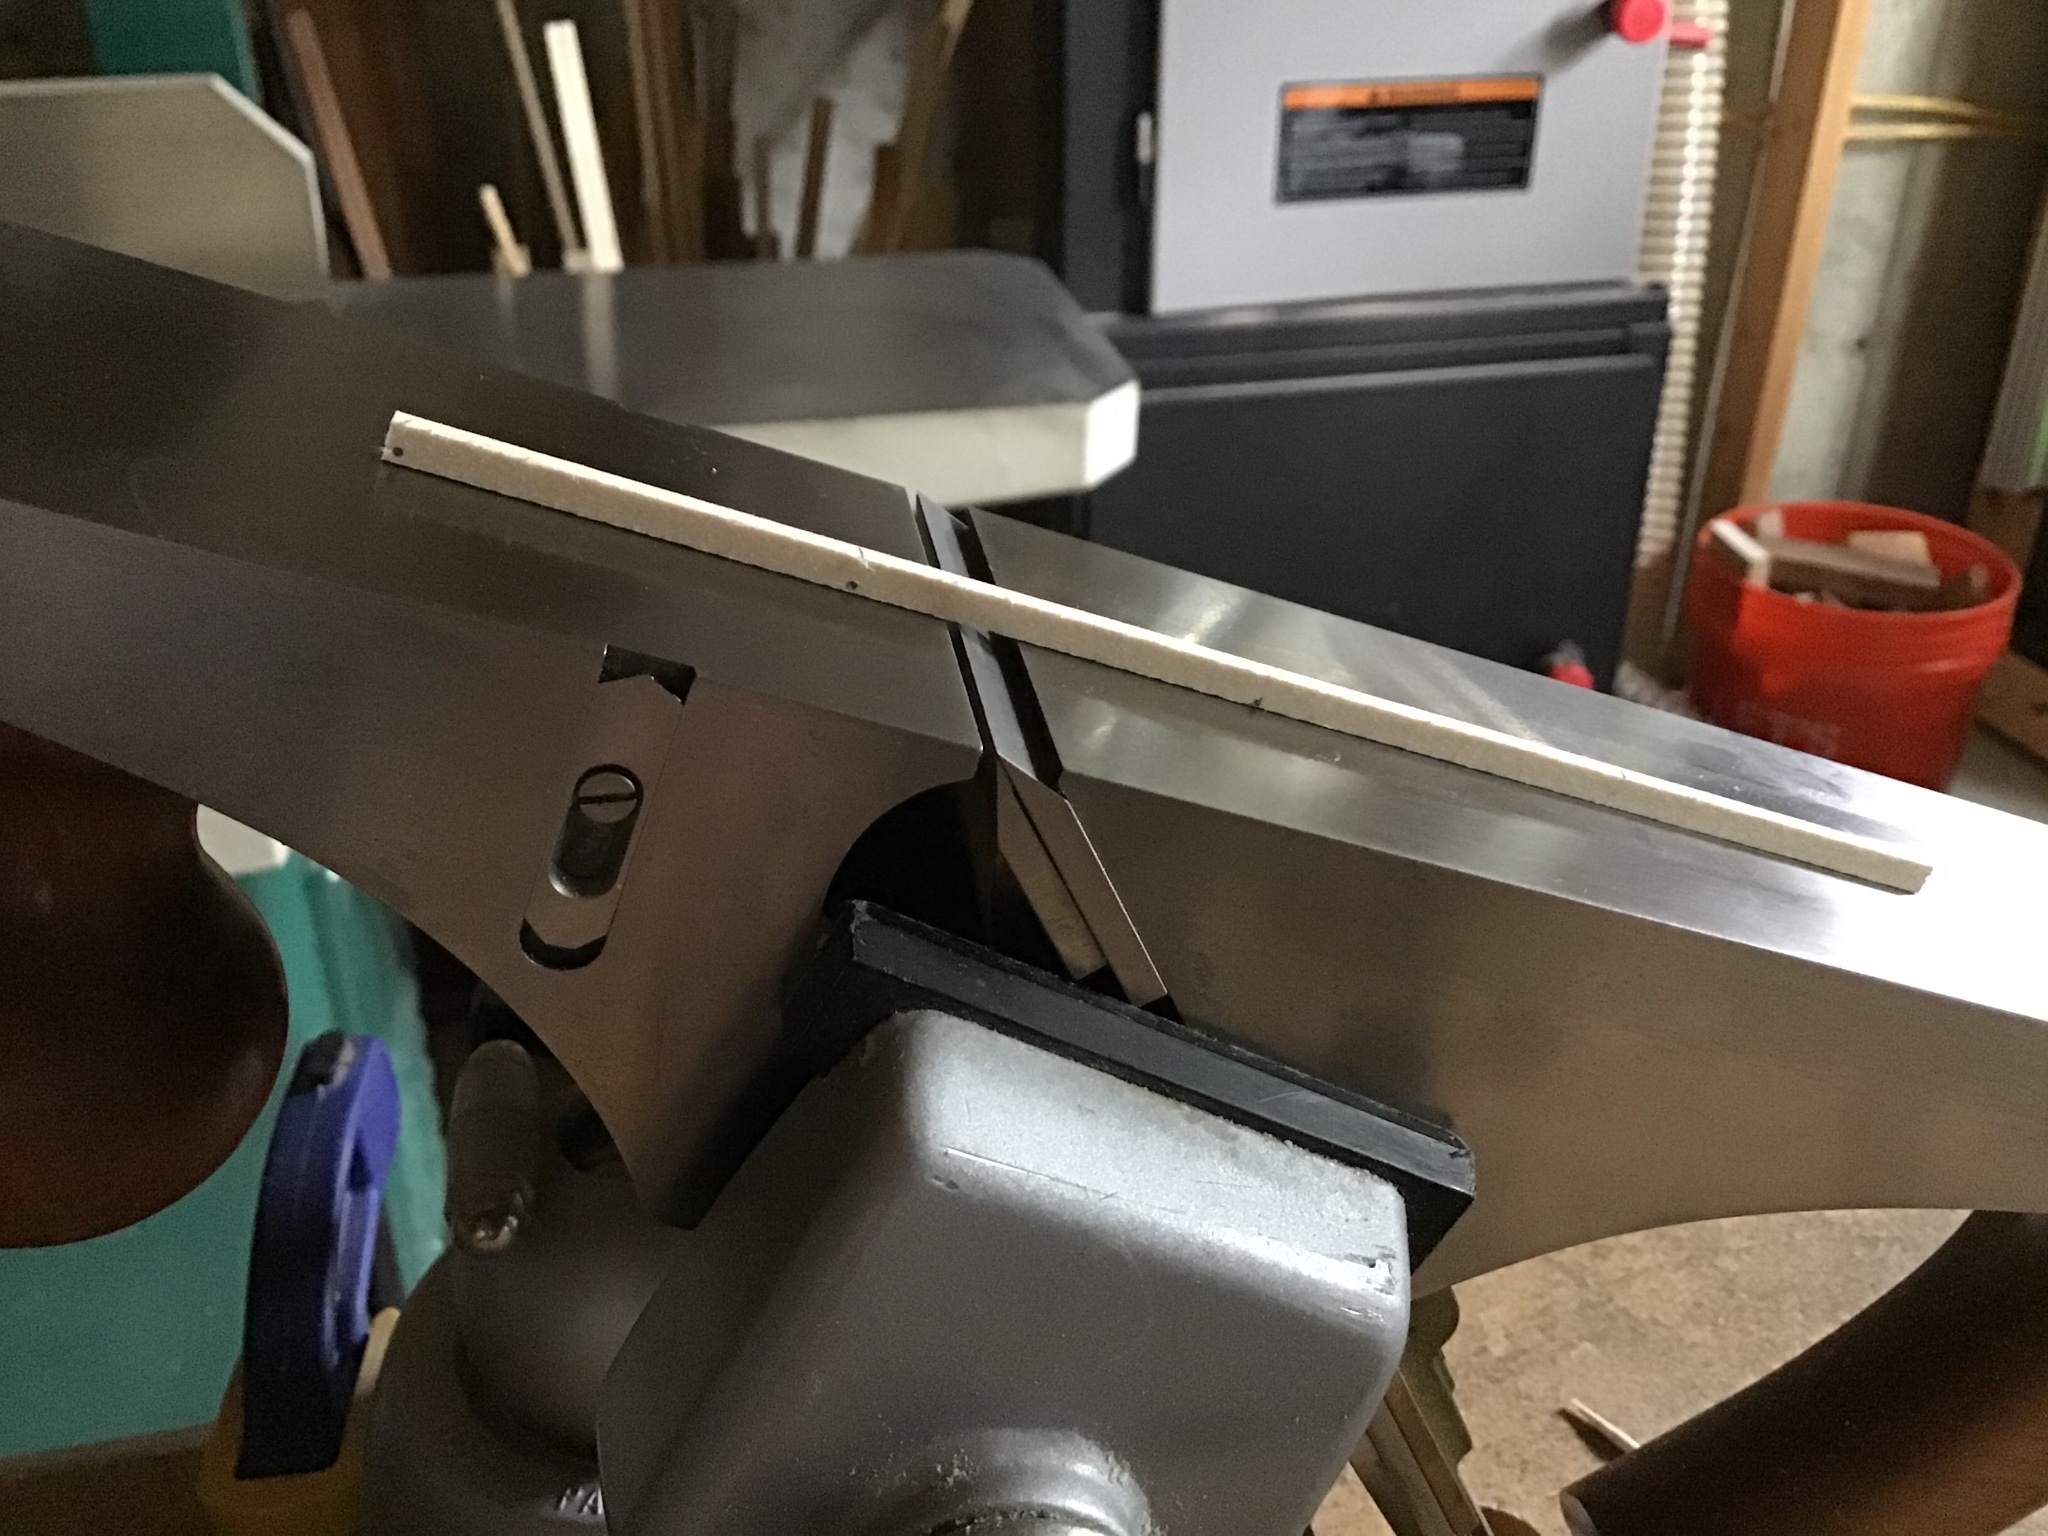
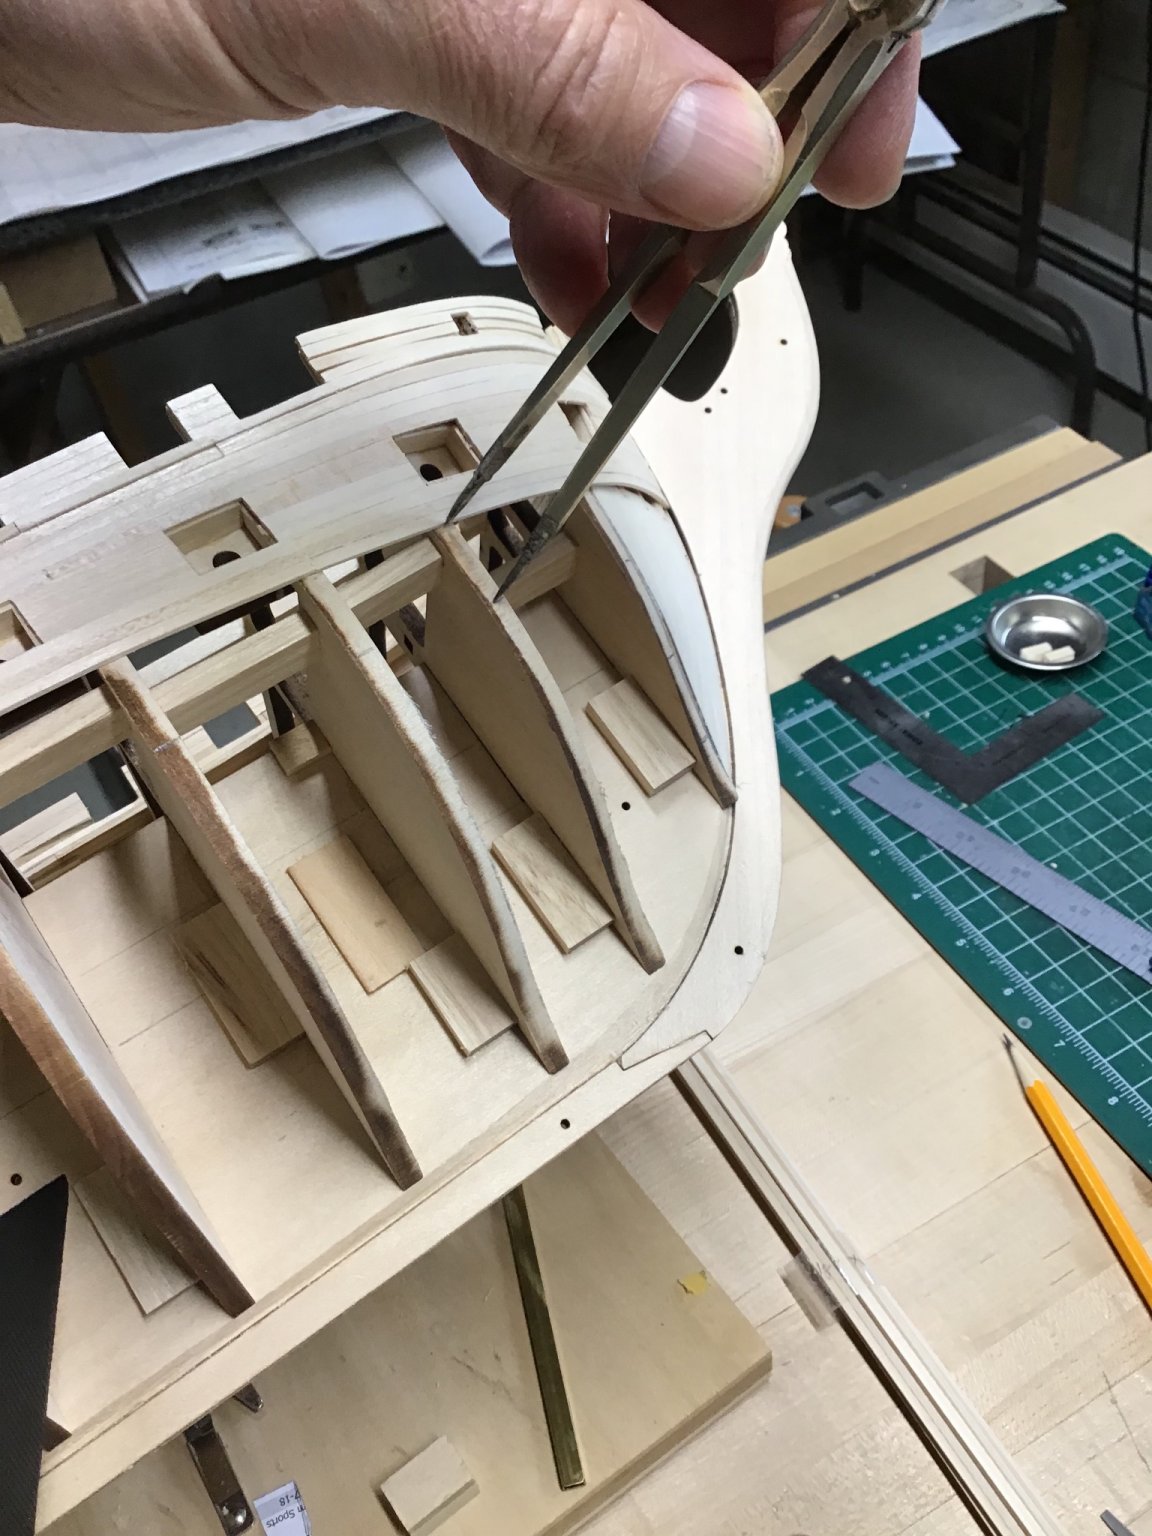
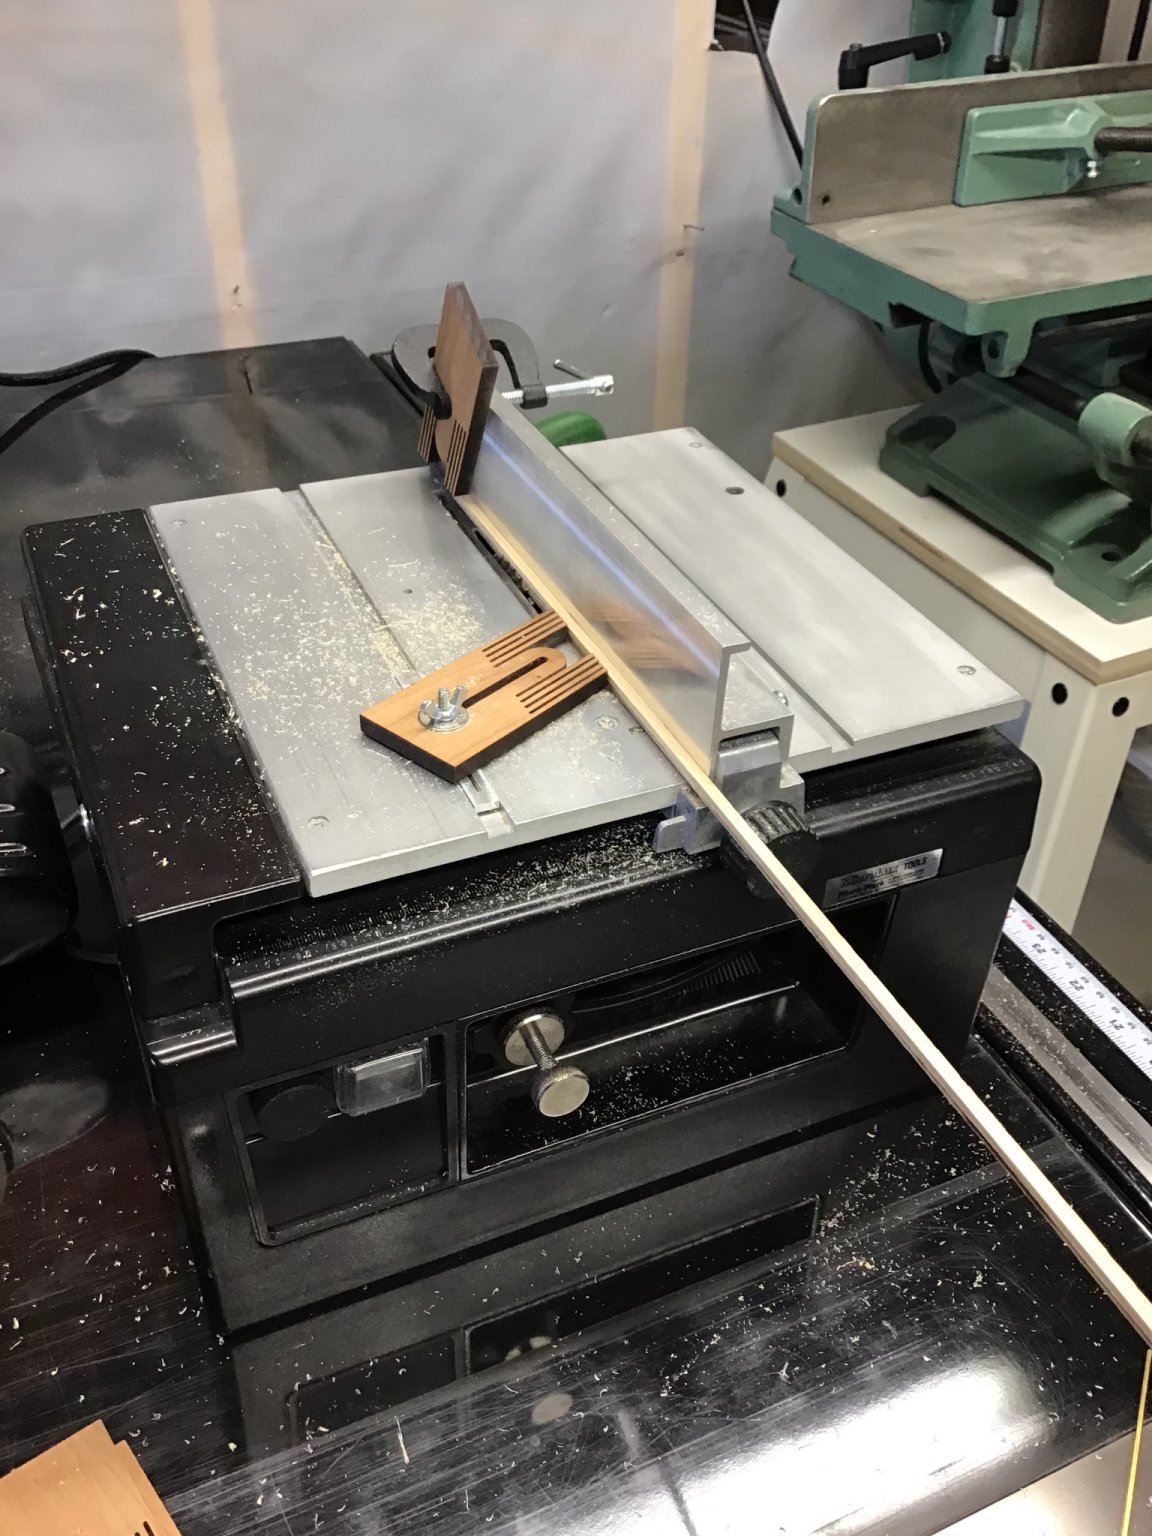
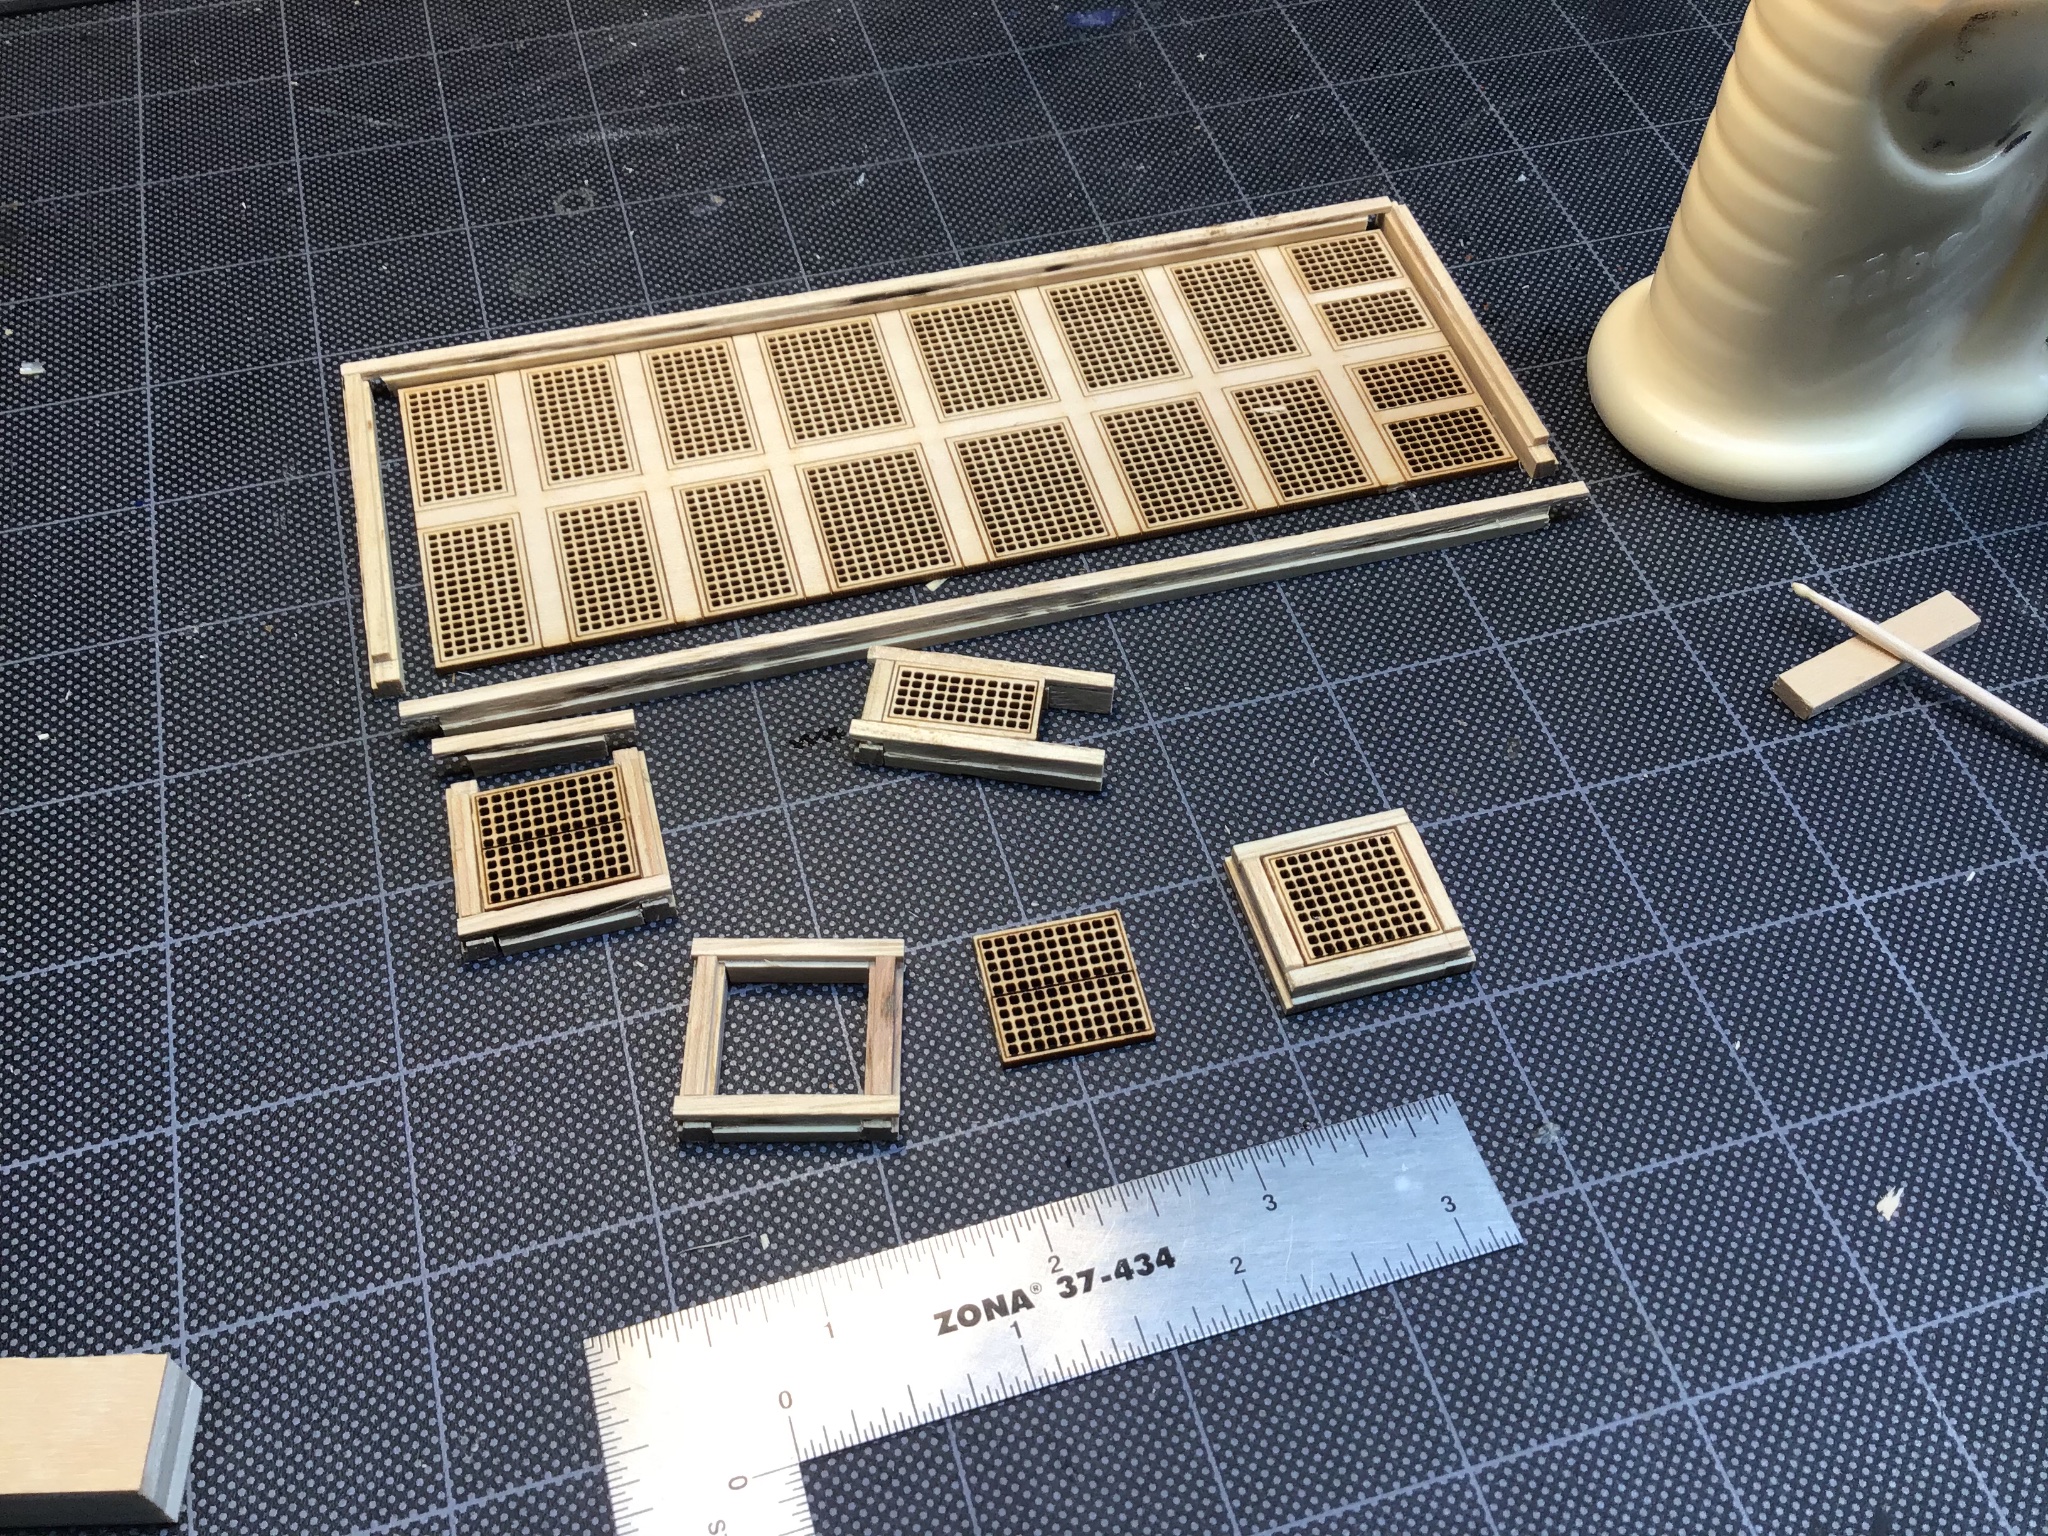
Coamings and Hatch Framing
The kit calls for the builder to use 3 pieces of stripwood to build up the coamings (base moulding around the hatches and companionways. Doable but difficult.
Instead I used hickory hardwood as stock and milled it with the Byrnes table saw.
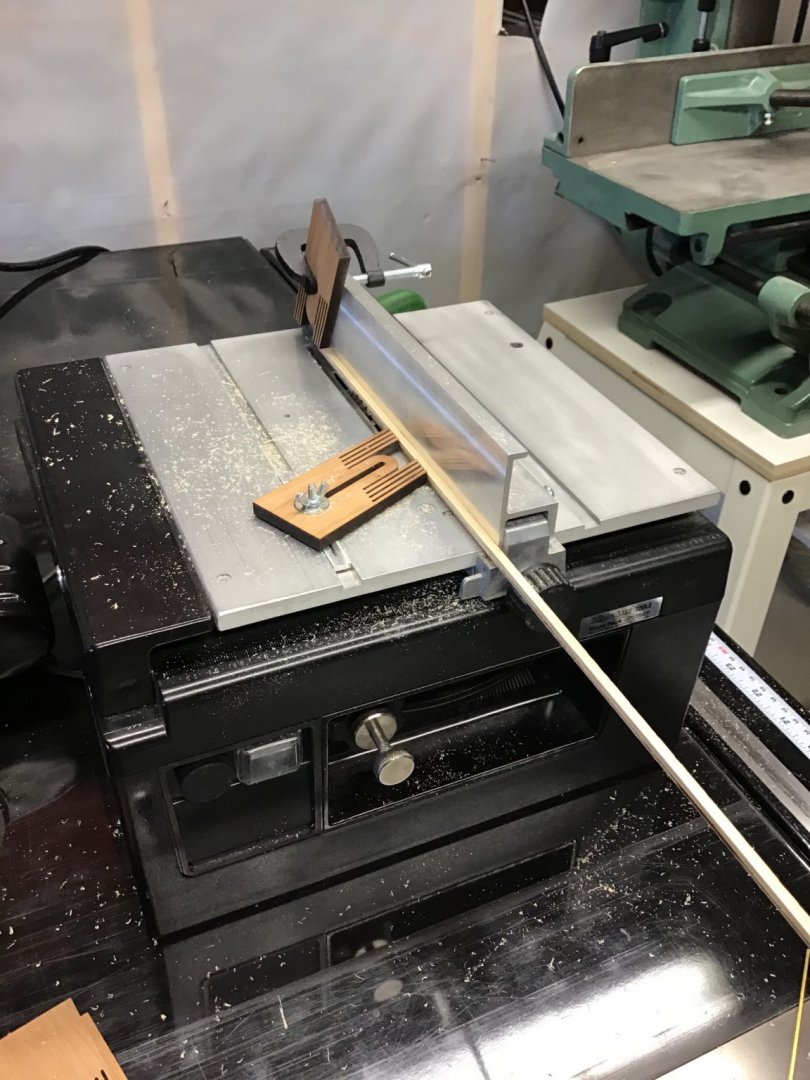
Start by milling the stock 5/32” wide by 7/32” high. The job is to cut two rabbets 1/32” wide, one 1/16” deep for the inner lip the grate sits on, the other 1/8” deep leaving 3/32” for the outside lip forming the outer base moulding.
Set the table saw fence to 1/8” (4/32”). This leaves 1/32” for the rabbet width on the outer edge. Feather boards are needed to hold the stock against the fence and the table - Picture 1.
Set the blade height to 1/16”. Cut the first rabbet. Set the blade height to 1/8”, flip the stock around and cut the second rabbet.
Picture 2 shows milled stock, notice the rabbets on the outer sides.
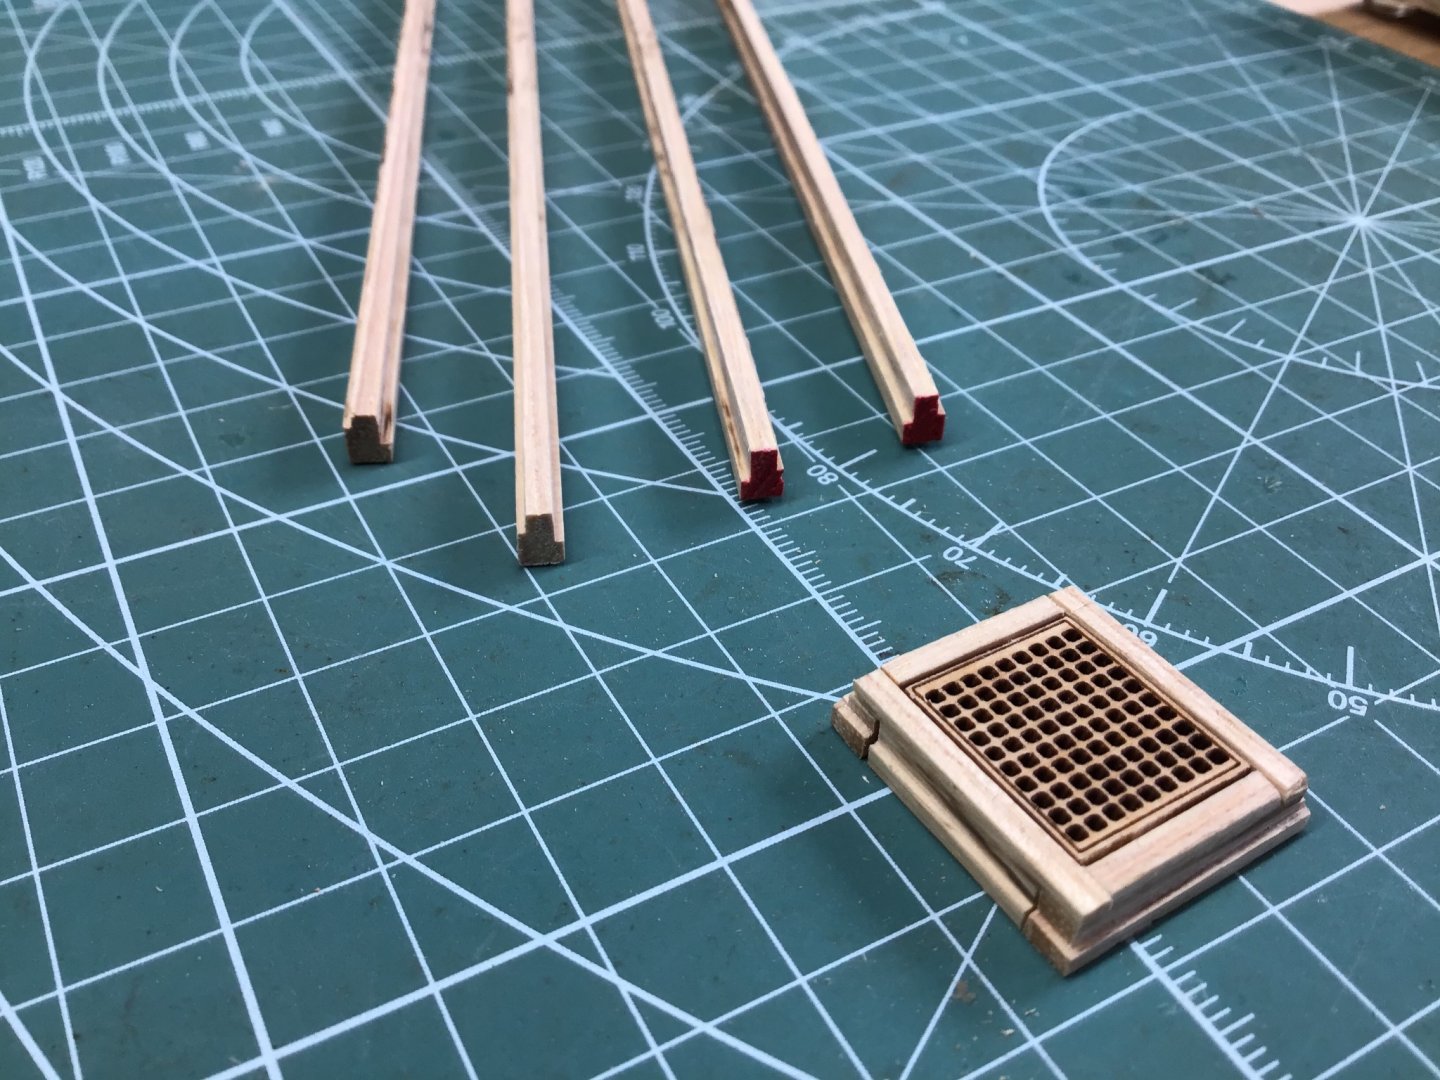
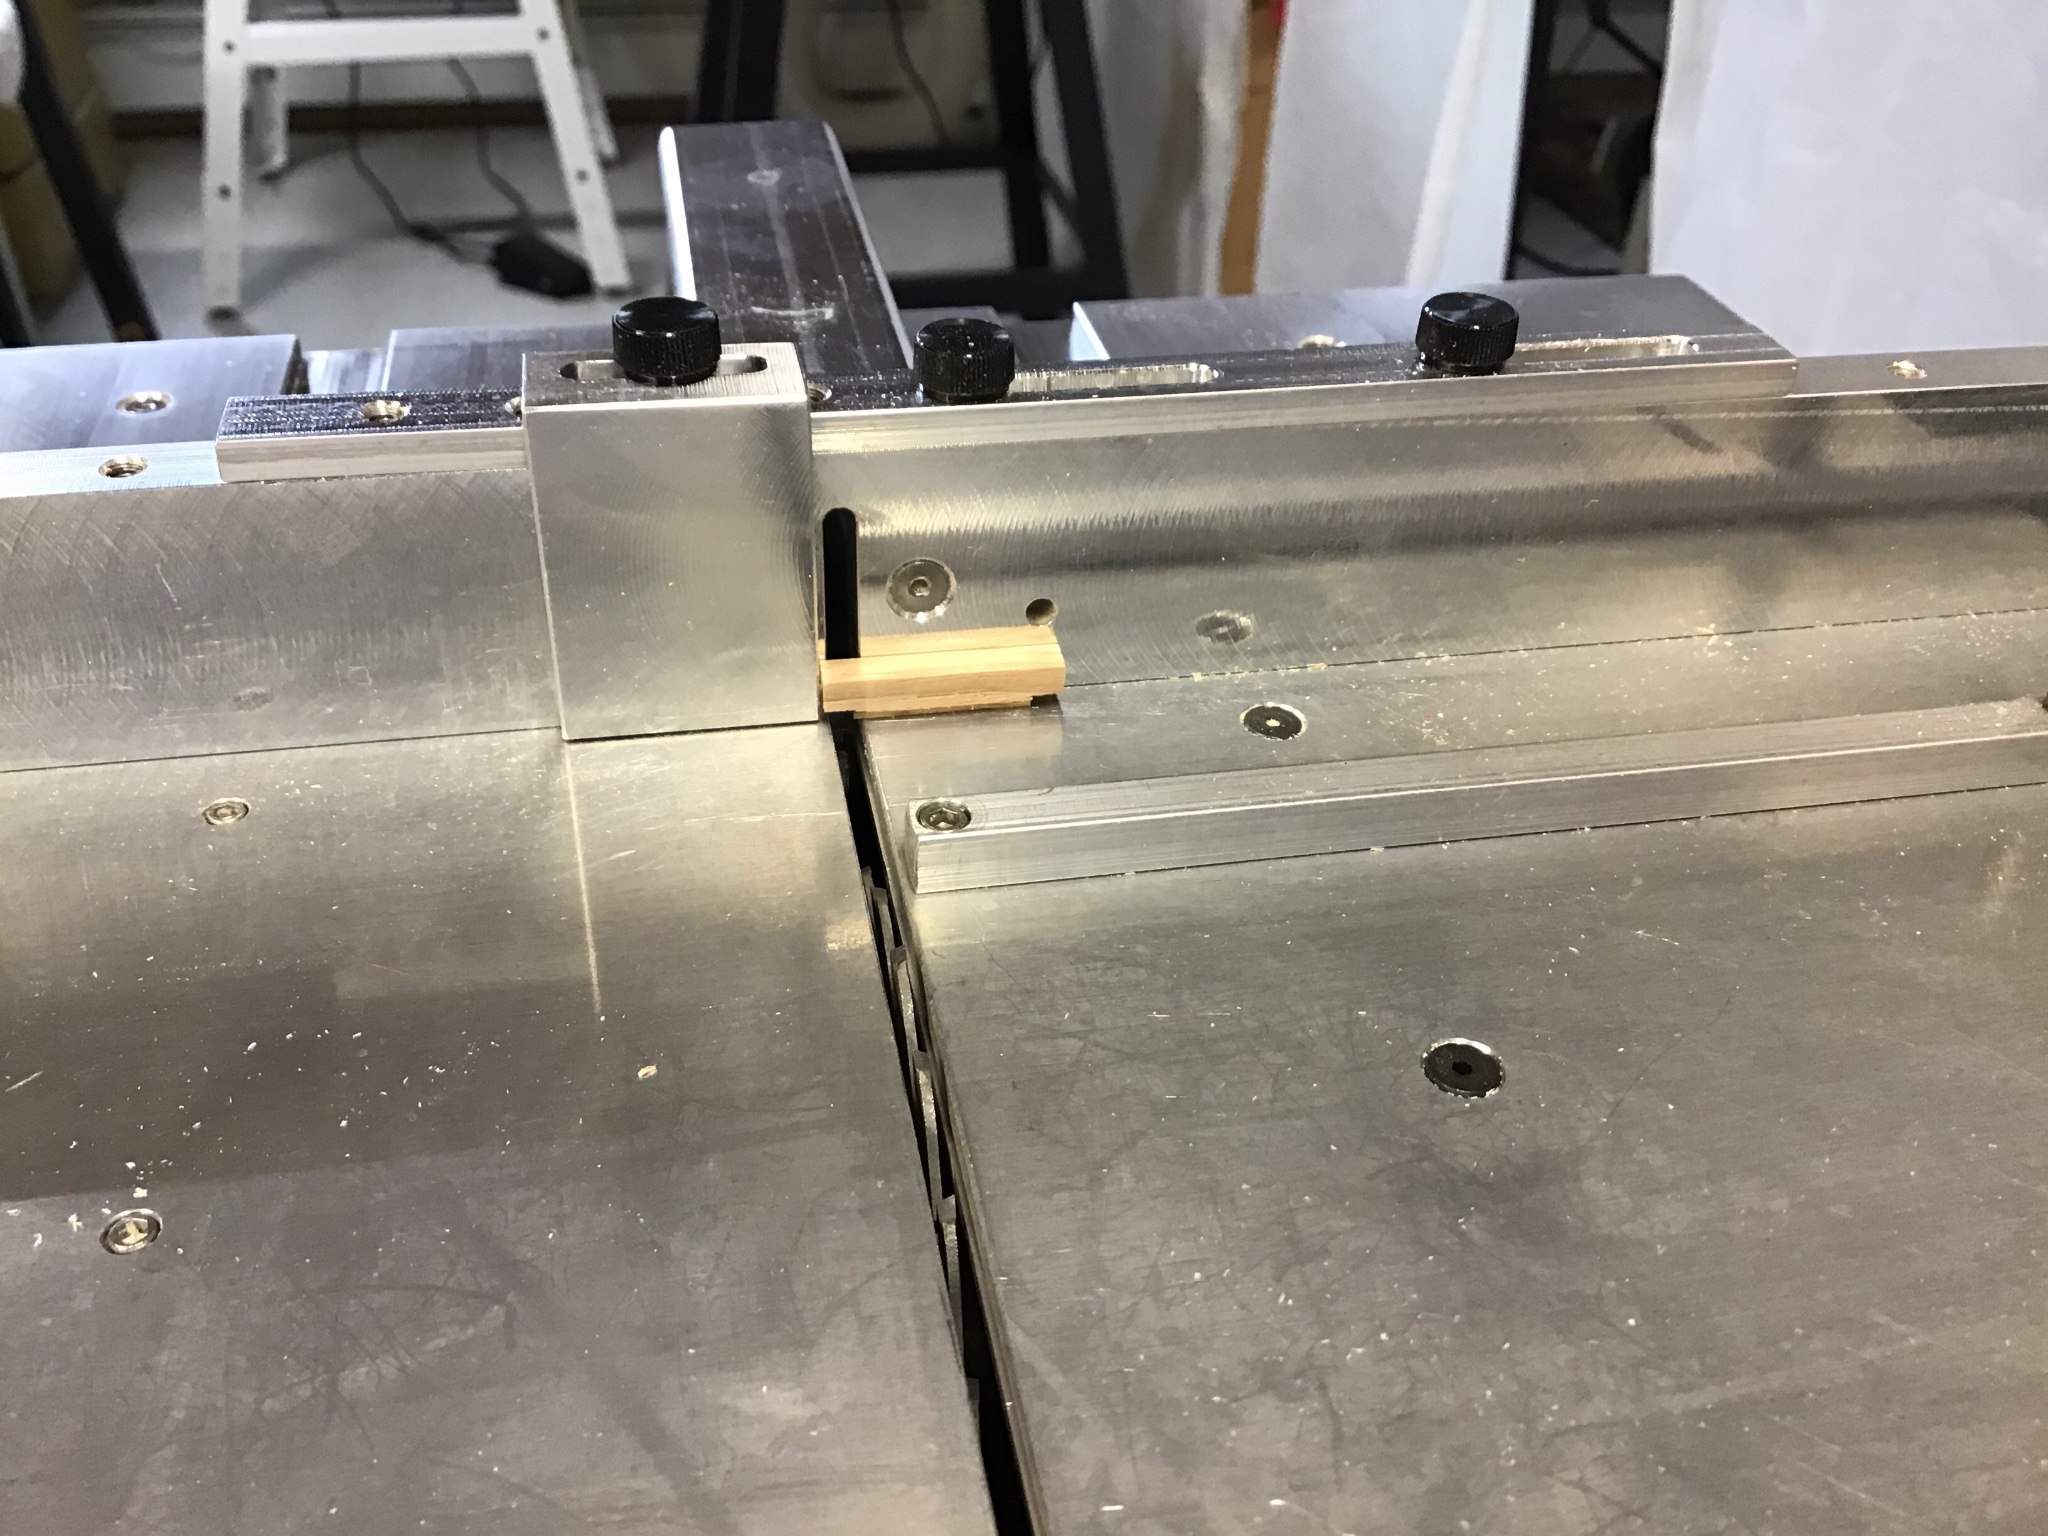
Next is framing the grate.
In this procedure we’ll refer to the long side and short side of the grates, and will cut long sides and short sides of the coaming stock.
The coaming sides need rabbets too, the coaming short sides will have the rabbets cut on top, the long sides on the bottom.
First measure the length of the short side of the grate. Short sides will have a 1/8” wide rabbet on each end that is 1/16” deep. So the coaming short side length is the measured length of the grate short side plus 1/4” (2 x 1/8”).
Cut the coaming short sides and cut the rabbet on the top side of each end 1/8” wide by 1/16” deep. Picture 3 shows the fence setup on the sliding table ready to cut rabbets for the short sides 1/8” wide by 1/16” deep.
Next dry fit the coaming short sides to the short sides of the grate. Measure the width of the assembly. This width of the assembly is the length of the coaming for the long side.
Cut two coamings for the long sides. Last is to cut the rabbets on the bottom of each end 5/32” wide by 5/32” high.
Glue up the frame. Cut the excess stock in the corners so the outside edges match up. Last picture shows the process, bottom left to right, from dry fitting, glue up, and finished product with excess material removed to even up the outside base.


- Duanelaker, GuntherMT and Sea Hoss
-
3
-
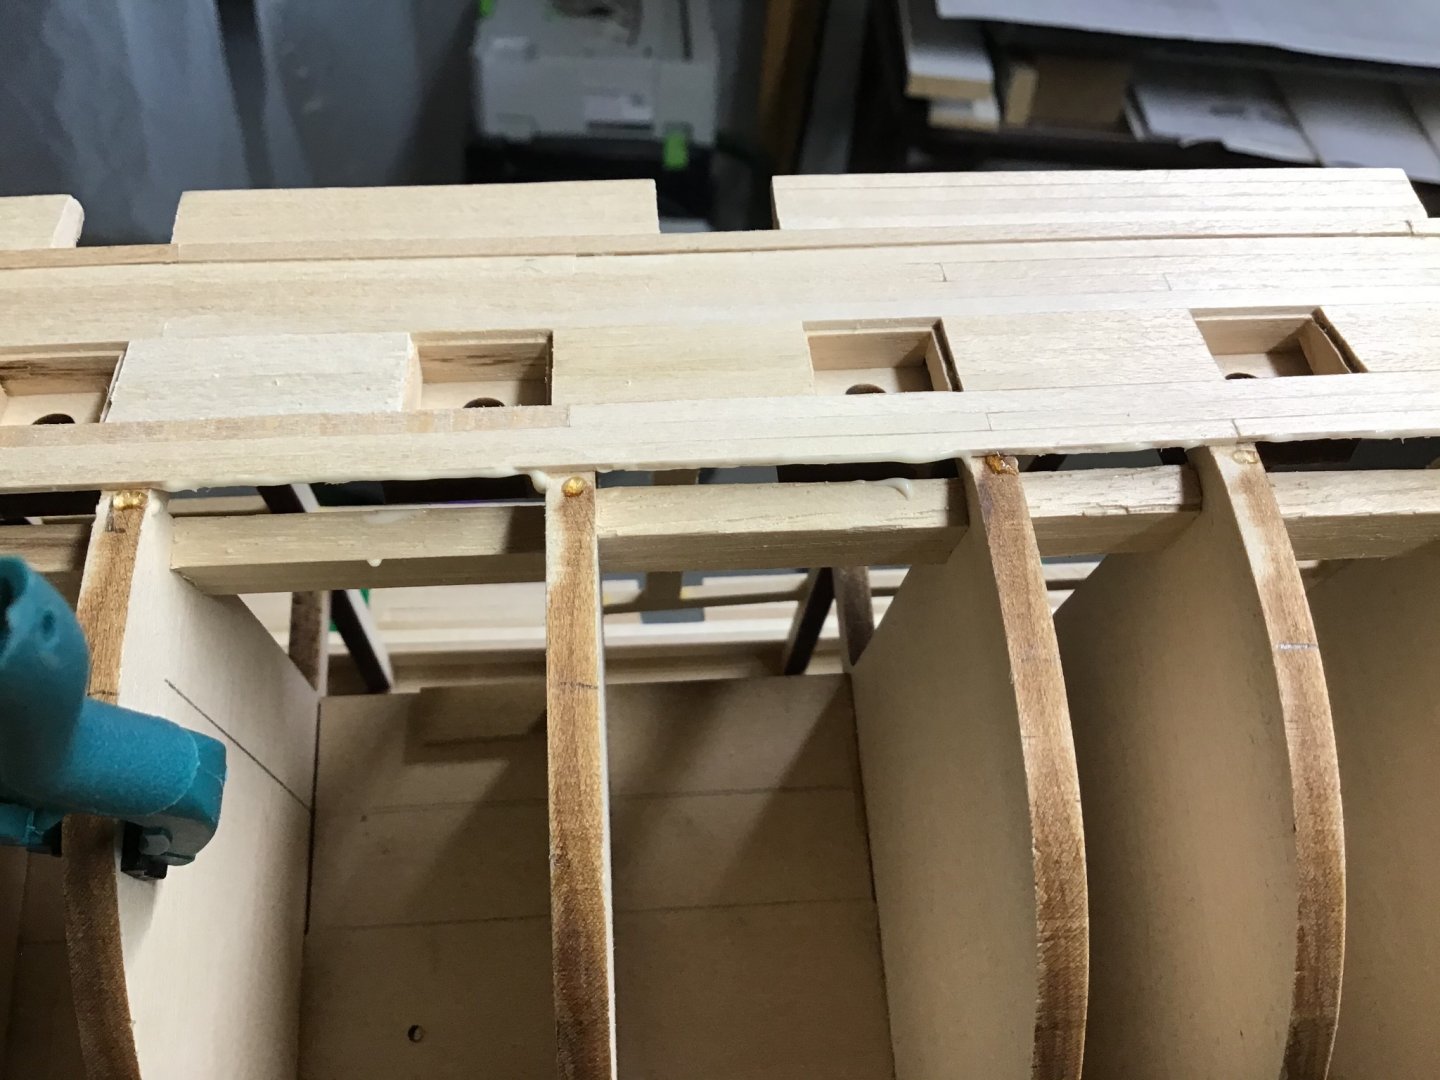
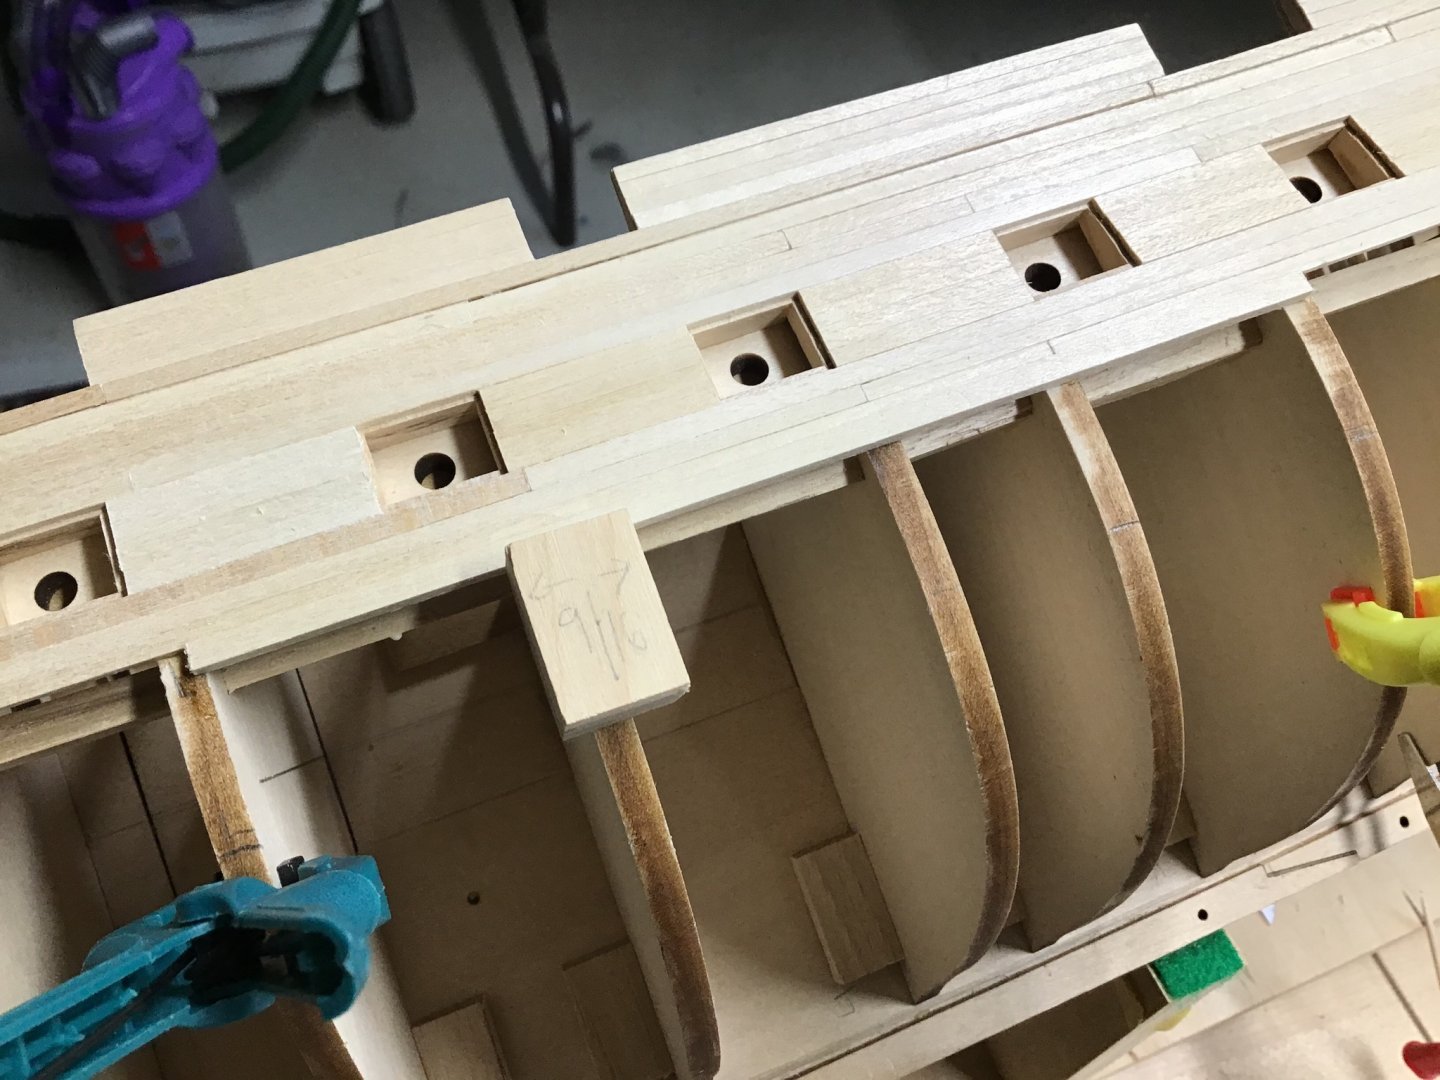
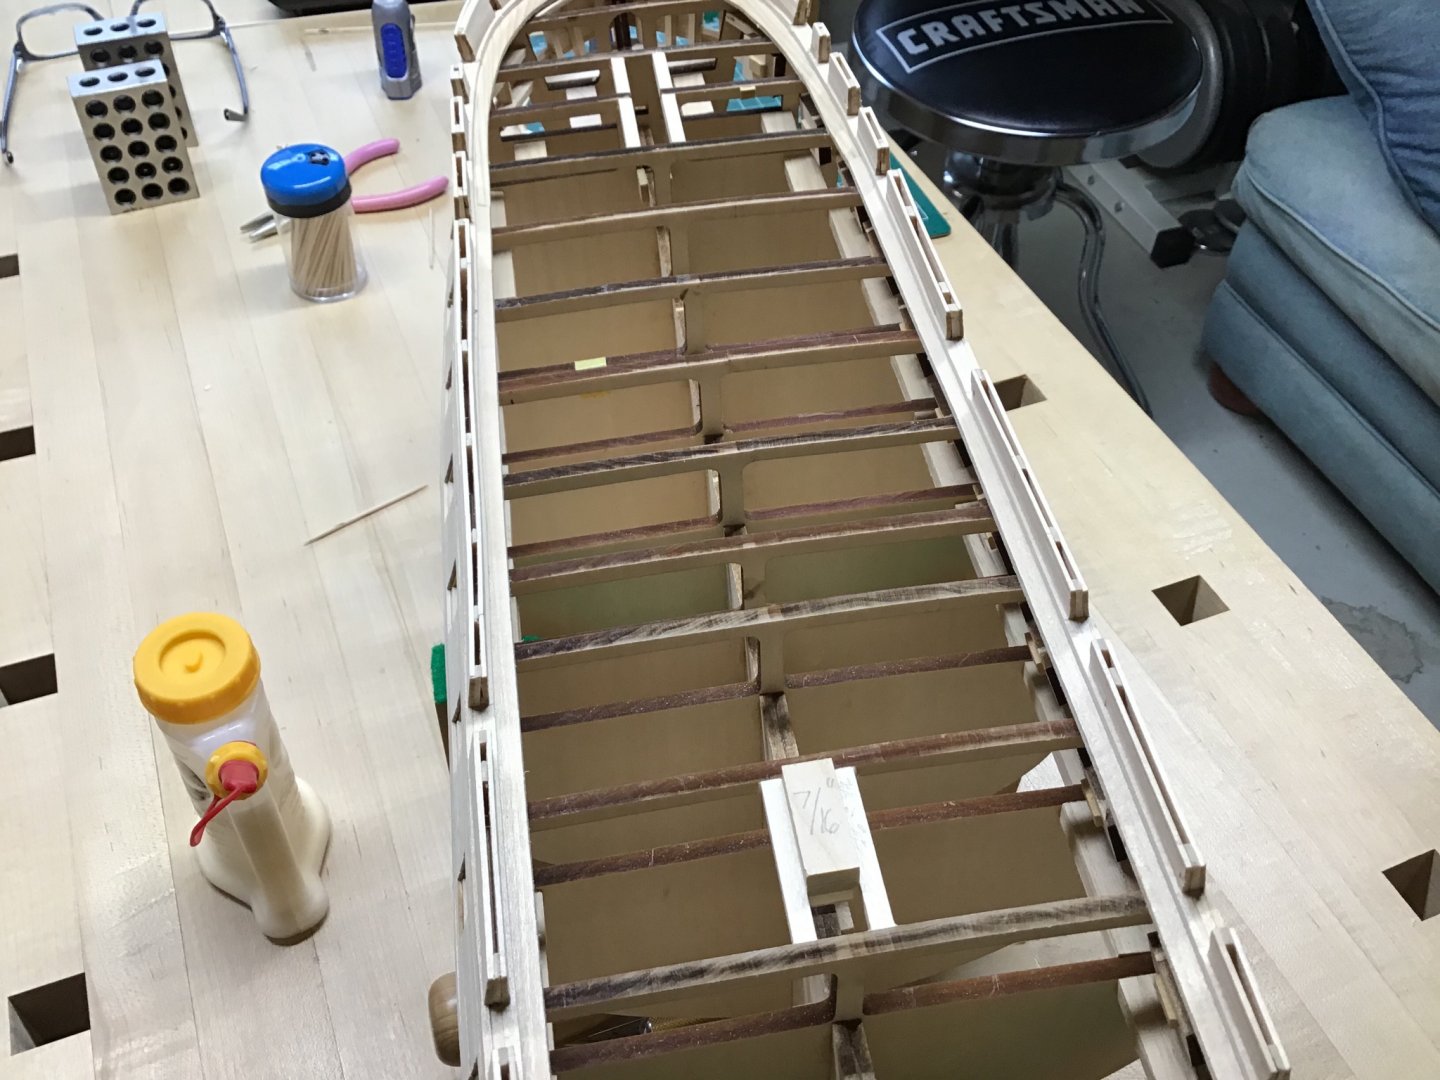
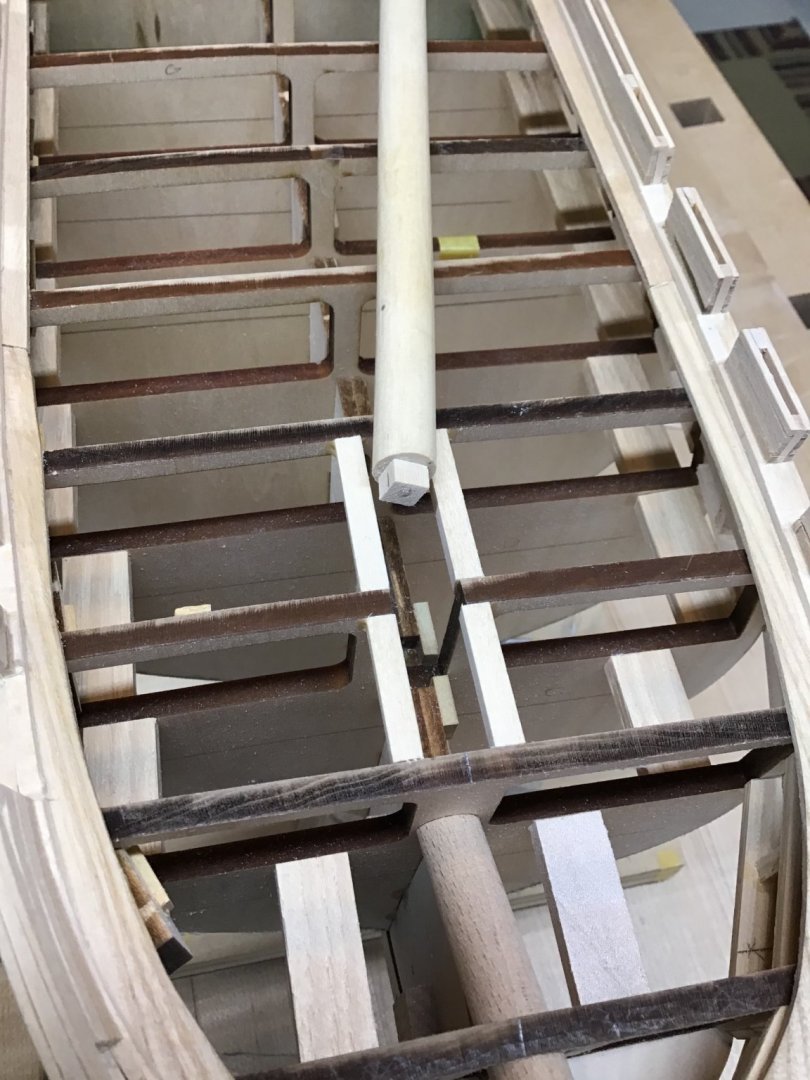
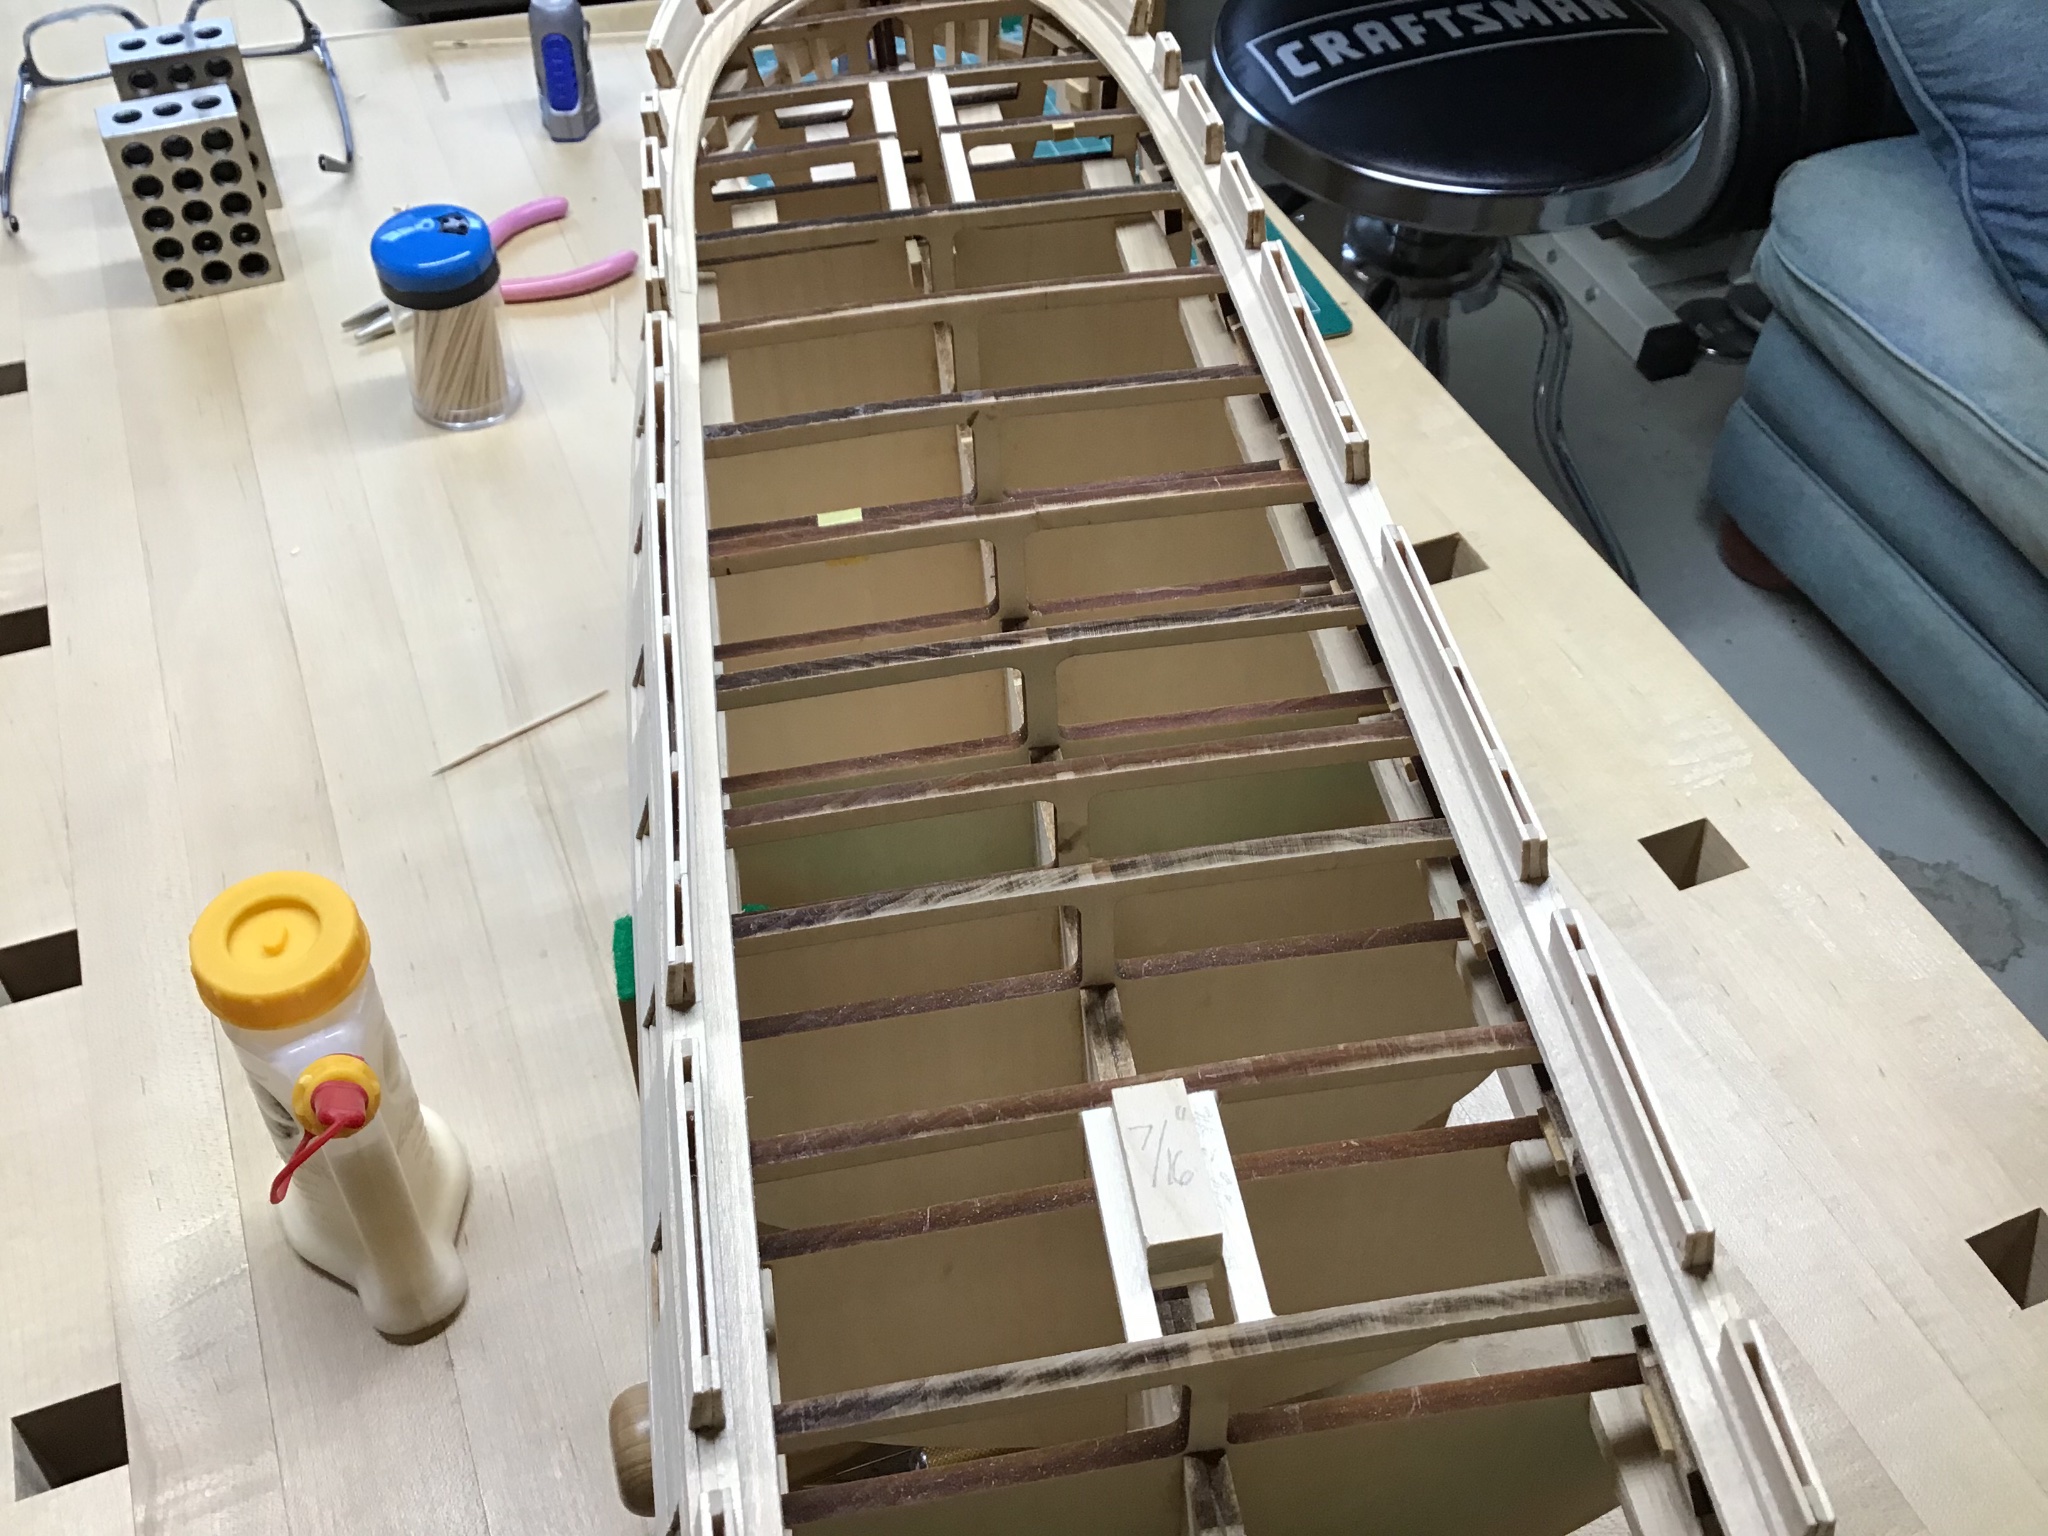
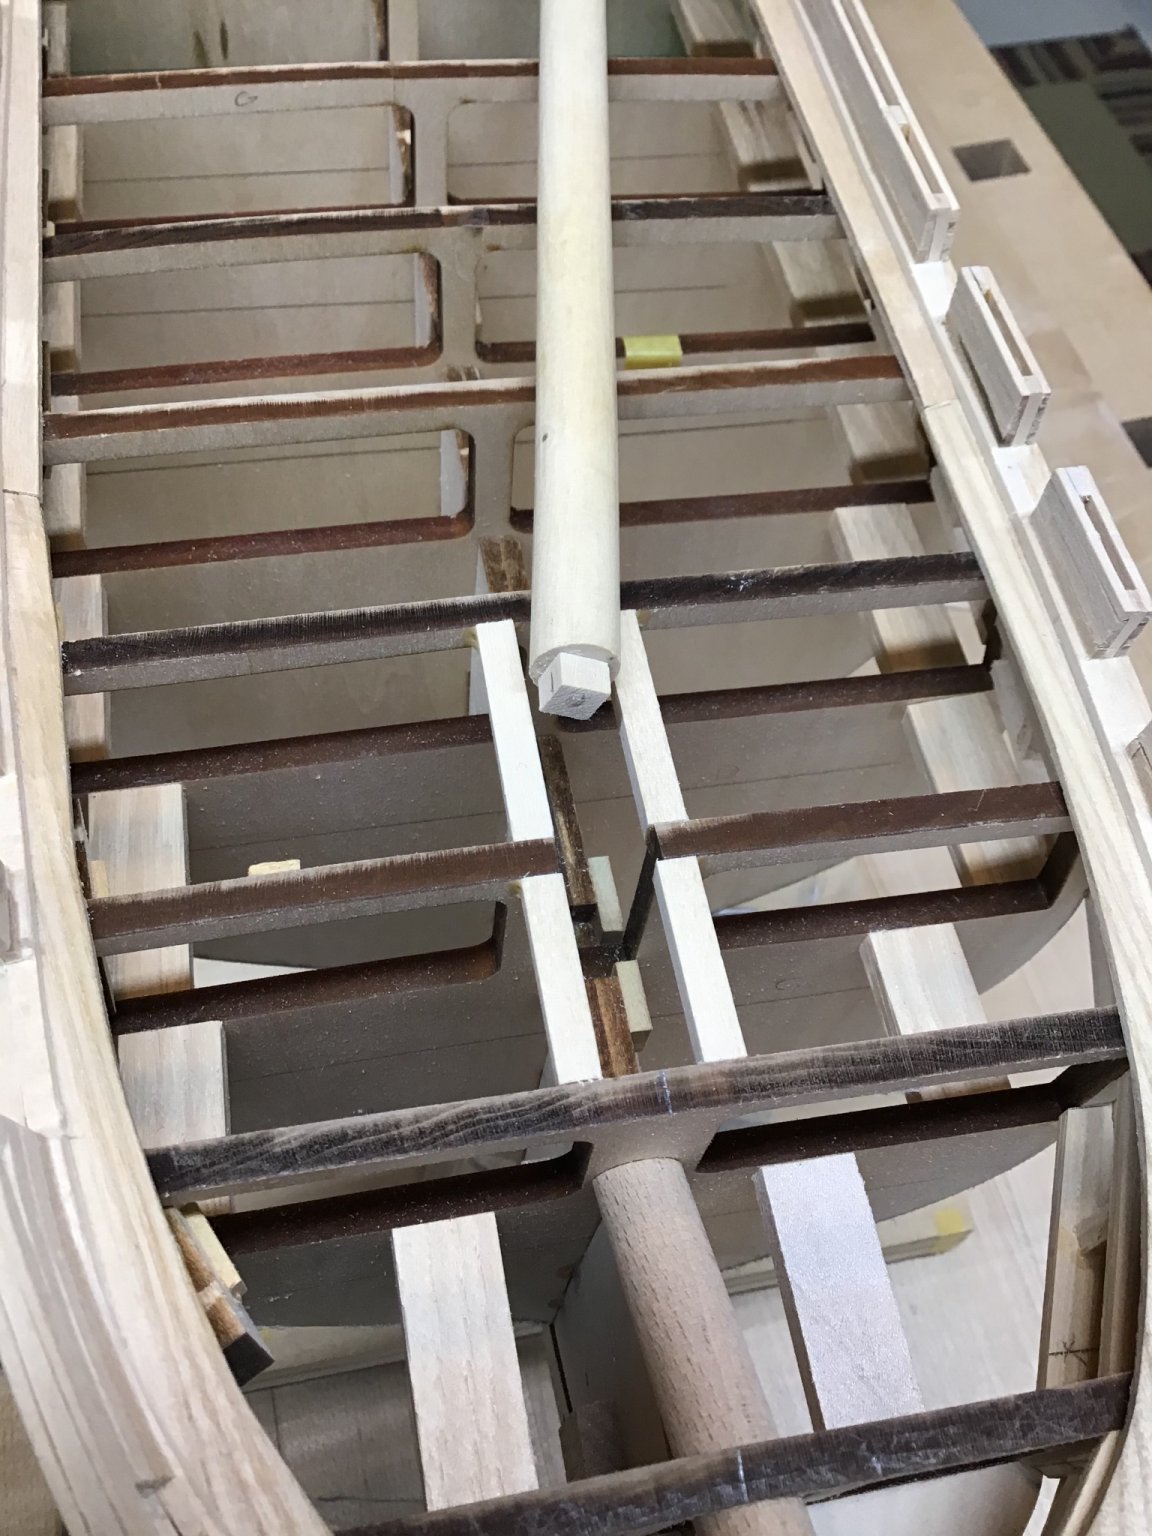
Mast Partners/Tenons and Deck Framing
Used spacer blocks to locate the mast partners.
Established mast angle be cutting the bottom mast face at the correct angle on the Byrnes saw.
Glued and doweled tenon to mast face. Test fit masts.
Also located deck framing for hatches with spacer blocks. Hatches will sit on deck frames with deck planking around them.

-
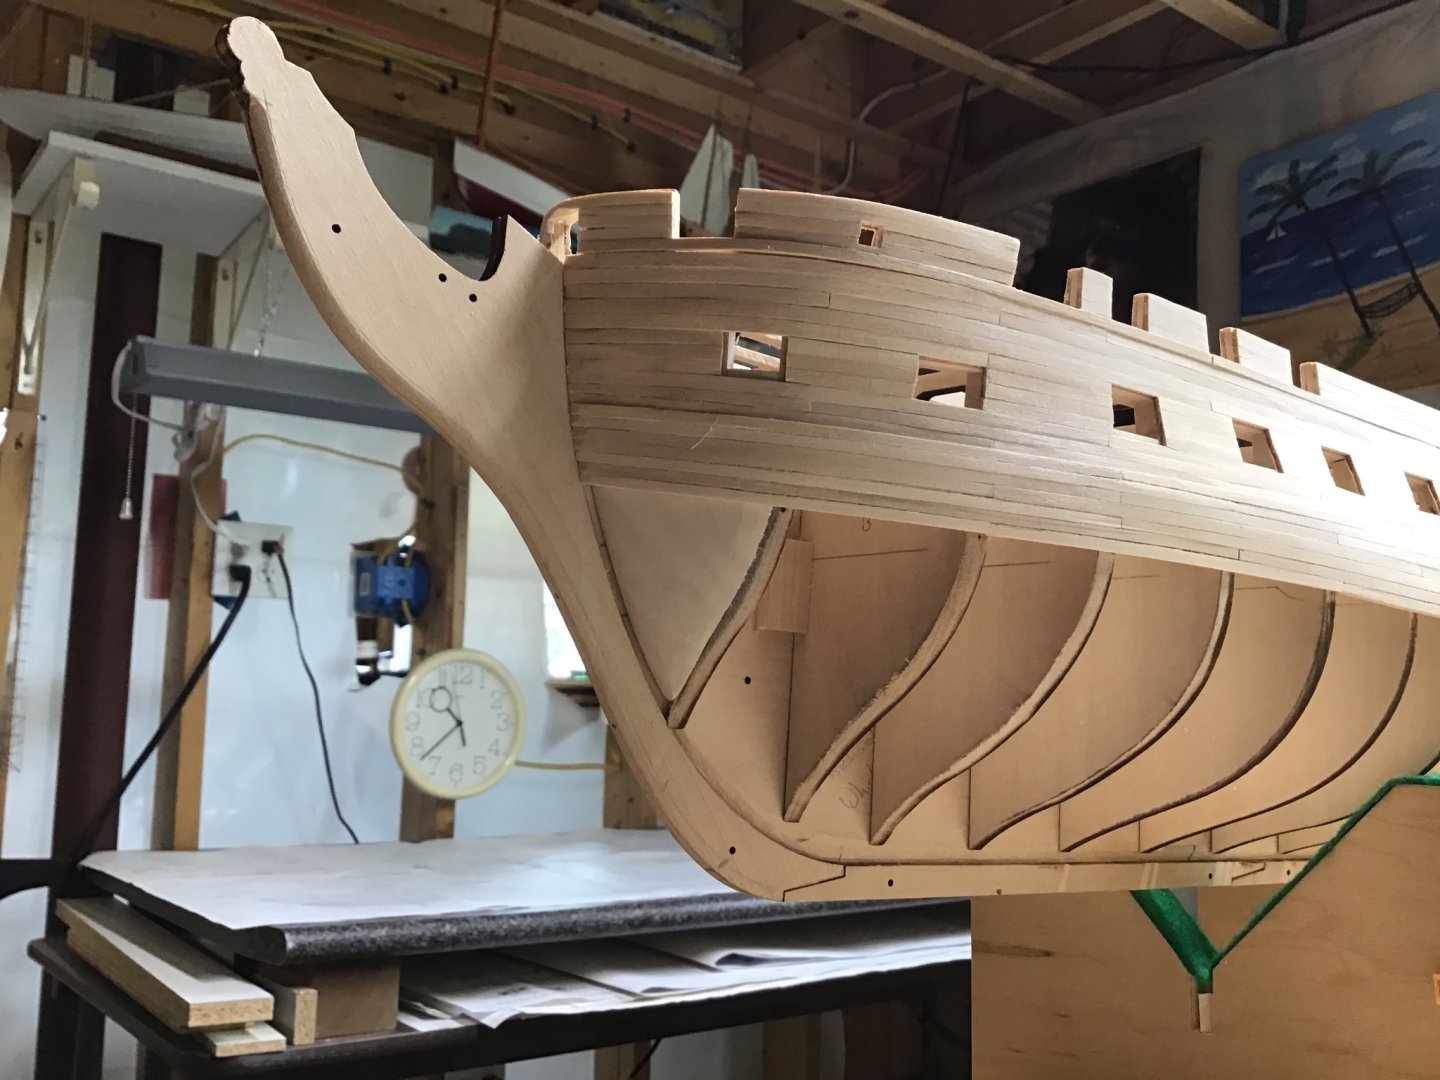
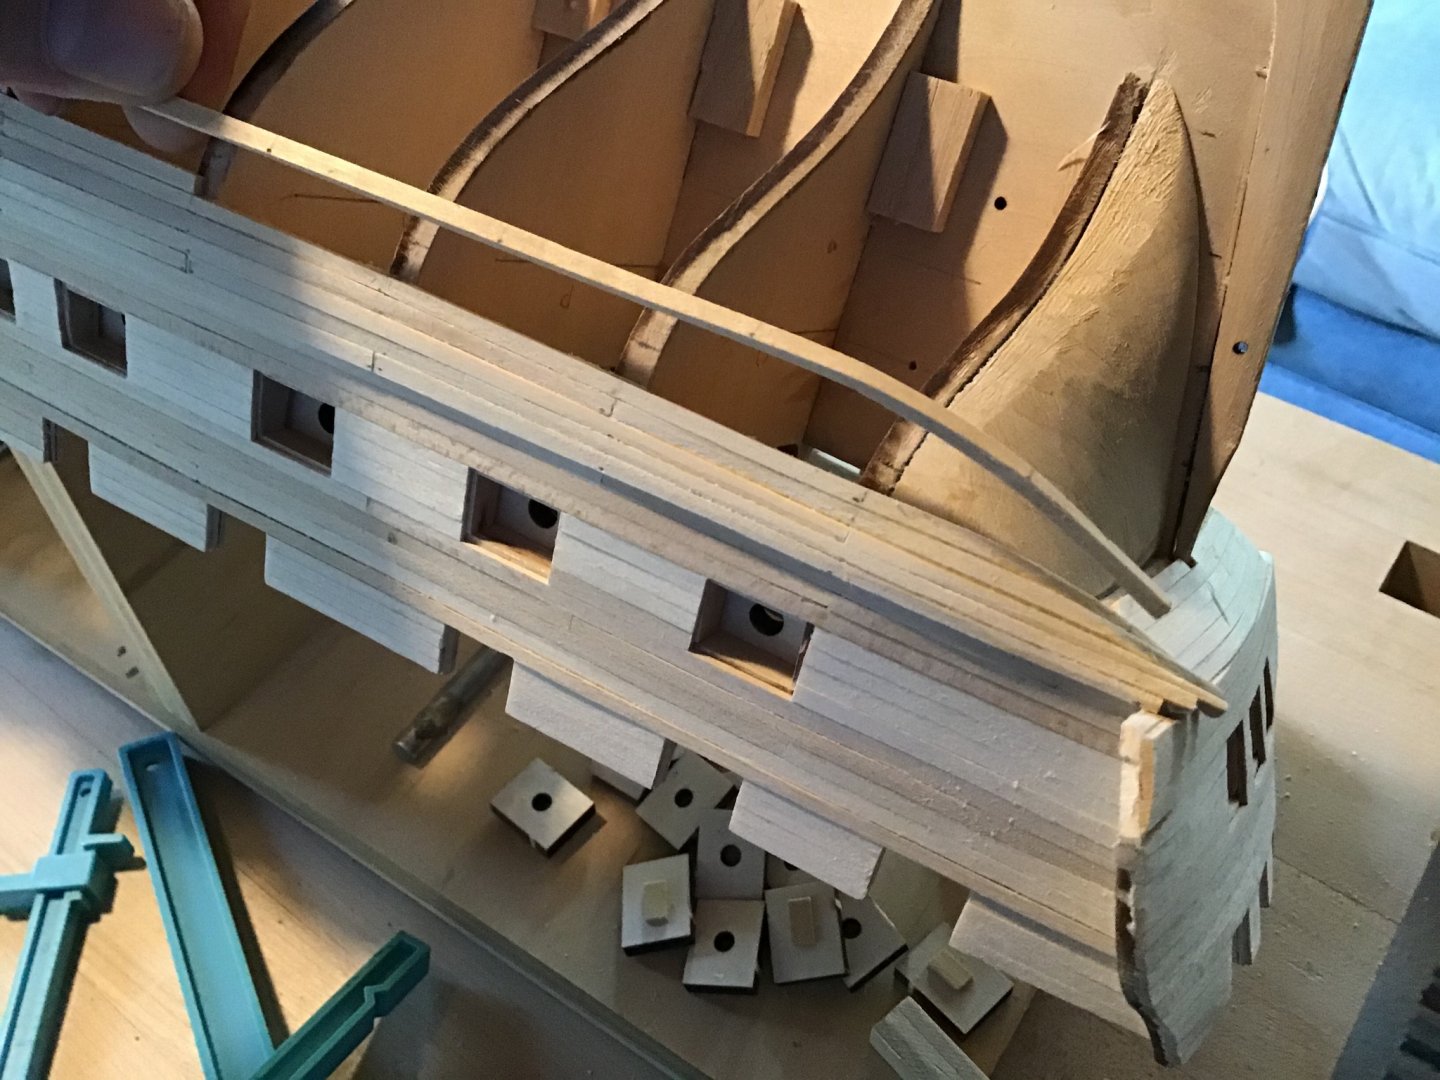
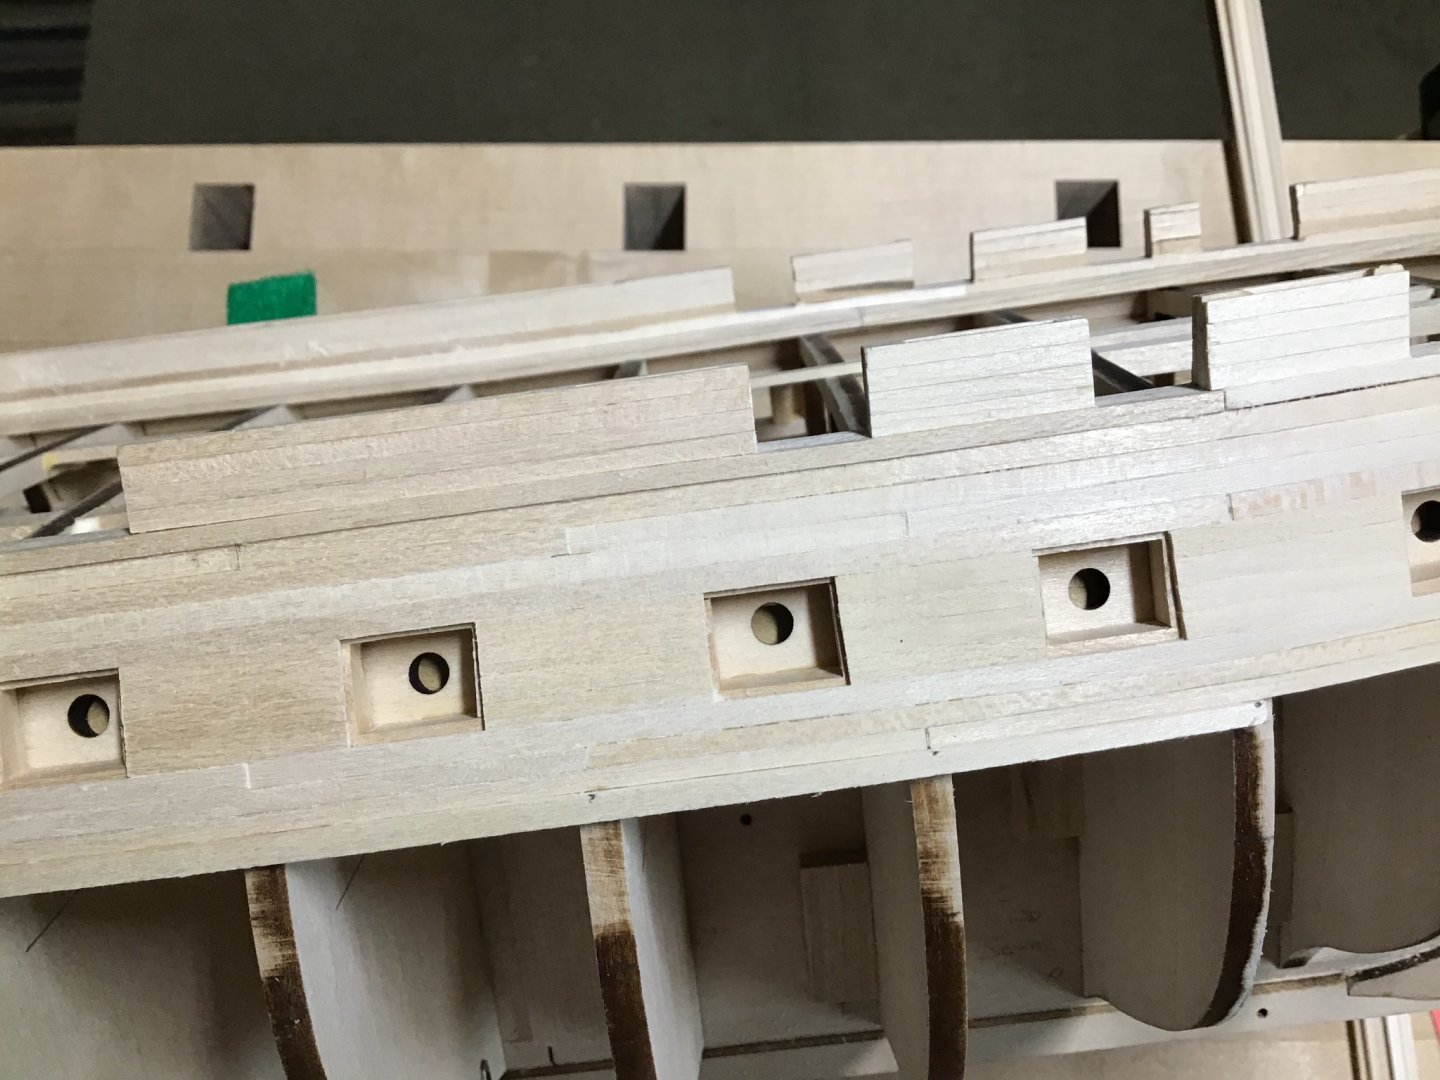
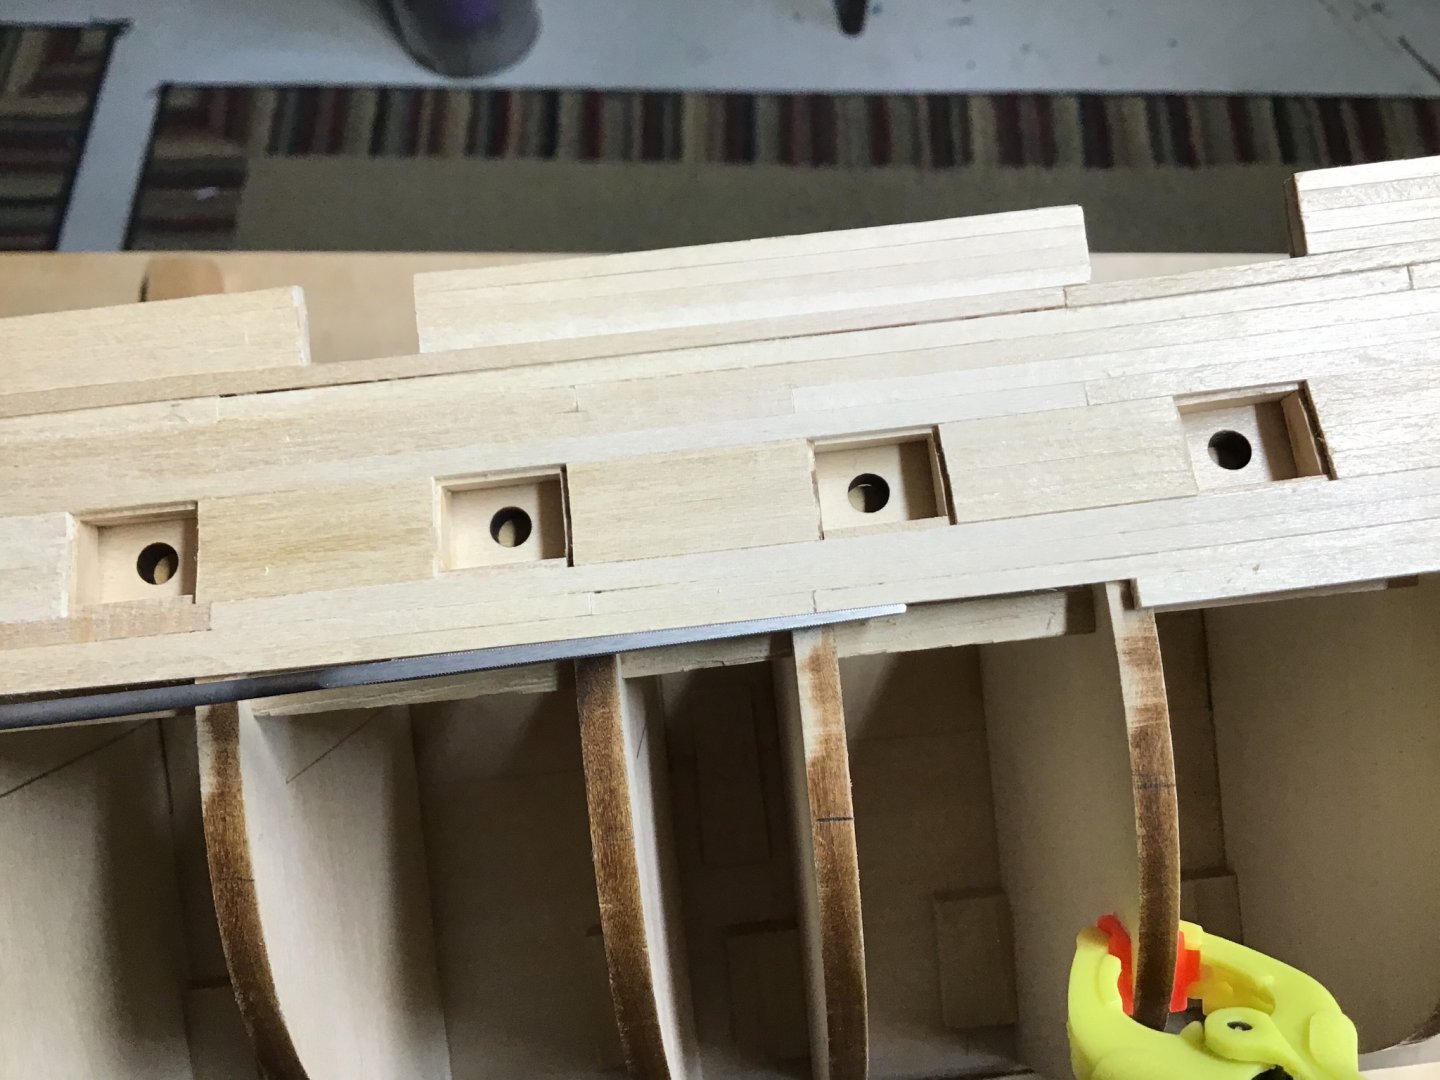
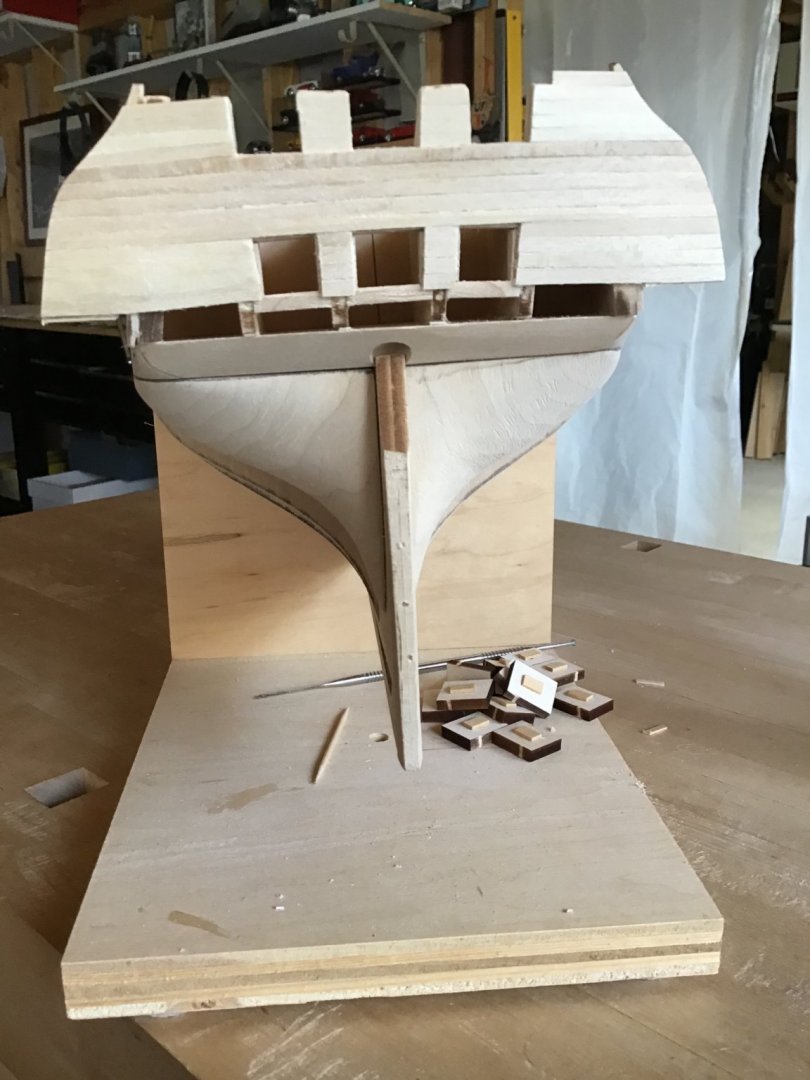
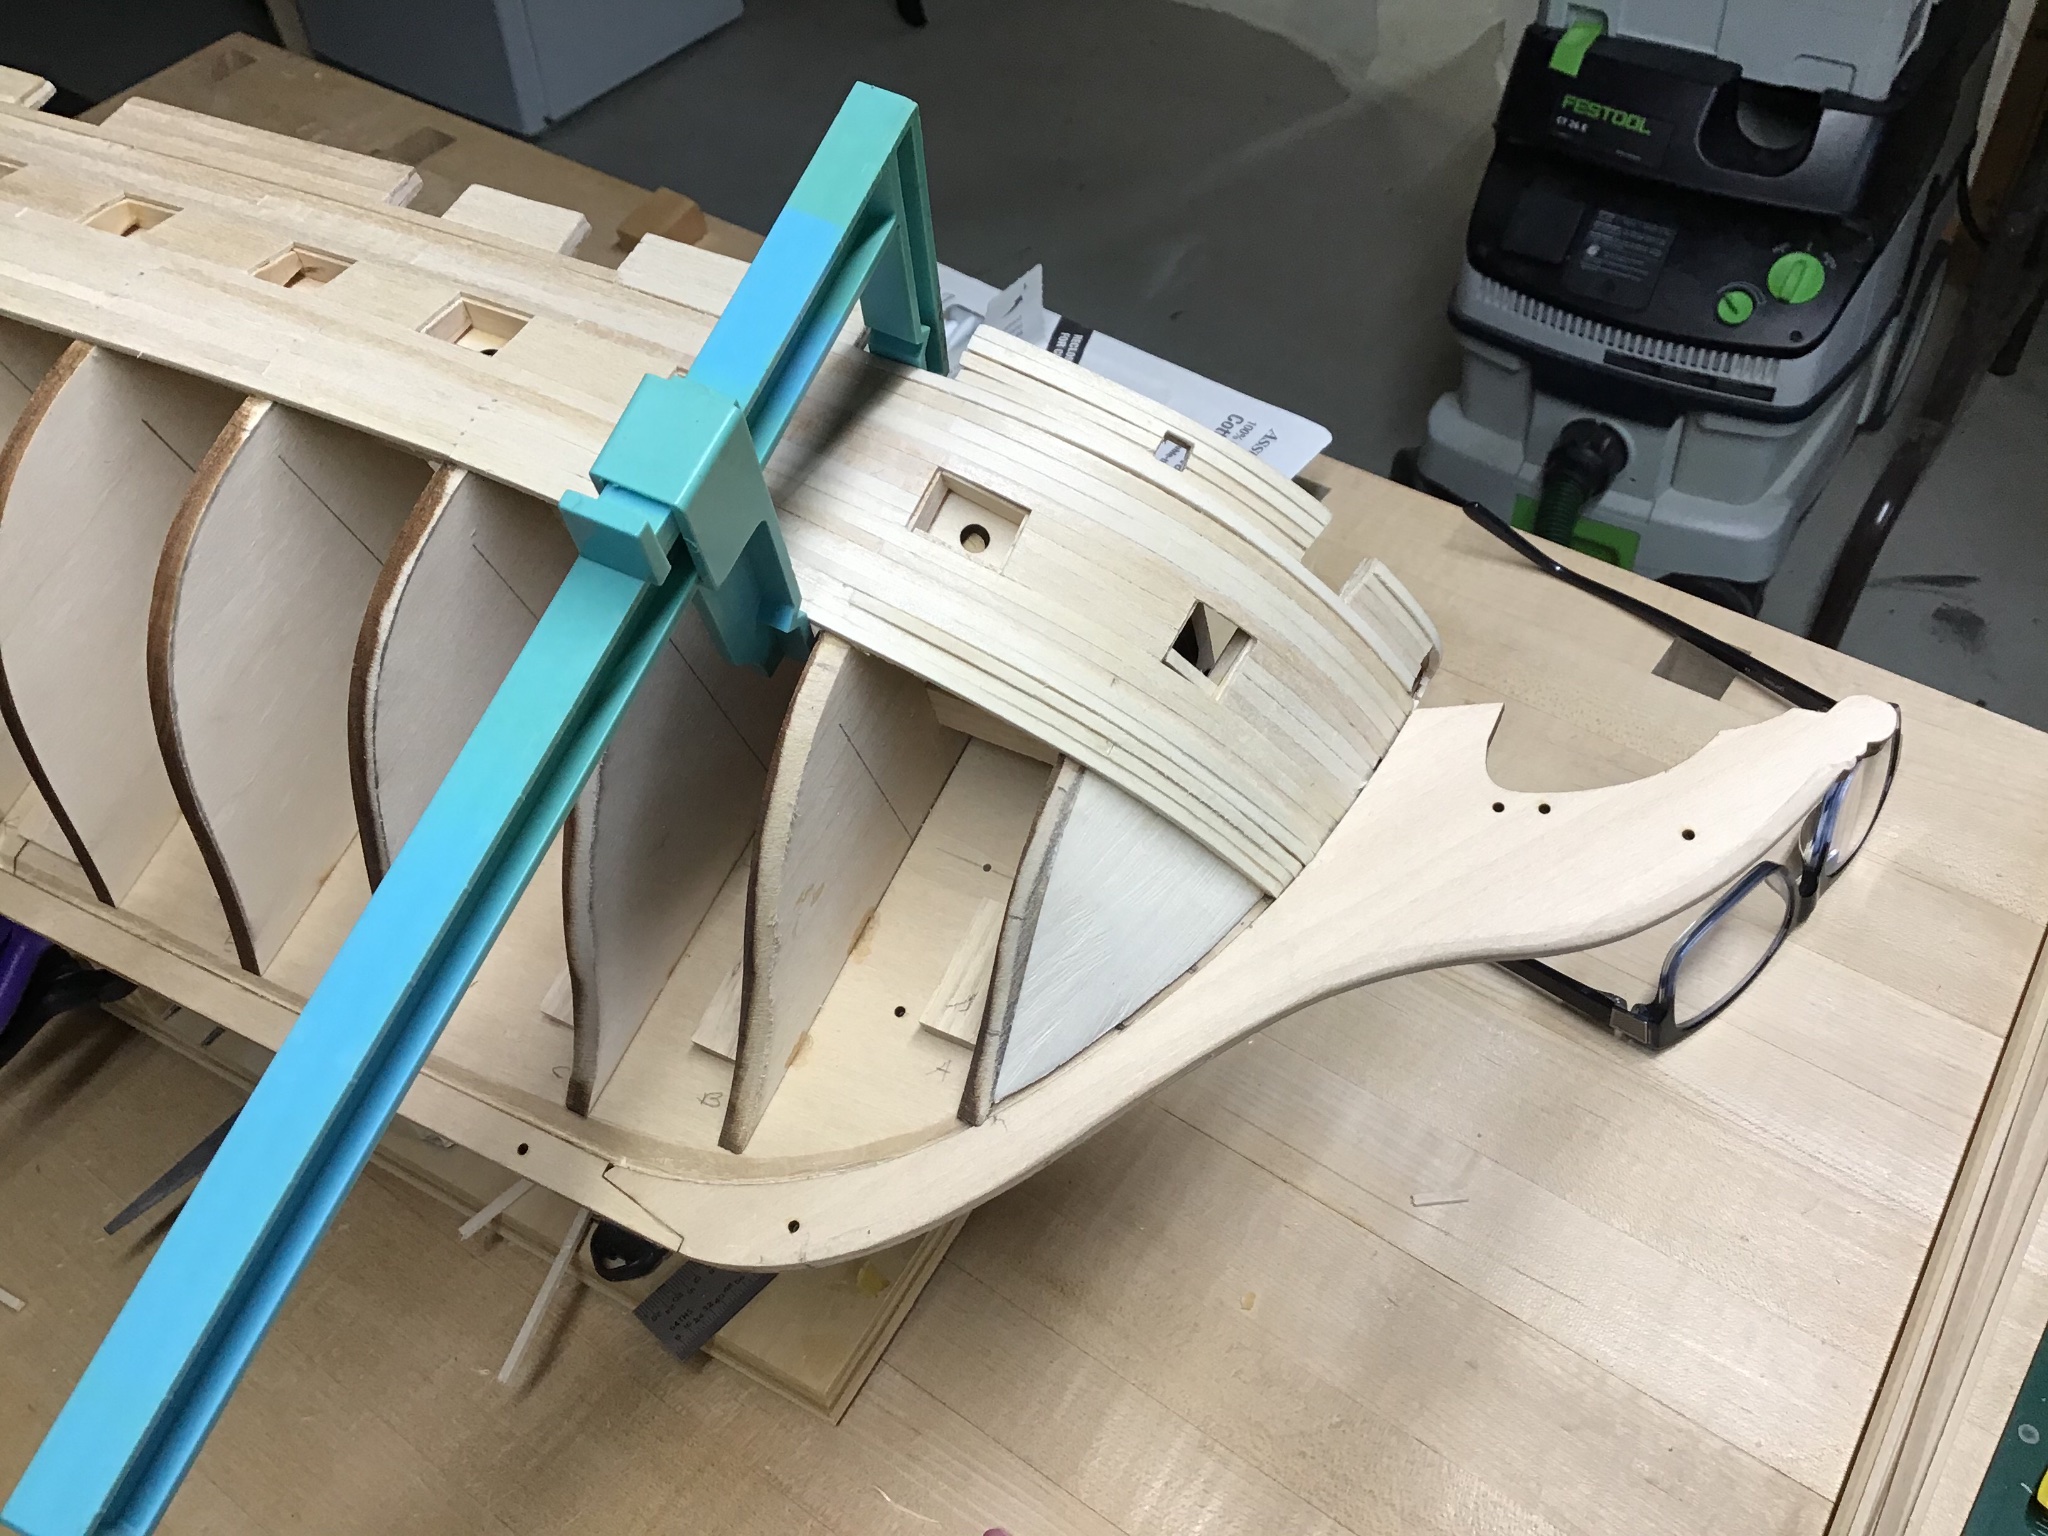
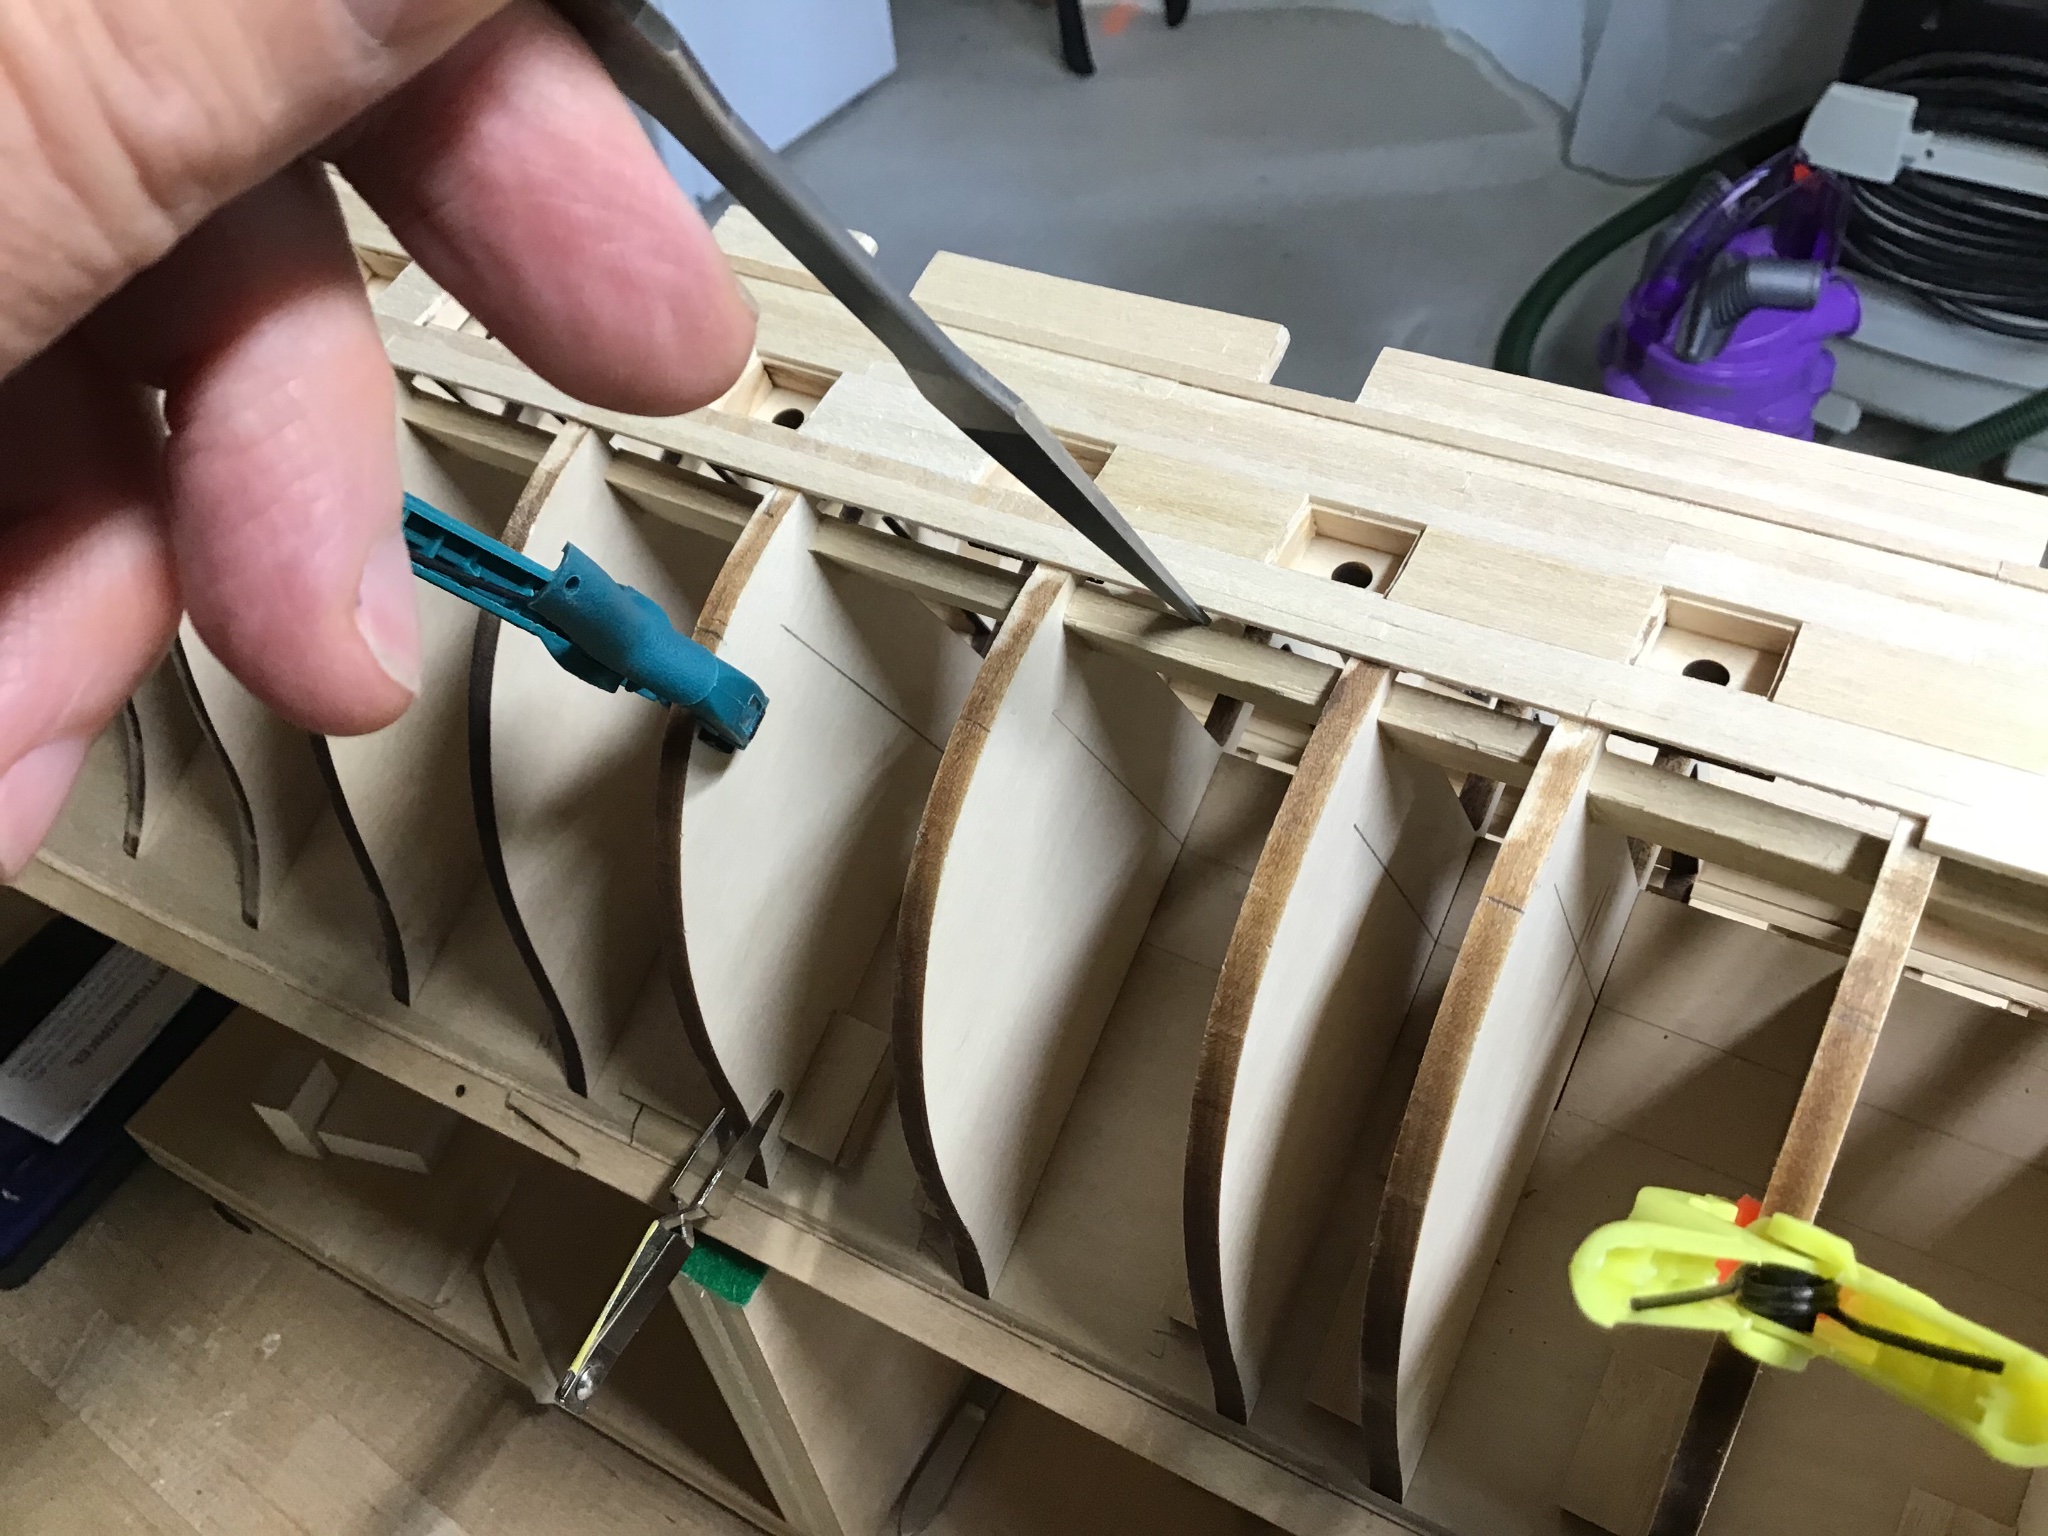
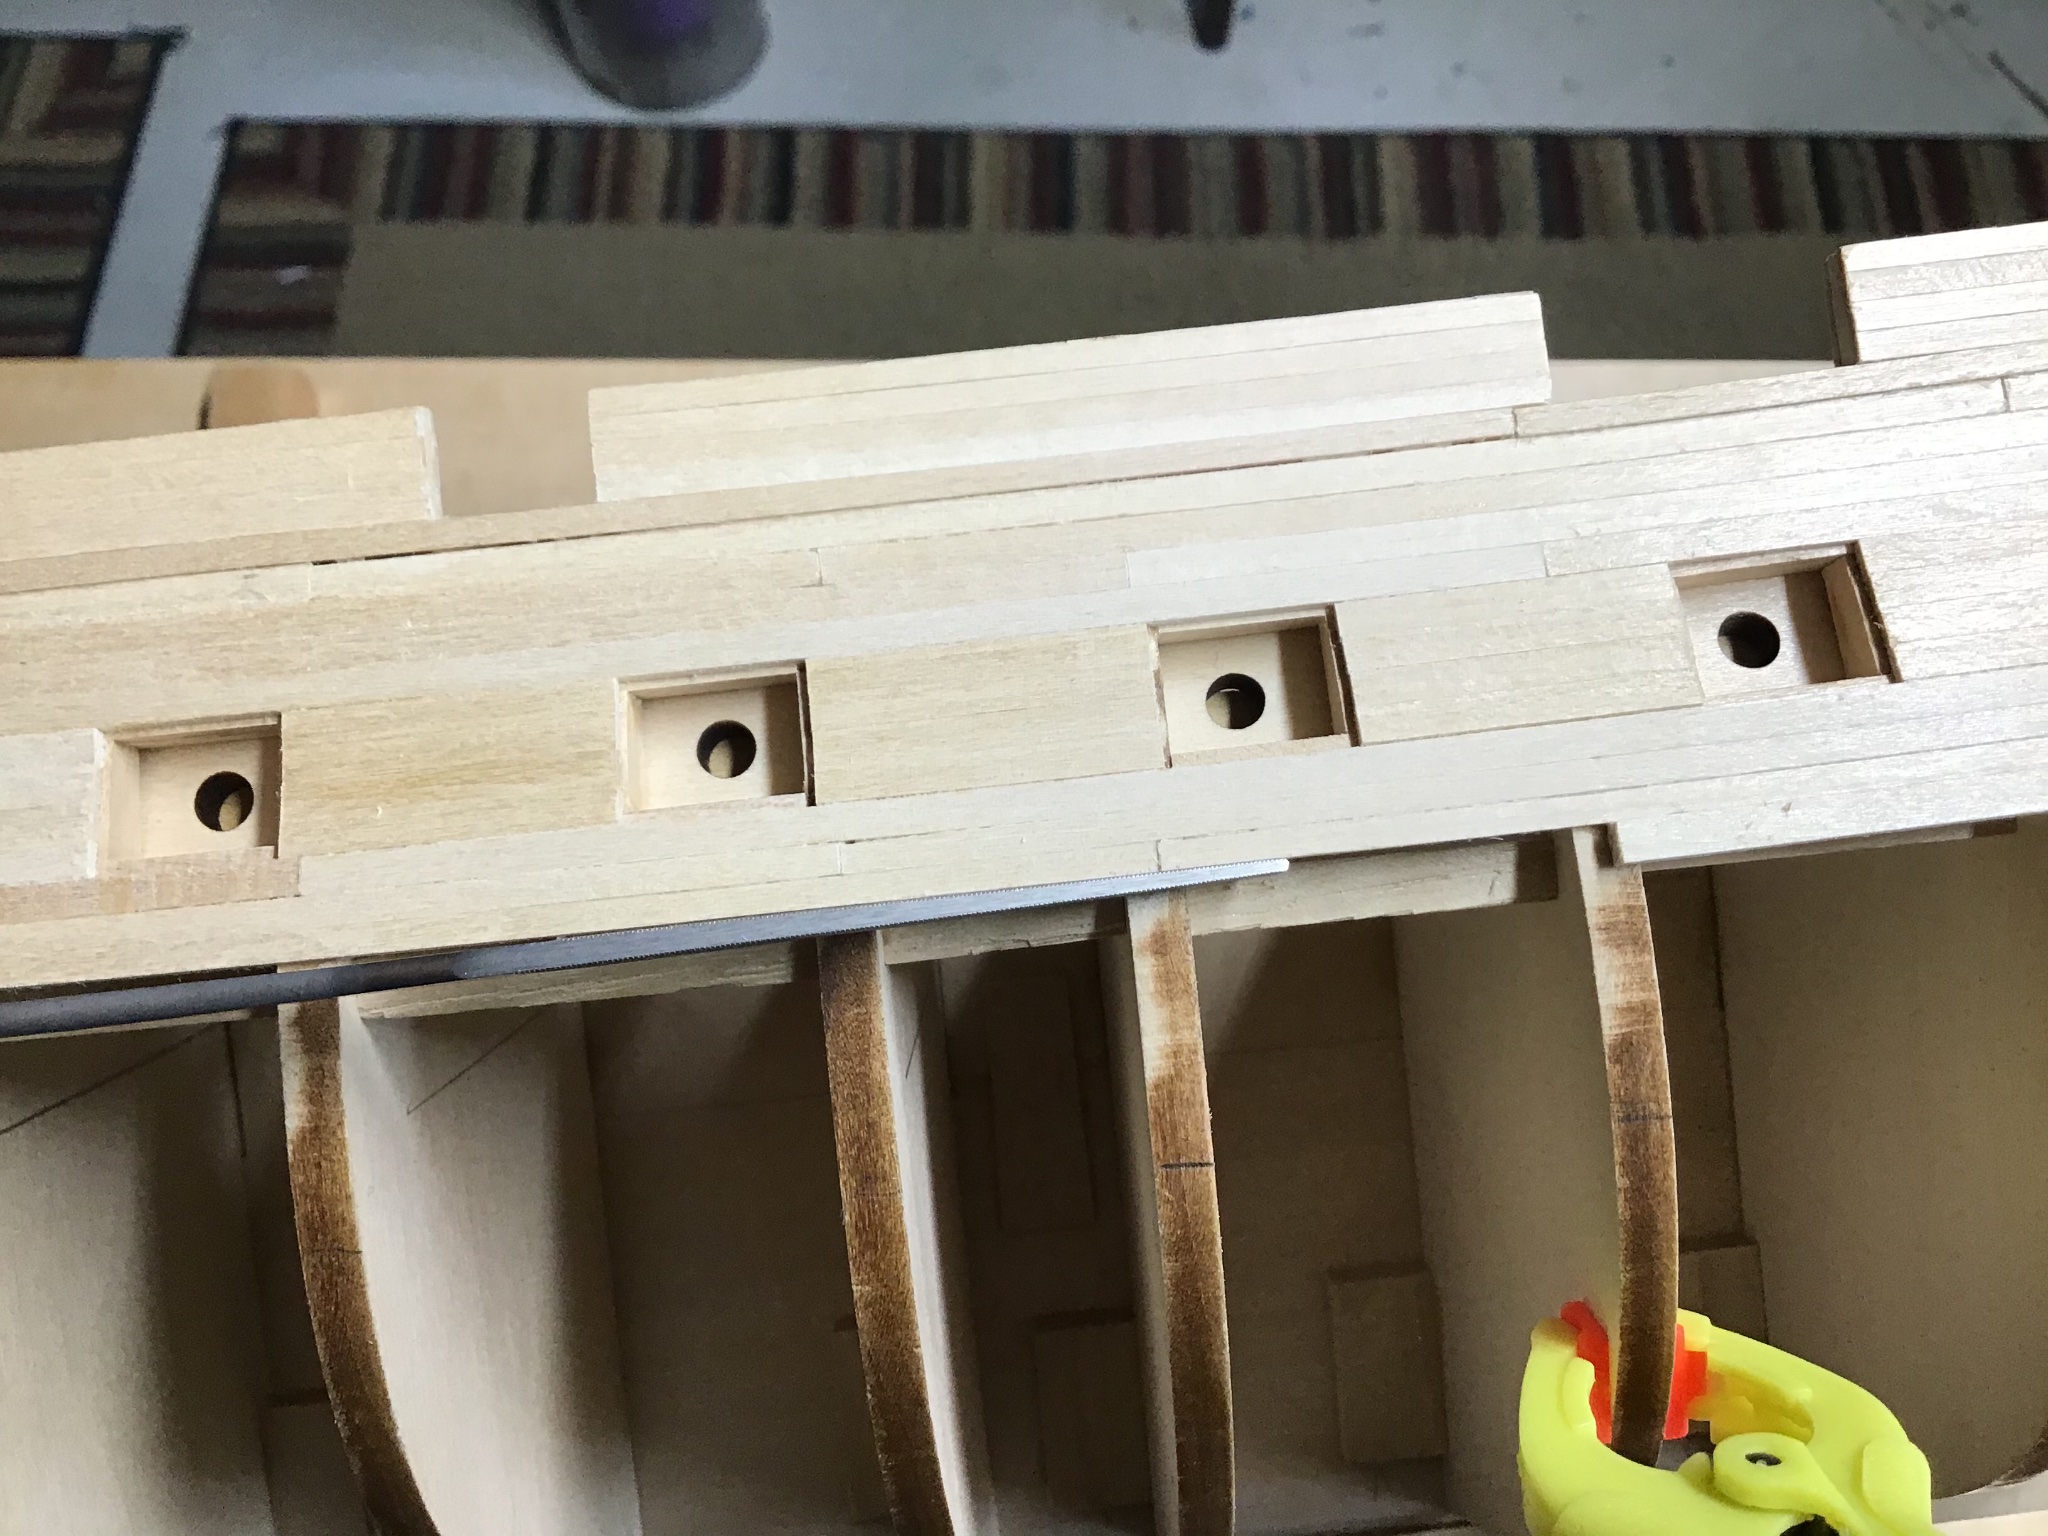
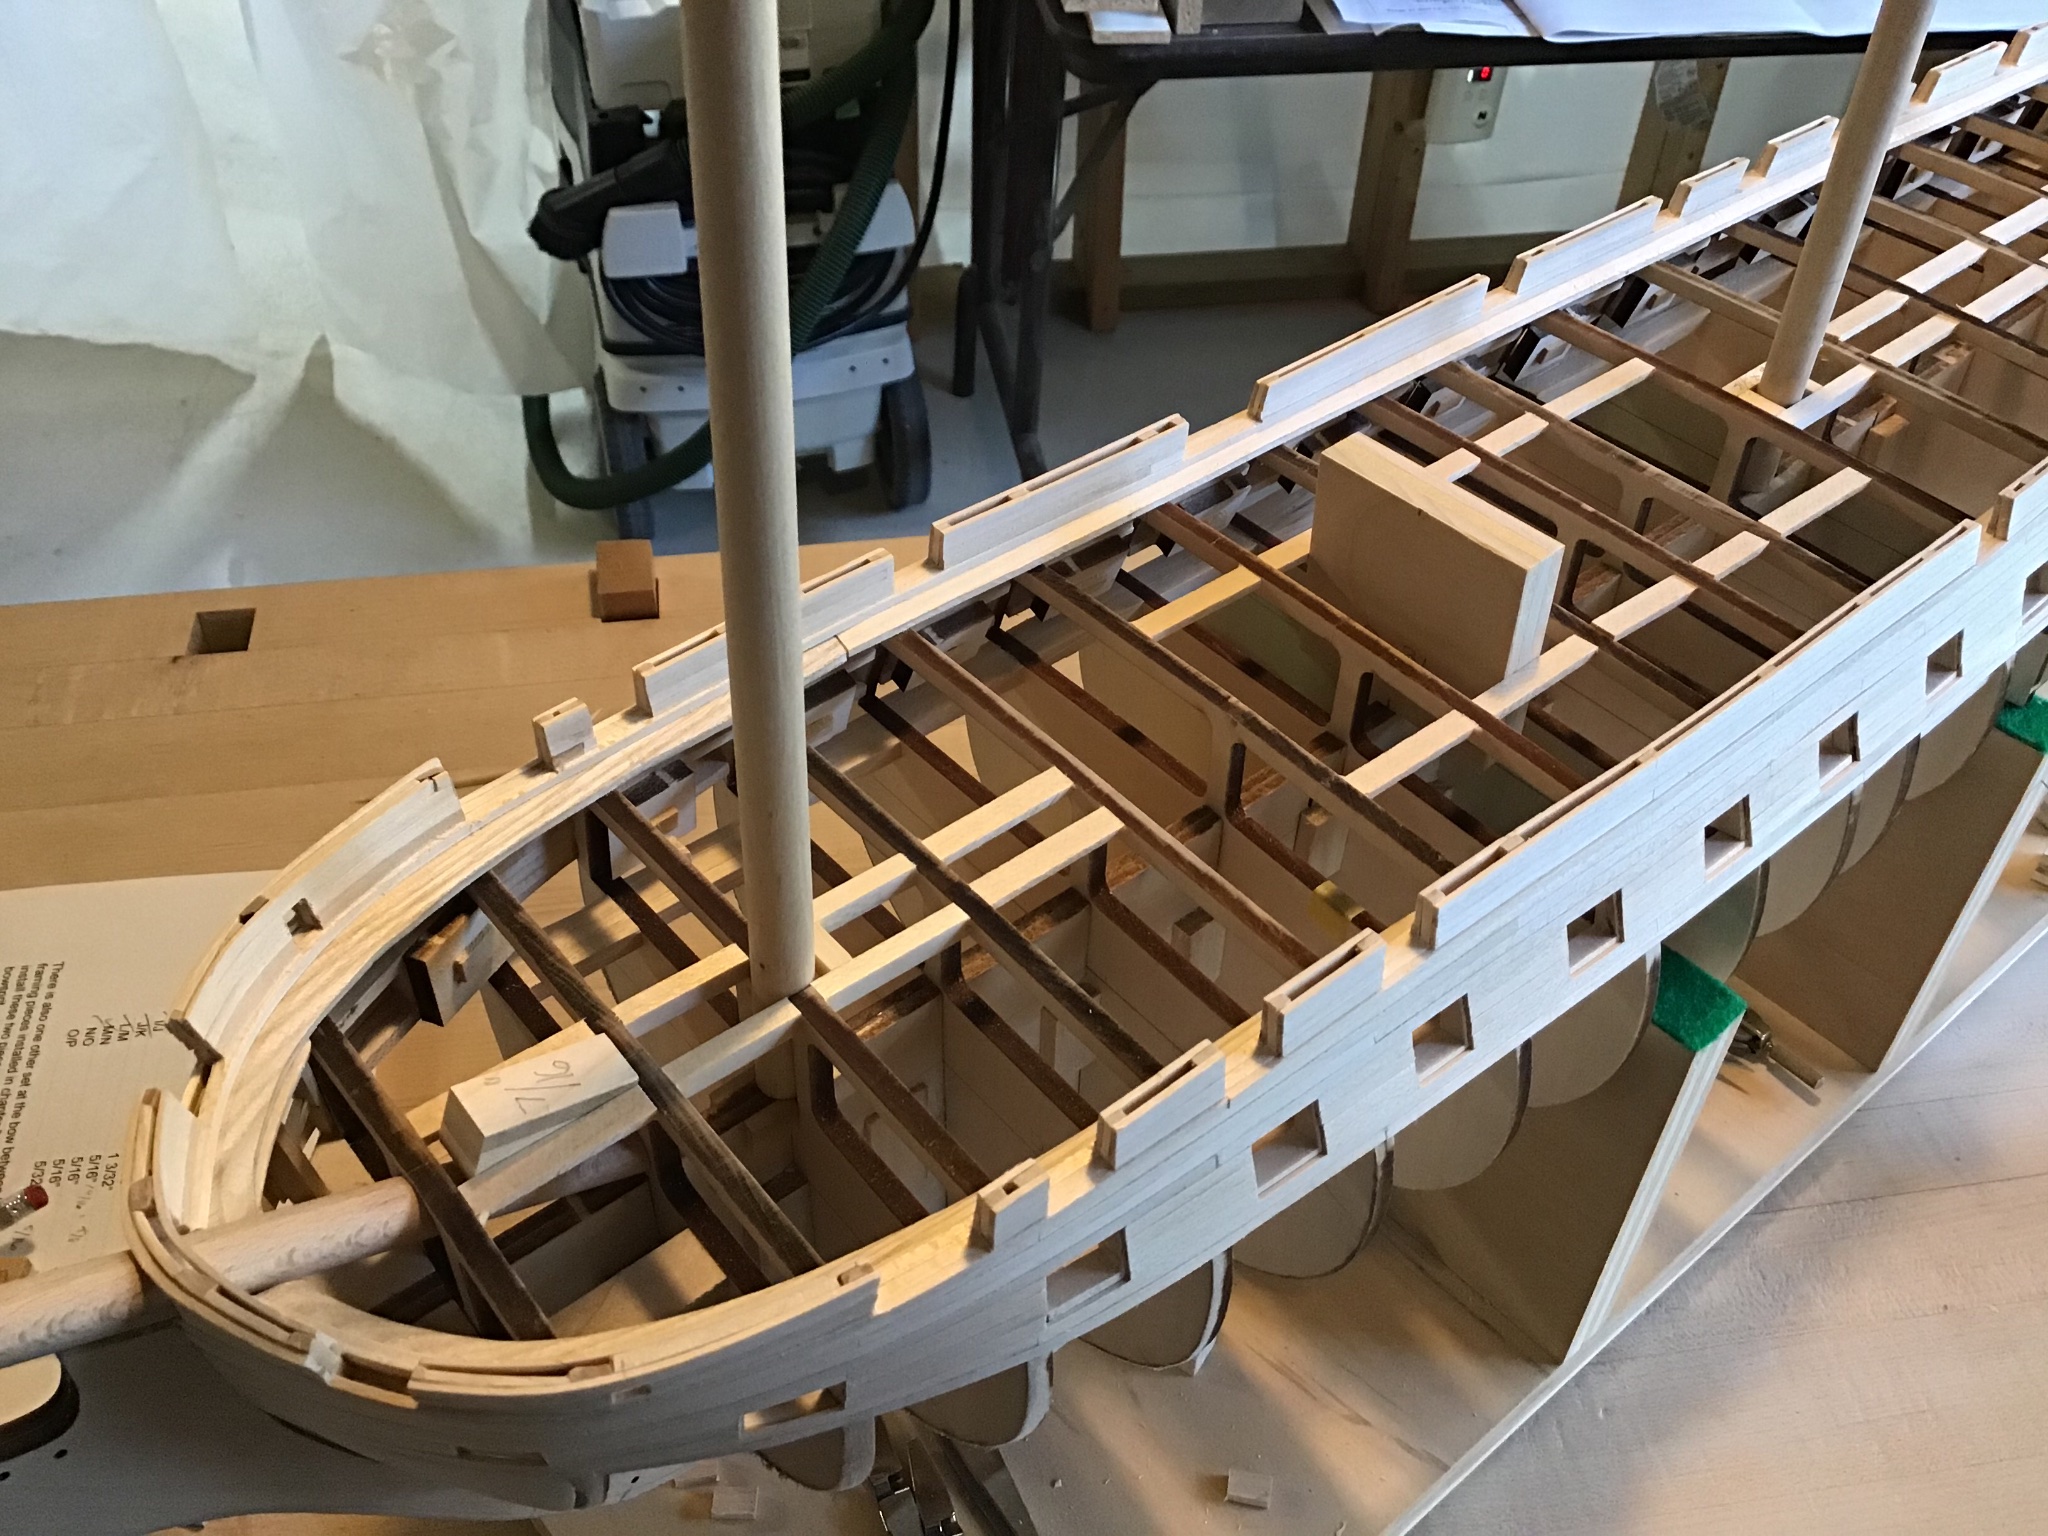
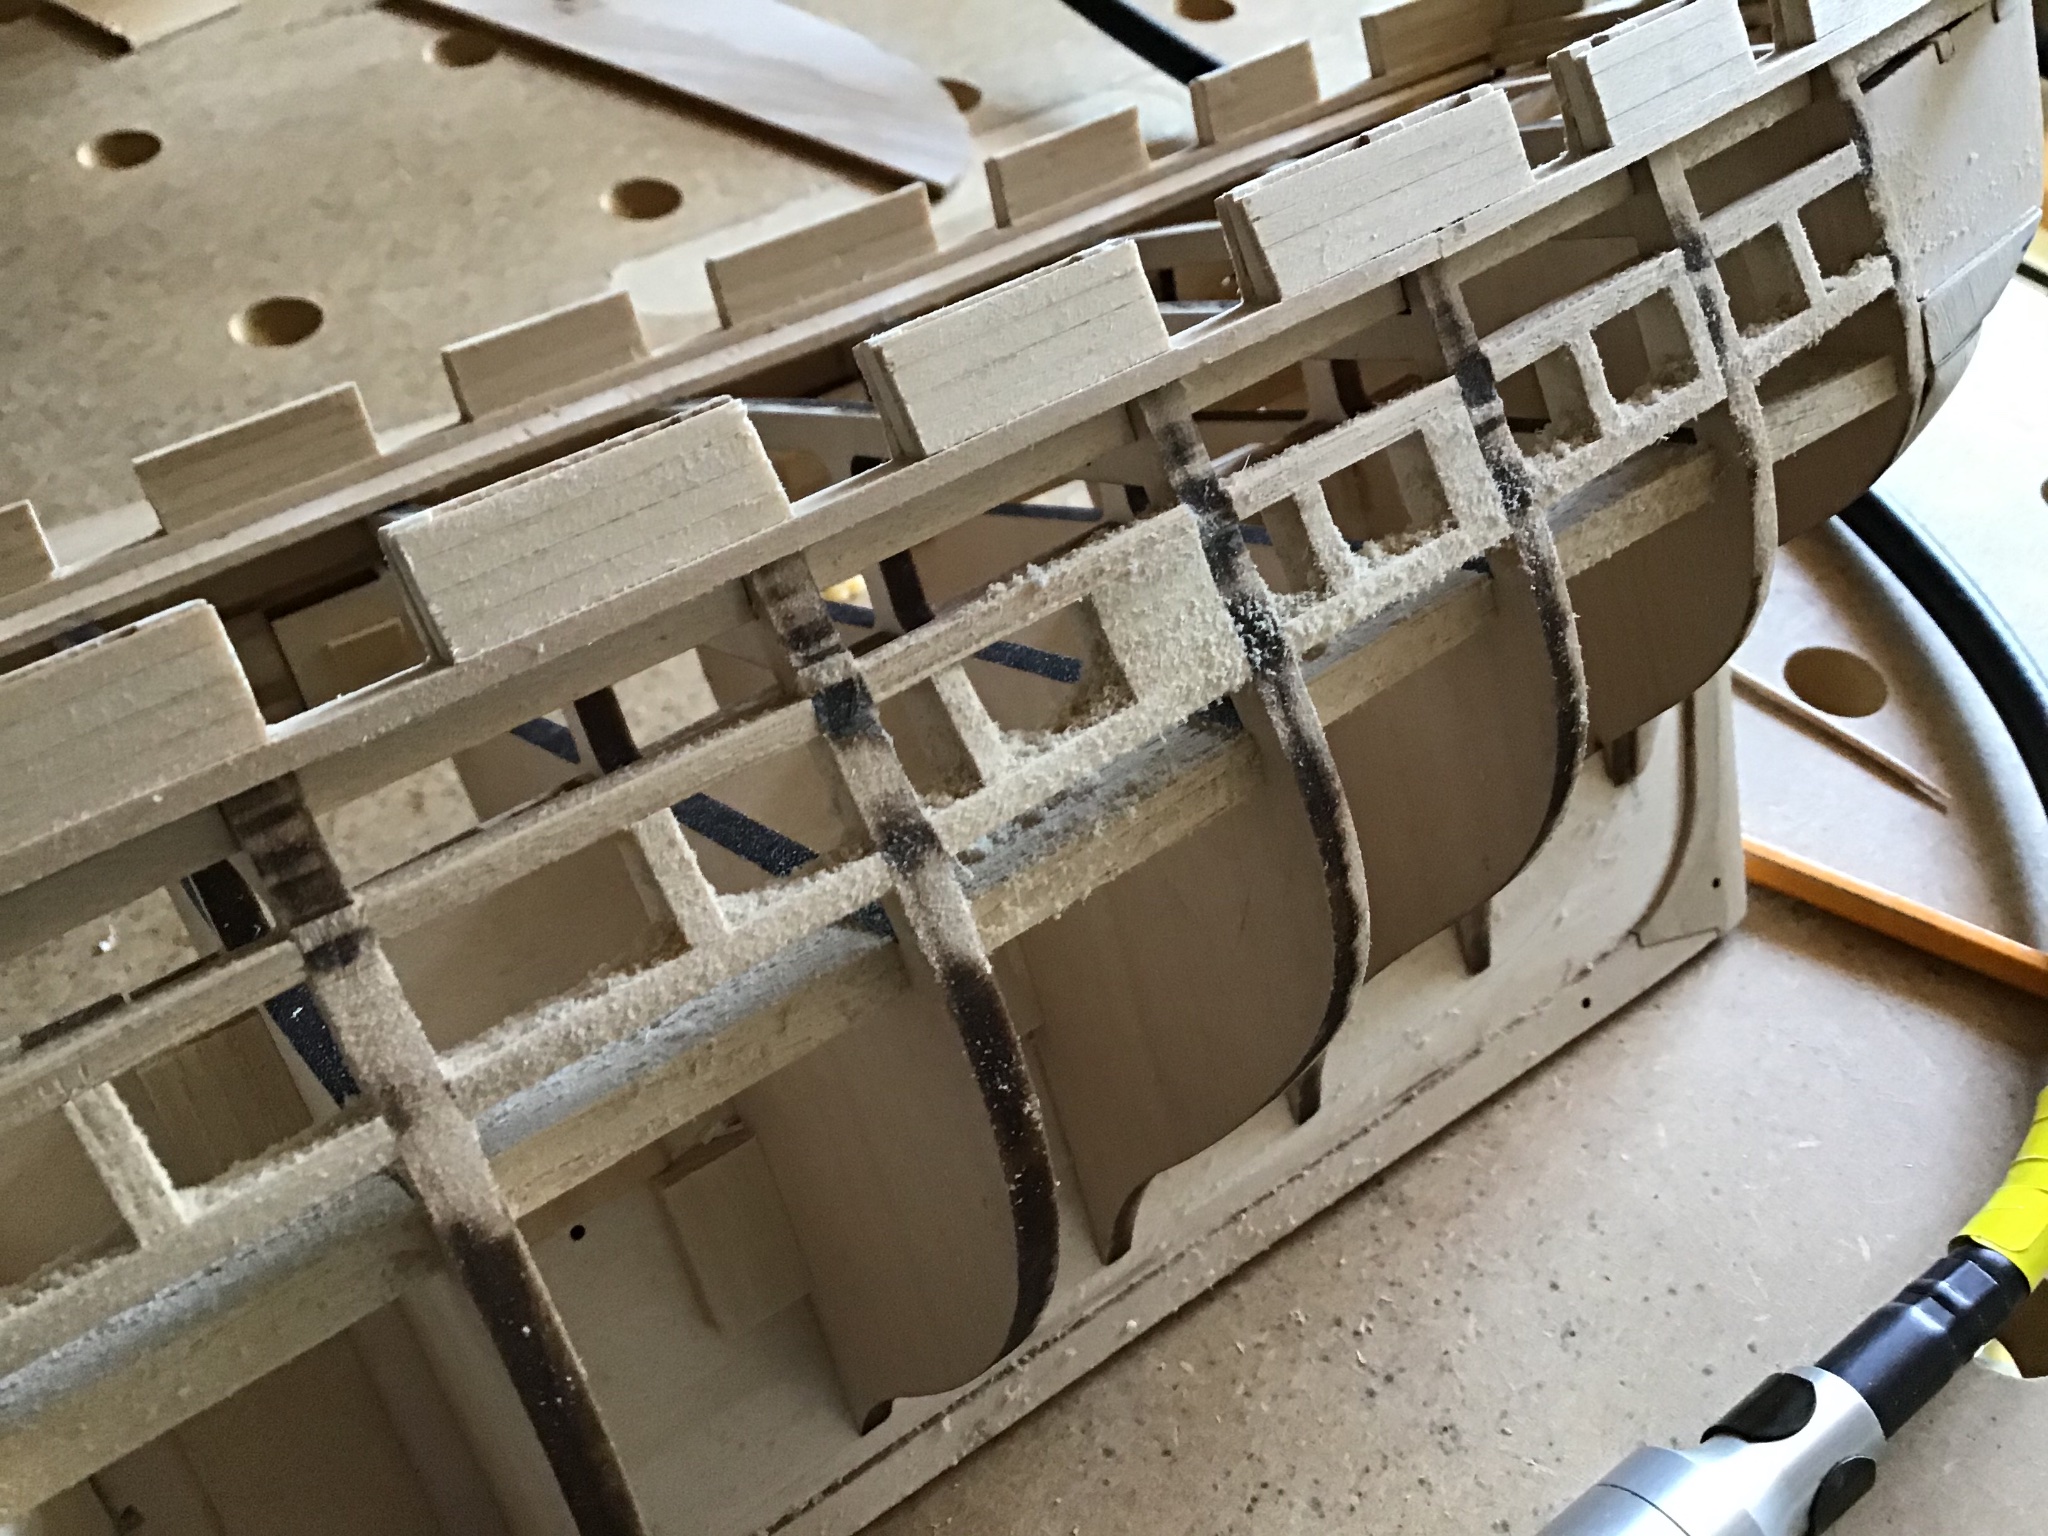
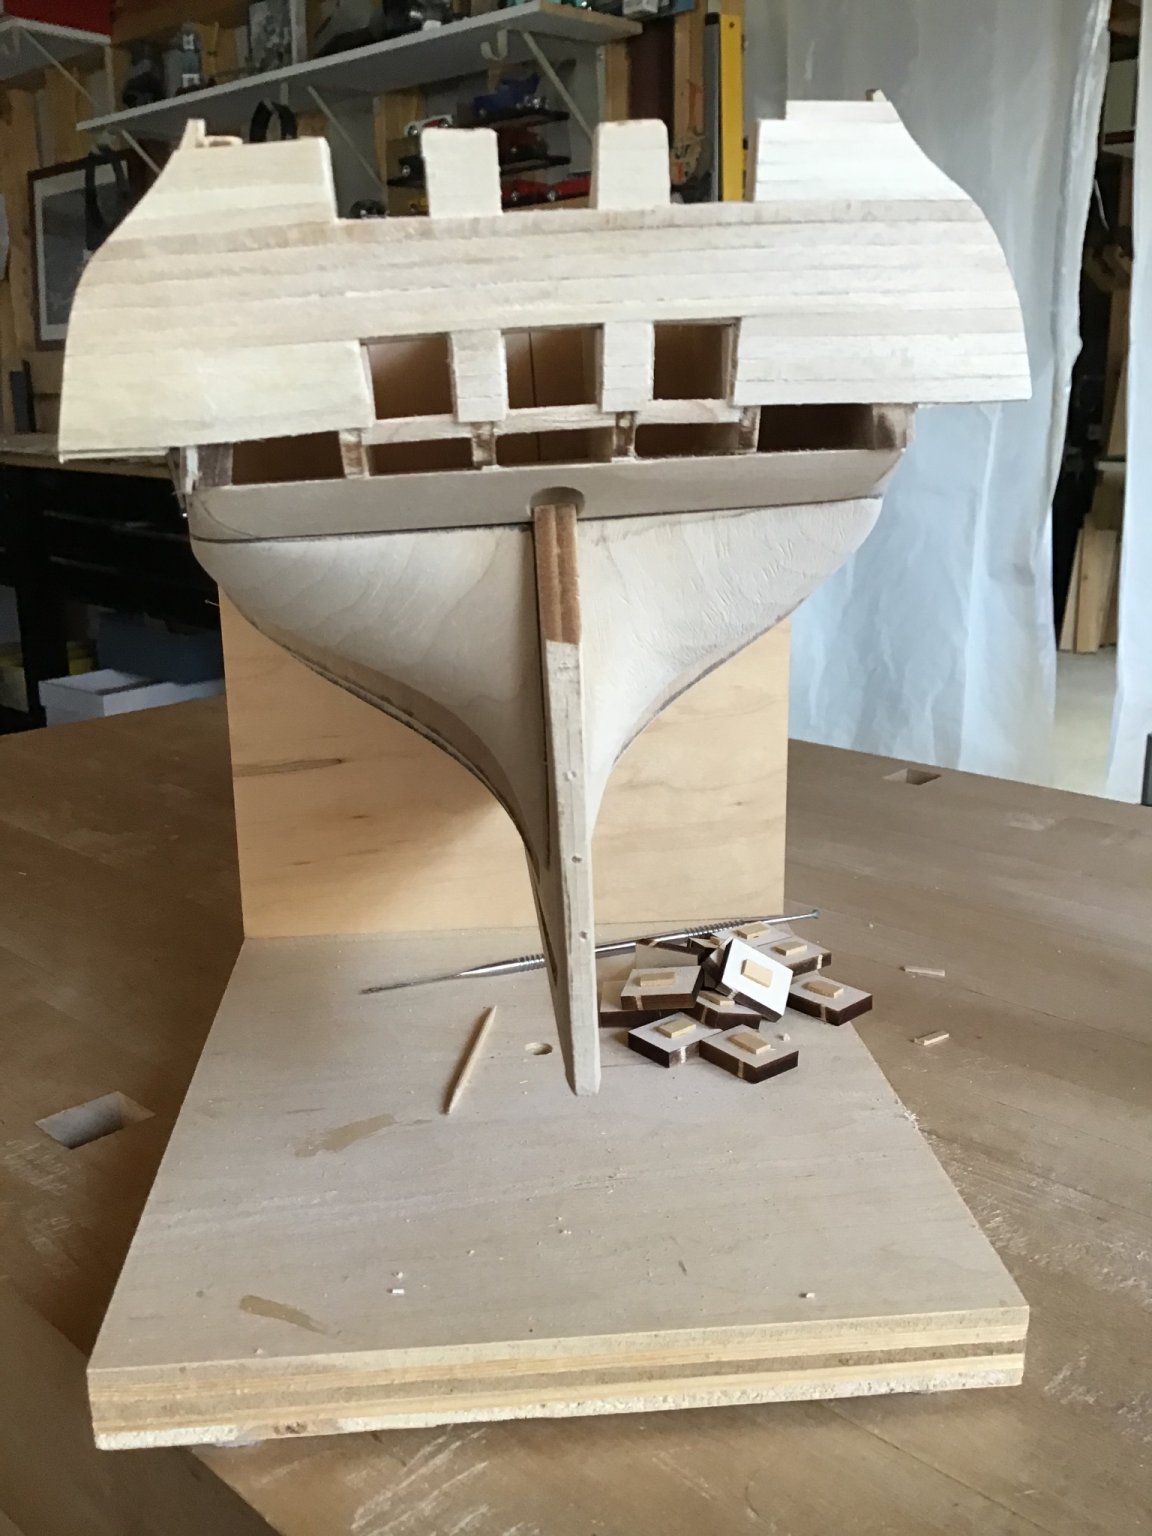
Gunports and Upper Hull Planking Completion
After learning how to do it on the starboard side, completed the port side gunports and planking a little faster.
Pictures show rough sanding of the gun port sills and side frames, using a sanding block. And the Foredom hand piece with a flame shaped bur. Foredom offers hyper tight control of material removal on the sills and frames. First time using the Foredom for this task and a huge time saver.
Installed the side extensions and planked the transom.
Finally smoothed the planks with a 12” long wood file and the Amati sanders as necessary. Wiped her down with alcohol to knock down the fuzzies and clean her up. Still some smoothing work to do but about 90% there.
Next are coamings and framing the grates.


- GuntherMT, Sea Hoss, Duanelaker and 1 other
-
4
-
Takin’ care of business! Good to hear and best of luck.
-
Good Morning,
Ebay is a quick way to find the value of a kit.
In terms of dollar value, most likely an older kit is not worth very much.
The kit could have educational value for your son.
New kits are made with laser cut parts, which save the builder time because less work and skill are needed to prepare the parts. Older kits typically have the lines of parts printed sheet stock - which means it takes much time and skill to prepare them.
This means older kits are less appealing, therefore less demand, therefore less value.
That being said, if your son is interested, try building it. It could be a great learning experience. Model building teaches skills like following directions. understanding plans, instructions, and three dimensional relationships. And the satisfaction of seeing something built with your own hands.
Cheers!


USS MAINE by steven. R - sheet metal
in - Build logs for subjects built 1901 - Present Day
Posted
Found you project and decided to follow along.....
What a unique look....looking forward to your posts....thanks.