Andyrew
-
Posts
126 -
Joined
-
Last visited
-
 AJohnson reacted to a post in a topic:
HMS Agamemnon's Launch by Andyrew - Disarmodel - 1:30 Scale
AJohnson reacted to a post in a topic:
HMS Agamemnon's Launch by Andyrew - Disarmodel - 1:30 Scale
-
AJohnson reacted to a post in a topic:
HMS Agamemnon's Launch by Andyrew - Disarmodel - 1:30 Scale
-
Prowler901 reacted to a post in a topic:
HMS Agamemnon's Launch by Andyrew - Disarmodel - 1:30 Scale
-
Cathead reacted to a post in a topic:
HMS Agamemnon's Launch by Andyrew - Disarmodel - 1:30 Scale
-
 Gus M reacted to a post in a topic:
HMS Agamemnon's Launch by Andyrew - Disarmodel - 1:30 Scale
Gus M reacted to a post in a topic:
HMS Agamemnon's Launch by Andyrew - Disarmodel - 1:30 Scale
-
bruce d reacted to a post in a topic:
HMS Agamemnon's Launch by Andyrew - Disarmodel - 1:30 Scale
-
Toolmaker reacted to a post in a topic:
HMS Agamemnon's Launch by Andyrew - Disarmodel - 1:30 Scale
-
KARAVOKIRIS reacted to a post in a topic:
HMS Agamemnon's Launch by Andyrew - Disarmodel - 1:30 Scale
-
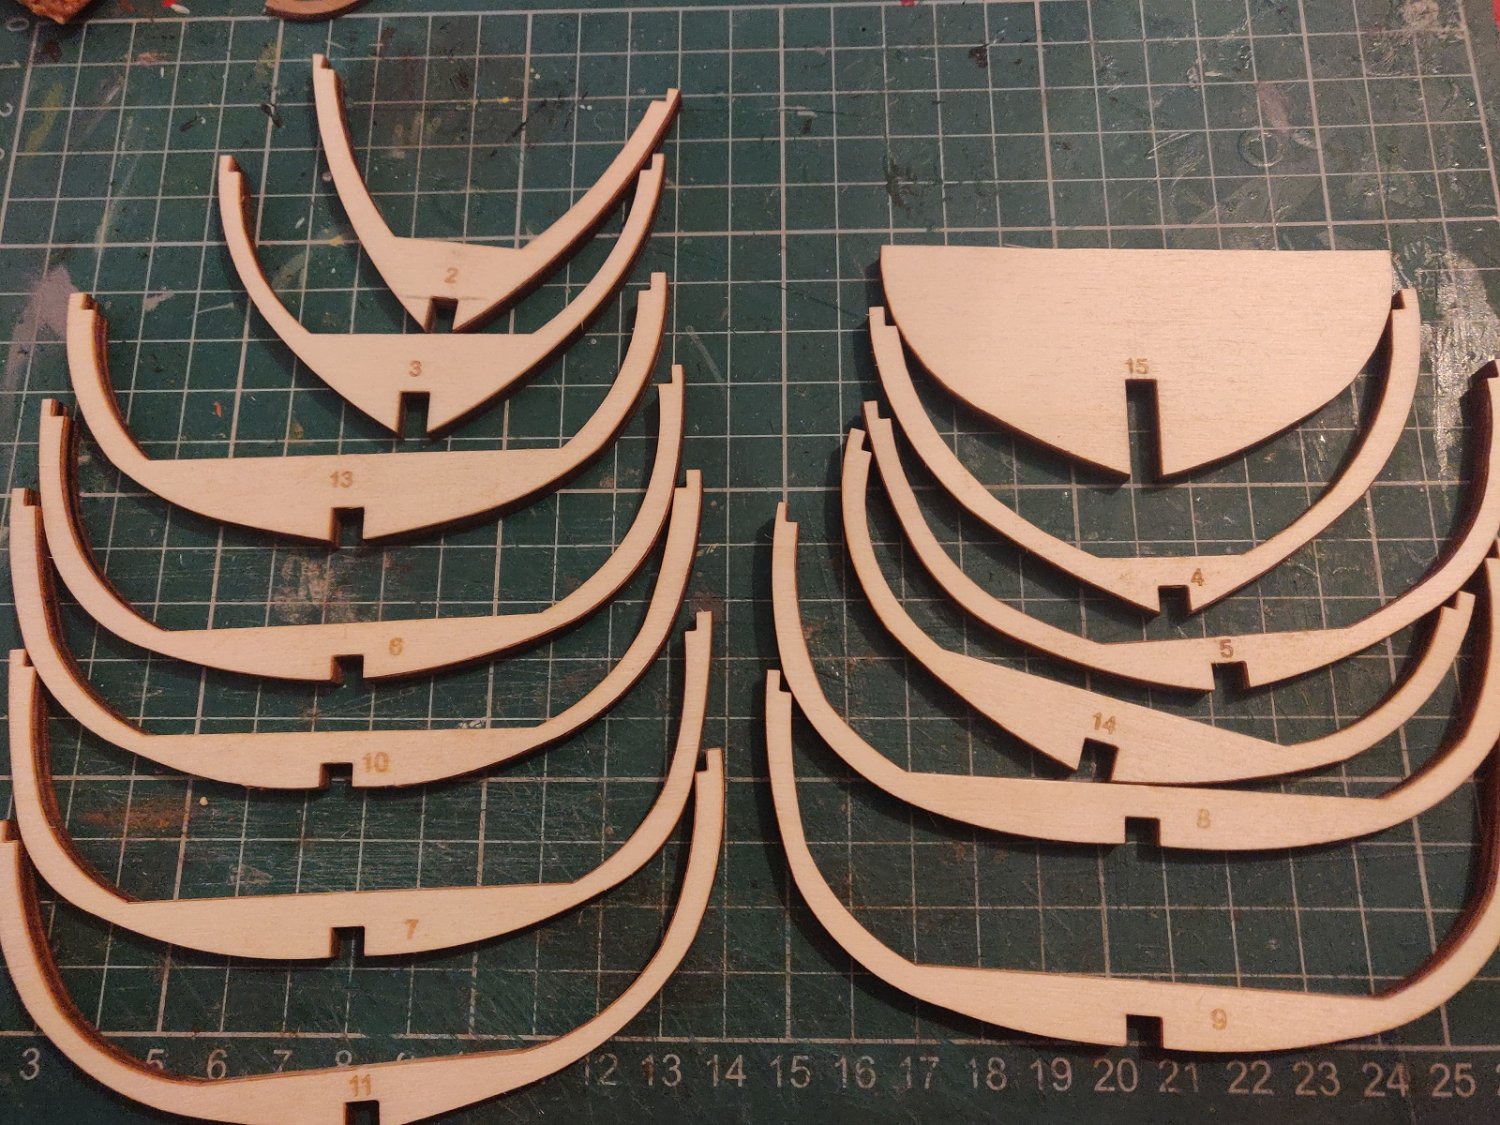
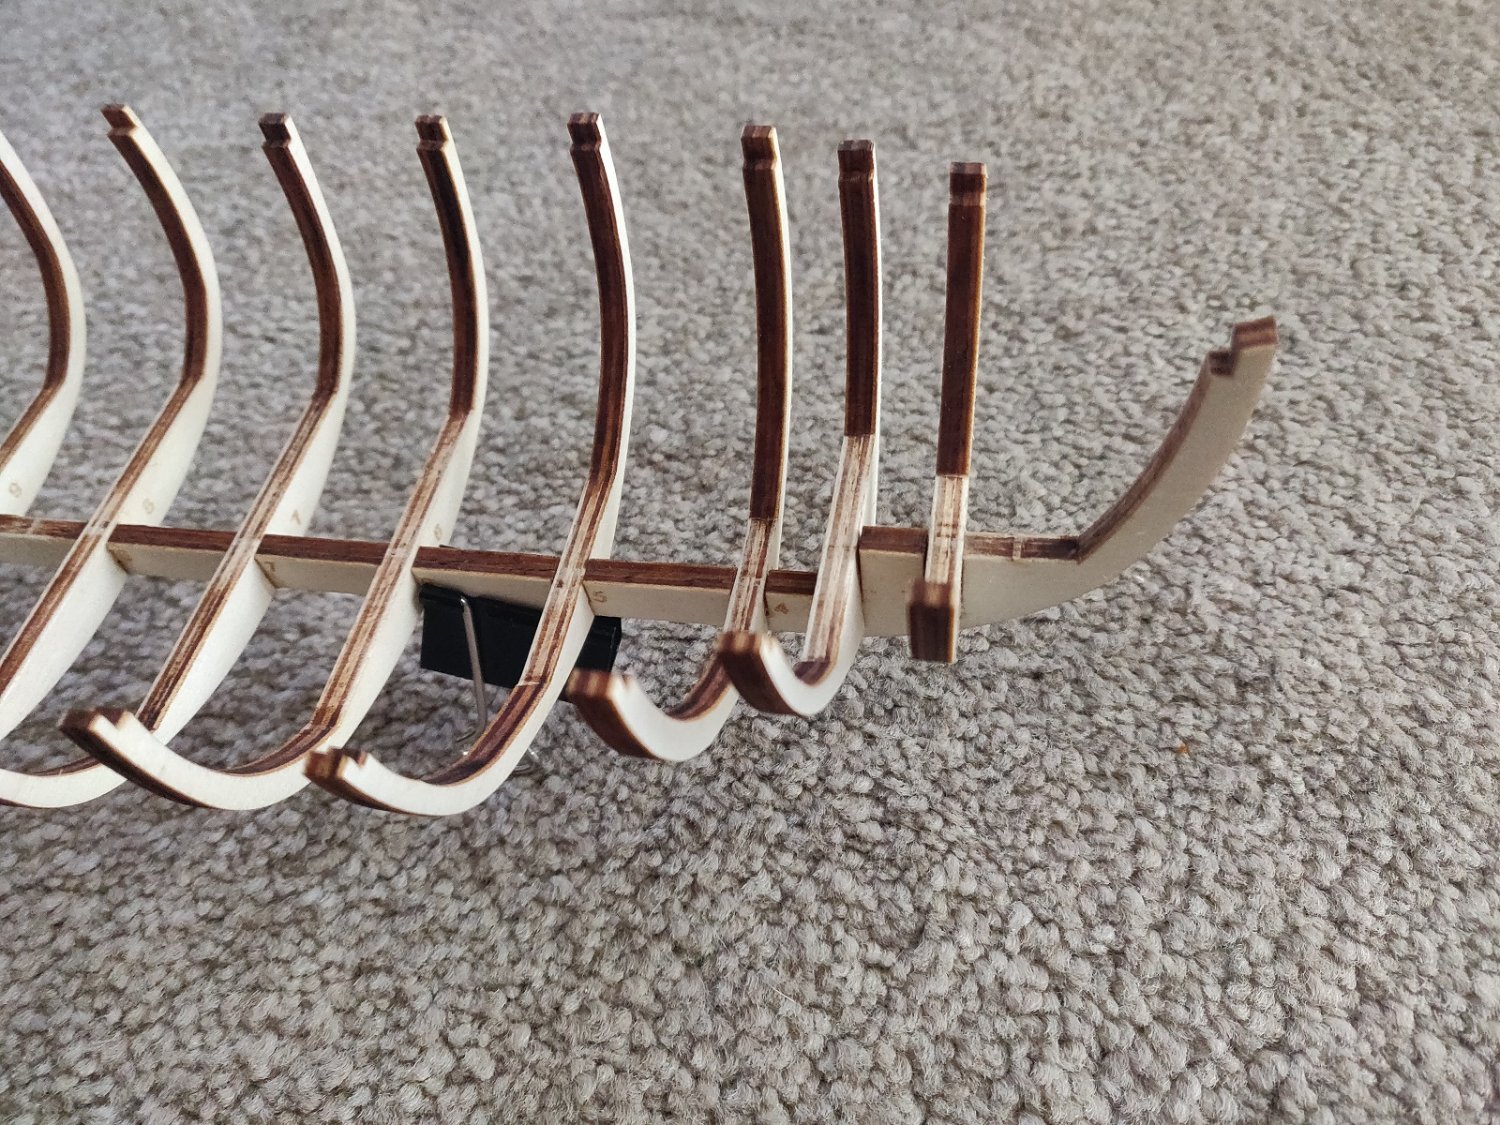
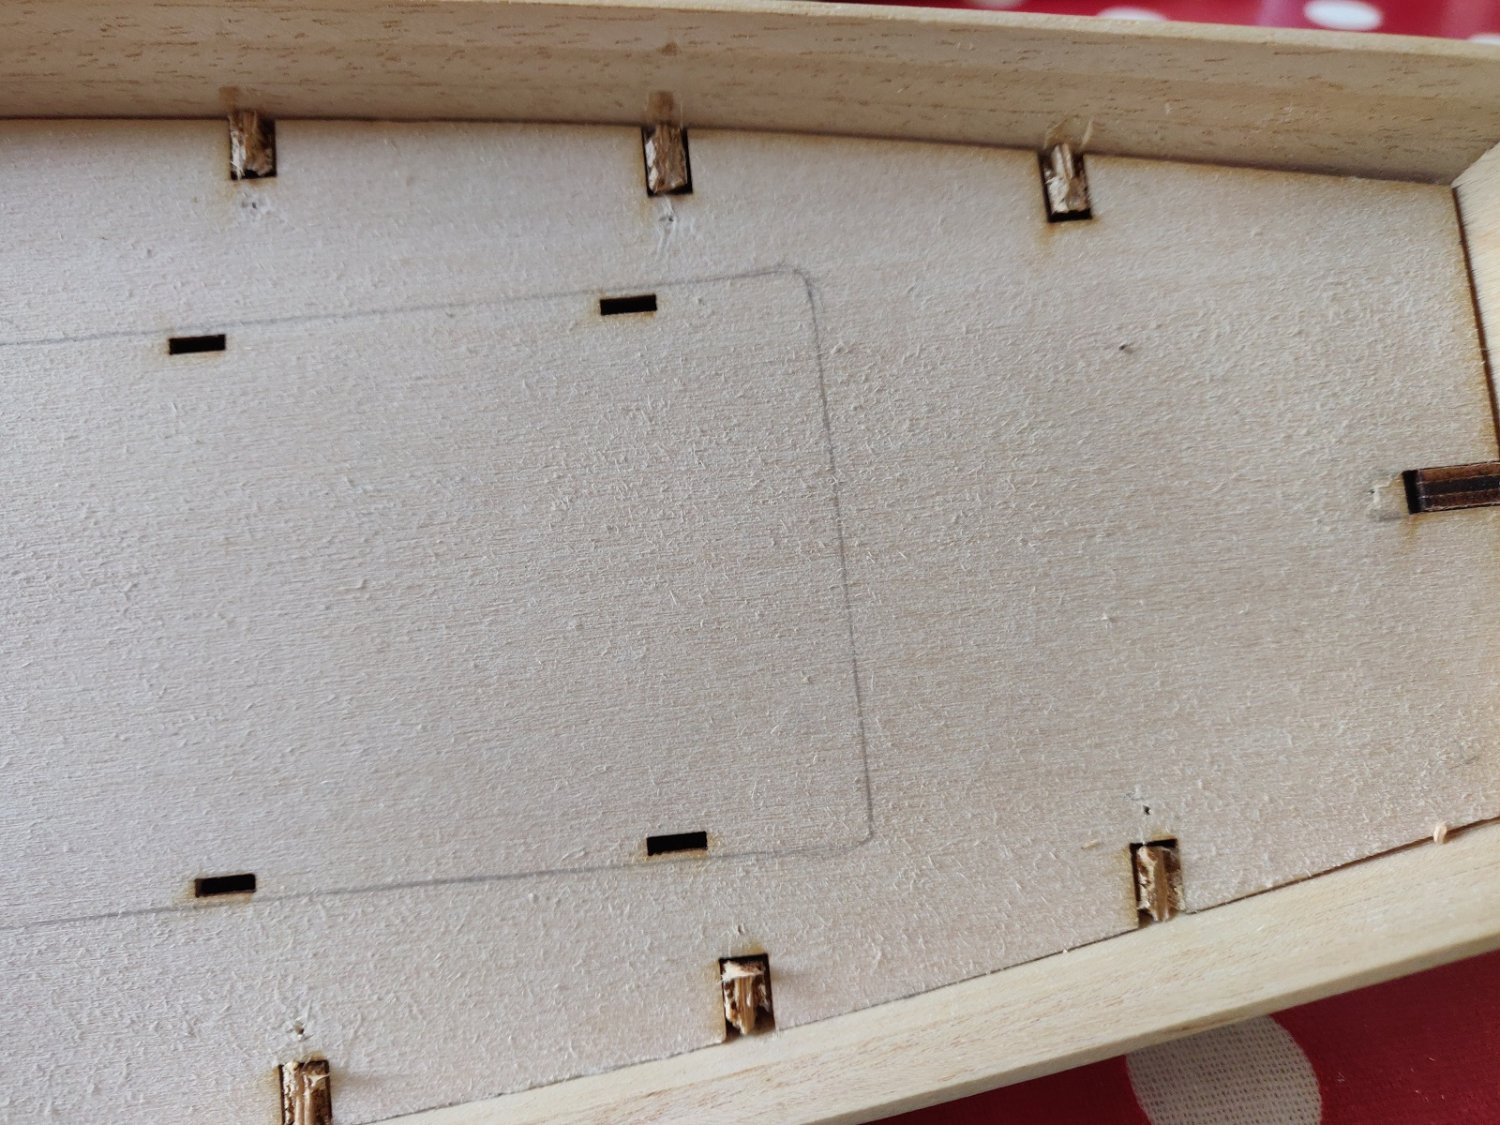
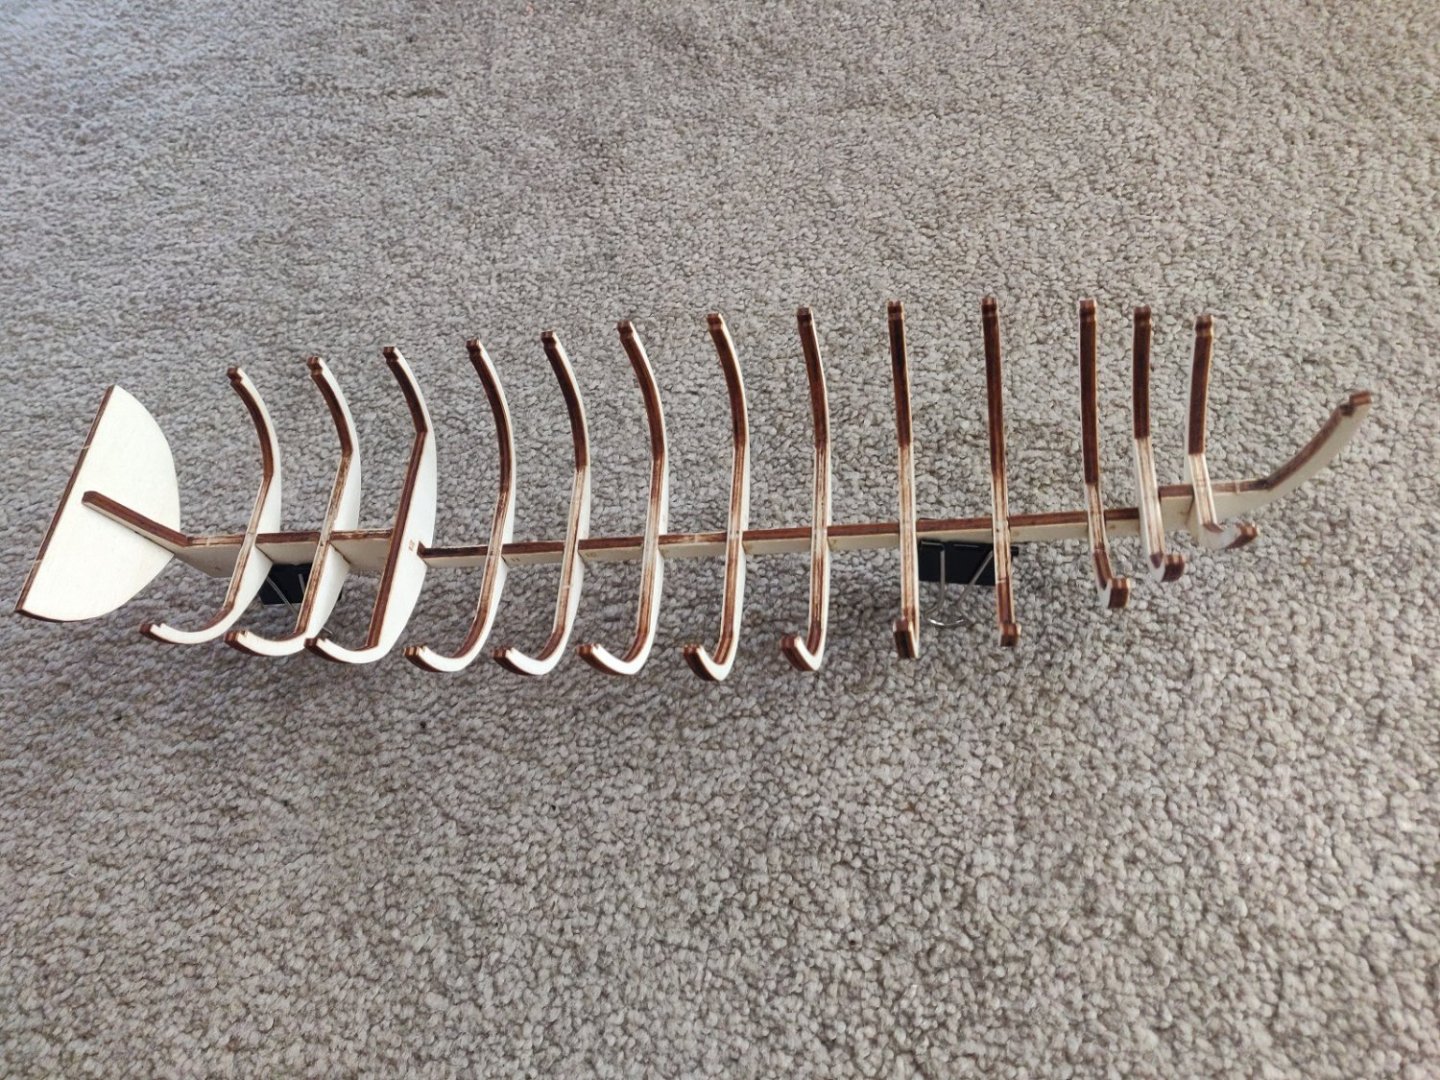
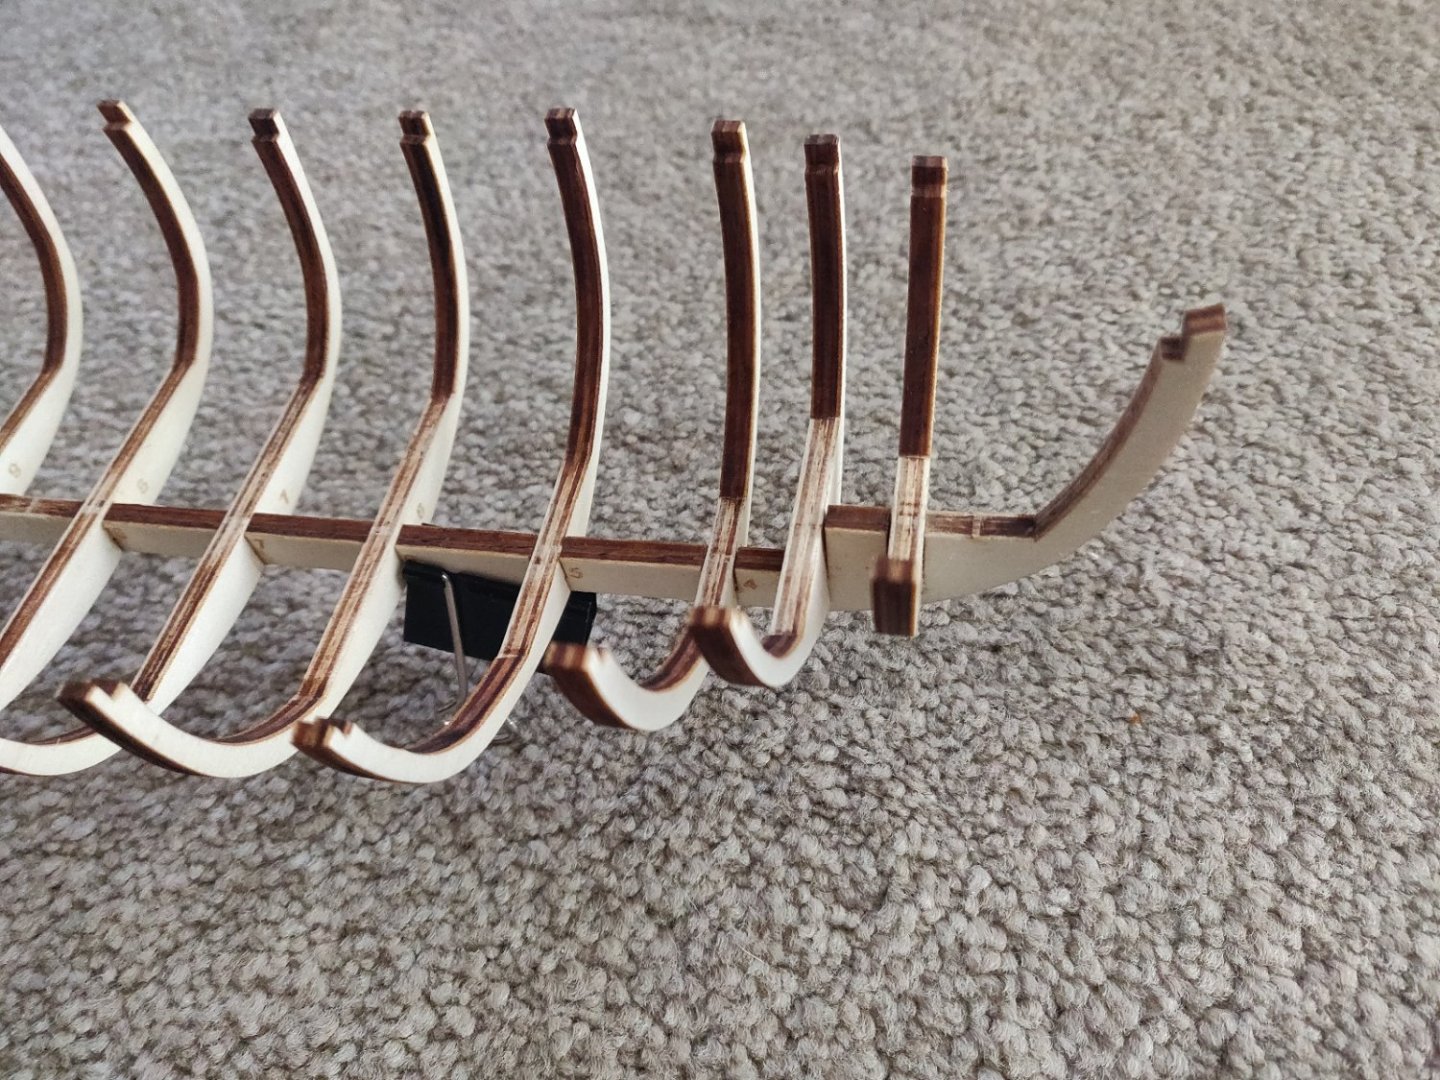
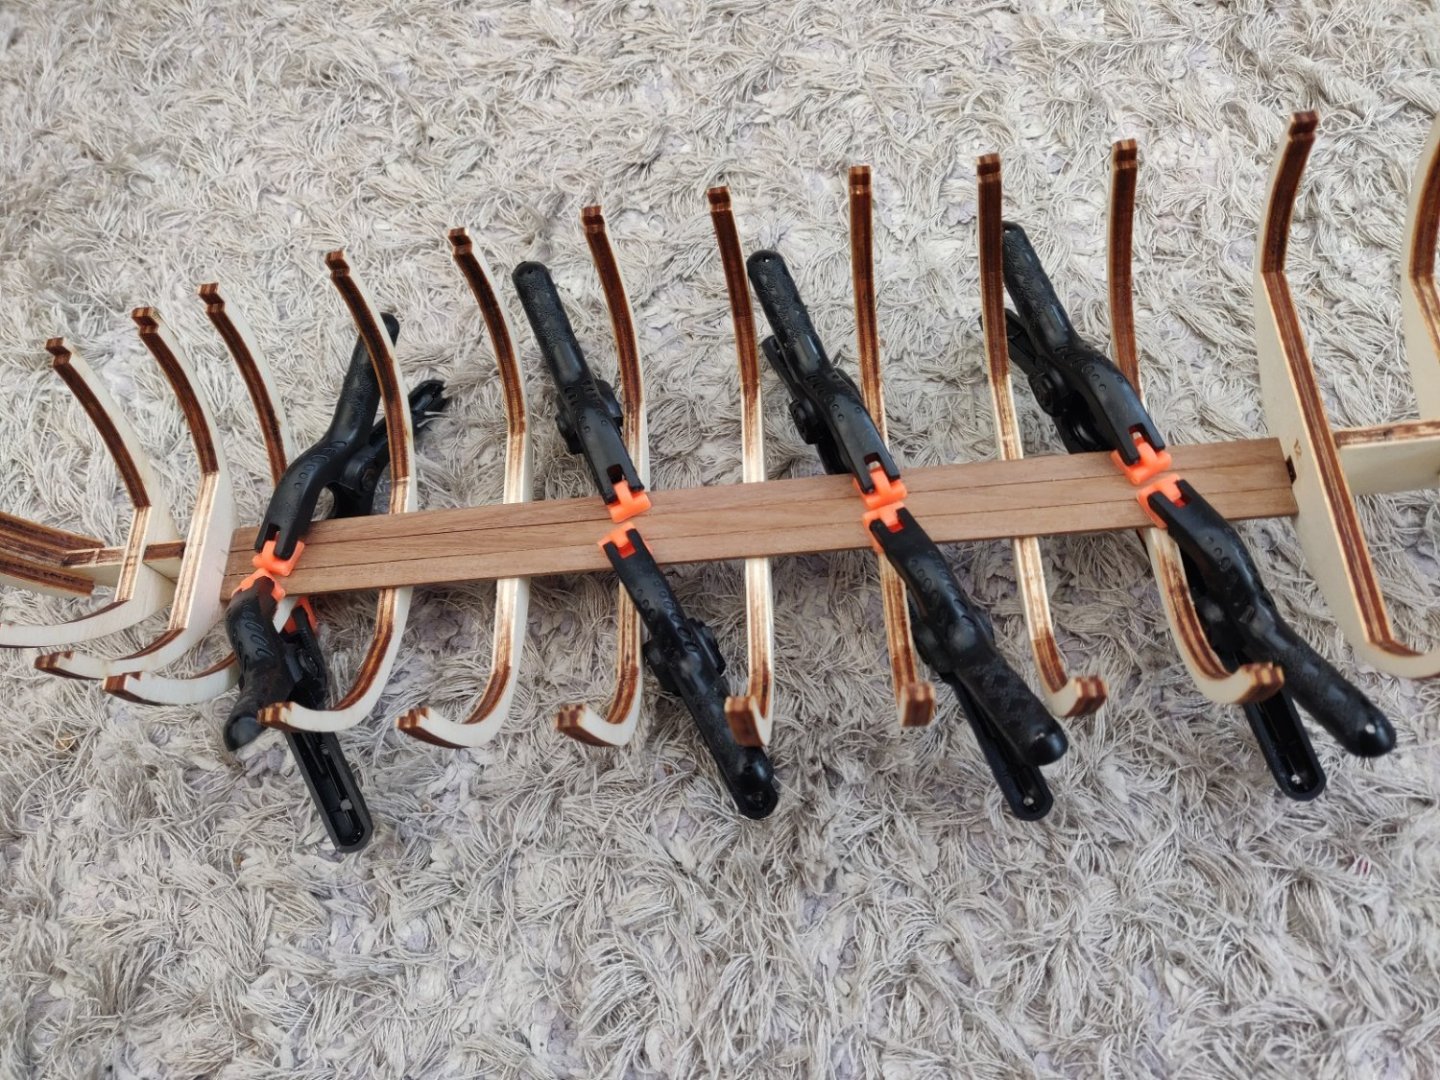
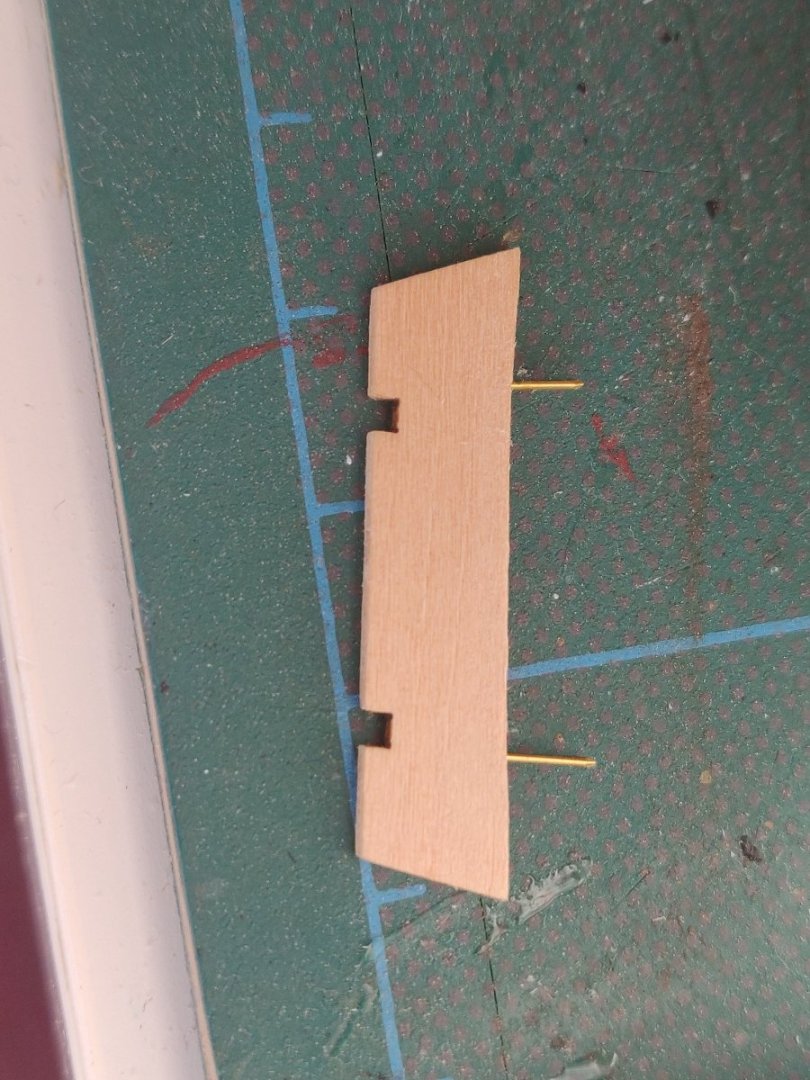
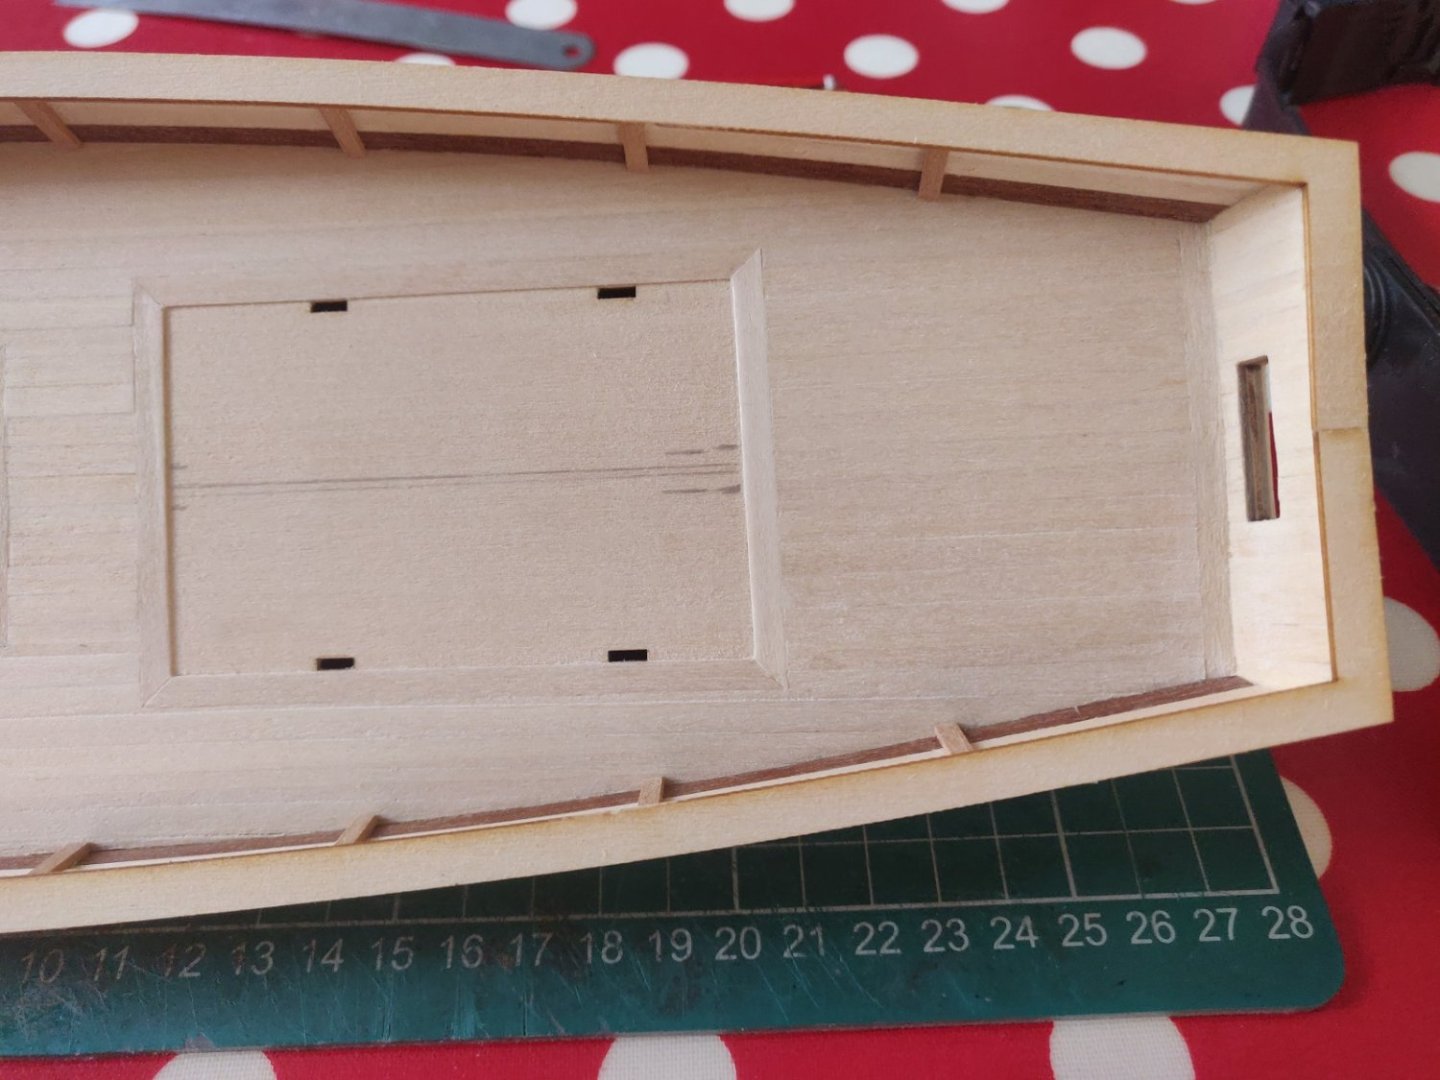
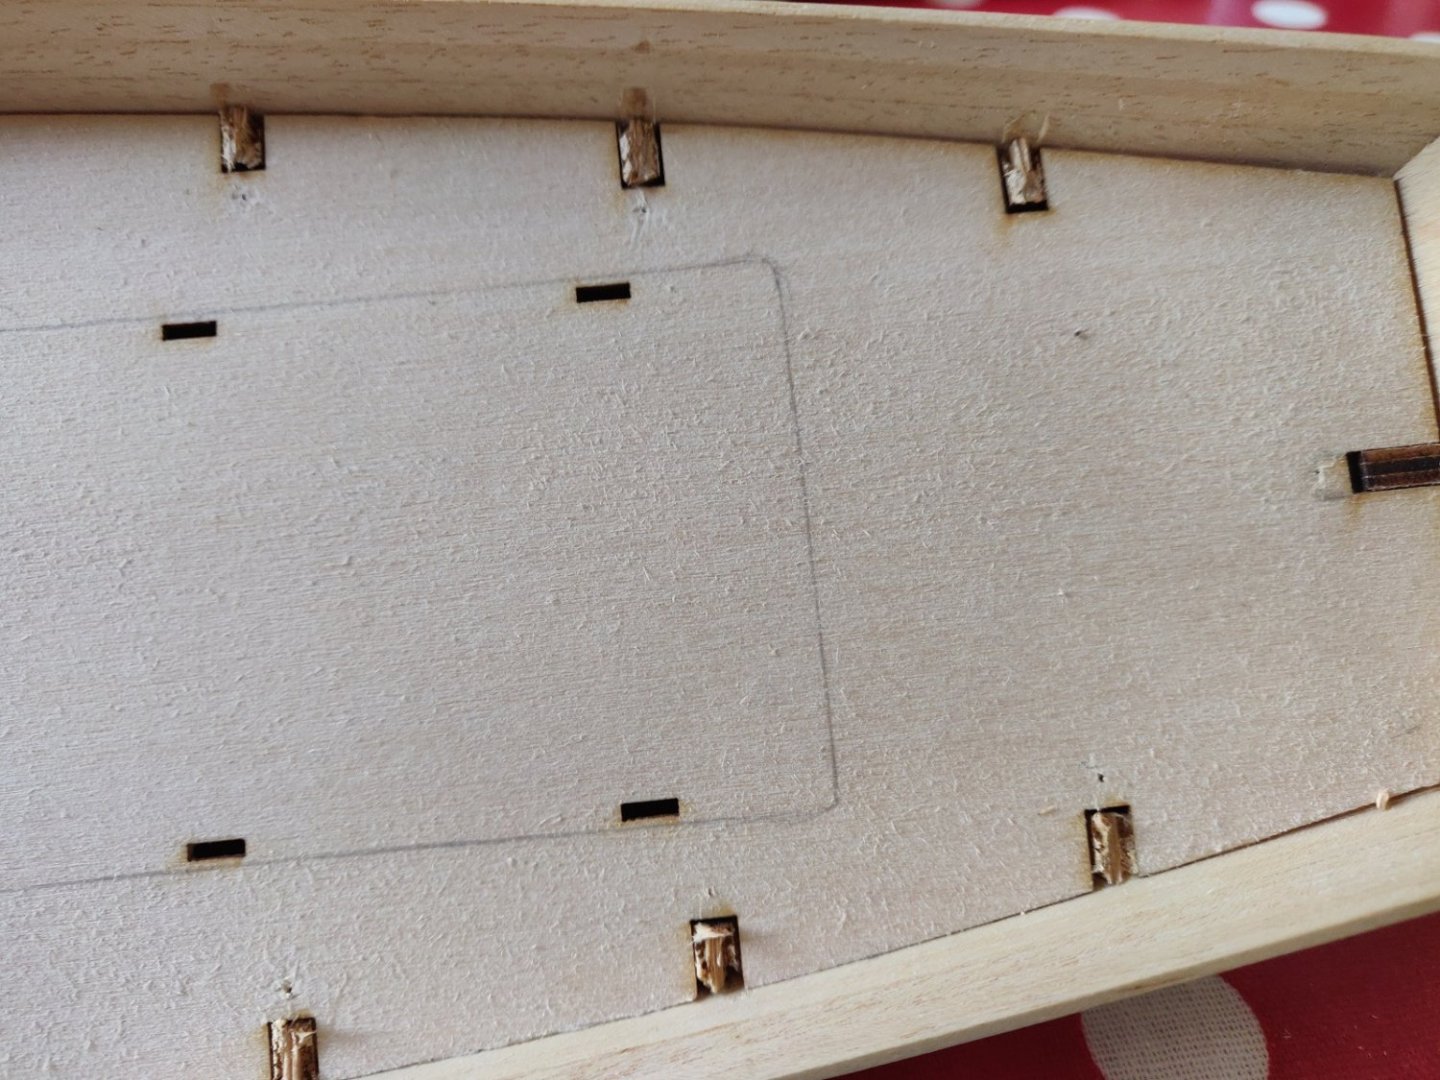
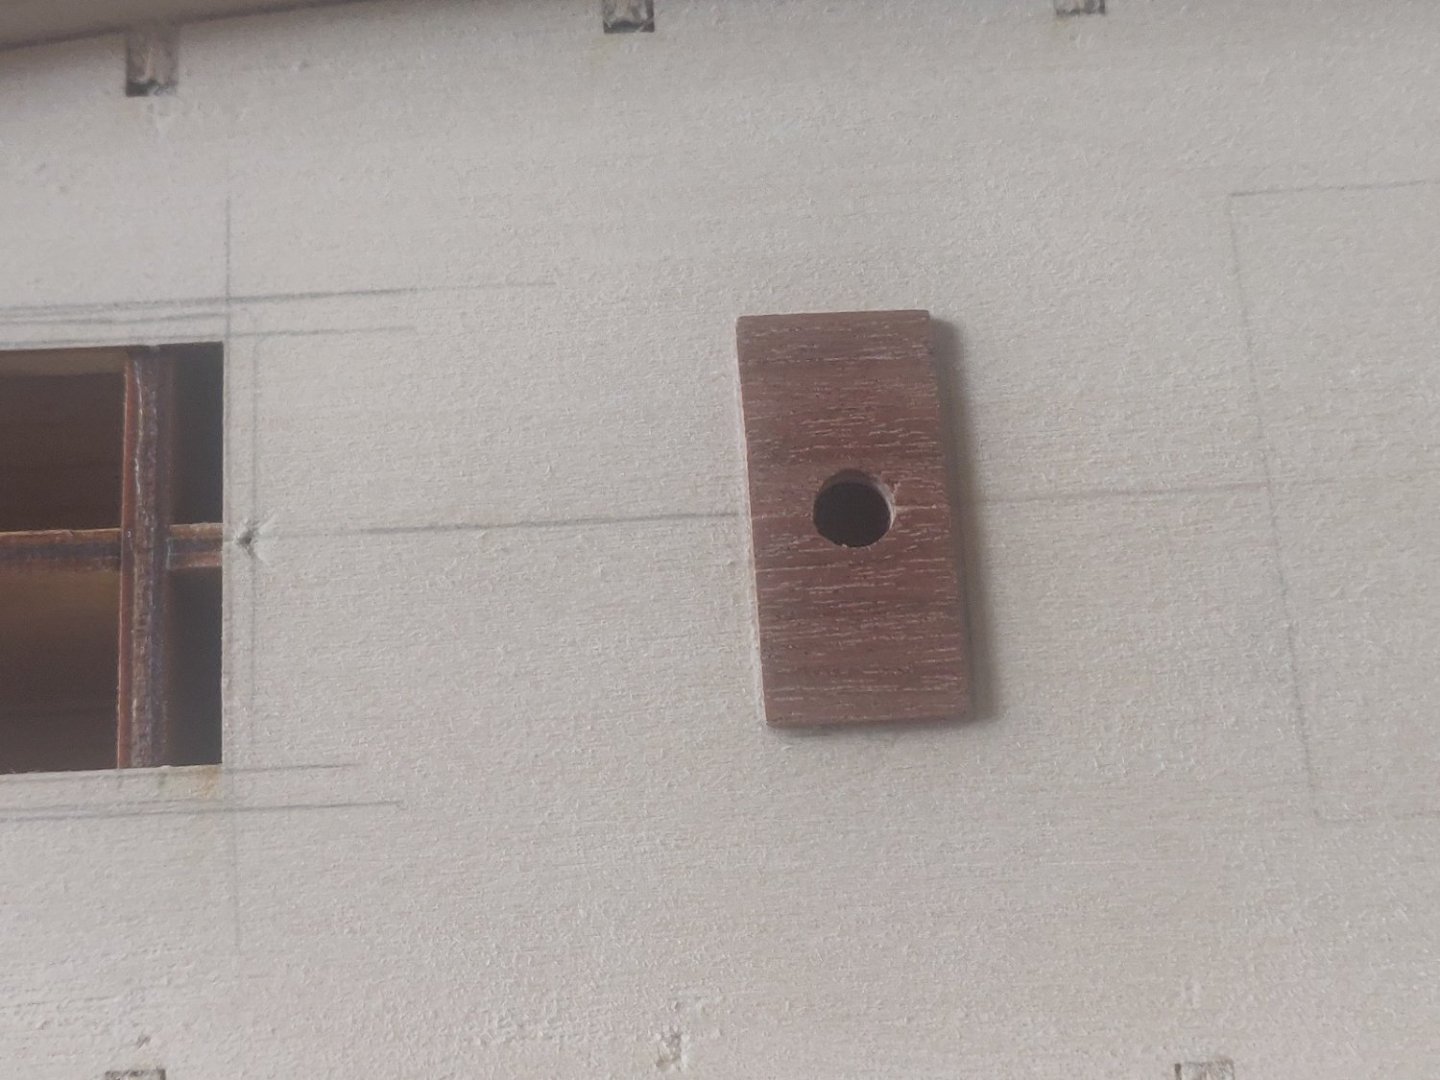
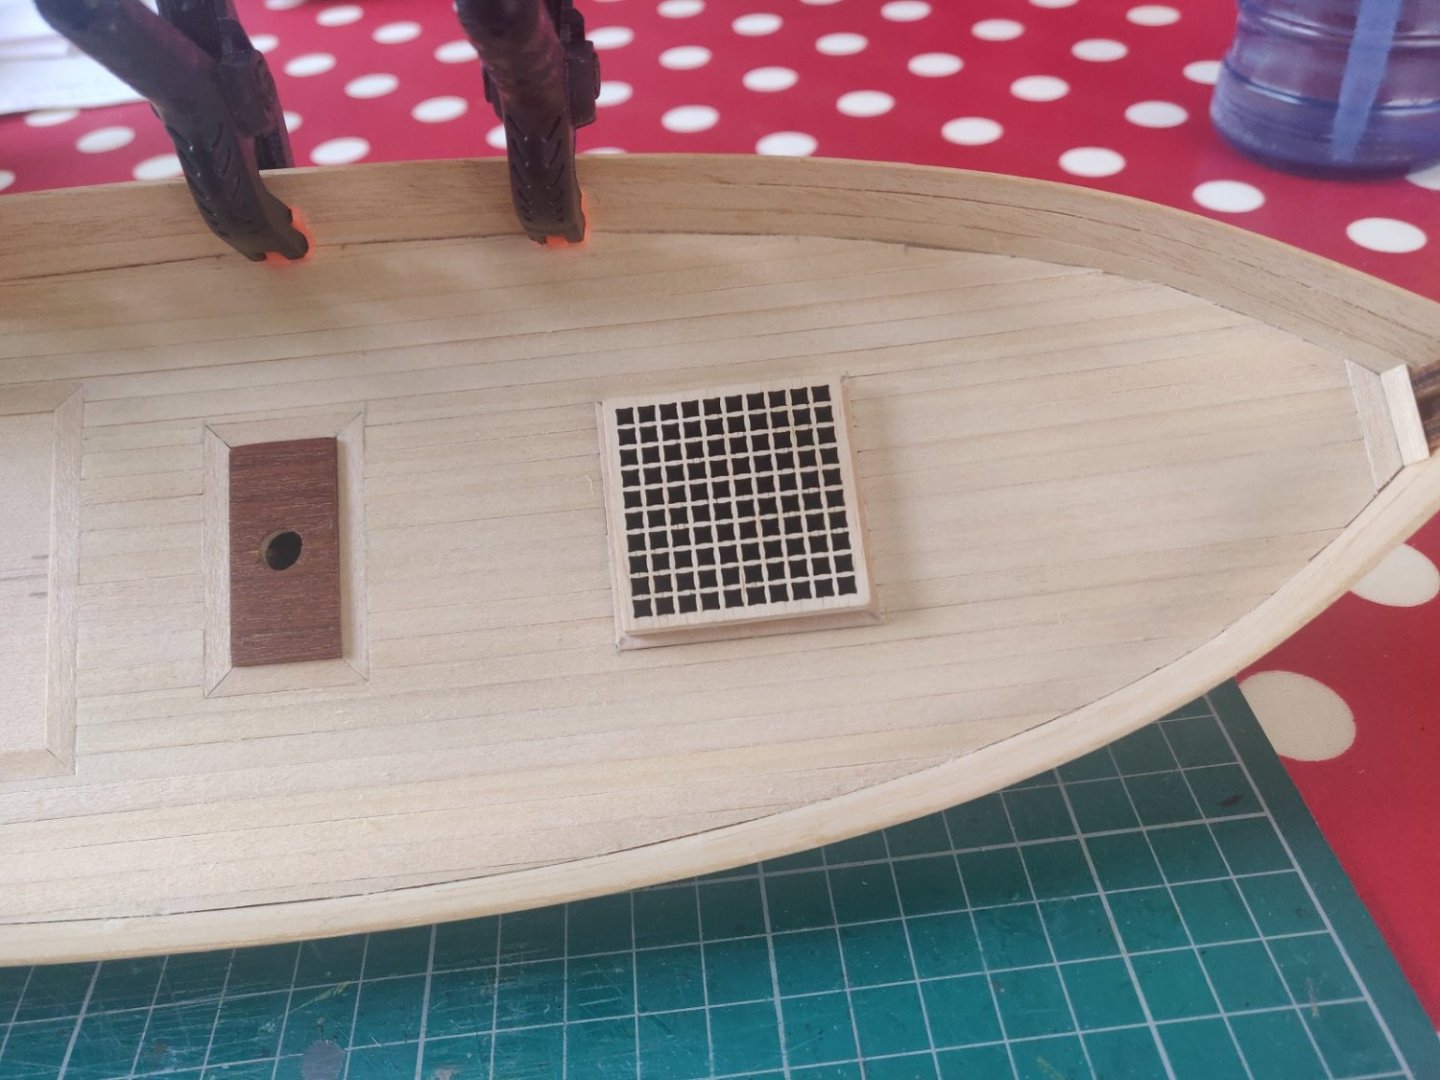
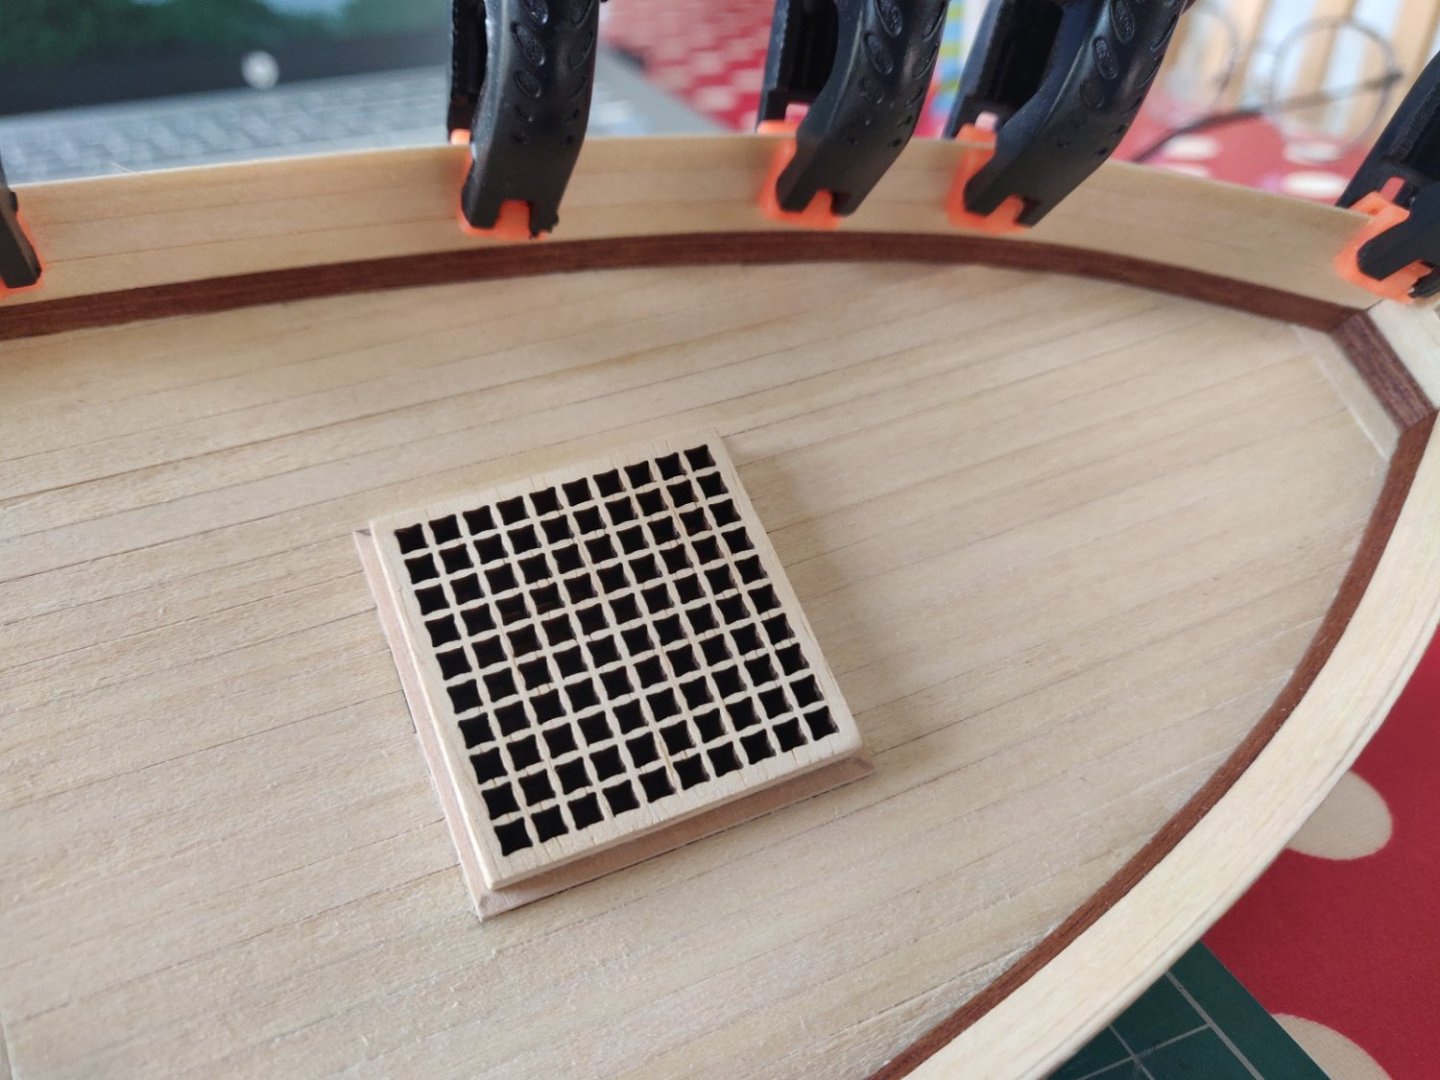
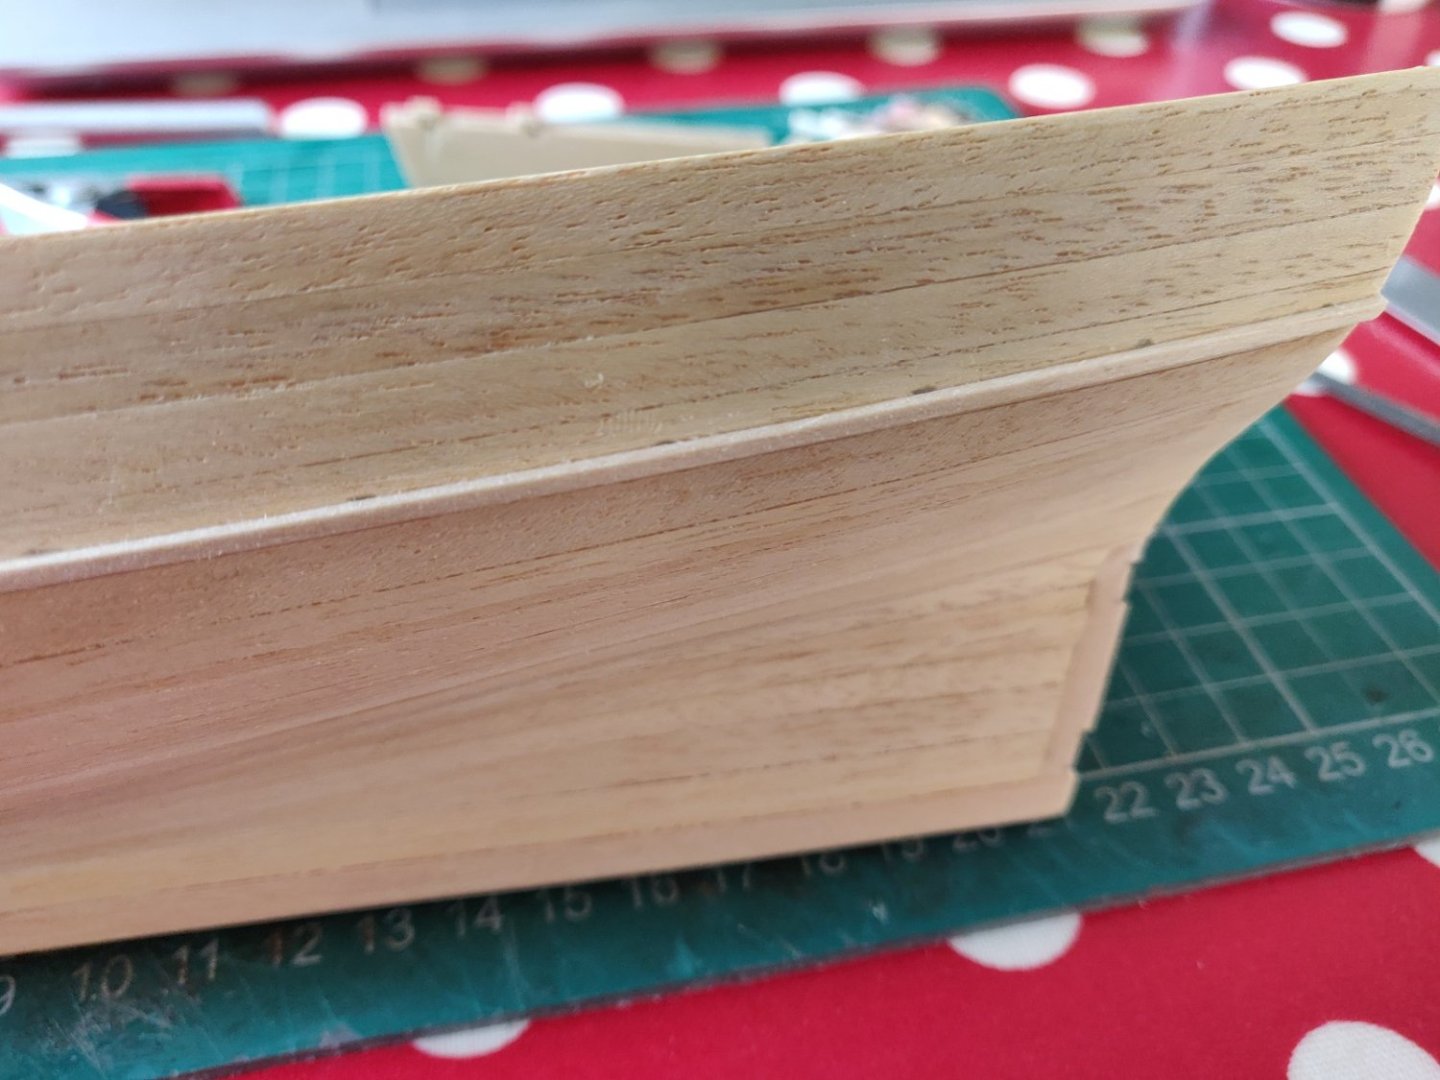
 Overall I'm impressed by this kit, the wood is good quality and there is plenty of it. The various fittings are fine, a couple of Blocks are a little out of shape but that is quite common in many other kits. The manual is mostly good clear photos but there is very little written instructions and in one or two places it's a bit unclear how to go about things, but that's part of the fun with this hobby, working out things for yourself, keeps those little grey cells active 😀. The one down side for me is the lack of any plans, you have to hunt round for various measurements, Mast and Spars, but overall I would say it's very similar in quality to A.L. or OCCRE, and good value, this kit cost me around £70. Disar make quite a few ship kits and they are mostly subjects that other manufacturers don't do. The first step is to attach the Frames to the Keel, all the parts are on a 5mm Plywood sheet which was slightly warped, but this seemed to straighten once all the parts had been removed. The fit on most of the Frames was a little loose so I glued them one at a time making sure each was straight and level, and that the glue had set before the next one was fitted. I left the "skeleton" for a few days and then started fitting the Floor planking. This is 5mm by 1mm Mansonia wood, a hard wood so I used a small razor saw to cut them. Cheers Andy
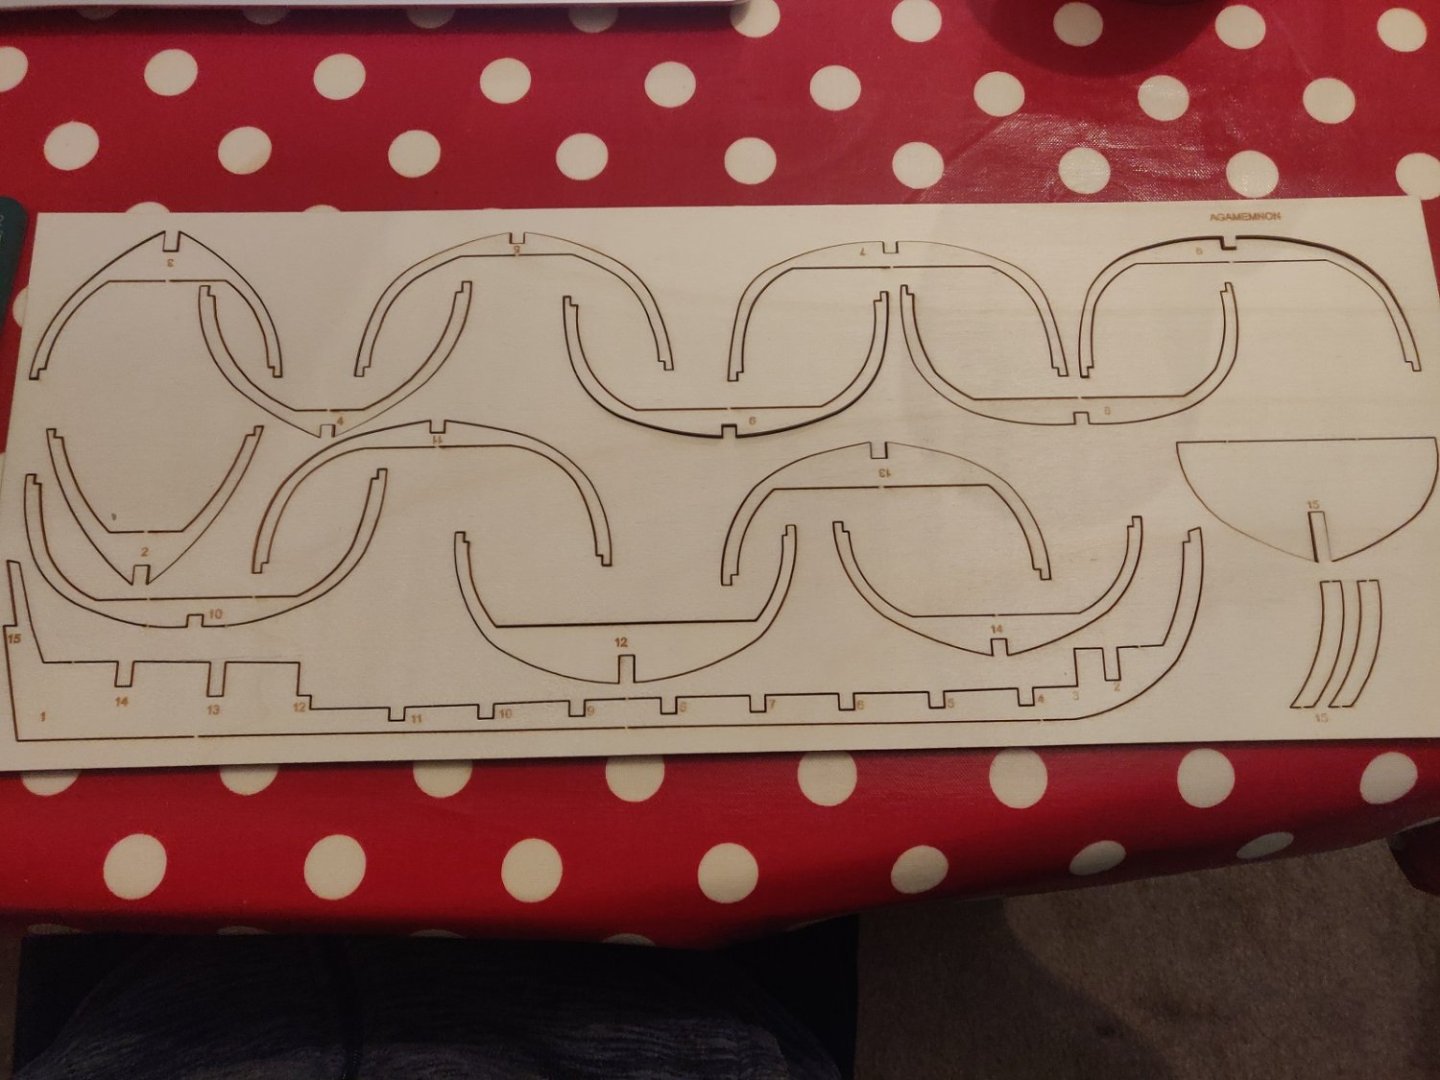


-
Montaigne reacted to a post in a topic:
HMS Agamemnon's Launch by Andyrew - Disarmodel - 1:30 Scale
-
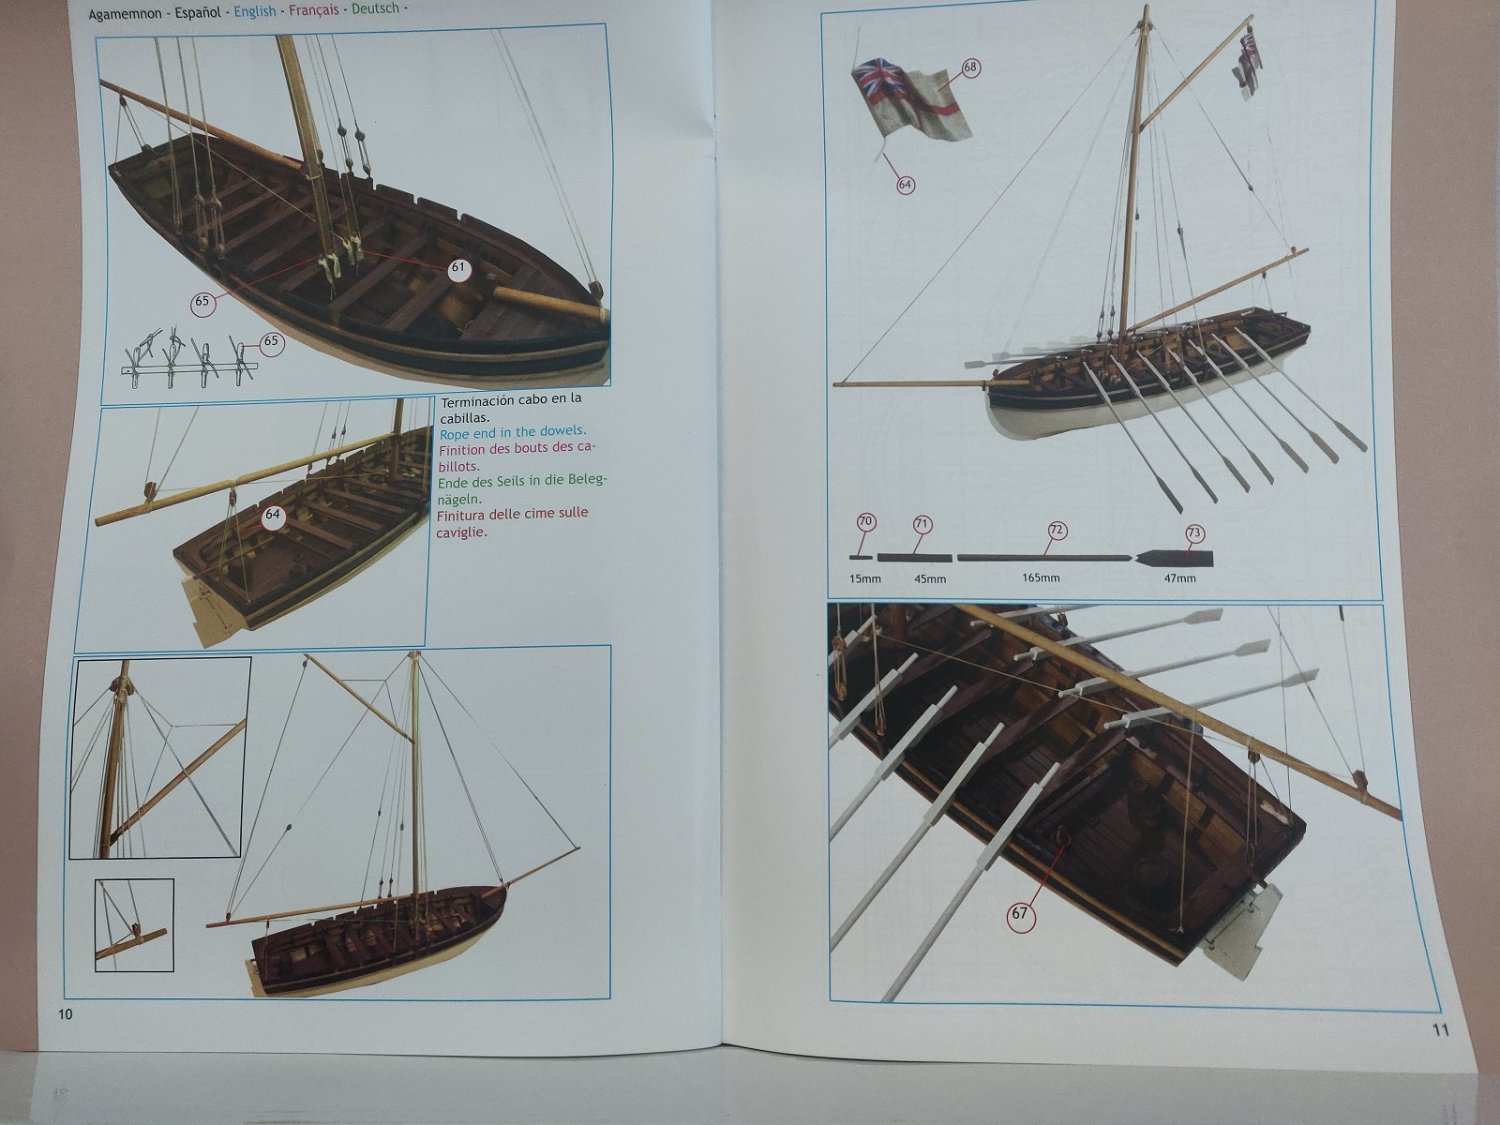
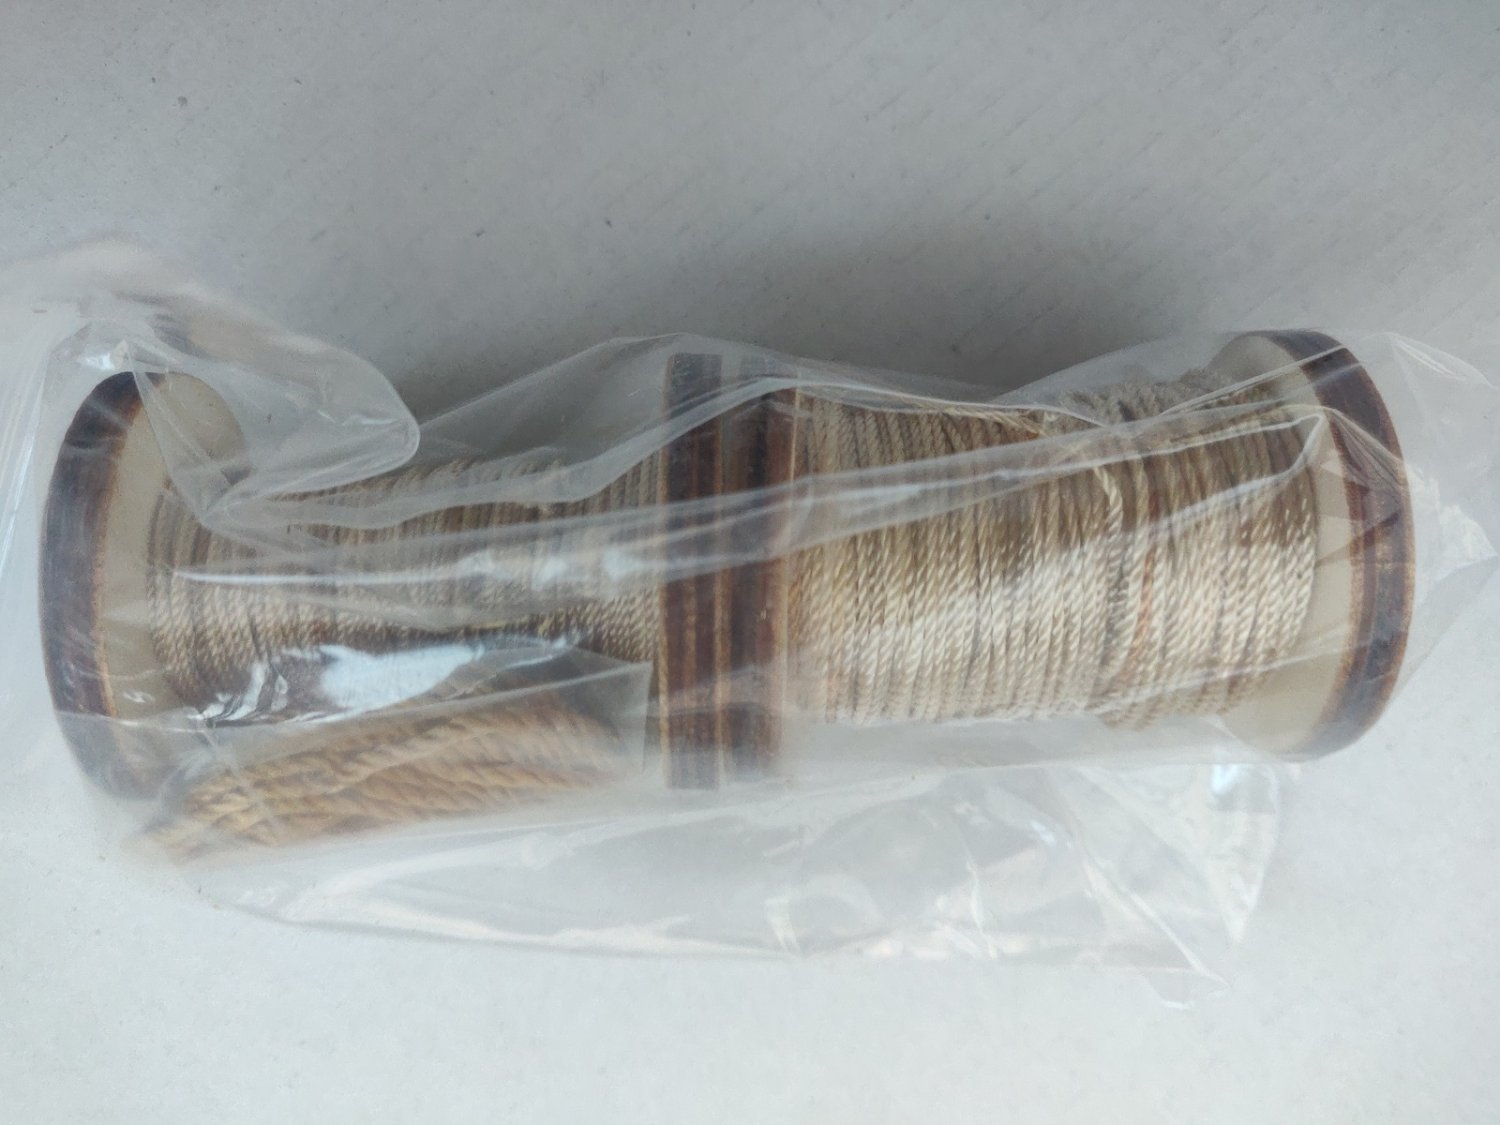
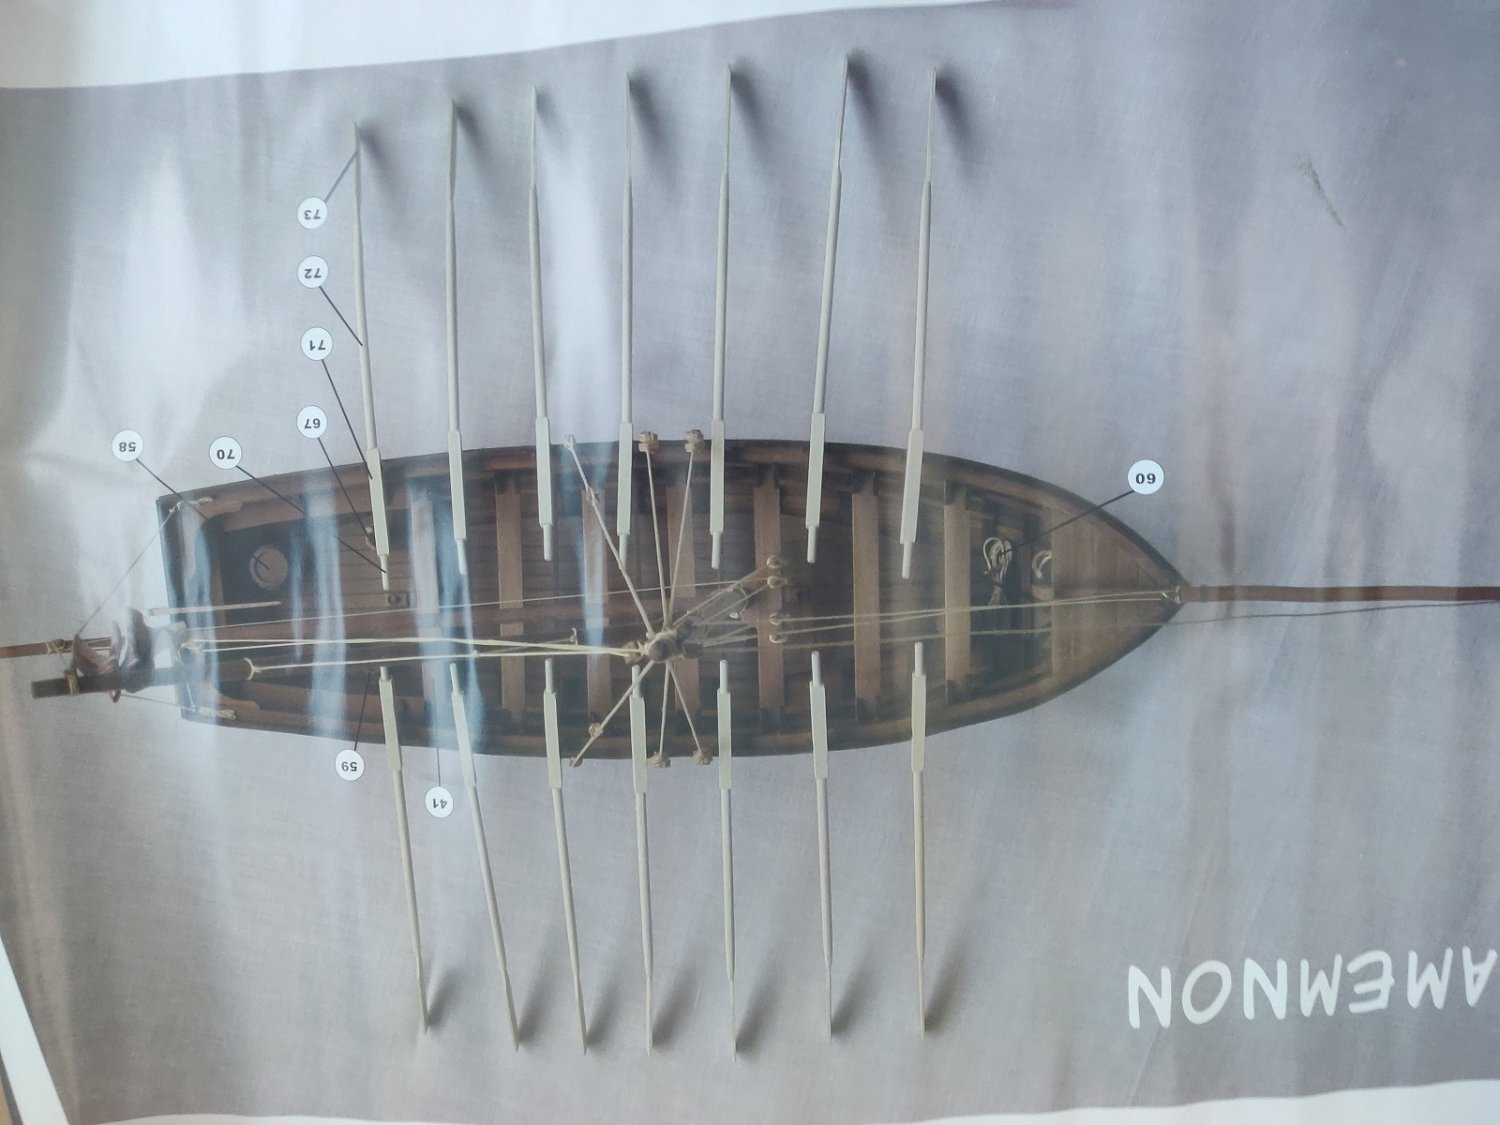
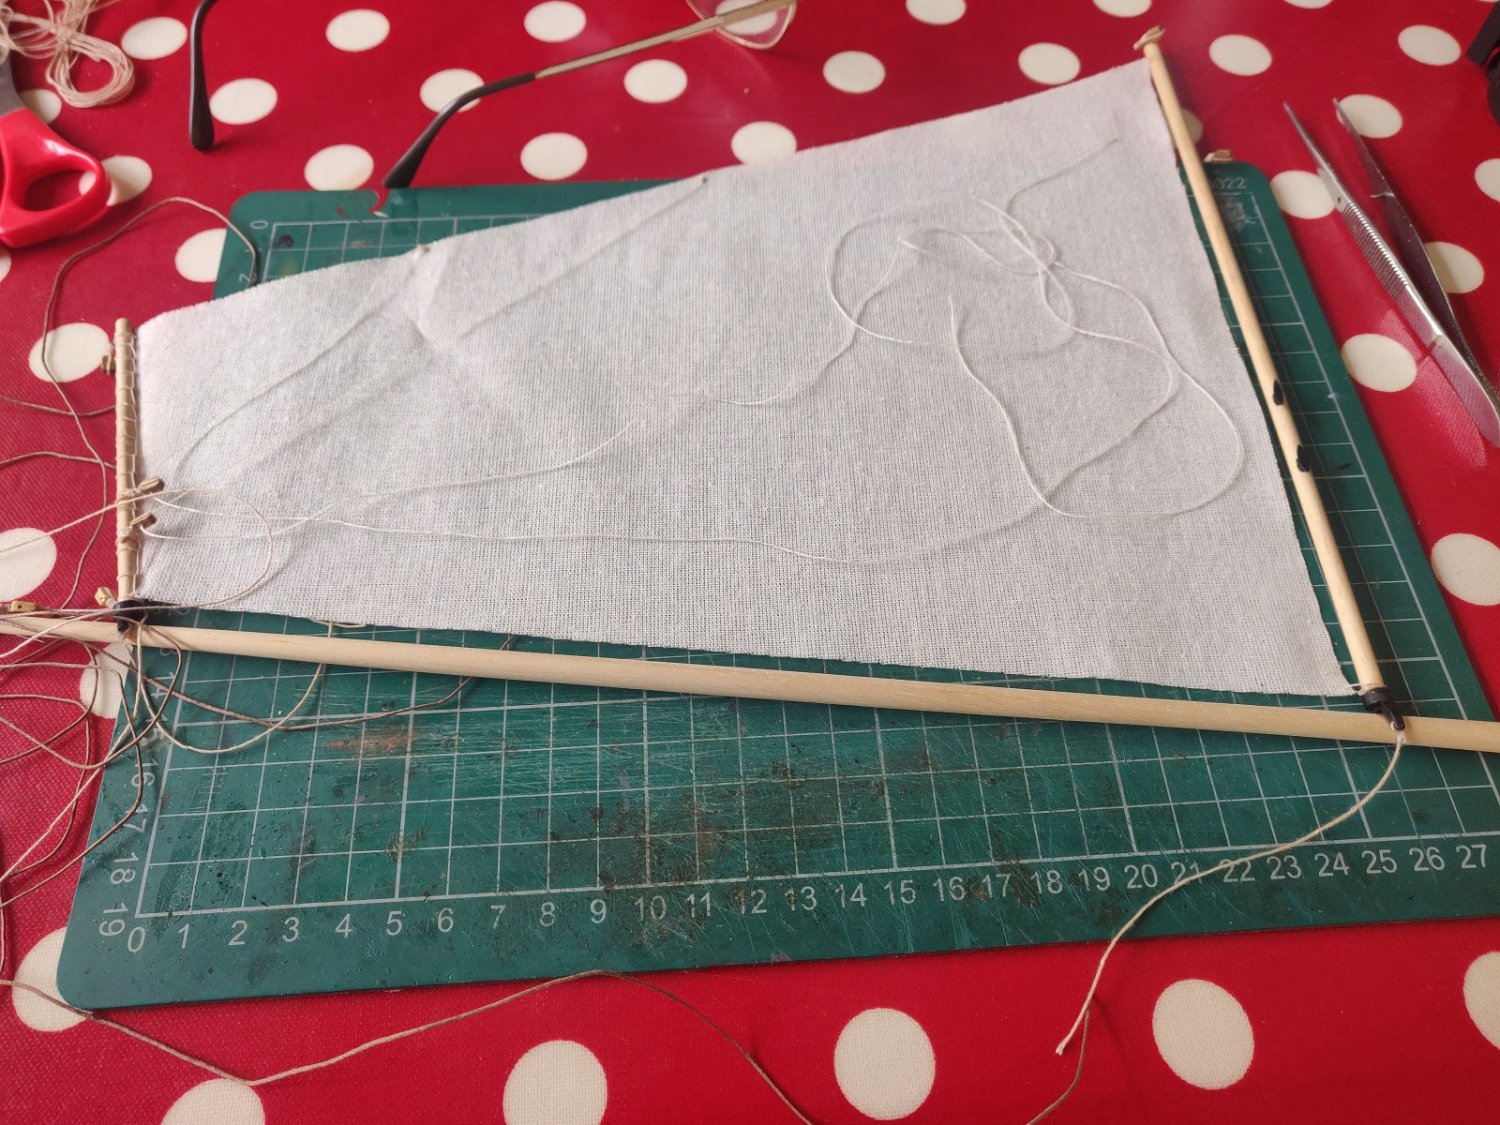
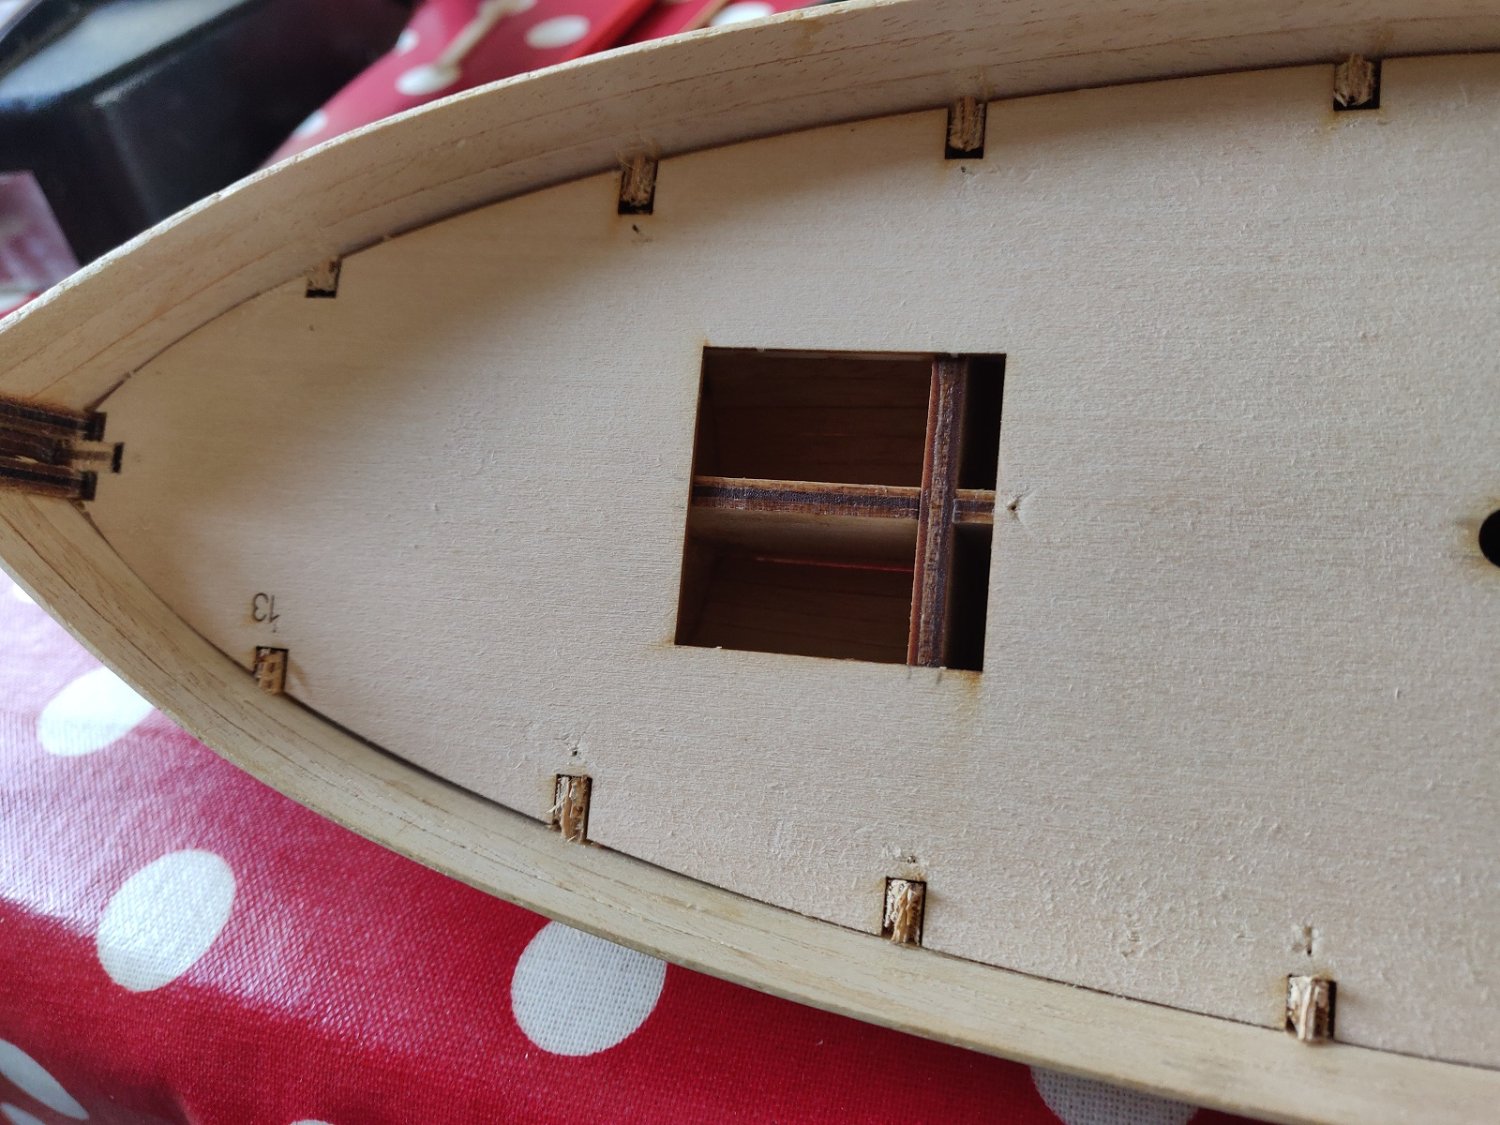
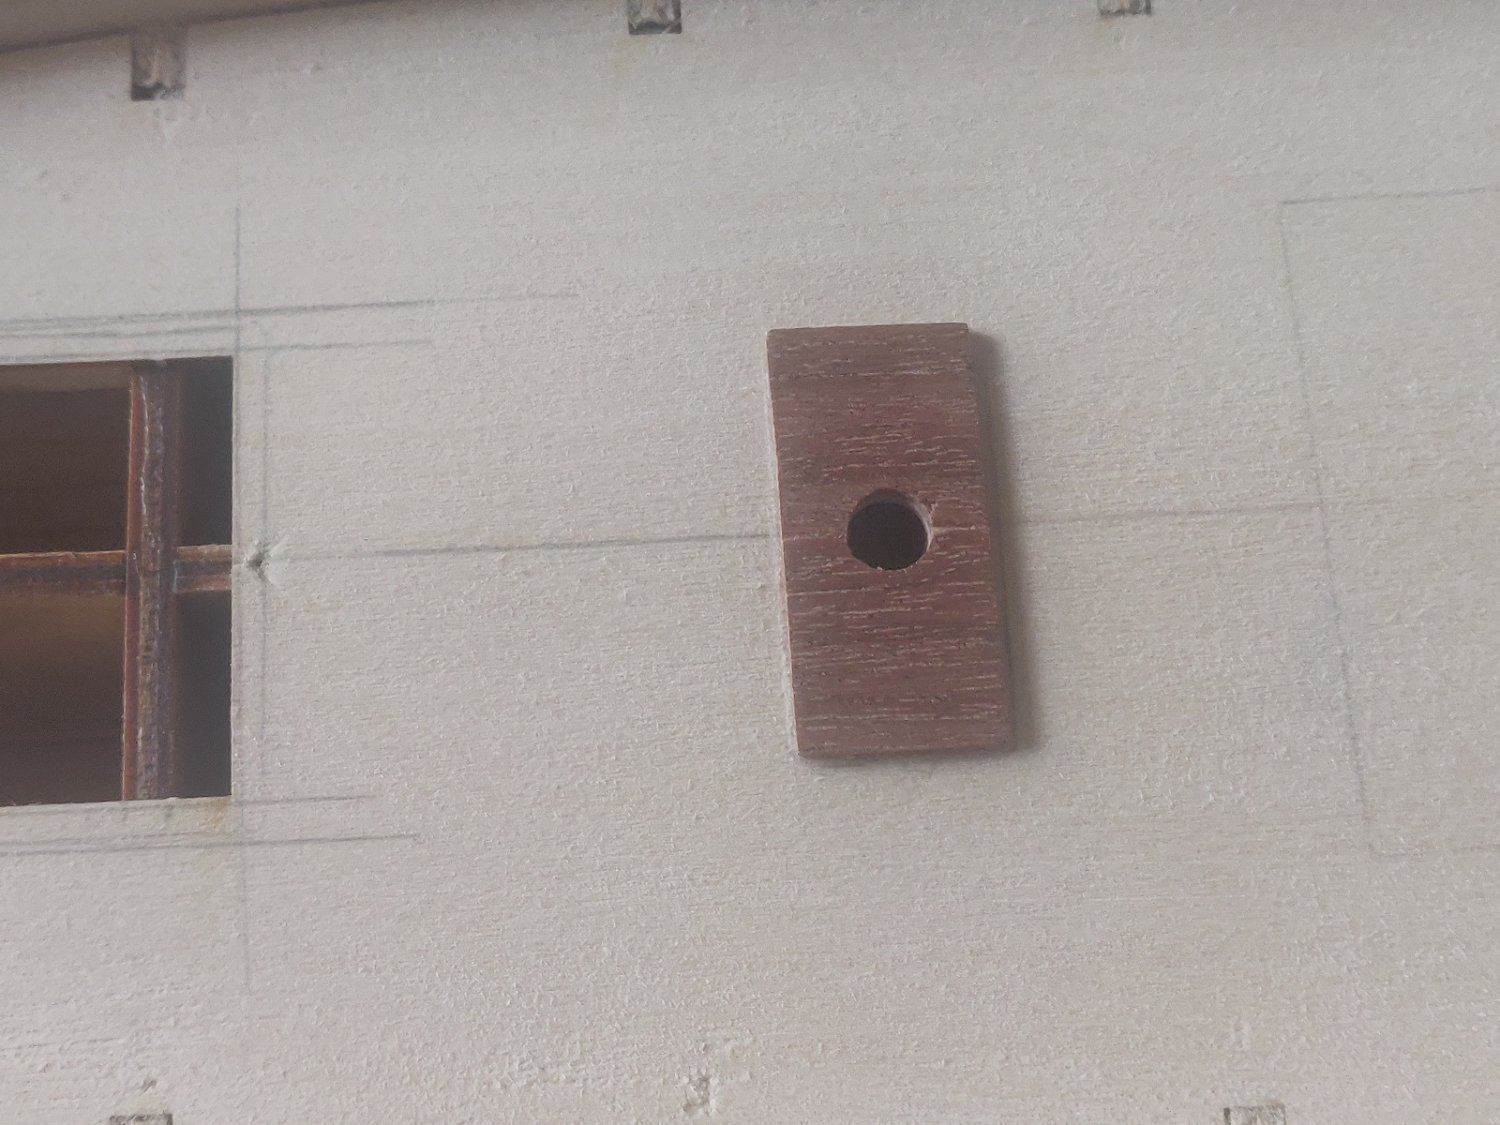
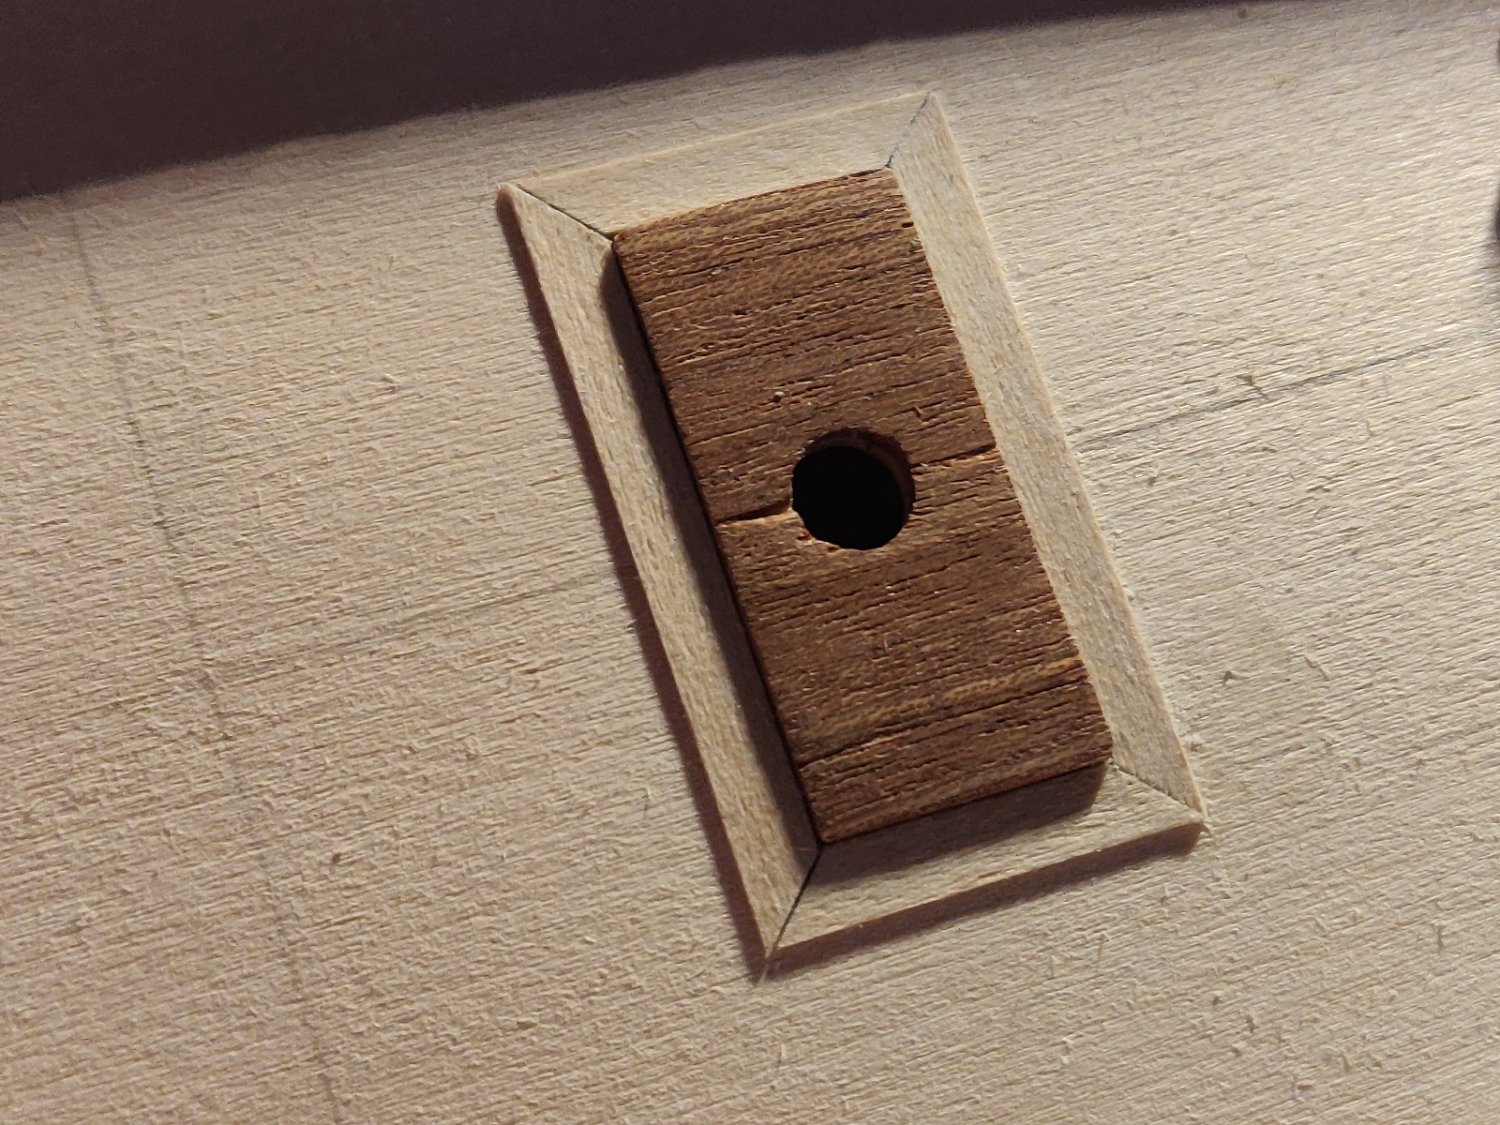
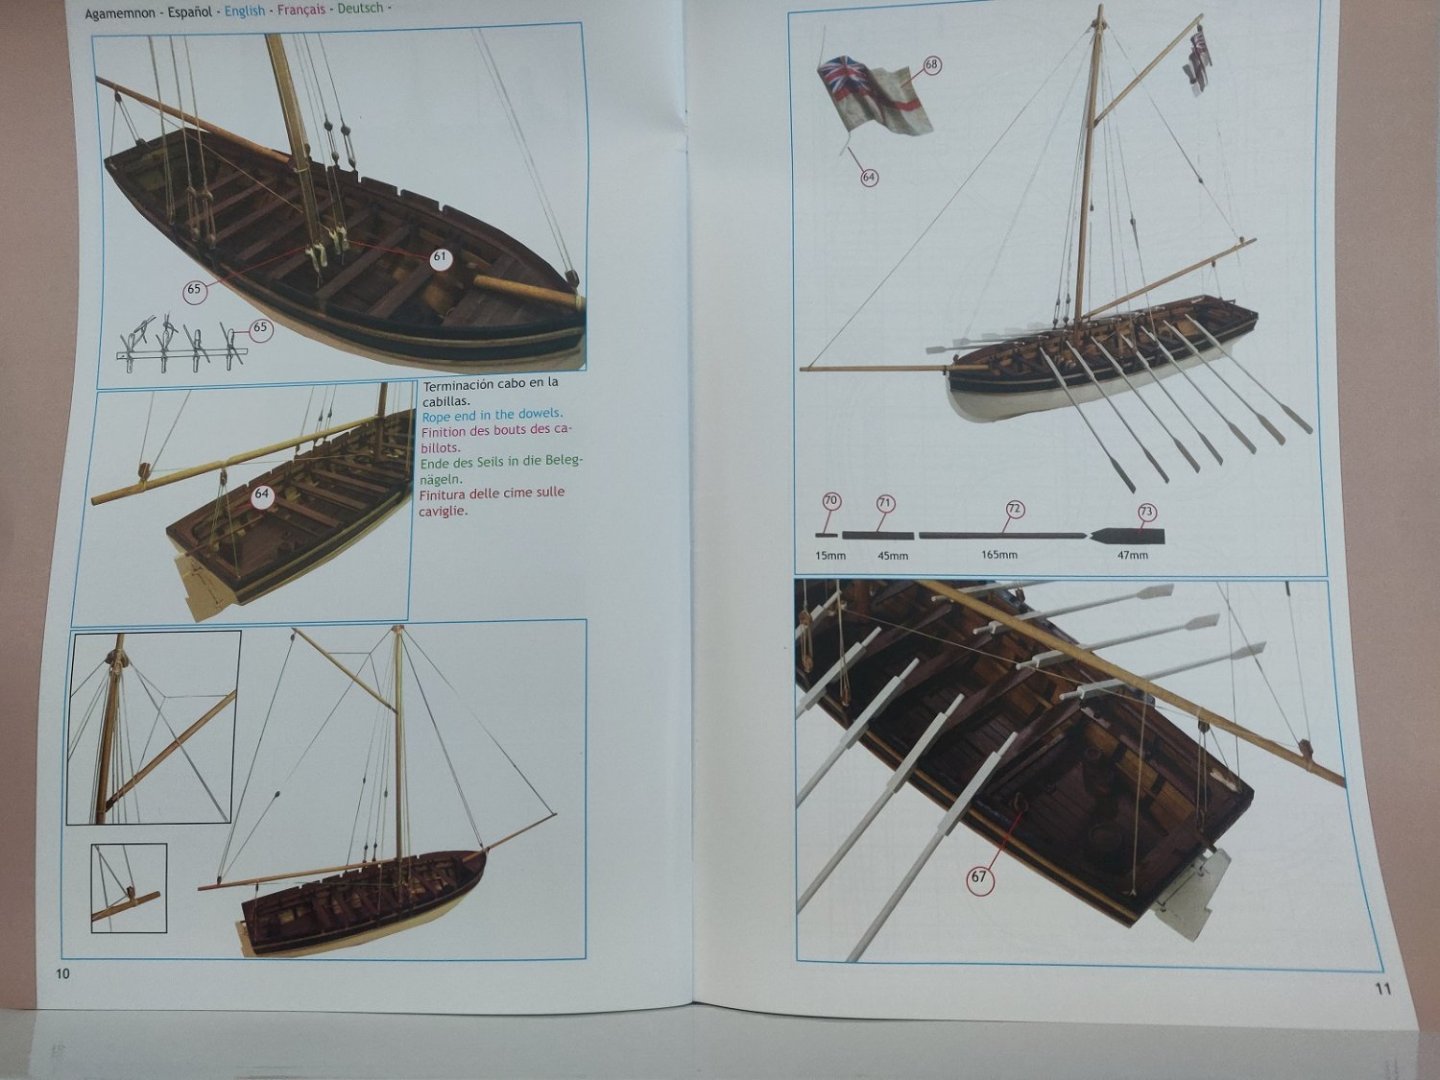
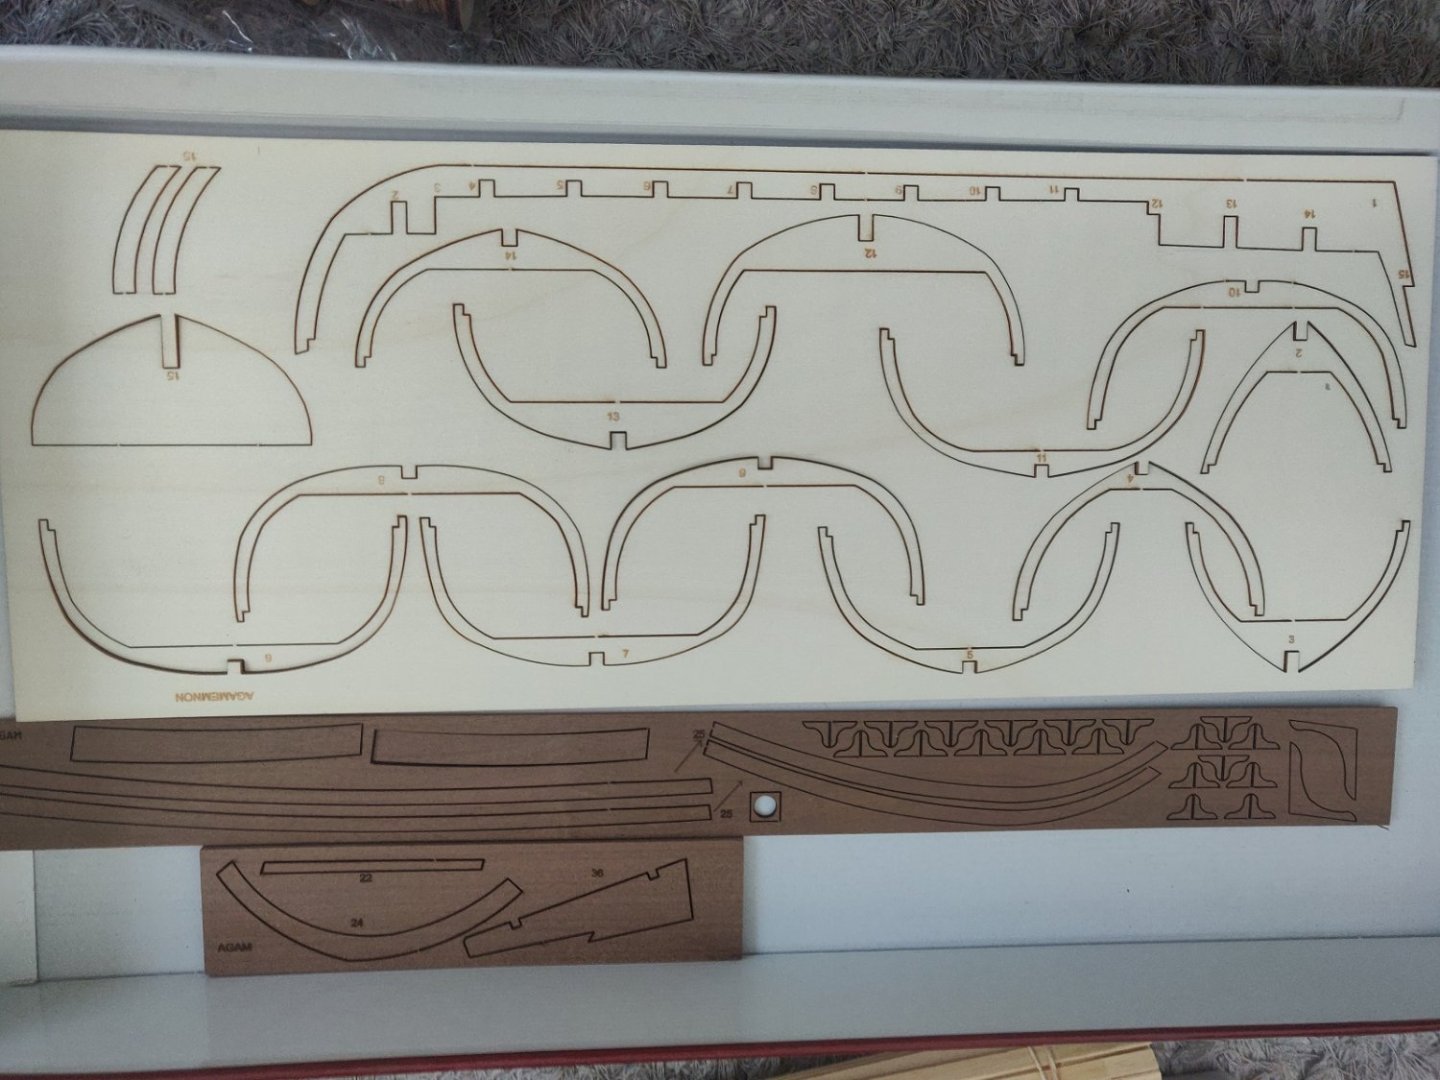
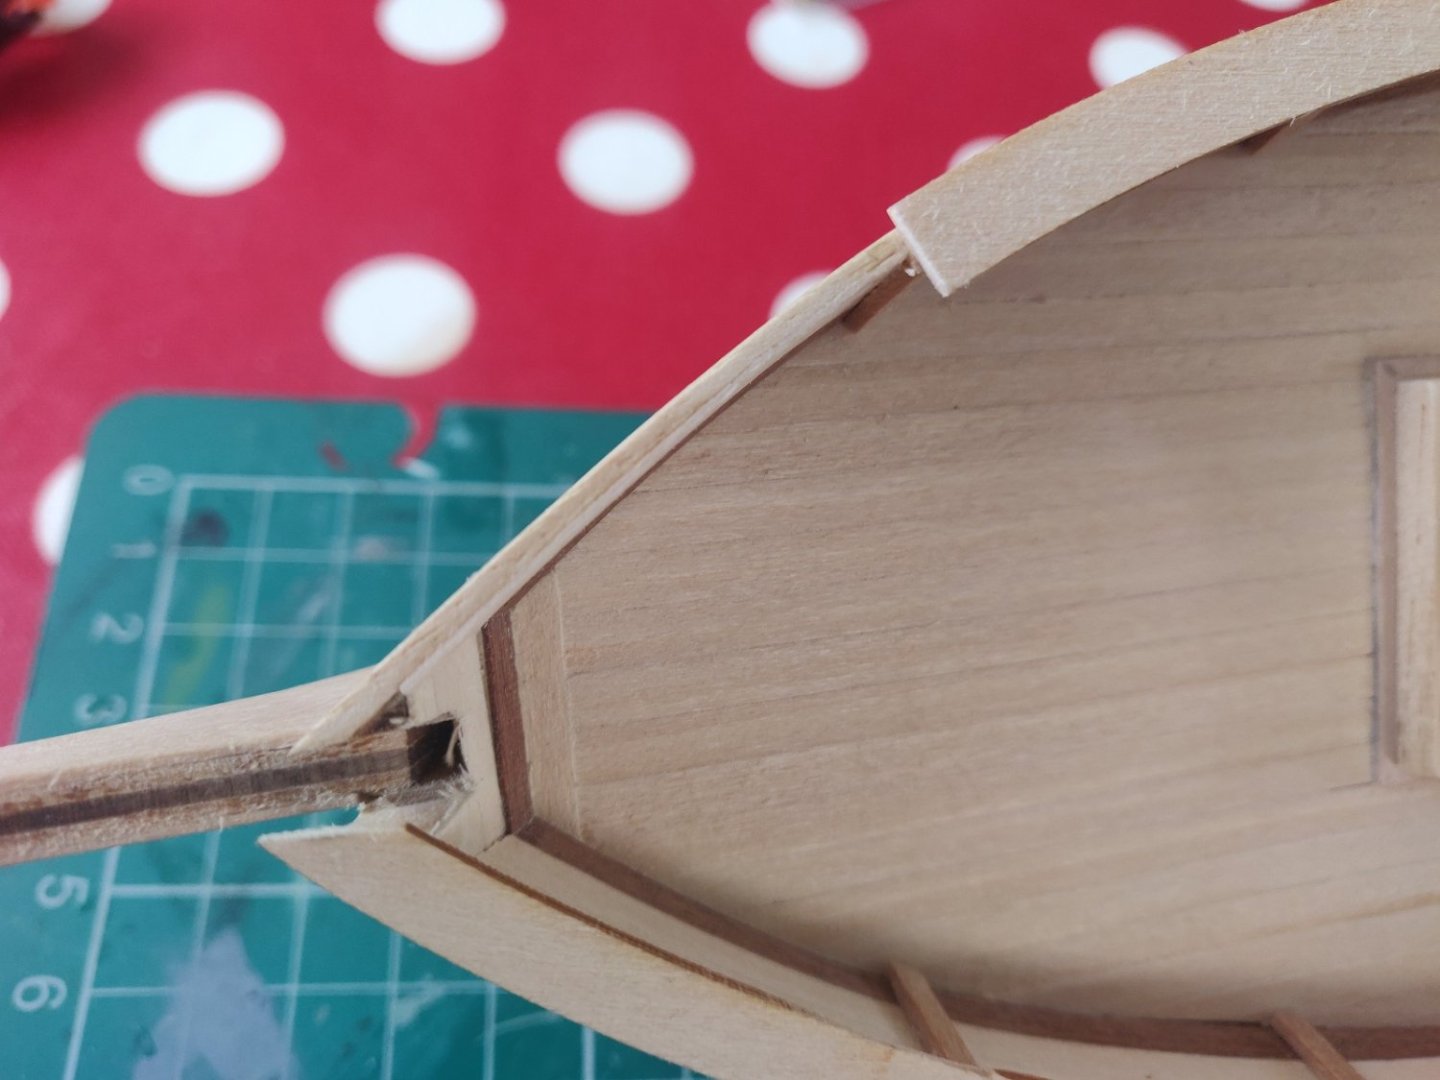
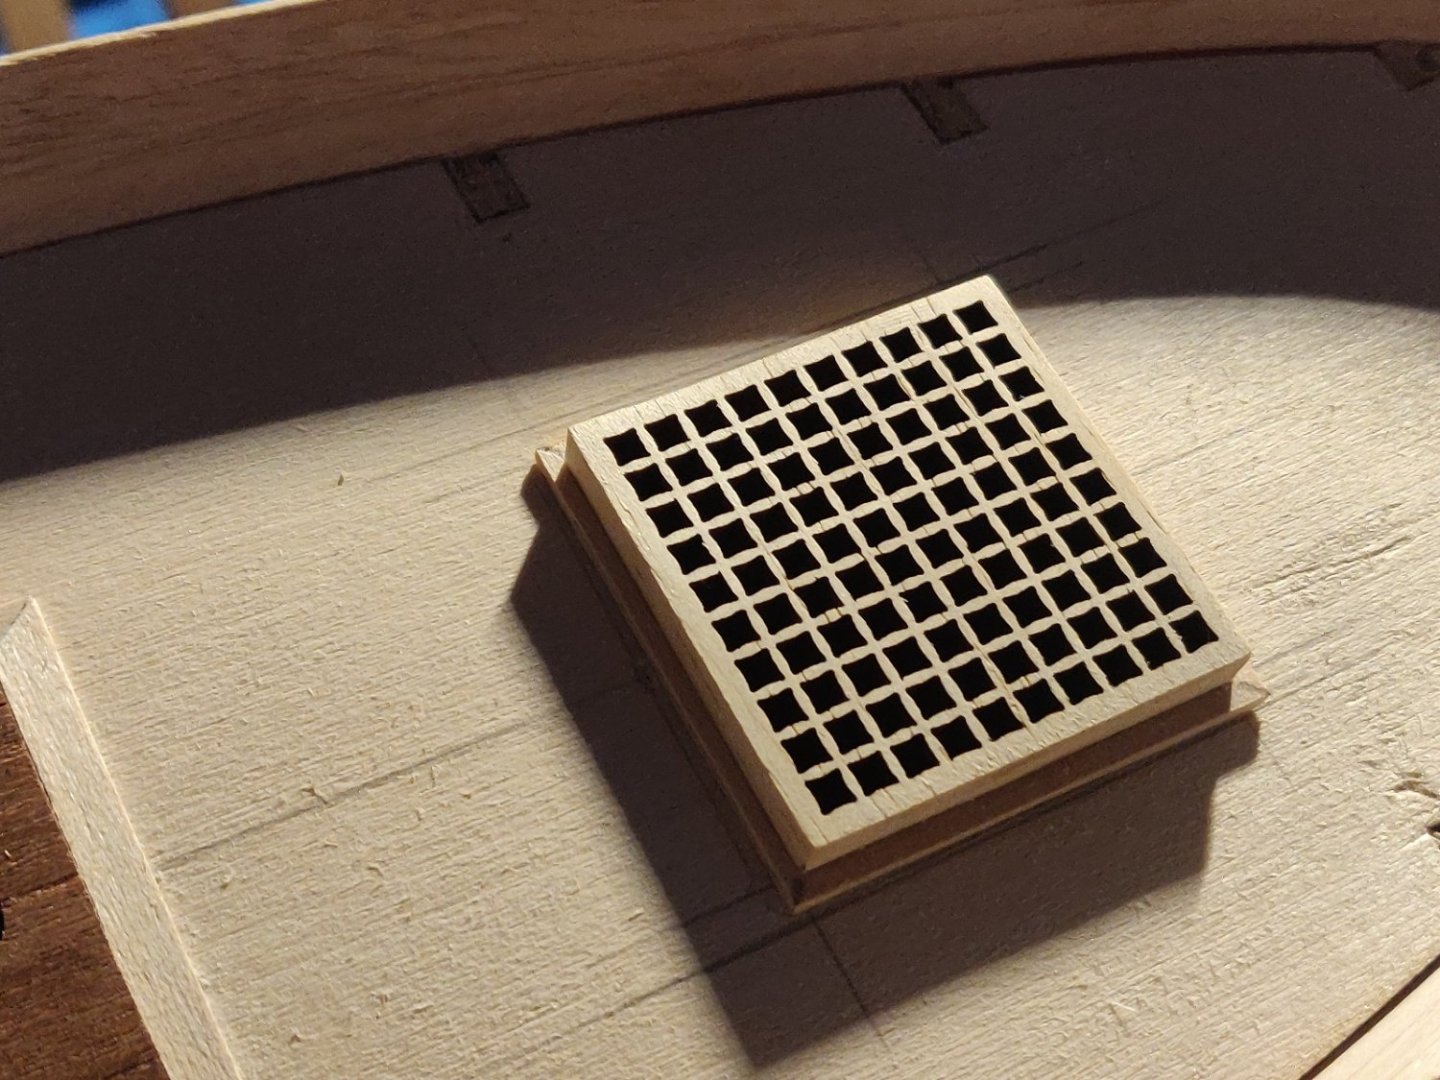
It's been quite a while since my last build, I've been really busy at work, we had a Technician leave just before Christmas and have now got 2 new Apprentices, they have had to be trained in the basics of the job, and of course, as is traditional with all new Apprentices, several practical tricks have to be played on them, sent to the Stores for a long weight (wait) and the one that caught me out when I was an Apprentice, a 100 Farad Capacitor which would have been about the size of a small town. I've been interested by Disar Models for a while but have never seen anything built of theirs until about 4 months ago when I found a YouTube video of a Spanish chap building HMS Agamemnon's Launch and decided to get one knowing that if I had any problems I could watch his videos. So lets have a look inside the box, The Instruction Manual has nice colour photos, a small amount of written instructions in 5 languages including English and a parts list. Having read through it several times there are a few areas that might require a bit of guesswork so this might not be a kit for a first build. The Frames and Keel are Laser cut in 5mm Plywood, there was a slight warp in the Keel but this disappeared when I removed it from the fret. The other 2 sheets are Laser cut Mansonia wood which is African Walnut, All the strip wood is nicely cut with straight edges, it's a mixture of Mansonia and Iroka. The Plastic box contains the various Blocks, Dead Eyes, Brass wire and strip, 2 Barrels, the Anchor, Tiller and Ensign. 2 Spools and a length of thread for the rigging. There aren't any plans just a doubled sided colour pictures of the completed model, there doesn't seem to be any measurements for the lengths and diameters of the Mast and Spars so I guess I'll have to measure these pictures. Cheers Andy


-
Andyrew reacted to a post in a topic:
Saucy Jack by MaxC - Vanguard Models - Barking Well Smack - first build
-
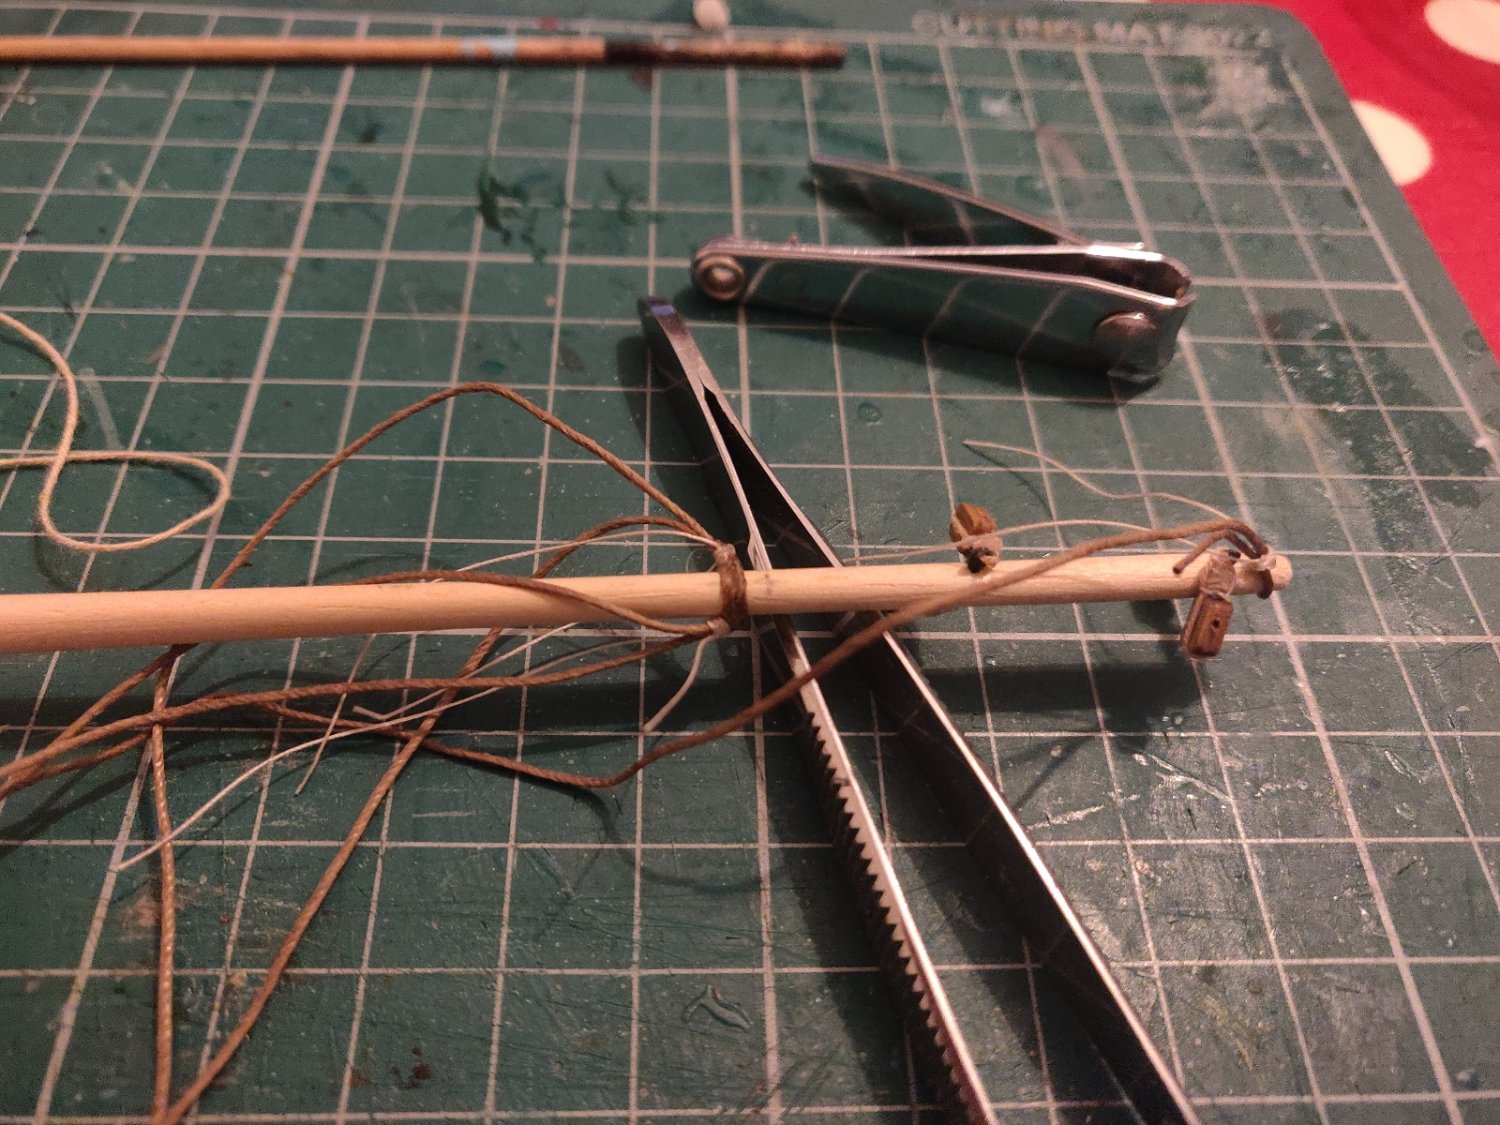
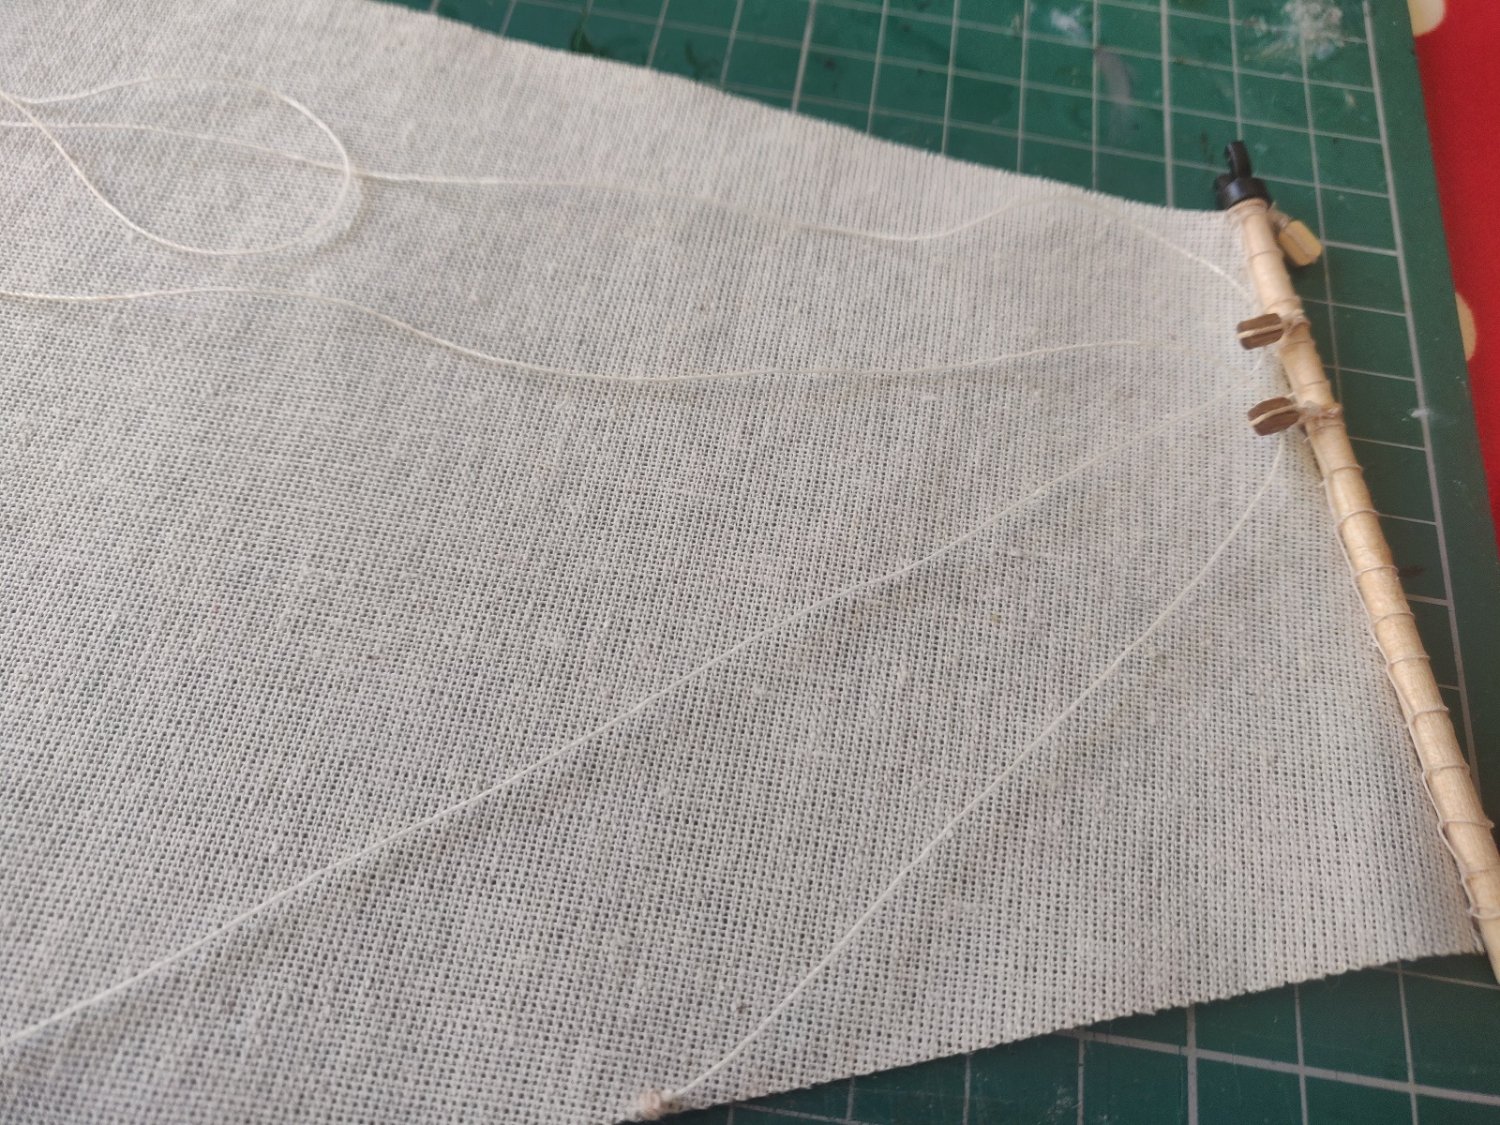
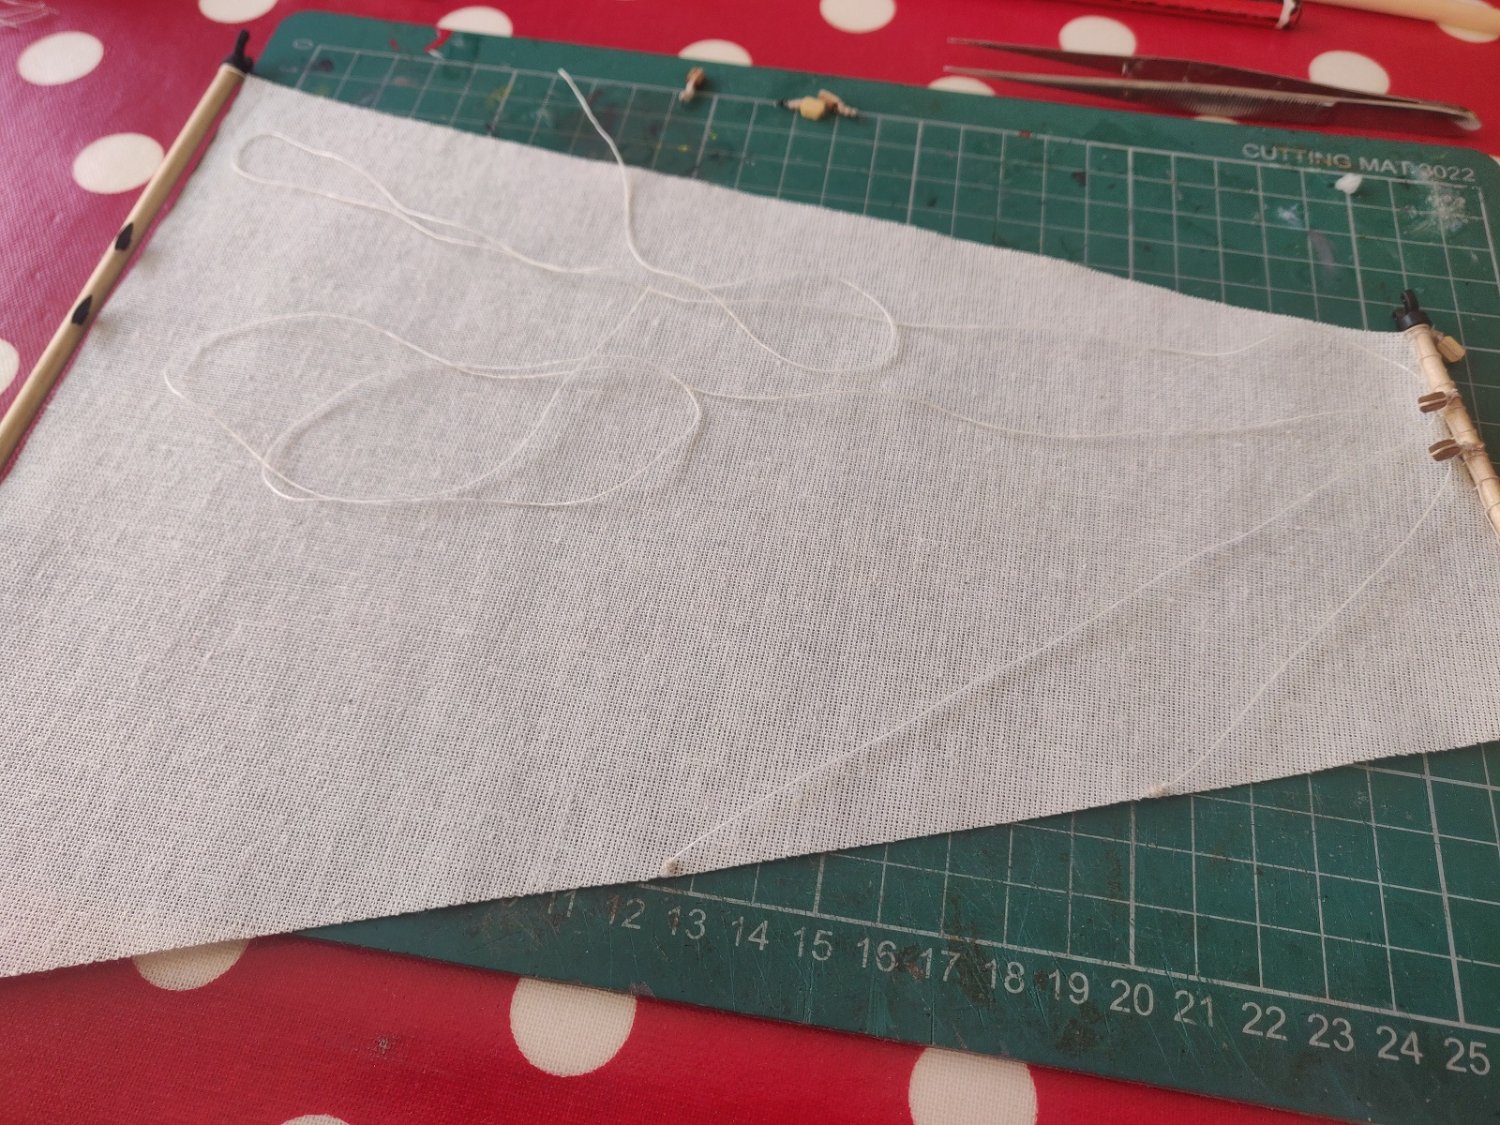
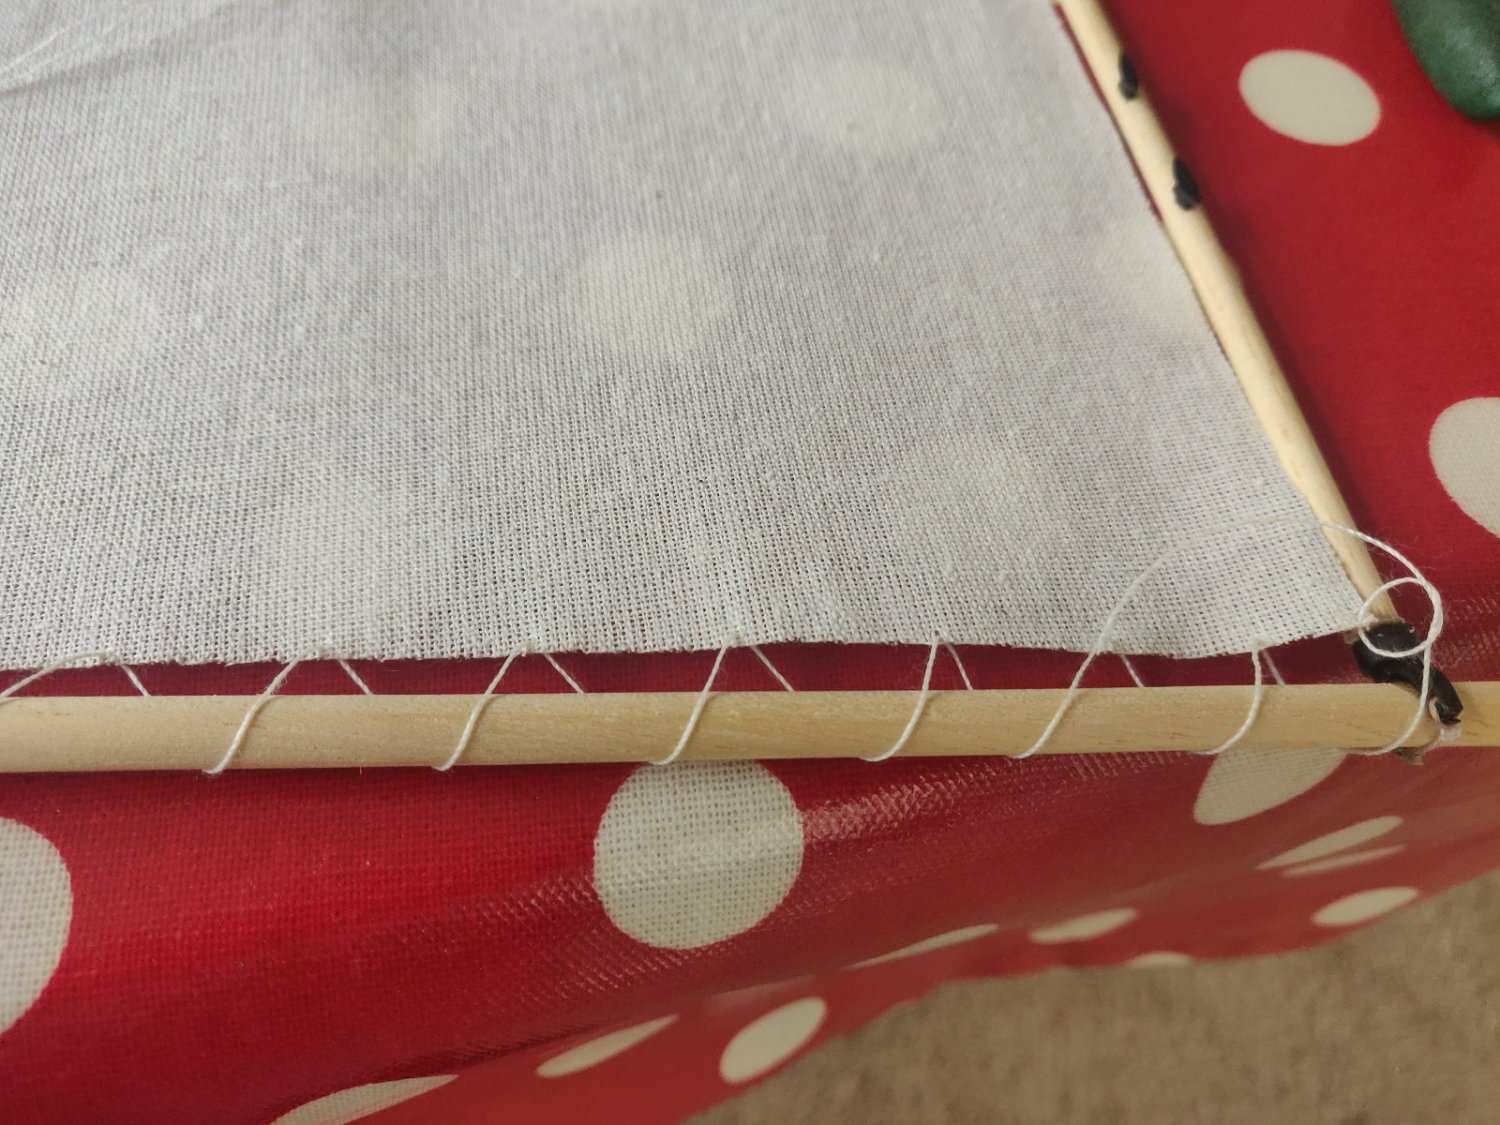
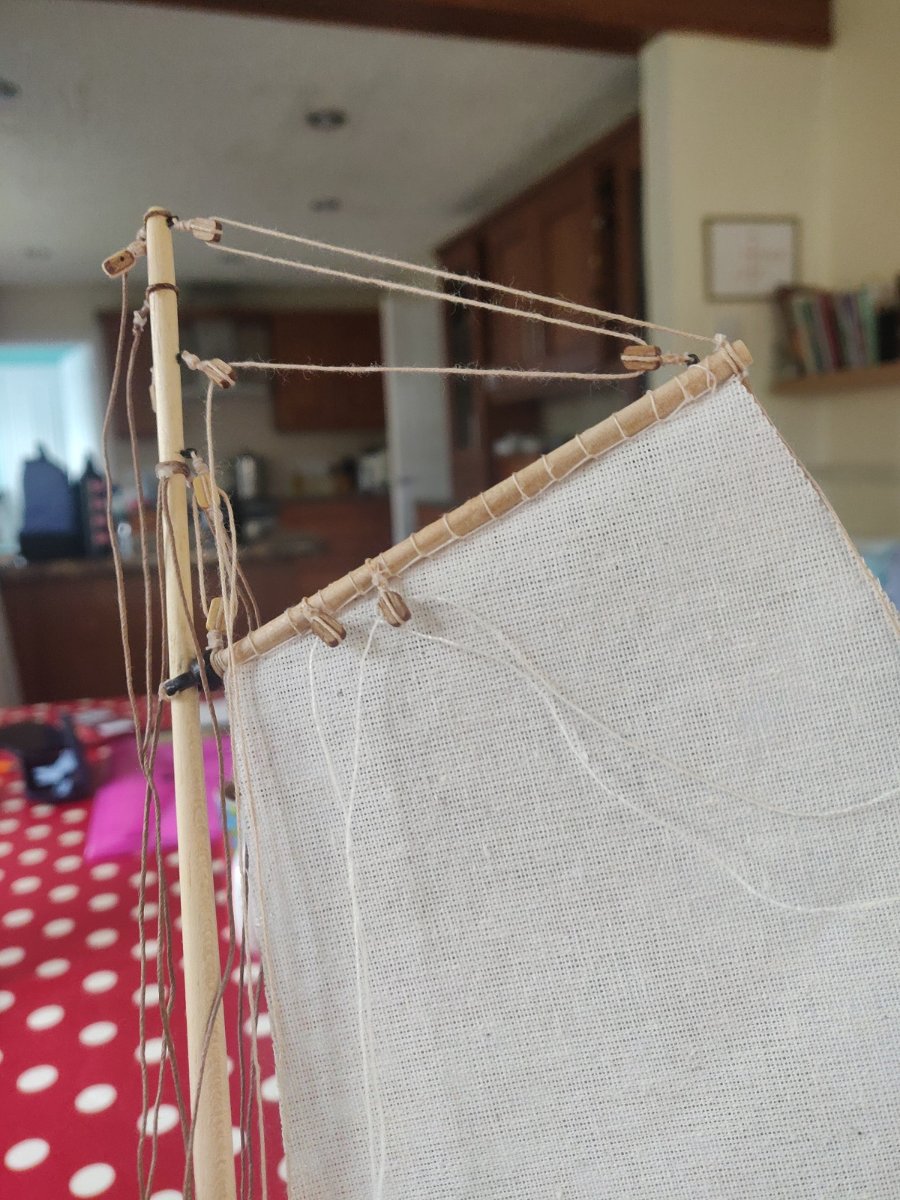
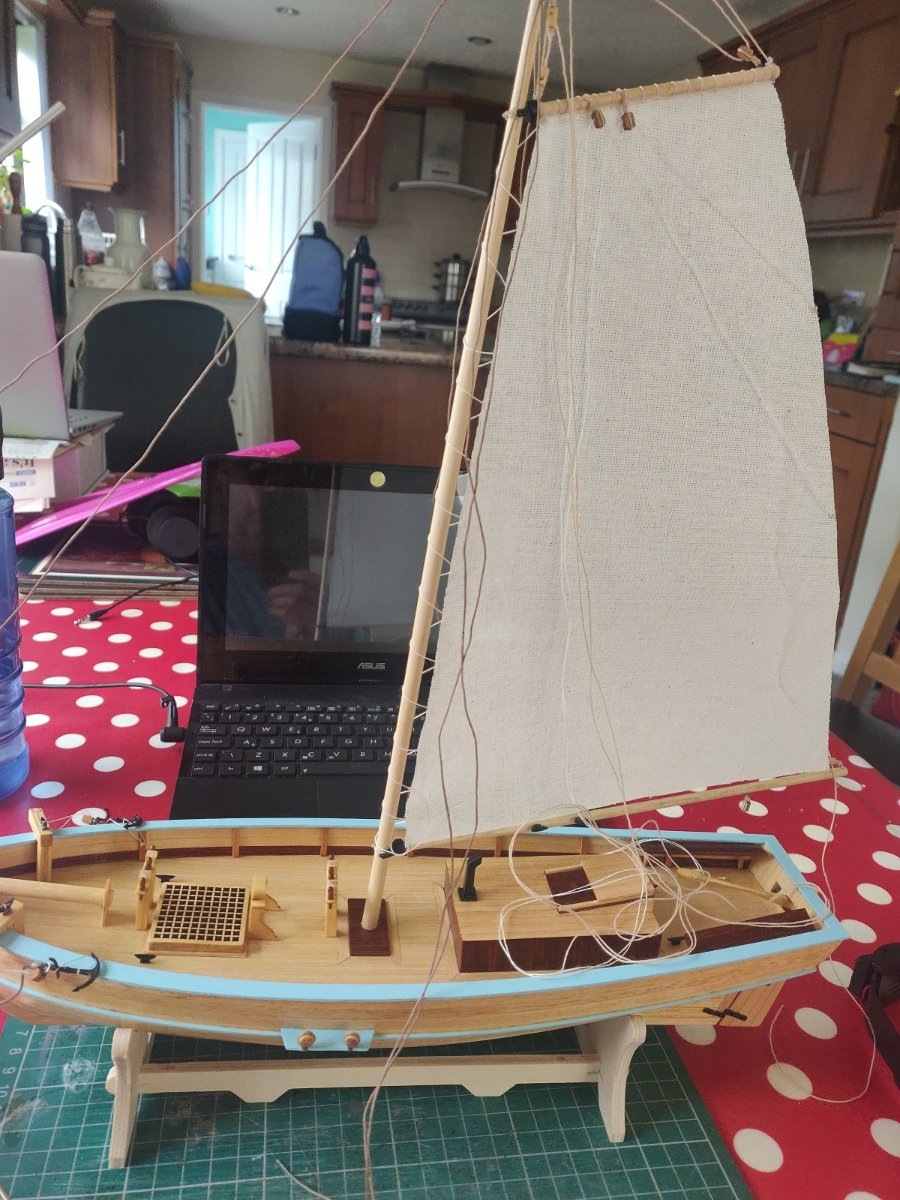
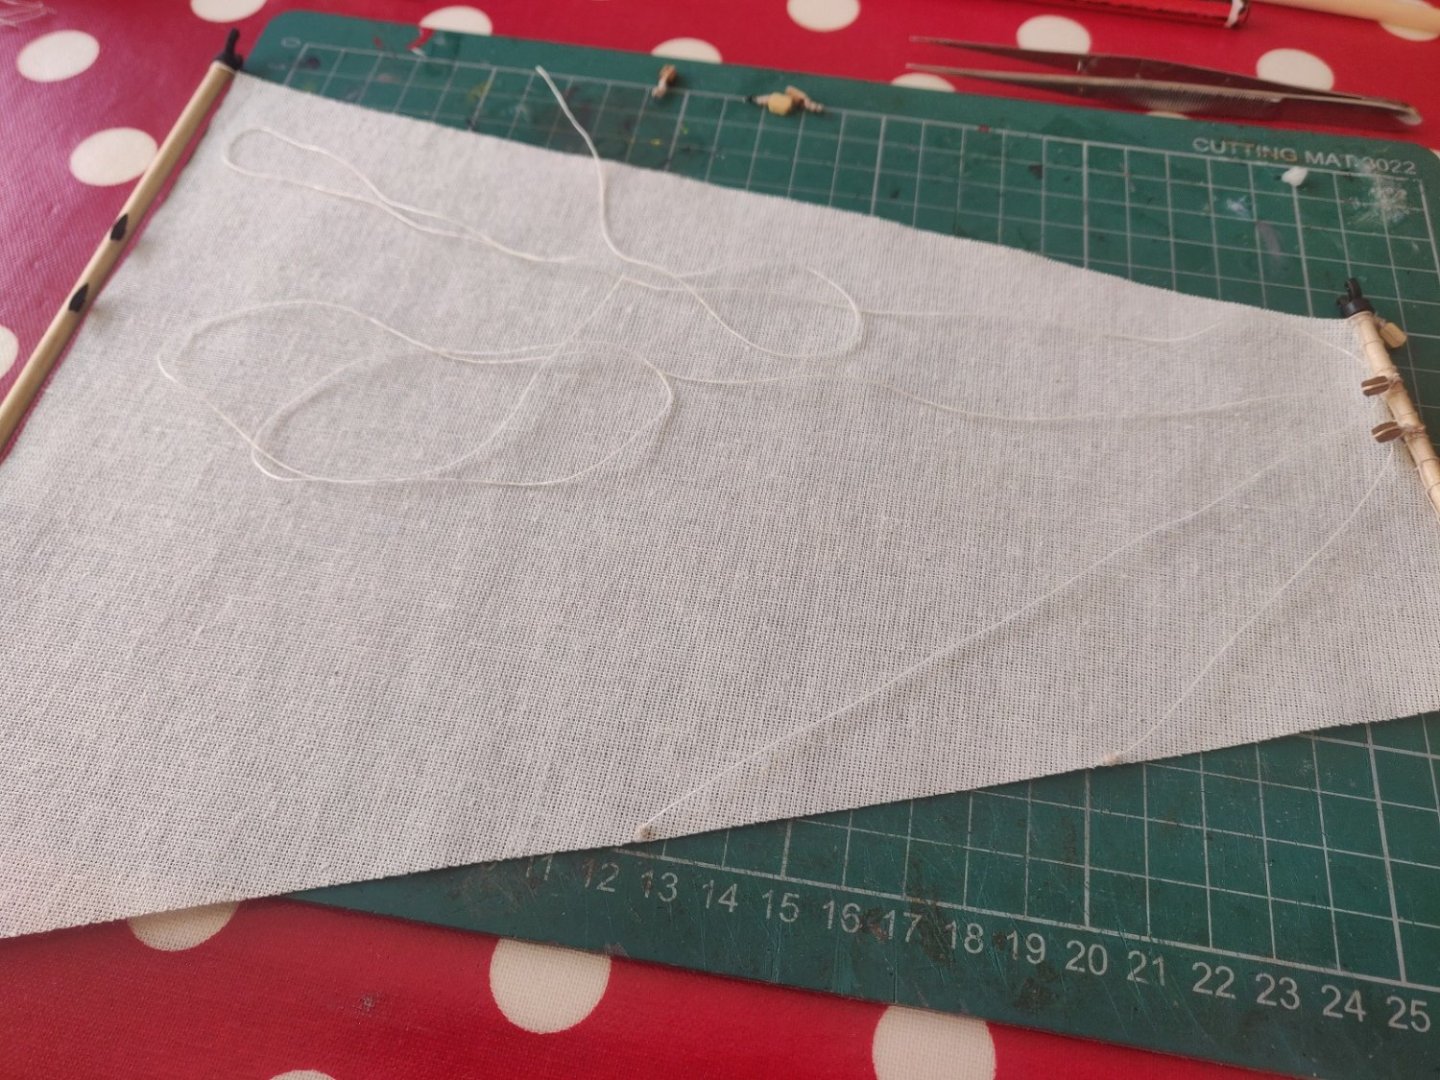
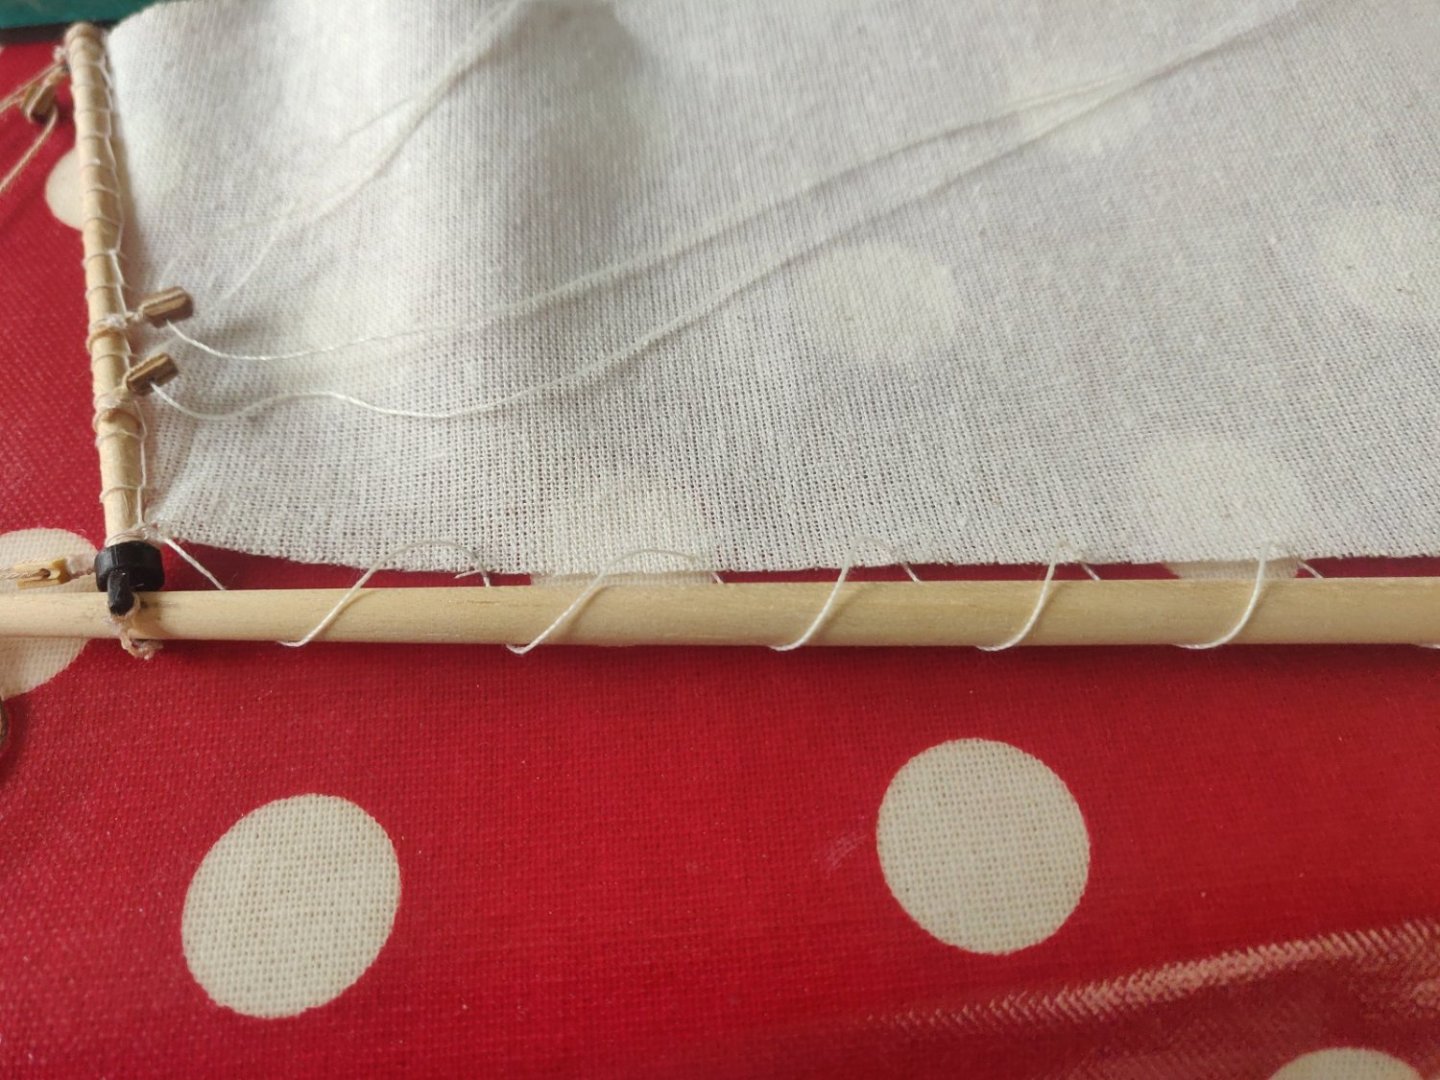
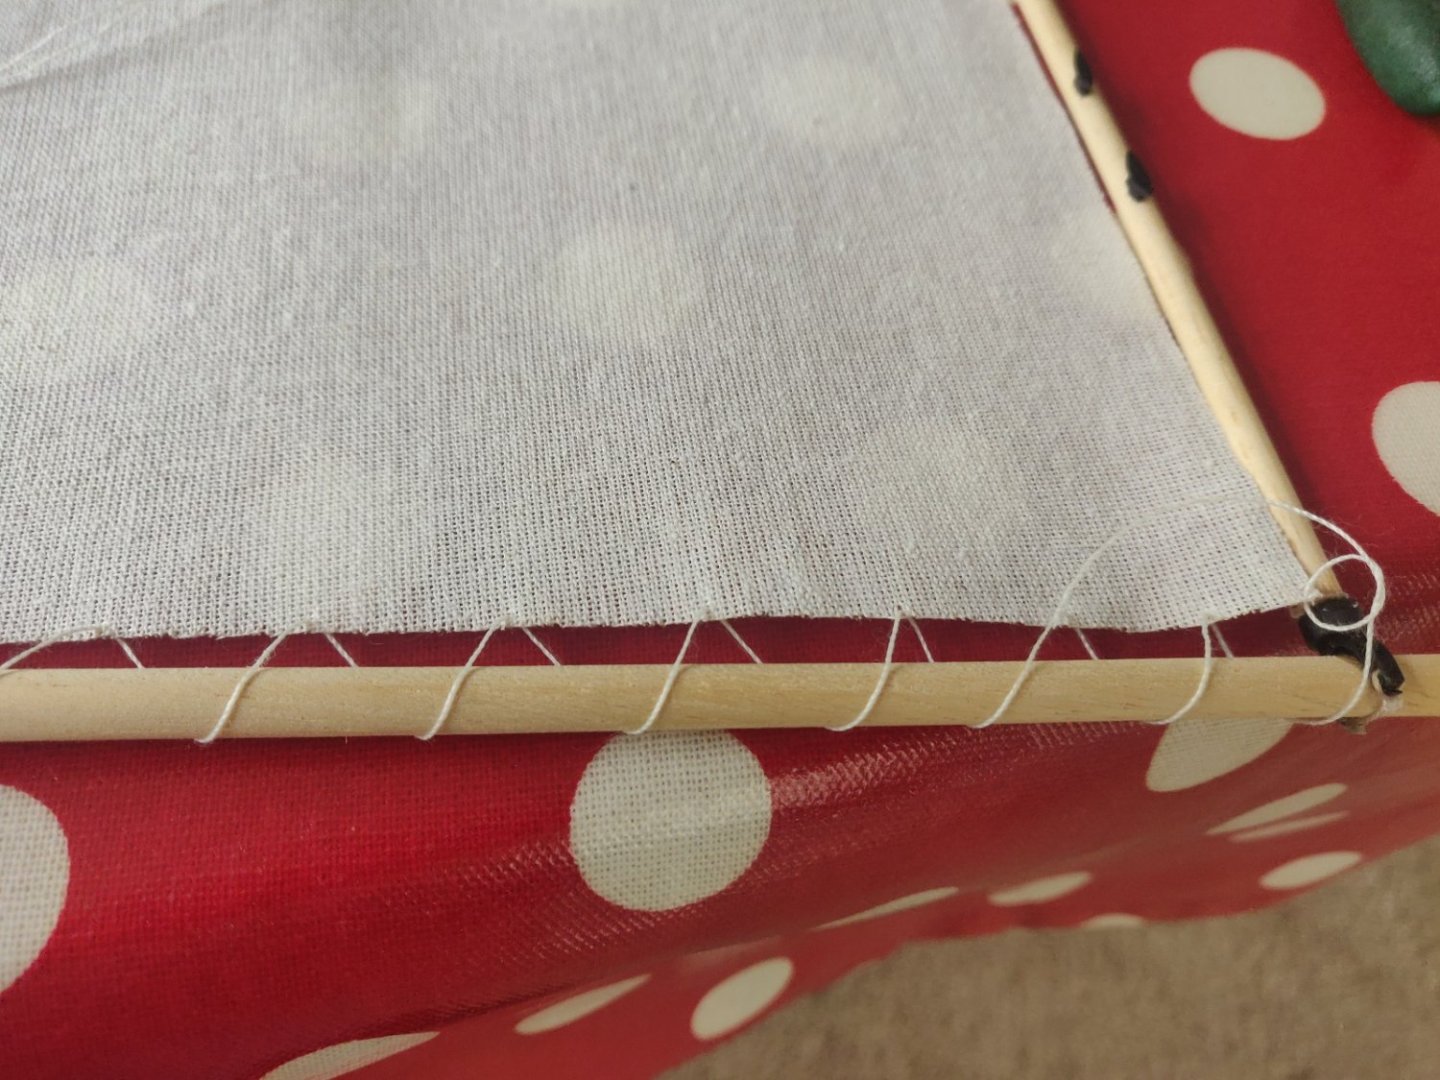
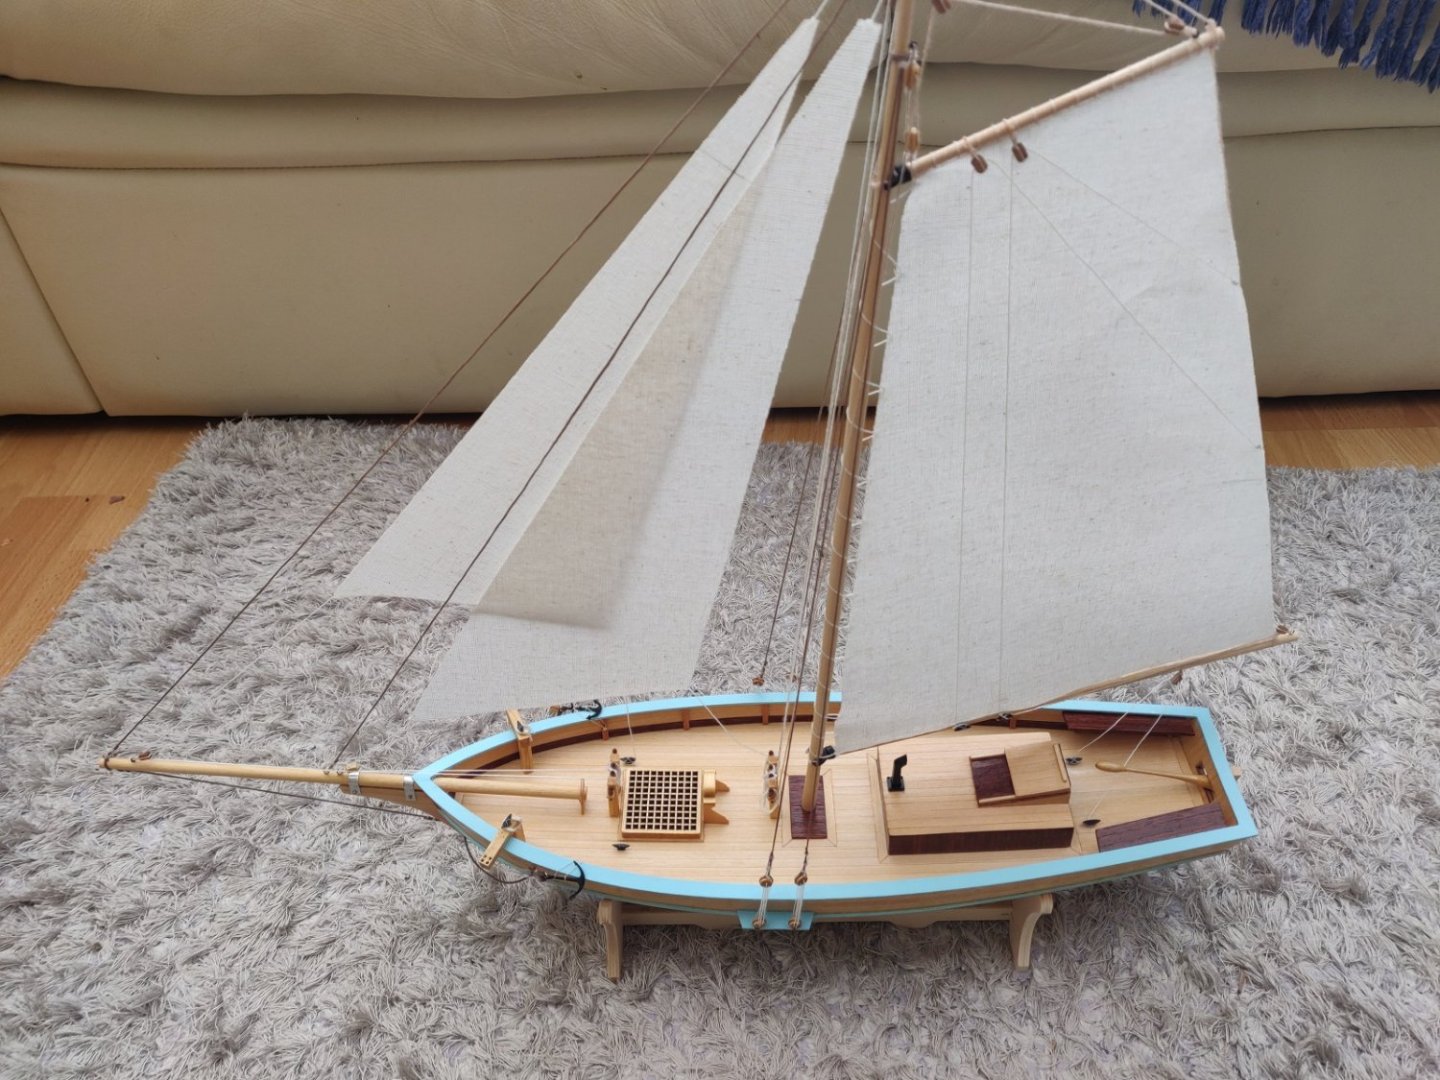
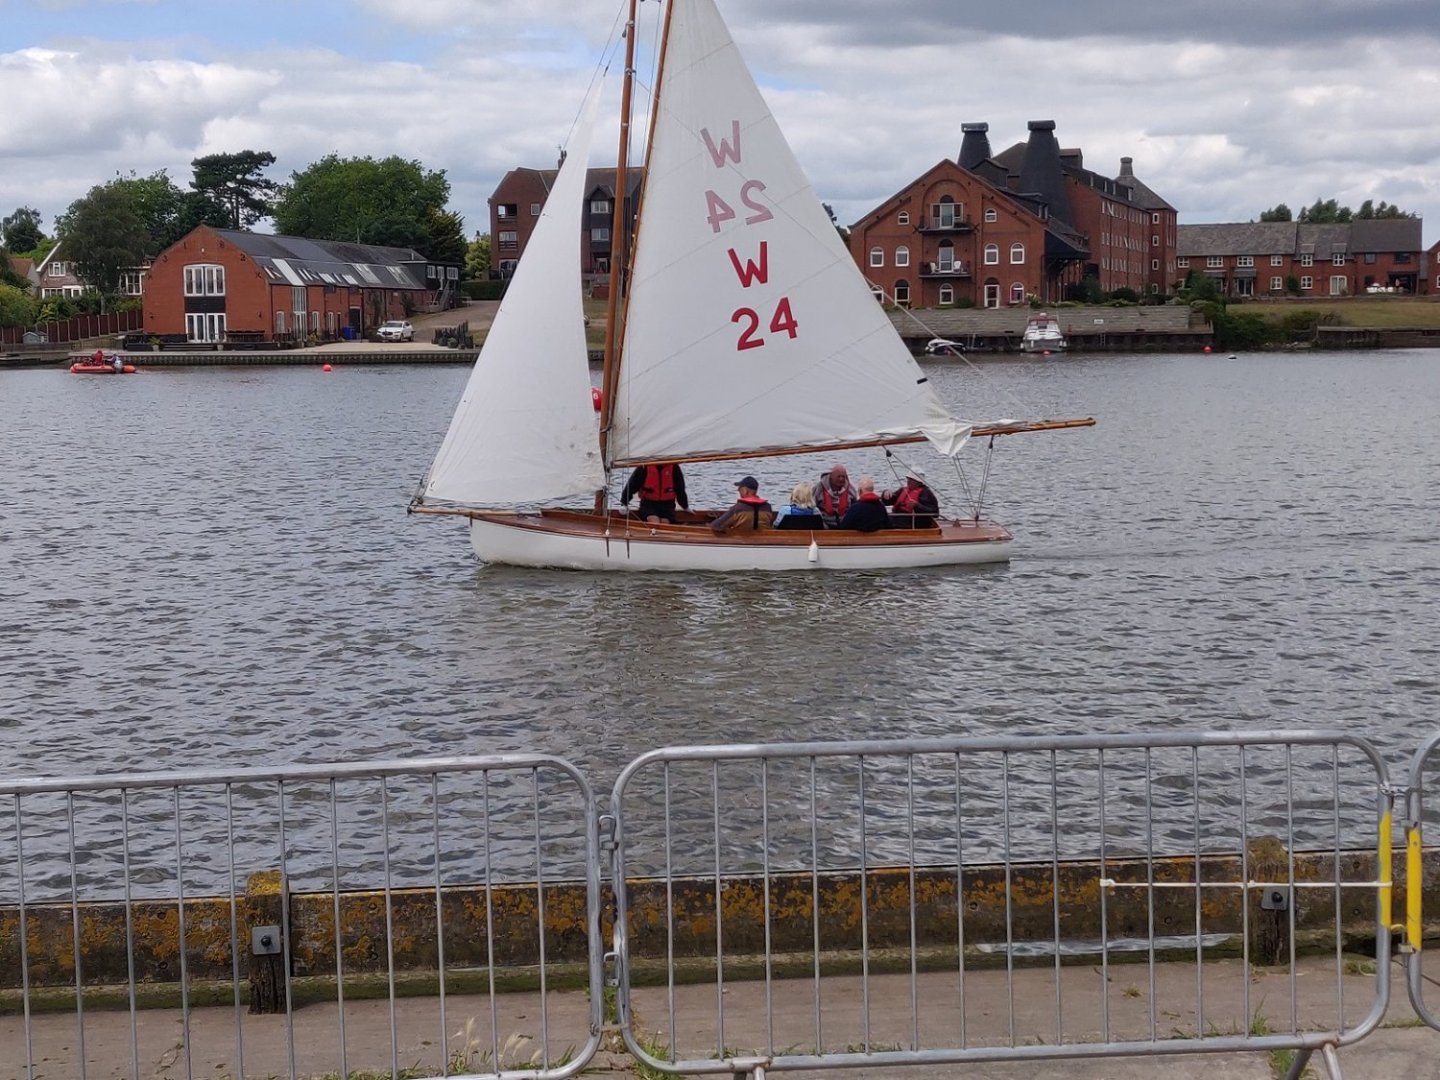
The Mast, Bowsprit and other Spars are already tapered but the Mast needed tapering a bit more so that the 3D printed Gaff Jaws would fit. I decided to fit all the Blocks to the Mast, Bowsprit and Gaffs whilst they were still on the bench, I find it much easier to do it this way. Once all the Blocks, Shrouds and Stays had been fitted to the Mast, Gaff and Boom I attached the Main Sail to the Gaff, the instructions showed that the sail should be laced to the Gaff, this was the first time that I had done this and once I had worked out how to do this it looked rather neat. The Main Sail was then tied to the Boom and the Mast glued to the boat. The upper Deadeyes were attached to the Shrouds, 2 on each side and then the Lanyards were fitted. The rest of the rigging was fitted along with the 2 Fore Sails. I made up some coils of rope and attached them to the various belaying points, and that's it all completed. Thanks to everyone for all your comments and "likes," I have enjoyed building this Cutter, it's just a pity that I haven't been able to find out anything about the original Cutters. Cheers Andy


- 14 replies
-
- 5
-
-
- Bosphorus Cutter
- Turk Models
- (and 1 more)
-
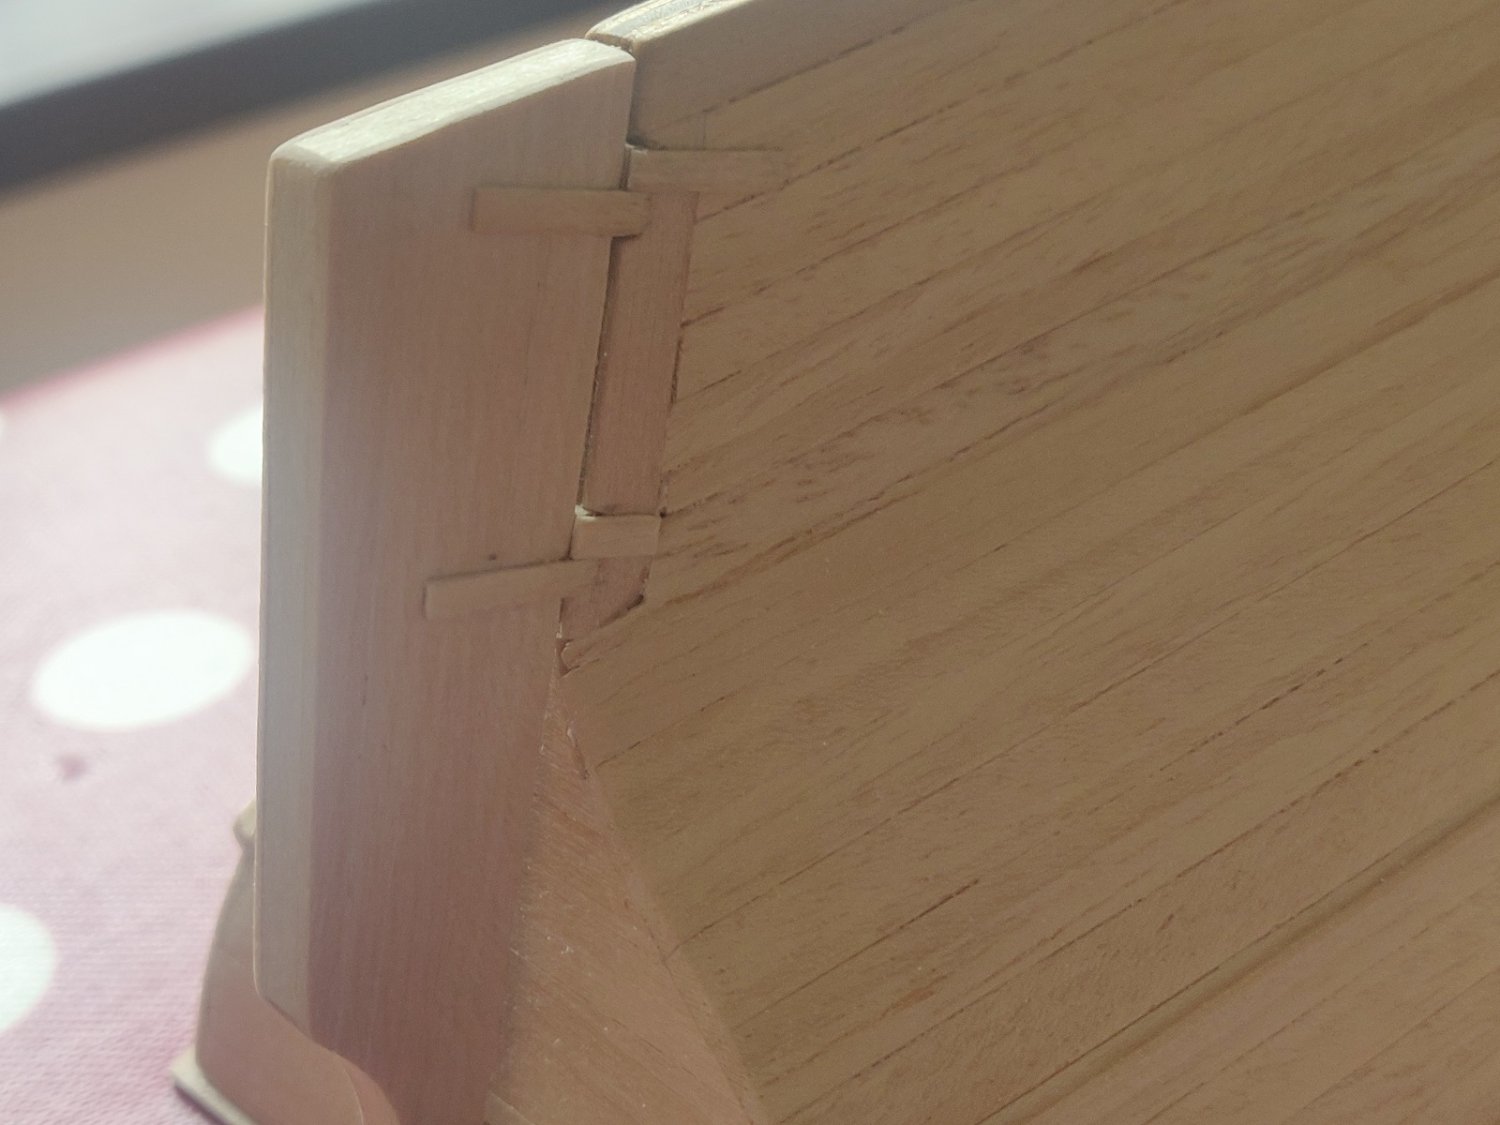
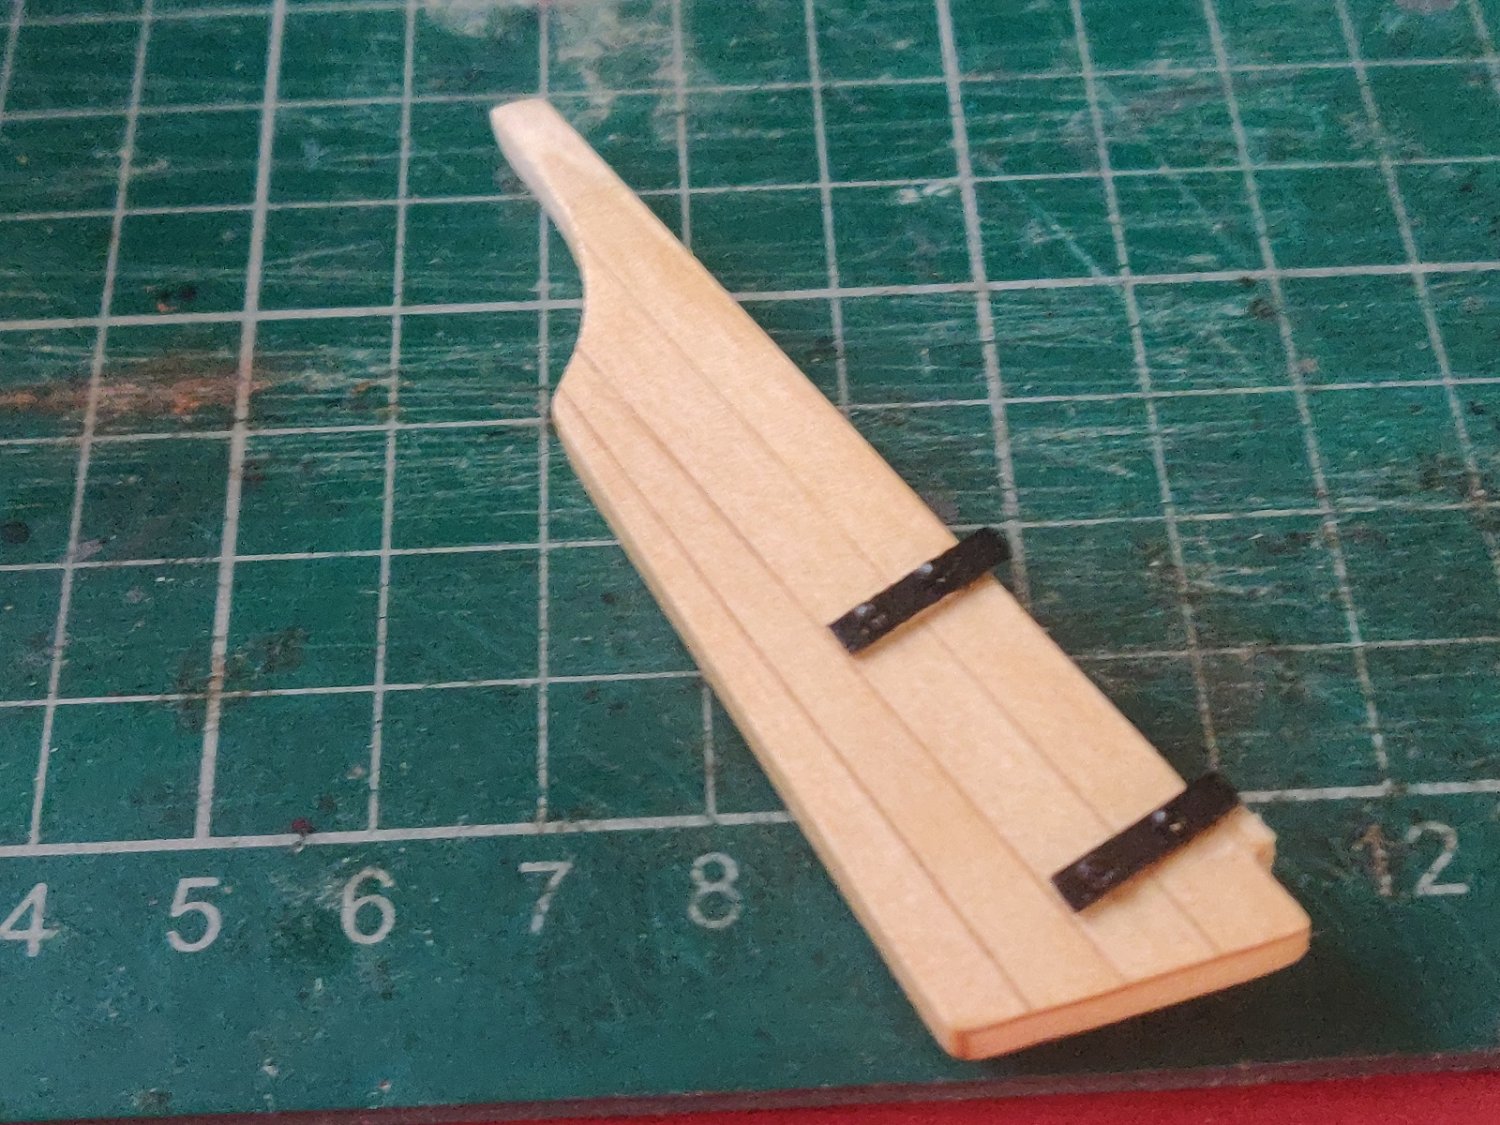
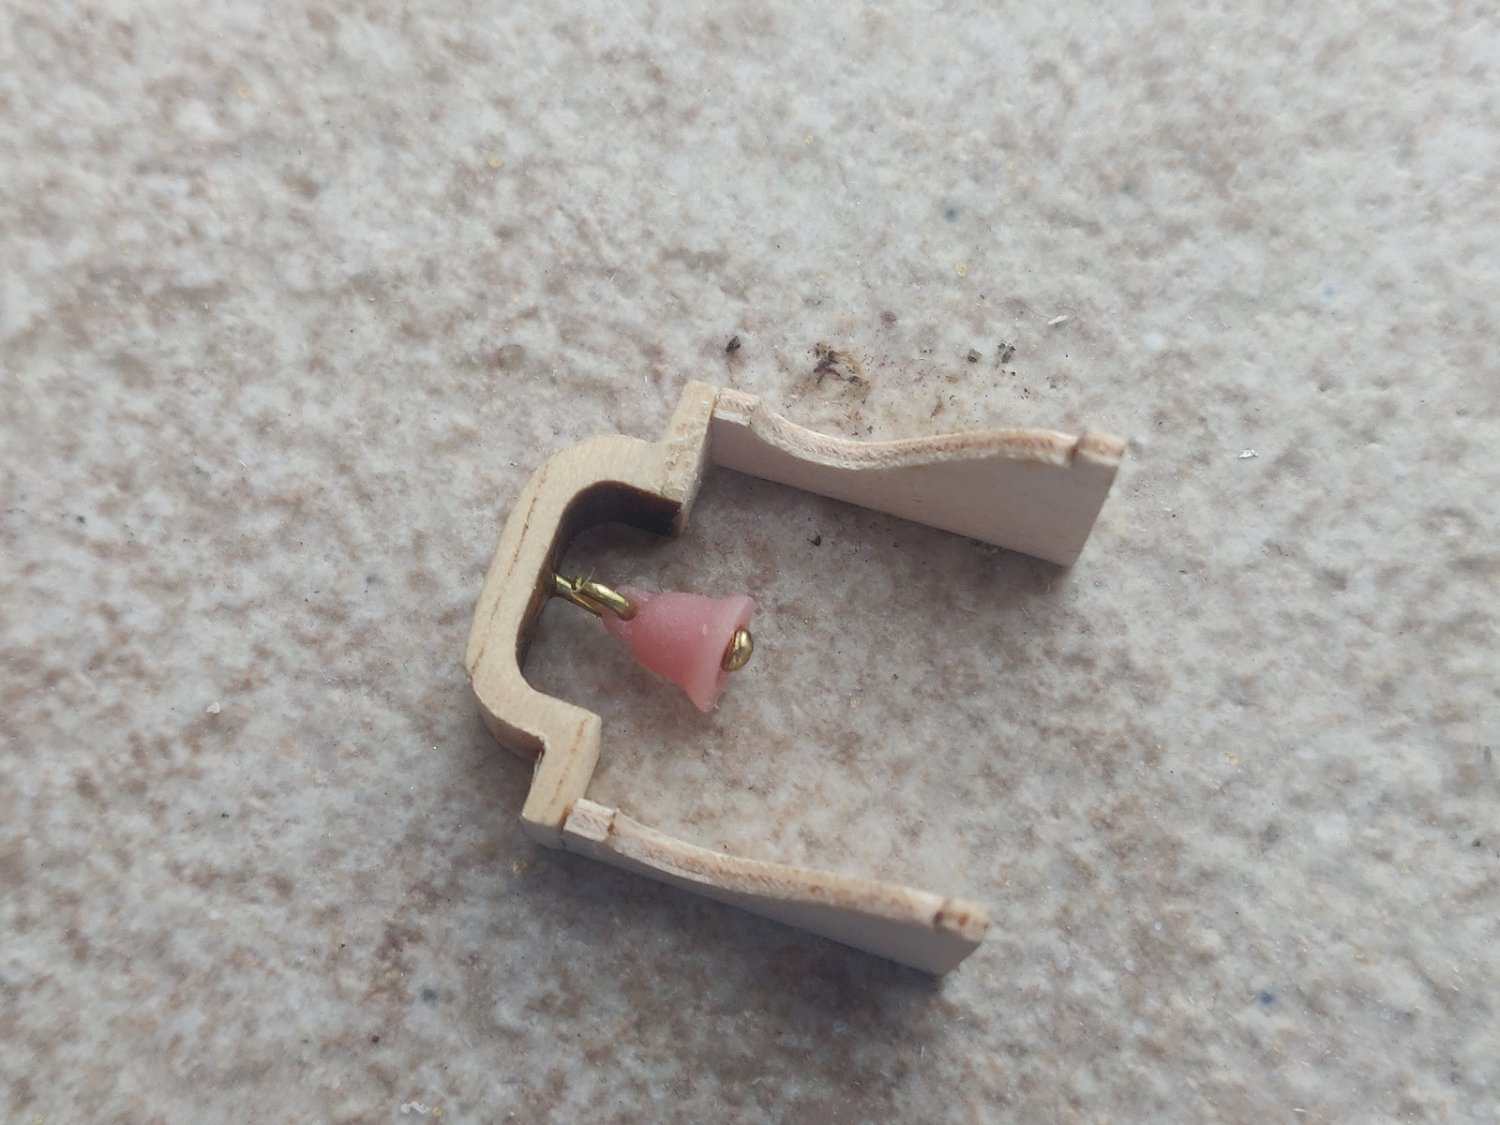
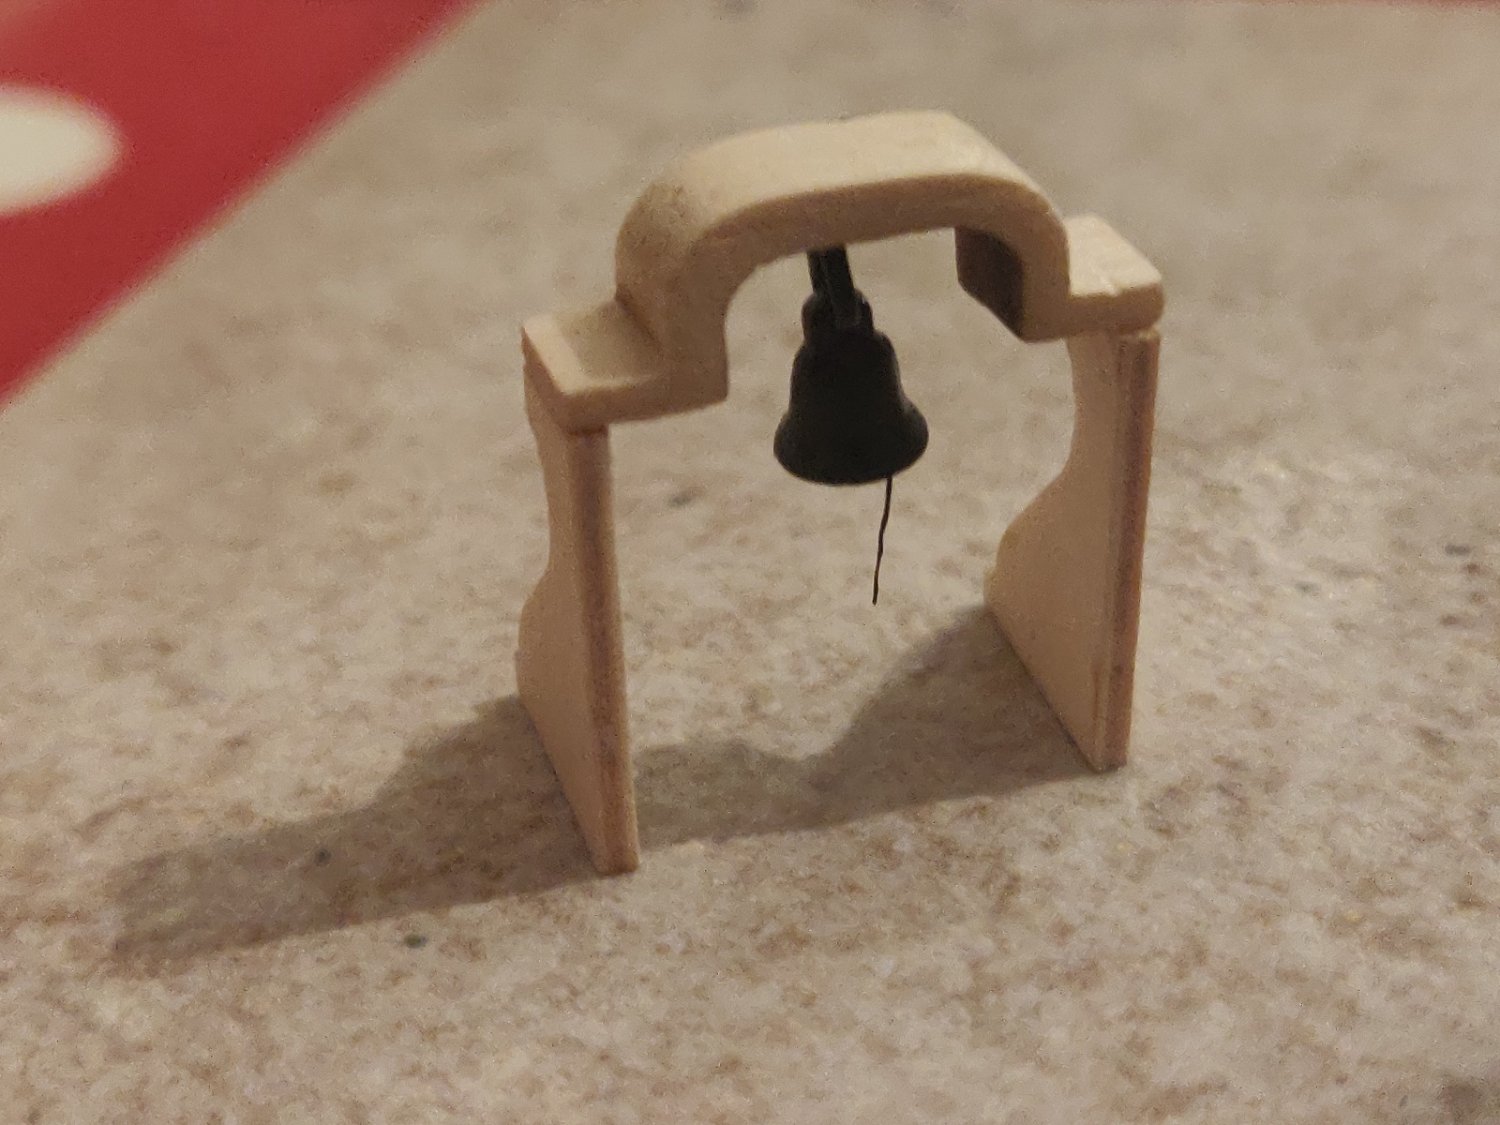
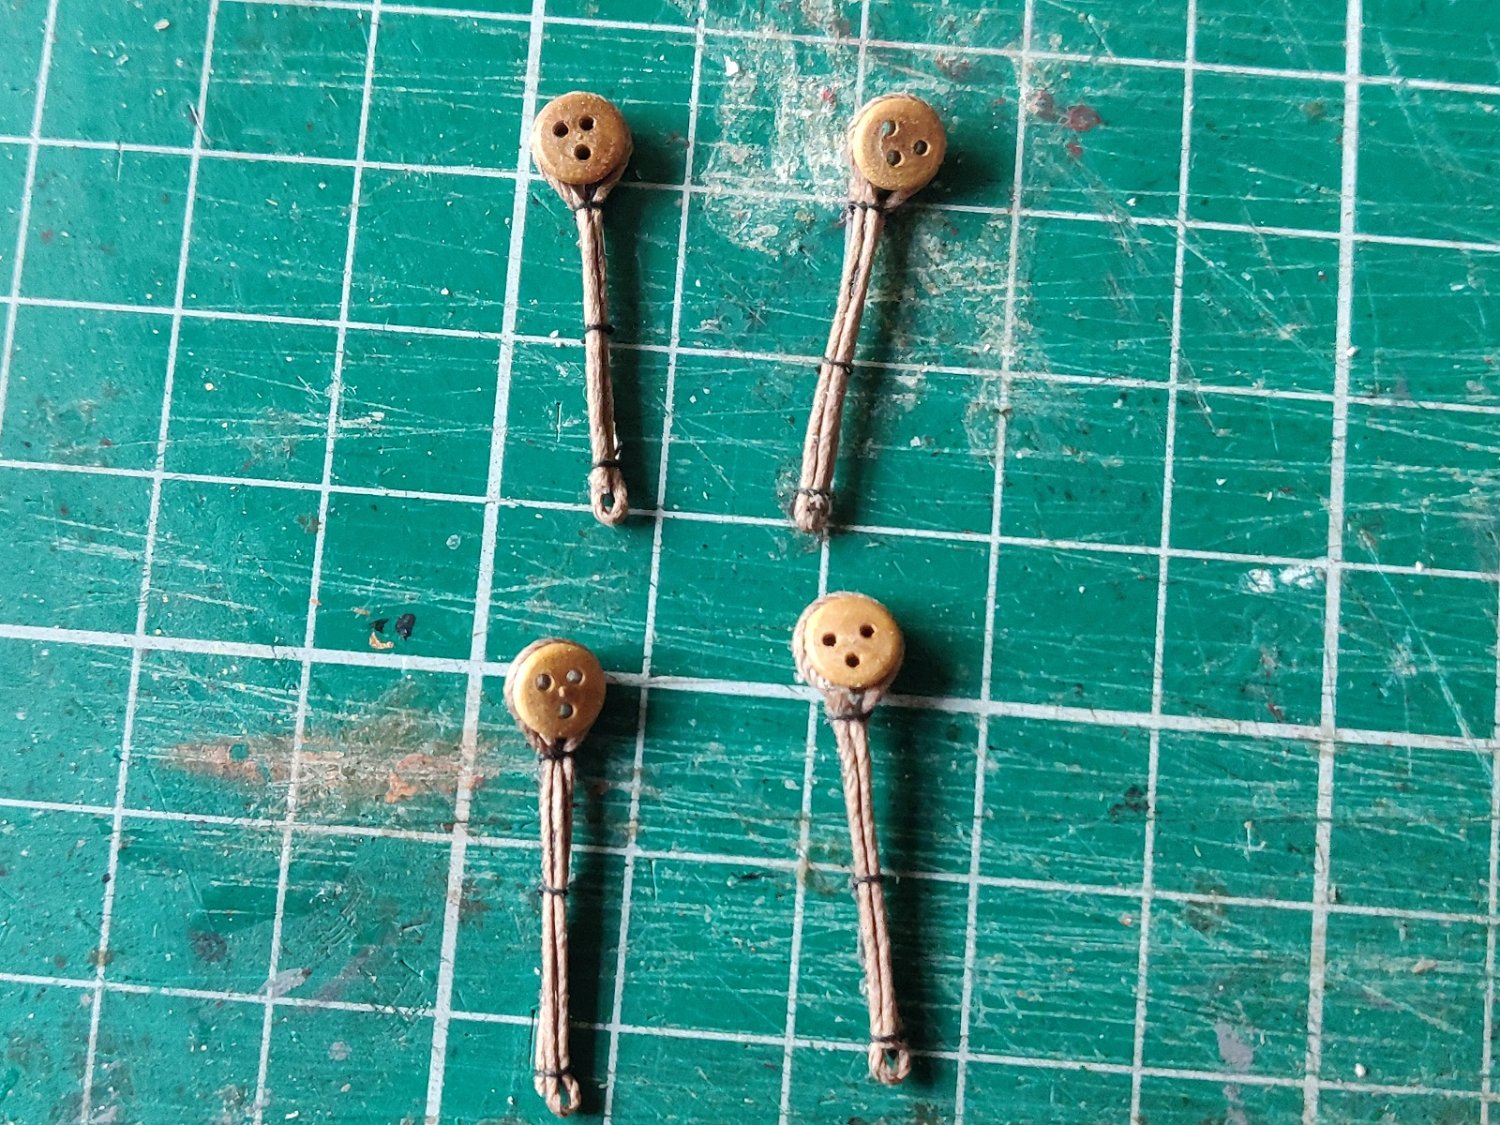
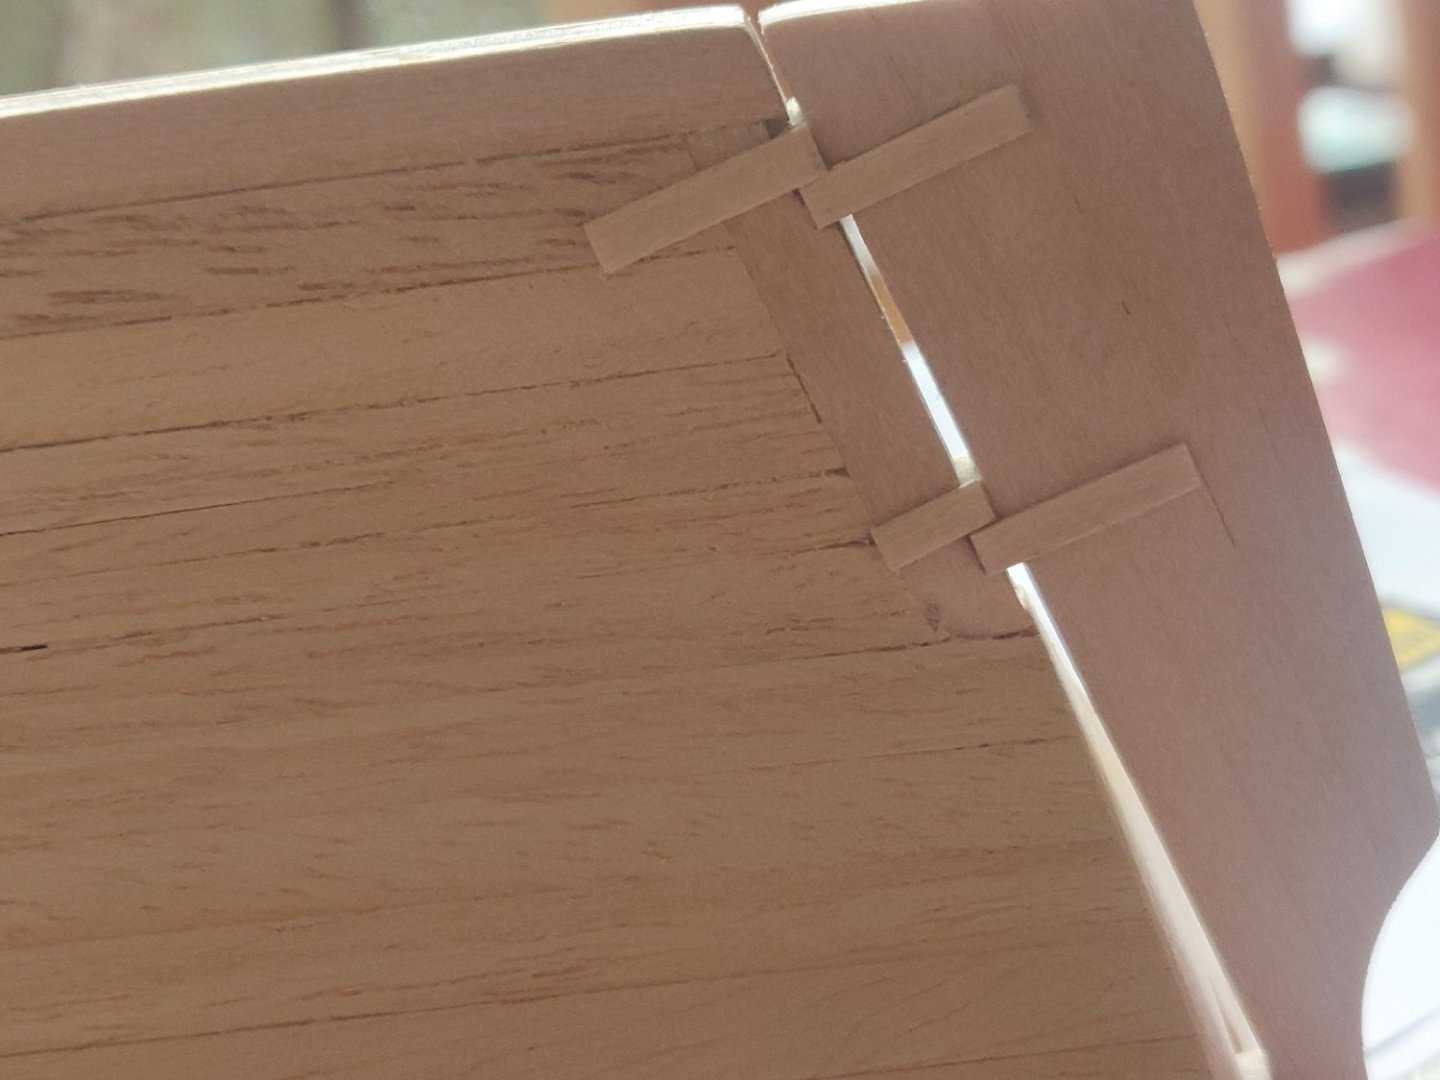
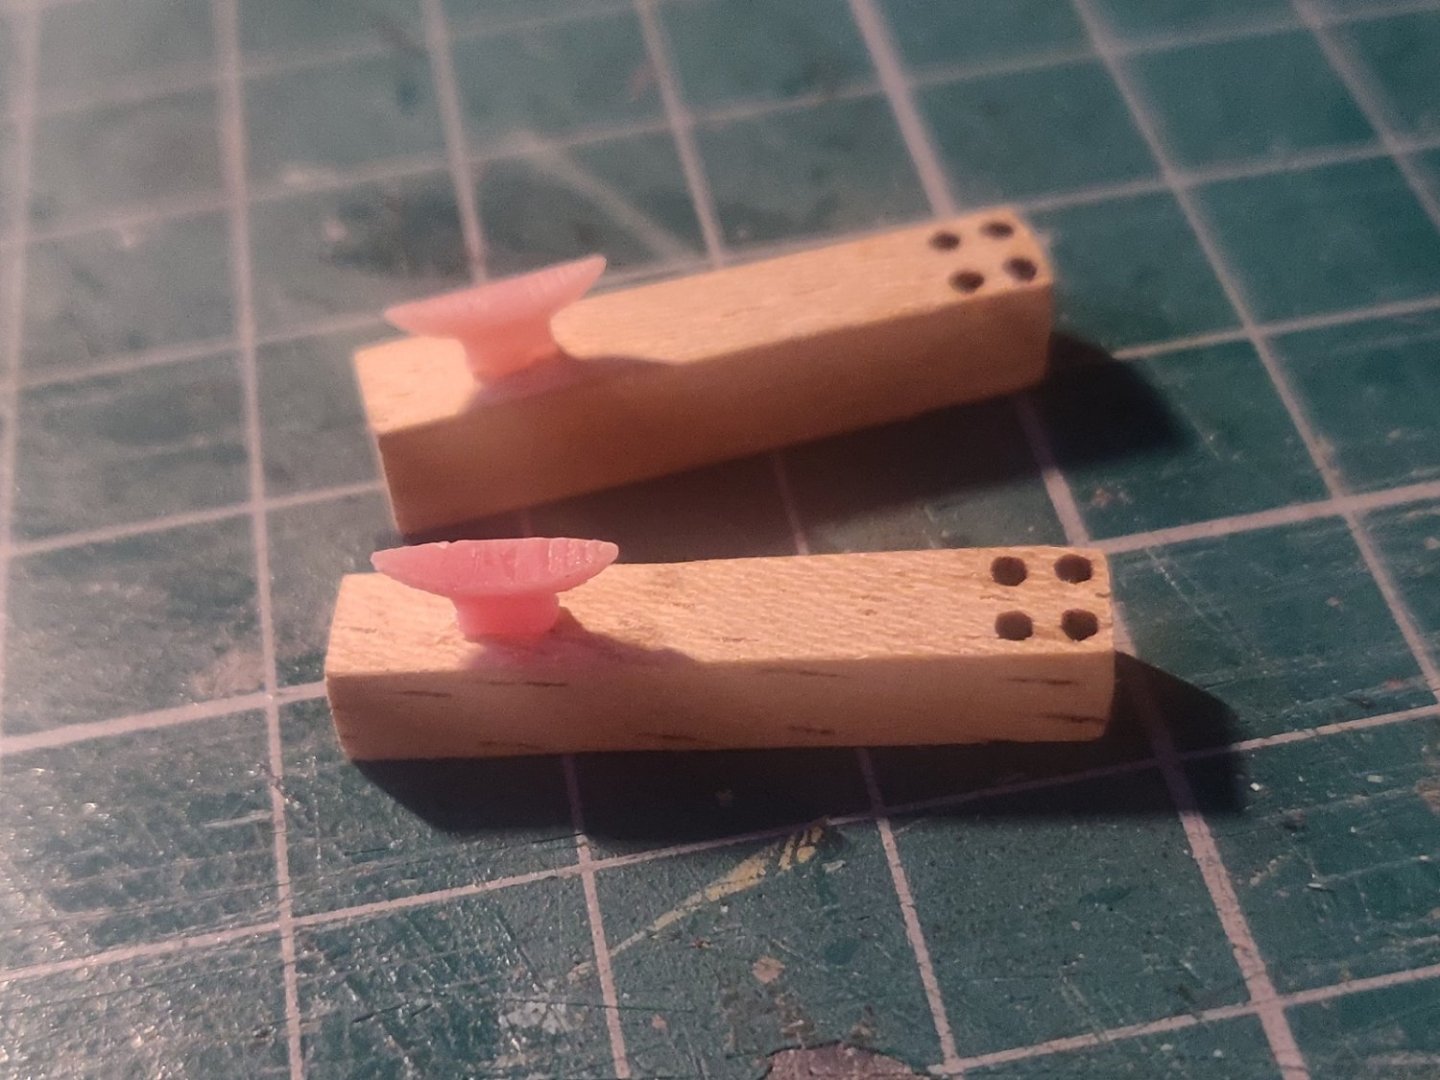
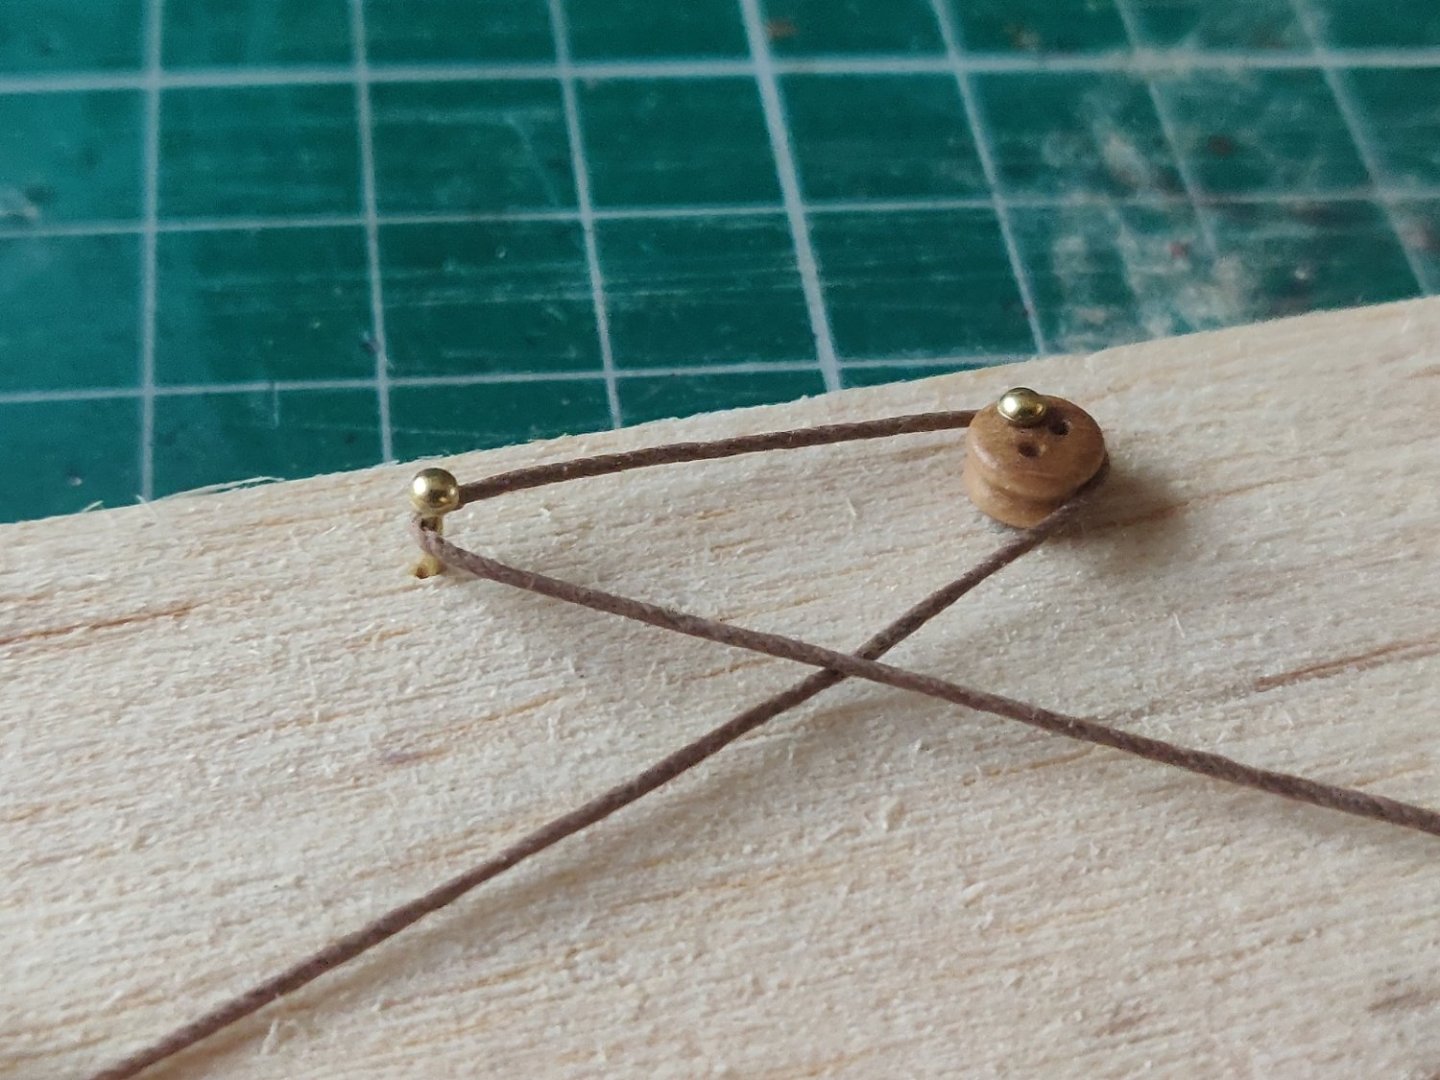
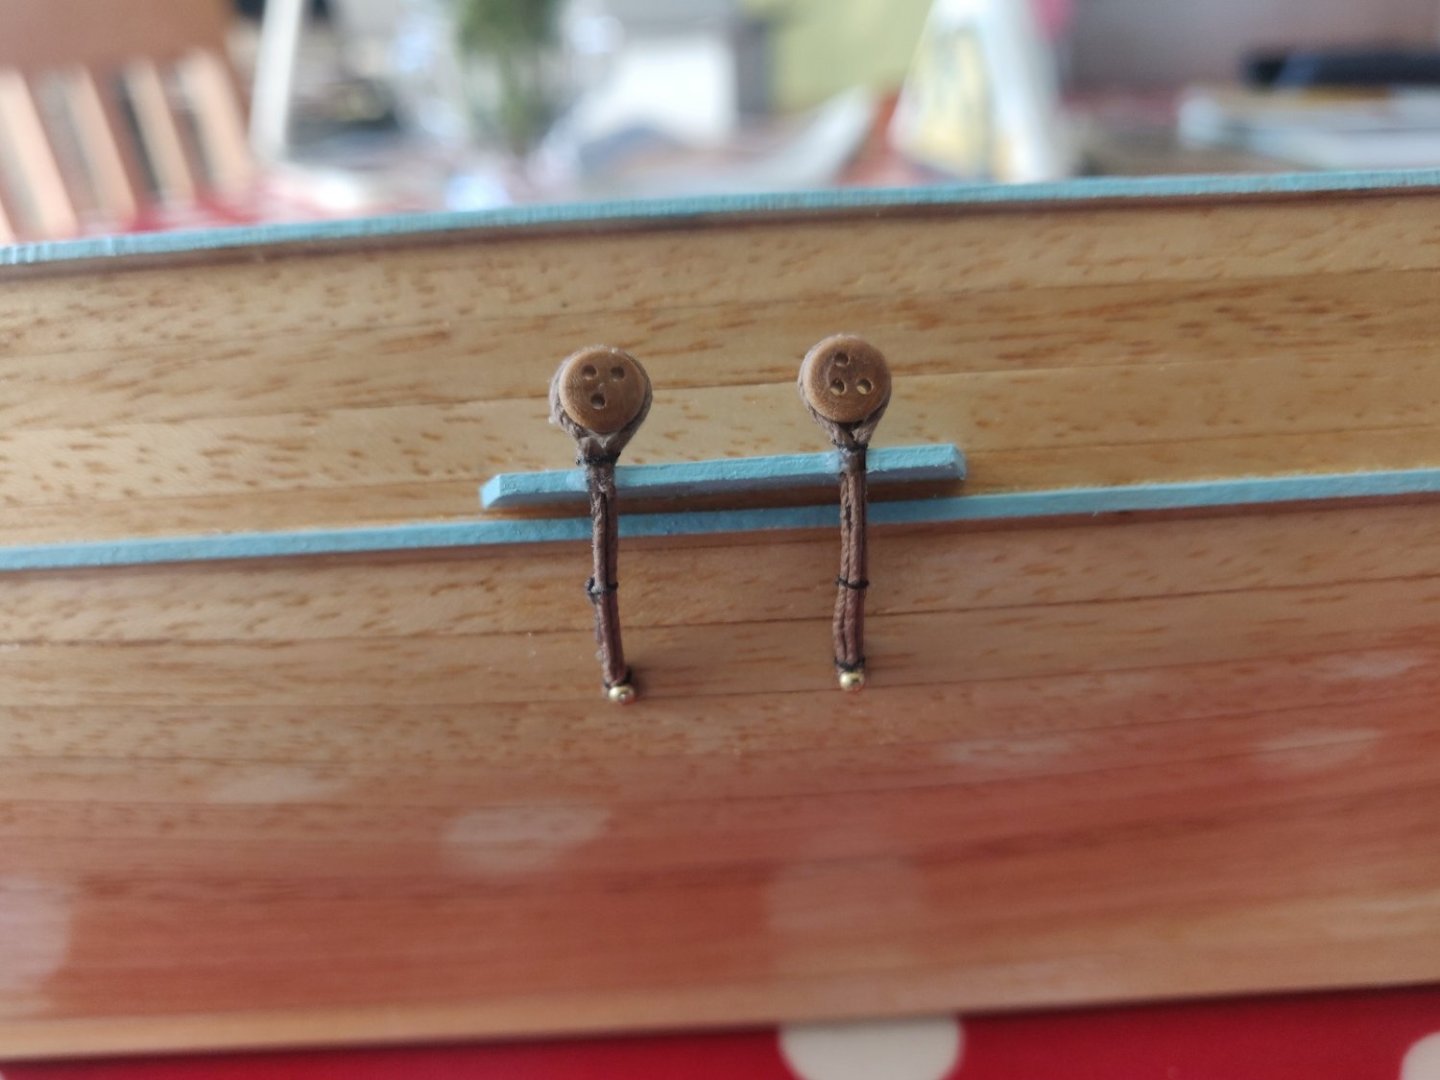
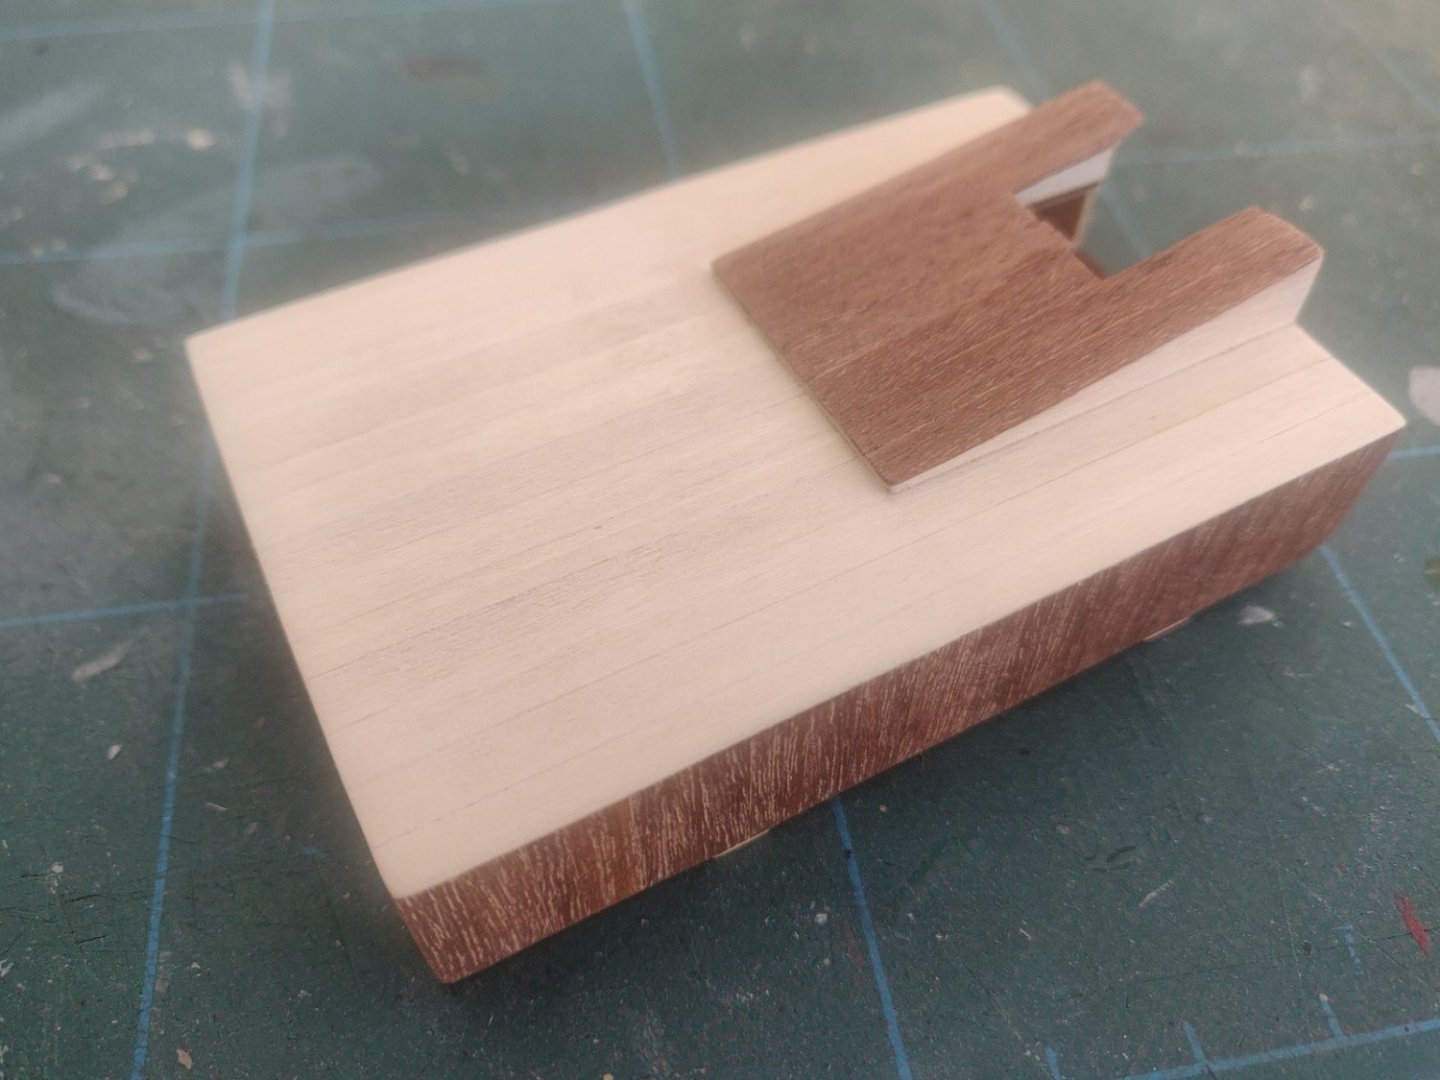
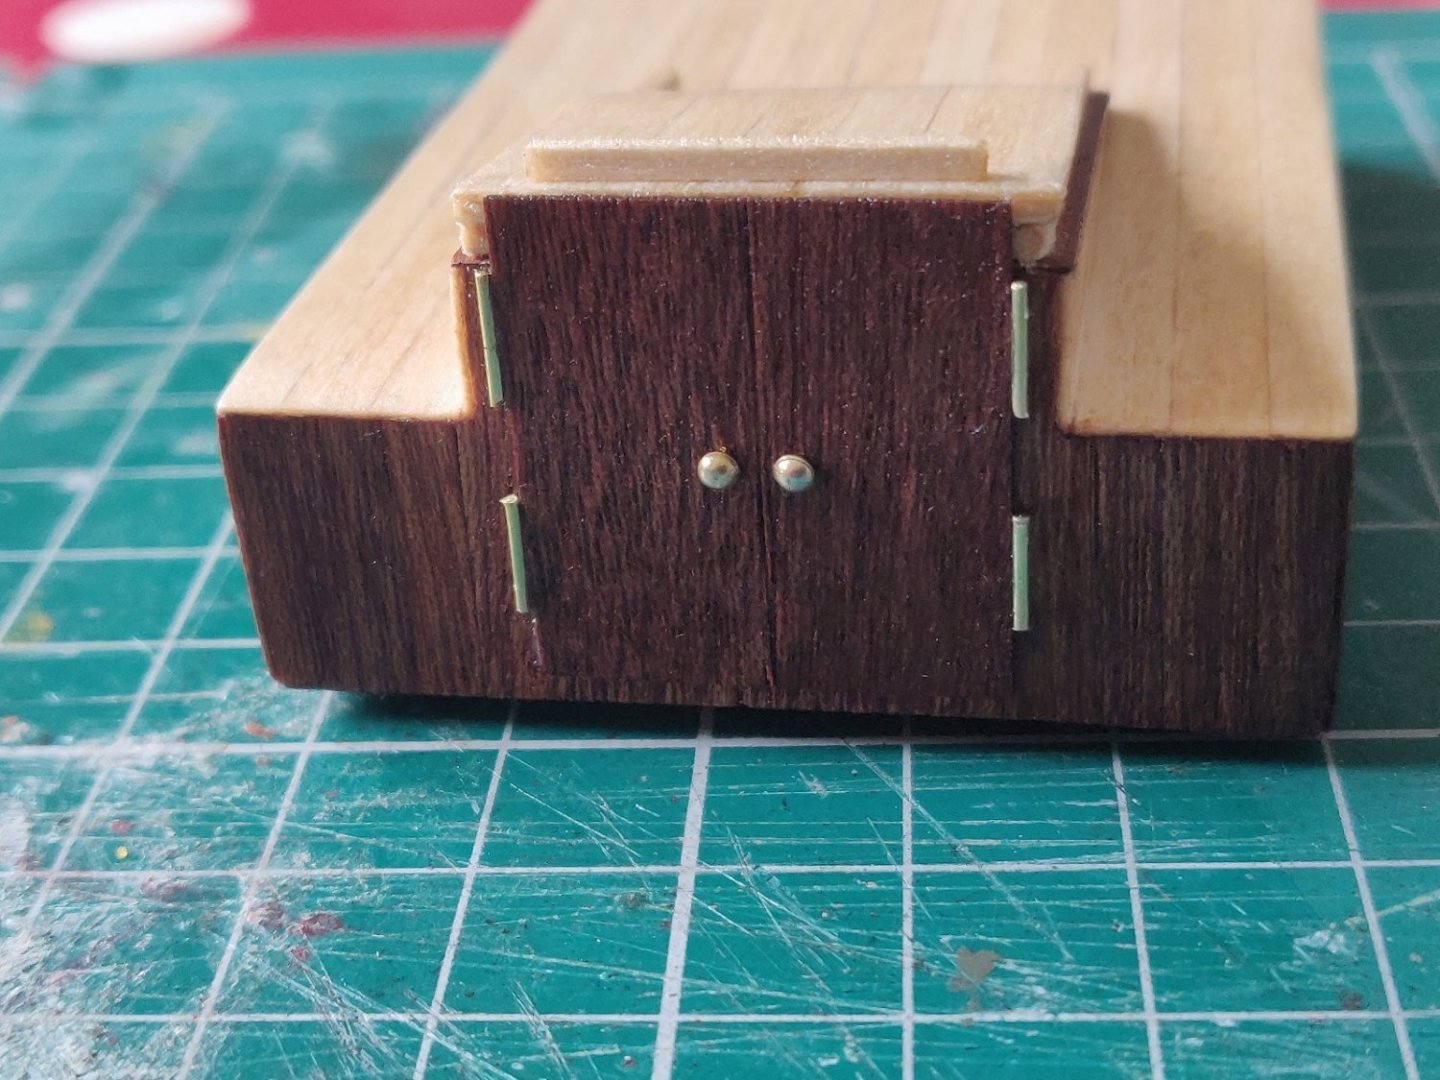
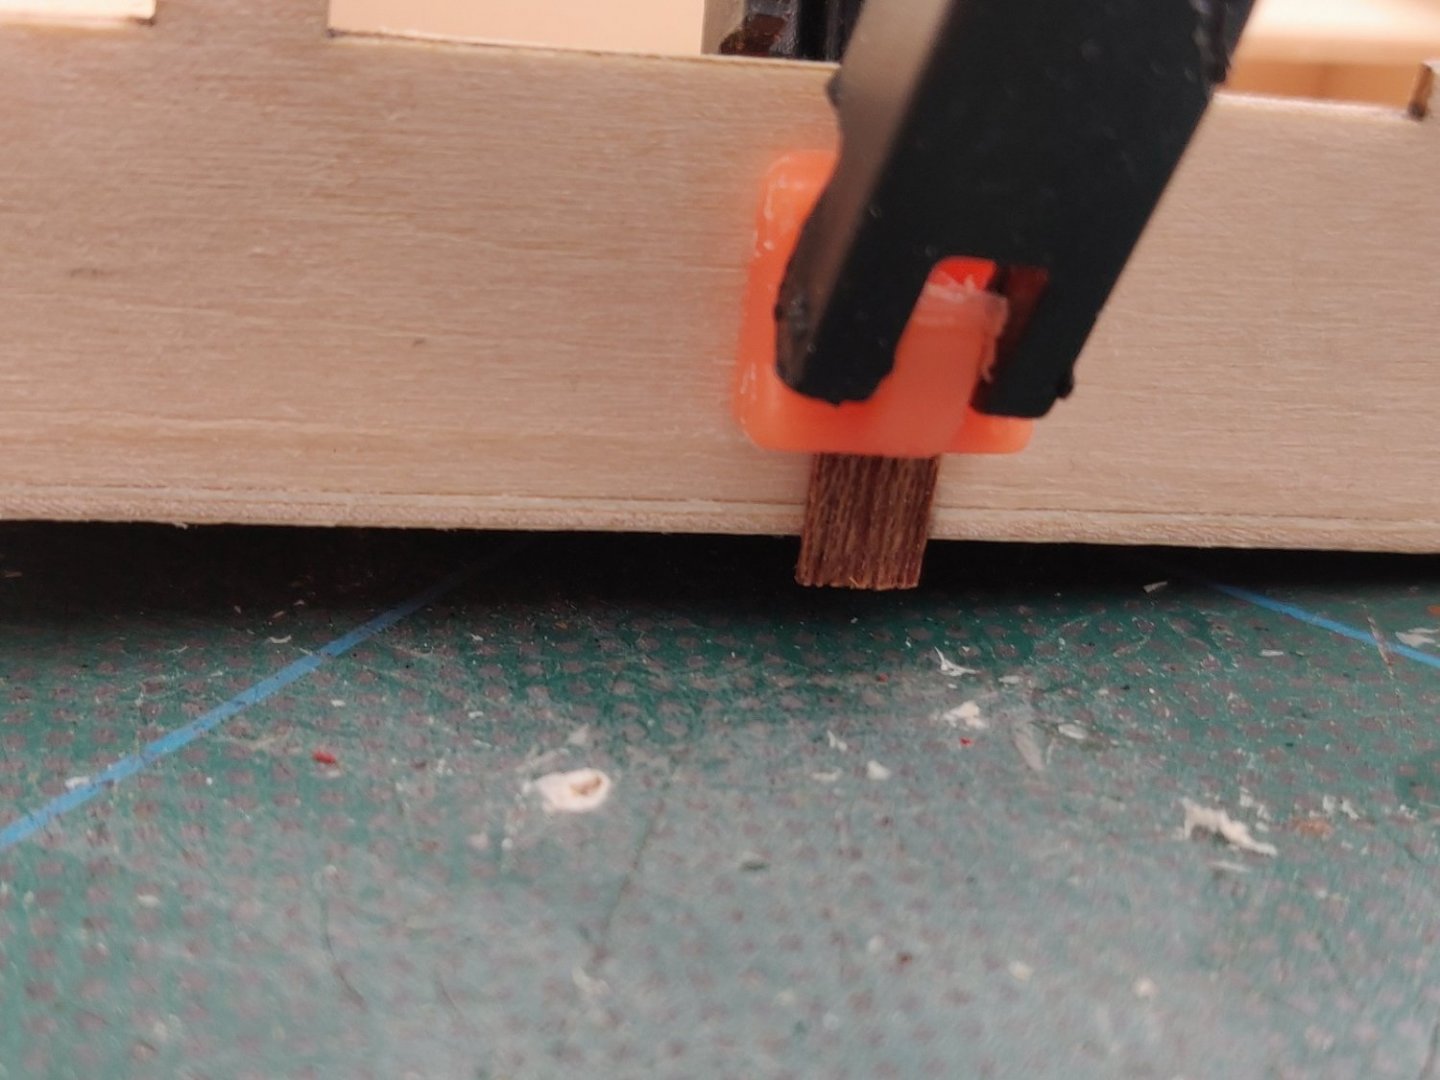
The Rudder is attached to the hull using 3D printed Gudgeons and Pintles, because I had covered the Rudder and Stern Post with thin planking strips it meant these 3D parts needed some work to get them to fit. I not only managed to break a Pintle but the bit that broke off disappeared and I'm guessing the Carpet Monster (Monsterus Carpetium) has claimed it. I don't have any thin Brass strip so I decided to make the Gudgeons and Pintles the same way that is on my Nisha and Lady Eleanor boats. I glued 2 small blocks to the Rudder and then glued it to the Stern Post. I cut some thin planking strip and glued that to the Hull and Rudder. I fitted some cut down dome headed pins and painted the strips and pins black. Whilst the paint on the Gunwale and Rubbing Strakes was drying I made the Belfry, this is 5 parts, the Bell is 3D printed and I cut down an Eyepin to hang the Bell on. I fitted the end of a dome headed pin to the Bell and then used a strand on Co-Ax cable screening for the rope to ring the Bell. The Catheads need a Cleat fitting to the top in-board side, these are 3D printed and required a bit of cleaning up to make them look half decent. I also fitted a cut down Eyepin on the under side of each Cathead to tie the lift rope to. The Chain Plates are also 3D printed with a small hole at each end. I tried to tie a Deadeye to one end of a Chain Plate but couldn't get to sit right. I spent the next couple of days thinking about how to make Chain Plates, as I mentioned earlier I don't have any thin Brass strip, I have some that is too wide and I didn't fancy trying to cut it narrower. I worked out that if I made a jig using 2 pins and a small sheet of Balsawood I could make 4 Chain Plates all the same length using some of the wax coated thread that came with the kit. I pinned a Deadeye to the Balsa, and having already measured the gap fitted aother pin to the Balsa, I then ran the thread around the Deadeye and the pin and used thin cotton thread to tie the wax coated thread. The thicker thread was then covered in C.A. glue. These Cain Plates were then fitted to the Cutter. Cheers Andy


- 14 replies
-
- 2
-
-
- Bosphorus Cutter
- Turk Models
- (and 1 more)
-
Andyrew reacted to a post in a topic:
Nisha by longshanks – Vanguard Models – 1:64
-
Andyrew reacted to a post in a topic:
Nisha by longshanks – Vanguard Models – 1:64
-
Andyrew reacted to a post in a topic:
Nisha by longshanks – Vanguard Models – 1:64
-
Andyrew reacted to a post in a topic:
Nisha by longshanks – Vanguard Models – 1:64
-
Andyrew reacted to a post in a topic:
Nisha by longshanks – Vanguard Models – 1:64
-
Andyrew reacted to a post in a topic:
Nisha by longshanks – Vanguard Models – 1:64
-
Andyrew reacted to a post in a topic:
Nisha by longshanks – Vanguard Models – 1:64
-
Andyrew reacted to a post in a topic:
Nisha by longshanks – Vanguard Models – 1:64
-
You've built a great looking Nisha, well done Jonathon.
-
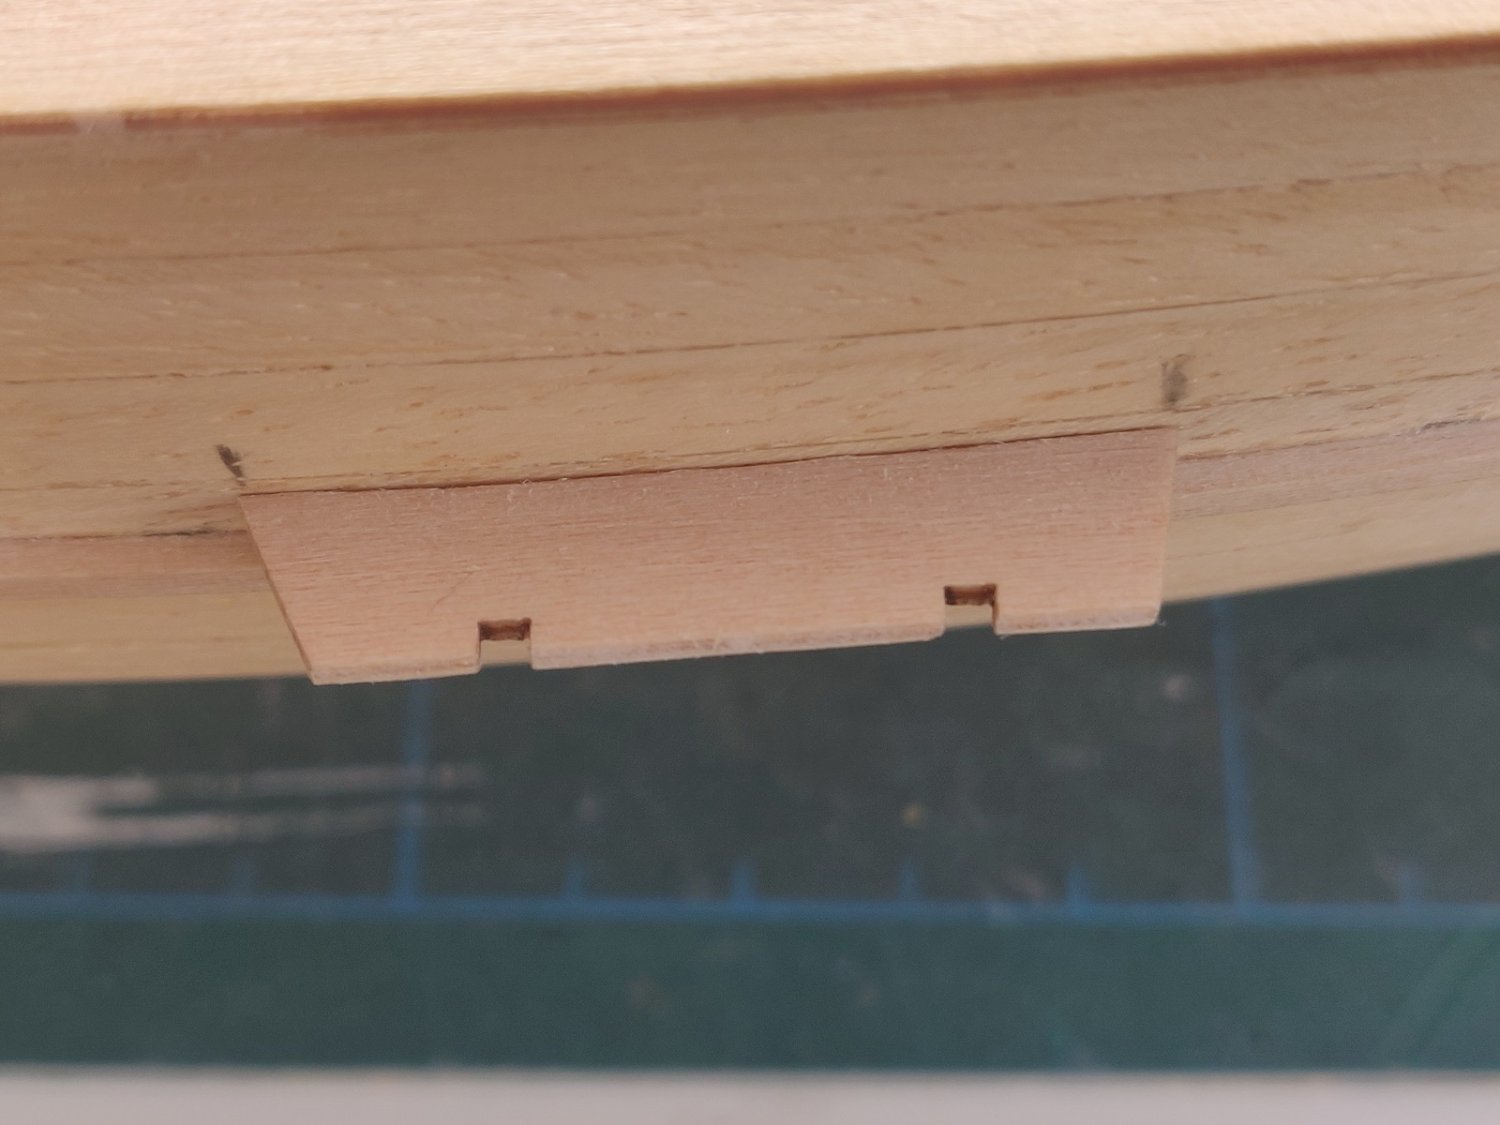
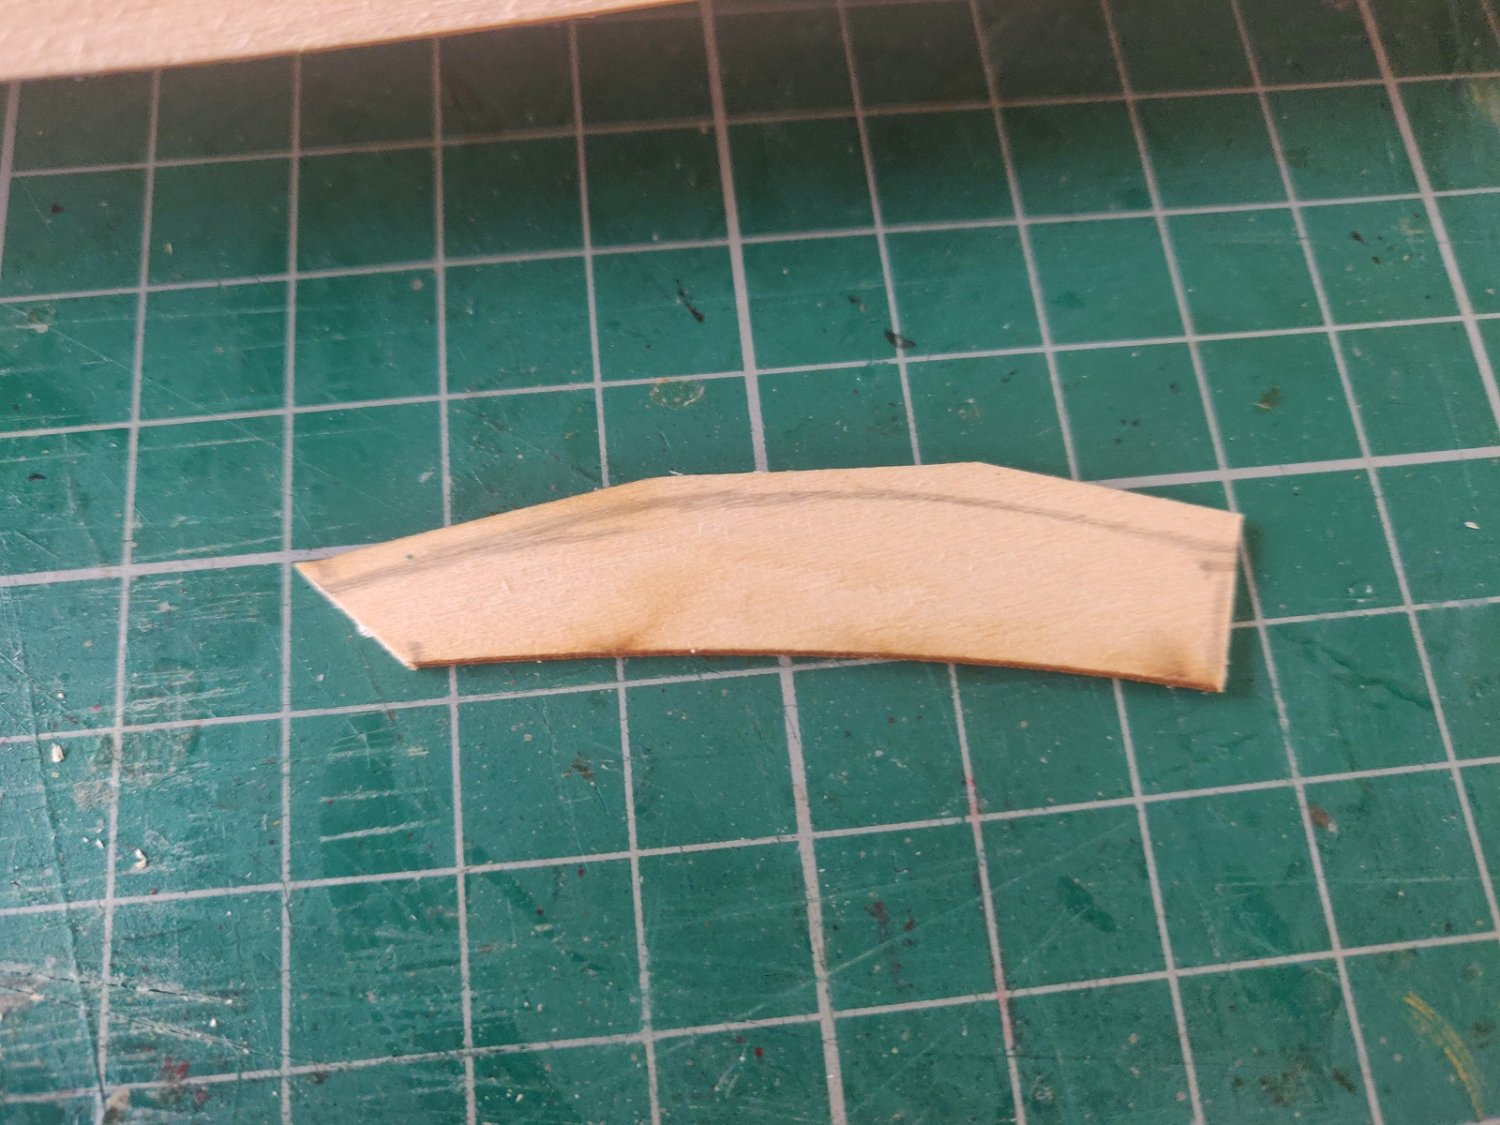
The 2 Channels are Laser cut from Plywood, I did think about putting thin strips on the top and edges but it would have been difficult trying to fit the edging where the 2 cut outs for the Chain Plates are. After I had shaped the edge that fits against the Hull I drilled 2 0.5mm holes in each Channel and fitted some cut down pins leaving the sharp end sticking out, the Channels were then pushed against the Hull and the sharp pin left a mark so that I could then drill 0.5mm holes in the Hull sides. The 2 Channels were then glued to the Hull. The left and right Gunwales are Laser cut Plywood, unfortunately due to a very very tiny error, well ok massive error the front end of my Cutter didn't match the shape of the front part of each Gunwale. I laid each Gunwale on the Cutter and was able to see where the fault lay. I then cut the frnt part of each Gunwale off and then glued the remaining Gunwale in place. I measured the gap on each side and cut the missing parts from the Plywood "fret." I had cut both parts over size and all it needed was some careful filing to get a nice neat fit, they were then glued to the Hull and left for a couple of days. I have now filed the edges of both Gunwales and smoothed the top surfaces. I am going to paint the Gunwales and Channels which will cover up the joins and edges, and also paint the Rubbing Strake. After a lot of thought I have decided not to paint the Hull, I have given the Hull 3 coats of Antique Wood Oil which will bring out the wood grain and leave a sheen on the Hull. Cheers Andy


- 14 replies
-
- 6
-
-
- Bosphorus Cutter
- Turk Models
- (and 1 more)
-
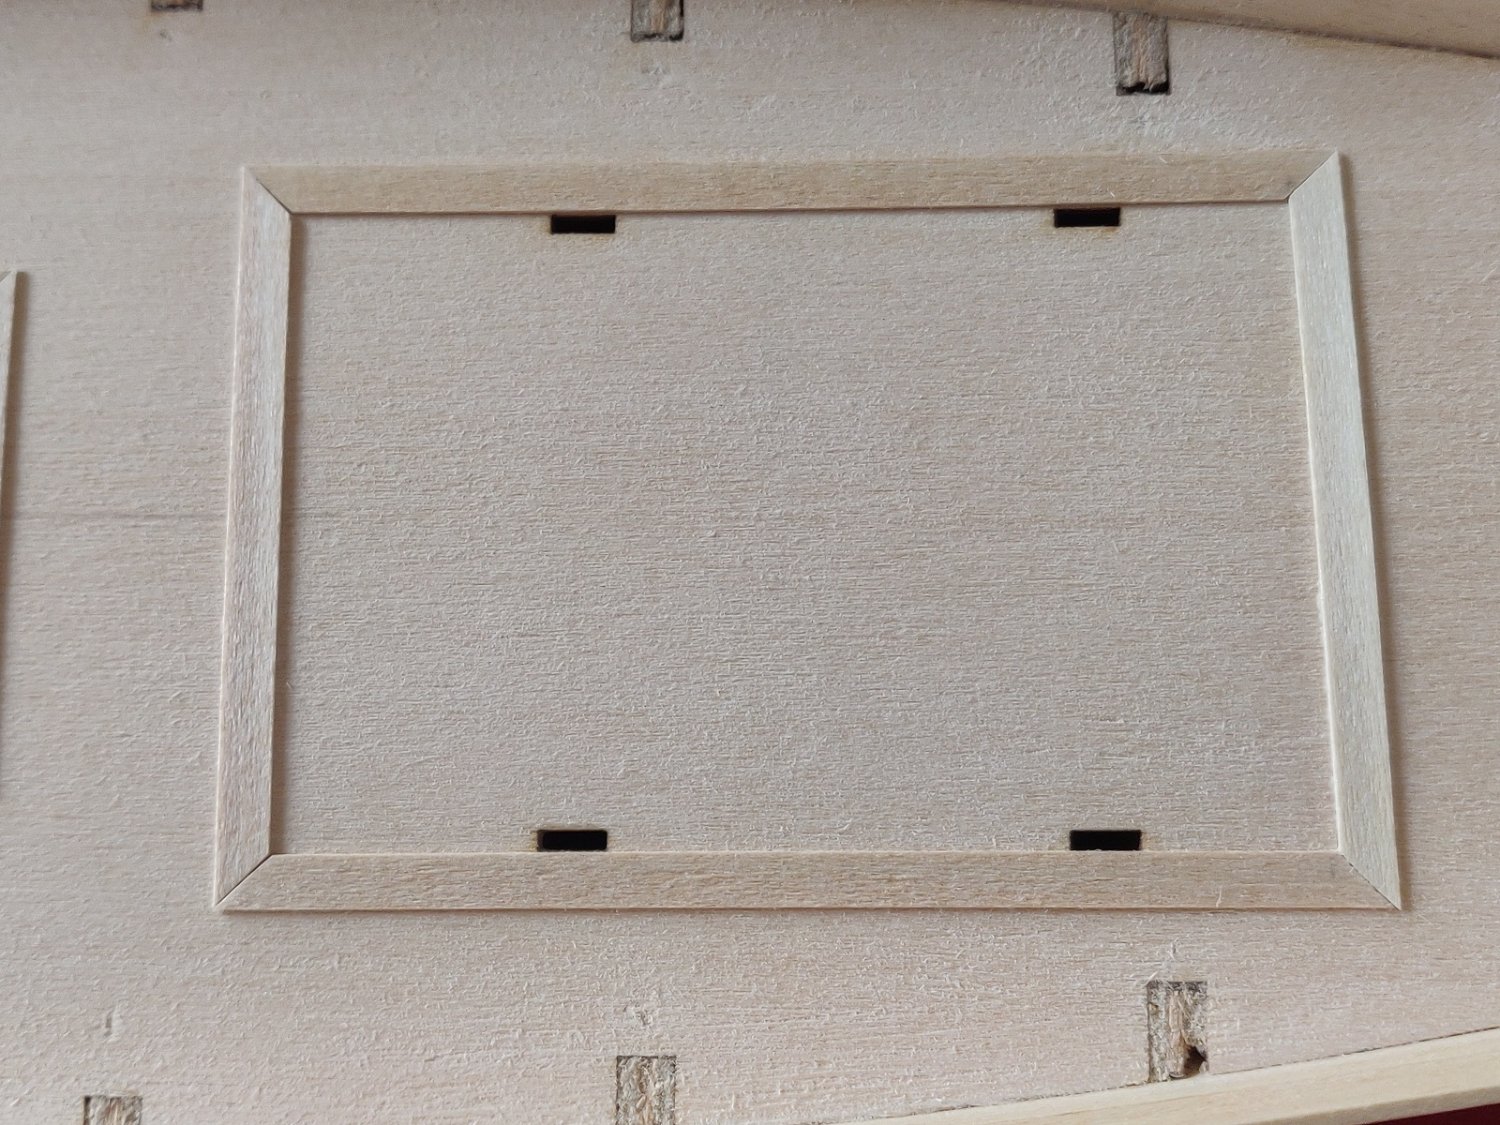
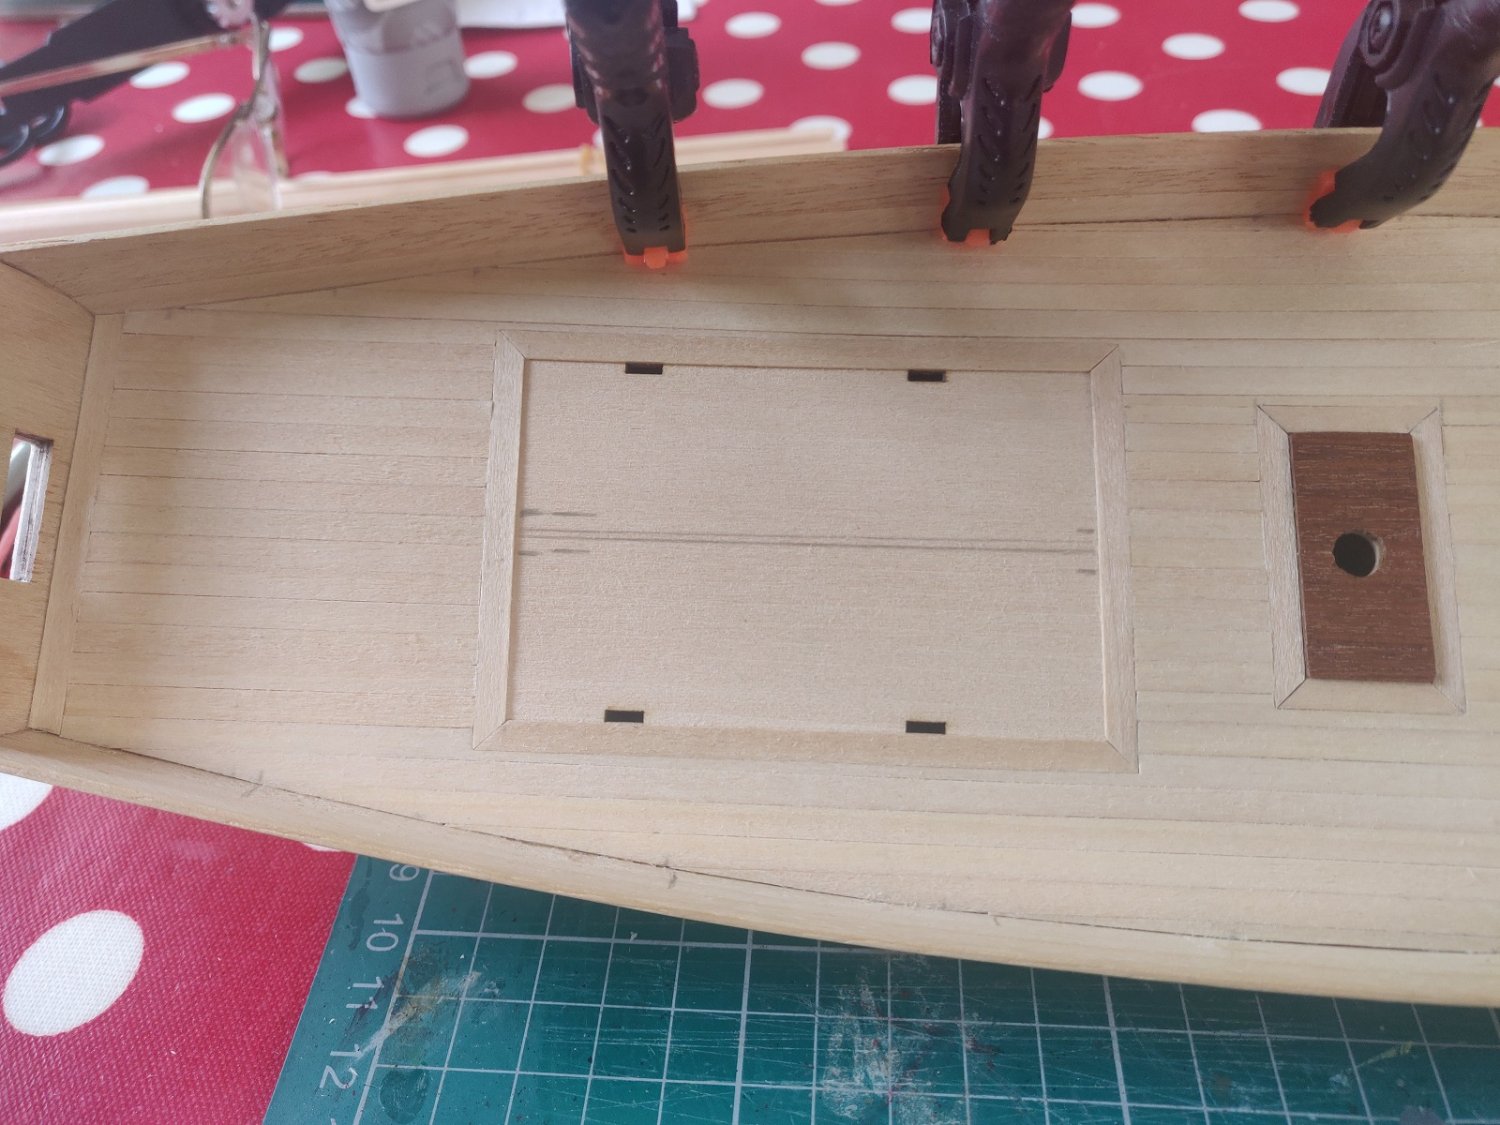
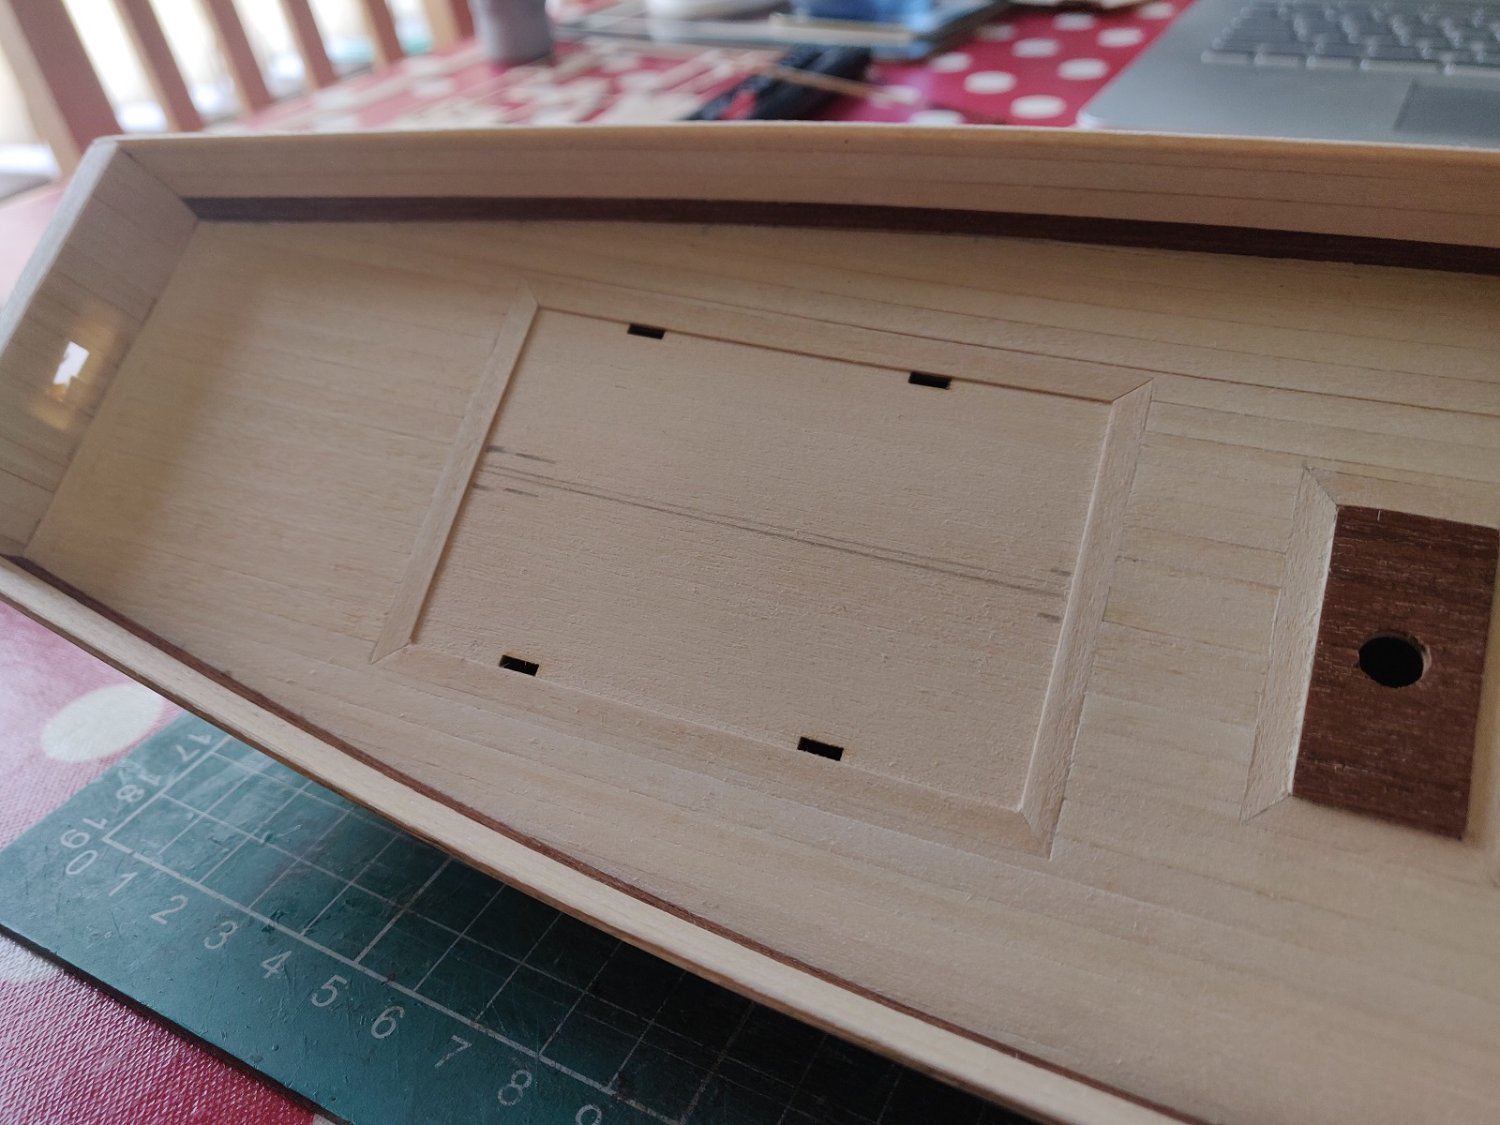
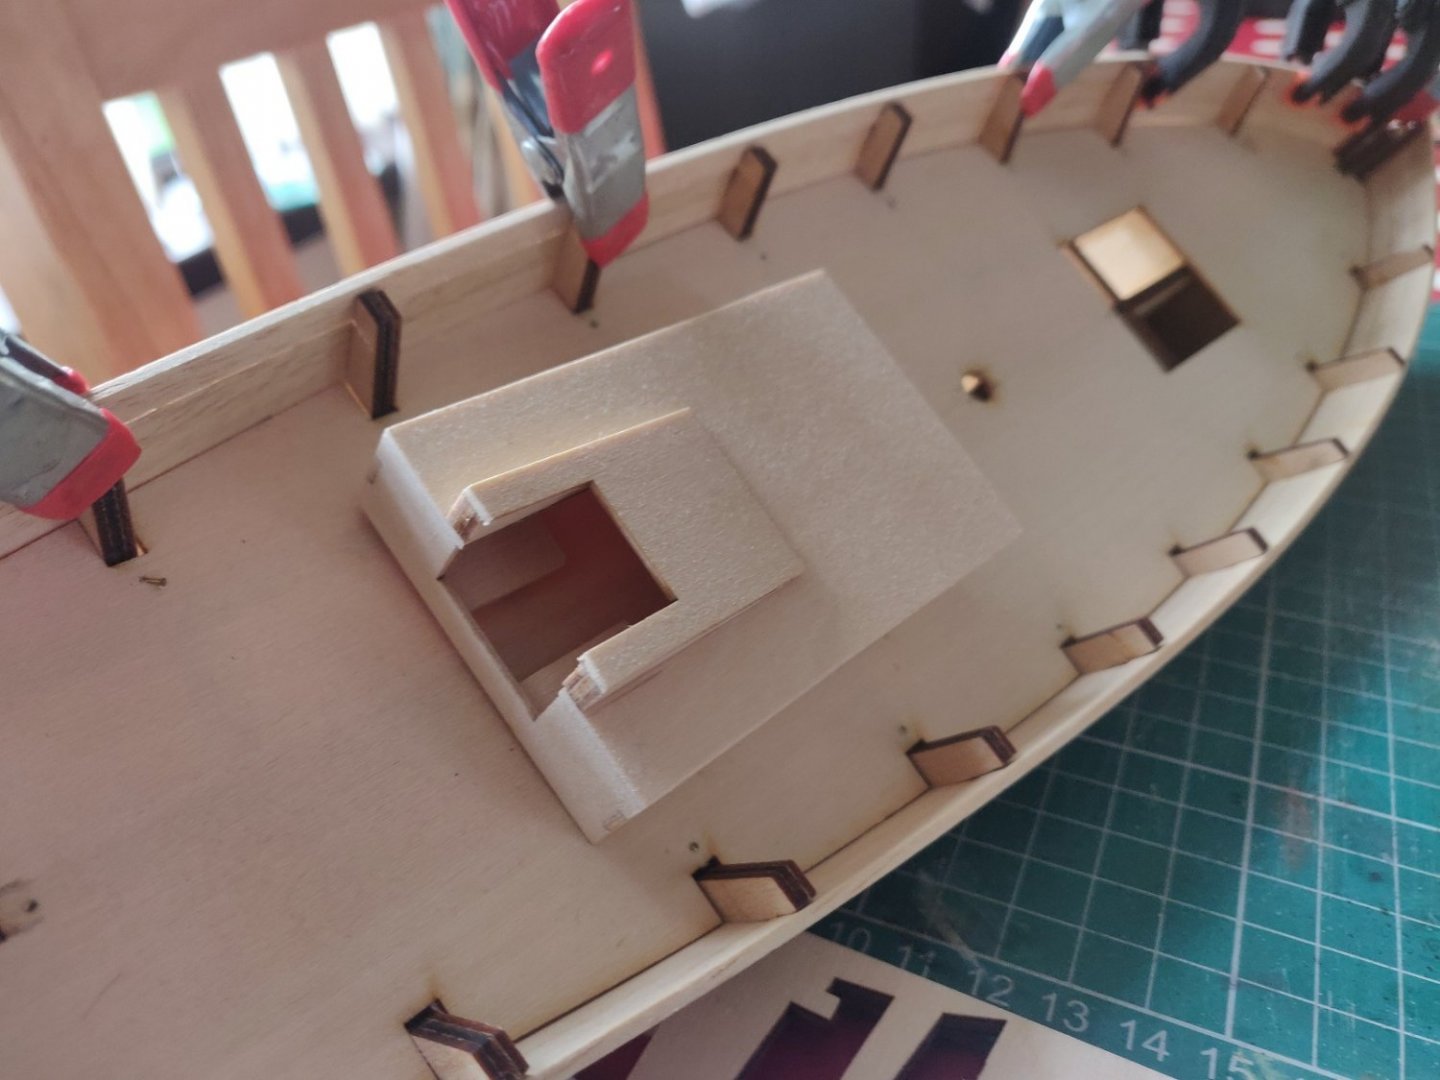
Thanks Jonathan. The next step is to plank the Deck, the tops of the Bulkheads were removed, I used a pair of Pliers to carefully break the Bulkhead tops and then a file to smooth each one. I spent some time thinking about how to plank the Deck, I still can't find any pictures of these Cutters so I am going to build it to my own personel taste so to speak. I couldn't get any thin strips to run round the outer edge of the Deck so decided to not bother with a Margin plank. I fitted the Mast base which I had planked with some Mahogony strip and then fitted the Hatch. Using some planking strip I laid a border around the Mast base and Hatch. I dry fitted the Cabin so that I could put a border around it which meant I had to be careful gluing the planks to make sure I didn't glue the Cabin to the Deck. I ran a pencil along one edge of each Deck plank starting in the middle of the Deck and working out to each side. I sanded the Deck with a medium grit sanding sponge and then a fine grit sanding sponge. The inner Bulwarks are also planked with the Deck planks. I had 2 Mahogany strips left so I decided to fit one each side at the lower edge of the Bulwarks. Cheers Andy


- 14 replies
-
- 7
-
-
- Bosphorus Cutter
- Turk Models
- (and 1 more)
-
I looked at my Northlight the other week and though I'll leave it a while longer it might build itself. Not a good idea to ask me to hold your beer you'll get an empty glass back 🙂
-
Looks really good Dan, you are building some great looking Fishing Boats.
-
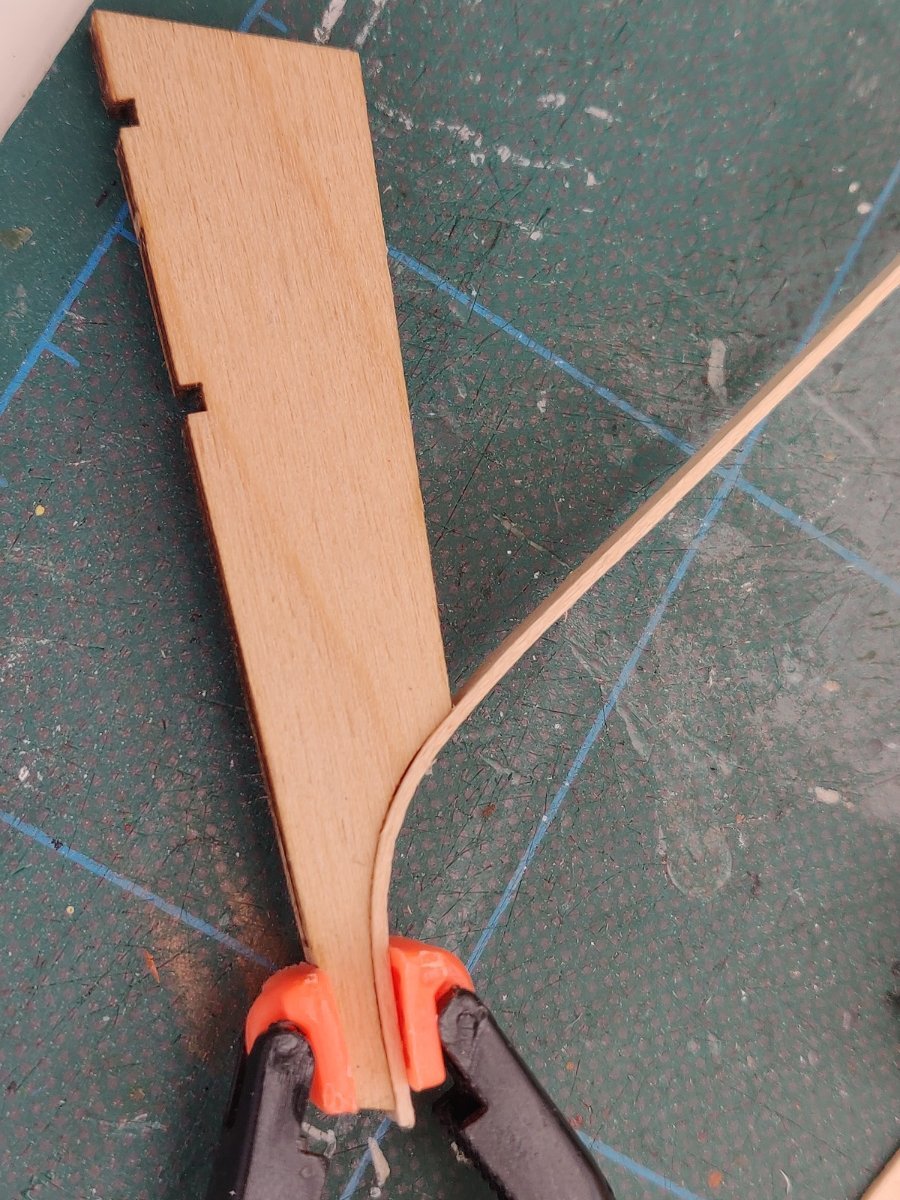
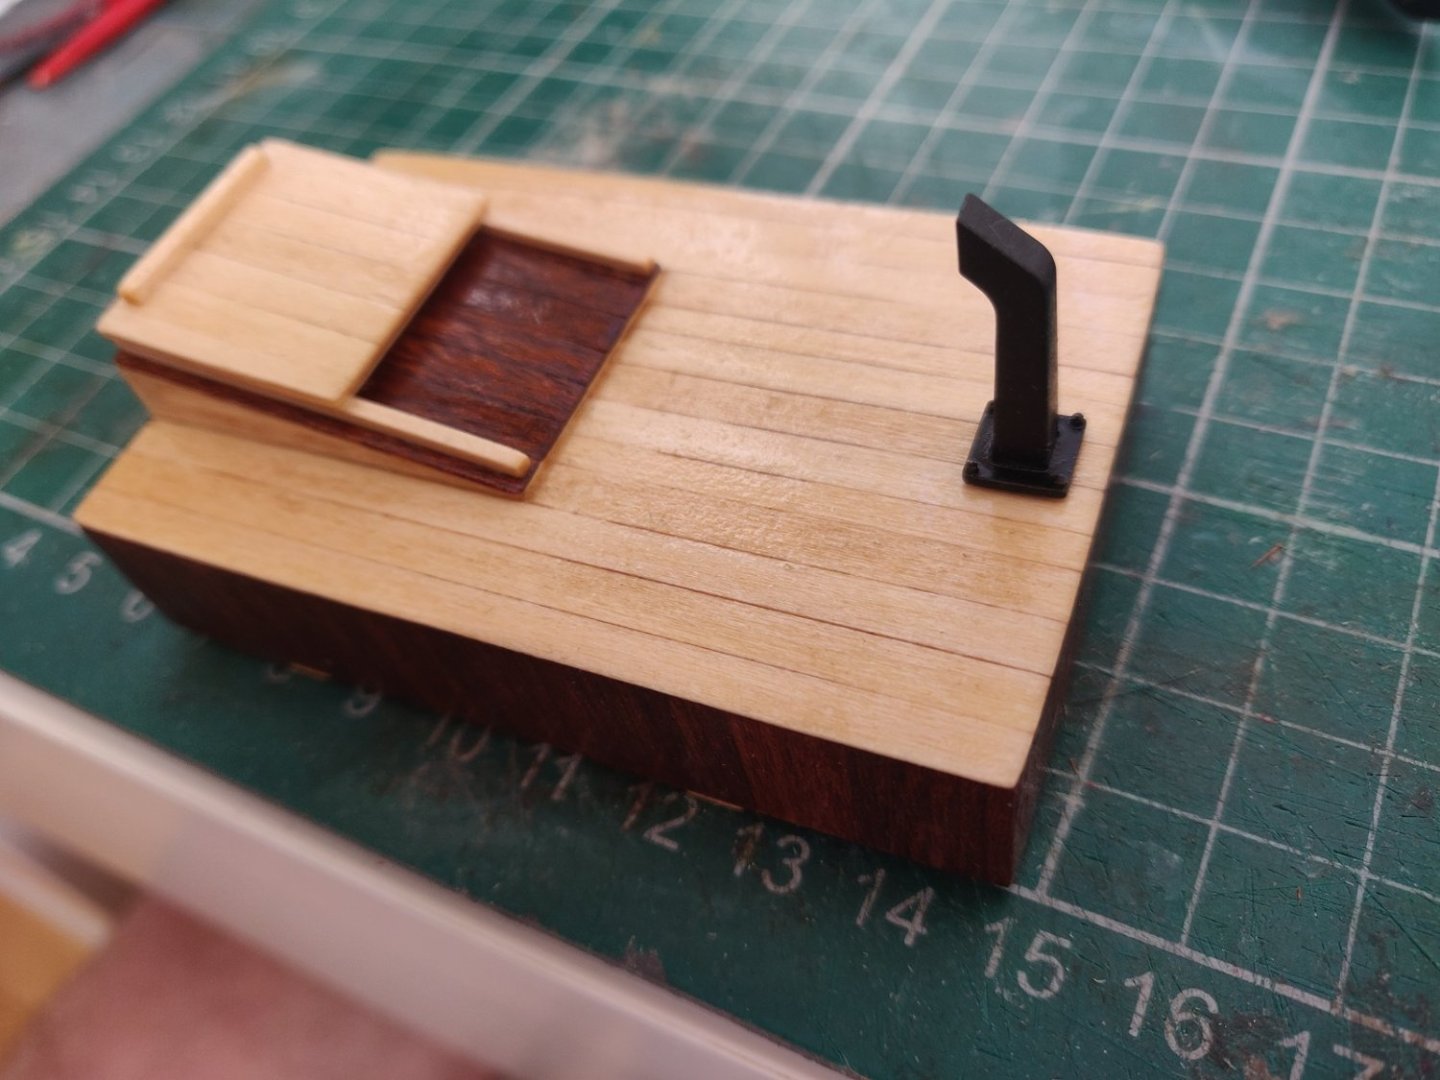
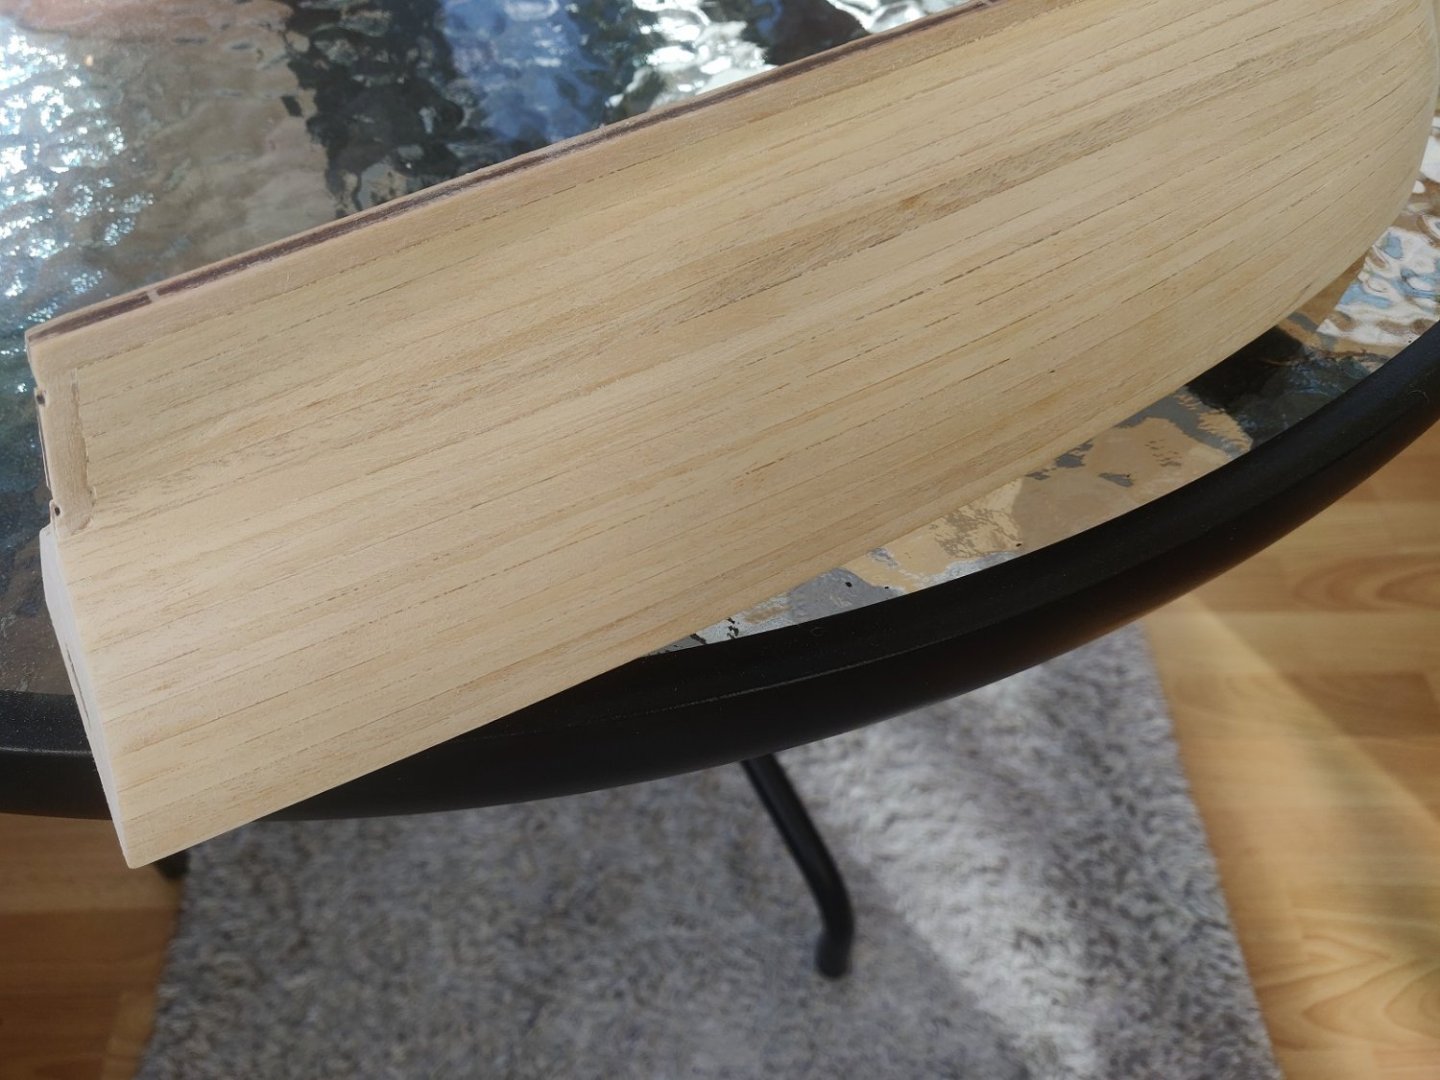
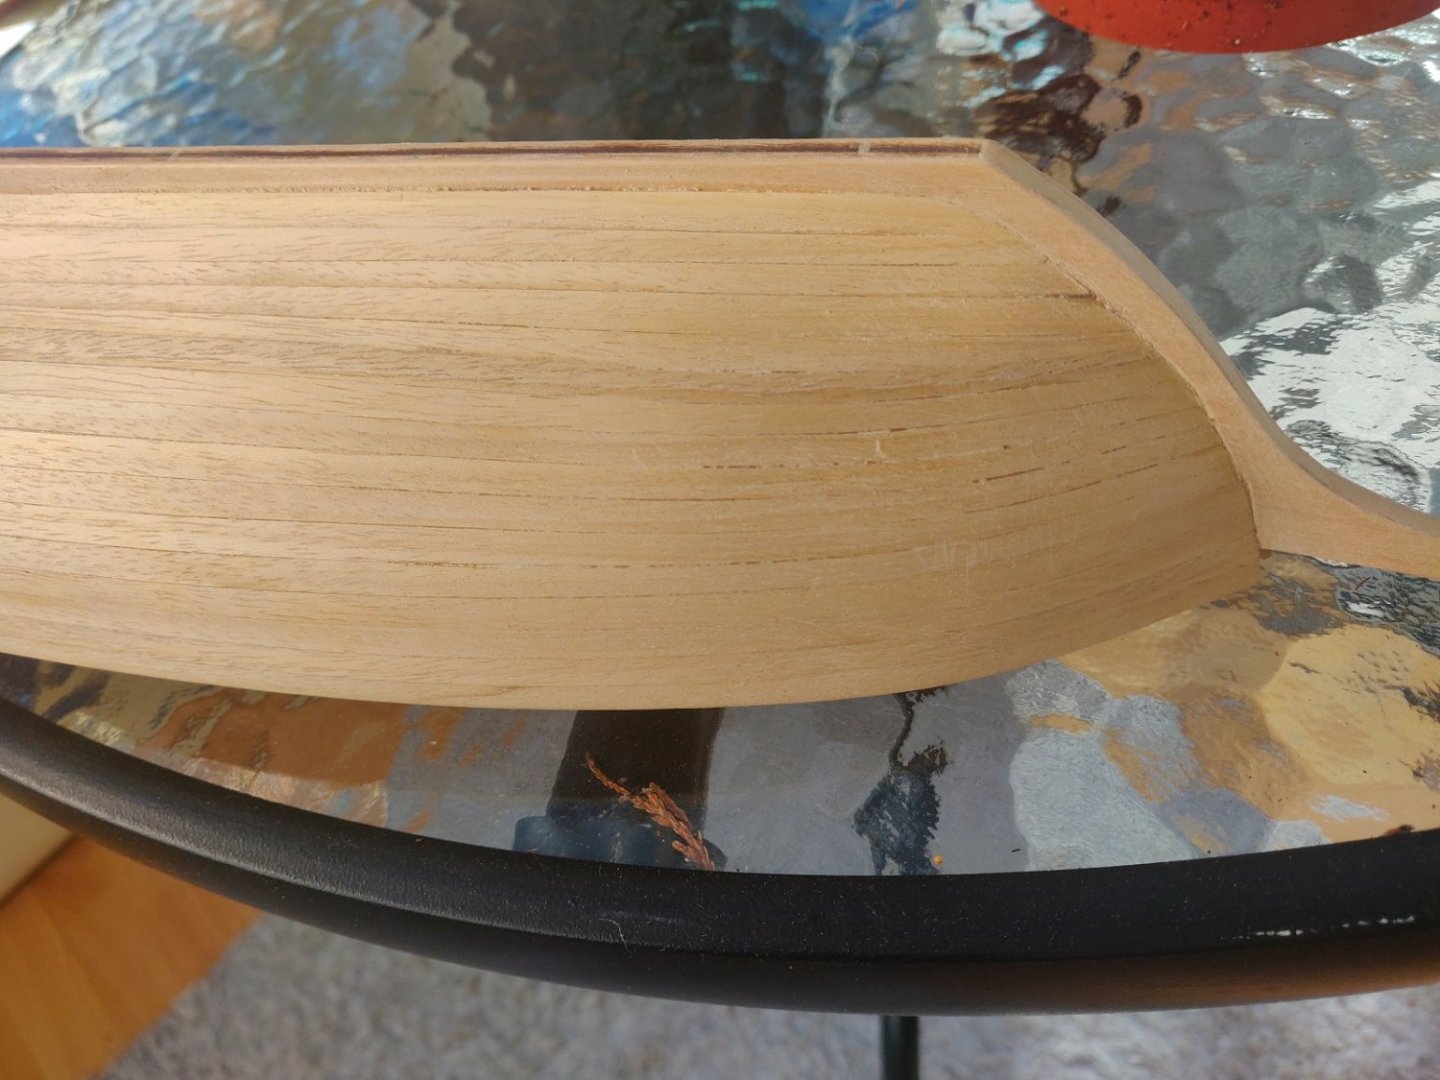
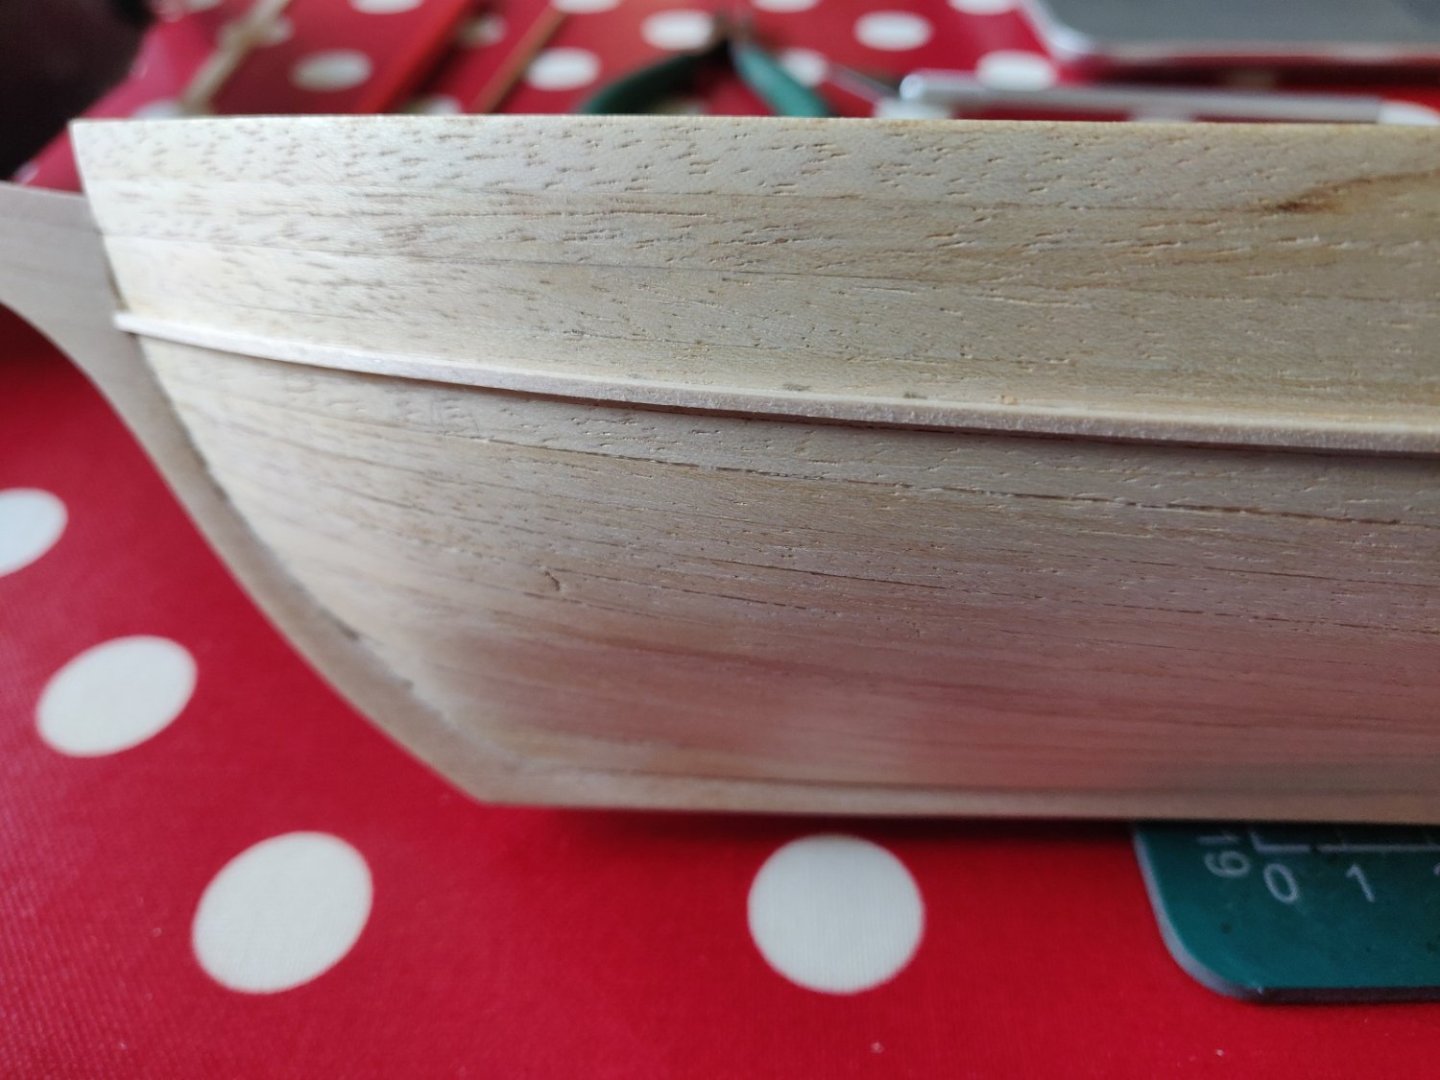
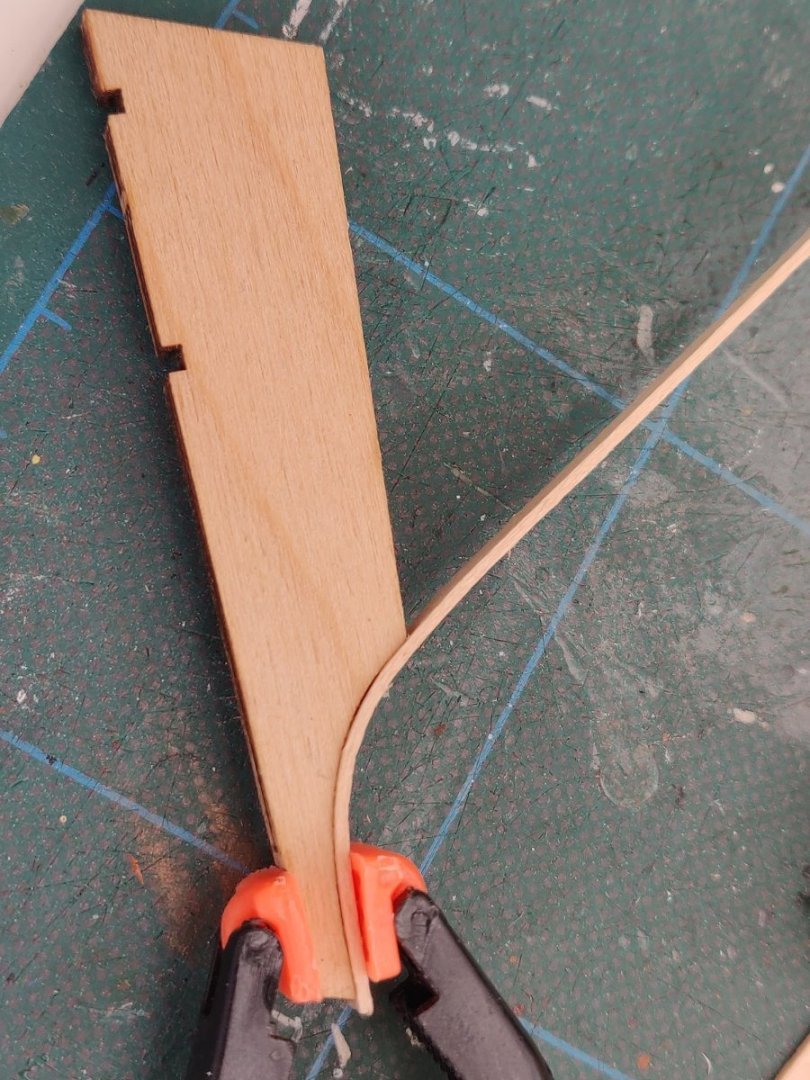
It's been a few weeks since I last posted anything but I have been busy working on the Cutter. I had a couple of weeks away on holiday, the first at my Mother's in the south of England which required a 2 hour Ferry crossing and a 10 hour drive to get to, we take Archie our Hound with us so we have to drive. I spent a few hours each day sitting in the sun in her garden working on the Cutter. When then had a week at Oulton Broad in Suffolk where I was able to do some more work to the Cutter as well as spending time watching boats sailing on the Broad and some Powerboat racing one evening. I realised that I had forgotton to fit the Chimney to the Cabin roof, this is 3D printed and needed a little bit of work with a needle file to smooth the Chimney's surfaces, the printing leaves minute ridges as each layer is done. I primed and then spray painted the Chimney, and once that was dry I put a small length of wood into the bottom of the Chimney, put a metal pin into the wood and glued it to the Cabin roof. I had measured each of the Bulkheads and worked out the amount of taper that each plank would need, I soaked 6 planks in water for a few hours and then cut the required taper on each plank, which were then clamped to the Hull to dry. I then shaped the end and top side of a plank to get it to fit in place before glueing the plank into place starting at the Stem and gradually working my way Aft using Gorilla wood glue. I continued this way working my way down the Hull alternating between left and right sides until I was about 2 thirds of the way down the Hull and then started at the bottom and worked upwards. It took about 4 days to do all the planking, the last plank needed a bit of fine work with a scalpel and files to get it to fit. I then coated the whole Hull with diluted Gorilla wood glue in case there were any unglued plank edges. The Hull was then left for a couple of days before I started smoothing doen the Hull. Once that had been done I fitted the Rubbing Strips to the Hull, these are 1.5mm square strip and are quite easy to fit. I haven;t decided about whether to paint the Hull and if so what colours to use so I'll continue with the Deck. Cheers Andy
- 14 replies
-
- 8
-
-
- Bosphorus Cutter
- Turk Models
- (and 1 more)
-
That's a great looking Puffer Andrew. I see you have the larger Northlight Puffer waiting to be built, I also have one patiently waiting it's turn but I can't start it until you begin yours, so I can see how to build it, same as with Nisha😉
-
It's looking good Jonathan, I used Microset and Microsol on the decals to help position them. Can't remember which one does what at the moment due to the fact that I am on holiday and my brain is in full relax mode. Decals are best applied onto a gloss finish which helps stop the "silvering" where the carrier film is visible. Good luck with the sails.
- 38 replies
-
- 2
-
-
- Nisha
- Vanguard Models
- (and 1 more)
-
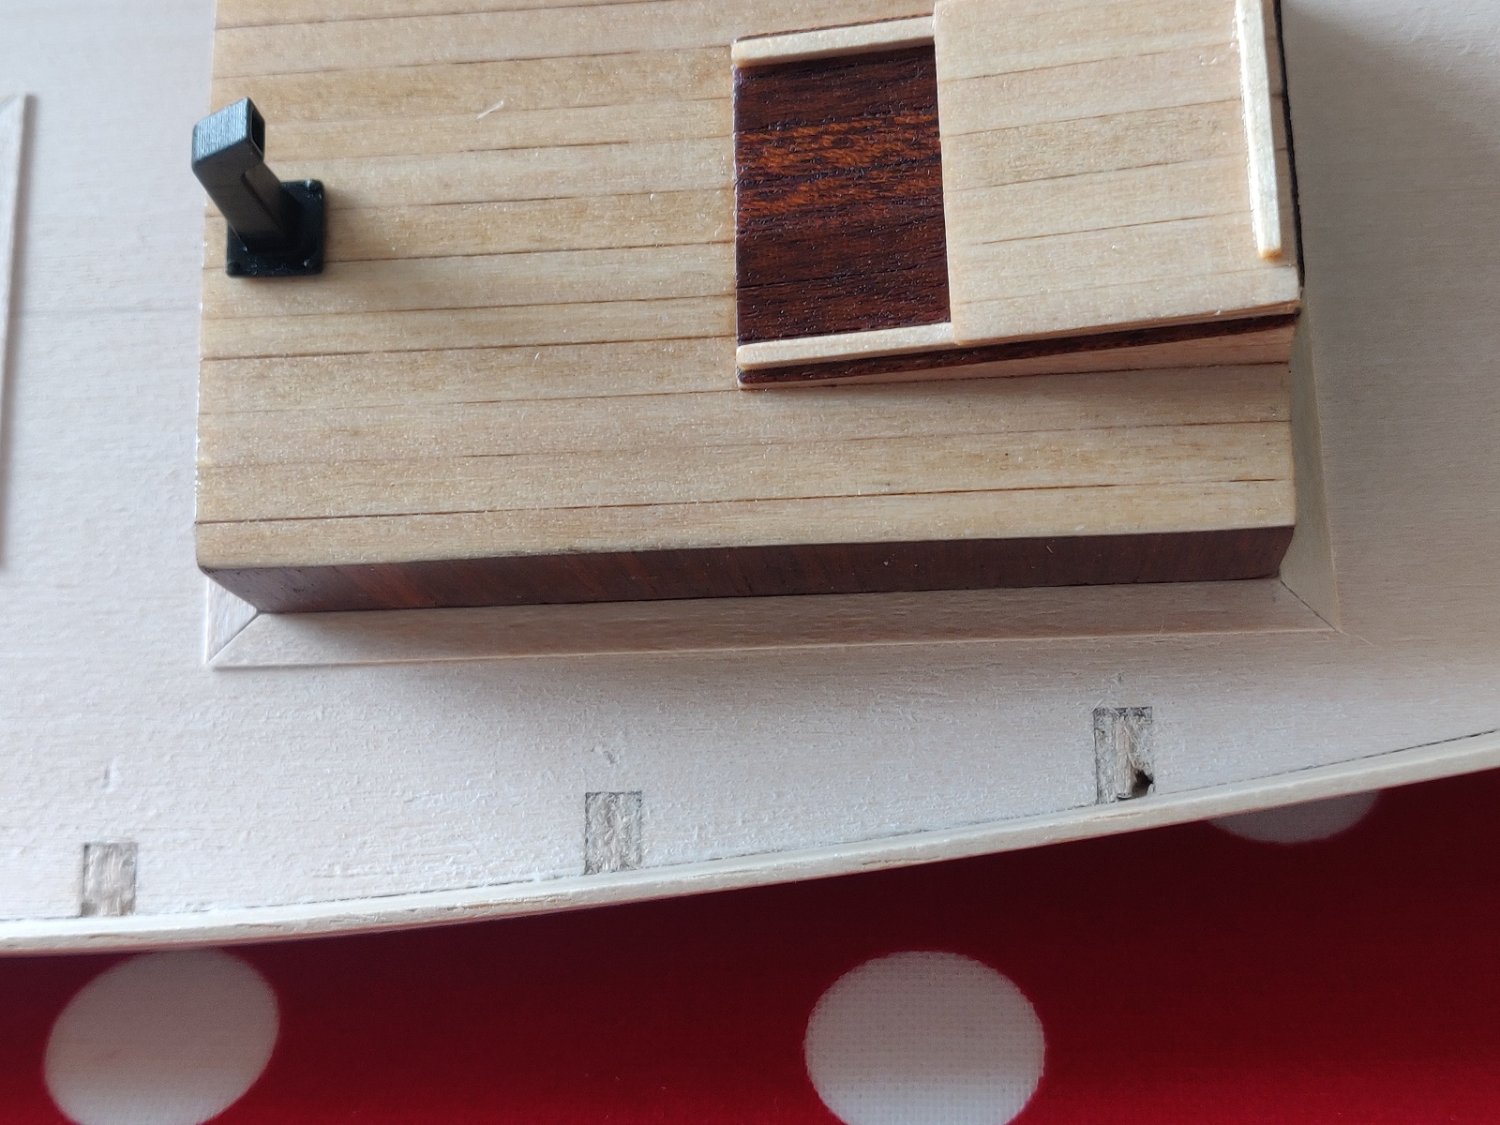
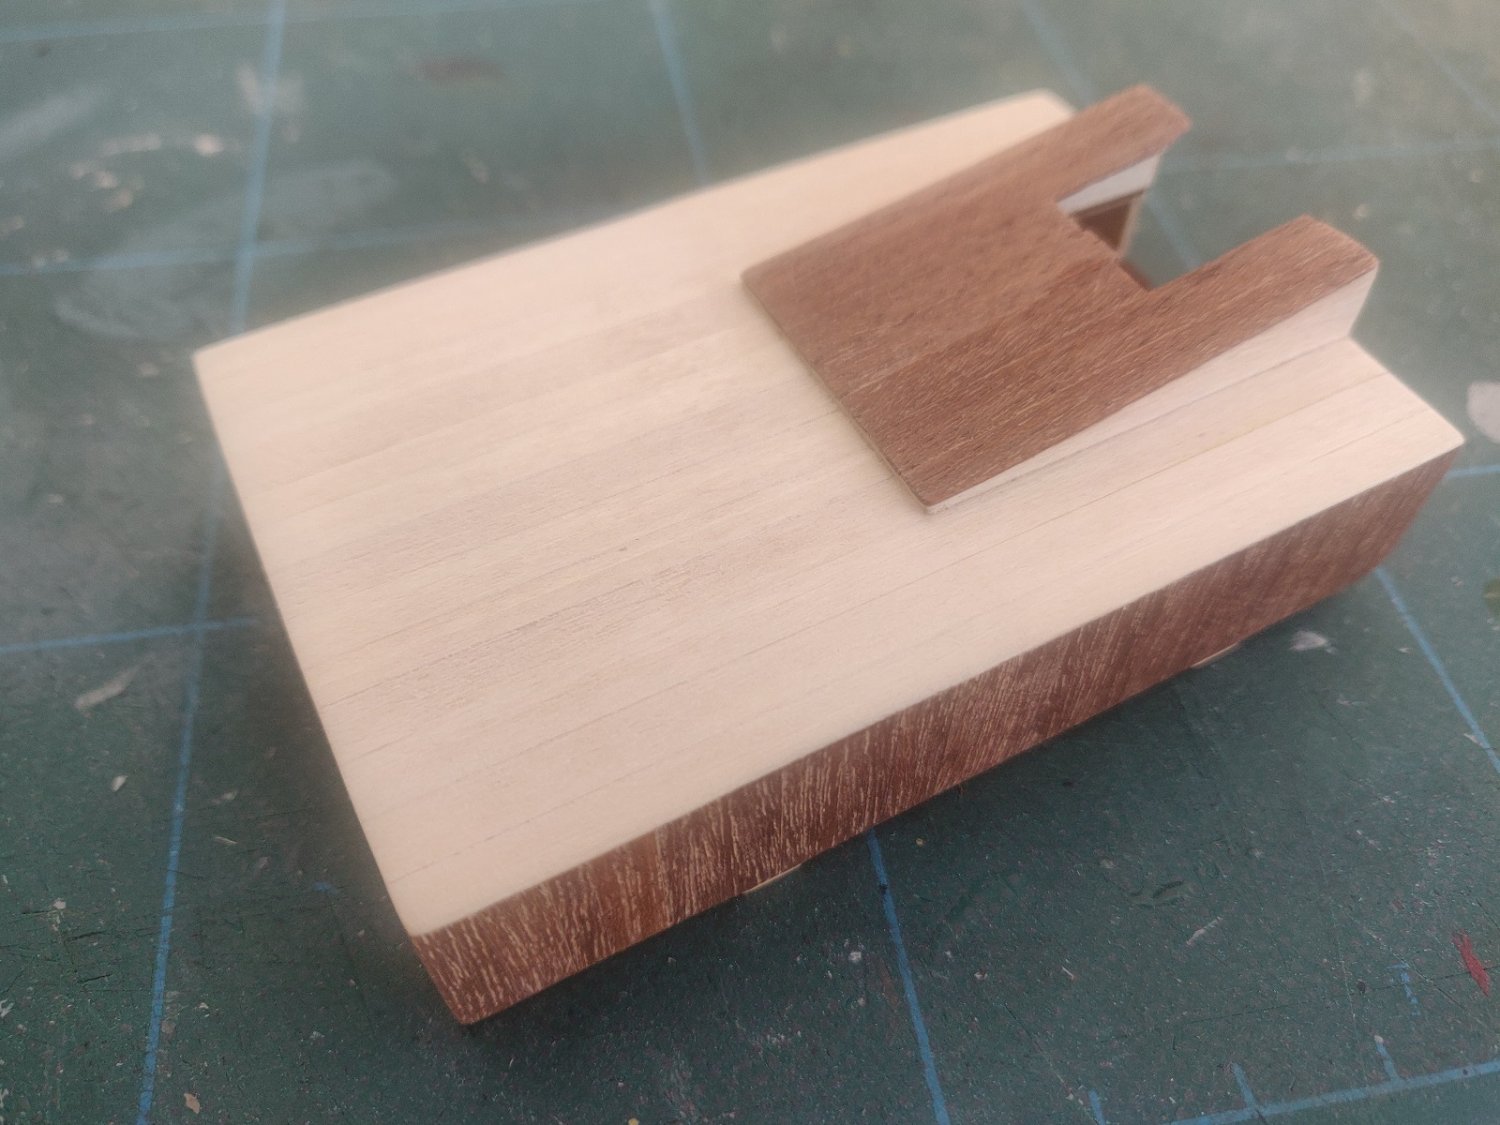
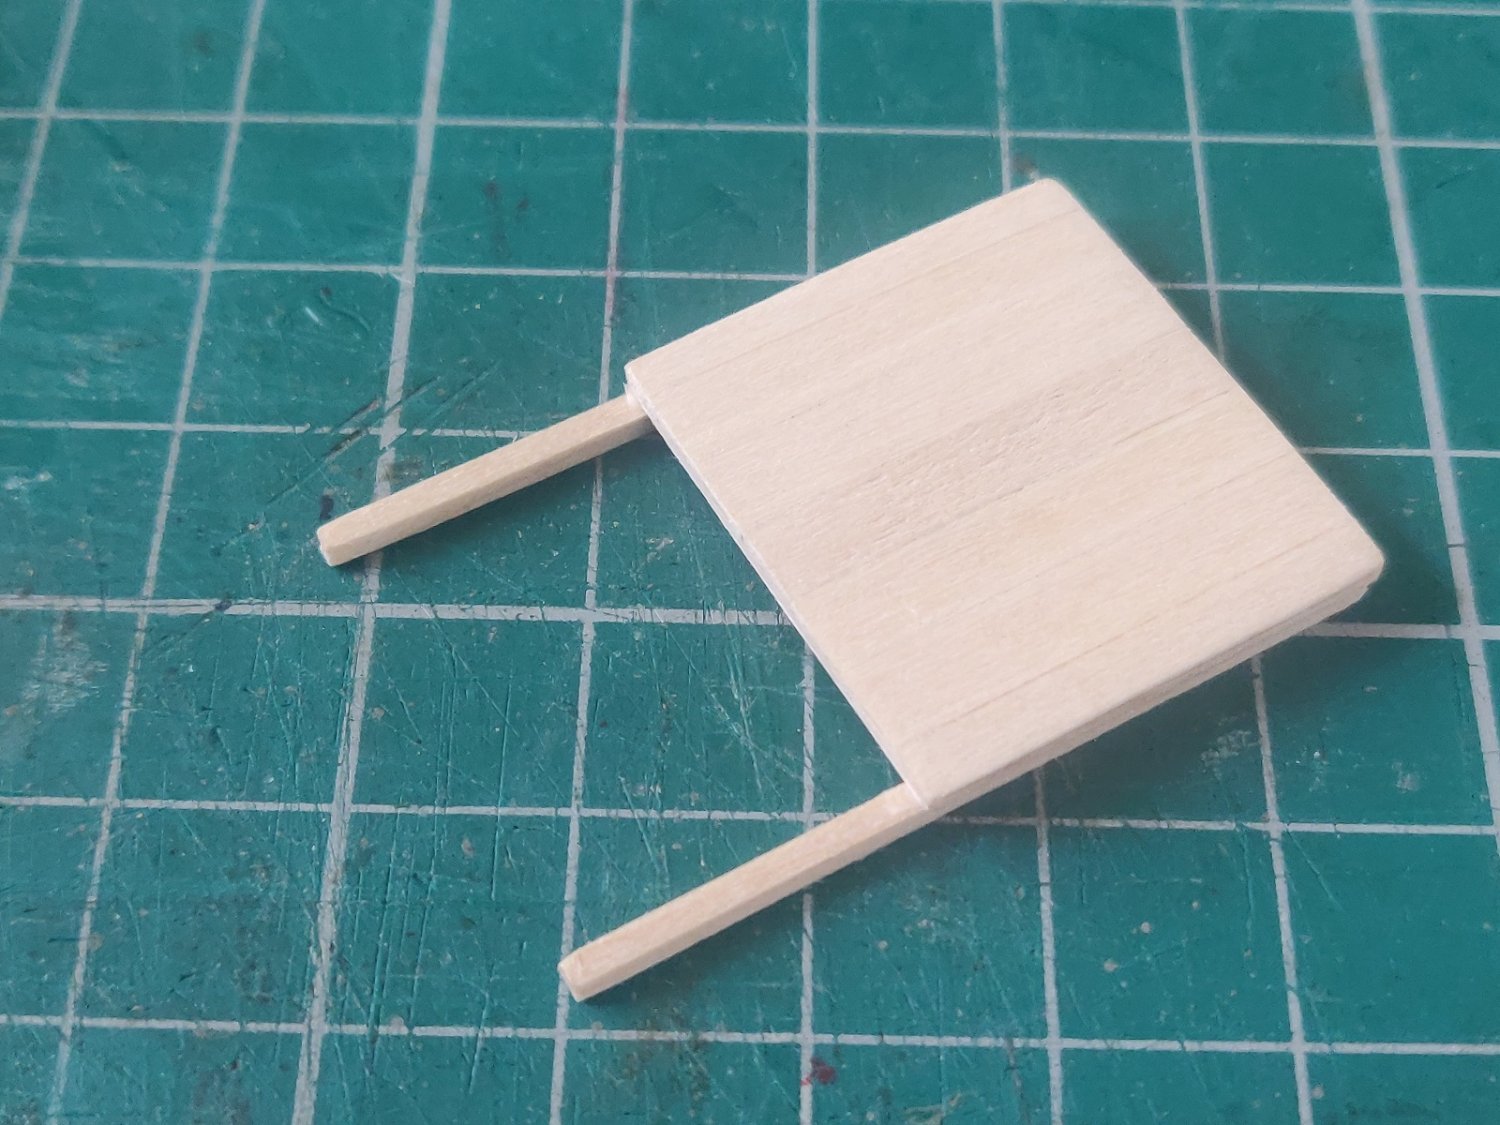
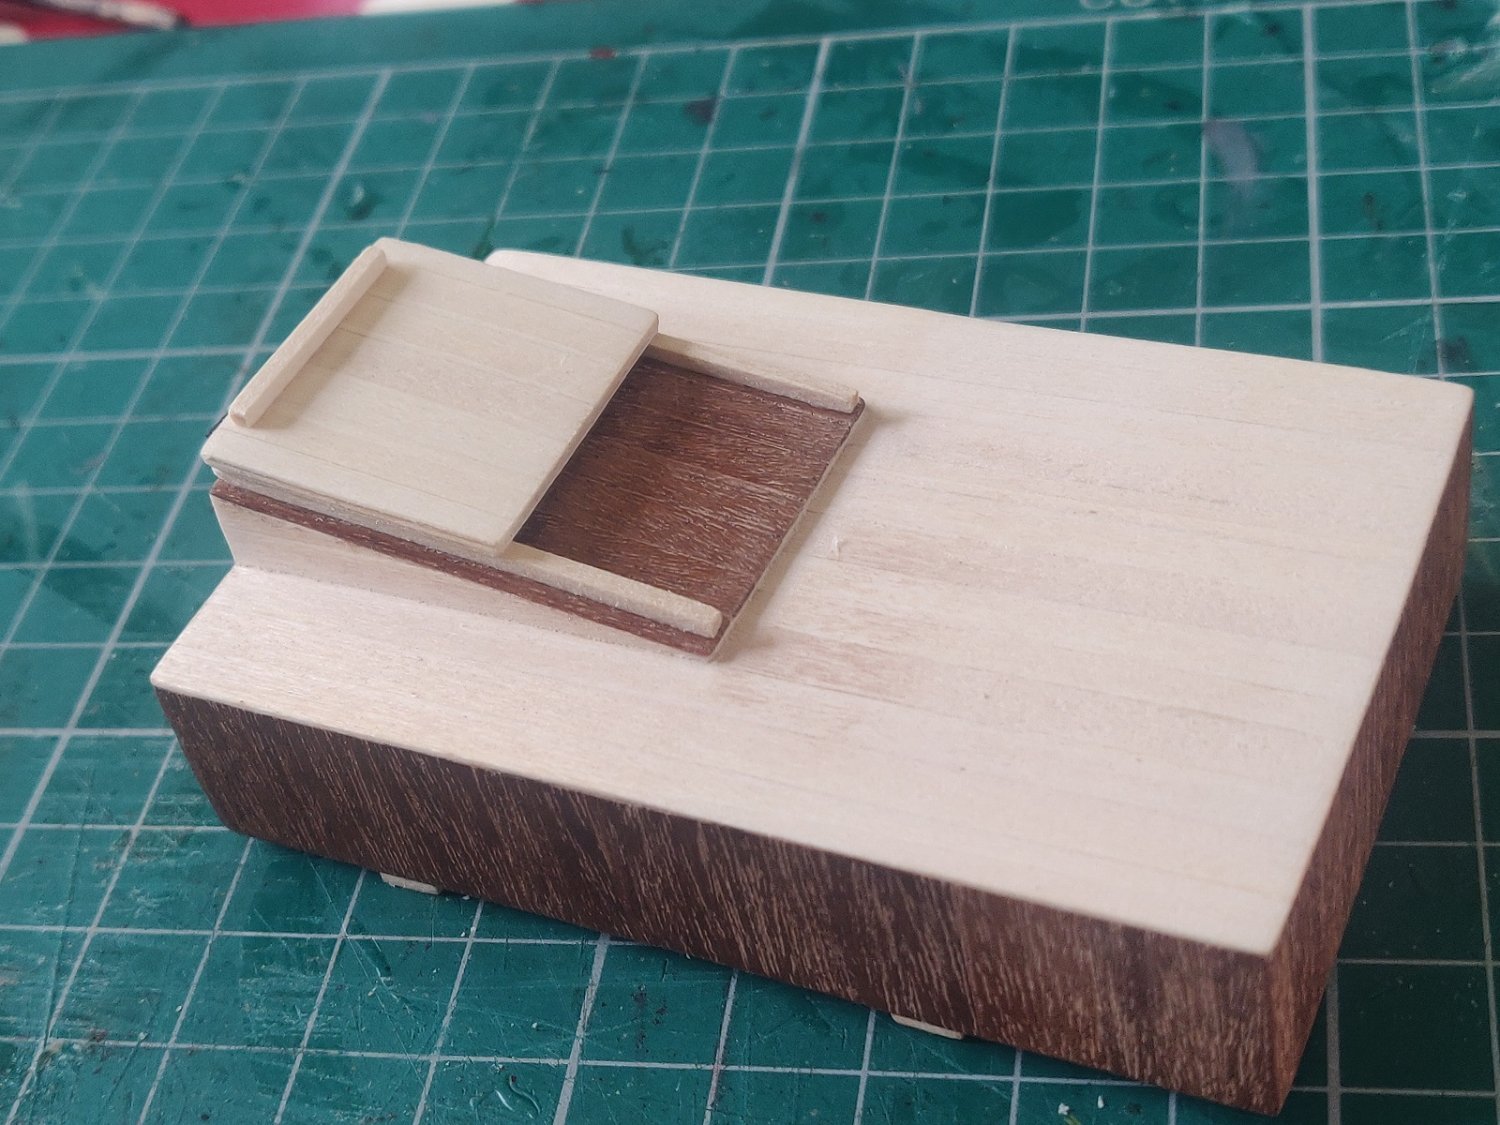
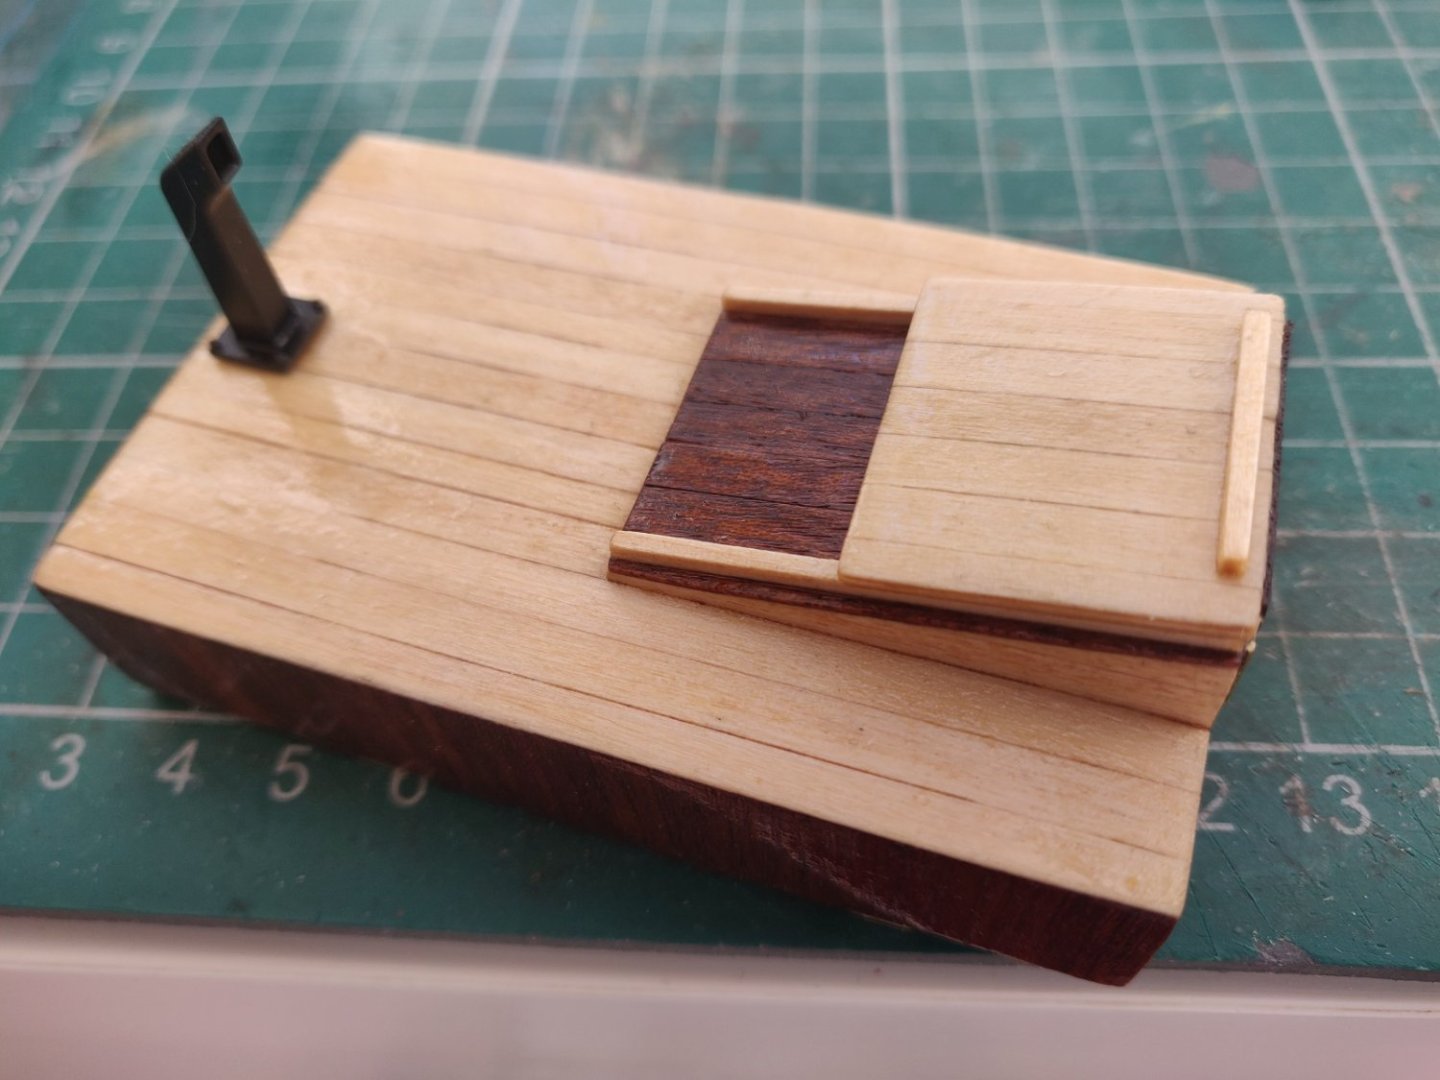
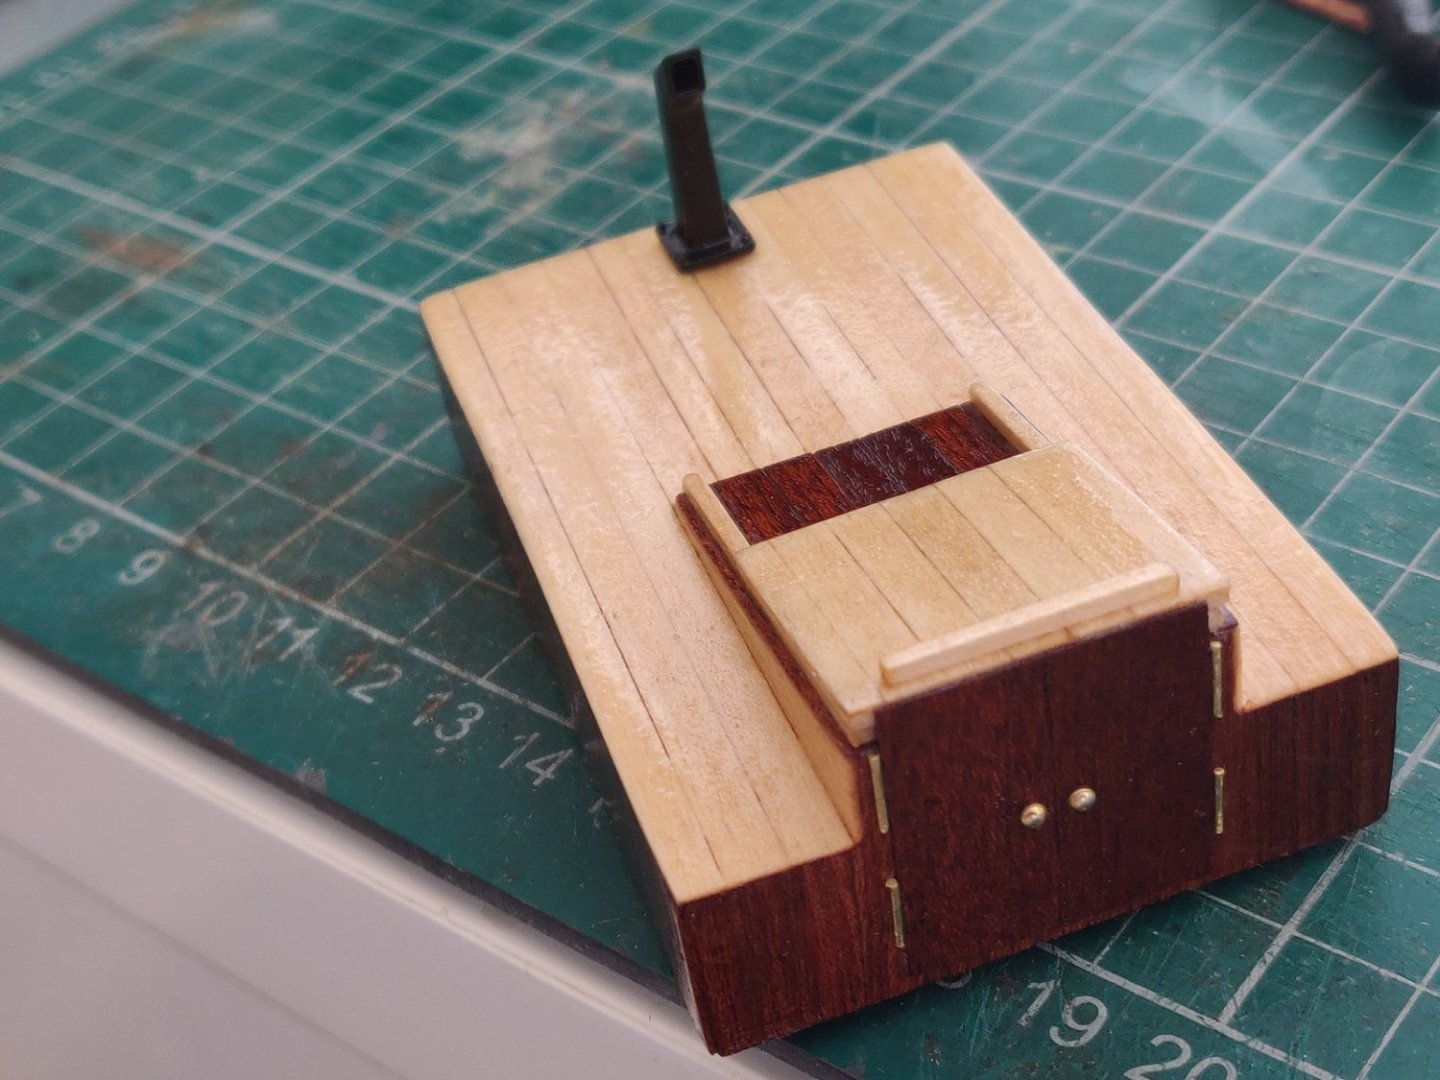
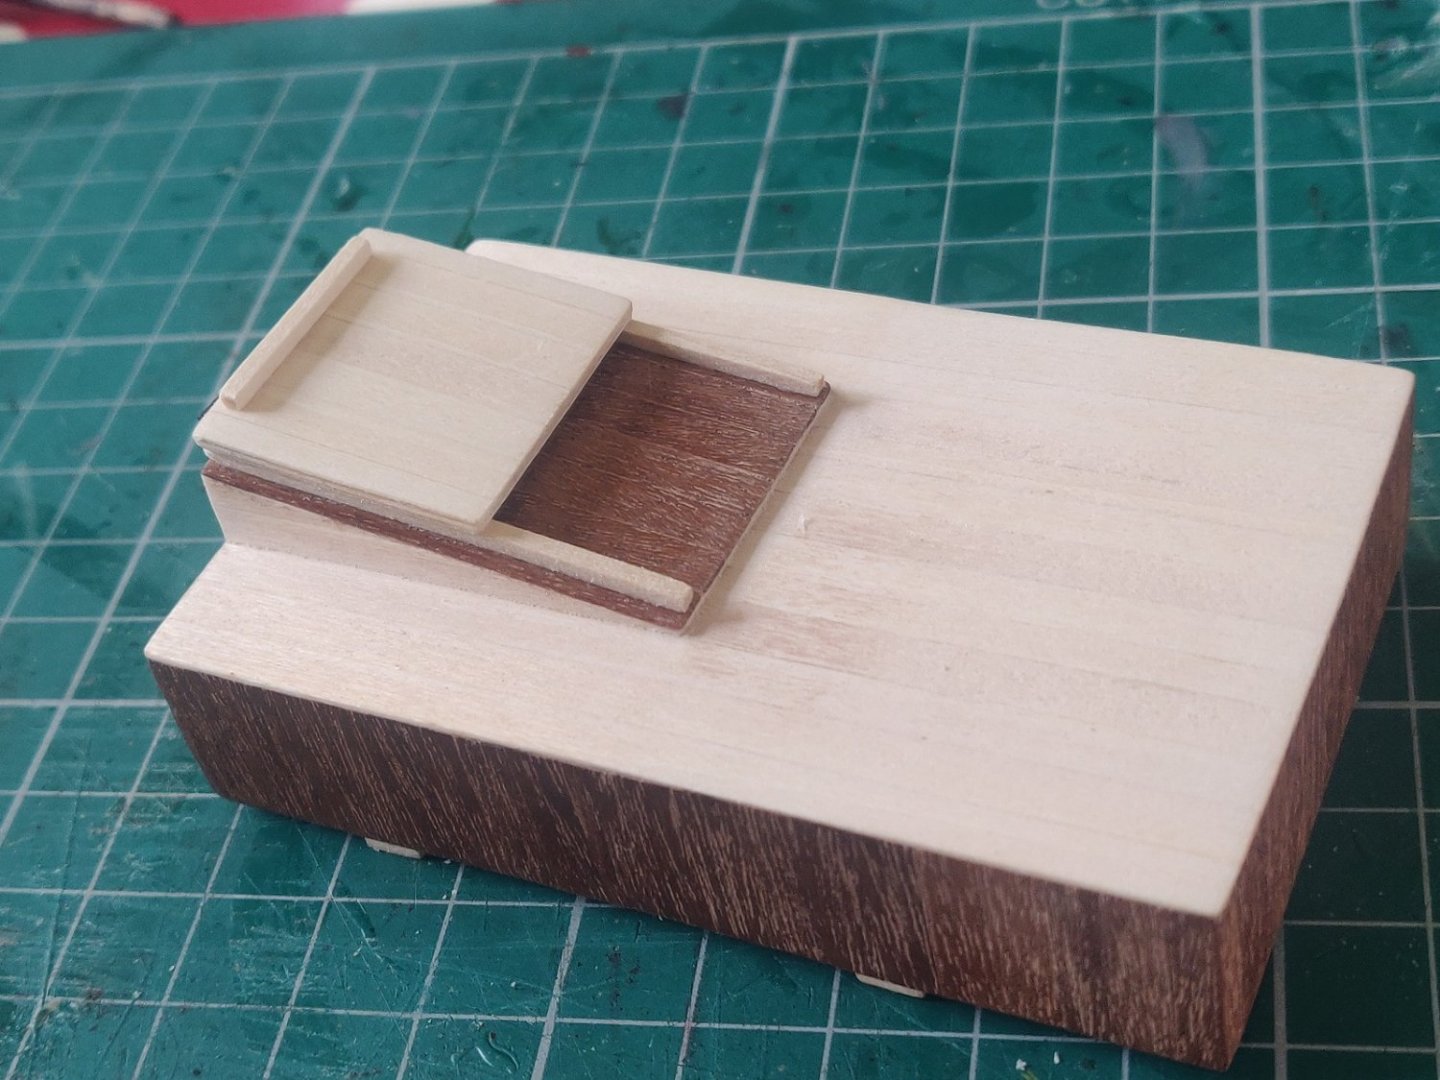
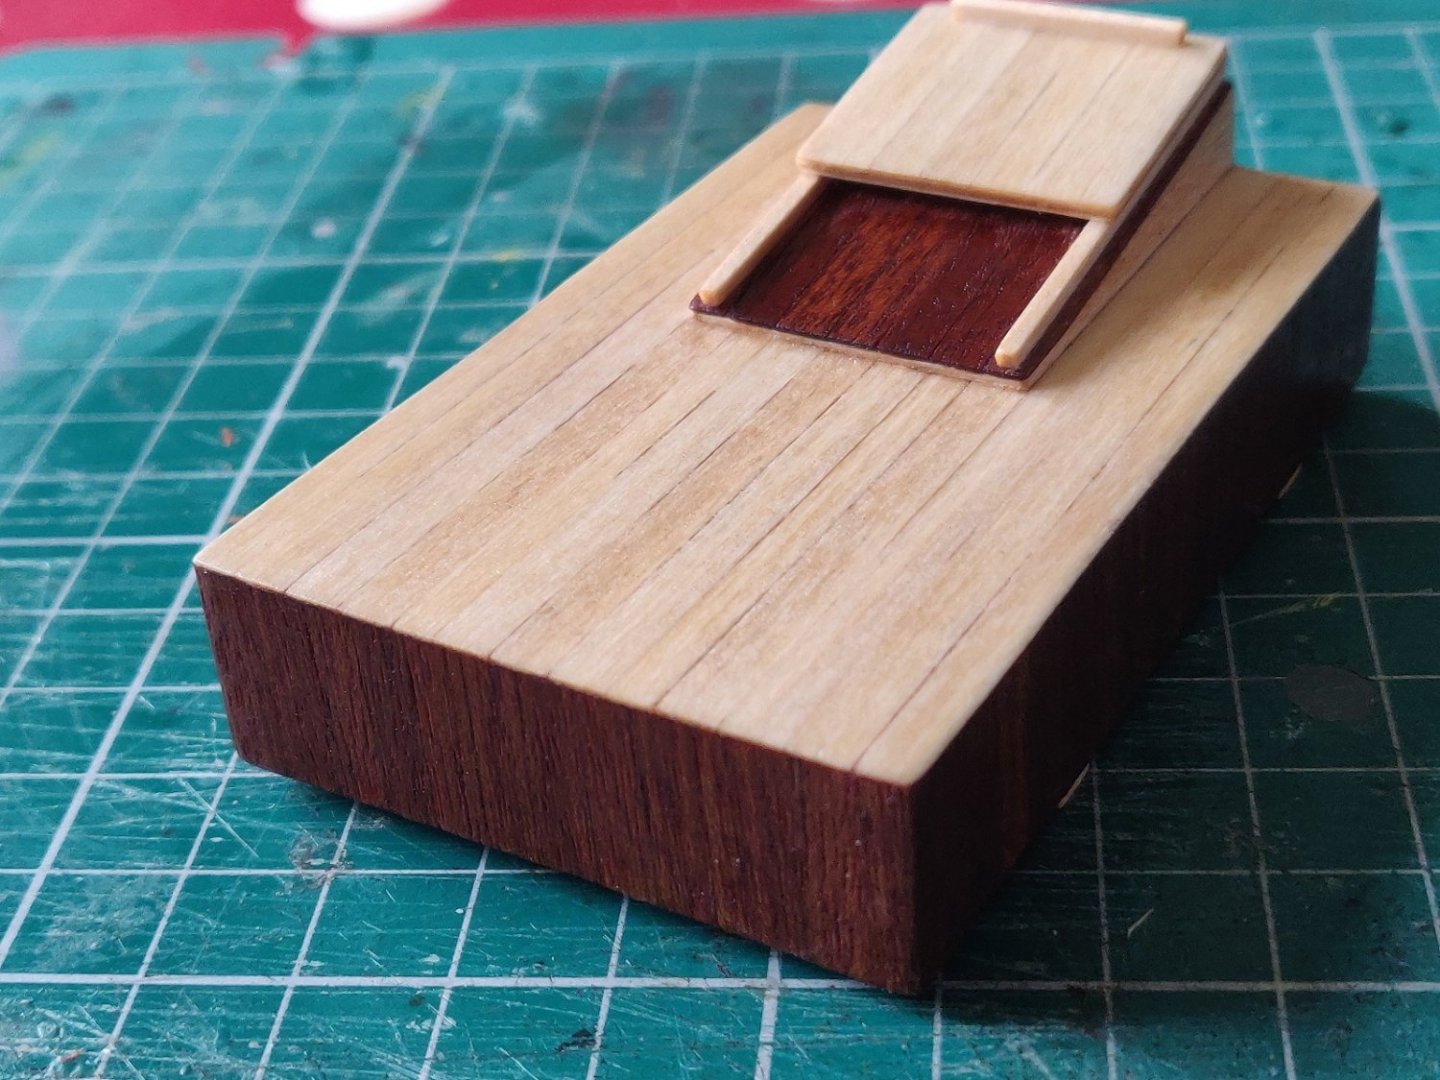
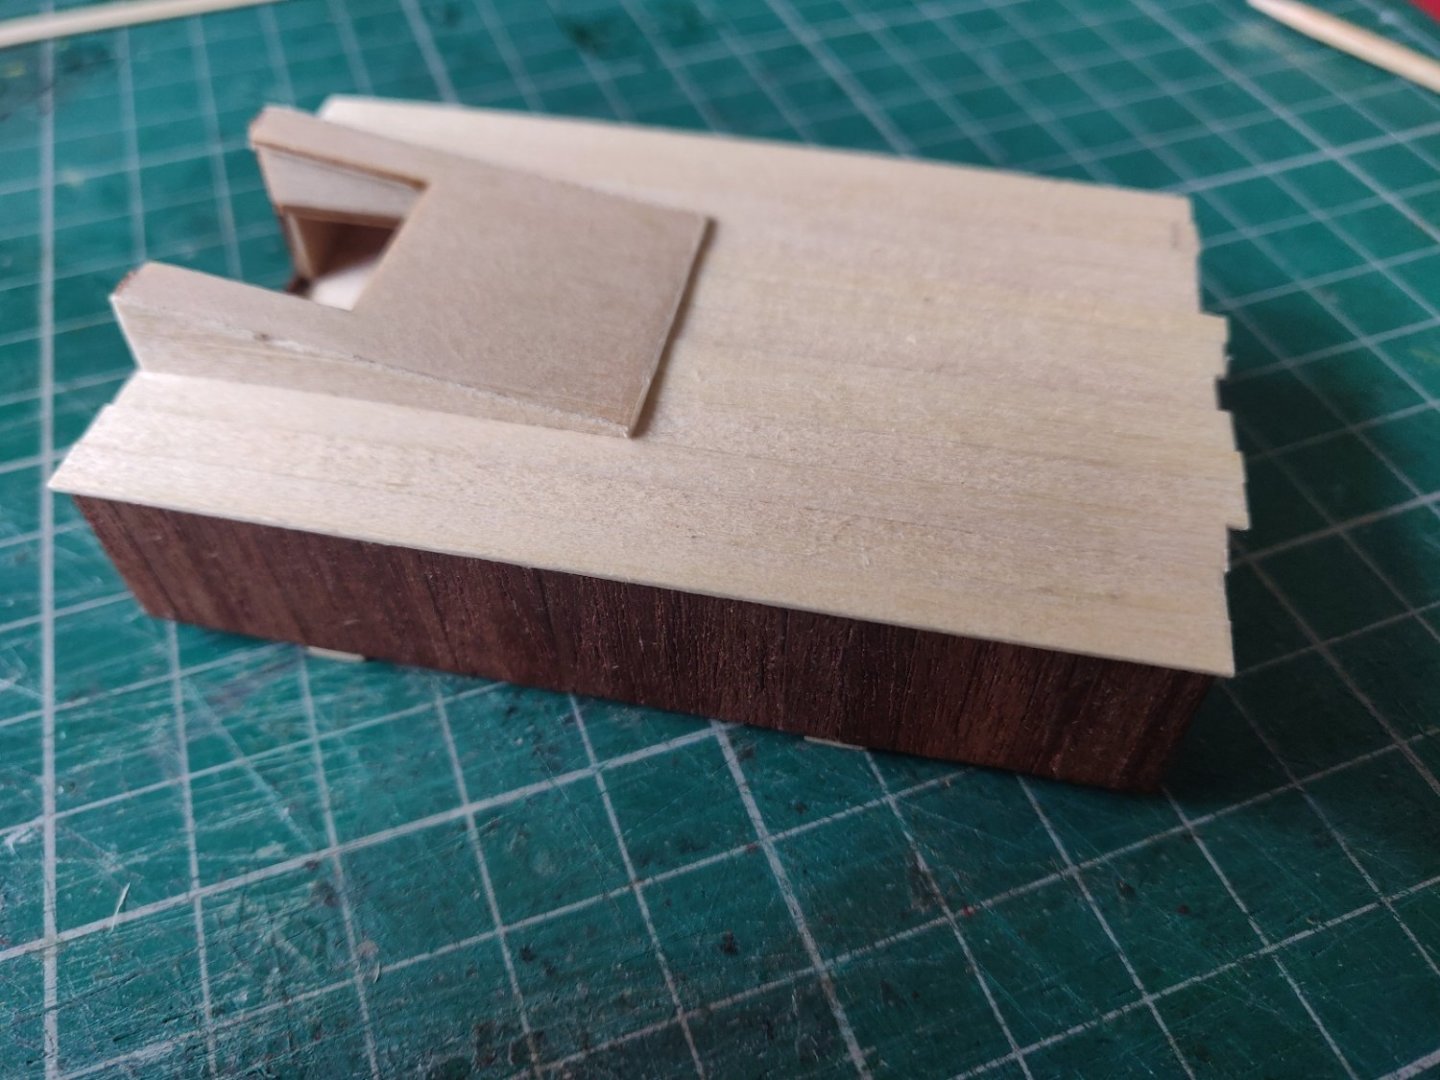
The next step in my Hull planking avoidence scheme is to carry on with the Campanionway, I used some Mahogany strip to cover the Companionway. This was then trimmed and then sanded down to get a nice smooth finish. The sliding cover is a piece of laser cut plywood, this looked a bit plain so I covered it with some Basswood strip. the 2 slide rails were made from 1mm square strip glued to the underneath of the cover. The cover handle was made from some more 1mm square strip. The doors are a one piece Mahogony vaneer that has had the detail laser etched onto it, the door knobs don't stand out so I fitted a couple of dome headed pins. The doors still looked like something was missing, the Hinges, I found some Photo Etched Hinges but I couldn't get them to look right so in the end I cut up some Brass pins and glued them to the door edges. I have now given the Cabin/Companionway several coats of antique wood oil which will protect the wood and has left a nice sheen.


- 14 replies
-
- 6
-
-
- Bosphorus Cutter
- Turk Models
- (and 1 more)
-
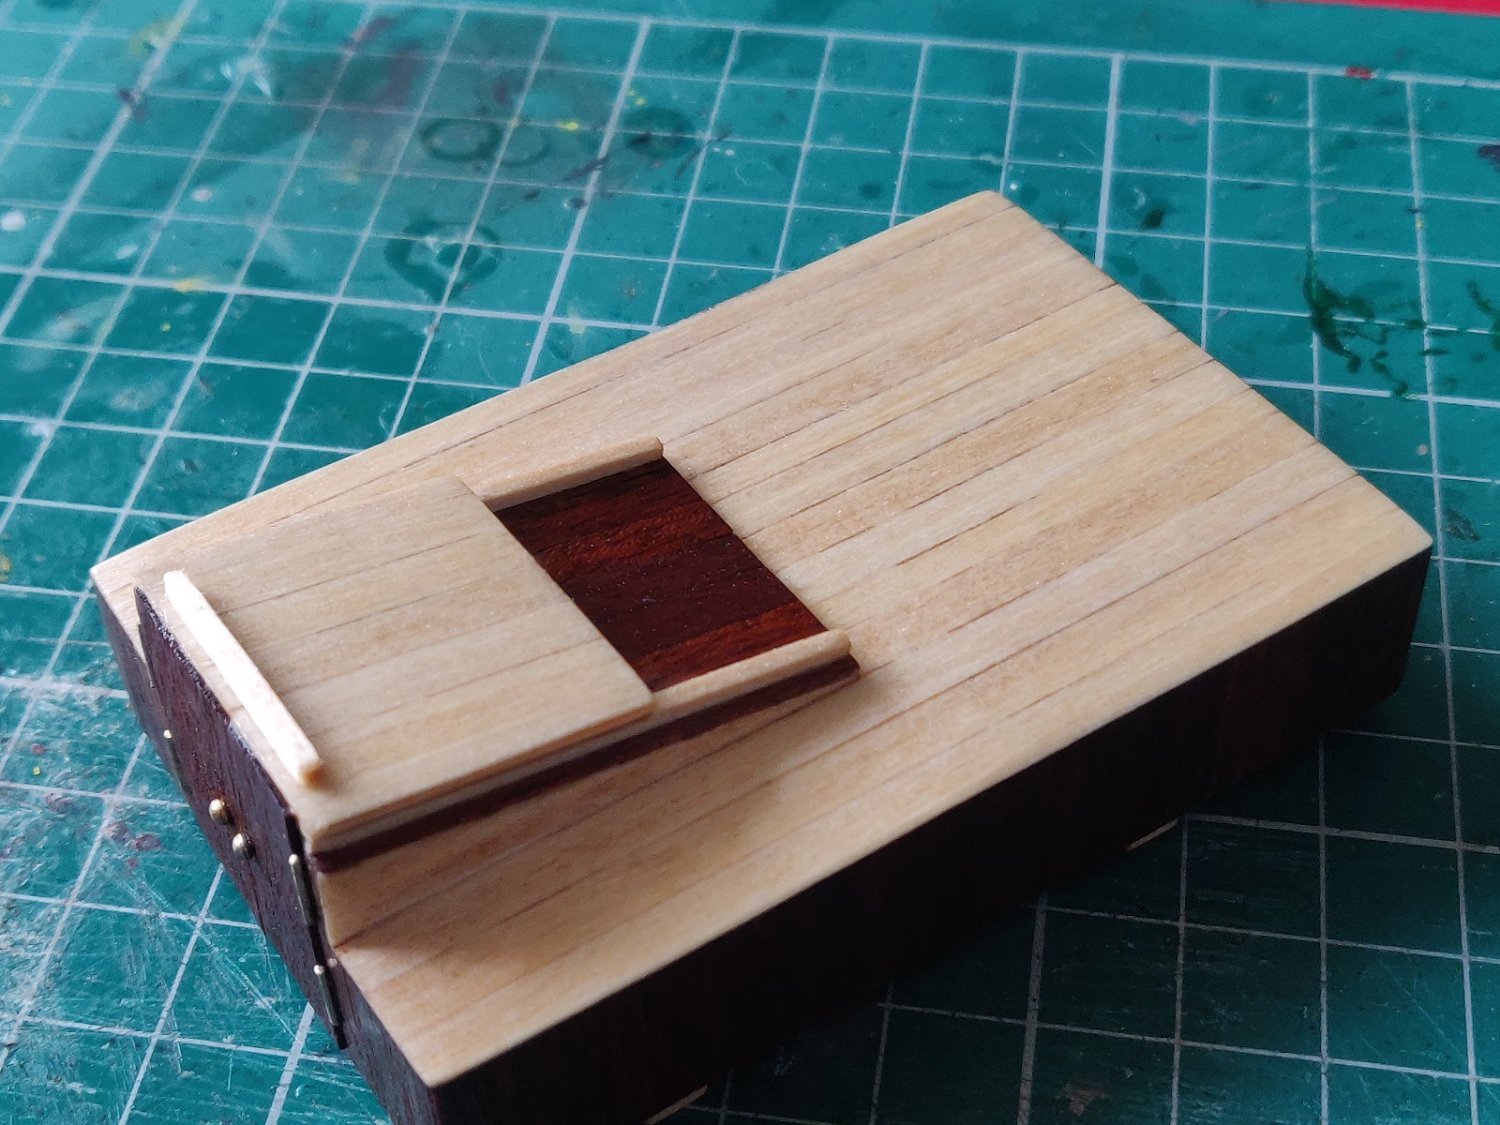
It's been a busy few weeks both at work and at home, the people that live behind us had mentioned the 3 Fir trees at the bottom of our garden had grown really high so I've spent the last couple of weeks removing about 3 foot from the tops of the trees whilst whistling "I'm a Lumberjack and I'm ok" in true Monty Python fashion. I am now in the process of cutting up all the offcuts so that I can transport them to the local re-cycling centre where I can dump garden waste. From cutting to Cutter' I have now fitted the top 4 planks to each side of the Cutter, I then decided that I didn't like the look of the "bare" plywood on the Transom so using some spare 5mm by 1mm Limewood strips I planked the Transom. I then looked at the Stem and decided to plank that and whilst I was at it I fitted some strips along the edge of the Keel and Stem to create Rabbet patterns the same as Chris Watton uses in his Fishing Boat kits. The Rudder is also cut from plywood so as part of my Hull Planking Avoidance Plan I used some thin Limewood strip to cover the edge of the Rudder and I will then plank the Rudder. I have also carried on with covering the Cabin, the sides have been planked with 4mm wide Mahogany strips, I measured the length of each side and divided it by 4, I then started planking from the centre of each side so that I would get a nice even finish. Once all the sides were done and the ends trimmed off I planked the sides of the Companionway with 4mm Basswood strips and then glued the Companionway onto the Cabin roof. The Cabin roof was then planked with 4mm Basswood strips. Cheers Andy
- 14 replies
-
- 5
-
-
- Bosphorus Cutter
- Turk Models
- (and 1 more)
-
Your Nisha is a lovely looking Fishing Boat Dan, it's been enjoyable watching you racing through the building of her. 👍
- 62 replies
-
- 2
-
-
- Nisha
- Vanguard Models
- (and 1 more)