Sir Charles Edward
-
Posts
67 -
Joined
-
Last visited
Content Type
Profiles
Forums
Gallery
Events
Everything posted by Sir Charles Edward
-
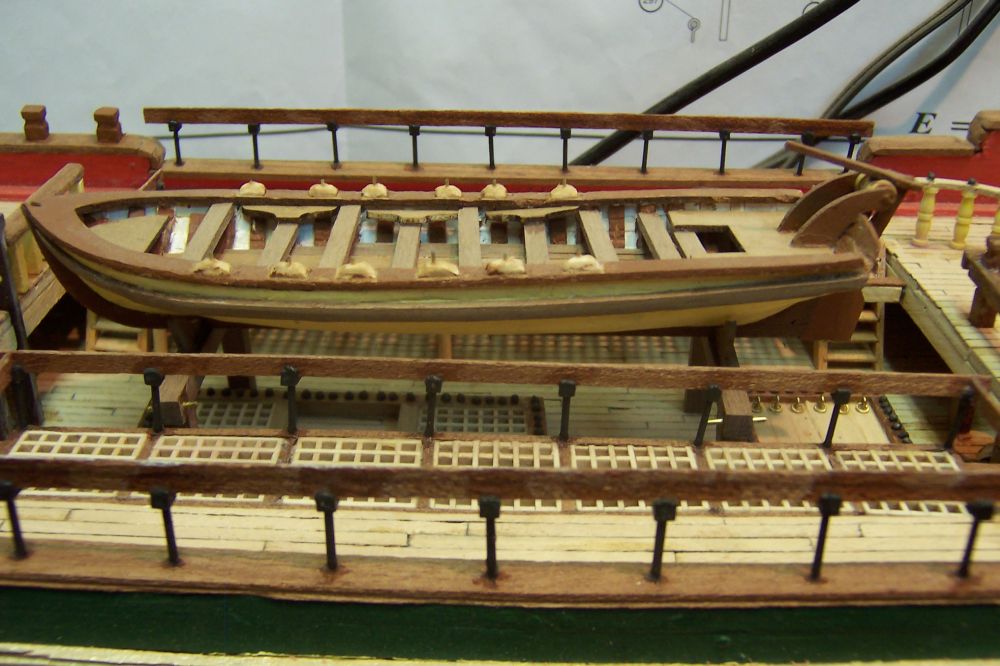
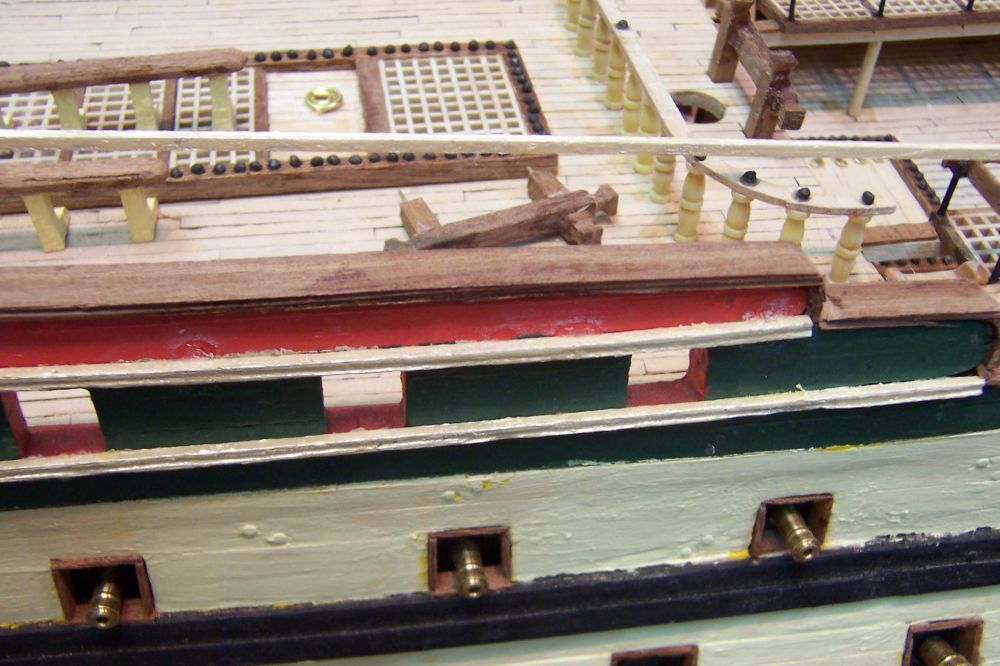
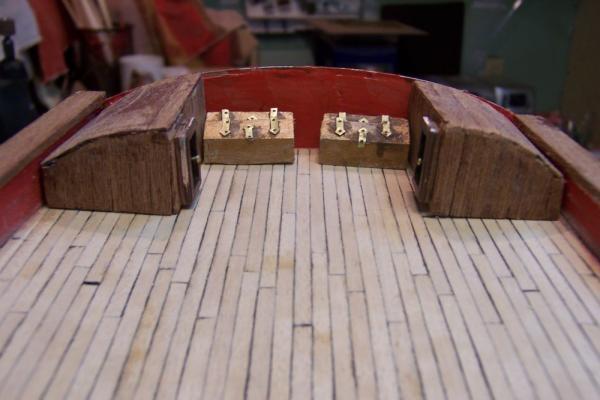
 Next update shows the installed ships boat supports, note the brass tie downs that will be used to secure the boat to its stand at a later date.
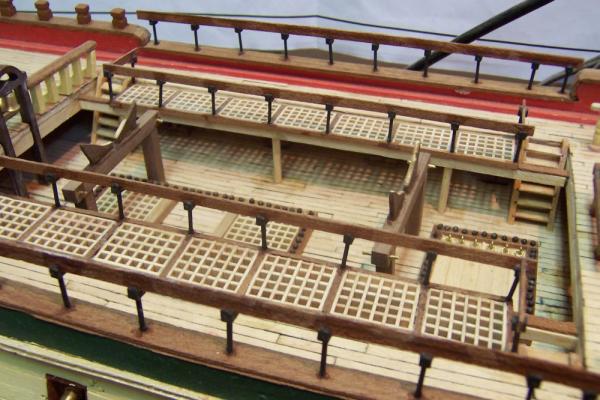


-
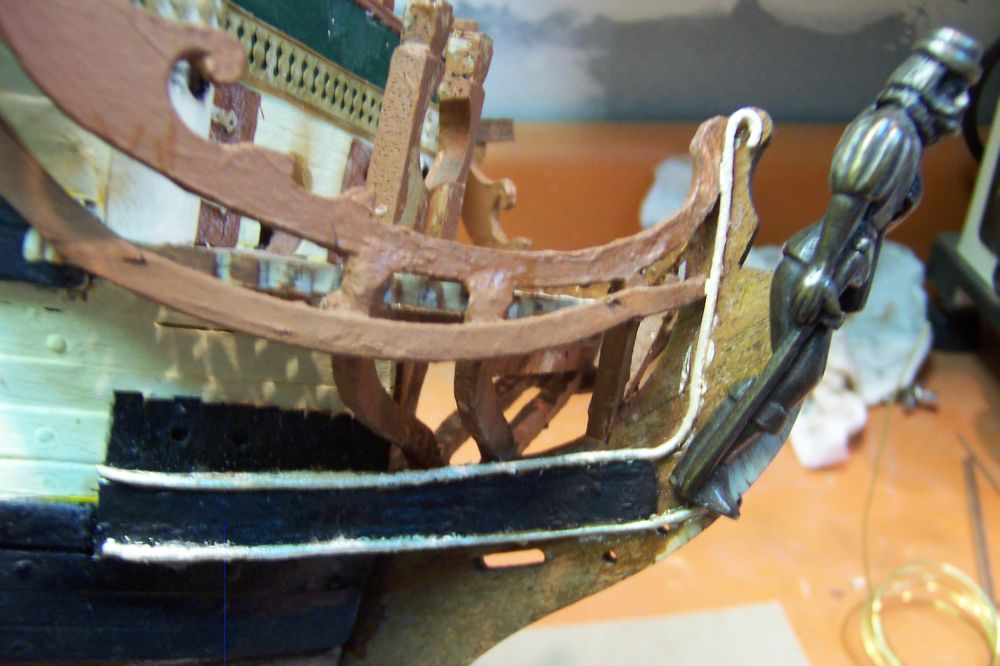
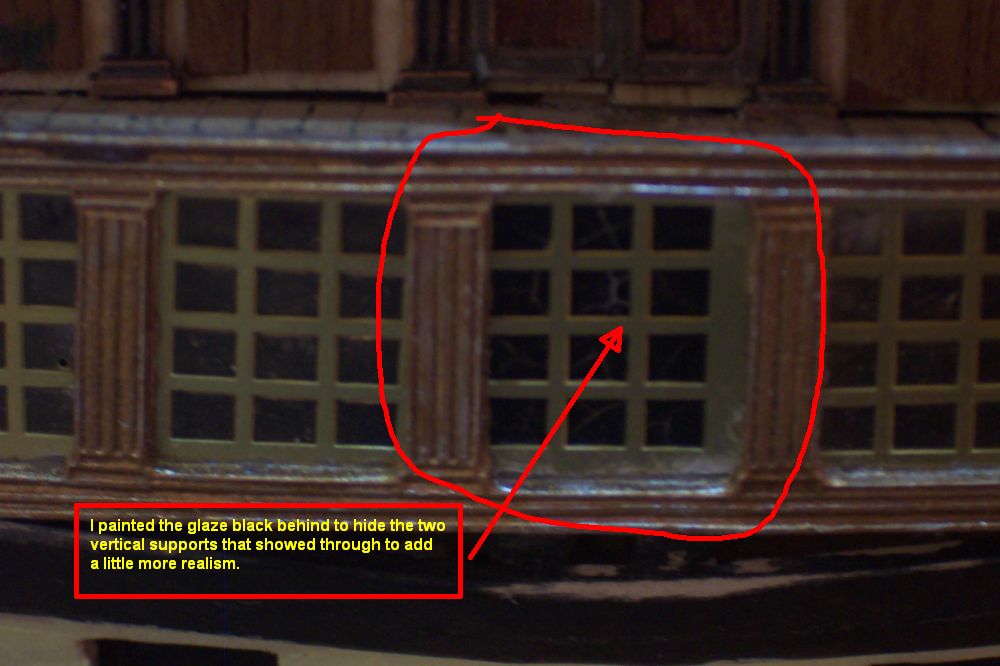
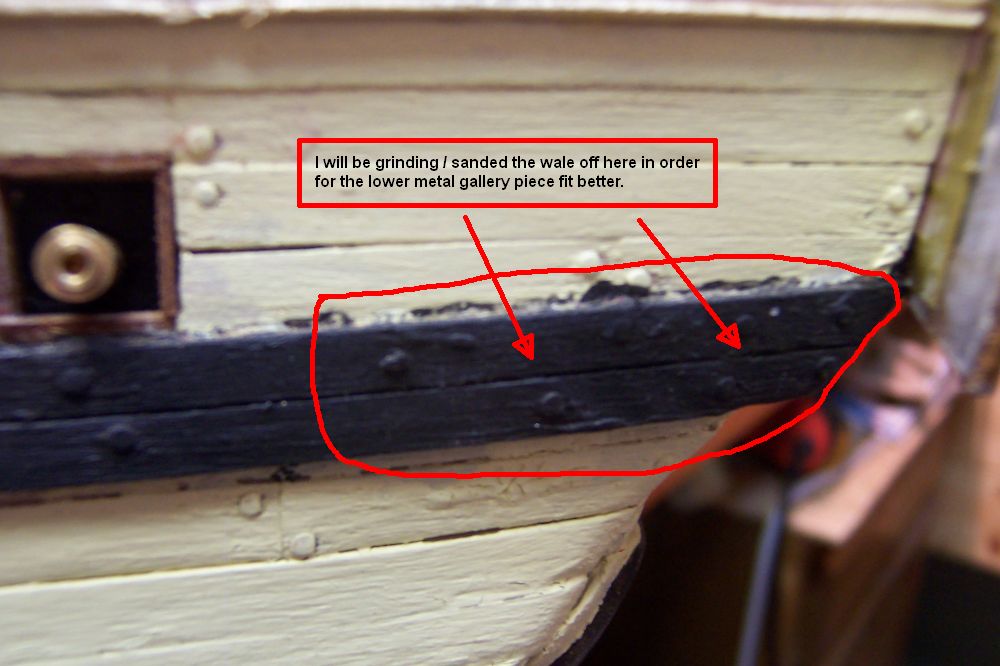
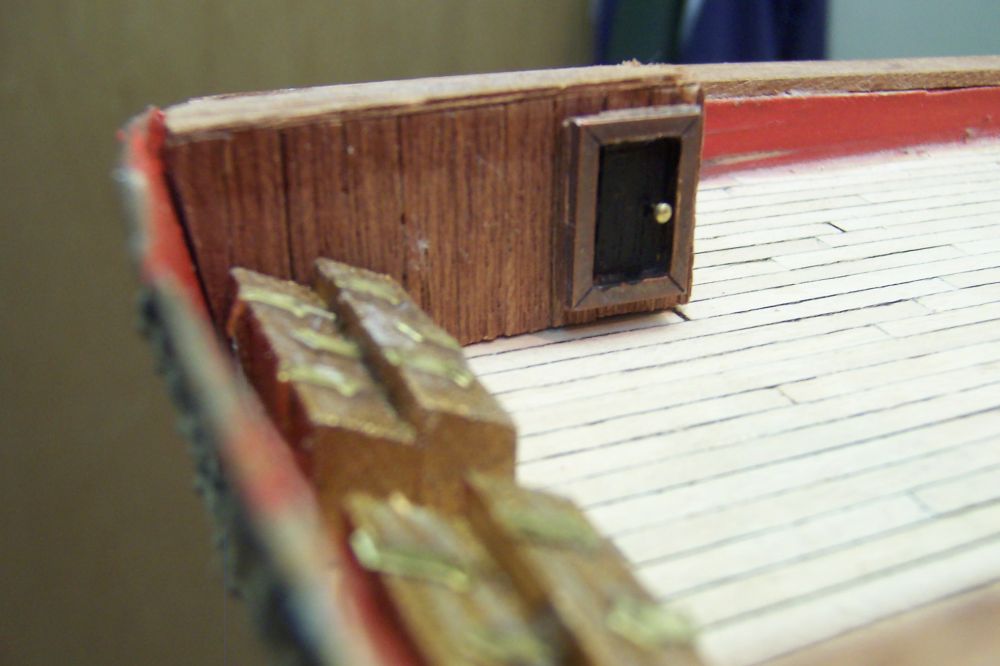
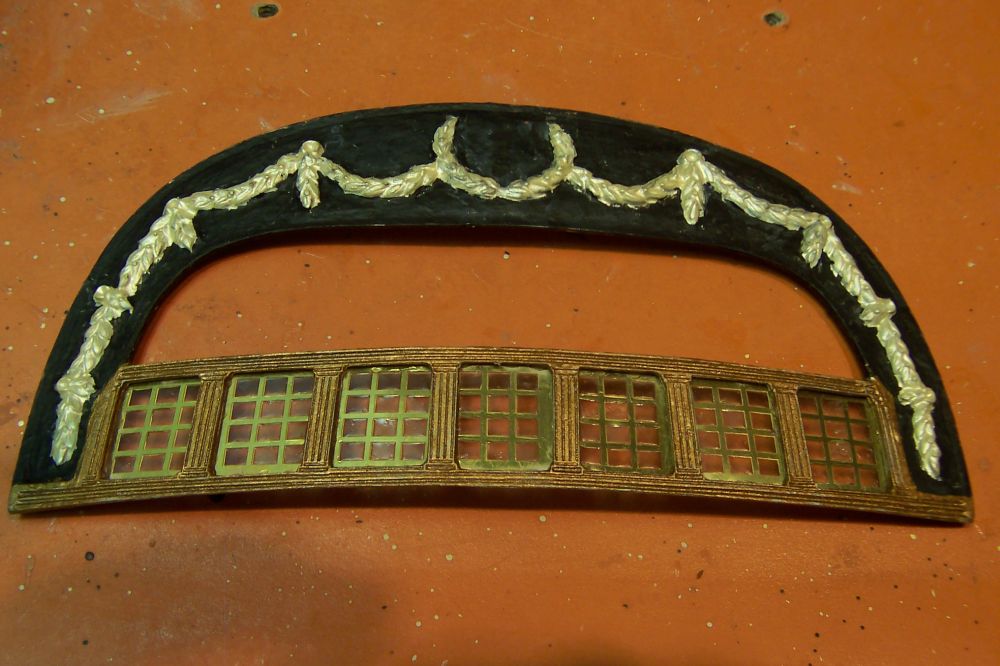
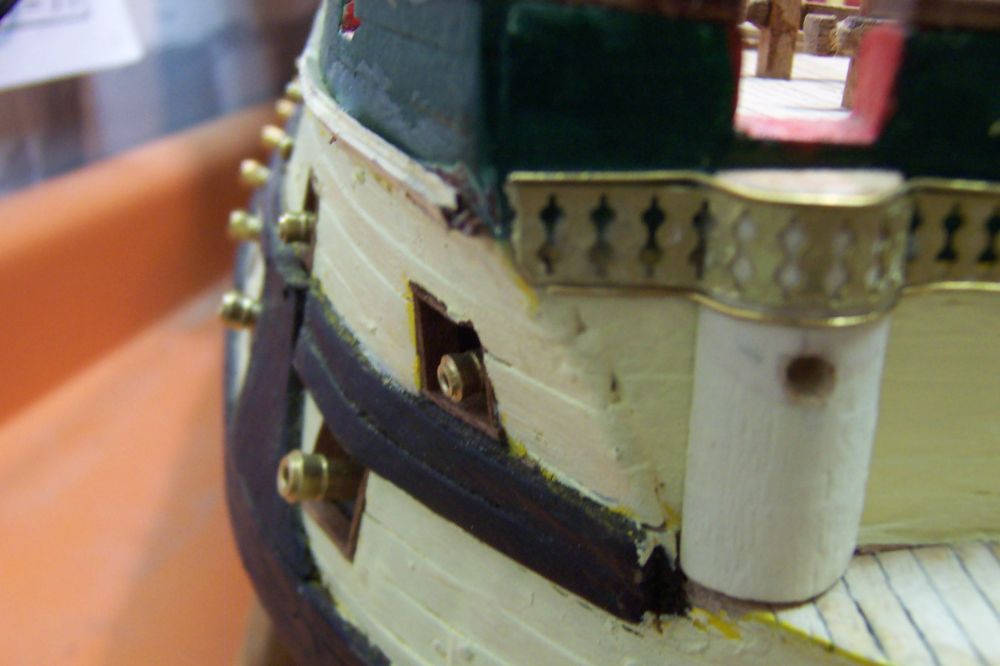
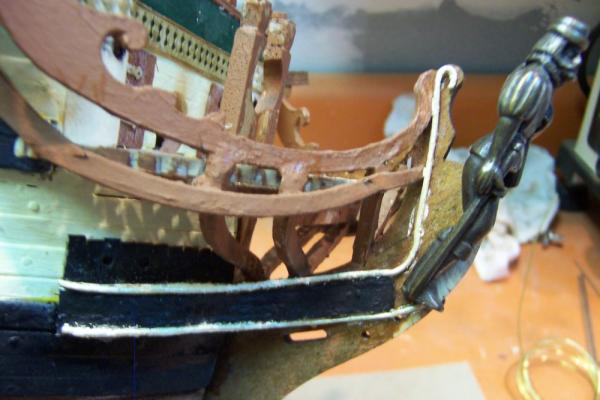
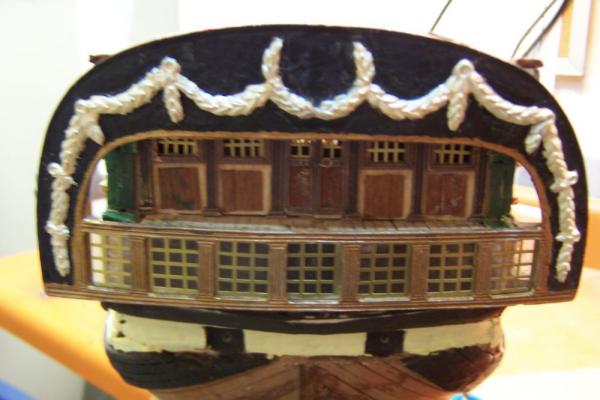
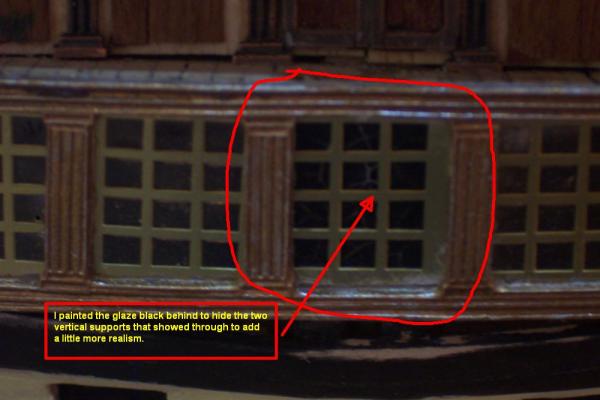
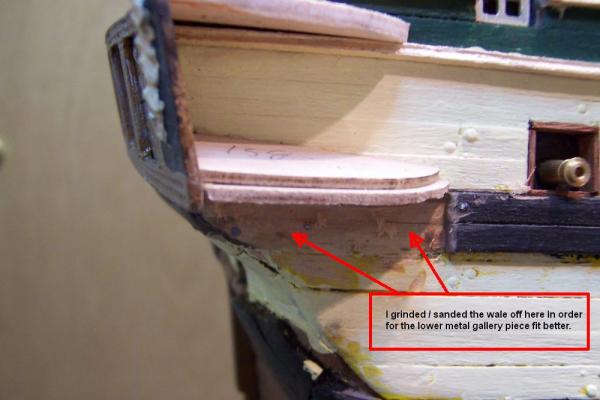
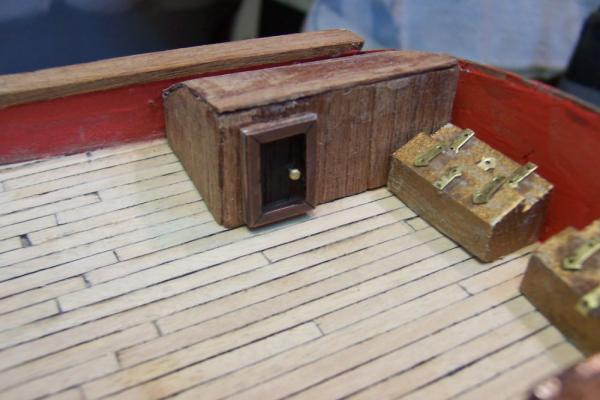
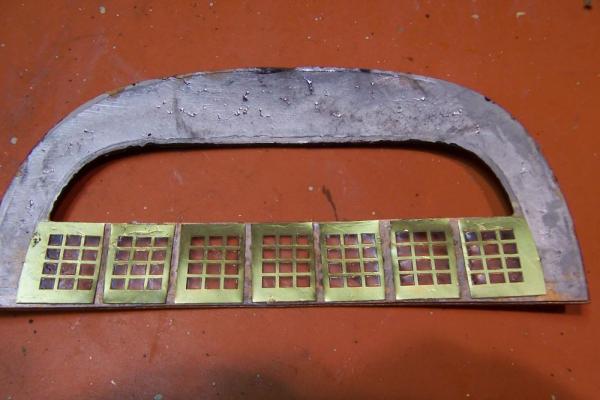
An update showing the brass wire decoration affixed to the prow, painted gold. The figurehead is not yet cemented, I just dry fitted it to align the lower brass wire decoration. After this I attached the main stern gallery. The photo shows that I painted over the middle glazed window because there were two obvious stern supports showing through there and I want more realism. I realized that I maybe should have painted all of the windows black, as there is really nothing to see behind this piece except wood supports. I next installed the port and starboard stern gallery supports which will be used to install the brass window highlights and some metal railings. I plan to glaze all of these and paint them black on the inside since there is no detail behind them. I dry fitted the lower metal stern gallery pieces that will adorn the port and starboard gallery and saw that I needed to grind, sand the main wale in order to better fit the pieces. The photos show the already removed / grinded / sanded wale on the starboard side and the next photo shows the wale where I will have to grind / sand / remove it. The last series of photos show the quarter deck stern lockers, I believe that these are not yet cemented to the deck.


-
Yes, the second planking will cover all of that up. I still hope that my RW will look similar to yours, when I start it up again.
-
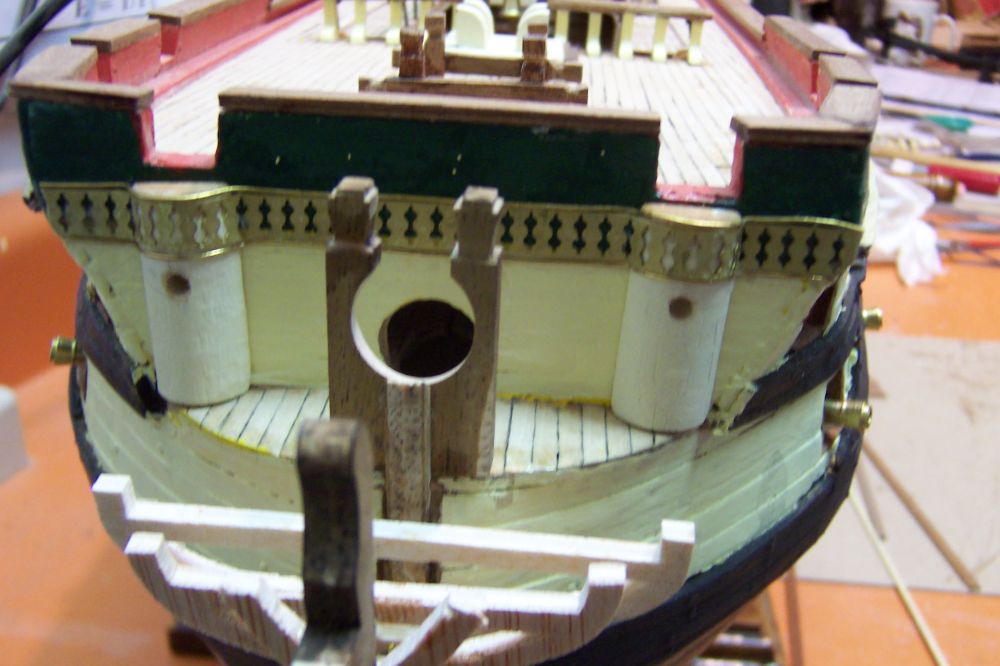
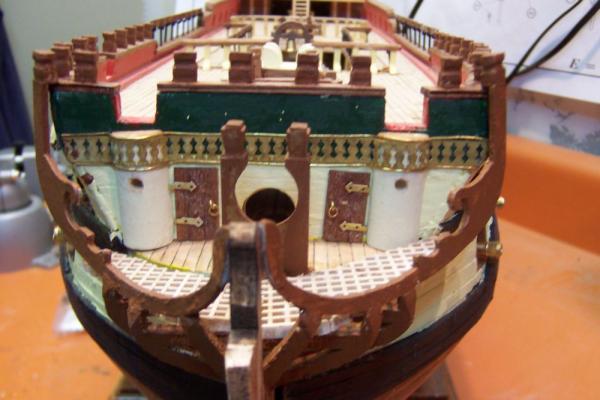
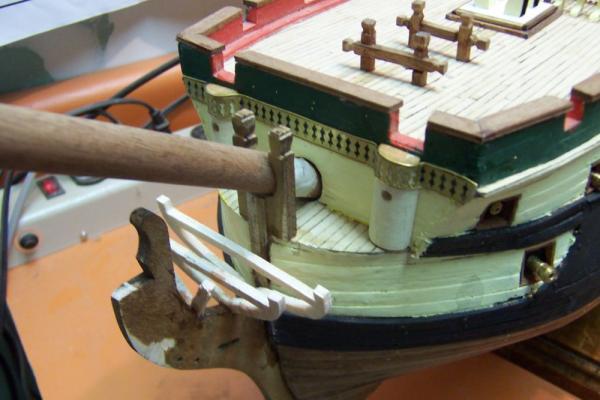
To continue with the bow detail. Installed the lower head rail and the anchor davits and you can see the finished doors in the photos. Added the bowsprit grates. The main stern piece with all windows glazes both front and back views, plus a close up.


-
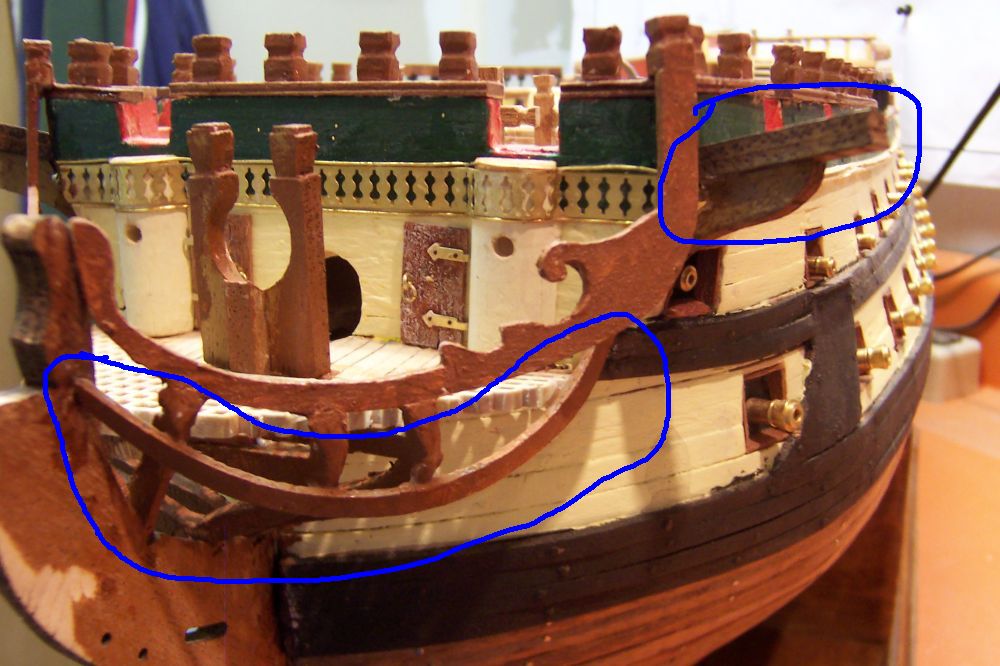
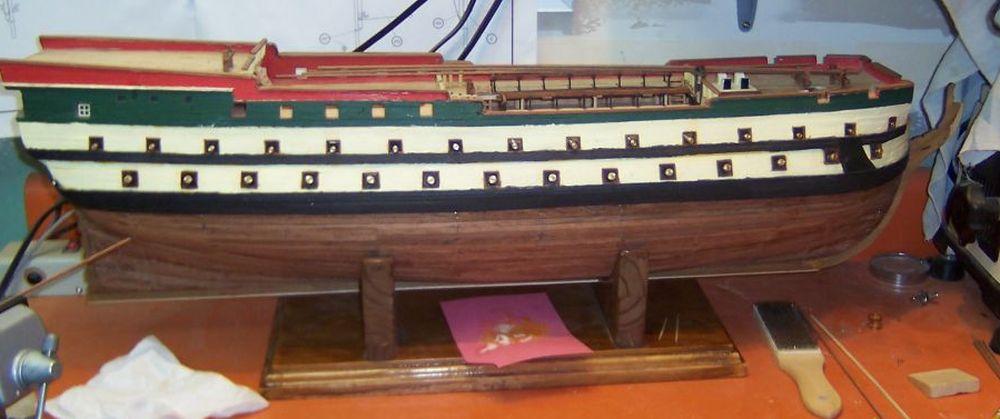
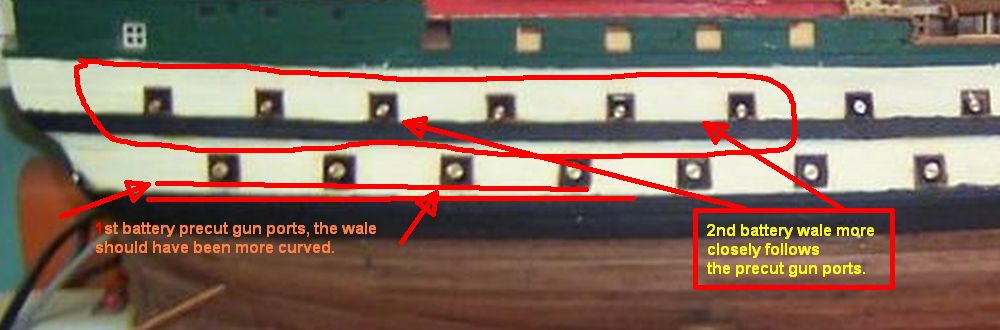
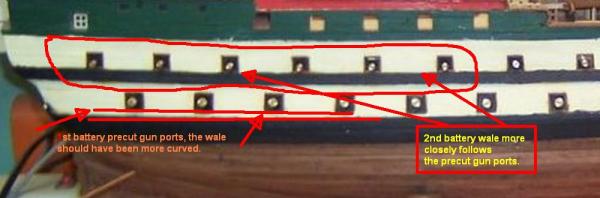
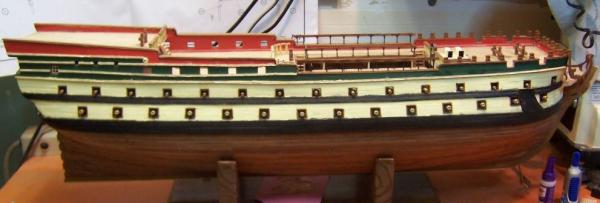
My Montanes follows the curve of the wales very slightly on the 2nd battery, but they are far more shallow with only two gun decks than the RW. As this picture shows my 1st battery wales are apparently way off the mark in curvature, but the precut bulwarks, which already had the gun ports cut into them, do show a distinctive curve that my wale should have followed. Ah, live and learn.

-
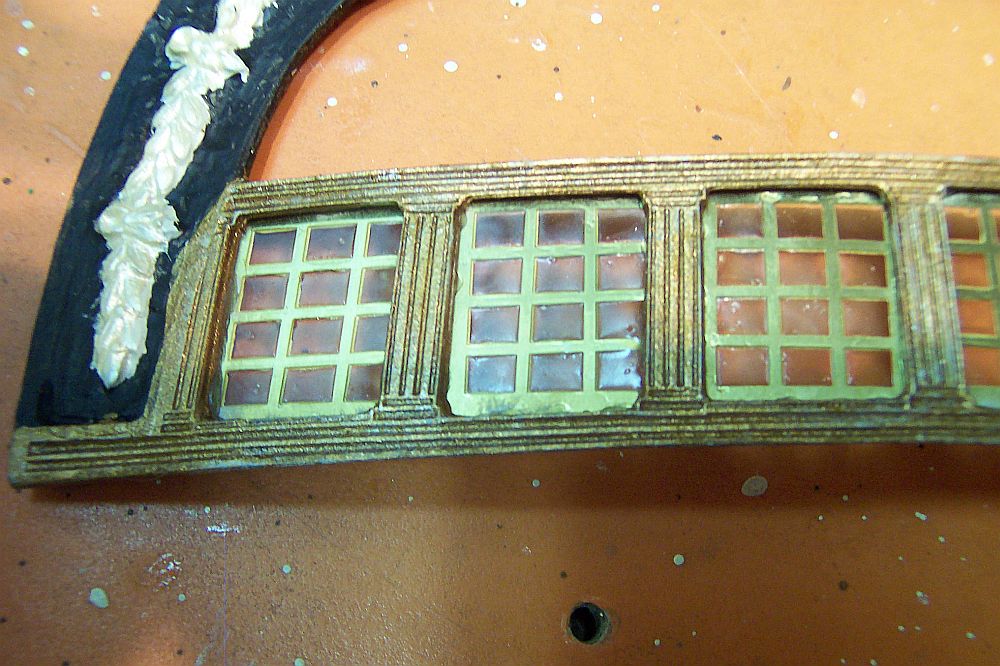
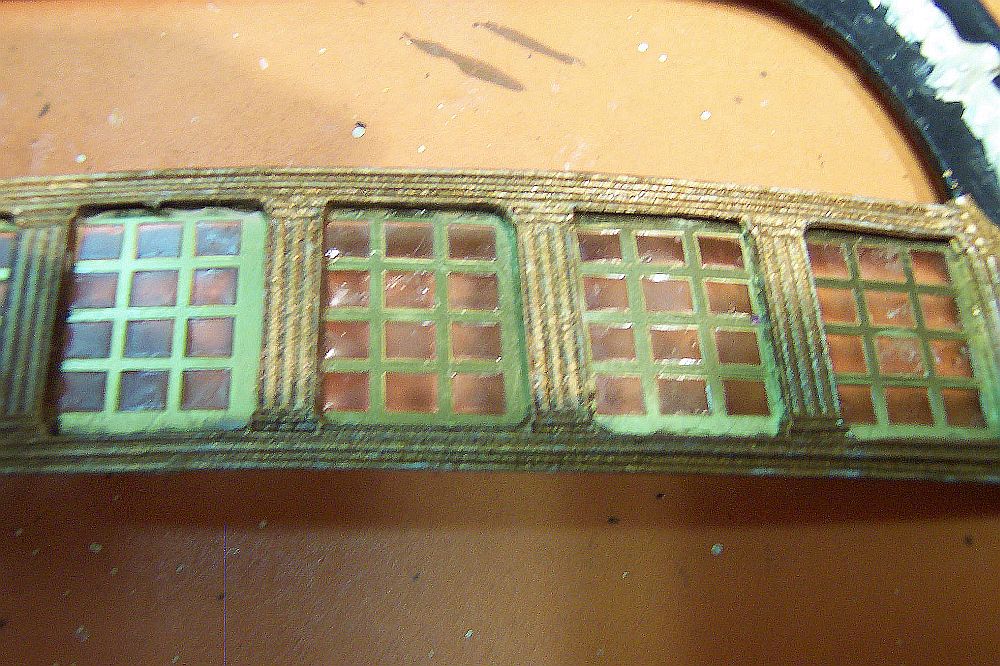
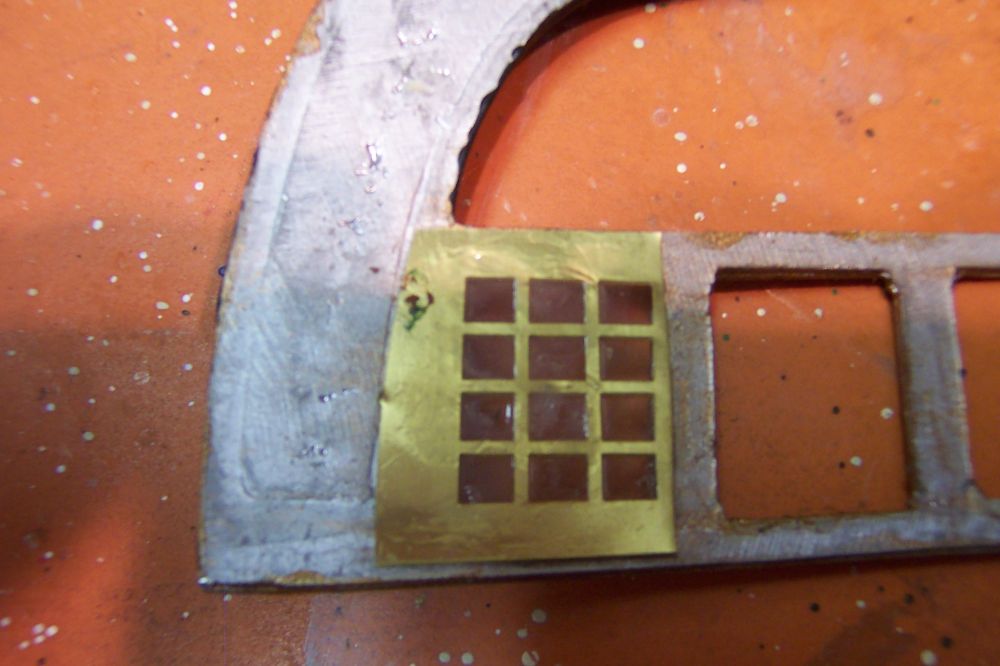
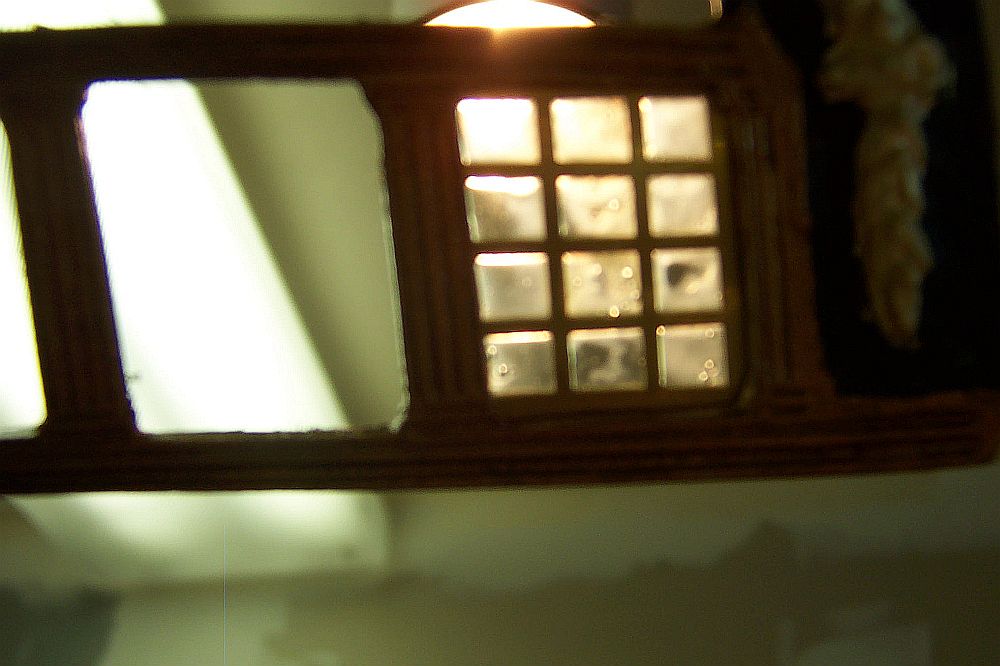
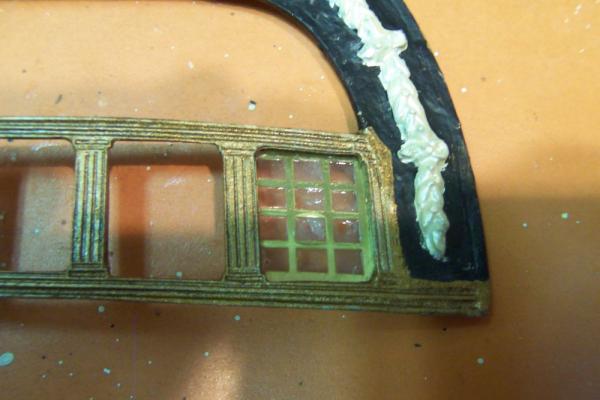
This update is to show the results of using that "Liquid Windows" stuff to glaze windows. I wanted to see if the stuff was still okay after being stored for almost four years and to see how it looks. I found that I liked the effect and you can actually paint it after the glaze has dried. I was thinking about glazing the three lantern brass details, then painting them red instead of following the instructions and using a simple red colored paper affixed to the interior of the brass windows for those three stern lanterns. The first picture shows the result, it had not fully set when I took this photo. It looks much better now, and the glazing does not leave much trace so I could actually get away with using the glaze on the front side of the windows versus the back side. The last photo shows the effect of a light directly behind the glaze, it does look pretty neat.

-
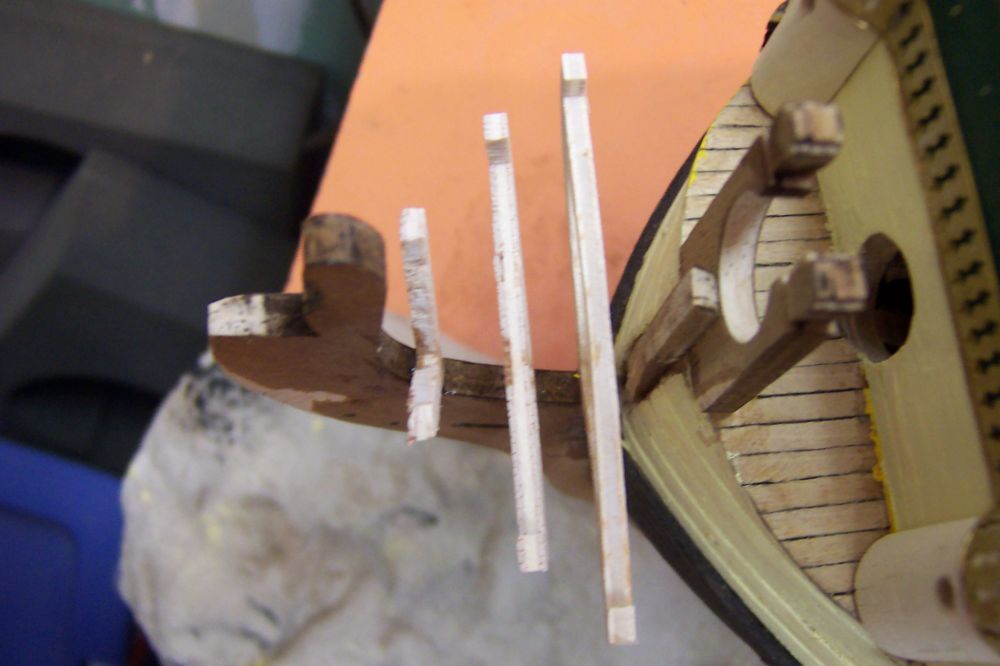
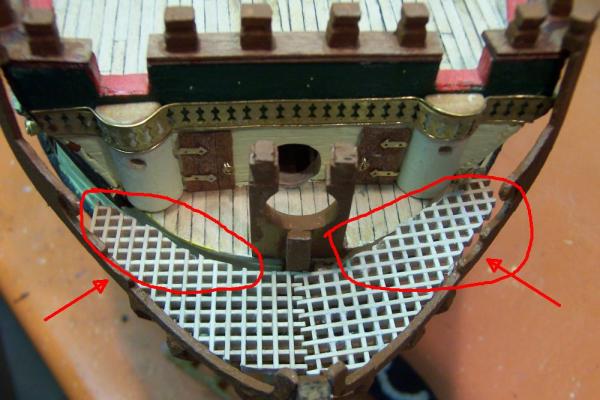
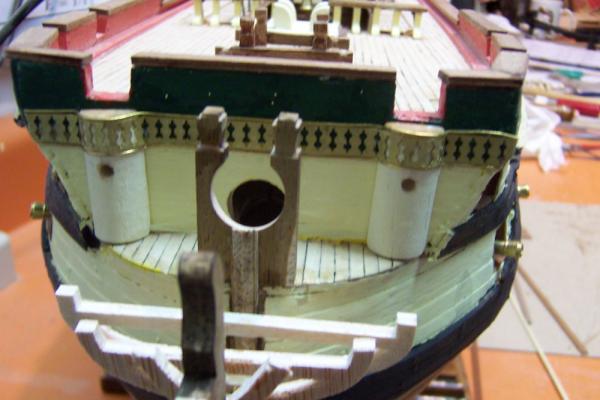
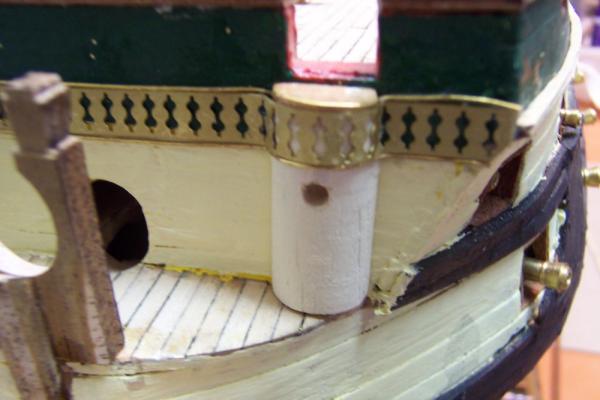
To continue with the bow detail.....I affixed the upper head rail and the completed doors to the forward bulkhead. I also cut out the bowsprit grates and dry fitted them to the bow. I discovered that there really was nothing to attach the grates to along the hull, so I determined to place a couple of small 2 x 2 mm boards just under the grates cemented to both the hull and the largest head rail support. The first picture shows where I needed the support, the red circles, and the arrows indicate UNDER the grates. Those Sampson posts that I made by "slicing" a shaped piece of wood, were then placed and painted all along the foredeck. The outer amidships railings were attached also and finally the foredeck railing that was incomplete a few posts ago. The final picture for this update is the starboard view of the Montanes at this time of construction.


-
Wayne, Thank you for letting me know. I guess either I was clicking on the "add to post" button automatically and for some reason didn't do that last night. Thanks again.
-
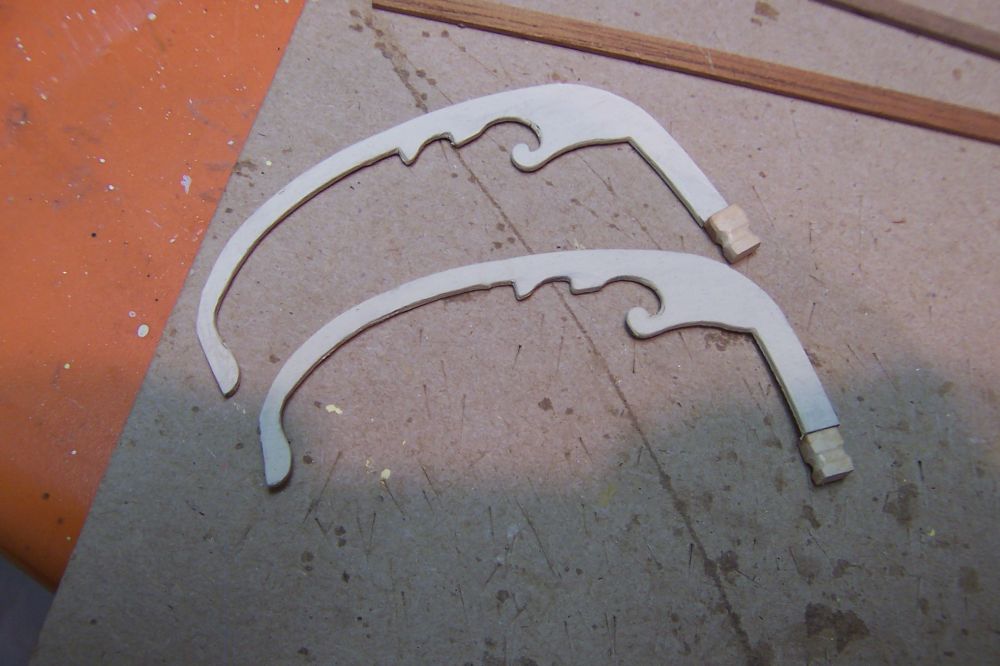
After installing the rubbing strakes, I started the bow detail work. The semi-circle heads, the upper head rail supports, upper and lower head rails were all precut. I had to construct the two doors using 1 x 4 mm dark wood strips, adding hinges and door handles before cementing them to the forward bulkhead. The photos show the bow section, and close up shots of the port and starboard heads, which show the brass decoration and brass wire used as a highlight for the decoration. The pre-cut upper head rail and the two incomplete doors are shown also. Argh for some reason my pictures are being loaded in reverse order!!! I thought that this was fixed? Am I doing anything wrong?


-
Raddrick, I believe that the Segal took the longest to build, probably about two years, as I was still active duty in the US Navy until 1981, and could only work on the kit in CIC, when we were in port, and I wasn't on duty. I did not keep an accurate hourly work done during that build like I did with the next kits. The Dallas took maybe 550 hours to complete, followed by the Scottish Maid that took around 425 hours to complete. These two kits I did while I was attending the University of California, Berkeley, when I wasn't studying. Next kit was the Mantua Santa Maria, but life situations during that time caused that kit to take almost three years to complete, but I guess actual hours worked on it amounted to about 600 hours or so. I did actually keep track of the hours of building somewhat until the next couple of builds. Mamoli's Yacht Mary, and Golden Hind were done almost at the same time and I believe that I completed them in 700 and 750 hours respectfully. The last model completed before I began six different kits, was Corel's Half Moon, with some life situations delaying that build for a bit but a total of around 800 hours were spent on construction. Currently five of the six incomplete kits are on hold until I finish the OcCre Montanes, I HAVE to complete at least one kit for me and it is easier to build just one at a time. Although I do read over the plans regularly of all those kits, just to keep my construction notes up to date.
- 78 replies
-
- 1
-

-
- dallas
- artesania latina
- (and 1 more)
-
Yes, I remember that going through the plans, but I also remember a comment from an interpretive instructions from the Euromodel site that mentions that those closed gun ports actually are located directly on a bulkhead, and the bulkhead would have to be cut out to make room for a cannon.
-
Very nice job on the gun carriages. I am taking notes BTW.......
-
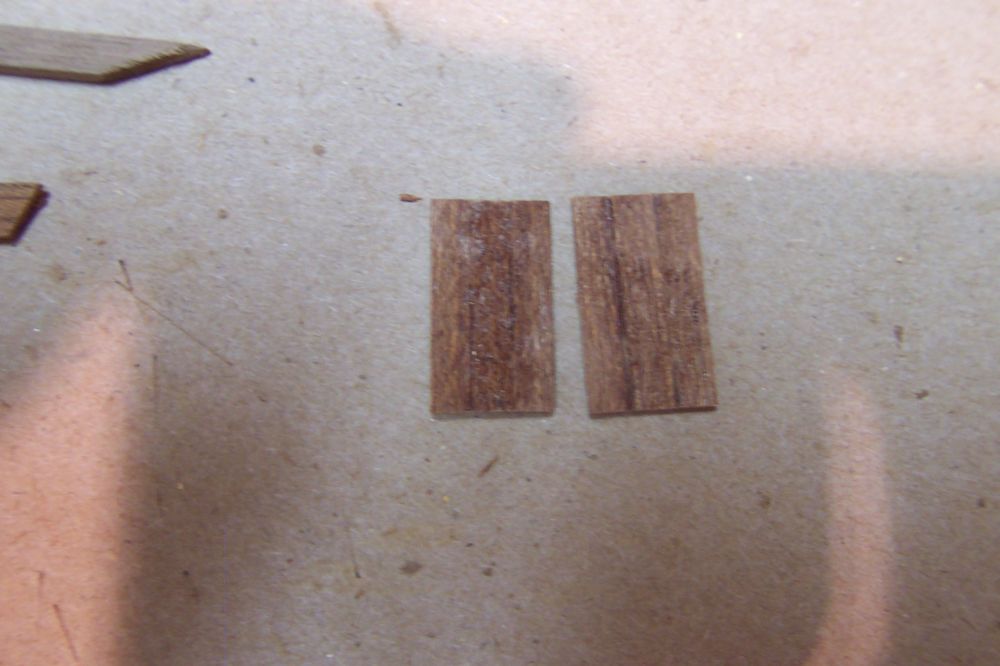
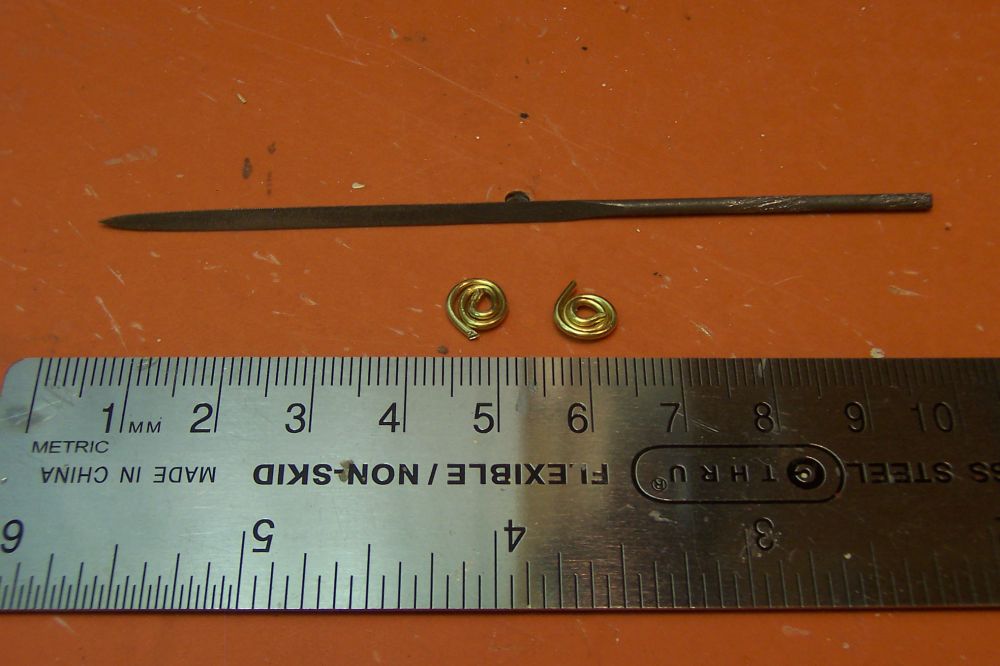
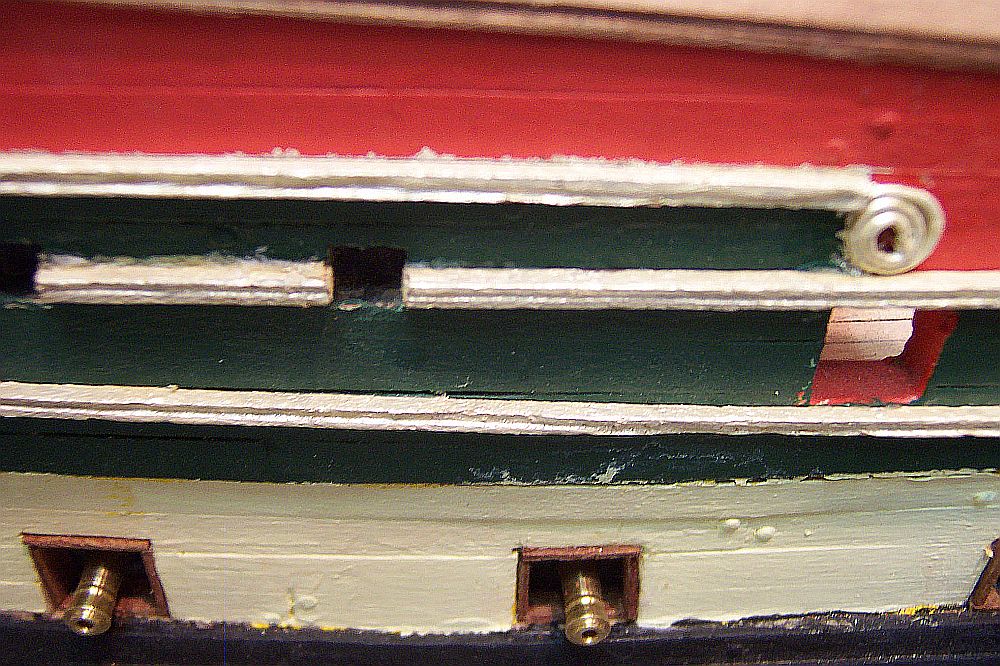
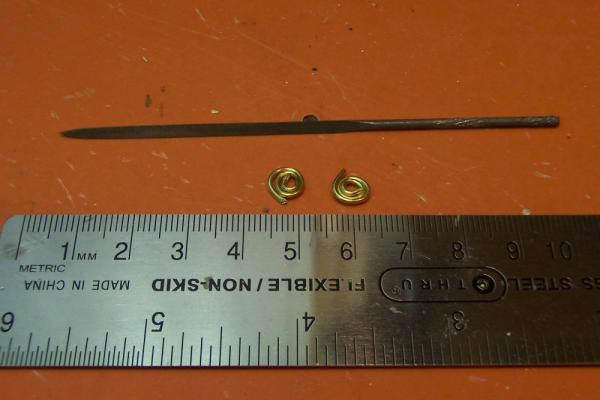
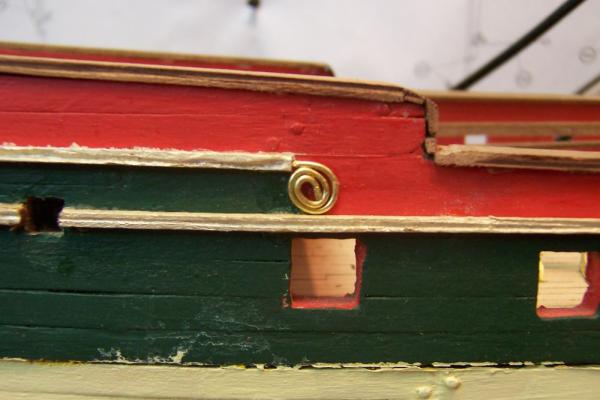
The rubbing strakes had to be built out of 2 x 2 mm wood stock with a groove carved into one side with a triangle file. You can see this groove better after they were installed onto the hull, but I have included some photos of the grooved painted rubbing strakes before installation. There were ten pieces to make of three different lengths, I used a combination of various sized triangle files, a rotary cutting tool, and a sharp pyramid shaped engraving tool to try to get the groove just right. Painted them a gold and cemented them to the hull. There were also two decorative details made from 1 mm copper wire, rolled up like a seashell, needed. The photos show those pieces quite clearly before installation and after installation and painting. Oh, during all of this construction I was also installing the gun port frames along the first and second battery. I had also installed all dummy guns and the ten guns directly below the airways on the main amidships well. This is where the gun carriages made without the wheels went. There are 14 more guns to install along the main deck that I am going to try to rig accurately, since you will be able to see them and these carriages do have the wheels attached.


-
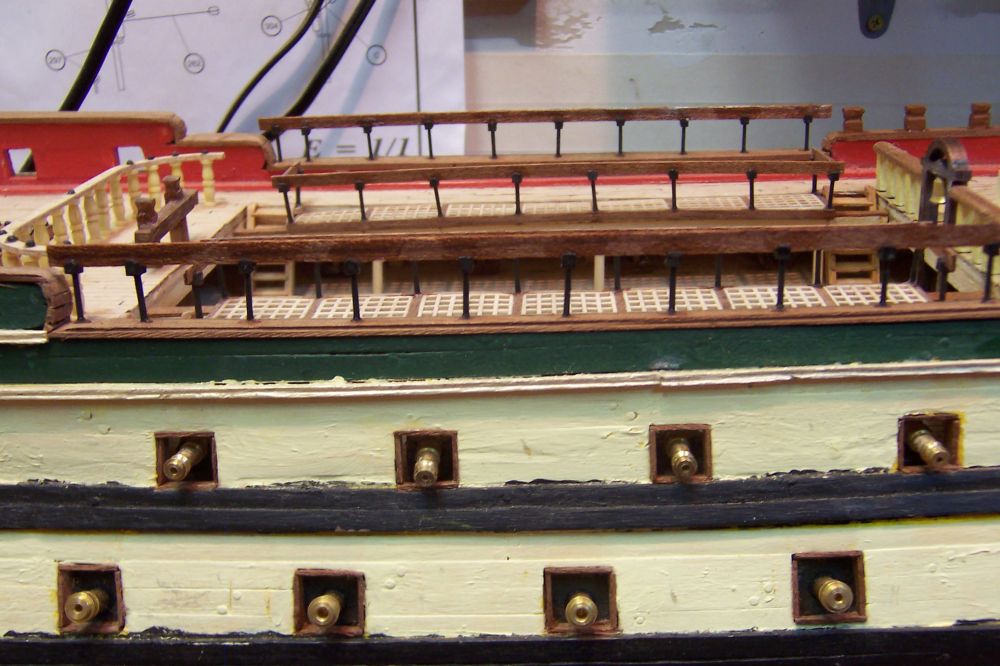
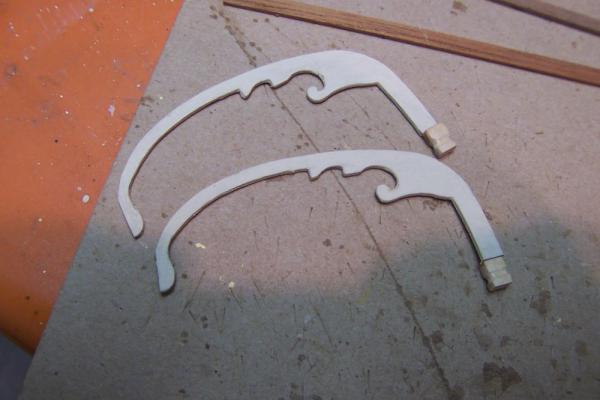
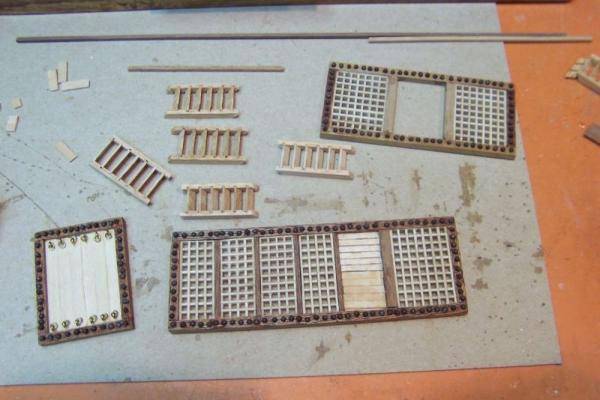
The foredeck railing parts awaiting assembly and some additional close up shots of the various railings installed.


-
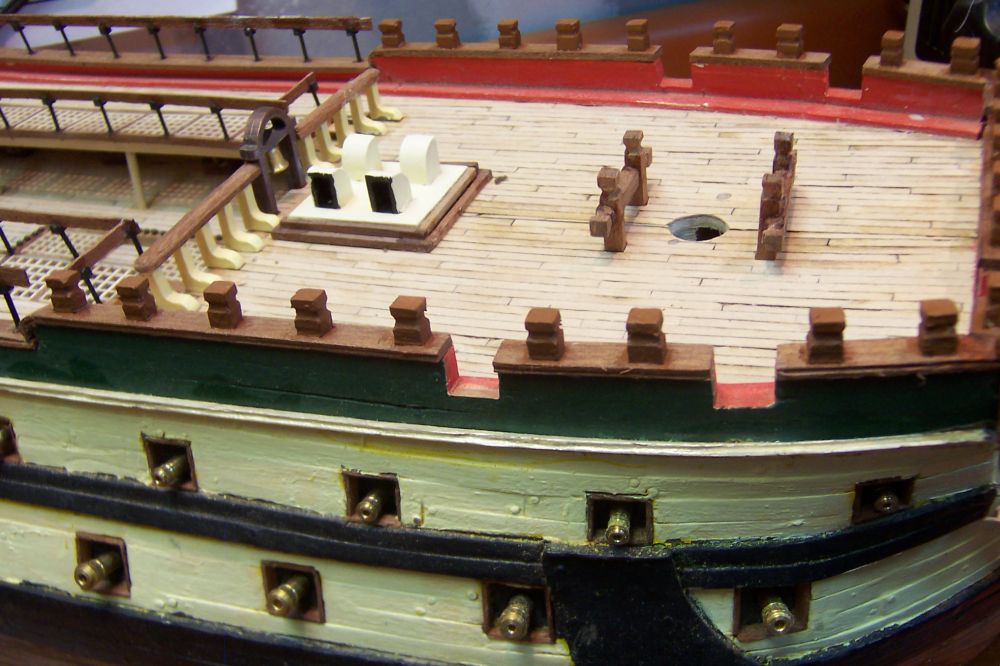
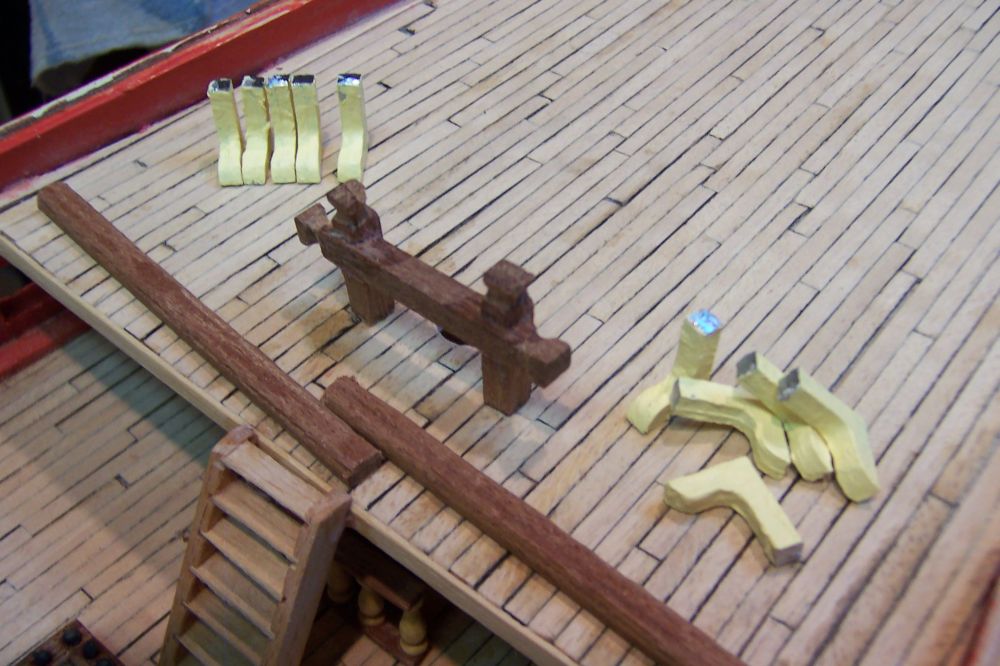
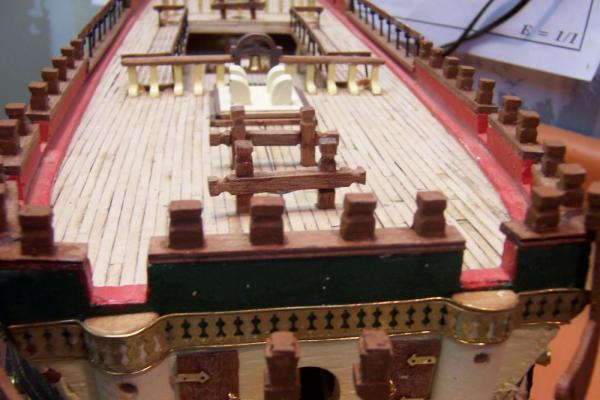
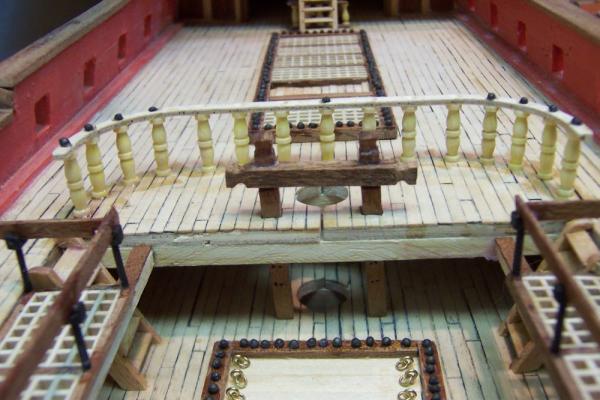
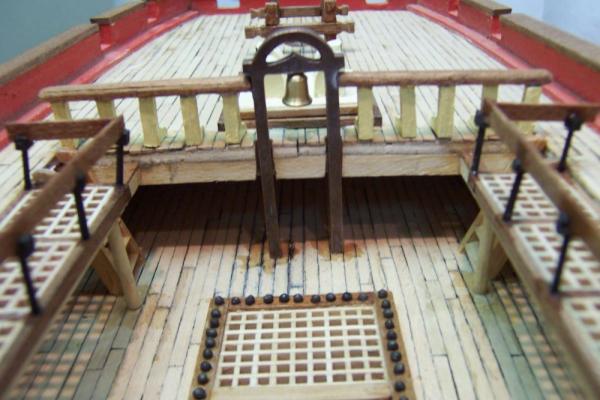
Now on to some deck furnishings. I made the amidships well railings, the curved main mast railing and the bell tower railing. The curved main mast railing was missing some cannon balls as I had dropped this entire kit box which overturned and spilled ALL of the contents out onto my hobby shop floor. It literally took about three hours to pick up the dozens of cannon ball scattered all about and of course I missed some. OcCre happily replaced the missing cannon ball / ammunition, in fact I received about 50 or so of both black cannon balls and silver cannonballs, which I may use on another kit some time. They also included to my surprise a custom wood model name plaque, which I showed in an earlier post. That curved railing is now complete and I will include a more recent picture of the model with a future post. The final photo shows all of the previous discussed deck furnishings, plus the chimney assemble, which I forgot to take a picture of upon completing that piece.

-
Beautiful work so far, and I have a couple of versions of Peter's "instructions", and his solution is workable, but pretty exact for me, although without trying you never know if you can expand your self imposed limits or not. I often check the Euromodel web site for any updates Peter has added since his work is still not quite finished.
-
Denis, same with me, I will be sitting by watching. I have this kit on the bench, (with five others, partially done), and have completed the basic carcass assembly, I look forward to your progress as this kit is pretty advanced for me, and there are several parts that I foresee having trouble with.
-
I have this kit also and noticed the same things that you have in my first look through of the plans. I had not noticed the clunky windows though, the figurehead is indeed excellent and most of the other metal decorations seem well done. I am not sure if I will be able to paint that figurehead as suggested, but will try. The wood is of good quality also, and I will have to do the same thing with the numerous blocks and etc. I actually counted those blocks and found out that I was missing quite a few but Euromodel happily sent me loads of extra plus an entire "set" of additional metal parts, including a ships wheel and few other things that I had not thought of when I was planning this build. You are correct the assembled hull, which is where I suspended this project, is extremely sturdy, and I added a few extra supports per Pete's interpretive instructions, which makes it by far the heaviest hull that I have yet to build. I have communicated with Pete via email and he has assisted me greatly in my own construction plan of this kit. I have already installed the first and second battery decks into the carcass and that was a pain to cut those mahogany pre-cut sheets in half just to allow them to slide into place through the stern gallery. There was a lot of cutting and fitting to make those decks fit, and it is fortunate that they will not be visible on the completed model. Anyway, I look forward to watching your progress, as I will be starting this project up again in a few years and will need all of the help that I can get with it. The Royal William is one of six kits that I have on the bench in various stages of hull planking. I am currently only working on one kit, OcCre Montanes, trying to complete it, and I have been reposting my build log of that ship here. Then the plan is to will finish Mamoli's Sao Miguel, Corel's Wappen von Hamburg, two Albatross kits, one from OcCre and the other from Constructo. After these kits are done, I may be able to attempt the fairly advanced kit Royal William.
-
The Dallas was the second model that I built, and I gave the completed model away to a friend or pastor when I left California. Artesania Latina, discontinued the kit maybe ten years ago or so. My first kit was Sergal's HMS Sharke, that I purchased from a hobby shop in Long Beach California around 1976 or so. Gosh, have I been building wood ship models for over 35 years!!!!
- 78 replies
-
- 1
-
-
- dallas
- artesania latina
- (and 1 more)
-
That is true, but we both know the satisfaction of actually building those parts and WE know that they are there, perhaps unseen by all, but the same goes for that main stairway that you made so well. Most of that will be under the deck, if I remember the plans, but just knowing that you did that part and the stove leaves you with that good feeling inside. How do you plan on making the circular stairs? THAT is what I have been considering since my first look through of the plans and realized that those pieces were not included with the kit stock either. I have looked around for about two years or so for any type of circular stairway to use as a model, and just can't find the right one. I believe that I have seen similar circular stairs on other models, but I have never been to the point yet of downloading those pictures and trying to build them.
-
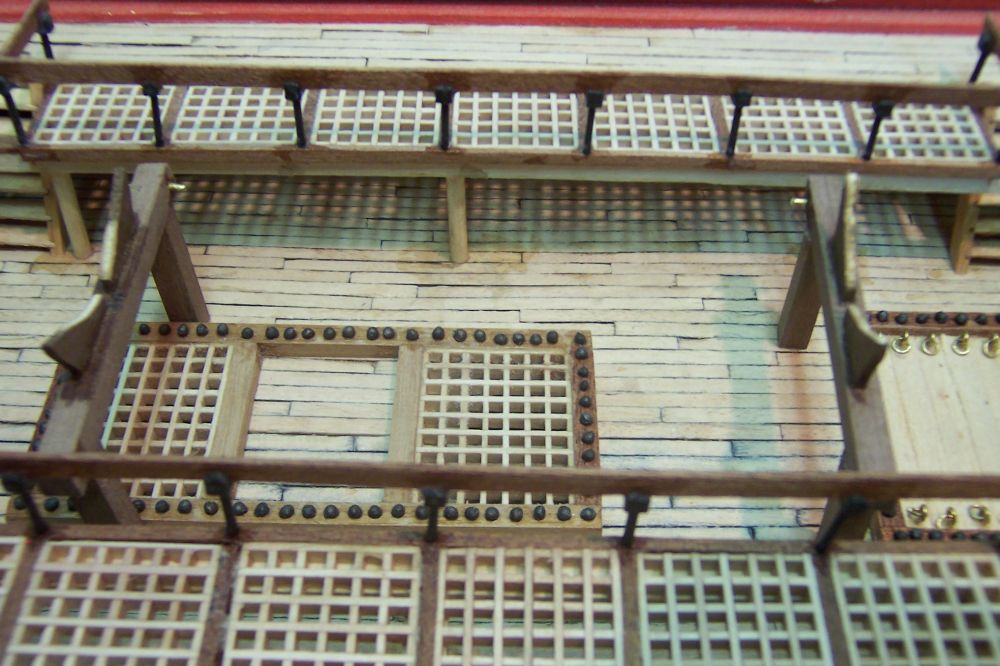
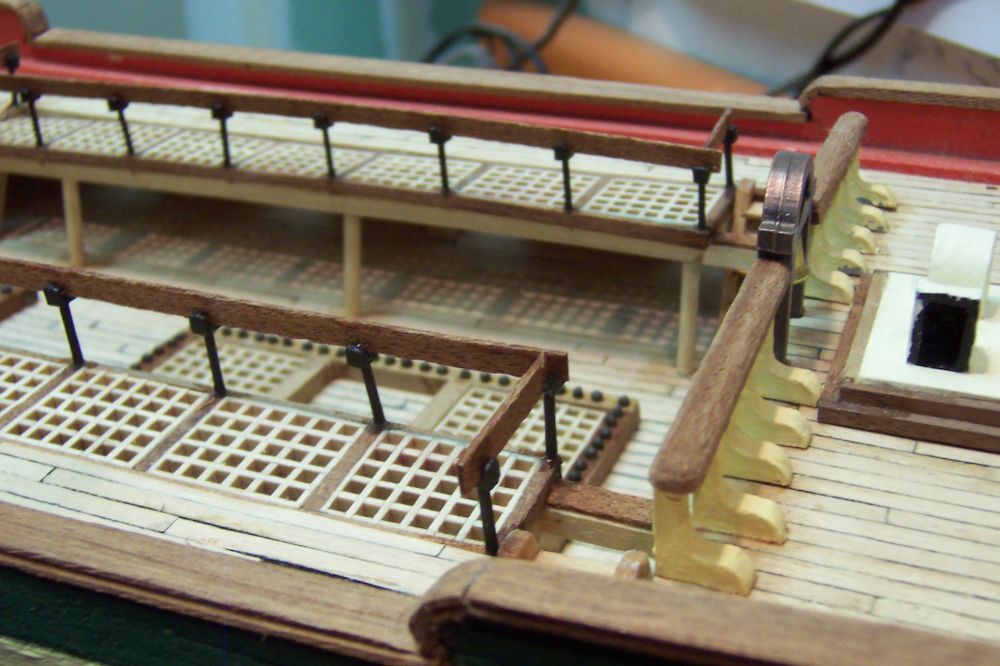
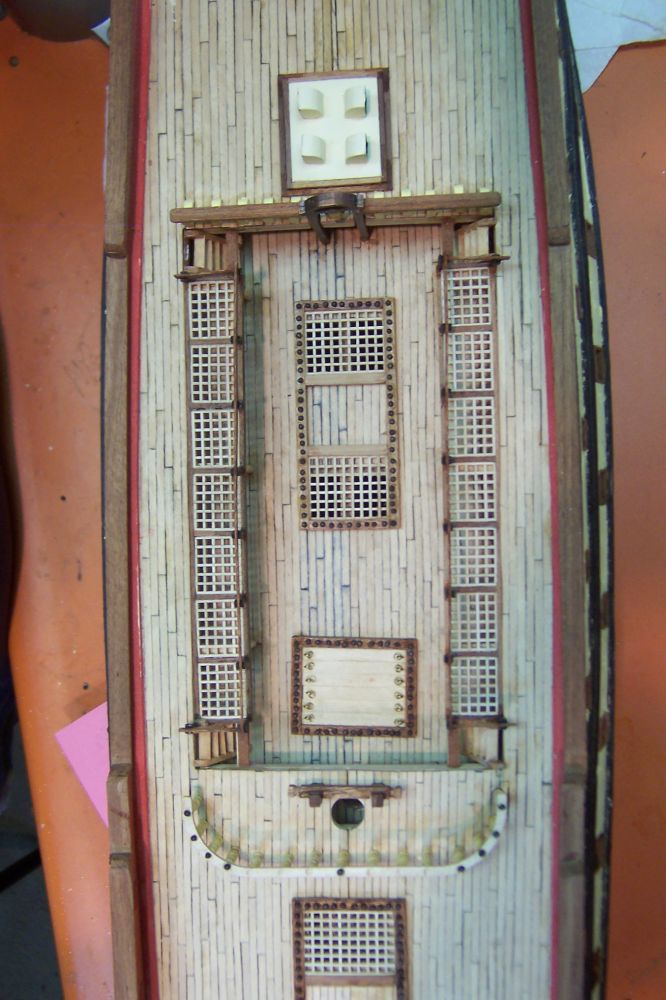
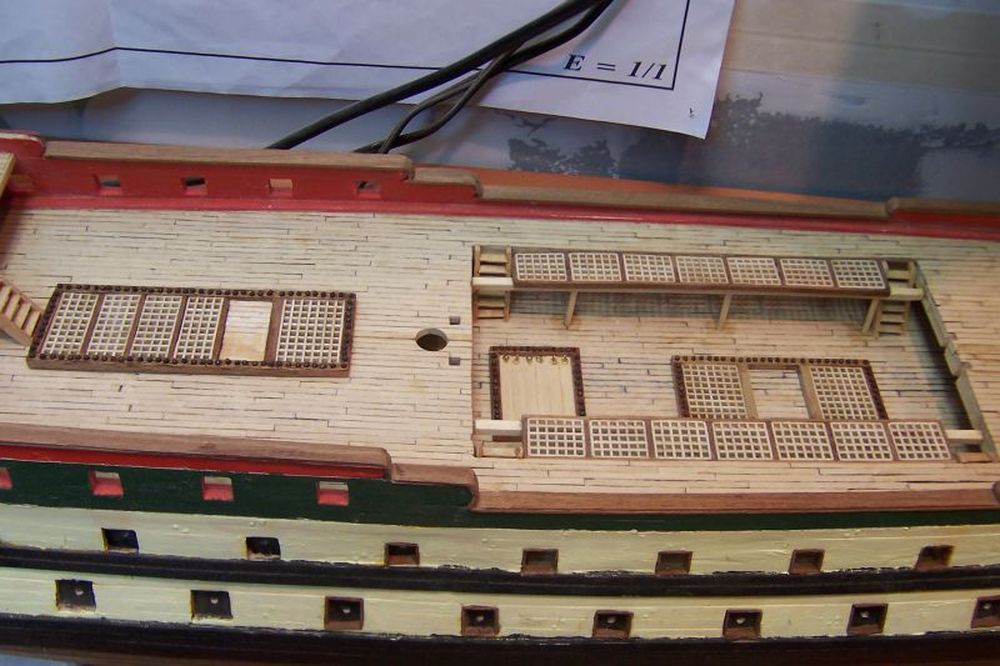
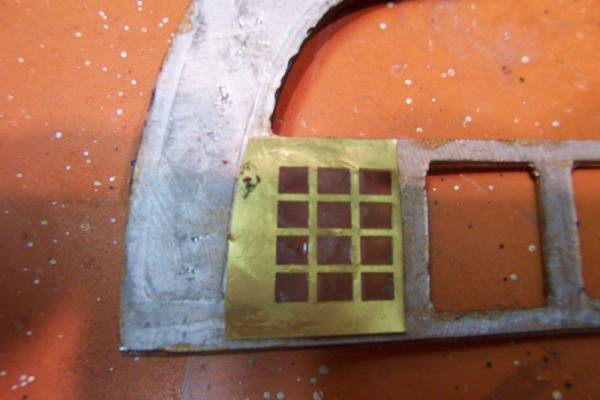
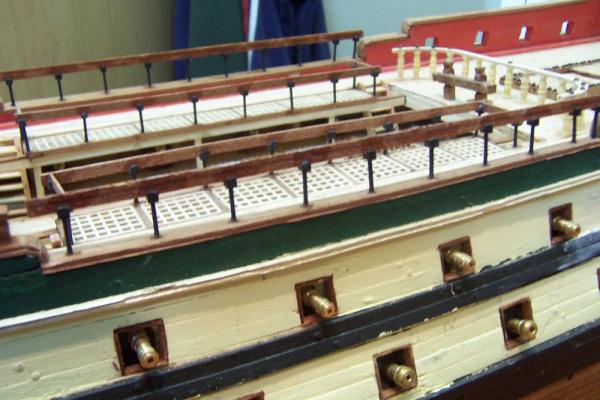
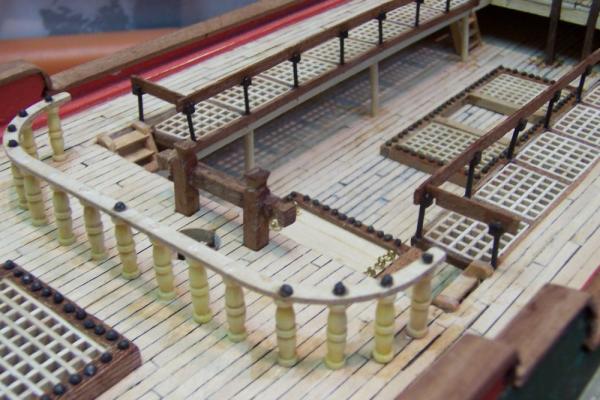
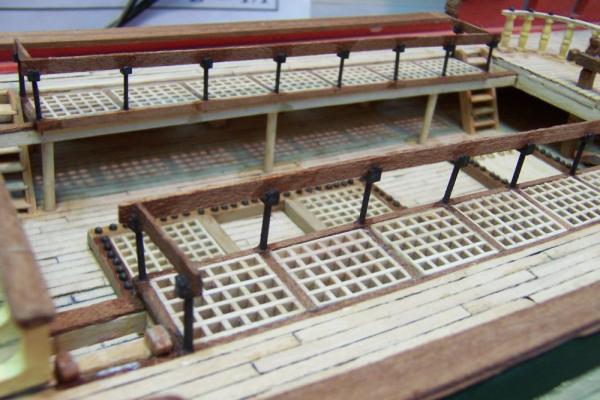
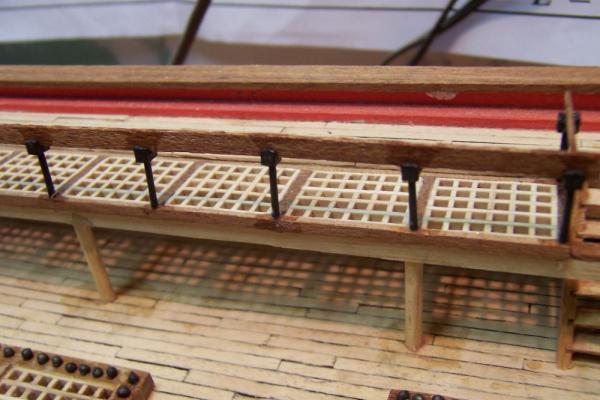
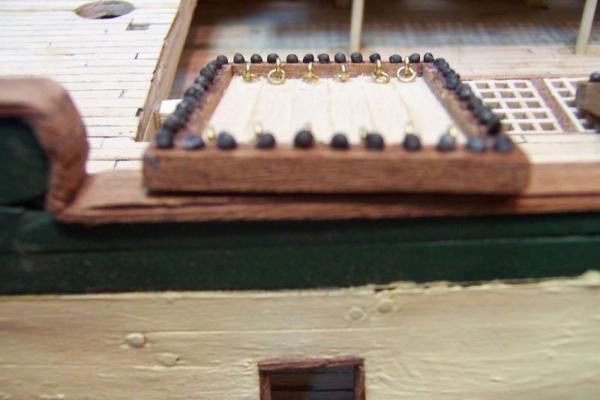
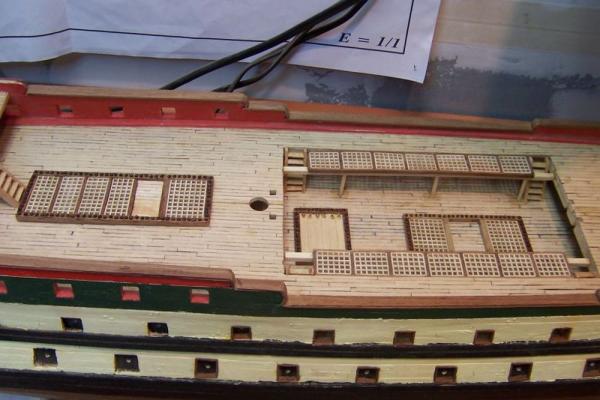
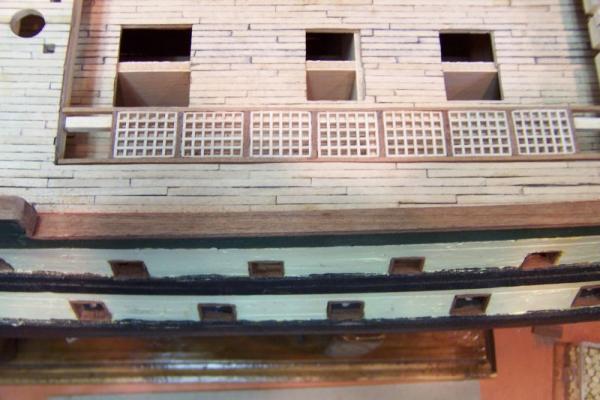
Per the instruction all of the deck grates and hatch needed to have the small black cannon balls affixed to the entire outside frame. I found this much easier than I thought with the proper use of the correct rotary tool. You have to use just a very light touch to form a small half circle indent around the 4 mm edges, but there was plenty wood area to chew up so that proved not to be a problem. The final photo here shows the deck placement of all of the grates and ladders that have been shown.

-
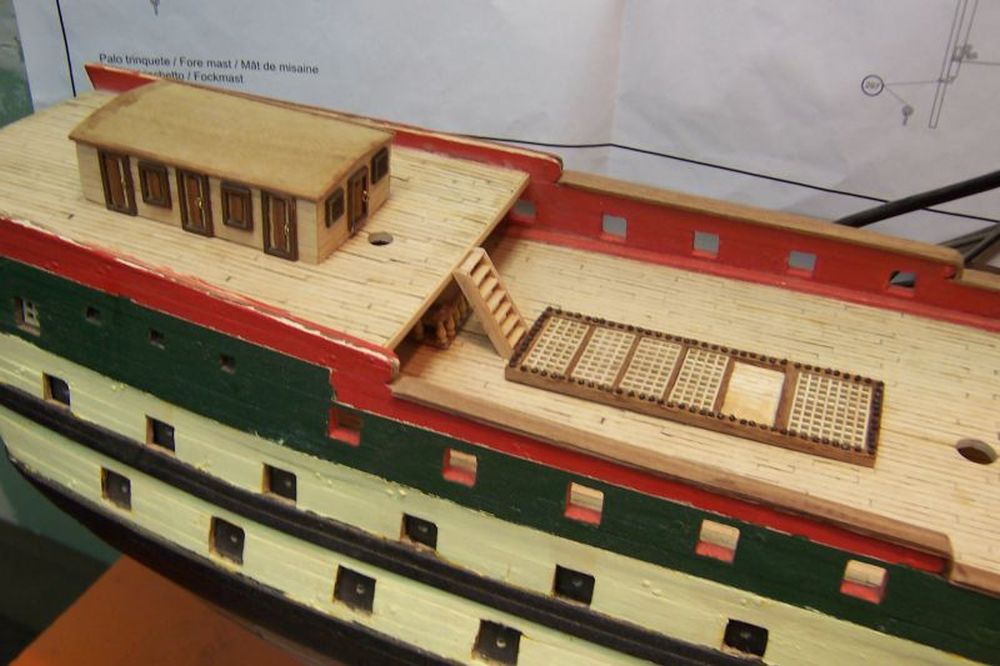
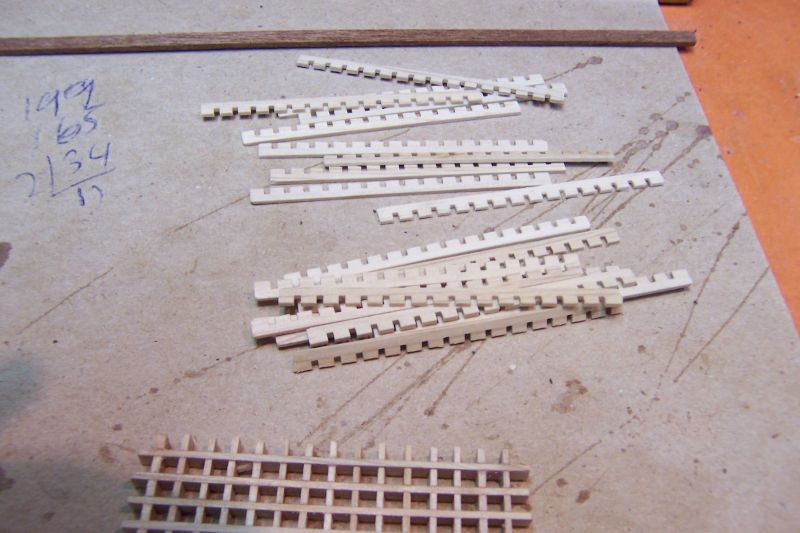
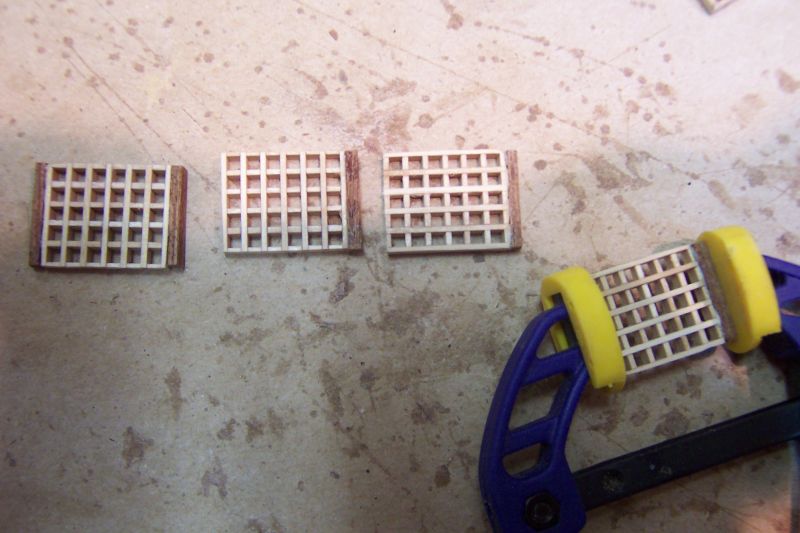
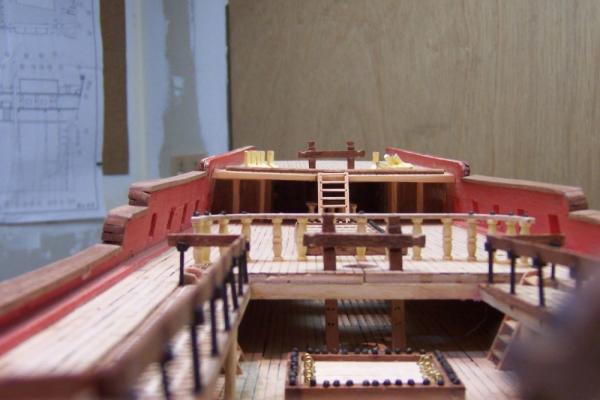
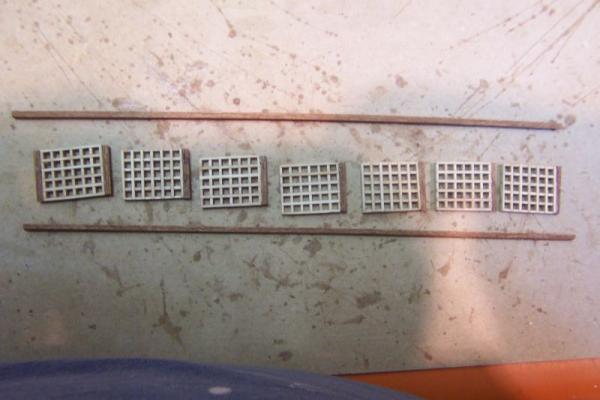
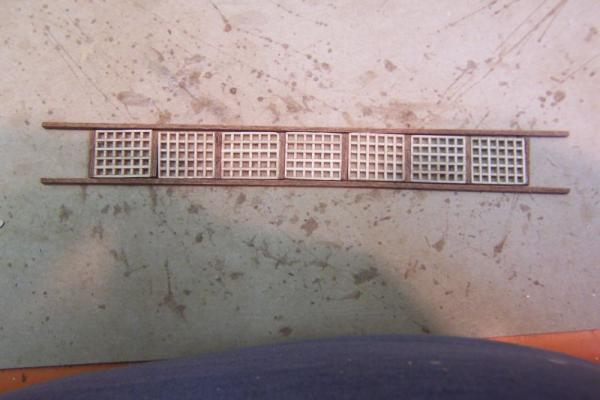
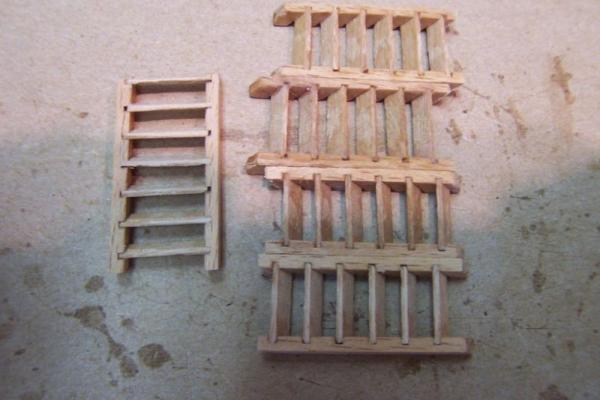
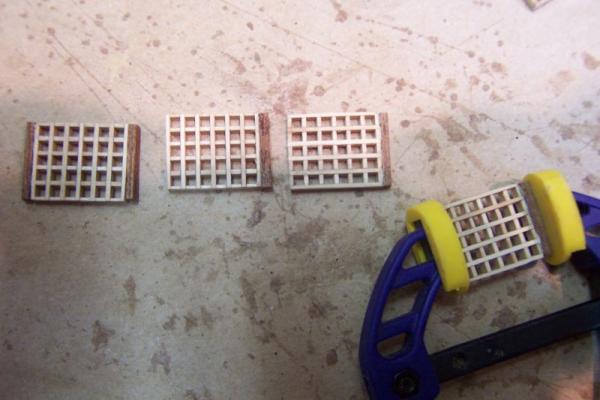
Continuation of making the main airways...and the final picture is of the ladders needed. I was very pleasantly surprised that the laser cut ladder supports and the actual ladder step stock fit so well and tight together that I almost didn't have to use glue at all. The next couple of updates will include photos of all completed deck grates and the main deck hatch.

-
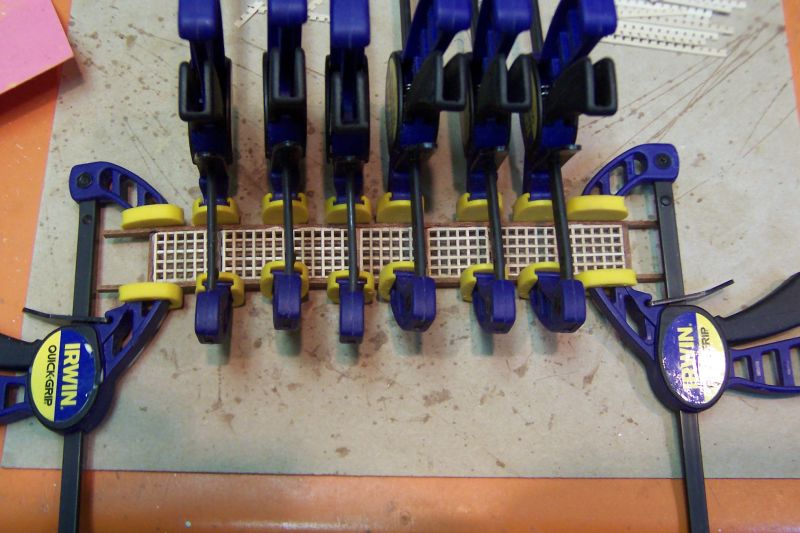
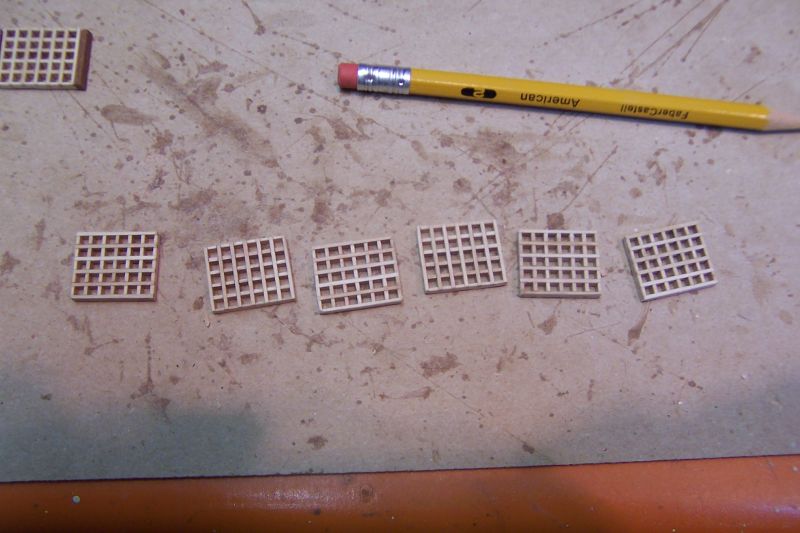
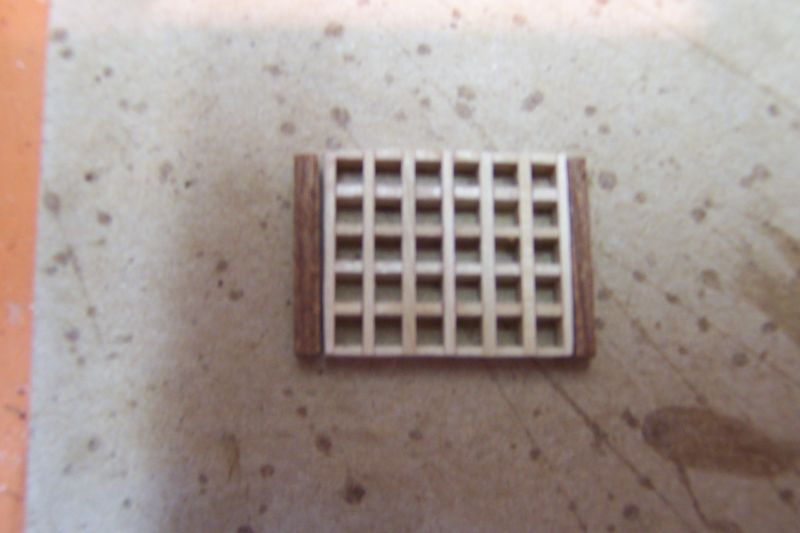
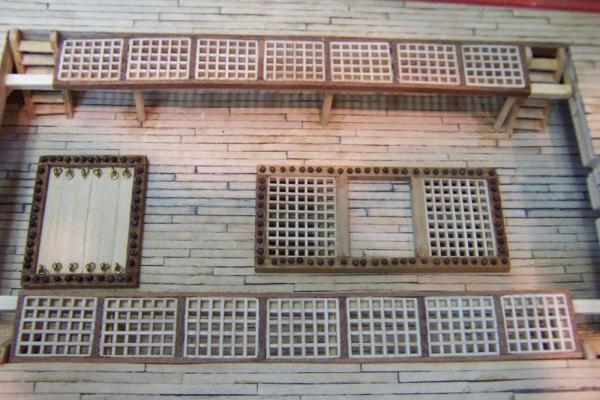
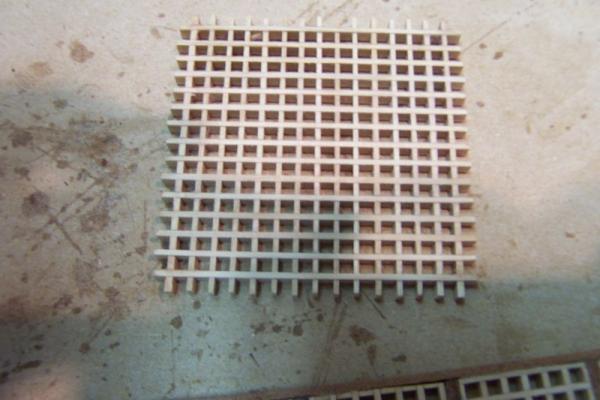
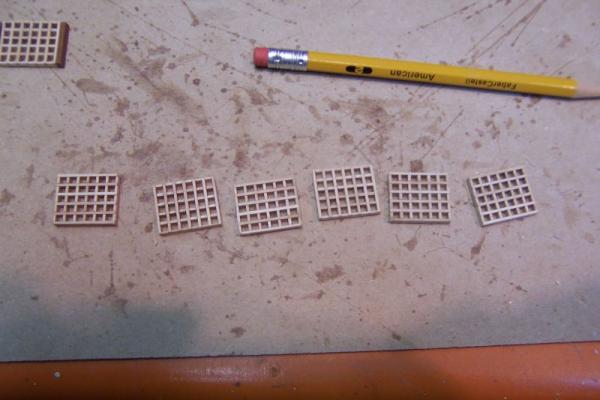
After finishing the hand rail details, the next step was making the deck grates. After clearing up some confusing instructions regarding the main deck airway grates, I studiously put together all of the grates using CY glue, let them set fully overnight and then started assembling all of the various deck grates and the main hatch. The main airways were the first pieces I cut and assembled.


-
Scratch building requires wood stock, and lots of it. Until I have a full stockroom of all plank sizes available, all metal fittings available in all scales, all wood sheets available, it is easier to buy a kit that supposedly includes everything and then just get what you need make that particular model kit better. I keep all excess wood stock from all of the kits I build, so the lumberyard is sort of getting started. Eventually, I will have a full model lumber yard and fitting warehouse, THEN I will start to just purchase plans or get museum blueprints of the ships that I want to model.
-
I have this kit myself, on the bench with the carcass finished but not yet planked. That project is on hold until I finish a couple other kits. I look forward to see how you will do the circular staircases. Since the kit did not supply material for this, or the stove either, it is an advanced kit. I really want to make those curved stairs so I will be watching this build now. Looks very nice so far, keep it up.