rookie
-
Posts
145 -
Joined
-
Last visited
Content Type
Profiles
Forums
Gallery
Events
Everything posted by rookie
-
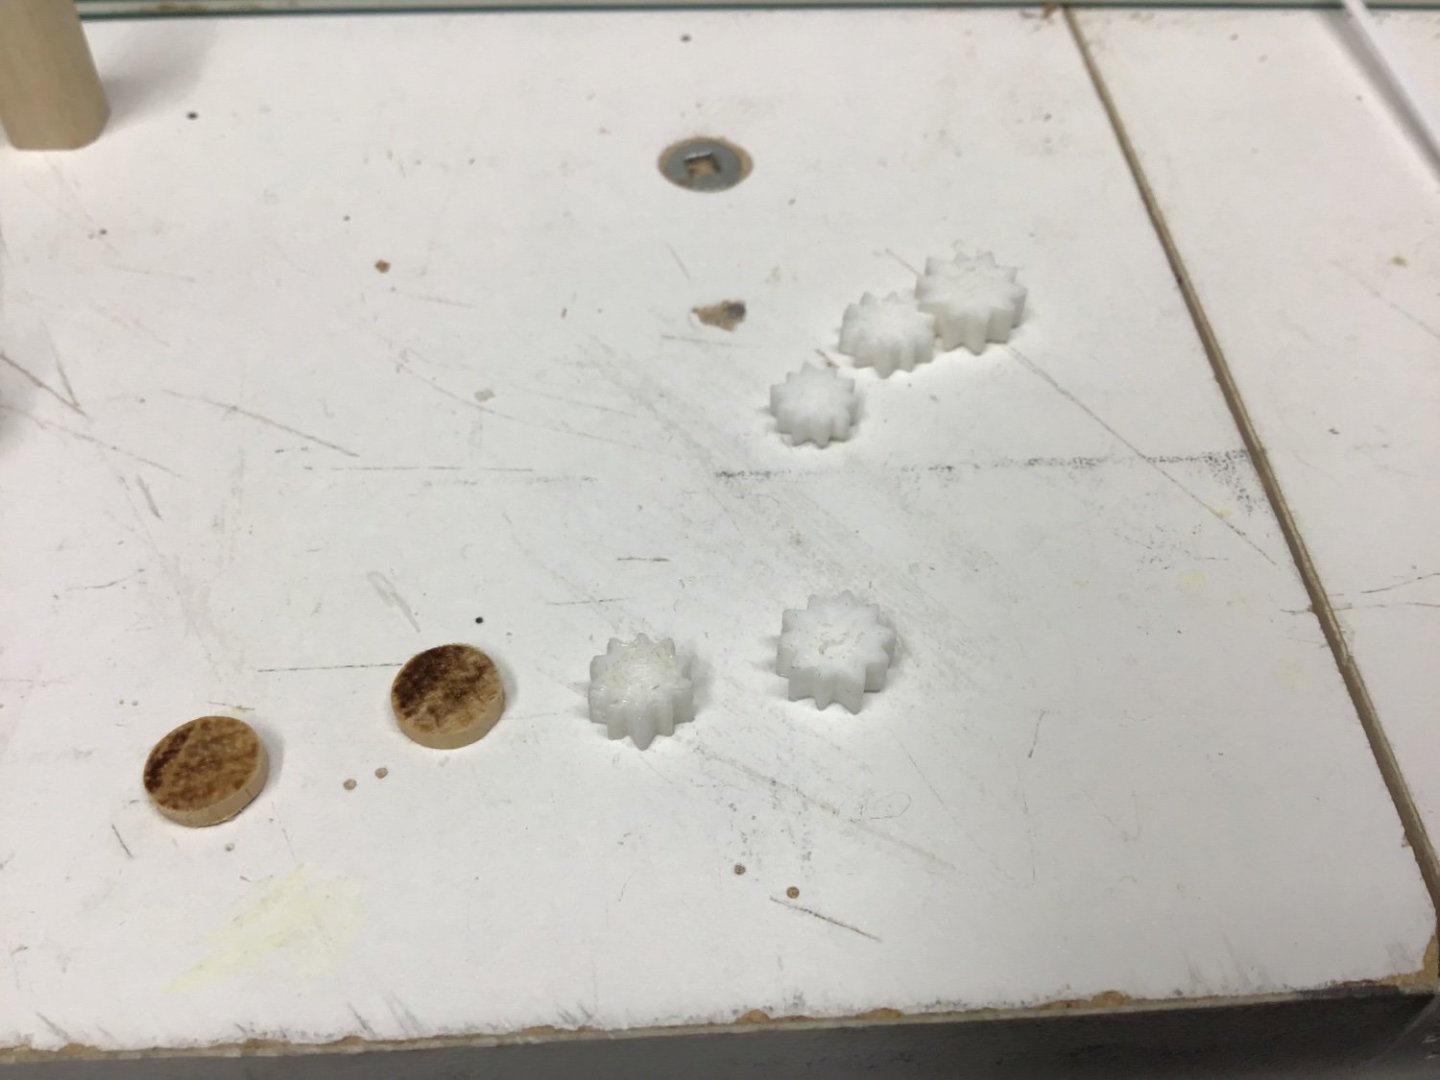
 Update to my Tinkering with Tinkercad and 3D printing here’s a photo showing many trial prints and wood pieces along with the ‘skewer’ that has the current 3D parts i believe I still have some changes as I expected these parts to be a bit wide : suspect I messed up measurements somewhere I include photo from CWM herself
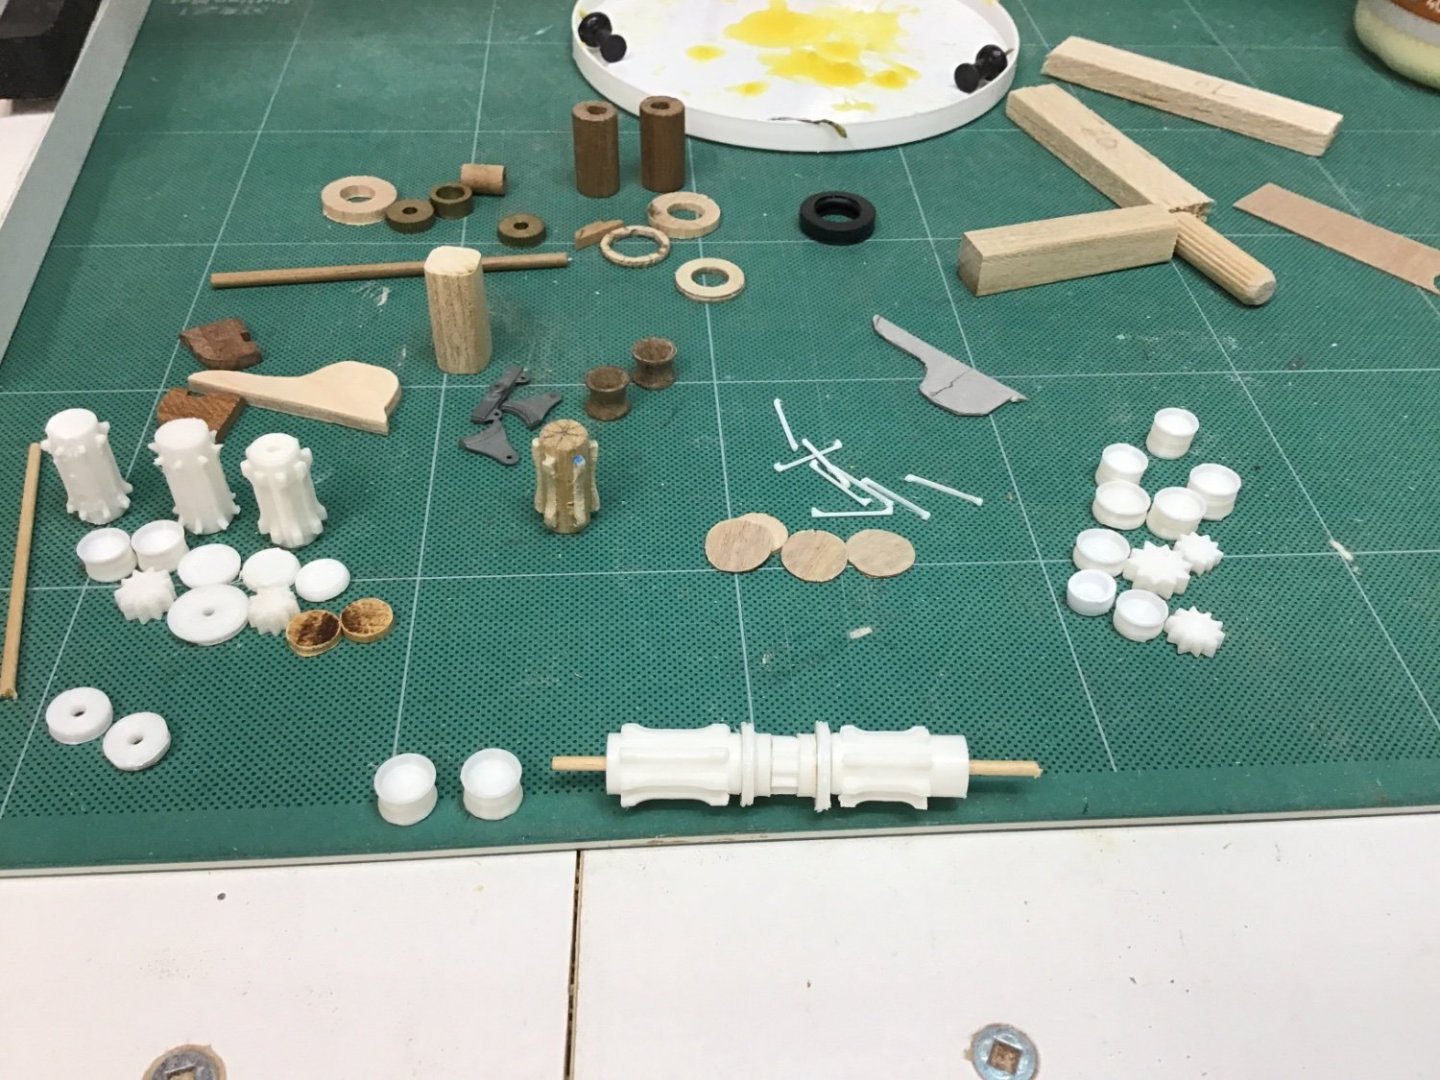
-
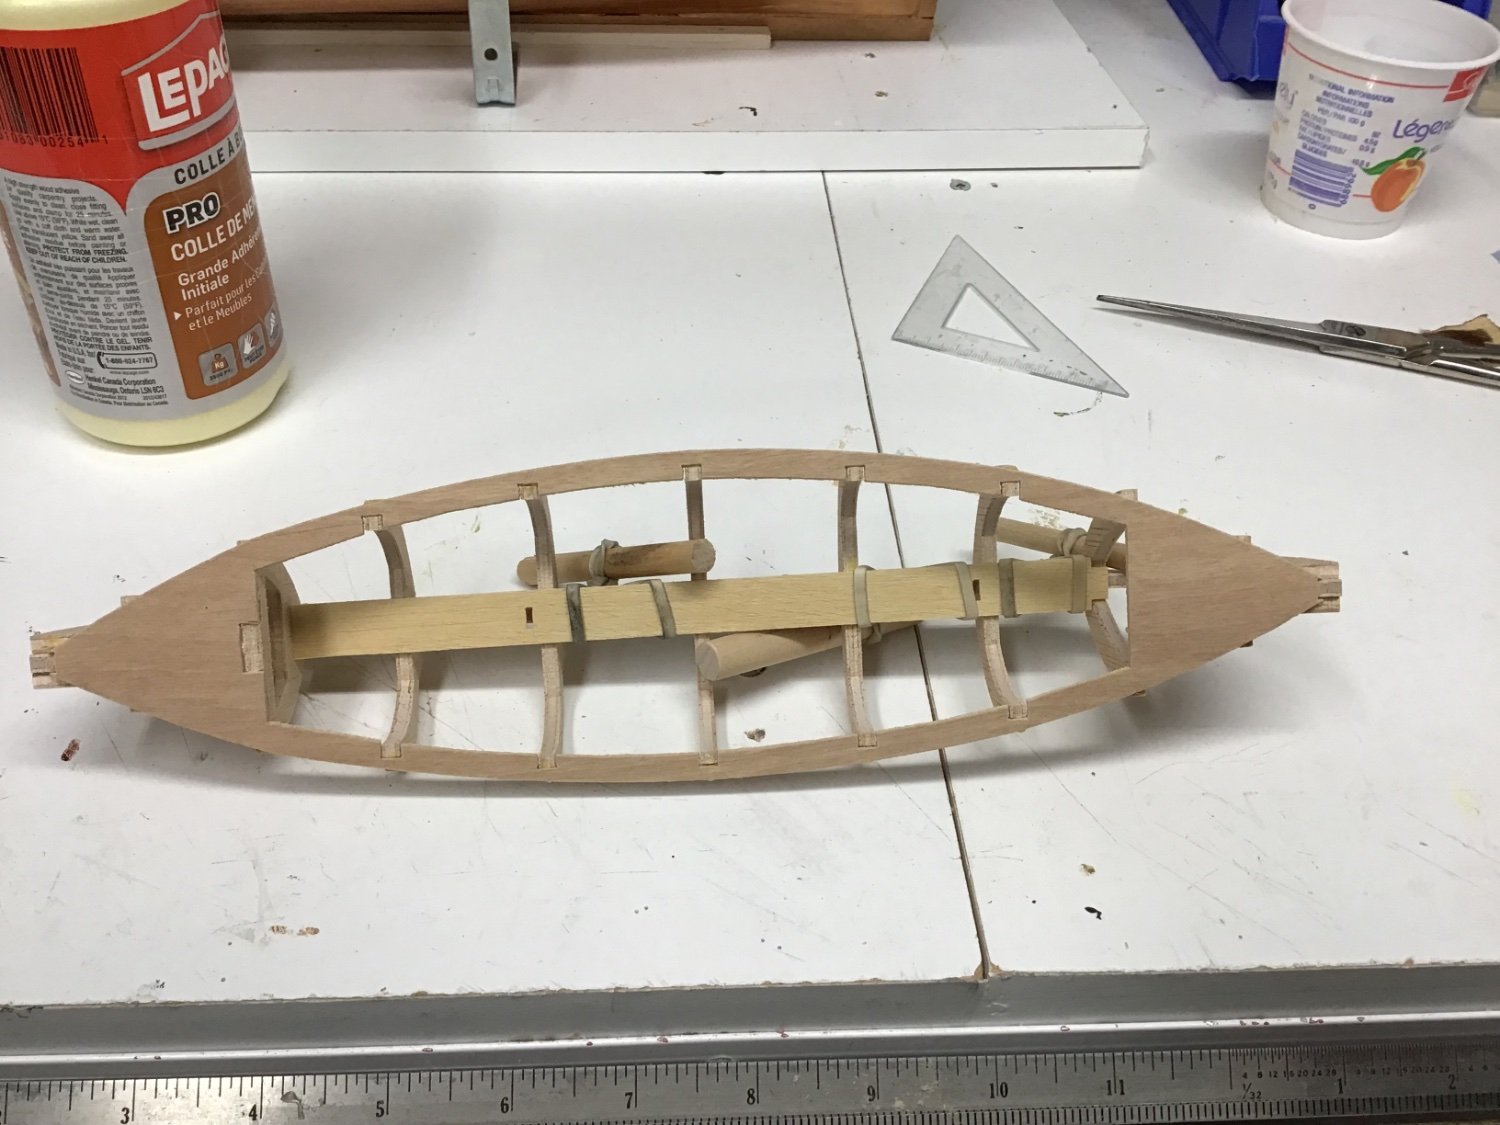
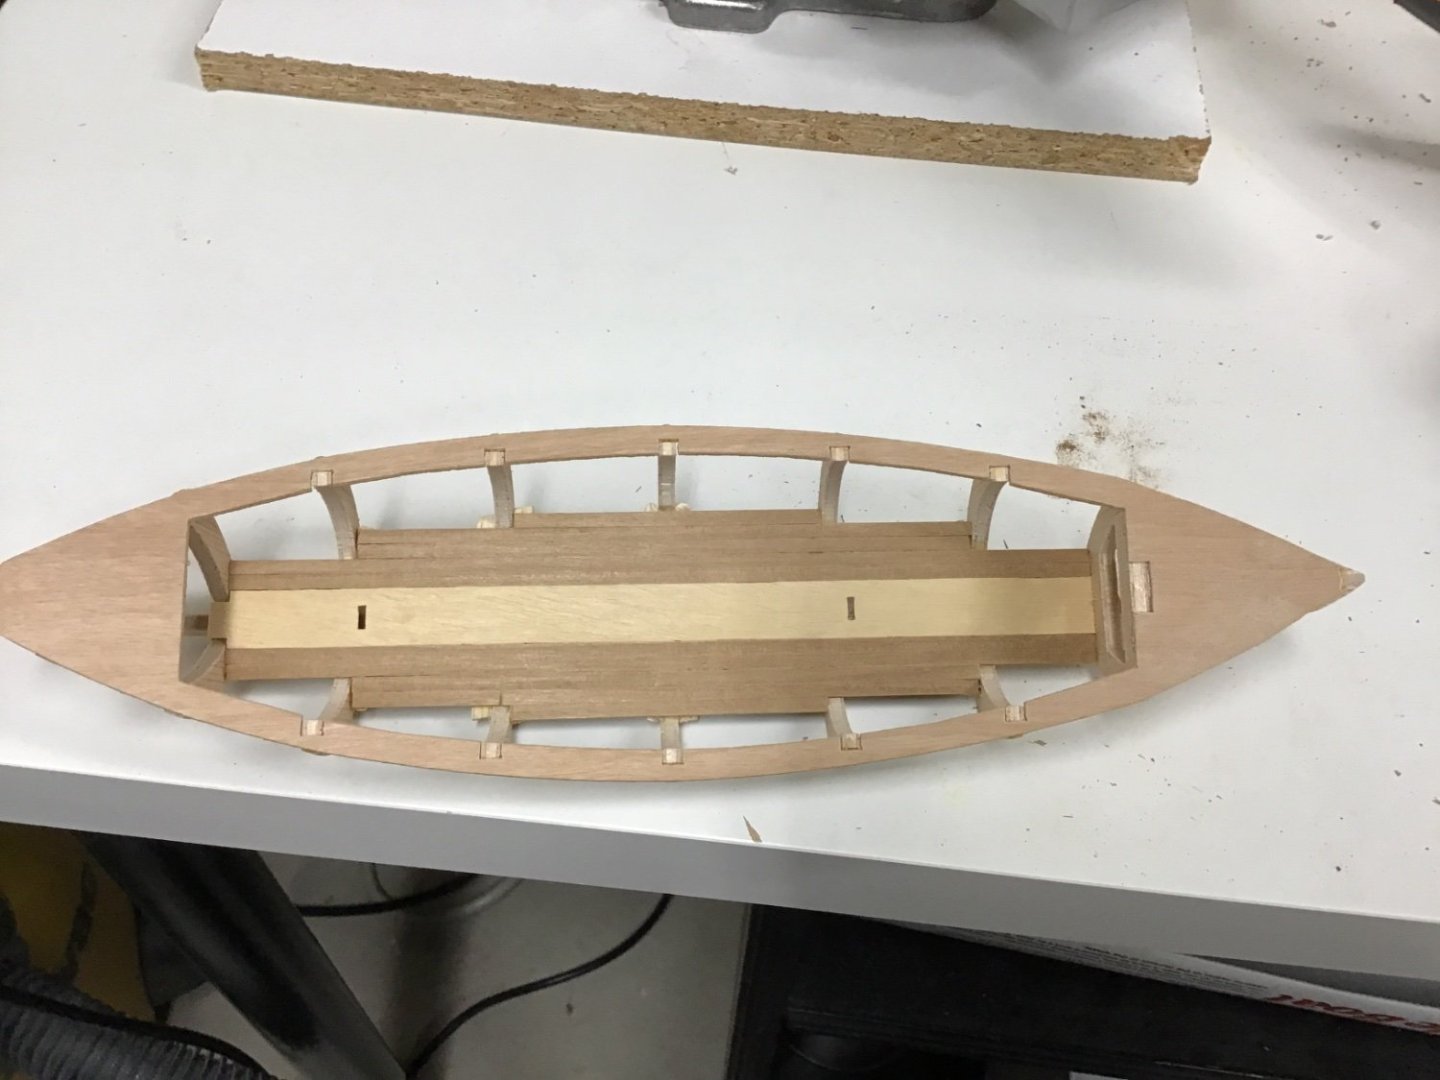
I completed the ‘floor’ planks the inner side planks have a difficult twist struggling a bit with those at the moment
- 1 reply
-
- 1
-

-
- Whaleboat
- Artesania Latina
- (and 1 more)
-
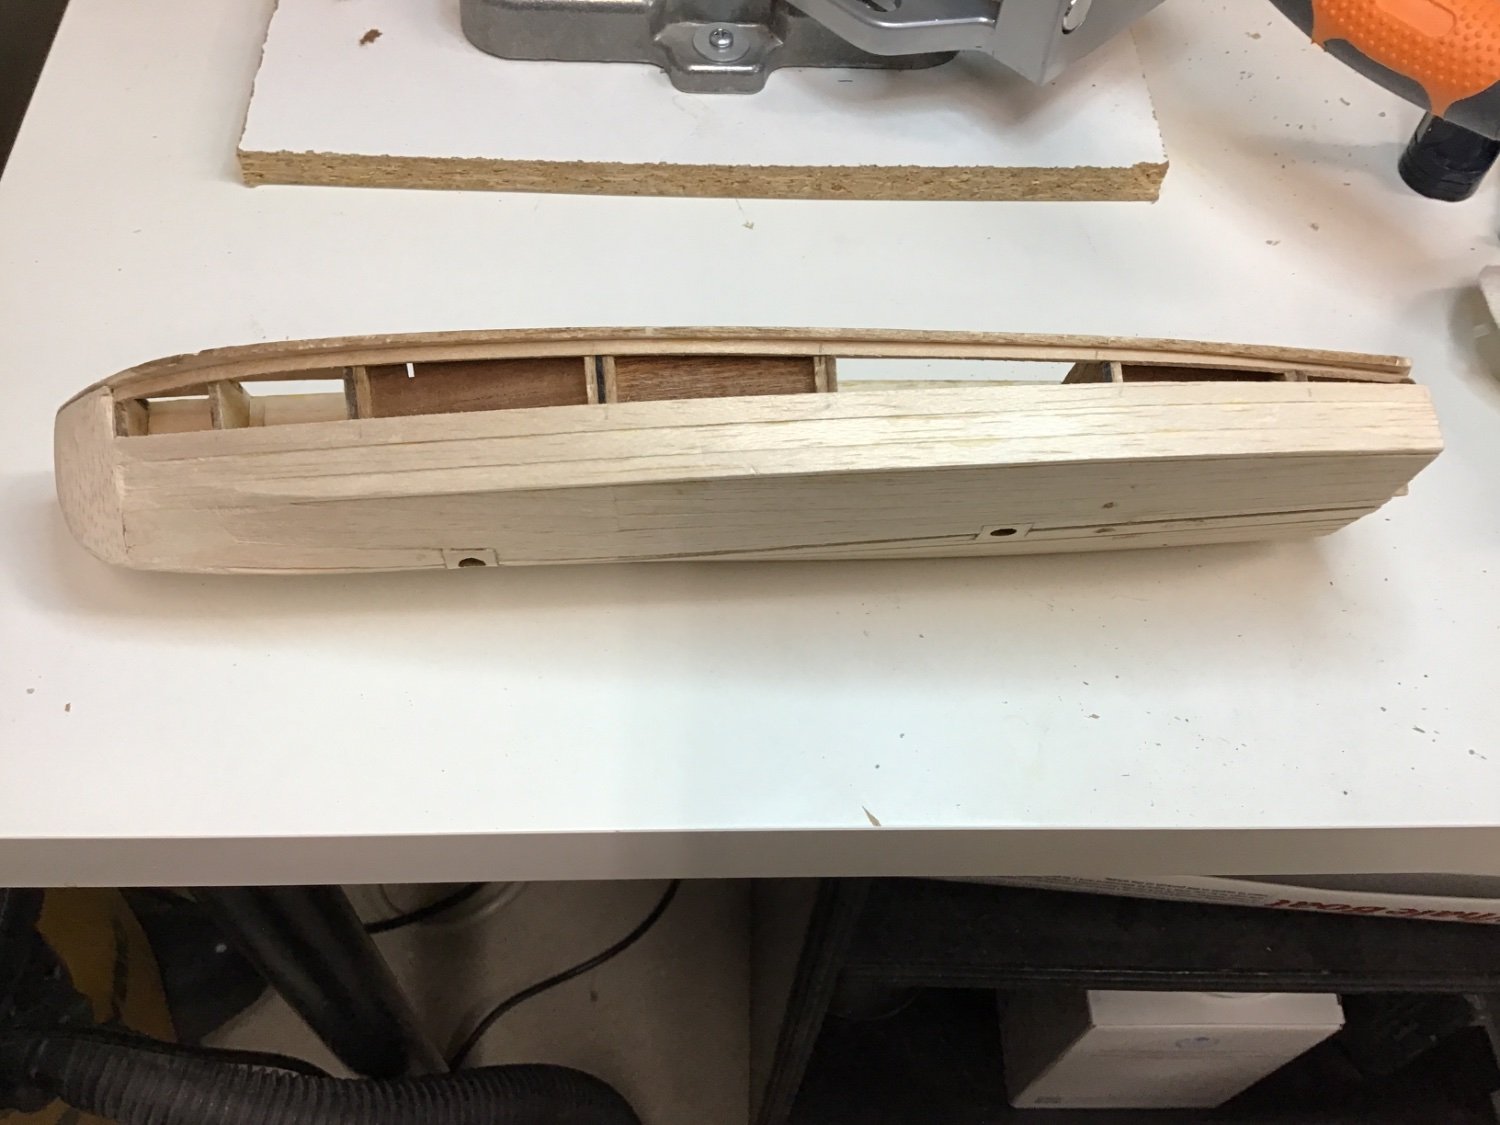
I am working on balsa layer of planking i saw a picture of actual boat that shows the planking has a bit of an upward sweep at the shear as well as quite a weird shape at the bow , that deep cut or twist below the chines seen here not obvious in the instructiions


- 8 replies
-
- 6
-
-
- Dumas
- Chris-Craft
- (and 1 more)
-
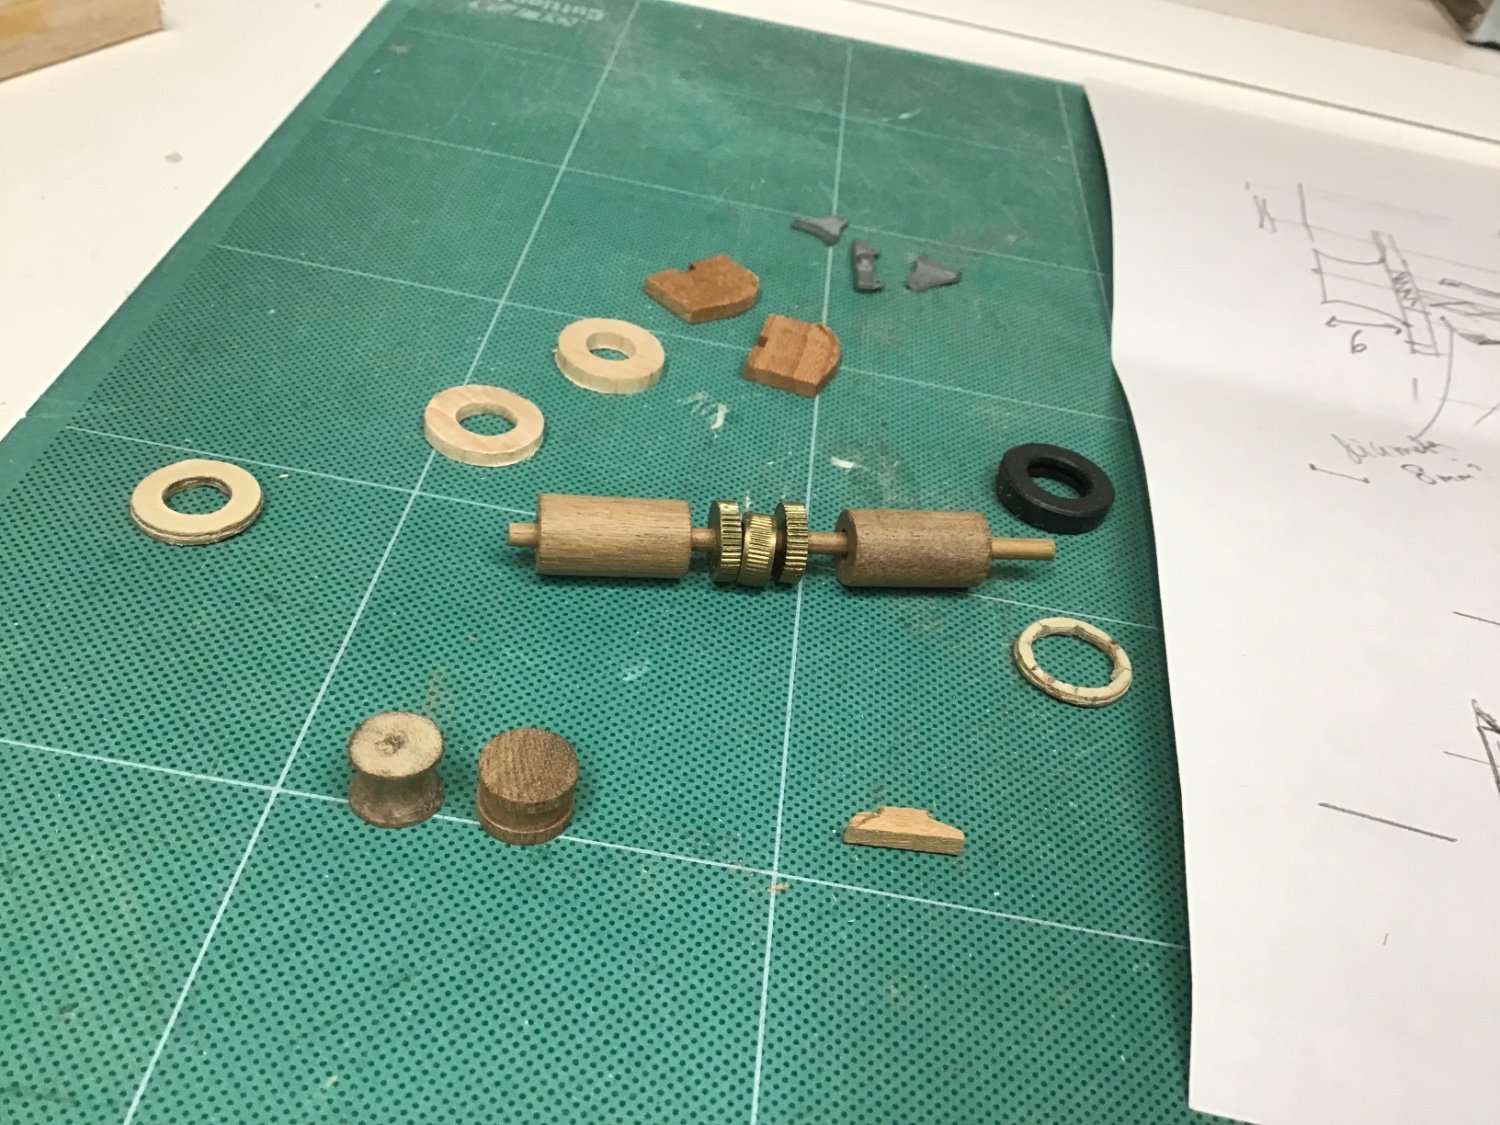
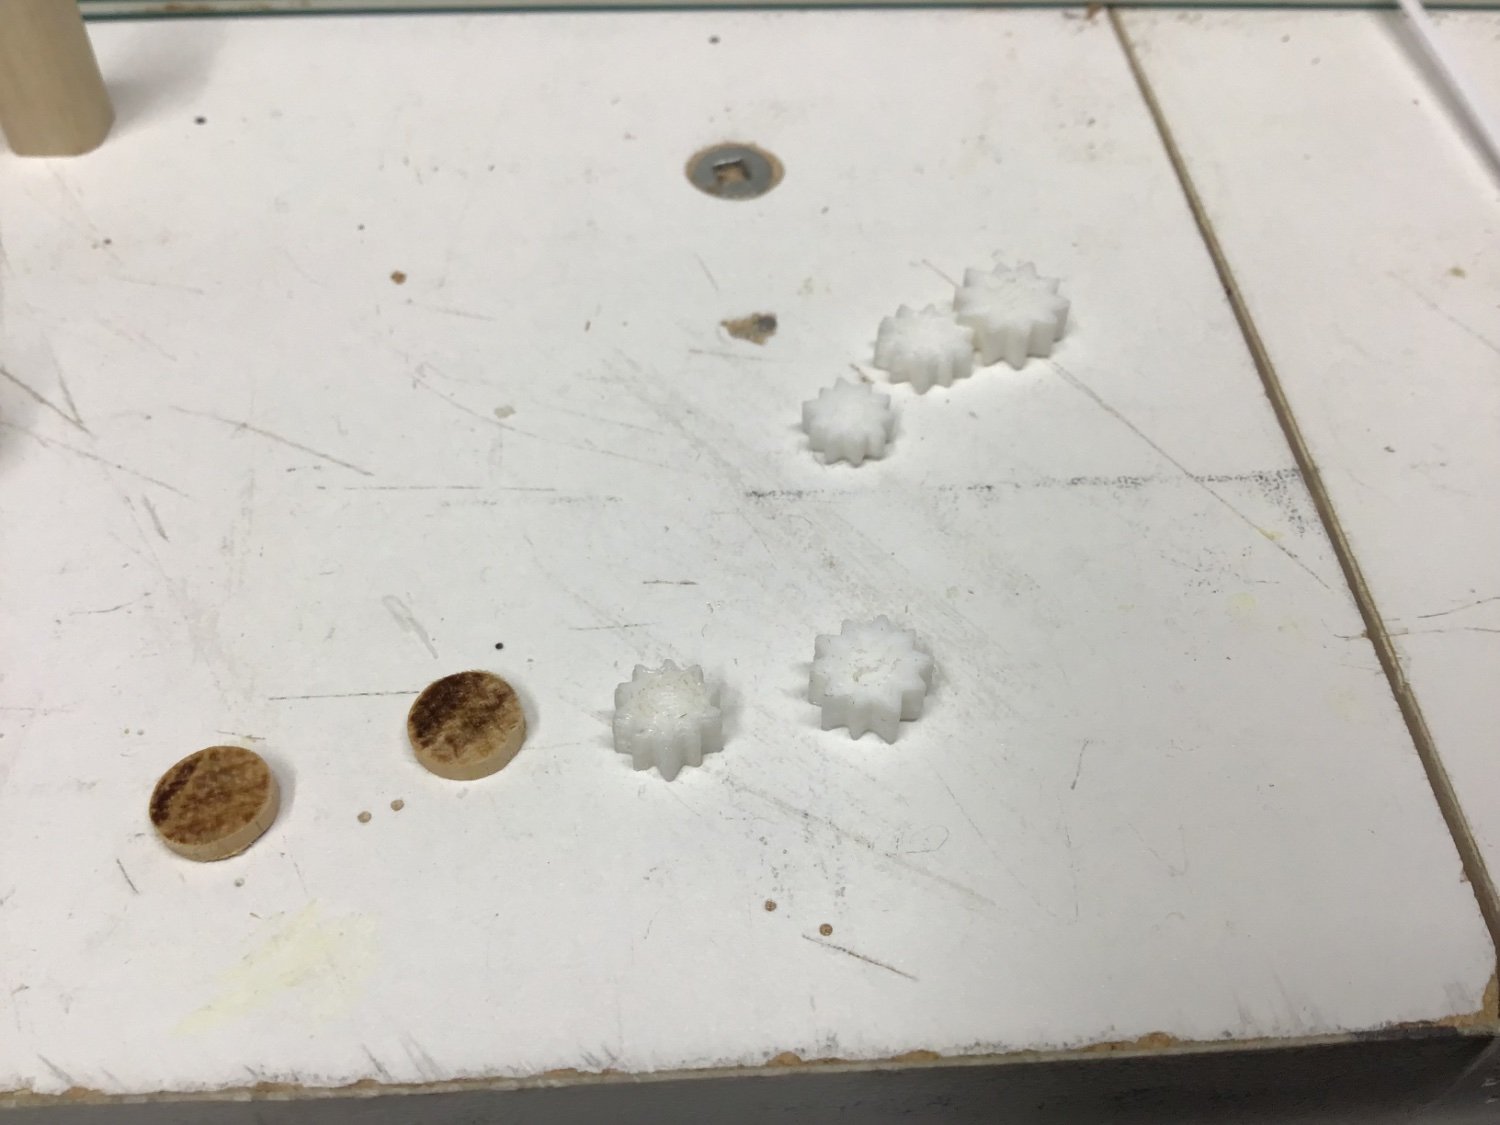
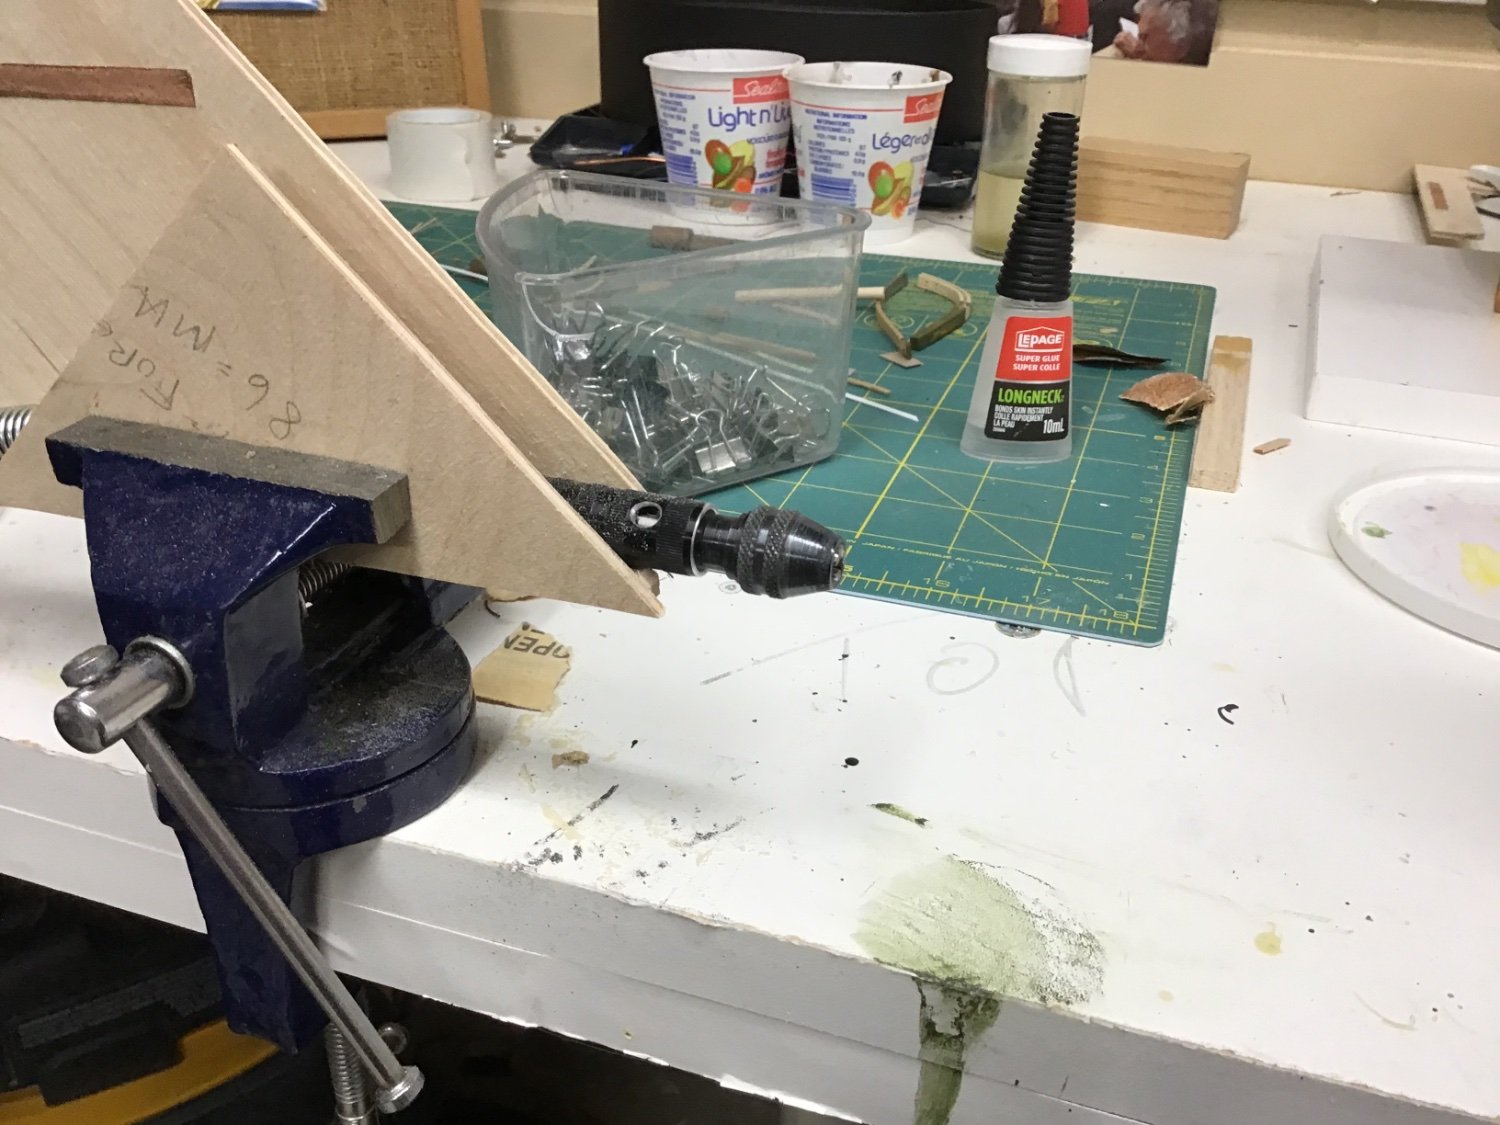
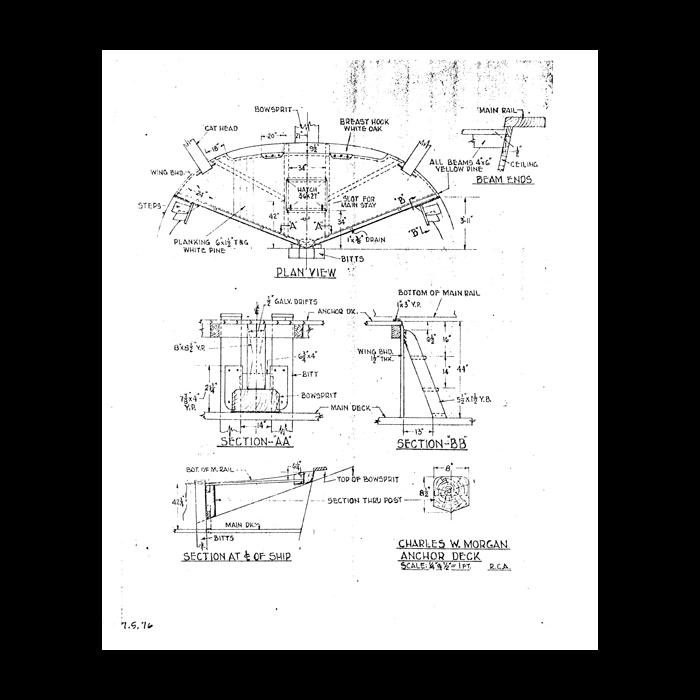
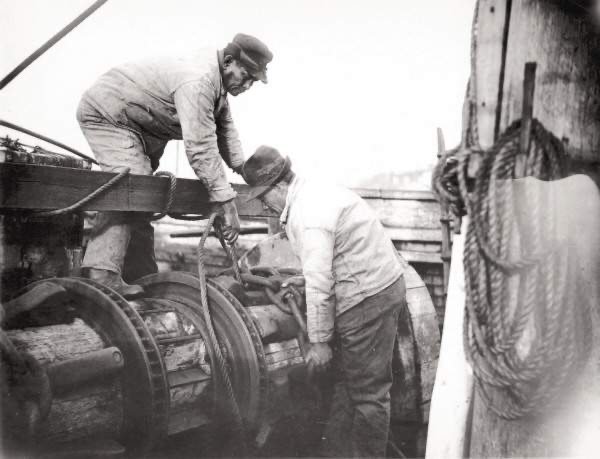
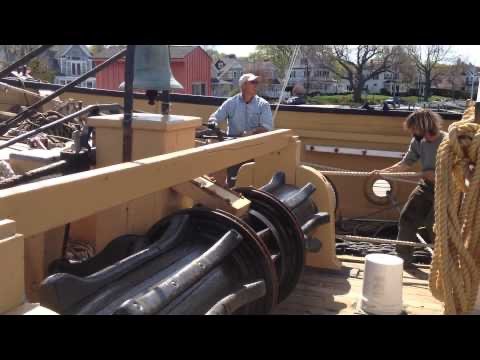
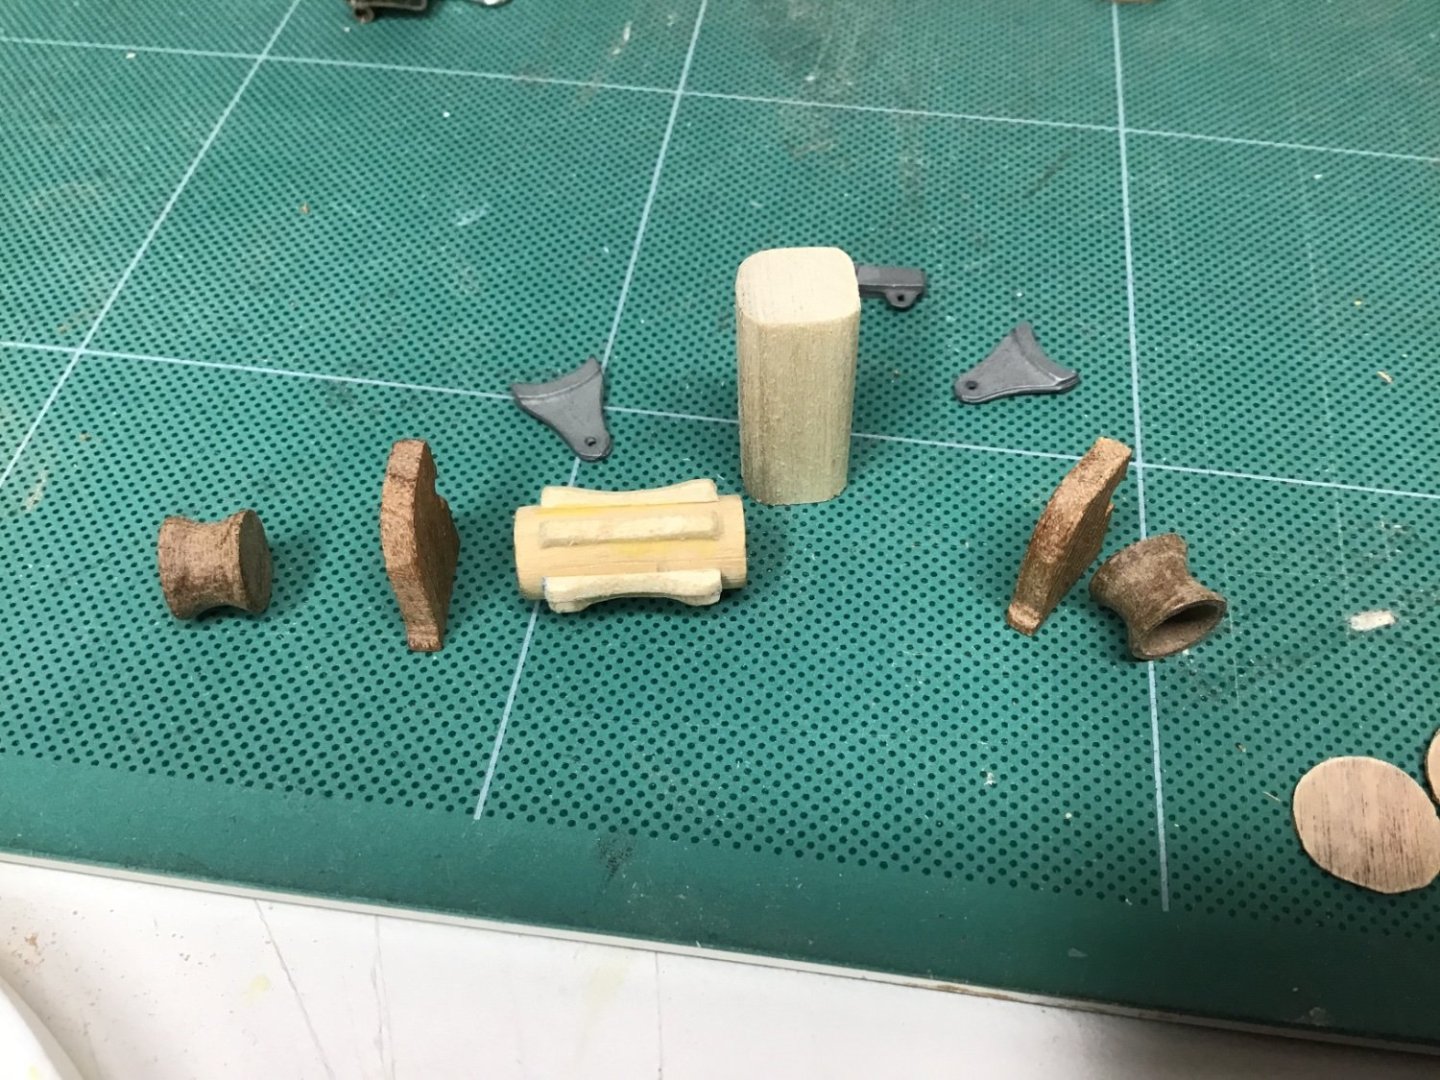
While I mull over what to do about 3D print of boats, I decided to stop stalling and get the windlass done. the parts in AL kit for this are real bad. I attach a photo i am modifying some of those parts and building it based on actual photos and my best guess Her3 is photo of some of the parts I completed so far. The drum at each end I whittled down from kit and shaped based on real ship. i also used my 3D printer for the ratchet gear in the centre of the windlass I am considering doing the main parts of the body with the metal pieces it wind the chain, still learning how to draw with Tinkercad et al so will see how it goes

-
Your galley is the coolest boat you have built, I have to say.
- 502 replies
-
- 4
-
-

-
- Quadrireme
- radio
- (and 1 more)
-
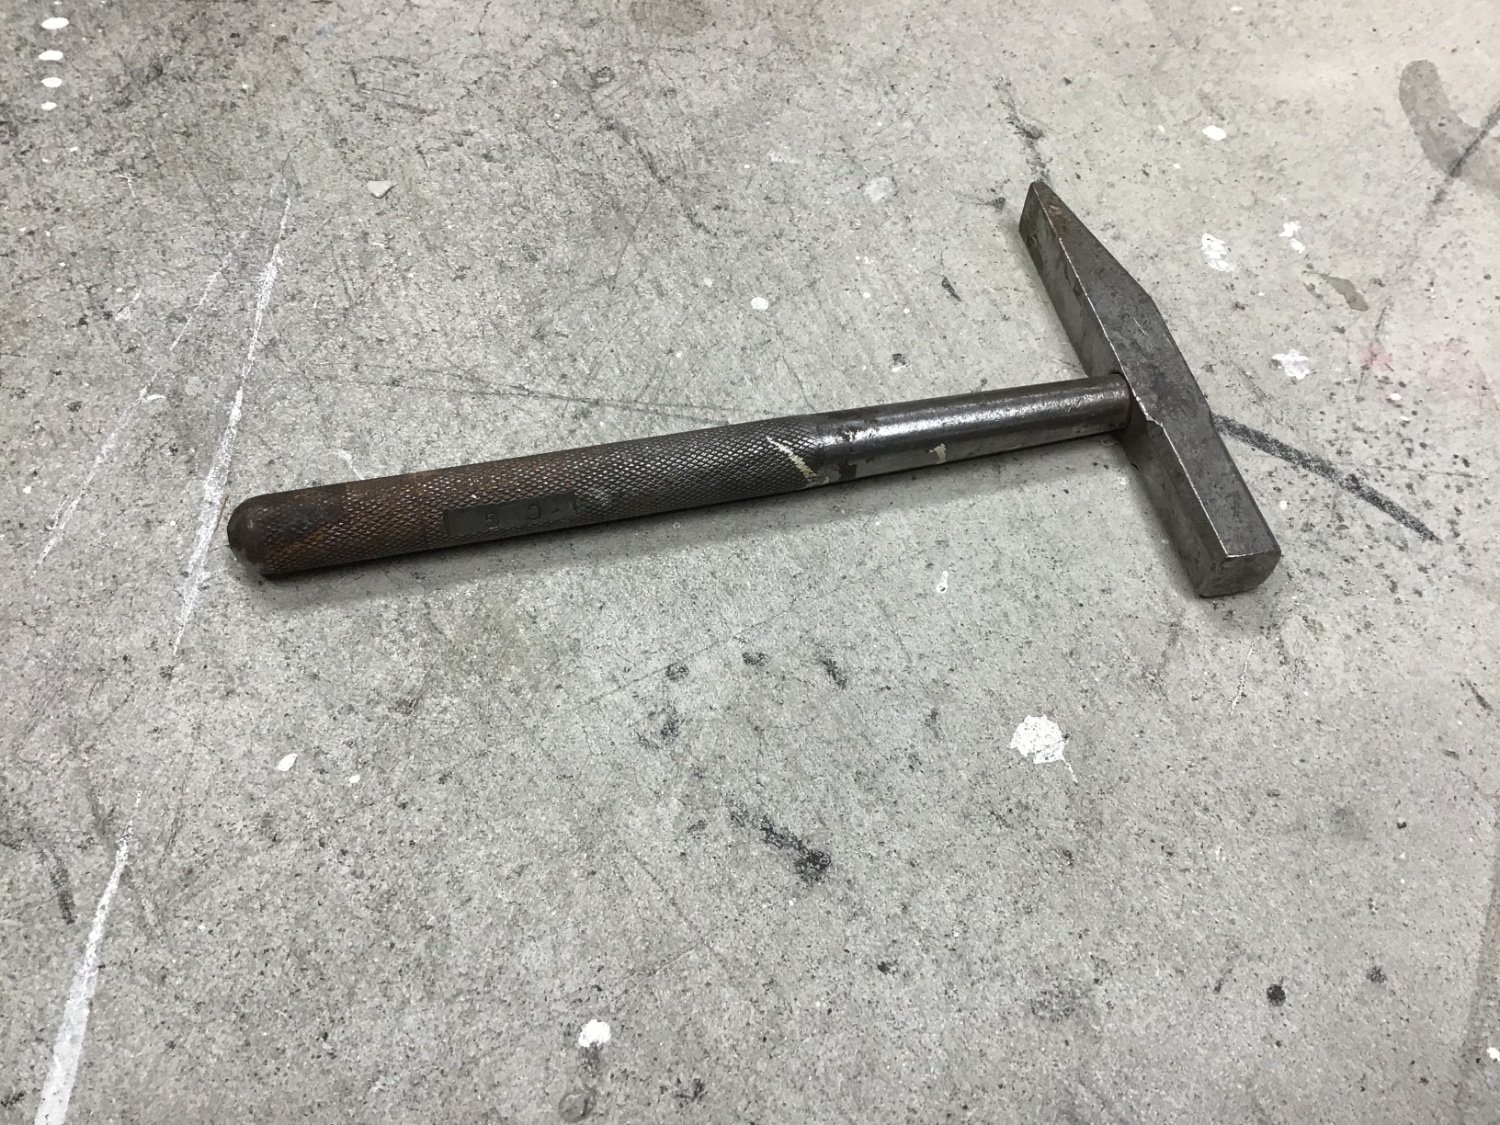
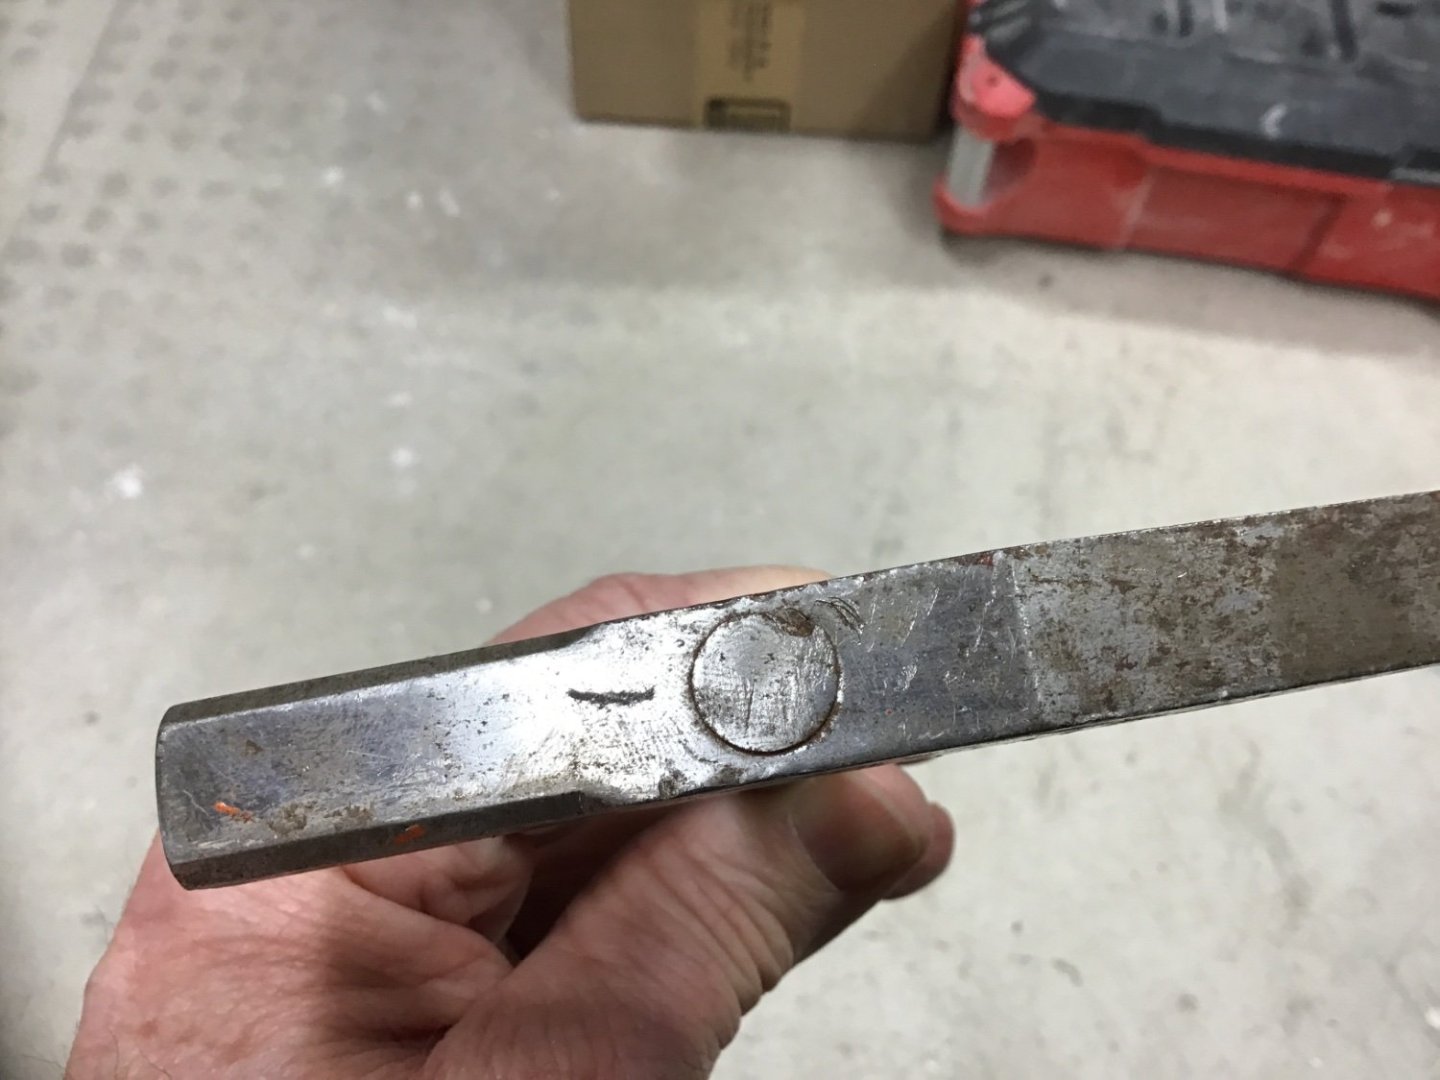
I would have no clue about knurlinf these days looks like the handle on this one is not brazed, just passed through head and hammered down Fun times
- 502 replies
-
- 6
-
-
- Quadrireme
- radio
- (and 1 more)
-
Wow! I had no idea you had a wood lathe i have been toying with getting a mini one but have nowhere to put it. it would be handy , also a mini tilt table saw but also lack of space the mast looks great
- 502 replies
-
- 2
-
-
- Quadrireme
- radio
- (and 1 more)
-
I think the layers also make it difficult to shape the sheer line swoop for lack of a better word from the side the hull drops down amidships
-
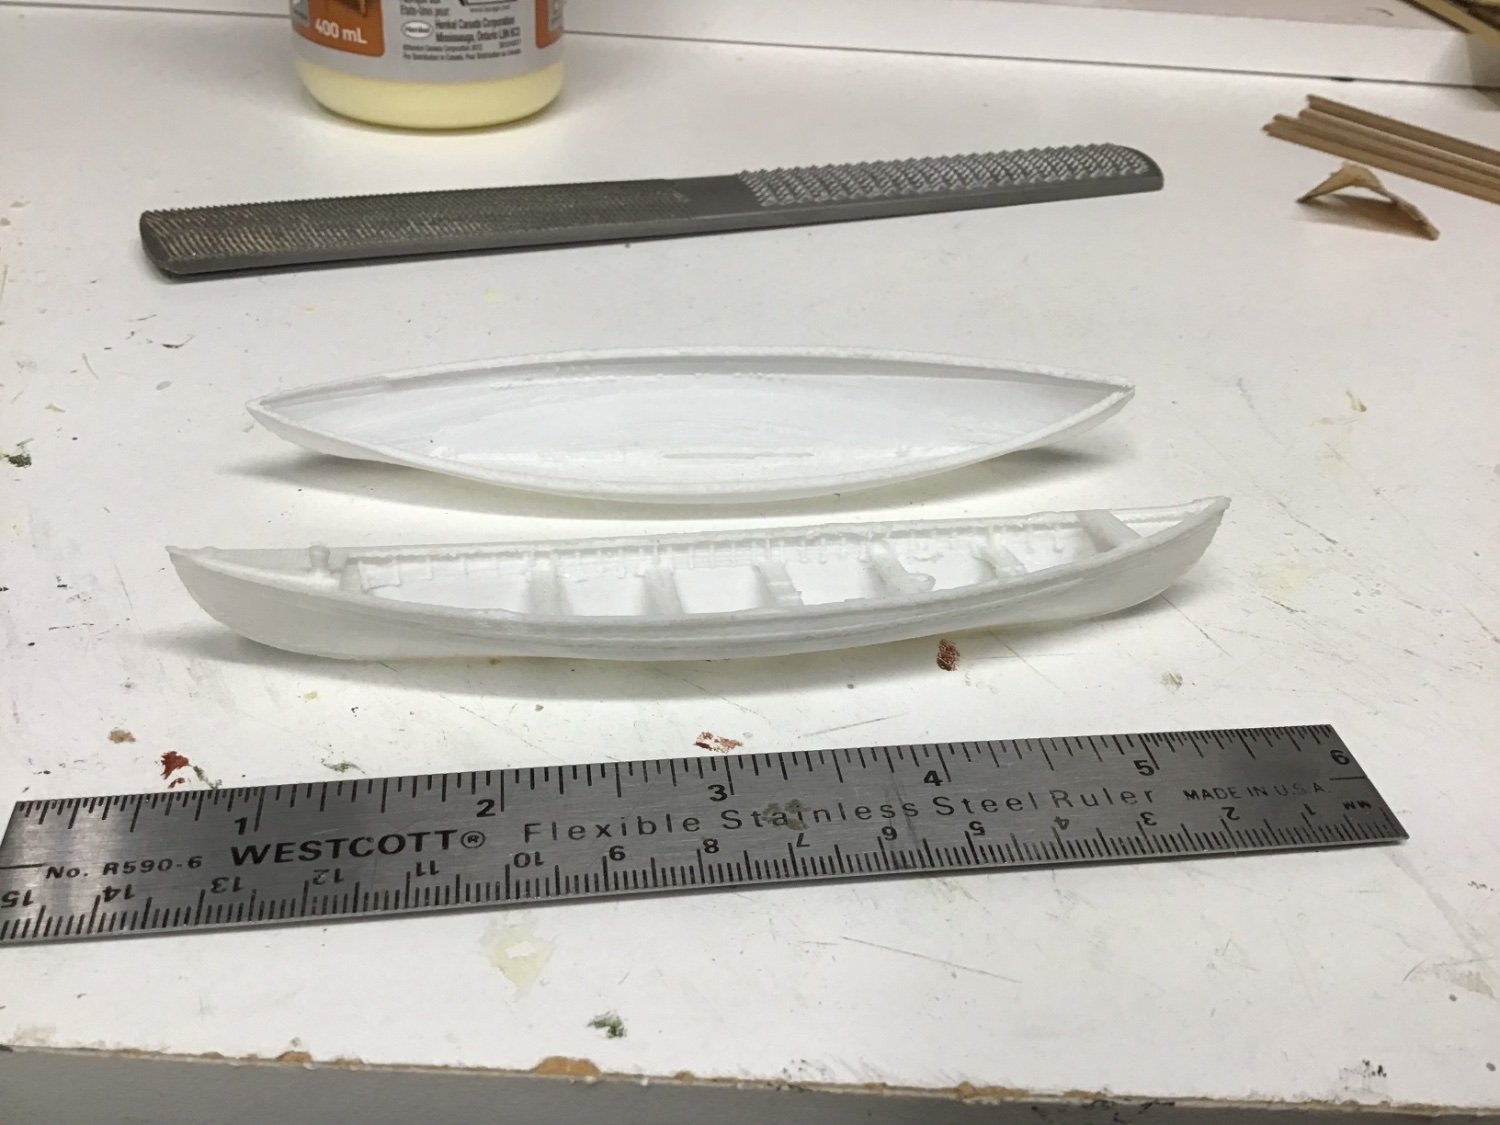
I have been experimenting with 3D printer for the boats I found a Beetle Whaleboat file on a 3D site and have printed a few at this scale the detail is rough though that may indicate my ‘rookie’ level ability with 3D printing My brother said to get resin printer which looks like good advice at the moment heres a couple samples from todays printing effort one with empty hull and one with seats etc also one showing scale beside Morgan i may print slightly larger, the empty shell could be the upside down spare or I may print all empties and fill in details with wood

-
Interesting that kit uses layers for the boats i have spent a lot of time looking at how to build boats the AL kit provided frames way too big and chunky and only a couple anyway i found a 3D file of Beetle whaleboat online but having difficulty experimenting with printing it at this scale i suspect the filament printer is not good at small detail and also I have only printed a few things for my son and his Milwaukee Packout tool system I will post the 3D soon on my CWM build if I get anything useful
-
I decided to begin yet another of the models on my shelf. it is a whaleboat of European origin, I assume i can work on this while glue dries on other models I am building 😬 here are some shots of building the frames

- 1 reply
-
- 4
-
-
- Whaleboat
- Artesania Latina
- (and 1 more)
-
Wow! I had the same thing with a sink drain the trap is all glued so I bought the threaded parts to replace it have not gotten around to the replacement part yet ….
- 502 replies
-
- 3
-
-
- Quadrireme
- radio
- (and 1 more)
-
Colours look great! you may have to store it in the garage or start doing push-ups
- 502 replies
-
- 2
-
-
- Quadrireme
- radio
- (and 1 more)
-
I think the manual is online so you can use your smartphone to look it up
- 502 replies
-
- 2
-
-
- Quadrireme
- radio
- (and 1 more)
-
Valeriy great to see you posting another project! I missed this one completely…. For almost a year apparently fantastic metal work as usual wonderful to watch Colin
-
Wow you even put the eyes for the storm cover ropes i did not even bother nice!
-
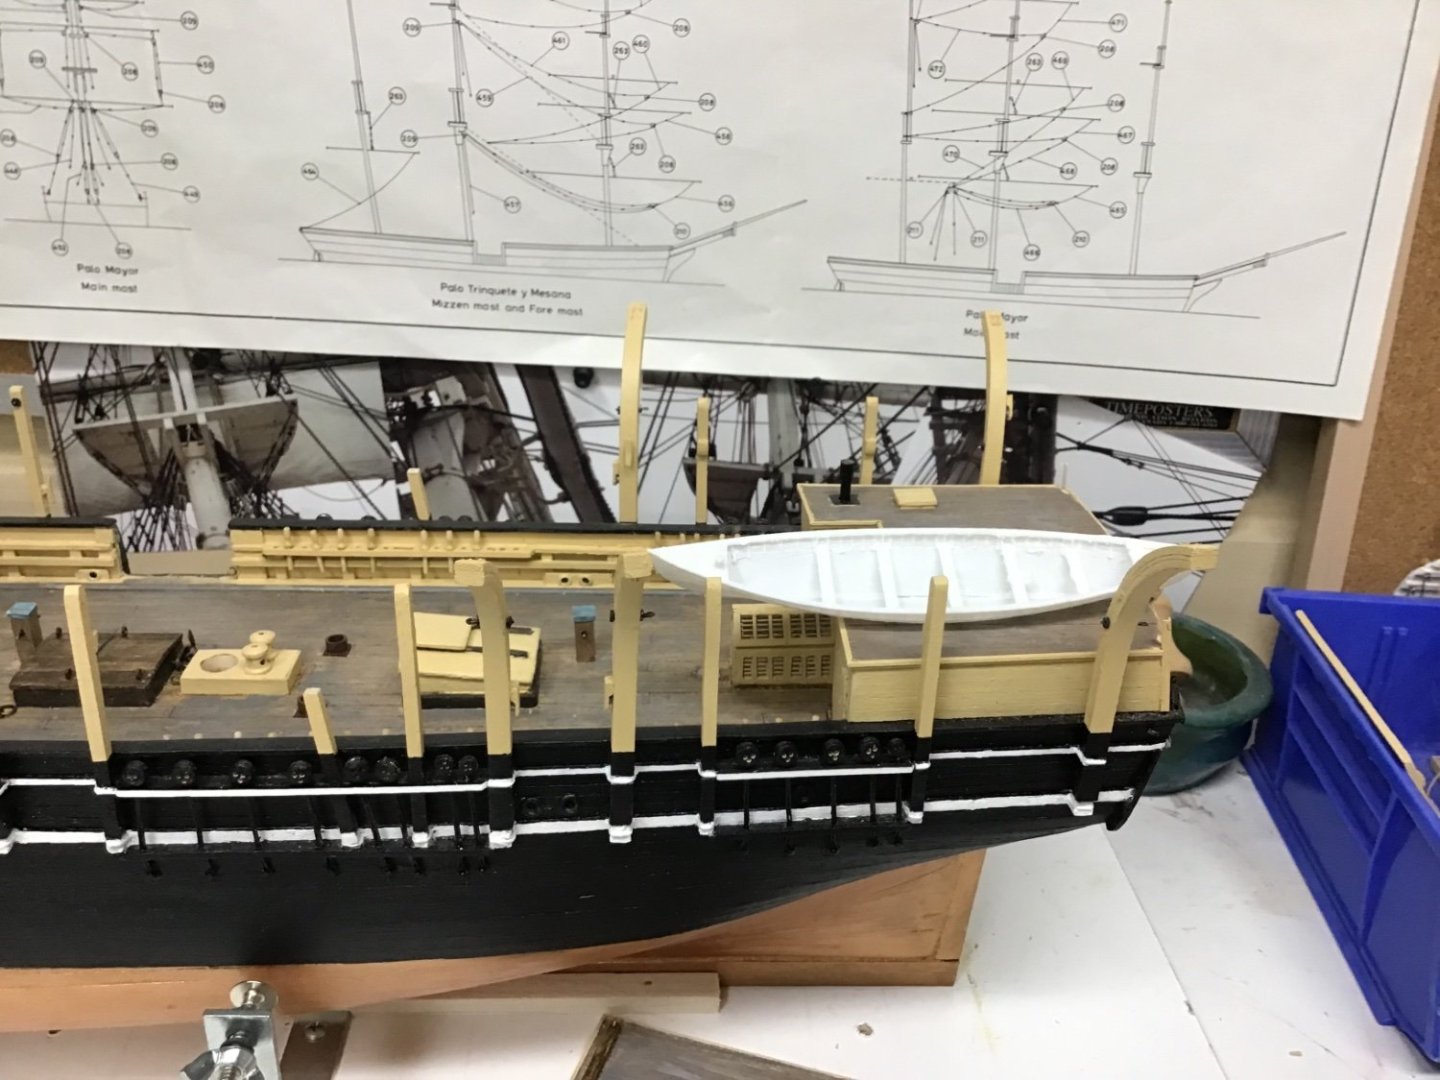
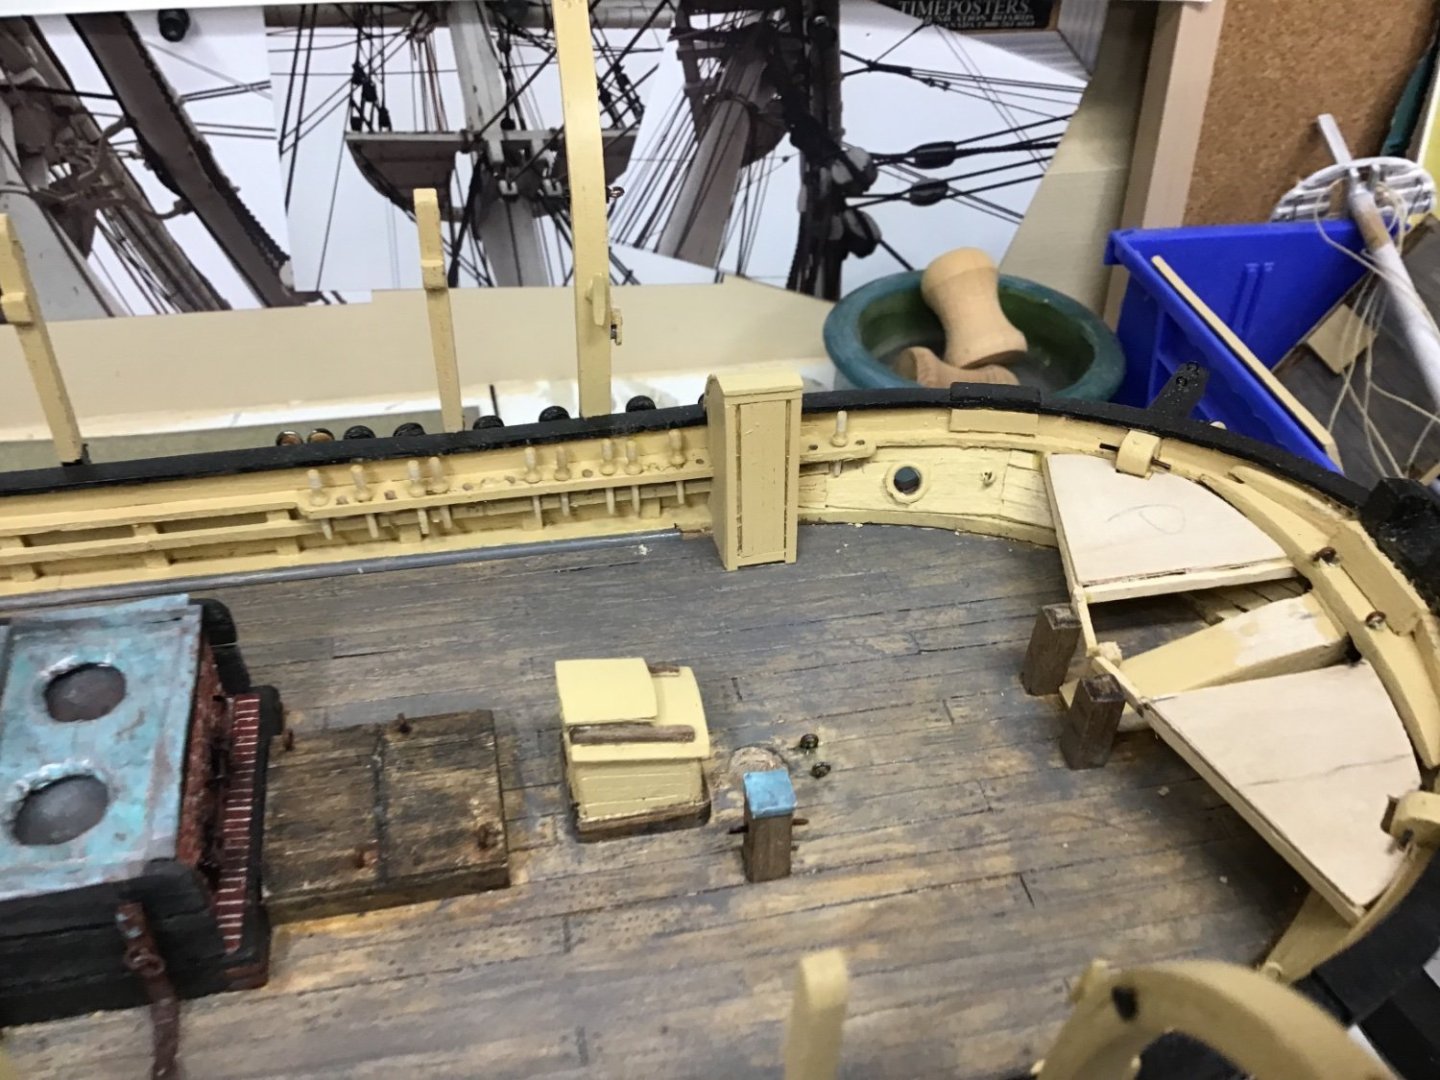
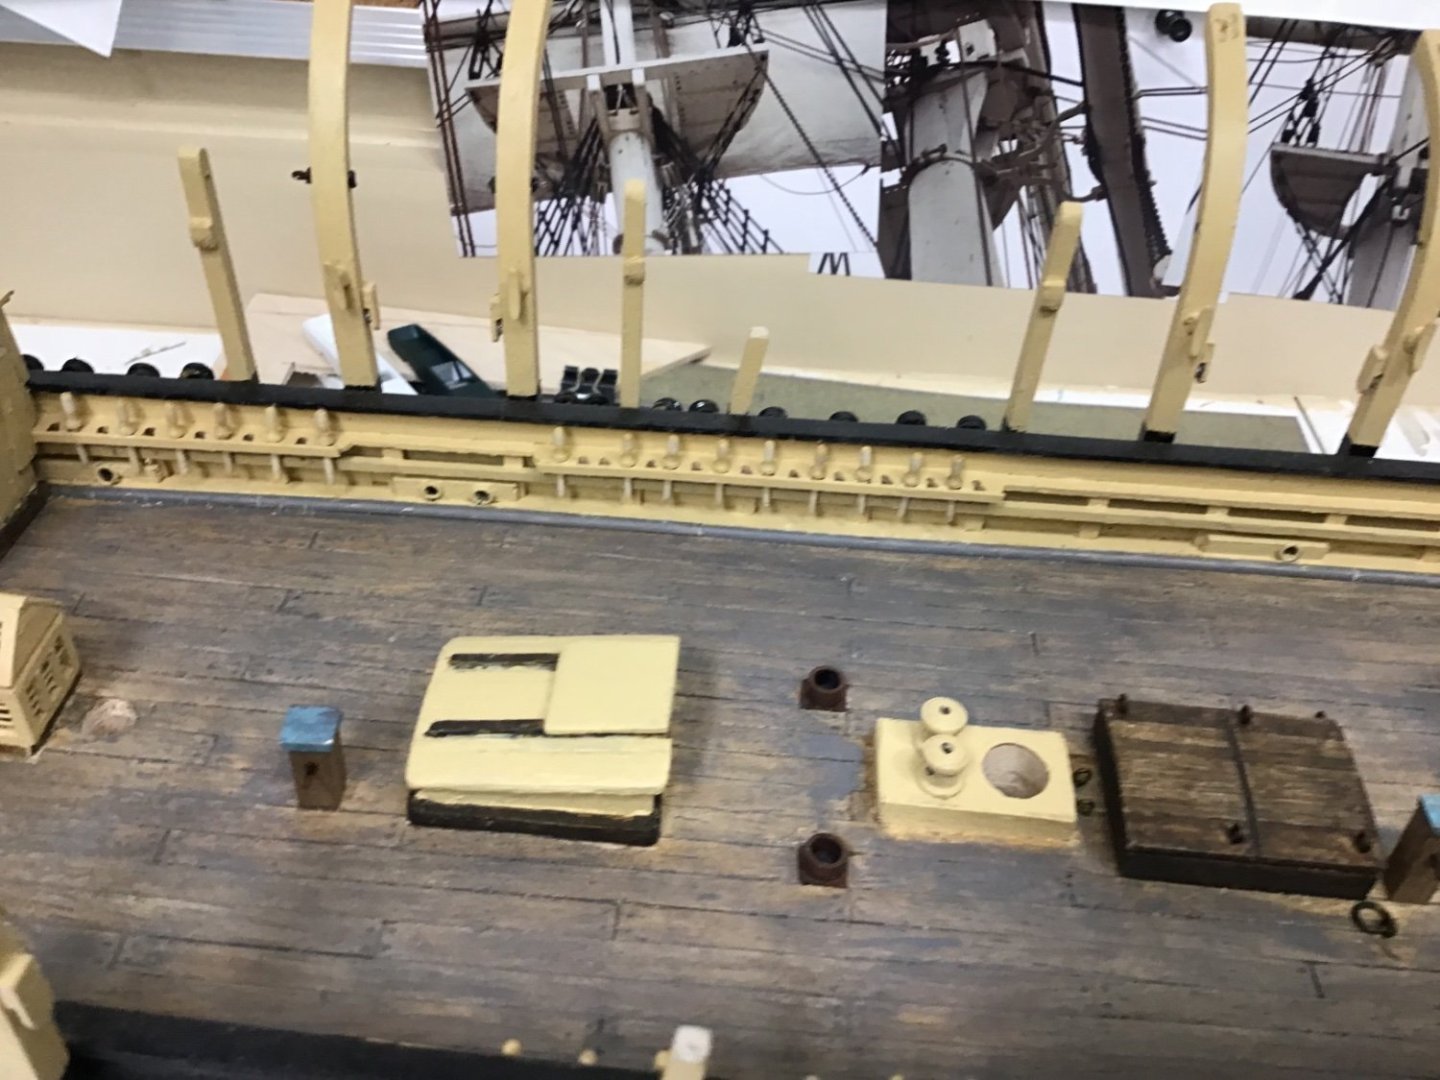
Well, I had a bit of a disaster when I decided to add belaying pins it seems I messed up the pintails so the belay pins hit the other rail when inserted into the holes rather than tear off the pin rails I enlarged the holes which,of course, lead to breaking the rails anyway I hacked it back together and hopefully won’t be too noticeable once I have shrouds, rigging loops, boats etc block8ng the view I also bought belay pins and they were too fat so I sanded them all down using my pin sander just clamp in chuck and sand away

-
Wow! looks awesome very well done thanks for the “upgrade” comment, by the way
-
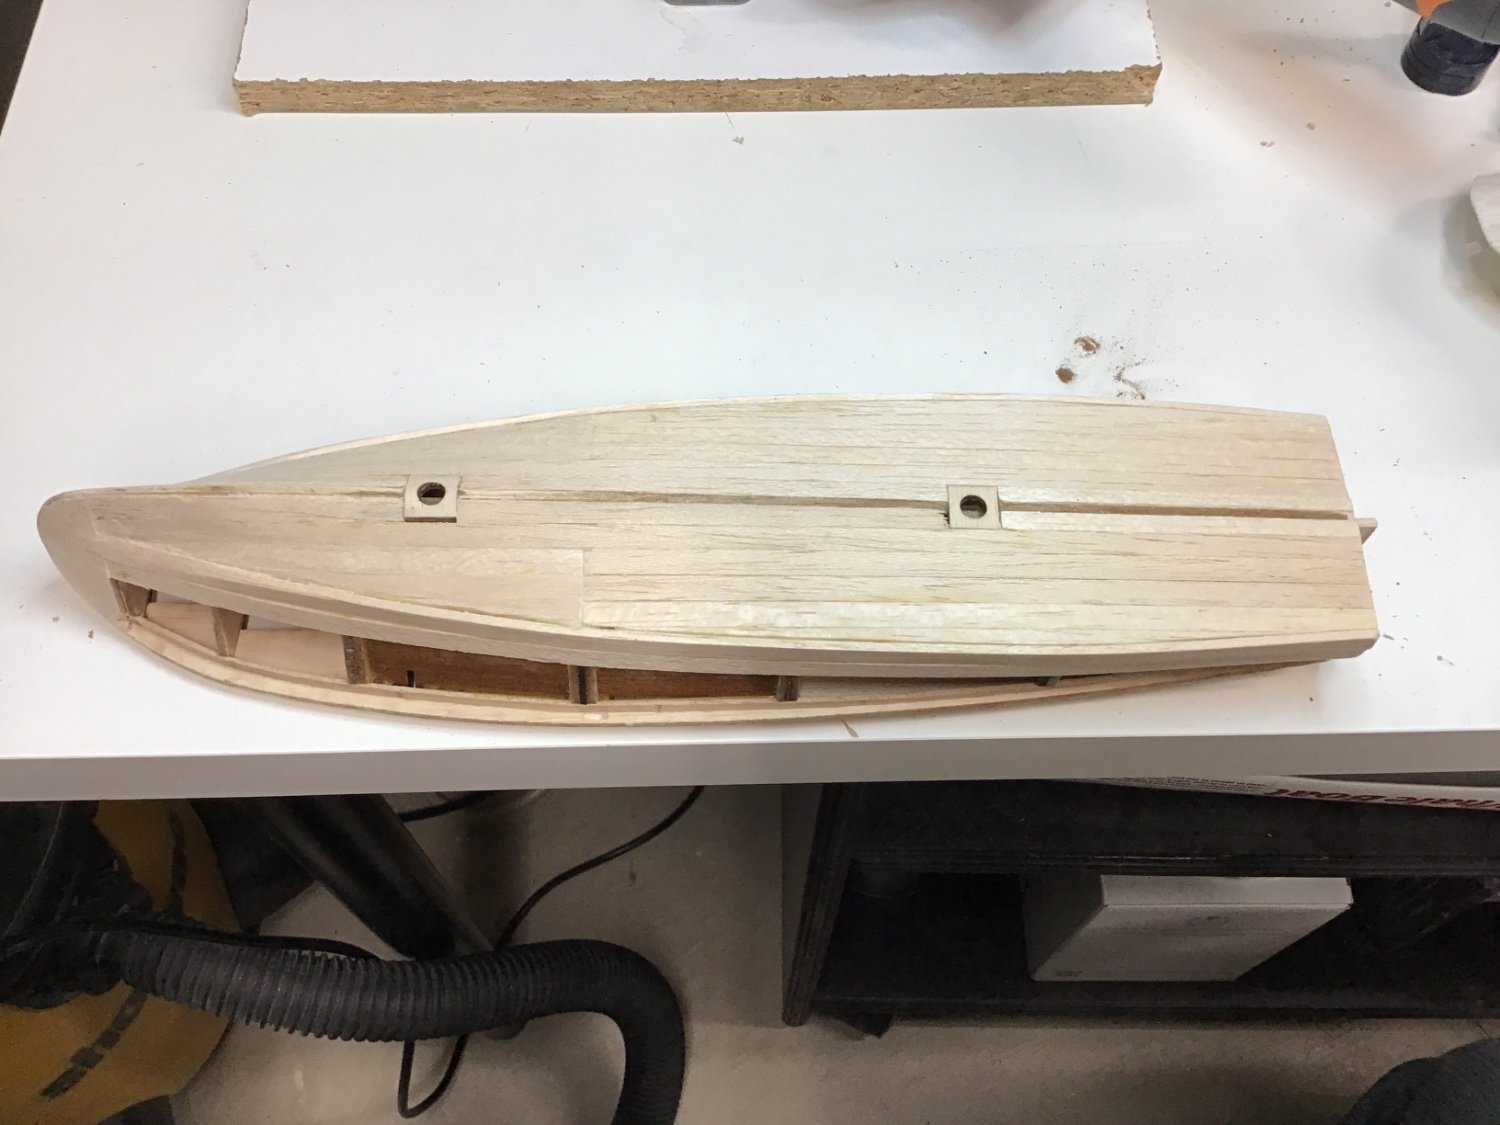
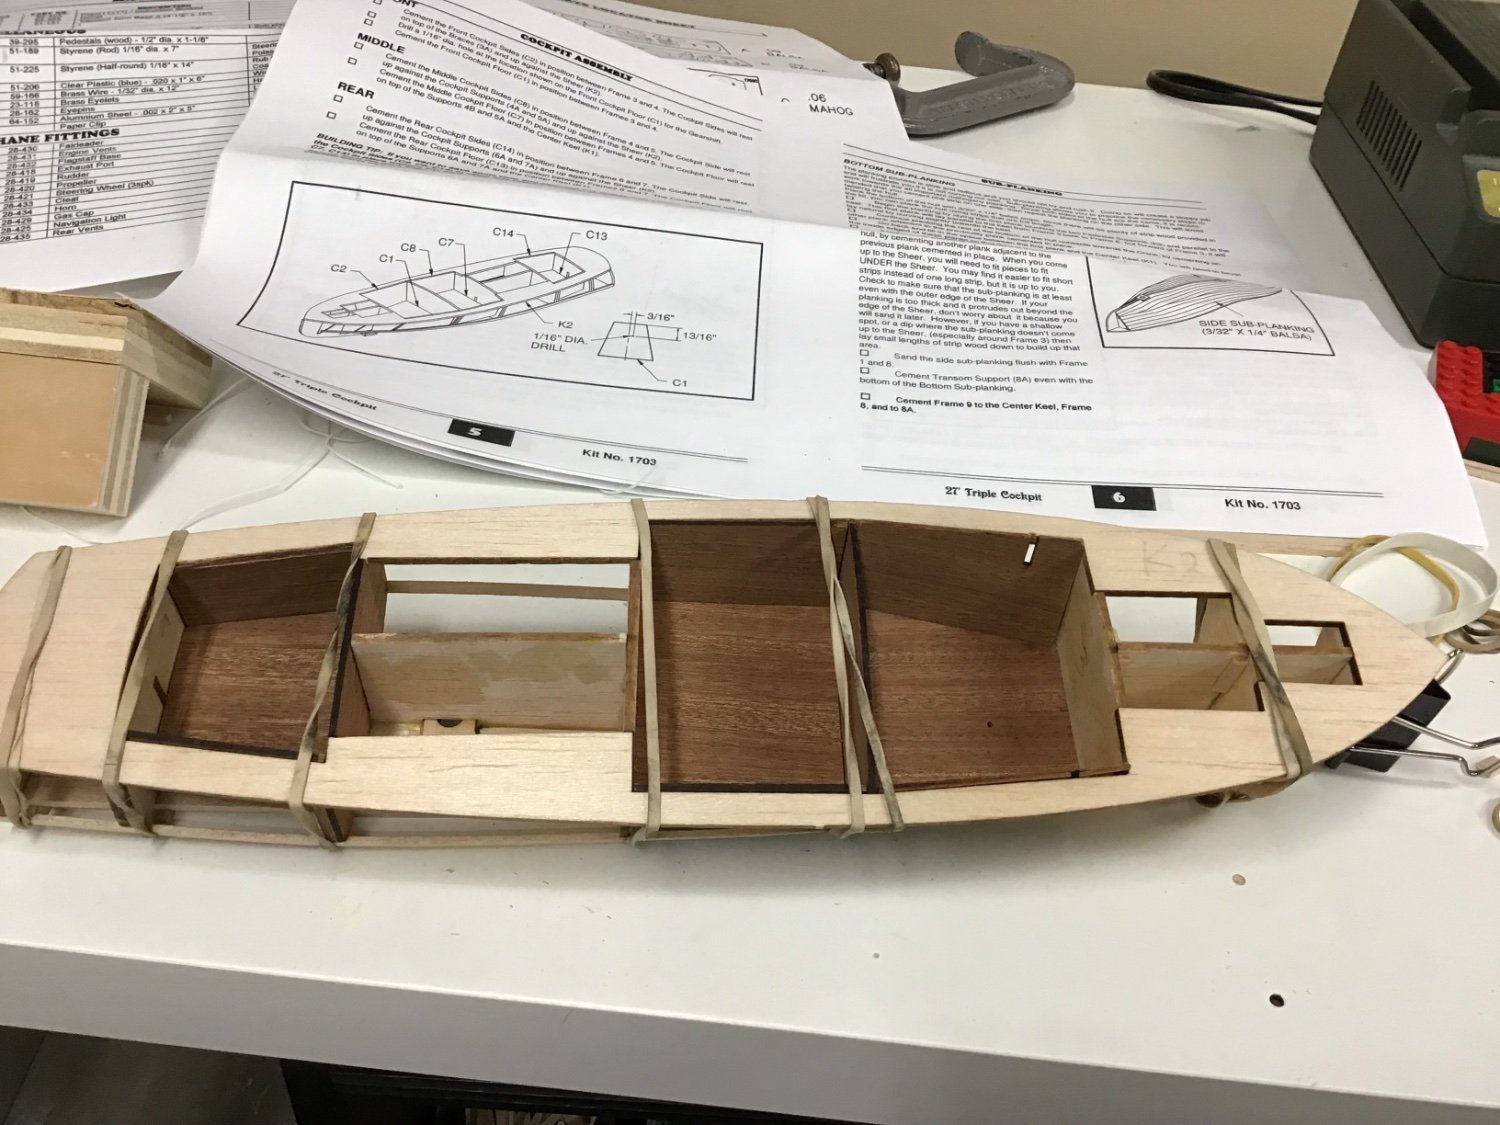
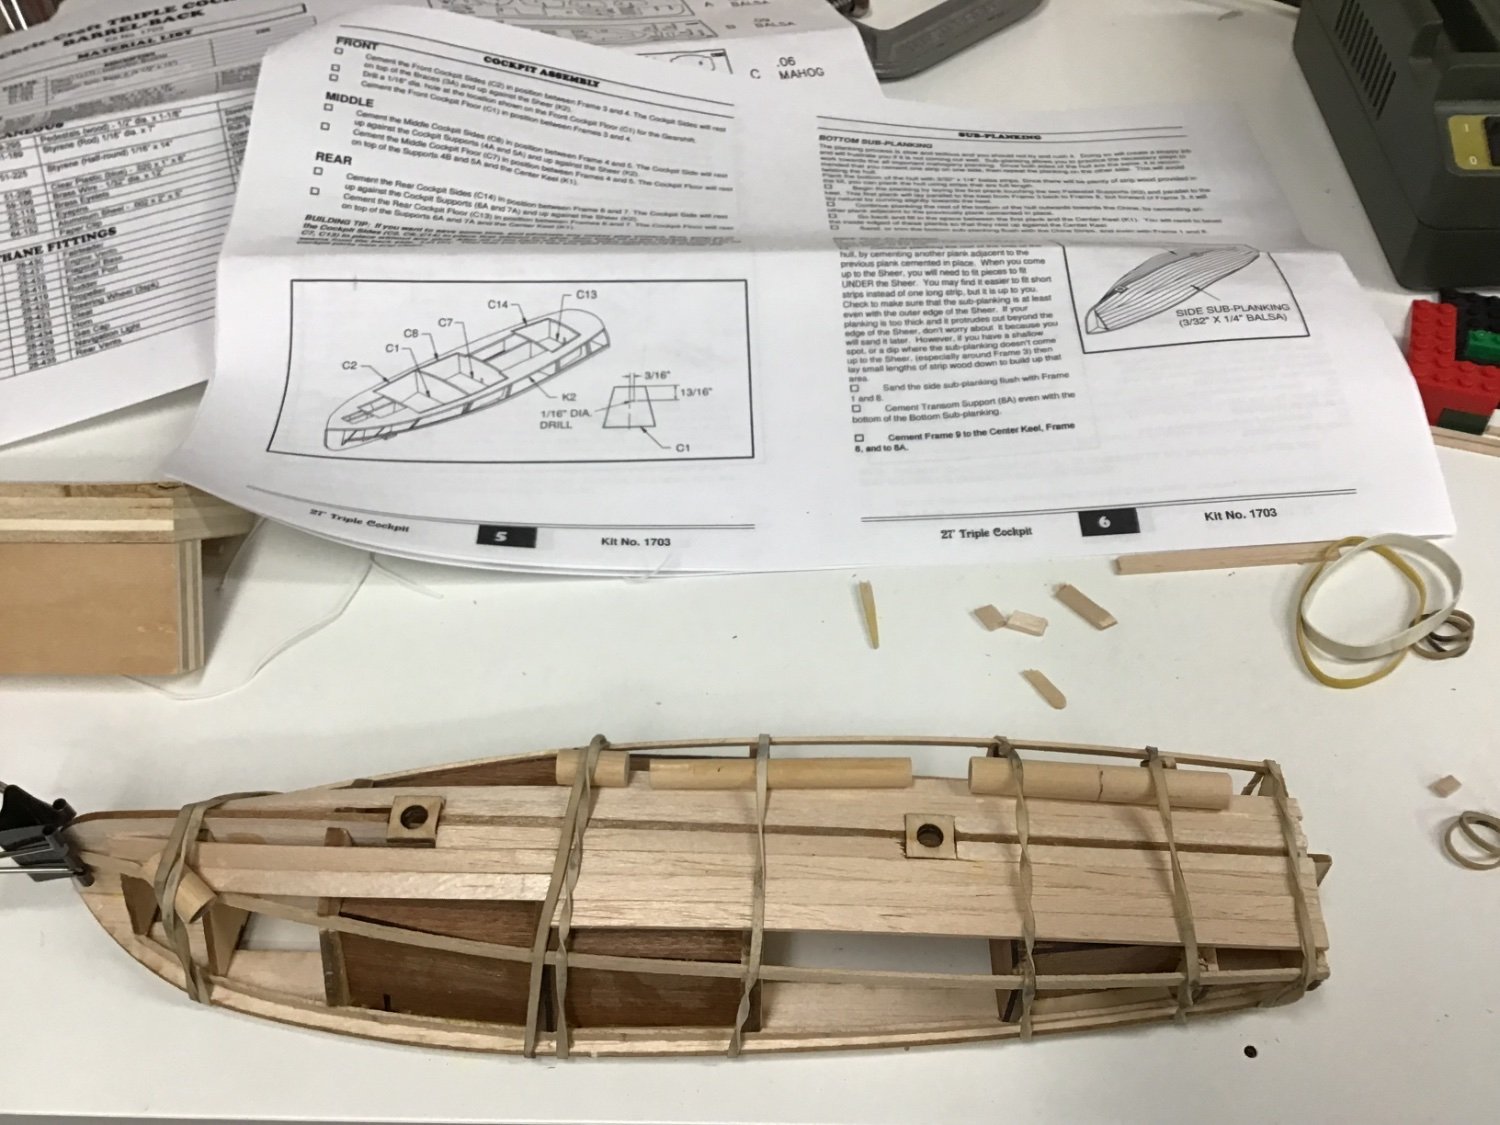
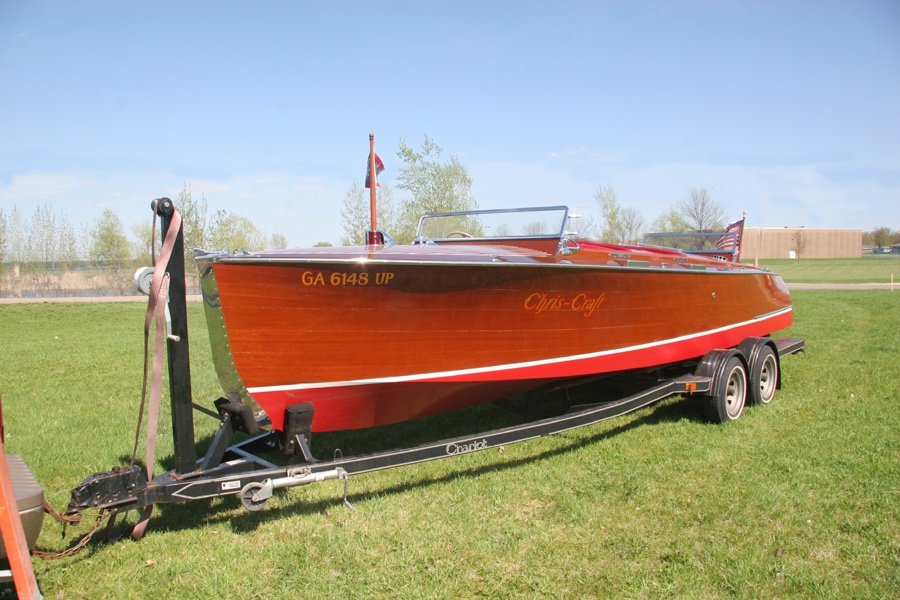
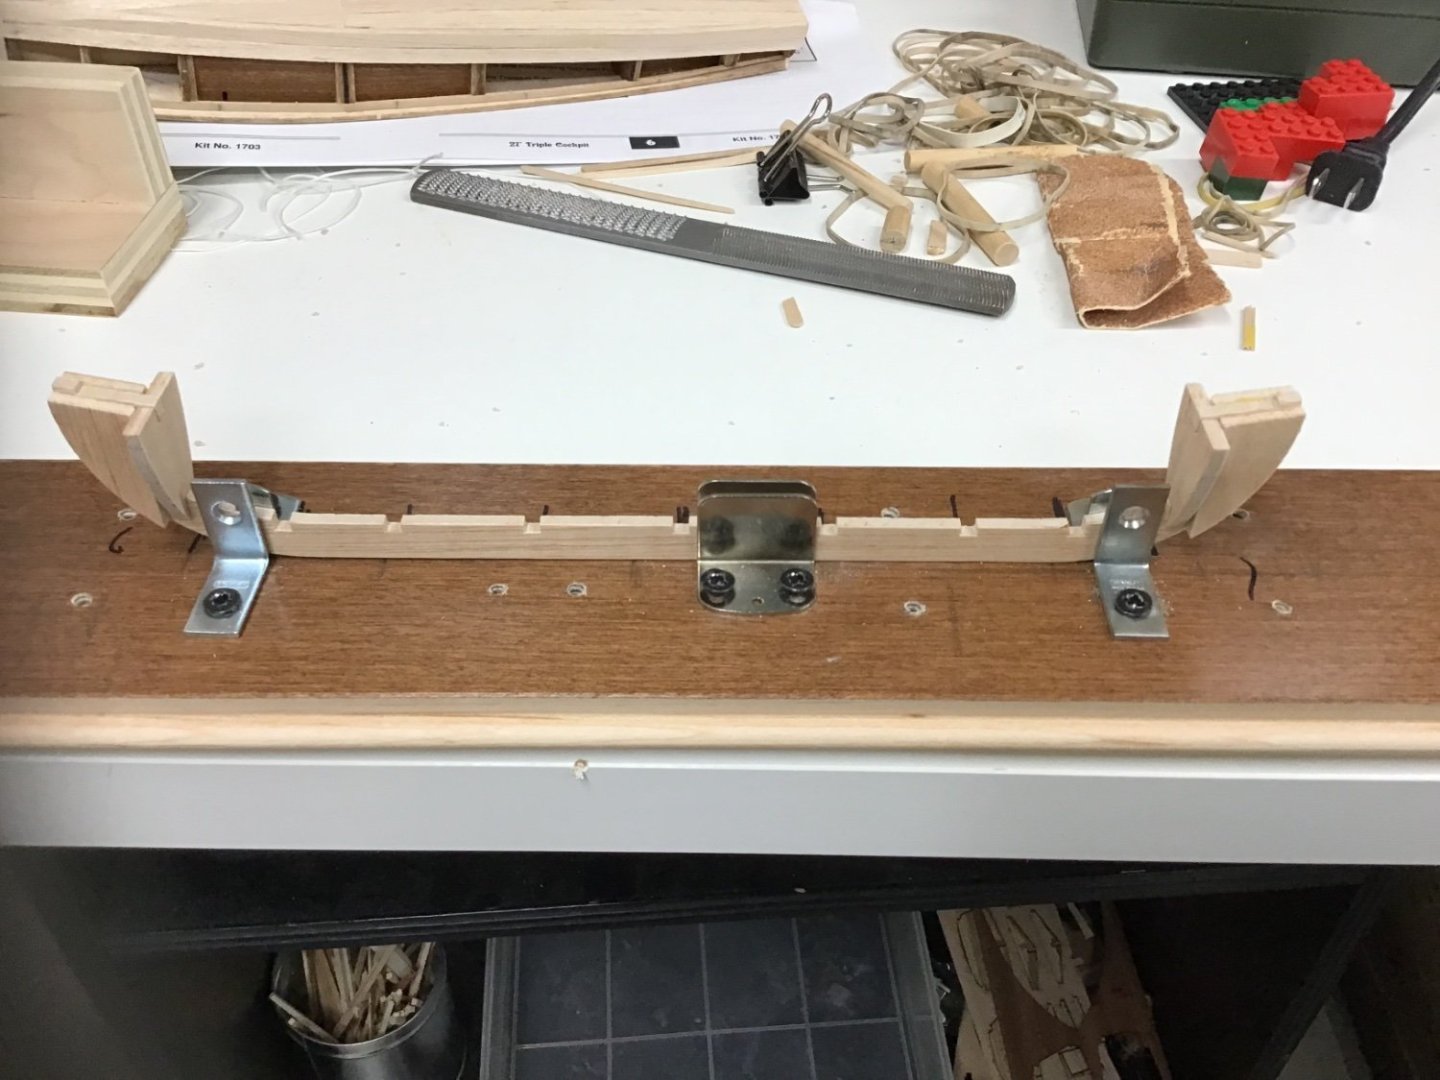
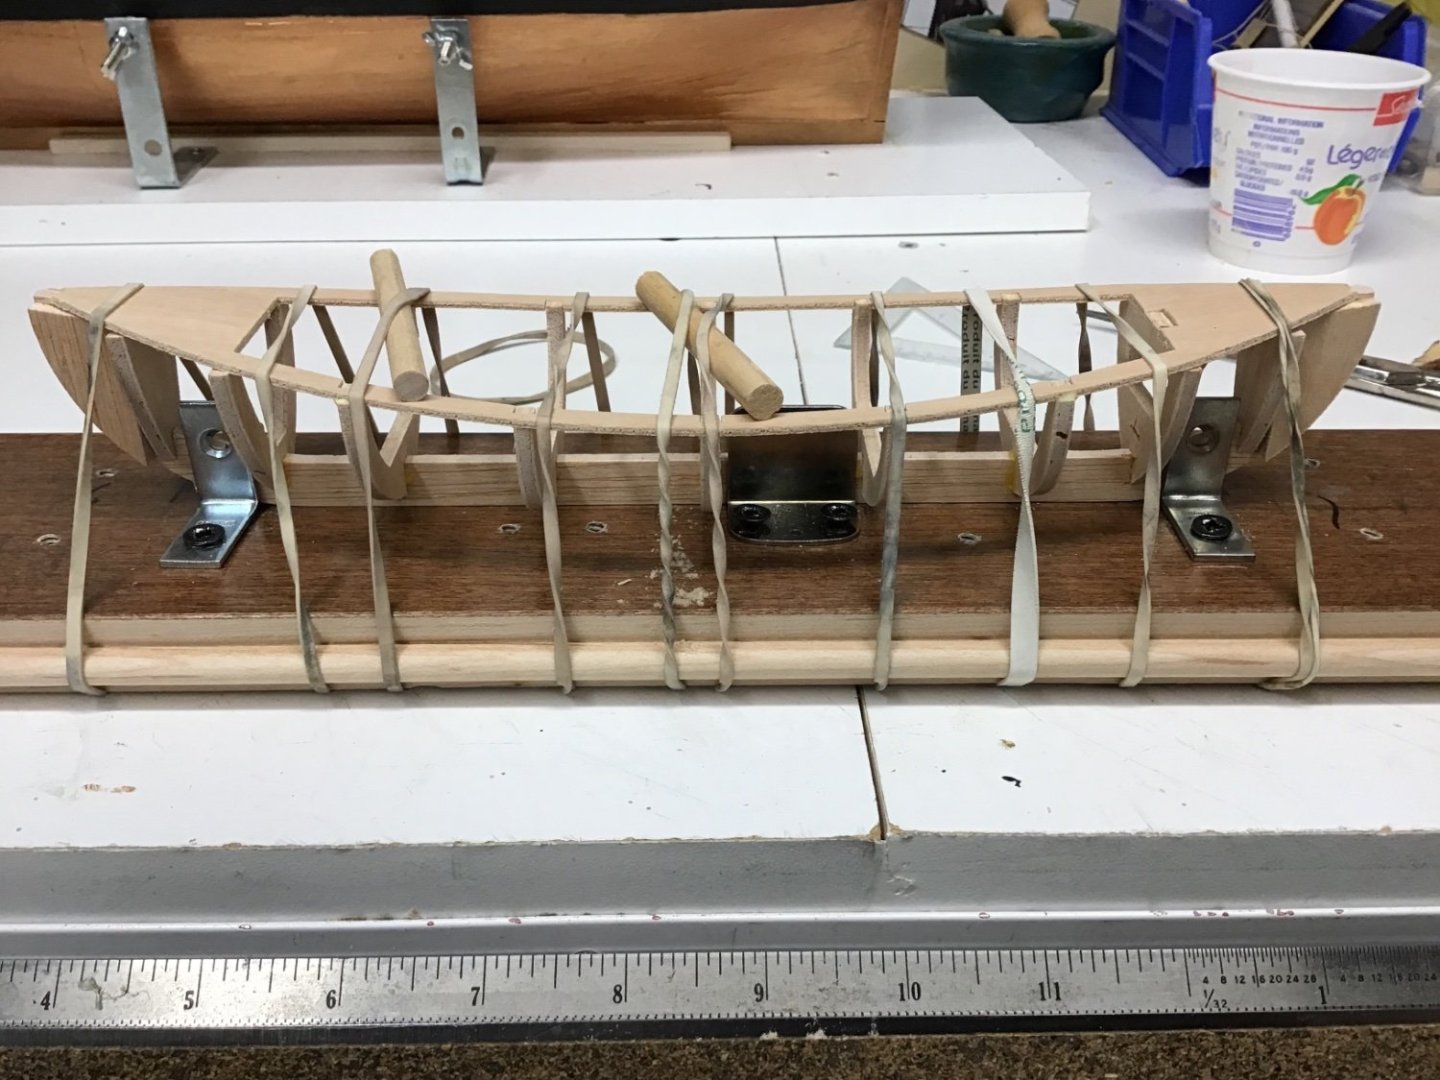
Another update i added the mahogany walls to three cockpit areas started sub planking with balsa you need to be careful with finger nails to not damage this soft wood also imagination required to clamp it in place


- 8 replies
-
- 5
-
-
- Dumas
- Chris-Craft
- (and 1 more)
-
I am definitely going to use that jig idea on my Morgan thanks!
-
Wow! that,s amazing at that scale i used piano wire for the bars and sandwiched them between two layers of wood well done!
-
I can’t believe you still have the box for Lumba Lumba i had forgotten about the cabin cruiser i have the cheap Proxon, no tilt, no height adjust should have gotten better saw
- 8 replies
-
- 1
-
-
- Dumas
- Chris-Craft
- (and 1 more)
-
The tryworks looks great! I ordered tiny bricks from Etsy and glued them on one at a time the sheet looks like a bette4 idea i also had a tough time with the skylight, ended up deciding the bars are too small at scale to get 9 of them on a panel i also omitted glass since the scale is small looking forward to see your skylight PS I like the hul planking, the planks in my kit were way too wide but only realized it afterwards great job so far