-
Posts
145 -
Joined
-
Last visited
Content Type
Profiles
Forums
Gallery
Events
Posts posted by Techtonic
-
-
-
On 3/7/2023 at 5:52 AM, ADoyon said:
Hi Chestcutter,
Your build is coming along beautifully! The treenails on the decking looks great! What was your method of treenailing?
Andre
Hi Andre,
Since you quoted my post I believe maybe you are referring to my treenails? If so I used a black 005 extra fine tip marker, e.g. https://www.amazon.com/Prismacolor-XtraFine-Marker-Resistant-1-Each/dp/B0027ACMVQ. I also used the same marker to draw the plank ends.
One tip is to check for color fastness of the ink with whatever finish you plan on using on the decks. I used a black brush calligraphy pen to create the caulking effect between the planks. I guess the ink in pen I used was water soluble as when I started to paint the deck with water based clear acrylic all the ink started to bleed, which looked like a right mess! Luckily I started applying in the area that is hidden by the upper decks so I was able to stop in time before any visible areas were affected. At this point I had a major panic that I would not be able to apply finish to the decks. After some experimentation I switched to oil-based polyurethane and fortunately that did not cause any bleeding. Even so - I now need to be carefull to not drip any water on the decks.
-
On 9/13/2022 at 8:58 PM, Chestcutter said:
I am looking for some advice from any members on the MSW forums.
Have started to build the ship stove for the Vanguard. It has both plywood parts and covered with etched brass parts. The finished stove needs to be black in colour and the details on the brass are quite fine.
My question is what is the best way to assemble and colour the parts?
Paint first?
Paint with brush or airbrush?
What is best way to paint the etched brass parts? Do they need a primer? Any recommendations to primers?
or Use Blackening acid like the Birchwood Casey Brass Black?
Paint after assembly?
Thanks for your advice in advance.
Hi Chestcutter,
Just found your log an will be following with interest as I'm about 4 months in to building the Vanguard.
For the oven I used flat black spray can from local hardware store and it worked great. I applied it after assembling the complete oven. I also used same for spraying all the black PE parts, eye-bolts, and canons. They came out great and was way quicker and smoother than hand painting. I didn't use primer - but then I don't expect any rough handling of the ship once complete.
One other thing with the oven - Plan Sheet 4 shows some extra detailing on the sides with eye-bolts and wire that are not shown in the booklet. Though of course they'll be barely visible in the finished model. Here's what mine ended up like:
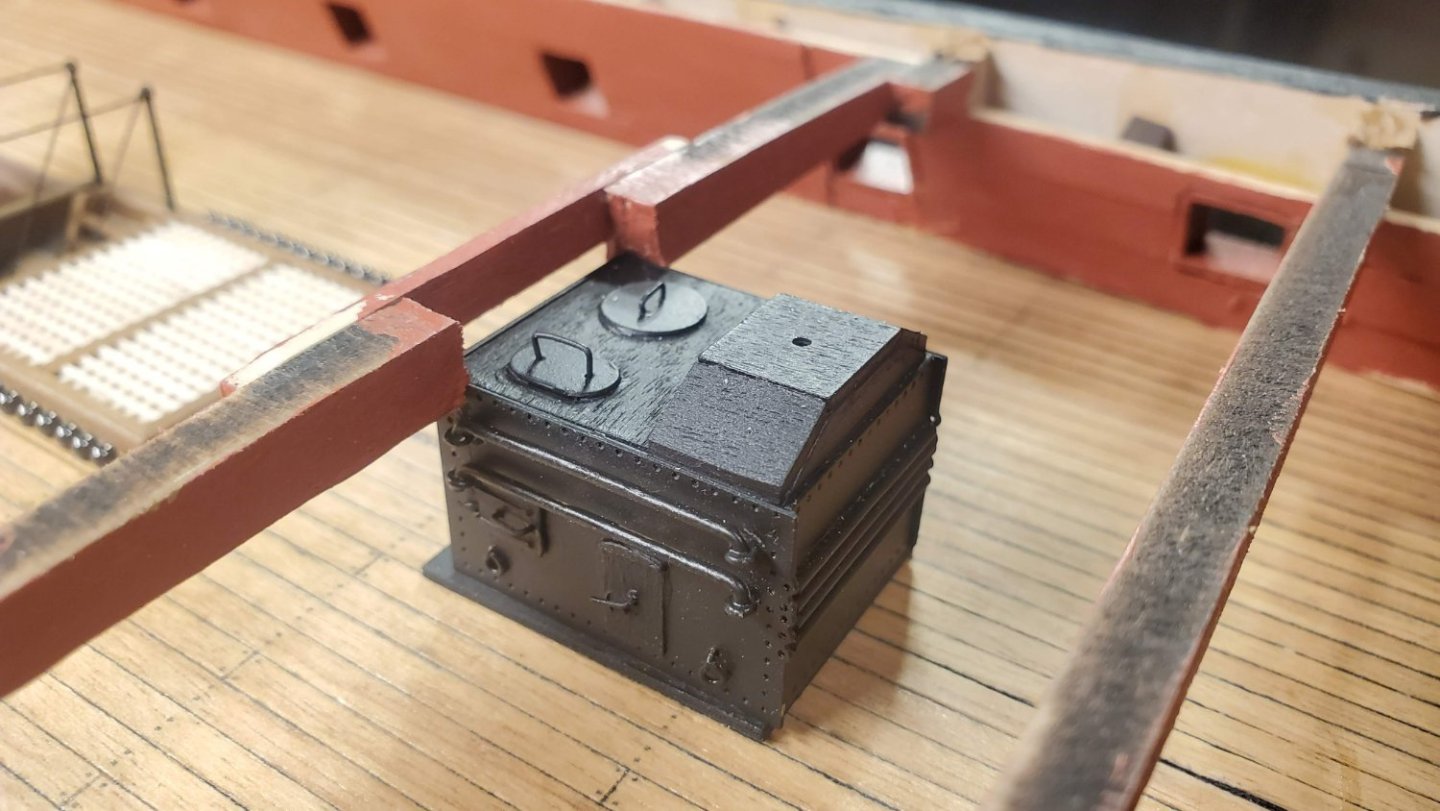 You'll also see in the pic I added an extra beam just aft of the oven that is modified to bypass around the oven. I'm not sure if this beam is necessary, but it just seemed to me the deck above was not very well supported in this area without it.
- Chestcutter and mort stoll
-
 2
2
-
On 9/1/2022 at 4:19 PM, Techtonic said:
I just came across a a new documentary on the anatomy of HMS Victory that I thought might interest you and other followers of this log. There's enough similarities between Vanguard and Victory that this was well worth watching:
https://www.youtube.com/watch?v=61SYvhojGvg
FYI the second episode of this is now available here https://www.youtube.com/watch?v=TrC3yMMDsc8 and just as interesting as the first.
HMS Bellerophon even gets an honorable mention at around 27:15.
-
On 9/6/2022 at 10:12 AM, flyer said:
It's natural cotton found at a local fabric store. After explaining what I was looking for, the owner helped to search the finest, nearly unbleached natural cotton. After washing it was still a little whiter than the kits fabric. It is less transparent but much denser woven - a valuable find.
For this build I omitted the staining of the cotton with a mixture of black and sage teas. But pencil grit from marking the seams smudged the finished sail nicely.
my cotton on the left and what was in the kit on the right
Thanks for the side by side pic. Your cloth is a surprisingly big improvement on the kit cloth. A pity I couldn't find anything like it at my local fabric store. I don't suppose you recall if the material had any specific name? That would make it easier to find in online stores.
-
The spanker looks great Peter!
What material did you use? And how did it compare to the material supplied in the kit? A week or so back (I know I'm a long way from the sails stage, but nothing like planning ahead!) I searched around Joann's, which is a large fabric store chain over here in the US. I bought a sample of the finest cotton they had. But when I got it home and compared it to the material in the kit, it was no finer and had more imperfections in the weave.
While I was there I did also get some cream plain bridal veil netting which looks like it will work great for the hammock cranes, etc. So not a complete wasted visit.
-
13 hours ago, flyer said:
Techtonic, your transom really will look good. Well done!
The ship is coming along nicely too - it's a pity I can't find your build log.
As some food for thought I have a picture showing our hero's left side. It doesn't look bad and with all the rigging also being prominent in view, I think you need not to base your decision about which variant to build on that view of the figurehead alone. And resting places may change...
Thanks for the port side pic, it doesn't look bad - just doesn't look as interesting as from starboard. I'll probably stick with Bellerophon but I've got a while before I need to commit.
I considered doing a build log but never pulled the trigger on this one.
-
14 hours ago, flyer said:
Your sails look good!
Me, I'm currently setting up the spanker and should have some pictures in a few days.
I found this log a few days ago which includes some nice details on making furled and set cloth sails - I thought the end result looked very good. I'm definitely considering something similar for when I get to the sails. https://modelshipworld.com/topic/3741-queen-annes-revenge-1710-by-shipmodel-finished-136-scale/page/6/#comment-283055
-
13 hours ago, flyer said:
Did you already decide which variant you will build?
My current leaning is towards HMS Bellerophon since I like the mythological link with my previous HMS Pegasus build. A month or so back I painted the transom decoration and figurehead. I followed your lead with the transom decoration and modified the Elephant resin one. Here is what I ended up with:
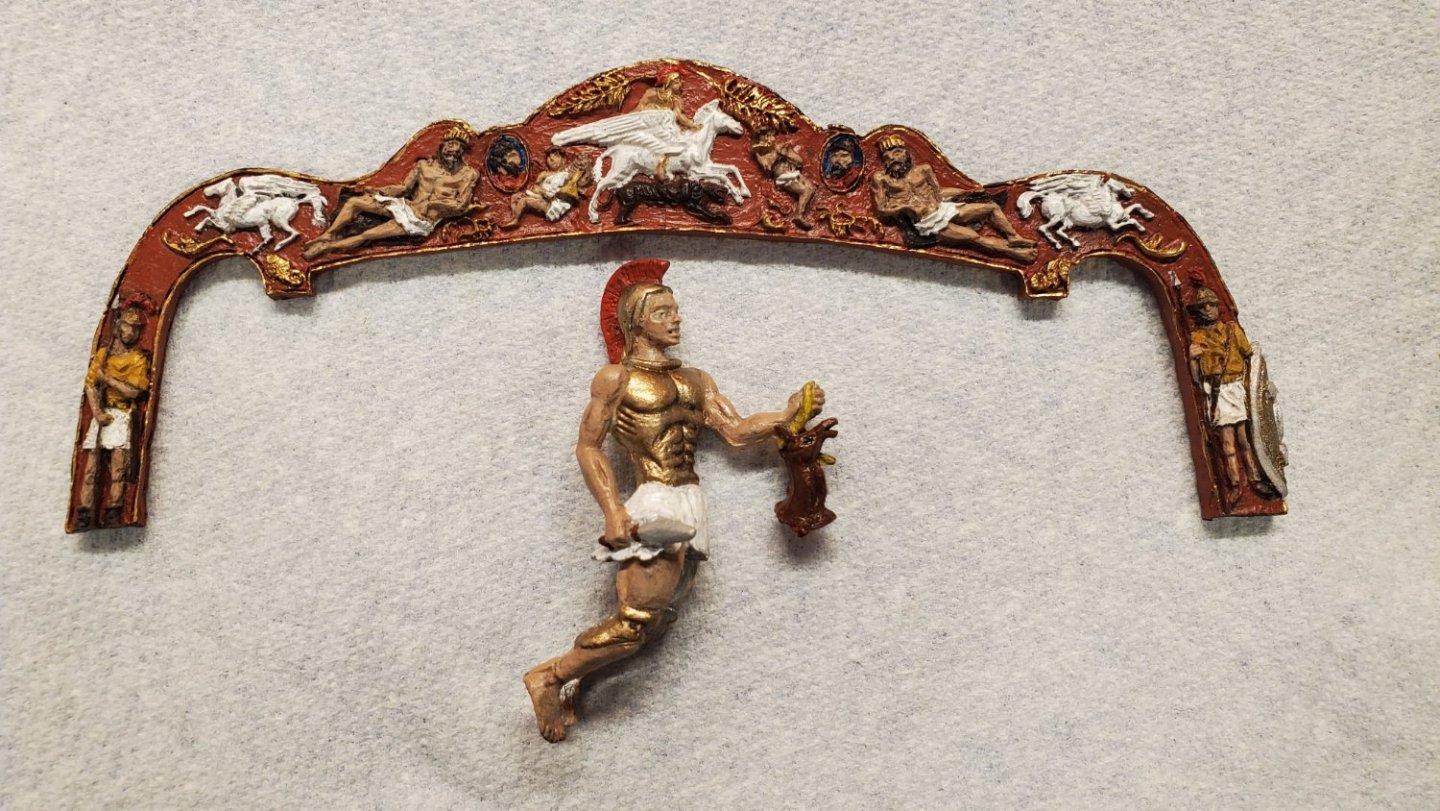
I like the result - but I noticed a problem when trial fitting it to the boat. My intended resting place for the boat will have it viewed mainly from the port side, which means the figure head is looking away from the viewer, which is not his best side. So I may end up switching to doing HMS Vanguard instead.
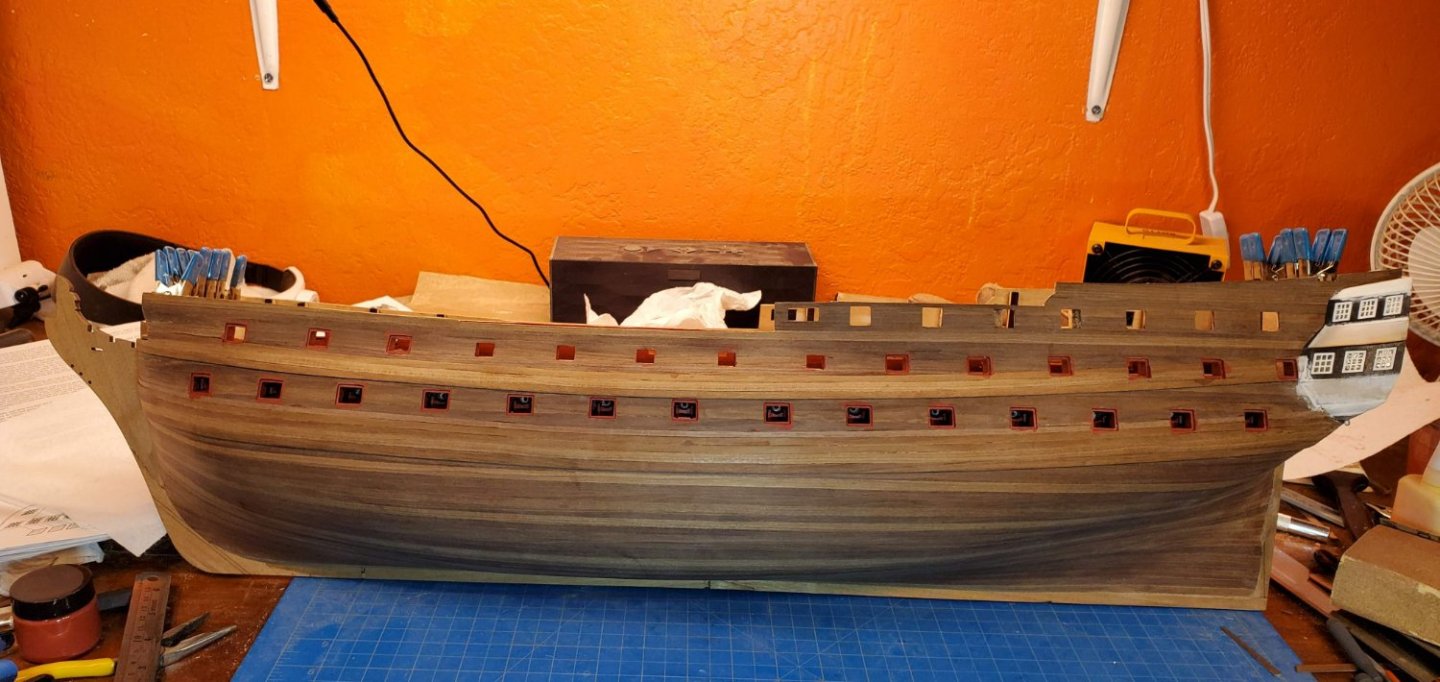
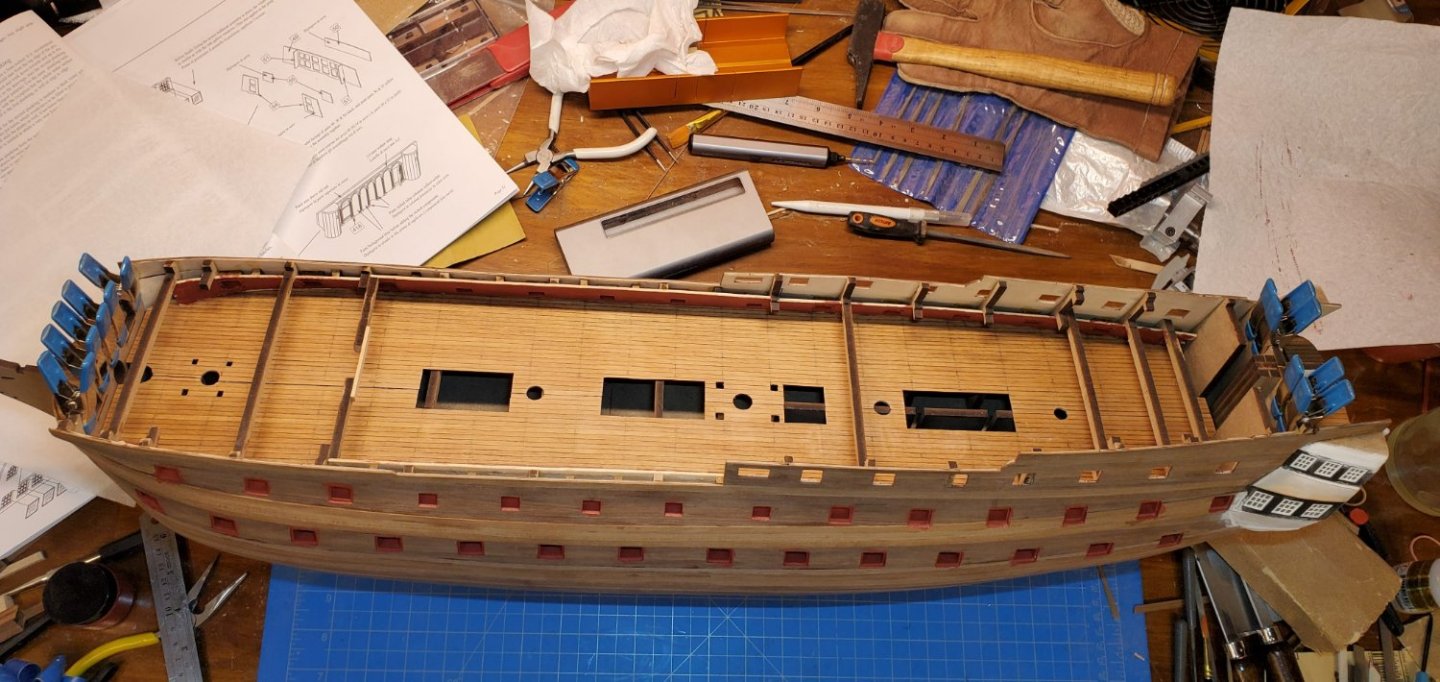
Here's a couple of other shots of my progress so far. I've just finished doing the dummy lower gun carriages and gun port linings:
- mort stoll, AON, flyer and 2 others
-
 5
5
-
I just came across a a new documentary on the anatomy of HMS Victory that I thought might interest you and other followers of this log. There's enough similarities between Vanguard and Victory that this was well worth watching:
https://www.youtube.com/watch?v=61SYvhojGvg
-
7 hours ago, allanyed said:
I realize this is absolutely not your doing and you are pretty much stuck with what OcCre provides, but this raises the question, do any kit makers provide plans and parts for realistic ships' boats to go with the ship in the kit?
Allan
I built the 95mm boat from Master Korabel (https://www.agesofsail.com/ecommerce/new-master-korbel/ship's-boats.html) as an add on to my Pegasus. It's a very nice kit - each plank is pre-shaped laser cut from very thin ply so they fit together nicely. There's a three part review someone did here:
https://shipmodeler.wordpress.com/2021/06/02/building-a-master-korabel-ships-boat-kit/
https://shipmodeler.wordpress.com/2021/07/05/building-a-master-korabel-ships-boat-kit-part-2/
https://shipmodeler.wordpress.com/2021/08/16/building-a-master-korabel-ships-boat-kit-final/
I also see Vanguard Models recently bought out a whole range of boats at 1/64th https://www.agesofsail.com/ecommerce/new-vanguard-models/ship's-boat-kits.html. Looking at the pdf instructions it looks like, unlike the MK boats, the planks must be hand tapered.
-
On 6/27/2022 at 11:39 AM, E Z Breeze said:
Wow, that was quite a read. My eyes are sore! Thank you for persisting with the log despite the shortage at times of feedback. I started reading because I have a Victory models Vanguard in 1/72 to build someday and it wasn't until you mentioned the 1/67 scale of yours that I realised it was a different model. 😅 No matter, I still enjoyed the log. I'm sorry that I forgot to click the likes on the first two pages - they are there in spirit.
You began by pondering whether it was worth posting a log for a craft that others had already built on line. I say most definitely yes. The kit is not the build, and nor is the builder. The build is the 'relationship' between kit and builder at that particular point in the builder's career and as such all logs are fascinatingly different. You had some really hard times during this one, as evidenced by the two year hiatus, and I found it quite a dramatic story. "Will he finish or won't he?" I'm glad that you did and that in 2022 you are building again.
The model looks brilliant to my eye and please accept my congratulations for finishing her.
EZ - I'm pretty sure this is the exact same model you are building. I'm guessing Glenn just put 1/67 after doing some math comparing the model length and the real ship length. It's not unusual for models to not be exactly at the scale they claim to be.
Glenn - thanks for your build log - I just finished reading through all of it. It will no doubt be of help and inspiration as I continue my build of HMS Vanguard. I hope I don't get as put off by the coppering as you were. I coppered my Pegasus in about a weeks worth of evenings - so I'm thinking the Vanguard will take maybe three to four weeks so long as the tedium doesn't kill me midway like it did with you!
I share the same surname as the great Sir Thomas Slade, so I like to think I share some family connection to the ships designer. Hopefully this will provide me with the inspiration needed to complete the build.
-
This micro drill just came on the market a couple of weeks ago: https://www.amazon.com/gp/product/B0B3HYVPR4
To me it looks ideal for ship modelling type applications so I ordered one. When I ordered it it was only $35 with the coupon - but I guess that was an initial promo price as now it is $47 with coupon. It ships from China so mine should arrive in a week or so.
There's also pro, drill press and screwdriver versions of it: https://www.amazon.com/s?k=ARROWMAX&crid=121NPJHTL5150&sprefix=arrowmax.
I found more info on it here https://www.indiegogo.com/projects/sds-pro-smart-motion-control-mini-electric-drill--2#/
-
8 hours ago, Ian B said:
Thanks I have seen this video-- I am having great difficulty in locating silkspan in the UK--- so if anyone knows where to get some I'd be greatly obliged
.
I used Silkspan to do the furled sails on my Pegasus, I think it looks great for furled sails - you can see the results here https://modelshipworld.com/gallery/album/2554-hms-pegasus-164-amati-victory-models-by-techtonic/.
For set sails, while the silkspan may look more accurate to scale, I've a feeling the cloth sails may be more aesthetically pleasing. The cloth supplied with the Vanguard is very fine so might look reasonable. I'll probably experiment with both to see which looks best.
-
8 hours ago, Ian B said:
I used the kits barrels but used the wooden carriage kits from Chris Watton's 'Victory model's instead of the cast ones...
Hi Ian. Do you happen to recall which size carriage you got https://vanguardmodels.co.uk/product/cannon-carriages/, was it the 1:72 9 pounder? Just want to make sure since the kit 9 pounder barrels seem undersized but I want to at least make sure the carriage matches the barrel reasonably well. That's definitely an affordable solution at 90p per carriage, though shipping to the US costs more that the carriages.
-
18 hours ago, flyer said:
Hi Techtonic
First I wish you as much joy with the build of this monster as I have.
My canons are the same. It seems, that the mistake happened when someone got copy-paste-itis and did paste some 18 ponders instead of the smaller 9 onto the fore deck when drawing the plan.
Another point is, that possibly the guns aren't in the right scale at all. If I take Brian Lavery's 'The 74-gun ship Bellona' as reference the barrel of an 18 should have a length of 41mm compared to the 35 of the kit whereas a long 9 should have 39mm instead of 27. Even the short 9 pounder should still have a 34mm barrel.
Possibly Amati did compromise a bit too much when weighting accuracy of the kit against its price.
Nevertheless it's still an amazing kit and you always could substitute the guns. Perhaps you could have them printed somewhere.
Vanguard model sells them in 1/64 but if you take the short 18 pounder it would be quite close to what you need. The difference would be about 10%. But one complete pair costs you 10,5 or 11,5 £ each...
And I look forward to your build log.😉
Cheerio
Peter
Thanks Peter for confirming I have the correct incorrect parts 😕
Looking at your pics they don't look too bad once fitted so I'll probably stick with them since it would be pretty expensive to replace them all. I tend not to get too fixated on historical accuracy as long as it looks right.
I haven't decided yet if I'll do a build log for this one. I did for my first ship, HMS Beagle. But just did a completed build gallery entry for HMS Pegasus (for which again your build log was a source of inspiration).
Now the big dilemmas: Vanguard, Bellerophon or Elephant? Full sails, furled sails or no sails? I got carried away when I saw it came with sail cloth and sail plans and bought a sewing machine - so I may go for full or half furled sails on this one.
-
Hi Flyer (or any other HMS Vanguard builders who might be reading this),
I'm excited that I have just joined the fold and starting building HMS Vanguard myself. I've been very much enjoying reading your build log and will take much inspiration from it.
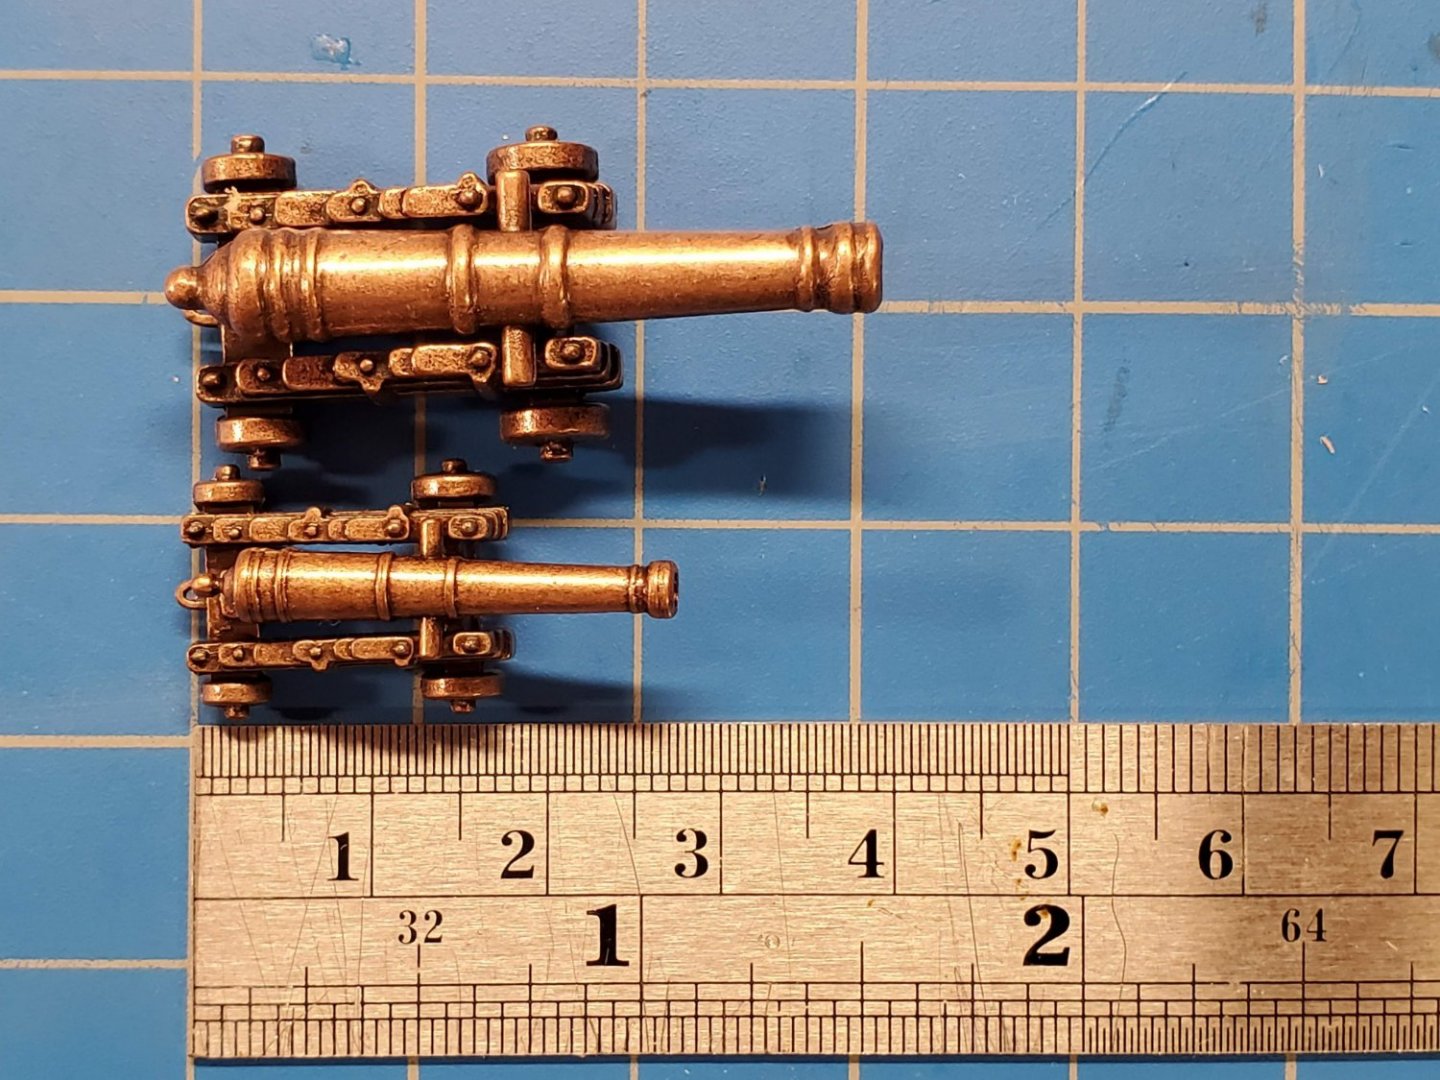
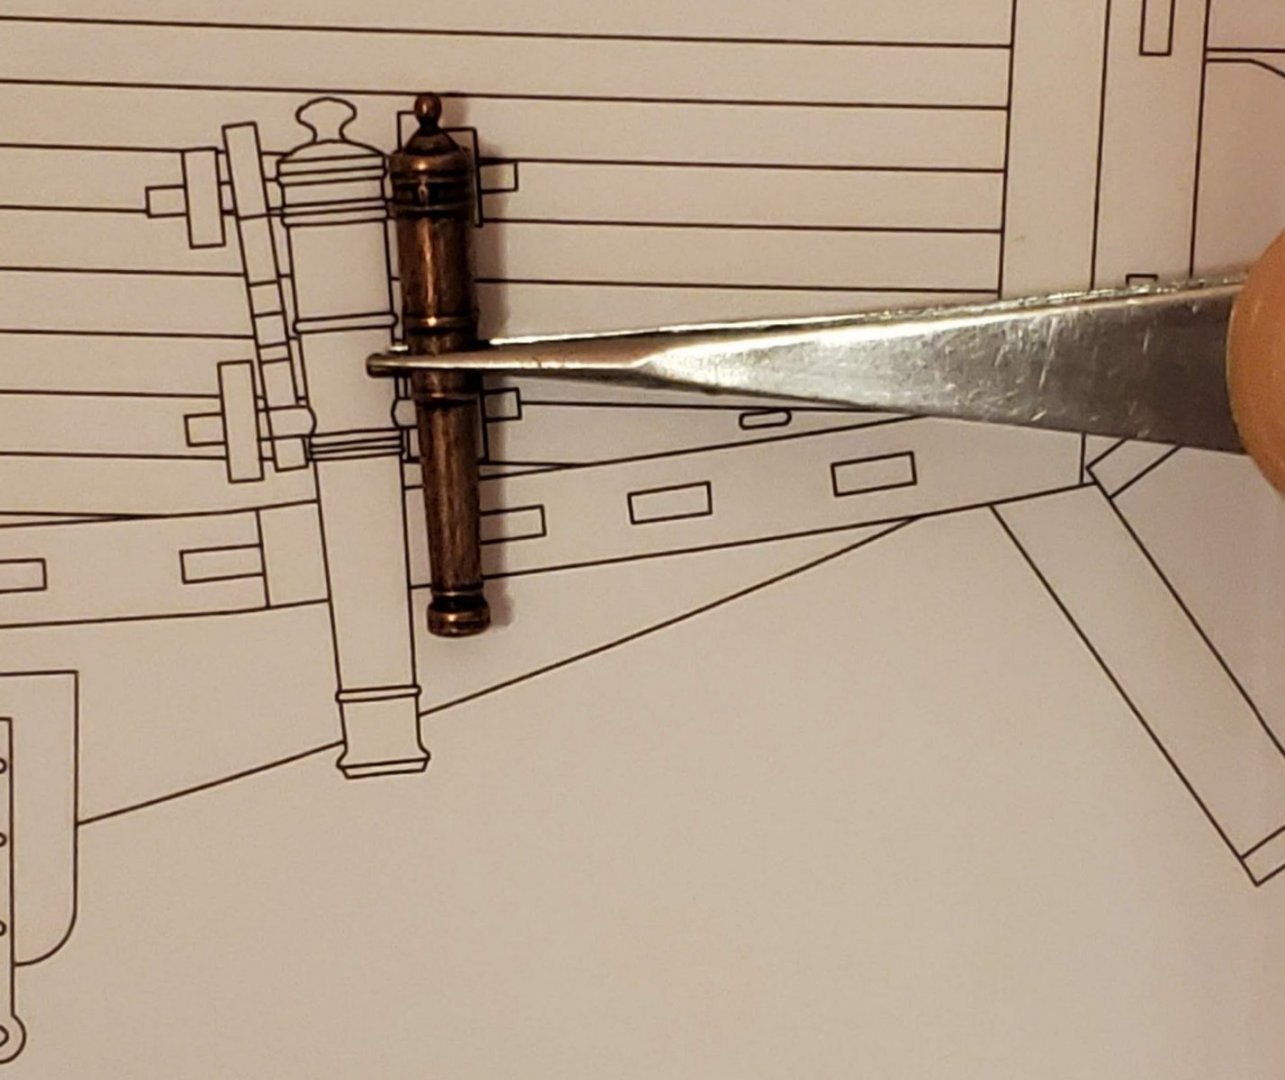
Looking through all the parts in my kit I did have a question about the cannons. The 9 pounder cannons in my kit seem very undersized. I just wanted to check if this is normal or if maybe Amati substituted a smaller cannon in my kit?
Here is a pic of the 18 pounder and 9 pounder cannons supplied:
Here is what the 9 pounders look like against the 1:1 plans:
So do these 9 pounders look the same as the ones in your kit?
-
I would also recommend varnishing the hull now. Until it is varnished it is more susceptible to getting ingrained dirt. This is about the stage I did it on my Beagle.
- The Gimps Chimp, Clementine and Dave_E
-
 3
3
-
On 3/14/2022 at 4:15 PM, Moonbug said:
Thanks @Techtonic, thanks for letting me know! I may have to give them a try. It’s nice to have another option besides the infamous Amati crew. Be sure and post pictures of your fellas when they’re painted.
Just FYI I just got finished completing my Pegasus. I've posted some pictures in the gallery link below. There's some pics that show the crew so you can see how they came out.
- Dave_E, Jorge_Goncalves, Knocklouder and 3 others
-
 5
5
-
 1
1
-
14 hours ago, allanyed said:
I respectfully disagree with Techtonic regarding glue. First, to many members "quicker" is an oxymoron to shipmodeling. If speed is a criteria, ship modeling is not a good hobby to pursue.
From an article by the Oakwood Veneer Company.
Using contact cement to adhere raw wood is a complete failure waiting to happen for numerous reasons. Do not do it. Contact cement is more suited for use with synthetic laminates, like Formica. It is best to use a two-part resin or PVA glue adhesive when working with raw wood.
For me, epoxy resin is over the top for wood to wood, but PVA has a long track record for use with wood. If the planking is spiled or otherwise tapered and shaped, finger pressure on the plank with PVA for 30 seconds will work. If the plank is being slightly forced into place, PVA and a clamp of some sort for a few minutes will work. If a lot of force is necessary, the plank has is not properly shaped. Depending on what is important to you, study the planking tutorials here at MSW that will yield beautifully laid planking where every plank ends at the rabbet as they should, not coming to a point short of the rabbet.
Allan
Allan - I would certainly agree with your assessment for normal 2nd layer planking. But the Occre Beagle does not come with what would be considered normal 2nd layer planking. It is literally just paper thin veneer which is quite porous so the glue can soak through. I tried PVA glue, PVA glue plus CA at the ends, and contact cement. The contact cement gave the best results as it did not soak through the wood or bleed through the seems (some of which you can see between Clementines first two planks). The fact that it was faster was just a bonus. Also with the second layer being so thin it is not possible to do anything but the lightest sanding afterwards to clean things up.
-
On 5/12/2022 at 6:19 AM, Clementine said:
Thanks for the advice Chimp, im adding some more filler today and ill try starting the 2nd layer later on. if you have any advice in terms of the 2nd planking layer it would be greatly appreciated.
I finished my Beagle about a year ago, see my build log here https://modelshipworld.com/topic/28420-hms-beagle-by-techtonic-finished-occre-160/
I definitely recommend the method Occre show in their build videos using contact cement. I talk about it a bit in the first post of my log. The Occre 2nd layer planking is paper thin which makes the contact cement method work well. It is much quicker than other methods and the end result looks great. CA glue is problematic on this thin 2nd planking as it soaks right through which will give a splodgy appearance and your fingers will keep sticking to it. I tried it for the first few planks before switching to the contact glue method.
-
On 2/25/2022 at 7:32 AM, Moonbug said:
Hello everyone. I did not fall off the face of the earth - only to Mexico for holiday with the admiral. One day she got fed up with her work (we both work from home at the moment (Covid rules apply) as well as the cold Colorado winter and rather spontaneously booked a trip to a resort in Yucatan. Who was I to argue? I'm an anthropologist so I was happy to finally see one of the "new" seven wonders of the world - Chichen Itza, and I'm also a golfer so I got to play a round at the Riviera Maya PGA course.
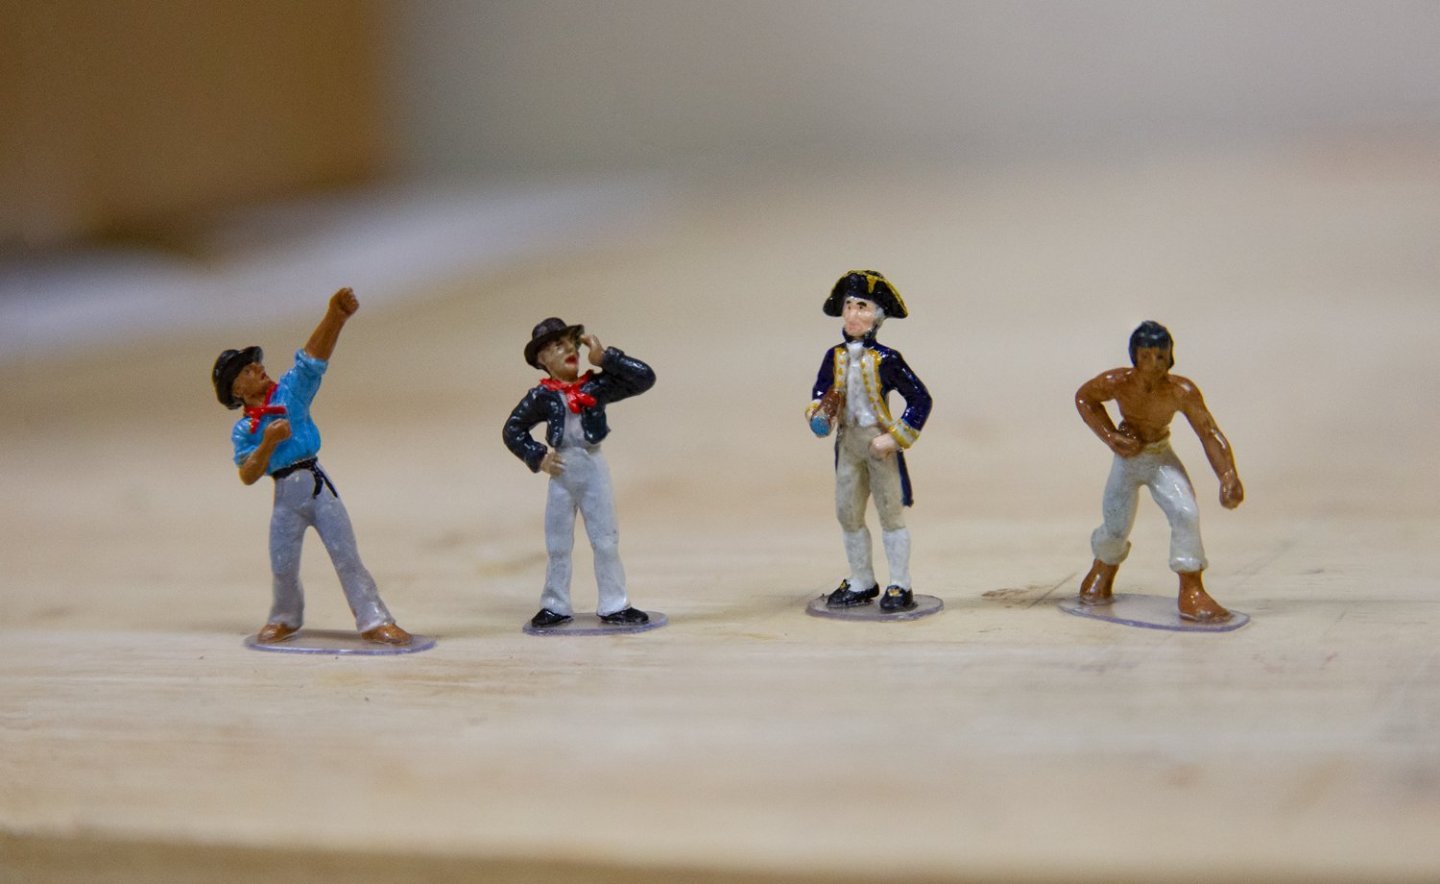
Meanwhile, while we were away - the ubiquitous and certainly infamous Amati Crew arrived, so I painted those fellas up and mounted them on small bases made from a leftover hard plastic container. Except for climber-guy of course. I've never considered myself very adept at painting by hand (which is why I airbrush so many things), but I like the way these guys turned out. Just for fun I tried to give them a little extra realism by adjusting their skin tone depending on their job and exposure to the sun - ranging from the pasty white Cap'n to the super tan fellas.
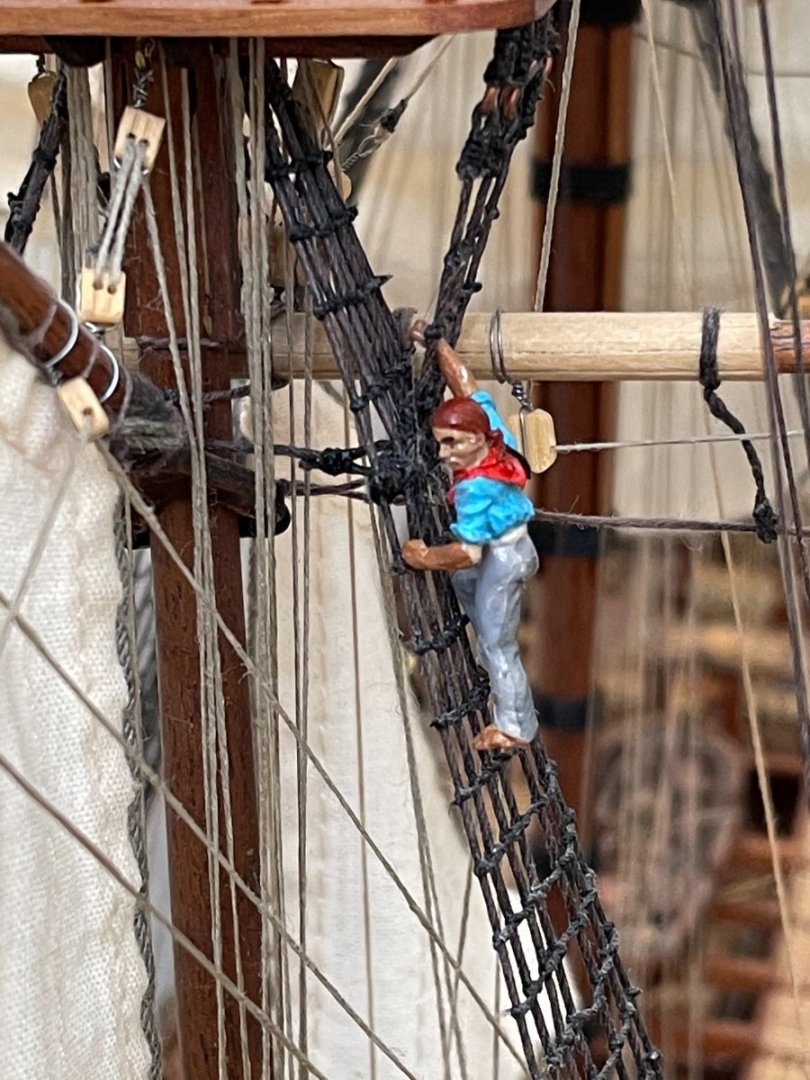
Great job on painting the figurines! They certainly look much better than my attempt last year when I was building HMS Beagle https://modelshipworld.com/topic/28420-hms-beagle-by-techtonic-finished-occre-160/?do=findComment&comment=822063
. I wasn't too sure at the time what sailors wore back then and I definitely made their fashion sense a bit too colorful!
I'm now about half way through doing the rigging on my Pegasus. A week or so ago I stumbled across these new figurines that Artesania Latina just brought out late last year https://www.agesofsail.com/ecommerce/metal-figurines-with-accessories-for-hms-endeavour.html. They are marketed as an accessory for their HMS Endeavour kit. This kit is contemporary with, and at the same scale as Amati HMS Pegasus kit. I ordered them and just received them. I'm not sure about the Cossack dancer, but all the other figures look more appropriate to me for the Pegasus than the Amati ones. You can see them in place on the Endeavour here https://youtu.be/6v6QVFRALFE?t=173. Well just thought I'd let you know in case you wanted to consider using them.
I'll certainly be using your efforts as an inspiration when painting these figures.
-
It looks like you are doing a great job!
I just finished copper plating my Pegasus a couple of days ago. In hindsight I would say it would be better to reverse the port and starboard plates compared to what they show in the plans. There needs to be a small overlap on some of the plates to follow the line of the hull. With the way shown in the plans and working from stern to bow, the overlap ends up up putting the unriveted short end on top, partially obscuring the rivets of the previous plates short end. By reversing the sides the rivets would always be on top. Too late for me and you - but perhaps future builders might consider this.
Did you roughen up the backside of the plates before applying? I found adhesion was significantly better if I lightly sanded the back with 220 grit first. Same goes for all the decorative freezes.
I can highly recommend BSI Gold+ CA glue for anyone that has sensitivity to CA glue. Using regular CA glue even for a few minutes will make my nose burn for two or three days. But Gold+ is odorless and does not give me any problems even with extended use.
What kind of patina are you aiming for? I wanted my ship to lean more to the decorative side than weathered. So I cleaned up the plates with gentle fore/aft strokes of 0000 wire wool, then coated with ProtectaClear to prevent oxidization. I now have a nice shiny hull that will not dull, and I don't have to be careful about handling as fingerprints are no longer an issue. The ProtectaClear was easy to use and gives a nice smooth finish. The whole hull only needs less than 0.5oz for two coats.
-
Are you using the thread from the kit? I had slight fraying with my Beagle but nothing like as much as what it looks like you are getting.
Also, a tip on the belaying, the rope should go round underneath the pin. That way it is impossible for the pin to be pulled out by tension on the rope. There's a good description half way down this page: http://www.sdshipmodelersguild.org/public/scuttlebutt/frmRigging.htm


HMS Beagle by The Gimps Chimp - FINISHED - OcCre - 1:60
in - Kit build logs for subjects built from 1801 - 1850
Posted
See The Gimps Chimp's post on October 28th.