
Cmm4000
-
Posts
38 -
Joined
-
Last visited
-
 mugje reacted to a post in a topic:
Montanes 1794 by Cmm4000 - OcCre - 1:70
mugje reacted to a post in a topic:
Montanes 1794 by Cmm4000 - OcCre - 1:70
-
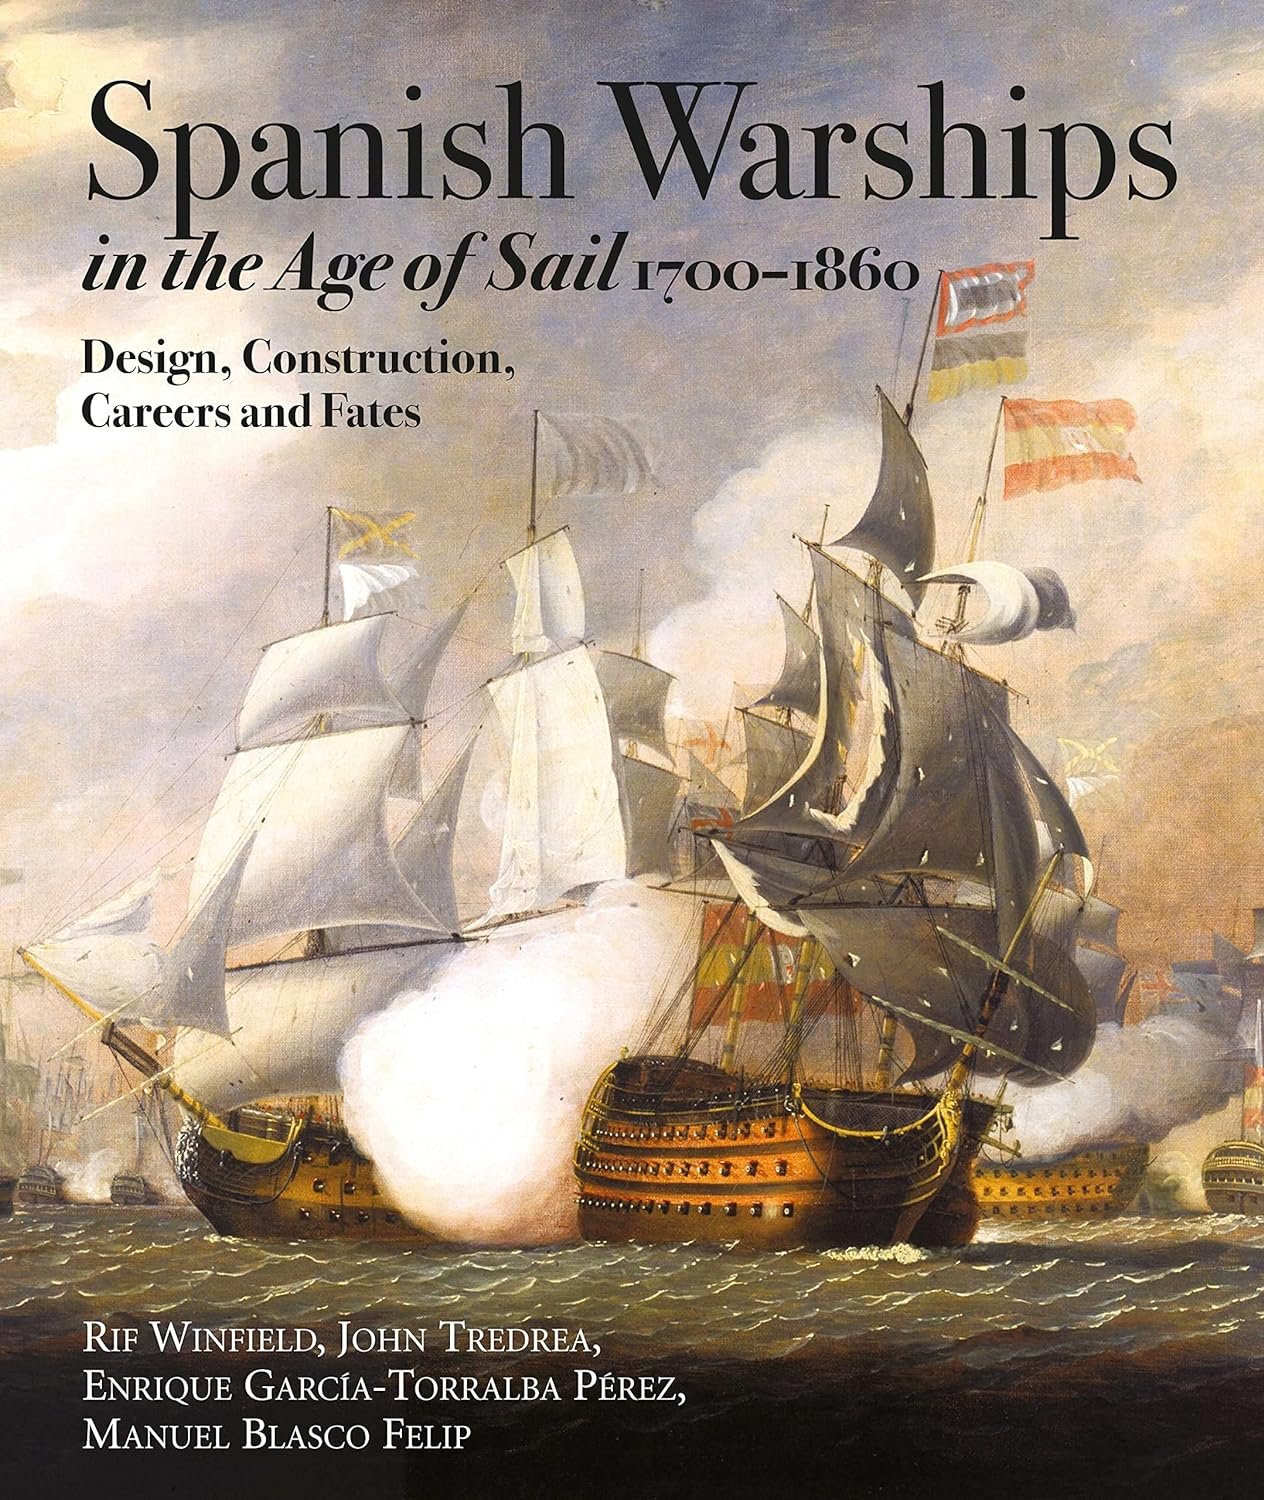
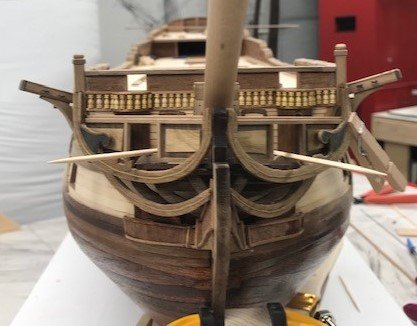
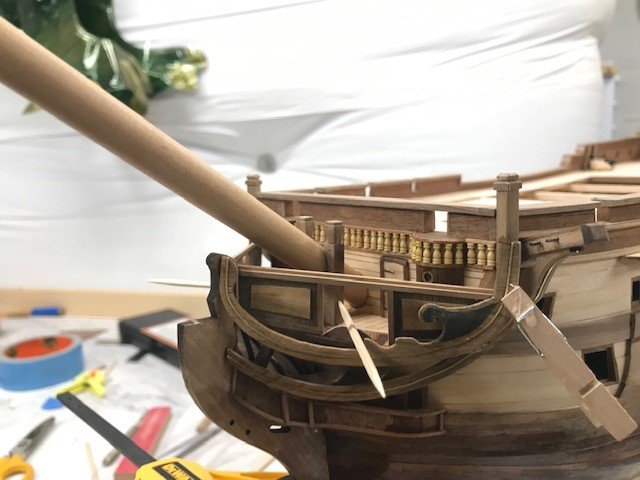
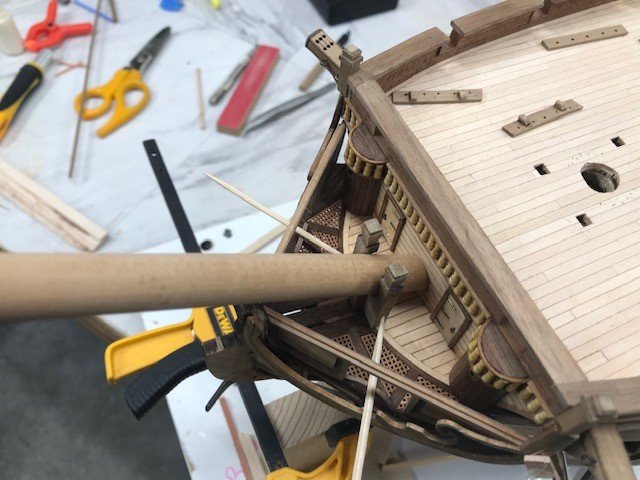
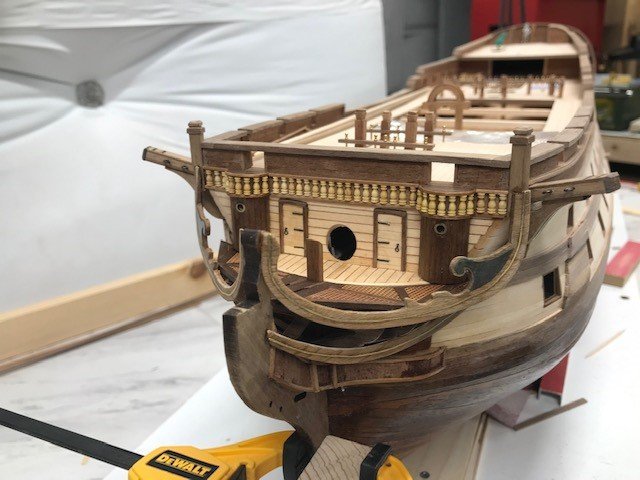
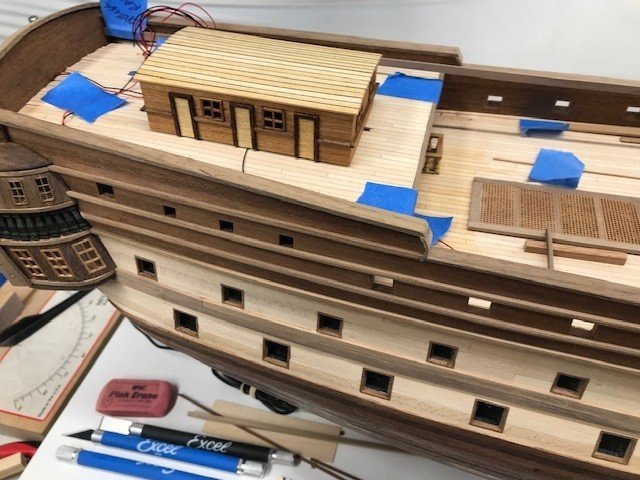
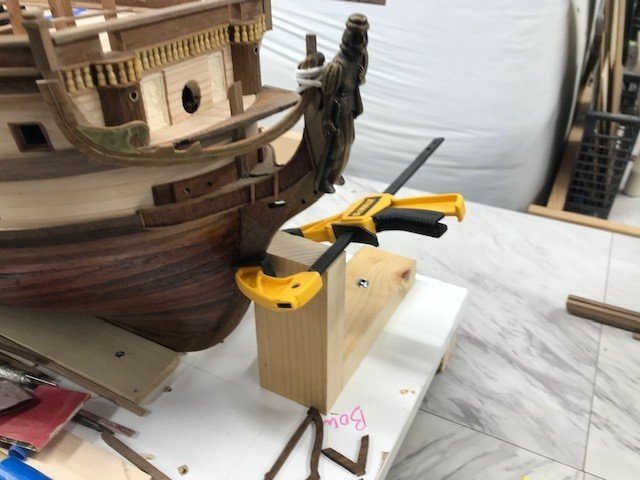
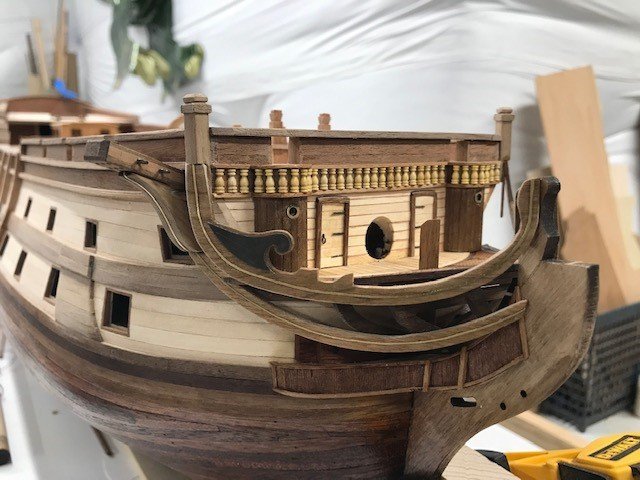
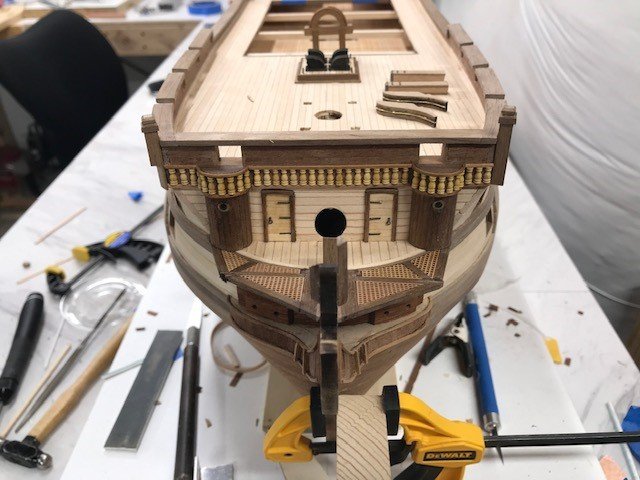
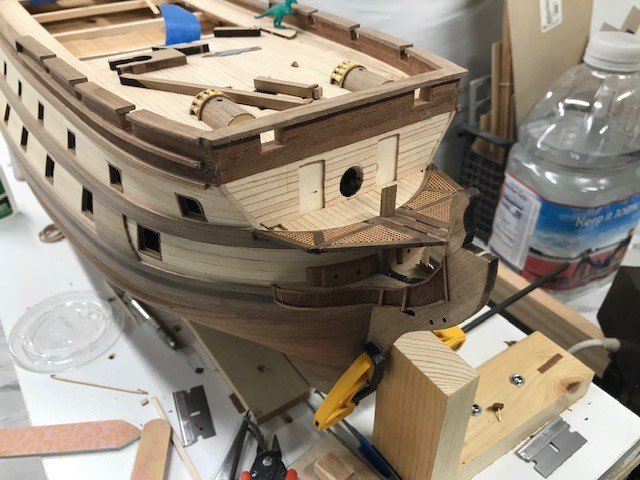
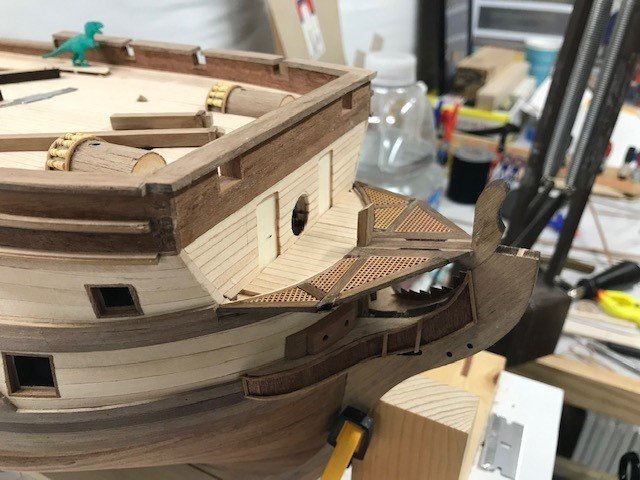
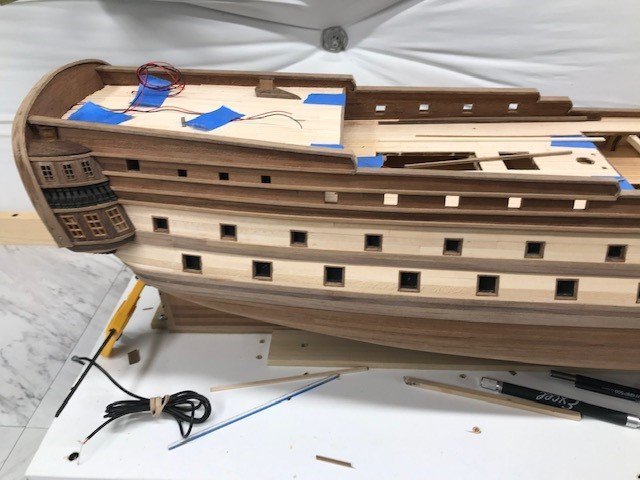
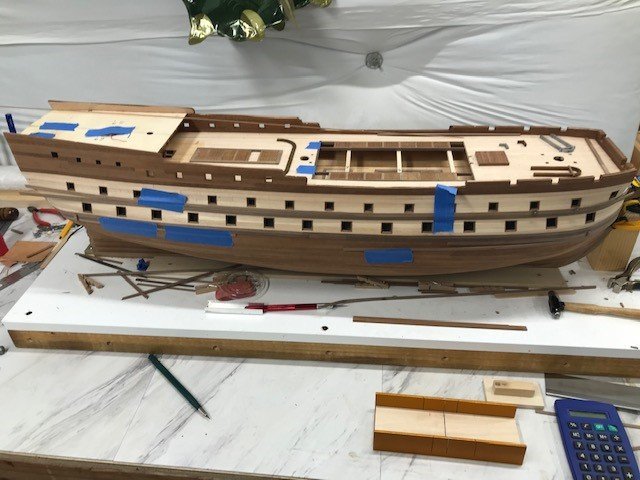
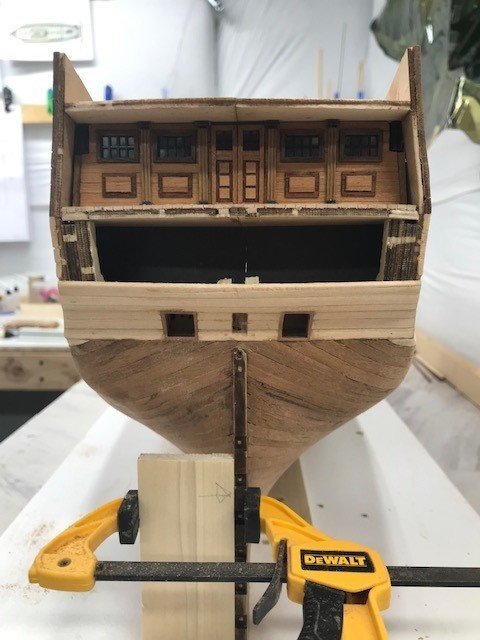
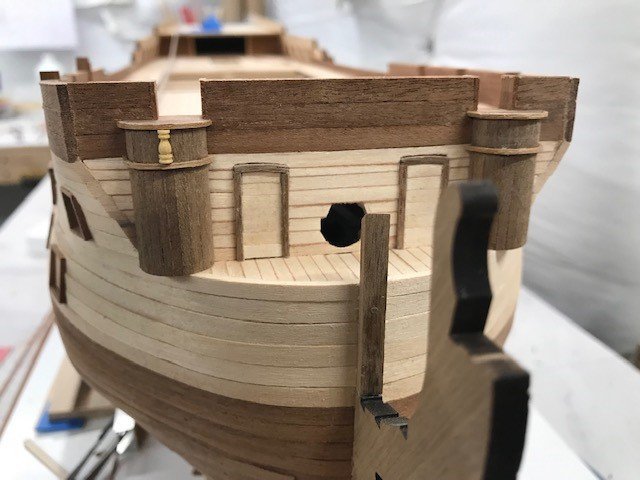
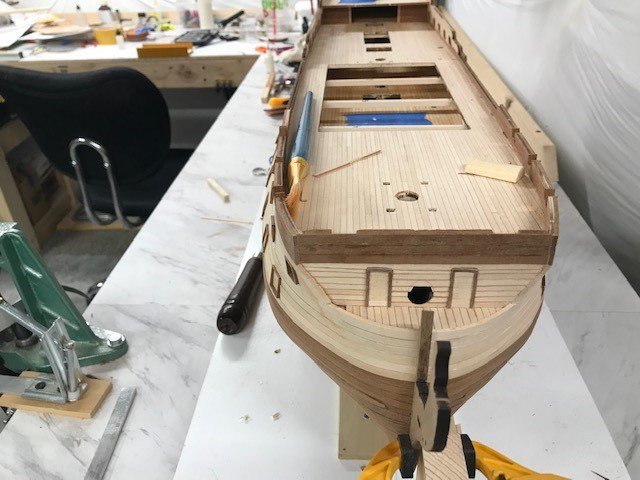
More dry-fit work on the bow, just some detail work left before things get set. Detail work on the hatches and gratings and got the gun tackle worked out so I can start mass production. The admiral got me a copy of Spanish Warships in the Age of Sail, 1700-1860: Design, Construction, Careers and Fates for Christmas I highly recommend it. I used several of the illustrations to help build the bow parts.

-
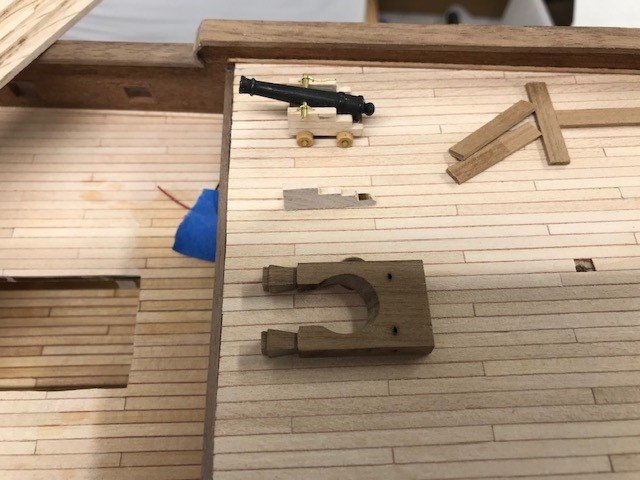
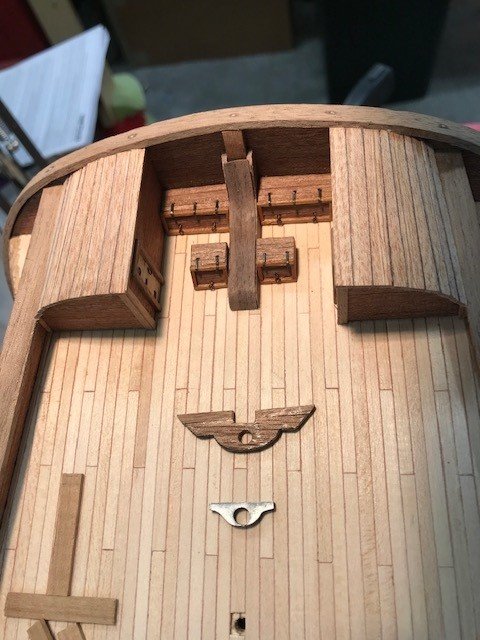
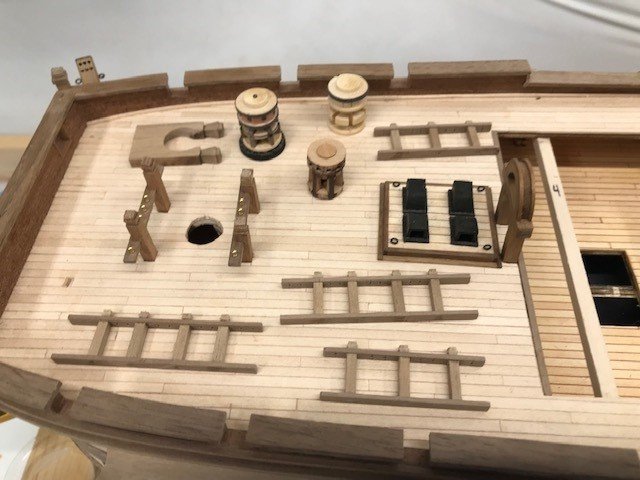
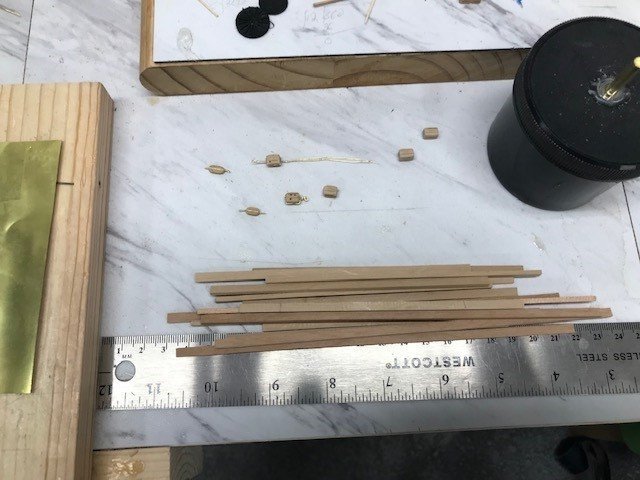
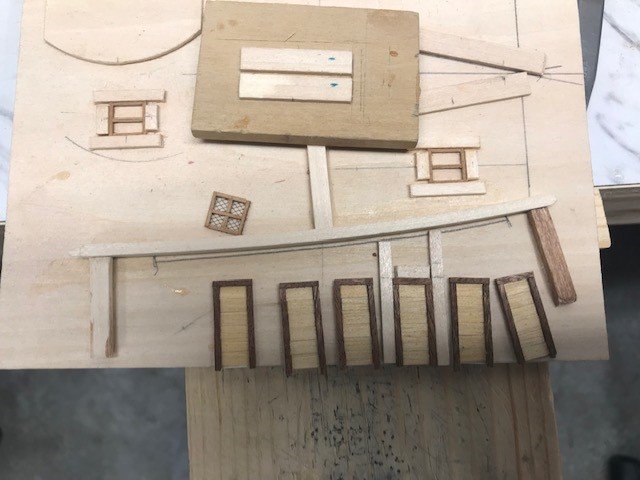
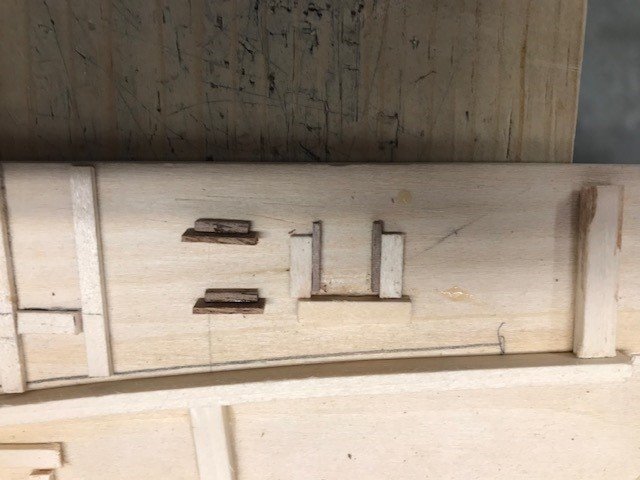
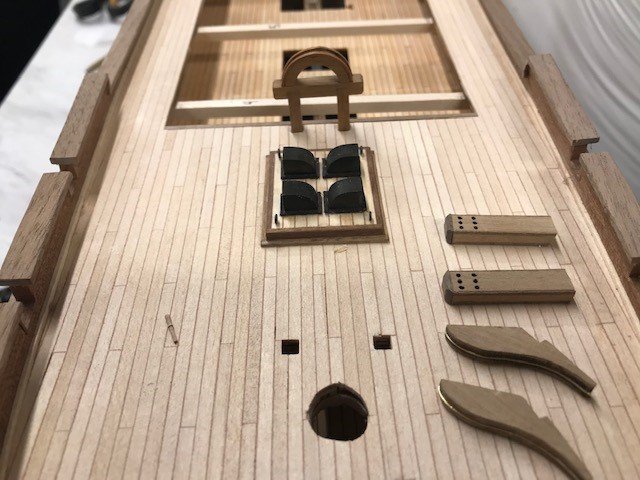
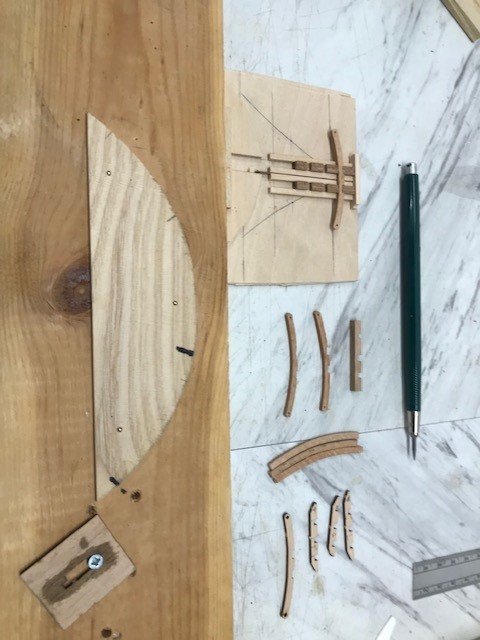
Just more detail work. Made a proto cannon to verify the height and milled the stock for the carriages using a table saw (The kit supplied cannons and carriages are horrid). All the detail is added to the capstains. My versions of the flag boxes and the ensign staff support. Holes drilled for the davits using a proxxon mill and a dividing head.
-
Cmm4000 reacted to a post in a topic:
Montanes by Iseaz - OcCre- 1/70
-
Tyguy35 Thank you! Just been doing detail, navigator cabins (I used different wood and caulking to make the officials quarters and the navigator cabins stand out a bit), rails, fenders, ladders and capstans. Gonna try making blocks, been playing with all the variables, size proportions, wood type, wood processing, machining and tumbling. I'm waiting on an ellipse template with less projection and some router bits. Looks like the hard part is going to be the mass production. The three types of wood so far castello boxwood, pear, and cherry from pen turning blanks. Once I'm happier with the prototypes and I get the production stage I'll post more photos of the block project. On the bright side I'm not going to do sails so I won't have to make as many blocks. Oh, El Capitán is back on his feet.


-
ccoyle reacted to a post in a topic:
Montanes 1794 by Cmm4000 - OcCre - 1:70
-
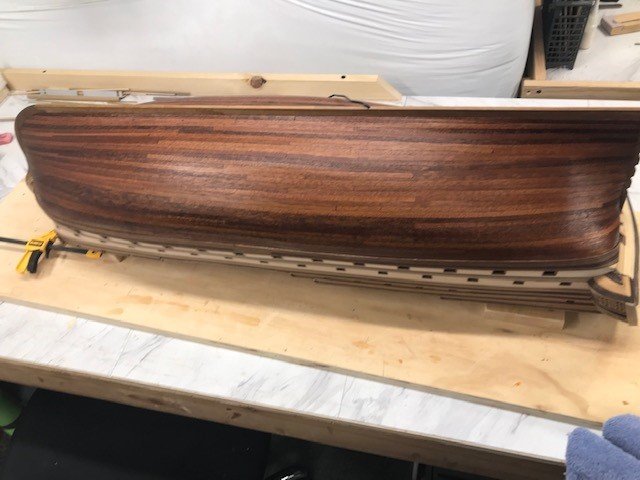
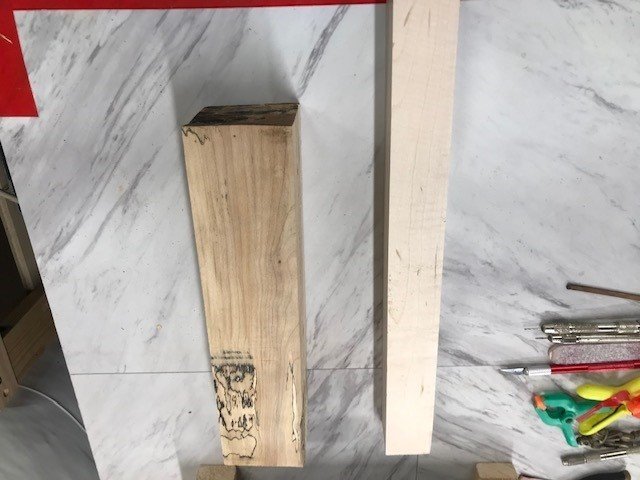
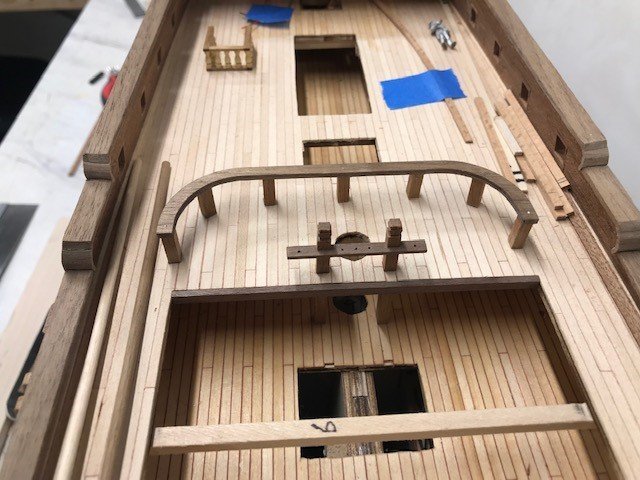
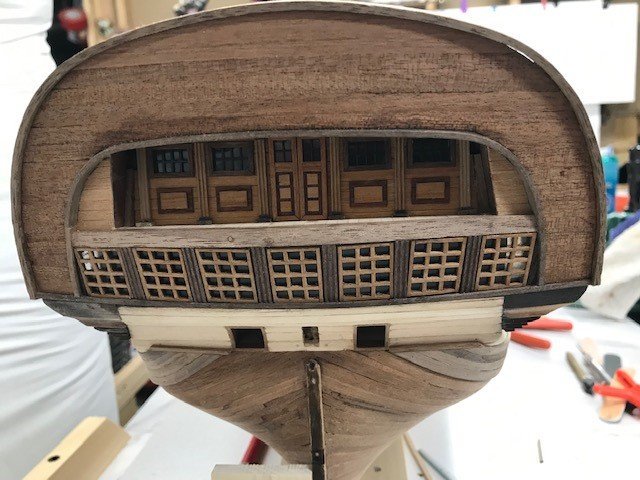
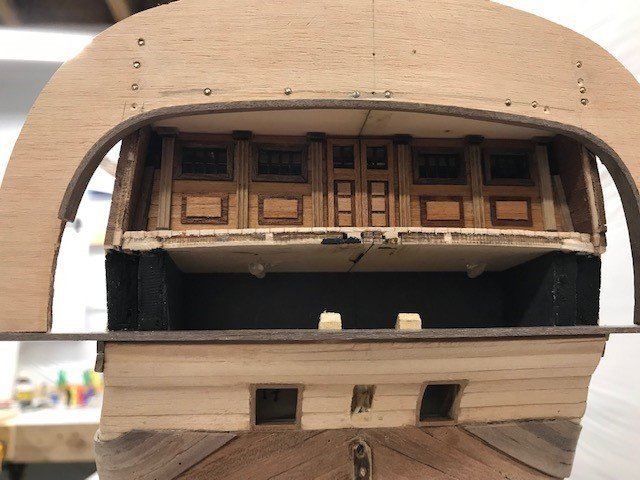
Chris and Chris, Thank you for the thumbs I must be doing something right! Lots of progress but I have been away from posting for a while so here are updates. Finished the lower hull with seven coats of sealer and installed the rudder. Construction of the official's cabin and the jig for building the doors and windows. Constructed the display base out of spalted maple that I got from the cutoff box at the wood store also scored some curly maple. I have plans to use this on the ship in dry-dock the Norske Love. More of the official's cabin installing the hinges and door handles. Made good progress on the bow one side is finished. The jig to build the ladders and the ladders and fenders installed (I used beech for the fenders I could not get the walnut to cooperate, I also did them in two layers then doweled them in place. More of the deck furniture made. The channels from the kit are plywood and seemed to be to short so I have a longer set to cut and see how it works out I don't want to run out of channel for the standing rigging and I can always make them shorter. Also decided to use belaying pins per my question about the SJN. I think El Capitán got into the rum as he later fell and passed out on deck. Oh and now I get to do the other side.


-
ccoyle reacted to a post in a topic:
Montanes 1794 by Cmm4000 - OcCre - 1:70
-
chris watton reacted to a post in a topic:
Montanes 1794 by Cmm4000 - OcCre - 1:70
-
Work continues on the bow and details.
-
Esap reacted to a post in a topic:
Montanes 1794 by Cmm4000 - OcCre - 1:70
-
wvdhee reacted to a post in a topic:
Montanes 1794 by Cmm4000 - OcCre - 1:70
-
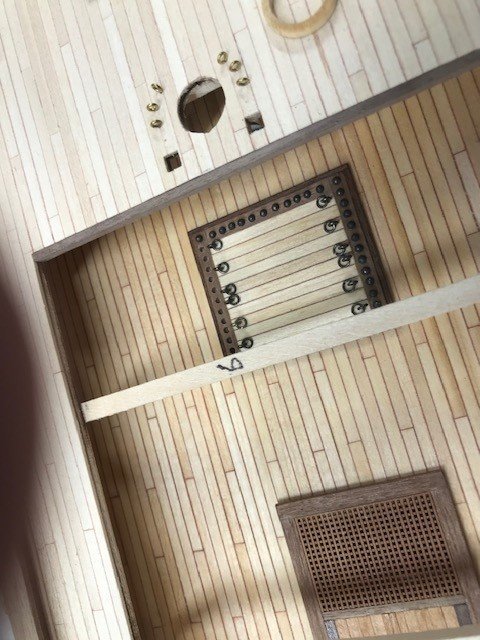
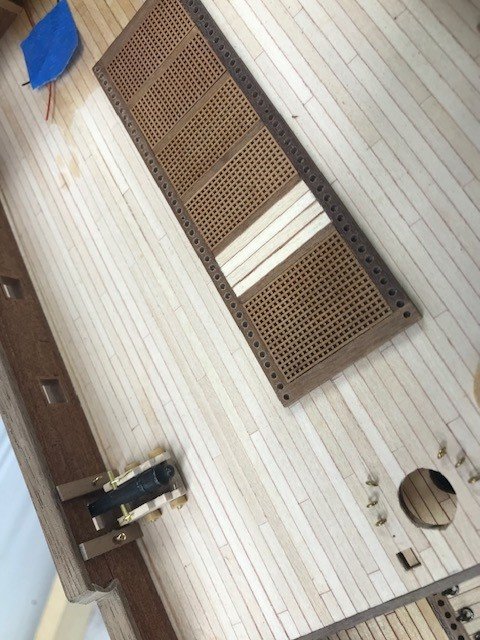
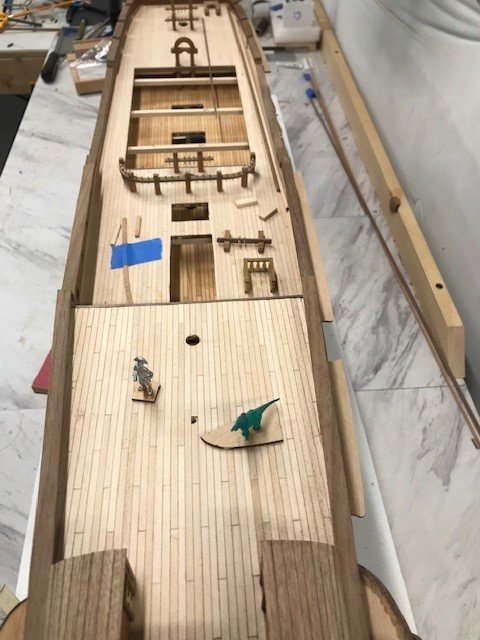
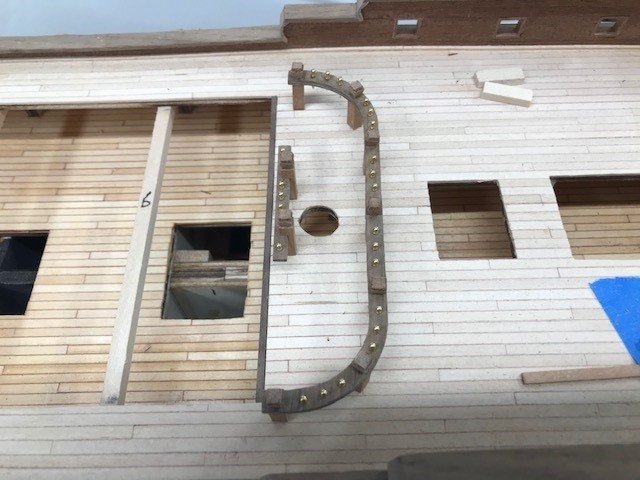
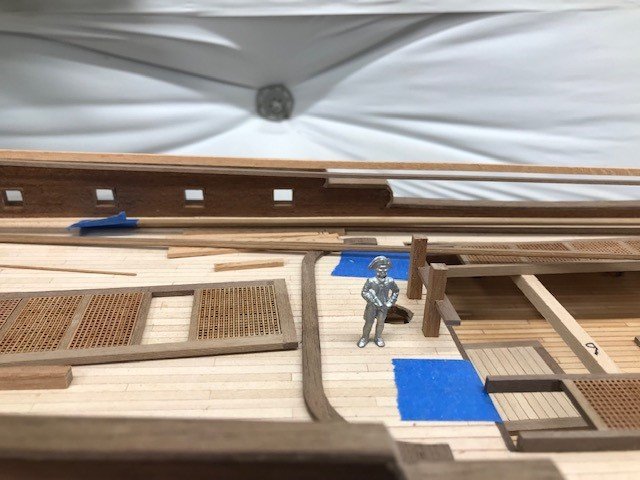
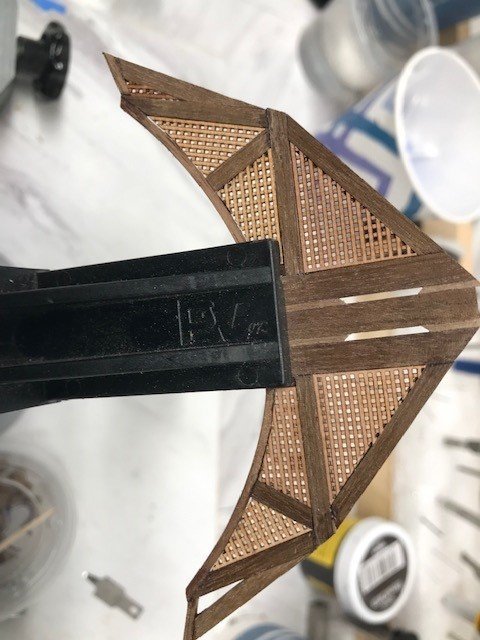
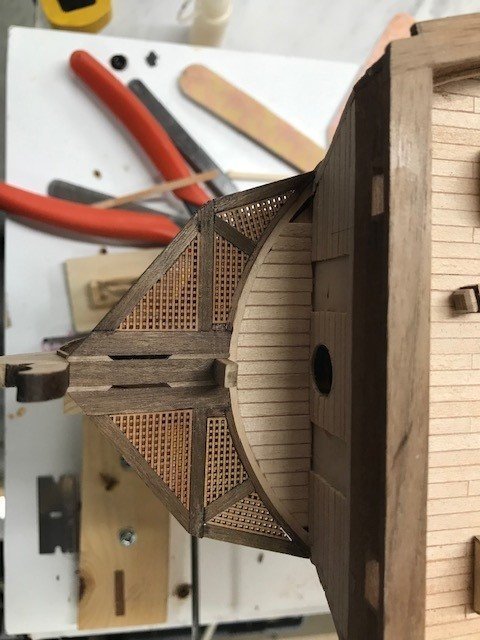
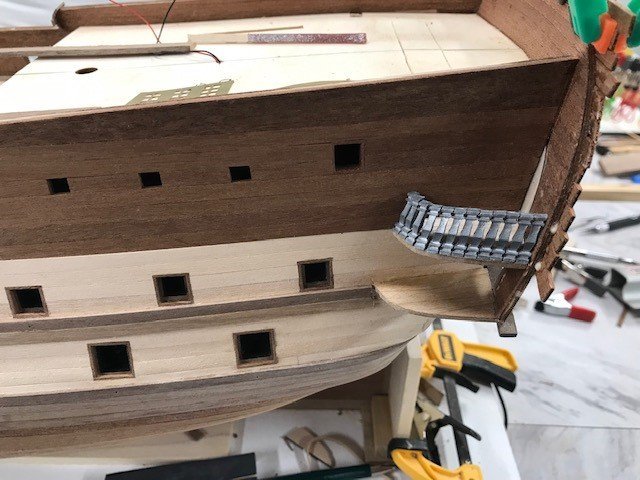
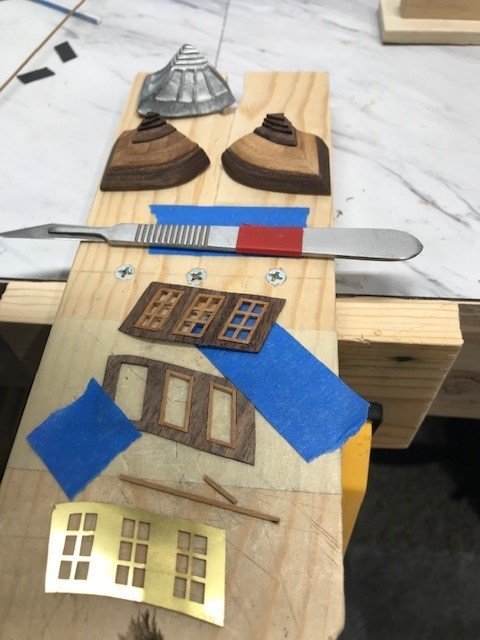
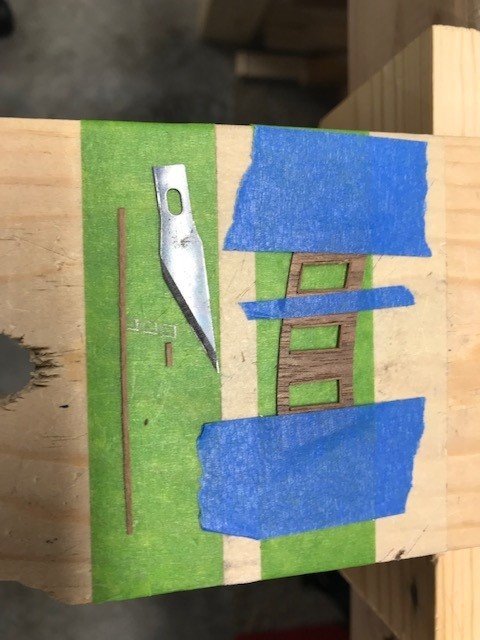
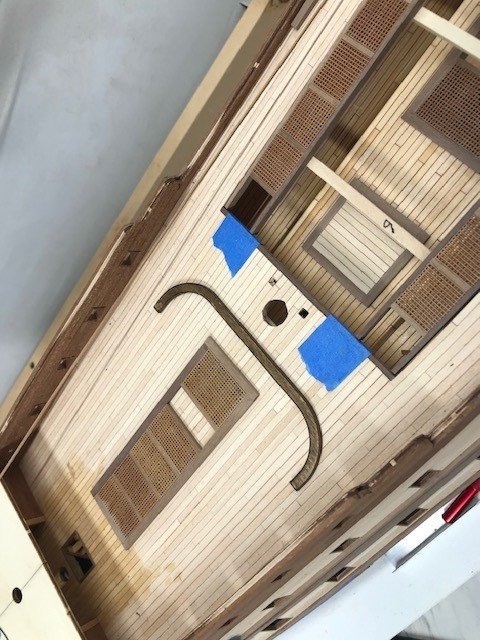
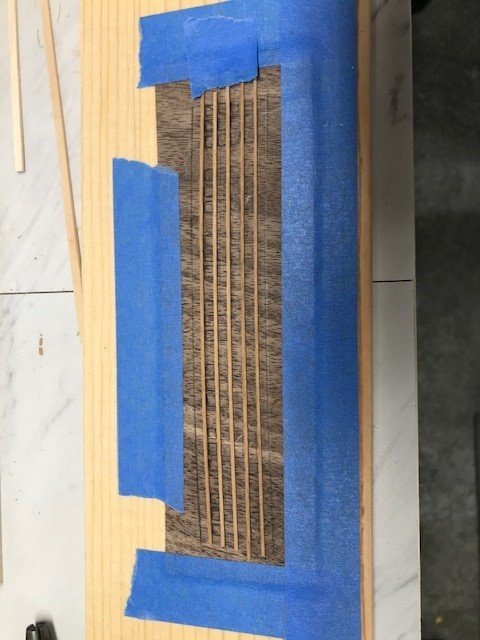
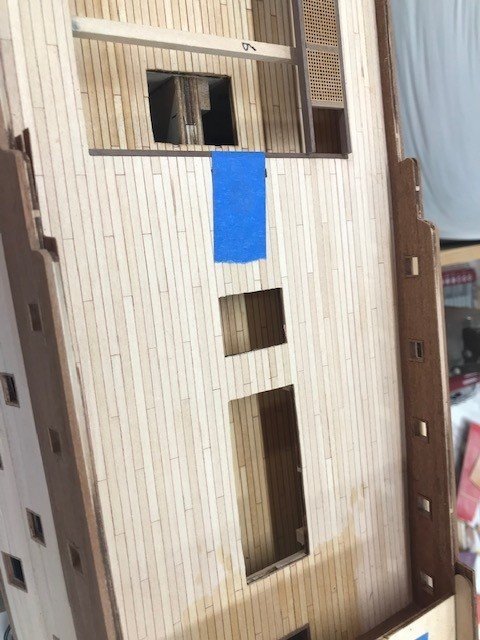
Scratched the bow grating the kit stuff IMHO is way out of scale. Work on the bow details continues. Stove vents built, used brass black on the supplied parts, pretty happy with the results with a sooty look.

-
RossR reacted to a post in a topic:
Montanes 1794 by Cmm4000 - OcCre - 1:70
-
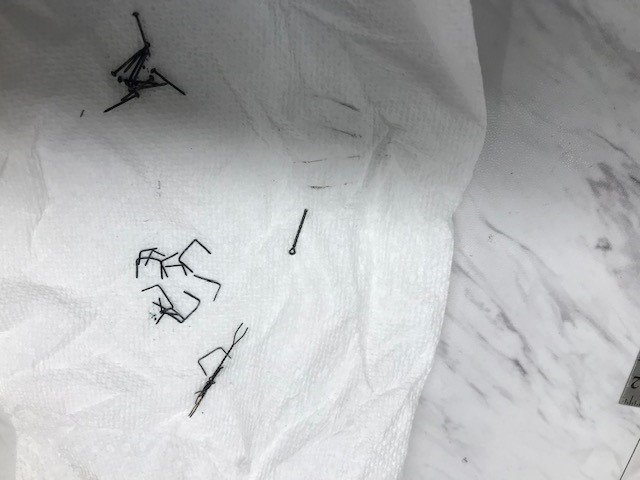
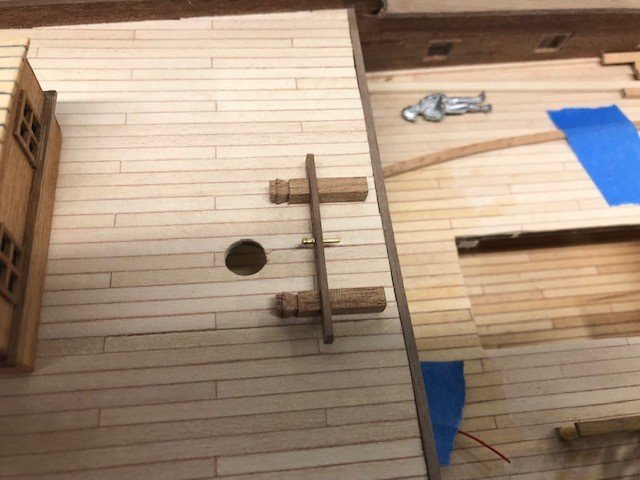
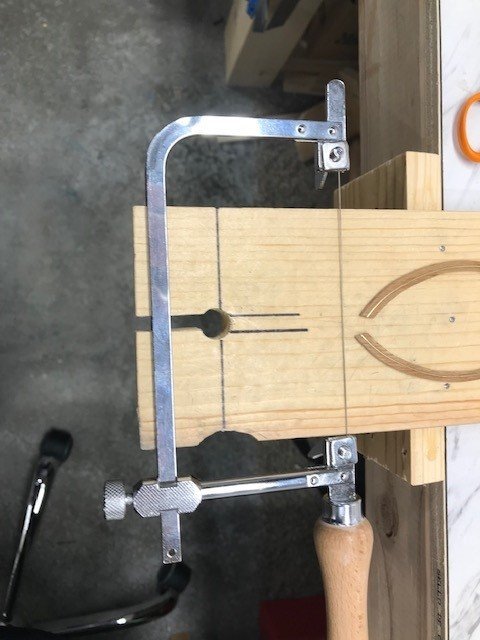
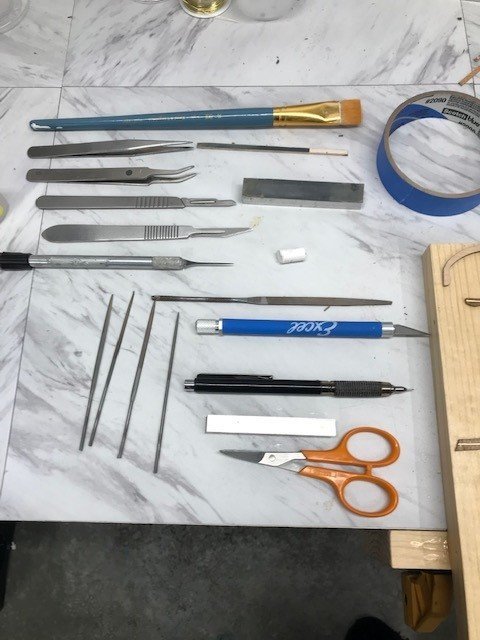
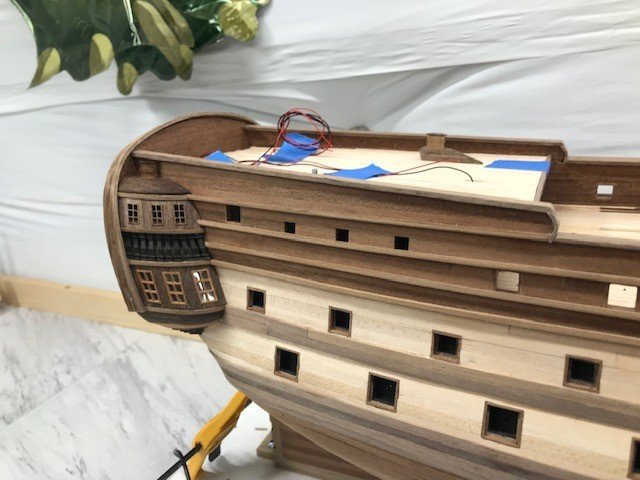
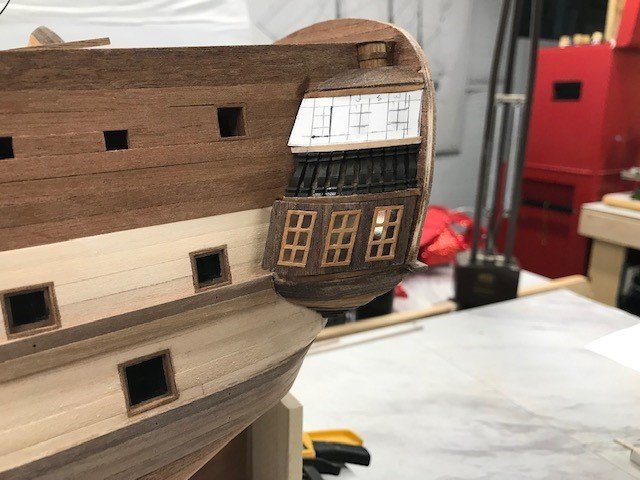
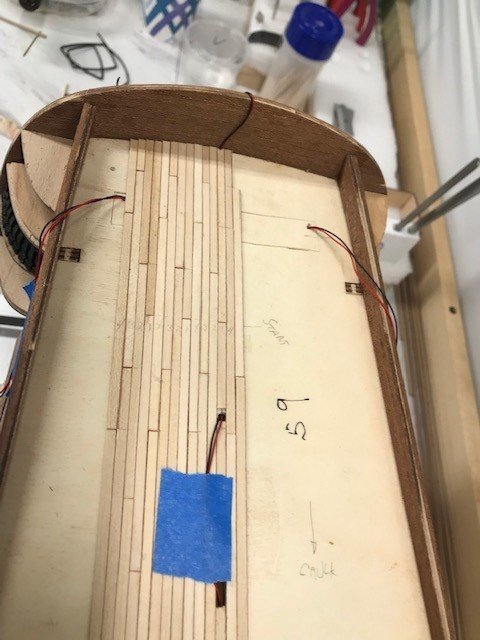
Hi Martin, Thank you for the compliment! My jeweler's saw set up and inlay tools. Mad some big progress with the stern and railing. The wire is for the stern lanterns and the official's cabins LEDs.
-
Mr Whippy reacted to a post in a topic:
Montanes 1794 by Cmm4000 - OcCre - 1:70
-
ccoyle reacted to a post in a topic:
Montanes 1794 by Cmm4000 - OcCre - 1:70
-
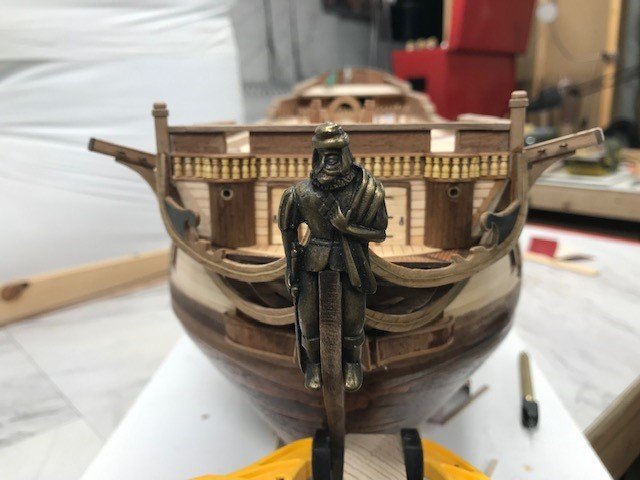
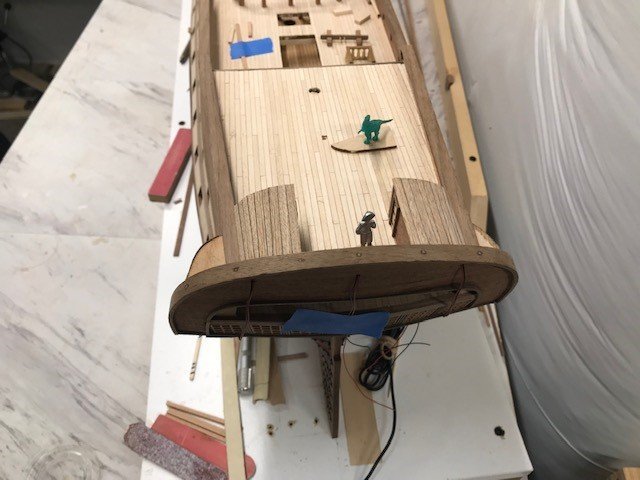
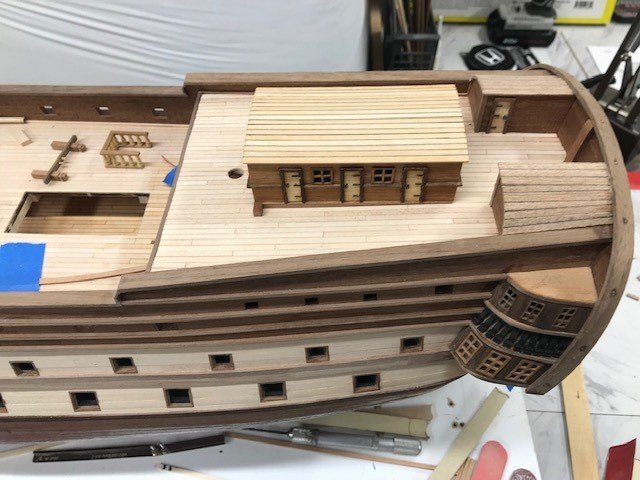
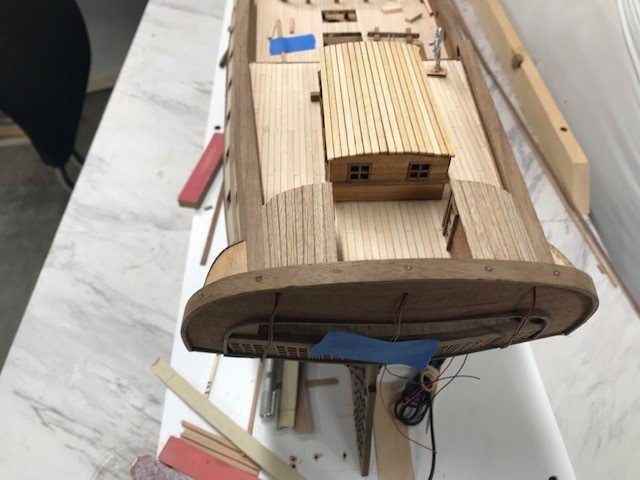
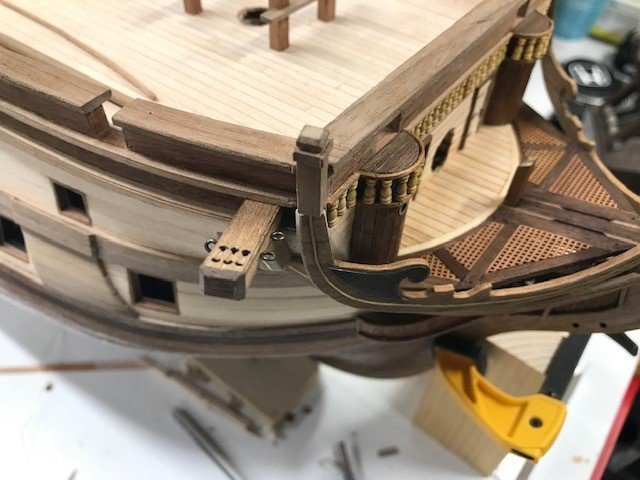
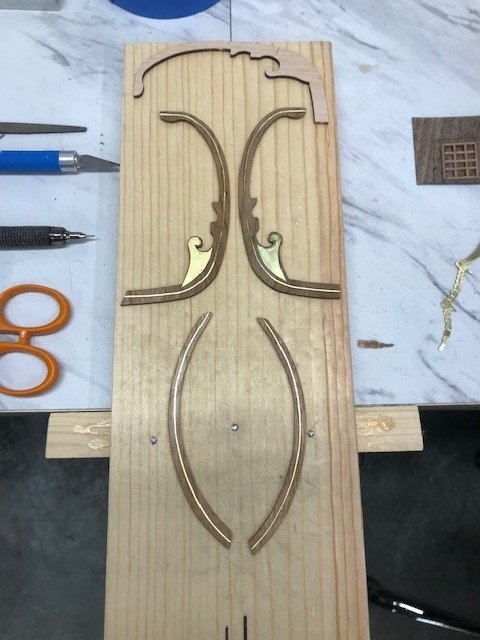
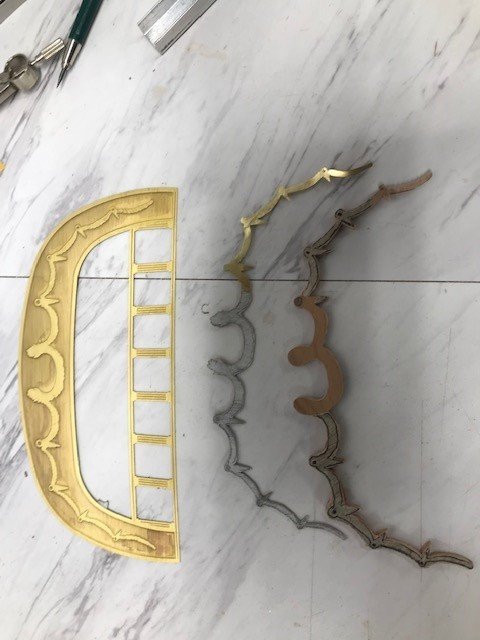
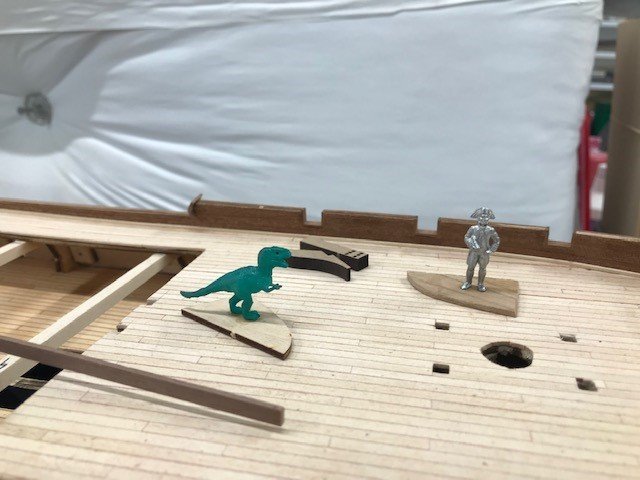
Hi Biker Mart, Your Montanes is looking good! Been kinda busy so haven't posted for a while so here is some new pics. Alot of stuff lately is figuring out how to replace the PE/Cast parts with wood and manufacturing detail parts. Also made some feather boards for the Proxxon table saw just paint sticks and some hardware with Teflon wing nuts. Not going to use the PE stern gallery or cast parts so working on the detail in wood and brass to see which works/looks best. Wiring installed for the stern lights and planking begins on the poop deck. And last but not El Capitán and his favorite pet raptor on deck (he is a little big so I will be ordering his clone in a smaller scale


-
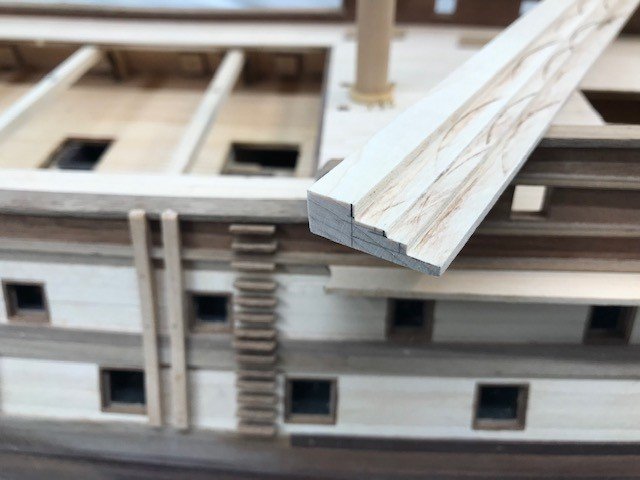
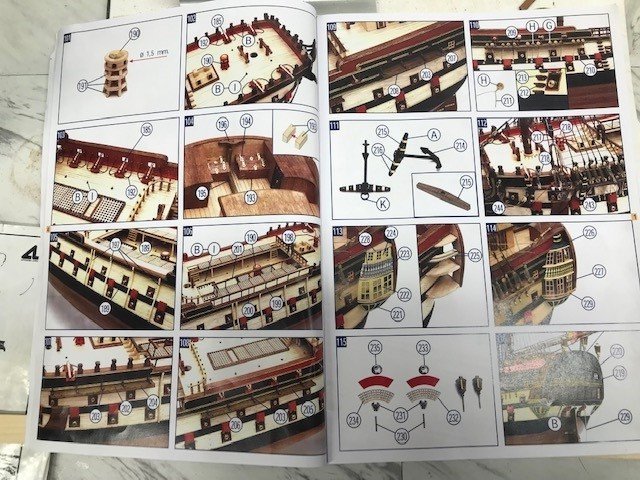
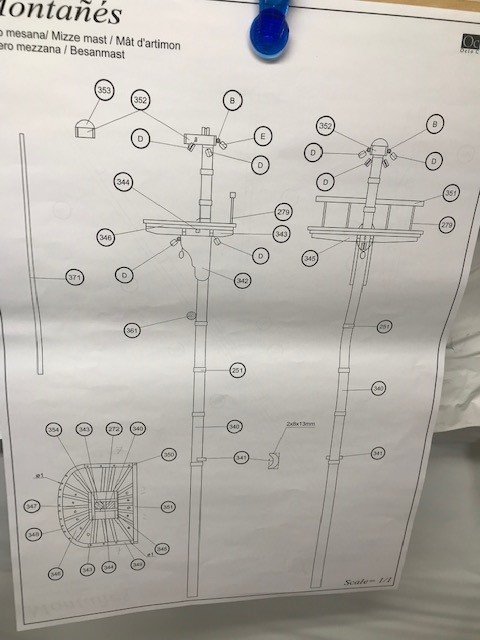
BikerMart, Allan, I actually read the instructions that come with the manual, my mistake the horizontals are called rubbing strakes, and the verticals are called fenders, on the manual pictures 105 and 106 which makes way more sense. Also some pictures of the plans and text. More work on the hull. The rail is the kit supplied ply with walnut fascia and stained, not crazy with the look will probably fabricate one. Gonna play with some options this weekend. Started the work on the transom windows to replace the PE
-
RossR reacted to a post in a topic:
Montanes 1794 by Cmm4000 - OcCre - 1:70
-
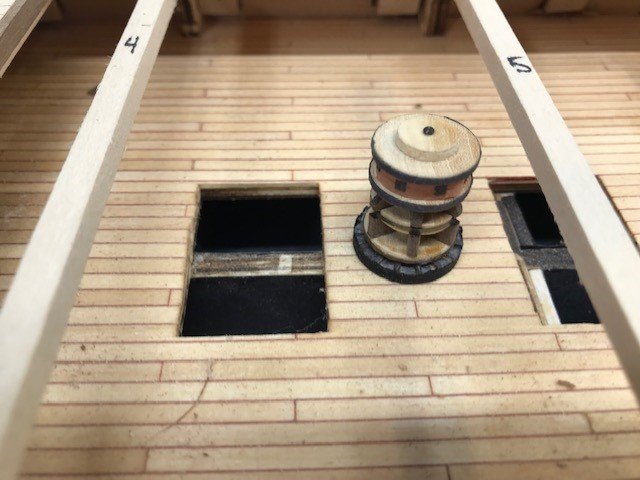
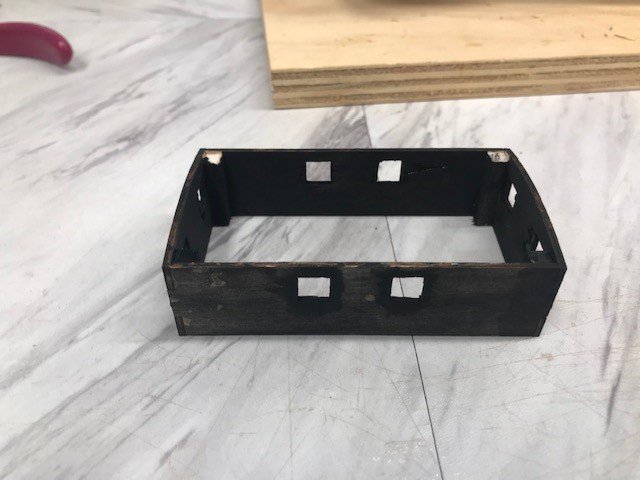
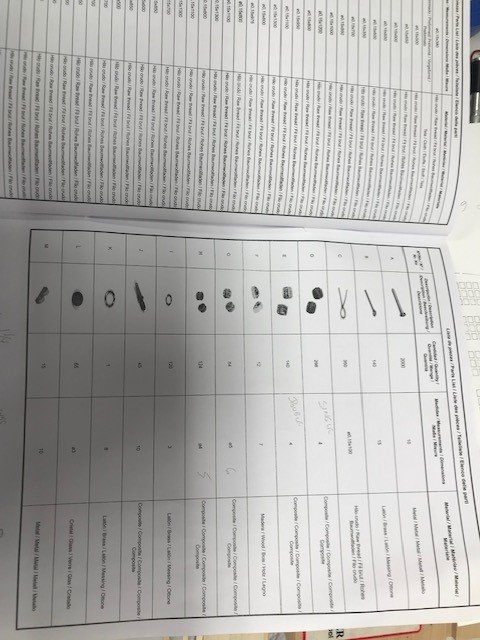
Sirs, You are correct the instructions, if I recall correctly, refer to them as fenders and I'm guessing maybe due to translation from Spanish to English? For me the most valuable instructions are the book of photos the plans and the parts list with the dimensions/what the part is made of. For the most part, IMHO, the instructions say something like "build this," so it looks like the plan or the photo and I'm guessing that's why this is such a cool hobby, sometimes it takes a few days just for me to figure out how to make a part. Like the bell tower, the kit part is metal had to go, I couldn't get the top cut right from a solid piece of wood so I laminated several strips together over a dowel and capped it with thin walnut squares. Port side is done, more of the deck furniture started and work begins on the starboard side.

-
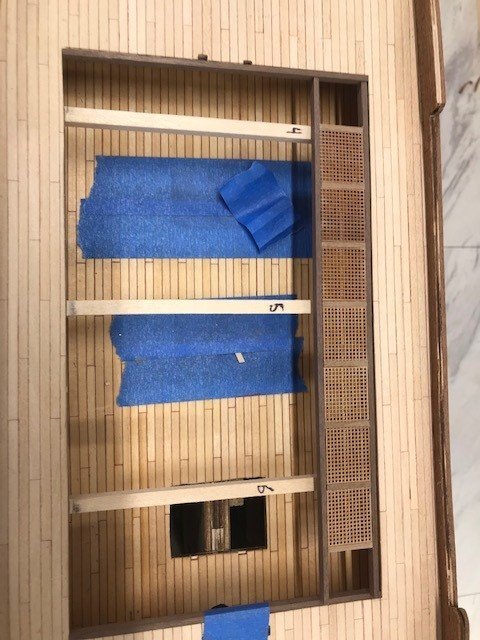
Work continues on the grates and hatch covers. Making the top for the bell tower laminating walnut with my high-tech jigs. Decided to go with the kit supplied walnut for the fenders really nice wood. Had to thin it to 1.5mm I could not get the 2mm to bend on the stern wood processed and test bend successful!

-
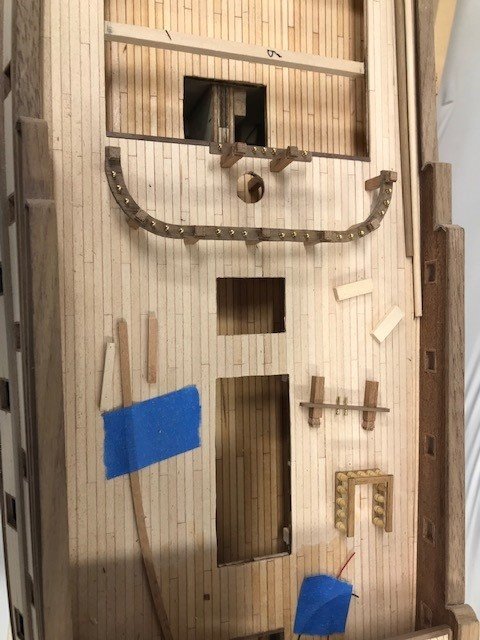
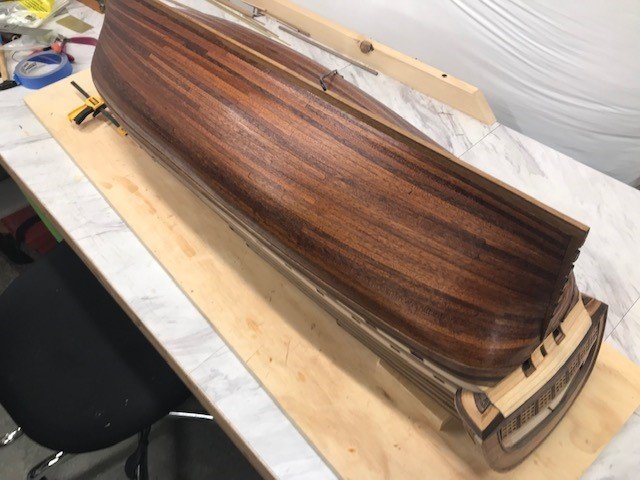
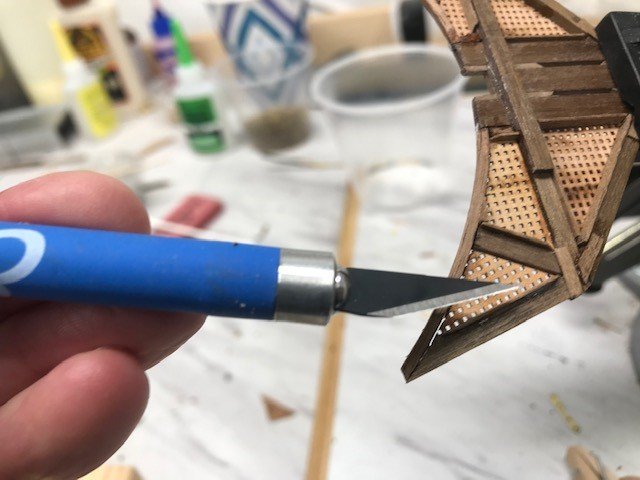
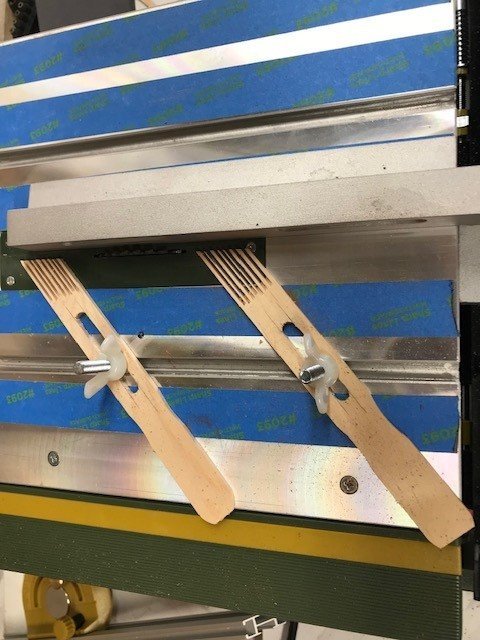
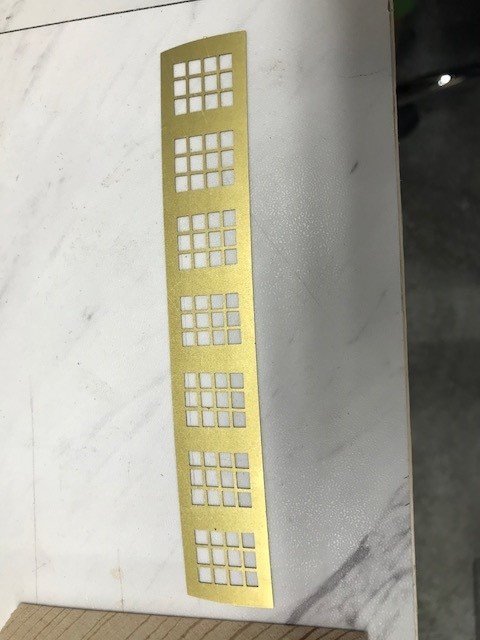
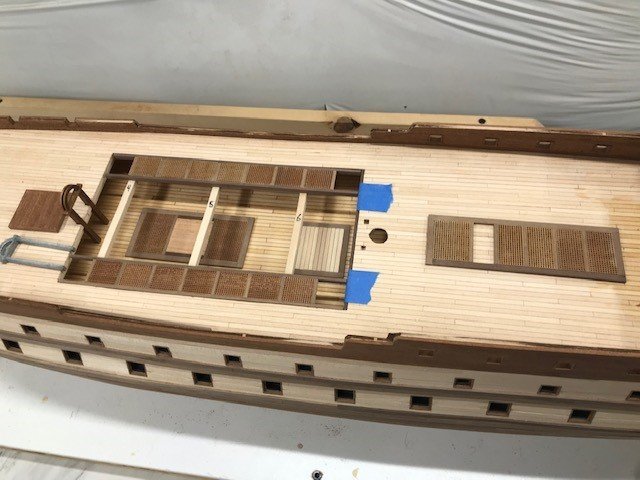
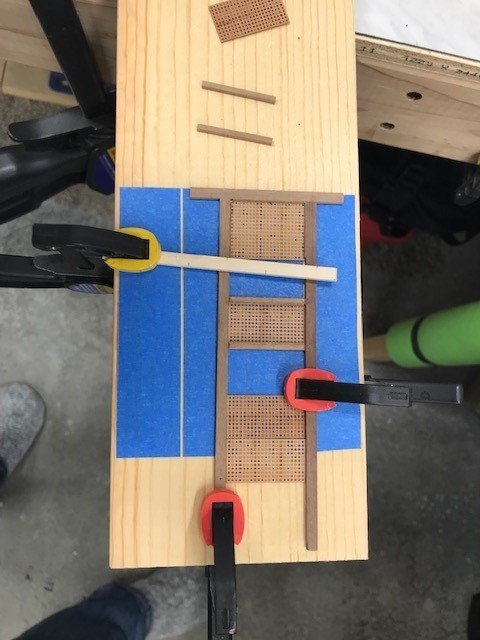
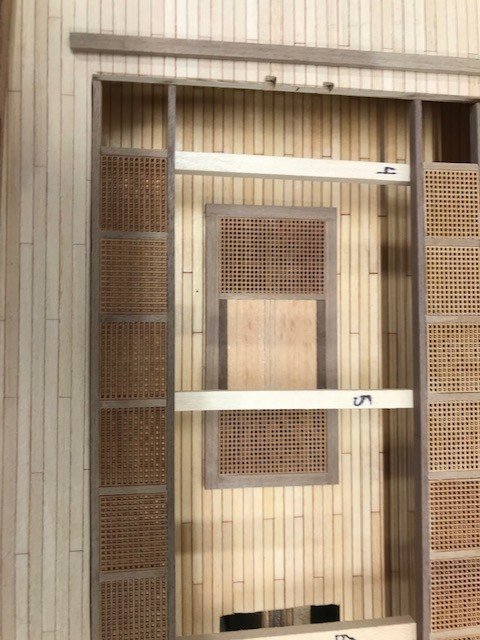
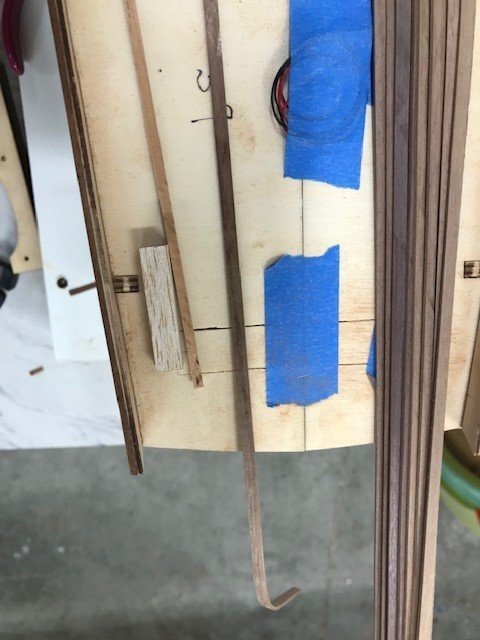
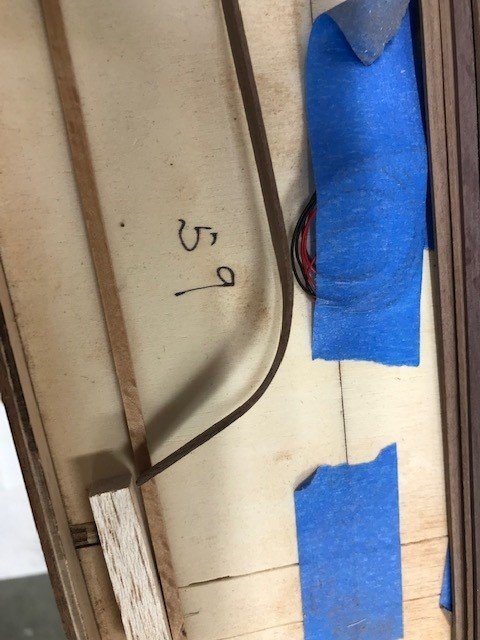
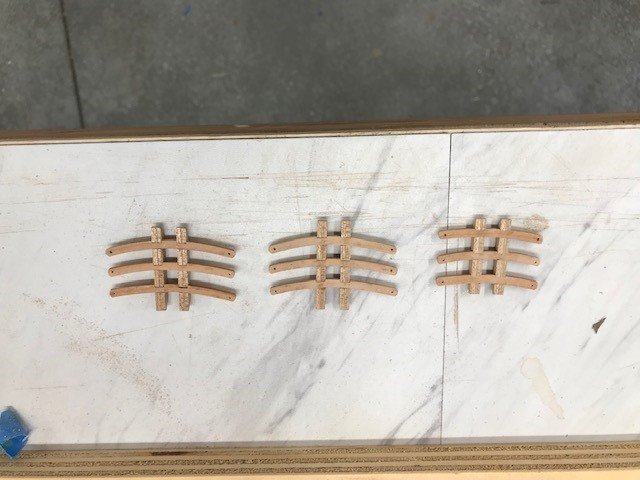
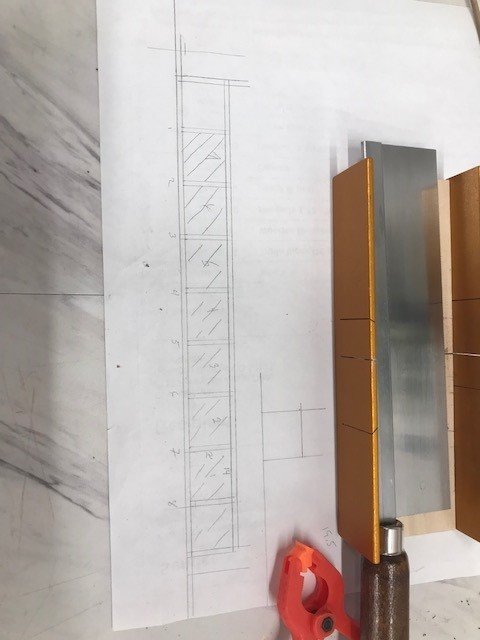
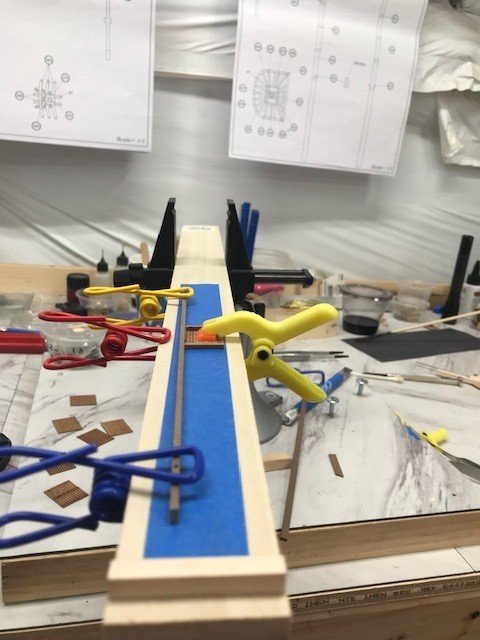
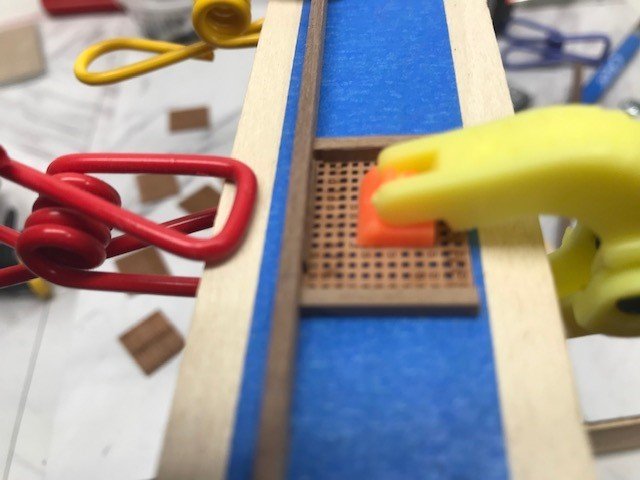
Crosstrees completed. Stern gunports cut in and lined. First hull sanding done (sand-vacuum, sand-vacuum, ugh). More of the bulwark lining done. Been messing with what to make the fenders from, either wood soaked in black dye or dark walnut. Both are soaking for bending so while I was waiting for that I made the waist grates. The kit grates are nice but IMHO way out of scale (the openings look way to big, I have a 1/72 scale sailor and his foot would almost fit through the opening), so I used laser cut grates from Falkonet with much smaller openings. One very important thing my Nepomuceno taught me is the importance of building assembly jigs. This is a piece of poplar from my local home improvement store with blue tape for a reference and a square block of bass for a stop. I keep a couple of these poplar boards on hand as they are great for making push sticks, sanding blocks, shims, vise jaw protectors, drill press jigs, etc. and they are really cheap too!
-
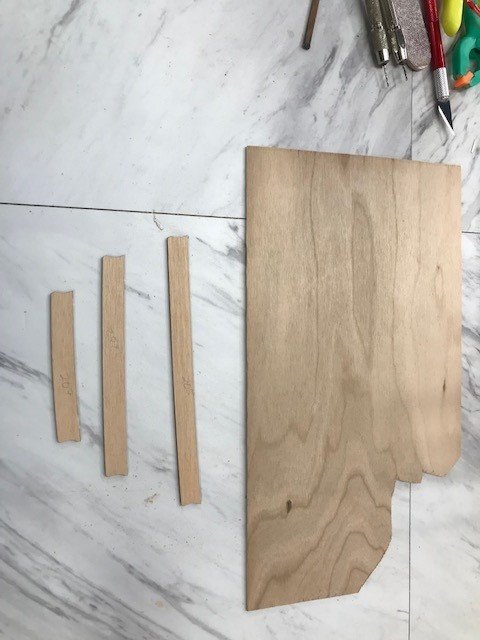
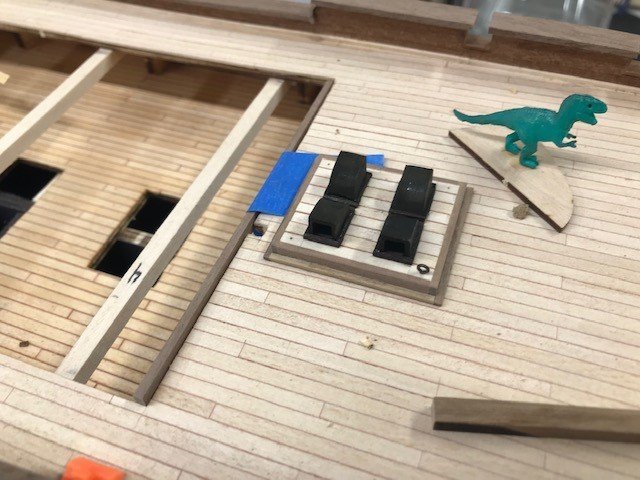
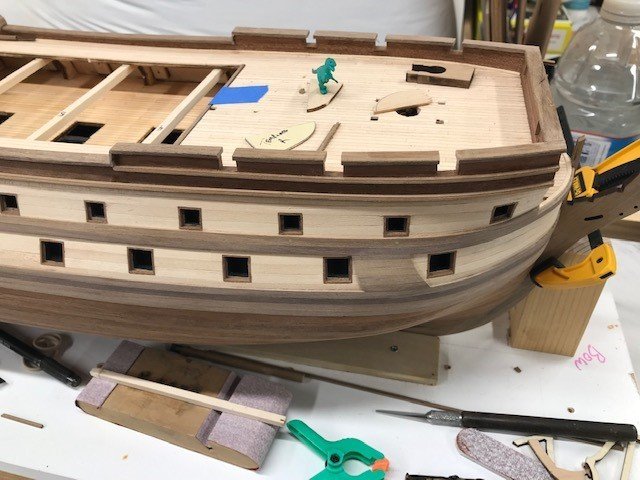
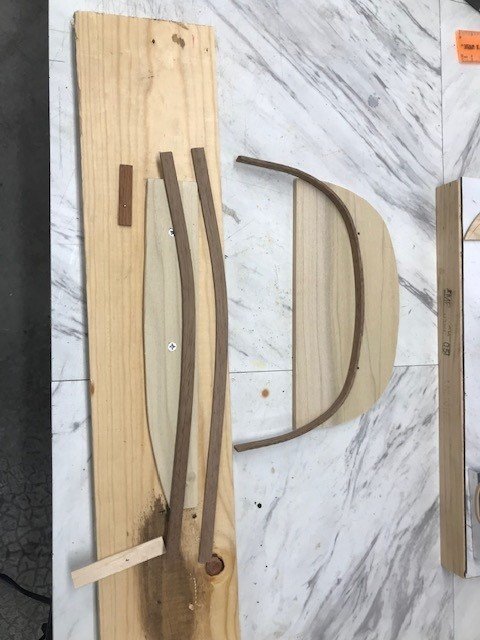
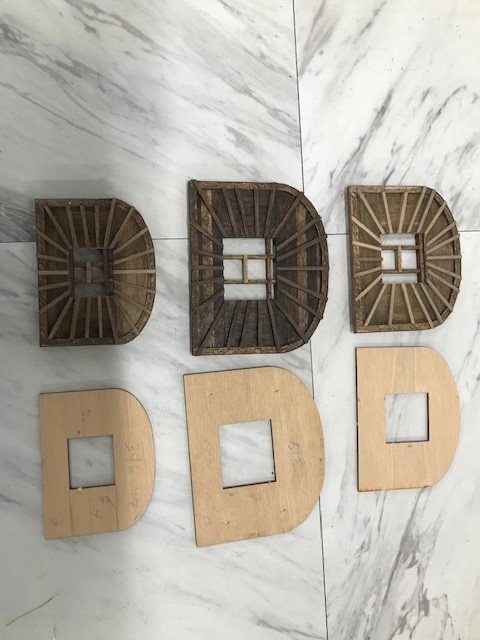
Got the heads and doors roughed in and the first test column to replace the kit PE. Mast tops major construction completed to replace the kit supplied ply w/ (walnut, cherry, birch, sapele). If I was going to paint the plywood the laser-cut is top notch but I'm a wood guy. The ply parts make excellent templates though. The jigs for the cross trees and making the cross trees (cherry and birch). The next big steps are sanding the hull and cutting the stern gunports, not looking forward to the all the sanding and mess, so I've been building these other parts to get motivated.
-
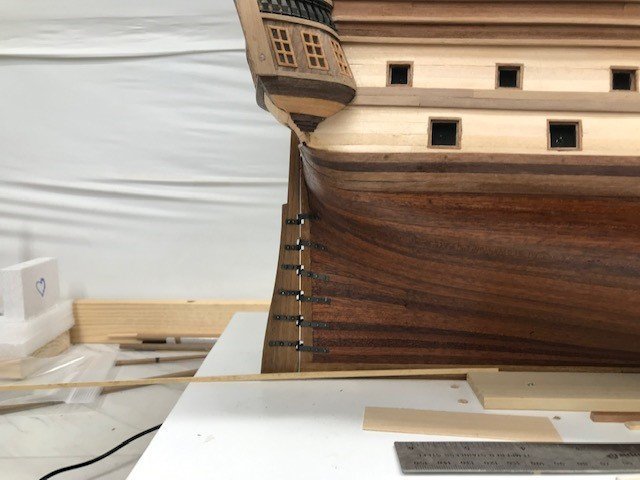
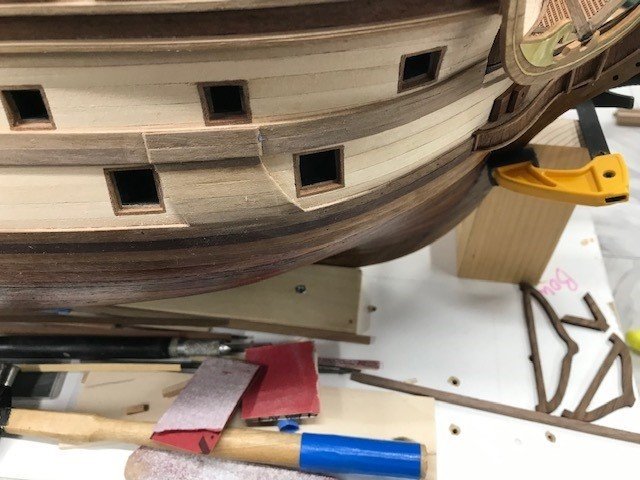
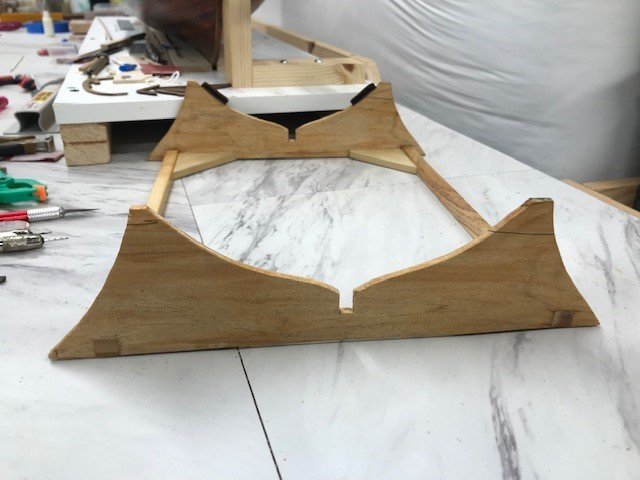
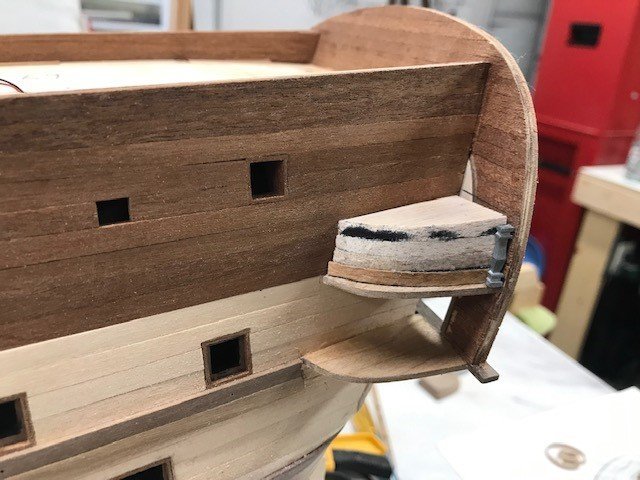
Started work on the bow. Sanded the plank flush with the prow and roughed in the doors. The plans call for rectangular doors and not inset I prefer the rounded top and inset matching many of the drawings I have accumulated.
-
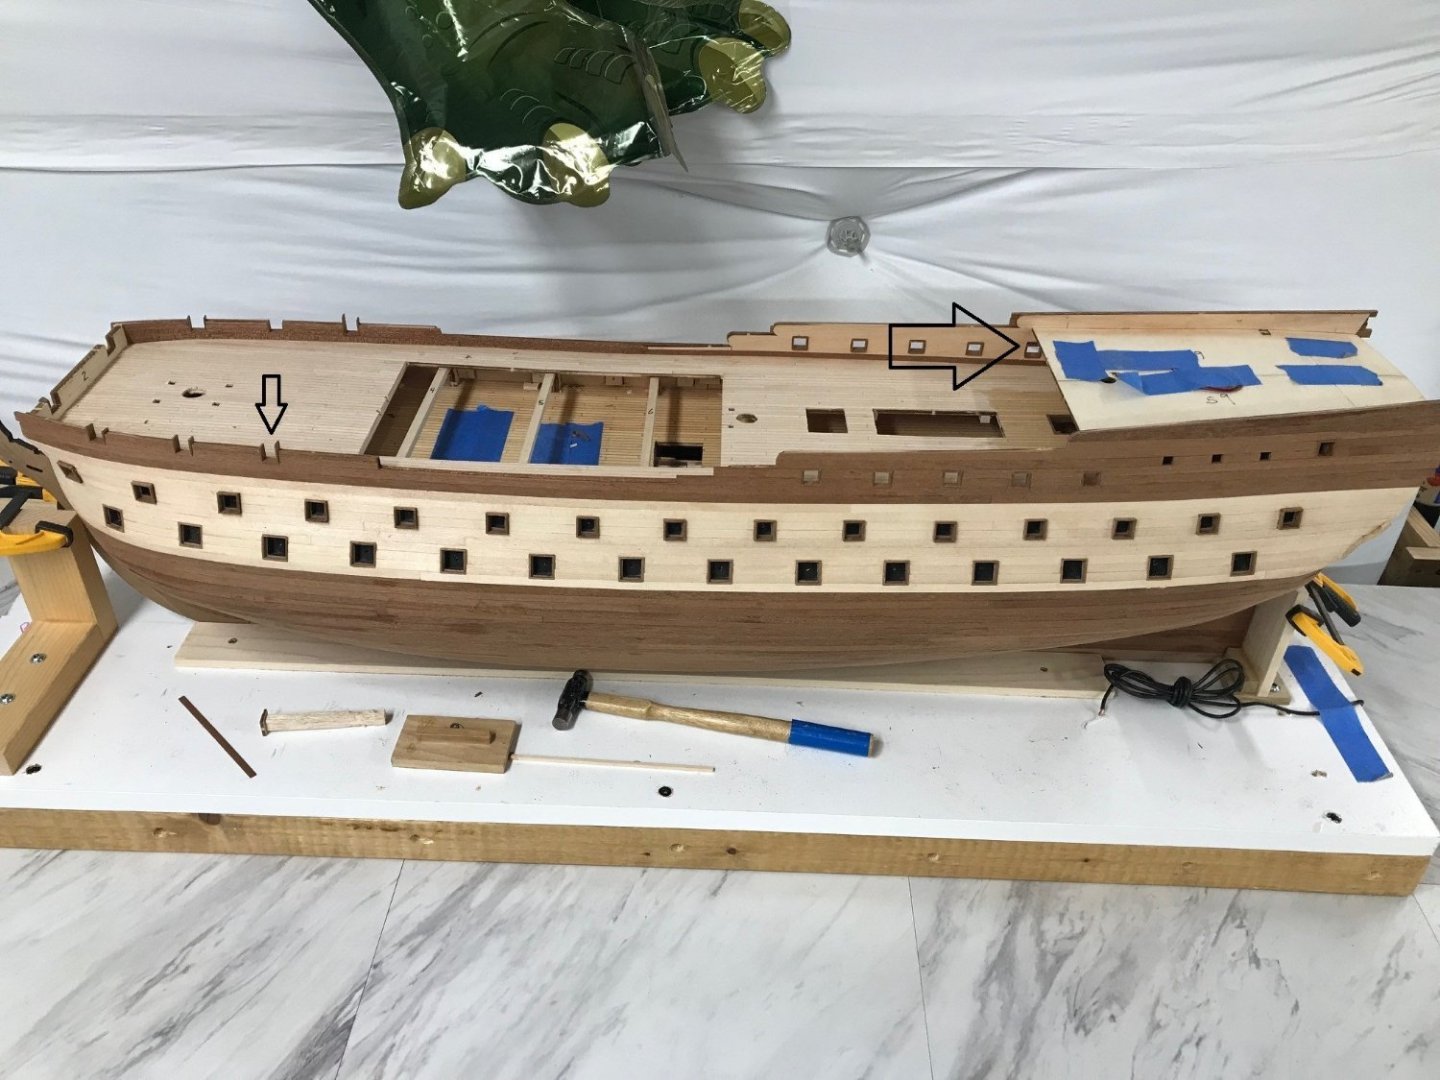
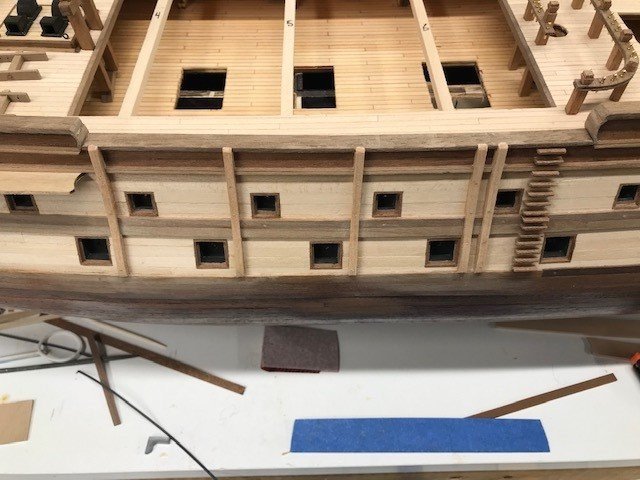
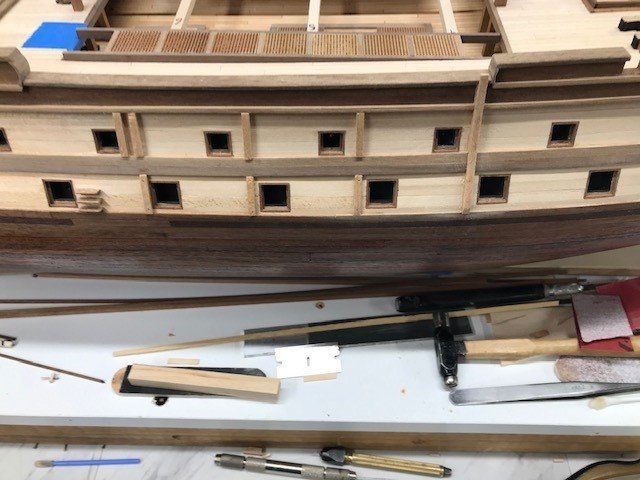
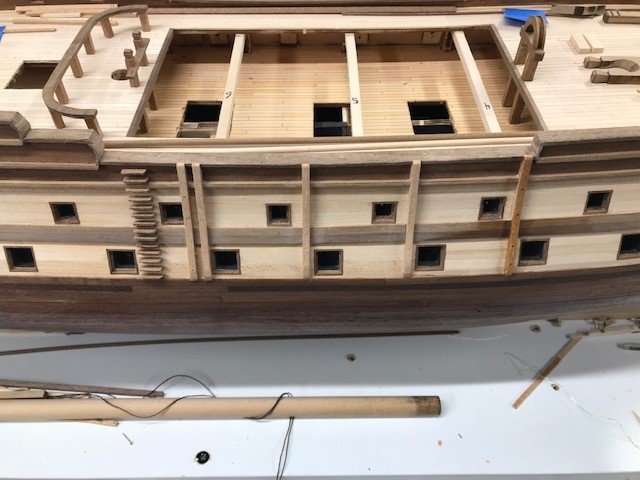
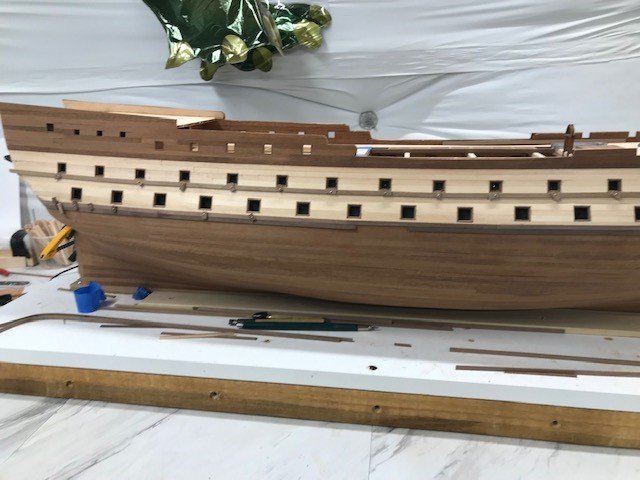
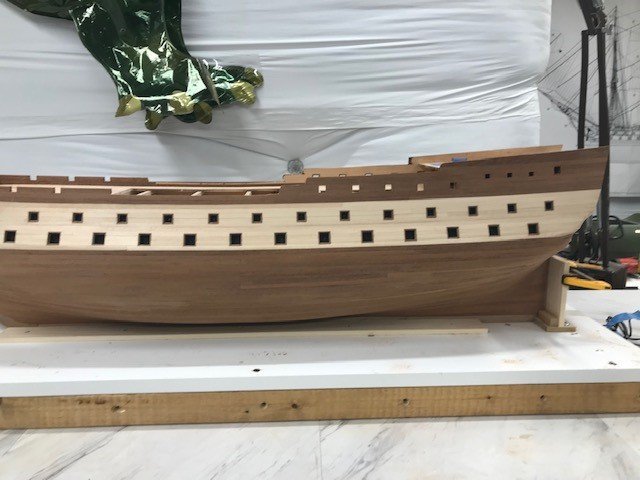
Finally got all the gunports installed/lined. Added a third port back from the bow on the upper deck. Missing in the kit plans/not precut, many of the drawings I have show this third gunport so I decided to add it. Also, the 5th gunport back from the waist was too high so I had to move it down to the correct height for the cannon.