Halvor
-
Posts
21 -
Joined
-
Last visited
-
 Halvor reacted to a post in a topic:
HMS Sphinx 1775 by Blue Ensign - FINISHED - Vanguard Models - 1:64 scale
Halvor reacted to a post in a topic:
HMS Sphinx 1775 by Blue Ensign - FINISHED - Vanguard Models - 1:64 scale
-
Halvor reacted to a post in a topic:
HMS PEGASUS by giampieroricci - Scale 1:36 - Swan-Class Sloop from plans by David Antscherl & Greg Herbert
-
Halvor reacted to a post in a topic:
HMS Sphinx 1775 by Blue Ensign - FINISHED - Vanguard Models - 1:64 scale
-
Halvor reacted to a post in a topic:
HMS Sphinx 1775 by Blue Ensign - FINISHED - Vanguard Models - 1:64 scale
-
Halvor reacted to a post in a topic:
HMS PEGASUS by giampieroricci - Scale 1:36 - Swan-Class Sloop from plans by David Antscherl & Greg Herbert
-
Halvor reacted to a post in a topic:
HMS Sphinx 1775 by Blue Ensign - FINISHED - Vanguard Models - 1:64 scale
-
Halvor reacted to a post in a topic:
Golden Hind (ex-Pelican) by Baker - FINISHED - scale 1/45 - Galleon late 16th century
-
Halvor reacted to a post in a topic:
Golden Hind (ex-Pelican) by Baker - FINISHED - scale 1/45 - Galleon late 16th century
-
Halvor reacted to a post in a topic:
HMS Sphinx 1775 by Blue Ensign - FINISHED - Vanguard Models - 1:64 scale
-
Halvor reacted to a post in a topic:
HM Cutter Cheerful 1806 by JPR62 - 1:48 scale
-
clearway reacted to a post in a topic:
Norden by Halvor - Billing Boats - 1:30 - First build
-
G.L. reacted to a post in a topic:
Norden by Halvor - Billing Boats - 1:30 - First build
-
Keith Black reacted to a post in a topic:
Norden by Halvor - Billing Boats - 1:30 - First build
-
Hartron reacted to a post in a topic:
Norden by Halvor - Billing Boats - 1:30 - First build
-
Baker reacted to a post in a topic:
Norden by Halvor - Billing Boats - 1:30 - First build
-
Baker reacted to a post in a topic:
Norden by Halvor - Billing Boats - 1:30 - First build
-
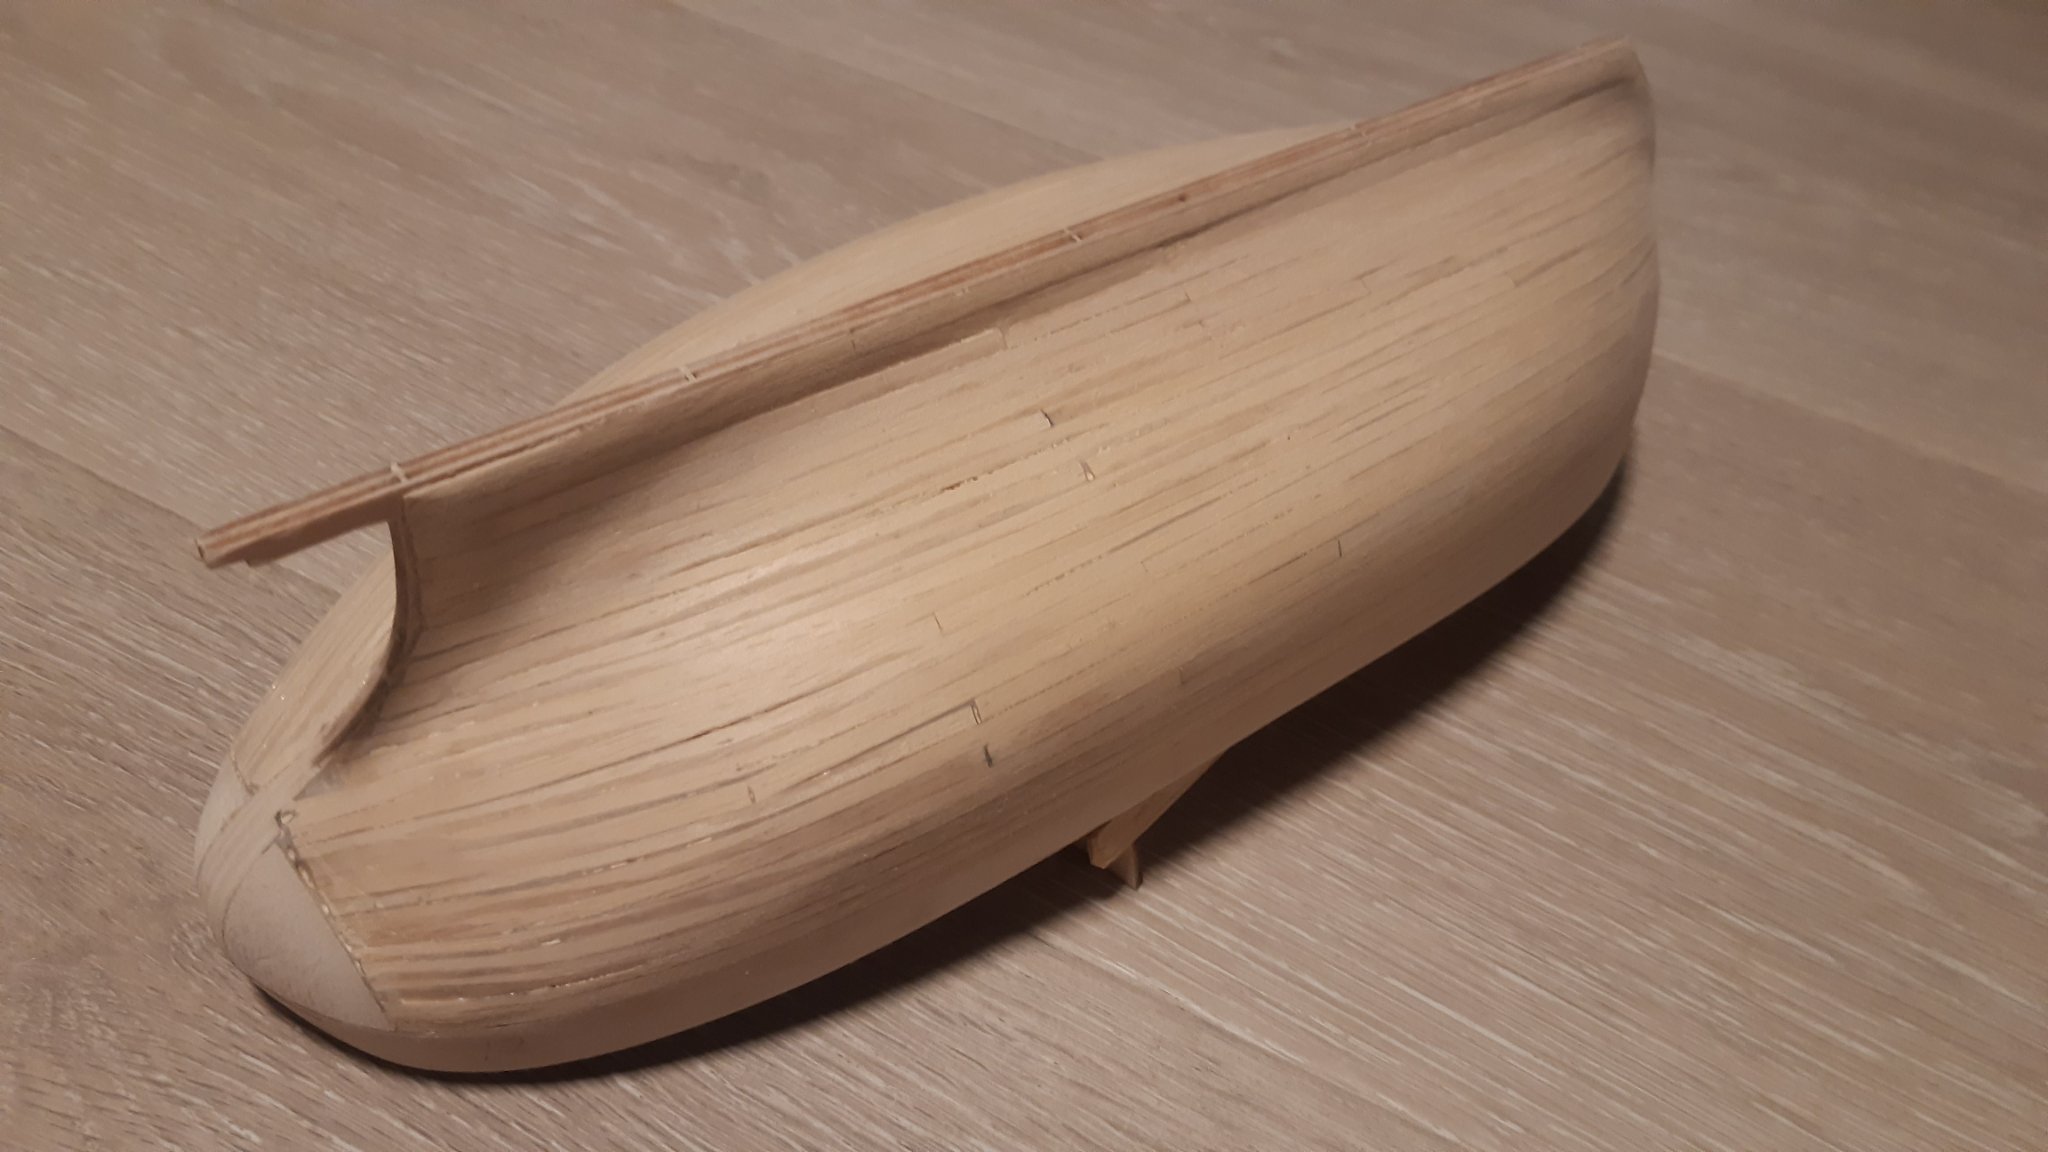
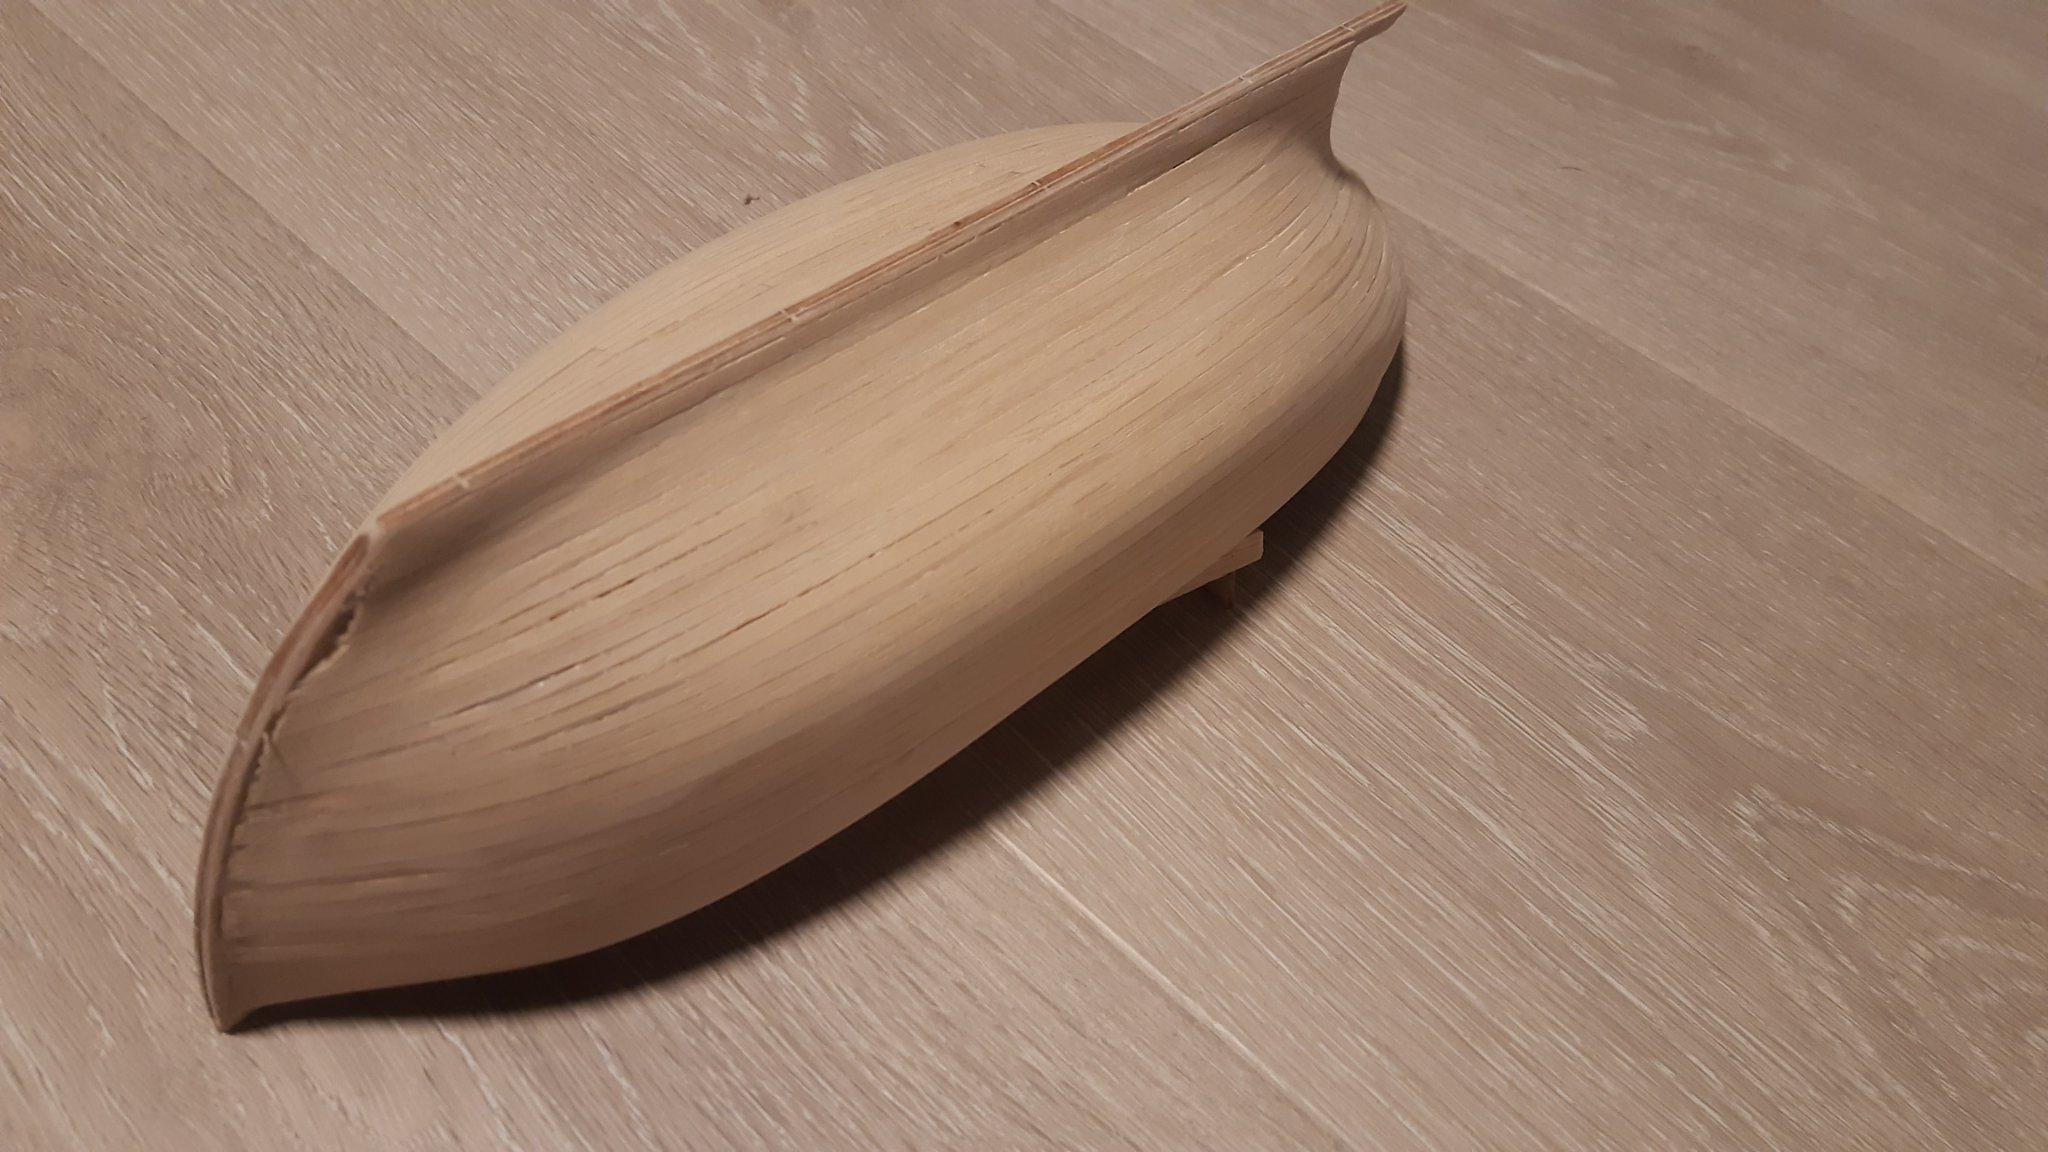
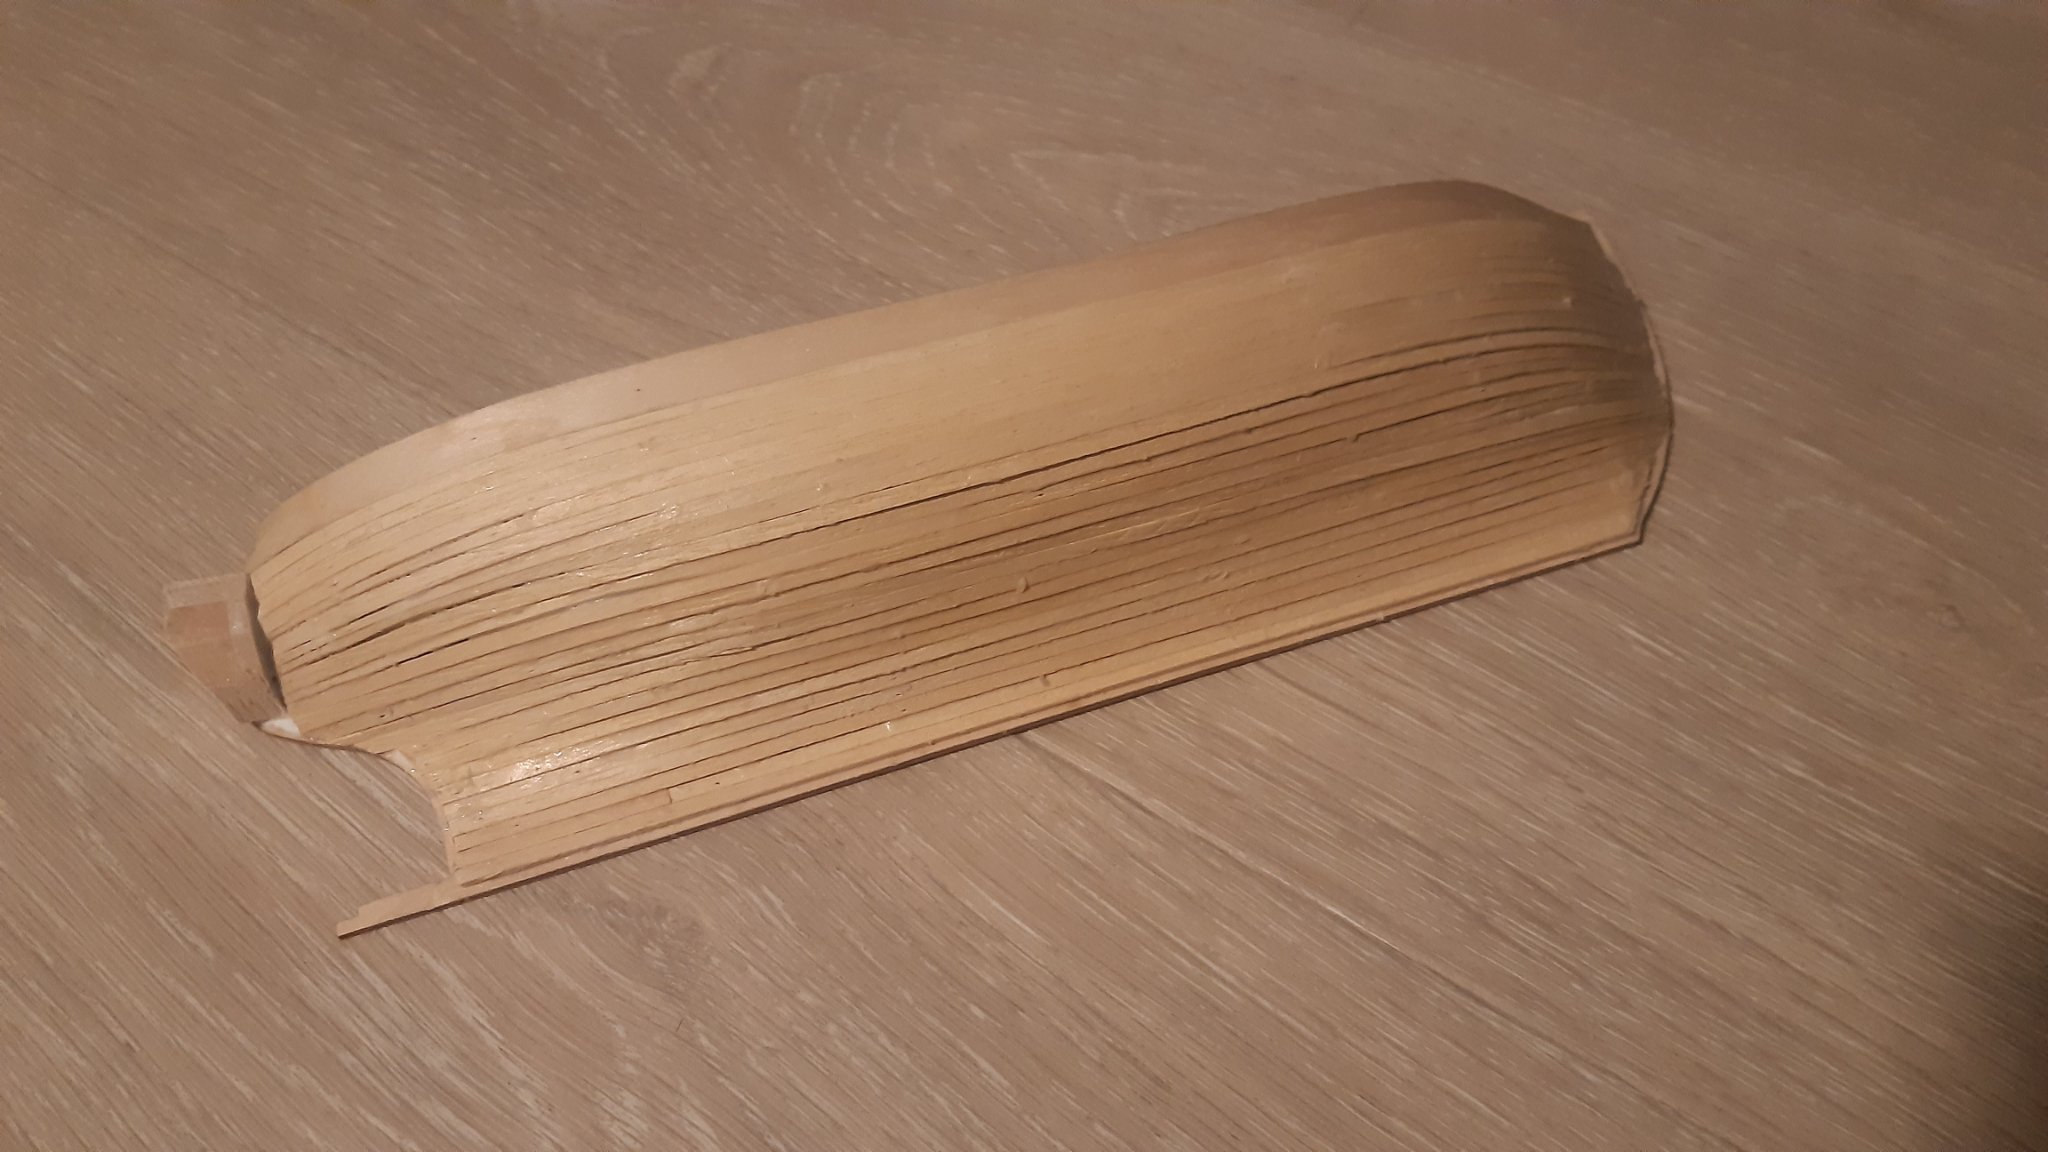
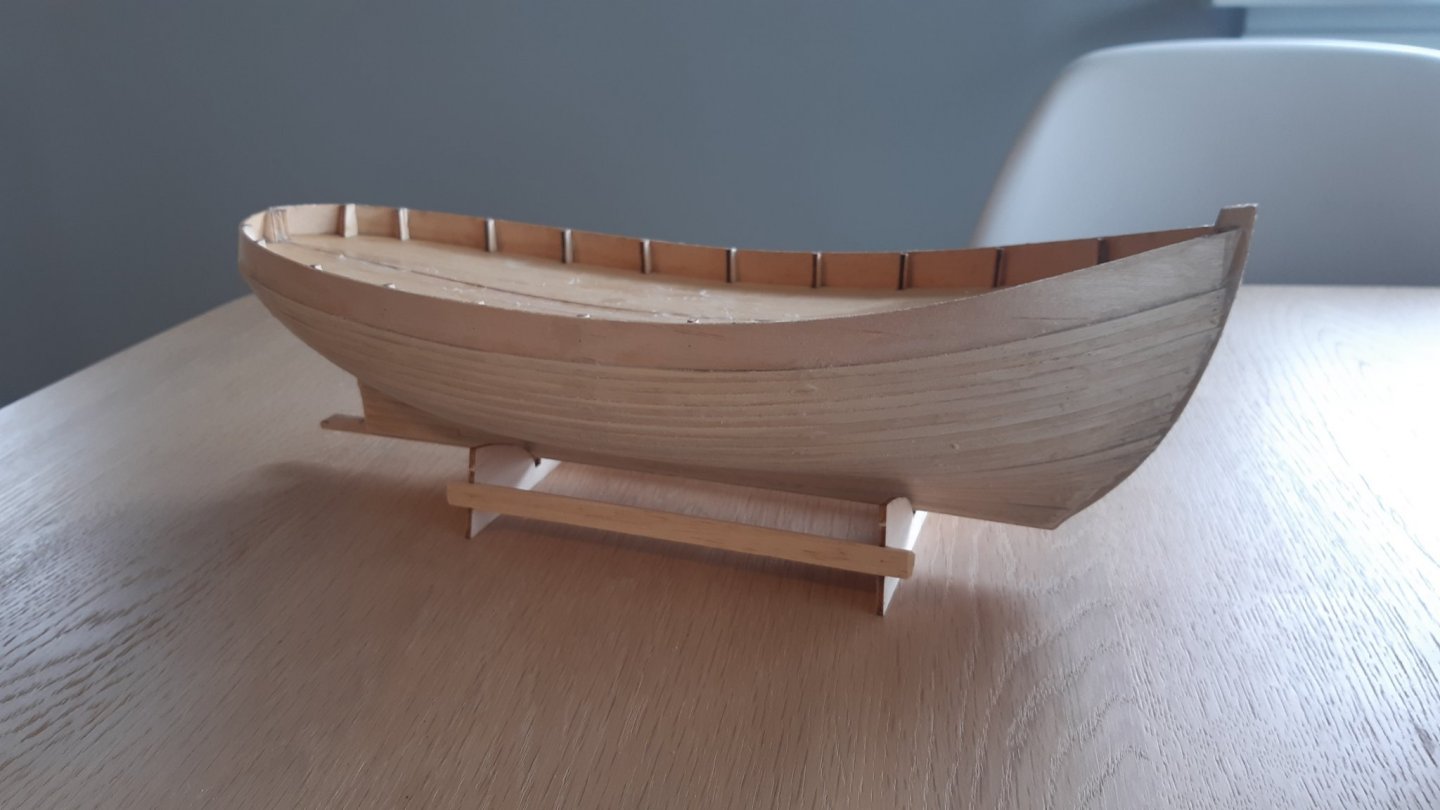
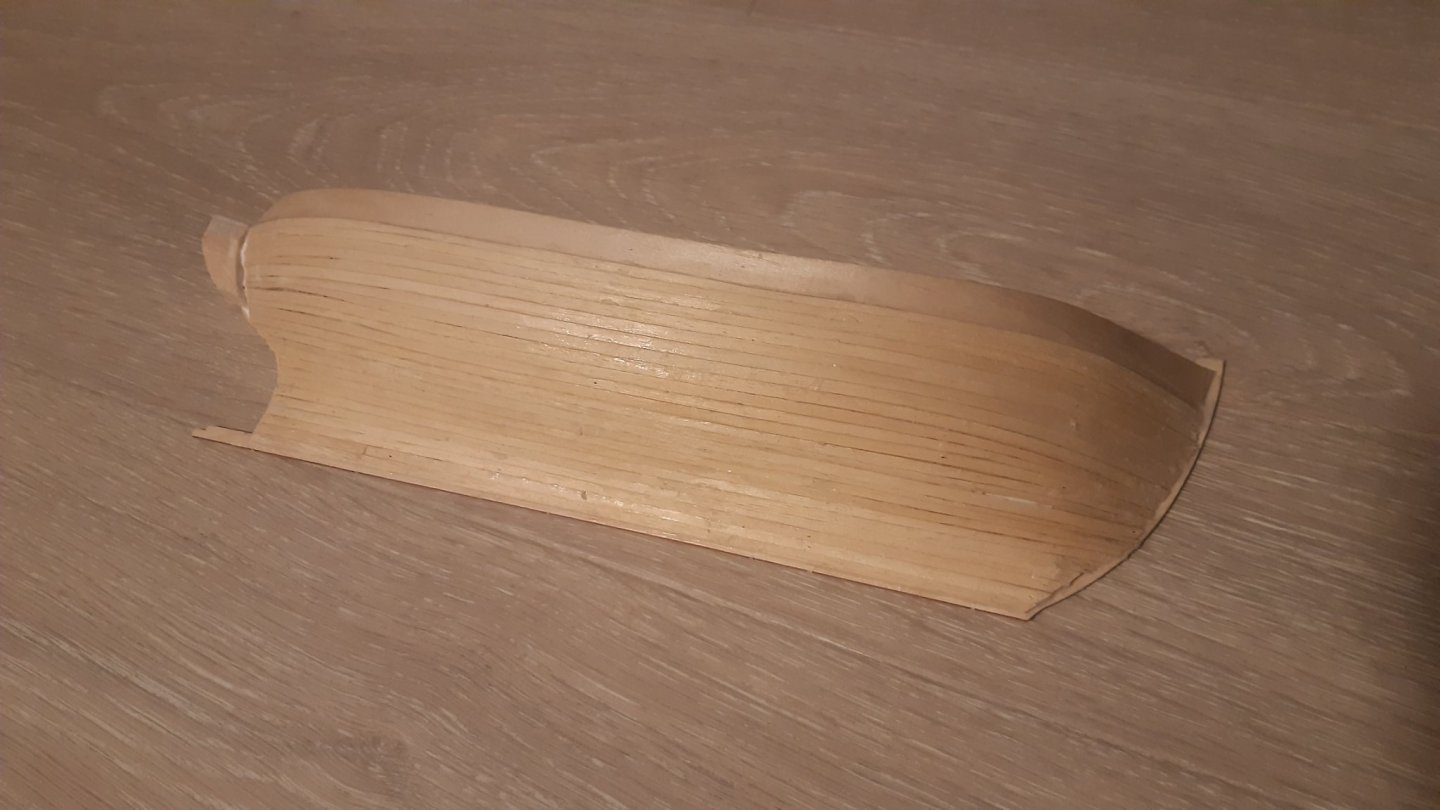
Buildweek 11 - Entry 12 Hi all, Since last entry I did some sanding, and the hull is now prepared for the second layer. Starboard Bow: Starboard Aft: Port Bow: Port Aft: I am now going to start to add a second layer of planking, this is not part of the kit, but I want to try it in order to achieve an unpainted surface. Thanks for following my project! All the best from Halvor


-
clearway reacted to a post in a topic:
Norden by Halvor - Billing Boats - 1:30 - First build
-
yvesvidal reacted to a post in a topic:
Norden by Halvor - Billing Boats - 1:30 - First build
-
Hartron reacted to a post in a topic:
Norden by Halvor - Billing Boats - 1:30 - First build
-
Keith Black reacted to a post in a topic:
Norden by Halvor - Billing Boats - 1:30 - First build
-
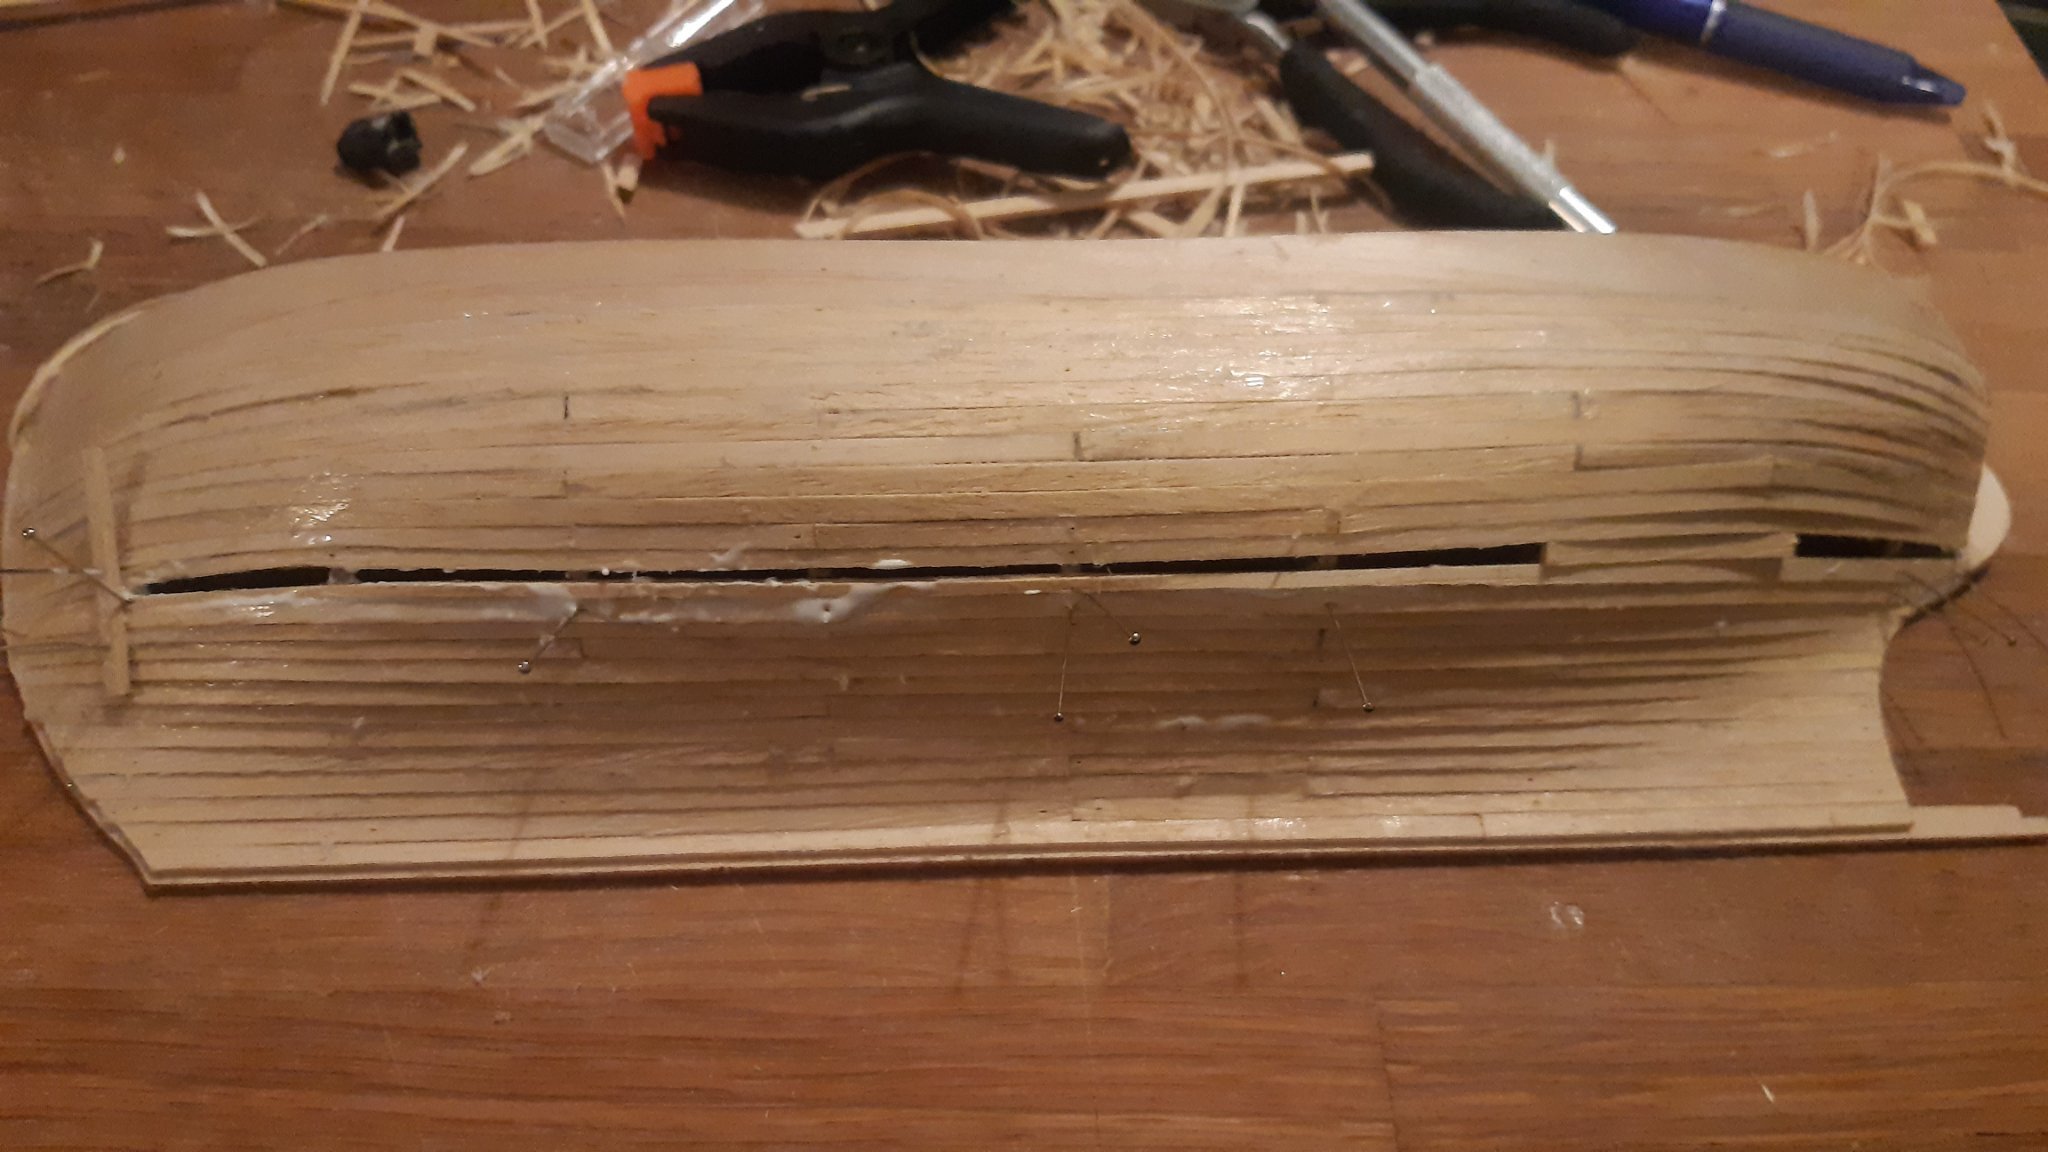
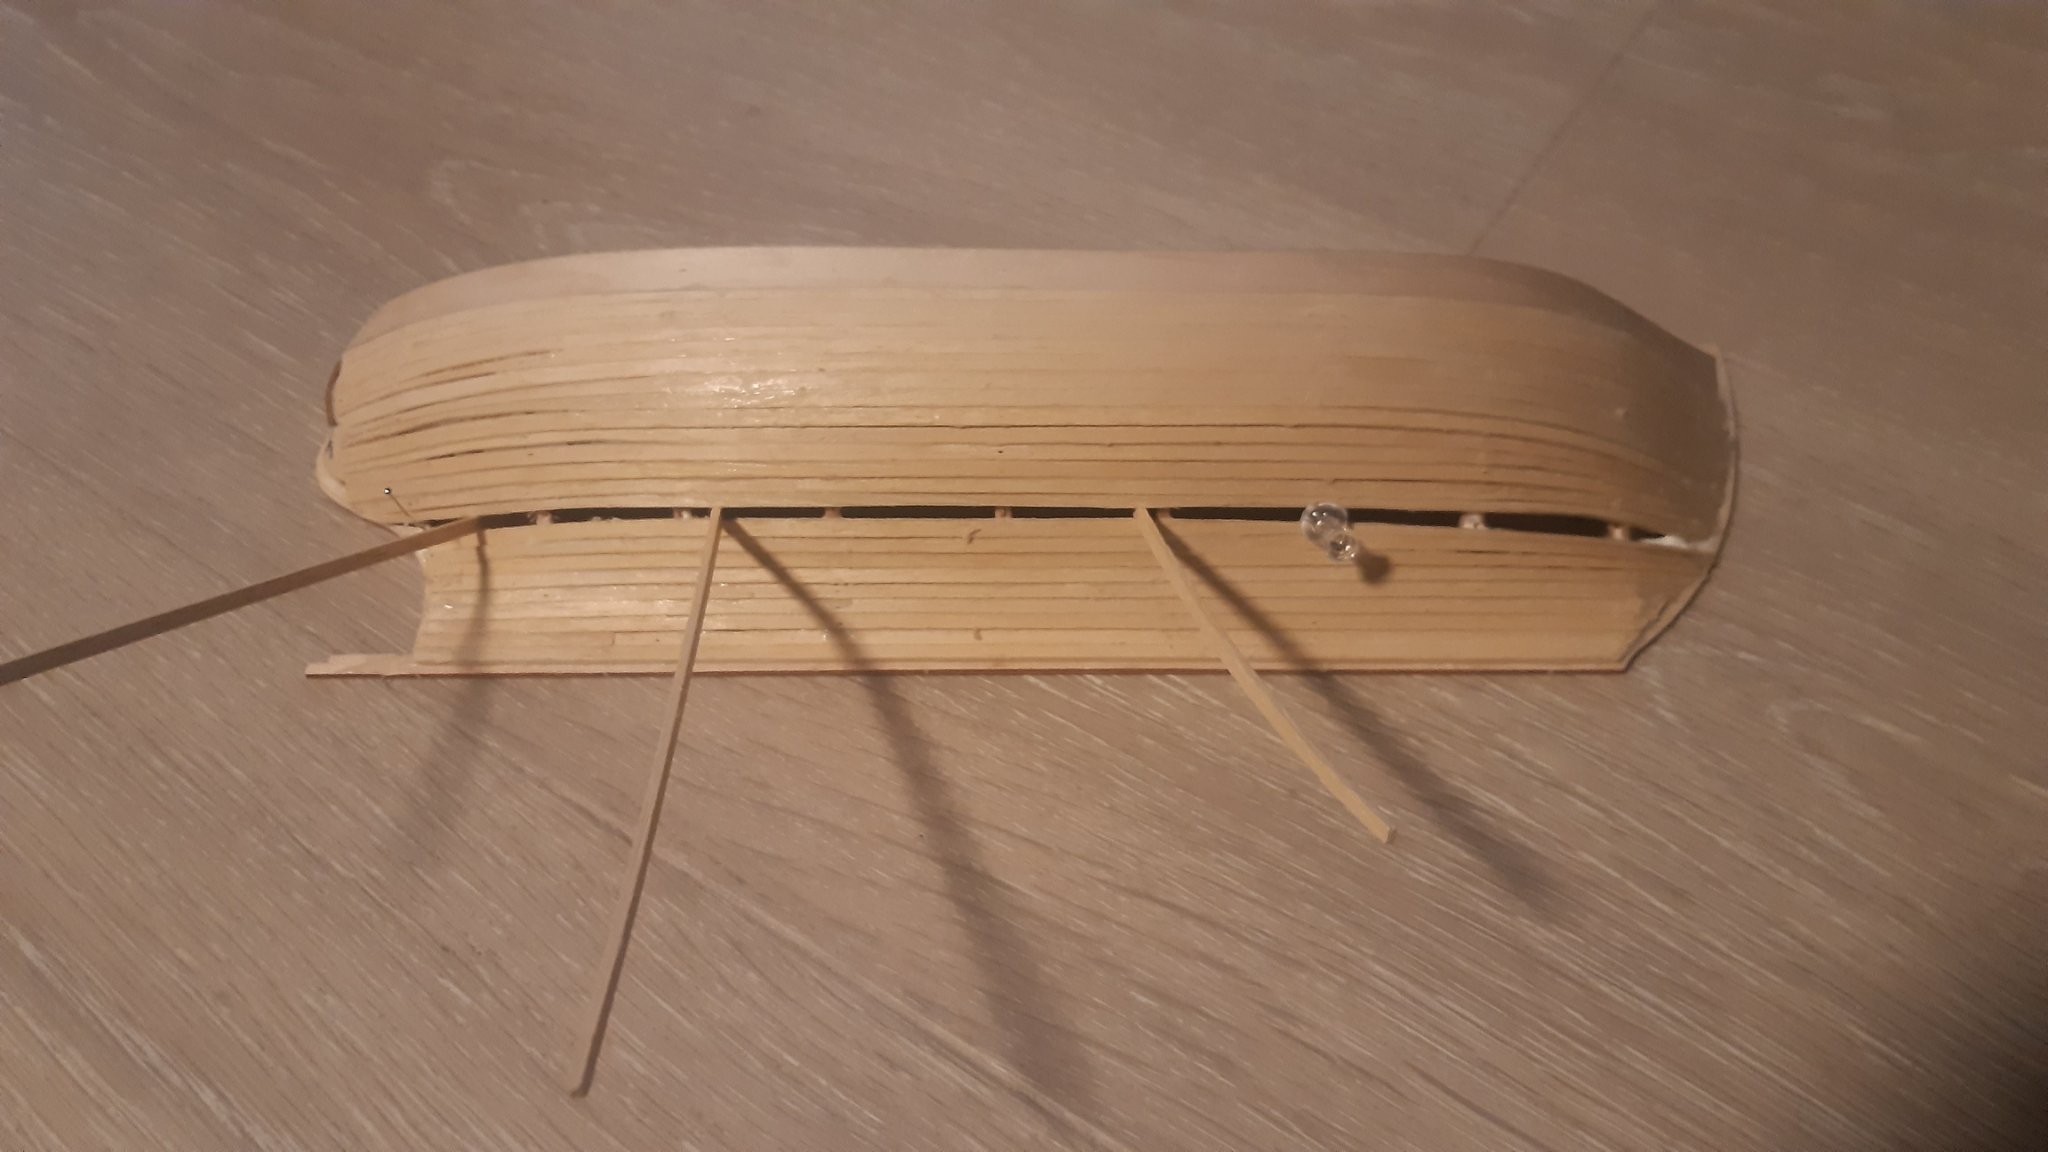
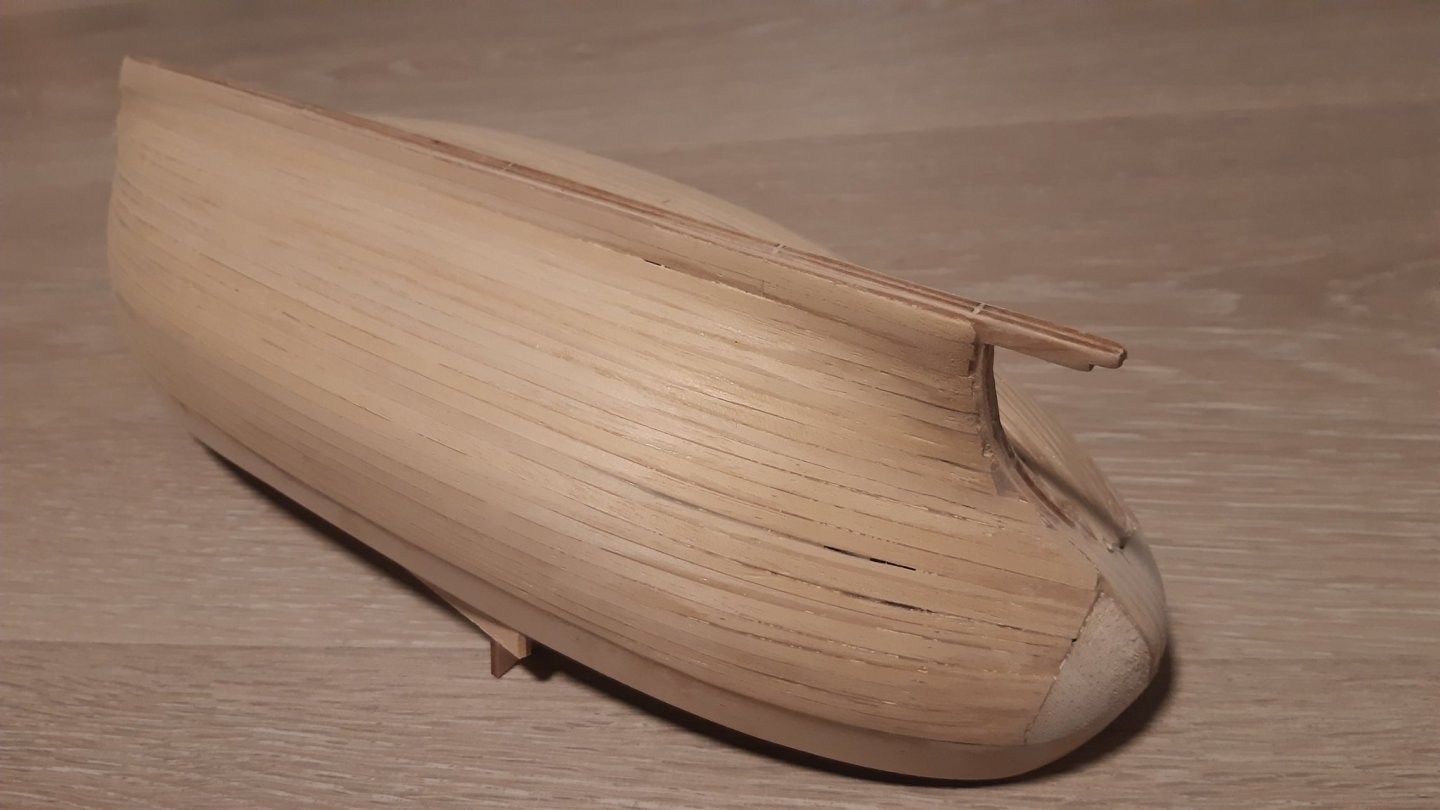
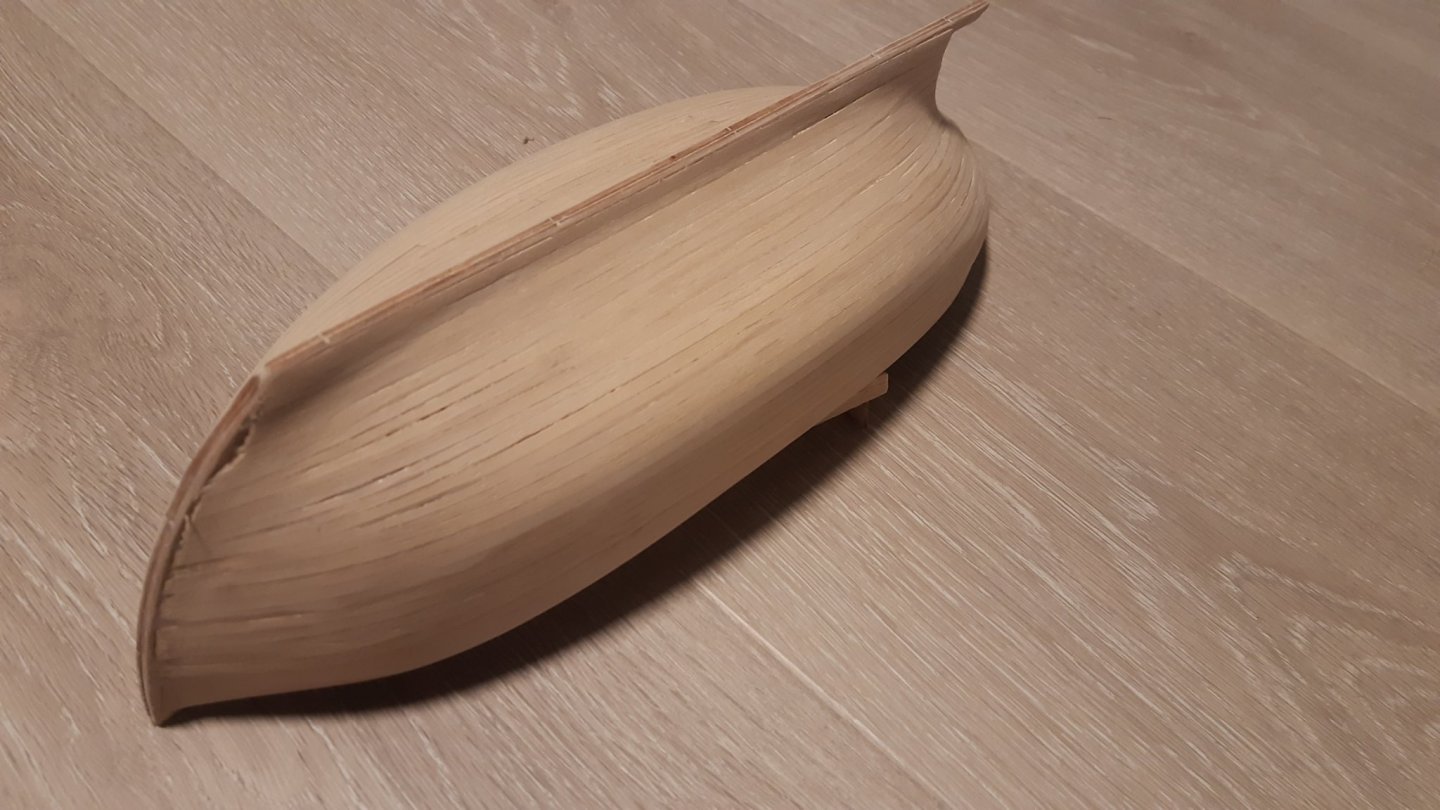
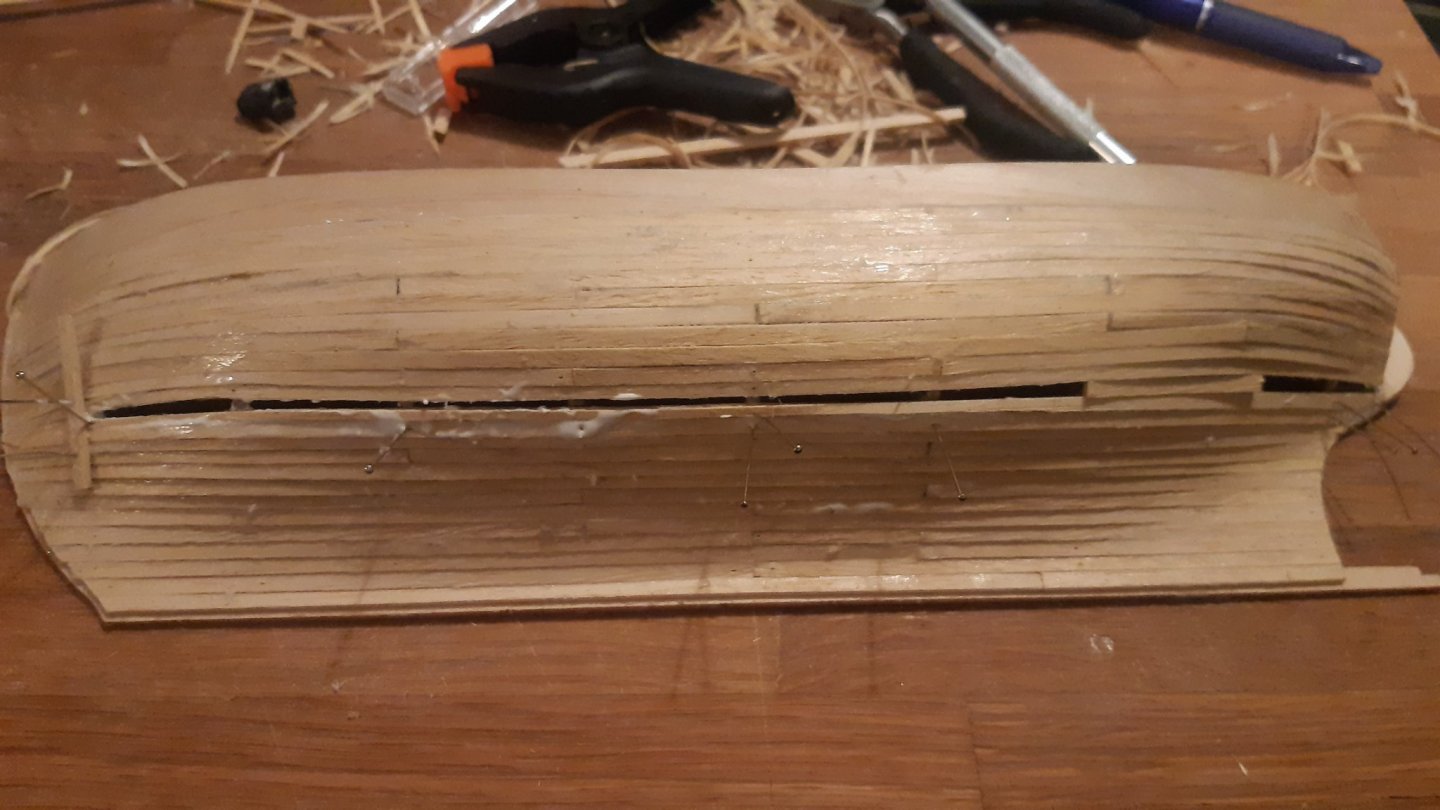
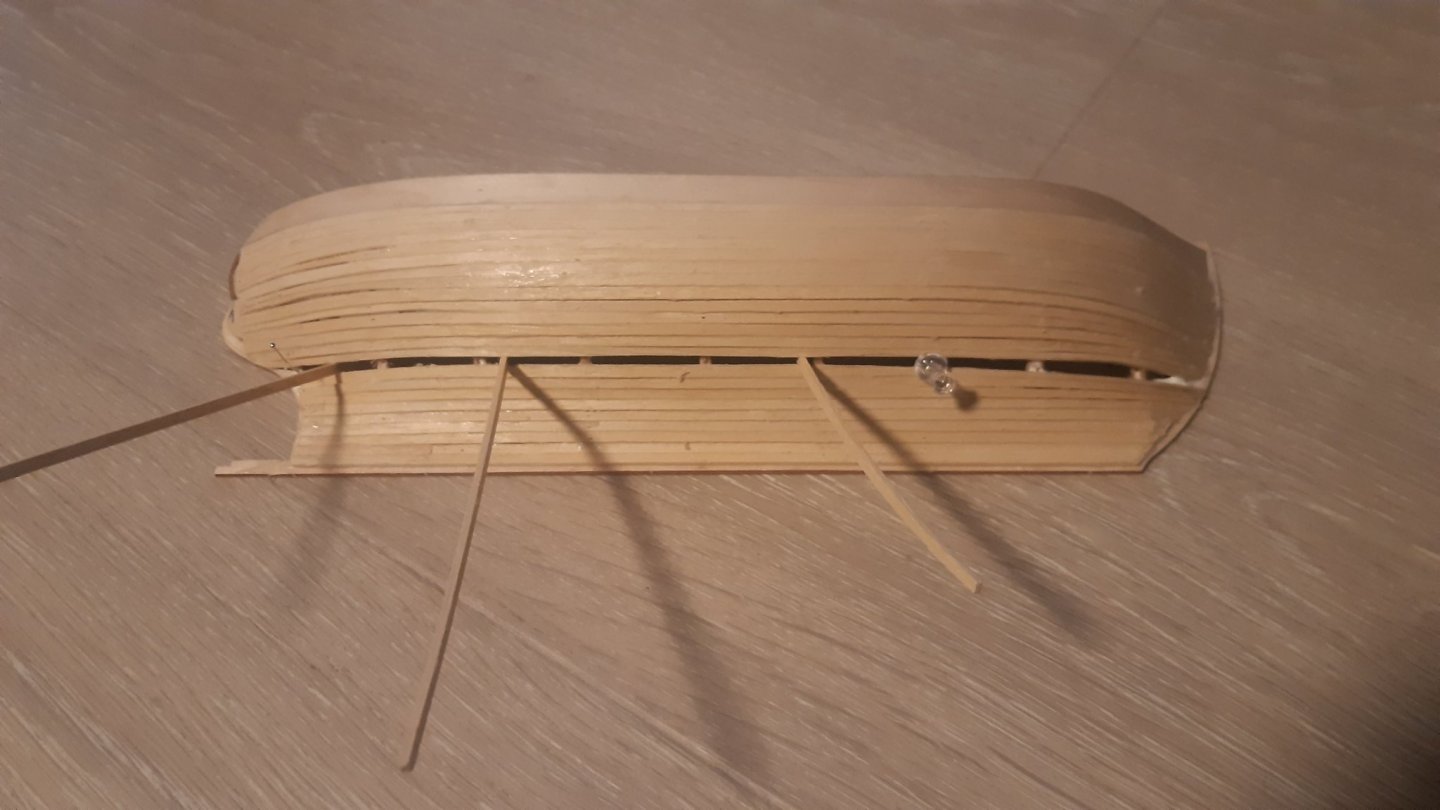
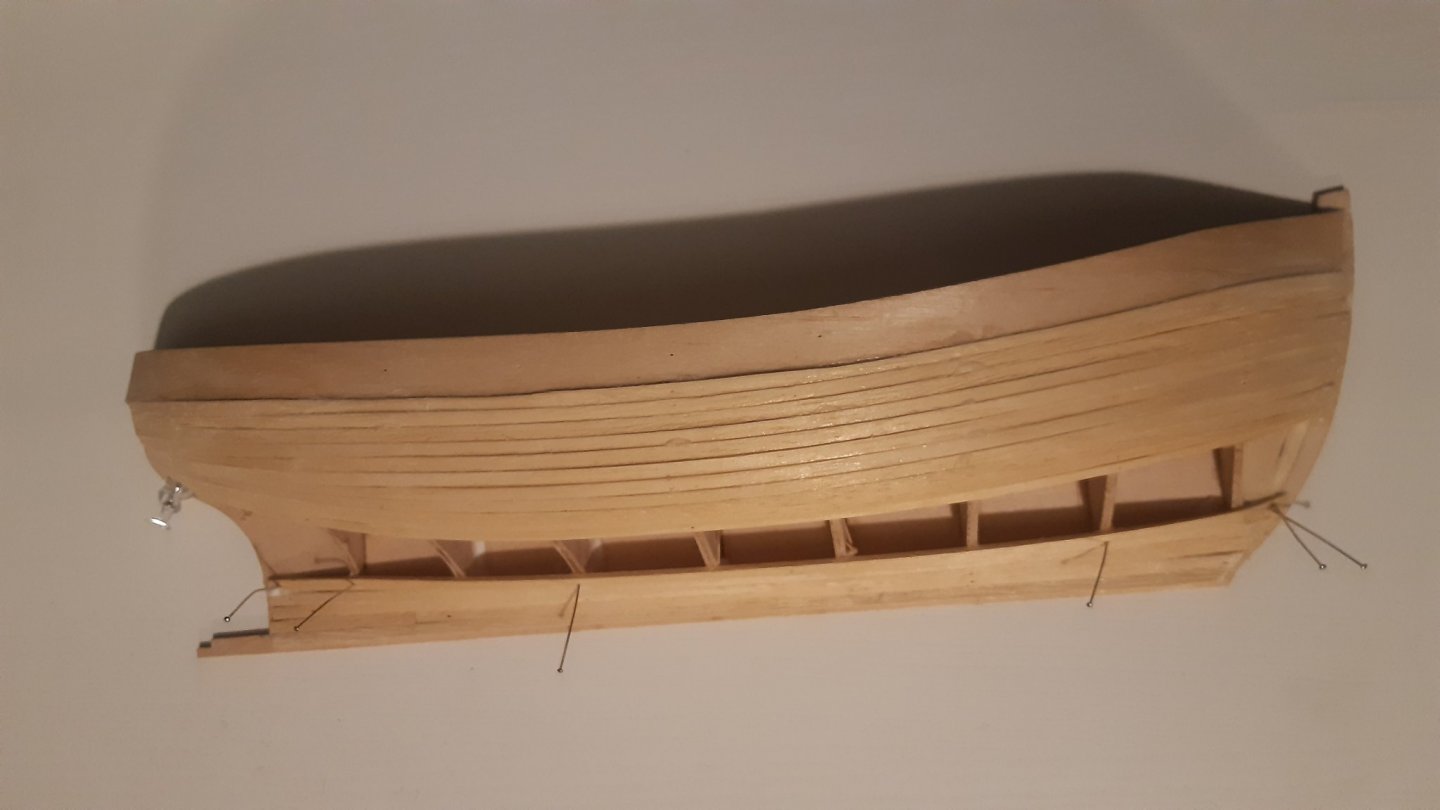
Buildweek 10 Entry 11 Hi All, I am happy to announce that the two parts of the hull are now merged 🙂 I feel like it is a large milestone, and currently wondering what to do next. I guess I'll have some time to think about that while I am sanding and filling and sanding. What I did since Thursday is that I closed the gap in the port side hull: And I glued the two halves together and mounted the stand so finally I have a hull to display. I am not sure that anyone will be impressed, however I will be more impressed next time I look at a complete ship model! I now look forward to try to decipher the Billing manual to figure out how to continue the build. Also, I have studied some fishing vessels on my holiday this year, and realise that Norwegian fishing vessels of this type are rarely painted on the hull. I bought some wood to be able to carry out a second planking if I wish too, instead of painting the hull. I have to decide after I have sanded the hull, but I picked up some tricks from the Vanguard building manual for Fifie, which is available from its online store (front runner for my next build currently) and feel more confident attempting the second layer. With the hull parts merged it is more convenient to plank on each side simultaneously and if - in the end - the planking result is not worthy of mimicking a Norwegian fishing vessel I can still paint it over and go with the original plans. Thanks for the likes and the comments, that really helps me keep going 🙂 Regards, Halvor
-
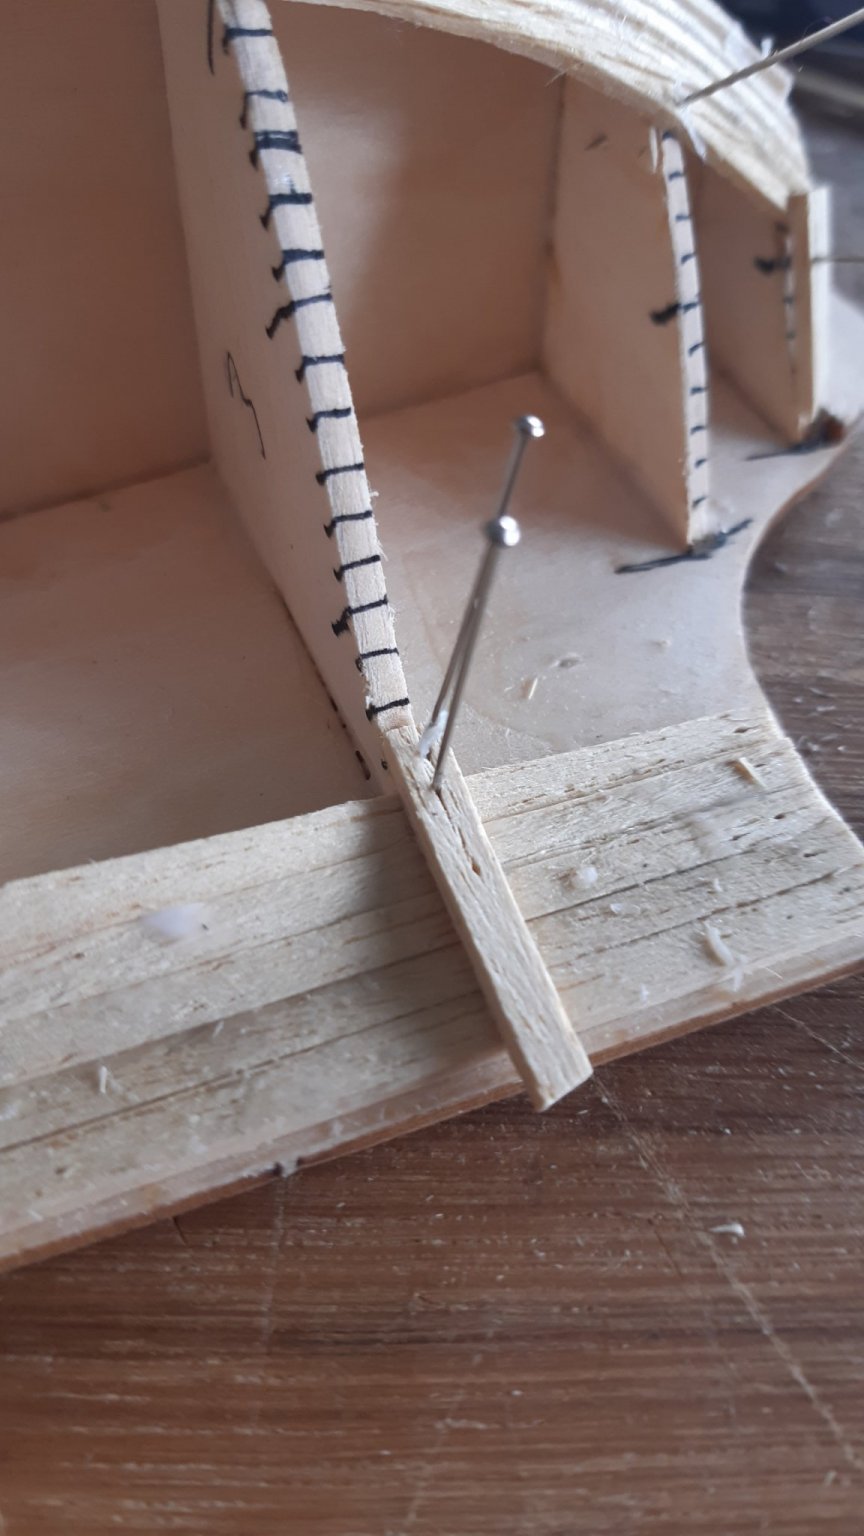
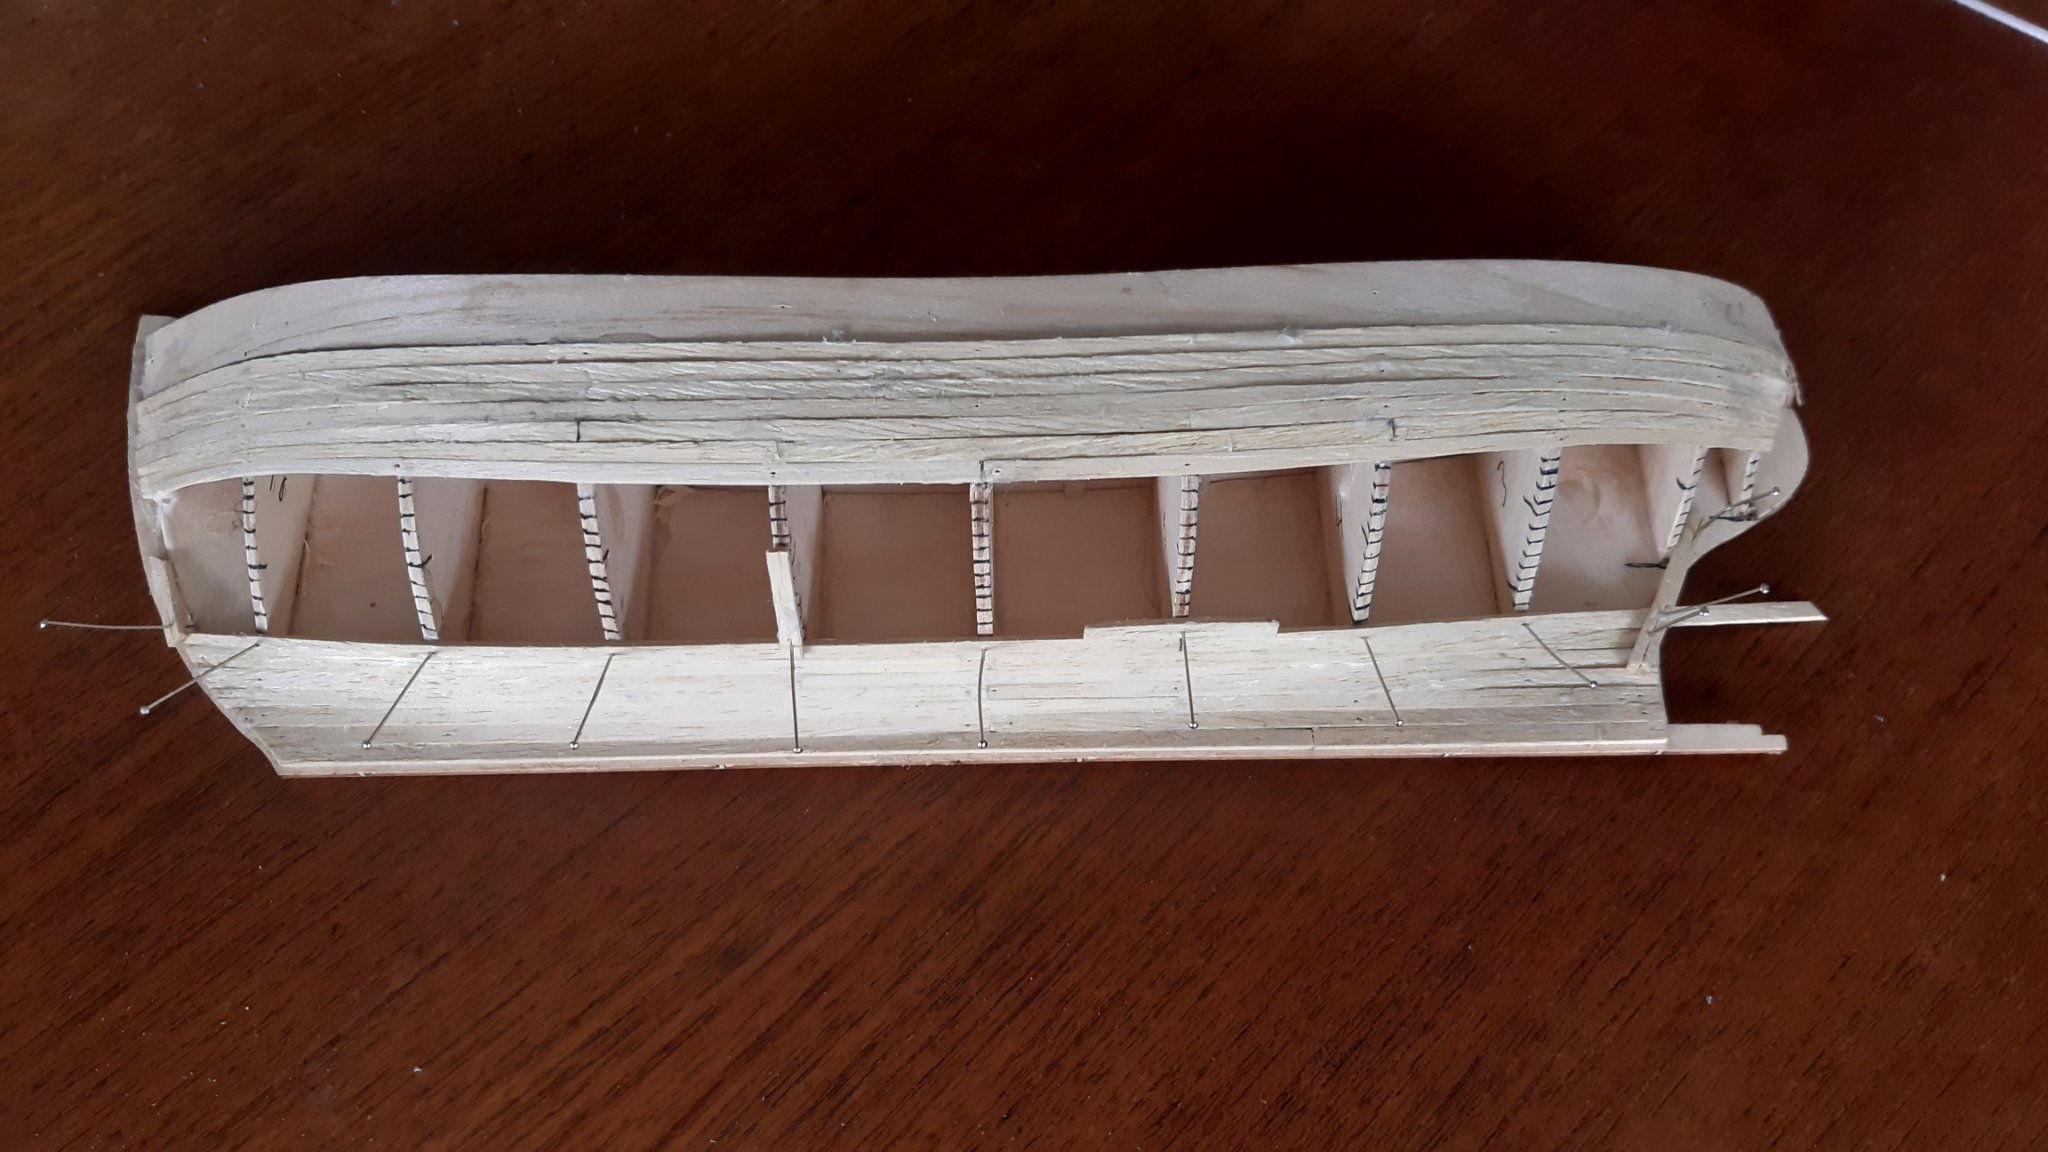
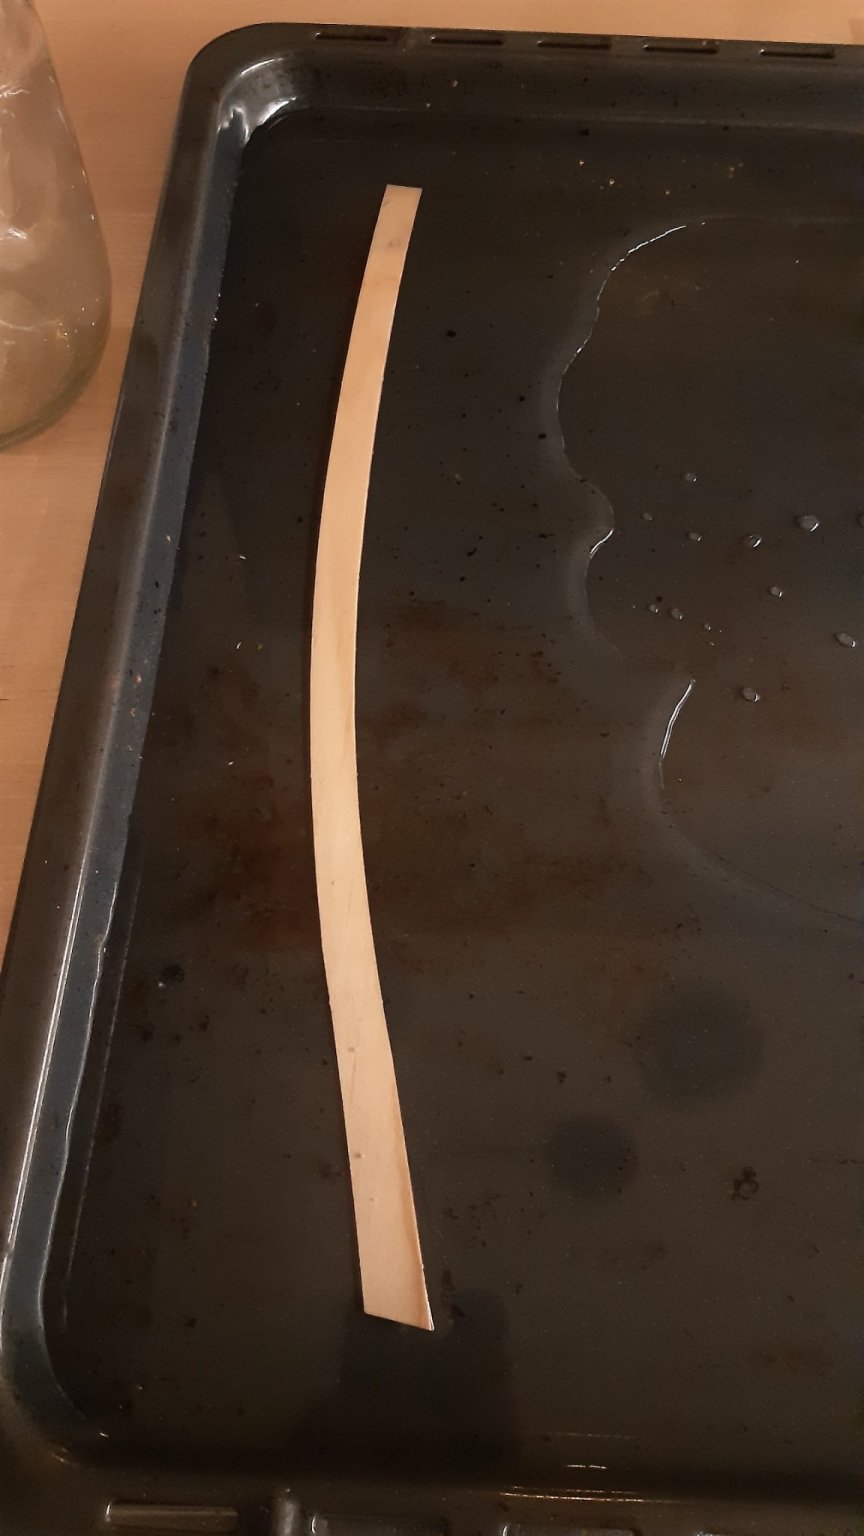
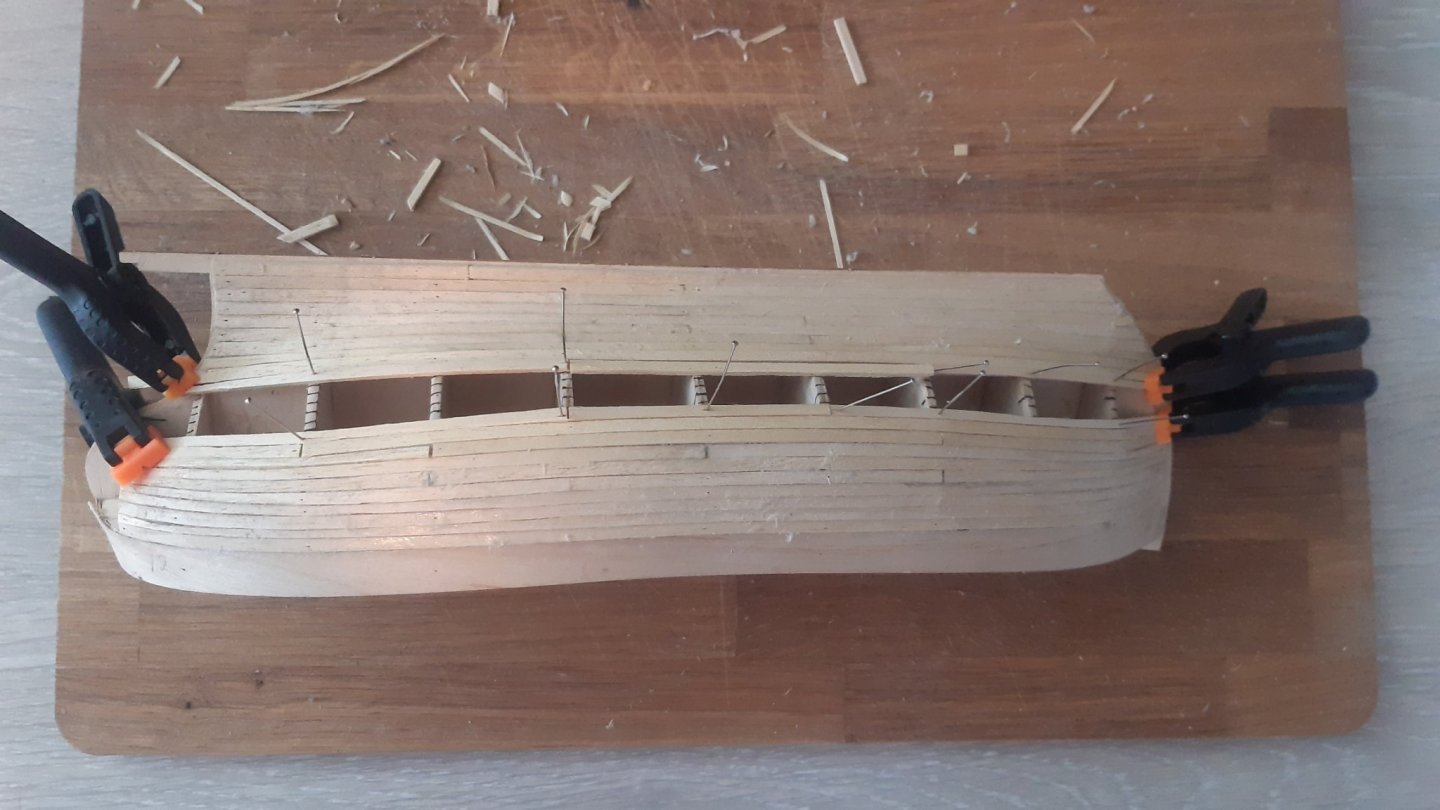
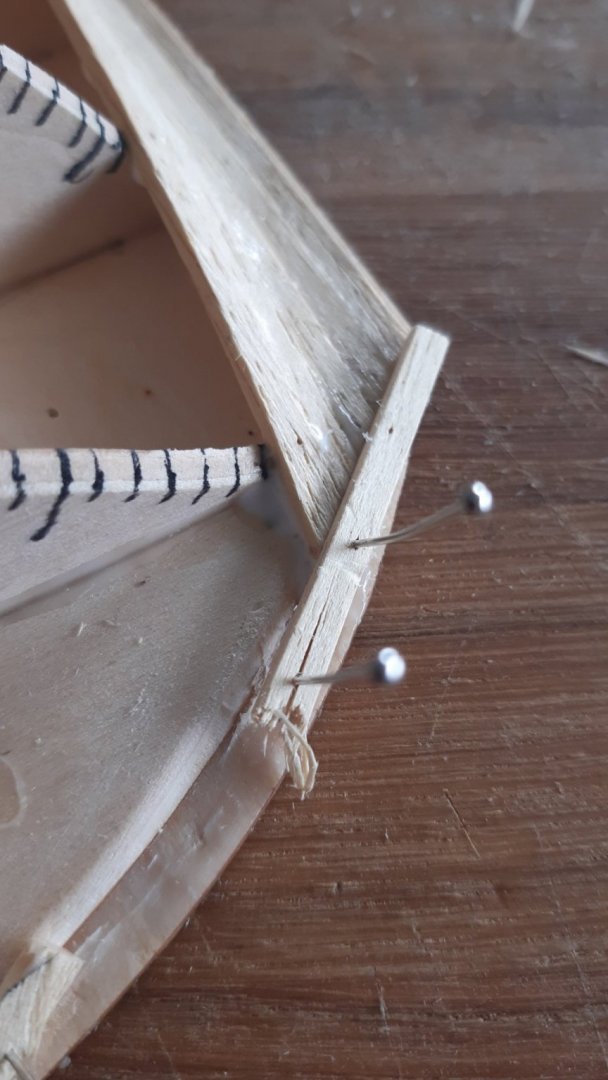
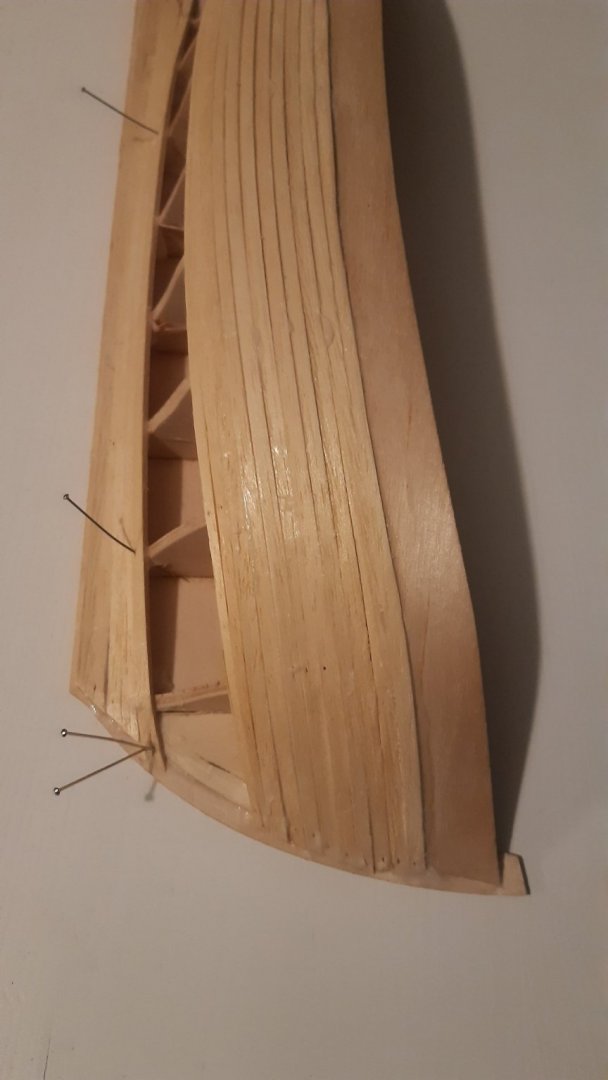
Buildweek 20 - Entry 10 A very long time since I posted anything now, had to complete some other tasks related to an almost completed renovation project at home 🙂 During my holyday I bought some new tools in Trondheim, clamps mainly, and a pin pusher as mentioned by popeye above. These really helped a lot and I am posting a picture of the current status for the port side (two strakes currently fitted and drying): I hope I will get around to do another post very soon! Best regards, Halvor
-
Buildweek 7 - Entry 9 Hi all, Just thought I would post a small status update. I've continued the planking of the port side, which is coming on nicely. This time I have used some of the shorter pieces of planking and I think I've had some solid progress. Still no clamps, but I'm considering if I will stick to the nails for this build and consider some starter pack for my next build. The current status: I have started to use some shorter pieces to get more pressure in the contact surface in spots where the planks does not fit exactly. Stern: Bow: Thanks for looking in. Best regards Halvor

-
Hi Trond, great work! "The third time is a charm" is what you are lookibg for. And I agree that it is a very suitable saying in this case 🙂 Best regards, Halvor
-
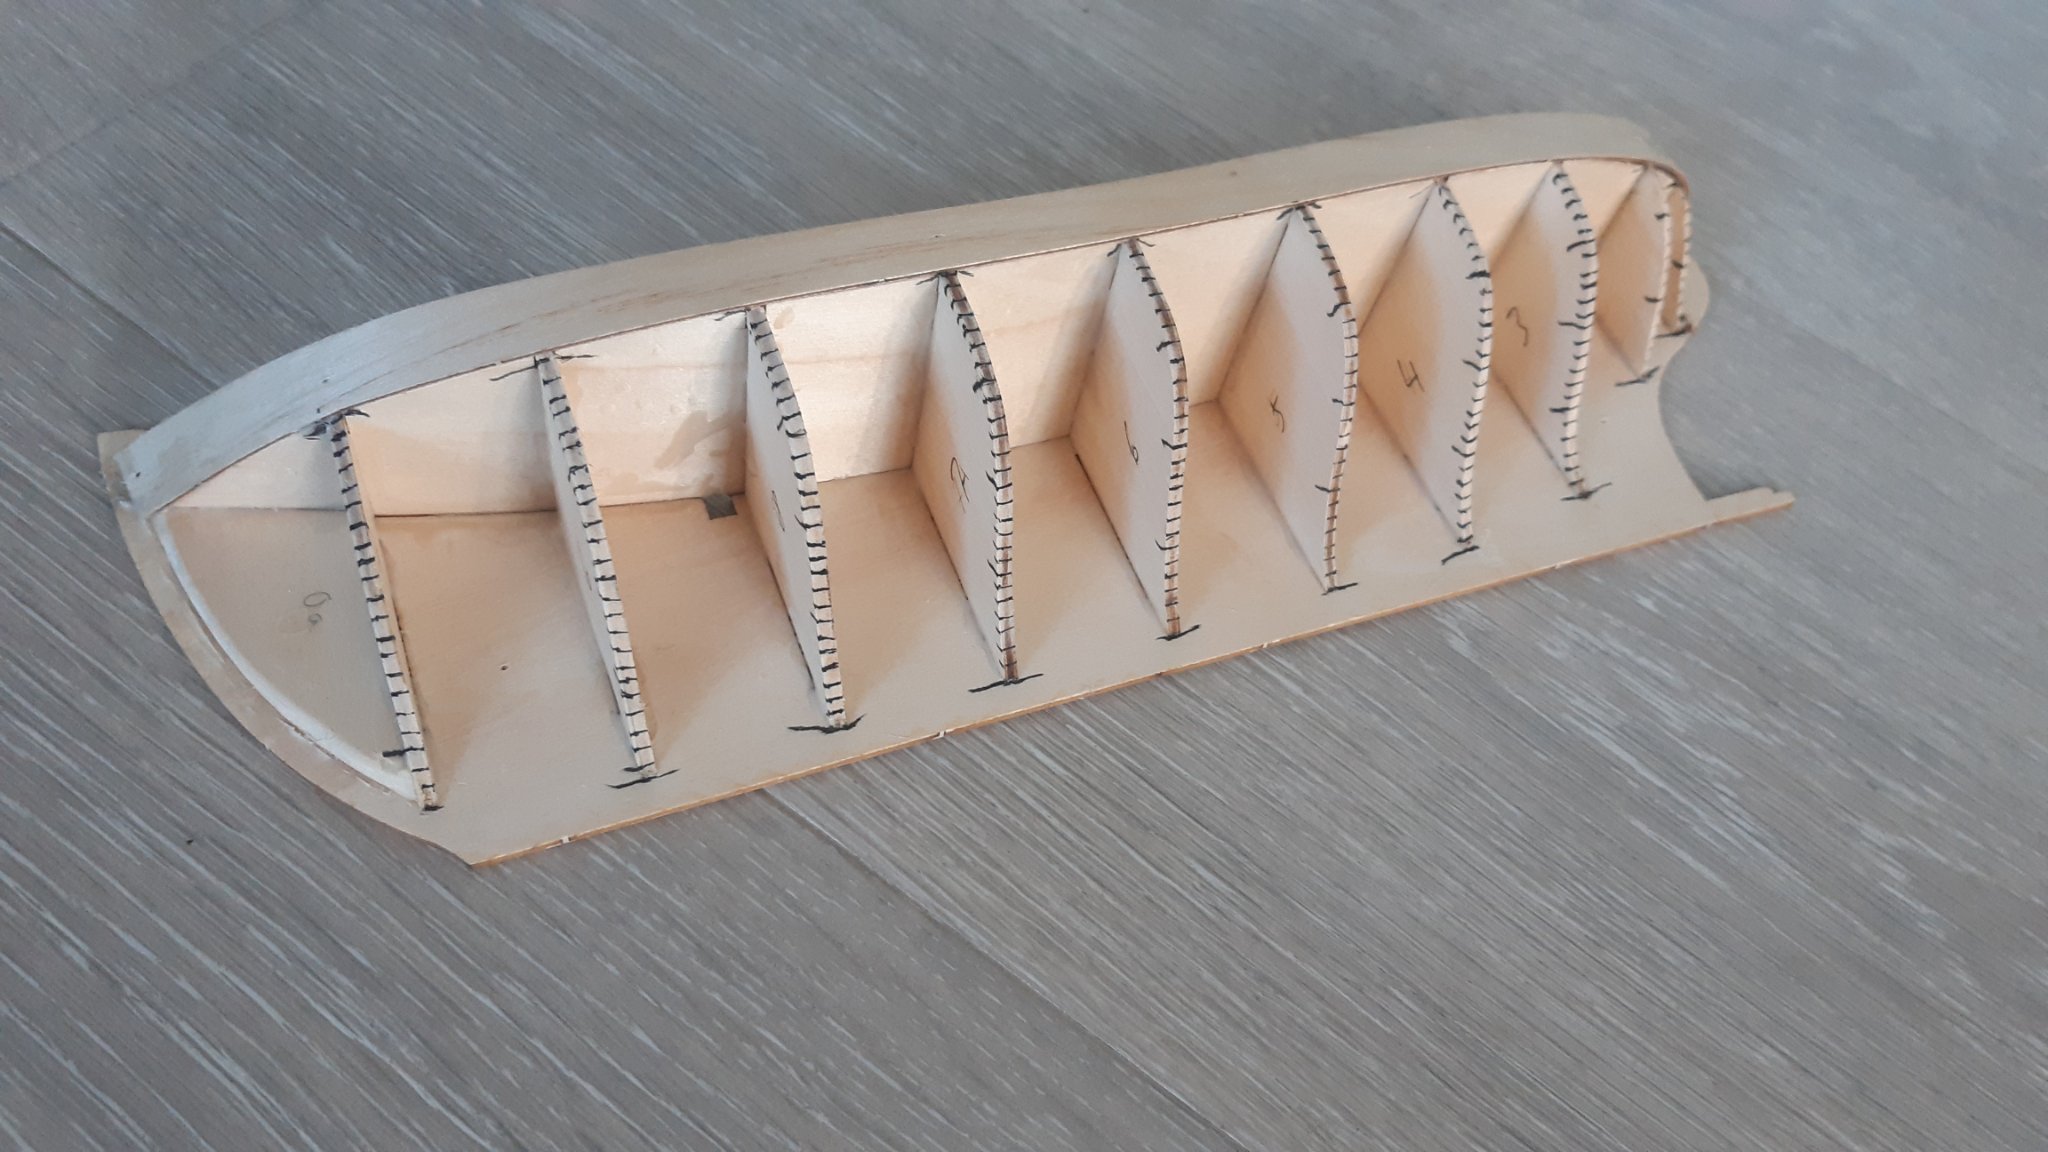
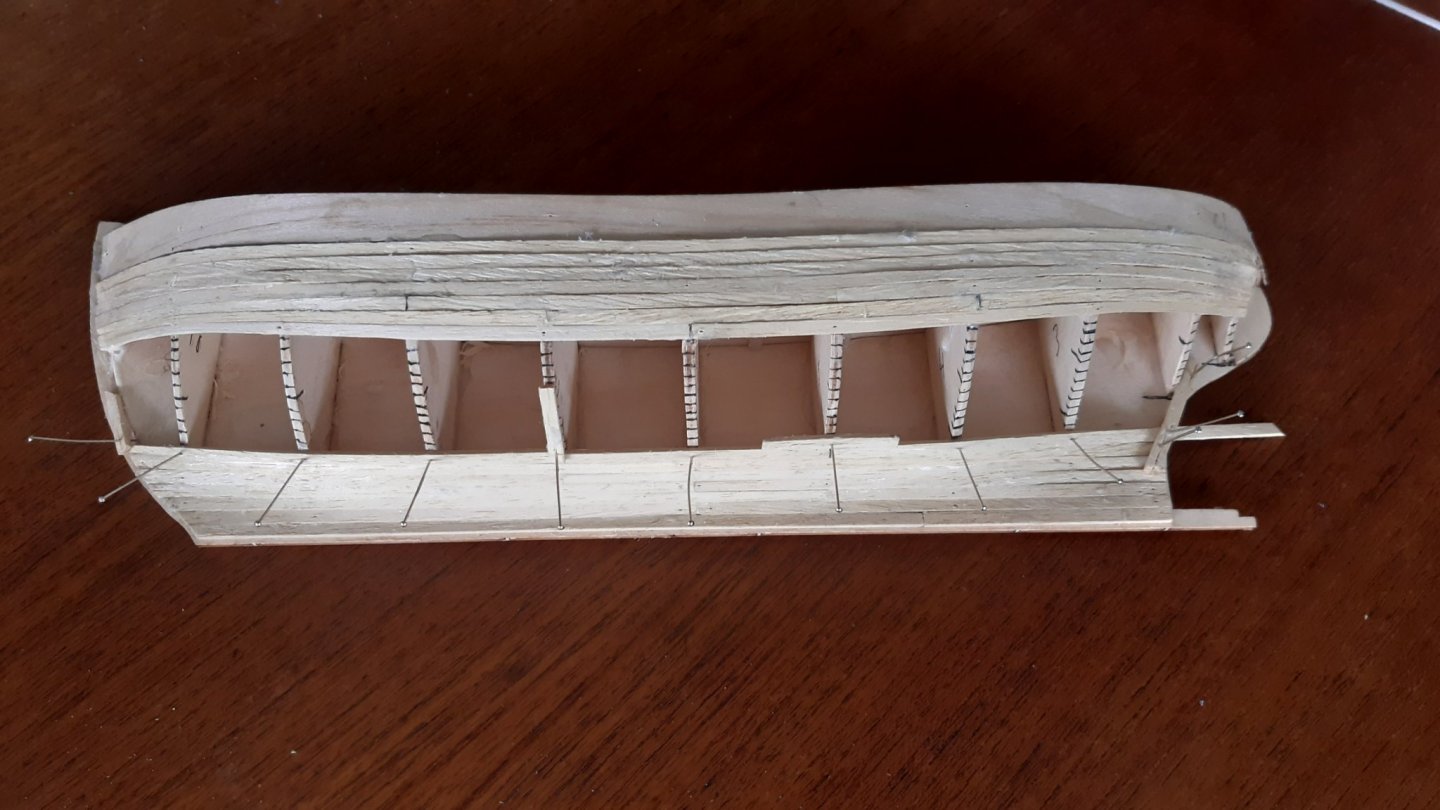
Buildweek 6 - Entry 8 First of all thanks for the kind words and encouragement, @popeye the sailor and @Veszett Roka, and off course all of you who read and liked my buildlog. The hull will be painted in the end, so most of what I do now will be hidden. Since I finished the starboard hull, I have completed some of the same steps on the port half. It is quite a bit quicker this time, particularly since I saved all the tape I used for measurements. Gluing the frames to the keel plate. Mounting the bulwark and transferring the lines from the starboard half Mounting the garboard plank and the top plank. Now I'm going to continue planking a couple of planks each night until I'm finished and then glue the halves together before filling and sanding. Thanks for looking in, and have a great day! Best regards, Halvor

-
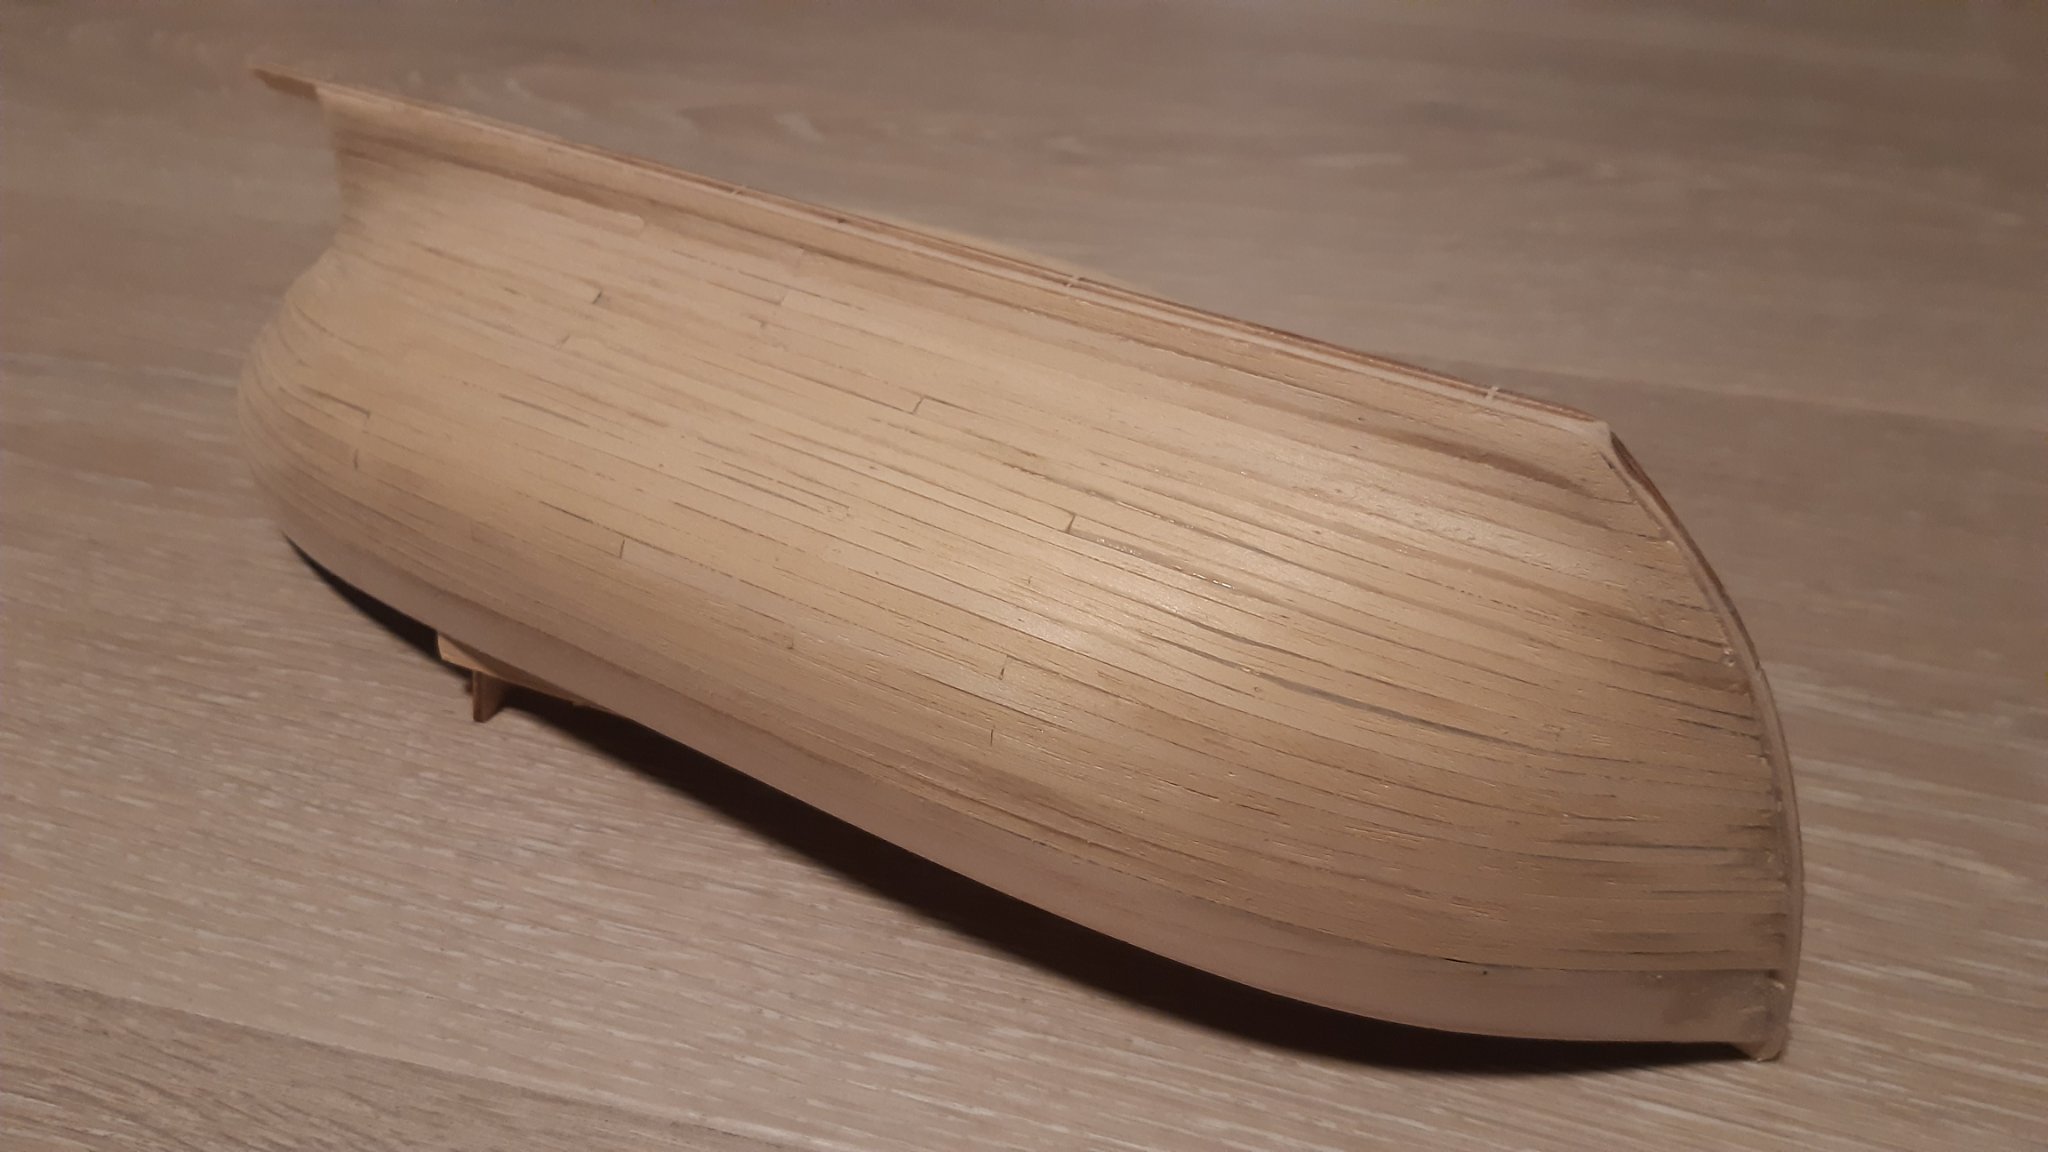
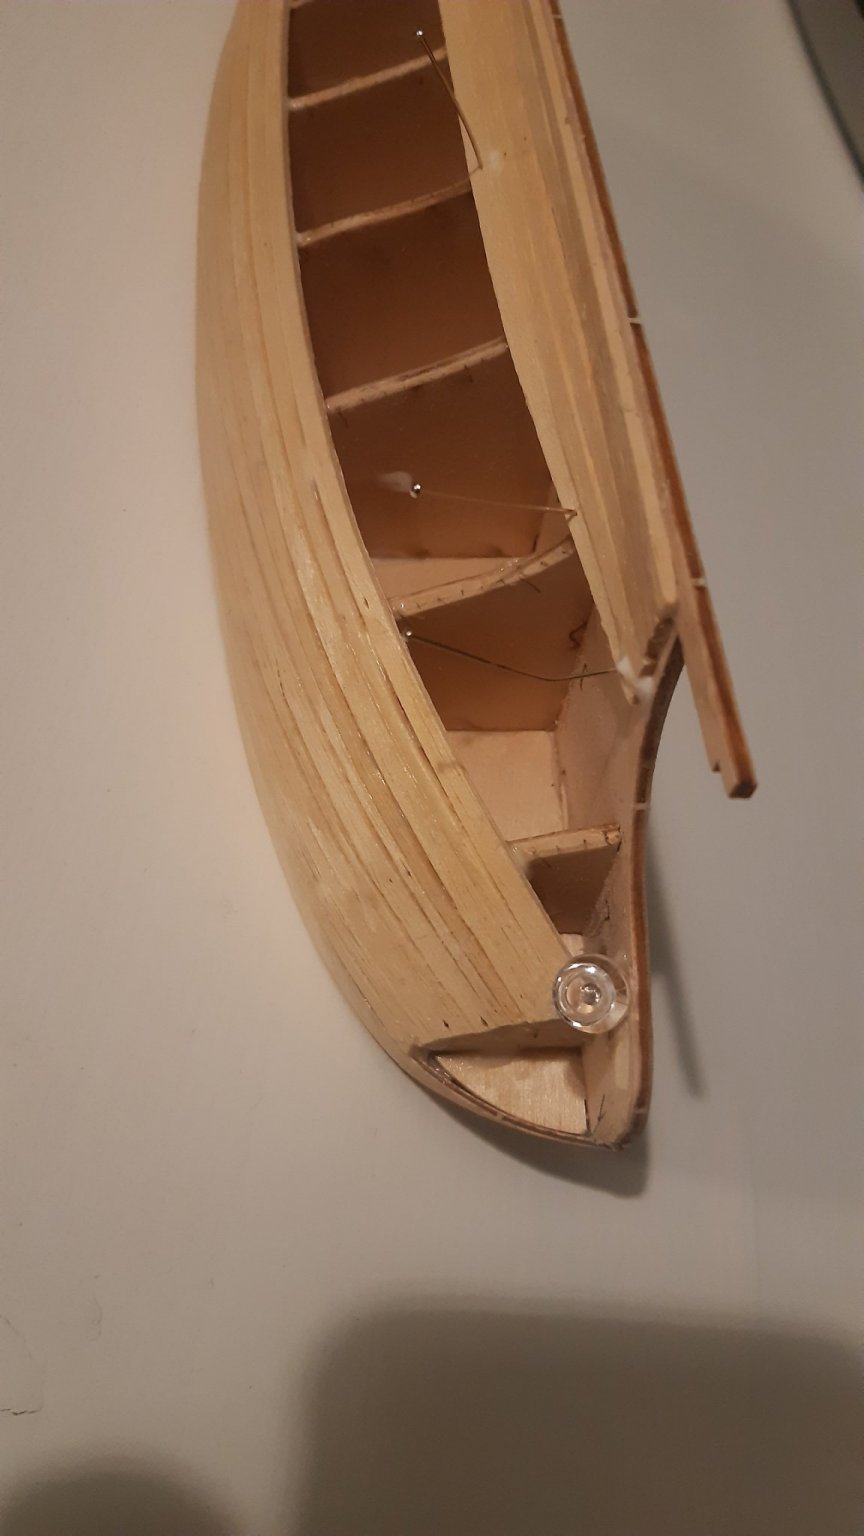
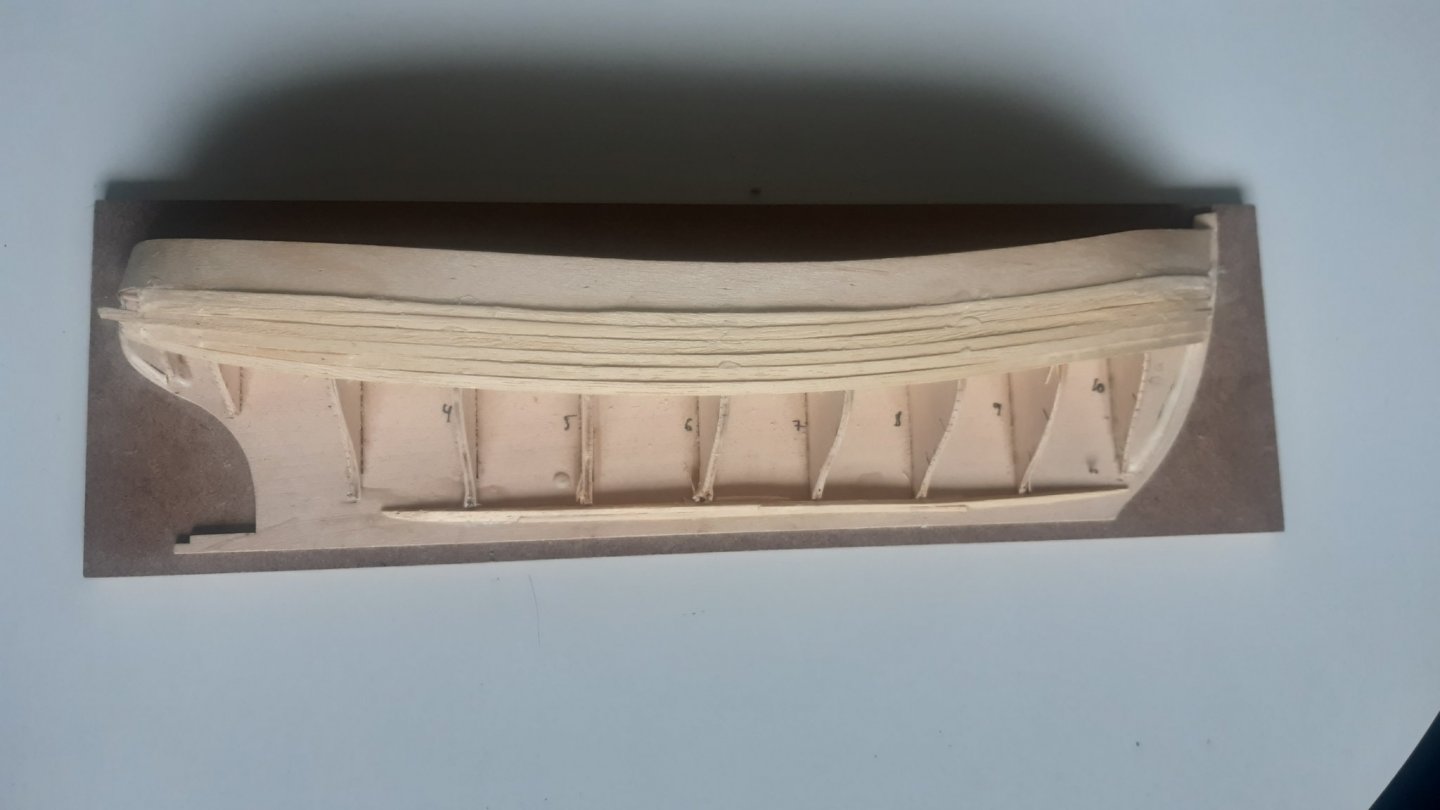
Buildweek 5 - Entry 7 I continued planking and have now completed the first half and attached the balsa piece at the stern. I managed to fit the planks so I could have complete lengths all the way, and this was sort of my hope for the first half. I now have more experience when I start on the second half. I do need to get some better and more suitable needles (short and thin with a head) before I start. Now for the pictures: I adjusted the second to the last plank so the last would be easy to fit: The last plank had just a slight reduction in breadth to make it fit. I do see that the last plank looks a bit strange since it is so large as compared to all the others. So room for improvement there 🙂 Now I just need to repeat the process! Thanks for looking in and best regards, Halvor

-
@popeye the sailor Thanks for the pictures and the tips - the wetting and bending around a class worked very well! It takes some skill it seams, if the planks soak to long they get to soft and break, and if they are soaked to short they seem to snap internally. I know it is a long time until, but I look forward to the next build to see if the quality of the wood supplied makes a lot of difference. Anyways, I'm very happy with the laser cut frames 🙂 Buildweek 4 - Entry 6 I continued the planking process after realizing that I had made a mistake with the planks closest to the keel. I looked a bit around on the forum, and seemingly these should extend pretty much from the bow to the stern. So I removed my first try and had another go. After doing this change everything went pretty smooth, and now I'm on the finishing stretch. One thing which is both good and bad about the half hull solution is that there is nothing to do while waiting for the planks to dry and then for the glue to set, I get time to realize mistakes - but I'm also pretty sure that the additional time that I would spend on doing both sides at the same time would not be a lot more. Here are some pictures with the current status: Thanks for following my build log! Best Regards, Halvor

-
I have no tips for you, but I feel with you. The instructions are not very inspiring. I think however that if you continue you will learn a lot! Hope you continue. Best regards, Halvor
-
Buildweek 3 - Entry 5 I started the planking 🙂 I realize I need to get some clamps and pins which are better suited since I did some damage on some of the frames with too thick pins. This won't be visible so I'm not too worried about it. I'll review my toolbox before commencing on the second half. Thanks for following and liking my build-log 🙂 My progress so far: Pre-fitting a plank Overview of my progress so far. I'm trying to taper the panks in the stern. Bow detail: Stern detail Best Regards, Halvor

-
@popeye the sailor Thanks for the tips, nice pictures! I'm just starting the hobby, so I'll use the balsa wood on the stern as provided in the kit. Maybe on the other side I'll try to bend the planks over it if I feel brave 🙂
-
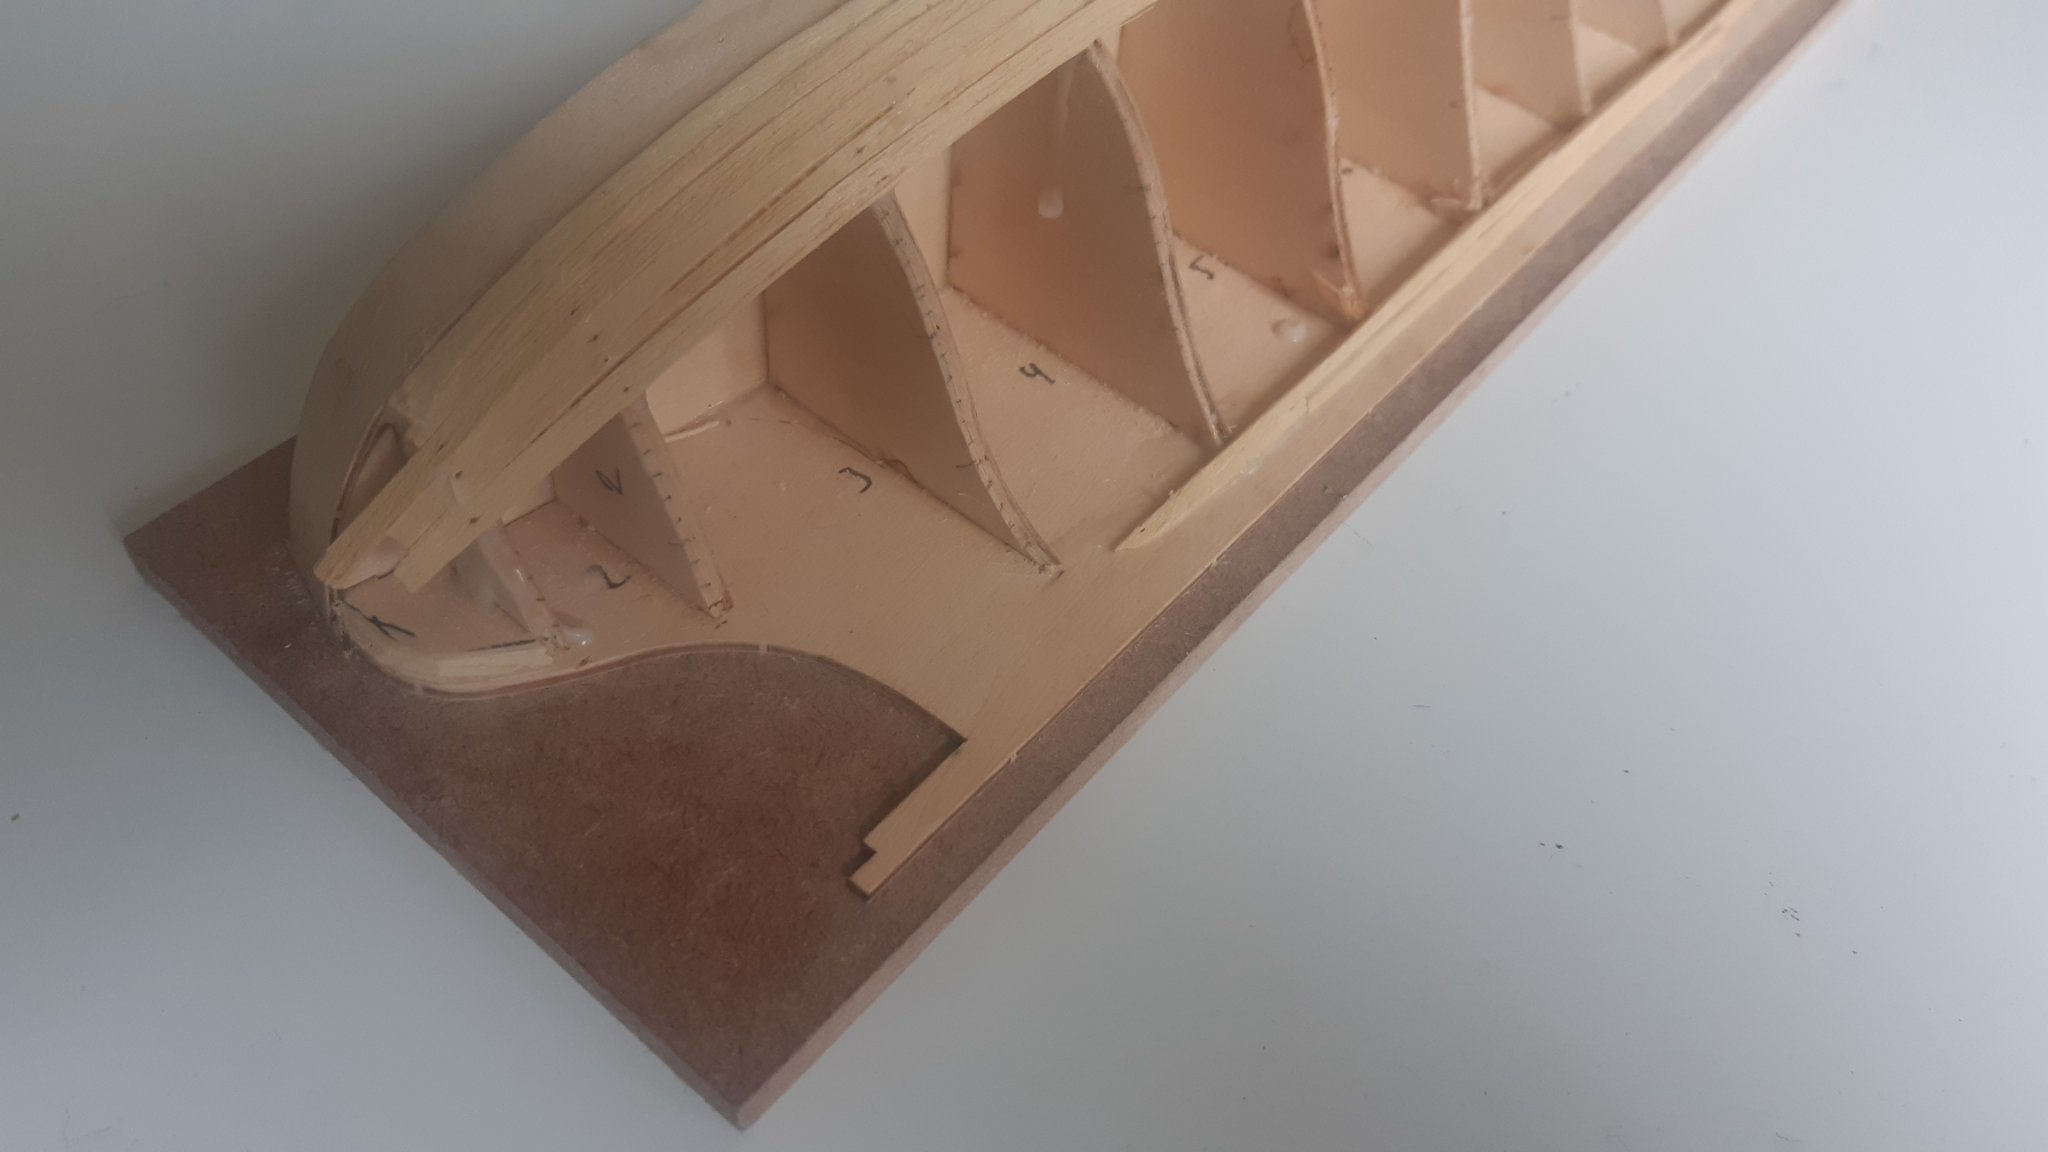
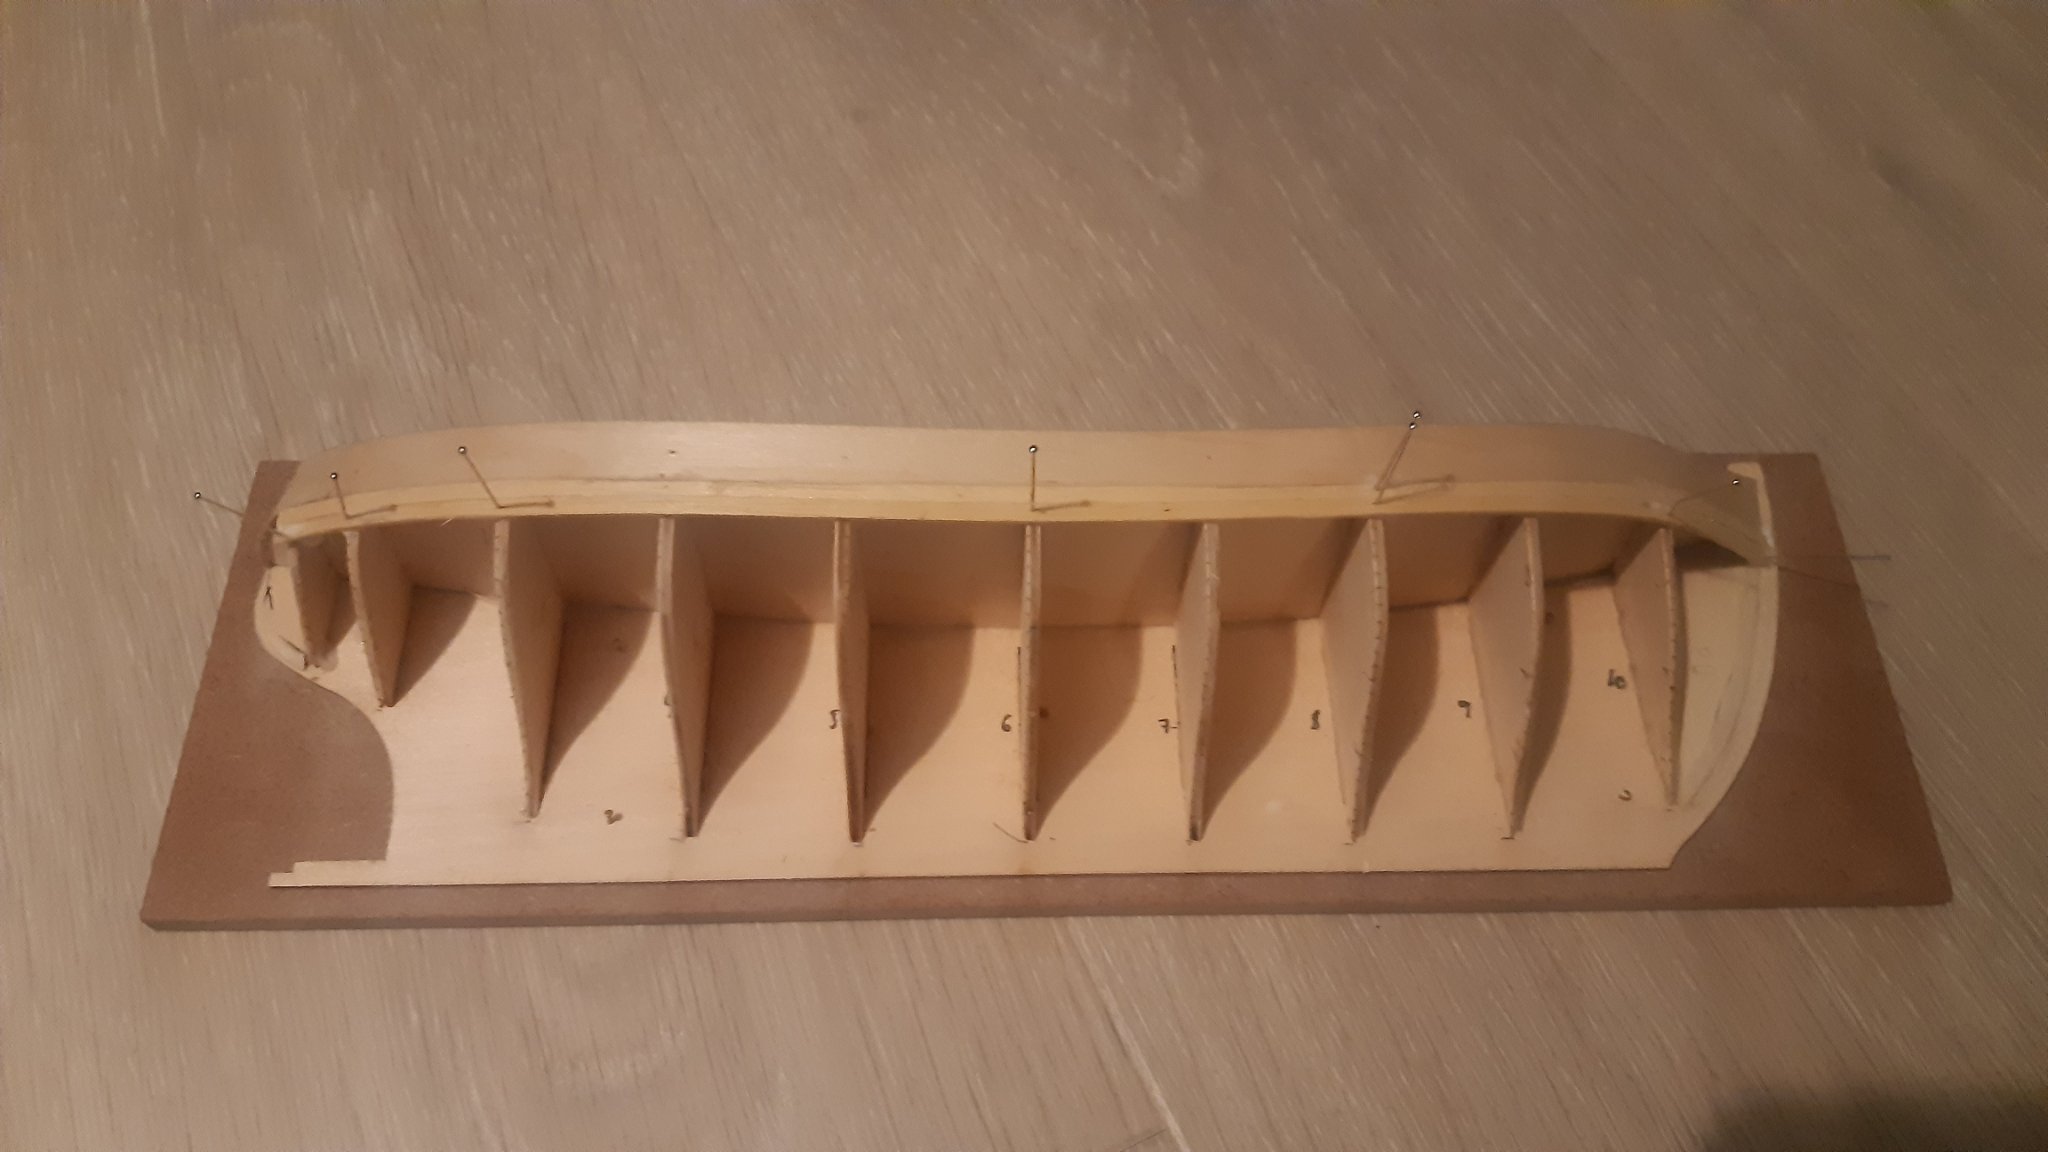
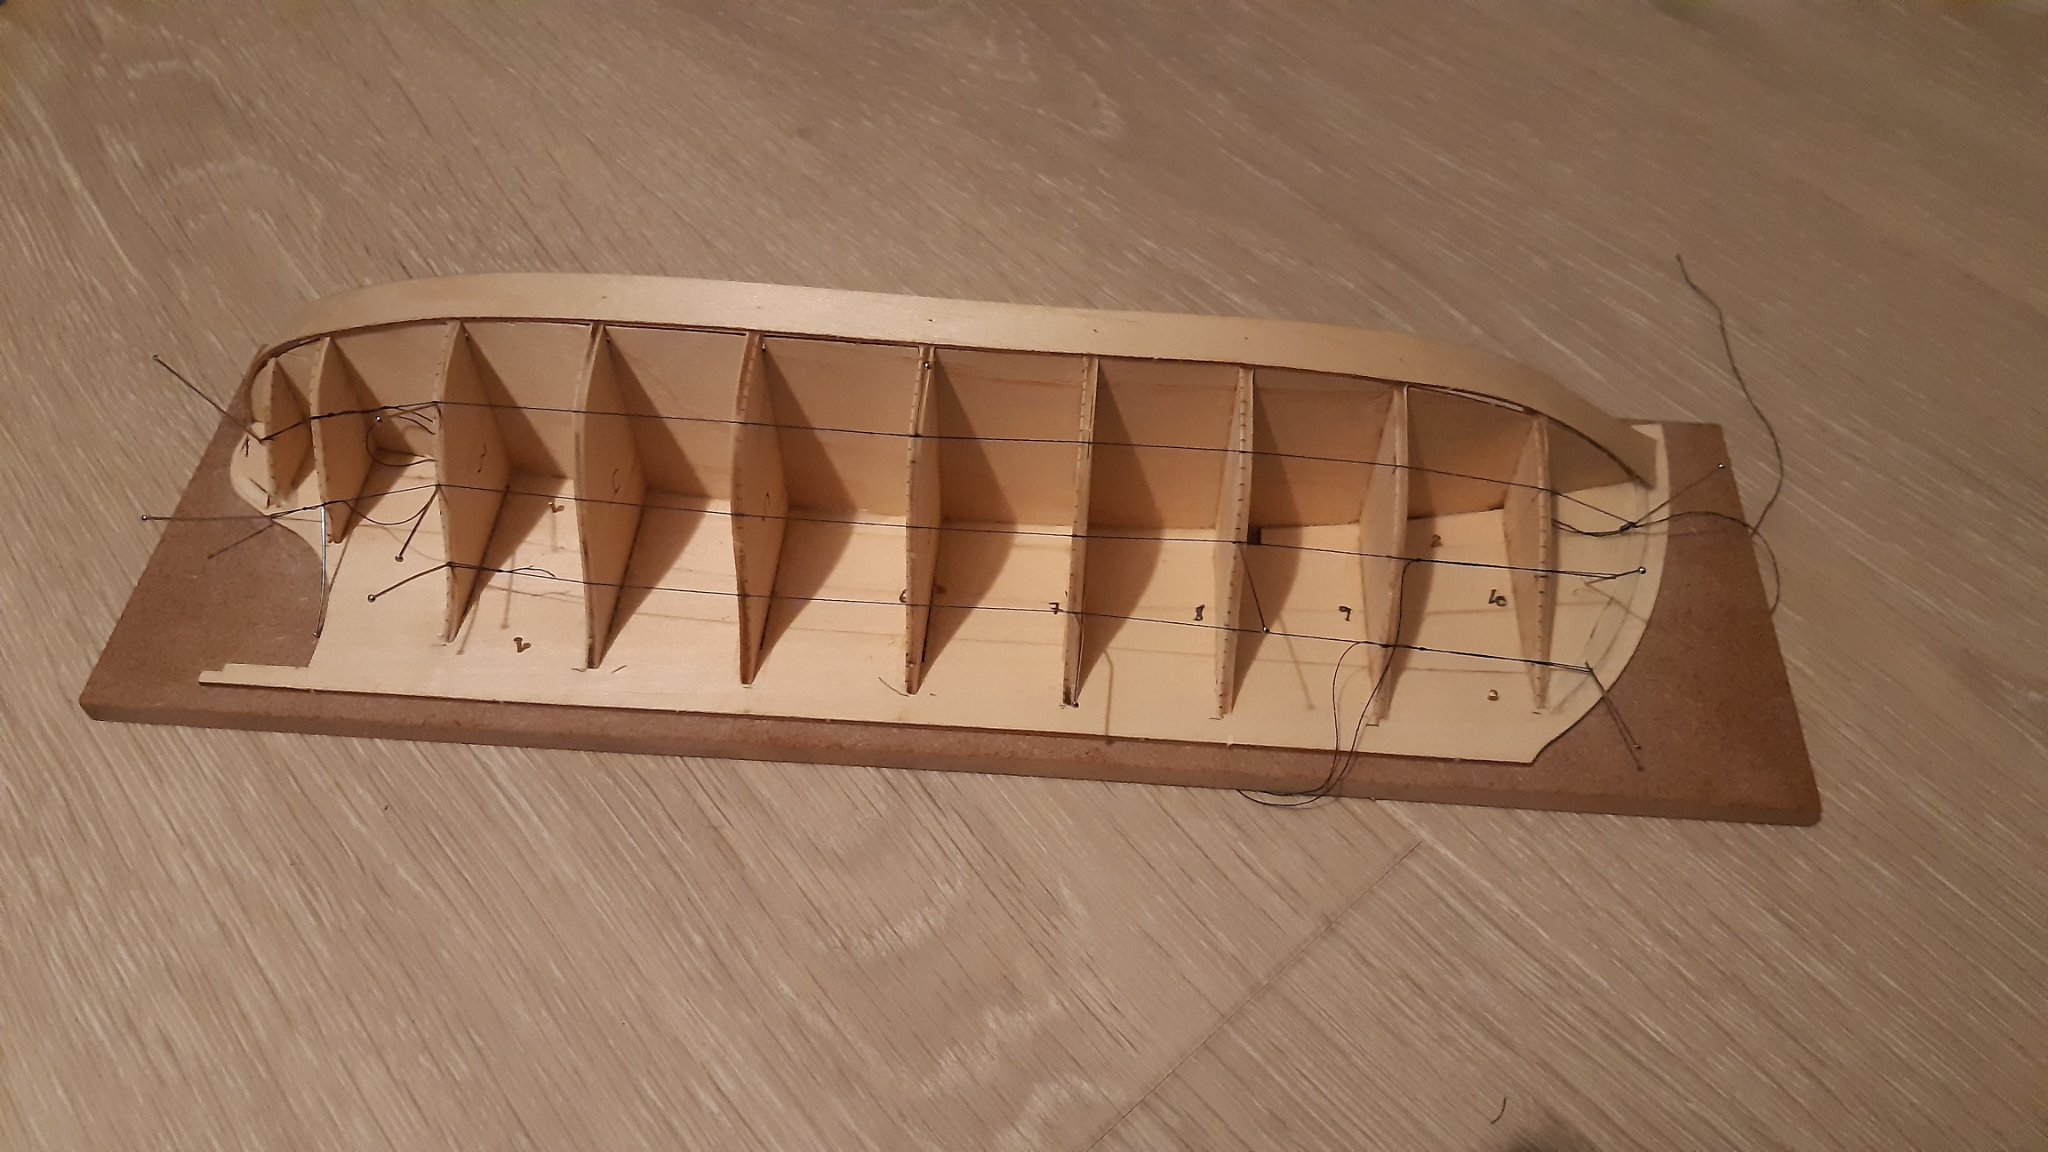
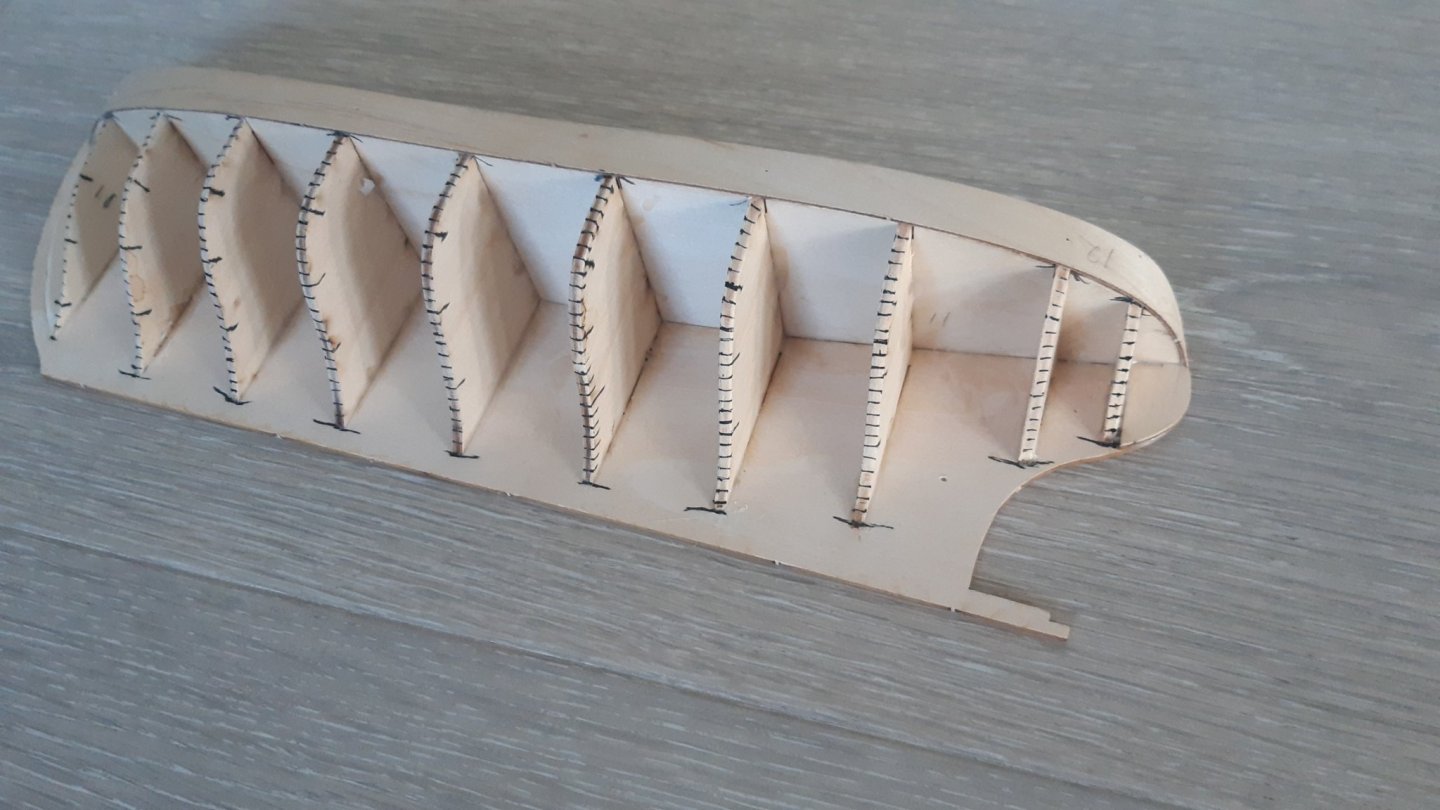
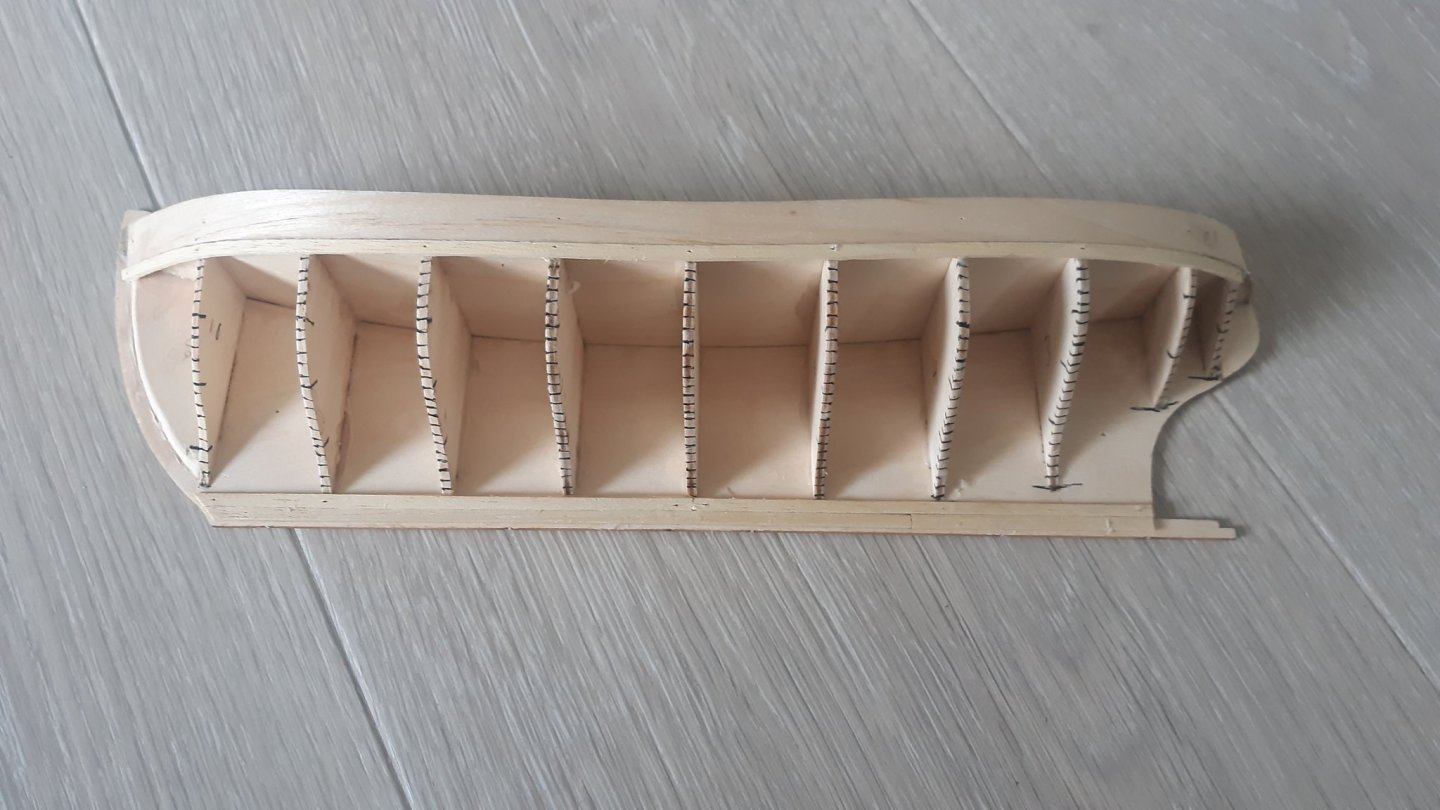
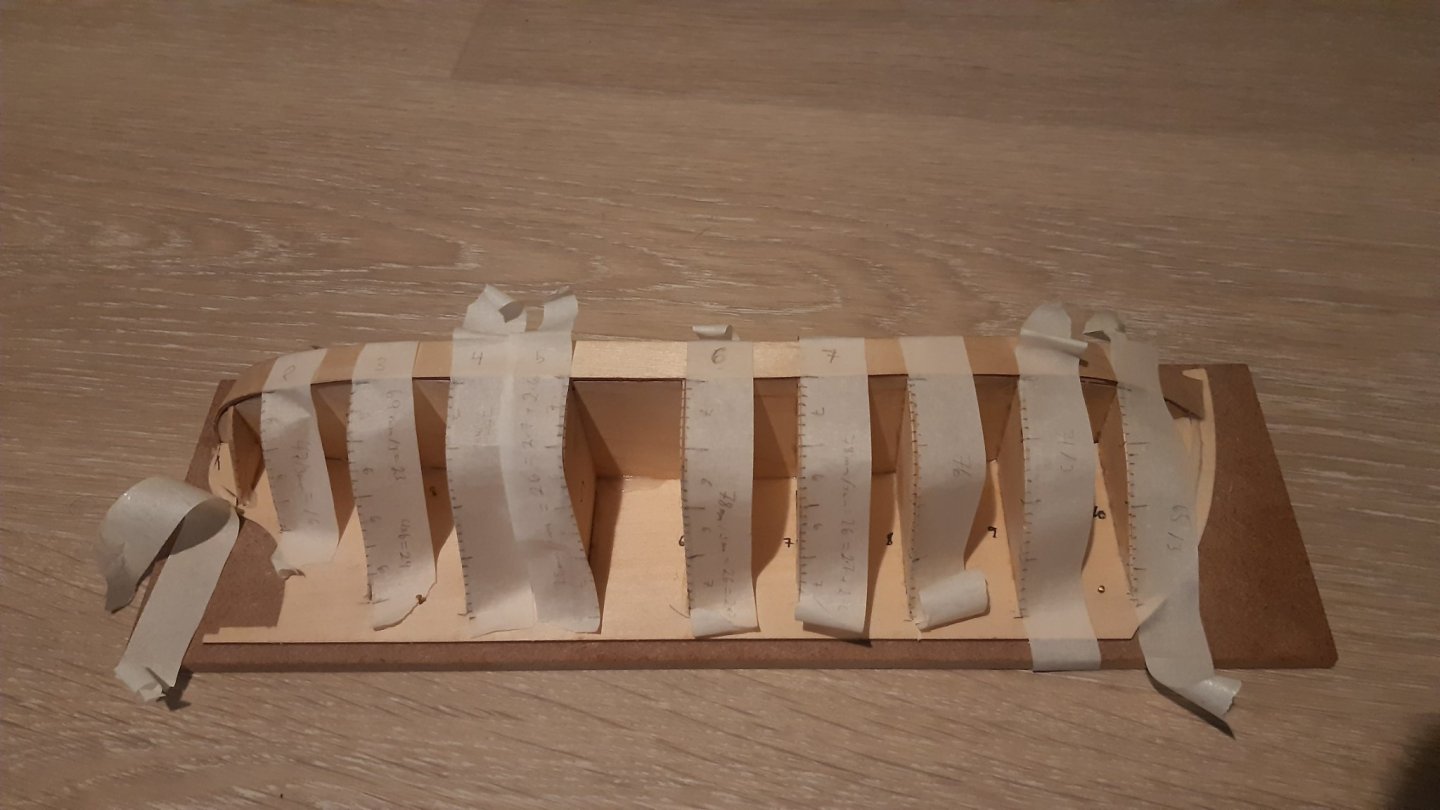
Buildweek 3 - Entry 4 Thanks for looking into my buildlog and a particular thanks to all of you who have liked my posts. Also thanks to Popeye the Sailor for the encouragement to start planking. During Easter I've been browsing a lot on the forum, looking at different planking techniques and the tutorials on these. I decided to try to follow the lining and measuring process and had some progress on this yesterday. Since I don't have a printer or special tools, I took some inspiration from the different build logs and tutorials and used masking tape, a pencil and a ruler to mark the planking on each frame. I adjusted the outermost planks instead of all planks so mainly they are 3mm wide and it turned out like this: After transferring the markings I attached strings of thread along three lines to see how it turned out, like this: The upper line does have a small kink nearing the aft, but I am satisfied with the way it looks and will use these markings as well as I am able to. I am aware that the main division should happen before I added the locations for each individual plank. When I started to measure each frame I realised one of the reasons for why this is a beginner kit, it was relatively easy to place each plank and the whole exercise was maybe not necessary (as clearly demonstrated by other build logs). I am however happy to be able to learn these processes and measuring techniques on an easy hull. In the next session I'll be starting to shape and affix the planking 🙂 Best Regards, Halvor

-
@popeye the sailor thanks for the post and pictures! I look forward to work with the winch, and your net find is an awesome story! I have to start keeping my eyes open. One thing I saw that you did and which I may try to do is to cut out the deck edge to frame the deck planking. I think that looked very neat. Anyways, first up is reading some planking tutorials. Best regards, Halvor
-
Hi @popeye the sailor, after you wrote on my build log for the Norden I found yours and have now throughly read it. The steps are easy to follow and many of my questions were answered so thanks a lot for this! Best Regards, Halvor
- 378 replies
-
- 2
-
-
- t78 norden
- billing boats
- (and 1 more)
-
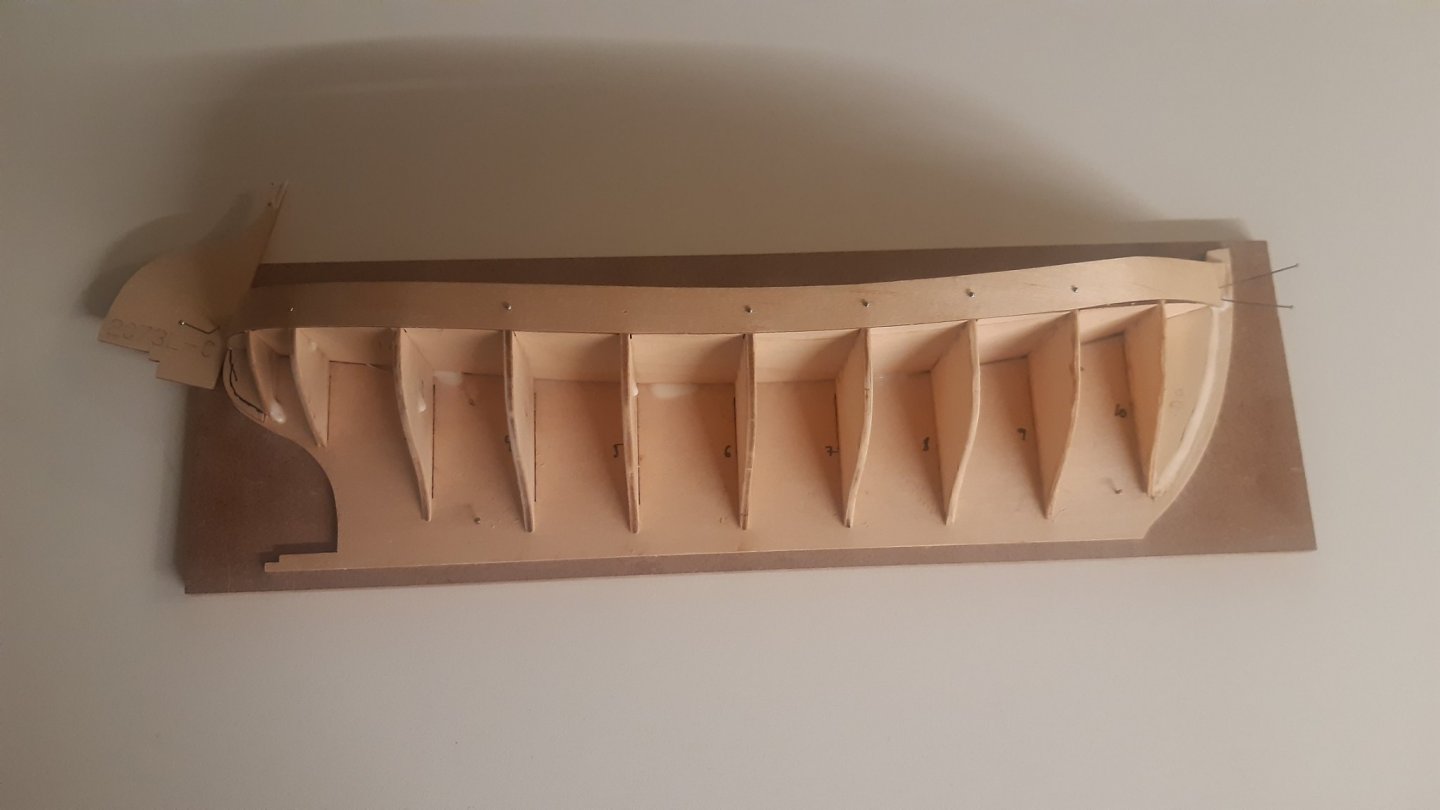
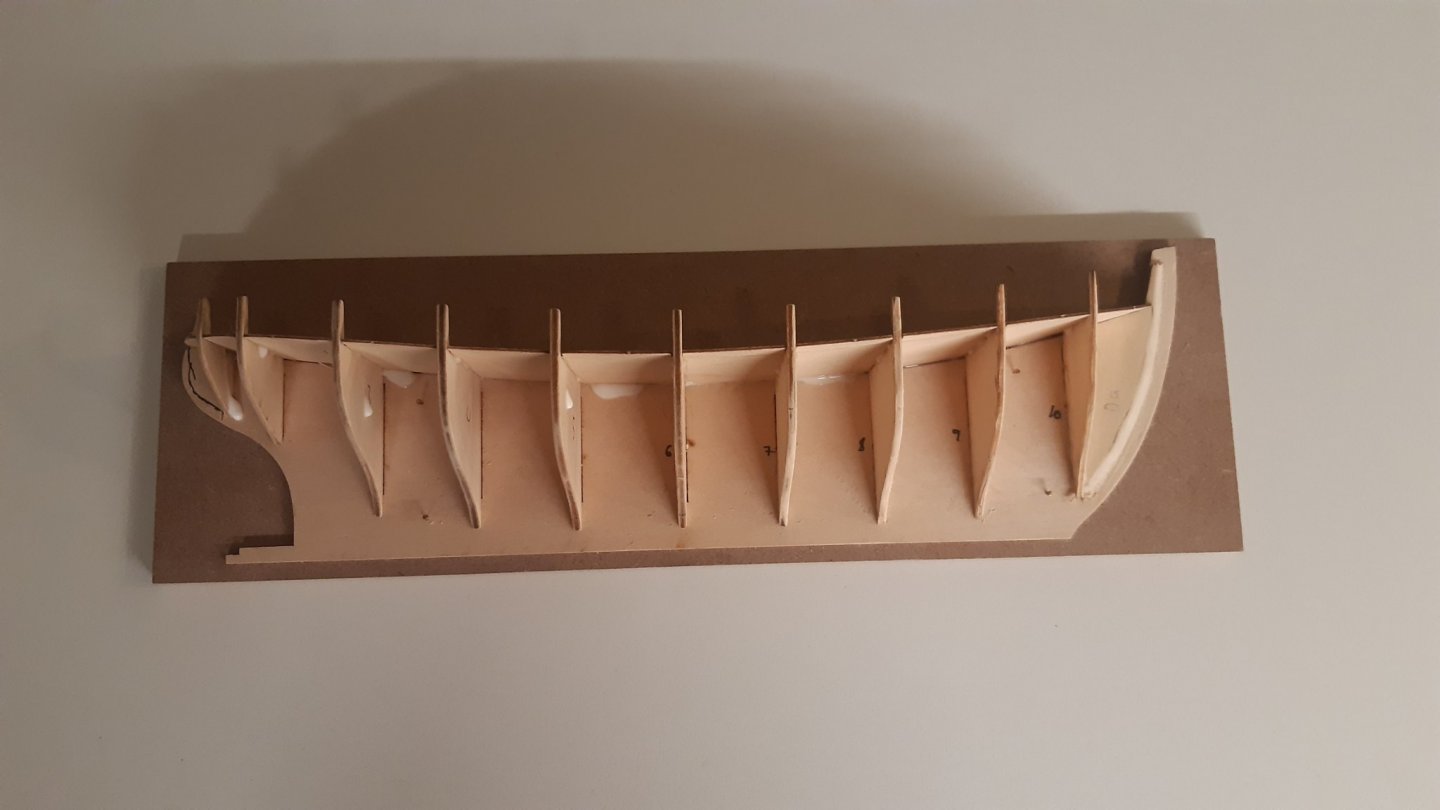
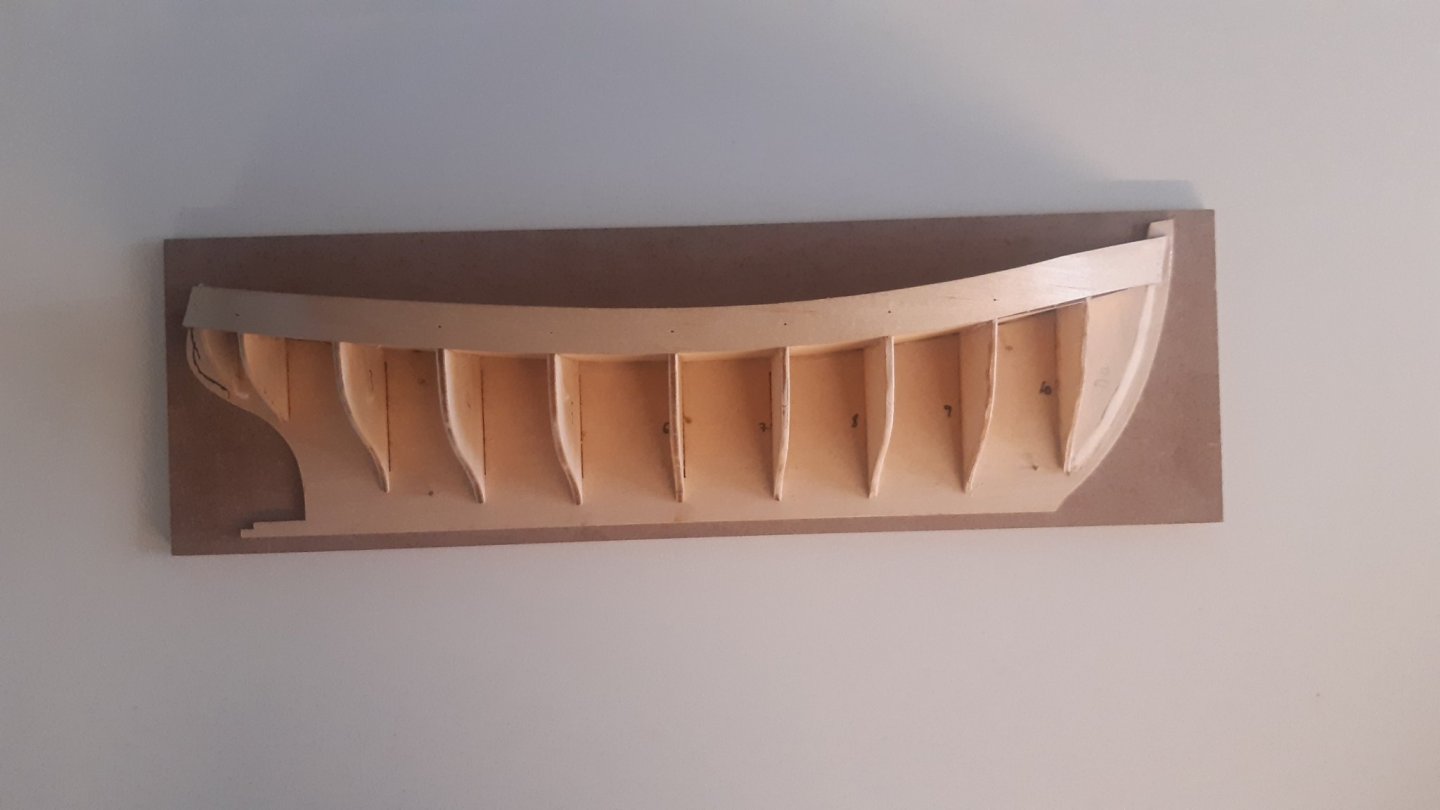
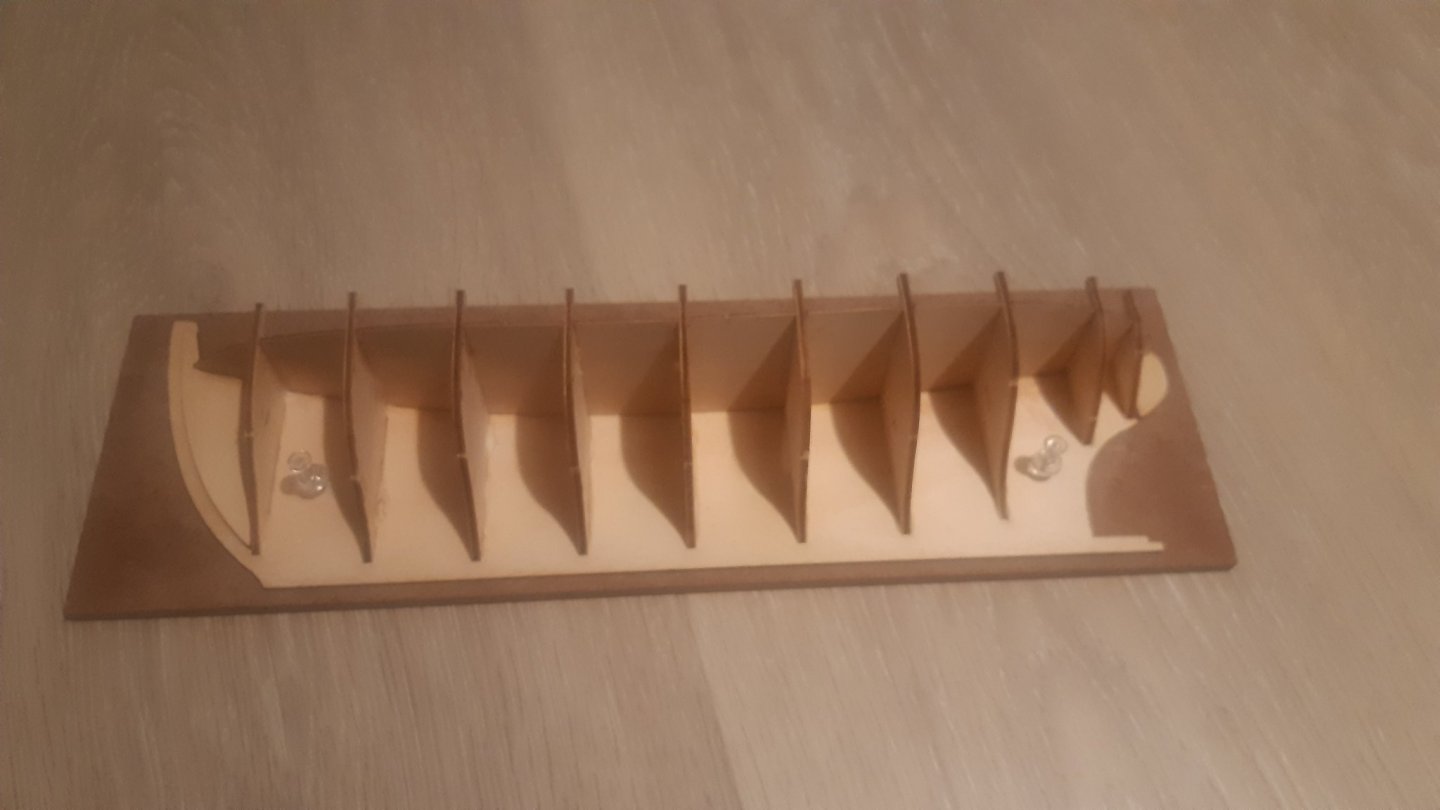
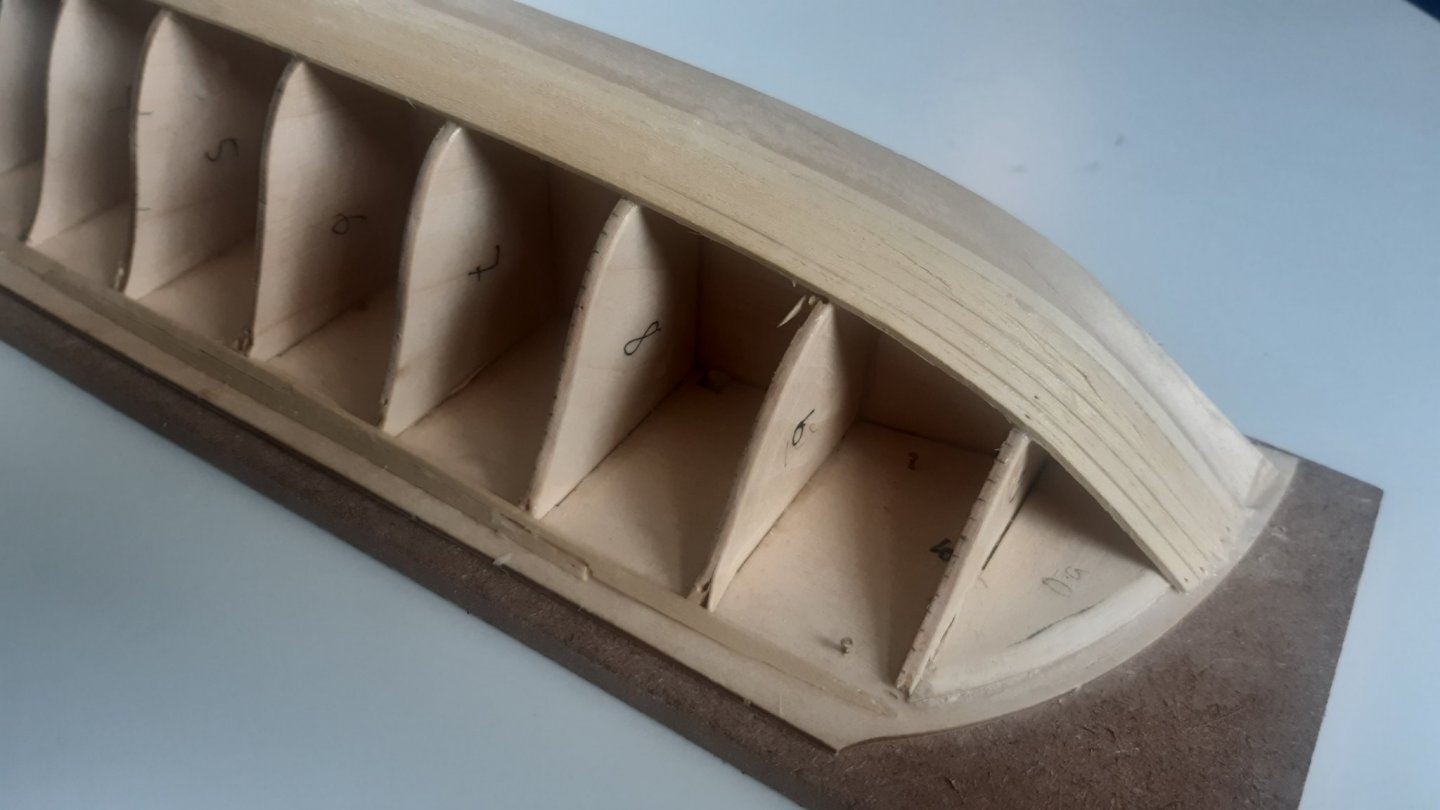
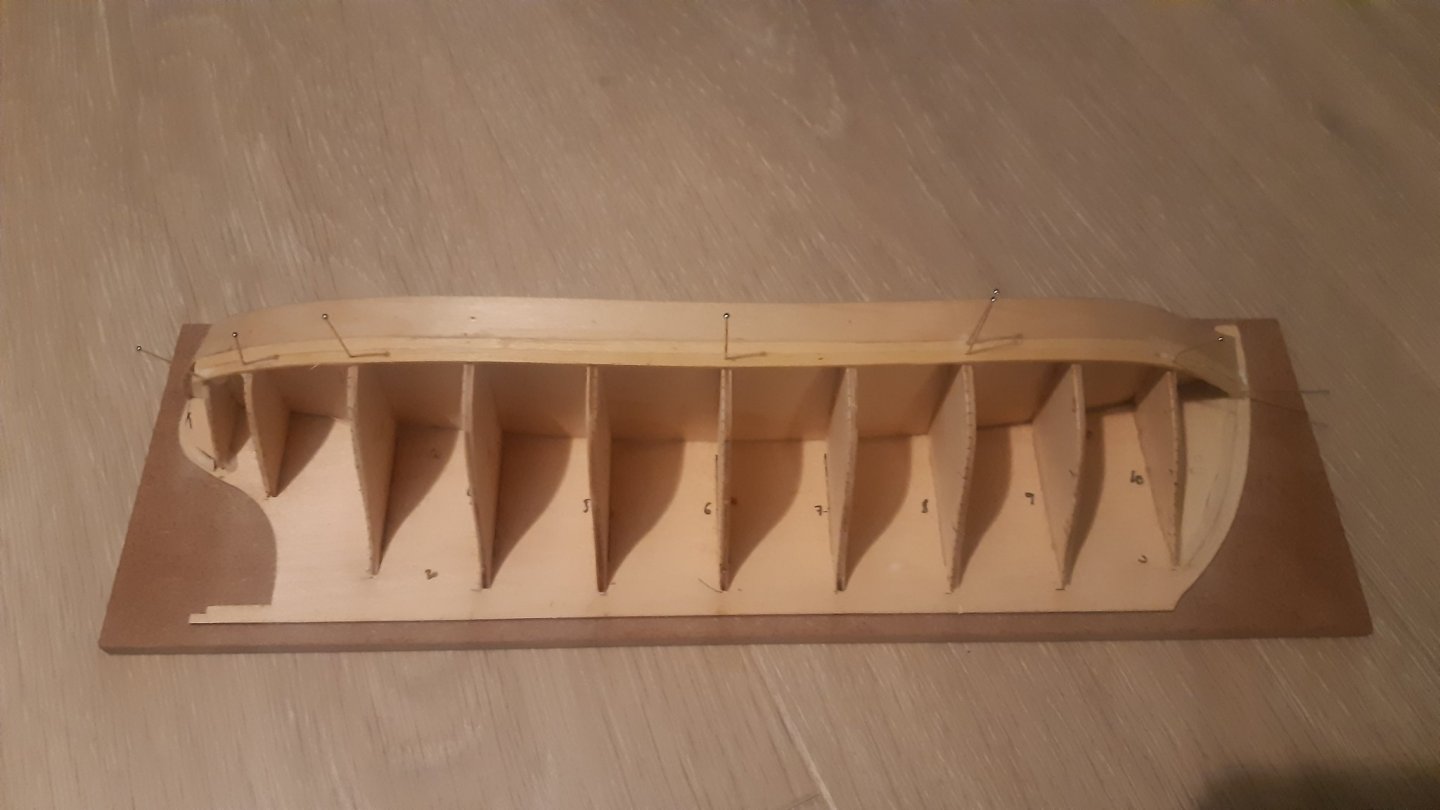
Buildweek 1 - entry 3 I decided to not change the side, after I learned that I will be free to decide the display side after the build is finished above. In this session I glued the frames to the keel, before I fitted the deck. I checked that everything looked good and glued the deck in place. Since I am new to this and do not have a lot of tools, I decided to just keep the deck in place while the glue set. 10 minutes can be a long time! An obvious opportunity for improvement before starting on port side. However it did turn out fine. After spending some time beveling with a hobby knife (I might invest in a better tool for this) and sanding paper (320) it looked like this: I installed the bulwark as well. I thought that the radius at the aft was a little small, and I decided to soak and fit it before gluing, using whatever I had at hand. After it had dried in place, I loosened it and glued it in place. It was a bit tricky to ensure good surface matching in both ends, but in the end I managed using pins. Again a couple of clamps might have been handy. This morning I removed the pins and it now looks like this: Next up will be more sanding and adjusting. I also think I will try to follow the lining process before starting to plank, maybe it would not be necessary for this model, but I think it would be good to learn the process and make the first mistakes here 🙂 There will not be any further building updates the next week due to other engagements, but the week after Easter I will continue. Have a nice weekend everyone and stay safe. Best regards, Halvor