cdanly
-
Posts
16 -
Joined
-
Last visited
Recent Profile Visitors
252 profile views


-
 AlleyCat reacted to a post in a topic:
Lady Nelson by Dave_E - FINISHED - Amati/Victory Models - 1:64
AlleyCat reacted to a post in a topic:
Lady Nelson by Dave_E - FINISHED - Amati/Victory Models - 1:64
-
Keith Black reacted to a post in a topic:
Lady Nelson by Dave_E - FINISHED - Amati/Victory Models - 1:64
-
Dave_E reacted to a post in a topic:
Lady Nelson by Dave_E - FINISHED - Amati/Victory Models - 1:64
-
Dave, I'm way behind on catching up on your project but at quick glance looking good!
- 362 replies
-
- 3
-
-
- Amati
- Lady Nelson
- (and 2 more)
-
cdanly reacted to a post in a topic:
Lady Nelson by Dave_E - FINISHED - Amati/Victory Models - 1:64
-
cdanly reacted to a post in a topic:
Lady Nelson by Dave_E - FINISHED - Amati/Victory Models - 1:64
-
cdanly reacted to a post in a topic:
Lady Nelson by Dave_E - FINISHED - Amati/Victory Models - 1:64
-
cdanly reacted to a post in a topic:
Lady Nelson by Dave_E - FINISHED - Amati/Victory Models - 1:64
-
cdanly reacted to a post in a topic:
Lady Nelson by Dave_E - FINISHED - Amati/Victory Models - 1:64
-
cdanly reacted to a post in a topic:
Lady Nelson by Dave_E - FINISHED - Amati/Victory Models - 1:64
-
cdanly reacted to a post in a topic:
Lady Nelson by Dave_E - FINISHED - Amati/Victory Models - 1:64
-
cdanly reacted to a post in a topic:
Lady Nelson by Dave_E - FINISHED - Amati/Victory Models - 1:64
-
cdanly reacted to a post in a topic:
Lady Nelson by Dave_E - FINISHED - Amati/Victory Models - 1:64
-
ccoyle reacted to a post in a topic:
Steamer Oscoda by cdanly - RADIO - scale 1: 35 - Great Lakes Lumber Hooker c.1901 as owned by Hines Lumber Co. Chicago
-
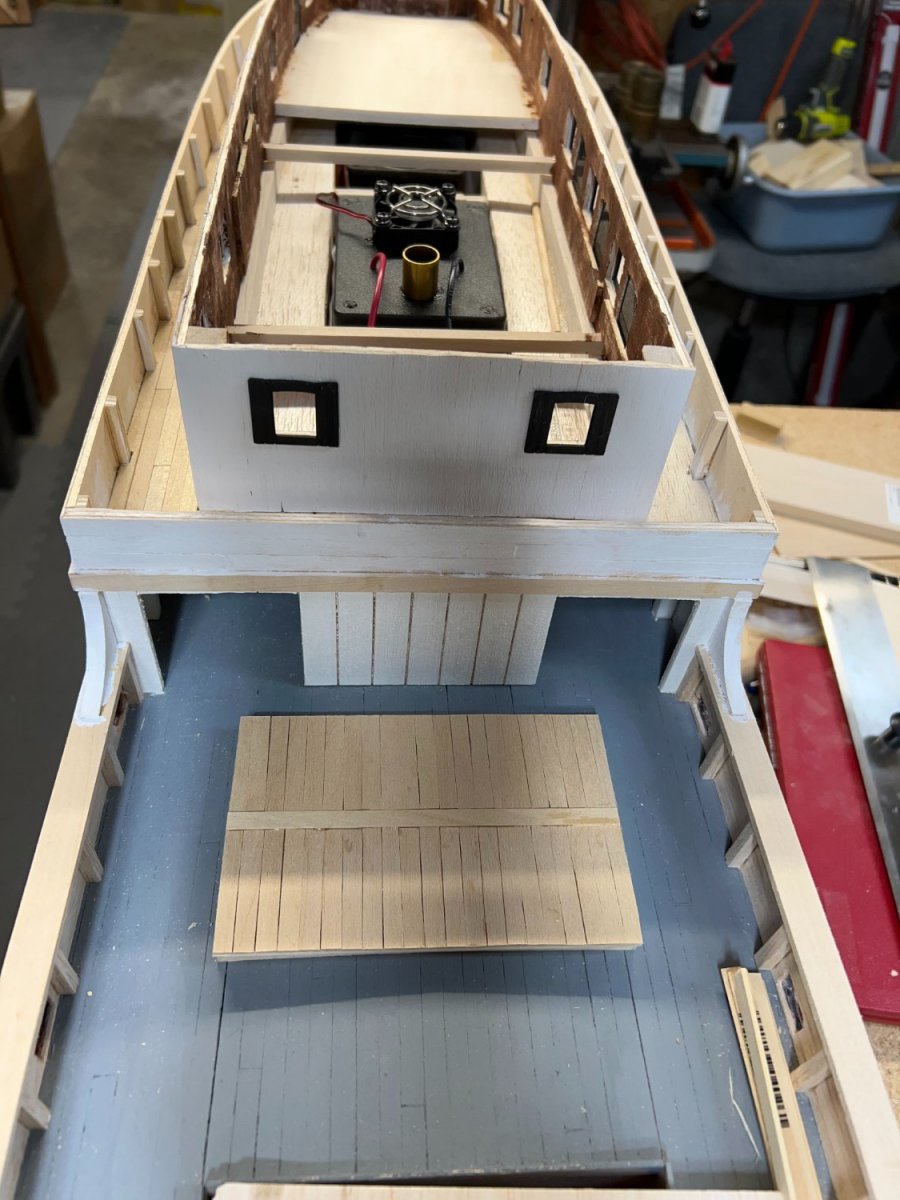
Ian, the fan you see is actually part of the smoke generator. At the moment I have nothing designed for cooling but may install a simple fan just to keep air flowing. Years ago I had a fast electric speedboat and had a water flow intake wrapped around my motor, then exhausted out the back. I know there are pumps available to do the same. As for cooling your servos I'm not sure what to do - unless you adopted a similar coil system and pump maybe? Your project sounds interesting! Any pics to share?
- 15 replies
-
- 1
-
-
- Hines Lumber
- Great Lakes
- (and 4 more)
-
Looking good Dave! For supplies I frequent local hobby shops as mentioned above. Online checkout https://www.harbormodels.com/, https://www.agesofsail.com/, and https://www.cornwallmodelboats.co.uk/index.html (Cornwall is in England but delivery is fast and inexpensive). I have used all of these in addition to Amazon. K&S has a full line of brass rod, tube, sheet you can buy direct from them I think.
- 362 replies
-
- 2
-

-
-
- Amati
- Lady Nelson
- (and 2 more)
-
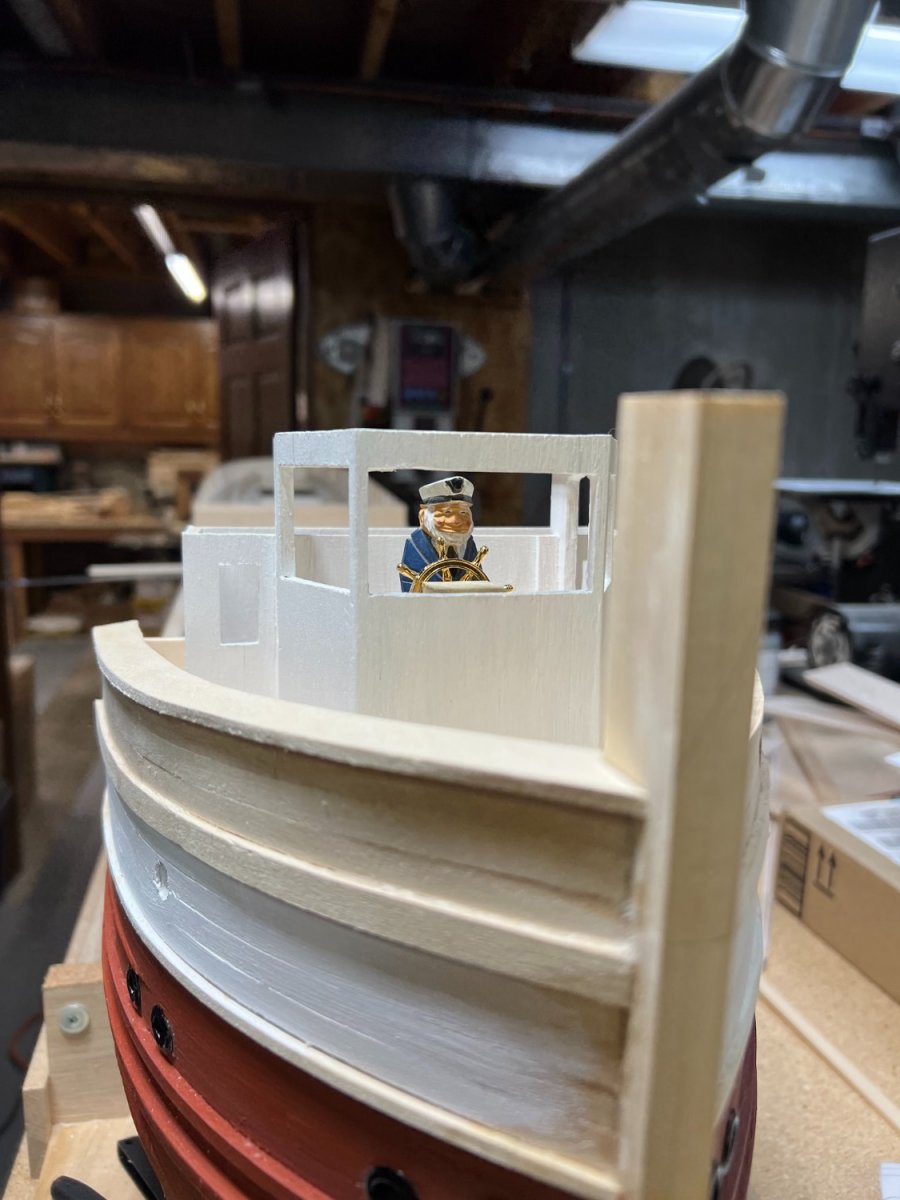
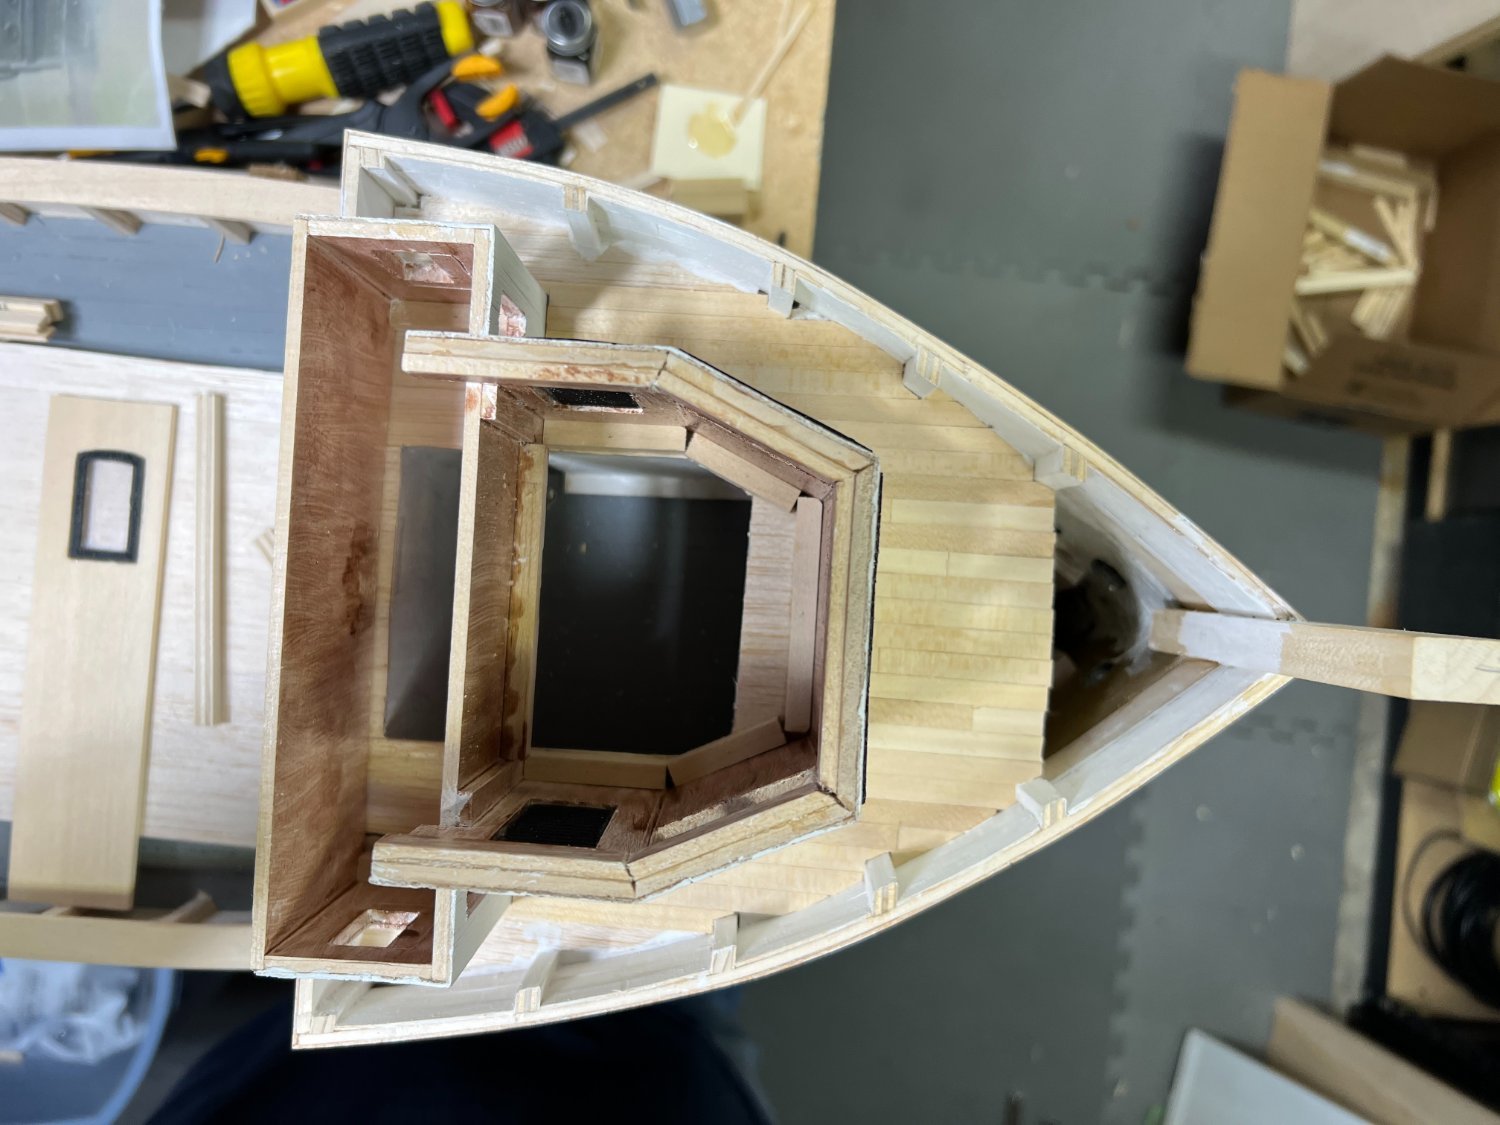
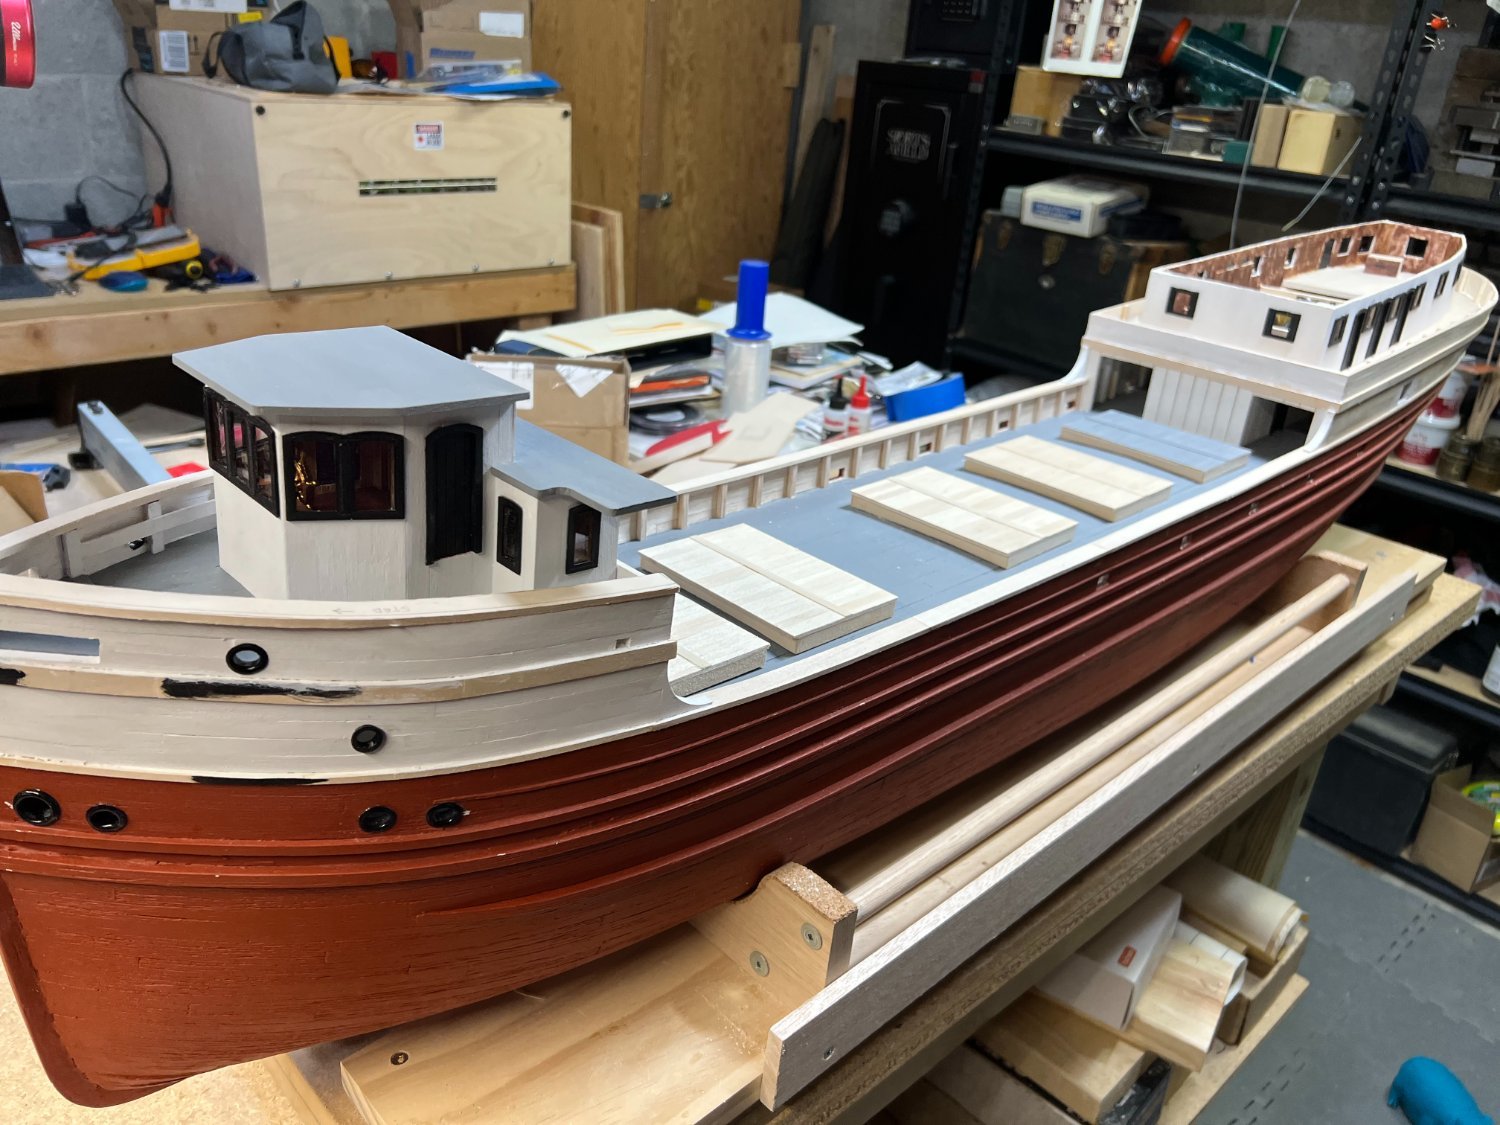
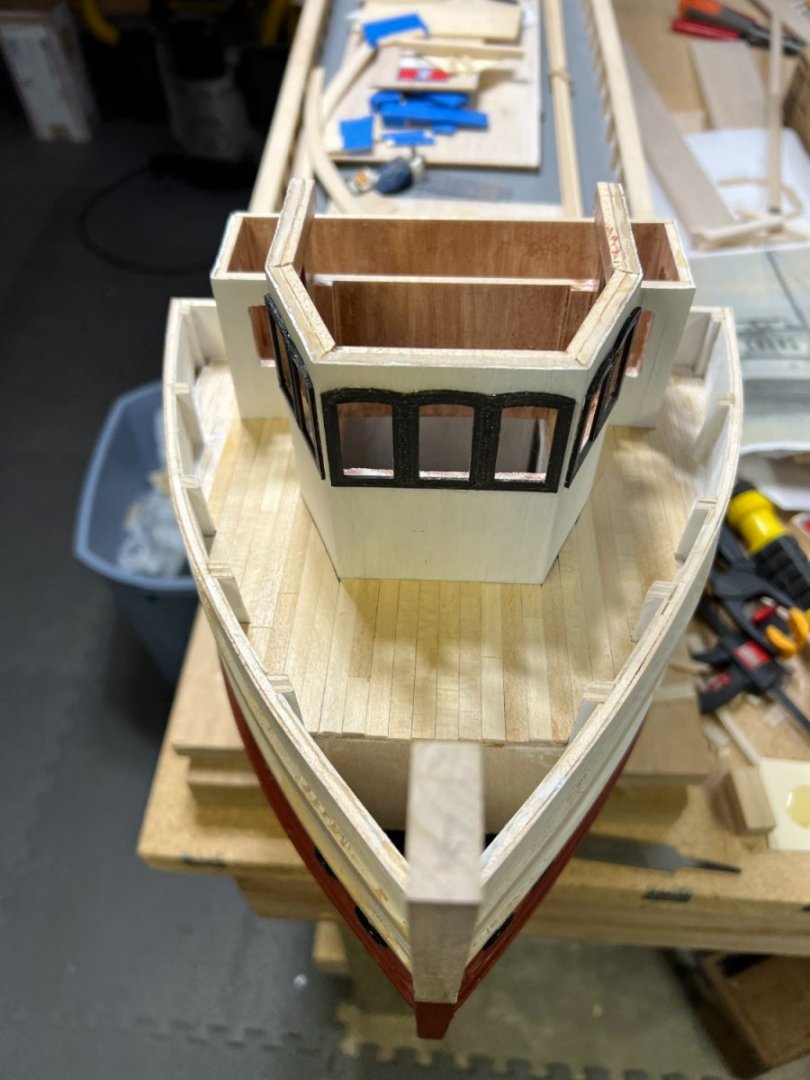
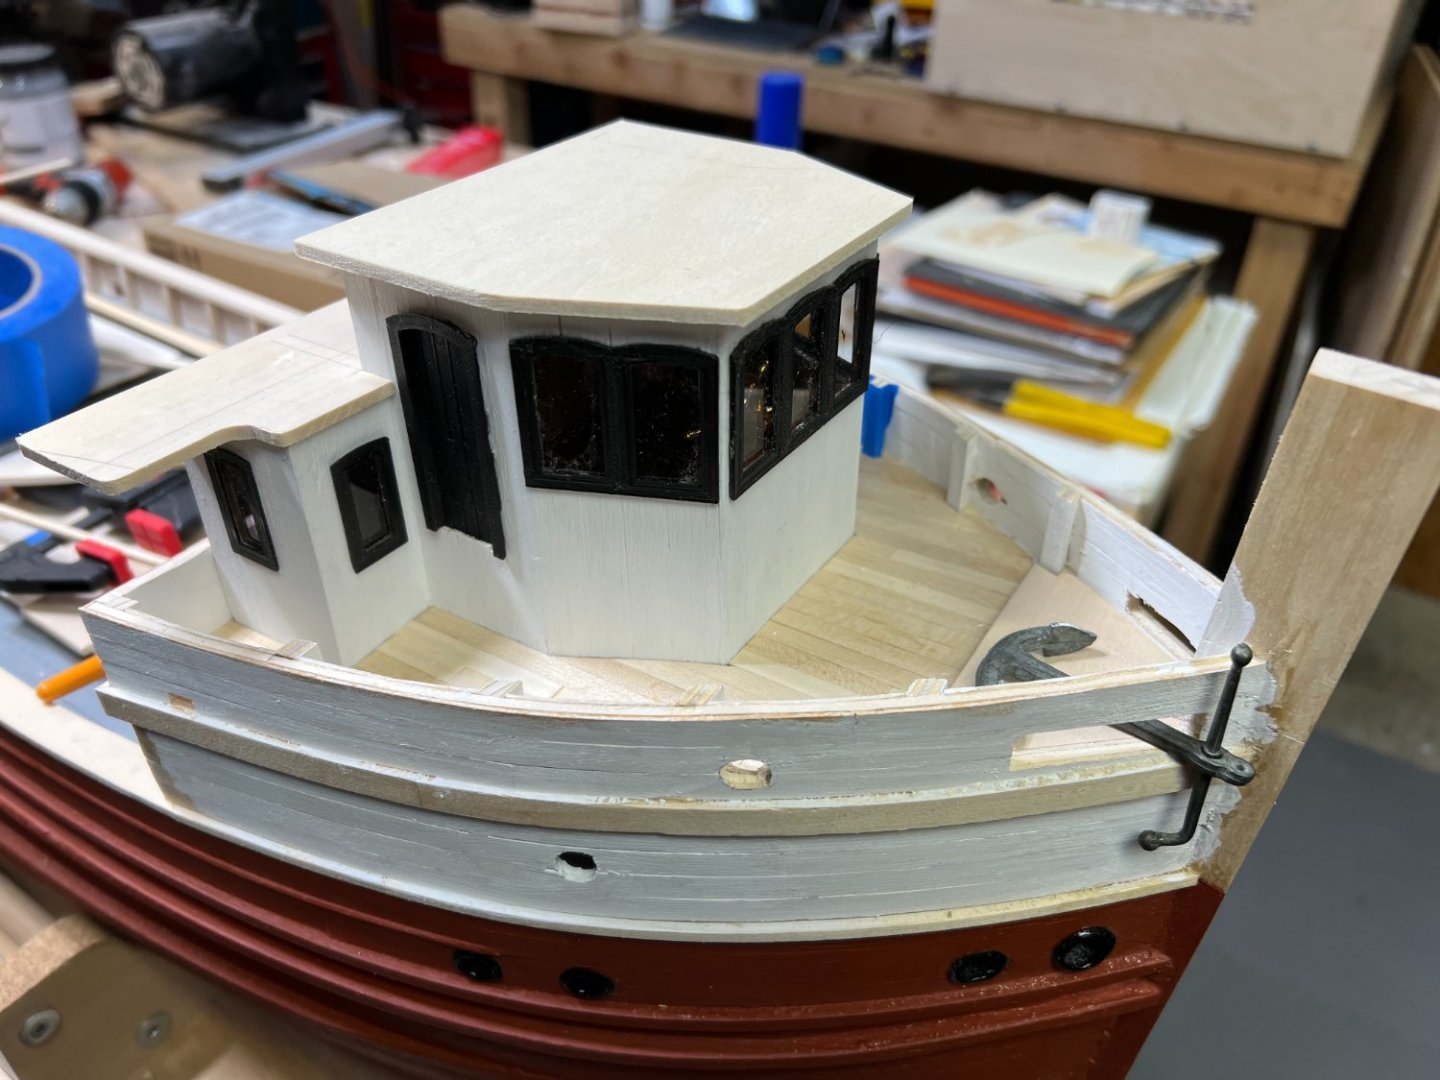
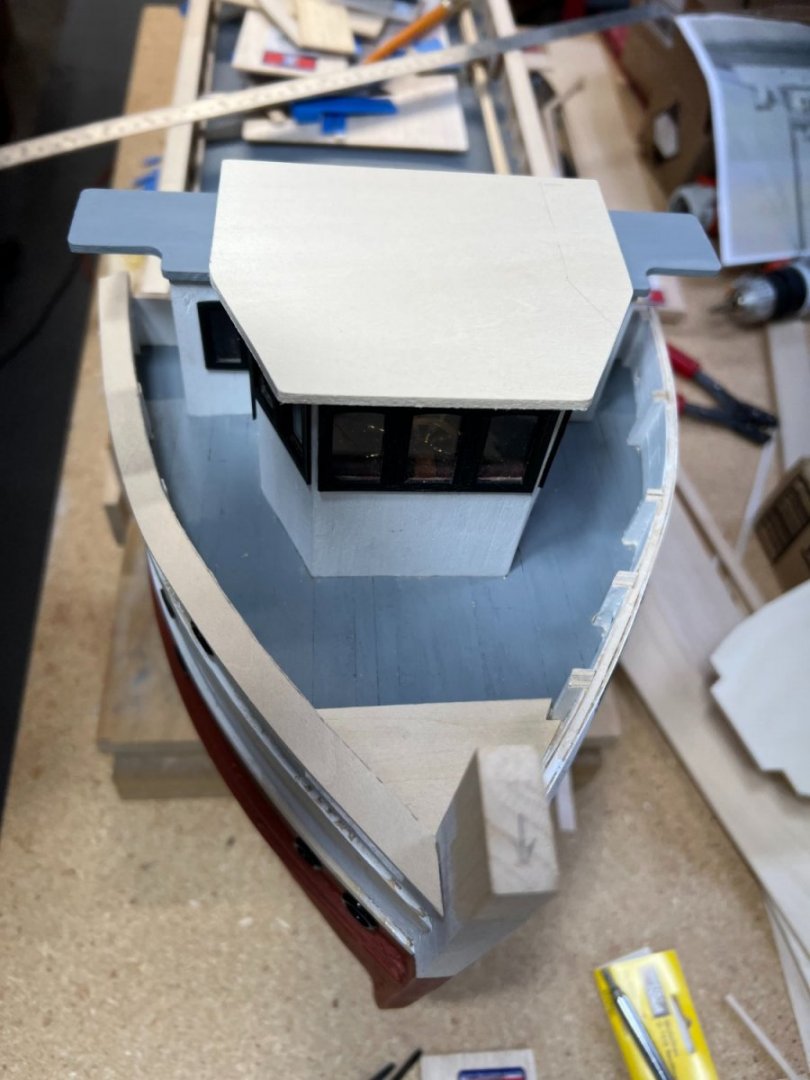
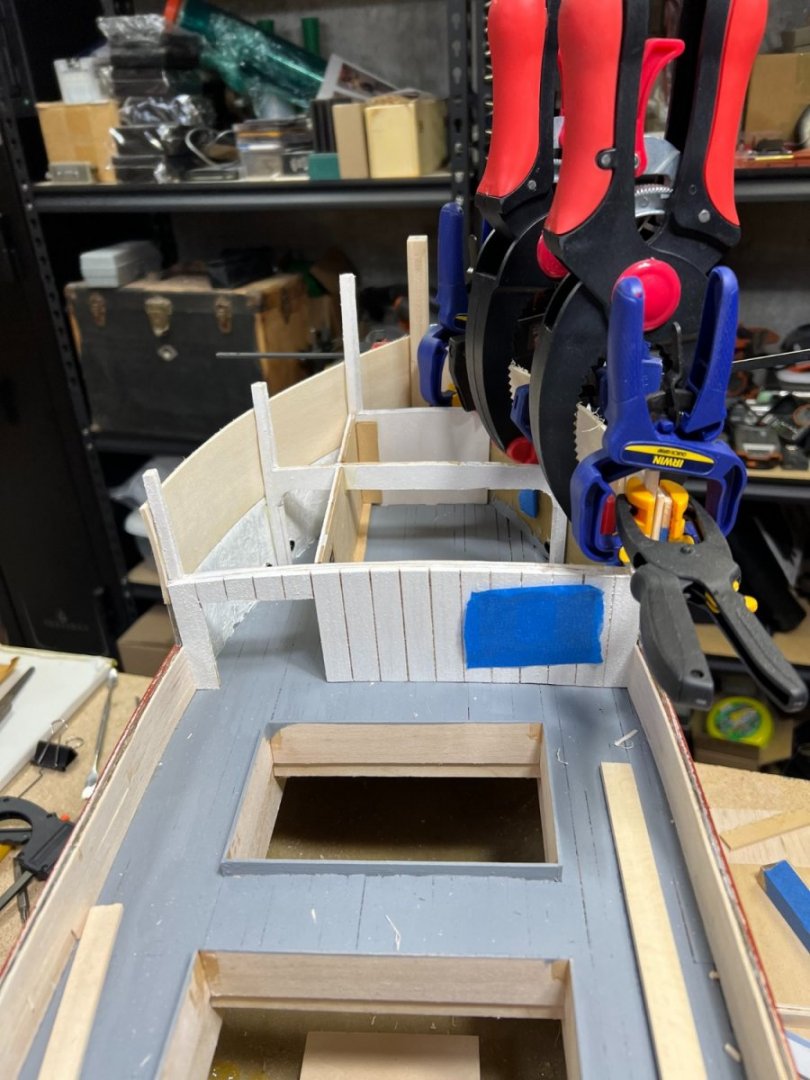
More pics: pilothouse, aft deckhouse, deck hatches.....


- 15 replies
-
- 8
-
-
- Hines Lumber
- Great Lakes
- (and 4 more)
-
 cdanly reacted to a post in a topic:
Steamer Oscoda by cdanly - RADIO - scale 1: 35 - Great Lakes Lumber Hooker c.1901 as owned by Hines Lumber Co. Chicago
cdanly reacted to a post in a topic:
Steamer Oscoda by cdanly - RADIO - scale 1: 35 - Great Lakes Lumber Hooker c.1901 as owned by Hines Lumber Co. Chicago
-
I'm on the northeast side - easy access to Door County!
- 15 replies
-
- 3
-
-
- Hines Lumber
- Great Lakes
- (and 4 more)
-
Thanks Dave! Yes Once again I finally have a basement for a workshop and love it. Just moved to GB 3 years ago after living in Tennessee for 10 years - not too many basements there! I have a coworker who lives on 10 acres with a small lake - will be perfect for maiden voyage/buoyancy test. Beyond that I'm not sure where she will sail.
- 15 replies
-
- 2
-
-
- Hines Lumber
- Great Lakes
- (and 4 more)
-
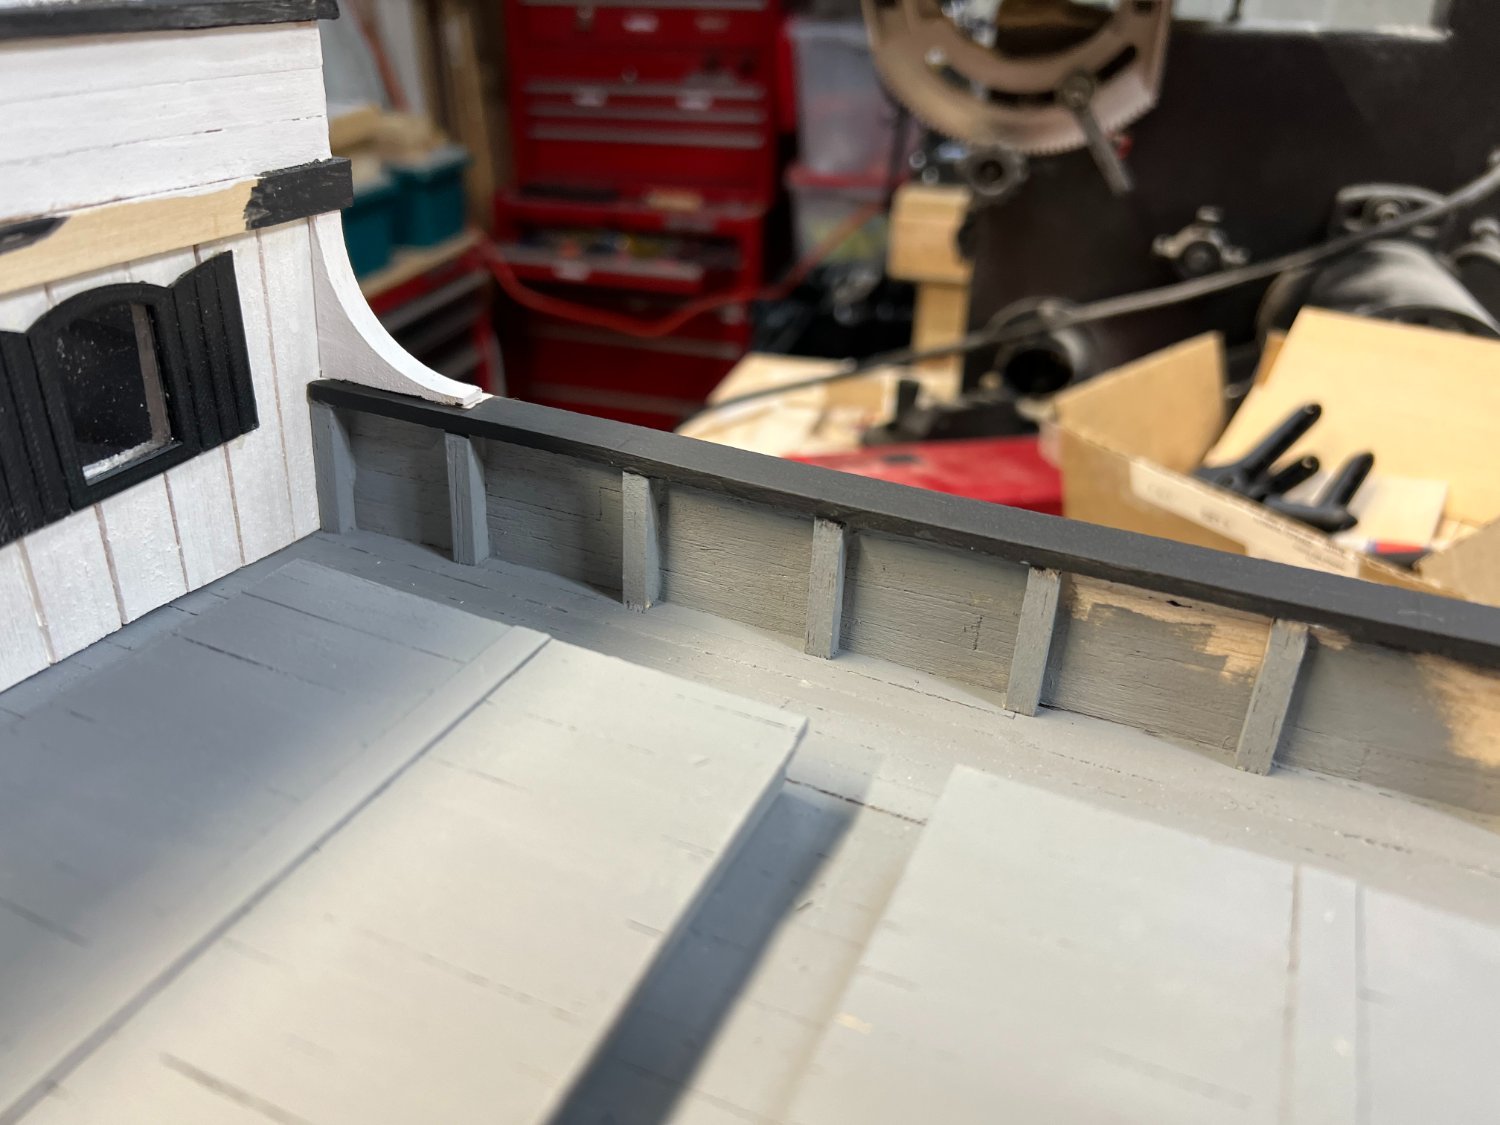
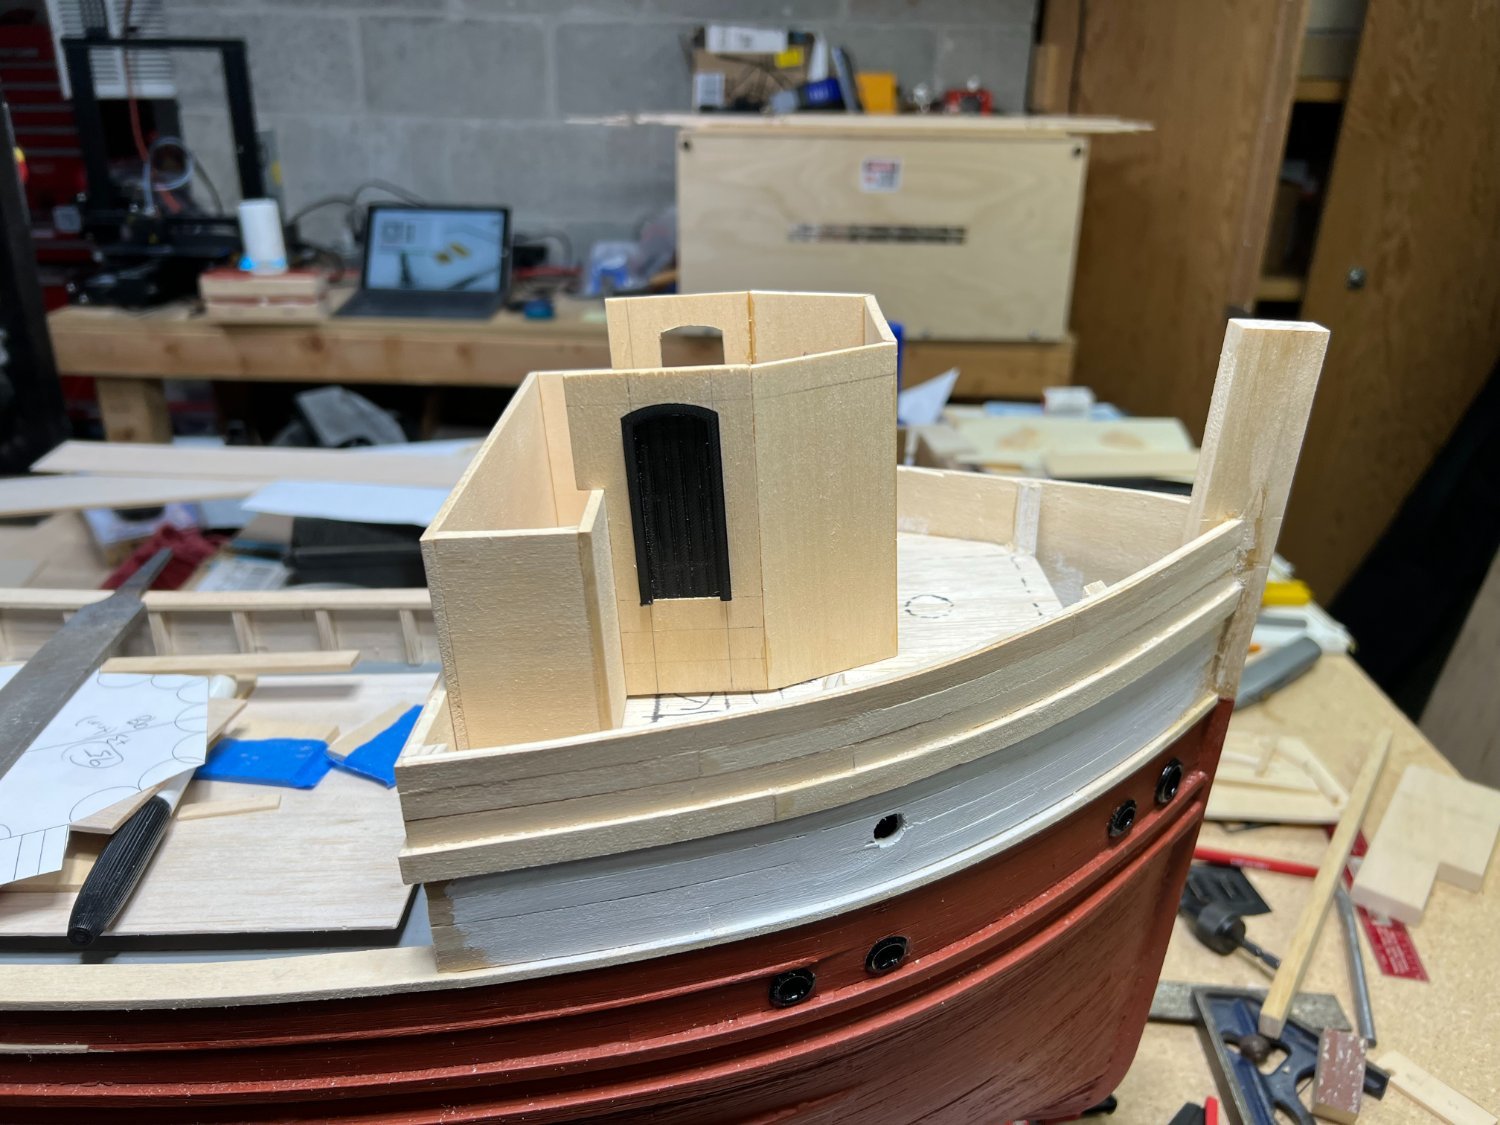
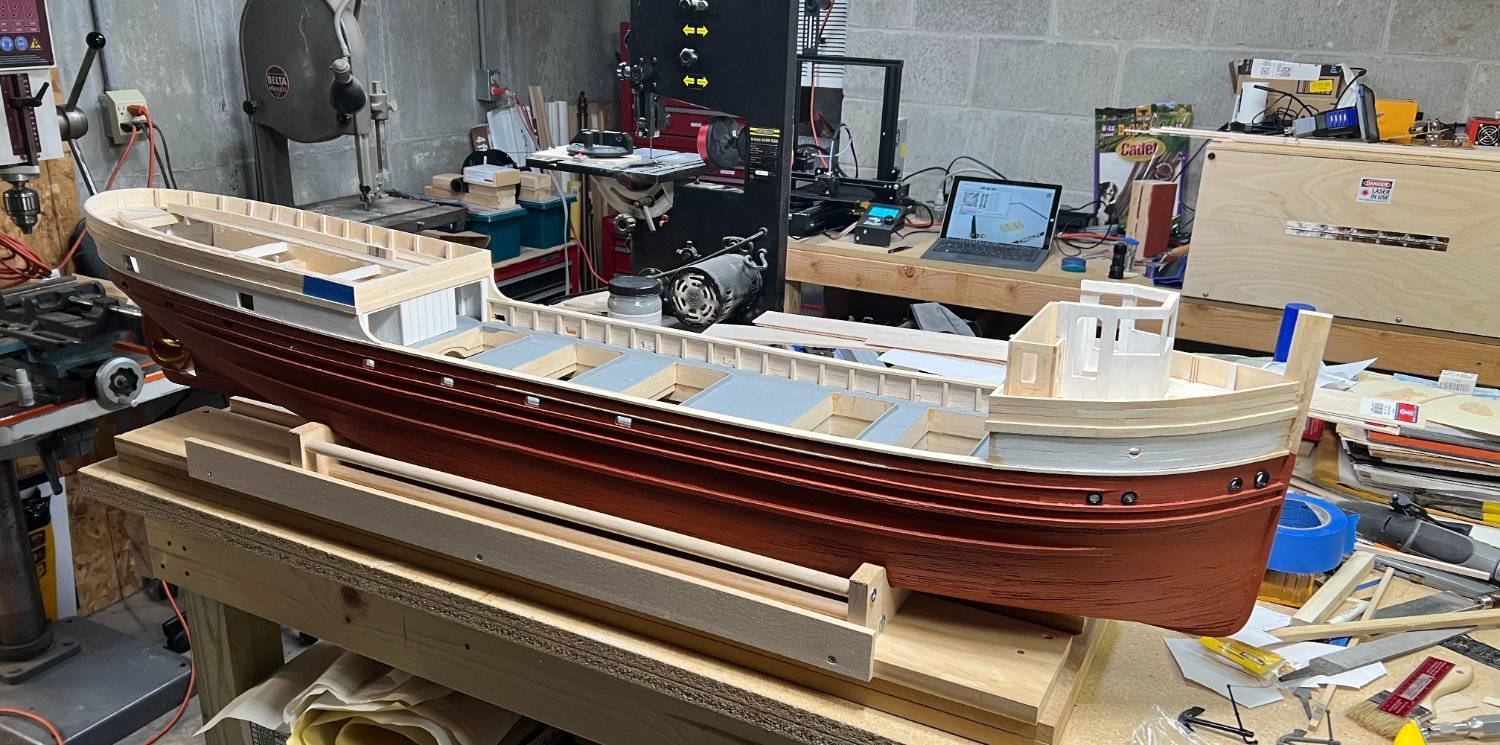
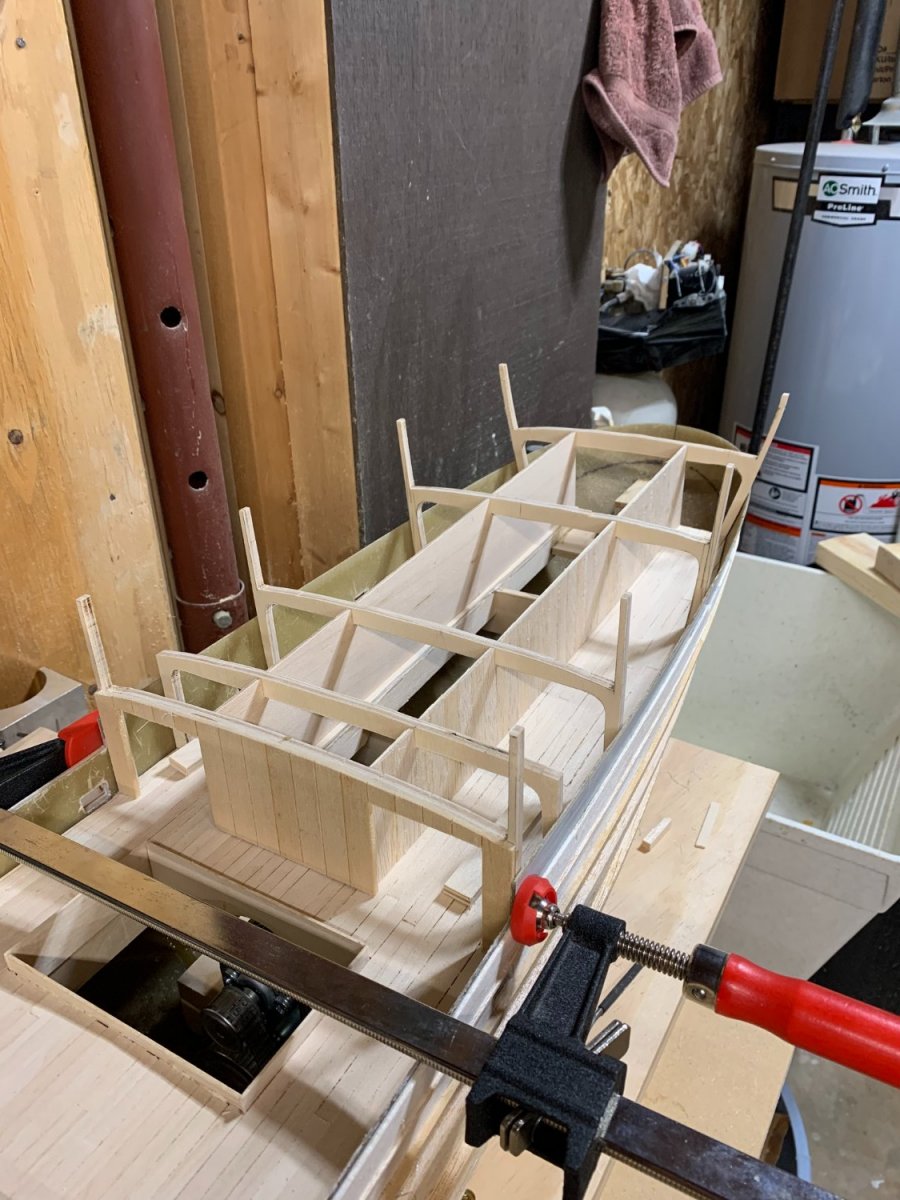
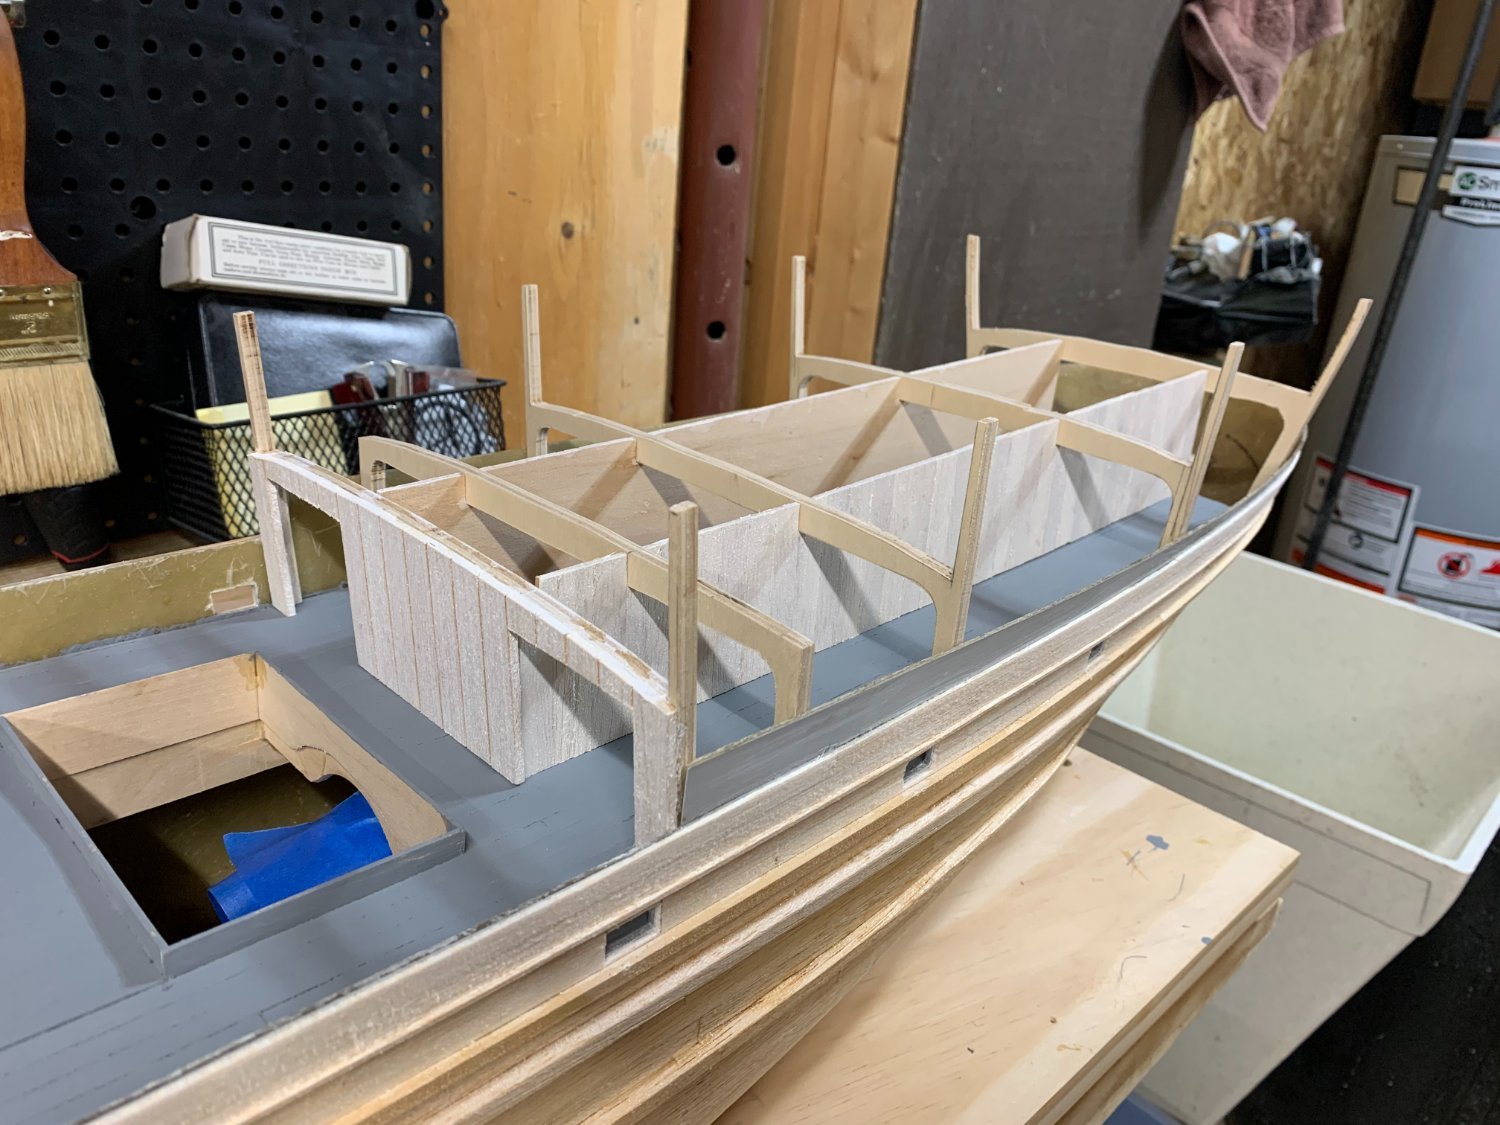
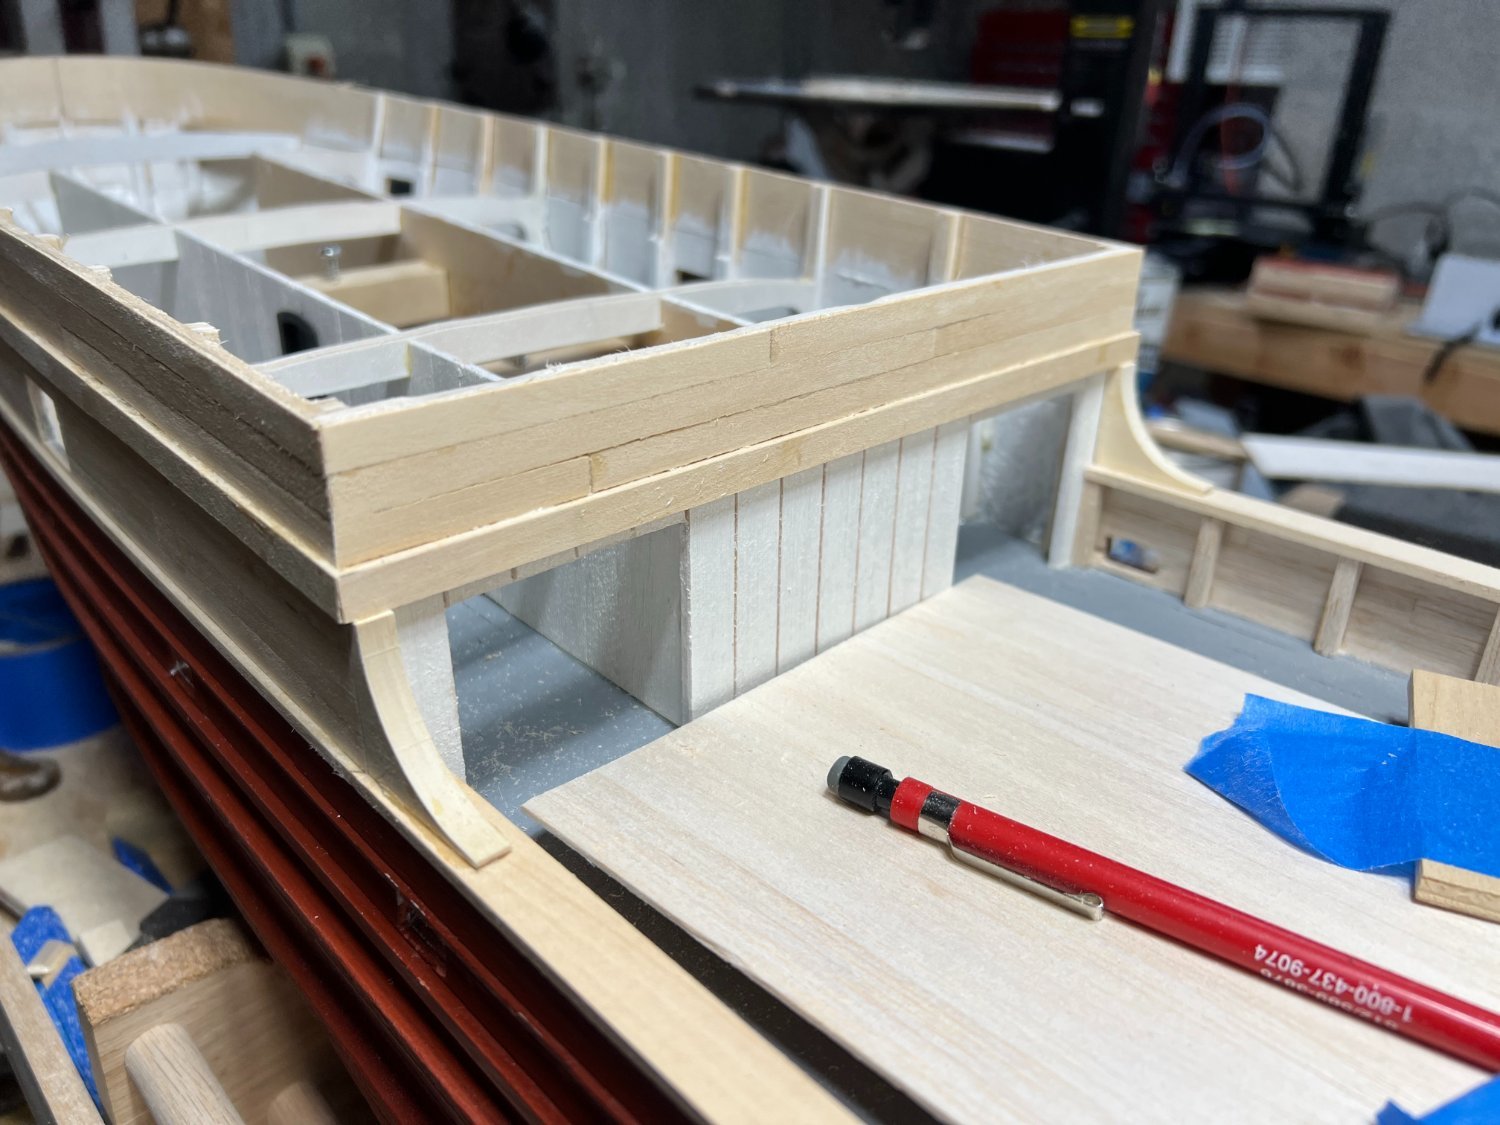
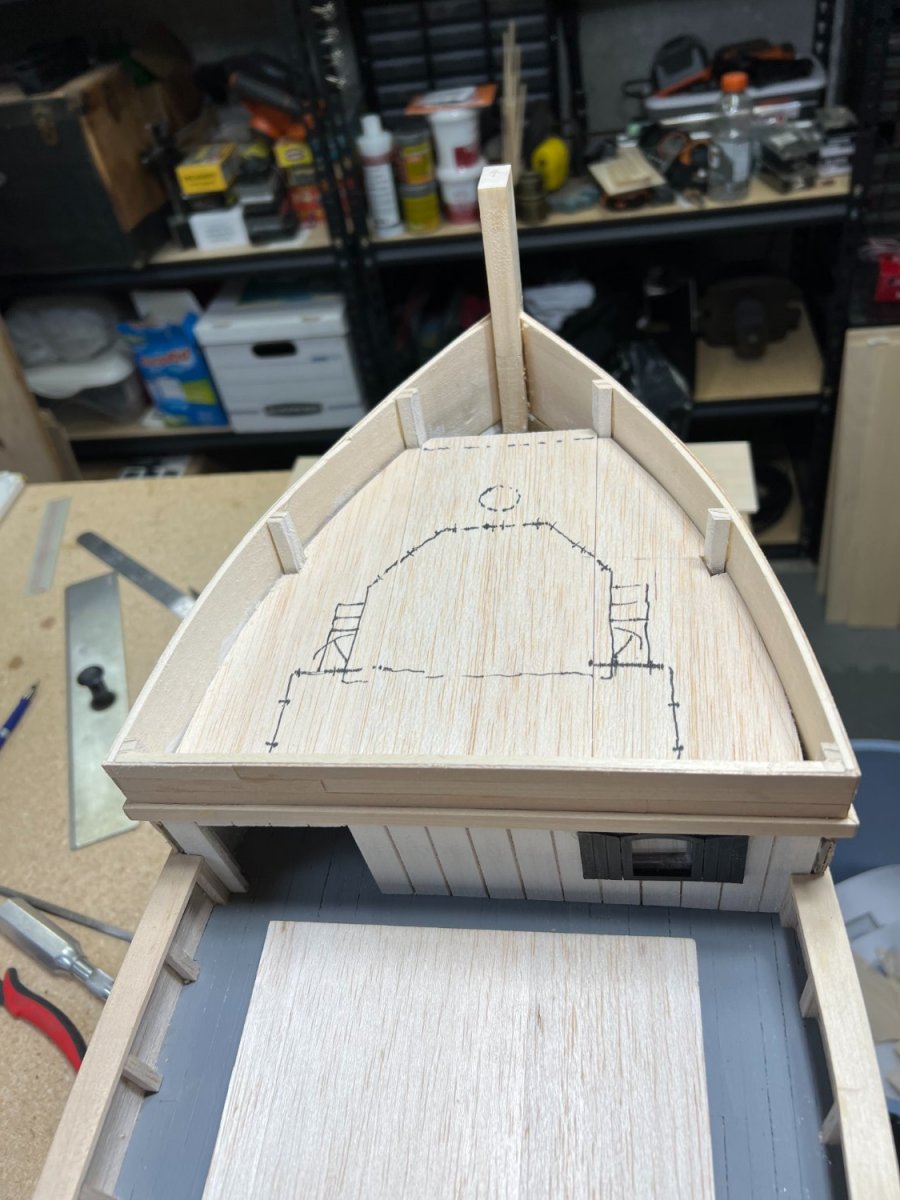
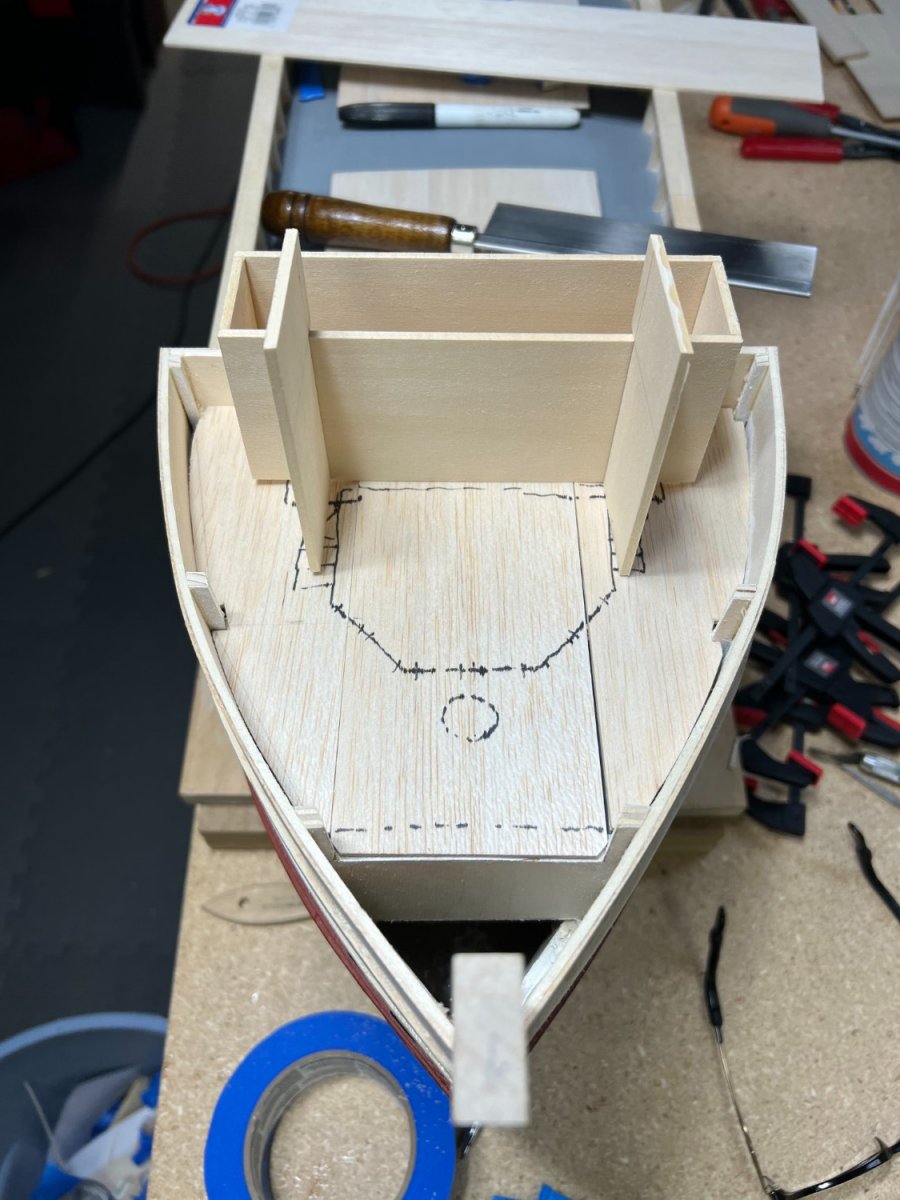
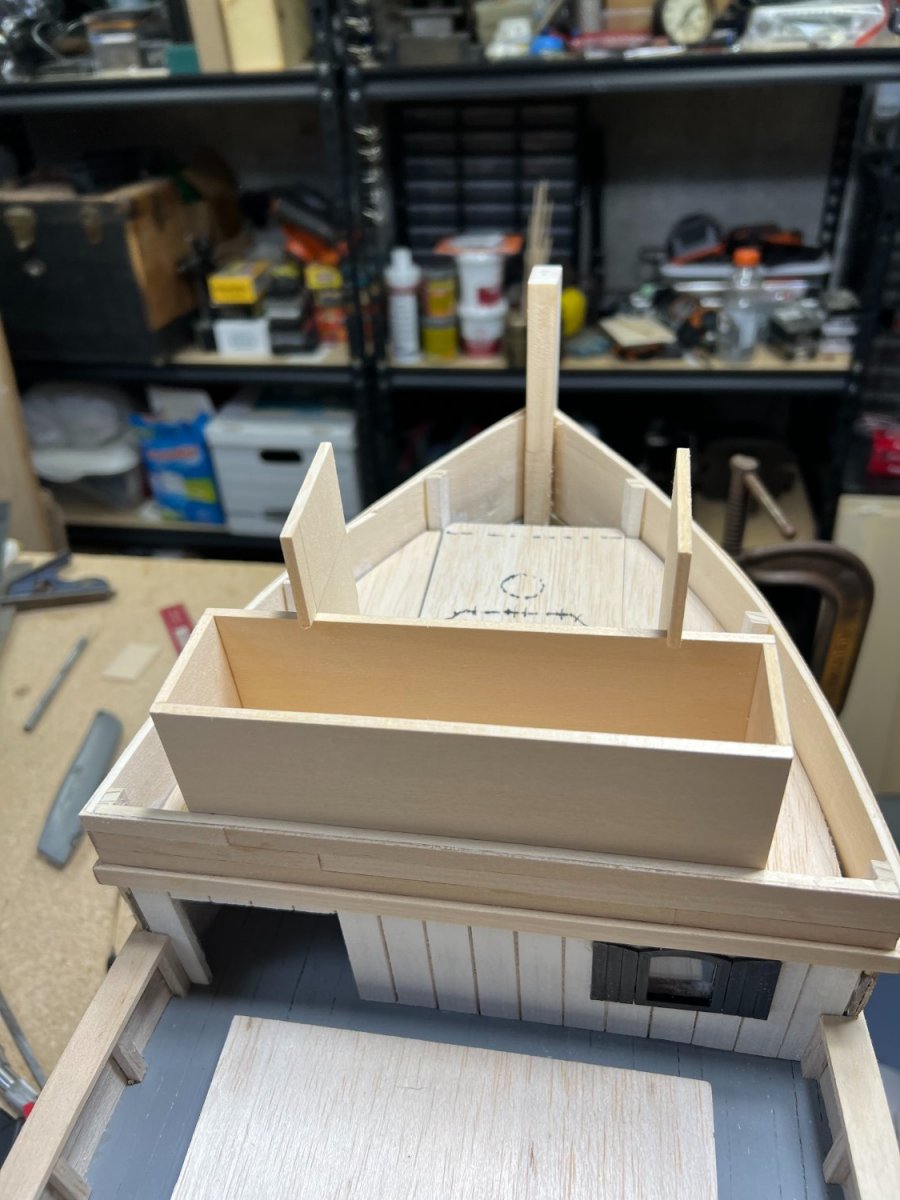
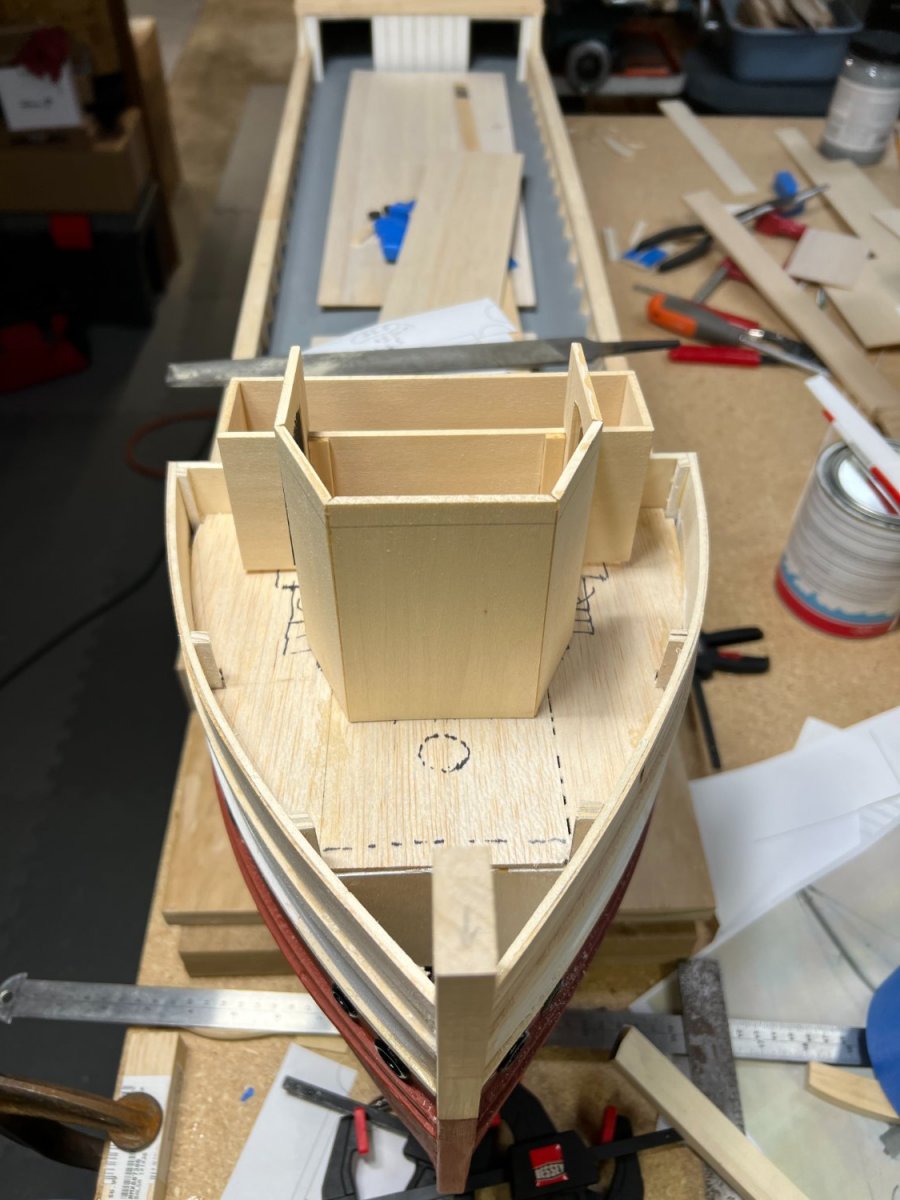
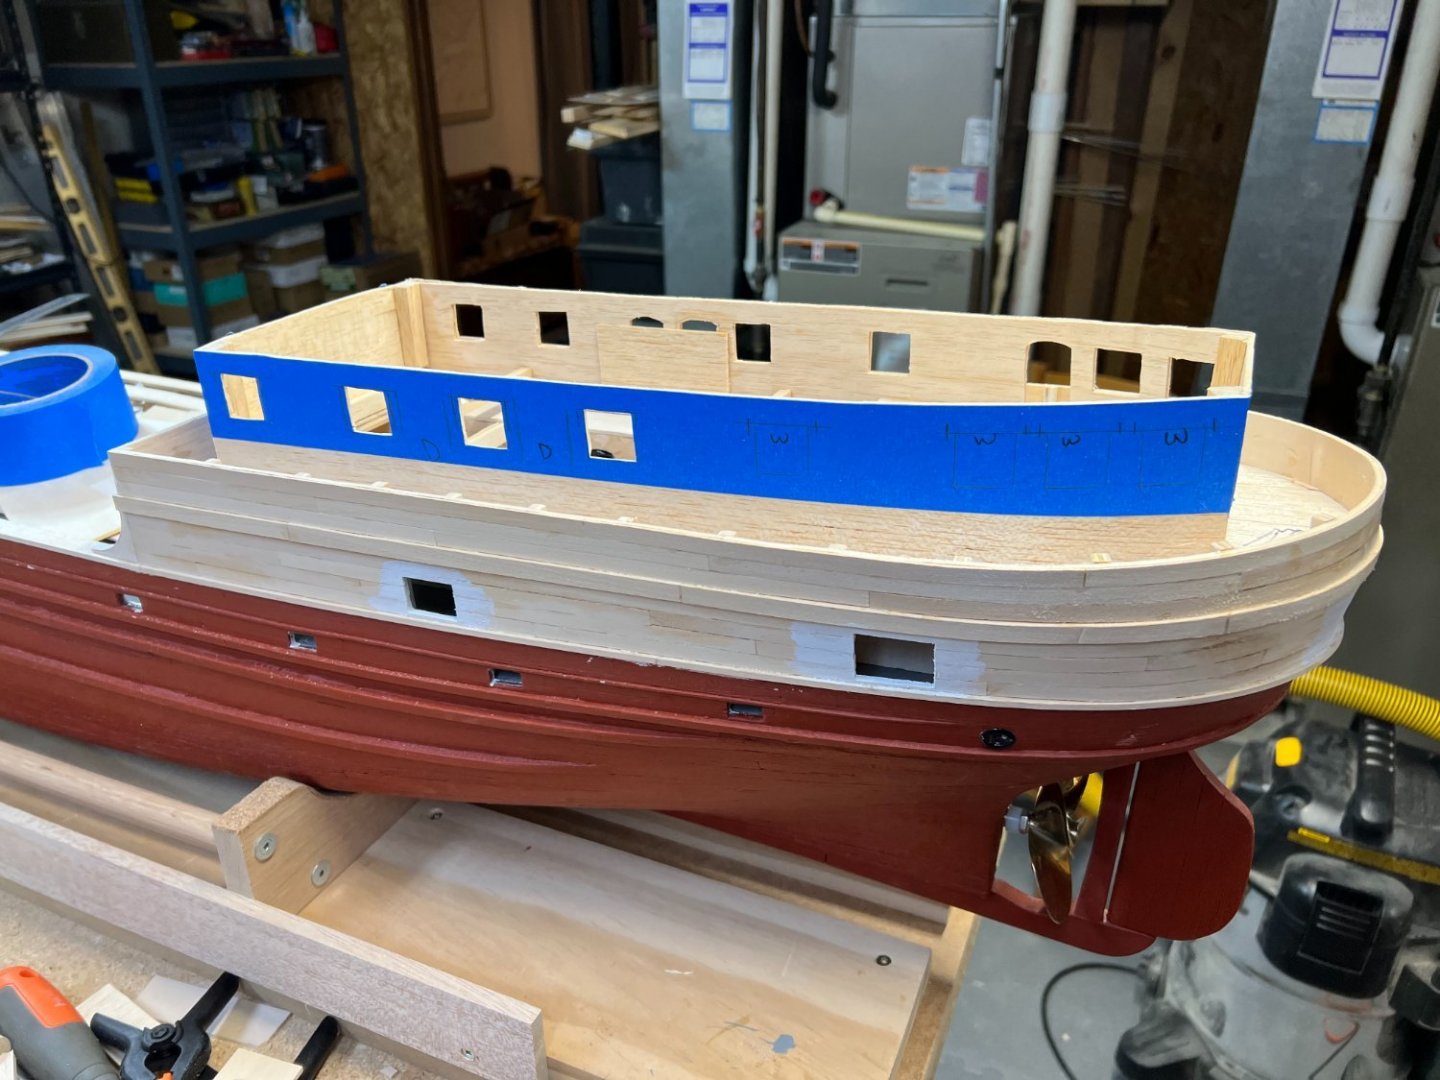
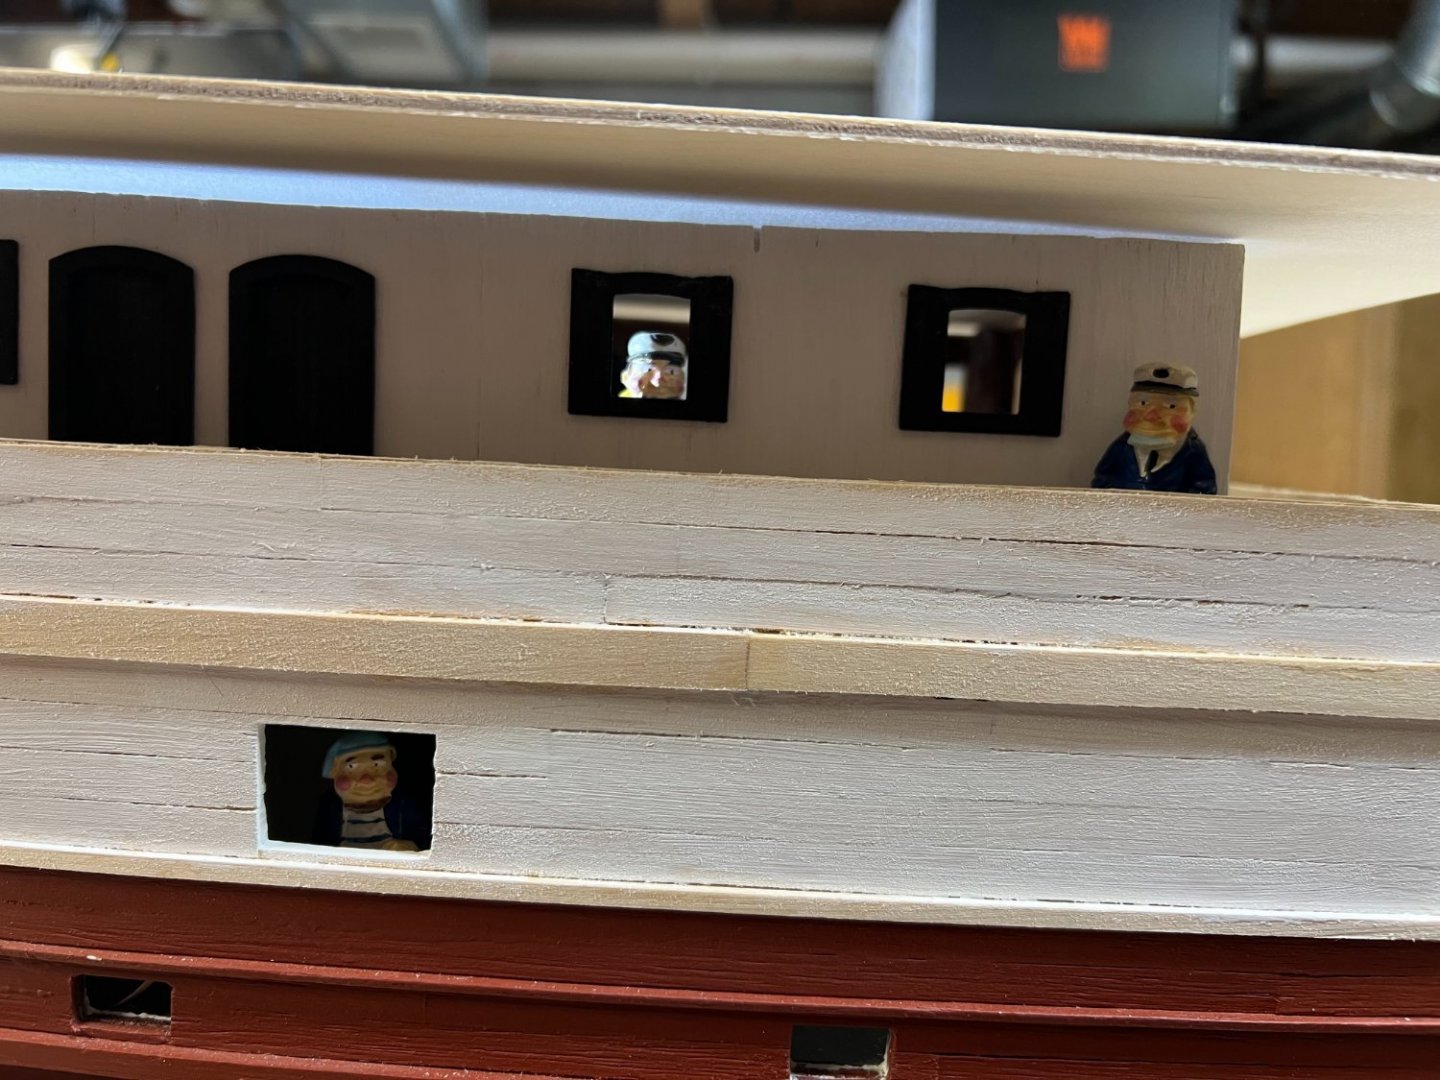
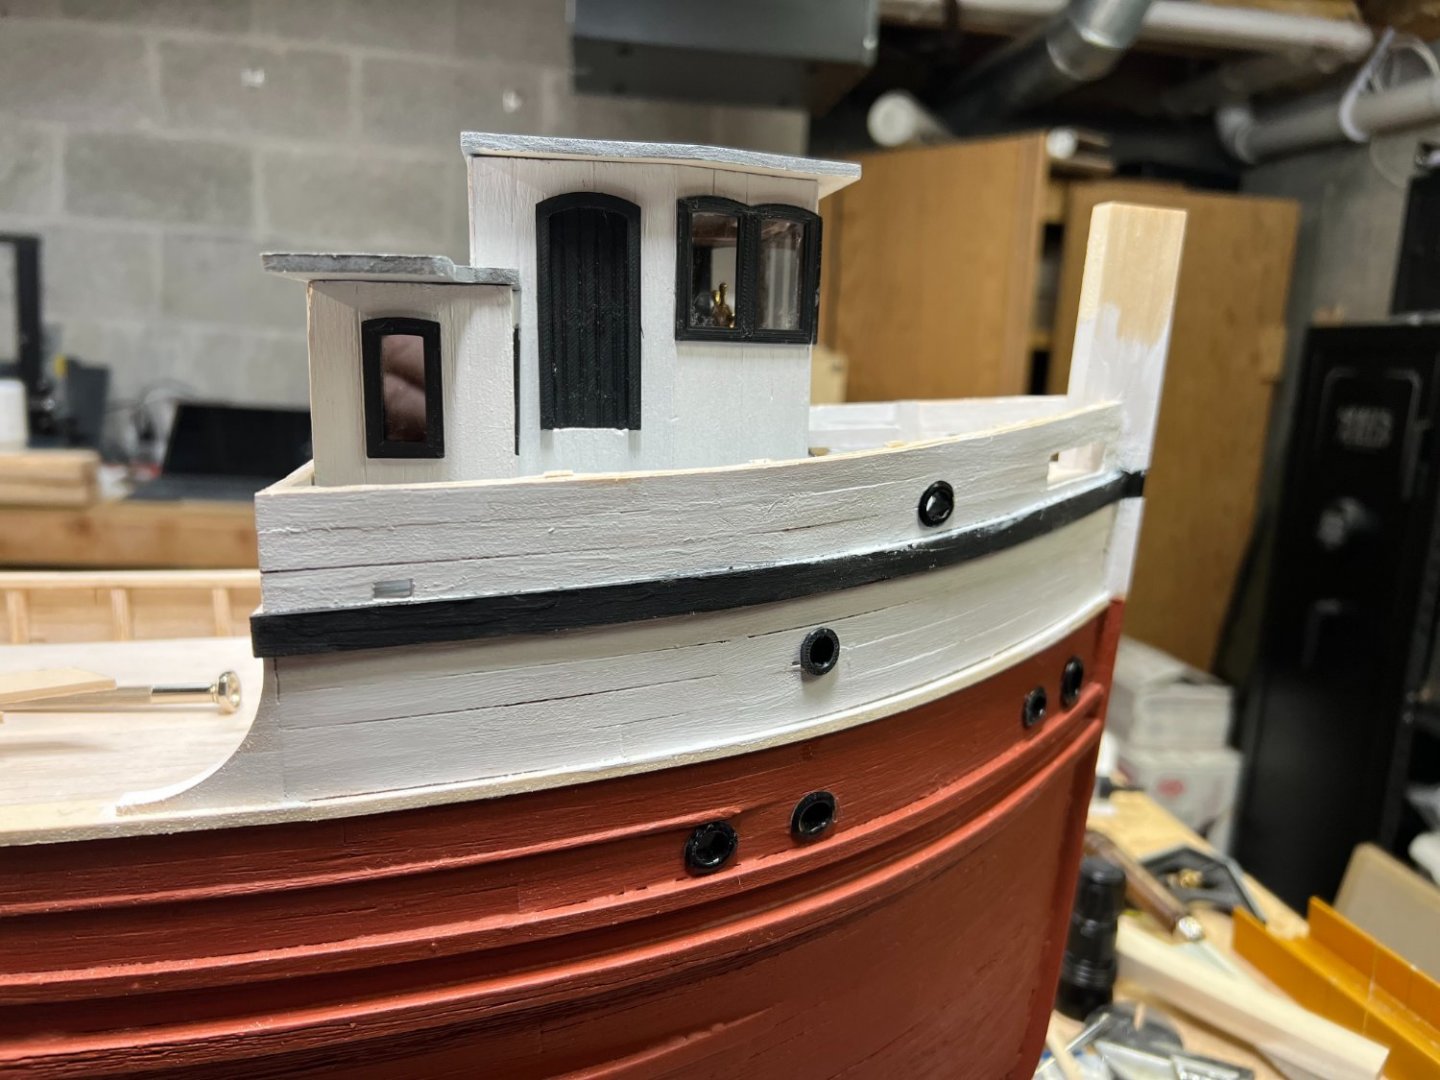
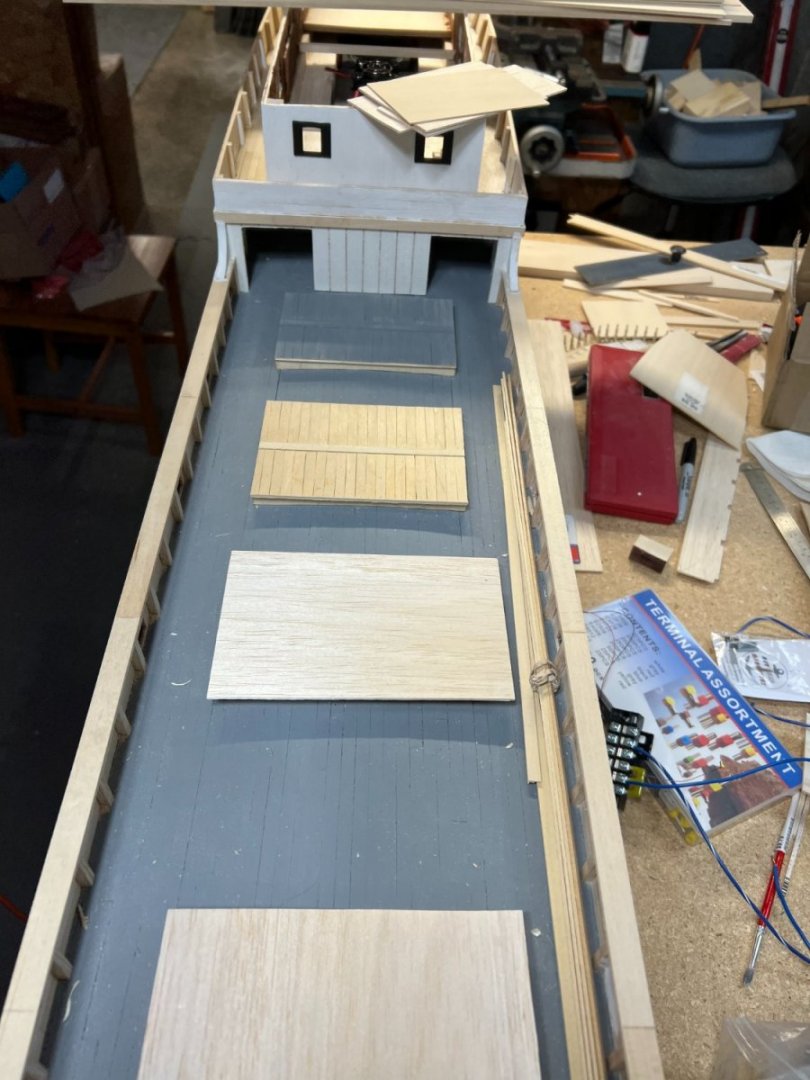
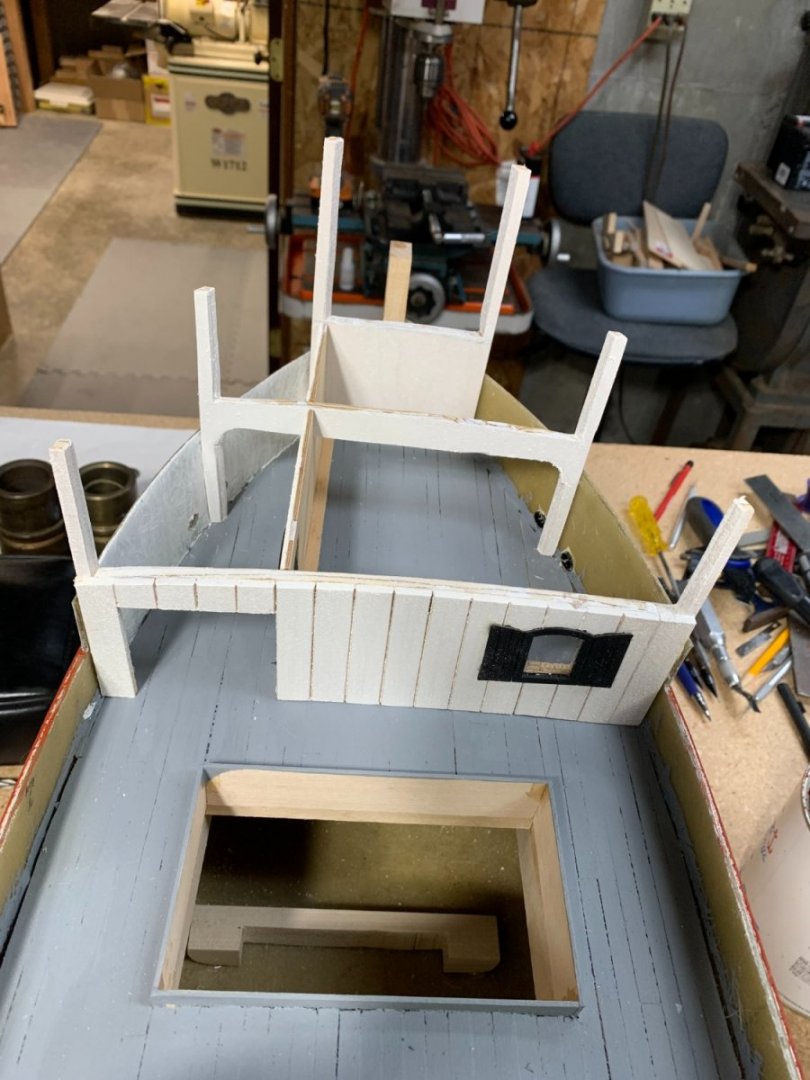
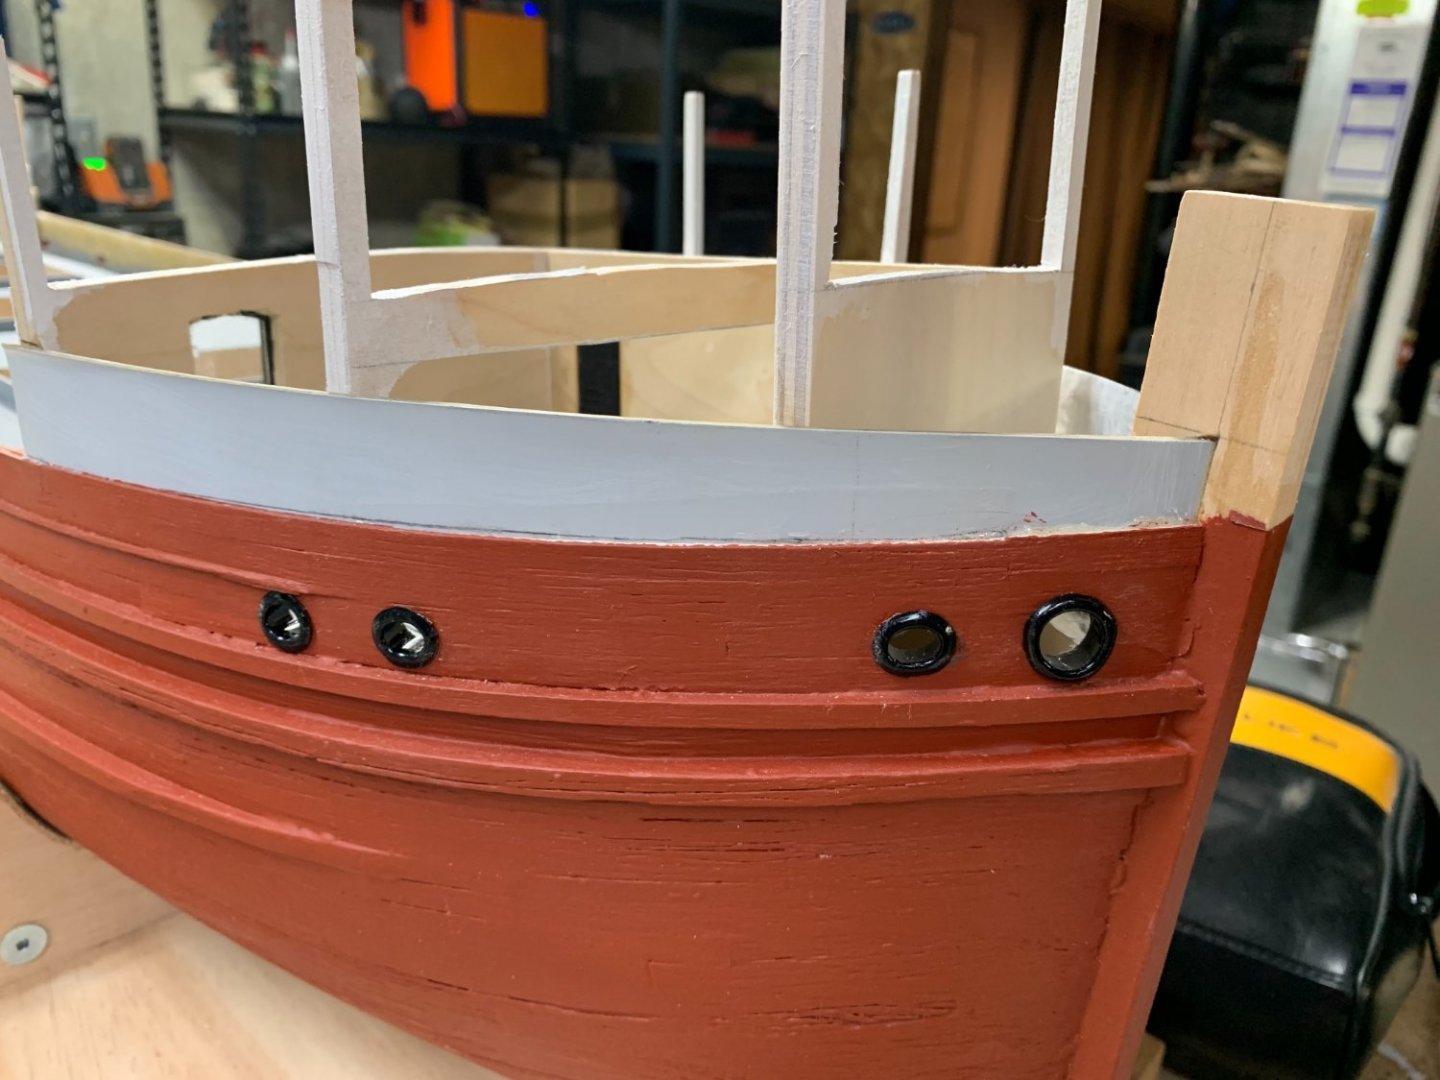
Superstructure construction begins! Again with the multitude of photos and the variations within them it was hard to pinpoint exactly how to design the pilot house and aft cabin house. I decided to take some artistic license and combine various features that worked well with the model and construction. Lots of thought went into what steps had to be taken, such as sanding, painting, details etc. before continuing on with the next level. I used my 3D printer to make doors and windows for the cabins (more pictures later will show some detail). Not having a fittings kit available I had to scrounge around to figure out ways to do some detailing such as the hawse pipes - I found some brass plumbing inserts at the hardware store and had to flatten them in my vise, reshape them, and cut them down. More pictures coming soon!


- 15 replies
-
- 7
-
-
- Hines Lumber
- Great Lakes
- (and 4 more)
-
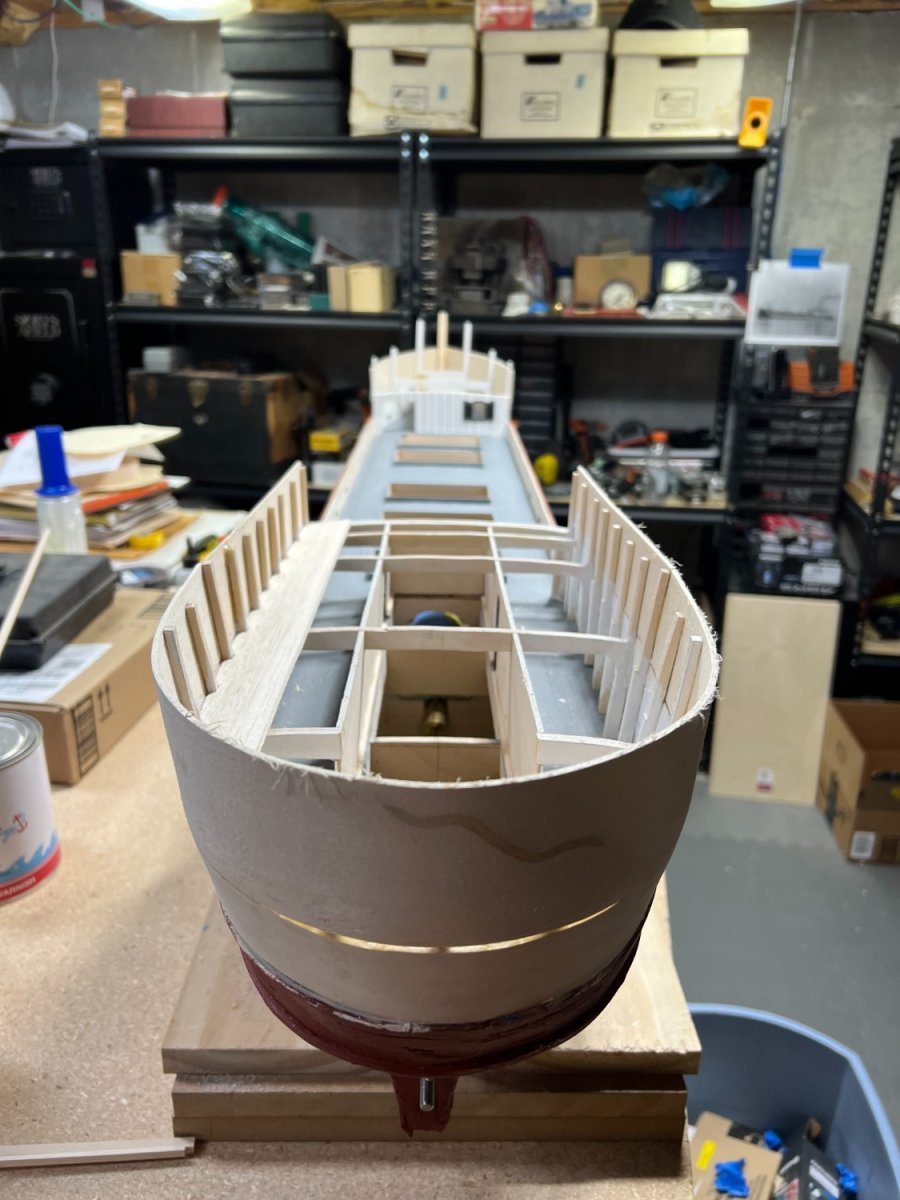
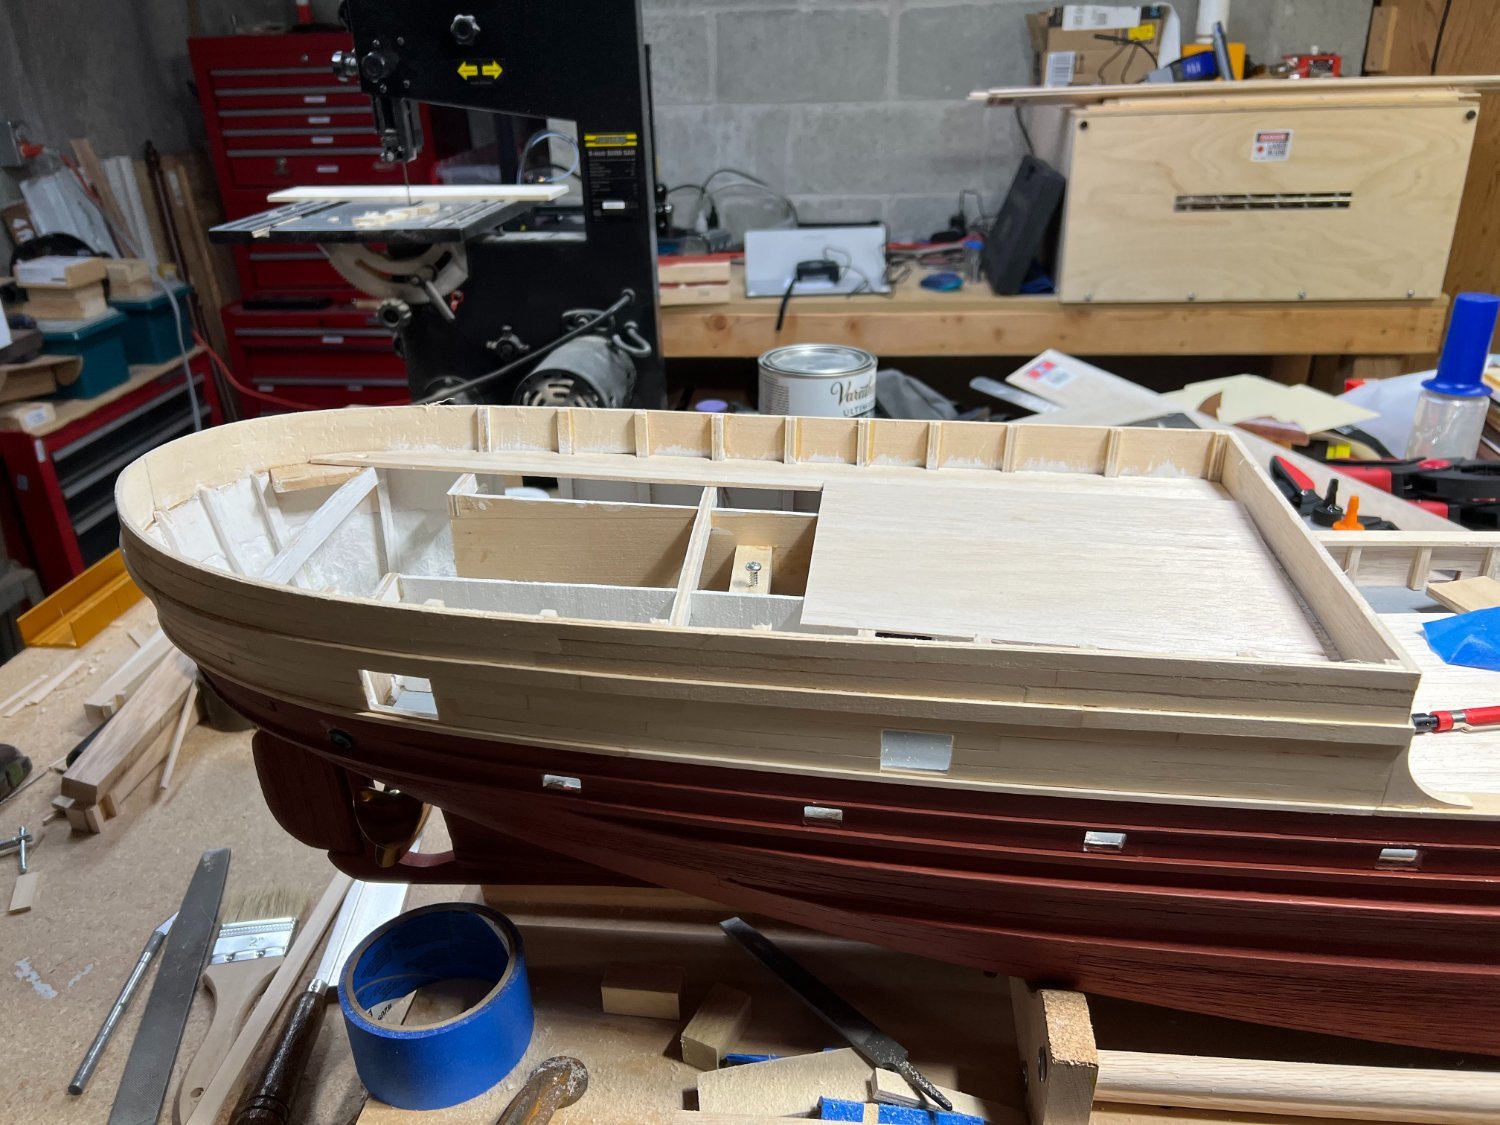
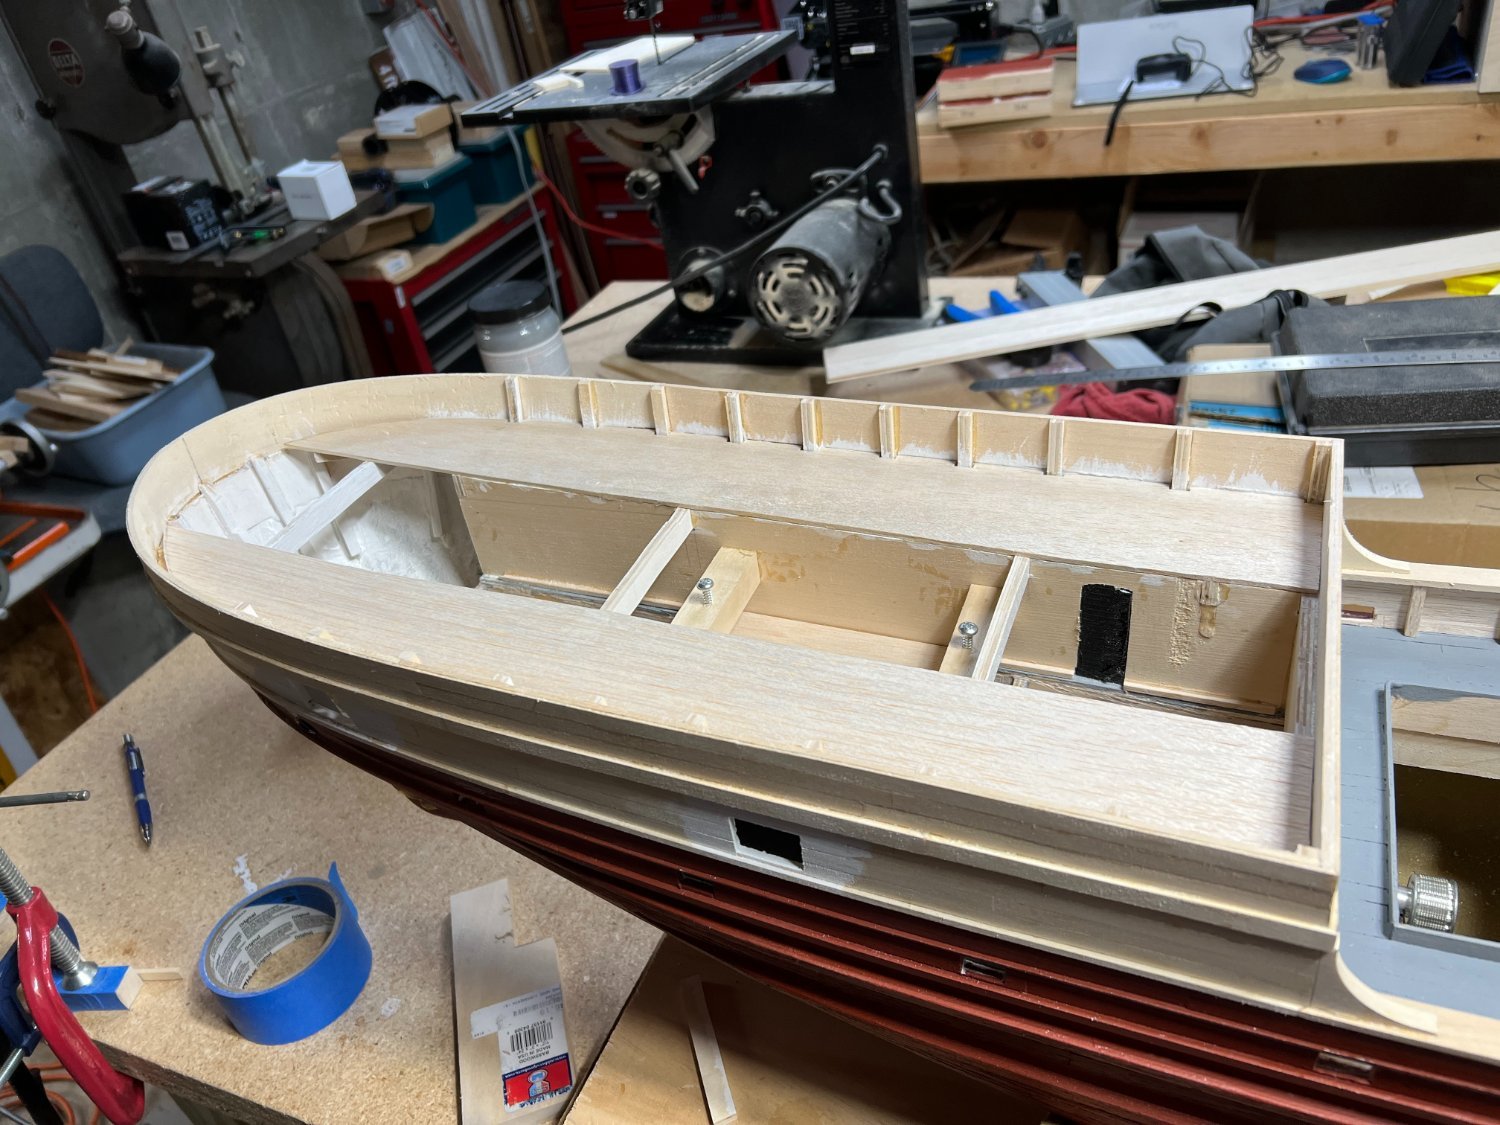
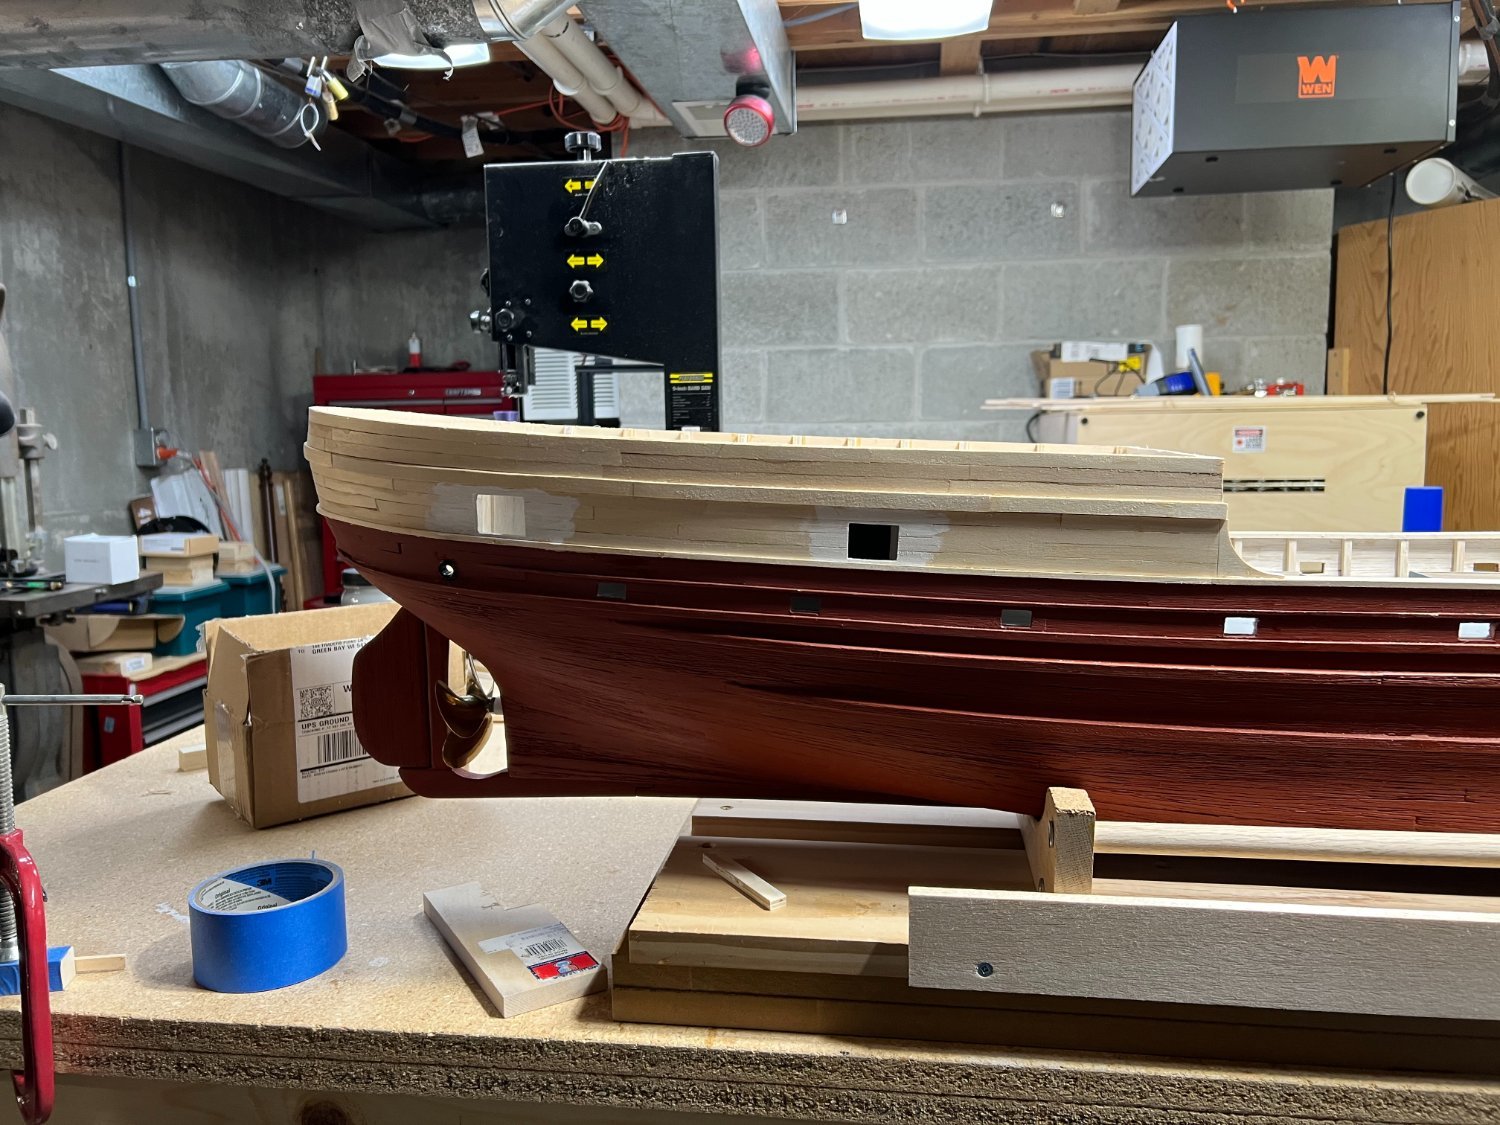
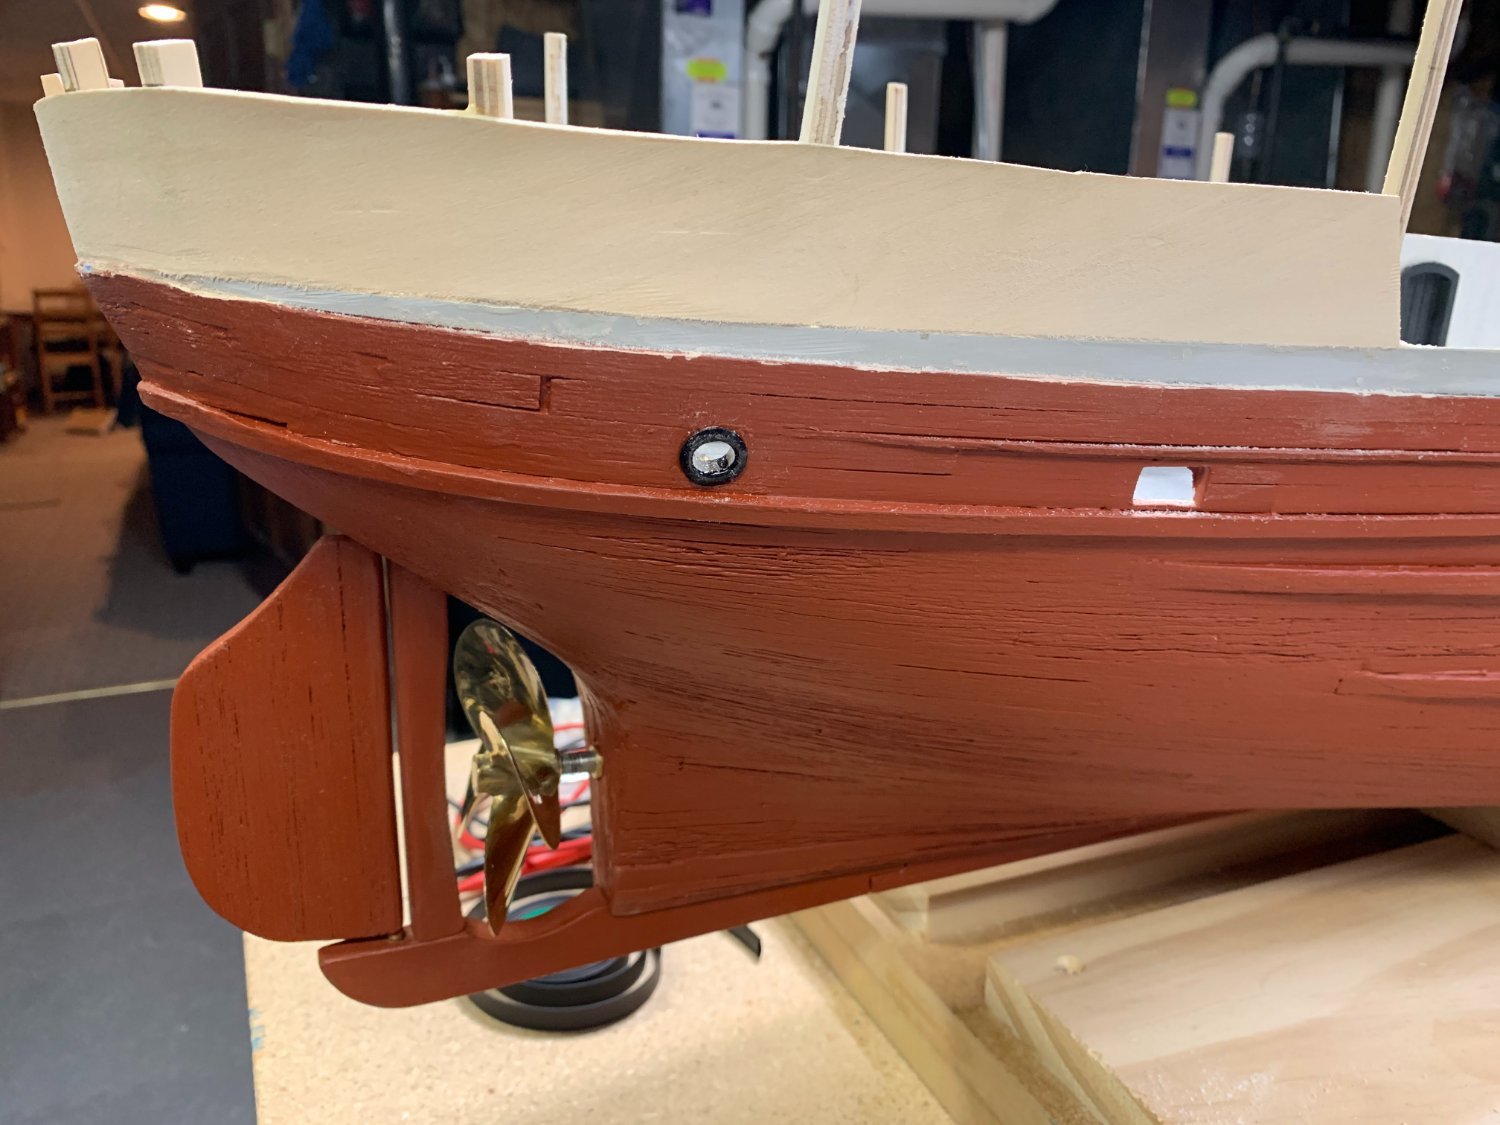
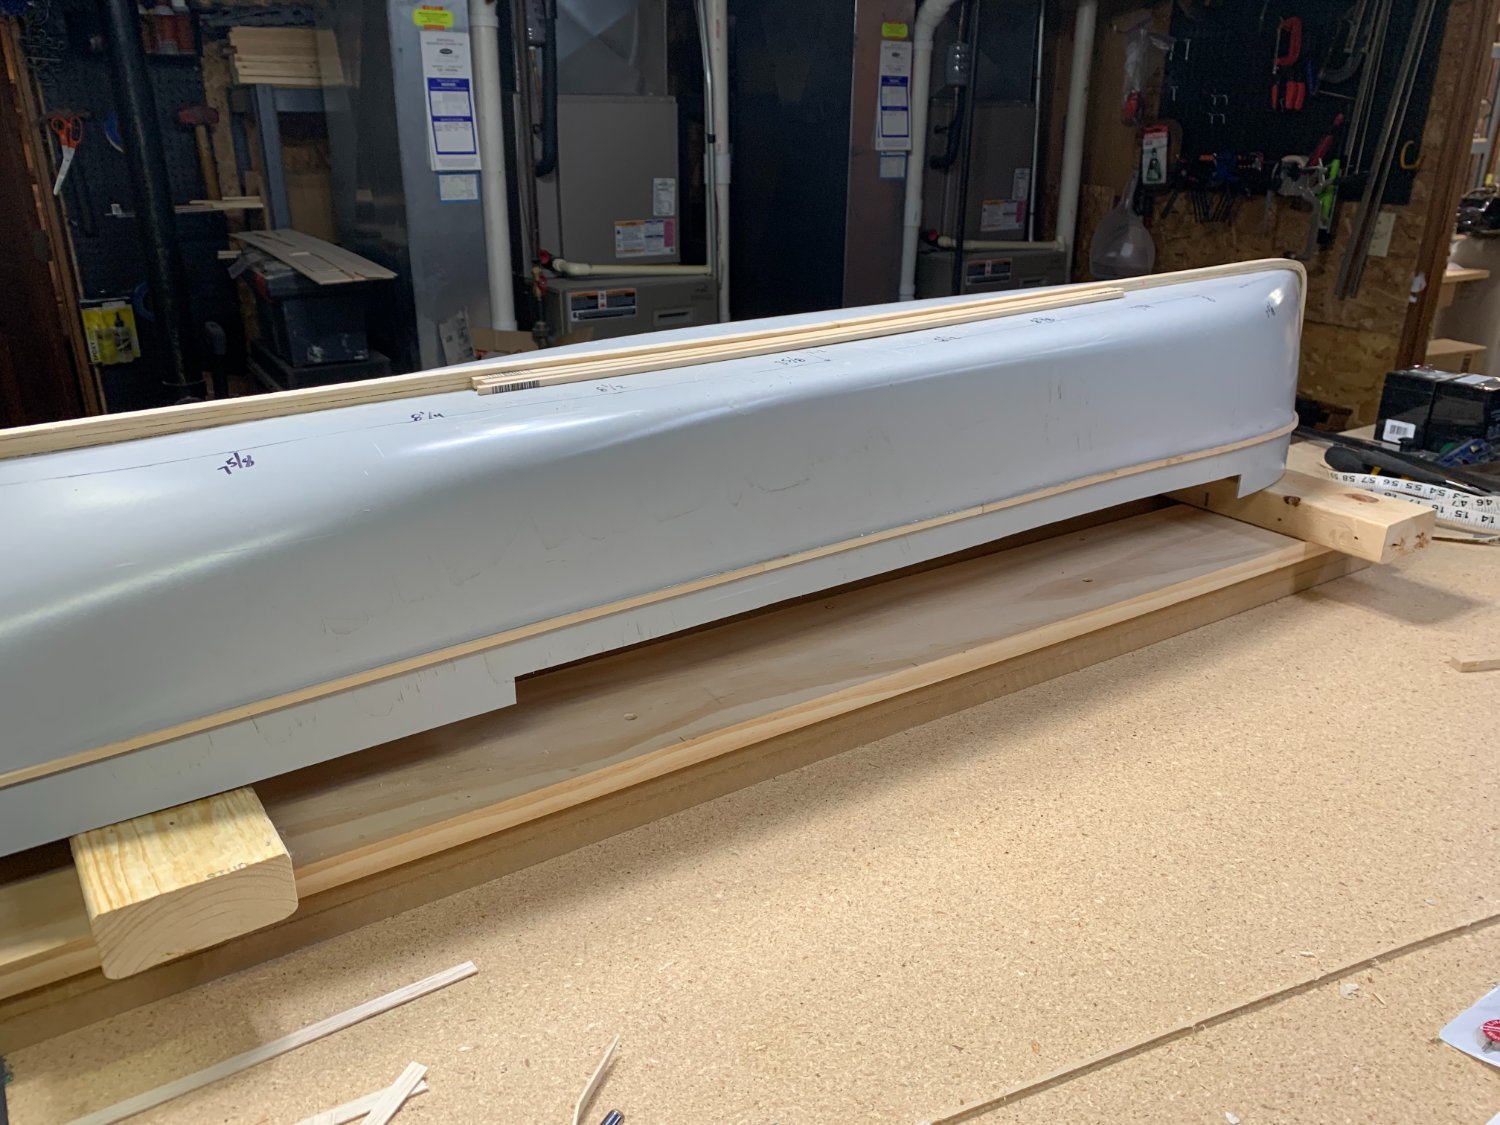
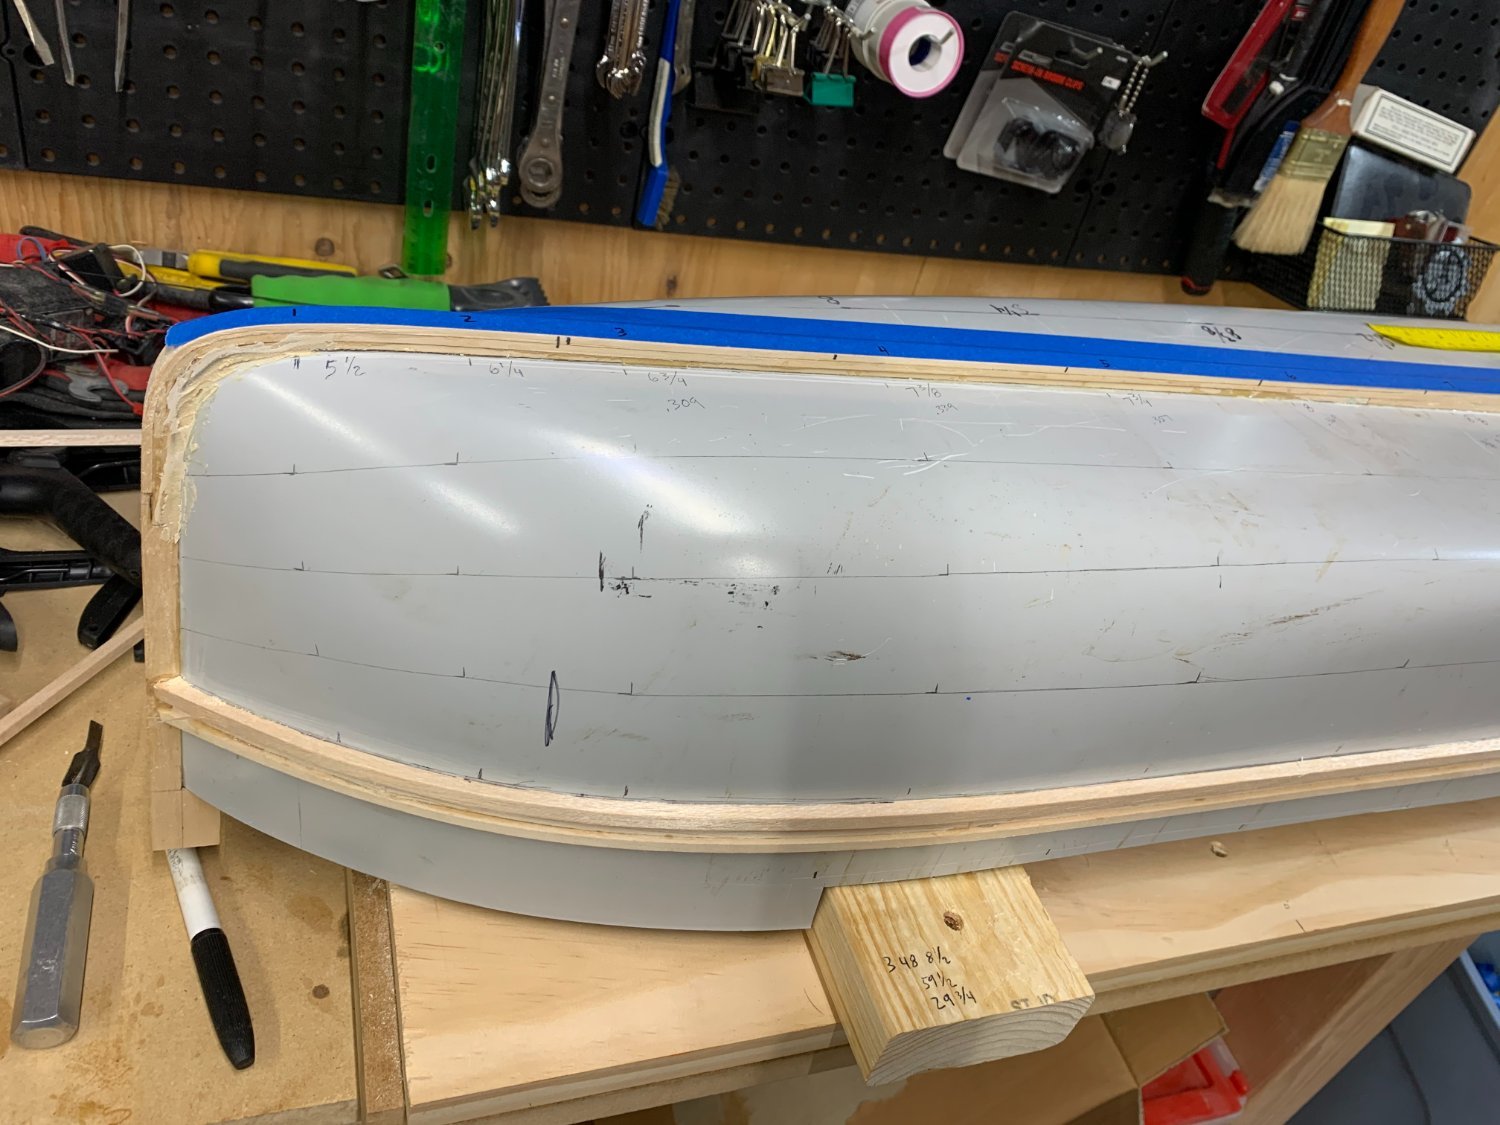
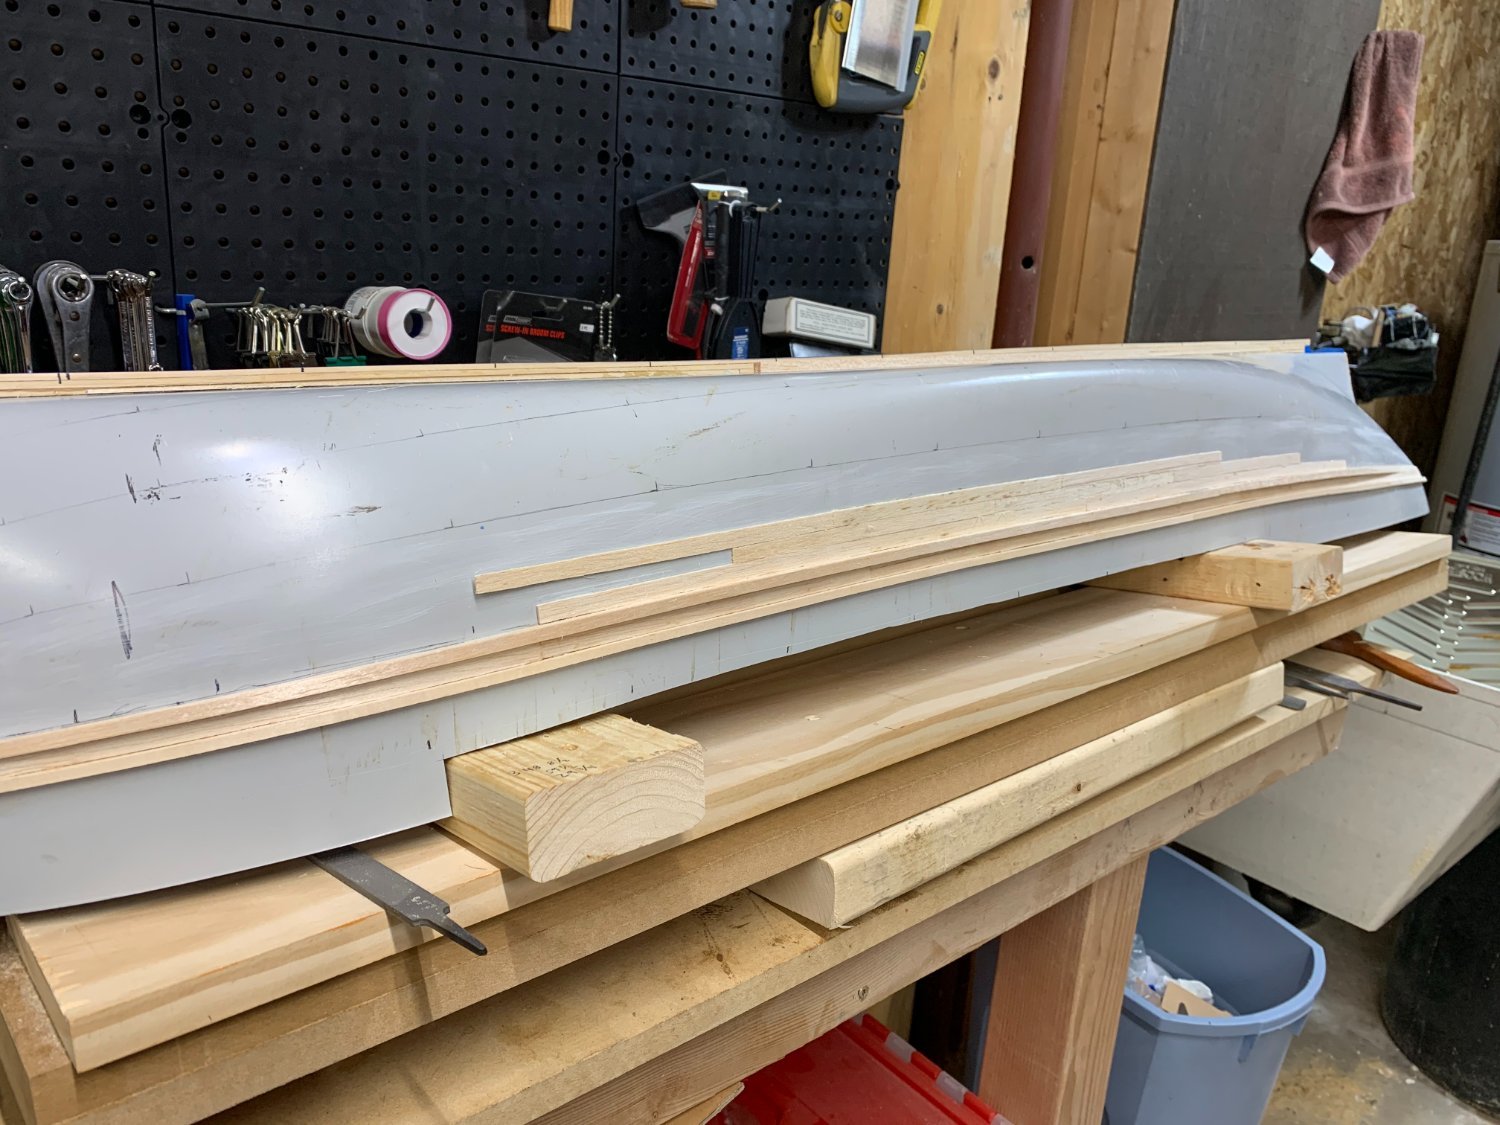
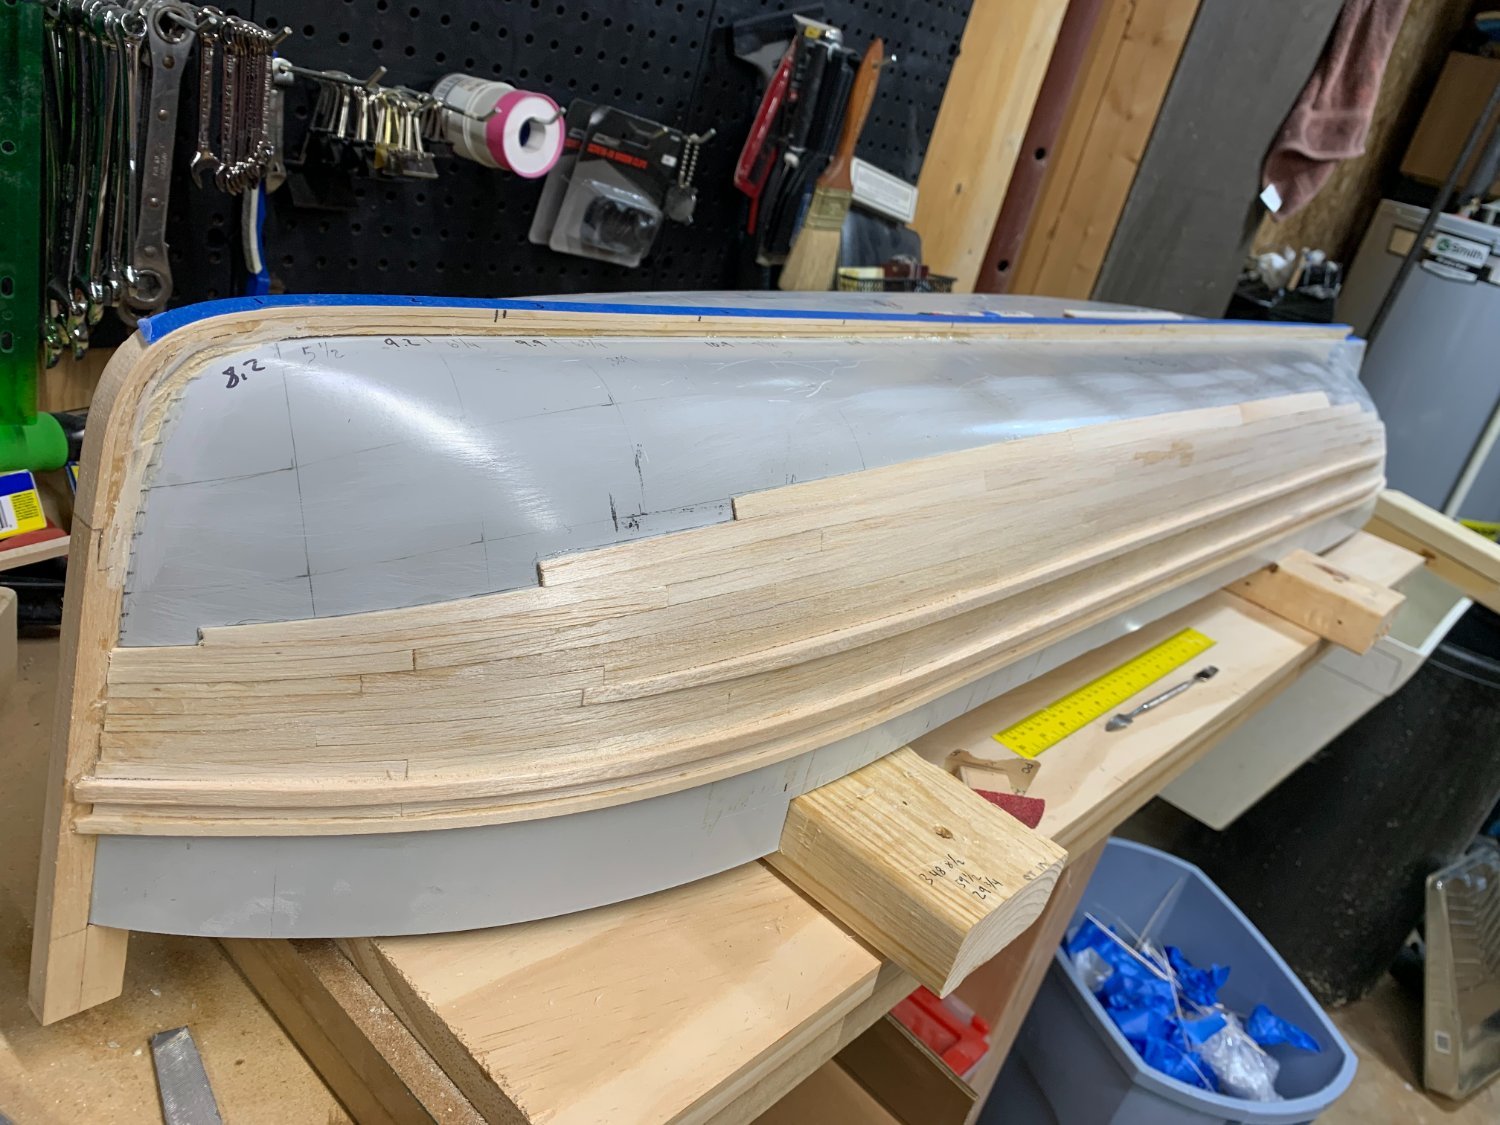
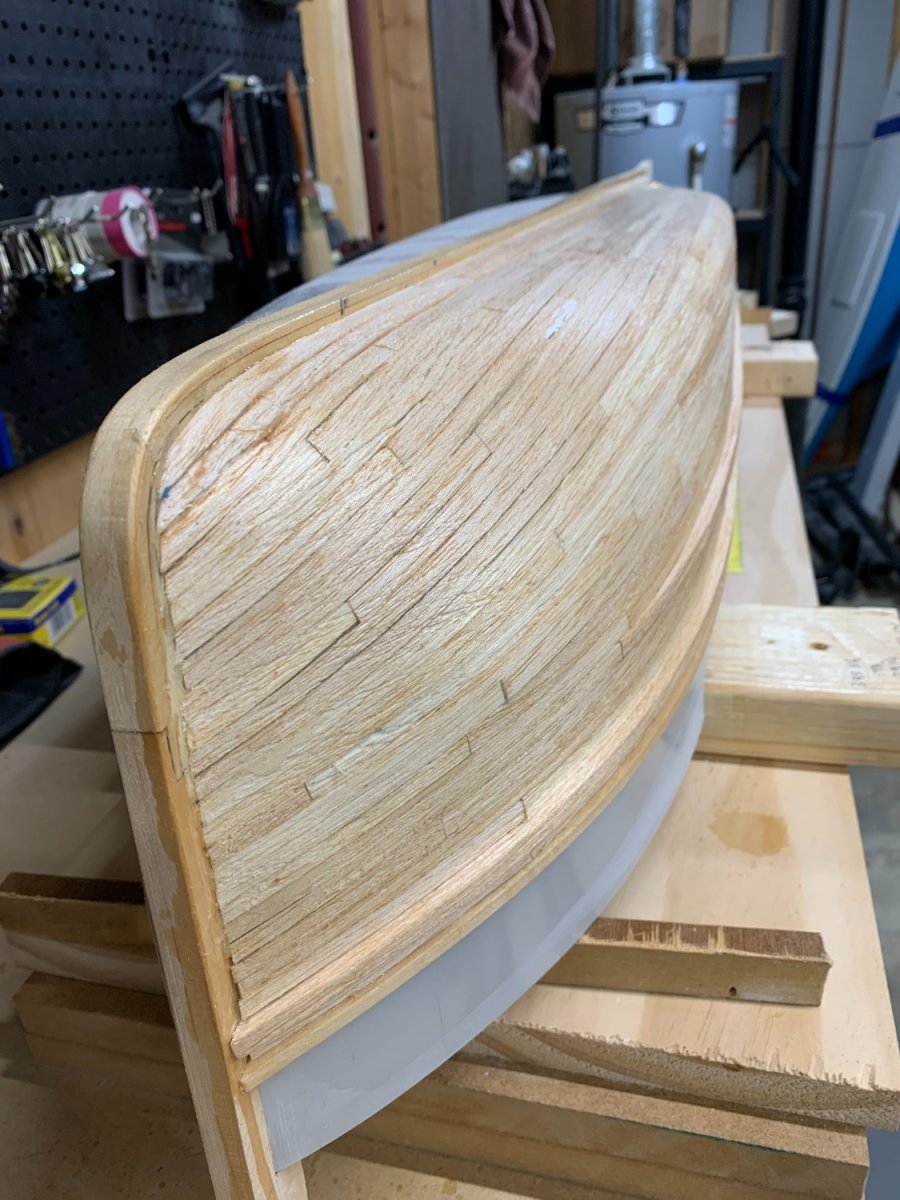
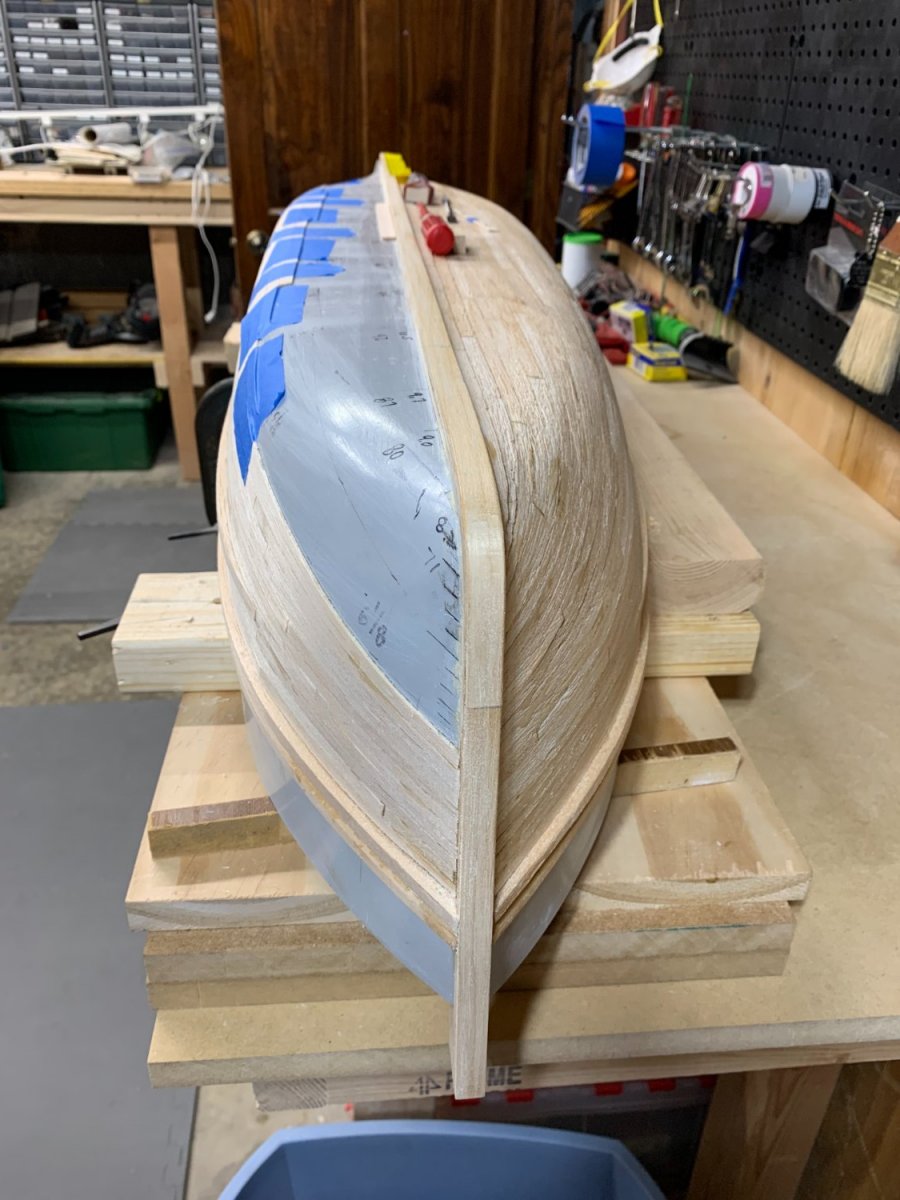
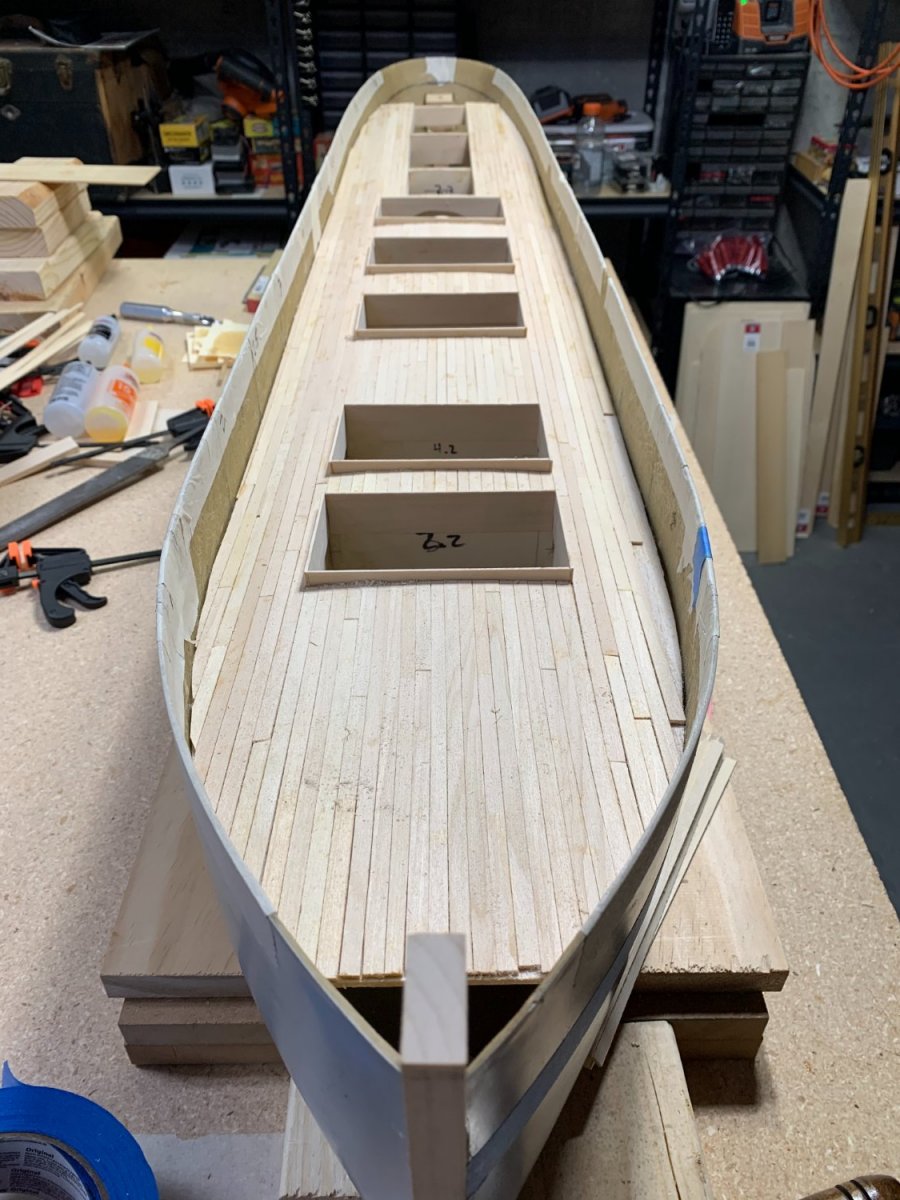
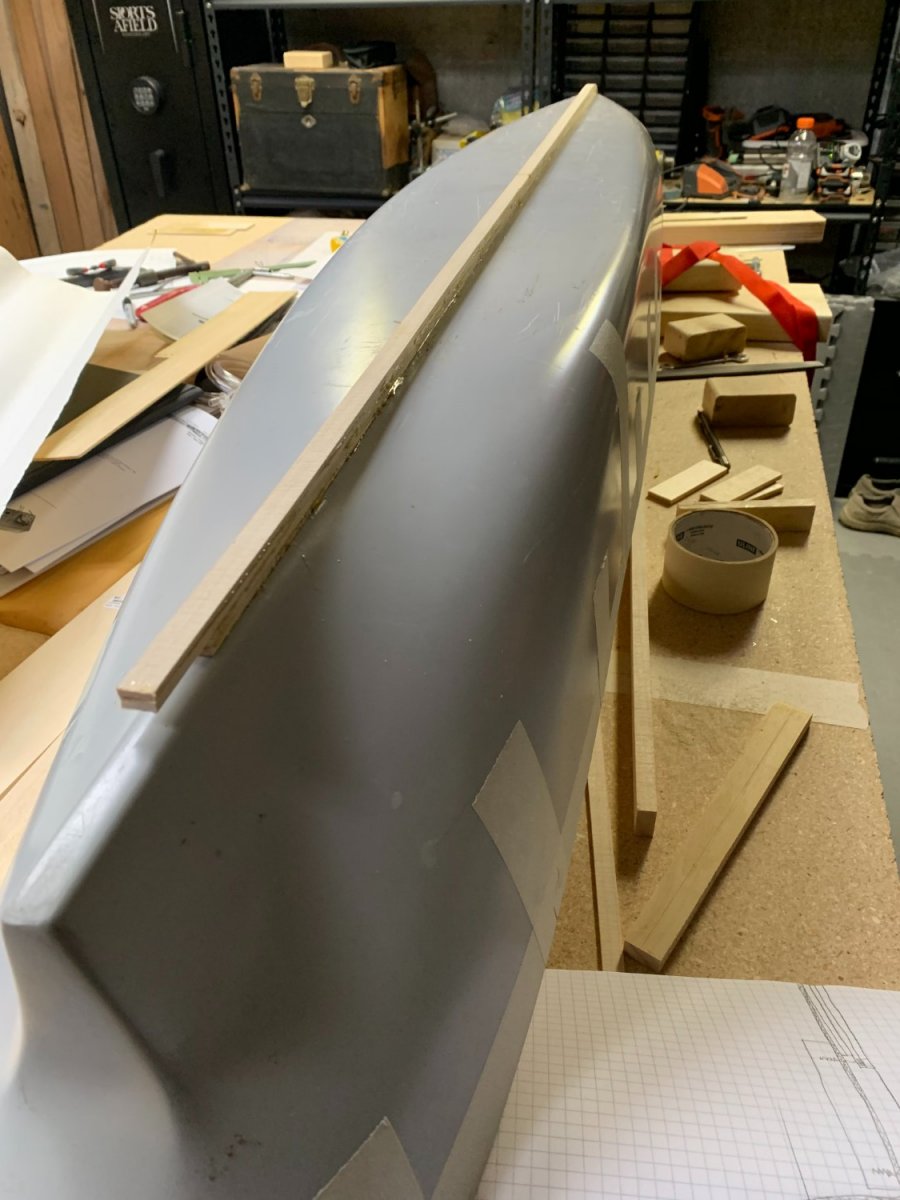
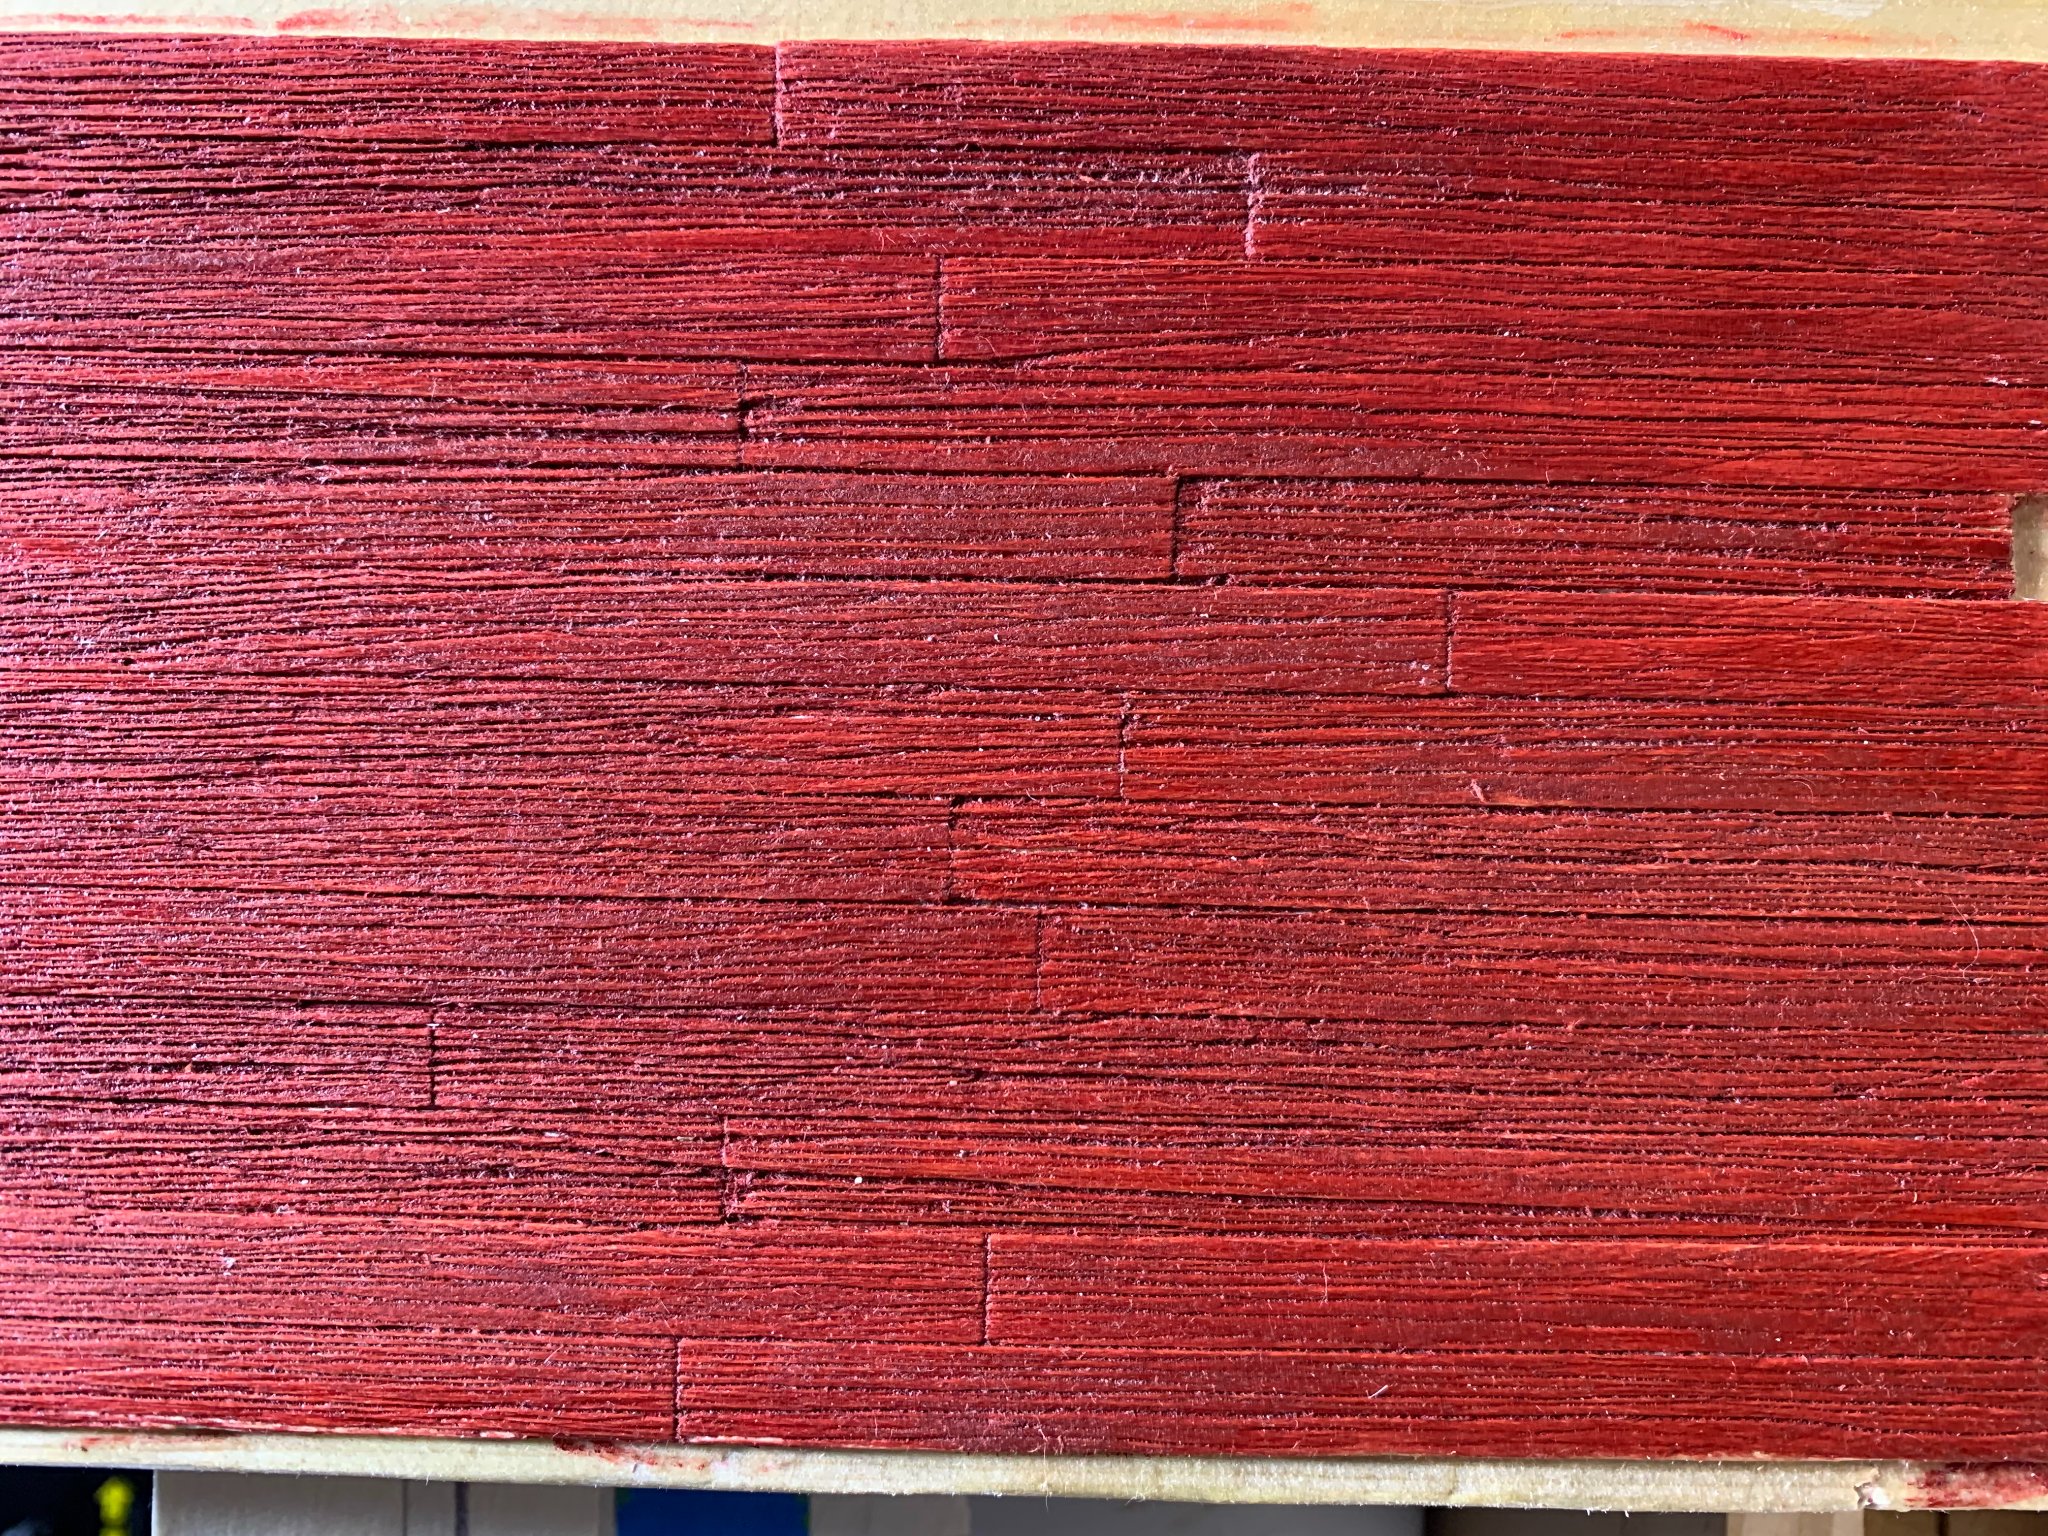
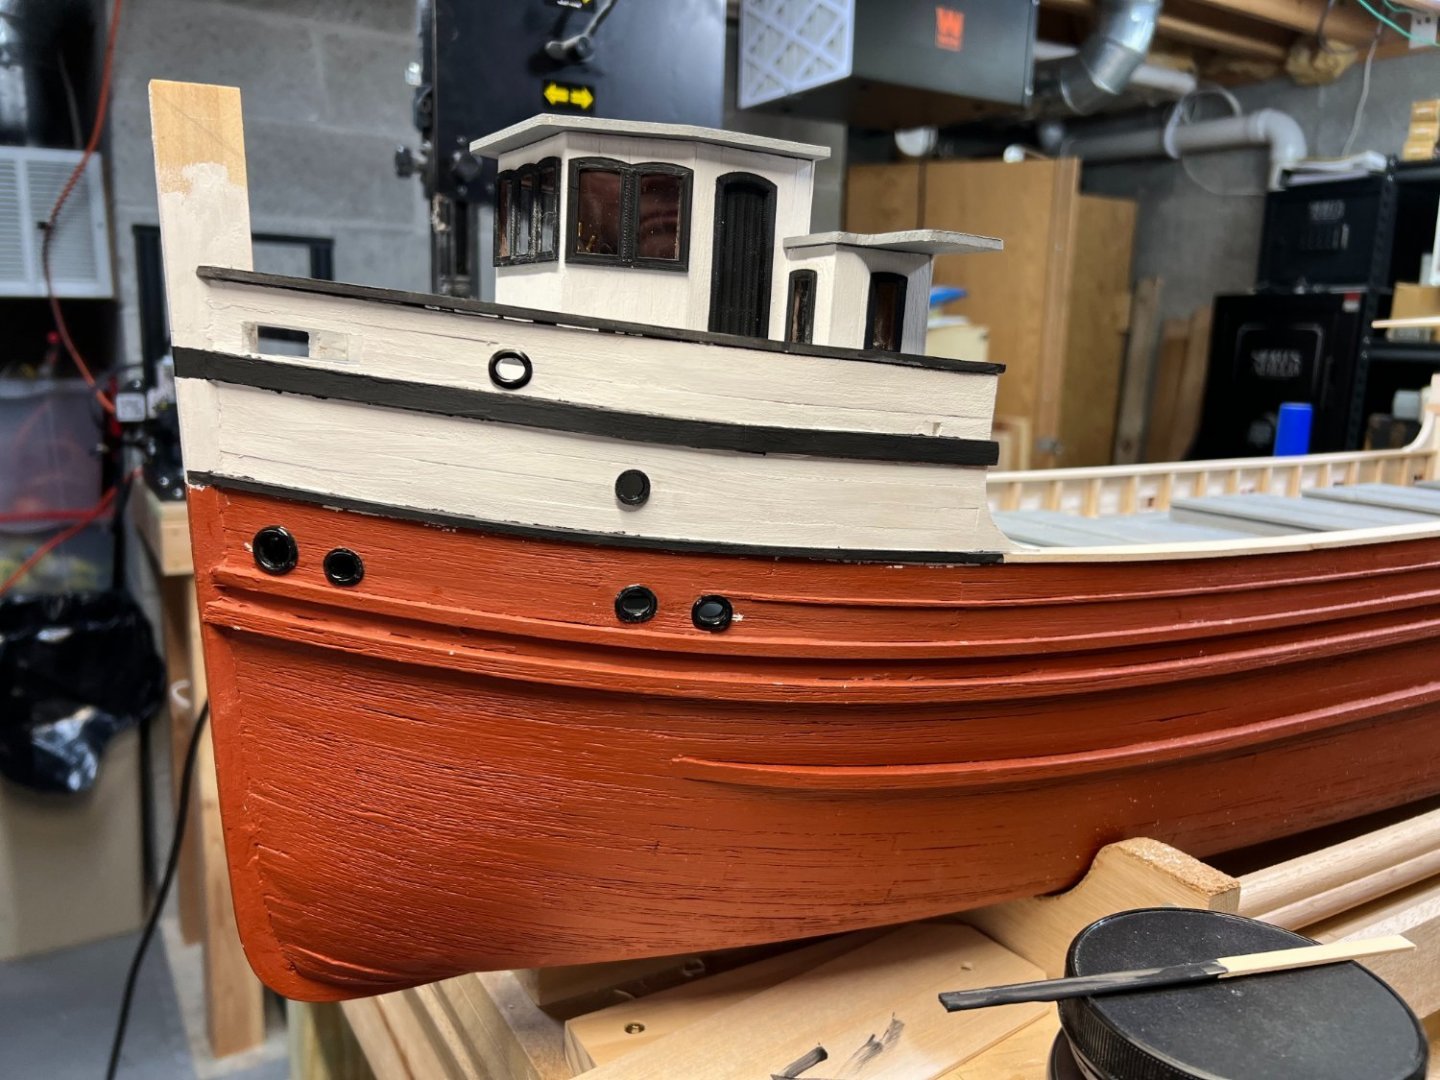
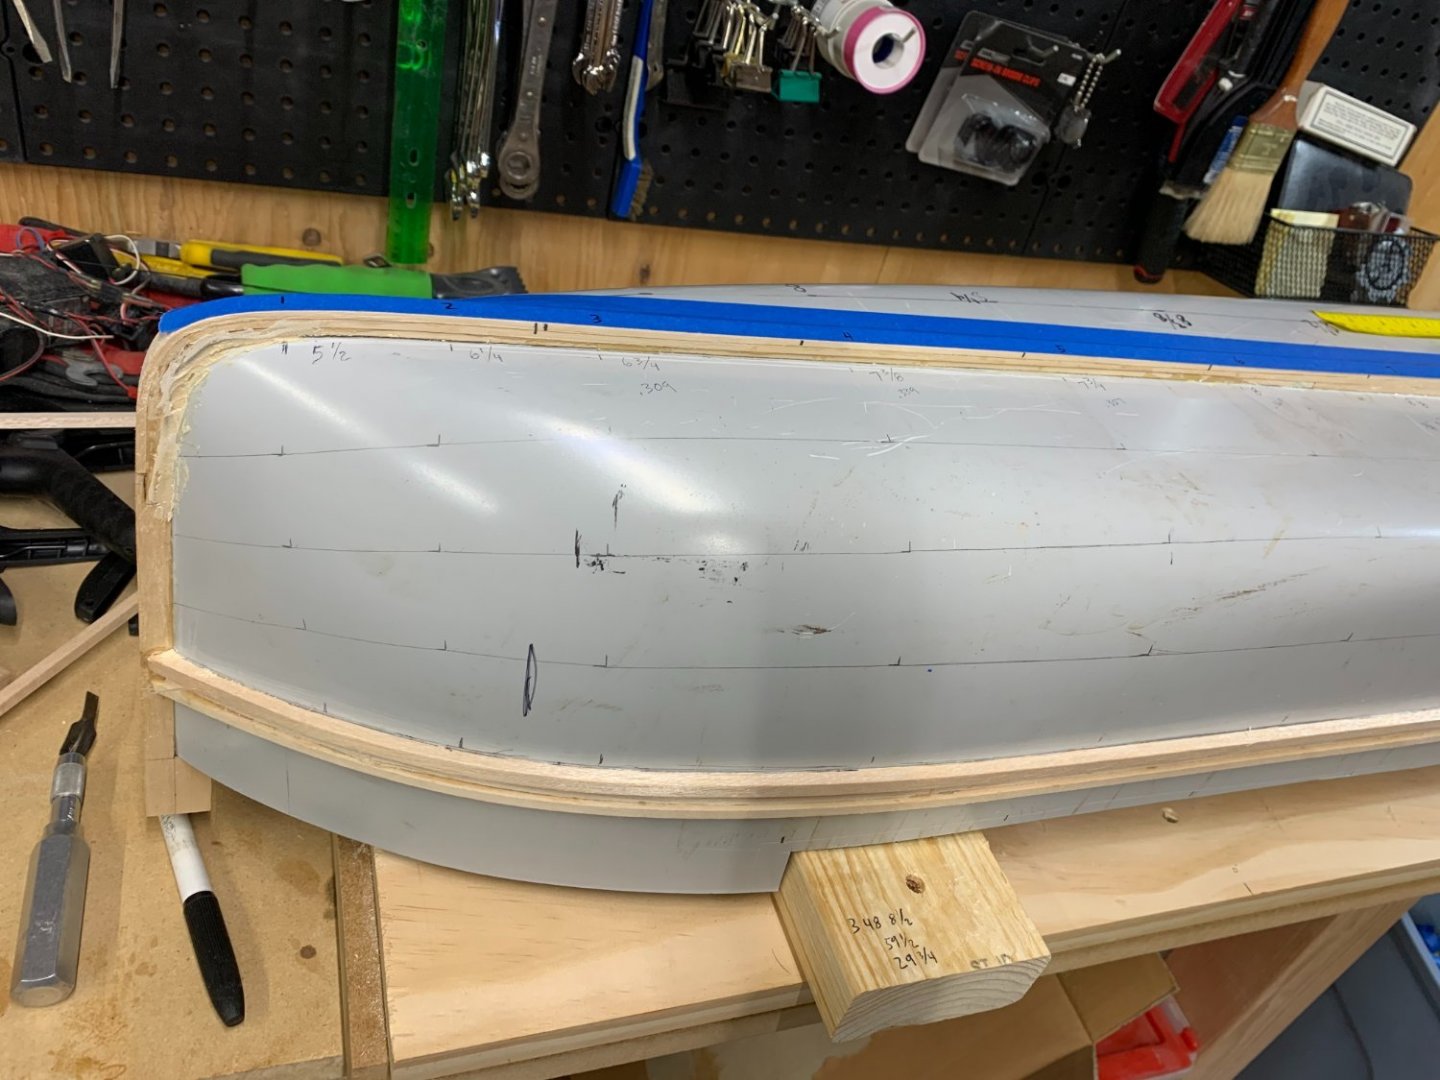
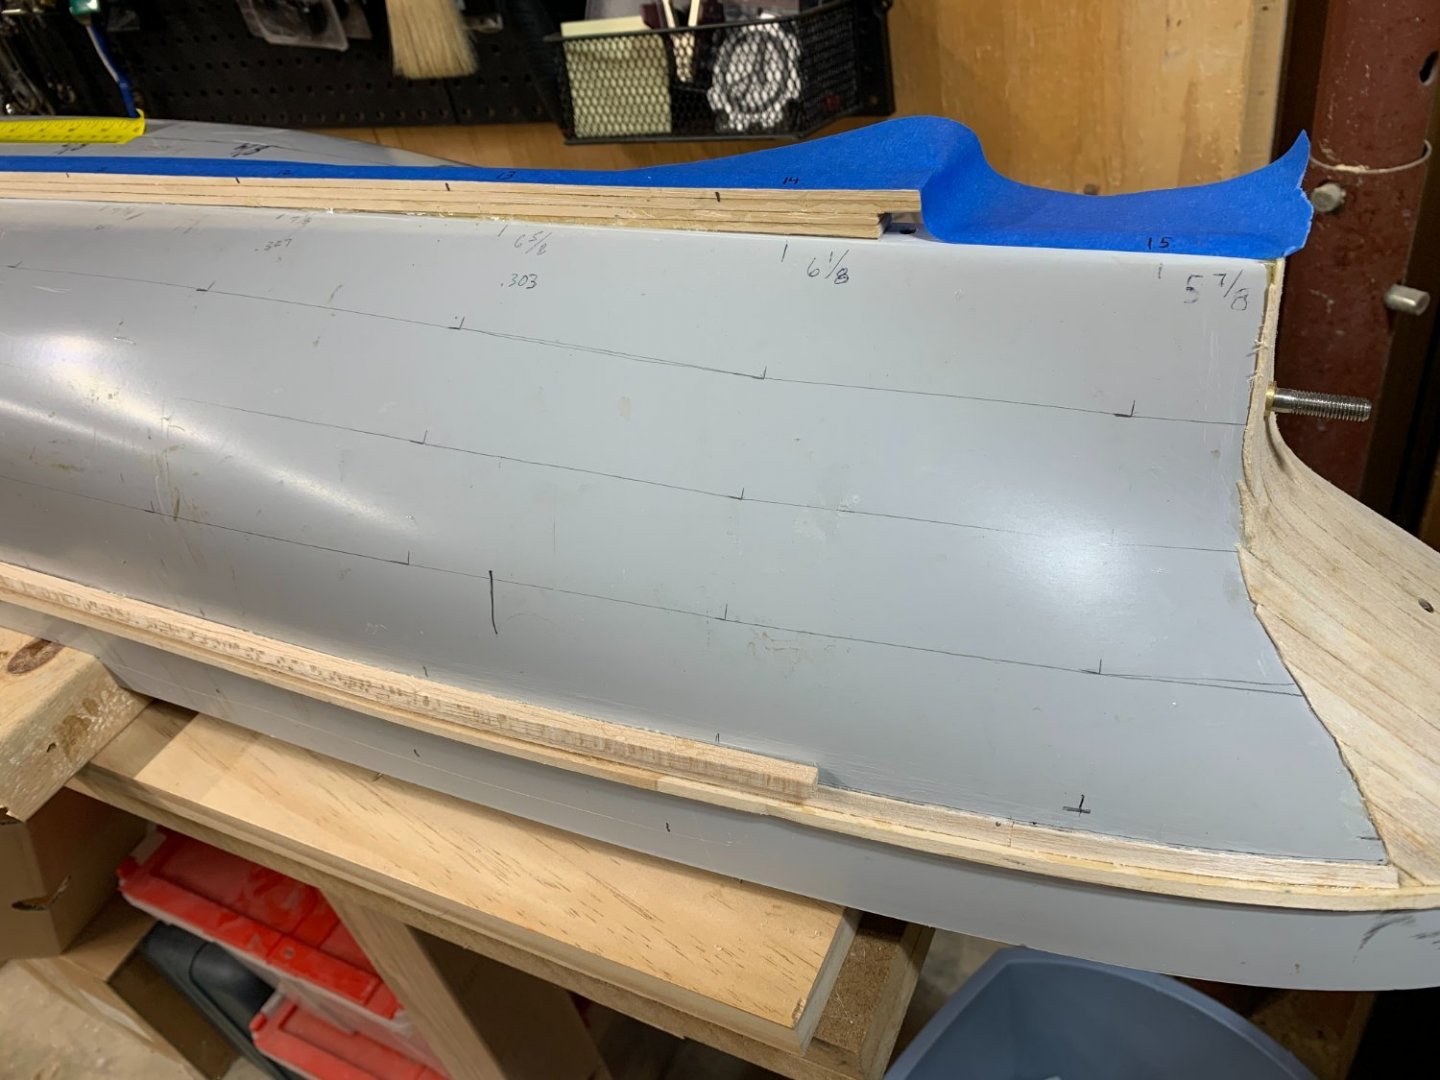
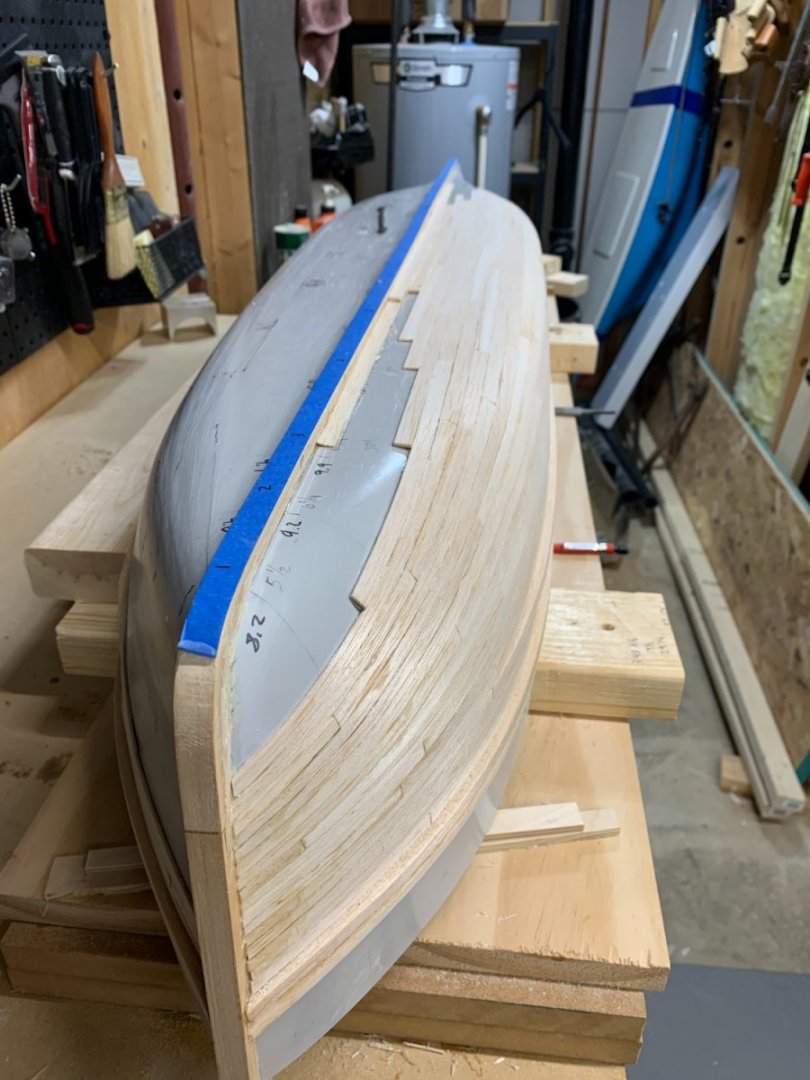
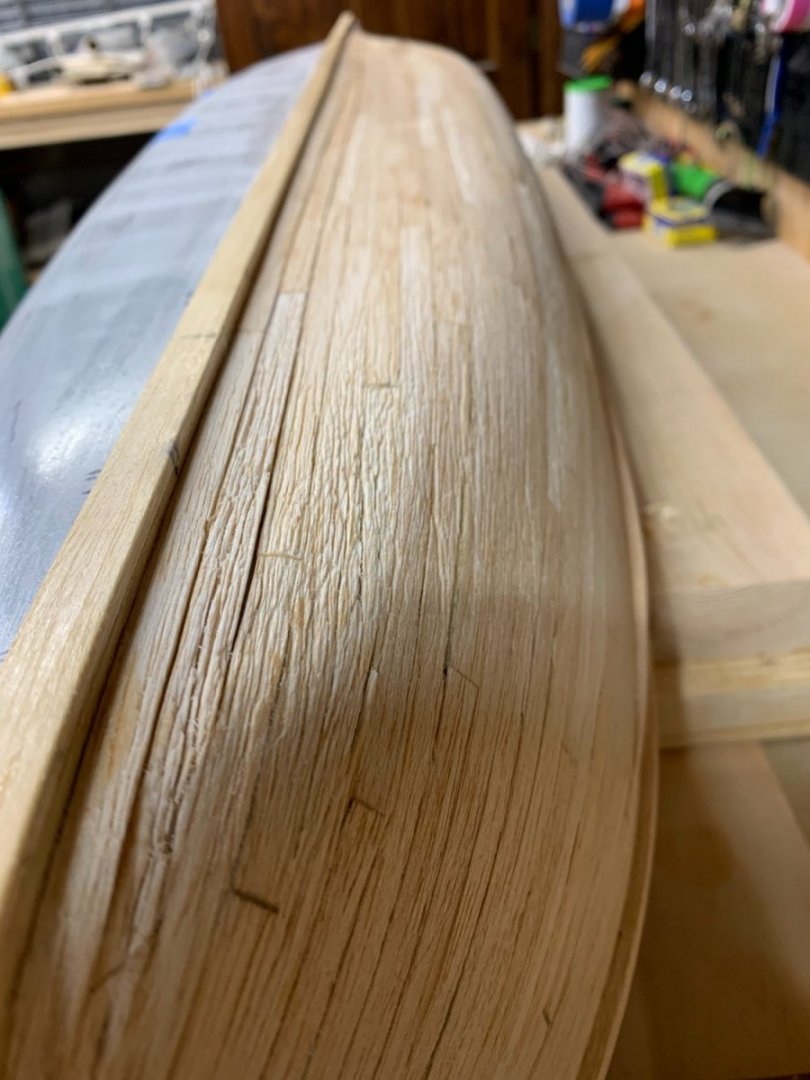
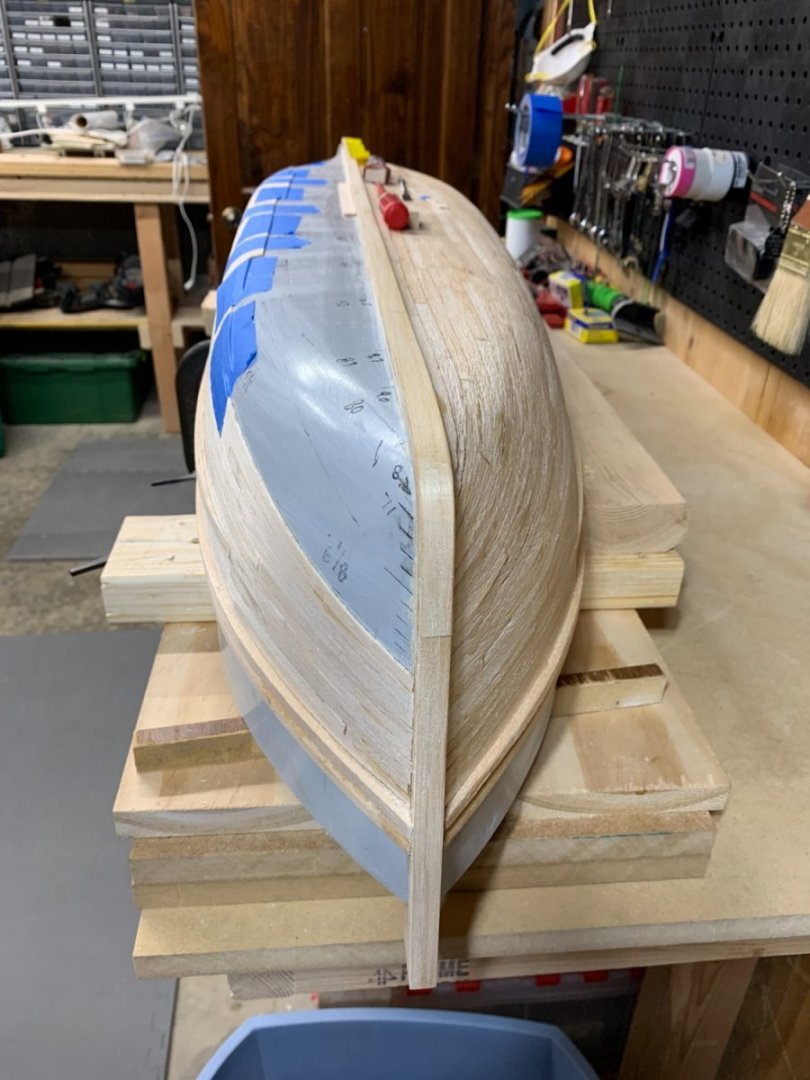
I really like the ease of using a preformed FG hull, however, I wasn't thrilled with having a smooth surface on the hull as this was a wooden ship. After carefully planning out my planking scheme and laying it out on the hull, I began gluing balsa strips to the FG. I used epoxy for this and was only able to do a few planks at a time. I used painters tape to hold the planks in place until the epoxy cured. Obviously this took a little more than a weekend to complete! When the planks were all on I used a stiff wire brush to distress the planks, giving a nice weathered look, and then applied a few coats of Verathane wood hardener which worked very well. Need lots of ventilation using that! Finally I applied a few coats of Duralux marine grade bottom paint: Sub-Trop Red Metal Primer M740. I have to say I'm pretty happy with the way it turned out!


- 15 replies
-
- 10
-
-
- Hines Lumber
- Great Lakes
- (and 4 more)
-
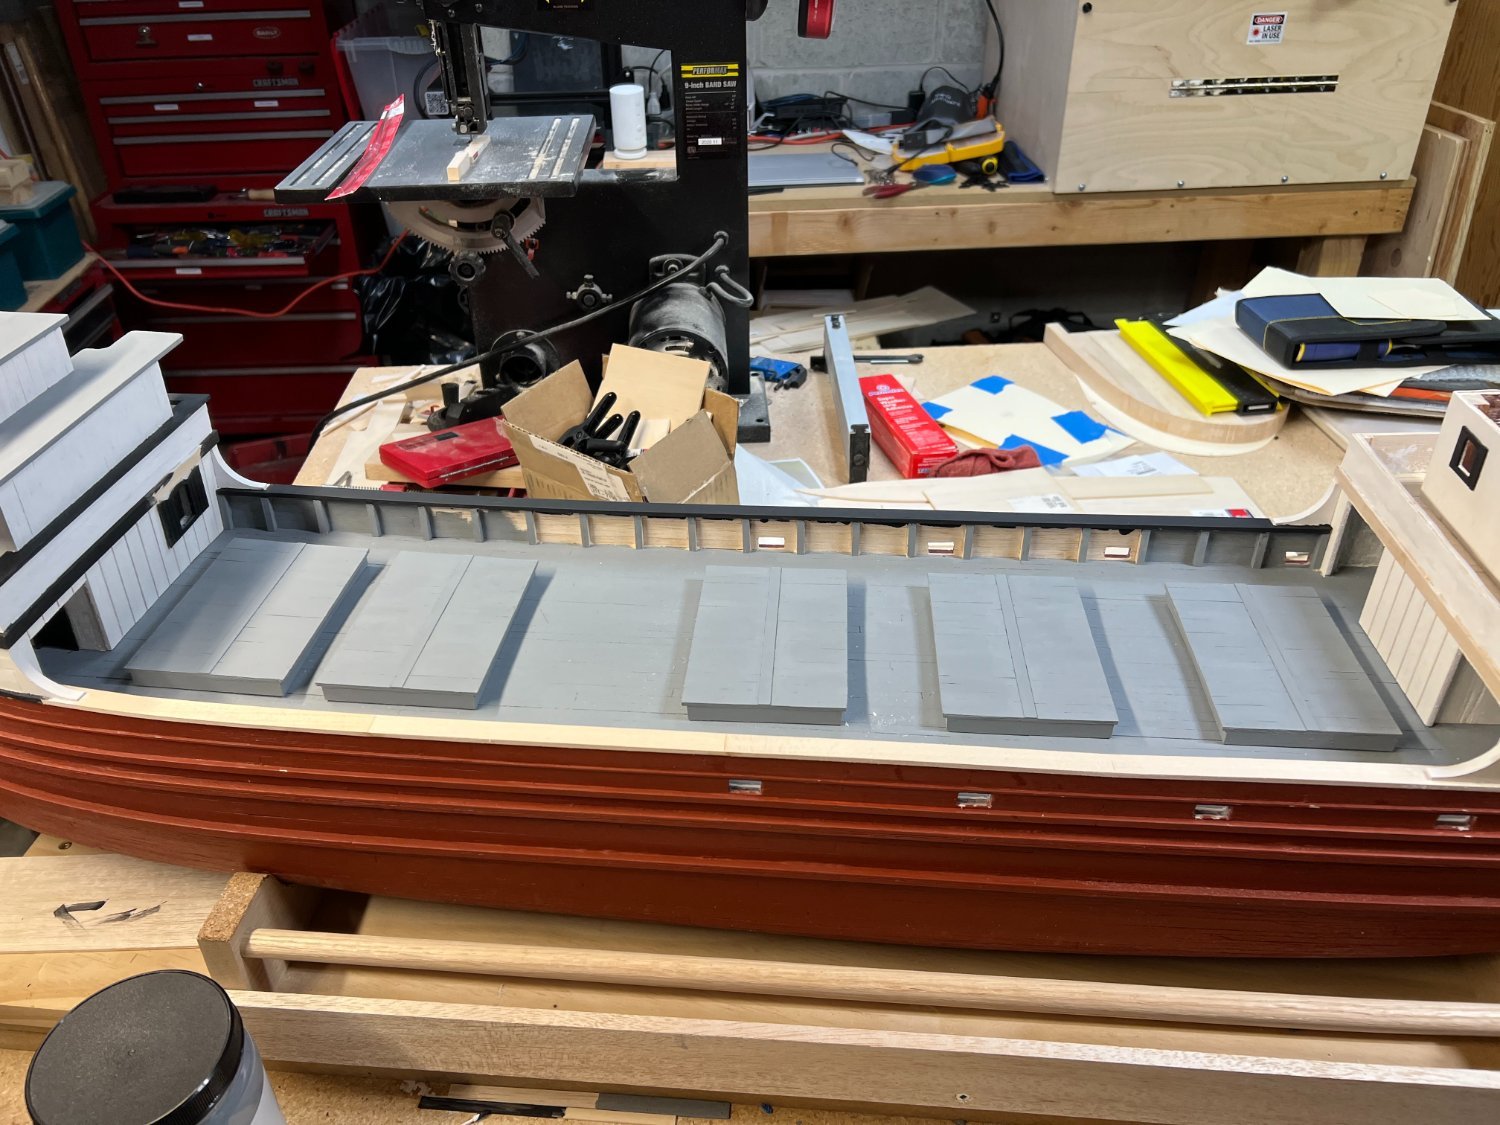
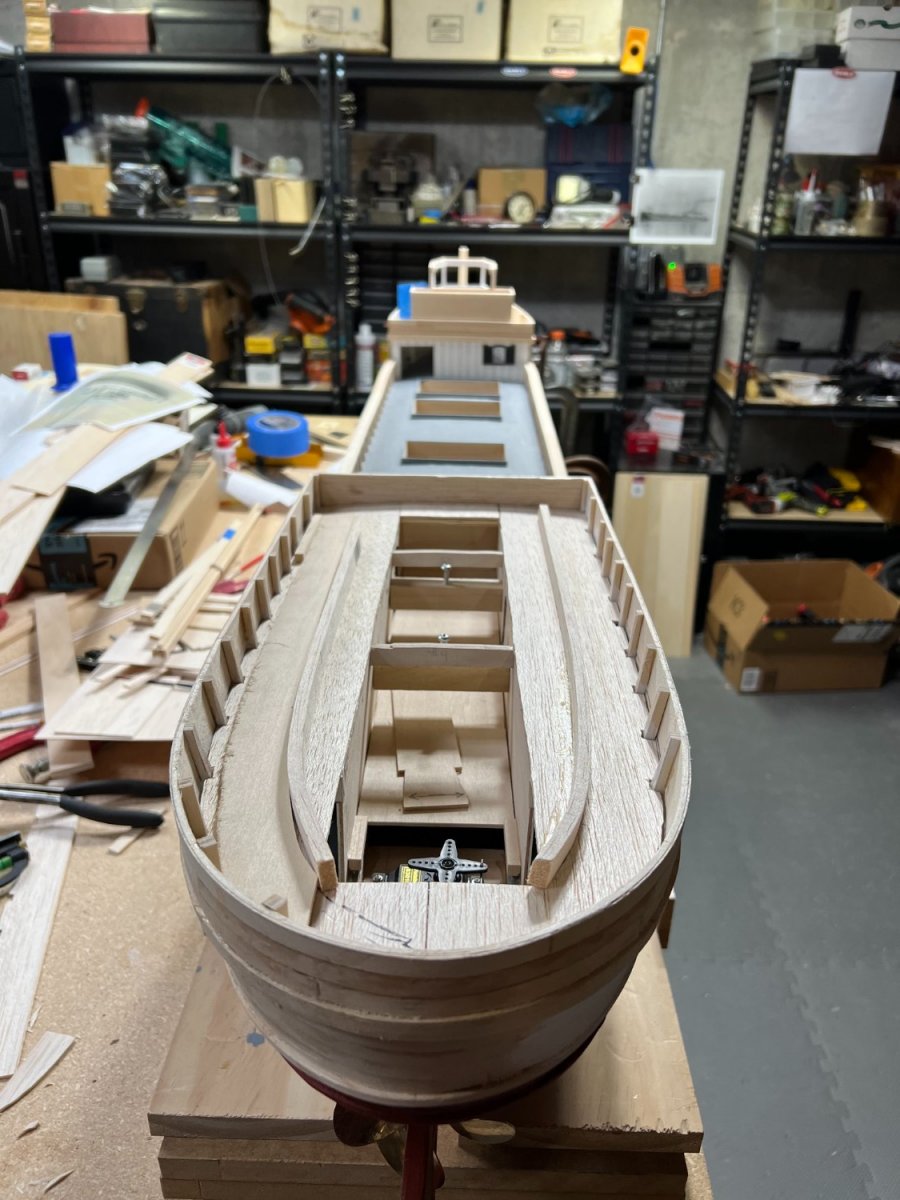
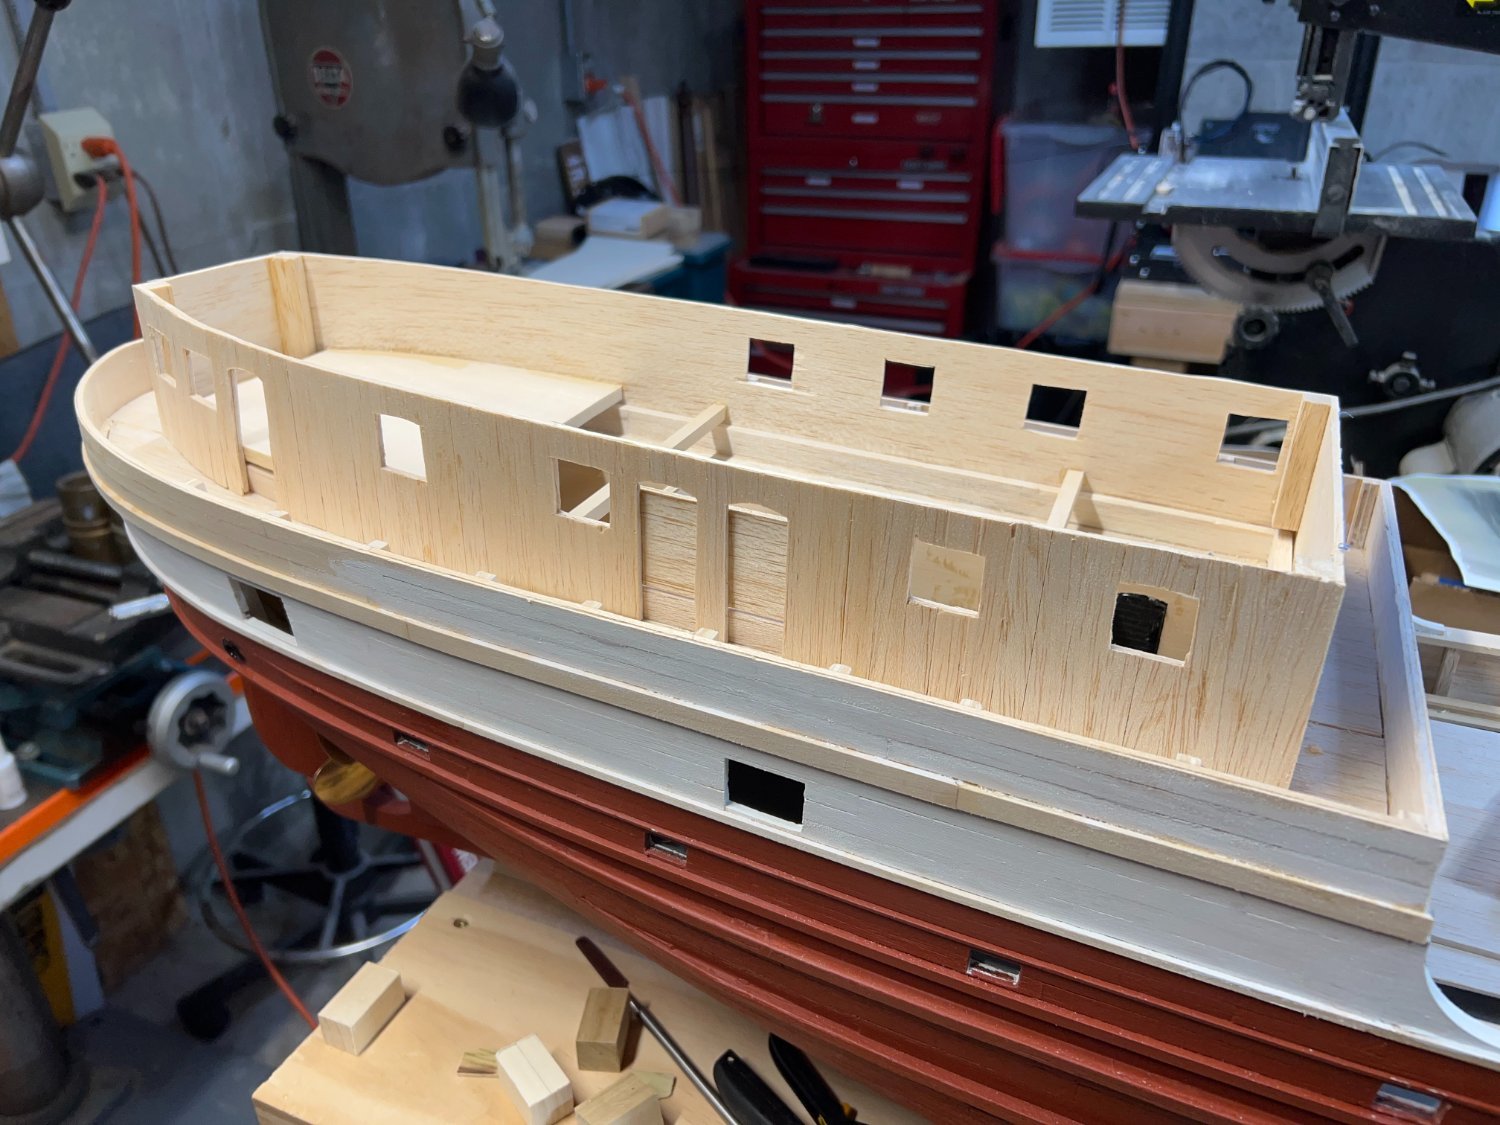
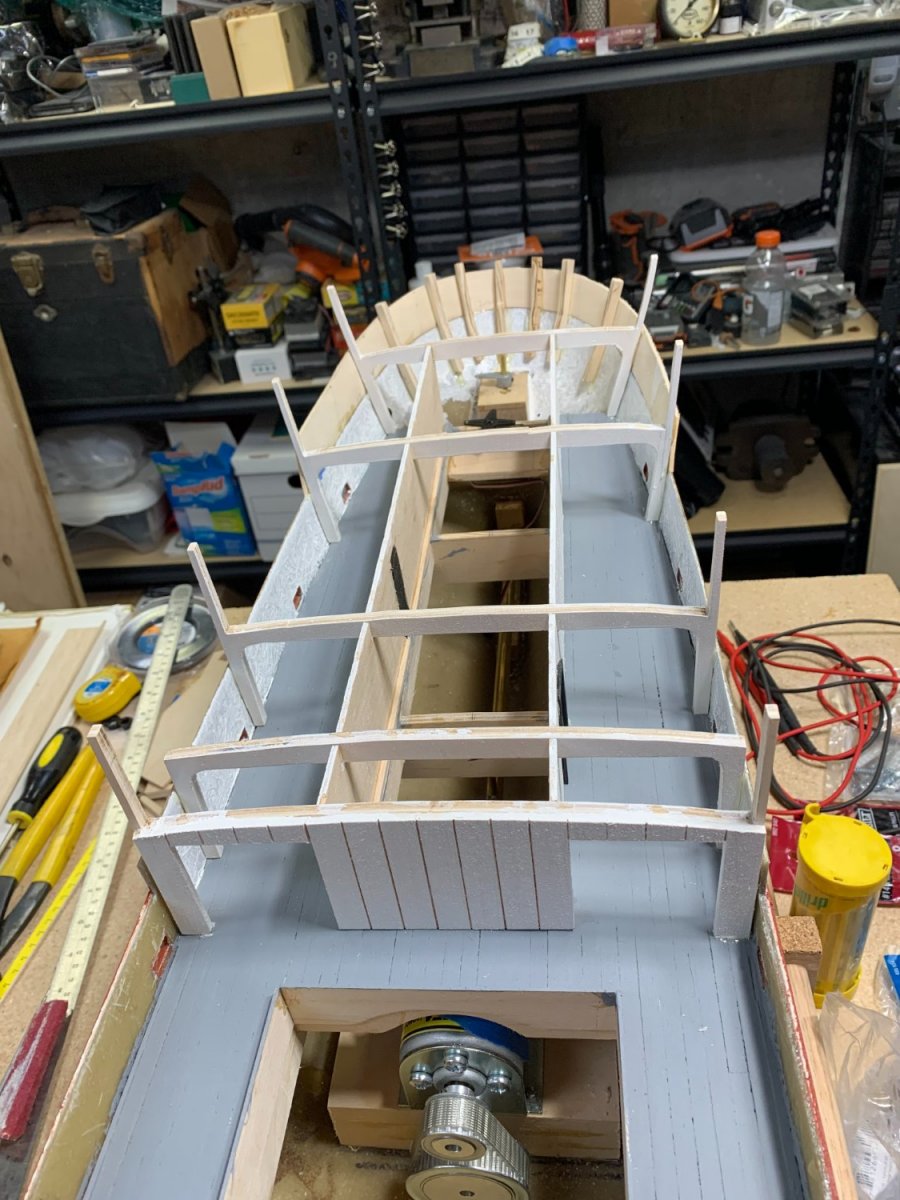
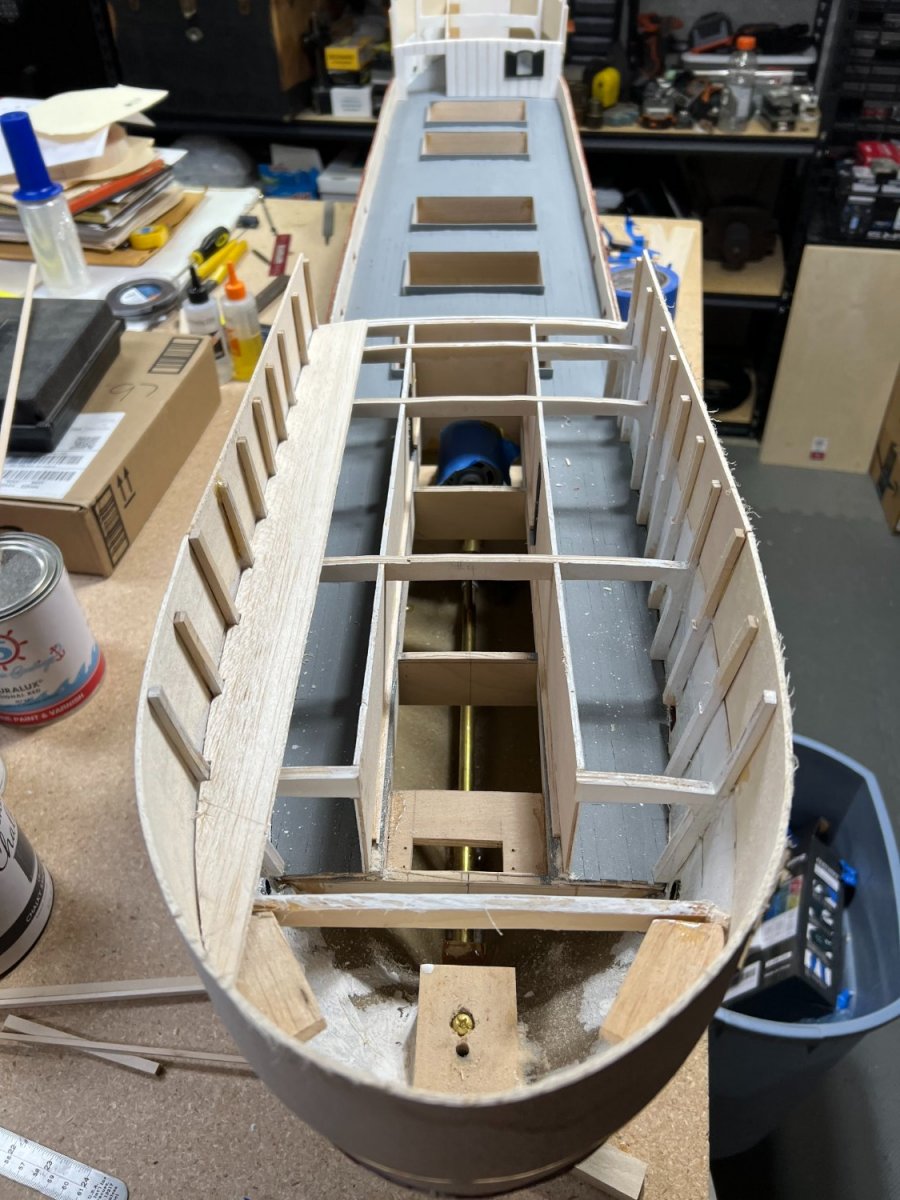
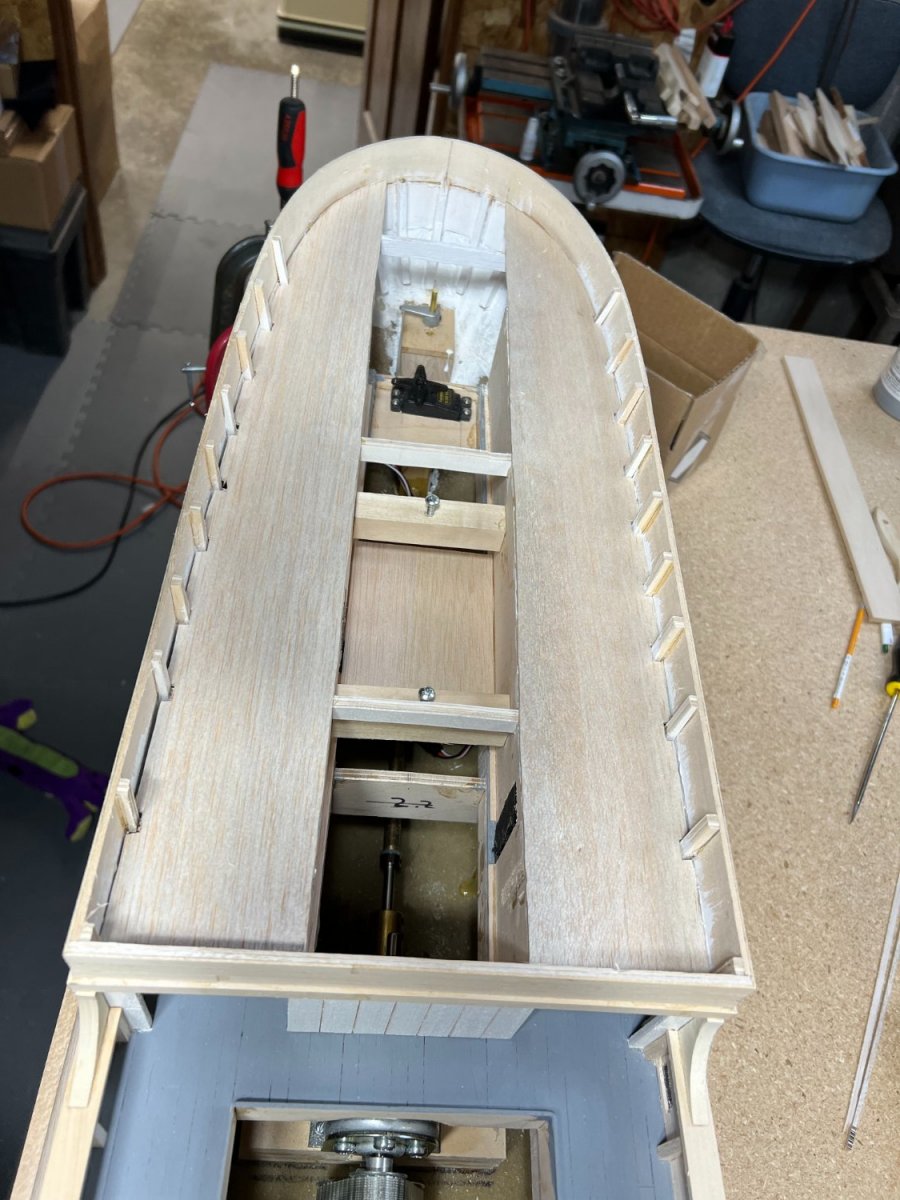
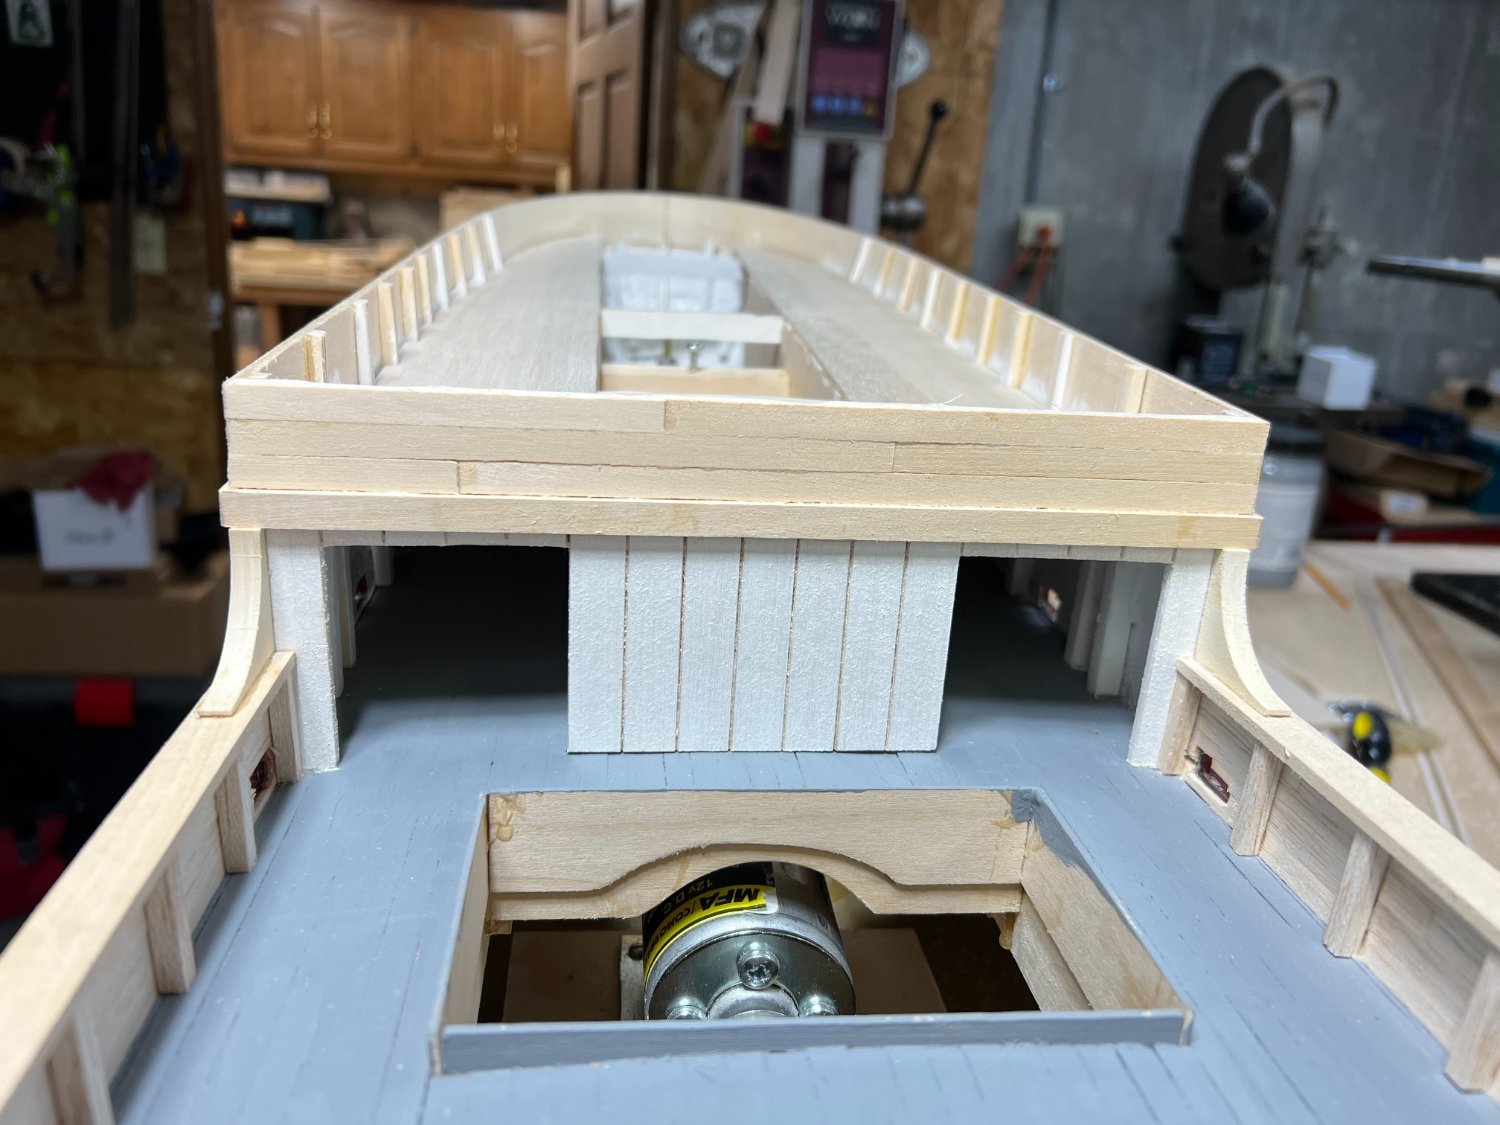
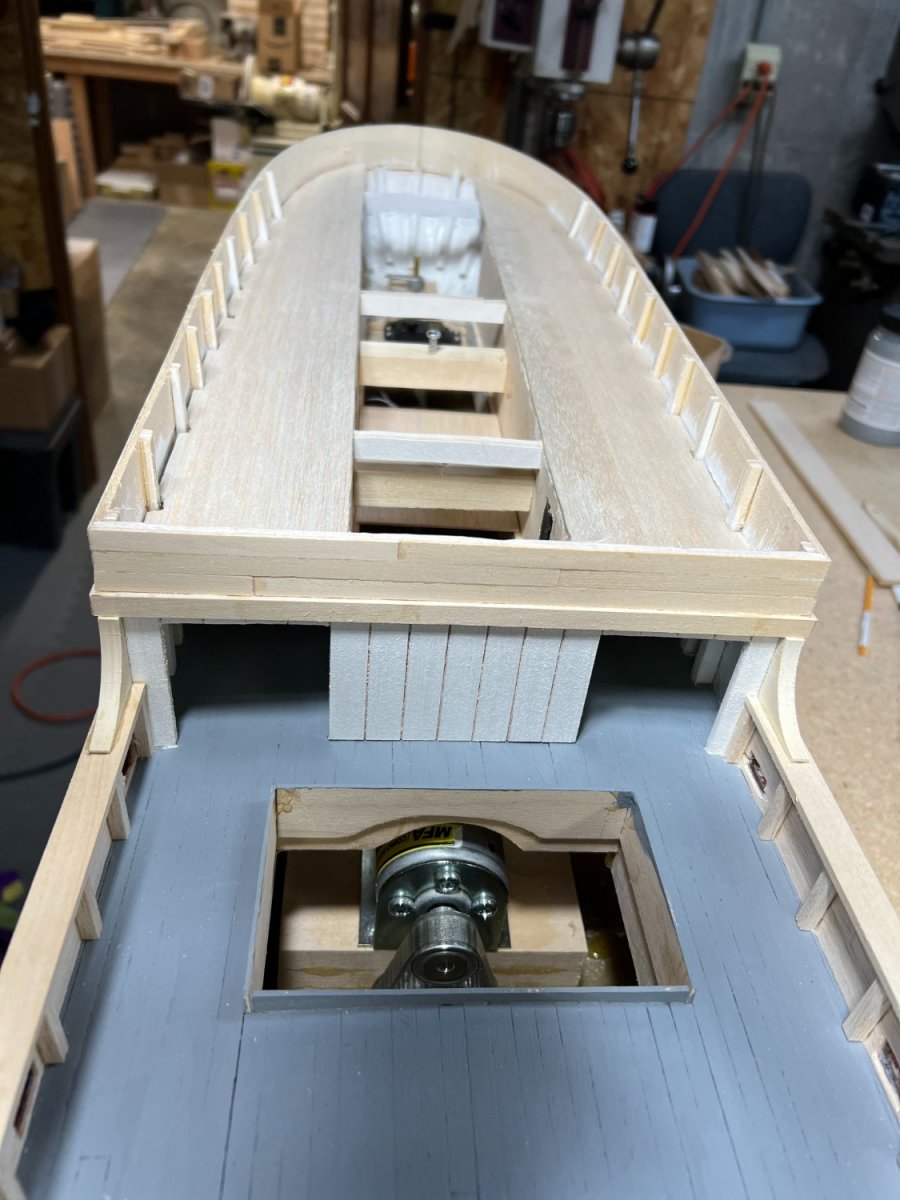
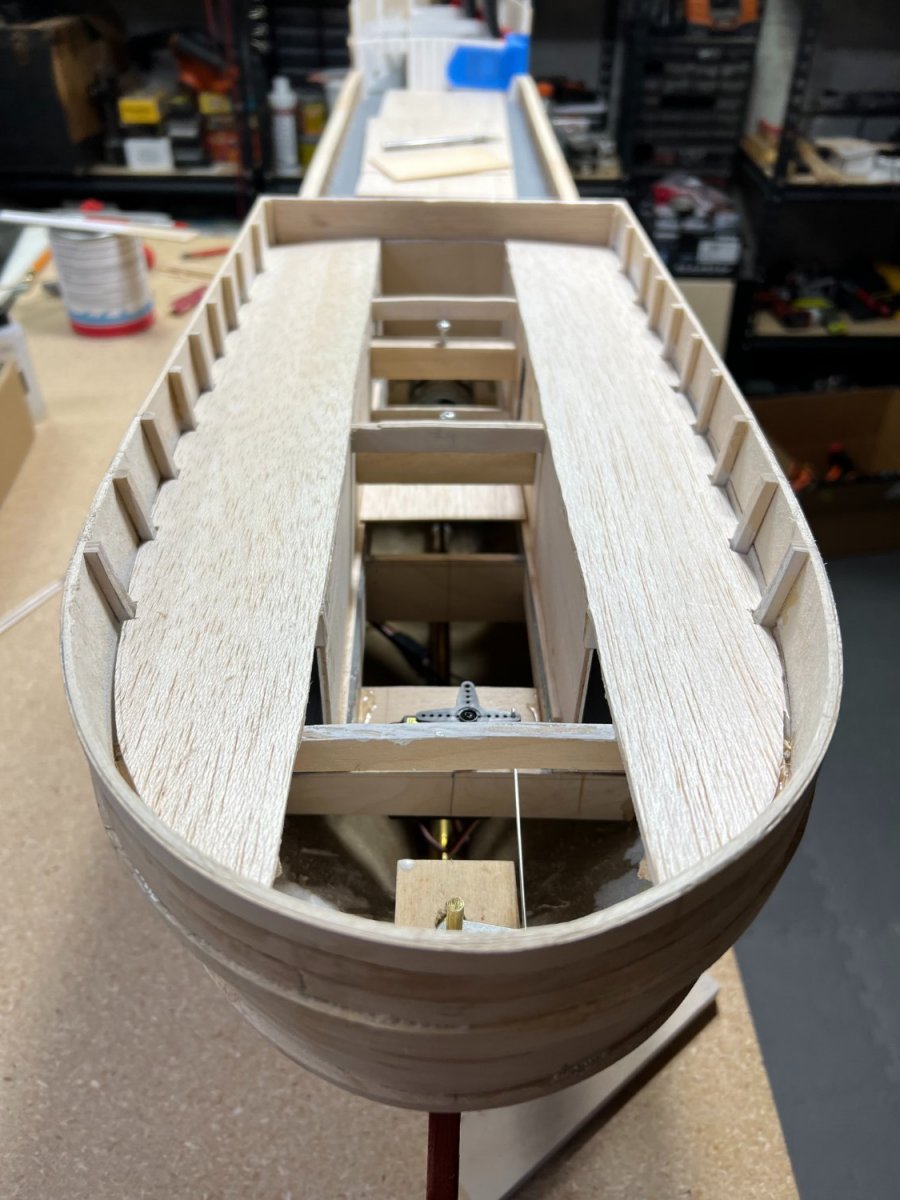
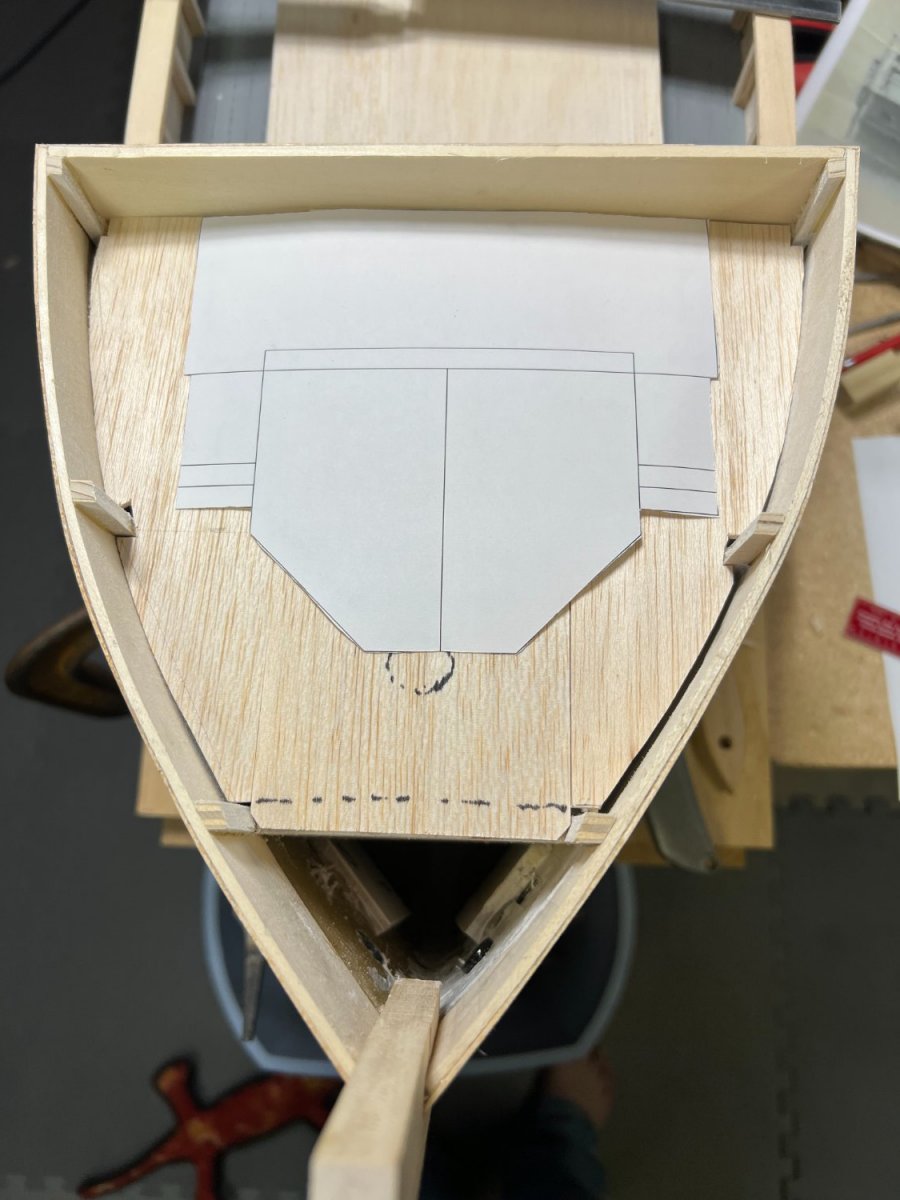
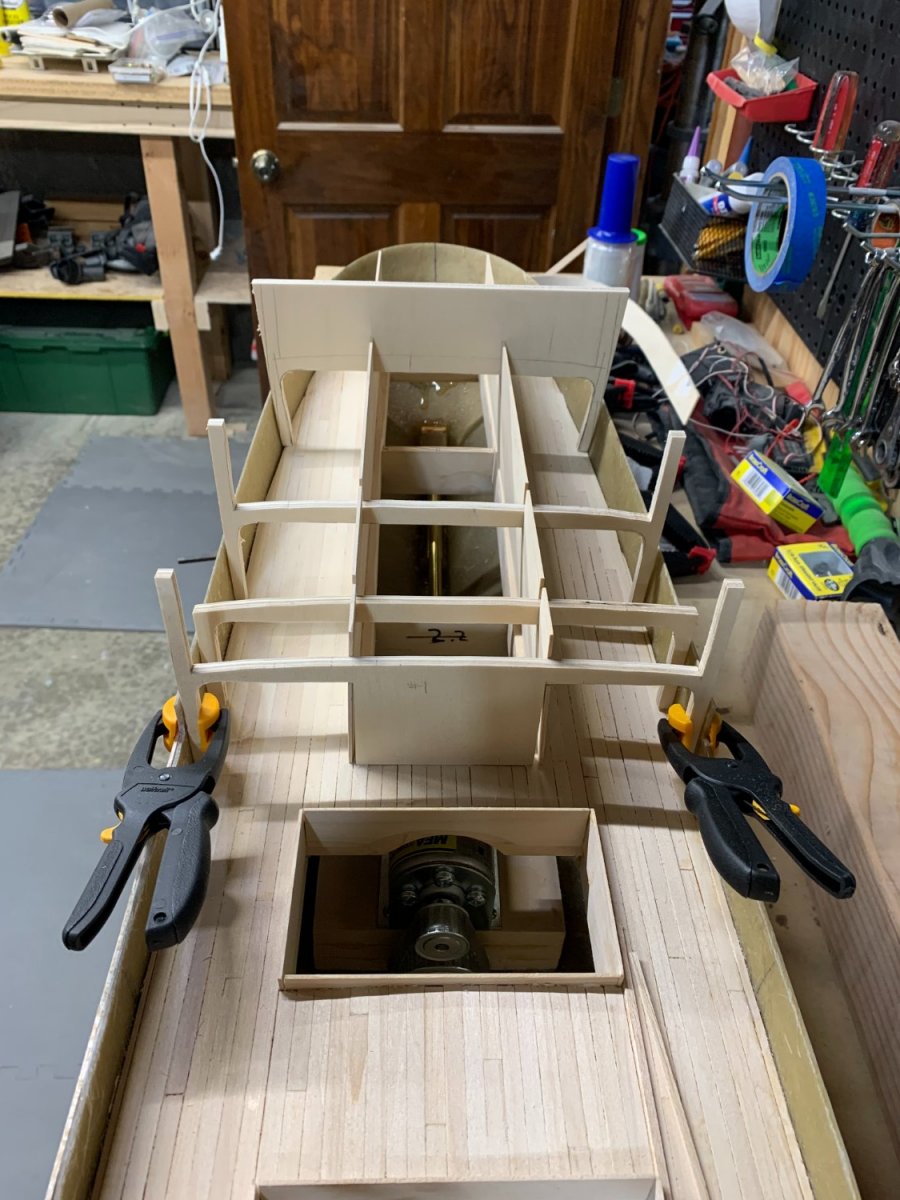
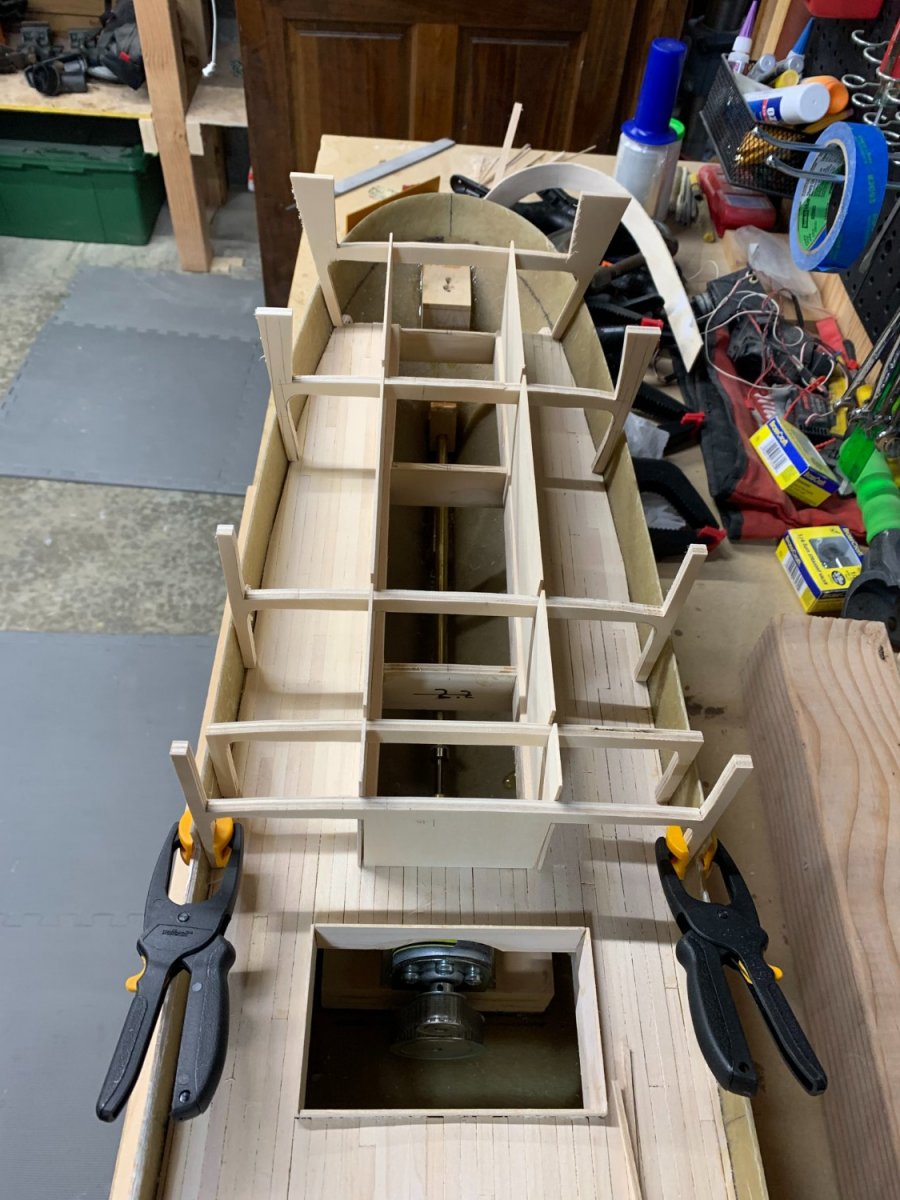
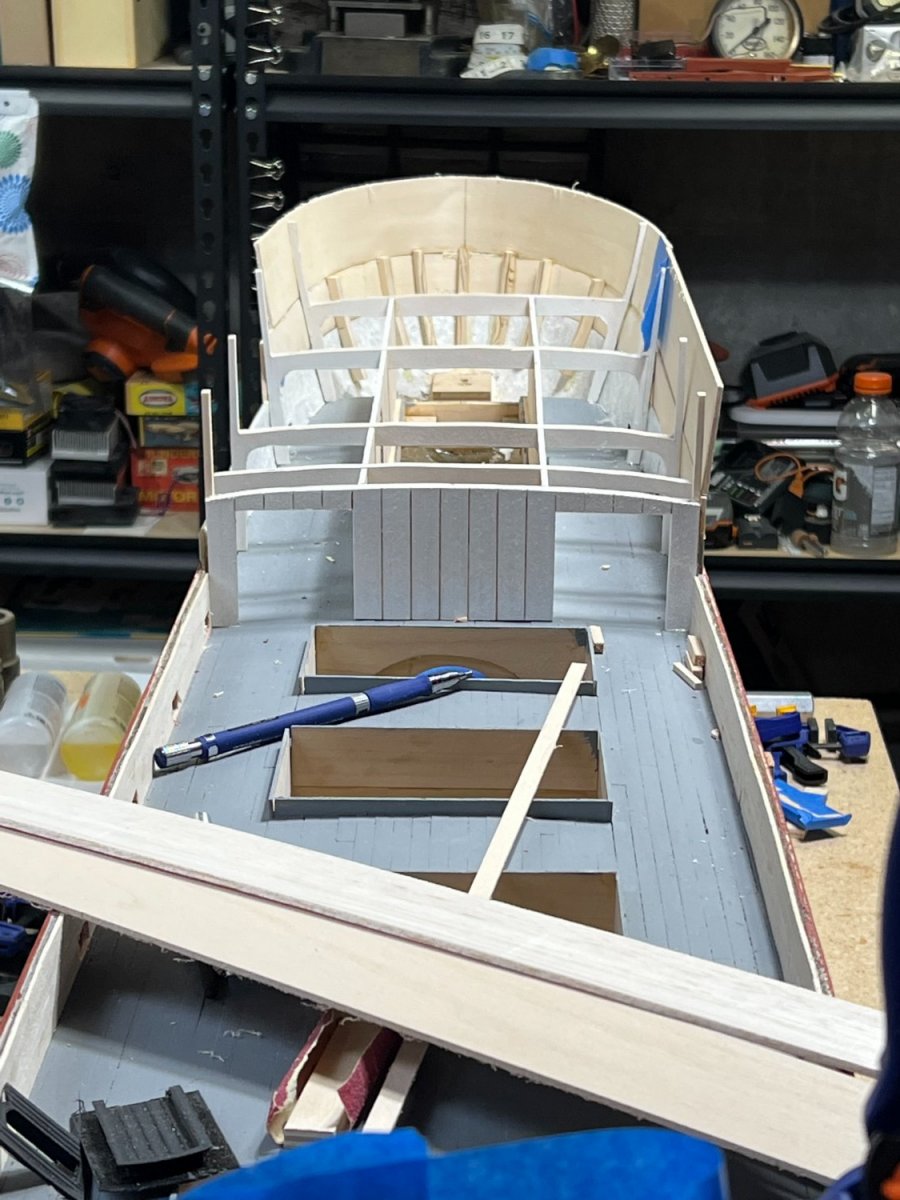
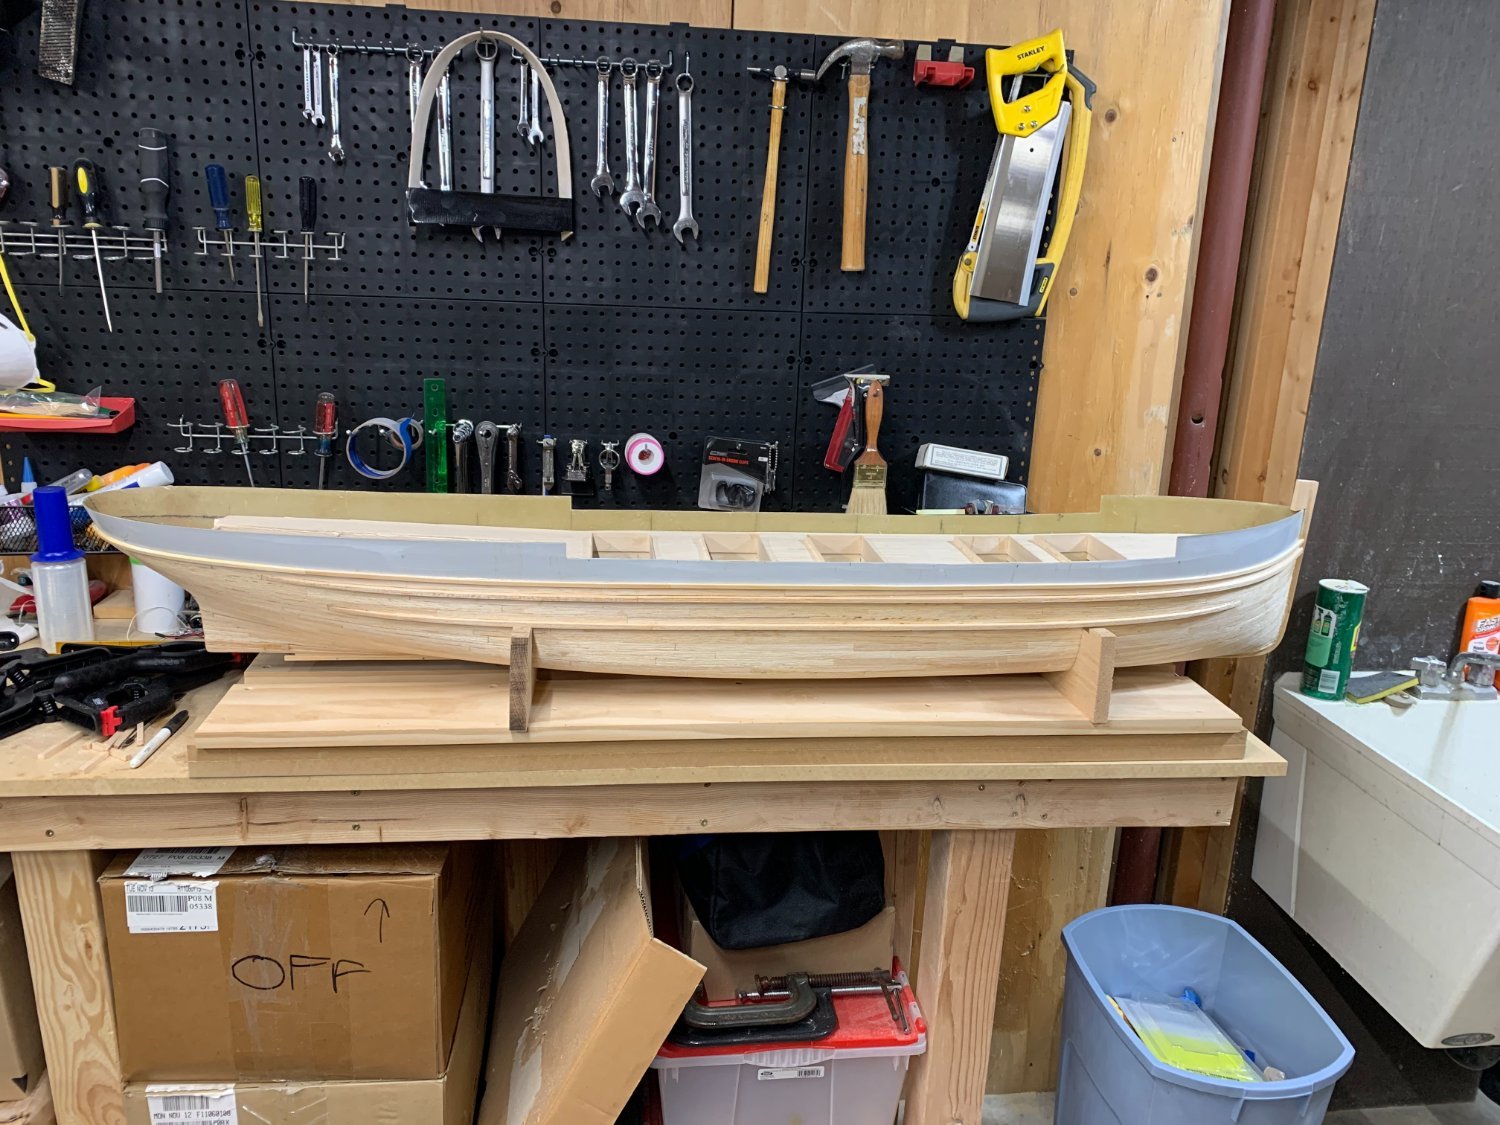
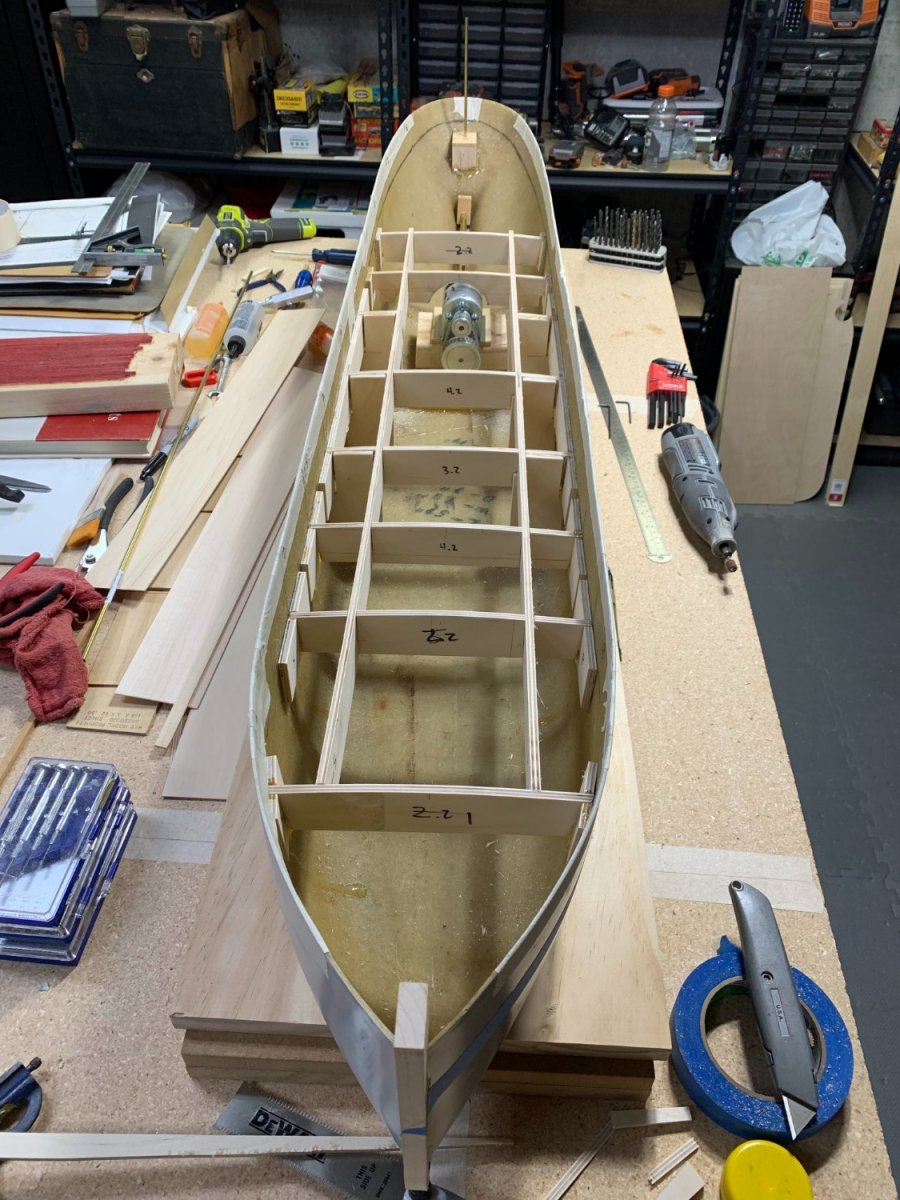
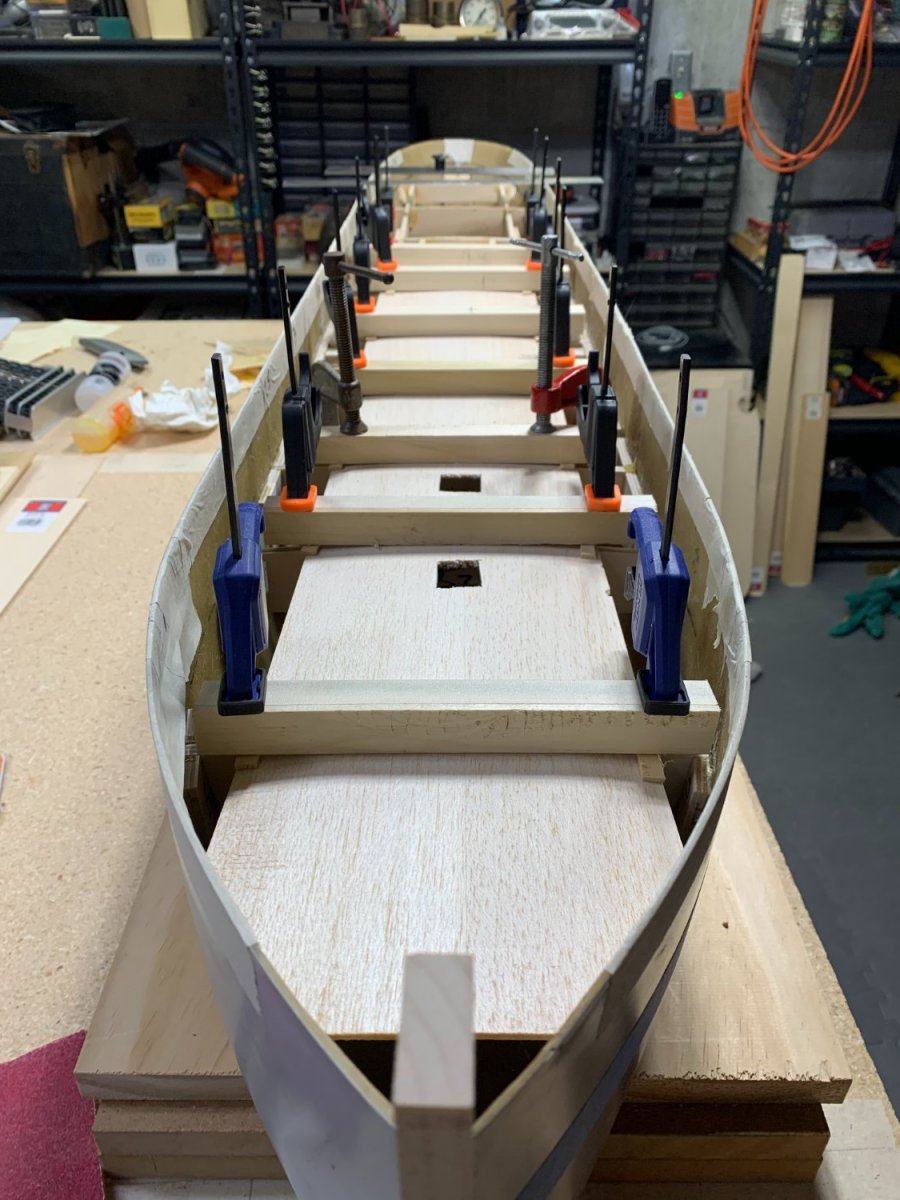
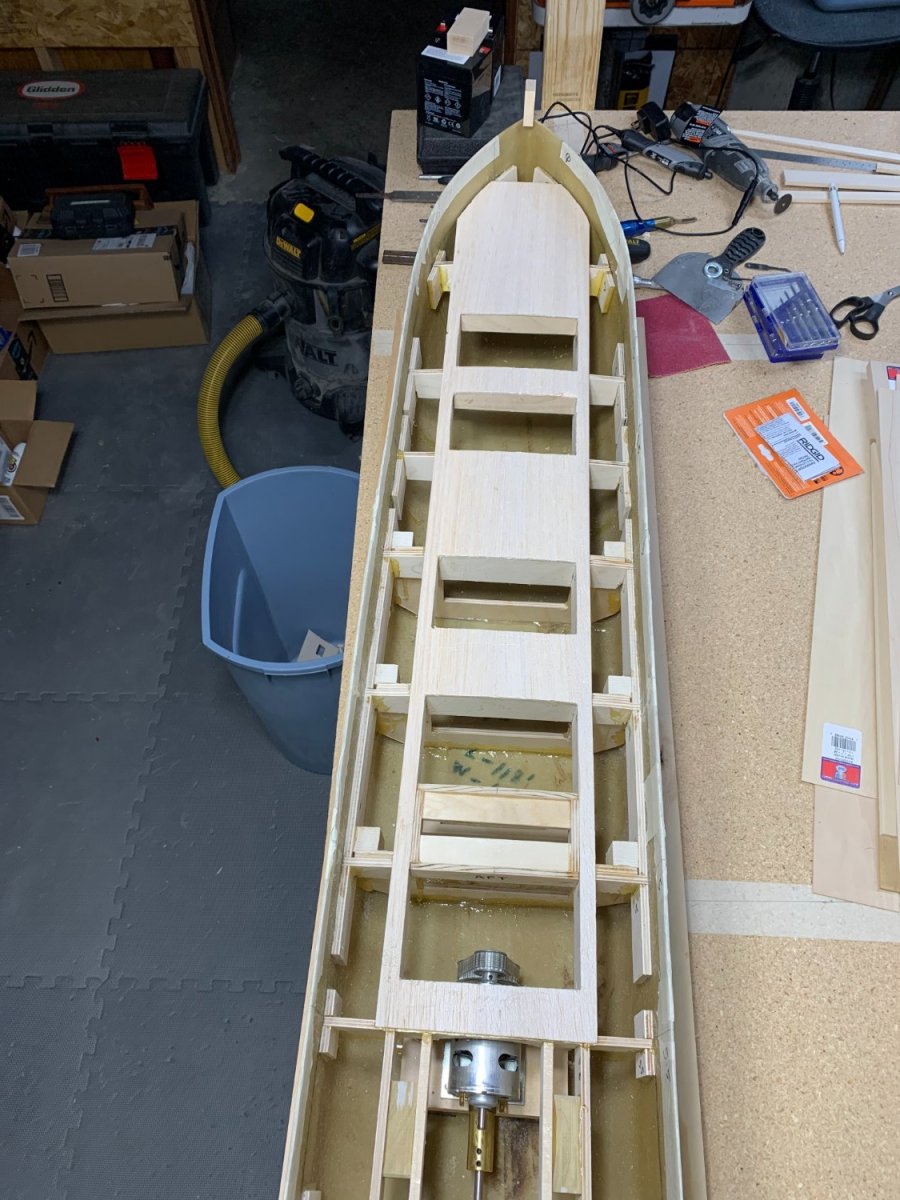
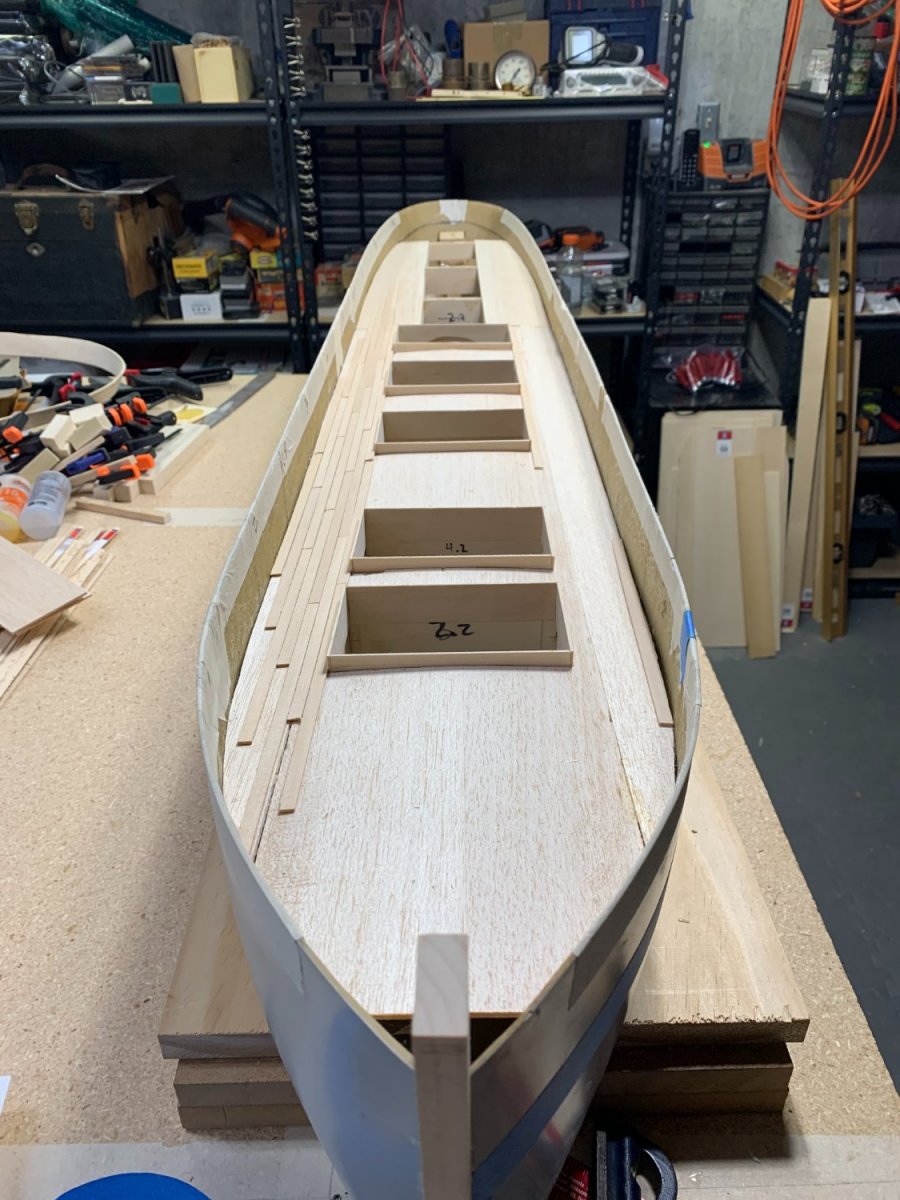
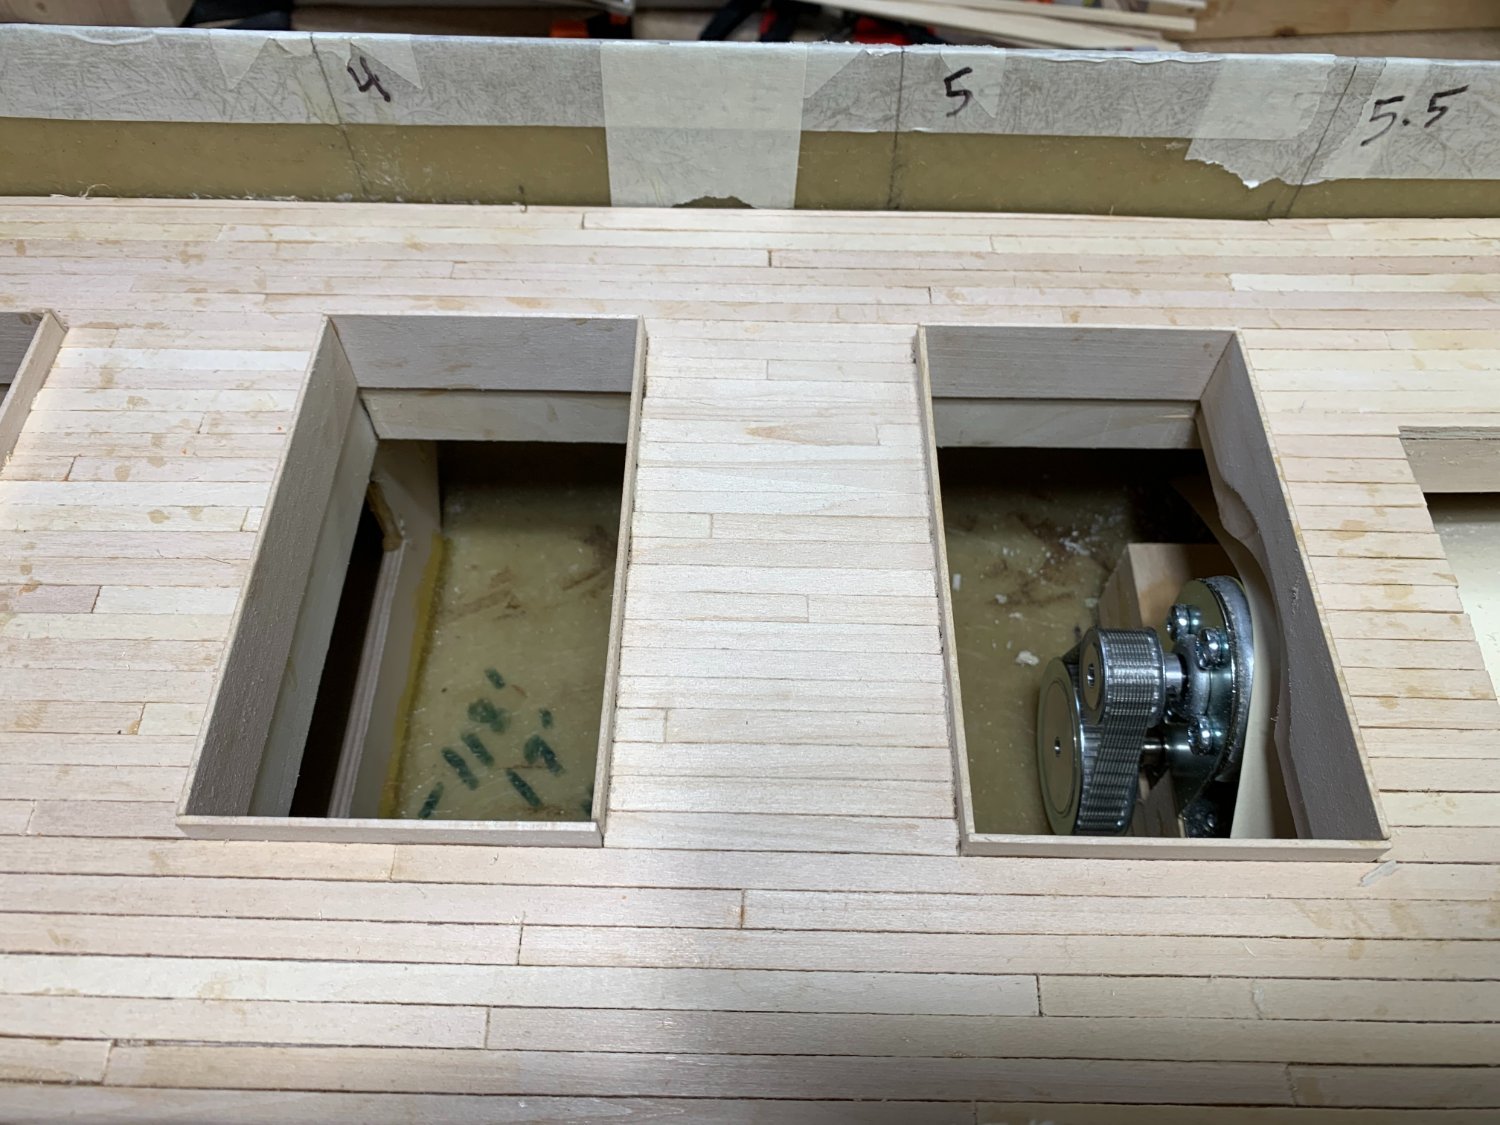
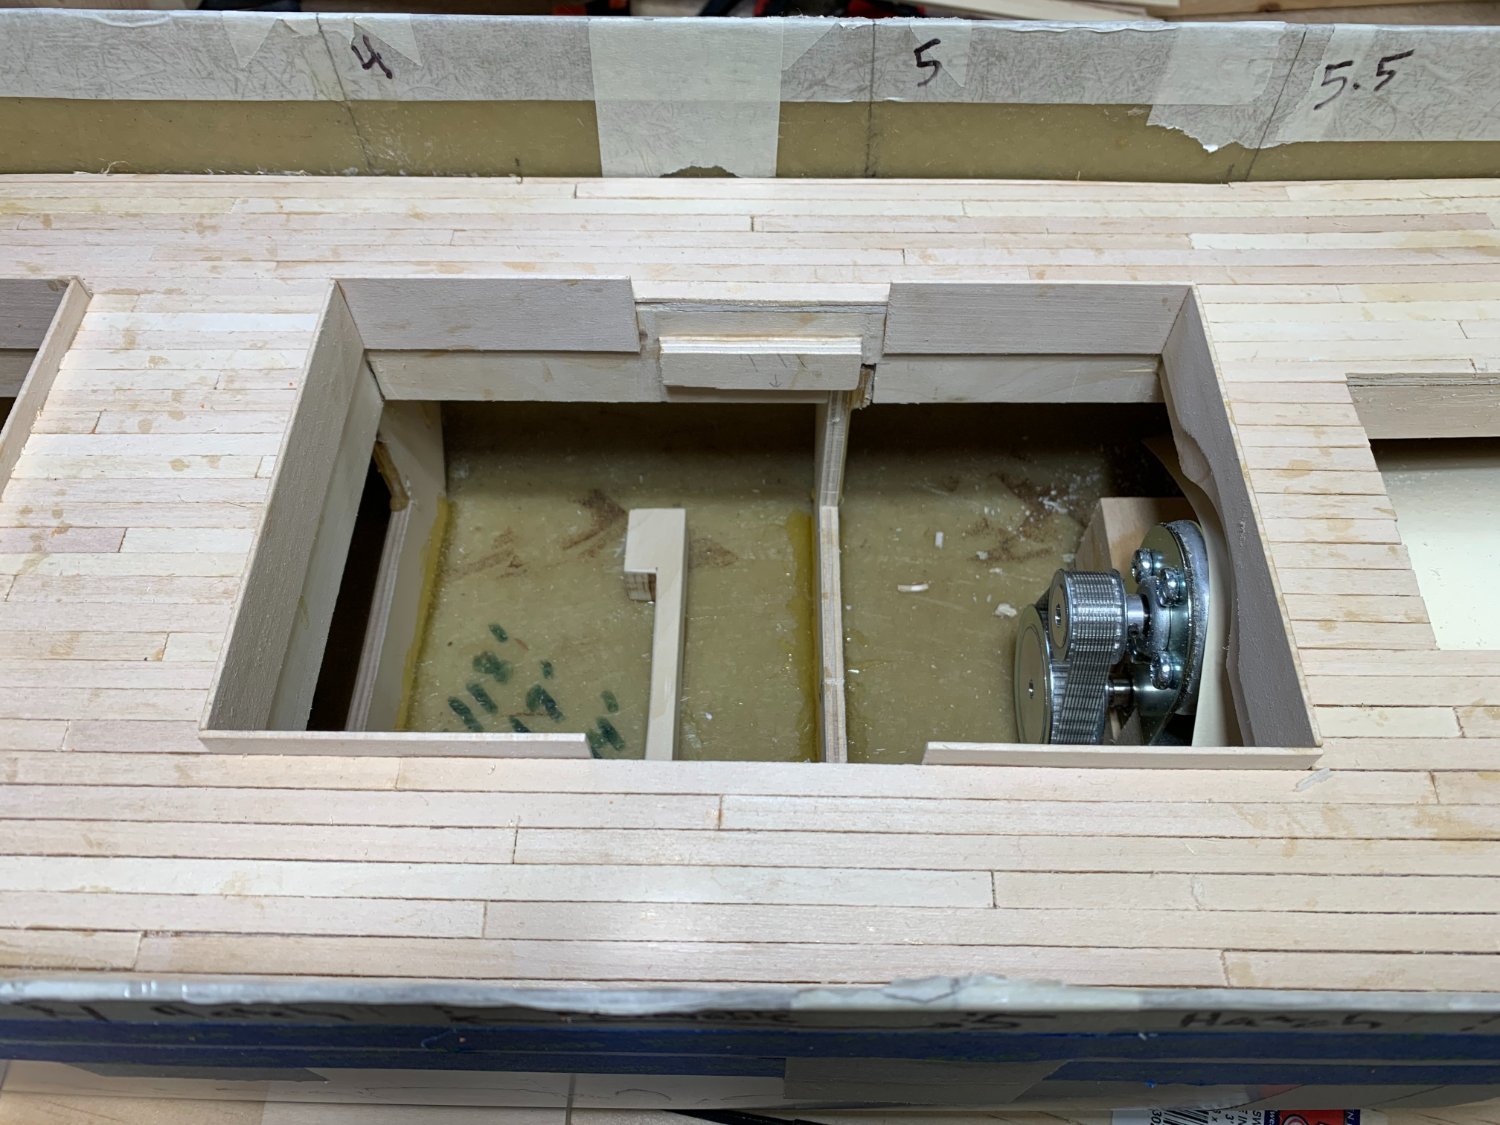
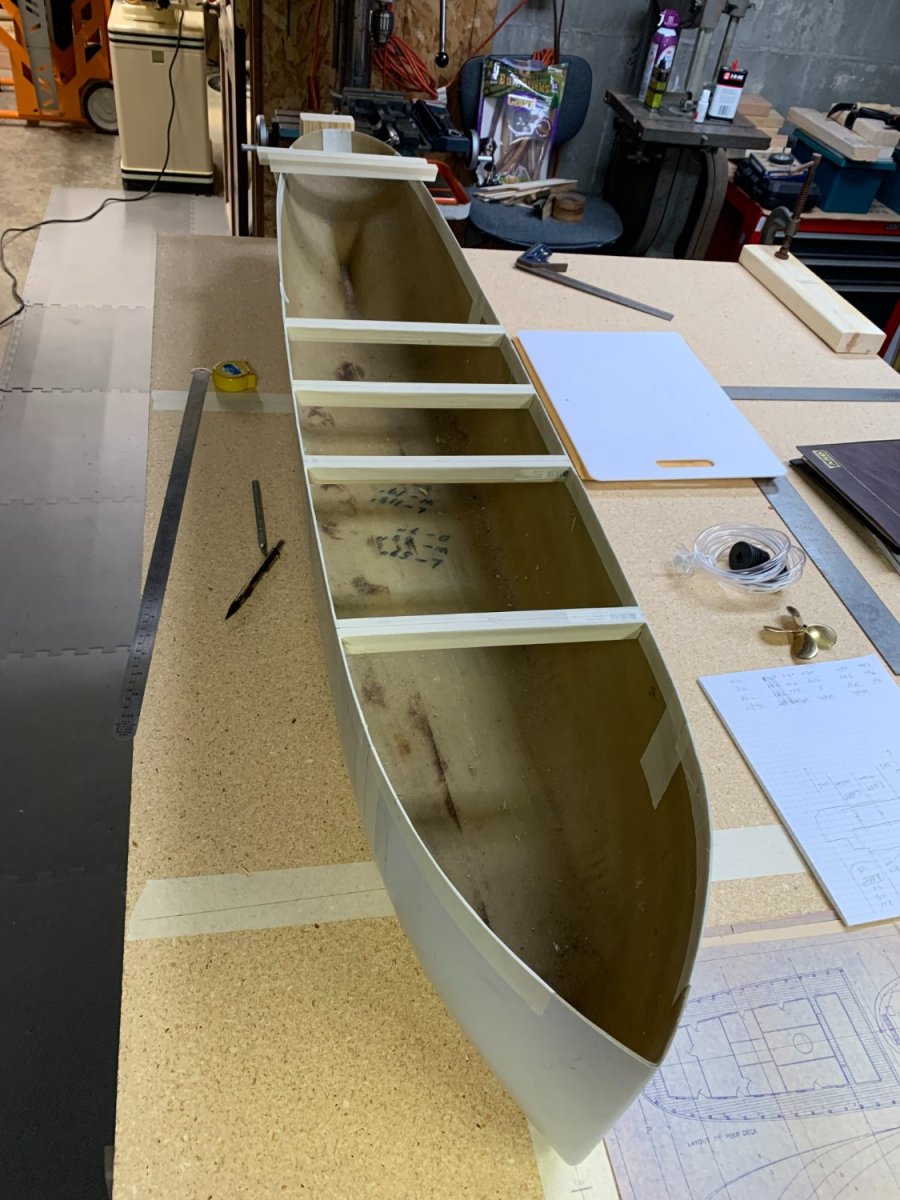
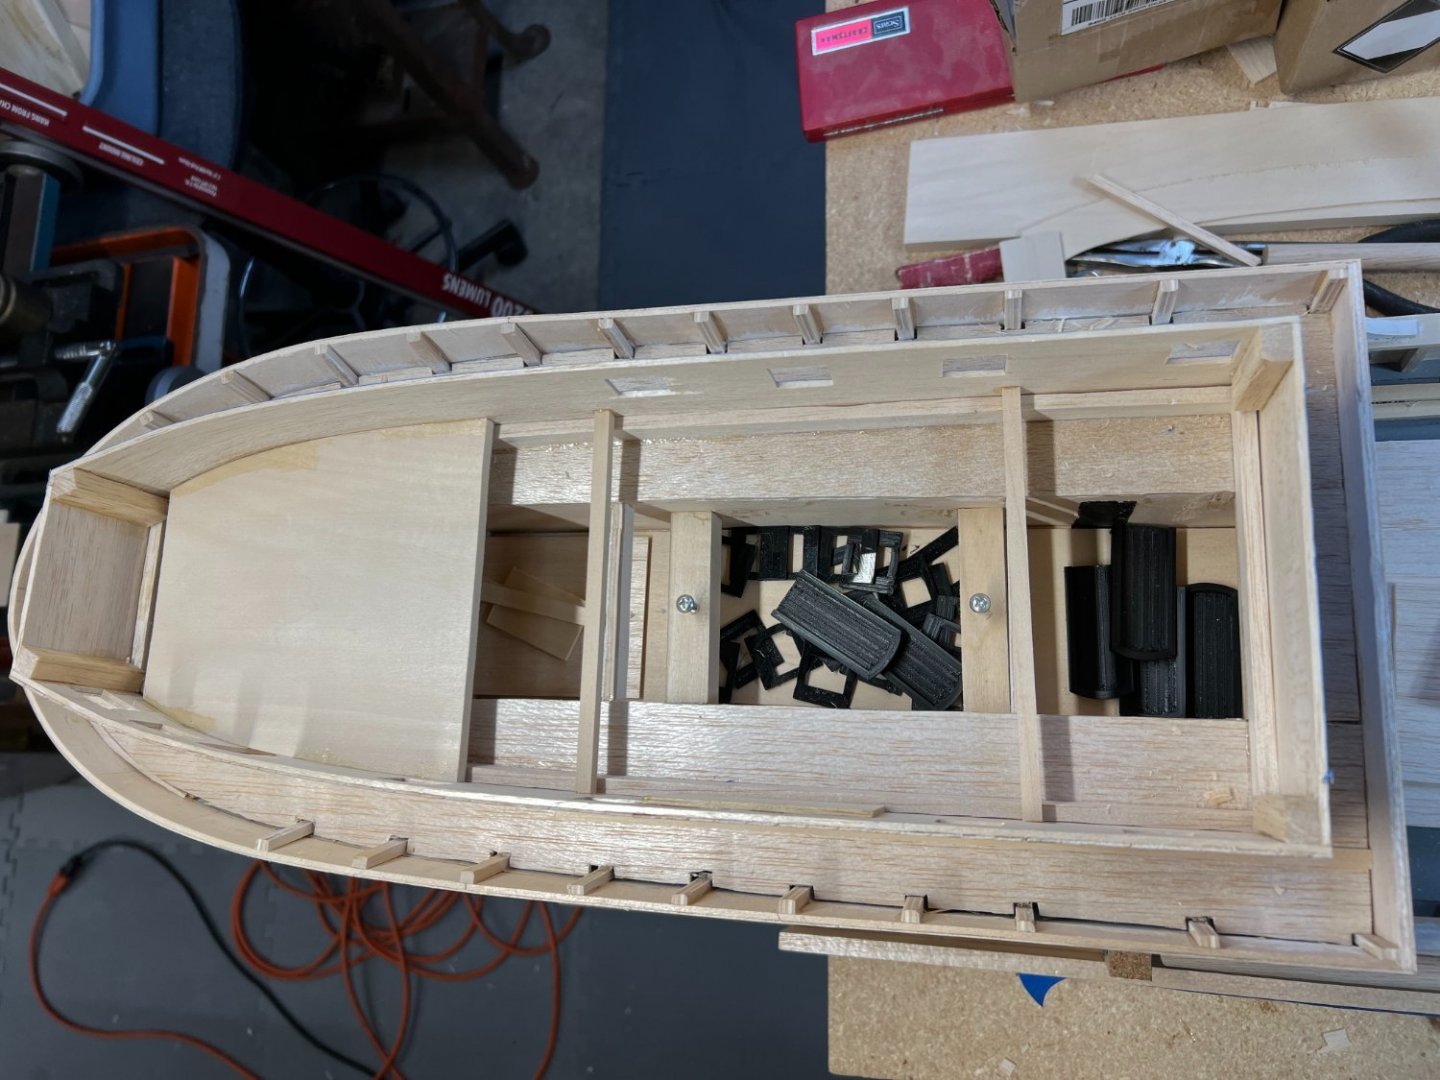
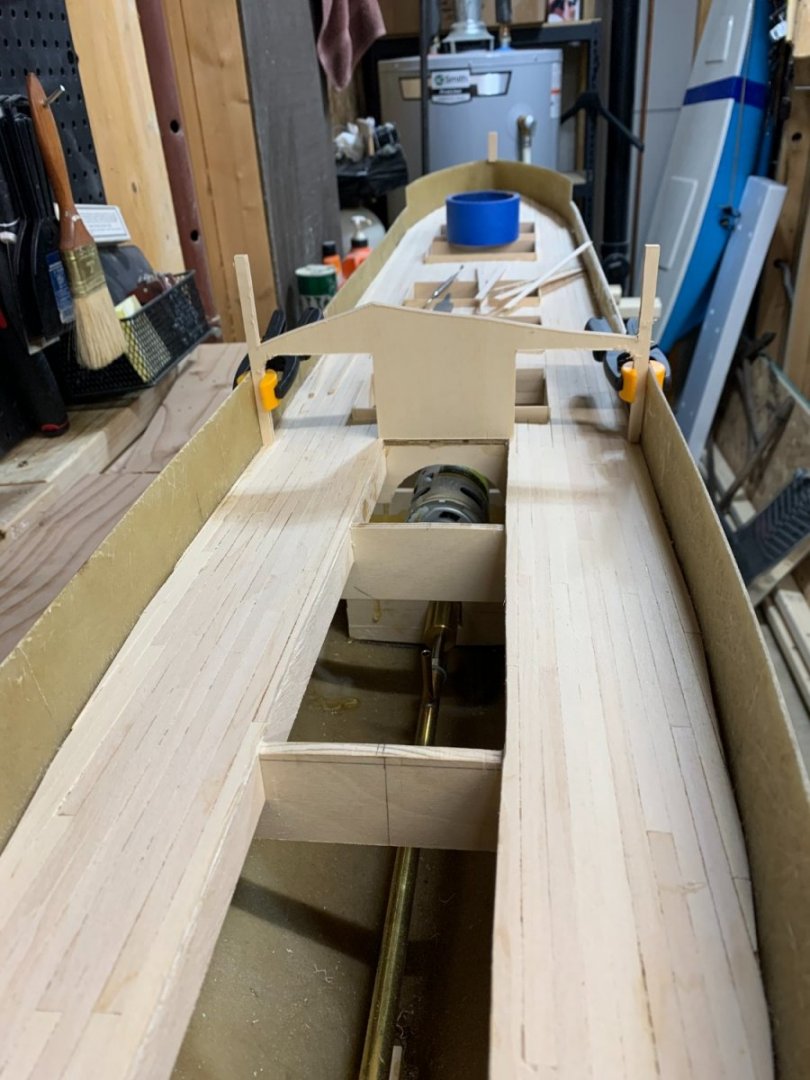
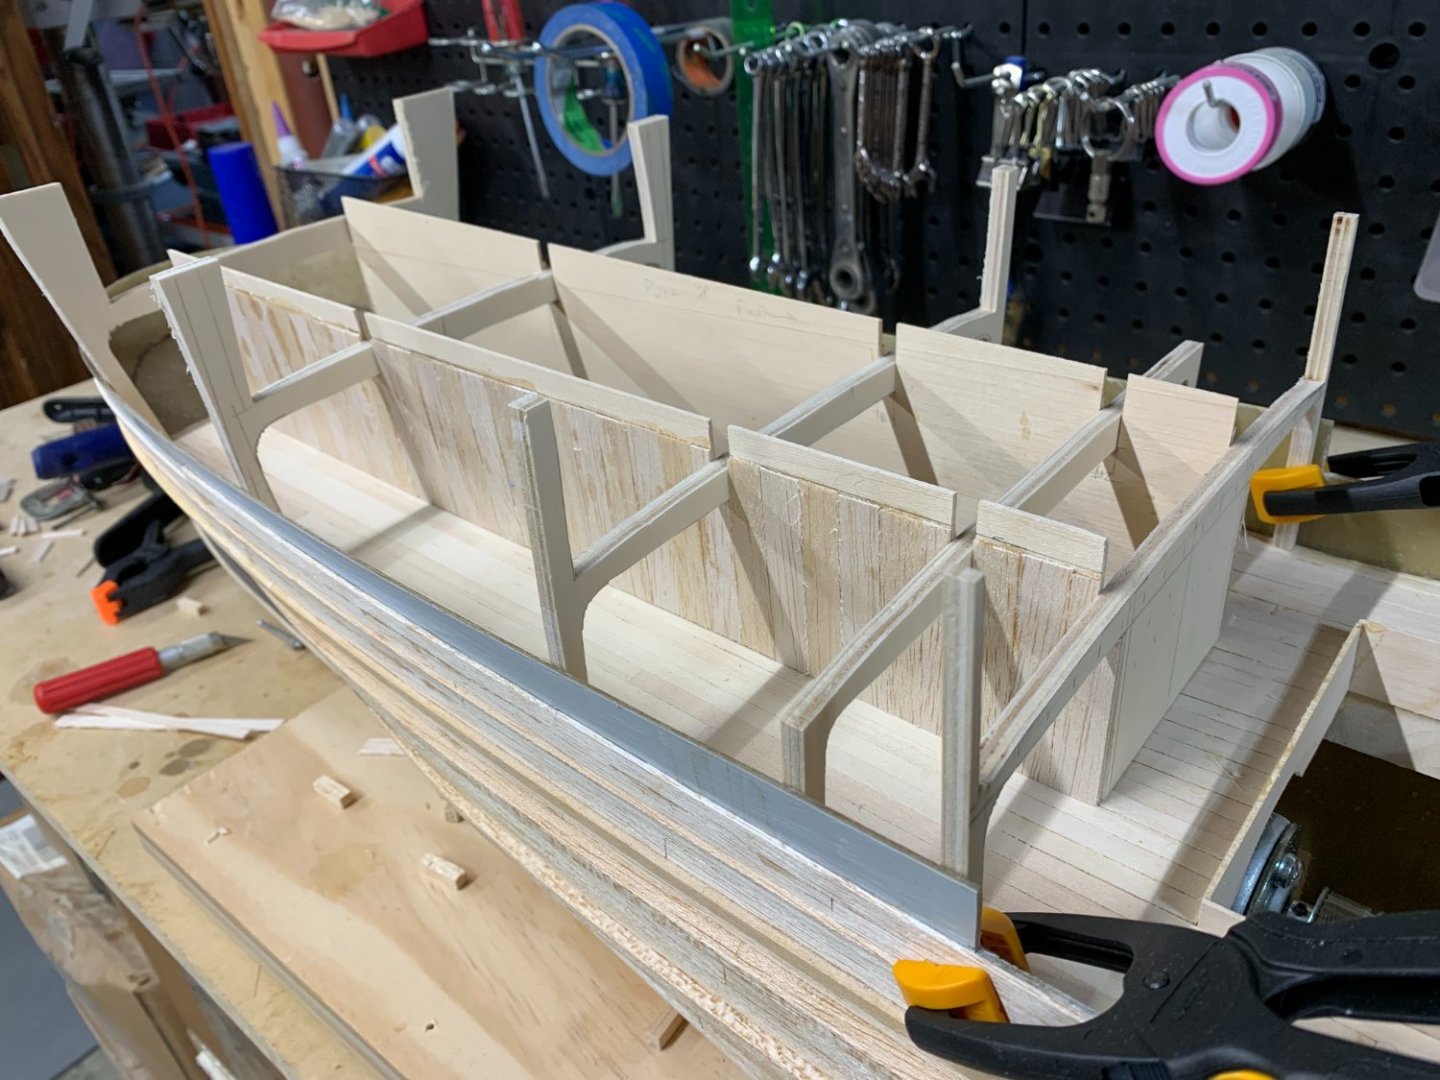
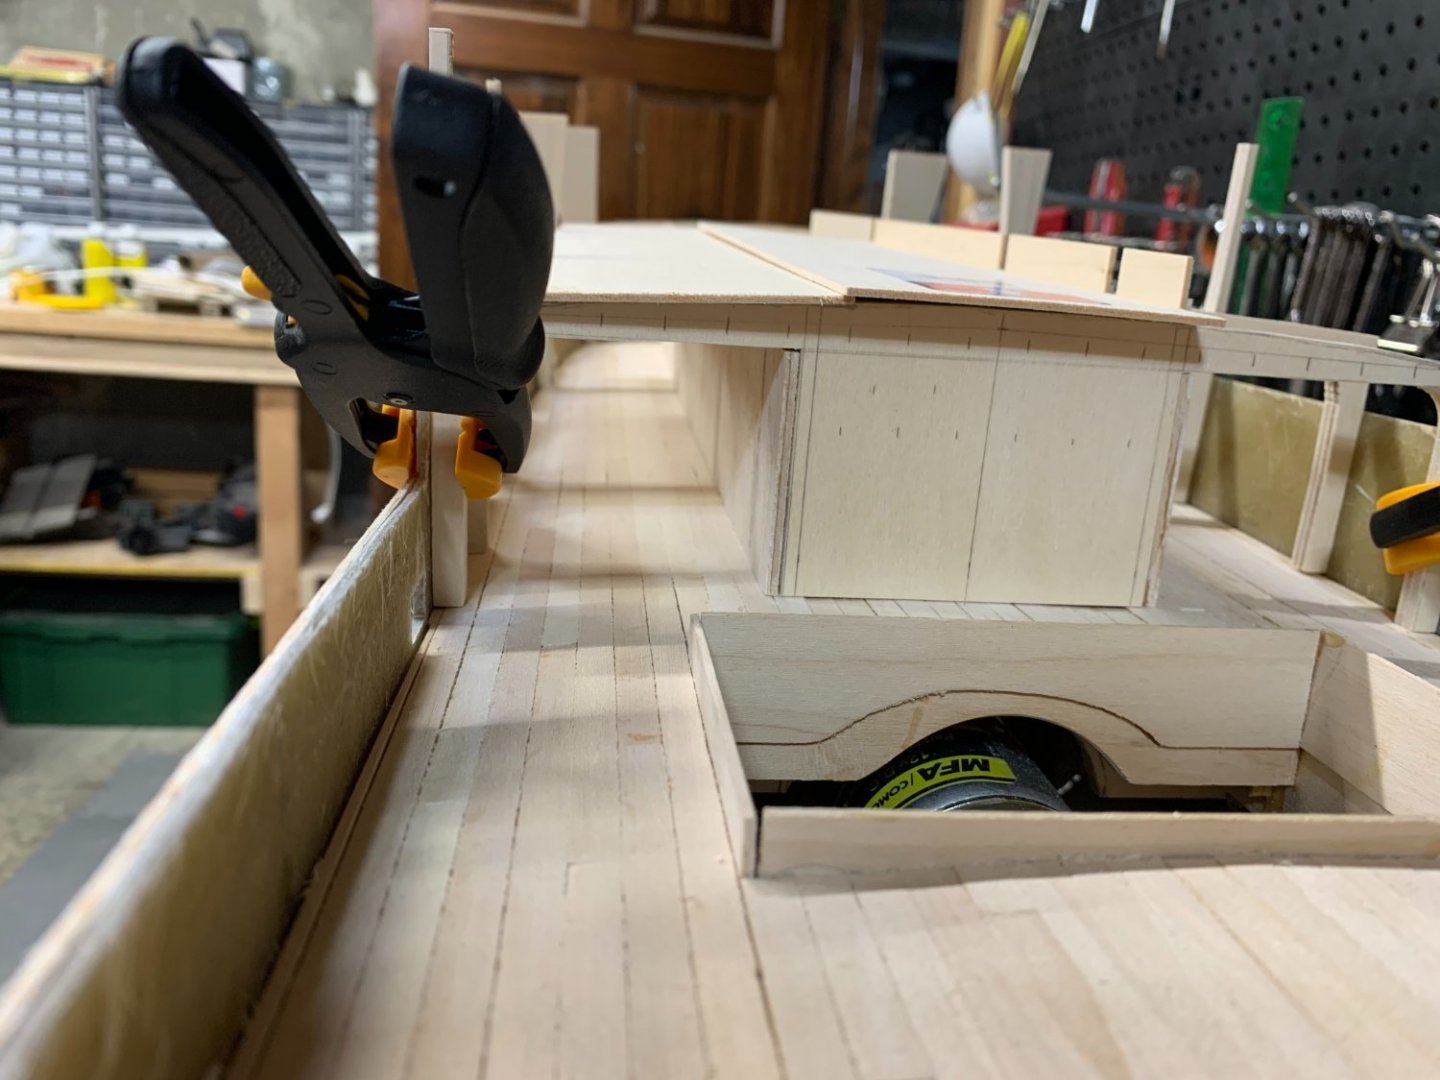
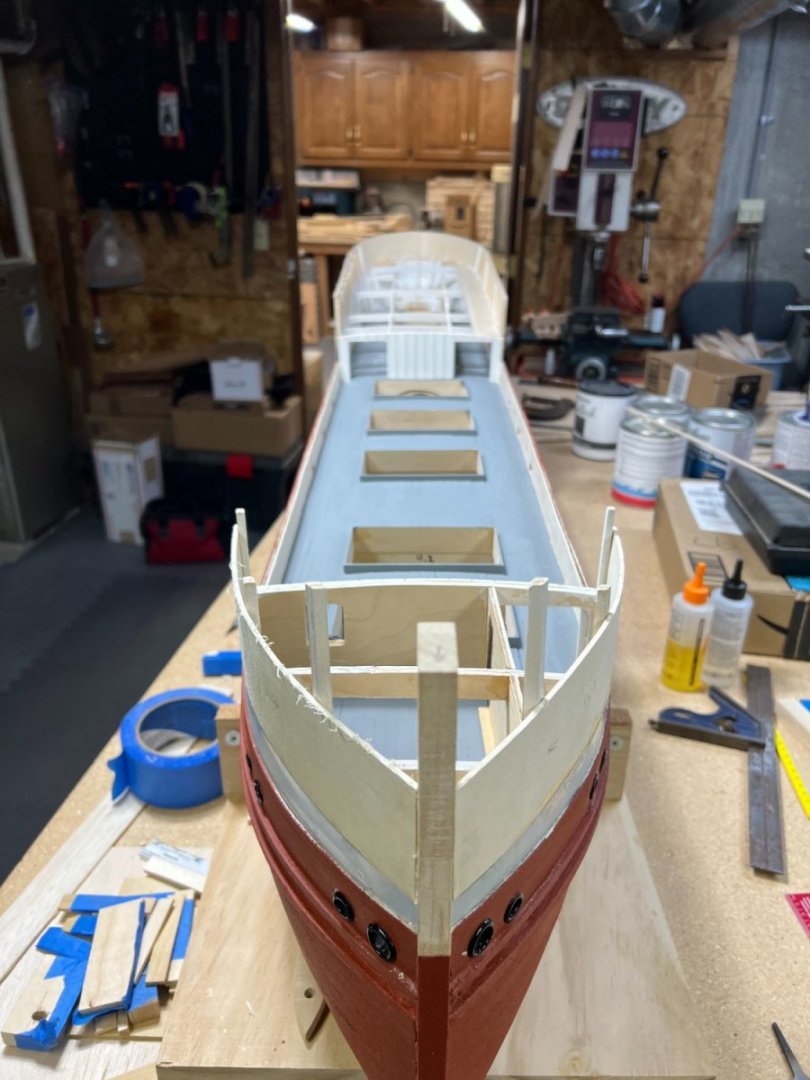
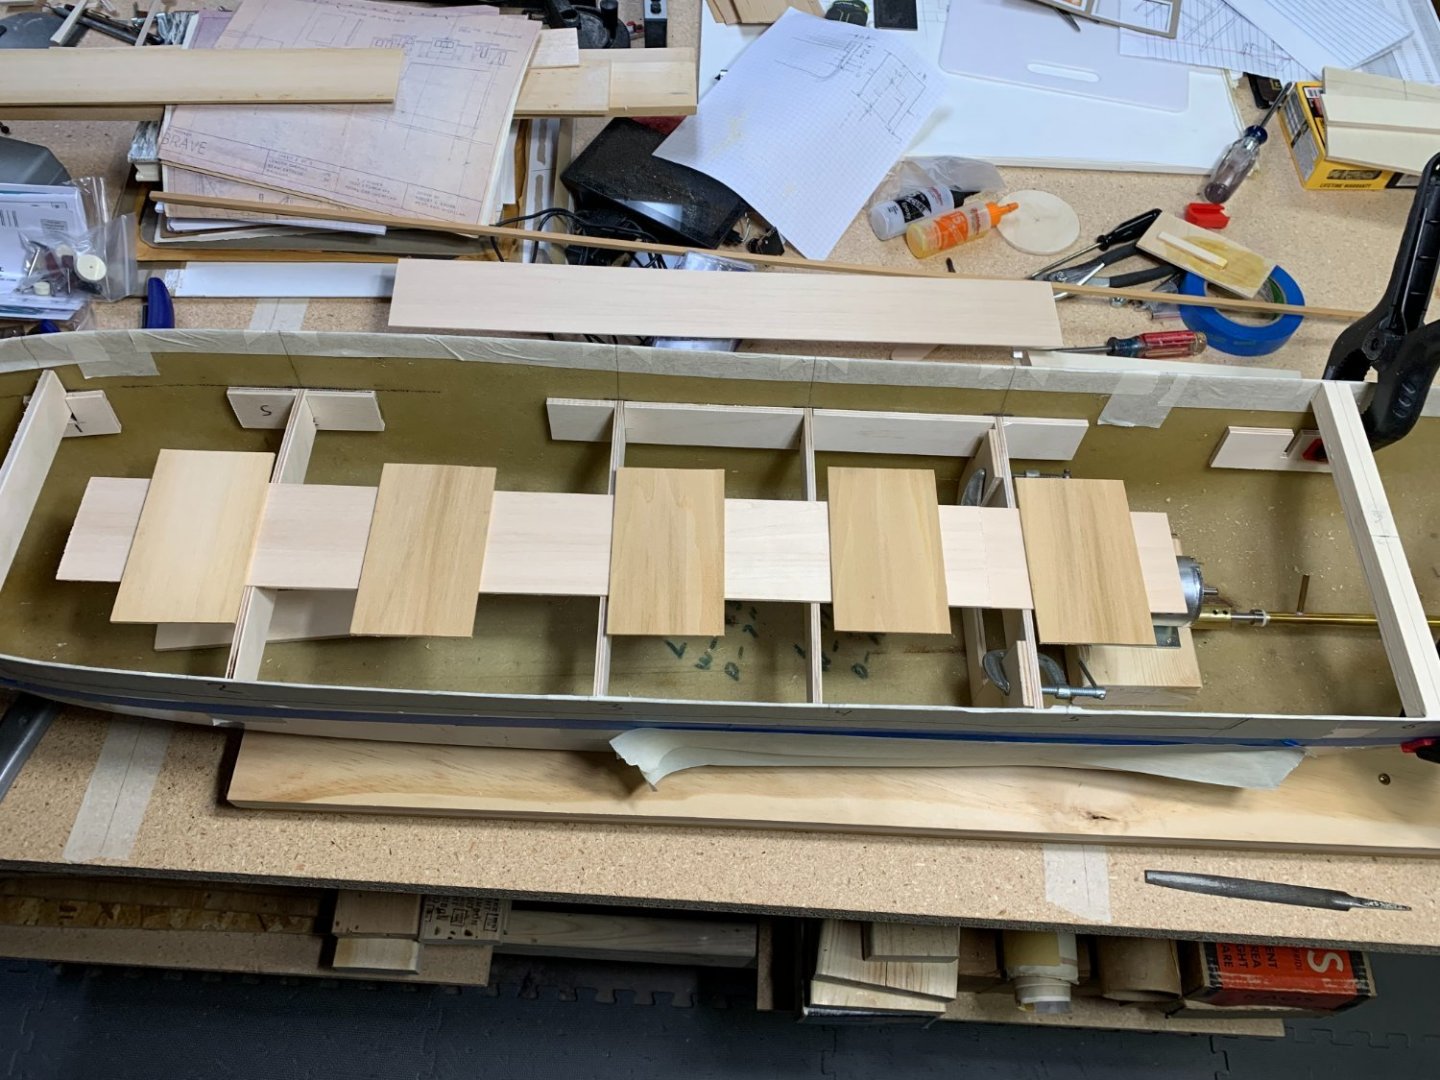
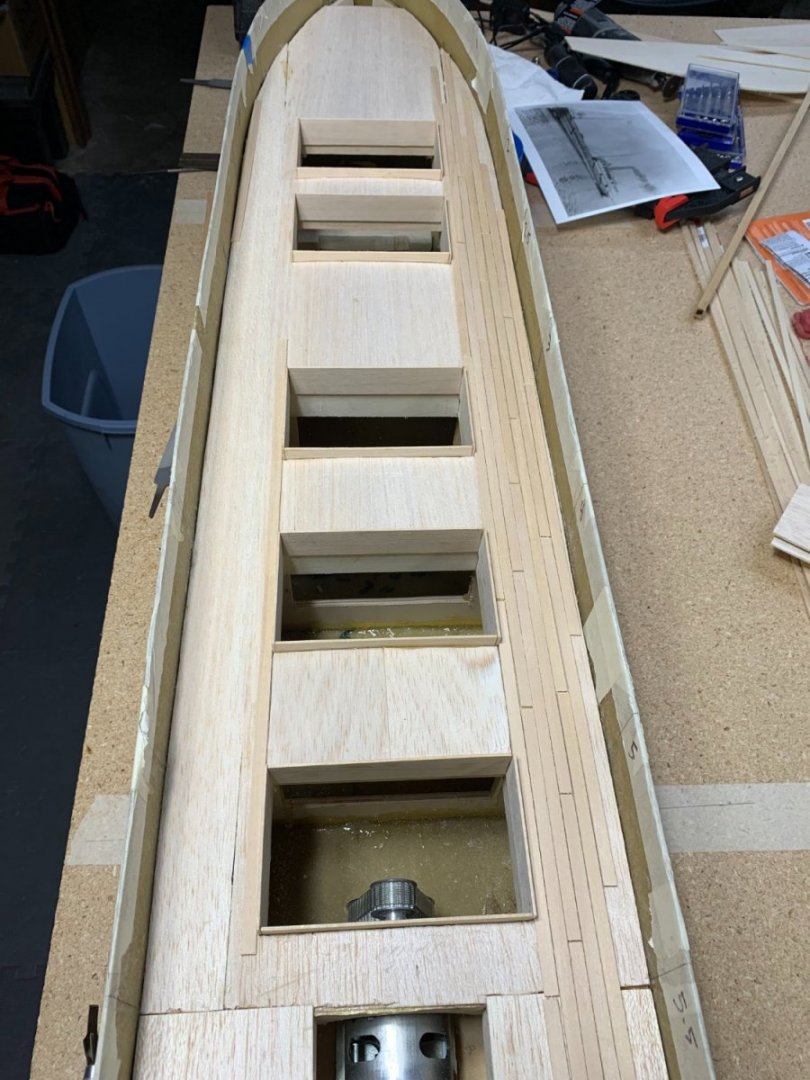
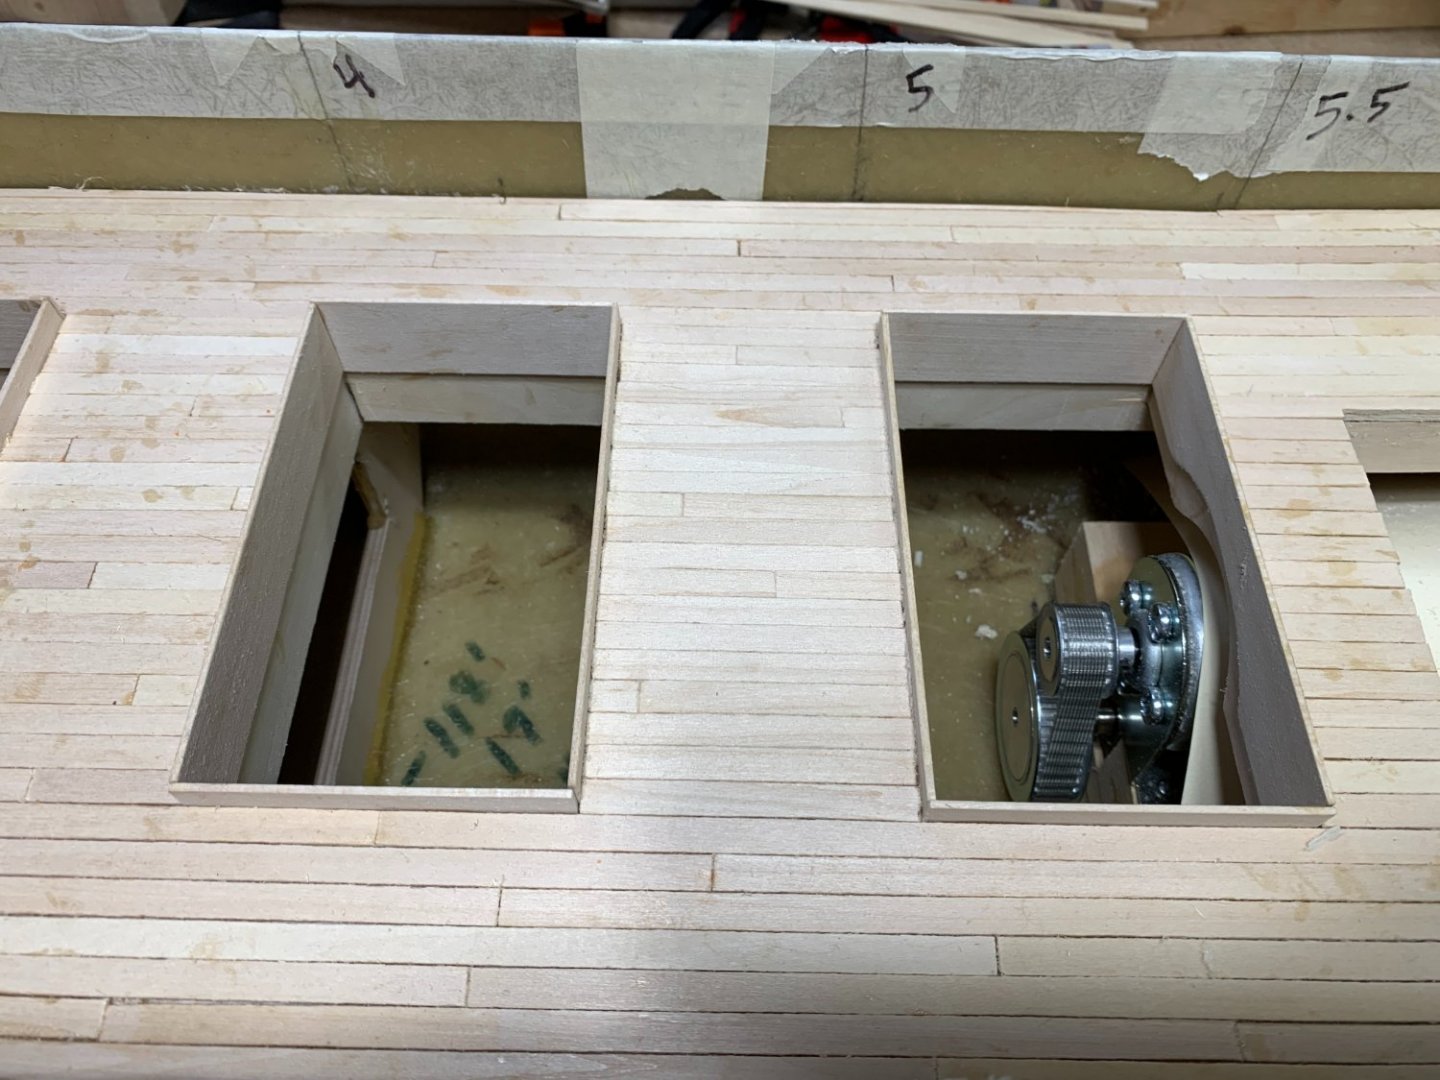
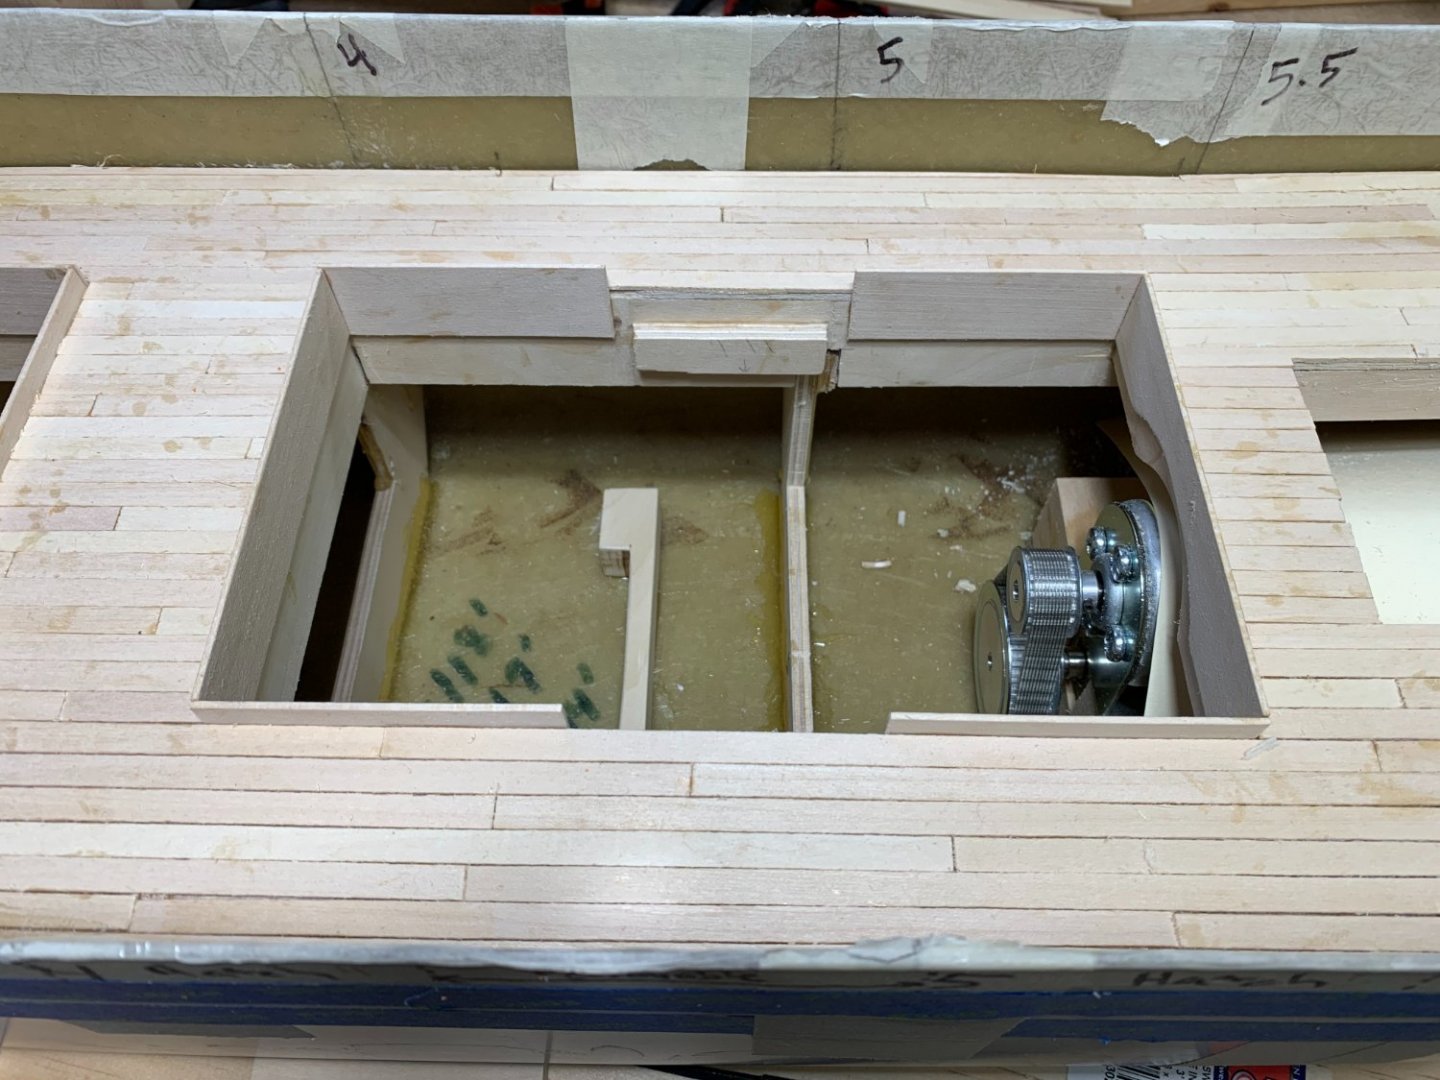
I am really enjoying the research aspect of this project. I grew up sailing on the great lakes and always loved seeing the big freighters going by. I wish I could have seen ships from this era! Oscoda was relatively small at 175' in length and 32' beam. She was 529 gross tons. Built by Simon Langell in St. Clair Michigan in 1878 she worked mostly Lake Michigan and Lake Huron hauling lumber and timber. There were several owners over the years with Edward Hines / Hines Lumber Company of Chicago being the last owner before November of 1914 when she ran aground and sunk in a storm off Pelkie Reef in northern Lake Michigan, just off the coast of the upper peninsula of Michigan. The Oscoda was towing 2 schooner barges: A.C. Tuxbury and Alice B. Norris. They were loaded with lumber from Georgian Bay and were headed for Chicago through the Straights of Mackinac when the storm hit. No lives were lost but Oscoda found its final resting spot. The schooner barges went on to serve for many more years. Here's some more pictures showing work on the main framing and decking of the single deck. I made a section between 2 hatch openings removable so I could access the motor if necessary.

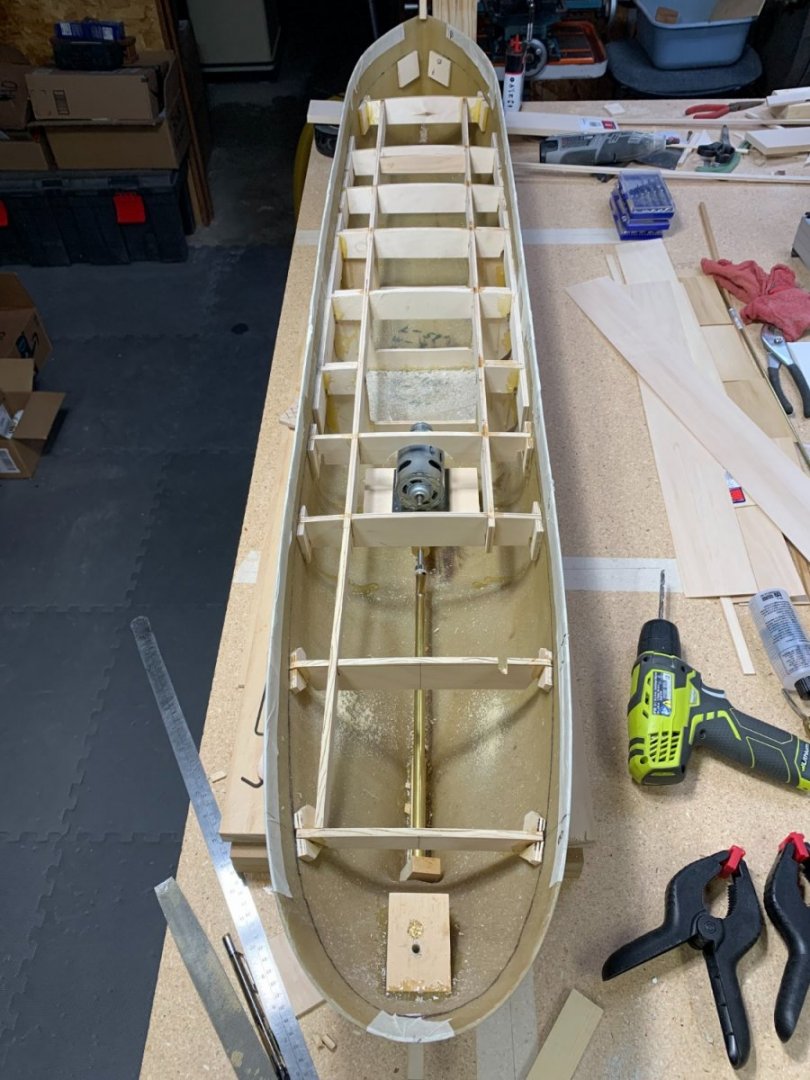
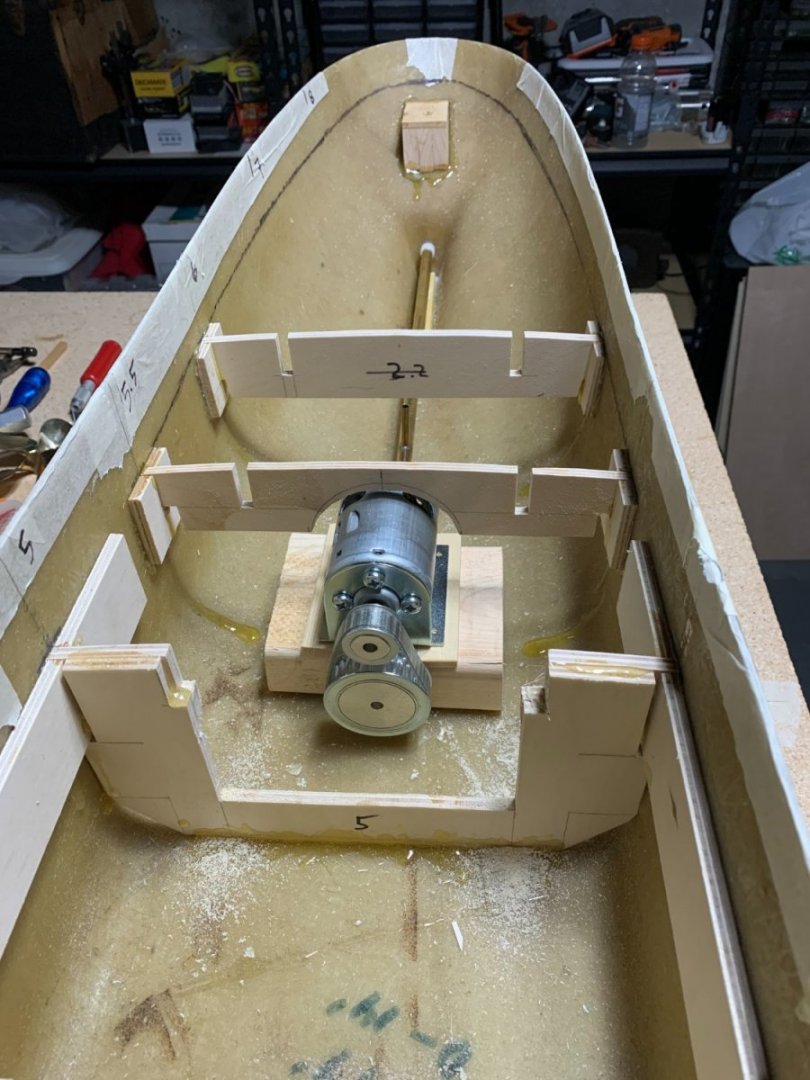


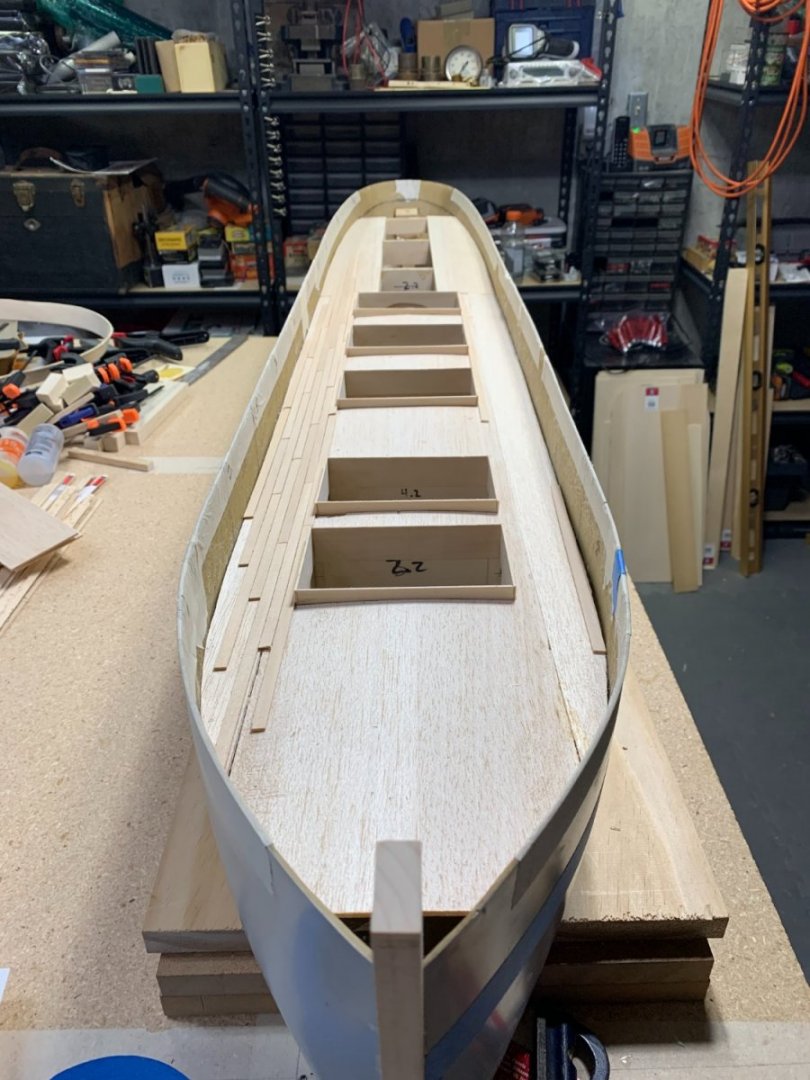
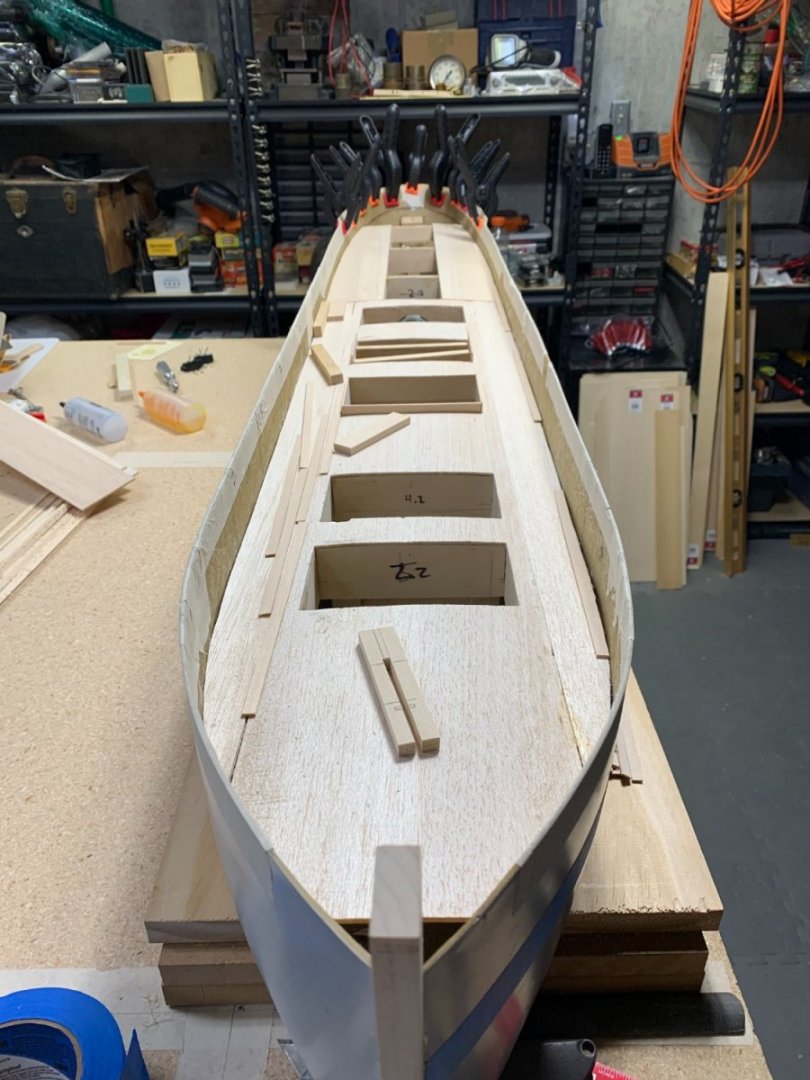

- 15 replies
-
- 7
-
-
- Hines Lumber
- Great Lakes
- (and 4 more)
-
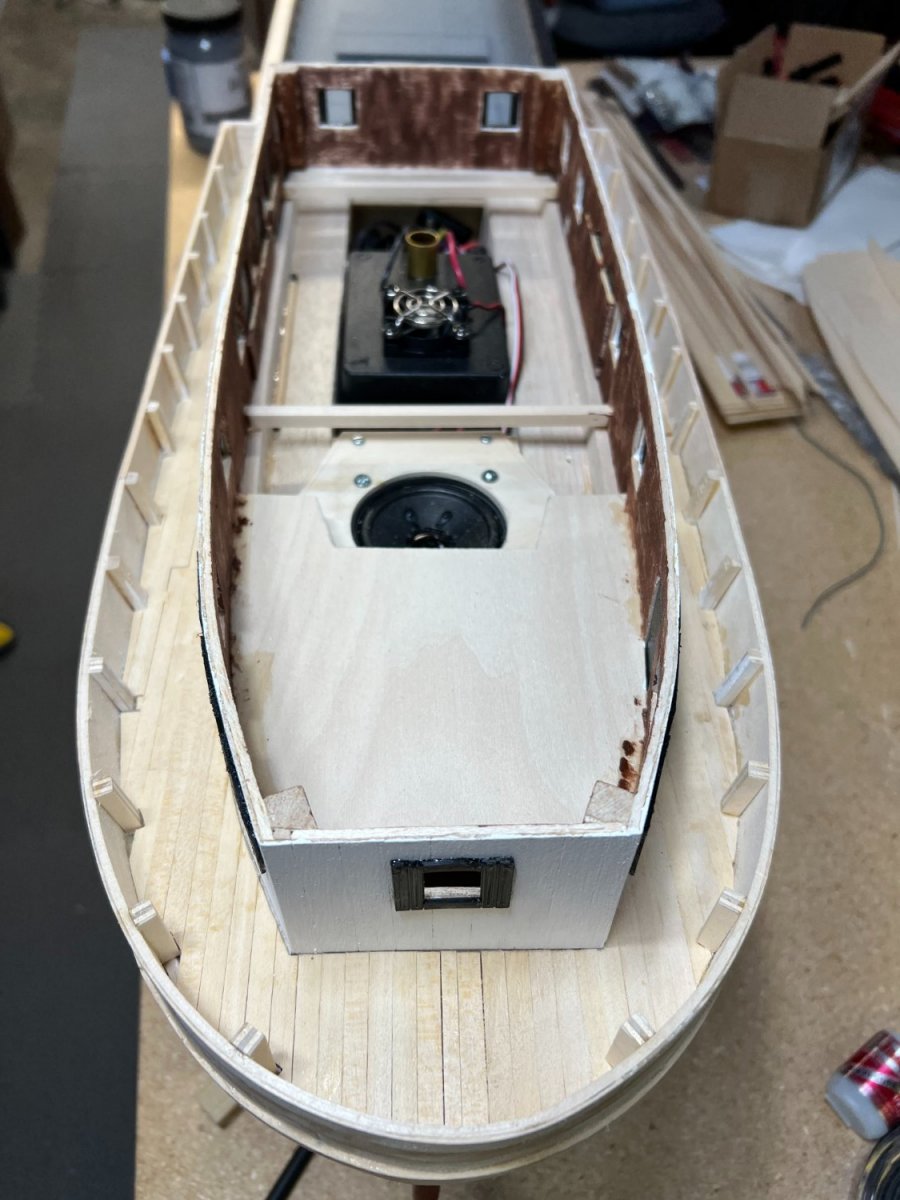
Even with a full time job I have managed to make great progress. Motor, electronics, batteries installed and operational. I hope to float it this spring or summer - assuming our ice melts!
- 15 replies
-
- 2
-
-
- Hines Lumber
- Great Lakes
- (and 4 more)
-
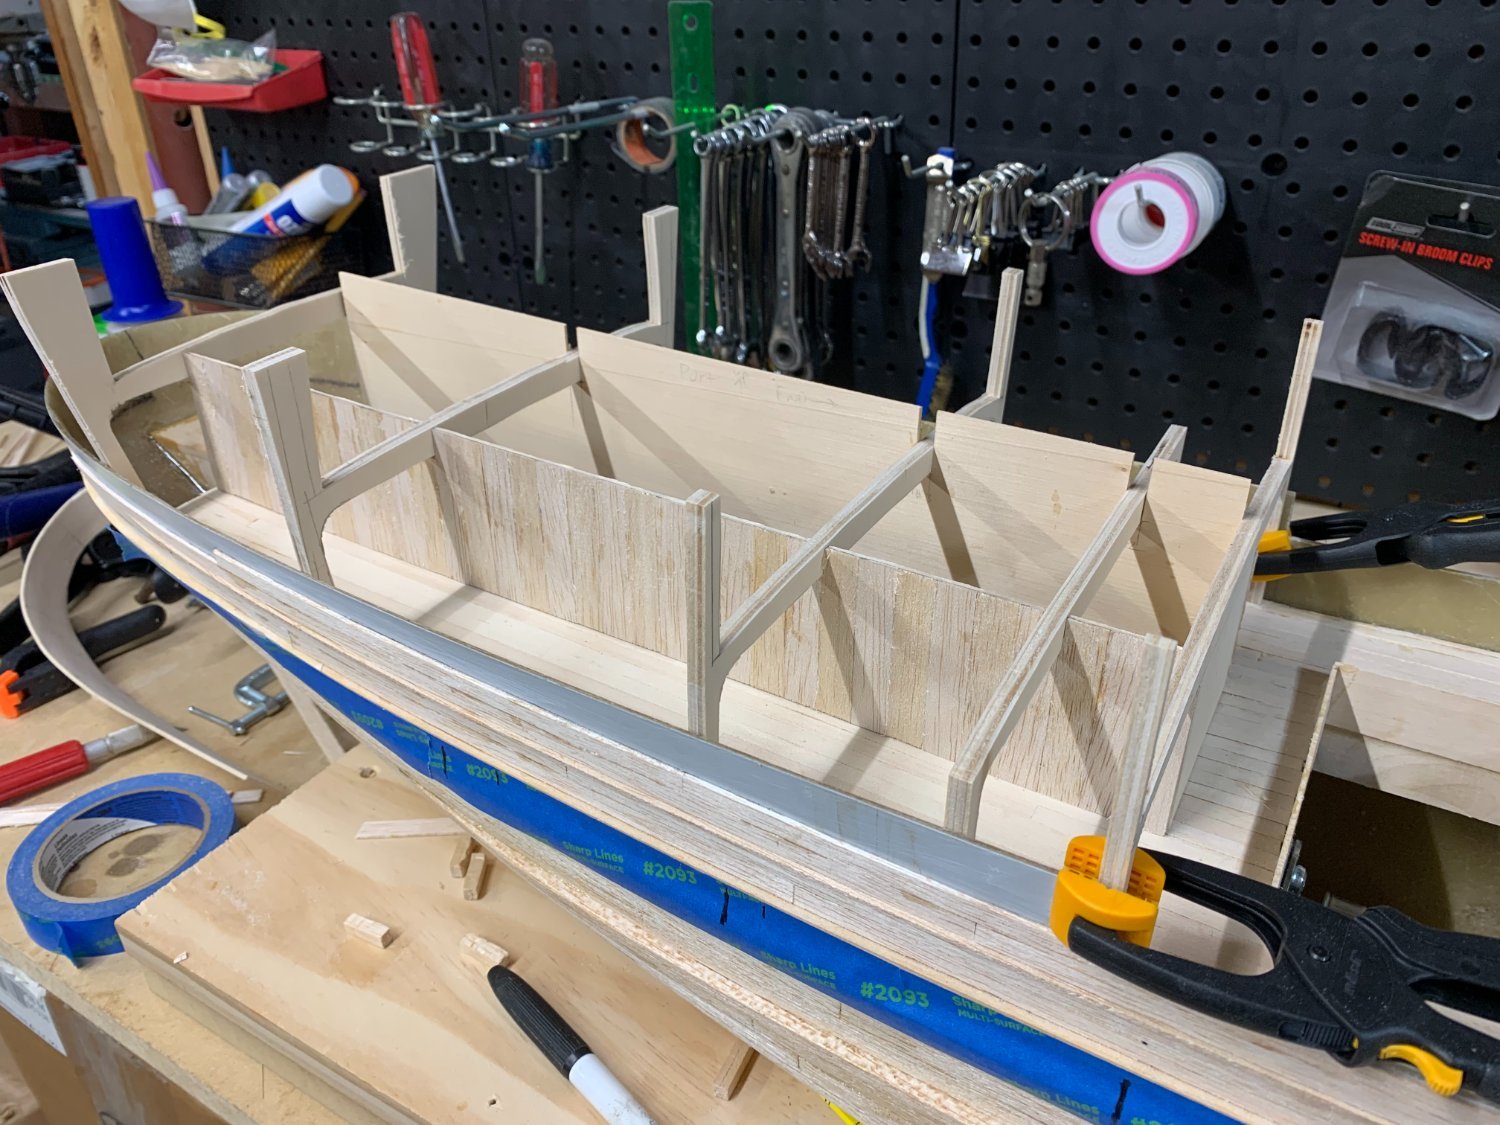
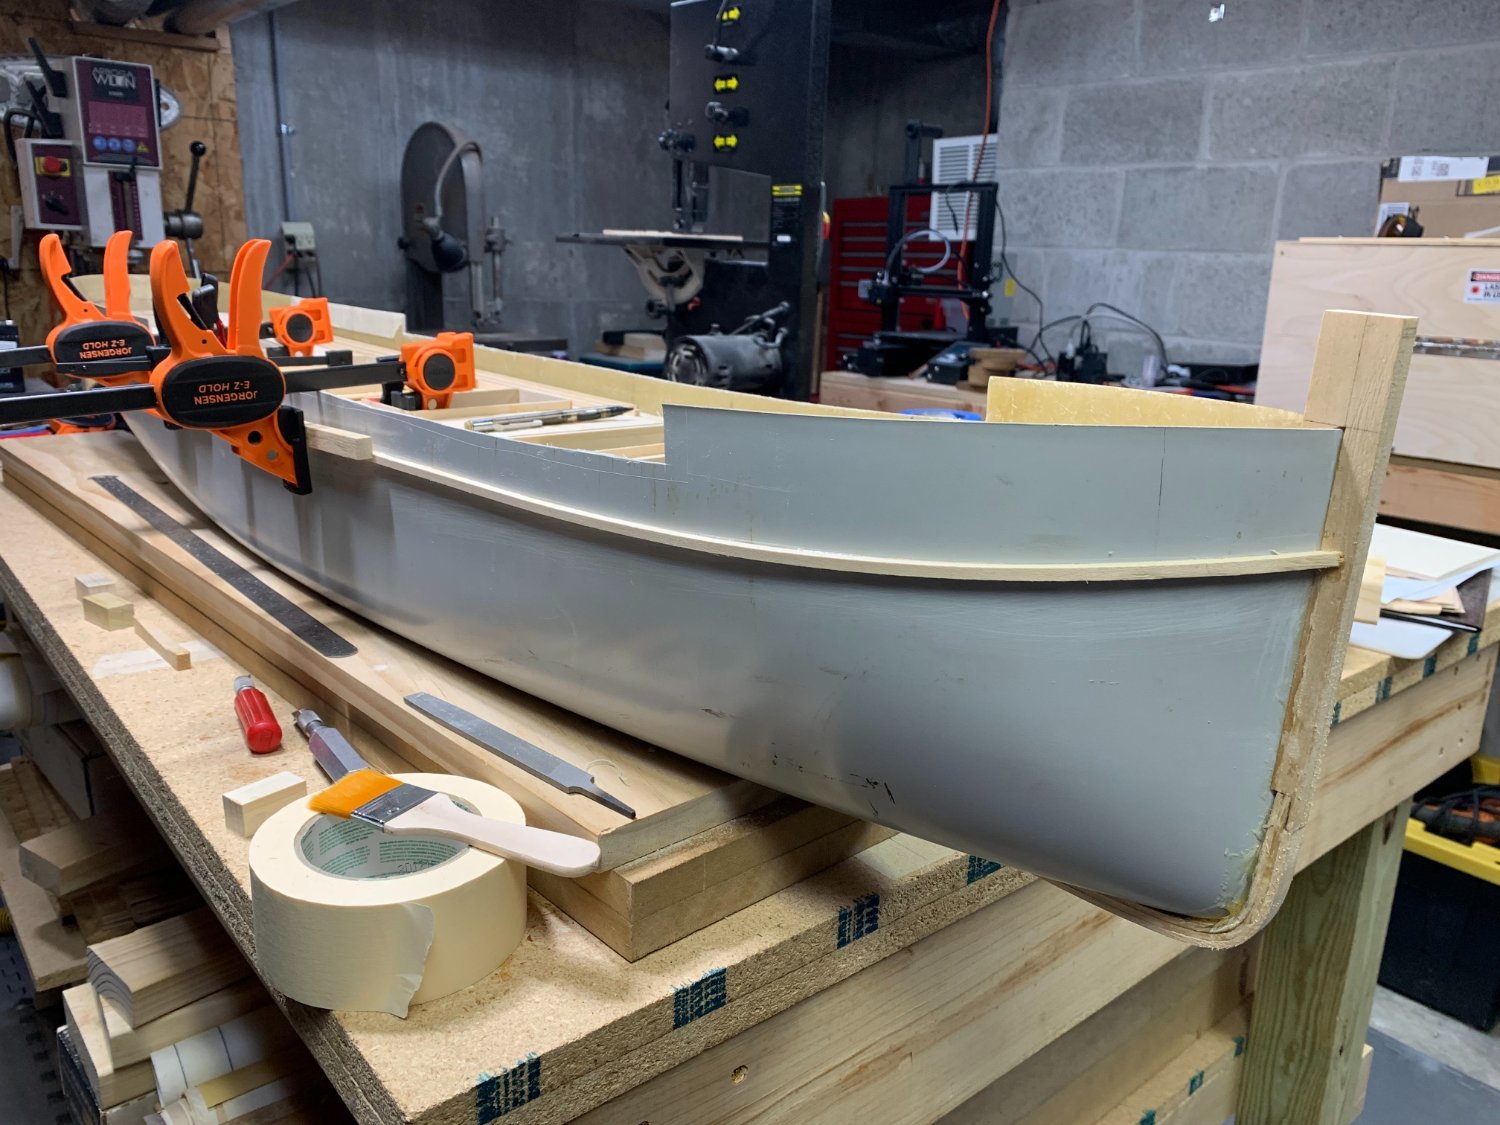
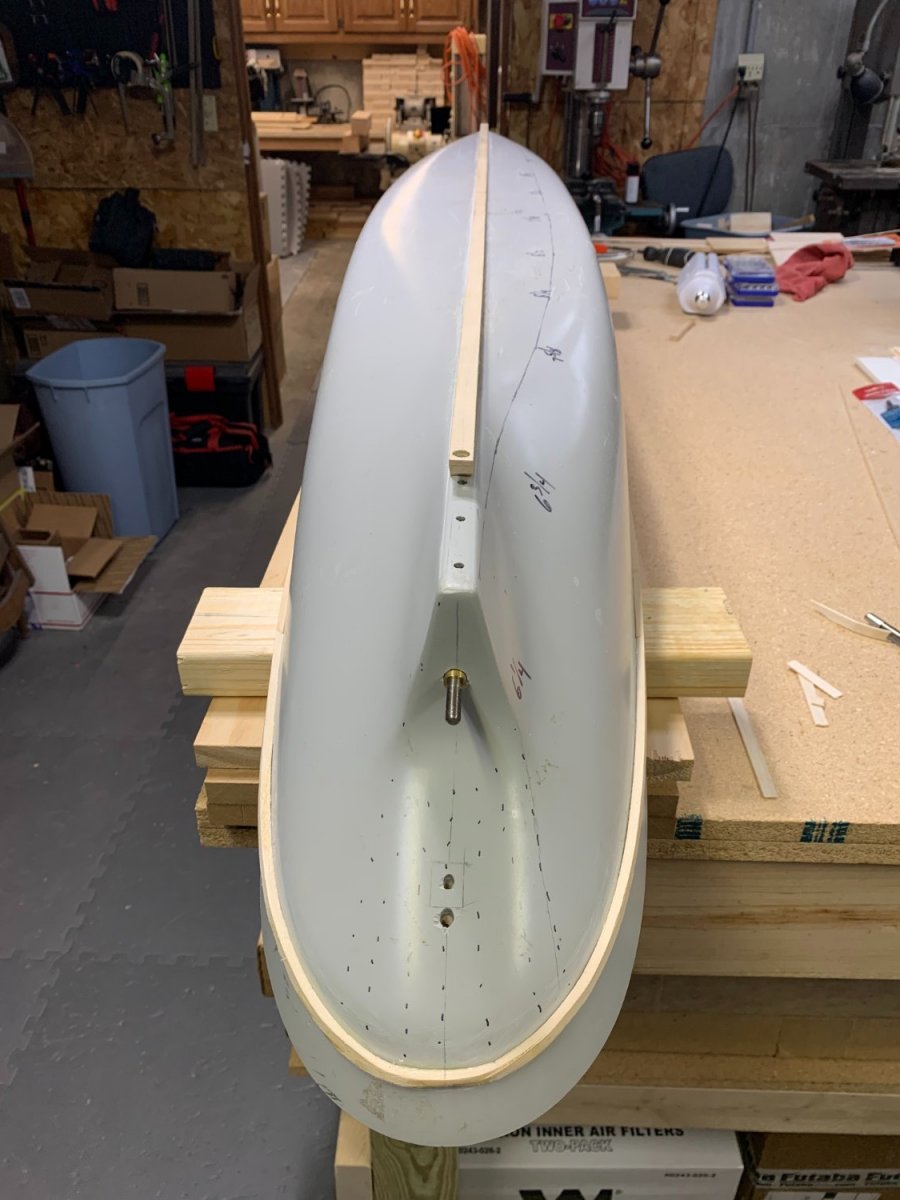
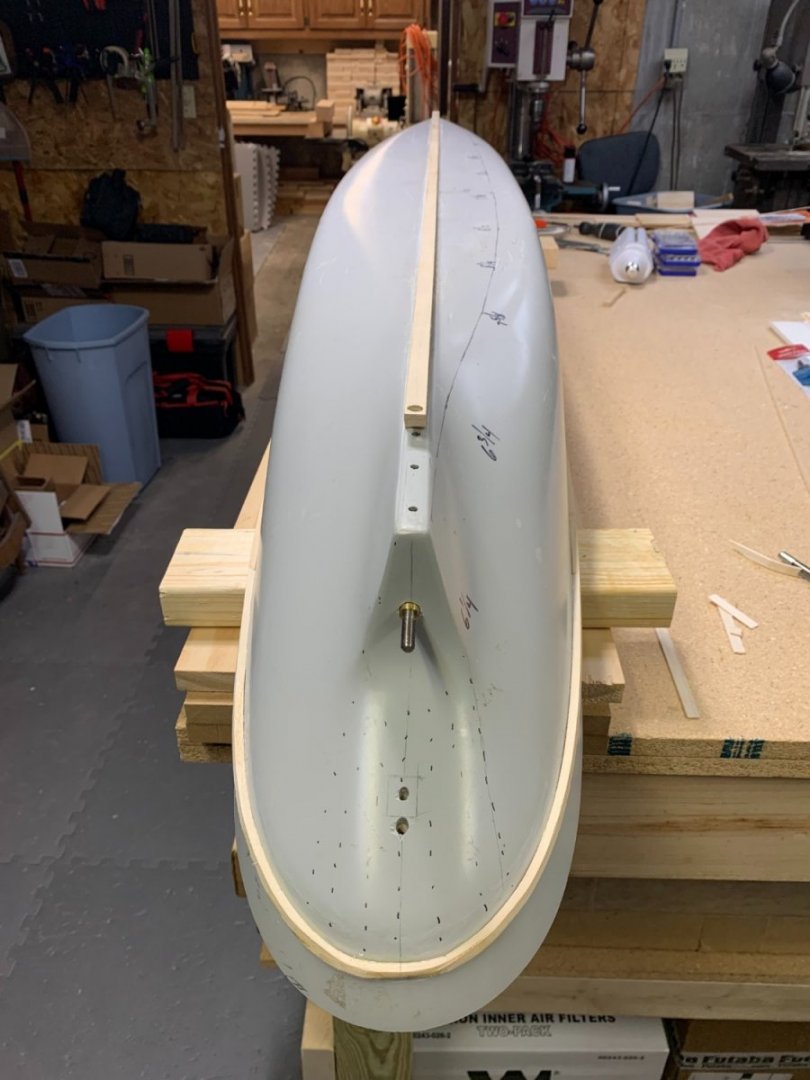
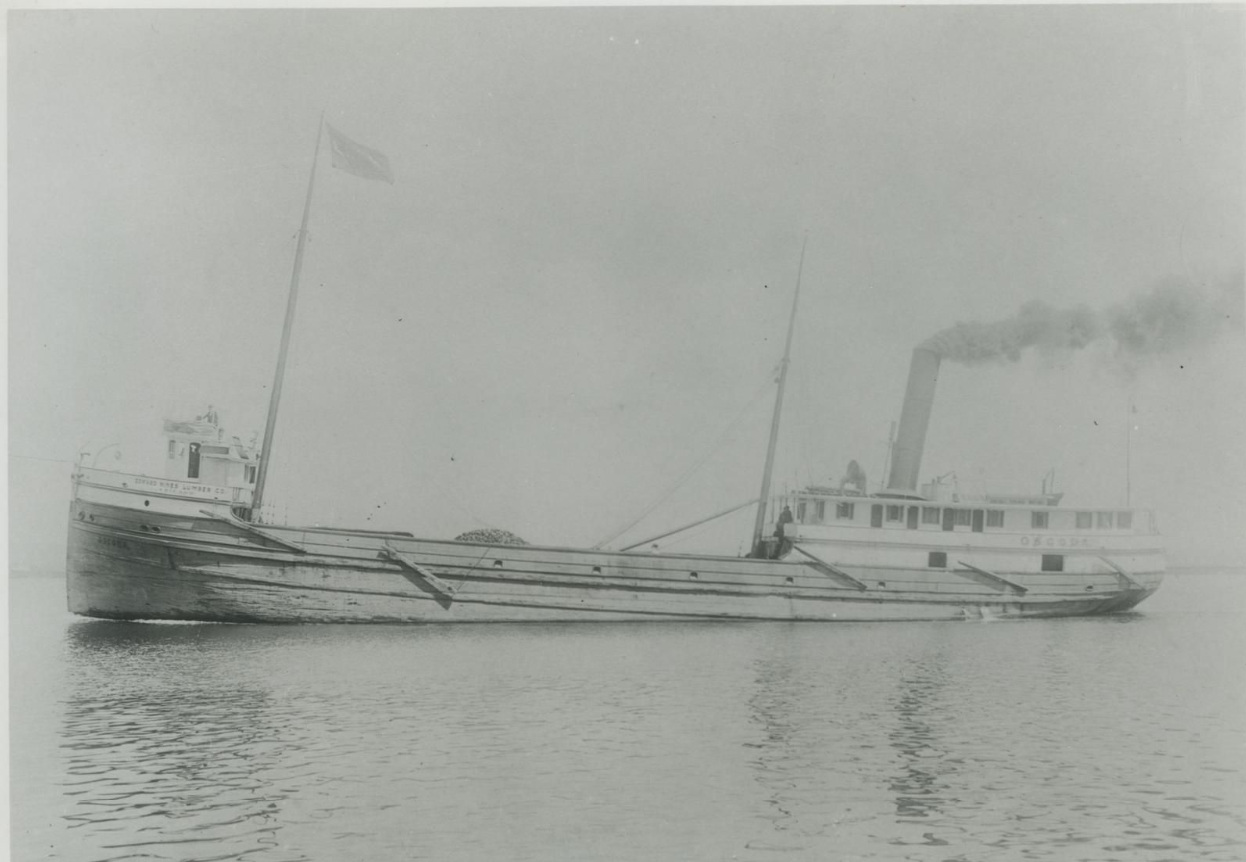
A project I originally started in 1993 but had to put on hold until recently. It was March of 2021 when I built my work table, dusted off the few documents I had, and began figuring out exactly how I was going to do this! I had originally purchased a 60" long fiberglass hull and this would be the foundation for the project. Many hours have been spent scouring the internet for information, stories, pictures, etc. as well as trips to local maritime museums and many subject matter books. As I have no real plans for the vessel I have relied on the photos I've found for the construction. Over the years modifications were made to the ship and as such my model may be a mix of various eras, but still maintaining accuracy. Over the past year I have made a great deal of progress but only now starting this post. I have hundreds of build pictures and will filter a few in from time to time if anyone is interested! For now the original Oscoda and a few pics of the laying of the keel. I hope you all enjoy this as much as I do!


- 15 replies
-
- 7
-
-
- Hines Lumber
- Great Lakes
- (and 4 more)
-
Thanks Roger, I appreciate your feedback. As for adhesion, I used epoxy for my sample board and it worked well but was only flat. For the curved sections I'm formulating plans for addressing that. I foresee lots of steam and stretch wrap in my future, and I've already resigned myself to a long process - maybe one plank per night?! lol I've been to both Manitowoc and SB, but need to spend more time at the later. Manitowoc has already been a great source of info for this project and others coming up with photos, drawings books (one of yours in fact). Superior as well and also Bowling Green. I found on google books an excerpt from The Merchants' Magazine and Commercial Review: Volume 35 on the proceedings of the Association of Lake Underwriters, Buffalo: Aug 1856 (page 490). I also located a reprint of the entire proceedings on Abe Books, which incidentally is a good source as well. Ordered that for $12. Hope to learn more from my findings, thanks for the tips!
-
Very interesting Roger. My wood hull lumber hooker project is on a fiberglass hull. I wanted a more authentic look - so my plan is to strip plank over the fiberglass. I made a test board with random balsa planks of 2 slightly different thicknesses, and staggered the joints. Afterwards I sanded the surface to eliminate sharp transitions between the 2 thicknesses. Then I used a stiff wire brush to give a bit of a weathered look. Final step was wipe down with Varathane wood hardener and paint. I used Duralux marine bottom paint - "signal red". I like the way my sample turned out and hope the final product looks good too. Now I need to do a plan for exactly how to run the planks! Any comments or suggestions? Has anyone done something similar? -Craig