

luponero
-
Posts
235 -
Joined
-
Last visited
Content Type
Profiles
Forums
Gallery
Events
Posts posted by luponero
-
-
I thank friends for their appreciation,
finished the frames that will be inserted into the openings on the keel, I started to create the external details of the keel, also in walnut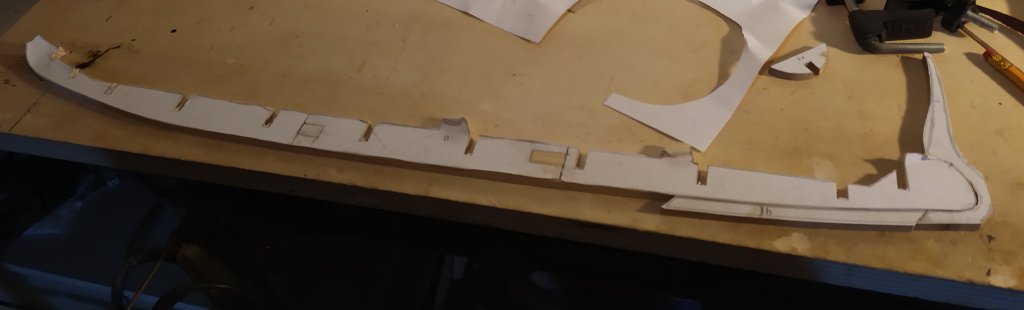
I end with the bas-relief of Lenormant, found by the archaeologist, numismatist and Assyrologist in 1852, the transalpine, François Lenormant,
on the Acropolis of Athens a bas-relief destined to go down in history for those involved in the classic maritime sector. It is a fragmentary slab, now kept in the Acropolis Museum, dating back to around 410 BC, which reproduces the central part of a ship with three rows of oars.
The Lenormant bas-relief has been for over a century at the center of a vast literature and discussions on the rowing system of ancient polyremes, in which archaeologists, naval engineers and admirals have intervened.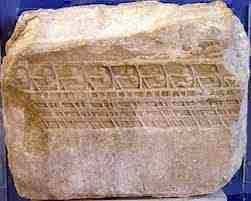
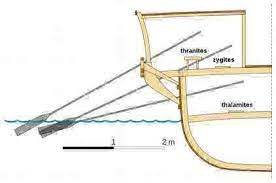
Scholars claim that the ship depicted in the fragment is an Athenian triere from the end of the fifth century, it shows a section of the ship that includes 9 thranites on the "parexeiresia" (equivalent to the "posticcio * o buttafuori " of the galleys.), 8 zygiti and 8 thalamites
* posticcio, scaffolding which, in galleys, protruded from the edge of the hull and ran from stern to bow; it served as a support for the oarlocks;
I report the design of the rowing system on the triere, which will be deepened by Morrison, the position on the three levels of the rowers will be the central and fundamental element of a discussion that lasted years, and which ended with the practical demonstration of the correct interpretation made by Morrison, but for now it is too early to "deepen" the subject
see you next time
black Wolf
- druxey, mtaylor, GrandpaPhil and 2 others
-
 5
5
-
Realization of a model of triremes, or rather "triere" (to say it in the Greek) Athenian of the fifth century. to. C., I do not hide that trying to create a model of triere is very stimulating and uncertain, apologizing for the "mistakes" that I will be able to make, despite myself. The retrieval of the material immediately proved to be "complex" the monograph "ATHENIAN TRIREME ANATOMY SHIP by Douglas McElvogue" that I had fixed in a German bookshop, is not available for the moment (perhaps it has never been published ,,, who knows)
certainly the bottom of the sea has never returned to us the remains of this extraordinary and mythical boat, mentioned in classical writings, protagonist in recent and past cinematography, which as often happens in the cinematographic transposition of historical situations, has not been correctly reported both in the its complex and futuristic, (for the times) structure, propulsive technique and historical phase, consequently the beginning was not easy, but this was a stimulus and it will be later to deepen autonomously the knowledge on the history and evolution of this model.It seems that already in the eighth century. to. C. a model of triere already existed, which over time will be transformed several times both for the experience acquired and for the different needs of use, the evolution from the "light triere" to the "heavy triere", which has characterized the evolution of the Athenian fleet between Themistocles and Cimon, which allowed me to understand the characteristics and evolution of this ship,
The scale of realization is 1/50, the measurements of the model will be of a width of 12 cm and a length of 76 cm, the actual measurement was an overall width of 5.5 m and 35/36 m in length, a rower on each oar ("sensile" type of rowing), a total of 170 rowers on three rows per side, each row on a different level, 31 rowers in the upper rows and 27 each in the middle and lower rows, the longitudinal distance between rowers is 2 "cubits" (0.888 m), I will try to deepen, during the construction, the characteristics of the ship, and of the "rowing", which for years has been a "mystery" at the center of analysis and discussions of experts and scholars , of this very fast ship.
The essences that I will use for the realization will be, fir, walnut, cherry and maple, then, who knows it depends a little on the moment, so we will see ..., for now we are at the beginning of this adventure.As I said I do not have much technical material, the construction plans are composed of construction details of Olympias and construction plans of a trireme downloaded from a site, I have varied the scale from 1/72 to 1/50, integrating, redesigning them in the plans of construction downloaded the features the structural features of Olympias, the triere made by Morrison and Coates,
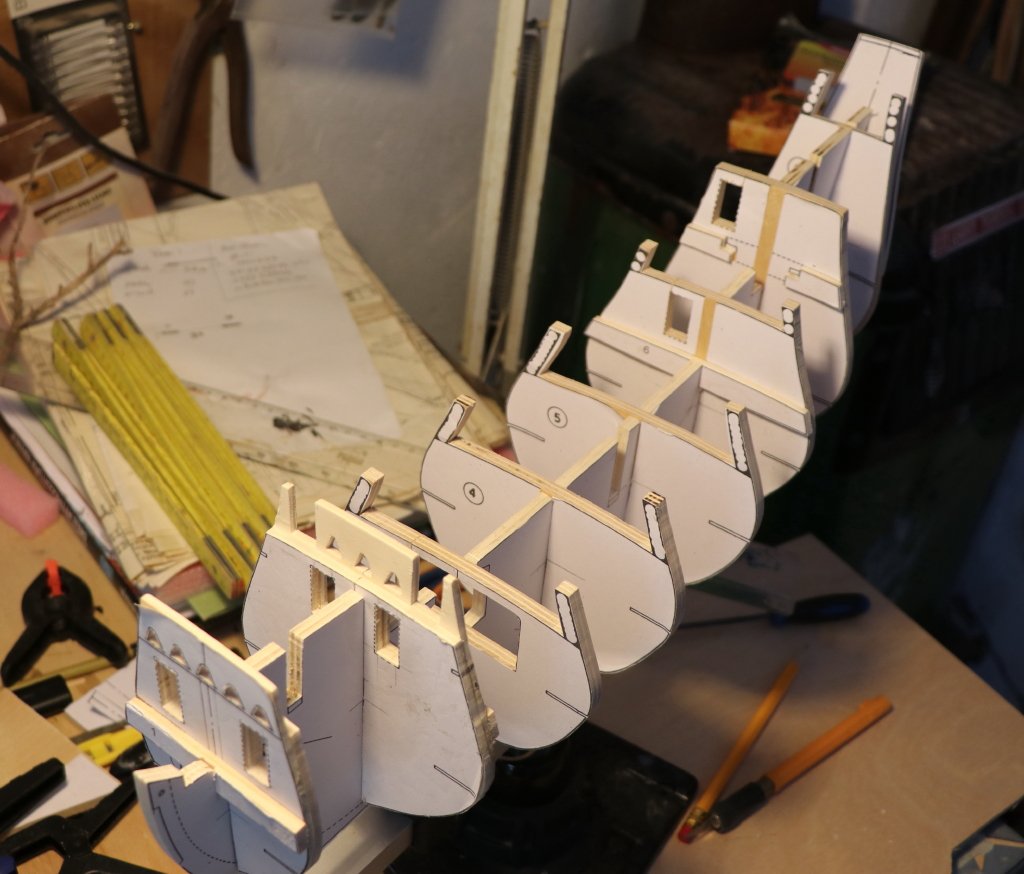
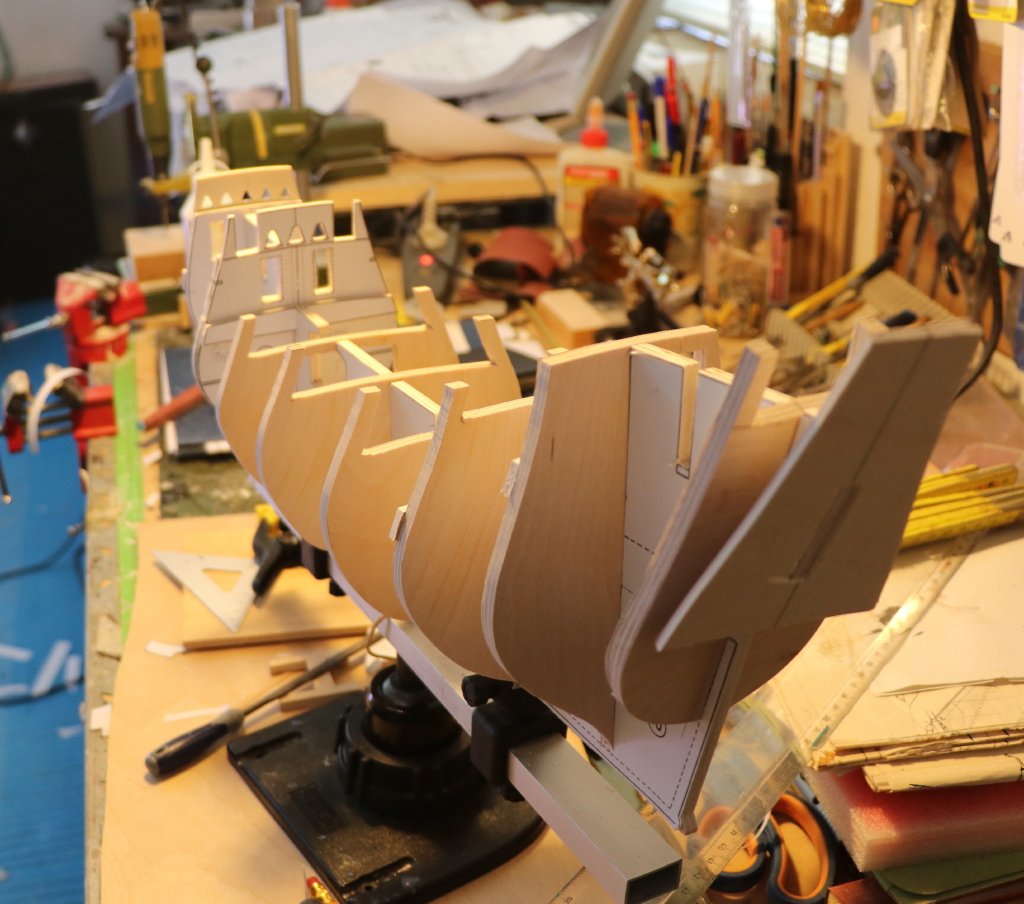
the first part I made was the "keel" divided into three parts, made with a 6 mm thick planed spruce board,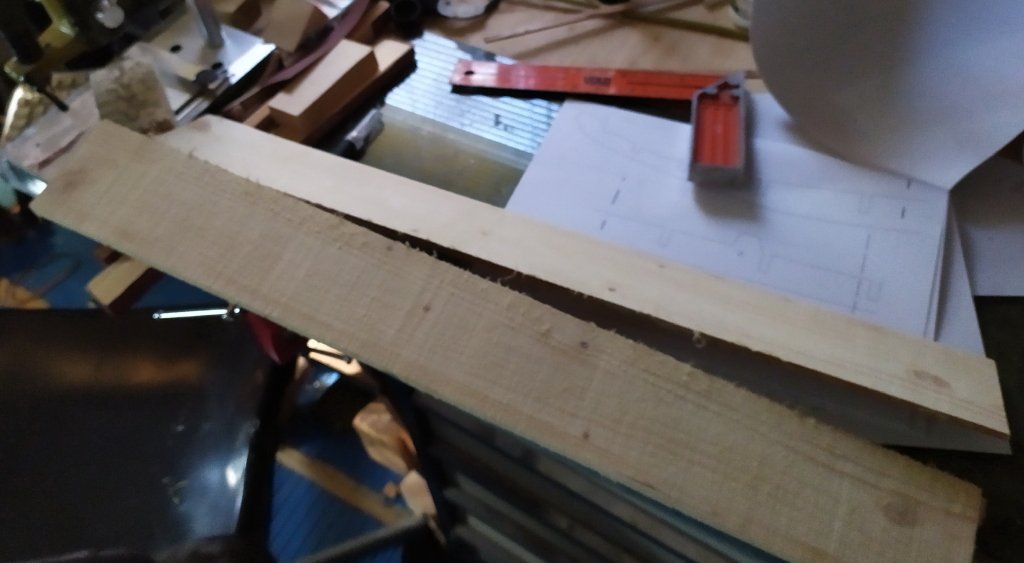
the three pieces were joined with a simple mortise and tenon joint

the length of the keel is about 65 cm, to keep the keel straight I glued the pieces holding them under a perfectly straight steel profile
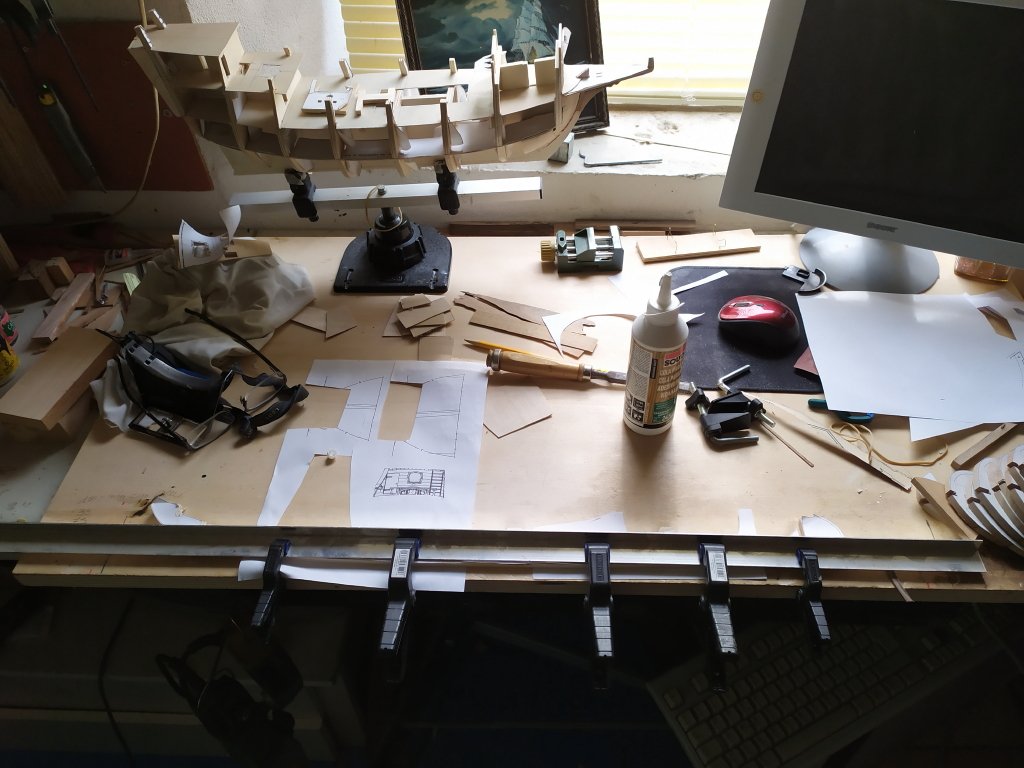
in the background the Medici galleon "SGB" is visible I will alternate the construction of these two models working alternately two weeks for each one (it will be hard!)
after the keel I made the ordinate, these with walnut
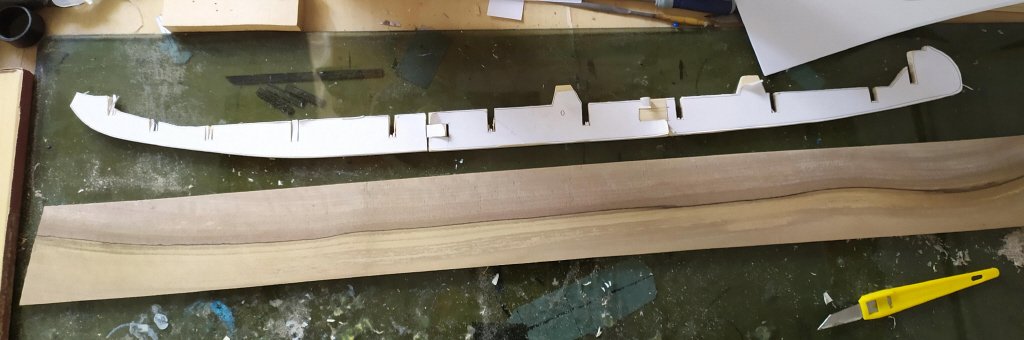
after the keel I made the frame, these with walnut, ( which has very beautiful veins and shades )
by cutting them out, these are the "initials", later there will be changes made, making the ribs with the system used in the Etruscan ship
see you next time
black Wolf
- mtaylor, VTHokiEE, GrandpaPhil and 2 others
-
5
-
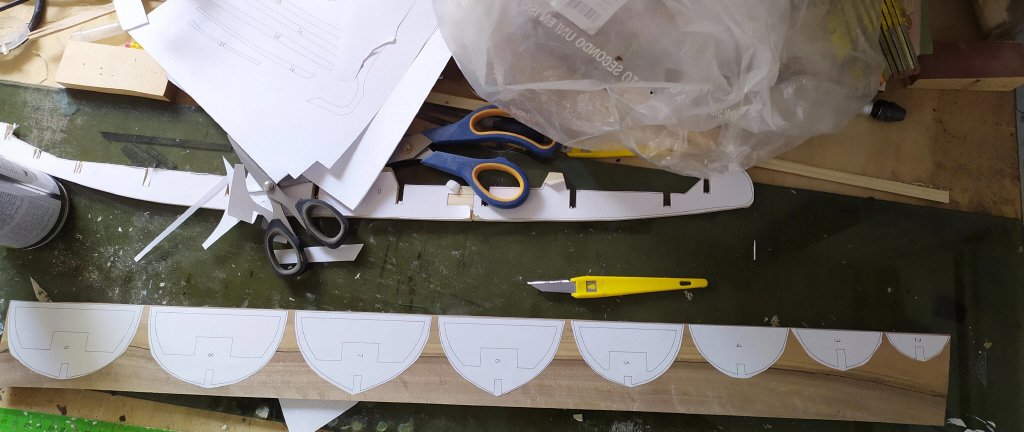
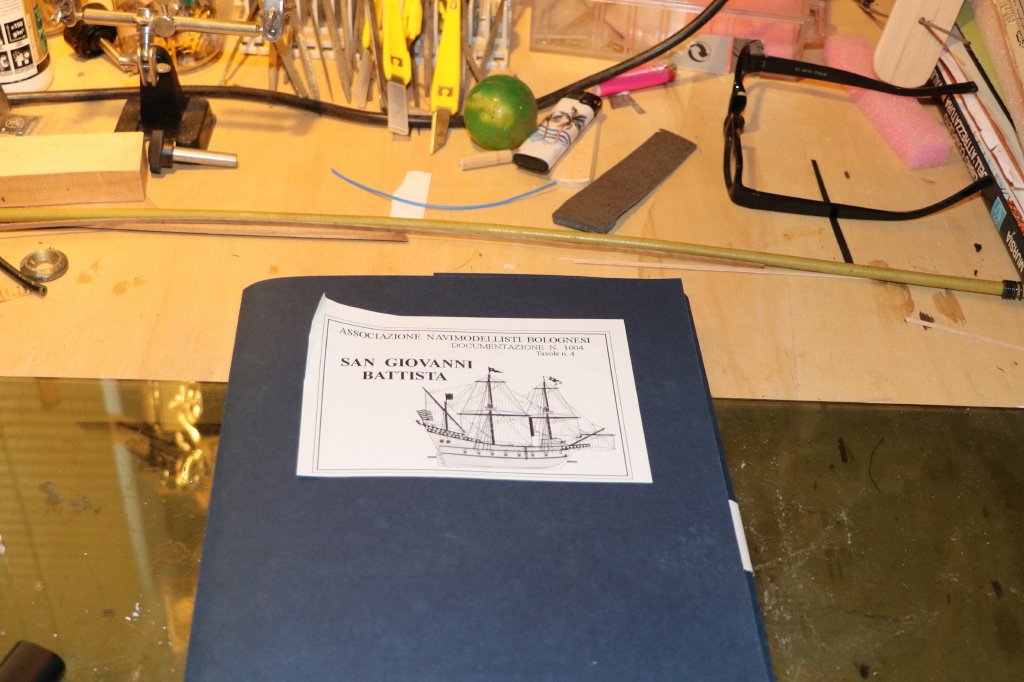
The model is in 1/60 scale, shown on six well-designed and well explained tables, made in the seventies by a Florentine designer: Matteucci, but "missing" some fundamental parts, the bridges that I will redesign using an old table "old fashioned" drawing, which I used when I was a student (many years ago)
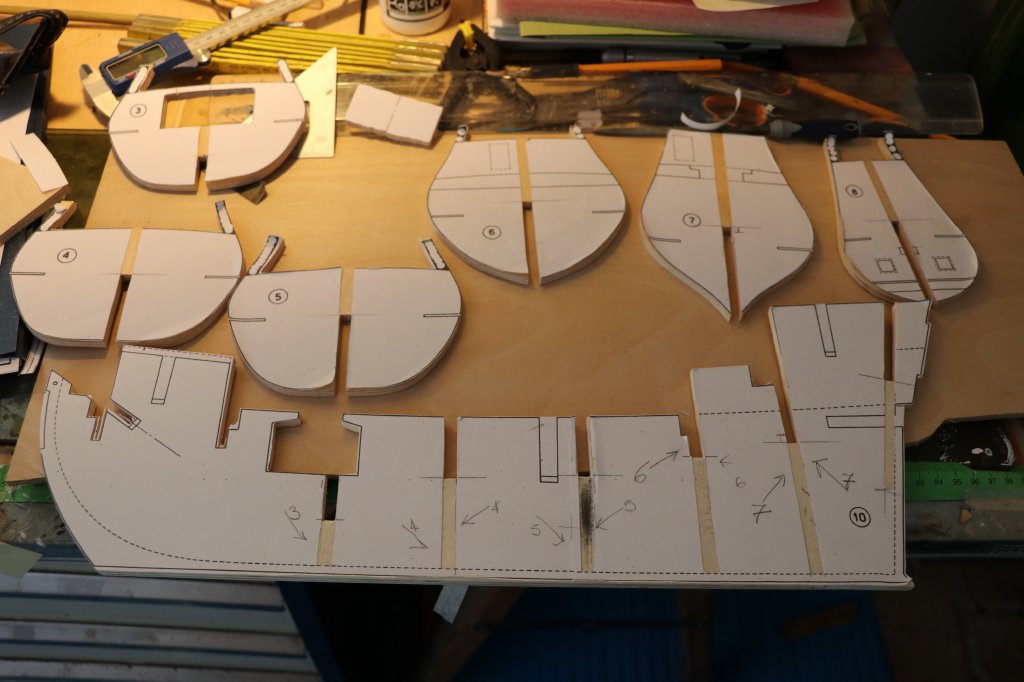
first I made the keel and put it in order, drawing the above drawings of the 6mm plywood
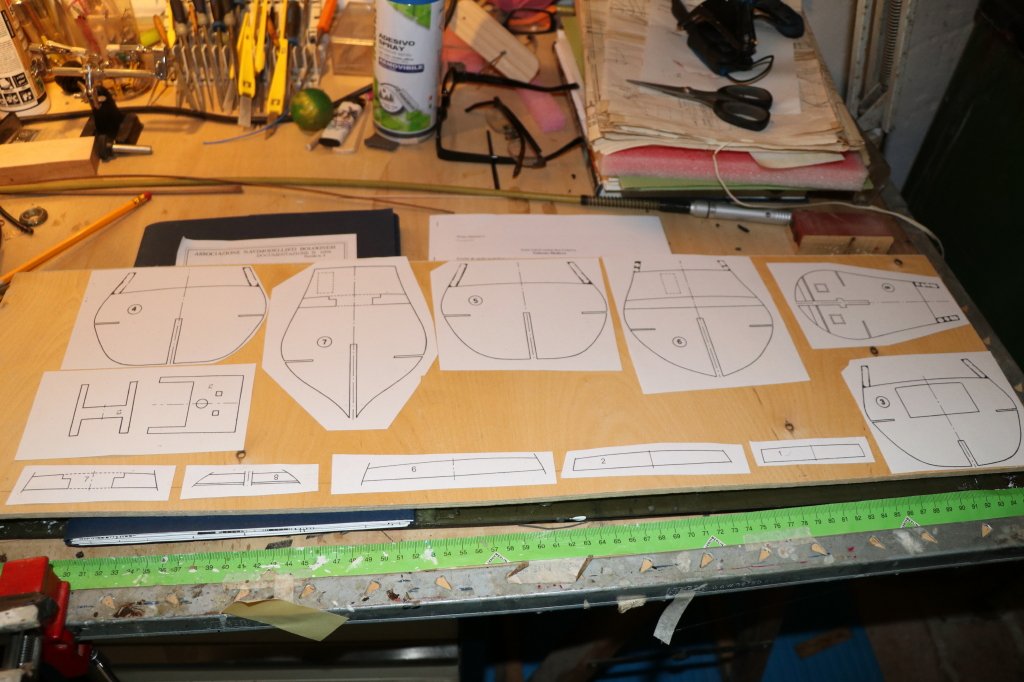
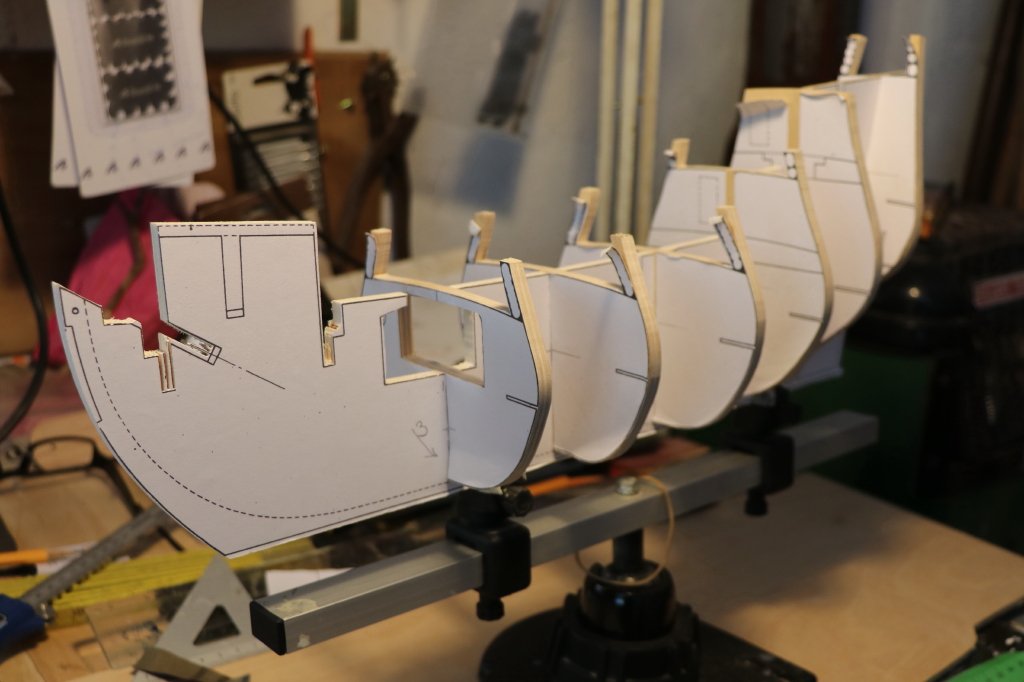
later I cut them out and inserted them, without gluing them into the keel
to glue the drawings I use a removable spray glue, very practical, which allows to obtain a cleaner result
see you next time
black Wolf
-
It is a galleon of the Medici family of Florence from 1598, which was restored, by order of the Marquis Ferdinando I, to the English naval engineer Robert Dudley, as reported in the libraries and archives of Florence relating to the construction of some galleons in Livorno , with purely "war" characteristics usually armed with 16 guns, telling that the name St. John the Baptist has been assigned to at least four boats, to a galley (the first which should be the one that took part in the battle of Lepanto), a another galley built in 1589, the third a galleon built in 1598, and the fourth a large galleon with 64 guns of the English Dudley of 1607, probably the galleon of 1598 will be one of the galleons that Alessandro Risaliti (Commissioner of the Galere of the Order of S. Stefano) reports to Lorenzo Usimbardi (Secretary of State) with the aim of demolishing or selling them because they are no longer efficient, this provision will exclude the Livorno galleon and a large galleon under construction probably the San Giovanni Battista del Dudley, set up in 1607. From this information it is believed that the Livorno in service with the Order of S. Stefano is none other than the S. Giovanni Battista of 1598, renamed to "Livorno" to pass the name to the flagship under construction, obviously it was not just a change of name but a profound structural modification of the boat, improving its structural characteristics, will be one of the characteristics of the Dudley, the capacity to renovate existing boats by improving their hydrodynamic and propulsive characteristics, so this model is the San Giovanni Battista of 1598 prior to the renovation work, and built by "DeAgostini" which is called S. Giovanni Battista, in reality it is the "Livorno".
-
-
Thank you Phil, it is tissue paper placed on top of the paper to print in A4 format, with this technique it is possible to make flags and many other things using the printer, bringing any color and "nuance" back to life, moved by the wind.
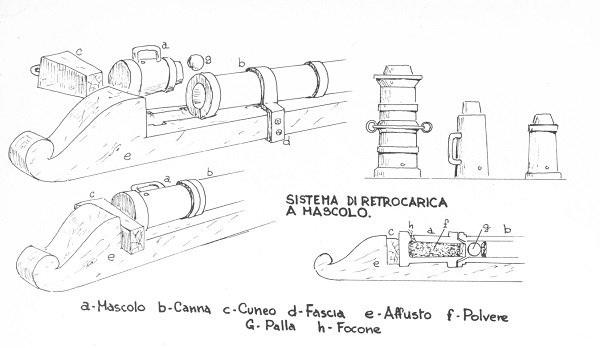
They are "falconet" in Italian falconetti or bombardelle, they were small-caliber revolving firearms, loaded with a "mascolo" on the back (a kind of cartridge with firepowder) loaded with stones and various objects, they did damage " limited "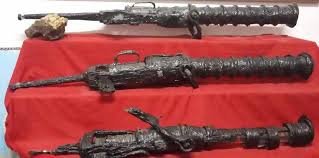
carry under a breech-loading system with "mascolo", it is a "bombarda" but for the falconets the system was the usual, obviously with very low charges
ciao
luponero
- mtaylor, cog and GrandpaPhil
-
3
-
It was a long time since I connected, seeing the work you did on the dromon makes you "open your mouth!" both for the realization on wood and the part of historical research,
really well done !!!
for me
it is a stimulus to restart with the creation of an ancient boat.black Wolf
- Strelok, cog, Keith Black and 2 others
-
5
-
-
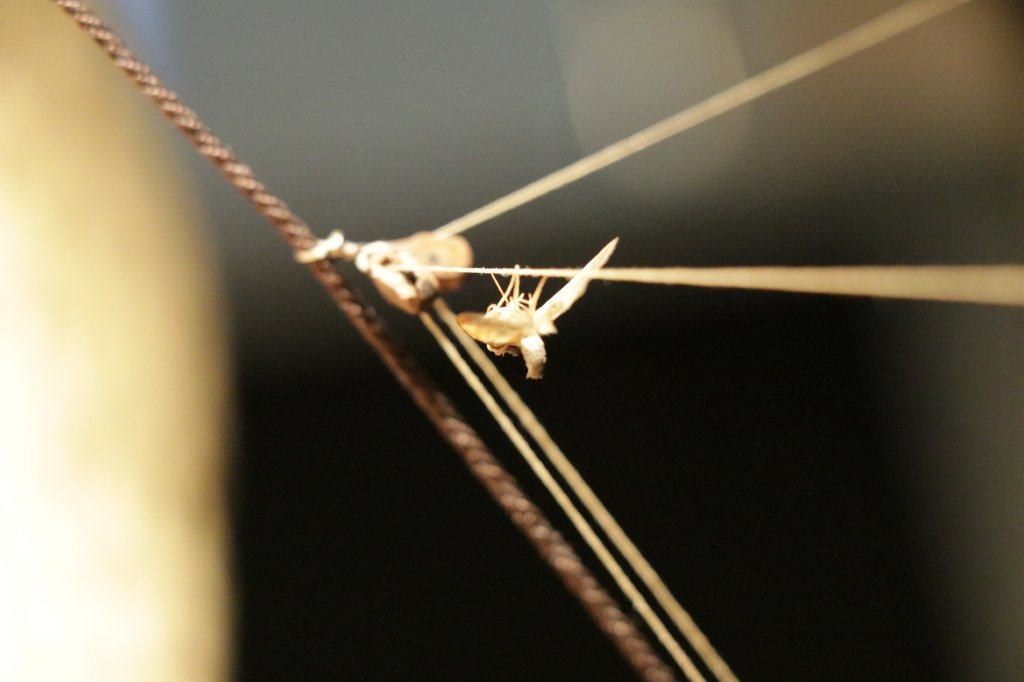
I thank you friends for appreciation, and I finish with the insertion of the last images, first the indications for the tissue paper,
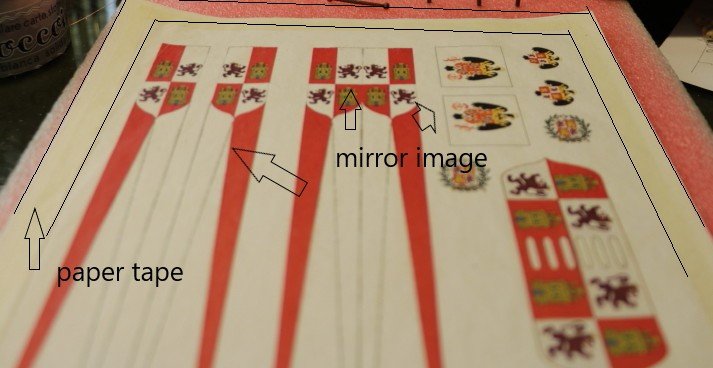
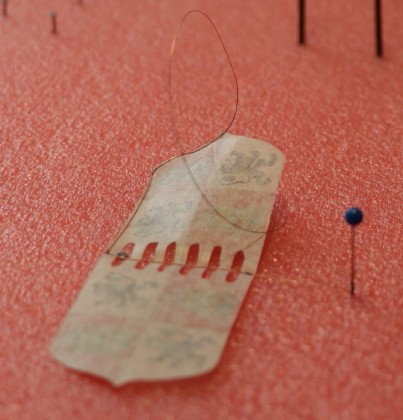
We can buy tissue paper in the most well-stocked stationery shops, it is usually also used in newly purchased shirts as internal protection, or even in shoe packaging always as protection, the main feature is that it is very thin and resistant, to print it sticks on a normal sheet of paper using paper tape on the edges (obviously it must be slightly smaller than A4 sheet) print the double image, one of which is reflected, after cutting it I pass a thin copper wire on the edge on which I put cyanoacrylic glue After having attached the solid paper glue to the surface of the paper, making the parts adhere perfectly, we can make it assume any shape, as if it were moved by the wind, which is very difficult with fabric.
I am attaching two images with indications and the copper wire used
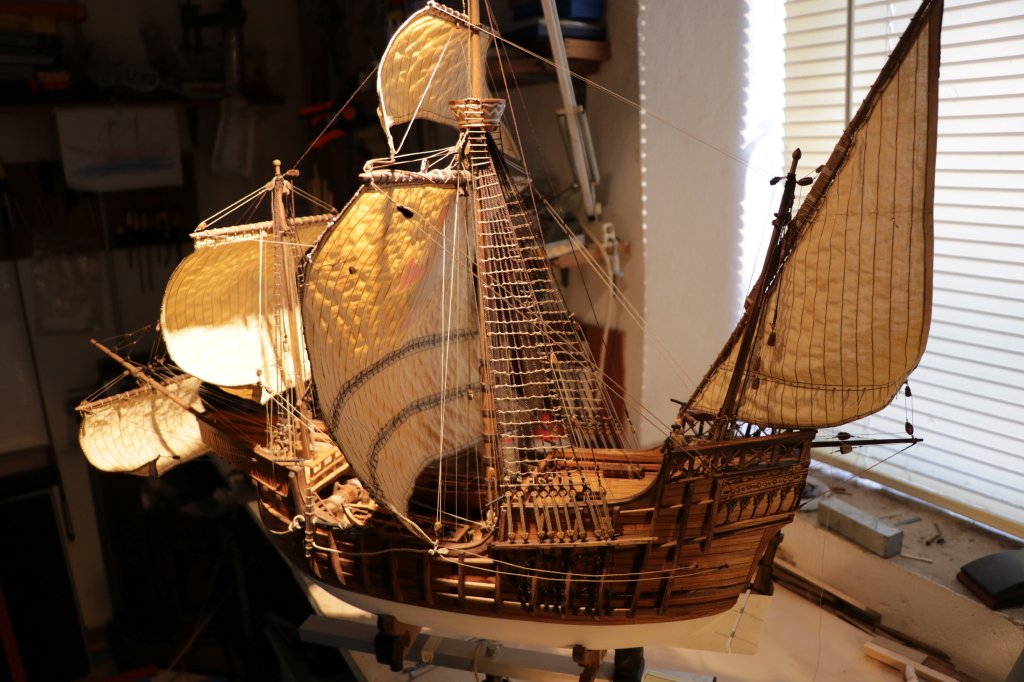
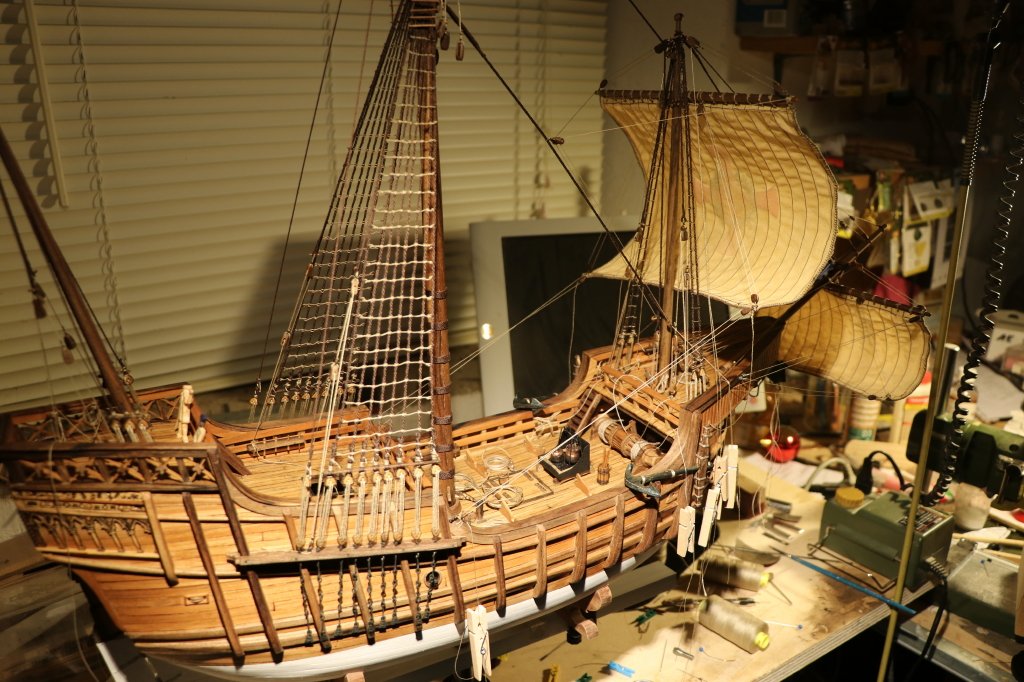
The final stage of the work,
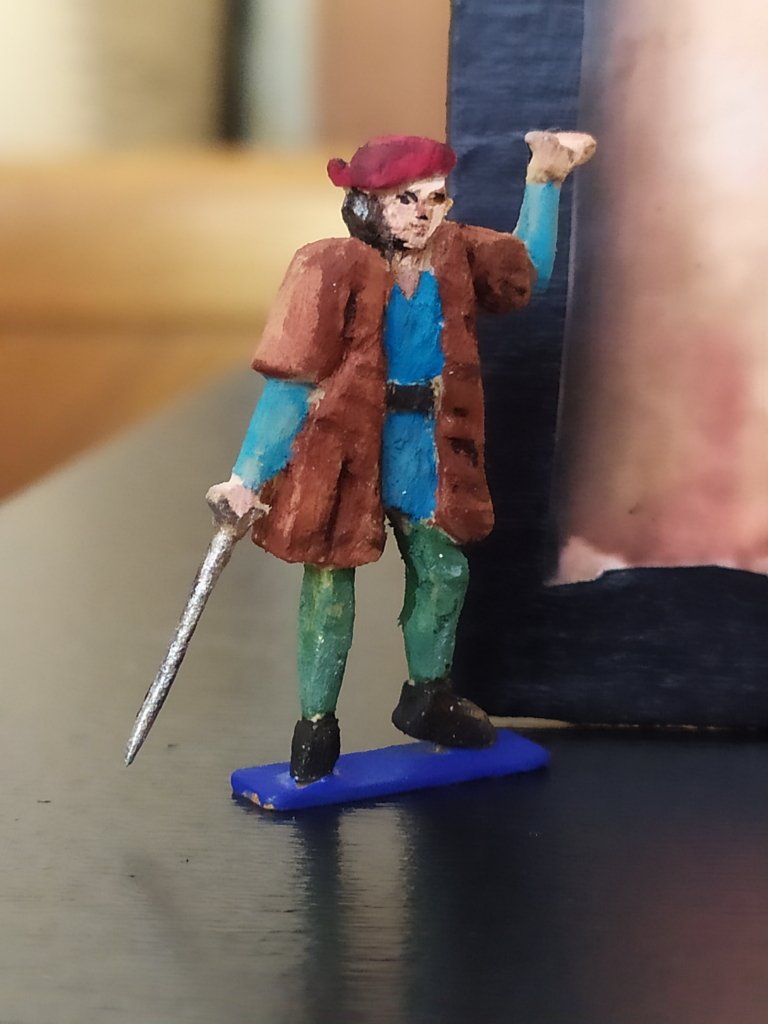
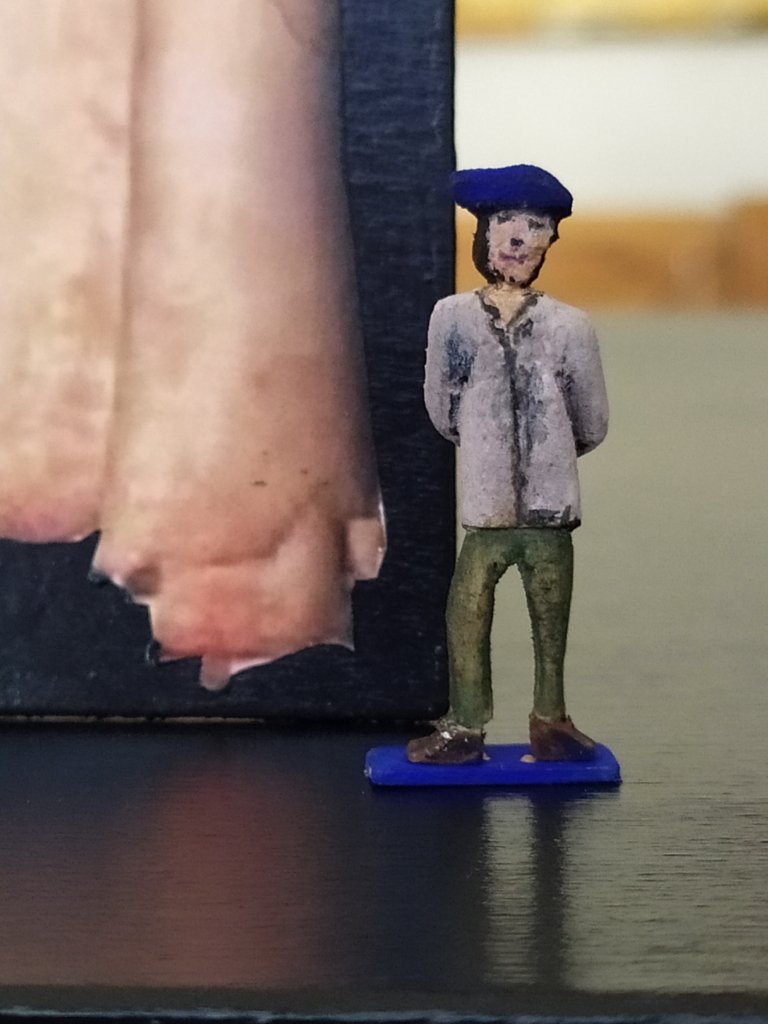
I thought about coloring Colombo and the Slim
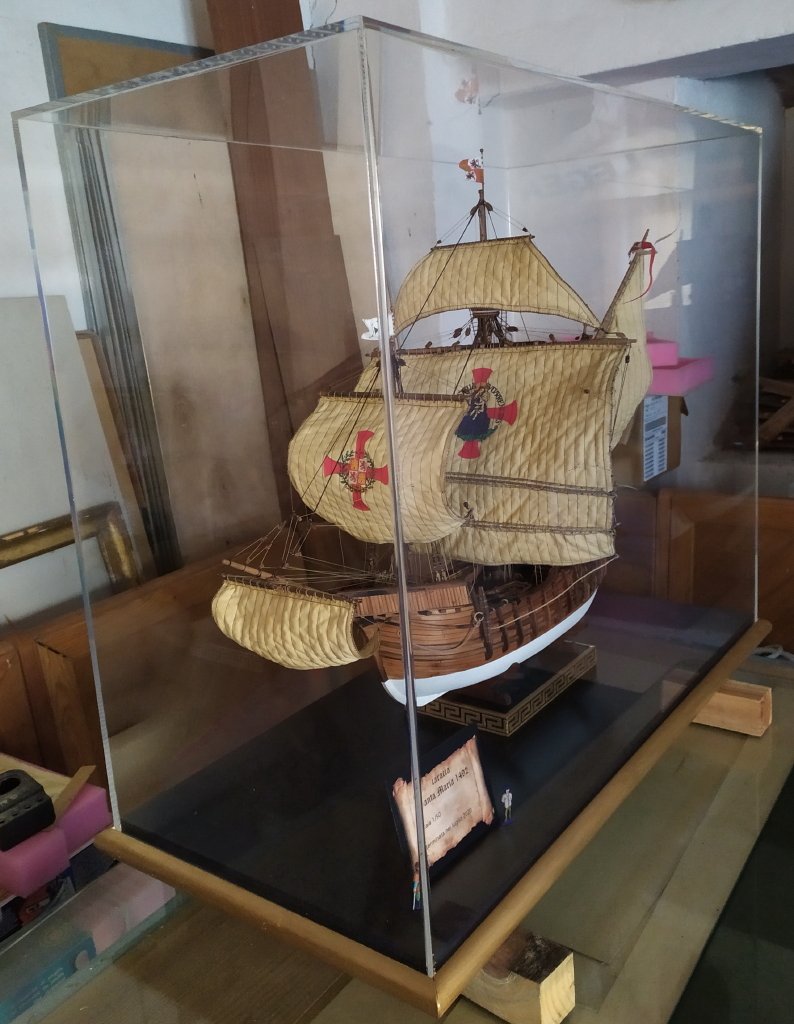
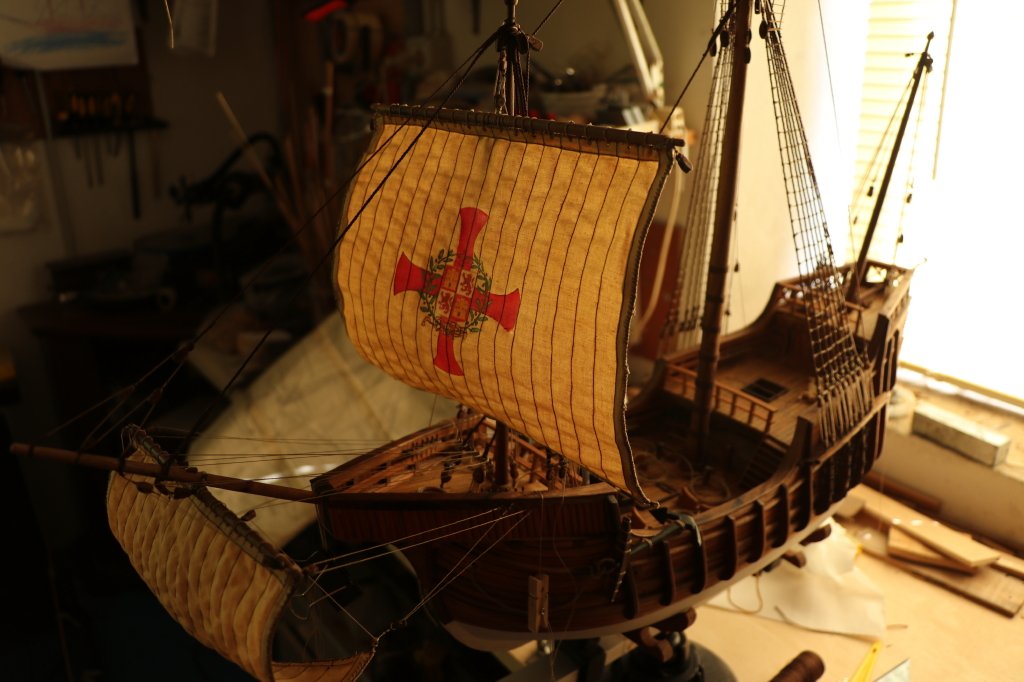
presenting the "poster" of the Santa Maria
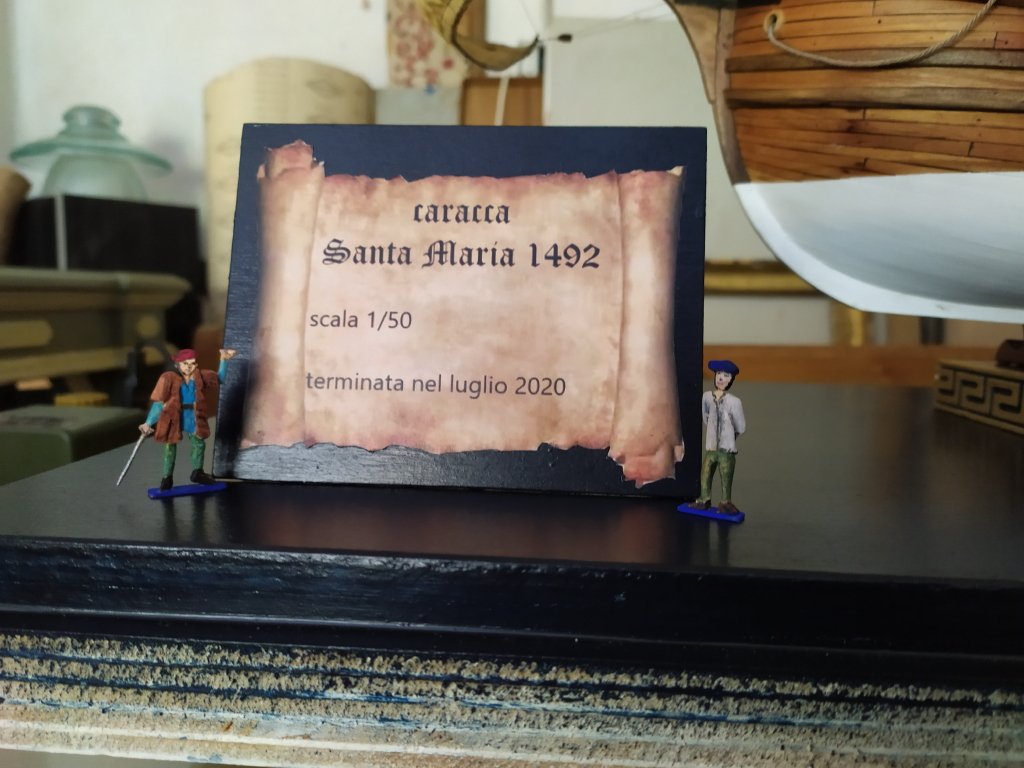
which was placed inside a plexiglass case awaiting accommodation inside the house "wife permitting !!!"
thanks to all the friends who followed me in this adventure,
to the next adventure
cordially
black Wolf -
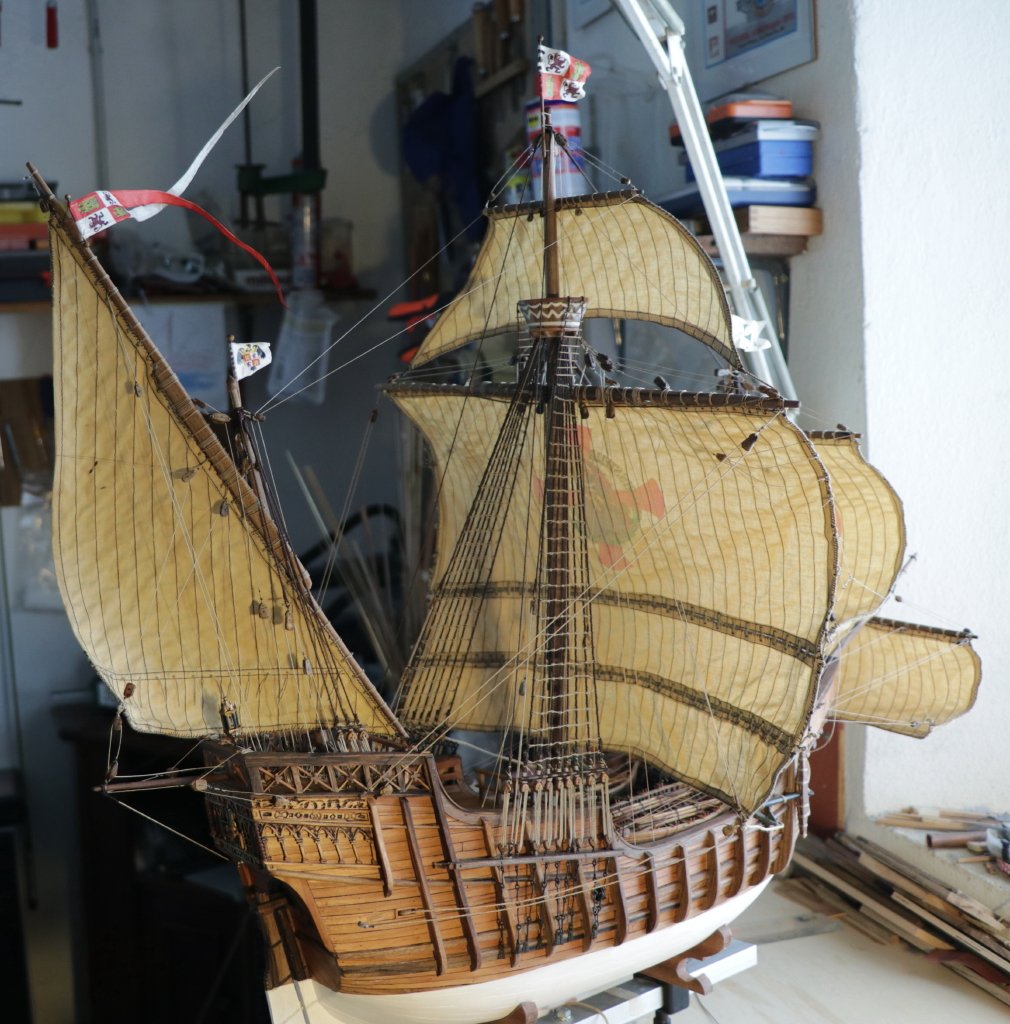
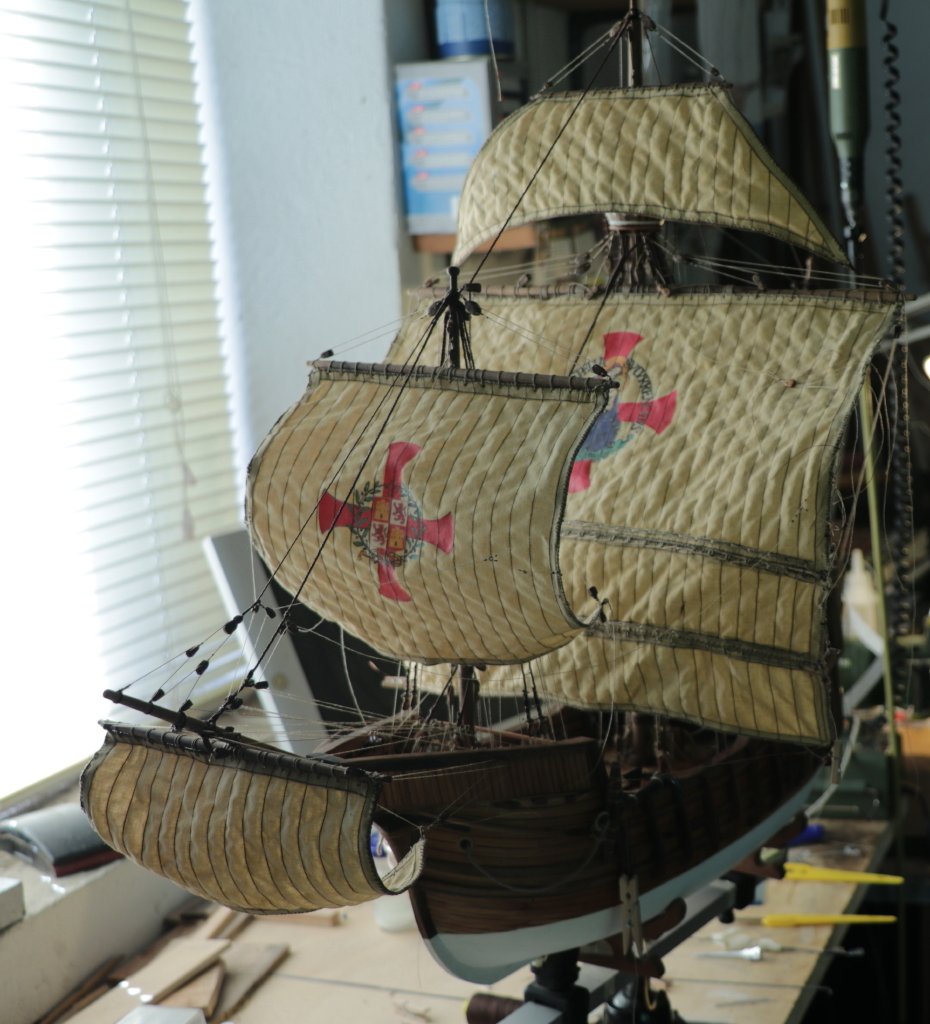
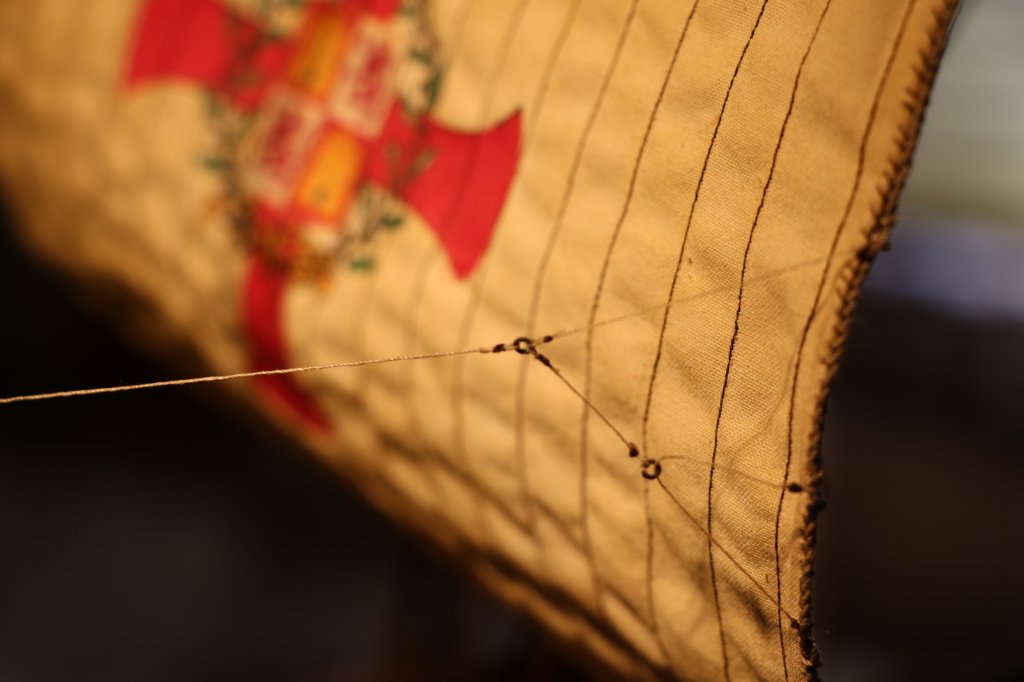
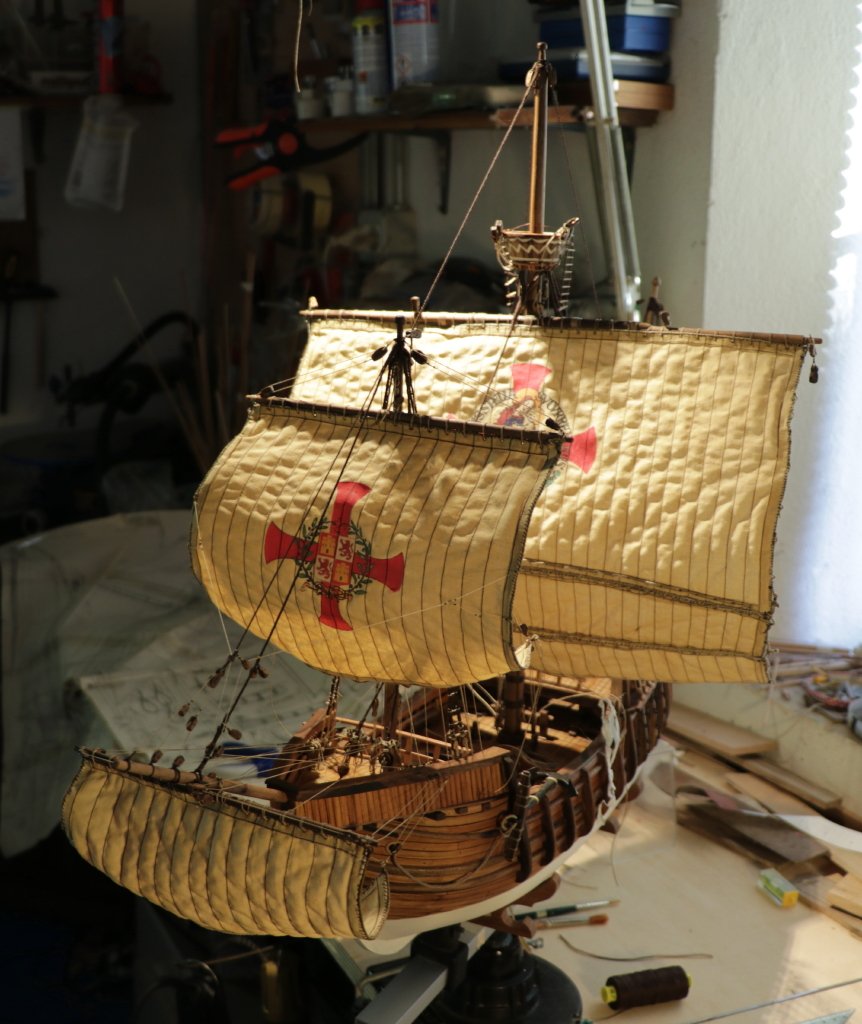
Thanks Louie, after the lantern the realization of the flags with "tissue paper" with photoshop I colored and in some cases worked on the images that are the coat of arms of the kings Isabella and Ferdinando, which were shown on the construction plan but much less detailed and precise .
I made the poles that support the flags,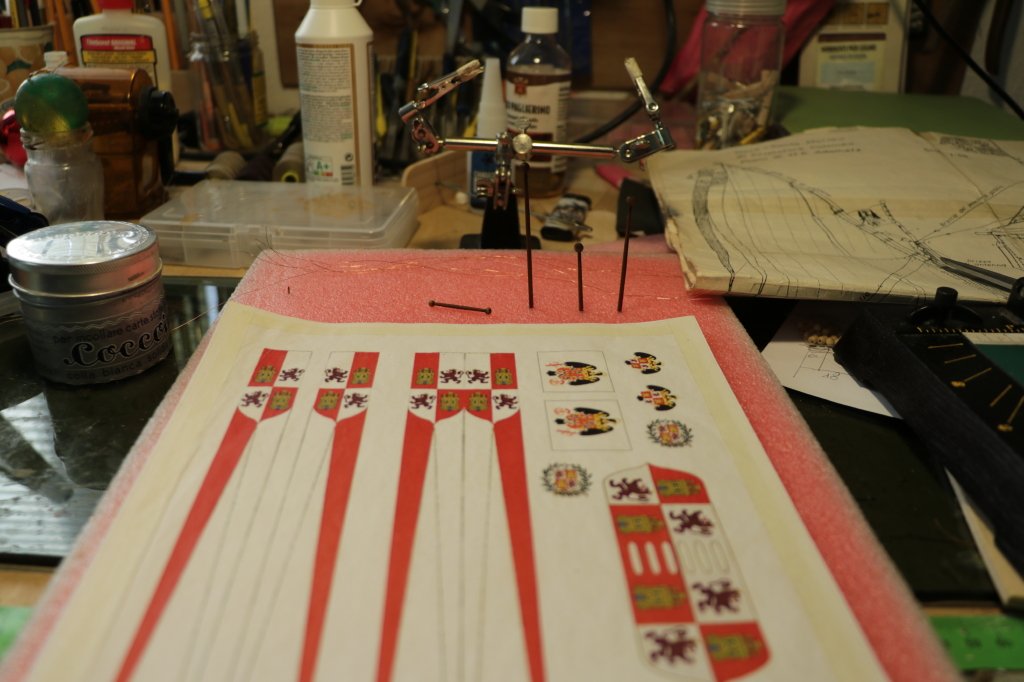

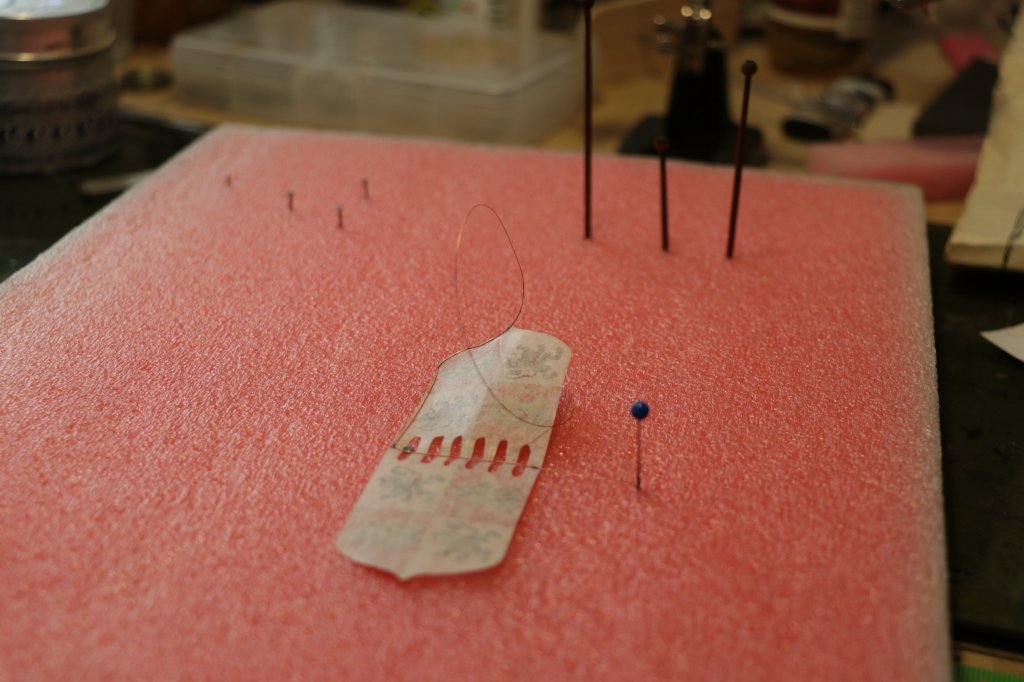
to print on the tissue paper I use a normal sheet of paper on which I attach the tissue paper then I print the two mirror parts, inside a thin copper wire allows me to make it take the desired shape, in the meantime I have put the lantern aft
the effect of the flags waving in the wind, the Santa Maria is close to launch, only some small work on the characters and will be placed in the display case,
see you next time
black Wolf

- modeller_masa, Binho, mtaylor and 8 others
-
11
-
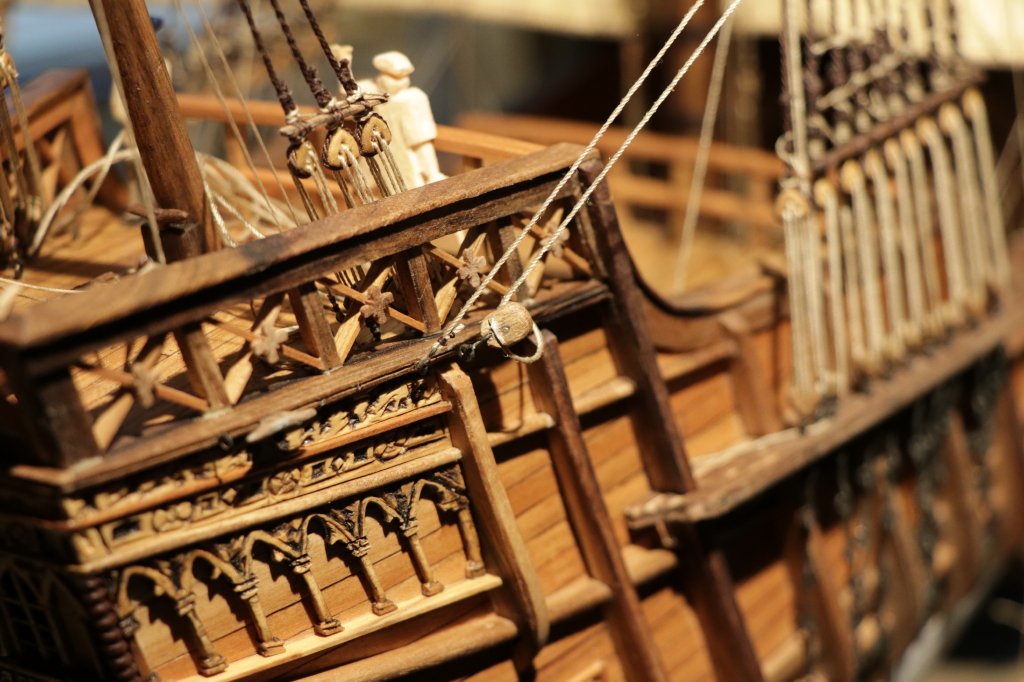
I thank friends for their appreciation and I keep updating the work to finish the model,
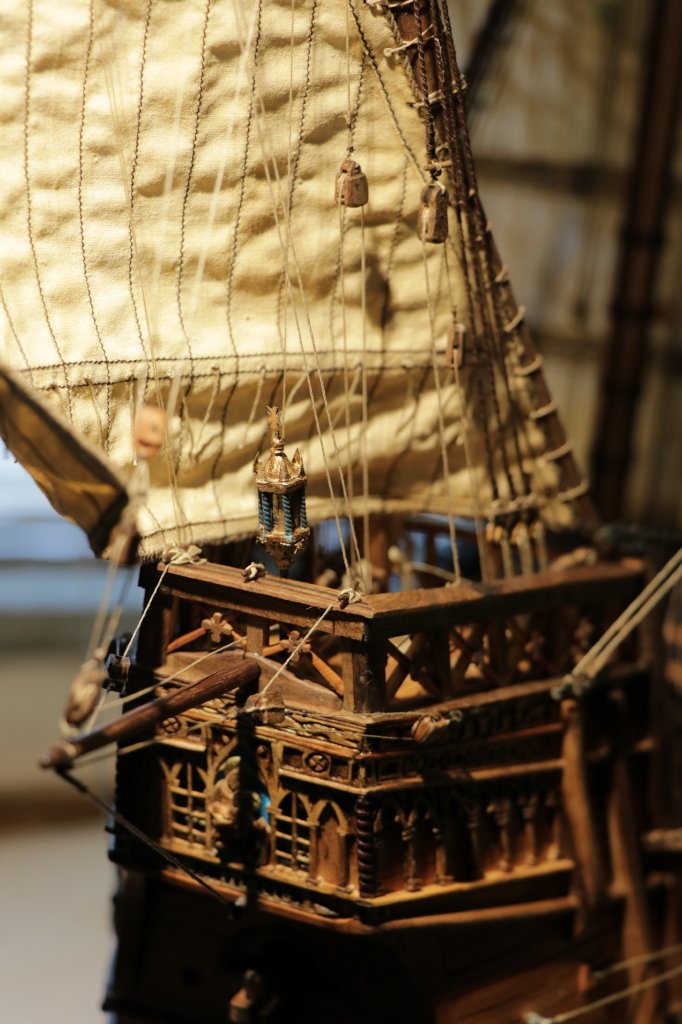
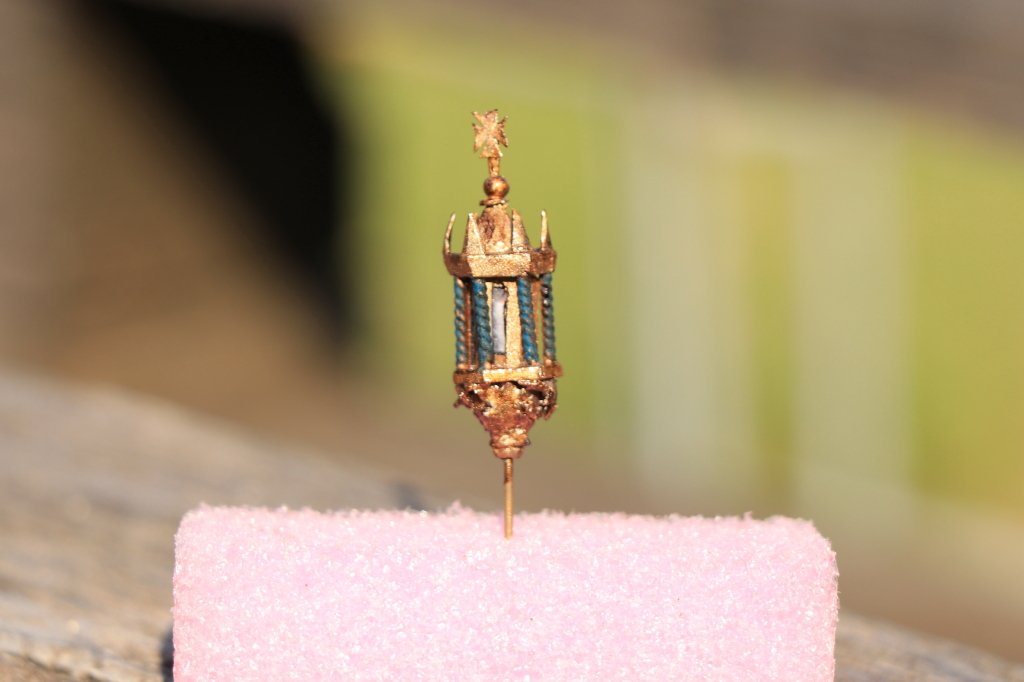
In 1492 the nights on the ocean sea had to be very dark (especially with the new moon) to contrast the darkness and to signal the ship, both for the Santa Maria and for the ancient boats the laterna assumed a fundamental role, consequently in its realization the 'aesthetics and form became of significant importance, in the construction plans of Adametz it is shown very schematically so I tried to find some material for more information but the differences are considerable so I decided to follow the design and photos of two models reproduced years ago for commemorative purposes, certainly its realization would have been a particular "challenging" since the piece is a "multi-composite" both for details and materials,I am attaching the image of the Santa Maria made for the commemoration, where the bow is visible at the stern
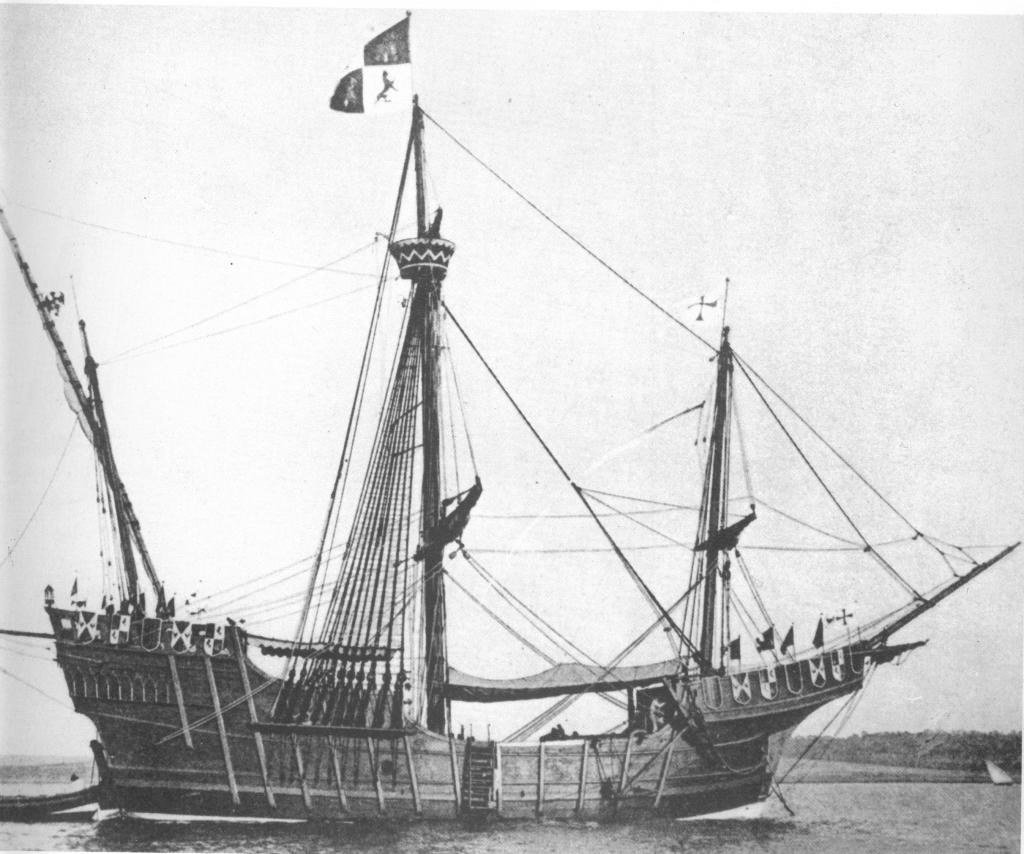
I started with the realization of the large candle placed inside the lantern, I used 0.8 mm brass wire, with the "red" tinfoil of the chocolates I made the "flame" (the usual one used for coals ) while with white rolled paper I made what the candle should be, while the two hexagonal parts on which the internal part of the lantern is developed are in 0.5 mm wood
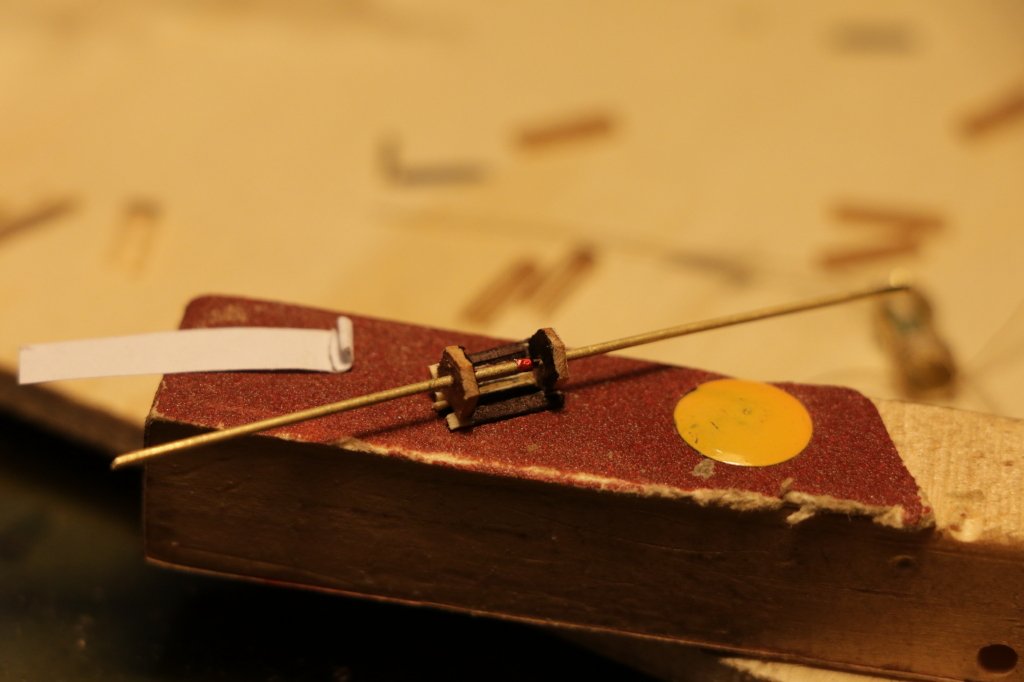
on which the six faces of the lantern develop, always made with wooden foil, with the blister boxes I cut out pieces with the intention of imitating the glass placed over the openings, finished their placement I painted them with antique gold paint to frames
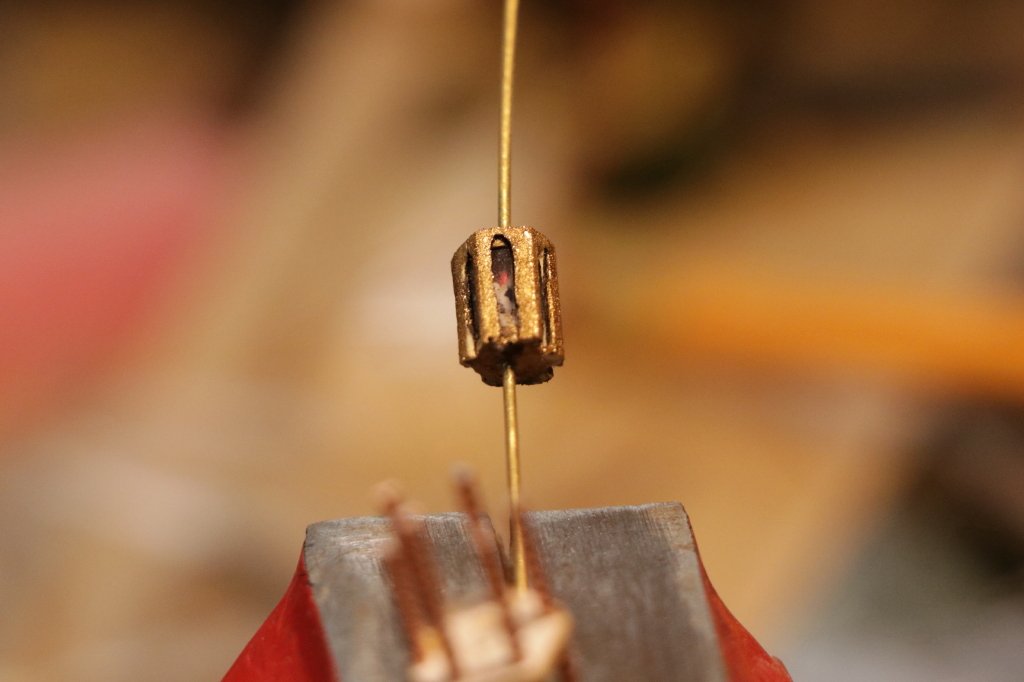
I made the two external hexagonal bases on which the "twisted" uprights will fit together (which I made with two copper wires twisted with the screwdriver)
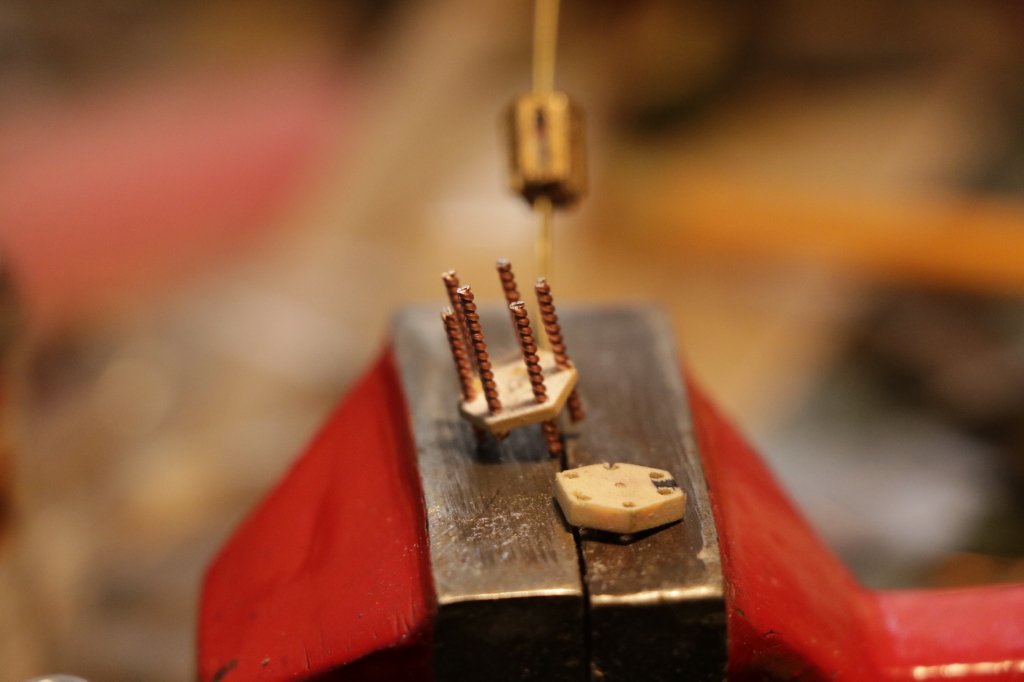
finishing the two pieces made with the small lathe and which will be positioned with gluing above and below the bases,
mounting the pieces made separately
welding the cross
the lantern was finished, but it was necessary to make it "aged"
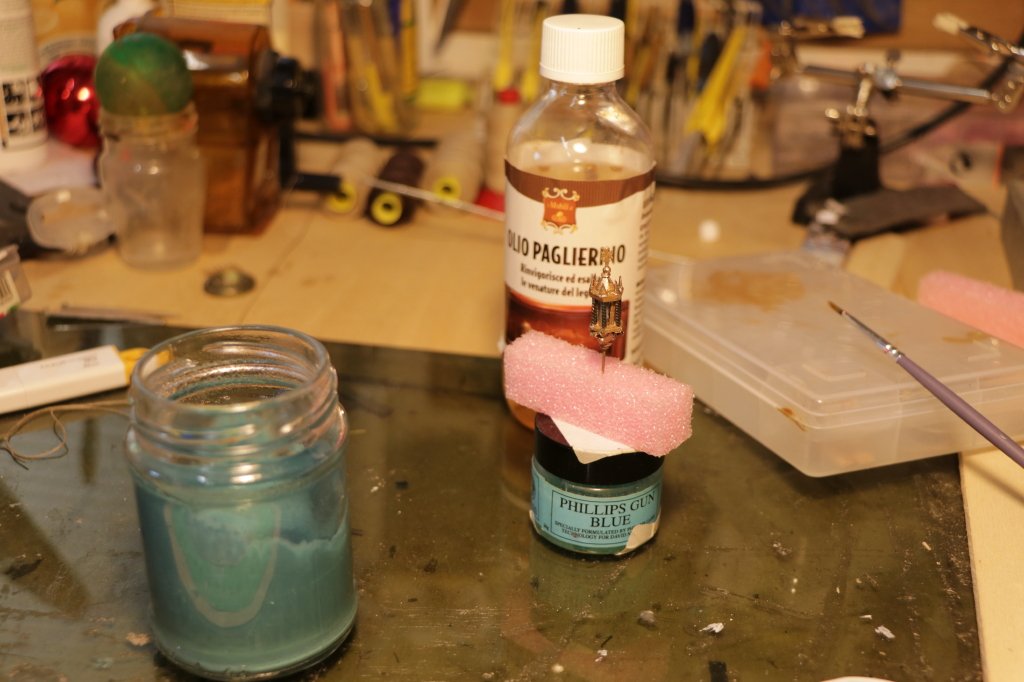
so I burnished some parts, then I used the "copper sulphate" which is used on the vine plants to protect them from mold, the color is perfect and sticks very well on the treated surface
the final result was satisfactory!
see you next time
black Wolf
-
After a break, due to problems with work and "restructuring" of the laboratory, I update the completion of the Santa Maria with photos
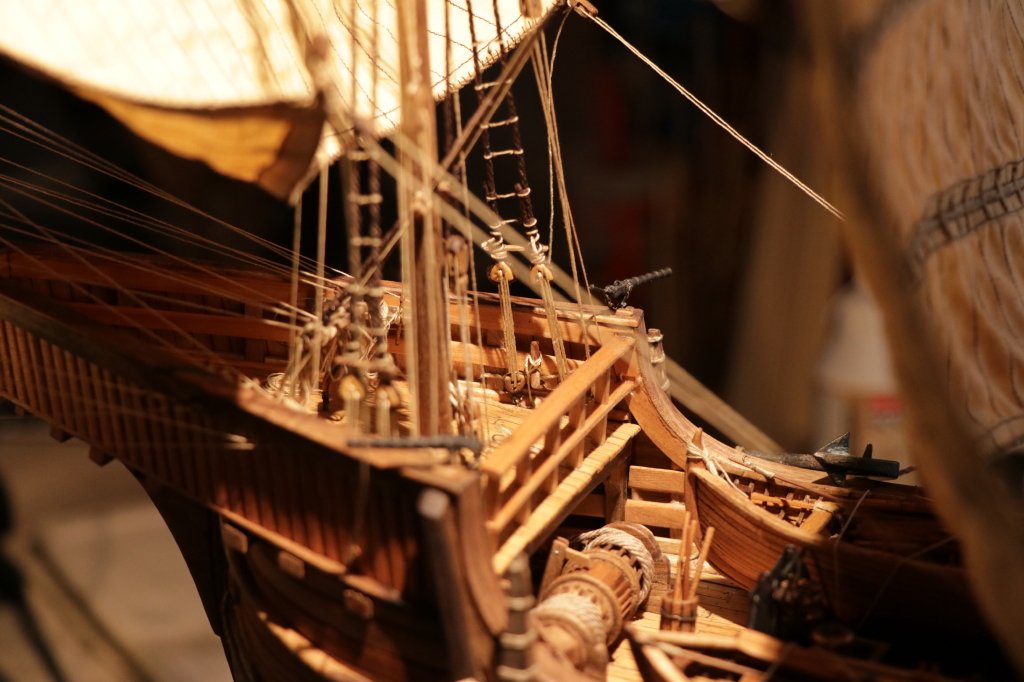
the first step was to tie the two lifeboats on the deck, it was not a simple thing the spaces are very small, I think at the time the lifeboats were "towed" because with them the space on the deck is minimal to do everything,
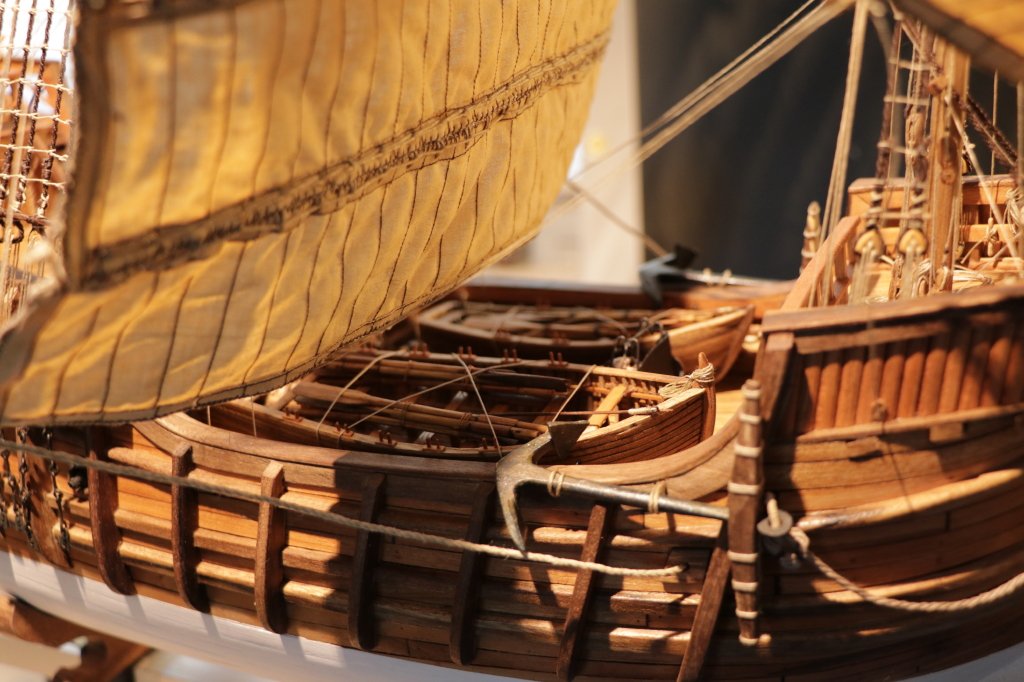
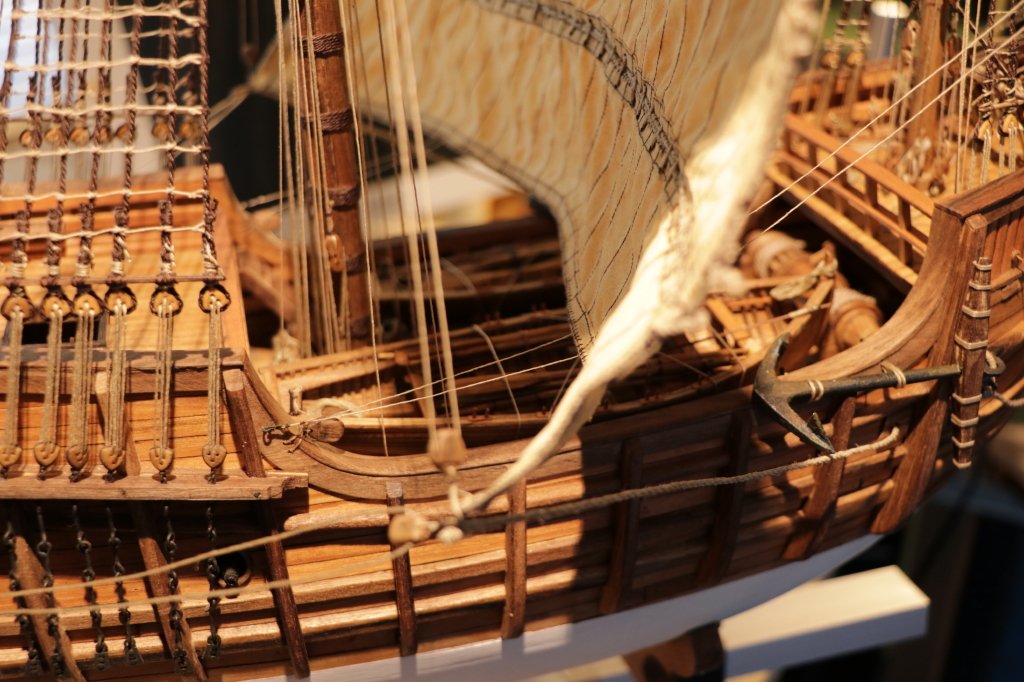
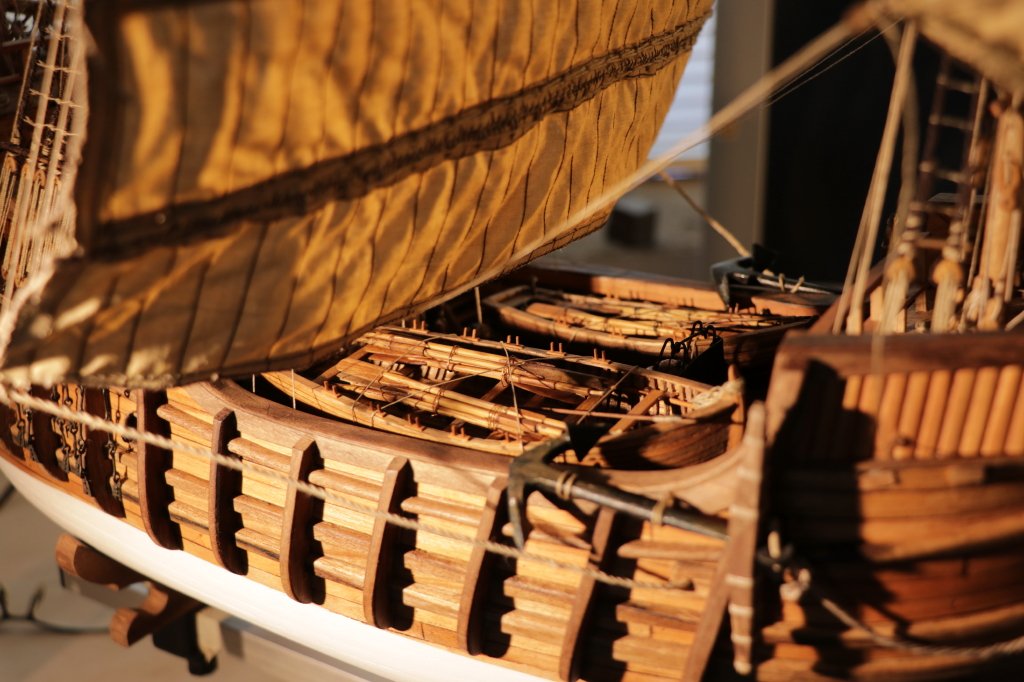
I made some details, anchors, buckets, mooring sticks, which were placed inside, so as not to go out of scale I used "the slim" as a reference
details were still missing, but the profile of the ship was finished
a long time ago, I had built the rifles that are placed on the ship's side...
finally it was time to place them
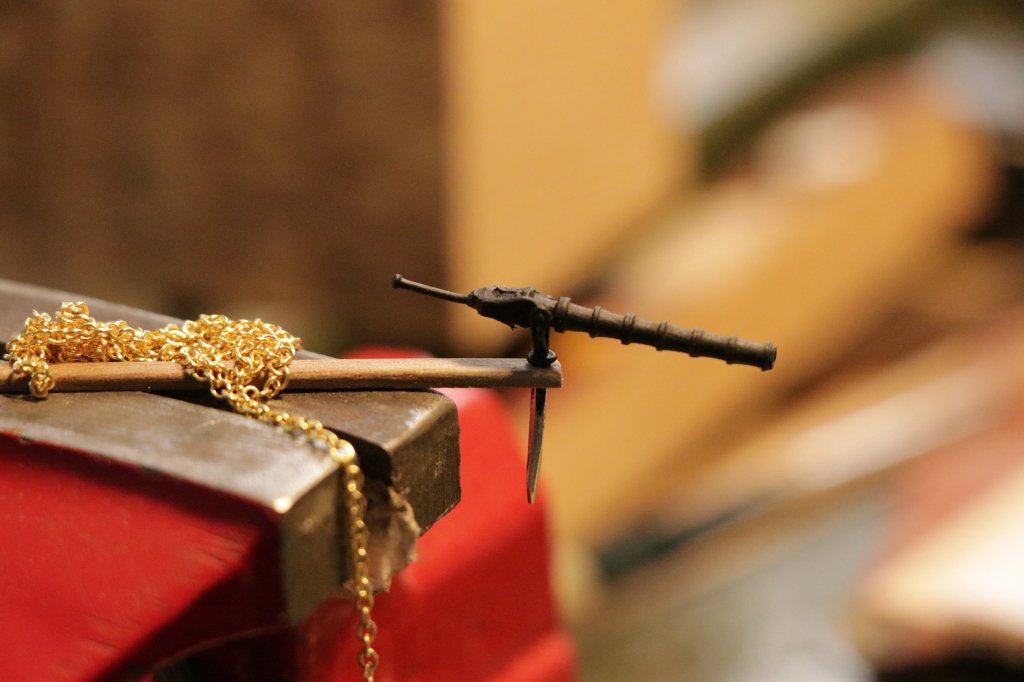
the brass chain with 0,5mm links, is the only thing I bought, I tried several times to make it, but I had to give up
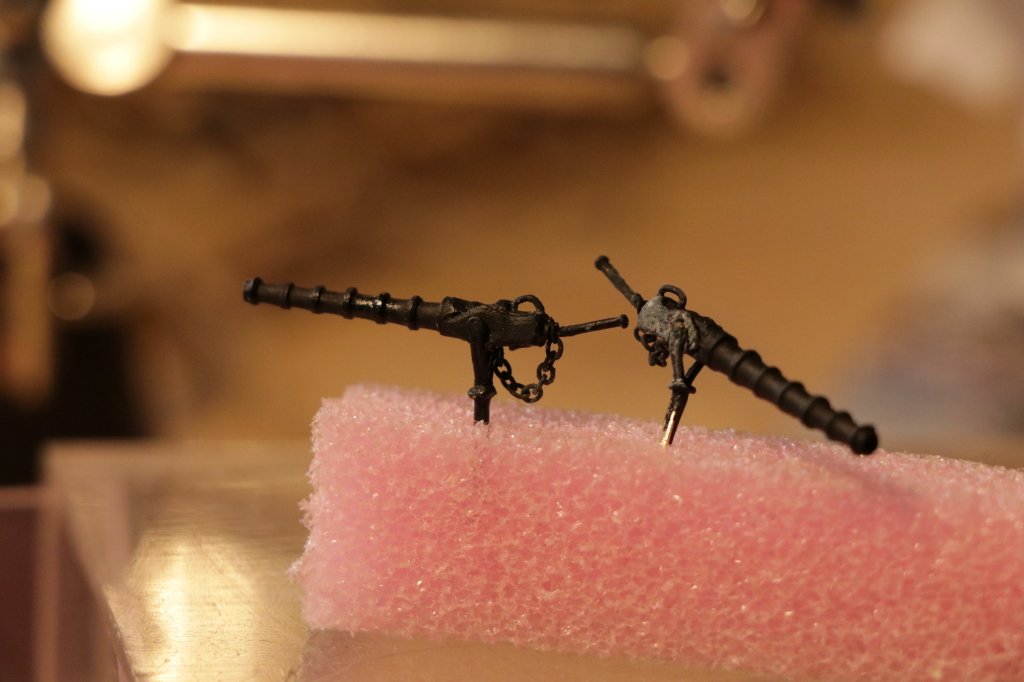
the chain and the "falconetti" (name that indicates small cannons in Italian) have been treated with burnisher

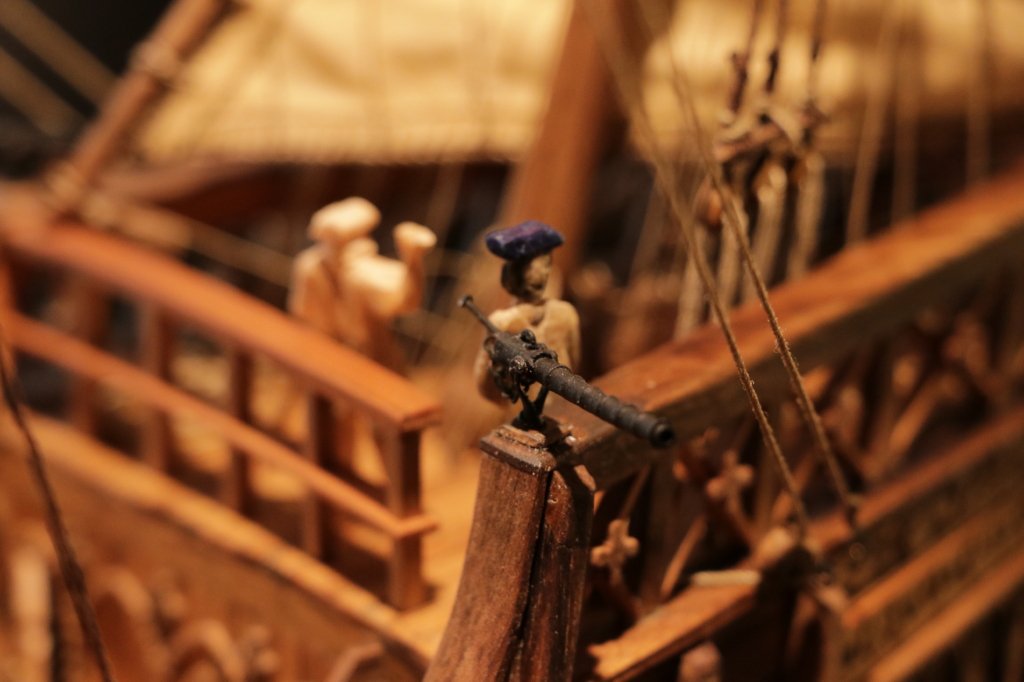
under these conditions, they would have punished the sailors for neglect of their weapons ... so I passed some oil on the barrel
the skinny next to the arms to check the report,
it doesn't seem bad to me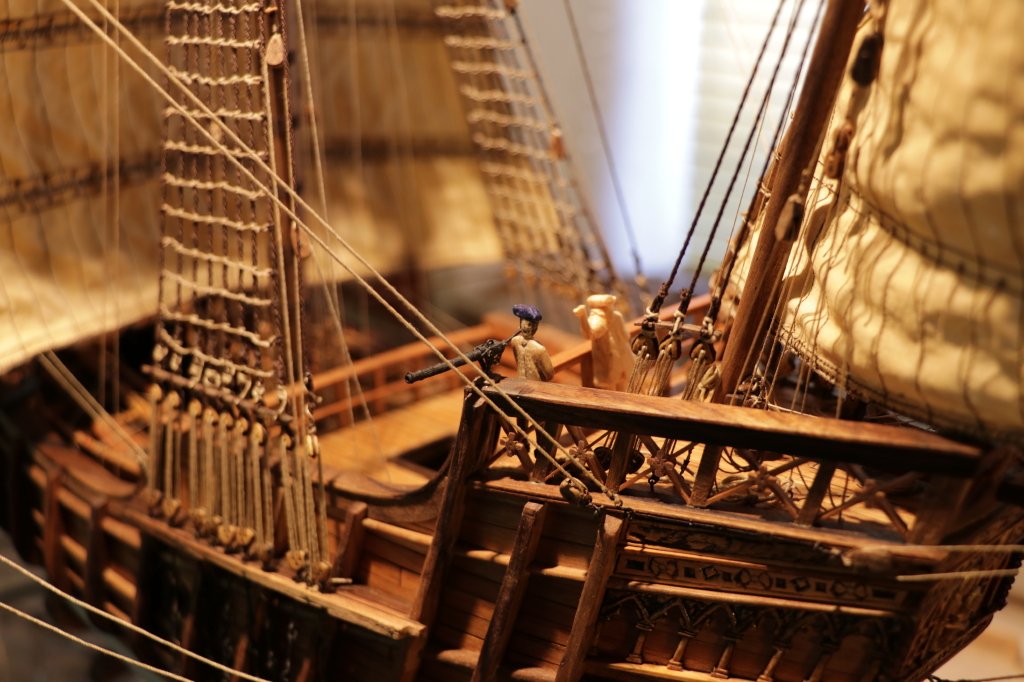
we are almost at the end,,,
see you next timeblack Wolf
- mtaylor, Louie da fly, GrandpaPhil and 6 others
-
8
-
 1
1
-
During the "hot" Italian summer, updates continued slowly ...
however they continued.
the next work had to concern the laying of the latin sail, but before inserting it I preferred to finish the sheets and the walls of the mainsail,
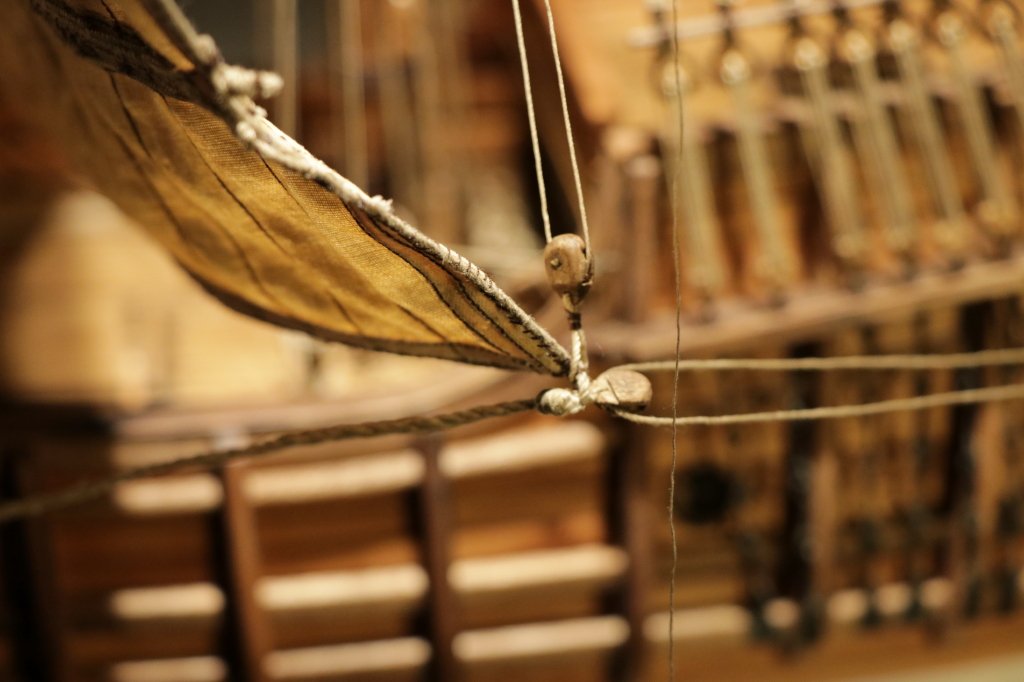
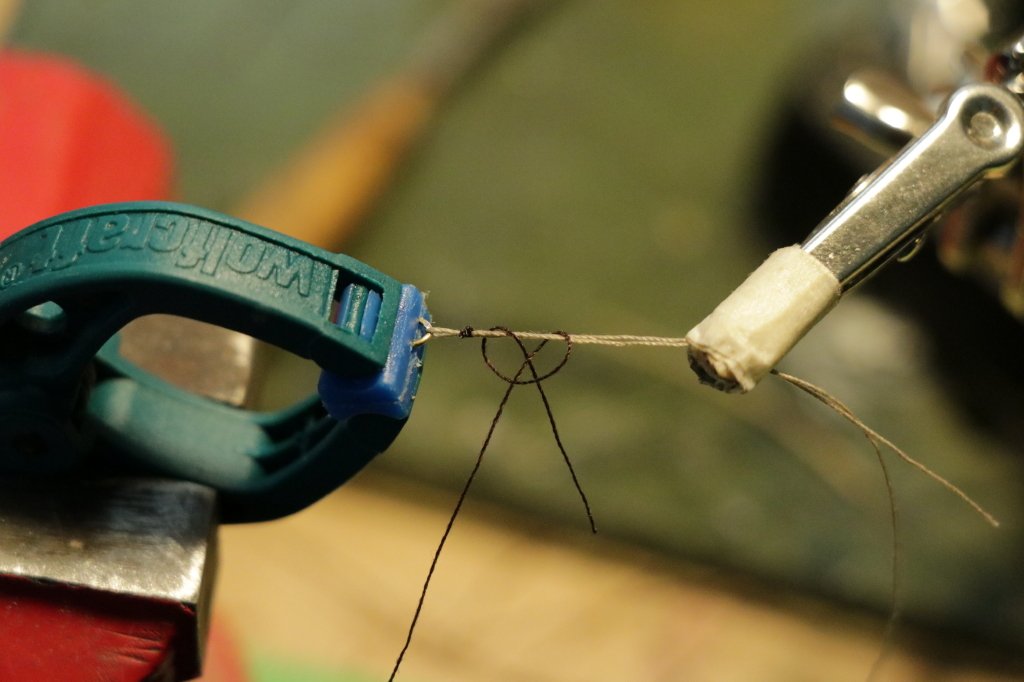
for the realization of the big cable that passes from the clew of the main sail I made a flat cable with 3 wires stopping them with the knot called "chicken foot"
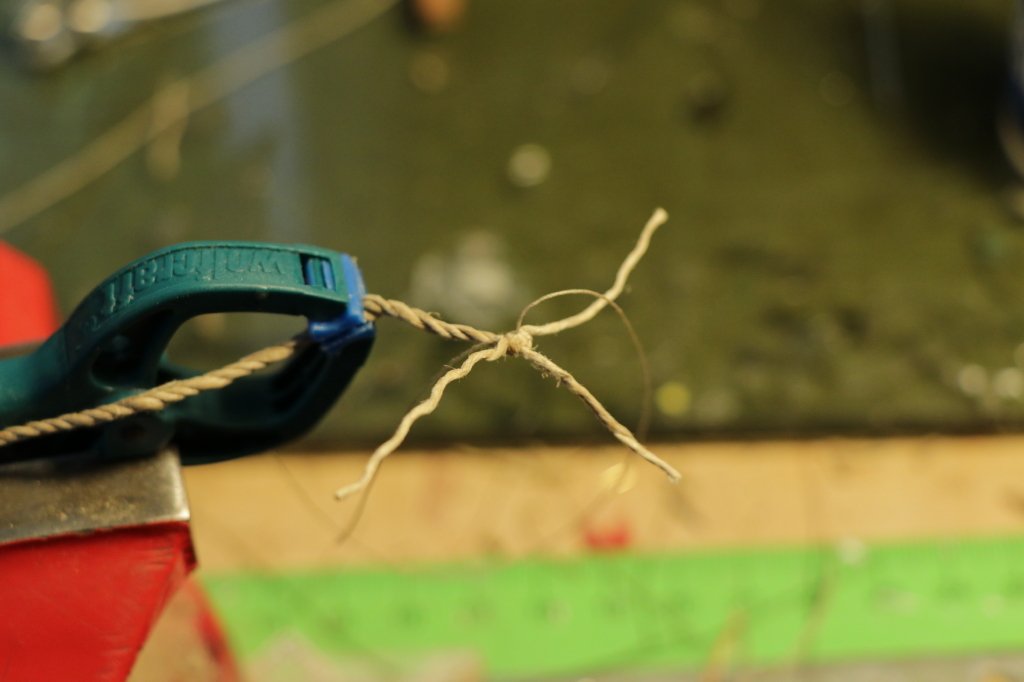
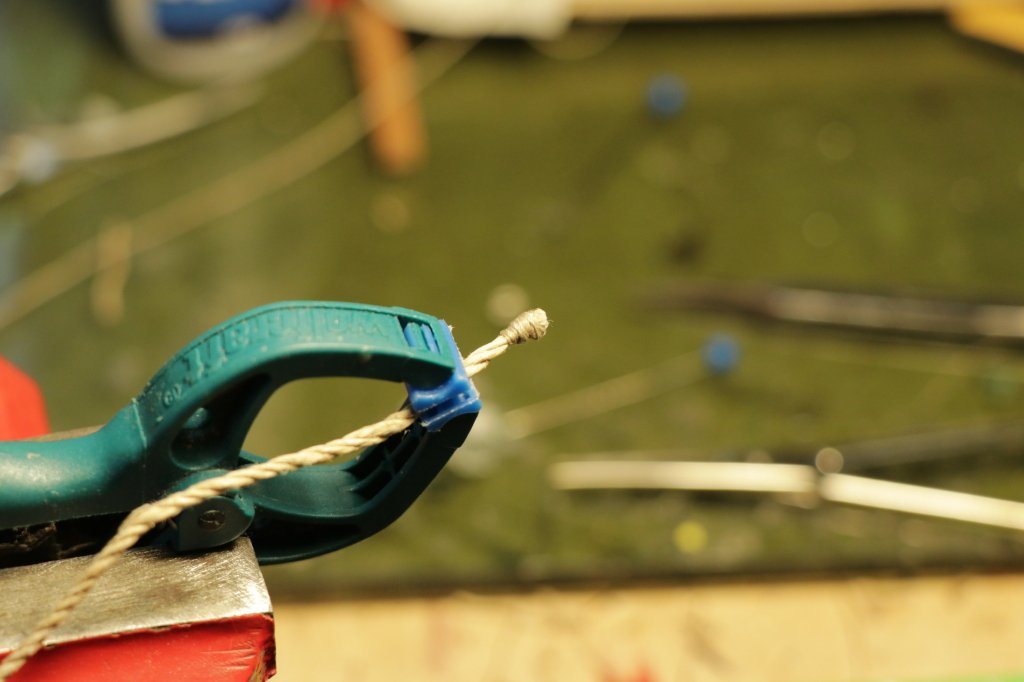
and finishing the maneuvers
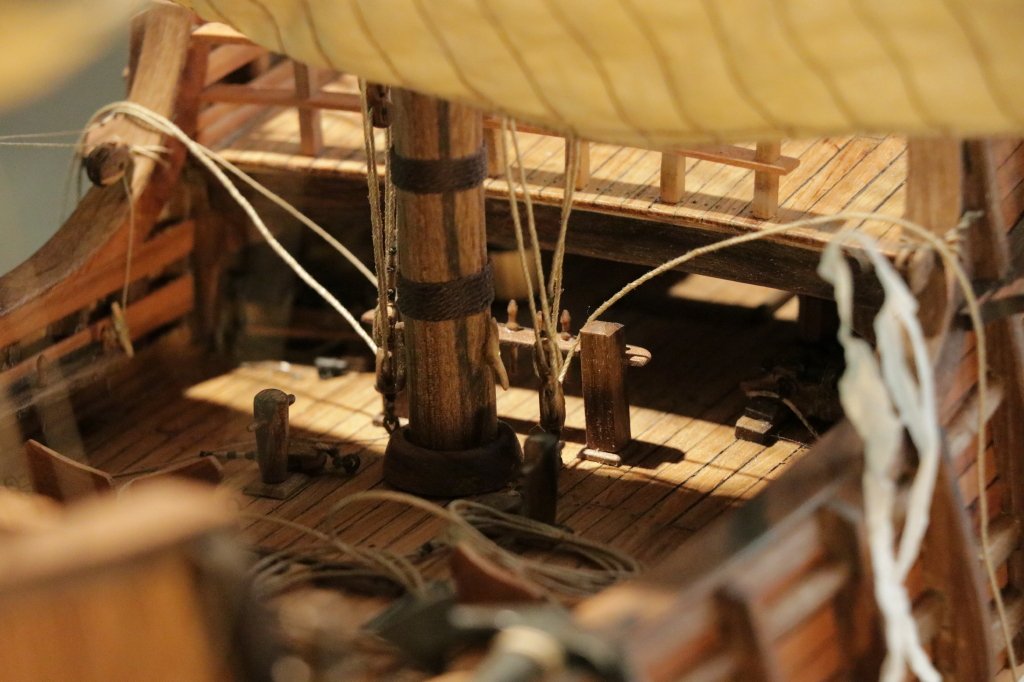
I rearranged and finished almost all the maneuvers,
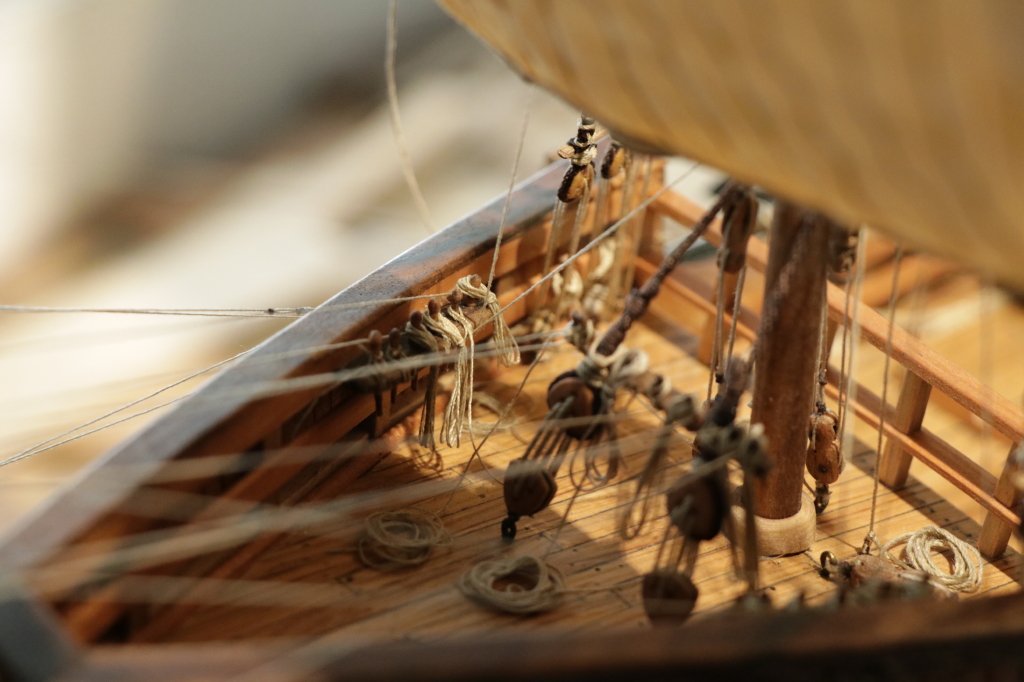
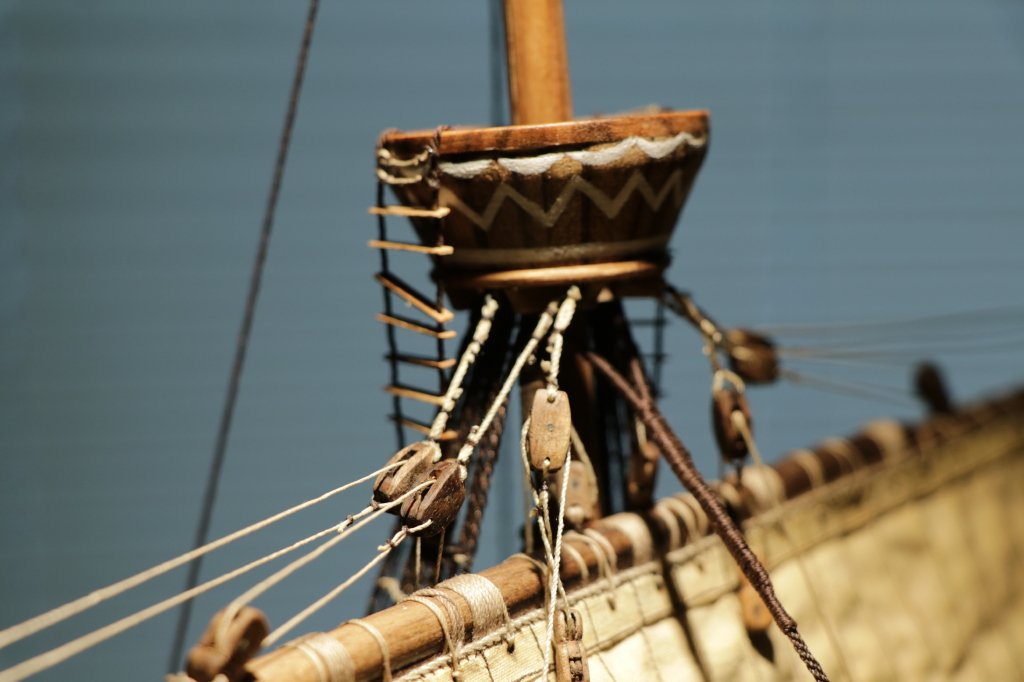
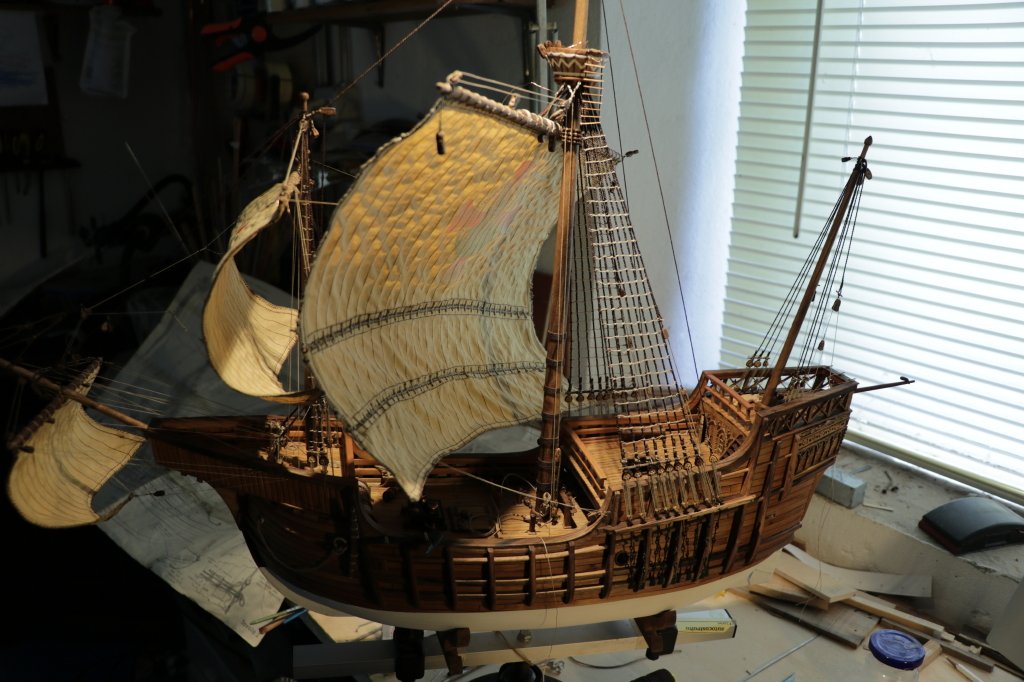
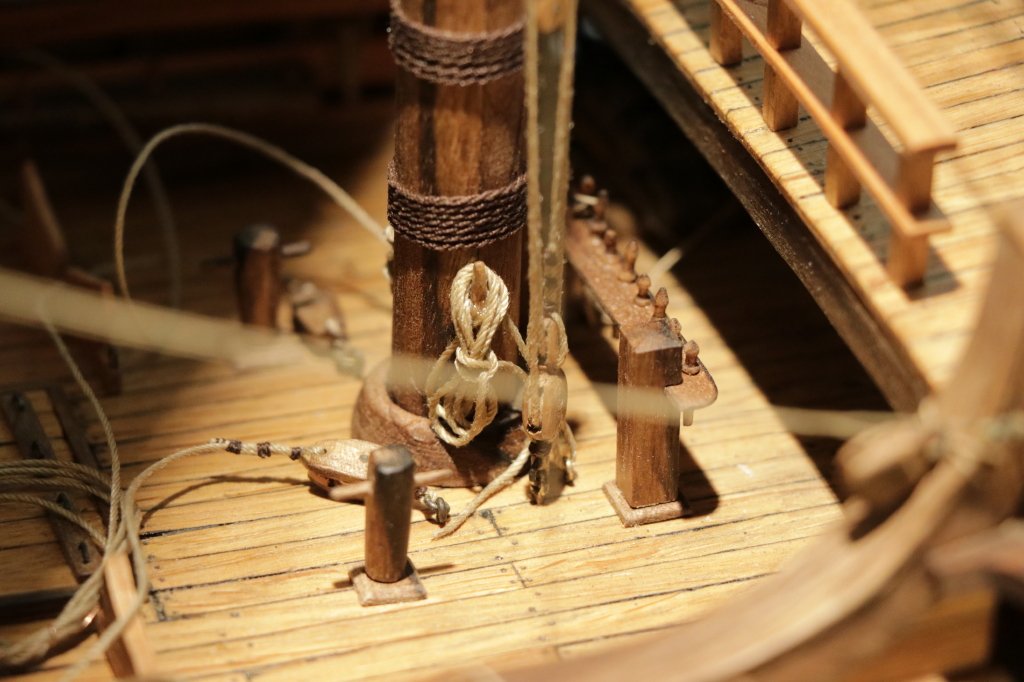
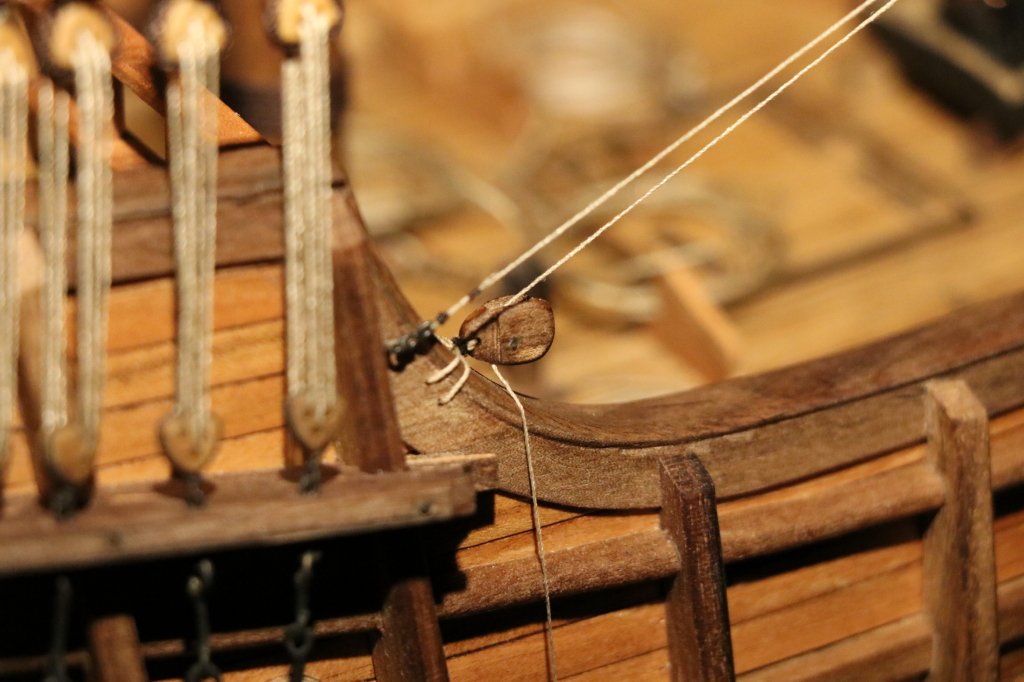
detail of the main mast restraint and double pole in front of the mast with the hoists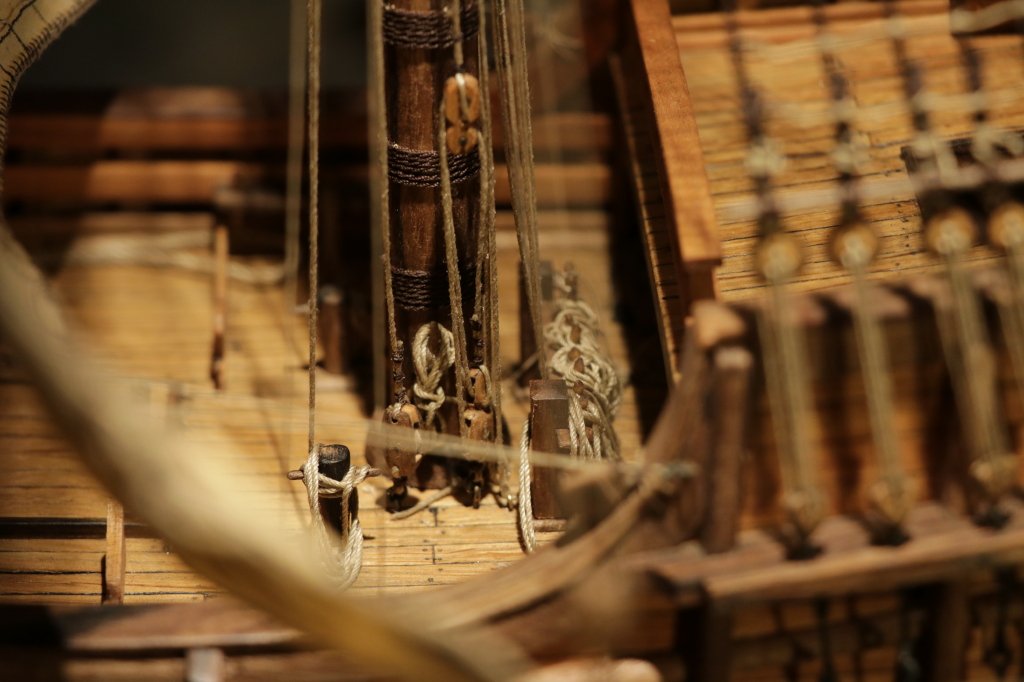
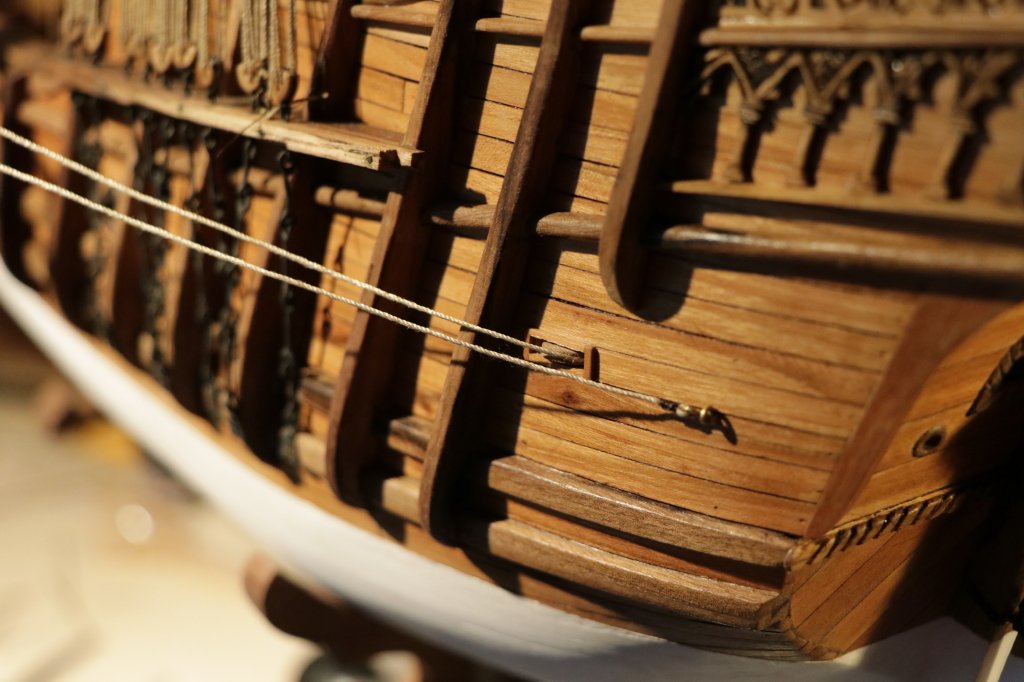
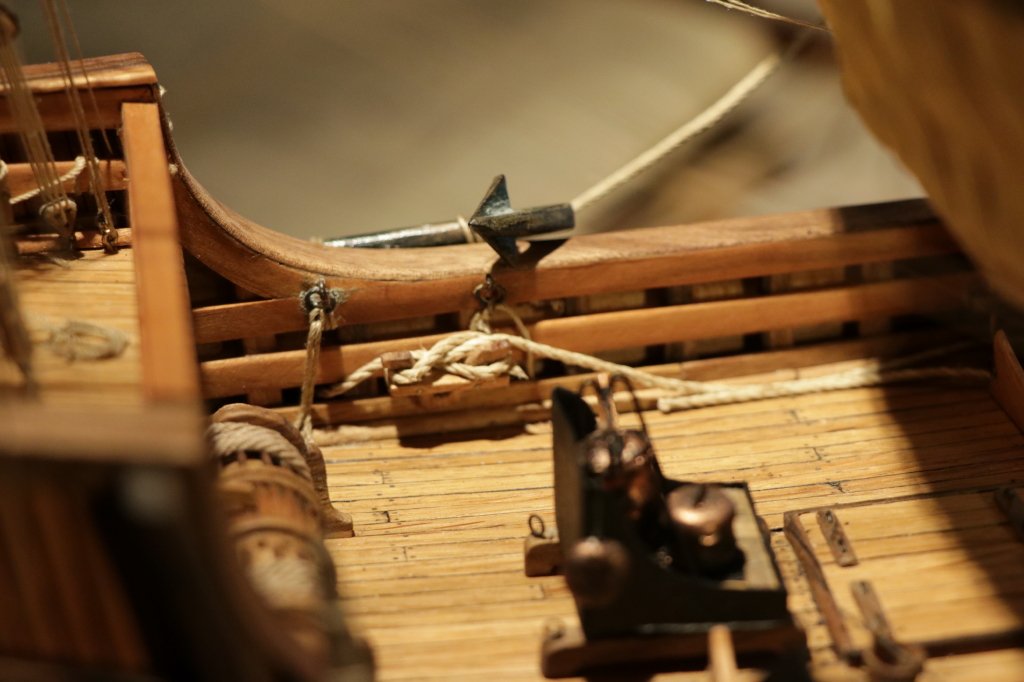
I also corrected the position of the anchor, removing the cables that tied it previously and making the changes to stop them by making brass eyelets to put the cable that binds them to the side of the ship
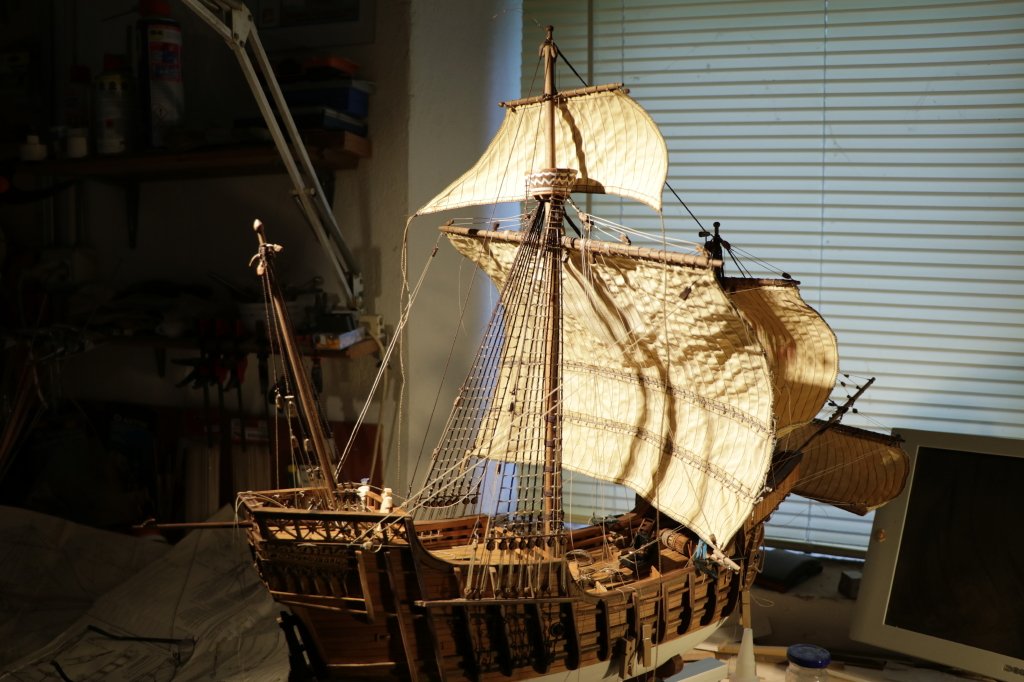
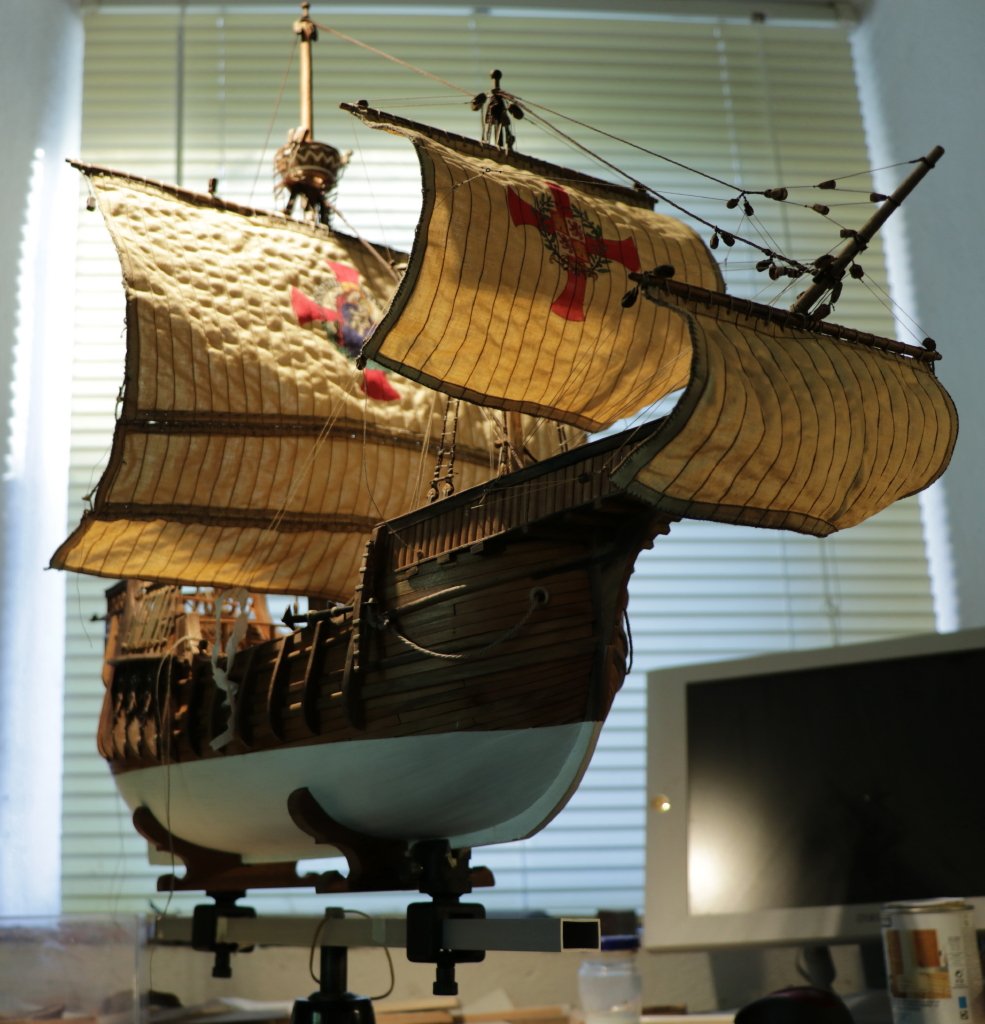
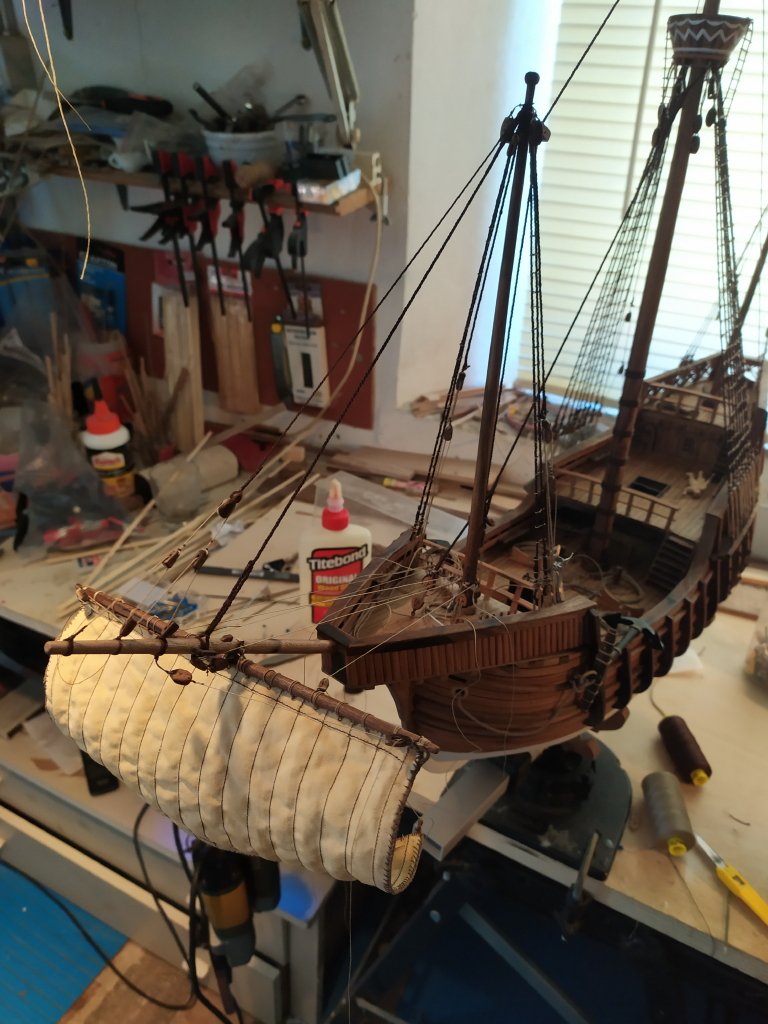
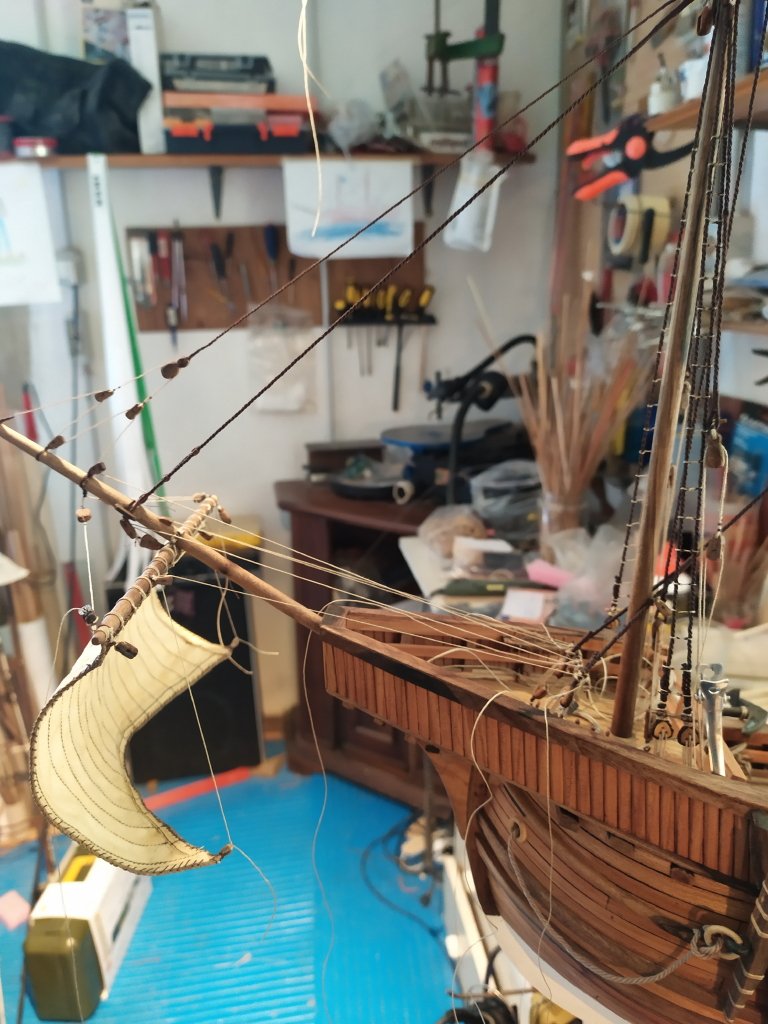
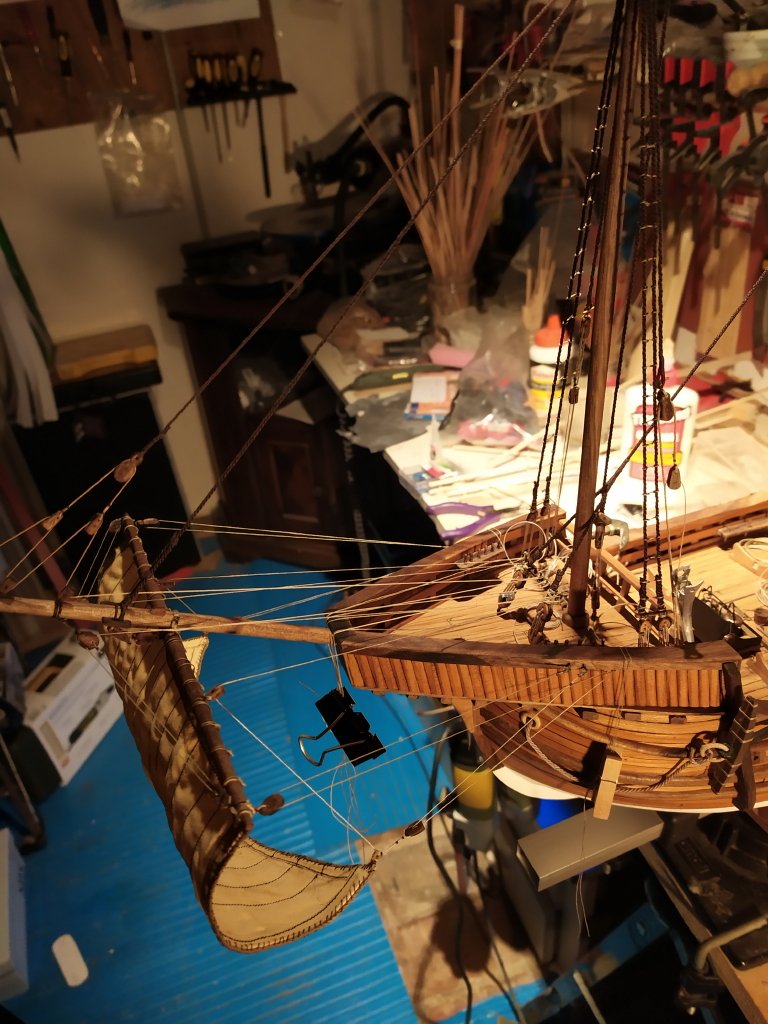
After the corrections I put on the latin sail, but first I had to "fill it" with wind, since the sails are swollen as if the wind came from the stern, even if it is not the best condition to sail with the sails
to do this I used the usual system, water and pva,
but before moving on to the installation I ordered the maneuvers of the quarterdeck, cleaning the bridge from the pieces of wire and ending them at the ankles with skeins or alternatively on the bridge,
later I laid the Latin sail of the mizzen mast
see you next time
black Wolf
-
Hi, David,
welcome, we are quite "close" considering the fact that here you will find many fans and friends from all over the world.with regard
black Wolf
- mtaylor and Ryland Craze
-
2
-
Hi German,
here you will find friends from all over the world with your usual "passion" with whom it will be possible and pleasant to share itSincerely
Black Wolf
- Keith Black and mtaylor
-
2
-
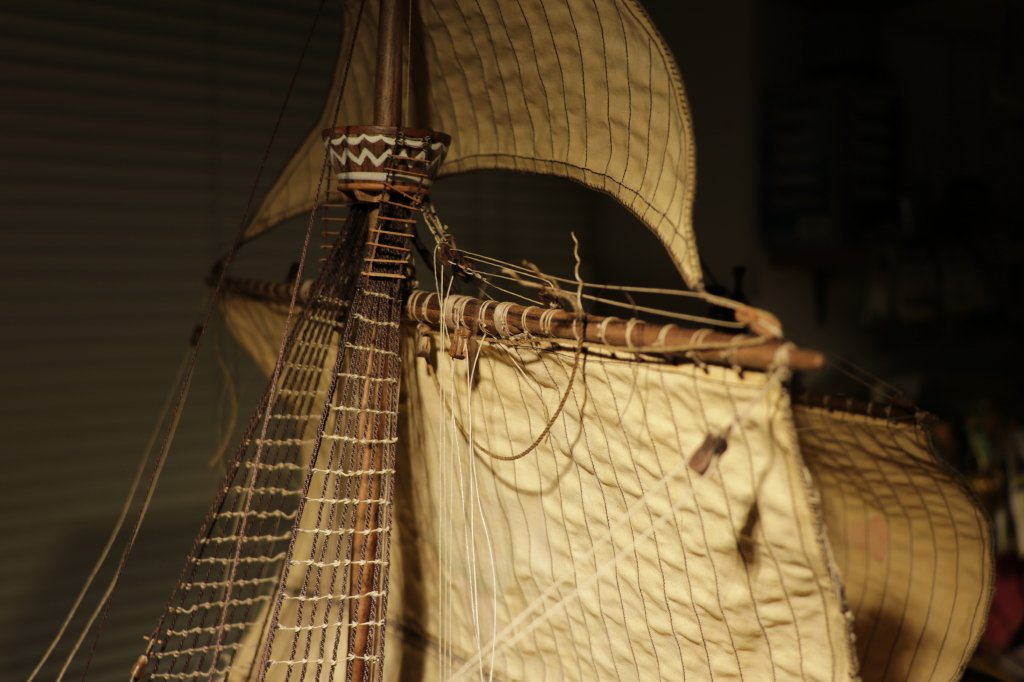
I thank you for the appreciation,
the small corrugations on the sail surface are due to the tension of the thread for sewing the panels,I think that even in real sails when they "swelled" under the action of the wind these undulations formed
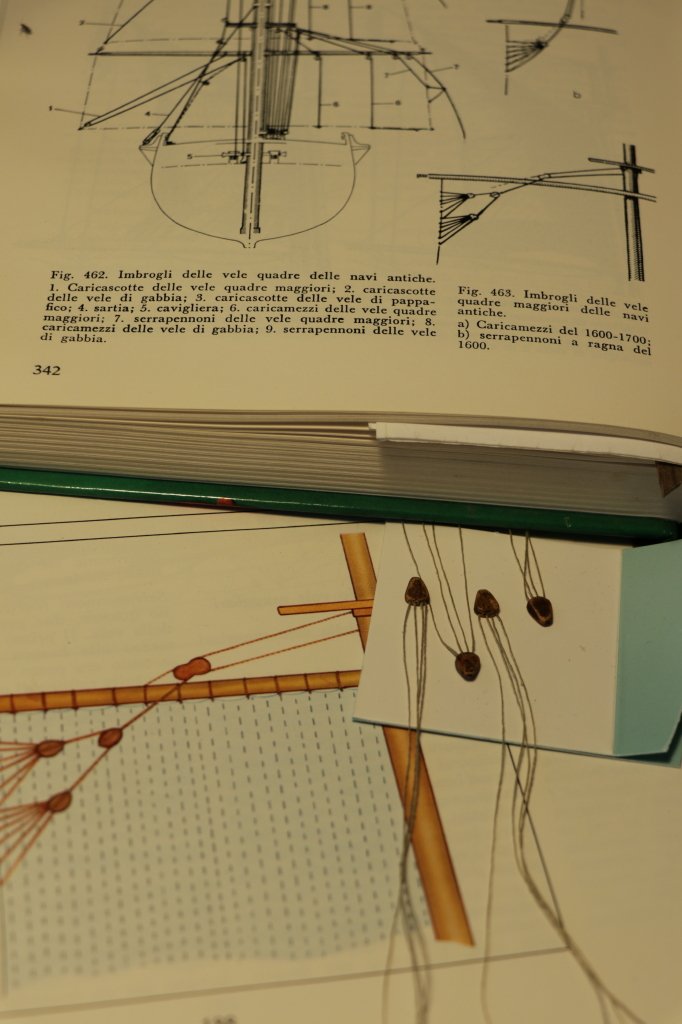
The work continued with the laying of the cage sail and the preparation of the maneuvers for the sail, small in size but complex in the preparation due to the "sheets" which are formed by the gratile of the sail itself which at the height of the clews on the lower part are transformed into sheets which, passing from the violin block located on the mast of the mainsail, end with a block that acts as a hoist, stopping on the bridge
the cable of the edge of the sail, which passes from the blocks to end on the bridge is very large, for this reason it was necessary to enlarge the holes of the blocks with the electric drill ... (with great happiness) however it went well, I did no damage
the cage sail had also been laid
see you next time
black Wolf
-
As I said I try to recover the progression of the work phases,
the execution of the maneuvers is not simple, it often happens to beat us with tweezers and this generates cursing,,,
after the flagpoles of the flagpole I realize the "arms", which regulate the direction, start with the cable "runner" with hook on the drawer and return to the block giving time to the cleat on the bridge,
on the photo above you can also see the " clew-line" cheating that starts from the clew placed on the low edge of the sail,
the blocks under the hood begin to be occupied by the maneuver cables
the appearance of the holy Mary begins to change
see you next time
black Wolf
- Baker, Keith Black, mtbediz and 2 others
-
5
-
After a month I update the works, which have gone ahead with respect to the inserted images, I will try later to make up for lost time,
I realized the double topping, in this photo you can see the first one
passing the cable from the blocks and stopping it on the cleat on the tree
the work on the maneuvers is demanding, confined spaces of maneuver, rearrangement of the bottlenecks to the racks and making ties is tiring especially for the view,
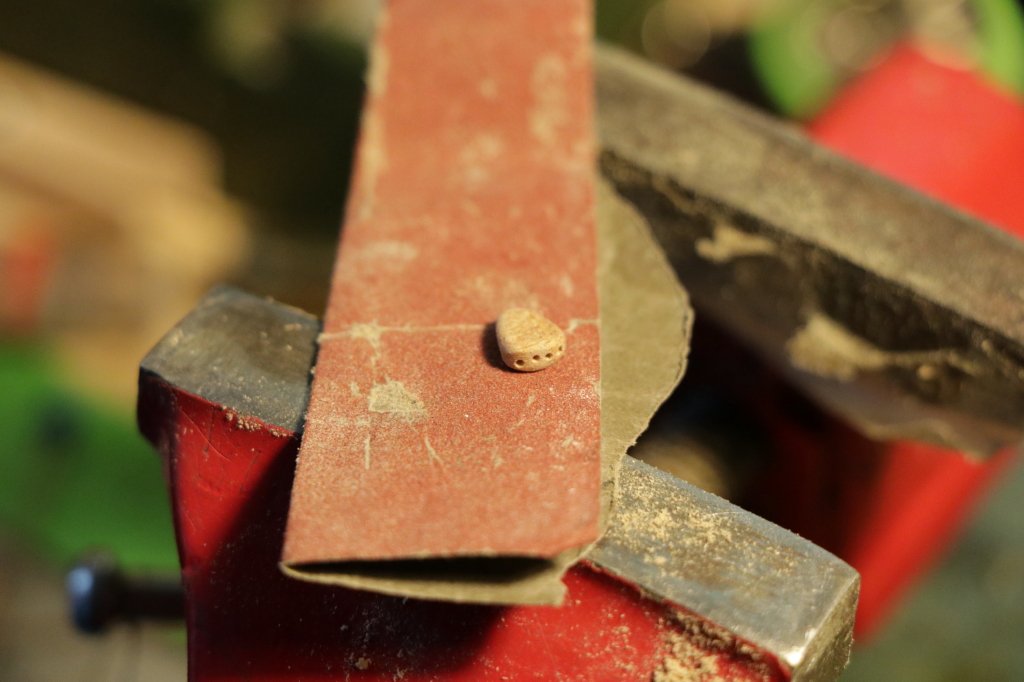
I made the " leech-linei", fundamental objects for maneuvers, cheating fixed to the gratile of the sail (teacher) that envelop and collect the sails on the flagpoles, in the S.M. I am a "spider" and I have equipped myself to make them, there are many workings of the objects for the realization of the maneuvers, ranging from cleats to hooks, rings, blocks and many knots that at first sight had not been seen (Adametz uses some "conventions" without giving examples and descriptions), the realization of these details takes time, of course ,,,
the leech-line, the realization phases, the thread must be inserted in each hole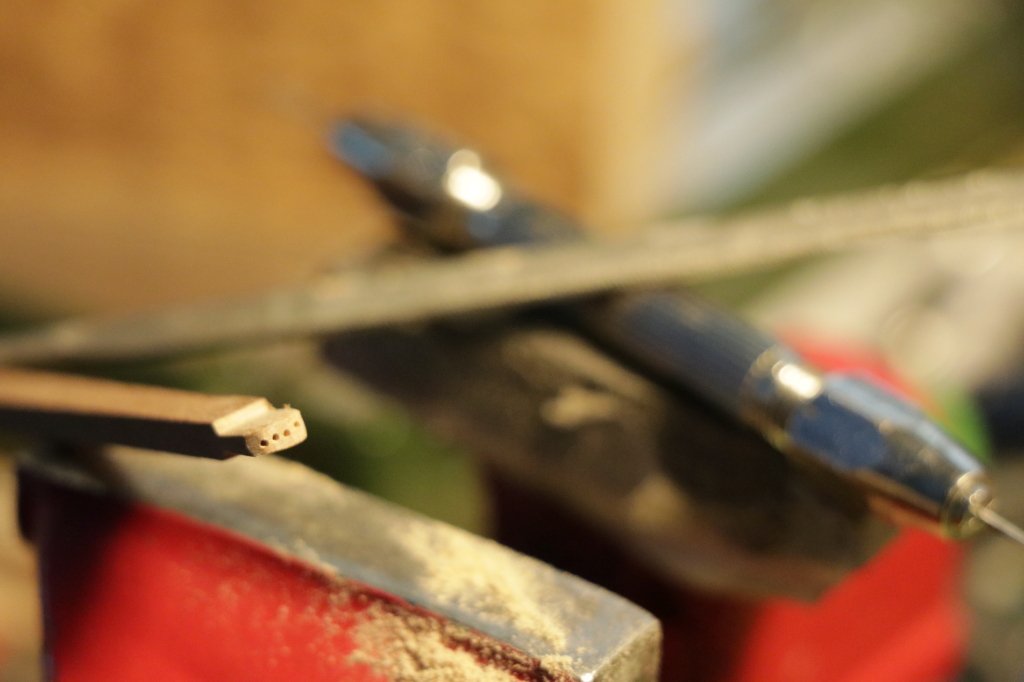
I am attaching an image from a book in which you can see what I have tried to achieve
I had to make other cleats with different sizes
and many "spoken" knots certainly among the most used for the start of ties, tighten immediately without widening or yielding
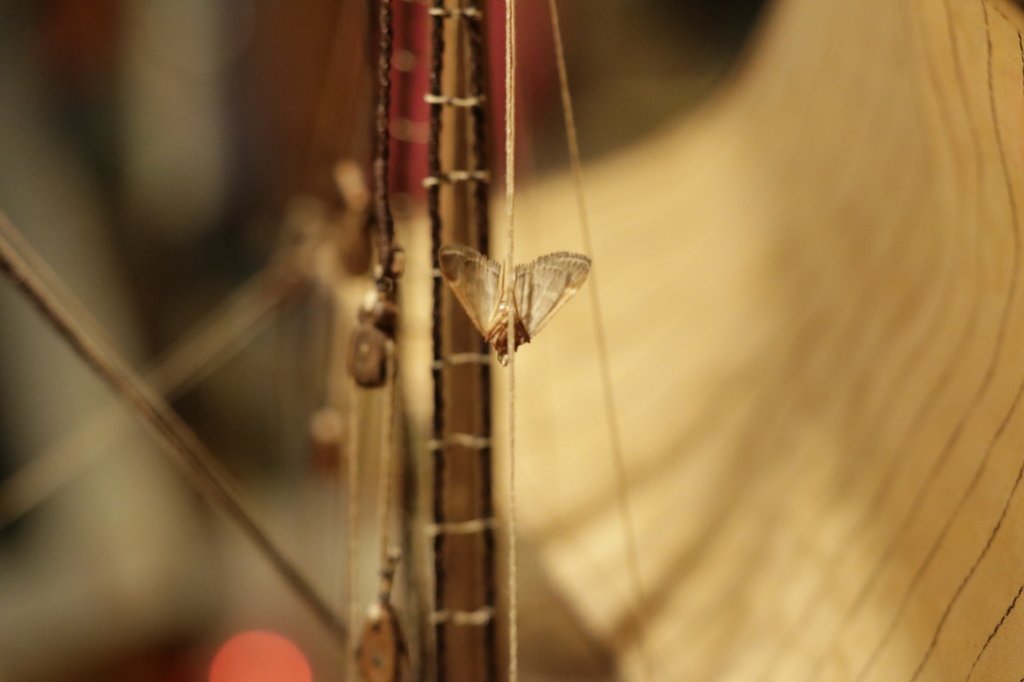
and especially at night, there is no shortage of "test observers"
")
see you next time
black Wolf
- Baker, GrandpaPhil, mtaylor and 1 other
-
4
-
As you know I really like wood, but seeing your build I think I also like paper and cardboard, you are very good I follow you with great interest !!!
black Wolf
- GrandpaPhil, SIDEWAYS SAM, rkwz and 3 others
-
6
-
I thank my friends for the welcome "likes",
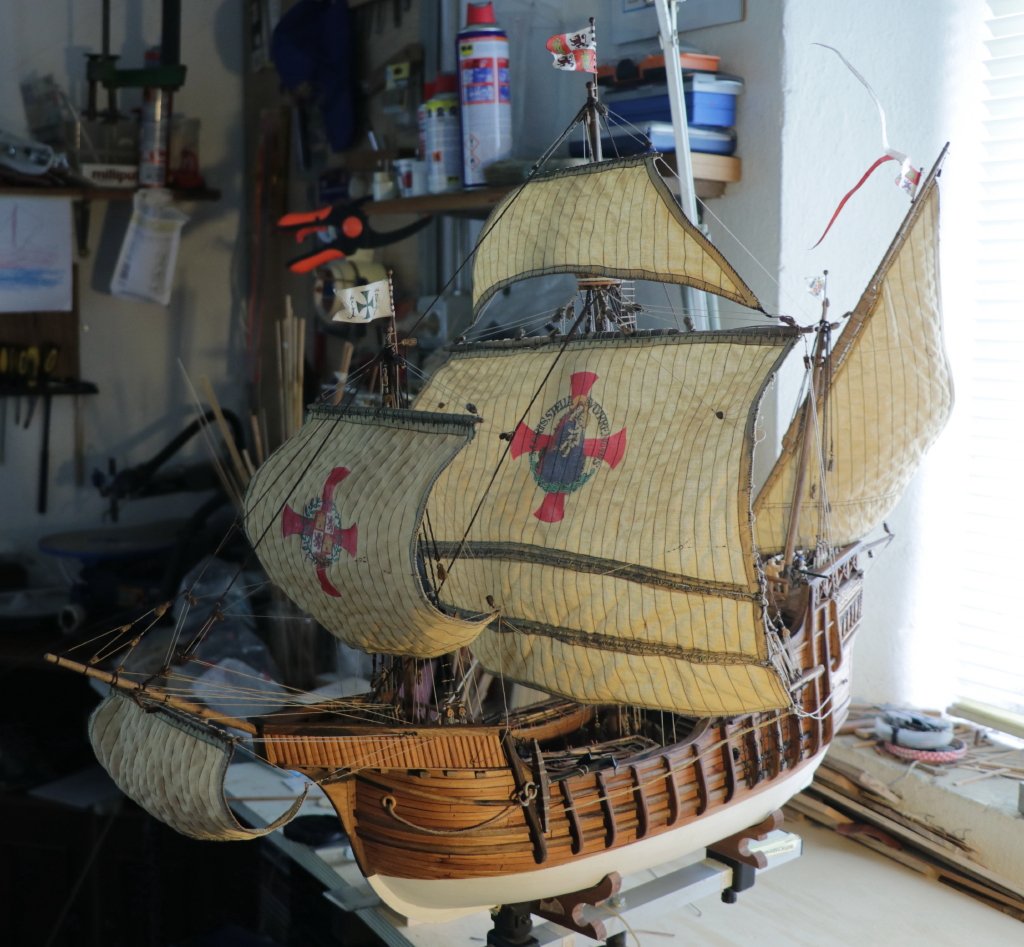
work on the sails continues in progression,
the rings are for bowlines
(in reality the rings were not in brass but in wood )
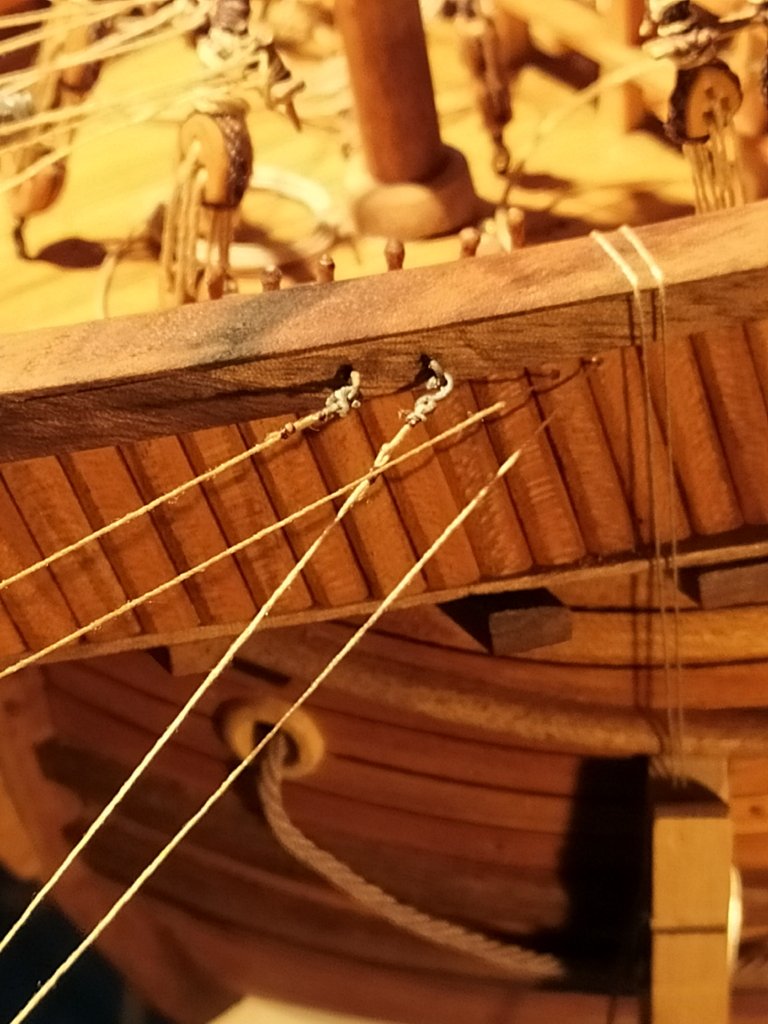
I have tried to scrupulously follow the drawing, however I have found some anomalies (errors?) that I will also indicate for suggestions, I attach the images that are the latest, the maneuvers are set only, you can see that they are stopped with some wooden pegs to fix them permanently following the ankles and / or cleats
the detail relating to the foresail sheet
the hole of the tack is not shown on the drawing, probably a "forgetfulness" of the designer, recovered by looking at the photos of the Santa Maria model
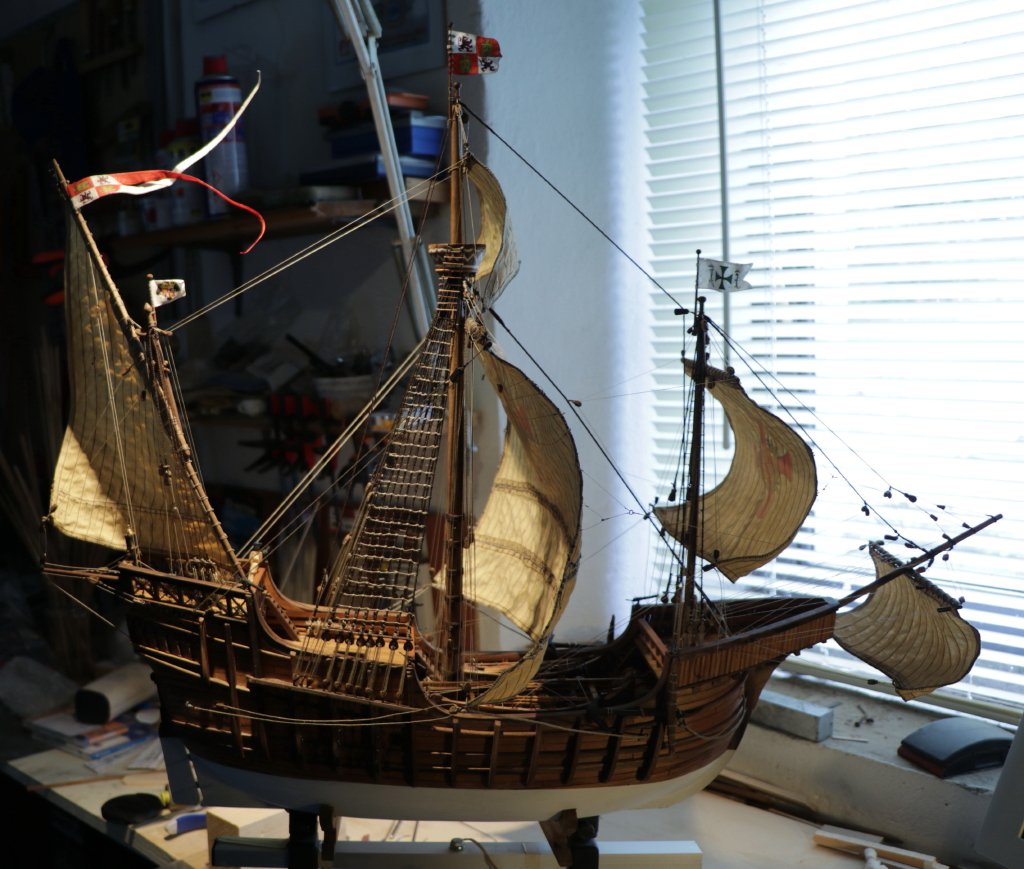
After the maneuvers of the sails I had to neatly adjust the positions of the ankles
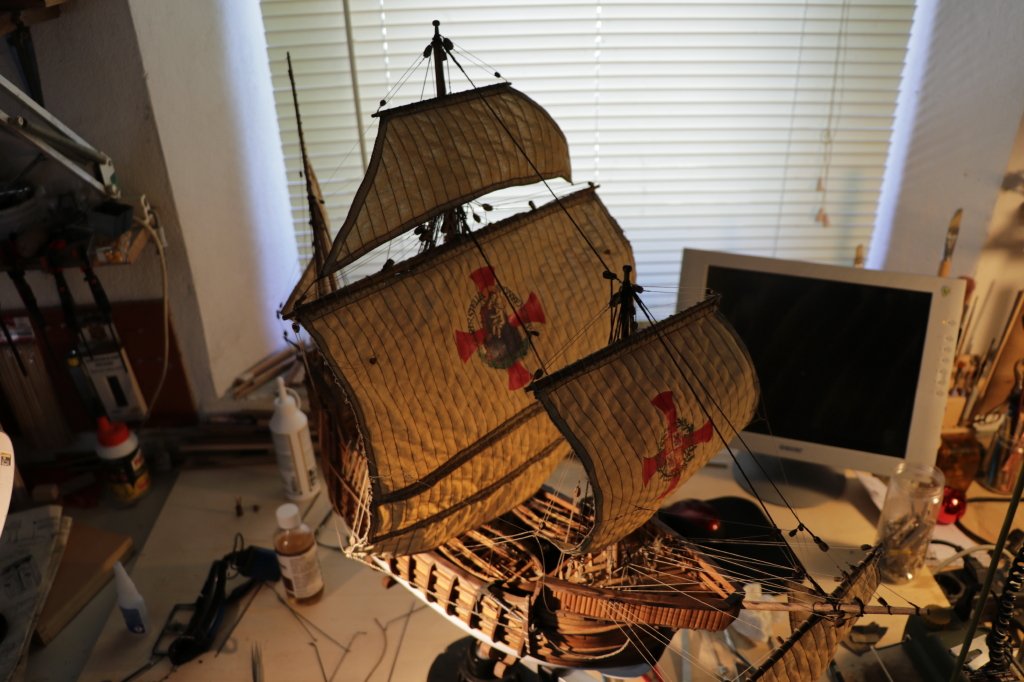
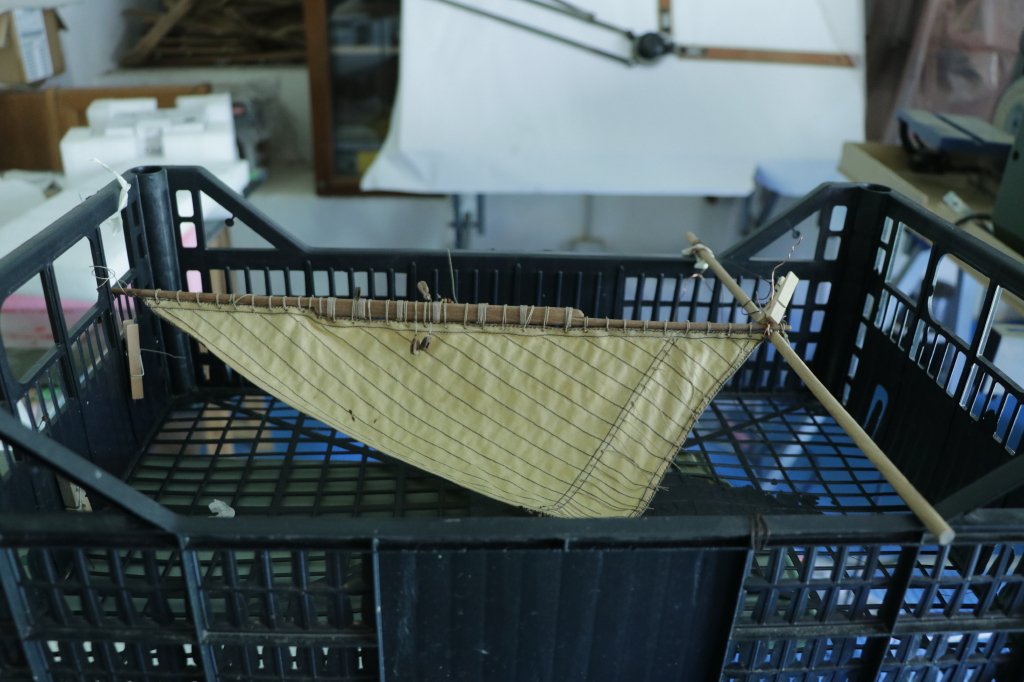
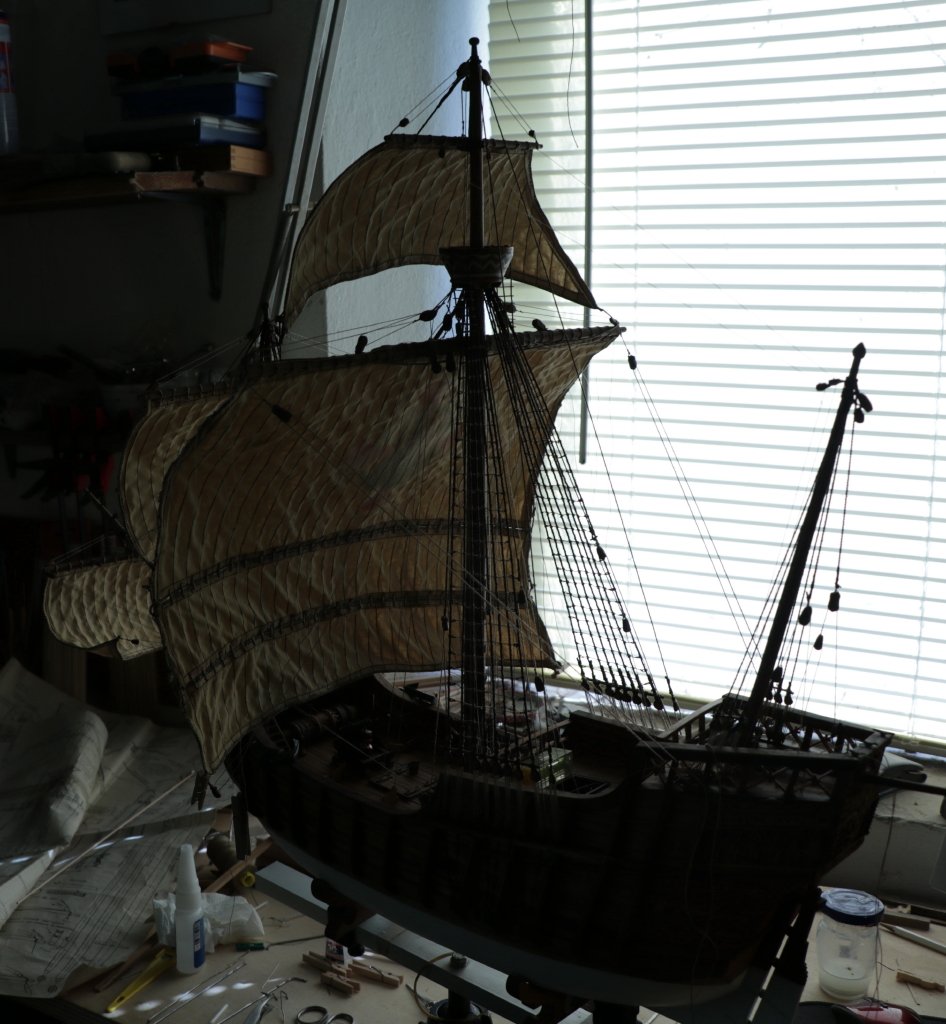
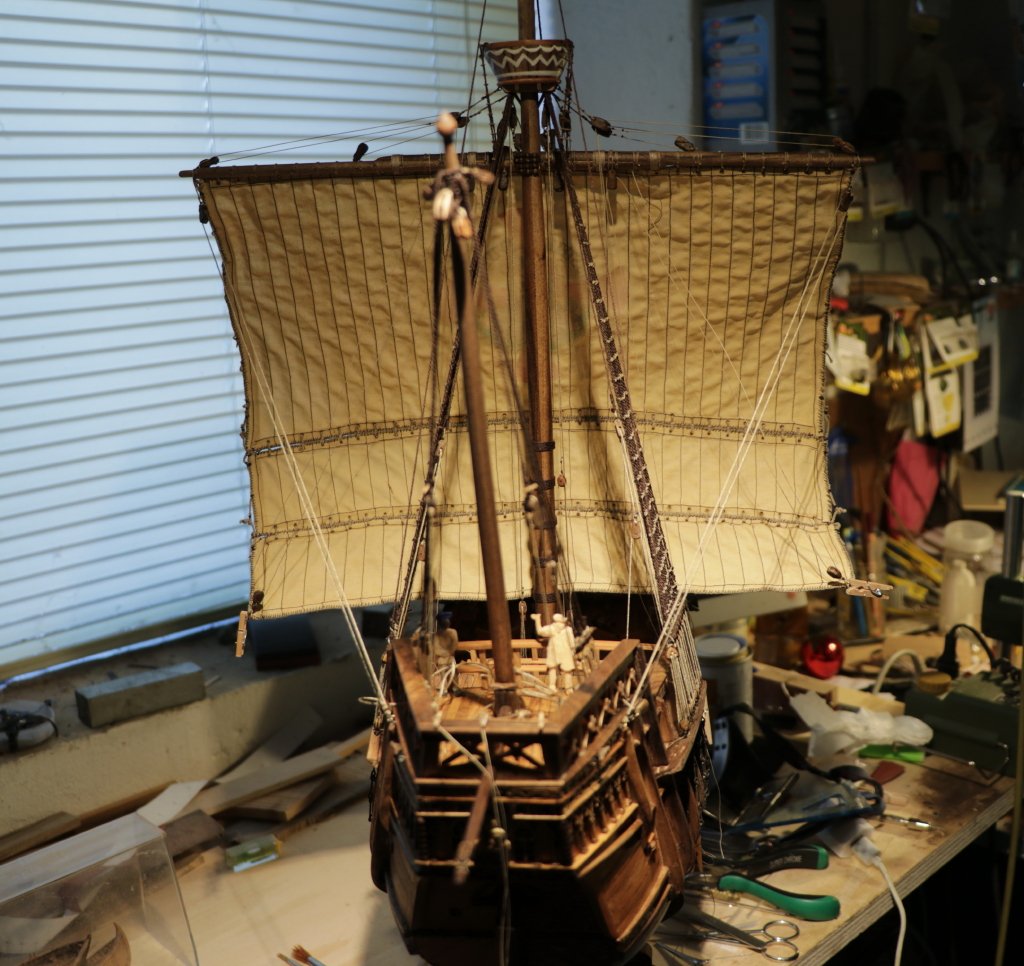
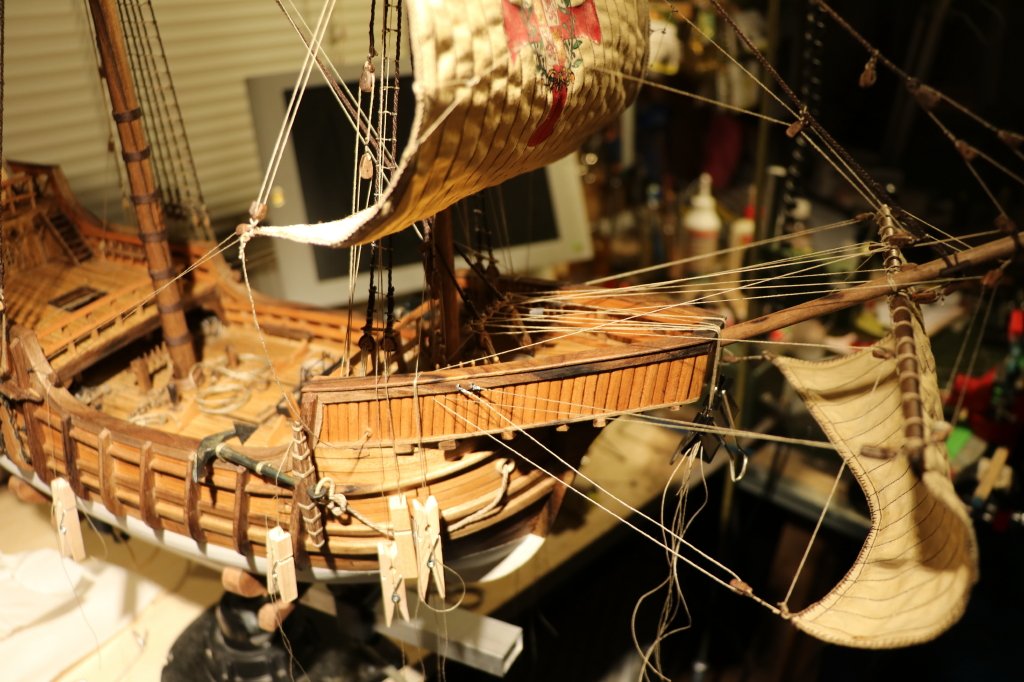
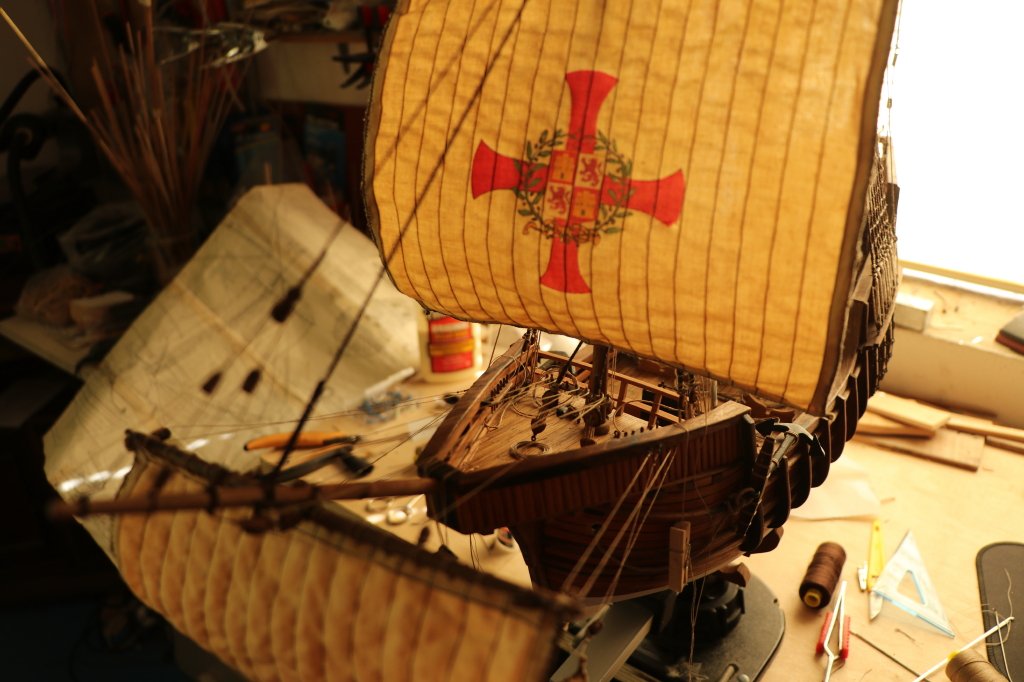
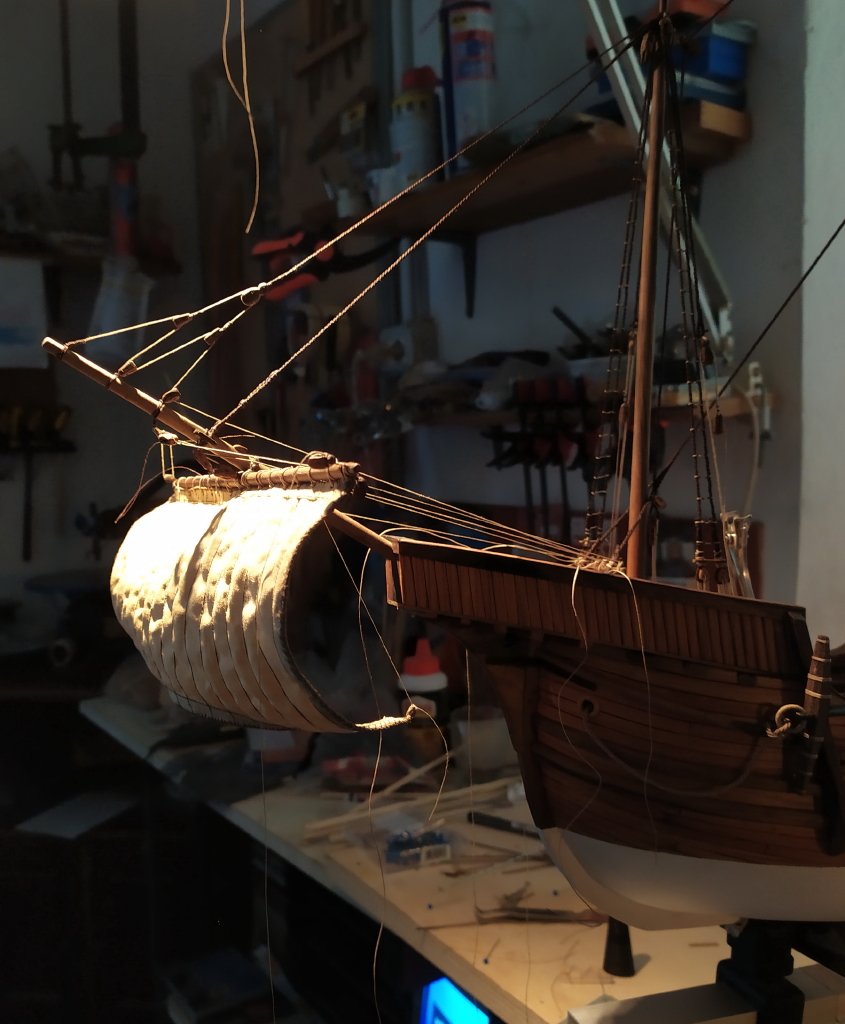
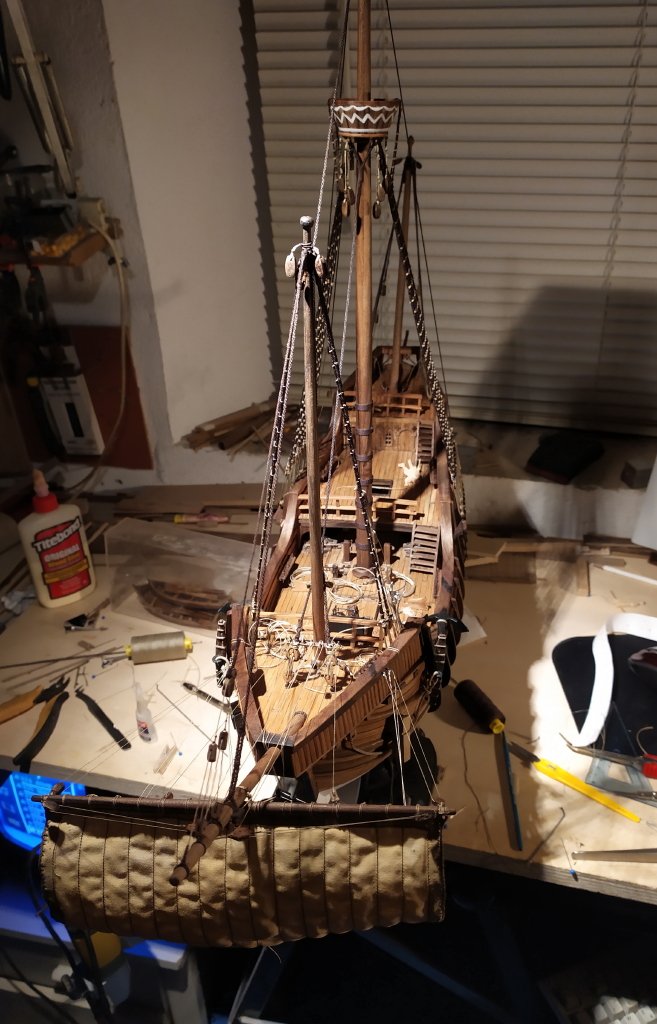
the time has come to put the large square sail unlike the "caravel" that the Latin sail had, removed from the fruit box in which I had placed it for drying the water with wood glue, to give the shape of the "swelling" I stopped it on the tree with a copper wire, just to stop it "on the fly"
I attach some pictures,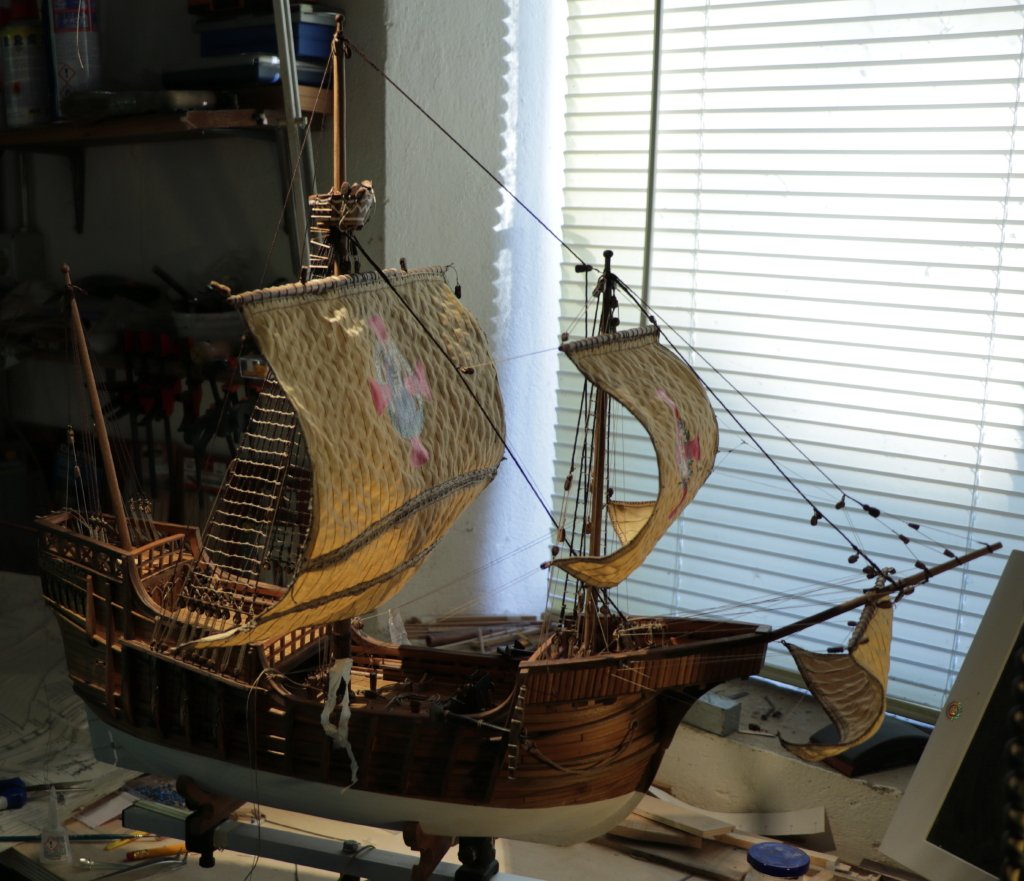
the sail was placed without the maneuvers, due to gravity it tends to "lean" on the mast with the maneuvers pulled it should take on the appearance of the wind swollen wind so it should tend to detach from the position taken without the tense maneuvers,

the image of the Santa Maria from the bow
the detail of the ankle rack, in which the maneuvers will be stopped, the maneuvering spaces are very reduced !!!
see you next time
black Wolf
- GrandpaPhil, cog, tarbrush and 5 others
-
8
-
also for this sail other blocks and rings are needed for the maneuvers of the upwinds, in the realization of the different maneuvers not highlighted in the drawings take on particular importance if you intend to carry out the correct maneuvers (certainty that I don't think I have, both for the lack of knowledge of the same and for the indications shown in the drawings)
in addition to the construction of the blocks,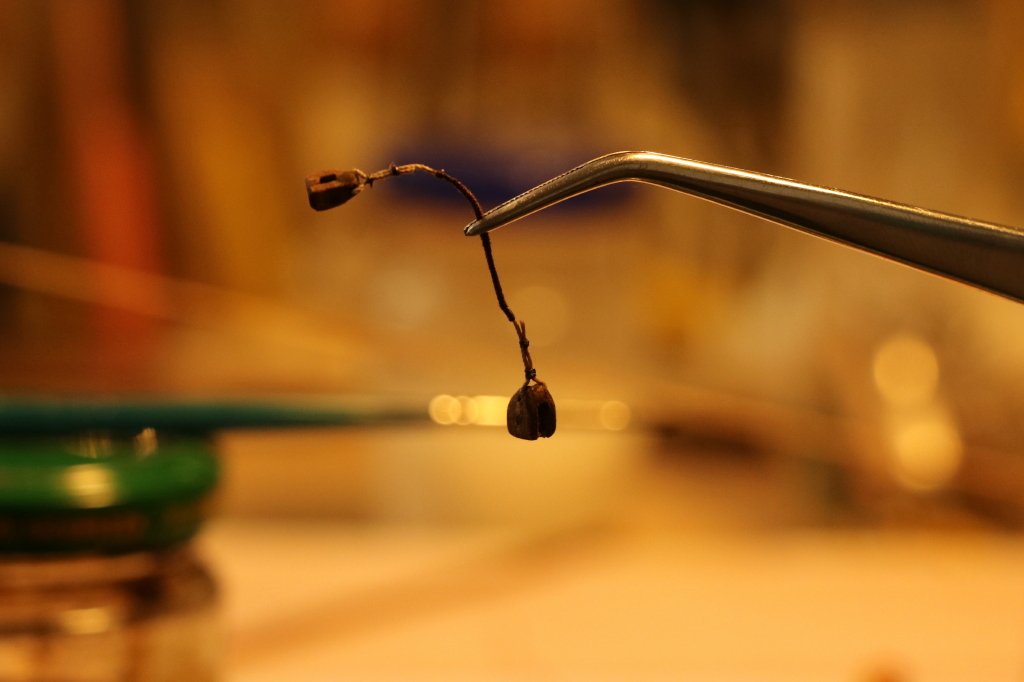
it is necessary to lay and tie in places that are not easy to work

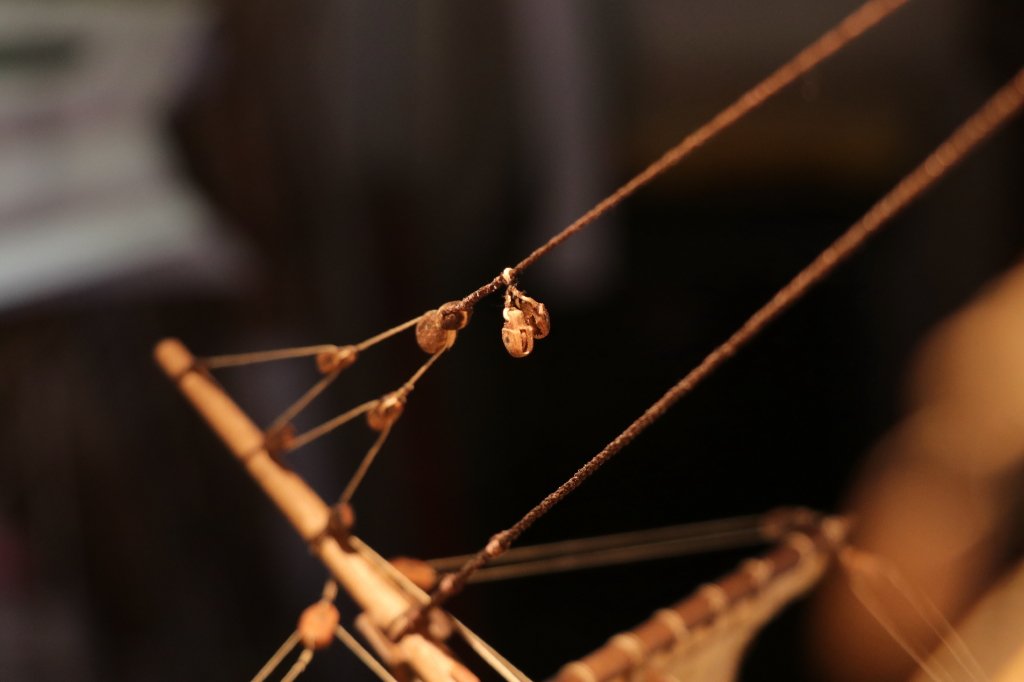
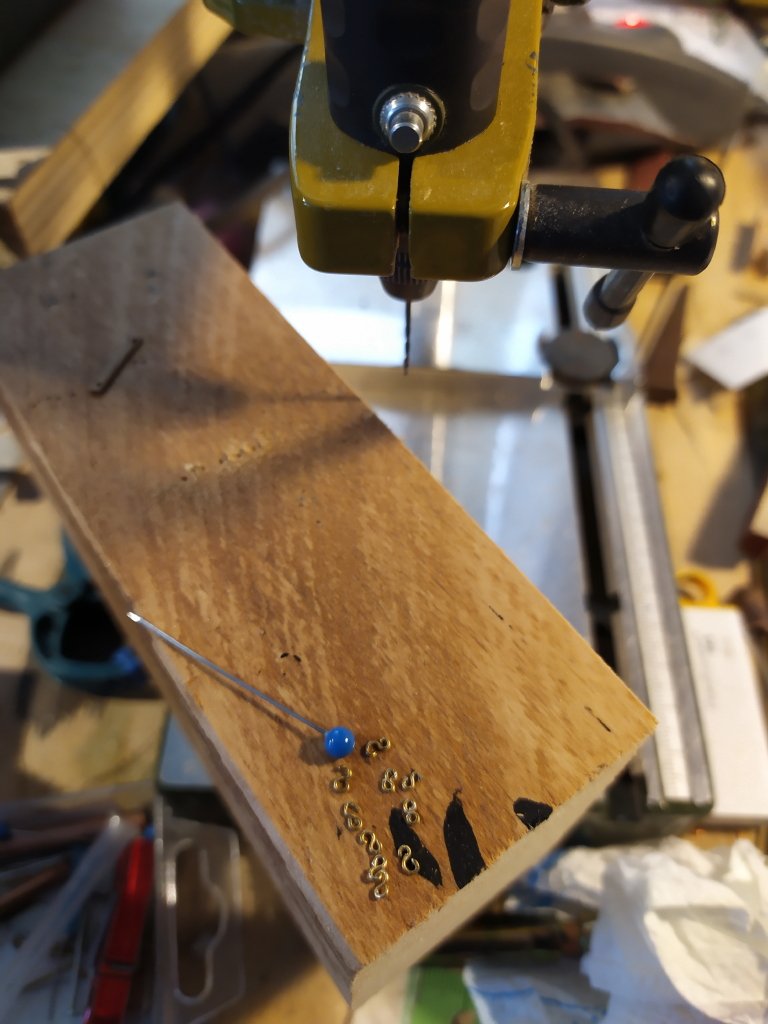
small rings are needed for the upwind courses, these too made with brass wire
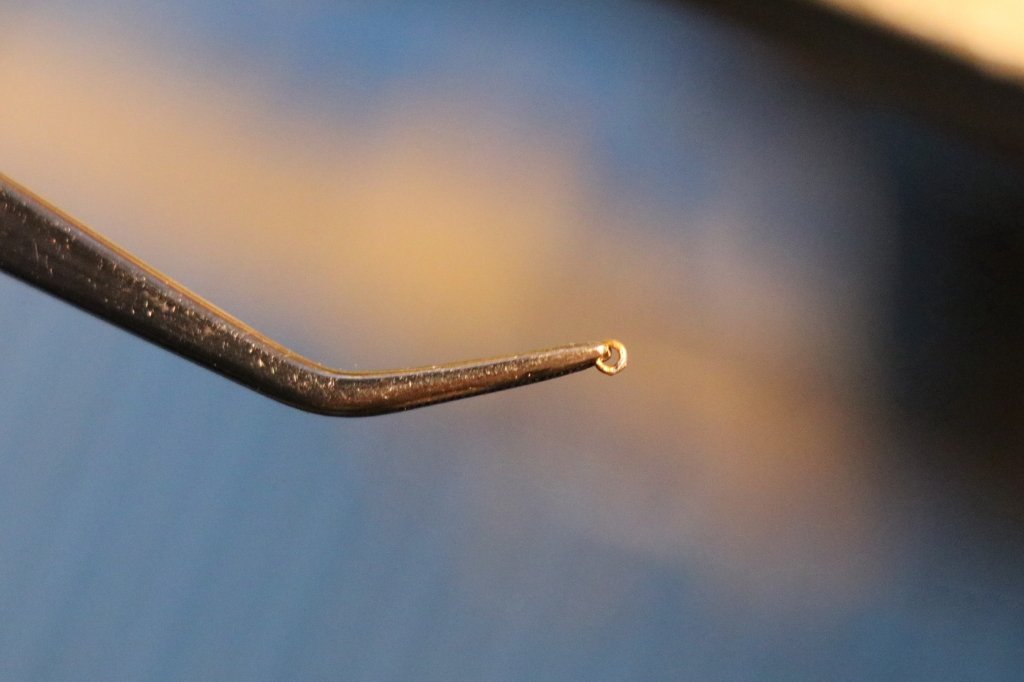
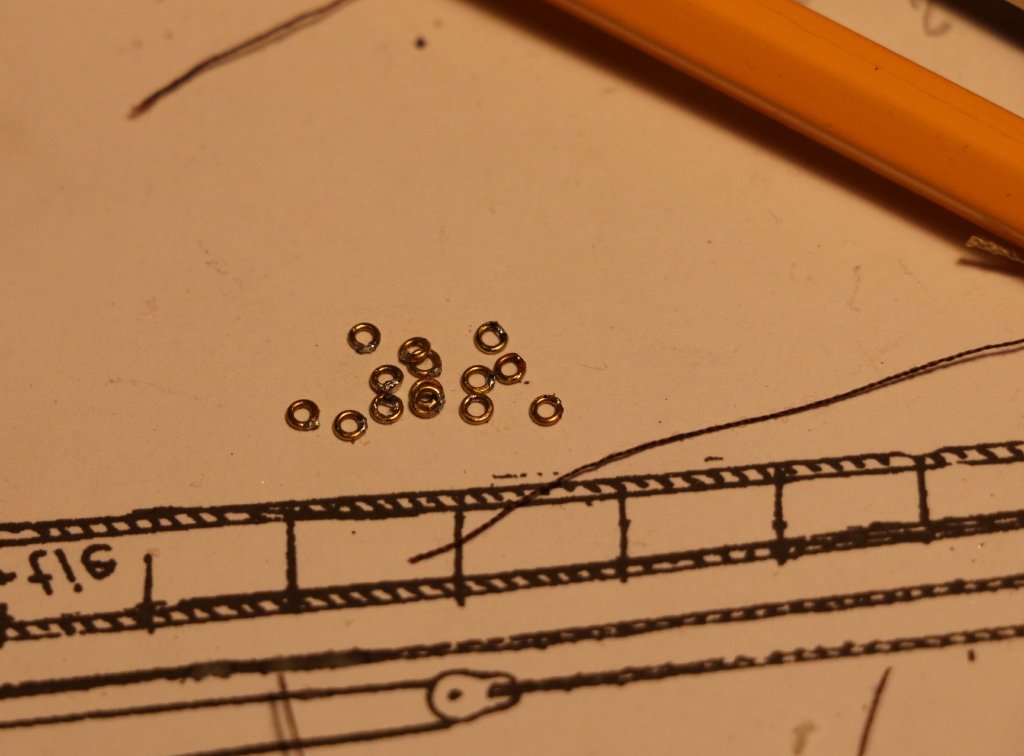
with the sewing needle it realizes their circumference and then the welding of the point of union of the wire, always with the usual method that allows to carry out micro soldering in tin in an "easy" way,
the only problem, if they fall on the floor are nowhere to be found, and given the size it often happens
see you next time,
black Wolf
-
Thanks Steven, your compliments are highly appreciated, like the likes of friends.
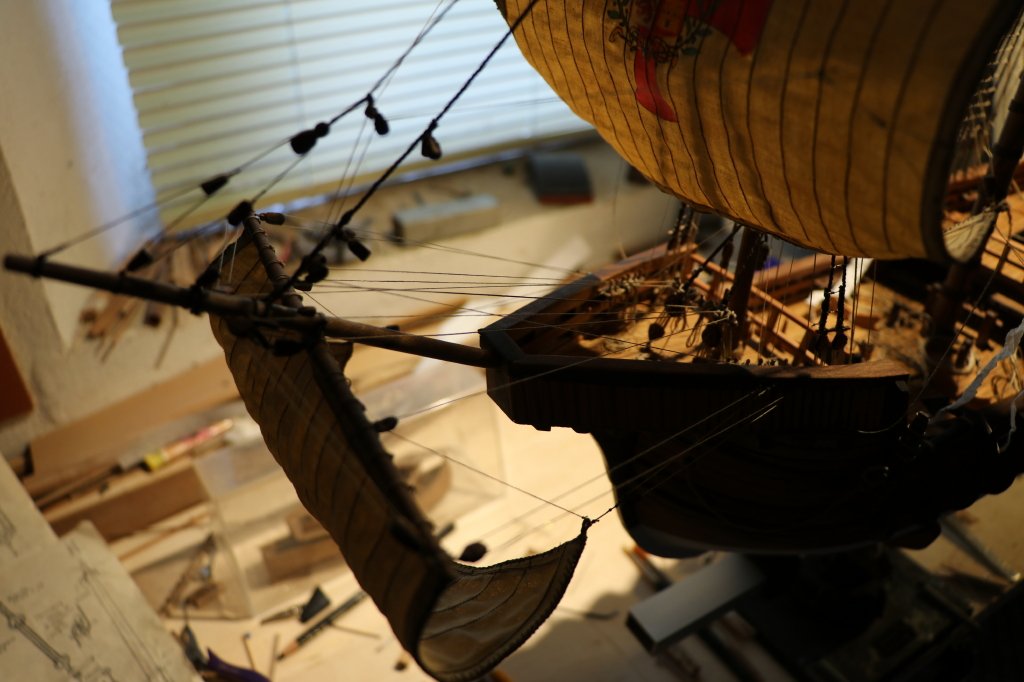
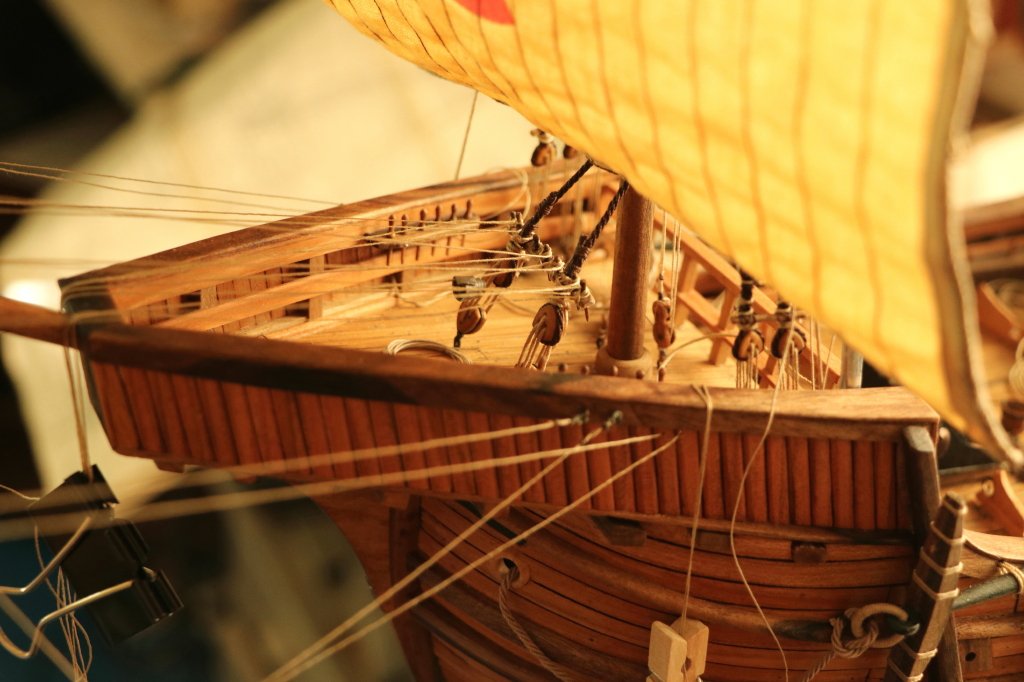
The time has come to place the sails, I started from the bowsprit, stopping the flagpole of the " sprit sail top sail" sail with the mast caps made from the rope,the maneuvers will only be set, without stopping them definitively, only when all the maneuvers of the sails on the deck are finished I will stop them definitively, trying to recover the errors,
the method used to "fold" the sails seems to me to work fairly well, even if the civada is not particularly large in size, the sail with water and clue for wood treatment is very stable and with copper wire I can change the curvature without make her lose the "camber"
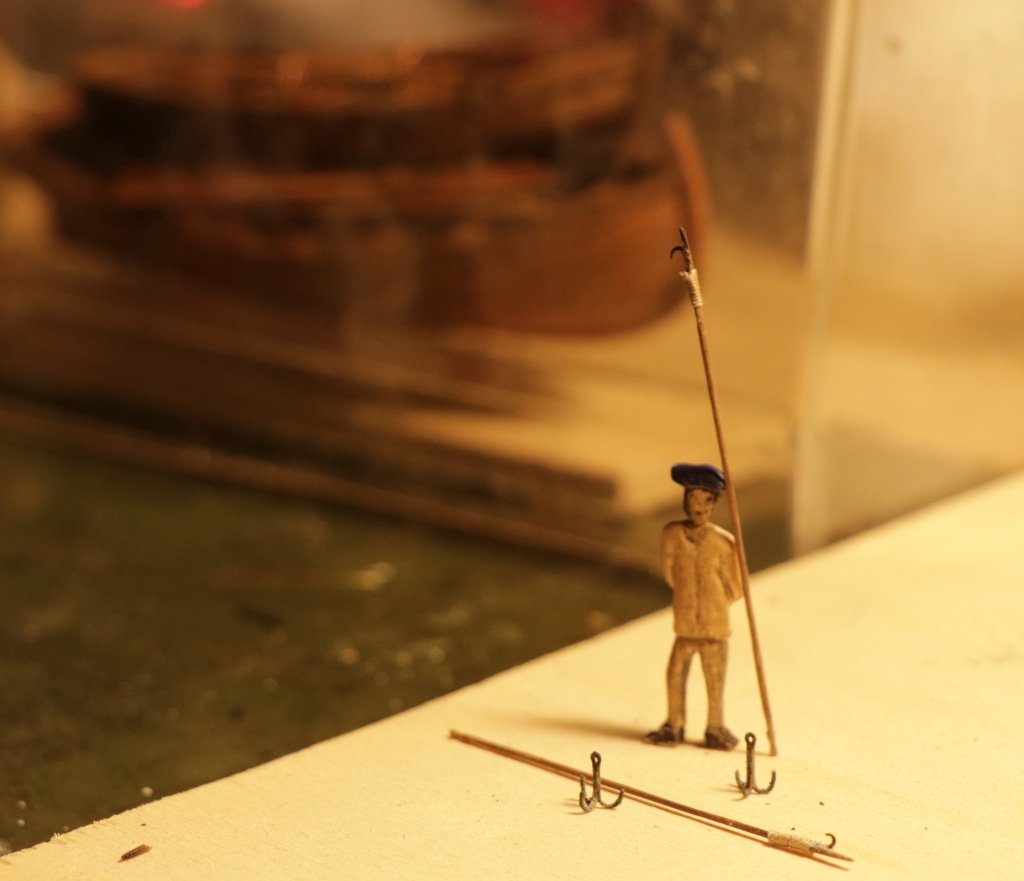
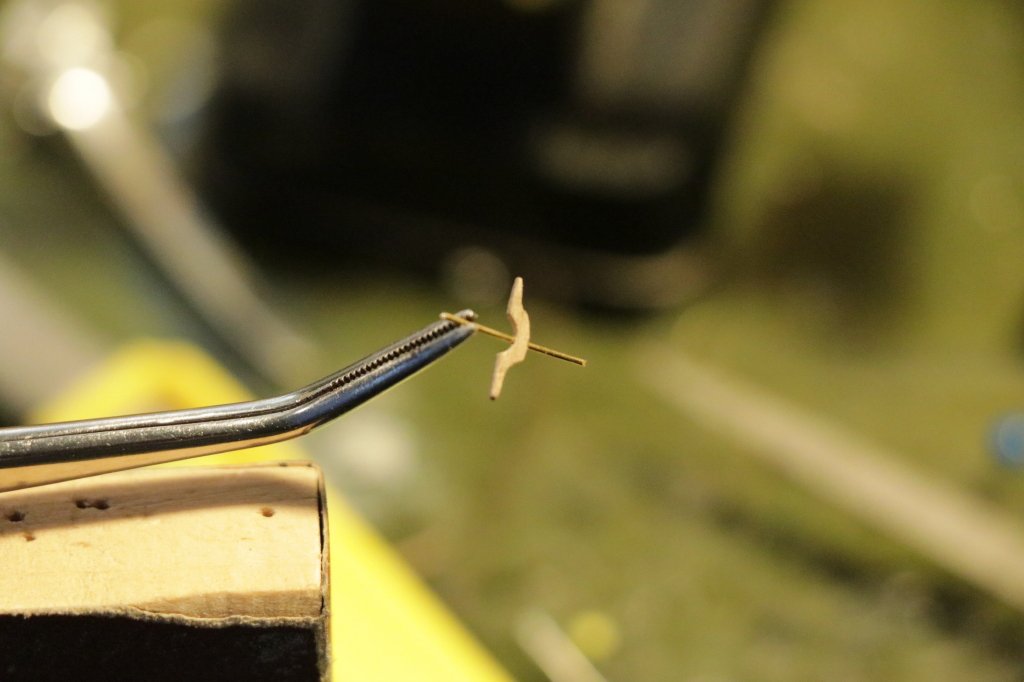
Necessary for the implementation of the various maneuvers, the realization of brass parts for fixing, I started with the hooks, I had some but they seemed too large, out of scale, so I redone others using a pin for the curvature and the brass wire of d. 0.5 mm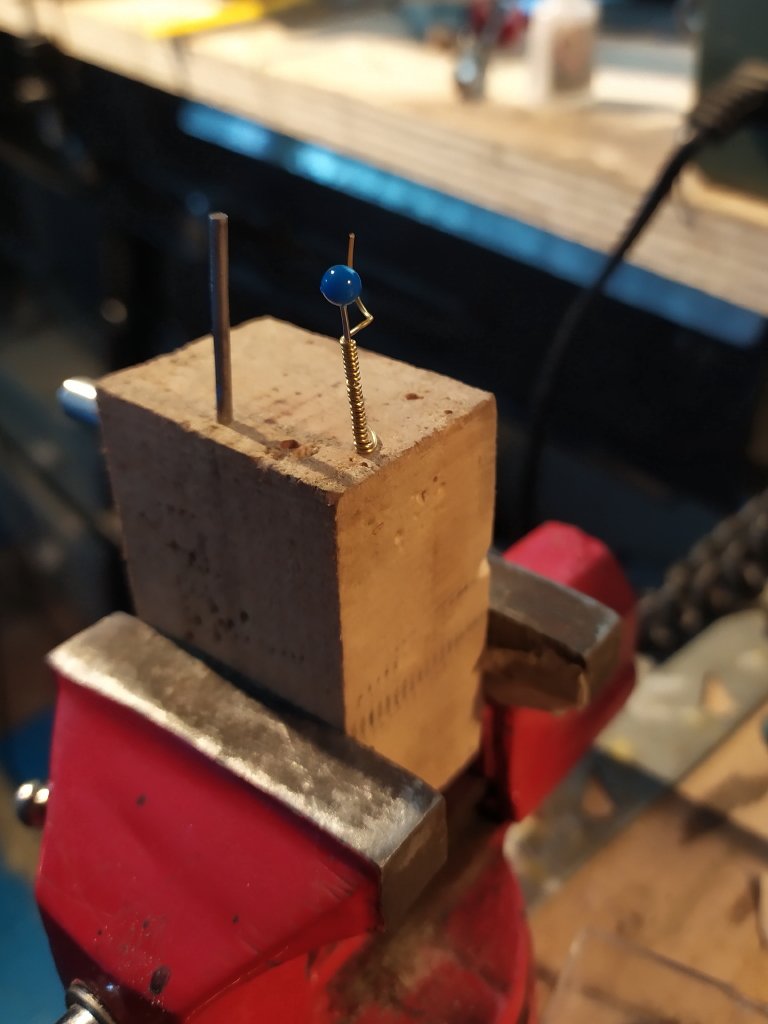
a good method is the realization in the usual scale of the model of the "little men / sailors" who, although rough in their features, allow "glance" to establish the relationship with the piece or element made and to be laid, even these hooks seem to me too big in comparison, but having no other thread available I have to "please", so the throttling of the arms and sheets is achieved using the hooks made
the hooks made with the brass wire have been burnished.
The processing on the maneuvers takes a lot of time and thinking that it is not yet the definitive one ...
the next step is the laying of the foresail through the mast caps and the halyard, unfortunately I realized that I hadn't changed the light settings of the camera so some photos have the saturated color (turned to yellow)
even the foresail is well "stiffened" (paper-coated) but with the copper wire at the edges it can take any curve,- mtaylor, GrandpaPhil, cog and 2 others
-
5
-
-
I thank my friends for the appreciation,
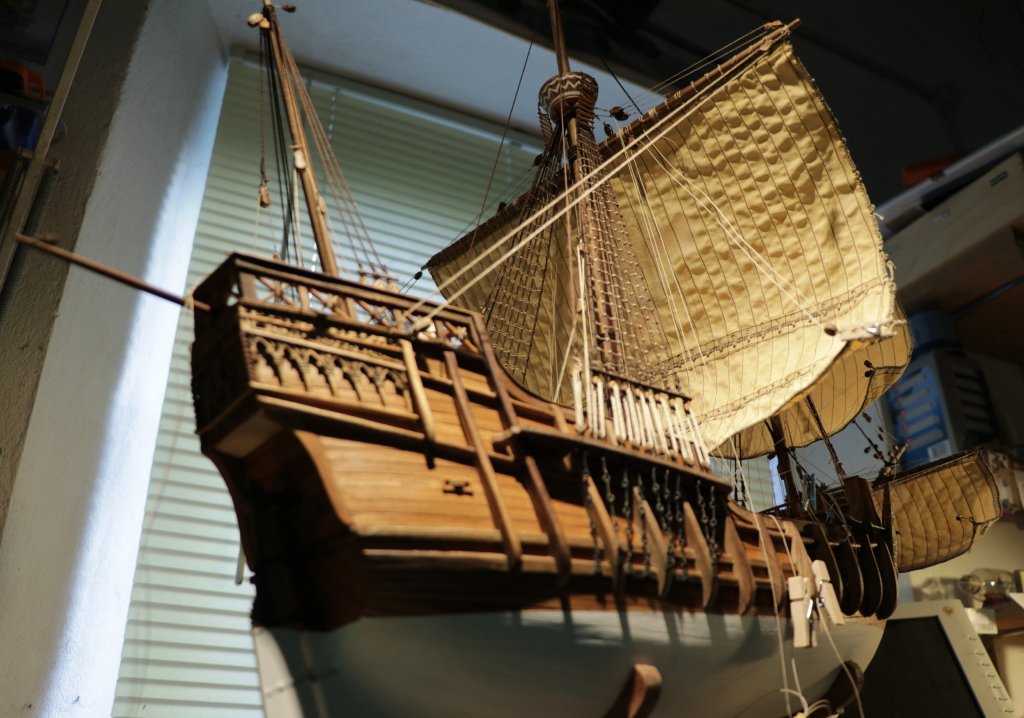
if you come to my part it will be very pleasant to invite you to eat, maybe we will not eat paella, certainly typical Italian dishes accompanied by a sweet Tuscan wine.another detail that I have finished is the rope ladder, used to enter the crow's nest
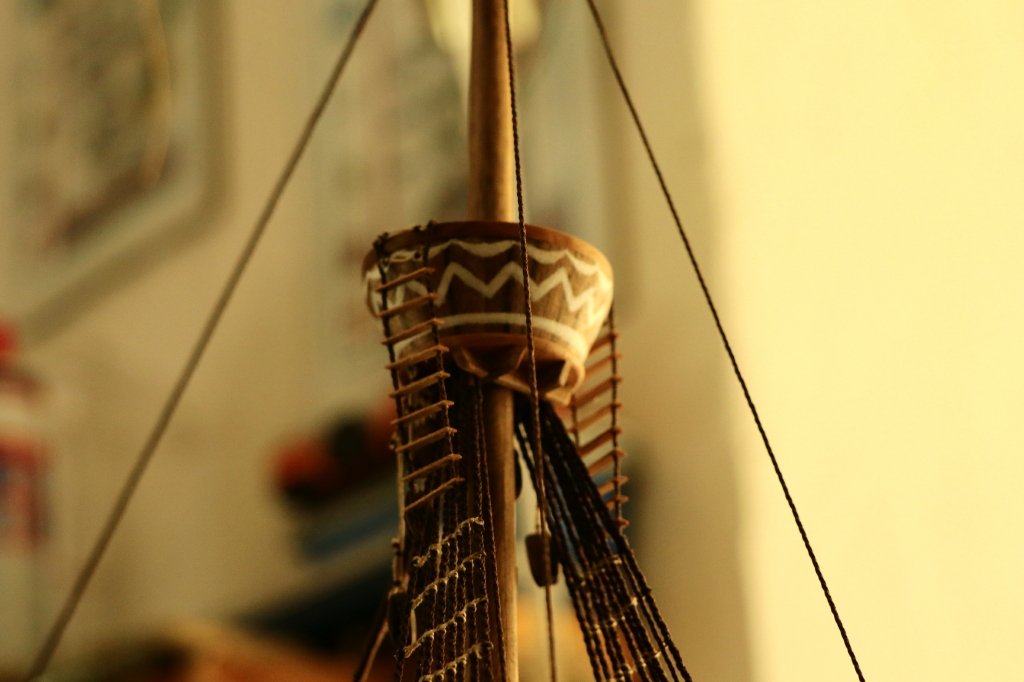
later I corrected the error (the handle) made on the pot, and to put the lid on
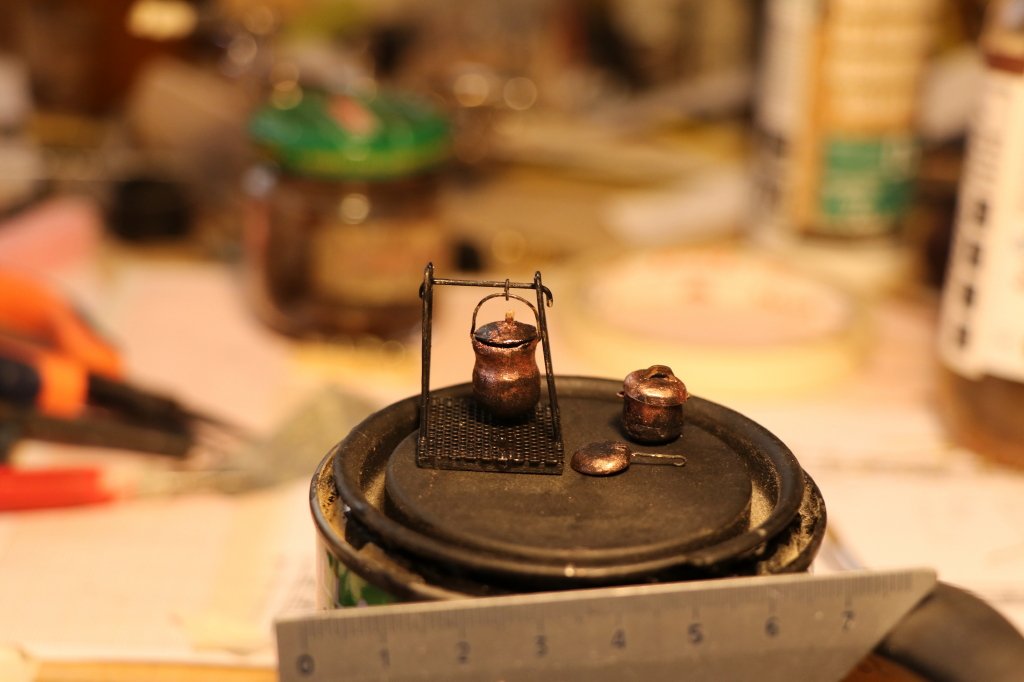
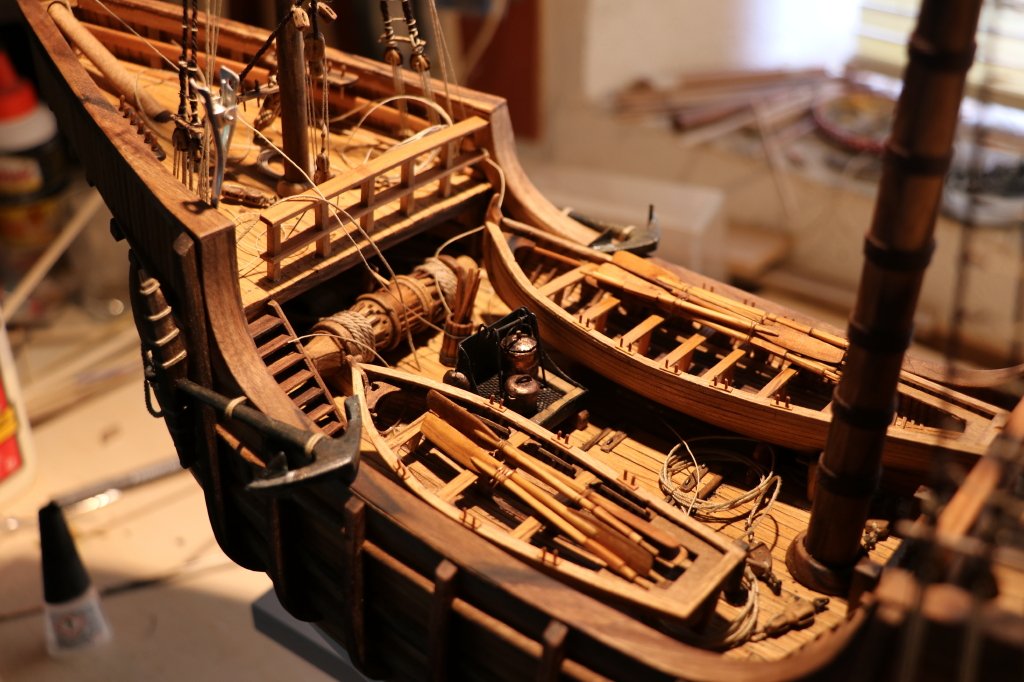
I arranged the piece made on the kitchen
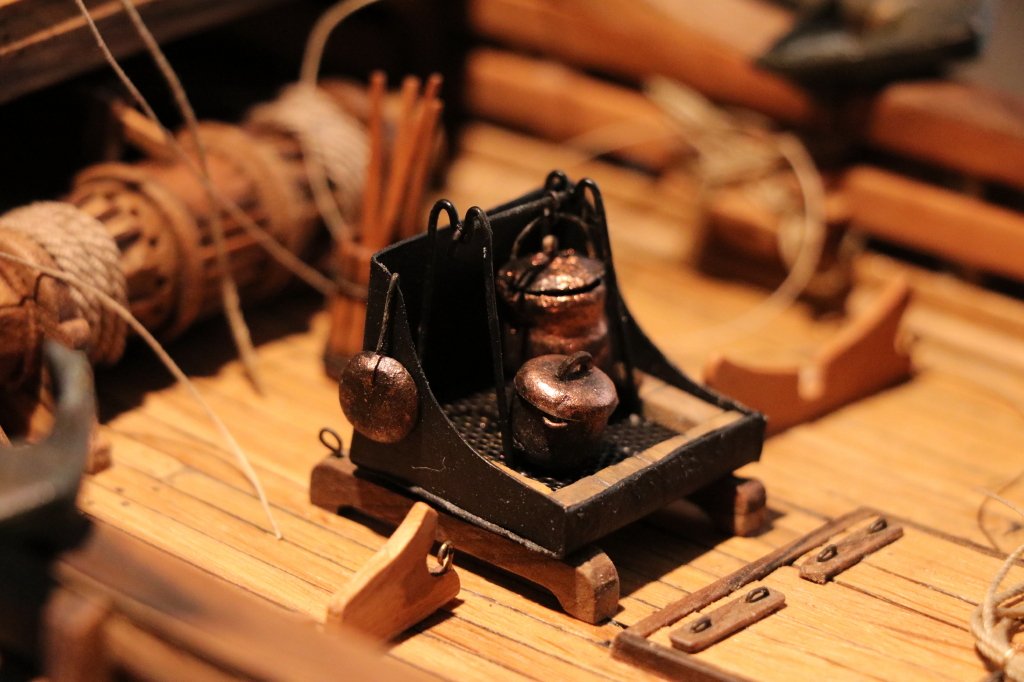
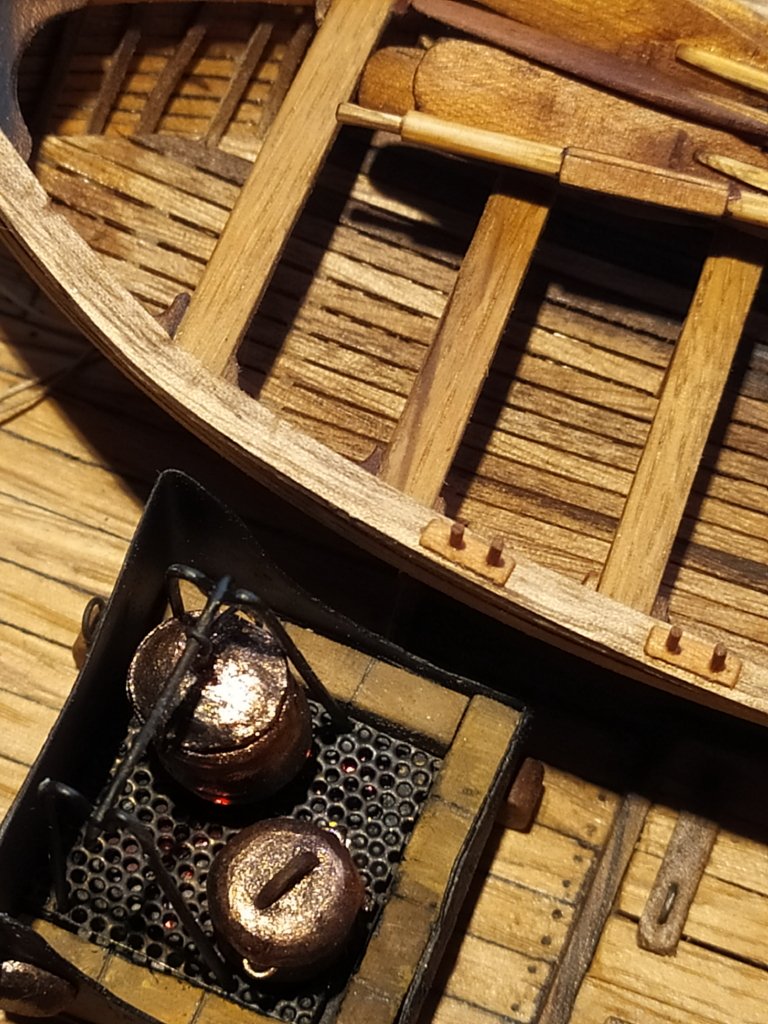
but I have also seen how it would have been with the lifeboats, surely the space is very small, perhaps during navigation they were towed to have more space on the bridge
while I tried to take a picture to show the "reflections" of the glow of the "burning embers", while we move slightly, the tinfoil of the chocolates are certainly more visible, curled up in small pieces put together with fragments of coal offers a better result,
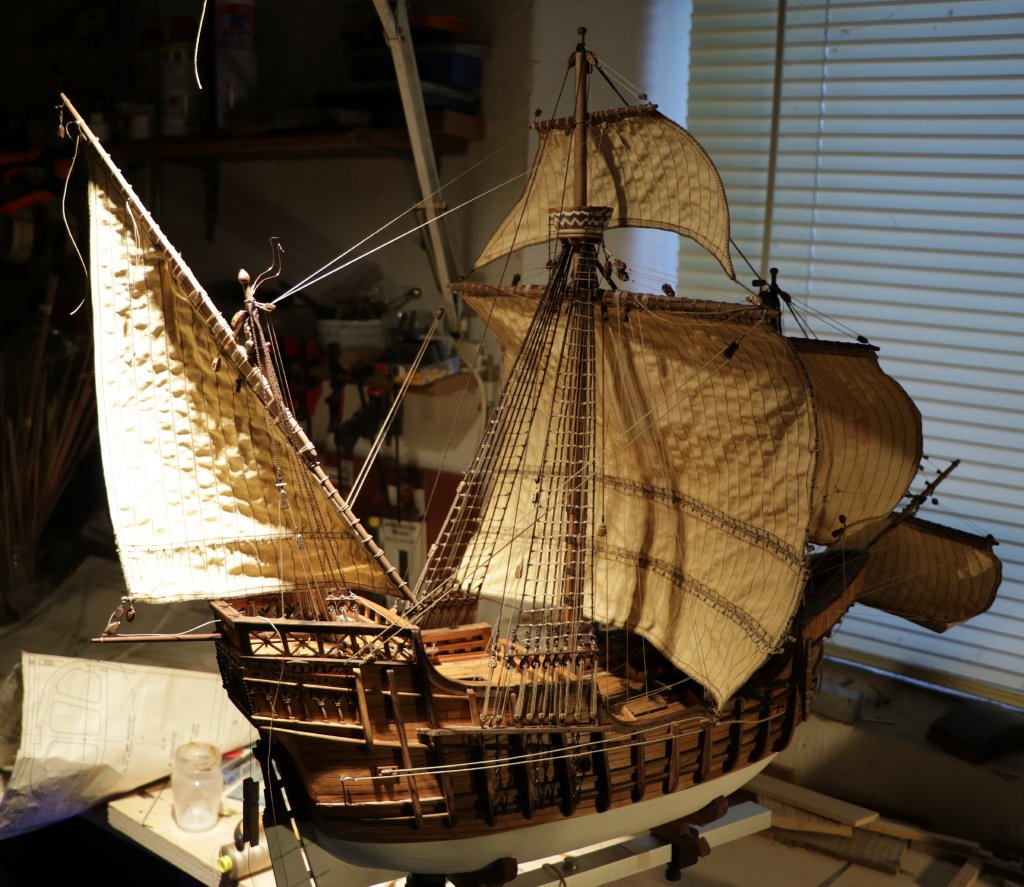
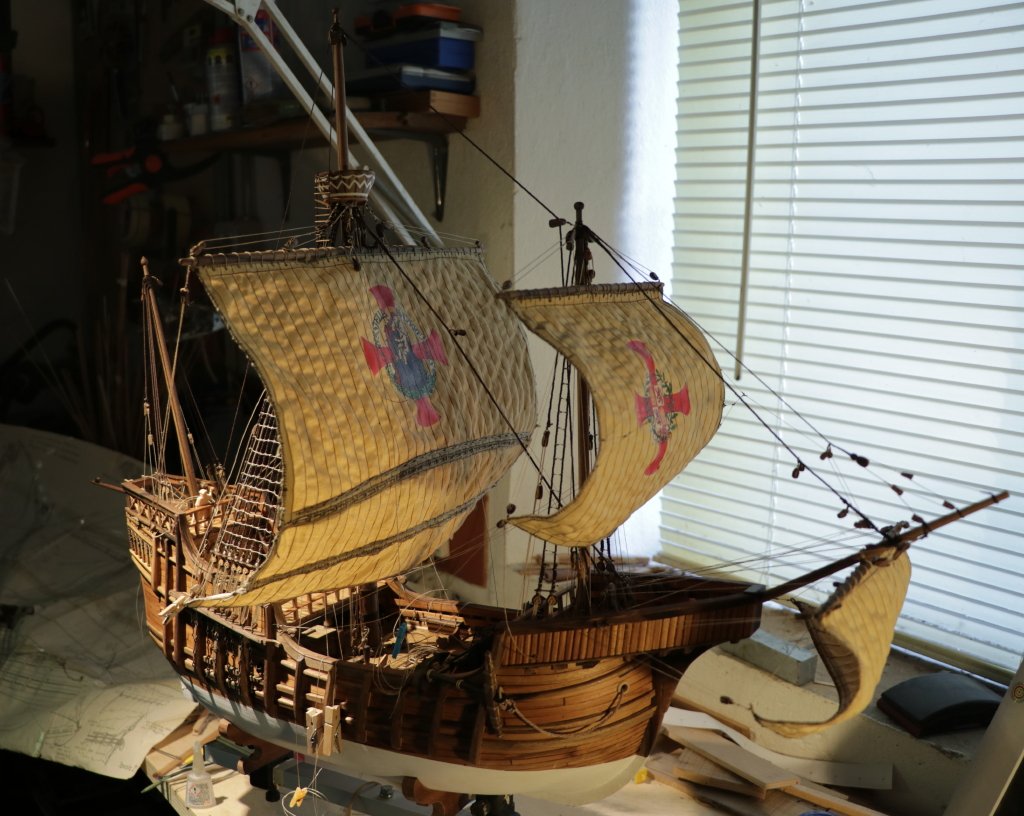
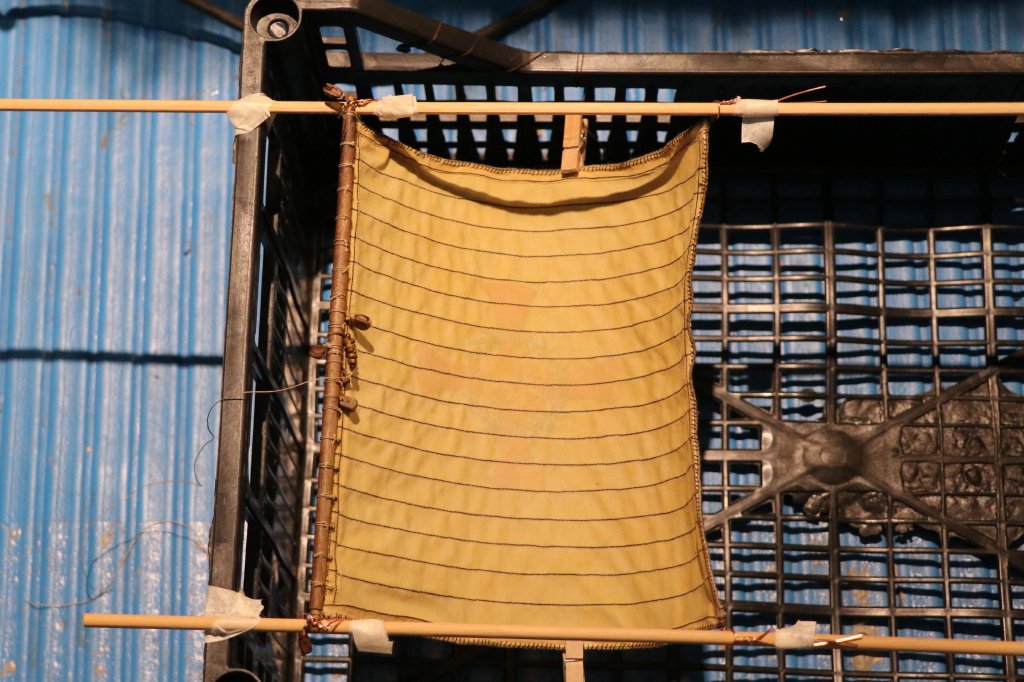
finally after having lowered the sails I started to give him the "inflation"
indeed to try, both with sprit-sdil and that of forage I used vinavil diluted to 30% in water with a little surfactant, (a few drops, common liquid soap for fabric, allows a faster and better absorption on the fabric ) and after having tied them inside a fruit box to give them the shape I brushed them with the mixture made, we will see the result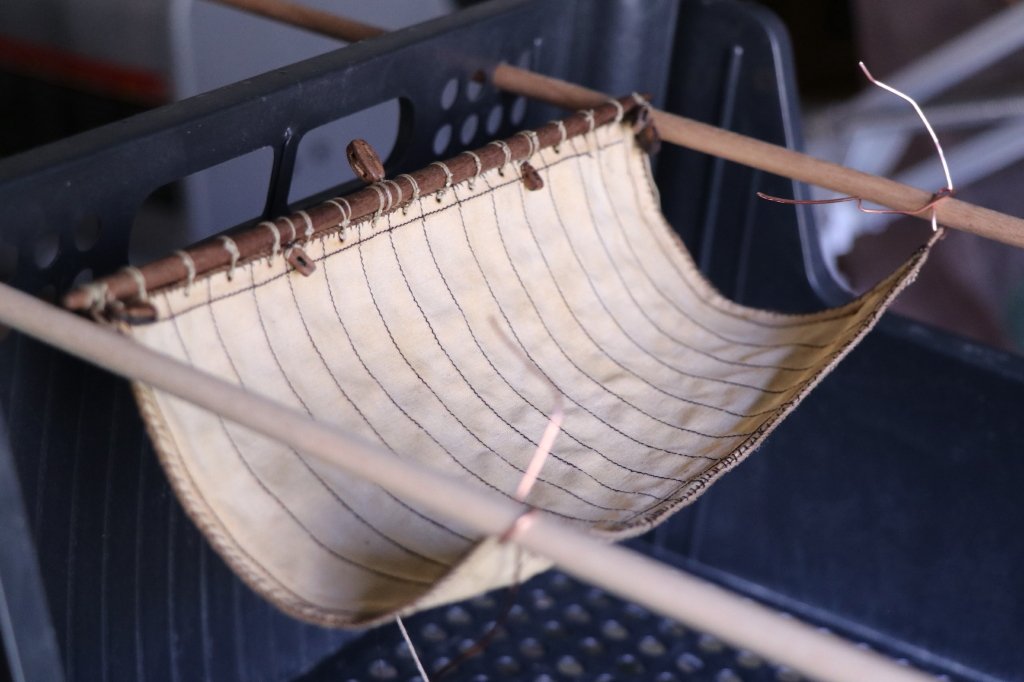
see you next time
black Wolf
- mtbediz, GrandpaPhil, Binho and 6 others
-
9
10th-11th century Byzantine dromon by Louie da fly - FINISHED - 1:50
in - Subjects built Up to and including 1500 AD
Posted
Every time I return to your site I am "open-mouthed!"
truly a beautiful job,
luponero