

luponero
-
Posts
235 -
Joined
-
Last visited
Content Type
Profiles
Forums
Gallery
Events
Posts posted by luponero
-
-
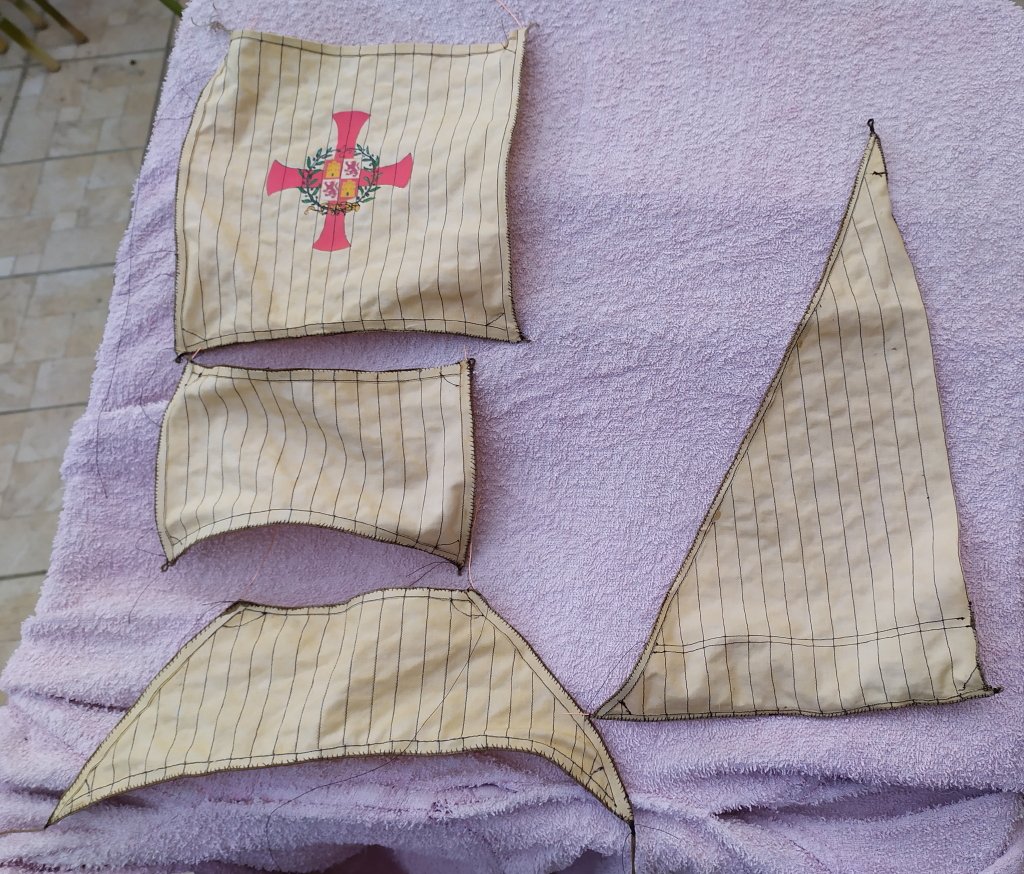
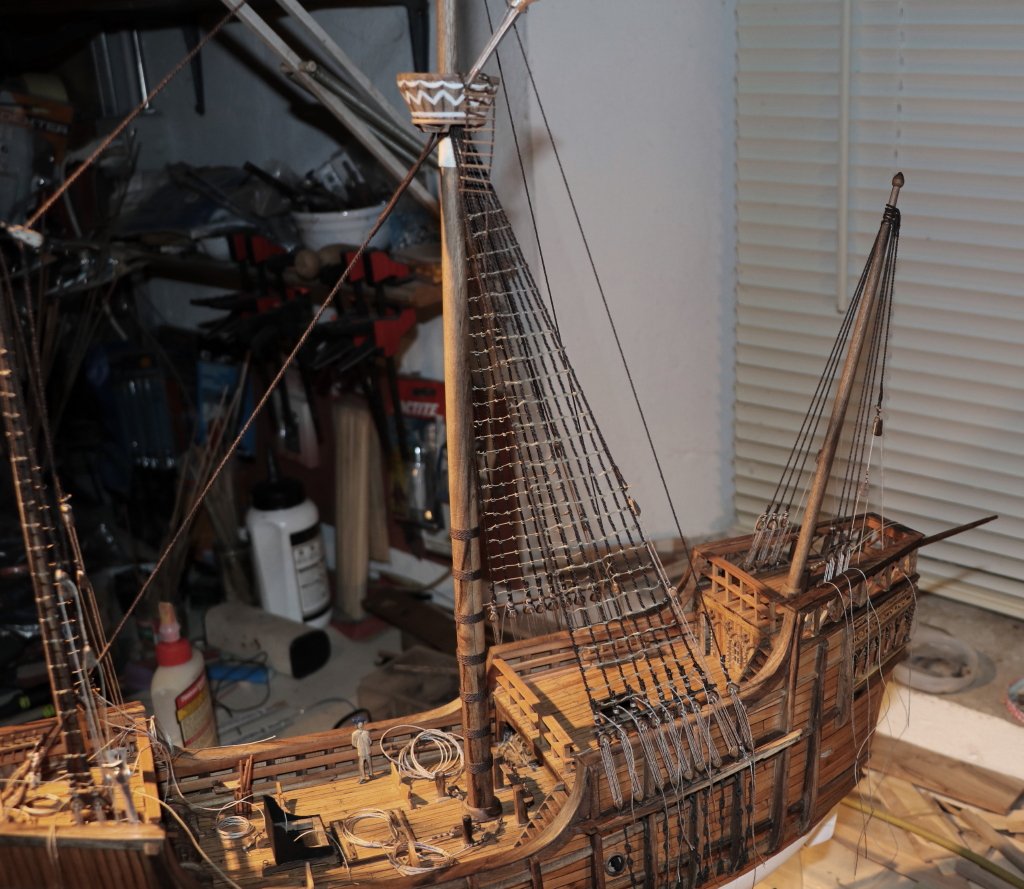
The preparation of the flagpoles continued with a foresail,
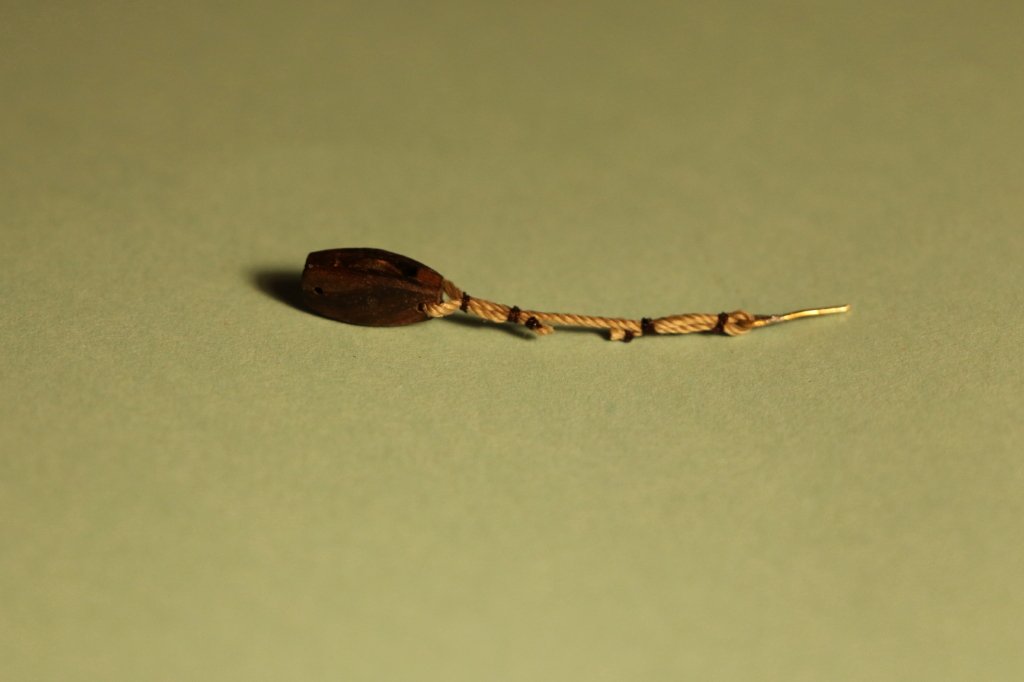
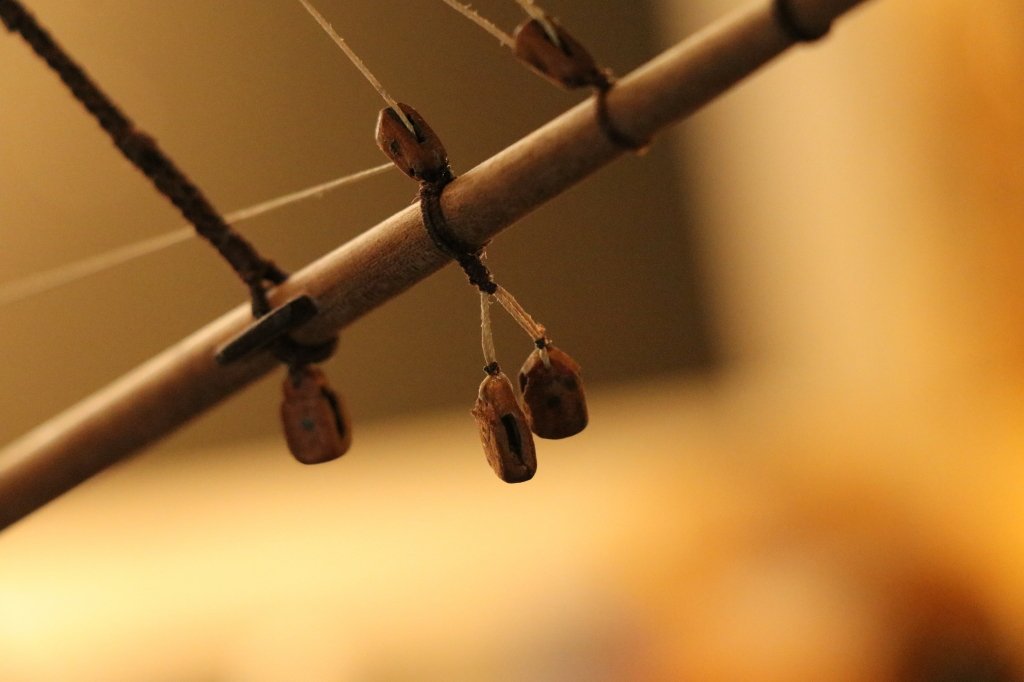
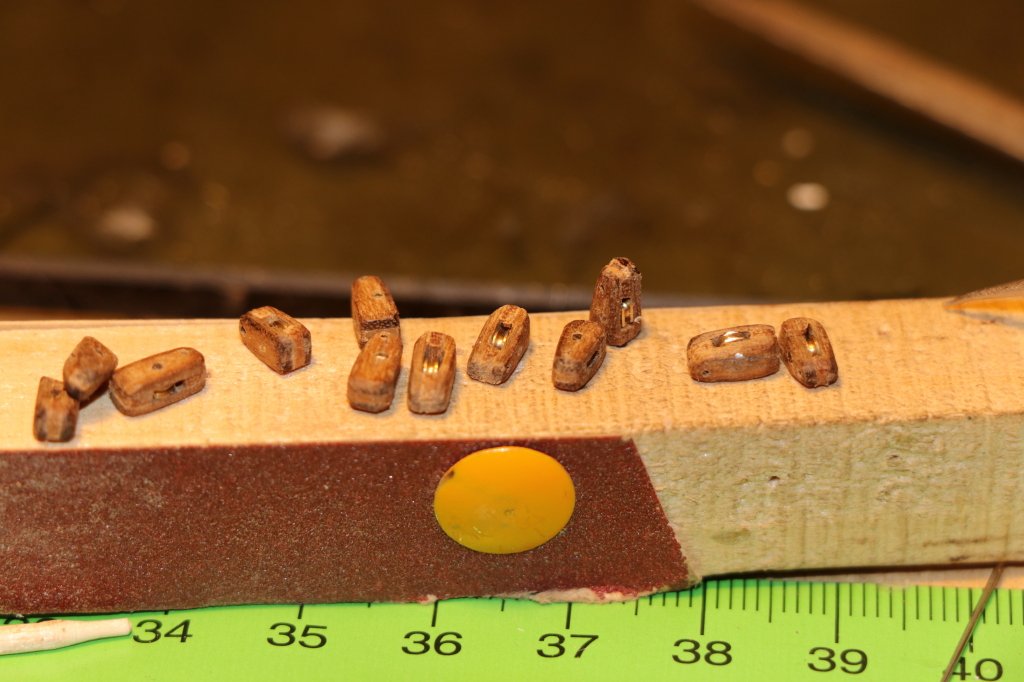
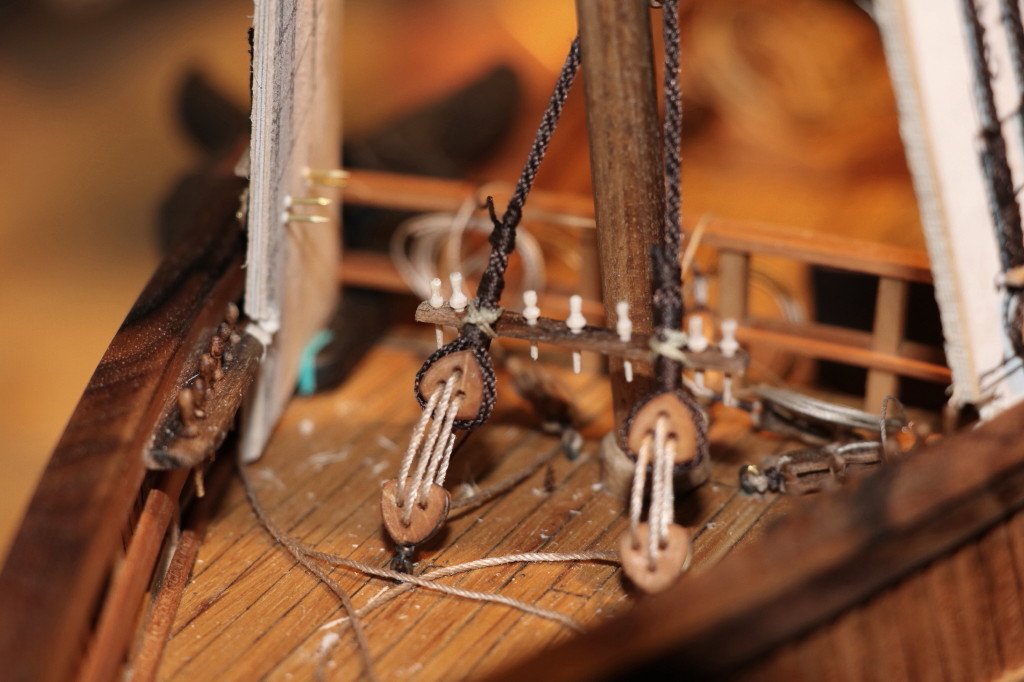
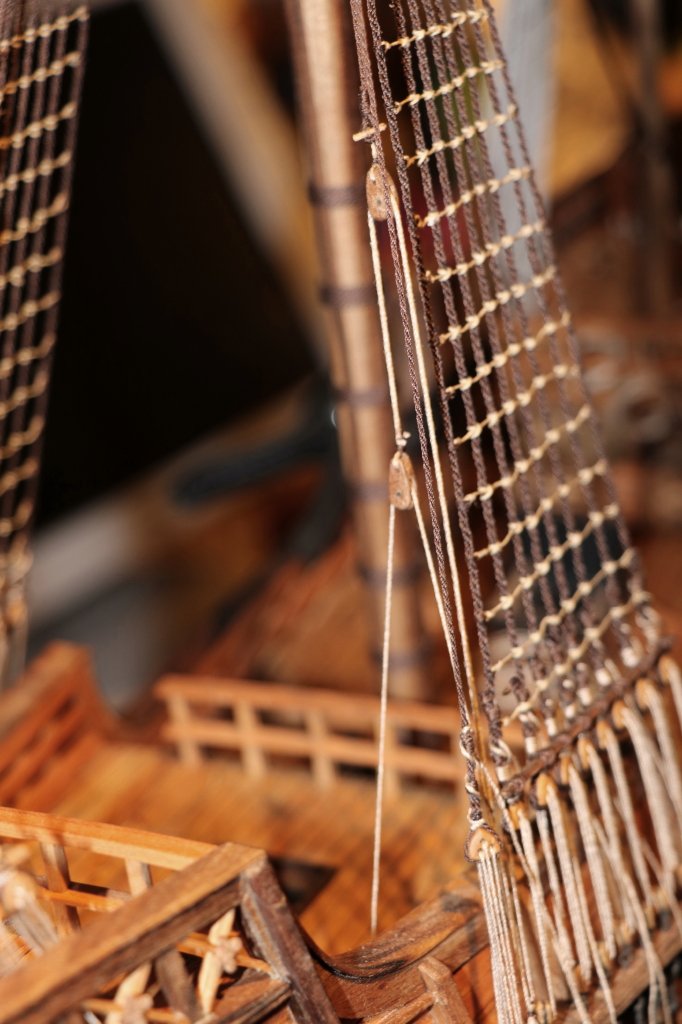
the block group consists of the central block and two lateral ones, with the wooden pulley with the burnished brass wire pin d.5mm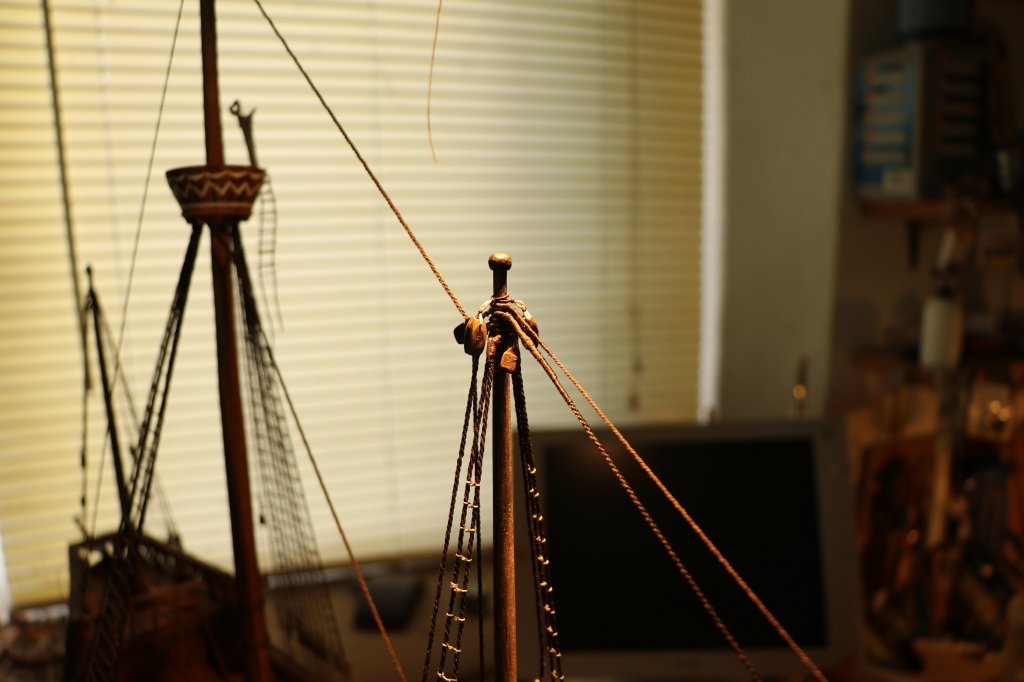
I like more to make the block with wooden pulleys than with brass ones, they are more suitable for the period, they are made with 2mm and 3mm beech rods and then with "a lot" calm thinned, after the realization of the groove, bringing them to the thickness of 1mm, (perhaps the most complex processing)
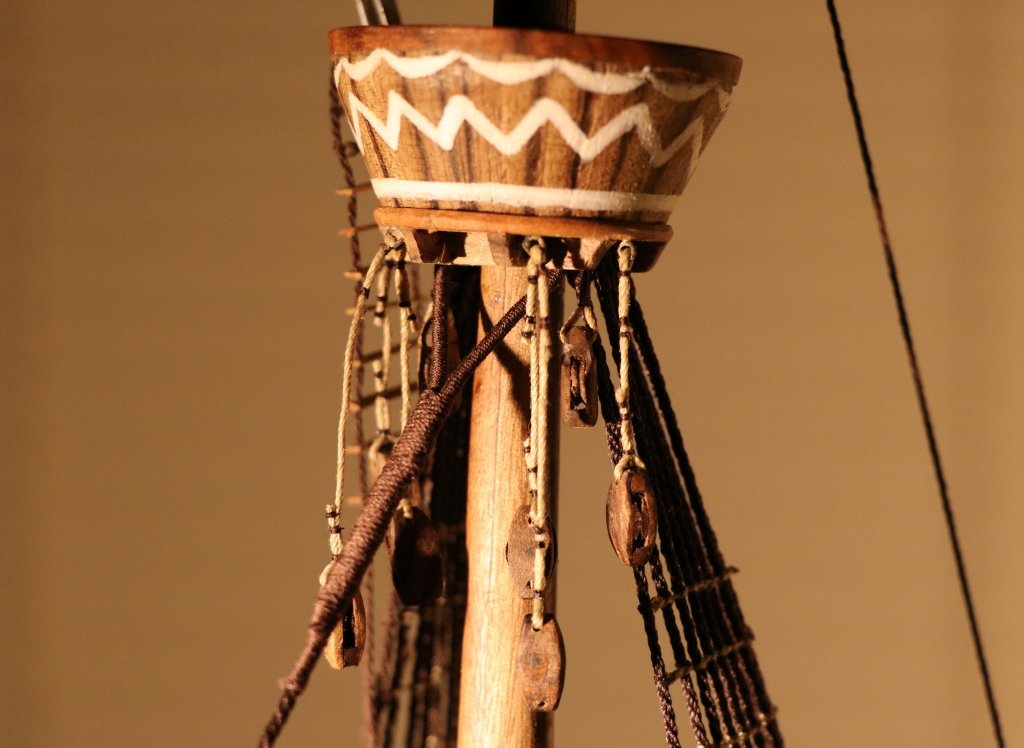
the following are those of the main mast on which the mast of the cage sail will be hoisted,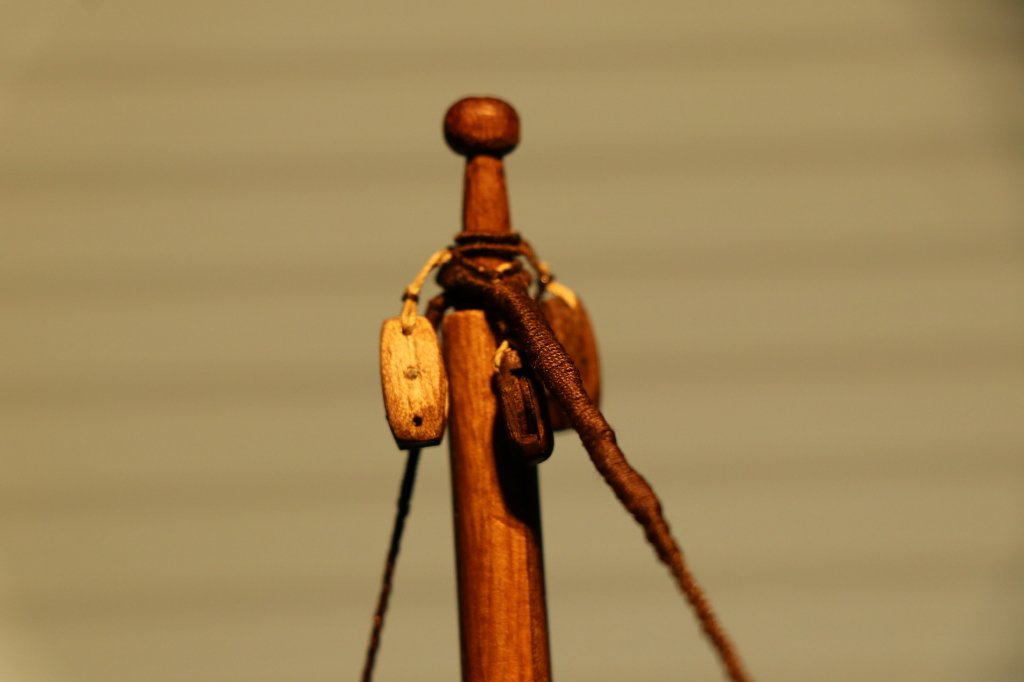
Usual composition, with slightly larger blocks (about 7x4x3 mm)
in the construction plans there are 7 different sizes, the smallest are those of the stopping blocks of the trozze, they are 2/3 mm x2x3 (the problem is to hold them with your "fingers" to work them with the file and try not to make them fall to not lose them ...
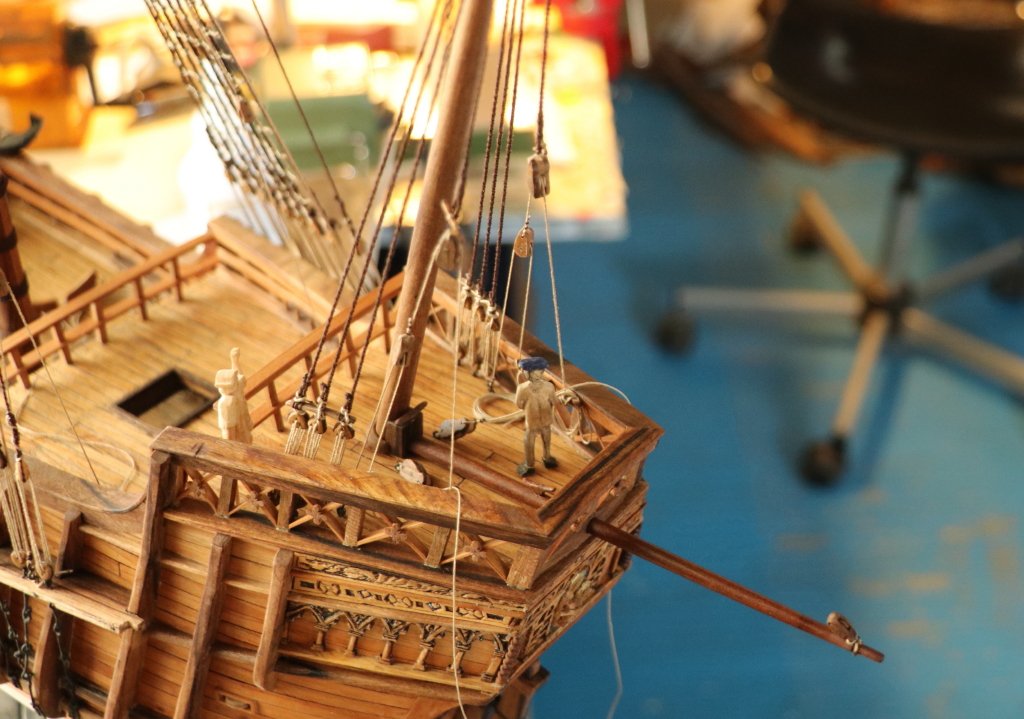
still some work is missing to finish the set-up works, the group of blocks hooked under the hut, a rope ladder ladder and some blocks and eyebolt on the bridge to then move on to the sails on the flagpoles,
While two blocks are required for the halyard of the mast of the major shaft, a problem that arises is that the casing and the shrouds have already been assembled so it is not possible to prepare the piece and install it first, it must be done with a block and with the banded cable, passed inside the "hole of the cat" and ended later by tying the missing block, simple to say to do it for me who am particularly "slow" it took me a couple of hours, I put the photos in progression ,
the cable bandage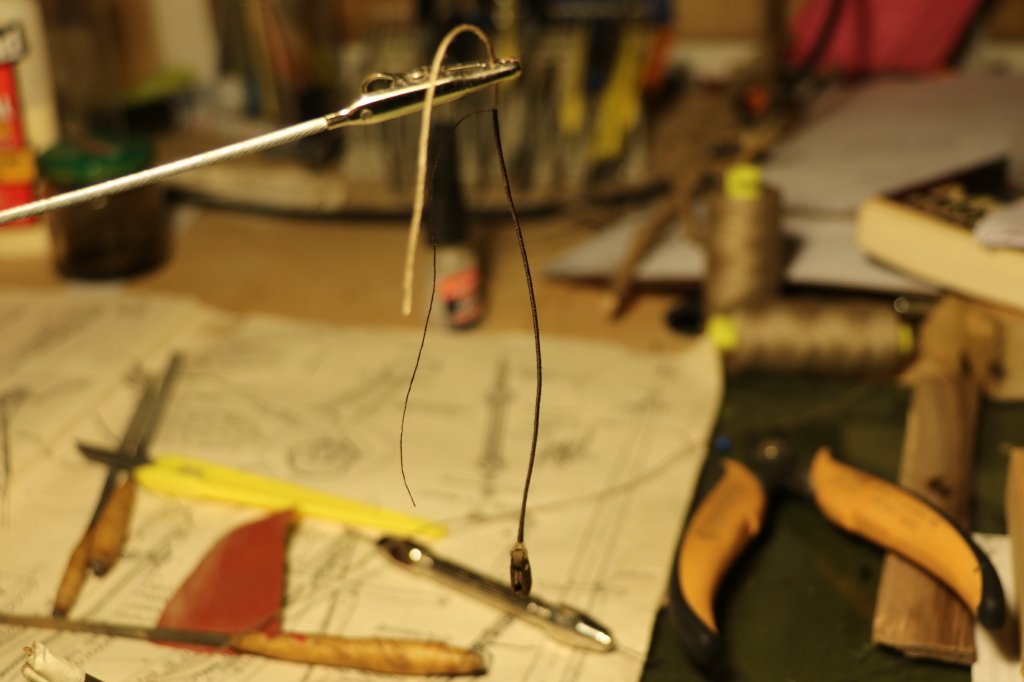
the exit from the cat pit
the binding of the missing block
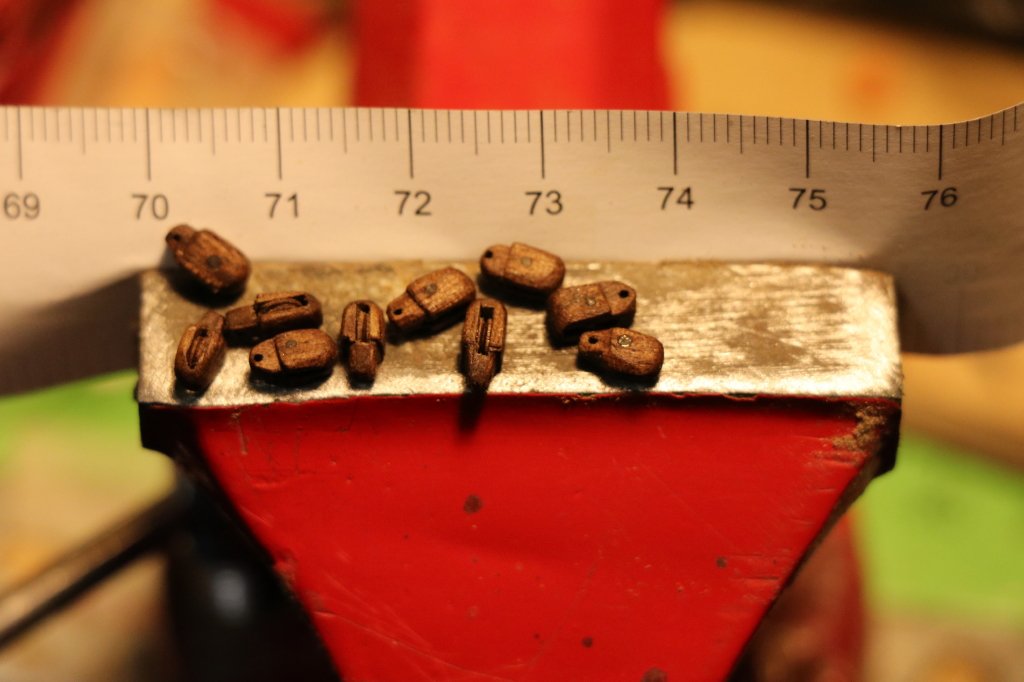
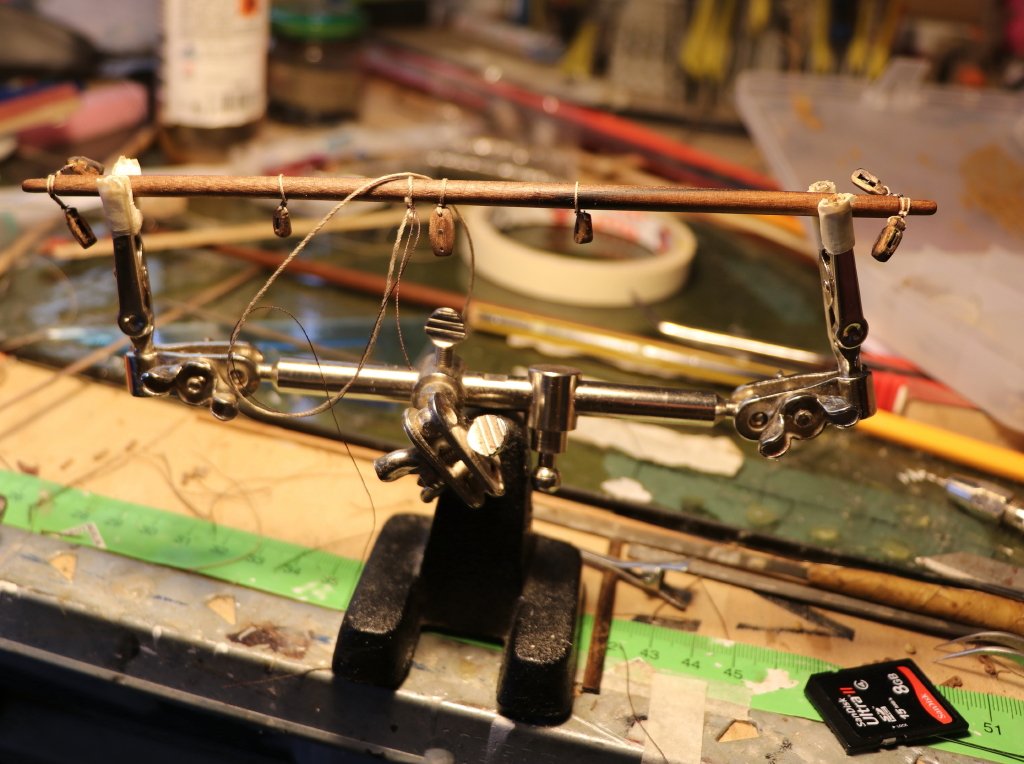
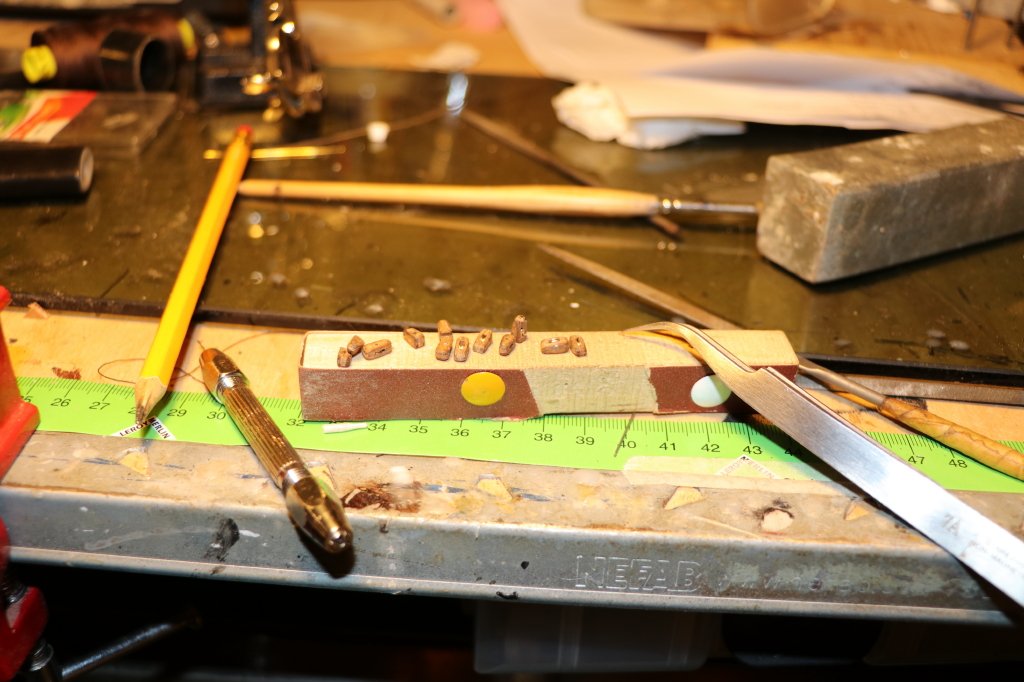
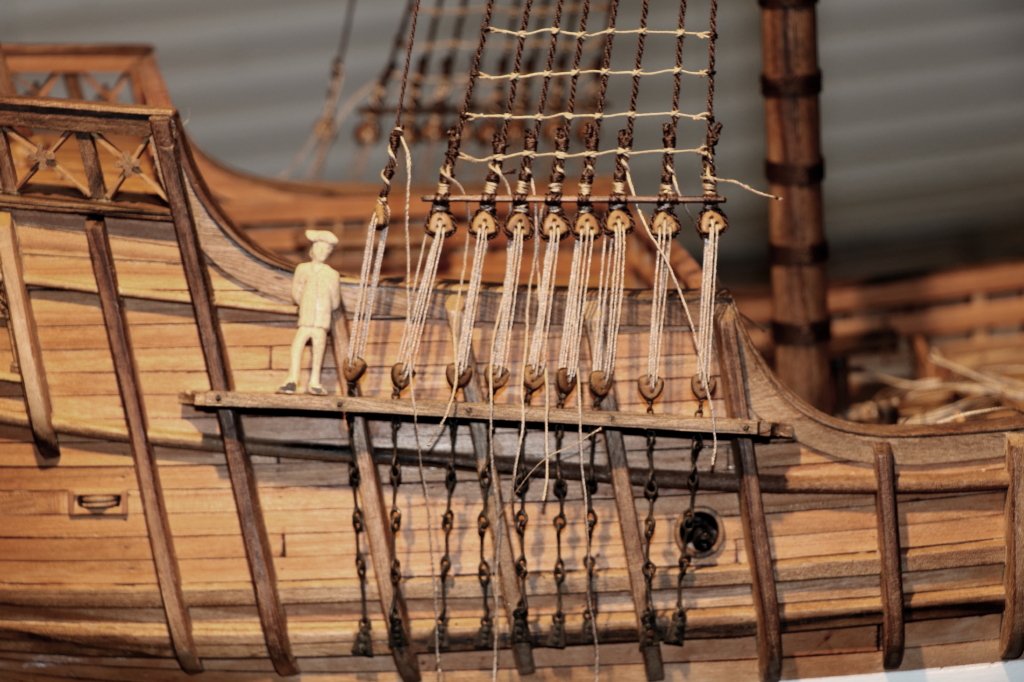
In the meantime, it was necessary to prepare a dozen small blocks (4x3x2) (those that I hold badly between my fingers and that when I fall they are pains to find them) always self-built with walnut details,
As already mentioned there are 9 different blocks shown in the drawing, the problem is that they are not particularly "visible" in the exploded view of the sails, so the number of blocks has significantly increased compared to what I thought were necessary from a "first sight"
under the box with the prepared blocks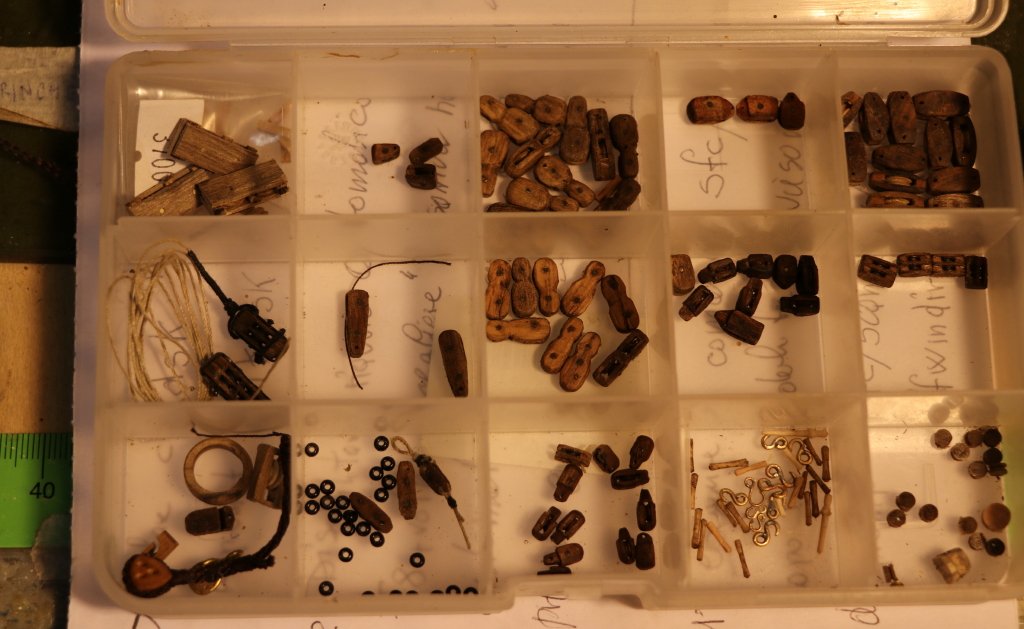
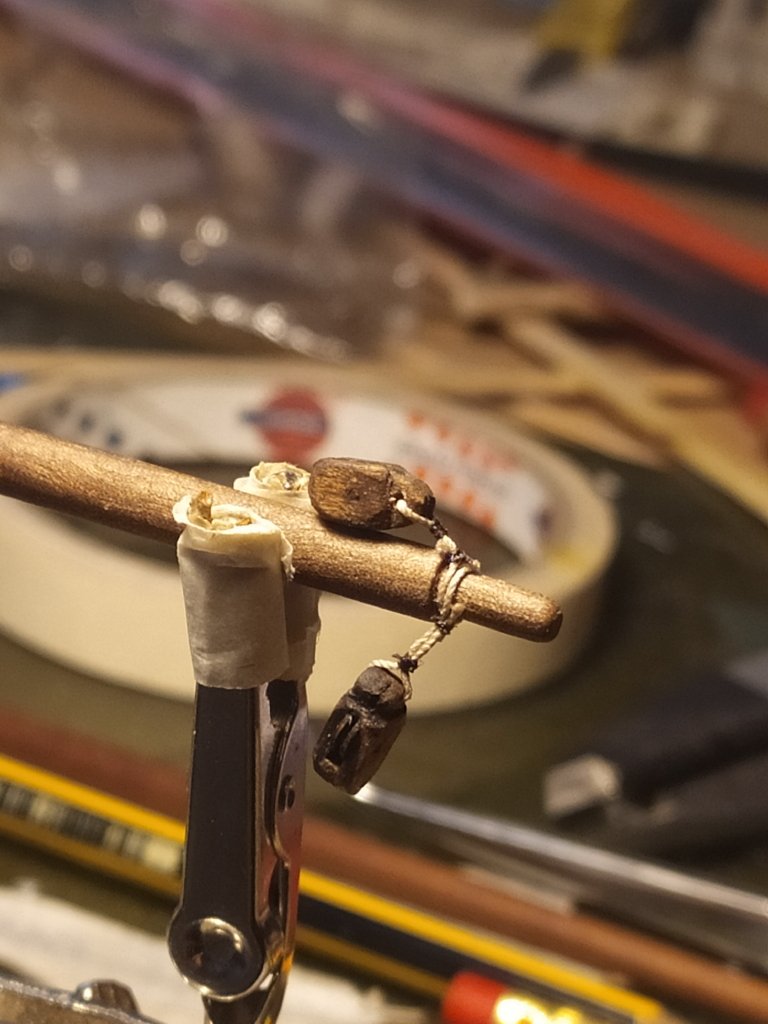
The photo of the detail of the block that will be put under the hood together with five others
the blocks placed under the crow's nest
see you next time
black Wolf
- shipcarpenter, mtbediz, JpR62 and 7 others
-
 10
10
-
-
Thank you Cog, I also hope to see soon how the finished work will be ...
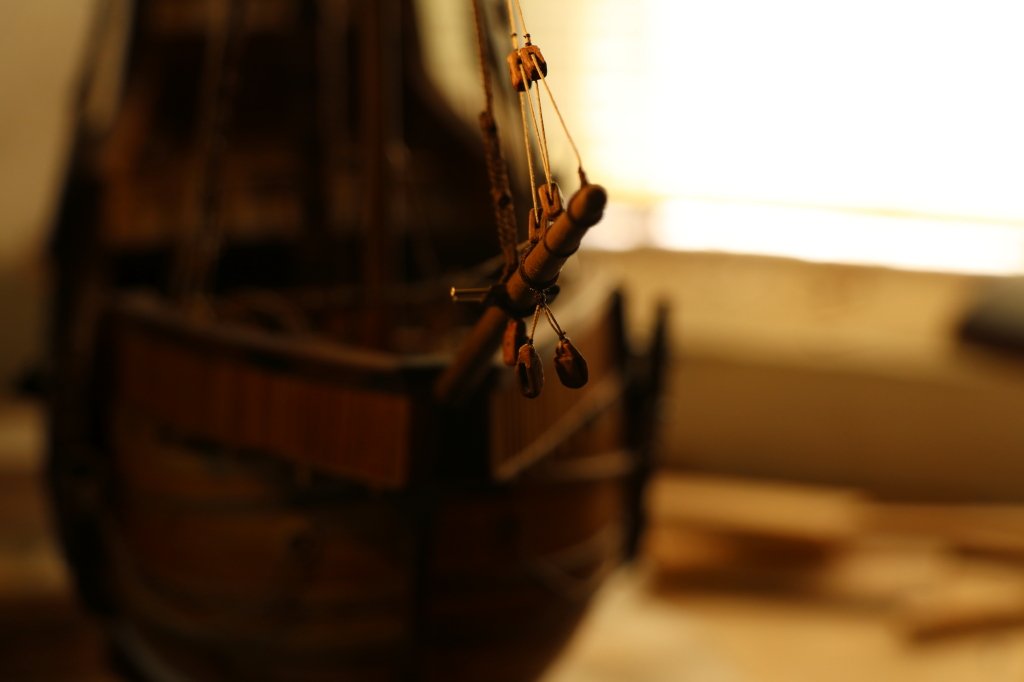
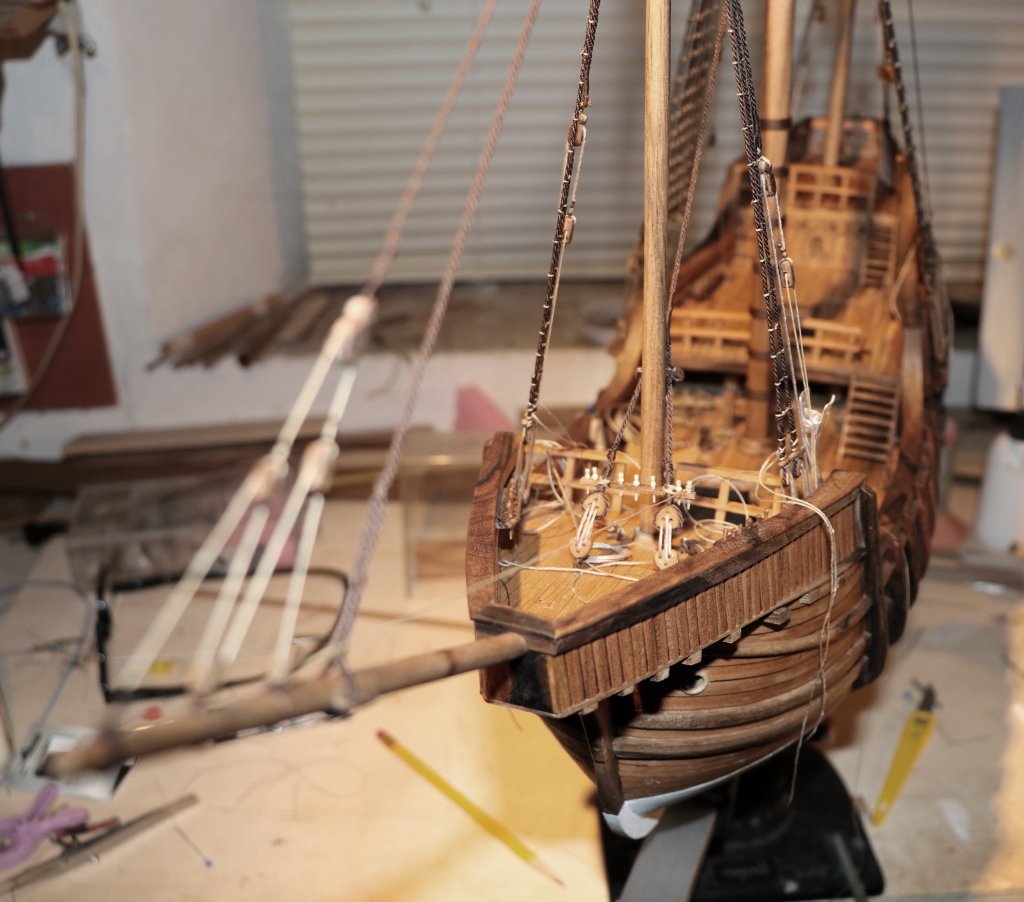
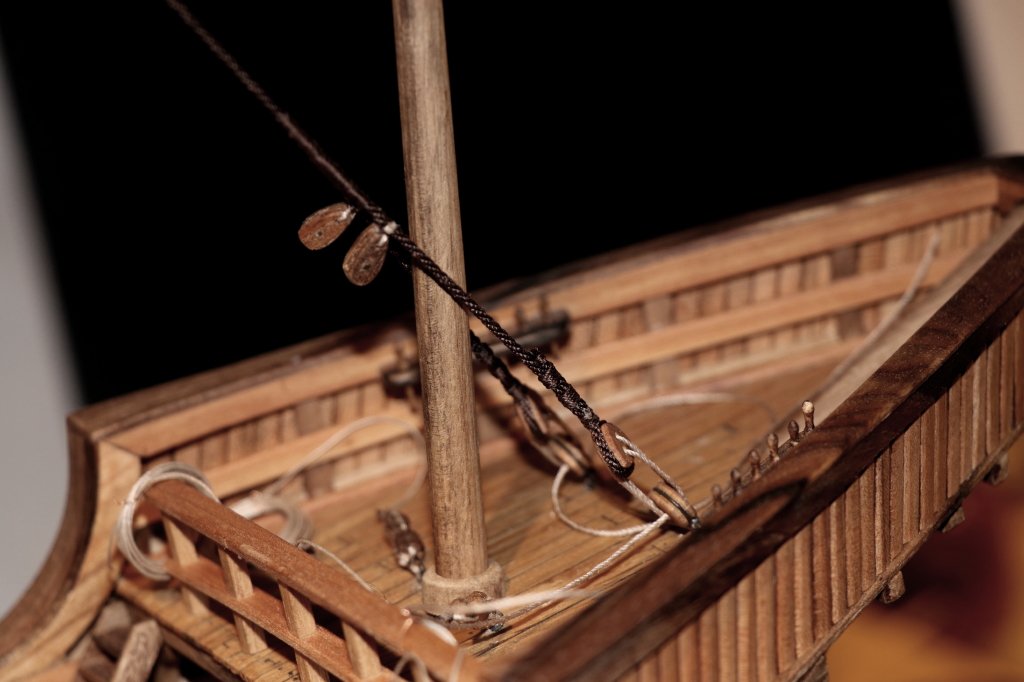
the flagpole of the sail of civada, has for thegooseneck a piece of cable that must be struck on the mast of the bowsprit, so in the assembly on the flagpole I only did a part to finish it when it will be fixed with the sail,
under the detail of the blocks for topping lift and guy.
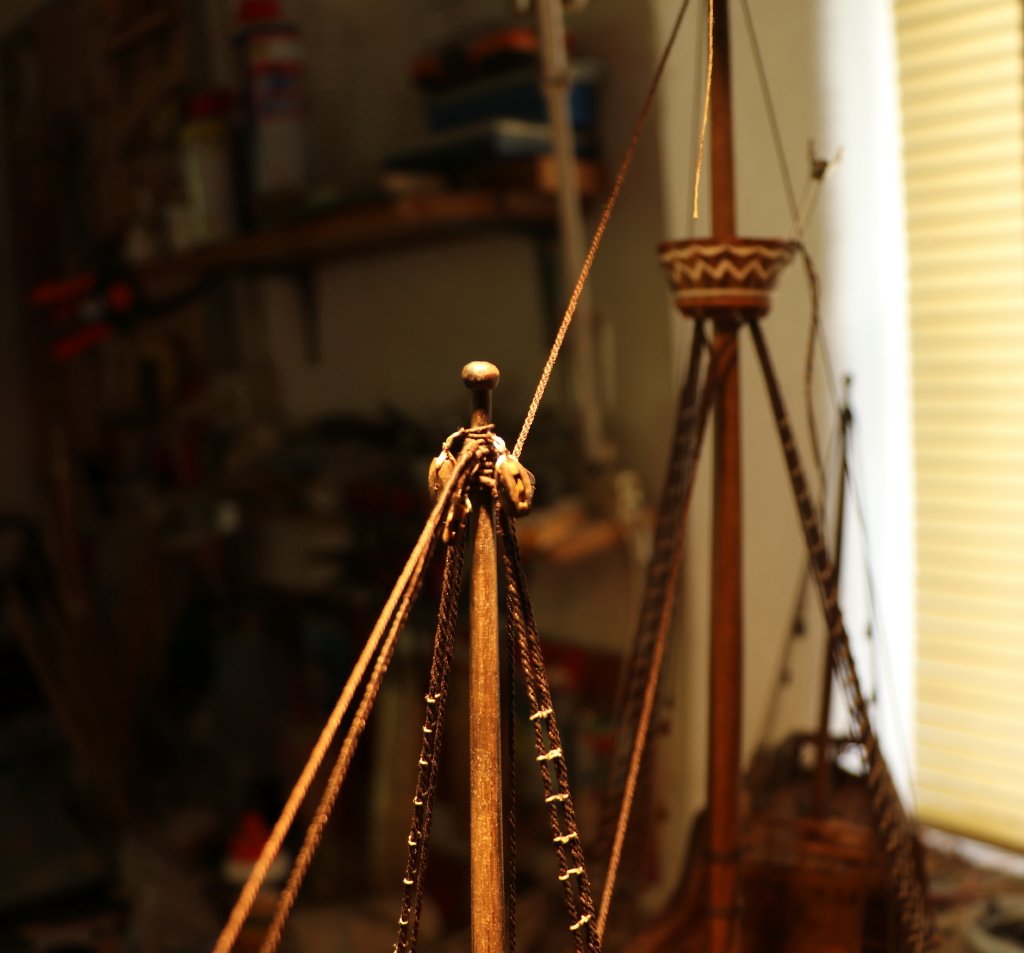
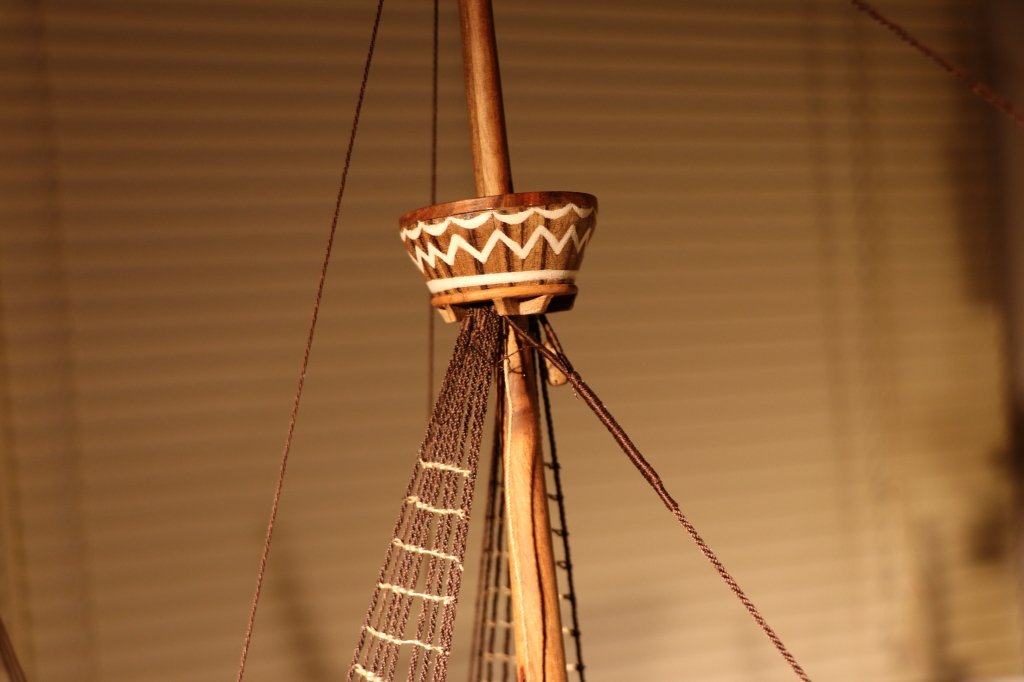
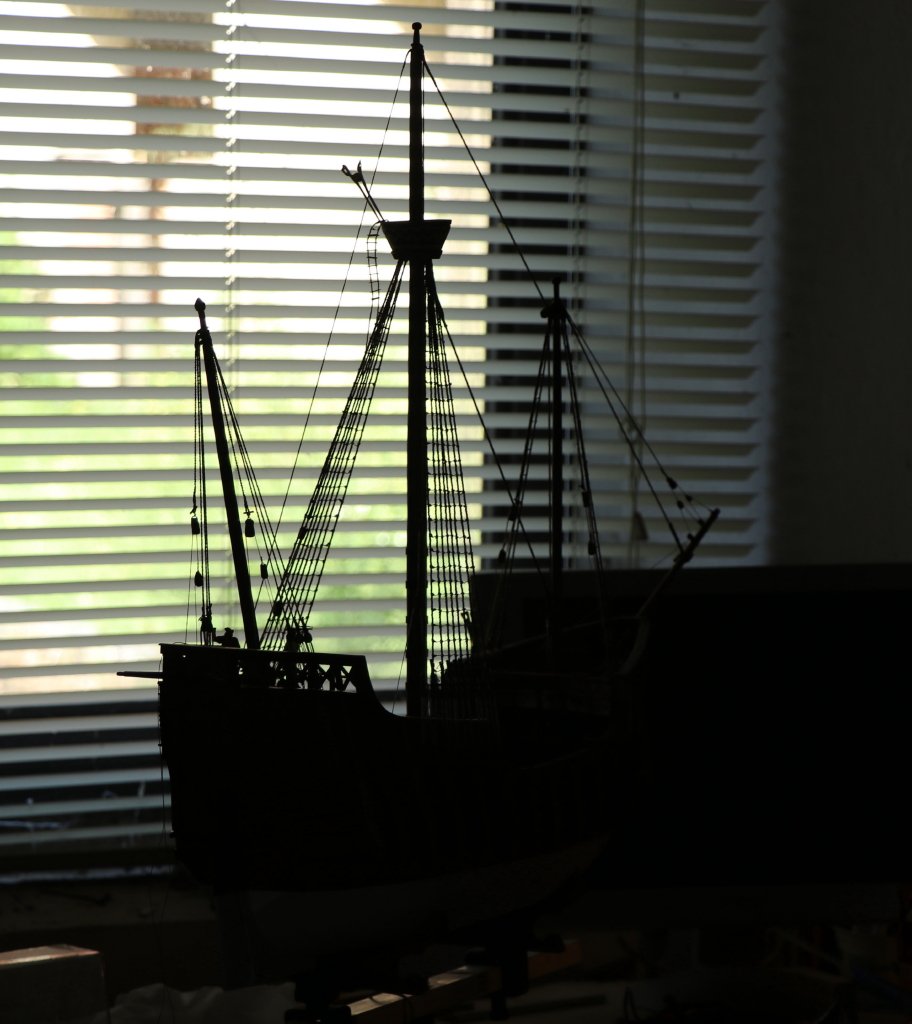
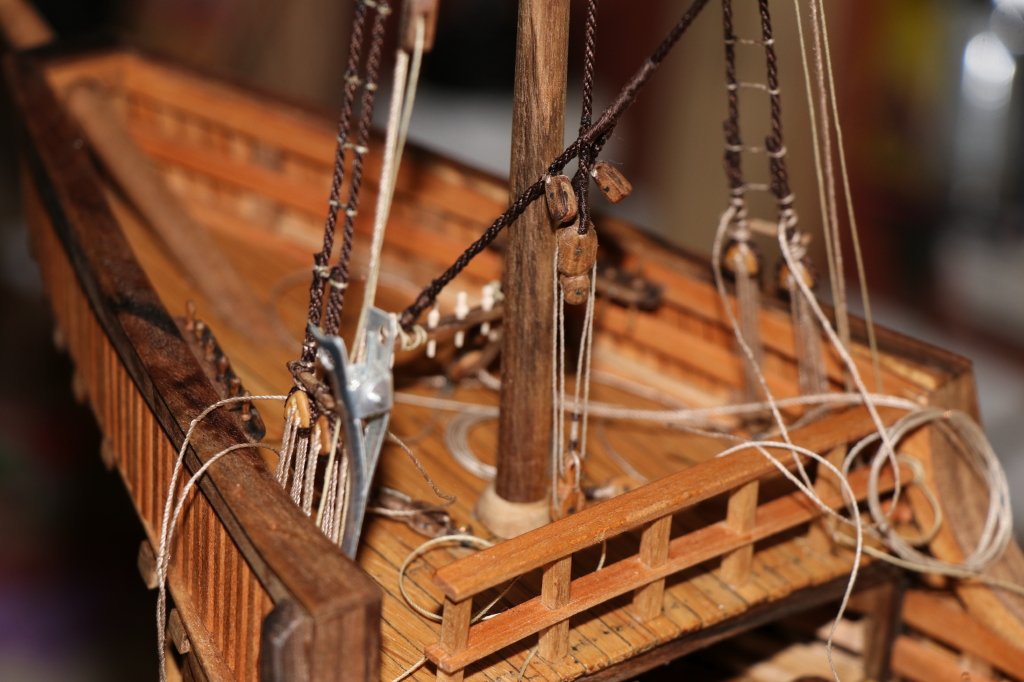
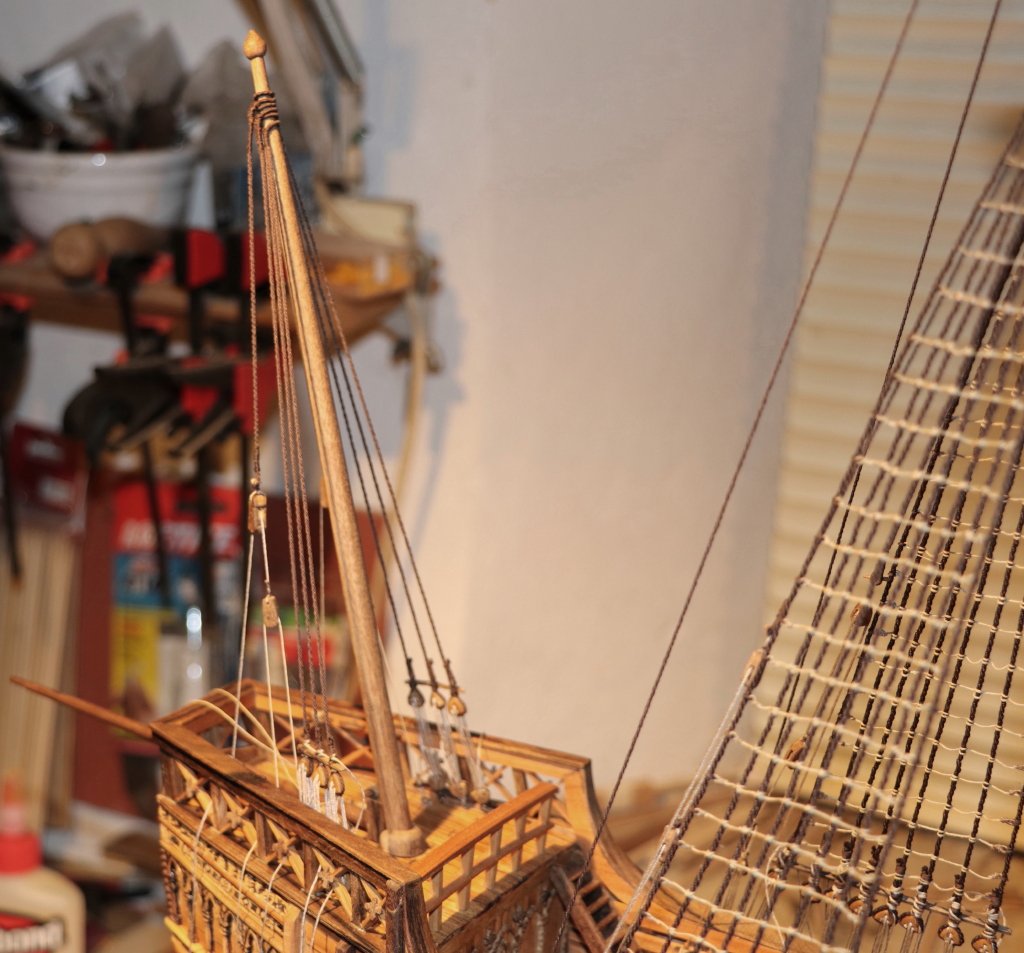
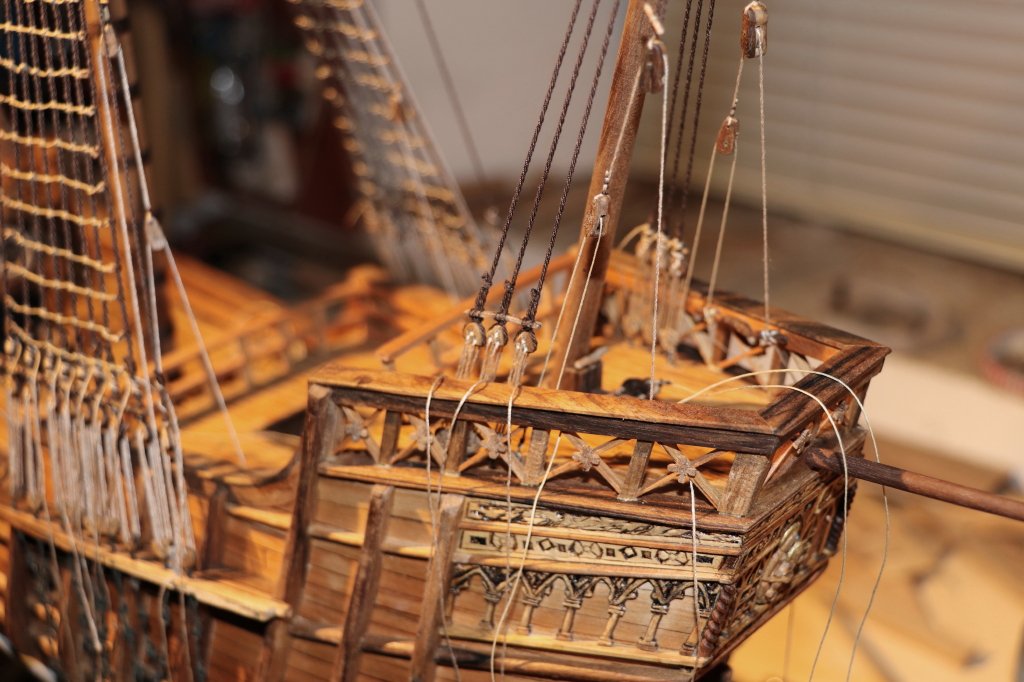
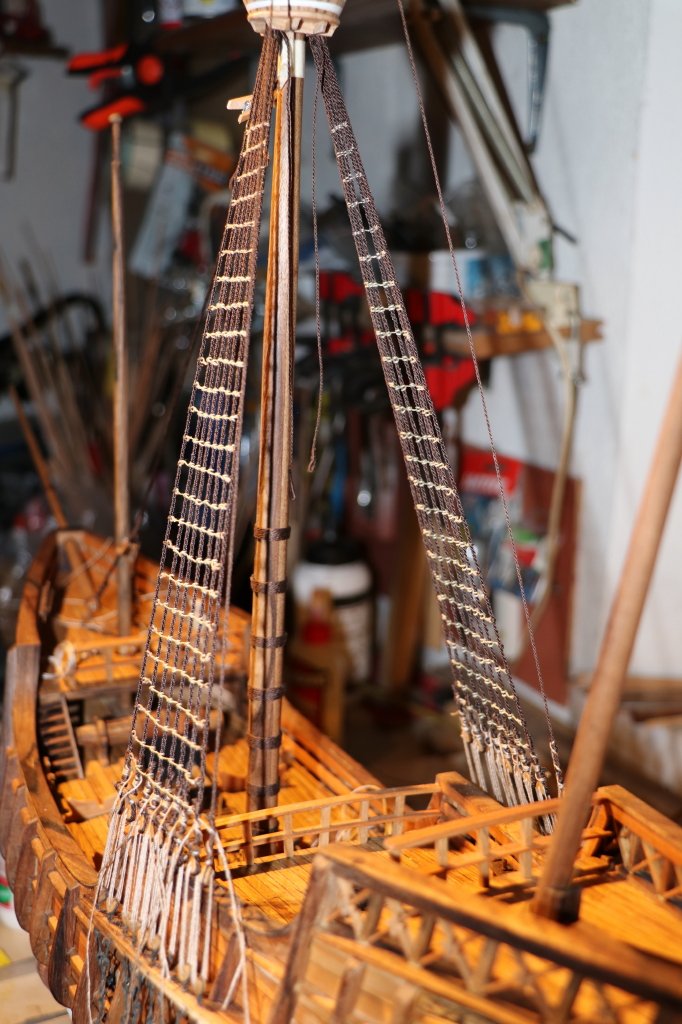
Before working on the sails I want to finish the laying of the blocks on the tops of the flagpoles, necessary to put pull and place flagpoles by pulling the sails, a process that I had not done previously and that will take time, to see the Santa Maria before preparation of the blocks I made a silhoutte, reusing the old camera (instead of the cell phone, certainly more comfortable for speed, but less "known")
The first step was on the boom with the cleat (in front of the "long") and the block to tension the Latin sail at the bottom of the boom
after at the opposite end the bowsprit, on which I have placed three blocks, the single inside the violin, in which the runner of the block will pass on the flagpole, while the other two couples will put tension on the loops
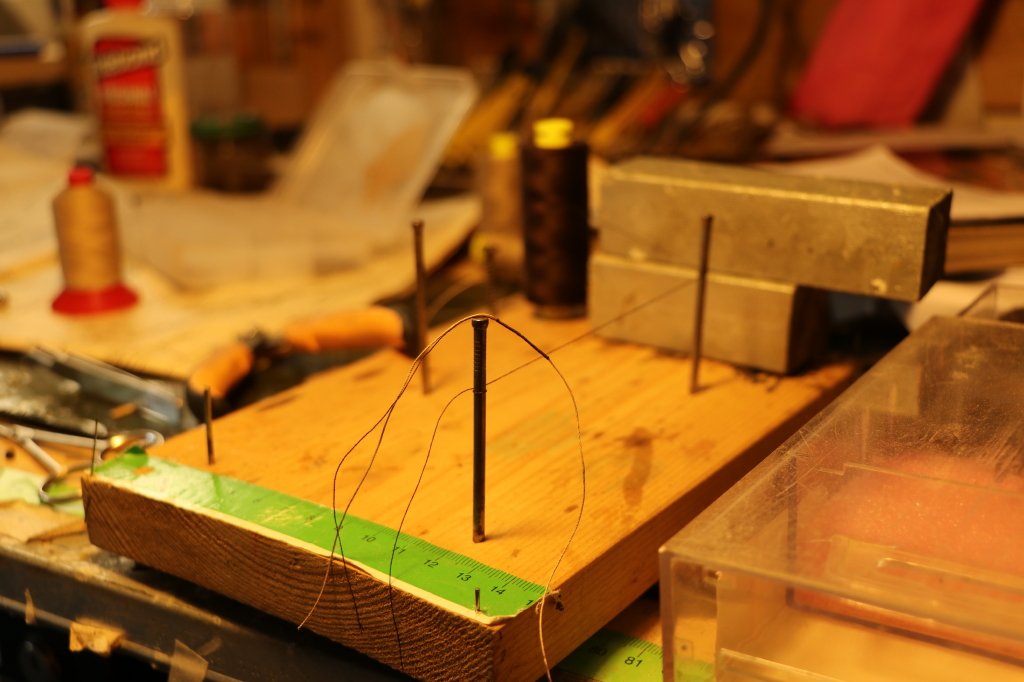
the part of the cable used to tie the blocks to the flagpole is bandaged to prevent rubbing on the wood quickly consuming the cable (method also used for cables of fixed maneuvers)
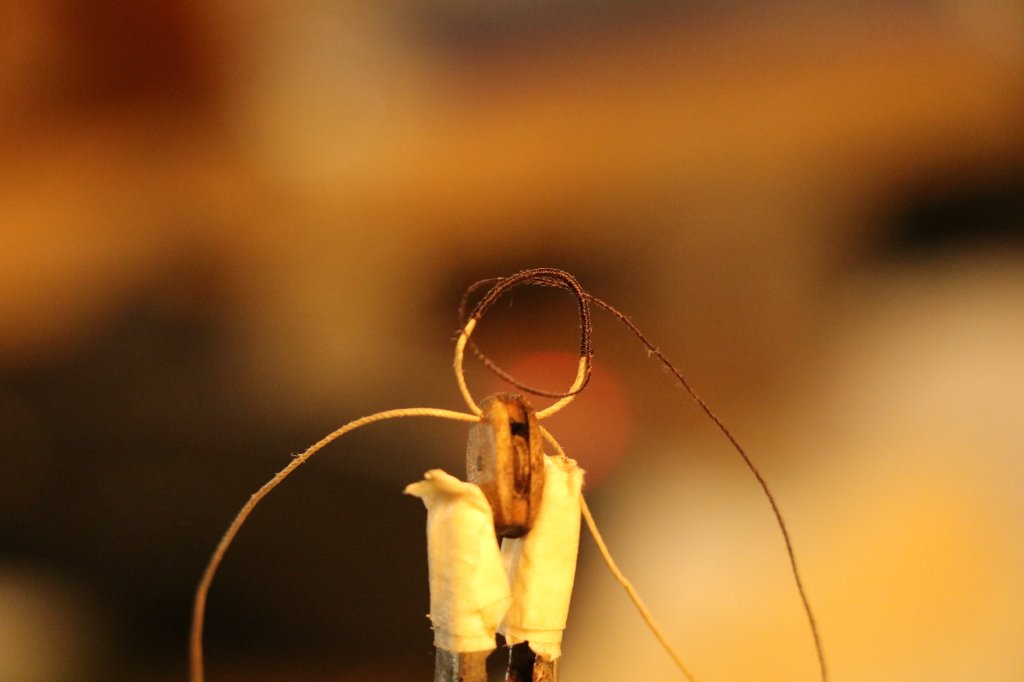
the bandage is made by hand with the use of this tablet in which the nails are used to tension the thread of the spool to bandage the cable "coiled" by hand, or rather, with your fingers ...

see you next time
black Wolf
-
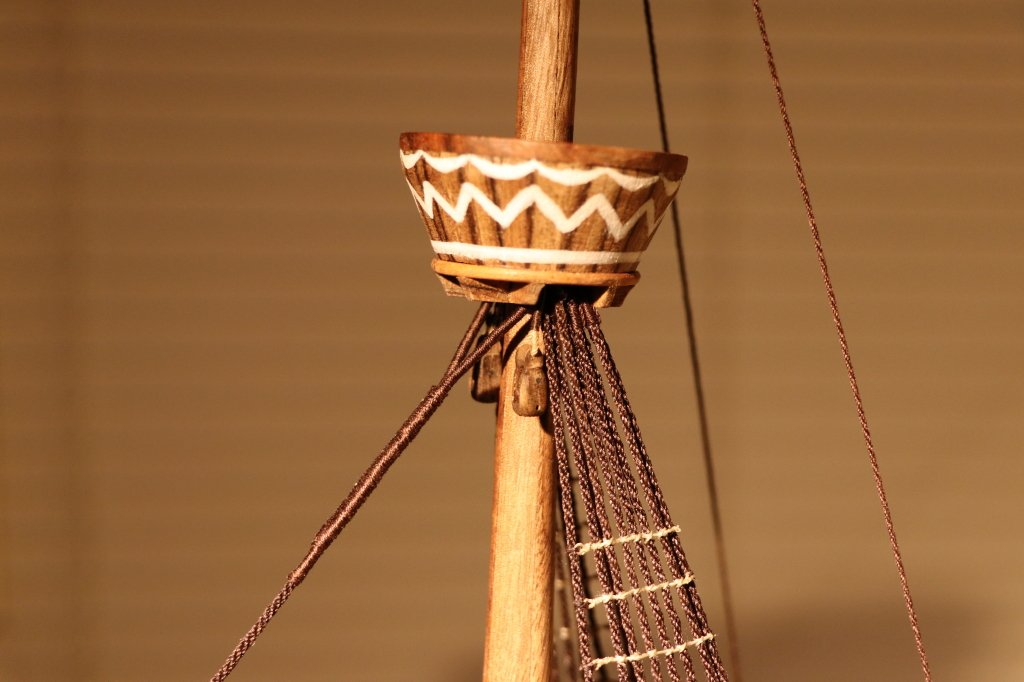
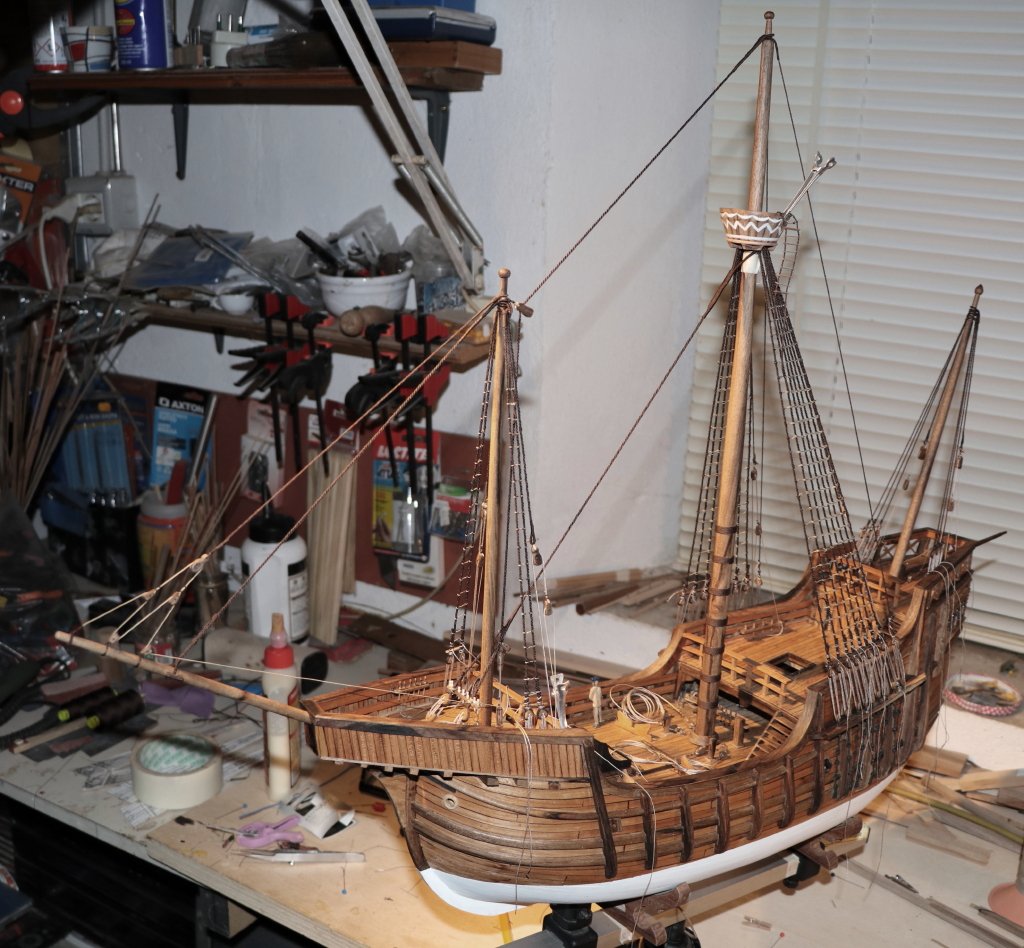
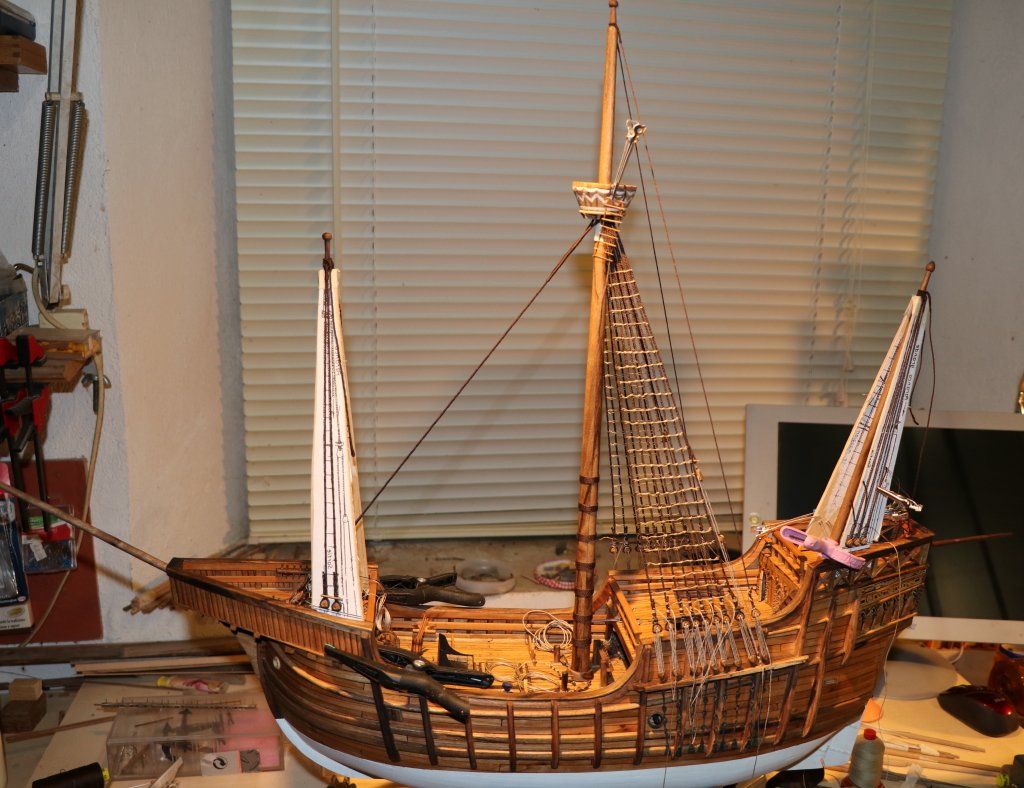
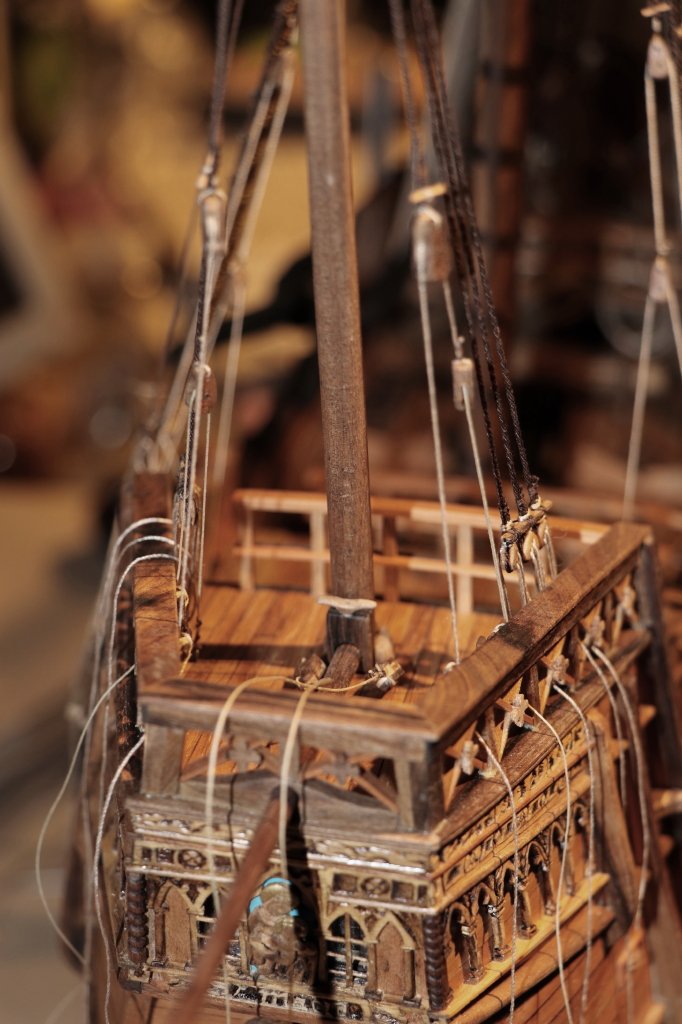
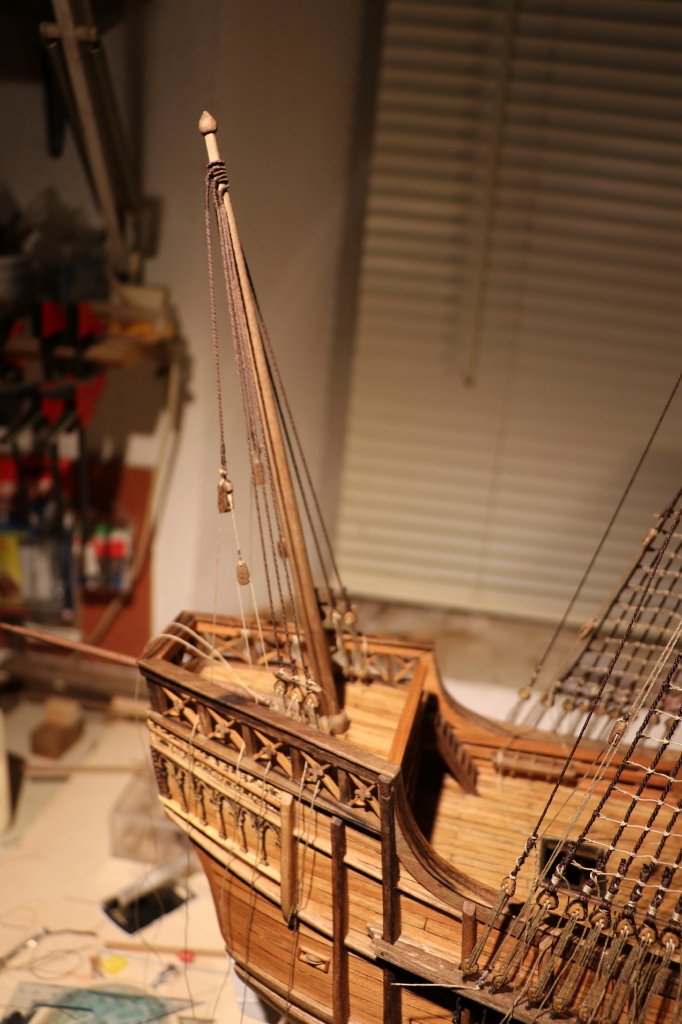
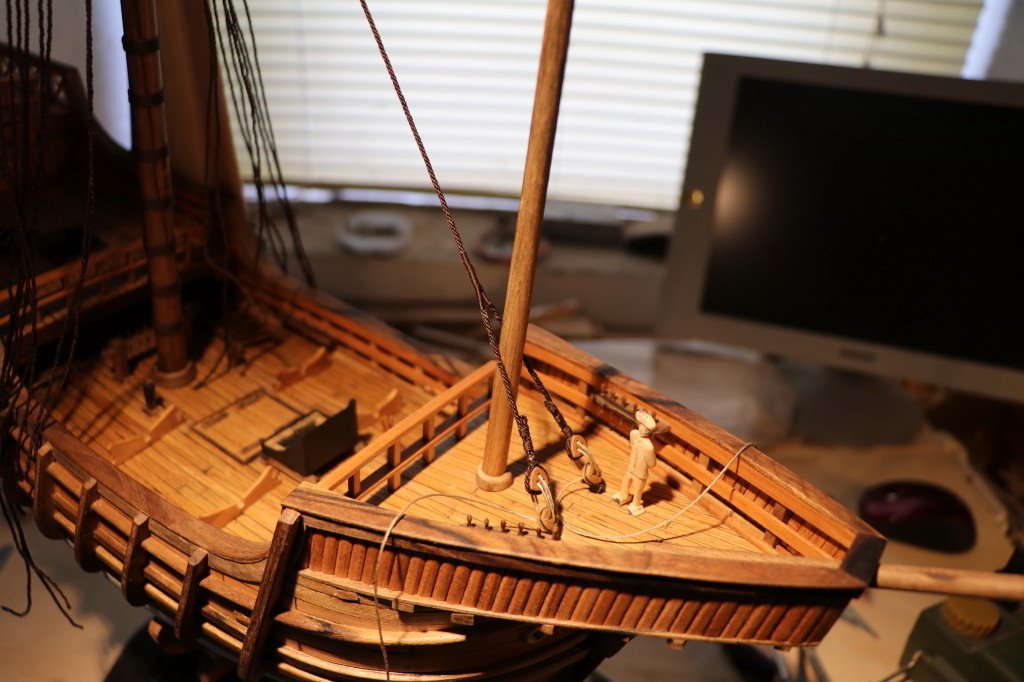
The time has come to set up the flagpoles, that is to put the thegooseneck, blocks and bounties to stop the flagpoles on the masts and to pull the current maneuvers to hoist the sails. Part of the blocks I had previously made for the realization of the fixed maneuvers, they have the characteristic of being larger and more robust than those for the current maneuvers,
so I had to make other smaller ones trying to keep the shapes.
The antenna of the mezzana tree is very reminiscent of that of galleys, I don't know if it is an error by Adametz, with regard to the part of the coupling of the two rods that compose it, the technique used for coupling in the central part, with one "fluted" and the other "round" rod was a typical process in the antennas of the galleys, while I saw that the antennas for the Latin sails of the galleons were usually a single or multi-compound (bundled) piece like the major masts, who knows if it is an error by Adametz ...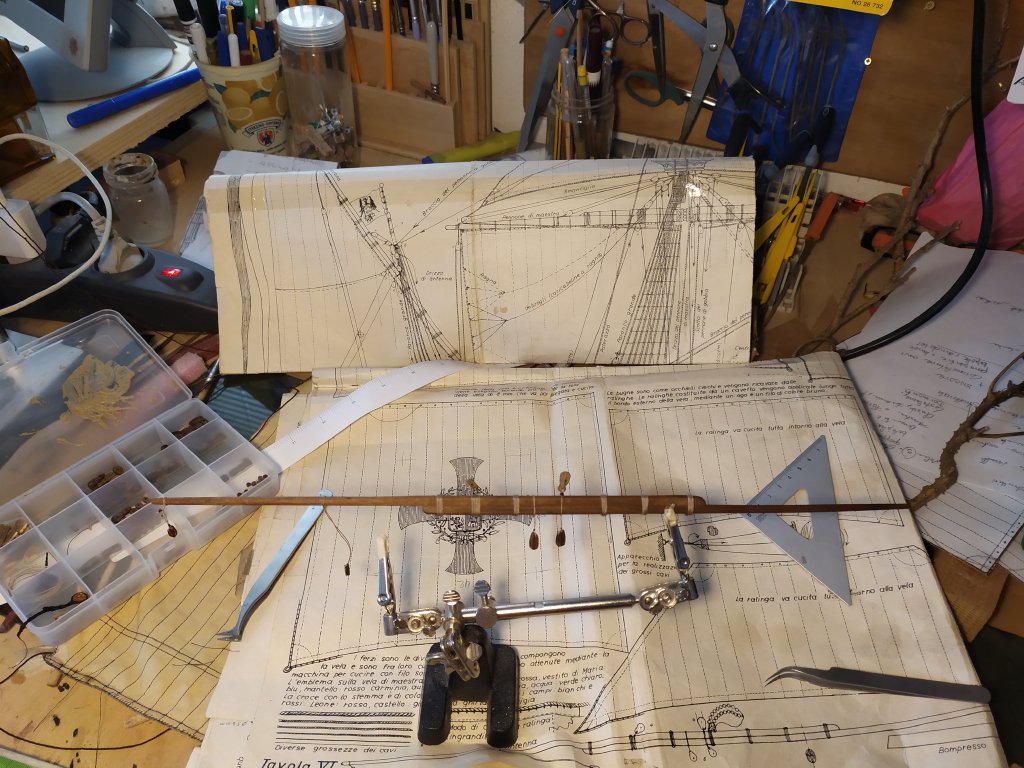
the photo represents the yard in the middle of the setup, blocks and trozza are still missing,
while in the following one I am making the gooseneck,( parrel) of the flagpole of the major tree, I had the half idea of putting industrially, but I realized that the bigots that make them up were "" PLASTIC "" not to be a purist but trying to do everything on your own (with all the flaws of the case) and putting plastic bigotes did not seem like a correct choice, so I made them in wood, losing a few hours

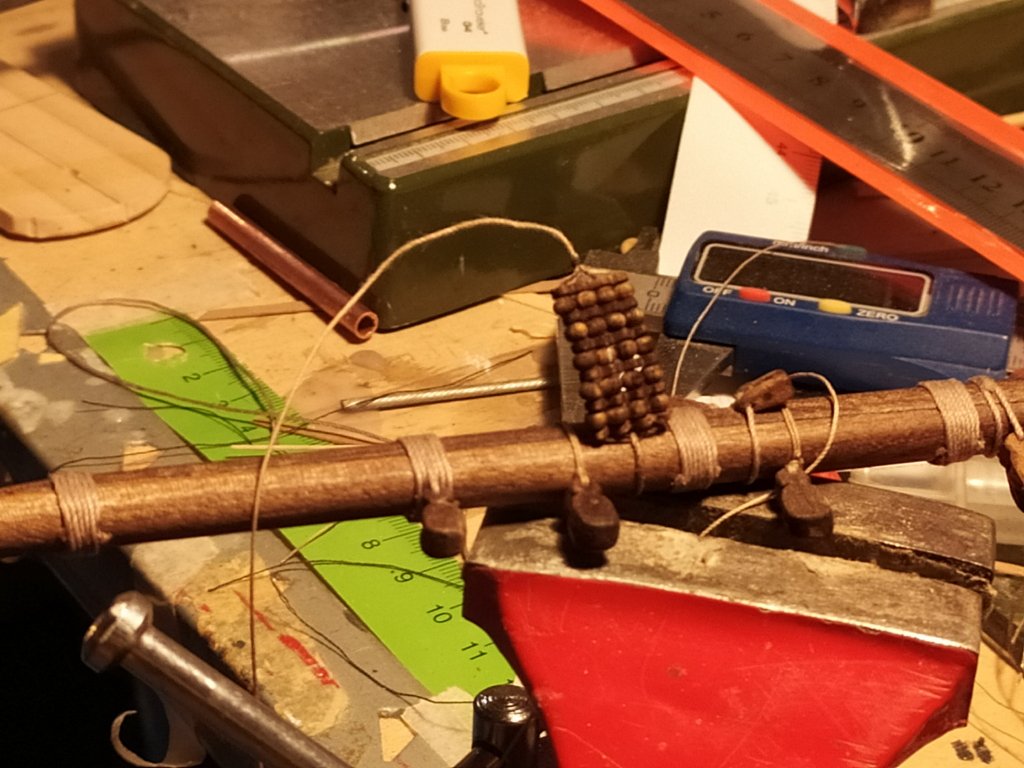
the parts that make up thegooseneck have a name that is not translated into English, or the name used in Italian does not have a direct correspondence, so I report an image with the names of the most important parts that compose it,
structural differences are visible in the realization of the trozze which are shown in Adametz's drawings, who does not use bowline knots to block them, but a small block (???) (I don't know if it is an error)
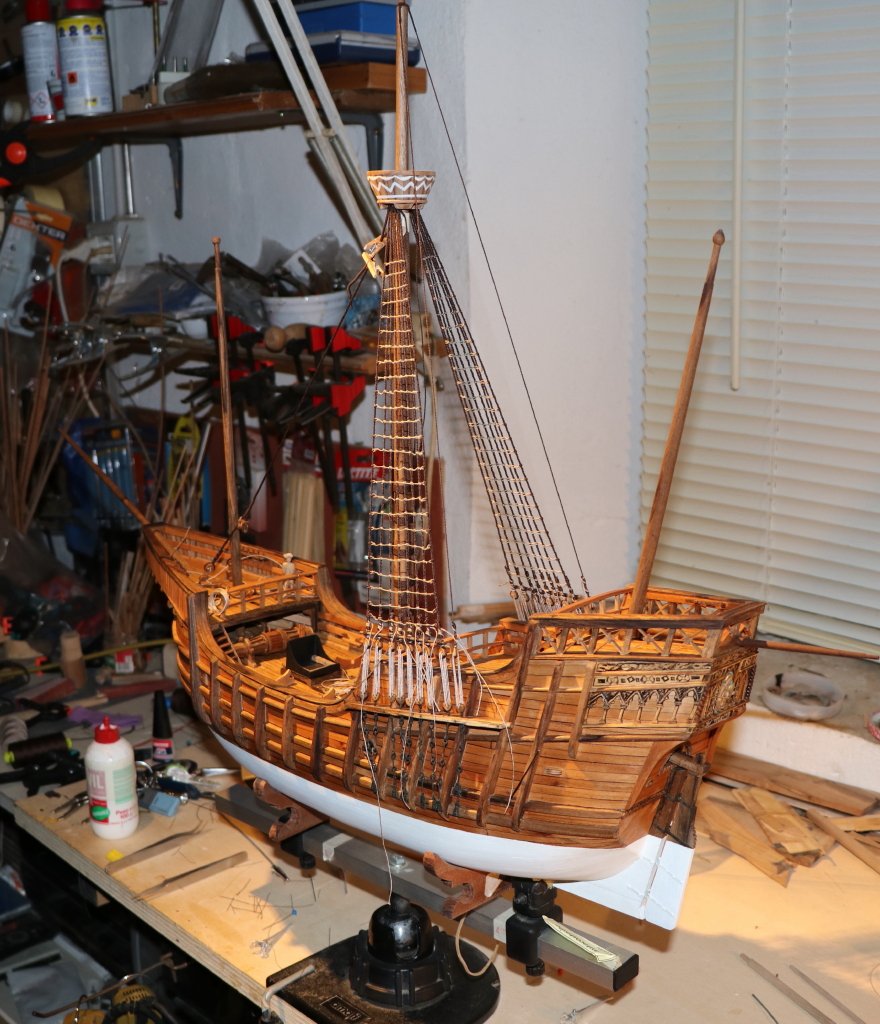
later I made the flagpoles of the mast and the sail of the cage
time necessary for the realization, two days of work

but still the flagpole of the bowsprit mast and some workings on the boom that I will do later are still missing
see you next time
black Wolf
- Siggi52, GrandpaPhil, Baker and 4 others
-
7
-
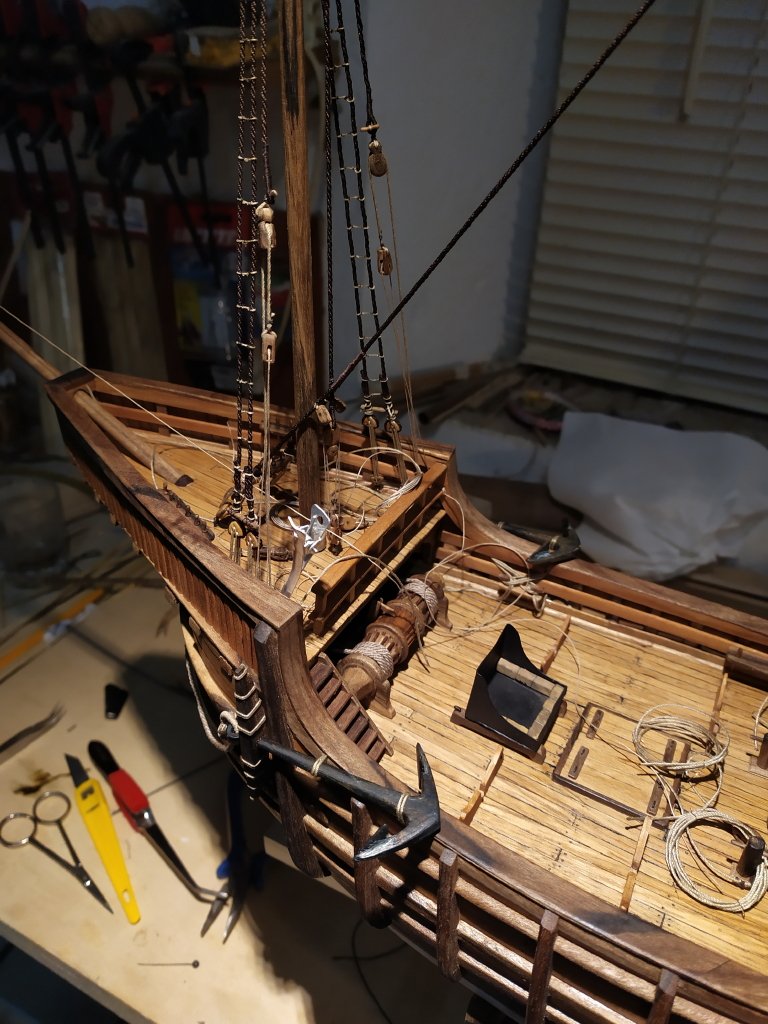
Small updates on MS, which I have withdrawn from provisional coverage,
waiting for the assembly of the sails and flagpoles I am finishing the works and chores on the bridge, first the placement of the two large anchors, before laying them I made the hawser, a twisted cable made up of 4 flat cables committed on a smaller central cable , (to do these I used Domanoff's ropewalk) by stropping it to the cicada of the respective anchors and to the winch on the bridge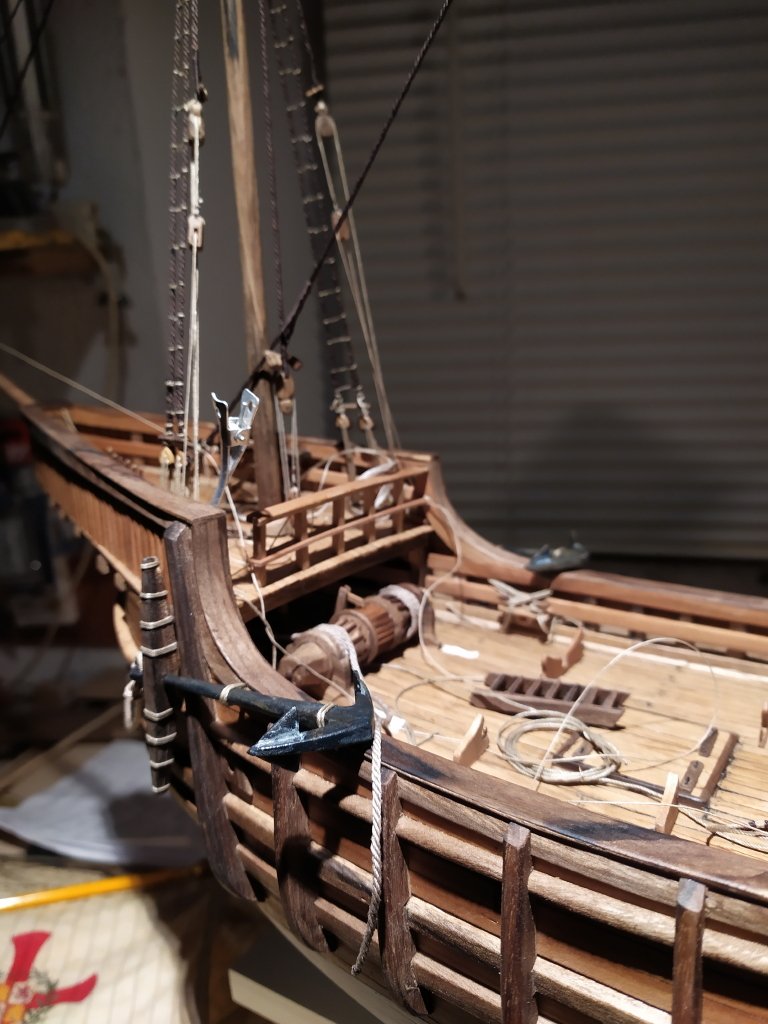
permanently fixing anchors
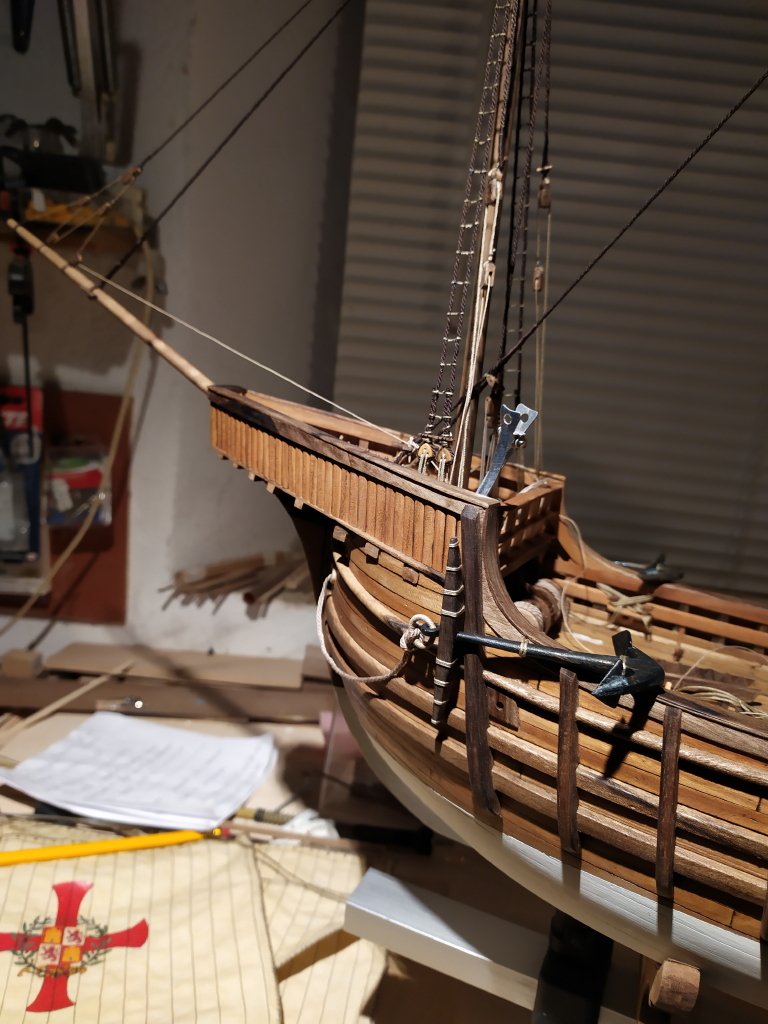
the kitchen was also stopped on the bridge
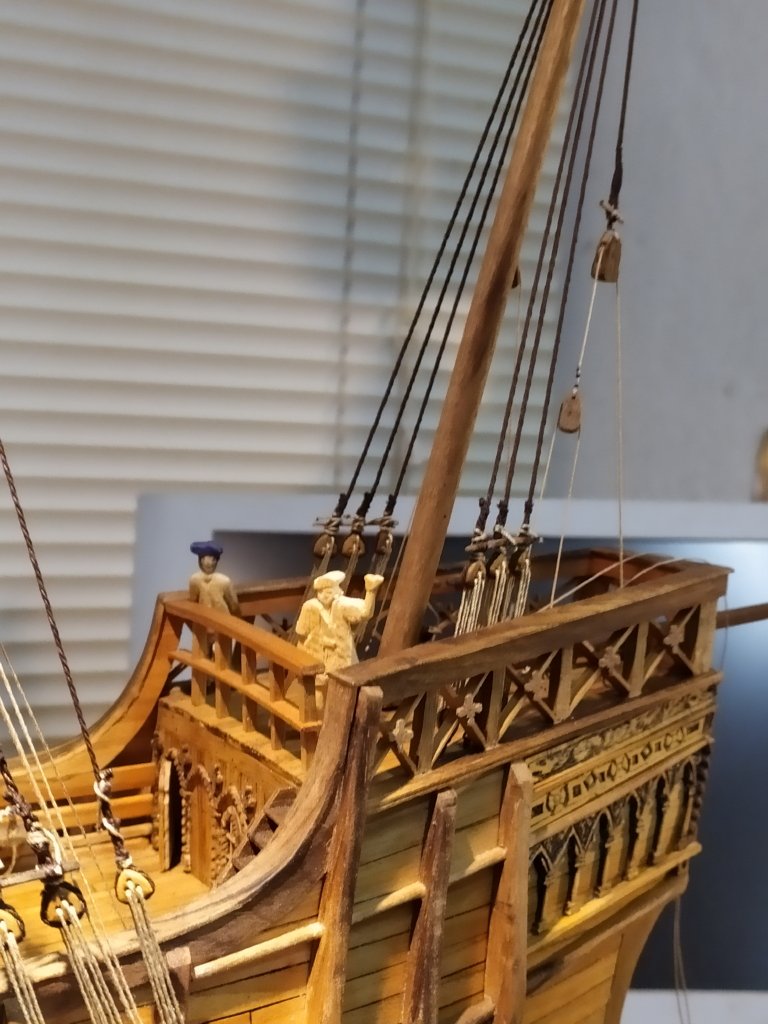
then great news, after months of absence "Colombo" had disappeared from my desk, but in this period of various rearrangements, among the paperwork on the floor it stood out outside Colombo, the long stay between the paperwork has changed the contours of the face (it is a little more "flattened) and no longer stands up, but in short I put it back on the bridge next to the" long ", in short, a little to the" prodigal son "...
see you next time
black Wolf
-
Very good Mustafa,
now I am inspired by your model, especially in the creation of the flagpoles that I have yet to make 🙂
luponero
-
I thank my friends for the likes
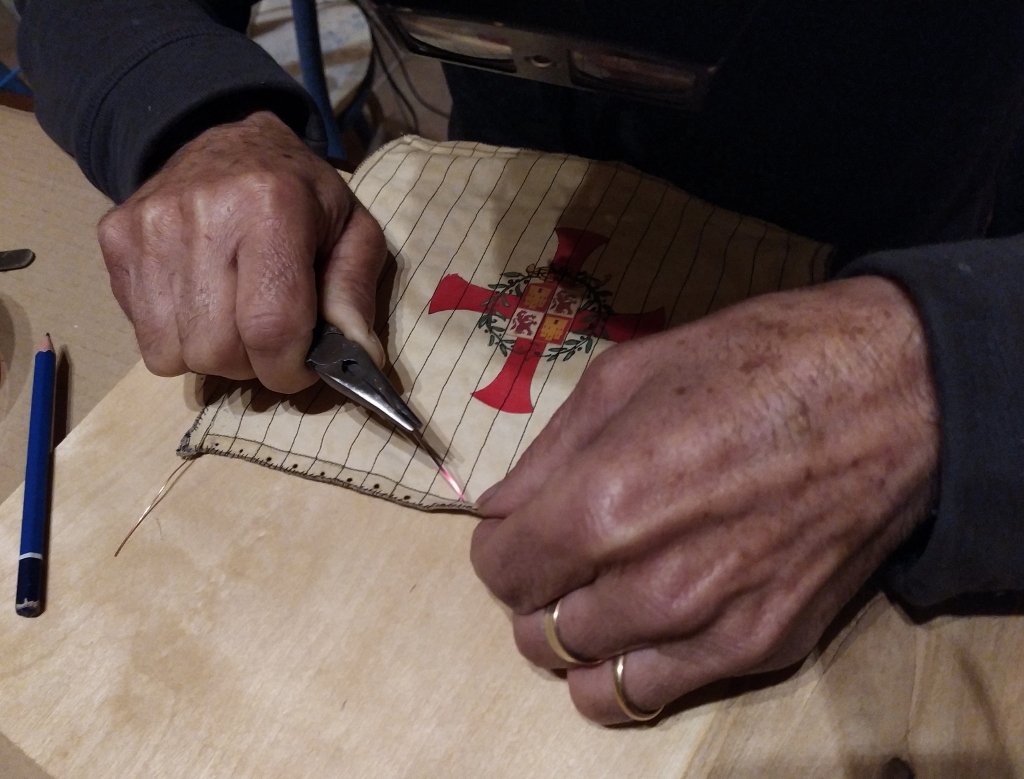
the work continued with the sewing of the bonnets, I had not previously had to integrate additional pieces to the sails for which I took from the drawing the sewing technique that Adametz draws in a very superficial way without giving any indications whatsoever, so I armed with the needle and for the thread I used what I needed for the realization of the herring using a single thread, I do not deny that just to start with the seam I made several attempts to guess the way of sewing, in practice it starts from end going backwards, determining in advance the length of the eyelet made with the thread that will pass through the other upper hole and will be stropped with a smaller eyelet always made with the usual "strangle" thread, the explanation is complex, think the seam ...
in short, I put the photo of the sail with the bonnette prepared for sewing
the next step refers to the moment when the "seam" was finished and the rings "were passed through the upper holes
4/5 hours had elapsed the work proceeded very slowly, when I tried to stop the bonnetta superior to the sail I realized that the "rings" made were insufficient to close the seam

I had to cut the thread (curses were not missing !!!)
recovered the calm, I resumed the seam another 3/4 unnerving hours, the thread despite the holes made are wide it must be double in two successive passages and the amount of thread inserted in the needle for the seam was over a meter so after the first few steps the thread twists on itself ... however in the end I managed to put the first bottle,
what a stress !!!I imagined the situation at sea ,,,
if the time needed had been what I needed or not there was the risk that started the maneuvers to increase the surface of the sail with the bonnette once the wind was finished it had already dropped
surely even if it was in the late Middle Ages the time for the maneuver had to be much faster, surely there were more hands and a different technique, so I started thinking and observing,
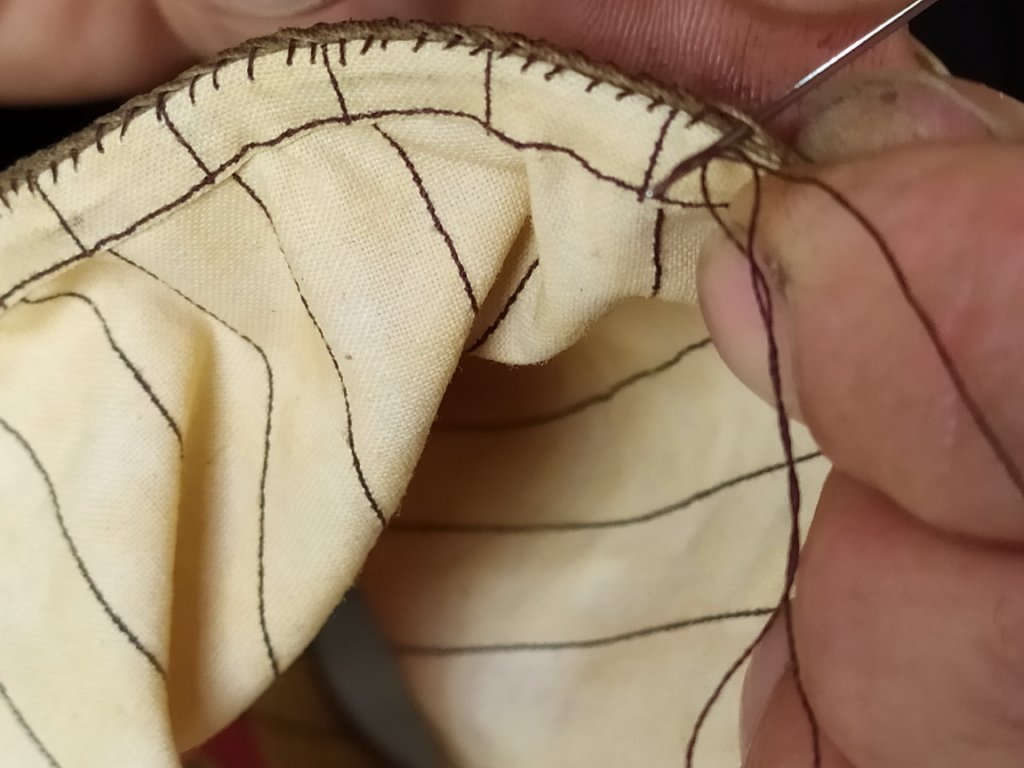
the seam made with the needle is too long and complex with twisting problems, the method was not the seam but the "re-threading", perhaps I had in mind the system I prepared myself with the copper wire a curved needle to thread the wire, place the progressive images of the re-threading, with the work they are in the first row of lower holes and I hook the wire with the copper needle
then I take it back from the hole, taking it behind the herring to the extent obtained from the "L" that the ring must have to choke with the other ring next to it (roughly a couple of cm, in my case)
the next step is to make the ring for tightening with the wire coming from the right, passing the garment inside on the right
pulling it to tighten (strangle) the major ring by starting on the right with the thread and re-preparing another ring,
once you have finished all the rings on the bottom row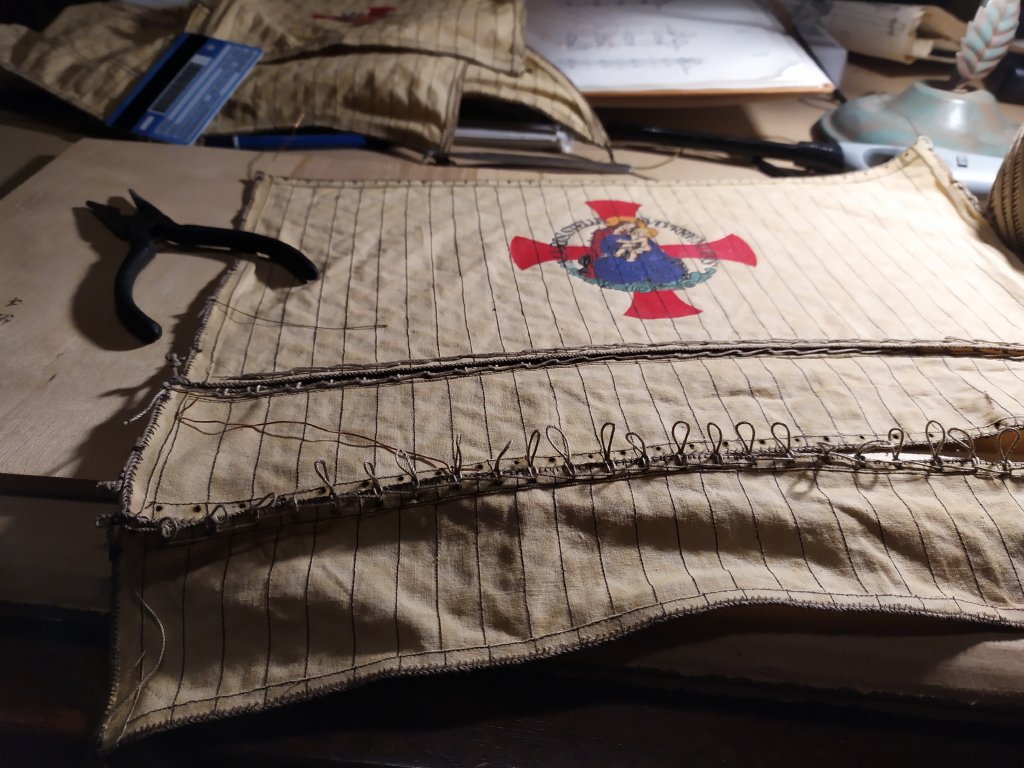
they are all inserted from the inside into the upper holes, going back inside the ring to the end of the ring by pulling to the right and developing the coupling towards the right;
time needed an hour but with less problems of twisting and various "enlargements",
I think a couple of medieval sailors armed with tools and experience completed the maneuver in a few minutes ...however it was gone! the main sail was over
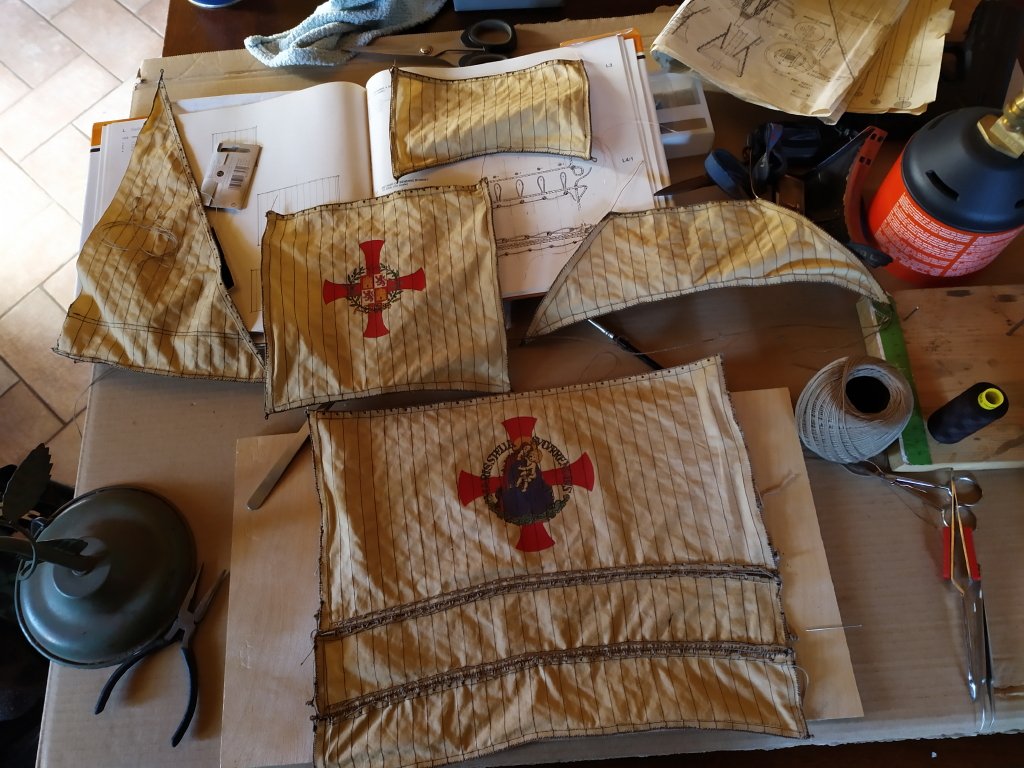
I put image of the main sail with the bonnette in front and behind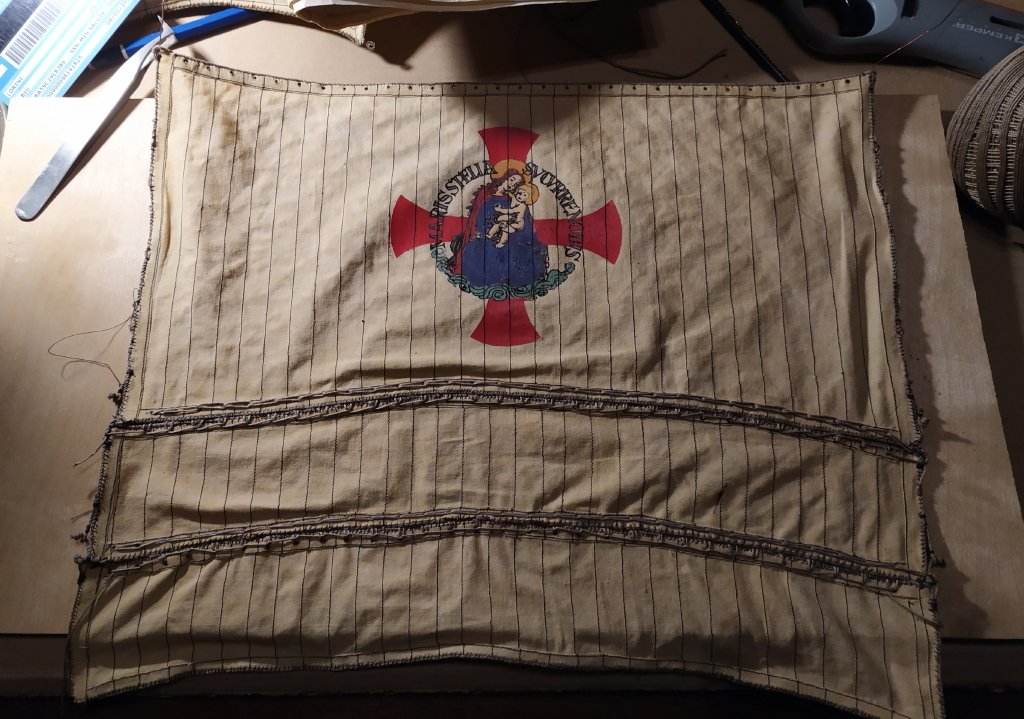
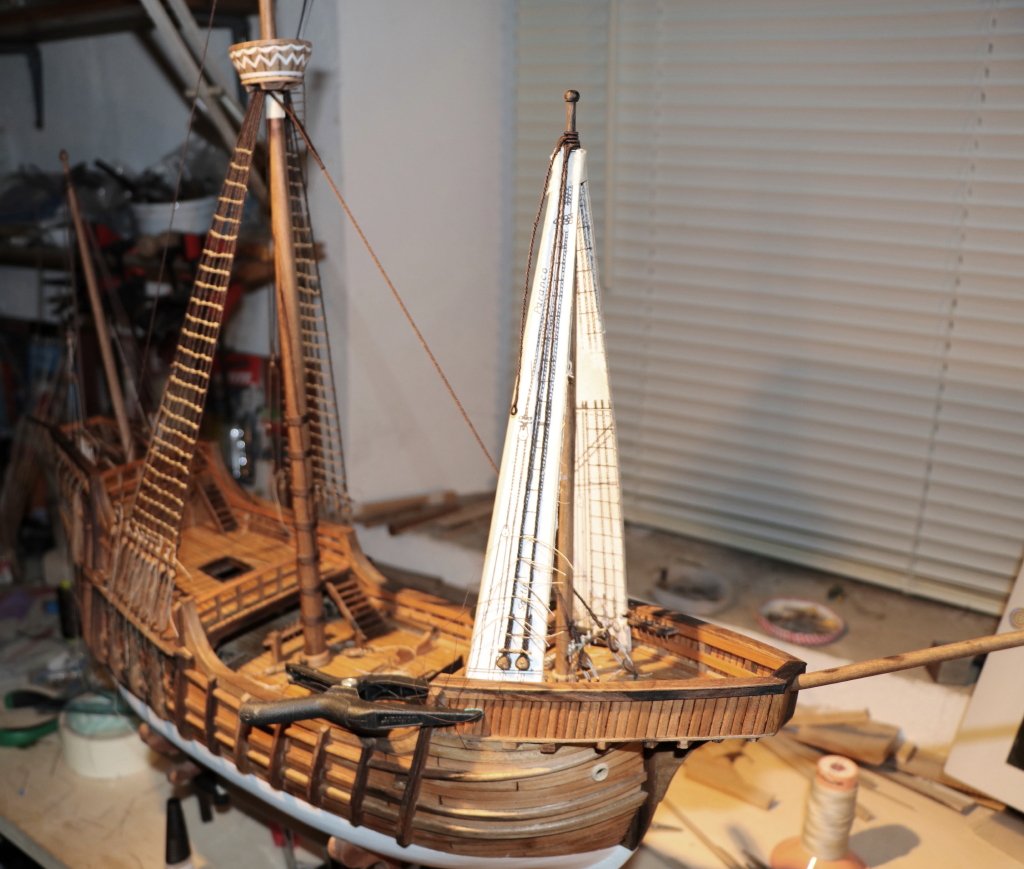
so the sails are ready to be positioned
I have to remove the Santa Maria from the bag and start again with the work in the laboratory,
in a few days, I have to detoxify myself a little")
... I'm going to detox in the garden ...
see you next time
black Wolf
-
simply wonderful !
luponero
-
the bolf rope was missing for the greater sail and the bonnets for which I took needle and thread and spent a day sewing ...
I had sat down at the PC desk, while I was sewing I listened to old-time music with headphones
(Jethro Tull)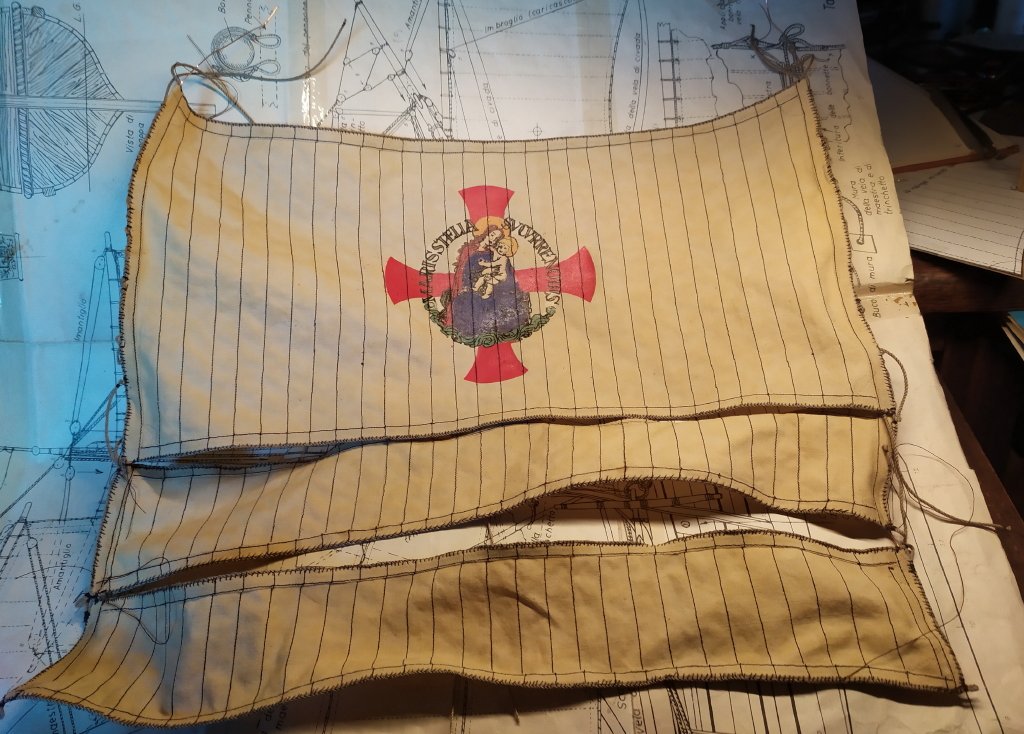
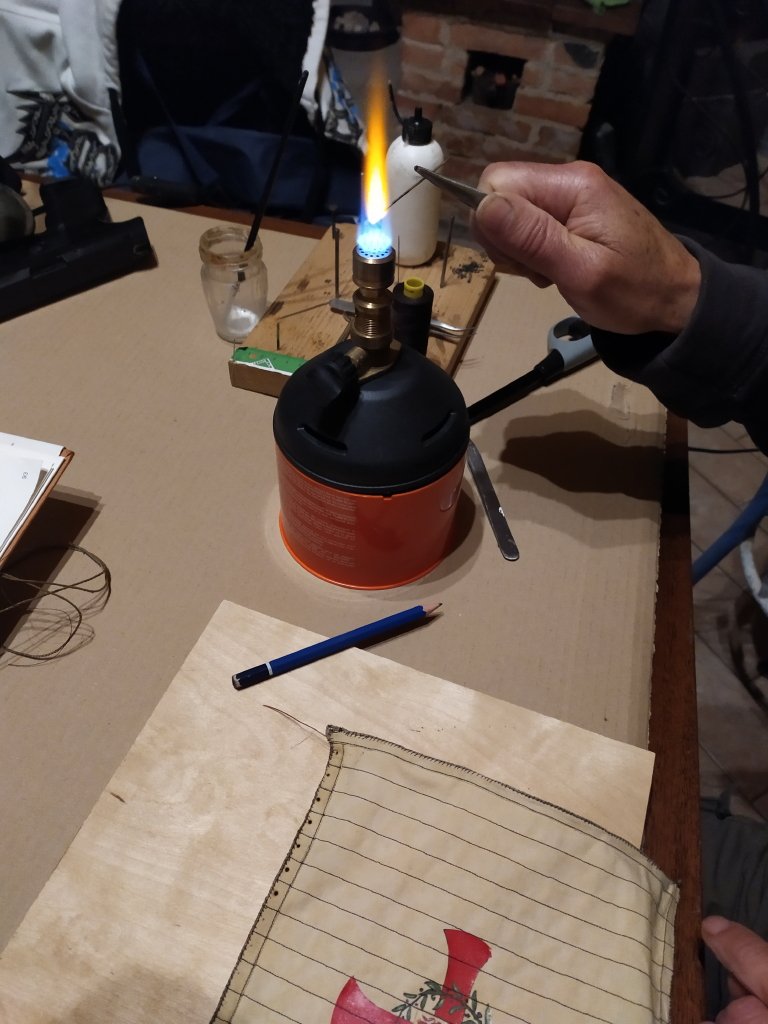
I prepared the holes for the slinging of the sails, I use the red wool needle with a portable "bunsun beak" (which I use for various workings in the laboratory that require a contained but powerful flame, and which I once used for chemical analysis of the components ,,, once
time passes quickly, ( if it did not pass it would be worse!)
I also prepared the holes on the main sail and on the bonnets to connect them with the main sail and between them, a fundamental step it is not possible to sew them with the cord if you do not prepare in advance the holes for the passage of the "cable" that will connect the various pieces
the next step will be the seam, I assume it will be a complex thing,
"just to change!"
see you next time
black Wolf
-
Congratulations Mustafa,
we are both making a model of the Santa Maria, what to say beautiful ship in all its countless interpretations, yours is very neat and clean, a pleasure for the eyes!
For the shades of wood you use yours fully responds to the "blonde" name they assigned to it at the time of its constructioncordially
black Wolf
-
Thanks Mark for your appreciation,
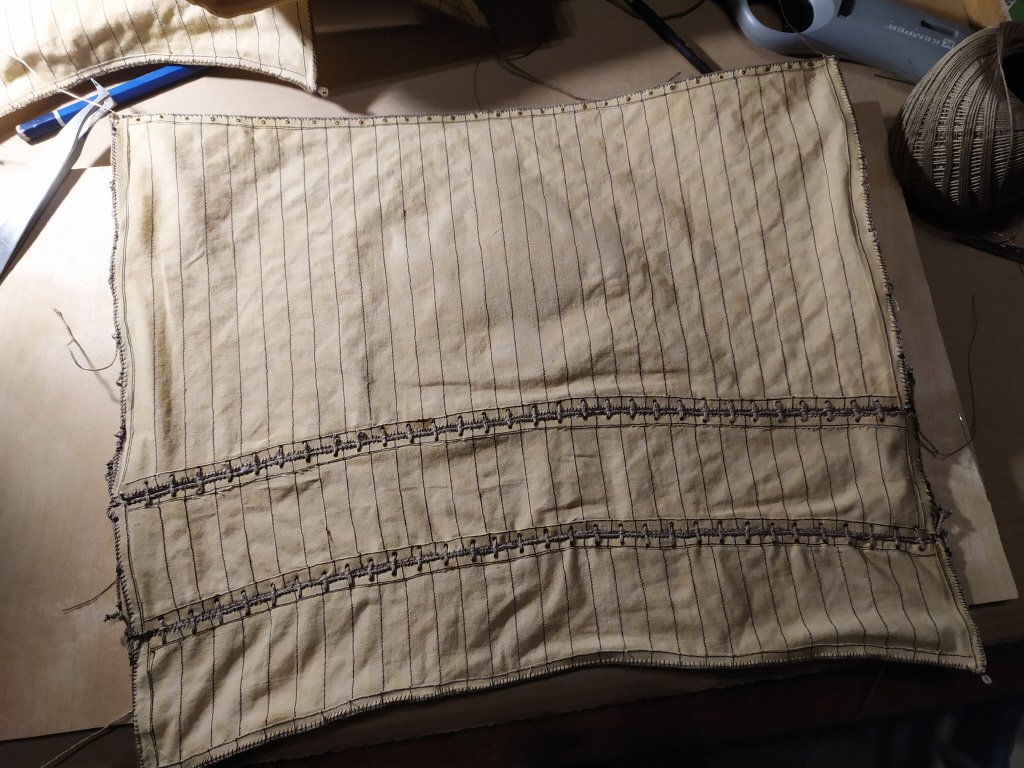
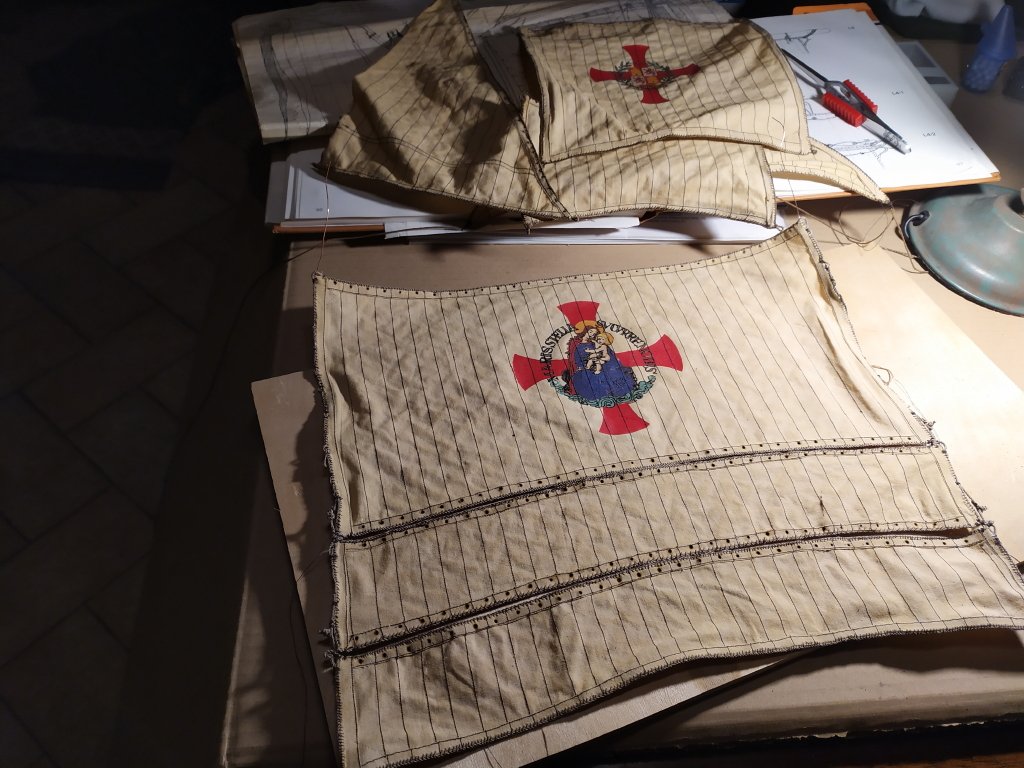
the work on the sails continued with the construction of the shank of the sails made, it is the flat cable that reinforces the edge of the sail and I do not deny that in my opinion it is one of the most "boring" processes in the creation of a model , both for the amount of time and for the repetitive continuity of the movements: the seam of the cable on the edge of the sail, passing the thread of the seam inside the cable, precisely on the highest strand, of the three that make up the flat cable , compared to the edge of the sail ... which is not easy for me.
But let's go in order, first the realization of the cable called "ralinga", it is a big flat cable (which is twisted to the "right"), one of the most common problems when self-realizing the cables, is that the wires (strands) that are used for the realization of the cables, are commonly twisted on the right so they are useful for the realization of the "twisted" cables that are twisted on the left (like the hawsers and shrouds) for the realization of the flat cables ( the most common in the cordage) threads (trephons) twisted to the left would be needed, which is uncommon to find, (only "scotland" cotton is twisted to the left) so it is necessary to twist the threads from right to left and then make the flat cable, one of the things I had to do using a screwdriver placed on a small manual stranding machine and then twist the three strands in the opposite way to get the flat cables for the various lifts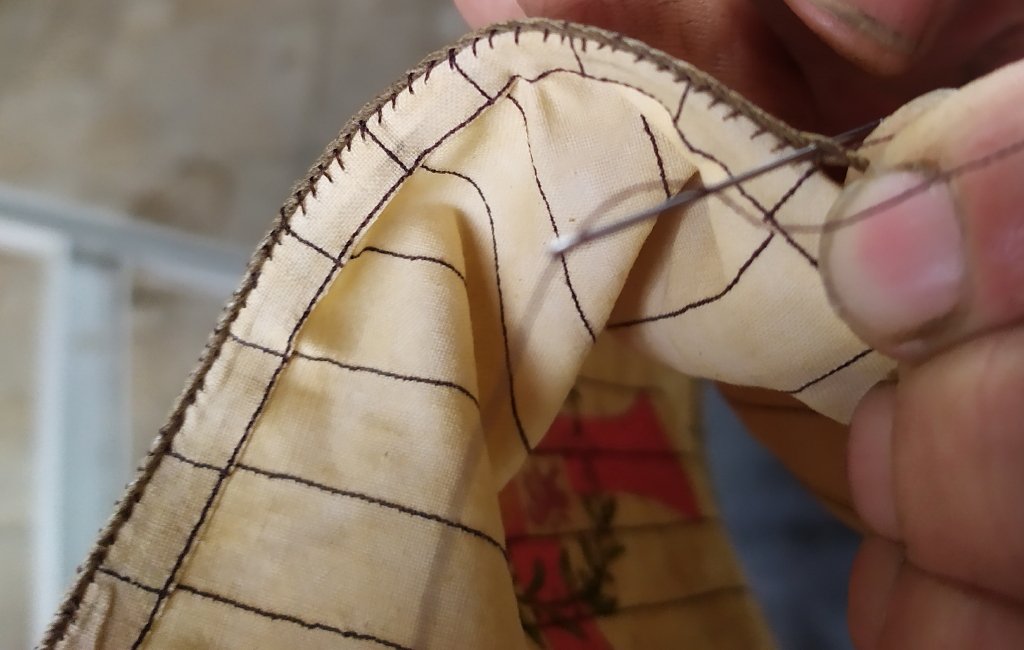
this is the job after five days of "sewing", (I'm not a very fast tailor)

I'm not done yet I miss the mainsail with the bonnets a couple of full days, I'm going to check if the battery of the screwdriver has been recharged to twist the wires from left to right and make the flat cable
see you next time
black Wolf
- mtbediz, G.L., GrandpaPhil and 2 others
-
5
-
Thank you Geert for approval of the work, you also reminded me to post the images relating to the realization of the images shown in the model of Santa Maria made by Adametz
... it had crossed my mind
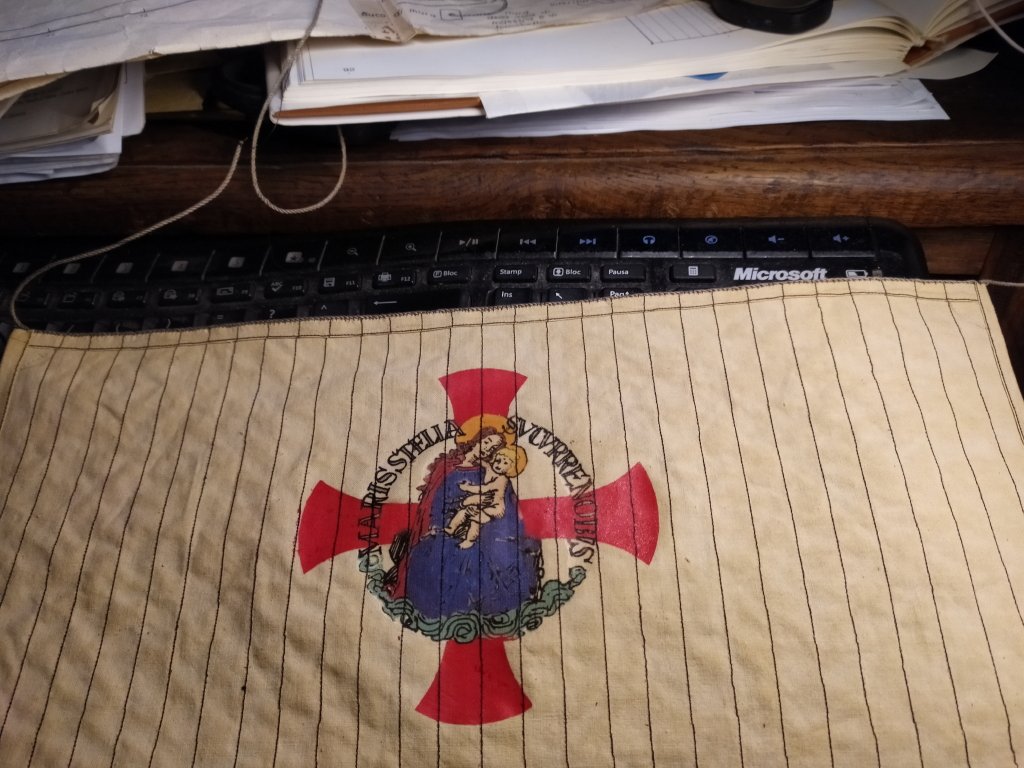
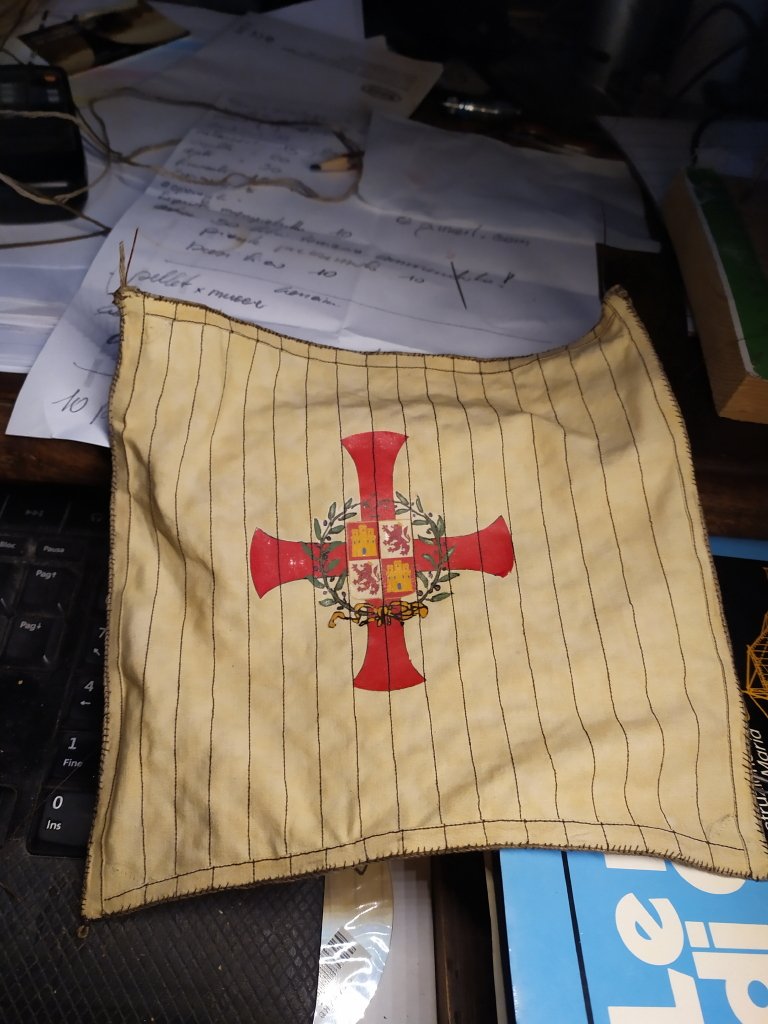
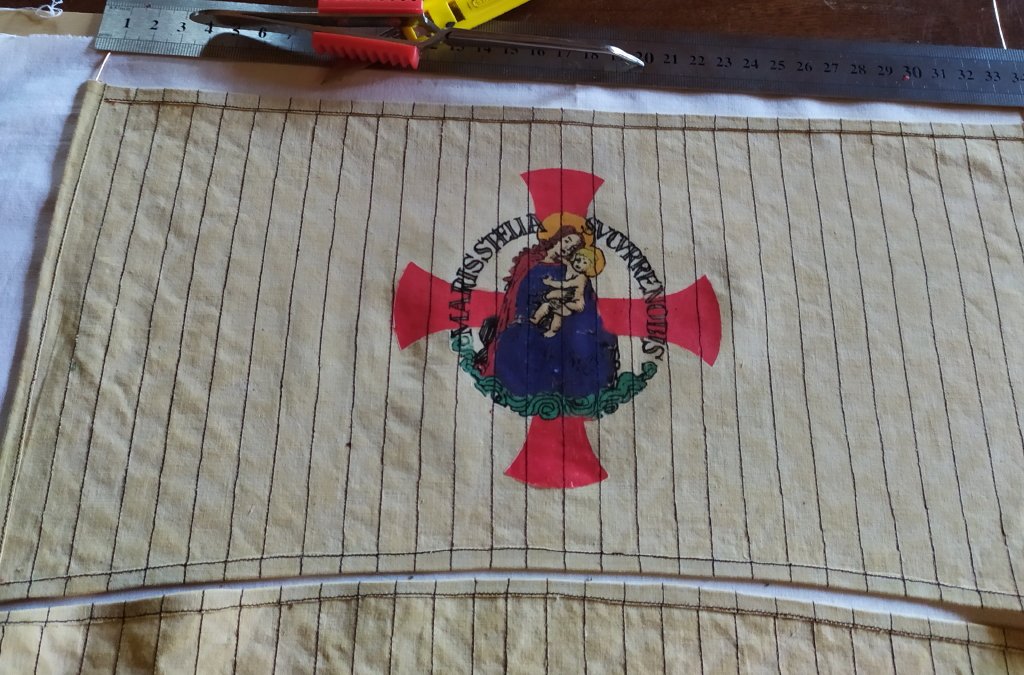
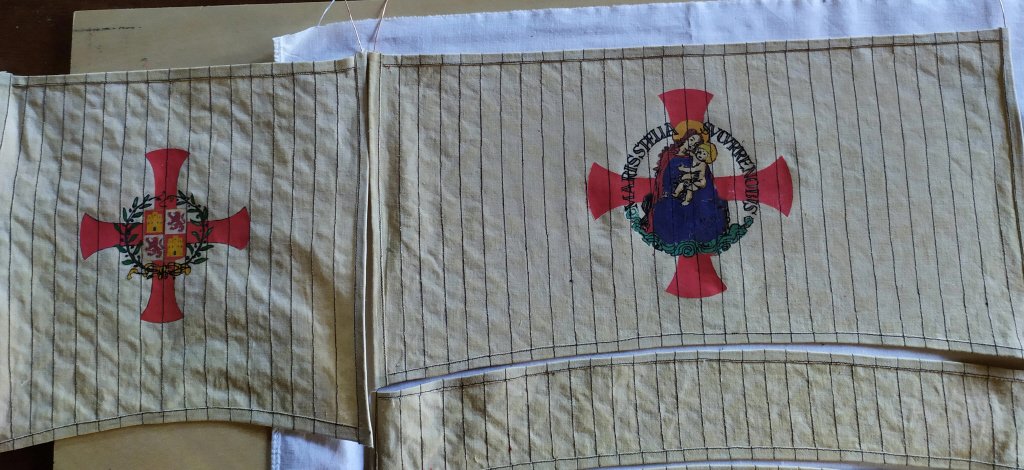
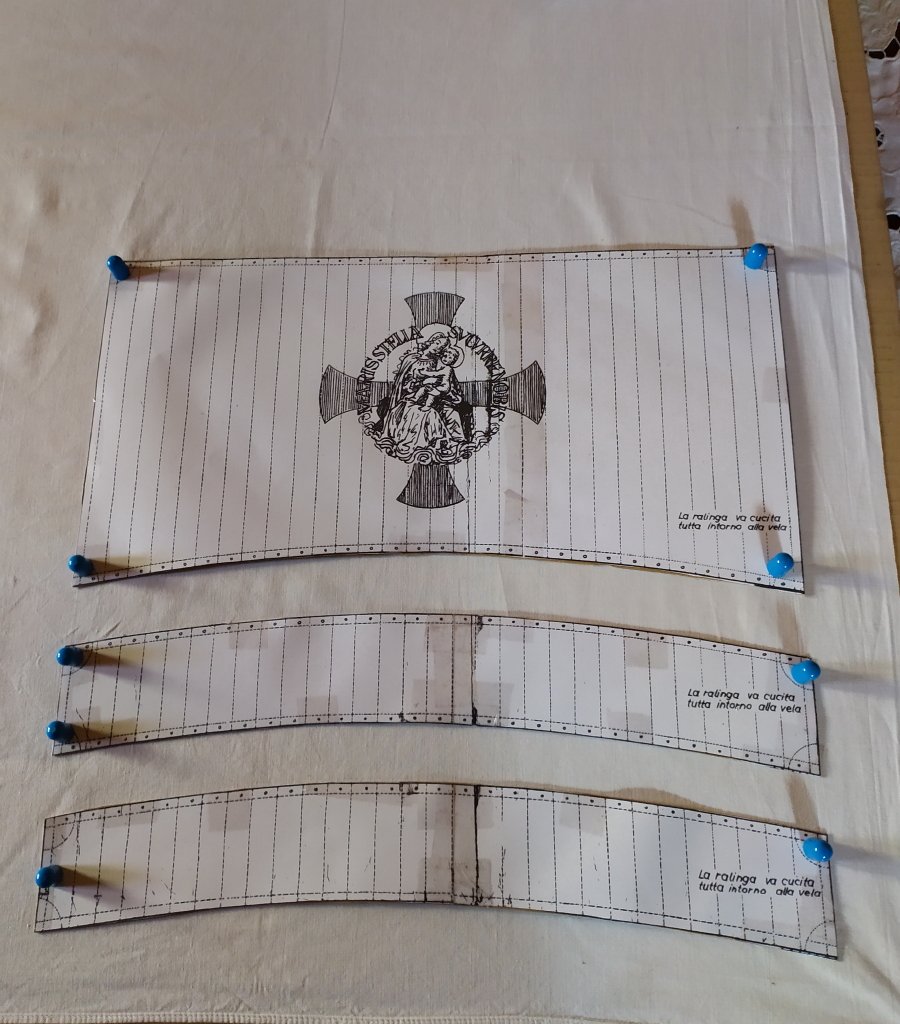
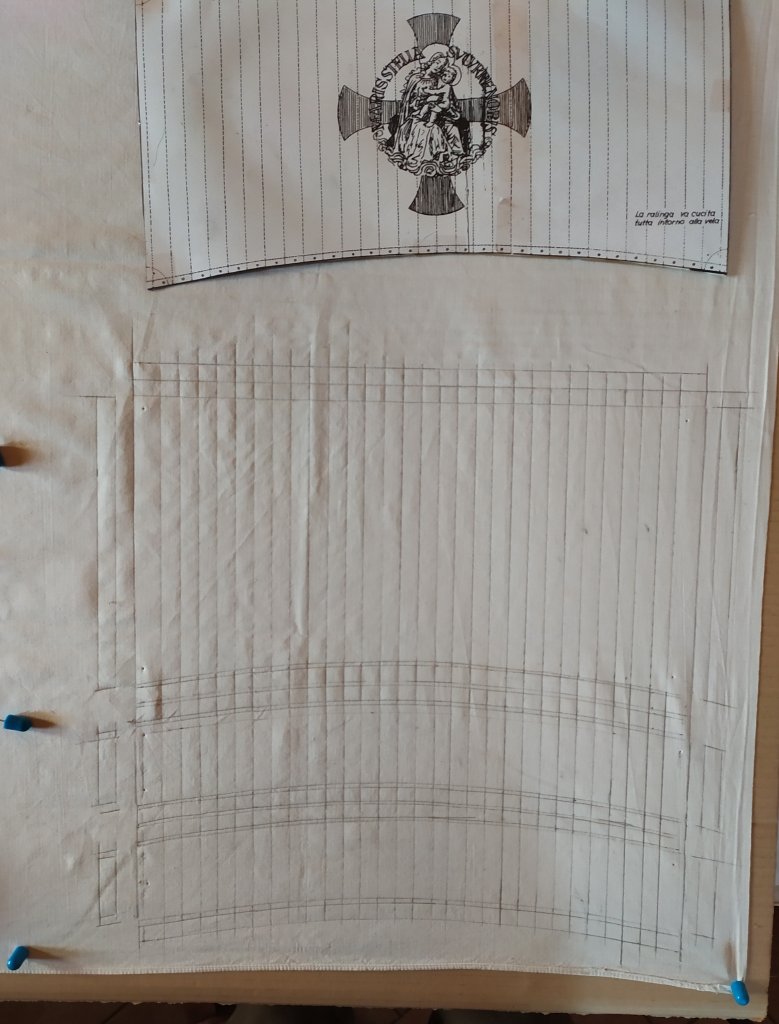
the images indicated in the construction plans of Adametz are shown on the foresail and on the main sail,
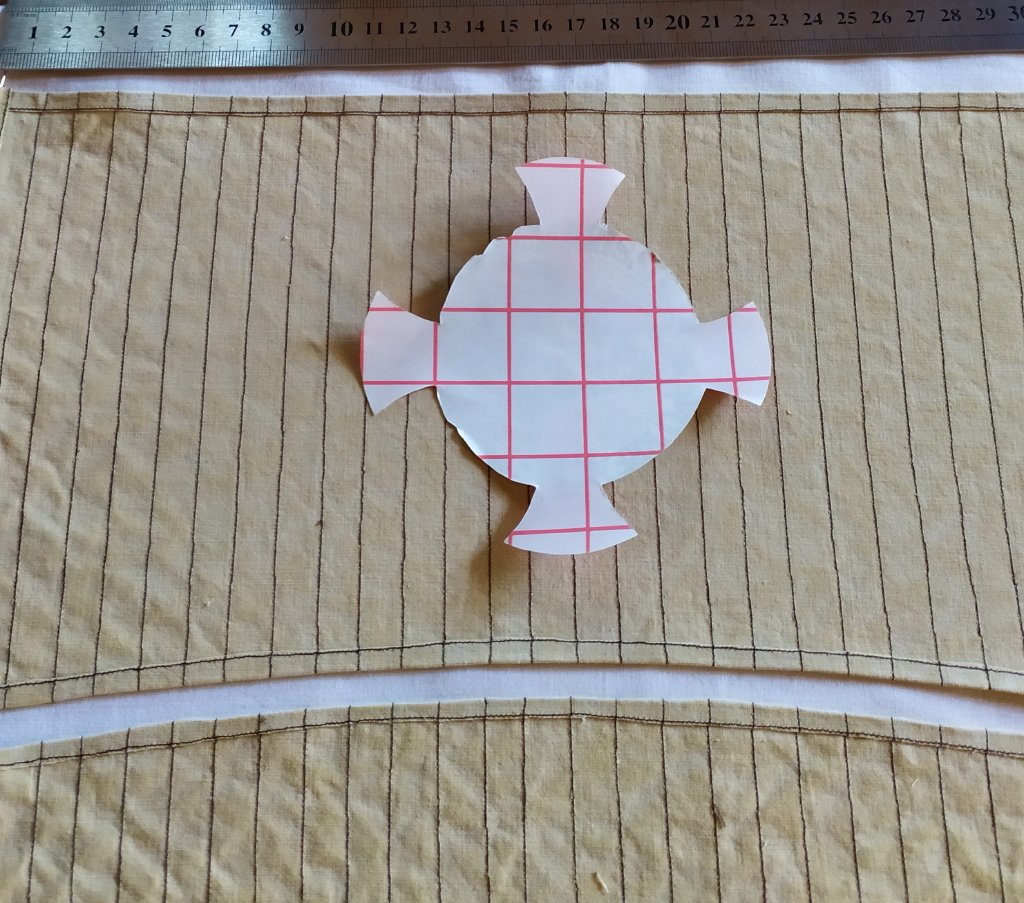
on the foresail in the central part of the cross the coat of arms of the royals of Spain is reported, while in that of the main sail, the image of the Madonna with the child (also reported in the sculpture placed in the transom) is reported in the book of Winter , (in which the drawings are attached), it is said that the reference refers to the image of the "mother of God" shown in the compass rose in the Spanish world map by Juan de la Cosa, shown in the previous post, while the writing "Maris stella sucurre nobis "(Star of the sea bring us help), the combination of Mary with the guiding star of the navigators, towards which the compass needle is thought to be pointing, is found in the ecclesiastical songs and on the starry blue silk cloak of the emperor Henry II, honestly I did not find any information that explains why Adametz has brought back the images on the sails, in the many models made of the Santa Maria only the classic crosses are reported, however I decided to bring them back respecting their shapes, the problem was how to later bring back on the fabric l colored image with photoshop, although I had to search the internet for sharper and more detailed images than those shown on the construction plans.To bring back the images I thought of using the thermal paper on which I had previously printed the images, then with the iron I applied them, (perhaps with the dyes for tussuto the drawing would have been more natural but it would not have been possible to bring back the details with precision)
I am attaching some images relating to the transposition of the images on the sails
see you soon
black Wolf
- GrandpaPhil, G.L., Binho and 5 others
-
8
-
Thanks for your appreciation, I apologize for the chaos with the translator that I did previously.
The next step was
the realization of the hull of the sails made, it is the flat cable that reinforces the edge of the sail and I do not deny that in my opinion it is one of the most "boring" processes in the realization of a model, both for the amount of time and for the repetitive continuity of the movements: the seam of the cable on the edge of the sail, passing the thread of the seam inside the cable, precisely on the highest strand, of the three that make up the flat cable, with respect to the edge of the sail. .. which is not easy for myself.The construction phases began with the creation of the cable, (hoping that the translator will allow me to translate technical terms) the cable that reinforces the edge of the sail, called "ralinga" ( leech rope)
it is a large flat cable (which is twisted to the "right"), one of the most common problems when self-making cables, is that the wires (strands) that are used to make the cables are commonly twisted to right for which they are useful for the realization of the "twisted" cables that are twisted on the left (like the hawsers and shrouds) for the realization of the flat cables (the most common in the ropes) wires (strands) twisted on the left would be needed, uncommon thing to find, (only "scotland" cotton is twisted to the left) so it is necessary to twist the threads from right to left and then make the flat cable, one of the things I had to do using a placed screwdriver on a small manual stranding machine and then twist the three strands in the opposite way to obtain the flat cables for the various sails then the cable is sewn using a darker thread, it is necessary that the thread used to sew the reinforcement cable of the edge of the sail passes inside the cable itself, near the corners of the sail it is necessary to make, always with the cable the "clews" to make the cable stand out more during the seam I moistened the fingers in the stain that I had used the days before for the construction of the sails, so by manually twisting the upper part it looks darker than the others, surely staying at home allowed me to stay more "behind" my hobbies, photos, vegetable garden and modeling but with the latter I think I will give the first signs of "dotage"
 since I indicatively need about ten hours between twisting and sewing for each sail,
some photos taken during sewing,

this is the job after five days spent "sewing"
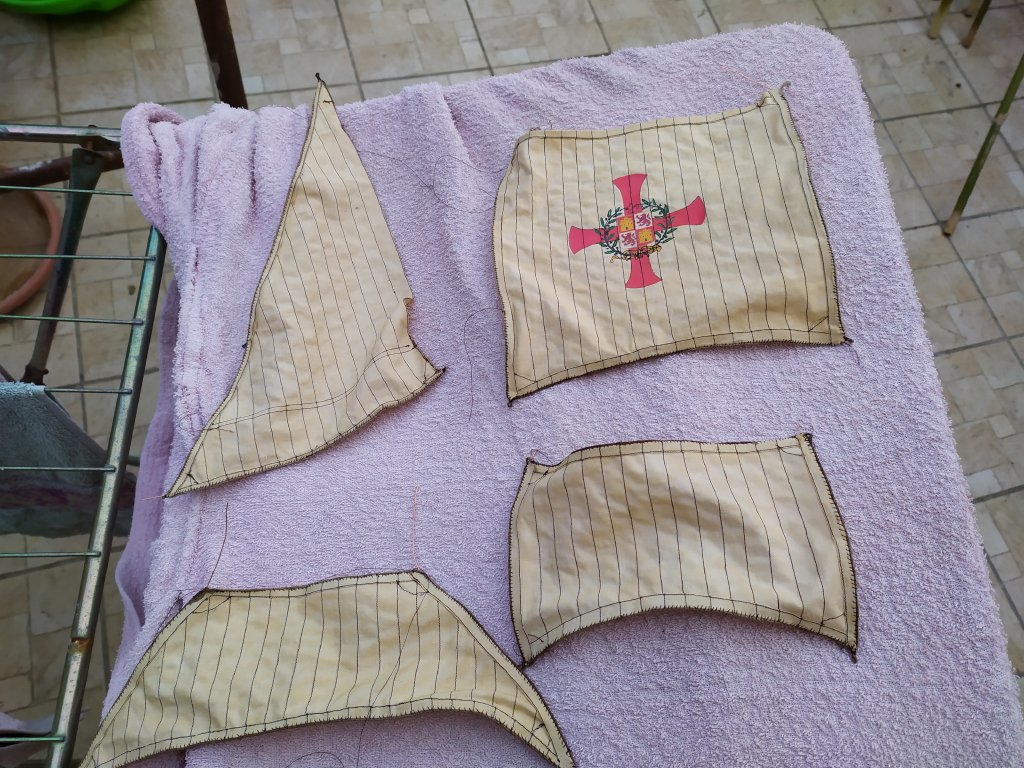
detail of the foresail

I'm not done yet I miss the mainsail with the bonnets a couple of full days, I'm going to check if the battery of the screwdriver has been recharged to twist the wires from left to right and make the flat cable
(if any of the friends can show me the brands of twisted threads on the left, it would do me a favor)
see you next time
black Wolf
- mtaylor, JpR62, Mark Pearse and 5 others
-
8
-
I thank my friends for the likes
and I keep updating the works,
in the construction plans of Adametez on the foresail and on the main sail, besides the classic crosses, there are the images depicting the coat of arms of the sovereigns of Spain and the Madonna with child, these representations are shown only in the model made by Adametz, on the book of Winter "Columbus' ships" in which Adametz's construction plans are attached, in the chapter on sailing equipment it is said that the image of the Madonna is taken from the "compass rose" of the Spanish world map of Juan de la Cosa, (owner and owner of the Santa Maria) the Latin inscription: Maris stella sucurre nobis (star of the sea bring us help) is taken from ecclesiastical verses and from the starry blue silk cloak of the emperor Frederick II,
what to say, surely in the "various" models of the Santa Maria there are numerous differences both structural and ornamental, giving this beautiful boat charm and mystery,
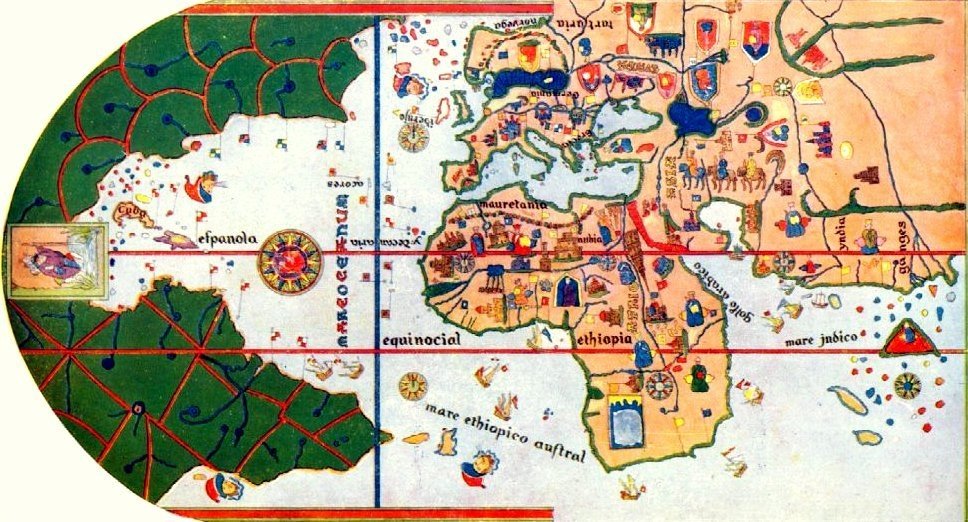
I am attaching some images relating to the planisphere of Juan de la CosaPlanisphere of Juan de la Cosa, the Carta de marear or Mapa mundi, hand-painted parchment dated 1500 made vertically with the west facing north. It contains the first known representation of the territories discovered by Christopher Columbus and other navigators up to the 1500s. Cuba appears as an island and just above are the Abaco Islands with the name Habacoa and the Florida peninsula. The chart is on display in the Naval Museum of Madrid.
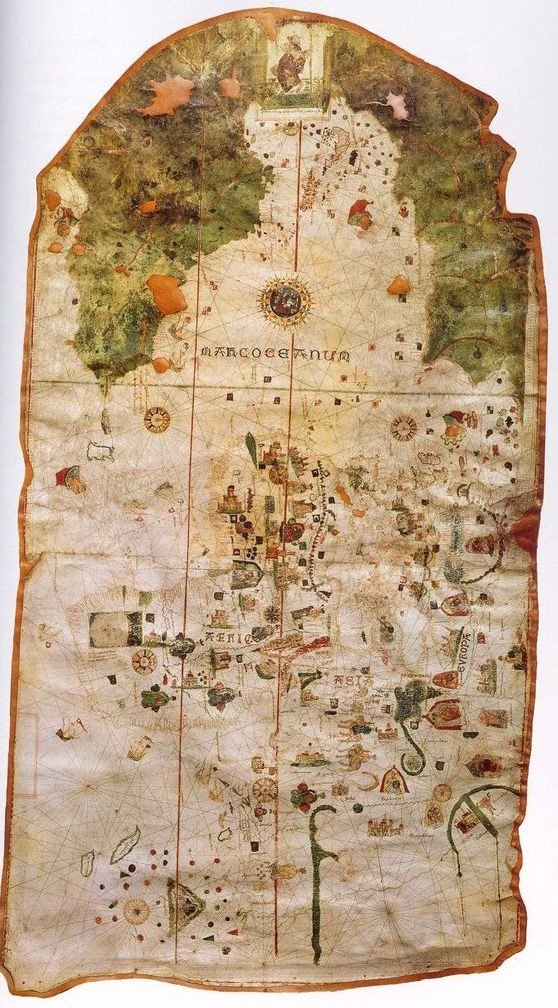
The paper is drawn on two joined pieces of parchment and measures 96 × 183 cm. The upper part of the paper, the west, is rounded due to the shape of the skin of the animal with which the parchment was made. At the top there is Saint Christopher depicted crossing the river with the baby Jesus, probably a reference to Christopher Columbus.
.
Below it, an inscription indicates the author's name: Juan de la cosa la fizo en el puerto de S: maa en año de 1500

The map is made up of two panels. On the one hand there are Europe, Africa and Asia. On the other hand, the New World found by Colombo between 1492 and 1500. The two panels are designed on different scales, with the new world on a larger scale. It was built in Puerto de Santa Maria in Andalusia in 1500.
e per finire il ritratto (museo di Madrid) e il mosaico (realizzato nella sua città natale, Santoña da Juan de la Cosa

ma prima della realizzazione delle immagini sulle vele era necessario rifinire l'equipaggiamento delle vele realizzate con pelle d'uovo, per dare un colore più appropriato
Riporto l'immagine delle vele che sono state appena cucite, le rughe del tessuto sono causate dalla tensione del filo con cui ho realizzato le cuciture
Ho allungato il panno e l'ho immerso nel tè nero che avevo preparato aggiungendo pigmenti color terra ocra, per saturare ulteriormente l'aspetto
Ho cucito i vari rinforzi della vela che successivamente metterò rinforzando i bordi,
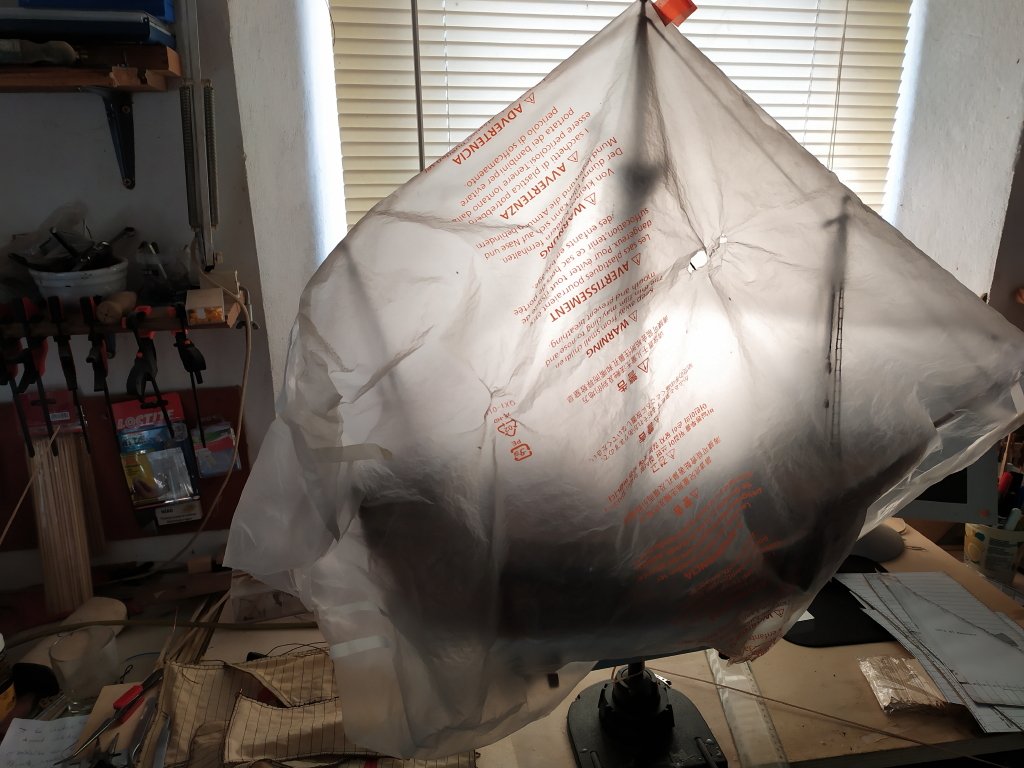
Non so quale forma darò alle vele, se le riempirò di venti "alisei", o lievemente calmo, comunque metto il filo di rame all'interno del rinforzo, ne avrò bisogno in seguito per fare le varie pieghe e forme,
Inserisco le immagini della preparazione della vela a gabbia, realizzate anche sulle altre
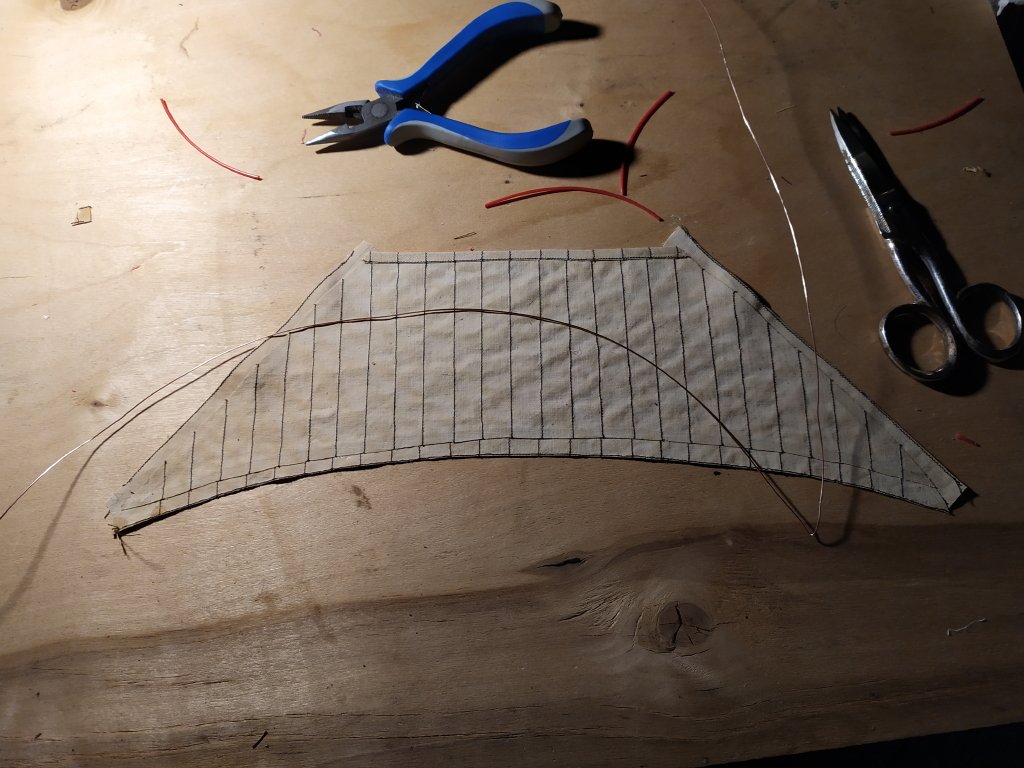
con colla in tessuto gutermann ho incollato i rinforzi precedentemente cuciti creando un piccolo bordo senza difficoltà, passando il filo di rame al loro interno
ovviamente manca ancora molto lavoro per finire le vele ...
arrivederci alla prossima
lupo nero
-
After a long time I go back to the construction site,
more or less four months have passed since I finished the sleeping maneuvers, in this period I made the lifeboats (fourteen!) of the battleship Potemkin, it is a sailing model that we had to bring to the Veronese exhibition with the group of models in which I collaborate, so in January I started working on lifeboats with a "strong" rhythm to be ready for the exhibition, but at the end of February when I was almost finished the lifeboats the situation deriving from the covit 19 virus means that the exhibition did not take place, we were at the beginning ...
However,
now I have resumed the work on Santa Maria, the lifeboats will finish them later, then the resumption of the work began with the construction of the sails (I had to start again ...), to make them I used an old bed sheet for "children "made with cotton called" egg skin ", famous for being thin and soft, used to make clothes and sheets for" children "a lady gave it to me, my neighbor and the child who used it is now a man of forty years, time passes ...to be more sure of the translation, I bring an image with an egg that indicates the parts that compose it, the cotton fabric called in Italy "egg skin" refers to the membranes
.gif.e3b4b74fc187cf8e5cc436b4c458ef47.gif)
and the characteristic of being thin and soft, like the cotton used to make sheets and clothes for children, and in my case the sails of the ship.
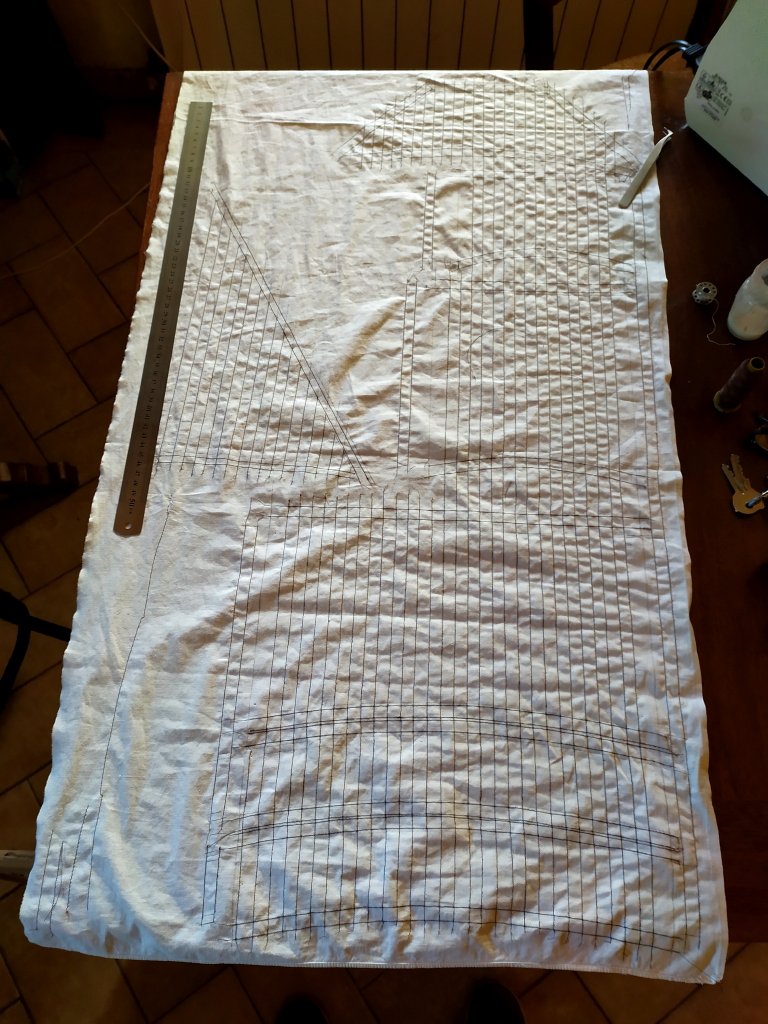
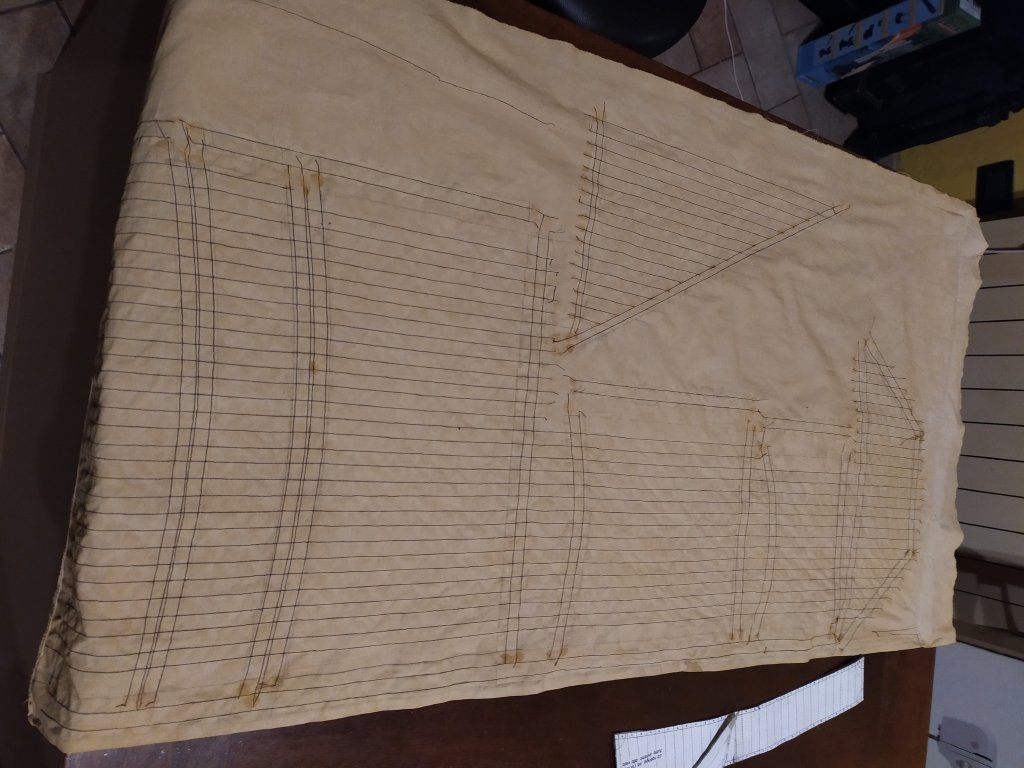
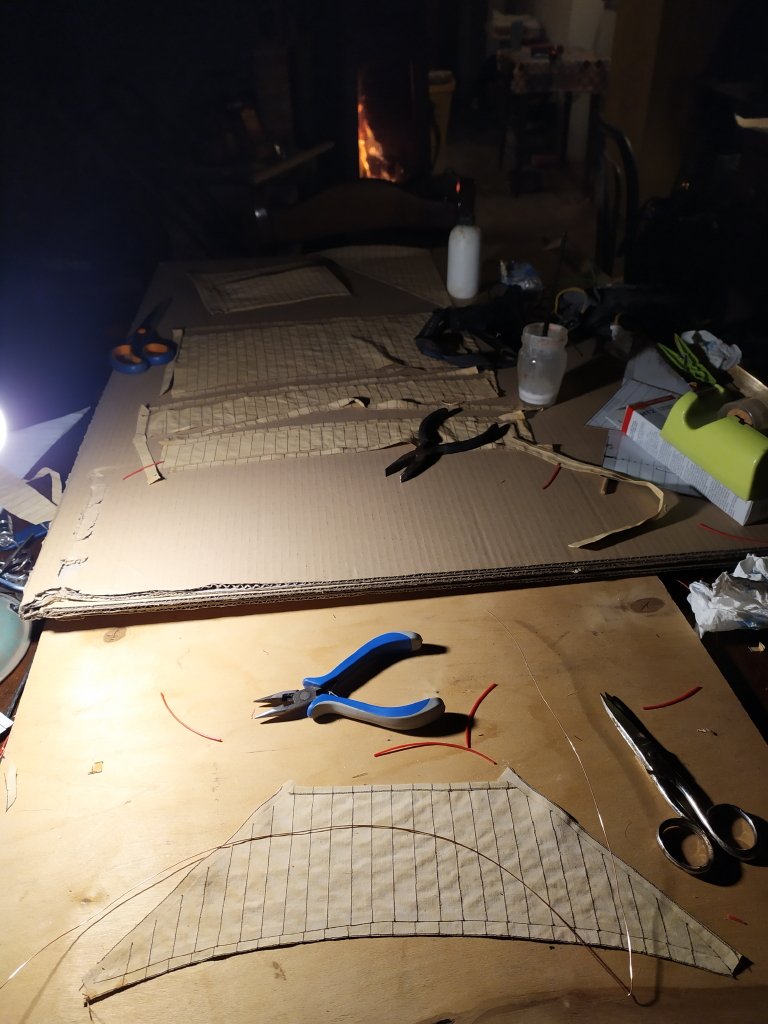
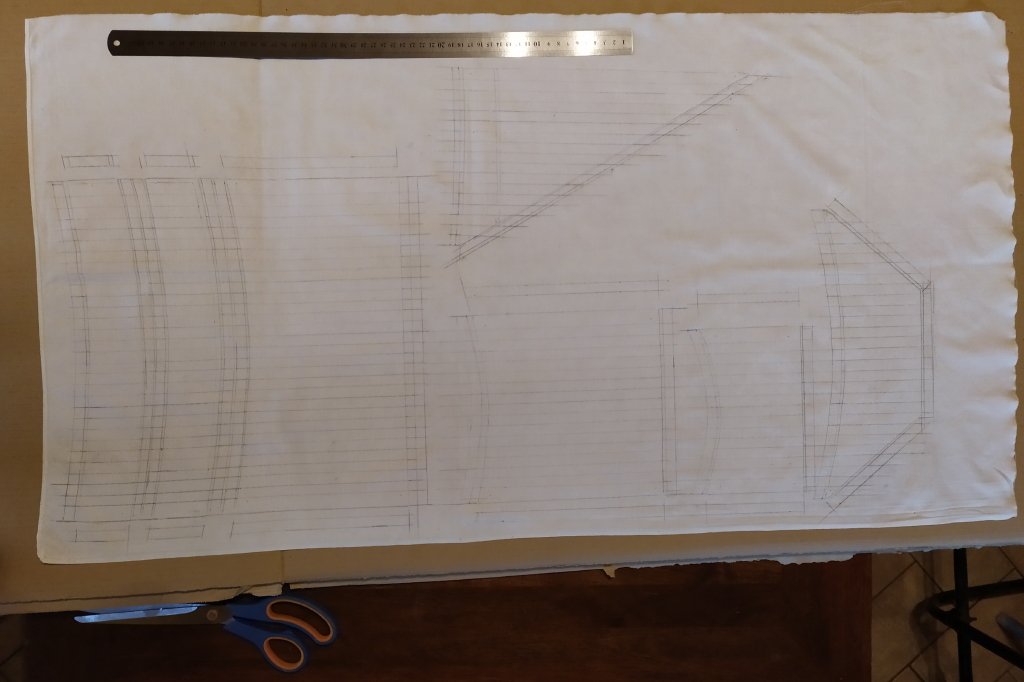
for the realization I made some cardboard models to bring the shape of the sails onto the fabric,
after having reported the outline I have reported with the pencil the seams of the iron and the reinforcements, as in the drawings

carrying all the sails of the Santa Maria on the sheet
done this the next step was the beginning of the stitching, with thin Gutermann thread, of the lines of the stitching of the iron, which in reality should be double, but being in scale 1 to 50 it is almost impossible to double them because the distance between the seams, which in reality had to be about 10 cm, scaling it would mean making two straight seams at half a mm distance (impossible for me!)
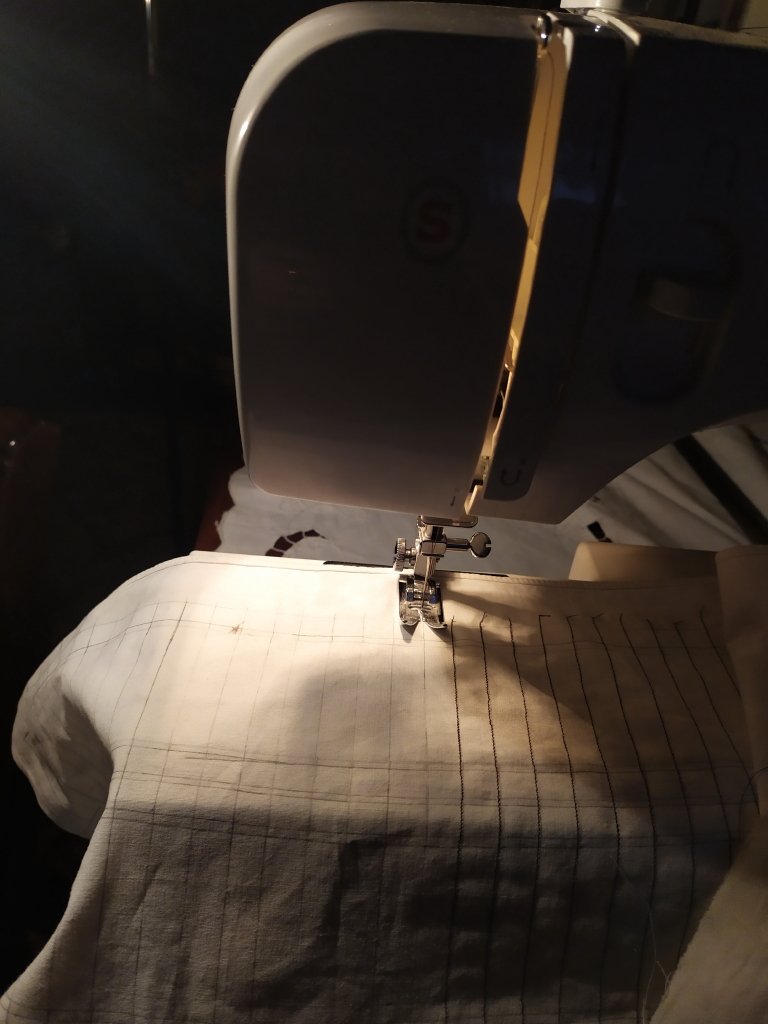
so I decided to make only one seam, preferring simplicity to specular and impossible realization for myself,
see you next time
black Wolf
-
I thank my friends for the appreciation and the "likes", both very welcome
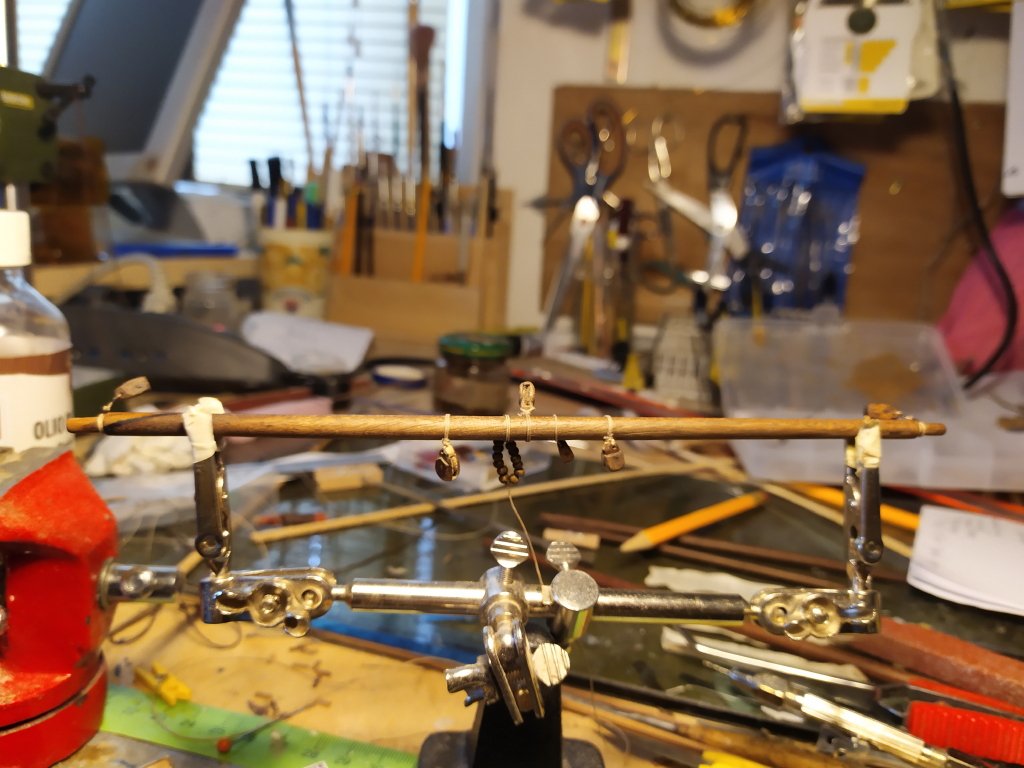
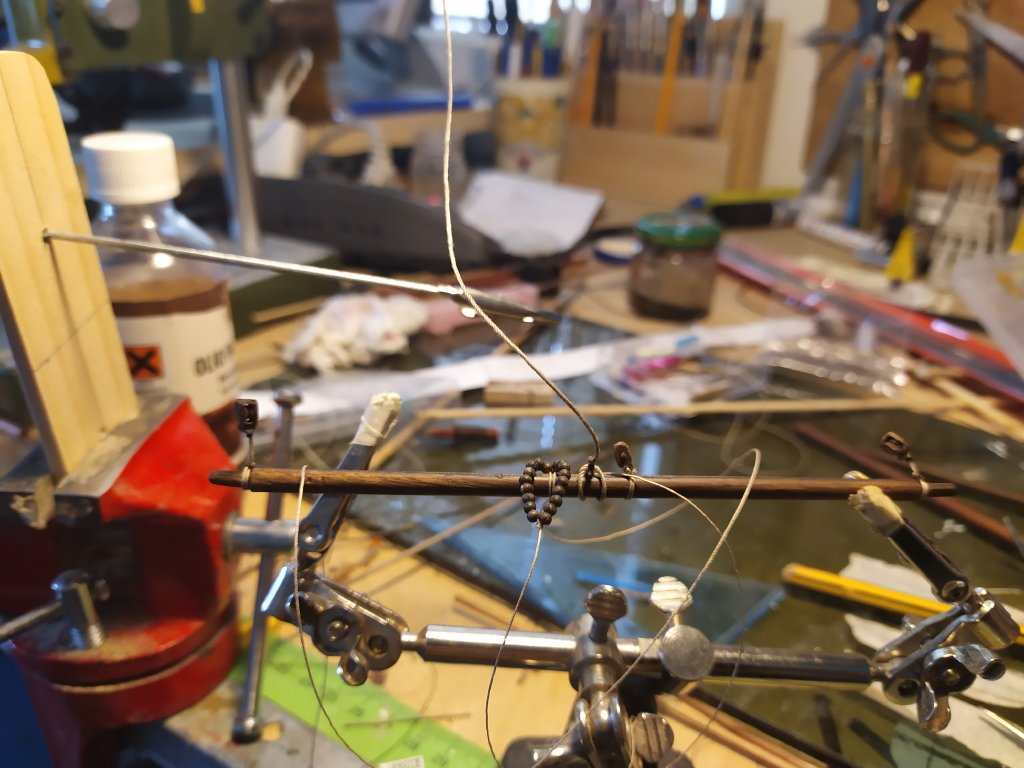
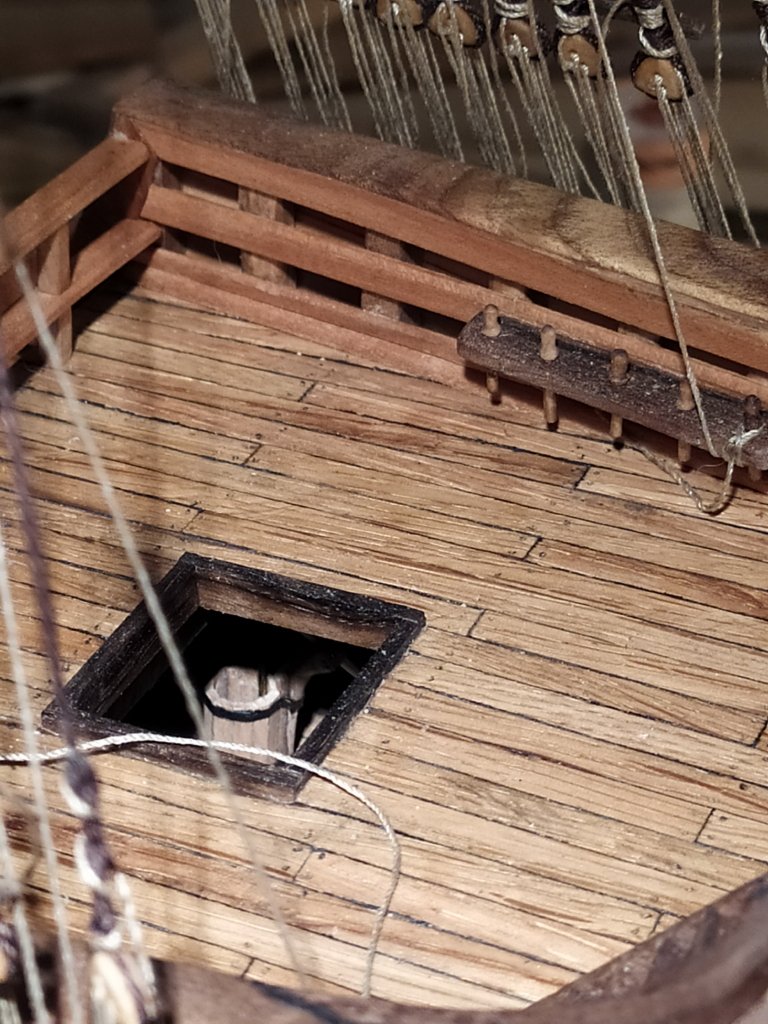
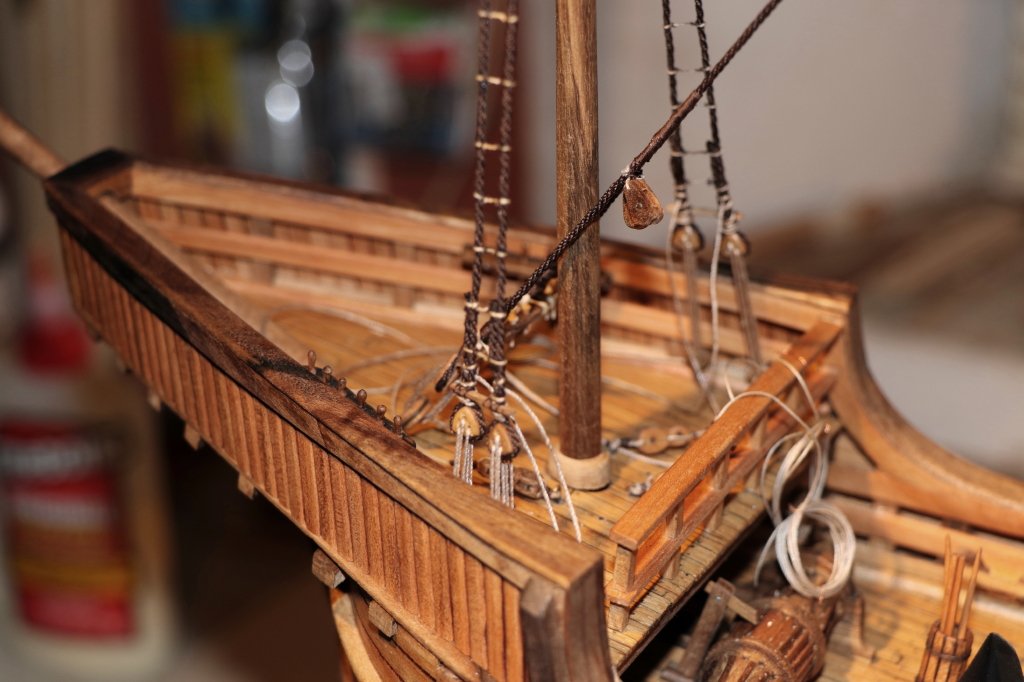
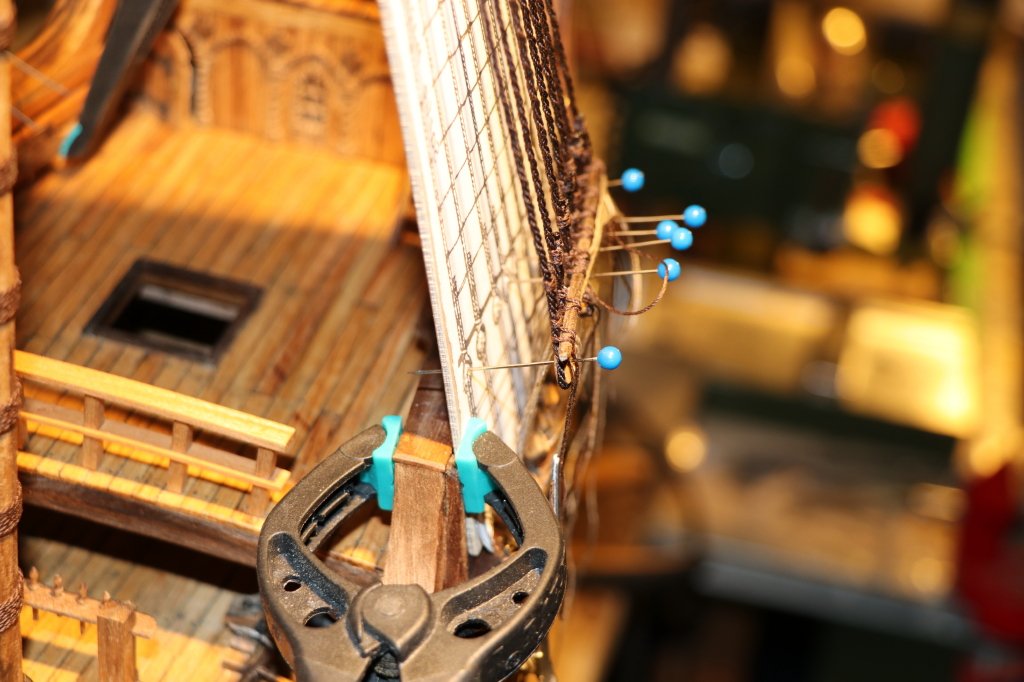
The time had come to work on the scraps, both the forestay itself of the cage and the foresail tree, but before starting it was necessary to prepare smaller blocks than the previous ones, I made them with the usual system
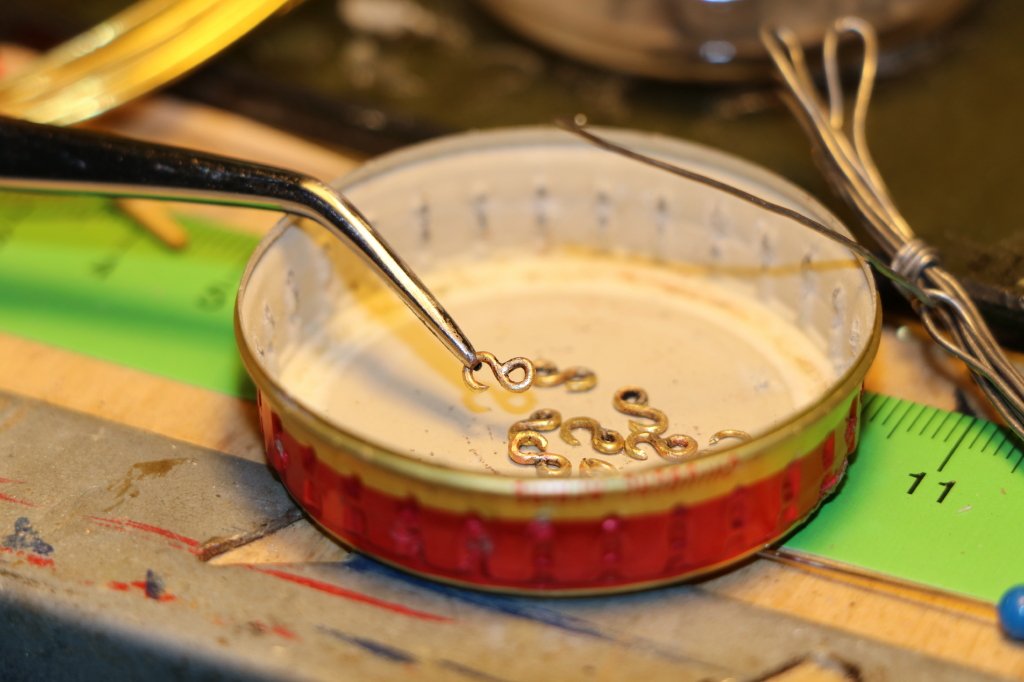
but this time I used brass washers, left over from previous work, with a diameter of 1.5 mm
finish with the burnisher and straw oil

some details made previously are visible only in some circumstances of light and positioning of the hull, surely after the finished model they will be invisible, such as bilge pumps
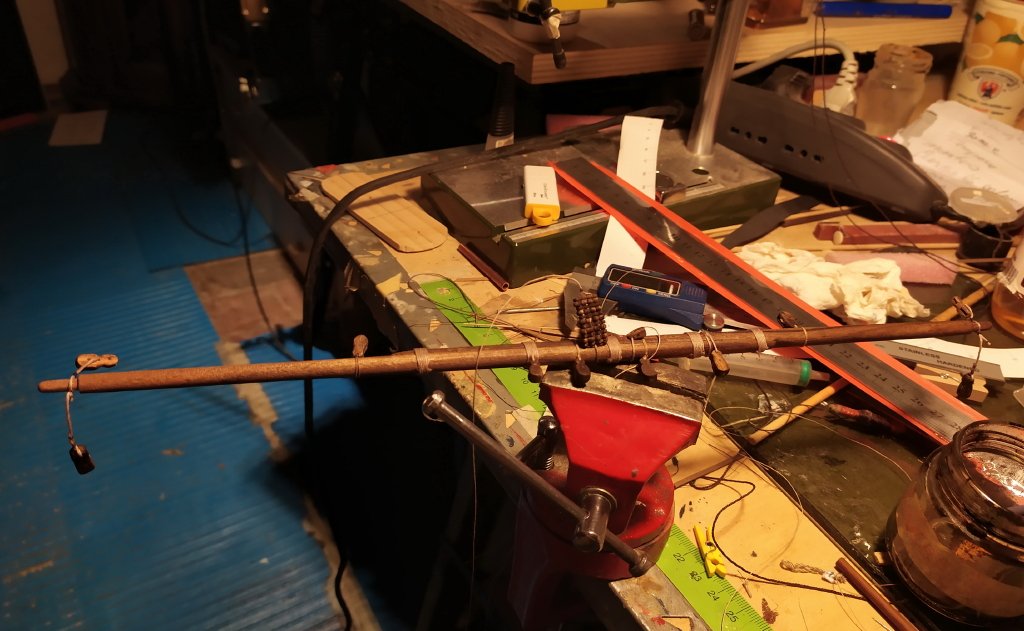
After making the "twist" cable called "S"
I made the stay of the "cage" tree and I replaced the two blocks made on the straglio of the main tree with the smaller ones (also visible in the "ancient" photos of the Santa Maria)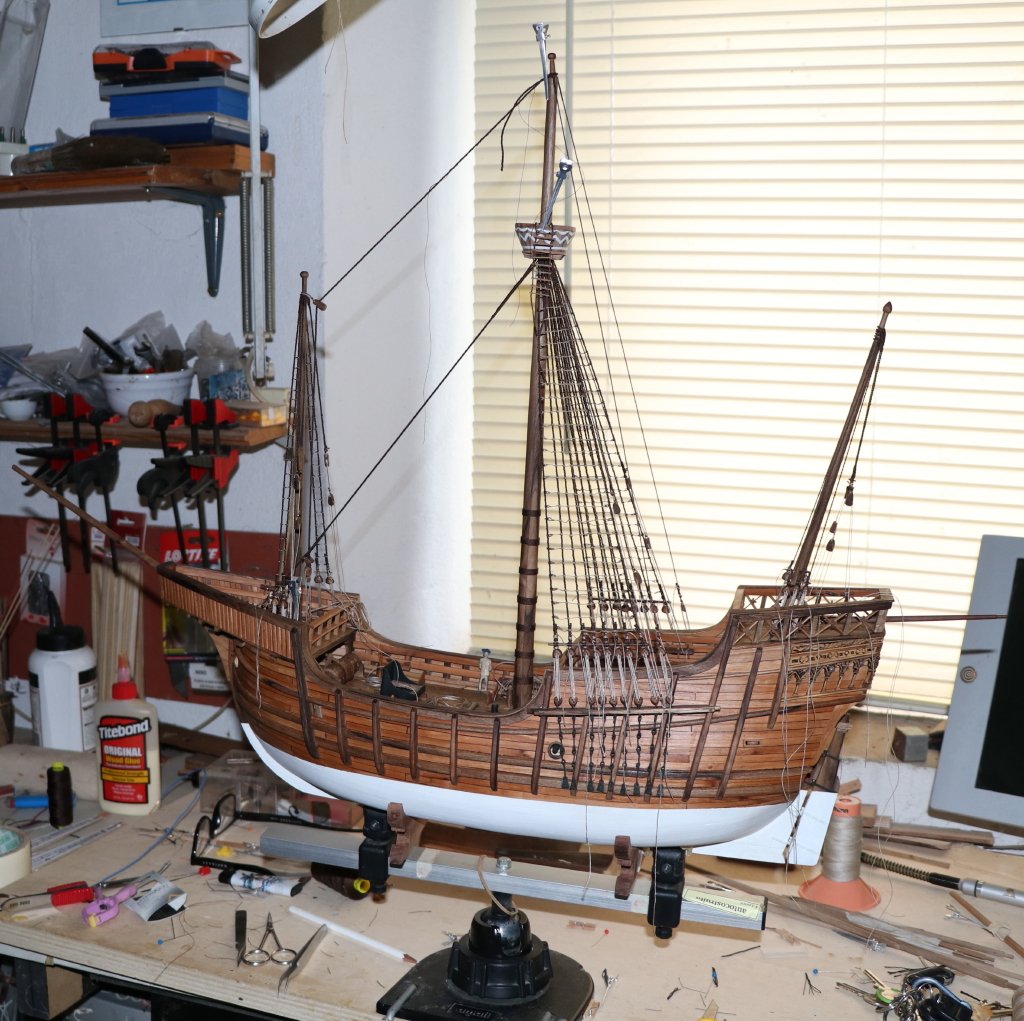
the aluminum "hair clip" is used for hair by ladies, but in these cases it is also very useful for modeling
the forestay and the counter-stanchion of the foresail was then made (I don't know if the translator did a good translation ...)
I attach a series of photos related to the job perhaps they explain better

and with these I greet you,
wishing you a Happy and Merry Christmas
black Wolf
-
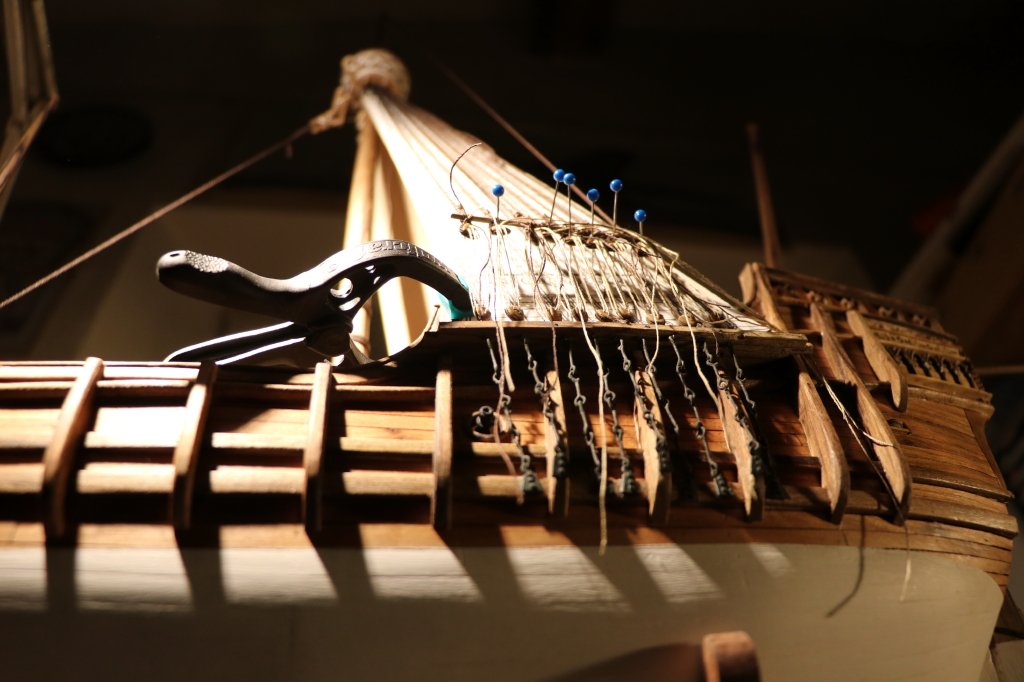
I started with the realization of the hooks for the blocks made with brass wire and with tin welding, they will be put under some blocks
for the realization of the shrouds of the other two trees, the foresail and the after mast, I used the usual system, I reported on the 2mm plywood the drawing of the shrouds and ropes

always align the bigots to the "tarozzo" which is the first wooden step, in the shrouds made on the foresail in which there is a shroud formed by a row of simple ratlines
I also finished the stay of the major mast, creating the horizontal support in which the maneuvers of the bowsprit will be tied
I continued with the work for a few days, finishing the maneuvers, you know the shrouds and backstays, I am attaching a series of images that show the construction phases in progression
after finishing the rigging with the ratlines I removed the support

fixing them with bigots to put them under tension
details

to hear from you soon
black Wolf
-
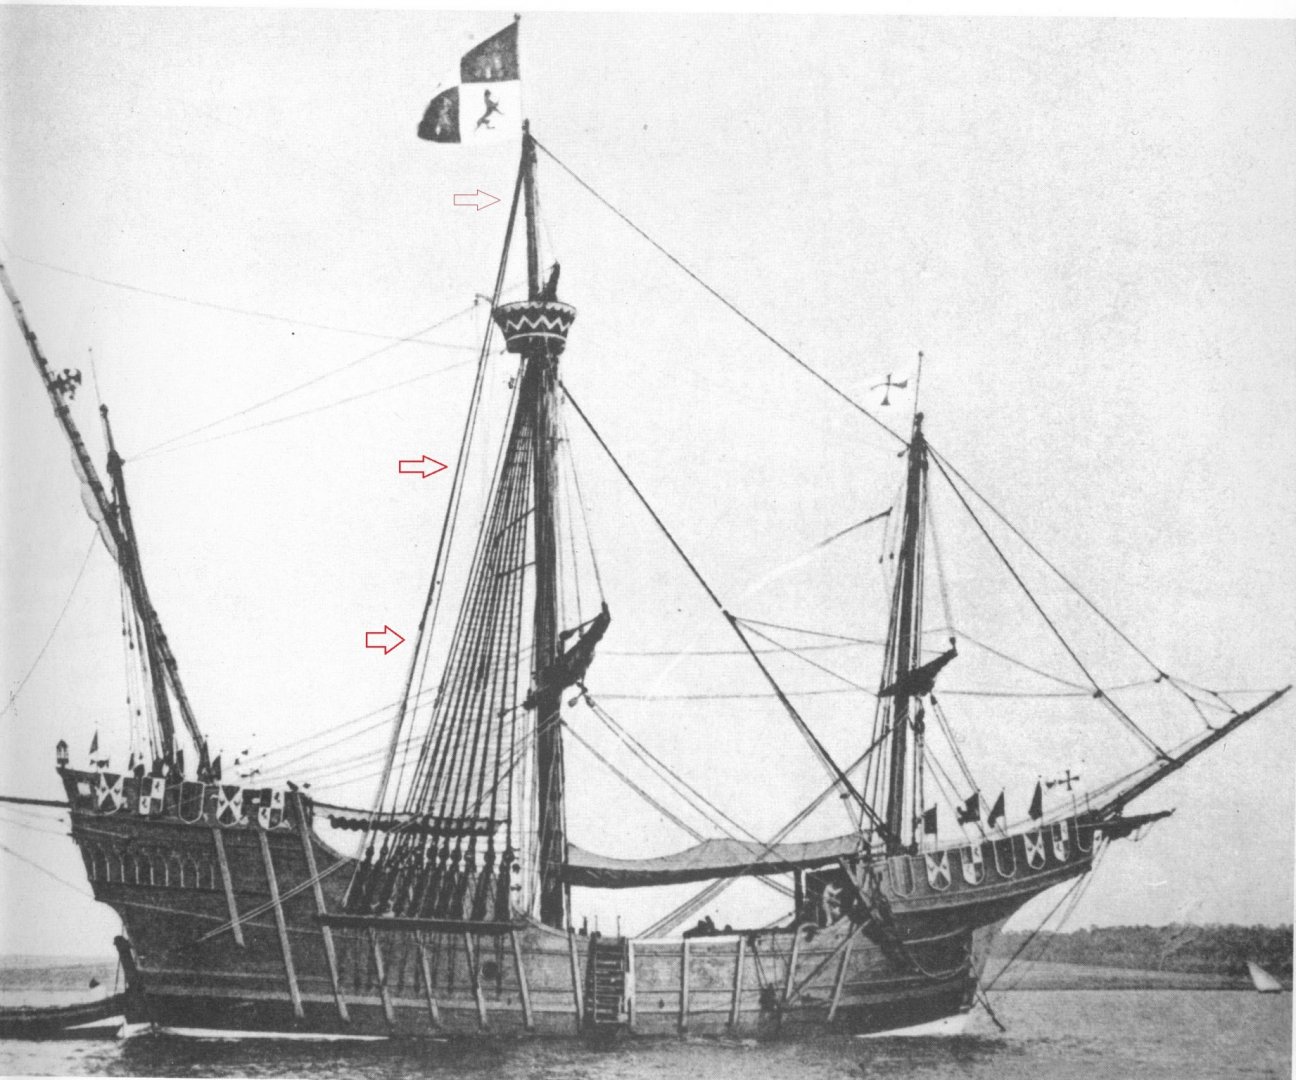
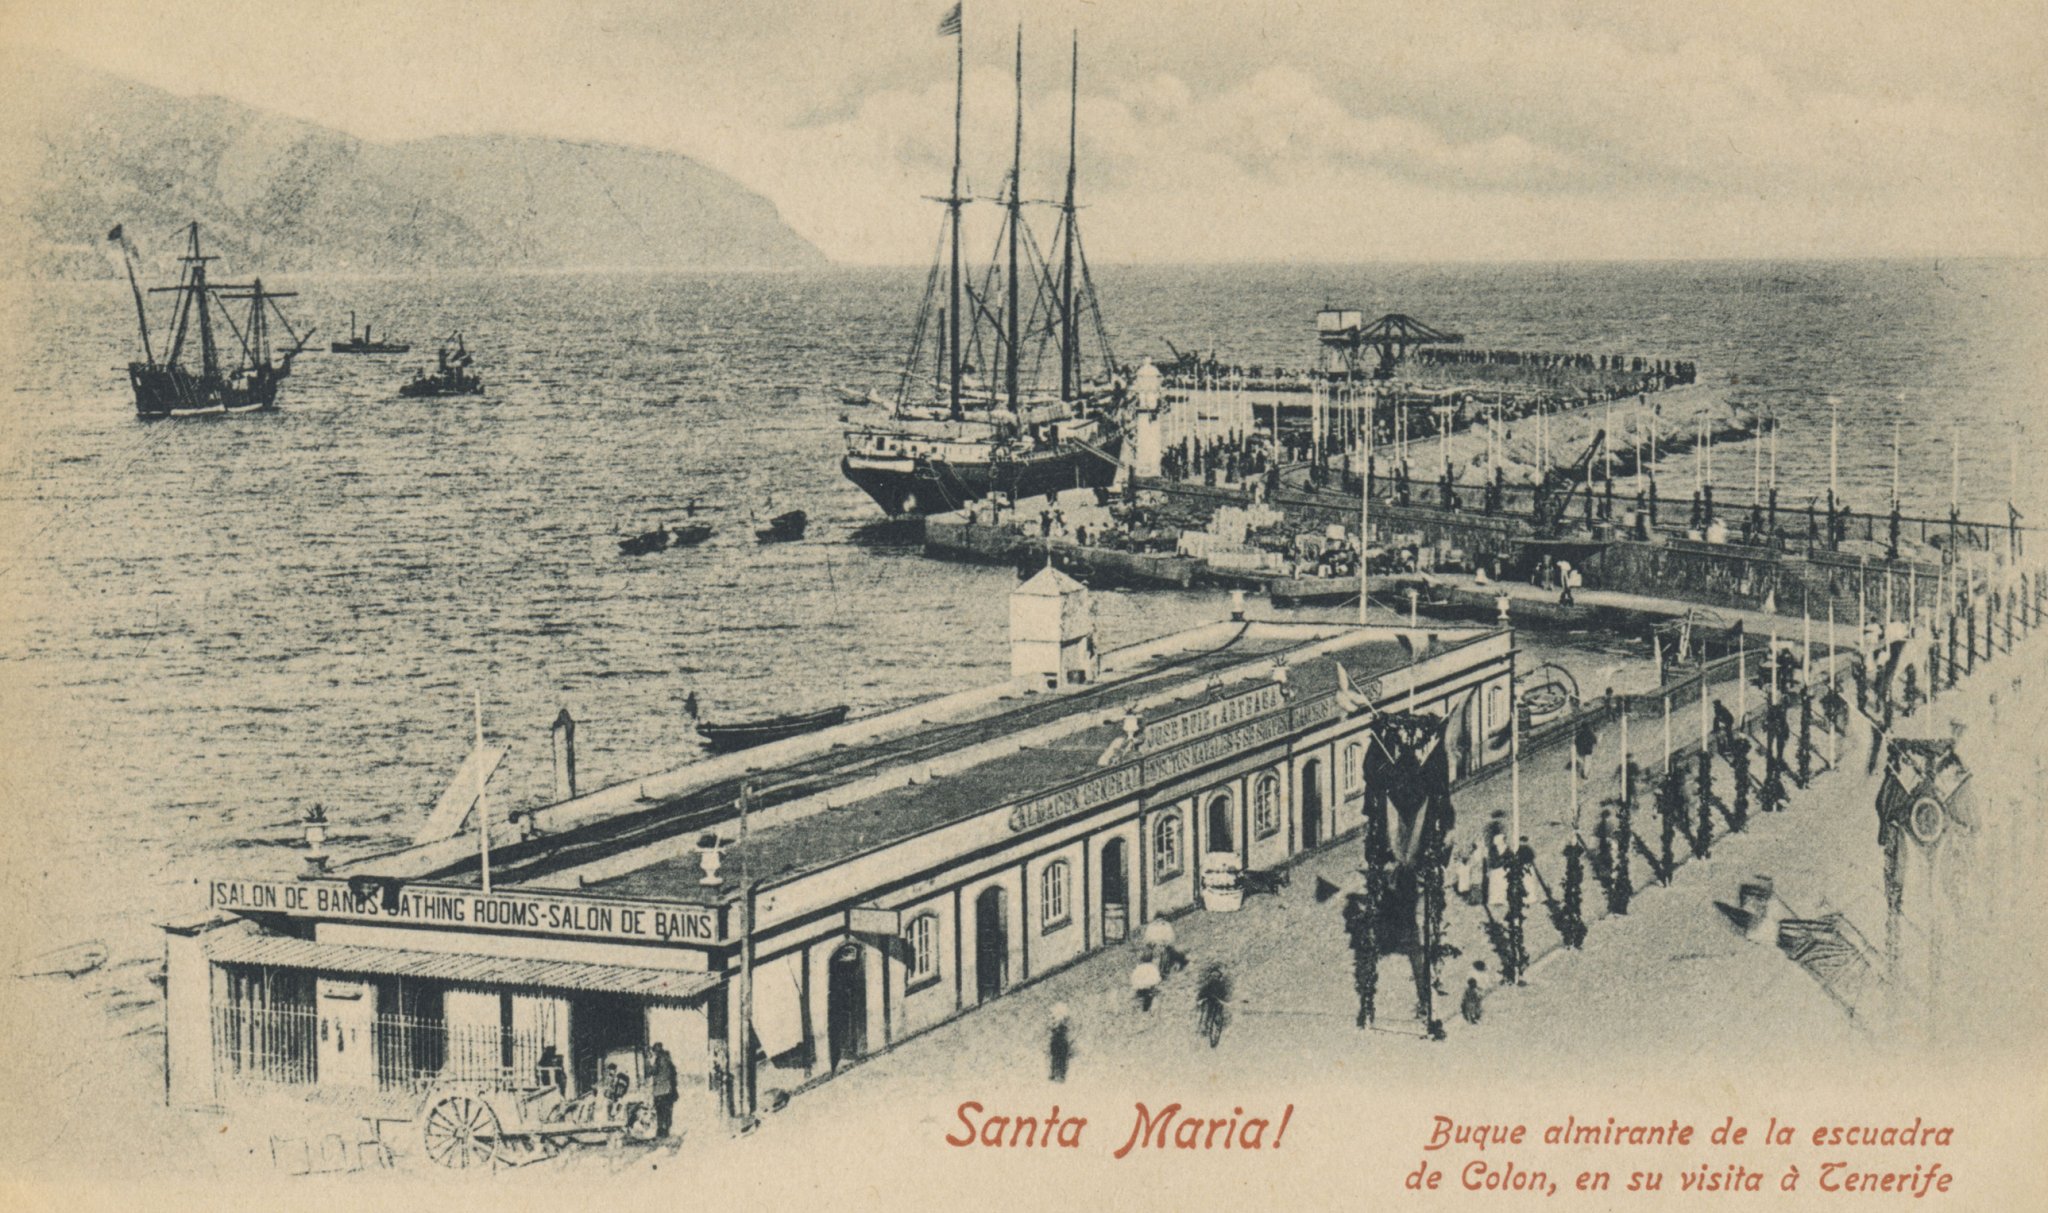
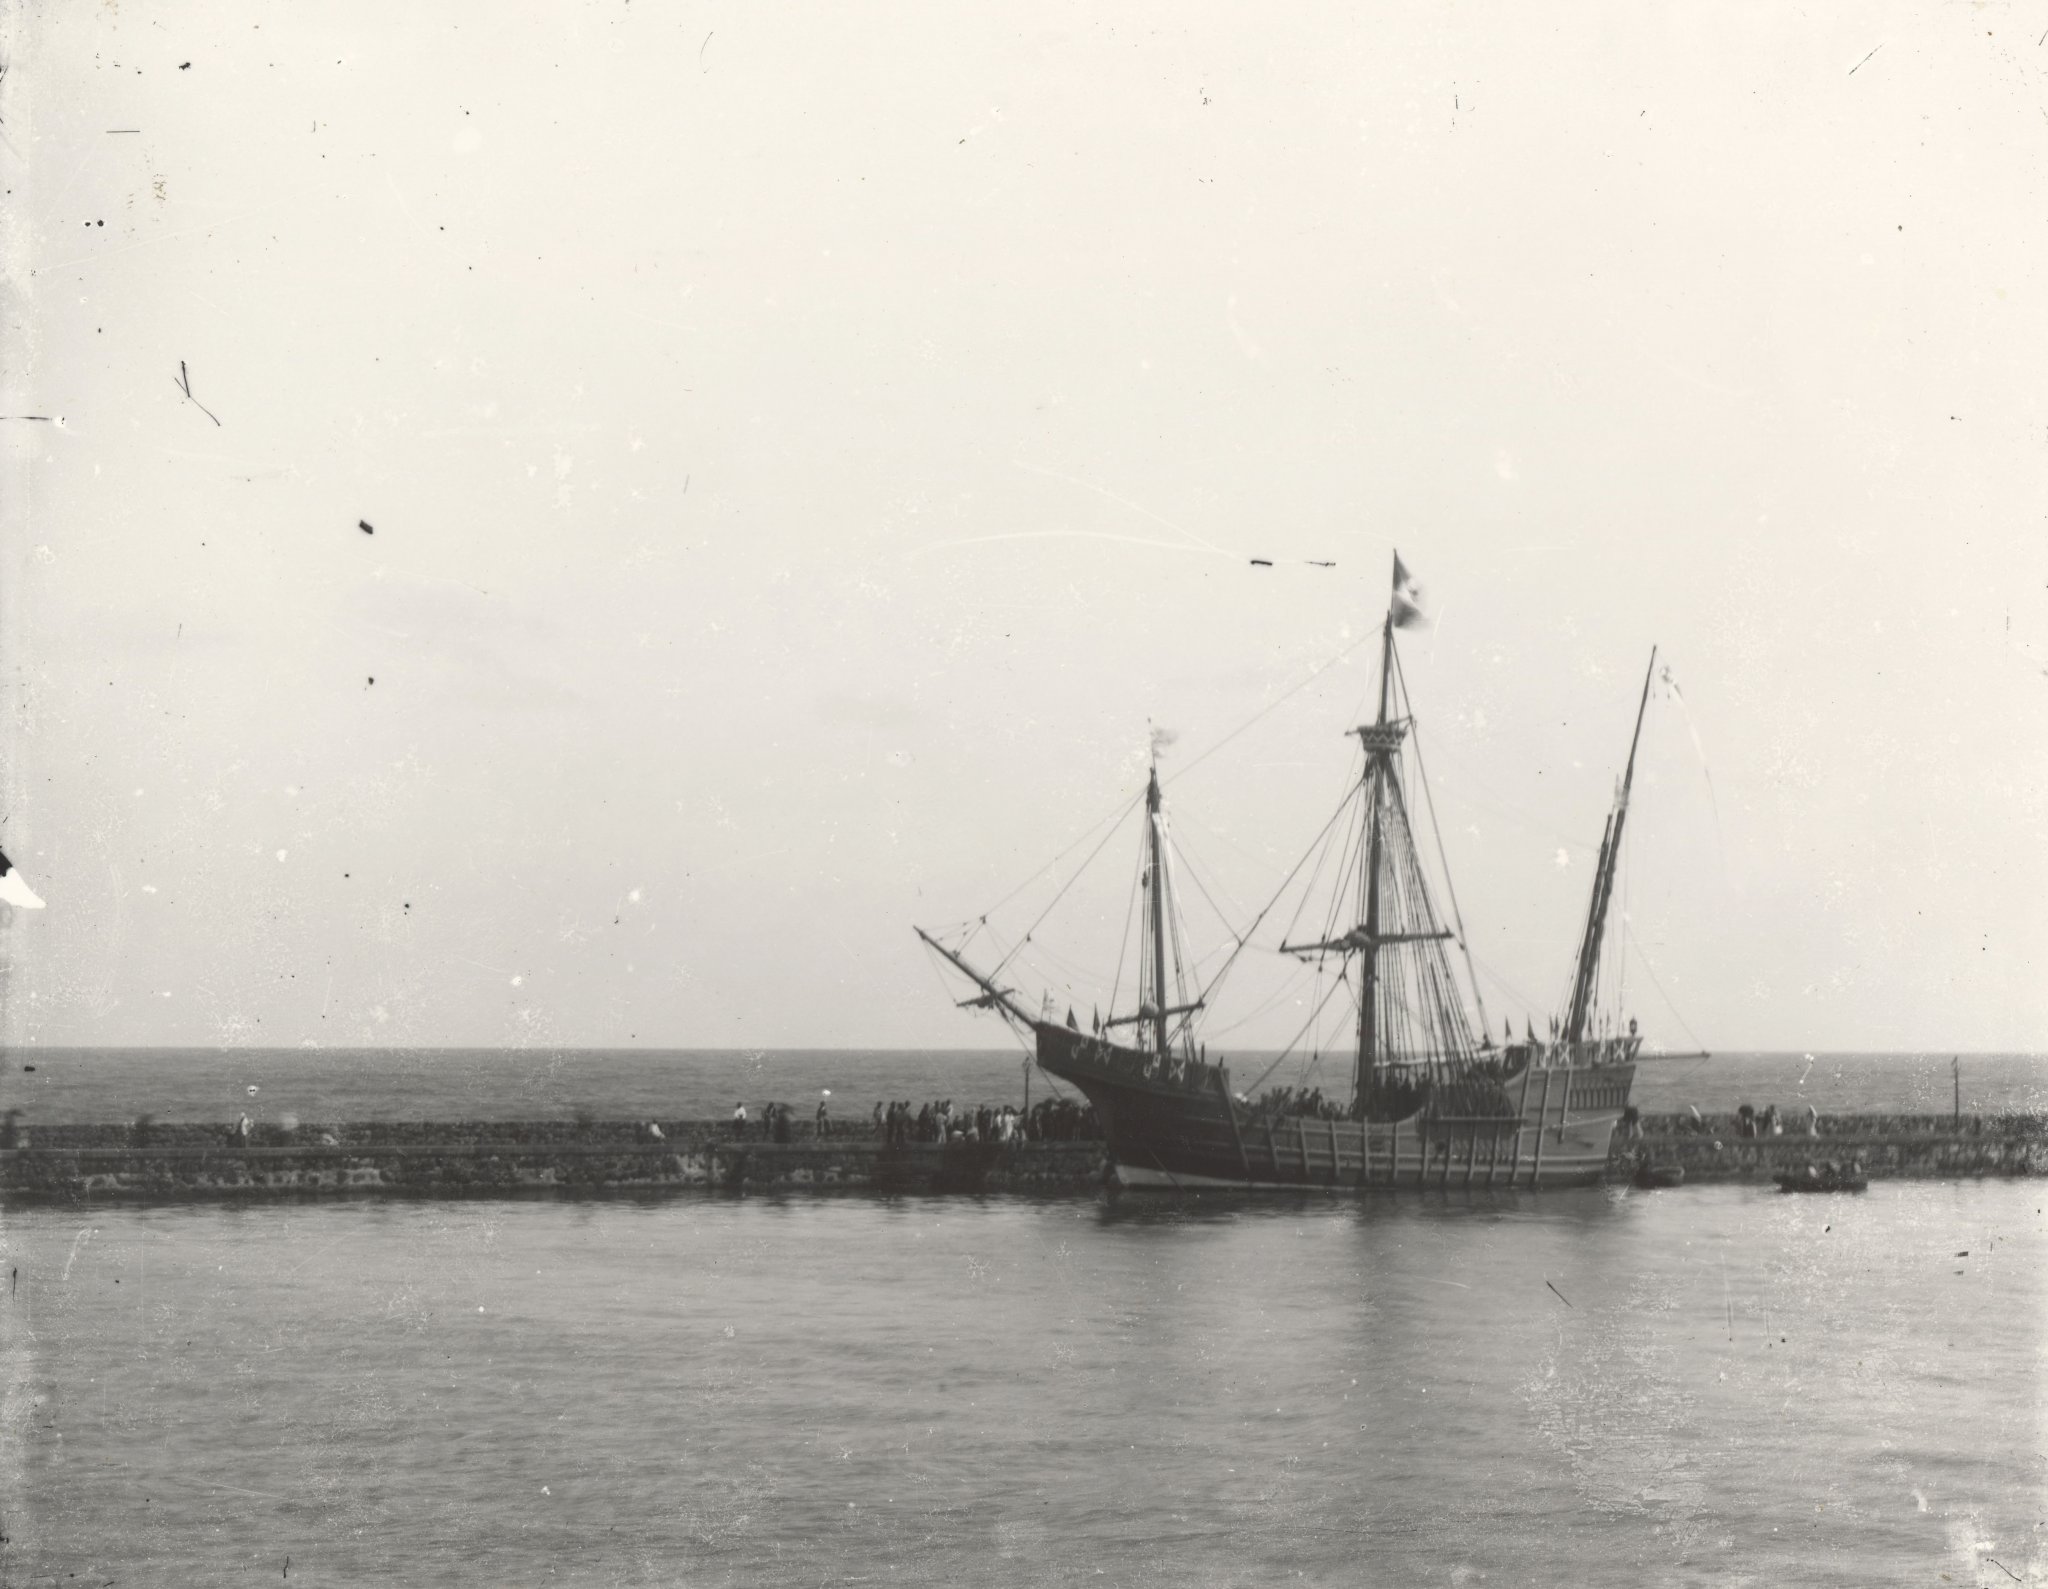
Having looked for images related to the model of Santa Maria taken from the studies carried out by Fernandez - Duro and from the construction plans of Adametz, stimulated me to deepen the research related to this model that was made in 1892 for the commemoration of the 4th centenary of the discovery from America, I managed to find some photos and honestly they seem very beautiful to me, the world of the internet allows you to carry out searches which, in the absence of this tool, would be very complex to carry out, some photos are taken from the historical archive of Canarias, others, I presume, that are from private individuals available on the net, even if some time and experience are necessary to carry out the research.
Certainly the photographs, even if "ancient", allow us to have "certainties" of some details of the model I am making, which surely is not what Columbus' carack should have been, given that there are few certainties on this medieval ship,
surely the photos found allow me to have "certainties"
relating to the model built in 1892 and which I am makingbeginning from the oldest photo, it is a postcard from 1892 in which you can see the Santa Maria together with the other ships in the port of Tenerife
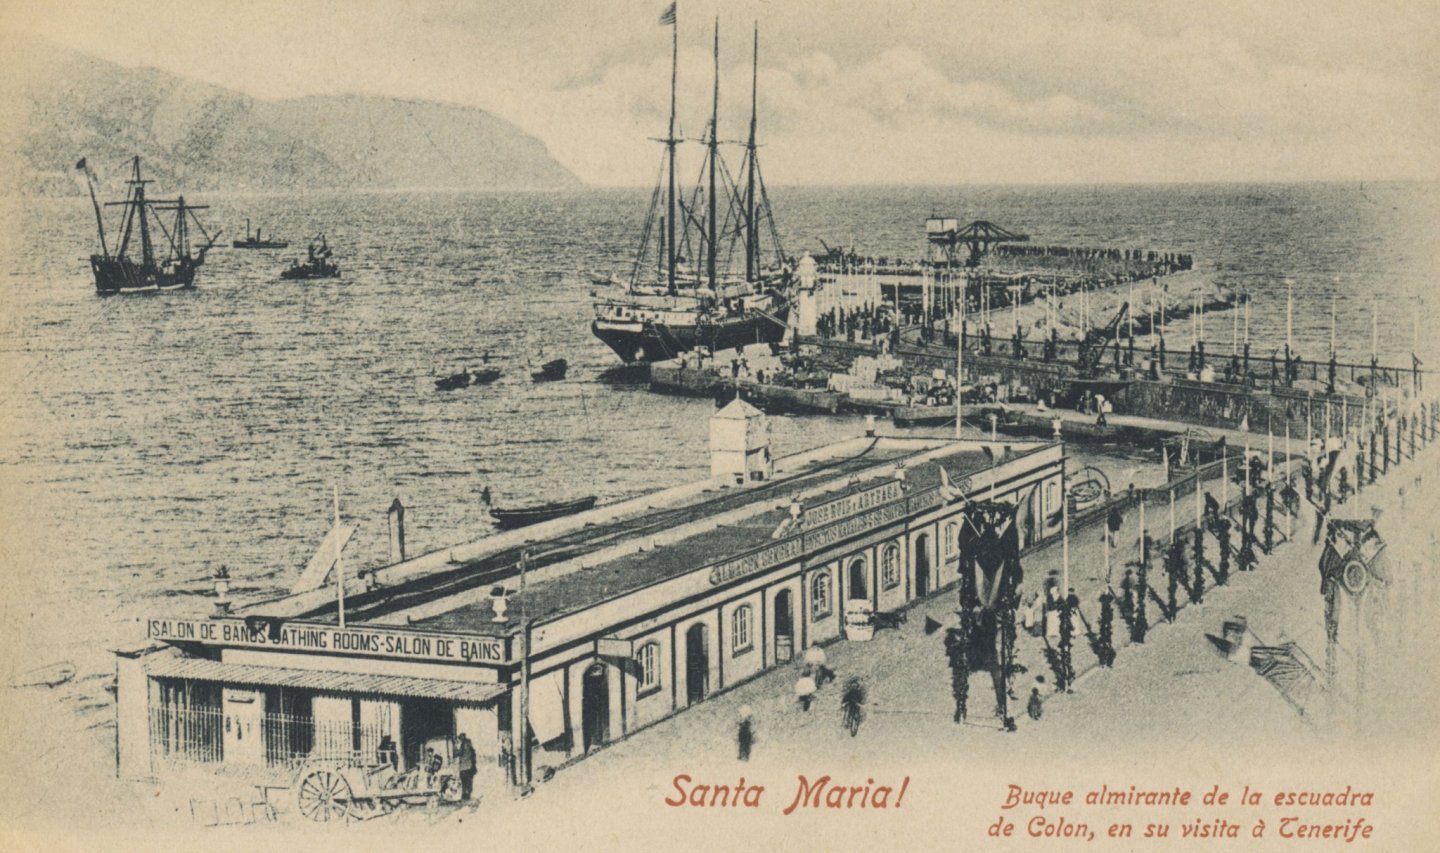
the following show the ship anchored at the port in 1893, people probably came to the dock to admire it

ready for navigation with the other two ships
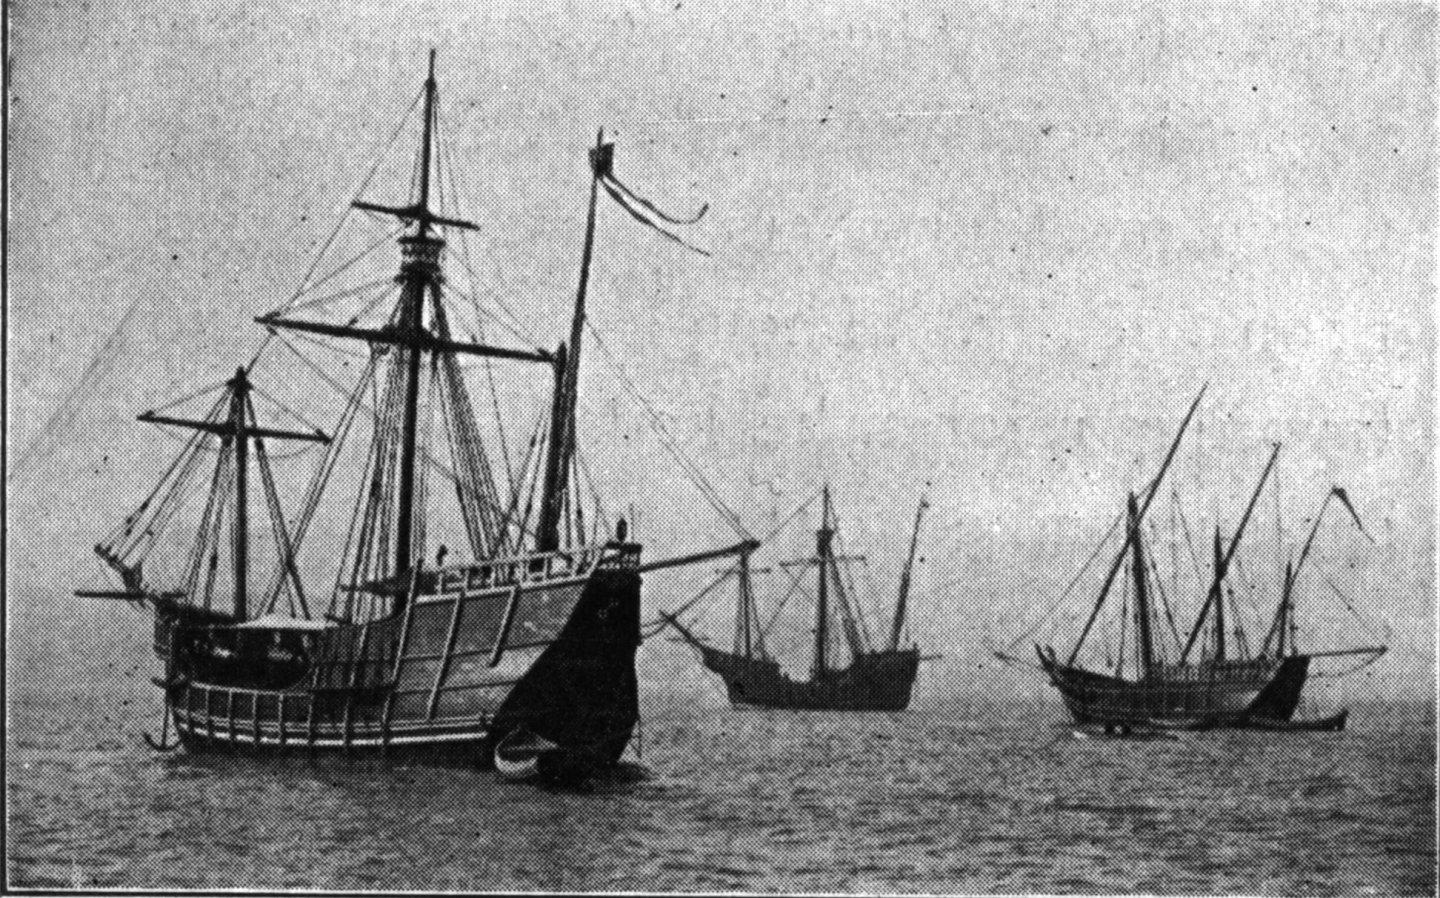
dropped anchor
at full sail
detail of the stays of the major tree, called "fork"
construction updates will follow
black Wolf
- G.L., GrandpaPhil, Louie da fly and 6 others
-
9
-
On 11/23/2019 at 1:19 PM, Backer said:
I'm going to follow this shipbuilding lesson.
I will be quiet in the classroom, and pay attention
Also did some homework. I have also had to cut down a cherry tree, the suitable pieces are dried and ready for further processing.
If it is not a problem I would be in the school desk with Patrick, I know I am a little late, but to recover I cut a cherry tree, a pear tree, an apple tree, a plum tree and then my wife "inflated" me!
apart from the "jokes" I follow you willingly
black Wolf
- thibaultron, Baker and mtaylor
-
3
-
Hi Patrick,
the question you ask me is a question that I cannot answer with certainty, the material on medieval ships is always "uncertain" what I have are the Adametz construction plans attached to the book "The ships of Columbus" by Winther and information taken from the book "The ships of Christopher Columbus" by Pastor, both in the construction plans of Adametz and in the ship built to commemorate 400th anniversary of the European discovery of America, I attach the images
the cable is a backstay, but honestly I don't know if it was already in use in the late 1400s,
also from this photo it seems that it is present on the replica of the Columbus ship,
and just because the material and information are few, requests for further information and additional information are welcome
I put the little man (with a nickname "sardine") near the griselle to see and compare the situation, surely the rise of 40 cm is not little but it is feasible.

to the next
black Wolf
- Bob Legge, GrandpaPhil, tarbrush and 7 others
-
10
-
The major tree forestay is among the thickest cables, it is a "torticcio" cable made with four strands (shrouds with three) the thickness in 1/50 scale is scarce 2mm, in reality a cable from about 10 cm, (only the anchor line should be larger)
following a schematic image found on the internet, with the direction of the cables being made (torticcio and piano) and the direction of rotation starting from the strands (composed of lint, if I remember correctly) it can be useful to try to commit the cables, need to self-realize or buy the contractor)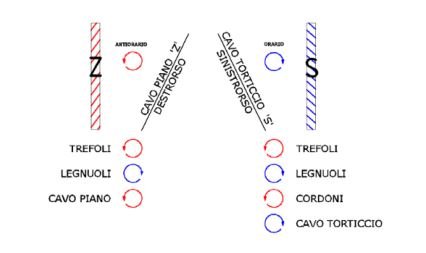
the "torticcio" cable is formed by four "cords" which are nothing more than "flat" cables, however, this image shows the made of the main shaft which for now is the only shaft fixed / glued
The forestay is fixed with two bigots bigger than those used for shrouds
the blocks that will later be used for the spars and "antenna" are visible on the bridge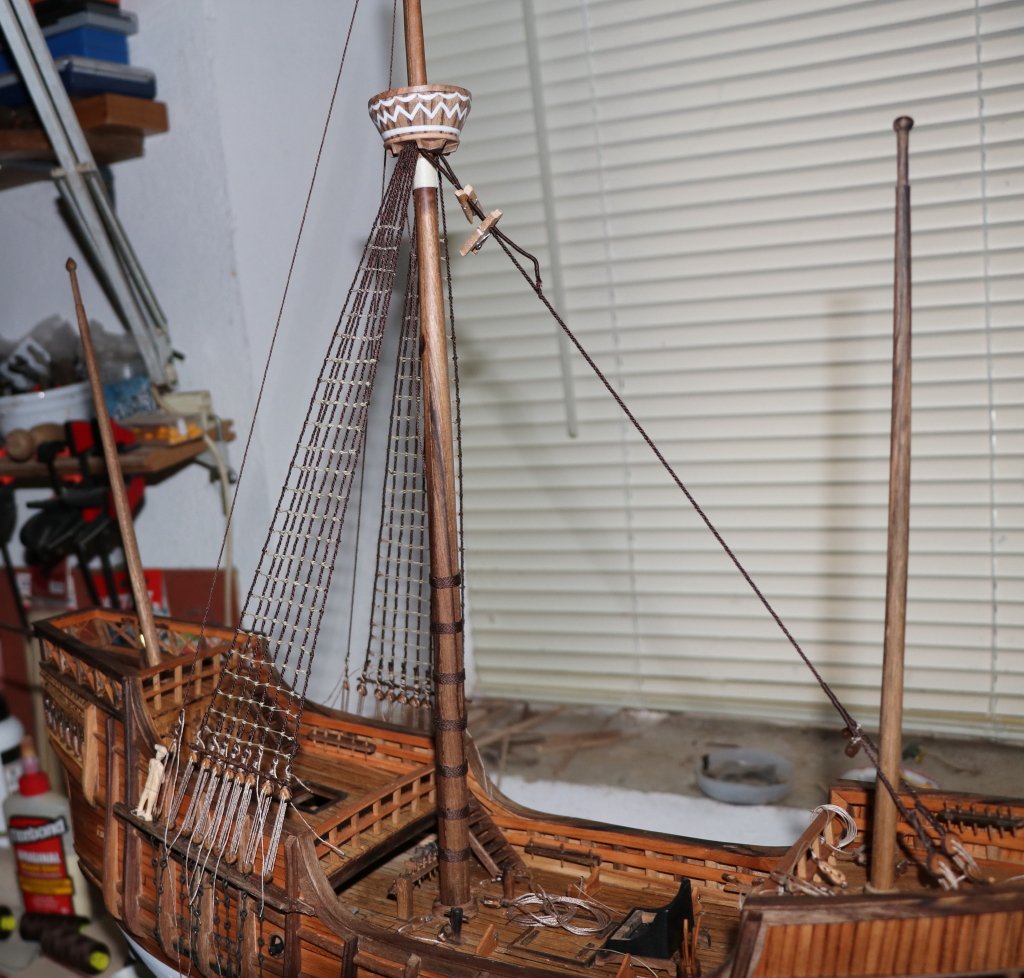
those that follow illustrate the "bifurcation" of the staysail (?) obtained with the splicing of the cables (in reality, instead I worked, "shredded" the cables to make them more spiral and wrap with the thin wire) the little man I need to estimate the height of the horizontal table placed over the bigots in which ankles are housed
end with detail of the staysail and sail blocks
to the next
black Wolf
-
I thank my friends for the "likes"
unfortunately the translator, although very useful, does not correctly translate the meaning of the terms and this can create problems of mutual understanding unfortunately, however you have to be satisfied or learn English better, maybe I'll do it when I retire, maybe ,,,
I came back too late to turn on the stove in the laboratory for which I update the building site (not in real time, but we miss a little), obviously gradually the jobs go on, very slowly, we go up higher,

and gradually the distance between the shrouds decreases, so that making the ligatures and the knots becomes impossible because of the little space between the shrouds, for this the last "steps" I realize with a thread of smaller diameter, it should be 0,2mm all 'roughly, I take off the template that I used because I reached the last ratlines (grisella) , in addition to the tailoring it is also visible the Forestay itself greater of the tree strap on the fly with two small springs
the photo was taken when both shrouds were made)
the next photo is a detail of the bigotte (?) and alignment with the tarozzo (?)
(alignment to be respected in the realization of the upper ratlines - griselle )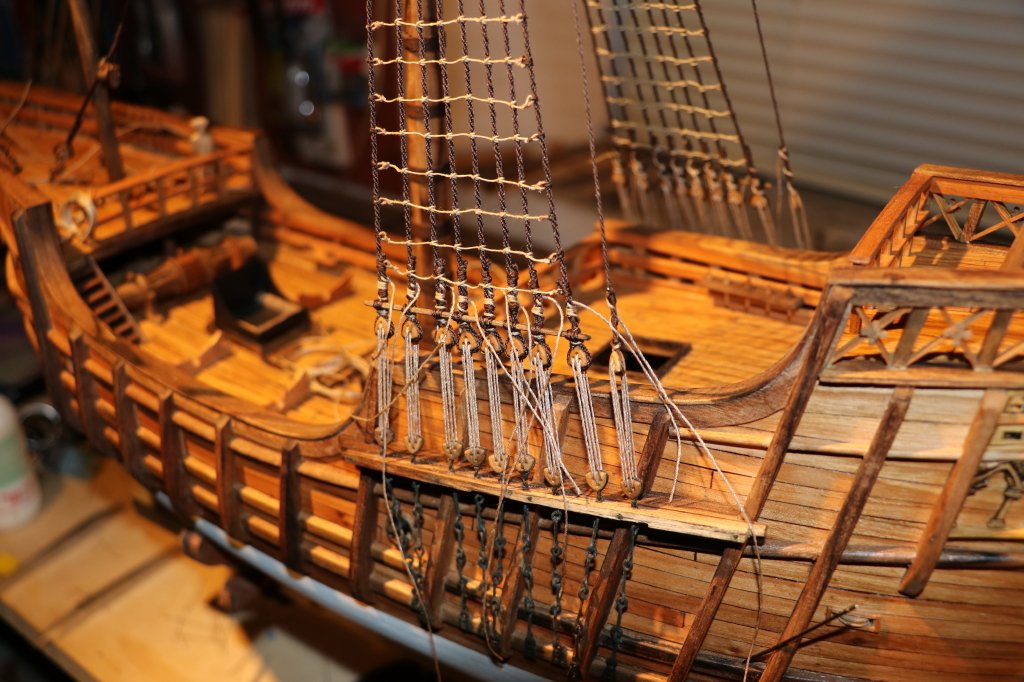
and below, the diagonal view from "port"
- Baker, Bob Legge, GrandpaPhil and 4 others
-
7
-
The next step was the tying of the griselle to the shrouds, a clarification that I had not previously reported (the bigots are shown on the template practicing on it the holes from which the "runner" will pass with a tip of 0.7mm + or -, to rub the bigoted with their own tailoring it is necessary to stop the bigotas on the template on the three holes of the runner using the classic brass nails, to avoid the "rotations" of the same one, after the rubbing the nails come off and in their place is used the pin, to make the movements towards the outside and their positioning towards the inside)
the thread used for griselle is in cotton (found in a workshop of a cobbler "a rarity" of these times) the diam. is roughly 0.3 mm, (committed to the right so a "flat" cable carries an image of the shroud-laid rope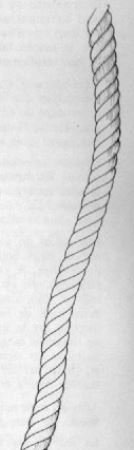
making bandages with the finest thread at the beginning and at the end of the grisella is not easy, especially if you want to respect the scale (1/50)
also in the binding of the griselle the "dima" (the design of the shrouds) is very useful
following the lines the grisella is laid precisely, the "rise" between grisella and grisella is 8 mm (40 cm real),
in the following picture you can see the binding of the final part, the thread is bent and the thread of a d is prepared. very thin with a simple open knot, slips into the folded part and pulls, repeating several passes, previously I had wrapped in cable for the affected stretch, sliding to the right point to make the curved part (gassa)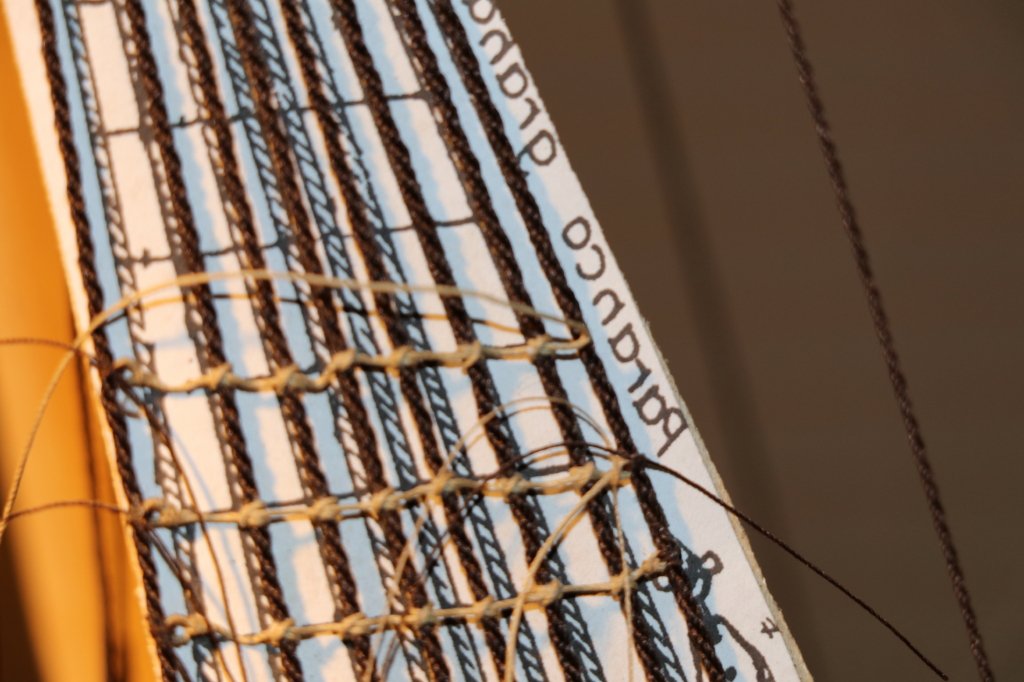
while in this photo we see the "clove hitch." knot pulling it from the extremities, and in reality with the weight of the sailor we will be strongly to the sartia, like all the nodes once learned the system if they realize quickly
to the next
black Wolf
-
The next step was the redundancy (Turn Buckle) of the "bigotte", for the realization of the "runner / CORRIDORE" or the cable connecting the bigots, ( shroud-laid rope ) I always used a Gutermann yarn (the yarn is always "flat" so if the thickness is of the yarn is correct, it is used directly, the argument on the making of cables, perhaps, would need a deepening, but I don't want to "weigh down" too much the update)
the color used is the one that in my opinion approaches the untreated rope with the anti-fouling systems of the time,
I insert an image "in which some of the" technical "terms I used, of which I am not sure of the correct translation (hopefully well ...)
seen from inside the ship

the "flat" work is opposite to that used for the production of shrouds (torticcio cable) the reticulation was carried out after the "tarozzo" was scraped and as I said the method of using the shroud printing pasted on the 2mm plywood and positioned later on the parasartie and under the crow's nest it allows the realization of the various parts that make up the shrouds with relative ease, due to the fact that stopping the bigots with pins you have the space, pulling forward the bigoted, to work well, repositioning them later without losing the fundamental alignment (a method that I would advise) it is necessary to avoid the gluing of the runner until one is sure of having finished the work, obviously the displacement of the bigots necessarily causes the lengthening of the thread (runner) and in following the shortening, manageable or very difficult maneuvers, if the wire has been glued
the next step will be on making the "griselle" translation permitting,
to the next
black Wolf


Santa Maria by luponero - FINISHED - scale 1/50 - carrack - from diagrams of Adametz
in - Subjects built Up to and including 1500 AD
Posted
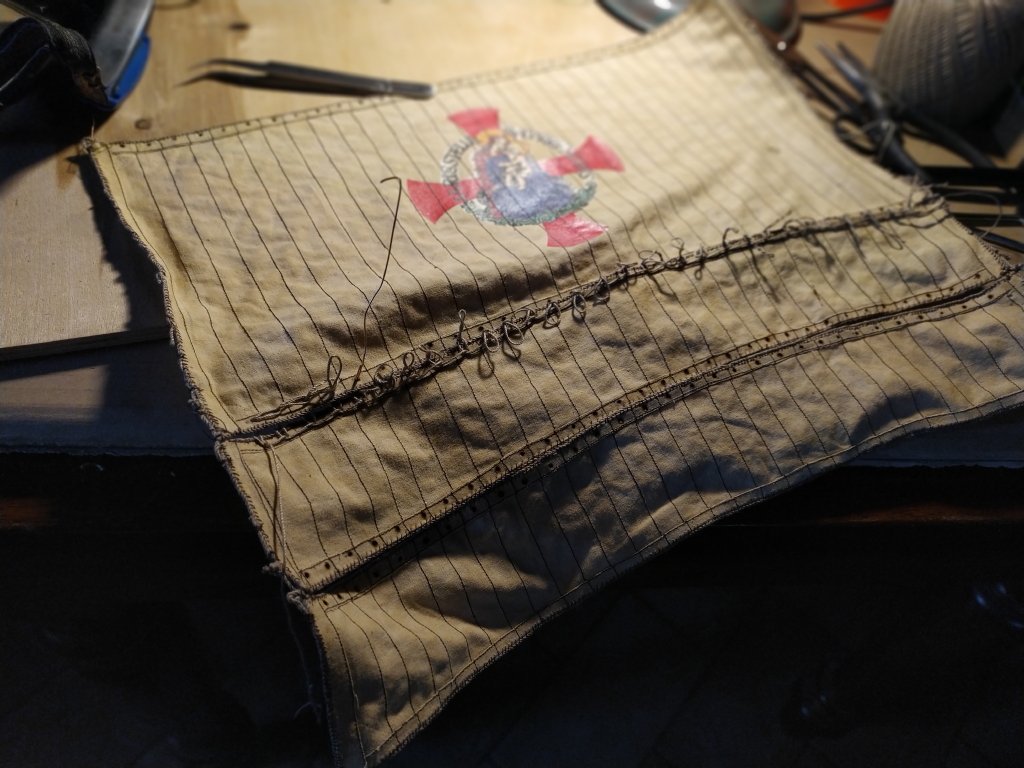
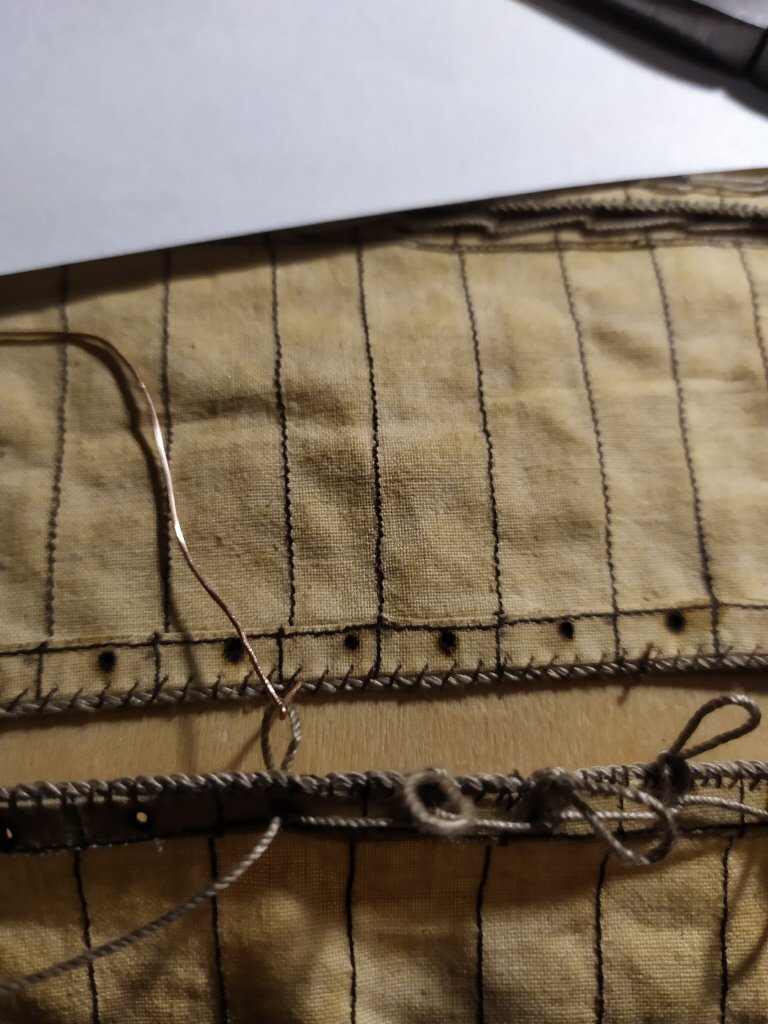
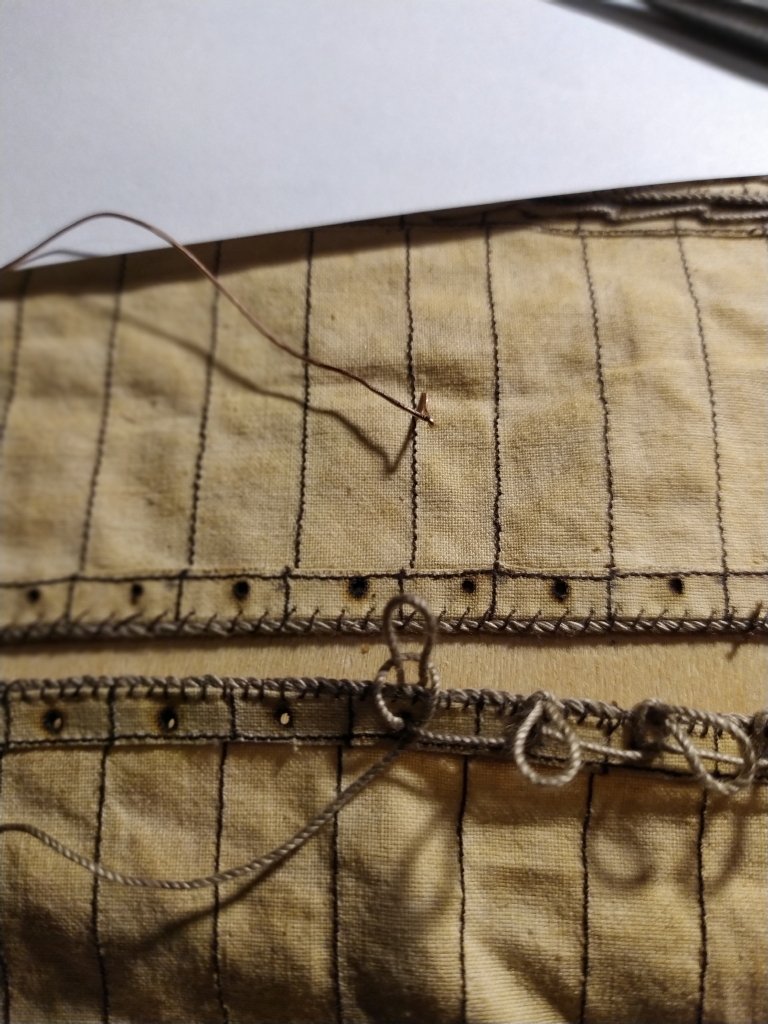
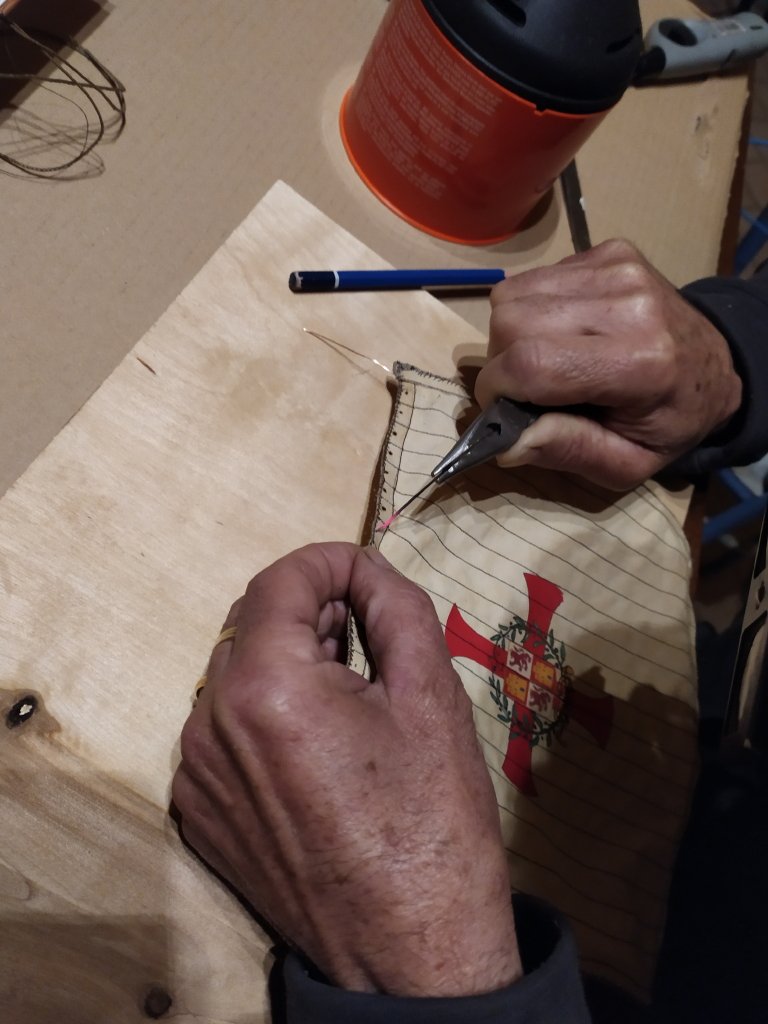
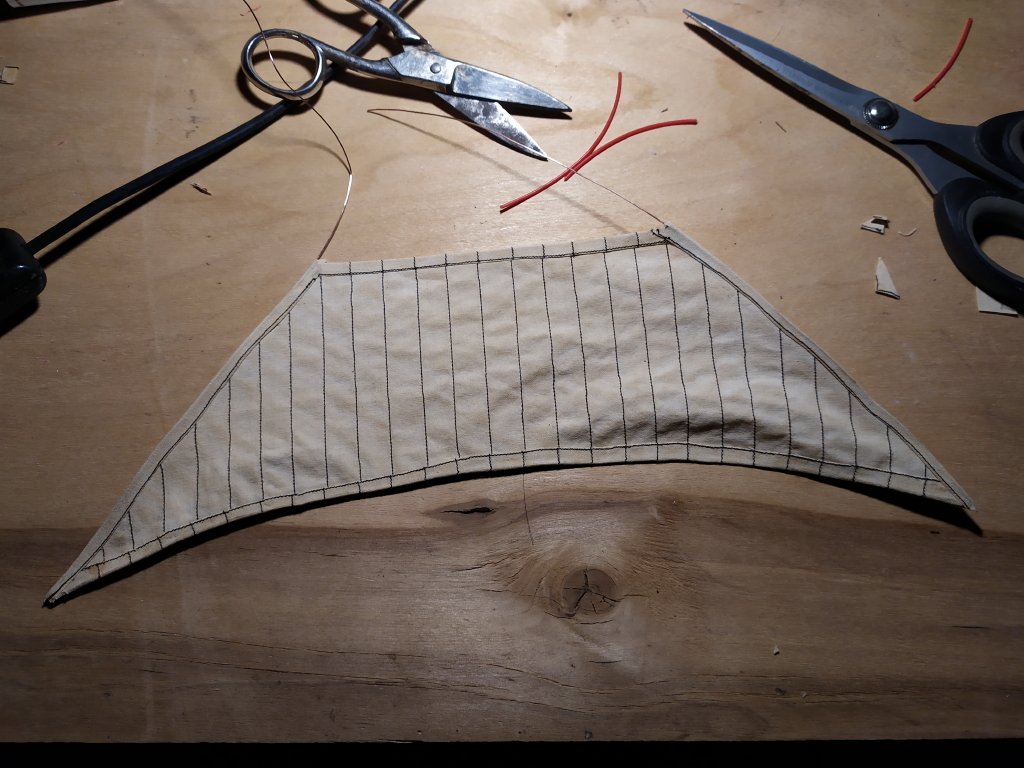
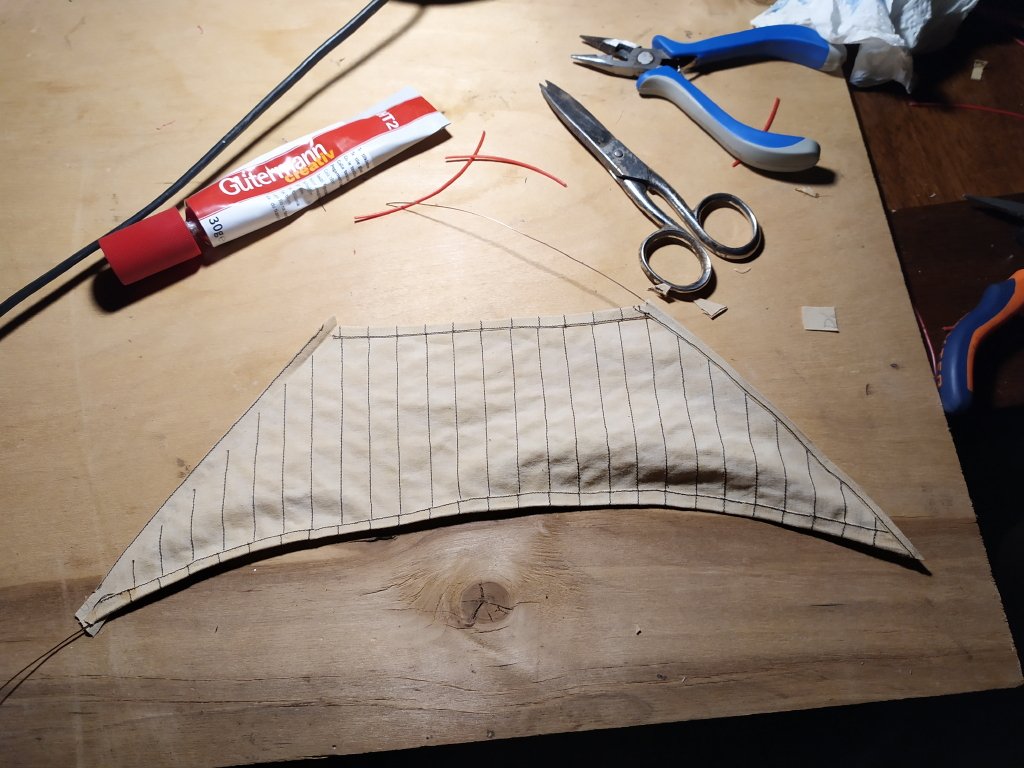
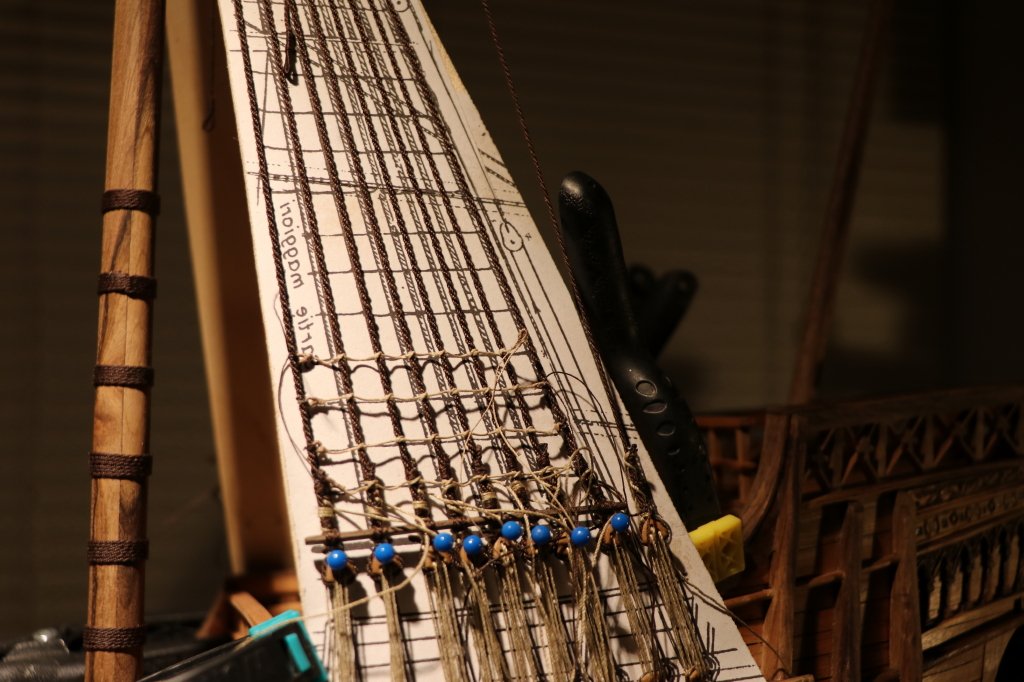
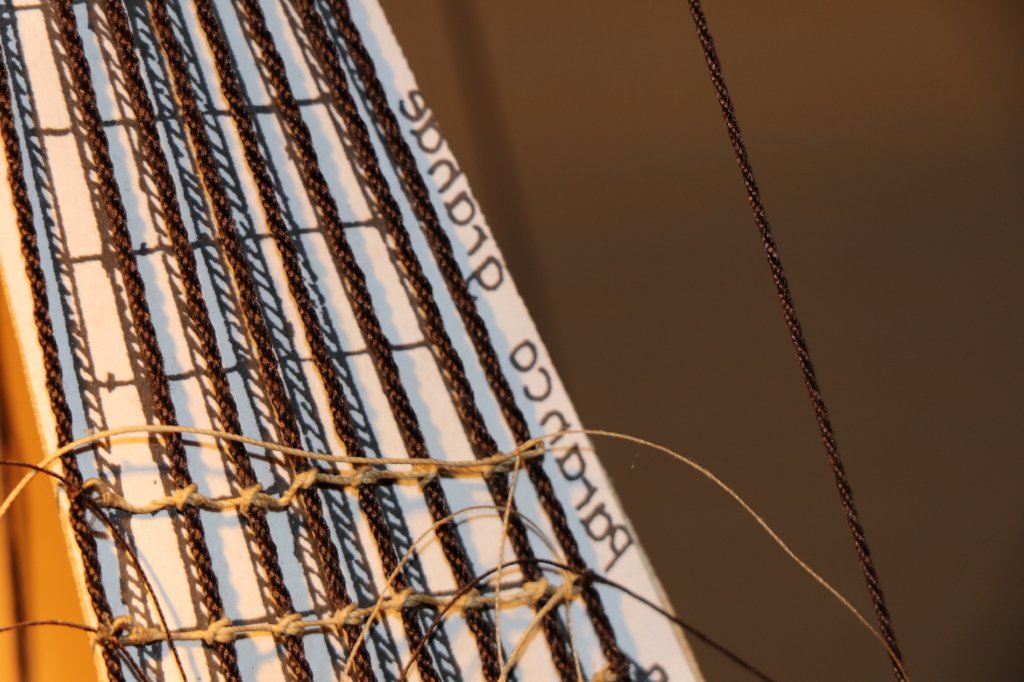
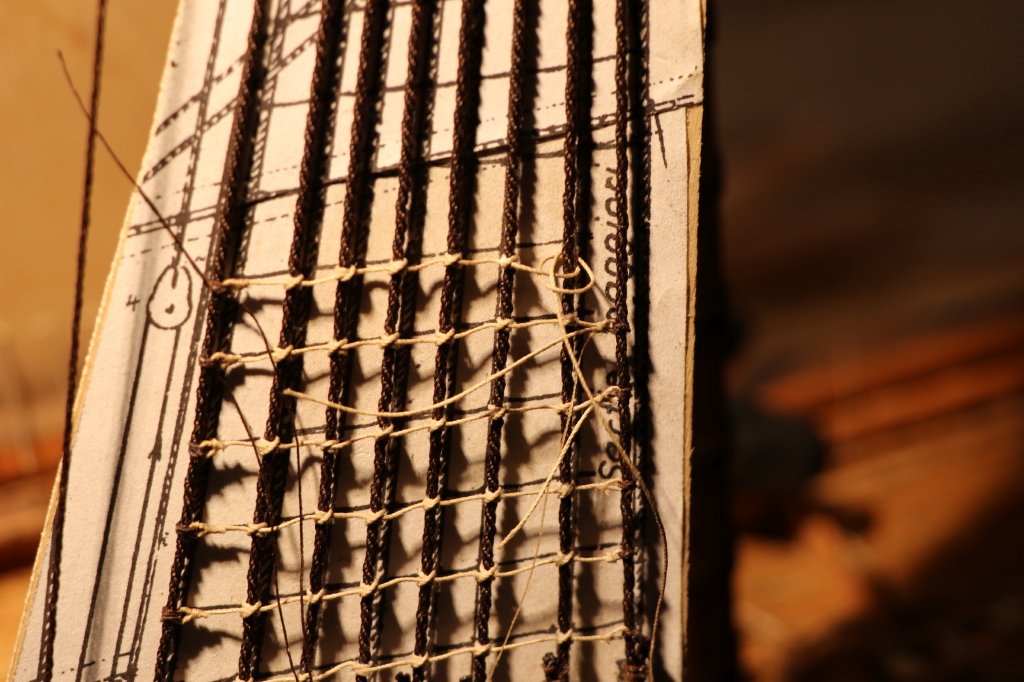
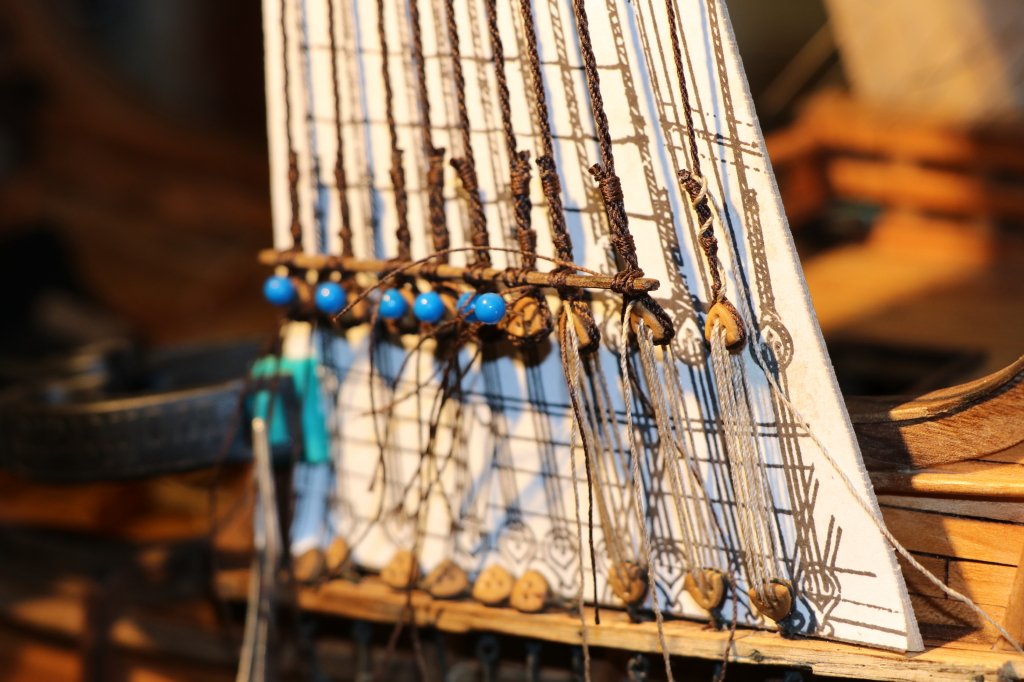
I started the slinging of the sails on the flagpoles, this is the way used in the late Middle Ages, the technique used is not seen from Adametz's drawings, in practice the sail is stopped using pieces of line, not with a continuous rope but with pieces passing individually from each eyelet making on this two opposing knots, and then tying on the flagpole with simple knots,
I report a drawing that was useful to me for the realization
the number 5 is the luff cord, the 3 the reinforcements of the sail, the knots that keep the sail locked, can be seen on the rib (1)
in the photos you can see both the back and the front part with the realization of the stitching
in the photo below (not in focus), you can see the copper wire that I passed inside the edge of the sail that enters the hole made in the flagpole, which I need to keep the sail in position during the pressing and then to make the curvature of the same,
the other sails were also stopped at the flagpole with the usual technique, including the Latin sail (?) I'm not sure that the technique used is correct ... who knows?
Before laying the sails I thought it appropriate to finish the finishing work on some details, which would be more difficult if made with the sails explained, one of these is the finishing of the kitchen already laid on the base, I thought of making the classic "pots" that give the material used lead and copper powder a little "color"
The photo shows the pots just made yet to be "finished" with the perforated brass plate, which will go on the base of the kitchen, a protection against possible flare-ups and sparks that could certainly have done damage if they had not been checked.
what follows is a first realization of the cookware (with some errors) I made the "coppering" with the powder and the addition of the handles on the small pot, (the error I was saying is in the handle of the big pan, so put it does not allow to put the lid on)
when you start making these "little things" you risk exaggerating in fact I started making a pan for the "paella" ( is a traditional dish of Spanish cuisine based on rice, saffron and seafood or meat)
then a bit of special effects, the creation of burning embers, I usually use the red foil of the chocolates, but having already eaten them without keeping the file I used a broken Christmas tree ball
the foil of the chocolates and in this case the paint of the ball "catches and reflects" the light, moving you can see the "flashes" of the reflections, as if the embers of the coal light up
I make small pieces that I will put on the bottom (with the "red" visible)
gluing them with black paint
we'll see the rest later ...
see you next time
black Wolf