luponero
-
Posts
235 -
Joined
-
Last visited
Content Type
Profiles
Forums
Gallery
Events
Everything posted by luponero
-
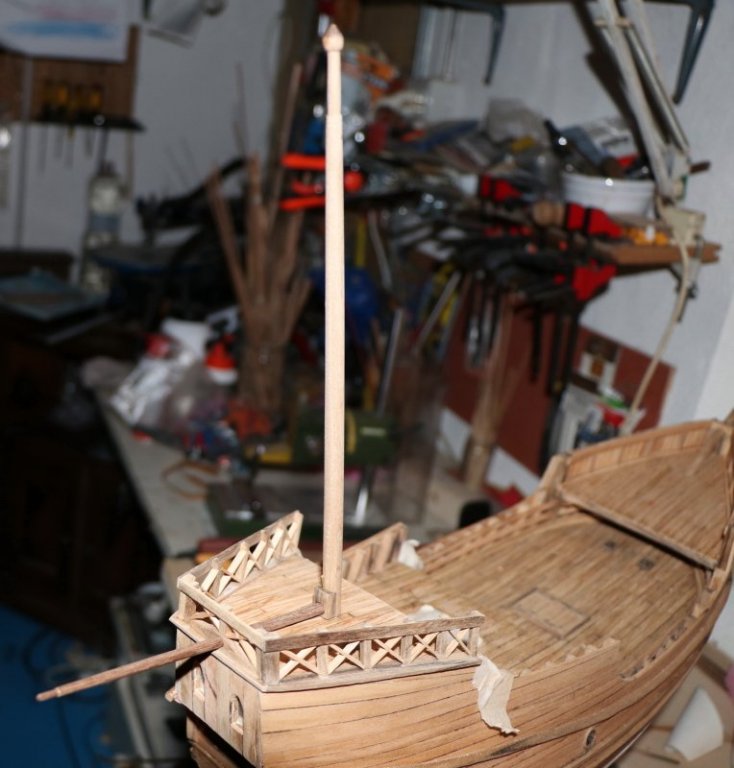
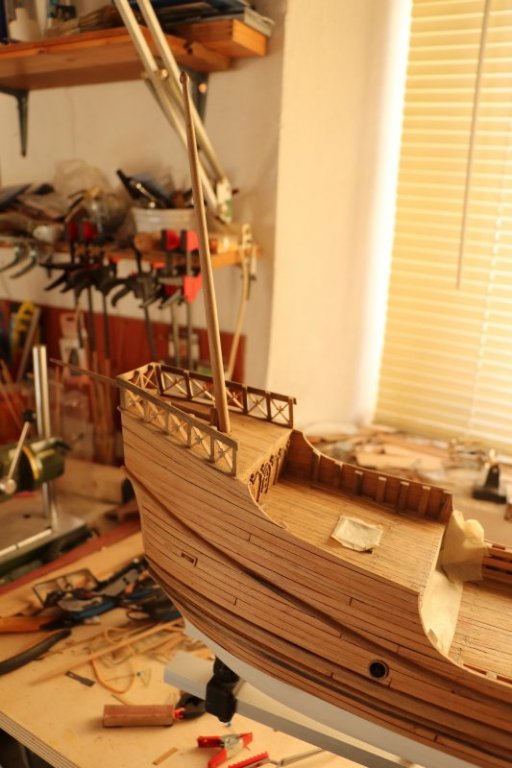
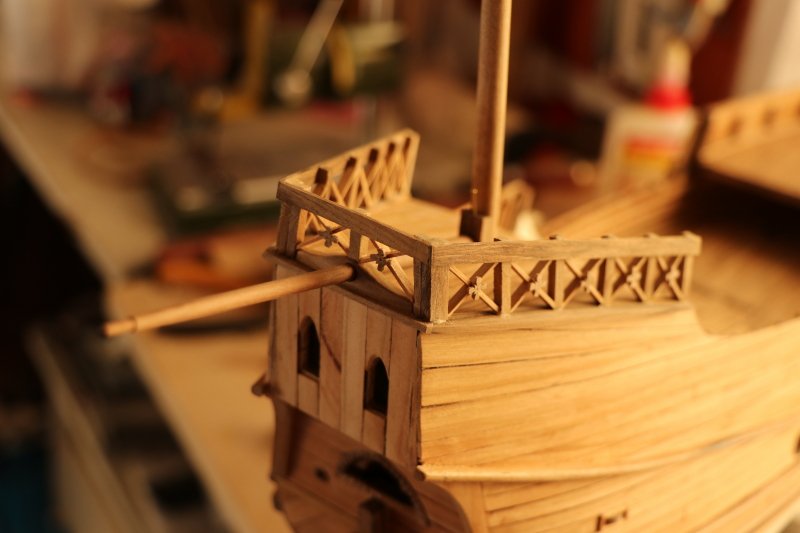
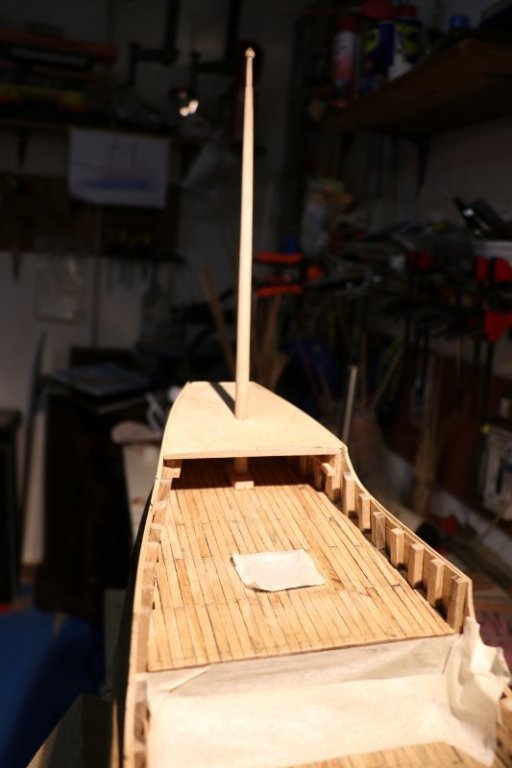
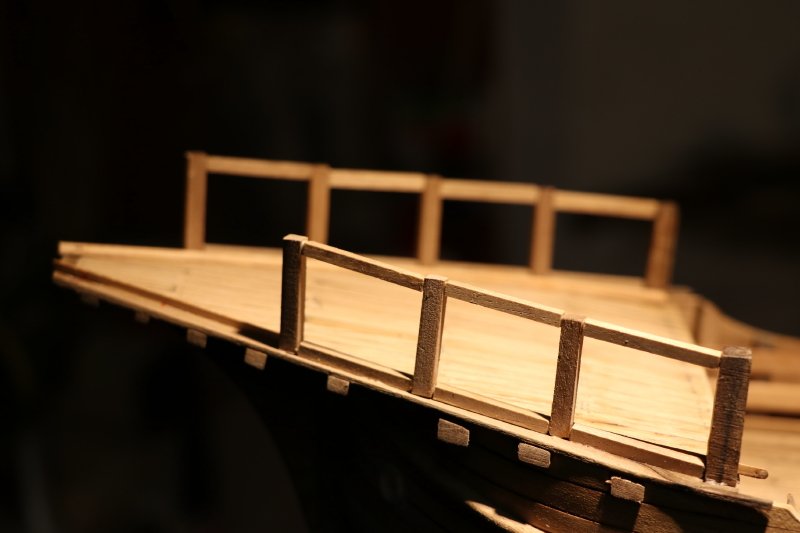
 the wood used for the balustrade: walnut for the supporting structure, the central cherry cross section, mizzenmast and boom always in walnut in the photos below, the central decorations of the balustrade (should be floral subjects, more or less ) see you next time luponero
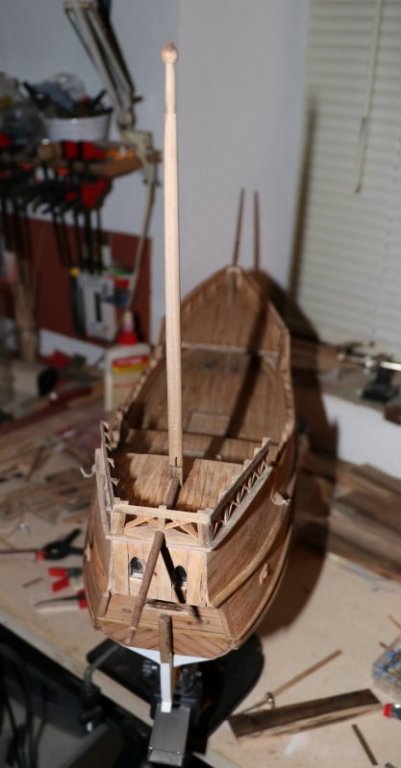

- 197 replies
-
- 8
-

-
- santa maria
- carrack
- (and 1 more)
-
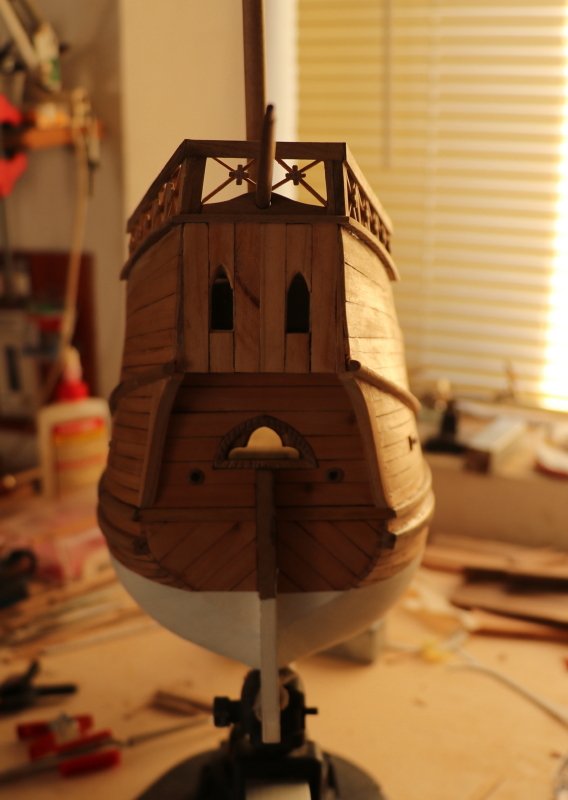
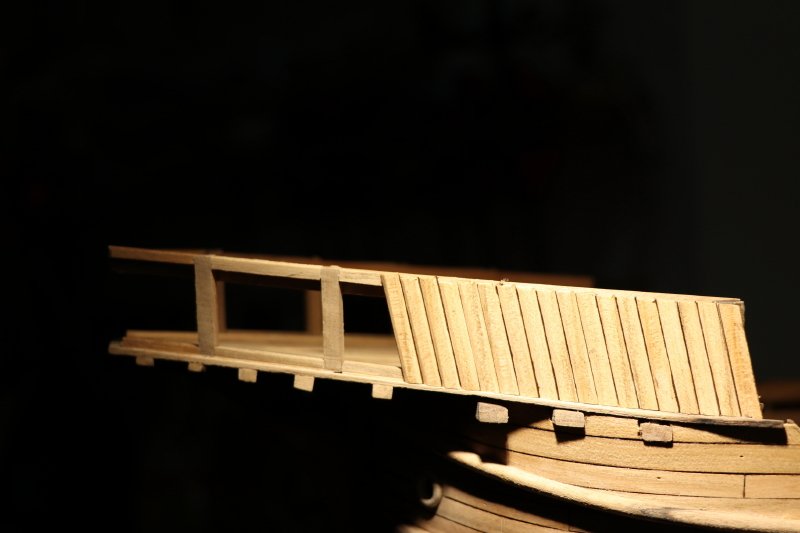
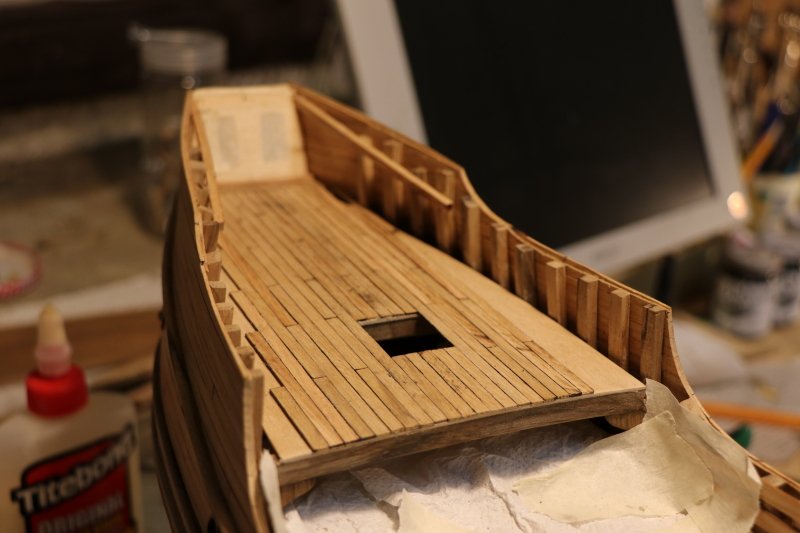
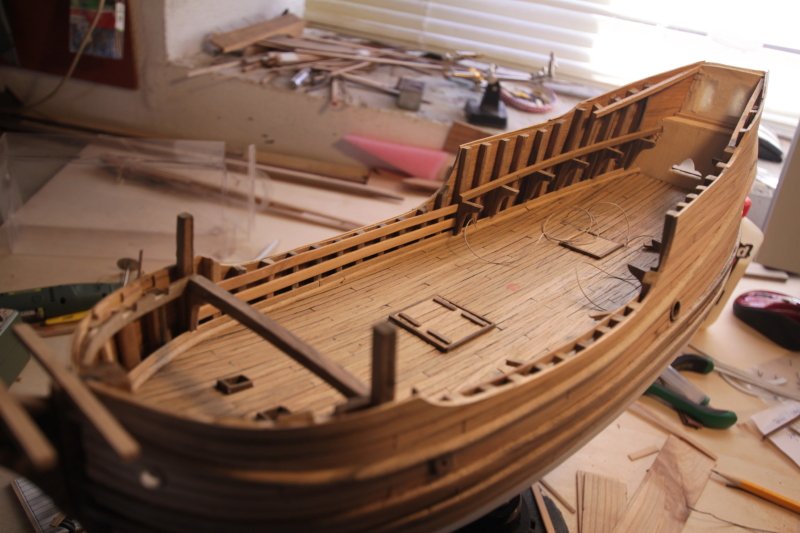
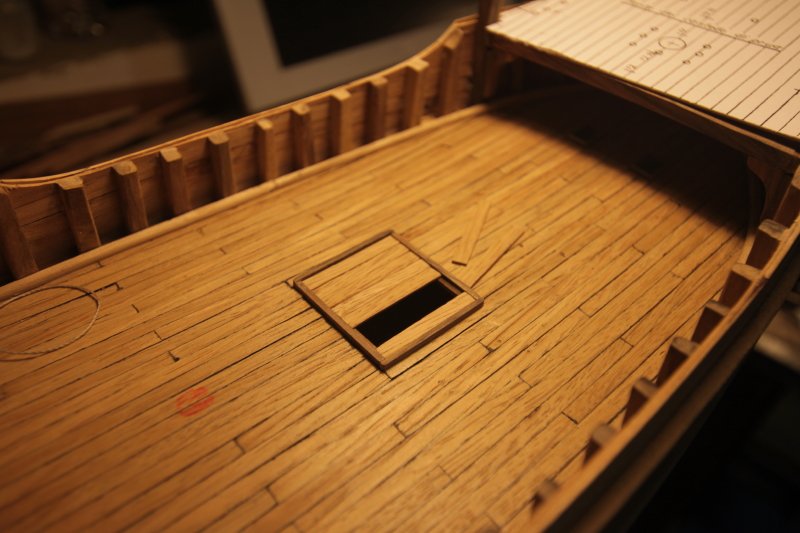
unfortunately I must have made a mistake in loading the images, for not having translated the previous part and for not having explained the various steps, I try to do it now, apologizing for the inconvenience, I thank Steven for the appreciation for the work, I am also a lover of ancient ships and I follow with attention the updates on the "dromone" and the interesting historical and technical details inserted, the work on the carack went ahead, I finished the deck of the bridge with the usual material used for those made previously, the previously inserted photos refer to the construction of the balustrade on the bridge of the quarterdeck bunker
- 197 replies
-
- 1
-
-
- santa maria
- carrack
- (and 1 more)
-
Ti ringrazio per gli apprezzamenti per il lavoro, anche io sono u appasionato di navi antiche e seguo con attenzione gli aggiornamenti sul "dromone" e gli interessanti approfondimenti storici e tecnici inseriti, i lavori sulla caracca sono andati avanti, ho terminato il tavolato del ponte con il solito materiale utilizzato per quelli fatti in precedenza,


- 197 replies
-
- 6
-
-
- santa maria
- carrack
- (and 1 more)
-
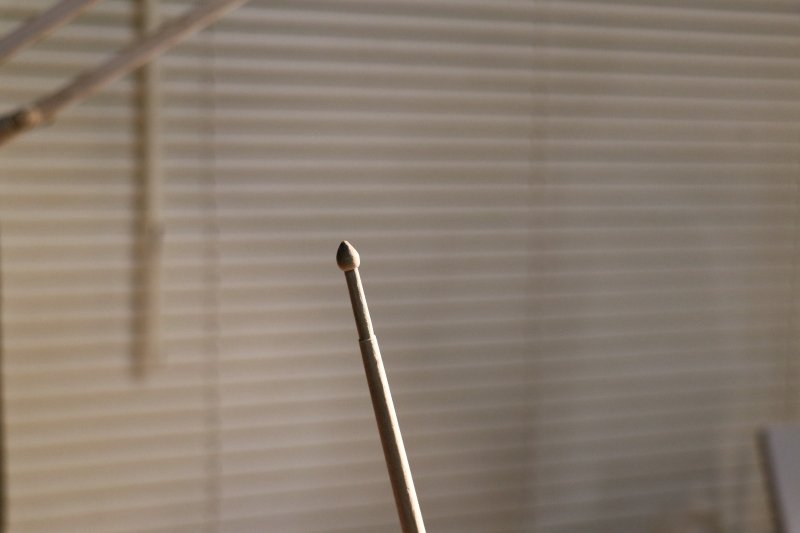
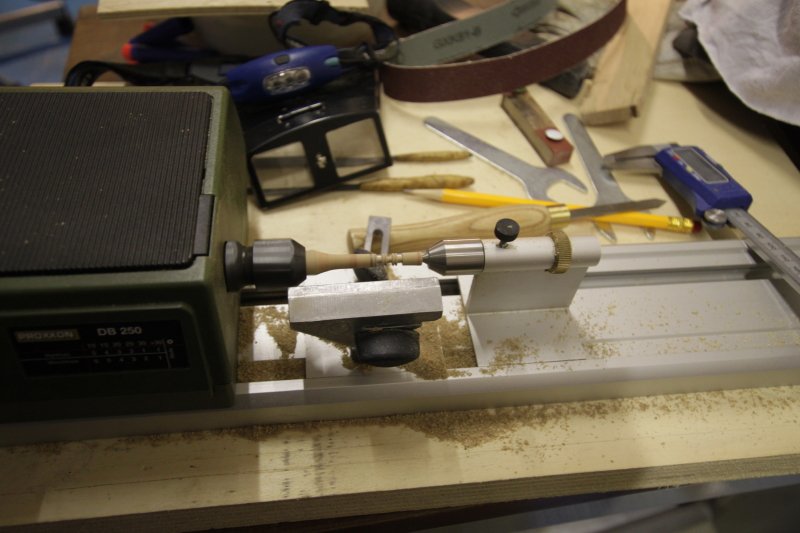
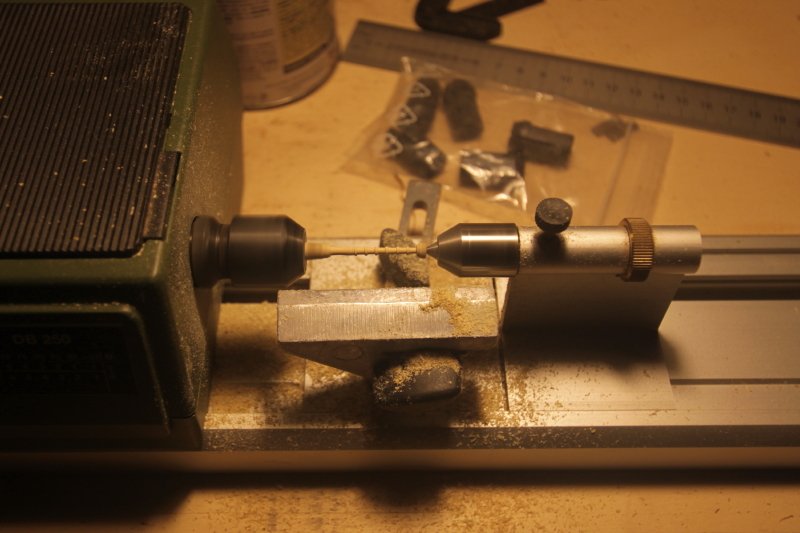
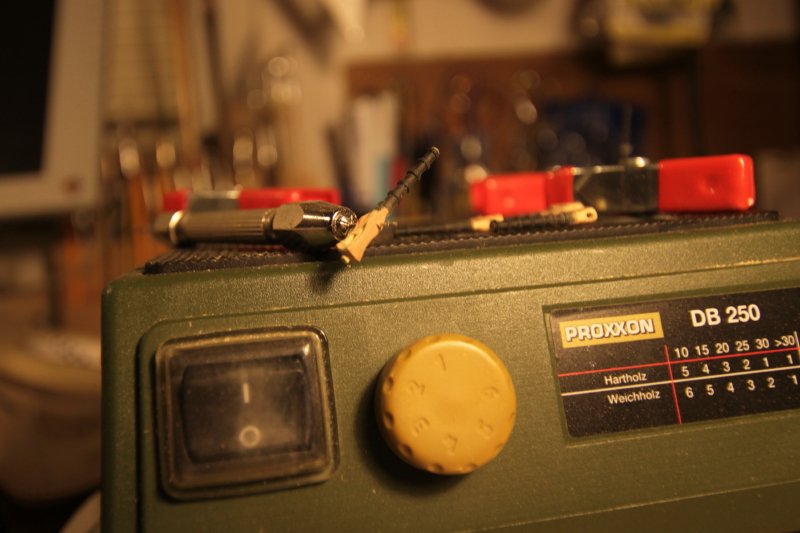
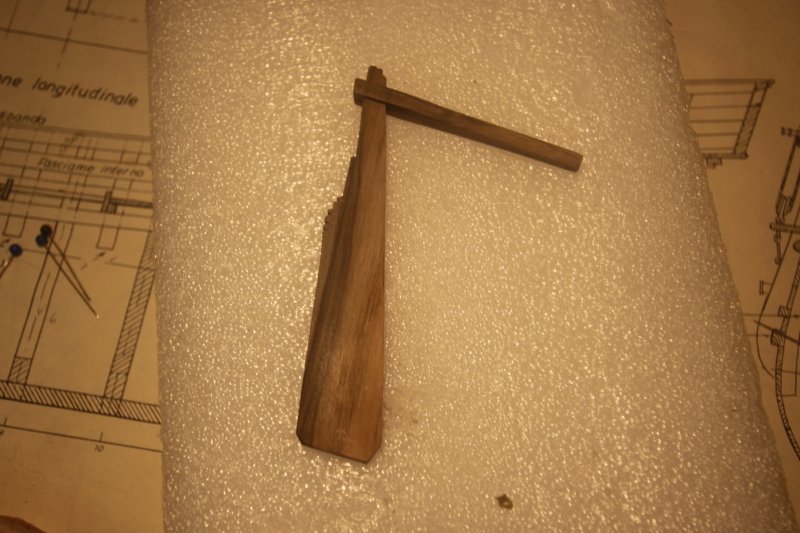
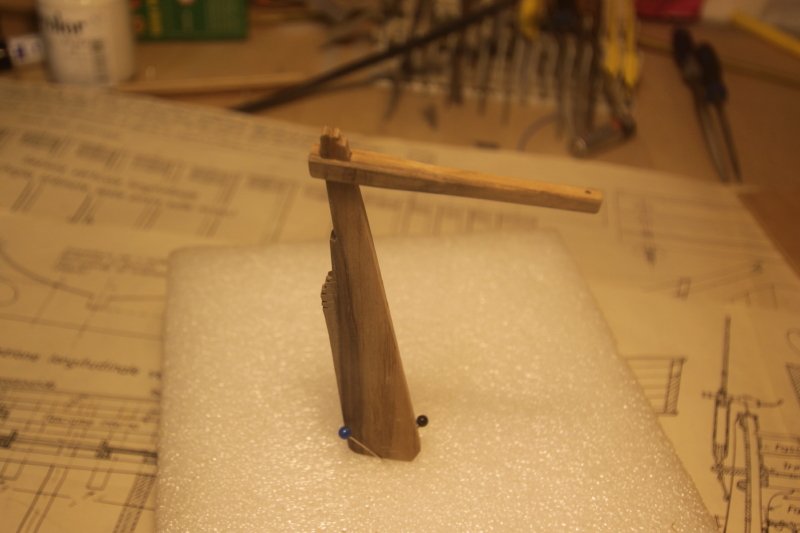
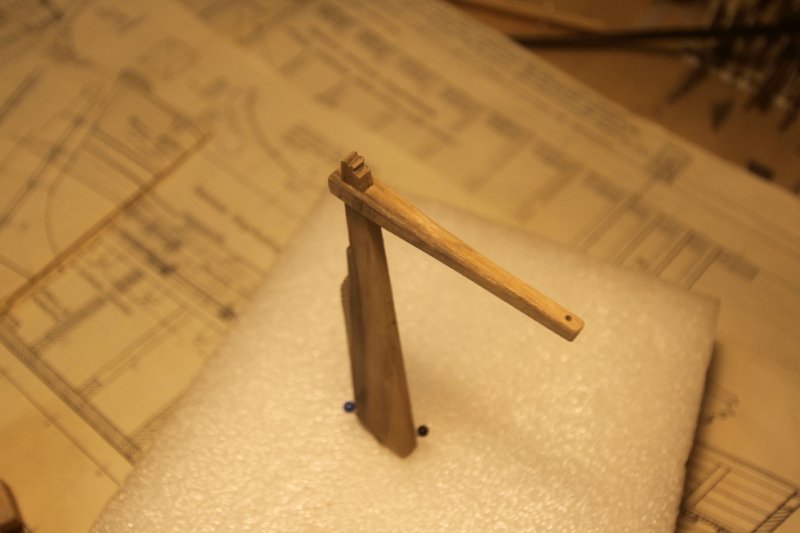
before fixing the wall stably, I had to make the shaft of the tree (which is inside the part under the form where Columbus was lodged), where the end of the foremast is fitted, made by turning the piece into walnut, under the tree detail (unfortunately I have difficulty in inserting images,) I will try again tomorrow regards luponero
- 197 replies
-
- 7
-
-
- santa maria
- carrack
- (and 1 more)
-
so I made the frames and the window, ( come non tradotto sopra,) purtroppo non posso inserire altre immagini ( There was a problem processing the uploaded file. -200) OK
- 197 replies
-
- 4
-
-
- santa maria
- carrack
- (and 1 more)
-
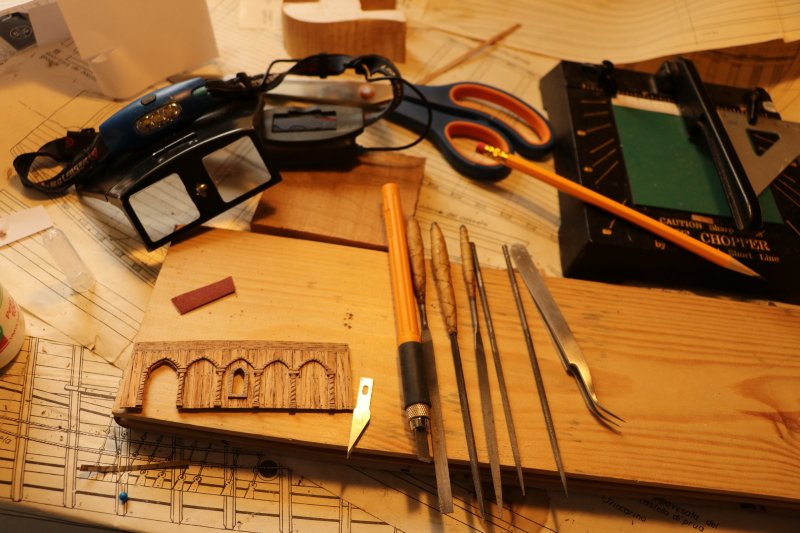
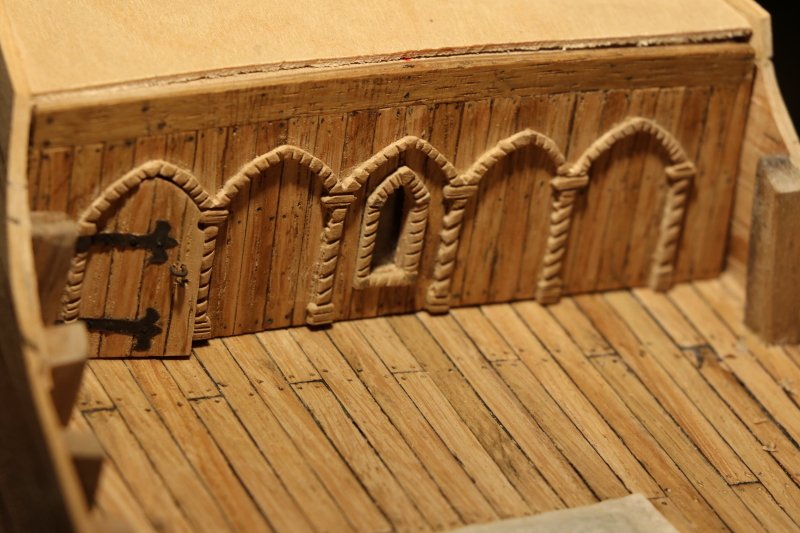
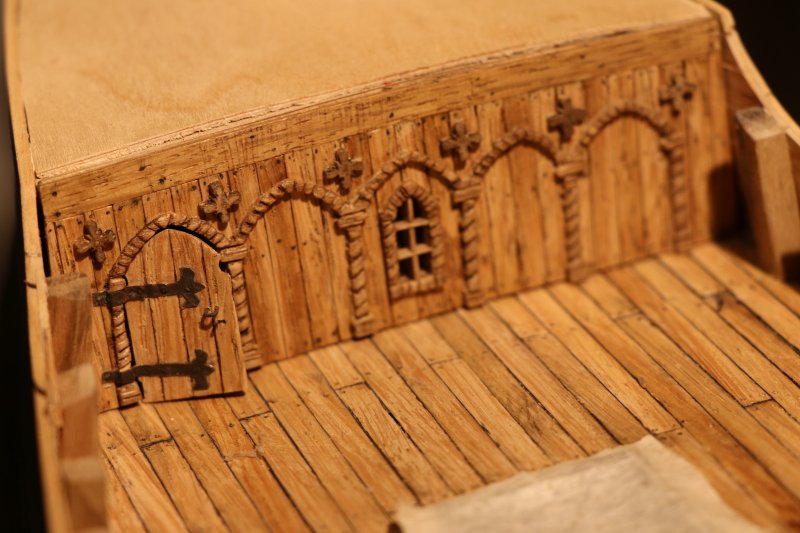
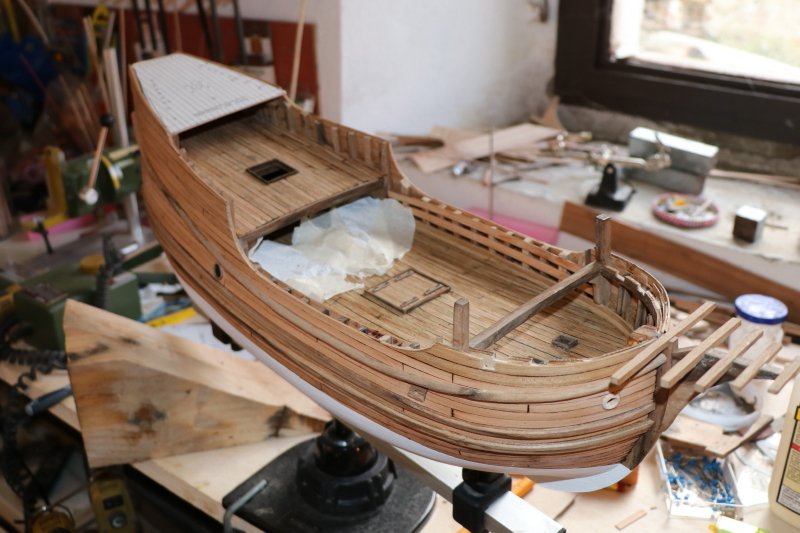
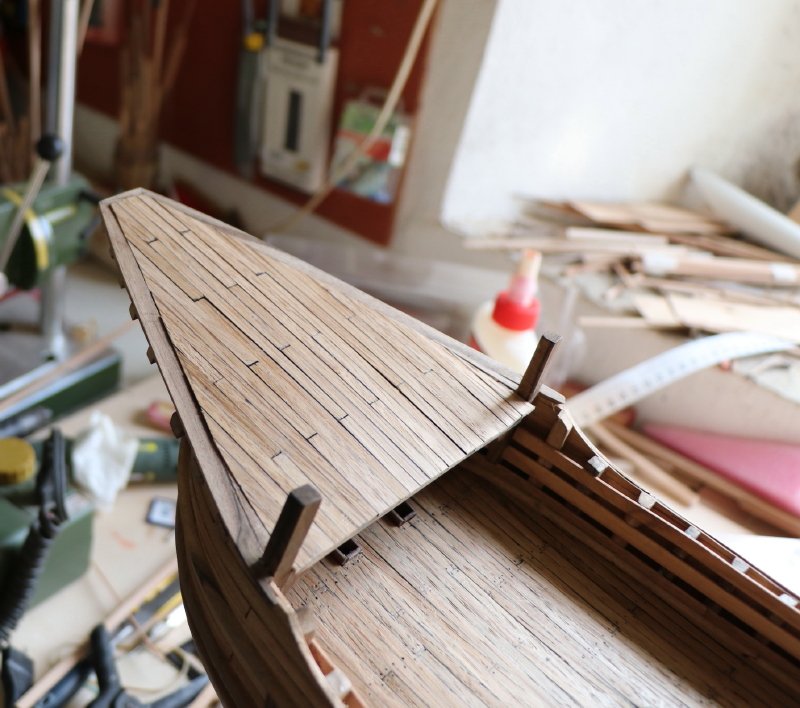
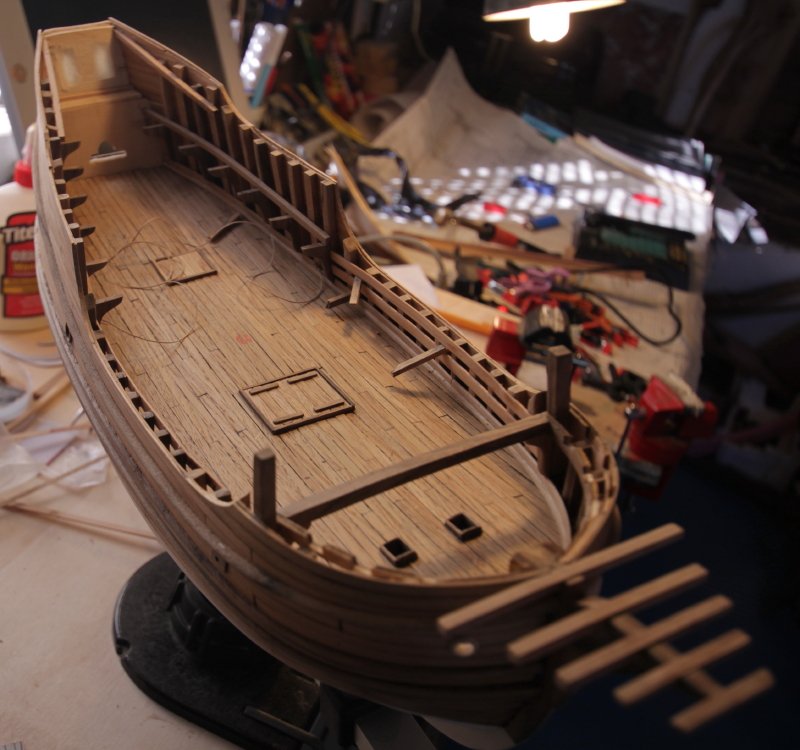
I thank my friends for their appreciation, I will continue with the adjournment of the works, Once the bow castle has been finished (in part) I have started the construction of the drawers (it seems that it was Cristoforo's quarters, but even on this situation the positions of the scholars are mixed), so set up the beams on the bridge of the drawers above the beams I will bring back the 0.8 mm plywood base on which I will lay the plank , while for the external wall of the formwork, where there is the door to enter the lodging of Columbus and the false arches with the window, I use the boards with which I made the bridge to make the frames (arches, window and flowers?) I had two possibilities, use resin, (milliput) or wood, certainly for the aesthetic effect the modeling pastes allow excellent results, with wood the thing changes ... I did not have the resin, so the choice was wood: walnut, (unfortunately I had finished the boxwood) and I started with the "frames" using the classic equipment, trincetto and limette even if for the small size of the details walnut does not lend itself very well to the processing
- 197 replies
-
- 5
-
-
- santa maria
- carrack
- (and 1 more)
-
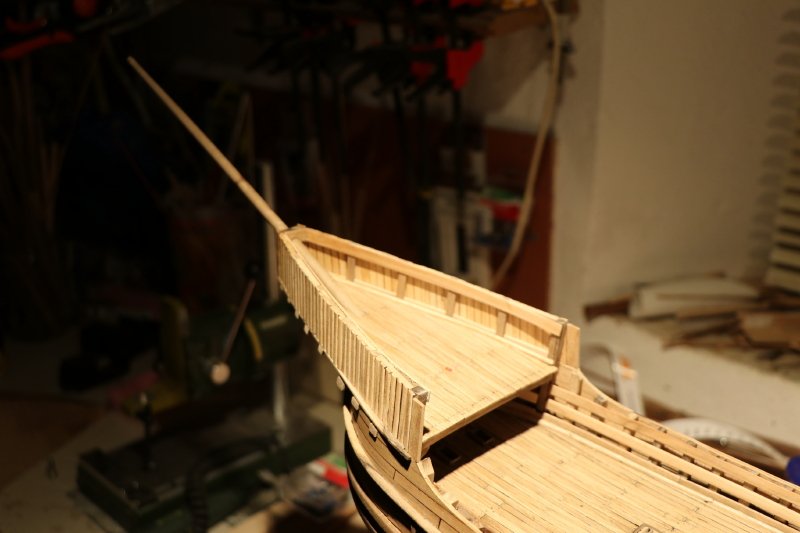
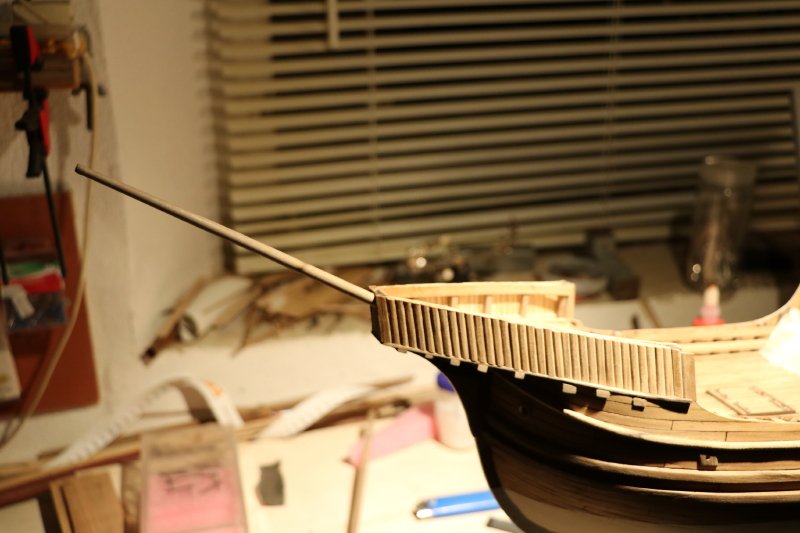
Some updates on the work of the formwork, the timber used is oak and as you can see the tables have an inclination with respect to the vertical as indicated in the drawings by Adametz, between the board and the board the edge has a bevel, giving a shape that resembles a defensive palisade, you can see on the plank, the opening for the passage of the bowsprit tree, to make it was necessary a long time and "file" to avoid doing damage on the deck of the bridge up to the insertion of the bowsprit (which is now possible to remove) to make the tree I came back of the walnut tree, (surely making all the pieces in self-construction is very nice, but it takes a lot of time) insert the last image with the view of the bow, the tree fits into the trimmer (the frontal wood in which the tree passes is walnut with the typical stains that characterize it) ) regards luponero


- 197 replies
-
- 12
-
-
- santa maria
- carrack
- (and 1 more)
-
Hello Franco, you are doing well, for what I can do there are no problems, eventually if you need material and information you can send me mail from my profile, with regard Fabio
- 510 replies
-
- 1
-
-
- reale de france
- corel
- (and 1 more)
-
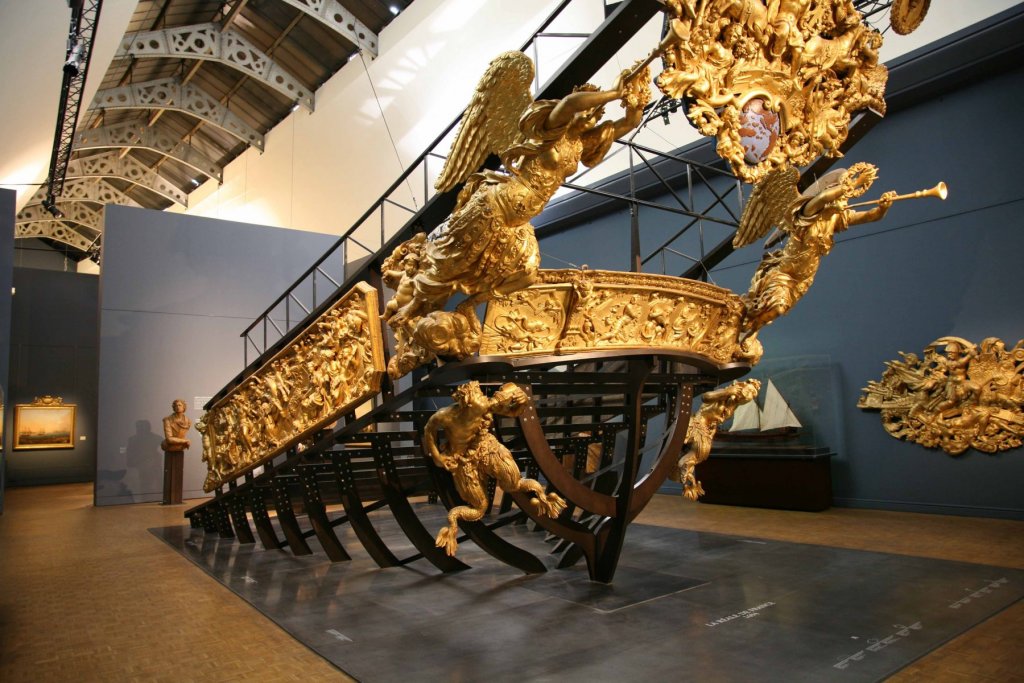
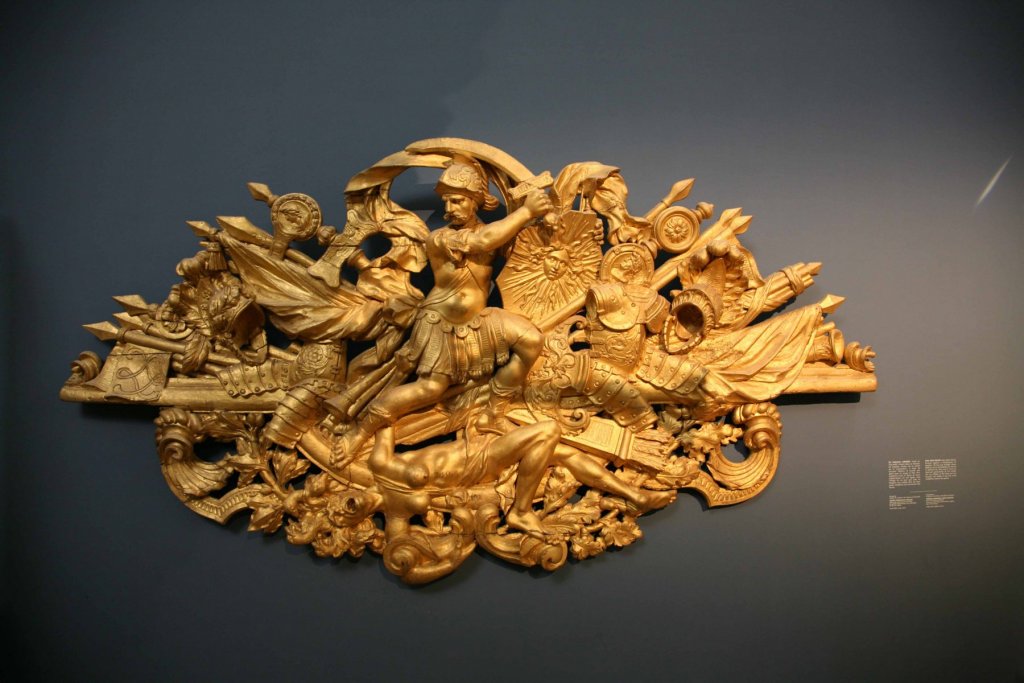
Hello Franco, the pleasure of getting to know each other is mutual, as I am very pleased to give you information for Reale, which I started doing in March 2013 and ended in April 2016, as you have already seen the model is very nice and complex, I will report photos in the gallery I will call "Real de France" are those of the model almost finished, I saw that you finished the part related to the plating very well, you'll see that the realization will lead you to the construction of many "repetitive" pieces that make up the galley structurally, which was a "long ship". La Real as basic coloration has blue, red and white, (which will later become the national colors of the French flag) the decorations are in "baroque" style on the part of the stern area are shown the French sculptor decorations Pierre Puget, visible at the Musée de la Marine in Paris. For now you have not made the "errors" that probably Corel has reported in the plans of construction (probably to make differences compared to those deposited at the museum and which are in scale 1/75), you have the monograph of the Fleur, where they correctly reported the "two" boats and the sizes and hoists instead of the "violin blocks and simple" construction details still far from the point at which you arrived now, I bring back some pictures of Royal decorations at the Paris museum, maybe you can be "stimulus" even if for now you think that considering the complexity is not possible, because you'll see that during the construction of the works you will be kidnapped by the beauty of this ship and you will want to make it as beautiful as possible, you'll see ... to hear from us Fabio alias luponero

- 510 replies
-
- 3
-
-
- reale de france
- corel
- (and 1 more)
-
Hi Doris, I wanted to go to bed early tonight ..., then I started to see your yard and I did 1:08 am, " ...it was worth it !, even if this morning I'll be a "zombie" with regard black Wolf
- 1,035 replies
-
- 7
-
-
- royal katherine
- ship of the line
- (and 1 more)
-
Ciao fmodajr, congratulations for your Real de France shipyard is coming very well, I also realized the usual model three years ago, I bought only the Corel construction plans and in three years of work I managed to finish it, in the construction plans of Corel there are some "errors" that with the help of friends from Venice very experienced galleys I corrected the errors reported in the drawings of Corel, The Real de France was one of the "representative" ships of Louis XIV, the "Fleur de lys" was the "sister" for this there are many constructive analogies, the monograph of Delacroix is very precise and you will be very "useful" during the realization of future works, I will follow your work, if you like, I have a lot of photos and information about Real de France that may be useful for you, I live in Florence and to communicate using the google translator, unfortunately my English is not the best for which I must use this tool, we hope you work well !!! greetings and good sawdust luponero
- 510 replies
-
- 1
-
-
- reale de france
- corel
- (and 1 more)
-
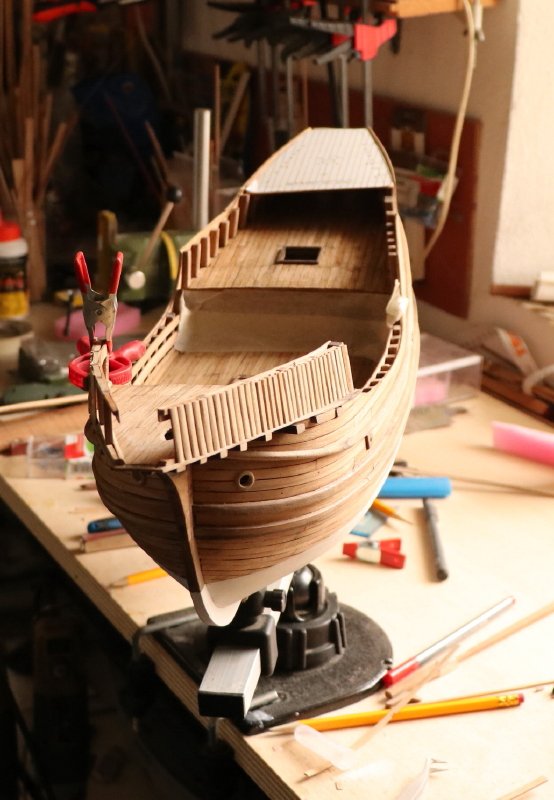
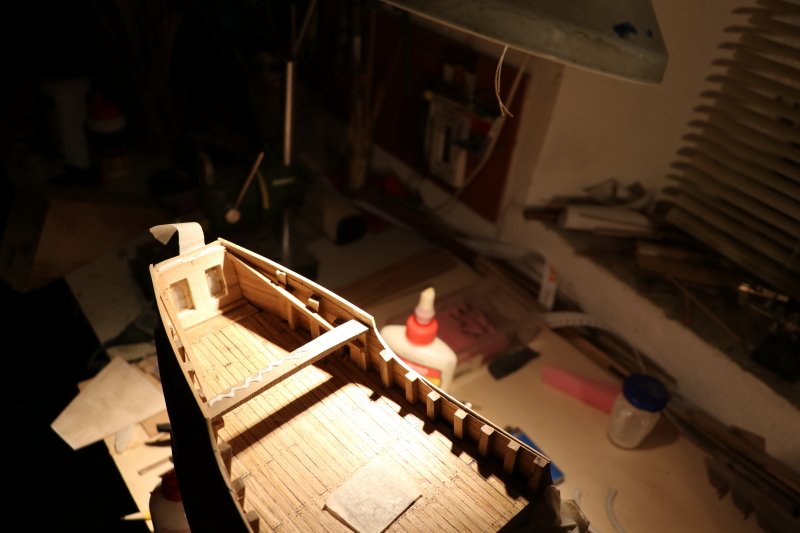
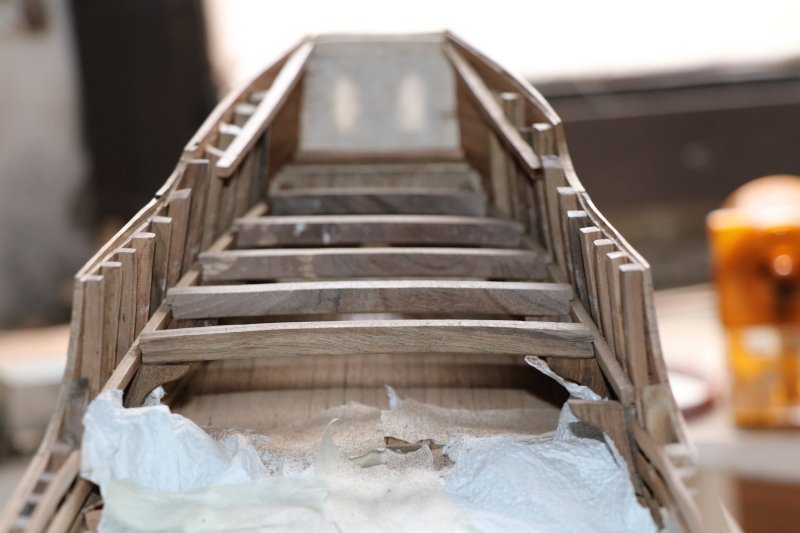
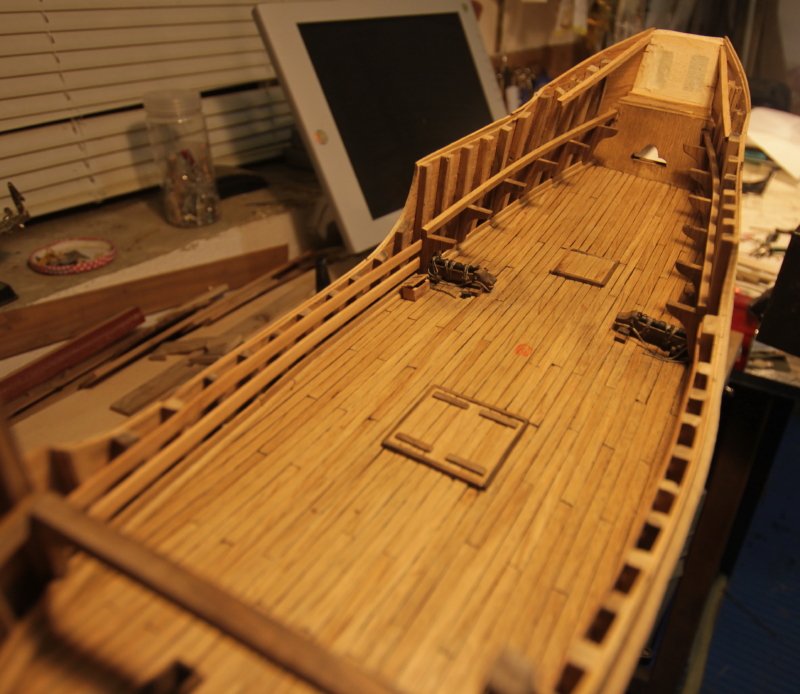
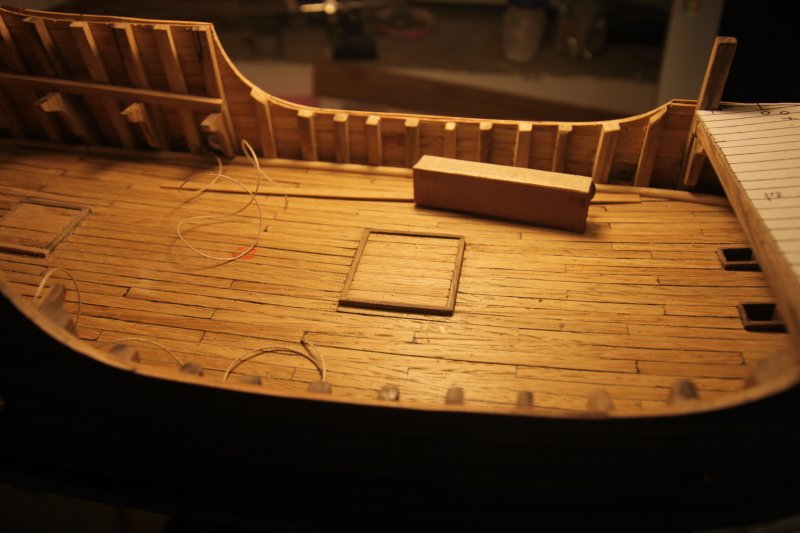
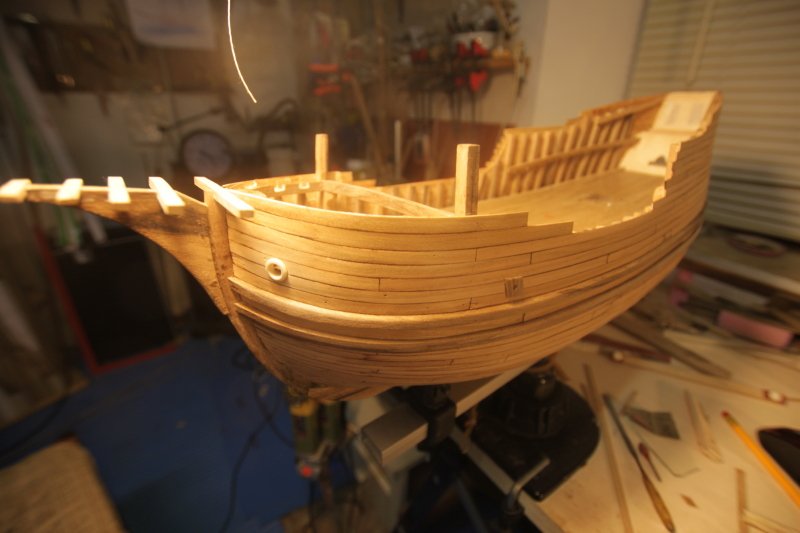
After the placement of the bombard, it is necessary to finish the bridge of the formwork, I started to lay the beams of the bridge of the formwork resting on the armrests, I prepared the plywood base with a thickness of 1 mm to put the boards that form the boarding, to make the boards I used oak wood with the following measures 4x1 mm when the bridge was over, I finished the hatch laying down the coamings, (?) the next step the preparation of the foredeck, to do this I replaced the bagli made previously, they seemed too thin, always in walnut but with a thickness of 5mm, excluding the first resting on the armrests, the other three are embedded in the planking plank and on the sleeper with a simple opening, while I left the bagli on the "tagliamare", which are 4 mm thick also in this case, to correctly lay the plank, I prepared with plywood the base on which I put the plank (always in oak) I painted the lower part with the bitumen of Judea diluted, and I made with the graphite the lines of demarcation of the tables, this to "imitate" the lower part of the board (which is visible from below) I glued the base on the beams, stopping it for drying with clamps, always oak boards, but with a delimitation band in walnut i realized that I had to do the nailing of the plank "better late than never !!!" manual drill bit of 0.5 mm (and many holes ...) then I started working on the bulwarks of the quarterdeck preparing the structure on which will develop the plank of the 'bulwark , to make the structure more stable, as well as the glue, the brass pin supports the upright on which the structure is developed with this I greet you, to hear from you soon for updates luponero


- 197 replies
-
- 7
-
-
- santa maria
- carrack
- (and 1 more)
-
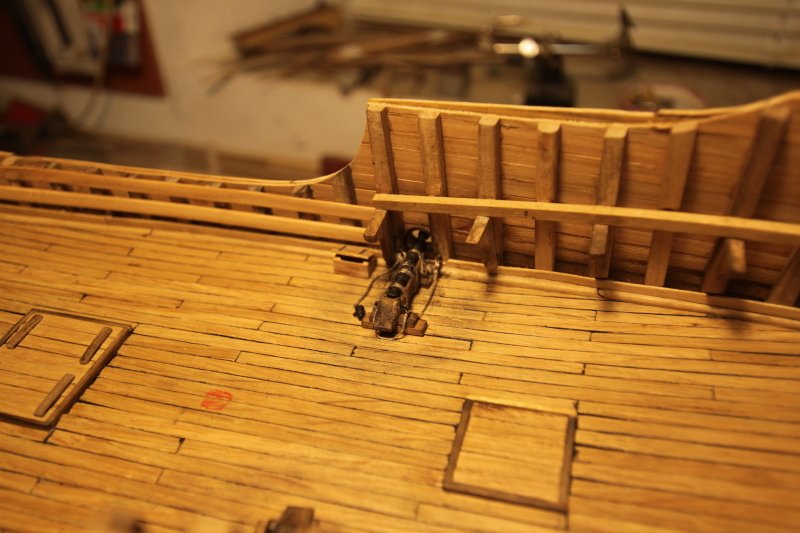
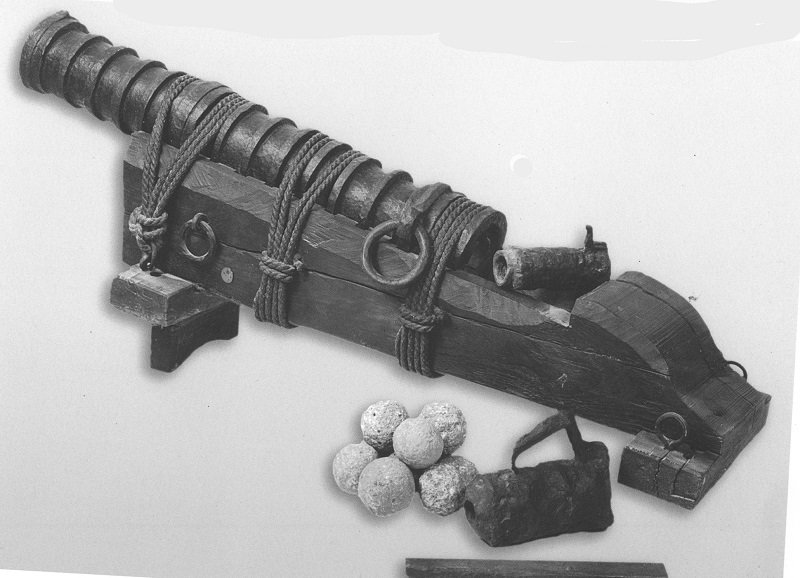
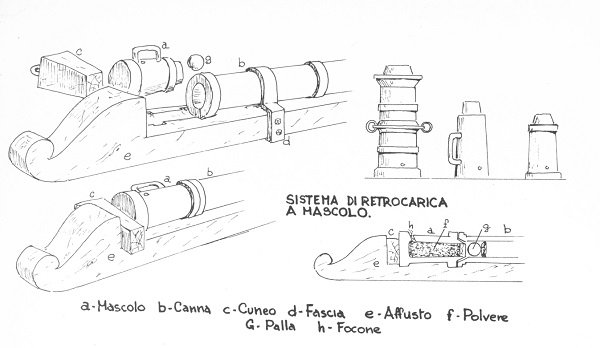
Hi Cog, it is not a problem to replace the wrong piece, I have already replaced the particular, but I did not remember to take the picture, in practice I made a pulley with a larger diameter, instead of 4 mm is 6 mm, comes out of the planking of two mm approximately, this time correctly, I have finished closing the hatches, and I have started to put the ropes on the inner walls with which the bombarde's guns will be tied I started laying the inner planking I started to bind the barrels I started to bind the barrels with their bases ( gun mounts) placing it on the bridge, near the openings for the cannons I made some details, the box to the left of the bombard, inside which there should be bullets. In the following picture I also put a "mascolo" (next to the cross of the block) in which the gunpowder was put, the loading system was backward, the masculine fitted to the breech, which due to the inevitable defects of the connection (we were in 1400/1500) did not allow the use of large doses of gunpowder, for bullets were used stone balls, the trenches (called blocks) were made from large trunks of hollow oak, which rested on wooden boards used instead of wheels, in addition to the photo also shows a drawing in which are shown the details of loading system of the medieval bombard, other updates will follow to hear from us black Wolf

- 197 replies
-
- 11
-
-
- santa maria
- carrack
- (and 1 more)
-
thanking you for your "like" continuous description of the works, the construction continued with the closure of the hatches on the main deck, I started to fix the ropes that would be used to tie the bombards. Then I started working on a pulley that recovers the rope of the sail of the major tree, it was the beginning of a "mistake" ," errare humanun est, perseverare autem diabolicum" that is, to err is human, to persevere is diabolical, ... if so, I often persevere above the preparation of the two pulleys the preparation of the piece insertion into the opening, obviously out of scale ...the error, I'll correct it later

- 197 replies
-
- 6
-
-
- santa maria
- carrack
- (and 1 more)
-
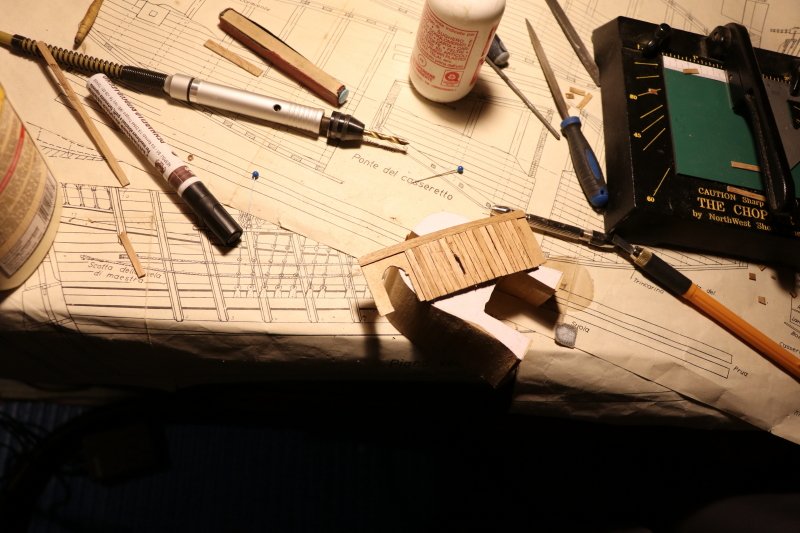
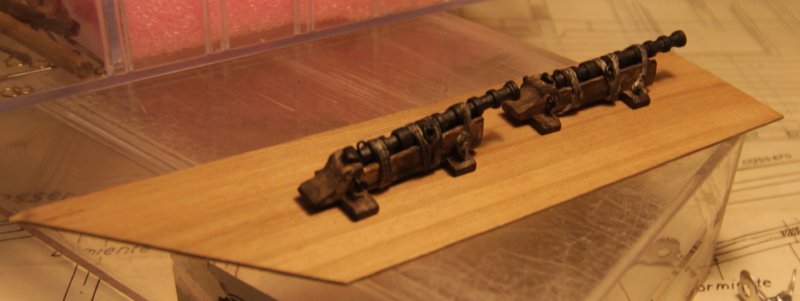
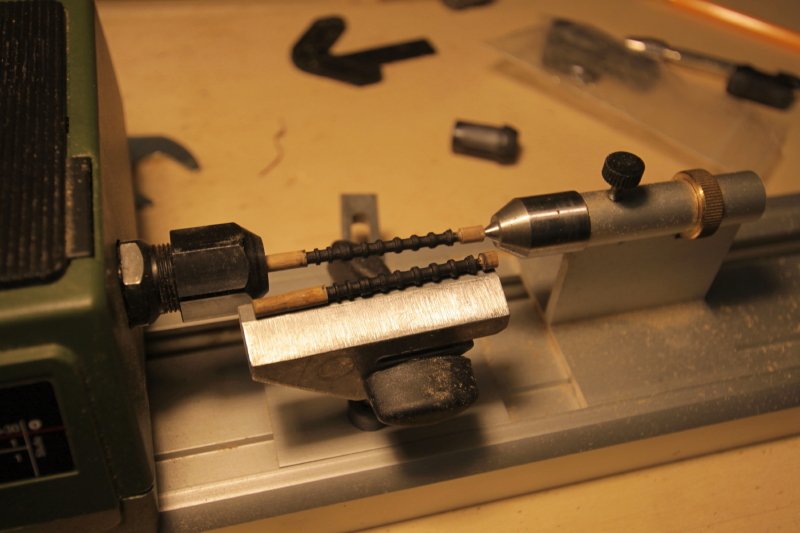
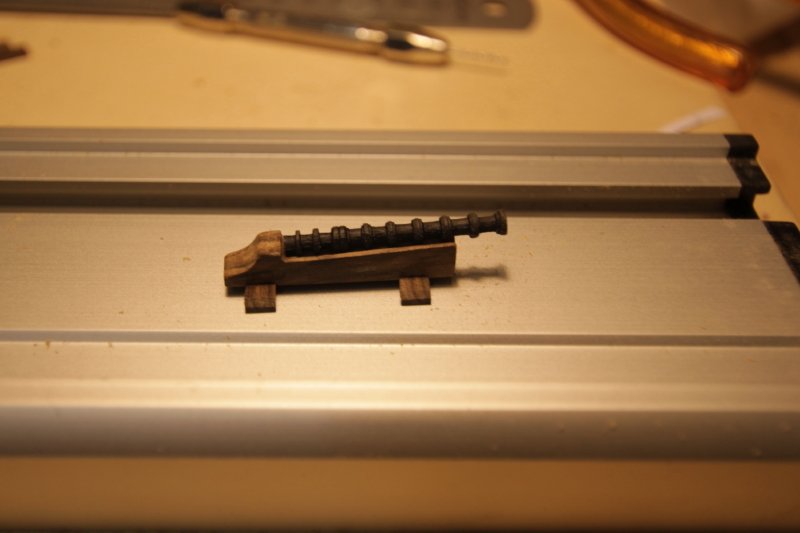
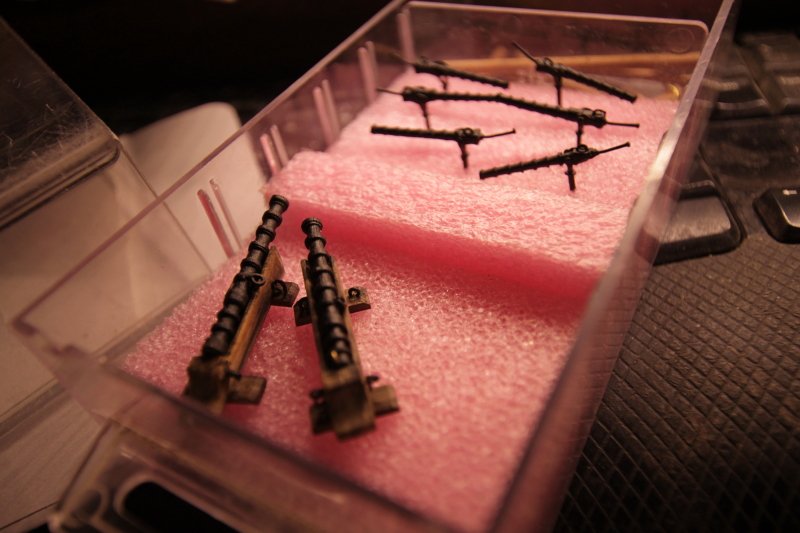
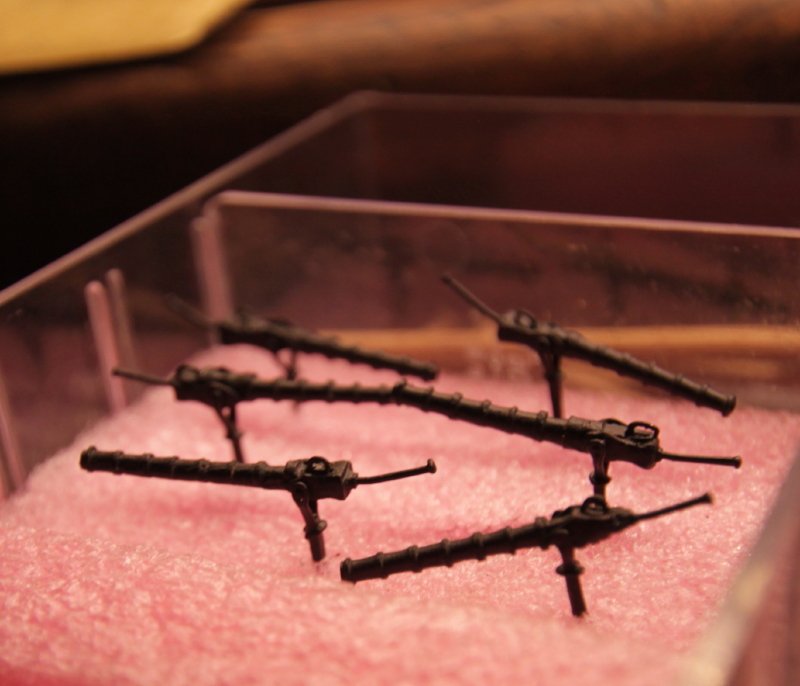
the following images are part of the paraphernalia that I made during a working day, at the lathe for the construction of the pipes while the parts that make up the pieces with limes and coloring what follows is the turning and coloring of the two bombardment pipes from a small piece of walnut I made the carriage and I tried to put the rod while those that follow are the six complete "bombardelle" after a day of work (intense) I had done the pieces, (but still there was work, the finishes) the forks are made of brass wire for today with updating I stop, I go to "lunch" and then I go to the Santa Maria ... luponero
- 197 replies
-
- 12
-
-
- santa maria
- carrack
- (and 1 more)
-
To go to the construction of the upper decks, must end all the parts that are inserted on the main deck, there are not many details to be made, the model of Santa Maria is relatively simple and even the details of construction follow this feature, (obviously the simplicity and the soft and rounded lines of the model give it harmony and beauty) however, the armaments are one of these parts to be realized, (although in some models of the Santa Maria the composition and the number of pieces of the armory is different) in the realization of the Duro and in the drawings of Ademetz two "bombards" (blunderbass ?) are reported and six "bombs" typical weapons in the historical period of reference, the bombards were used since the middle of 1200, the two on the Santa Maria belong to the largest, made with slatted iron bars (like the barrels) and welded together, then reinforcing the structure with strong iron rims. The bombards had the so-called "logs" carved out of the trunk of an oak by placing them on wooden crossbars (like wheels), usually the balls (bullets) were made of stone, while the "bombardelle" were small pieces of artillery fork to be put on the capifibanda, also these fired stones or small pieces of iron ,,,, however, I do not have the metal lathe for which I had to make them in wood, to turn I used the "box" a very hard shrub, good to make small turned parts, alternatively I could buy already made, but the cost of shipping of the pieces was high and even the appearance did not convince me, so I took a bit of boxwood (the hedge at the side of the road) and I started to turn this is the shrub called "boxwood" the realization of the "bombardella" barrel coloration of the barrel and fixing of the "braga" see you soon, luponero bombarda .bmp bomarda 1.bmp legatura.bmp

- 197 replies
-
- 9
-
-
- santa maria
- carrack
- (and 1 more)
-
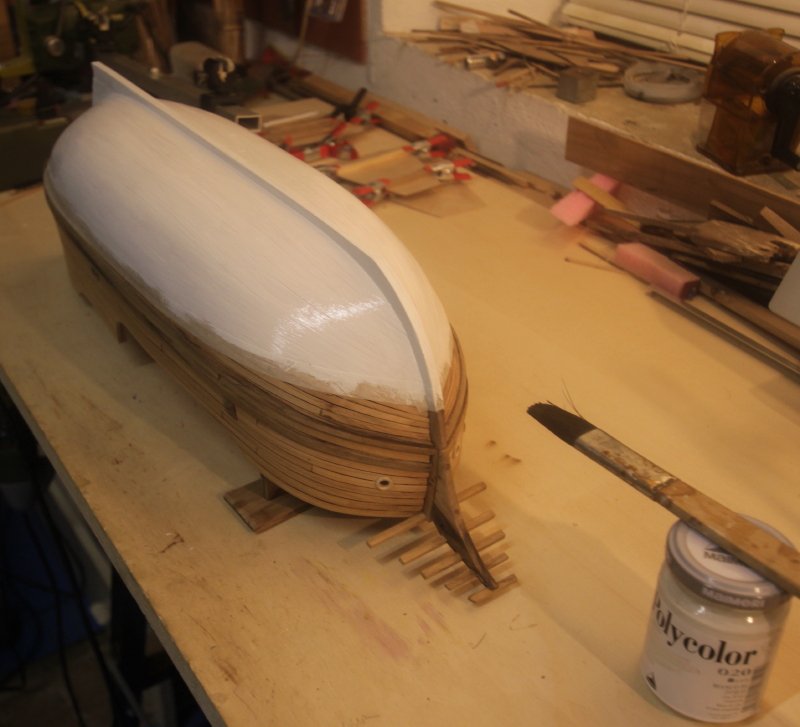
While I was waiting for the paint to dry, I made the rudder, always with the walnut as you can see its composition is very simple, it will be a piece that I will insert later, once the paint has dried, I gave the third "past" leaving it to dry
- 197 replies
-
- 14
-
-
- santa maria
- carrack
- (and 1 more)
-
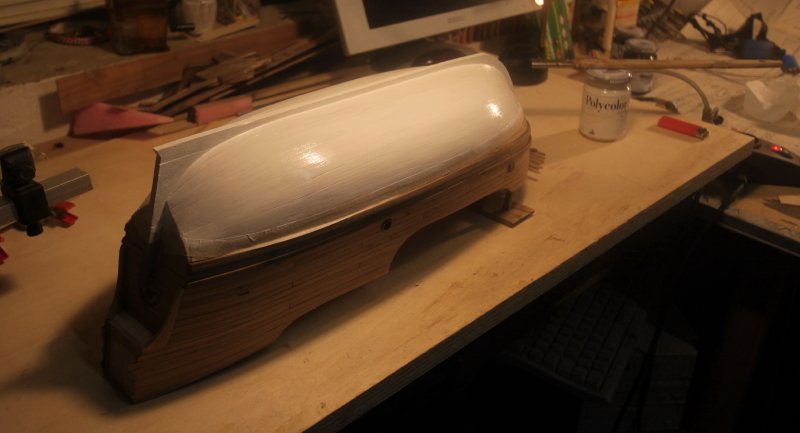
To counteract the damage caused by the teredines and the proliferation of algae and similar, on the part relating to the living environment an antifouling paint was given the "pattume" a mixture of sulfur and tallow, white lead or minio, vegetable tar, fish oil, and the best was considered, from the aesthetic point of view, the "white", while with the use of mineral tar the color will become black, from an aesthetic point of view I would have preferred the black paint, but from the photos related to the reconstruction of the Santa Maria for the commemoration of the 400th anniversary of the discovery of America, we see that the painting used was white, so I decided to make it white, using a tempera paint acrylic paint has good coverage, the glossy effect disappears during drying
- 197 replies
-
- 5
-
-
- santa maria
- carrack
- (and 1 more)
-
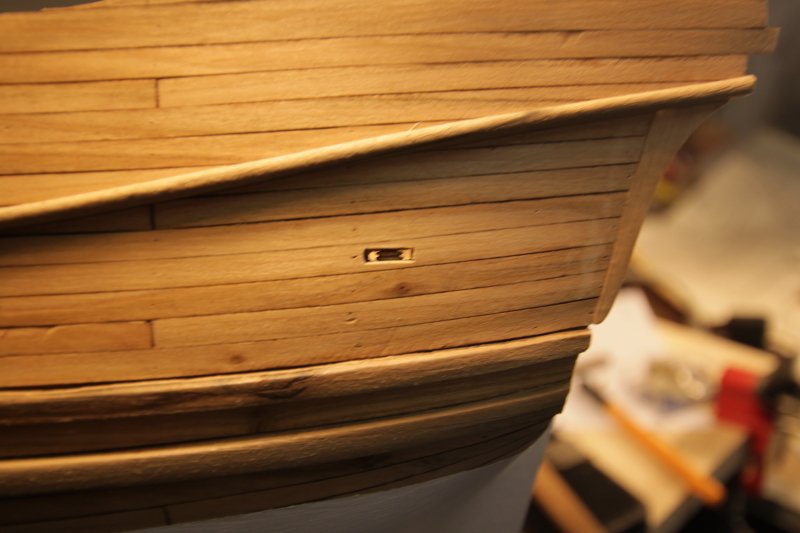
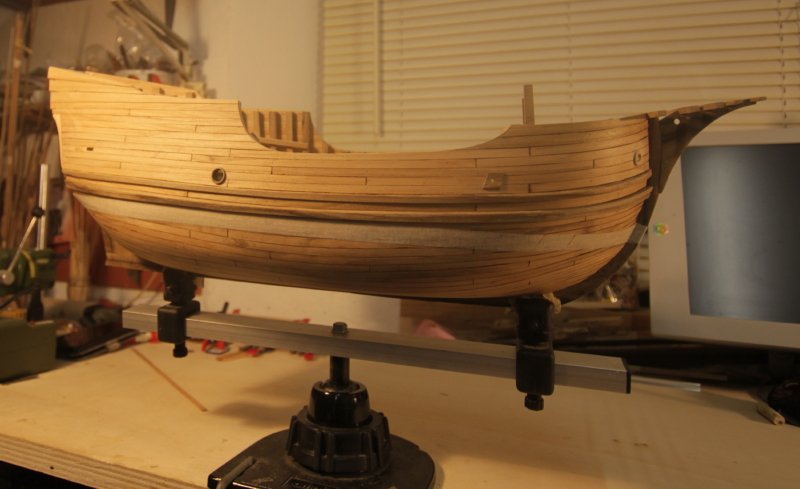
on the bulwark there is the "tack hole" I placed the "profile" of the bulwark and I did the gun port and made an opening for reeving sheave I put the paper tape to report deadwork, which I would later make with painting see you next time black Wolf

- 197 replies
-
- 9
-
-
- santa maria
- carrack
- (and 1 more)
-
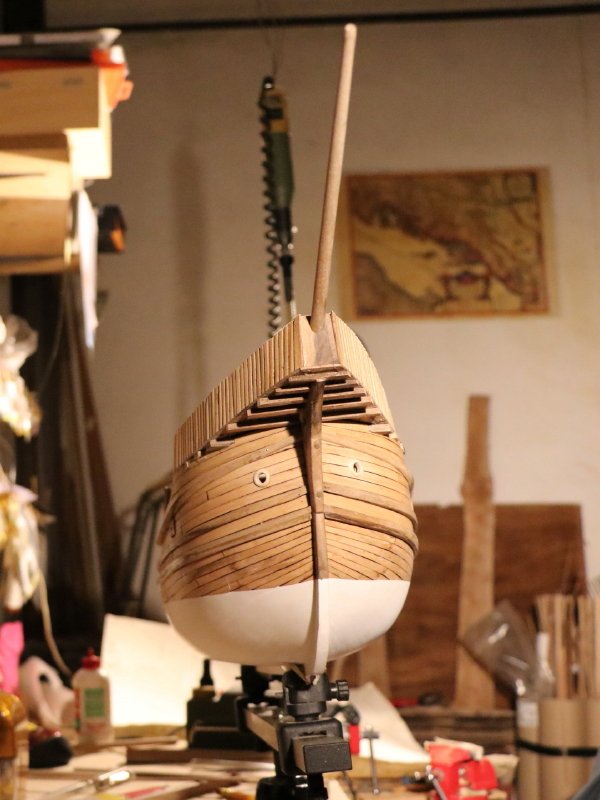
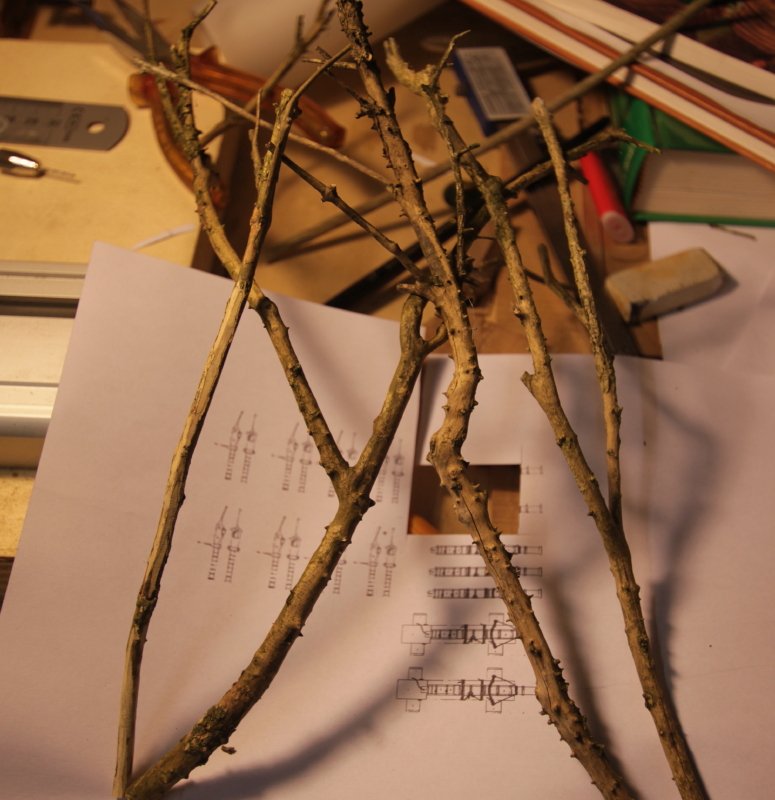
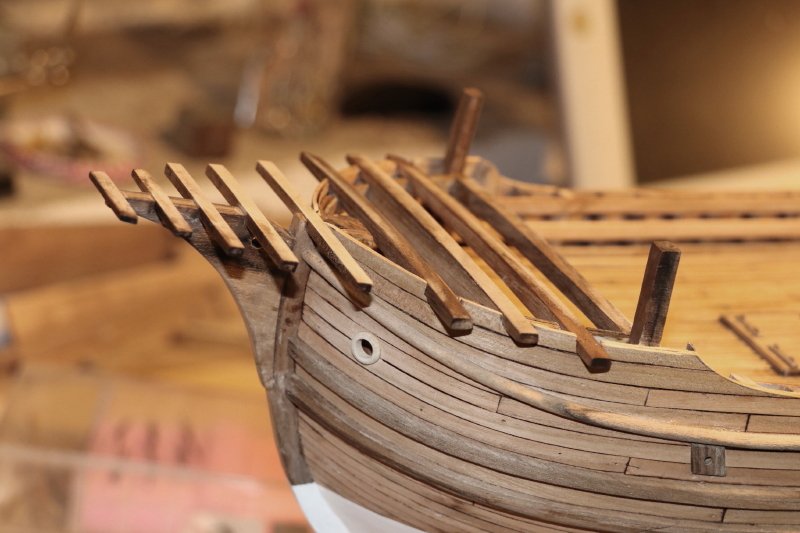
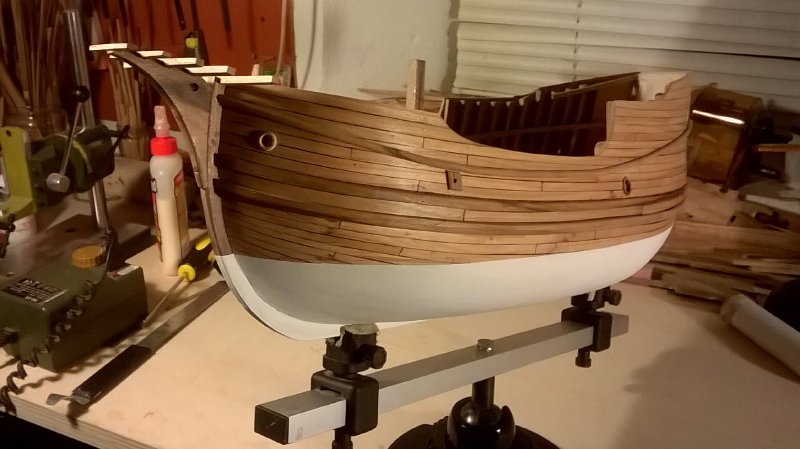
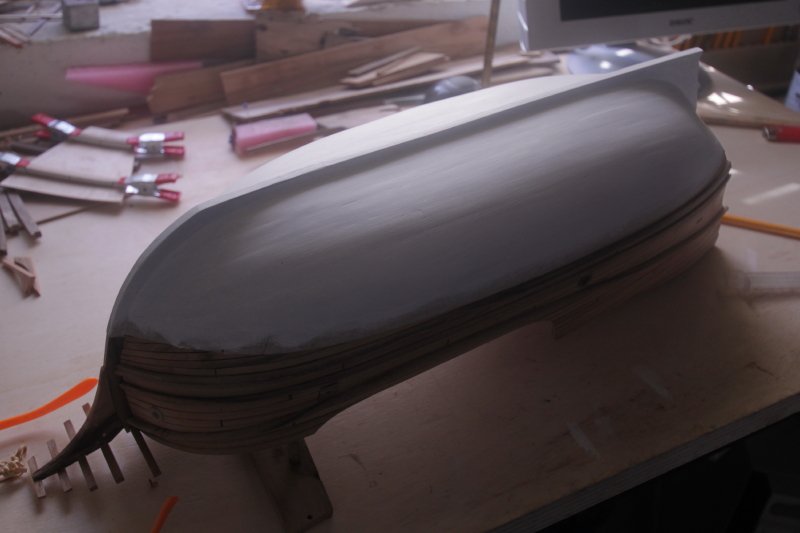
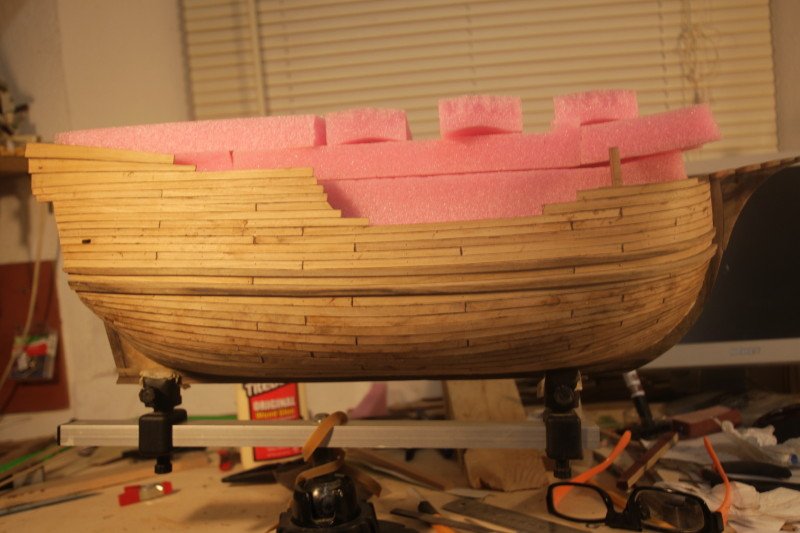
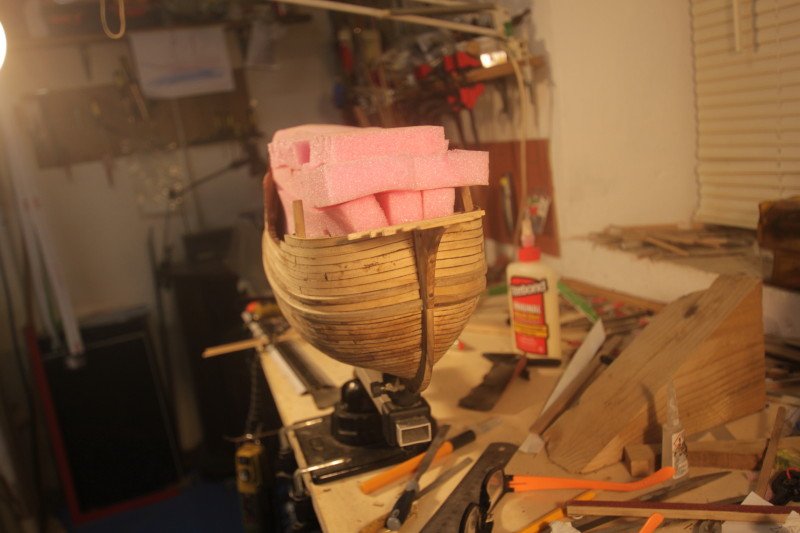
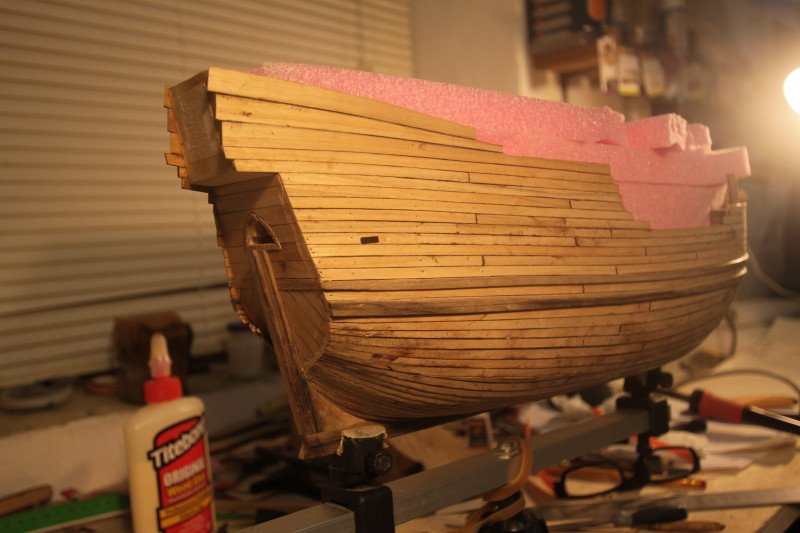
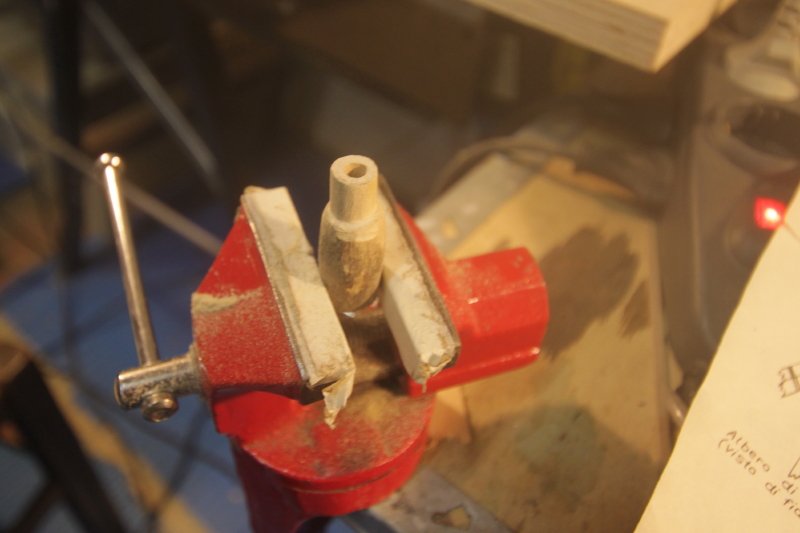
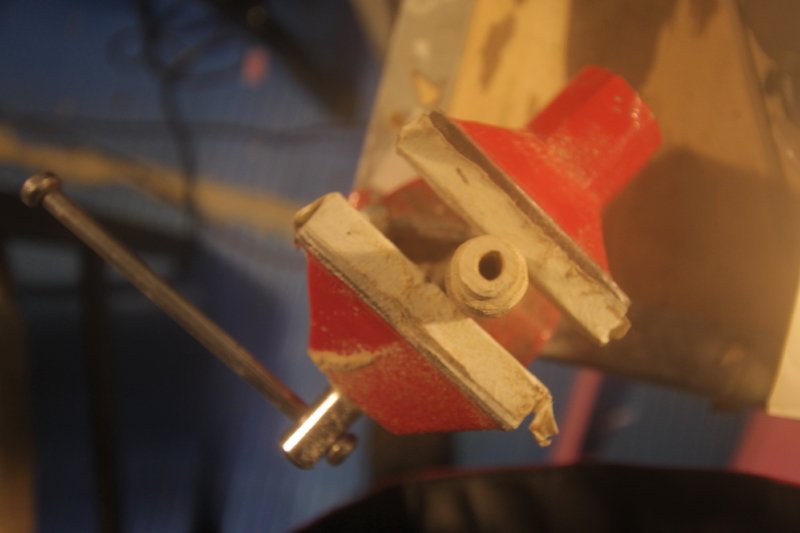
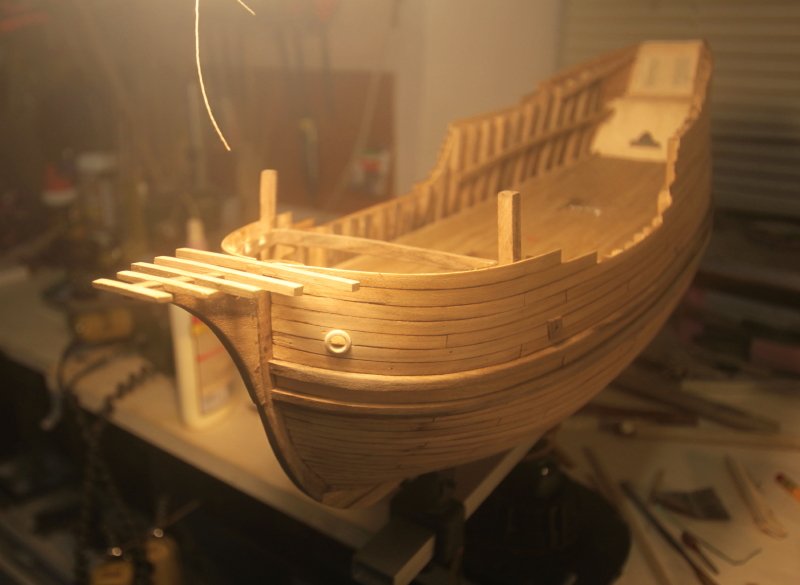
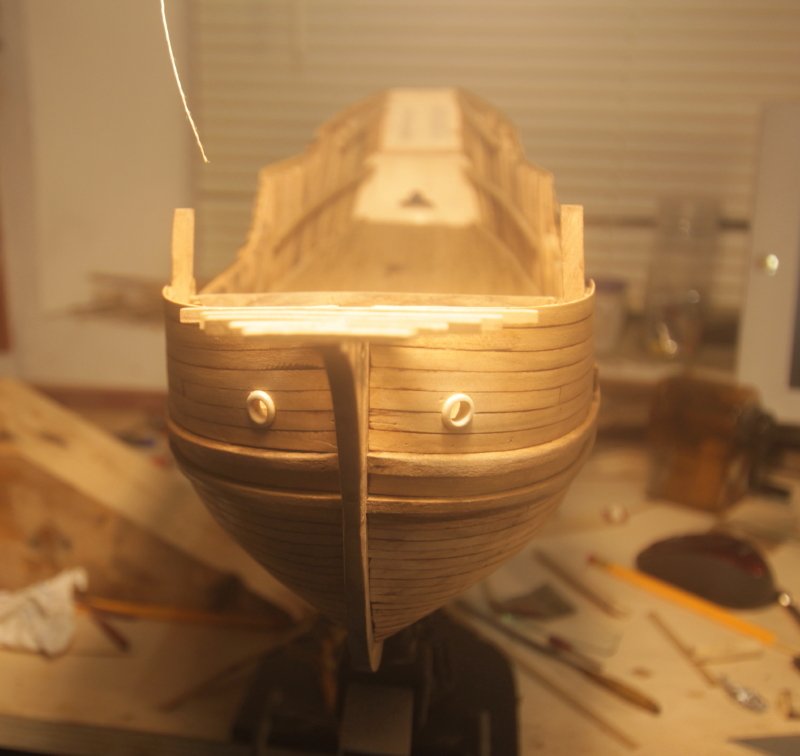
The cold of these days does not create the condition to go and do the Santa Maria, I should turn on the stove and anyway it would take time to get a pleasant temperature, useful for moving the fingers ... so I prefer to update the build with other images of the realization of the work, after the termination of the plating (always cherry) I passed everything with the abrasive paper and pieces of a sheet of glass (broken) using it as a plane the "pink blocks" I needed when I put the model upside down working it with the abrasive paper the following works, were the realization of the external components of the walls, the first I made the hawse hole using a walnut branch found outside the laboratory, trying to create a more similar situation for the types of processing of that period, (many times we modelers researching in the various stages of construction that borders on perfection, which was impossible to achieve at the end of the fifteenth century) I thought to use the cylindrical "natural" shape of the wood for the realization of the hawse hole with the file I have enlarged the central hole and thinned the outer part, realizing hawse hole and putting it on the bow "strangely" the walnut used is very clear (it will be necessary to darken it in the future)
- 197 replies
-
- 6
-
-
- santa maria
- carrack
- (and 1 more)
-
very good, every day better !!!