Will Ferris
-
Posts
44 -
Joined
-
Last visited
Content Type
Profiles
Forums
Gallery
Events
Everything posted by Will Ferris
-
 Nigel, Excellent work sir! Thank you for your kind comment on my build log. I see you already have a few builds worth of experience. I hope you don't mind if I pick your brain occasionally.
 -
Paul - Fantastic work! Well done!
-
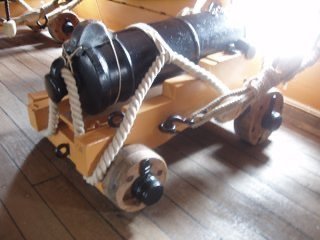
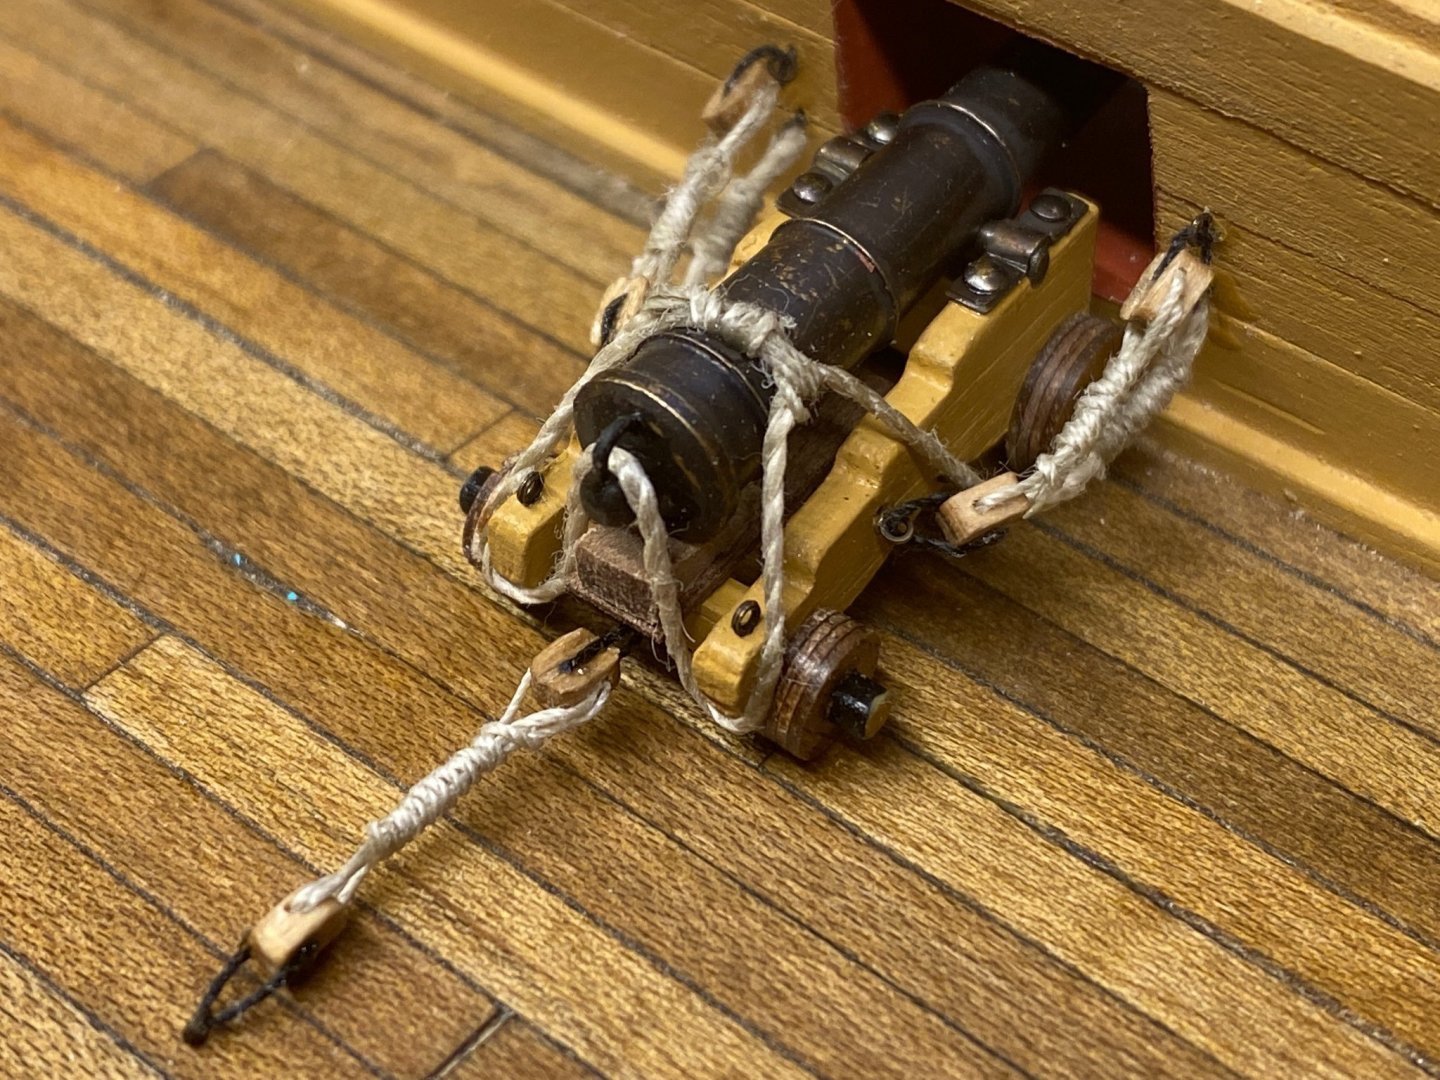
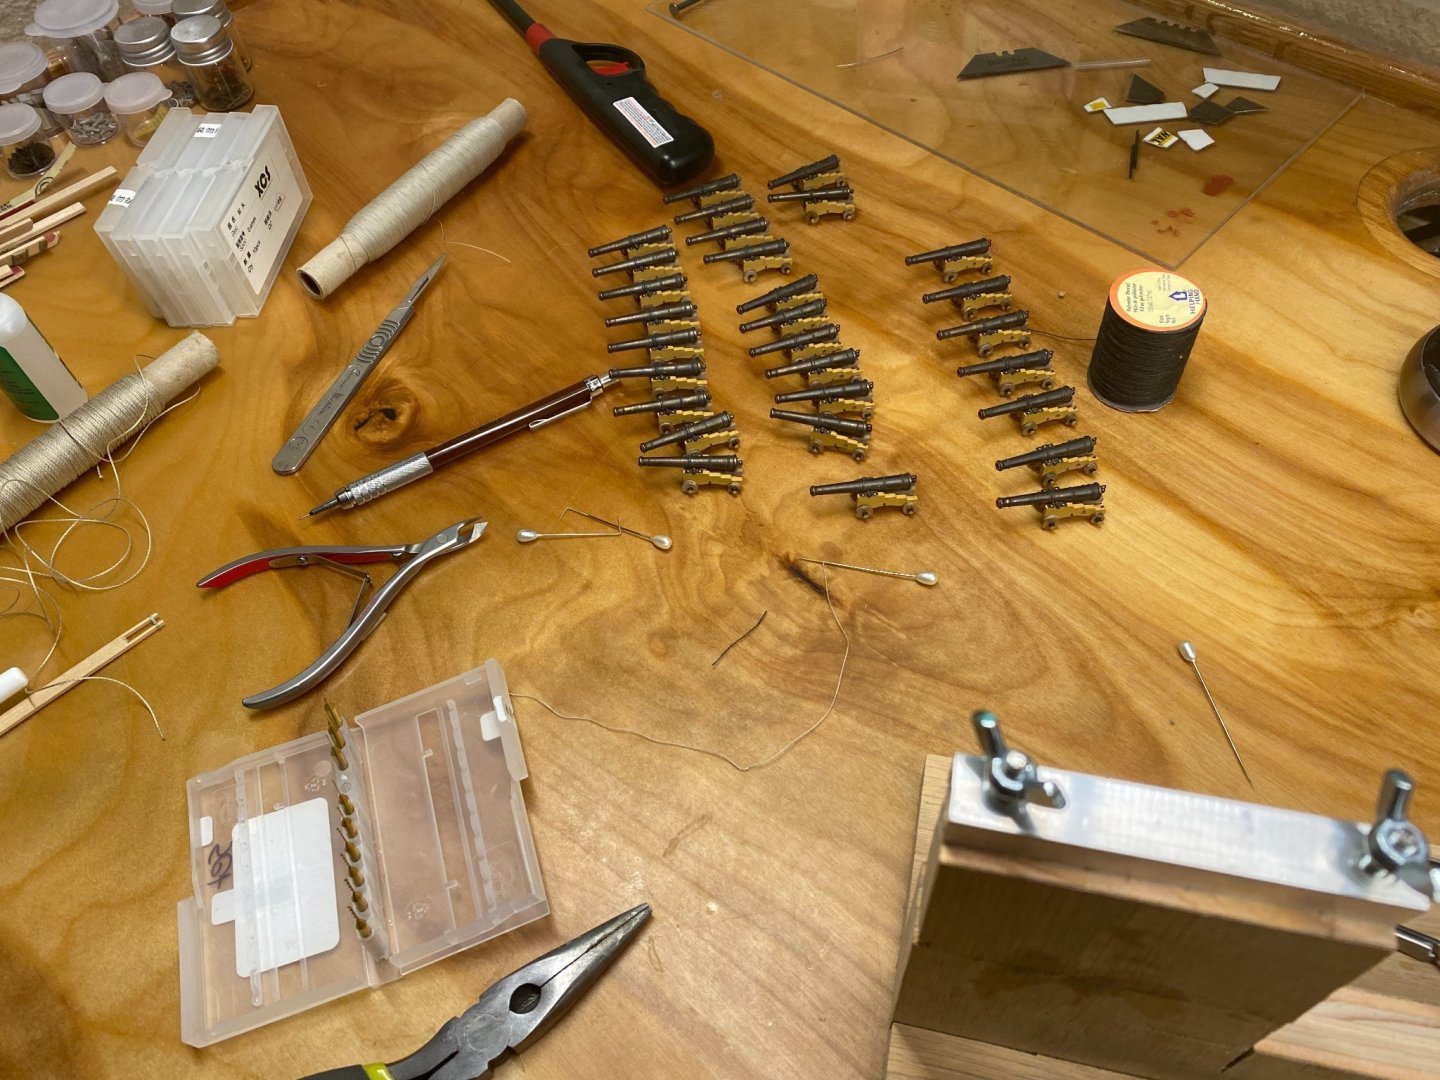
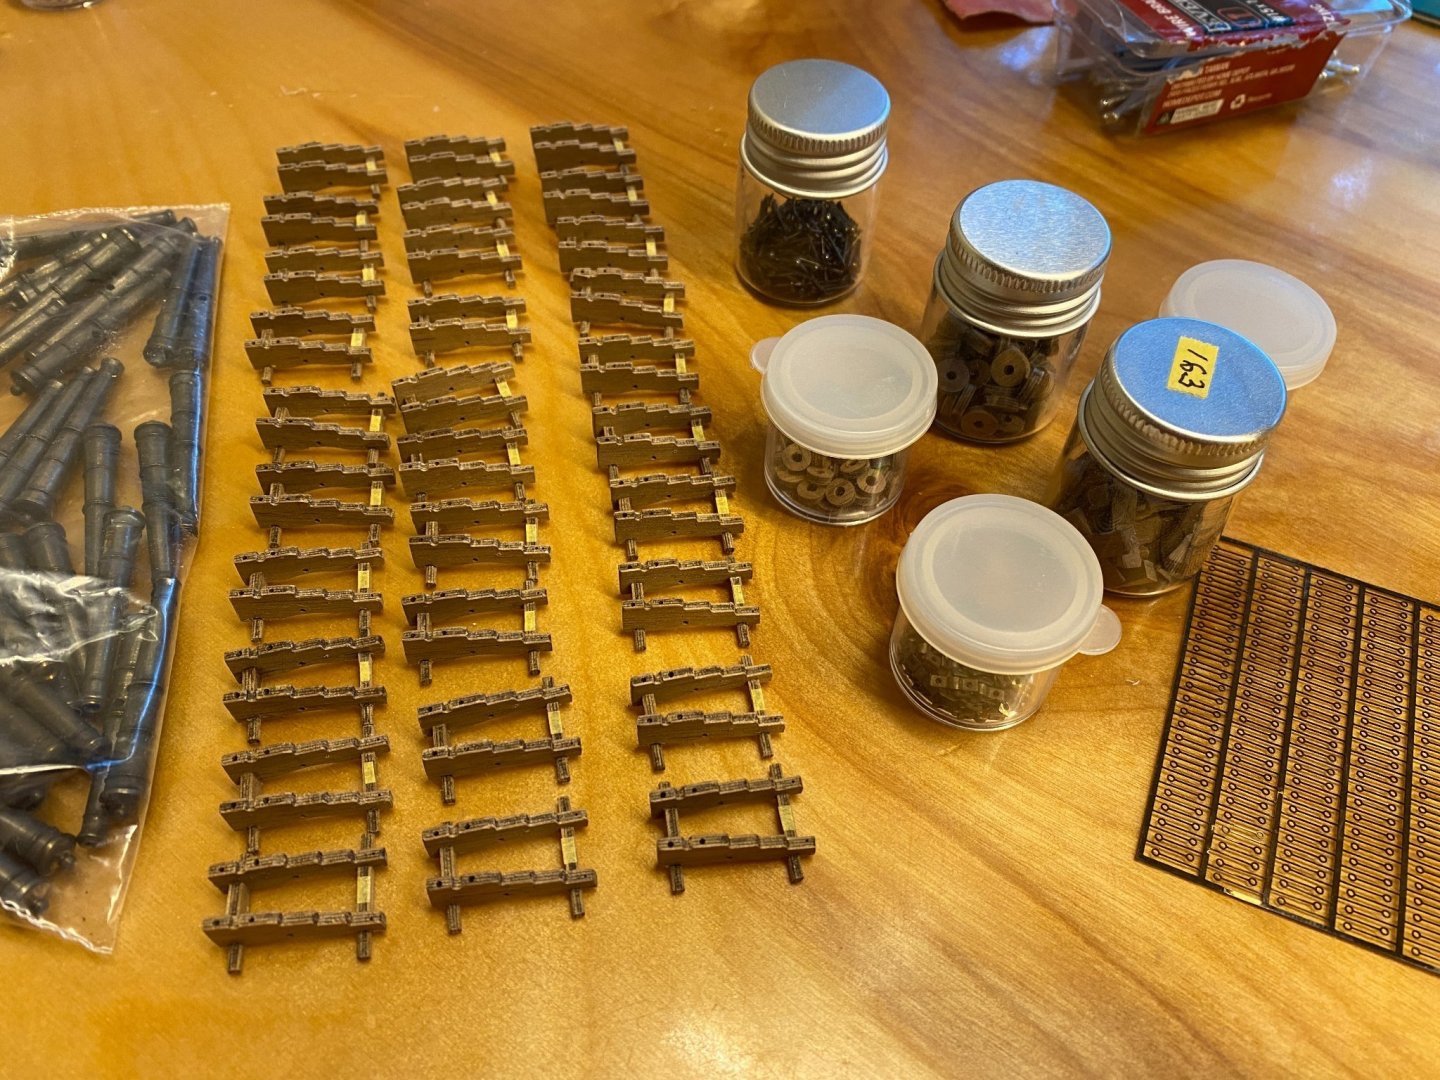
Caldercraft HMS Victory build Update - 30 x 12 lb. Long guns Hi all; it's been awhile since my last post. Work has been busy. Anyway, I finally managed to get my first cannon rigged and mounted. I had no idea these little buggers could be so time consuming. Cutting and sanding the parts and drilling all of the various holes easily took a week. After that, I prepped all of my brass per Kurt Van Dahm's post on brass blackening. I didn't get a perfect, even black finish, but was still reasonably happy with the result. No new discoveries here, just follow his advice to the letter including the pickle pot. I'll leave this photo legibly large. I assembled and painted the gun carriages before having to clean paint out of all of my holes again. (12 holes per carriage - all of varying sizes) I found a nice little micro-drill bit kit on Amazon (0.2 to 1.1 mm) and quickly learned I should have bought ten of each size as they have a nasty habit of breaking if they're just merely breathed on wrong. I also made sure the glue surface for the stool bed was adequately masked off before painting. Each carriage took four coats of paint to get adequate coverage. I had to relocate all of my pad eye holes with a finely sharpened pin after each coat. Note bed bolt hole in photo below. After painting, I inserted the bed bolts, glued on all of the stool beds, and added all of the metal, including pad eyes. A templating jig allowed uniform pad eye hole placement in the deck and around each gunport. The rigging for each cannon was (and still is!) a tad more involved than I had originally thought as well. I couldn't seem to rig them in place, so I made a mock-up jig for this. ...And one for making block & tackle assemblies. Mine... ...And here's the real thing. It will be another few months before I post again. Work, family etc., and 29 more cannons to rig!

-
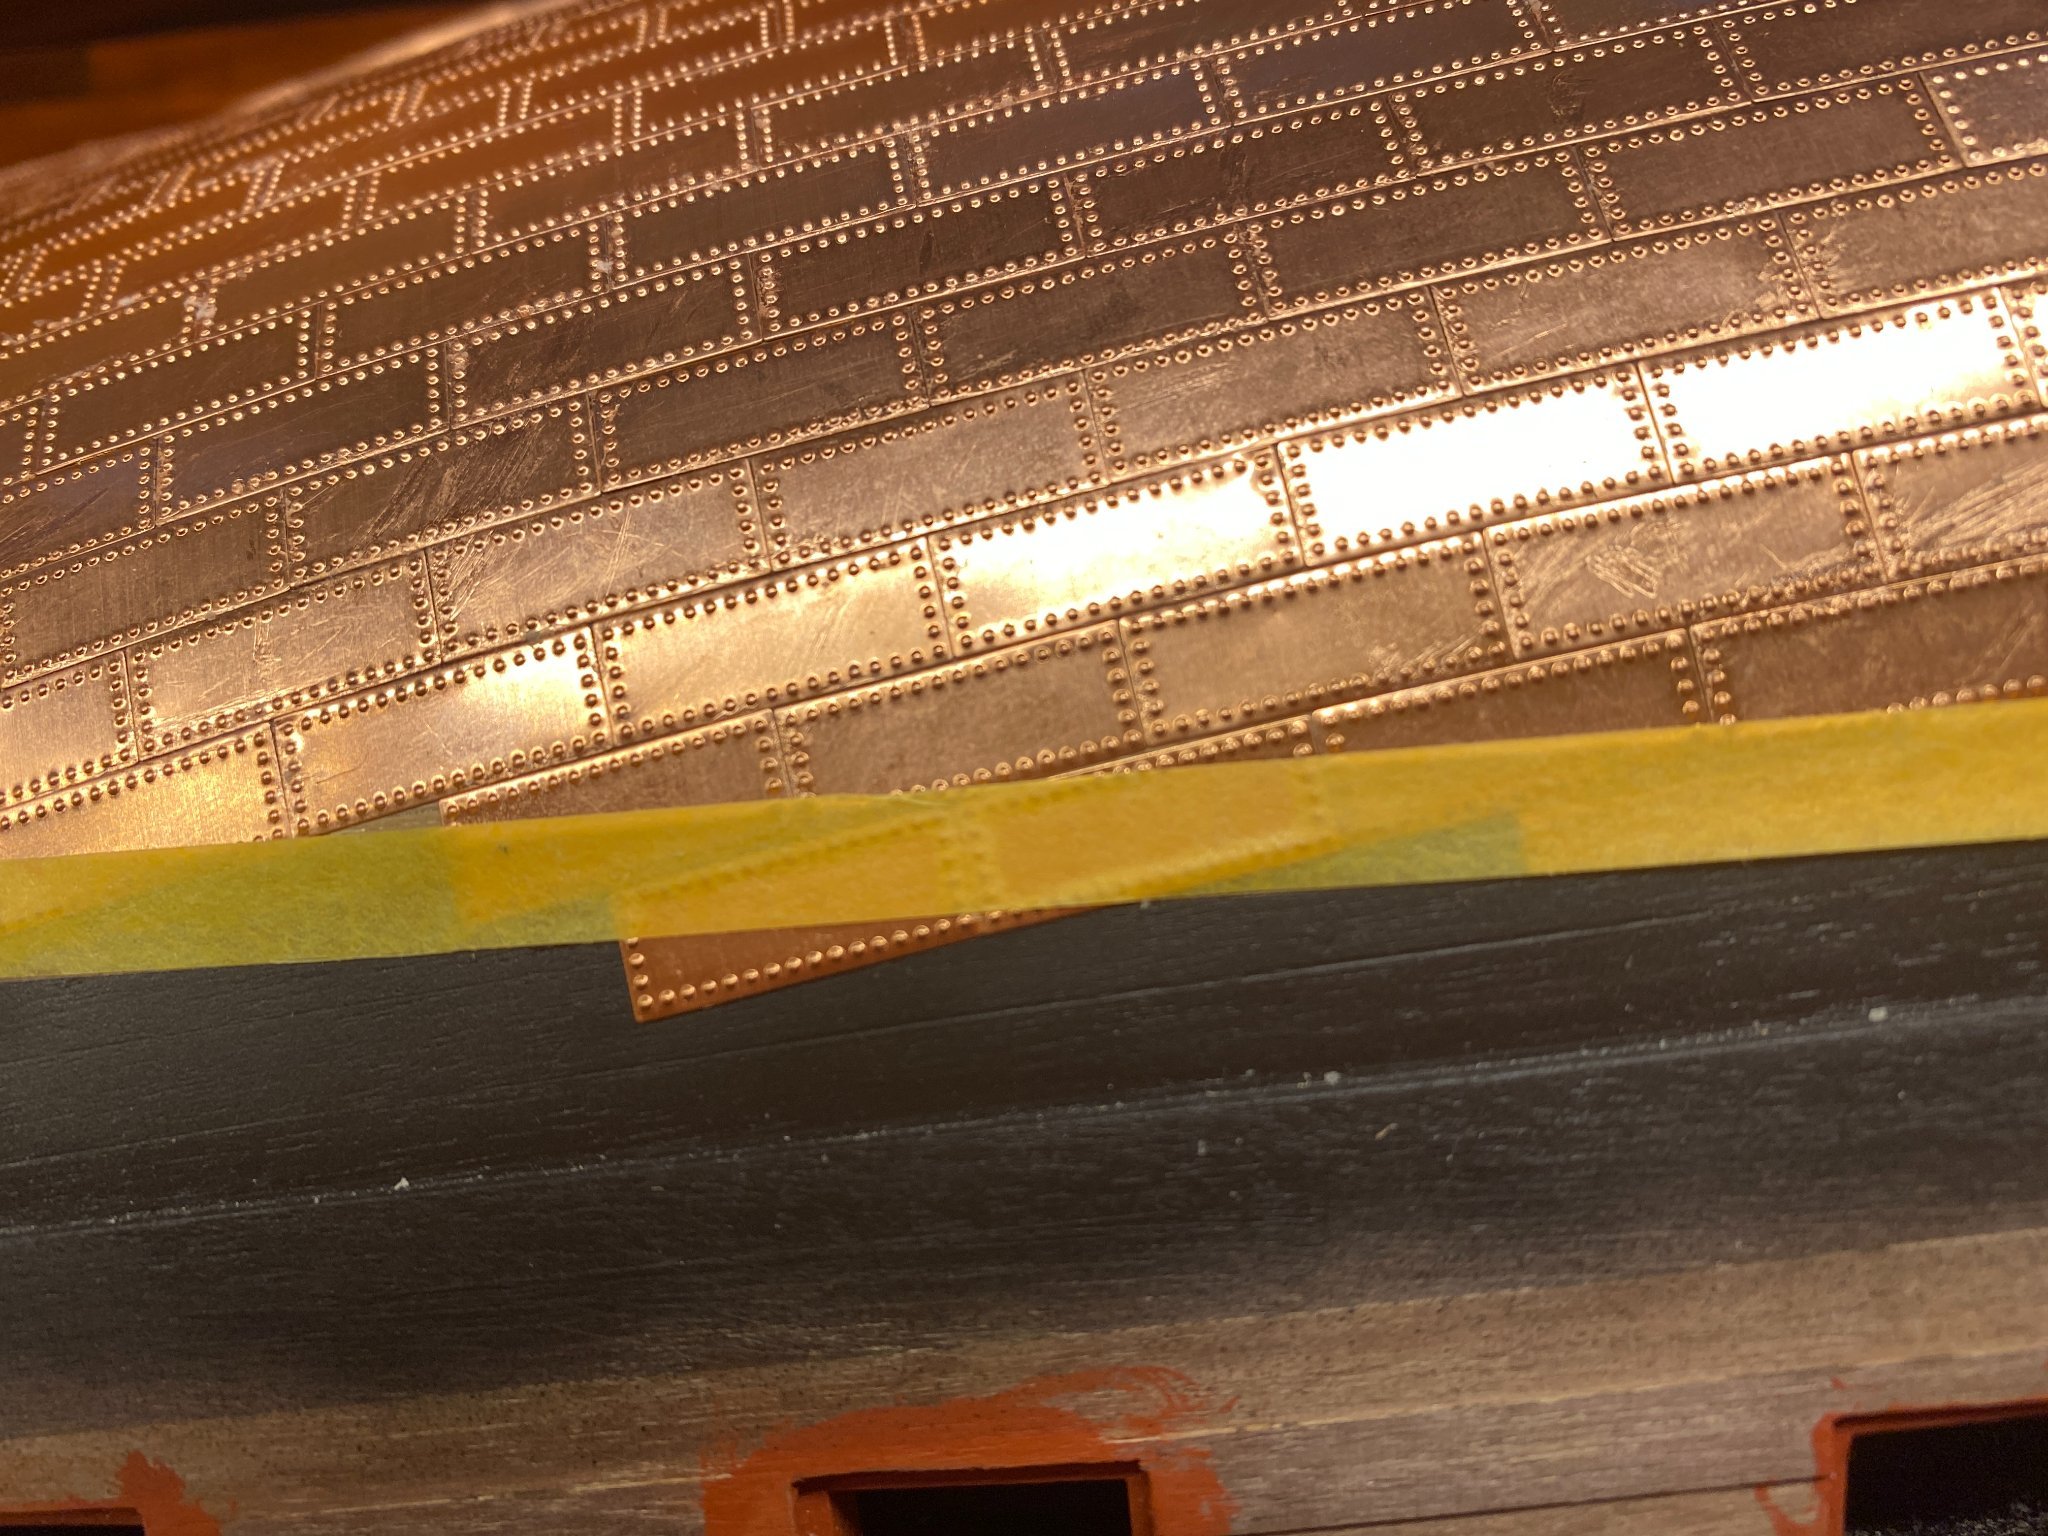
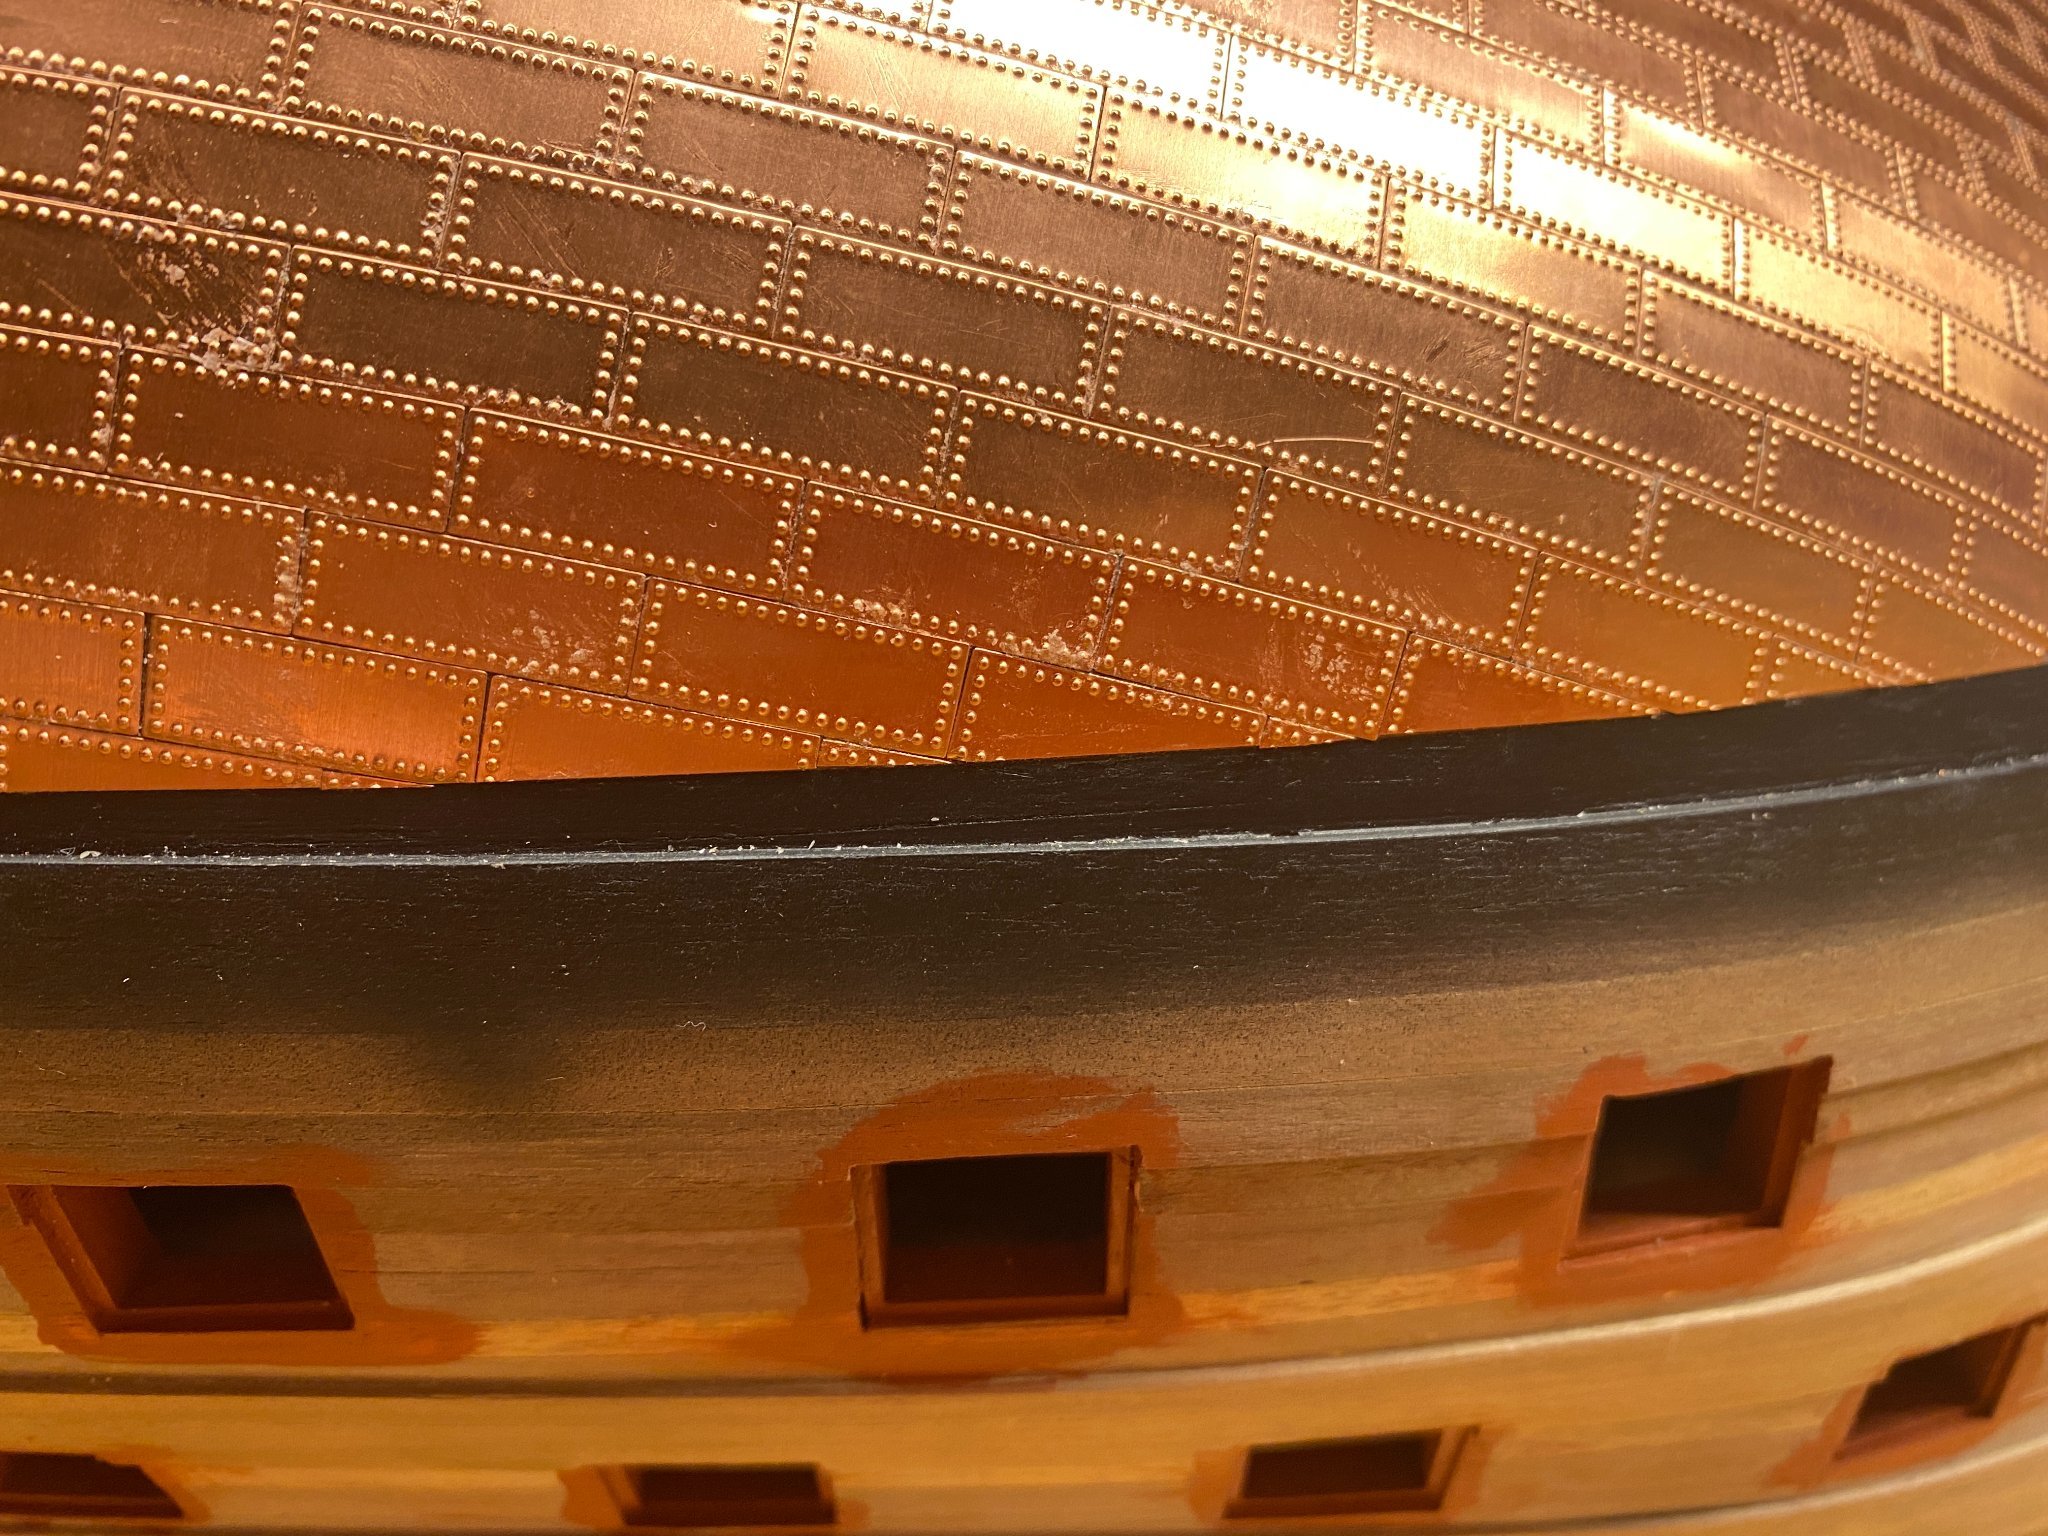
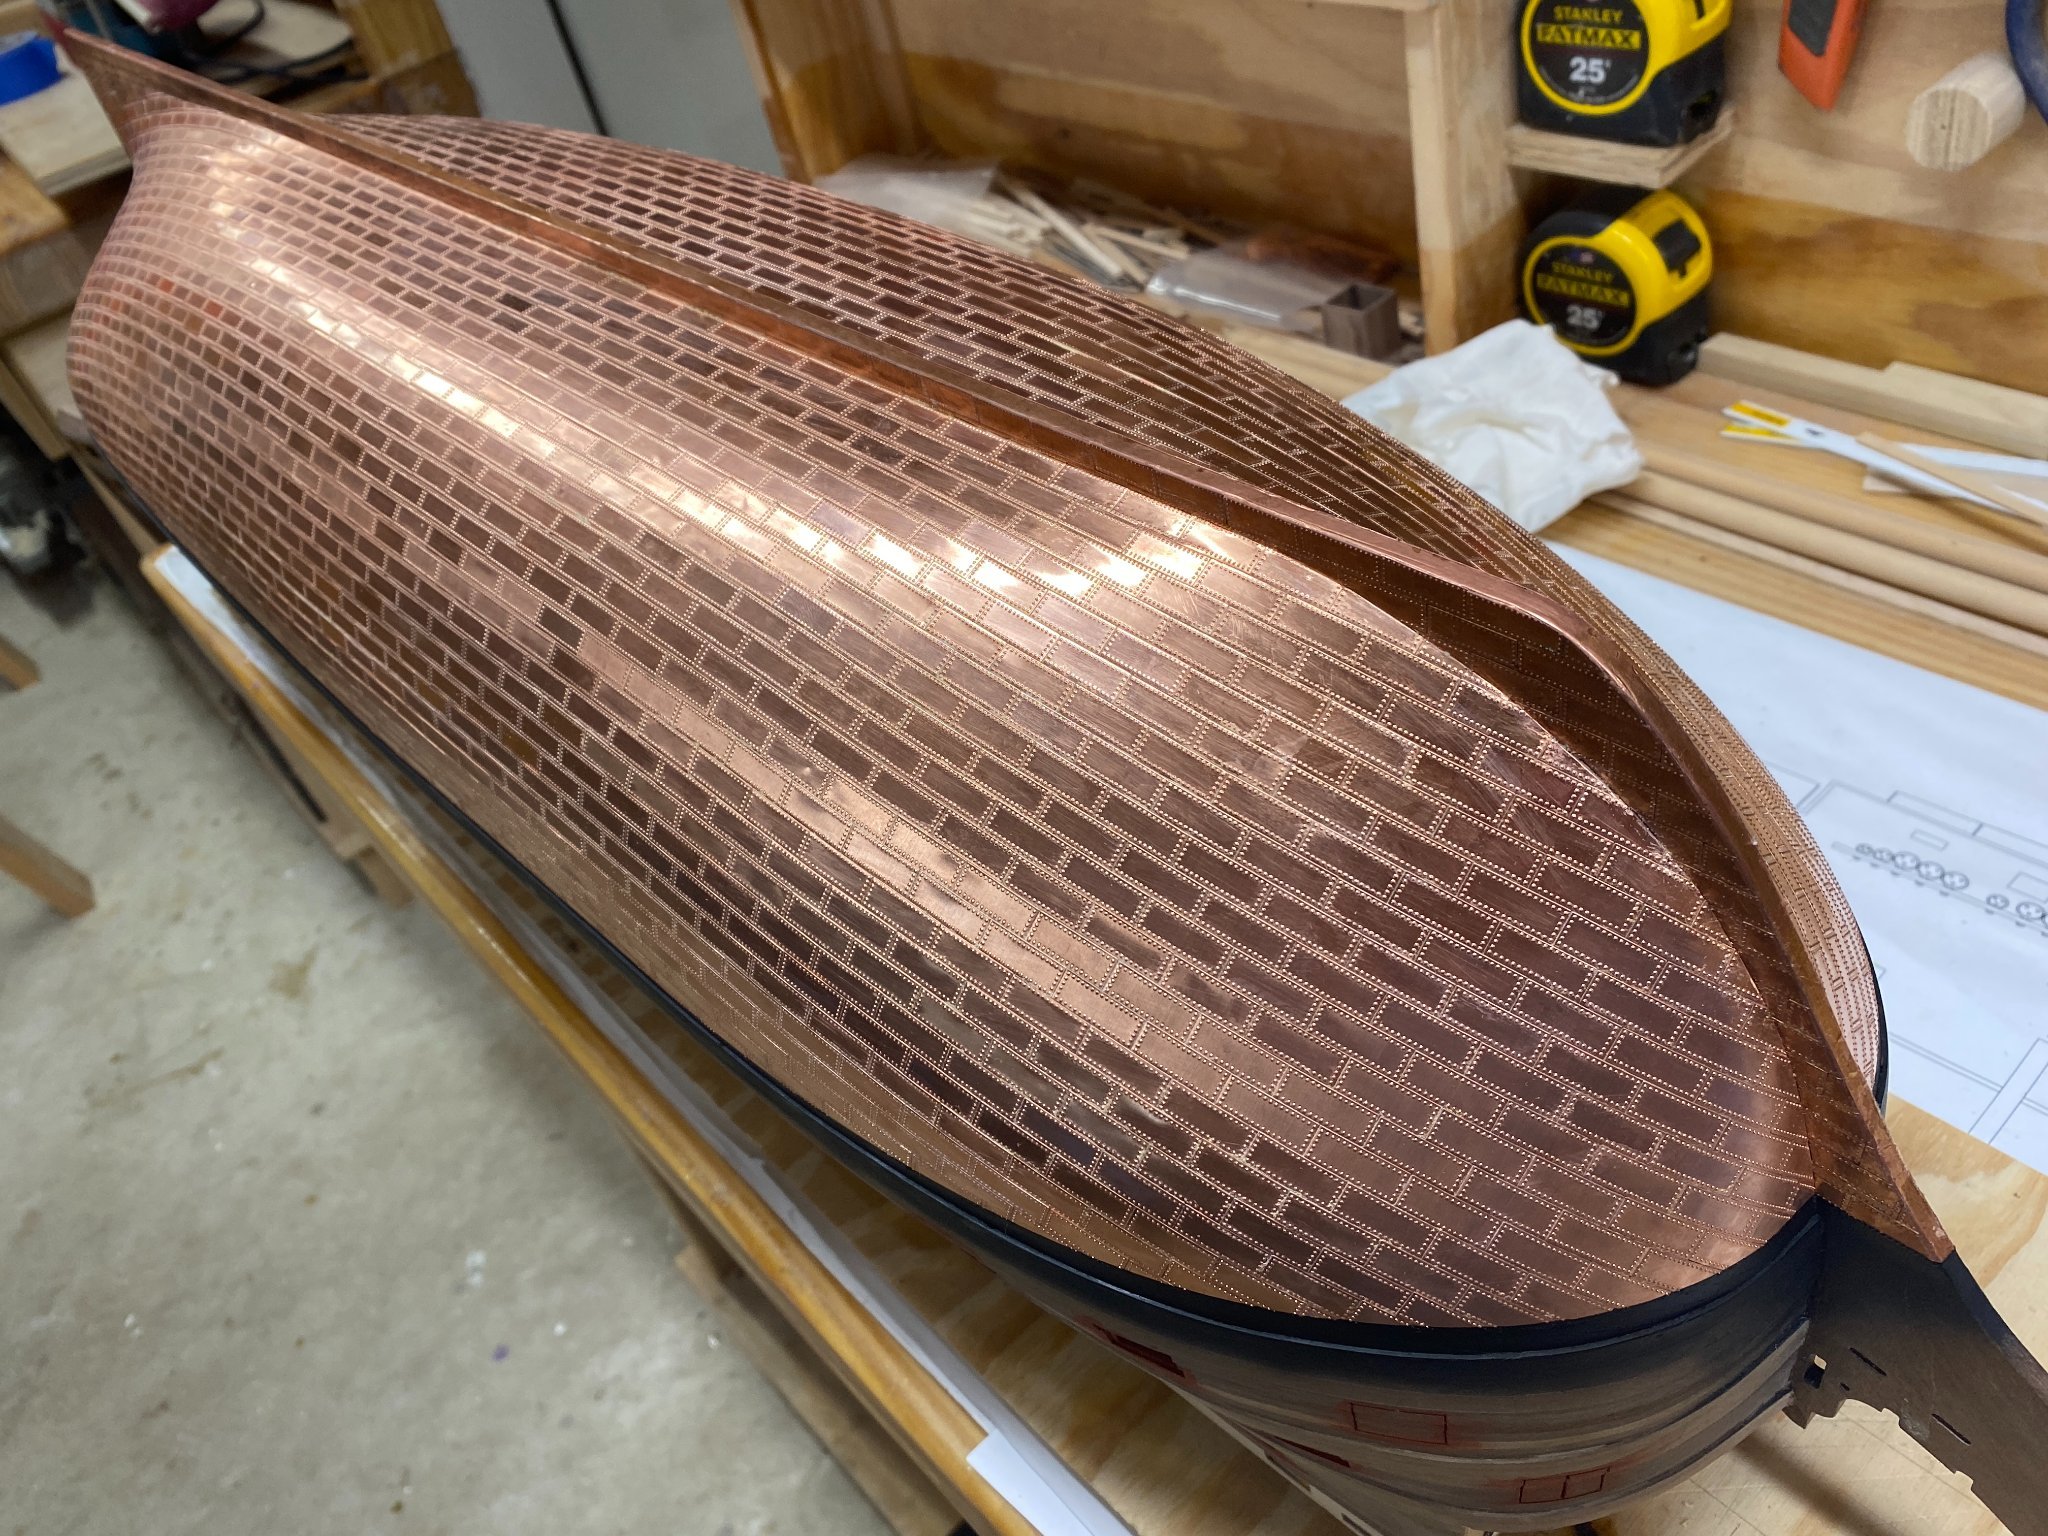
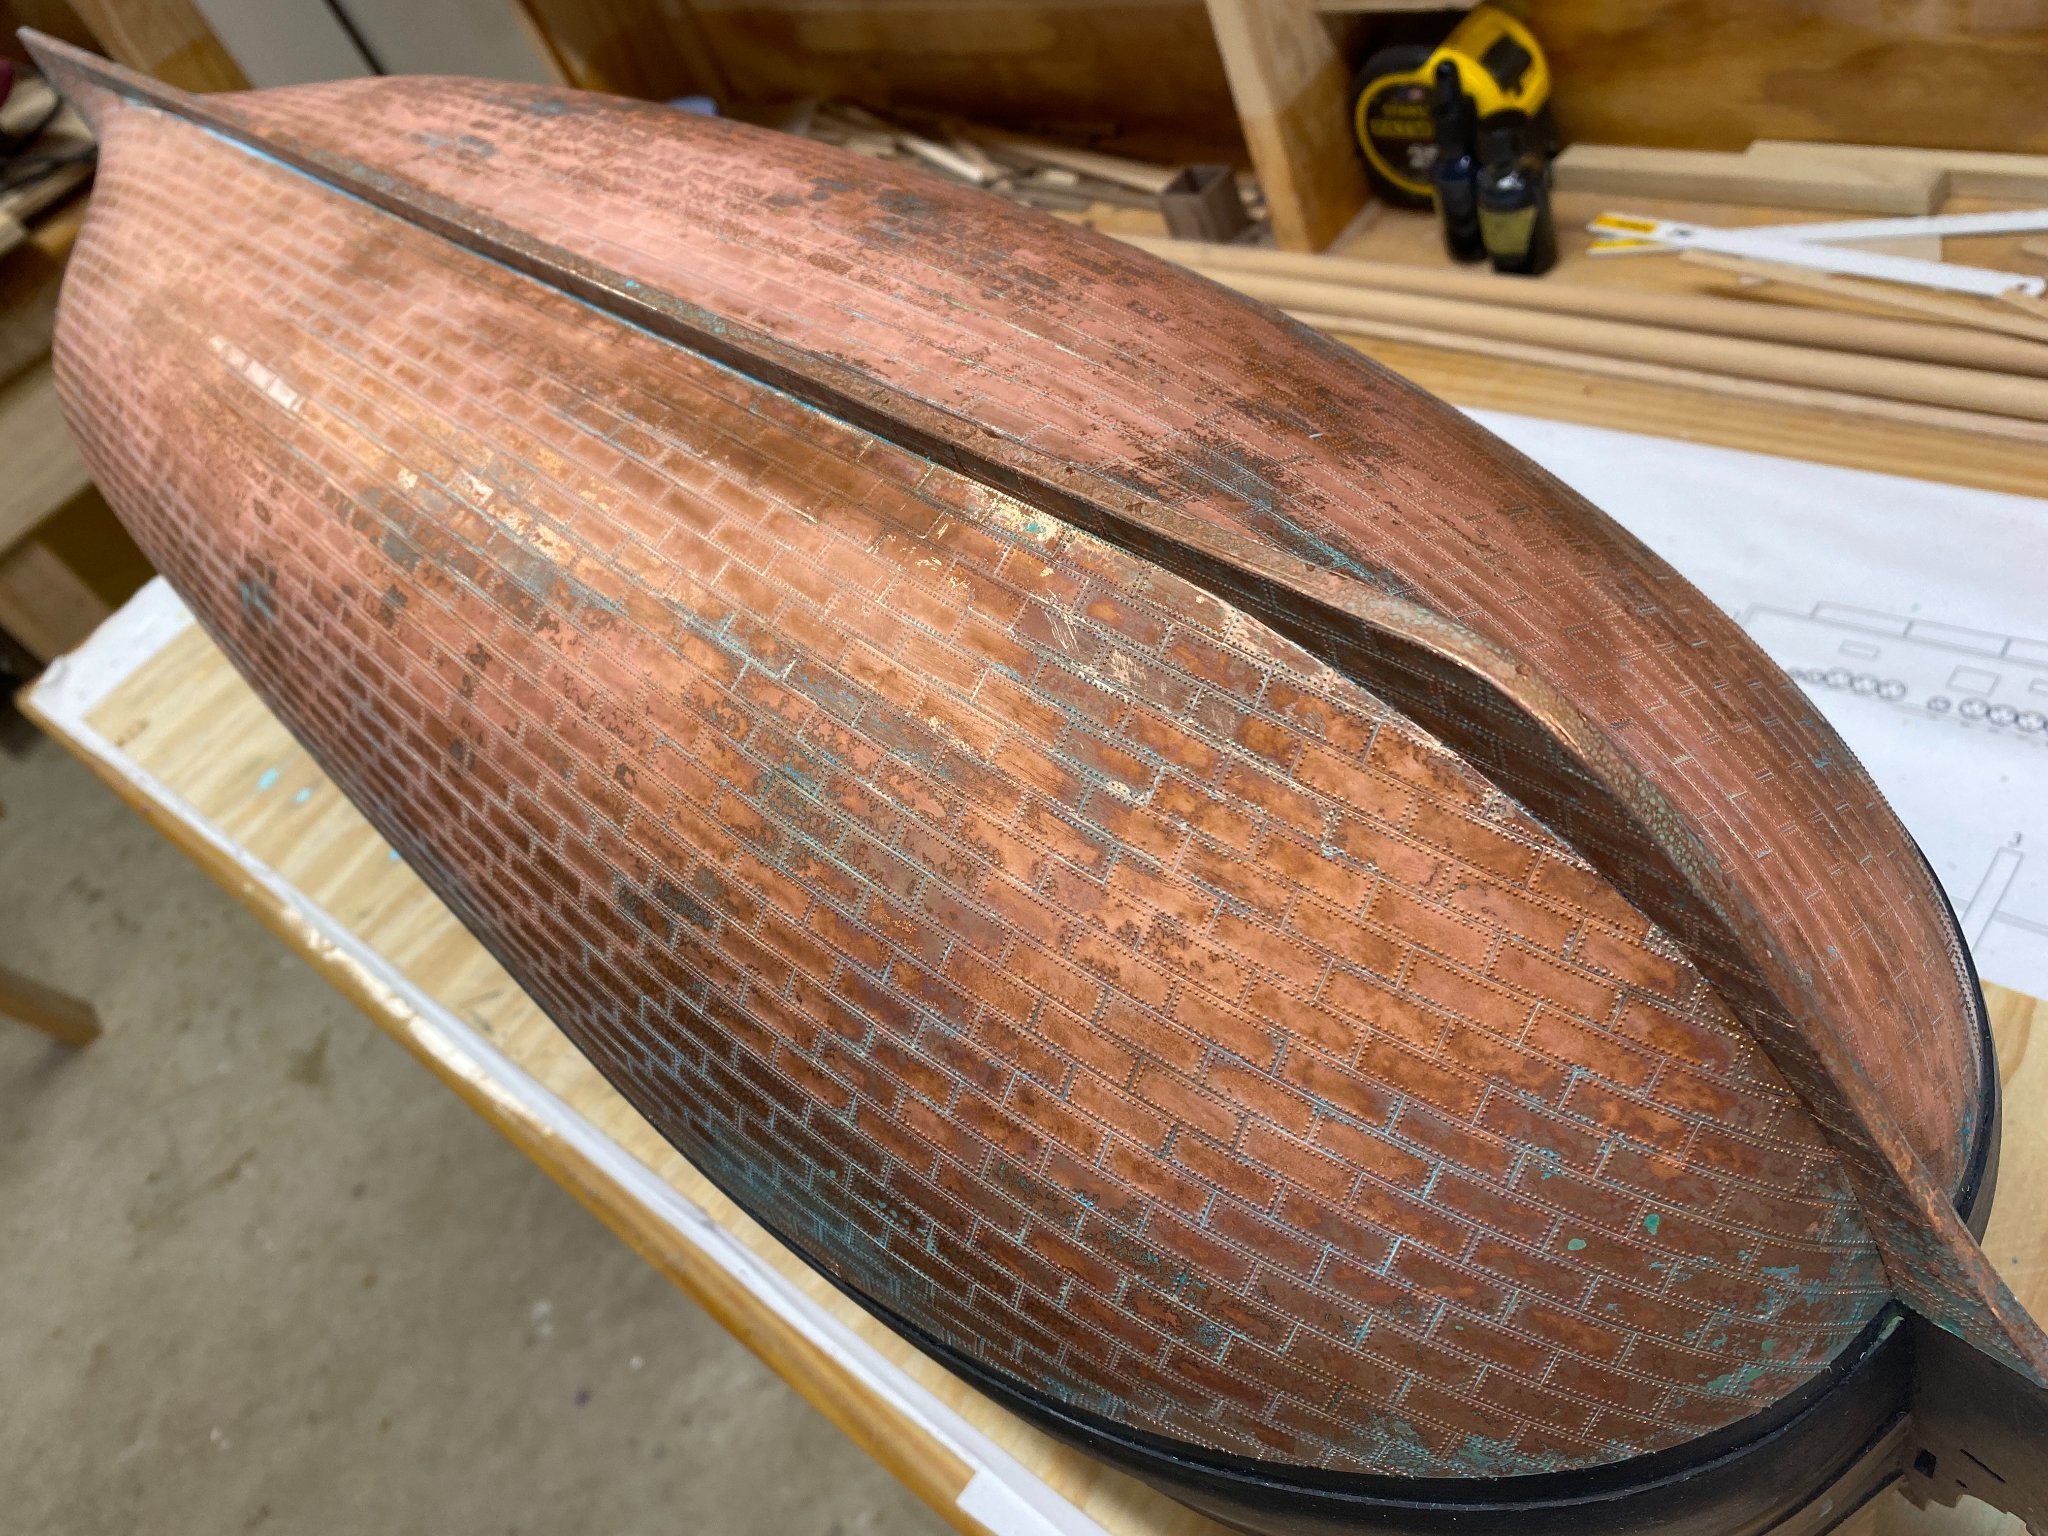
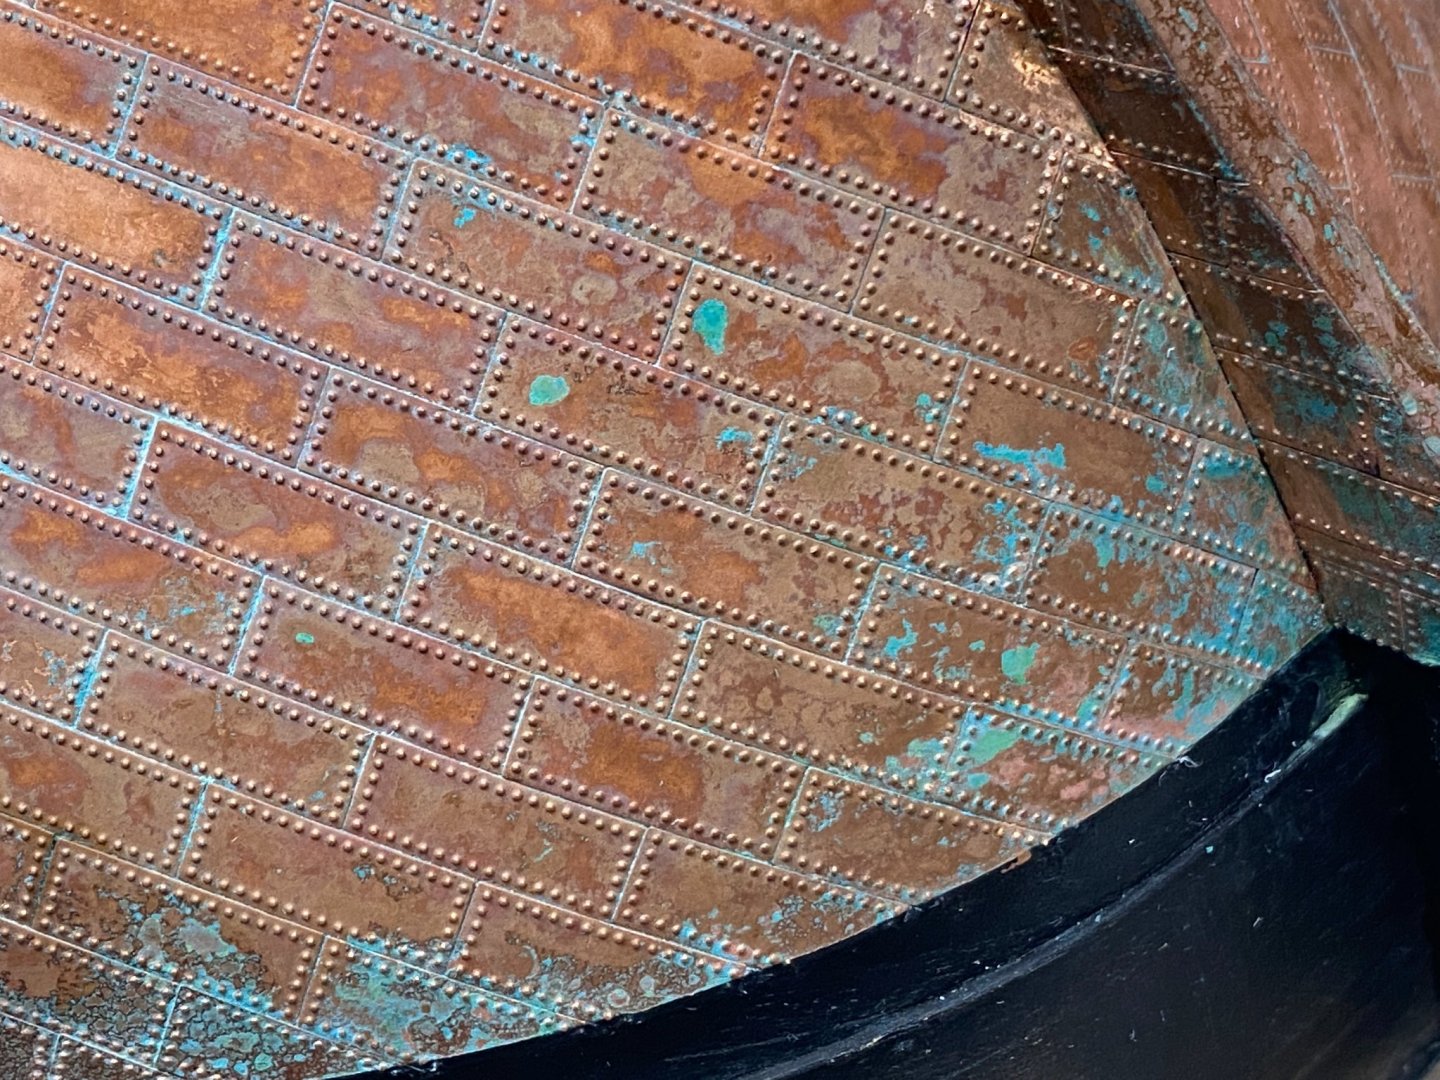
Caldercraft HMS Victory build Update - Copper Plates Ted - Thank you for the advice. Your work looks fantastic. Allan - Thank you for your kid words. I did as Ted and others suggested - starting at the garboard and working my way down. Notice all the CA glue on the tiles I used a brownie pan filled with acetone and a new kitchen sponge to clean all the CA glue off after I was finished. I then masked off a new water line 1/16" onto the edge of the copper and painted it on with an airbrush. This gave me a very clean finish at the edge. I then applied a patenating solution (Modern Masters Green Patina Aging Solution) using a small misting spray bottle. I let it completely dry. The result was this horrifying neon turquoise color: No worries though. The majority of it came off with just a wet cloth leaving the patina I was looking for: I needed to do this now, because I will not be able to start my rudder for several more months and wanted to be sure I could recreate this finish: Next: Upper deck? Please let me know what you think. It'll be a few more months before I'm able to post again due to work. Sincerely, Will


-
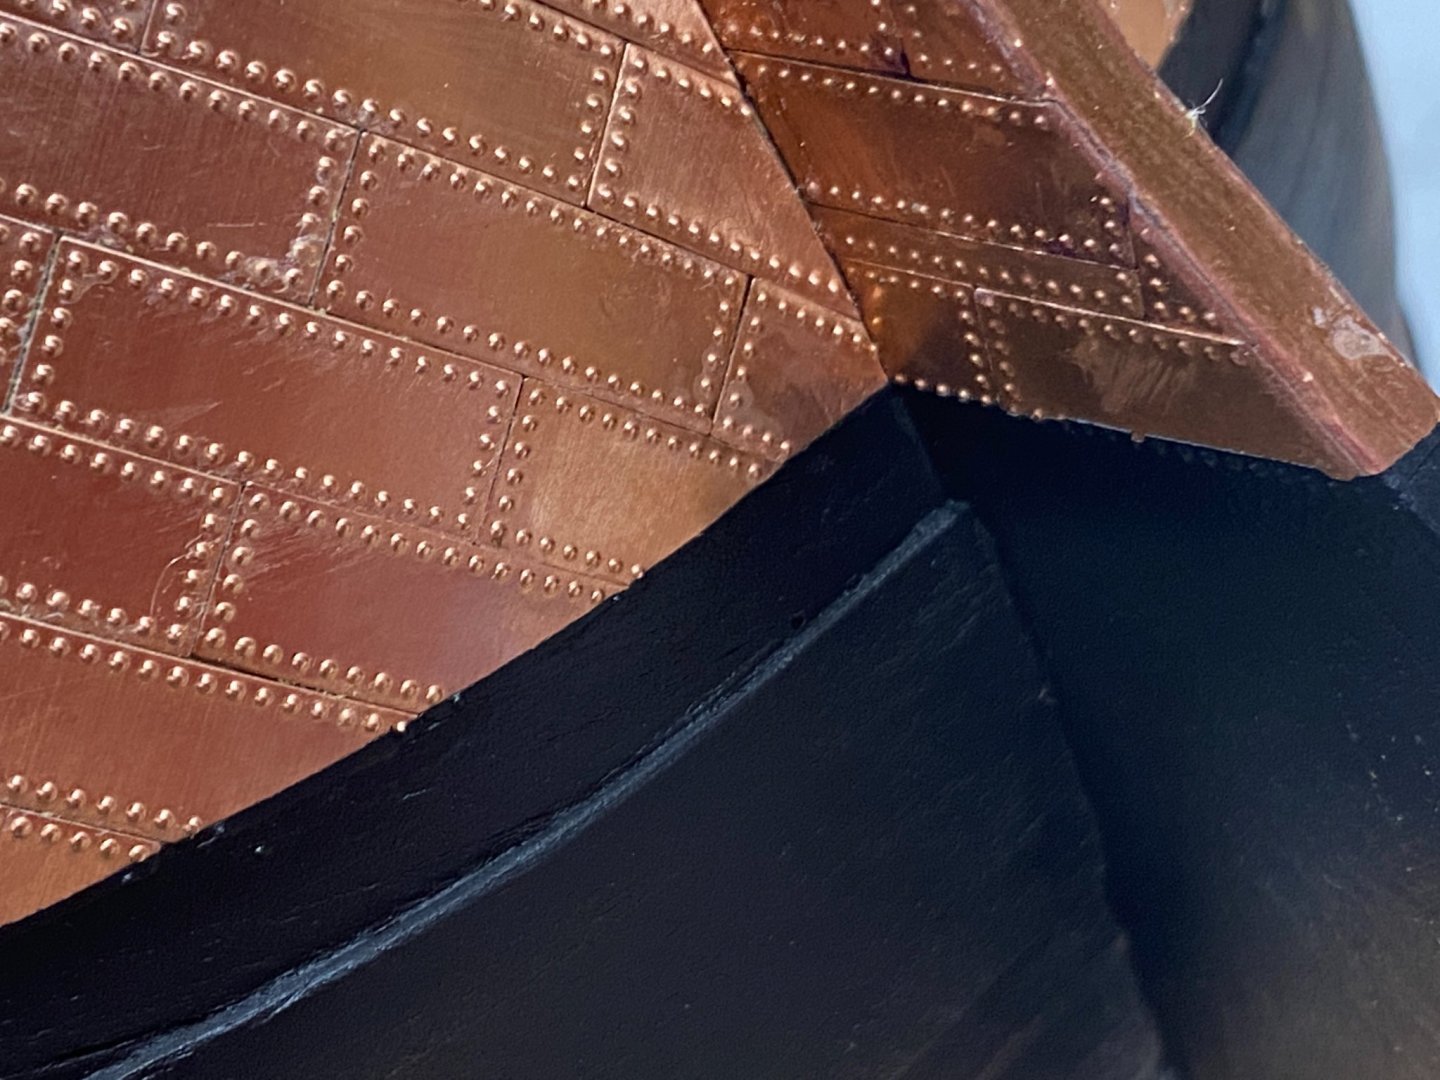
Allan, It is with no small amount of bashful remorse that I confess you are seeing a illusion. I have indeed put the plates "rivets out." I do apologize.
-
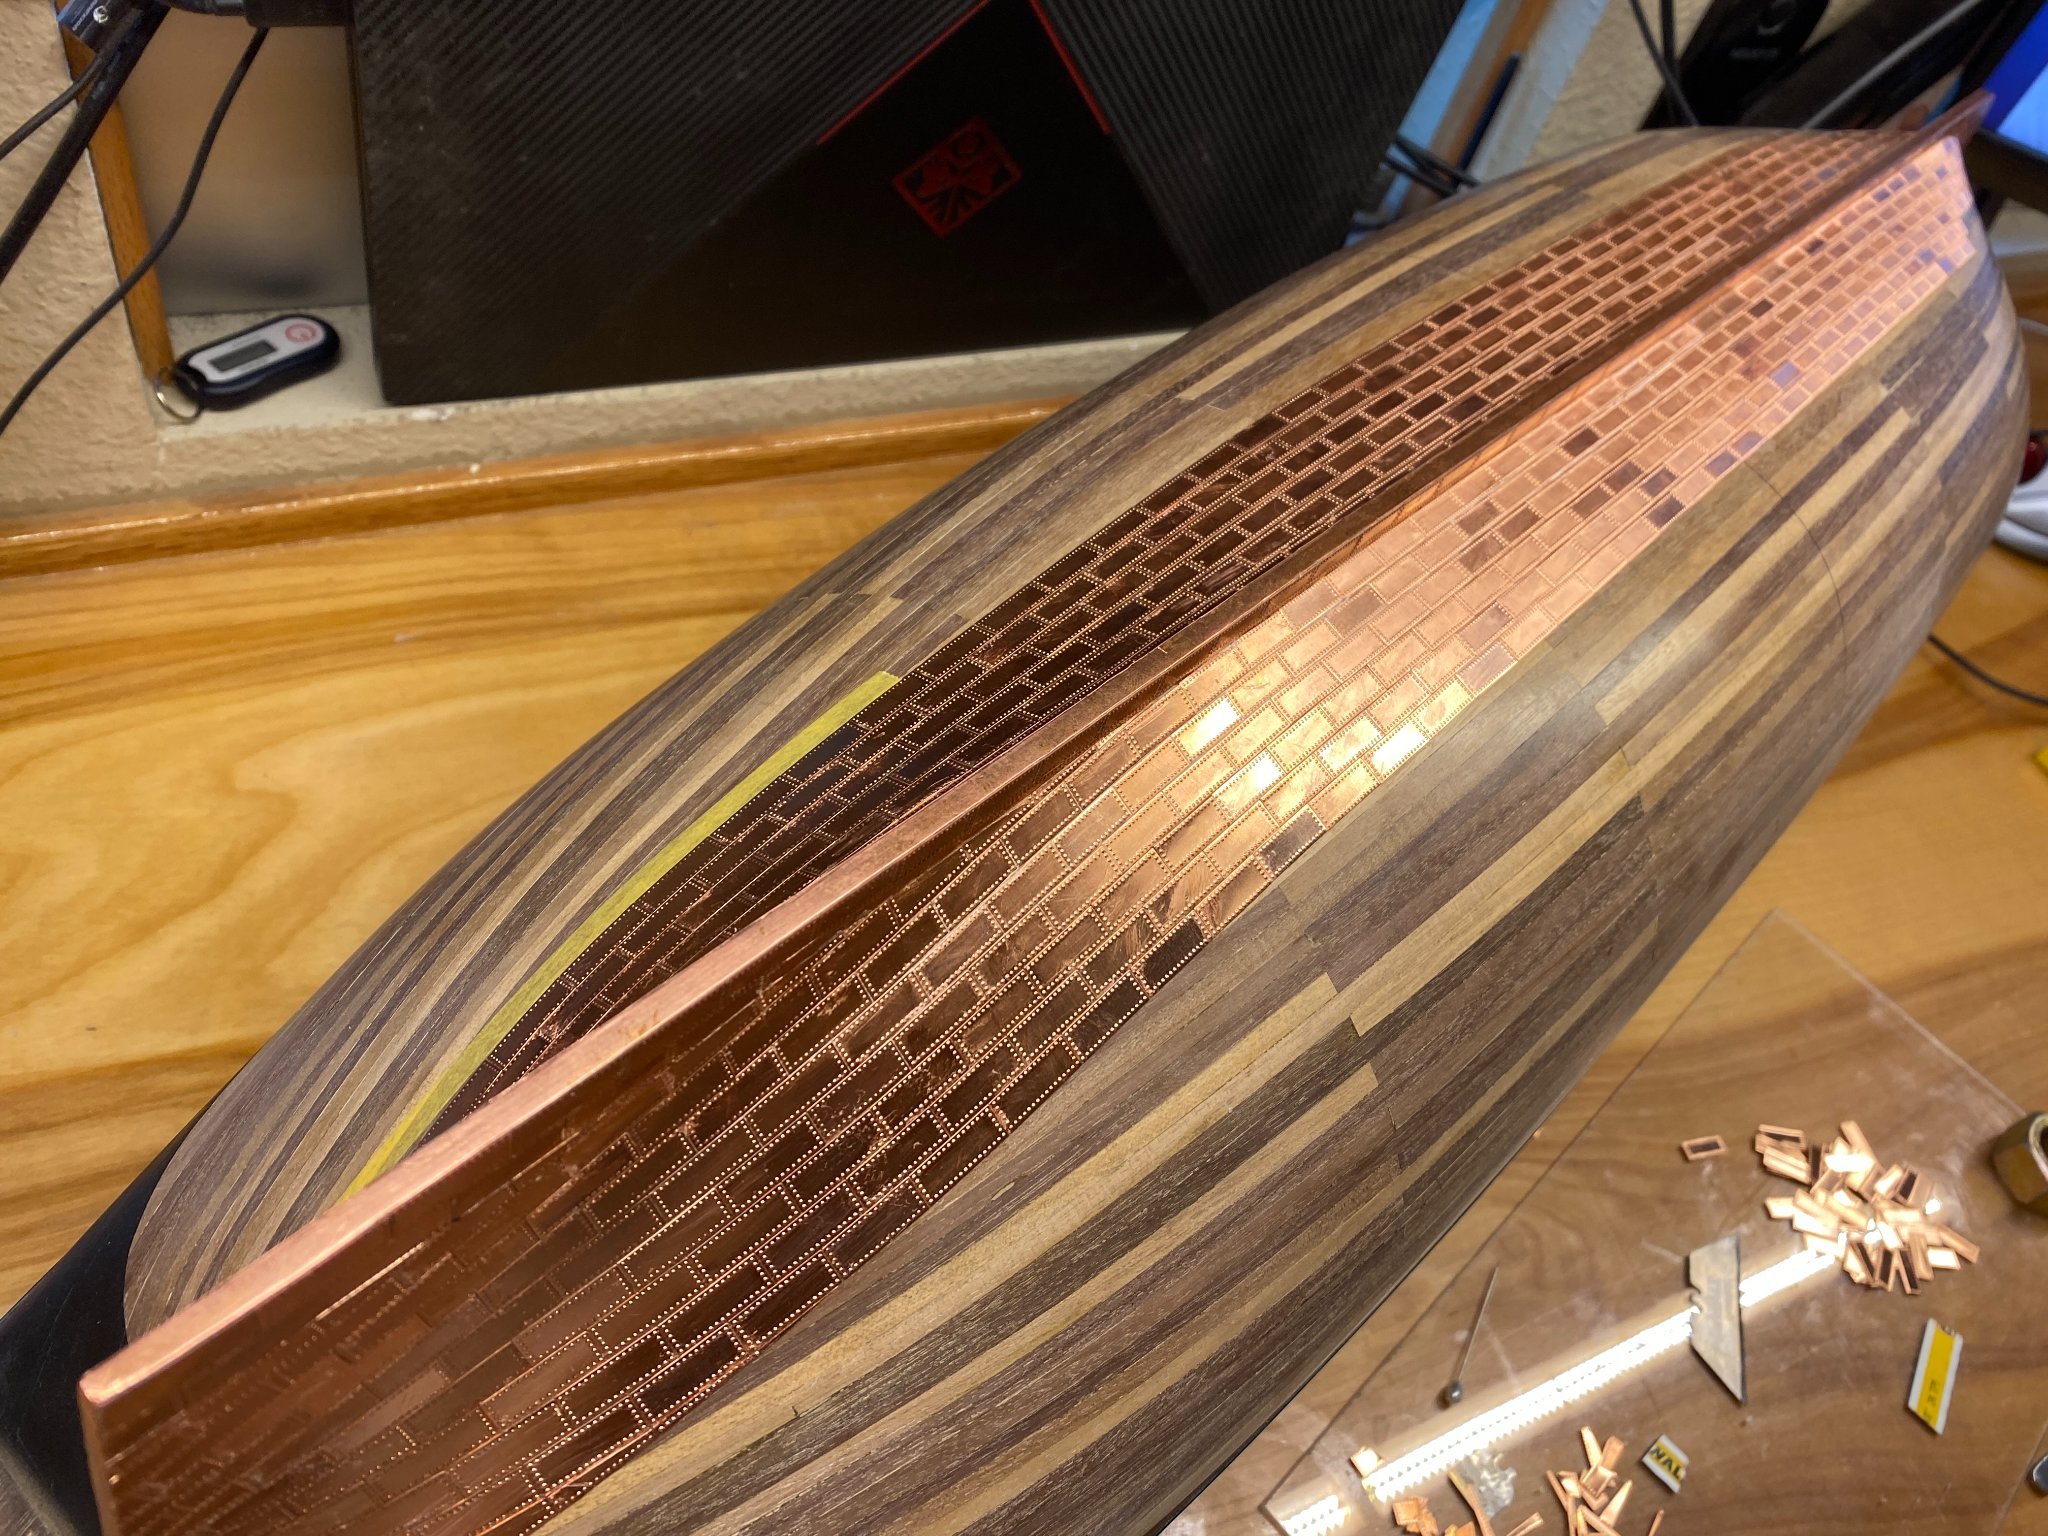
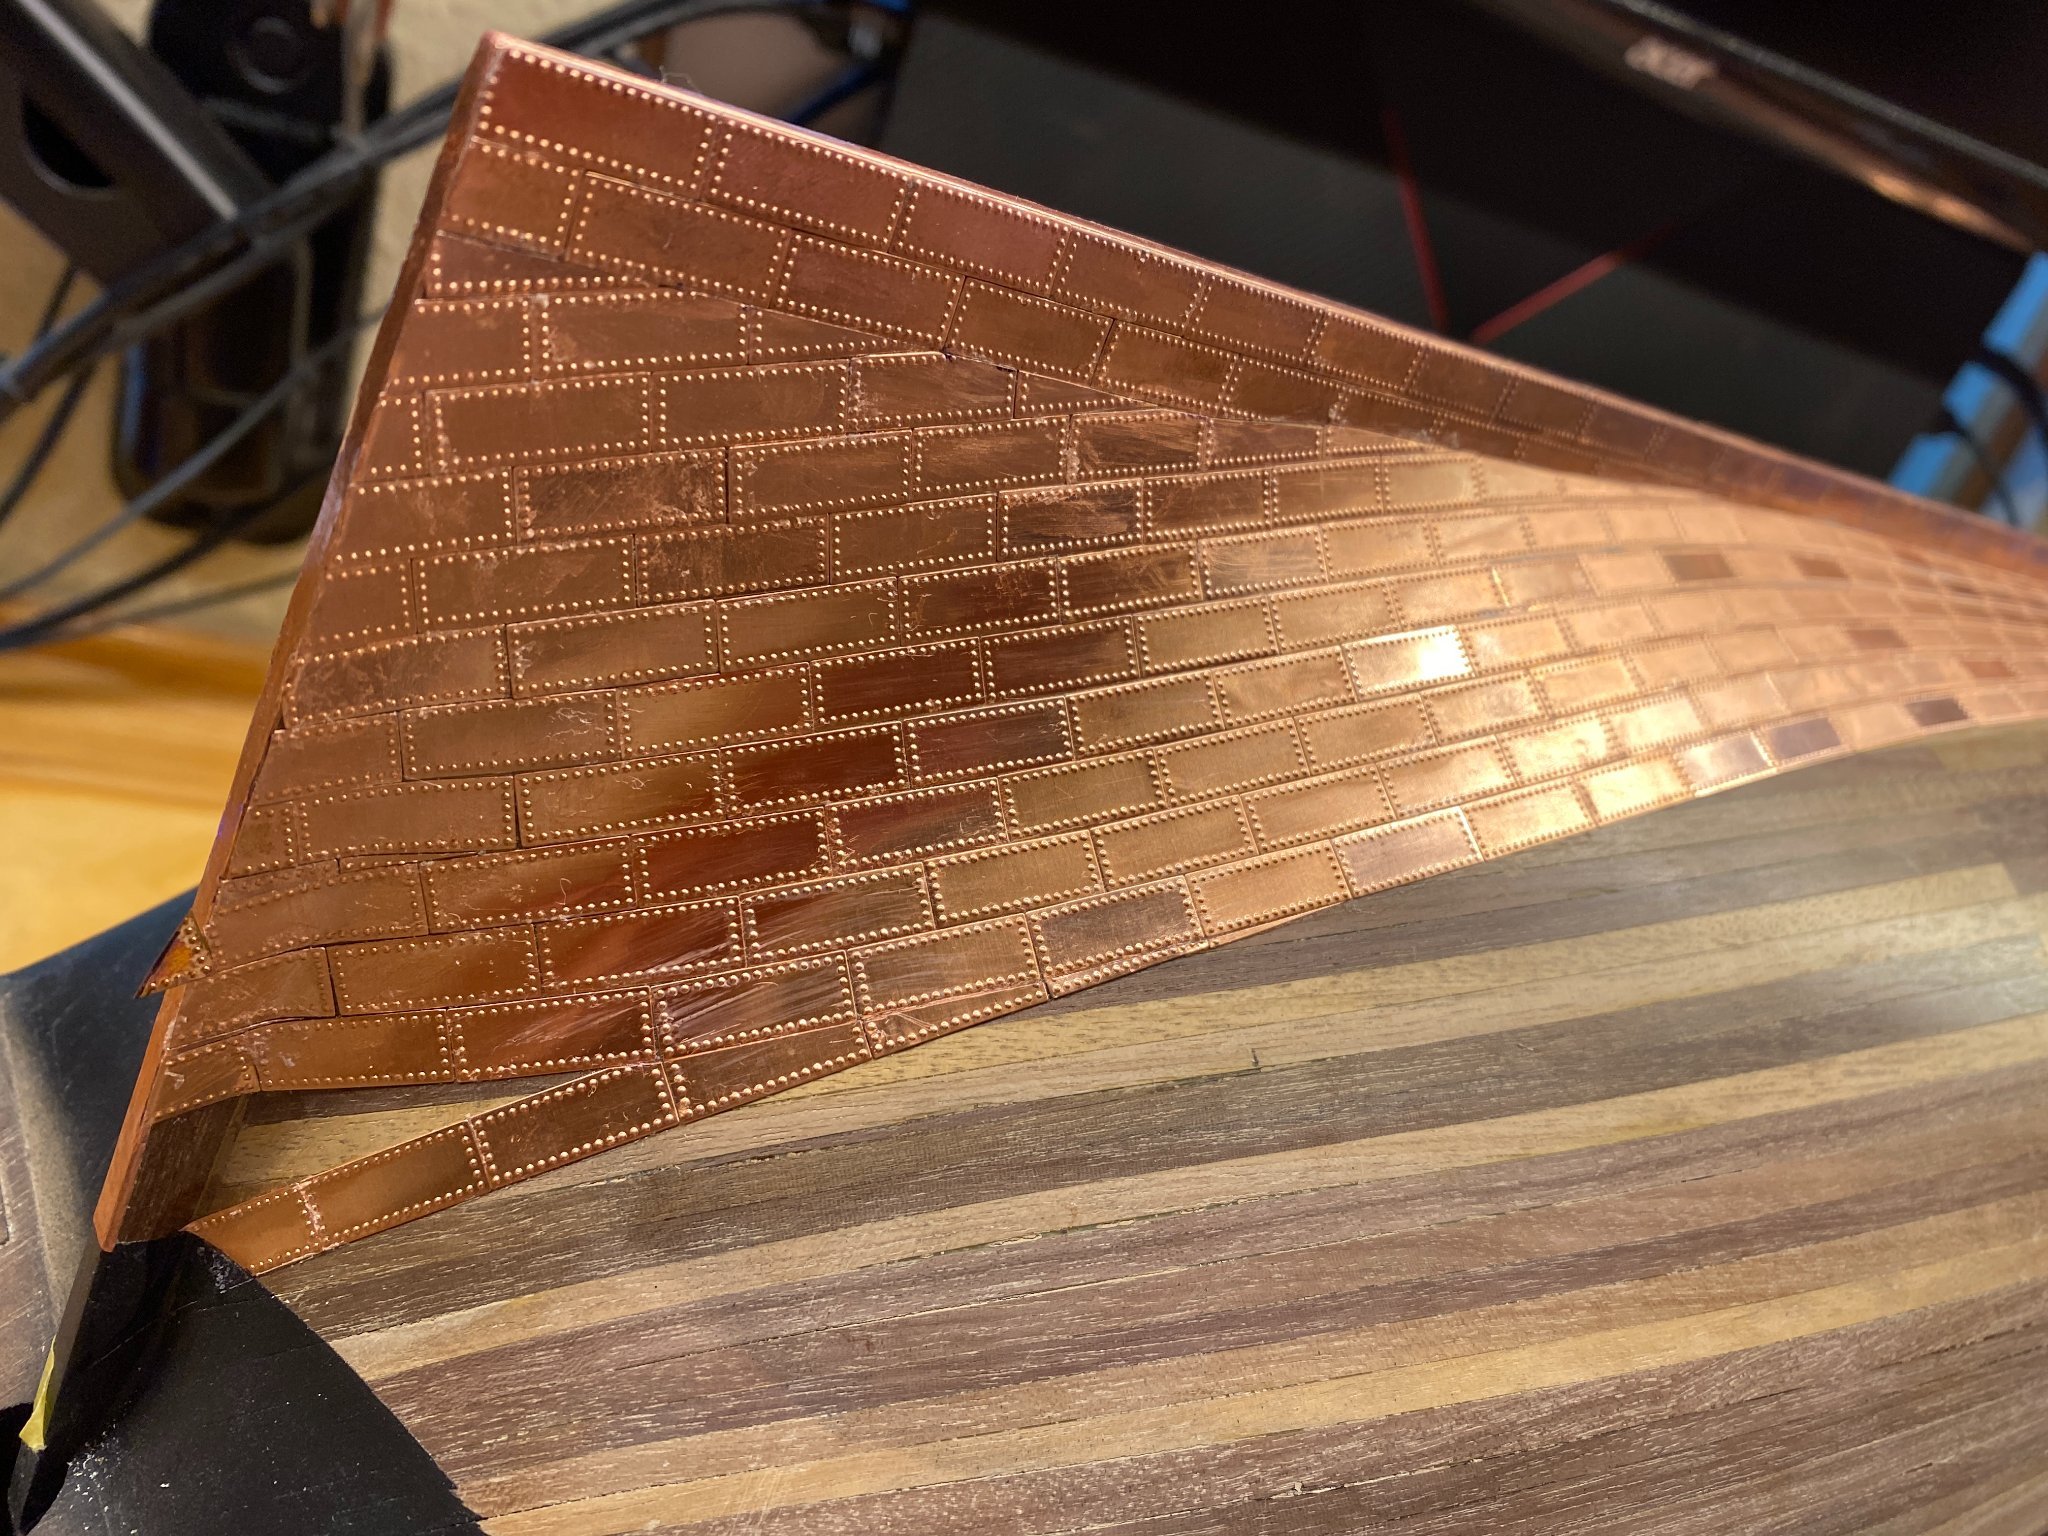
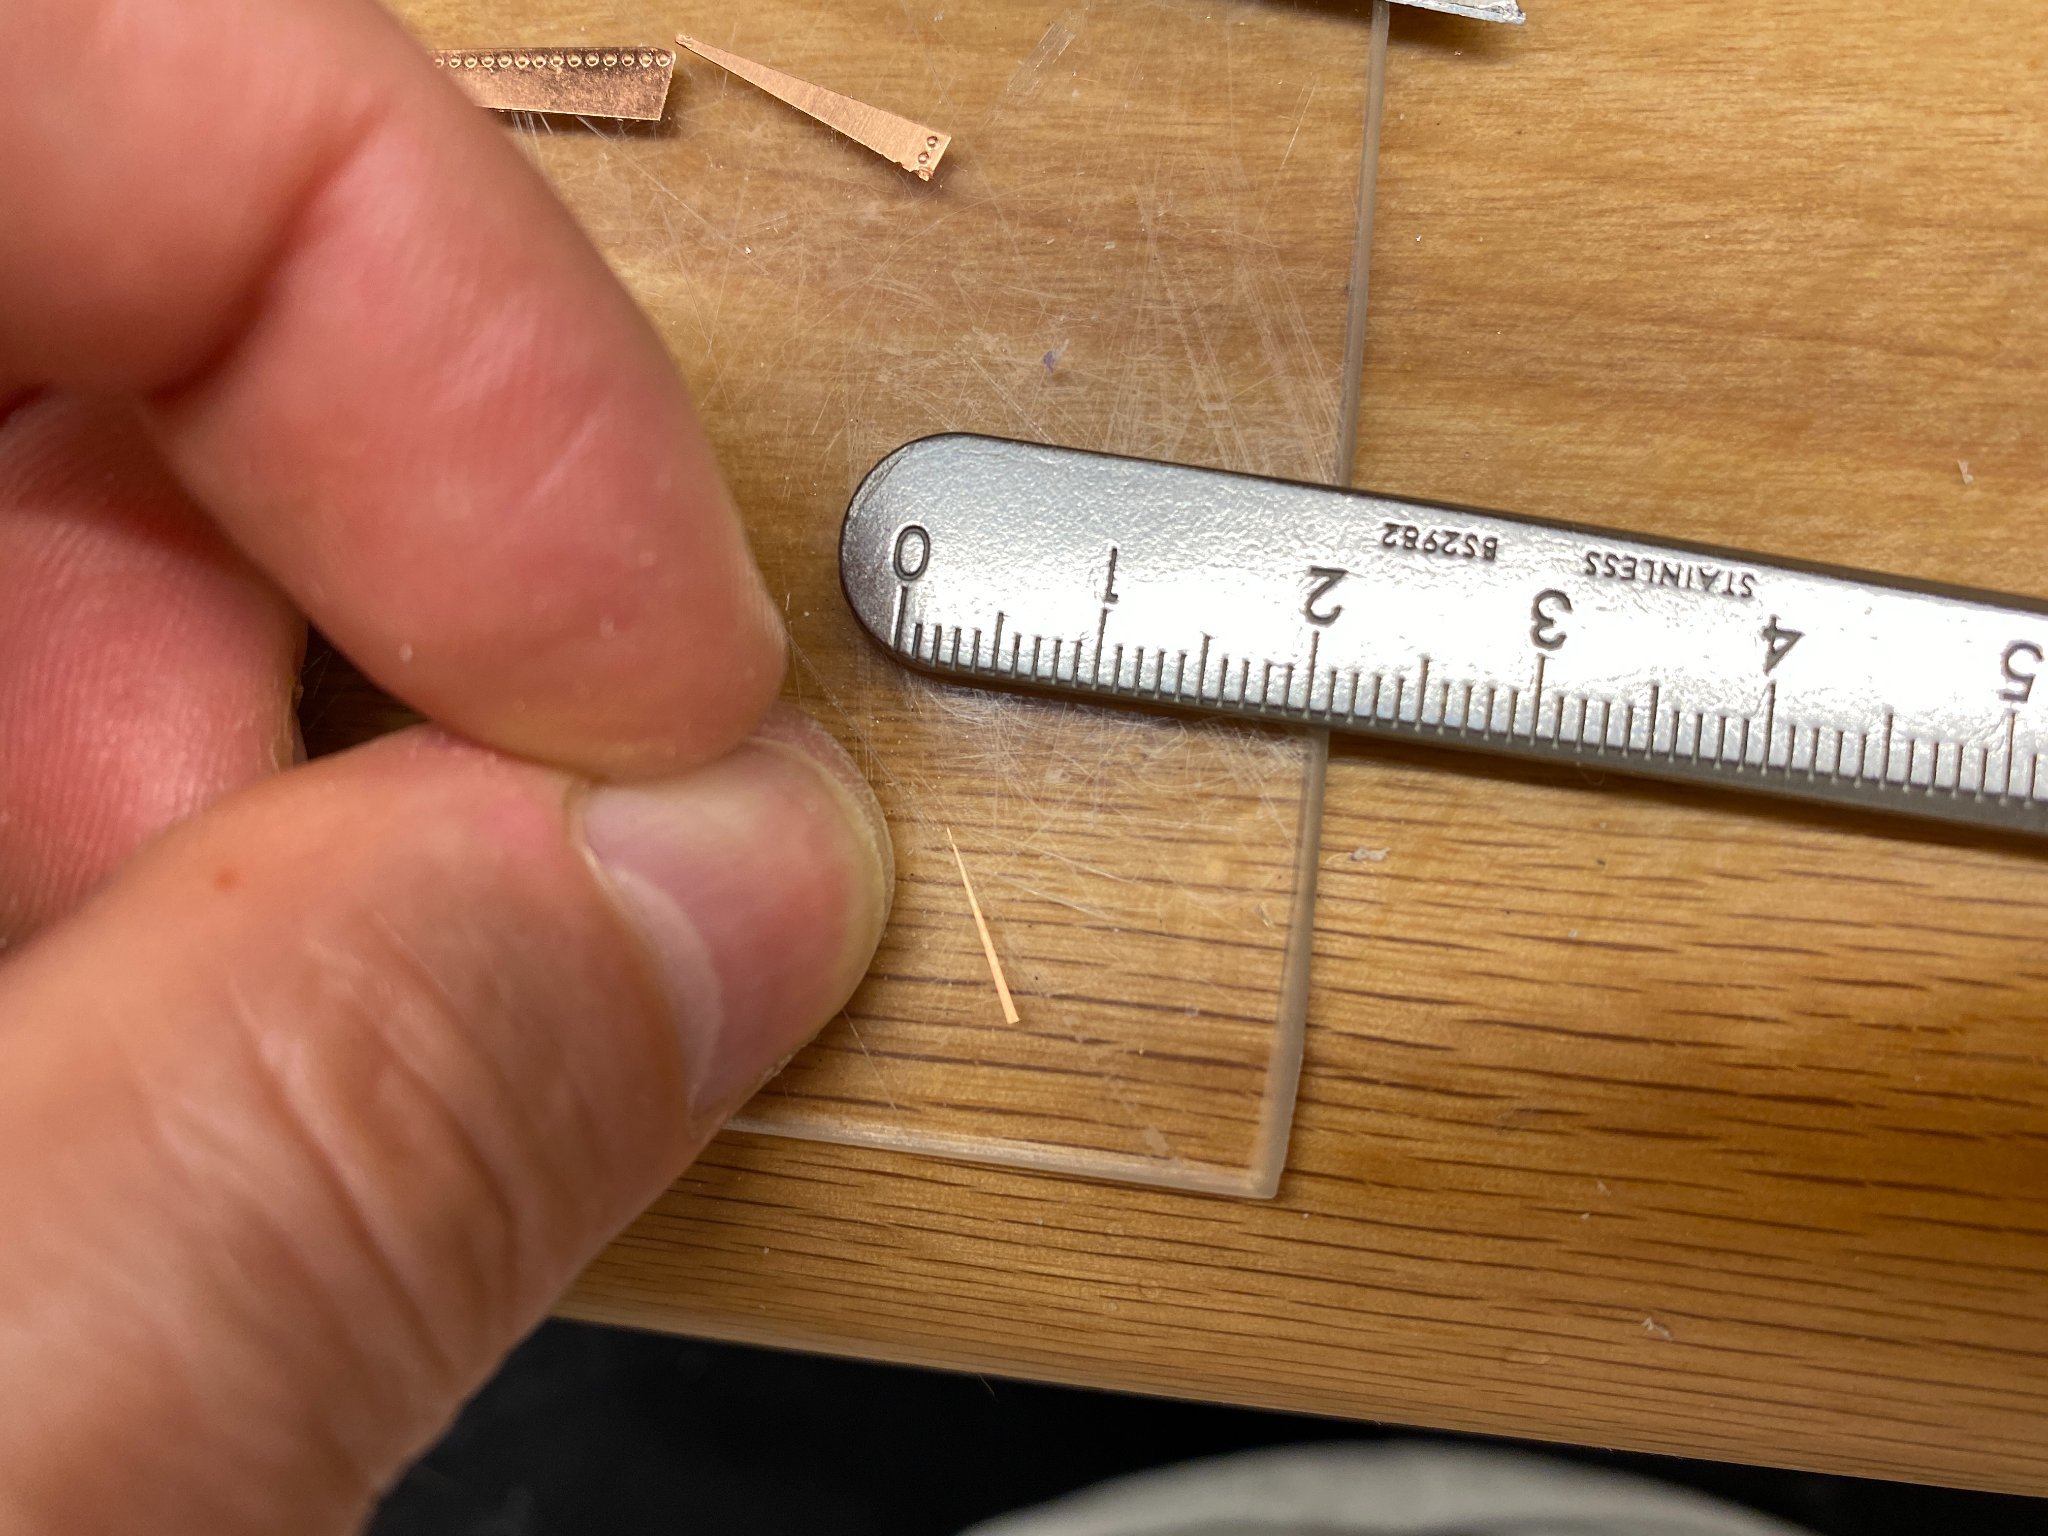
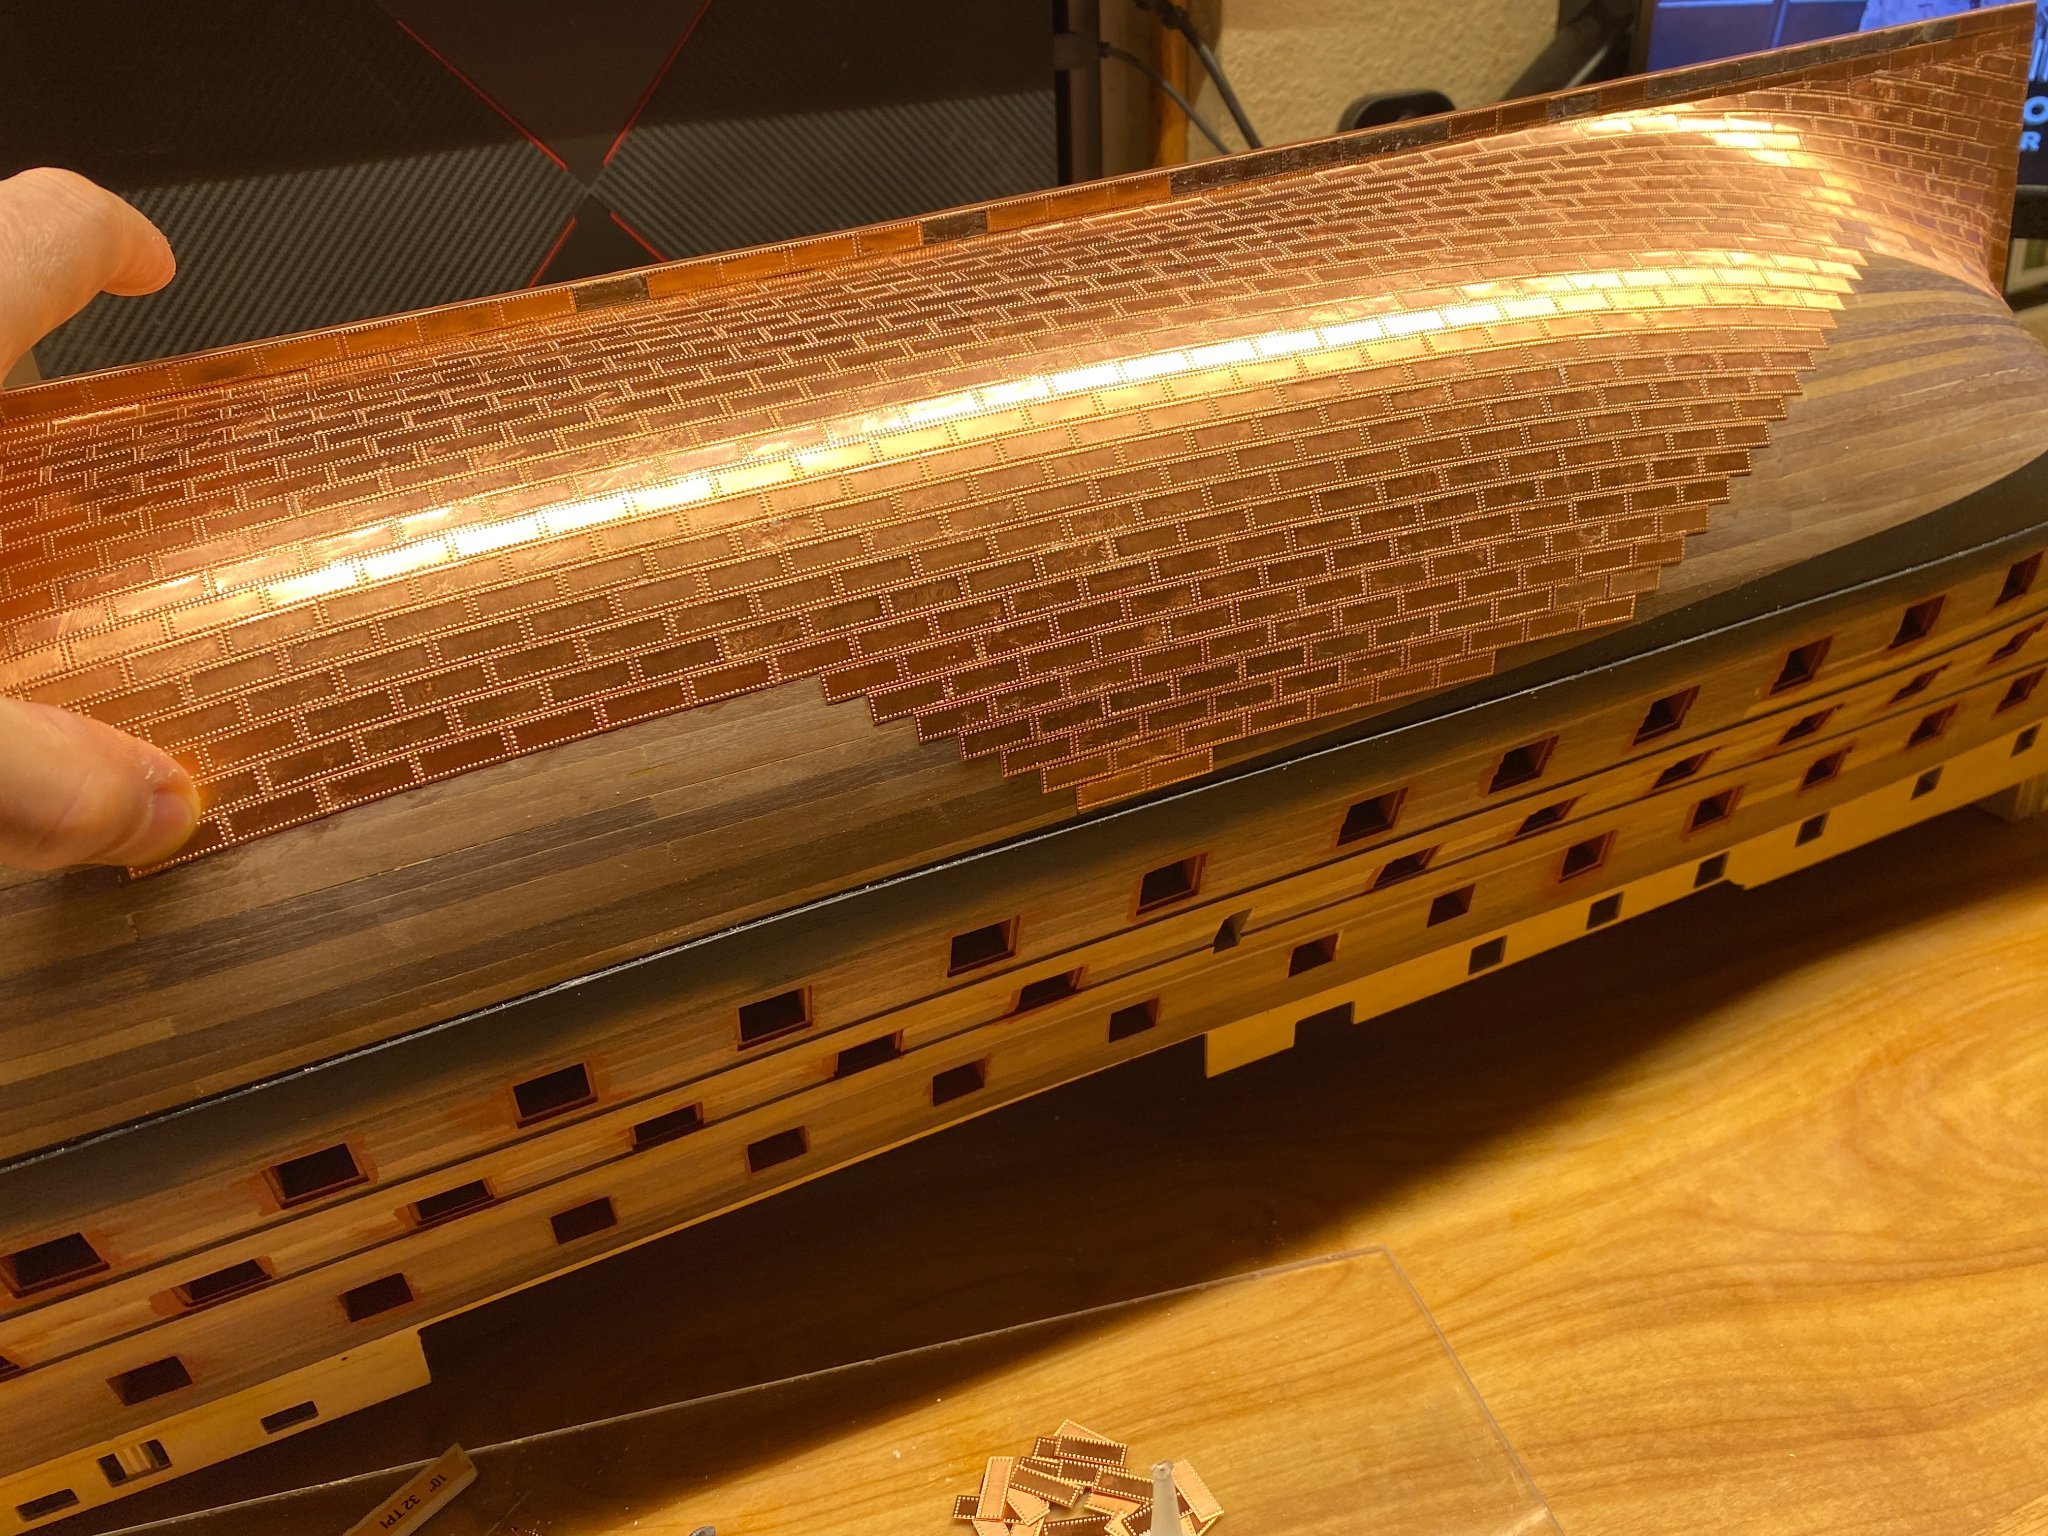
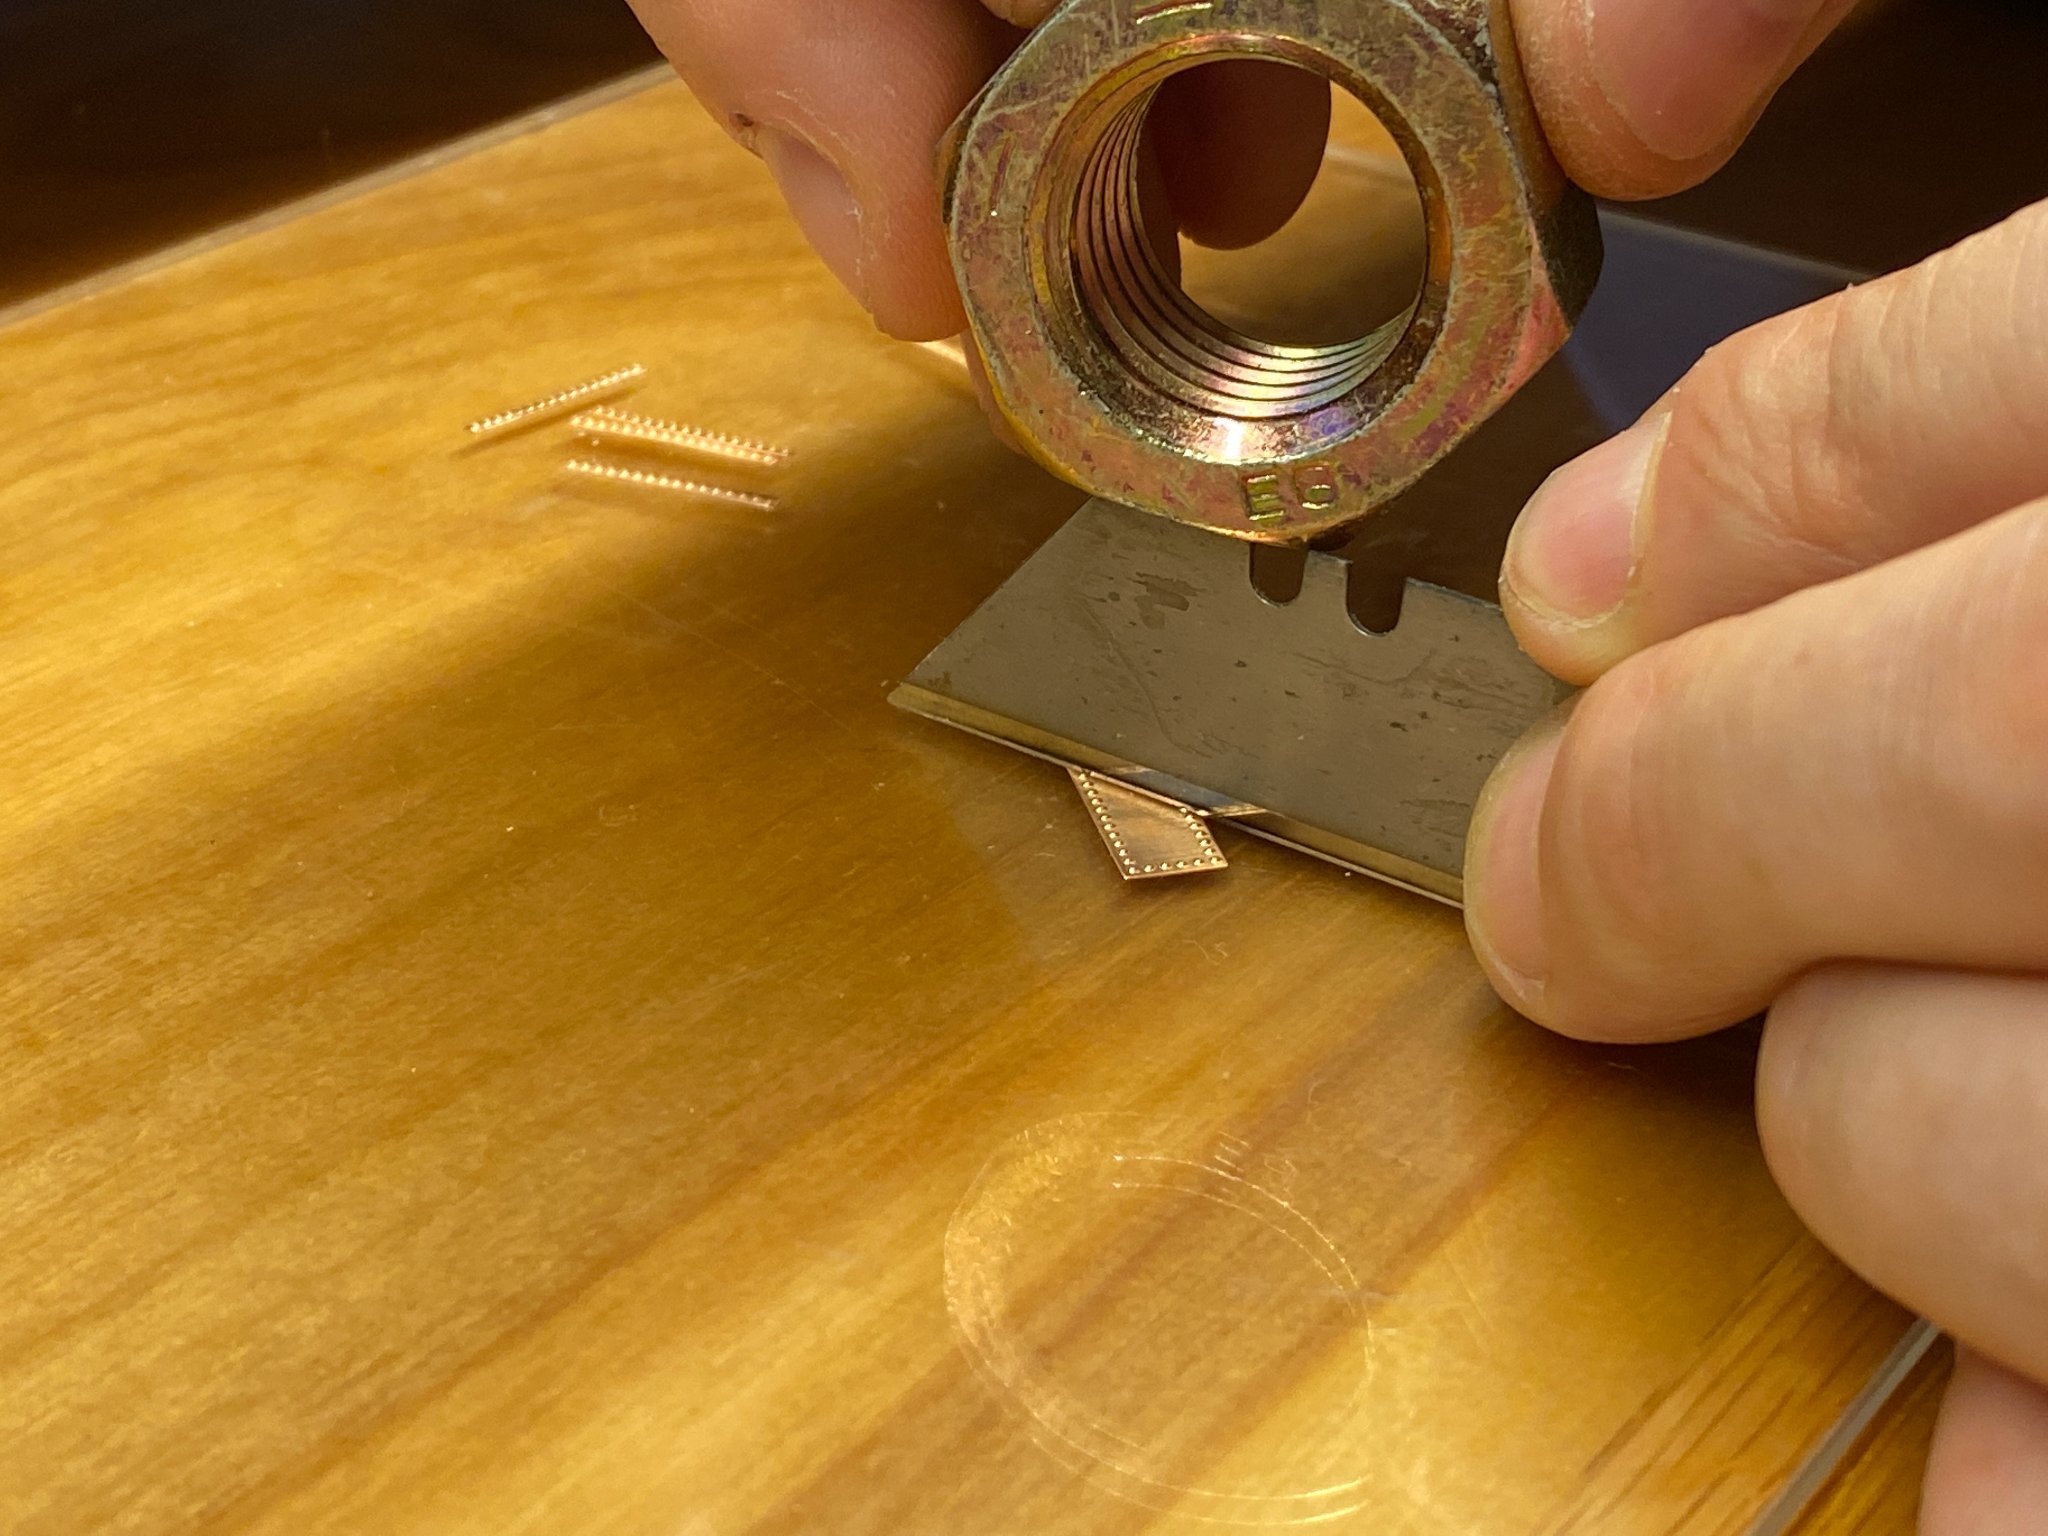
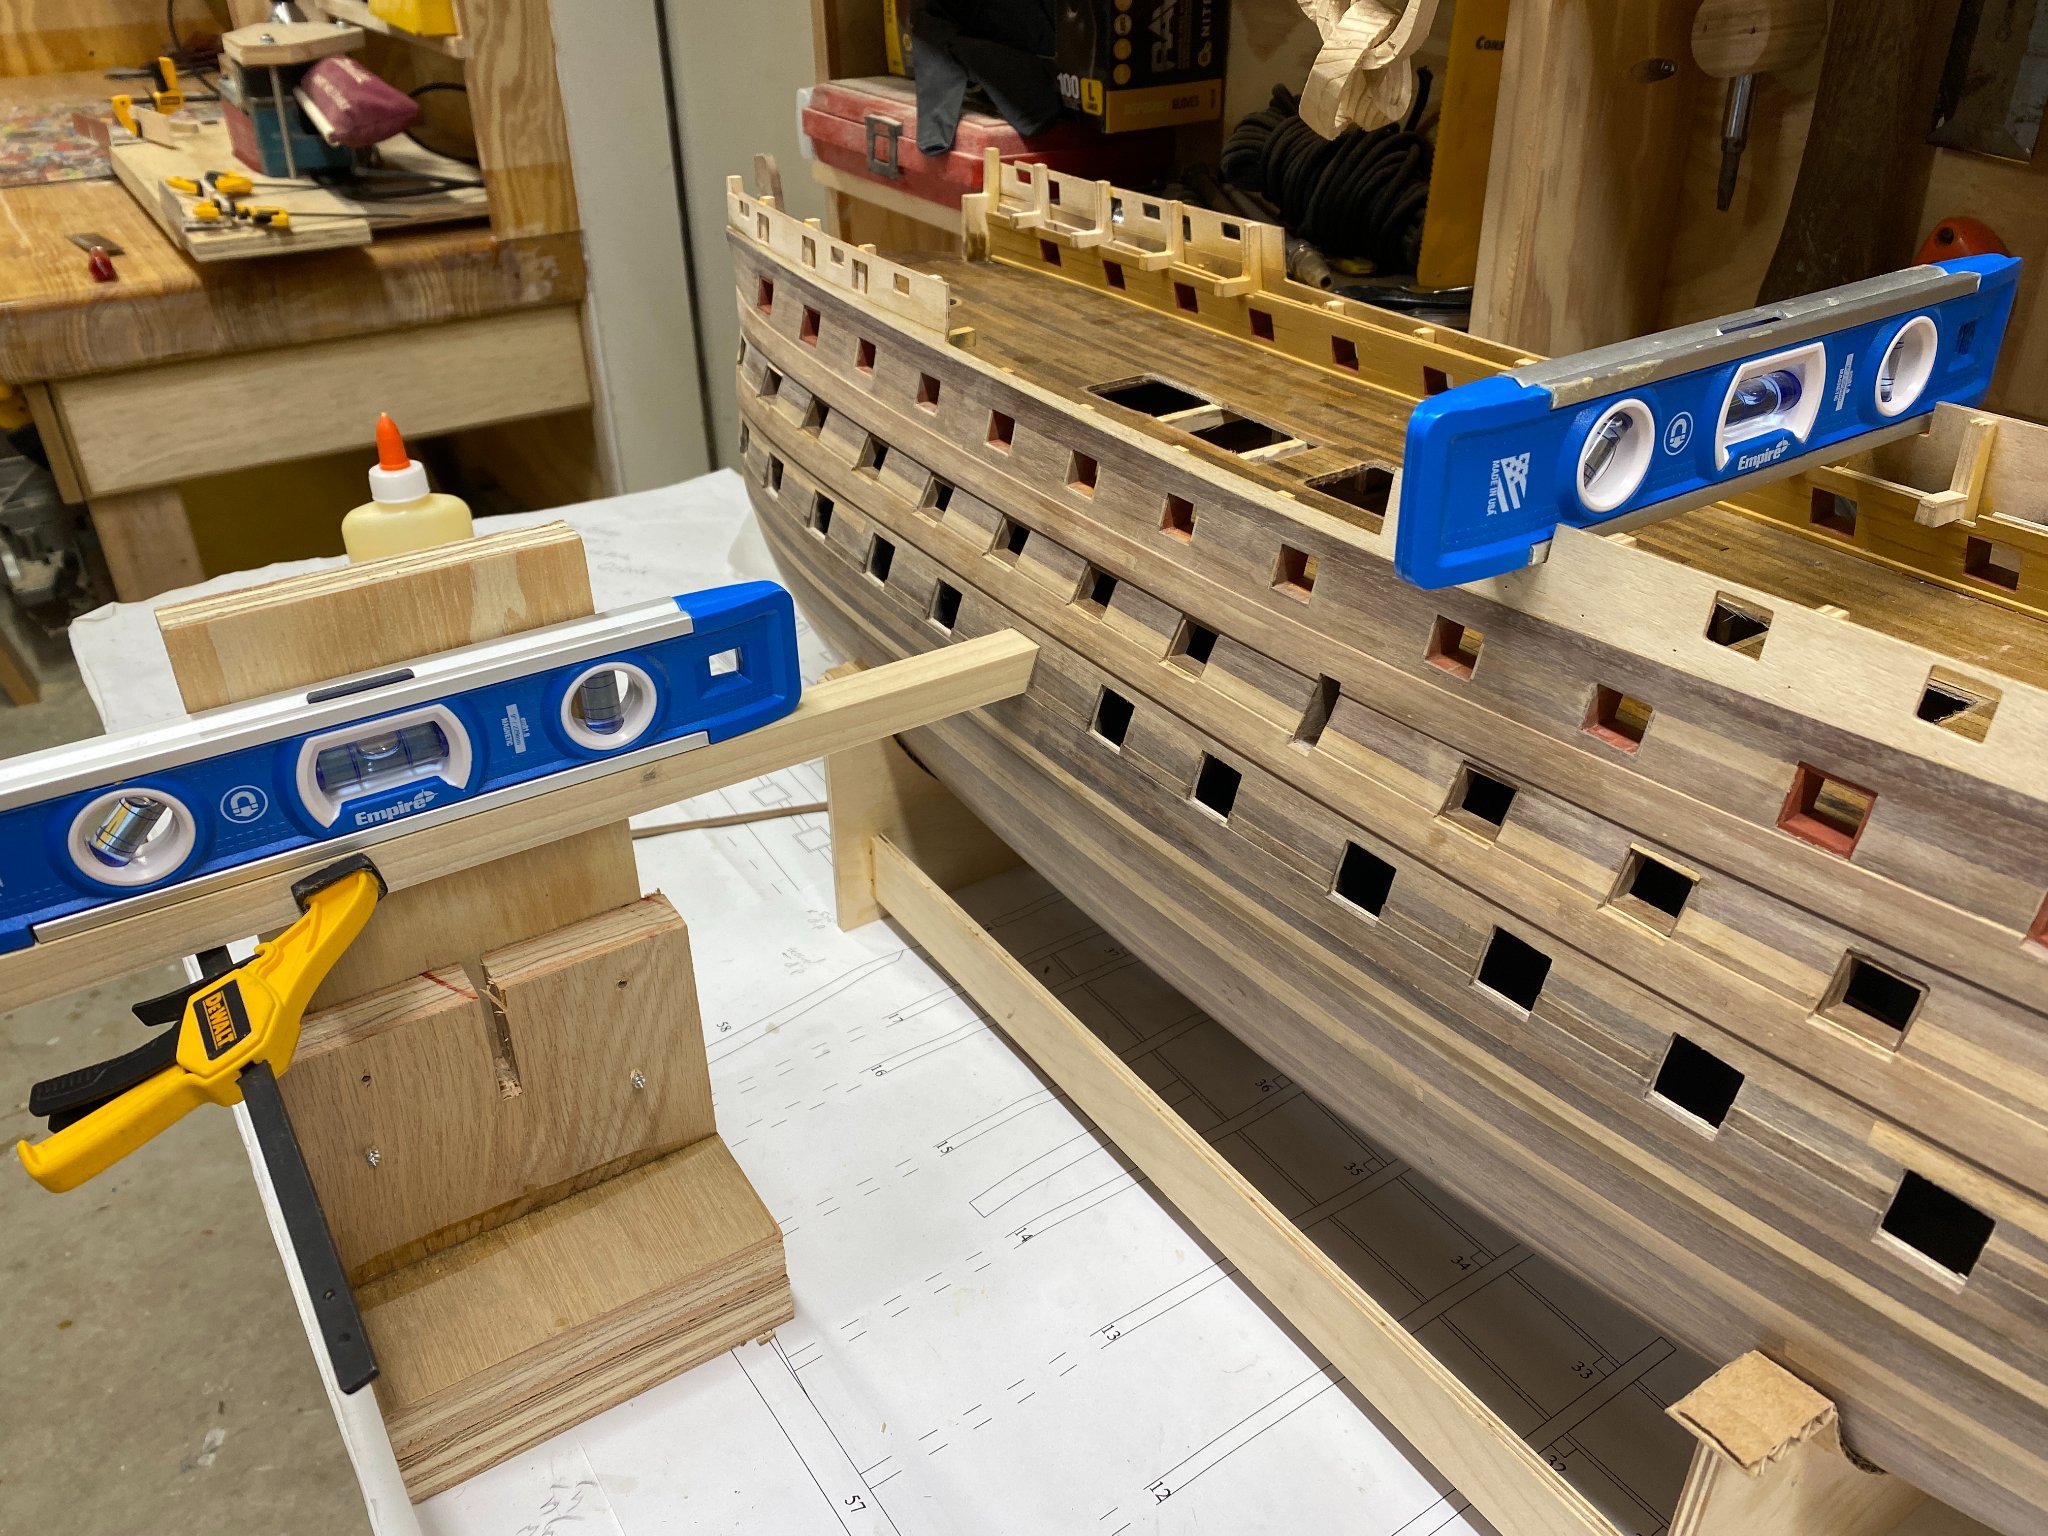
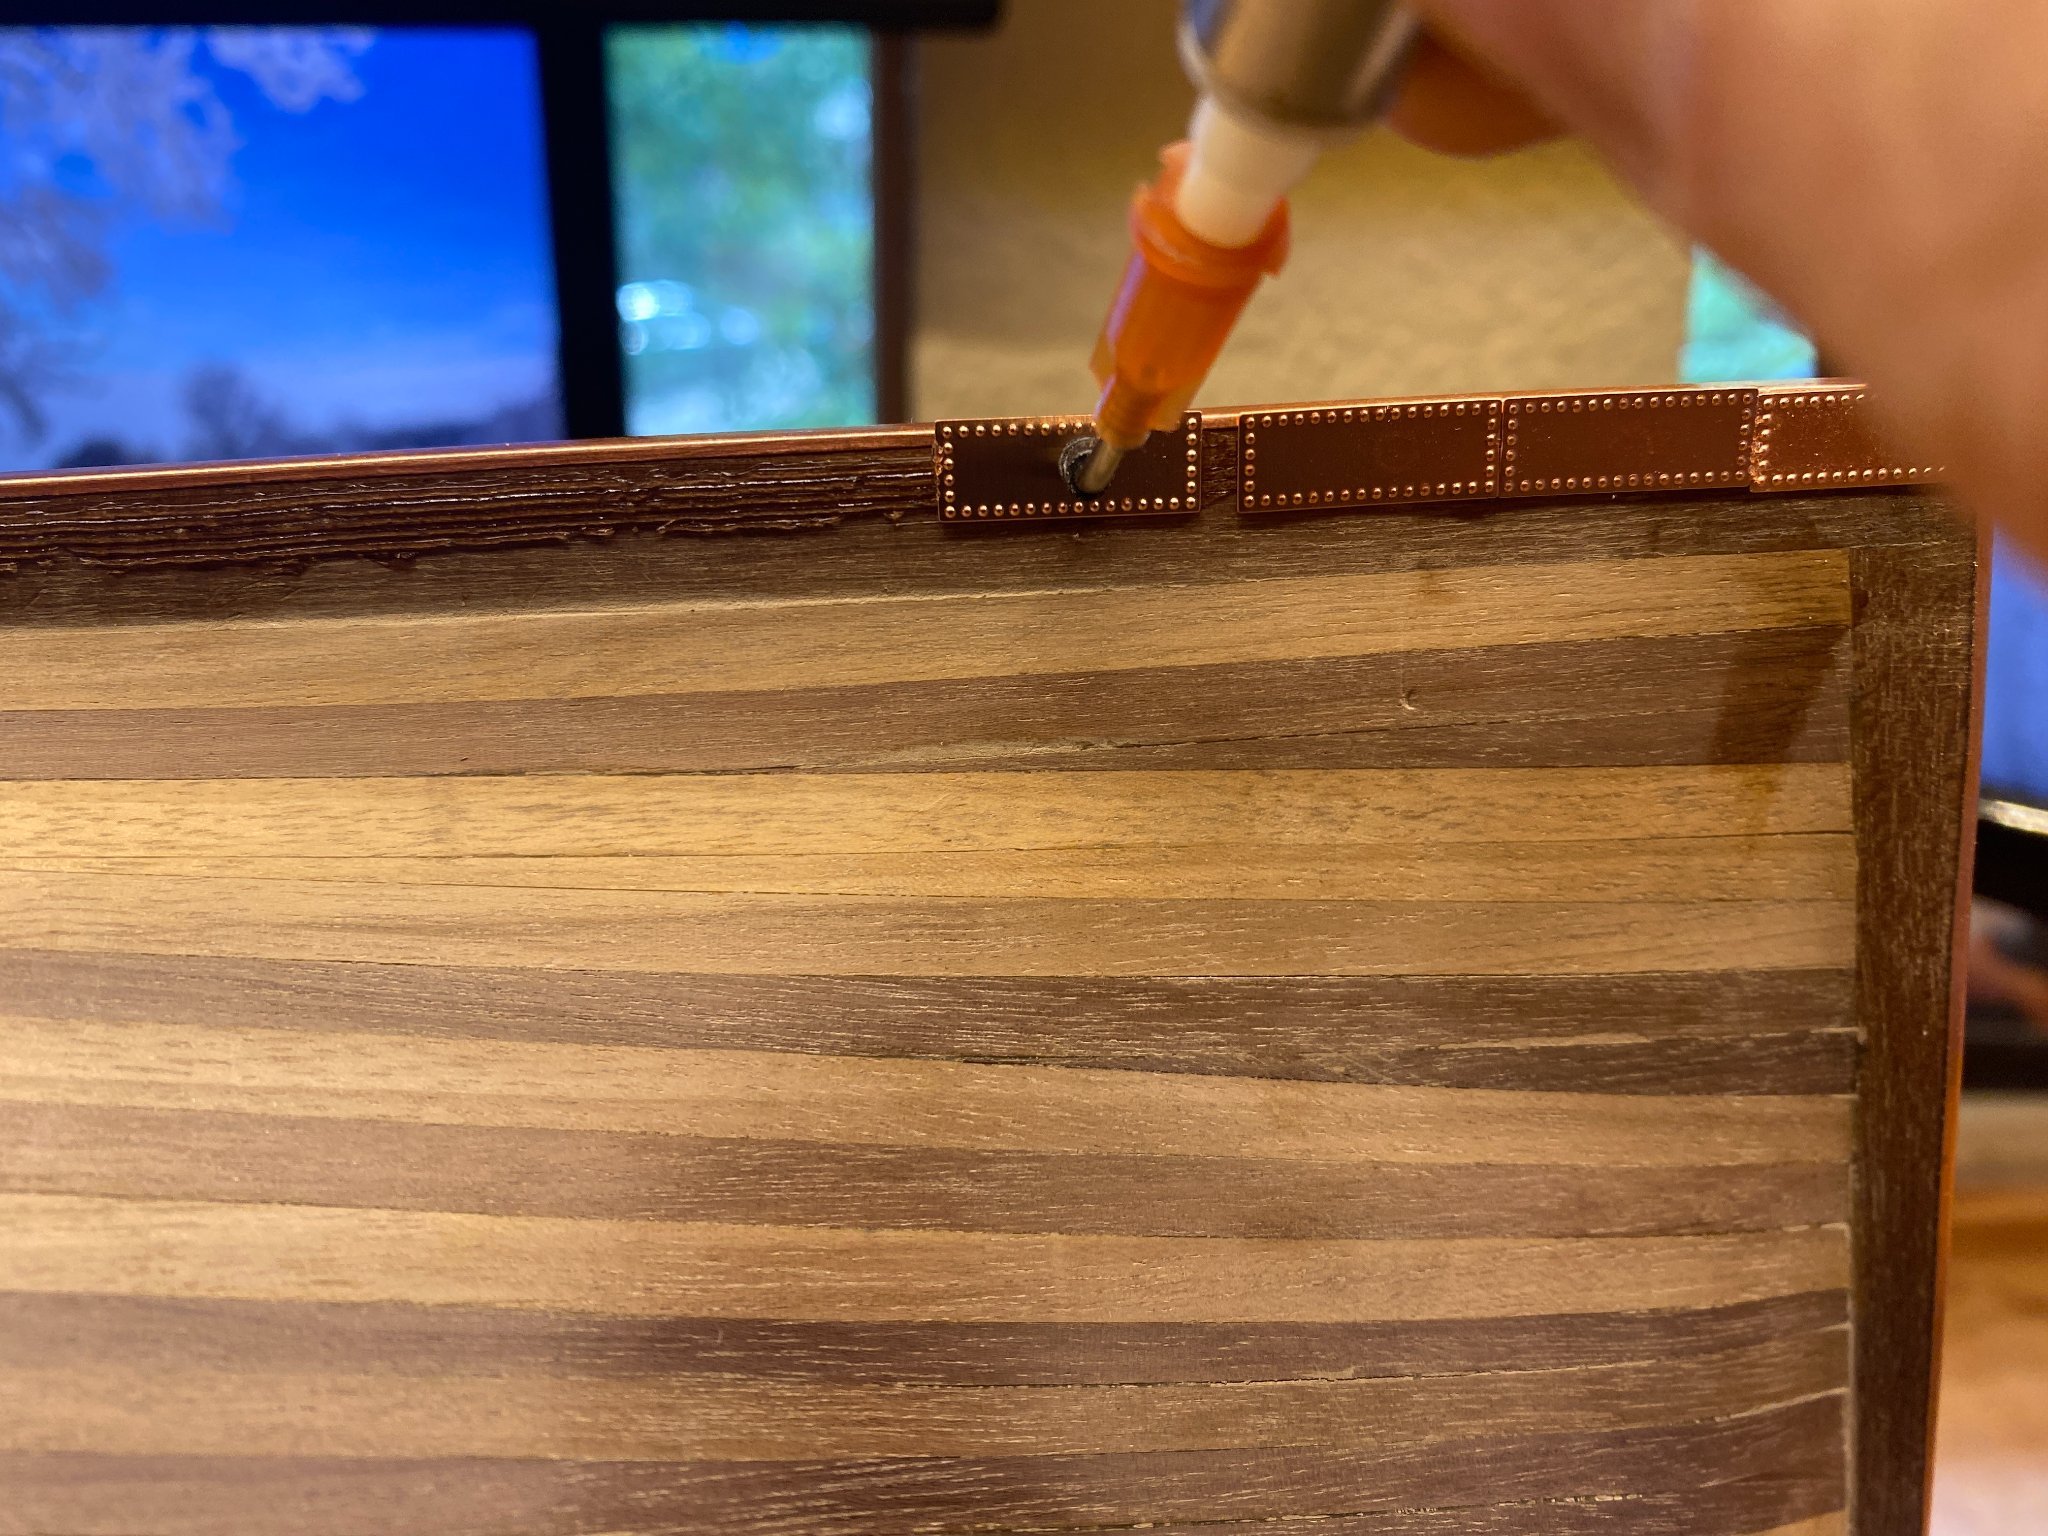
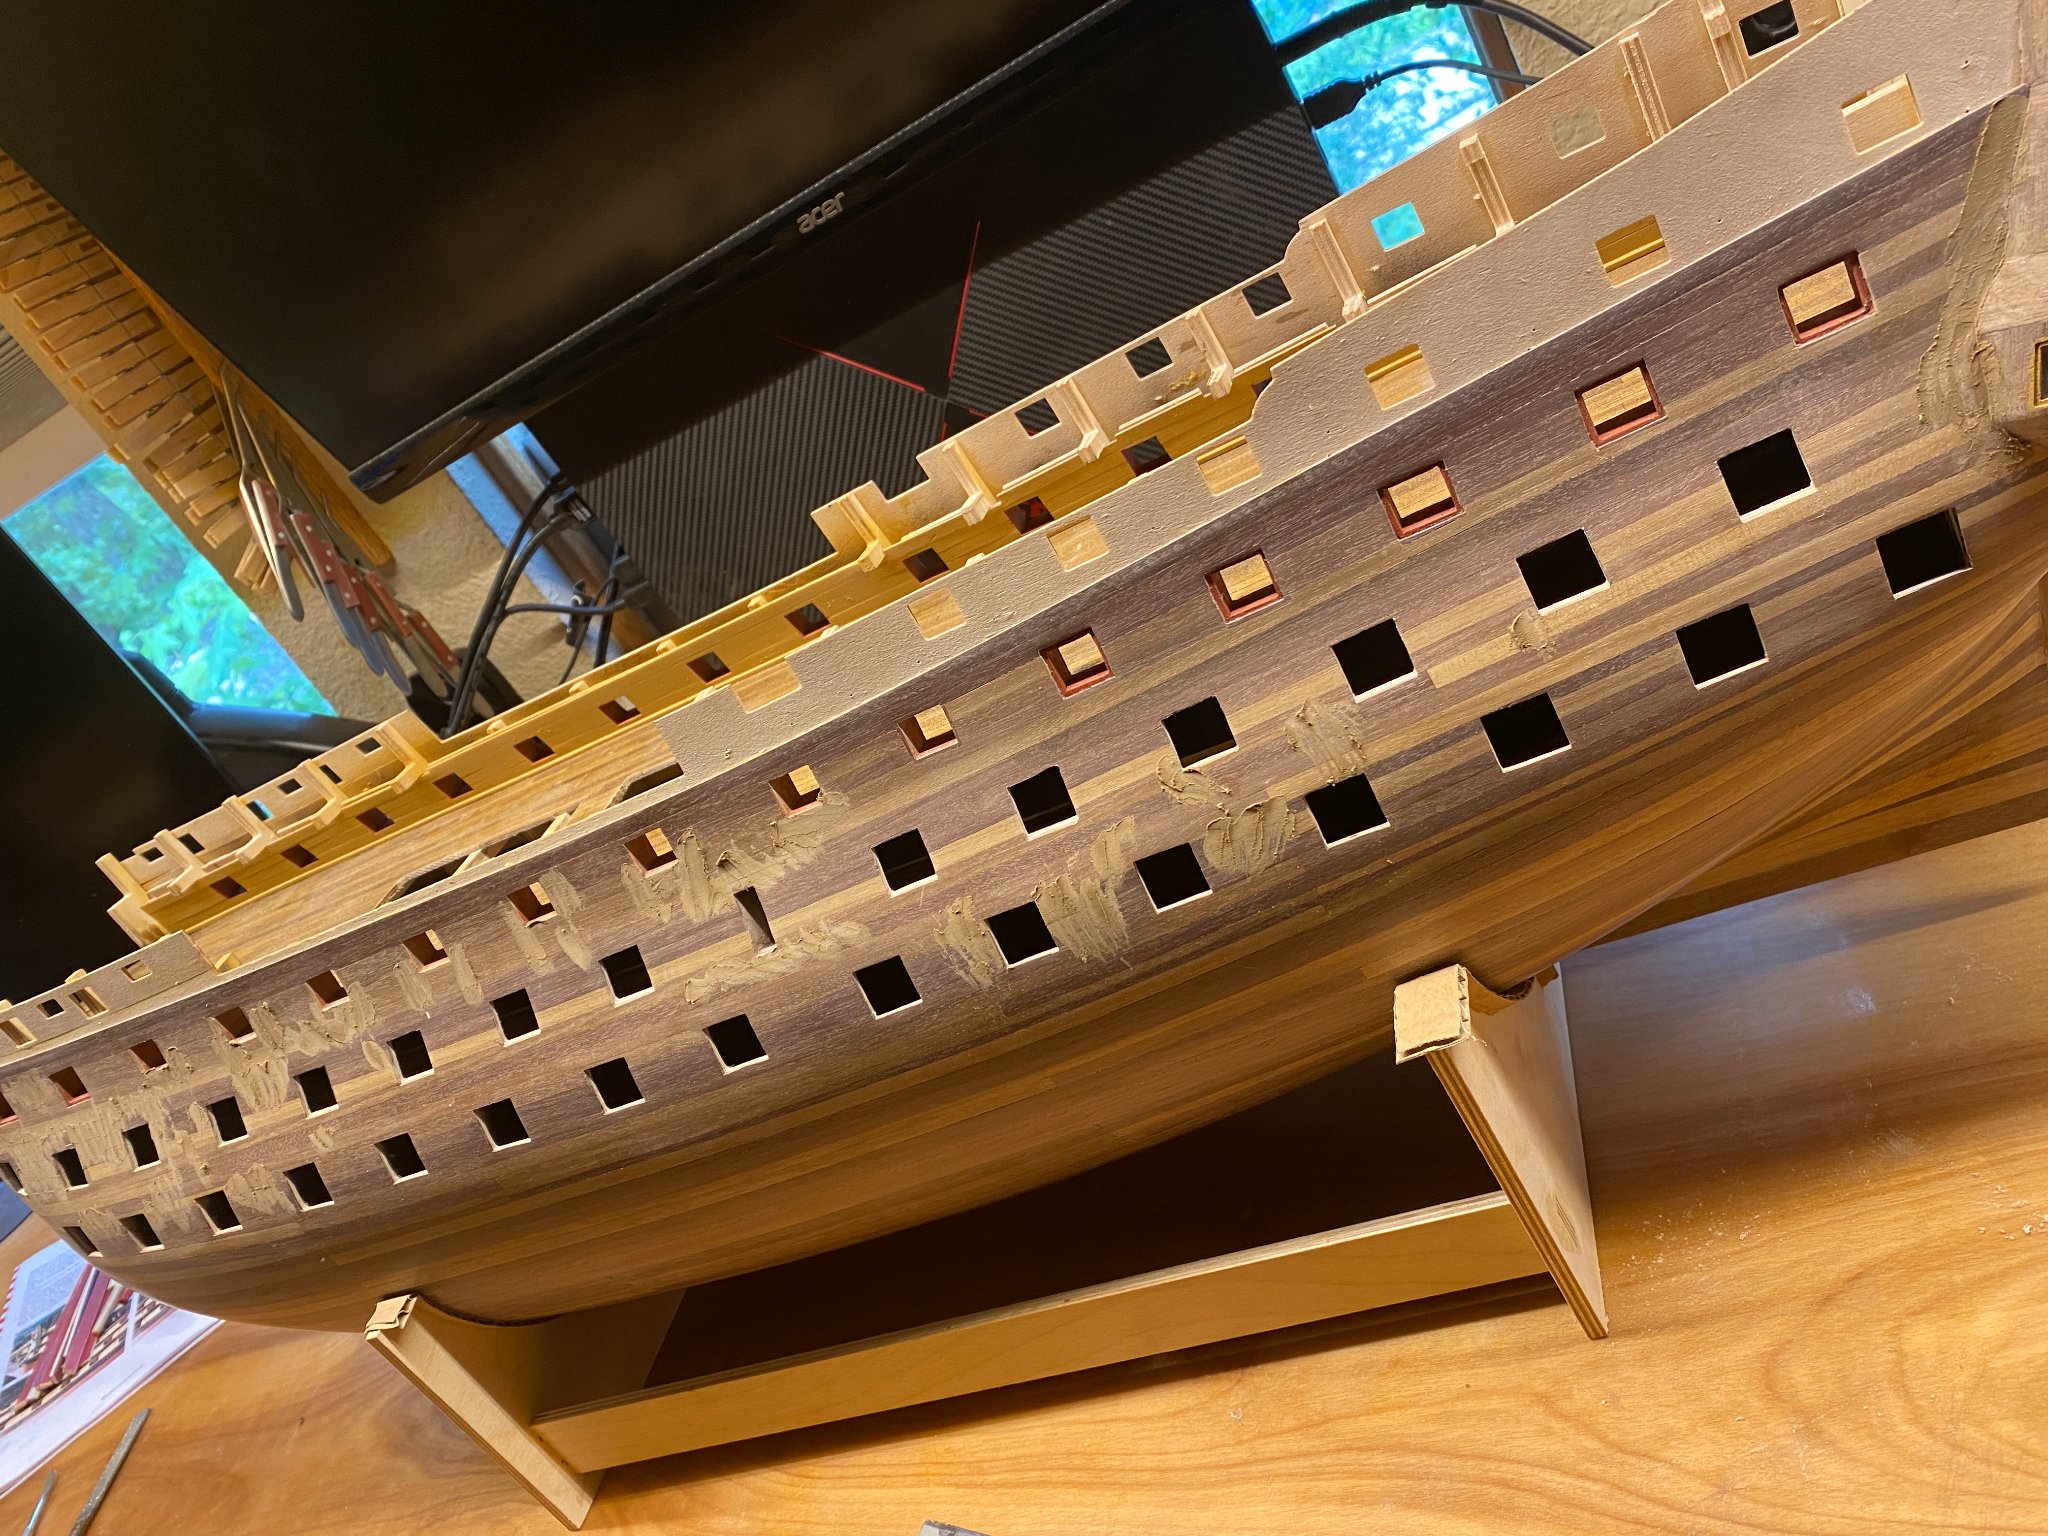
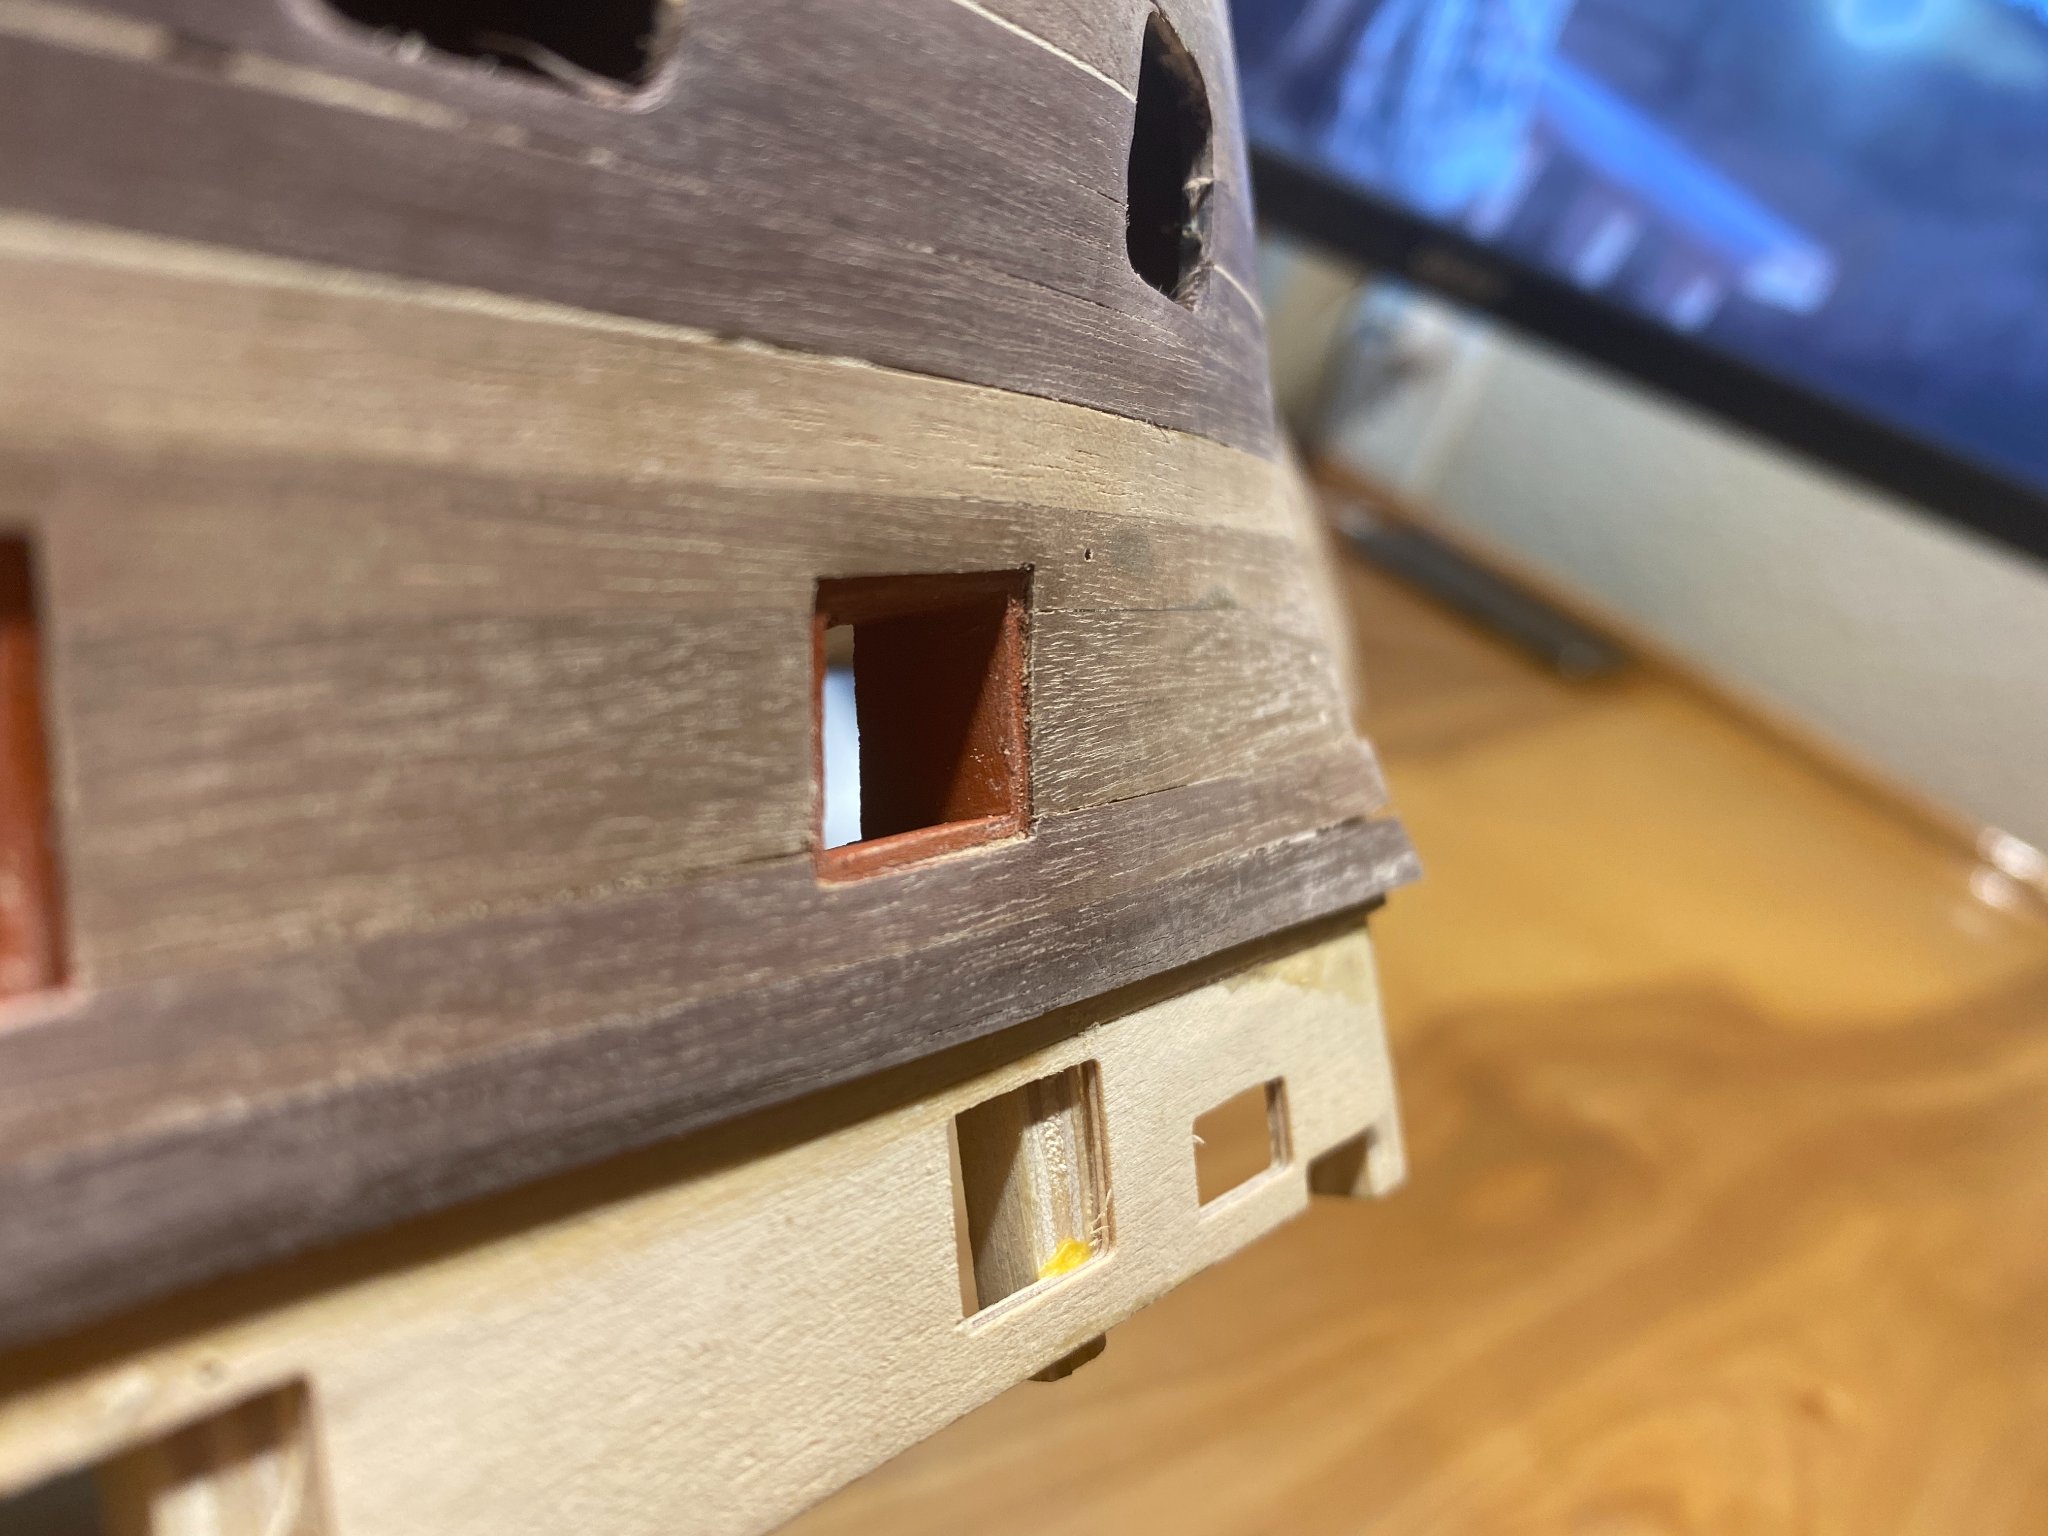
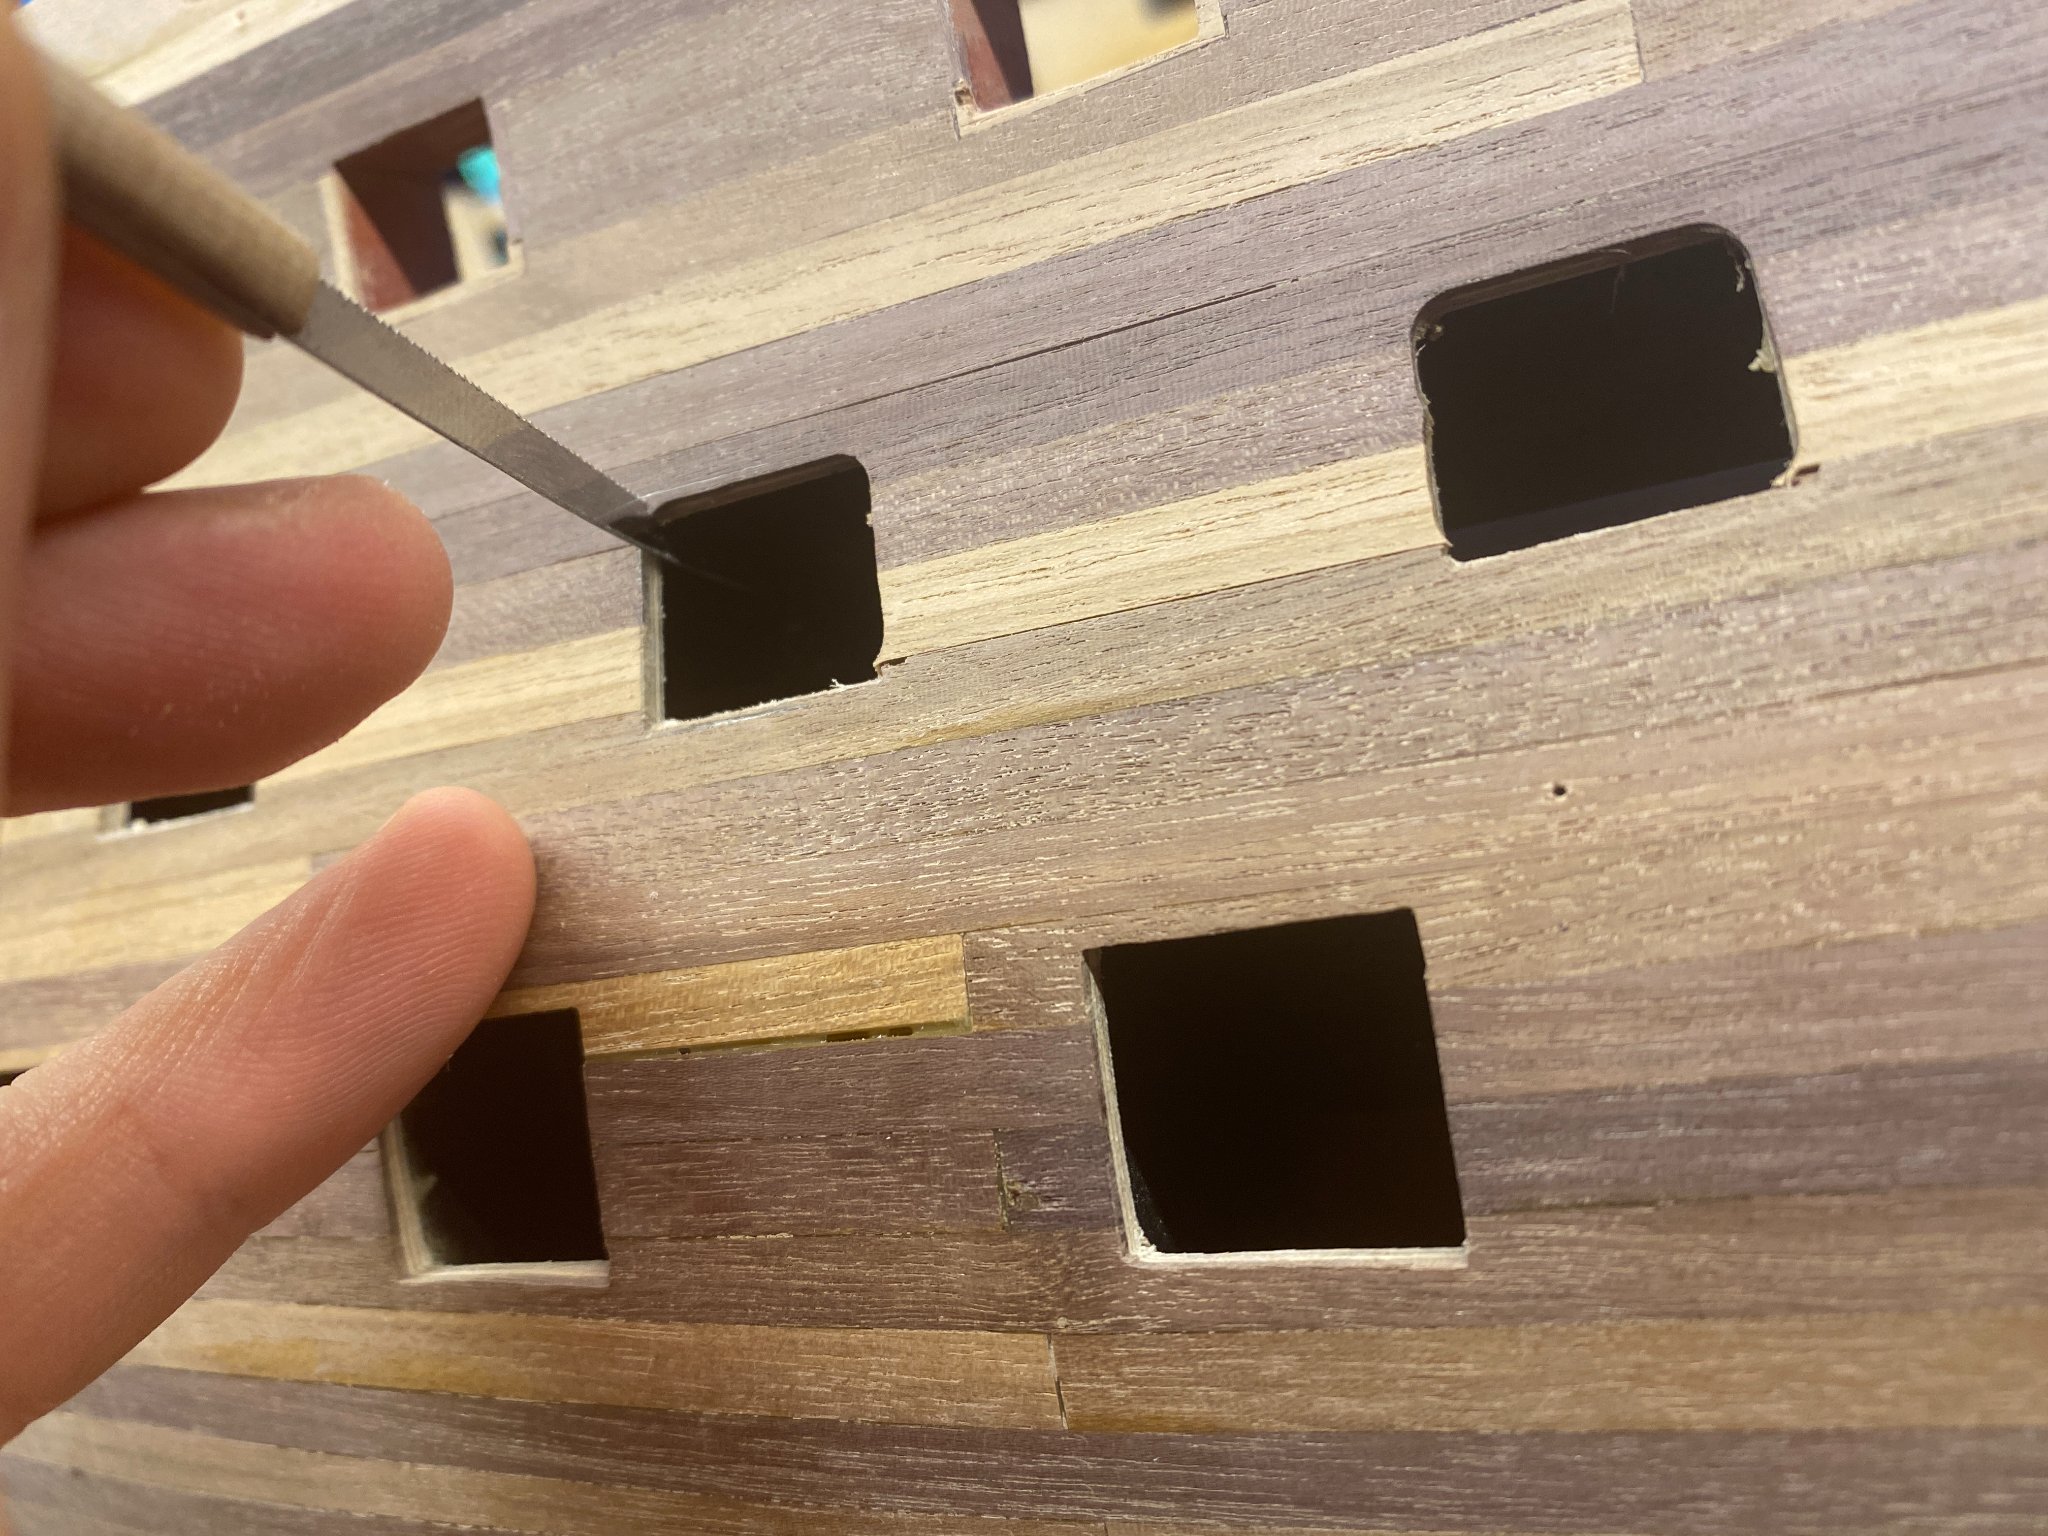
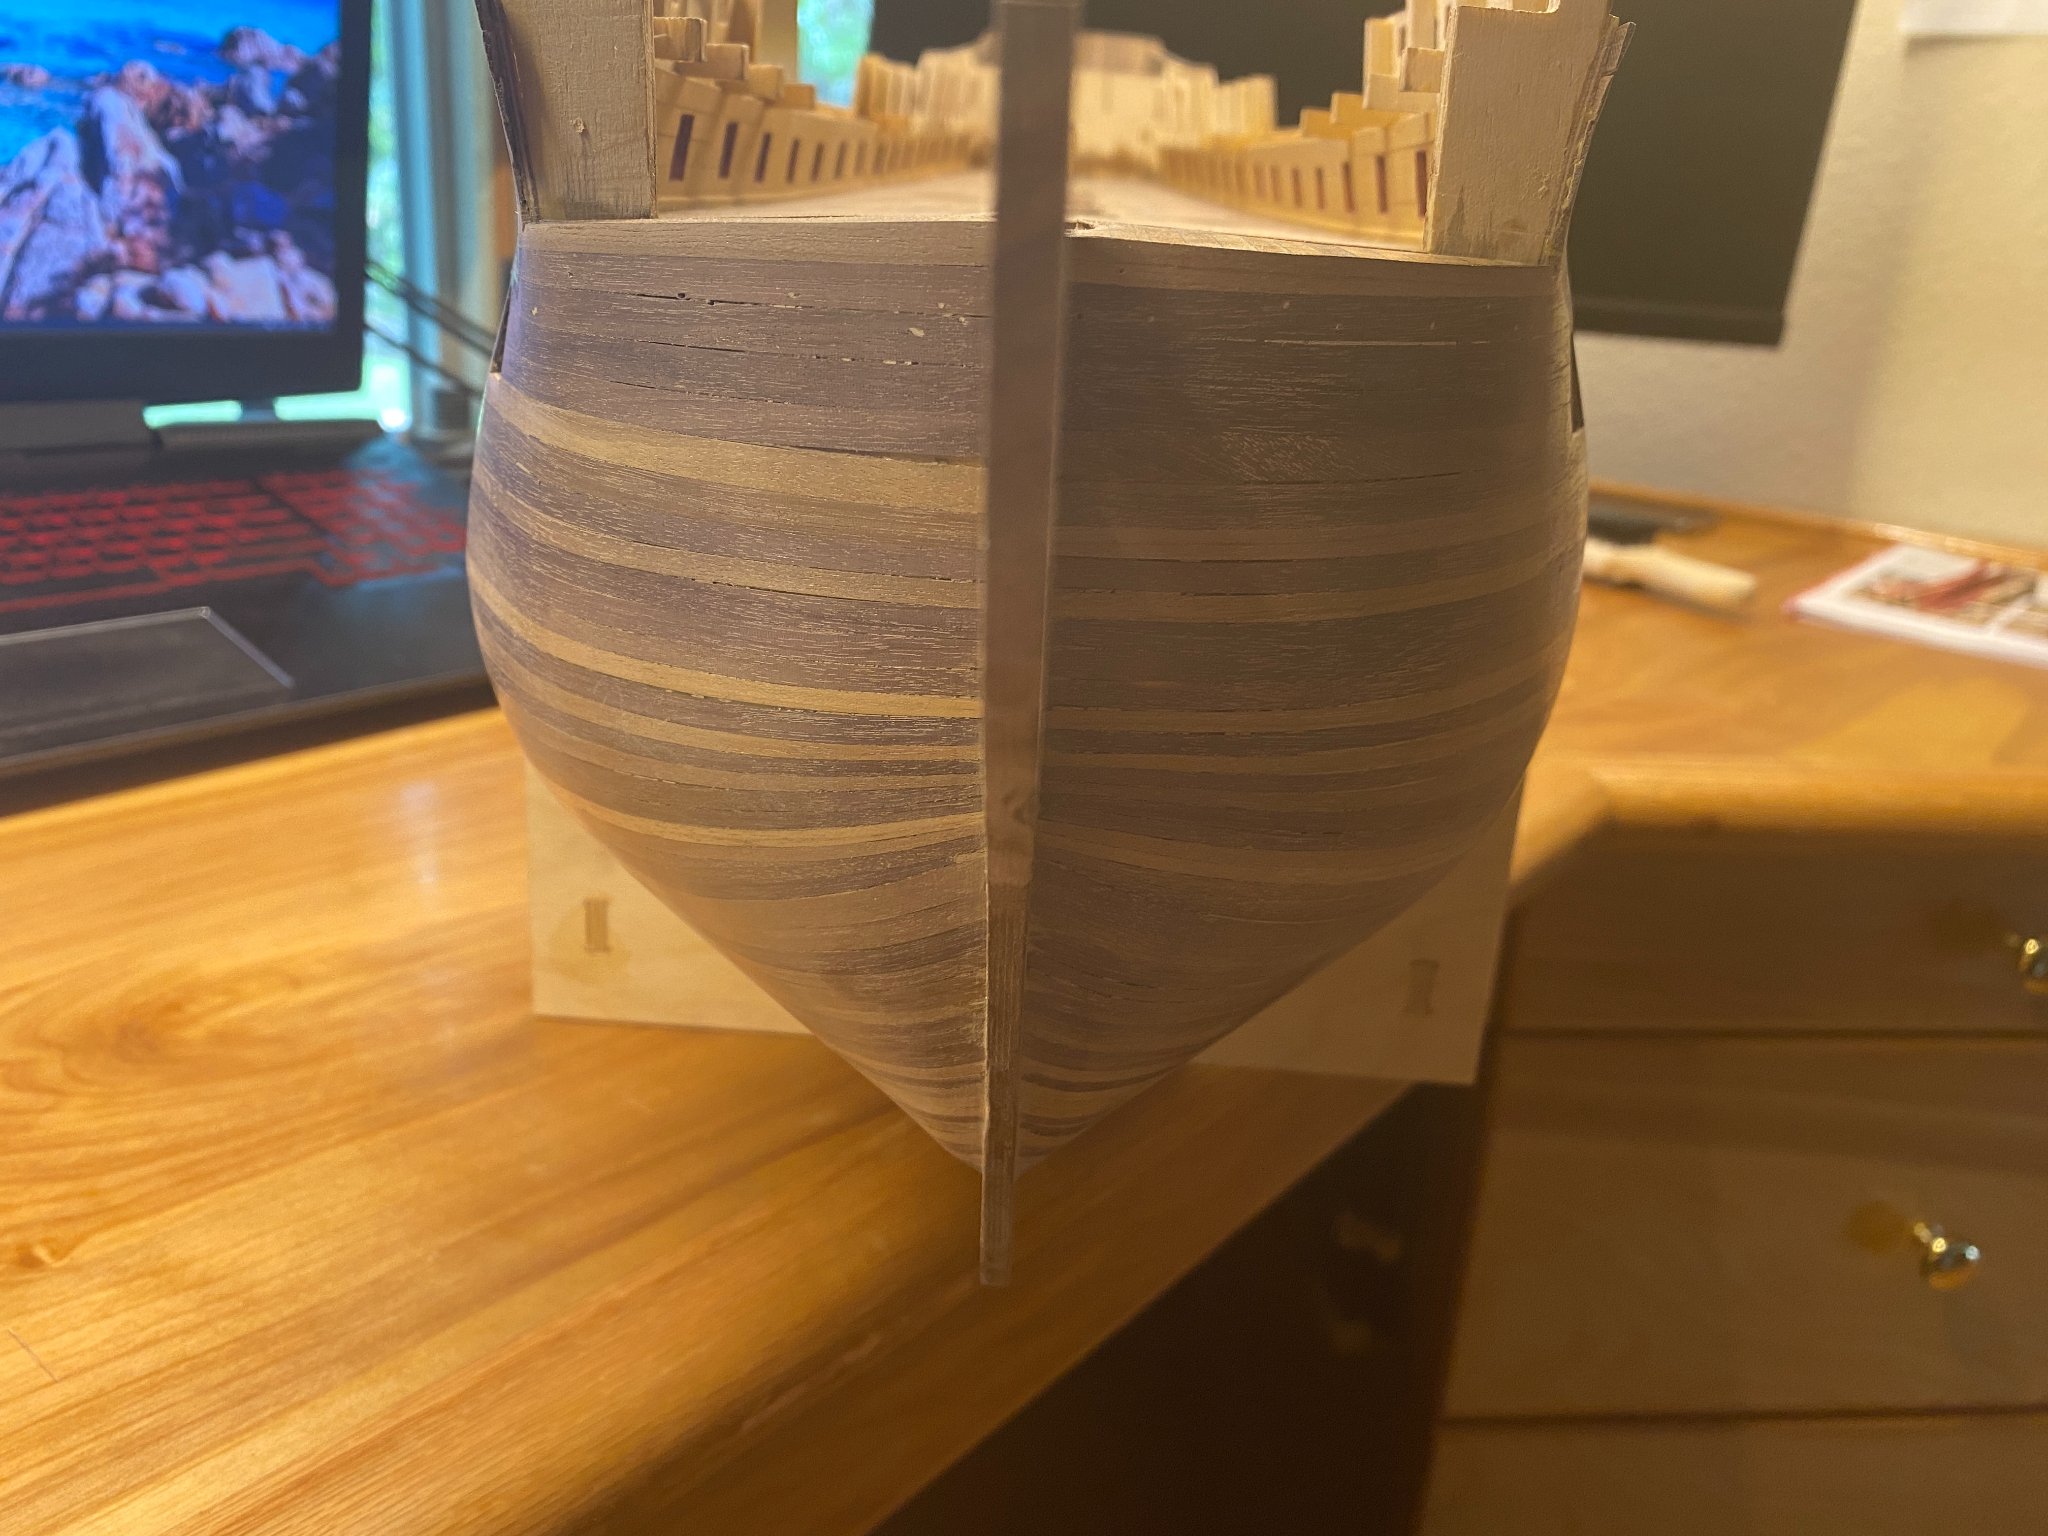
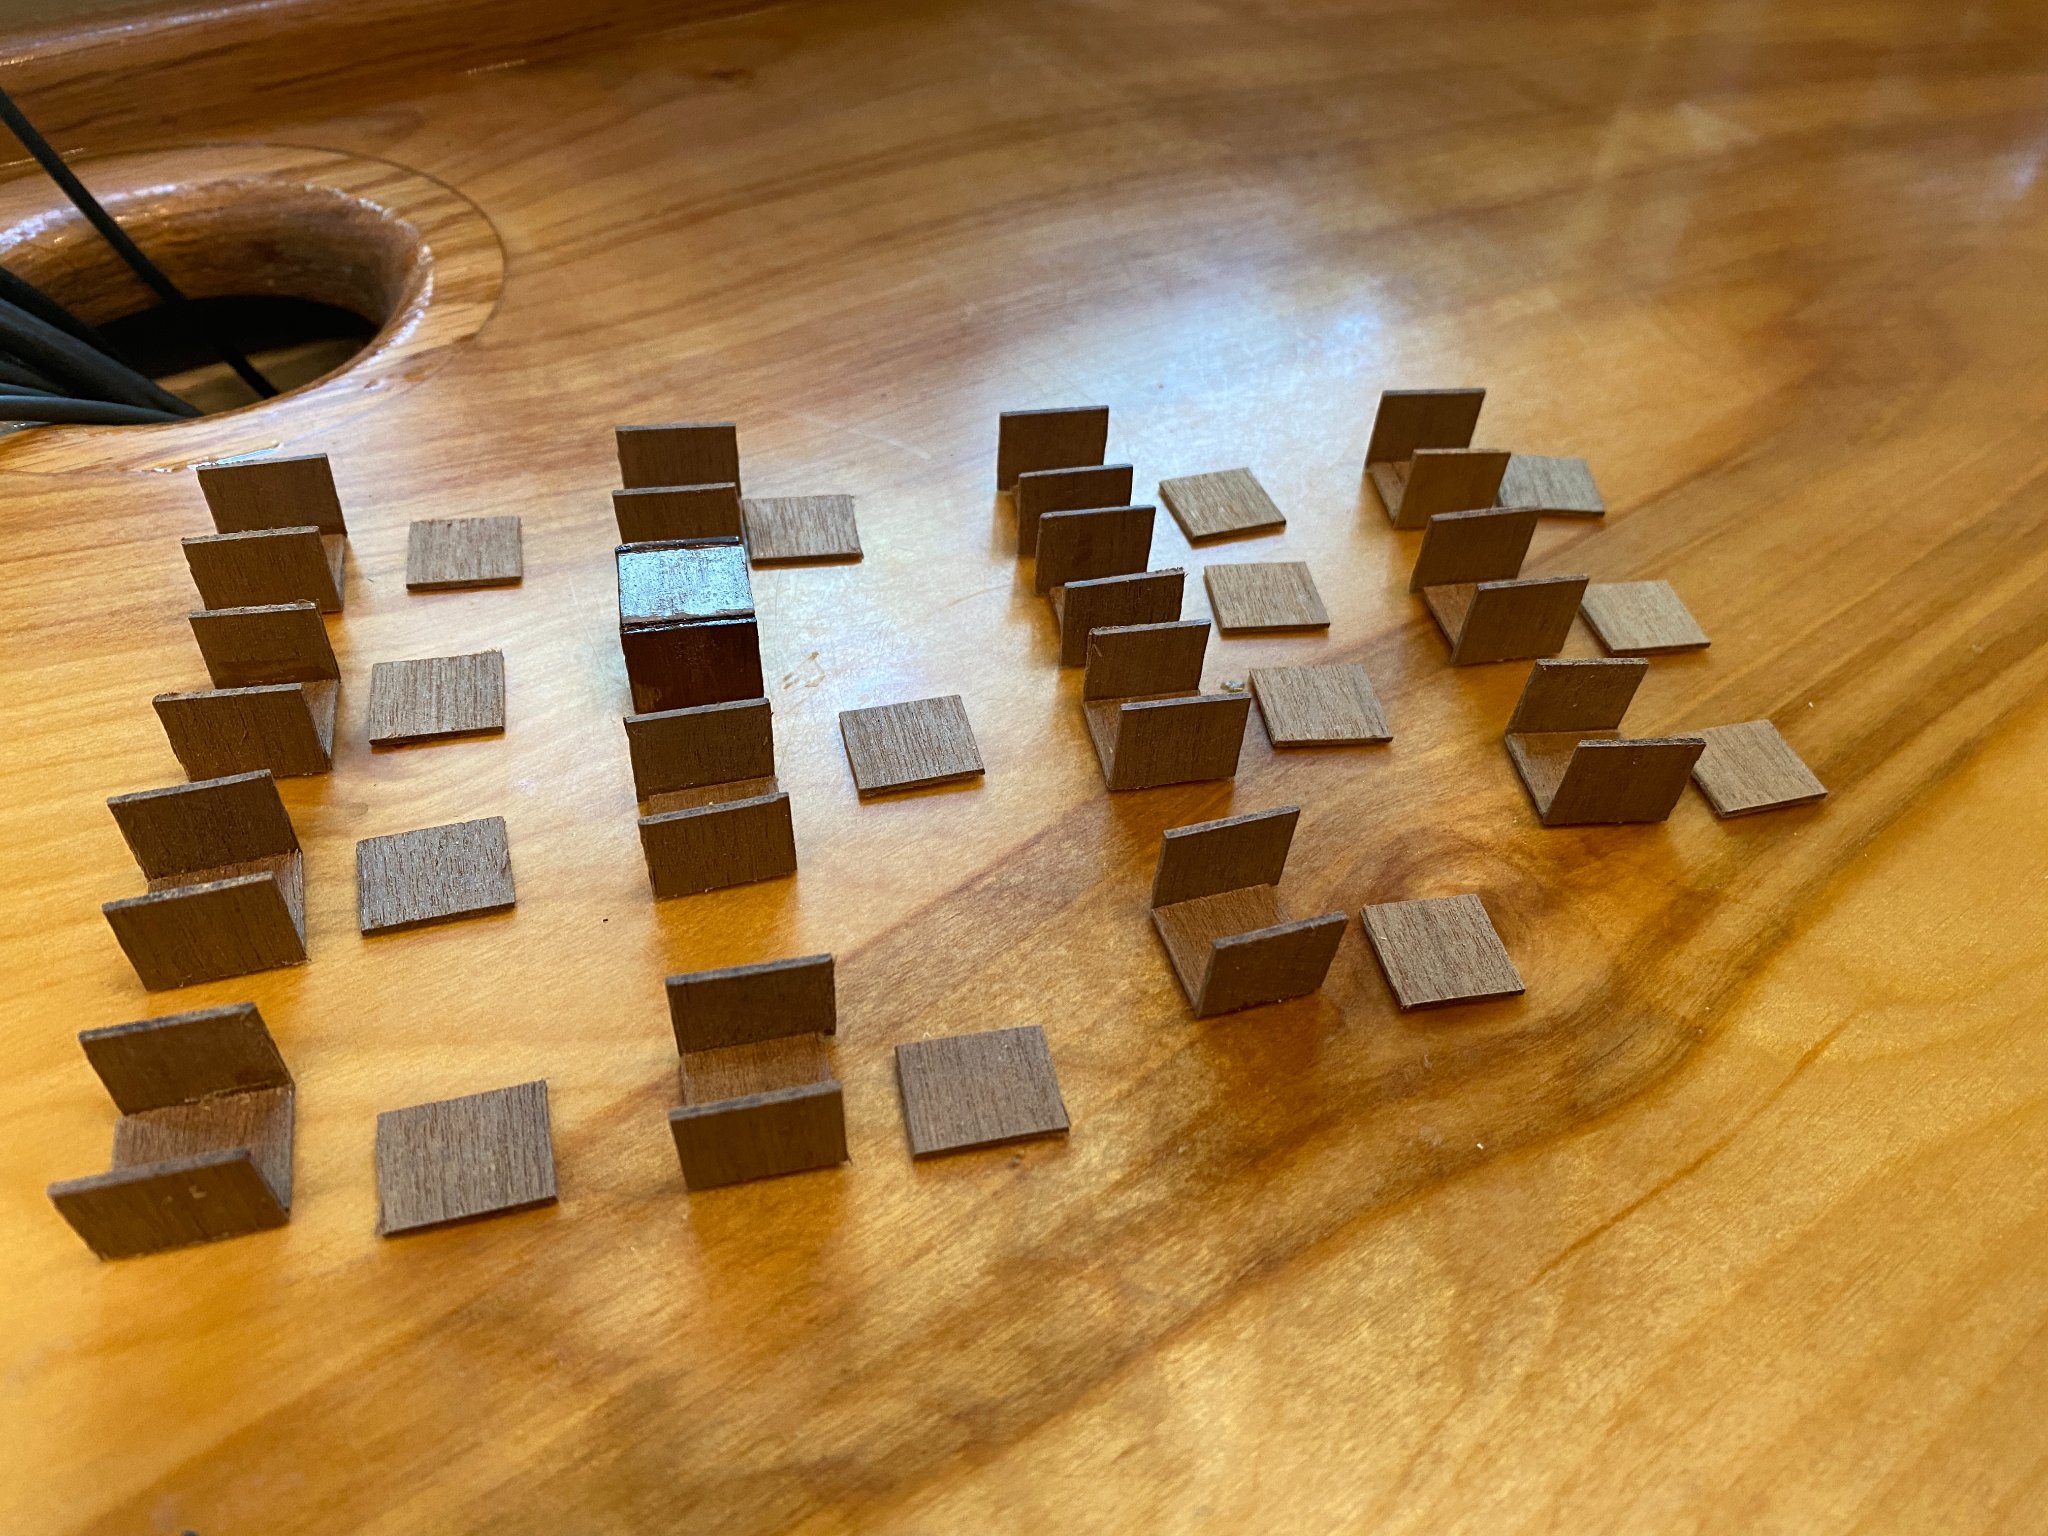
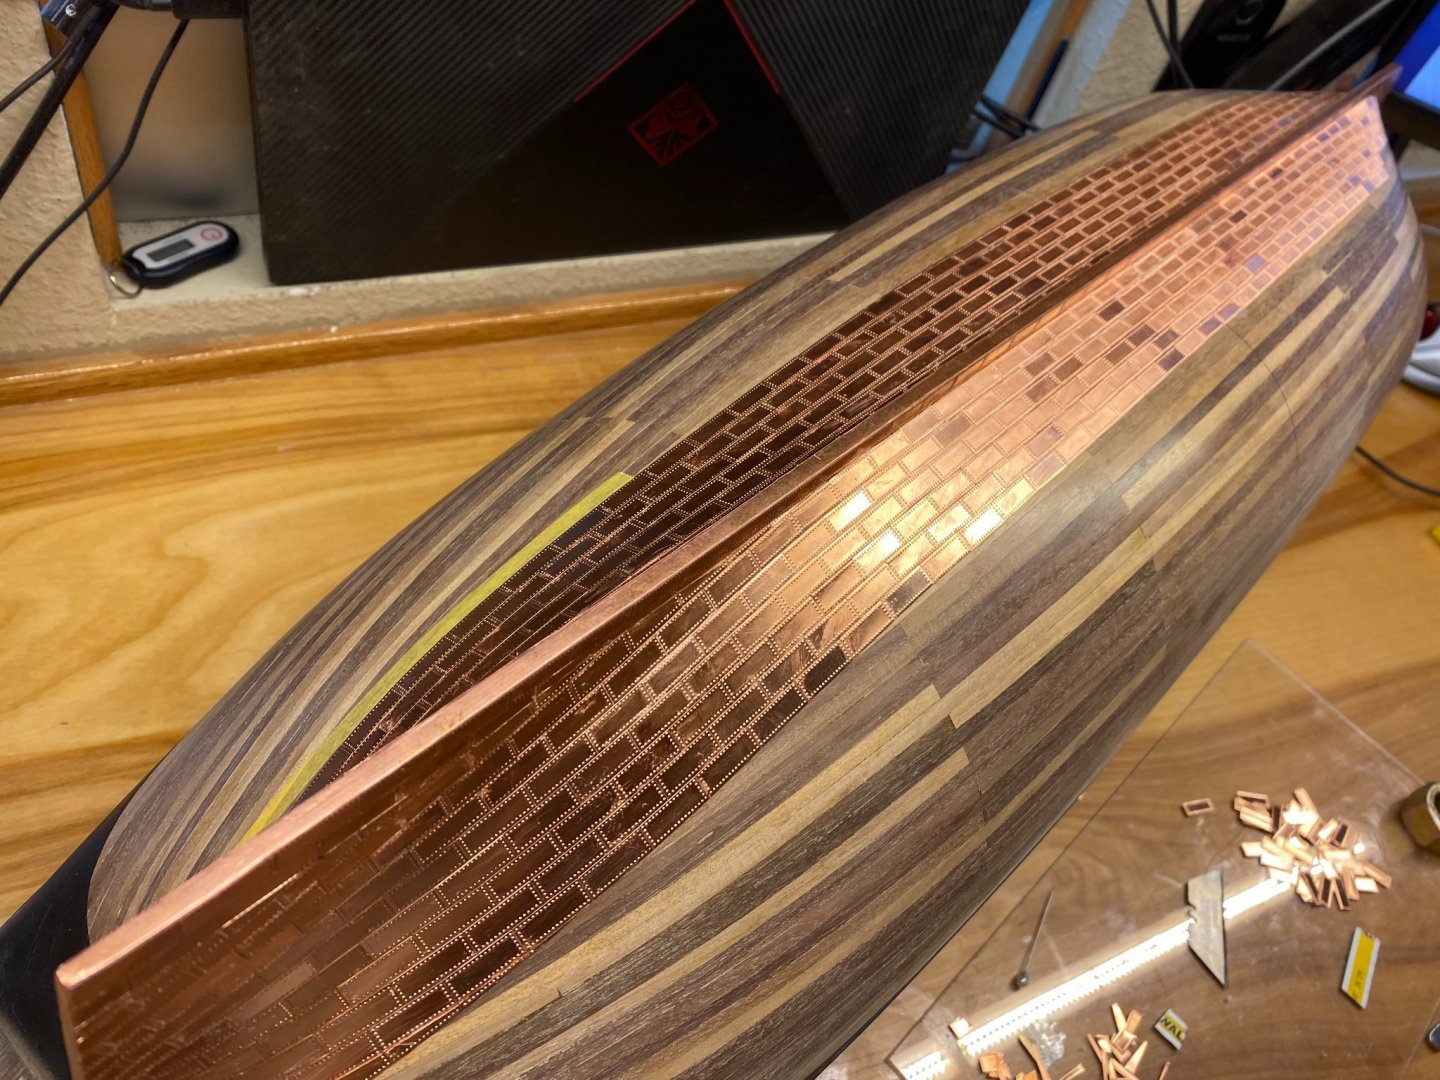
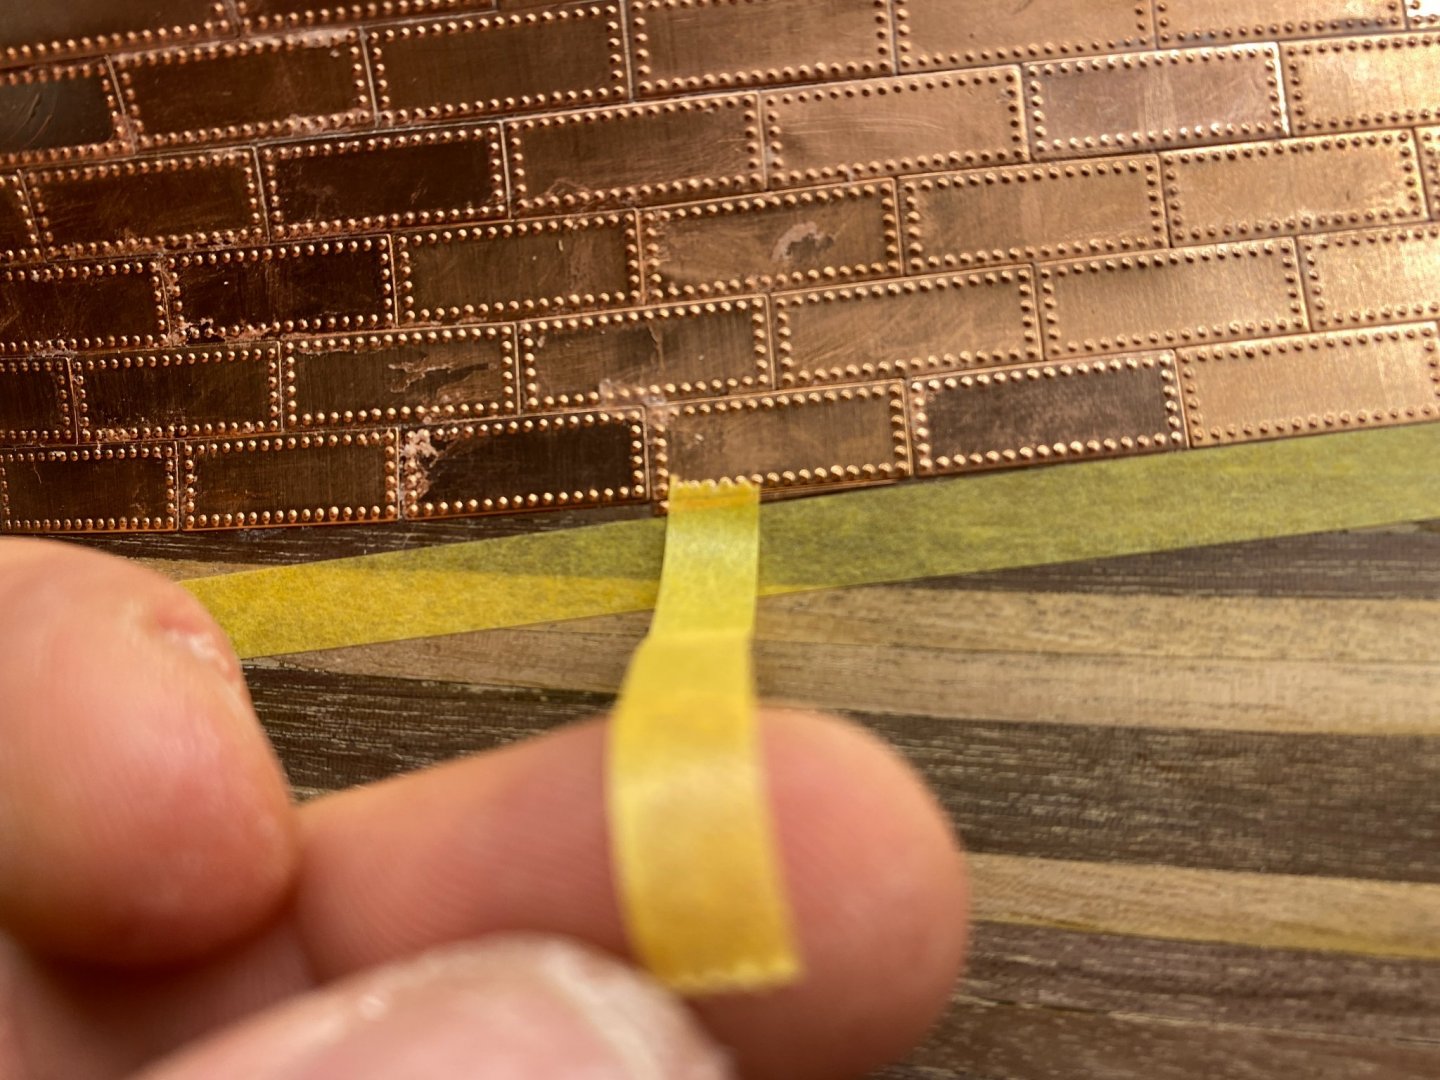
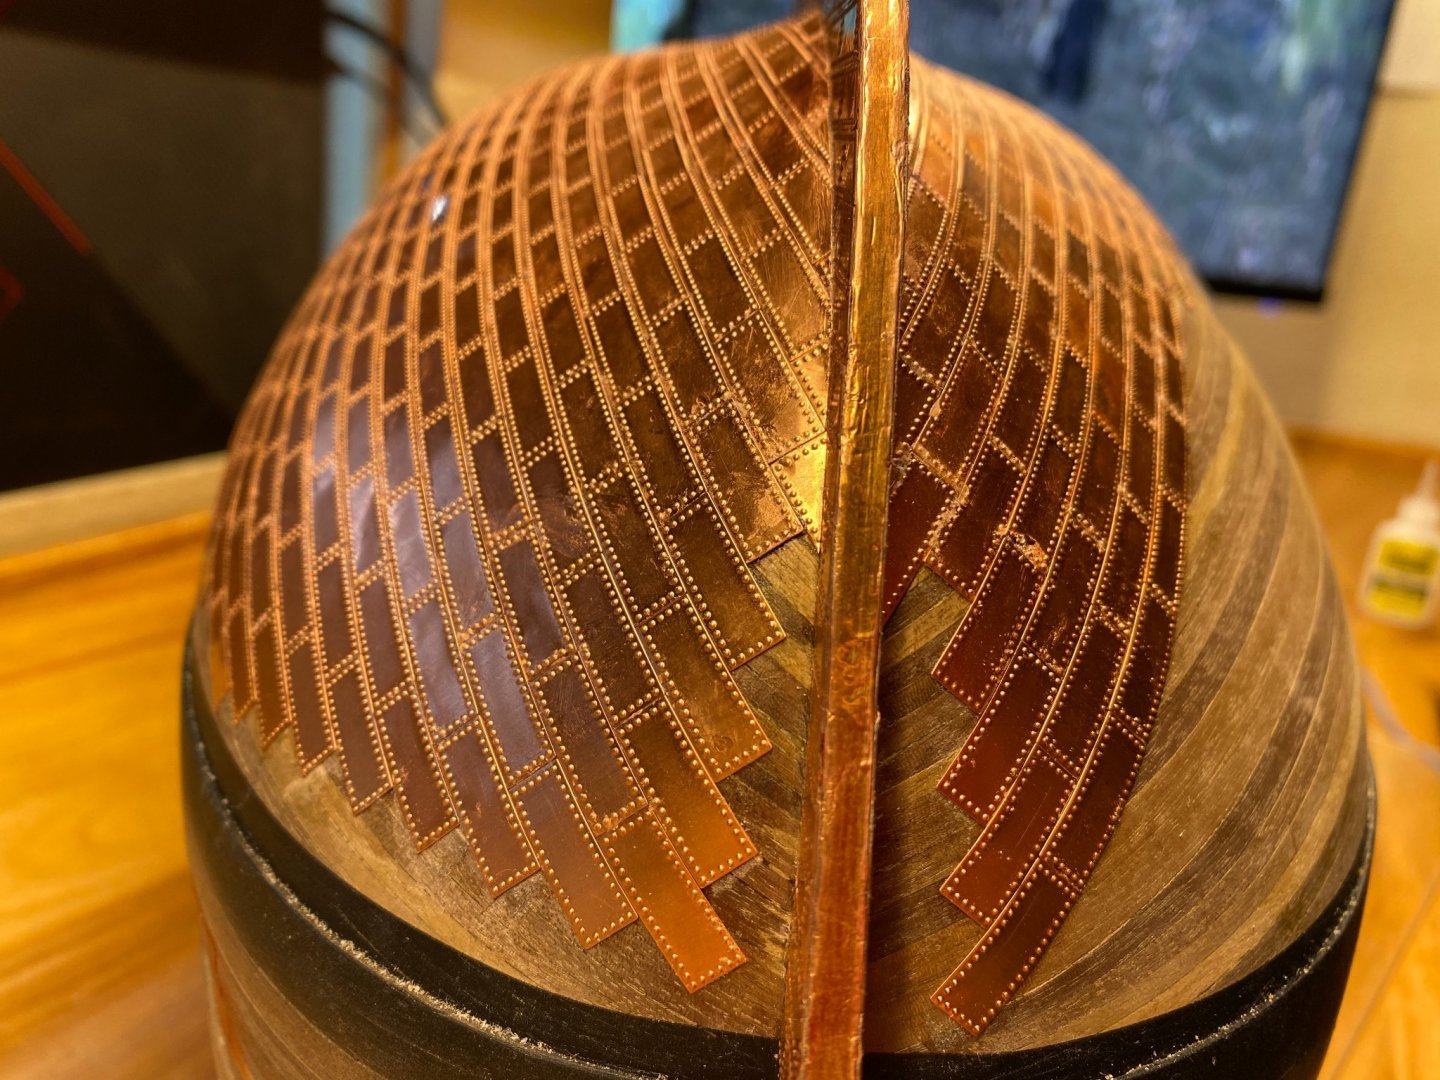
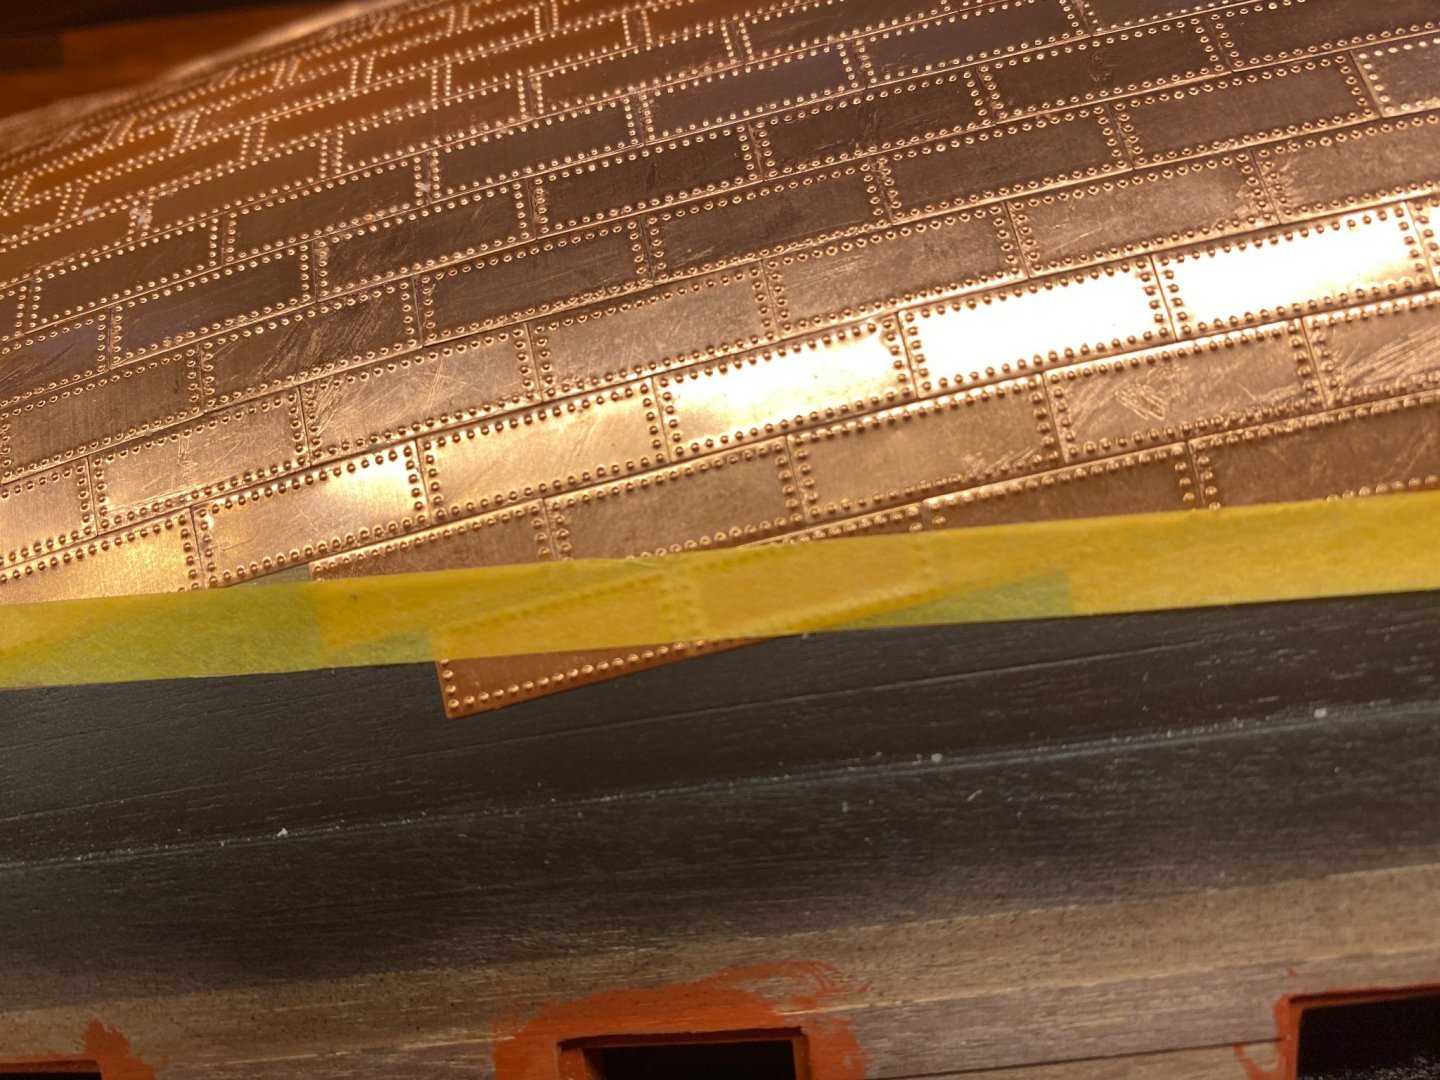
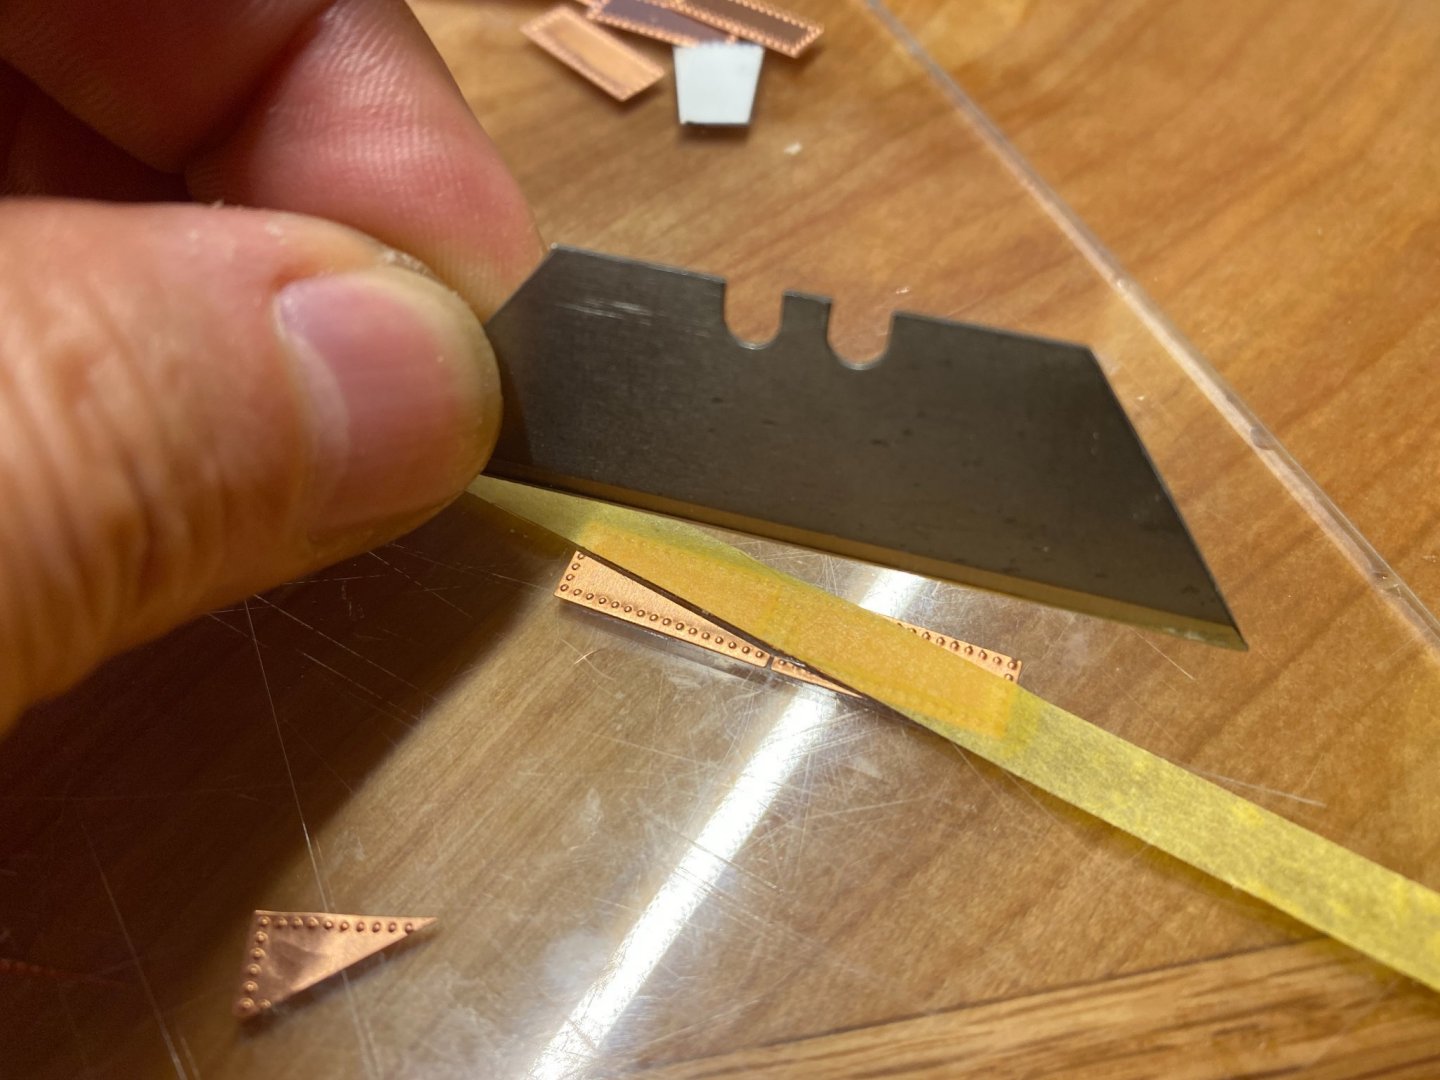
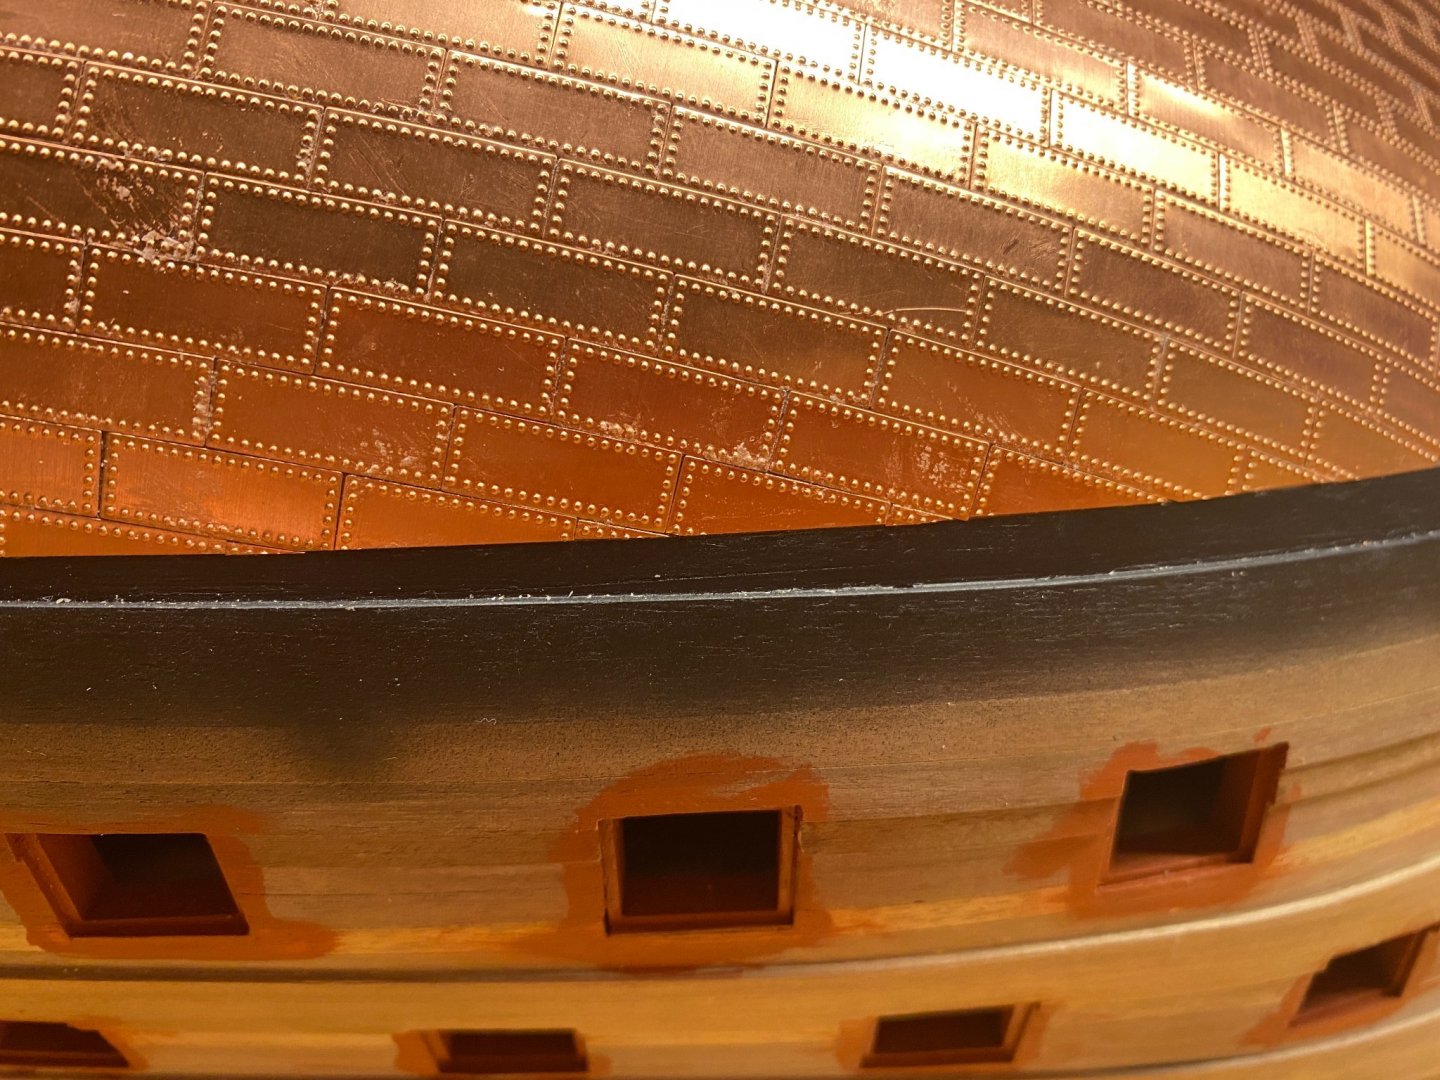
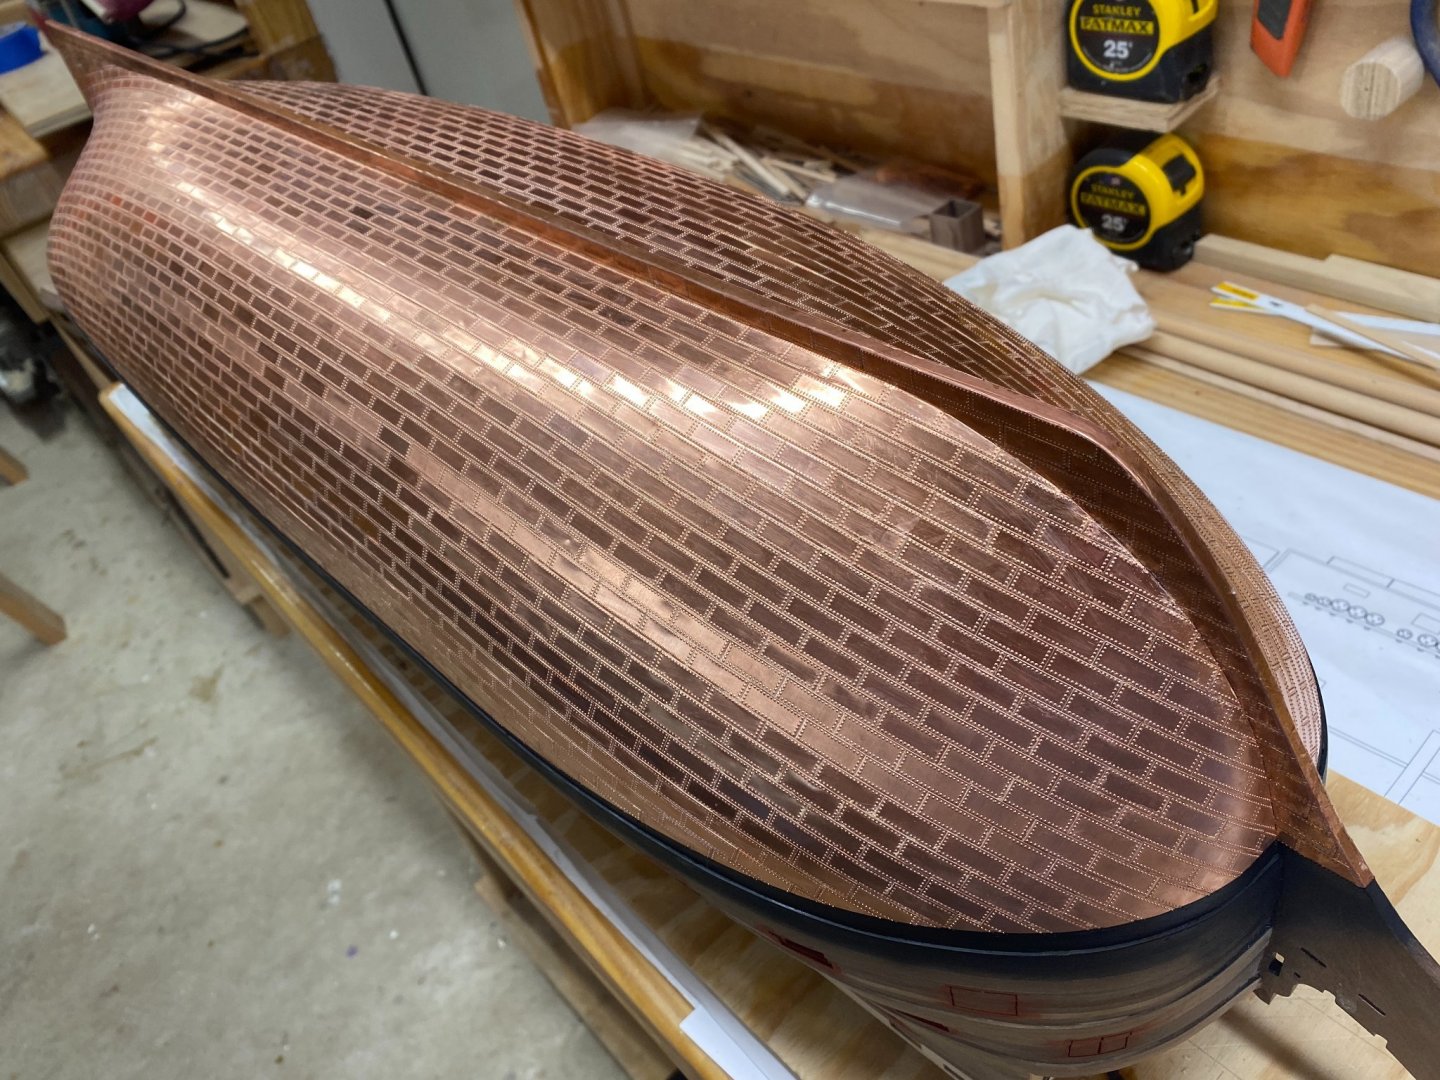
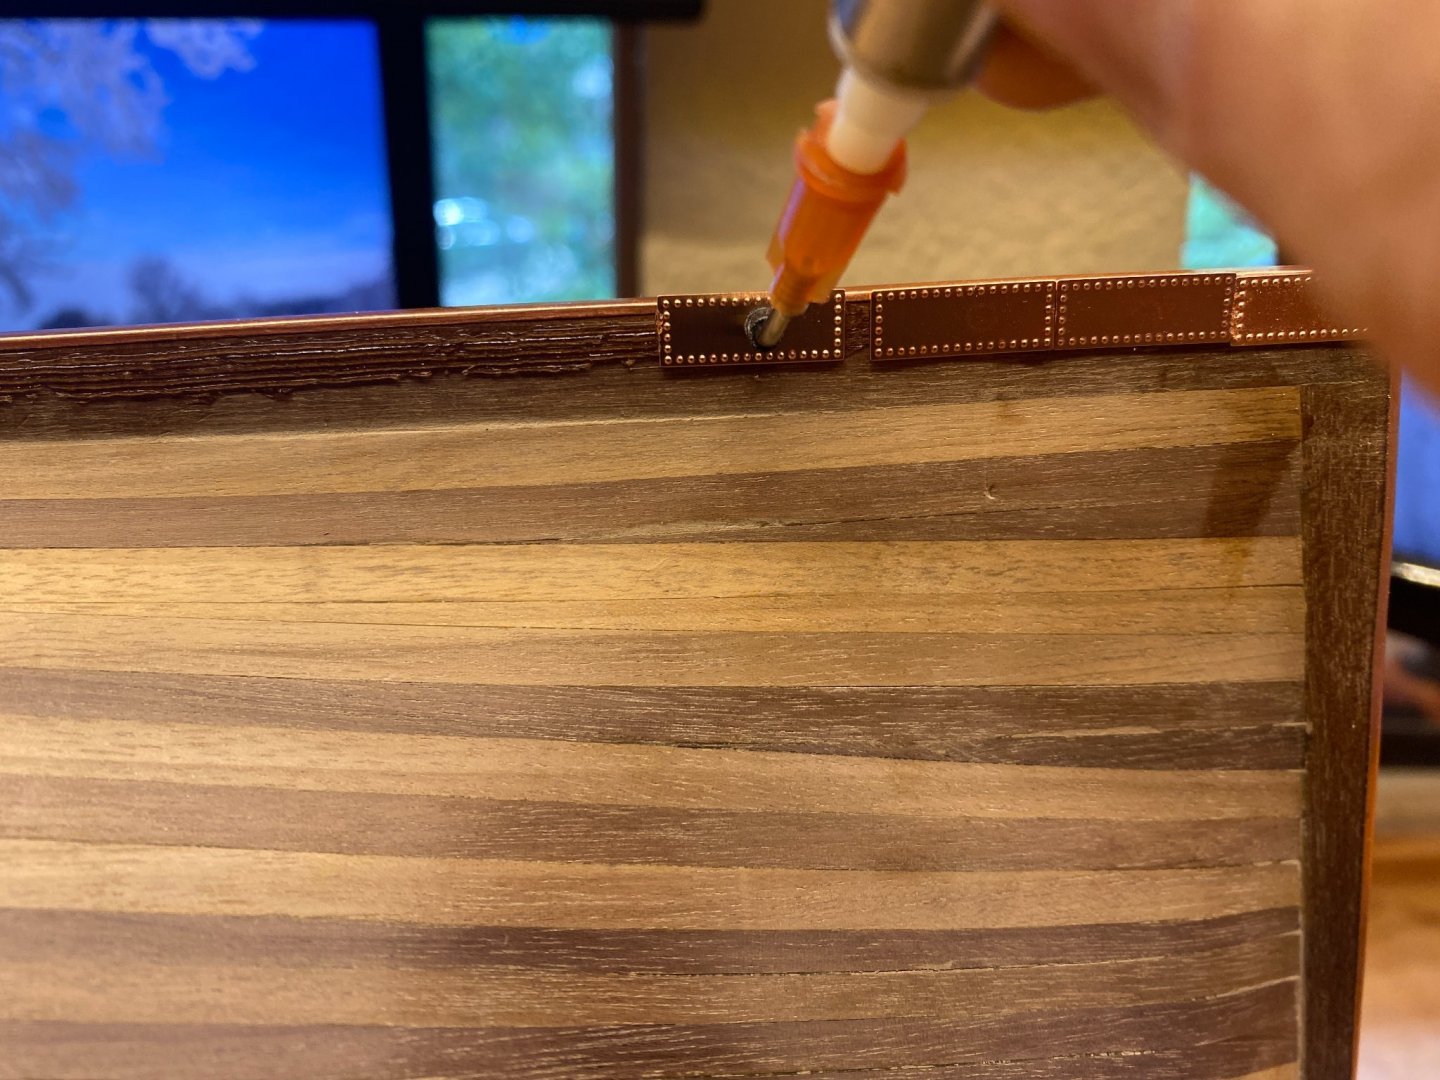
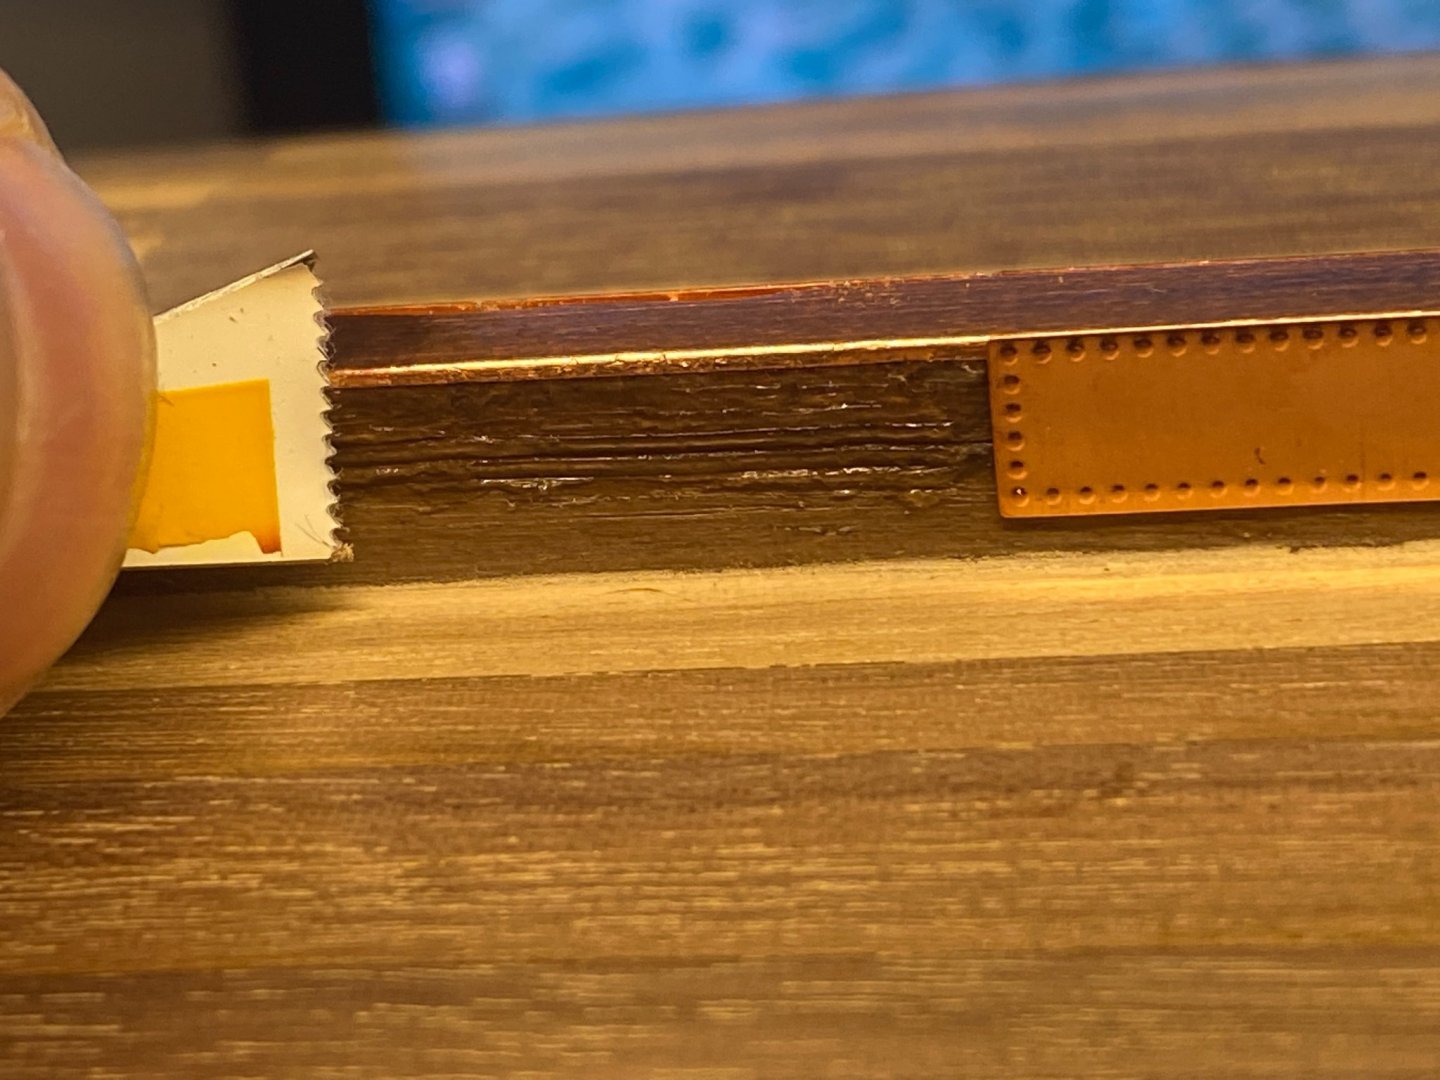
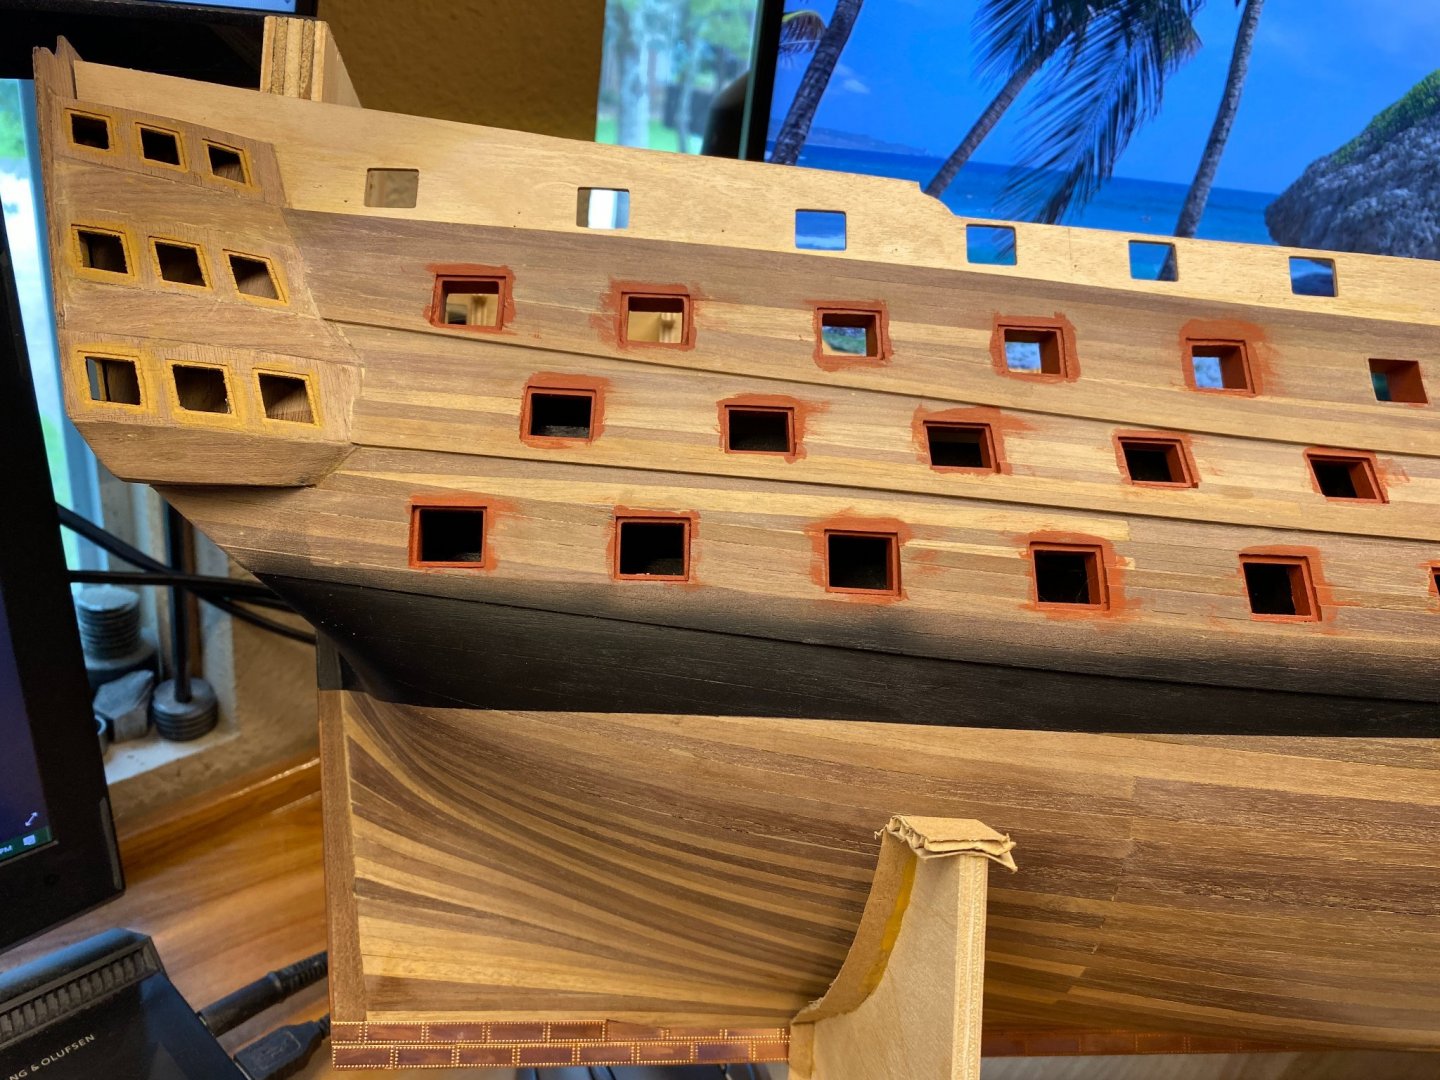
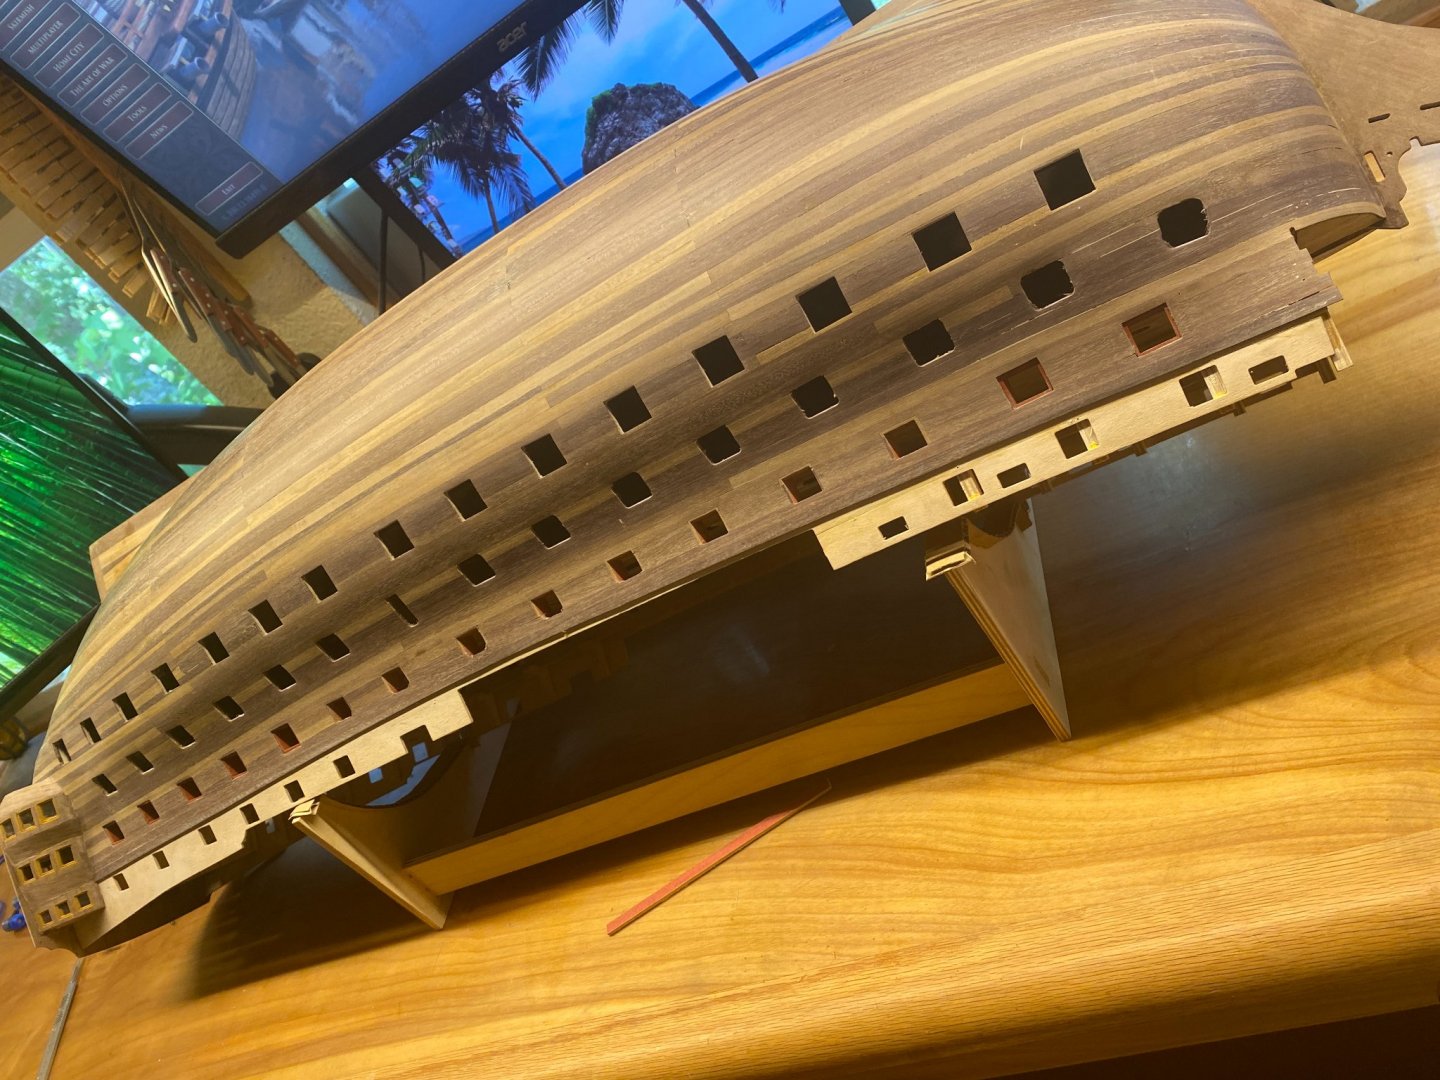
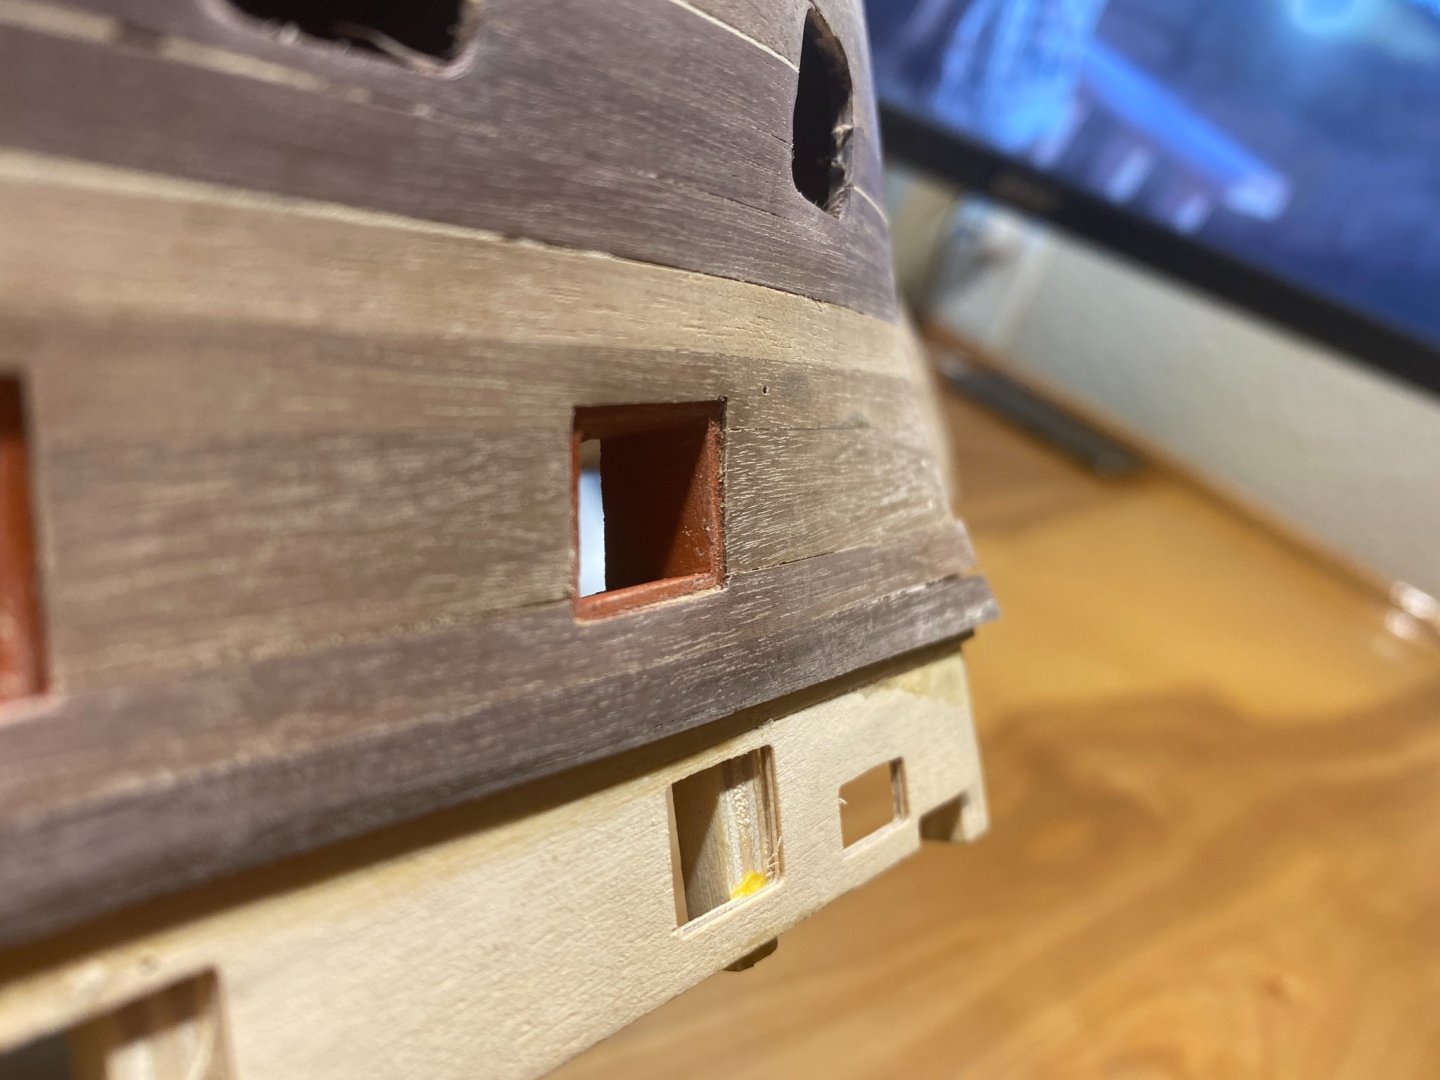
Caldercraft HMS Victory build Update Hi All, I'm back after a 7 week hitch offshore. Confession: the last job was delayed for a week so I was able to make some progress but was too much of a slacker to post. I am prepared to rectify that condition now. I did get the wales glued on; Keith and Greg were both right; the uneven deck heights at the bow somehow evened out with some creative sanding and "plank cheating" for lack of a better term. (I ran the wales plank a wee bit high on one side, and a wee bit low on the other.) I noticed that even though I started out the first wale planks exactly as instructed, the spacing still came out wrong when finished. (See wale spacing at stern galleries in last photo of this post.) Clearing ports: (I already did this once, but it never occurred to me that I would need to do it again after the wales went on. I have learned my lesson, but big time waste. For anyone following this build as an instructional, I would definitely wait to clear your gun ports (precisely trimming them to final size and bevel.) until after you've installed your wales and final hull sanding. - Or maybe I'm missing something. Please feel free to comment. I then pre-assembled all my liners after measuring the angles of all the gun ports at each deck. (See previous posts for example.) ...And quickly discovered I had to create a way to set/hold them in place while the glue dried. I used CA glue a the corners just to get them in place followed by a needle bead of PVA glue all around for final install. The liners were painted. I did leave them a bit messy with the intention of using the black and yellow (Well, now sort of "peach-ish" if current research prevails...) primary hull colors to get final definition. I then leveled out the hull, and used a "Sharpie-micro" pen to mark the waterline (I just couldn't see the pencil line.) before using an airbrush and modeler's masking tape to apply the flat black coat to the water line as instructed before starting the copper tiles. There's been a lot of talk about the best method of copper tiling. Here's what I'm doing: I completely acknowledge the fact that the original HMS Victory did not have a double row of rivets at each seam between tiles, but after deciding I would indeed tile, I have decided to use the ones that came with the kit. I have chickened out and applied a single piece of copper tape to my keel/bow/rudder mount, as I could not figure out a way to bend or coax the tiles around these components in a way that looked even vaguely acceptable. (The #^%@$ things kept falling off regardless of adhesive, not to mention looking saw-toothed and uneven. - Any insight into this including forming/bending the tiles around the rudder, compound shapes, etc. would be greatly appreciated.) I did not want to use CA glue due to it's quick dry time and propensity for tiling fingers rather than hull. I wanted an adhesive that would allow me 5 - 10 minutes of workability and was "trowelable." I tried experimenting with "Loctite Power-Grab Ultimate Crystal Clear" after getting sucked in by the snazzy name, but it proved no better than clear silicone caulk. I could pick off individual tiles with just a fingernail after it had fully cured. The "PL" series (-100, -200, -300, -400...) adhesives "skinned" over too quick after initial application as well, rendering them inadequate. ...Fine. Crazy glue it is. I settled on the thick stuff applied to the bare wood hull instead of the individual tile. I "troweled" it out using a piece of 32 tpi hacksaw blade pounded flat to ensure an even coat that didn't ooze out between tiles, keeping a "wet edge" as I went. I am keeping a jar of acetone and a good supply of Q-tips handy for when I do accidentally get glue on a finger, the top surface of a tile, etc. Many people endorsed a vacuum pick-up tool to help with placement. The one I picked up has been working well, but I do wish I had spent a tad more and gotten one with stronger suction. I found the best way to get straight copper tile cuts was to just use a utility knife blade and a small weight (in this case 7/8" hex hvy nut) to precisely chop tiles using a piece of 1/4" polycarbonate sheet (6" x 6" is more than large enough.) as a cutting board. This method requires surprisingly little force and is very precise. (The manual endorsed using a rounded exacto blade worked continuously over the copper on a ceramic tile until it cleaved the copper. - I found this to be almost useless. Multiple passes required caused my fingers to go numb. The results were messy and inaccurate, and the blade and ceramic tile had to be replaced very often.) A good pair of beefy scissors handled the rest. I am about to attempt tiling the large areas of the hull. As usual, everyone's input is greatly welcome! Here's a photo taken this morning: Post Script: Notice the stern gallery windows in the above photo. The "glass" is missing because I accidentally blew a few of them out when "de-dusting" my model with 120 psi. air before deciding that the remaining ones were not installed well enough to remain either. ( had glued in the scissor-cut acetate strips with a "fog-free" adhesive that barely "adhesed" and was far from "fog-free.") I have since mastered the art of cutting coverslip glass with a diamond scribe, but it's still going to be fun getting them installed at this point! - Again, any ideas?


-
Caldercraft HMS Victory build Update Hi All, I have spent the entire week working on getting more hull planking on per the manual "clearing the gun ports as I go." I think next ship I will not "clear the gun ports" until after I have sanded as I had a rather nasty time trying to sand around the port openings. (The paper kept getting snagged on them.) Using a sand sponge achieved similar results. this left thinned planking around the edges of most gun ports. I also didn't discover a gap in the planking until I had completely finished the bow. this caused the top course on the stbd side to be slightly raised when compared to it's port counterpart. I tried heat, various solvents, etc to soften the titebond 2 glue, but it was to no avail. Any one have any ideas? I then did a round of wood filling followed by some light sanding with #400 to remove the over-fill. Next: Glue on the wales. Thank you again. It will be a while until my next update as I'm due to be away for about two months due to work.


-
Great looking work Sir! That would drive me nuts too! Do you have some kind of magnifying device? They're tiny!
-
Excellent job Chris! Care to drop any pearls of wisdom on me before I start messing up mine?
- 29 replies
-
- 2
-

-
- agamemnon
- caldercraft
- (and 1 more)
-
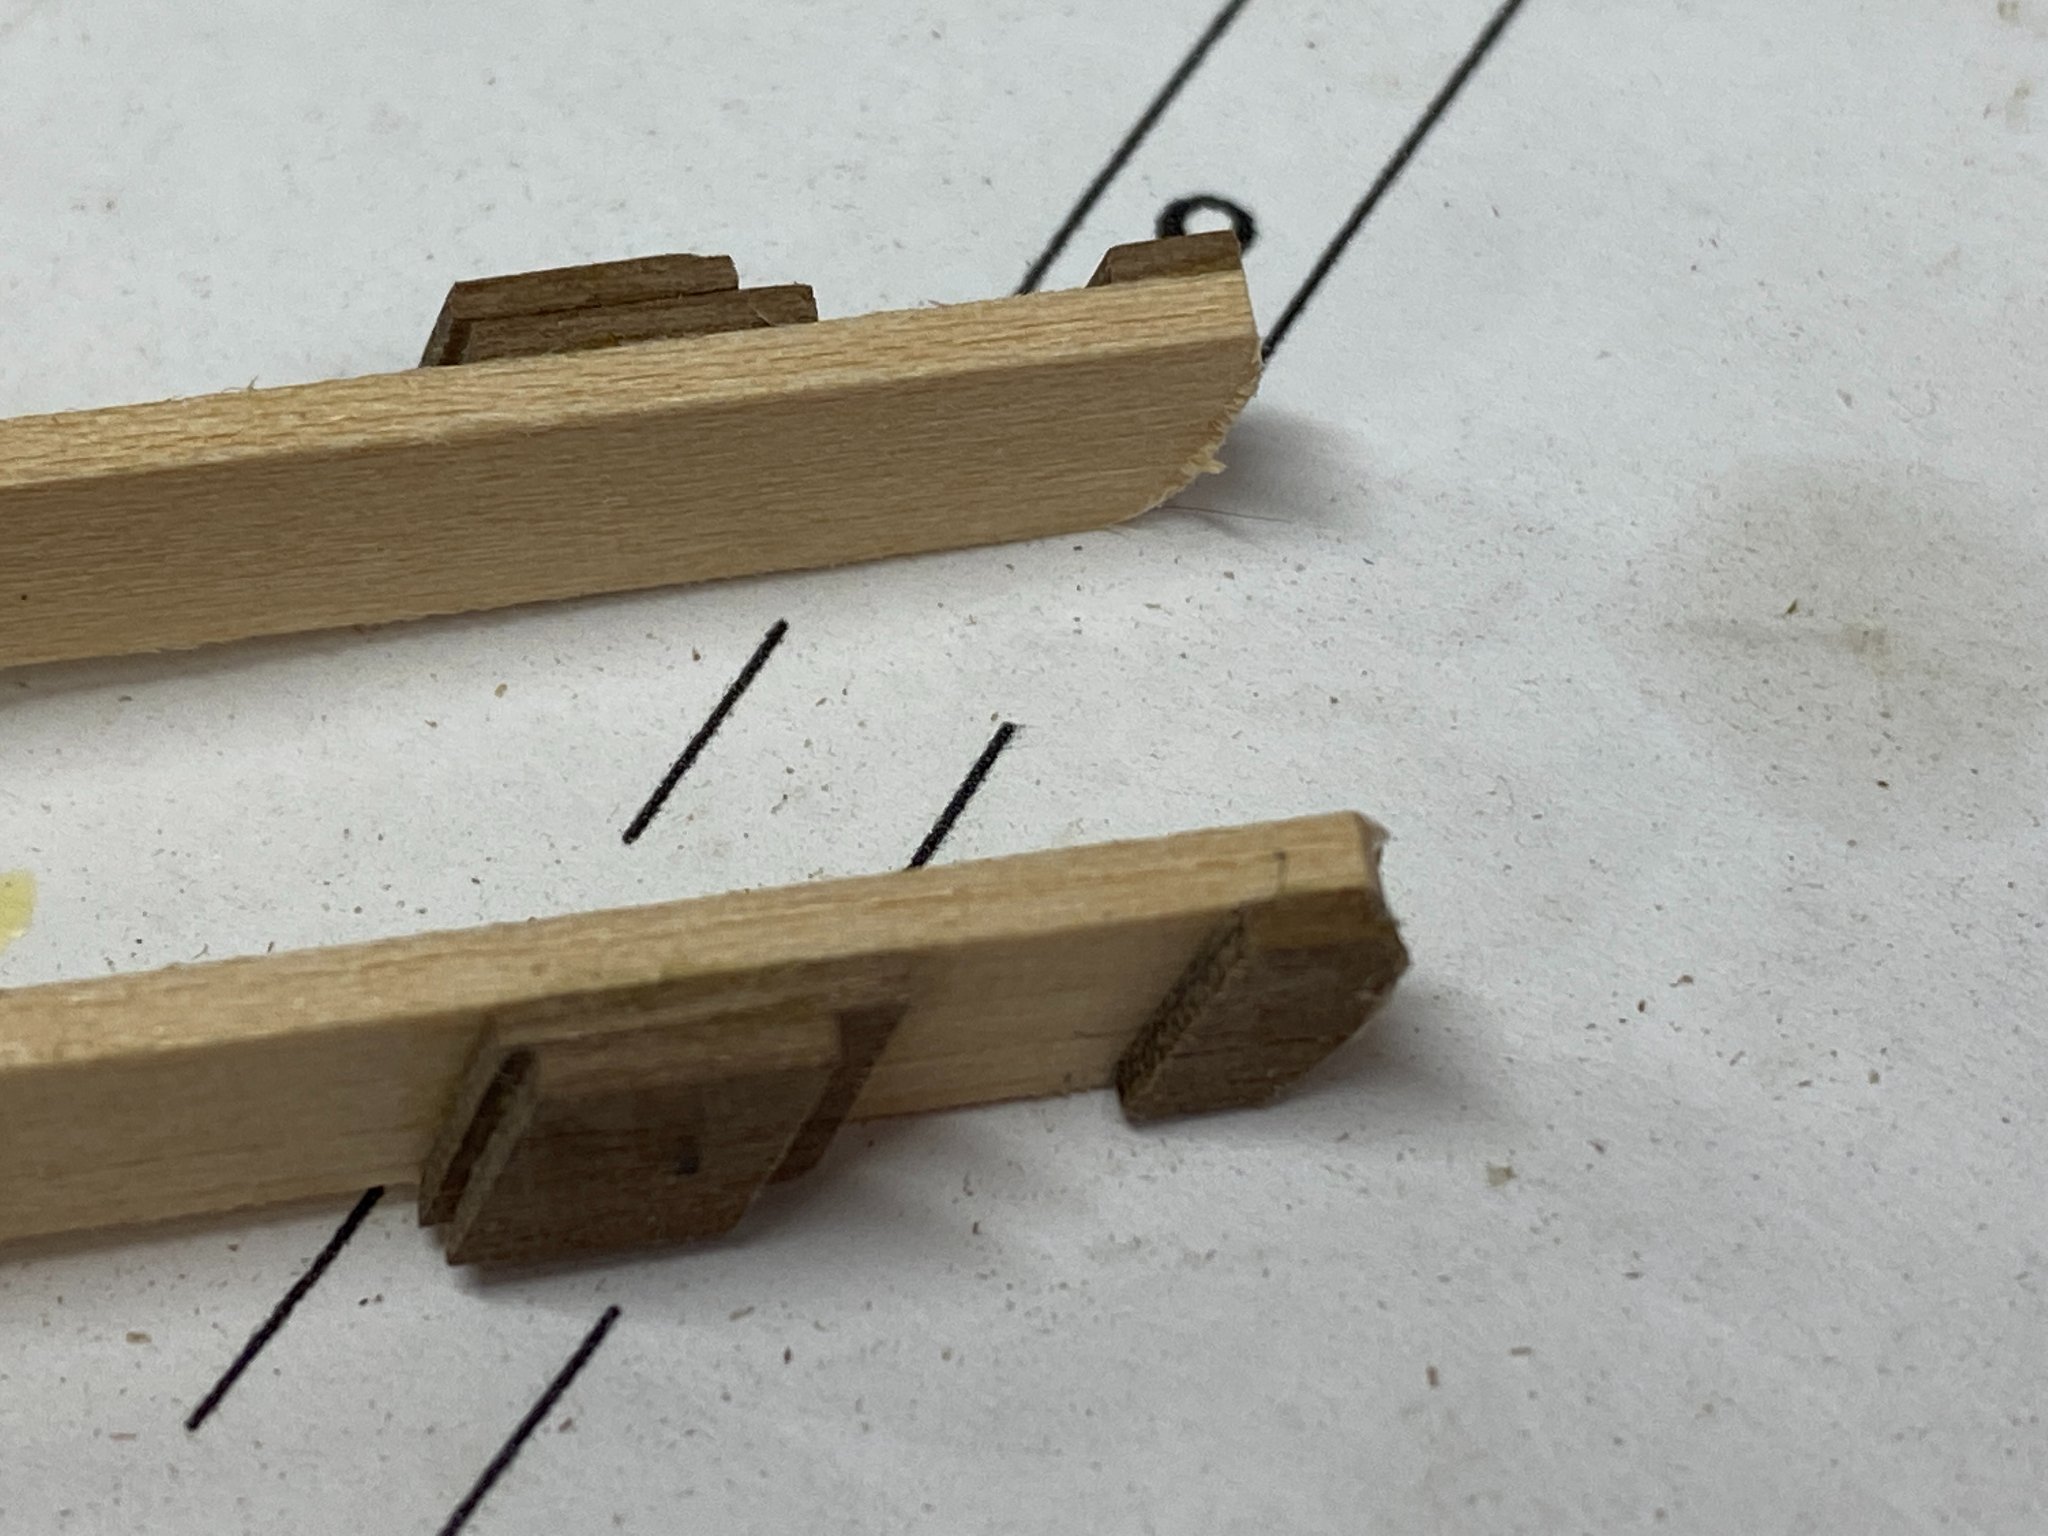
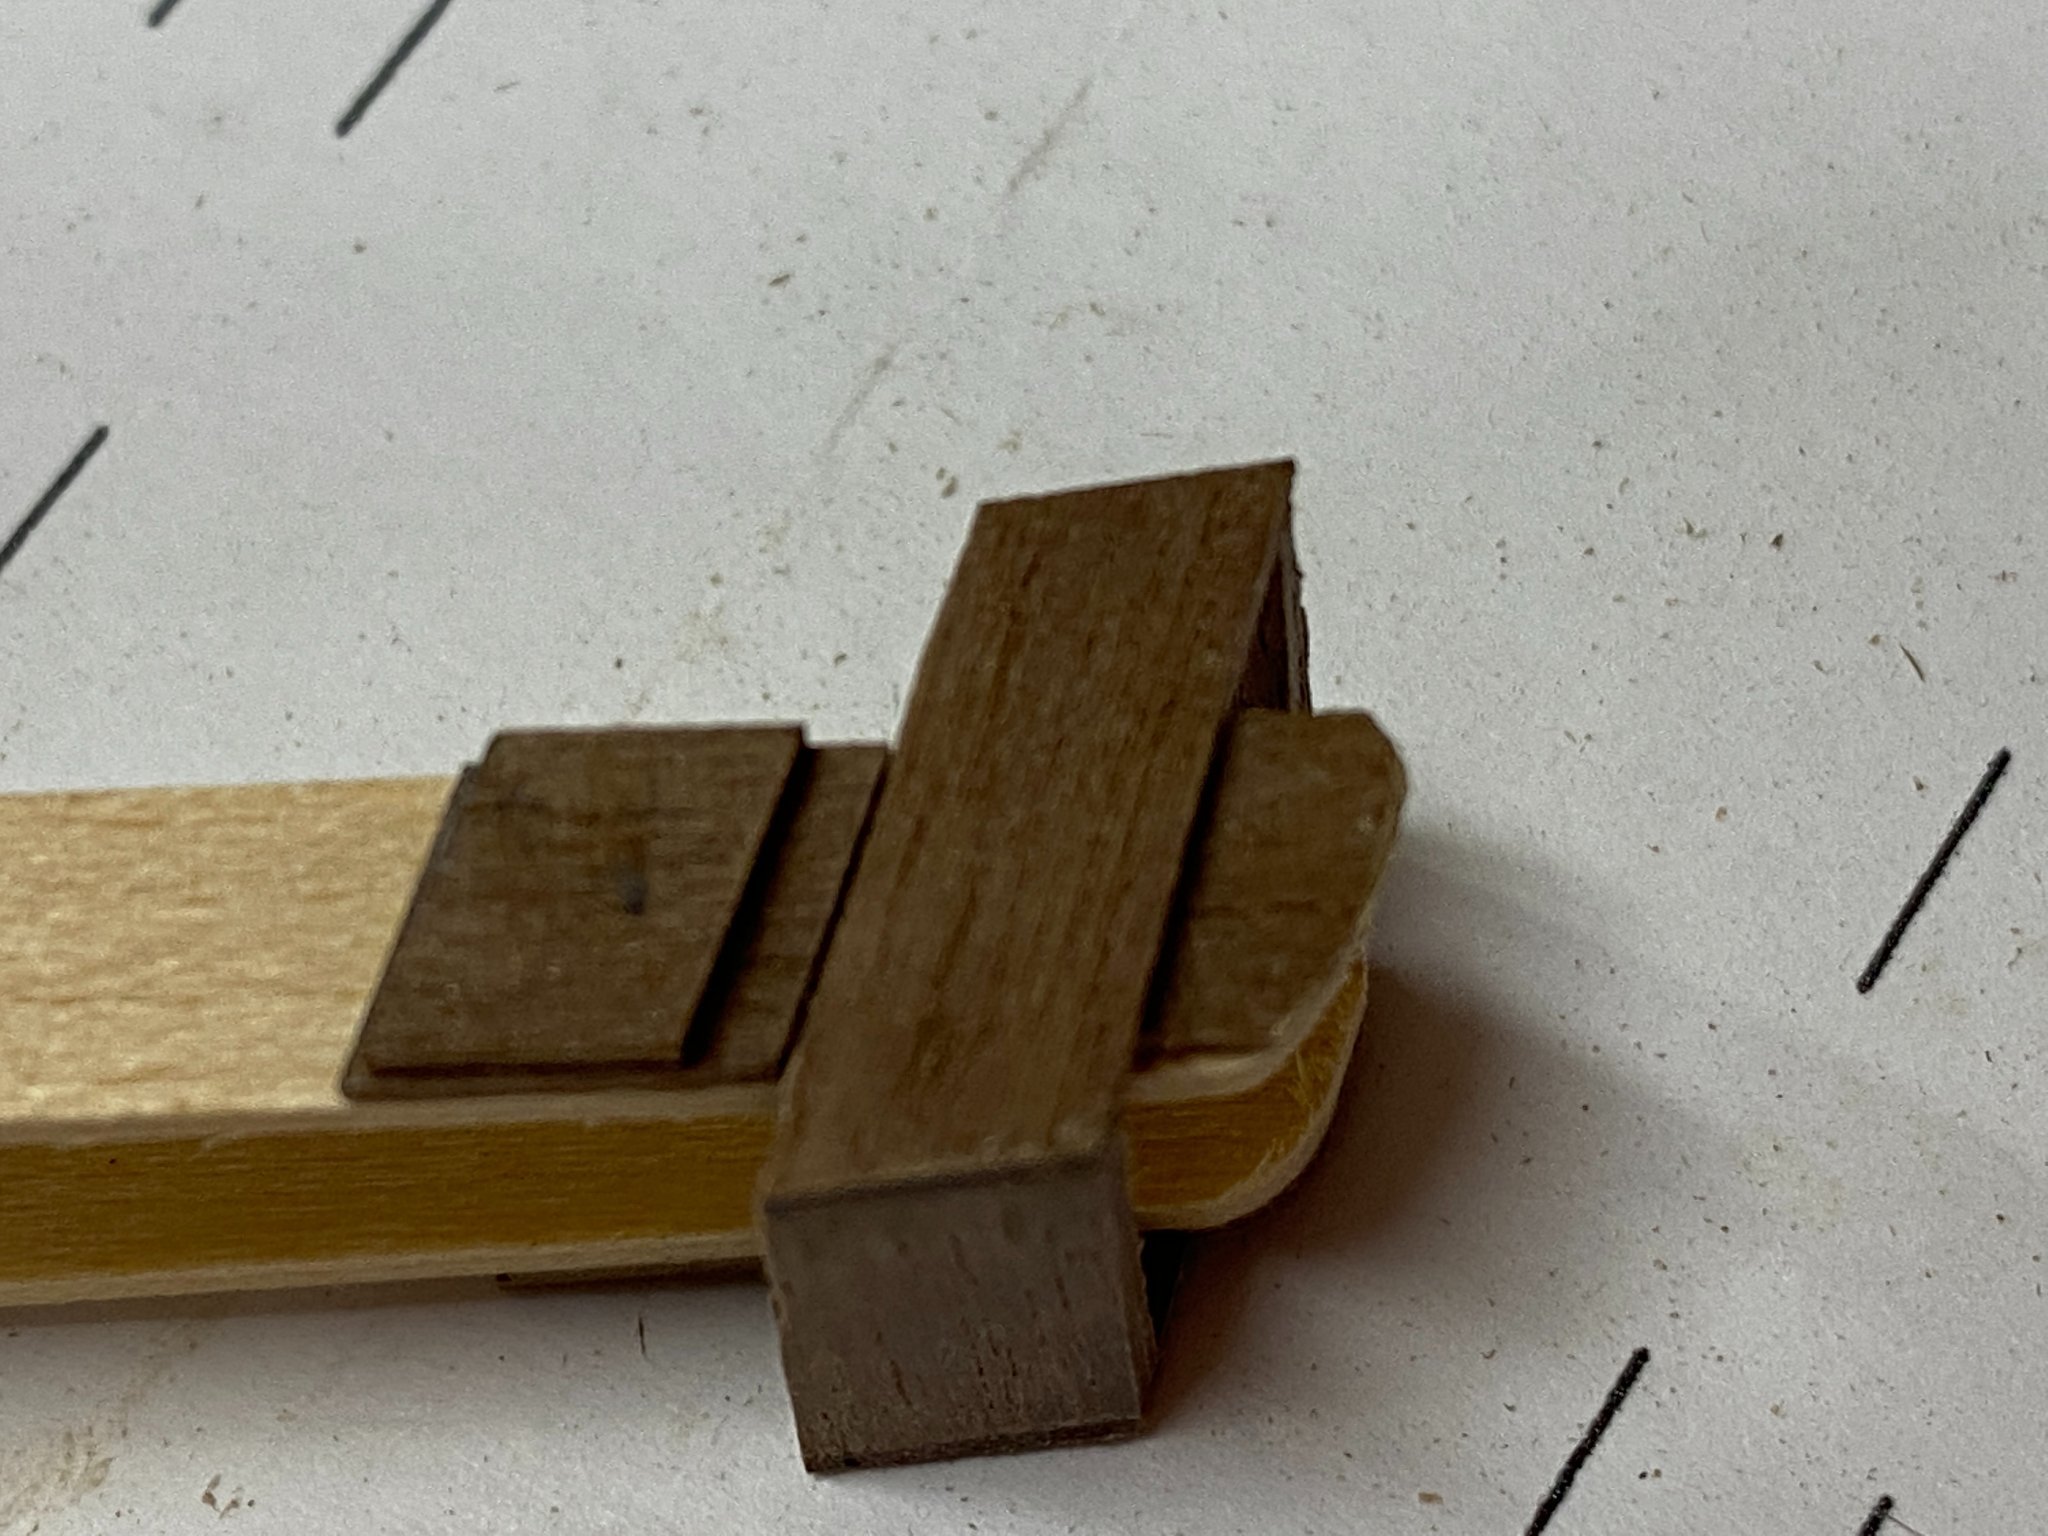
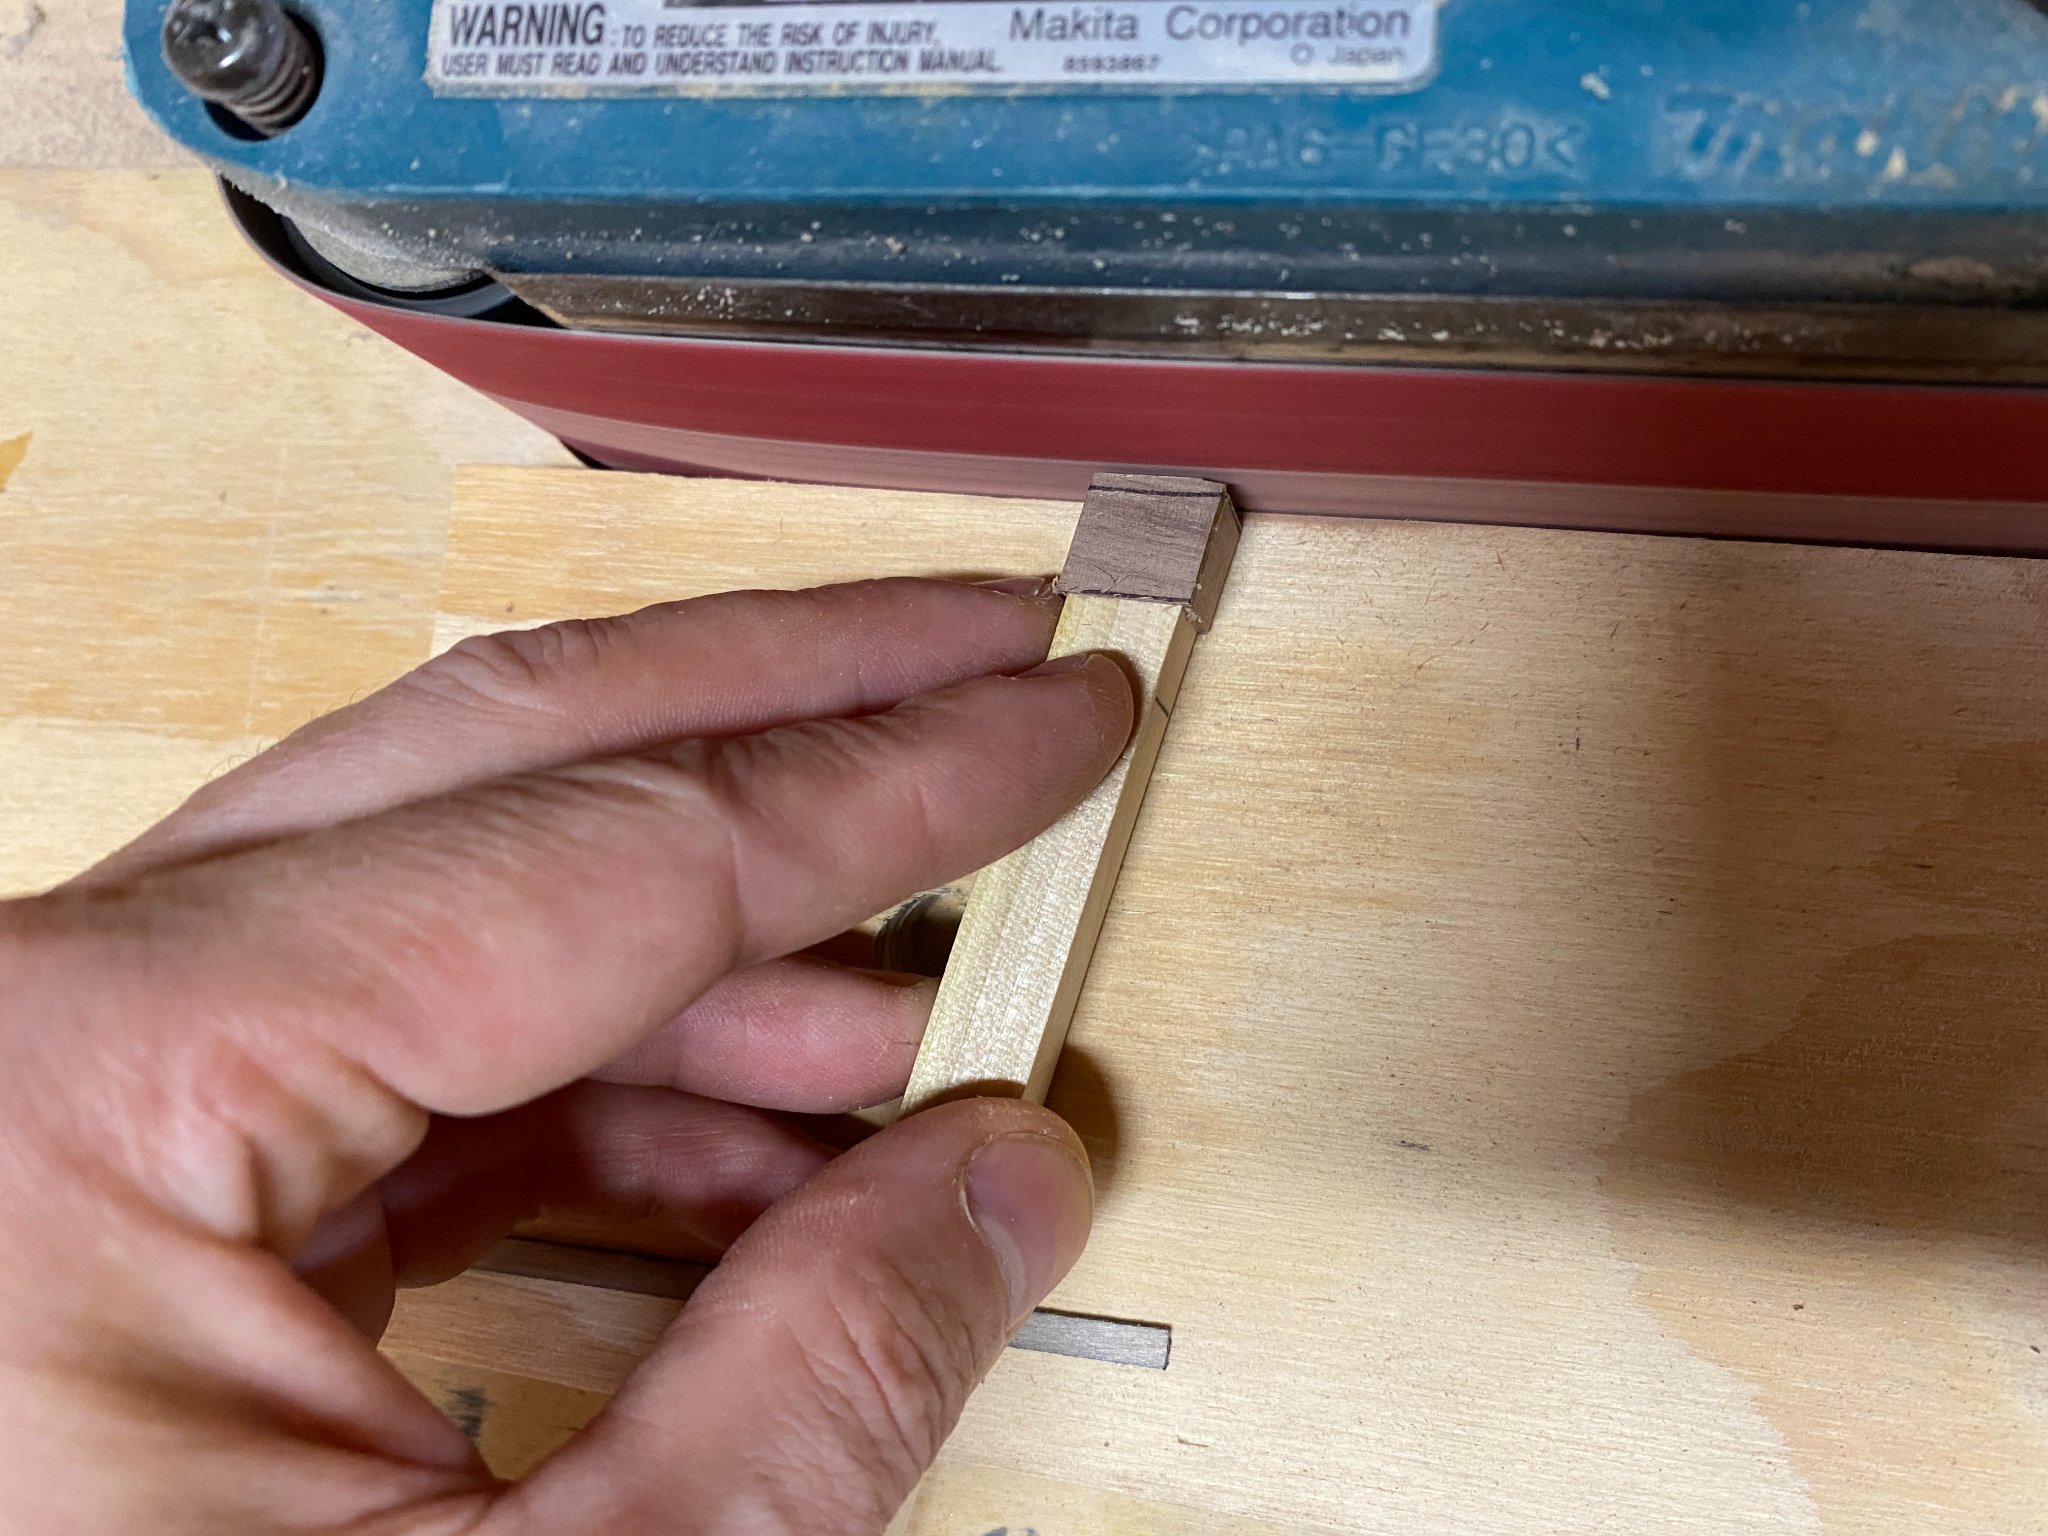
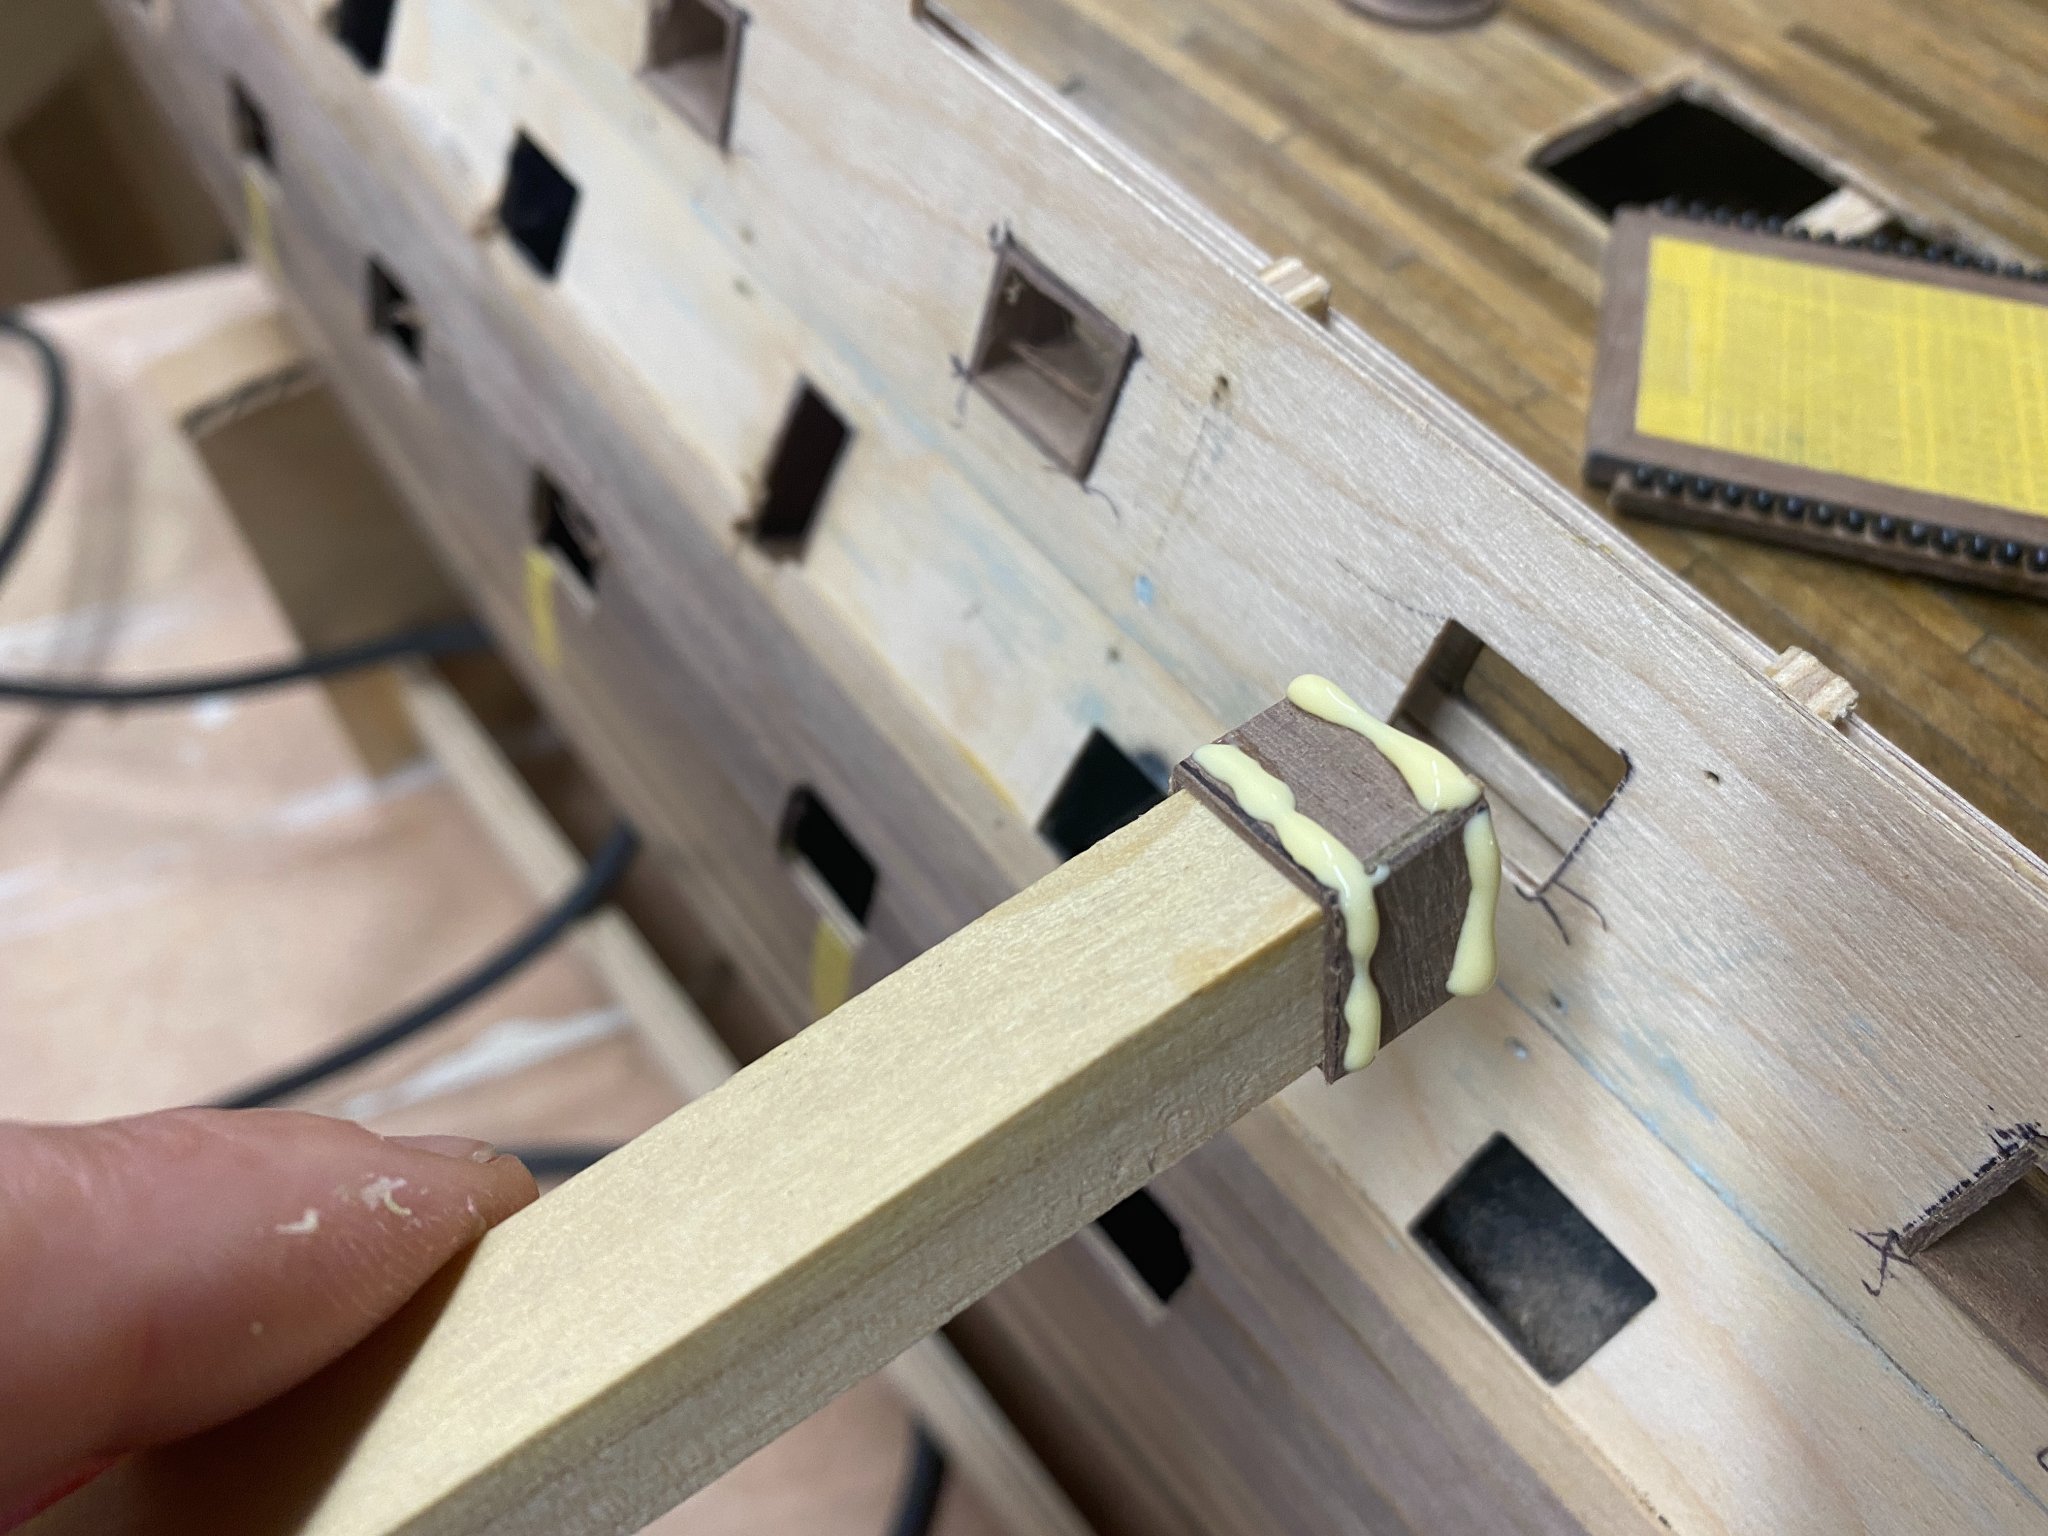
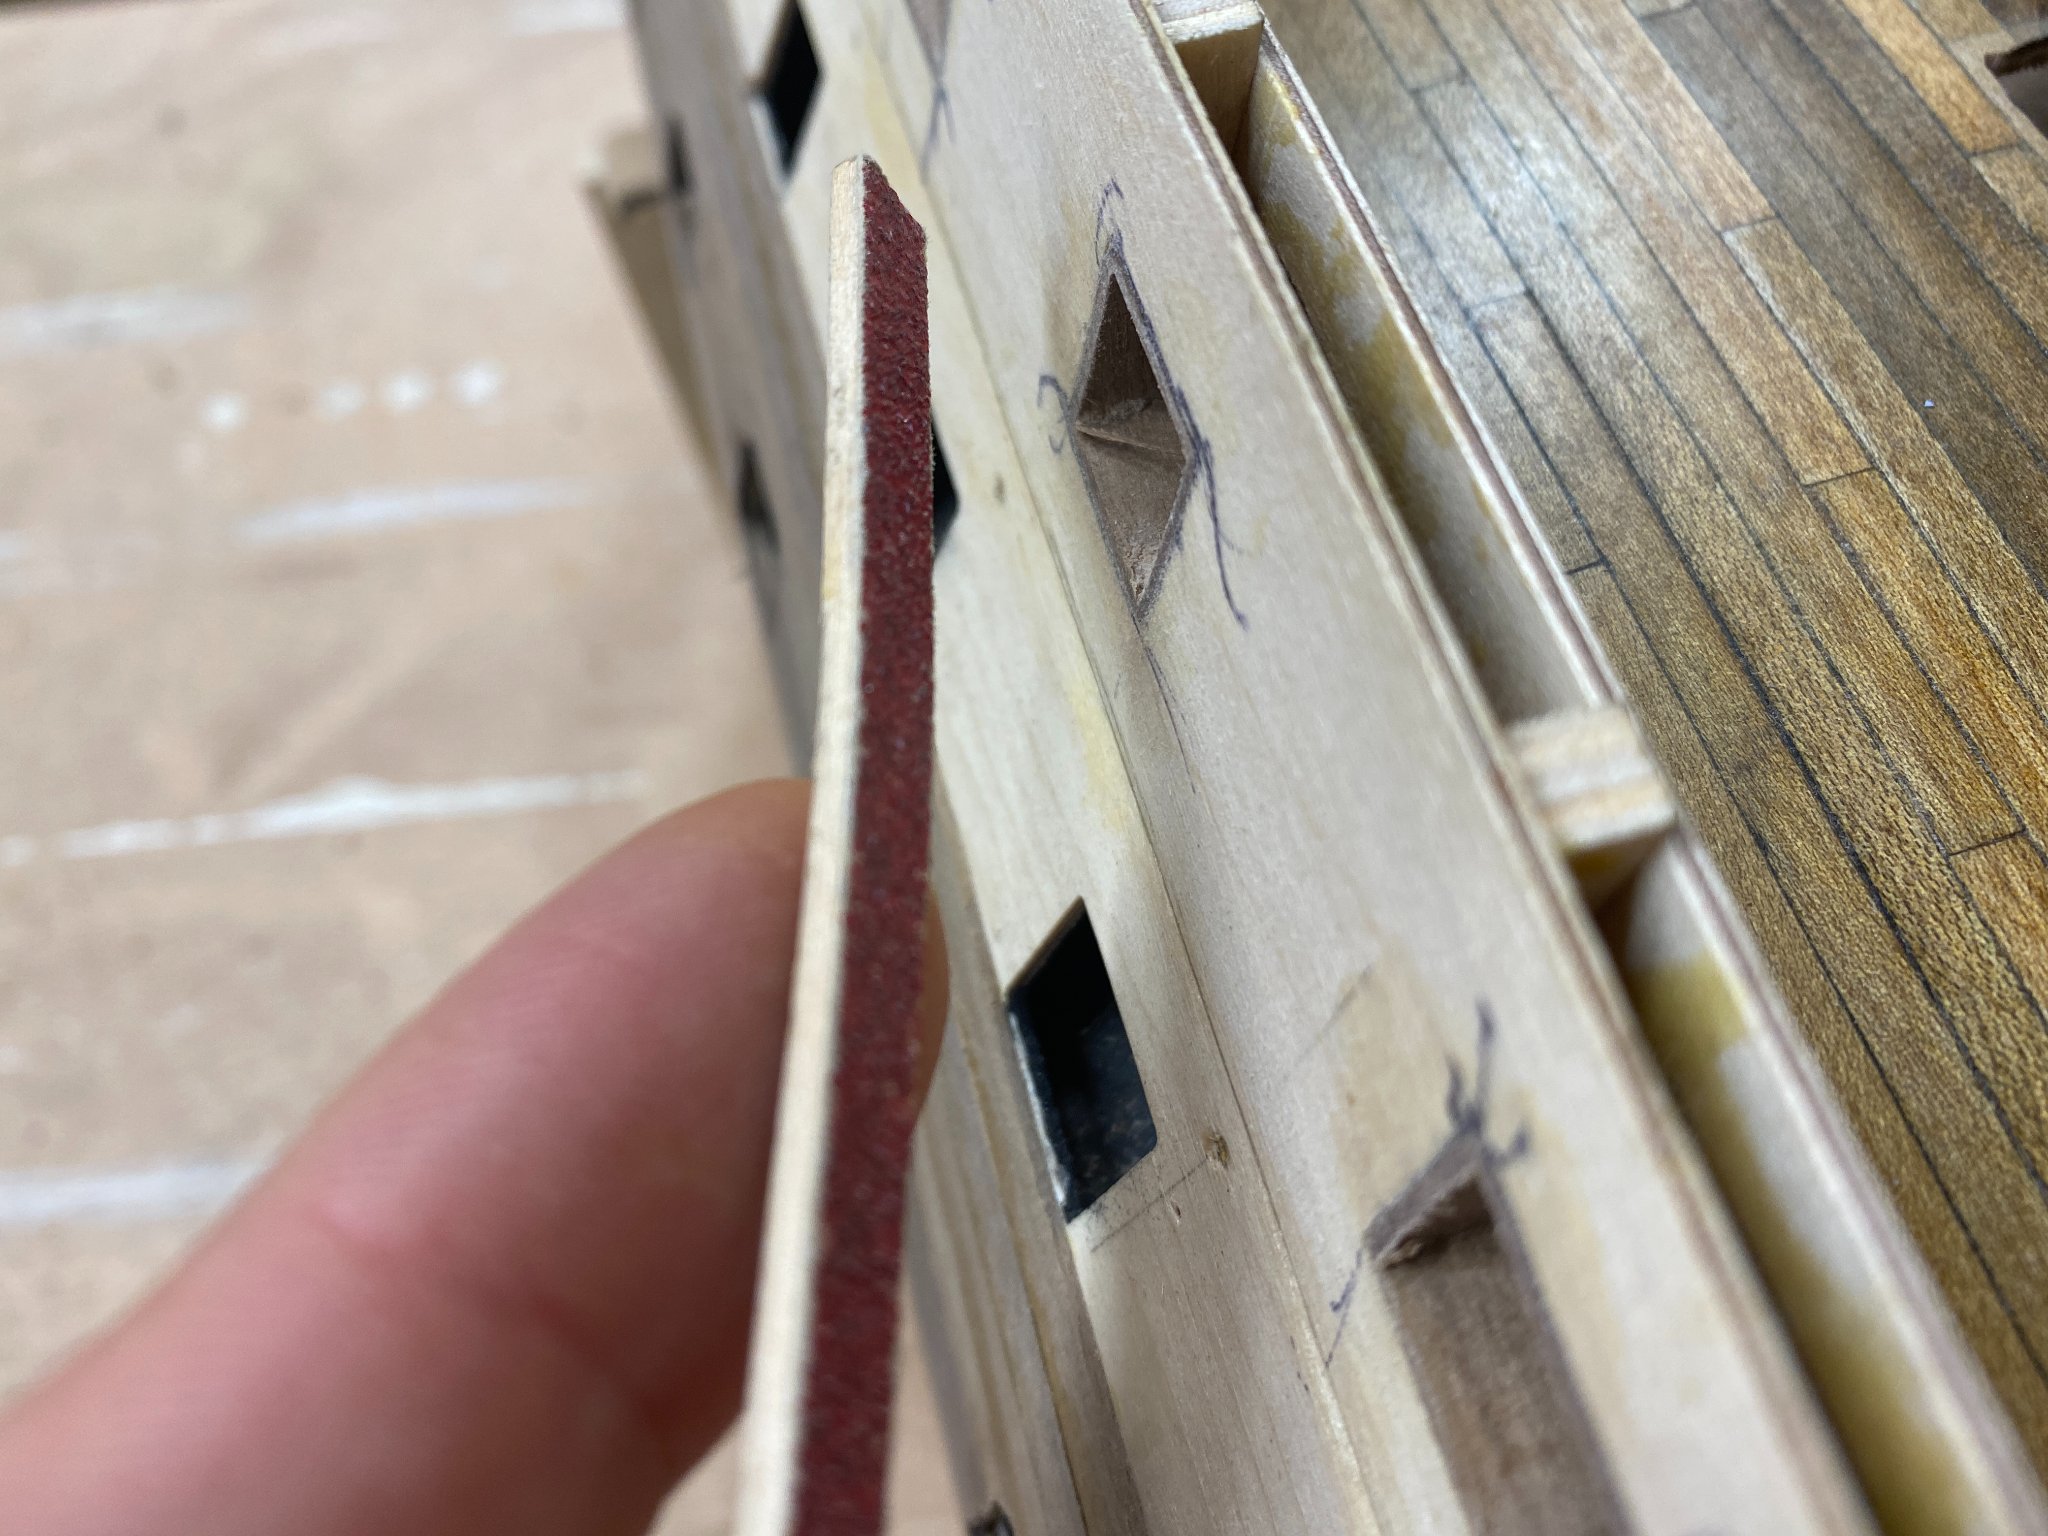
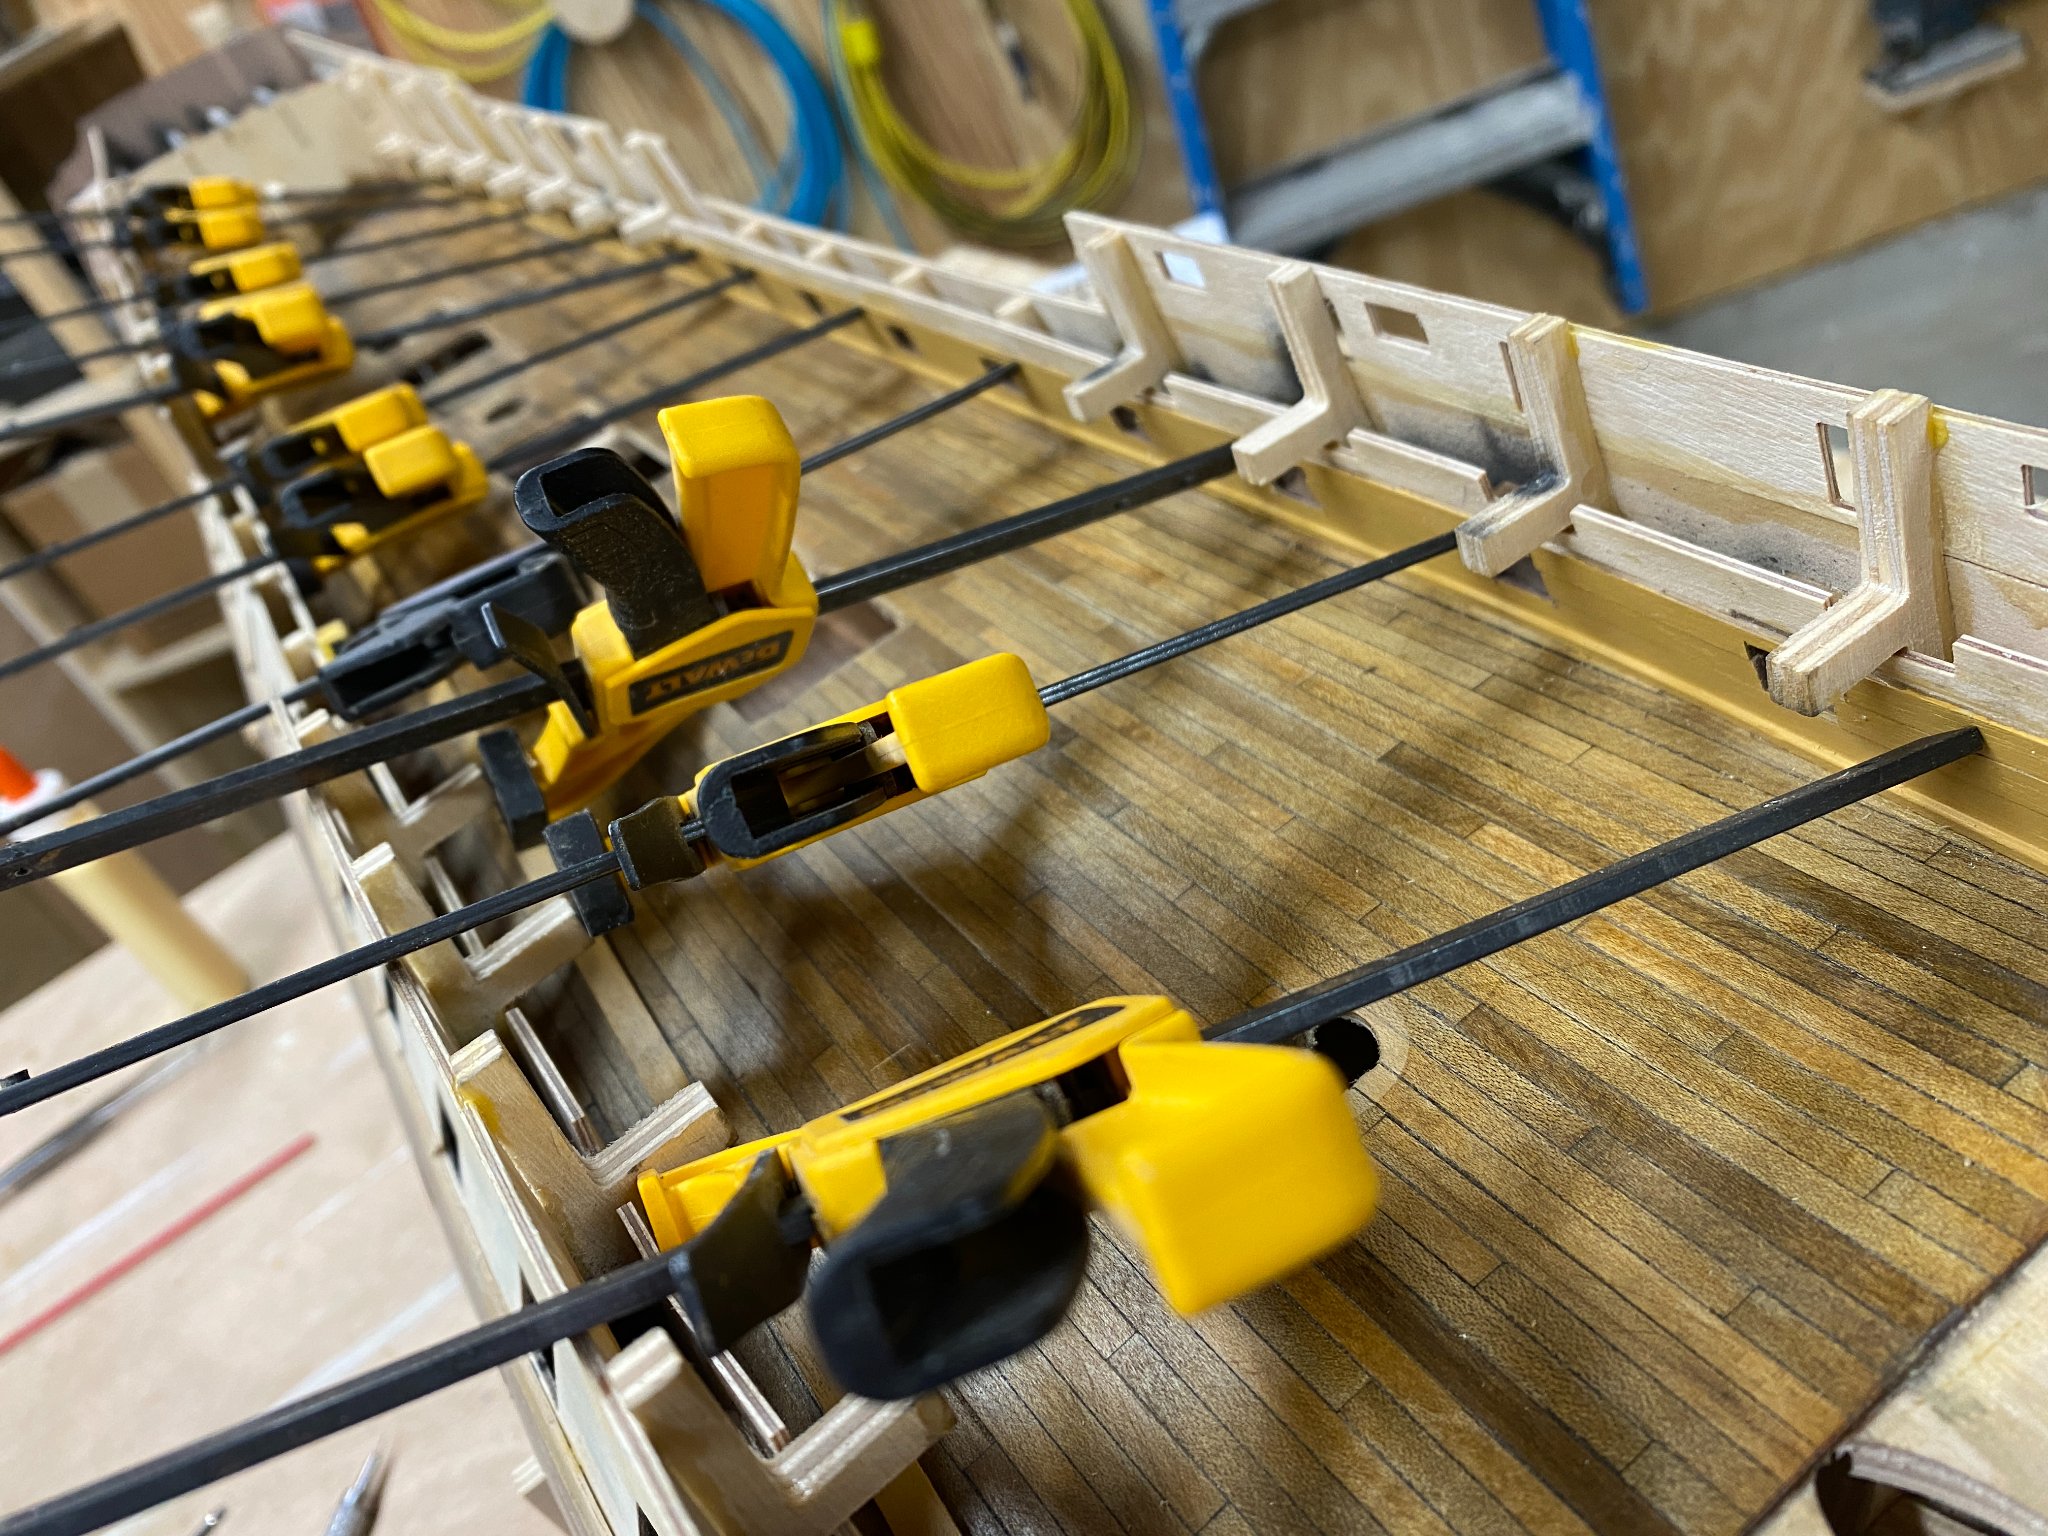
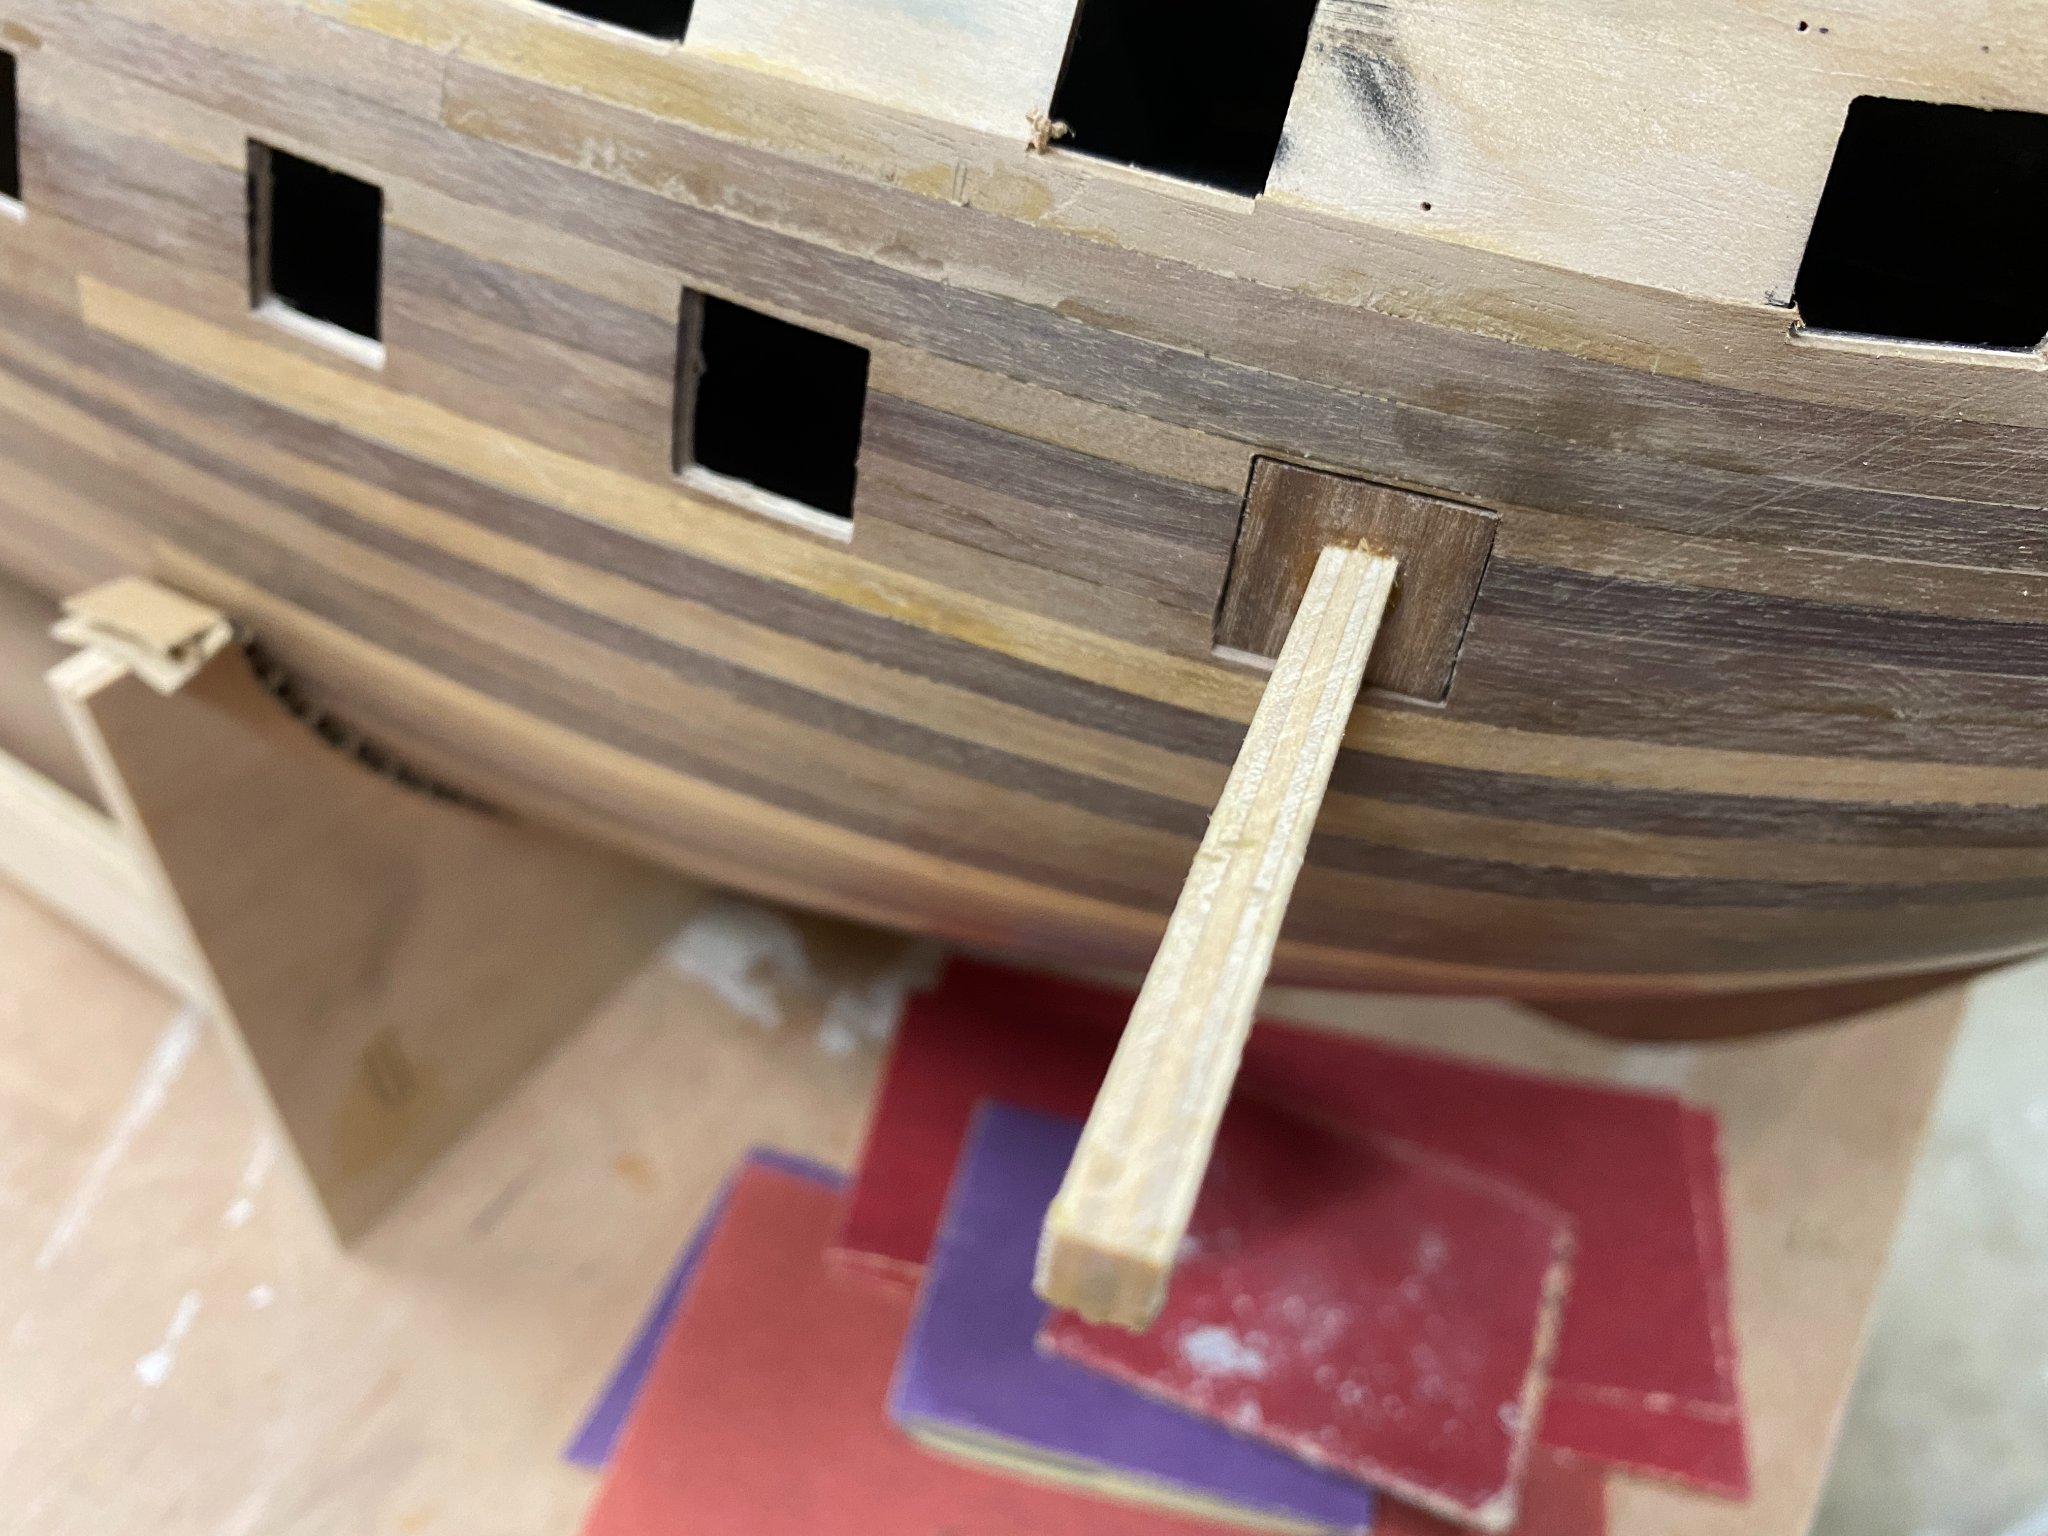
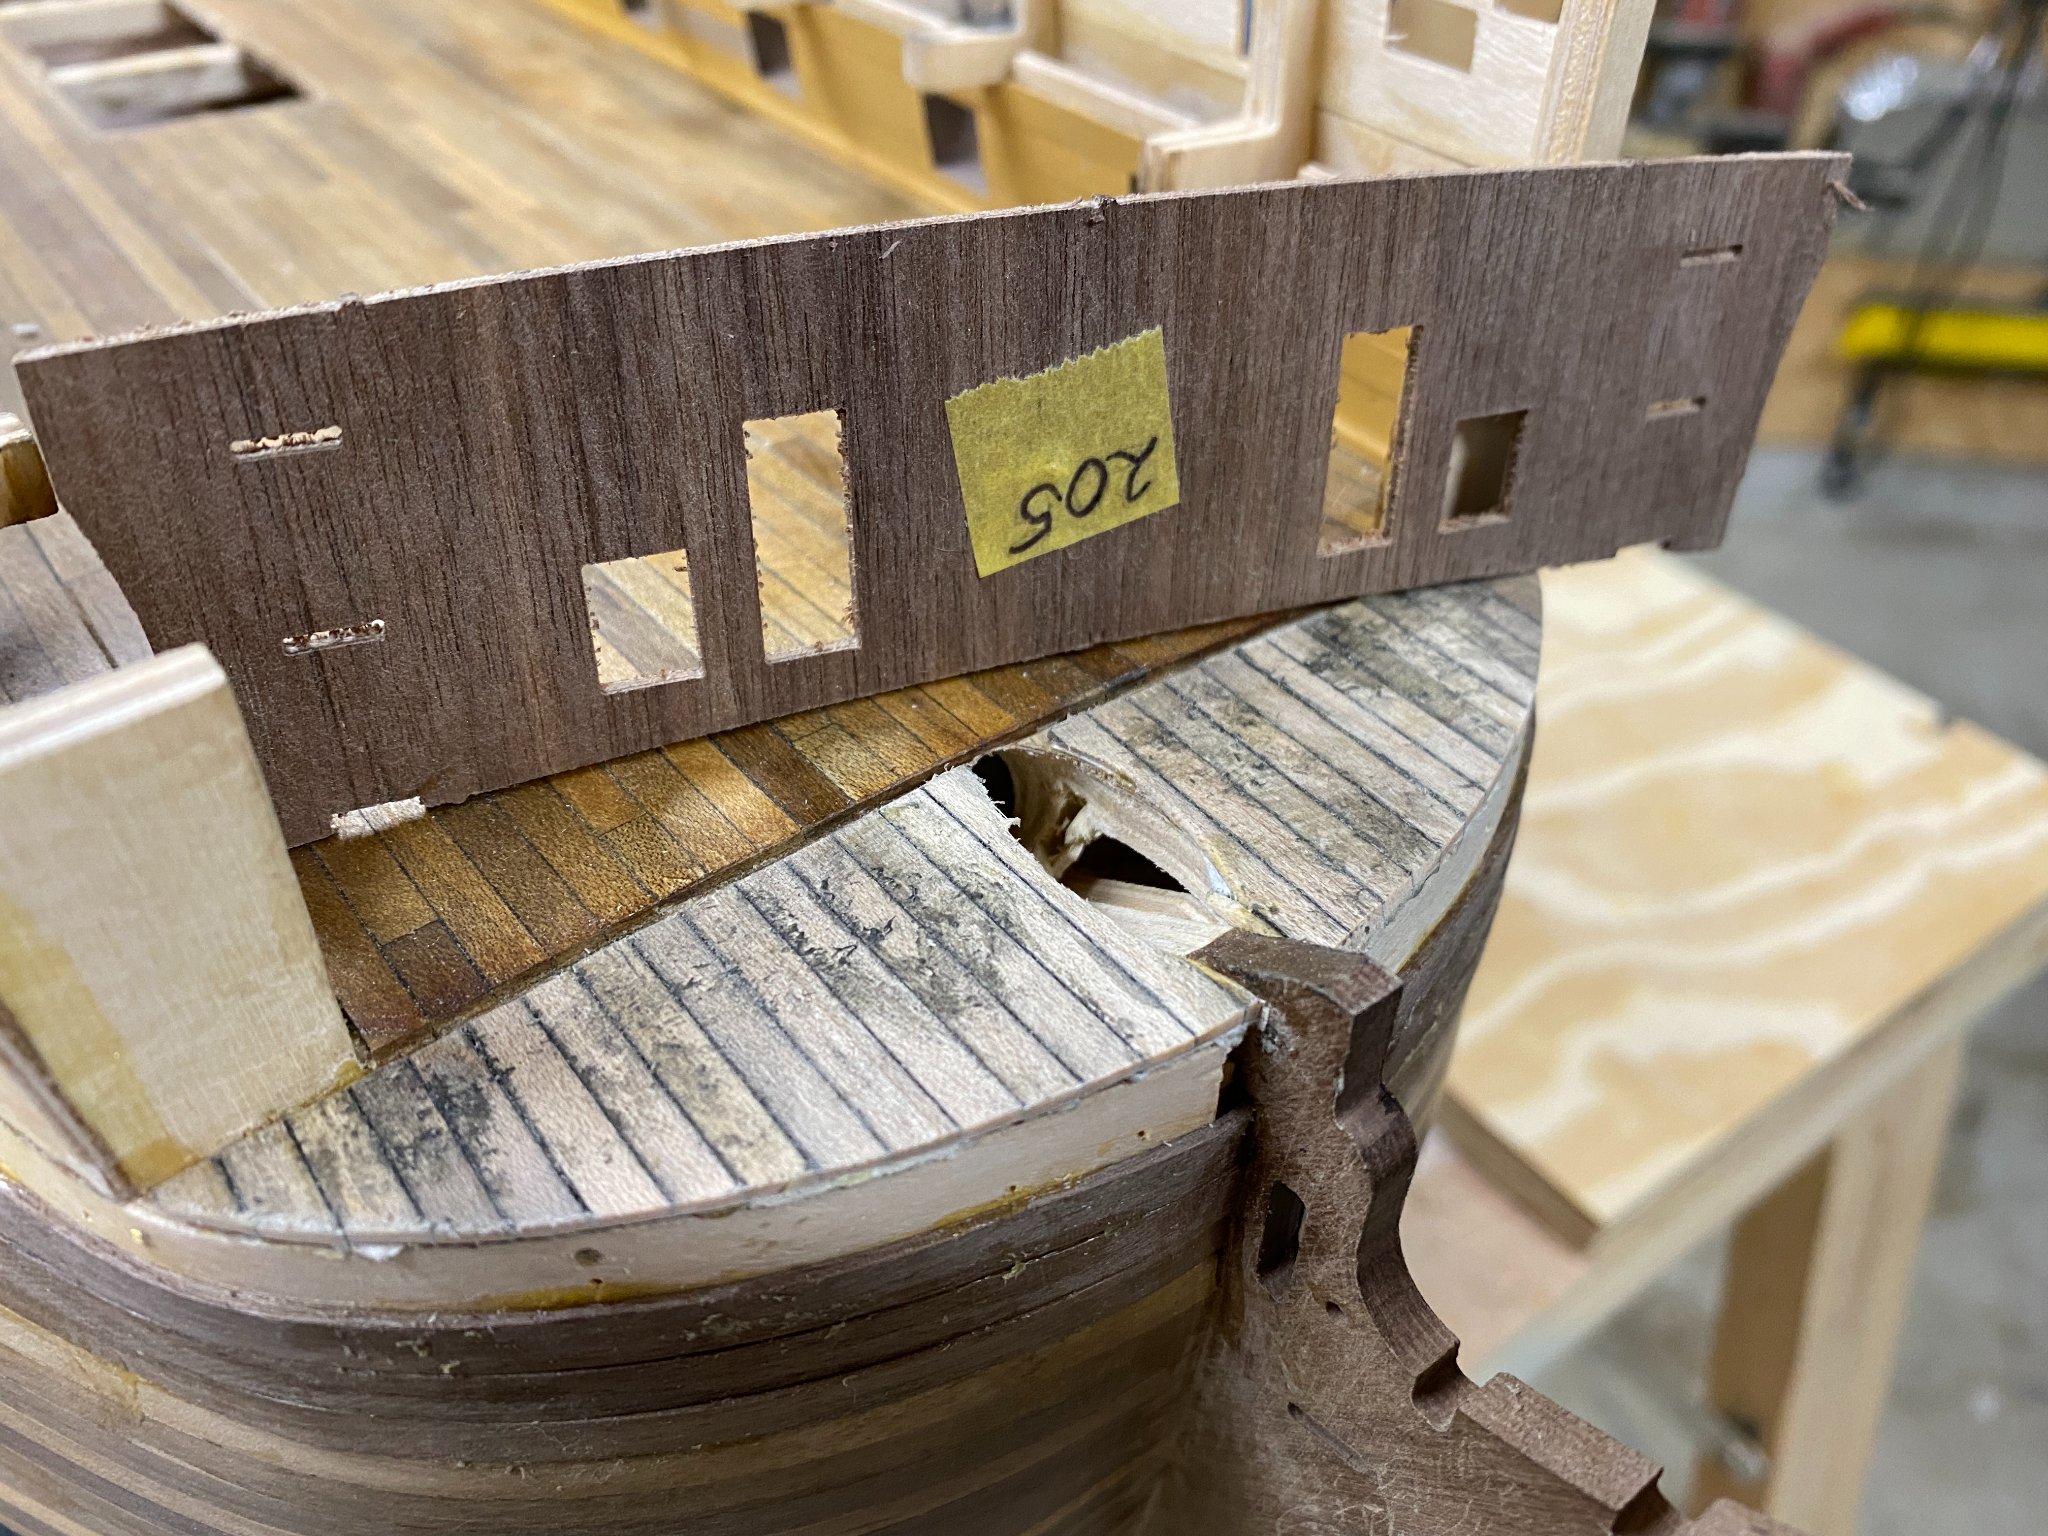
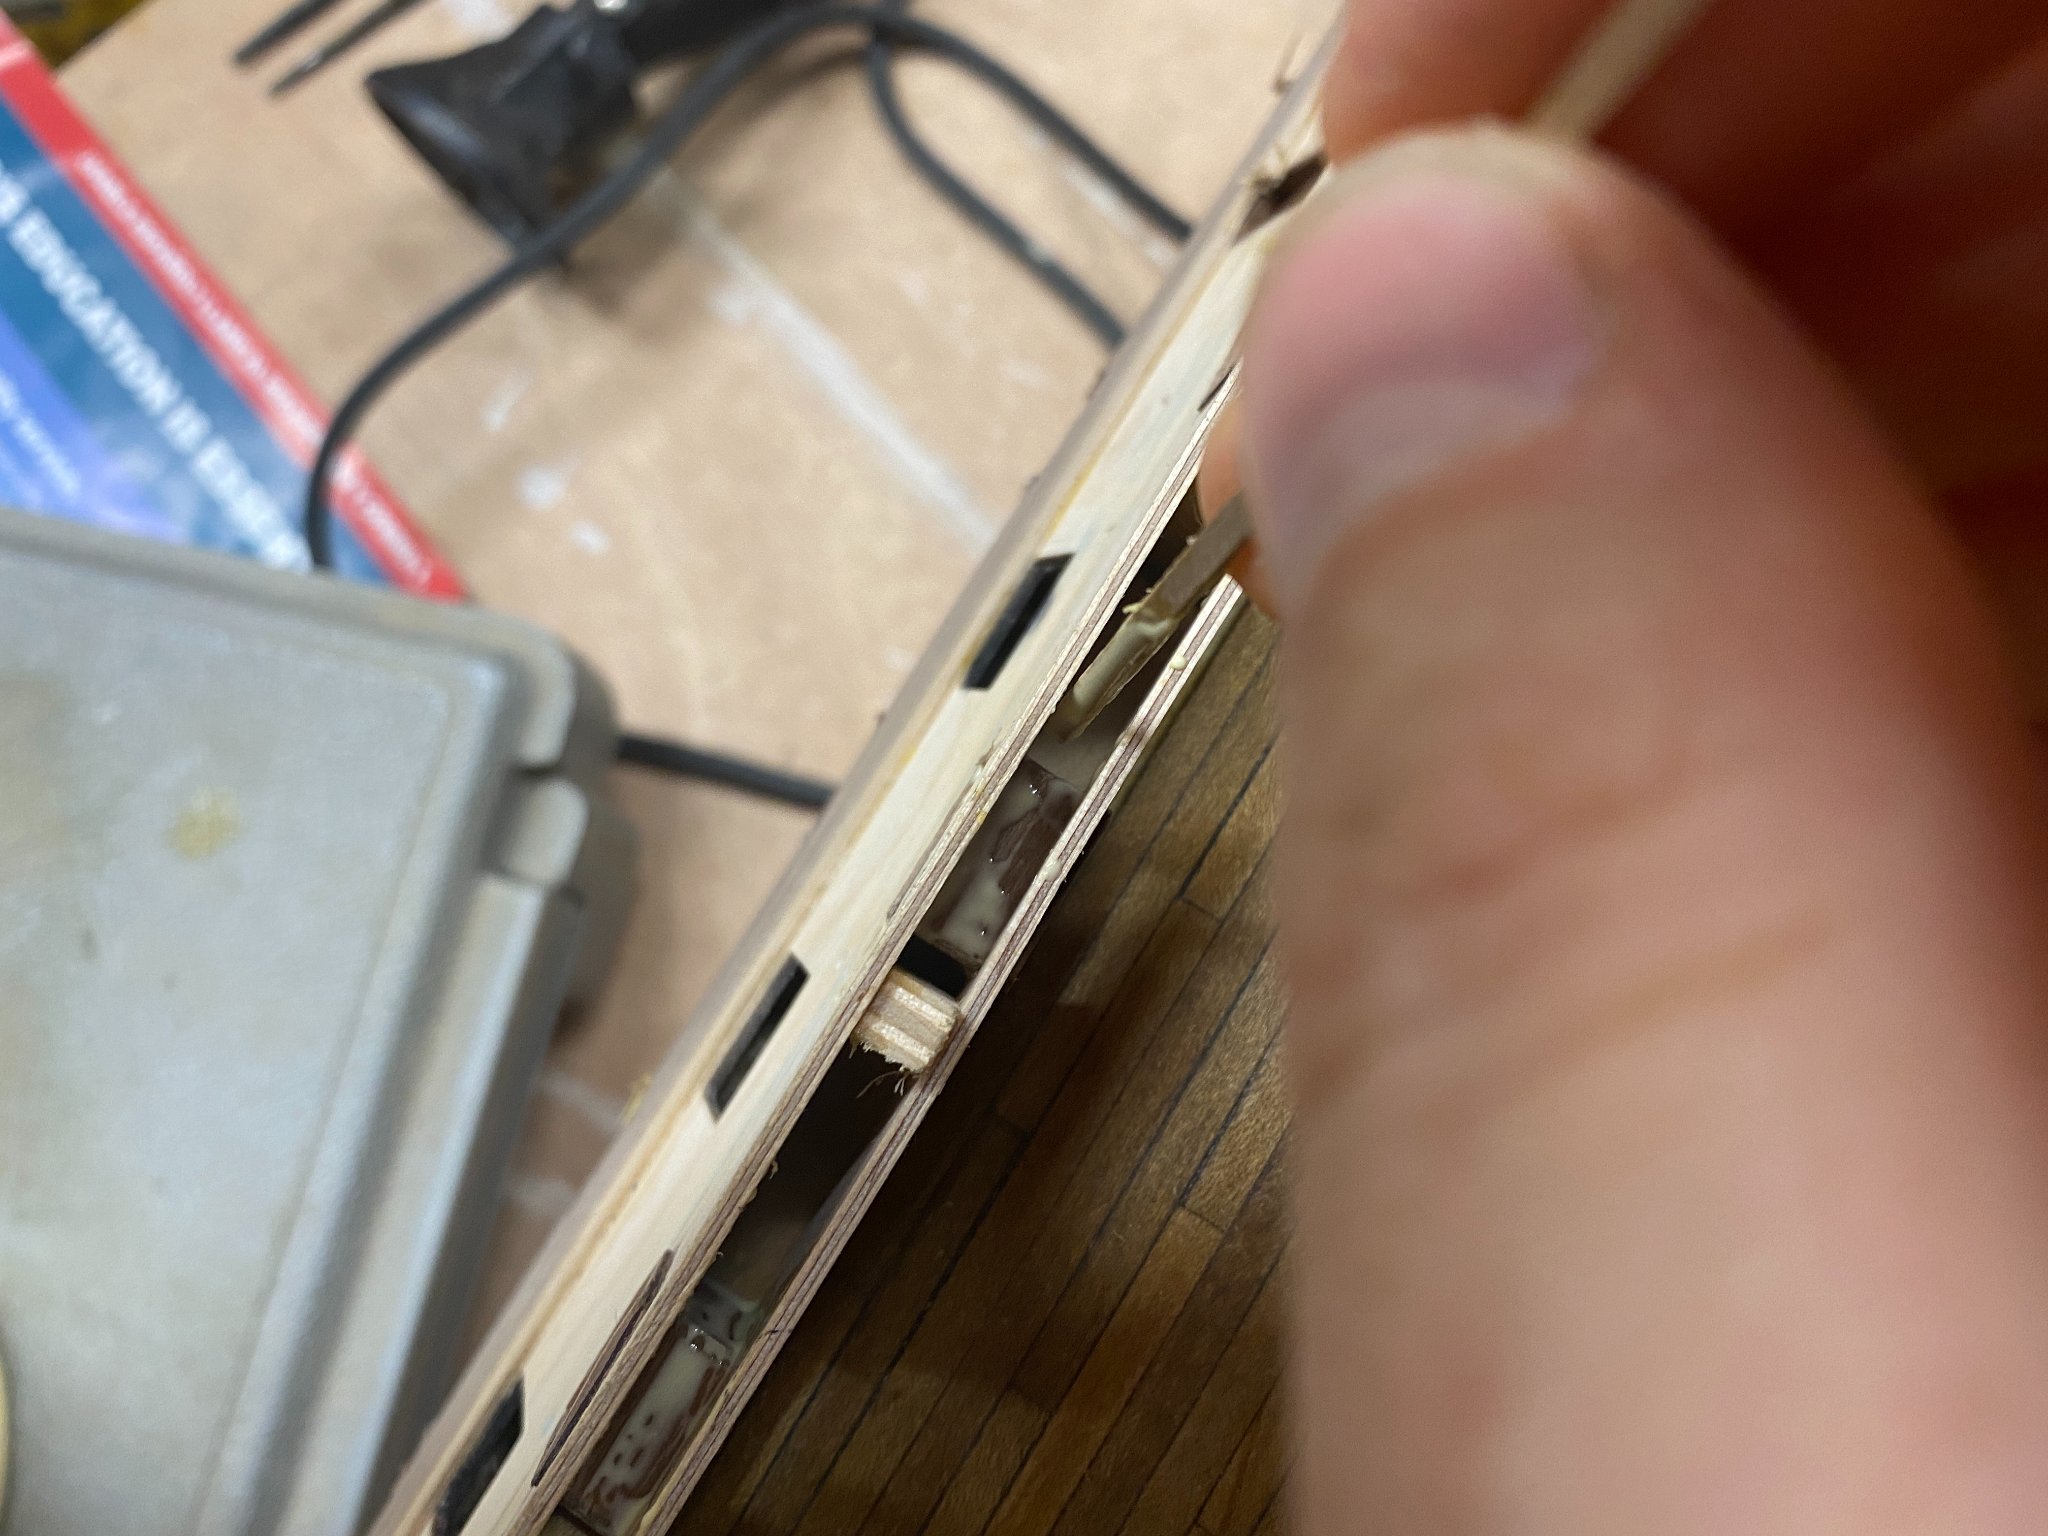
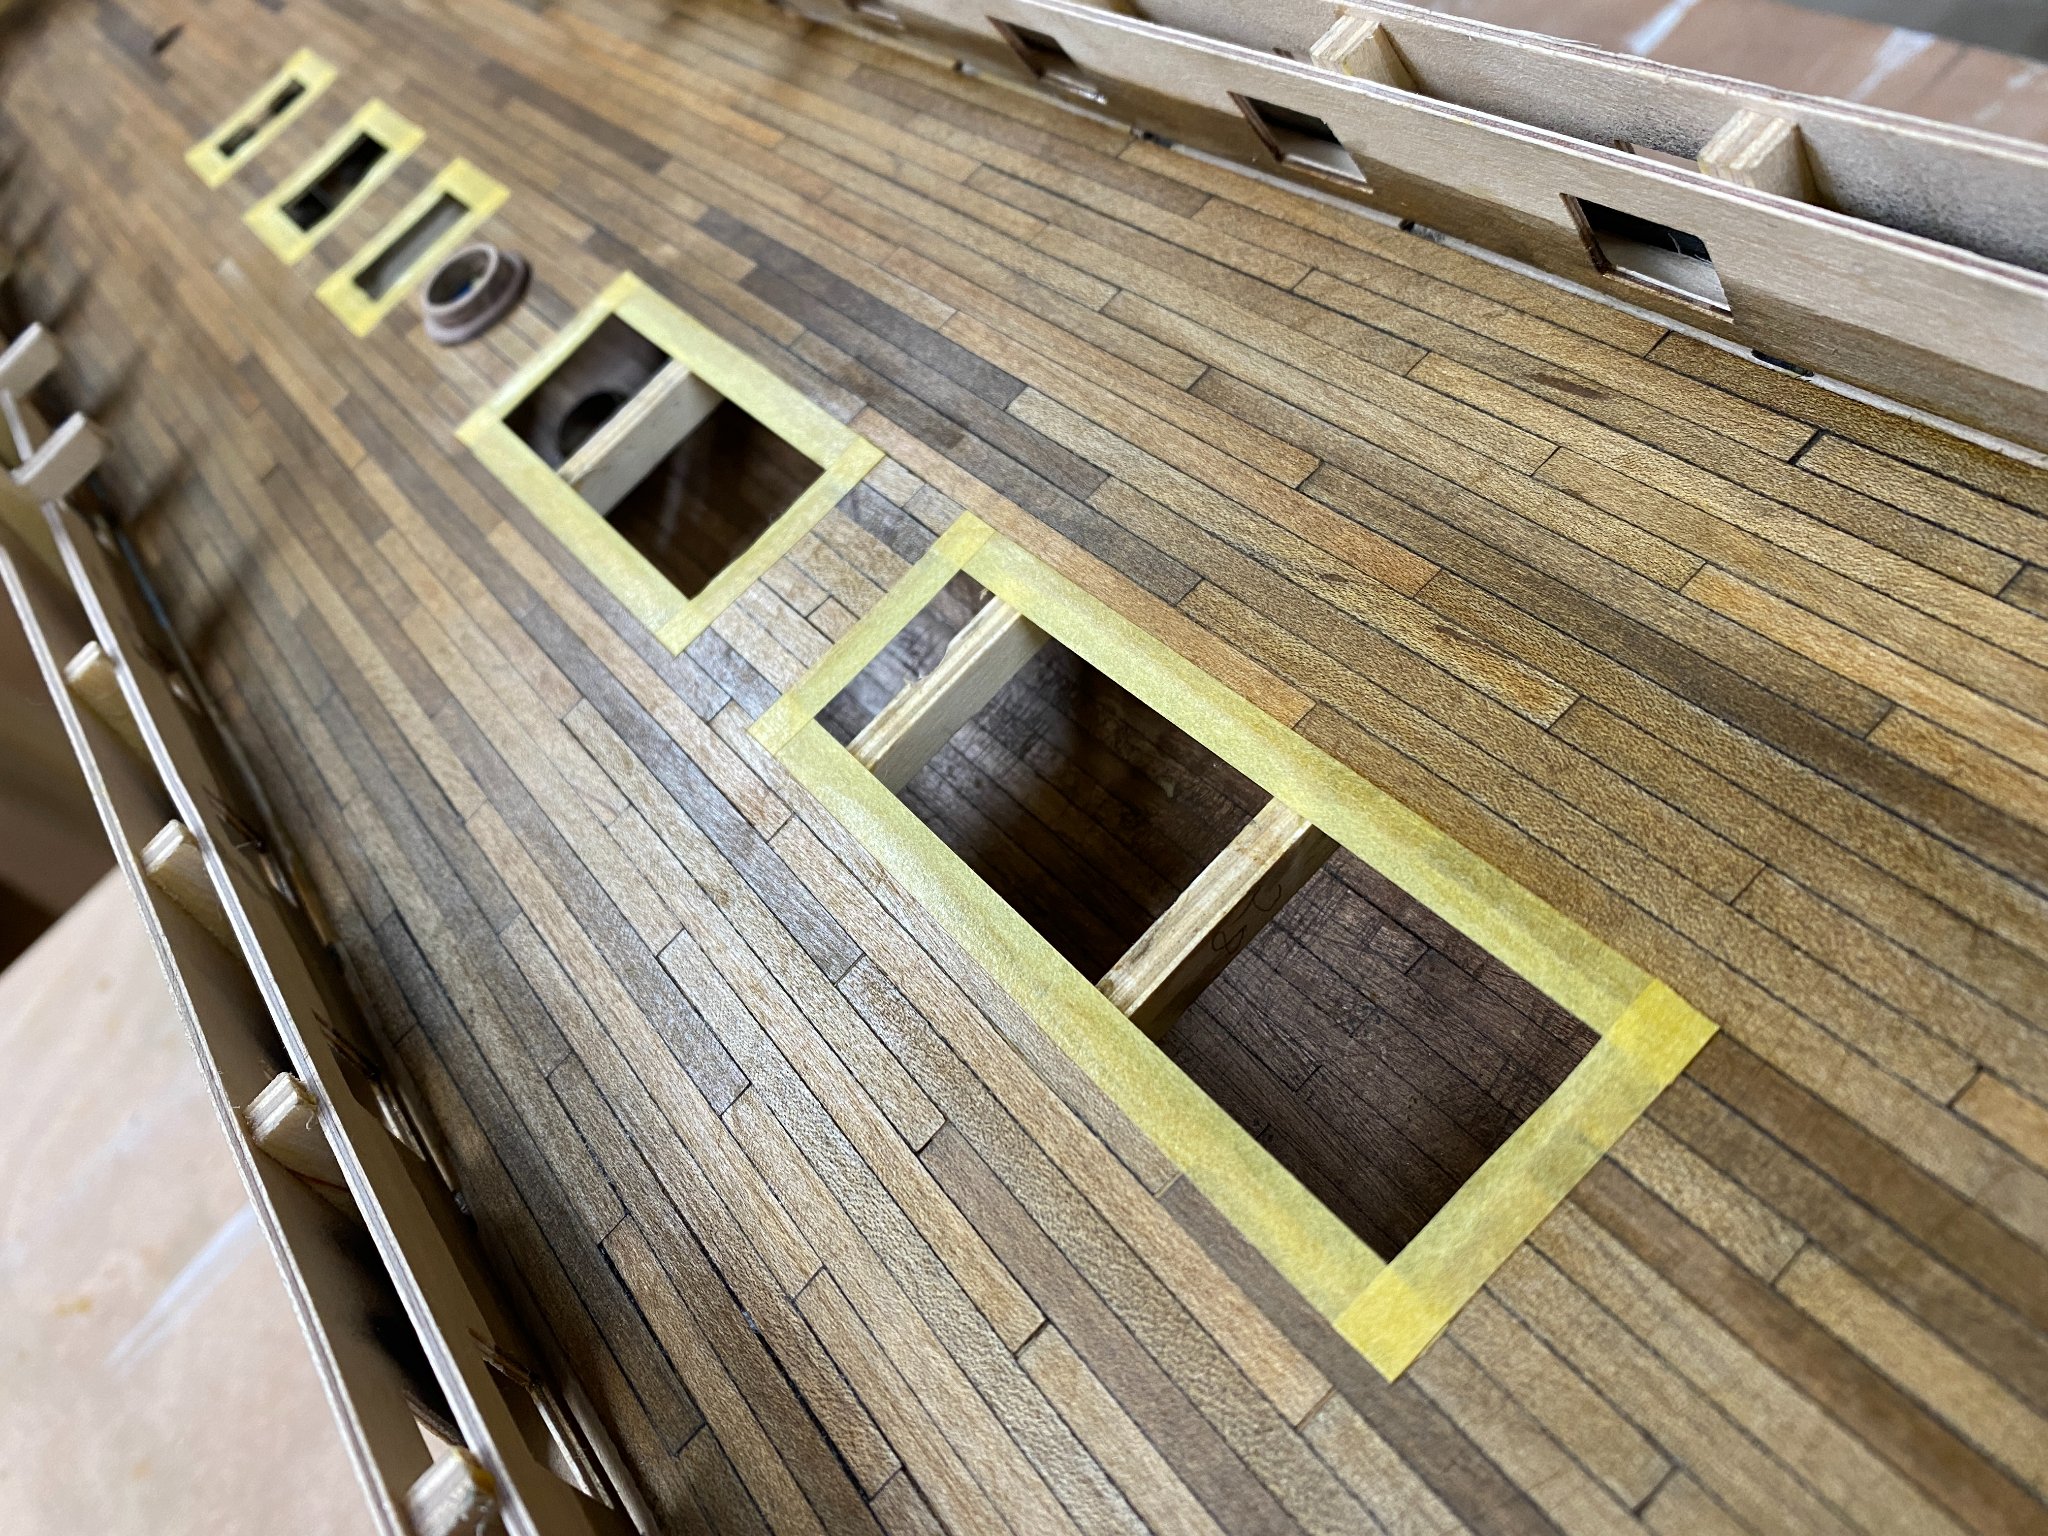
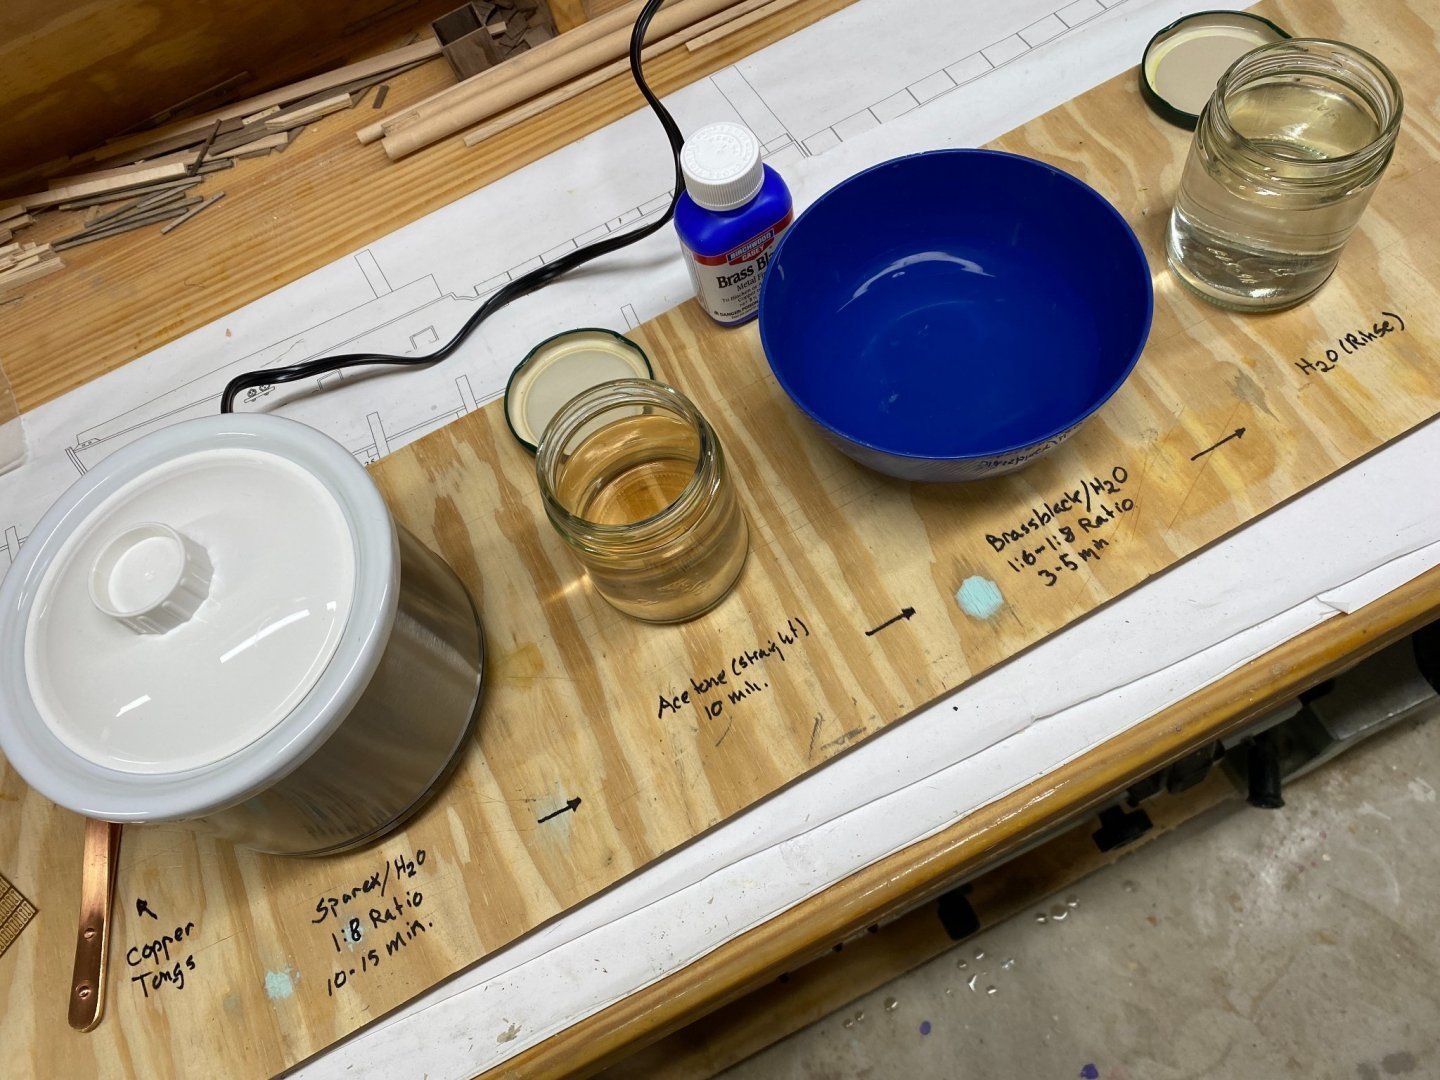
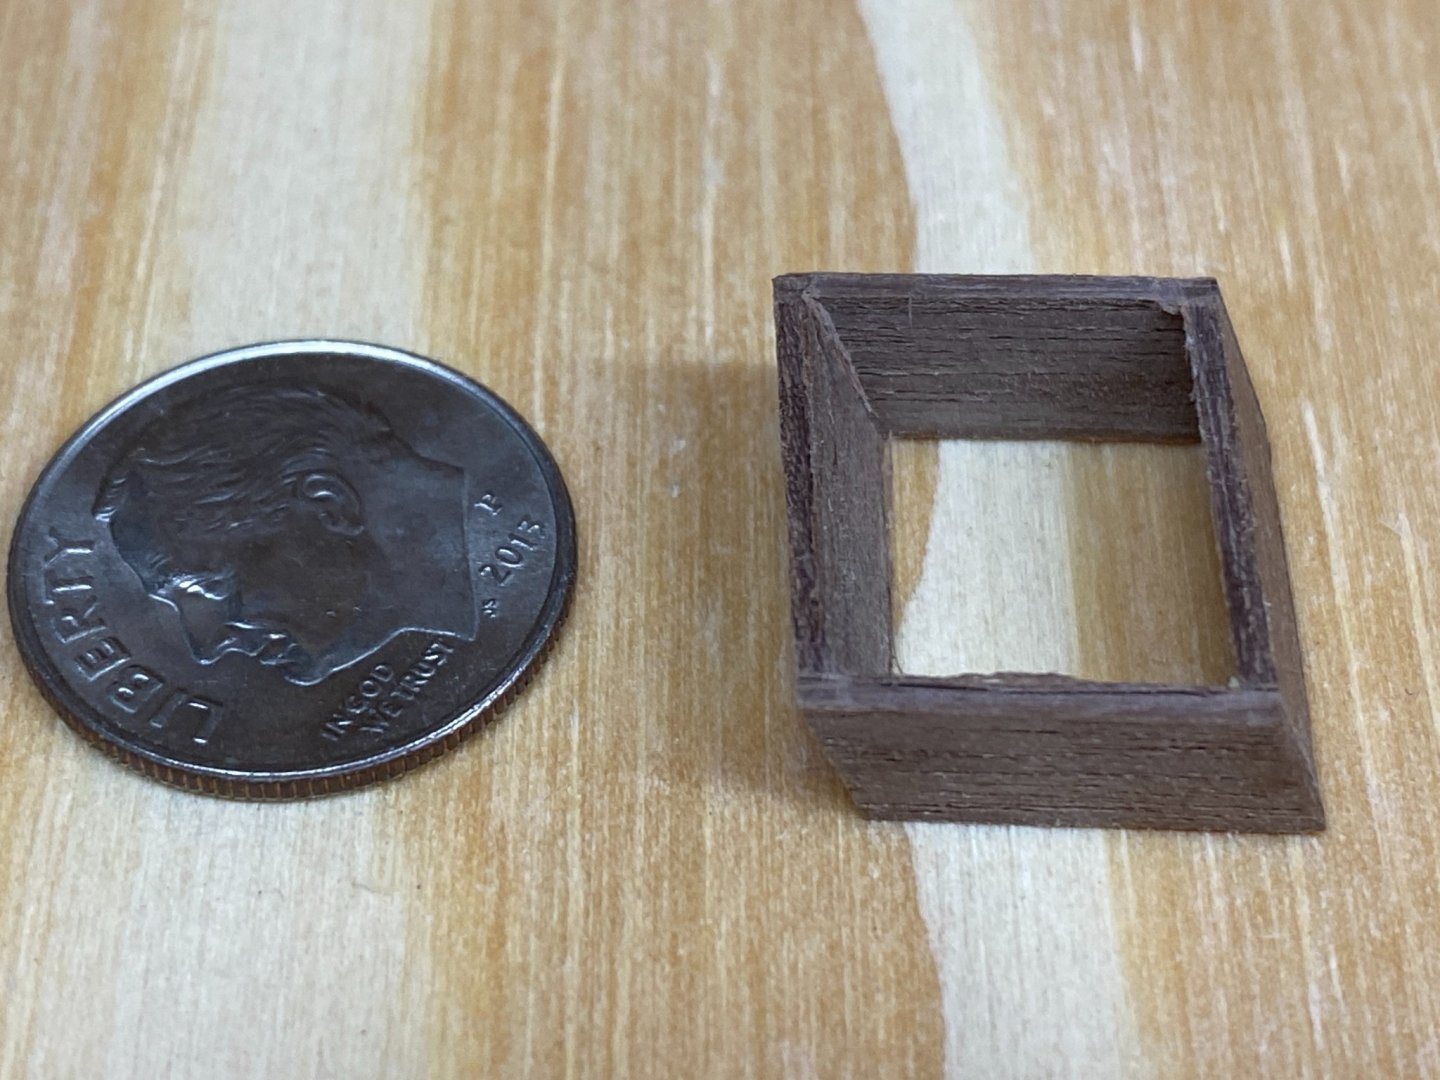
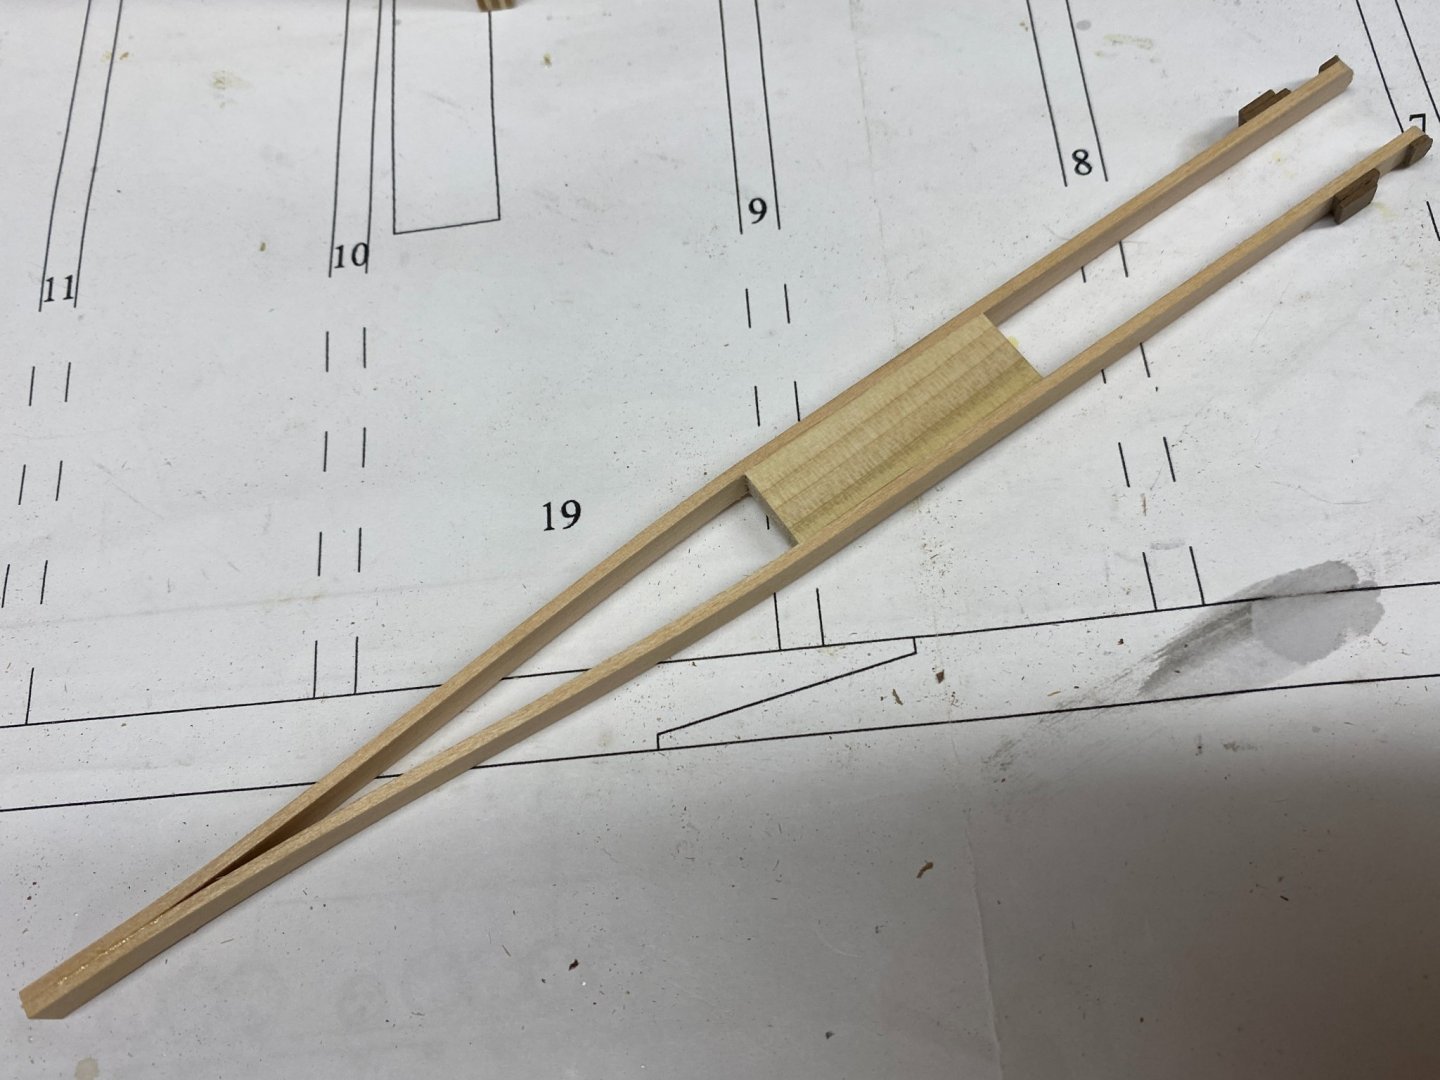
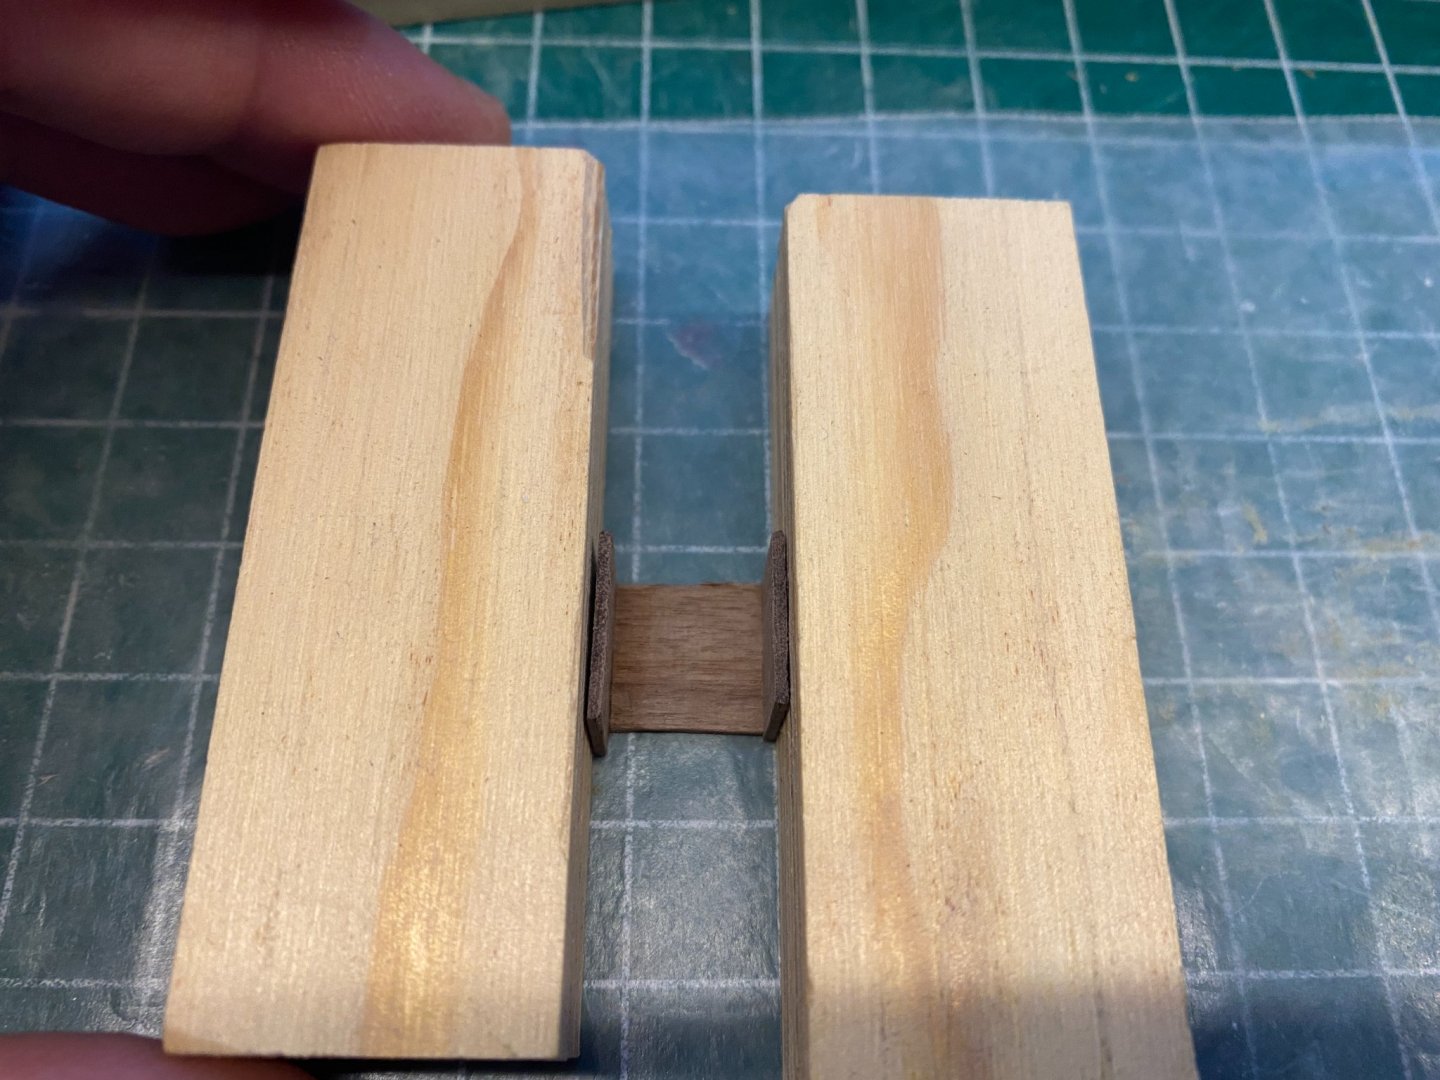
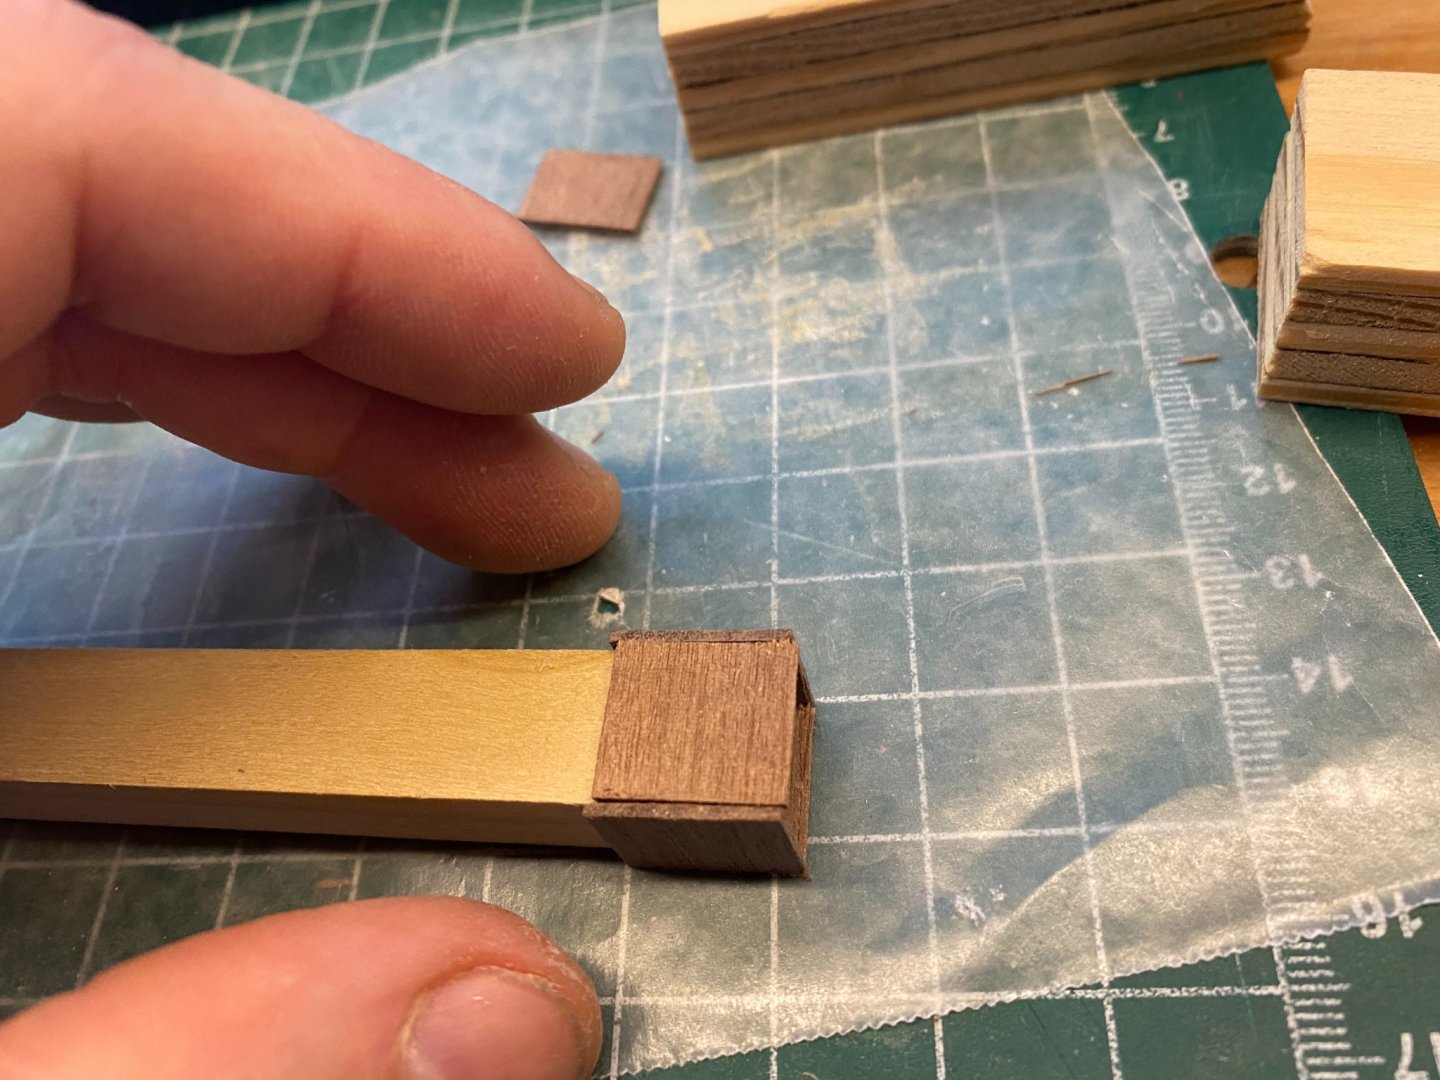
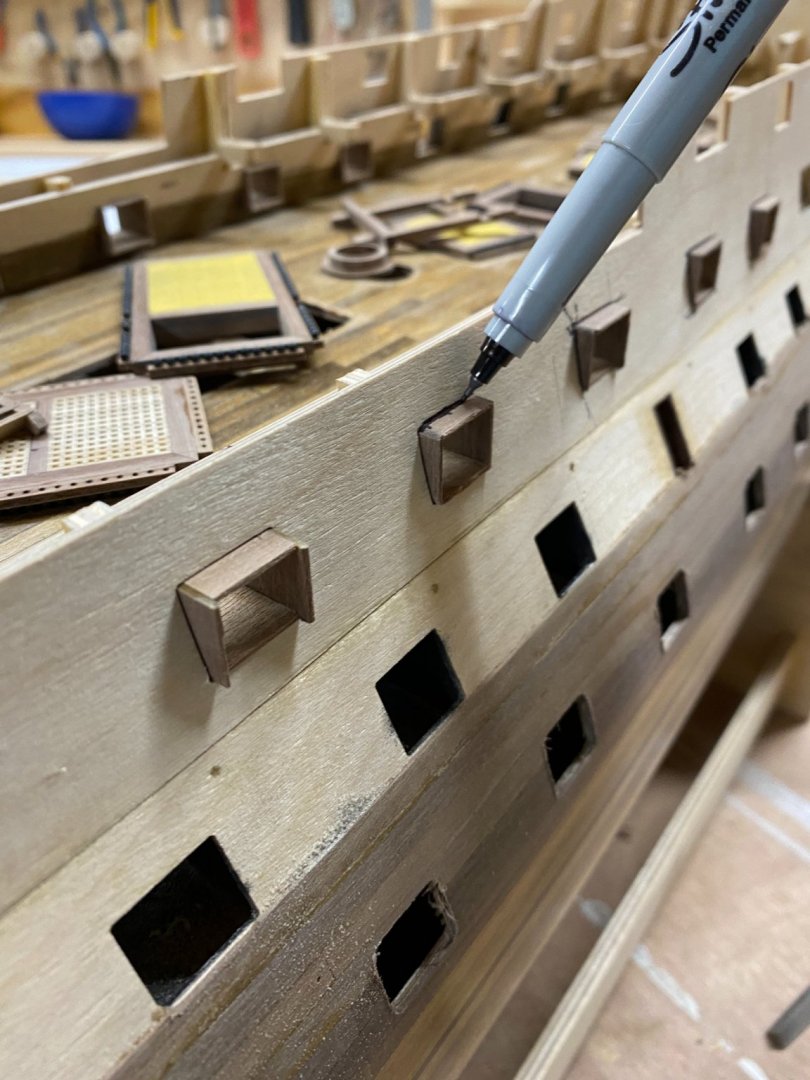
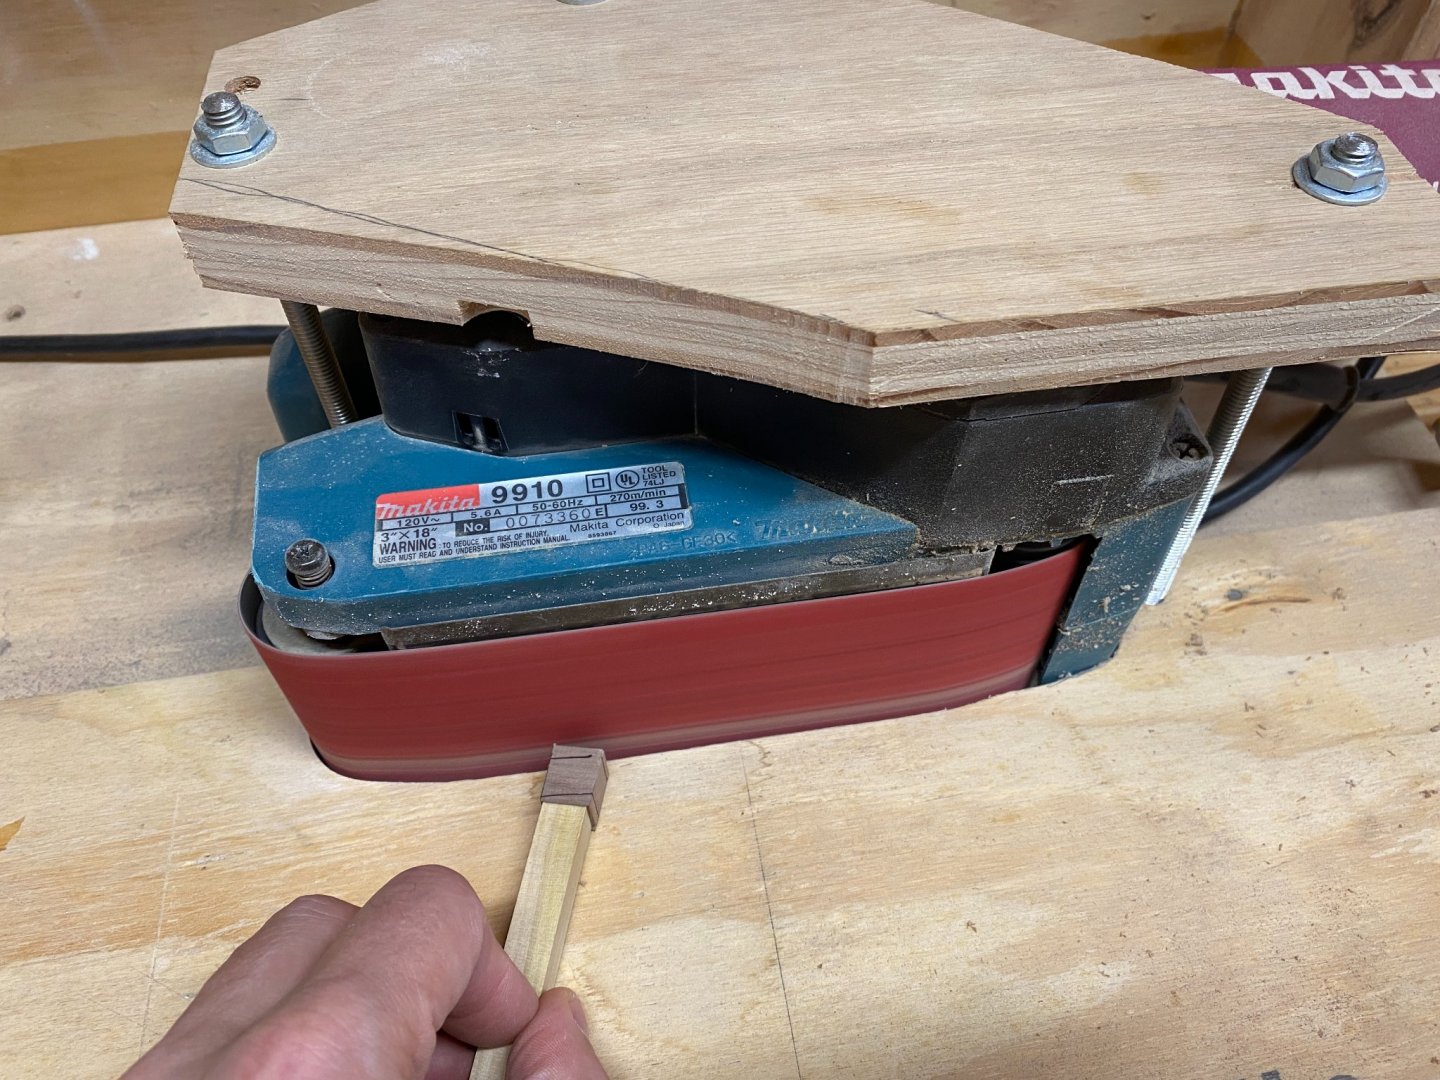
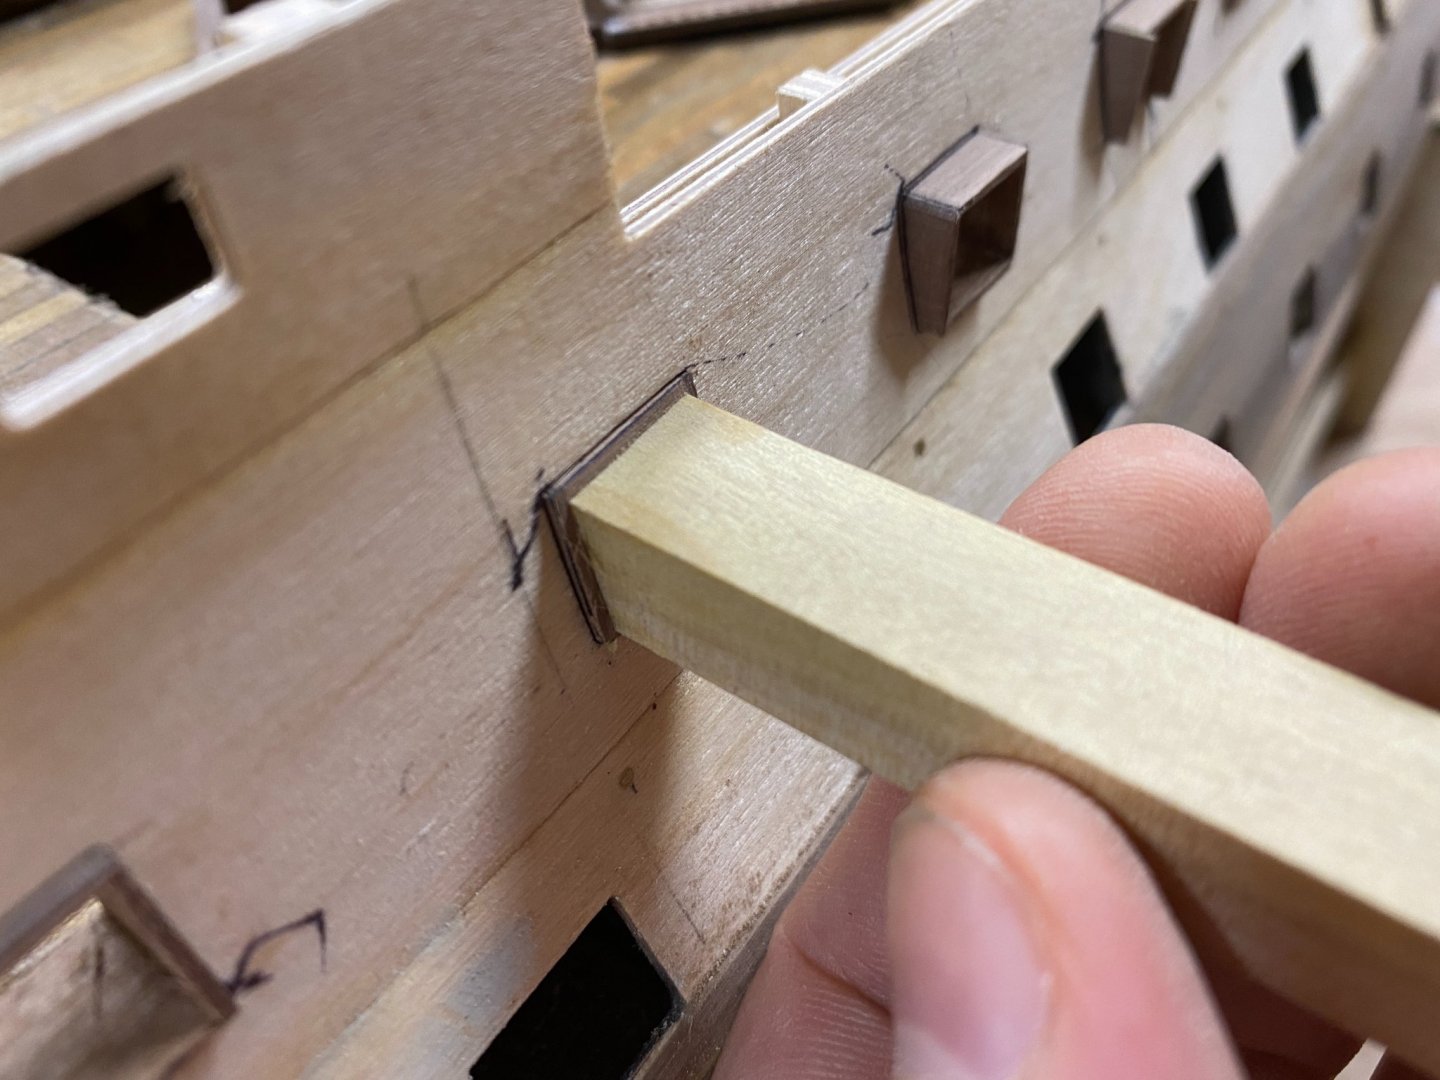
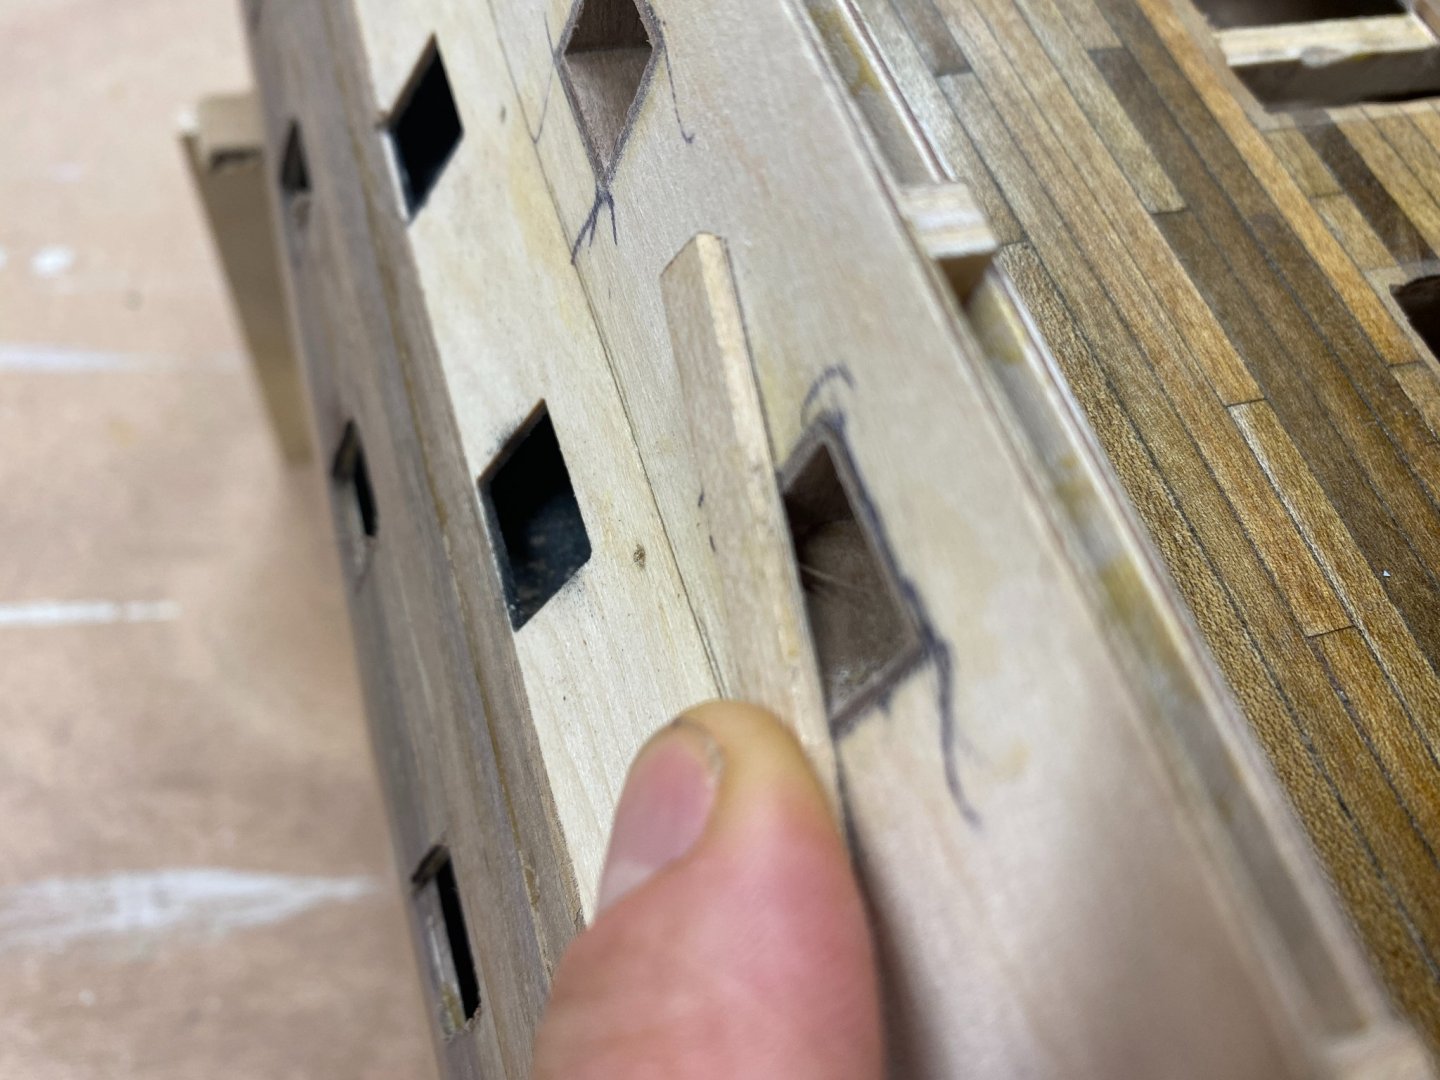
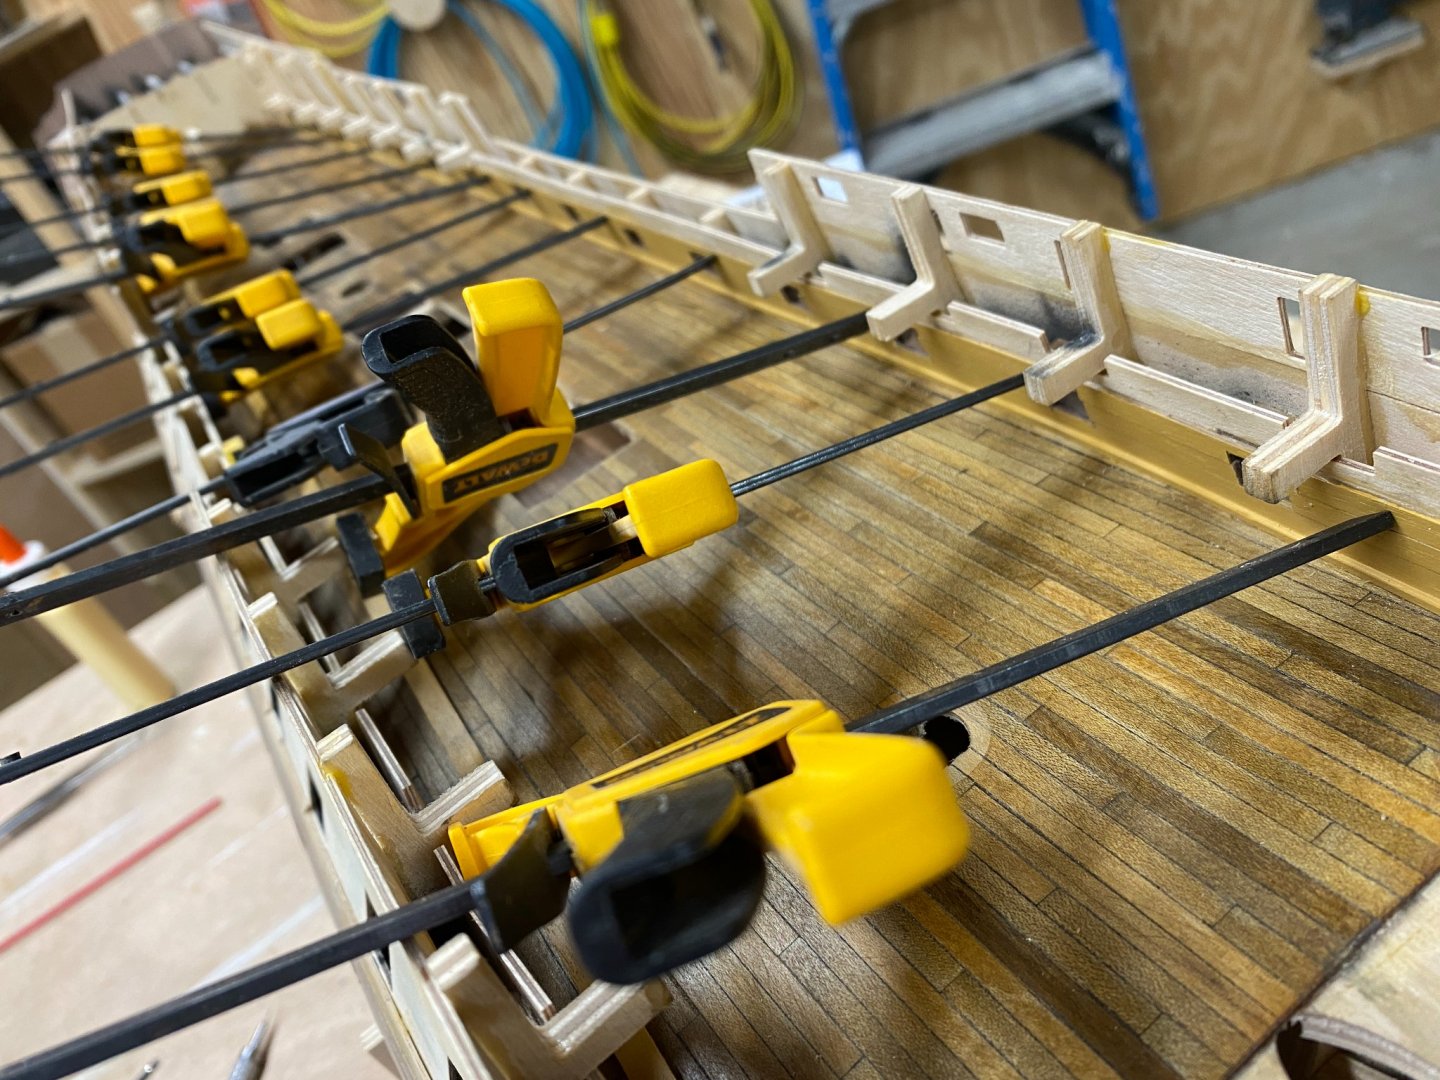
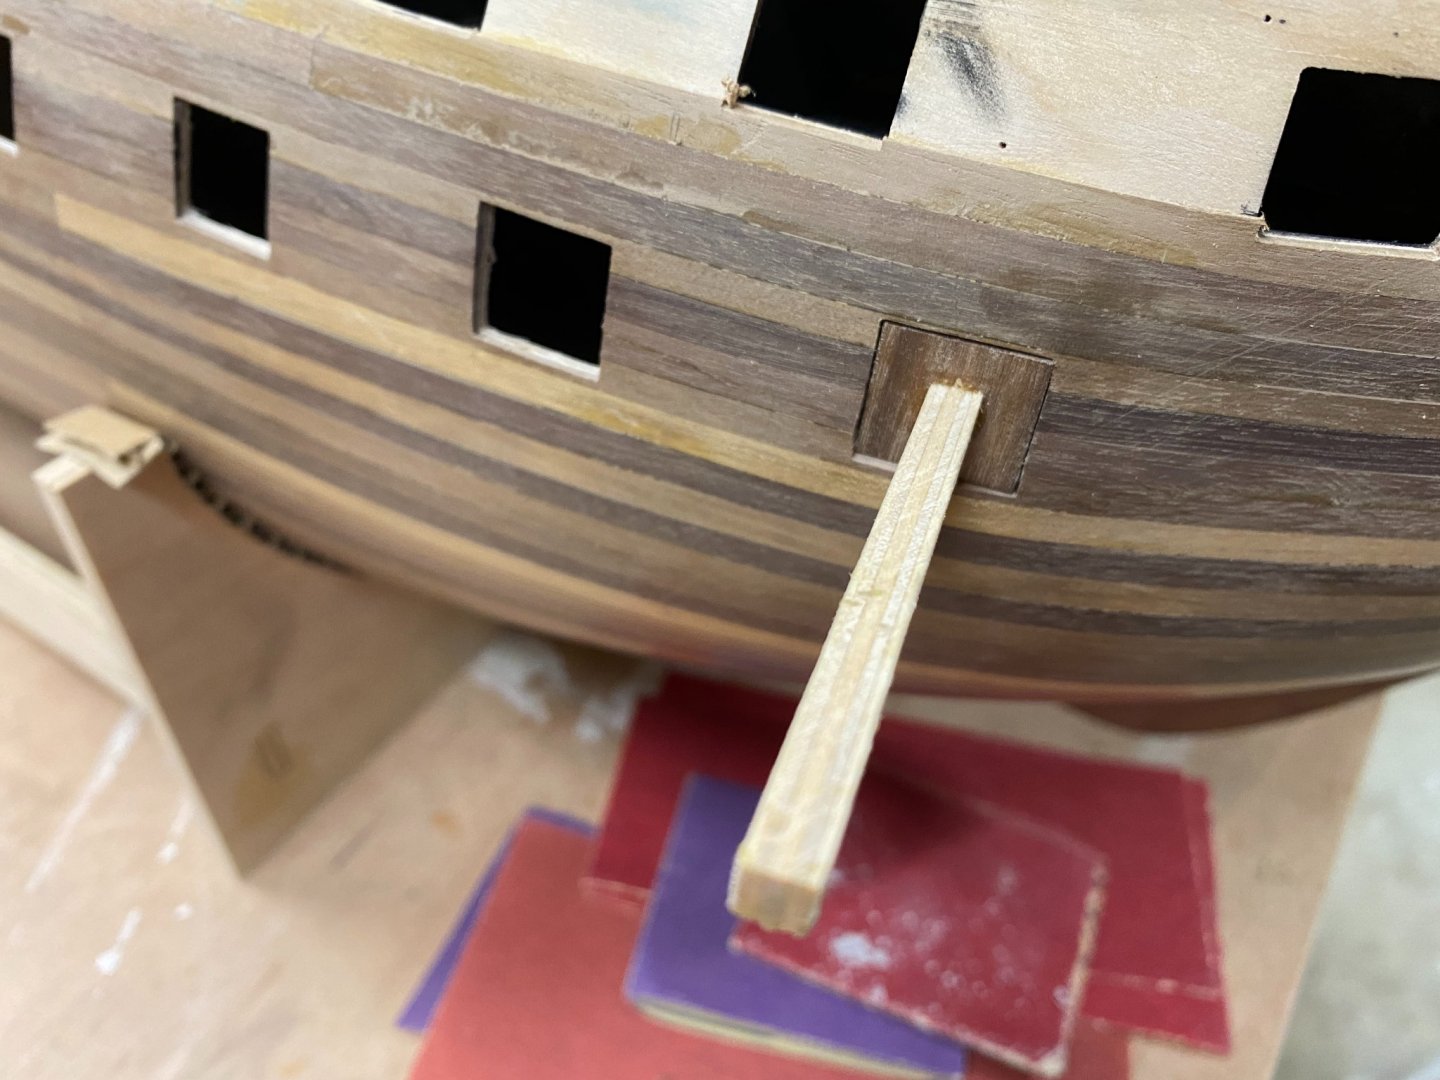
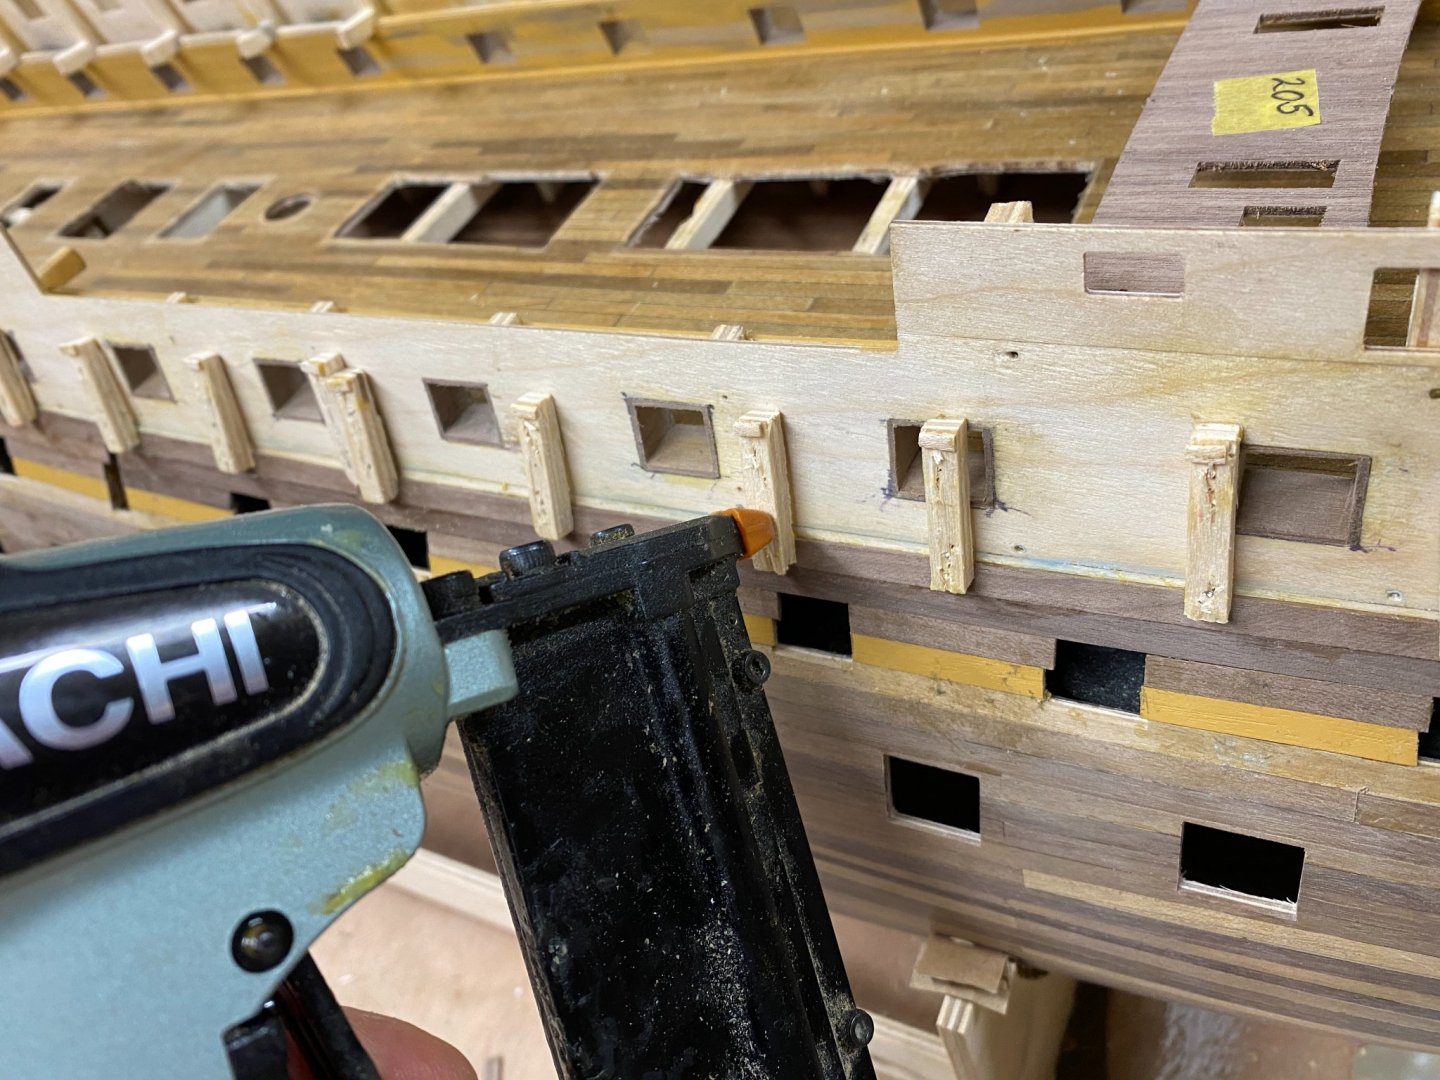
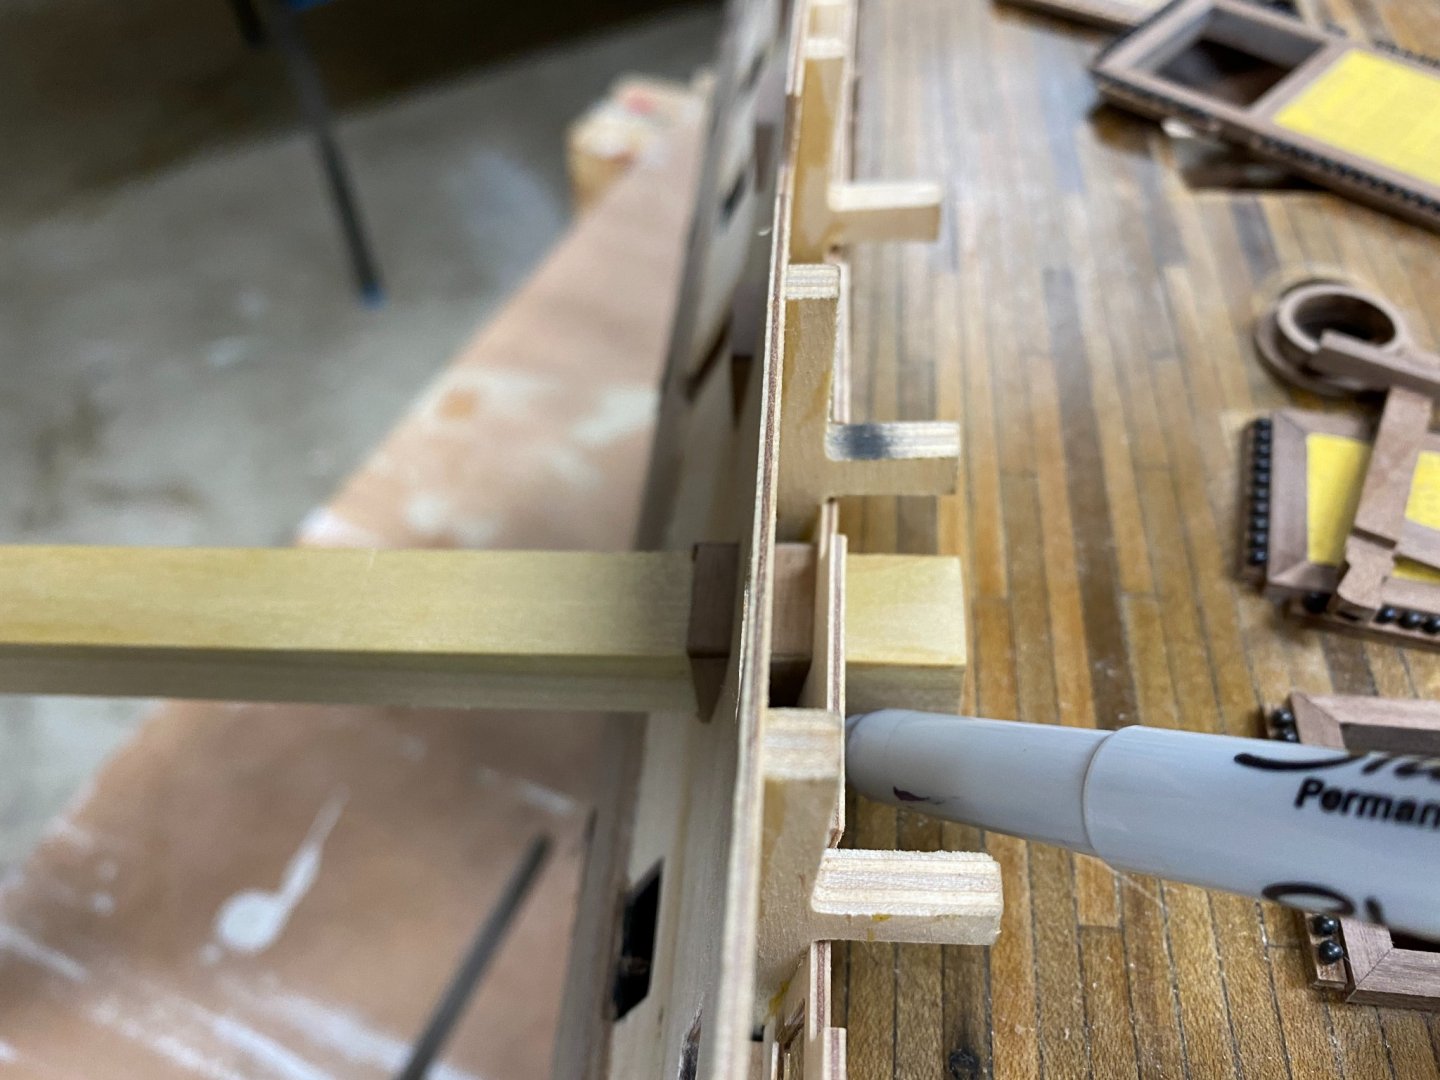
Caldercraft HMS Victory build Update Hi All Keith - Thank you for the advice; a bottle of Birchwood Casey Brass Black arrived this week. I just haven't started playing with it yet. Chris - Congrats on scoring the Caldercraft Victory Kit! How far "started" is it? I know what you mean about making a stand. I found it very hard to do anything on the model unless it was securely screwed or clamped to the bench. Mort - How did you get the copper tiles to to follow all of those hinge notches (not to mention other curves and shapes) in the rudder? Greg - I'm giving the rotten eggs (Sorry - Boiled rotten eggs...) some thought. I saw, from your example, that the copper seemed to finish up a bit browner than I'm looking for. (still wonderfully weathered though!) Does the "eggs" method have a variant to allow for a bit of green? (well, more of a turquoise really...) So here's the week's progress: Gun port liners - The whole key to this is the precisely sized stick. (I planed down the original one I had used to line up plywood gun port openings - See last photo of previous post.) I started gluing them together with CA glue, but they kept falling apart after getting stuck to either me or the stick. PVA glue proved to be the best for this. - I'm a big believer in Titebond II. This allowed me a bit of time to make fine adjustments, proved elastic enough to handle abuse without falling apart, and still "tacked up" in good time. (10 min+/-) I used two 3/4" plywood blocks on wax paper to help me initially glue them. together. After I had three sides glued, I used the stick to get the precise opening for the final side. There's a fine line between letting the glue dry enough to secure the fourth side, yet not enough to accidentally glue the liner to the stick. I then carefully inserted the liners in the openings with the stick before scribing them with a sharpie pen. (I tried pencil, but just couldn't see the line.) Then over to my homemade sanding station to sand them almost down to the lines. Gluing them in place. After the glue dried, I sanded both sides flush to the plywood using some homemade sanding sticks. I installed painted planks on the upper gun deck inner bulwark patterns, letting them run over the edges of the gunport linings. I didn't get as detailed as Gill Middleton, but I did add a small bit of baseboard. While waiting for things to dry, I checked lower gun port sizes with the kit supplied lids, filing and sanding as needed. I also temporarily clamped the beakhead bulkhead into place and installed the upper gun deck bow planking so that I would be ready to continue hull planking and wales. I used a micro-wood rasp, square file, and sanding strip to finish up the inner bulwark planking at the gunports. (The one on the right is done.) Final painting of upper gundeck inner bulwark planking after some re-sanding. I then continued the hull planking up to just below the upper gun deck gunports. (I want to paint the liners before planking past them.) Pending: Wales Lower and middle gun deck gun port liners. Please let me know your thoughts/alternate methods. Thank you guys!


-
Vacuum (or Suction Pick-up Tool
Will Ferris replied to Will Ferris's topic in Modeling tools and Workshop Equipment
Kurt & Wlell, Thank you guys, this is good to know about! -
Mailba, Good call! Even if I were to do just the ones on the main gun deck, they'd still be just more things to break during the copper, liners, wales, etc. Thank you Sir!
-
Does anyone have any experience with a vacuum or suction pick-up tool? I used one years ago when doing some electronics work. I'm going to try using this model here (https://www.fdjtool.com/ho7001-pick-it-up-vac-tool-by-beadsmith.html) to install copper tiles. Thoughts anyone? Does anyone here already own one?
-
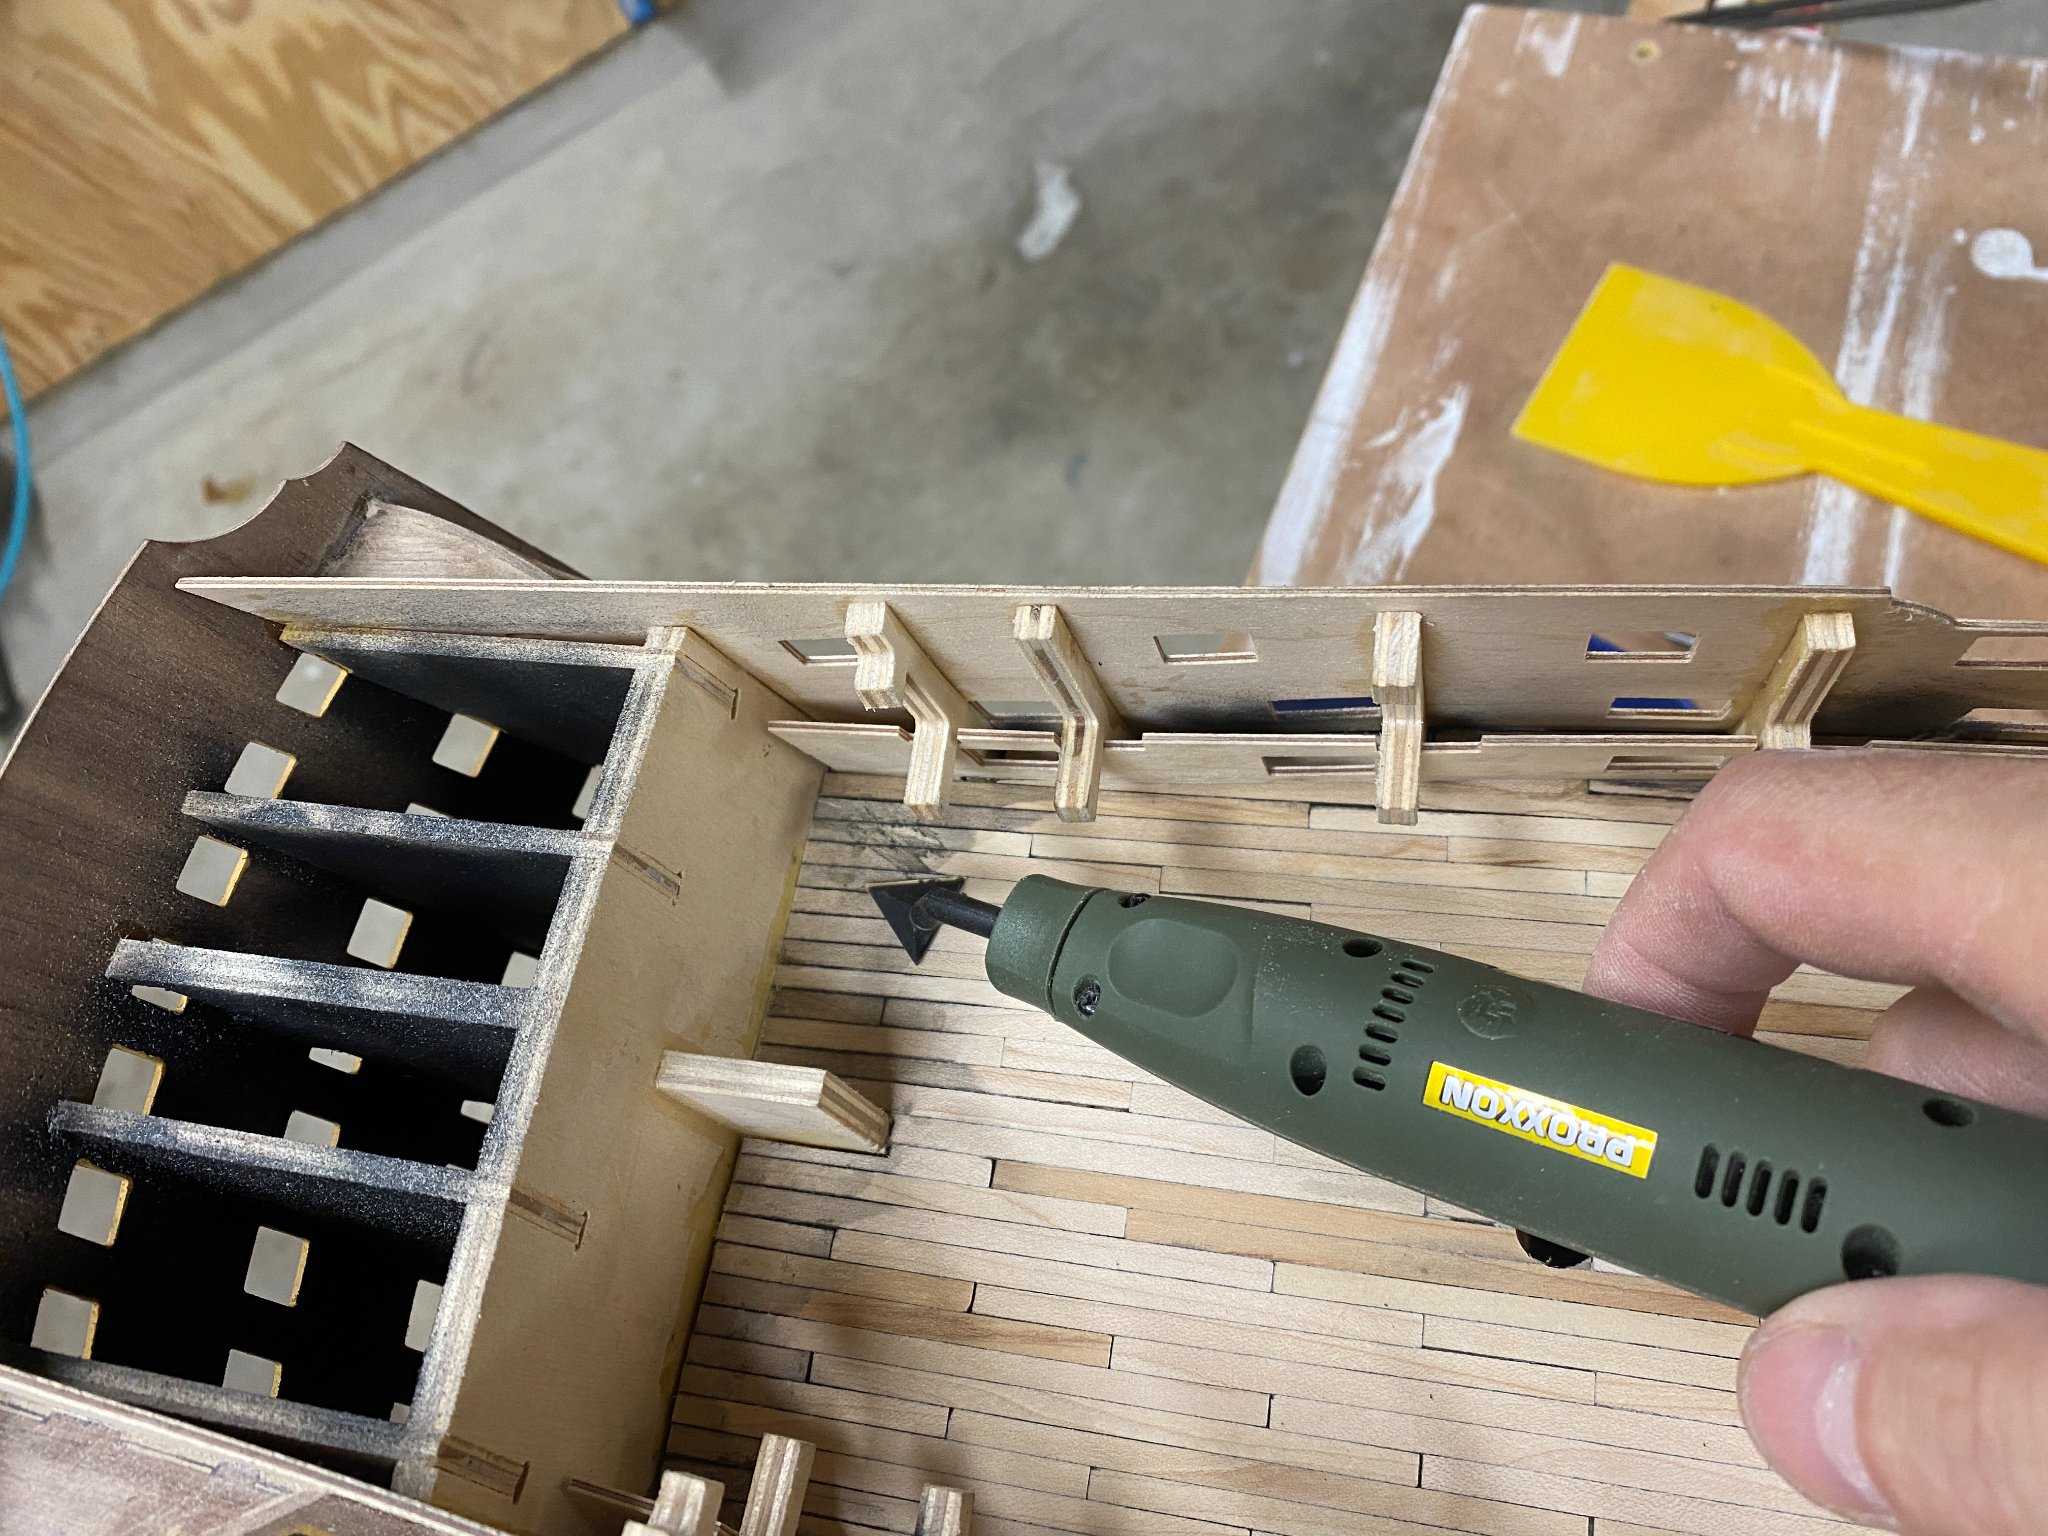
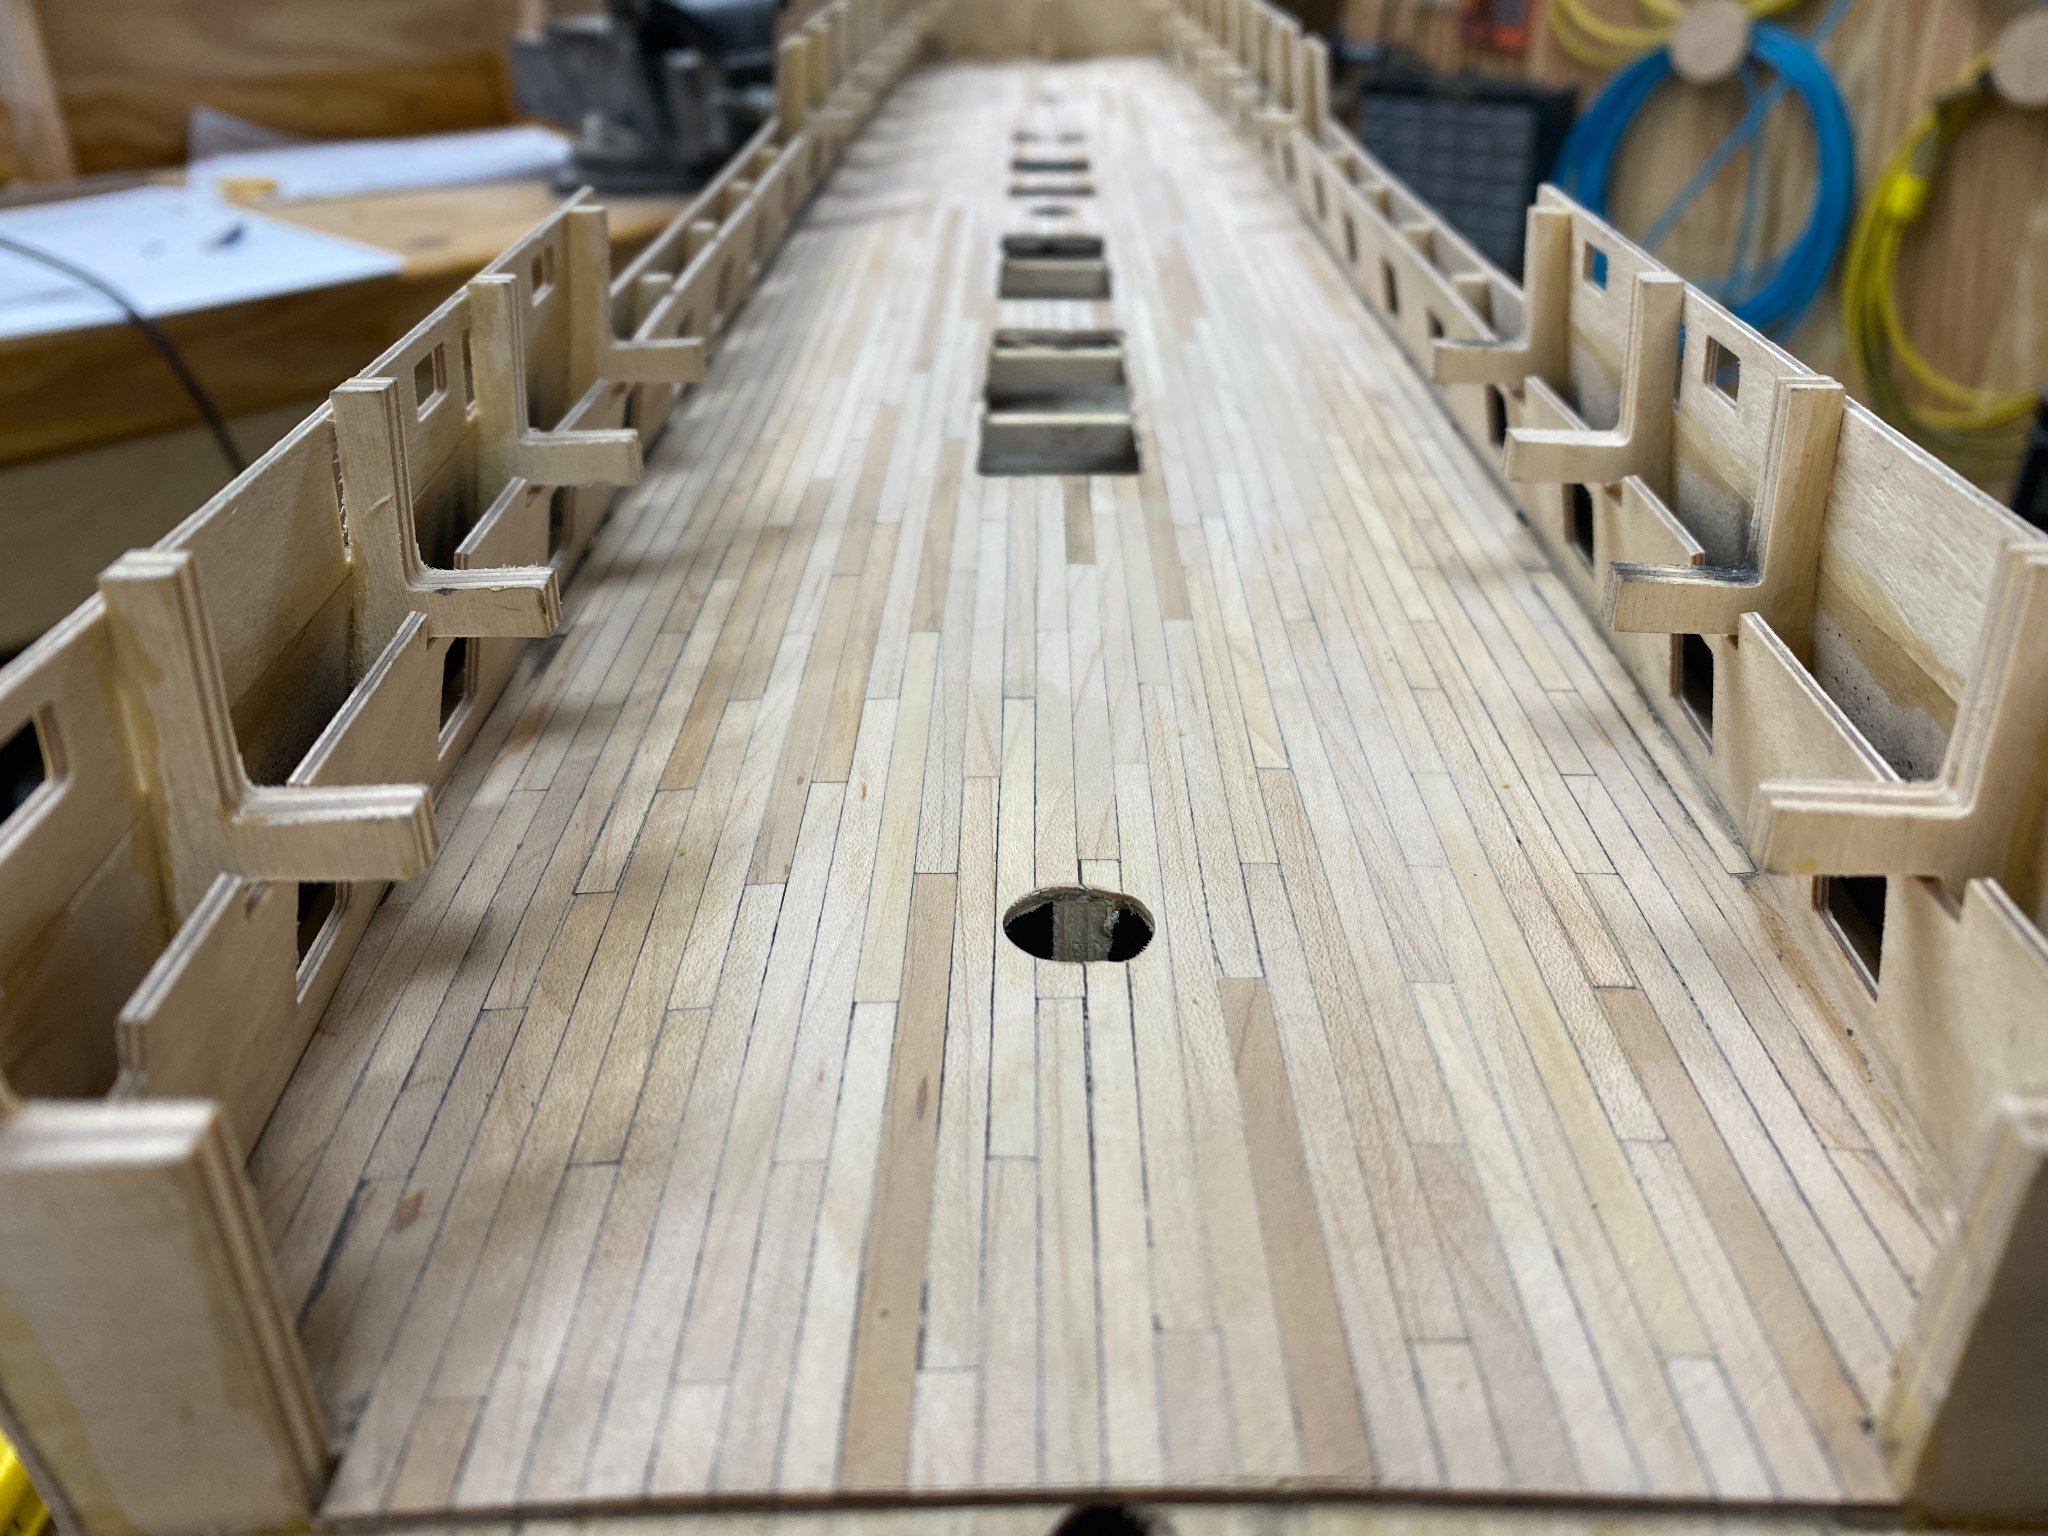
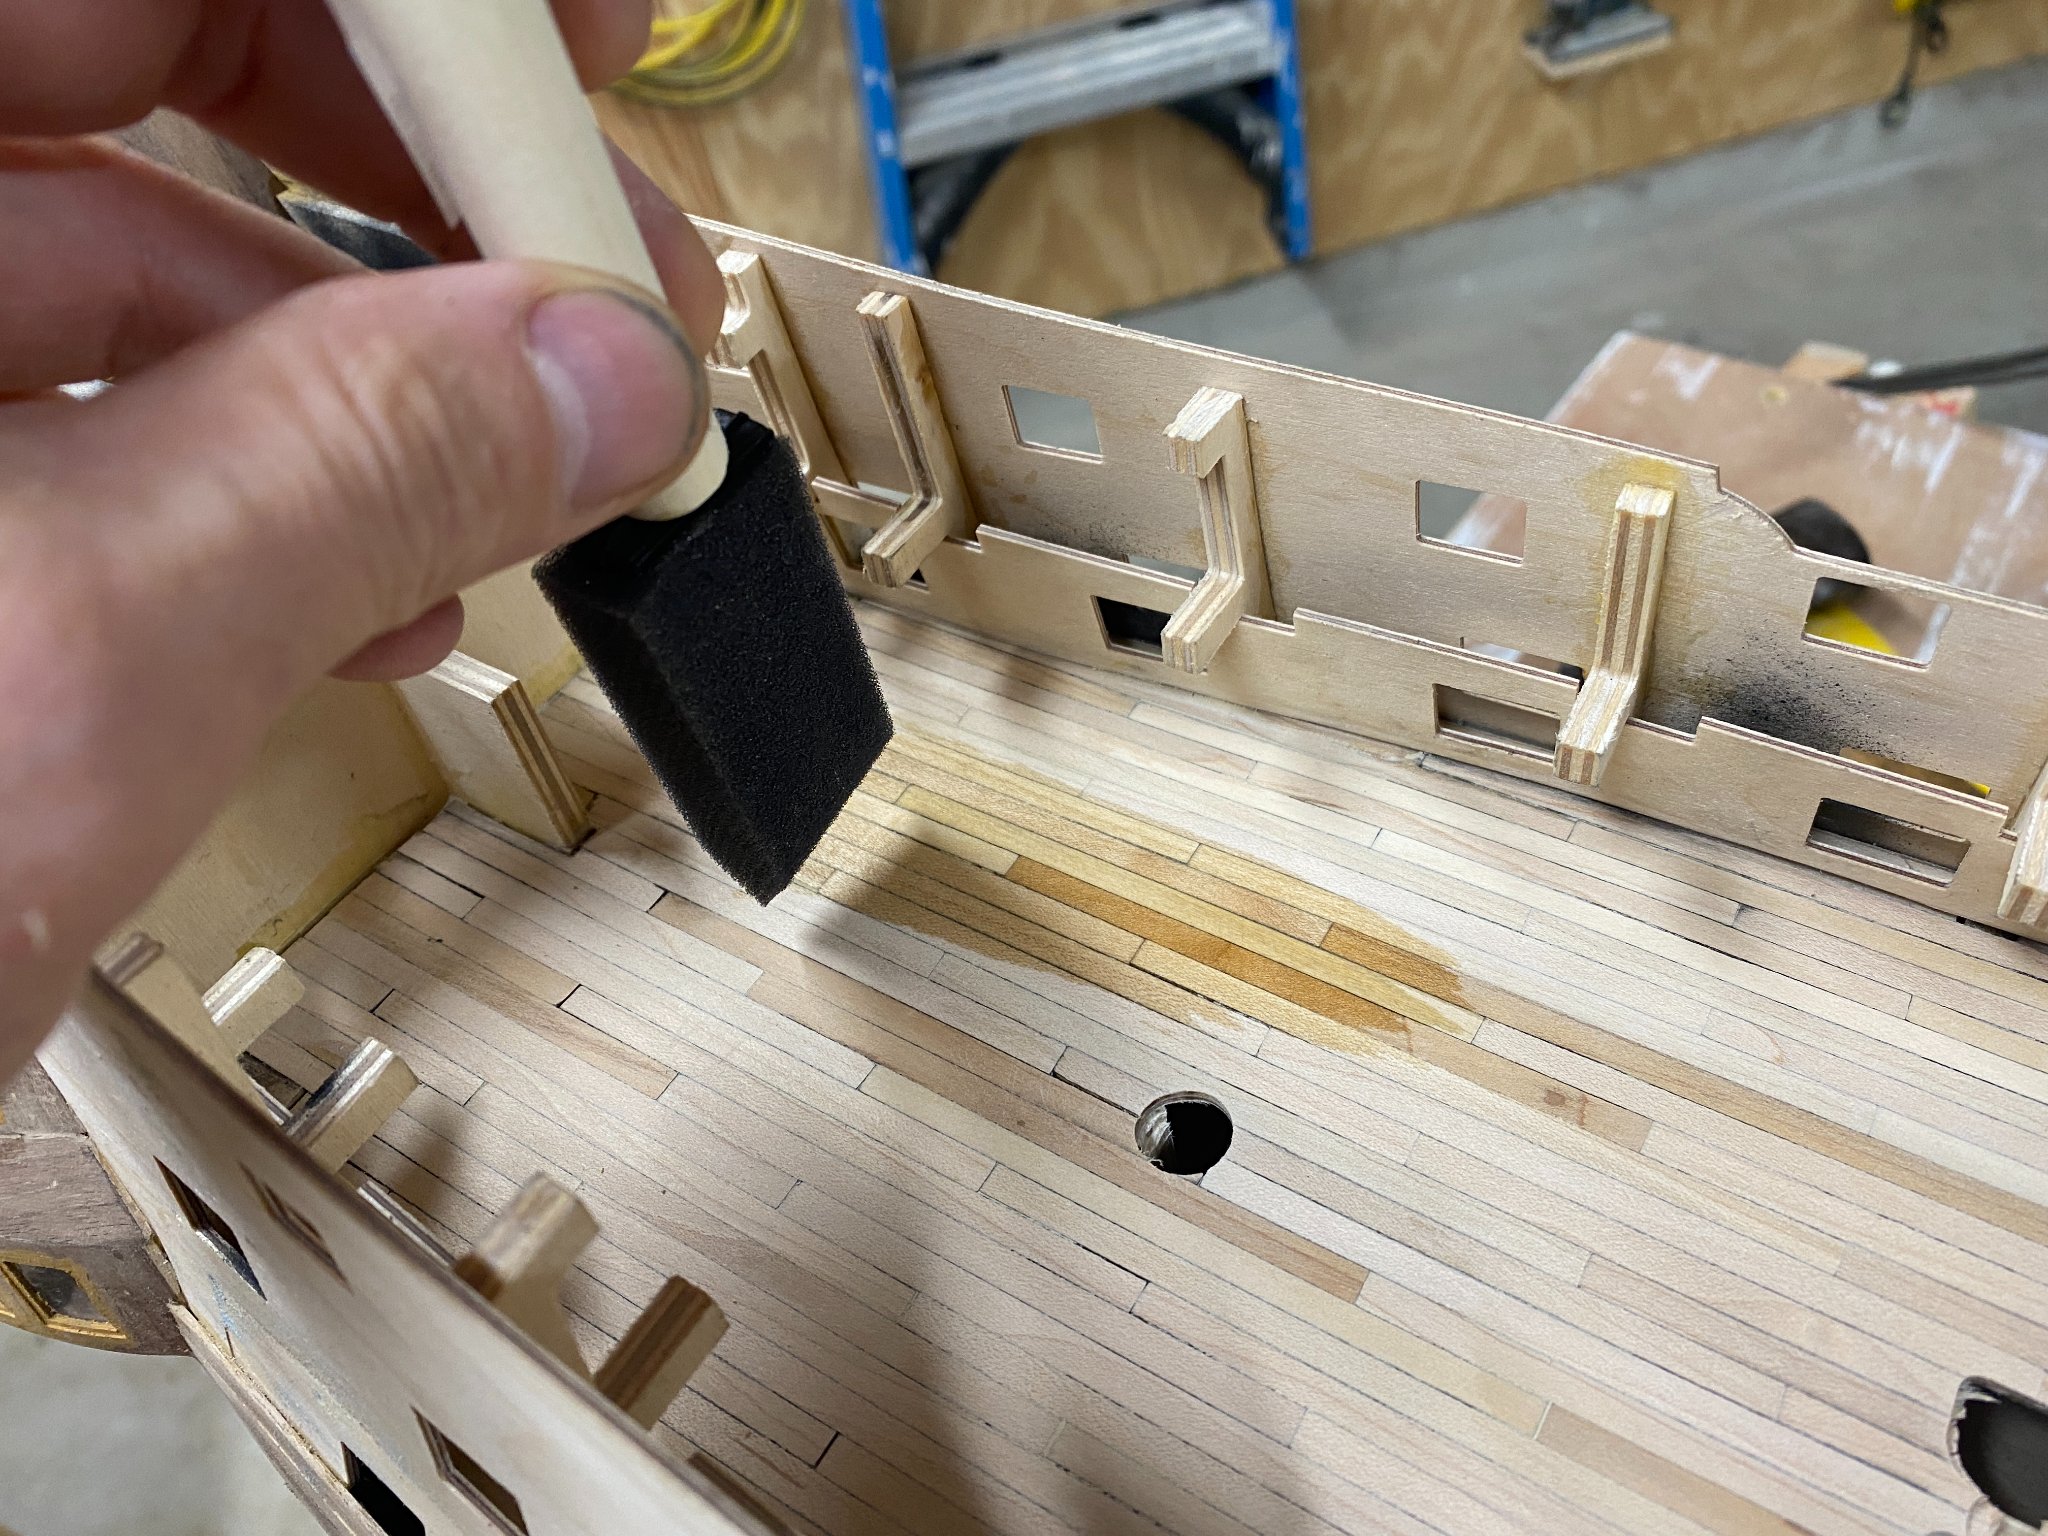
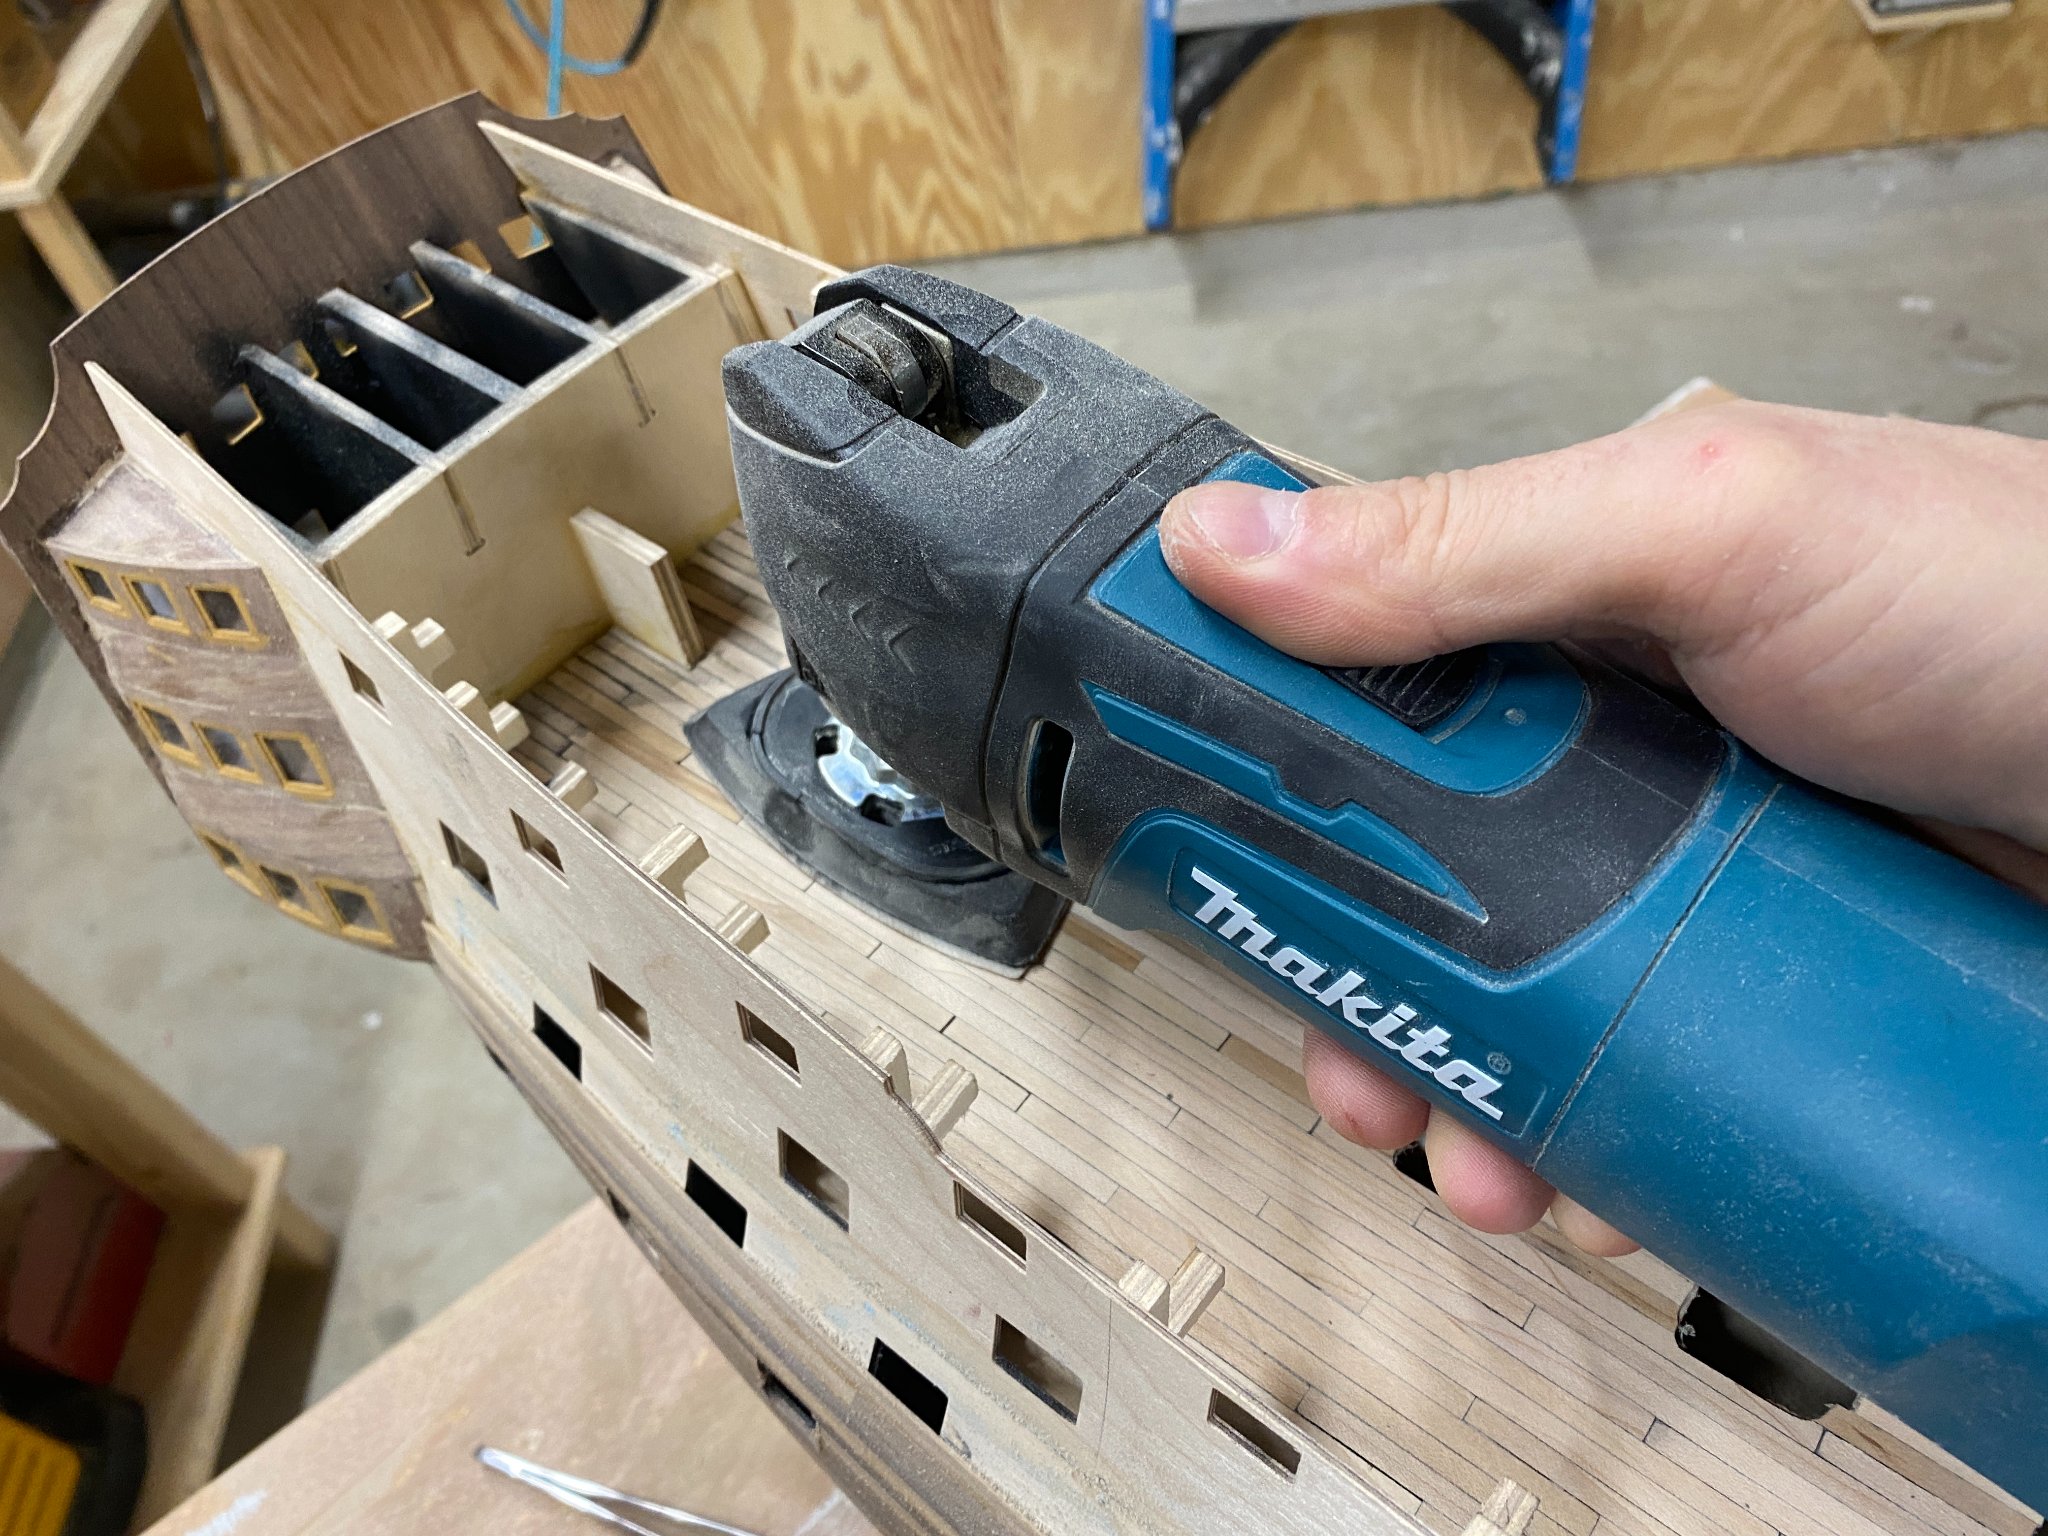
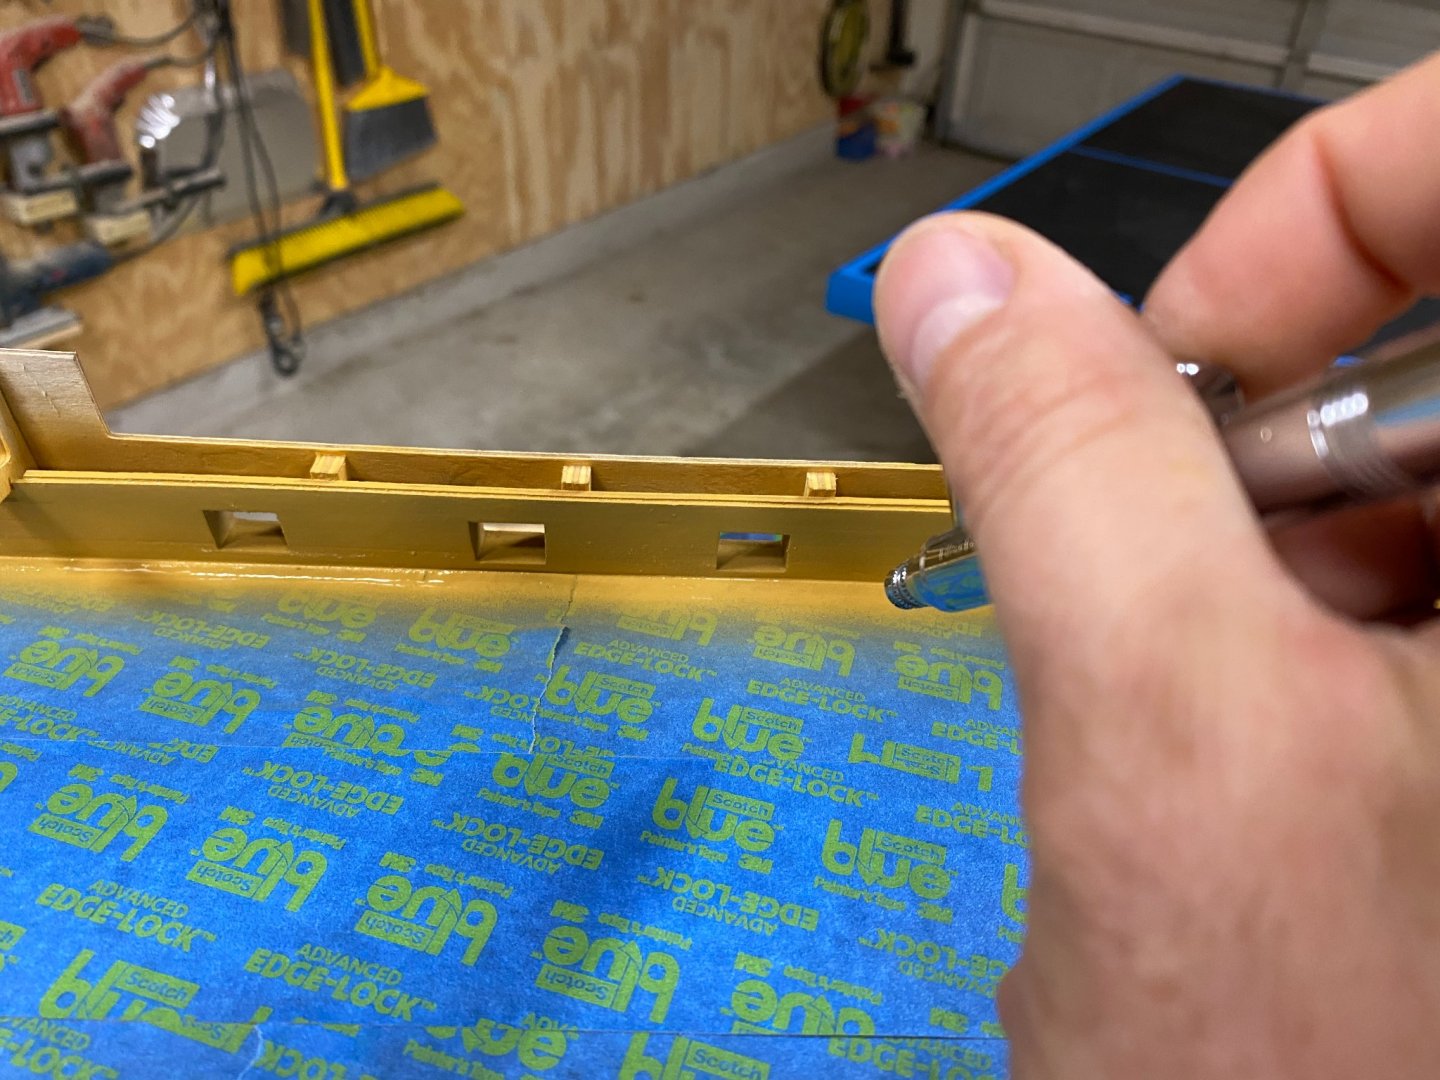
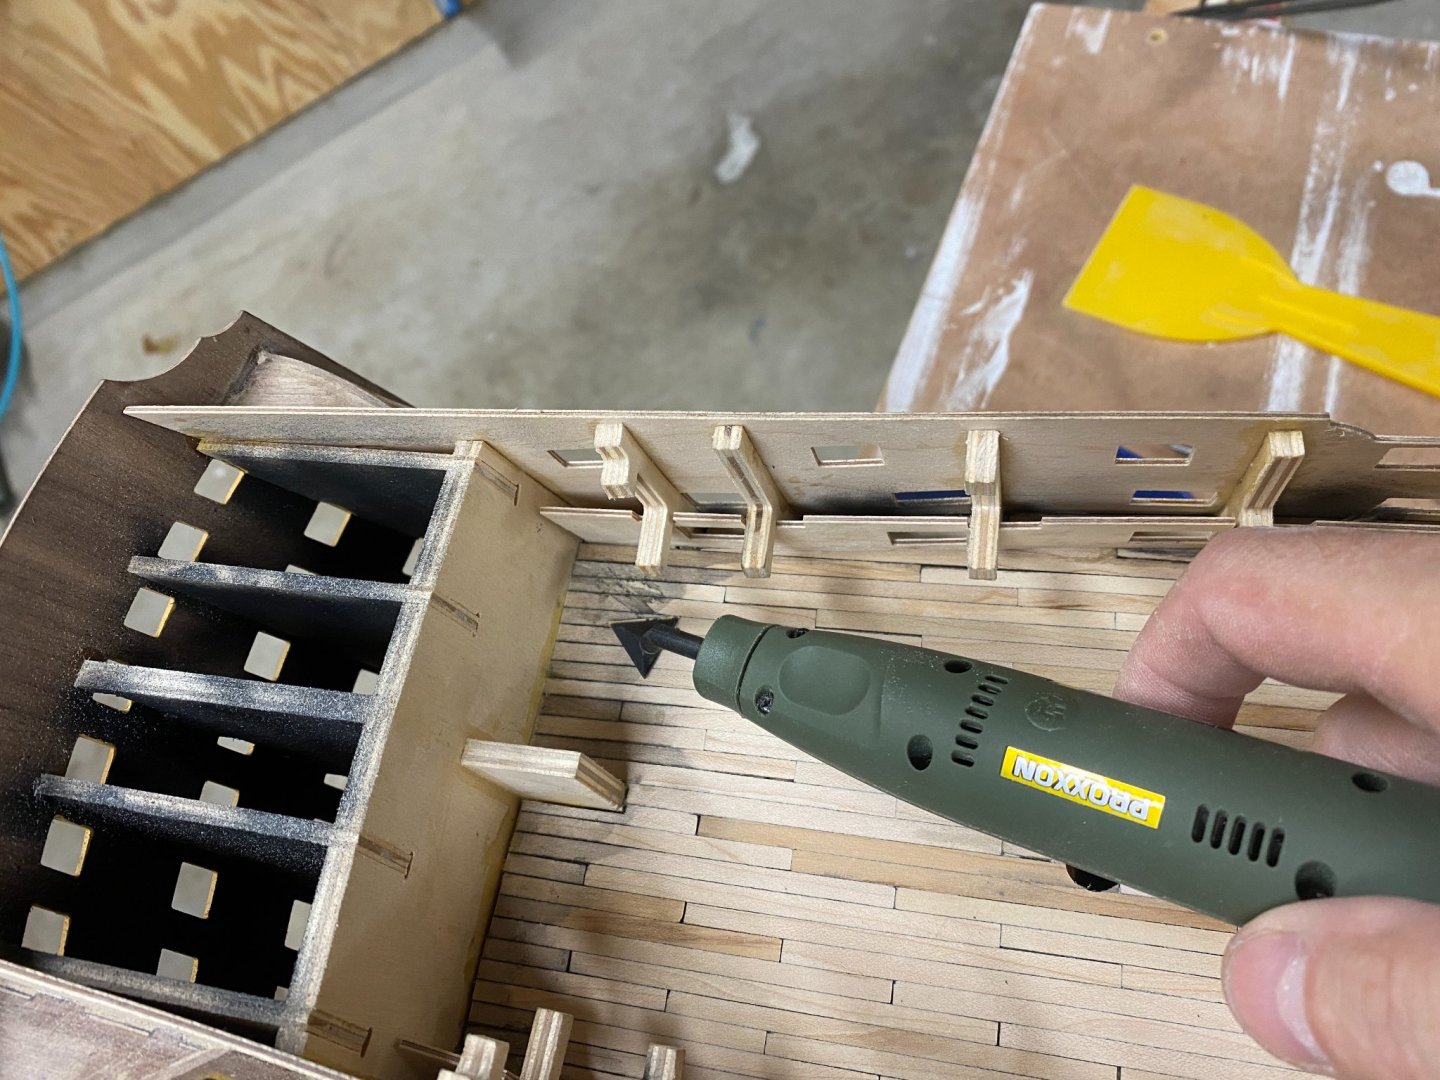
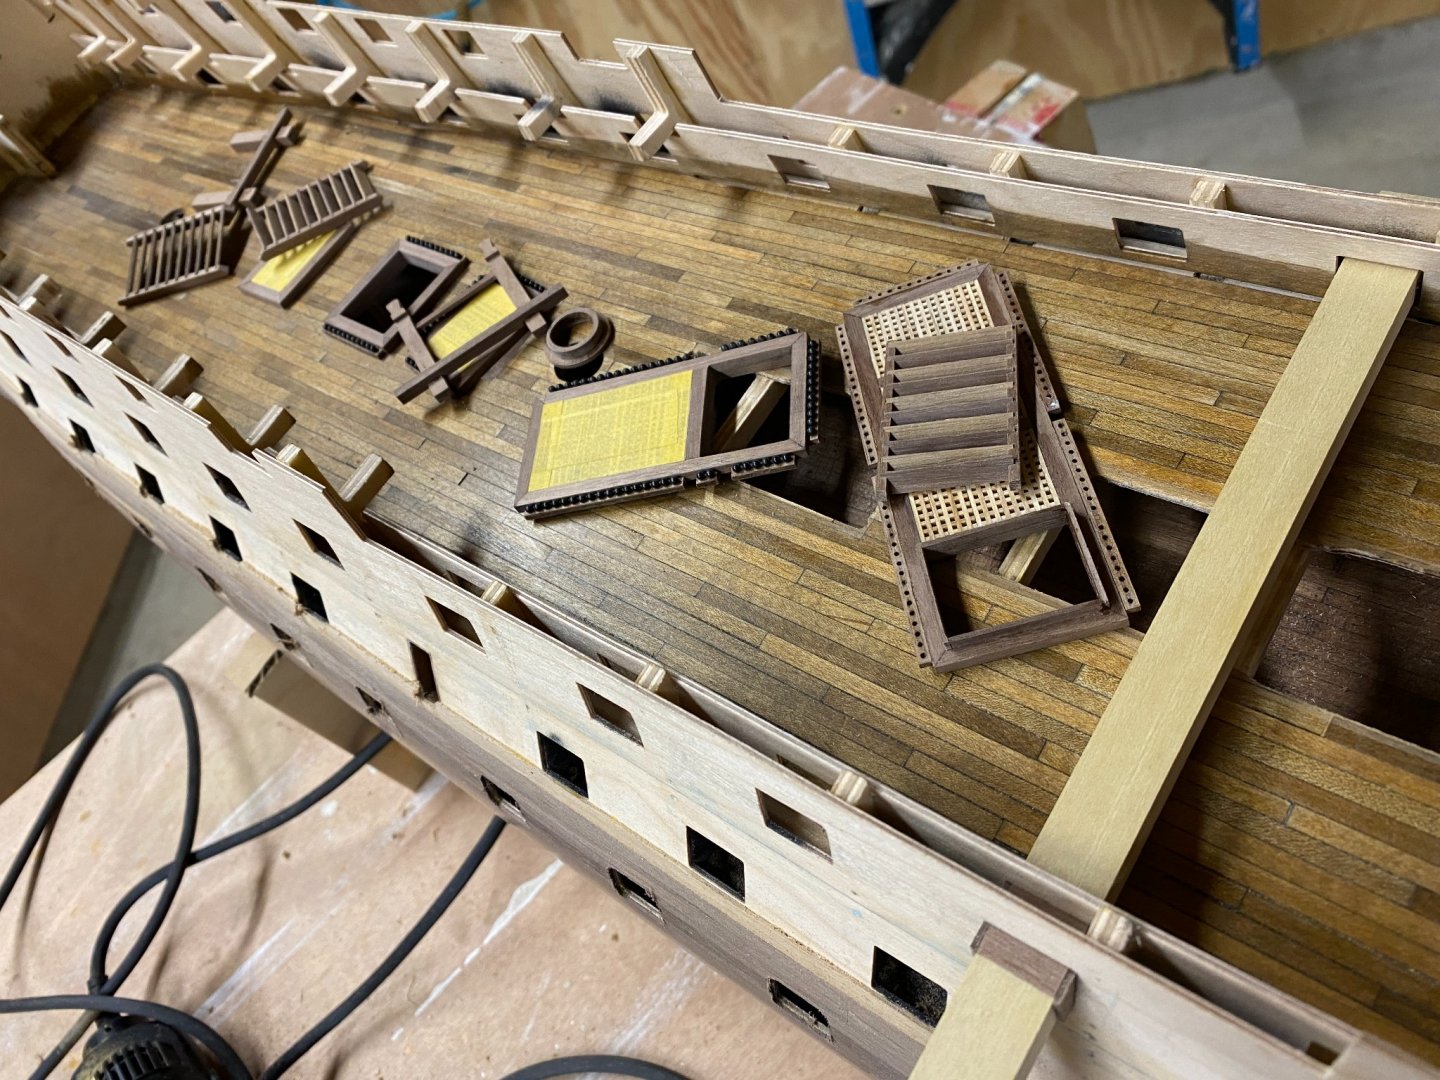
Caldercraft HMS Victory build Update After gluing down the rest of the upper gun deck planking, I removed the majority of the smudged graphite by scraping it off with a bit of broken glass (For the uneven spots & corners - Thank you Lucien) and a razor. (For the field - Thank you Keith) I then sanded going from 150# to 400# with a combination of multi-tool, Proxxon detail sander, and hand-sanding. This was followed by four applications of a vinegar-steel wool stain. After about three treatments, I noticed that the planks were not darkening anymore. I was looking for a more weathered silvery grey like I had seen on so many other wonderful builds (Anyone who has not checked out Gil Middleton's Victory log should do so asap!) but after viewing the gun deck portion of a walk-through video on Youtube, I felt a bit better, and the color actually started growing on me a bit. I then assembled all of the grating, stairways, shot garlands, etc. that comprise the upper gun deck fixings. I wanted to be able to accurately mask off these areas before applying a final finish to the planking. I learned the hard way that cannon balls are best glued in last just before painting. It's not a good idea to work with them over shag carpeting either. Not all of the holed planks on the sheet where the shot garland boards are found are meant for cannon balls; quite a number of them are actually meant for bitt pins. (I'm already set up to assemble the garlands, so why not get all of them out of the way, right?) I ended up having to acetone-soak off more than a few. I then applied two coats of hand-rubbed oil base polyurethane sanding with 400# after each coat. (Final hand-sanding with 1500#.) I am now in the process of hashing out how to install the eight gun port liners per the manual (See rectangular rod stock "installation" tool in photo below. At this point, I could probably go in a number of directions: Up next: Start experimenting with a brass blackening agent I ordered for the cannons. (...and other brass stuff.) Is there any reason I can't finish all the gun port liners now? (No, I obviously didn't learn my lesson from my cannon ball screw-up.) Install all fixings, stairs, railings, etc for the main gun deck. (Or should I wait until after coppering the hull for this step?) Wales installation. Copper tiles installation - Still researching adhesives and installation tools. Gil's copper job with tape is immaculate, but I'm going to try to stick with the tiles that came with the kit.) I have been told that I need to apply any aging (patinating) solution to each individual tile before installation. Why? I would think a far better result (not to mention faster) would be obtained by treating the copper after it has been installed, not before. Any one have any thoughts here? Am I going to screw myself somehow by coppering the rudder now as well? (The manual doesn't address this until much later in the build.) Painting as needed. Any insight, imparted by people keeping an eye on me is most gratefully heeded, but unfortunately not necessarily followed due to a sporadic propensity for stone-headedness on my part. I really appreciate everyone's help!


-
Found this video to be very helpful as well: (from Rob in Calgary 2014 - Username Robipod)
- 29 replies
-
- 3
-
-
- agamemnon
- caldercraft
- (and 1 more)
-
Hi Chris, Gil Middleton has a fantastic build log for his Caldercraft Victory build. You can find his coppering technique on the first page. It looks like he used tape instead of tiles though. Perhaps LucienL has some tips for the both of us. He recently coppered one of his builds. I'm sure you have seen it, but DaGostini has a basic Instruction sheet for this. (See attached.) Please let me know how you fare as I'm going to need to copper tile my build one day. HMS Victory Copper Tile Instructions.pdf
- 29 replies
-
- 1
-
-
- agamemnon
- caldercraft
- (and 1 more)
-
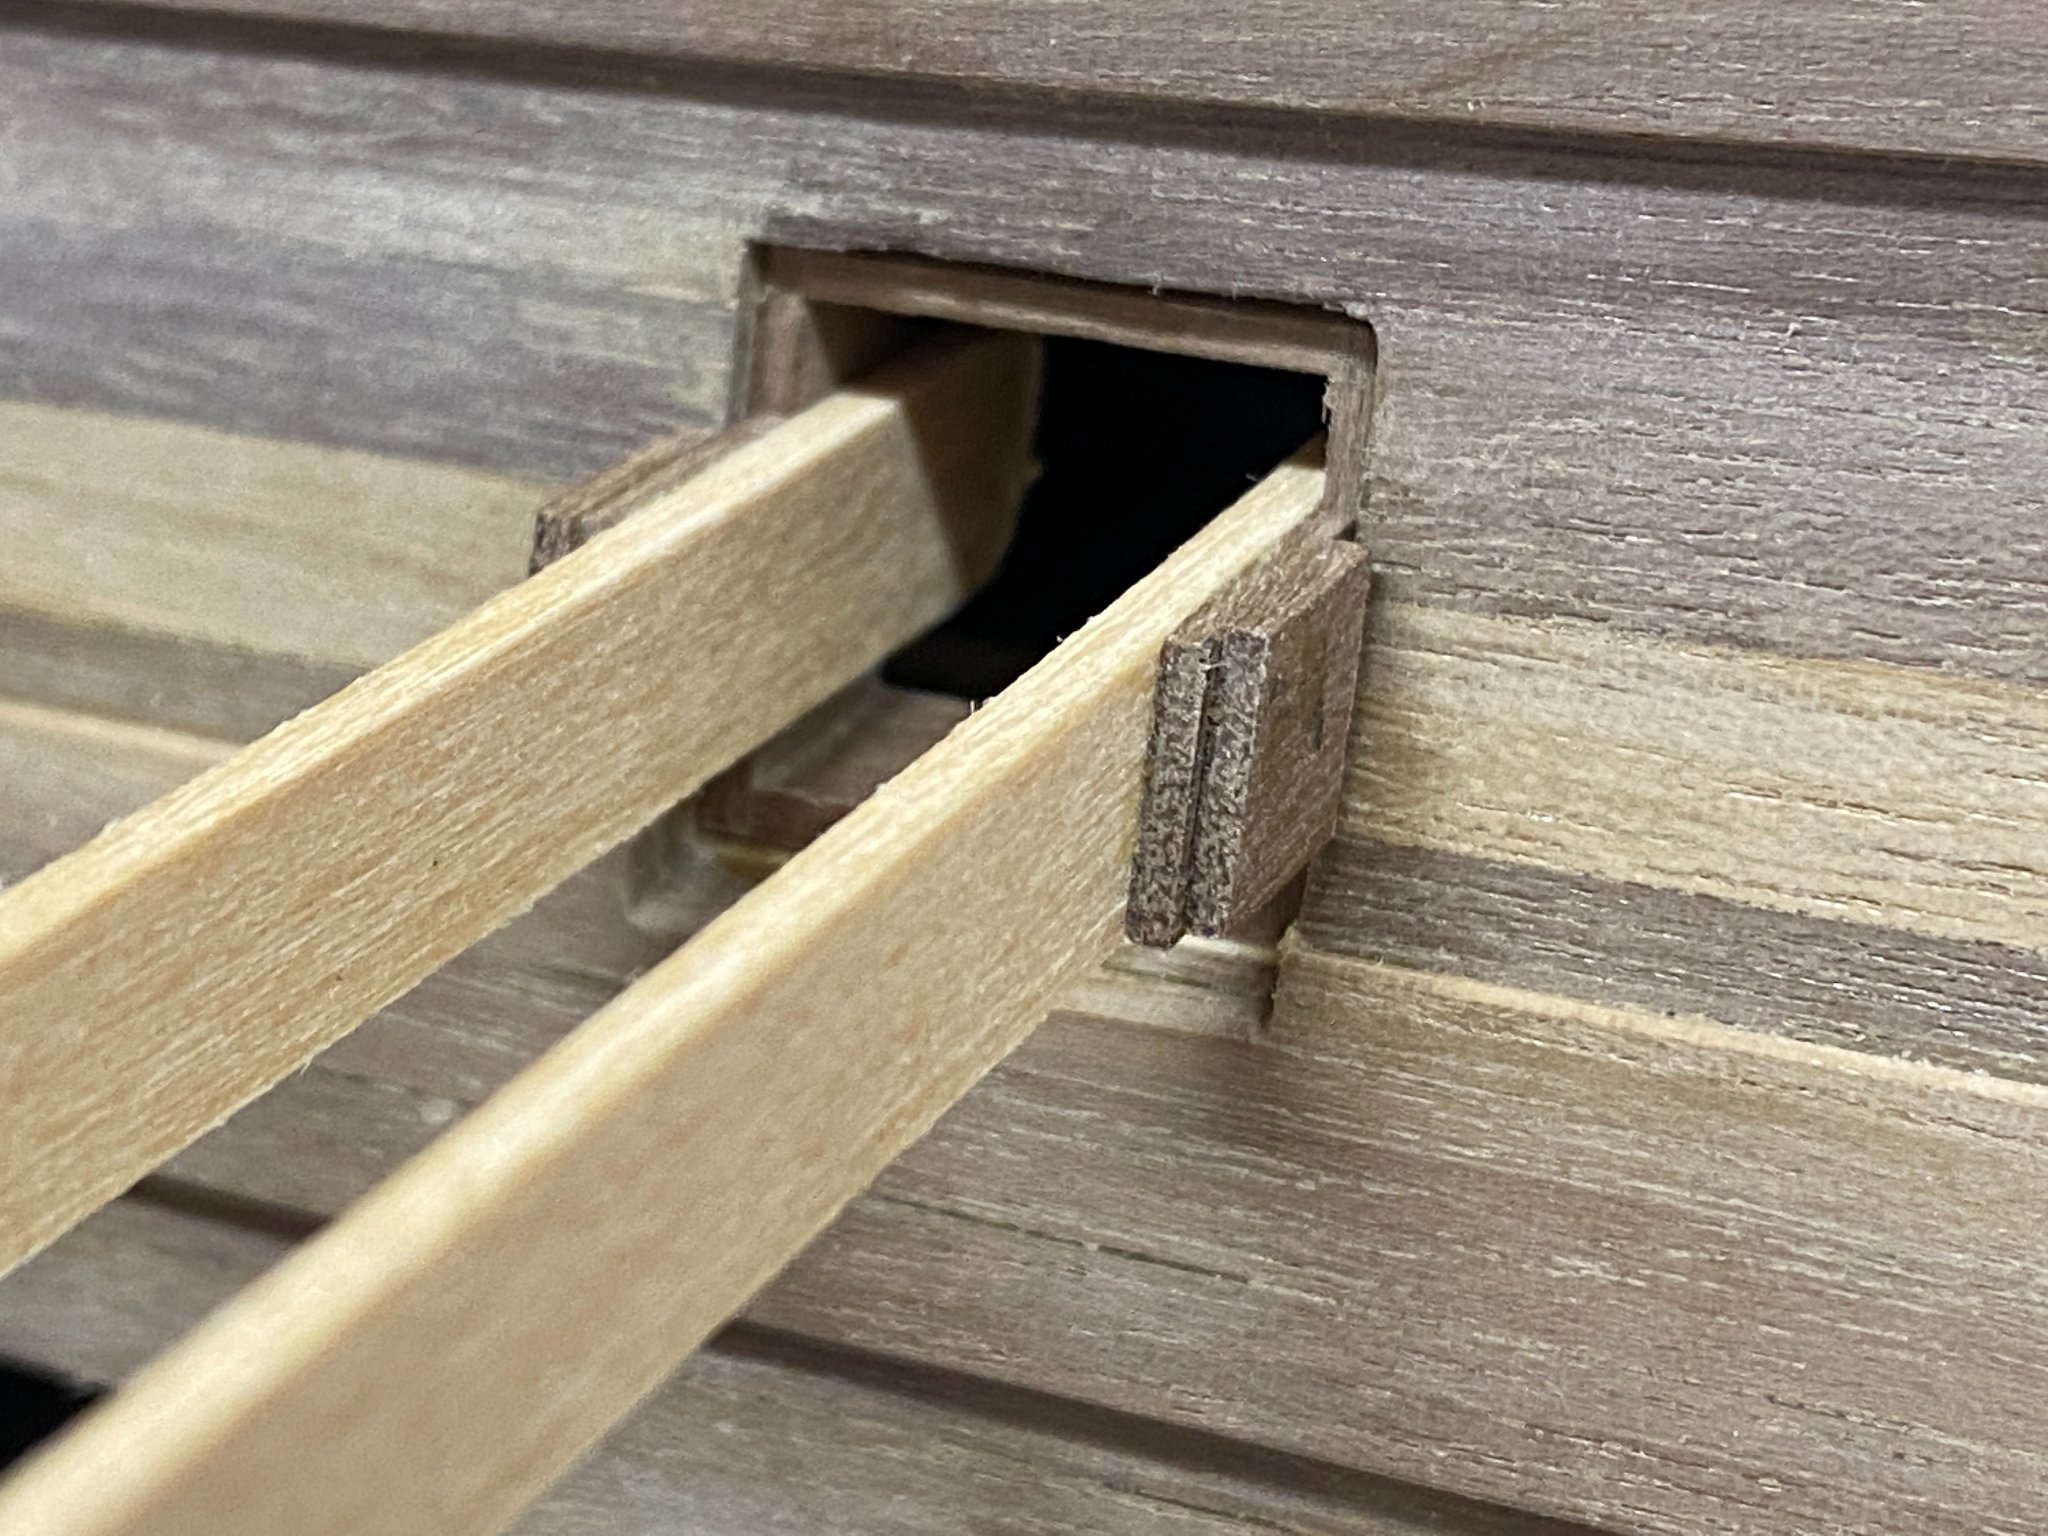
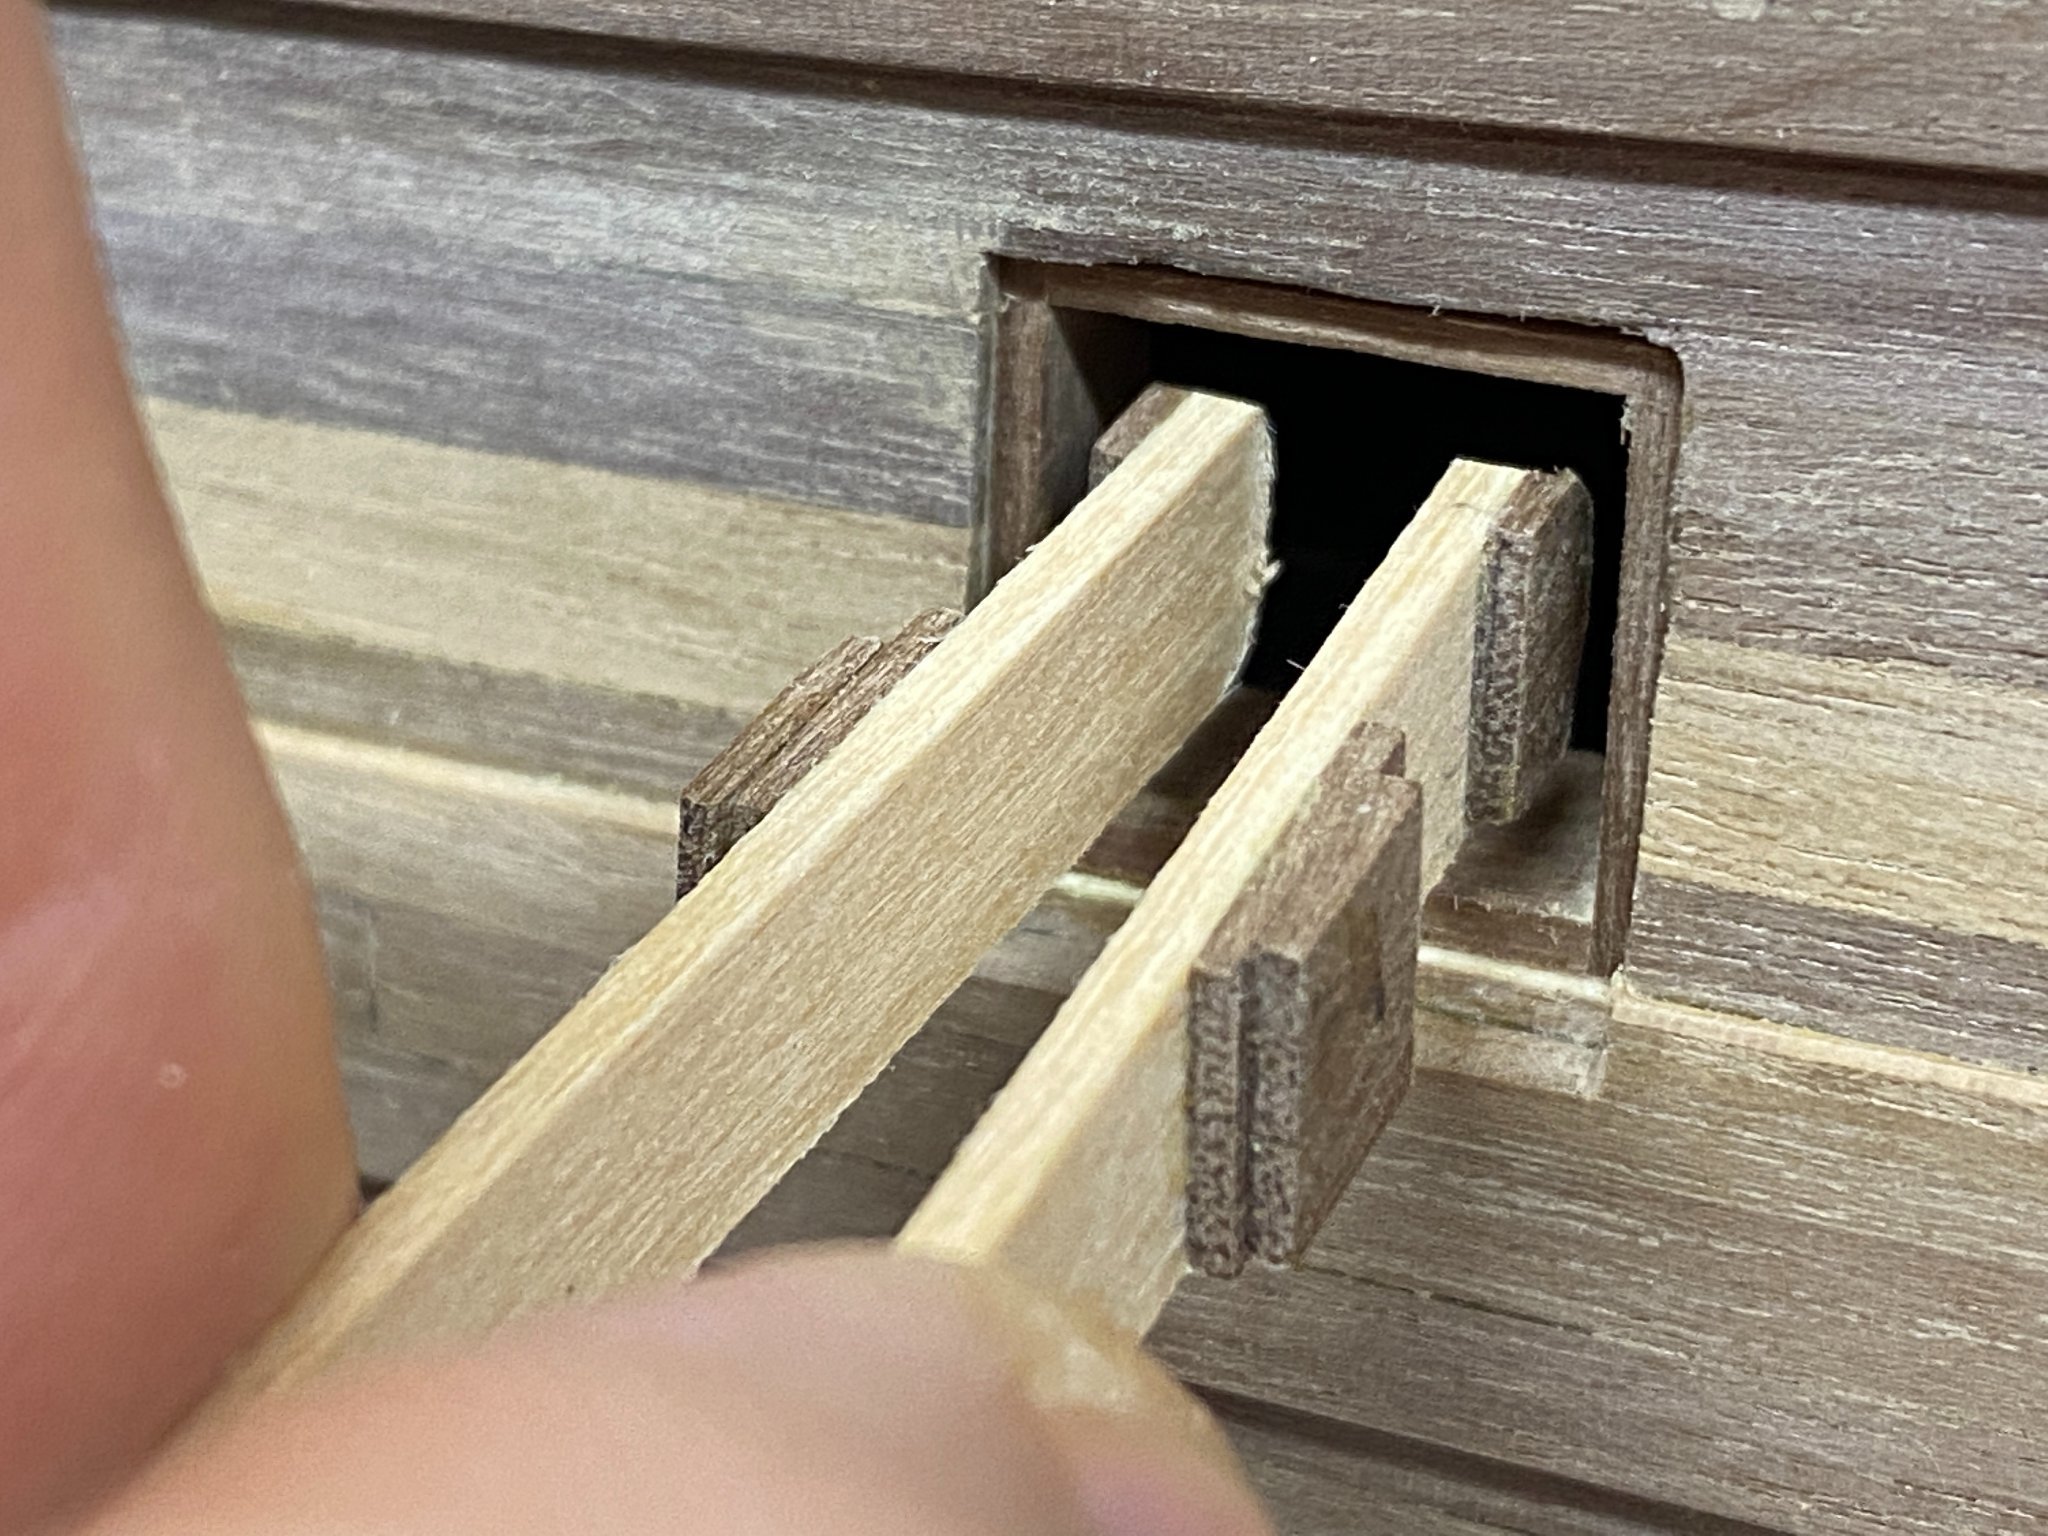
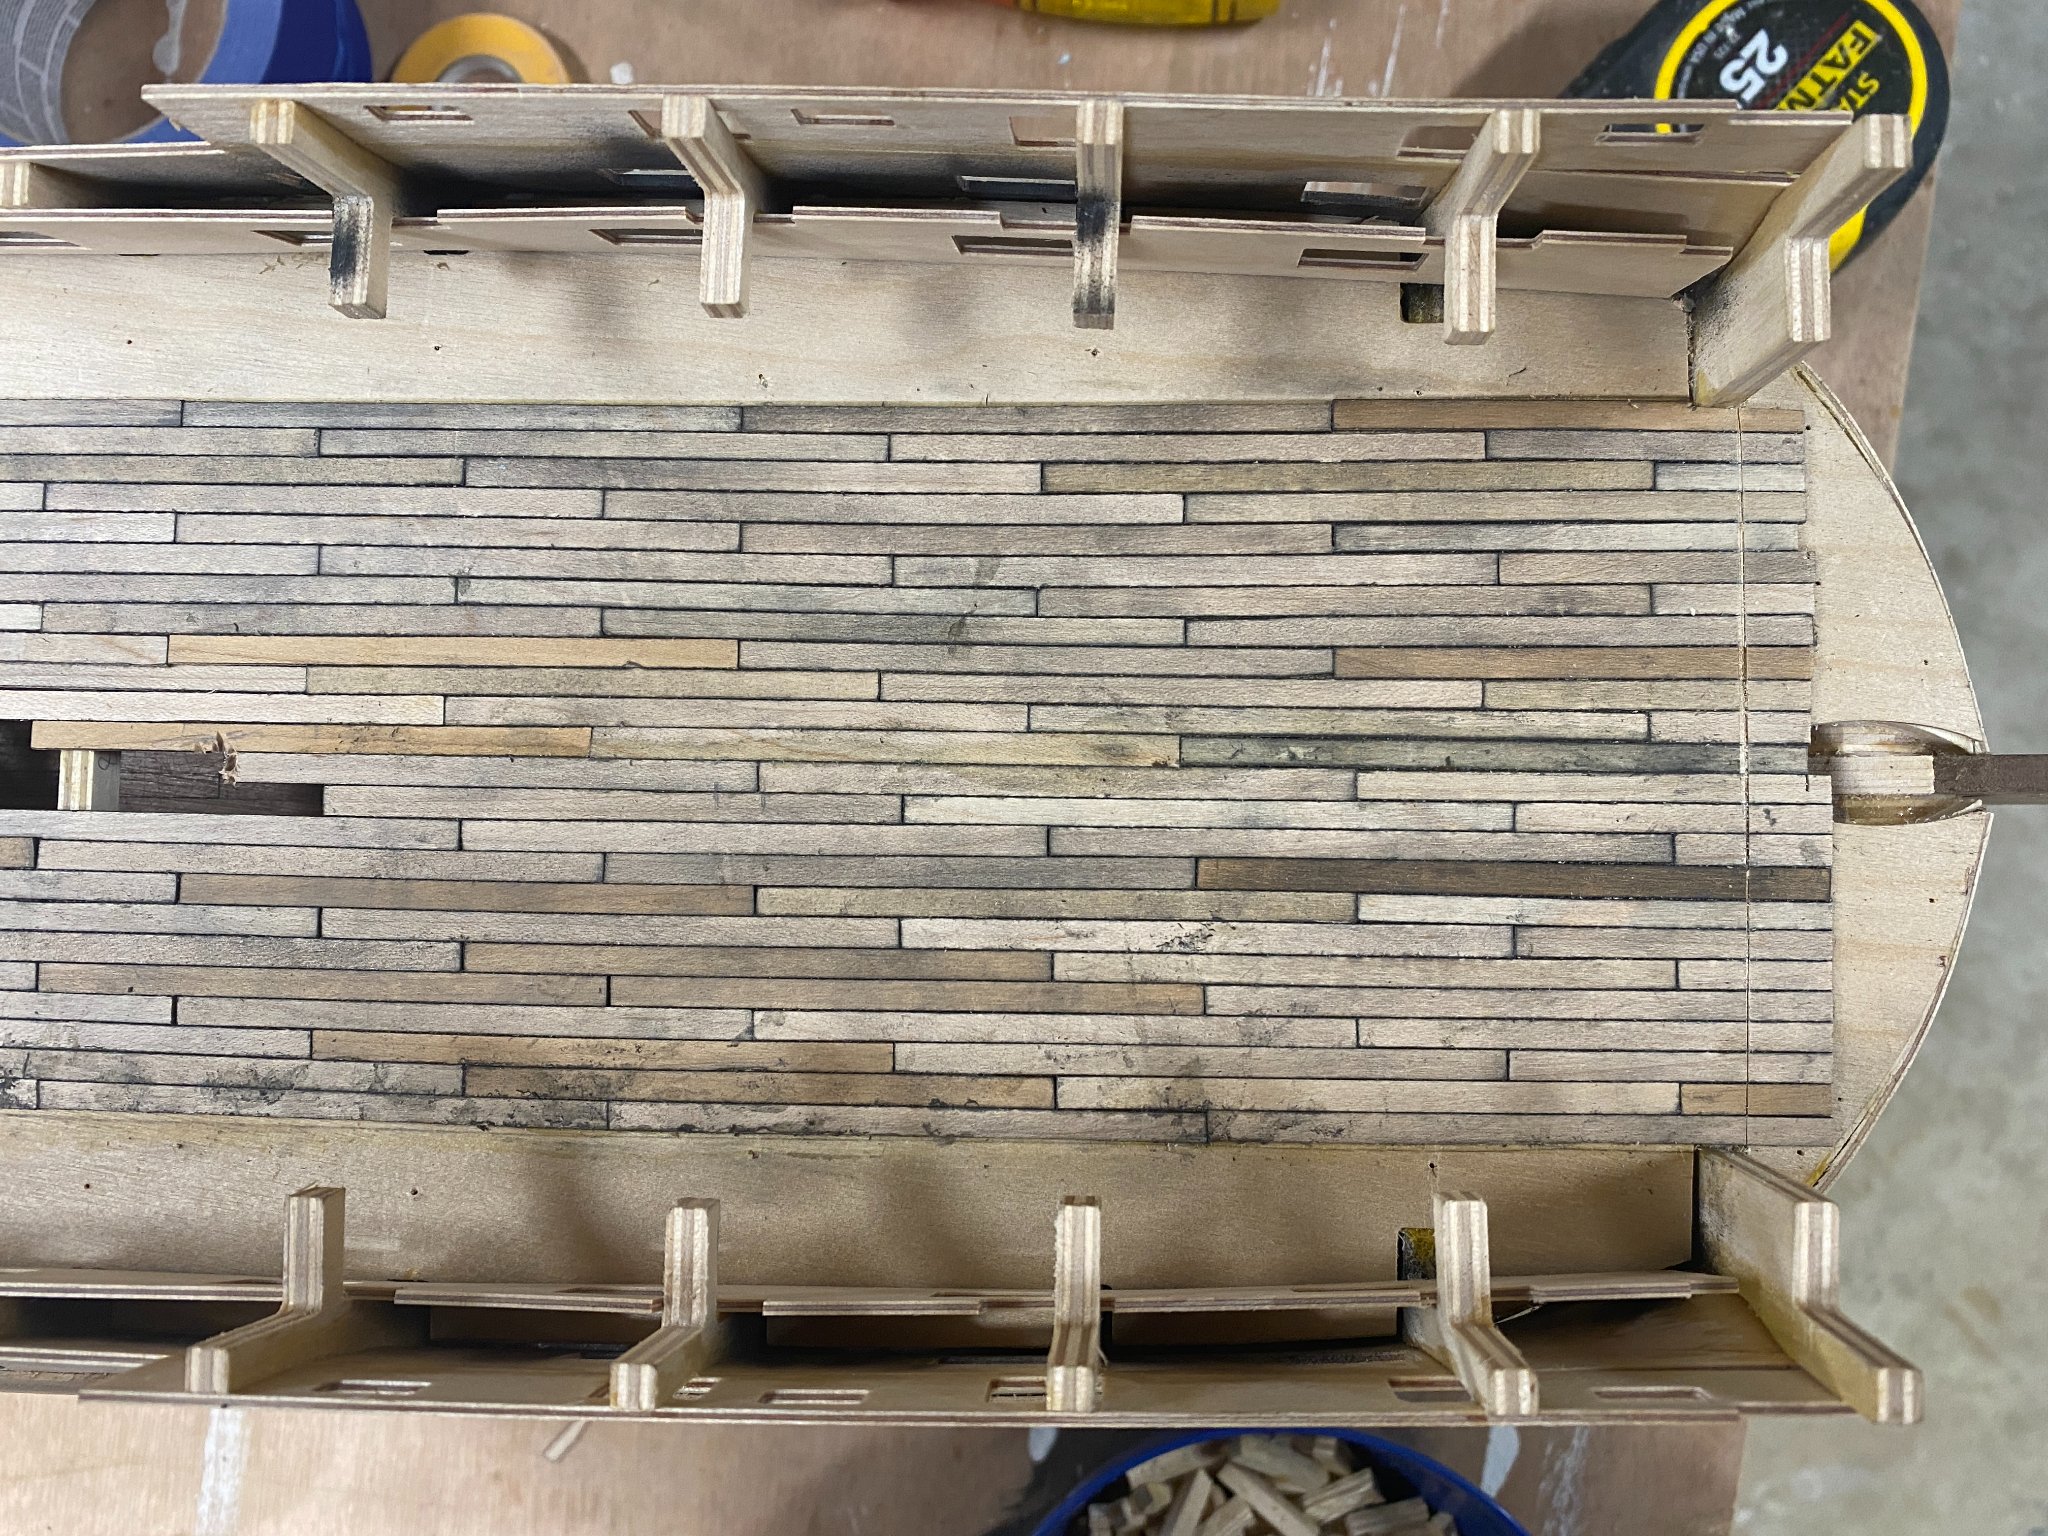
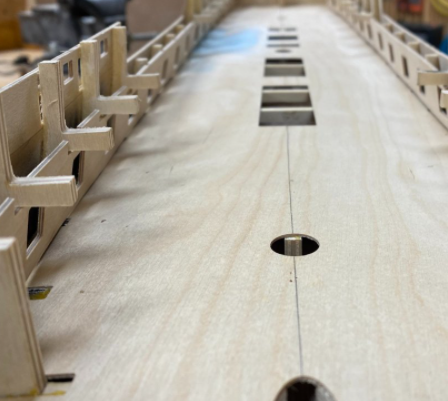
Thanks Maliba, I'm not quite sure what you mean by false deck. The kit comes with a big piece of laser cut thin plywood that is a persnickety pain to shape and install. See photo of it below before planking.
-
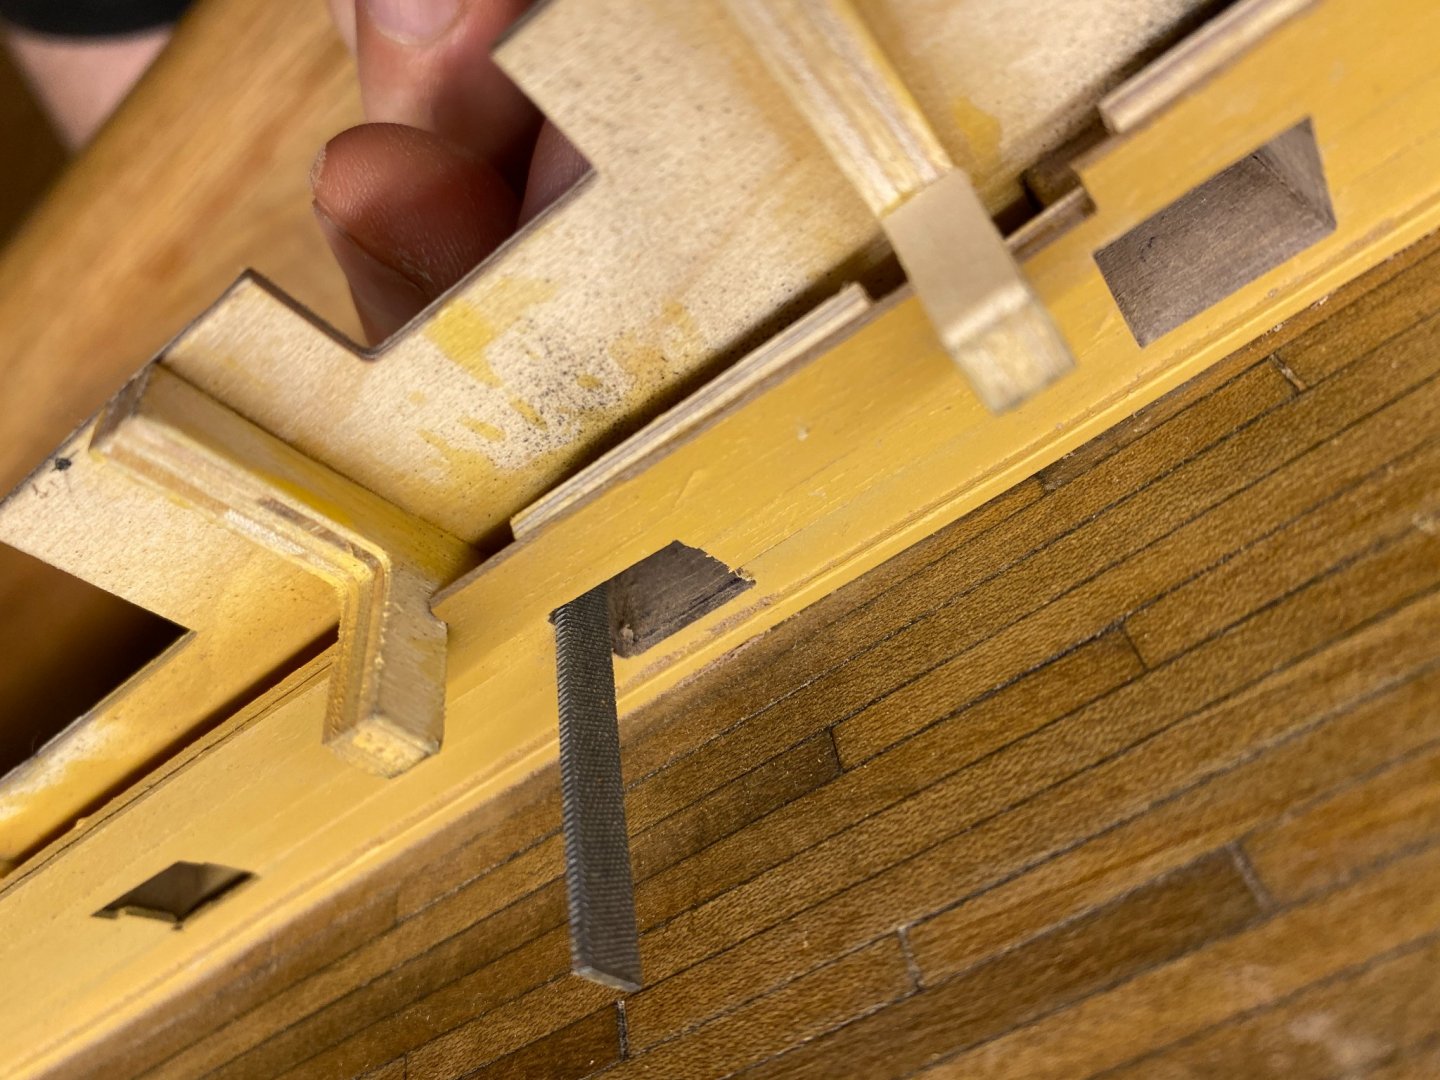
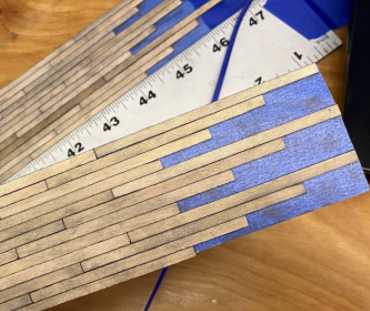
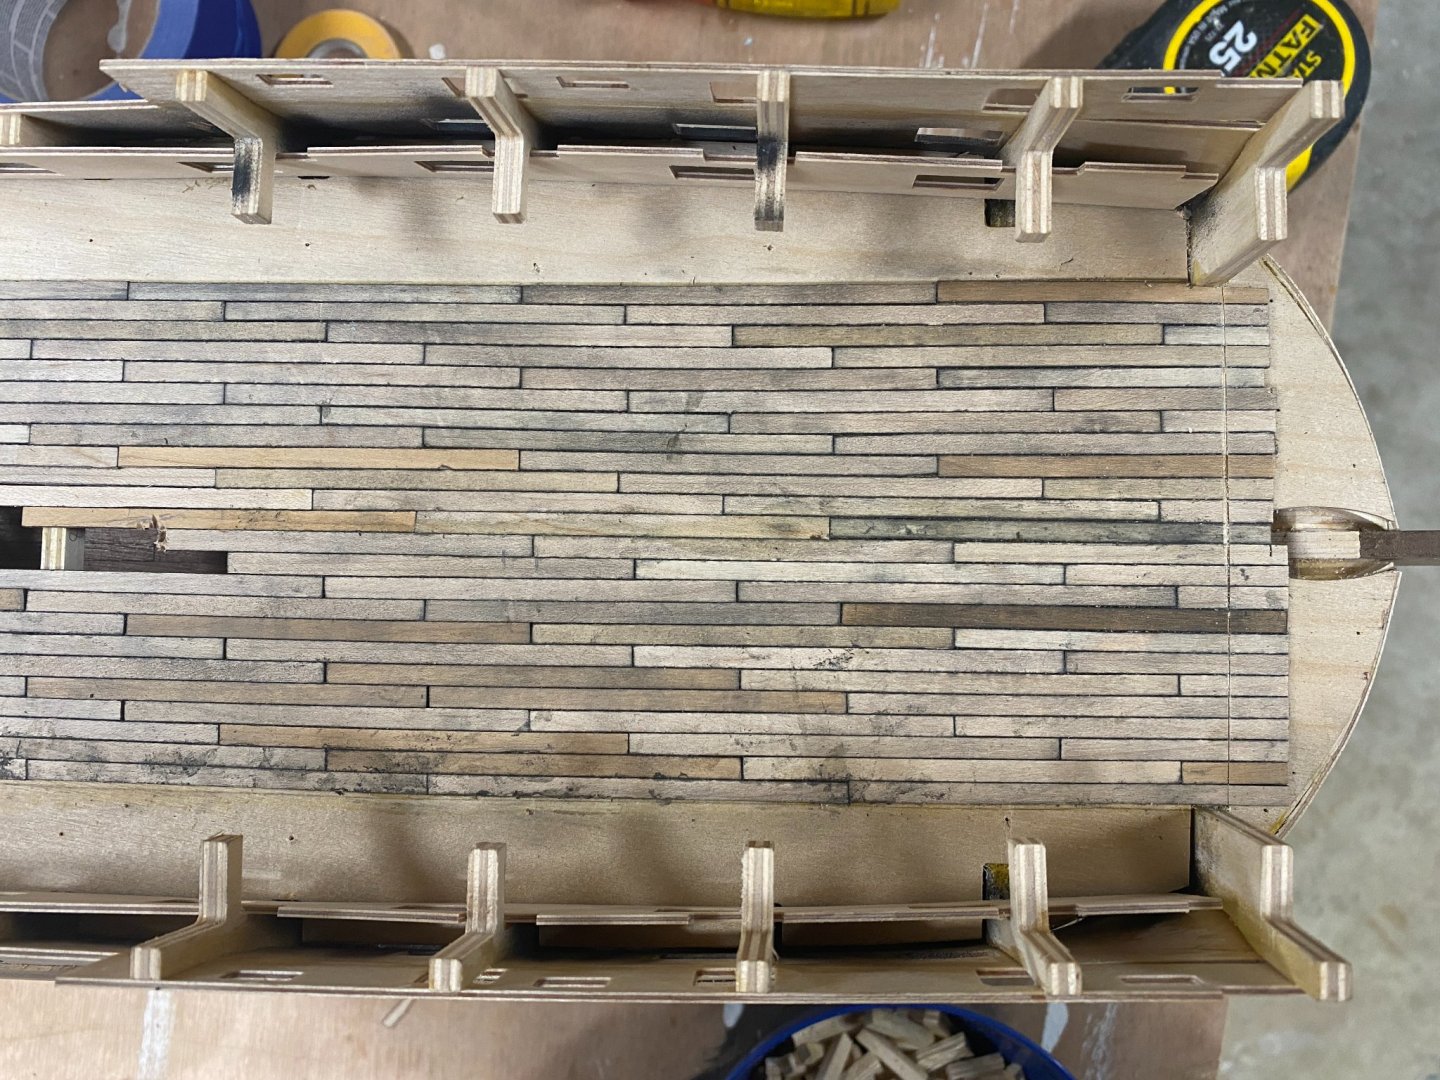
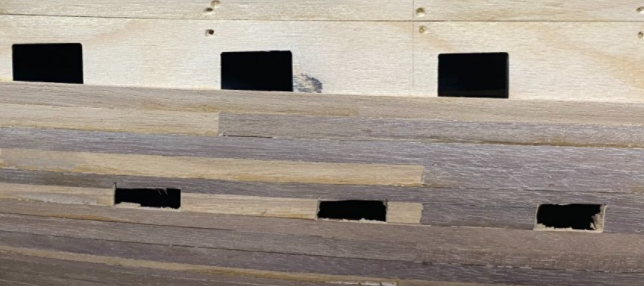
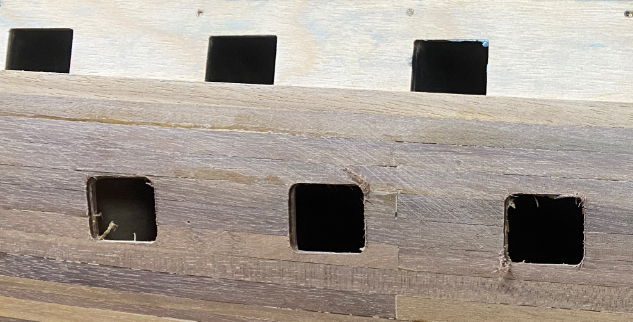
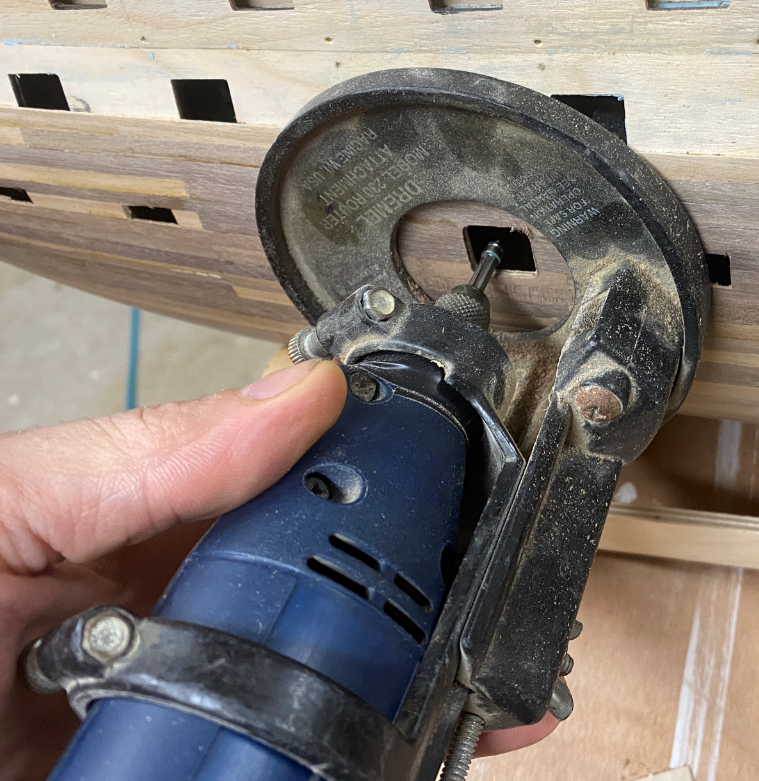
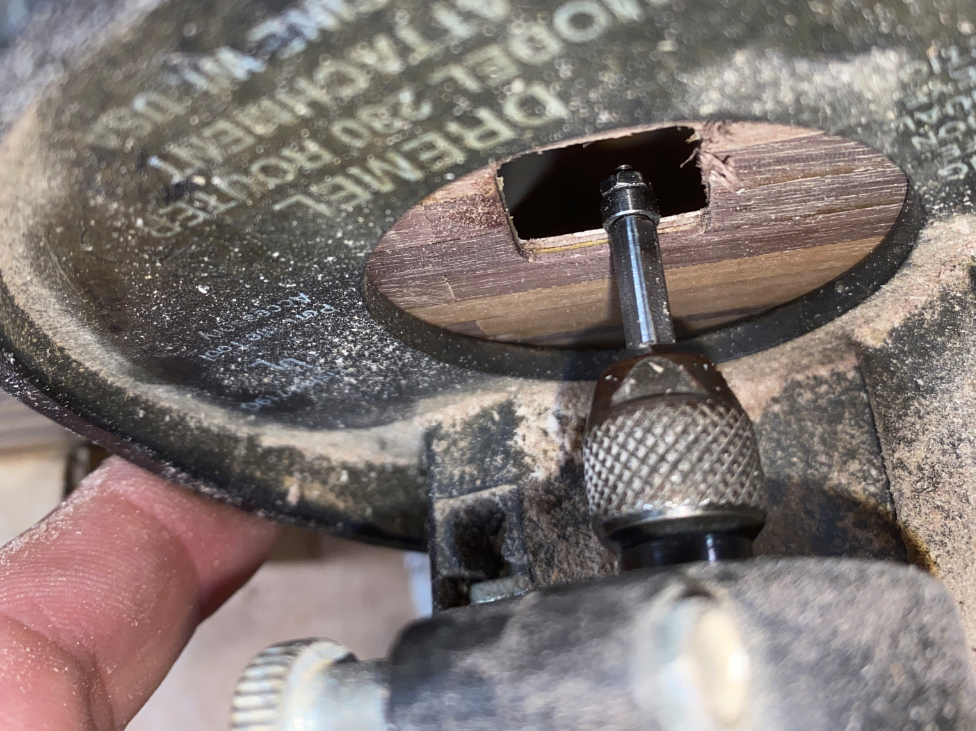
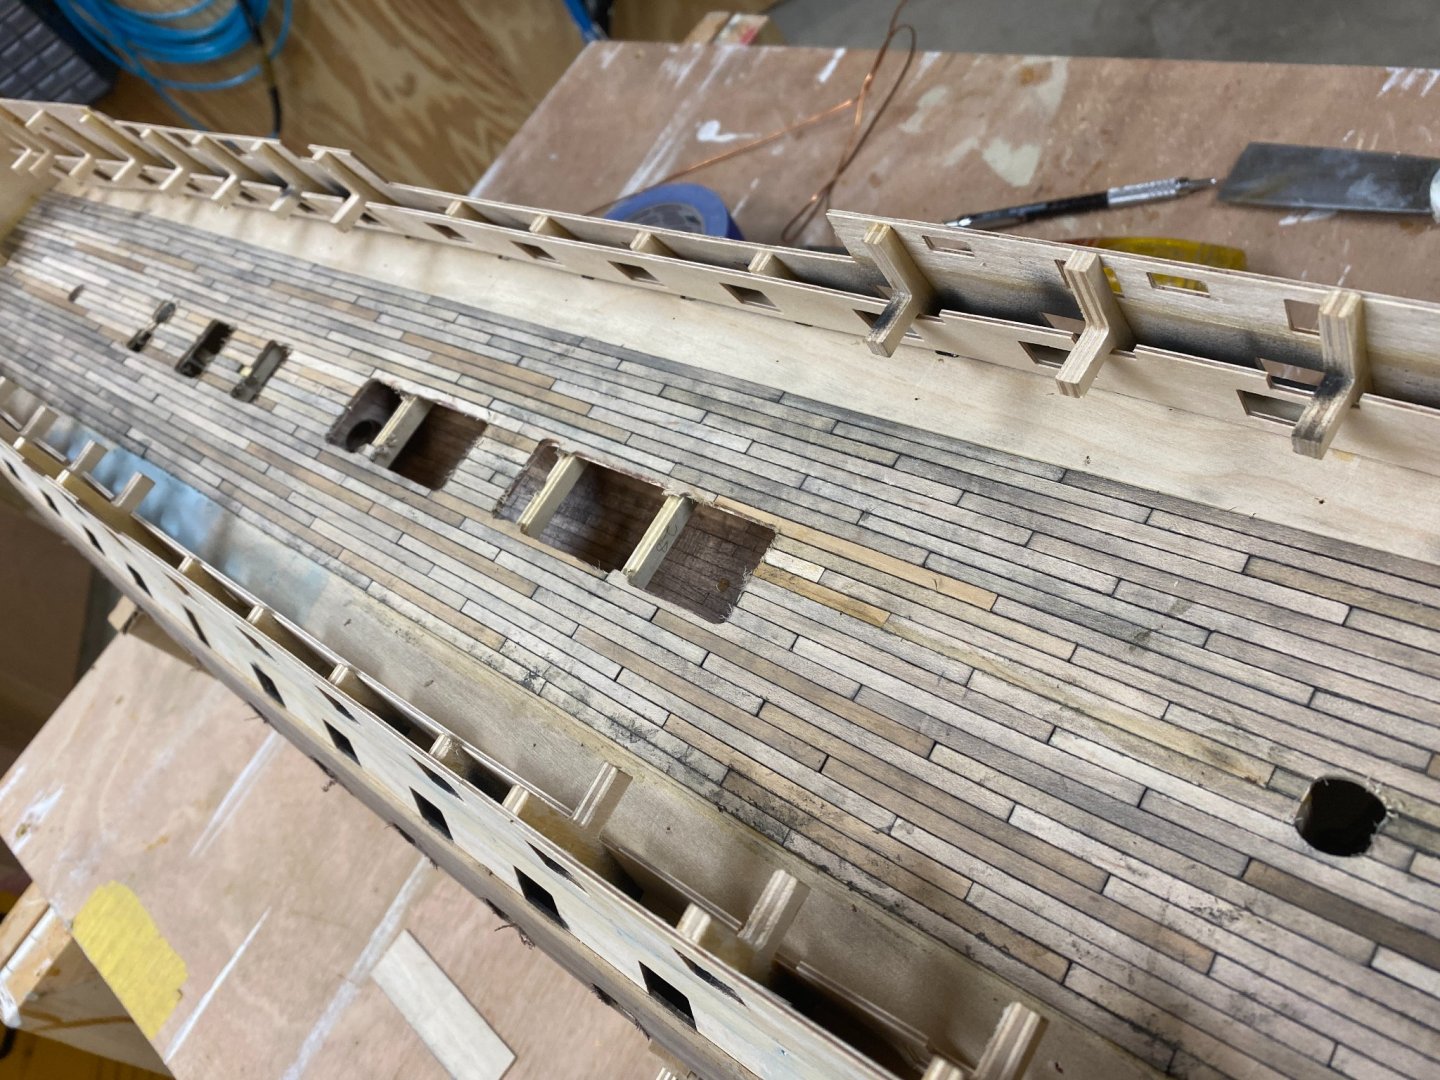
Latest Progress & Solutions: So I thought I'd try sticking the majority of my upper gun deck planking down all at once seeing as I had already stuck it to some tape to check the layout: Used a piece of 23 TPI pull saw blade as notched glue trowel to ensure a nice even coverage. (Kind of like what you'd use for tile.) Laid down both pieces of tape-plank assemblies, pushing and wriggling until all the planks were well imbedded in the glue. Used a single AA battery to carefully unroll the tape off the planking. Needed to push a few stragglers back into place, but this method saved considerable time. (Yes, some of my course breaks are indeed a tad crooked, but still not too bad for about 15 minutes worth of work.) My experimental flush-cut bit arrived today as well, so I was able to accurately trim back all planking to the underlying plywood openings. I did need to slightly modify it to get rid of the tiny gap between the bearing and the cutting blades and I'll still need to do some filing in the corners, but this also was a massive time-saver. Before: After: During: I Also hit the openings in the newly glued deck.

-
Wow! That's a drawing? I just joined about a week ago. Everyone on this forum is so nice and so helpful. Welcome!
-
Ted, about your hull plating job: OOOooohhh!!! ...But I'm actually looking for a patina about 5-6 years: I'm also extremely interested in your sails. - They look Incredible! Where did you find plans for them? Are you going "full sail?" Have you "weathered" them at all?
-
They look great Ted; did you paint or use a blackening agent on them?
-
Maliba - Thank you sir! I'm planning on posting all of my mistakes (brain-dead or otherwise.) with photos. - Just had another one this morning; I planked over the foremast hole in the upper gun deck thinking I could easily find it later. (Nope!) Lucien & Keith - It sounds like both glass and razor have their merits. As it is, I found that the painter's tape itself removed a lot of the smudged graphite. (There's still enough left to warrant a good scraping though.) I have heard that the virtues of neither wife nor daughter are safe with a jar-glass shaven Aussie around.
-
Thank you both for such a clear explanation. The photos are a big help. I really appreciate it! Greg - Thanks for the clarification. I thought you meant after you had them all installed.
-
Oh. After they're in place. - Thank you Greg. Lucien, I'll try your glass trick. - Thank you as well!