MWD
-
Posts
24 -
Joined
-
Last visited
Recent Profile Visitors
120 profile views

-
 ESF reacted to a post in a topic:
Scooter by MWD - BlueJacket Shipcrafters - 1:12
ESF reacted to a post in a topic:
Scooter by MWD - BlueJacket Shipcrafters - 1:12
-
ESF reacted to a post in a topic:
Scooter by MWD - BlueJacket Shipcrafters - 1:12
-
Duanelaker reacted to a post in a topic:
Scooter by MWD - BlueJacket Shipcrafters - 1:12
-
Duanelaker reacted to a post in a topic:
Scooter by MWD - BlueJacket Shipcrafters - 1:12
-
Duanelaker reacted to a post in a topic:
Scooter by MWD - BlueJacket Shipcrafters - 1:12
-
Duanelaker reacted to a post in a topic:
Scooter by MWD - BlueJacket Shipcrafters - 1:12
-
Duanelaker reacted to a post in a topic:
Scooter by MWD - BlueJacket Shipcrafters - 1:12
-
Duanelaker reacted to a post in a topic:
Scooter by MWD - BlueJacket Shipcrafters - 1:12
-
Duanelaker reacted to a post in a topic:
Scooter by MWD - BlueJacket Shipcrafters - 1:12
-
Duanelaker reacted to a post in a topic:
Scooter by MWD - BlueJacket Shipcrafters - 1:12
-
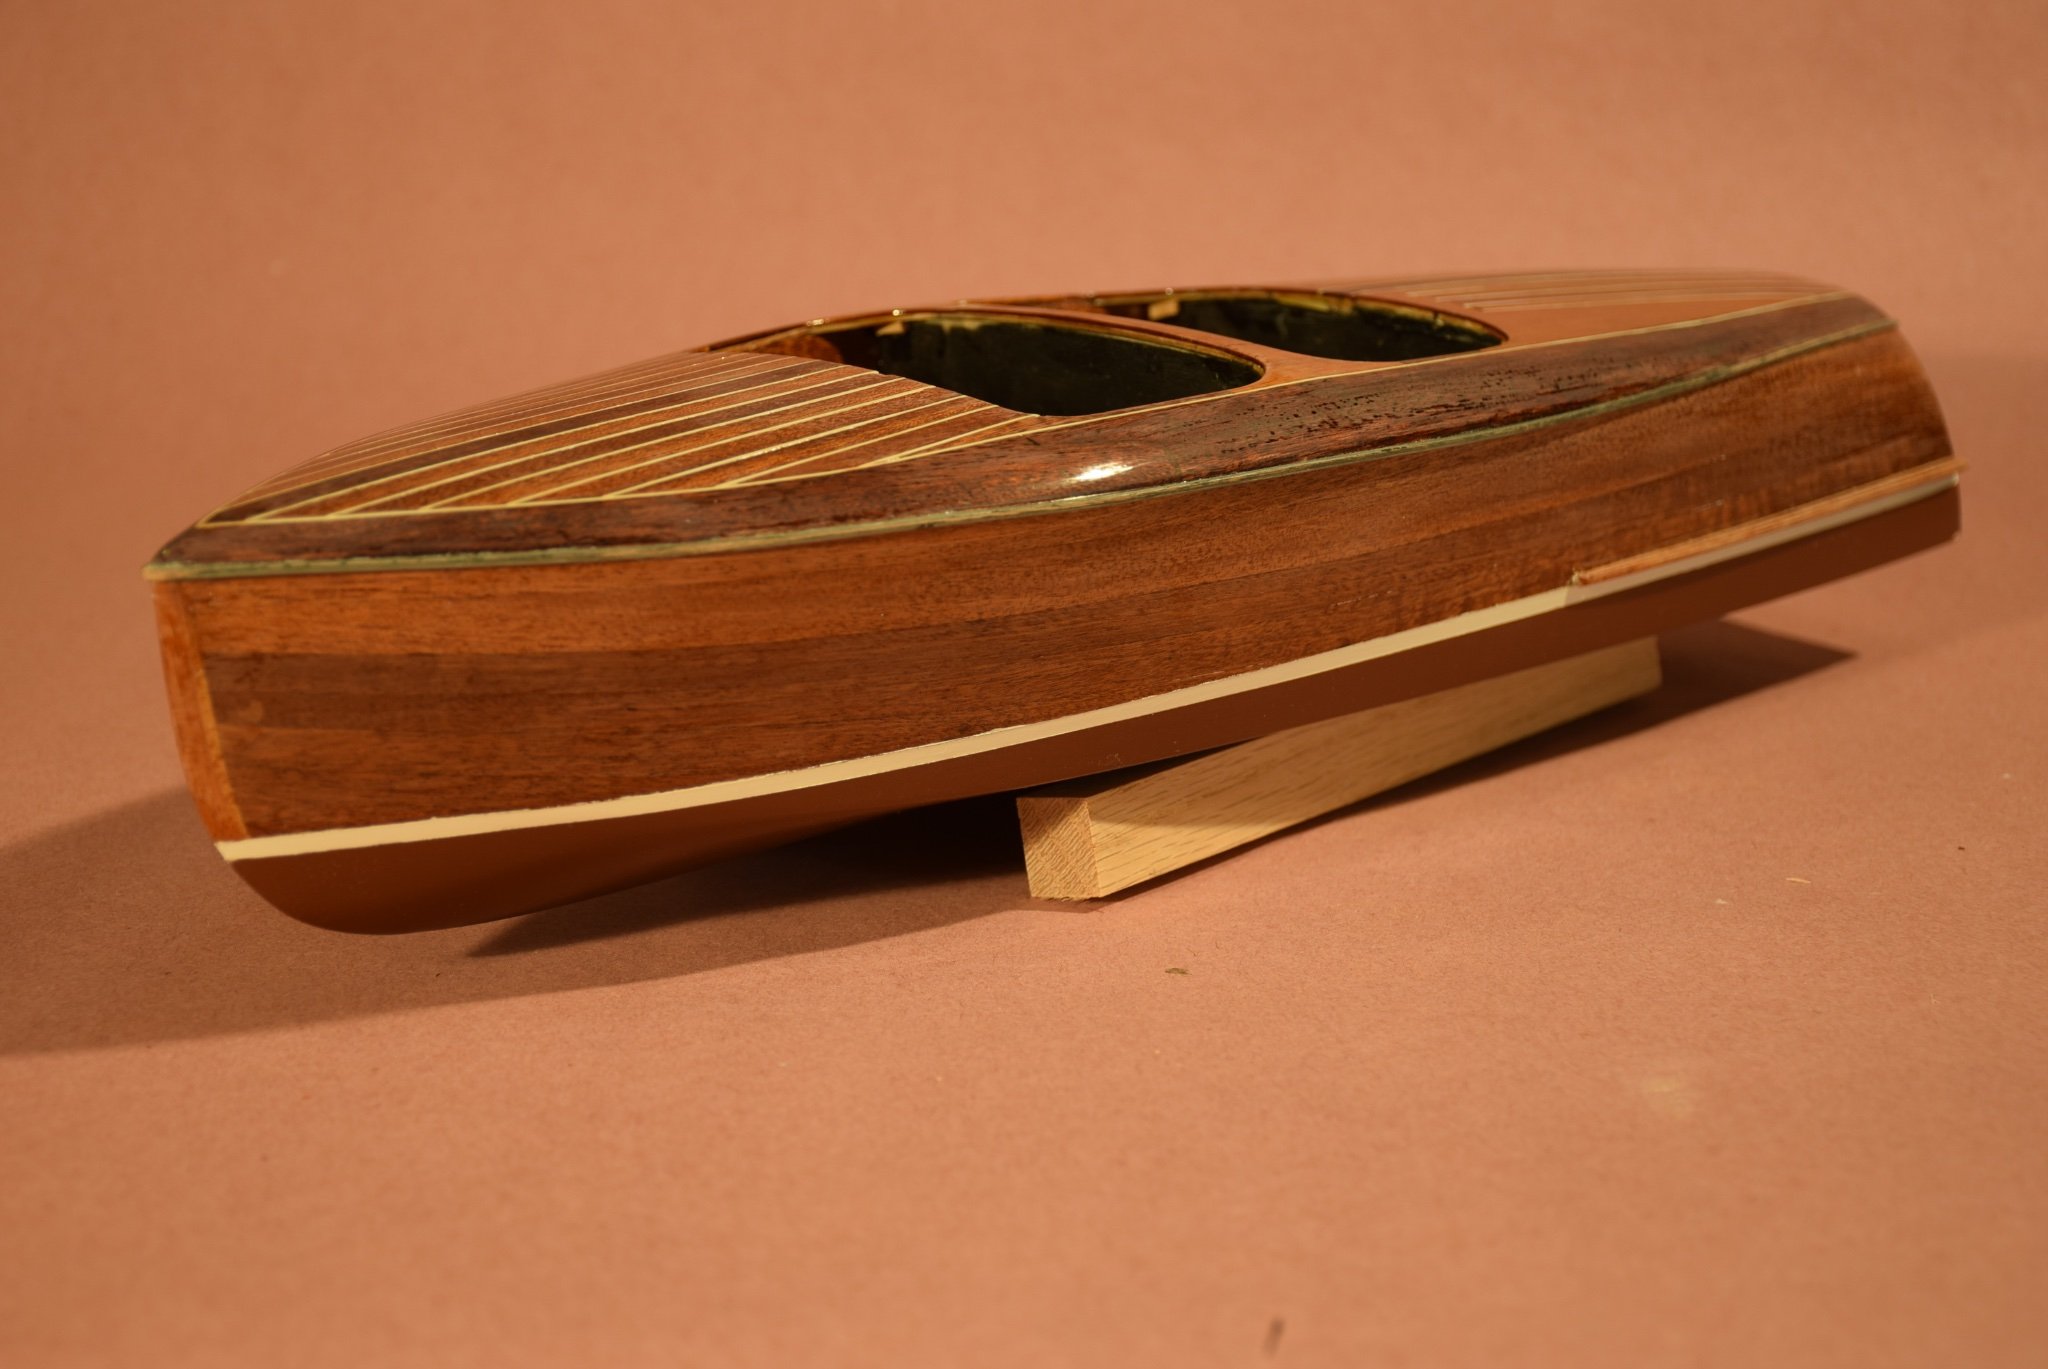
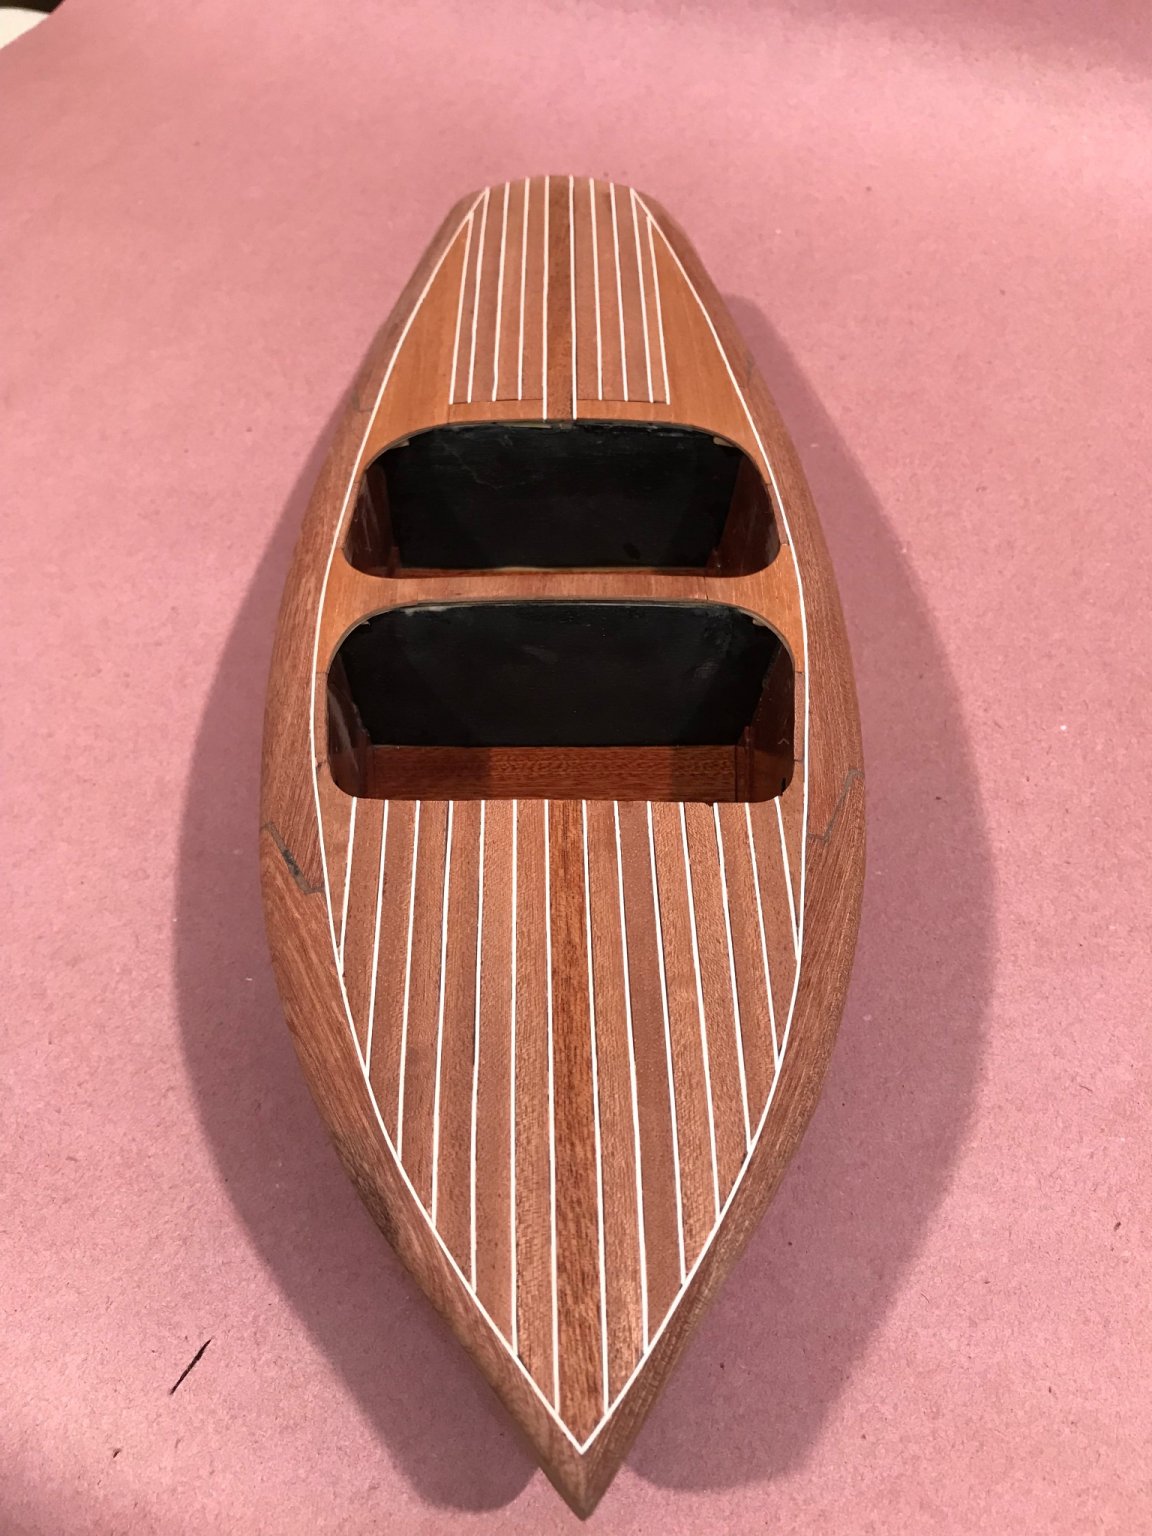
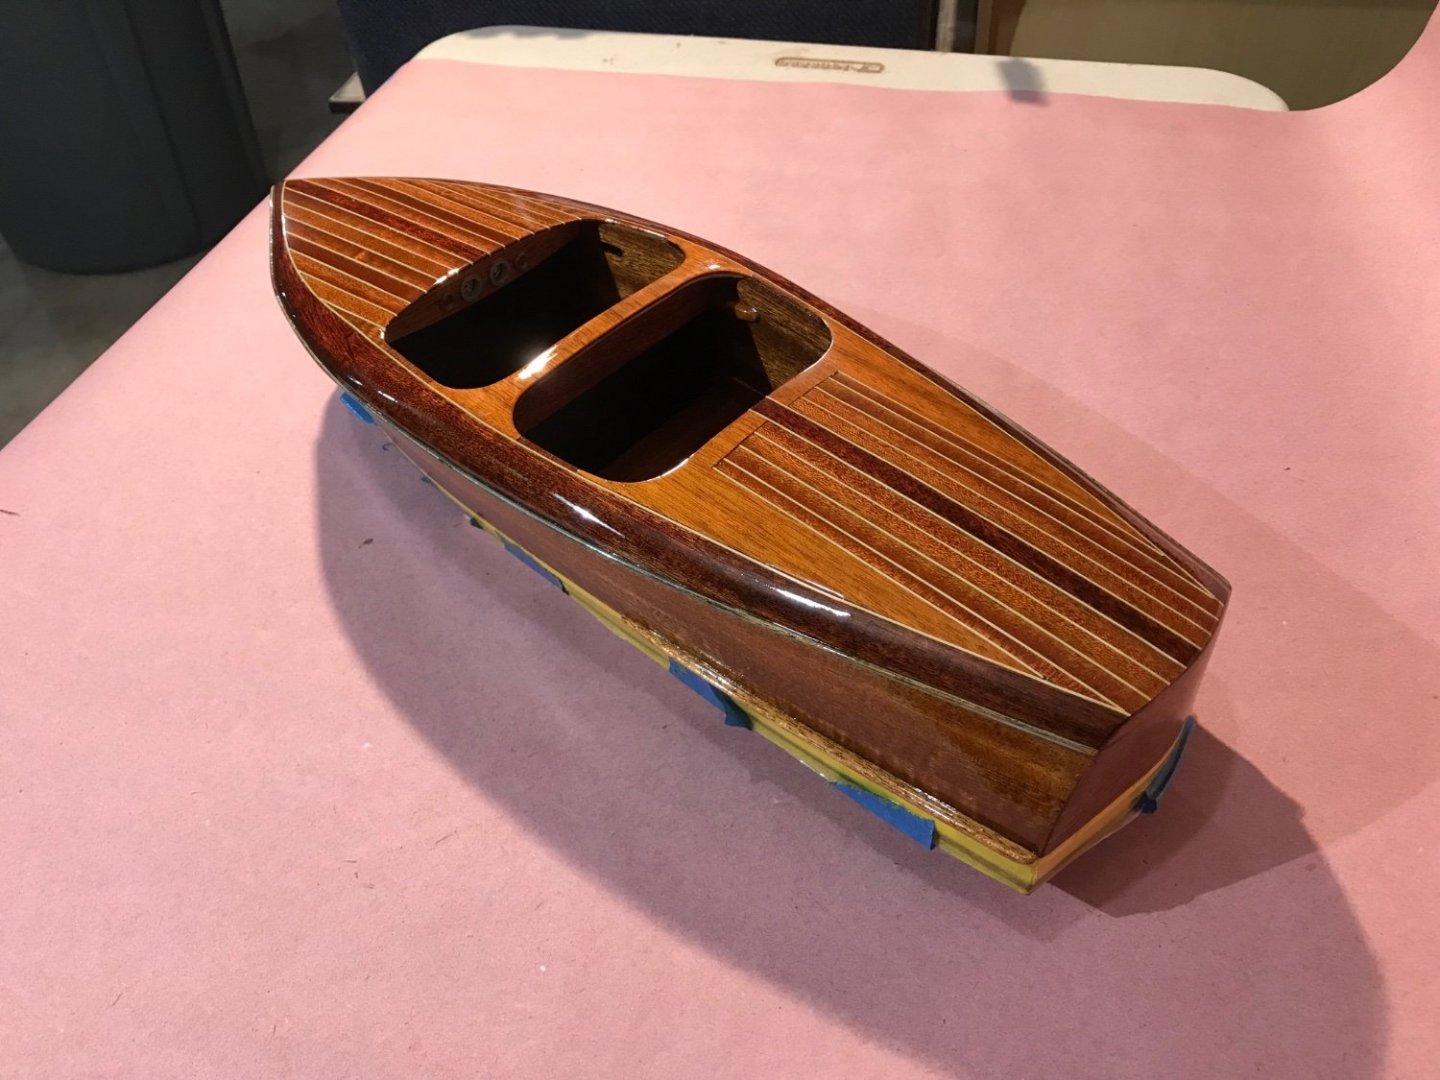
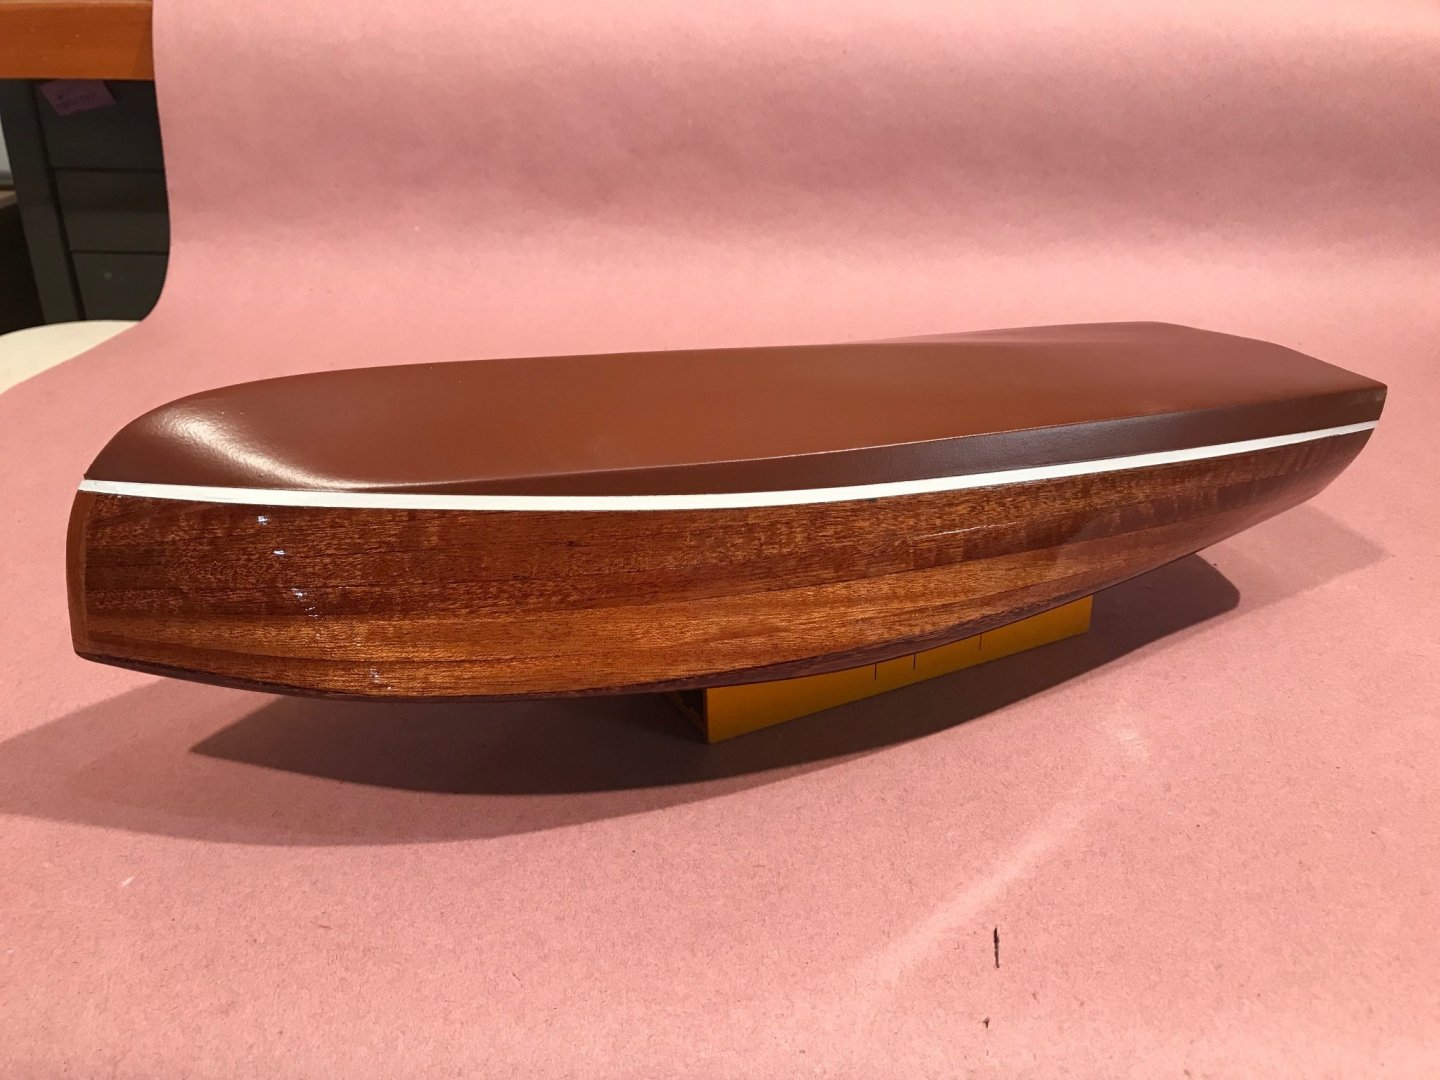
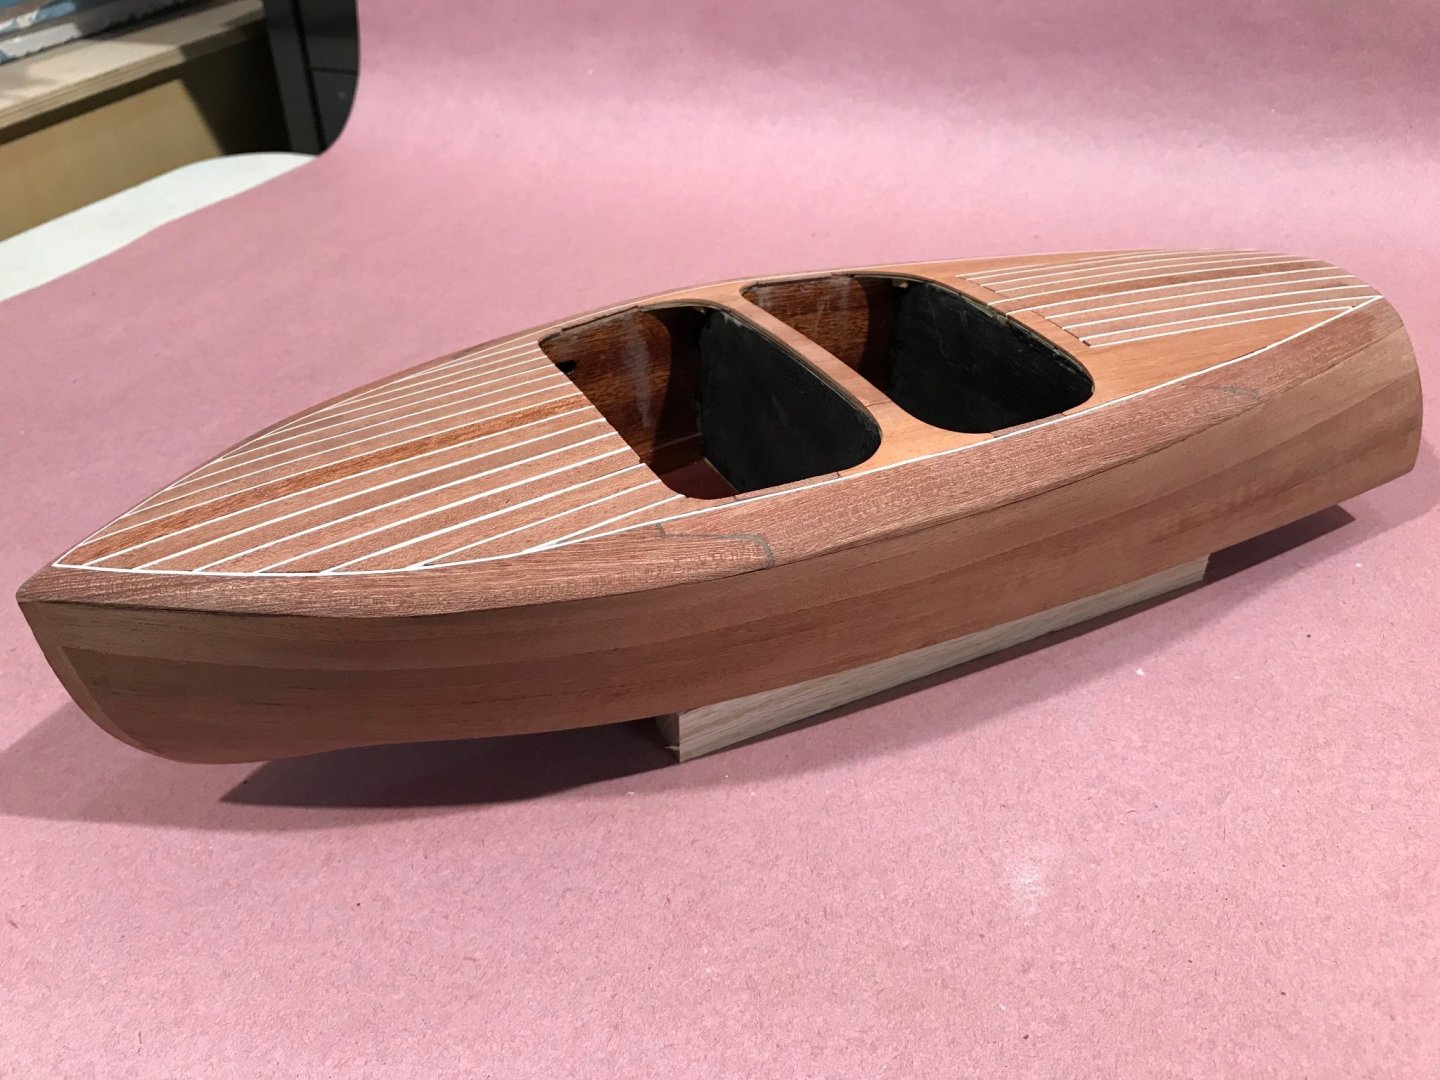
I finally got the "varnish issue" solved by filling the "dips" between the wood planking strips with beads of varnish as contemplated previously. At first I waited 48 hours thinking the varnish had cured I sanded just a little until I could feel the sandpaper starting to drag uh oh stopped and gave it another day sanded just a tiny bit ... again and again this process took over two weeks so it could be sanded completely with out smearing the beads and having to start over. Last weekend I sprayed one coat with an HVLP sprayer. whew I feel like I have turned a corner... a couple more light sanding's and varnish coats and I can finally move on. I have varnished trim on full sized boats that took less time...I think it's the scale you just notice every little thing more. To be continued...

-
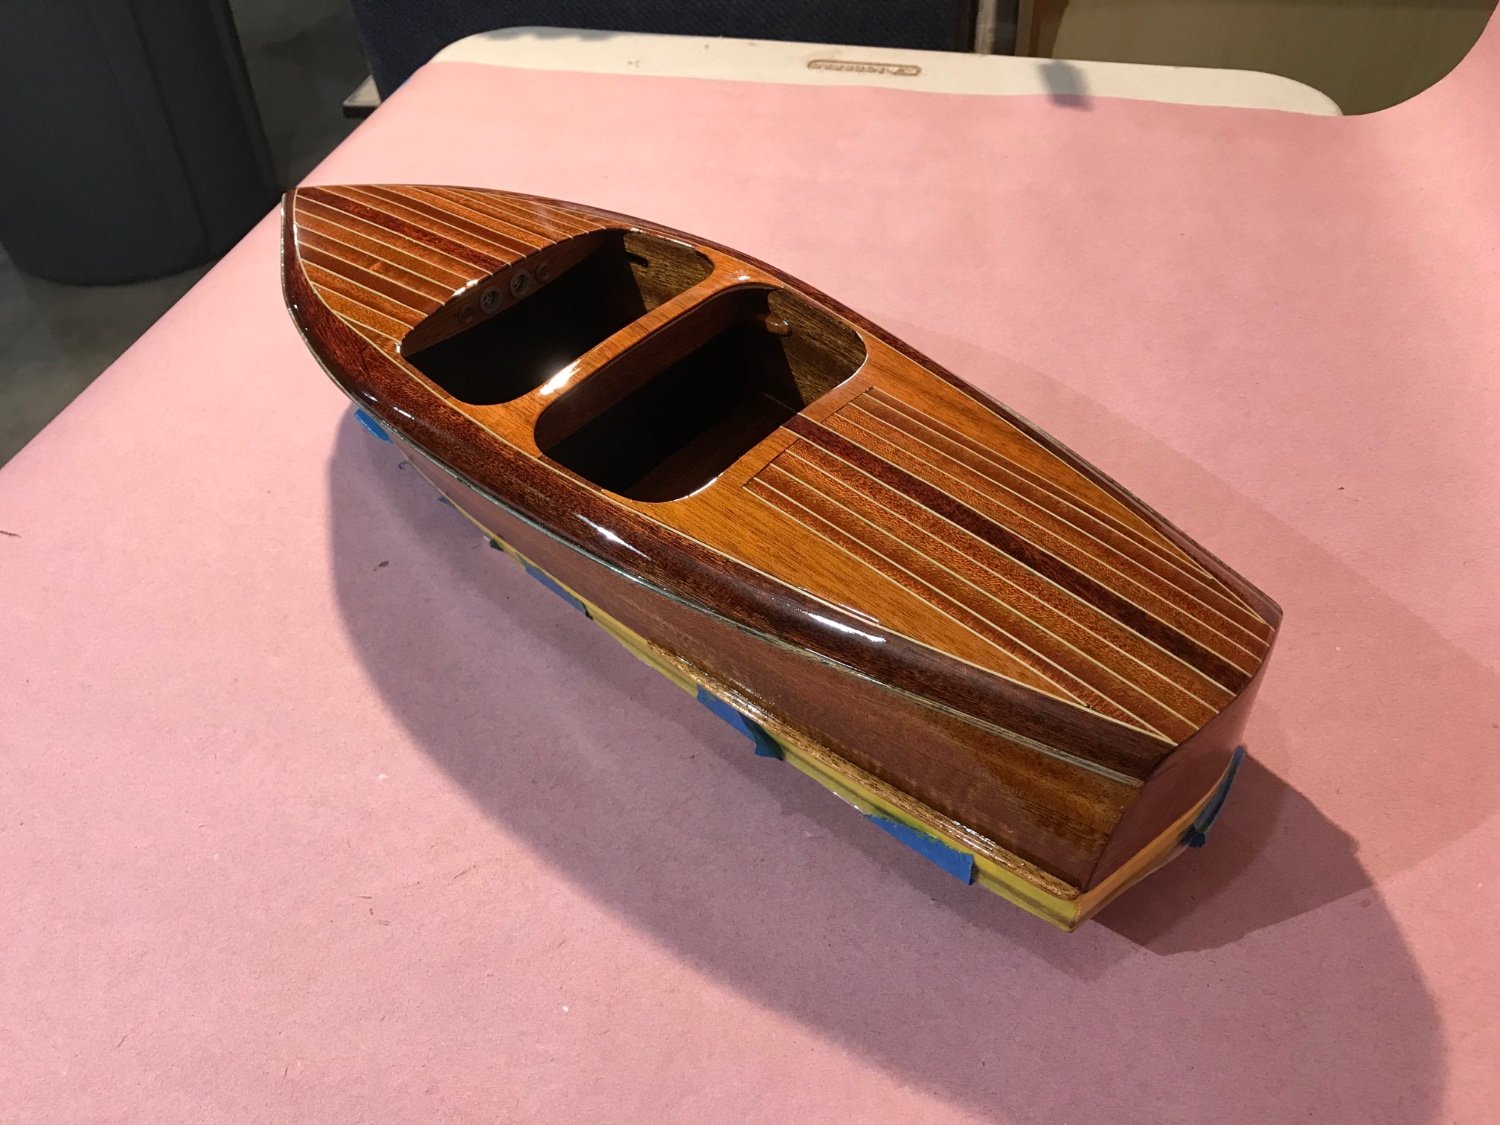
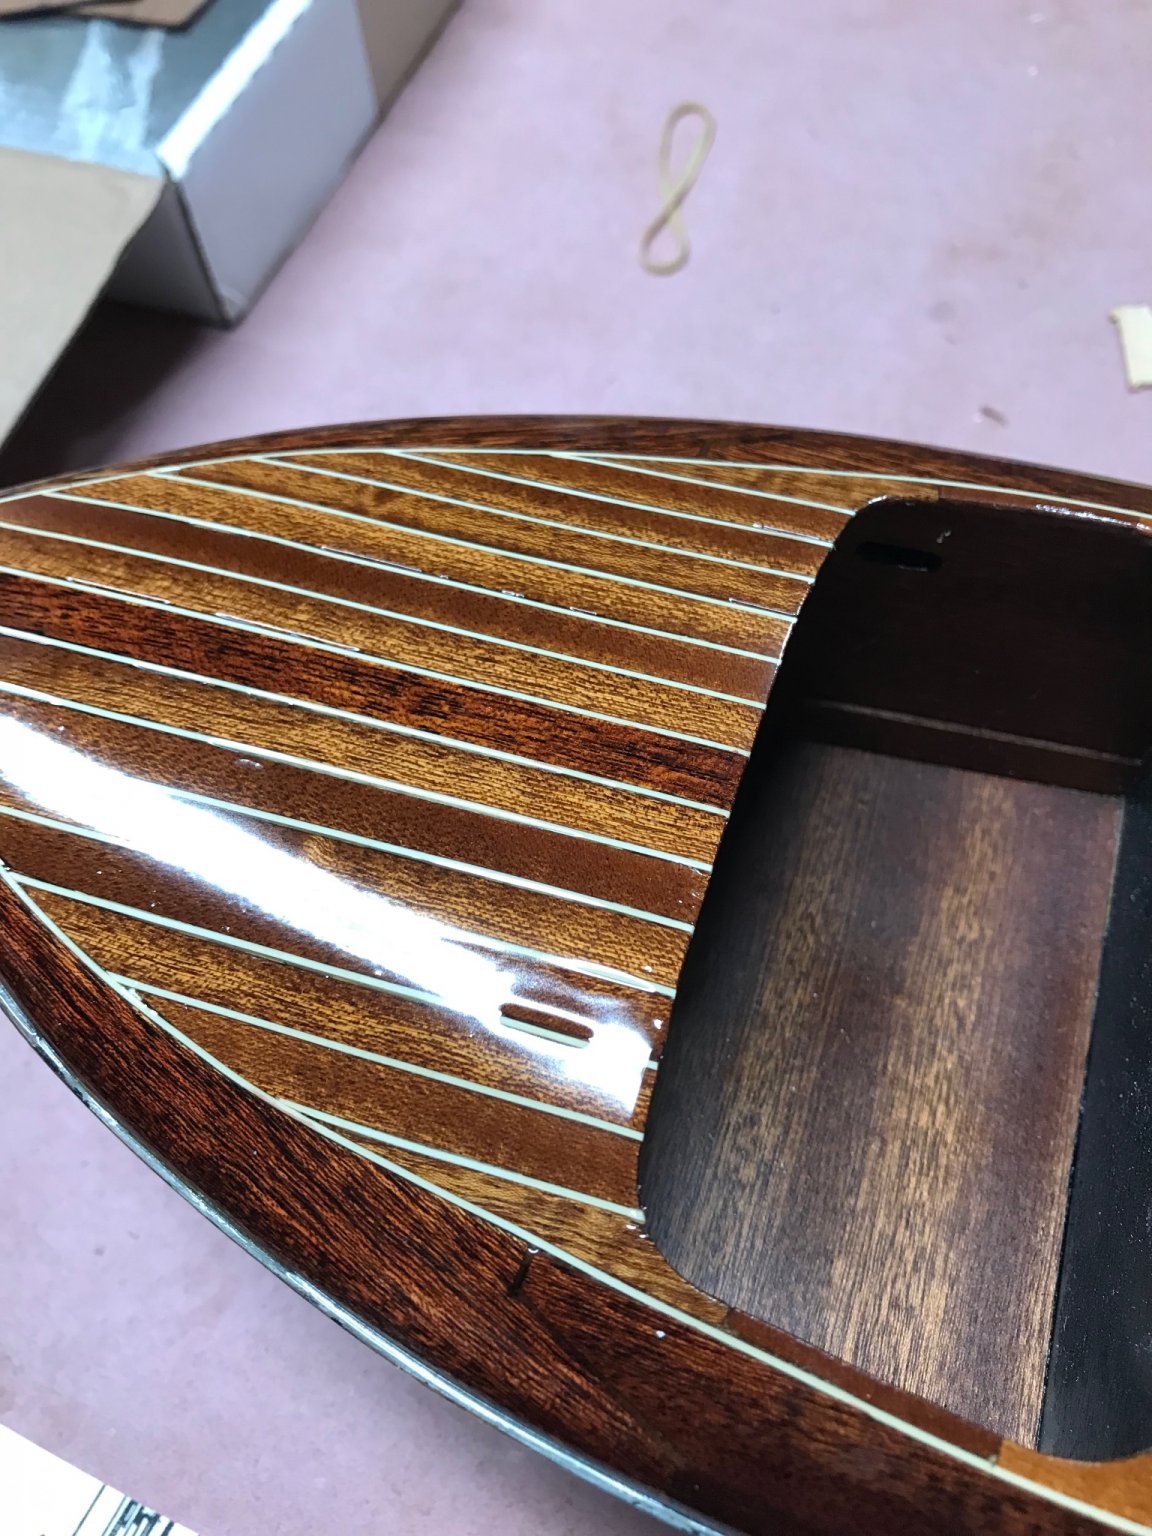
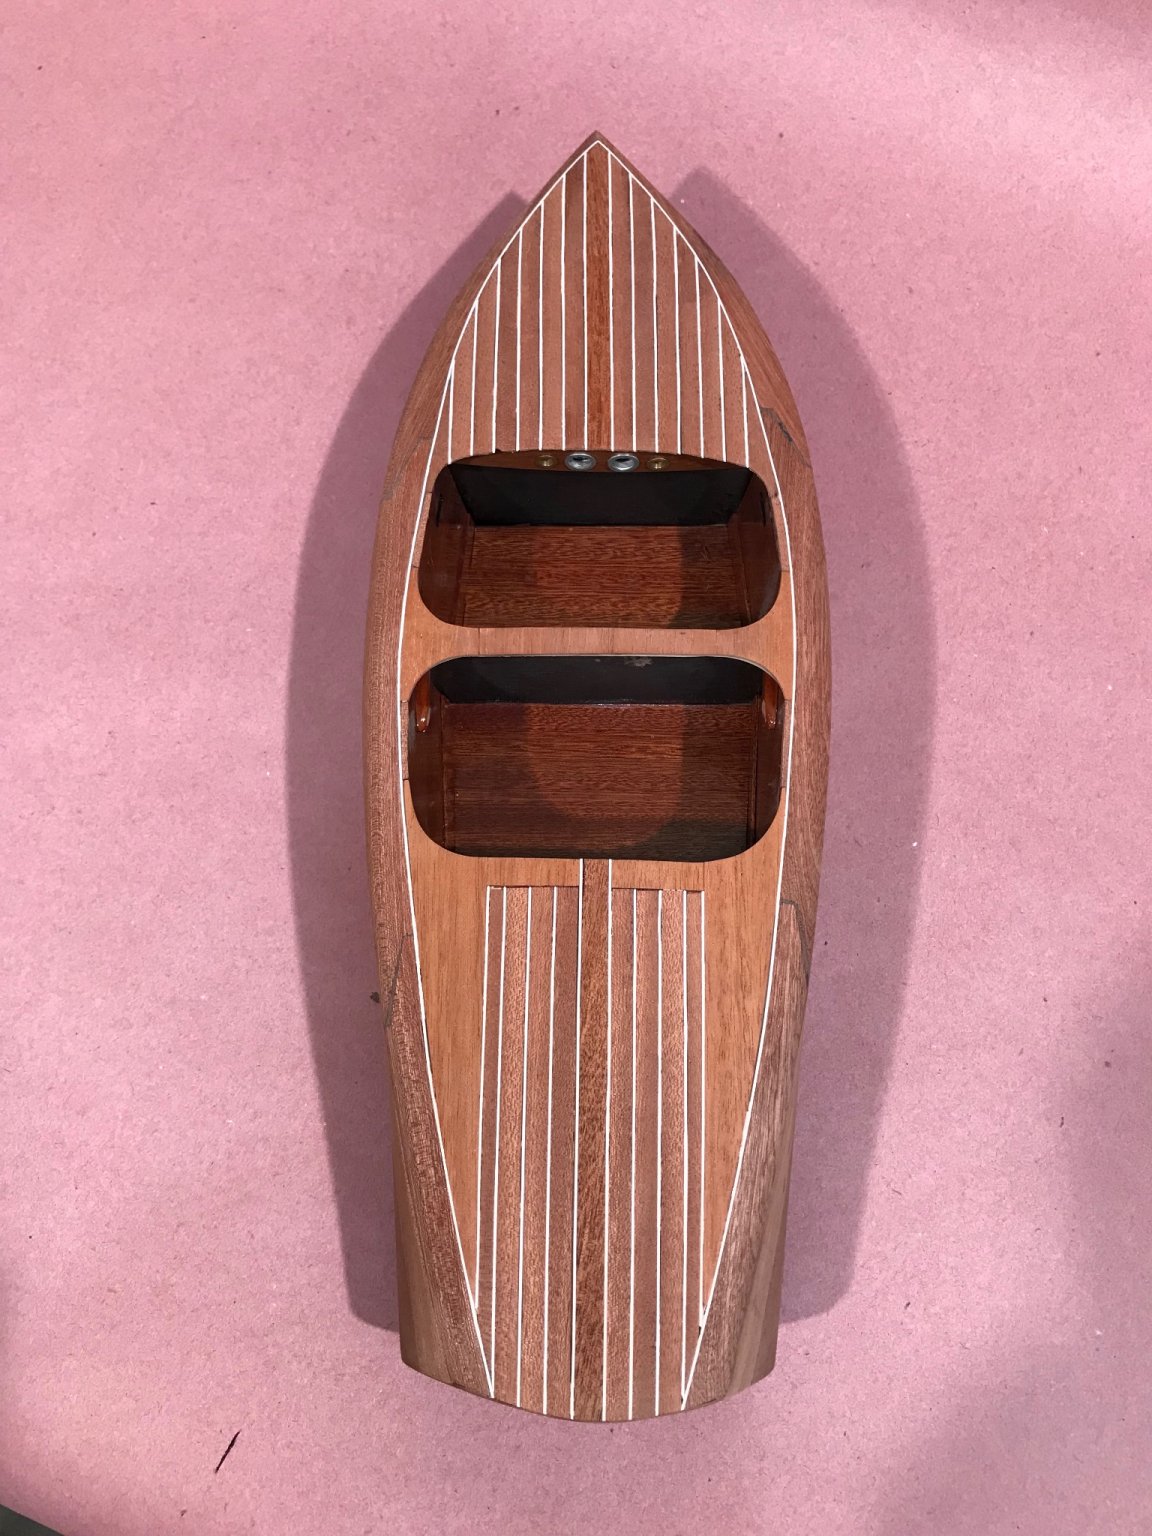
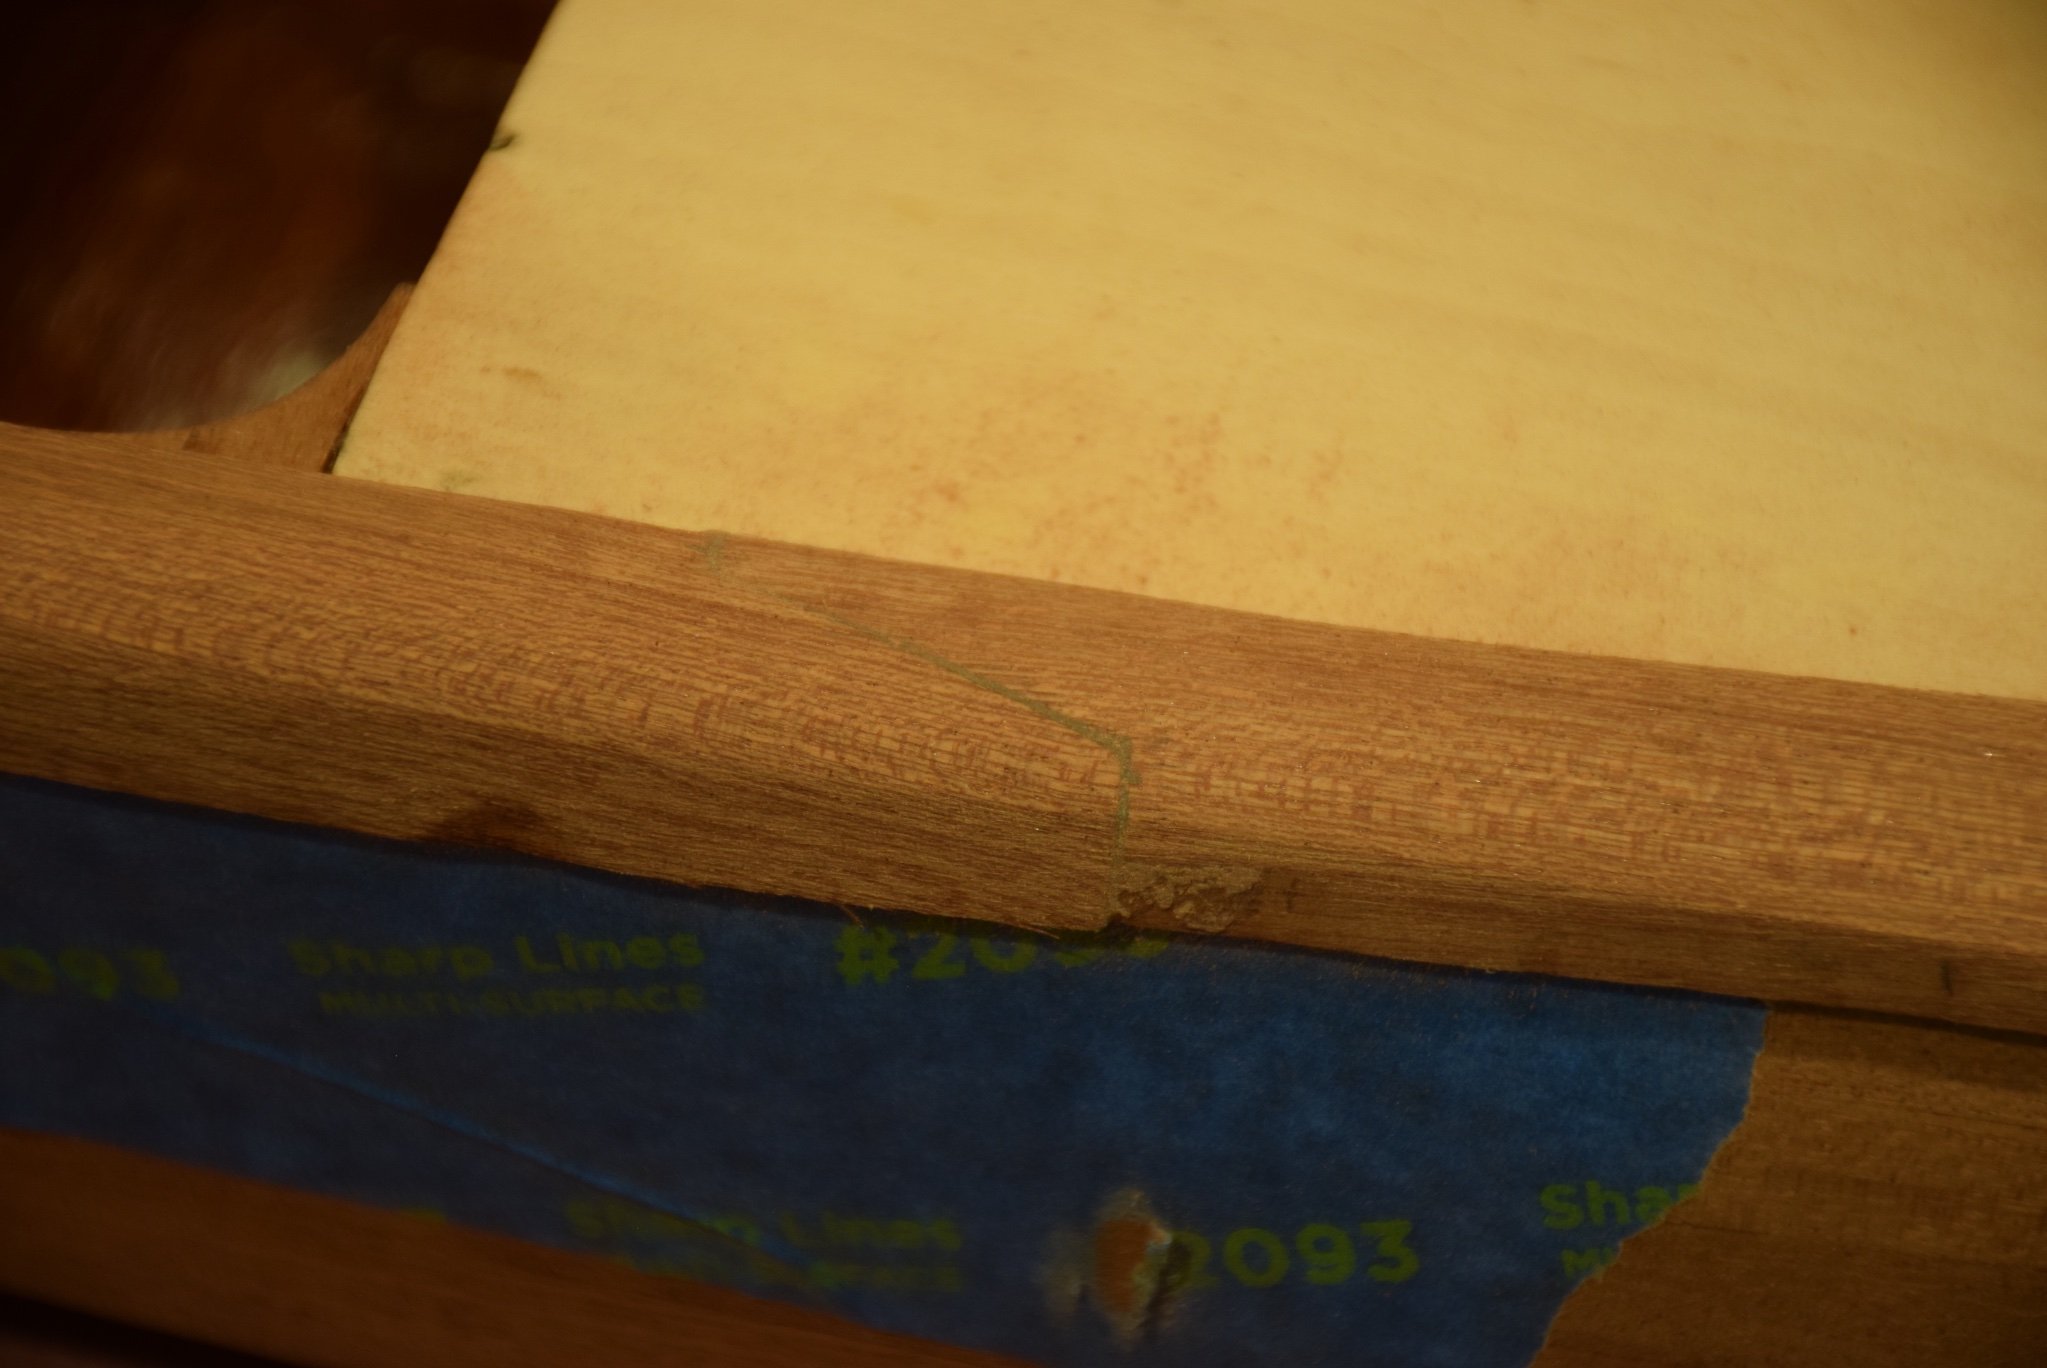
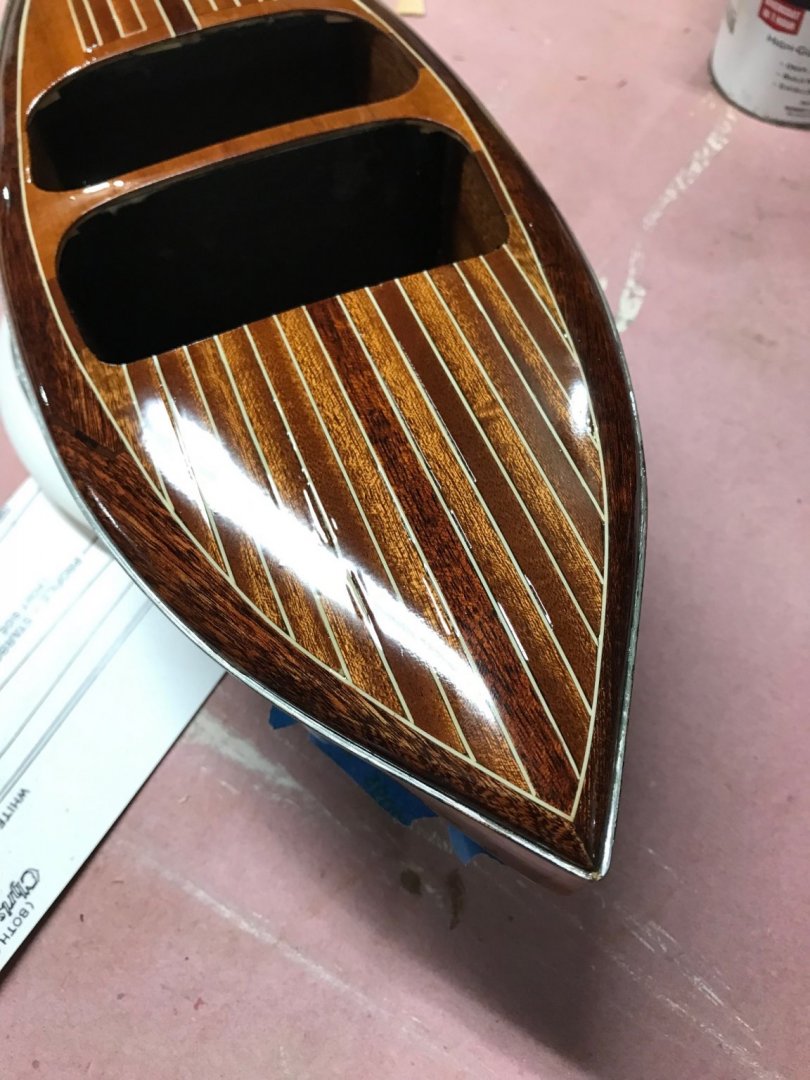
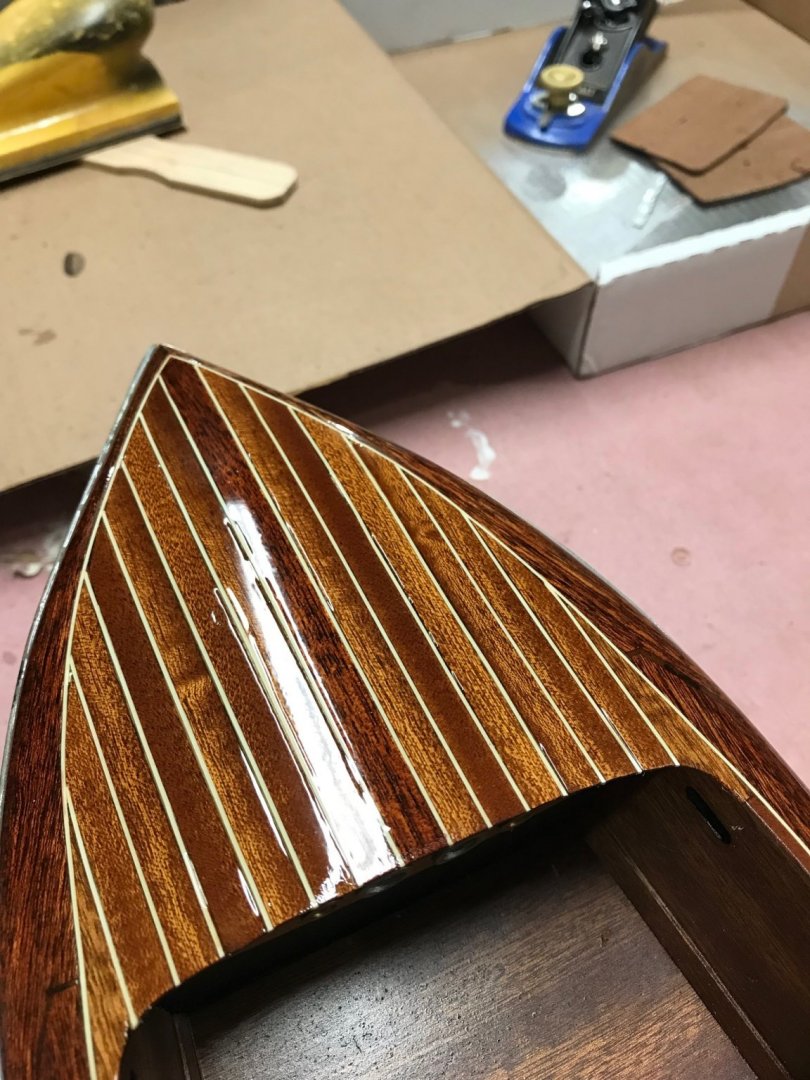
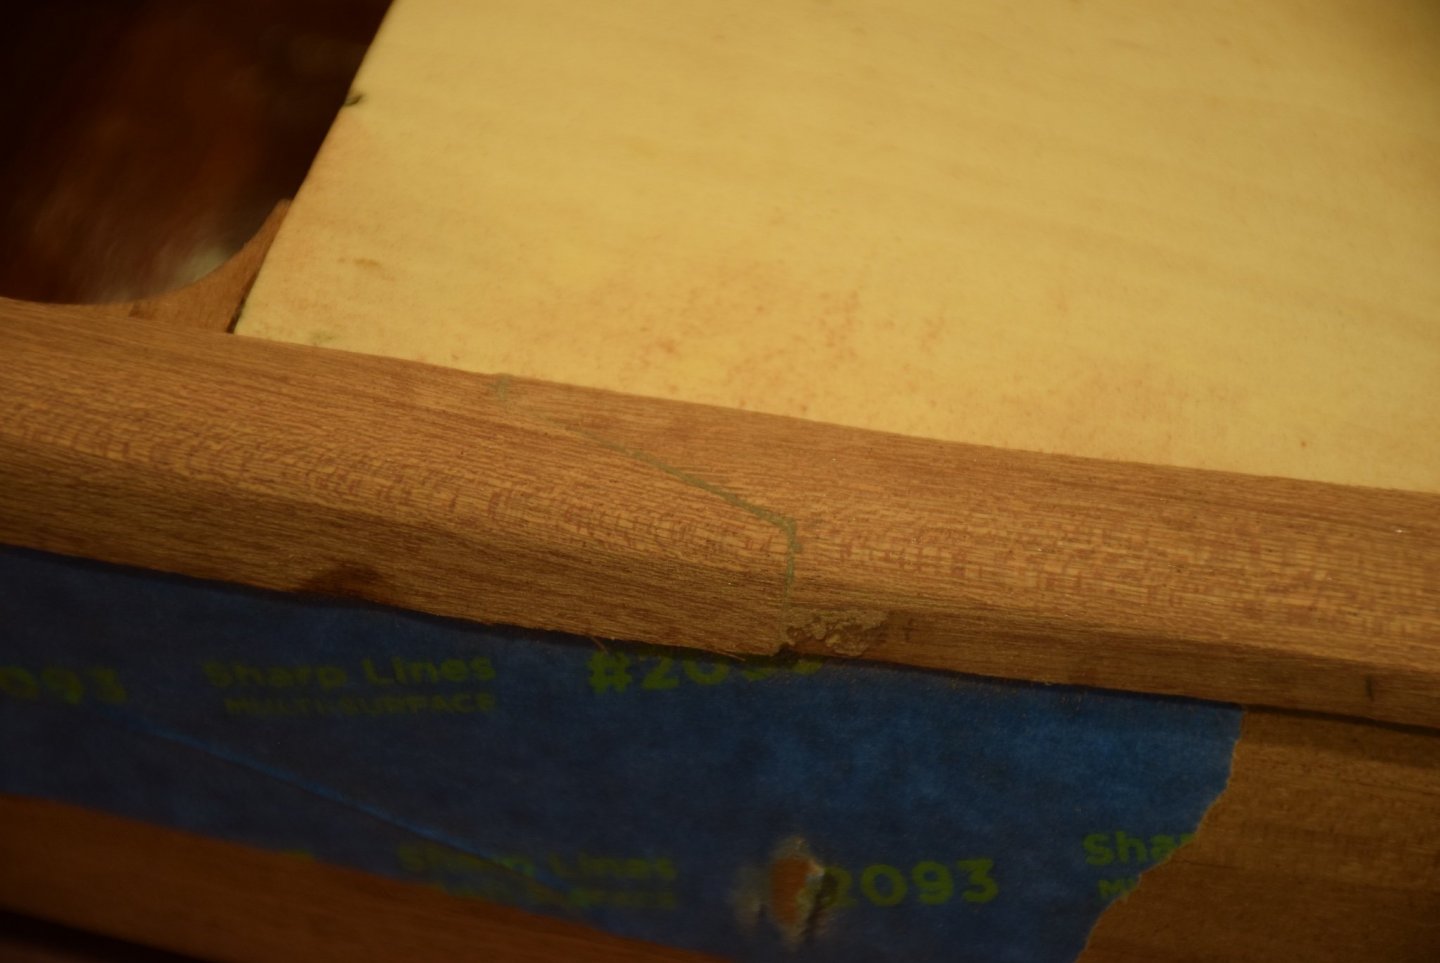
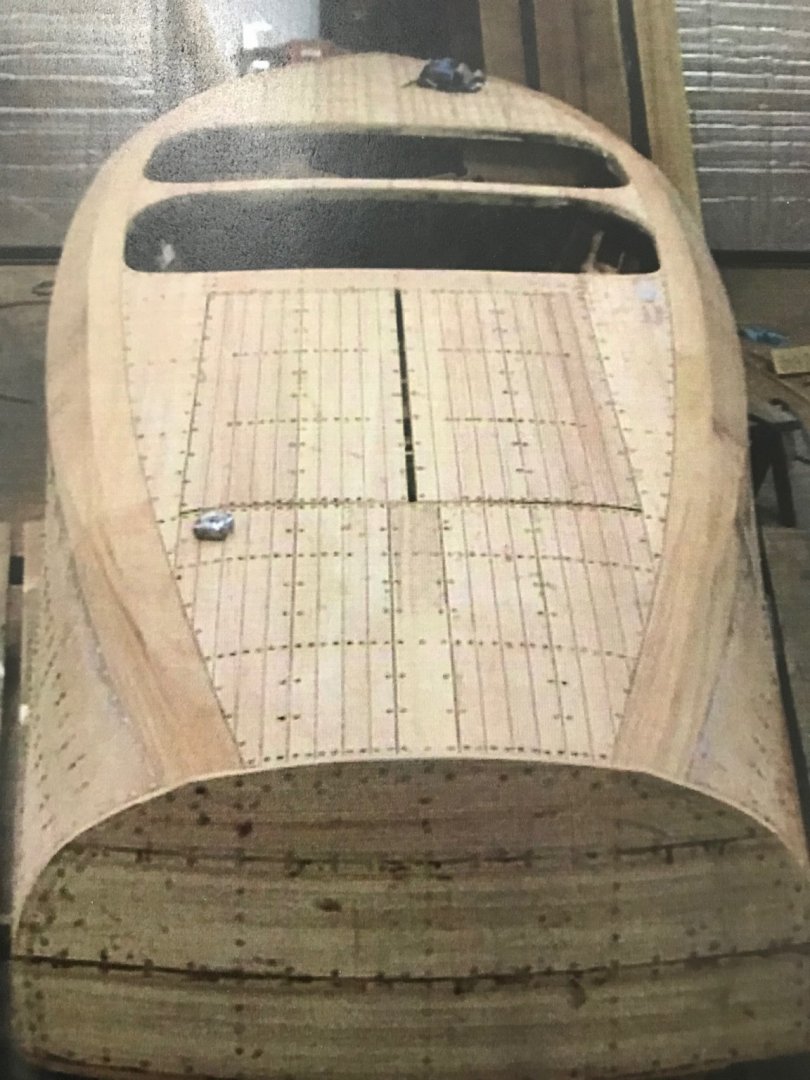
Sorry its been a while ... After installing the rub strip and spray rails I decided to do one to three coats of varnish to fill all the wood grain. BTW I did coat the rub strip with the liquid chrome and it looked great but it is delicate and most of it rubbed off during installation... re-coating it and spraying a protective coating will be a final step. I also wanted to try air brushing the varnish which worked out pretty well but left some varnish voids in the lines between deck planking and and the styrene "caulking". They showed up after two spray coats had dried I am not sure why but suspect the air brush blew the varnish out of the small gaps rather than filling them. Anyway I sanded the deck and hull and re-sprayed two more coats. Better, but still there, if you look closely the photos below show the issue I am having but not very well I'm afraid lighting them is tricky! I want to fix this as the dips in the finish are much more noticeable in person but I am not really sure where to go from here. I am thinking about using a syringe and filling just the dips with a "bead" of varnish allowing the varnish to fully cure, re-sanding and then re-spraying a final coat or two???...any suggestions would be much appreciated! To be continued...


-
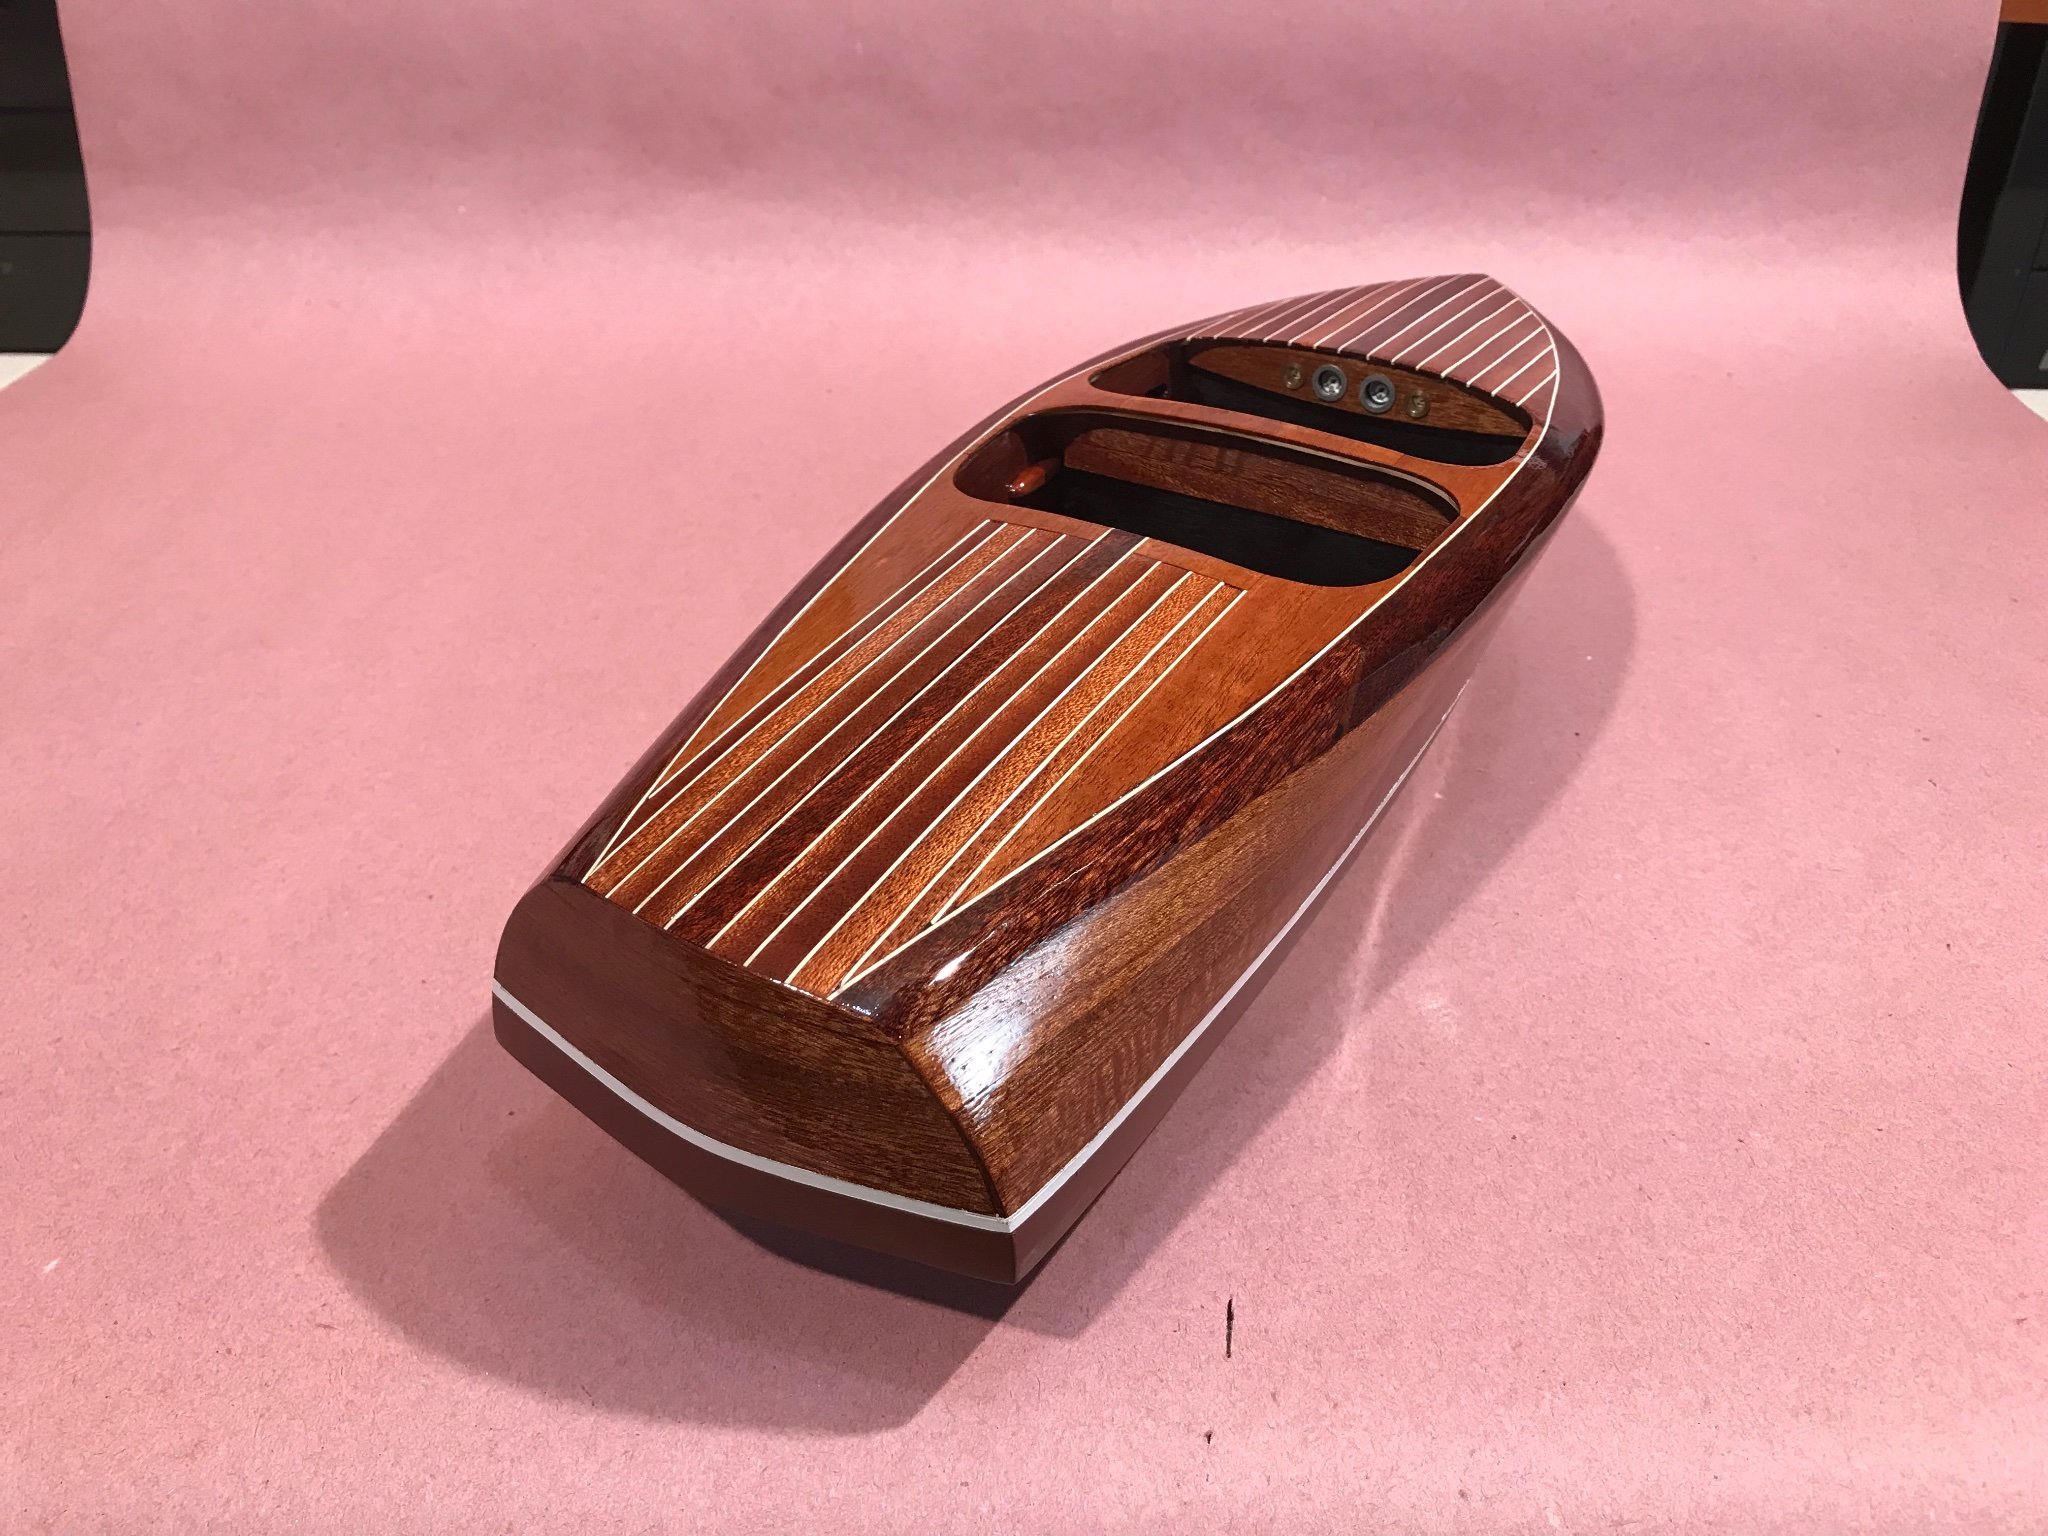
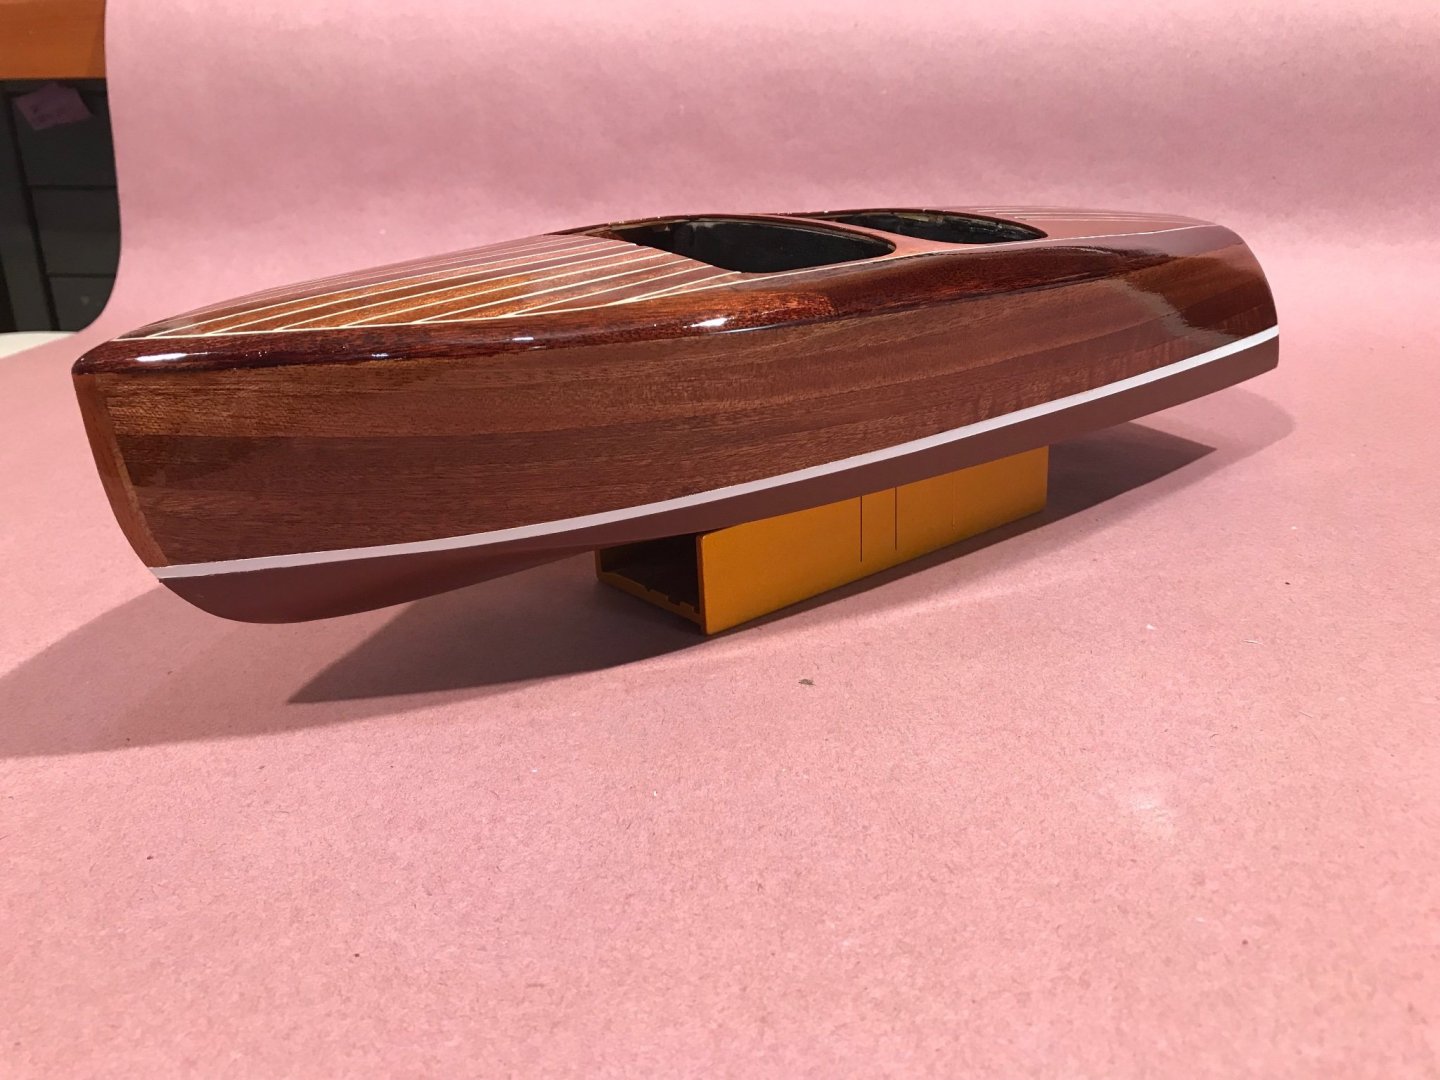
The past few weeks have not allowed much time for the model. I have been able to spend a few hours masking, priming and painting the anti-fouling and boot stripe. I purchased some Tamiya plastic film with masking tape attached to its edge Wonderful stuff! prompted me to purchase their masking tape in three different widths and with its use, for the first time ever, had no paint or varnish bleed beneath the tape. I had some issues with the bottom planking that became painfully evident after I primed the hull for the anti-fouling. I had beveled the planks for a tight fit and in some locations my sanding was a bit too aggressive and some gaps needed to be filled. I fill with West System epoxy mixed with their Micro-balloon's it is very easy to sand super smooth when cured. Sorry no pictures of the process I somehow deleted them after downloading to my computer. So here she is after bottom paint and three more coats of varnish the wood grain is just about full...I think another three will get me where I want the varnish to be. But first the rub strip (finally got the liquid chrome) spray rails and the interior. To be continued...


-
Thanks so much Gary and for those giving this project a thumbs up! I have strayed somewhat on the build order in the kits instructions and did two coats of varnish primer on Scooter mainly to protect the alcohol dye stained coamings and king plank from handling and to give me an idea of what the final finish will look like, so far so good. I have some experience with full size boat varnishing and stumbled upon Total Boat products this summer and decided to try their Varnish Primer and Lust Varnish the primer is great for initial filling of the woods pores and grain and doesn't require sanding between coats if subsequent coats are done in under 24 hours. I have decided to do the boot stripe and red anti-fouling next and then finish the topsides with 4 to 6 coats of varnish that should totally fill the grain and leave a very slick finish. A graphic artist friend has used the Molotow liquid chrome pens and made the suggestion to give it a try I ordered their refill bottle to use through my airbrush but it has yet to arrive if it gives the desired finish I am thinking of using thin brass sheet to fabricate the metal pieces and spraying them as well...I too built the CLC Annapolis Wherry a year and a half ago and enjoyed it very much...I am thinking of building the full size version when I semi-retire at the end of this year.
-
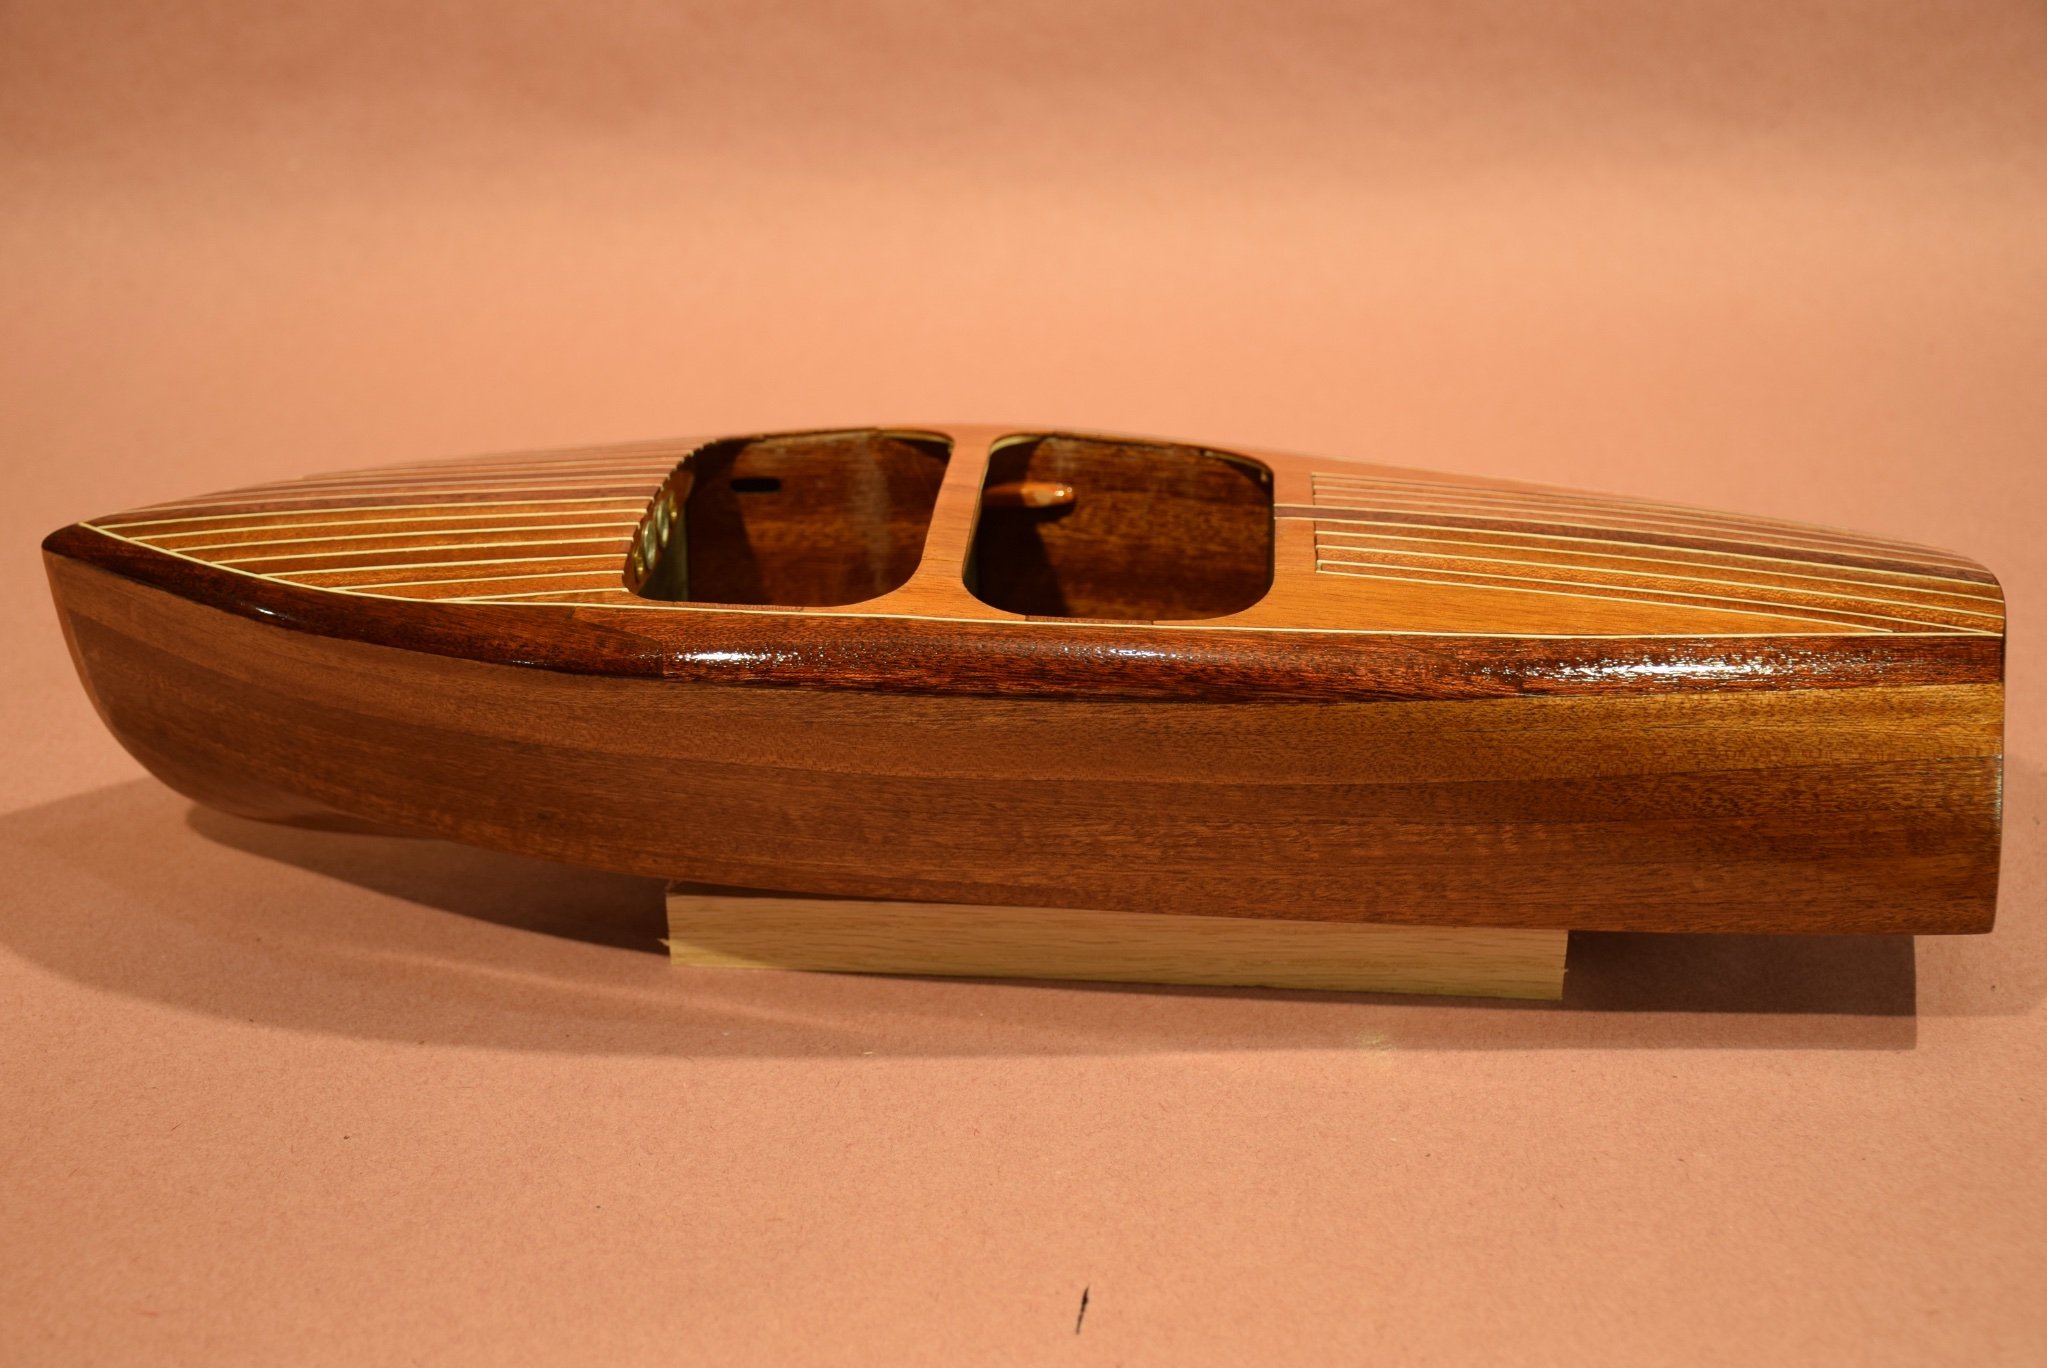
Thank you very much John..."flash"...I like it. I haven't had much time to work on Scooter much over the past few weeks as my wife and I have taken on a large landscaping project in our side yard. What I have been able to accomplish is refinement of the shape of the coamings into what I feel is their final contours... I didn't realize how hard mahogany is Lot's of sanding to remove what amounted to a few MM's. I modified the seat backs and bottoms to fit into the rounded corners I added to the front and rear cockpits. I think I will wait to install these until I have the hull painting/varnishing complete as I am considering spraying the varnish. With other full size water craft varnish jobs over the years I have realized the hard way that prep for a quality varnish job is everything so the deck and topsides were sanded up to a 320 grit prior to applying a varnish primer. I then stained the coamings and king plank with an alcohol based "Dye" I had left over from another project. And finally applied two coats of Total Boat varnish primer. Here is where I am today. Since my last post I found an alcohol based "chrome ink" called "Molotow liquid chrome" that I plan to use to hopefully solve my "rub rail dilemma" mentioned last time... first by priming the wood with a gloss black paint and then air brushing the chrome ink on the rails...if and when I get it...I ordered it in early September and it has yet to arrive. Still trying to figure out a substitution for the kit supplied chrome tape for the cutwater, stern trim and engine hatches...any suggestions would be much appreciated. To be continued...

-
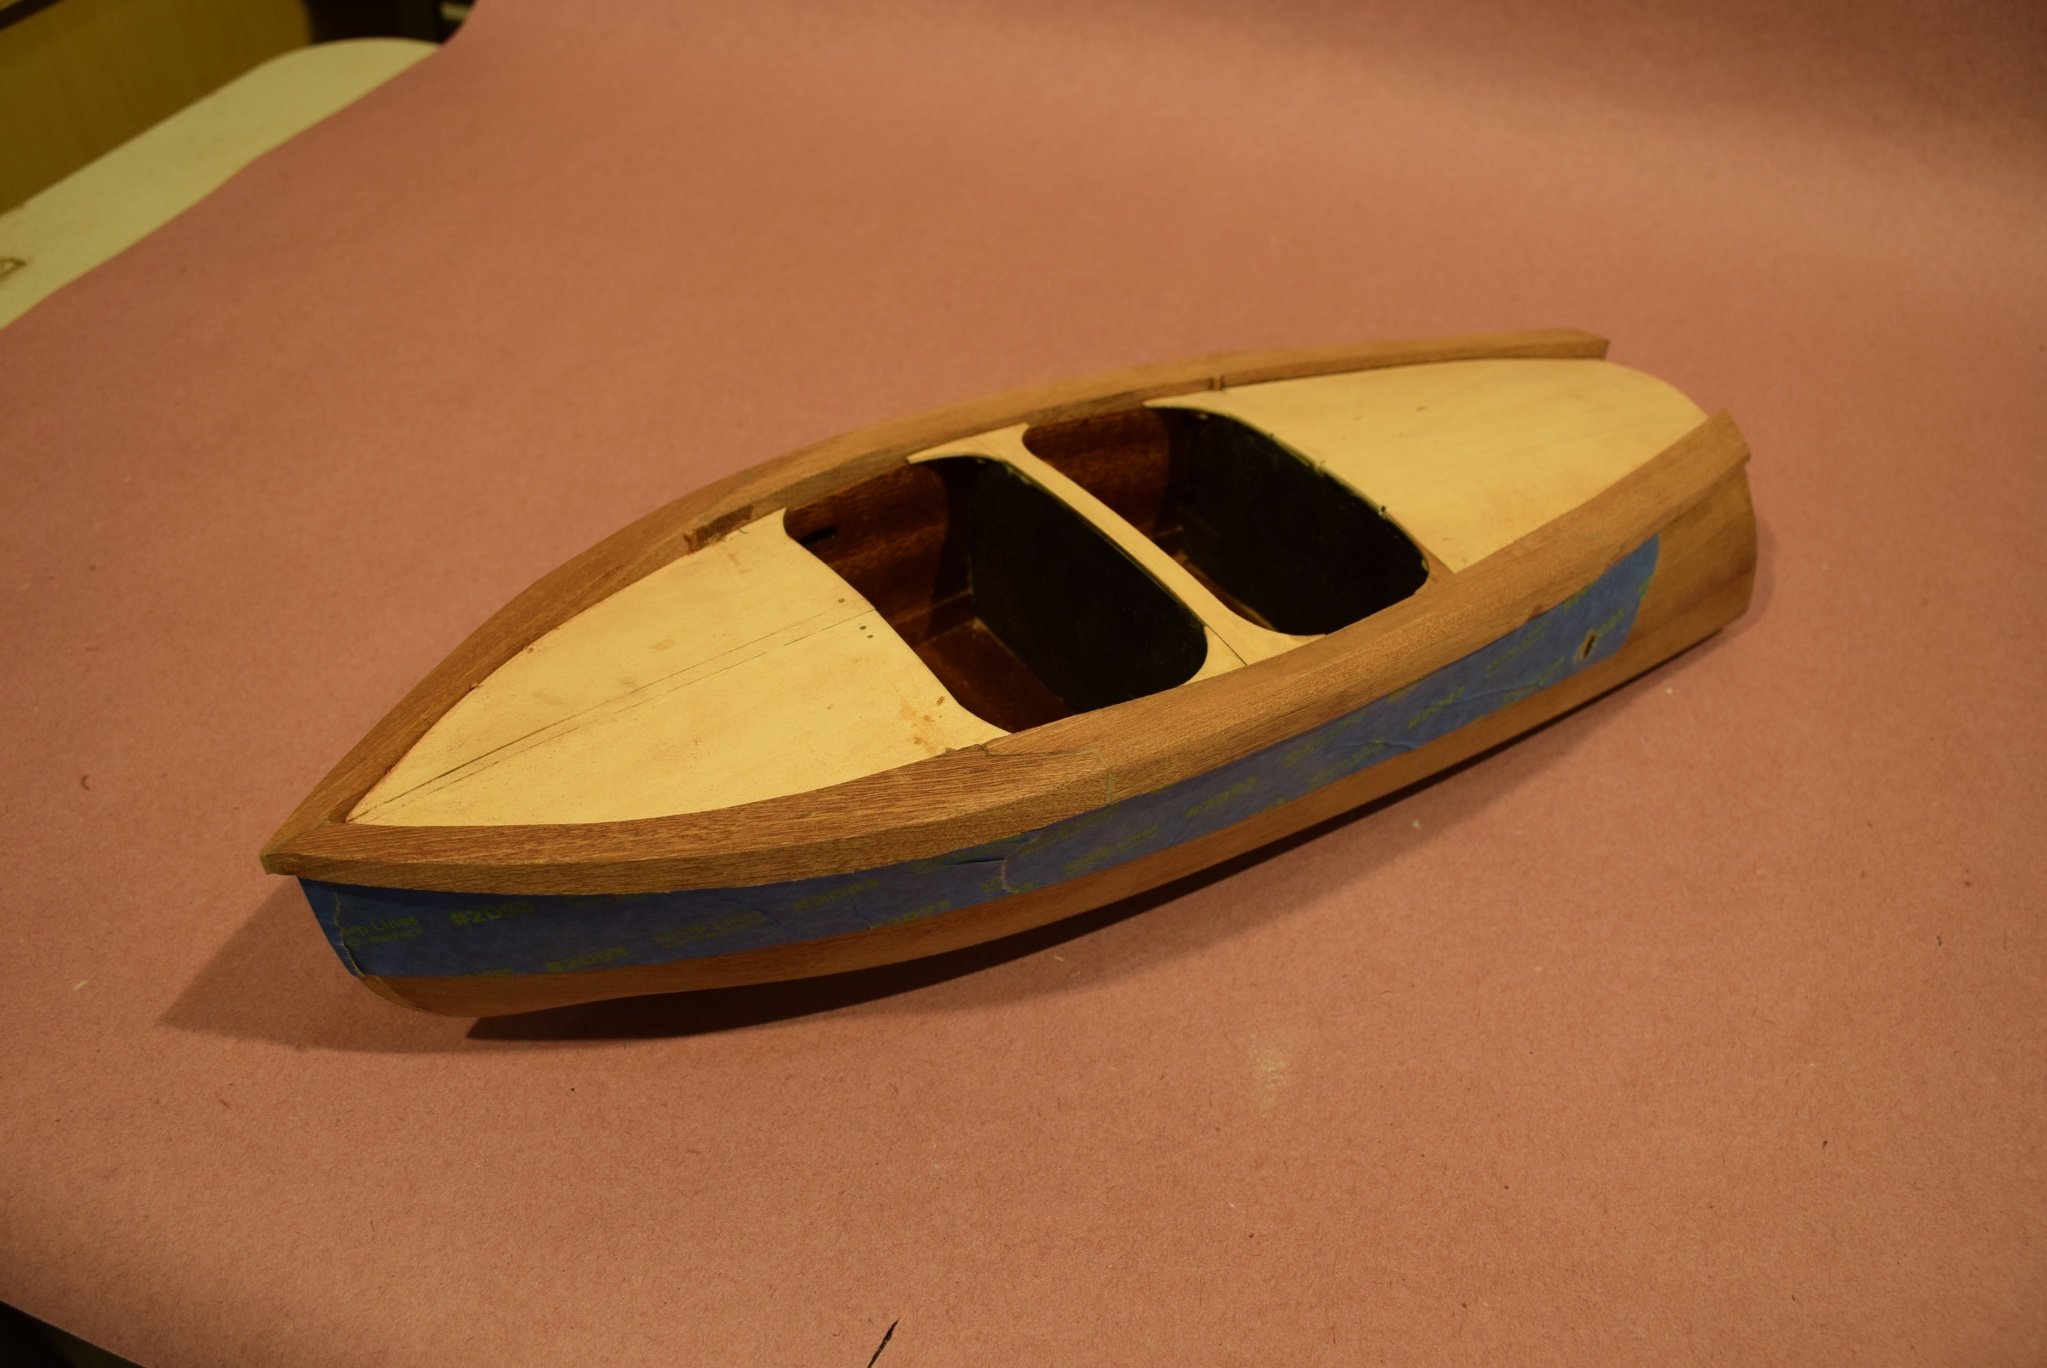
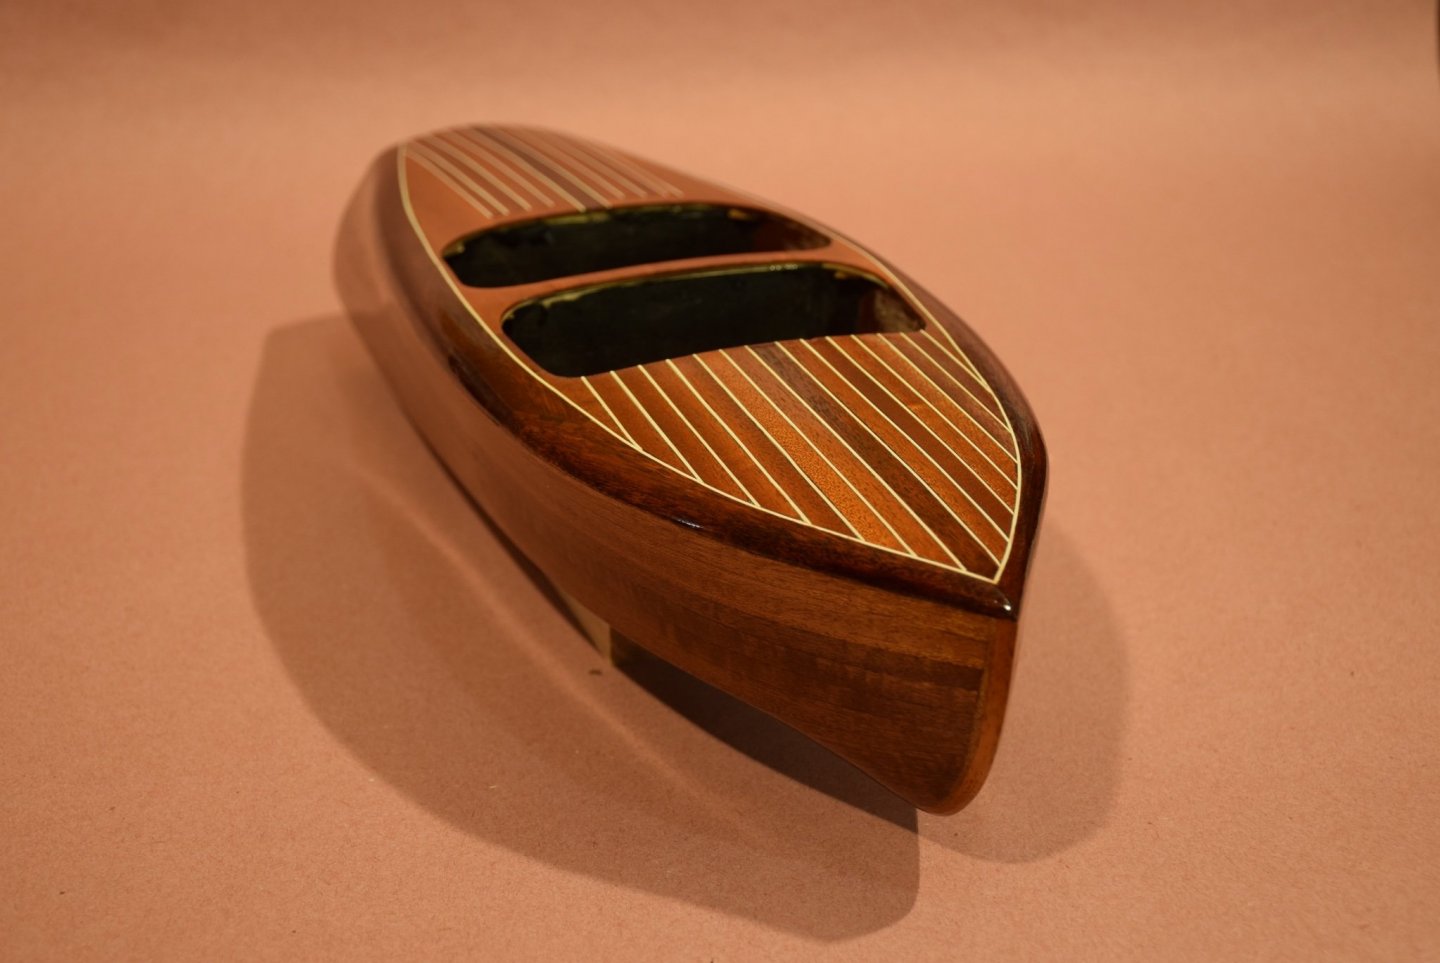
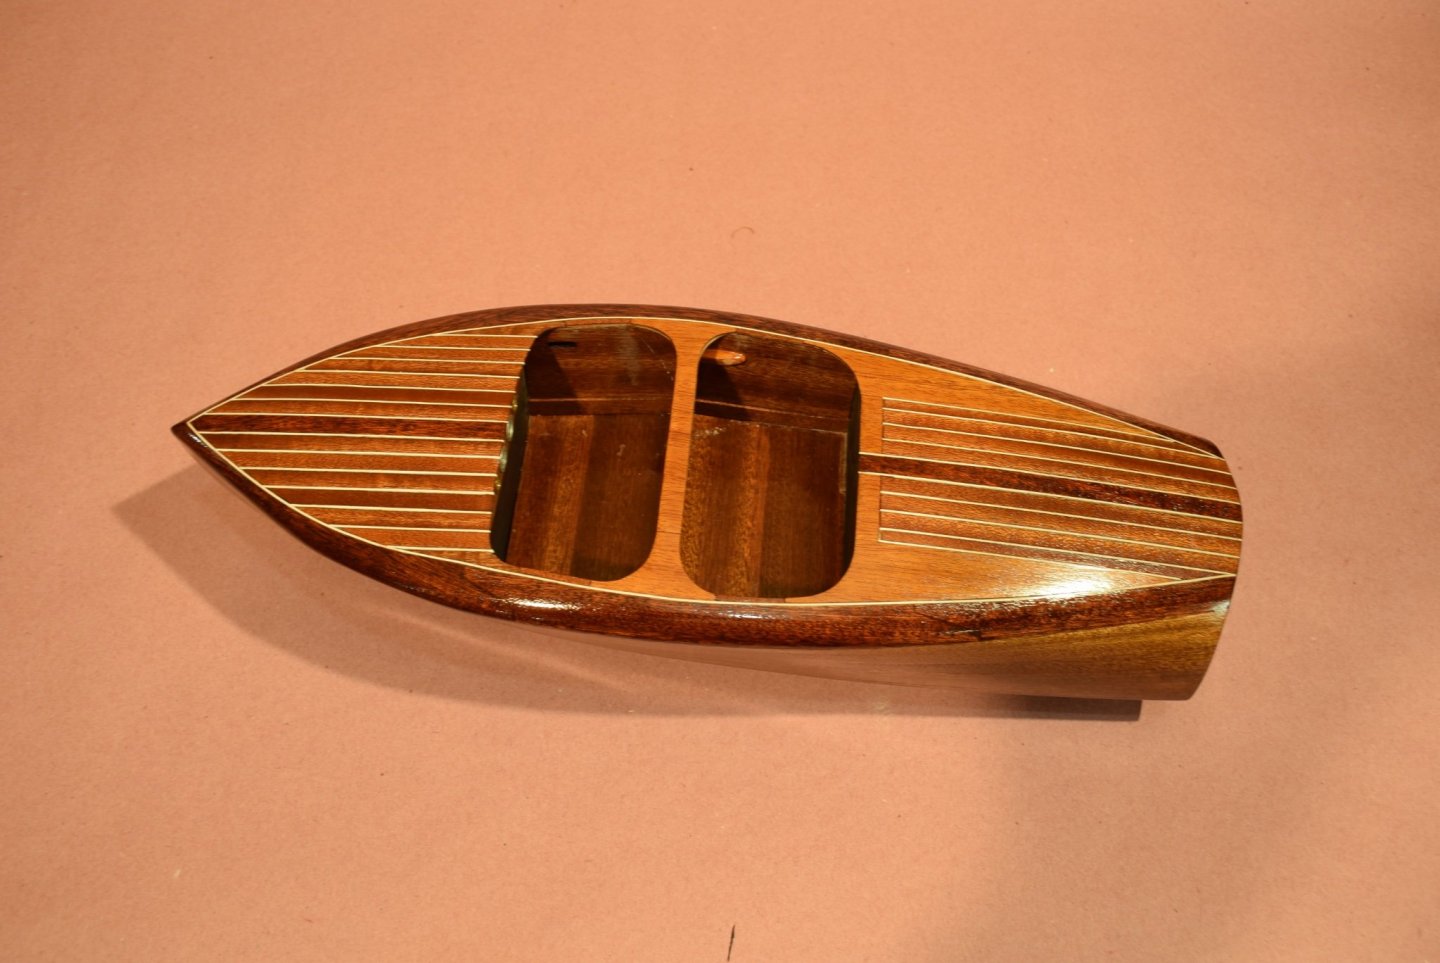
Sorry It's been a while since my last post...life happens. The deck planking was a relativly straight forward procedure first the styrene strips next to the coamings then the solid plywood panels between the cockpits and on either side of the engine hatches then on to the deck planking strips with the king plank first flanked on both sides by styrene strips install the next plank and repeat...and repeat. The really time consuming part was the final shaping of the coamings (the pictures don't really show how chunky they were) there was a lot of material to remove which I accomplished by first carefully planing ( boy am I glad I bought the luthier's block plane I mentioned before) and then switching to sanding down to the deck line. During the process of sanding the actual deck planking and styrene strips I hooked one of the bow planks at it's angled cut somehow and damaged it so badly I had to replace it...arrgh! Had it been later in the sanding process it would have been difficult to cut the plank out without damaging the surrounding styrene and mahogany planks luckily for me it was easy, if a little nerve wracking, to remove with a very sharp 1/8" chisel and a square sanding stick I found on Amazon. Soooo this is where I am now with much more gracefully shaped coamings, all of the planking complete and complete hull sanding up to a 220 grit. BTW I am very happy with the modified cockpit openings mentioned in an earlier post. The next step in the instructions are to round off two corners of a 1/16" square mahogany strip for a stem to stern rub rail to be installed where the side planking meets the coaming. However in my research every "real" vintage Chris Craft this rail is a chrome plated strip...does anyone know if there is a source for a chrome strip this small or how I might make one? I thought of paint but have never seen a paint that ends up with a true chrome finish. Speaking of chrome pieces the kit comes with a silver metal tape to simulate the metal used on the "real" boats I would like to do the cutwater and stern trim in chrome plated metal but I am again kind of at a loss here ... any suggestions would be much appreciated. To be continued...


-
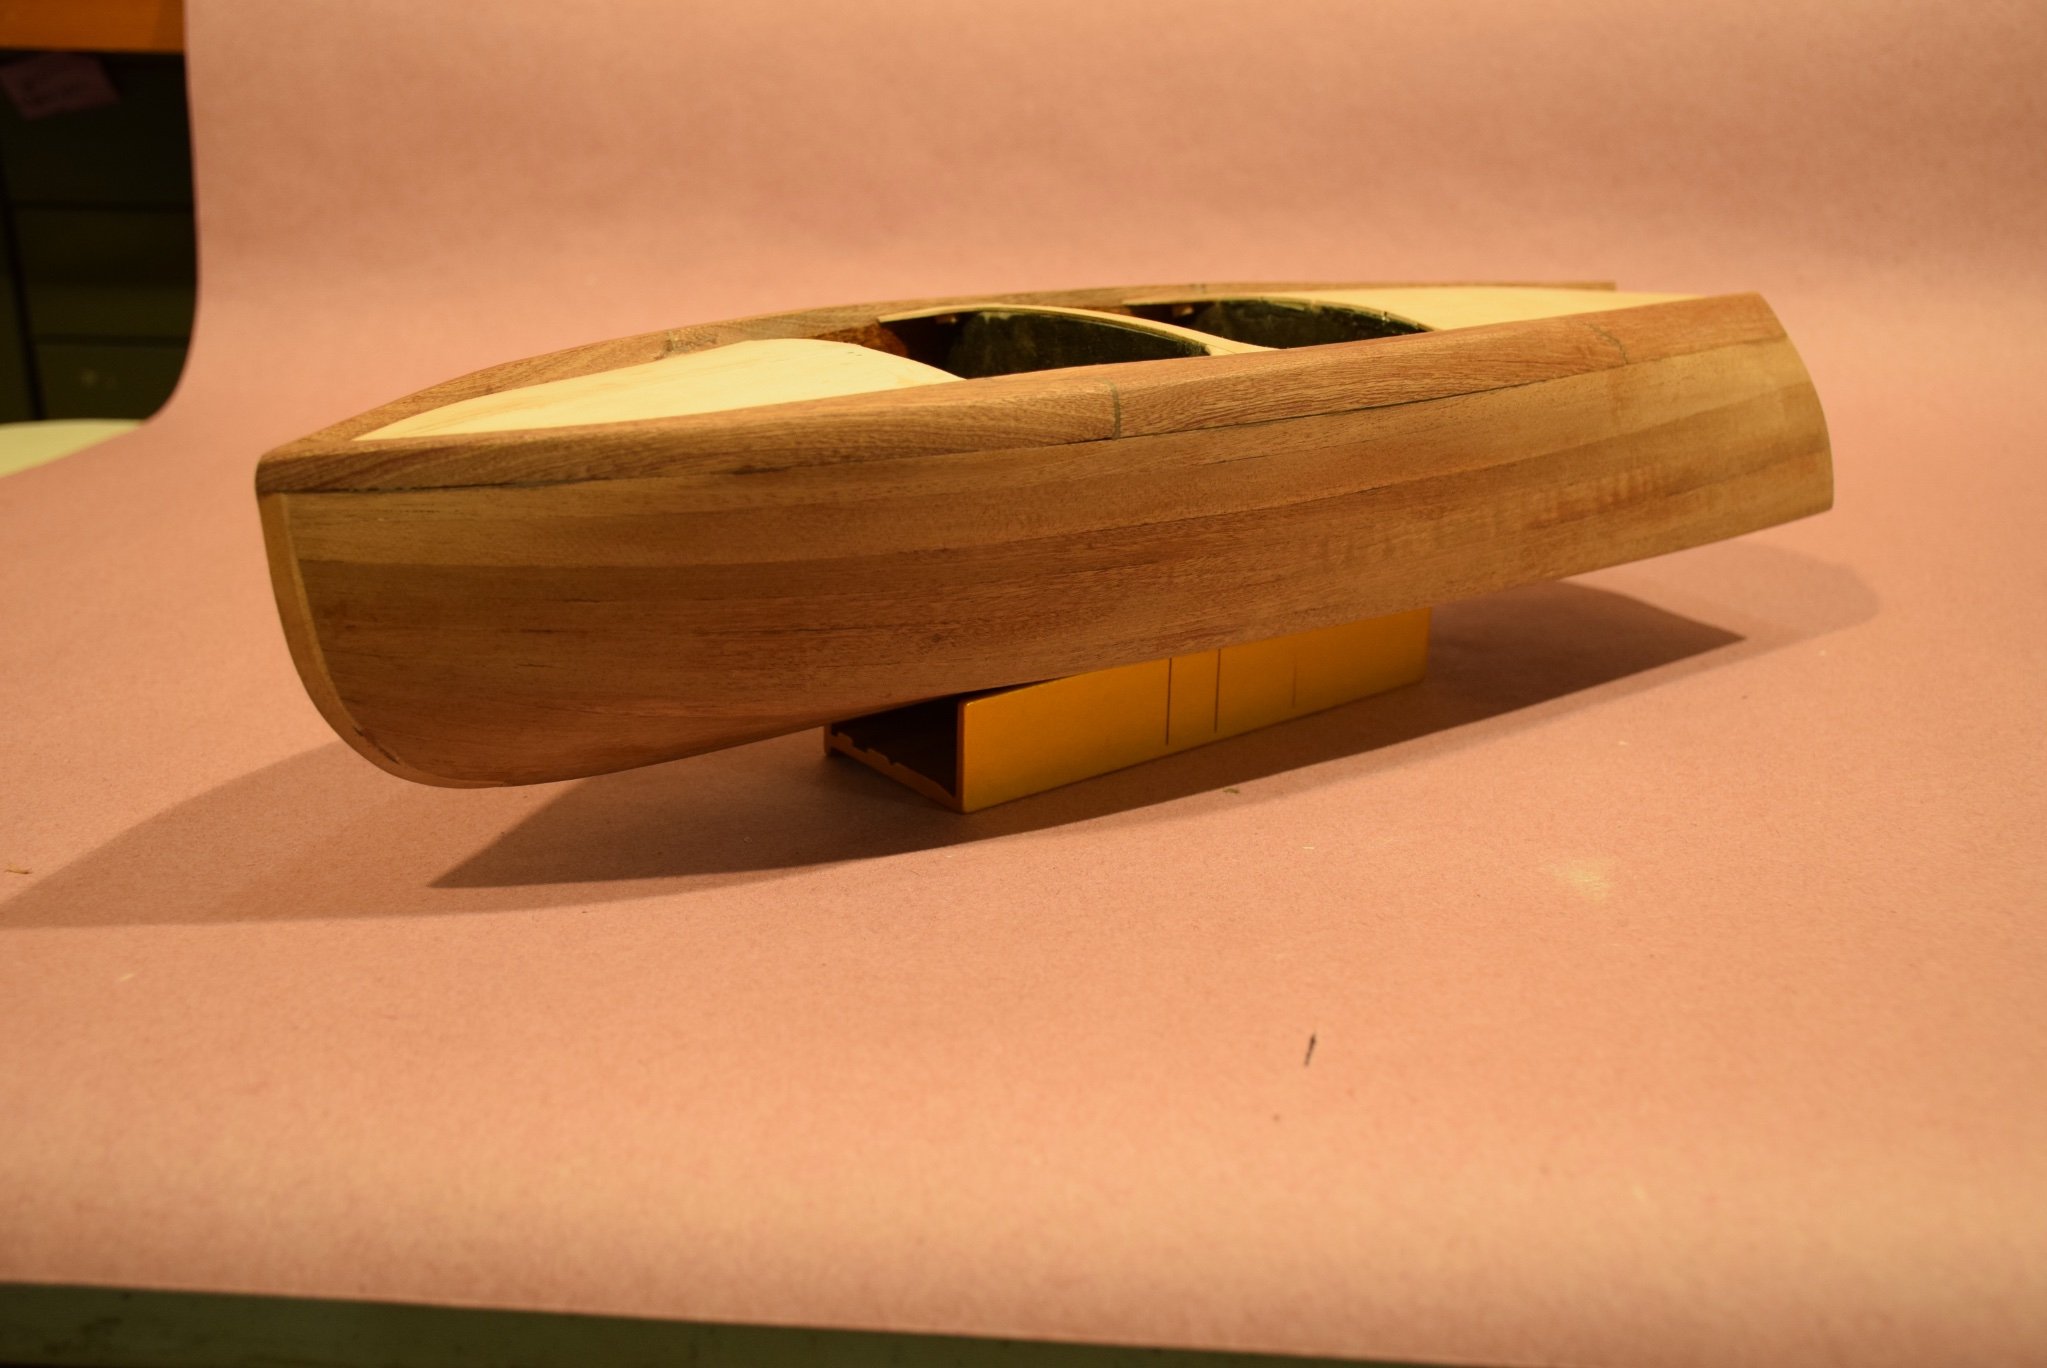
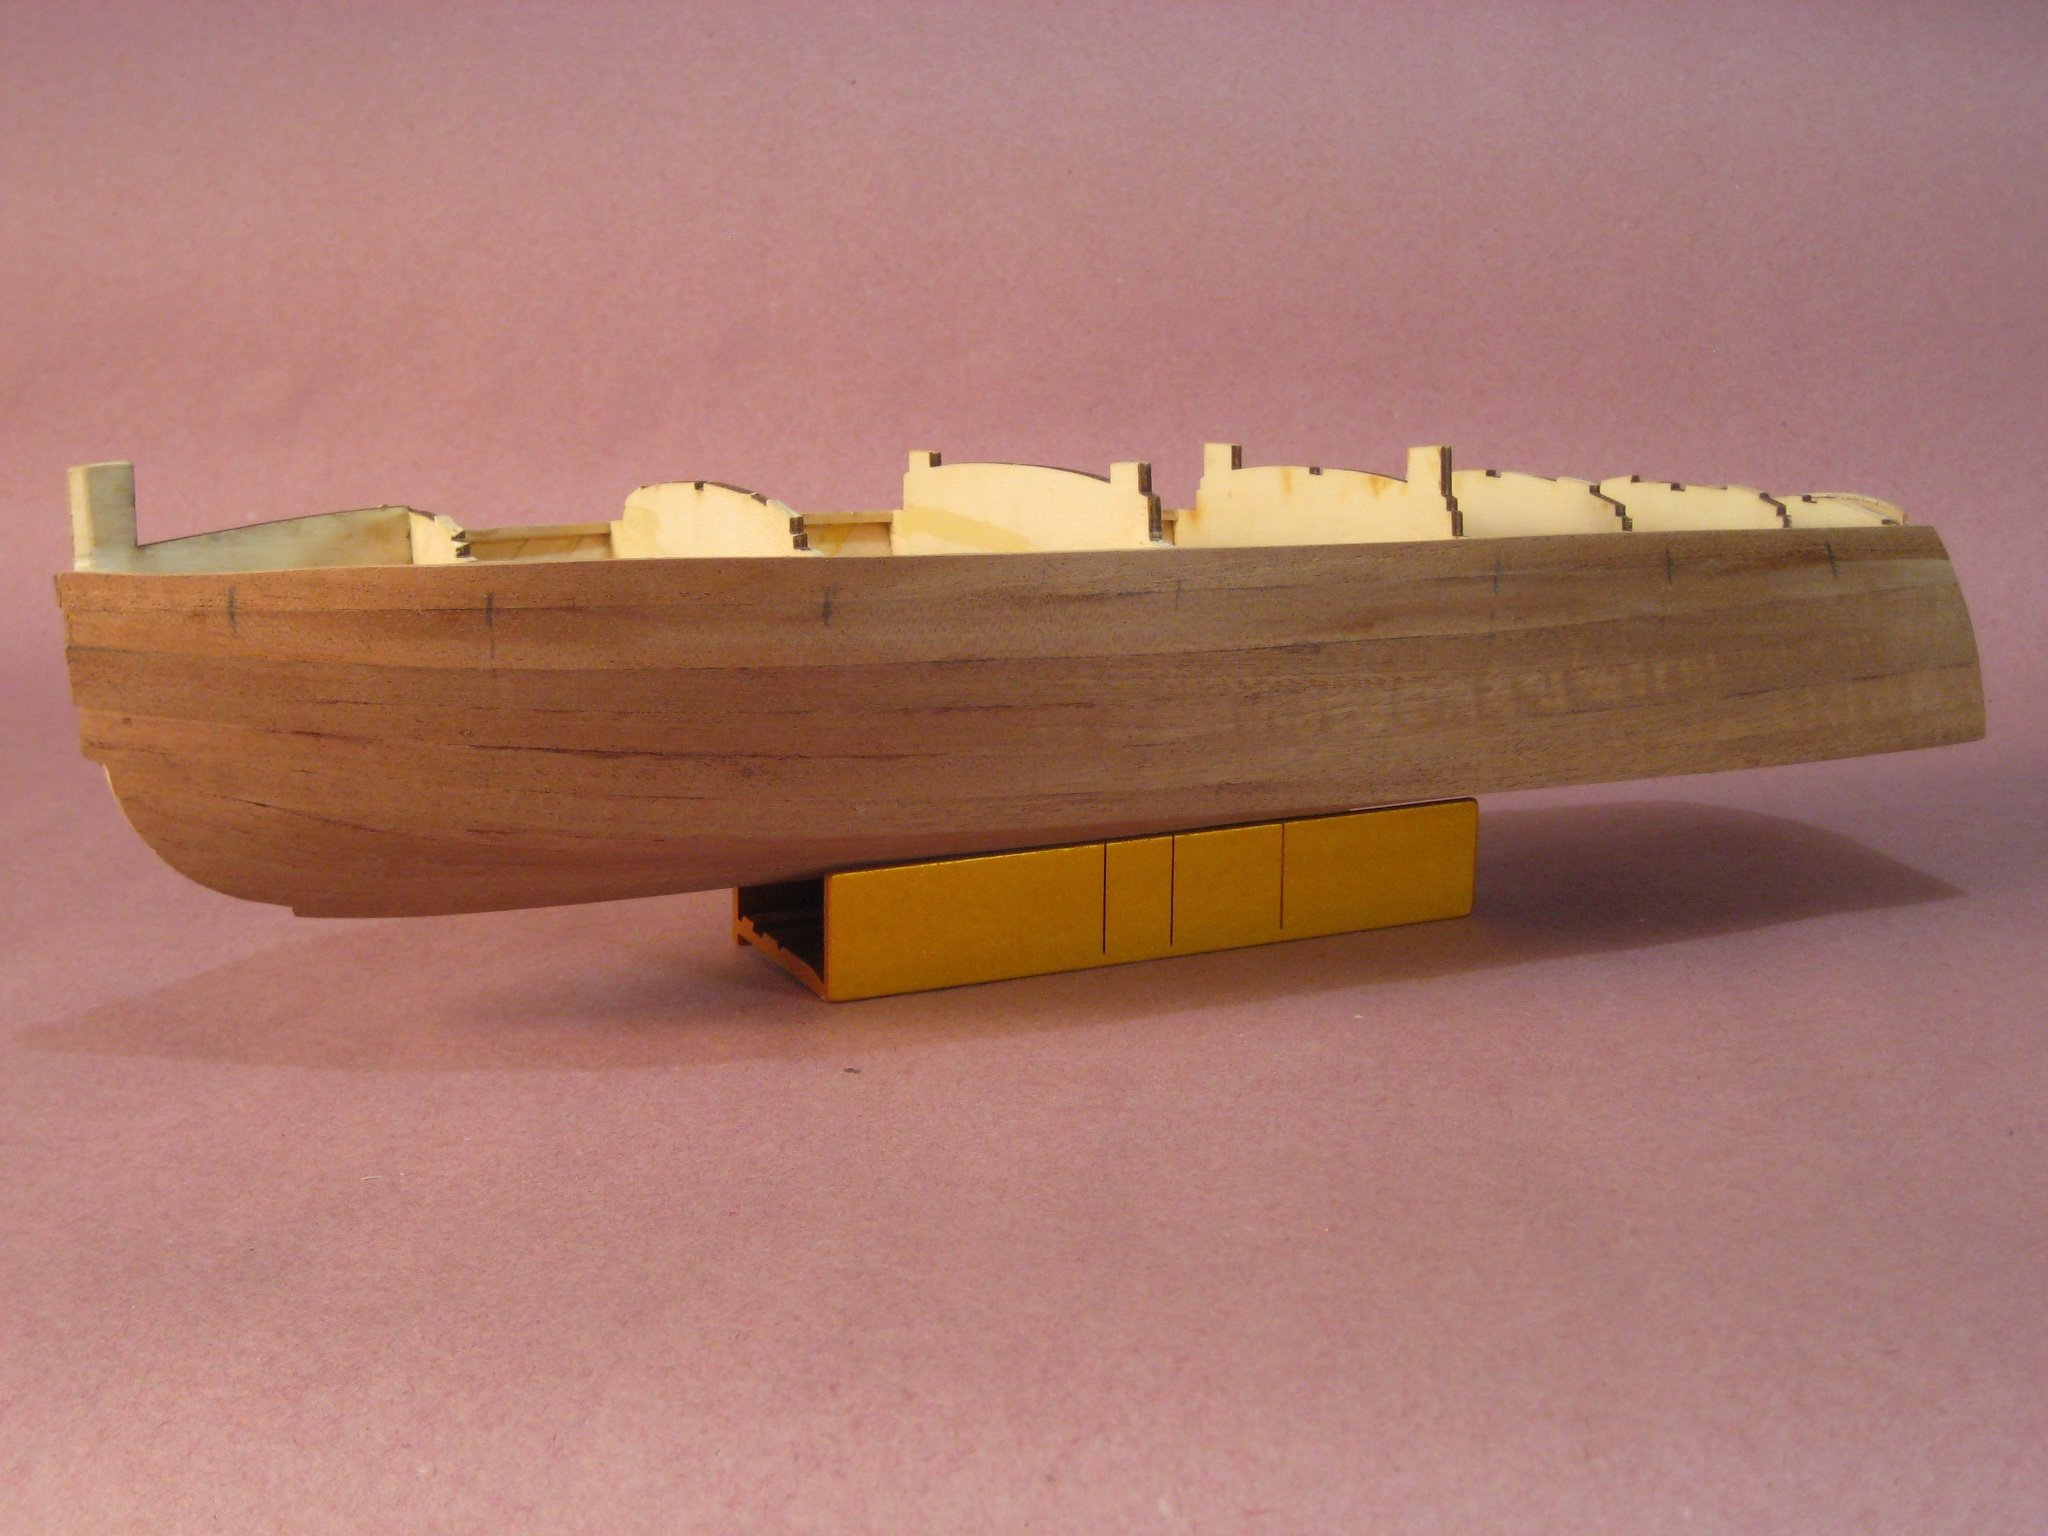
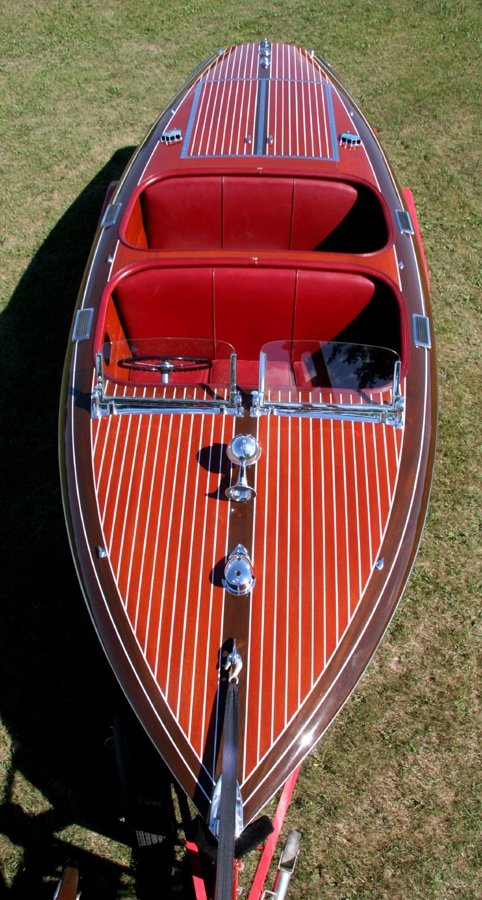
I was correct there was a lot more planing and sanding to come! She is finally to the place where I can start on the mahogany decking some of it fabricated from sheet goods and some planking with white styrene strips to simulate caulking. I have taken to the inter web to reasearch existing albeit I am sure mostly restored Chris Crafts to give me some direction beyond the models plans and instructions. There are quite a few 1904ish boats around for sale and as such there are a wealth of photos from every possible angle...wish I had started "Researching" earlier it's been big help and has led me in some slightly different directions on a couple of details the first being the more rounded cockpit corners mentioned above. And I think I am going to stain the coamings and the king plank leaving the remaining decking and hull natural. Hummm Leather seats anyone? I have a long way to go 😳 Back to the build...The tops of the coamings are down to just above deck level and are roughly flush to the sides To be continued...

-
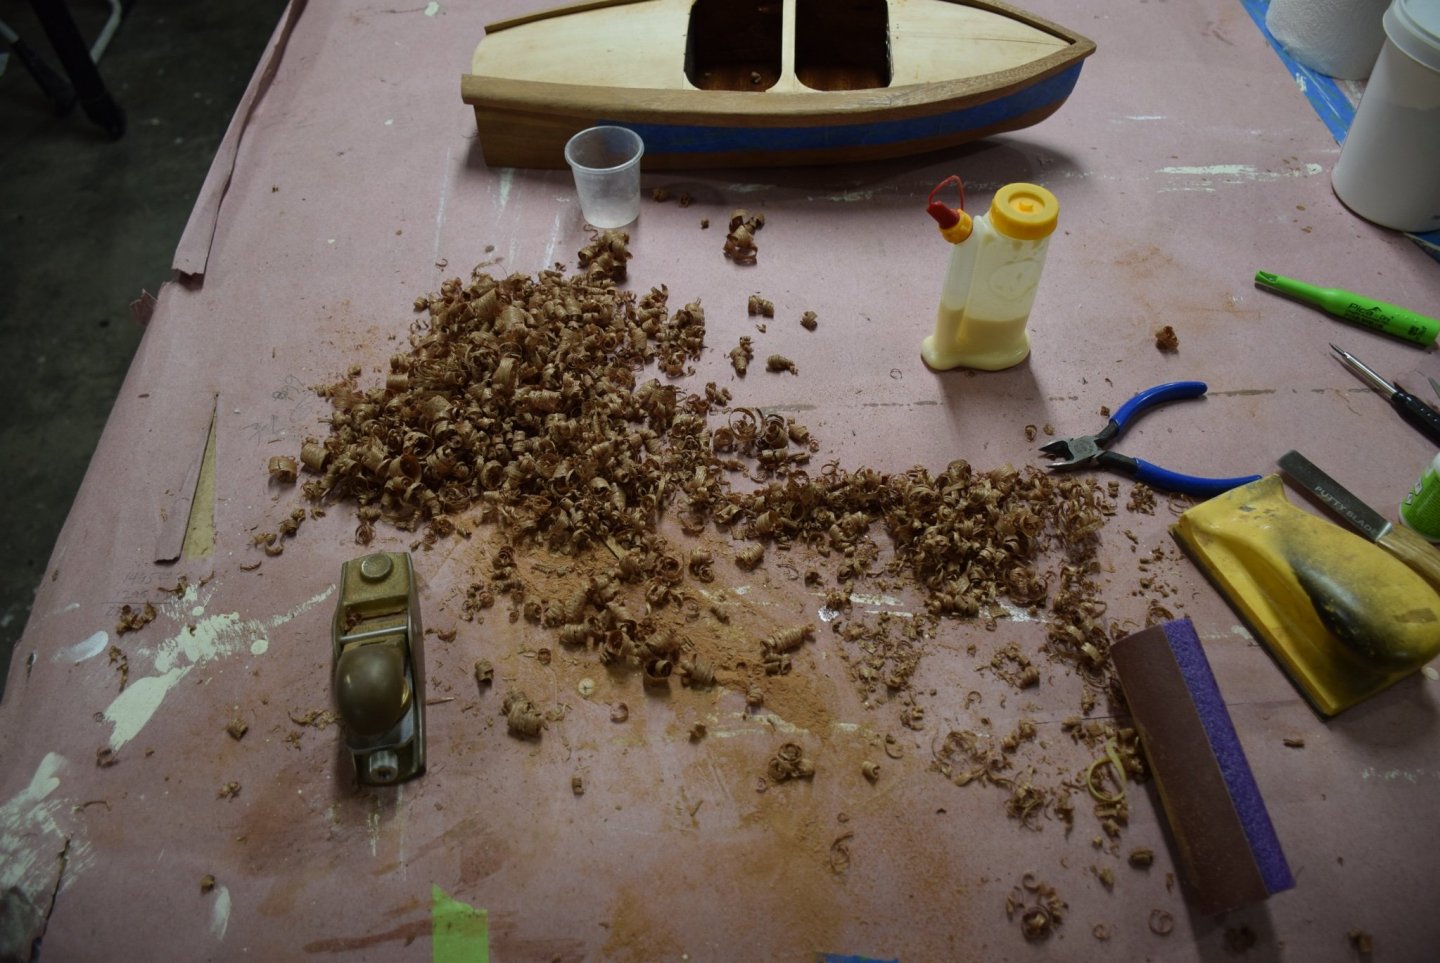
Sorry it has been a while since my last post I thought that the coamings would be the biggest challenge for me so far...and they have been. The coamings consist of three pieces per side with a joggle joint between all three, fabrication consisted of copying the much oversized plan templates, which I again did on Bristol board, and adjusting the templates to the deck line and just outside the shear with scribe lines. I then used rubber cement to adhere the now more accurate templates to the provided 1/2" thick mahogany board. I cut the six pieces with my scroll saw and began by fitting the aft pieces first. Working forward on each side I had the pieces reasonably well fit to the deck line then the tedious part began... because the shear rises in the middle of the boat the pieces had to be fitted to that line by removing material from the bottom of each piece in order to keep the four joints relatively level this was a constant sand-check fit-sand-file- check fit dance that took seemingly forever. My former life was that of a custom home builder so I have a level of skill with "home sized" joinery but nothing at this scale plus no straight lines to work from... it was nerve wracking to say the least so much so that I was totally immersed for a few days with the final fitting and then glue-up and took no photos until after I started to block plane and sand...so sorry. Very chunky looking but I am glad to have too much wood instead of not enough Started block planing down aft pieces to follow deck line I will keep the coaming quite a bit proud of the deck and sand down to it when the planking is complete. I can start to see now how important the coamings contribution to the "barrel back" look will be. I glued the joints with 2-part epoxy mixed with wood flour...I think they came out OK. This is just a part of the initial shavings and sanding dust that have come off so far... lots more to come. To be continued...


-
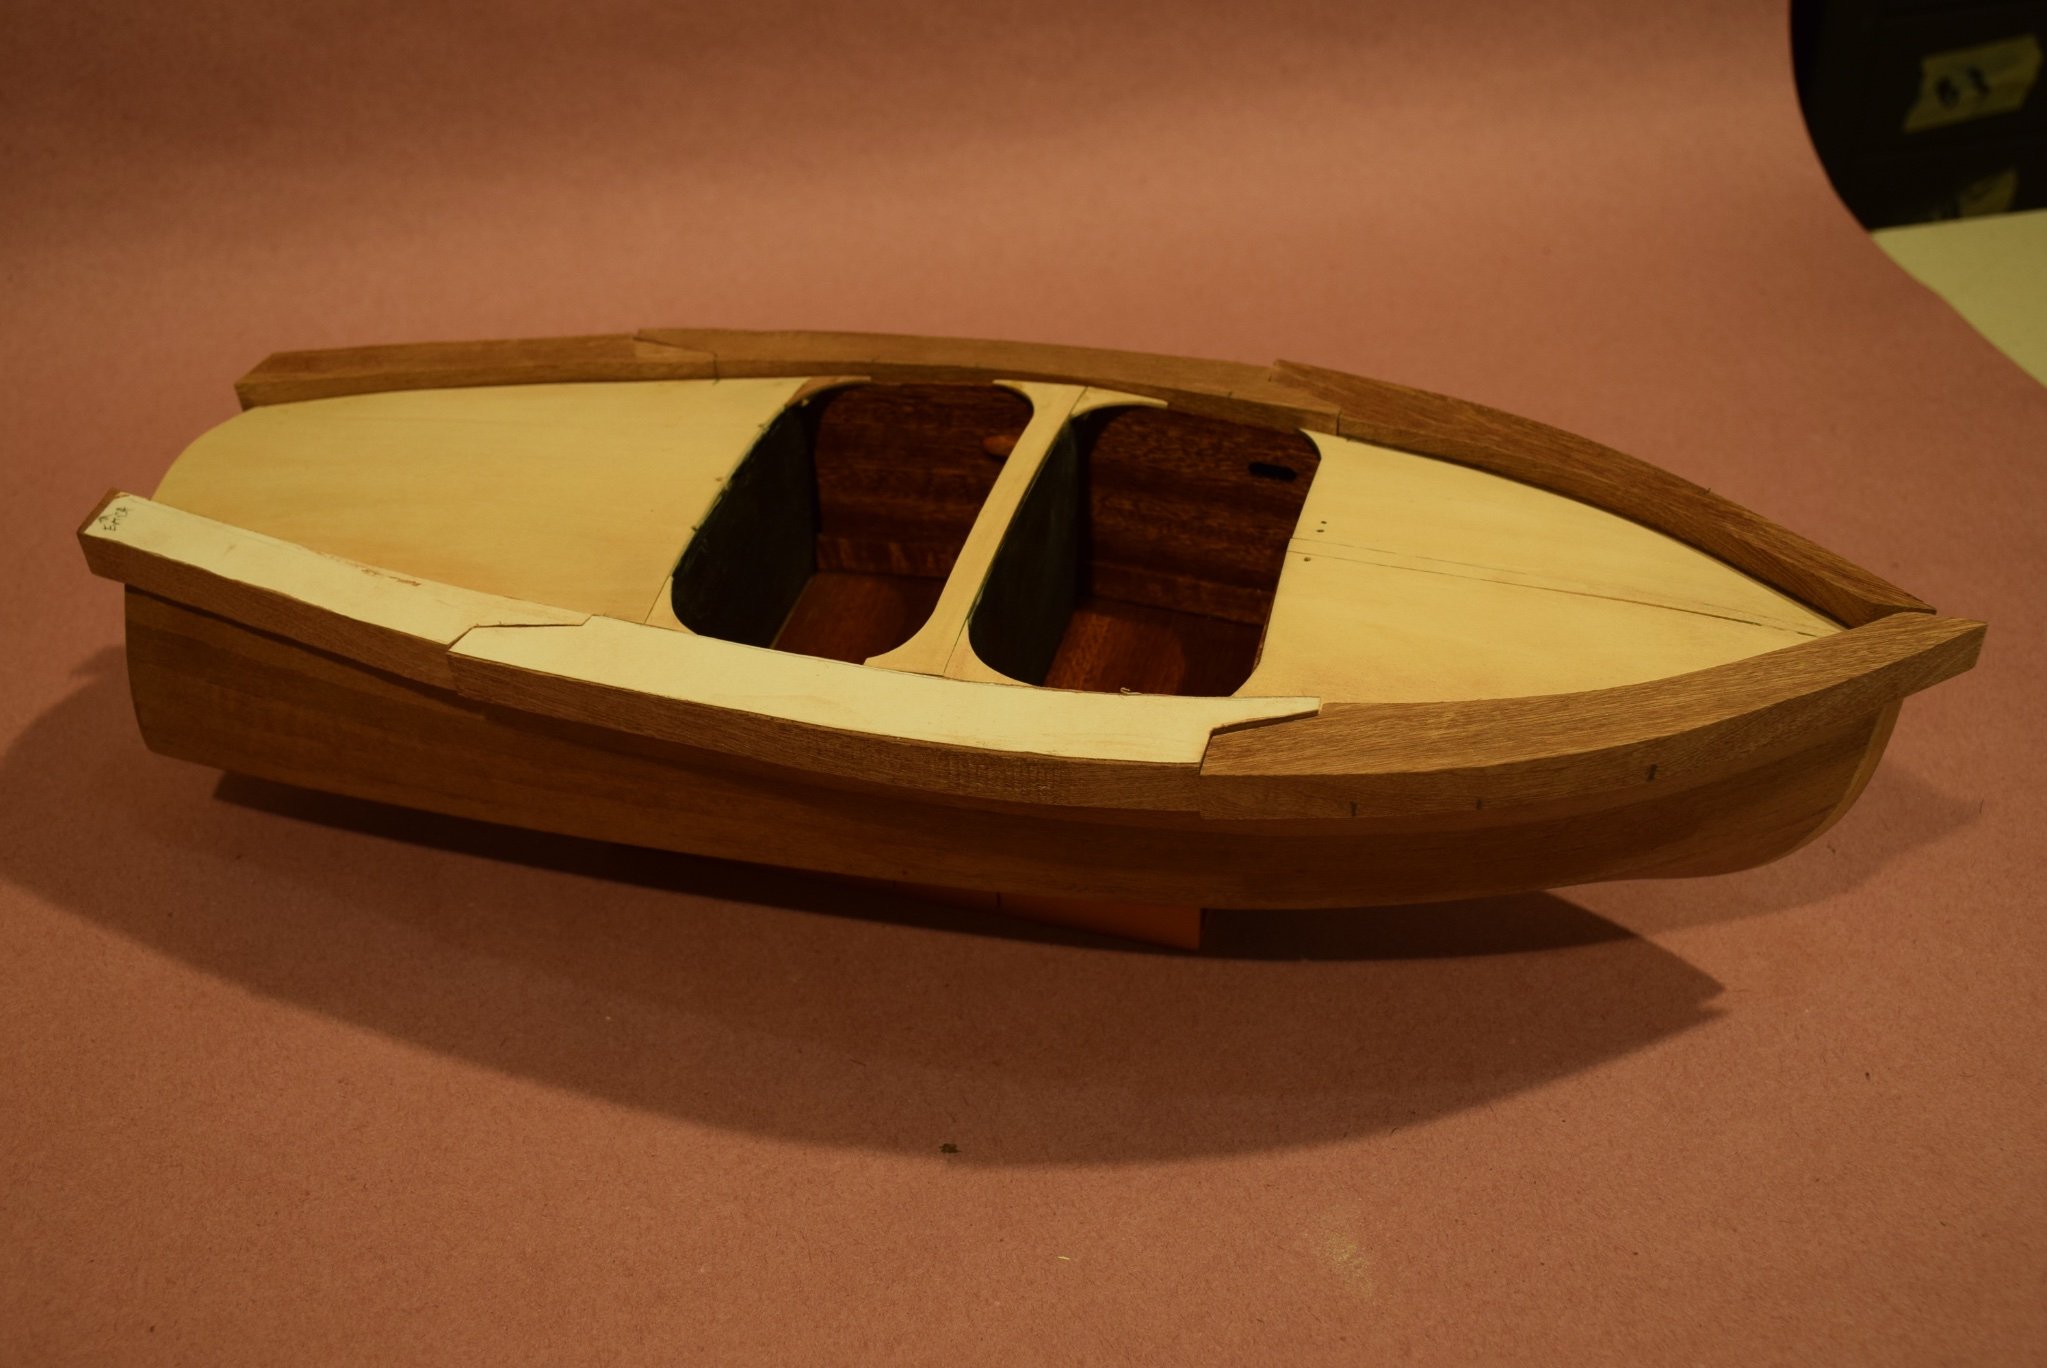
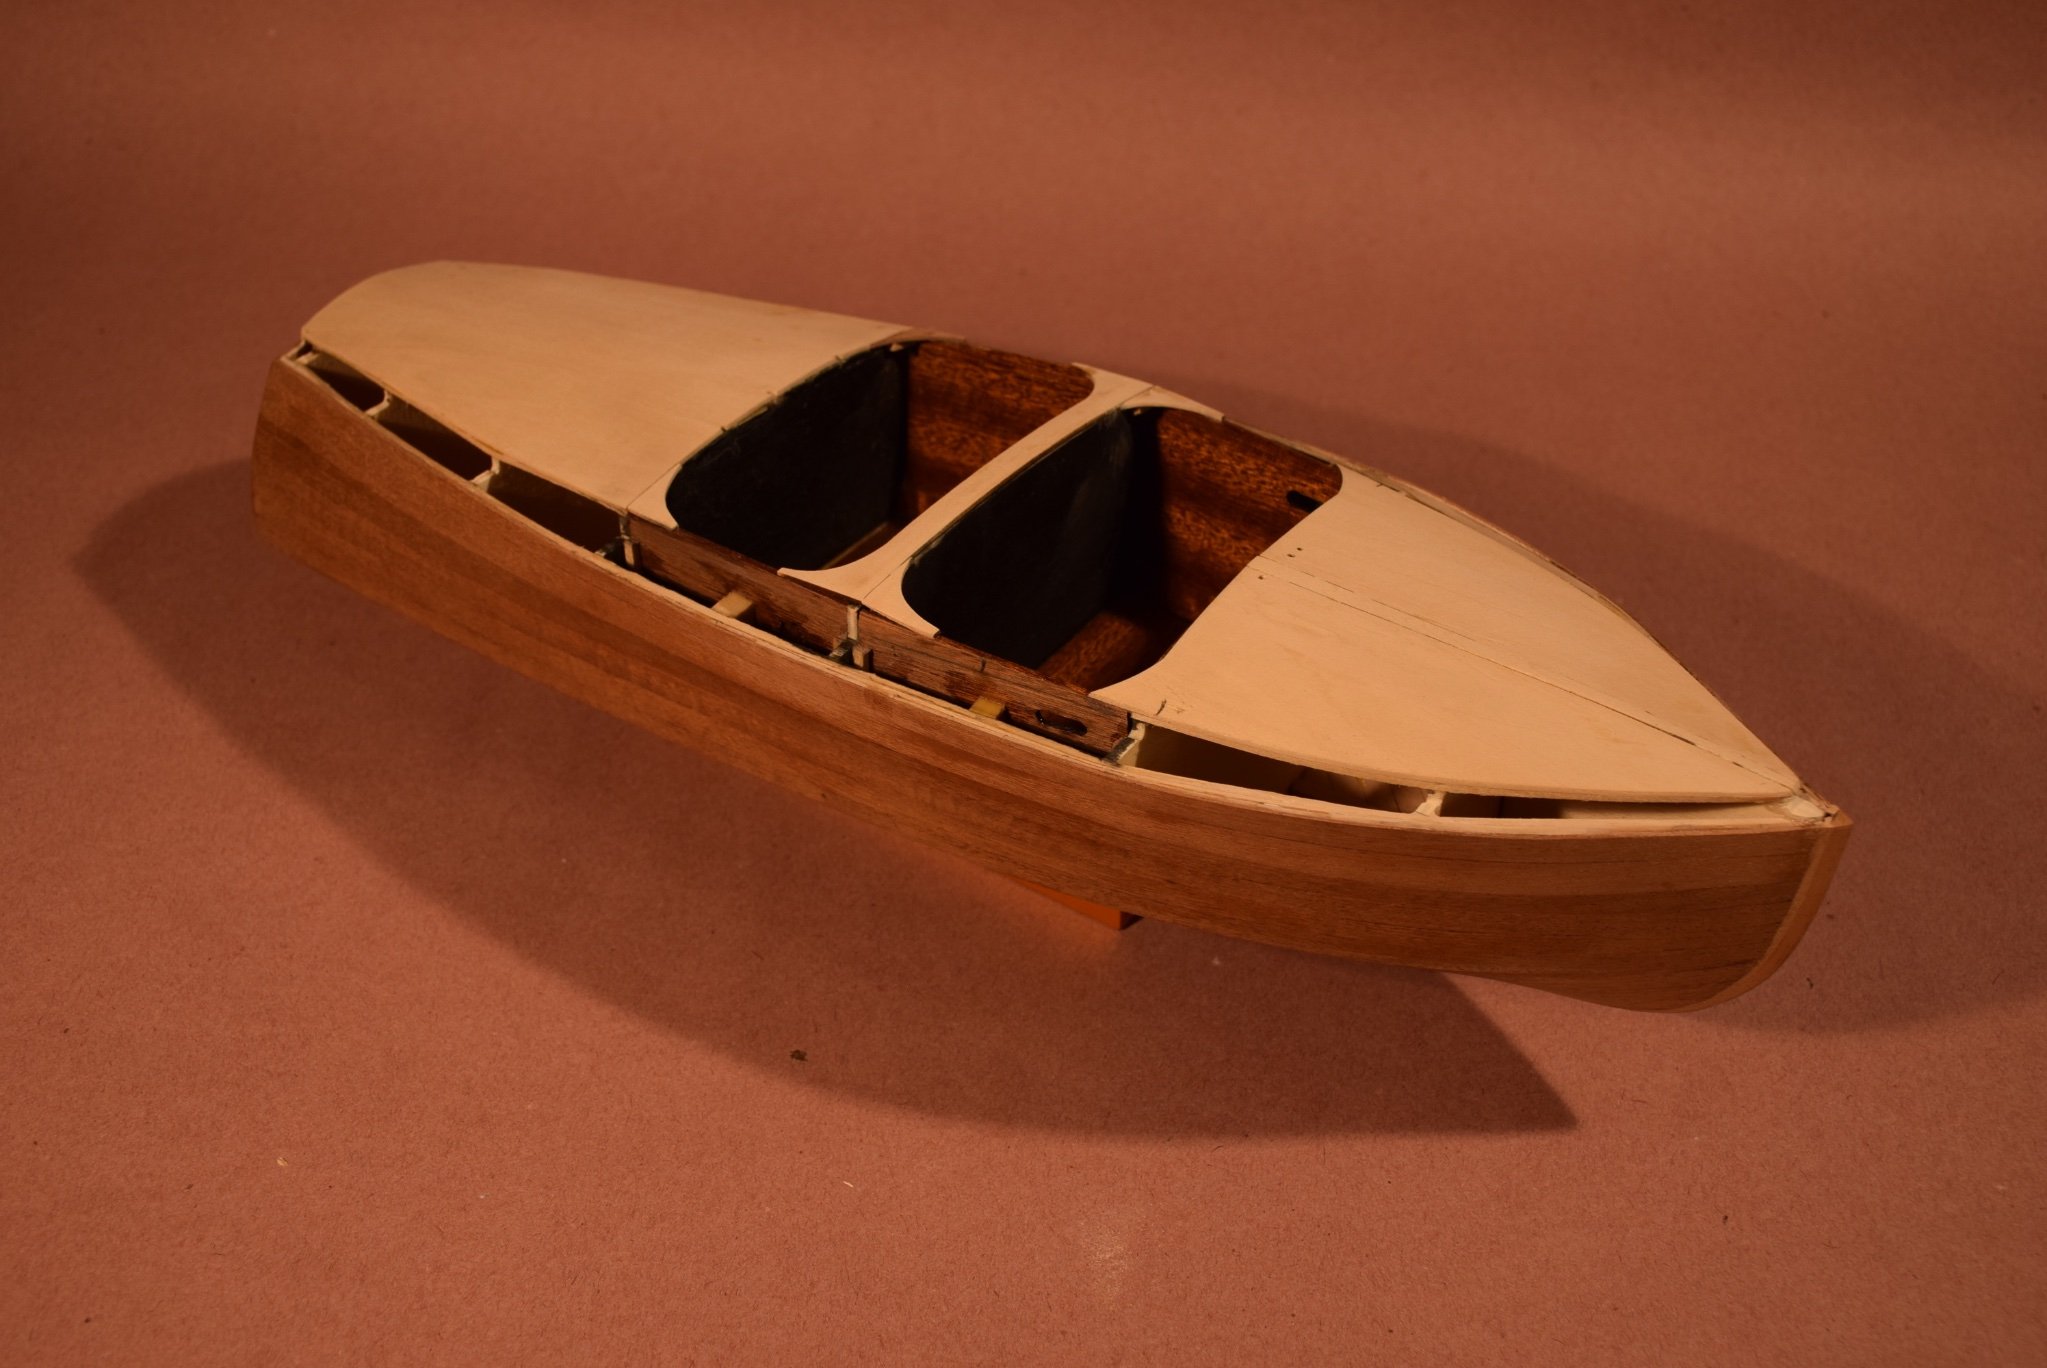
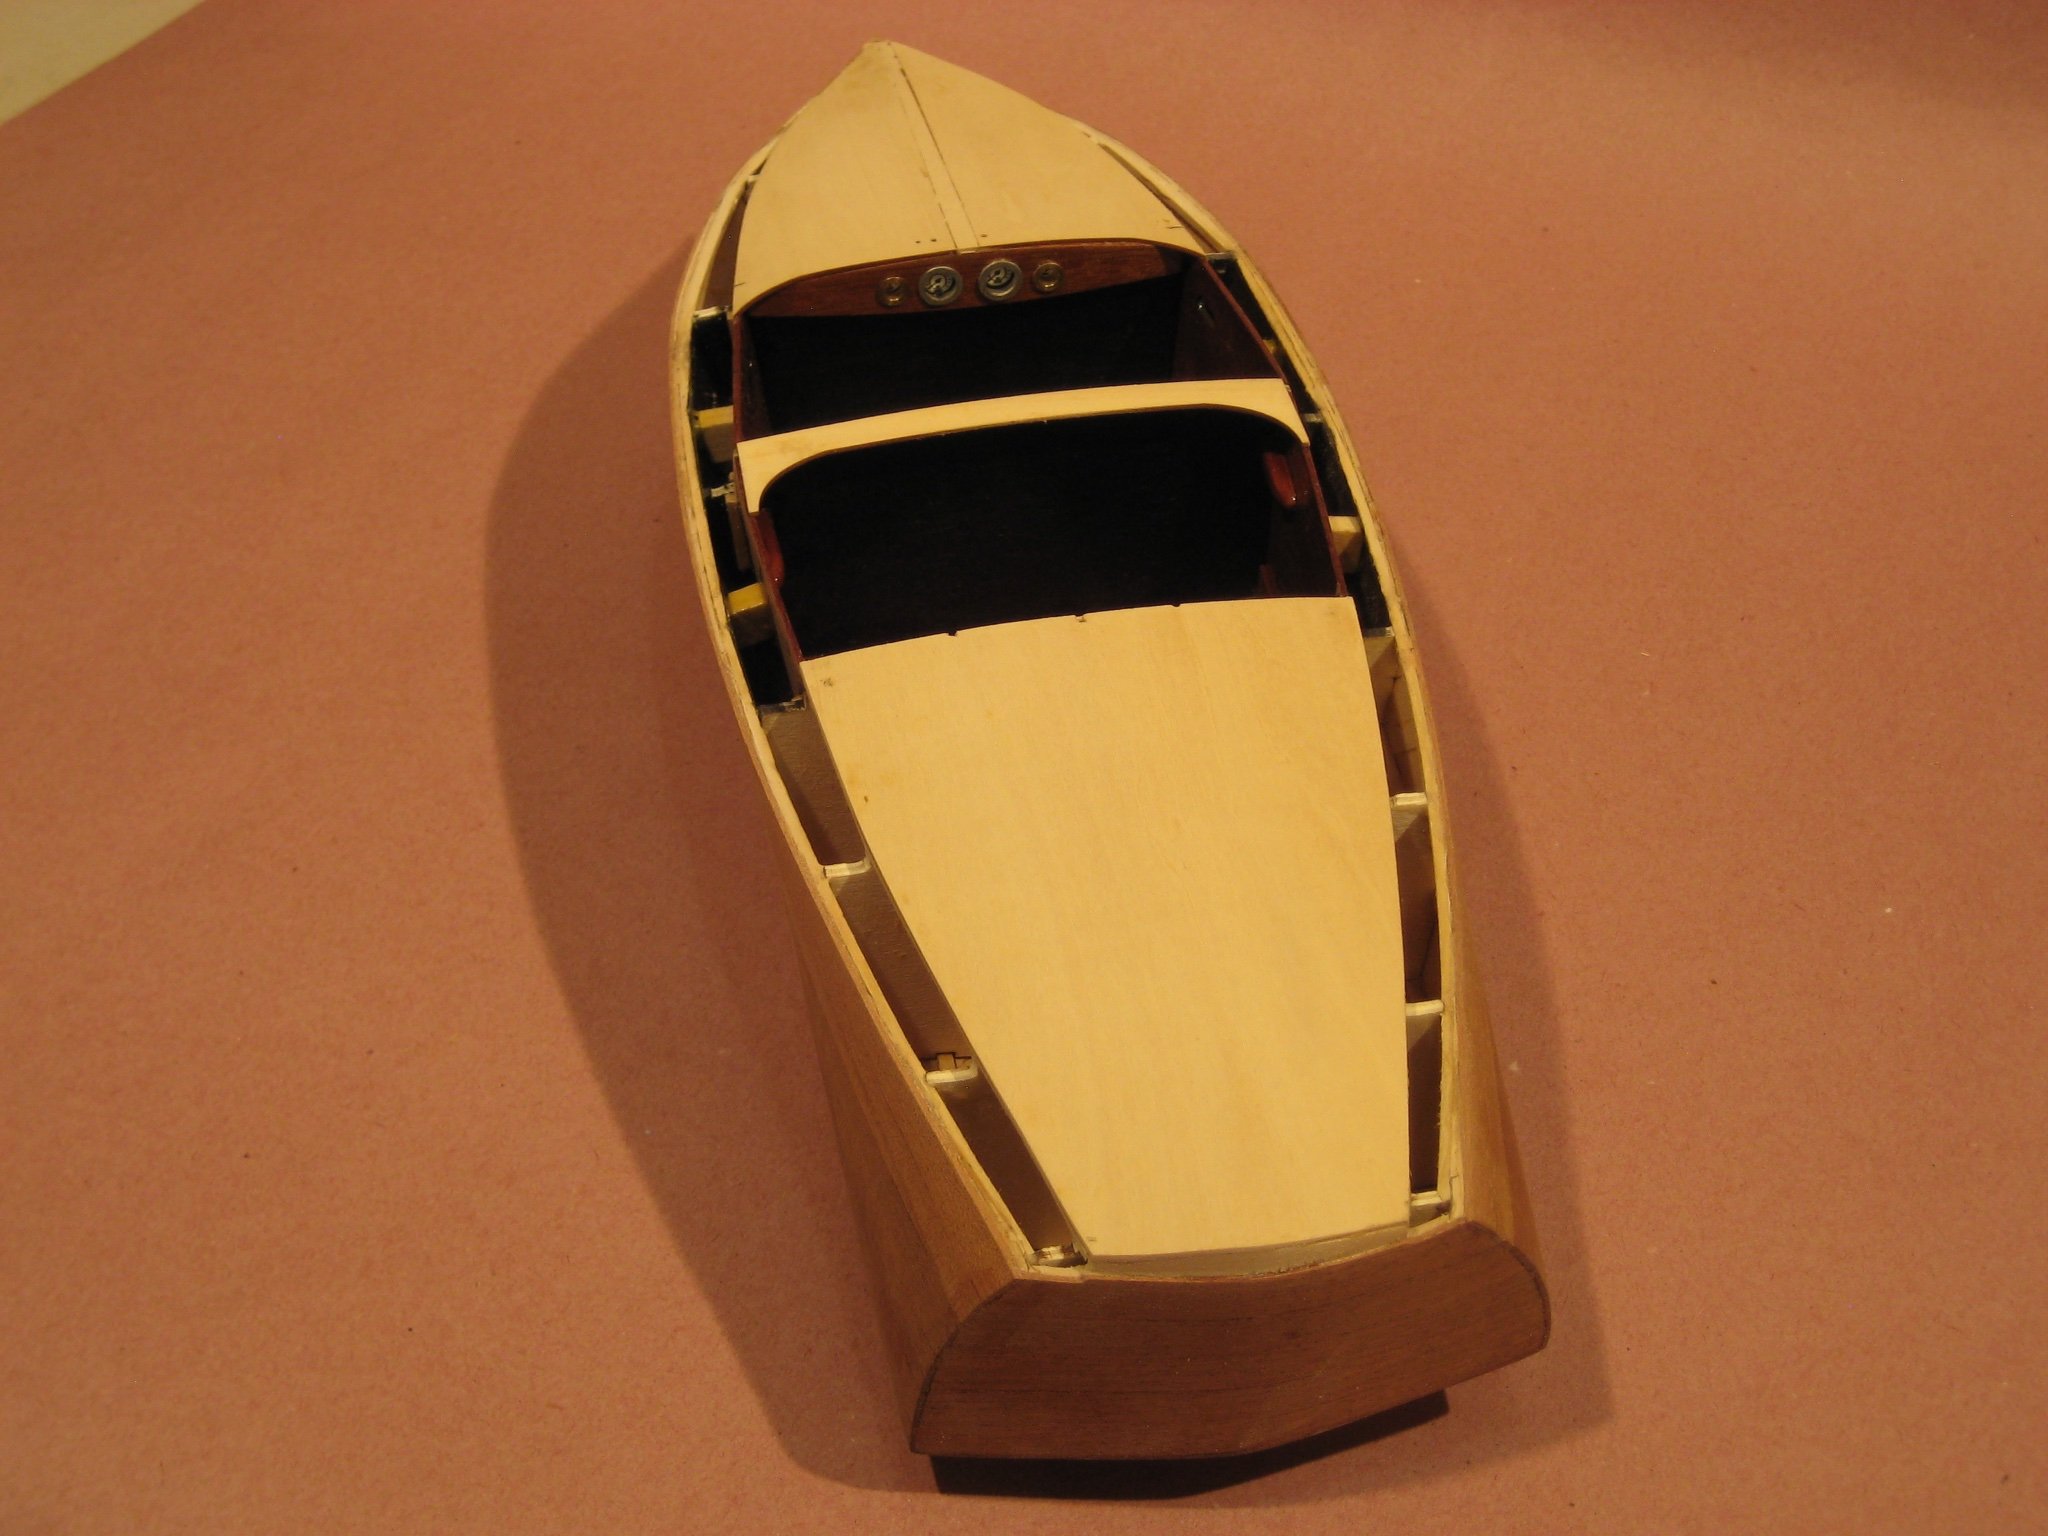
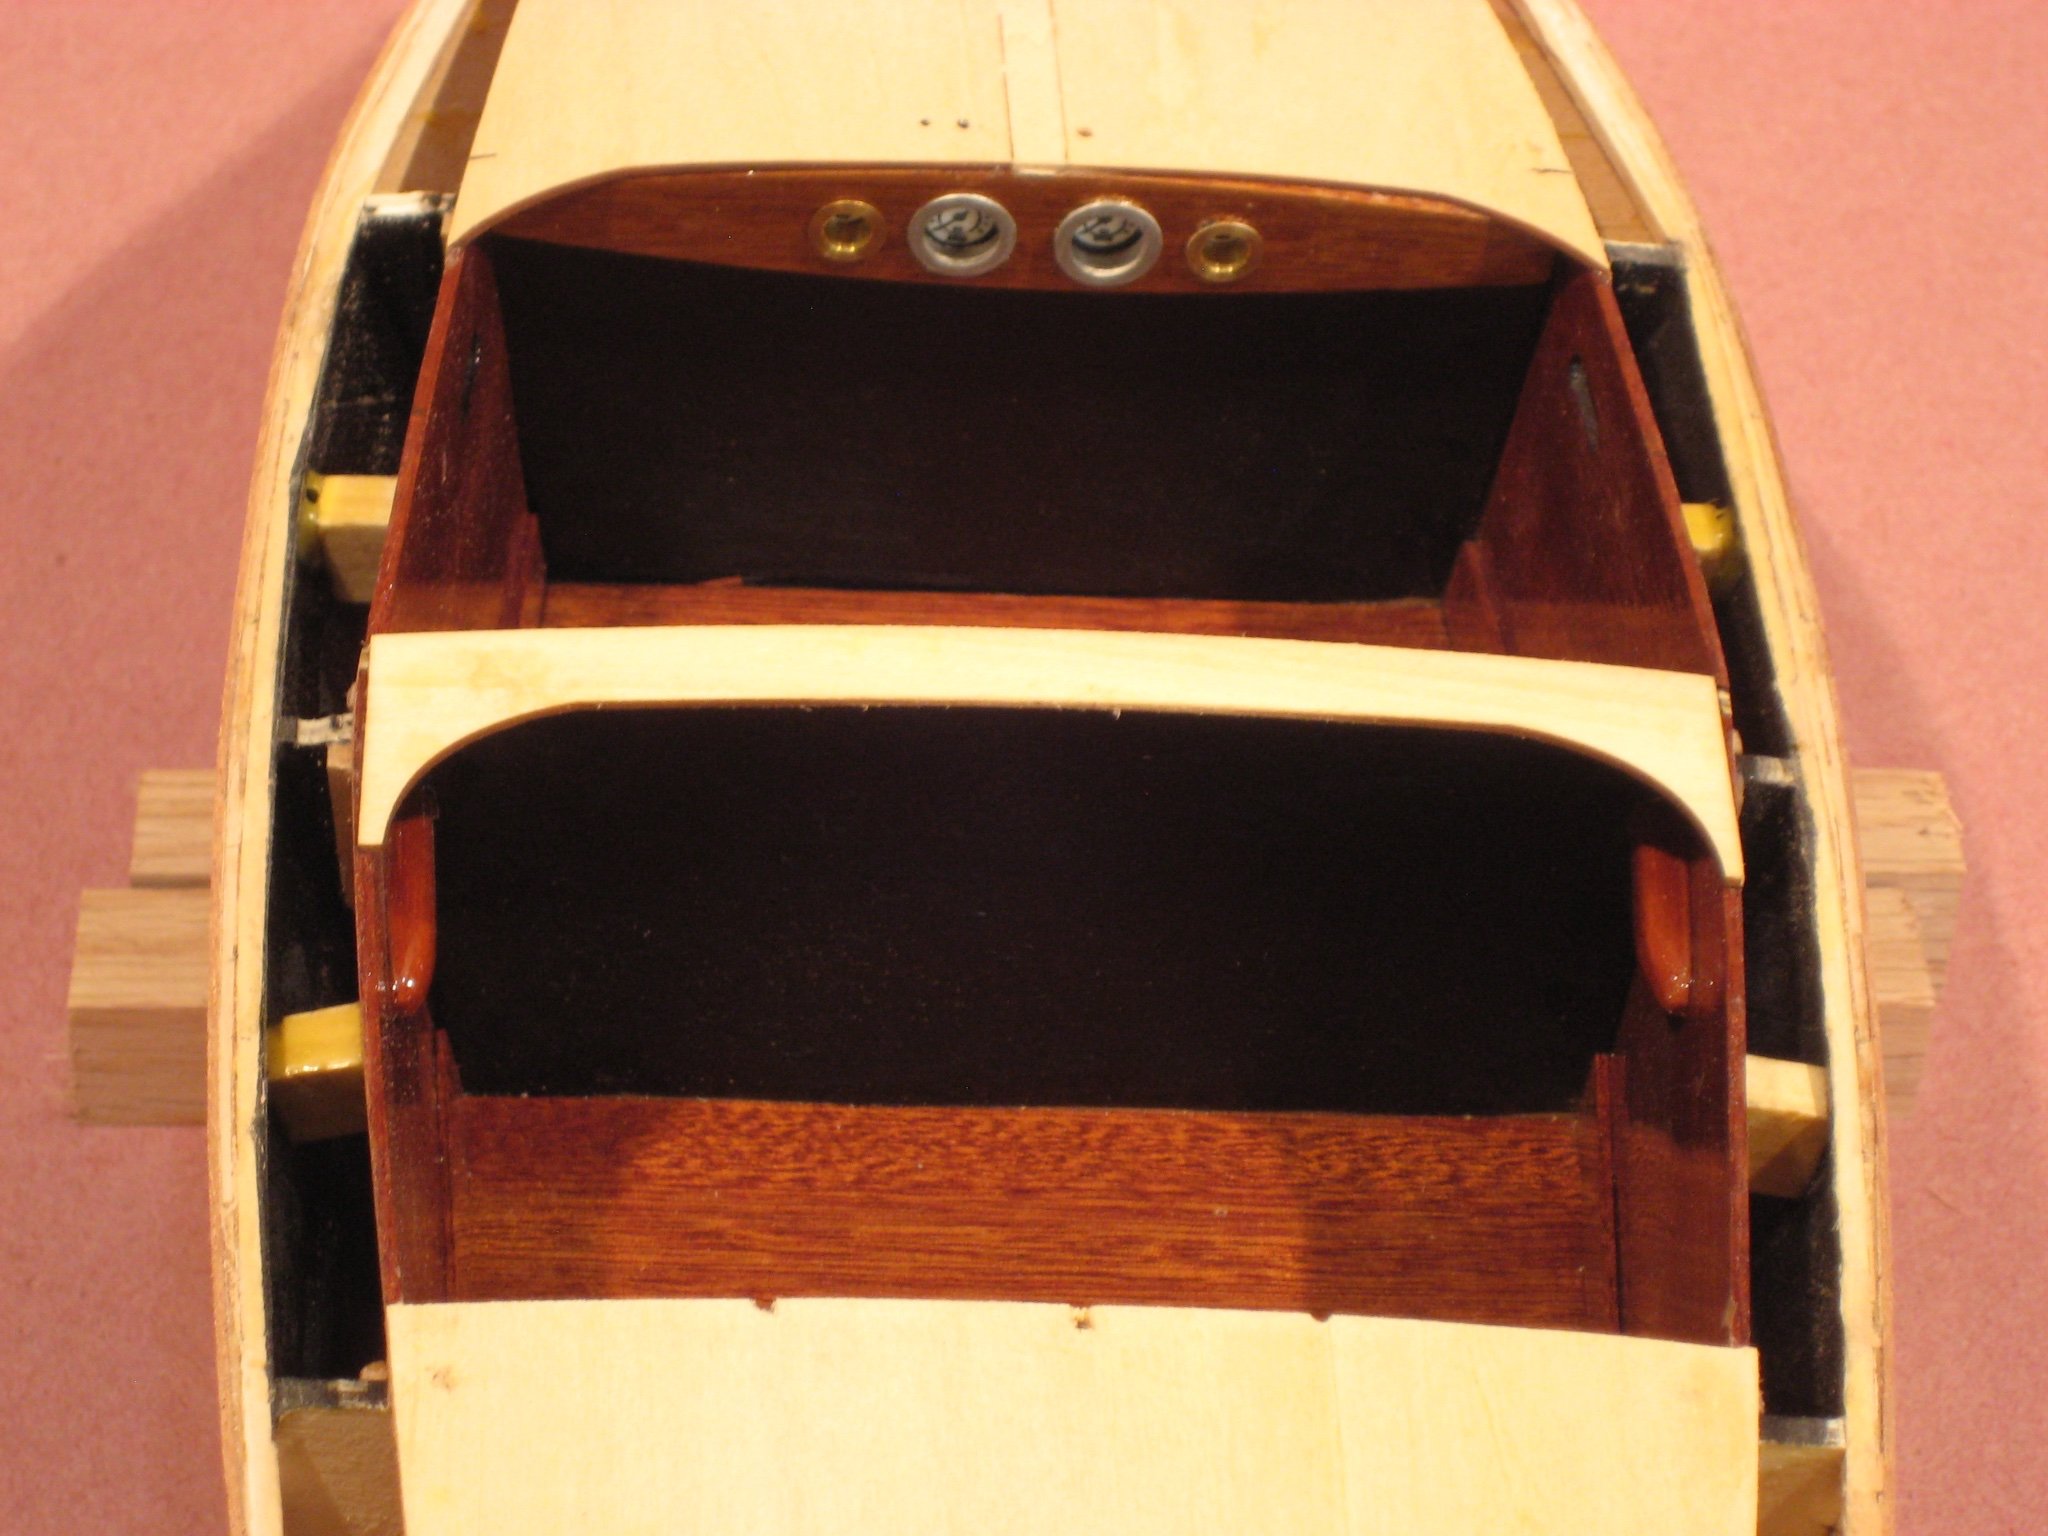
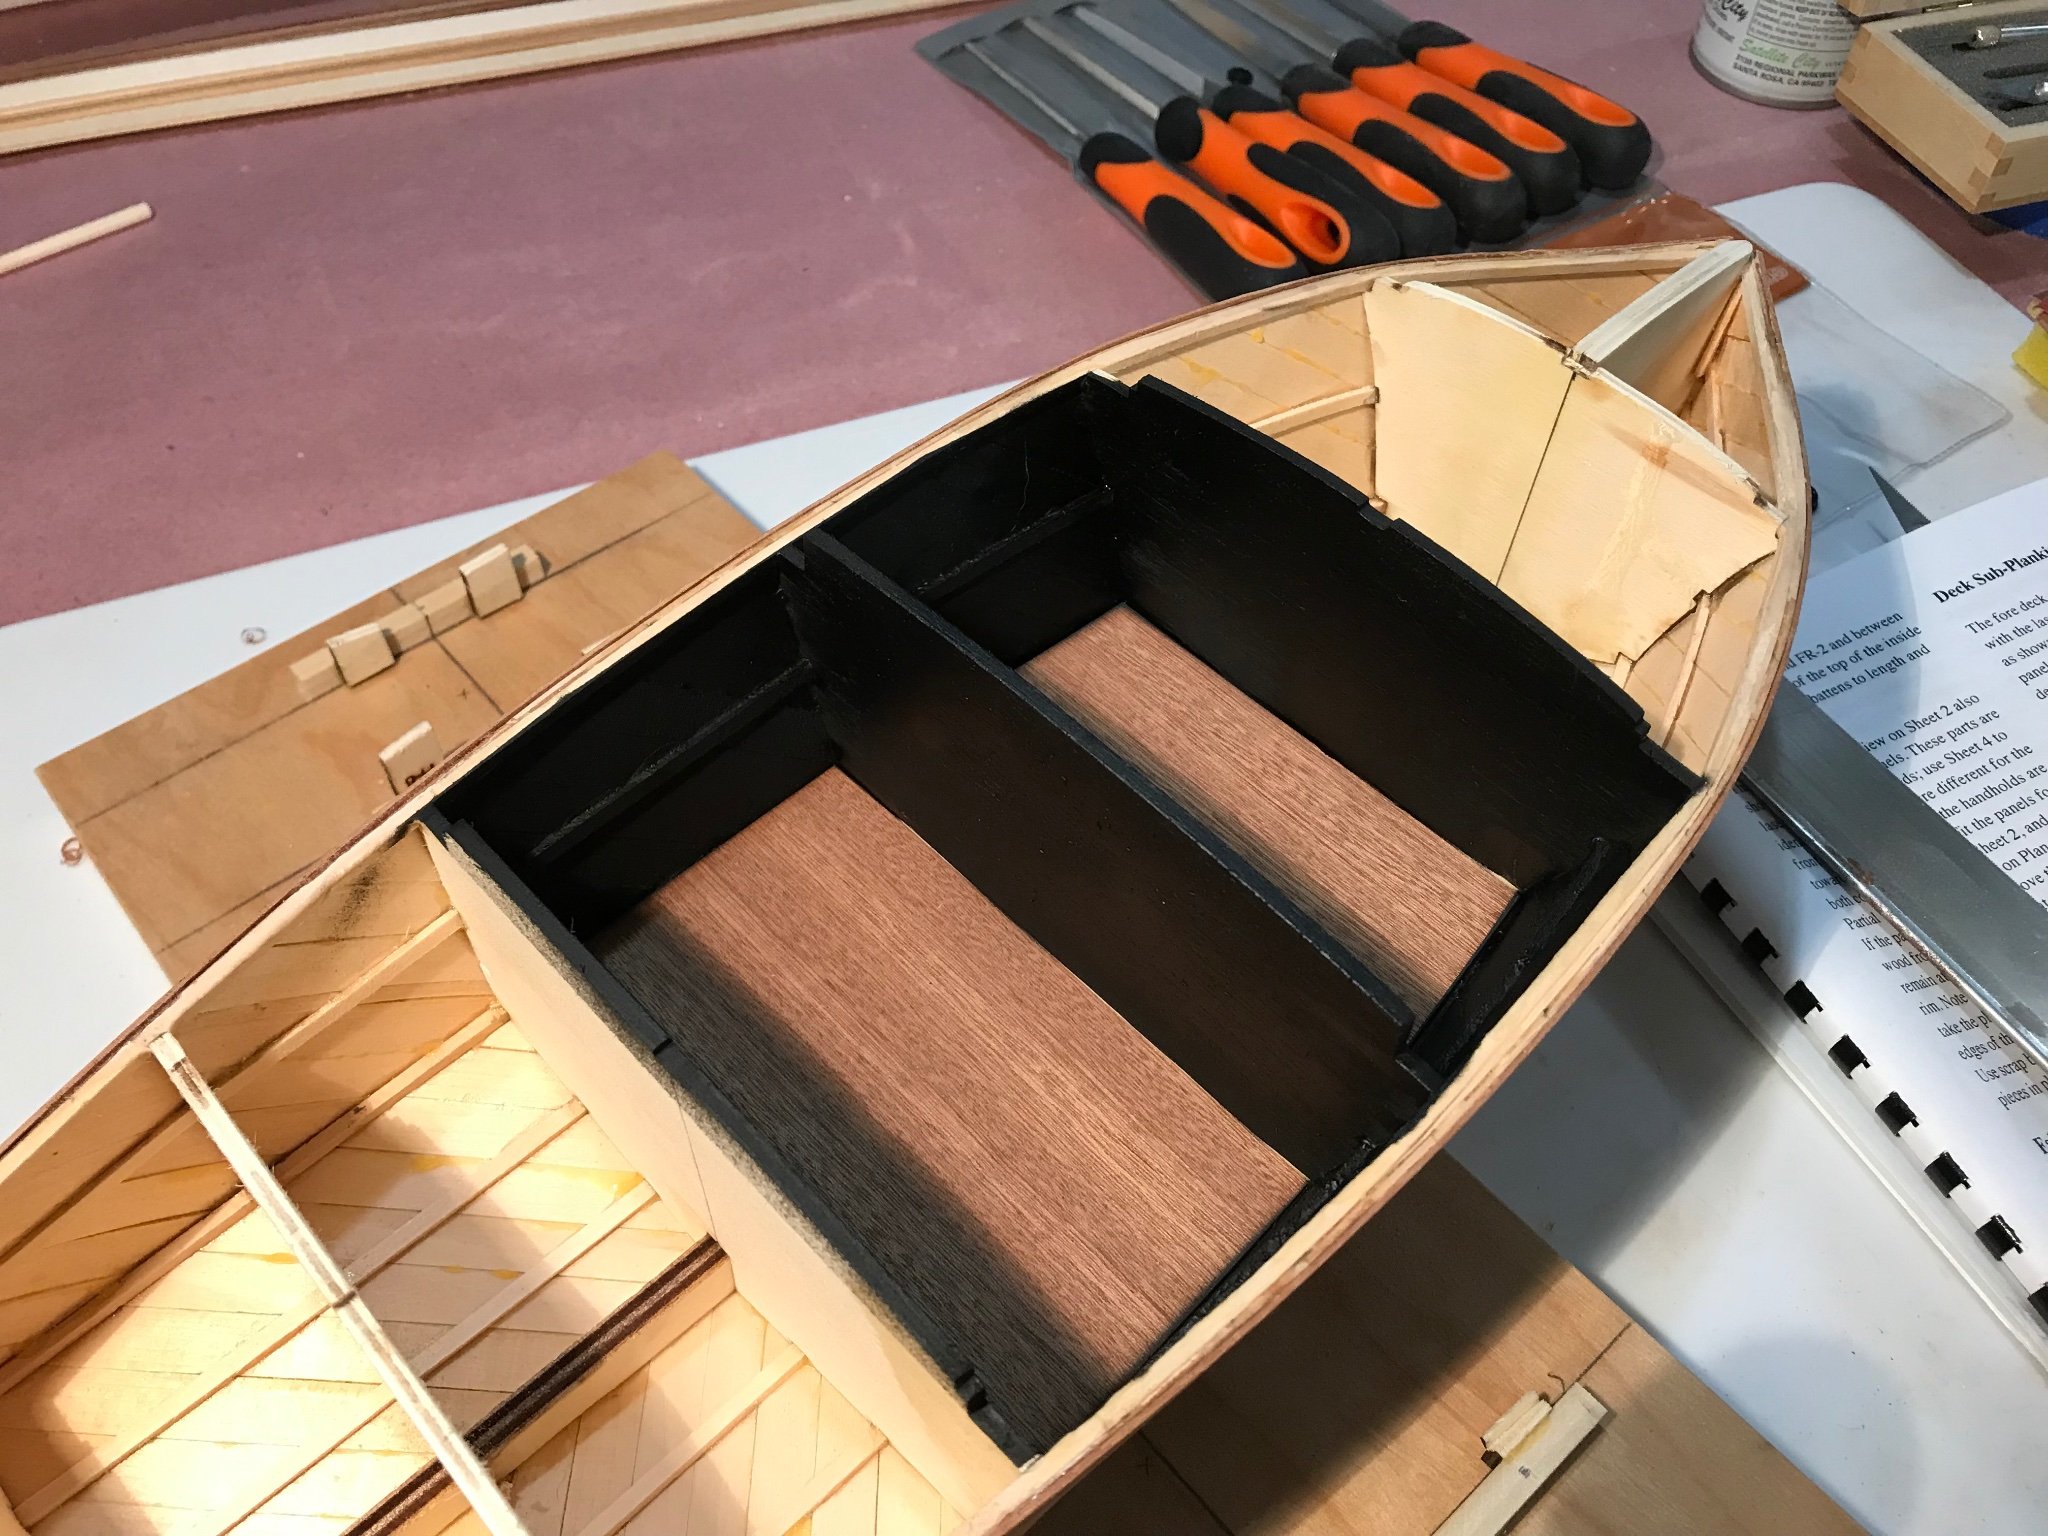
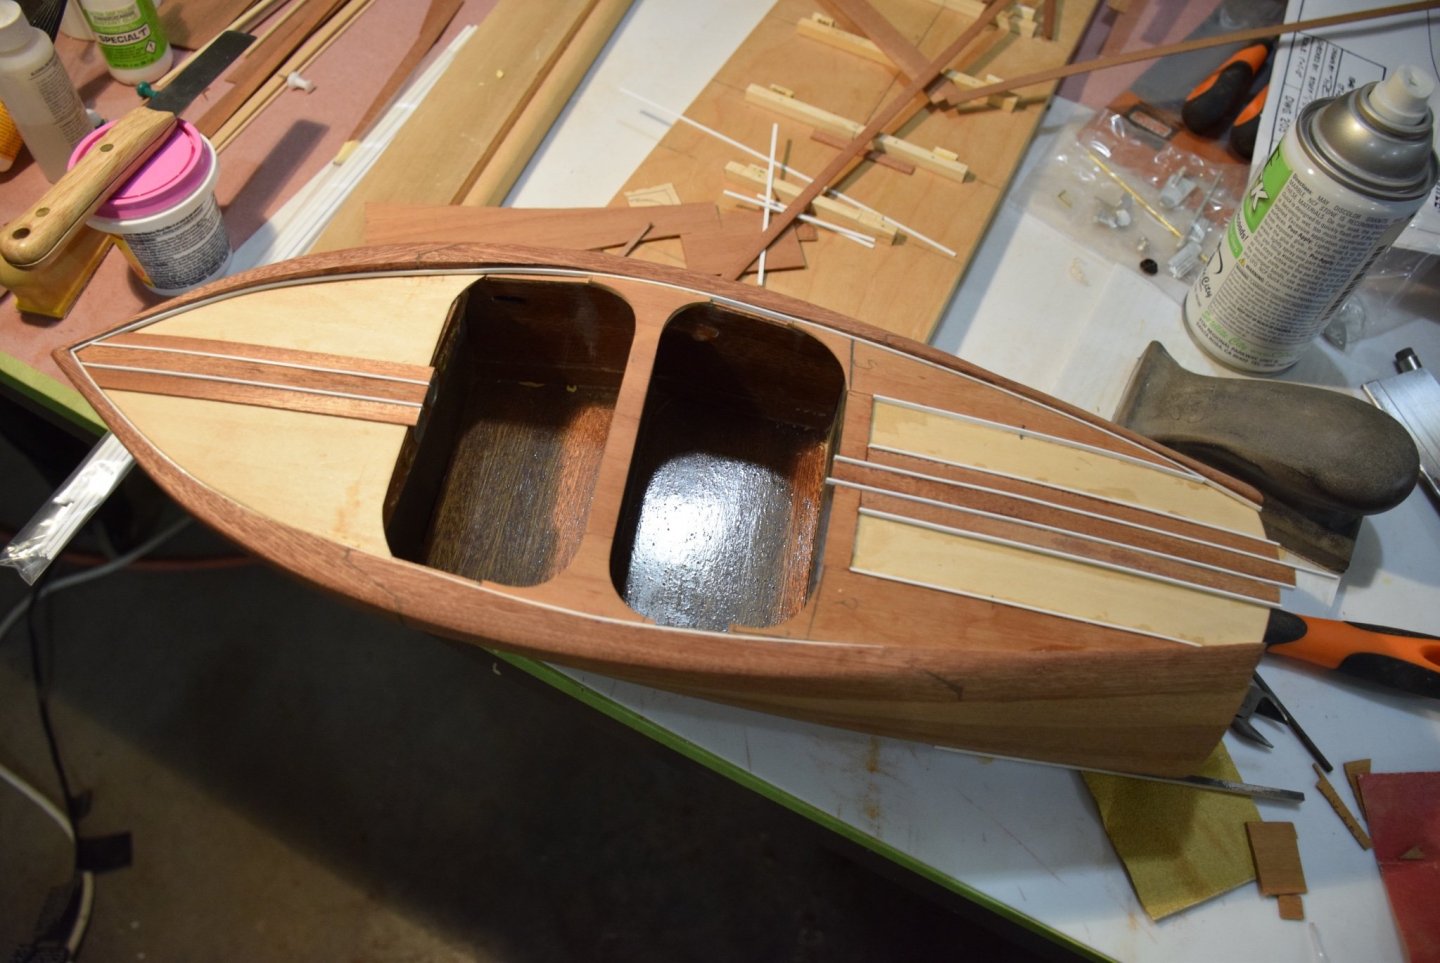
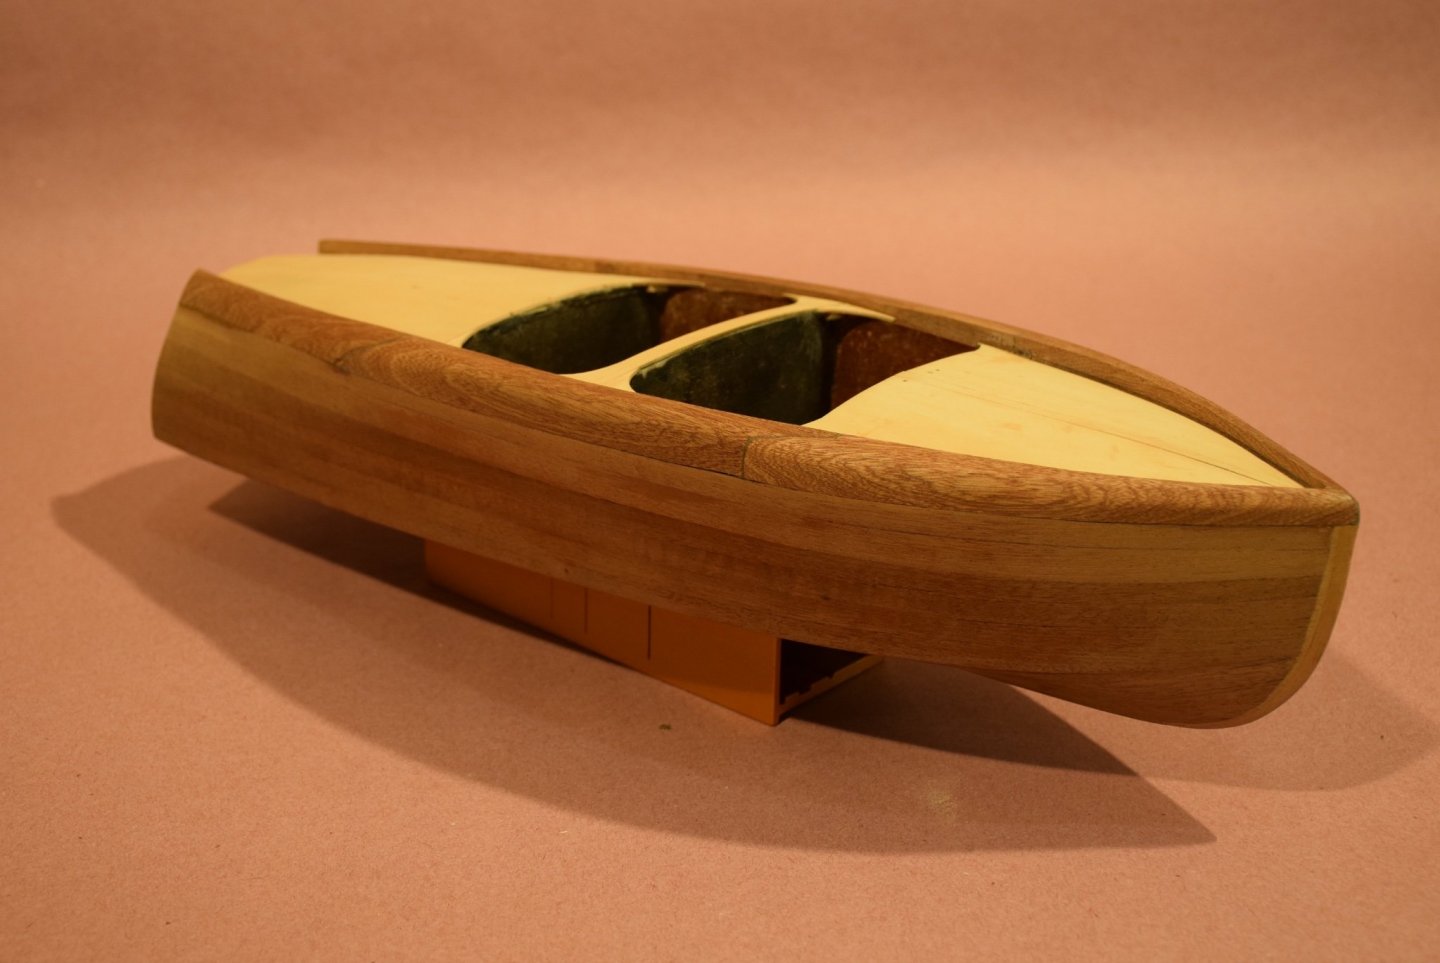
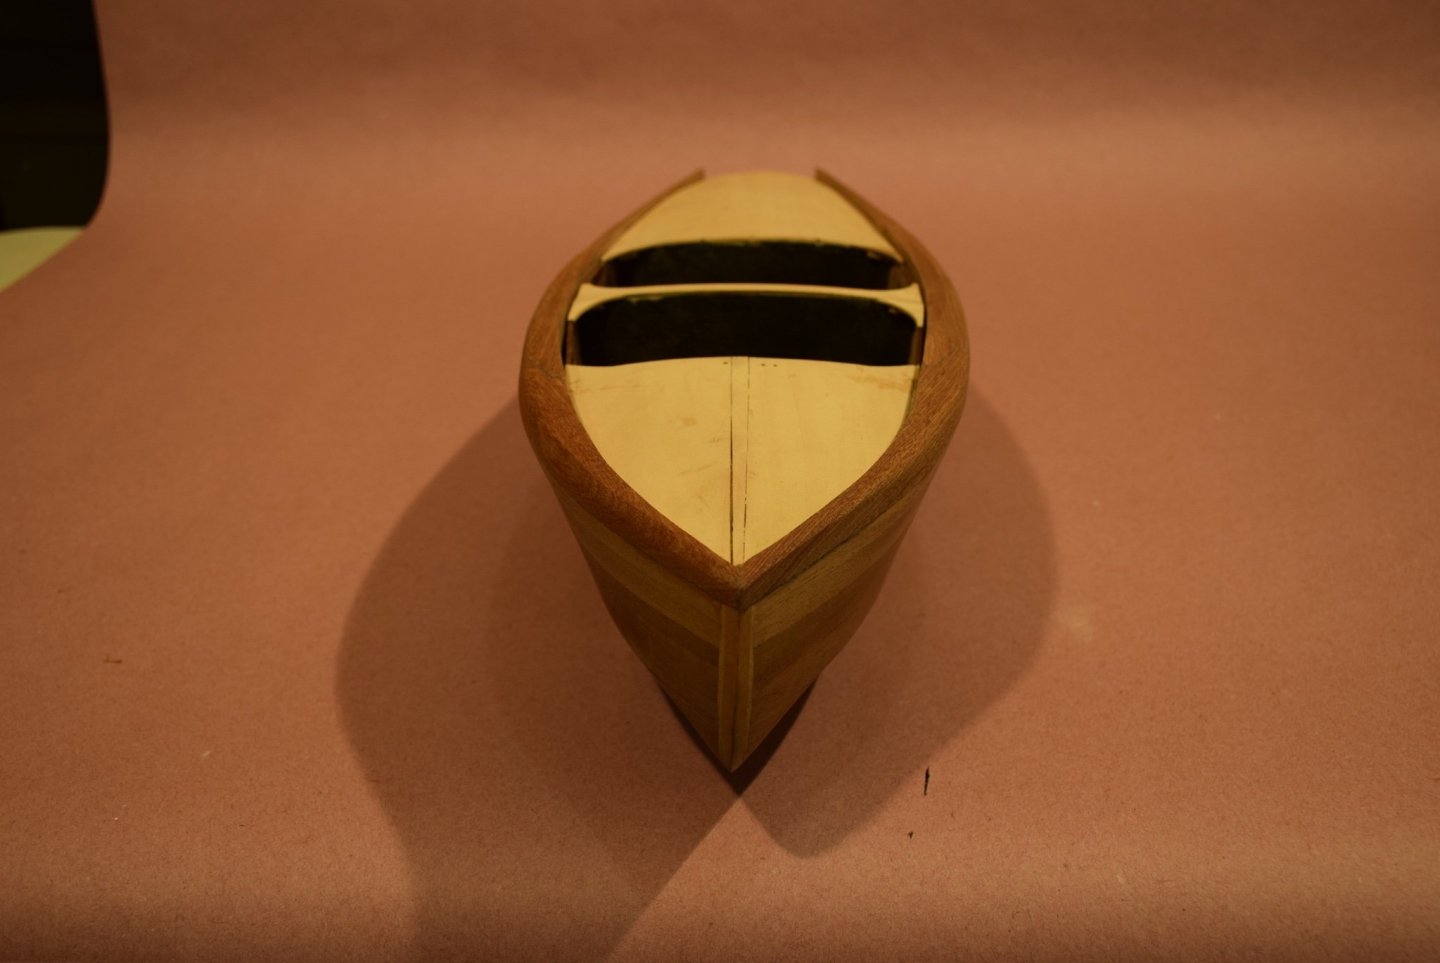
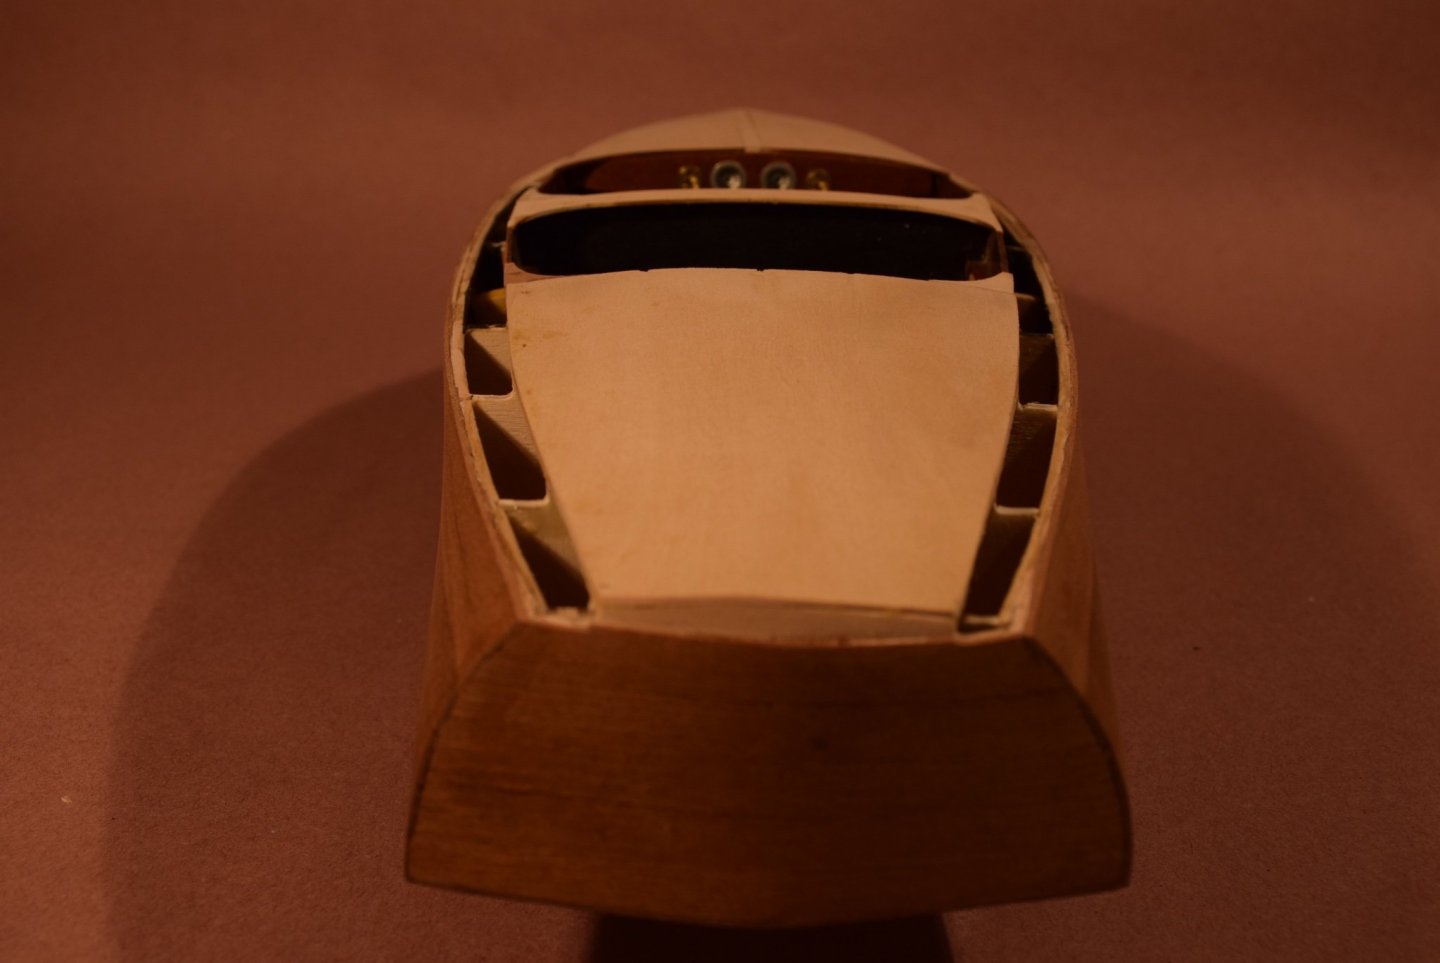
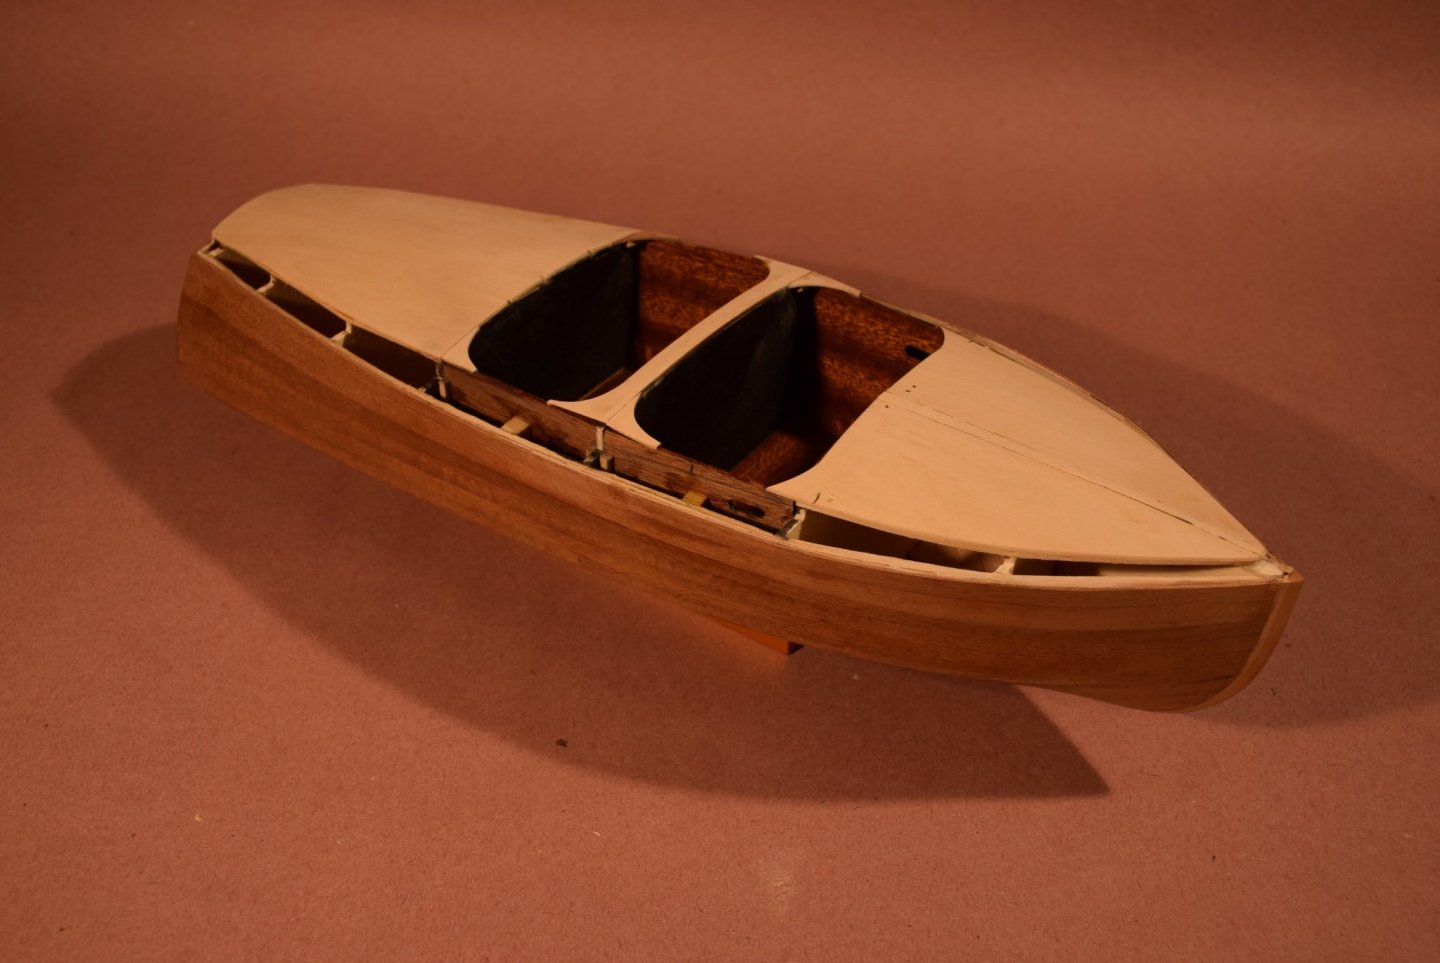
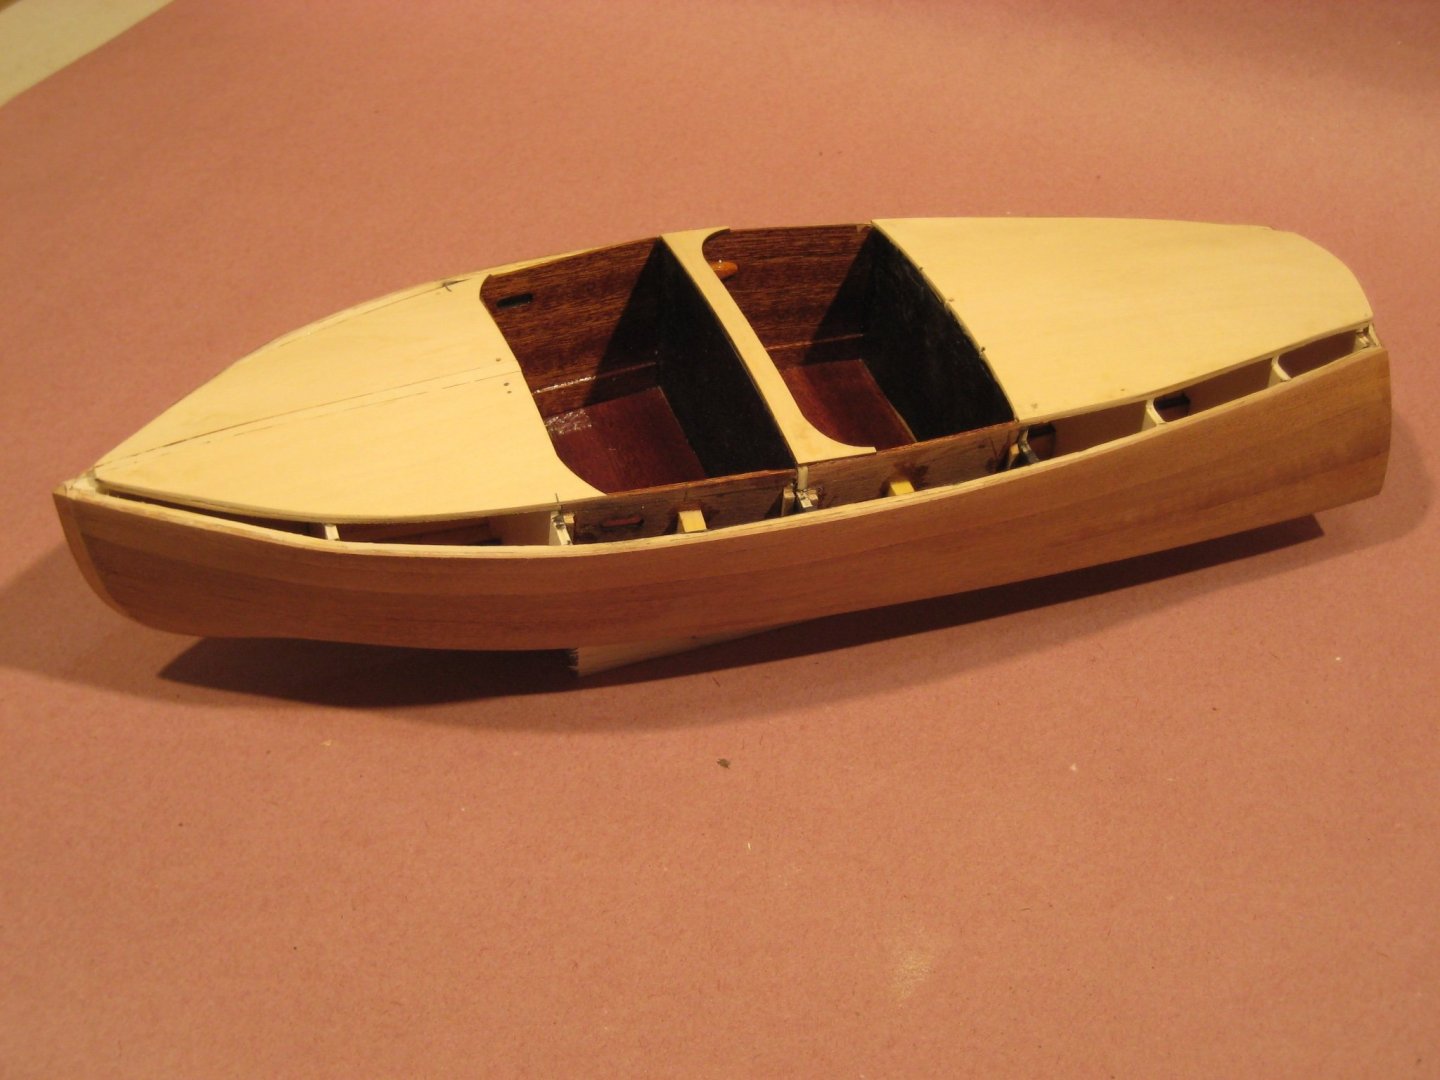
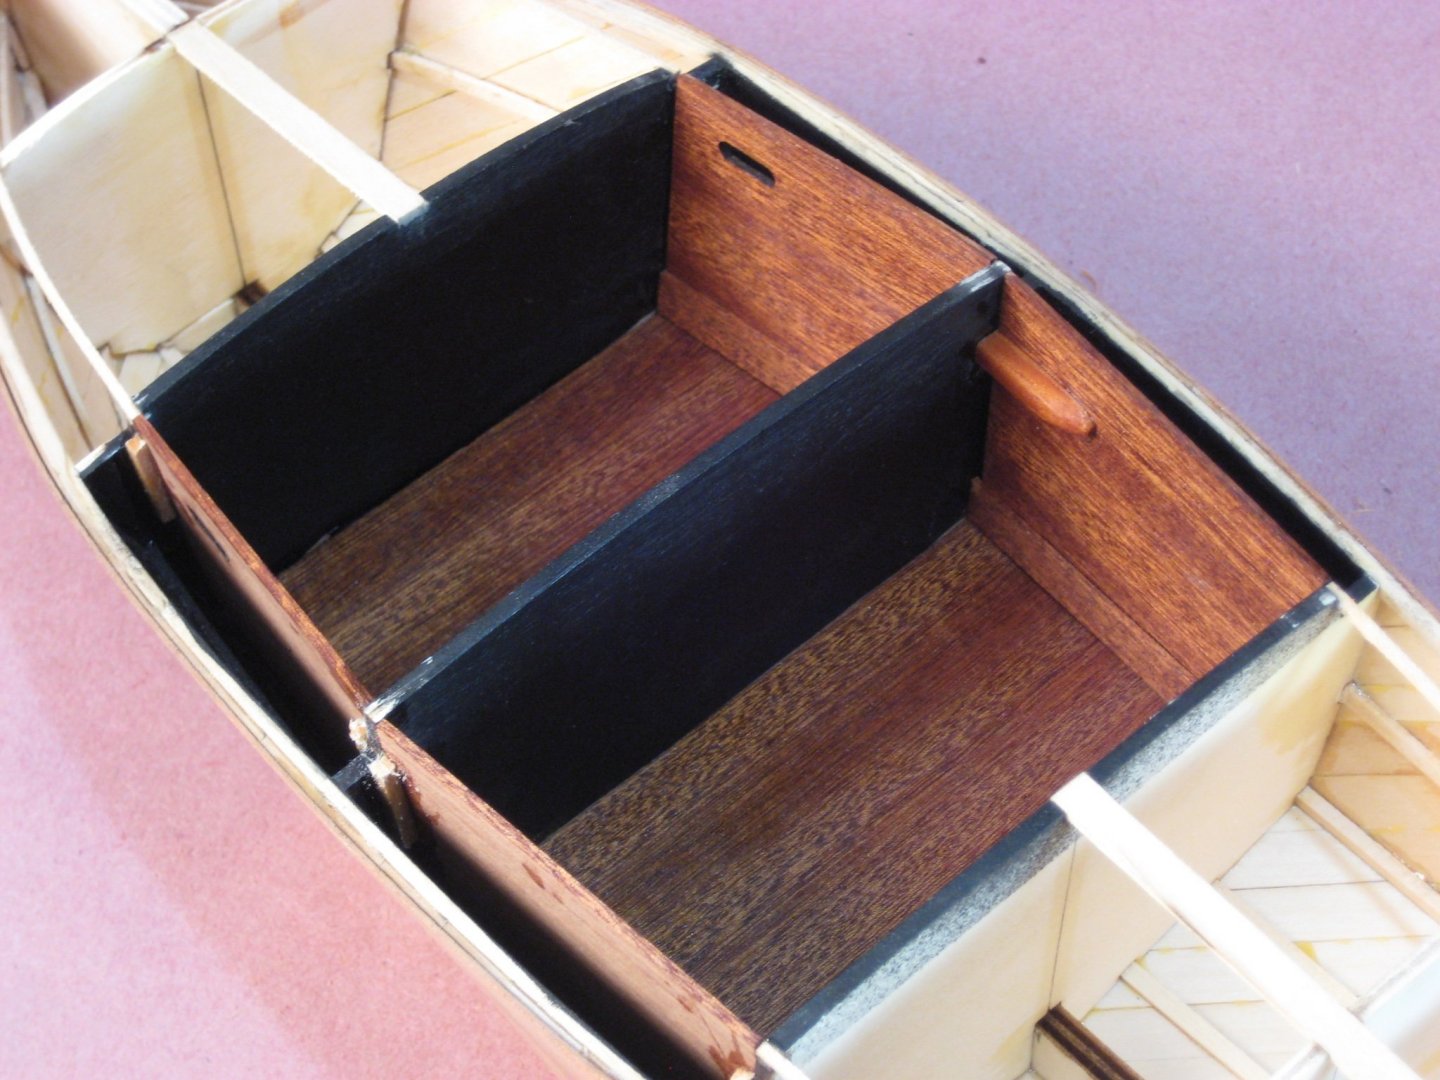
I have been giving a considerable amount of thought as to how to address my problem with the coamings and get the look of the cockpits shown above, I think modifying the models design will kill two birds with one stone (apologies to Blue Jacket for veering from your kit a little). By fabricating the coamings with a fair curve and filling in the space between the cockpits side walls and the coamings with thin strips of mahogany I will get the modified look of the fore and aft rounding of the cockpit openings and allow the correct faired look of the coamings and fix my screw up with the cockpit side walls. Diving in I made paper templates and then the sub decking filler pieces supported by small blocks on the bulkheads after I got them all in I'm sure I can make this change work. Not sure why these photos are so dark? I think the camera is compensating for the light sub decking. This photo is close to the angle of the real boat photo above. And a more overhead view I think this looks pretty good and I am happy with this change so far. Once I start the final deck planking I will shape the portion over the dash to more closely resemble the new curves hopefully I have the skill set to see this change through...and still be happy. To be continued...
-
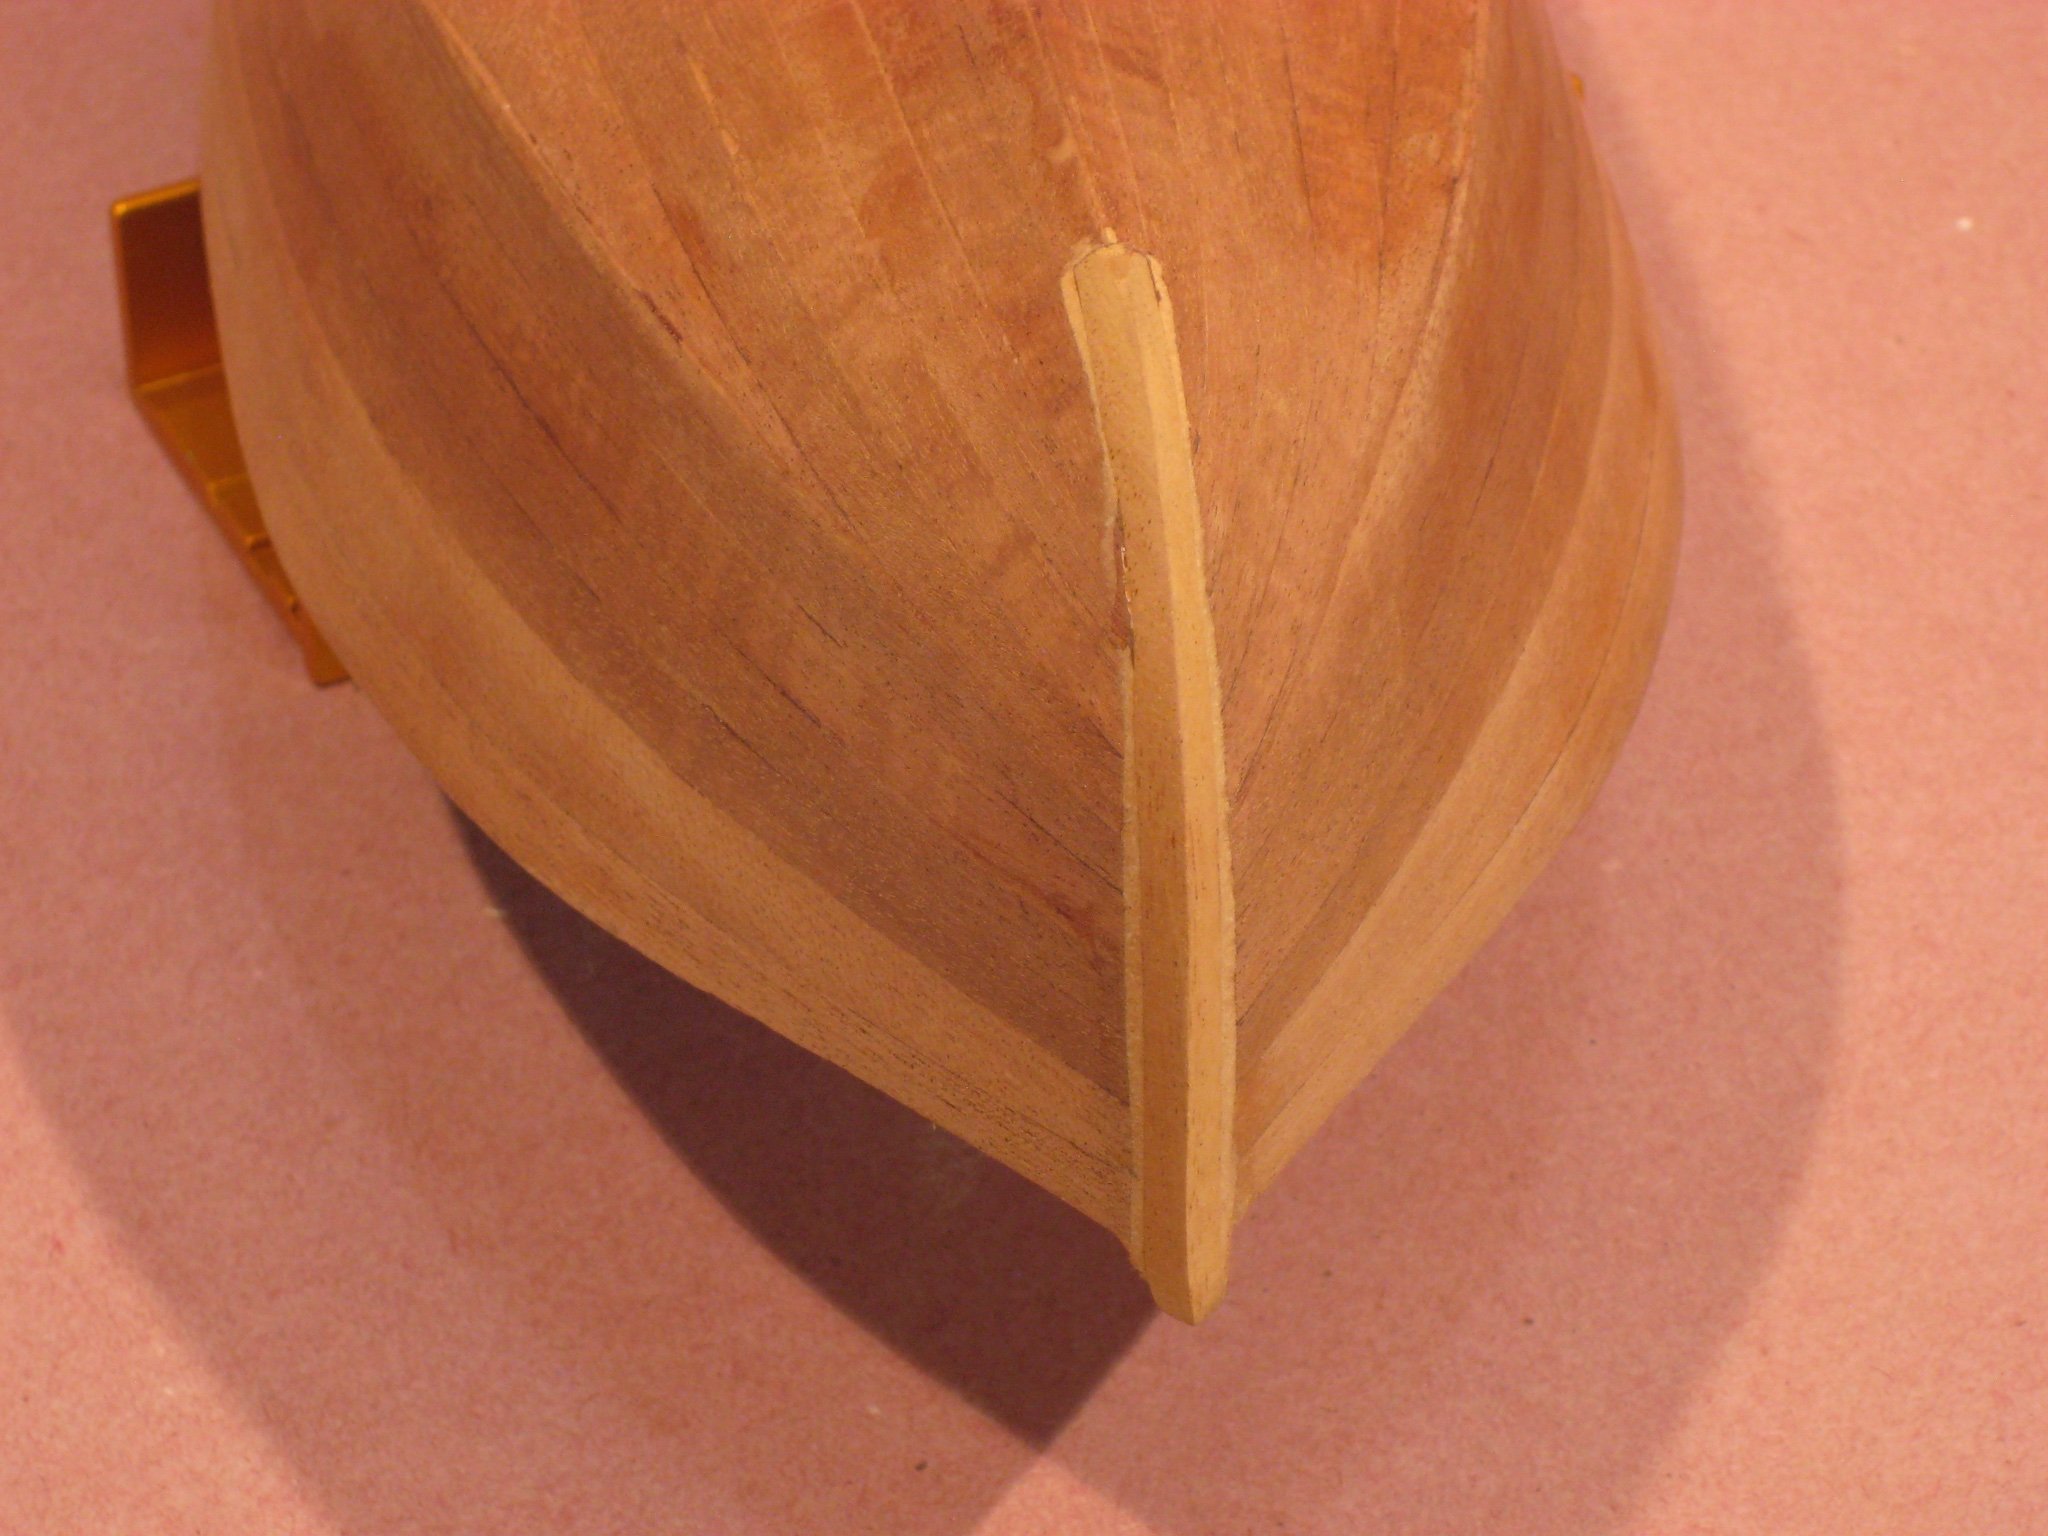
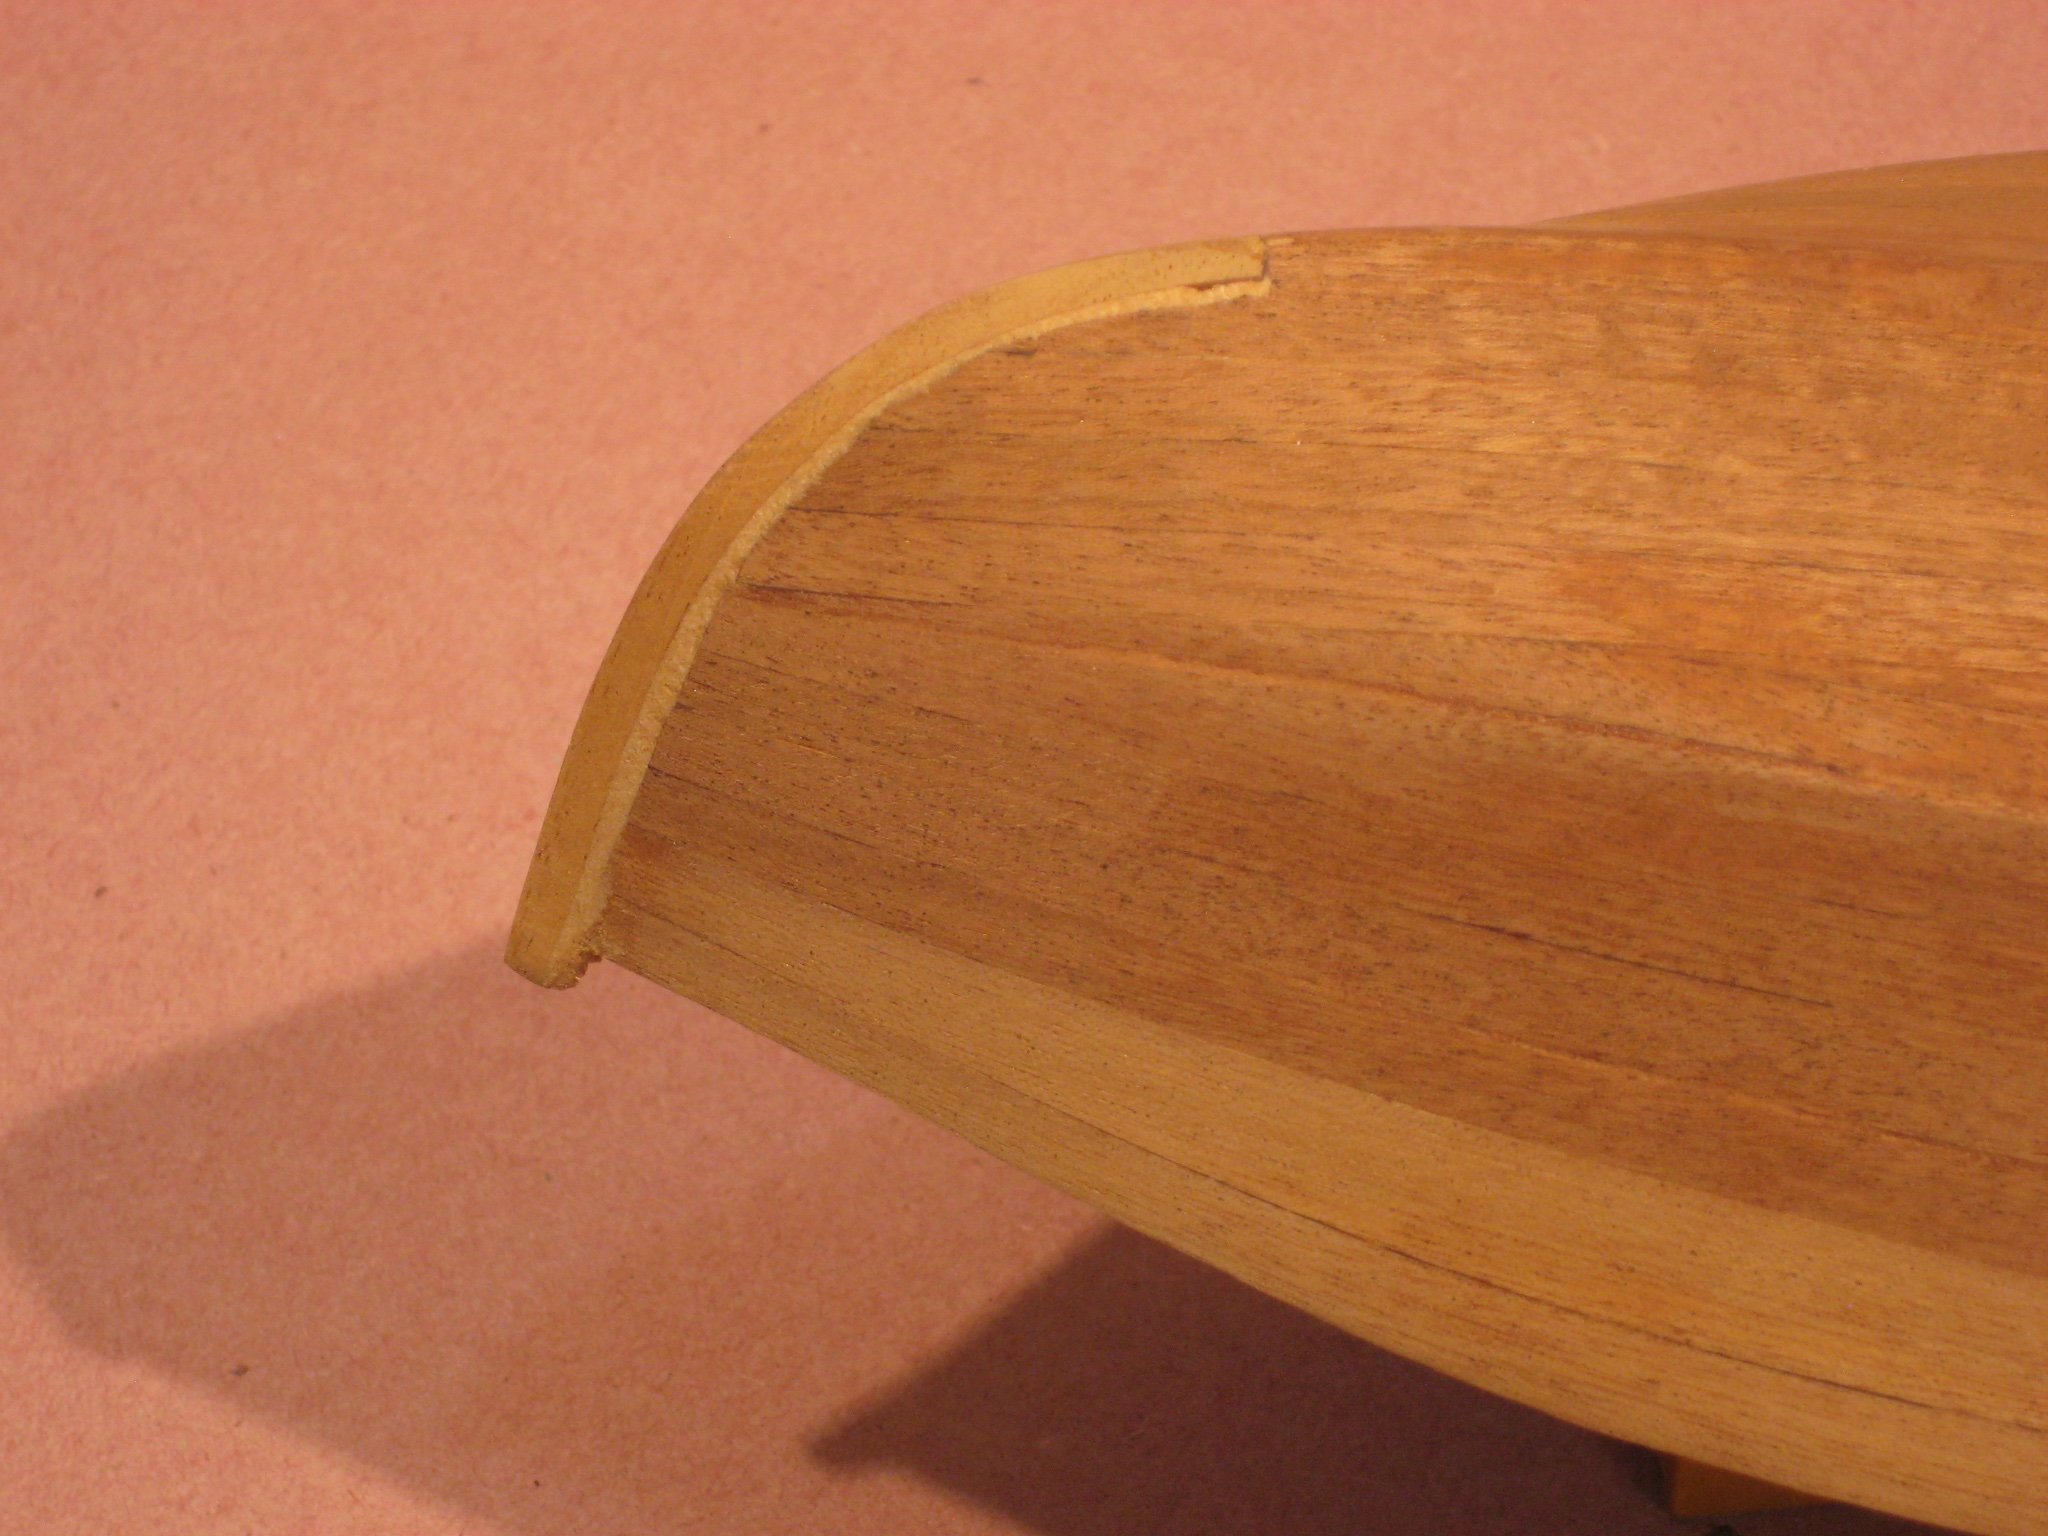
Thought I had deleted the front view stem photo from my previous post above. I did take a photo of the cockpit design I am contemplating a picture is worth a thousand words especially with my writing. To be continued...
-
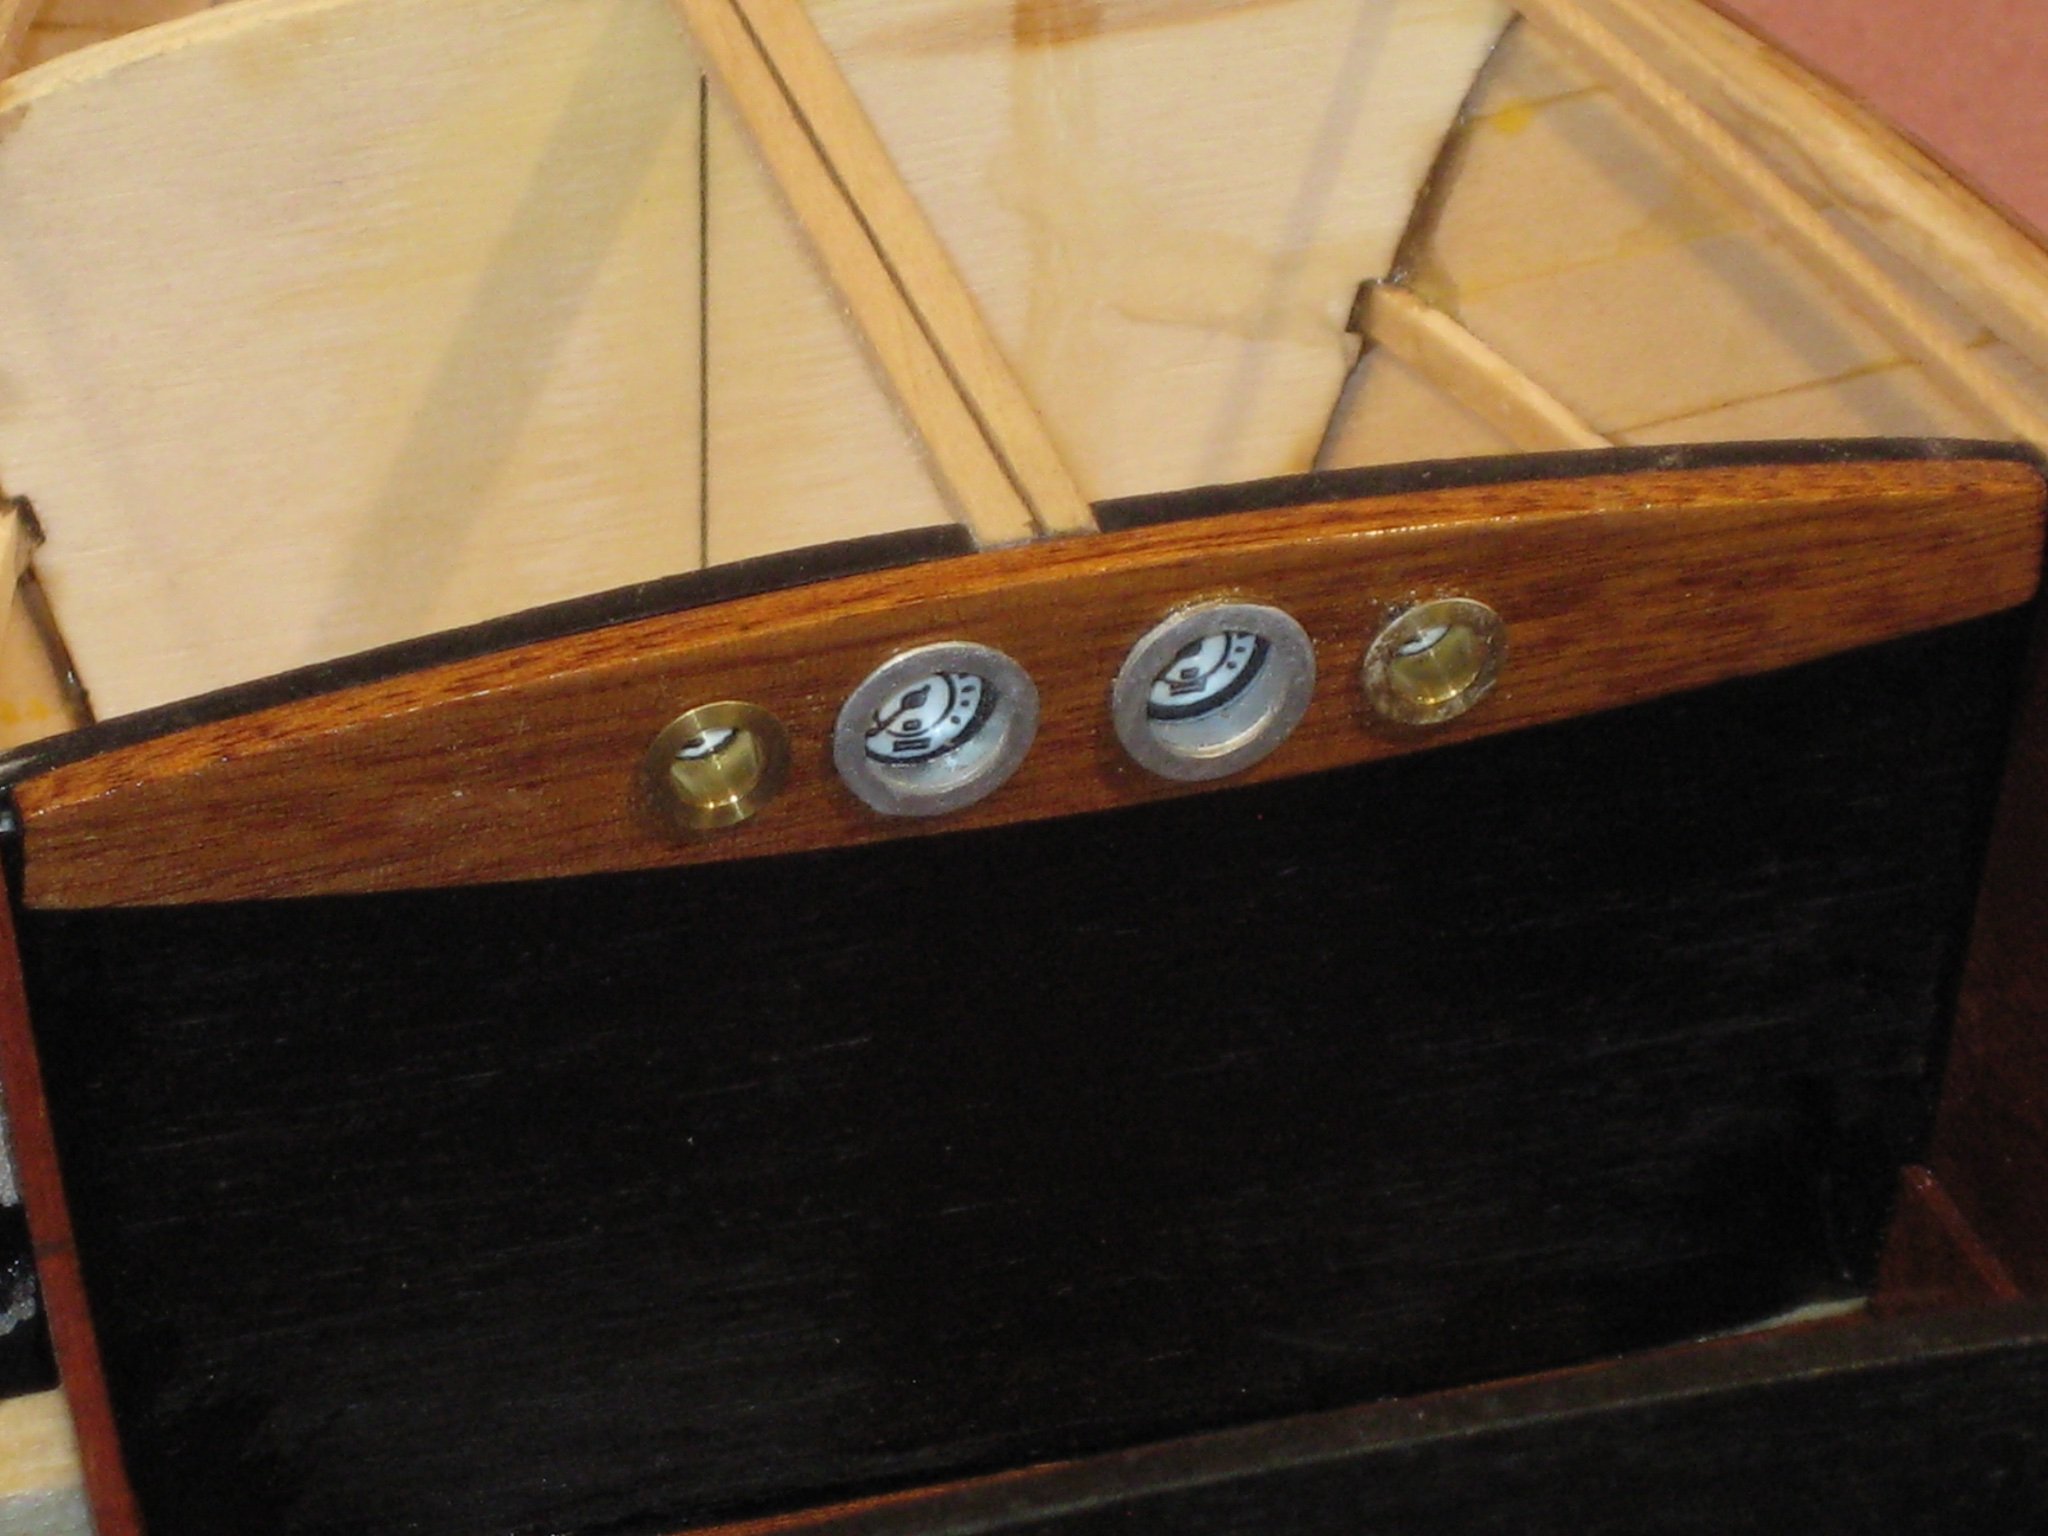
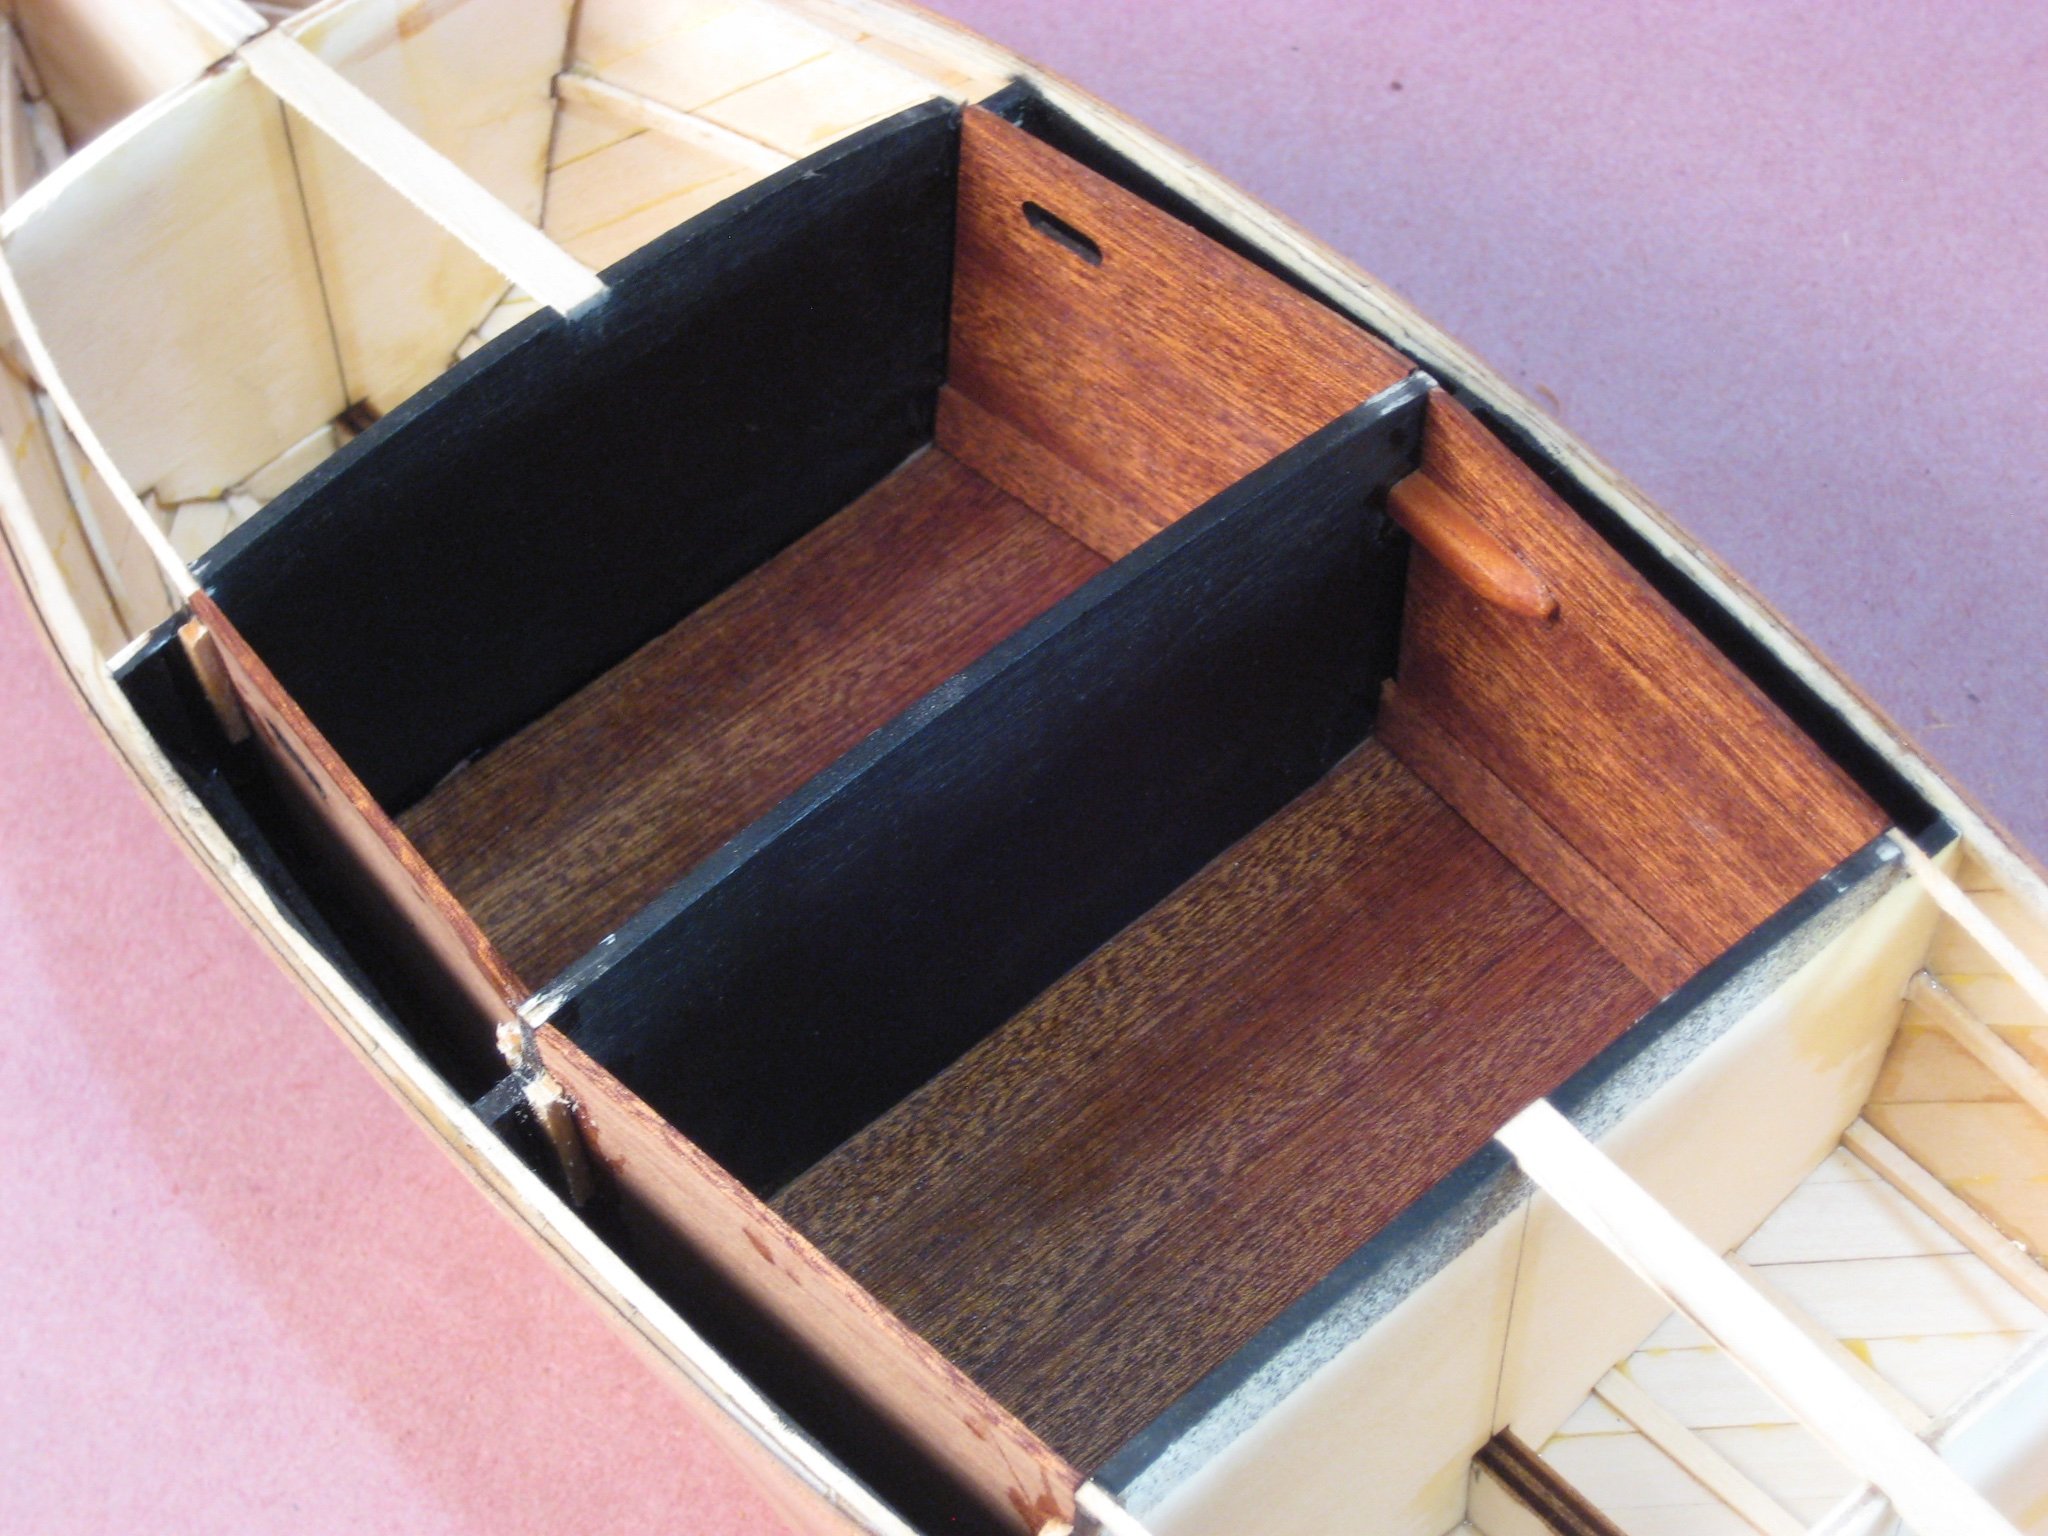
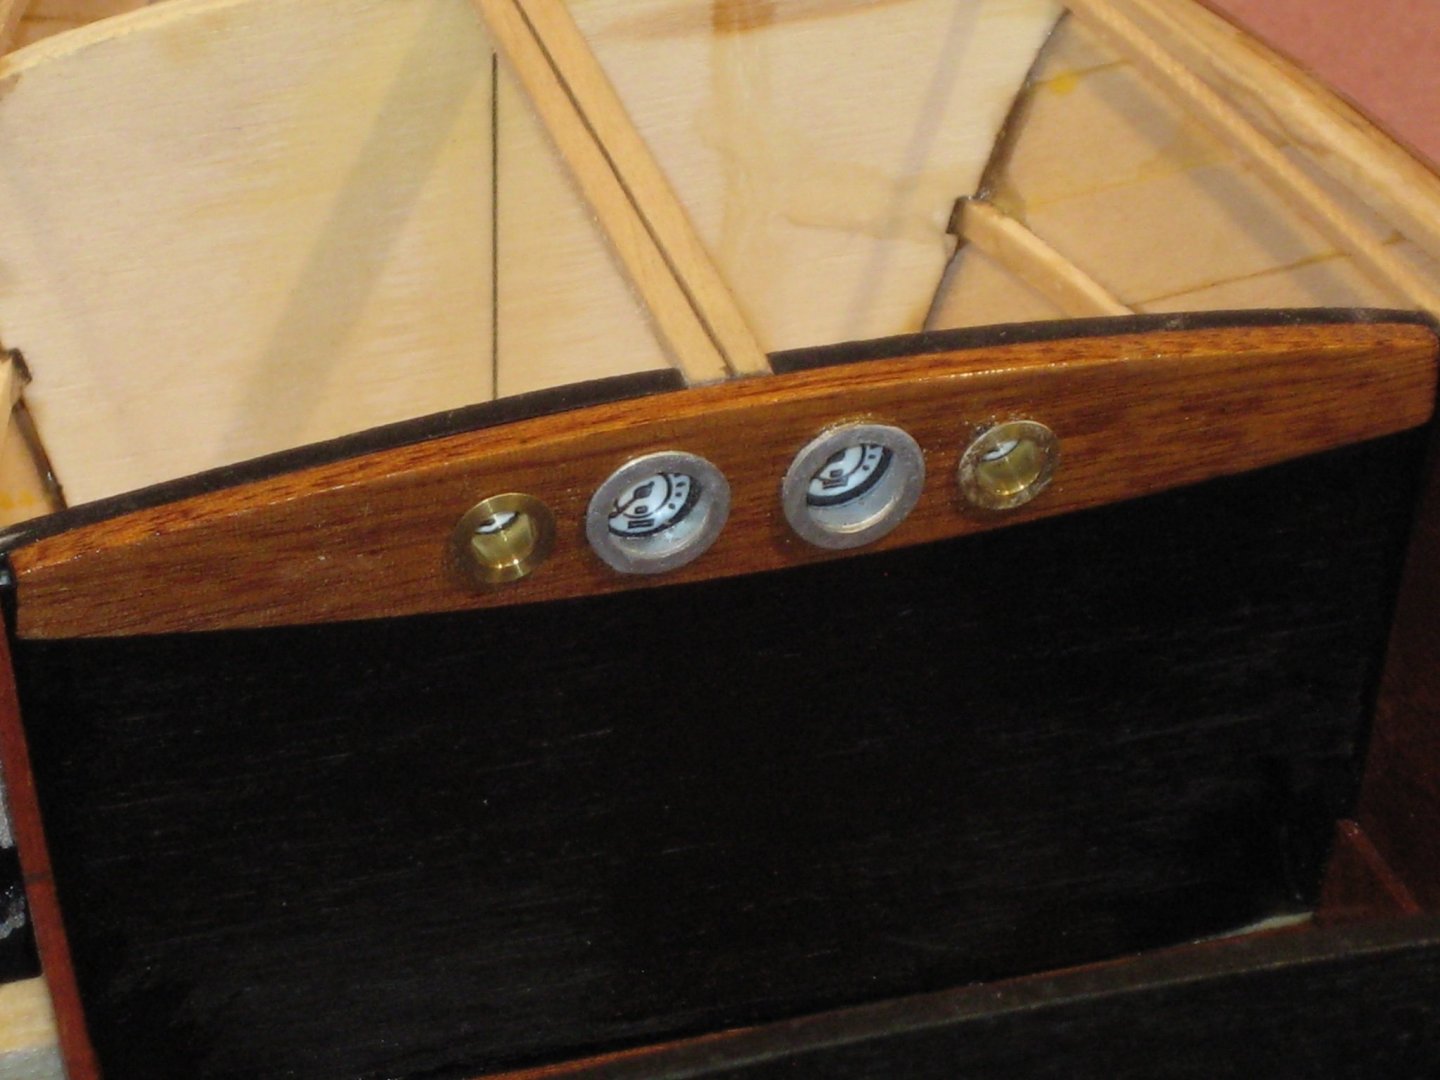
Sorry it's been a while...The kit comes with a scaled set of instrument dials you cut out and glue to the back of the dash I wanted them to have the look of glass covers so I copied the dials on a gloss y photo paper subtle detail but it worked and Installed the dash. In an earlier post I was fretting about the stem needlessly it seems because the installation and fairing went well I think I used a mix of 50% water 50% white glue and mahogany sanding dust to make a filler. Next up was installing the deck sub-planking pretty straight forward. The next step is to fabricate from 1/2" mahogany the port and starboard 3 piece coamings as I was working out the card stock fitting patterns I was struck with a mistake I made (again) with the cockpit sides if you look at the photo below you will notice that I put some camber in the sides but not enough to make a fair curve bow to stern. The coamings are supposed to fit right against the cockpit sides but this will look terrible in my opinion. I am thinking I can shape the coamings with a fair curve leaving gaps between the cockpit sides and the coaming because eventually this joint will be covered by a styrene tube that simulates padding but I am not sure if the tube will cover the gaps completely. My other thought is departing from the model's plan with a re-shaping of the front and rear cockpits final decking surrounds I have seen full size barrel backs with full rounded corners at the front (like the model) and at the rear where the seats will be located (I have a PDF photo but I don't know how to upload it here) I really like this look .... Just have to figure out how to make it happen. To be continued...


-
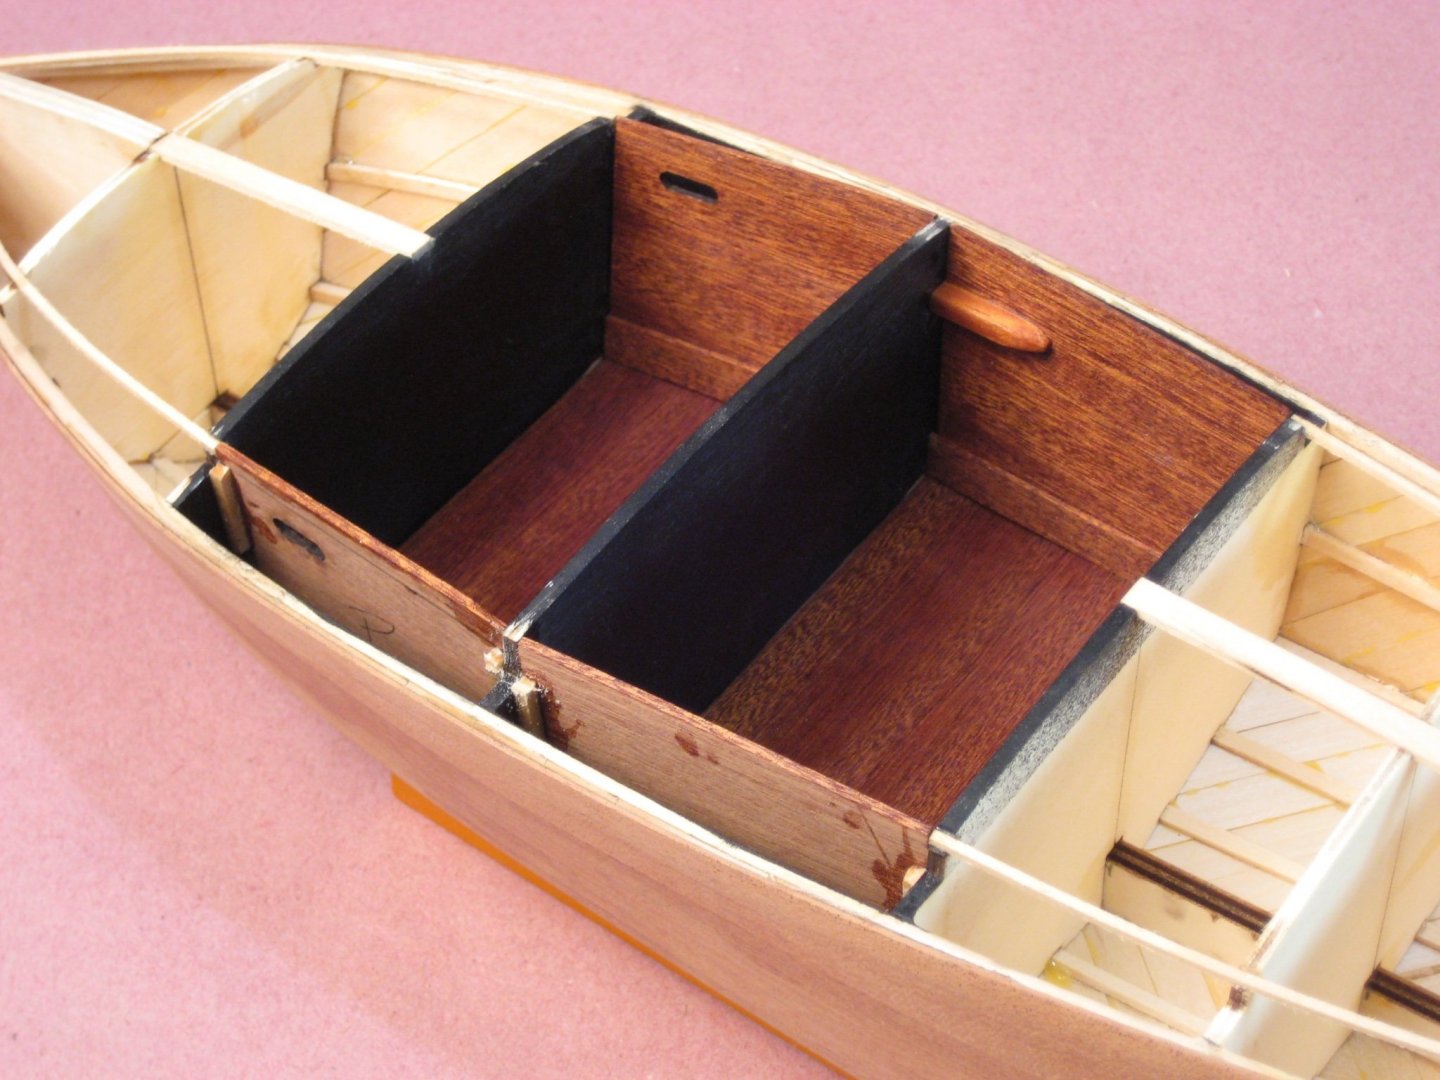
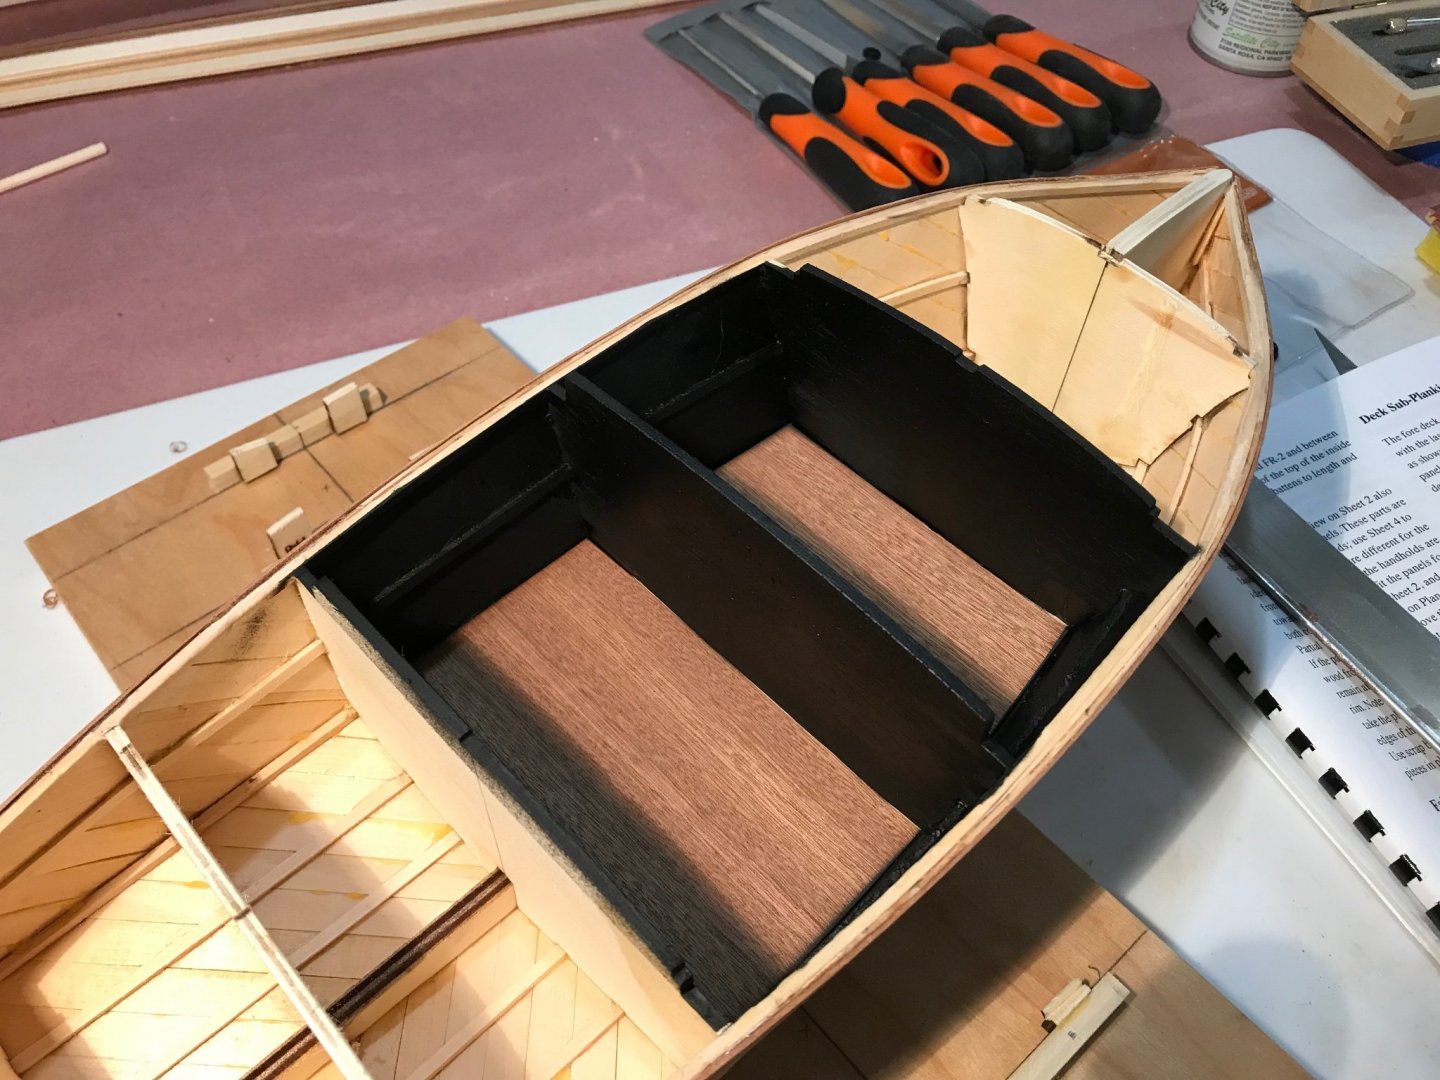
Thanks John... it is about the challenge of the journey not the destination. Finished the mis-made panels with only a couple of hours of work and installed them. I added a foothold/step in the rear cabin similar to ones I saw at a wooden boat show that took place a few months ago at the lake where we live on... I am happy with the fix. I also managed to get a couple of coats of pre-varnish wood sealer on. To be continued...
-
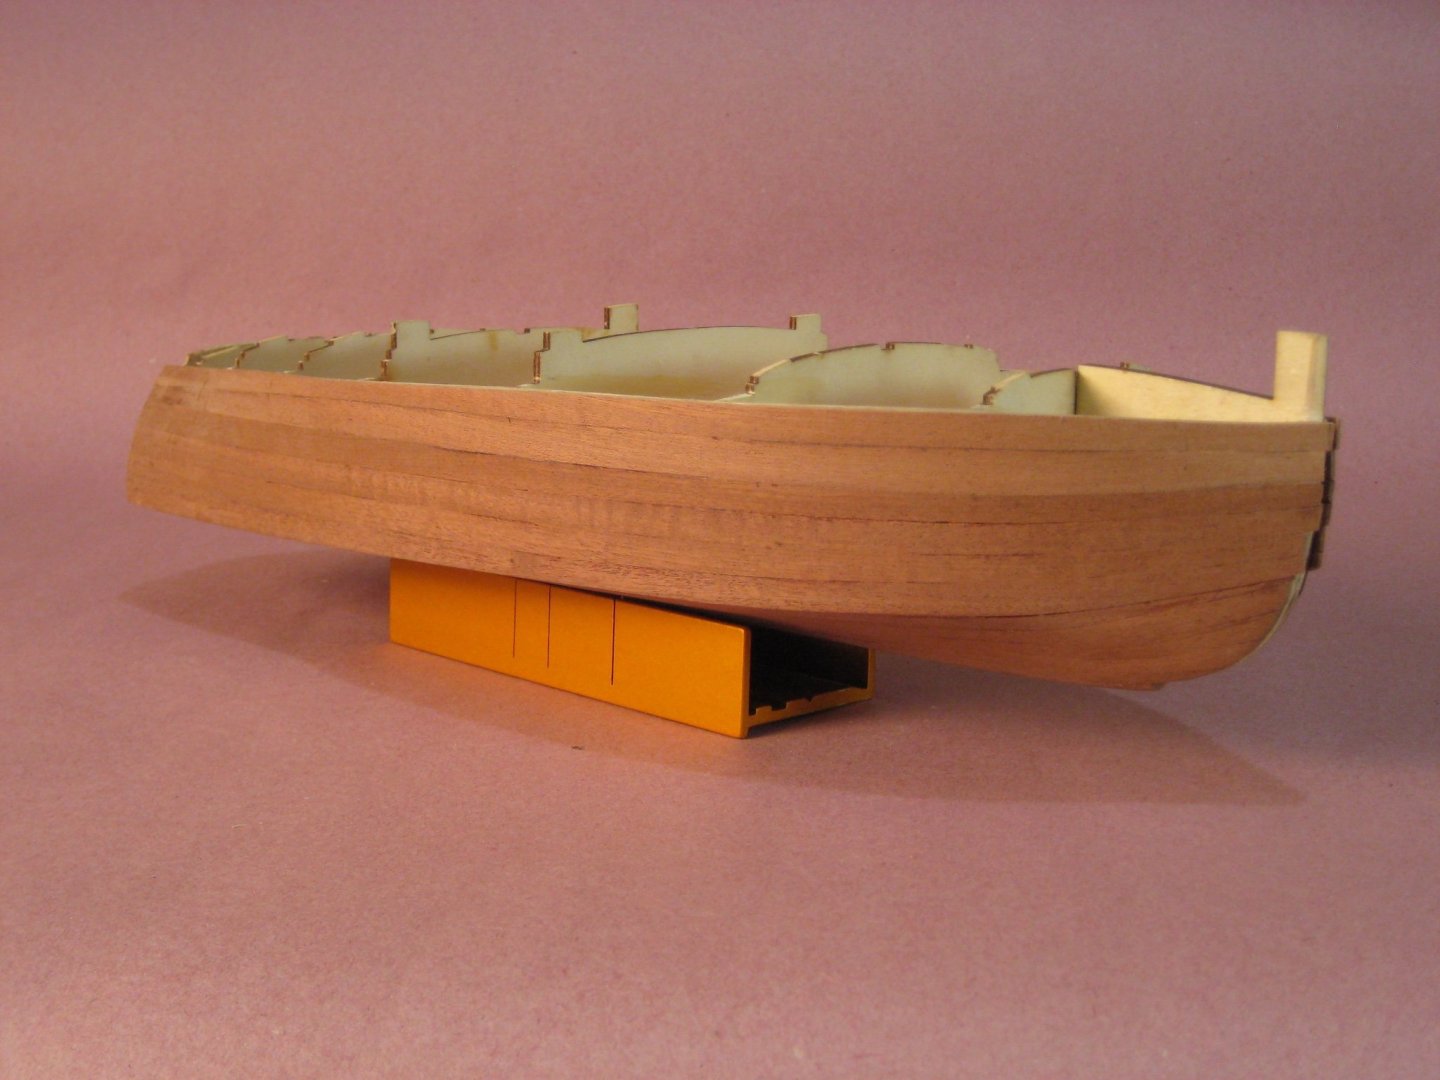
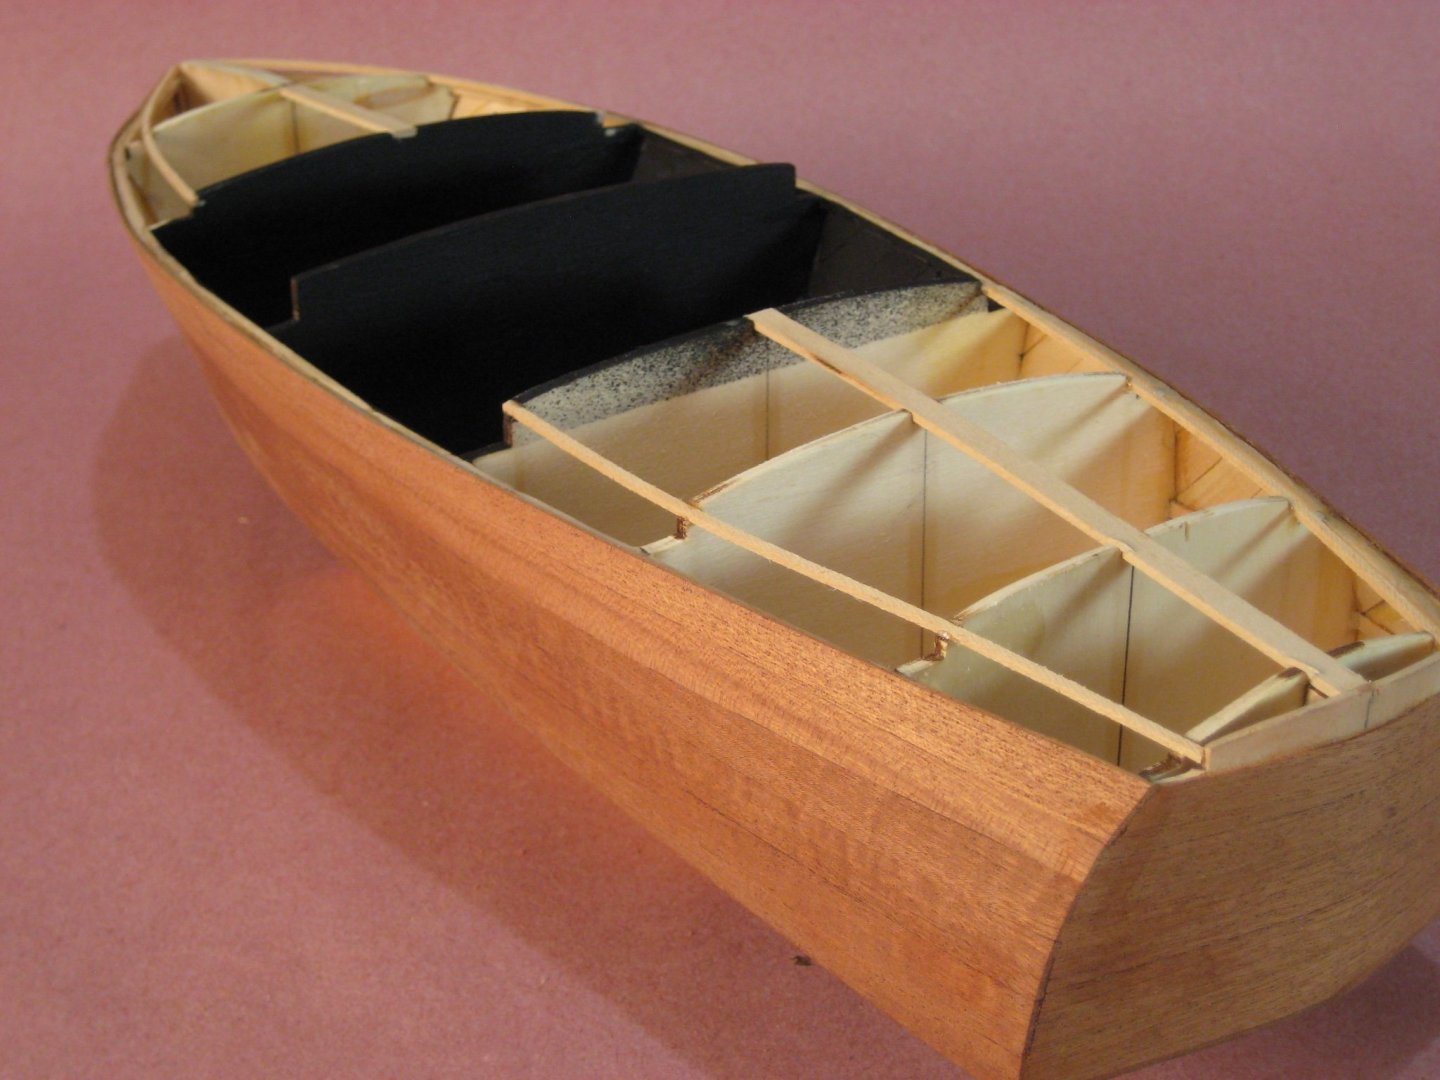
Haven't had a whole lot time to devote to modeling lately...over the weekend I did install the cabin floors and painted the bulkheads with a couple of coats of flat black to provide a sense of depth for the footwells. I also completed the deck sub framing...Pay attention to the outer framing where it meets the cockpits at the front and rear I will explain later... Worked a few hours this morning fitting the four cockpit walls and realized I had made a big mistake... properly done the walls should be a continuation of the outside deck framing however I had oh so carefully fitted all 4 of them to the sides of the hull...uggh! Thus they all were way to short (and the rears too narrow) to fit in the proper locations. After calling myself a few choice words for not double checking the plans (mostly DUMB _ _ _ ) since I forgot who I loaned out my board stretcher to I started thinking about how to correct my mistake. I made card stock templates of the correct locations and thanks to Bluejacket there was just enough "waste" material left from the laser cut sheets to make two new rear cockpit walls. The front walls were not quite as bad as the rear walls as they were just too short so I will use left over mahogany topside planking to fashion a "baseboard" to fill the gap between side wall and floor I think this will be a good fix and when finished only I, and now you, will know. So my next step is to correct my my totally self-inflicted mistake and hopefully in the process of fabricating and fitting learn a good lesson: to read the instructions and look at the plans more carefully...twice. One more time to self... YOU DUMB _ _ _ Now I feel better. To be continued...


-
Thank you sir! I did some sanding over the weekend and I am happy with the results. I will wait to complete the sanding until just before varnishing. To Be continued...
-
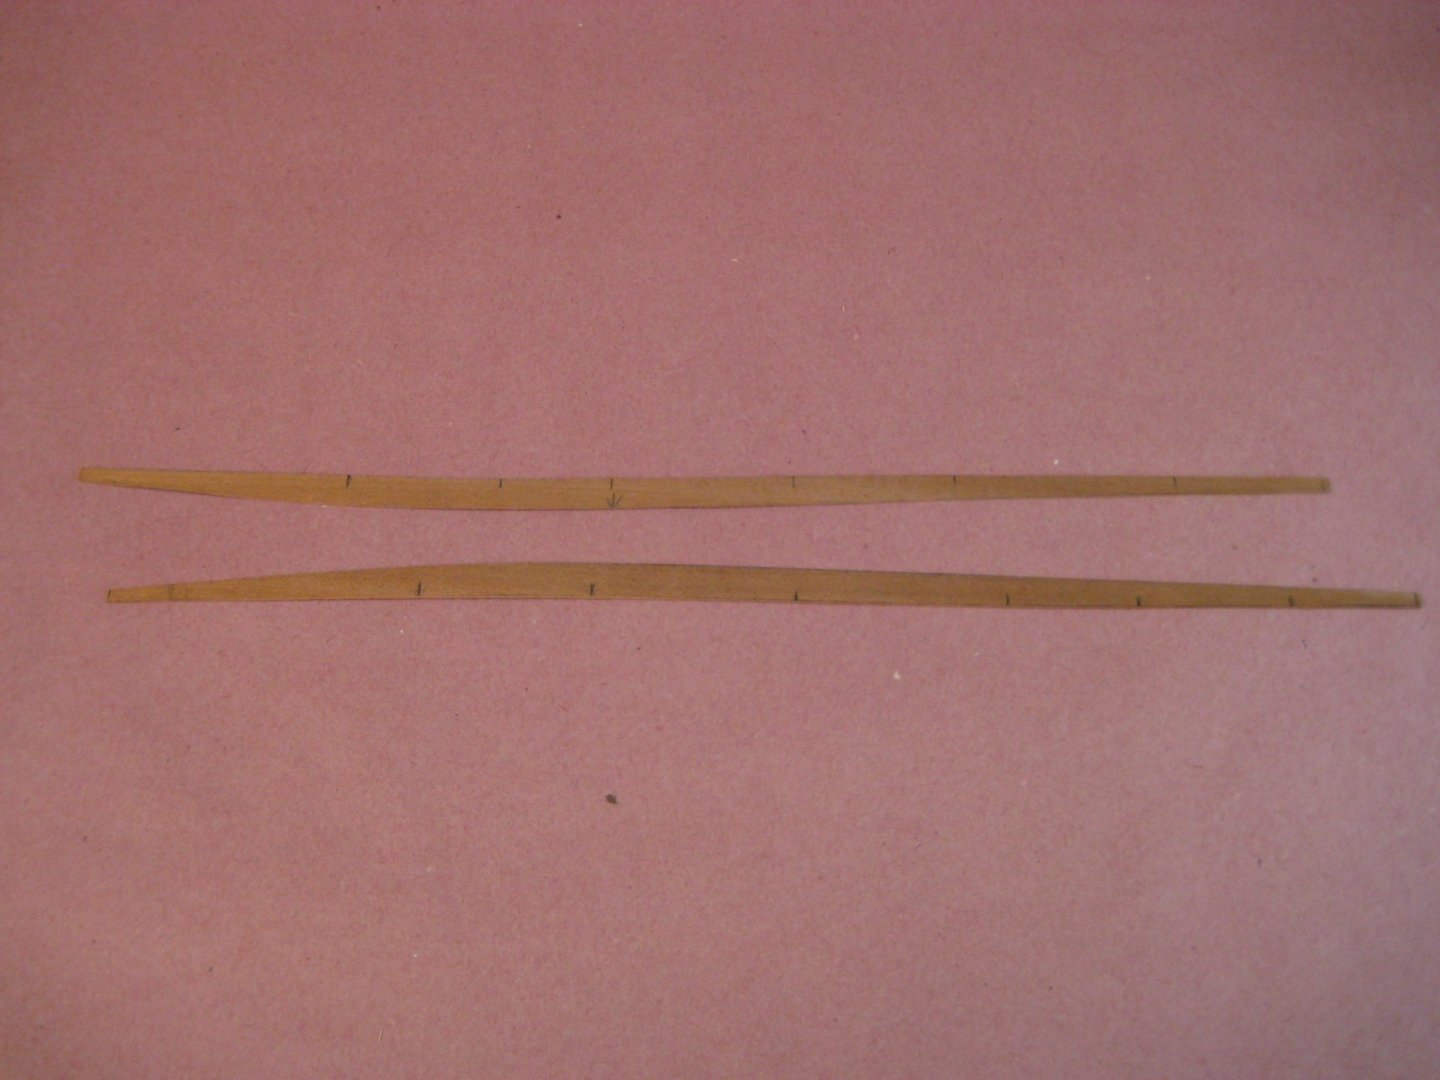
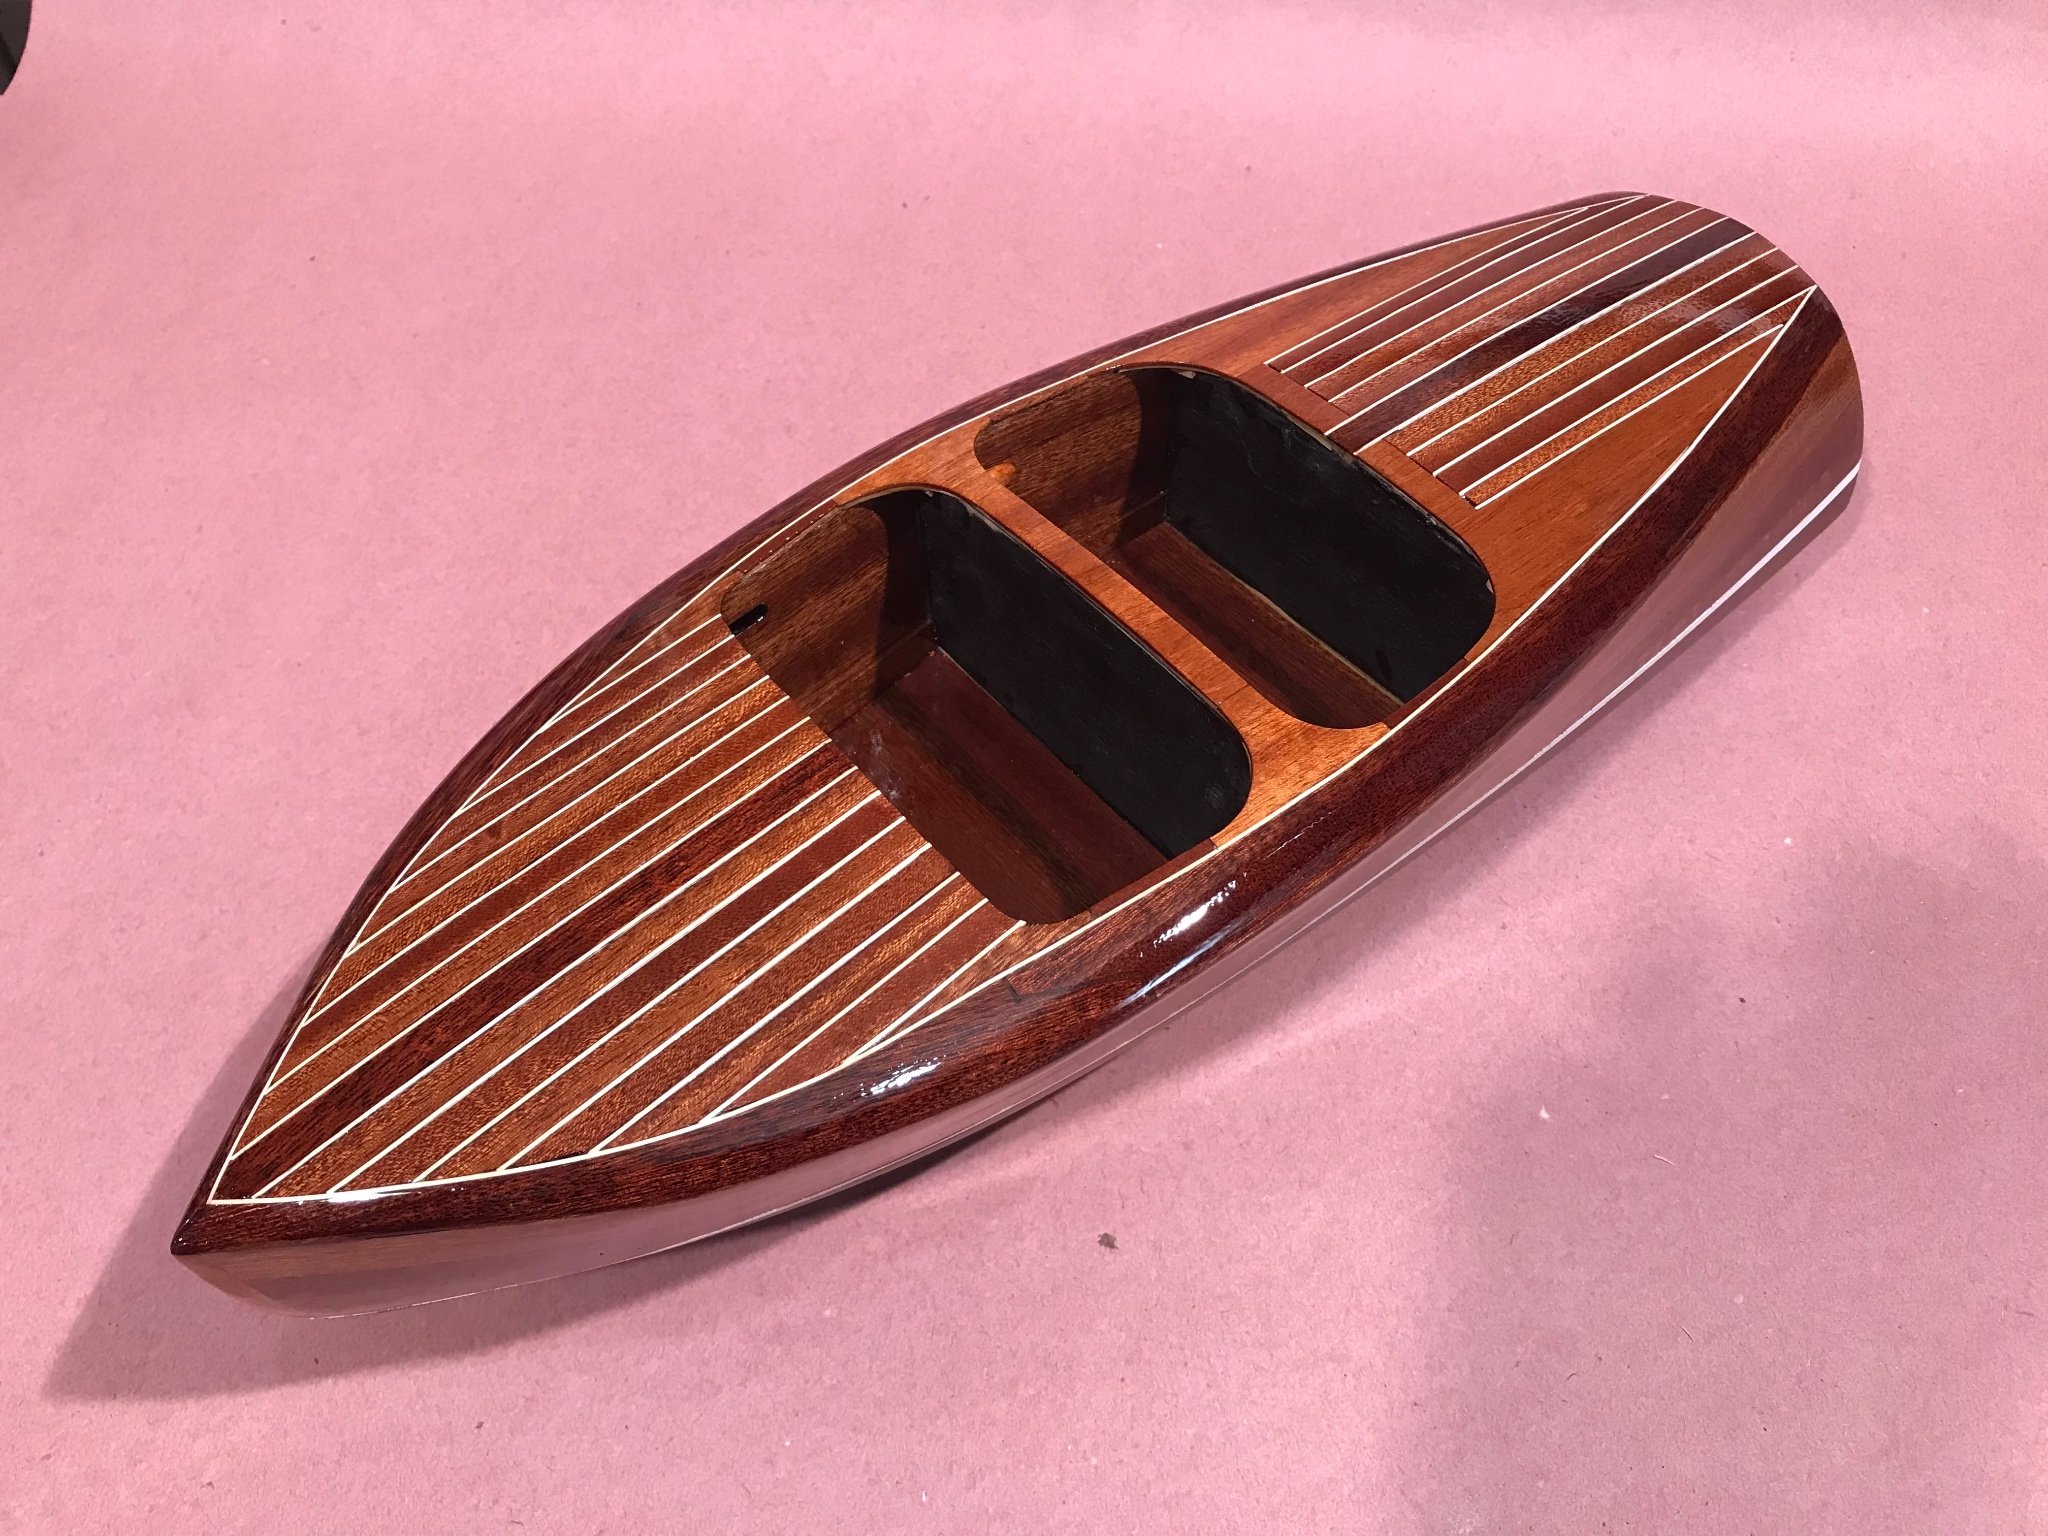
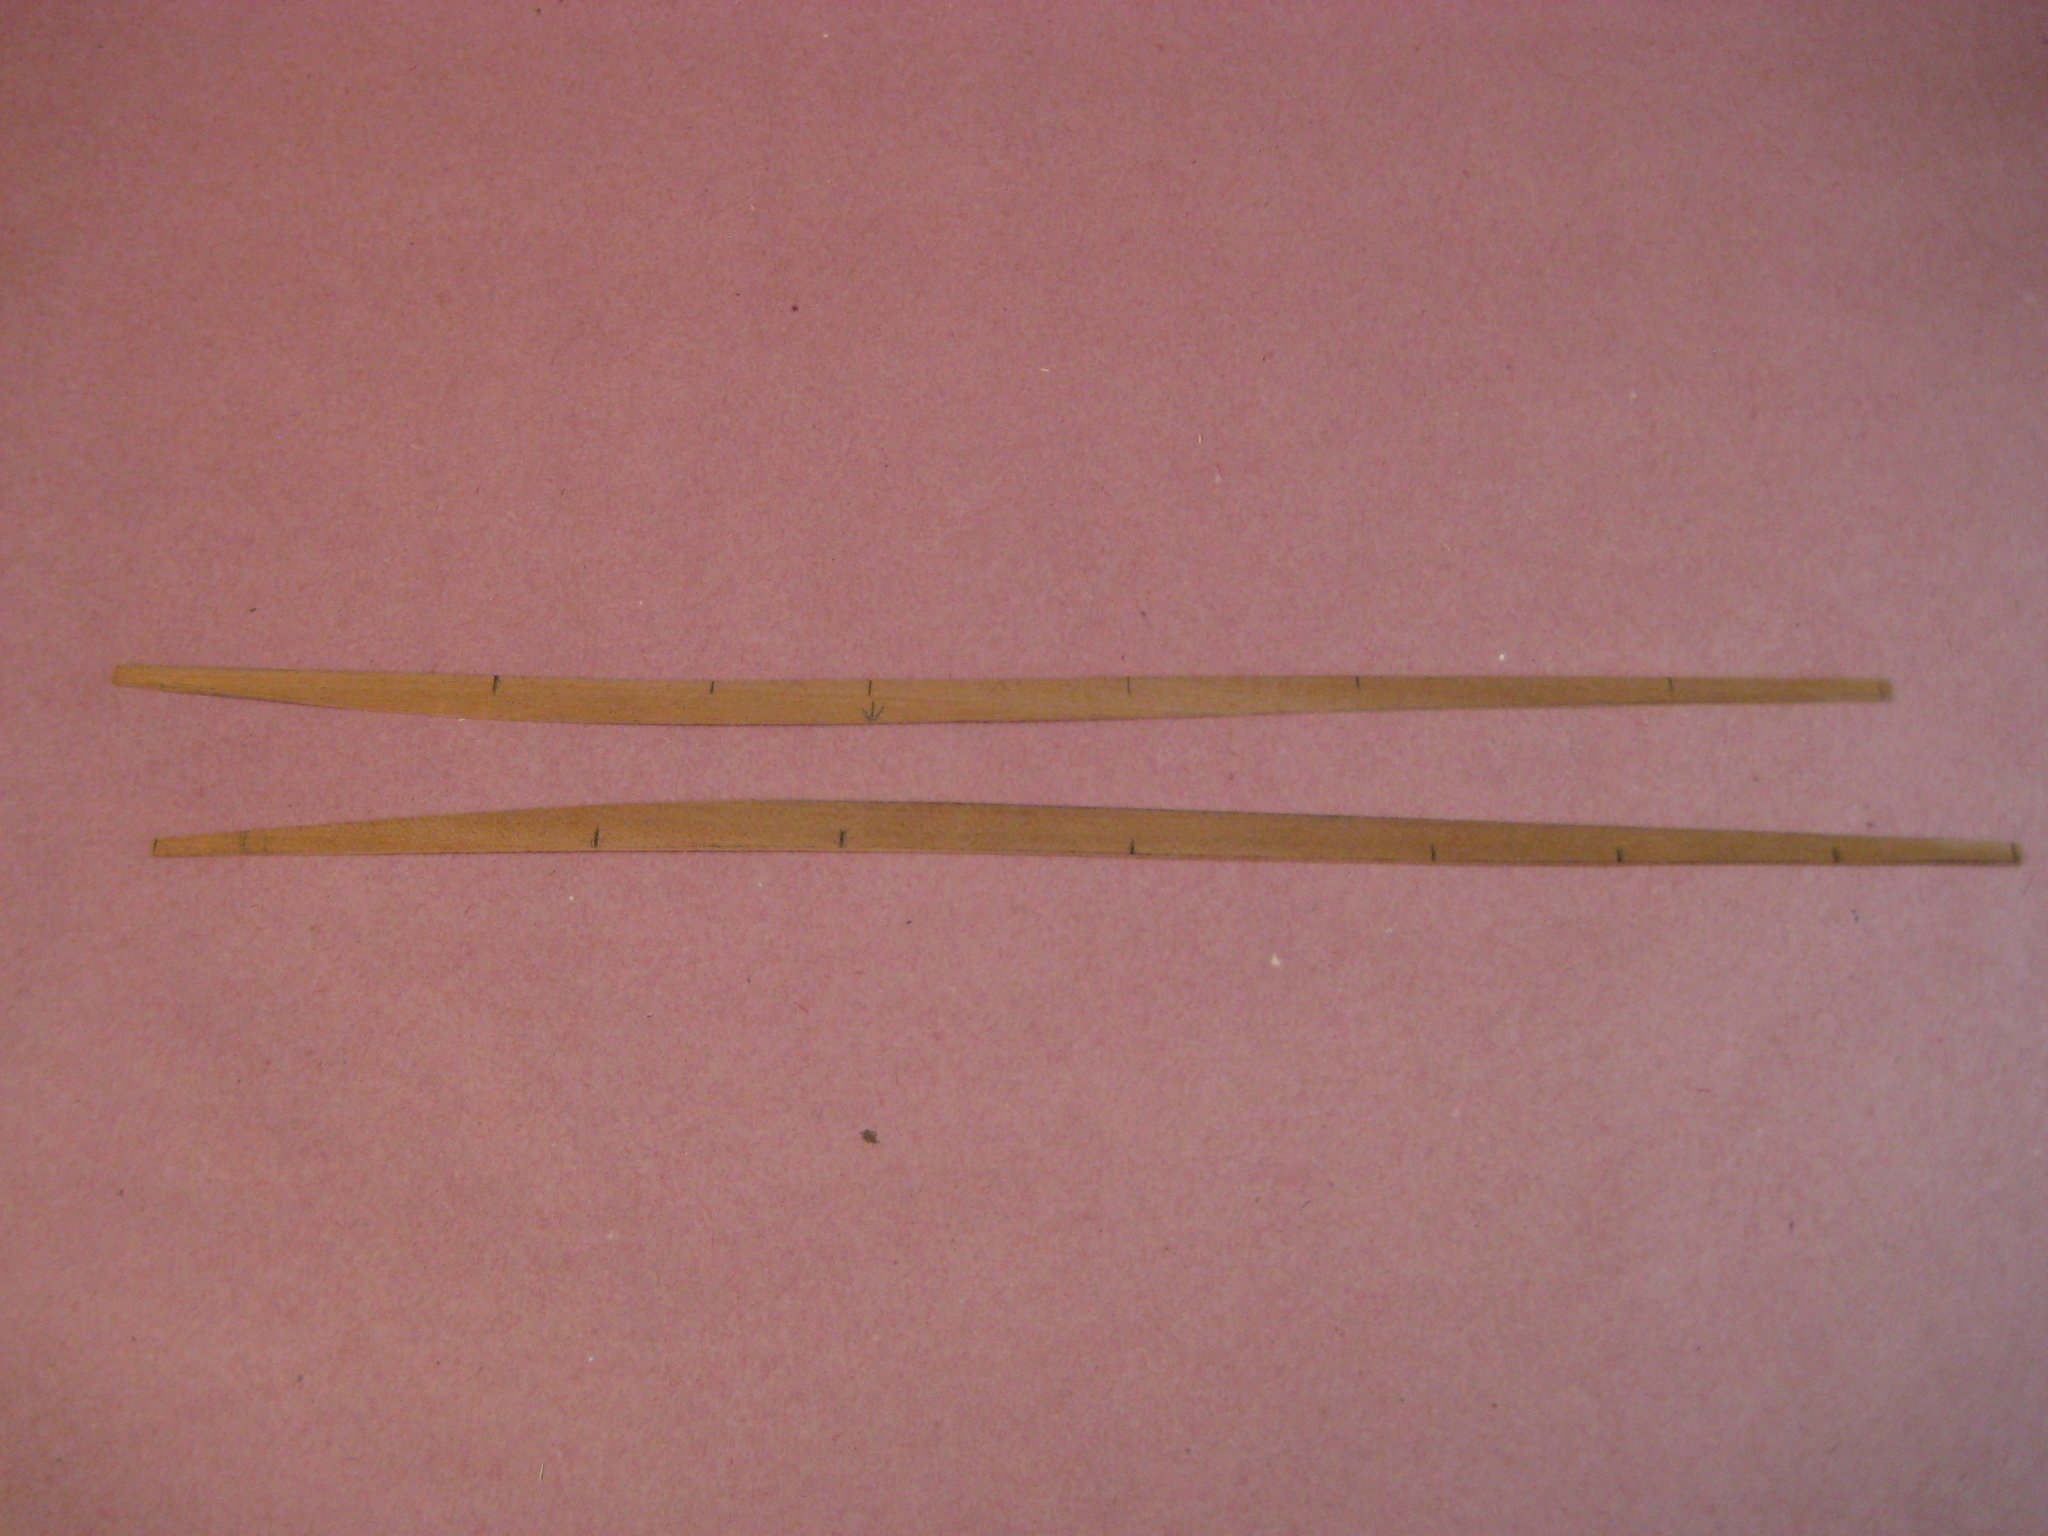
Took a couple of tries but I did get my bristol board patterns for the final two planks but there must be an easier way... any guidance for future projects would be much appreciated! The patterns were very helpful but I am glad I left a 16" margin on all sides when I transferred to the planks Finished port and starboard planks...and below is the finished planking To be continued...