


SparrowHawk7
-
Posts
61 -
Joined
-
Last visited
1 Follower

Recent Profile Visitors
286 profile views


-
 Overworked724 reacted to a post in a topic:
US Brig Syren by SparrowHawk7 - Model Shipways - 1:64 - First build
Overworked724 reacted to a post in a topic:
US Brig Syren by SparrowHawk7 - Model Shipways - 1:64 - First build
-
Overworked724 reacted to a post in a topic:
US Brig Syren by SparrowHawk7 - Model Shipways - 1:64 - First build
-
CiscoH reacted to a post in a topic:
US Brig Syren by SparrowHawk7 - Model Shipways - 1:64 - First build
-
Prowler901 reacted to a post in a topic:
US Brig Syren by SparrowHawk7 - Model Shipways - 1:64 - First build
-
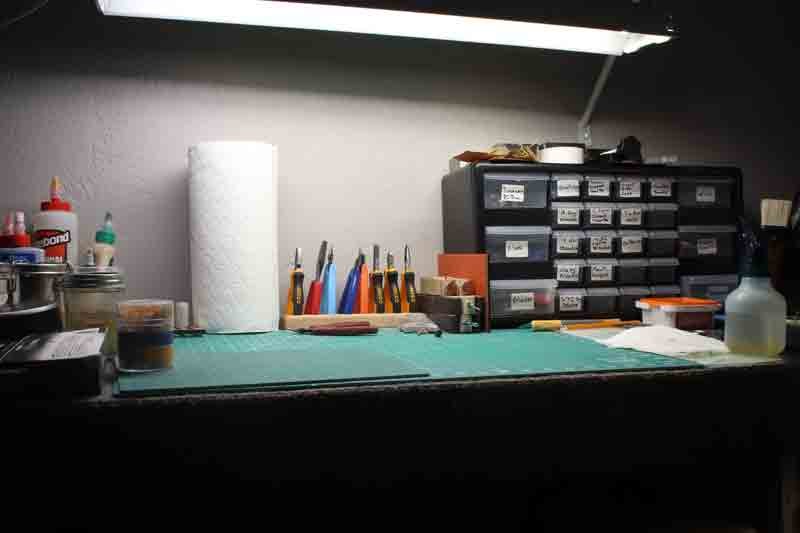
I'm back although nothing new particularly. I spent quite some time getting my tripod arranged so as to get you fine people better/clearer photos. That also required a remote. I tried 2 bluetooth remotes without any success whatsoever so they got sent back and I got a wired remote which worked, but I discovered I will need remote flash units. I wore myself out by then and had to put that off for another day. But I did get two shots without extra lighting which I will share with you now. I have two remote flash units which I will figure out and share later. Both were time lapse but I can't seem to repeat them so something is amiss. Sigh, it's always something. This has to be better for you guys. I'm just a crotchitty old man whose eyesight is failing badly so I can't hardly tell. Ken
- 100 replies
-
- 3
-
-
- Syren
- Model Shipways
- (and 1 more)
-
Ryland Craze reacted to a post in a topic:
US Brig Syren by SparrowHawk7 - Model Shipways - 1:64 - First build
-
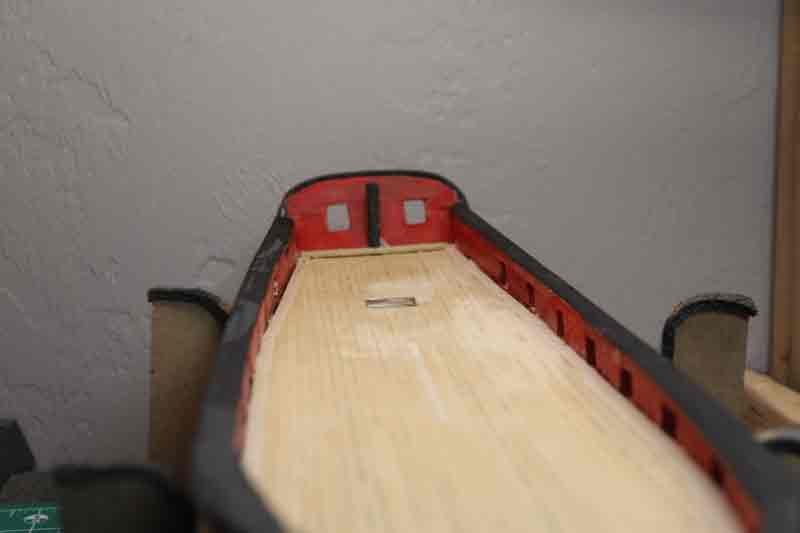
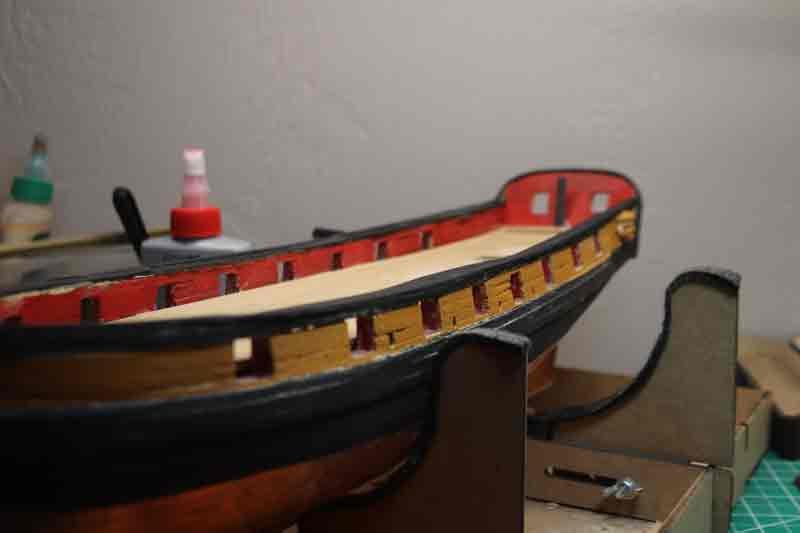
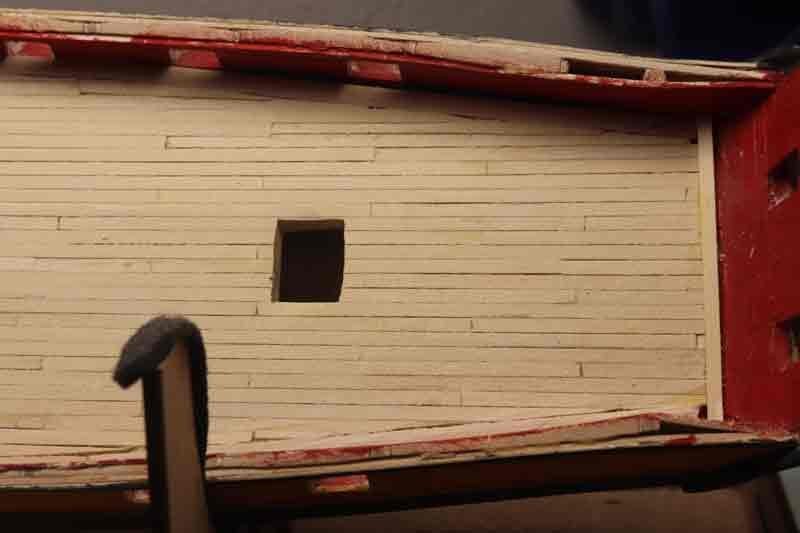
I've been at it again on the cap rails. Rather difficult as there were no pre-cut pieces. I found some planks that were close enough and tried to bend them to fit. No go which forced me to use straight lengths as long as I could and fit in more along their sides to cover the width necessary. I saw that the width was supposed to be around 1/16" wider than the width of the bulwarks so I tried to adhere to that. Mostly I sanded things down to the right width - I noticed I still have a bit to do along that line in one place in particular (see photos). It is not very clean looking as there are seams in many placed. I used wood filler and sanded before painting but it still shows. The bow with the largest bends was cut by hand from a sheet of 1/16" basswood as there was no way straight pieces were ever going to fit there. Next time a better way would be to scan and print sections from the top view of the master plans then cut them to size. Next trace them onto sheet stock or just tape them on it and cut the sheet out to close to the right size. It would probably be easier to make each side into 3 or so lengths. Then sand them to shape before installing them. Oh well ... my hindsight is getting better and better as I stumble along in the forward direction. But I am making headway and not terribly unhappy with the outcome (we won't mention that rudder). There are obviously many areas that need touchup paint all around the hull but that's reasonably simple. I also did the false galleries on the sides. Learning things all the time. But for a first build it's not a disaster (especially since I am modelling he as she looked on the day of her scuttling). Onward and upward. Ken
- 100 replies
-
- 2
-
-
- Syren
- Model Shipways
- (and 1 more)
-
Overworked724 reacted to a post in a topic:
US Brig Syren by SparrowHawk7 - Model Shipways - 1:64 - First build
-
maddog33 reacted to a post in a topic:
US Brig Syren by SparrowHawk7 - Model Shipways - 1:64 - First build
-
VTHokiEE reacted to a post in a topic:
US Brig Syren by SparrowHawk7 - Model Shipways - 1:64 - First build
-
ccoyle reacted to a post in a topic:
US Brig Syren by SparrowHawk7 - Model Shipways - 1:64 - First build
-
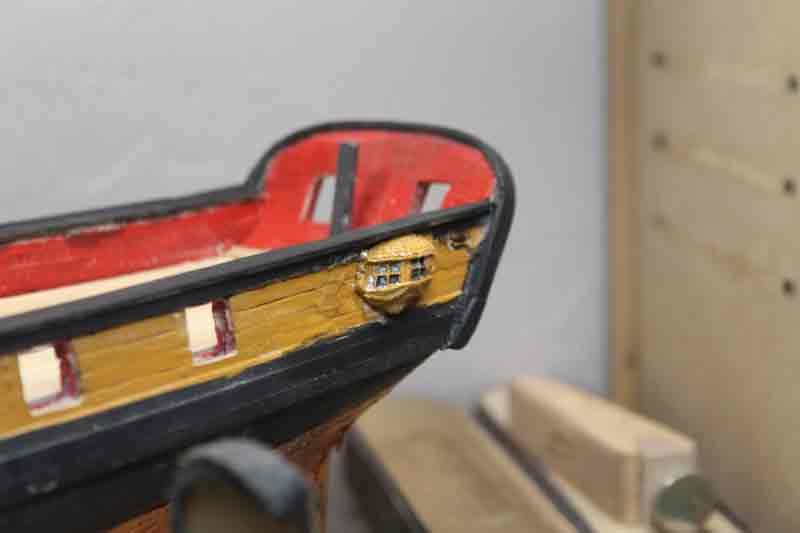
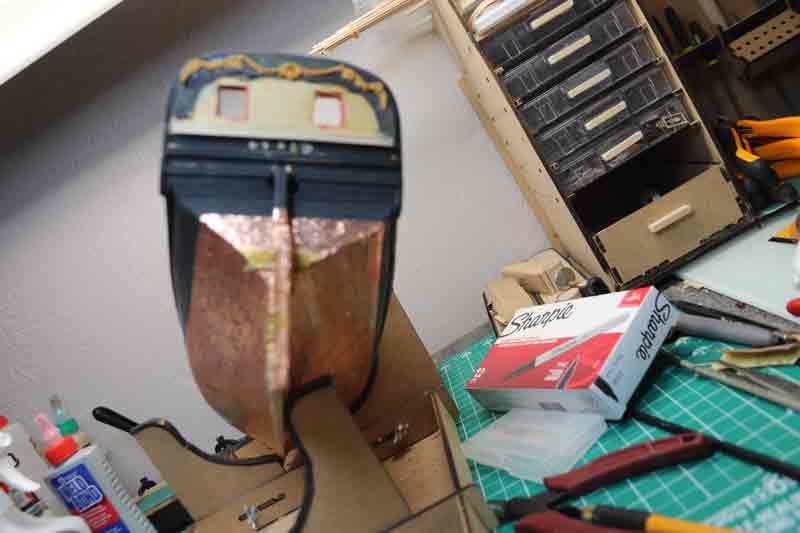
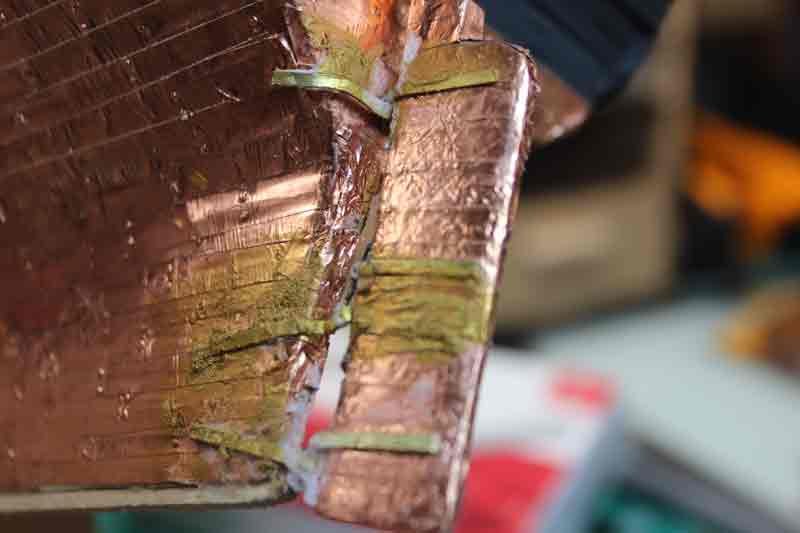
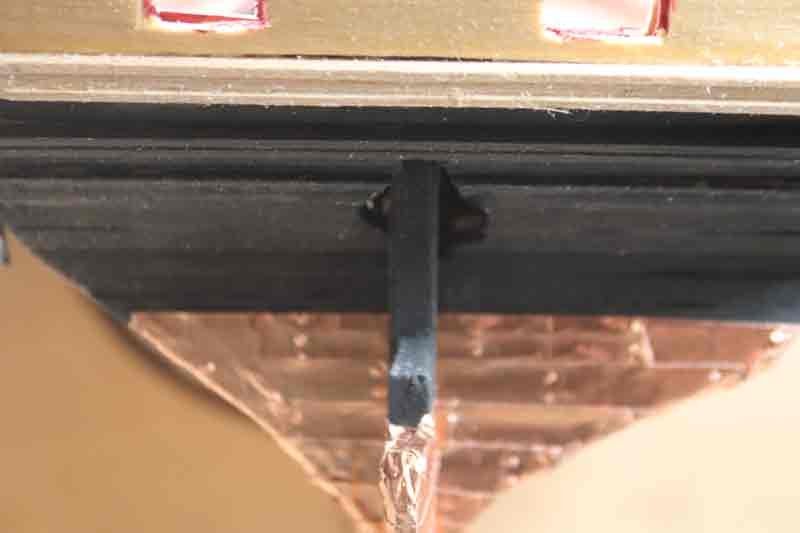
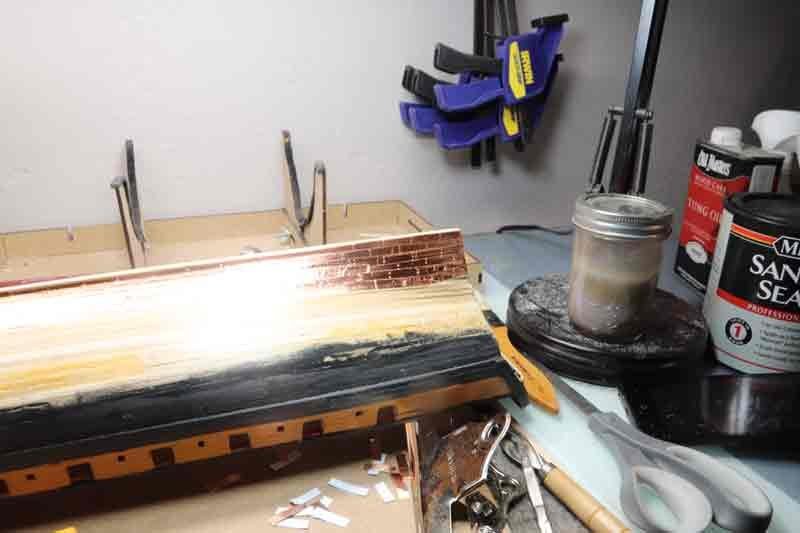
Hey guys. Bet you had thought I had disappeared. Nope ... I did have some trouble with my motivation for quite some time because that coppering was very difficult for me. Then I fund soimething even more frustrating with the rudder. I am NOT a fan of CA glue because it dries white. Last time I posted I mentioned I had lost the brass for the pintles and gudgeons. Model Shipways was kind enough to send me 2 more pieces at no charge so I finally got to move on. The first pintle was easy. I bent the brass around a drill shank and shaped it with pliers. Then I soldered a steel length of wire into the hole. The second one was a bit worse and the third was horrendous. Most people get better with practice ... I guess I forgot to read that memo. Attaching them to the rudder was OK but I should have used something other than CA. The gudgeons were another story. Getting the round receptacles for the shaft/pins in the right place was very difficult. And the rudder was only tenuously in place so I tried more CA to firm it up. It doesn't need to rotate anyway. More globs of residue. Overall it took me several weeks. I did the best I could but the CA left a lot of residue and that ruined the copper and the brass. I tried to paint them with approximate colors but it looks horrible. However after spending so much time on it and not really wanting to tear everything apart down to the bare hull again, I decided to leave it. This is, after all my first try at a wooden ship so I can't expect it to be all that great anyway. I can cover the white CA with paint which will help some but it's a pretty poor job overall. The copper is going to be a bit tricky. Then came the rest of the stern. In gluing the top arch I managed to break it in several places and there were gaps after I glued it down. So I decided to fill the gaps with putty and sand them smooth. That didn't look too good as bare wood so I decided to paint it black. That let the ornaments stand out better anyway as they were painted yellow ochre. Oddly enough I didn't have much trouble getting the ship name on there but the CA again left all sorts of light residue. So there is where I am. Yesterday I went in to start the two sheaves and rings behind he false estate sidings and managed to break every single drill bit I had that was close to the right size forcing me ot have to order more. So now I wait another day or two. Sigh. But on the bright side I am still making a little headway even though it is in fits and starts. I don't quit easily though so I am plugging onward. Thanks for looking in spite of there being nothing of much worth in the build so far. However, I am going to try to get better with practice (at least that is the plan) so you should see some improvement over the next couple years. Ken
- 100 replies
-
- 3
-
-
- Syren
- Model Shipways
- (and 1 more)
-
GrandpaPhil reacted to a post in a topic:
US Brig Syren by SparrowHawk7 - Model Shipways - 1:64 - First build
-
Just in case anyone was wondering what happened to me, I'm still here. I just haven't had time to do any building for the last couple months. Hopefully I can get back to things soon. I haven't given up or disappeared ... Ken
-
Hi Patrick, My brother had started the Syren a few years ago but his build met with a catastrophic end after he had the basic frame glued up. It was not fixable so he sent me the kit. In the meantime I had a leg amputated and my attention was elsewhere so I forgot all about it but it turned up a month ago and has all the doodads that I have misplaced I think ... so I may be i fine shape after all. I haven't had a chance to check it out but I am hopeful. I did contact Model Shipways last year because my kit was missing the ship's bell. They replaced it quickly which I appreciated. And, mind you, I still HAVE that bell ... but lost just about everything else. Go figure. Ken
-
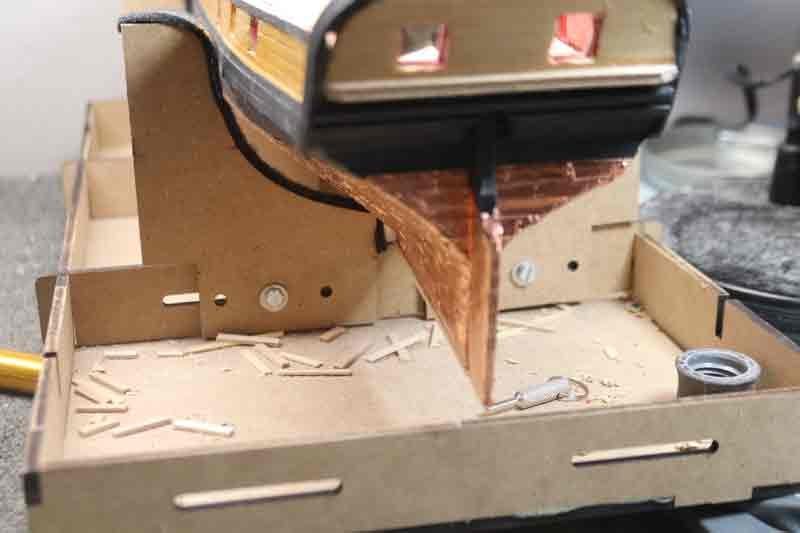
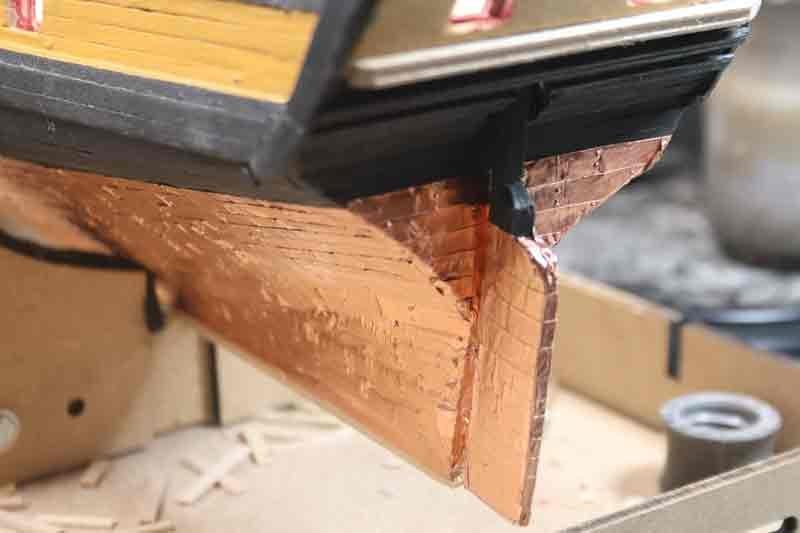
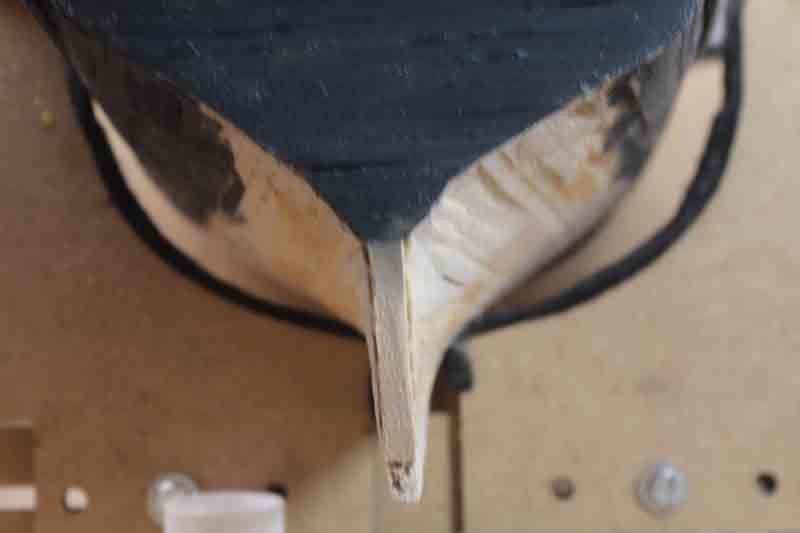
Contrary to rumors spreading like wildfire, I have not been entirely idle. I have been suffering from a certain amount of inertia it's true, but it hasn't been total. Keep in mind my planking of the stern was, well, unique seems a good word to describe it. I sort of made up the hull configuration which worked out somewhat balanced so that was at least something. But I curved up to the base of the apartments too early so there is way too much flat planking too low down. It is what it is and I have to carry on an accommodate that change which means designing my own rudder and figuring out where holes ought to go and how to mount it. To that end I have been working recently. I still have to shape the holes in the hull but I am in pretty good shape other than that. I glued on the false keel and sanded it. The piece I glued onto the bottom of the rudder fell off in sanding but that is an easy one to replace. Which brings me to another rather major issue. Somehow I seem to have mislaid all the brass and PE pieces, metal and other accessories that came with the kit. Don't ask me how but I cannot find the box anywhere. I will deal with other problems as they arise but just now I have no brass pintles/gudgions. Good luck finding replacements. What I did was order some 1/4" x 12" strips of brass from K&S Metals which can be fashioned. I would have preferred 1/8" wide but all I could find in that width were angle irons. Somewhere I read that the real ship ended up using copper from the plates so the 1/4" will work and I can make the rest of the attachments from that and have it look OK so that isn't such a big deal. I did get much better at putting down copper plating by the time I finished the stern so that looks reasonable in spite of being wrongly shaped. I will work on attaching the rudder next and then I can make the parts on deck to attach it to the wheel. So I am slowly progressing and getting closer to deck furniture/housings. I am thinking the cannons aren't very much further ahead of me either as they have rigging to be done and that is definitely easier before adding any shrouds or other standing rigging. It's slow but it is moving ahead and it best viewed at a distance so as not to notice the messed up details. One thing is definitely for sure ... my model is pretty unique BY A LONG MARGIN. Thanks for your patience and for continuing to watch. Ken
- 100 replies
-
- 4
-
-
- Syren
- Model Shipways
- (and 1 more)
-
I wasn't offended at all. I thought it was quite funny actually ... that was just my way of laughing at it. I think I can safely say that coppering isn't my favorite task. It is rather tedious but all hobbies have favorite tasks and others less so. I will be glad when the coppering is done. Part of one side of the hull and the rudder. But then, there is always next time. Sigh. I am contemplating the HMS Pegasus as my next build. Ken
- 100 replies
-
- 2
-
-
- Syren
- Model Shipways
- (and 1 more)
-
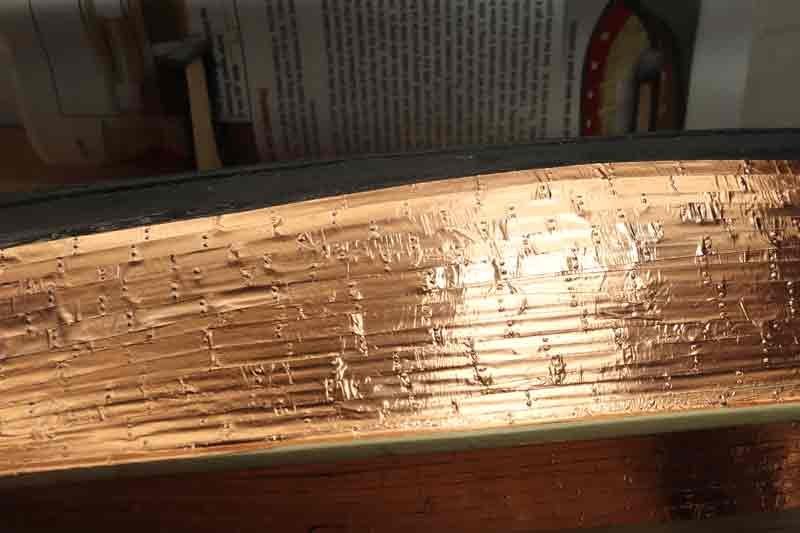
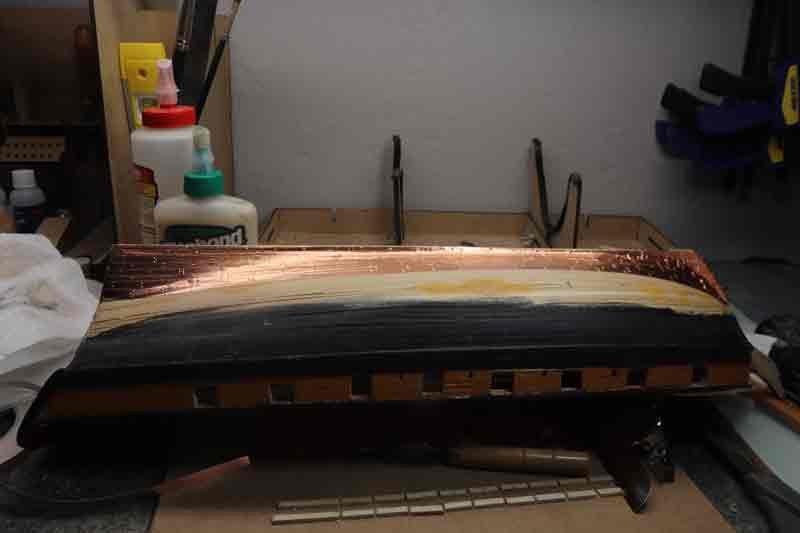
It wasn't a lot of fun but I finished coppering the starbd side of the hull. I still have a couple hours to do on the port side but I'll get there. I also need to finish up the false keel here and there but that is no problem. And a bit of smoothing. Then on to the rudder I suppose. I ended up eyeballing the water line. The waterline markers available SUCK - at least what I found. The pencil rotates and flops around and it just feels super cheap. It was quite useless so I simply followed a strake and hoped for the best. It's close anyway. Boy am I glad I didn't develop any extra skills or the entire ship would look odd. Always keep in mind I am modeling the Syren as she looked around the time of her scuttling. 🙄 Thanks for watching. Ken
- 100 replies
-
- 3
-
-
- Syren
- Model Shipways
- (and 1 more)
-
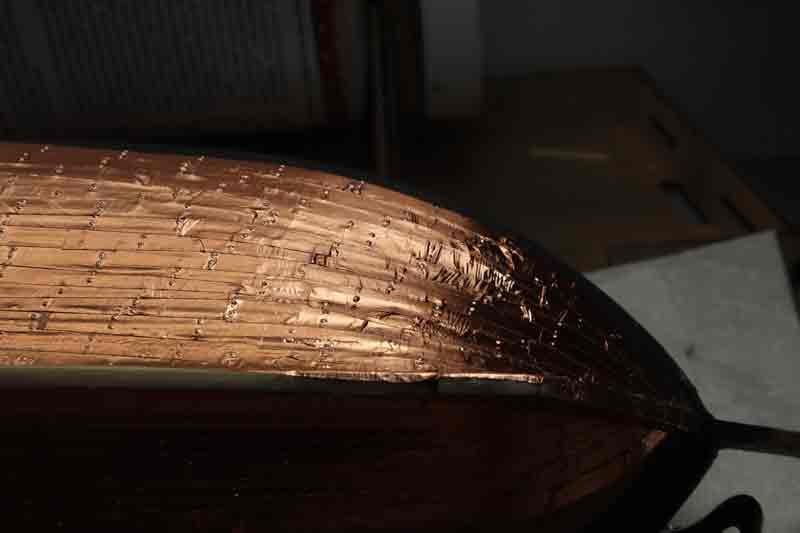
A little bit more. I moved over to the starboard side and began to lay lines of tiles. Not as high as the port side yet but I did a few anyway. The biggest problem I am having is getting the lines straight. I do not exactly want to put the tiles on individually as I think that leads to more possibilities of errors but I have been working with perhaps 2" or so of tape so 3-4 tiles and trying to apply them in that way. Unfortunately the lines have a tendency to run off in the wrong direction and compensating leaves a wrinkle and a noticeable crease in the line. How do you guys do it? Nothing I try works very well. There must be some trick i am not grasping because I see some builds that you could calibrate a micrometer to. This is happening mostly around the bow. Thanks for looking. Ken
-
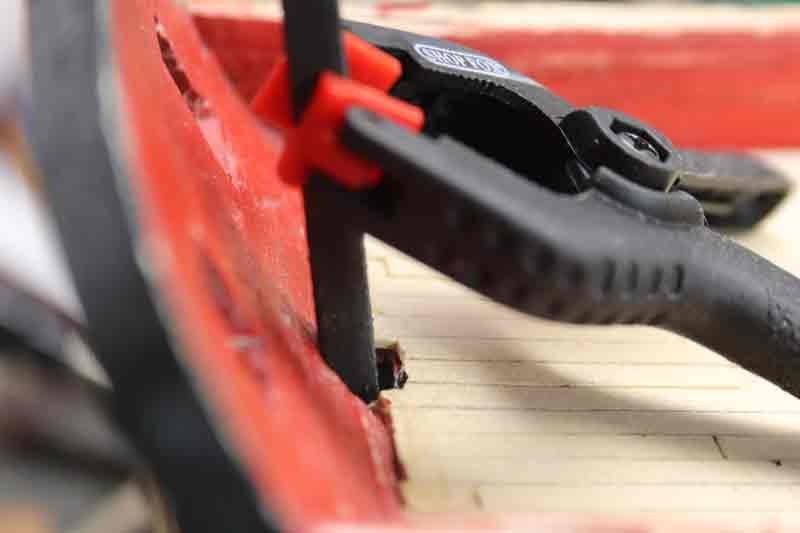
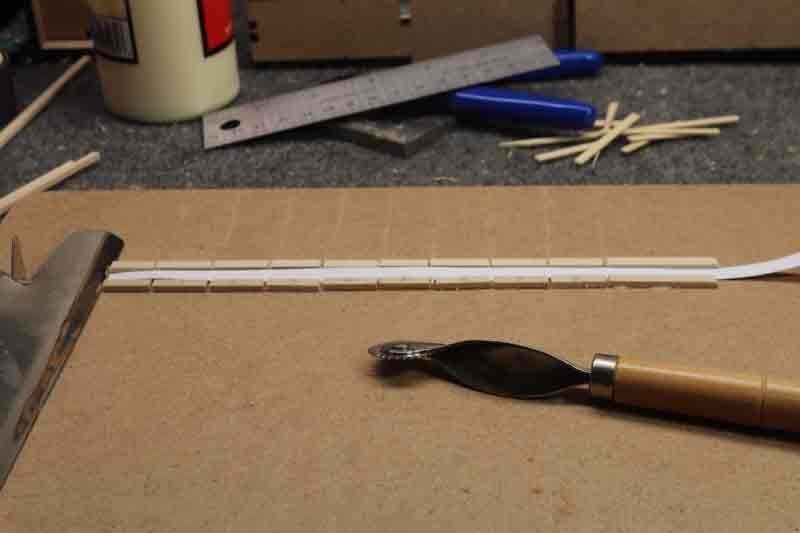
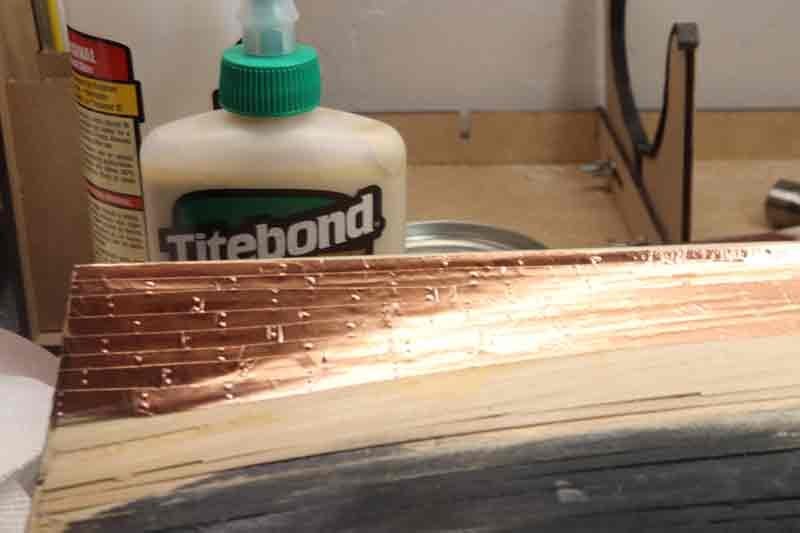
Finally some photos! Here's my rivet jig - much simplified from the instructions but adequate for a newbie. I am only doing vertical rivets. I tried laying a metal straightedge along the wood pieces to do horizontal but the pounce wheel simply would not follow the straightedge well enough so the rivets went every which way. No good ... so for this build, I gave up on horizontal rivets and will be satisfied with vertical. It is not easy getting the strips to lie flat and in line with one another. The tape backing is a bit too tough and the copper rather thin but a bit of practice and I'm doing OK I think. The time has come to mark the waterline I think so that is probably next. Then I can lay plates from that point down. The only downfall to that is the row where they meet - the down rows will be on top of the lower rows but the tape is so thin that such a thing ought to be somewhat easy to hide. More importantly will be a straight top to the copper. Anyway, just the one side so far but I am thinking it all may turn out acceptably as long as the viewer doesn't look too closely. At least there are SOME rivets showing. There are some wrinkles but this is my first try at this and I'm doing my best ... with practice I'll get better. Thanks for watching ... Ken
- 100 replies
-
- 2
-
-
- Syren
- Model Shipways
- (and 1 more)
-
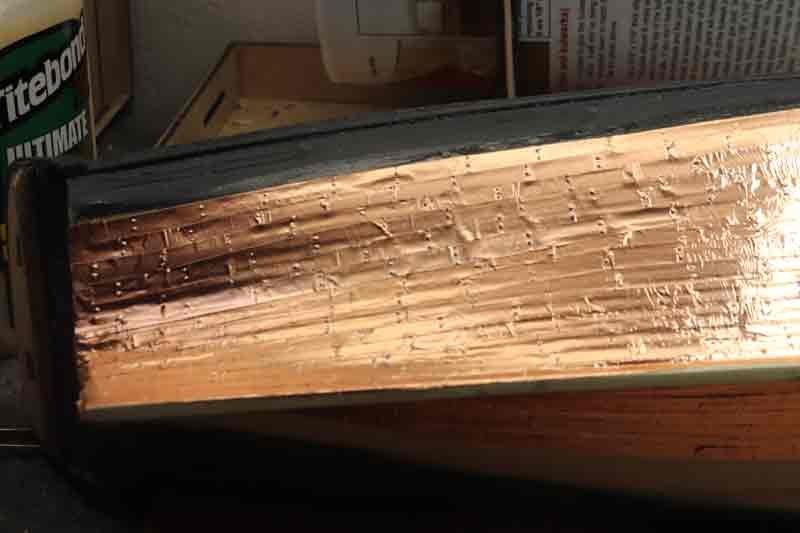
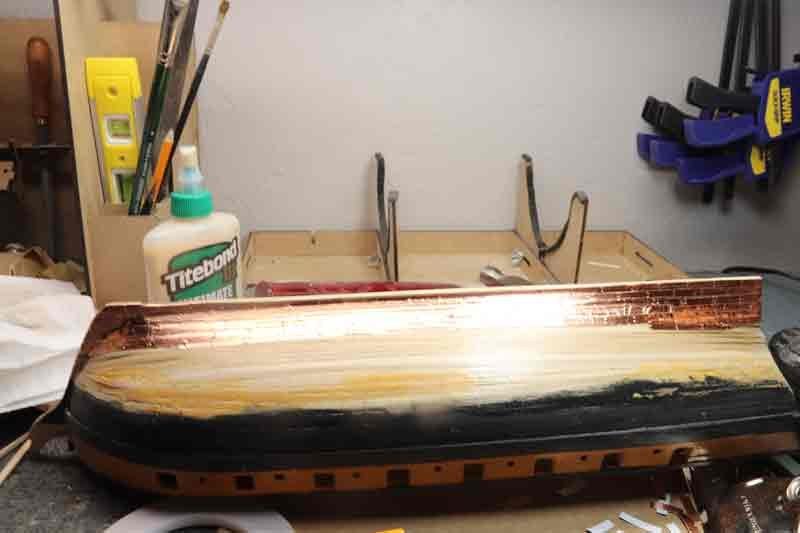
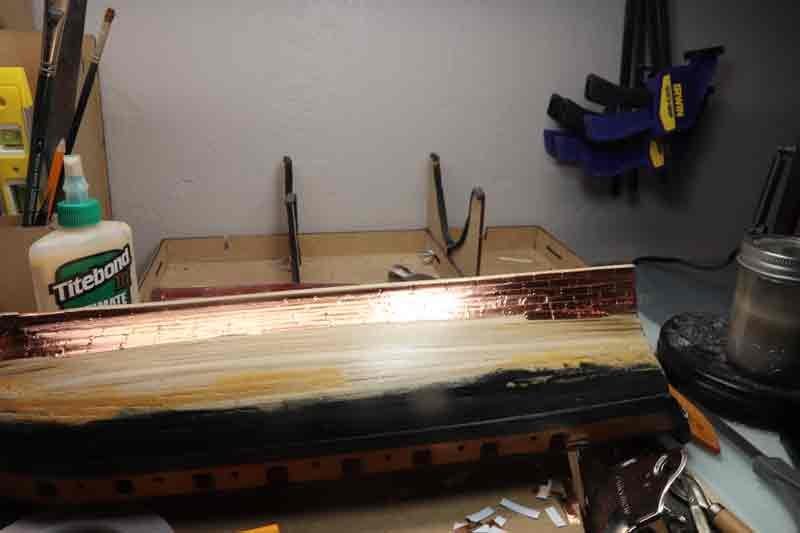
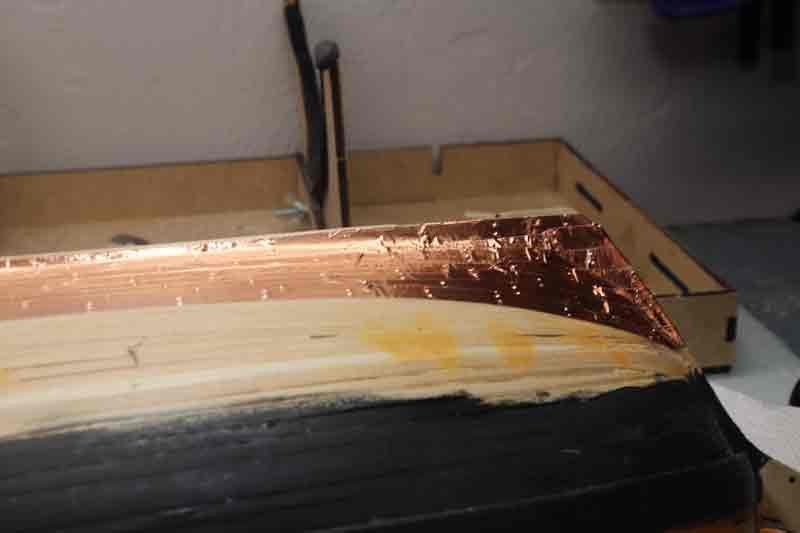
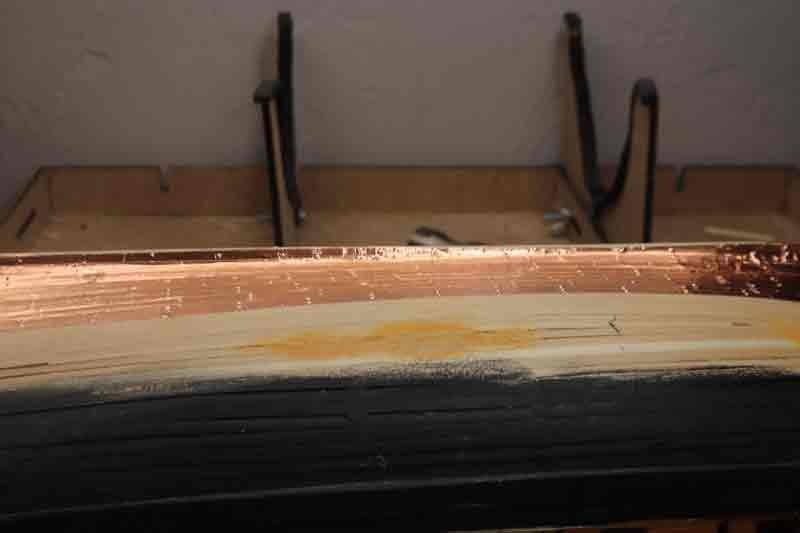
FINALLY ... some success to report. I put 2 coats of sanding sealer on the hull - sanded the first coat with a bit of 320 but left the second one as is then I tried a small length of copper without any rivet markings just to see if it would stick. IT DID!! So I began to make sections with vertical markings but left the horizontal out as they tended to wander around. It was fairly simple to get down 3 rows from stern to stem on the port side along the keel. I still haven't marked the waterline but I will do that soon to be sure I have the black painted far enough down. It is a bit difficult to get the tape to lay flat in a line but it is easily covered somewhat in similar fashion to gold leaf. In any case, I think things are going to be OK. Thanks for your support - it is sometimes difficult to pull yourself out of the doldrums when everything seems to be working against you. Doing these logs has pros and cons. This is one of the pros - if building this alone I would have been more prone to giving up altogether although that would probably have lasted only a couple weeks before I got angry with myself and gave it another try. But reading suggestions and encouragement was a great help. There seems to be some marginal hope that y'all are going to raise a potentially competent model shipwright here ... 😀 Ken
- 100 replies
-
- 3
-
-
- Syren
- Model Shipways
- (and 1 more)
-
Thanks for the encouragement guys. I was just so frustrated! Nothing even close to worked. As a stop gap type of plan I am putting down a couple light layers of sanding sealer on the bare hull. It might help the copper tape to stick but if not, it will be a good base for painting. And I might consider using a pretty wood as a second planking layer instead. As a different question ... I want to add featherboards to my byrnes table saw arsenal ... he hasn't answered my emails for over a month so I guess he won't. I need miter slot runners and would like aluminum or plastic as they can take tightening in the slot rather well. Does anyone know where they might be available? Thanks guys ... really. Ken
-
I'm just about to give up on the copper bottom. I've tried to get rivet lines on the copper tape using punch wheels as I do not think I am capable of building the jig in the instructions. The rivet lines go everywhere even when trying to use a metal ruler as a straightedge. In the end I tried making about 8 on a strip of tape but found only about 1 in 15 was marginally usable. I spent about 4 hours the other day making strips and ended up with 5. Then I went to start putting them on today and none would stick to the wood in the least. They immediately curled up and literally fell off.l Even after burnishing or at least trying to. The only thing I can think of to try before giving up is to get a coat or two of sanding sealer on the hull and see if that gives the adhesive something to cling to. Other than that I may have to buy some other wood and do a second layer of planking and hope for the best. I am feeling entirely insufficient for this hobby after spending a bit of time researching other builds for ideas. Ken
-
A little bit more. I finished sanding the deck with 220 which helped a bit and I installed what amounts to a margin board along the stern to cover the uneven deck lengths. There is a small hole at the port corner but that can probably be covered with some hanks or coils or something. It is rather small to get a patch to look correct and it's in an obscure corner so I think I can manage something. The decking is actually very level as opposed to how it looks .. that is the graphite making it appear uneven. I've no idea how to alleviate that. Then I attached the stern post and sanded the deadwood and keel to fit. The sloppy paint will be covered by coppering which it seems is next. I finally also adjusted the ends of a molding strip along the stern. Unfortunately I painted that area incorrectly so that i will have to change the scheme ... again. Being that the name is in PE brass it needs to go over black so I will have to paint the stern between where it is now and the bare molding strip black. Once I get the rest installed I will decide if that strip ought to be plain or black as well. Apparently it needs a little cleanup too. But there she stands. Ken

- 100 replies
-
- 2
-
-
- Syren
- Model Shipways
- (and 1 more)