


Dan Vadas
-
Posts
3,261 -
Joined
-
Last visited
Content Type
Profiles
Forums
Gallery
Events
Posts posted by Dan Vadas
-
-
Unfortunately I no longer have that shop setup
 . I've moved house several times since I was there, and am "reduced" to working from a single workbench. I still have all my tools, but anytime I need to do something on the lathe or mill I have to drag it out of a cupboard . Another reason why I got into Card modelling
 ") .
.
Cheers, Danny
- Landlubber Mike, Canute and mtaylor
-
 3
3
-
9 minutes ago, biltut said:
MIKE/DANNY:
I got the DRO set up on my mill and liked it so much I bought another unit without the display for my lathe.
Danny you have a really neat set up on yours. Did the encoders come with the red handwheels when you bought yours, or did you fashion them somehow later. I really hated to give up my Adjustable-Zero red handwheels but the DRO comes with some generic looking black wheels.
Bill, I can't remember if they came with the wheels or if I bought them separately. It WAS about 12 years ago
 . I do know that they are Sherline items however, and would have just bolted on without any modification.
 Danny
Danny
-
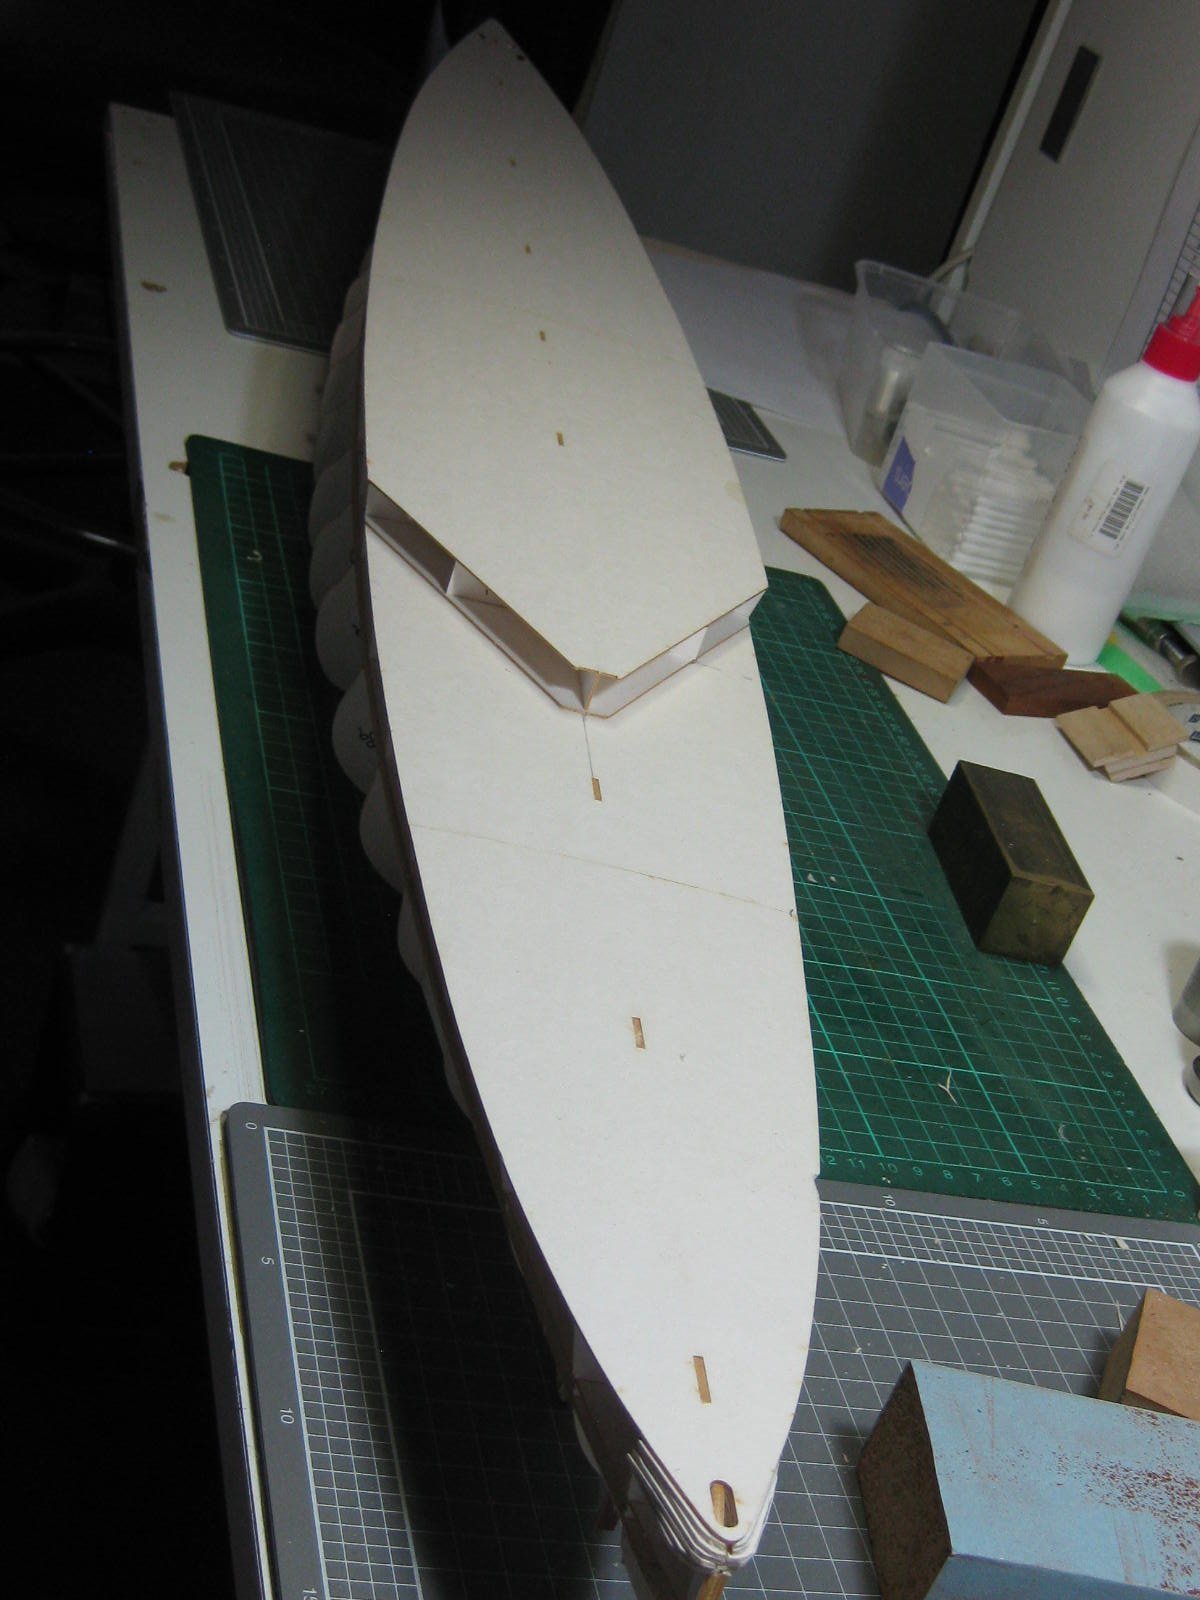
Apparently Halinski have supplied one hull skin that is 1mm wider than it should be. This skin is the one that is straight all the way across, and is at the widest point of the hull. No mention about this was in the instructions - I picked up on it when I dry-fitted it. This allows for any slight error when skinning, and needs to be trimmed to width. I moved to the stern and started skinning from there, and will finish on the wide skin.
The stern section has turned out very well, NO filler needed anywhere
") :
:
.thumb.JPG.c0a1a242aaefa397c68391c4eab1ab68.JPG)
.thumb.JPG.bb09bcd59a39044b778d7745c318fead.JPG)
.thumb.JPG.c9d33e097eb15cc88f7efe947dca8fbd.JPG)
.thumb.JPG.ffd835e575fa1797a17b78e12d9c6633.JPG)
Danny
-
5 hours ago, yvesvidal said:
Dan,
Are you going to re-spray the hull, to harmonize the colors?
Yves
No I'm not going to try to blend in the darker colour red (or brown?). I'm going to attempt to make this model without ANY filler or paint, other than edge-colouring and of course PE. Just for the challenge
.
BTW - I reserve the right to change my mind later on if it bugs me
.
Danny
-
Thank you Carl and David
.
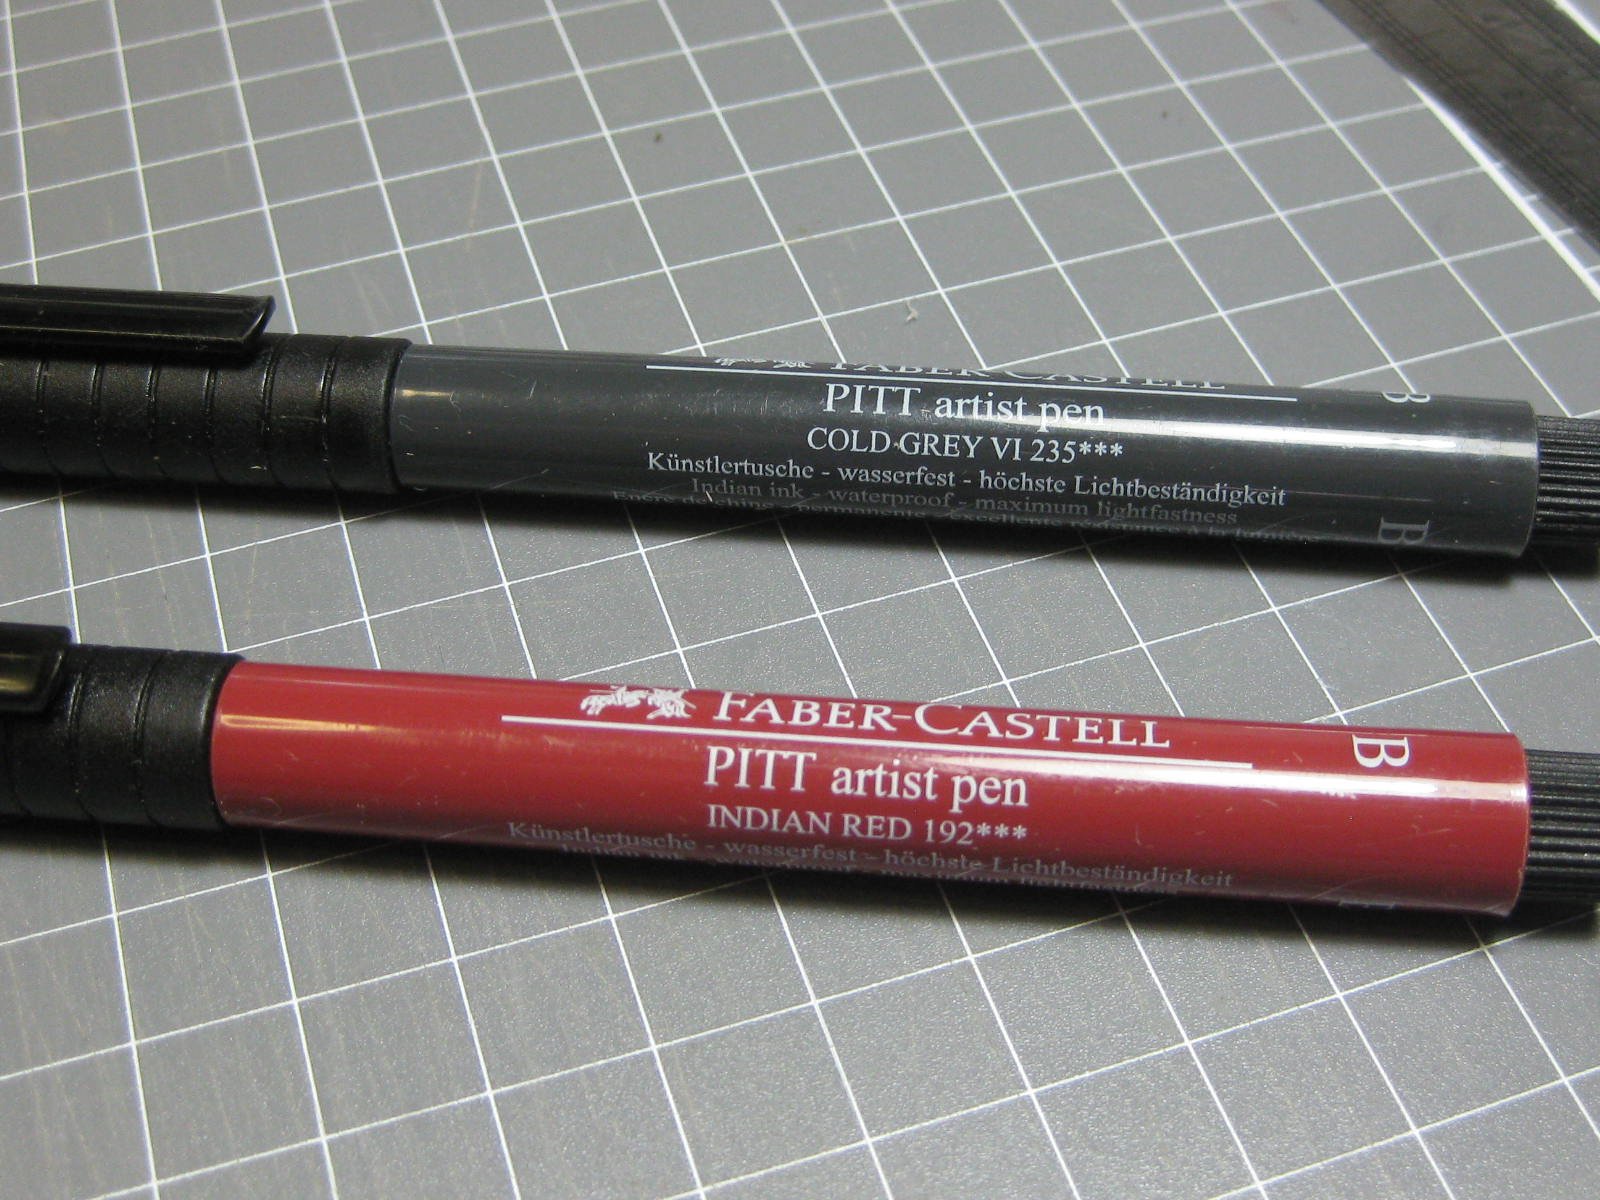
Before fitting any part I've been colouring the edges, using PITT Pens. These are waterproof and acid-free, and come in a large range of colours. I use the Brush tips :

.thumb.JPG.5924ea0344a9048527d3ec91e2991c55.JPG)
There is some unfortunate printing on the lower skins. The difference in colours is quite evident here :
.thumb.JPG.74931881cb605f313ff783b23961fb54.JPG)
11 skins done, 10 to go :
.thumb.JPG.bc5c6edfcfc42d98ce1174bf7076aa95.JPG)
.thumb.JPG.92d3768ee54ca3cae6b7060e549b2691.JPG) Danny
Danny
-
Thanks Steve, OC, Jan and Popeye
.
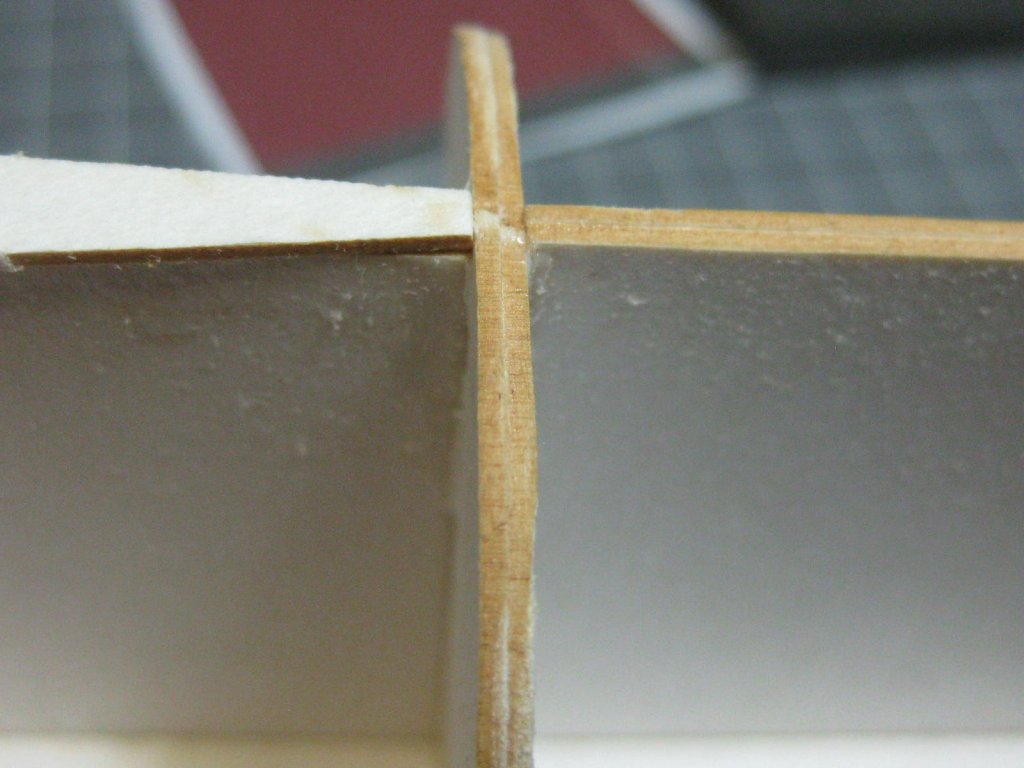
The instructions/renderings seem to be a bit short in some areas, notably the reason for a small notch between the upper and lower hull skins. I finally worked it out - there is a "joining strip" between the skins that fits into the notch
. This is a good idea, as it gives me a larger gluing surface for the edges, and it's also grey so any slight gaps won't be as noticable :
.thumb.JPG.8cc49137b796626b572564b2aabc34ea.JPG)
.thumb.JPG.a17cc834a4b050a53dcd2bf9ee1f073e.JPG)
I started the hull skinning yesterday, starting at the bow. The fit of the skins is very good, but I still managed to mis-align the first one resulting in a step on the next. The "step" in question is the one on the right in the pic below - the left one is actually OK, as there is a shift in the skins at that point.
The first skin only needs to be a fraction of a millimetre off to cause problems later. I've managed to get back on line however
:
.thumb.JPG.db2b570aa9a348e5d3d2fa7d78271ae7.JPG)
.thumb.JPG.87cccb6b84d95499ee9f85baa279afcd.JPG)
.thumb.JPG.c4a30a3a8ddde854d2e10541e2ca9458.JPG)
Here's the method I've worked out to get the skins on with a minimum of "starving cow".
First off, the Fairing on each bulkhead needs to be spot-on. Even with the excellent laser cutting of the framing they still need a bit of work to make sure there is absolutely no step between the two glued-together bulkheads. I used a combination of sanding and filling with thin paper to get them right.
Next is to pre-shape each skin as near as possible to it's final shape. I sit the skin in place and mark the bends. Then I use a round item - in this case a knitting needle - and a piece of high-density foam underneath the skin to shape it :
.thumb.JPG.4fde43698662e99fd91f3655580e2863.JPG)
.thumb.JPG.22224b6e068f07a53dfbe1424a877df6.JPG)
.thumb.JPG.b9b98b8cdb8ea9c397cb6a05549e0d96.JPG)
Last is the amount of glue I use. Just a small bead on each outer edge. Any more will result in the skin being pulled out of shape. This amount of glue is more than sufficient to hold the skin. Any excess that squeezes out is immediately cleaned off with a small paintbrush :
.thumb.JPG.03380d50bee15f1dbde6d64cb21fbc20.JPG)
I do each skin in three stages - first the middle, aligning the centre marks, then one side followed by the other. So far, so good
.
Danny
-
Mike, don't forget that you'll need TWO DRO sensor kits (but only one display). From memory they are the cheaper part of the setup.
Danny
- mtaylor, Landlubber Mike and Canute
-
3
-
Good move Jobbie
. For future reference that's called the Bearding Line, and tapering the keel from that line is more or less standard ship-building practise.
BTW - the keel tapers both vertically and horizontally, and also does the same at the bow but to a lesser degree. These posts - Stern - Bow - may give you a little bit if insight to keel construction.
Danny
-
9 hours ago, Jobbie said:
I can’t see one method being more accurate than the other, but at least there’s no unsightly burn marks.
Maybe you haven't seen what they do with lasers lately
. A good quality laser can cut (or burn) without any serious charring, like the bulkheads on my latest Card model :
And I seriously doubt a CNC mill would be able to cut these 2.0mm diameter handwheels. The "missing" quarters are supposed to be like that :
Danny
-
G'day Jobbie. I'm quite surprised that Caldercraft haven't shifted to laser-cutting the parts instead of CNC milling. It's a bit "old school" IMO.
Looking forward to following this build
.
Danny
-
I've finished all the framing - already
. This has only taken me a bit over two days, compared to the identical sized Bismarck which took me over a week. Credit is due to Halinski's excellently laser cut pieces - compared to GPM's Bismarck, well, there IS NO comparison. GPM's were really sloppily cut  . This framing has also turned out near perfect :
.thumb.JPG.75c2b2592a693102fd0b456424914a47.JPG)
.thumb.JPG.2d693d15894da8f4f585e5b1067d1e9b.JPG)
.thumb.JPG.bde06230994c1ba27aee38c1af567761.JPG)
.thumb.JPG.2a630545f955e5668c922b1cdc40904f.JPG)
.thumb.JPG.5c7a56a38076f202372b6de06775dd17.JPG)
Unlike the instructions in Bismarck, Halinski have you fit the (precut) Deck sections to the hull at this stage - without gluing the printed decks to them. This will make things a lot easier, as there's no chance of damaging the decks while fairing and hull skinning with the hull upside-down :
.thumb.JPG.085eb6594a156cd51b4f314b8e0df15d.JPG)
I've added extra card for Fillers at both bow and stern. Initial trimming was done with a scalpel, finished off with a 150 grit sanding stick :
.thumb.JPG.22f39f2eb874991ff943b3b12d790116.JPG)
.thumb.JPG.097f7136d38448547698e60df3c36e42.JPG)
.thumb.JPG.23868c9853374c929ff477d8de3fe55b.JPG)
.thumb.JPG.e26cf30b9a75c3479b2361ccaa791887.JPG) Danny
Danny
-
Jan, did you know that you can use Sanding Sticks to get a good finish to the rounded edges (take off the high spots), the same as you would do with wood? I use 360 grit on mine. Do a bit of practise with one first on some scrap to work out the technique. Also experiment with different grits to see which suits you best. You'd be surprised how coarse a grit you can use
.
Danny
-
-
2 hours ago, semorebutts said:
but it wont lay flat with the crows nest and everything else sticking out. but I tend to do most things the hard way. even my day off today was done the hard way... smashed my face into a windshield at work and got sent to the hospital... calling in sick would have been the easy way
Bugger, that doesn't sound good
. Hope you can still work on the model - at least they may not call you in for a cuppla days .
The crow's nest isn't really a problem if you support the mast with a few pieces of wood under it so that it clears. I was really referring to the initial phase of construction BEFORE you fitted it. Ah well, maybe next time
.
Danny
- CDW, popeye the sailor, mtaylor and 2 others
-
5
-
4 hours ago, popeye the sailor said:
looks super........how long is the model?
It's 1300mm long, almost exactly the same as Bismarck
.
Danny
- mtaylor, Canute and popeye the sailor
-
3
-
1 hour ago, semorebutts said:
Why does the camera make the angles look off? Doesn't look that bad in person.
It's caused by Lens Distortion
.
You've been making the mast the hard way. It's a lot easier to keep everything straight and plumb if you tape it down to a flat piece of timber and work horizontally instead of trying to do it vertically.
Danny
- semorebutts, CDW, mtaylor and 2 others
-
5
-
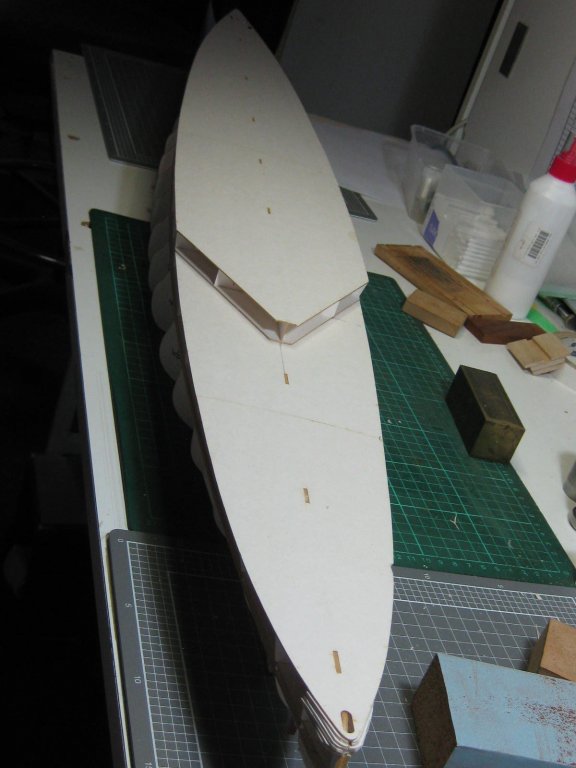
I've gone a fair way into building the framework. The laser-cut parts are EXCELLENT, they are so precise that I need to peel off the top layer of card to allow the tabs to fit into the slots :
.thumb.JPG.5d8a7f9632712bda8faa08567615dabb.JPG)
Here are the four sections. I've also discovered that I won't need to make any extra bracing between the bulkheads - they are supplied in the kit
. I haven't fitted any of them yet, I will need to fit the sections together first :
.thumb.JPG.08e196af6ab2d25667bbe45d9417165d.JPG)
.thumb.JPG.acfa357ee10bba6d311b39ff269621d7.JPG)
.thumb.JPG.6159ecc3514f10dd293219abeb6007dc.JPG)
So far the design has been brilliant
.
Danny
- gjdale, popeye the sailor, hexnut and 18 others
-
21
-
1 hour ago, amateur said:
Ehhhh..... who did this spreadsheet for you? It an't be you, you were finishing Bismarck (at least, that's what you suggested us
)
I will be followi g with interest!
Jan
Yep, I made the spreadsheet as soon as Bismarck was finished
.
Welcome Jan and John
.
Danny
- popeye the sailor, mtaylor, cog and 1 other
-
4
-
6 hours ago, Canute said:
I've read that Halinski is a top shelf company.
Ken, they're one of the best IMO
.
2 hours ago, ccoyle said:Another trick I used for tracking parts is to separate numbered parts from their sheets and sort them into zip lock bags, numbers 1-50 in one bag, 51-100 in another, etc. Works for people who dread spreadsheets. :-)
Not a bad idea either Chris. Actually, that's what my display folders are for - after cutting the parts I need from a sheet I return it to it's numbered clear plastic pocket until the next time I need it
.
WELCOME to the rest of you guys
.
Danny
-
G'day Jobbie, and another welcome to MSW from about 30km up the road
. It looks like Frontline Hobbies stocks have been somewhat depleted?
I also built the Supply, but it was the crappy Artesania kit. She turned out OK though, after a LOT of Scratchbuilding. She's now in the museum on Norfolk Island.
Your work looks really good, and I'm sure your Supply will be no exception. Have fun.
Danny
-
Thanks Mark. The spreadsheet was one of the best ideas I've ever had
. I figure it will save about 6 months worth of searching for parts over the course of the build .
I was right about the doubled-up laser-cut framing sheets - I've glued a couple together (not much to see yet) and come to the conclusion that I won't need to glue any extra card to the sides of bulkheads etc for a wider gluing surface like I've had to do on previous builds. What a bonus
. I will however glue thick card BETWEEN the bulkheads in at least one position (maybe two) to support the hull skins. I did this on both the previous models, and had no problems with accidentally crushing the skins.
I can already feel that this will be a really good Card model to build
.
Danny
-
Hi all. Here's the start of my latest Card model - HMS Hood, at the time of her short-lived battle with Bismarck. She was sunk on 23rd of May 1941. Information on Hood can be found on Wikipedia HERE.
The kit is from Halinski in Poland, a kit manufacturer that I've had some experience with (see "IJN Amatsukaze" in my signature). I had a lot of fun with that kit and found every aspect of it from design, printing and even the instructions to be excellent. A bonus in this kit is that there is a separate sheet of instructions in English, so I won't be needing Google Translate this time. Although I rarely looked at the written instructions anyway
, mostly I just used the photos.
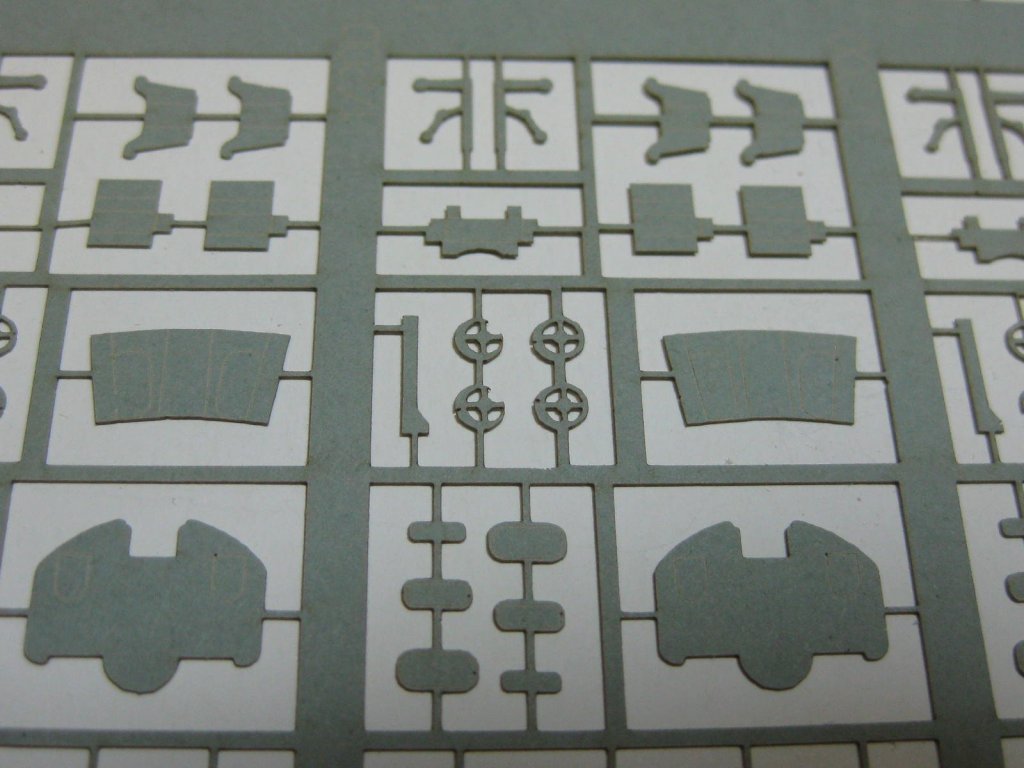
There are 20 sheets of printed parts. The number of parts on each sheet range from 5 to well over 250, depending on their size :
.thumb.JPG.53825869d621dea1841504afa73ca337.JPG)
I also bought the Laser-cut set of frames etc. There are 14 different sheets, but also about 6 of them have two identical sheets - some or most of the parts are probably glued together to double their thickness :
.thumb.JPG.b4e939a445a758f351ace3bf9171e707.JPG)
I also bought the Metal Barrel sets, and whatever PE Halinski had for this ship (12 sheets). However, NO railing was supplied in the PE set, so I will need to buy the Railing Set from Eduard's for the plastic Trumpeter kit - hopefully I won't need to modify too many pieces :
.thumb.JPG.460007bb19efb518e1f64e9c46368d73.JPG)
I've finished all the initial preparations. I bought two A3 size Display Books to hold all the separate sheets of parts :
.thumb.JPG.df8813f2b5a72ad7d4fd07ace2f6bffb.JPG)
The instructions are mostly in the form of computer rendered pictures which I found much easier to work with than the very poor line-drawings in the Bismarck kit :
.thumb.JPG.283a6ea6283da7bd8be63345f683876e.JPG)
.thumb.JPG.af71e35a8a18d8dbbe7bc5e7f17e9a1e.JPG)
My final preparation - and one I've found to be invaluable on previous Card kits - was to spend two days cataloguing every part on all the sheets into a Spreadsheet sorted into numerical order with the Sheet Number next to the part. This is quite a lot of work (there are 6 pages of the spreadsheet), but it saves A LOT of time later when searching for parts. Rather than search through all 34 sheets for one small part I can find it in seconds by knowing which sheet to look through
:
.thumb.JPG.cf9efb62a7ad02809a0130a69cc96207.JPG)
.thumb.JPG.d5ffdf221ca2e7a7cef0a72d0126cebe.JPG)
On with the REAL work
.
Danny
-
Thanks very much guys
.
7 hours ago, BANYAN said:Are you going to add a 'topping lift' to the accommodation ladder?
No, I've had enough of this model
.
Well, this is it - Bismarck is FINISHED
. Here are all the final pics - enjoy :
.thumb.JPG.df1df0202703e7f3b2c20c340b428dd5.JPG)
.thumb.JPG.00b6a4d7ad4a9a88715f679811194b03.JPG)
.thumb.JPG.d152a7a899c785e62610dd38d72e52b7.JPG)
.thumb.JPG.75373fcbe35fc51209c20066db0d48b2.JPG)
.thumb.JPG.3d11d12741e6c2d0b4701b48c438952e.JPG)
.thumb.JPG.e19ba409f6809b1727ec049dc6b310d8.JPG)
.thumb.JPG.68bf17709439f2cc963effafca560d2b.JPG)
.thumb.JPG.c8e6242d3471aacb257e3a95ab24f4c4.JPG)
.thumb.JPG.6c78126177f2dc8b4375a627e7103f38.JPG)
.thumb.JPG.73c8a2785544488a6e0d18c370199e49.JPG)
.thumb.JPG.cdb9f2204aba33509c6e44f04e24b0e5.JPG)
.thumb.JPG.e96ba7e9e3437188c56167b1f6afbdf7.JPG)
.thumb.JPG.1079b8795759e1de806075c9ff430a9f.JPG)
.thumb.JPG.04afd6795157928a6512d67b0b2269a7.JPG)
.thumb.JPG.77b8d62713f44217d9aed8174def1a30.JPG)
.thumb.JPG.3a918b05be12fe76afe2a9866cc4c134.JPG)
.thumb.JPG.028cfb0e45646e0acf7acc39b0f1f0aa.JPG)
.thumb.JPG.0b643f386da2b1aa986ee3f5f0b1948c.JPG)
.thumb.JPG.b6ff463a180361a4f9d4c15804f6df3c.JPG)
.thumb.JPG.afa1a3f514f7a388e8515870e490e7c1.JPG)
.thumb.JPG.4a002b3ff90e827ece2428d4b0ebc4f1.JPG)
.thumb.JPG.e9b6b710e70e8bff67be244114d11da9.JPG)
Thanks to all those who followed this build, and especially those who commented. Now onto HMS Hood
.
Danny
- Ryland Craze, CDW, hexnut and 37 others
-
40
-
Thank you John and Carl.
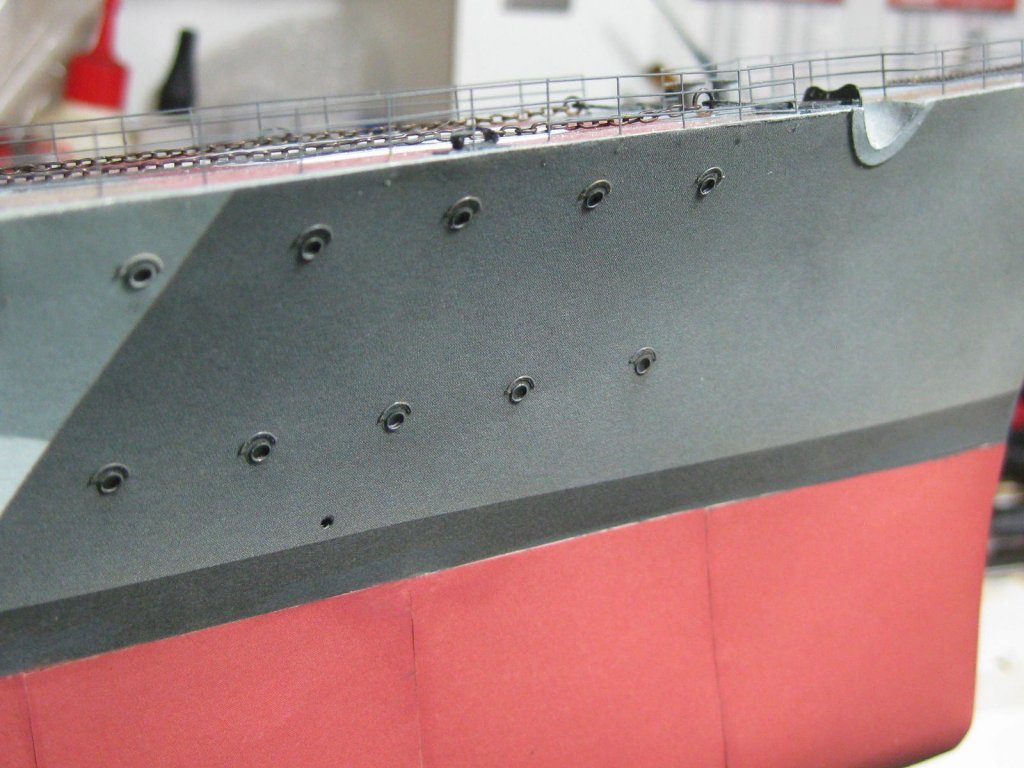
All the portholes and steps are fitted. The closest set of steps are about to be painted :
.thumb.JPG.87c63e2748c1ecf251299906e6223f33.JPG)
There's another Boom near the bow :

The main entry ladders are made from PE. I scratchbuilt the platforms :
.thumb.JPG.879c23534d108829ad2305bd4c204abe.JPG)
.thumb.JPG.e1a07fb54164d29c52a0c8ee18301b64.JPG)
It's now time to fit the screws and rudders which I made 5 months ago :
.thumb.JPG.82f8937822cd5d2a2a174a0a346c579a.JPG)
.thumb.JPG.687f75516c6dd361b4977707dd7f6a62.JPG)
The final things to fit are the two flags, as I usually do. It signals the end of the build
. I de-laminated the paper to make it look a bit more realistic, and glued the pieces back-to-back :
.thumb.JPG.d116047a3fc324cbda8438950ada550a.JPG)
.thumb.JPG.a378348917983b9c0454269bdd92edd7.JPG)
.thumb.JPG.d7123863e9589d21ade21ecd396c6a4f.JPG)
I only need to glue the model to the base, which I made a while ago. It's just been given it's final coat of lacquer (I'd forgotten to do that earlier
 ). The final pictures will be posted a bit later today.
Danny
). The final pictures will be posted a bit later today.
Danny
- Barbossa, Canute, marktiedens and 18 others
-
21
.JPG.54aded00a239acf6e3cbb50460a323c3.JPG)
.JPG.0ec31fada1f8bef7292deb426d2e2af9.JPG)
.JPG.6b10bcdeaa0c4a9bf97b8e511f94316d.JPG)
.JPG.f92ae8b3edc362ca79f376123b29382d.JPG)
.JPG.80195541eab69885e5bcbe2428b79082.JPG)
.JPG.431f7f550f5c0a6a6450c7060afba30e.JPG)
.JPG.7662b345e6e2f7aedef75609bf9a4e18.JPG)
.JPG.af4605e7939f49be0f9dbcd376dac4a8.JPG)
.JPG.25dde400b35115ec8fadac0f4d438fe1.JPG)
.JPG.726d2cde2de186b89d0d97ef2f986475.JPG)
.JPG.257f8717c940ded07694be92e223e335.JPG)
.JPG.34158467e8184f613bd35826325e7ede.JPG)
.JPG.ff9d7d74a2986568f0d96bd5b64ed5f2.JPG)
.JPG.2df0eca906279cd821f8a1ff29ad1979.JPG)
.JPG.7014f9f8f0af2327e8be52f771fae8c7.JPG)
.JPG.4cdf26ee40d9145d0ffa57d71ee014da.JPG)
.JPG.732167df21a6f95fffd458def970a826.JPG)


.JPG.daaff73c8fa17e37a17fe86228d6ee8b.JPG)
.JPG.7d2b3bc7aa217266f88fffe45a4edad3.JPG)
.JPG.a2a21c522d7af28b8c1913213ba2a45a.JPG)
.JPG.ca0b203bcfd1dd9dbfcf9b58e873a6d2.JPG)
.JPG.16e94160c871346ae4337b2649969565.JPG)
.JPG.75b152697ed055618391f2e2fcdc498e.JPG)
.JPG.bf9e82c98f2e76f74d8cda2fe4f5631e.JPG)
.JPG.69960d5095f6078273197a1117175333.JPG)
.JPG.33ad574e00ede741545ed5fac87afc50.JPG)
.JPG.0696a7d7b3d73af32cda6d0eb6535dc5.JPG)
.JPG.3b2502475d1a25ad262287a50da154a1.JPG)
.JPG.650869a7ed4b507815687685a034780a.JPG)
.JPG.37475aa5e298958fc36b31d800ea5304.JPG)
.JPG.8c5209742b27a1c91df6de9e6e8ac563.JPG)
.JPG.3f639ad64aa40ec7a518eac6046a52bf.JPG)
.JPG.cc3233aa15a45bf634068070e2e20b5a.JPG)
.JPG.27fca85eb0740e3c0a11ea3c9bb84539.JPG)
.JPG.88cdae0e1a06bdaf465cdf4c124e5566.JPG)
.JPG.7e11a43fae9c6cfb9ab3386fe3b44c52.JPG)
.JPG.db681348ce8d9fda4b0ec1fbd7e8497d.JPG)
.JPG.08de0cea8c4e9a5b219147ddfb37b1b1.JPG)
.JPG.fe9779c4c8351eff71ad50c10fe8e143.JPG)
.JPG.1d26bbeed6f268a466114a0459efa296.JPG)
.JPG.50281ed5bf10c765d624096d70f865b8.JPG)
.JPG.5abab89f6c1c90f85b924780b8303dfa.JPG)
.JPG.b1540bac7b4b1646e4ec7a87e9030f27.JPG)
.JPG.34db8e2fe4b752a80ab4c0cb120ddb37.JPG)
.JPG.3d3d84cf344bc7a64eb84d0e5065bc35.JPG)
.JPG.4a9f1f21e3e90e60fb2d3214af1501b0.JPG)
.JPG.2a42bf16b0de4e65e8a500cb7d202882.JPG)
.JPG.132d8bc24e29be122b44092ed472322a.JPG)
.JPG.9b52c50f8a1e8e0f814cbbf2cefe9d35.JPG)
.JPG.20aa22fda0ff7d73a7de9dd236abbff7.JPG)
.JPG.ae8be8e07538ec9fcac0ff4febf7d1e0.JPG)
.JPG.eebd50eb4bd09abedc4b14dc4a4f36db.JPG)
.JPG.067444bd97db95af0e00a666a9edf1a4.JPG)
.JPG.e704405ae50ad7c69ff2018d9d3eaec4.JPG)
.JPG.91e67946e299e9a68d06f57e7daa561b.JPG)
.JPG.264095534519b32c9ad1aacffe56834d.JPG)
.JPG.45af7faff2b4b3b9f2d35b662139b76d.JPG)
.JPG.ec84deb8be2a922b1a363b2e4369ce5f.JPG)
.JPG.e6b82697c16d8e7373c44a8d6f40e6cd.JPG)
.JPG.a6549bea4597096c2efff1b49c81eba1.JPG)
.JPG.5daca96ac11595448777d874842af0a0.JPG)
.JPG.30fa41251803a3ca77721858f5dd7ab9.JPG)
.JPG.94baade191a19a7a64ec9fcbc917f9a3.JPG)
.JPG.48a3d5d51310b6fdcf10a6db999062e7.JPG)
.JPG.43ffa6c355cf80e190c70bcdecd3a1a3.JPG)
.JPG.c800e830cd464a24f3096c6de589889b.JPG)
.JPG.a2363afe0e54f9faed122a5f7a27e98f.JPG)
.JPG.c1a06b6dae4604caef20b47ad05e8d04.JPG)
.JPG.8cc8970e108ec8cd7d4689f503aa5795.JPG)
.JPG.ef733dc6b788cd877252c22c6c5ba134.JPG)
HMS Hood by Dan Vadas - FINISHED - Halinski - 1:200 - CARD
in - Kit build logs for subjects built from 1901 - Present Day
Posted
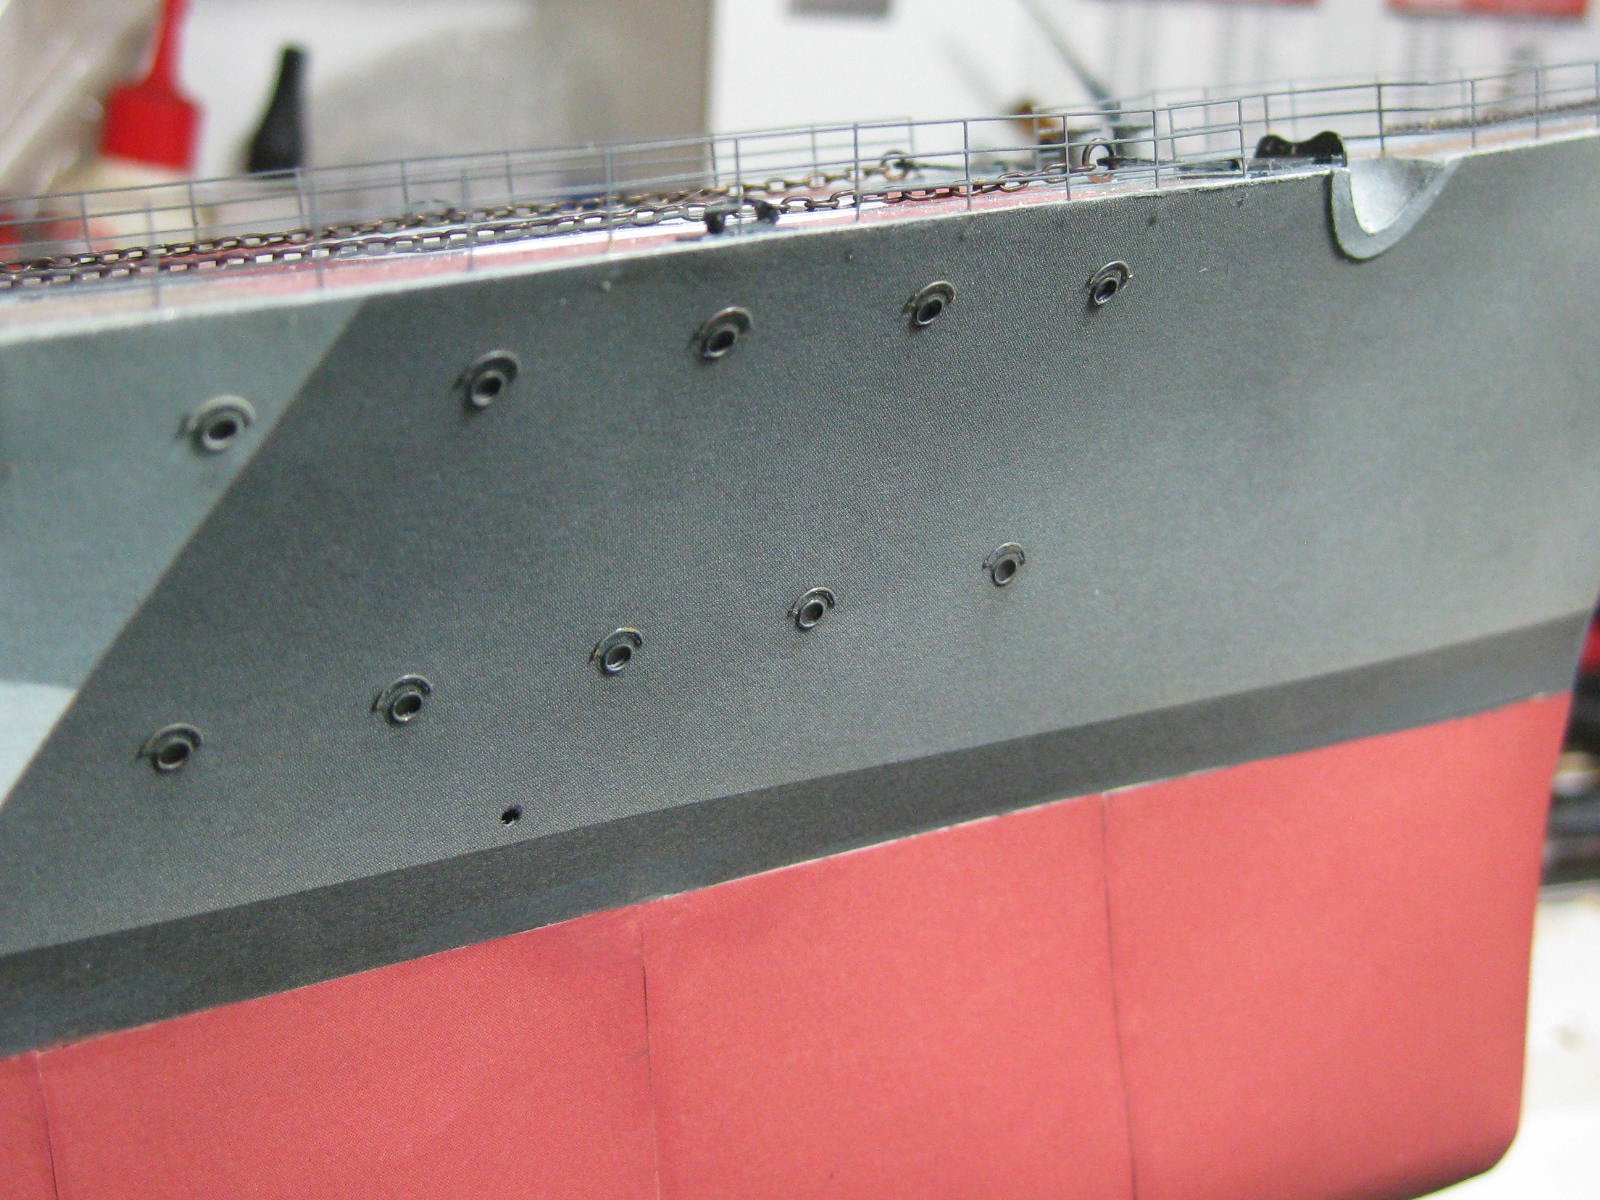
All the red lower skins are now fitted. They are about 98% OK, just some slight misalignment on a couple which is easily fixed") . In the 2nd pic below you can see about half of the longitudinal bulkhead below the skin. This needed to be trimmed flush with the edge of the skin, it took me about 2 hours to do all the affected areas :
. In the 2nd pic below you can see about half of the longitudinal bulkhead below the skin. This needed to be trimmed flush with the edge of the skin, it took me about 2 hours to do all the affected areas :
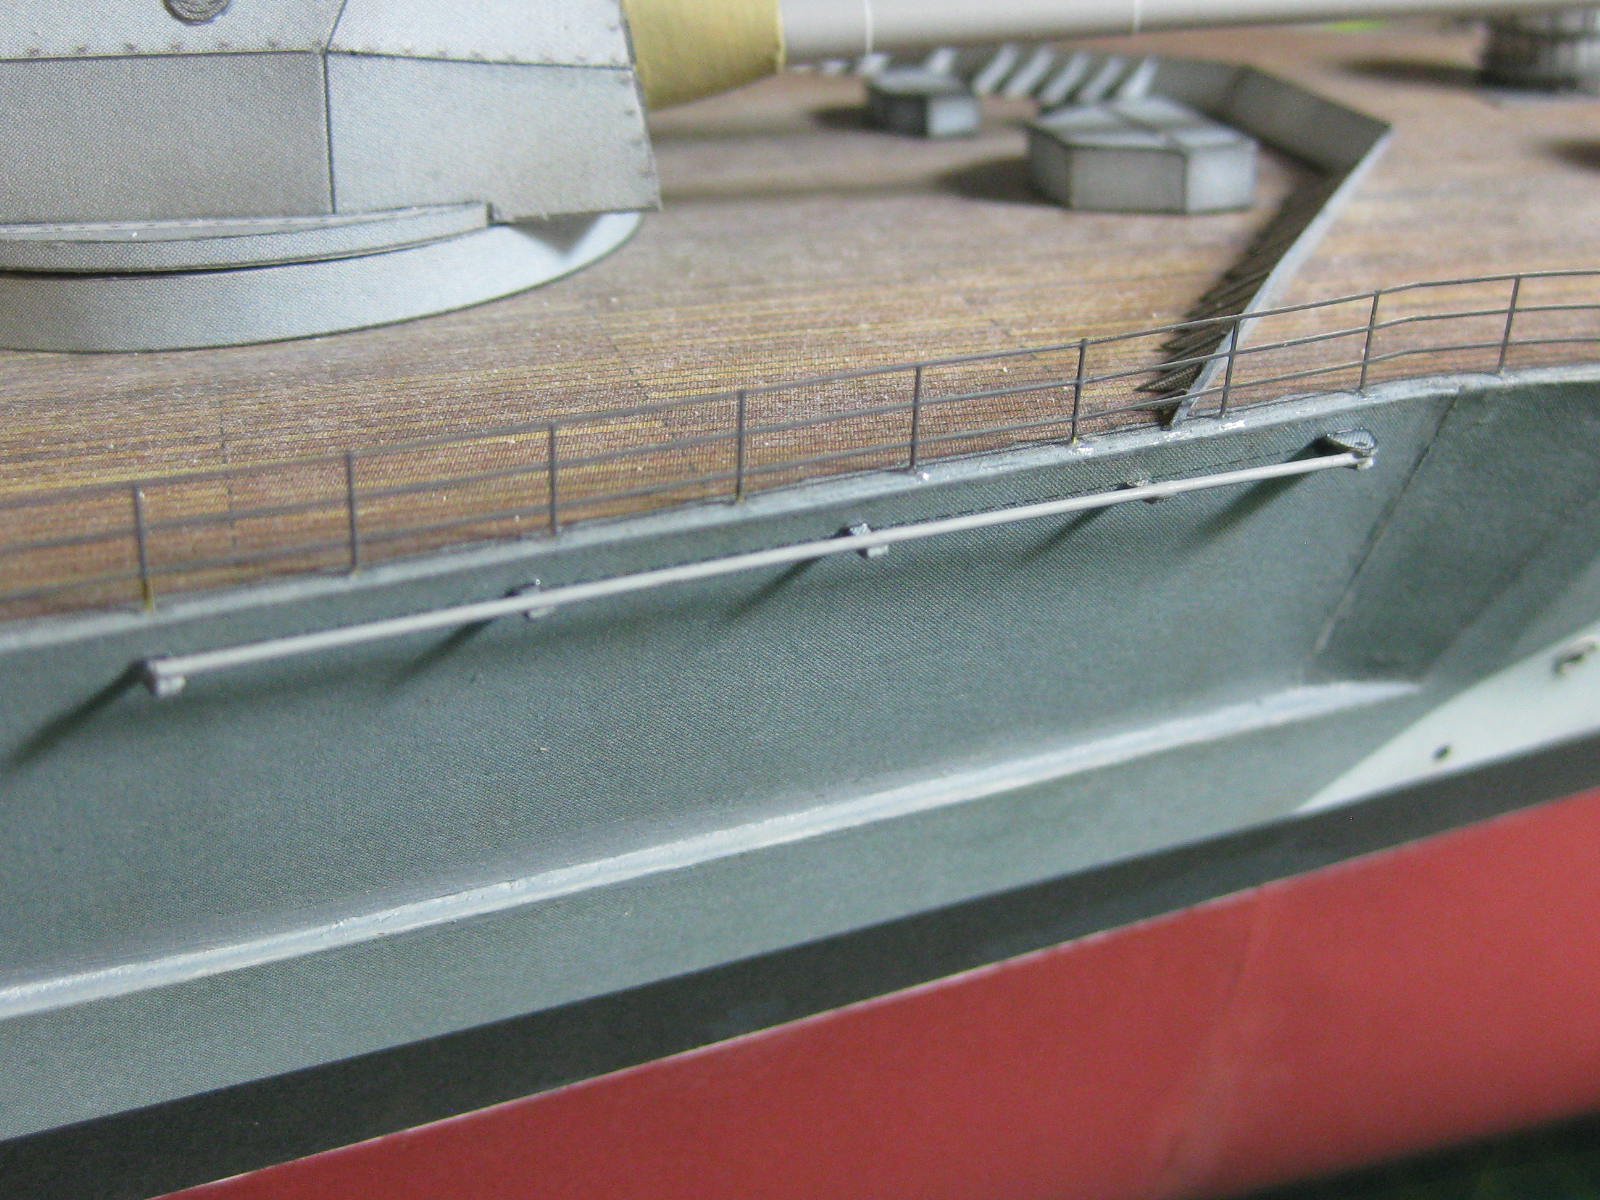
I've done some final trimming etc in readiness for the upper skins. I've also fitted the "teak" sections of the main decks. These fitted perfectly") :
:
Cheers, Danny