


Dan Vadas
-
Posts
3,261 -
Joined
-
Last visited
Content Type
Profiles
Forums
Gallery
Events
Posts posted by Dan Vadas
-
-
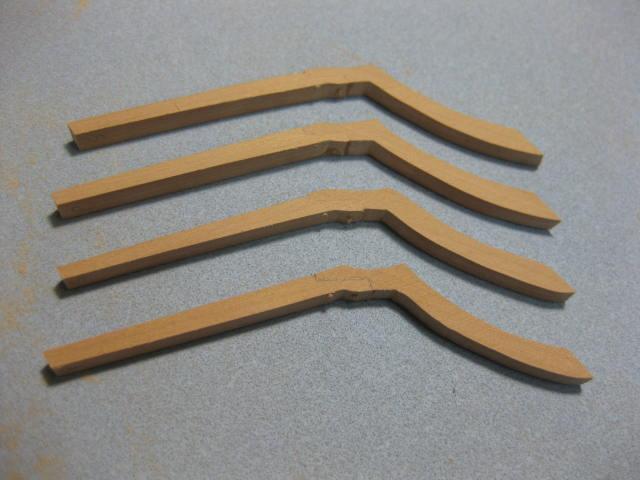
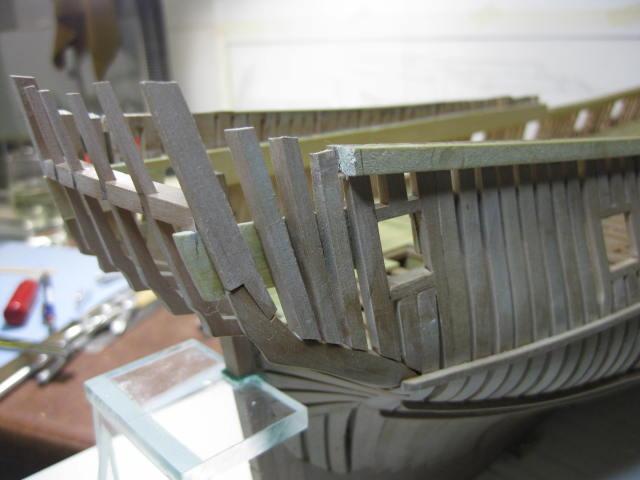
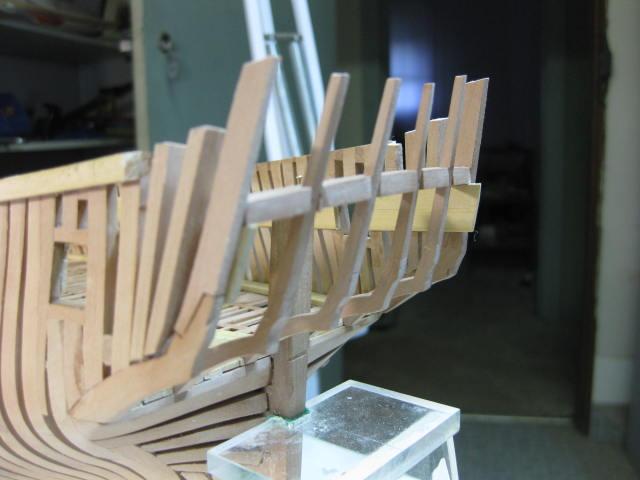
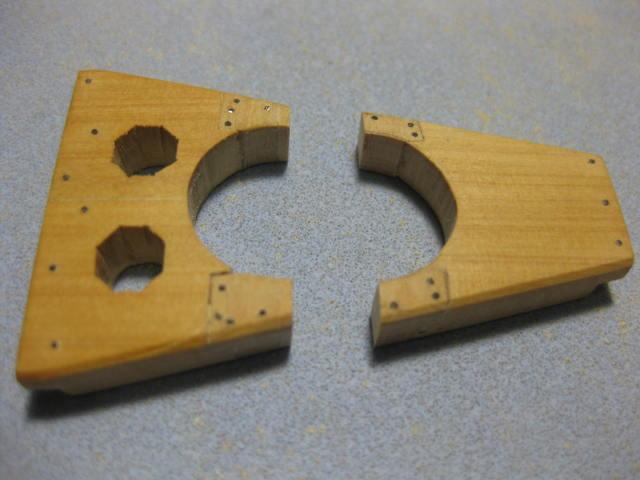
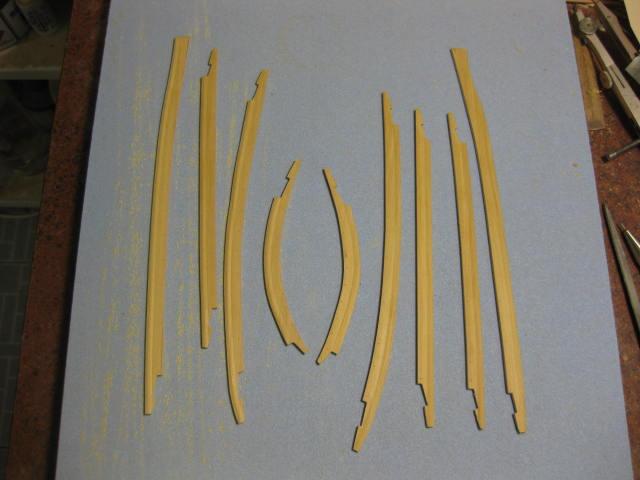
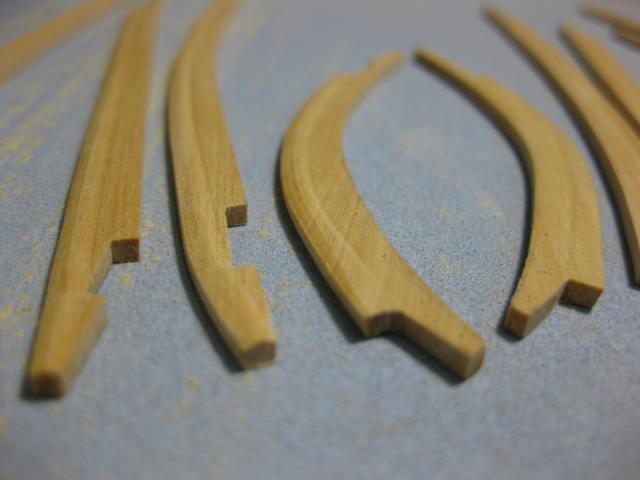
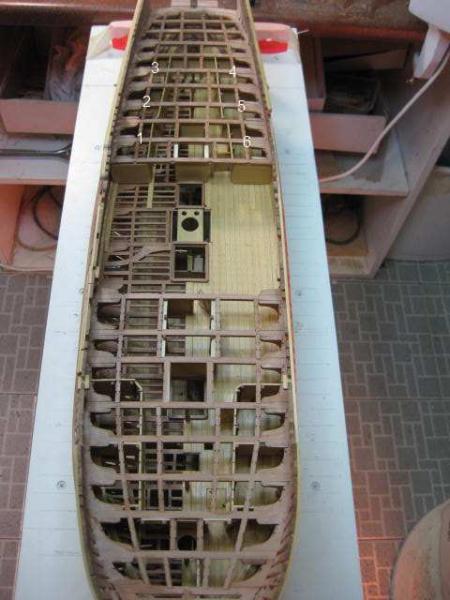
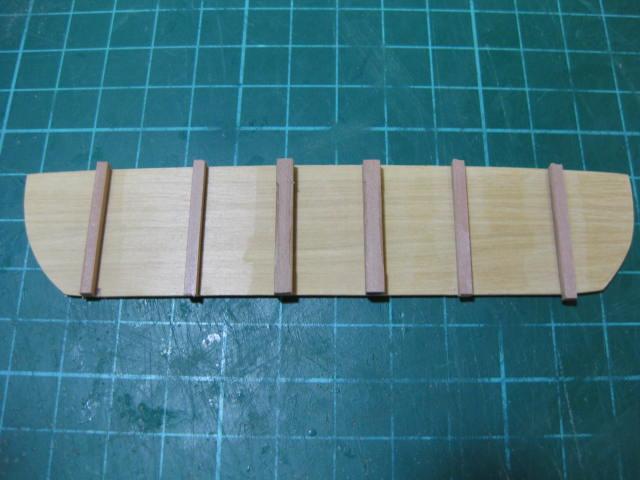
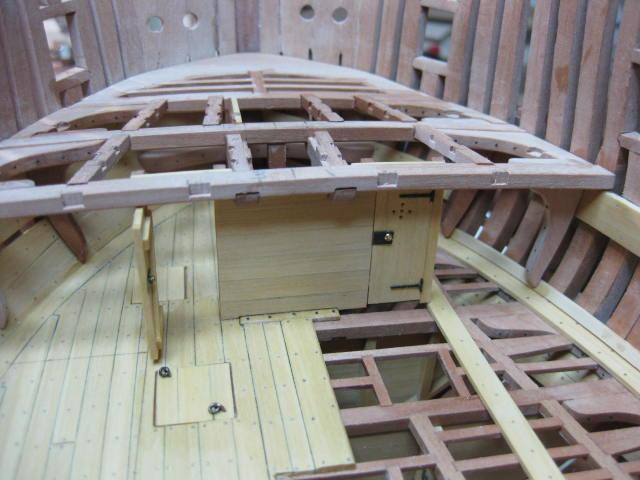
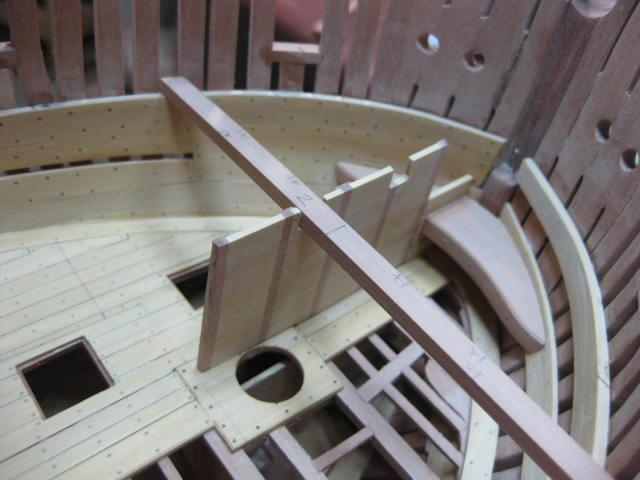
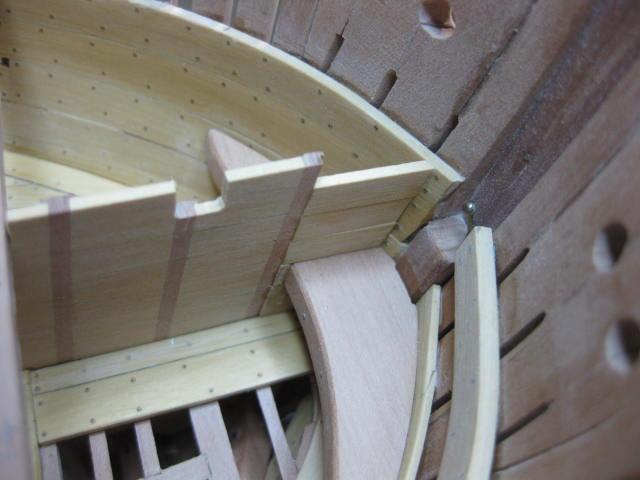
Counter Timbers
And now for something more interesting - the Counter Timbers. These are the timbers that go between the Stern Lights (windows).
They are each made from two pieces of timber scarph jointed together and taper toward the top both fore-aft and athwartships. They also converge toward the top to "meet" at a point at about the height of the Mizzen Crosstrees :
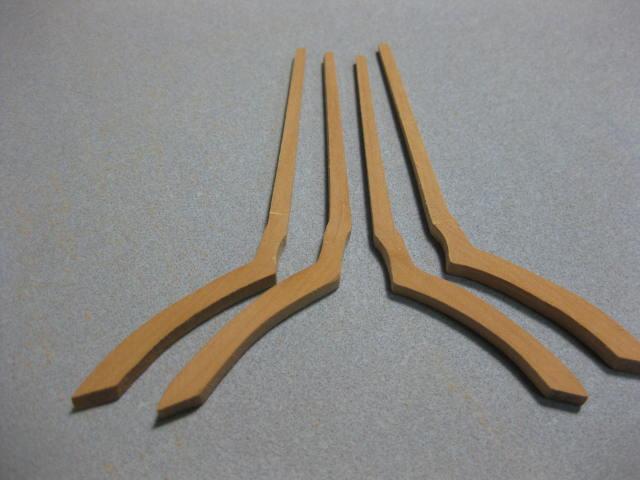
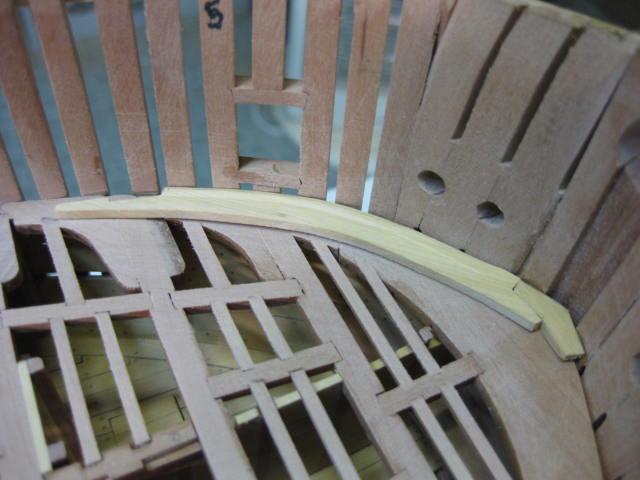
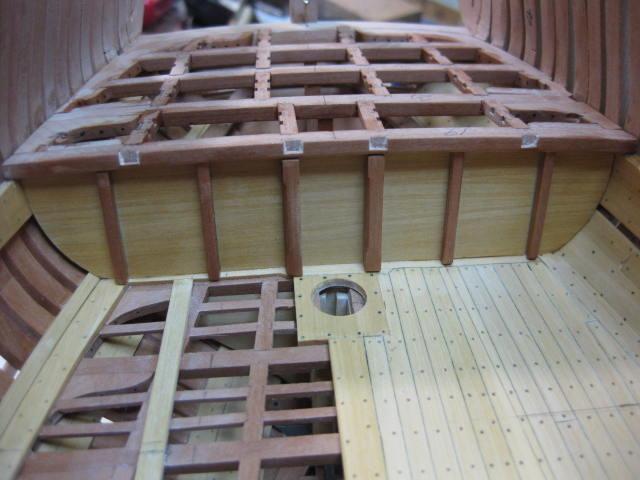
They are supported near their tops by the Quarterdeck Transom, which has a rebate in it's front edge to accept the quarterdeck planking. At this stage the transom still needs to be faired on it's lower outside edge :

- Jeronimo and garyshipwright
-
 2
2
-
Upper Deck Treenailng
More of the same - Treenailing (yawn
 ) :
) :


-
Top and Butt (Anchor Stock) Deck Planking
Same as Lower Deck Planking - I'll let the pics tell the story :


- Wishmaster, Jeronimo, garyshipwright and 1 other
-
4
-
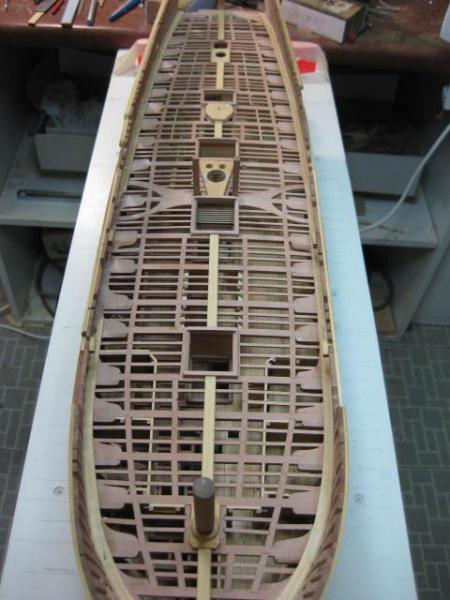
Upper Deck Planking
The same construction methods used in the Lower Deck Planking apply to the Upper Deck :

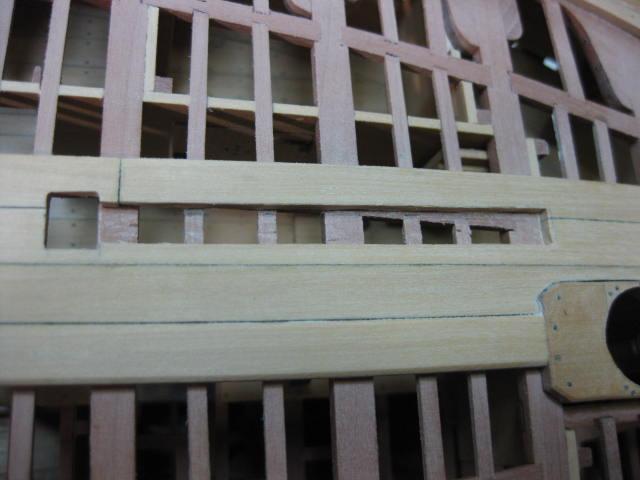
Note the small "hook" in the planking near the capstan step :
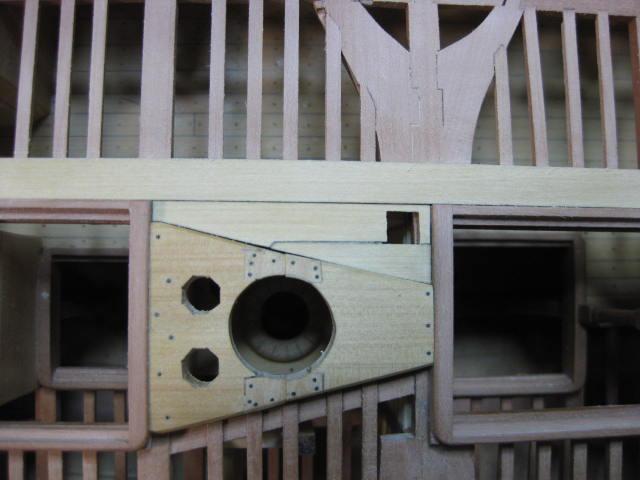
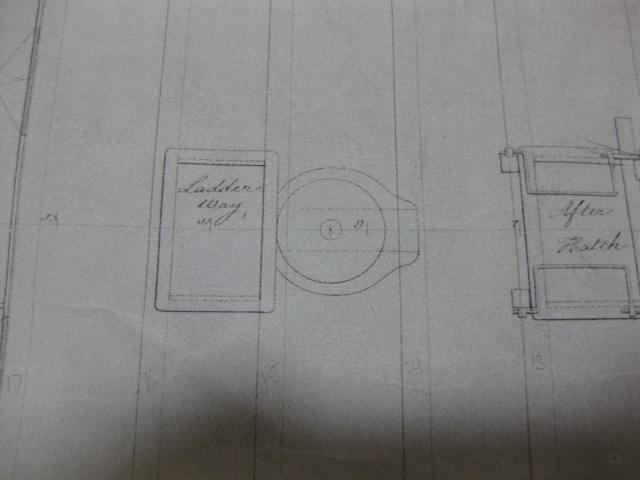
Another hook where the line of the Aft Ladderway is narrower than the Aft Hatch :
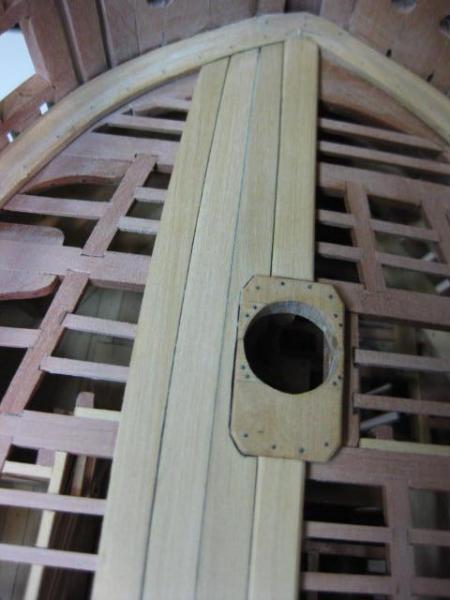
The planking cut out for the port Riding Bitts Standard :
-
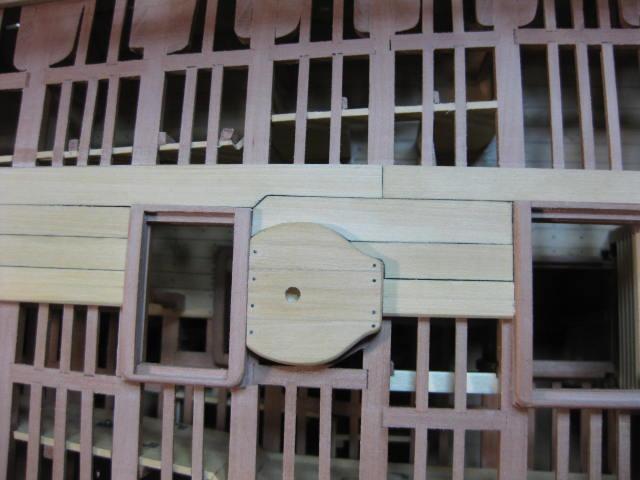
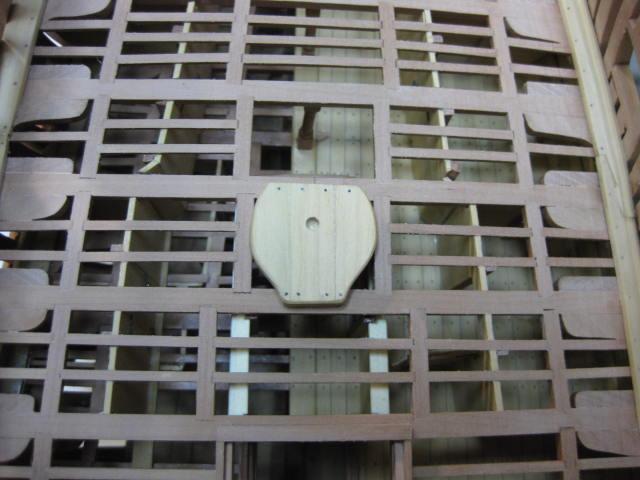
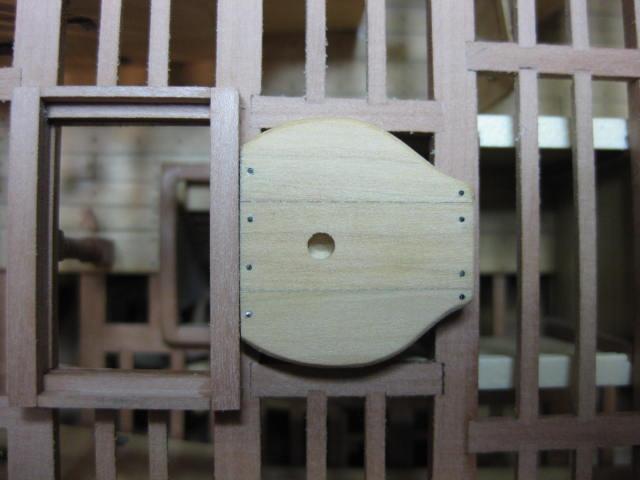
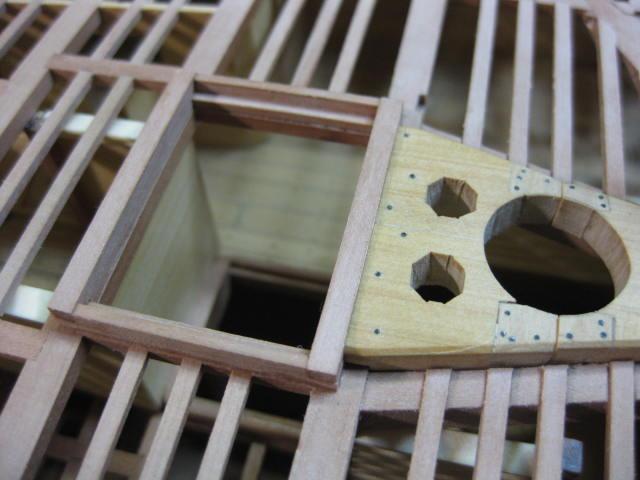
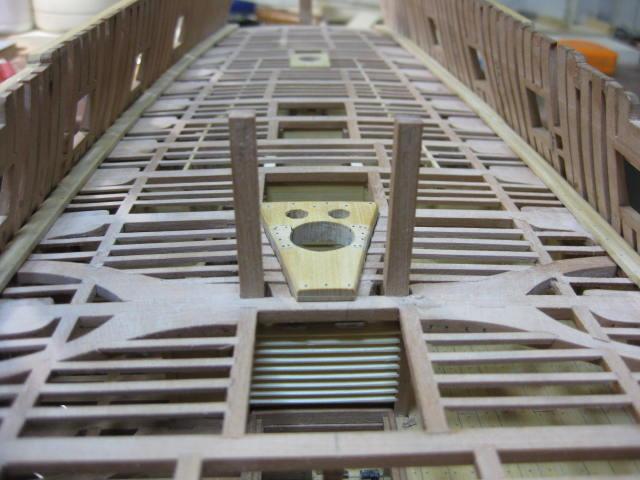
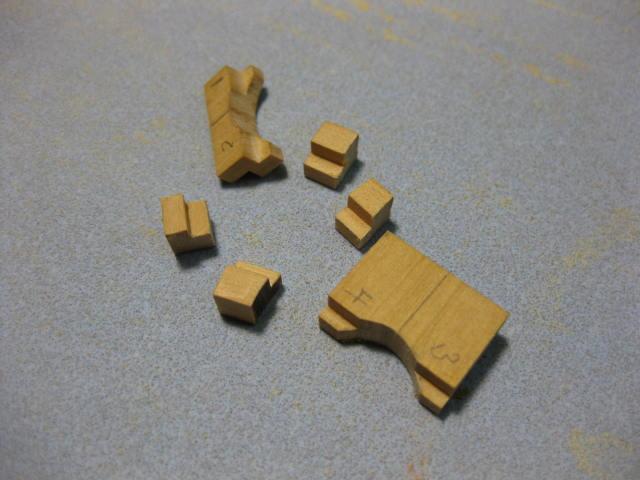
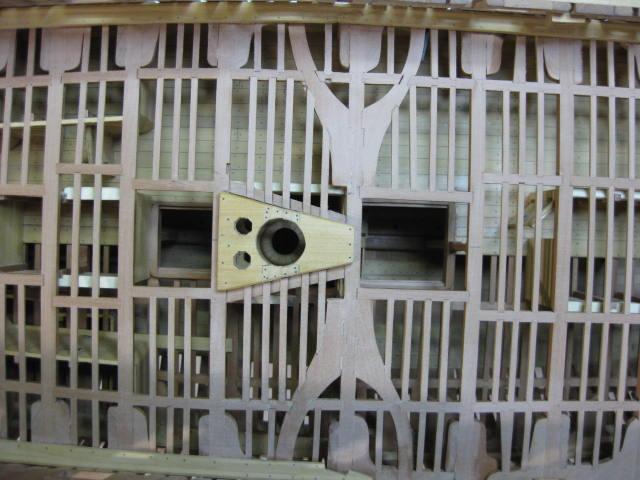
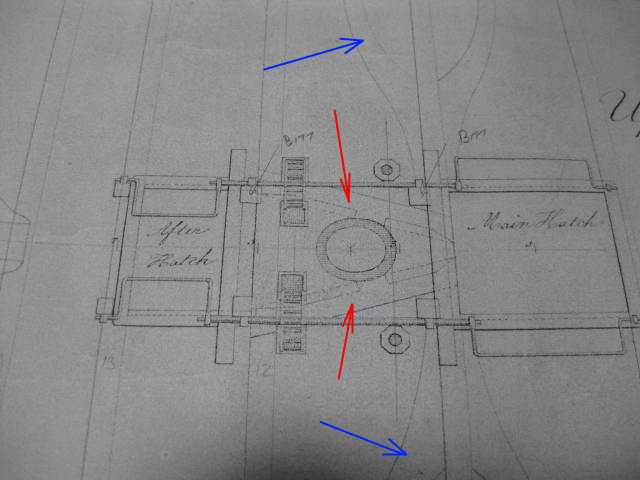
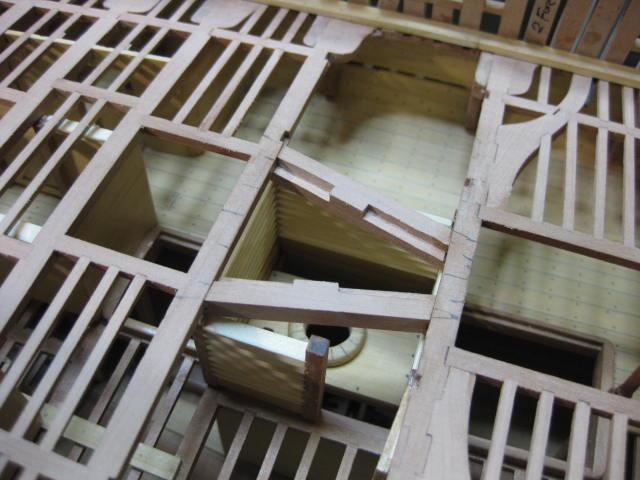
Capstan Step
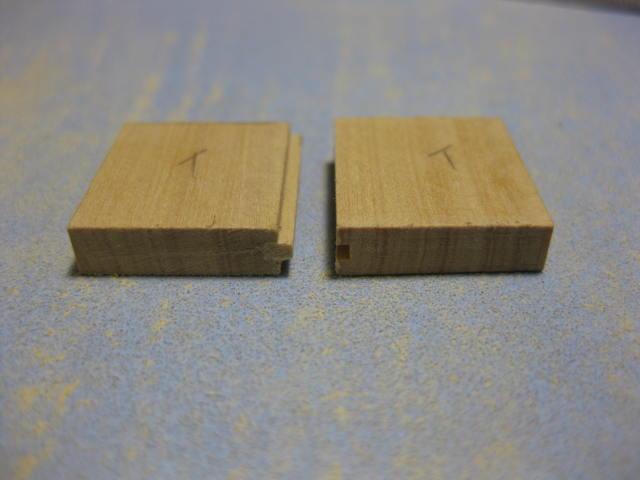
The Capstan Step is made from three pieces of timber with faked "dovetail" joints :
Another notable variation from the "norm" for Vulture - on most other "Swan class" ships it is a rectangle with a rounded fore edge. The NMM plans show it quite differently :
The top of the Step is horizontal to the waterline in both fore-aft and athwartships directions as the ship has Capstans on both the Upper Deck and the Quarterdeck, so a common base plane is needed to connect the two. The Step is about 2" thicker on the fore edge compared to the aft edge to allow for the slope of the deck from the vertical.


The Aft Ladderway Coaming has been fitted :
-
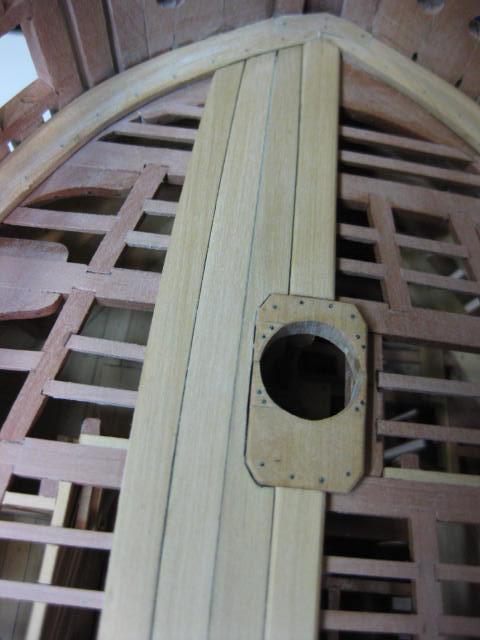
Upper Deck Hatch Coamings
Similar in construction to those of the Lower Deck.

-
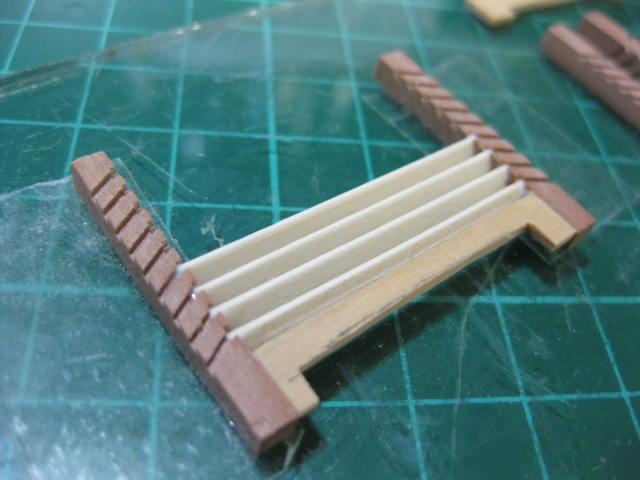
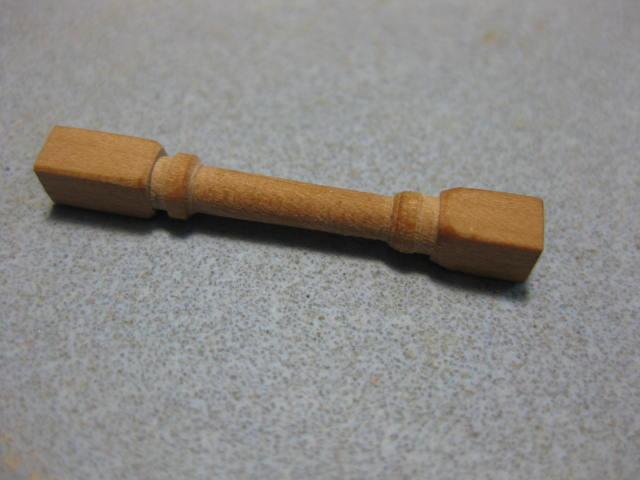
Main Topsail Sheet Bitts part 1
As I did with the Riding Bitts earlier I made up the Main Topsail Sheet Bitt Pins to enable me to cut their seats before too much else got in the way. They will be finished off at a later stage :
-
Mizzen and Foremast Partners
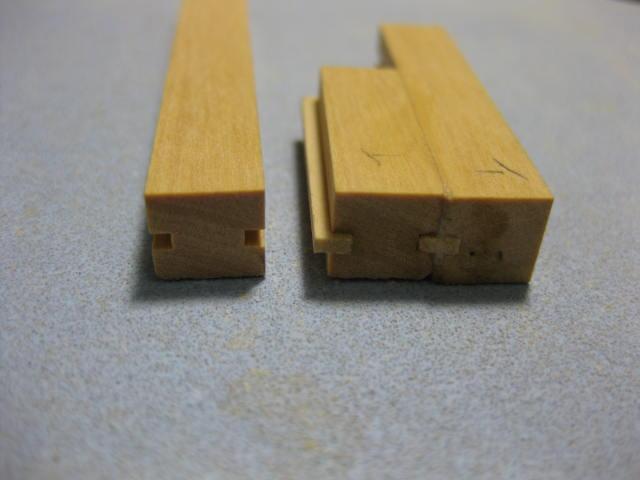
The Mizzen Mast Partners are of a simple type - made from two 17" wide planks dovetail jointed together :


The Foremast Partner is a "normal" rectangular version of the Main Mast Partner. All the steps and rebates were done using the Byrnes saw :


-
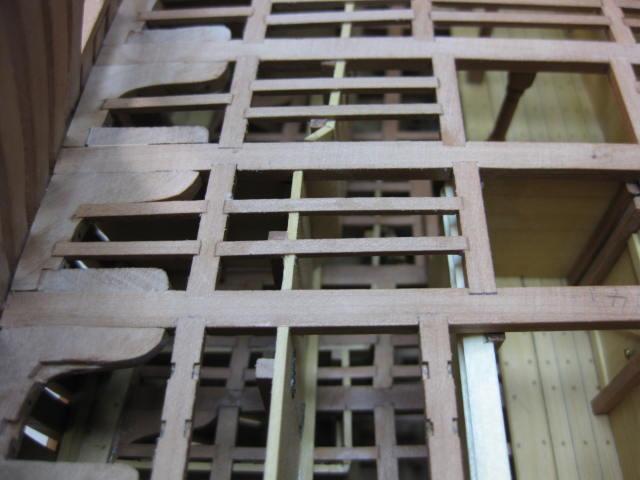
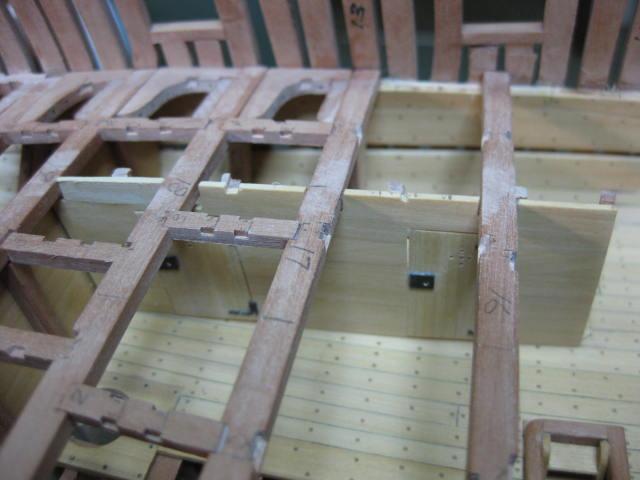
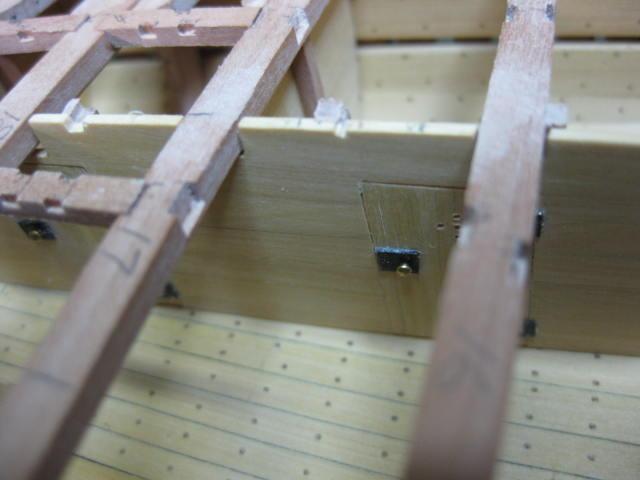
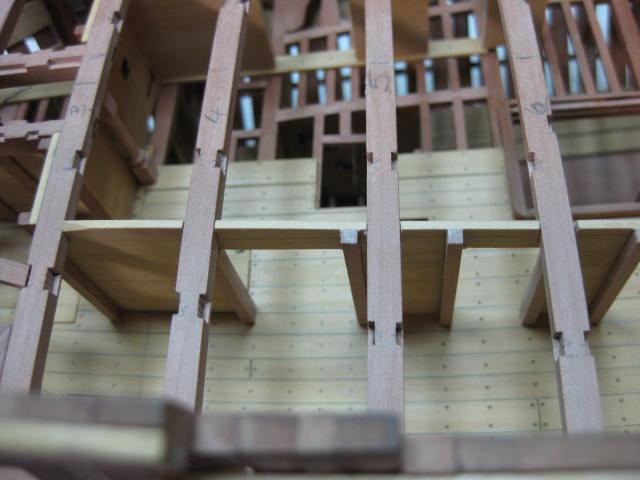
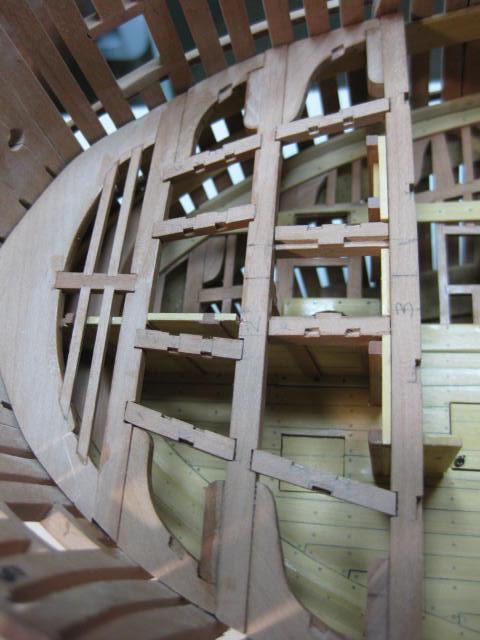
Aft Beam Arms, Carlings and Ledges
There are four Beam Arms on the Upper Deck - two each side of the beam separating the Main Hatch from the Main Mast Partners :


-
Main Mast Partners
HMS Vulture has a very different style of Main Mast Partner on the Upper Deck to most other ships. Whether this was an experiment that was not used again because there was no benefit is unknown. However, the NMM plans clearly show this method of use (2nd pic). The more "normal" type of main mast partner is shown in the TFFM plan in pic 1. I had to do my own interpretation of how the various components of the partner would have fitted together :
The two main pieces of the partner were rebated together - I used a fillet as the final join looks the same :

-
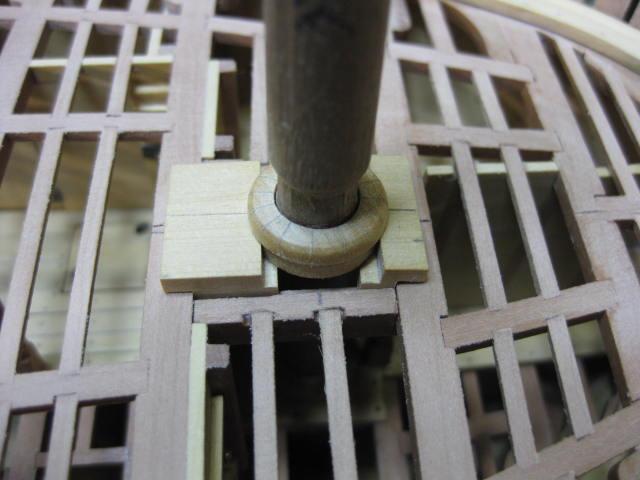
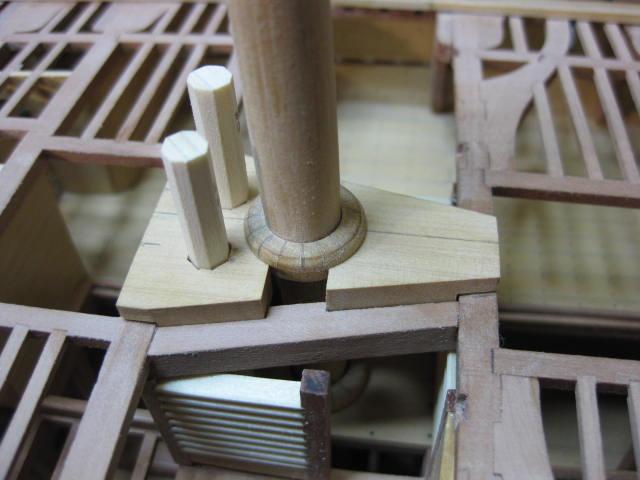
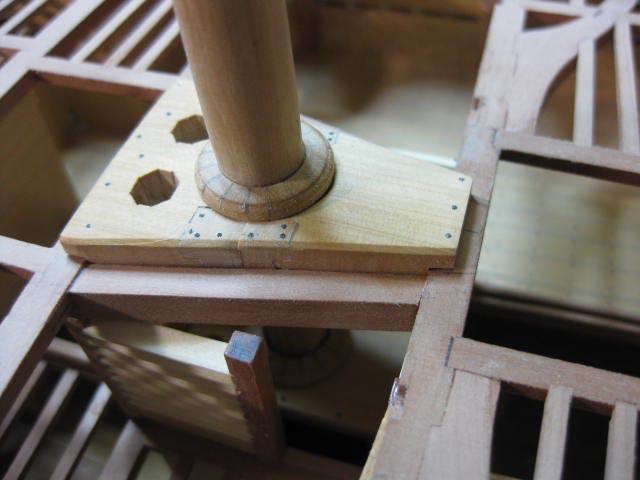
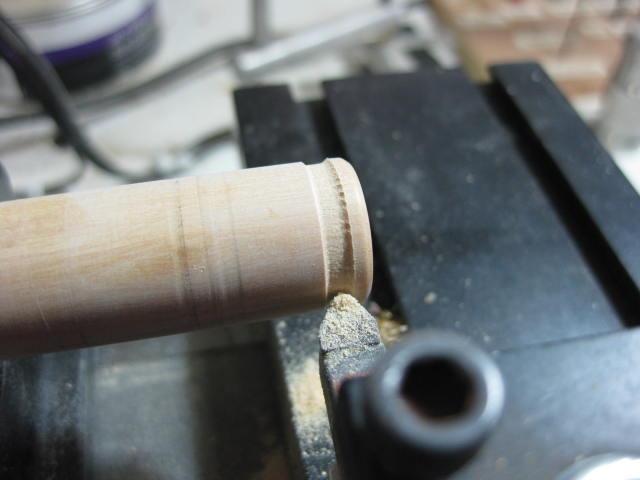
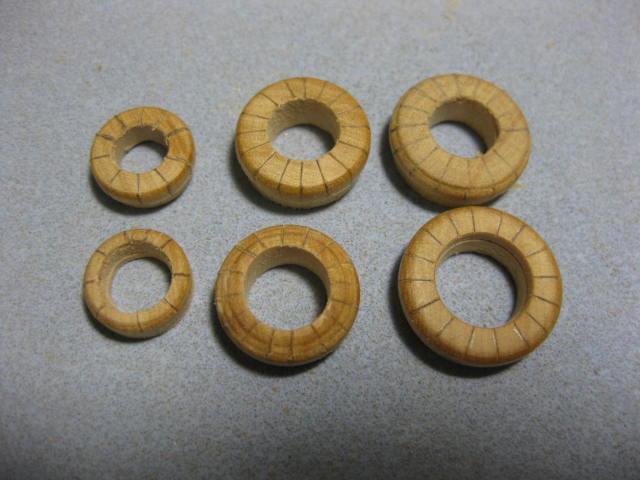
Mast Wedges
Masts were not bolted to any part of the hull or deck framing - this would have put far too much pressure on individual components, not to mention weakening the mast itself. Instead, Wedges were used around the mast at each Partner to hold it in position.
Rather than attempt to make individual wedges, which would be impossible to fit on a model for the lower decks, I turned up wedge "rings" on the lathe. The individual wedges are simulated with an Xacto blade and are enhanced with a pencil :
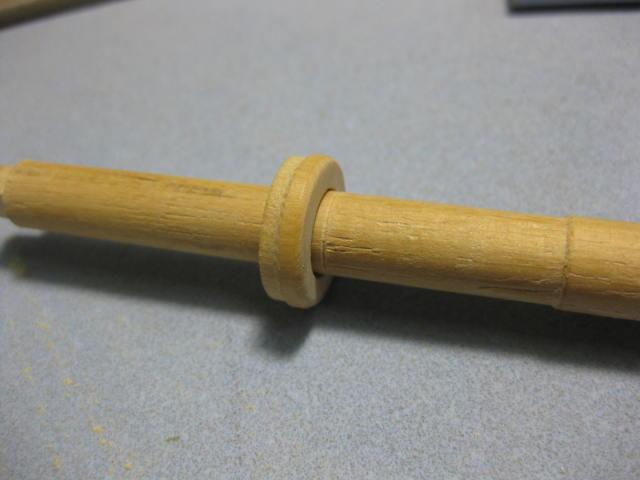
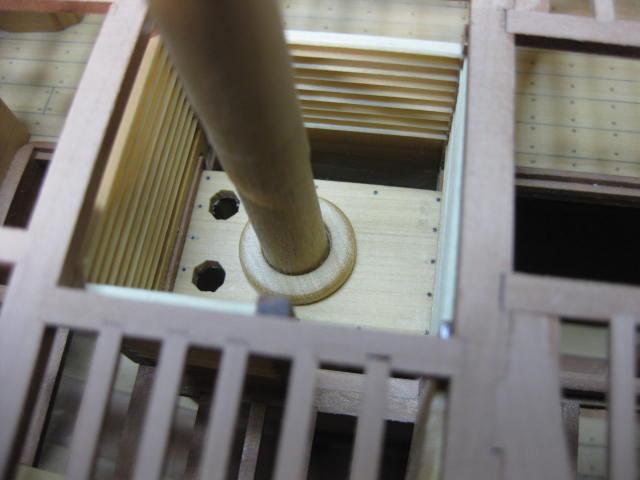
Note that the "mast" in these pics is only a dummy for alignment purposes - I haven't made the "real things" yet.
-
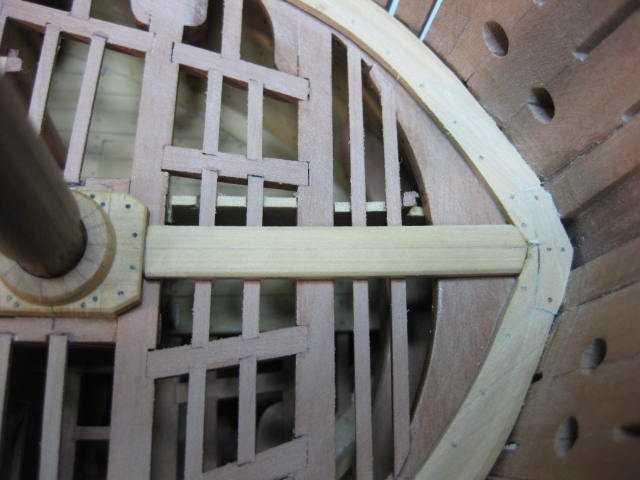
Upper Deck Waterways
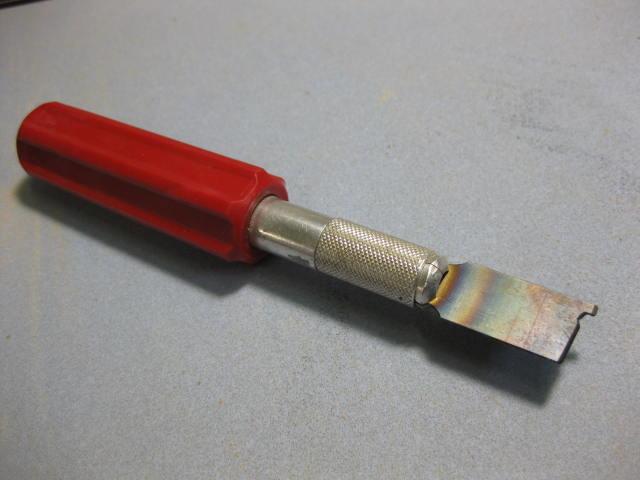
These were made and fitted in similar fashion to the Lower Deck Waterways, with one notable exception - their profile shape. This required a special Scraping Tool to cut the profile.
To make the tool I used a wide chisel-point Xacto blade. I first annealed it over a gas flame until it was cherry-red and allowed it to cool naturally. When it had cooled I filed the profile in with needle files and sharpened each facet with the same. Then I once again returned it to the gas flame, heating it to cherry-red but this time I immediately quenched it in water to cool it. This hardened the steel back to it's original condition.
One thing to note about the scraping tool is the "long" part of the blade (top-right in the pic) - the "vertical" facet has been left dull (rounded in fact) to follow the edge of the plank without cutting into it. This guides the rest of the blade to prevent it from wavering :

-
Upper Deck Ledges
Finally, the Ledges were all fitted :

- cpt. Tom and paulsutcliffe
-
2
-
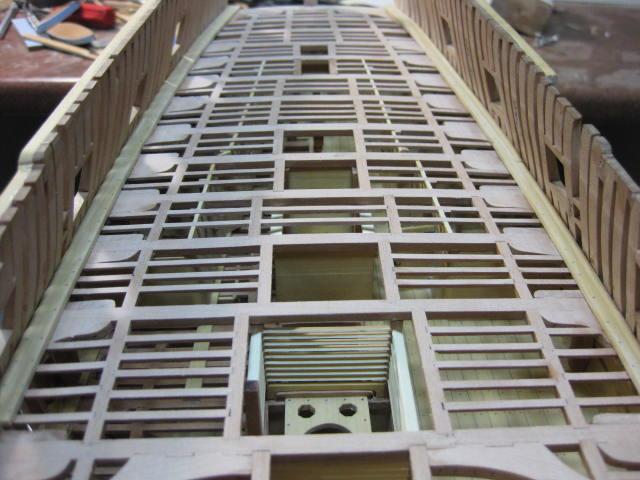
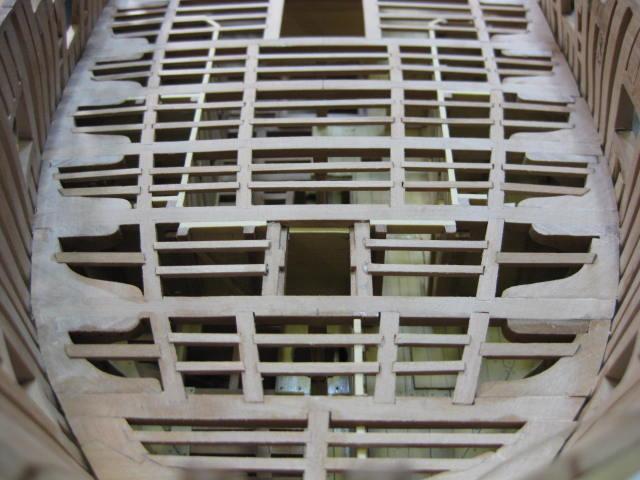
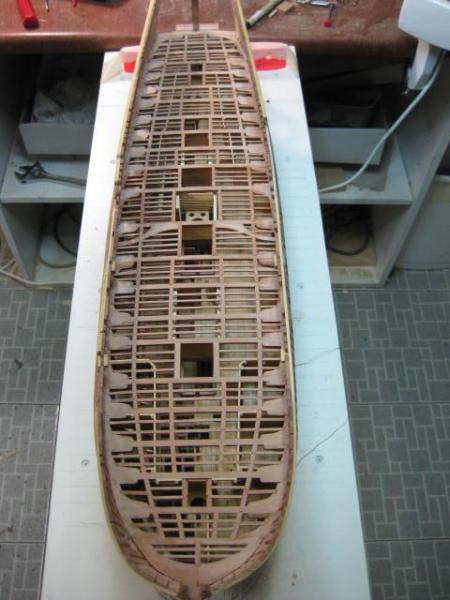
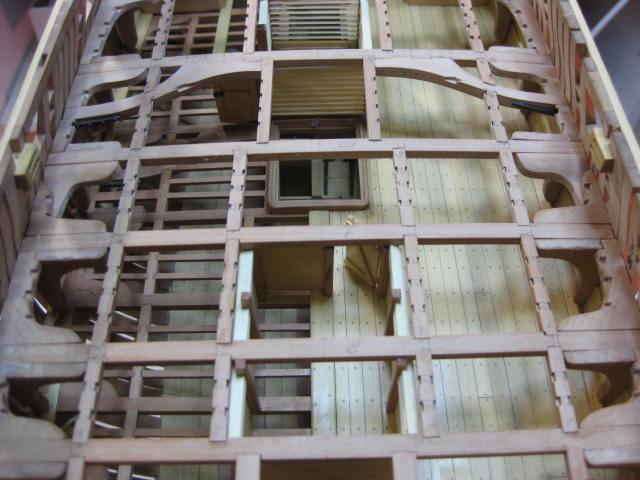
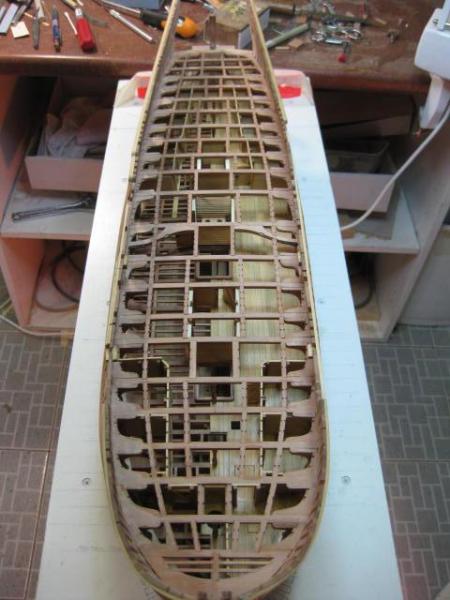
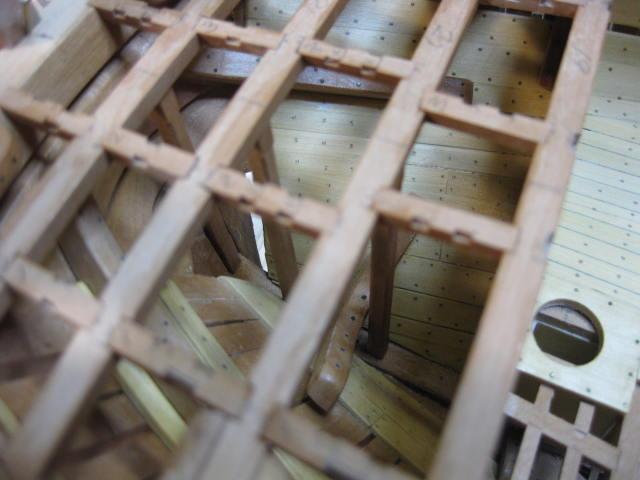
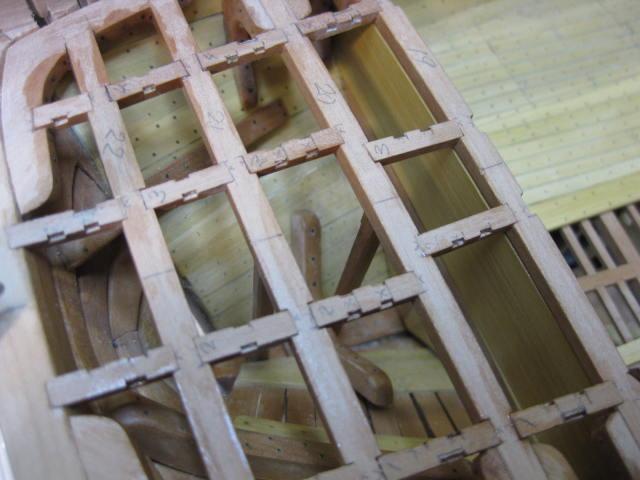
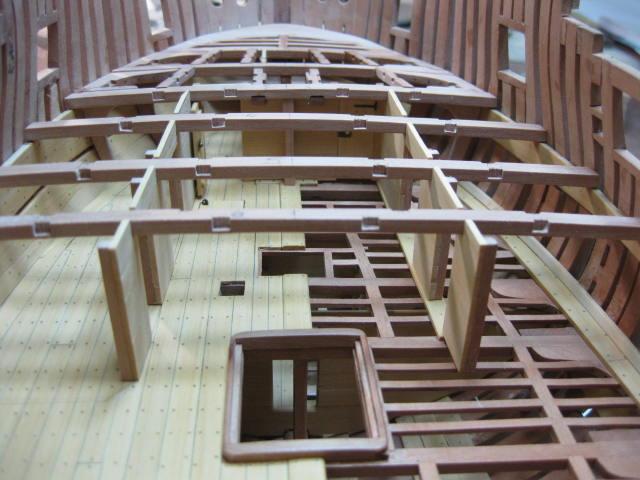
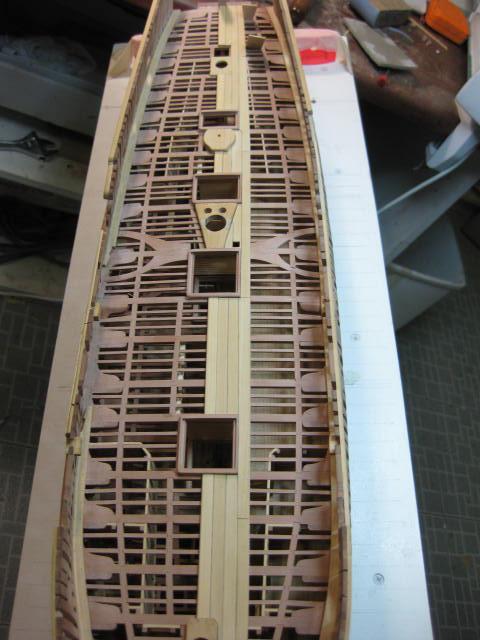
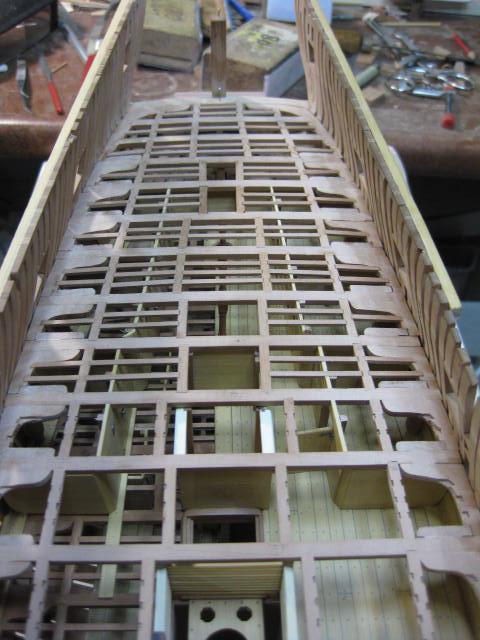
Upper Deck Framing Finished
When the Upper Well was finished the remainder of the Upper Deck Framing was installed :
- Wishmaster and paulsutcliffe
-
2
-
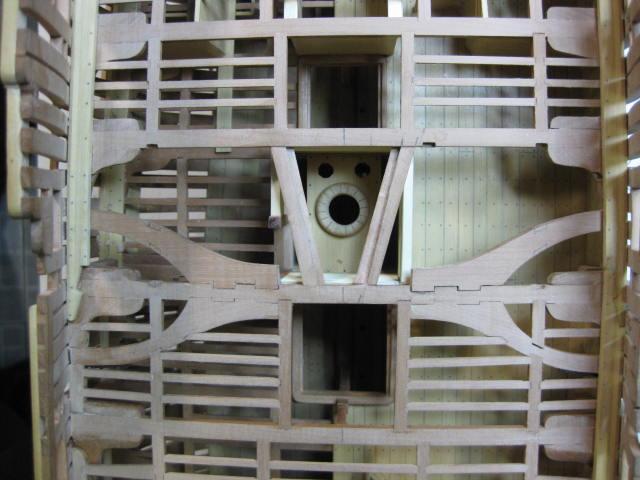
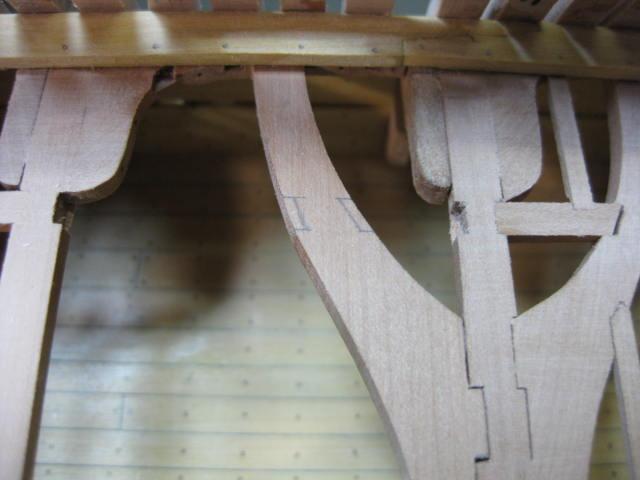
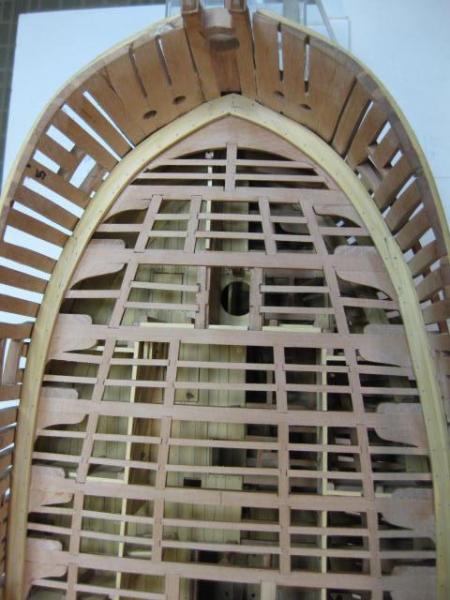
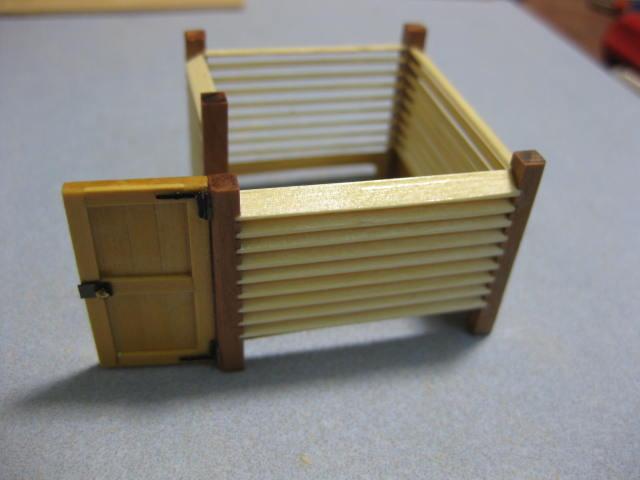
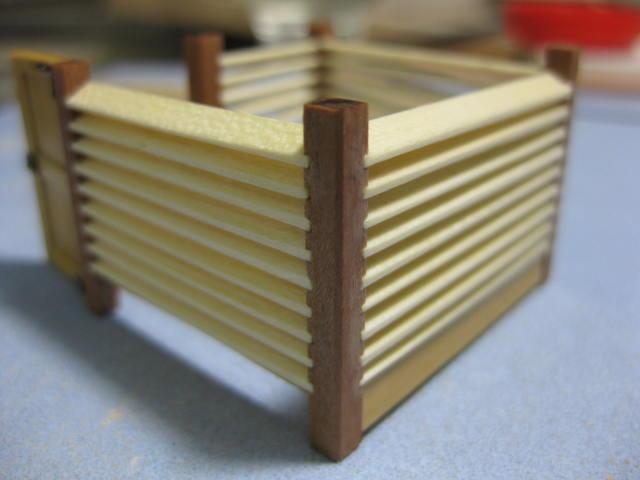
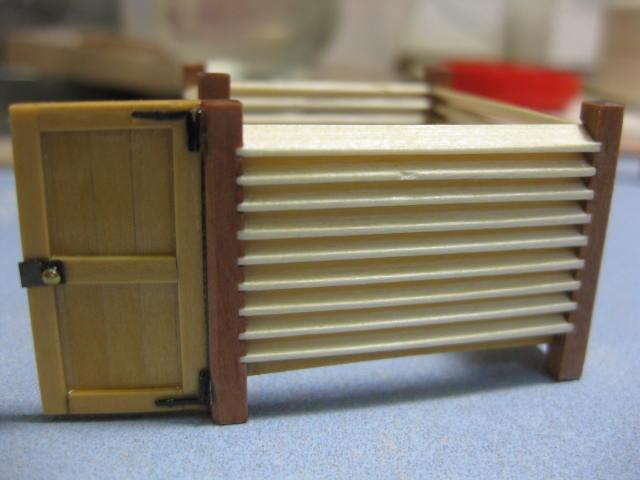
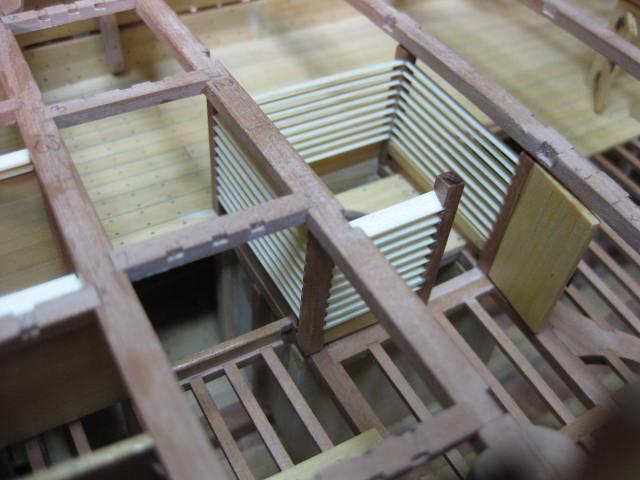
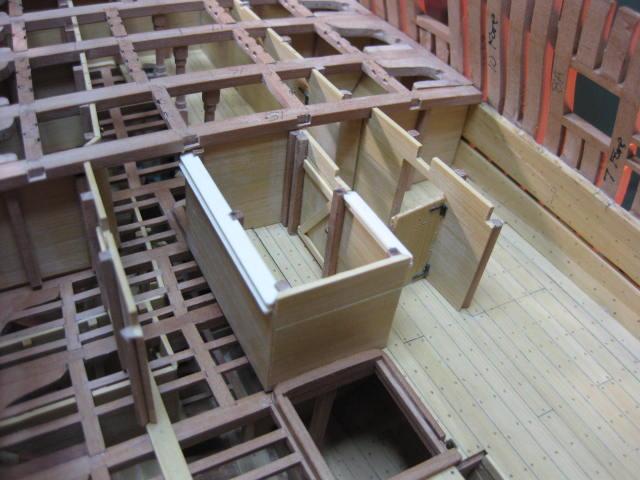
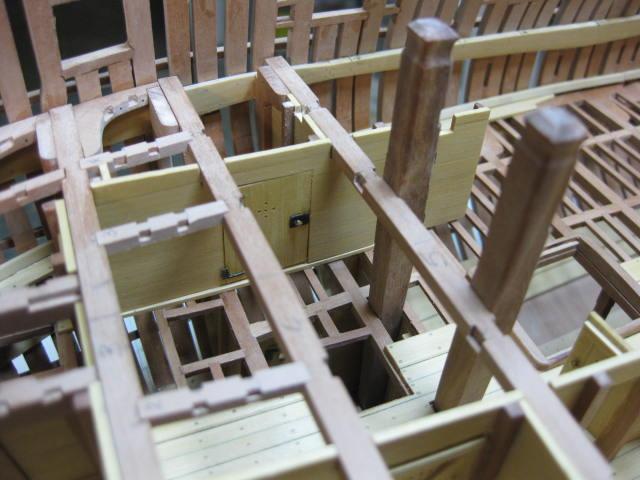
Upper Well
The Upper Well is a rather more complex piece to build compared to the other structures of the Lower Deck. It consists of fully louvered walls rebated into stanchions in each corner and alongside the door.
I cut all the stanchions to length first, allowing a few millimetres extra at the top ends. I also made up two extras in case of mistakes in cutting the angles for the rebates in the right direction - I needed one of them
. The angles were all cut on the Byrnes saw - very tricky to work out which angle needs to be cut in which direction, especially when you have to cut them upside-down  :
:

-
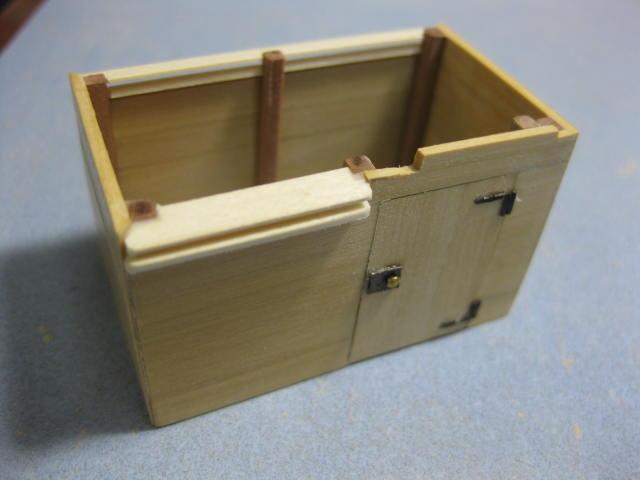
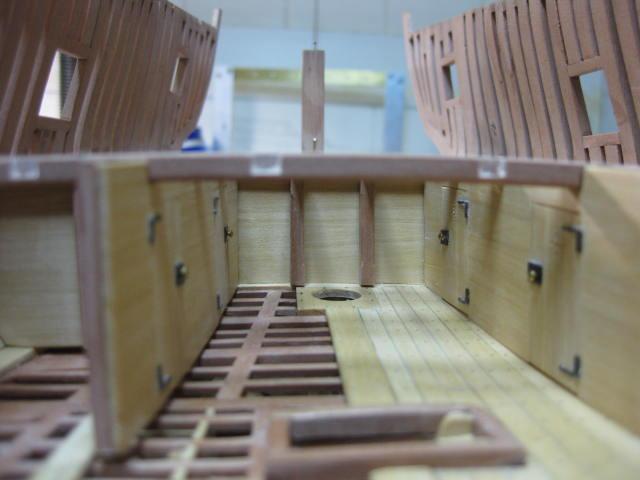
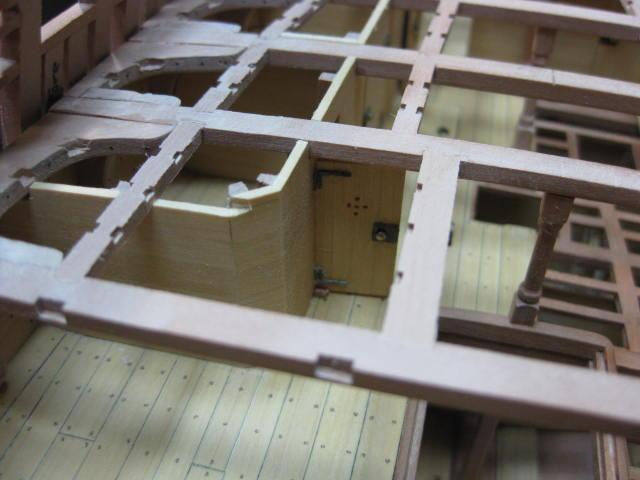
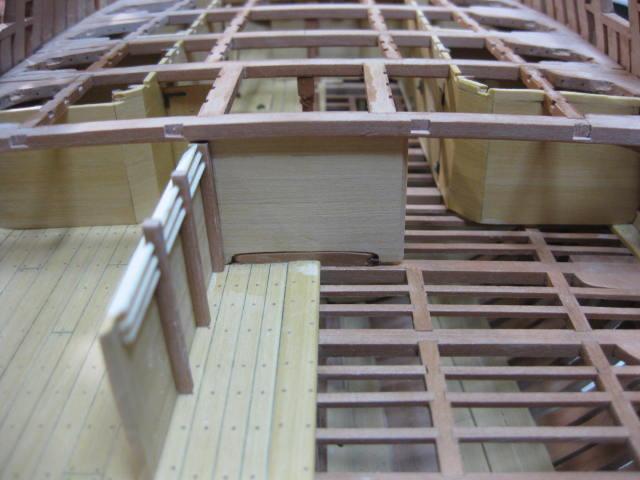
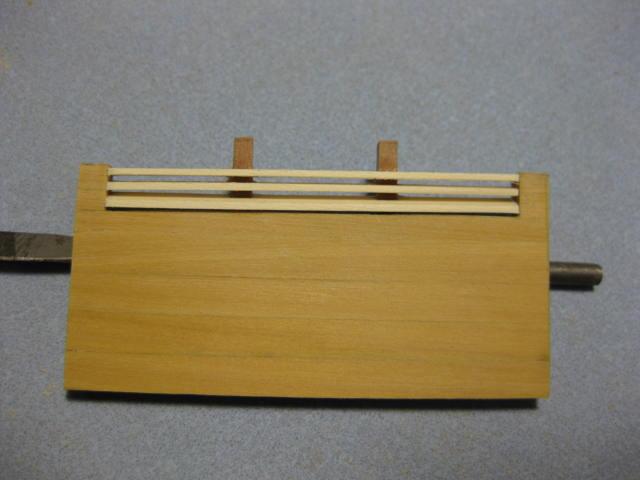
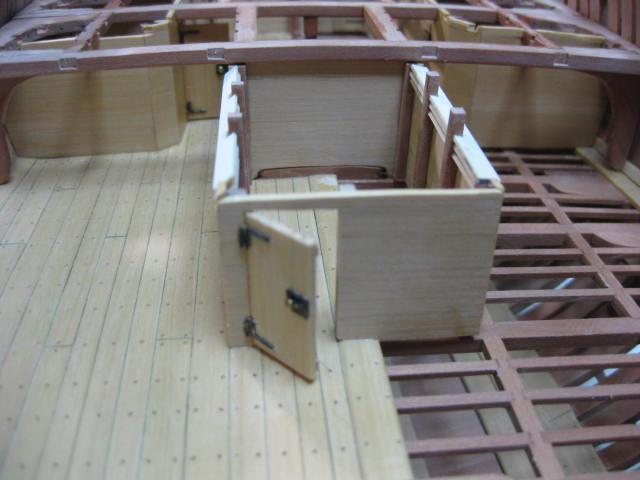
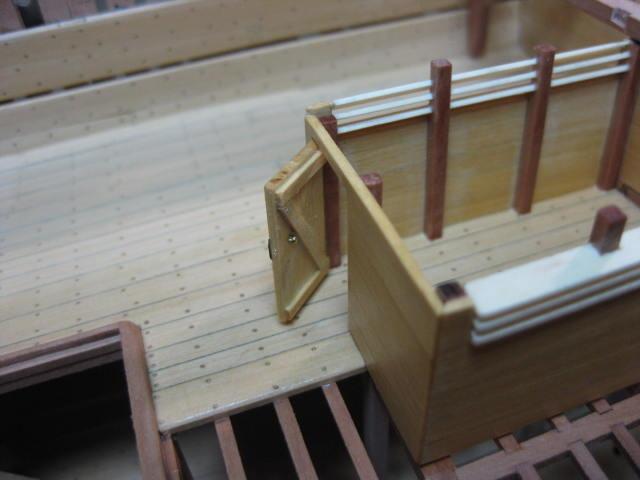
Pantry
The Pantry is a "stand-alone" room similar to the Sail Room in the fore part of the ship. It has ventilation louvers as well - I again made these from Holly :

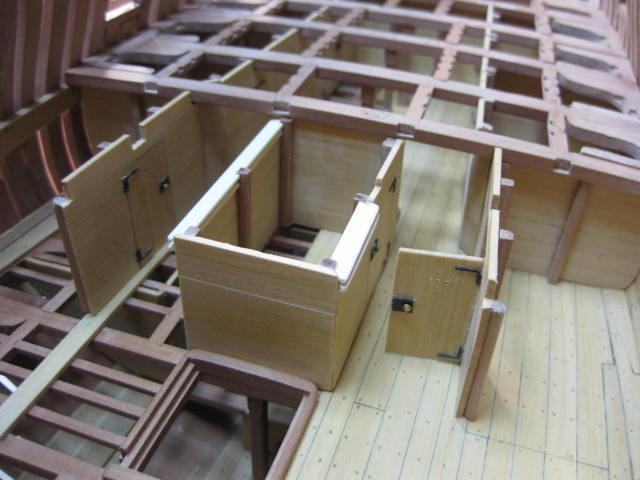
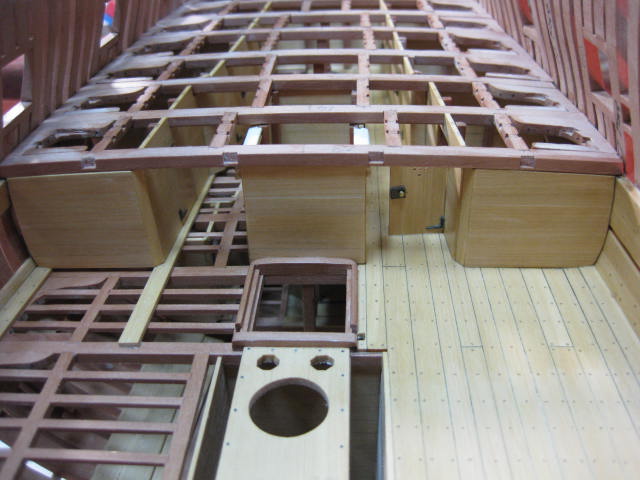
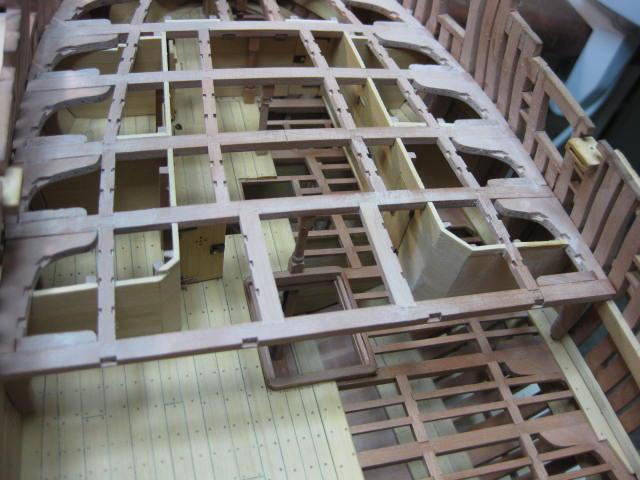
Once all the Aft Rooms were completed the Upper Deck Framing was done above them :
A description of the Aft Lower Deck Rooms :
There are three rooms each side, with the Pantry in the middle of the deck and the Bread Room at the aft end. In a clockwise direction from the forward starboard room the others are :
1. Marine Officers' Room
2. Master's Room
3. Surgeon's Room
4. Purser's Room
5. Lieutenant's Room
6. Gunner's Room
-
Aft Bulkheads
The fore-aft bulkheads were all made and fitted in similar fashion to those of the Fore Cabins :
-
Bread Room Bulkhead and Pillars
Construction of the Aft Rooms on the Lower Deck begins with the Bread Room Bulkhead. There are two Pillars either side of centre :
Upper Deck Beams and Carlings were fitted after the bulkhead was in place :
-
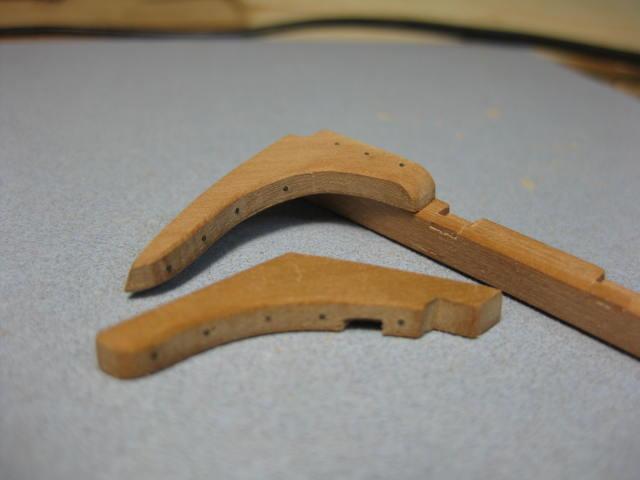
Wing Transom Knees
It was at this stage of the build that I discovered a problem with the height of the Upper Deck Clamp at the Transom. For my "fix" check out This Link.
The Wing Transom Knees are very similar to any other Lodging Knee and were made in similar fashion :


Note that the Wing Transom is not entirely accurate in these pics - another "fix" was needed and will be detailed later in the build.
- ryesbeemer and cardmagician
-
2
-
-
Forward Bulkheads Finishing


As the bulkheads were completed the framing for the upper deck was added :
-
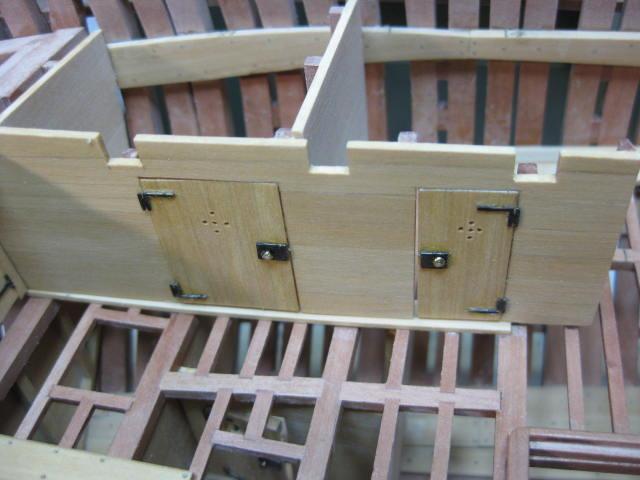
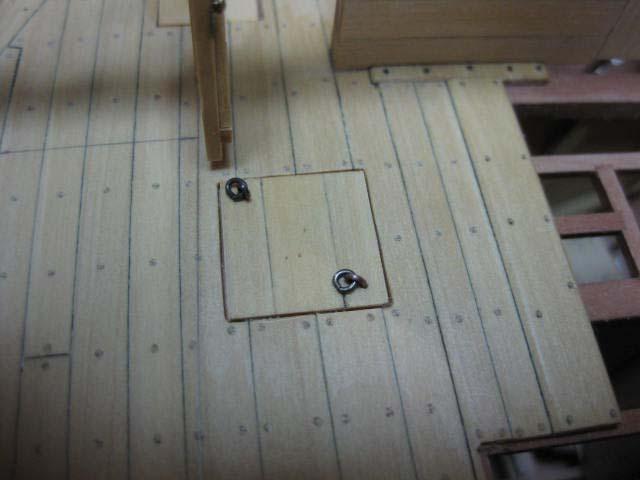
Forward Rooms Bulkheads and Scuttles
The eyebolts and rings for the Scuttle are made from brass wire which was blackened after shaping :
Door Hinges come from the PE set, the locks are thin brass plate and the handles are the heads of leftover brass planking pins :


-
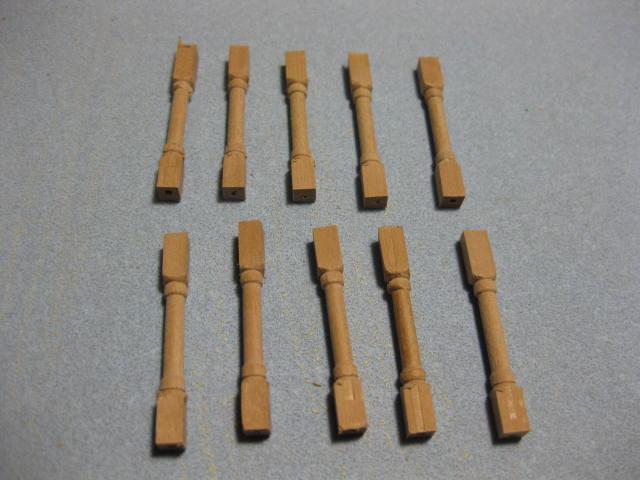
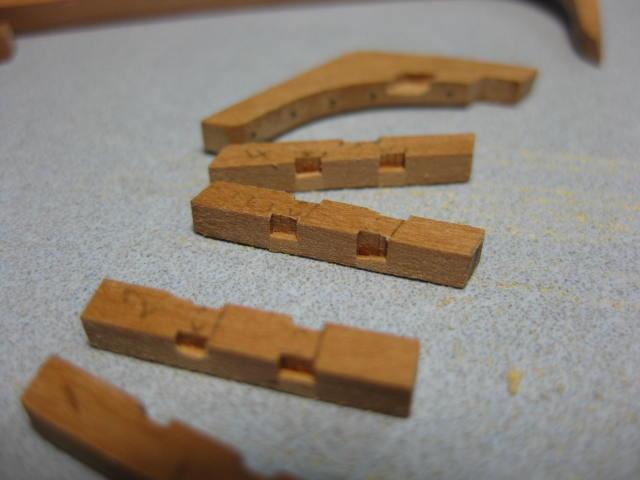
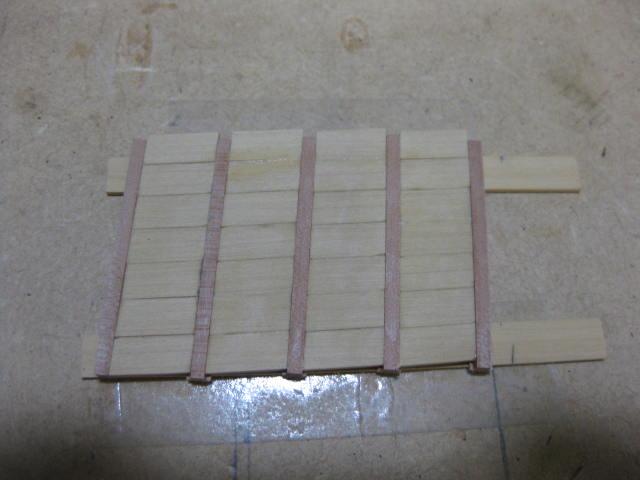
Upper Deck Pillars and Beam Set
The Upper Deck has fancier Pillars than those in the Hold. These were turned on my lathe using the Digital Readout :
Some detail pics of a typical Beam Set with the beam, lodging and hanging knees, and carlings and their various mortices :


-
Forward Room Bulkheads
The only variation of note in the construction of these bulkheads from previously detailed ones is the double rabbet in the fore-aft bulkhead stanchions which allows the planking to sit flush with one face of them. The rabbets were cut on the saw in one full length of stock and the stanchions were cut to size afterwards. The stanchions are vertical to the waterline, so the planks needed to be cut at the appropriate angles to compensate :

This is the athwartships bulkhead at the aft end of the Bosun's and Gunner's Rooms :


HMS Vulture 1776 by Dan Vadas - FINISHED - 1:48 scale - 16-gun Swan-class sloop from TFFM plans
in - Build logs for subjects built 1751 - 1800
Posted
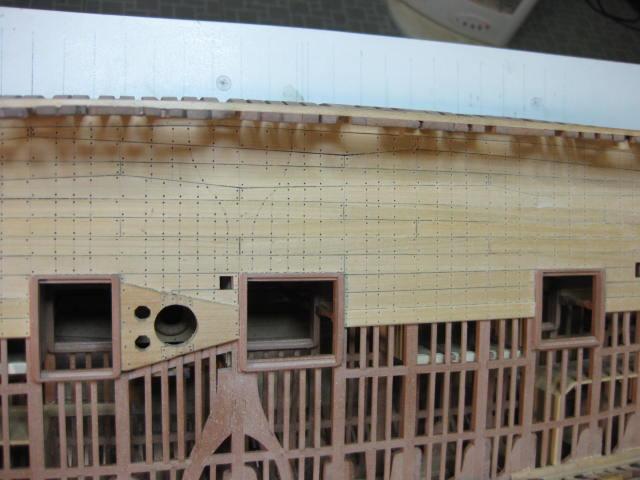
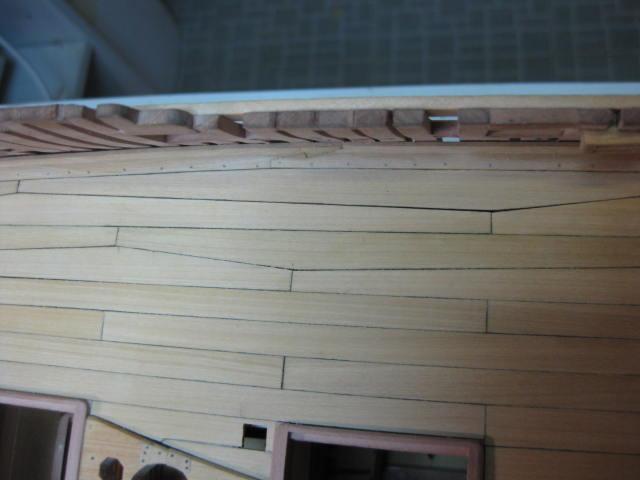
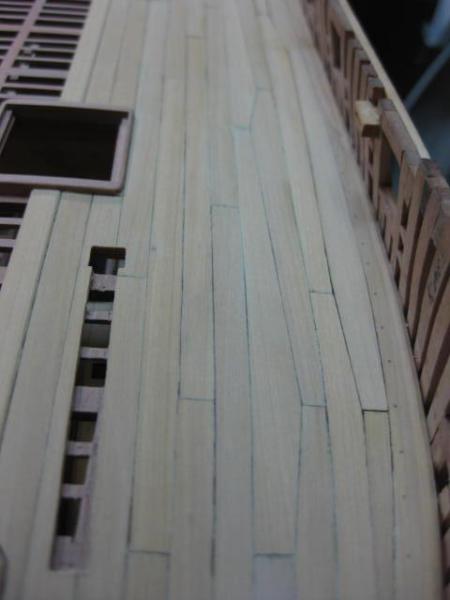
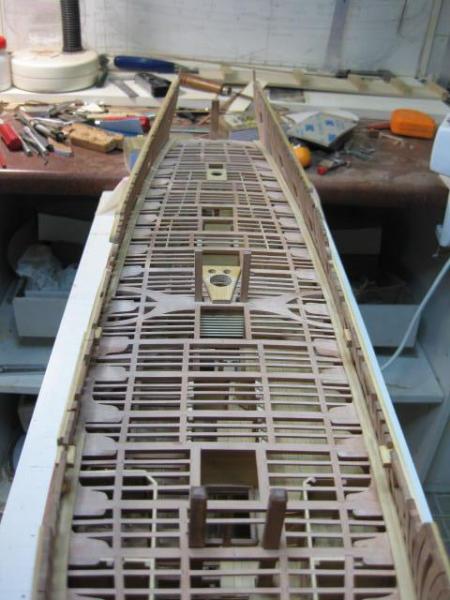
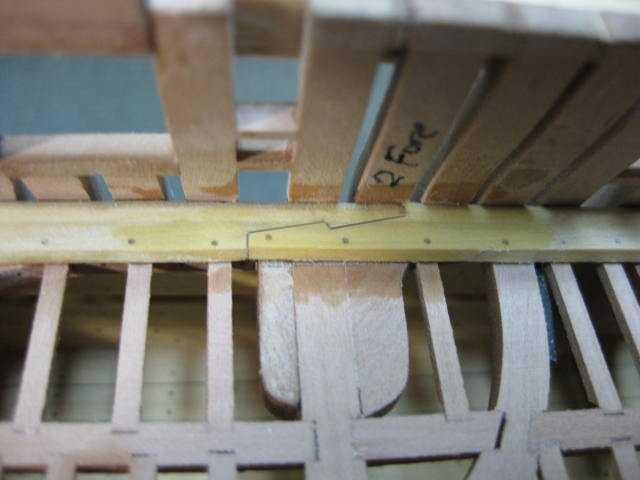
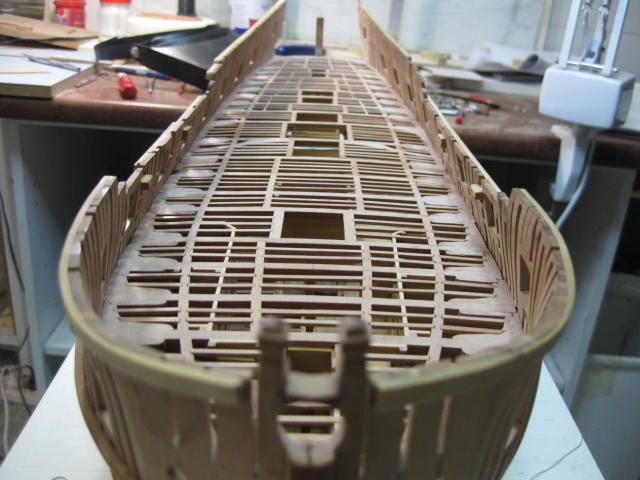
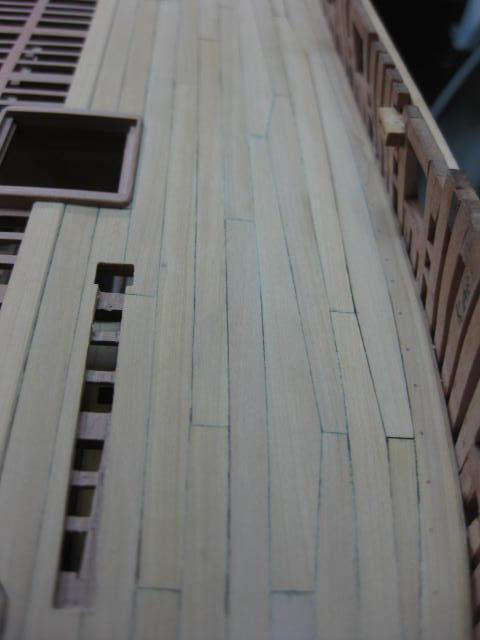
String in the Waist
This is the uppermost inside plank at the height of the frames in the Waist, which is the area between the Forecastle and Quarterdeck. They are all hook-scarphed together and the ends of the String are scarph jointed into the Clamps for both those decks, and is continuous with the Forecastle Clamp and the Lower Quarterdeck Clamp. It is 3" thick :