Ian Barefoot
-
Posts
12 -
Joined
-
Last visited
Content Type
Profiles
Forums
Gallery
Events
Everything posted by Ian Barefoot
-
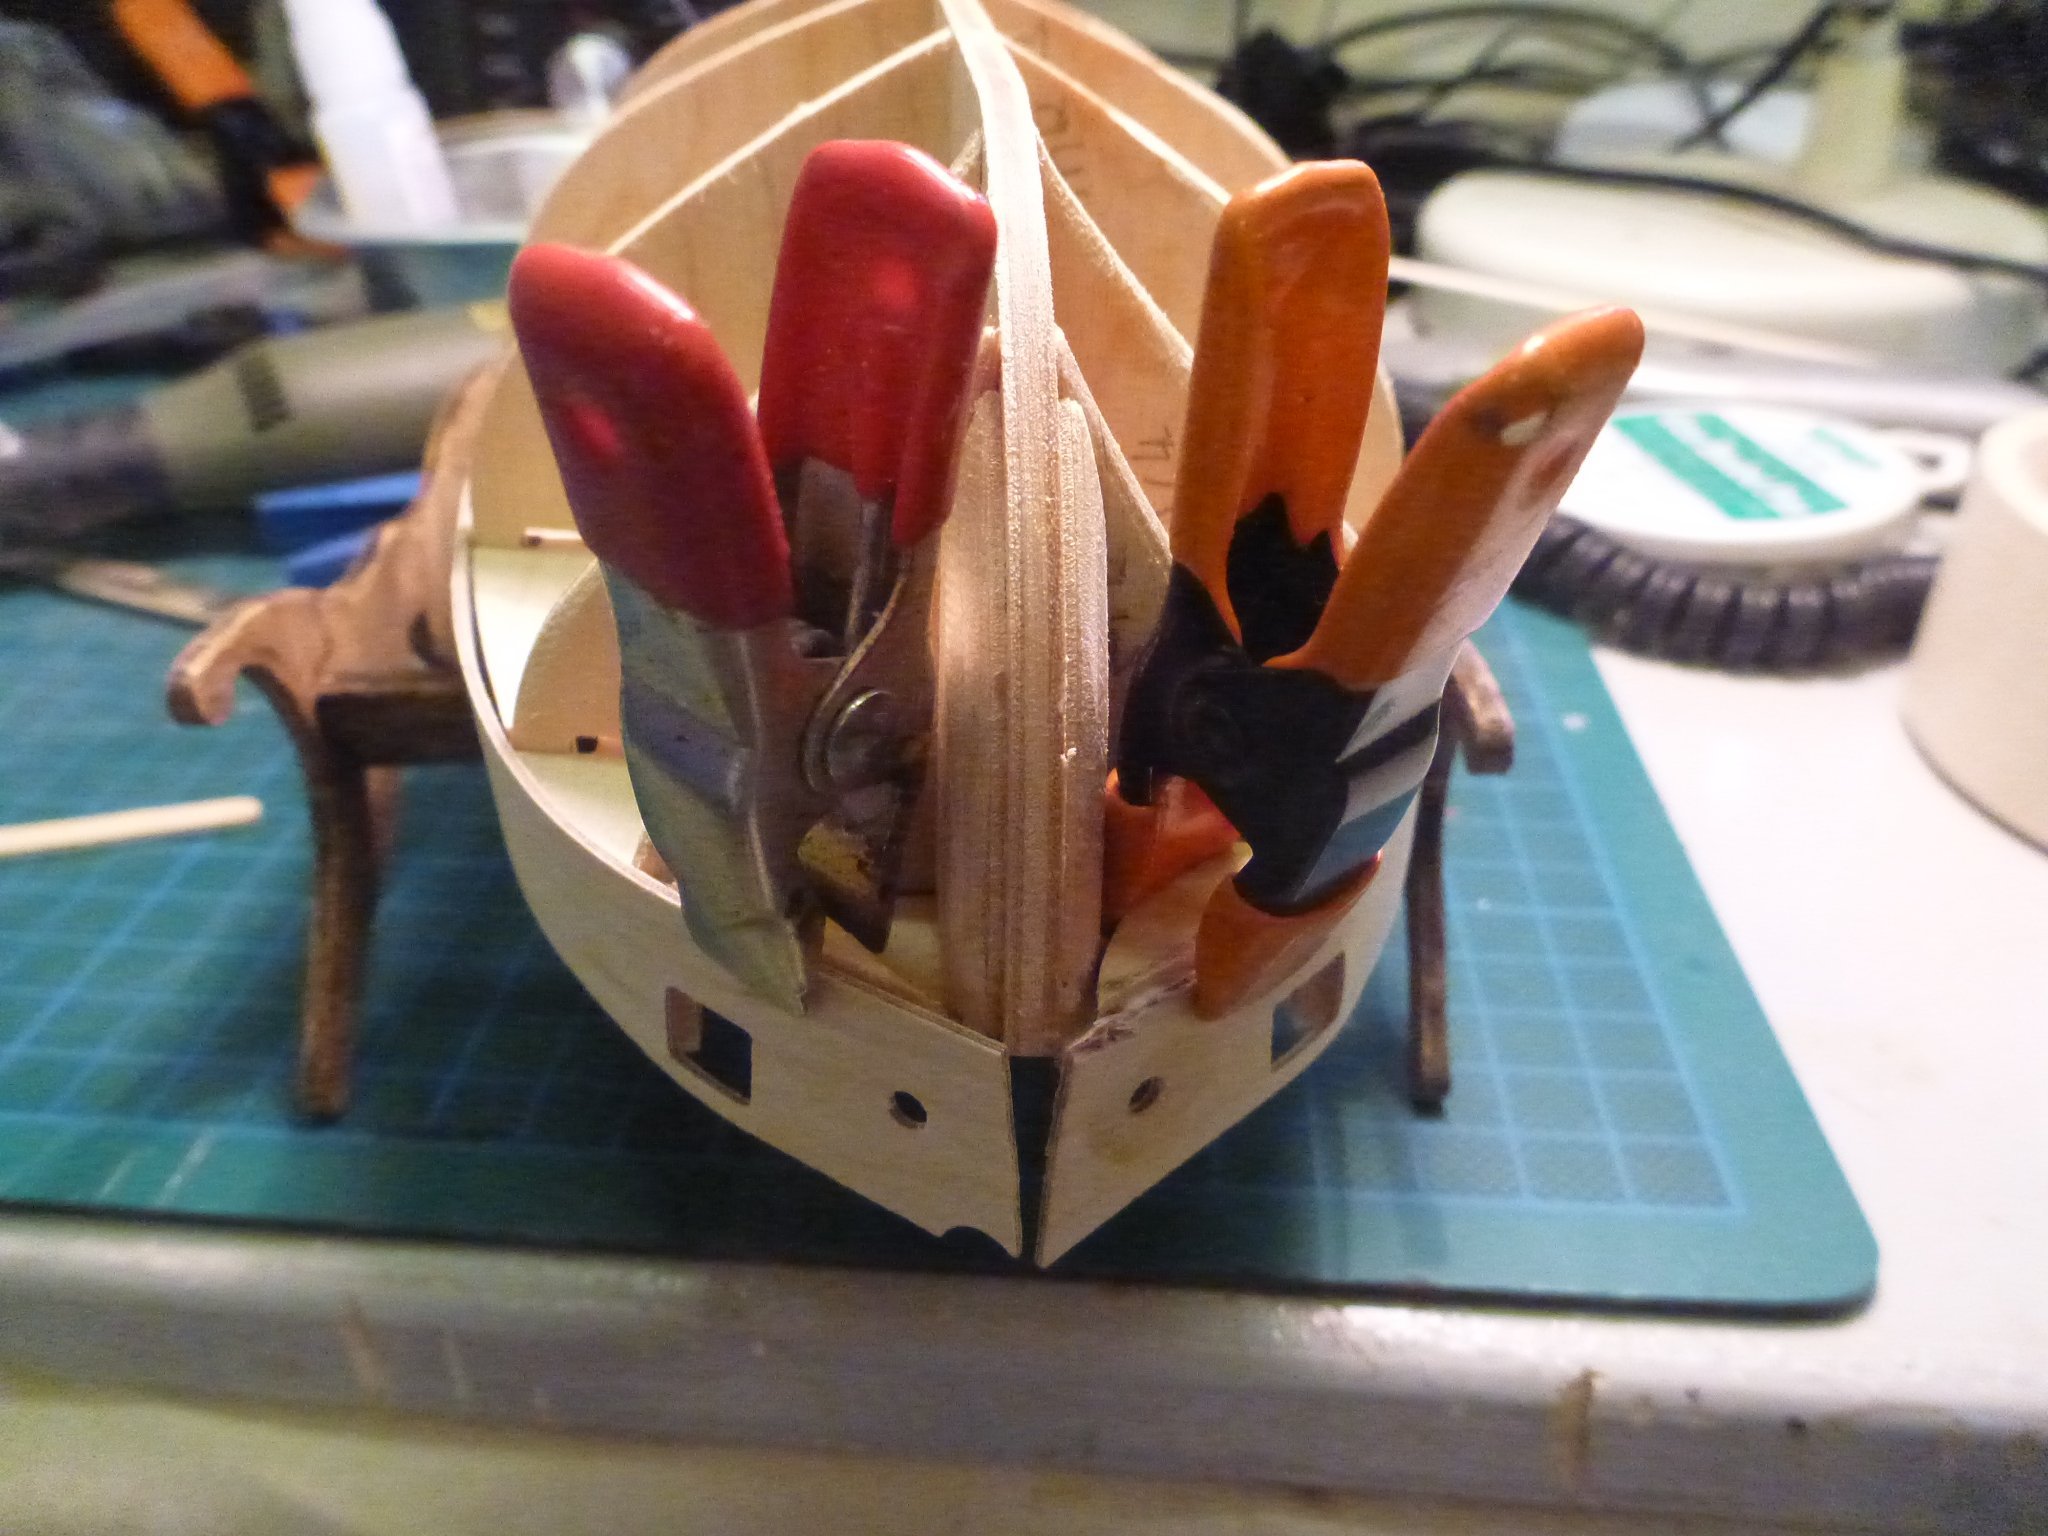
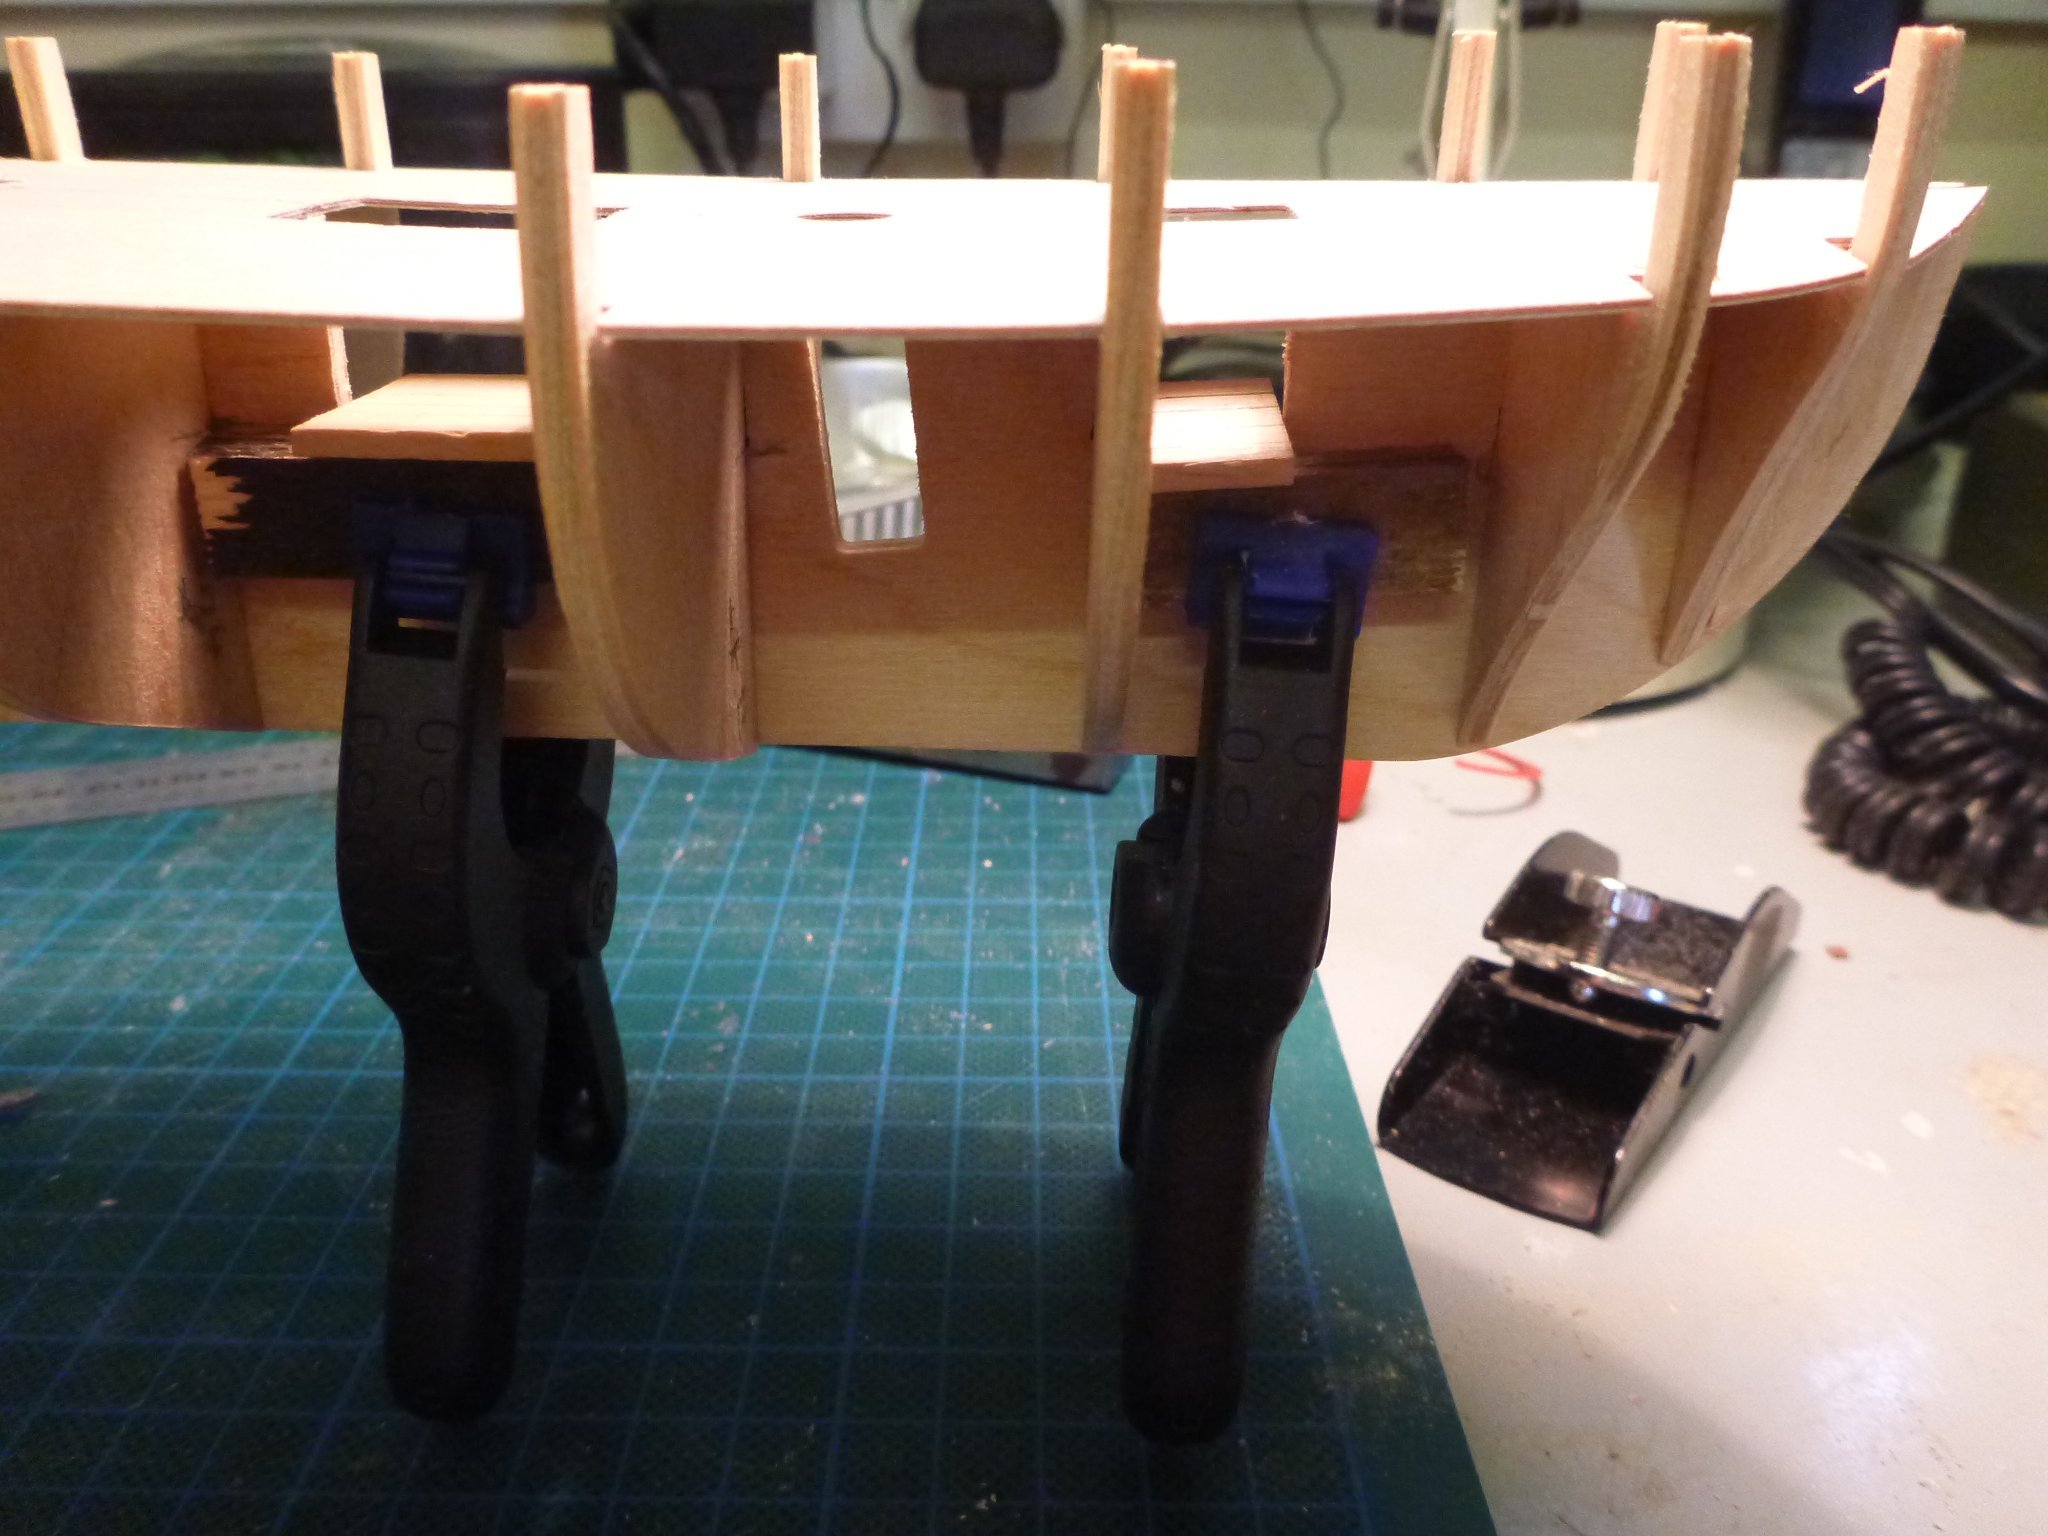
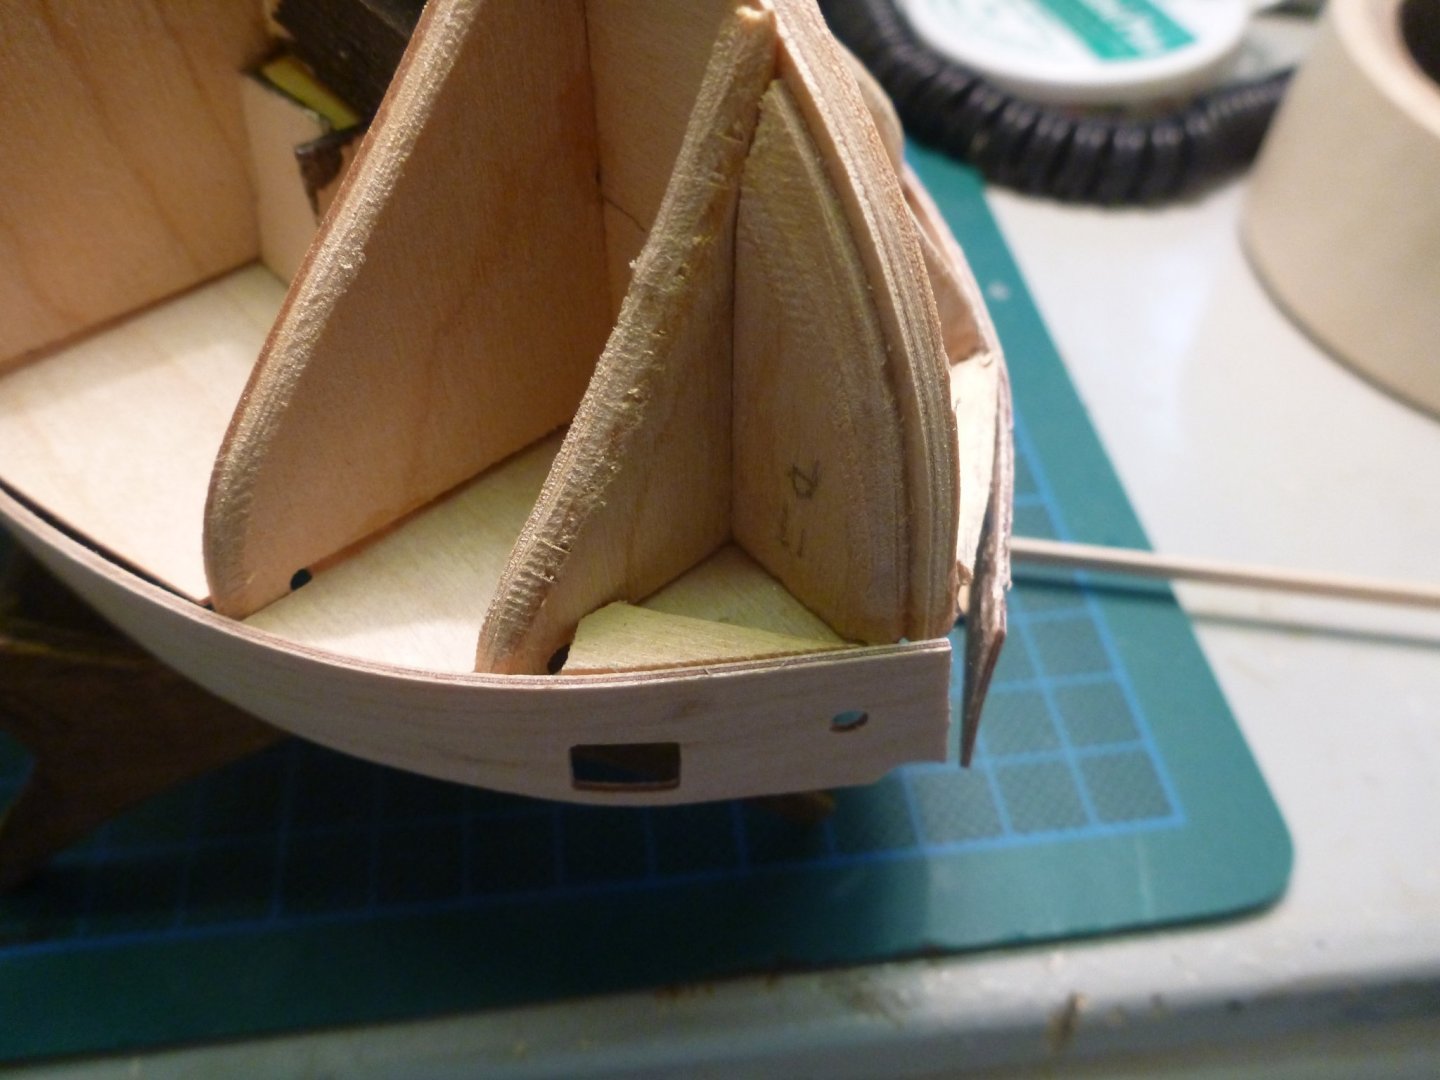
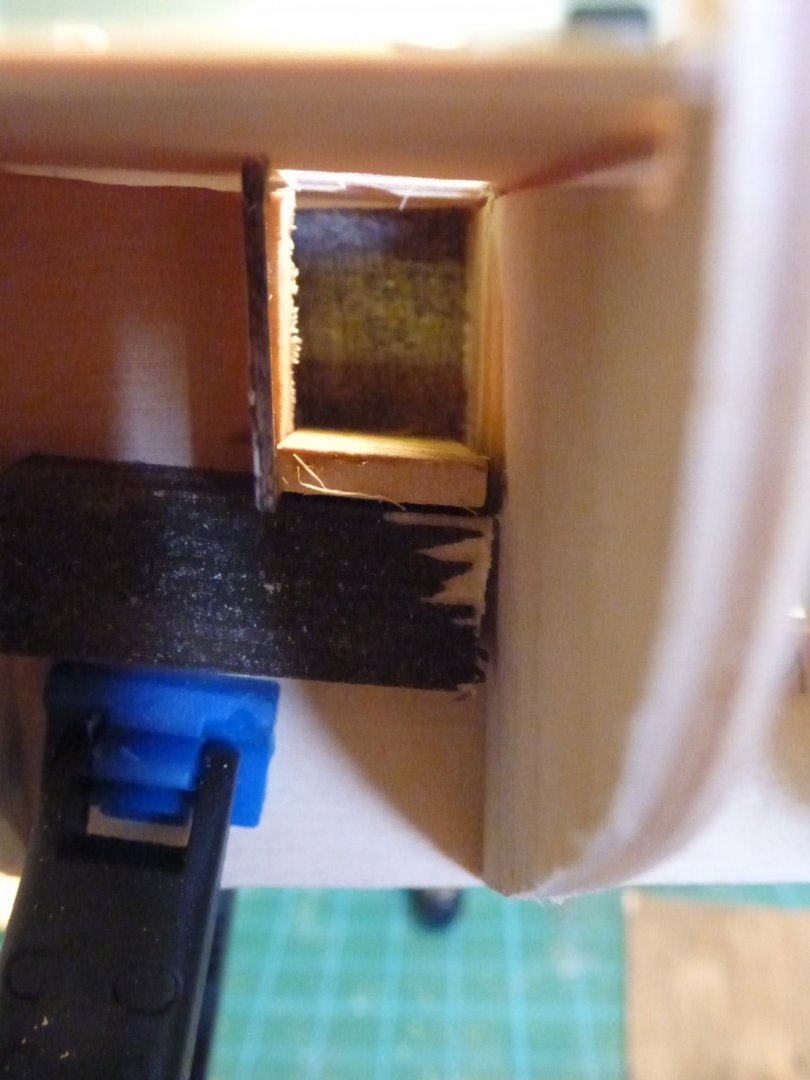
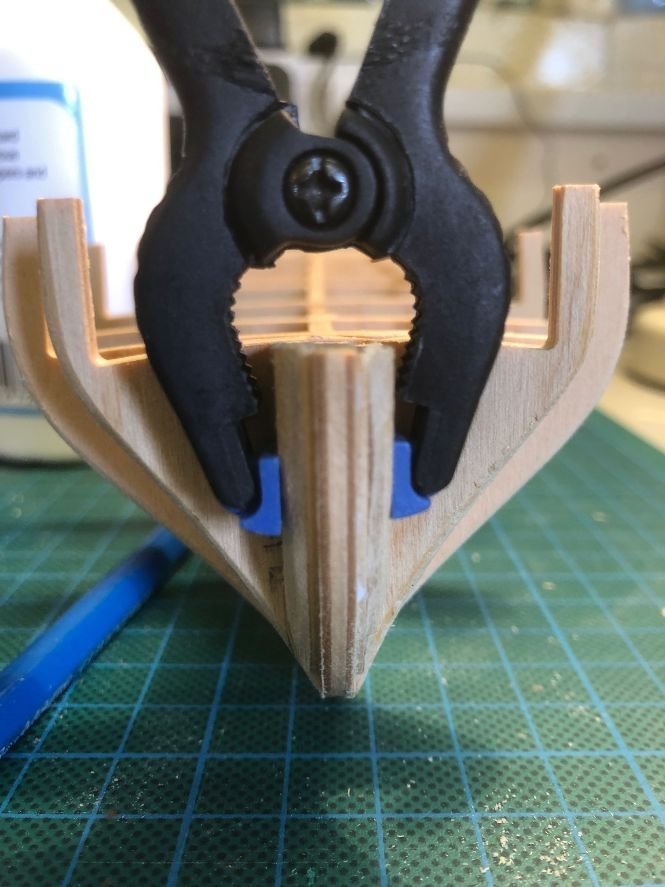
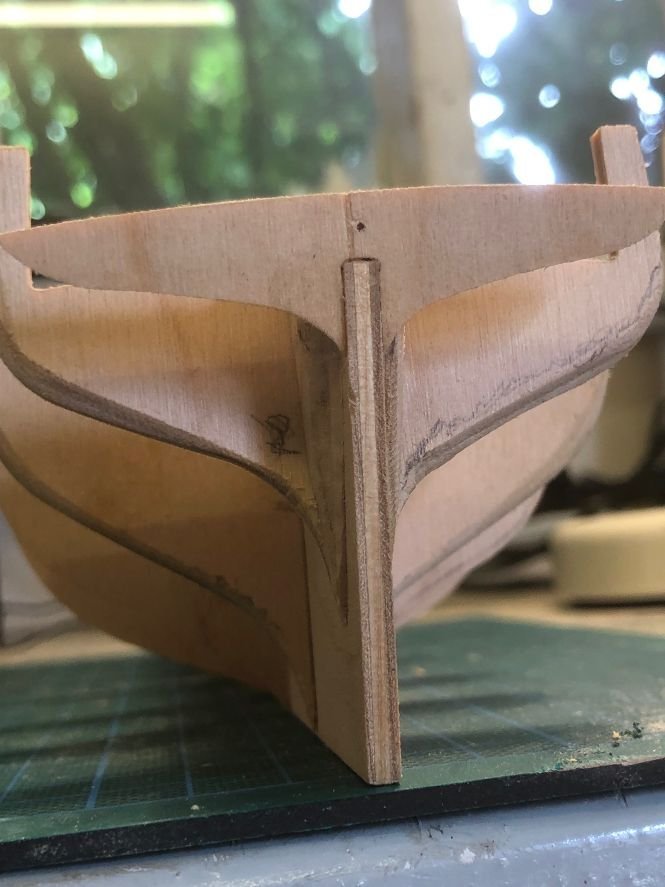
Hi folks - and once again, thanks forr all the supportive comments. My apologies for not following up sooner - but I took a 'bit of a tumble' coming back to the house from the workshop. A 'Parachute Landiing Fall' it wasn't. Still nothing broken except my pride - but badly bruised muscles have been a limiting factor! Right - onward. Books... Folowing Thukydides log on 'Alert' mention was made of George Bandureks book 'Superdetailing HMS Sherbourne' The book is still available from George and is a very detailed read with loads of images of the detail. A very worthwhile £22.50. George is, of course on here as 'Georgeband'. So finaly back to the modelling. I've had difficulty in shaping the bulwarks at the bow - mainly because there's a lack of purchase-points for peg-grips etc. After a couple of failed attemps I thought about reverting to prototype practice - or rather, a variation of it. The bow and stern of vessels of the period were virtually solid, as the frames continued the hull-shape into the area. They were very closely packed together so as to be virtually solid. (I've a photo taken of HMS Victory at Portsmouth with her hull planking removed which shows her frames literally touching each other over this area... Interestingly, this would not be the case for a clinker-built version of 'Sherbourne' as the practice there would have been to build the hull inverted, then, on turning it over, brace the hull with light timbers 'joggled' to fit the planking! So my answer - filler pieces betwen the stem & frame 1, shaped to follow the curve of the hull, but with sufficient space between it and the spine to take a clip.... filler in place NOTE the bulwark is not yet securede to it.. Both bulwarks secured - a bit of a mismatch to sort out...! Bulwarks fully secured.. As pointed out, there is a bit of a mismatch at the bow - however, considering the planking, both external and internal, that has to be fitted I' certain the matter wil be resolved. I'm considering this being carried on to support the first planking run at the bow. Talkinng of which - on with the 1st planking.. I'll be really happy when it's done as I reckon this is going to be one of the most difficult phases..


-
Well done - a very nice start! I'll follow your build with interest - particulqarly as this will probably be my next build after 'Sherbourne. Don't let 'nit pickers' put you off with regard to detail - after all, nobody axctually knows what tke lady actually looked like in real life... The recovered archaeology only realy covers the starboard side up to a certain level on the poop, and forward to a remarkably vertical straight finish - where she was cut loose from the remains the bow by a hydraulic chain saw... Anything foreward of that (apart from the keel & forefoot which were recovered in diving operations in 2005) is pure conjecture based maily on the 'Anthony Roll' entry. and there's some discussion about whether that actually depicts the 'Mary Rose'! If you need any detailsof the internals, let me know cos I'm hoping to be taken on as a museum guidein the near future..
- 50 replies
-
- 1
-

-
- mary rose
- caldercraft
- (and 1 more)
-
Thukydides, Many thanks for answering re the galley stove position - I'm not going to model the stove itself - for the same reasons you quote - bu the galley chimney is important and forward of the mast is a logcal place, keeking the gundeck and sailing area clear of obstructions. I must have a chat with a friend who's curator of Plans at NMM to see whats vailable... CCoyle Chris - thanks for the 'heads up' regarding Chris Watton - I've already checked his web-site, and appreciate his choice for the kit & the reasons why. I reckon he was 'pretty spot on'. At this point in time I'm not consdering purchasing any of his later kits - although I'm thinking Jotika's 'Mary Rose' as the next venture. By then the problem of the forecastle might be resolved, as there are tentative plans to re-visit the site. The keel and forefoot were actually raised in 2005, but there was no evidence of the forecastle then. Thank heaven for the 'Anthony Roll'! Another 'shooting quote' - 'Speeds fine - accuracy is final'!
-
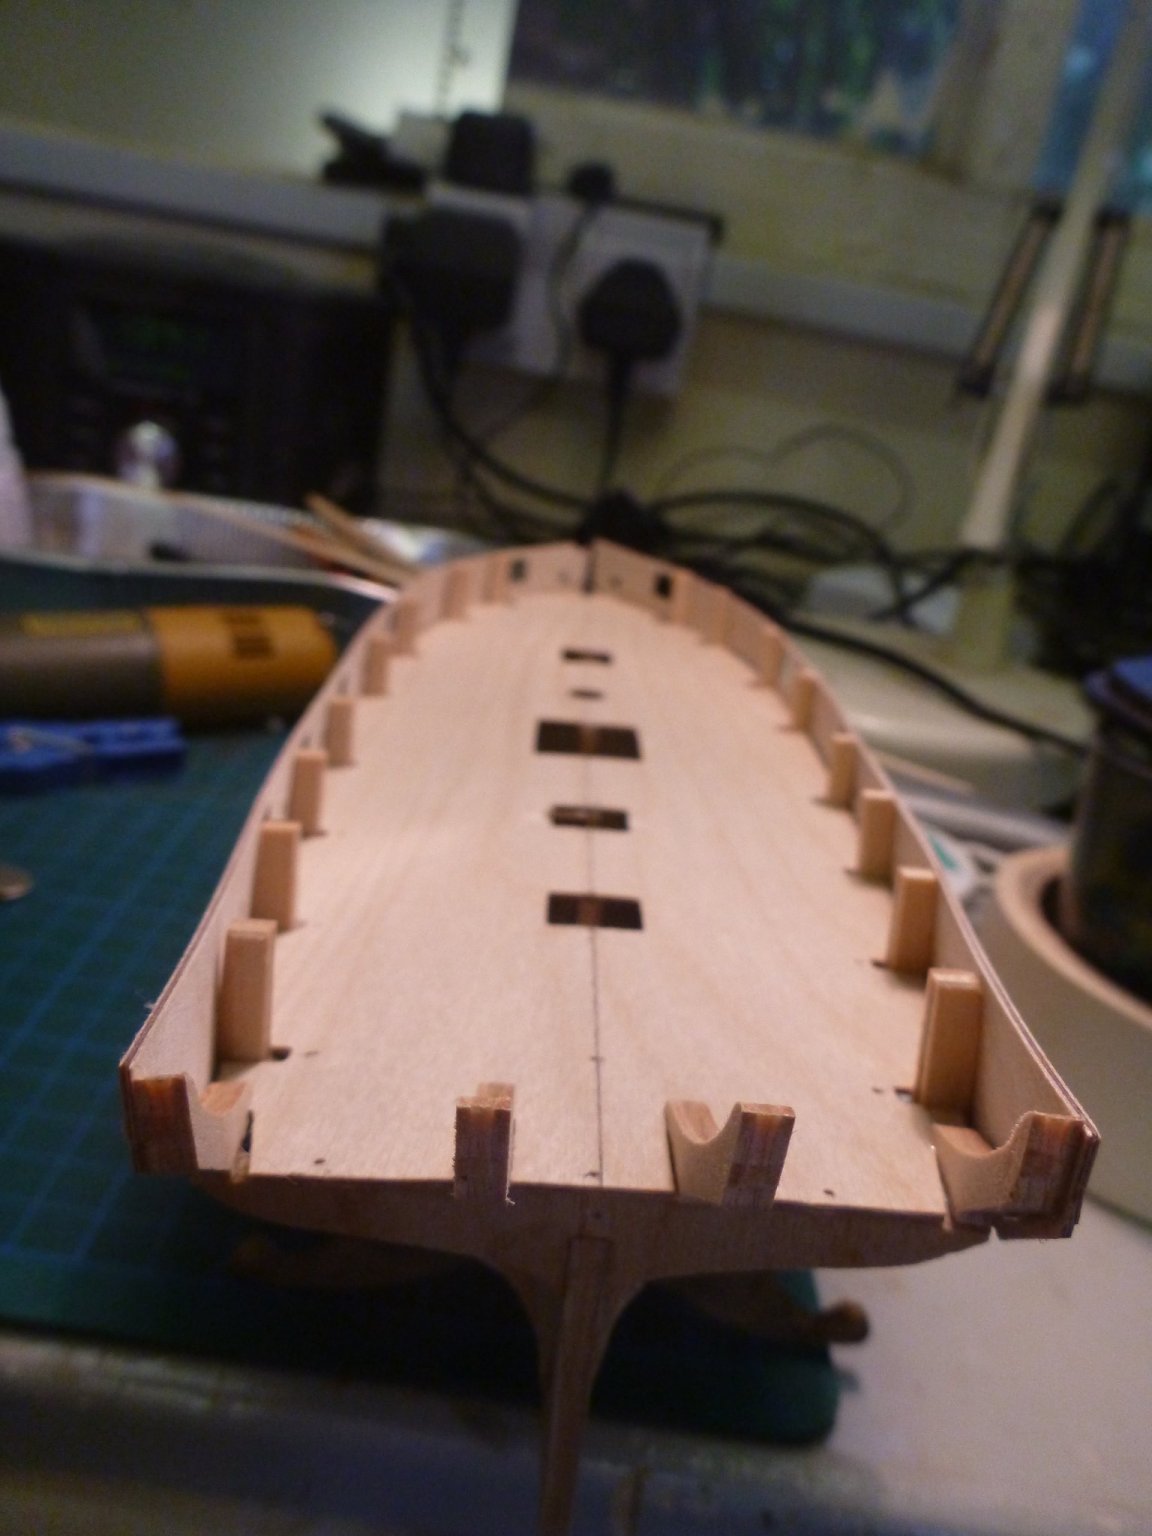
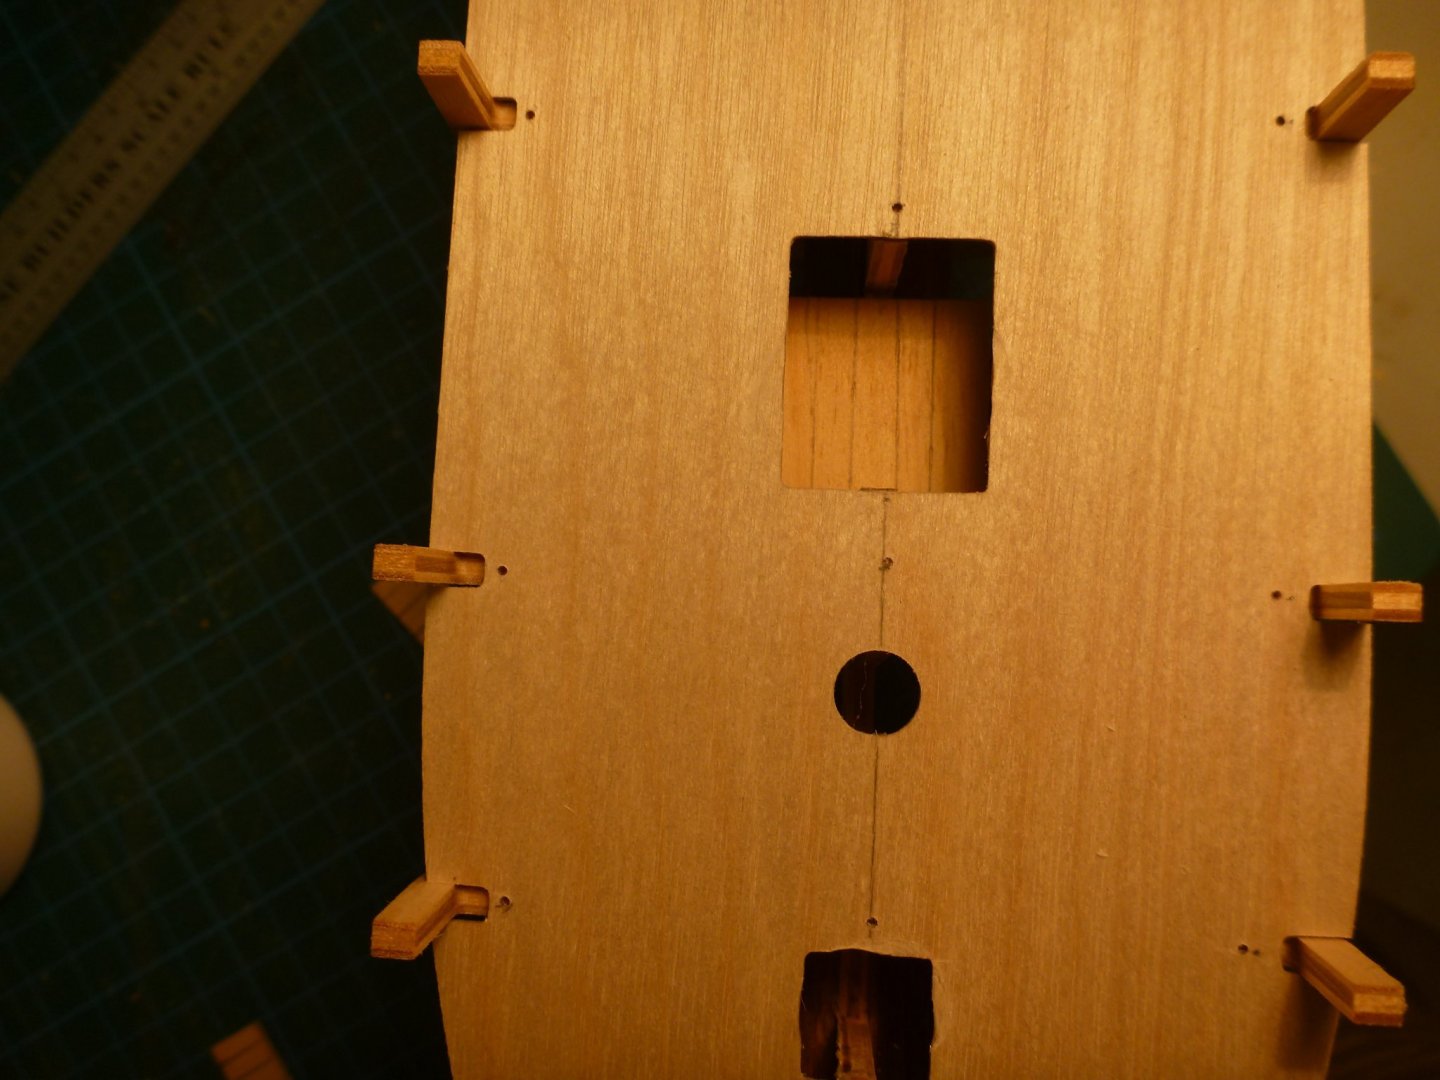
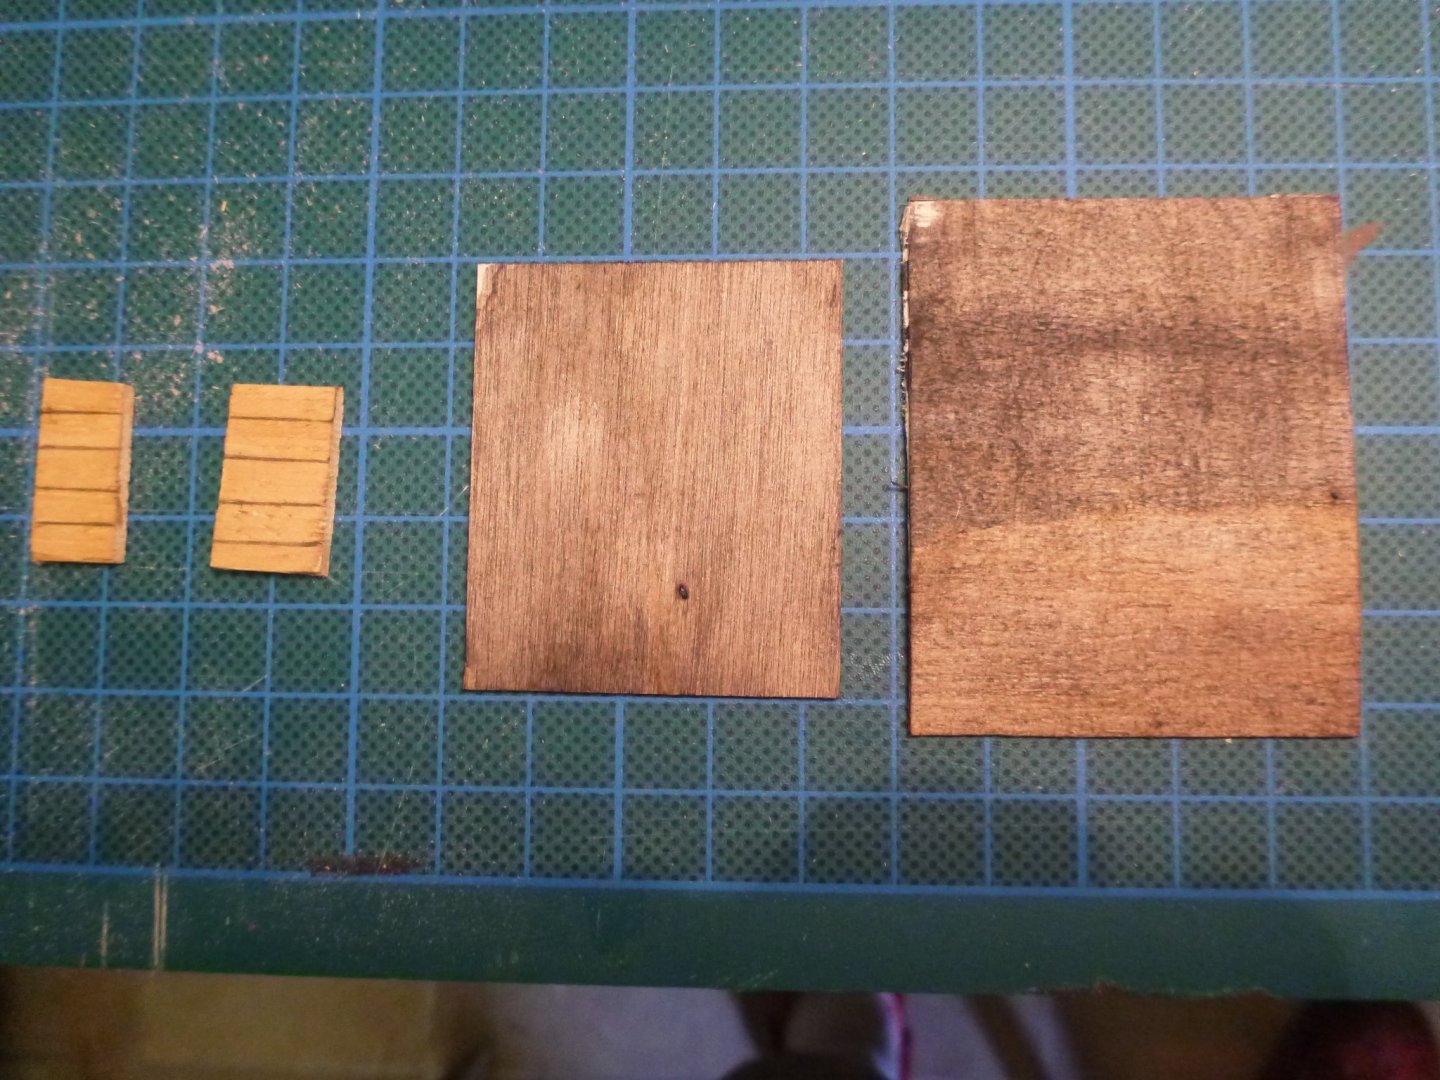
First - thanks for all the 'likes' and comments - I've been reading other logs on the kit and I will shamelessly 'nick' good ideas - as well as adding a few of my own! Second - George - thankls for the tip - I only wish I'd read it before laying the deck! However as I hope you can see, the sub-deck appears to have gone down okay just using clamps to secure it whilst the PVA (a very fast grab type) did its work... Mine is from a single thickness sheet less than 0.5mm so it could be that Jotika/Caldercraft have changed the material spec in line with other builders' comments So time to lift the hatches & jump in... As I secured the deck (having first removed the hatch 'blanks) it suddenly occurred to me that I could model what lay under the hatches. I will say immediately that I wish this 'lightbulb moment' had occurred BEFORE I laid the subdeck. What follows is the result of my version of 'keyhole surgery'.... The 'backbone' with some verebrae removed This was done with a very fine-bladed coping saw, drills n files 'False floors' made from scrap ply, suitably 'planked' by HB pencil, L-R - aft hold Middle Hold, main hatch, forehold Suitably stained . the larger scraps are not for bulkheads - more as sight-blockers Mainhatch 'deck' in place... Its amazing how much light enters those appertures... 'Sight blockers' in place - forehatch Okay - about another 4 hours work done, so back to the main kit. I hope the effort will be worth it - time will tell! As an aside - does anyone know what arrangements wer made for supply of meals on these craft? I understand they had a crew of about sixty who obviously slept on the lower deck, so I'm presuming they must have had galley facilities (they wouldn't spend every night in port...) so at least the galley stove should be modelled


-
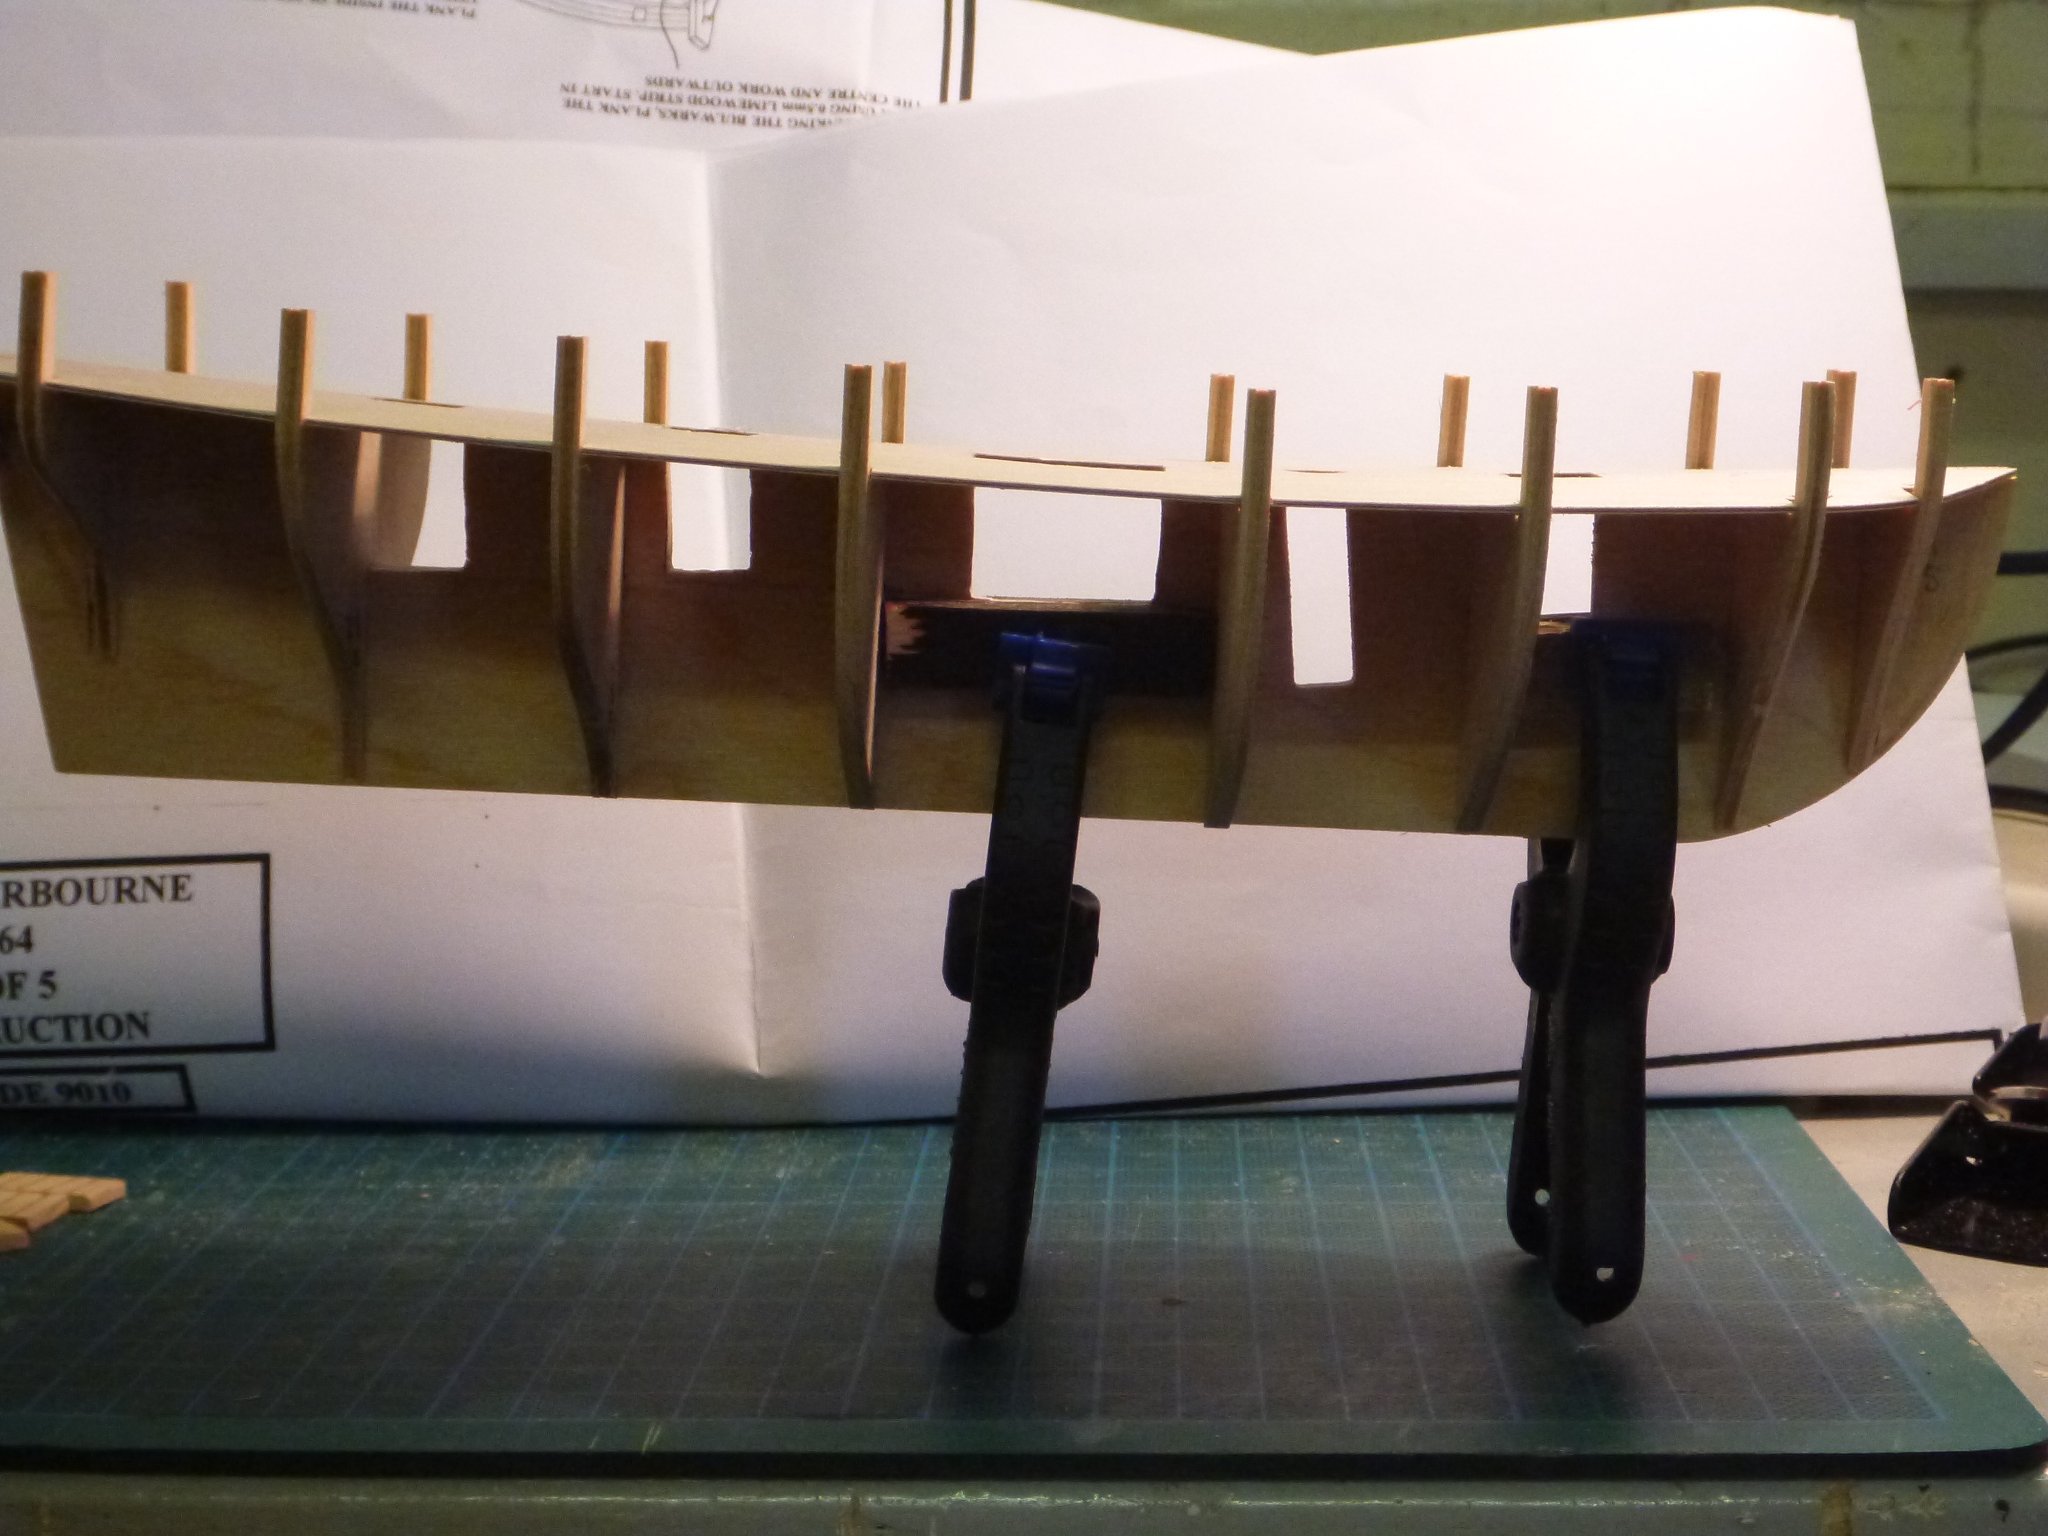
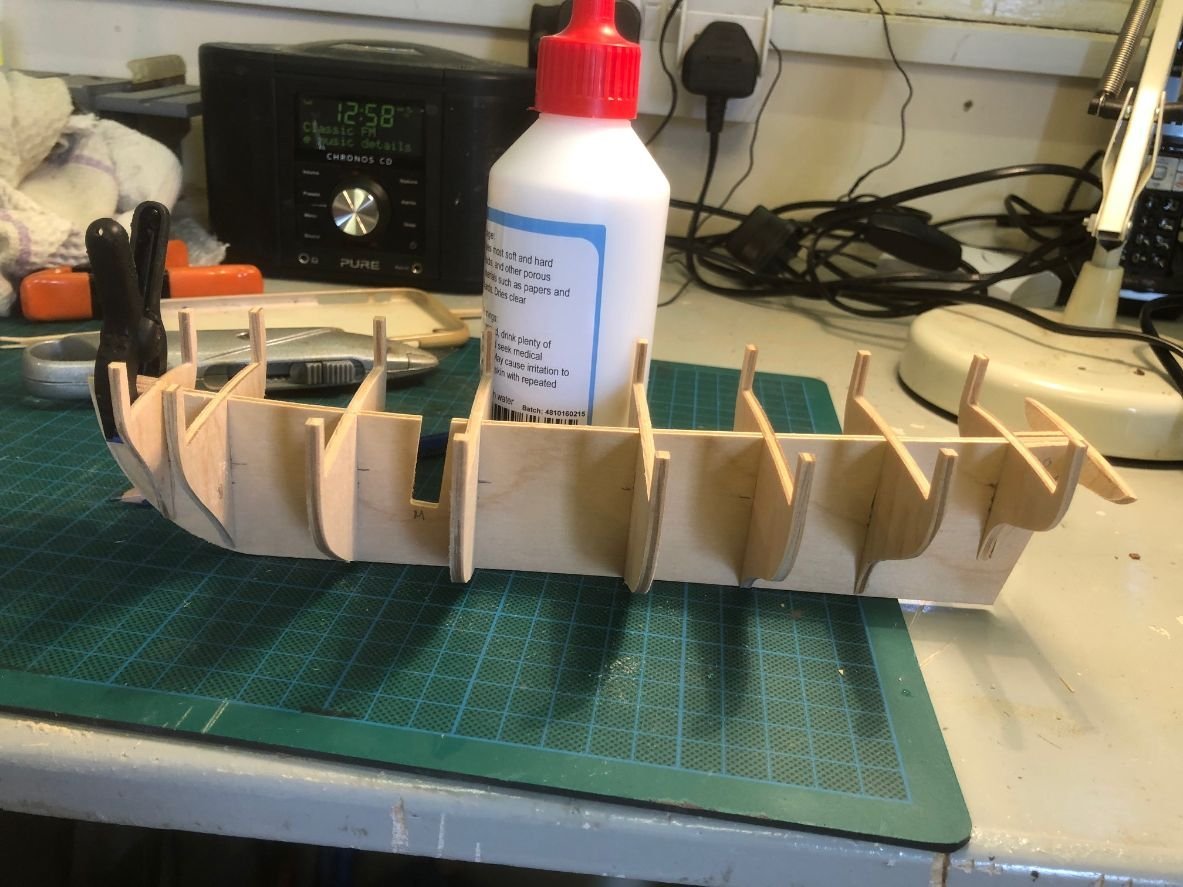
Oh no - not another 'Sherbourne'!! Afraid so folks - and for the same reasons as many others. I'm a 'newbie' to the world of model ship-building so took advice by reading other peoples build-logs. So why this kit? It fits (loosely) with the period that interests me (anything from 1509 to 1815(!). It appears to be relatively easy (time will tell) but there is some scope for individuality (I think). It is relatively small when built (but I bet the 'other half' still notices it!) and lastly it is reasonably priced so if I make a 'cods' of it, I've not wastede too much money... Okay, hopefully apologies accepted so down to the nitty gritty... As usual with my modelling activities in other genrs I'll break it down into stages. That way, if I get stuck/bored with one aspect, I can move to another and then back again. For example, stage 1 will be the hull (logical) but stage 2 couldl be the masts, or (from the looks of them) the cannon trucks which might need a re-work... Doubtless there will be areas of disagreement, and constructive criticism is always useful. So... Stage one. Very much out of the manual... Framing dry-run Bow filler assembly Transom view initial assembly complete. Okay, day one (about 6 hours) complete. Next will be fitting the deck etc - which will also indicate some modifications to the hull... Watcfh this space...


-
Ships of the early 17th century: pictures
Ian Barefoot replied to Mark P's topic in Nautical/Naval History
Hi Mark, You may be aware of these but... Having just bought them I can recommend Ricjard Ensors books ' The Restoration Navy' and 'The Master Shipwrights Secrets'. Both are lavishly illustrated both with images from the period and Ensor's own artwork. 'The Restoration Navy' covers the early part of Charles II's reign and (along with Samuel Pepys) the recreation of the Royal Navy following the 'commonwealth' period. In particular it describes in details the building of HMS Lenox (now the subject of a recreation in Deptford where it was built (Google 'The Lenox Project'.) As far as I'm aware it's only available in hardbound - about £40:00 The 'Master Shipwrights Secrets' features the working of the Deptford dockyard during the 17th-18th centuries and, in addition to a lot of historical information covers the build, rebuild and total reconstruction of HMS Tyger. The book is a mine of information about the work of the Navy Board, the Dockyard and the shipwrights who worked therin. It's available on 'Kindle'. Thev17th-early 18th century is a fascinating but little-known period of English Naval construction - but it fasciates me! I also have a personal connection as one of my ancestors was a Bristol shipwright who, in the early 18thC left Bristol to work at Deptford. With the opening of the Woolwhich Ship yard in mid-century he transferred there. Since then until the 1960's there were always family members who worked there. I was the one that 'broke the mould' - but I hope I've made up for it by becoming (in later life by becoming a nautical archaeologist! Regards Ian -
Pin Vice Help Needed
Ian Barefoot replied to Ed Gibbons's topic in Modeling tools and Workshop Equipment
I live in the UK and fortunately fairly close to a GOOD tool shop. I've bought several pin vices from various outlets on the 'model exhibition' circuit. Some were rubbish from the get-go and others worsened with use. From the toolshop owners advice I bought a 'Draper' pin-vice which closes down to zero (I think the maximum is 1.2mm) and I've never looked back.... Anything larger is adequately coped with by the others... -
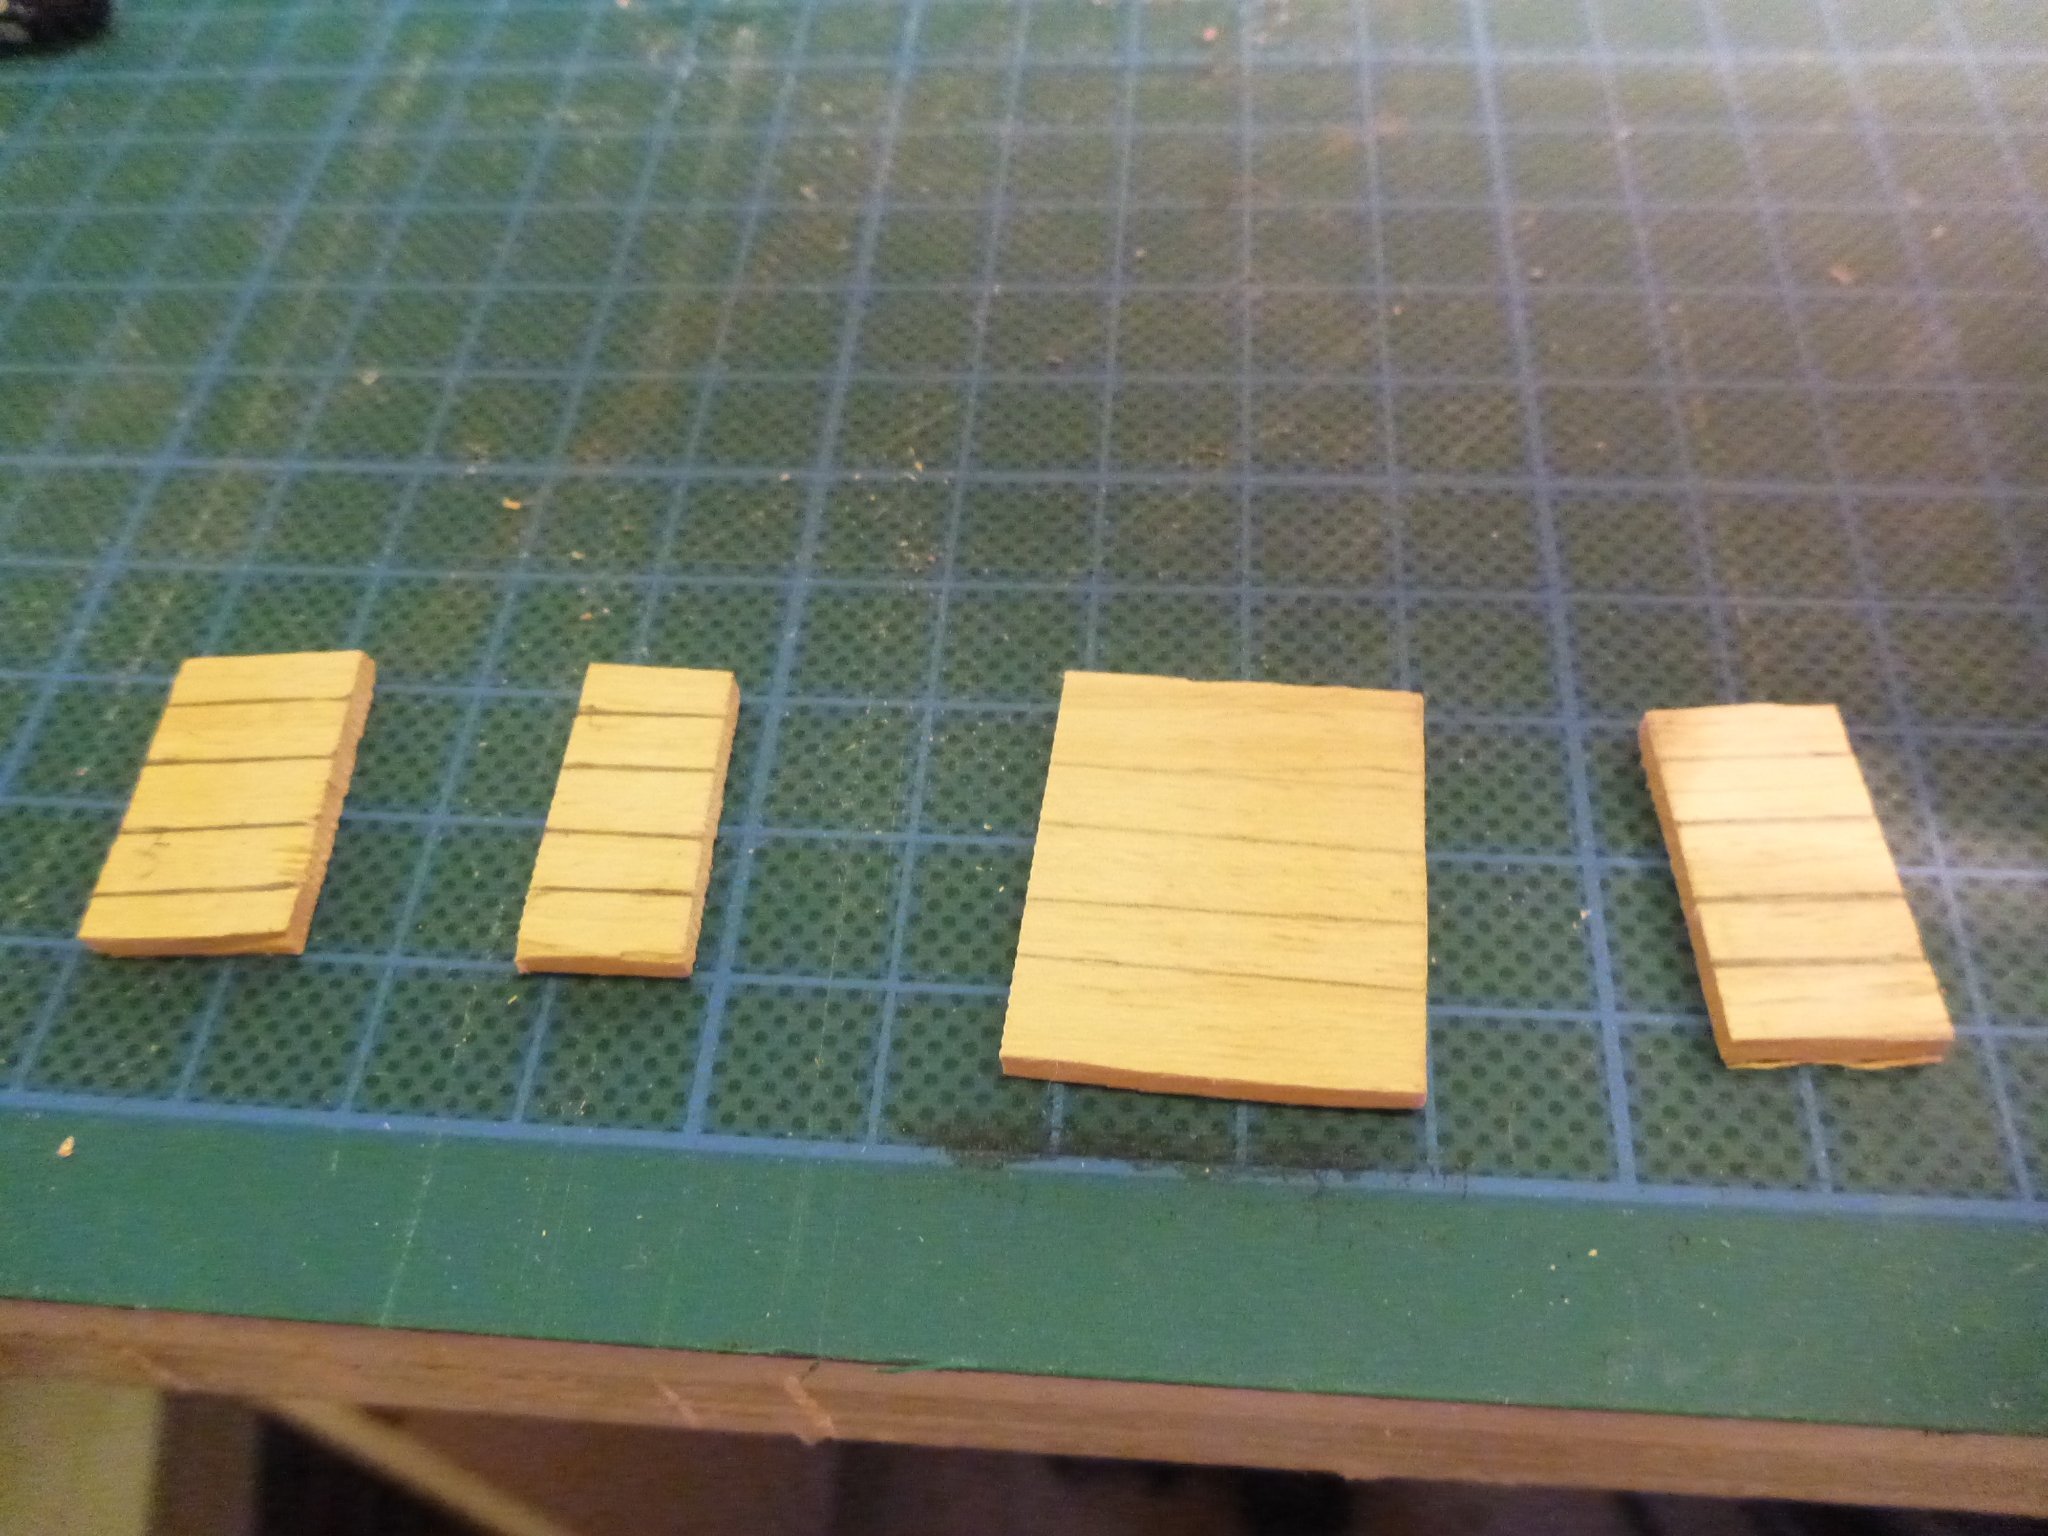
To all that responded to the thread - my thanks for the valid points raised. I've decided to take a 'middle road' and have ordered the 'Admiralty' paints for Sherbourne. My intention is then to prep some relevant woodstock and the paint it with a test sample of each brand with the colours as close as possible without actually touching! With regard to paint formulae a funny(?) story with a moral... As a nautical archaeologist I worked as a project officer for the Nautical Archaeology Society. We're based a 'Fort Cumberland' in Southsea which is a 'Scheduled Ancient Monuument' (the same level of protection as Stonehenge). The structures date back to the Napoleonic period. The front door to our office was peeling badly & we asked for permission to repaint it. 'Only if you use the correct formual paint' for the period' was the reply. Samples were sent for analysis, and £70:00 later we recieved a small tin of paint. We happily rubbed down the old paintwork and applied the new... It took six weeks to dry and another two weeks to peel.. We didn't have the same problem with the £7.50 tin of 'Valspar' which we painted over the top..... Kindest Regards and once again - my thanks Ian
- 10 replies
-
- 13
-
-

-
I've been model-making in other fields and for the last few years have been very happy with Vallejo brand products - paints, stains and weathering overlays. Today a very nice package arrived from Caldercraft containing my first wooden ship - HMS Sherbourne. In the packaging was a recommendation to use 'Admiralty' brand paints - which I've not met before. Does anyone have any comment - for or against both brands? Regards Ianh
-
Patrick - Congratulations - a stunning build! If you're interested I have some images of the carvings on the starboard side aft. Only two are painted anyway - according to Fred Hoeker they are of the King & Queen of Poland (Gustav Vasa was at war with them at the time...). Not surprisingly, he is depicted as a drunkard and she as a harlot! Regards Ian
- 63 replies
-
- 1
-
-
- vasa
- billing boats
- (and 1 more)
-
A million surgeons can't be wrong!
-
Good morning, As I hope to start work on my first model and report progress on these forums (?fora??) I hope this introduction will set the scene... Thw word 'newbie' shouldn't be taken too literally! At 75 years old, I've been involved in a lot of modelling - mainly fine-scale model railways in 2- 4 and 7mm ,and some historical architectural modelling - for some time I was an active modeller/member of The 'Pendon Museum', creating a huge diorama of the 1925-30's Oxfordshire countryside. However I've always had an interest in all things nautical, stemming from a fascination in SCUBA diving. I was lucky enough in the early 70's to be involved in the 'Mary Rose Project' - however, working as a police officer cramped my activites in that respect! However, I maintained my interest later joining the Nautical Archaeology Society, where after being involved in multiple projects I became a NAS Tutor. Which stood me in good stead when, on retirement from the police I applied to study archaeology at Southampton University. By very good fortune my supervising tutor was Jon Adams who runs the Centre for Maritime Archaeology. This led to a fascinating final interrview ongraduation... Having kept my involvement with the 'Mary Rose' 'quiet', at the interview Jon (who'd learned about it from another source) pointed out that I actually predated him with my involvement.... Theres a moral there, somewhere - he went on to run the CMA, gained world renown as amaritime archaeologist, whilst I became a 'plod'! However, I was happy in life (which is the main thing) with my model-making activites supporting my archaeolgical involvement -we dont do it for the money(!) - until in my early 70's I developed 'shaking hand' syndrome - which makes handling scalpels and hot soldering irons something of trying and occasionally painful experience... I also found it took a LOT longer to create models - something which I thought unfair to pass along to clients. So I gave it up... A subsequent heart attack put paid to diving (just the insurance costs alone were massive), so here I am with LOTS of freee time on my hands, and bored out of my mind to boot! Then a saw a 'YouTube' article on Philip Reed, a UK model ship maker, and it whetted my interest again! So here I am - 21 years(!) old and ready to go! In maritime terms, my interest lies in the 'Restoration Navy' of the Stuarts, and 'Georgian Navy' of Nelson and his 'Band of Brothers'. However with age comes a tempering of experience - so nothing 'large' to start with. I've just ordered 'CalderCraft's 'HMS Sherbourne' - their POF model of 'Mary Rose' will have to wait! So thanks for reading (Putting up with me) and I hope to be more proactive soon Regards Ian
- 9 replies
-
- 12
-