AlexMN
-
Posts
18 -
Joined
-
Last visited
-
 wool132 reacted to a post in a topic:
Lowell Grand Banks Dory by AlexMN - Model Shipways - 1:24
wool132 reacted to a post in a topic:
Lowell Grand Banks Dory by AlexMN - Model Shipways - 1:24
-
JpR62 reacted to a post in a topic:
Lowell Grand Banks Dory by AlexMN - Model Shipways - 1:24
-
Benjaming45 reacted to a post in a topic:
Lowell Grand Banks Dory by AlexMN - Model Shipways - 1:24
-
Ryland Craze reacted to a post in a topic:
Lowell Grand Banks Dory by AlexMN - Model Shipways - 1:24
-
AlexMN reacted to a post in a topic:
Lowell Grand Banks Dory by AlexMN - Model Shipways - 1:24
-
Paul Le Wol reacted to a post in a topic:
Lowell Grand Banks Dory by AlexMN - Model Shipways - 1:24
-
druxey reacted to a post in a topic:
Lowell Grand Banks Dory by AlexMN - Model Shipways - 1:24
-
AlexMN reacted to a post in a topic:
Lowell Grand Banks Dory by Nautikale - FINISHED - Model Shipways - 1:24
-
AlexMN reacted to a post in a topic:
Lowell Grand Banks Dory by Prairie Sailor - FINISHED - Model Shipways Shipwrights' Series - 1:24
-
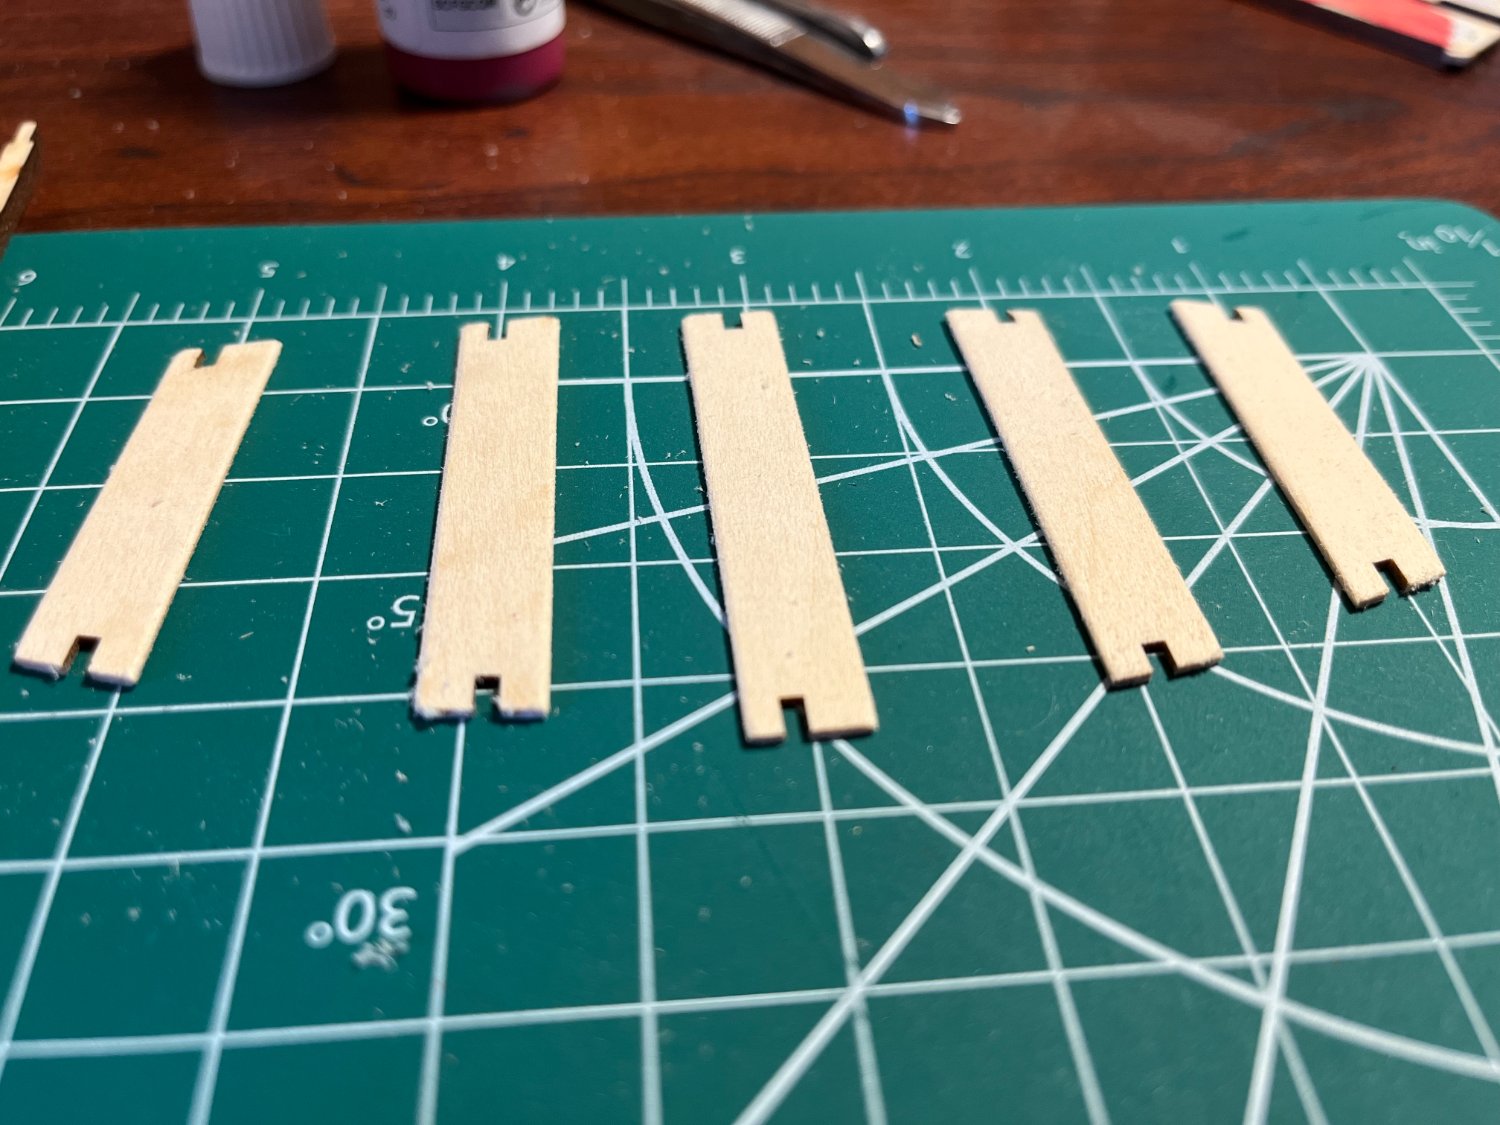
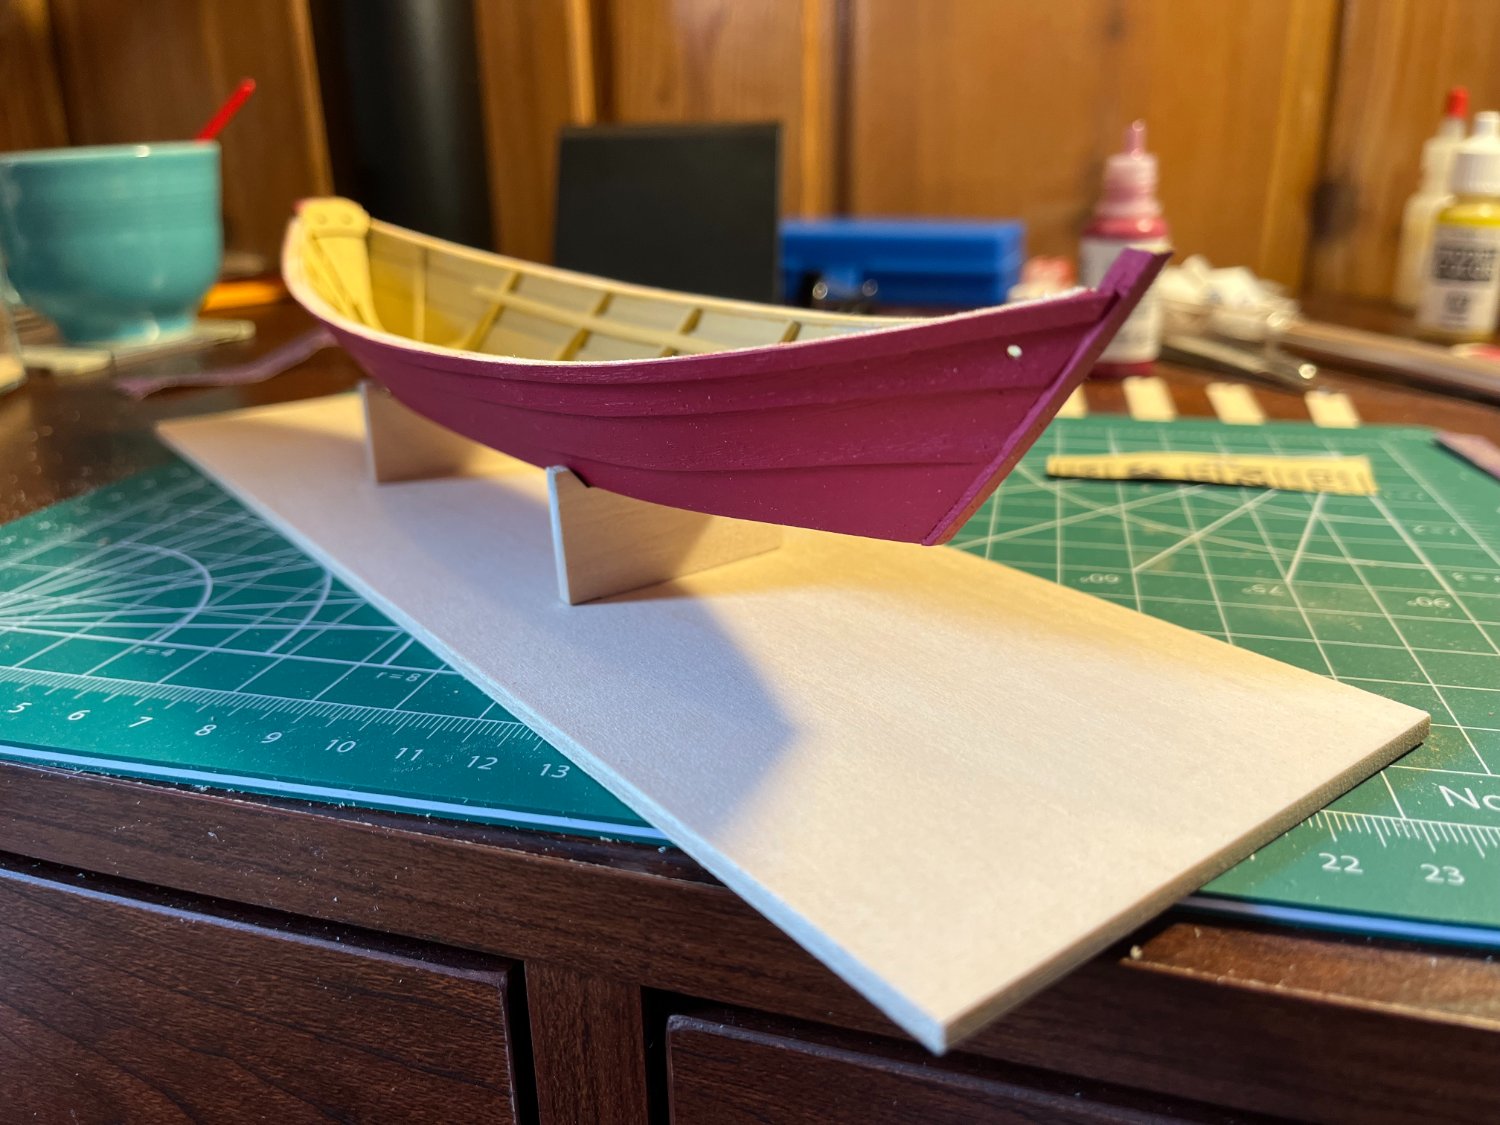
 Gosh, it has been a long time since I updated this. Due to a domino effect of life events (moving, new job, new dog, etc.), I have not had much time to dedicate to my build. Not to mention that in somewhere like Minnesota, you've got to take advantage of the summer months and spend your free time outside before winter returns. However we've had a few cooler days, and I was finally able to return to my dory. My next step was painting. It took a few visits to the model supply store to find the colors I wanted. I was trying to come close to matching the painting I included earlier in this thread: a darker red for the hull and a kind of beige color for the interior. I finally found colors I liked well enough, and began to paint. I have to admit, I am much more a fan of the building process than painting. In the future I may have to consider investing in an airbrush in hopes of making the process faster. However, that was not a purchase I wanted to make now, so I did the painting with a paintbrush I already had. I tried to keep the coats thin, as I didn't want to lose the wood grain texture, and I am reasonably happy with how it turned out. I think I ended up doing 2 coats on the bottom and only 1 on the interior. While working on the painting, I also watched a documentary I found on YouTube. It was about ancient vessels in the Mediterranean Sea. Couldn't help but think that it would be interesting to do a build like that! The red hull. As I waited for the paint to dry, I began removing pieces for upcoming steps and sanding the char off the edges. For the thwarts, I also rounded the edges as described in the instructions. The thwarts, all sanded. I also did a loose fit test for the stand, however I think that I want to stain the thwarts, oars, and stand a darker color, as I don't like how they look against the tan of the interior - not enough contrast. The dory on its stand, here you can see the interior color a bit. Next up is the cap rail, which I will possibly also stain. I'm also starting to think about some extra details to add. I've seen others build things like barrels, lobster traps, and other equipment to put inside the dory. I like the idea of that, and will begin brainstorming my options. Hopefully my next update will come much quicker than this one did. Thanks for your continued support!
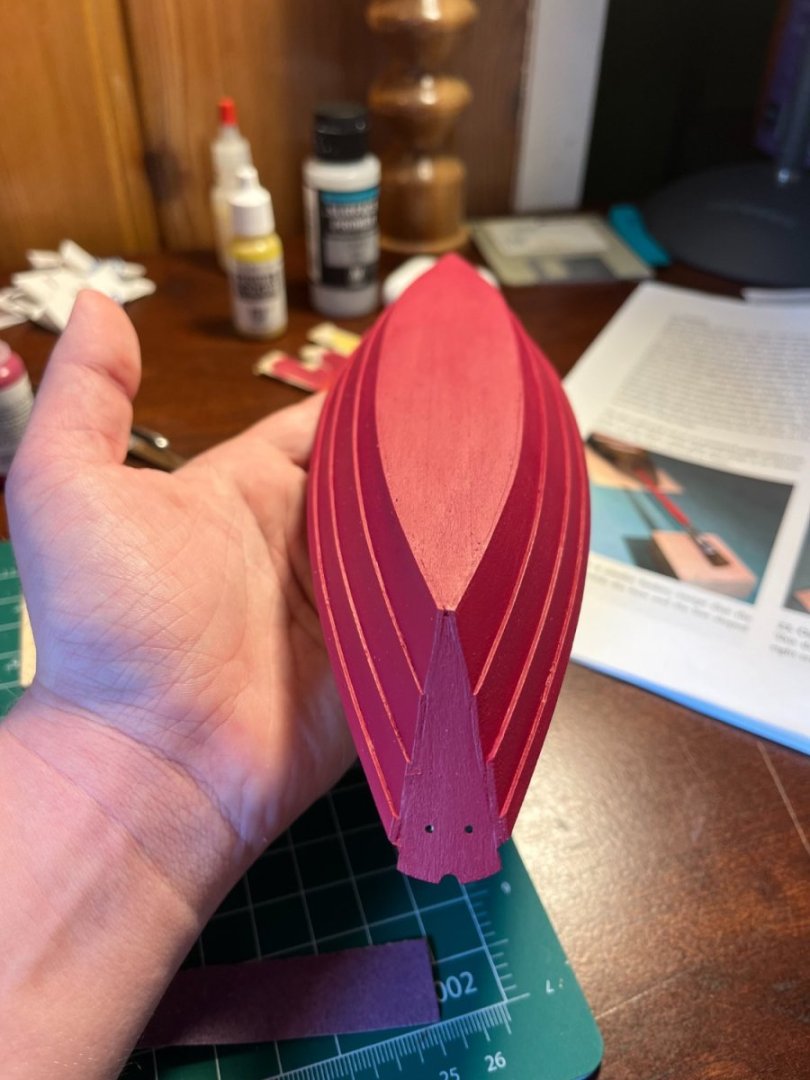


- 23 replies
-
- 5
-
-
- Lowell Grand Banks Dory
- Model Shipways
- (and 1 more)
-
AlexMN reacted to a post in a topic:
Lowell Grand Banks Dory by Prairie Sailor - FINISHED - Model Shipways Shipwrights' Series - 1:24
-
AlexMN reacted to a post in a topic:
Lowell Grand Banks Dory by Prairie Sailor - FINISHED - Model Shipways Shipwrights' Series - 1:24
-
AlexMN reacted to a post in a topic:
Lowell Grand Banks Dory by Prairie Sailor - FINISHED - Model Shipways Shipwrights' Series - 1:24
-
AlexMN reacted to a post in a topic:
Lowell Grand Banks Dory by Prairie Sailor - FINISHED - Model Shipways Shipwrights' Series - 1:24
-
AlexMN reacted to a post in a topic:
Lowell Grand Banks Dory by Prairie Sailor - FINISHED - Model Shipways Shipwrights' Series - 1:24
-
AlexMN reacted to a post in a topic:
Grand Banks Dory by tomebe - BlueJacket Shipcrafters - 1:12 - first build
-
AlexMN reacted to a post in a topic:
Lowell Grand Banks Dory by AlexMN - Model Shipways - 1:24
-
Ryland Craze reacted to a post in a topic:
Lowell Grand Banks Dory by AlexMN - Model Shipways - 1:24
-
druxey reacted to a post in a topic:
Lowell Grand Banks Dory by AlexMN - Model Shipways - 1:24
-
JpR62 reacted to a post in a topic:
Lowell Grand Banks Dory by AlexMN - Model Shipways - 1:24
-
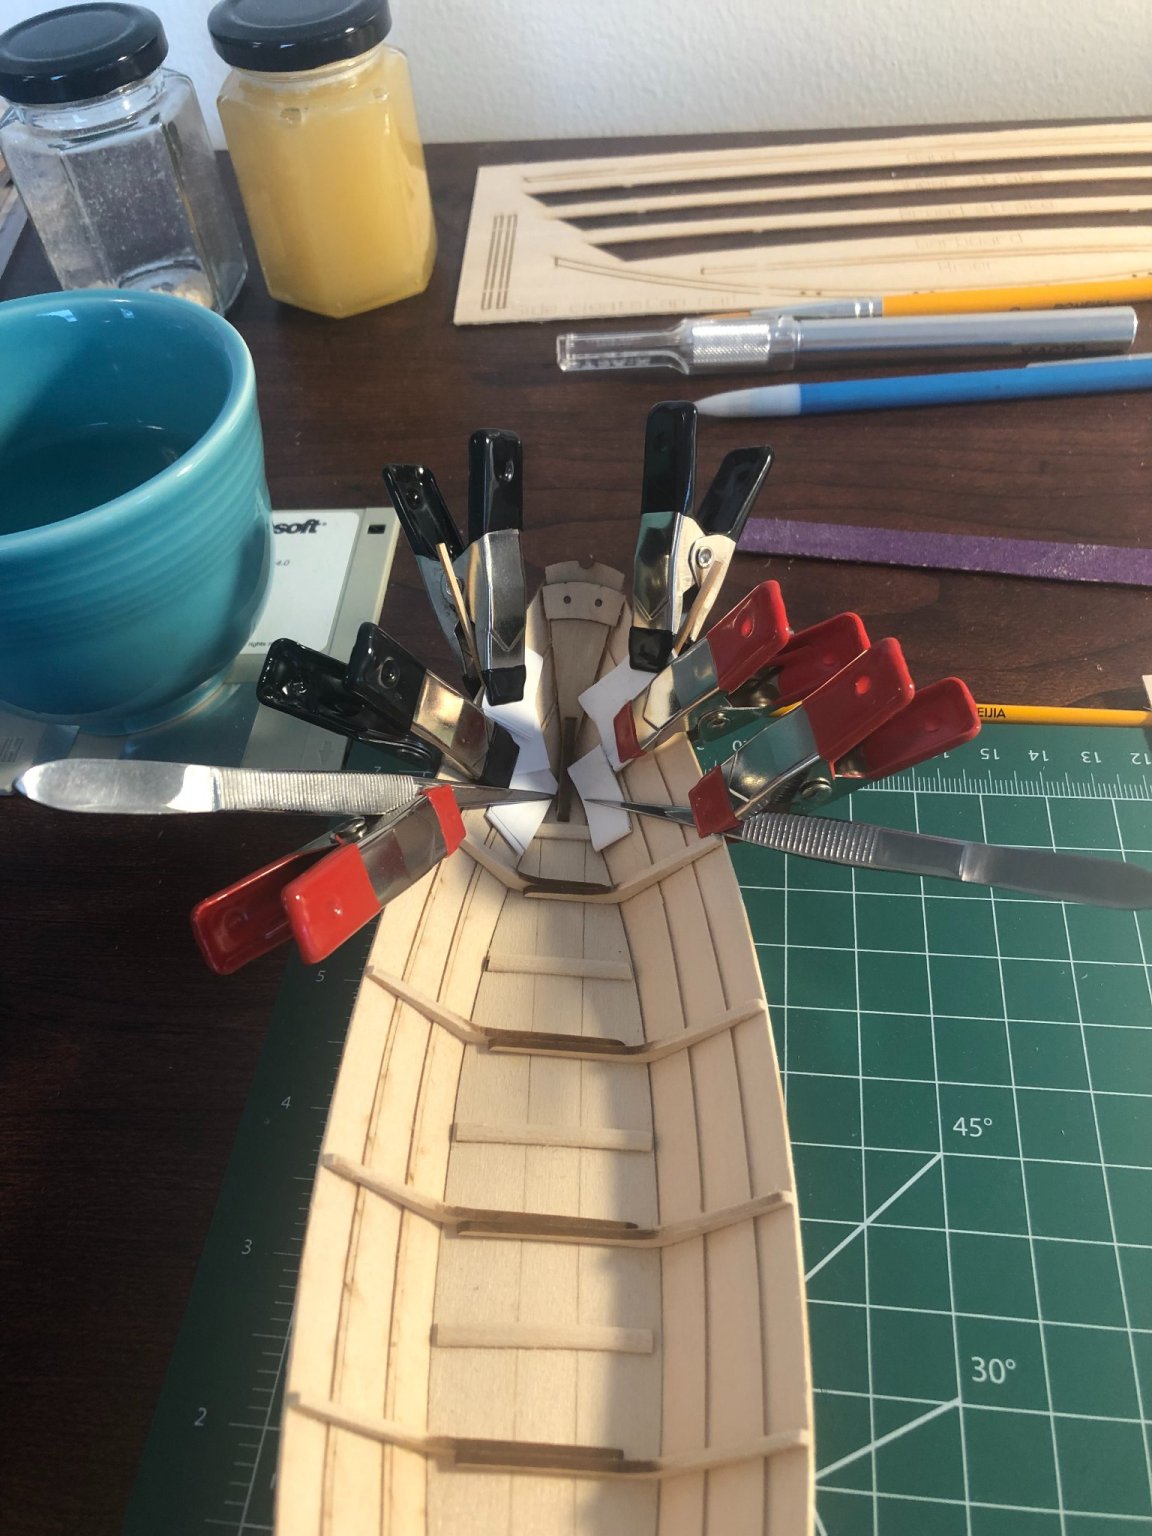
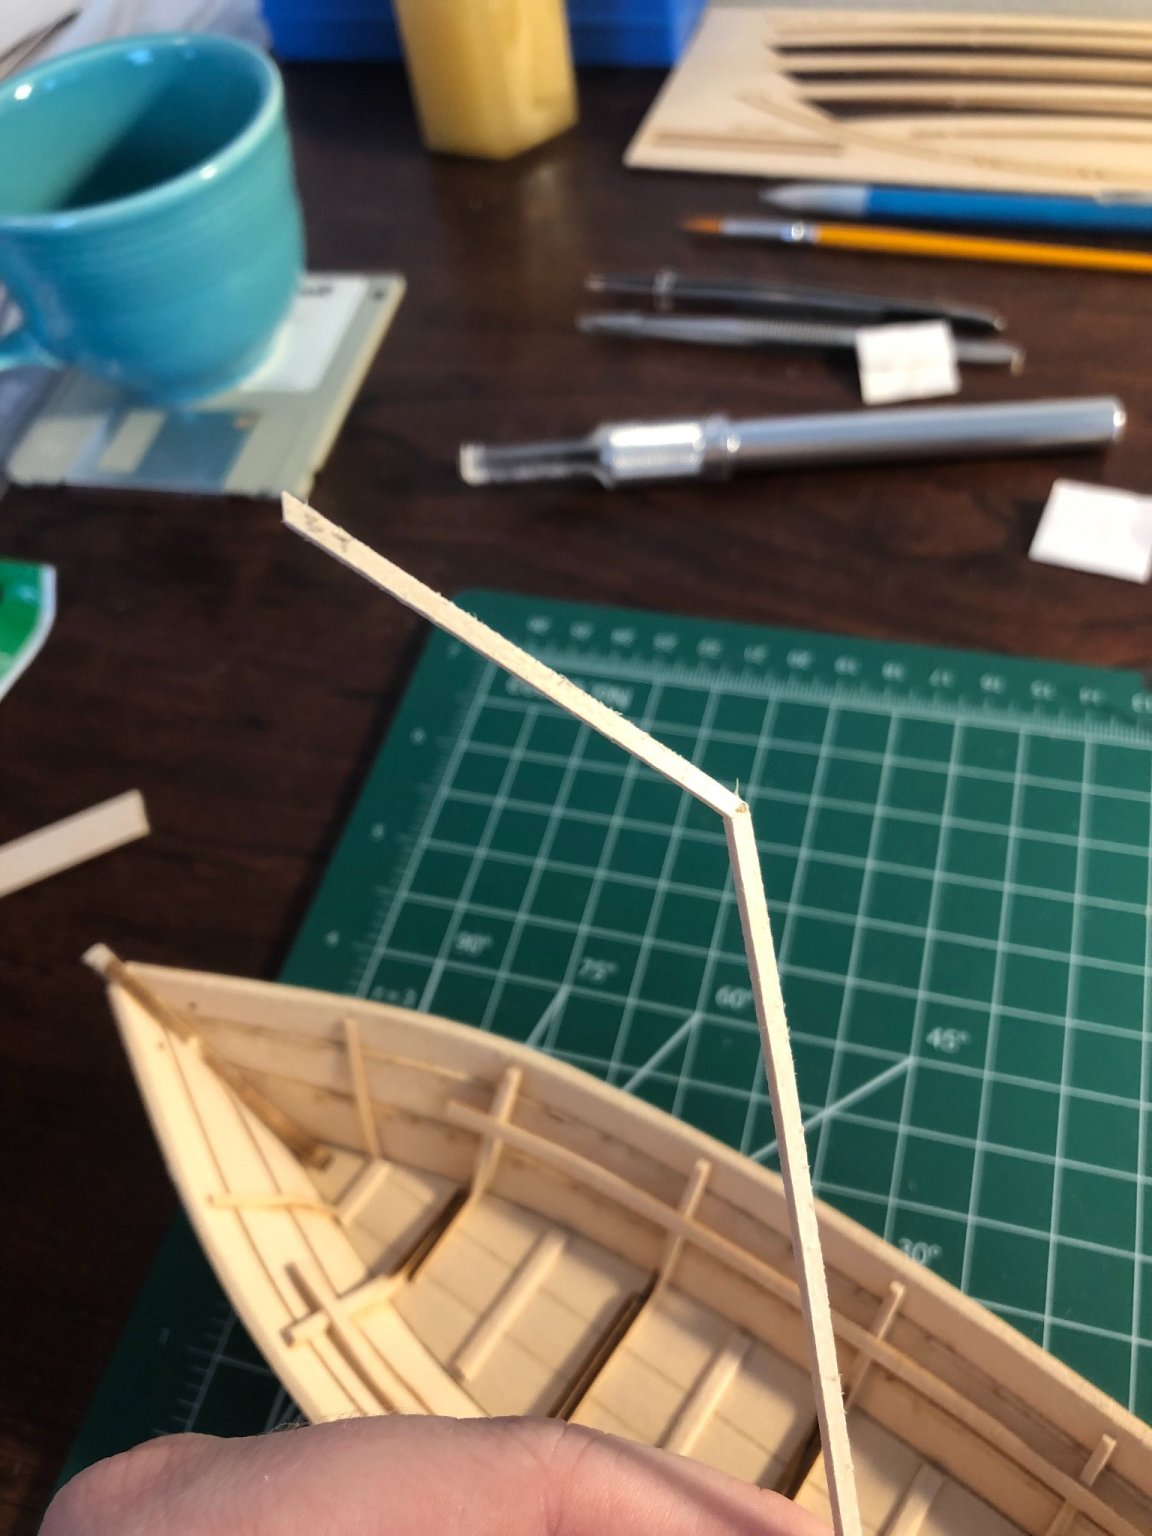
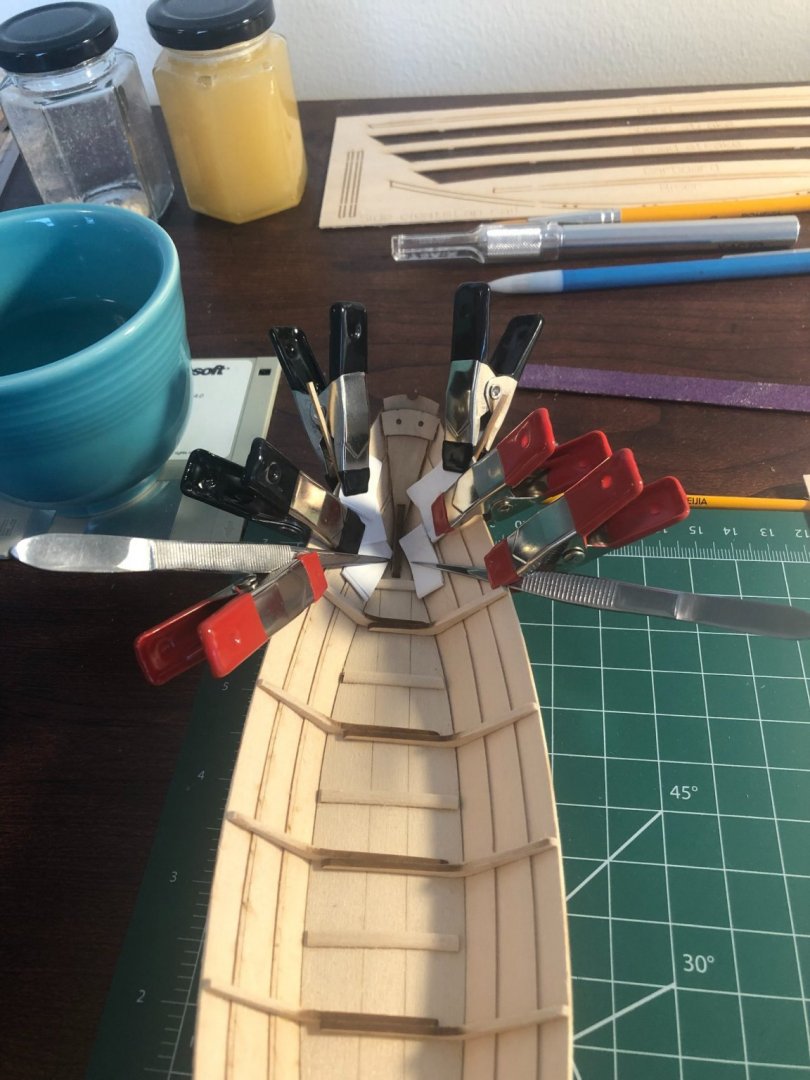
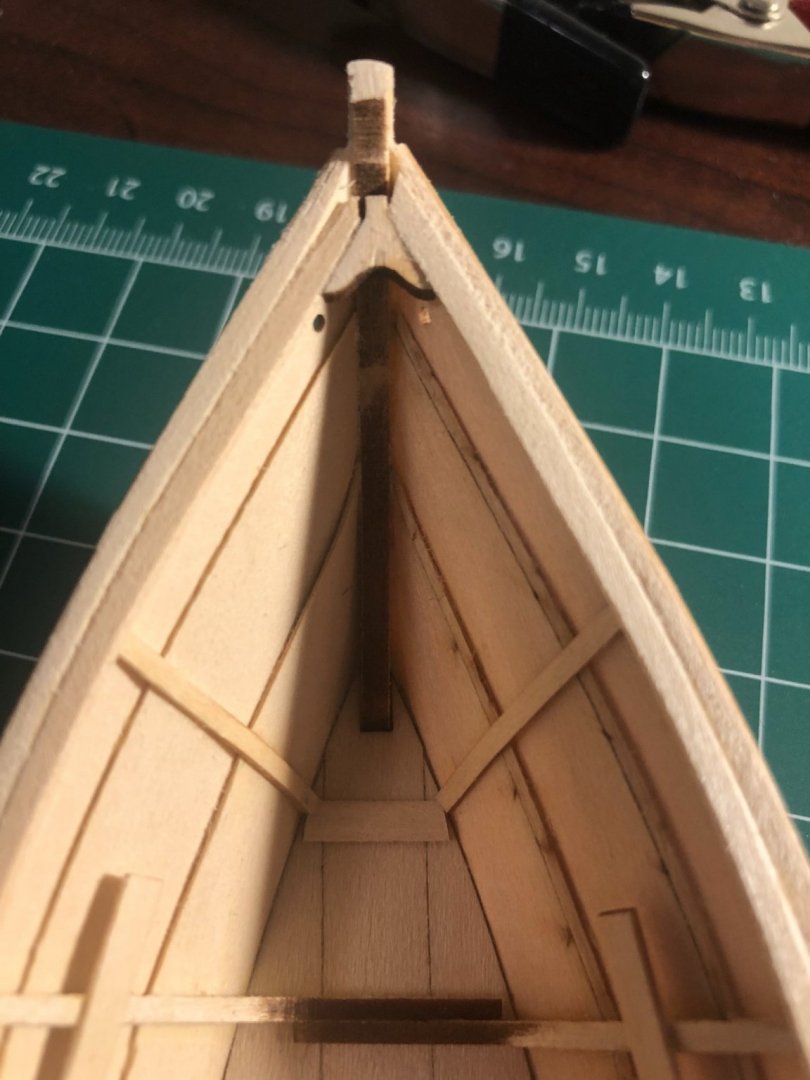
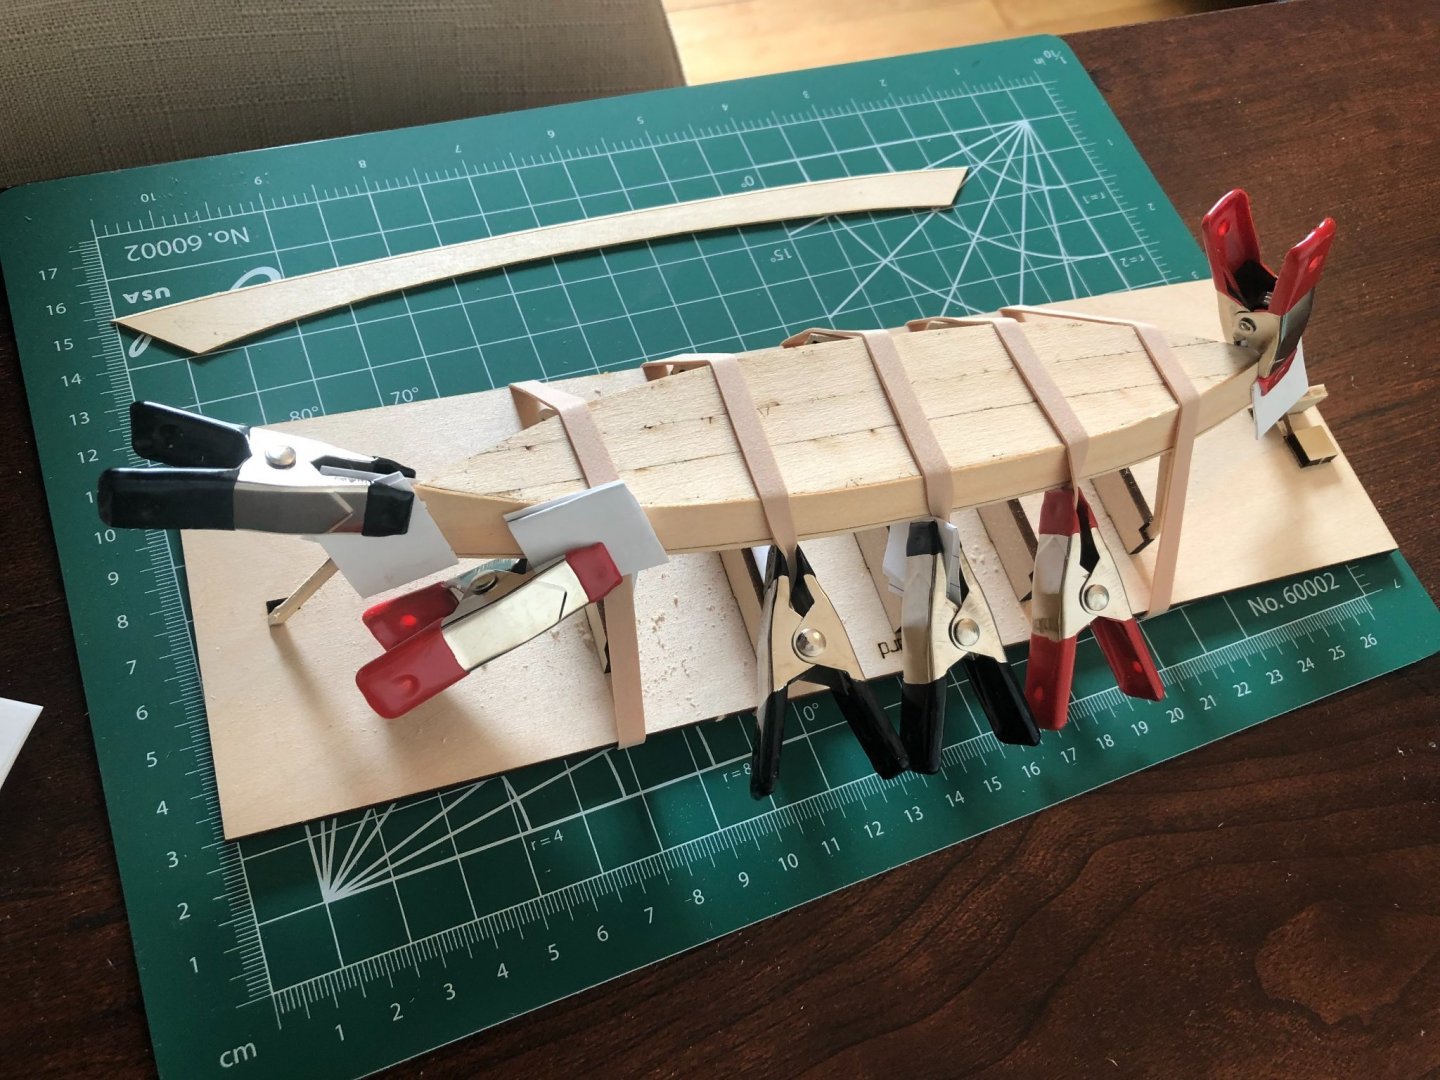
It has been a while since my last post. I have still been working on my ship, albeit at a slower pace as some life things have come up. After doing the false stem, my next step was to glue on the final 4 side cleats. This required some creative clamping as the cleat kept popping off near the bottom, and my clamps weren't long enough to reach that spot. I ended up using a tweezers to get down there and then put a clamp on the tweezer to keep the pressure. A bit of a strange setup, but it worked! The instructions showed to put the cleats parallel to the frames, however I chose to put them at an angle matching the bend of the boat as I thought that had a better looking effect. The clamping situation for the side cleats. I then bent and glued on the bands and the gunwales. I followed the same process for these as I did the planks - soaking in warm water for 5 min, then clamping and allowing to dry, followed by glue. The bands went on smoothly. However, the gunwales were a challenge. You need to cut down the frames a bit to fit the gunwale, and I found it difficult to test and see if it was far enough by placing the gunwale in position. I was getting frustrated, and instead of taking a deep breath and being patient, I tried to force the gunwale to fit with a little extra pressure... and was quickly punished with a *SNAP* sound. Broke the gunwale. The broken gunwale. Luckily, the piece had enough length after the break that I was able to use it without issue. But another lesson in patience has been learned. I decided after the break that it seemed to be fitting well enough, and continued on with the soak & glue process. This went smoothly. However after gluing on, the instructions say to sand the area with the band/plank/gunwale flat so that the cap rail can sit flush. As I started sanding, I realized that perhaps I had glued the gunwale on too high, as it was losing its square shape and becoming a sharper angle. I felt it was too late to re-do because of the sanding I'd already done, so I can put this one on the books as another lesson learned for next time. The bands and gunwales, attached and sanded. There is an optional step for frame irons in the instructions. When setting out on this project I wanted to do all the optional steps, just for the practice at least. However after sanding the gunwale down, I felt that the shape was no longer suitable for this step, and that they would not fit right. Therefore, I have chosen to skip the frame irons step. Instead, I moved on to attaching the breast hook up at the bow. This step was extremely challenging for me. The area it is supposed to go is a bit off center, not sure where the mistake was made. Perhaps with the gunwales or just planking more generally. It also is such a tiny piece, I had a hard time figuring out how to even get it placed. Ultimately, I did some light sanding on the edges as described in the instructions, then applied glue and took a tweezer to try and place it correctly. I think it came out alright but not great. It is, as I said, off-center, and the piece itself is glued in a bit crooked. But I am hoping that it is not severe enough to be noticed by the untrained eye, and no one will be looking as closely as I am now. The breast hook. Next up is painting, something I do not feel confident about at all. I need to do some research about how to best move forward with this process. I haven't even bought paints yet since I'm not sure what to get. So I anticipate it will be a little while before my next update. As always thanks for reading and for your encouragement and guidance!

- 23 replies
-
- 4
-
-
- Lowell Grand Banks Dory
- Model Shipways
- (and 1 more)
-
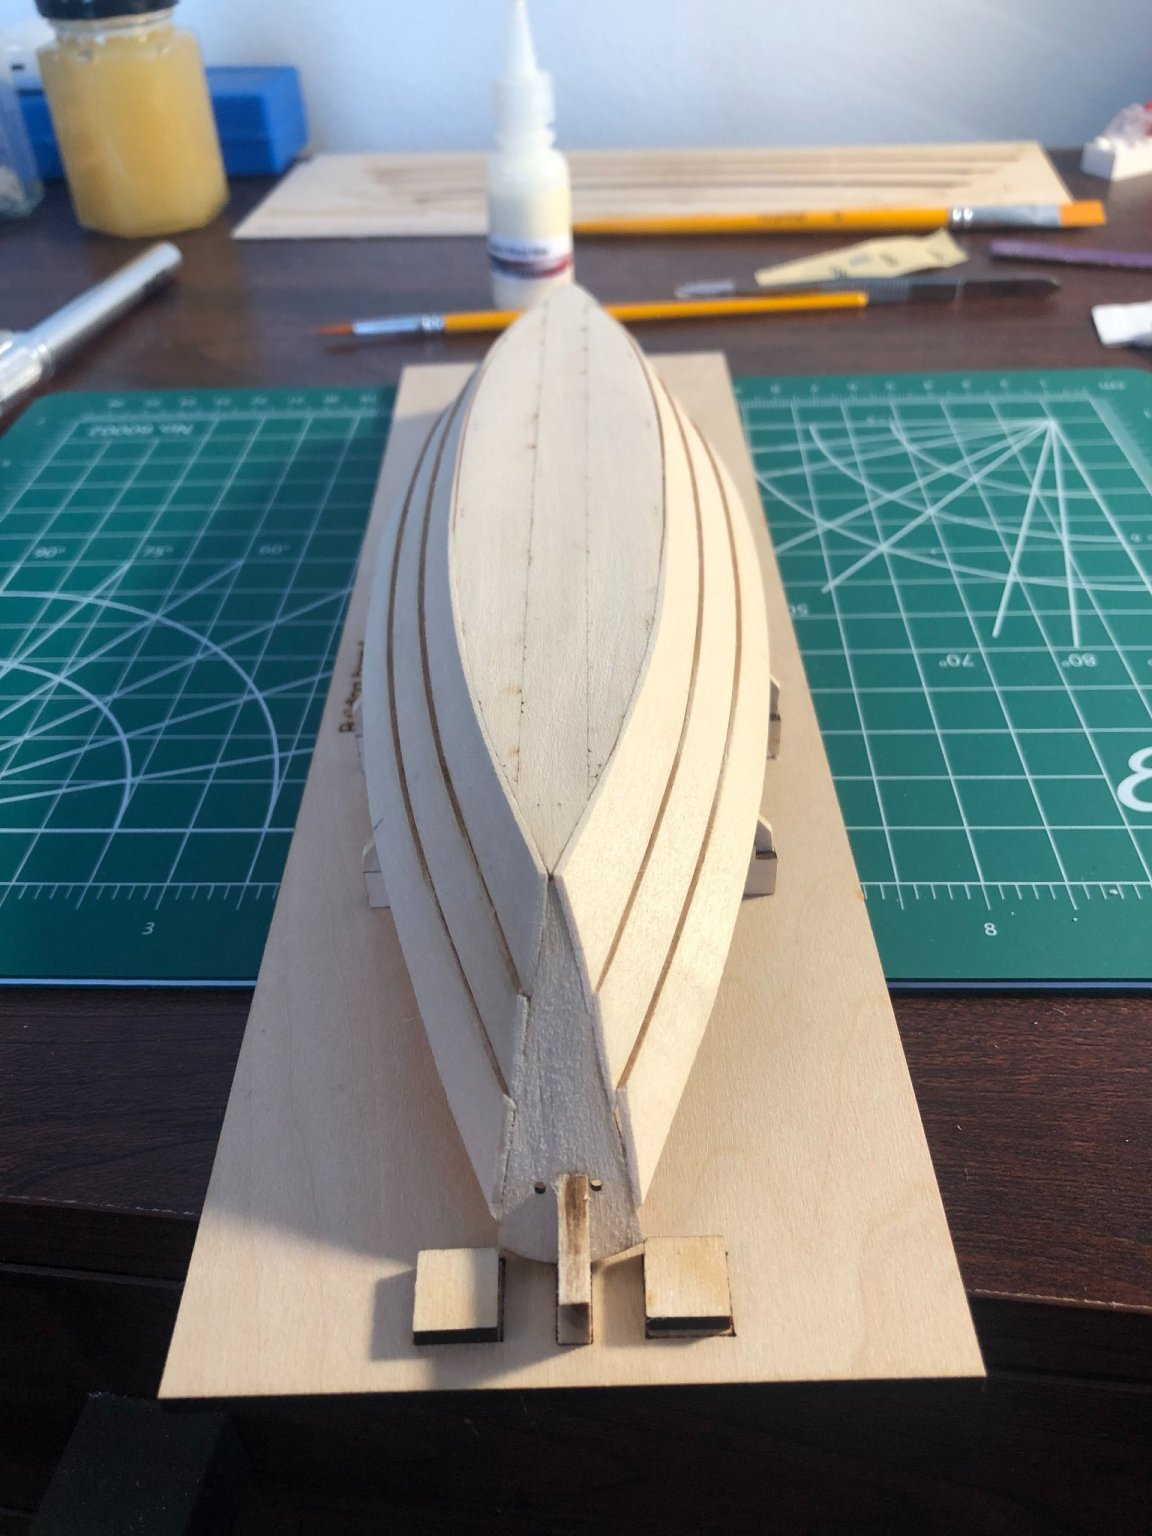
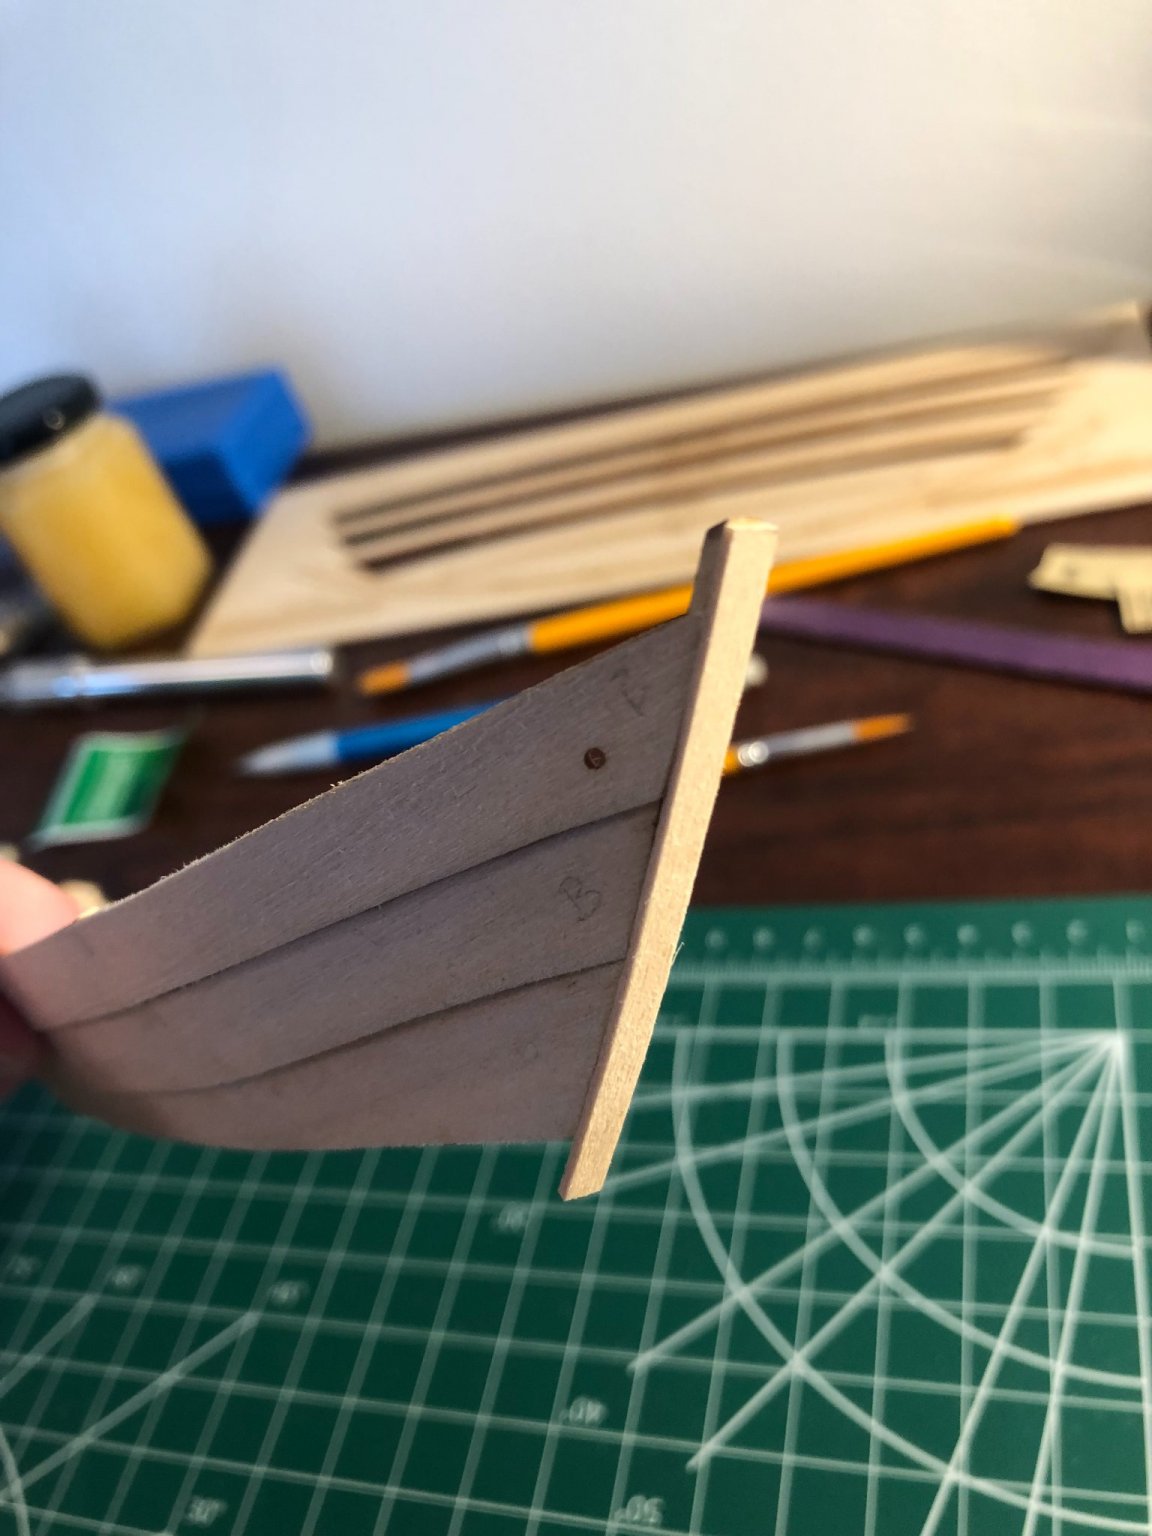
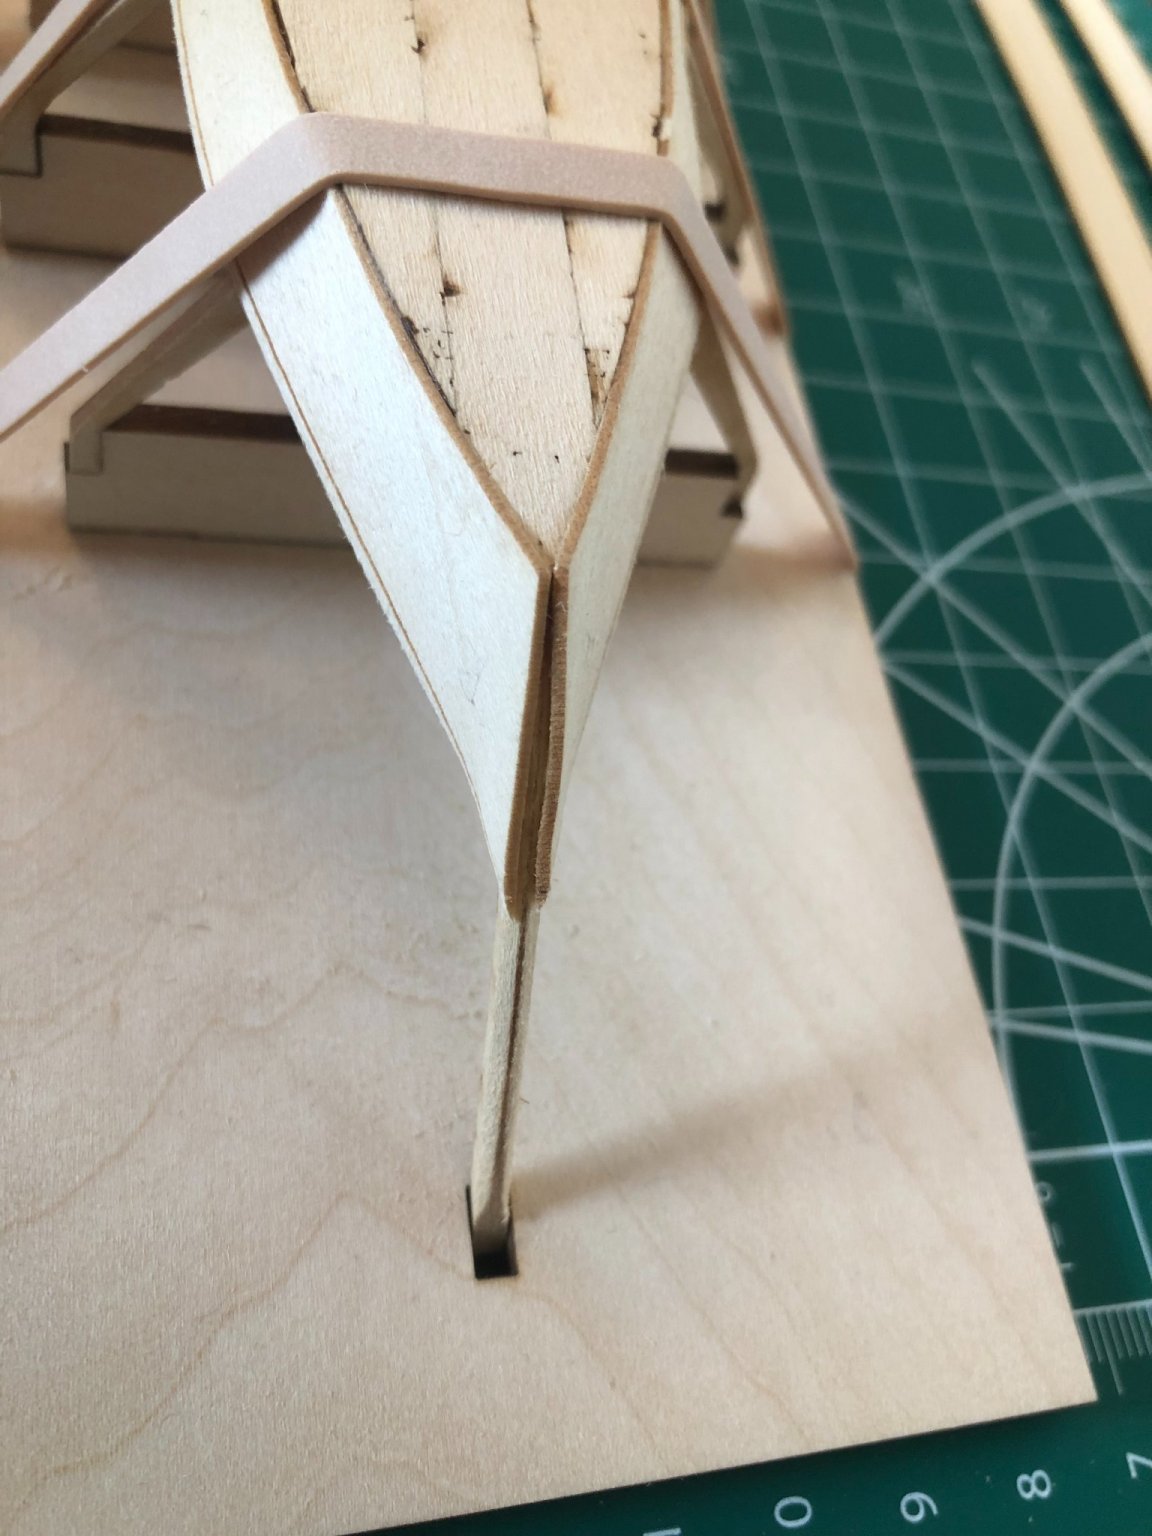
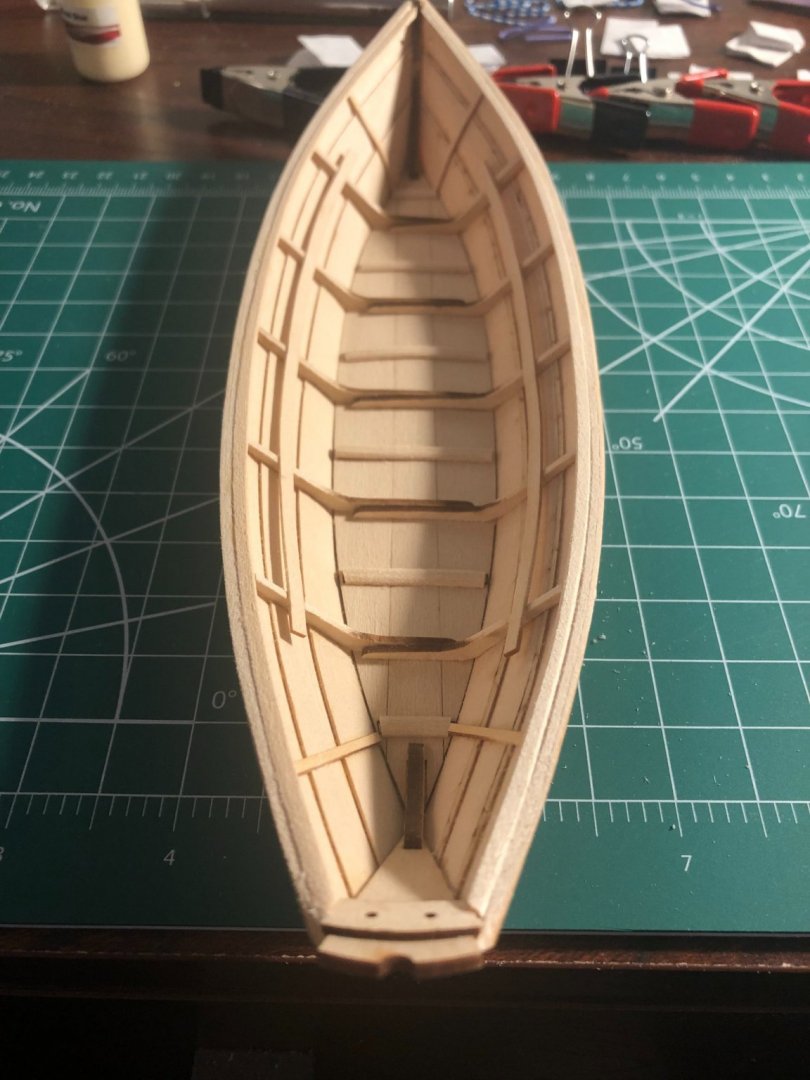
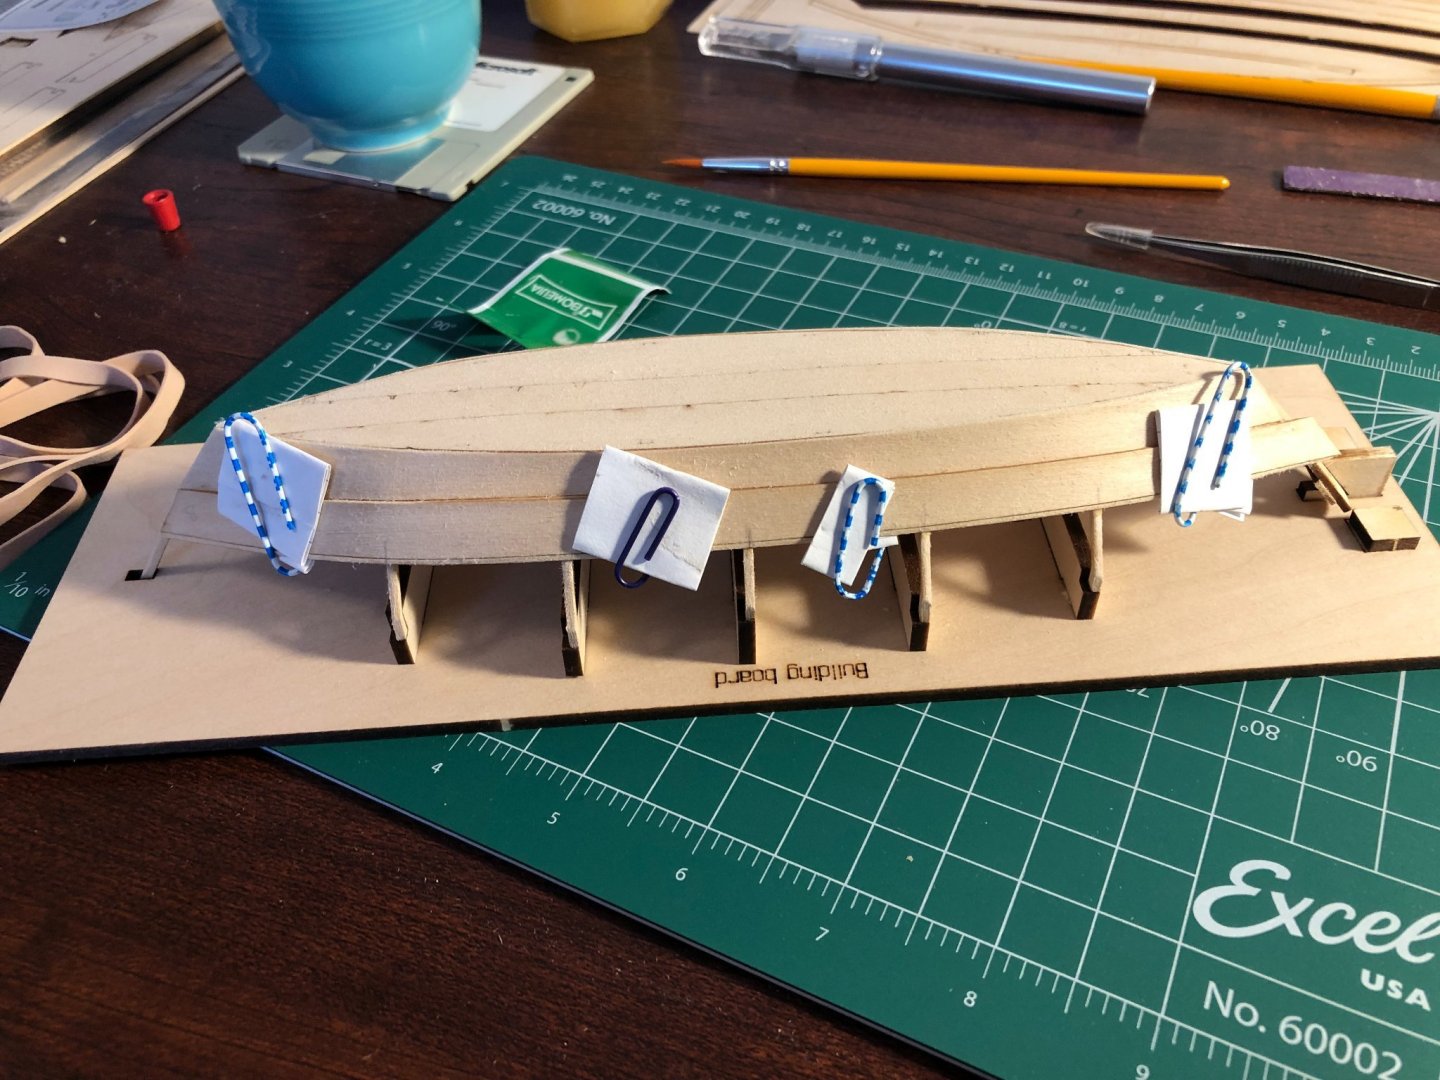
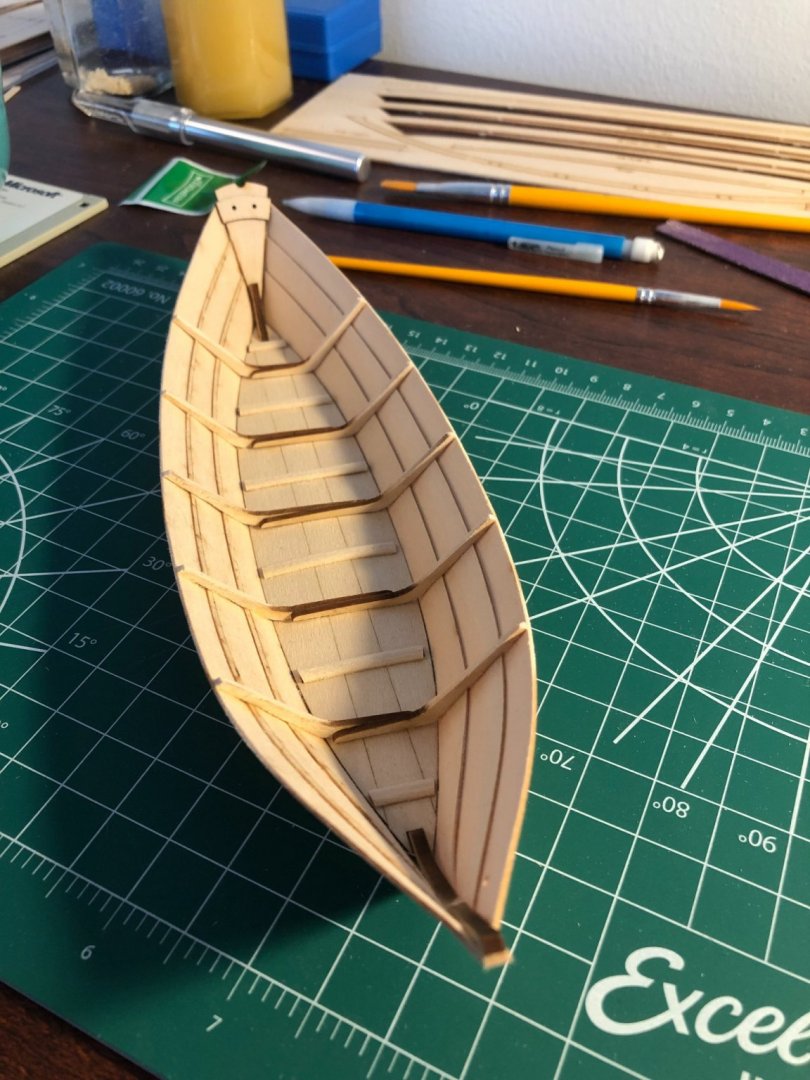
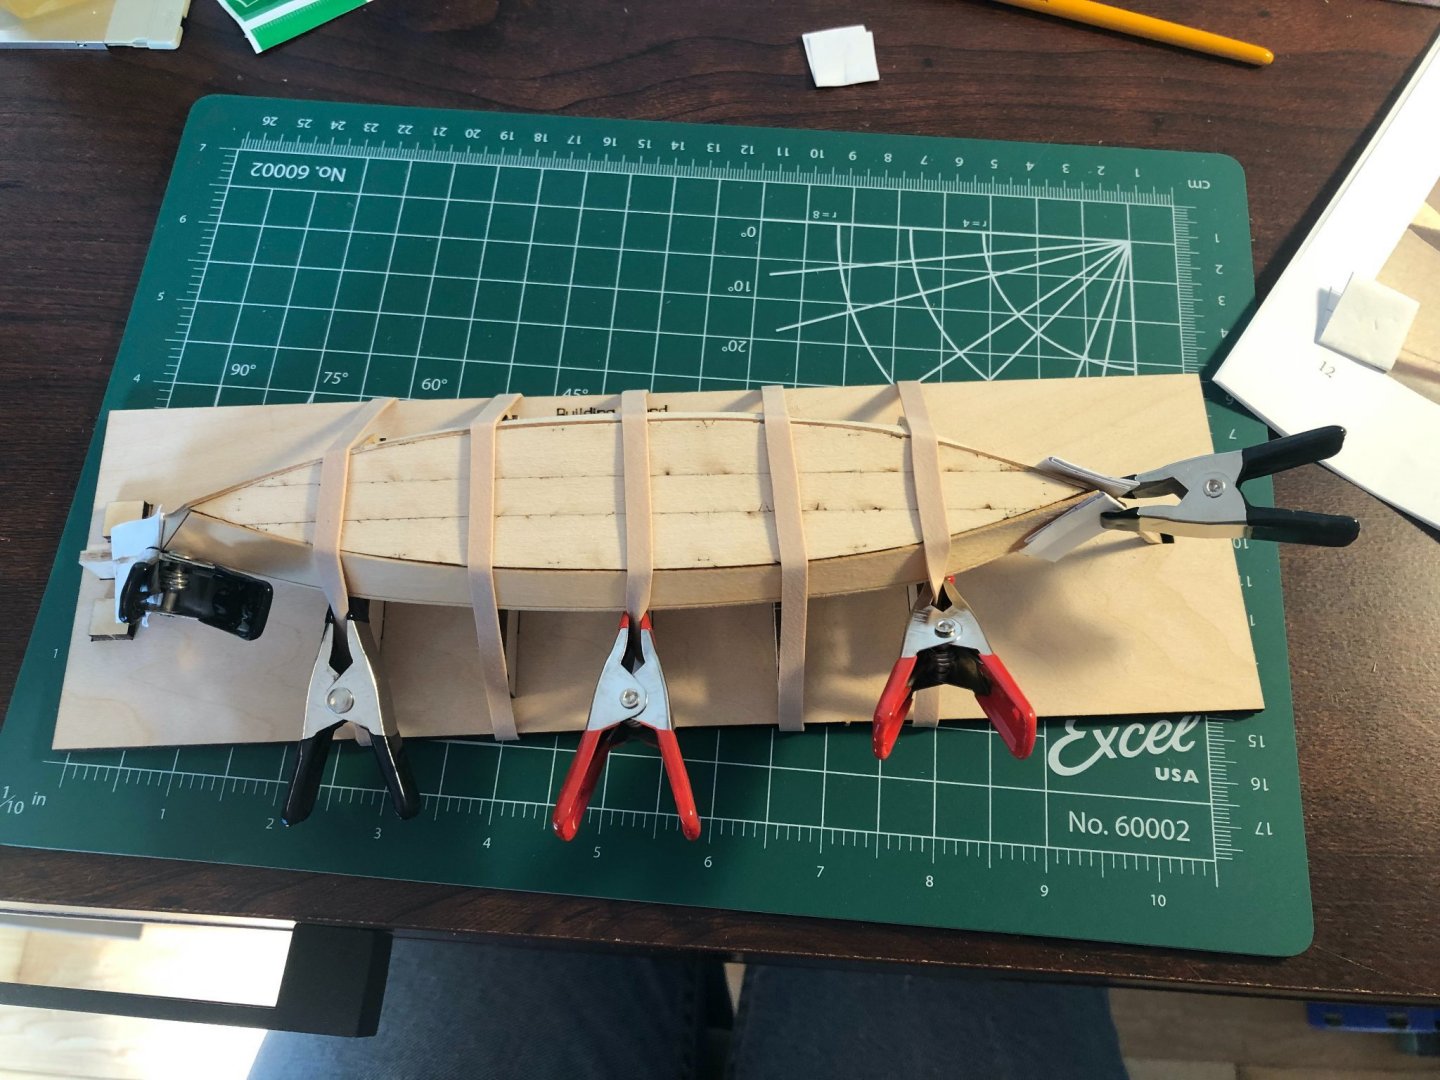
The build continues! I did follow through on fixing the planking misalignment. I brushed Isopropyl Alcohol onto the seams to loosen the glue, and then used a combo of tweezers/Xacto knife to gently pry it free. I was very nervous about breaking the plank, but by not using too much force it came off cleanly. I then used the back of an Xacto blade to scrape away excess glue before re-applying the plank to the ship. I was much more aware of alignment this time, and I think it came out well. The plank being re-glued. I struggled to fit the clamps I had on the model, so loosed up some paper clips to use for clamping. I then continued on with the rest of the planking - soaking the boards for 5 min in warm water, bending them to the model and letting them dry, then gluing on. I highly recommend a fit test to everyone before gluing as it could be challenging at times to get it right. Ultimately all planks were glued on, overhang was cut away, everything was sanded, and it came out looking pretty good! I did have to use some sawdust glue-water to fill some gaps along the transom, but I think it worked fairly well and won't be visible after painting. The planking completed. This is pre-filling gaps in the stern, you can see some of the areas I would go on to fill. Especially the right sheer plank. It then was time to free the boat from the frames. I was sure to be very gentle during this process, and everything came off cleanly. This was an exciting moment in the process as it finally looked like a small boat instead of some assorted pieces of wood! Wow! A boat! I did have to use some warm water and glue to bend and adhere a couple of the frames to the sheer plank. I just wet the plank in that spot and used a clamp to bend it into place, then glued. Luckily all came together well. I finished up my work for now by gluing on the false stem. This was also very satisfying as it really made the exterior of the boat come together. Next up is interior details such as side cleats and risers. The false stem glued on. The B's on the planks were markings I made to keep track of the bow of each plank during the preparation process.


- 23 replies
-
- 6
-
-
- Lowell Grand Banks Dory
- Model Shipways
- (and 1 more)
-
Well, I've made my first major mistake! I have been working on planking and making good progress. Got one broad plank on, no problem and then soaked/glued the second plank and I thought I was on a roll! I had a bit of trouble aligning the second broad plank, but thought I got it placed correctly... Welp I guess I should've looked from the front because the two broad planks are not lined up. They look okay in the stern, but the bow alignment is off. I didn't want to have to remove it and tried hard to convince myself that it is good enough... But I eventually accepted that it needs to be re-done. Knowing I still have one more plank to add on top, and I am worried that if I don't re-do this one the top plank will be even more off. I am taking the afternoon off from building to minimize frustration before returning to the project to prevent further mistakes. Live and learn I suppose! The misalignment as described.
- 23 replies
-
- 3
-
-
- Lowell Grand Banks Dory
- Model Shipways
- (and 1 more)
-
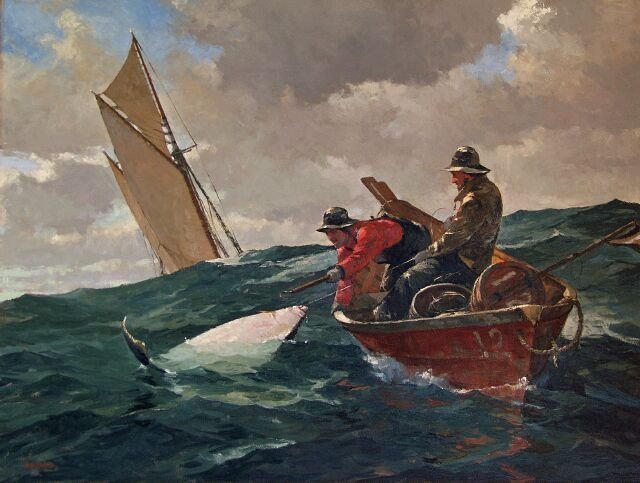
Thanks for posting the history info! It's a fun little boat and I appreciate its 'working class' status as opposed to some of the larger boats. I have been looking at some art and photos of the dory, Fog Warning is a great one! I have mostly been looking because the boat comes with paint in a bright yellow & green color scheme, which I don't really like. So I have been looking for alternate colors. The painting below (I believe a Homer painting though I don't know the title) has a red scheme which I'm considering. I also like the number on it, gives it a little character and intrigue as being one in a fleet of dories! (photo link)
- 23 replies
-
- 4
-
-
- Lowell Grand Banks Dory
- Model Shipways
- (and 1 more)
-
Sorry to hear it has been such a struggle! Planking has been a challenge on my dory as well. I'm trying to remind myself that every mistake is a learning experience for next time! Hang in there, I'm sure it looks better when taking it in generally than it seems to you on close examination.
-
That makes sense! Thanks for answering my question. Relieved I don't have to try to fill it.
- 23 replies
-
- 2
-
-
- Lowell Grand Banks Dory
- Model Shipways
- (and 1 more)
-
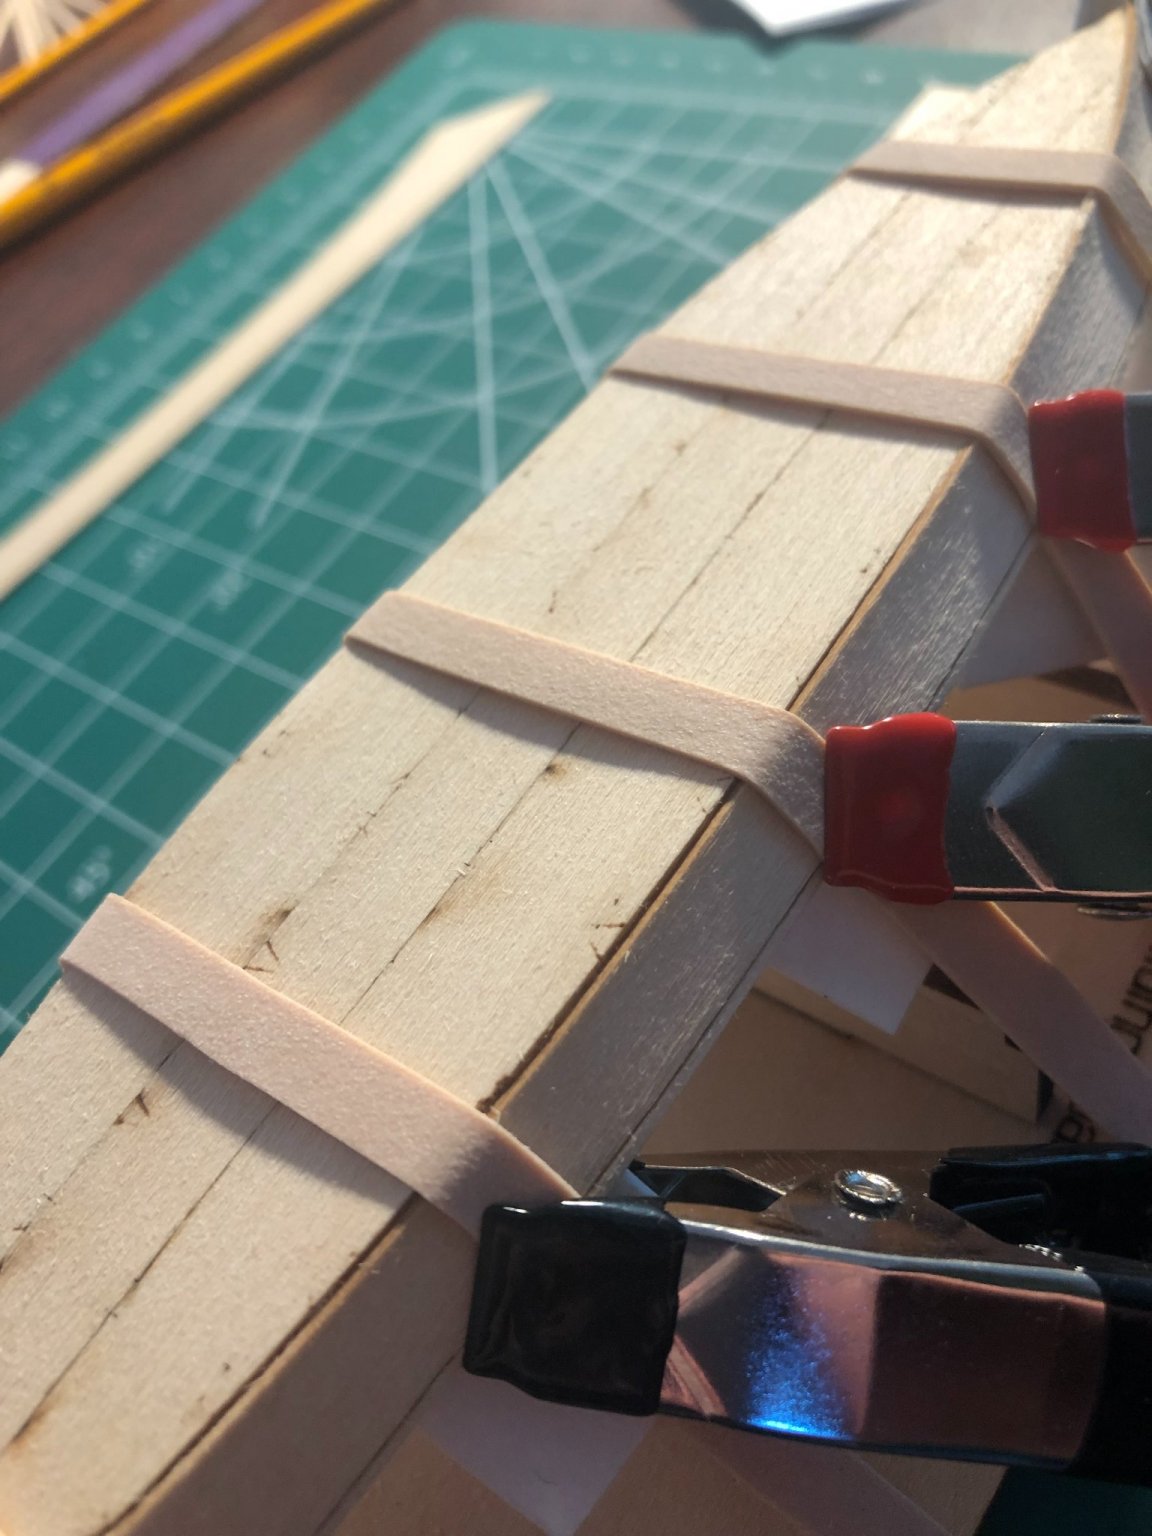
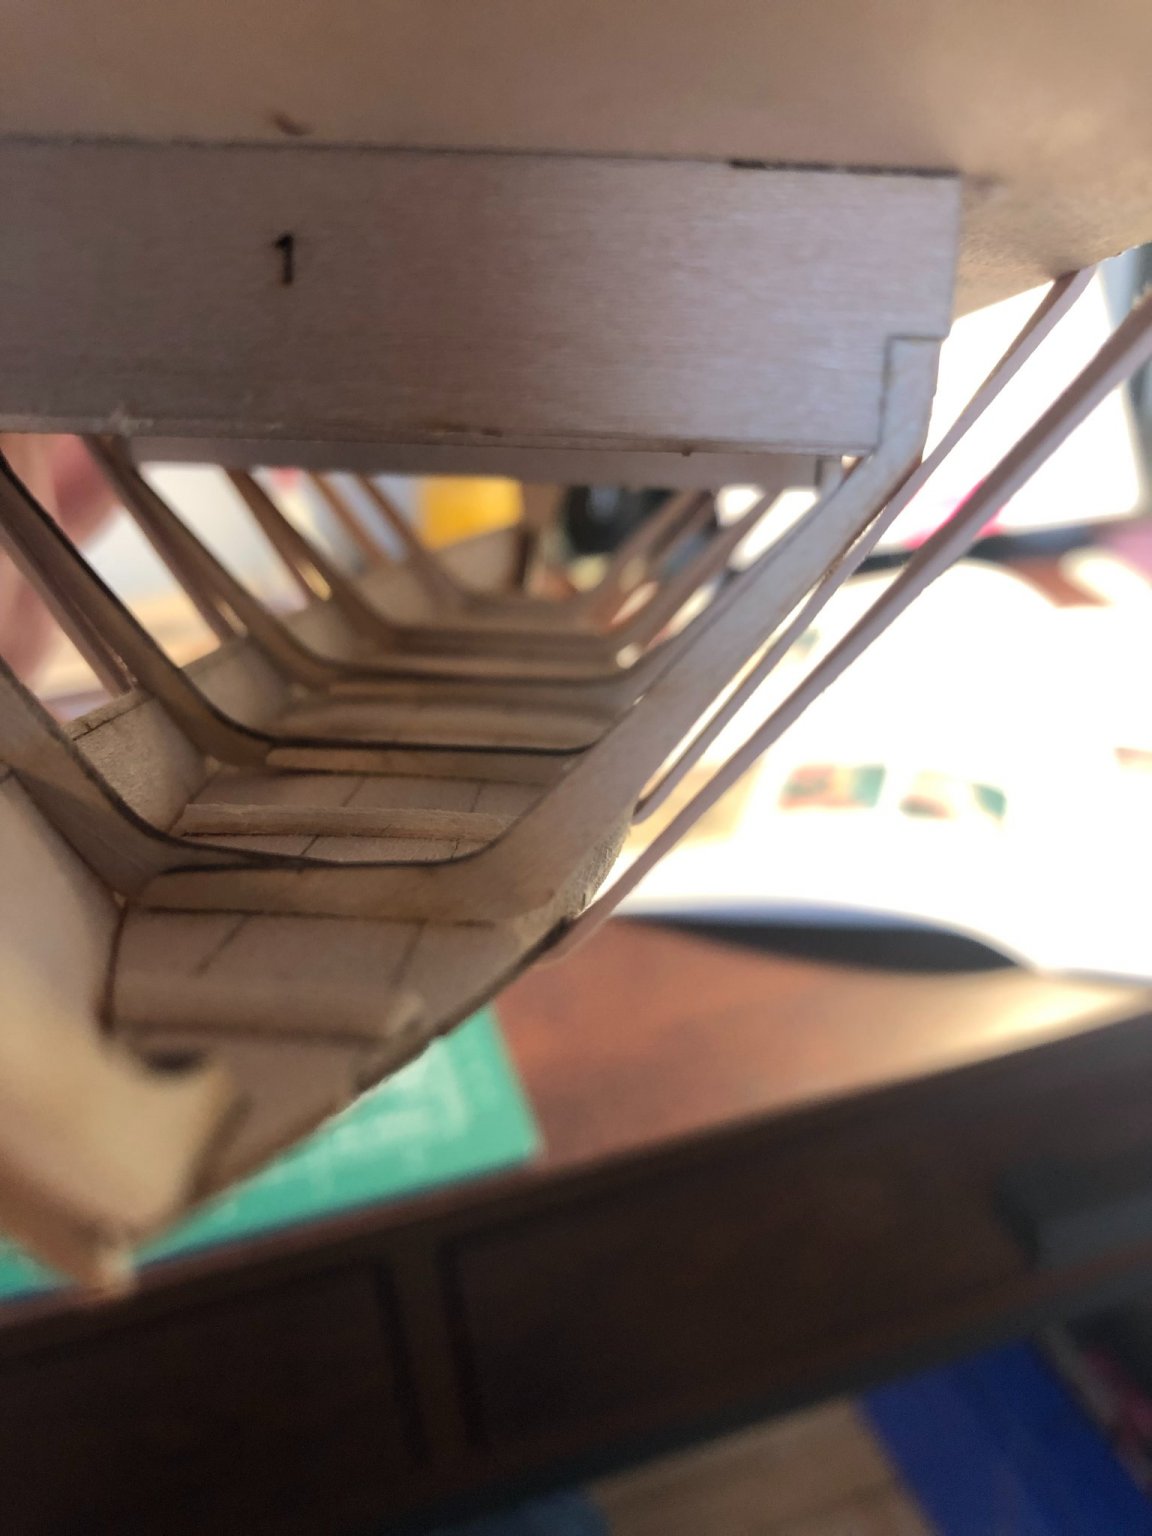
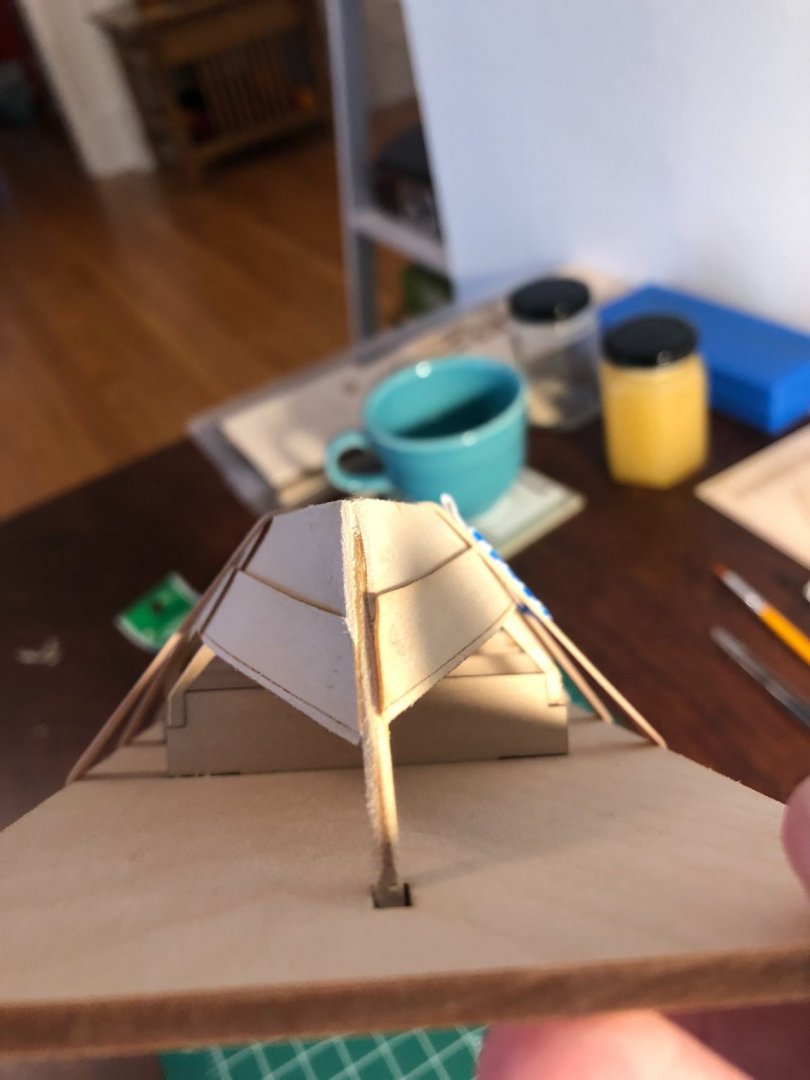
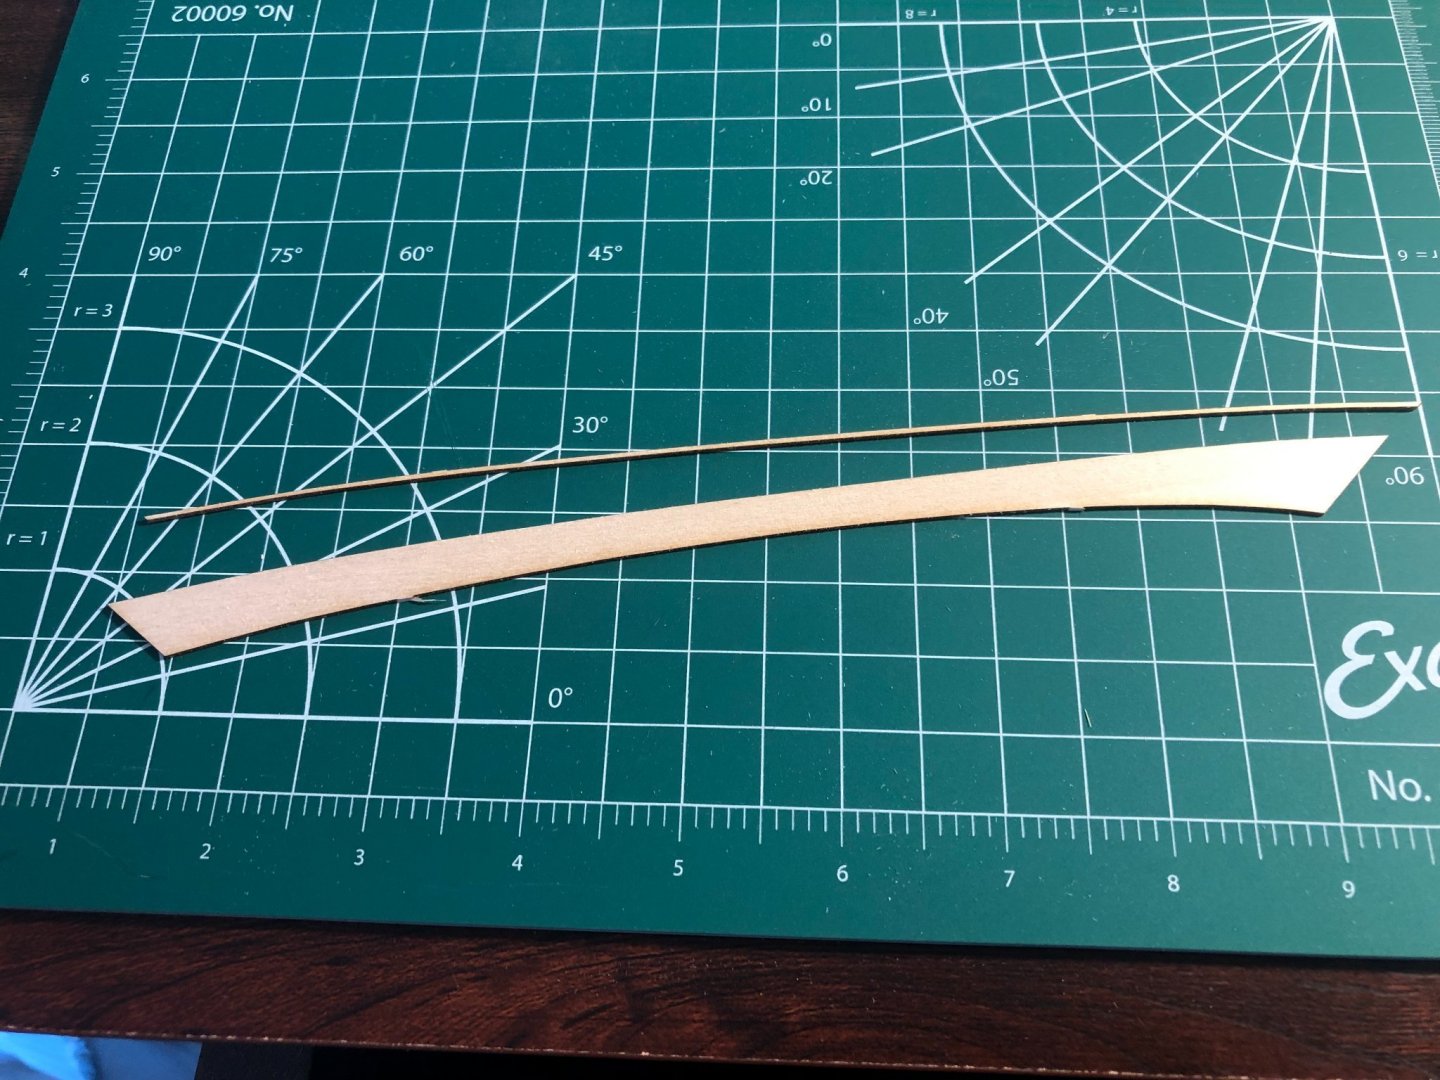
The build continues! Good news - gluing the bits of the garboard plank together worked fine, and I did not observe any issues when bending the plank. Hooray! After gluing the plank, I sanded and beveled both planks as described in the instructions. I am unsure if I did this correctly / well enough, but I will have to wait and see as I continue planking. I soaked the plank in warm water, then used rubber bands and clamps to fit to the frame. I paid special mind to the bow and stern, as the planks needed to 'twist' a bit to fit properly. Clamping the plank. As I was clamping the plank into place, one of the frames snapped. Luckily it was a clean break without any splintering and was easily re-glued. I will be more careful in the future. I left the plank to dry overnight and then returned to do the gluing. I found this challenging to position everything correctly, but was eventually able to get it, with a similar clamping setup to the bending process. The second garboard plank. Once the glue was dry, I repeated the process on the other side. Overall, everything went smoothly and I am happy with the results. There is some irregularity with how the planks lie across the bottom of the ship, with some areas overhanging and some resting just below the bottom. I am hoping that with some sanding, I'm able to fix this. The slight misalignment of the plank. Alignment on the bow. Some warping of the wood, but I believe this will get covered eventually. My greatest concern at this point is some gaps in the corners between the frames and the planks/bottom of the boat. I am unsure if based on the frame shape it is supposed to be this way or if it is an alignment issue. I could try to use some wood filler to fill the gaps, but am concerned about doing too many 'fixes' and adjustments which ultimately make the end product look worse. Any thoughts? The 'gaps' in the corner as described. You can see the light coming through a bit where it is not sealed to the boat. Thanks for reading and for any tips!


- 23 replies
-
- 6
-
-
- Lowell Grand Banks Dory
- Model Shipways
- (and 1 more)
-
Looking good! I hope you were able to work out the planking issue!
- 9 replies
-
- 1
-
-
- Bluejacket Shipcrafters
- Grand Banks Dory
- (and 1 more)
-
Thanks Ryland. I think I will first try gluing it. The kit didn't come with excess wood, but there are some hobby shops in the area that I will try if gluing doesn't work.
- 23 replies
-
- 1
-
-
- Lowell Grand Banks Dory
- Model Shipways
- (and 1 more)
-
I don't have advice as I am new myself, but I think it is looking great! Love the idea of the 3D printed blocks. They seem helpful.
-
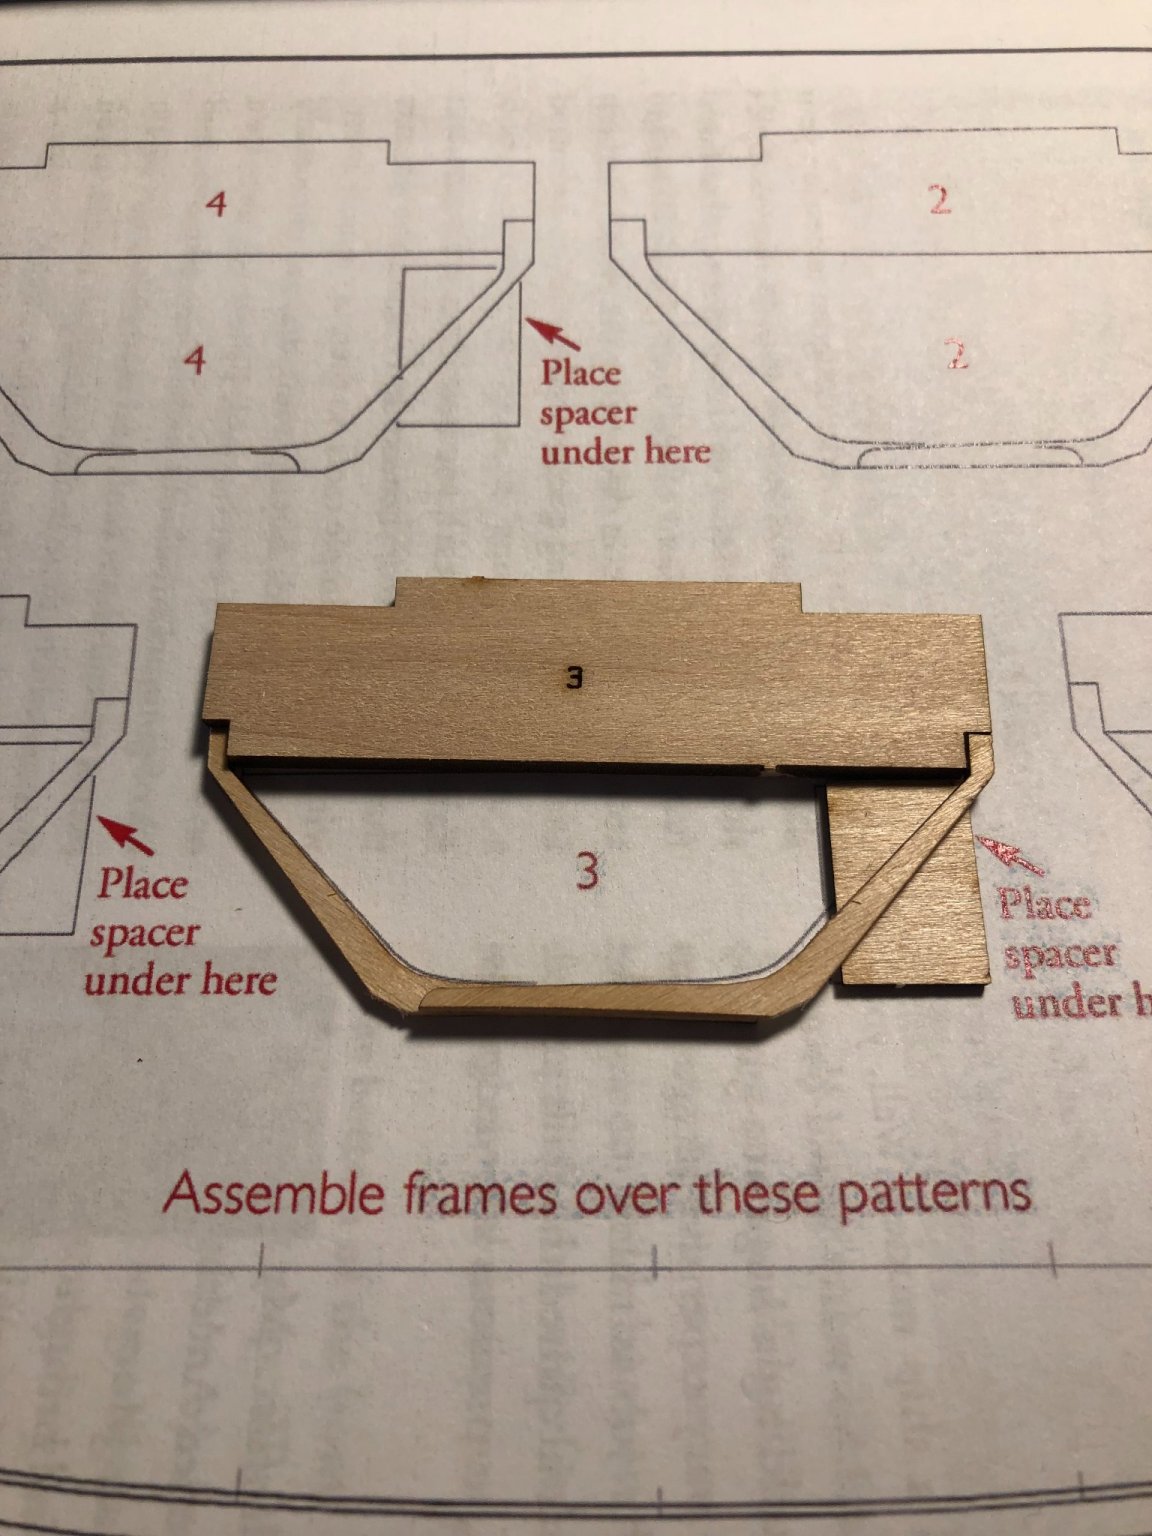
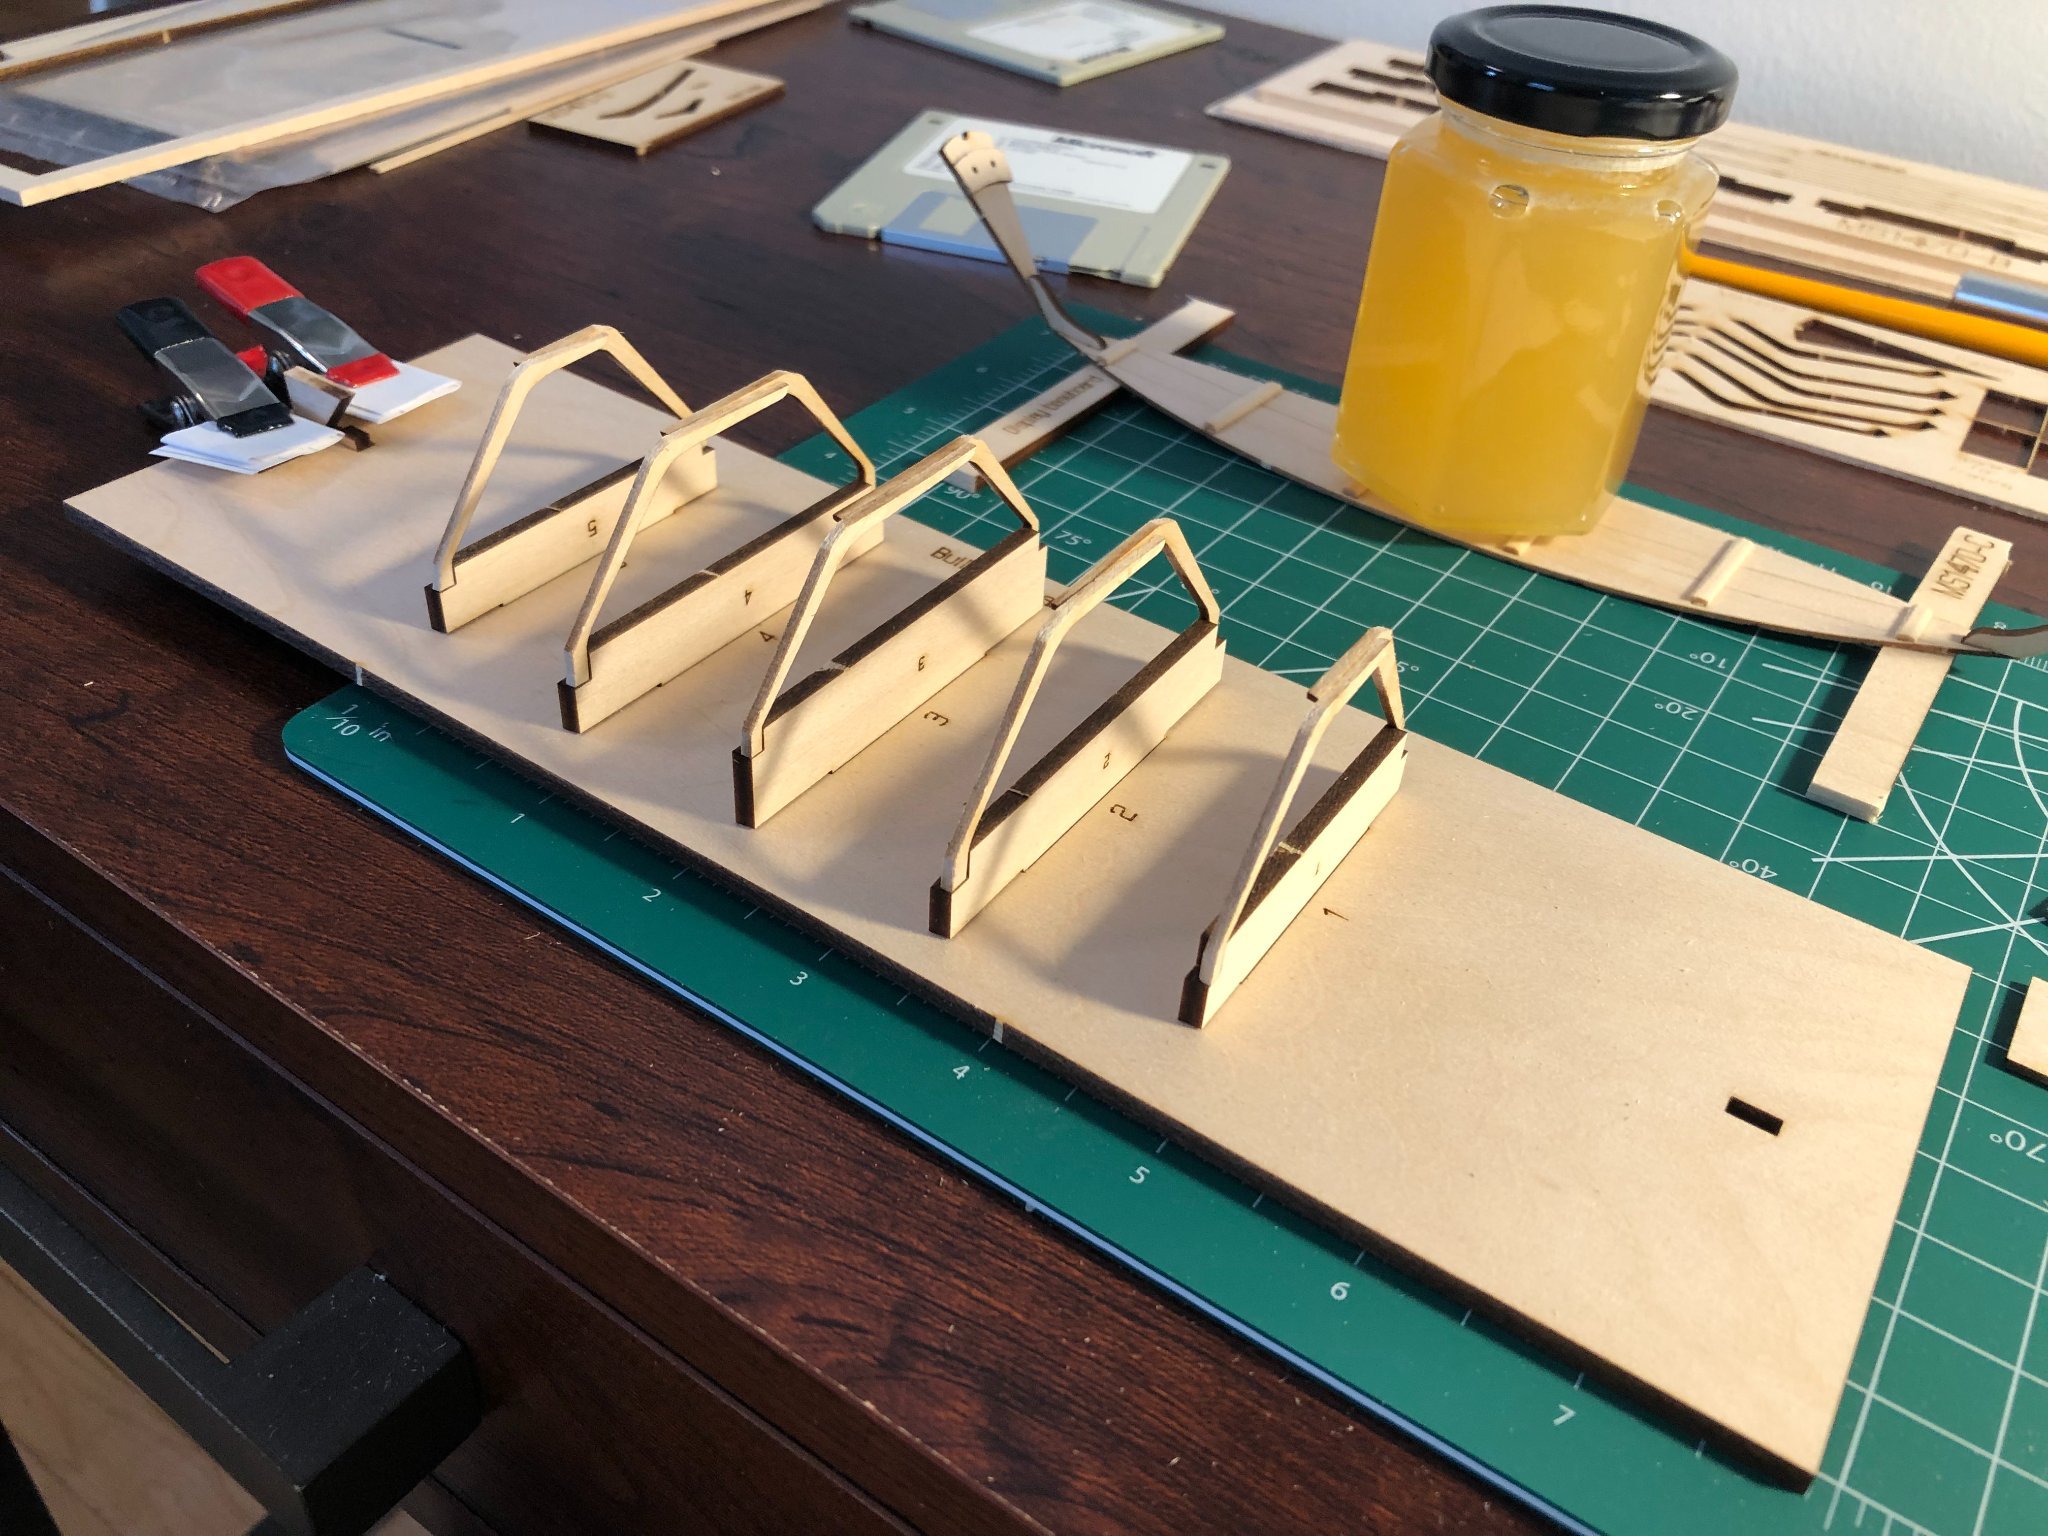
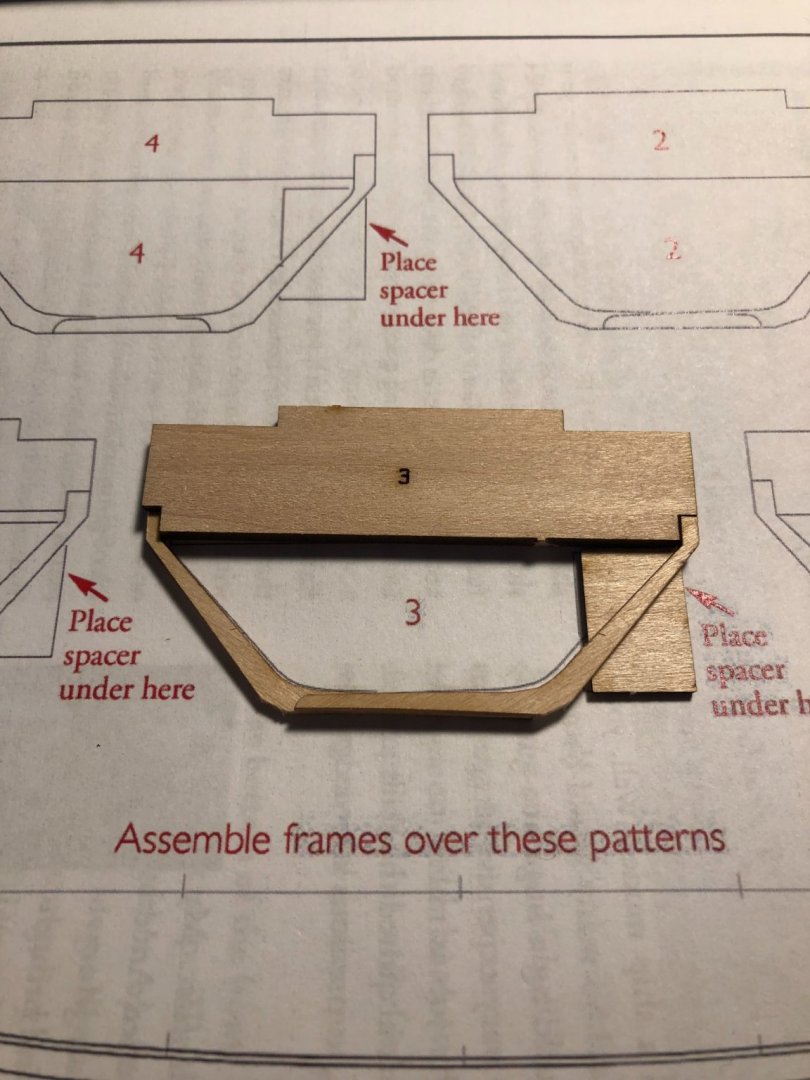
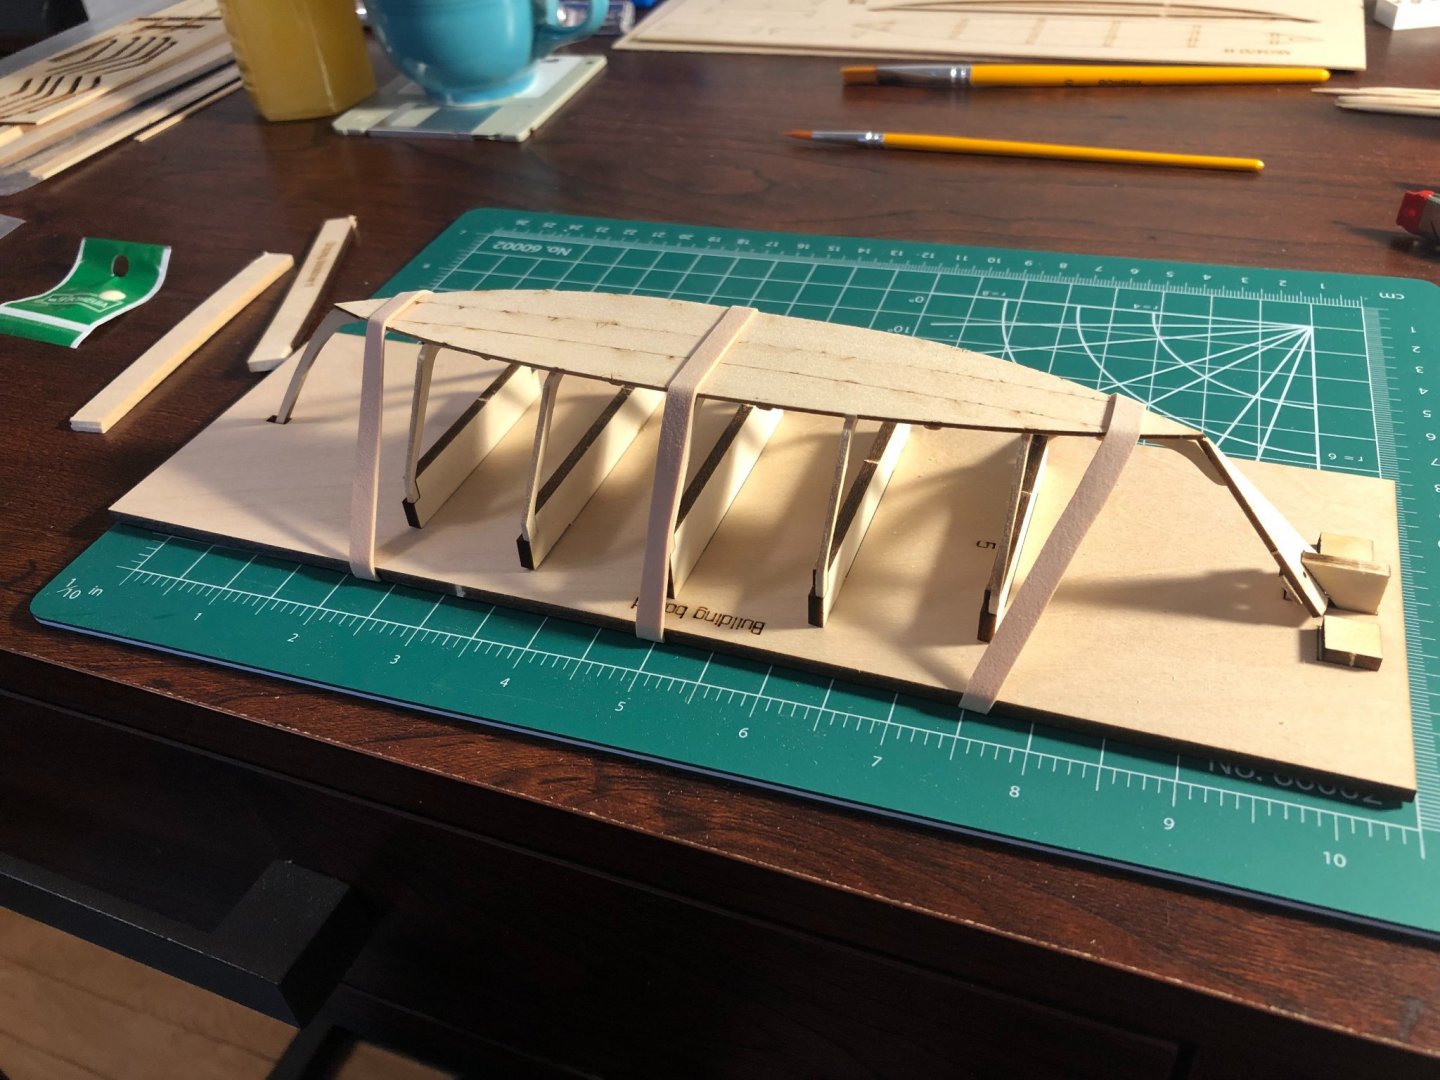
Thanks for all the encouraging words and comments! So appreciative that experienced builders like yourselves take some time for newbies like me! Seems like a great community here. I kept at the build yesterday evening and today. While waiting for the bottom to dry into a curve, I started work on the frames. I found this step to be a bit tricky as the pieces are so much smaller than the larger pieces in prior steps. I figured it out however, and feel pretty good about how things shaped up. First I sanded the pieces as instructed, then set them up on the pattern to glue together. The pattern seemed slightly smaller than the real size of the pieces, but it was good enough to get the idea. My biggest problem at first was in the gluing. In previous steps I used clamps to hold pieces together and couldn't figure out how to clamp these pieces together. I ended up holding the pieces with my fingers until it set, and this worked fine, guess I was overcomplicating it for myself with the clamps. One of the frames on the pattern. Once each frame dried, I placed it into the build board. This process was smooth, however I did have to sand down a couple of the spacers so that they'd fit appropriately into the cut holes on the build board. I then began the process of sanding the bevels into the frames. For this I made a sanding stick with some scrap wood and sandpaper, and sanded it as I bent the sanding stick how I imagine the planks will bend. One of the frames did pop off the spacer as I did this, but I was easily able to re-glue it. I was very intimidated to do this portion of the build, however I think it came out well. I am still learning where things need to be exactly right and where things can be 'close enough'. I tried my best to make the frames correct so that the planks will attach well, but I will have to wait and see if I did a good enough job. The frames placed on the build board. Finally, the bottom of the boat was dry. Thankfully the second round of attempting to bend it was more successful, and I felt ready to attach the bottom to the frames. I did the trial assembly first and everything looked good, so I applied glue to the frames, set it on, and then used rubber bands to hold it as the glue dried. Similar to the frames, I did my best to center it but am unsure of how precise I need to be. It does seem a bit off in some places, but is still very close. I will again wait and see if it is 'close enough' for planking. While the glue dried I looked ahead to the next steps to do a bit of prep for tomorrow's adventures. I realized that I have encountered my first problem. The planks are supposed to be marked with a shallow cut line to show you how far down to sand down the bevel. On one of my wood sheets, this is done correctly. However on the other sheet, the line is cut fully through the wood instead of shallowly as a guide. This leaves a very thin piece of wood and the larger plank as two separate pieces. I am unsure of how to remedy this. I am sure I could reach out to Model Shipways for a replacement, but I am enjoying building and would rather not get stalled waiting for a shipment. I am wondering if I could perhaps glue the smaller piece to the larger plank?? It may be too small to get it right, but maybe worth a try? Any advice? The garboard plank with the small cut bit as described. Thank you all for your likes, comments, and thanks in advance for any advice offered!

- 23 replies
-
- 3
-
-
- Lowell Grand Banks Dory
- Model Shipways
- (and 1 more)
-
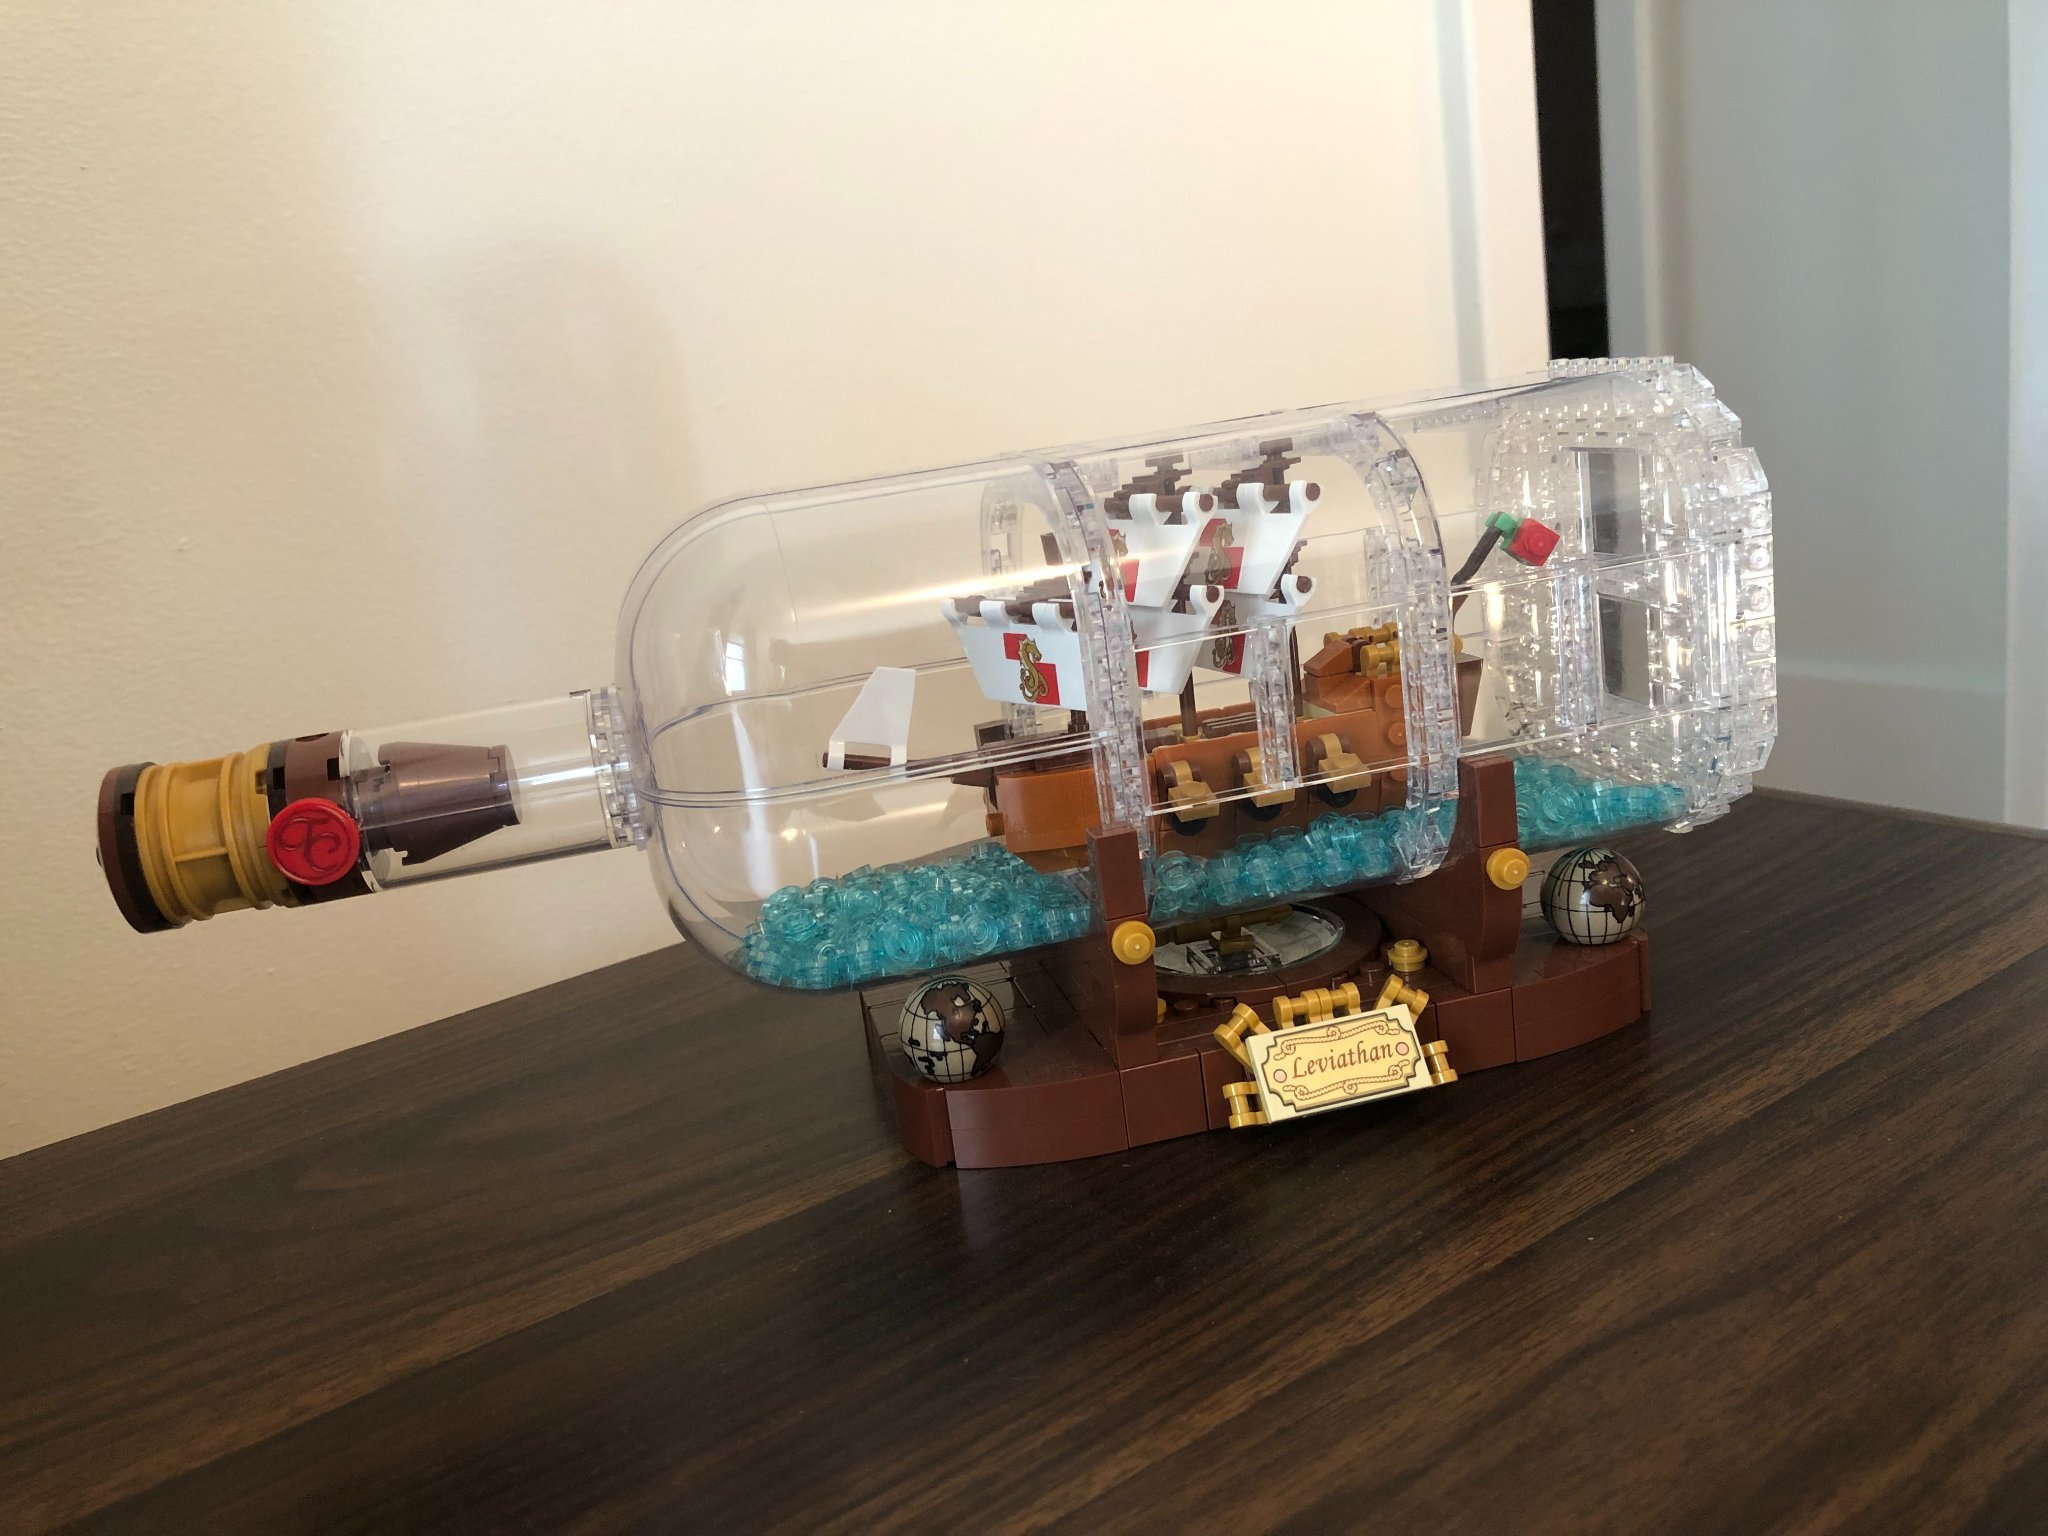
Thanks for all the welcomes everyone! Ryland, a picture of the ship in a bottle set is below! It is a very fun set to build and looks great displayed in my home. Costs about $70 I believe.

-
Hi Tom! I'm building a Dory as well, however I'm doing the Model Shipways Lowell Grand Banks Dory! I am interested to see how your kit differs from that one in looks and the build process!
-
Hello everyone! I'm new to the hobby and am saying hello from Minnesota's Twin Cities! I have been greatly enjoying the hobby thus far, and am excited to get to know others on here as well. I just started my first build log, which you can find here: Lowell Grand Banks Dory I think I skew younger than most others on here. I am in my late twenties and came to the hobby because I recently graduated from grad school and found myself with some extra time! I also enjoy building Lego kits, especially Star Wars, and wanted to try something more complex. After building the Lego ship in a bottle, I realized I have always been fascinated by ships and decided to give a real model a go! I also enjoy hiking and collecting hockey cards! So happy to meet you all! Happy building!