DanB
-
Posts
162 -
Joined
-
Last visited
Content Type
Profiles
Forums
Gallery
Events
Everything posted by DanB
-
Sultana by DanB - Model Shipways - 1:64
DanB replied to DanB's topic in - Kit build logs for subjects built from 1751 - 1800
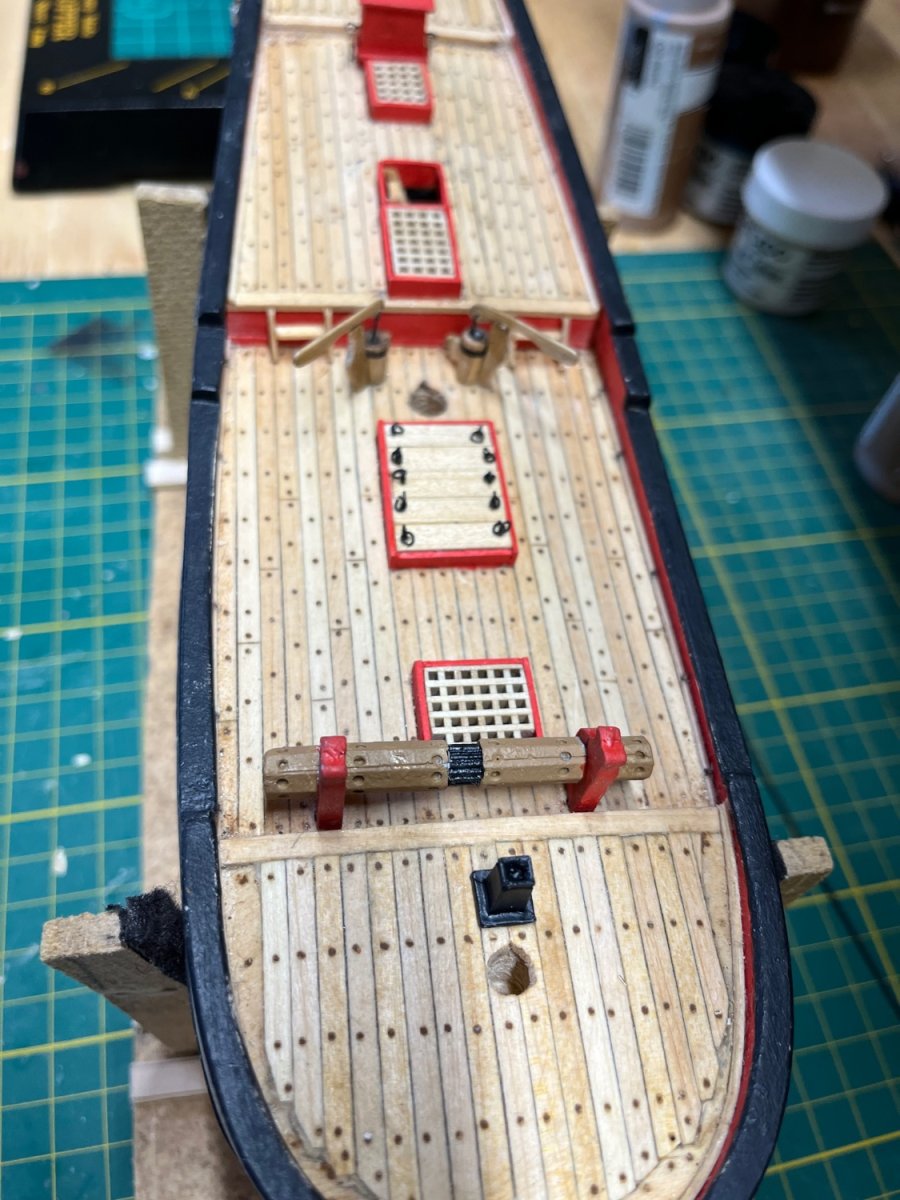
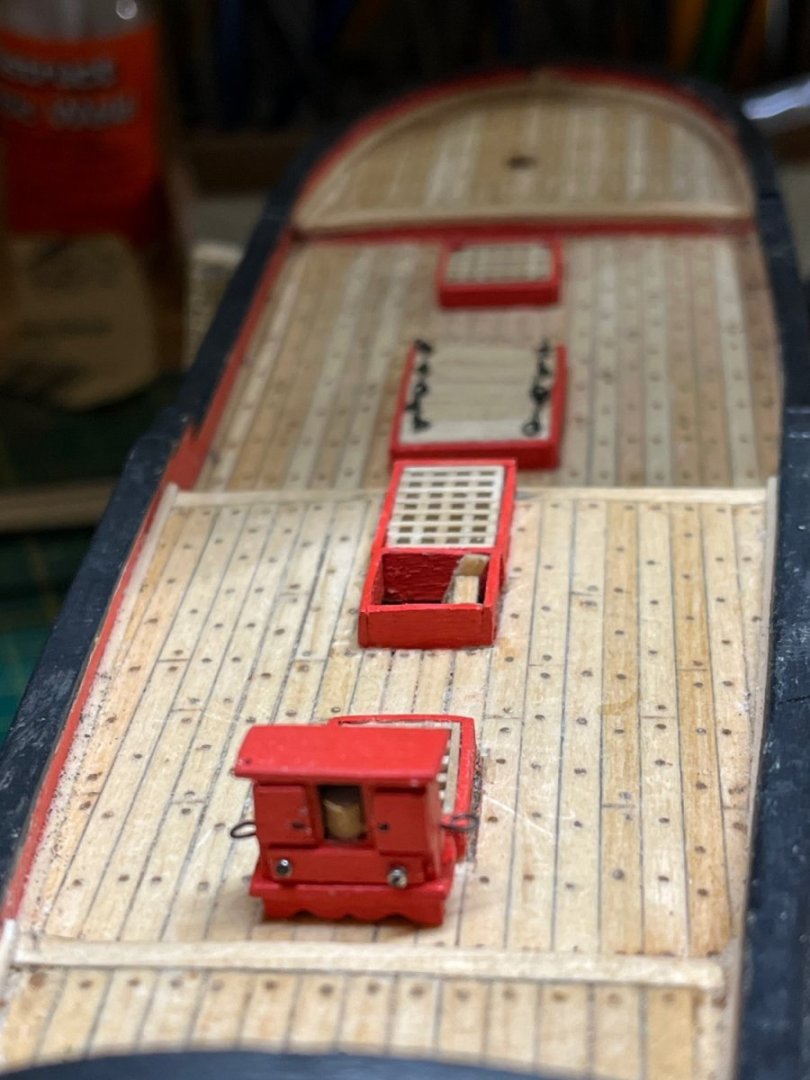
Pumps and windlass. Scratch built pumps using Chucks instructions. I was stumped by the windlass. I could not get the hexagonal shape right. I gave up after 3 attempts. I painted the kit supplied castings for the windlass and galley stack.
-
Sultana by DanB - Model Shipways - 1:64
DanB replied to DanB's topic in - Kit build logs for subjects built from 1751 - 1800
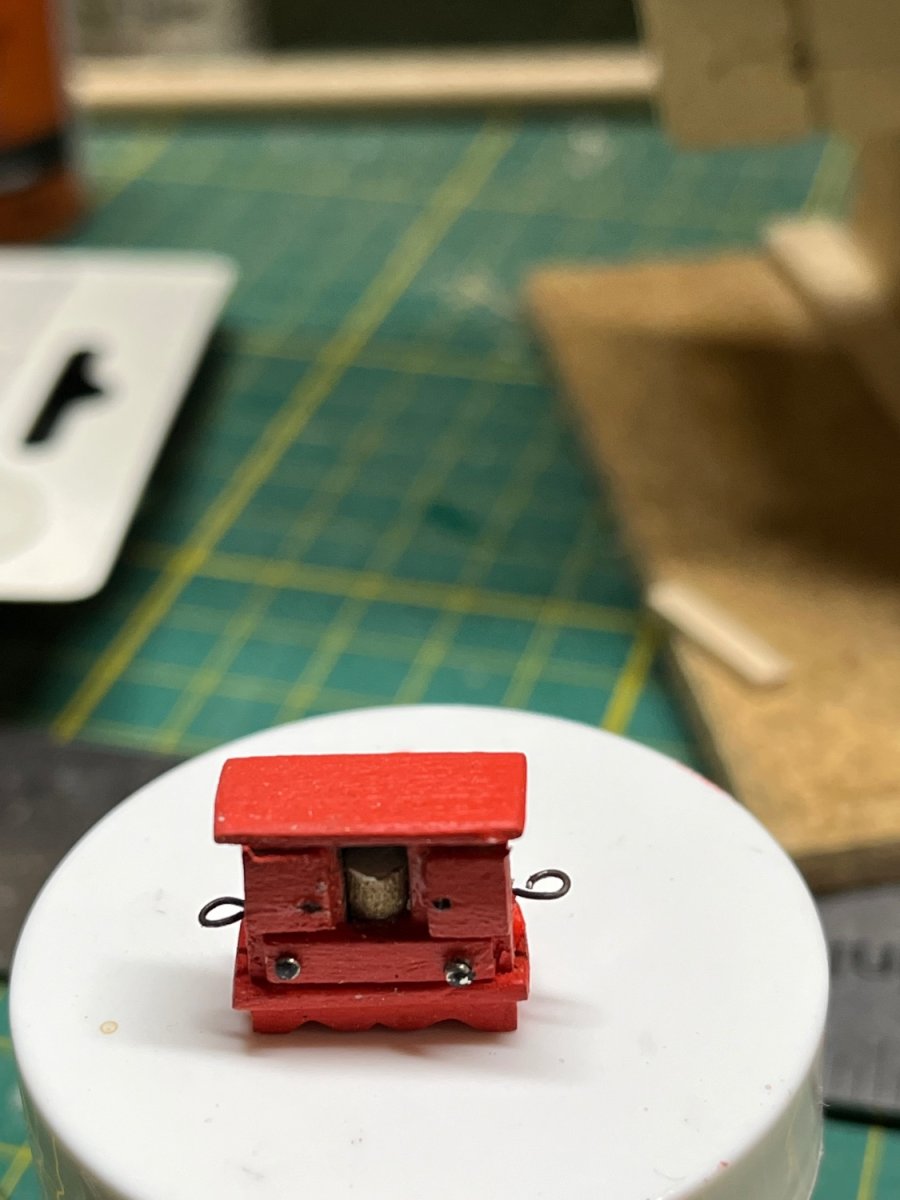
Thanks Bill. I also like them both. I did not feel I was able to be as accurate using the templates to shape the solid hull on my first try here , but I think I need more practice and would definitely try another solid hull in the future. I have been woking on the binnacle. Chuck’s shop notes have great step by step instructions how to scratch build one that looks like the one on the plans and has more detail than the casting supplied with the ship. This was mostly great fun. Chuck suggests using heads of brass nails for drawer handles. They looked to big so I tried using heads of pins, Slippery things that flew all over the place never to be seen again! I got 2 of them in and gave up on the upper 2 and decided a couple of little black dots would be good enough. Next is to figure out how it gets lashed to the deck.
-
Sultana by DanB - Model Shipways - 1:64
DanB replied to DanB's topic in - Kit build logs for subjects built from 1751 - 1800
Yes. Model Shipways stopped producing solid hull models. Maybe they could bring it back as plank on bulkhead at a larger scale. -
Sultana by DanB - Model Shipways - 1:64
DanB replied to DanB's topic in - Kit build logs for subjects built from 1751 - 1800
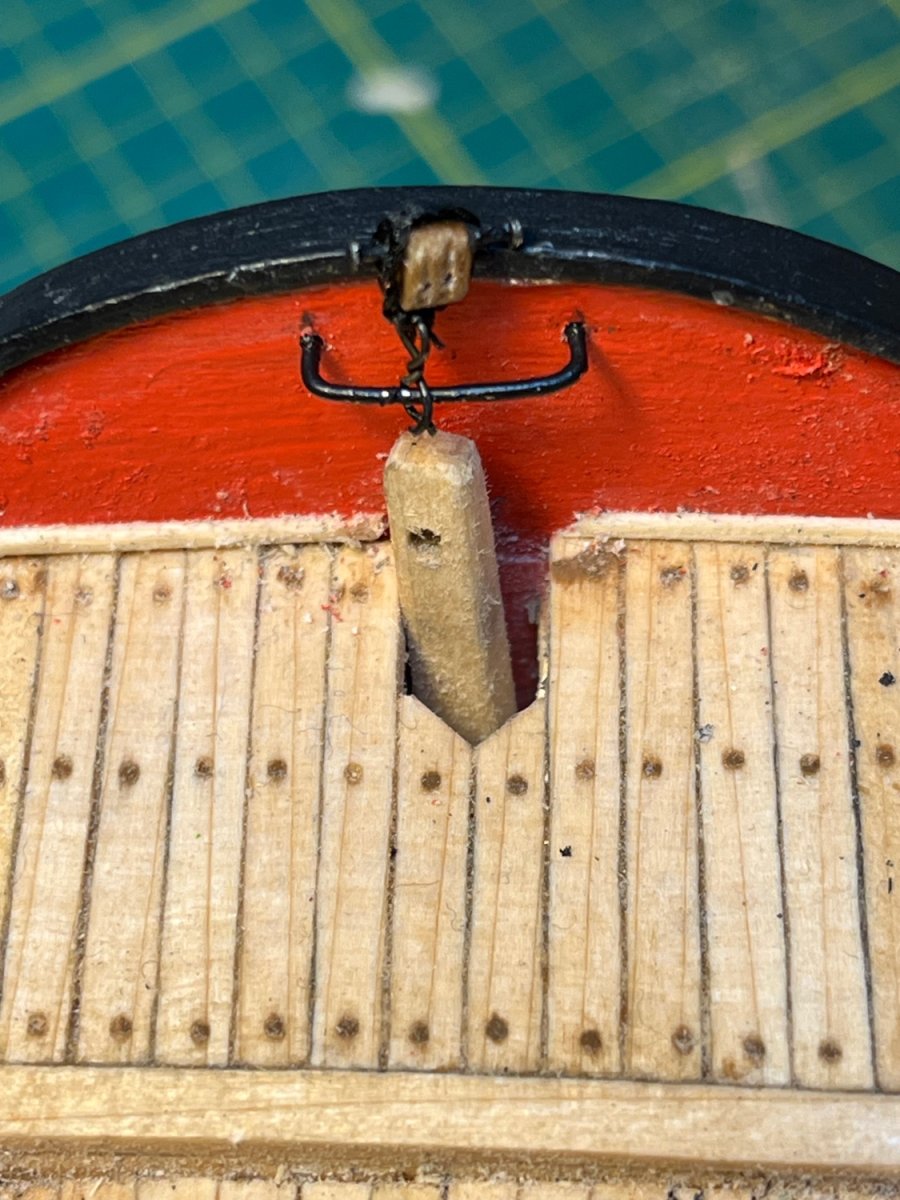
Traveler rod and bock On the ship now, an I did not knock the transom off or drill a hole clear through it! Getting the hook on the block was difficult. This site was very helpful in understanding the process, but I still had to look at the pictures a bunch of times. It took several tries. The third hand tool, CA glue and a lot of patience were essential. http://modelboatyard.com/stropping.html
-
Sultana by DanB - Model Shipways - 1:64
DanB replied to DanB's topic in - Kit build logs for subjects built from 1751 - 1800
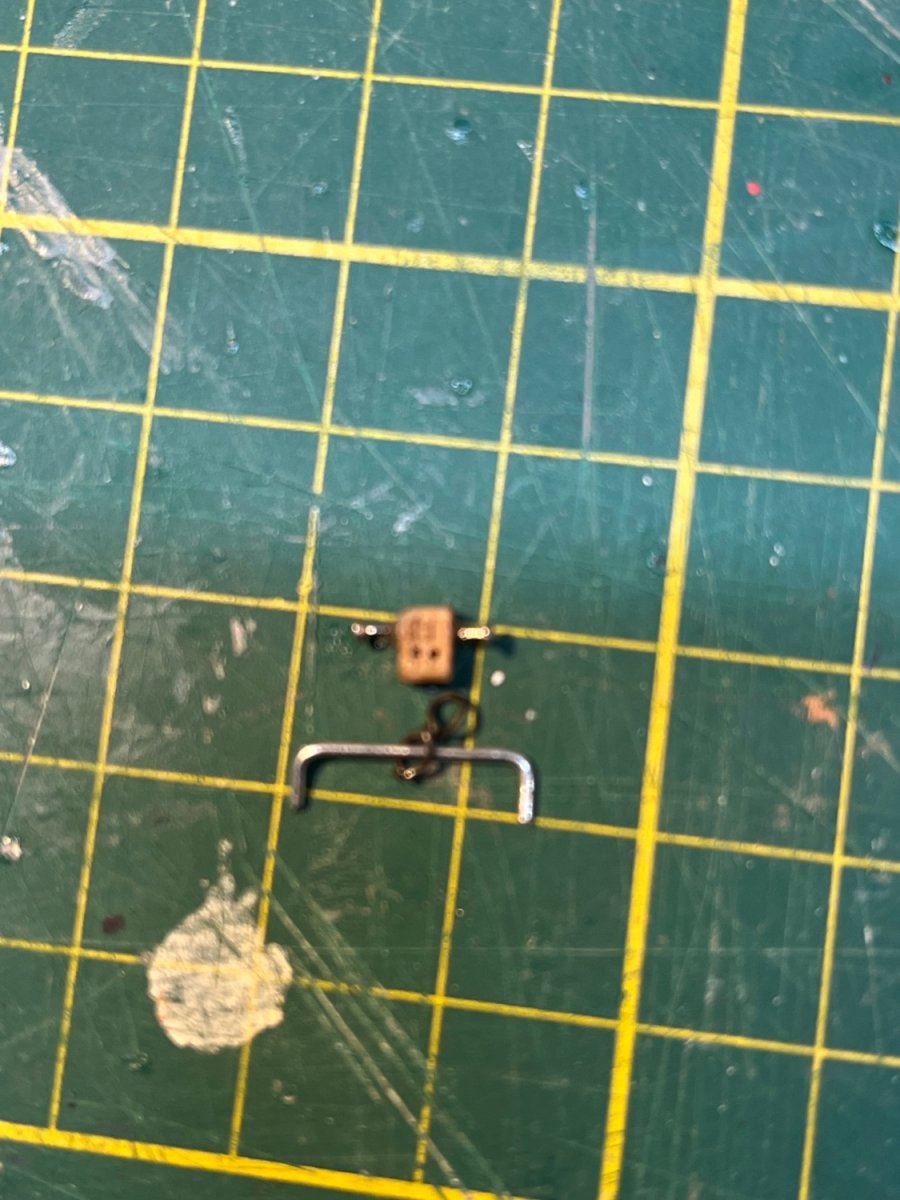
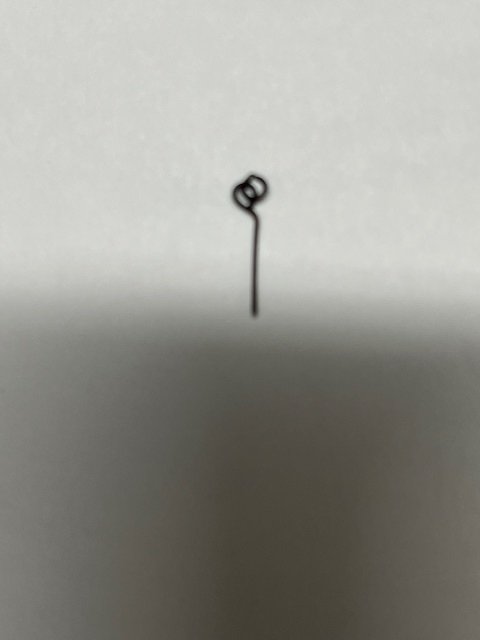
Ship instructions have a nice drawing of the block set up for the traveler rod and . Kit has pins that worked well for the extended pin. Made the loop and sister hook with 28 gage steel wire. Will paint pins and traveler rod and figure out how to attach hook to the block and get the rod on the ship next.
-
Sultana by DanB - Model Shipways - 1:64
DanB replied to DanB's topic in - Kit build logs for subjects built from 1751 - 1800
Added the coaming for the space that goes below deck (left it off by mistake) and built a ladder to go down there. Ladder took several tries using Chuck’s template. It’s still a bit rough, but most of it really is not visible. Next is to build a traveler rod for the boom and install it on the in on the not very thick and not very sturdy transom. The kit instructions say it’s supposed to have a double sheave bock connected to the rod with sister hooks .I was able to find pictures of what those look like. I am not really sure how I could make them and attach them to the block. The bock is also supposed to have a rod on each side of it. Chuck says he used two small nails for that part. This will be an adventure. I hope the transom survives it!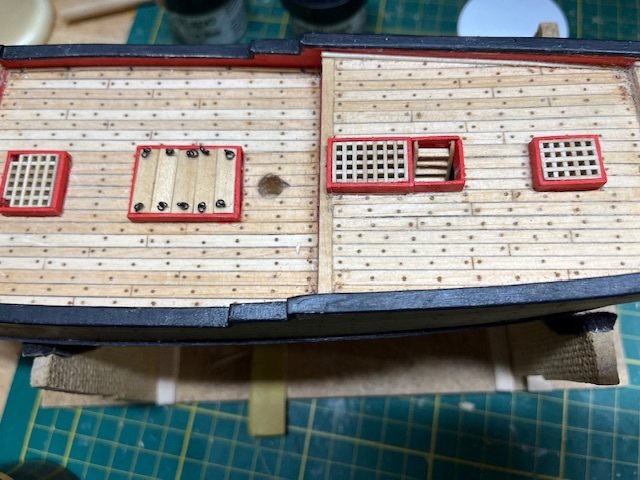
-
Sultana by DanB - Model Shipways - 1:64
DanB replied to DanB's topic in - Kit build logs for subjects built from 1751 - 1800
More Hatches Chuck’s instructions say to make eye bolts and split rings for the boards that cover the next hatch by bending 28 gauge black steel wire. I got an excellent refresher on how to do that from this thread. I took a bunch of tries and looking at the pictures in the thread a few times, but then it was not too difficult to get close : The last 2 hatches continued to need a lot of fiddling, but they are on the ship. Next is to make a ladder to go below decks.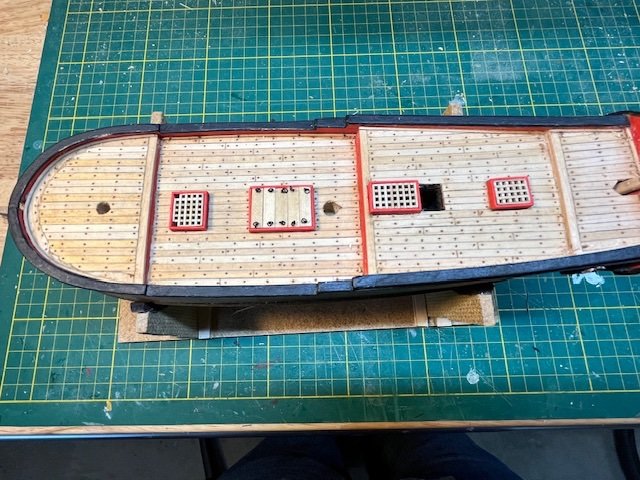
-
Sultana by DanB - Model Shipways - 1:64
DanB replied to DanB's topic in - Kit build logs for subjects built from 1751 - 1800
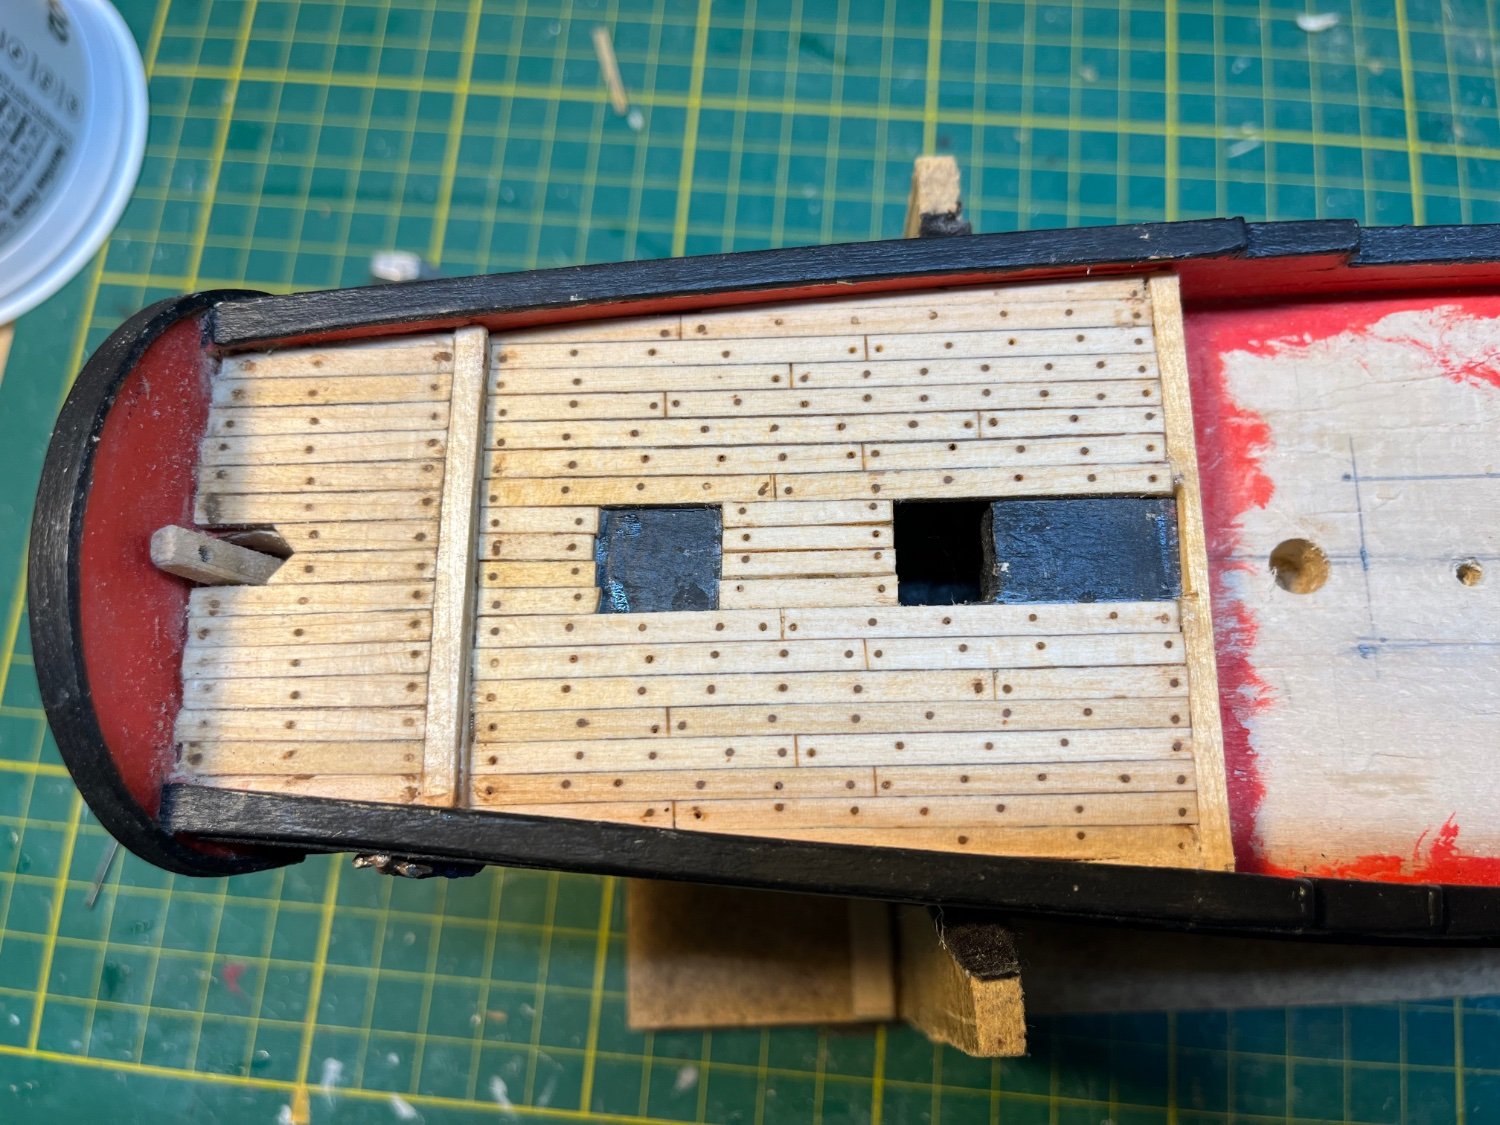
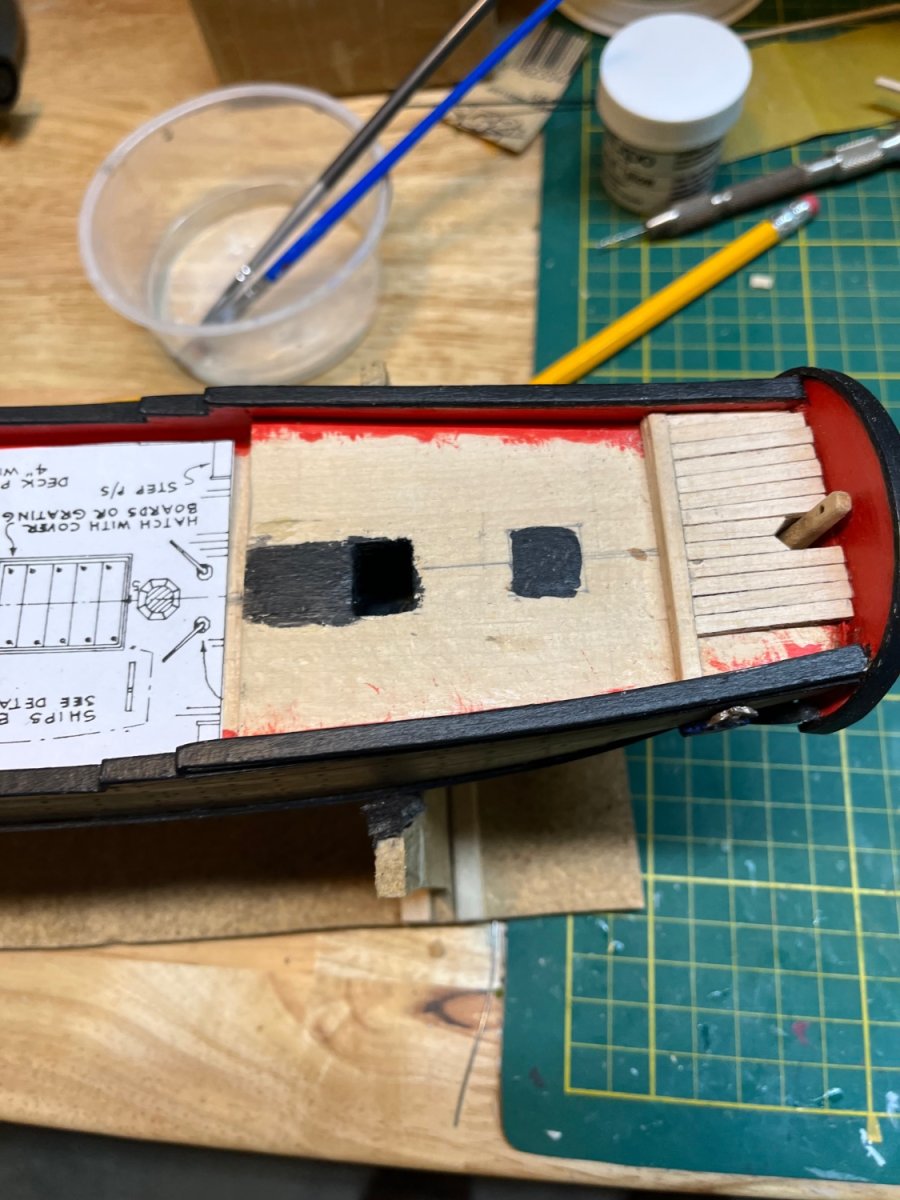
Working on hatch coamings and gratings. I marked out the holes based on the plans and planked around them. The problem was the gratings wound up being a bit larger to make the gratings fit well. so I had to make the spaces on deck bigger. It was difficult to enlarge the spaces in the planks and keep them aligned and square. I think should have made the hatch covers first and used them to mark out the spaces and then planked around those spaces. It’s a slow journey, this ship. I am learning how to do it better the next time though! Two more hatches to go.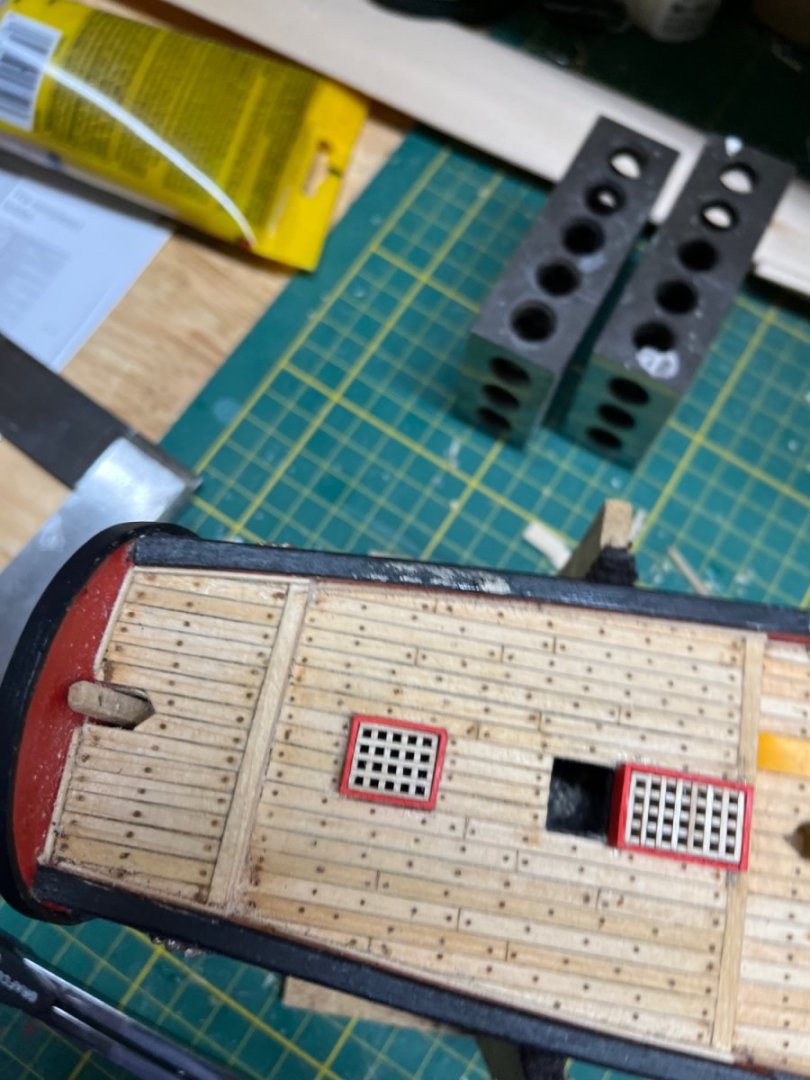
-
Sultana by DanB - Model Shipways - 1:64
DanB replied to DanB's topic in - Kit build logs for subjects built from 1751 - 1800
I finished the deck planking! I Looked at Chuck's shop notes and drawings in Historic Ship Models a bunch of times to try to understand joggling the planks into the margin plank. It did not come out so well. There was not much margin plank near the edges, and it split as I tried to fit the planks in. It was surprisingly difficult to get rid of the pencil lines I made to mark the cuts in the margin plank. Lessons for next time.! The next task is to install the waterway Chuck says to slice a 1/32 square basswood strip. diagonally so it has a triangular cross section. I am not sure I can do that, certainly not accurately, and I do have a fondness for my fingers!. Sanding the strip did not seem to work well, but it's safer! The wedge shaped piece then is supposed to get a concave shape by using a ball shaped sculpting tool to crush the triangular shape after it is glued down. This bit may be beyond me. I may just put in the strip ,smash it a bit with the ball thing and call it good!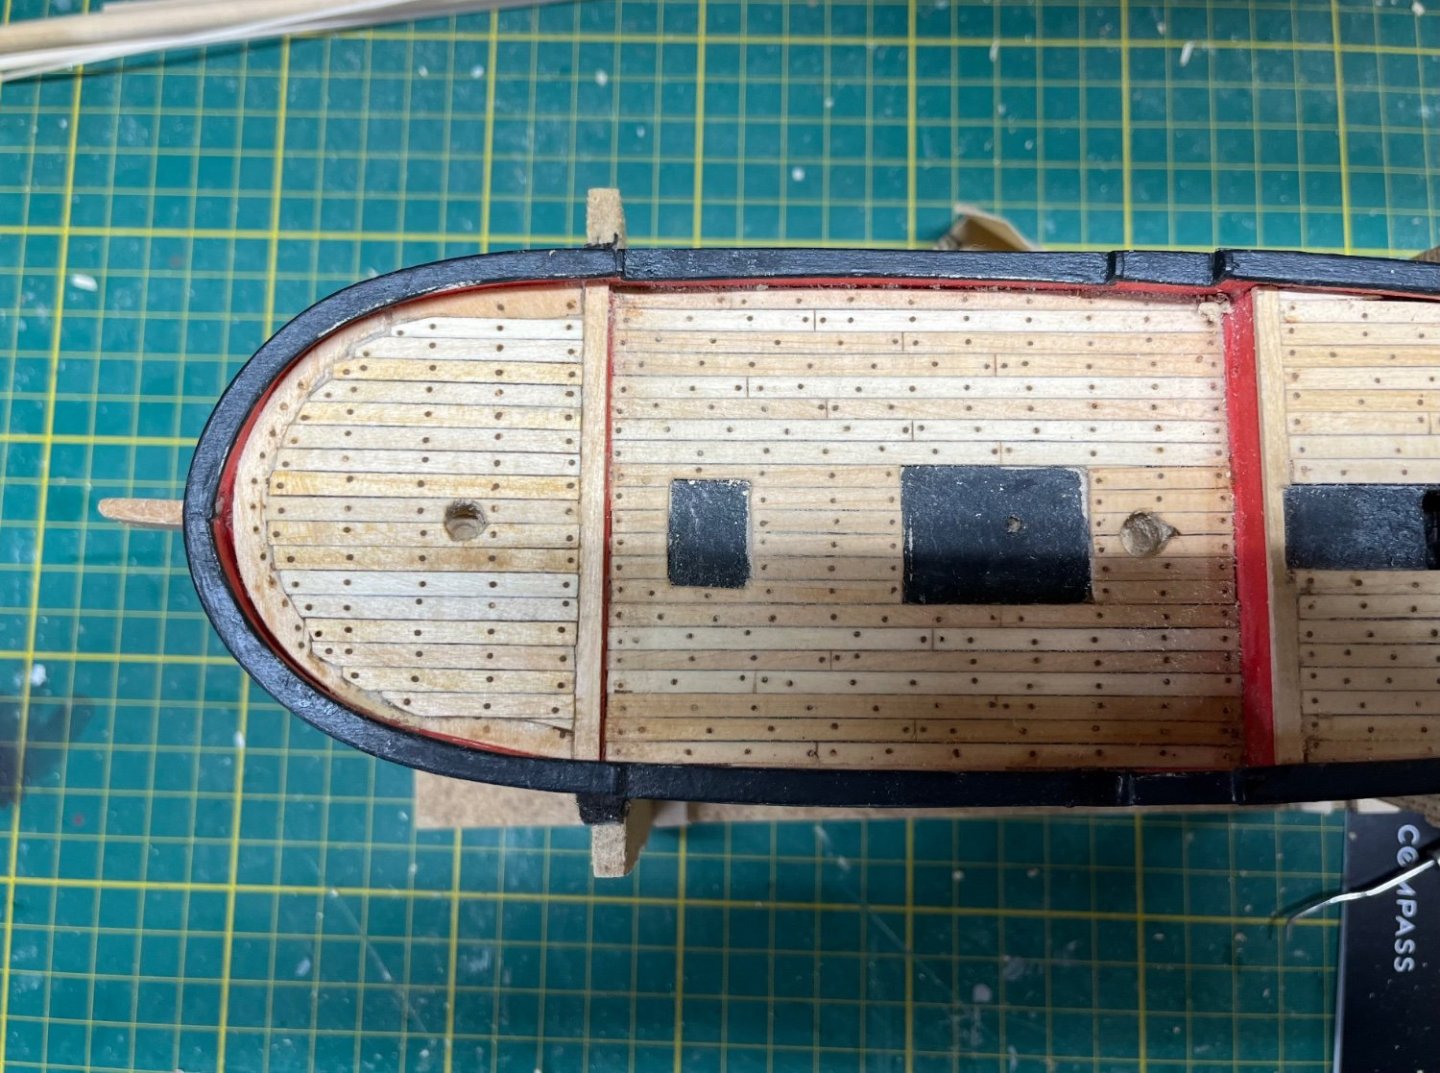
-
I think when I built the Pram I held the wire with a pair of fine nose pliers and used a small hammer to tap the end of it a bit. At some point the instructions tell you to get one of those flat metal plates that jewelry makers use. I may have used that to press against. You do not need the wire to expand to much, just enough to keep the “rivet” in the hole in the tiller. A lot of folks in different building longs had difficulty with the tiller on the Pram. I think it’s pretty thin and splits easily, you need to be gentle with the pin vise when you drill the hole. Search for the Pram and look at a few build logs. Good luck on your Pram Dan
-
Sultana by DanB - Model Shipways - 1:64
DanB replied to DanB's topic in - Kit build logs for subjects built from 1751 - 1800
Continuing to plank the deck. I am following Chuck’s suggestion to do one deck at a time to spread out the drilling, filling and sanding tasks. I am working on the margin plank to joggle the planks on the fore deck.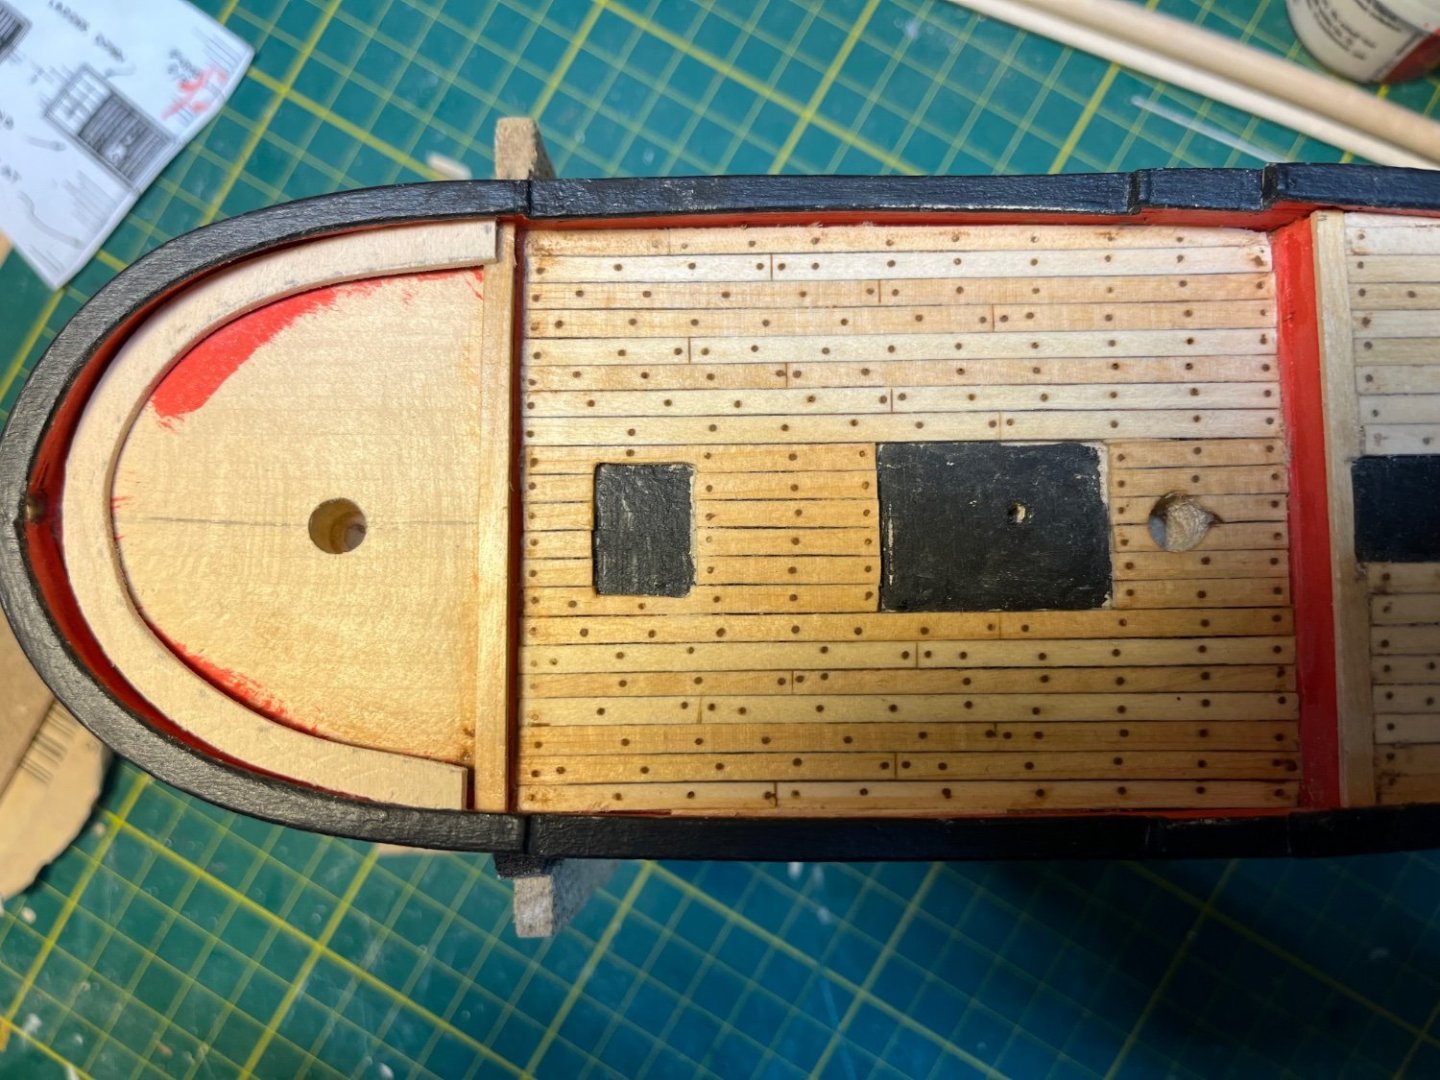
-
Sultana by DanB - Model Shipways - 1:64
DanB replied to DanB's topic in - Kit build logs for subjects built from 1751 - 1800
More deck planking, I used a rotary tool to drill all the holes. Much faster than the pin vise I was using!
-
Sultana by DanB - Model Shipways - 1:64
DanB replied to DanB's topic in - Kit build logs for subjects built from 1751 - 1800
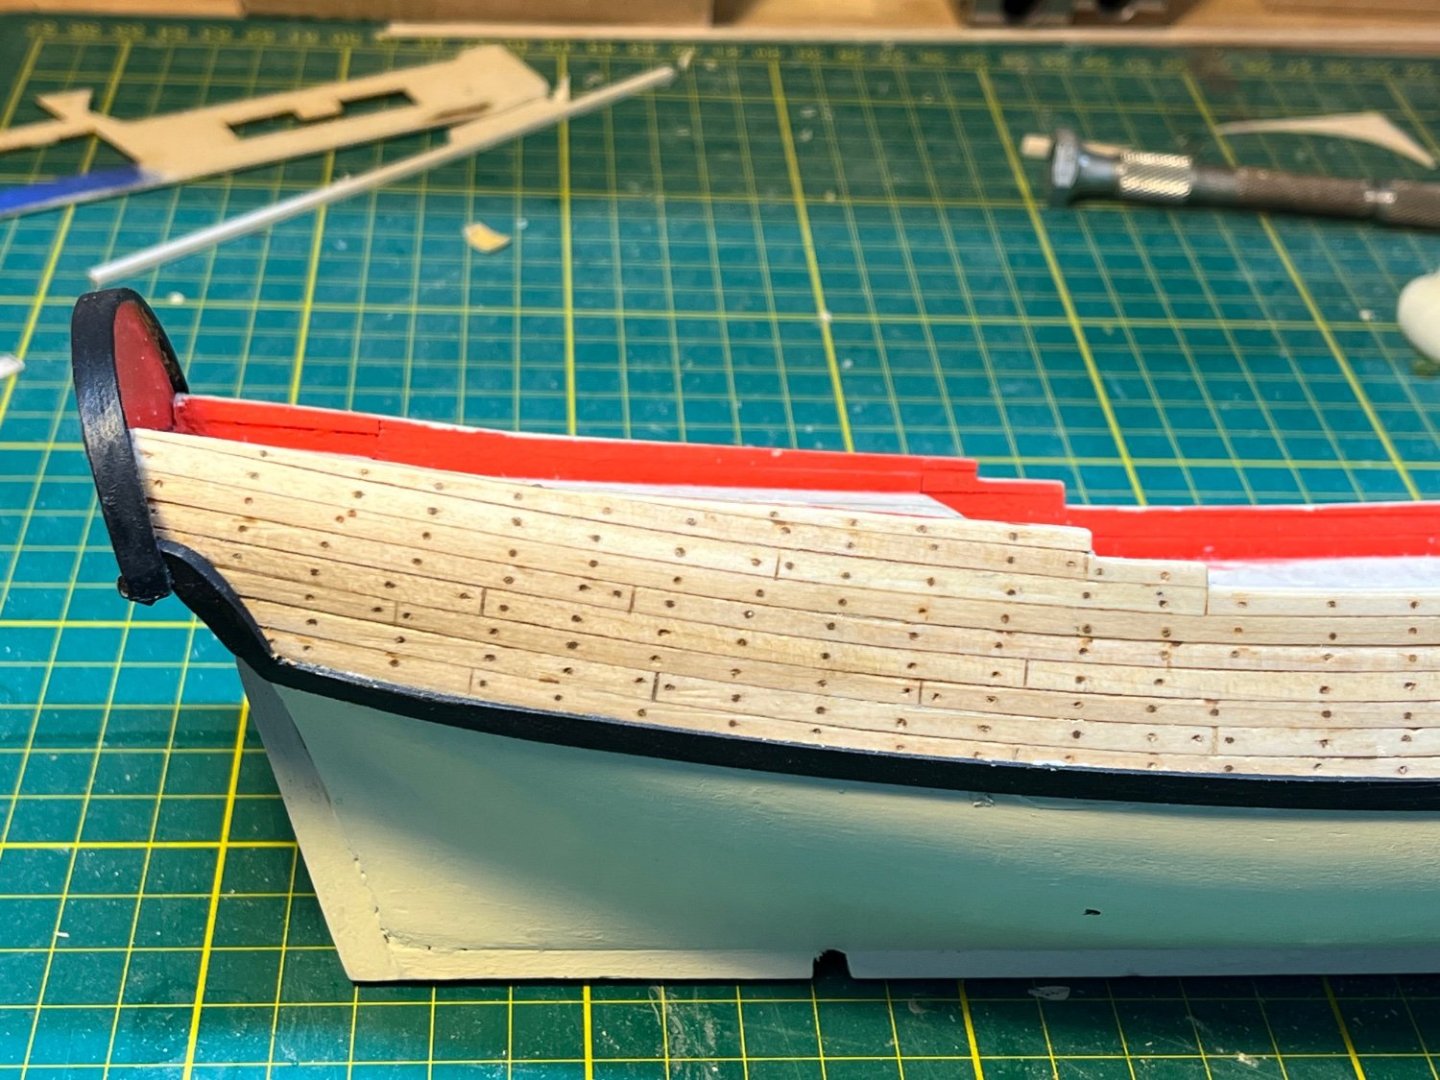
More planking. Used the same technique as the hull planking: drilled holes for trenails, filled them with darker wood filler (“golden oak”) and finished with tung oil. The filler darkened some with the tung oil. Having fun with this part! Moving forward.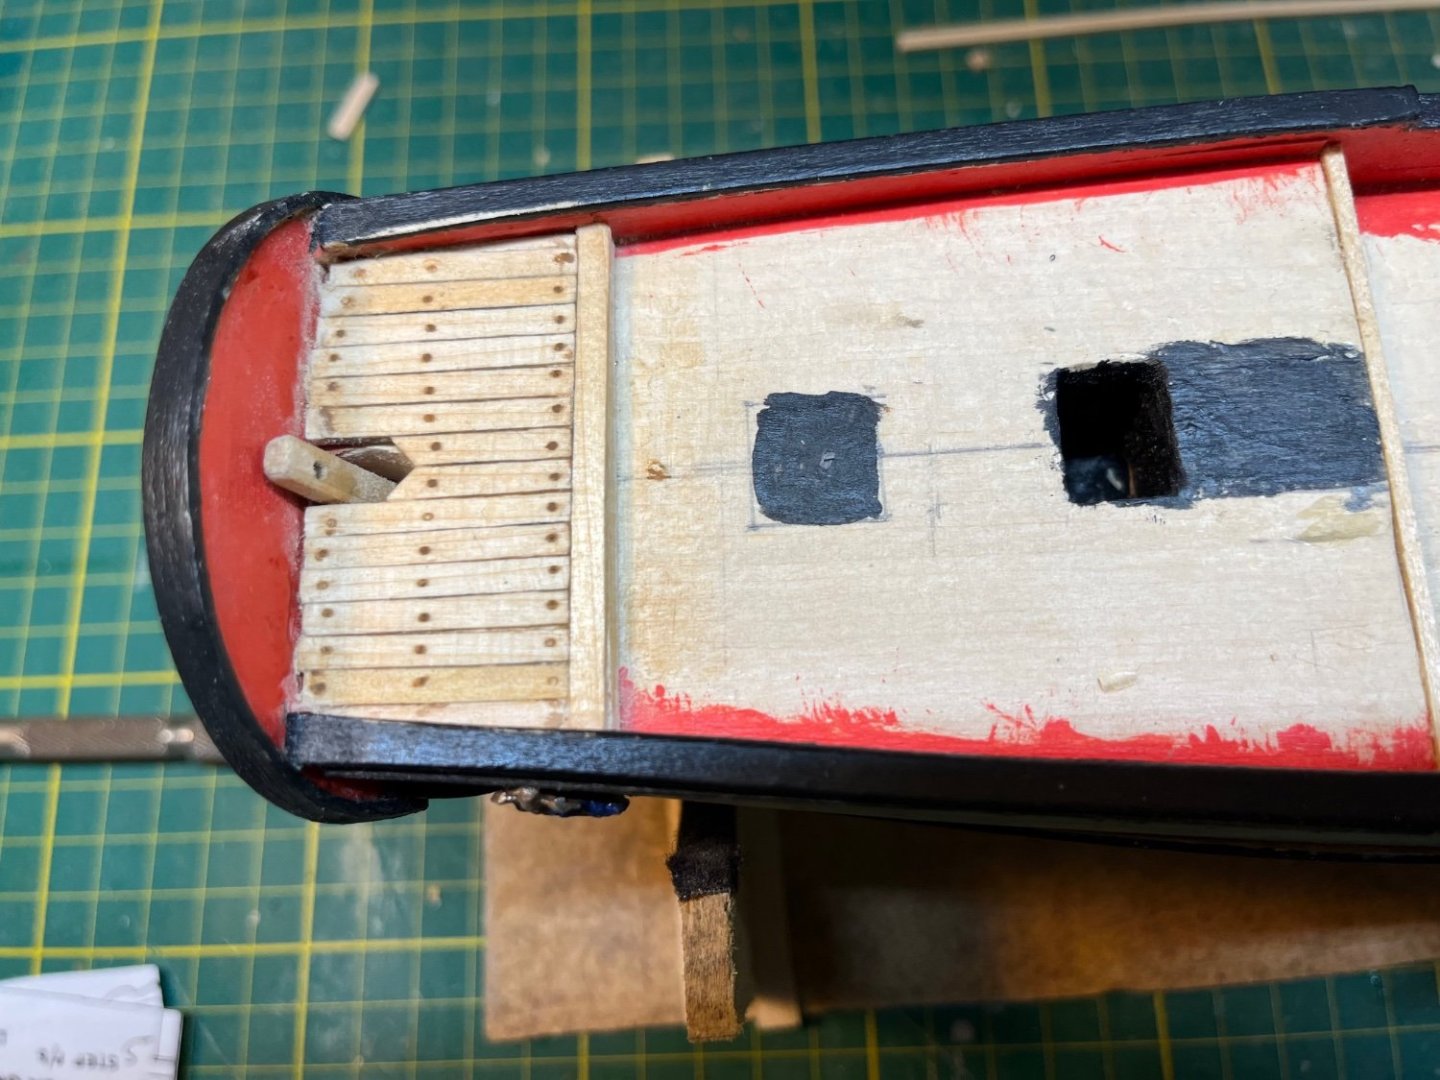
-
Sultana by DanB - Model Shipways - 1:64
DanB replied to DanB's topic in - Kit build logs for subjects built from 1751 - 1800
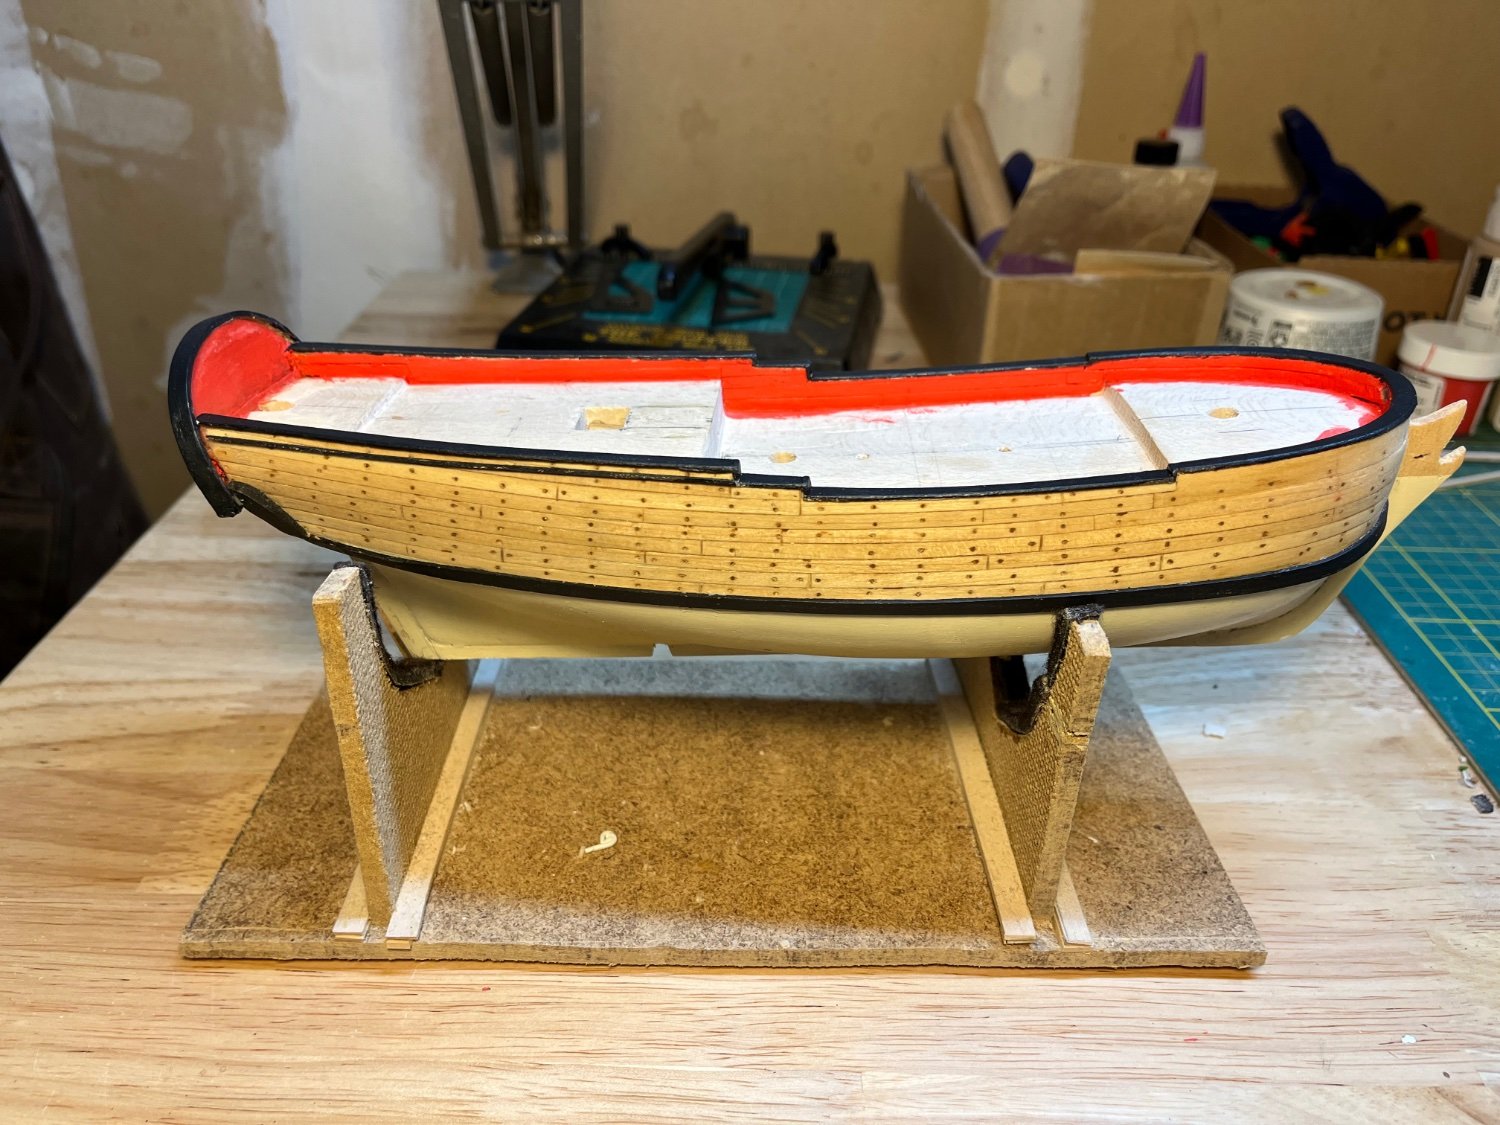
Rudderattached! Started planking the deck and painted the places where the gratings and ladder will be black.

-
Sultana by DanB - Model Shipways - 1:64
DanB replied to DanB's topic in - Kit build logs for subjects built from 1751 - 1800
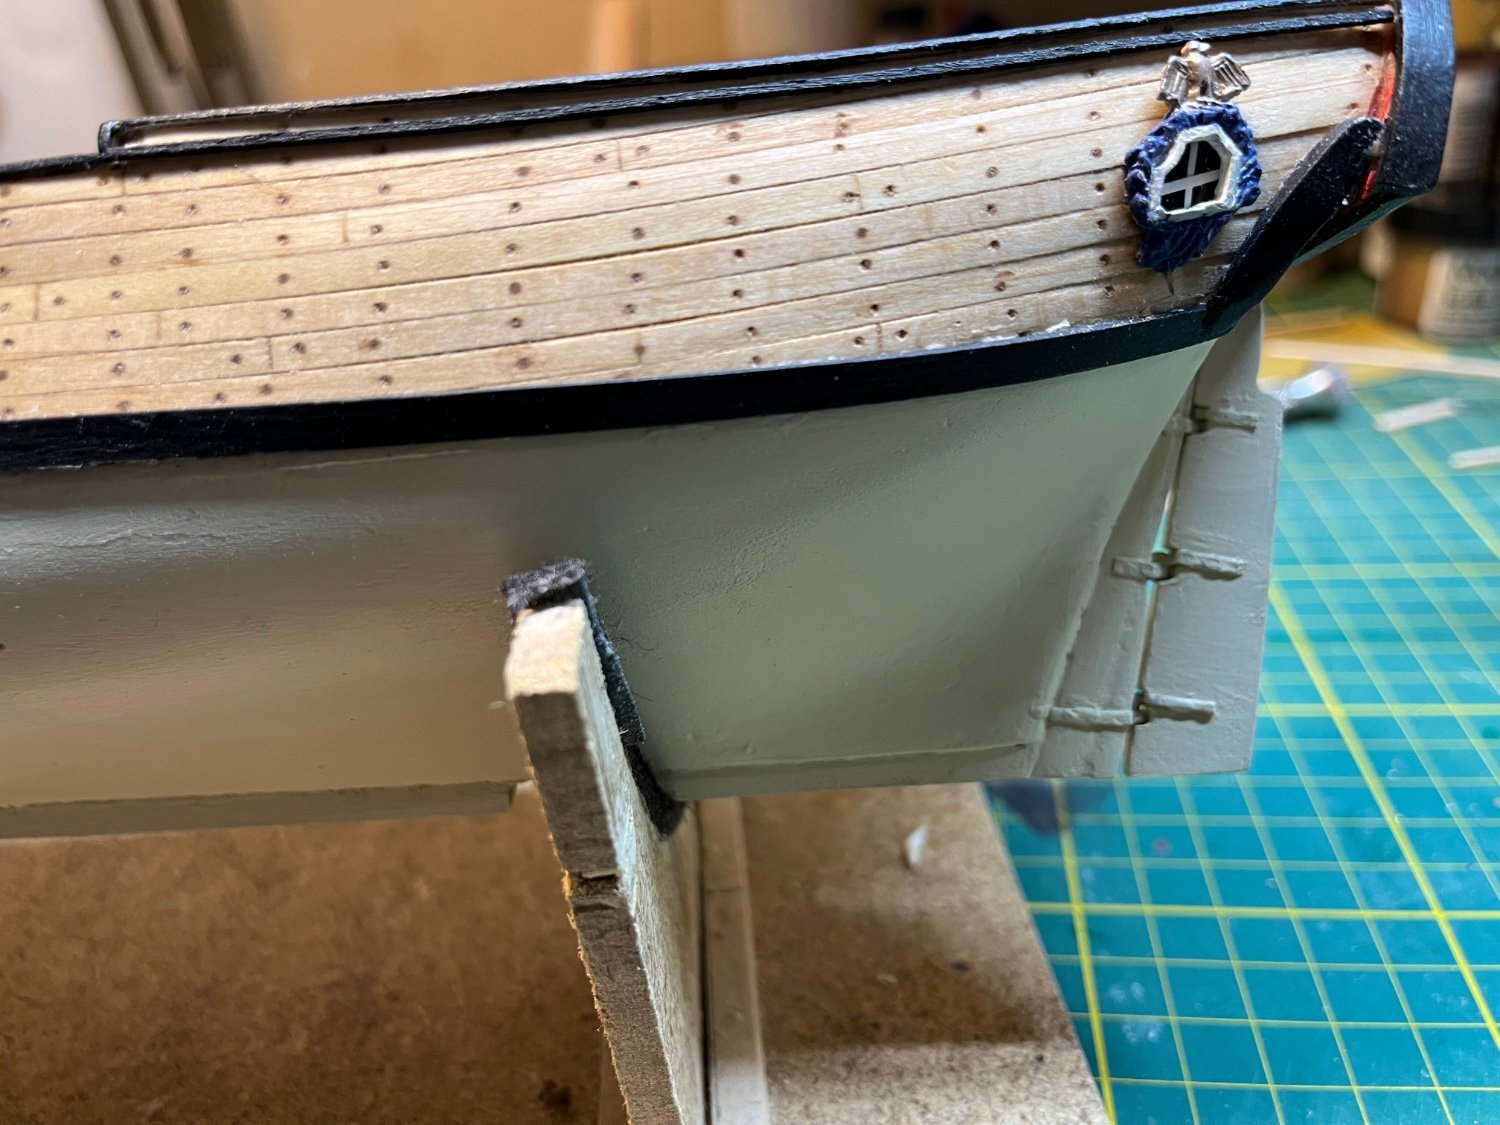
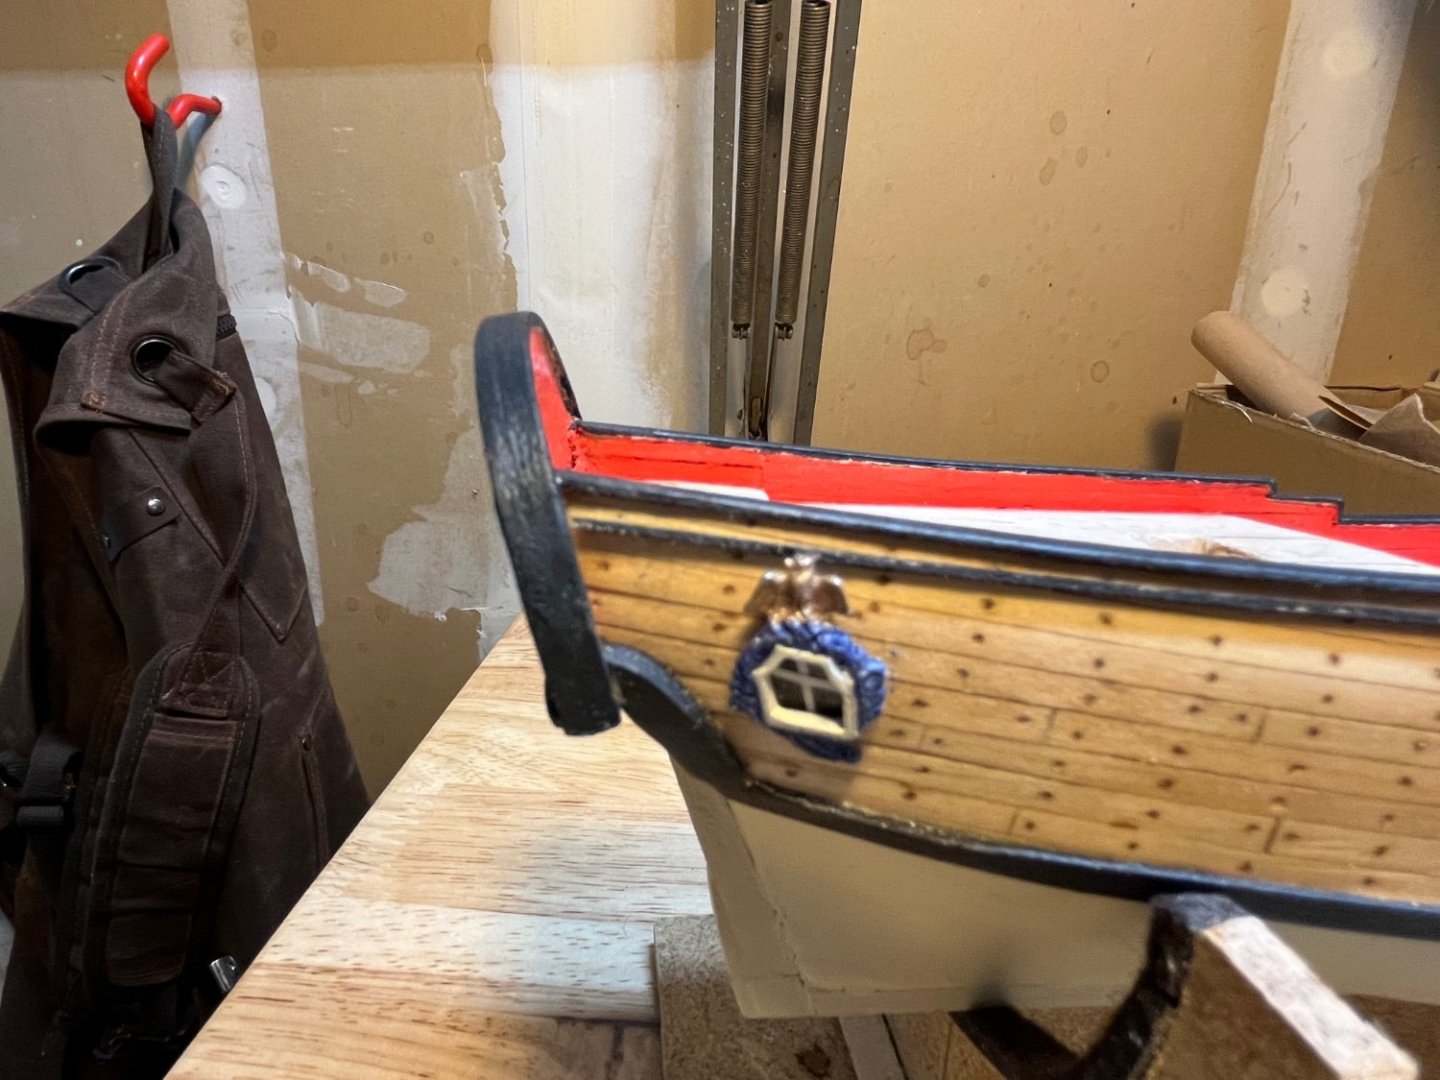
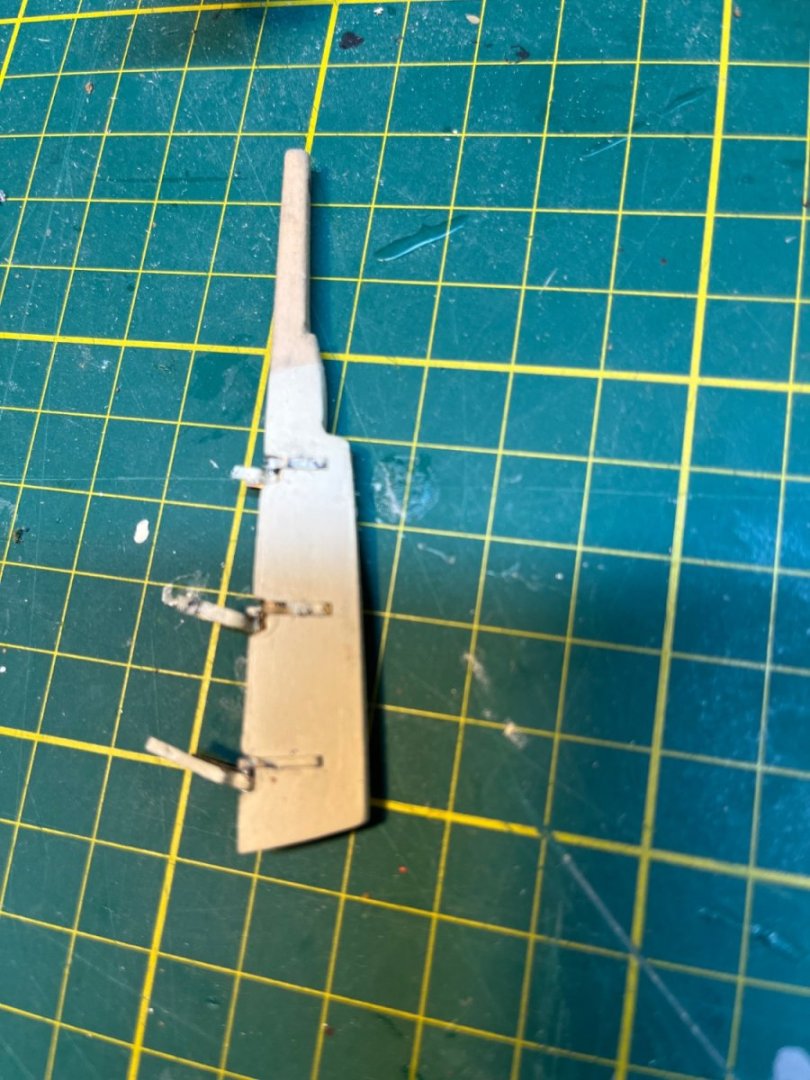
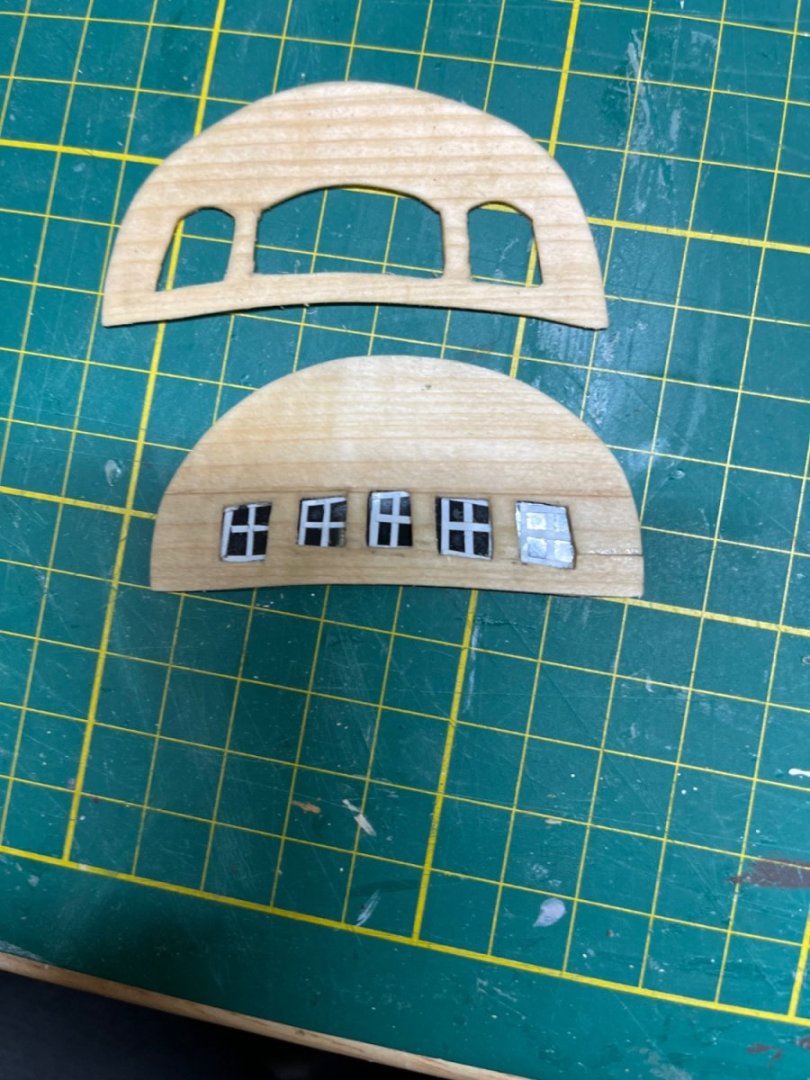
I've been working on Sultana, making slow progress. Added the cap rails. I tried making the scrolls with Sculpy but they did not look good and after making about 20 very small irregular scrolls, I gave up and left them off Quarter Badges and Rudder are next in Chuck's shop notes I used the kit castings for the quarter badges as I don't think I could do a better job with Sculpey. . Added windows using acetate sheet and pin stripe tape. Manual is not very specific about colors (not sure anyone really knows what they looked like on this ship) The rudder has been really difficult. Actually the whole ship has been difficult!. I am learning a lot, but almost every step has been slow going and ,I am not sure if I am going to be able to finish this thing. I had to tweak the stern post some, and it looks bit funny but the rudder now fits. The pintels and grudgeons are very small. Plans show them only 1/32 inch wide. I tired copper sheet but it was too thick and a pain to work with. Manual suggests 0.005 brass, which the local Ace had in stock.. I was able to cut it by scoring the line with a knife and then using scissors, but not to 1/32 with any consistency.. I made them wider. I annealed the brass which made it easy to shape, but maybe too soft. I have made multiple sets, gluing bits of 22 gauge wire for the pintels.. They have broken, wound up on the floor, or just disappeared. I tried to paint them back, and attach the rudder and it was a disaster as the CA melted the black paint on to the white rudder . Chuck suggests painting them white, so they are now white. I had them on wrong way around on my first attempt and was still not sure about the process attaching them to the rudder and the rudder to the ship. This video, was very helpful to understand the whole process even though my parts are simpler and smaller. This is where I am at after a lot of false starts and lost or broken parts. I had painted everything before putting it together, but it was not so pretty after it was all glued on and they will need more paint . I decided to leave the adventure of attaching the rudder to the ship for tomorrow, when I am less tired and have recovered some of my patience .
-
Sultana by DanB - Model Shipways - 1:64
DanB replied to DanB's topic in - Kit build logs for subjects built from 1751 - 1800
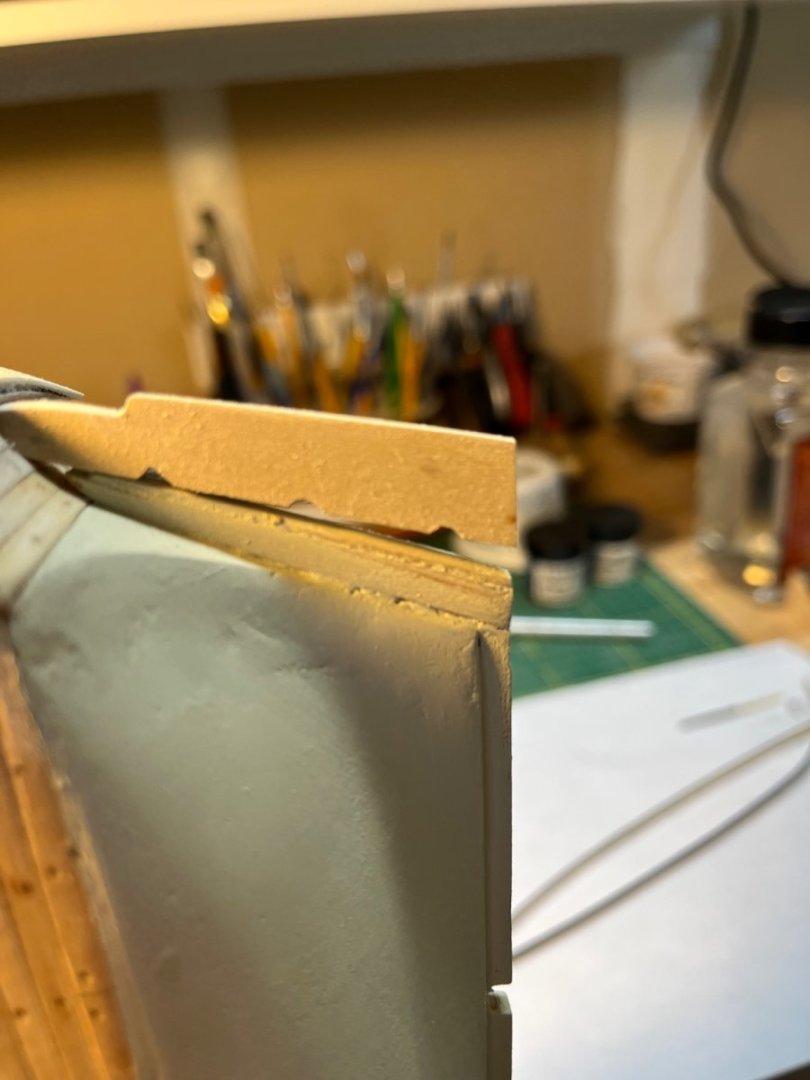
Wales, Transom The wales went on easily. The little fashion pieces that connect the wales to the transom took several tries, after puzzling them out between the drawings on the plans and the pictures in Chuck’s instructions. The transom has been really difficult. There is not much glue surface for it. I think I knocked it off at least 5 times while working on it and there may be a few more times on the way! Starting the cap rails.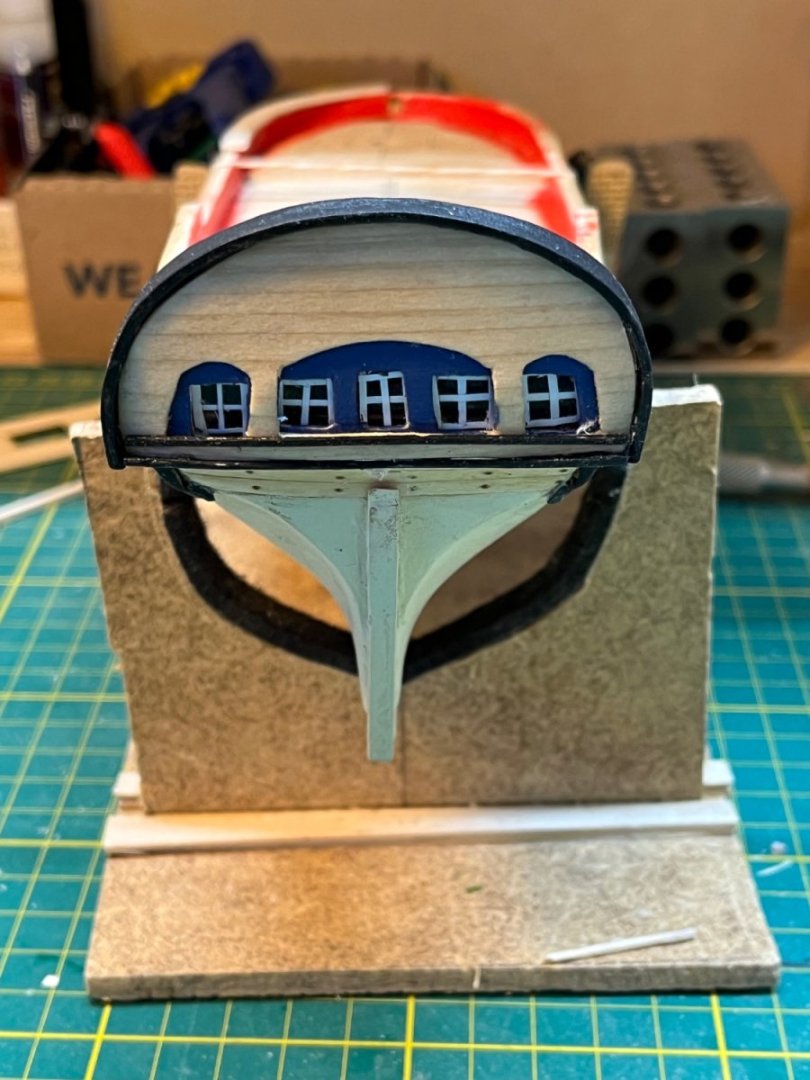
-
Sultana by DanB - Model Shipways - 1:64
DanB replied to DanB's topic in - Kit build logs for subjects built from 1751 - 1800
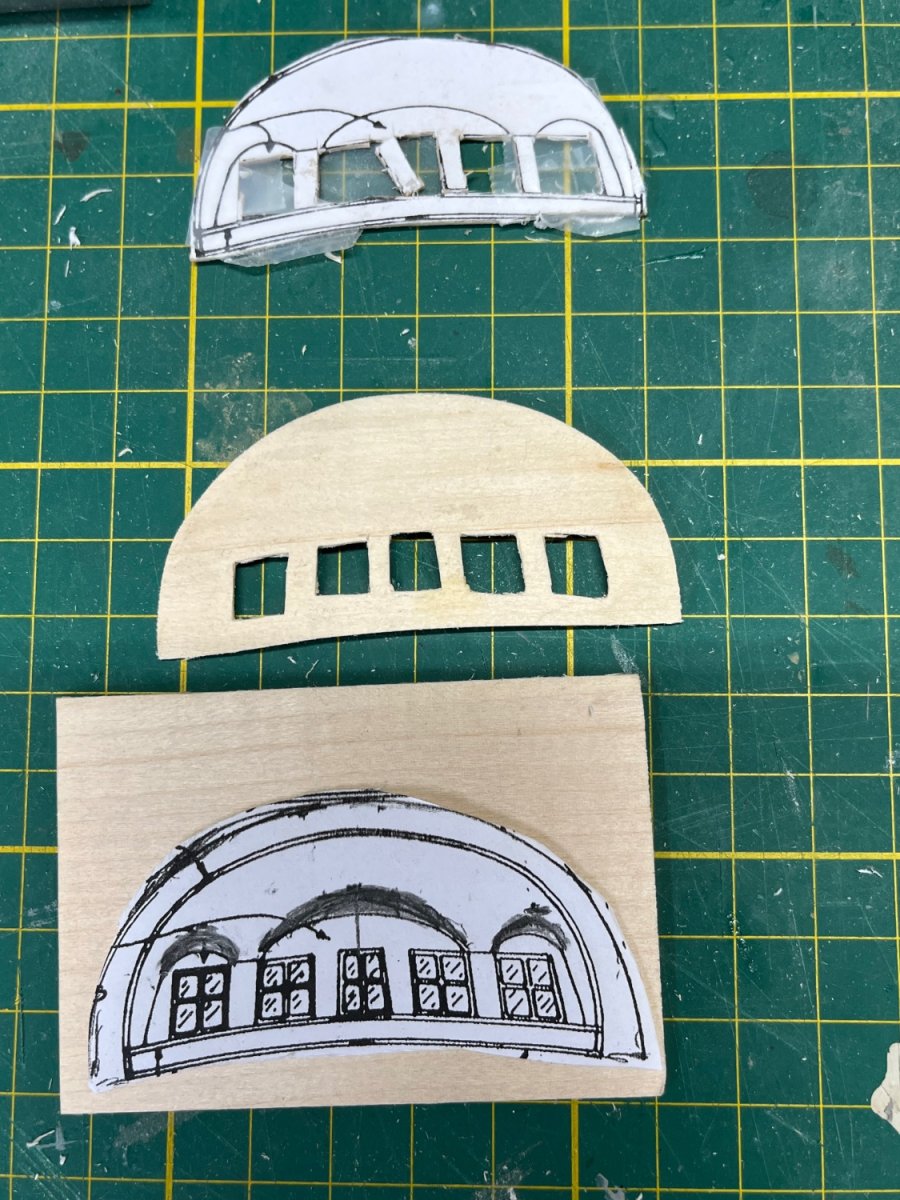
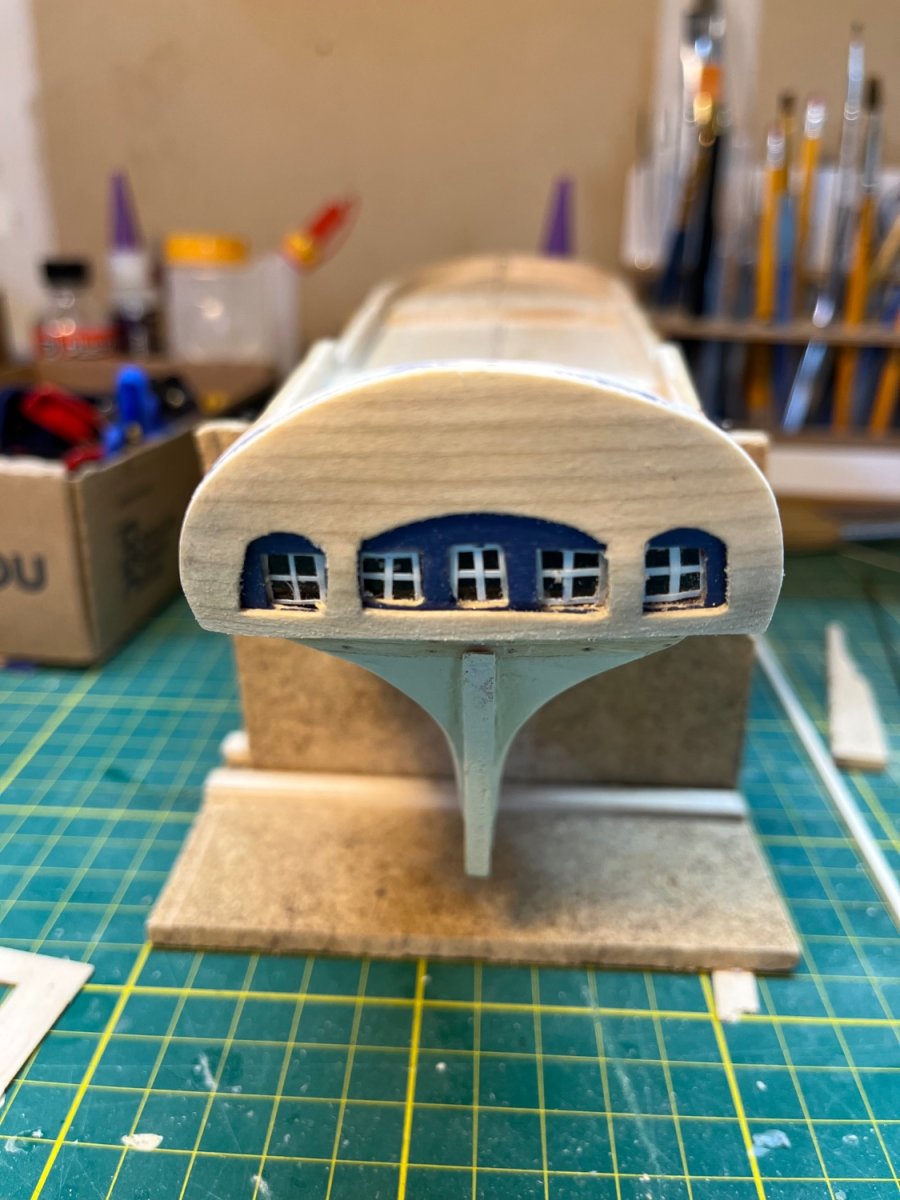
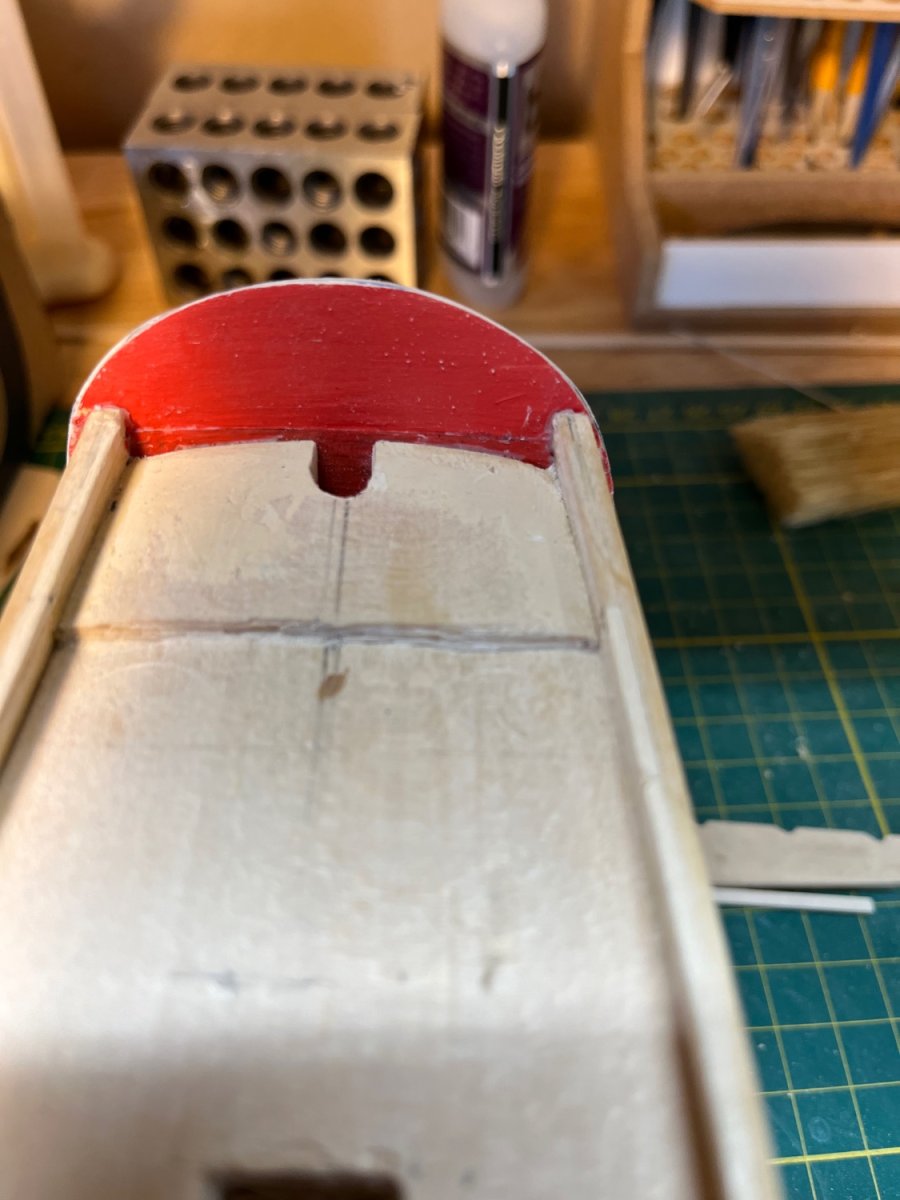
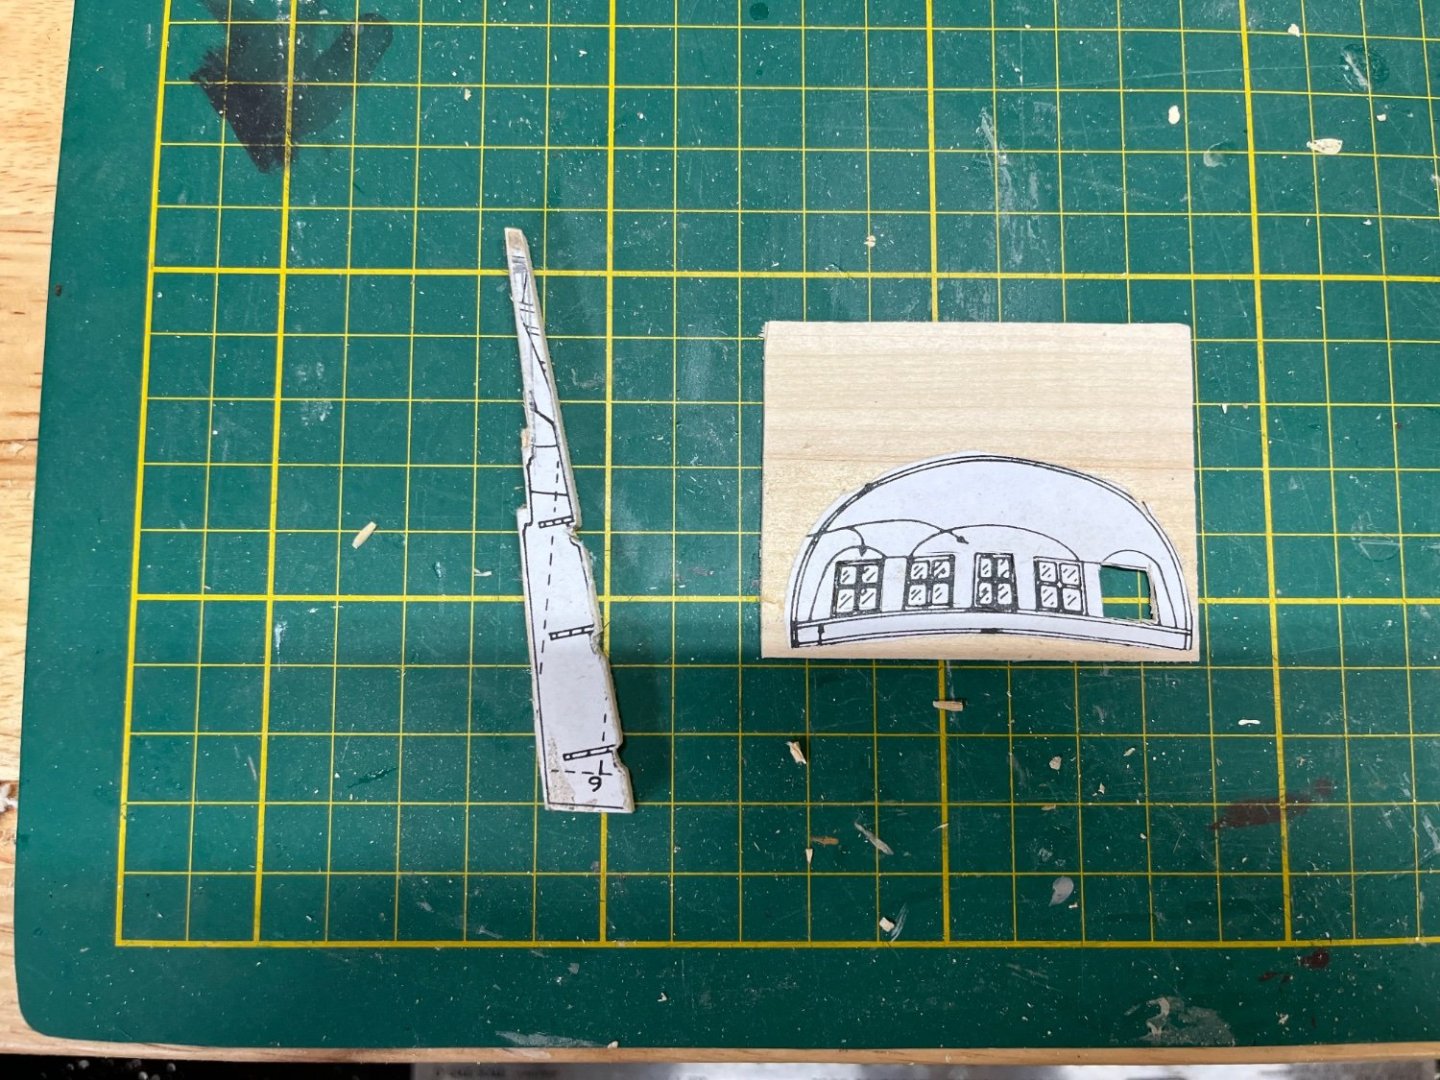
Transom This has been really challenging! Other build logs left this adventure for later on, but have been following the sequence Chuck outlines in his shop notes. Transom number one came out too small even though the paper cut out seemed to fit, so I made a bigger one . I did not enlarge the arches on the windows as much as I drew on the plans and just increased them a bit The second transom fit the hull but the stern needed some (actually a lot) of shaping to get the transom to fit. I messed up the acetate piece with the windows and had to make another one. Despite soaking it bending it before gluing, the first layer piece cracked at columns for the windows. I considered making another, thought that would probably also split. Decided to glue it and fill the cracks and paint it. Instructions say quarter badges can be blue so some blue for the transom also! I was able to glue and shape the first layer and then added the second. It took a few more tries and creative work rubber bands form the bulwarks to the transom to keep it all on while the glue set. Then added the second layer with lots of clamps and a few more tries to get it together It needs more paint and fiddling, and I am not sure it is quite right, but I think this will have to do given my current skill level. Now to try to get the cap rail around it Made the rudder before I stared this process to be sure it would fit though the hole to the deck. It fits but not at the angle on the stern post. More fiddling ahead!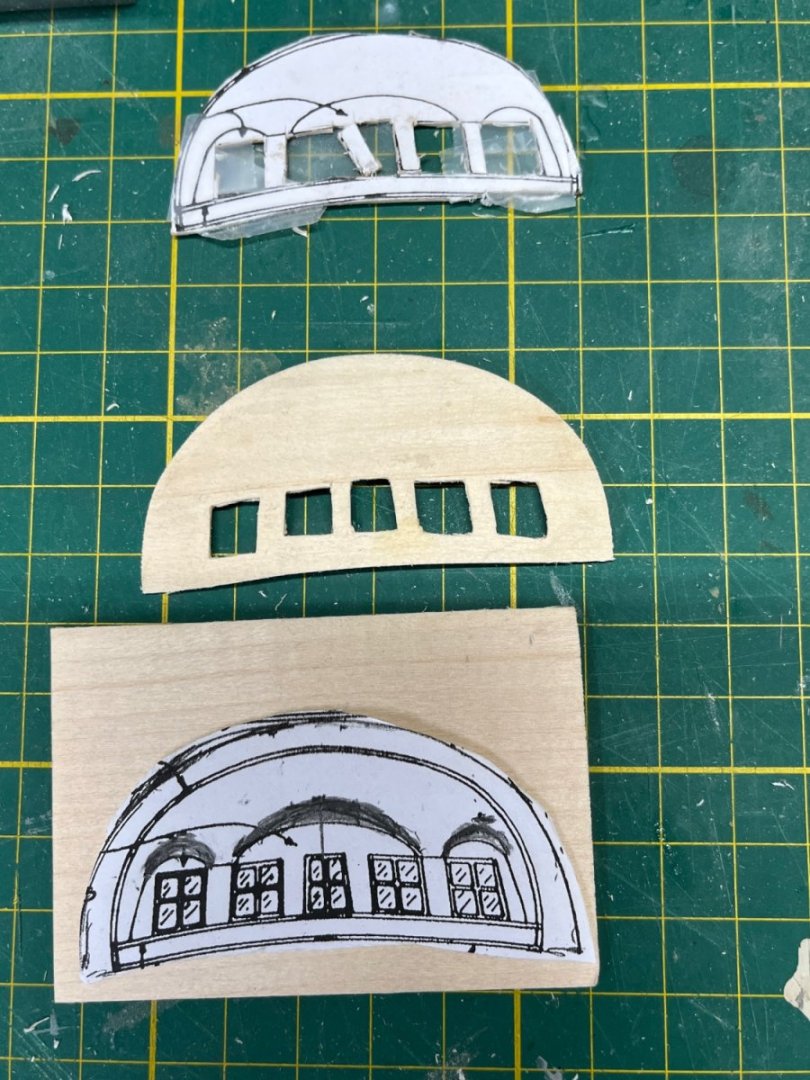


-
Sultana by DanB - Model Shipways - 1:64
DanB replied to DanB's topic in - Kit build logs for subjects built from 1751 - 1800
Added the stem, keel and stern post. Trying to get all the big holes drilled before adding more more delicate parts. Made the rudder to try to get that hole right. Made a scary deep square hole for the ladder that will go down below deck. On to holes for the pedestal screws and then will continue working on stern and transom.
-
Sultana by DanB - Model Shipways - 1:64
DanB replied to DanB's topic in - Kit build logs for subjects built from 1751 - 1800
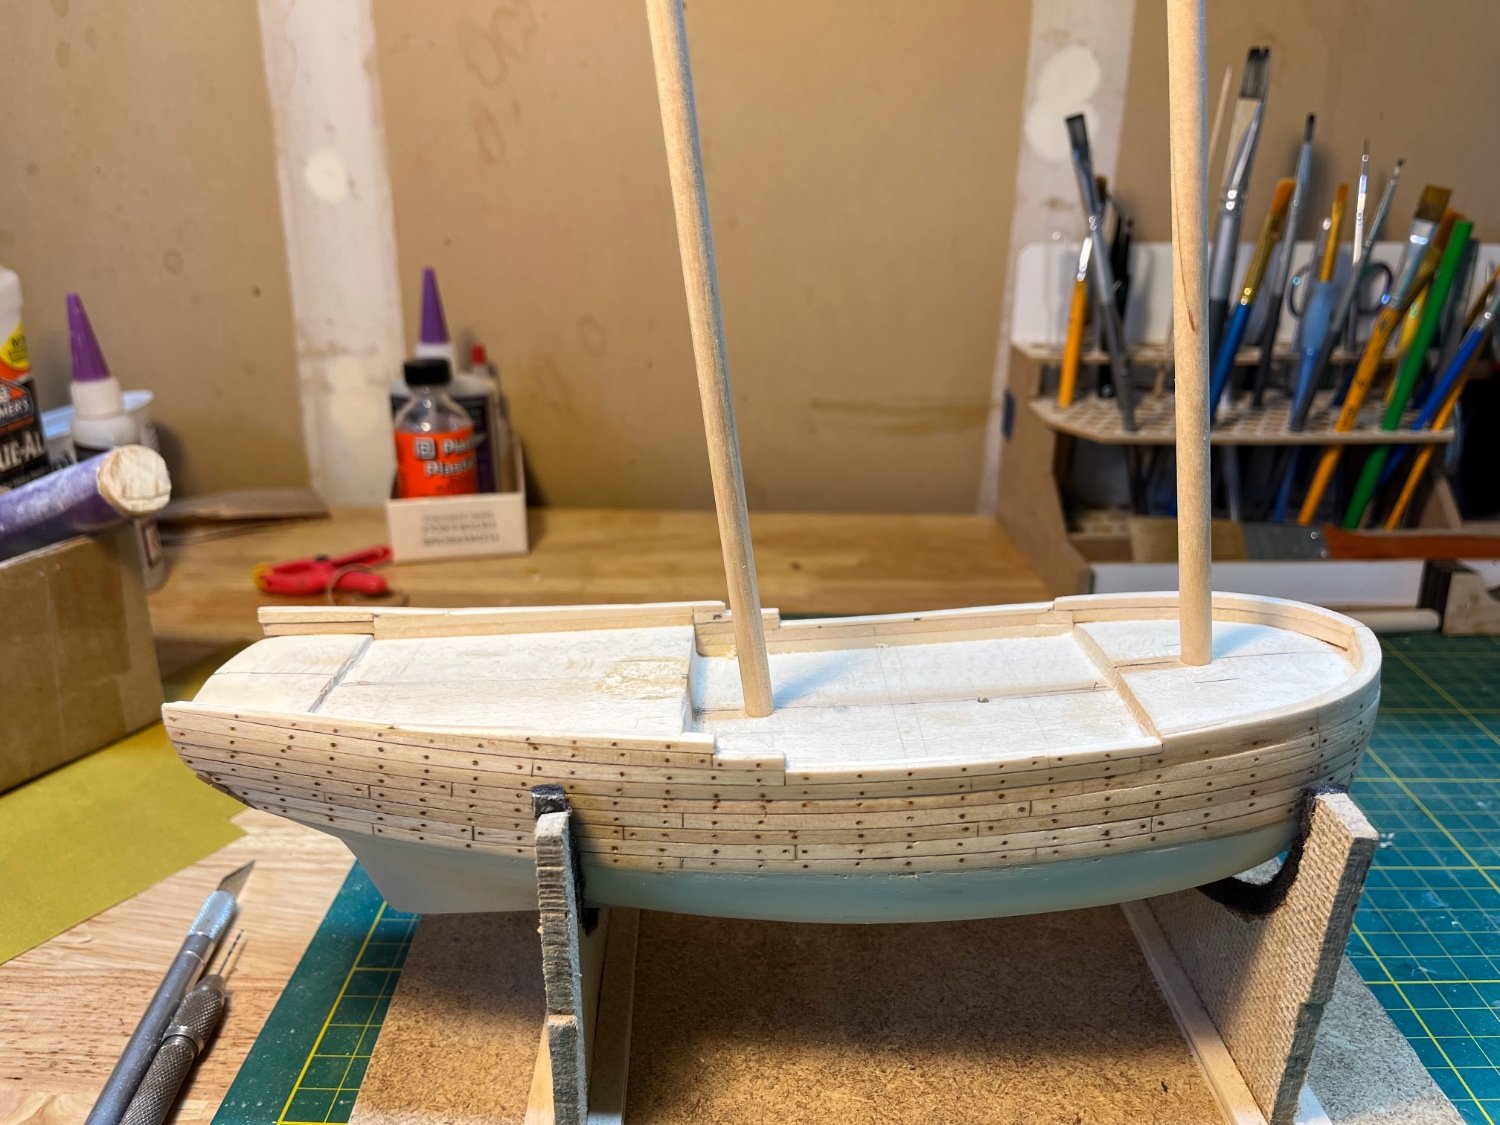
Drilled holes for masts. Kit instructions suggested using a wooden block with a hole at the correct angle as a guide. I did that. Not so clear though how to line it up with the spot on the deck where the hole needed to be drilled. Used a finishing nail in at the spot, slid the guide block over it glued the block to the deck with the nail centered in the hole, removed the nail after the glue dried and then drilled the hole. I think I got pretty close and can adjust them a bit when (if?) i get to mounting the masts.
-
Sultana by DanB - Model Shipways - 1:64
DanB replied to DanB's topic in - Kit build logs for subjects built from 1751 - 1800
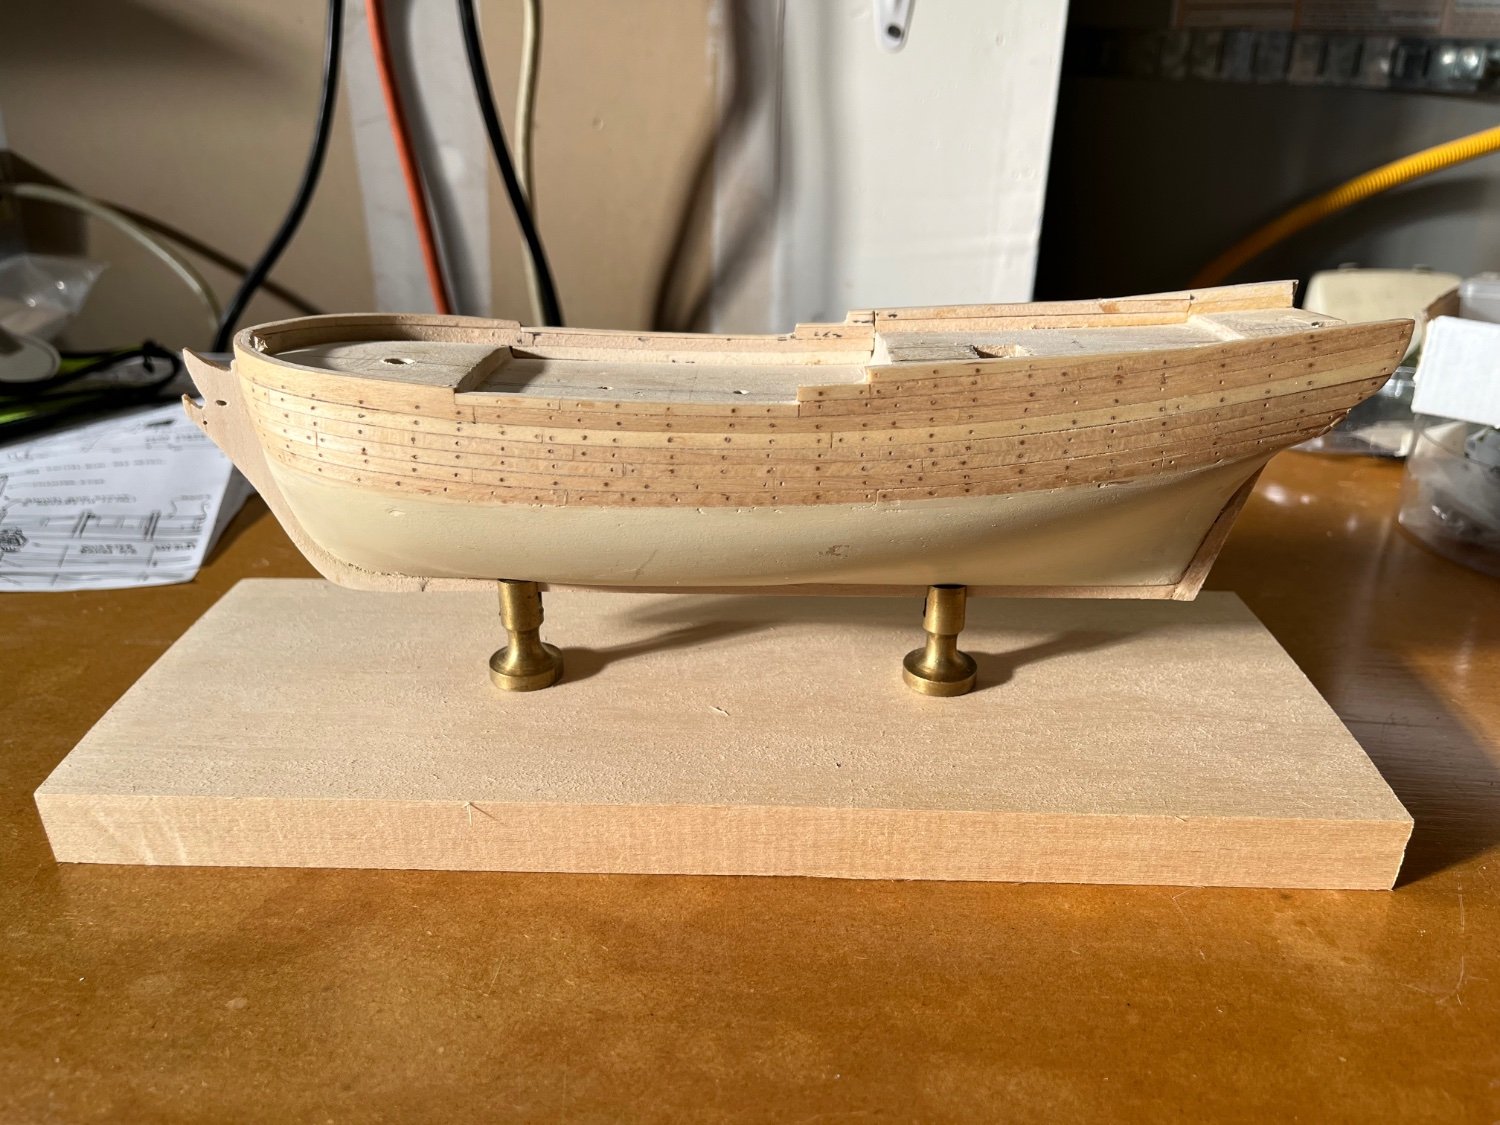
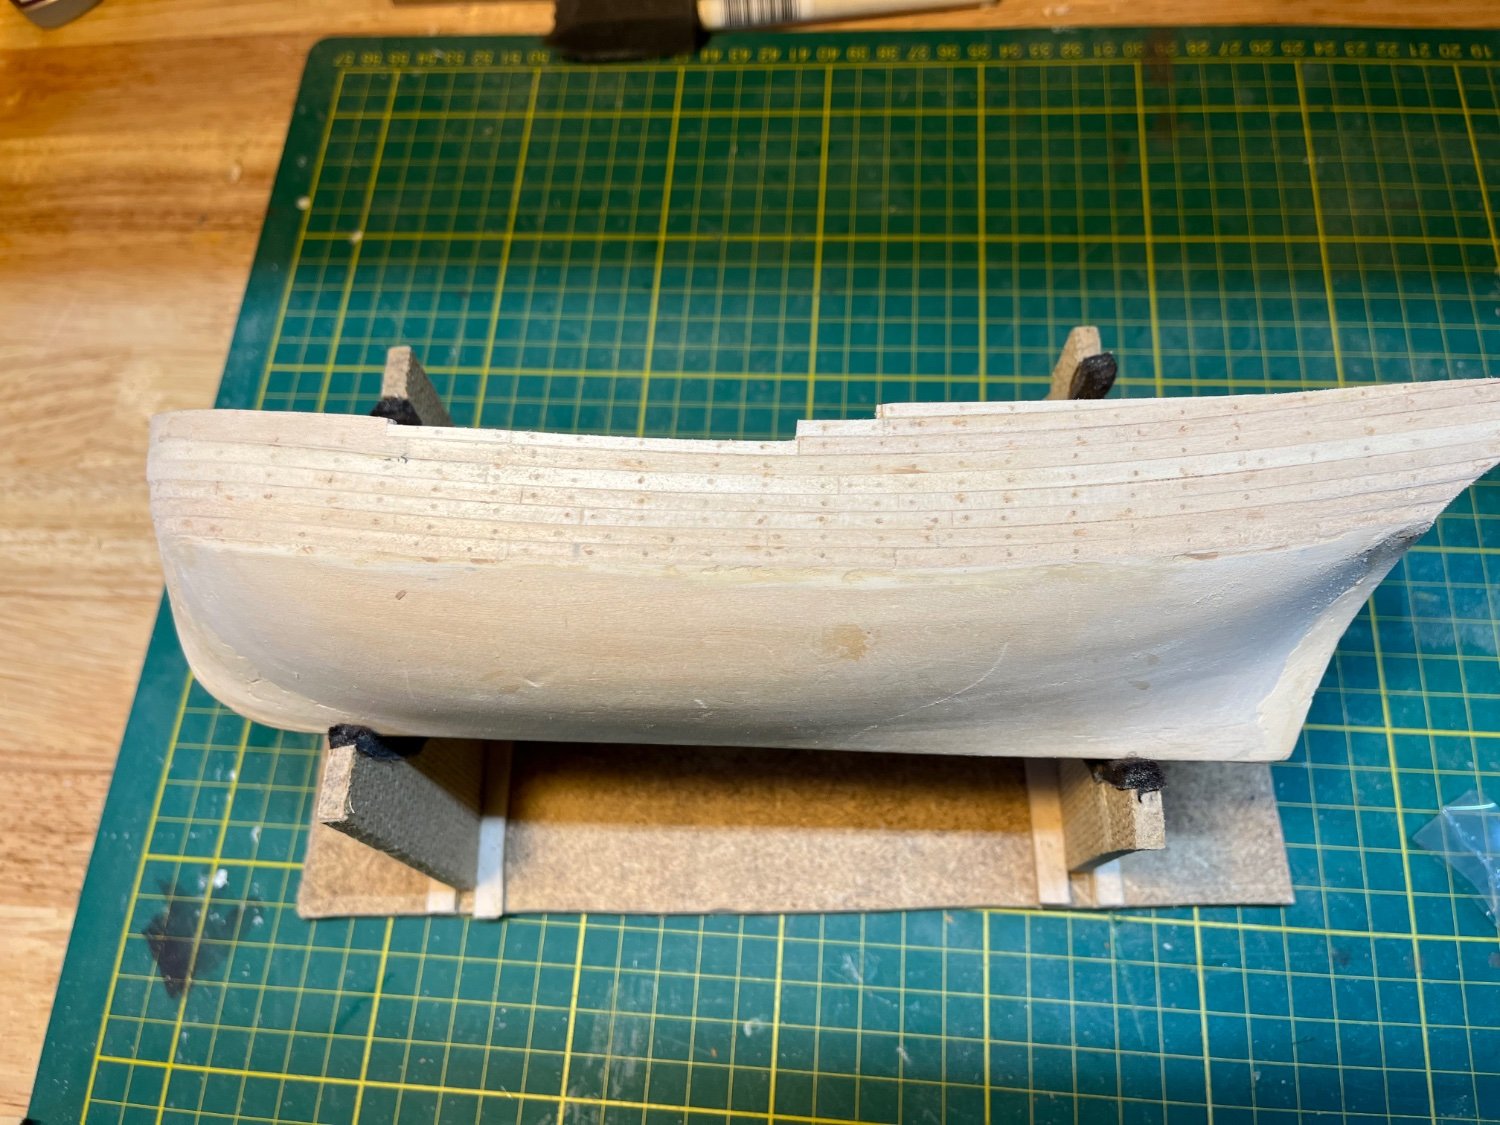
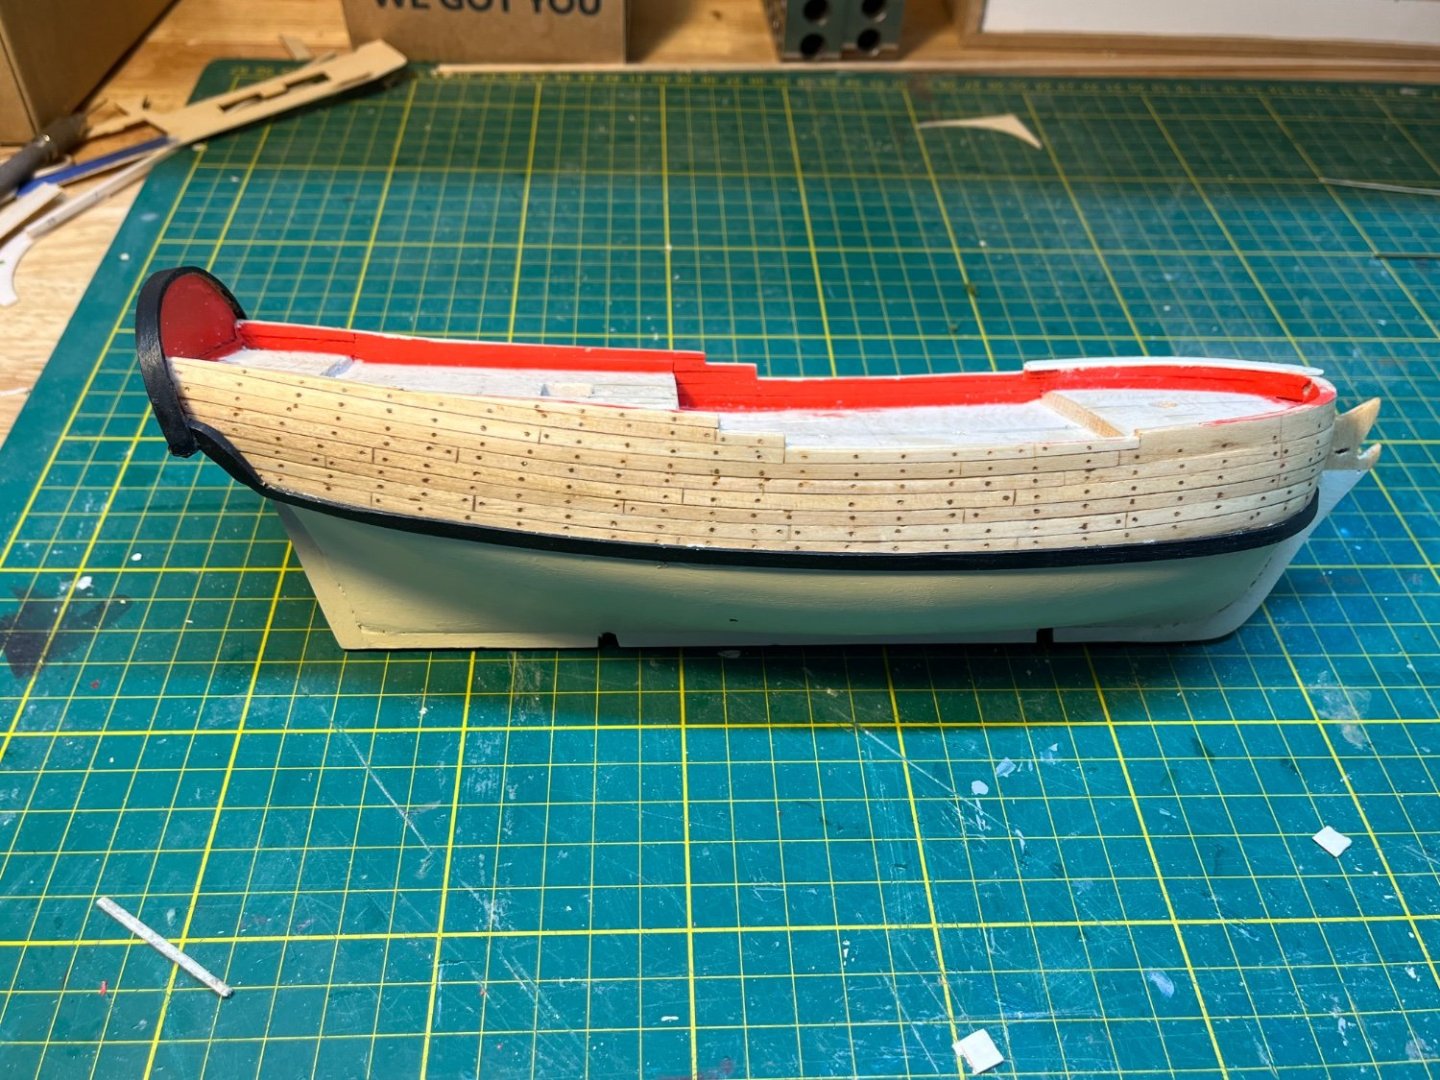
Lots of sanding and filling. Multiple thin coats of Model Expo tallow color on the bottom of the hull with more sanding and filling between coats. I have had bad luck staining basswood, so I just used an oil finish on the planks rather than the golden oak stain suggested in Chuck's instructions This is after one coat of 50/50 Tung oil and mineral spirits on the wood planking. More paint and filling on the bottom still to go.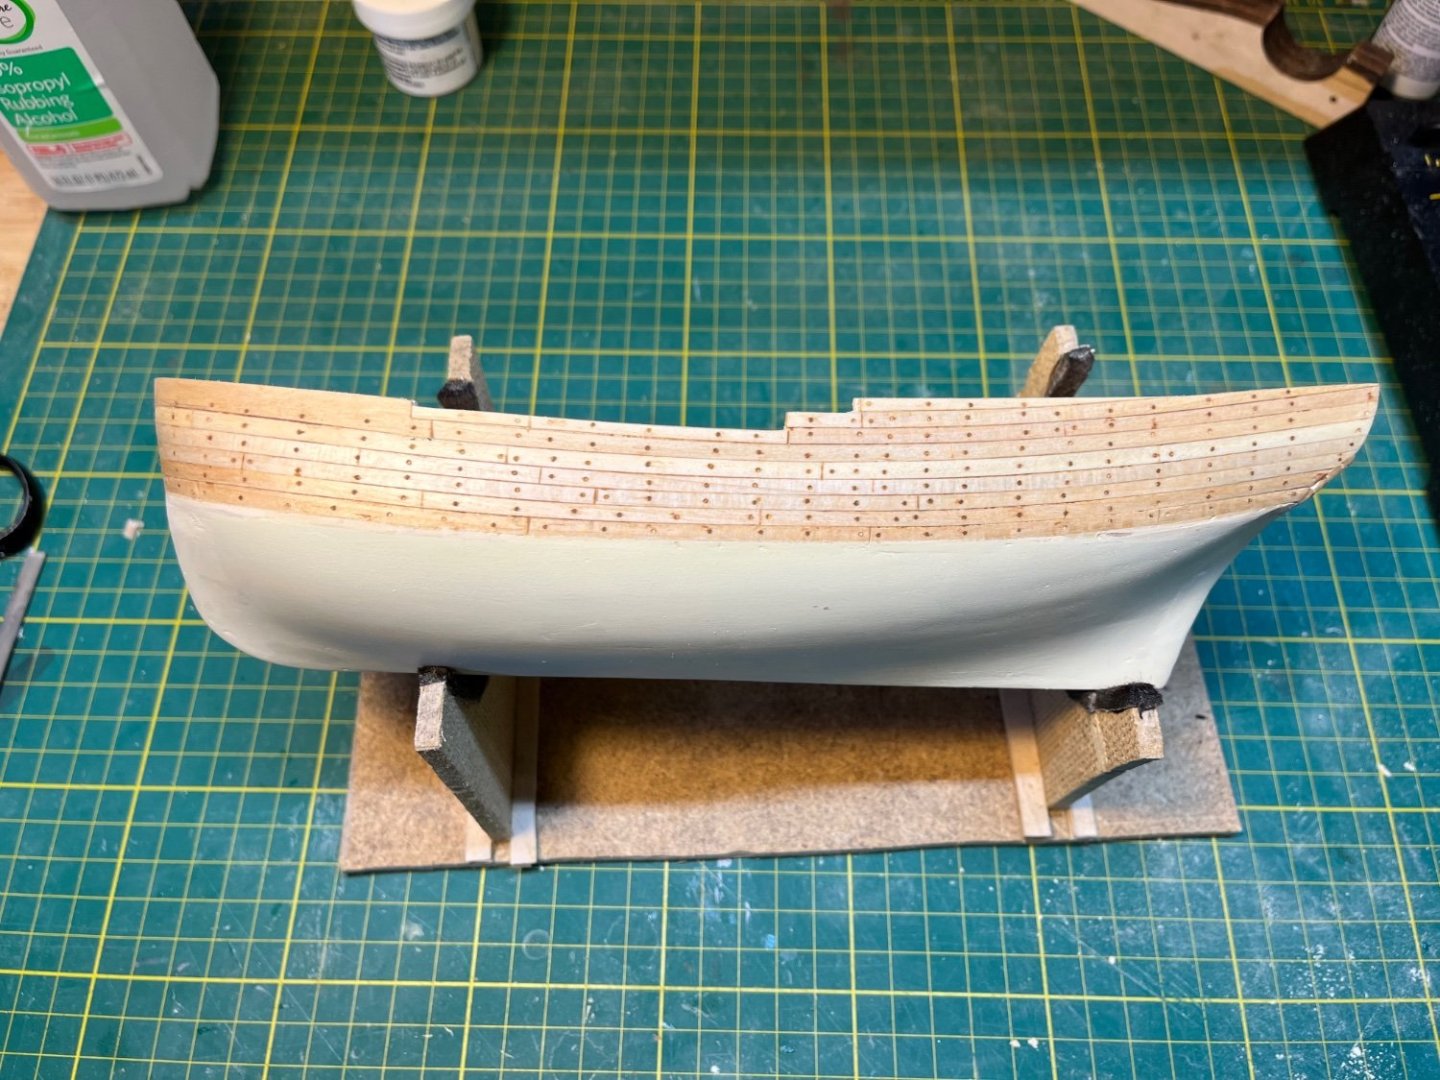
-
Sultana by DanB - Model Shipways - 1:64
DanB replied to DanB's topic in - Kit build logs for subjects built from 1751 - 1800
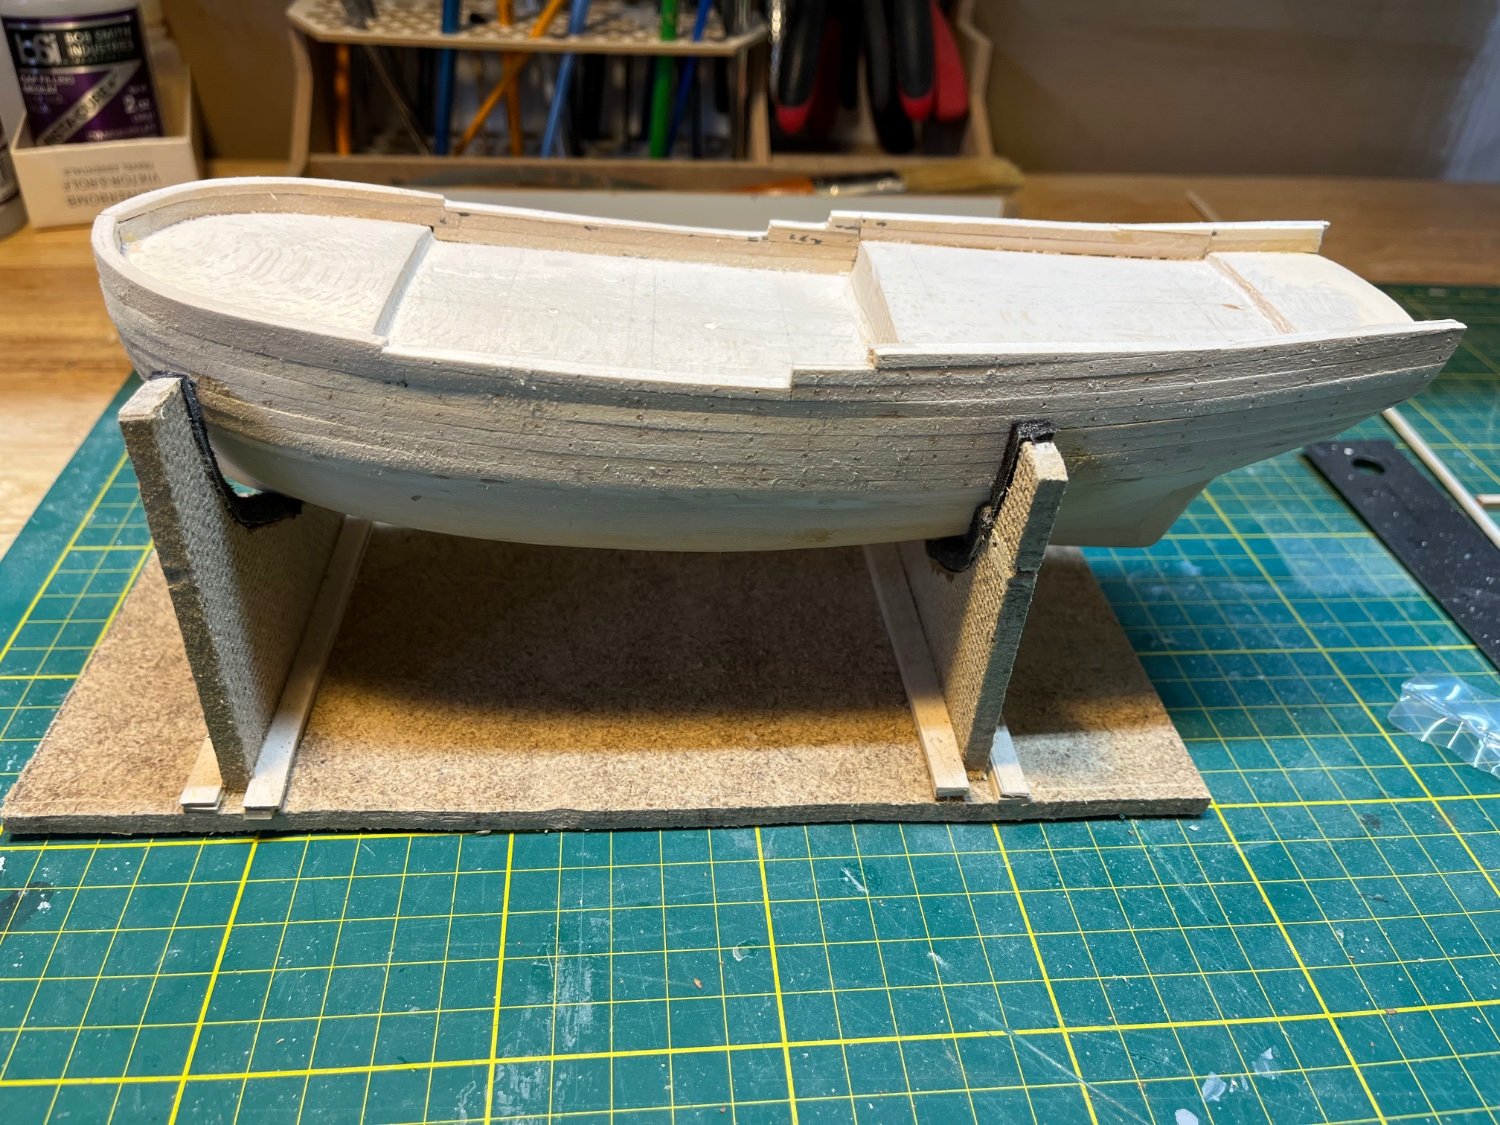
It took me a while to puzzle out the bulwarks, but I think. I have the heights close. I drilled a bunch of holes and then filled them with a darker wood filler to simulate the trenails. On to planking the counter and then some final filling and sanding . Kit instructions say to make a cradle to hold the ship. Used what was left over from making doll house walls for my granddaughter . It came out pretty ugly, but it does give the ship a home.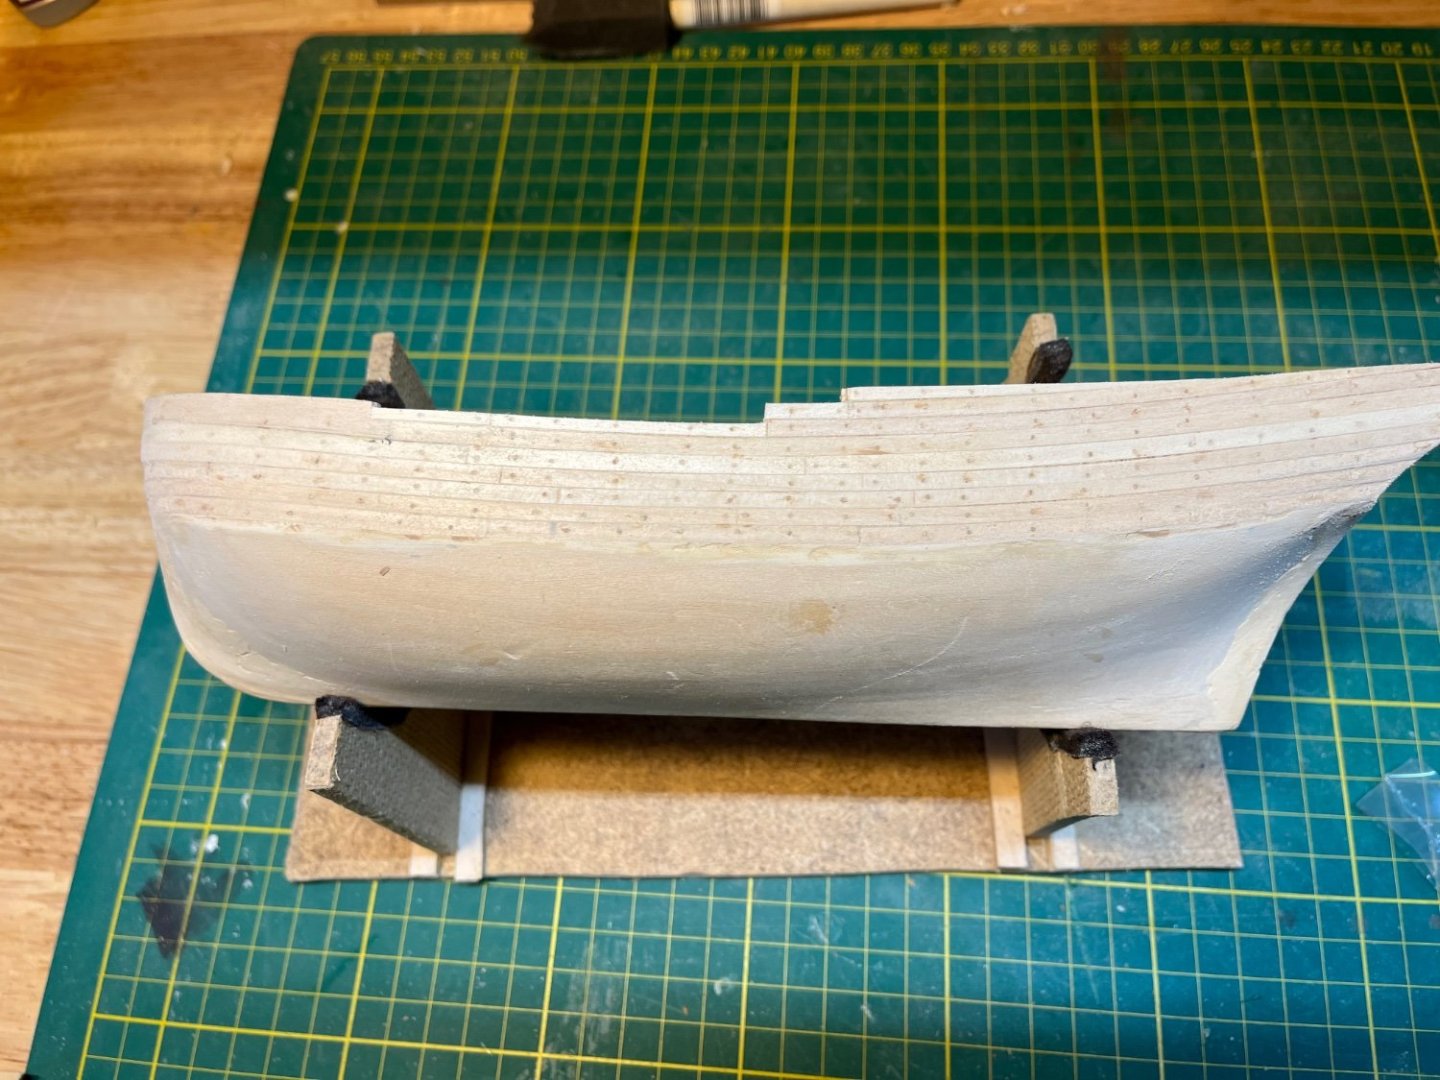

-
Sultana by DanB - Model Shipways - 1:64
DanB replied to DanB's topic in - Kit build logs for subjects built from 1751 - 1800
Planking in Progress The electric plank bender worked best. Soaked the planks for a while, bent them with the plank bender first to get the curve at the bow and then bent the edge to match the curve along the wale. Also put them on the hull with rubber bands and let them dry. Somehow my wale, hull, decks, did not wind up like in the practicum and the overlapping planks at the bulwarks did not work quite right. So I am fudging it , making the bow plank a bit wider on the outside. Puzzling out what to do with the other bulwarks further back. I think there’s going to be a lot of guesstimating and adjusting to get this one together. The line along the wale aso was not so pretty—- working on my wood filler skills .
-
Sultana by DanB - Model Shipways - 1:64
DanB replied to DanB's topic in - Kit build logs for subjects built from 1751 - 1800
Thanks very much for the suggestion Patrick. I had not considered either the mast holes mounting the hull. but it does make sense to do it now. I will look ahead and try to figure out what to do. Dan -
Sultana by DanB - Model Shipways - 1:64
DanB replied to DanB's topic in - Kit build logs for subjects built from 1751 - 1800
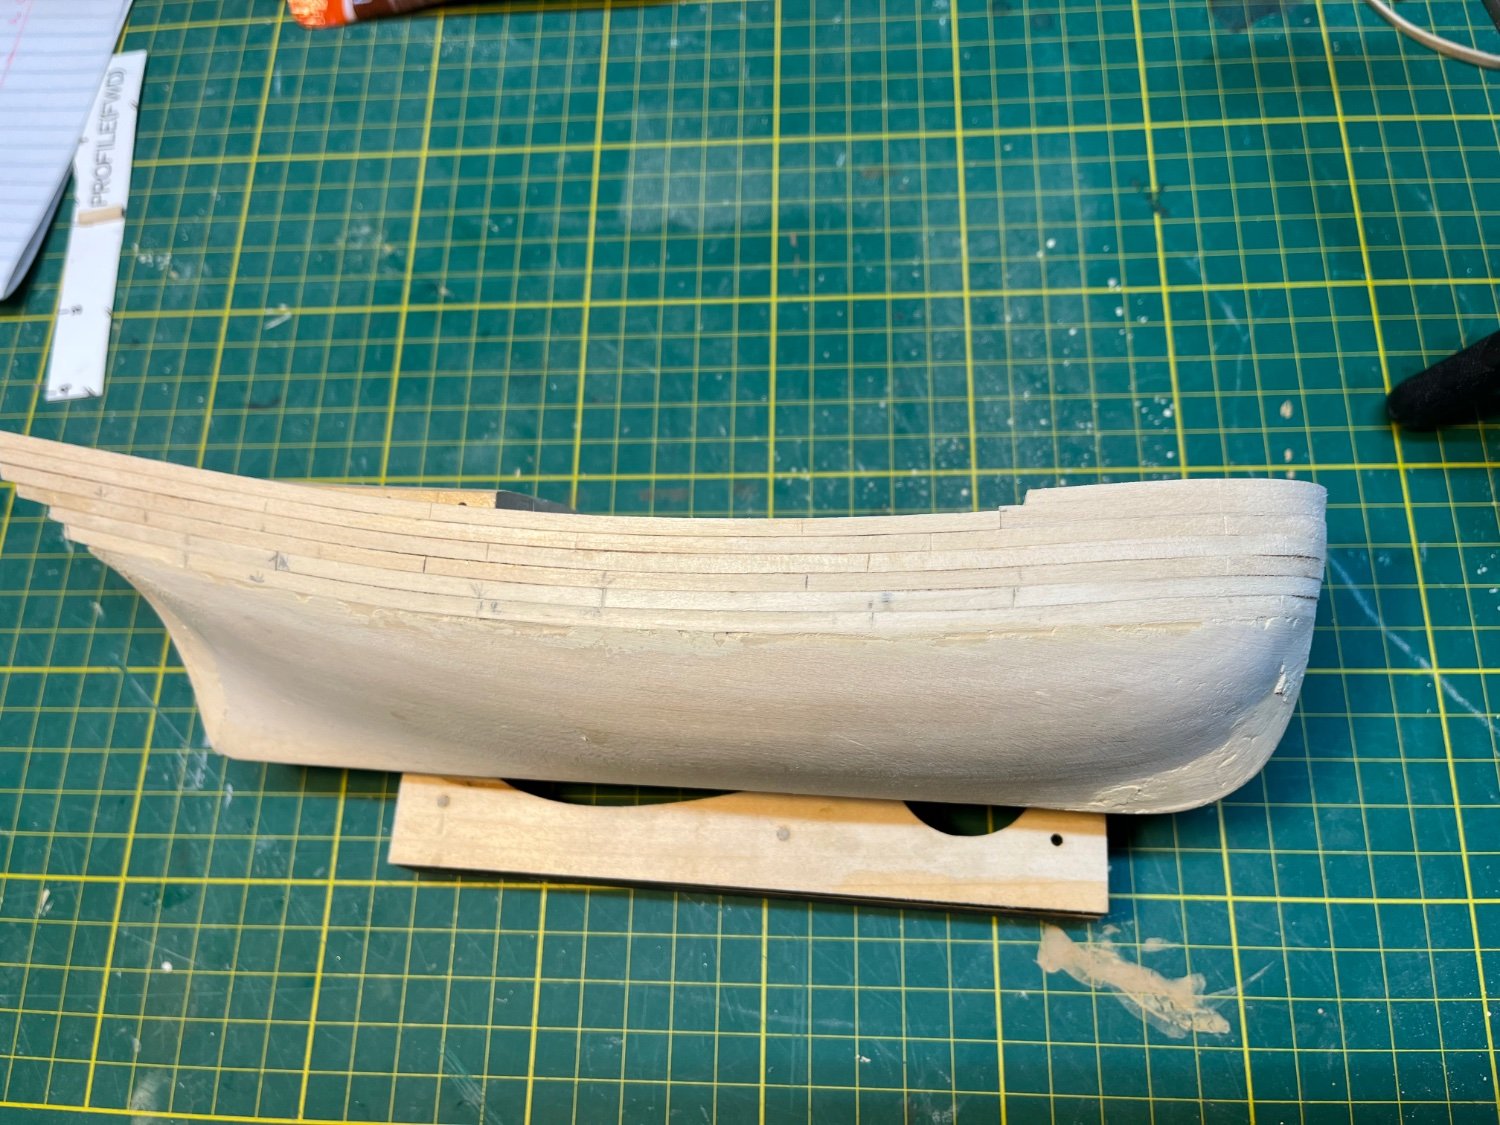
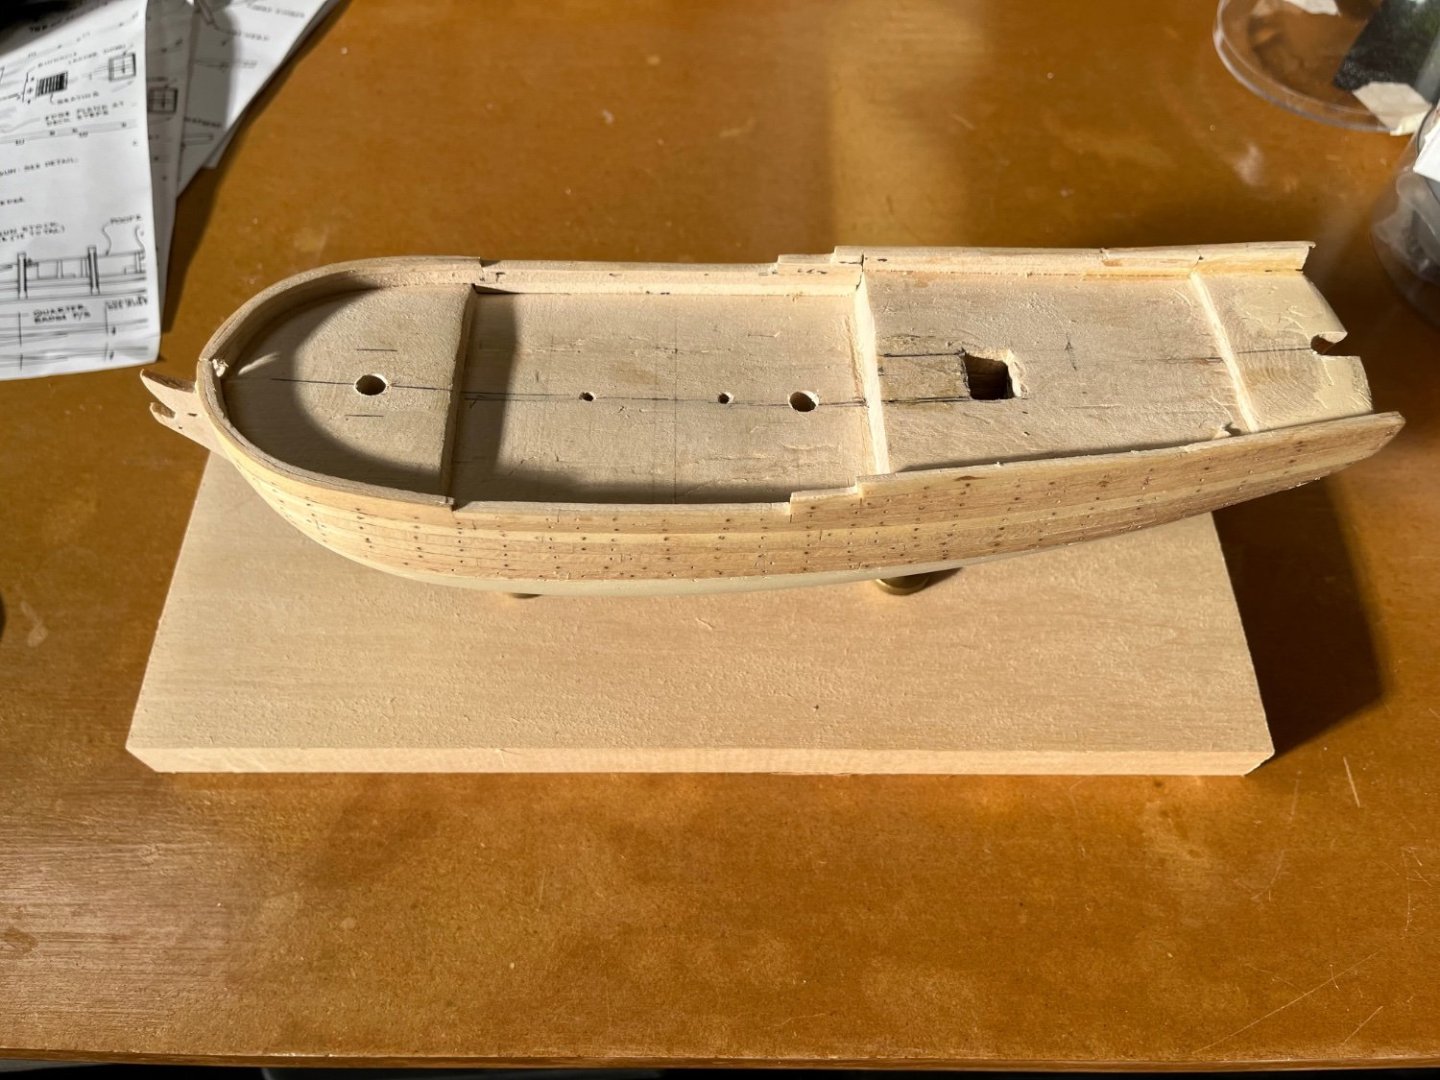
Shaping the hull for planking Carved sanded, carved more , sanded more. 1/16 inch all around is a lot of wood! I think its pretty close , Maybe not deep enough in some spots, but I was worried sanding off too much..Sanded down the decks about 1/16 inch and then sanded the camber.This solid hull business does not feel as precise the POB way. If it winds up more or less symmetric and close to the right shape, I think that’s going to be good enough. I started bending the planks. Even after soaking them and slowly bending them, they would still break. I had better success soaking them in warm water for about 15 minutes and then using the Model Expo electric plank bender to gradually bend the sharpest part of the bow curve, and then fit them into the bending jig to dry. After they dried I used the edge bending tech technique Chuck showed in his videos to bend the lower cure. It seems to be working as the planks now fit the bow curve and curve long the hull. Now to try to glue them in ,,,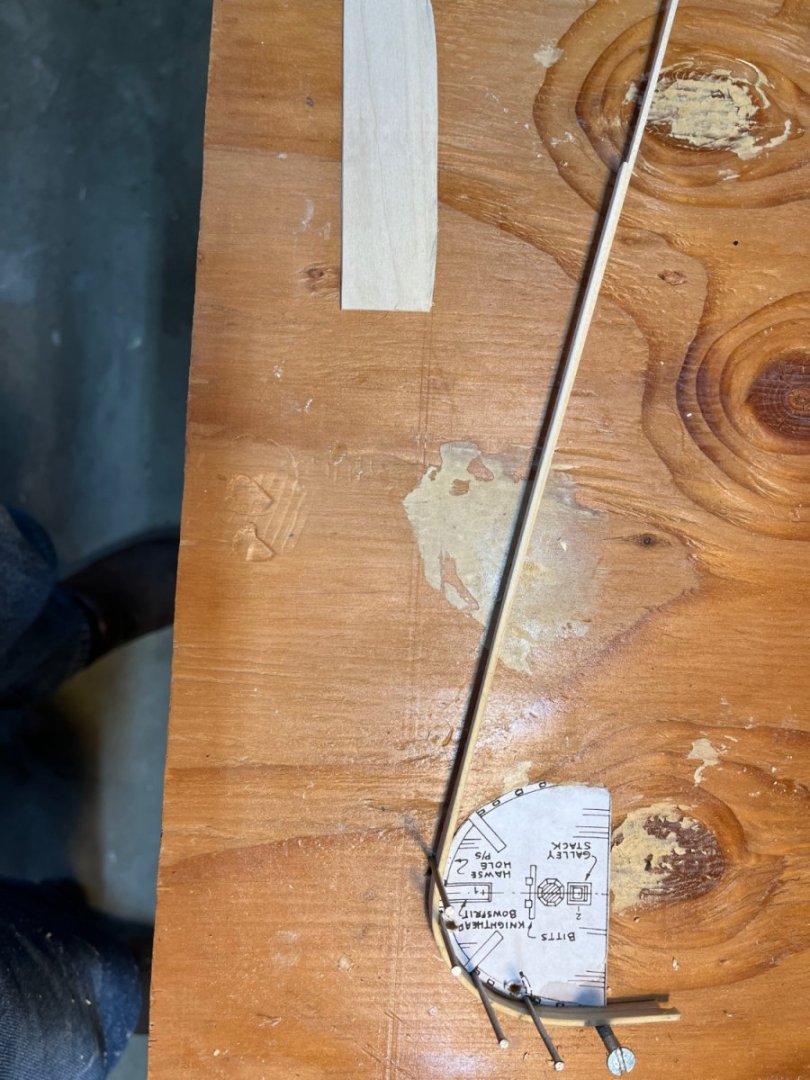

-
Your Pram is looking good. It’s been a while since I built this kit, but I do recall being frustrated with cutting off and driving those brass pins. Model expo did not send me enough and I finally left a couple off. We have a gas stove a I held the brass in some pliers and used the flame from the stove to heat it. I recall that the rudder assembly was tricky and I had to glue the tube with the pins in a few times while I was attaching the rudder .
- 38 replies
-
- 2
-

-
- Norwegian Sailing Pram
- Model Shipways
- (and 2 more)