


DanB
-
Posts
162 -
Joined
-
Last visited
Content Type
Profiles
Forums
Gallery
Events
Posts posted by DanB
-
-
-
@Veszett Roka Thanks very much for the diagram. I will try to add a cover to make a pocket for the battens!
@EricWilliamMarshall Thanks very much for the suggestions for drilling out the holes. I will ask model shipways to send some more nails is it is bugging me that they are not there. They also sent me some recently that was pretty dried up and lumpy, so maybe I can get them to replace the bottle.
-
Hi Veszett,
Thanks for your comment!
I think you are probably correct. The instructions do not say to cover them to make a sack for them, but I have been looking at pictures of sails with battens and they seem to fit into a reinforced sleeve sewed into the sail. I guess I could cover them with a thin strip of cloth a bit wider than each batten.
-
Sail
Working on this today. Not too difficult so far. Letting it dry overnight.

- SkiBee, Ryland Craze, Paul Le Wol and 2 others
-
 5
5
-
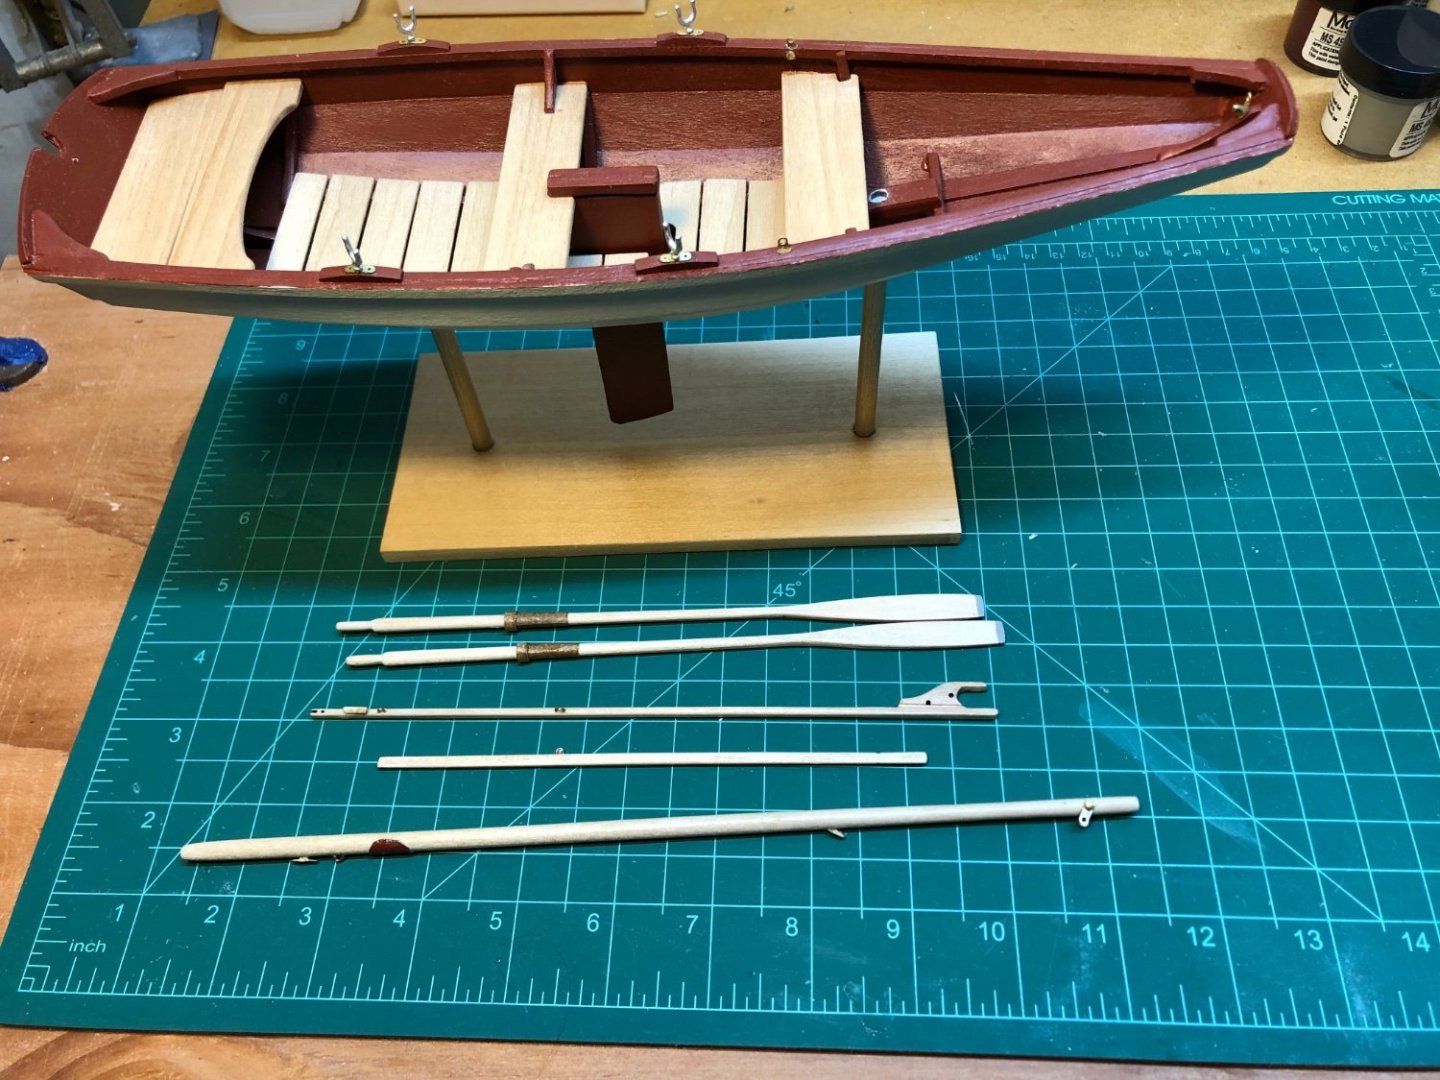
Boom, Gaff, Oars, .
I've been working on these the past few day , It has still been challenging to get them round without sanding them away.
The nails in the kit are a source of frustration. There should be 22 If I count correctly and they only suppled 18. The all need to be cut and then passed though holes int PE that are too small. The instructions say to drill out the PE but I found that very difficult, The nails tend to fly all over the place and I needed more that 22!. Finally. I cheated and just left most of them off.
I had no brown paint to paint the leathers on the oars, but using brown wrapping paper seemed to work OK. I painted it first with the MS acrylic satin finish and that made the paper darker. Next step is to make the sail, which is definitely new territory for me.
- SkiBee, gsdpic, Ryland Craze and 4 others
-
7
-
I’m new to all of this and really liked your diagrams— very clear! I will follow along!
-
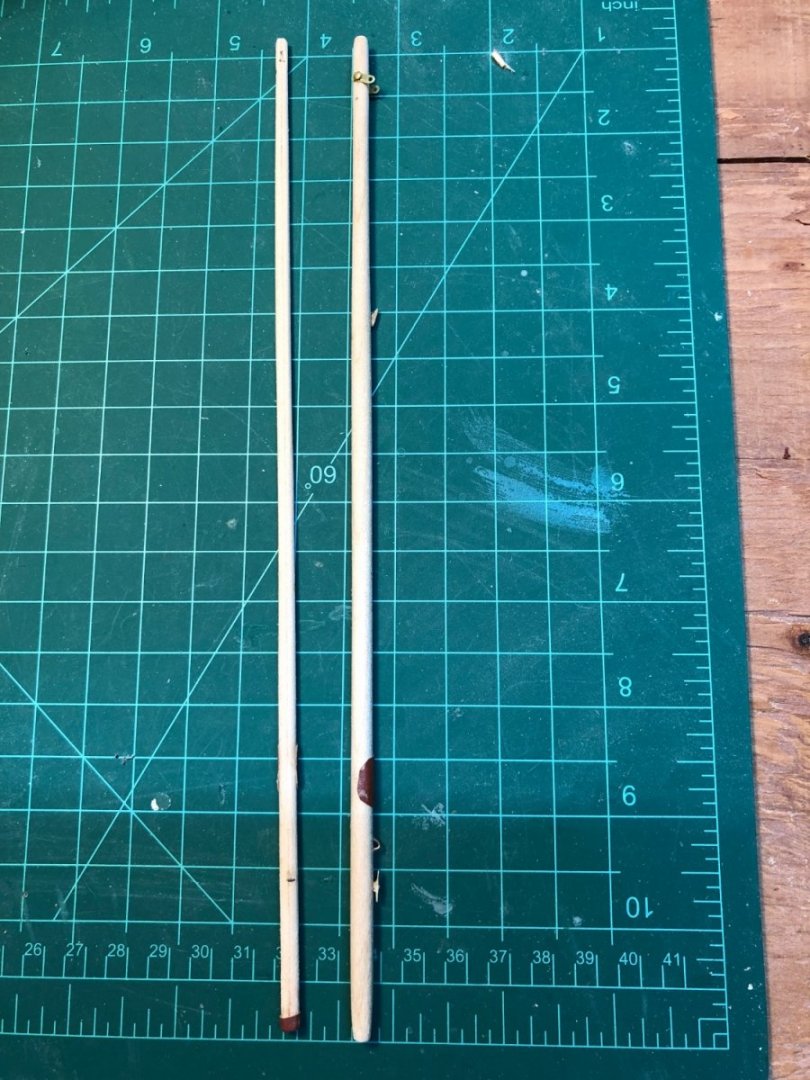
Mast
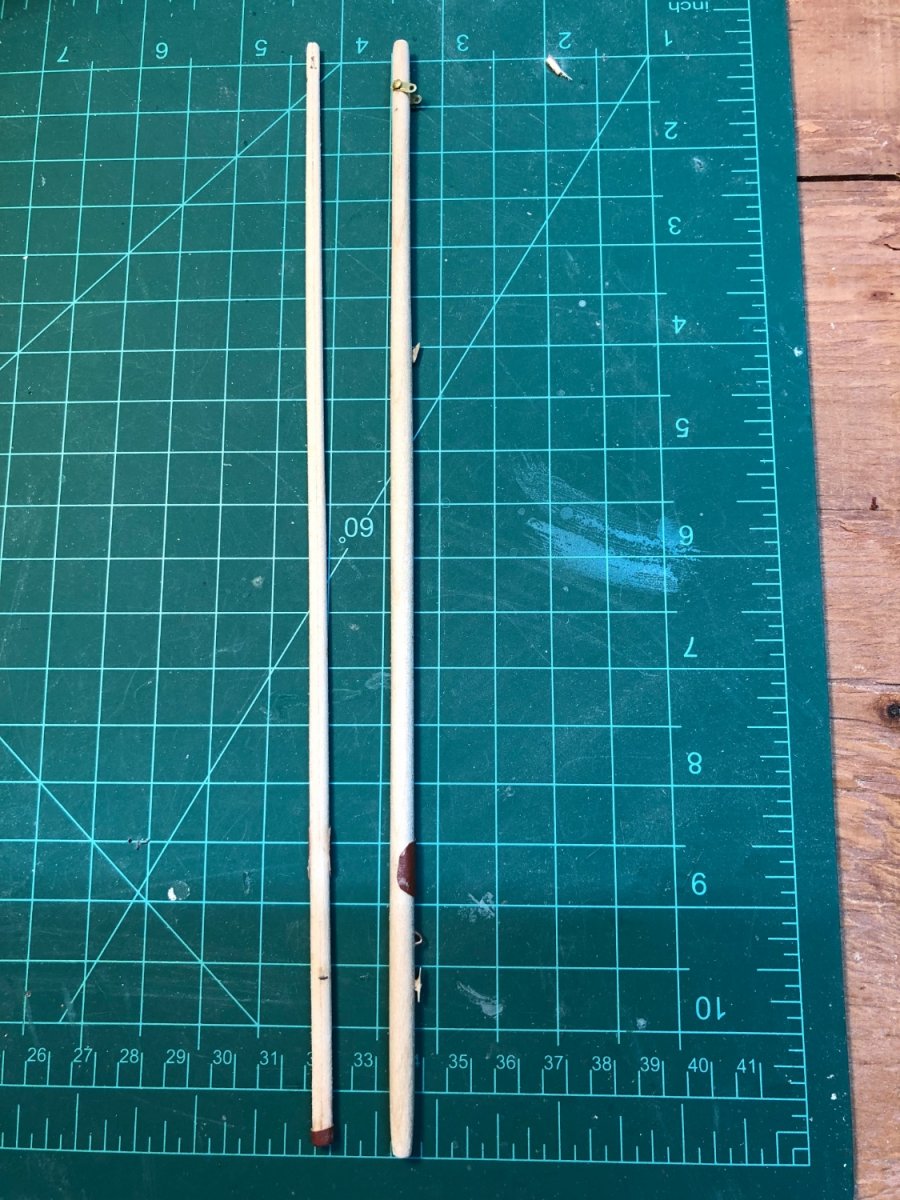
I made one mast using dowel and one built up using the laser cut parts. It was easier to drill the holes in laser cut mast while it was still rectangular, but I don't seem to have the technique shaping in to a circular form with the plane right. My attempt wound up elliptical and too thin as I tired to get it rounder. I am not sure what I did wrong. It was too small for the step at the bottom and would have needed paper wrapped around the bottom to make it big enough to fit the step.
It was easier to keep the dowel round and taper it. It was not so difficult to drill the holes in the dowel I just marked them carefully and used a point to make a start for the drill bit. The plan in the manual shows the mast and the boom and gaff a bit smaller than actual size, but the author does give the distances for the holes from the ends of the mast in the instructions. I think my dowel mast is still a bit thick, but much closer to the plans.and I was worried about making it to small again. . I am glad that the instructions said to try it both ways. I learned a lot and clearly need more practice planing a rectangle into a hexagonal shape.
- Ryland Craze, gsdpic, G.L. and 1 other
-
4
-
Mine also was a bit off square. I think the building board allows too much movement at the bow transom. I did not correct it as I thought it would involve ungluing multiple strakes and since I had already trimmed them I was to sure I would be able to reattach them.
-
Over the past few days I have been able to hang the rudder and make the stand. Making the mast is next. Instructions say to try making it twice, once form dowel and also by planing a square piece of basswood to compare techniques. Will see how it goes....
-
Tiller
Yesterday, I was able to make the tiller and the extension without destroying the pieces. i used the smaller brass rod for everything as i don't think it would have worked for me using the 1/16 rod, especially for the tiller extension. ( The pictures in the manual look like the smaller rod is used on the extension but it does not say to change sizes. I think it's a omission in the instructions) I left off the little cross piece at the end of the extension. Even with 1/32 rod, I think I would have destroyed the extension.
Stay Plates
Today I placed the stay plates in the inhwles. I found it really difficult, and it took much longer than I want to admit. The instructions say "a bolt is driven though the plate and inwale." and are not very clear about how to do it. The "bolt" is a cut off nail--- I think.
After much trial and error and not being able to get the nail though the plate not the firsts side, I think ( and I may be completely wrong) the process should be:
- The stay plate has 2 holes, a large one at the top and a smaller one ( too small for the nail) at the bottom. The top is curved.
- Use a broach (these things are great!) to enlarge the bottom hole in the plate until the nail passes through easily
- Make sure that the plate will pass easily though the hole in the inwale. Mine did not after painting and I needed to work on the holes more.
- Drill a hole in the center of the inwale (instructions say #71 but then needs to be enlarged for the nail).
- Cut the nail short enough so it will not go though the sheer strake. Enlarge the hole in the side of the inwale so the nail will go through it
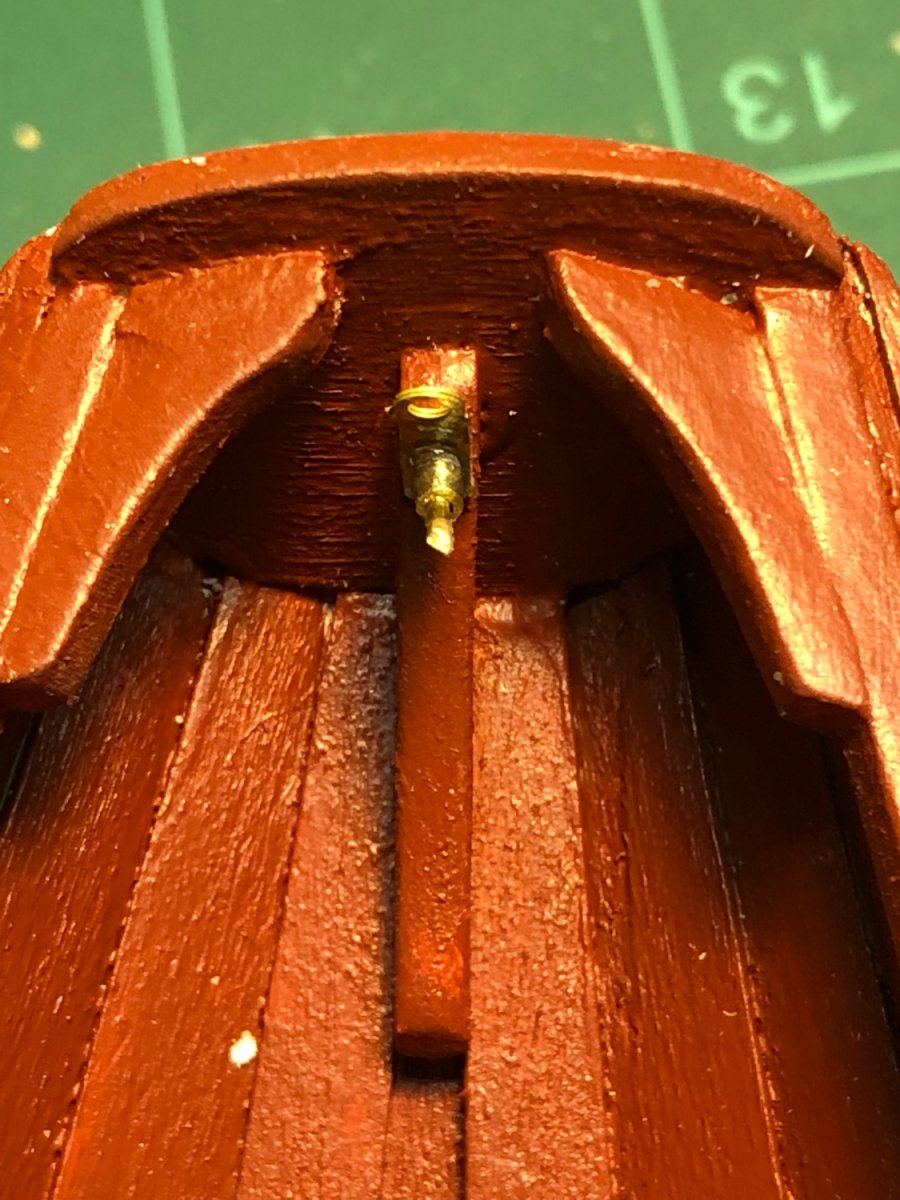
- Position the plate so the lower hole is even with the hole for the nail. Instructions suggest using a little CA to hold the nail in position and push it though-- this did not work for me, I had to wiggle the plate to line it up with the hole in the inwale and the nail head and then push it though .
- Add drops of CA to hold the nail and the plate.
The stay plate in the forward transom was easier: the broach was again really helpful in getting the hole in the tiny piece of brass tube clear so it would fit on the end of the eye bolt. After chasing little bits of slippery flying brass, all afternoon they are finally on! I did not trim the forward one yet as I did not want push my luck until the CA has had time to get good and hard

-
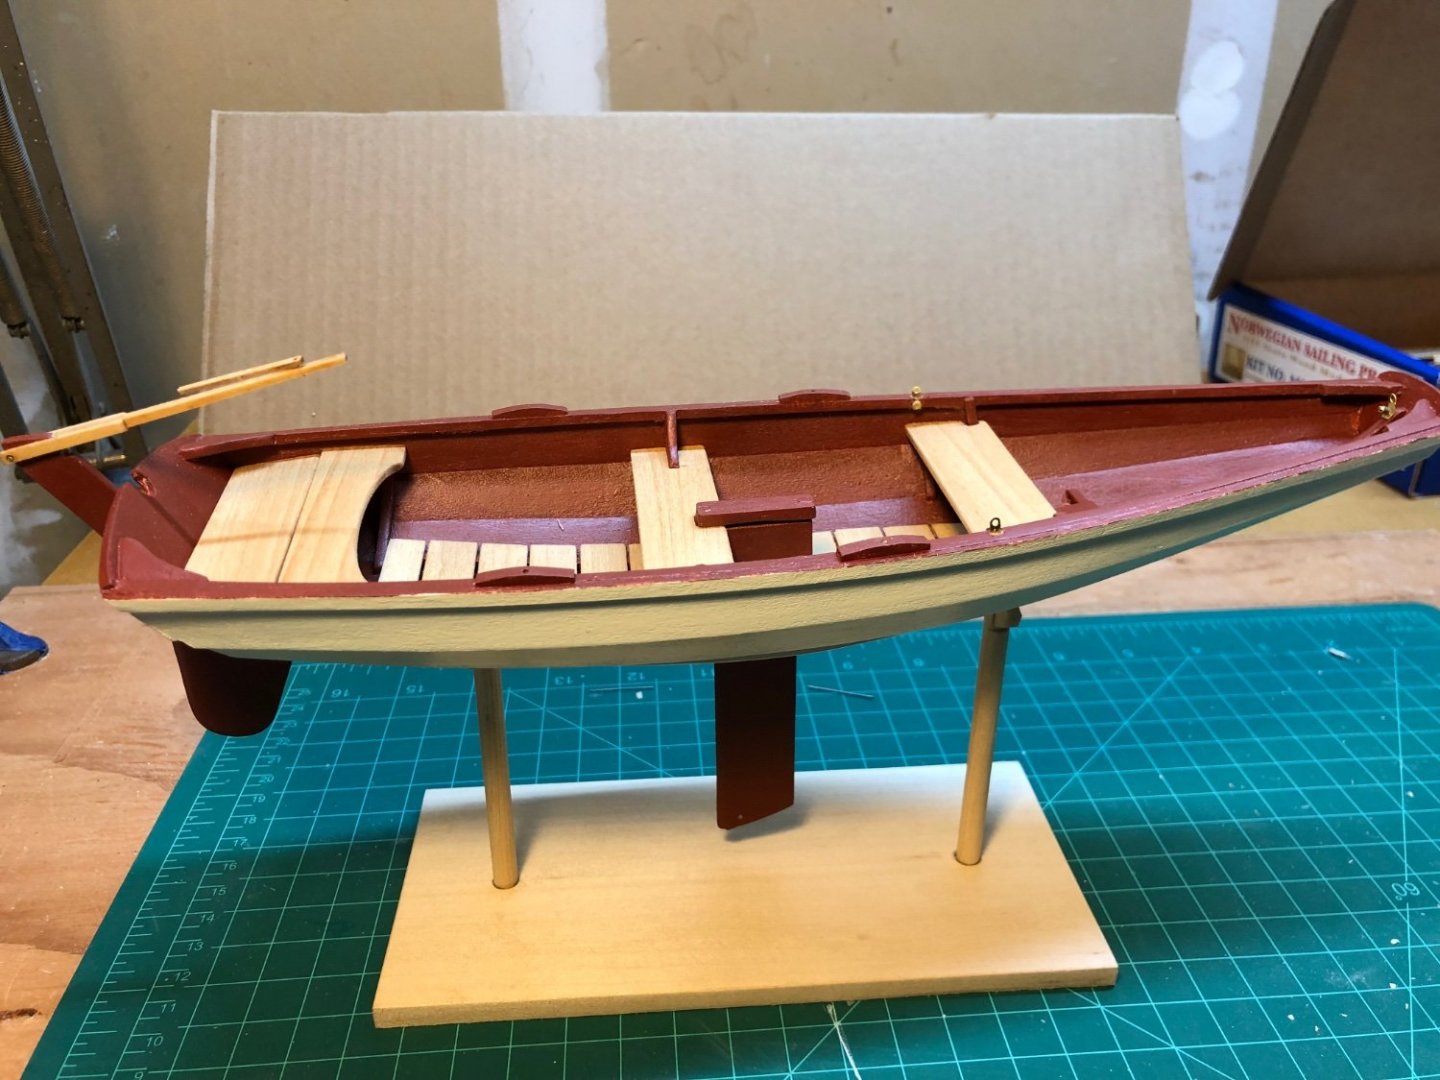
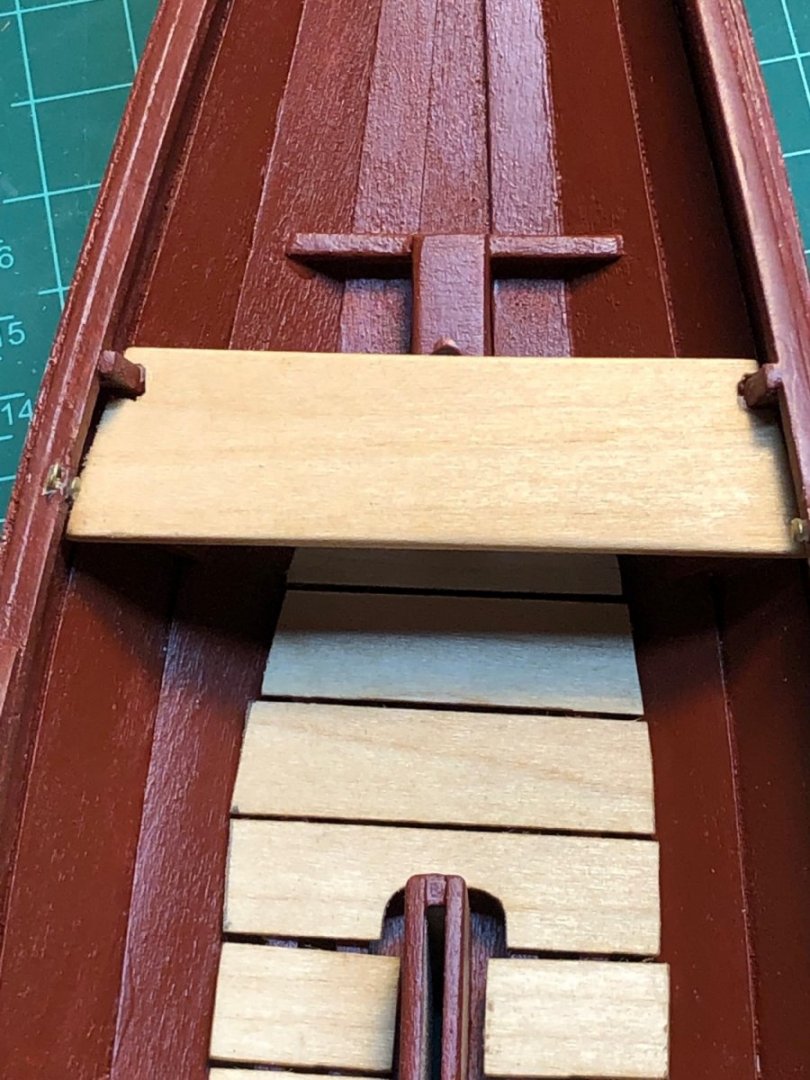
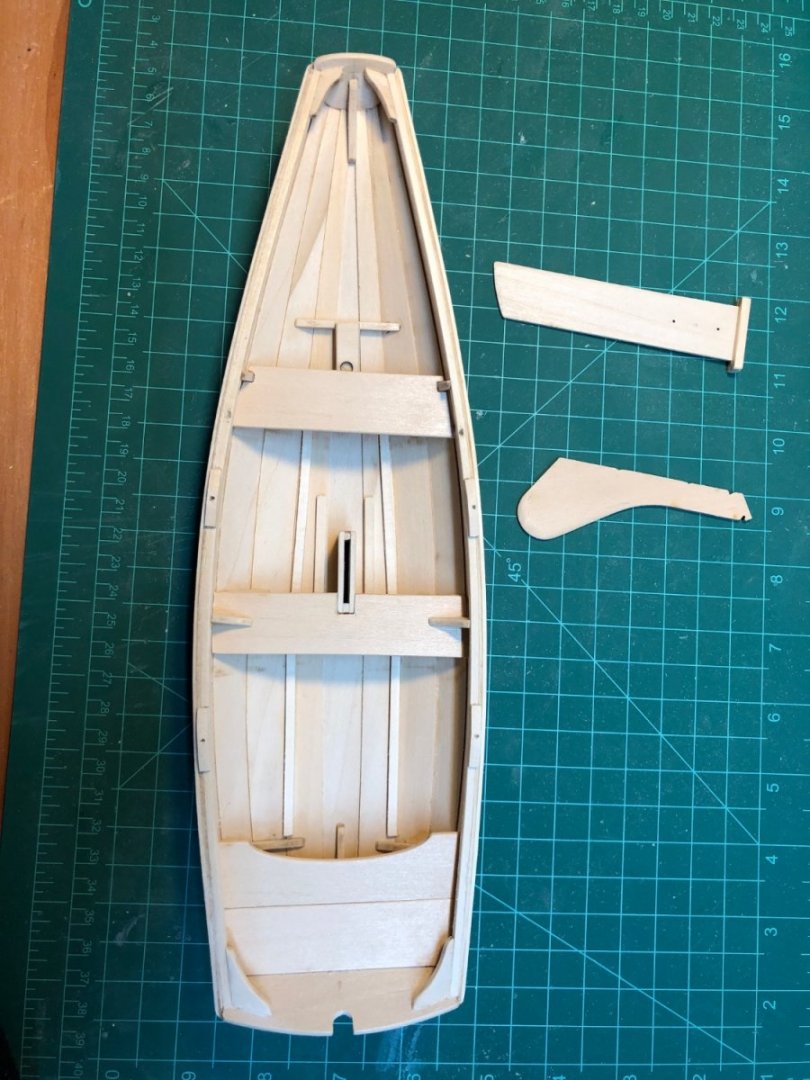
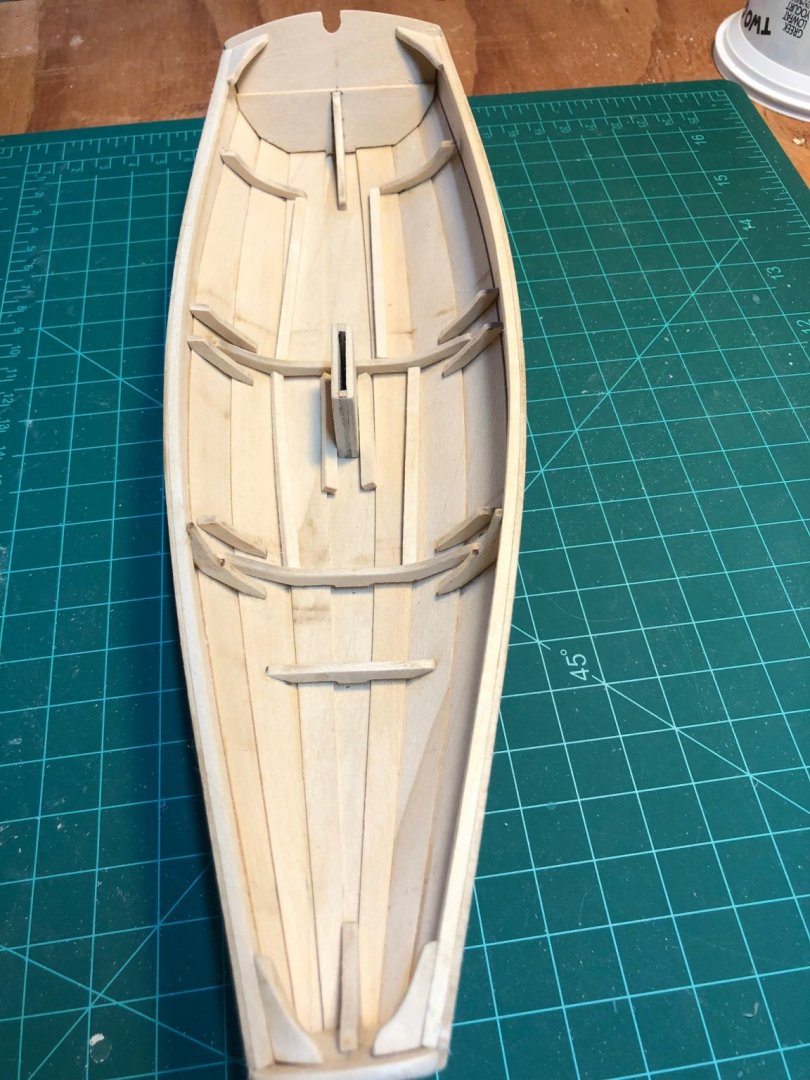
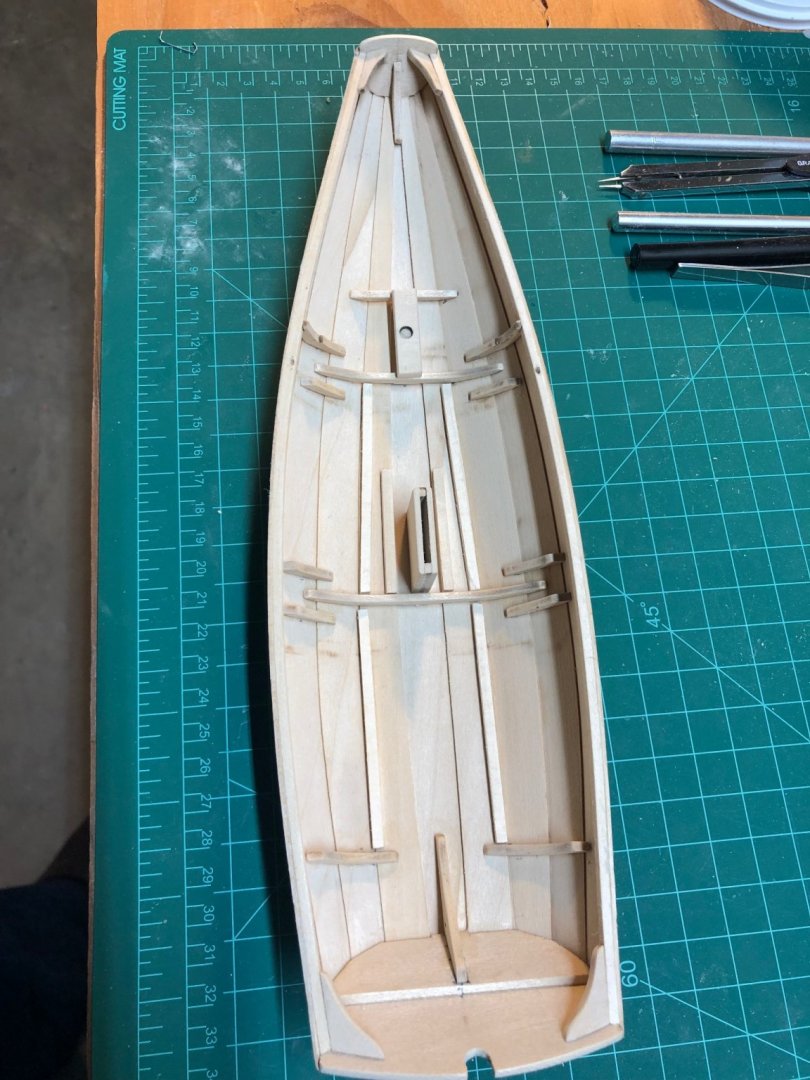
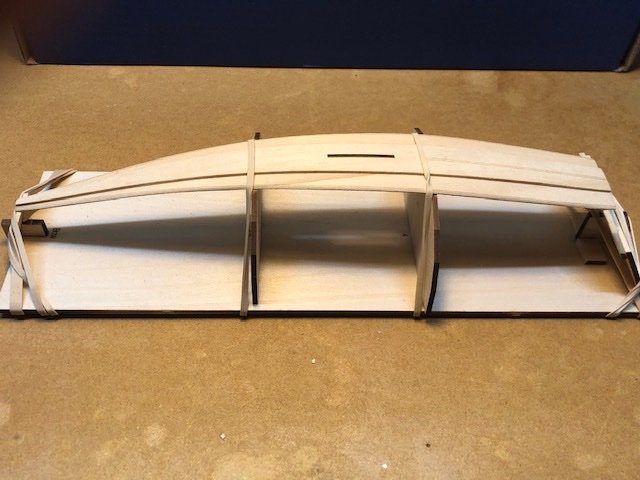
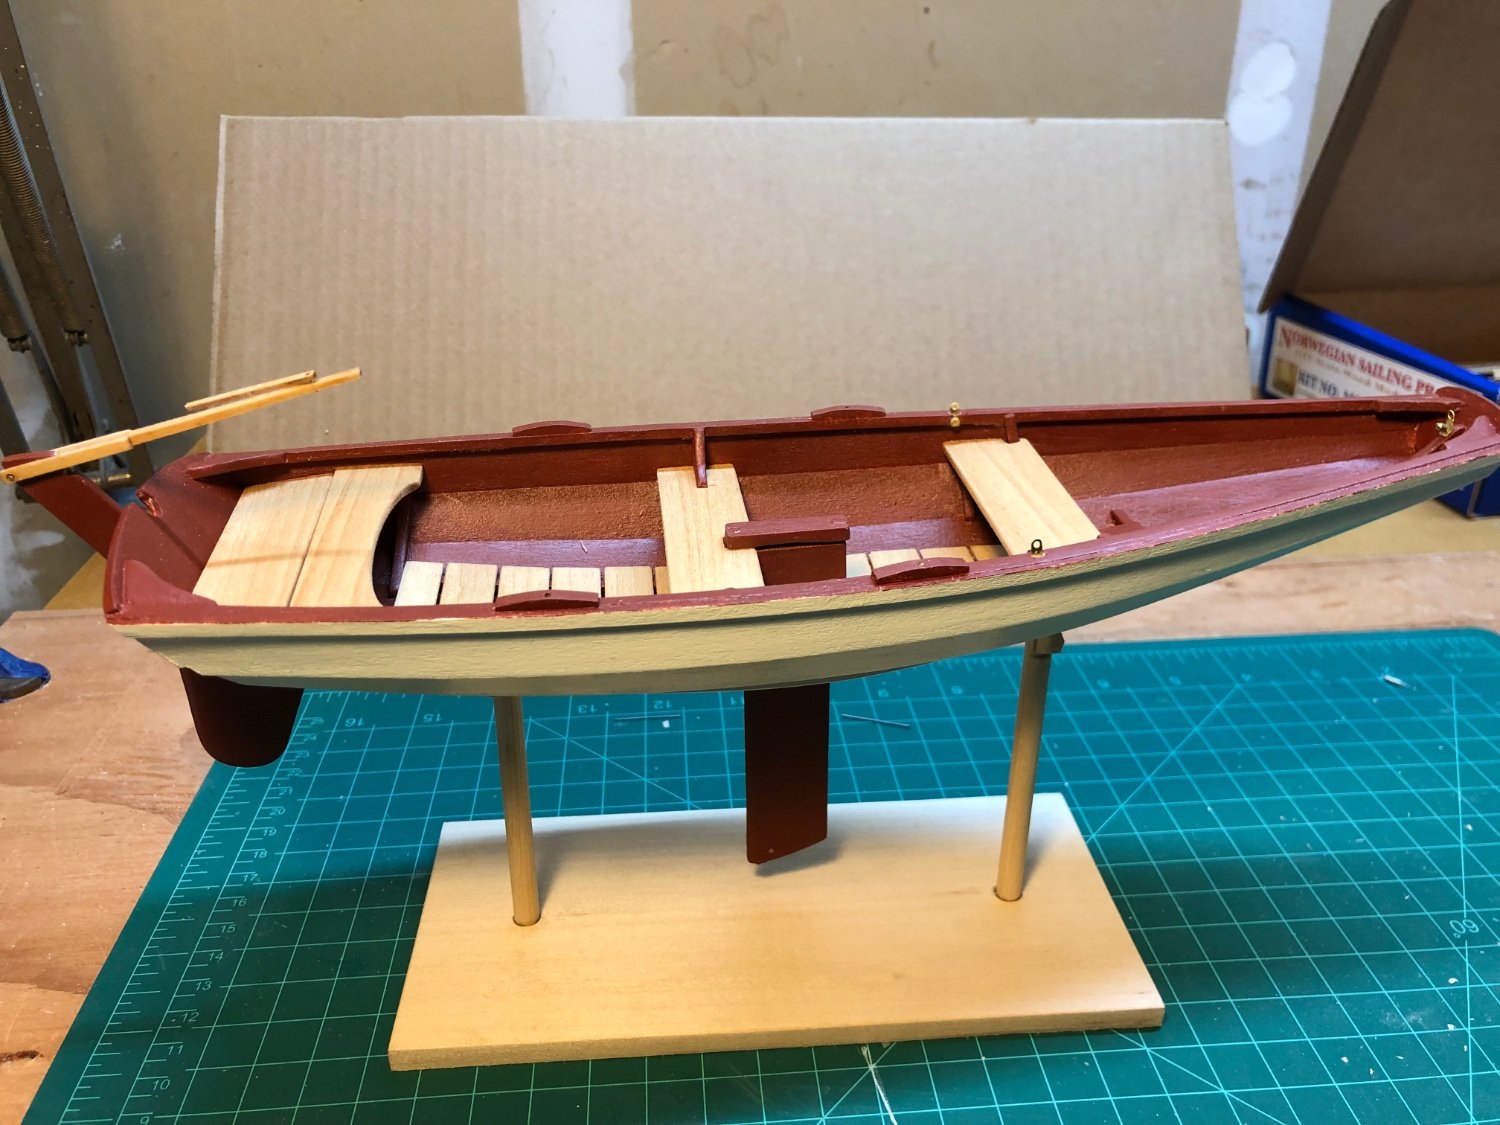
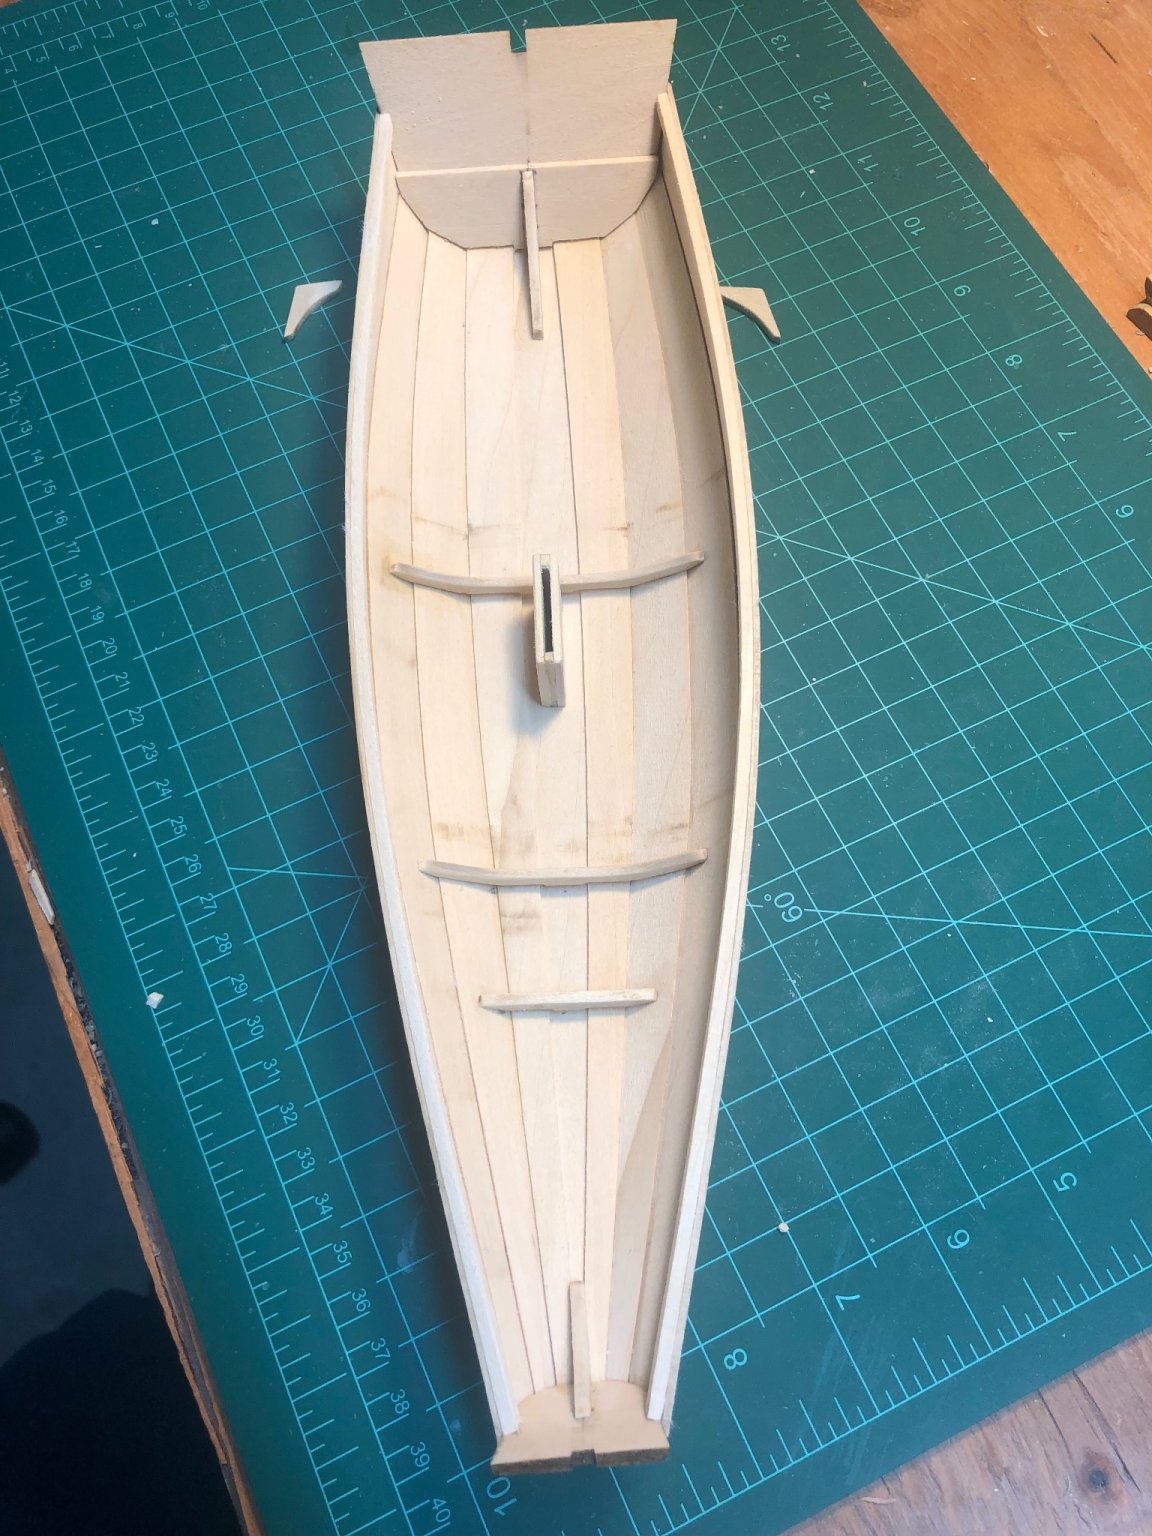
Painting past few days. Added floor boards and thwarts today.

- EricWilliamMarshall, druxey, G.L. and 4 others
-
7
-
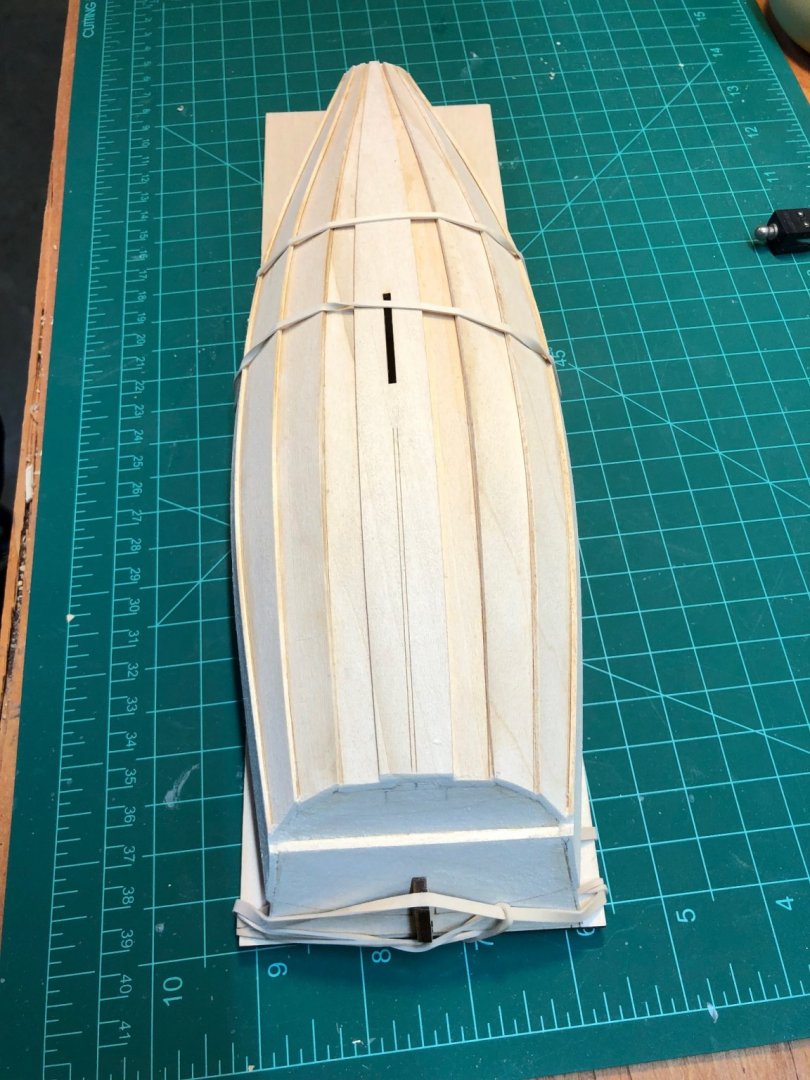
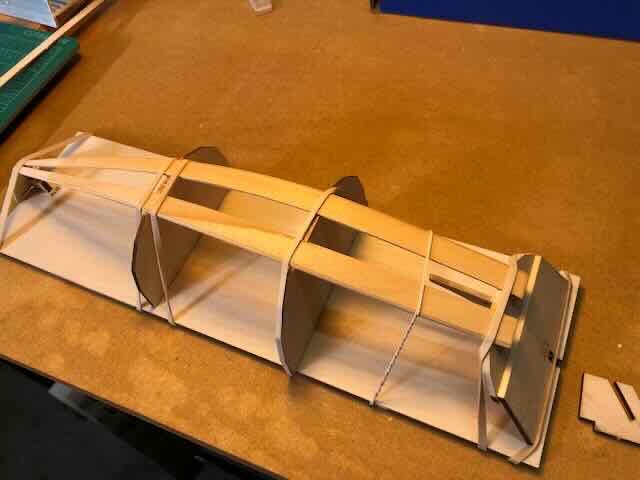
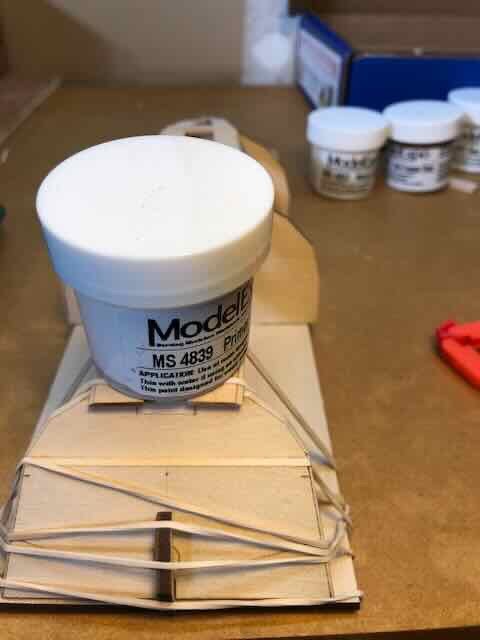
I had to do a lot of work to get the stern sheets and thwarts to fit in. There is a paper pattern marker in the manual that helps with stetting the distances of the frames but nothing that helps with the heights. I tried to use the pictures to gauge how high the frames should be. They wound up too high at the dagger board case and too low at the forward thwart. I had to unglue and reposition some of the pieces that support the thwarts.. My bow transom is also a bit off square-- too much movement on the building board during the planking I think. I am learning a lot from the instructions and from making and trying to correct mistakes. I think it's about ready to paint, but, I will spend a bit more time sanding first .
-
I had a gap between the keel plank and stern transom knee when I was finished planking. It was not very big and I was able to slip some glue under it and clamp it with a clothes pin. They lines on the outside of the plank were helpful for lining up the skeg.
-
Earlier this week I was able to get the frames for the thwarts installed but it was a bit of guess work to get the heights so the thwarts were level. The instructions don't say to prepare them until later on< but sanded them down to check that the frames would work out as I installed them. I also trimmed the ends of the transoms. The instructions say to use a razor saw, but shaving off the excess wood with a knife blade worked fine and seemed to have much less potential for disaster. The instructions say to use a ⅜ inch round file to make the groove in the stern. The grove is about the size of the tapered end of the file, and I was worried it would get too big. I used needle files to get it close and then just used the tip of the ⅜ file at the end.
We were supposed to be in Seattle visiting my grandchildren, but the trip got cancelled because of Covid concerns, so I had more time to work on the Pram today. I filled the hole in one of the mast step pieces with wood filler (only one is supposed to have a hole) before gluing them together.
Cutting the holes in the inwales for the stay plates was a new adventure for me. I read in other's logs that the instructions are wrong about the size of the hole (one scale inch, not two) I found the PE part for the plate, drilled the small hole in the inwale and then gradually enlarged it until the plate fit. The first one took a long time as I was worried I would make it too big or destroy the inwale. I tired different ways of gradually enlarging the hole as I was not very comfortable with the small saw blade.. Ultimately working slowly and gently with the tip of the # !5 saw blade ,as the instructions suggested, worked the best. The second hole took a lot less time and was better centered in the inwale.
-
Good luck with your build.! I am very new to building model boats, but one thing I can tell you so far is that slow is very good. Taking time to look at plans, read the instructions over and over and also taking the time to just enjoy each step has been a great help. Look at other build logs for your ship and also for similar ships. I have learned a lot from other's logs and they have been very helpful with understanding unclear parts of the instructions and in avoiding some mistakes.
Dan
- Keith Black and dirkske
-
2
-
It's been busy for me past 2 days but I did manage to get the inwales bent, cut and glued in, and I also started working on the stern quarter knees. A bit at a time is OK with me.

-
On 12/21/2021 at 8:10 PM, Ryland Craze said:
Very nice and clean looking. This is going to turn out to be a very good build.
Thanks very much for your encouraging words!
-
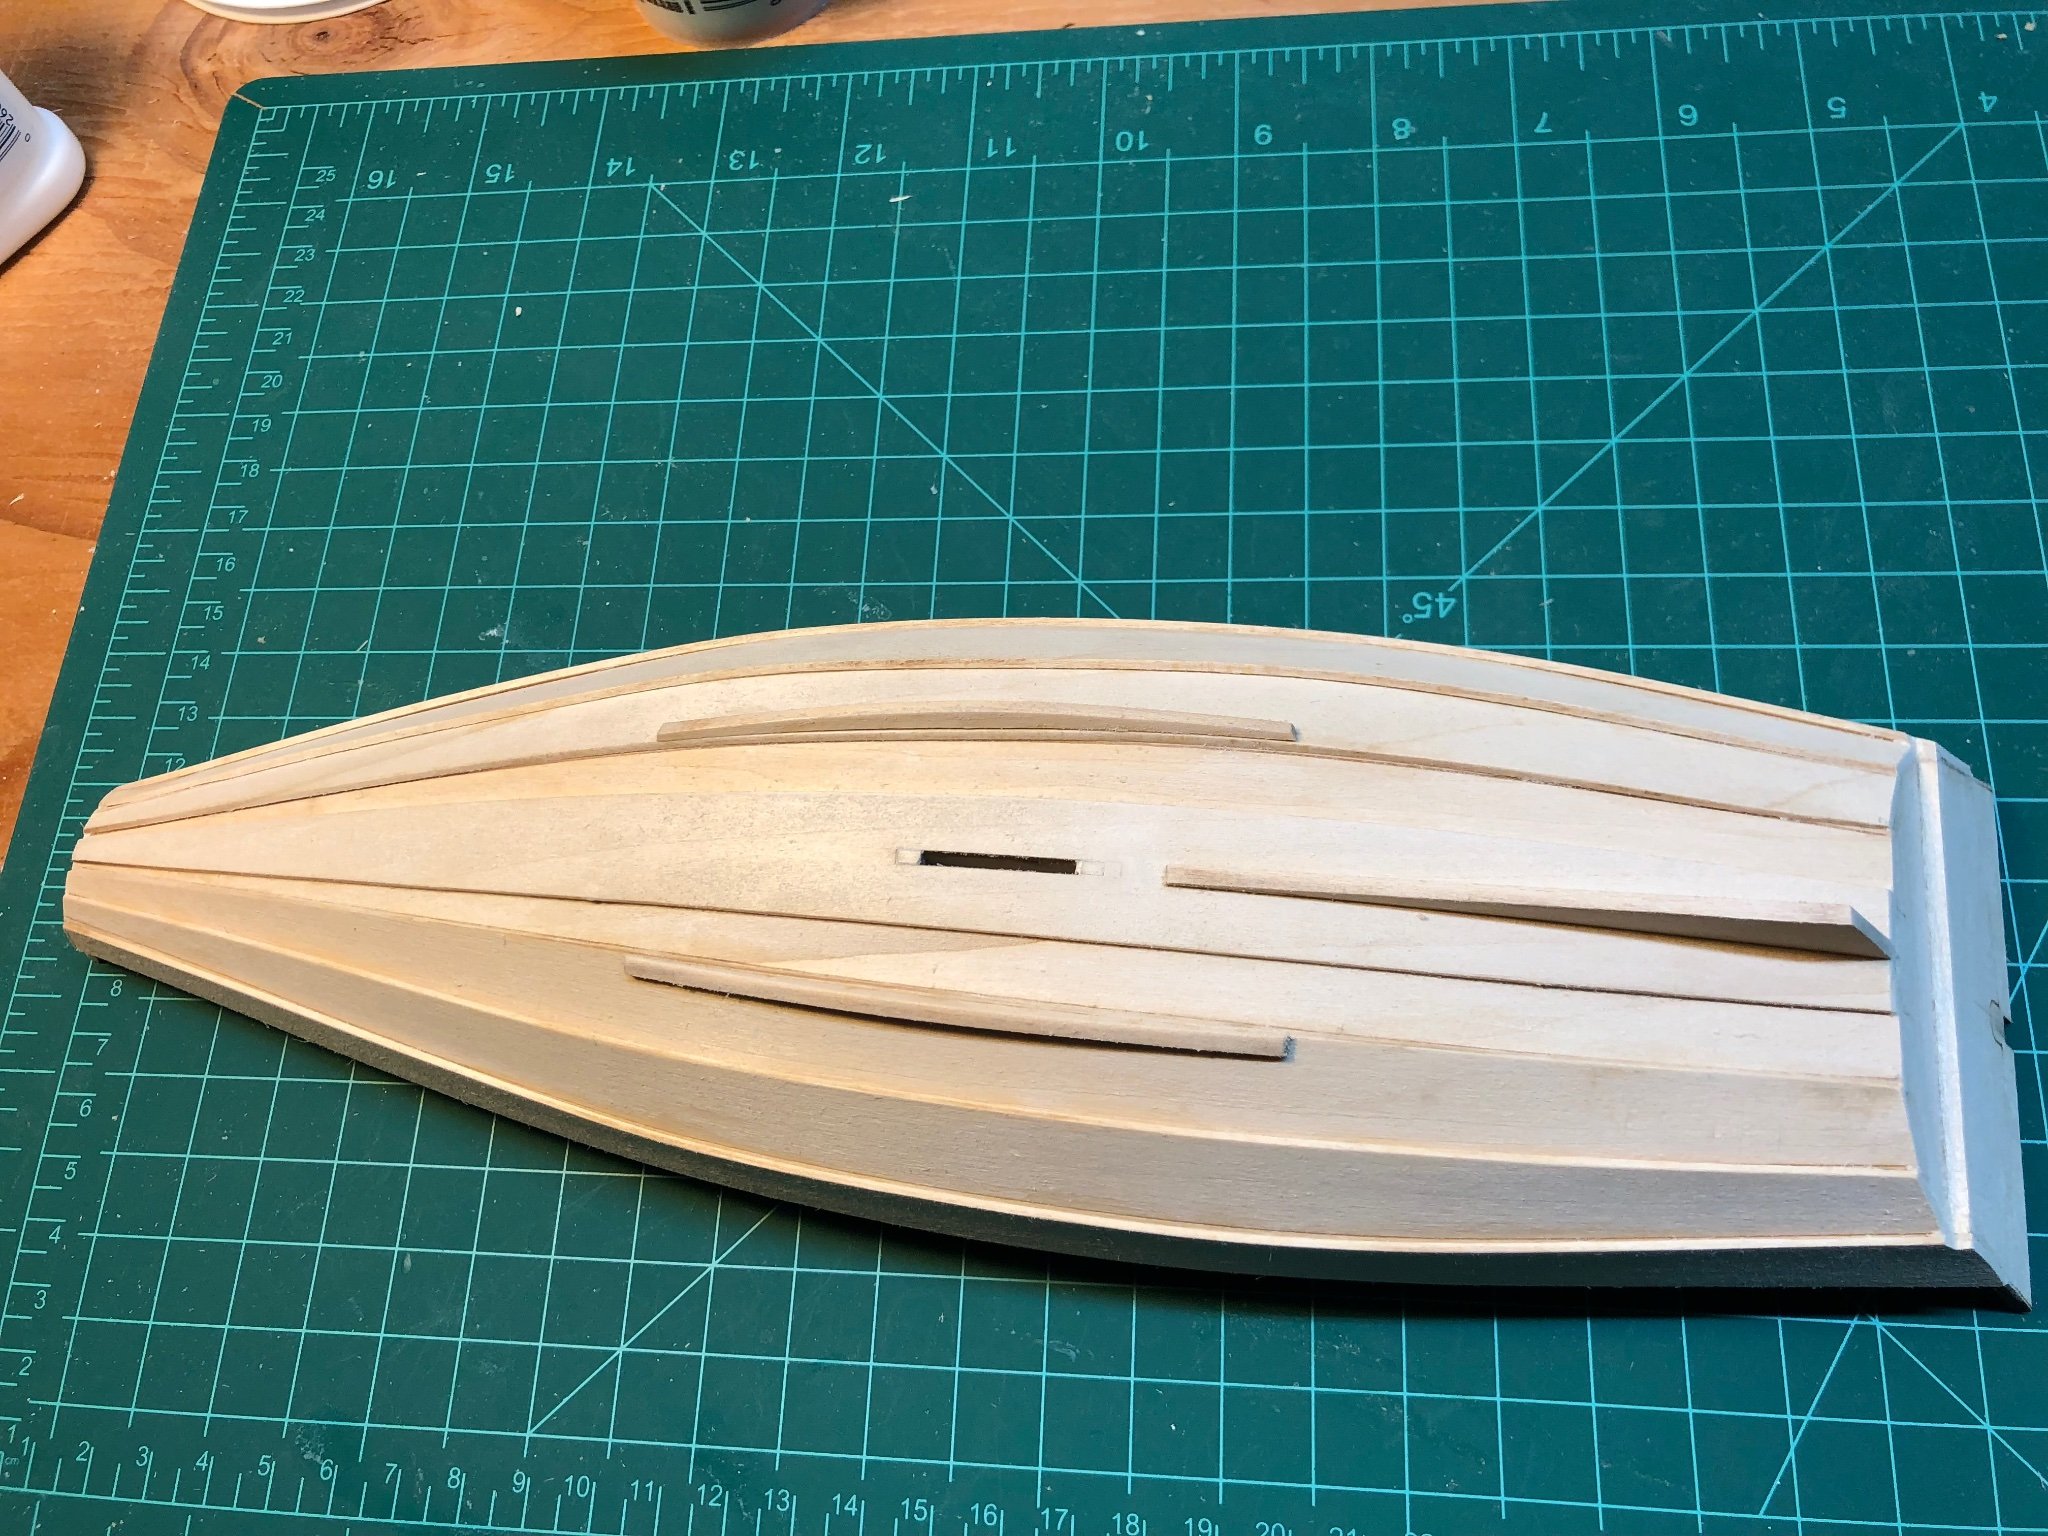
Today I added the skeg and bilge keels. It takes a bit of looking at the pictures and estimating where things go. The pictures are great especially using the pdf and blowing them up fro my old eyes. There is a drawing in the instructions, but did not help much.

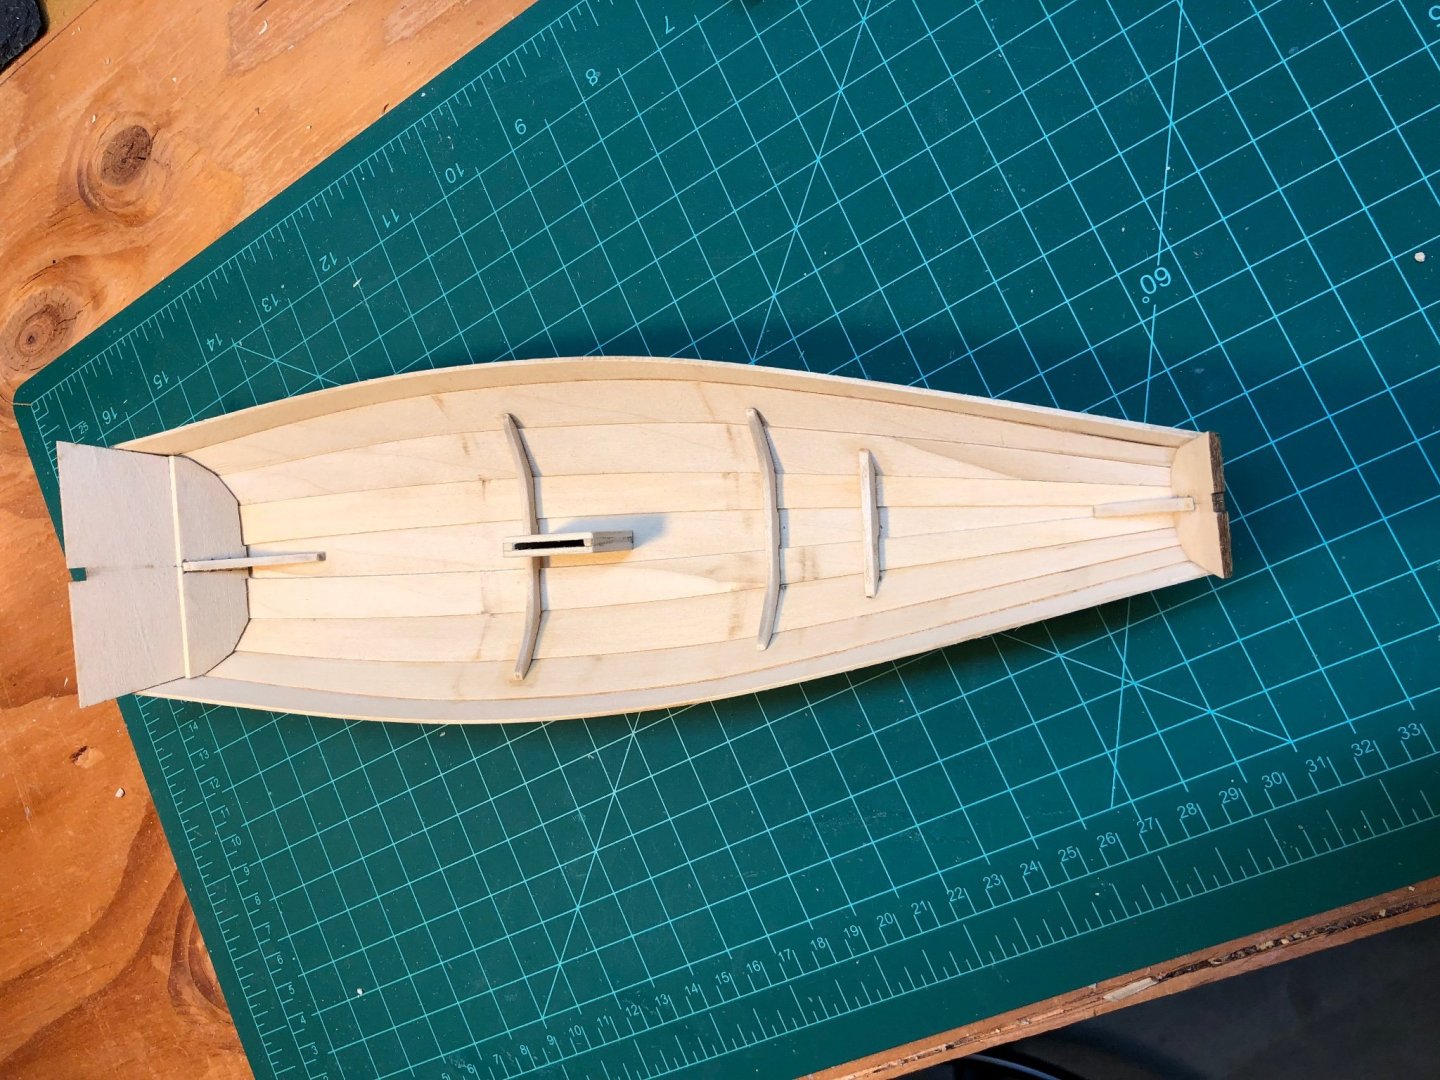
I built the case for the center board and installed the frames. The slot for the center board in the keel plank was too big. I moved it to the front of the slot and filled the back-- not sure that was correct. There is a guide in the manual to position the first 2 frames from the front of the center board. For the third frame, the pictures blown up, show it a bit behind the back of the center board case, so I fit it in there.
Agree with @bobandlucy that letting the planks dry out overnight, or at least for a few hours on the mold was vey helpful in getting them to the right shape, I also used the a bit of water on them and a hair dyer as suggested by @turangi as was gluing them in.
-
Sheer Planks
These were not so difficult to bend, but it was tricky to align them with the curves scribed on the transoms, the little marks on the molds, and the scribed lines on the second planks. I was only able to get close and try and do about the same thing on both sides to keep it symmetrical. It is really a lot of fun though, watching as it gradually goes from transoms and molds on a board to taking shape as a boat!
- Claire7, druxey, Ryland Craze and 5 others
-
8
-
Today I was able to add the second planks next to the garboard planks and started preparing the sheer planks. I bent one and it is drying out on the molds overnight.

- gsdpic, hollowneck, Ryland Craze and 4 others
-
7
-
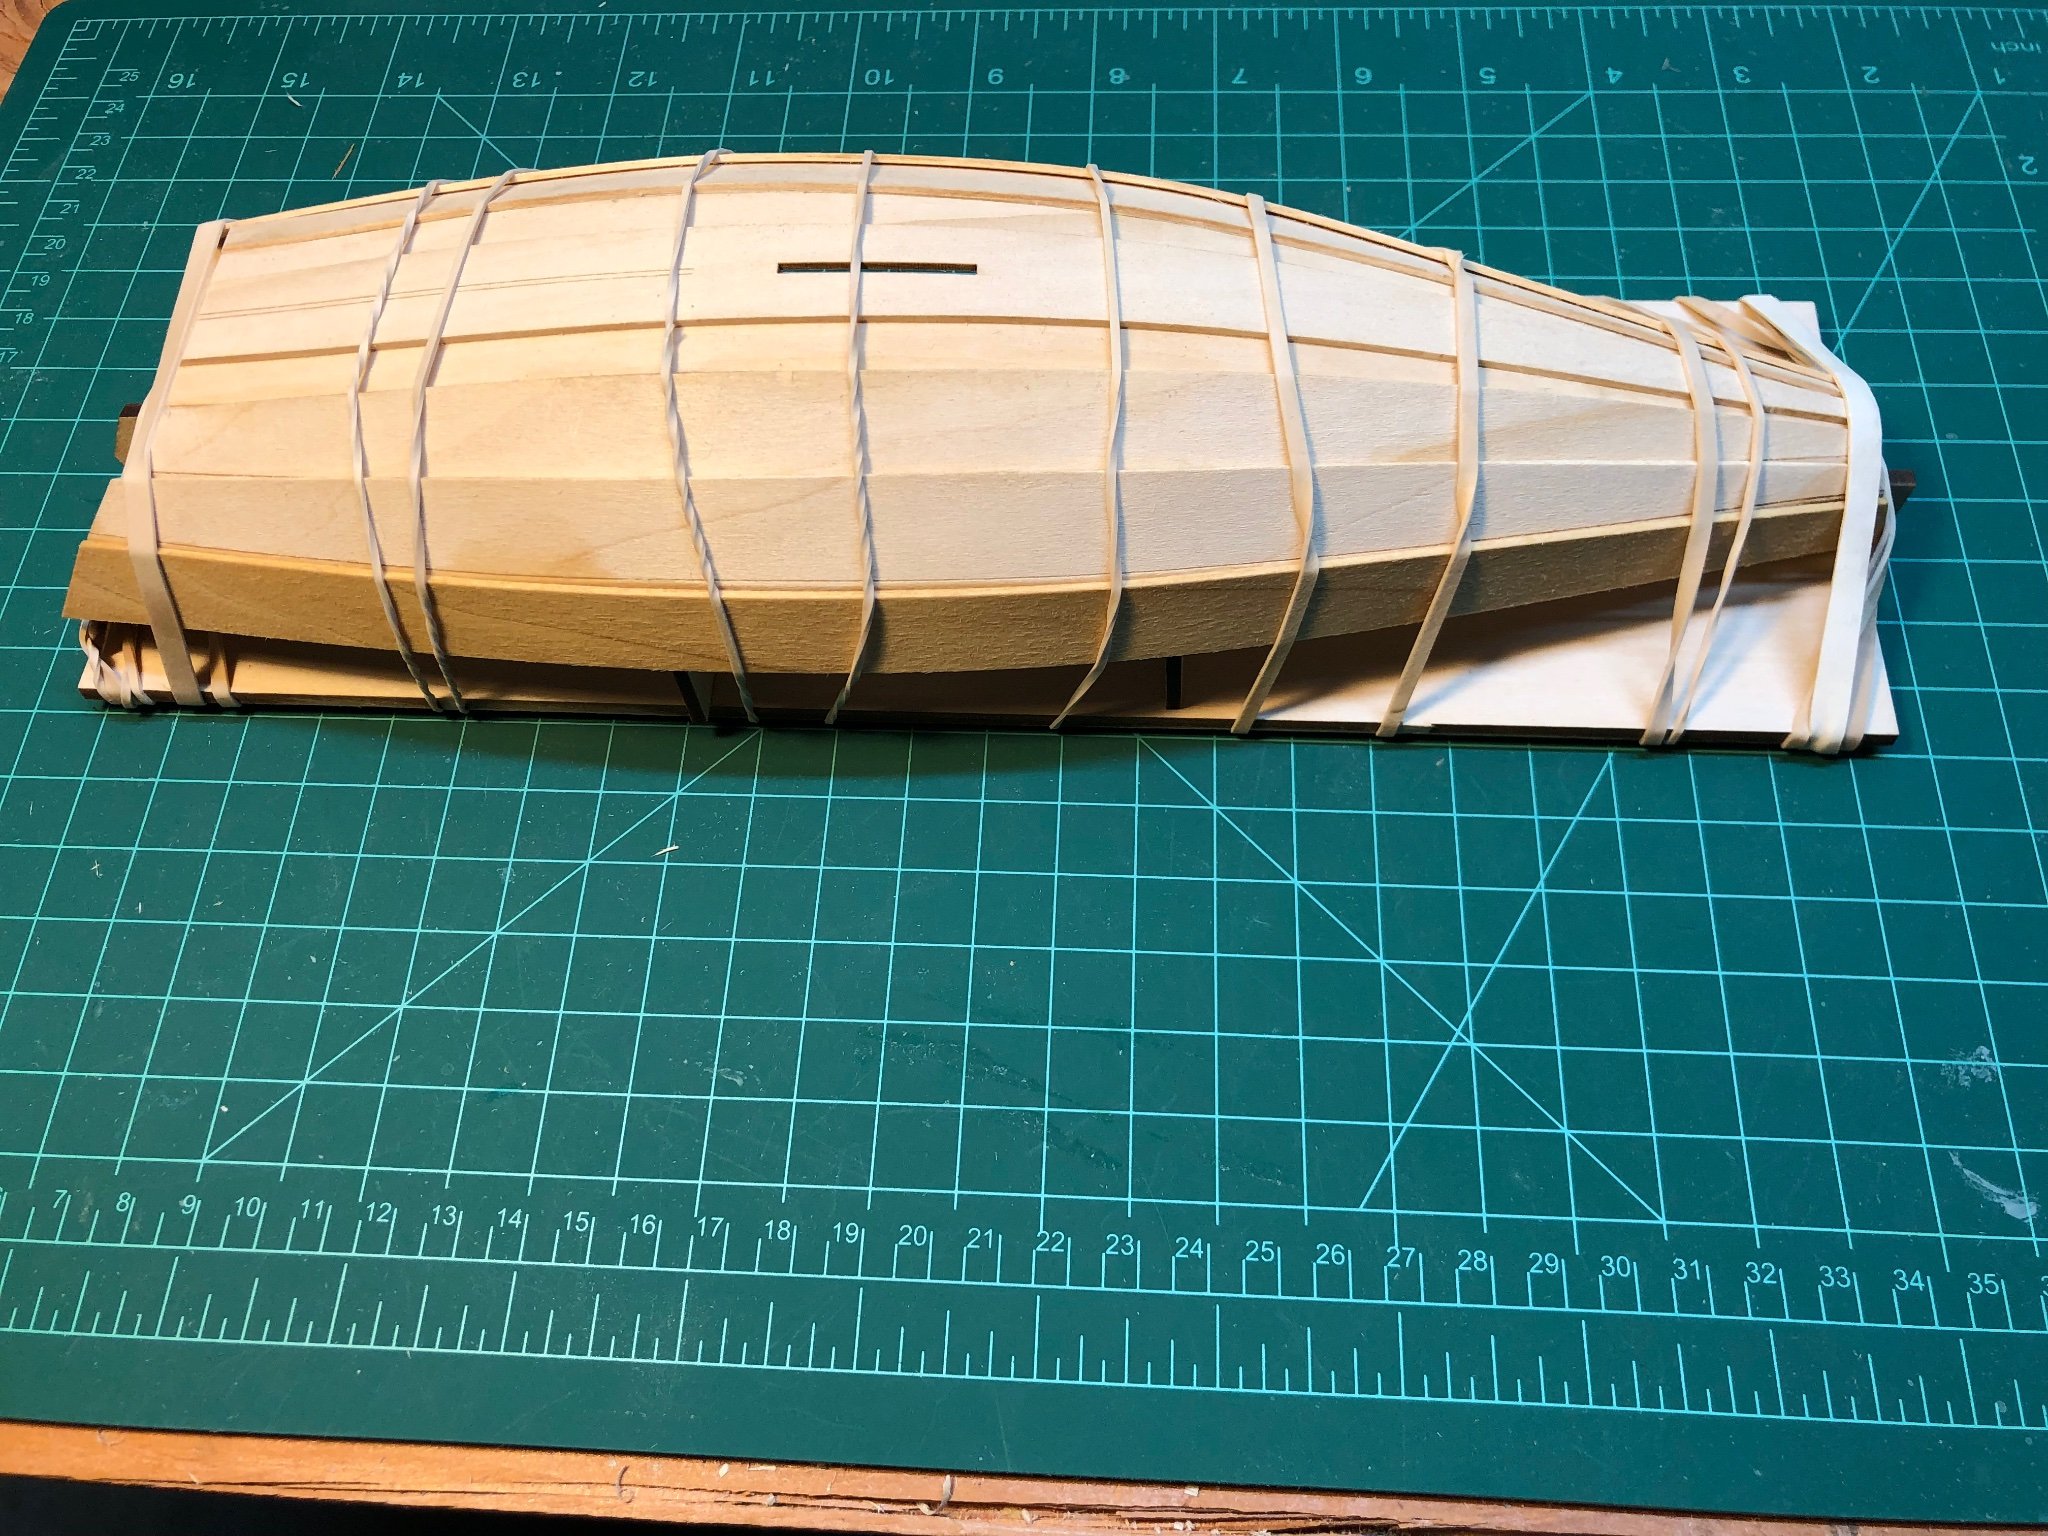
I noticed that the garboard plank I had glued in place was a bit off at the molds as the plank edge was not quite at the edge of the molds. I used alcohol to unglue it so I could try get the edge of the plank lined up better. It was not as awful as I thought would be, --just allowing the alcohol time to work and taking the plank off a bit a at time. I was able to align the plank better the second time . I glued down the other side and prepared the second planks. I soaked one of them and put it to bed with lots of rubber bands.
Lessons learned
- watch the alignment of both edges of the plank.
- since the plank is at an angle a small misalignment at the bow was much bigger at the molds at the middle of the boat
- Ungluing using alcohol to correct a mistake was not as terrible as it thought it would be. I had a plank that was a bit off on the Dory and I was too worried about messing it up more so I did not correct it. It came out OK-- but I know that plank is there!

- druxey, hollowneck, G.L. and 3 others
-
6
-
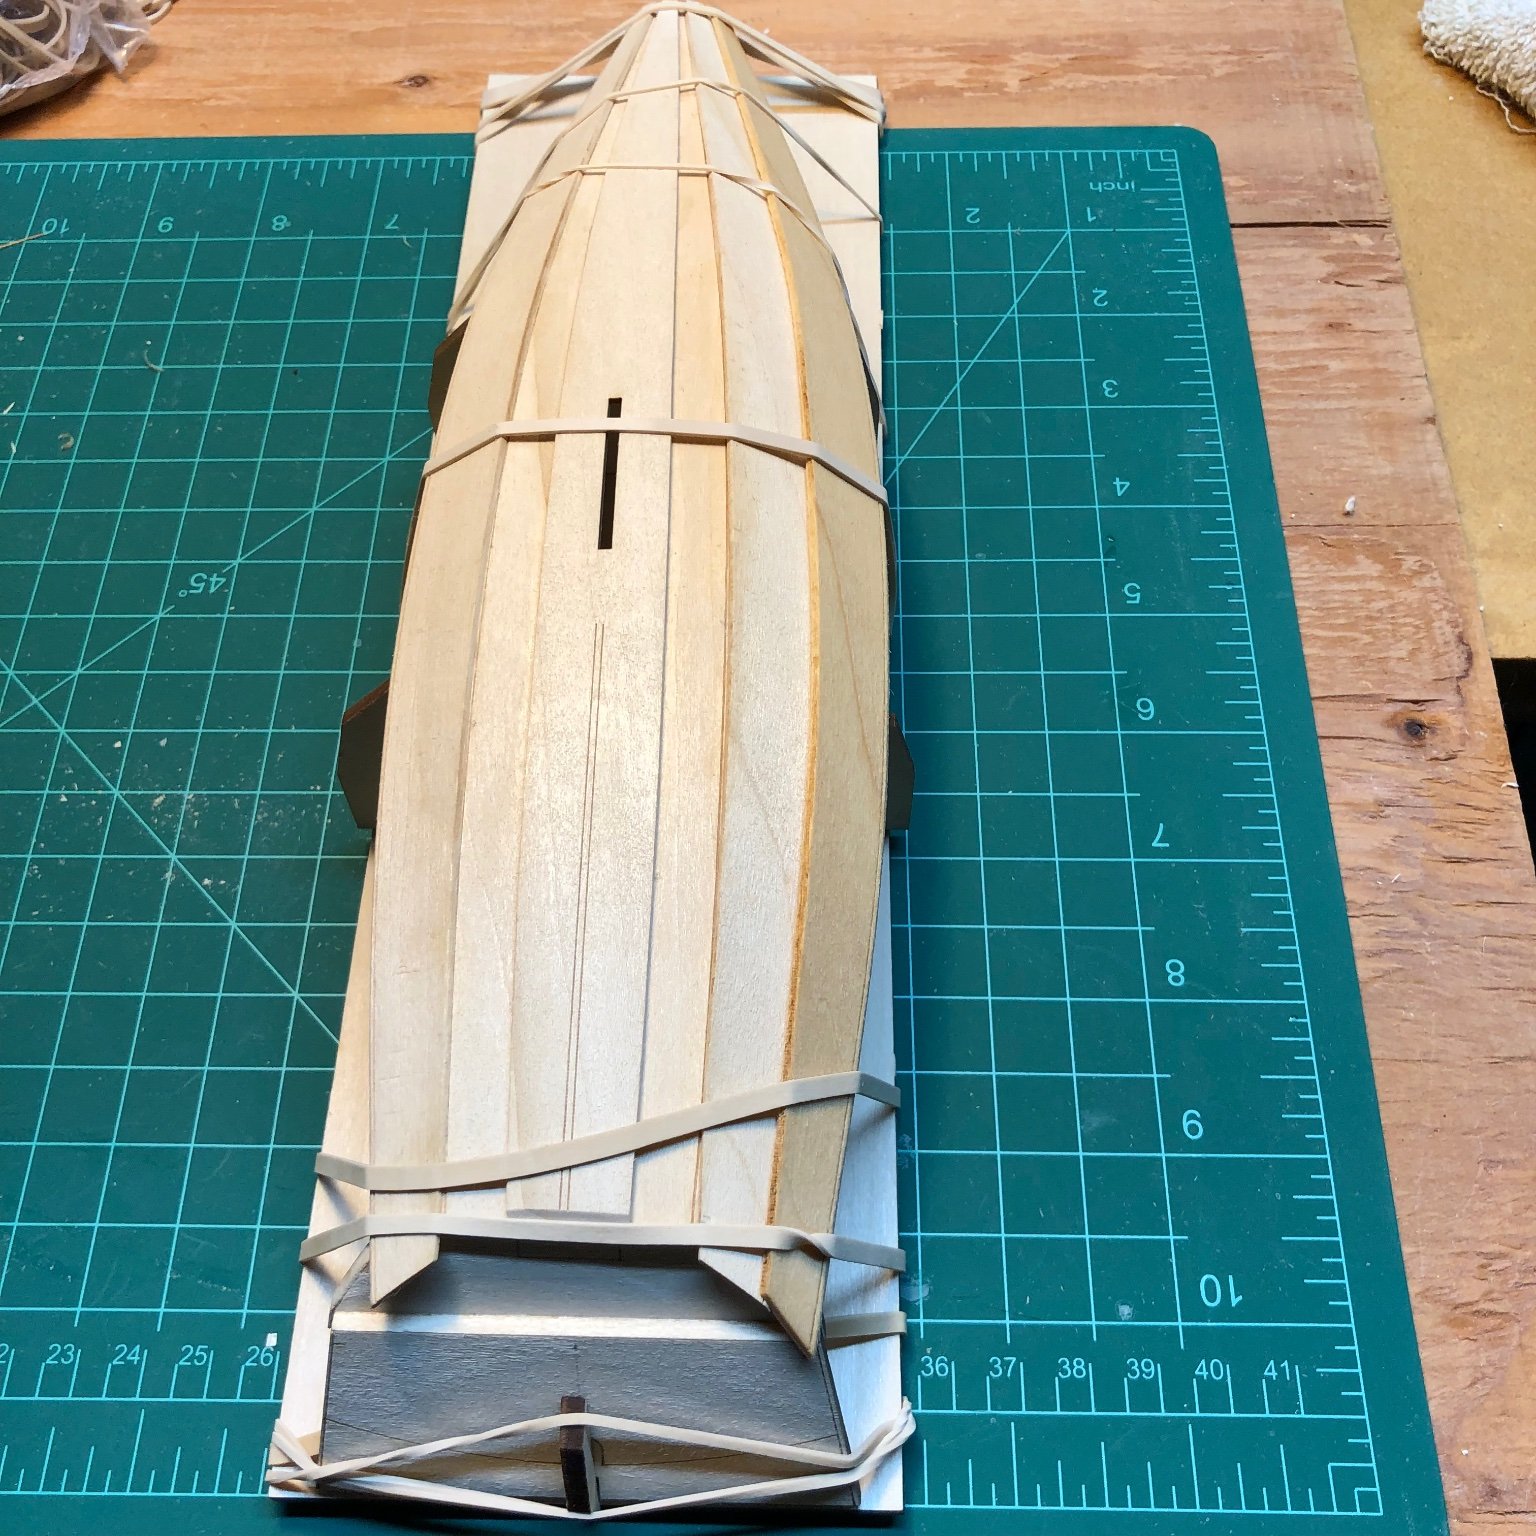
Today I cut the overlap of the bottom planks and keel plank at the stern transom and sanded the slight overlaps at the bow. I cut the rabbets in the gar planks. Used the chisel blade to remove a bit at a time and then changed to a flat needle file and sanding sticks when I was getting close to the right depth. Mine are as pretty as the example in the instructions, but the gains look ok at the transoms. Bent and glued in one side a bit a a time. I soaked the other one and tucked it under the rubber bands to bend it and then put it to bed to dry overnight.

-
Thanks very much to @turangi and @druxey for the wood bending suggestions! Today I glued the keel plank. Doing it in 2 stages as suggested in the instructions worked great. Shaped the bevels on the garboard planks. I am still practicing cutting rabbets one inch long on the ends of pieces of scrap to try to get mine to look more like the ones in the instructions. I"m getting a bit better at it with more confidence with removing a bit at at time with the chisel blade. I may try the hair dryer to help bend the garboard planks.
- druxey, hollowneck, Ryland Craze and 2 others
-
5
-
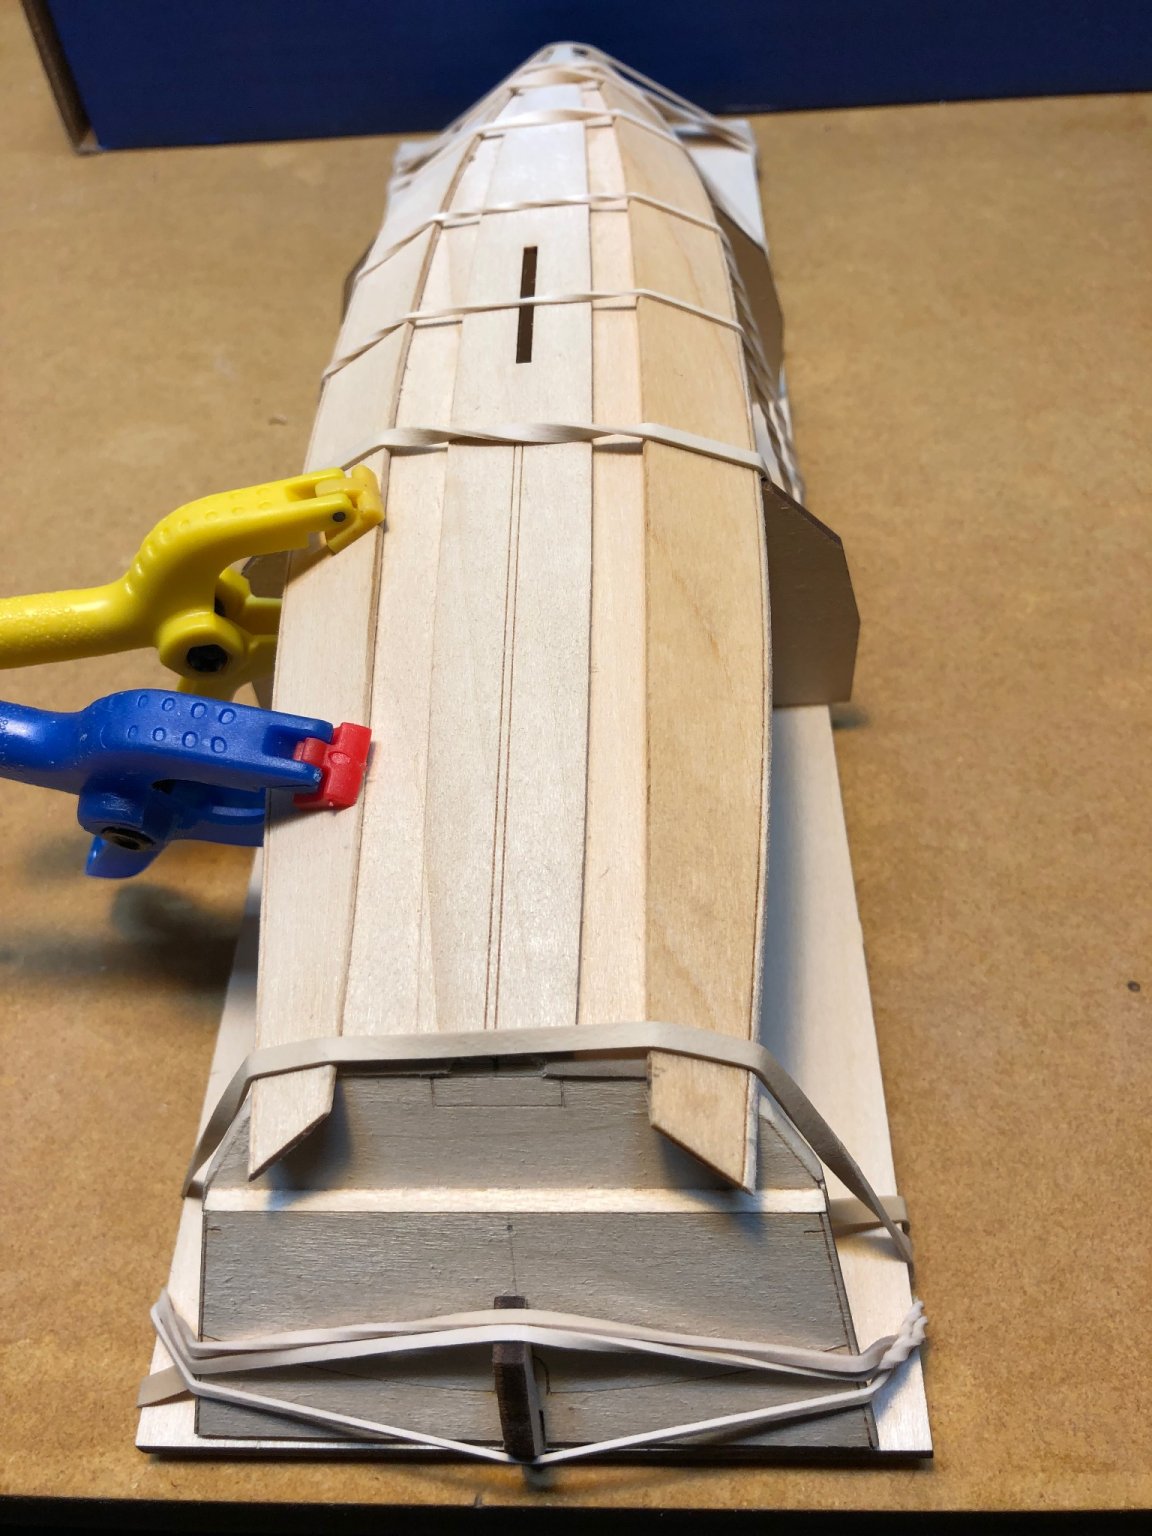
Gluing Bottom Planks to Transoms
This was more complicated than it looked in the instructions. I glued the bow without much trouble and let it dry. I spent a long time trying to fit the planks to the stern transom. I installed some wood scraps to keep the transom holder steady, but the transom was still wobbly an it sits a bit off the building board. (looks that way in some of the pictures in the instructions also). The planks tended to twist toward the midline. I broke the transom holder as I was trying to get it all to lined up and get the transom square with the board. Took a deep breath, and glued the holder back together. Bushed water on the planks and used rubber bands to get the planks to be a bit less twisted using just the transom to get the hieght and spacing correct as the they dried out for a a while.
The planks fit better in the slots in the transom after they dried out. It still took a major rubber band party to get the stern transom level and in alignment with the molds, including rubber bands around the transom holder to keep it seated in the board and a bunch around the transom. Once it was finally square, I lifted each plank enough to slip the glue under it with a paint brush.


Norwegian Sailing Pram by DanB - FINISHED - Model Shipways - 1:12
in - Kit build logs for subjects built from 1901 - Present Day
Posted
Sail
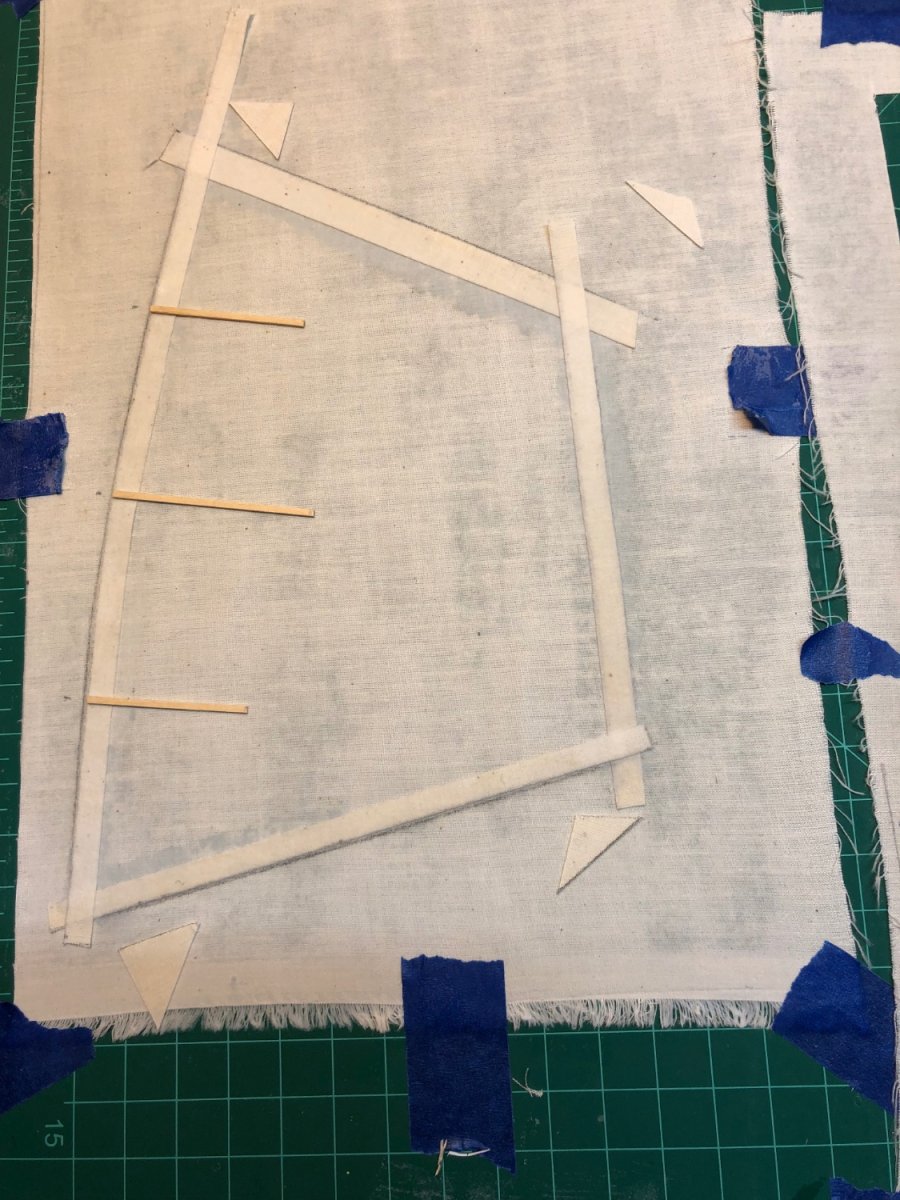
Added sleeves for the battens. I think it came out OK. It is still drying. I was not sure how wide to make the strips. The reinforcements around the edges of the sail are ¼ inch so I went a bit less than that, but I think they should have been a bit wider as it was hard to glue them down.
On to trying to do the rigging (also new territory for me) tomorrow.