tomganc
-
Posts
60 -
Joined
-
Last visited
-
 Mexspur reacted to a post in a topic:
HMS Victory by dafi - Heller - PLASTIC - To Victory and beyond ...
Mexspur reacted to a post in a topic:
HMS Victory by dafi - Heller - PLASTIC - To Victory and beyond ...
-
Obormotov reacted to a post in a topic:
HM Cutter Alert by Thukydides - Vanguard Models - 1:64 - first build
-
ErnieL reacted to a post in a topic:
HMS Sphinx 1775 by Glenn-UK - FINISHED - Vanguard Models - 1:64 - V2 Kit by Glenn Shelton
-
GrandpaPhil reacted to a post in a topic:
HMS Victory by tomganc - DeAgostini - 1/84
-
Old Collingwood reacted to a post in a topic:
HMS Victory by tomganc - DeAgostini - 1/84
-
Old Collingwood reacted to a post in a topic:
HMS Victory by tomganc - DeAgostini - 1/84
-
Old Collingwood reacted to a post in a topic:
HMS Victory by tomganc - DeAgostini - 1/84
-
Old Collingwood reacted to a post in a topic:
HMS Victory by tomganc - DeAgostini - 1/84
-
Old Collingwood reacted to a post in a topic:
HMS Victory by tomganc - DeAgostini - 1/84
-
Bill Morrison reacted to a post in a topic:
HMS Victory 1805 by Robert29 - FINISHED - Caldercraft - Scale 1:72
-
tomganc reacted to a post in a topic:
HMS Victory by Seahorse - Corel - 1:98 Scale - Cross-Section
-
That's really nice and neat build. I like your attention to the details and gosh the ago of the kit says it all. Wonderful piece of modelling. Regards Tom
-
This is looking great. I'm not far behind with mine I hope Considering this is 1/100 scale I'm well impressed with the level of details. Well done sir 👍 Regards Tom
-
tomganc reacted to a post in a topic:
HMS Victory by gil middleton - FINISHED - Caldercraft - 1:72
-
tomganc reacted to a post in a topic:
HMS Victory by gil middleton - FINISHED - Caldercraft - 1:72
-
tomganc reacted to a post in a topic:
HMS Victory by gil middleton - FINISHED - Caldercraft - 1:72
-
tomganc reacted to a post in a topic:
HMS Victory by gil middleton - FINISHED - Caldercraft - 1:72
-
tomganc reacted to a post in a topic:
HMS Victory by gil middleton - FINISHED - Caldercraft - 1:72
-
Hi Such a great build. It will be my inspiration for some of the rigging details I couldn't get right from the books. It is always good to look at the example when it's done right. You must be very proud of your build and you well should be. Fantastic craftmanship. Regards Tom
- 753 replies
-
- 2
-
-
- finished
- caldercraft
- (and 1 more)
-
tomganc reacted to a post in a topic:
HMS Victory by gil middleton - FINISHED - Caldercraft - 1:72
-
tomganc reacted to a post in a topic:
HMS Victory by gil middleton - FINISHED - Caldercraft - 1:72
-
tomganc reacted to a post in a topic:
HMS Victory by gil middleton - FINISHED - Caldercraft - 1:72
-
tomganc reacted to a post in a topic:
HMS Victory by gil middleton - FINISHED - Caldercraft - 1:72
-
Thanks for the reply. I will have a look straight away I looked it the books and I was hoping to see the block which was used to pull the yard up before securing it in its place with the sling. I will have a look through the build you've sent me and hopefully find all the naswers. Big thanks again. Regards Tom
-
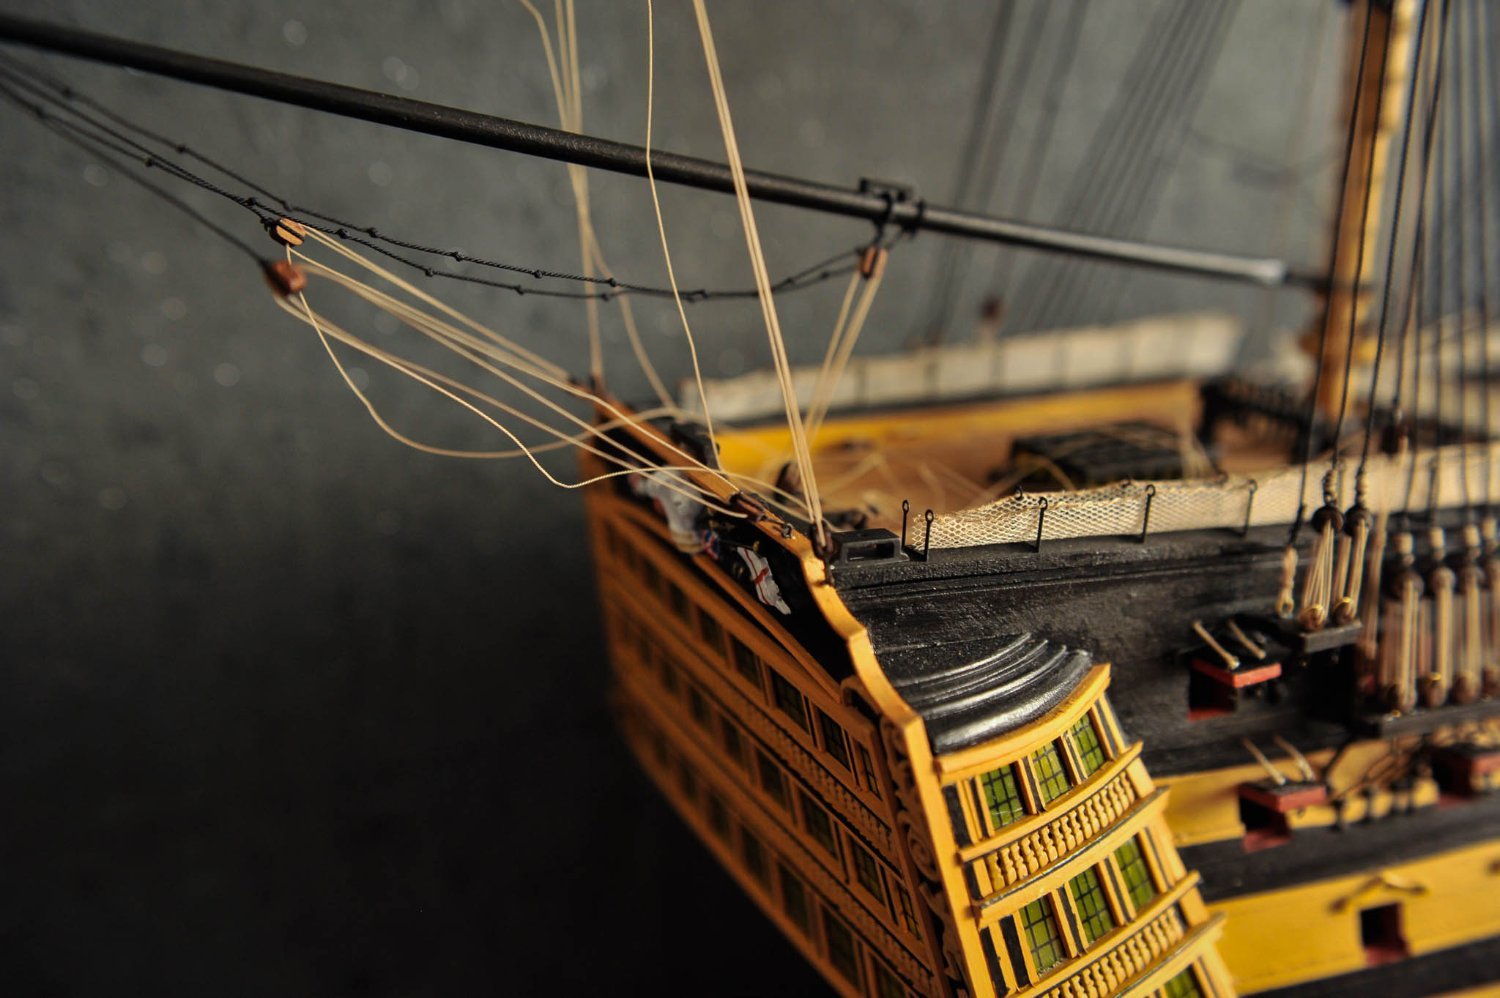
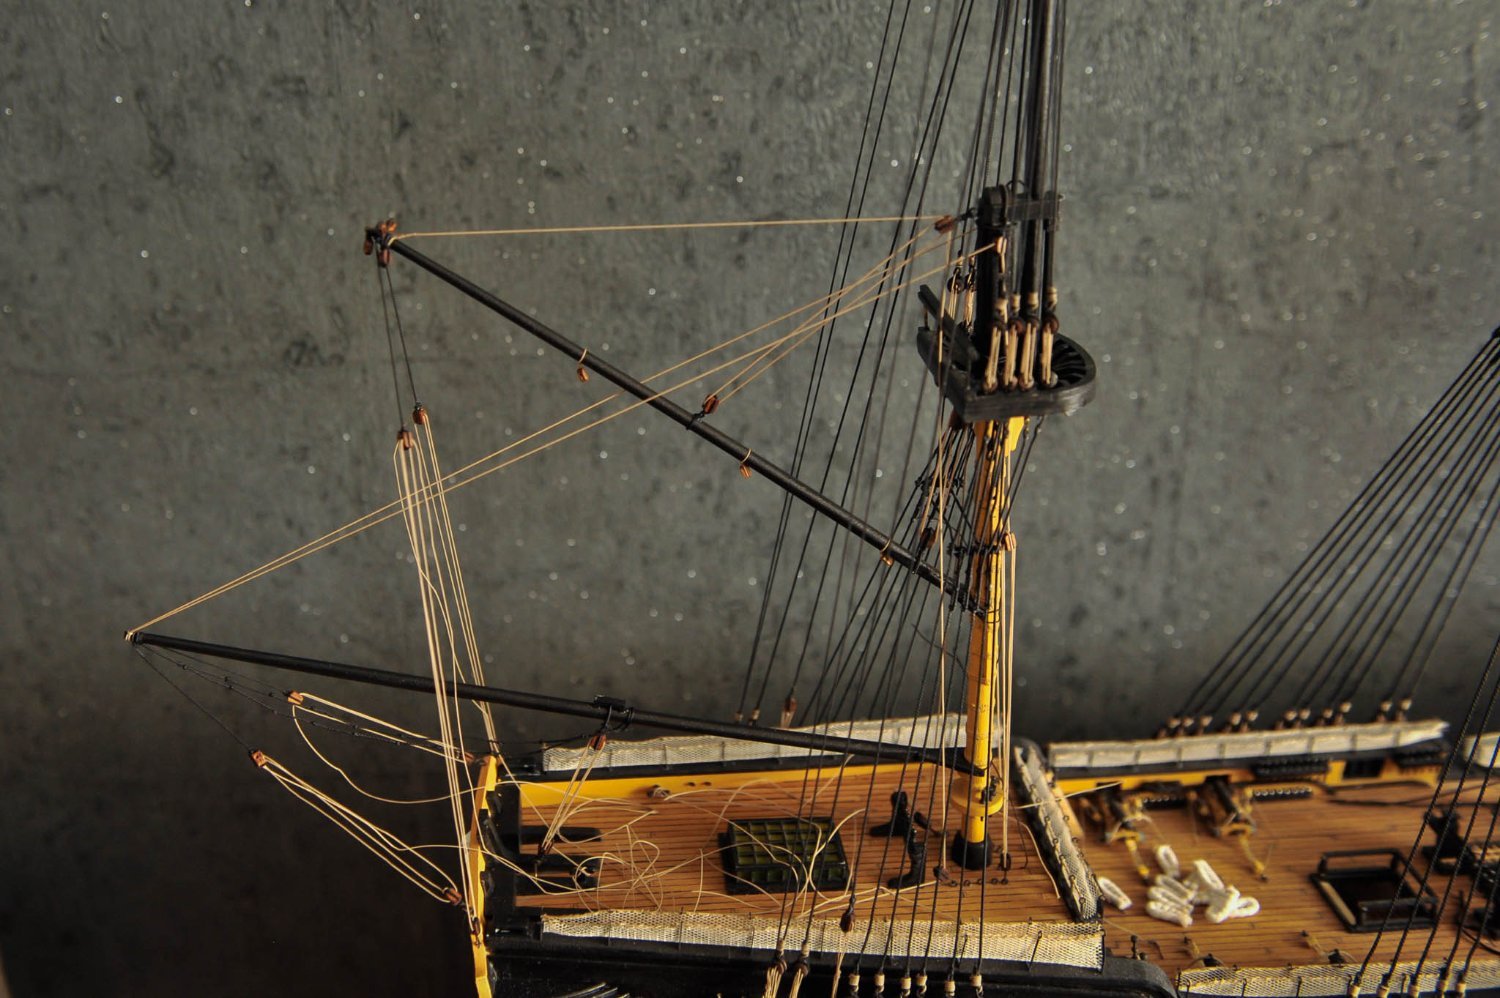
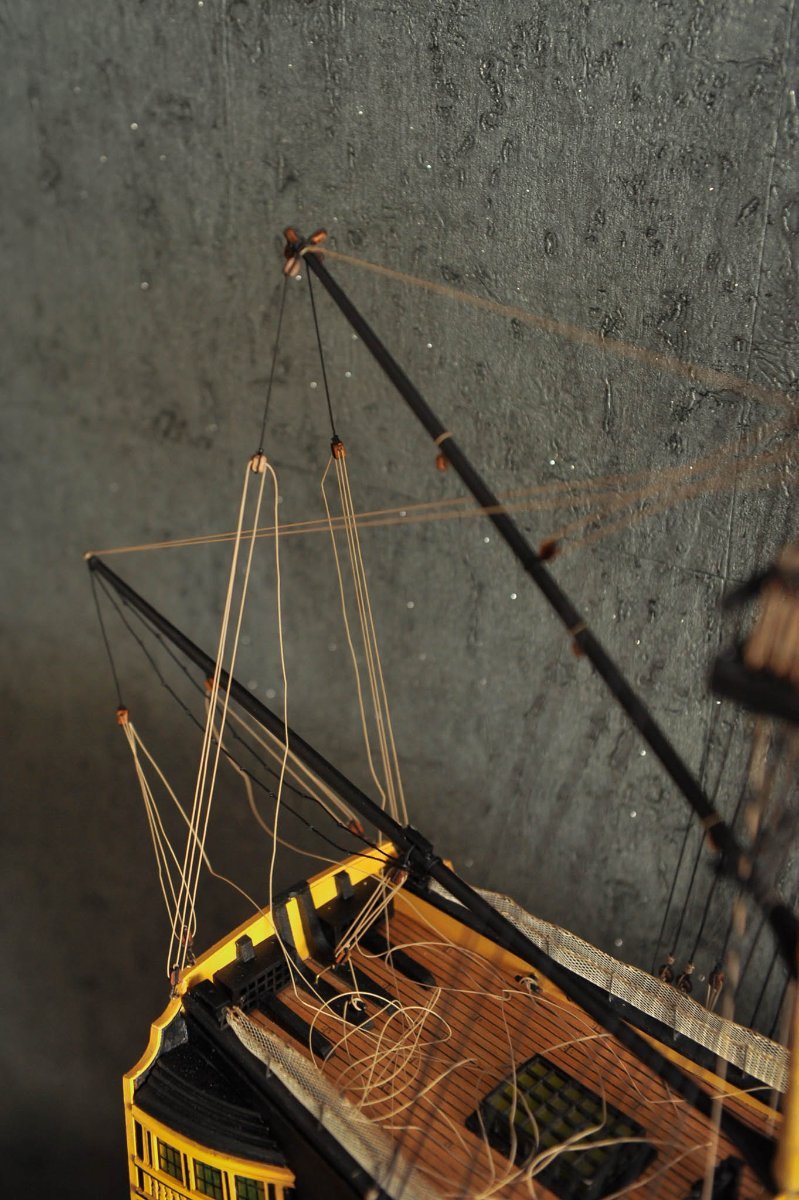
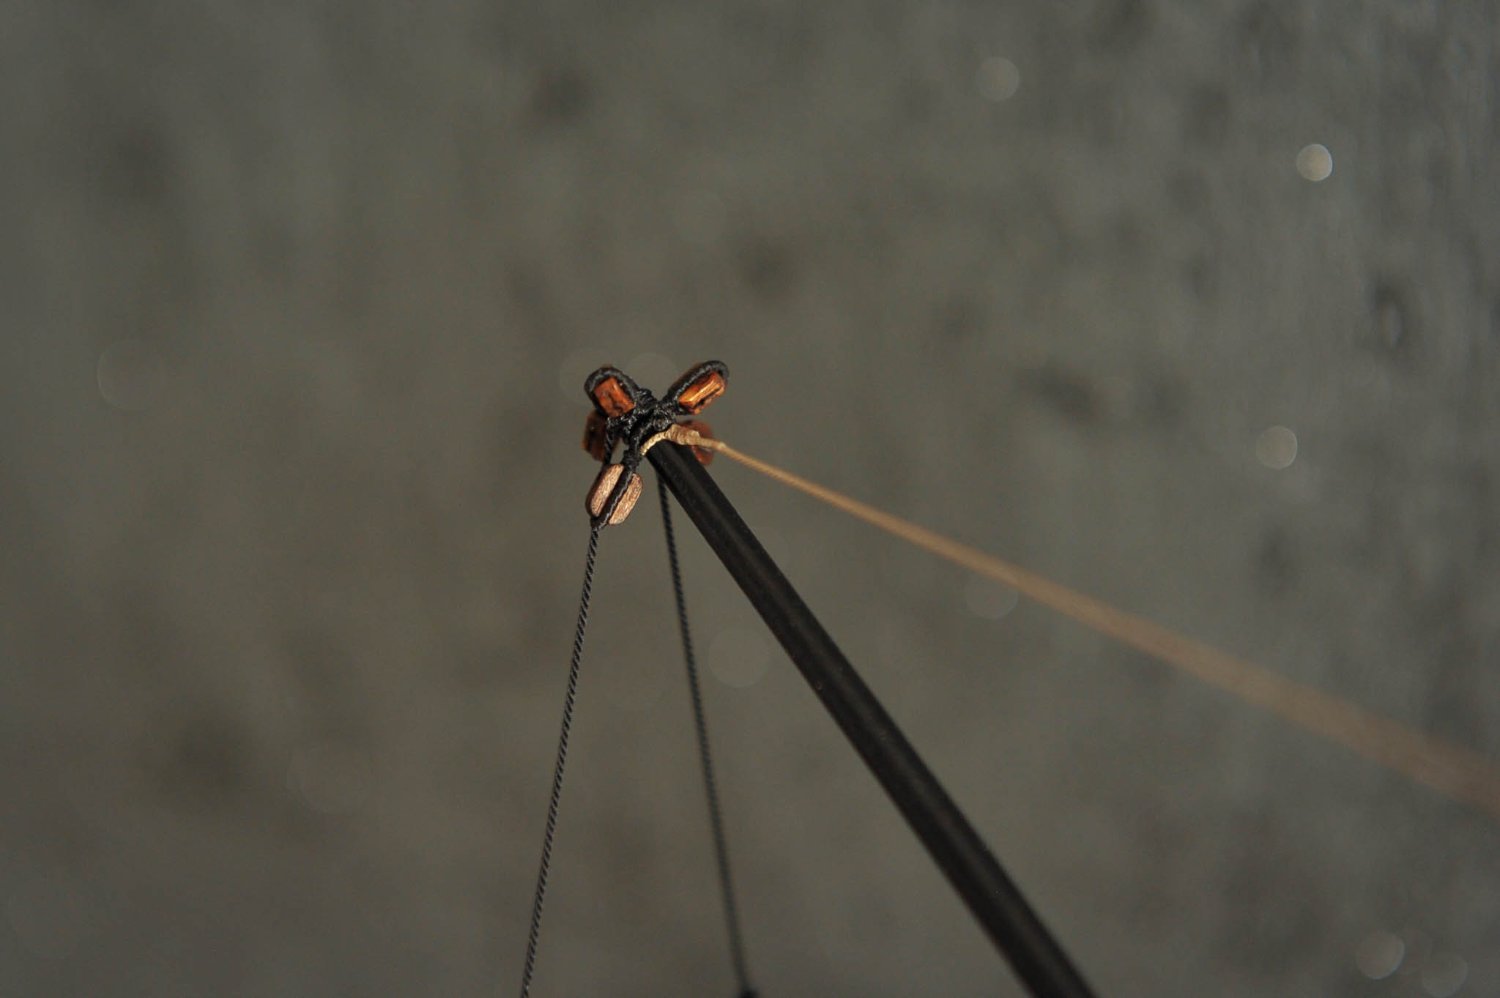
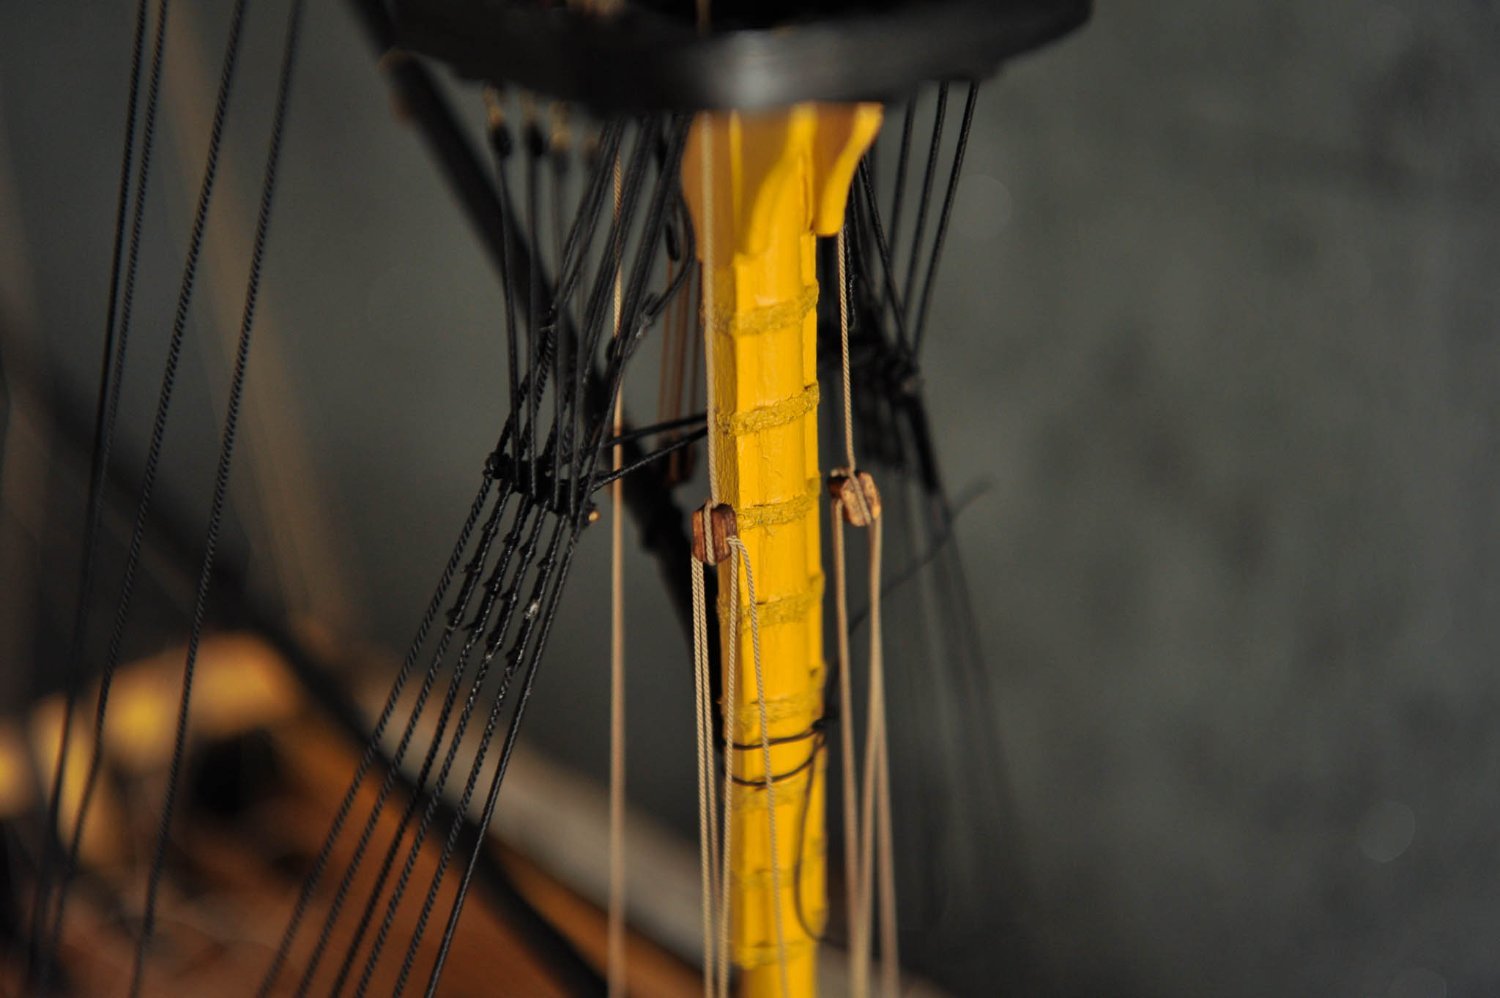
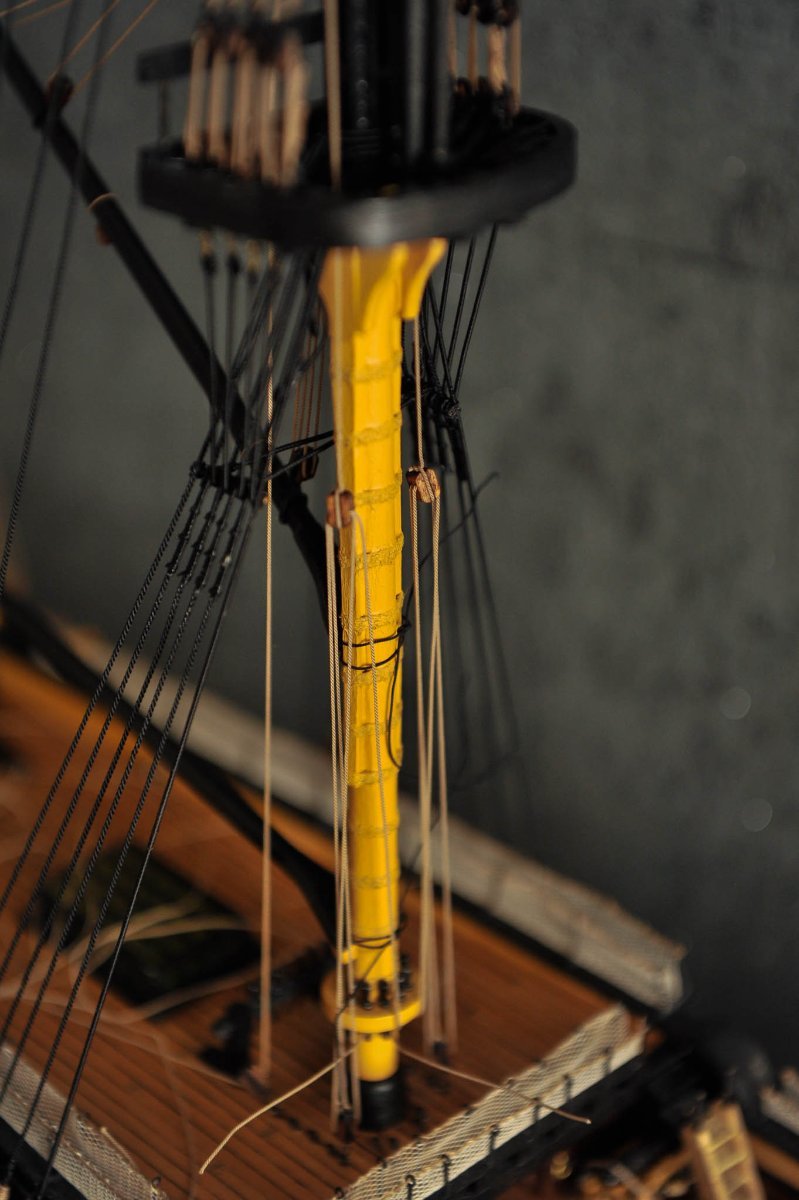
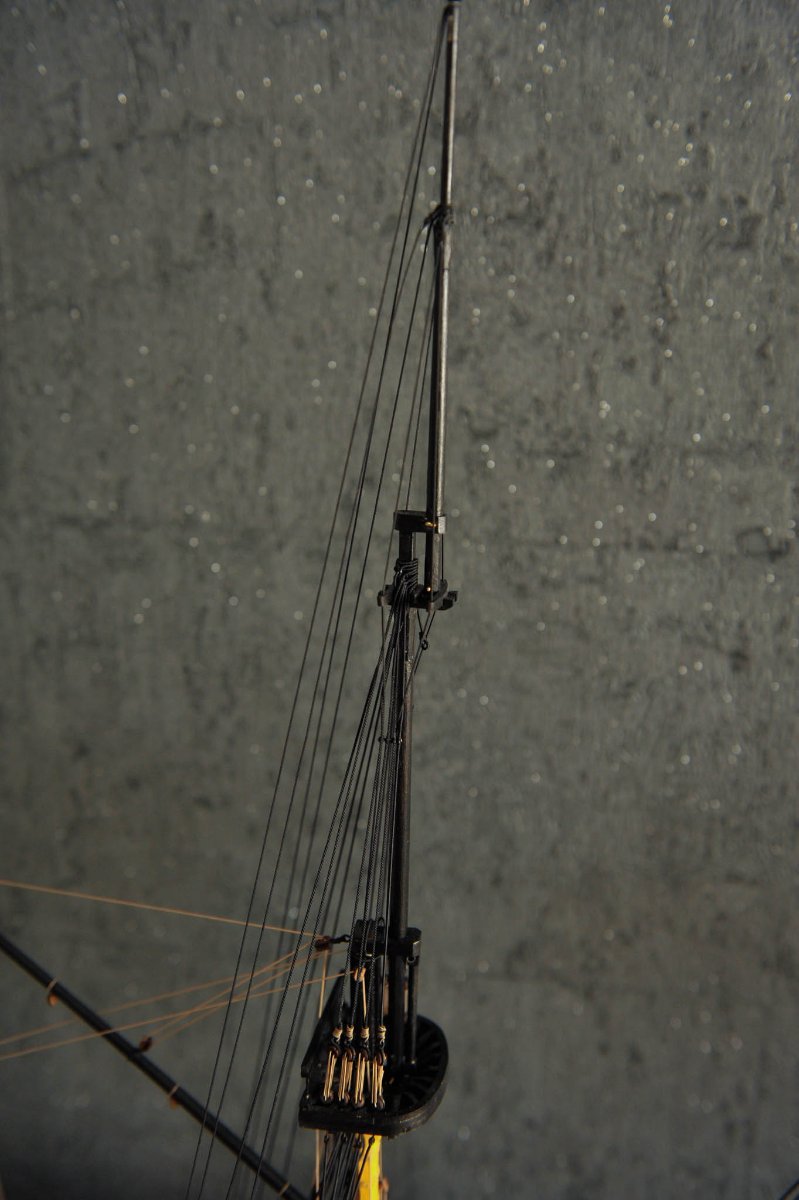
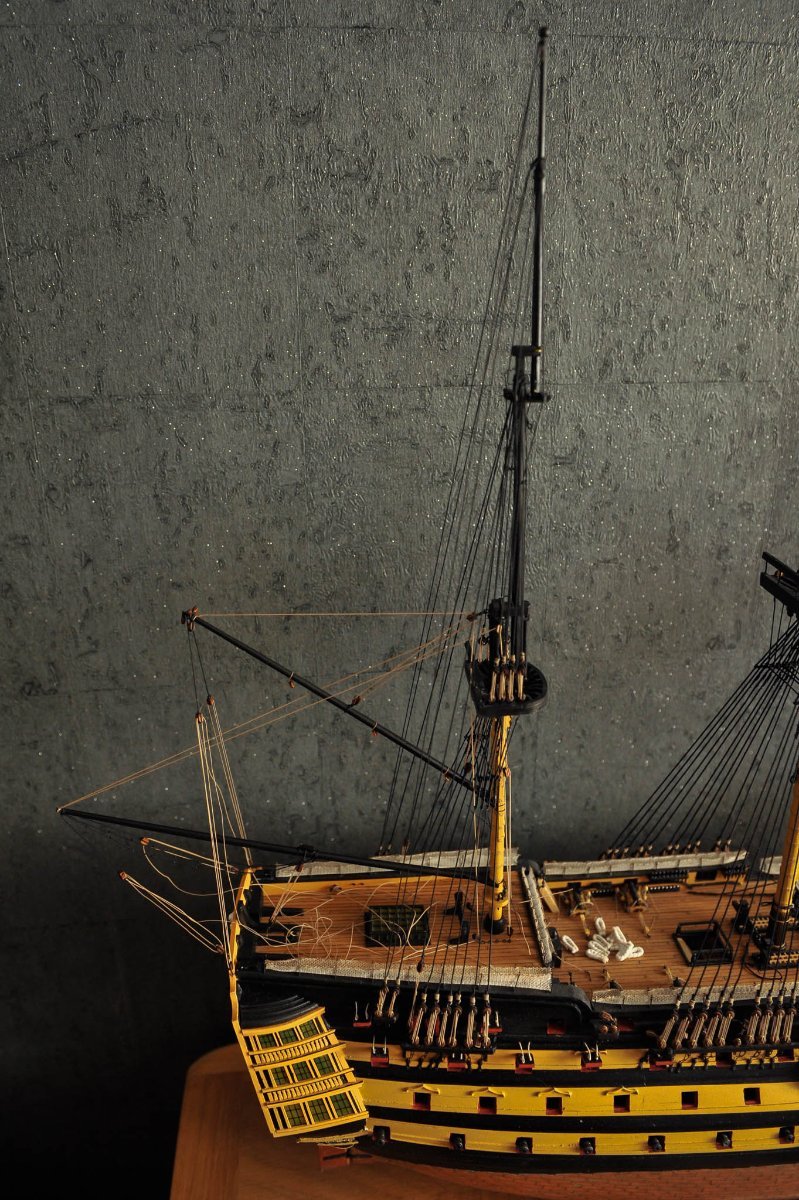
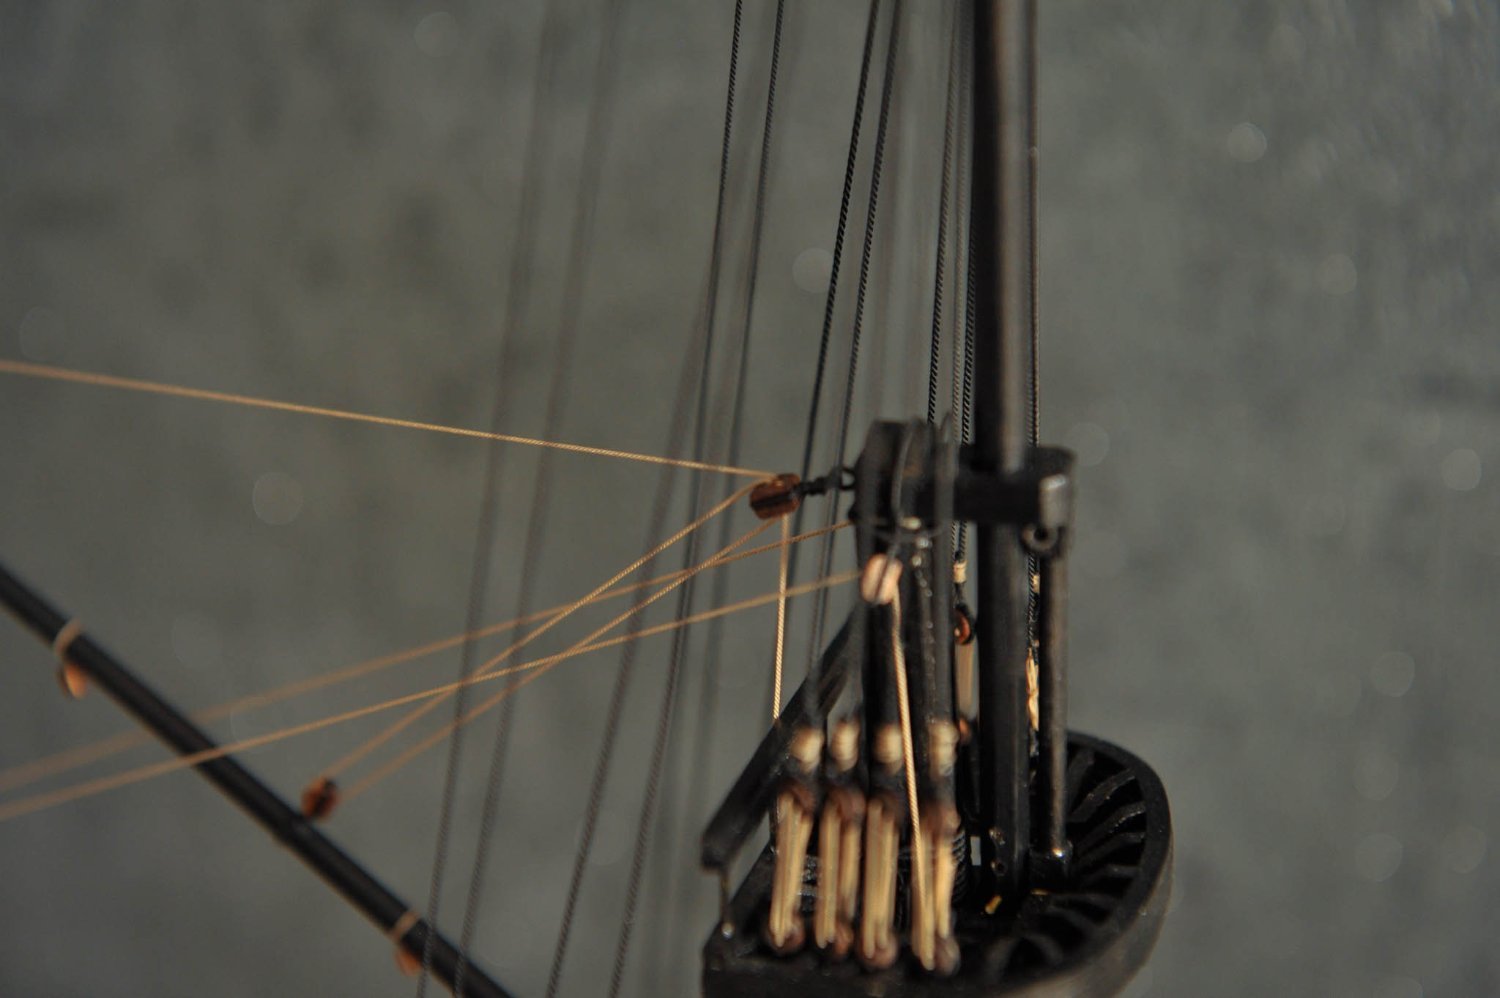
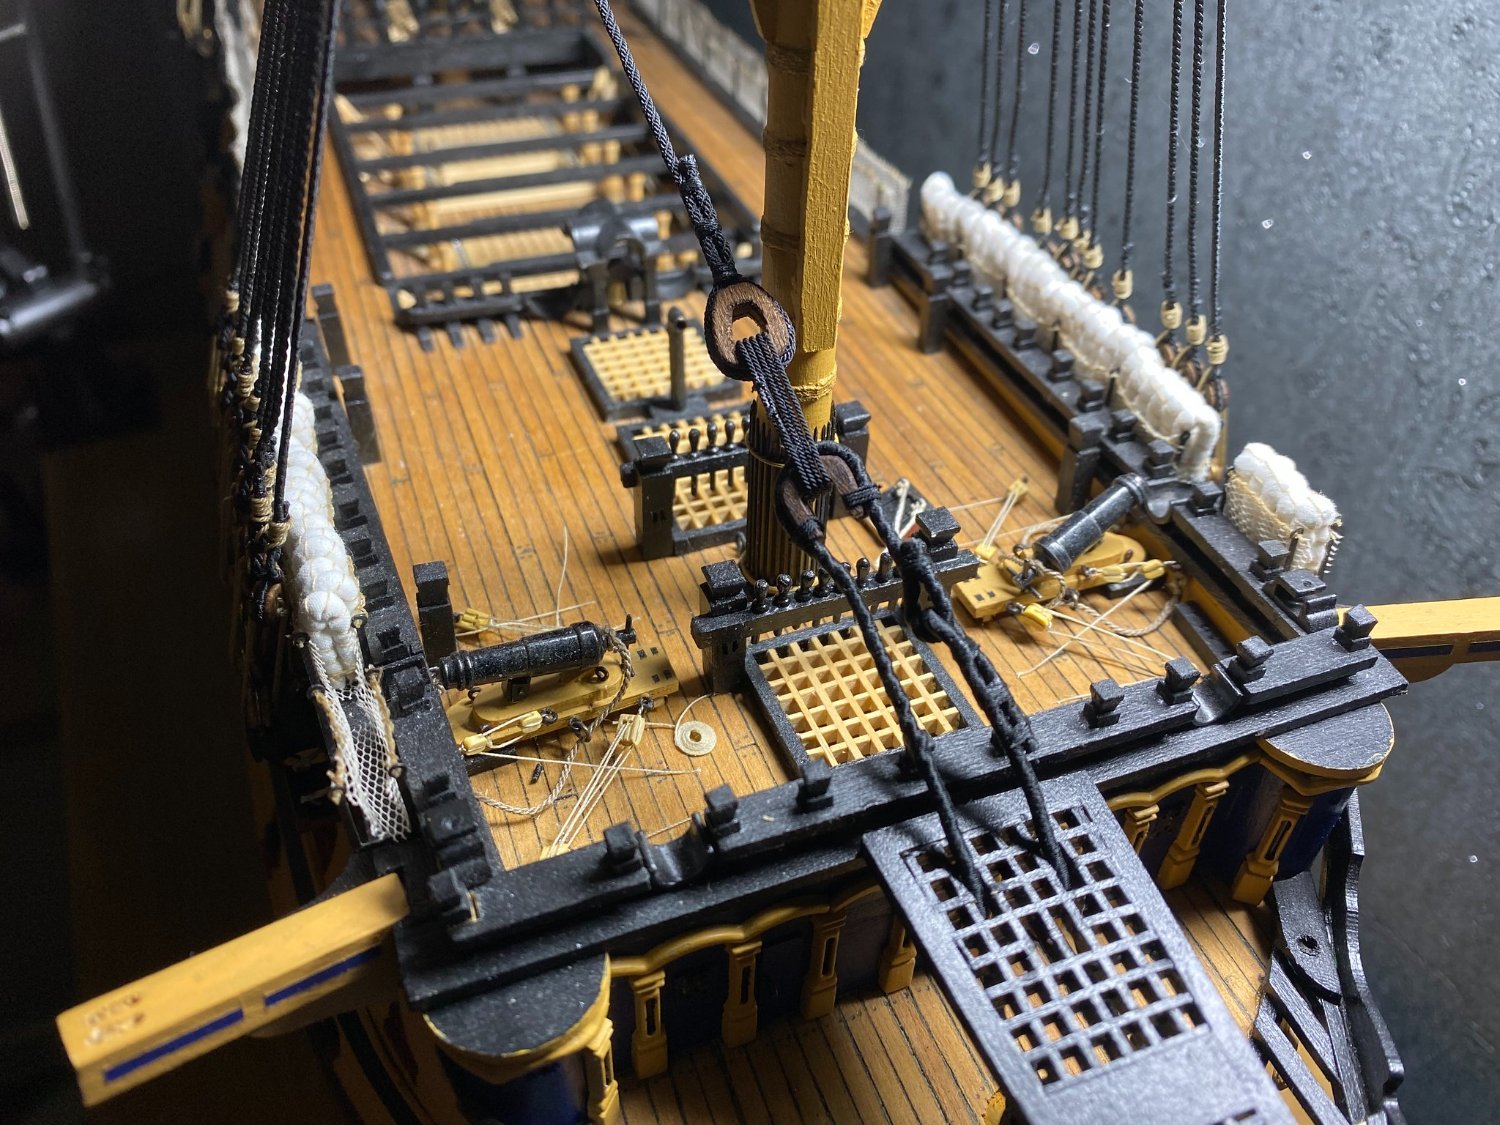
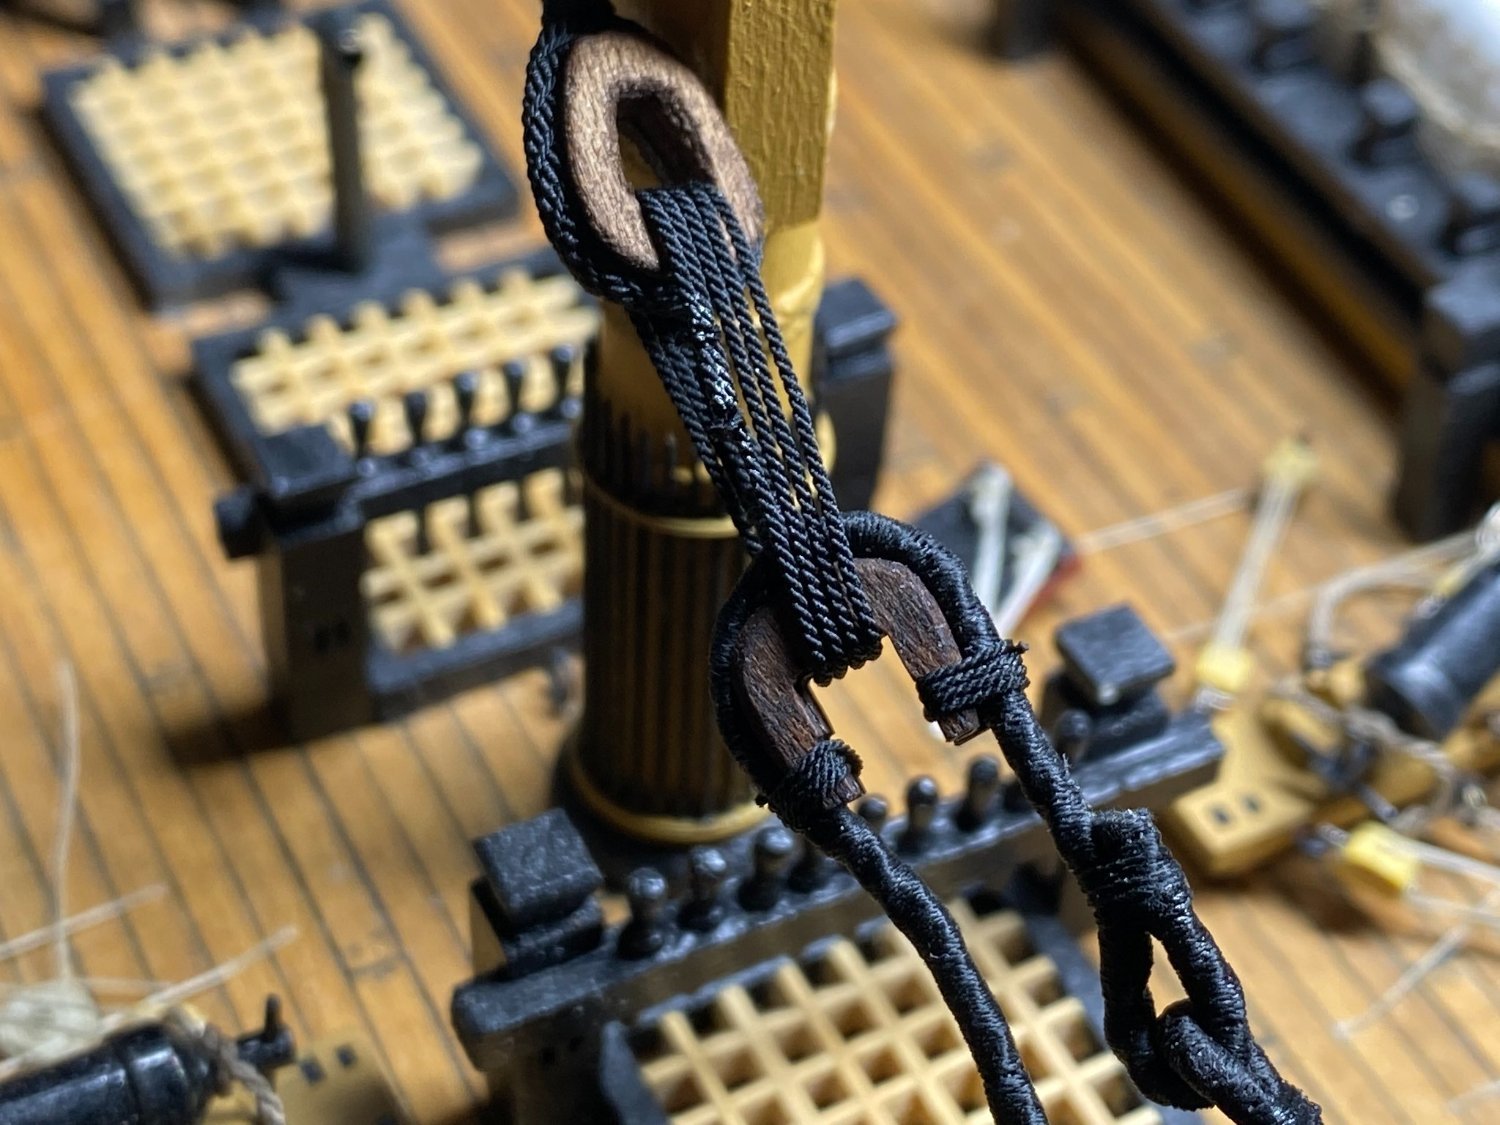
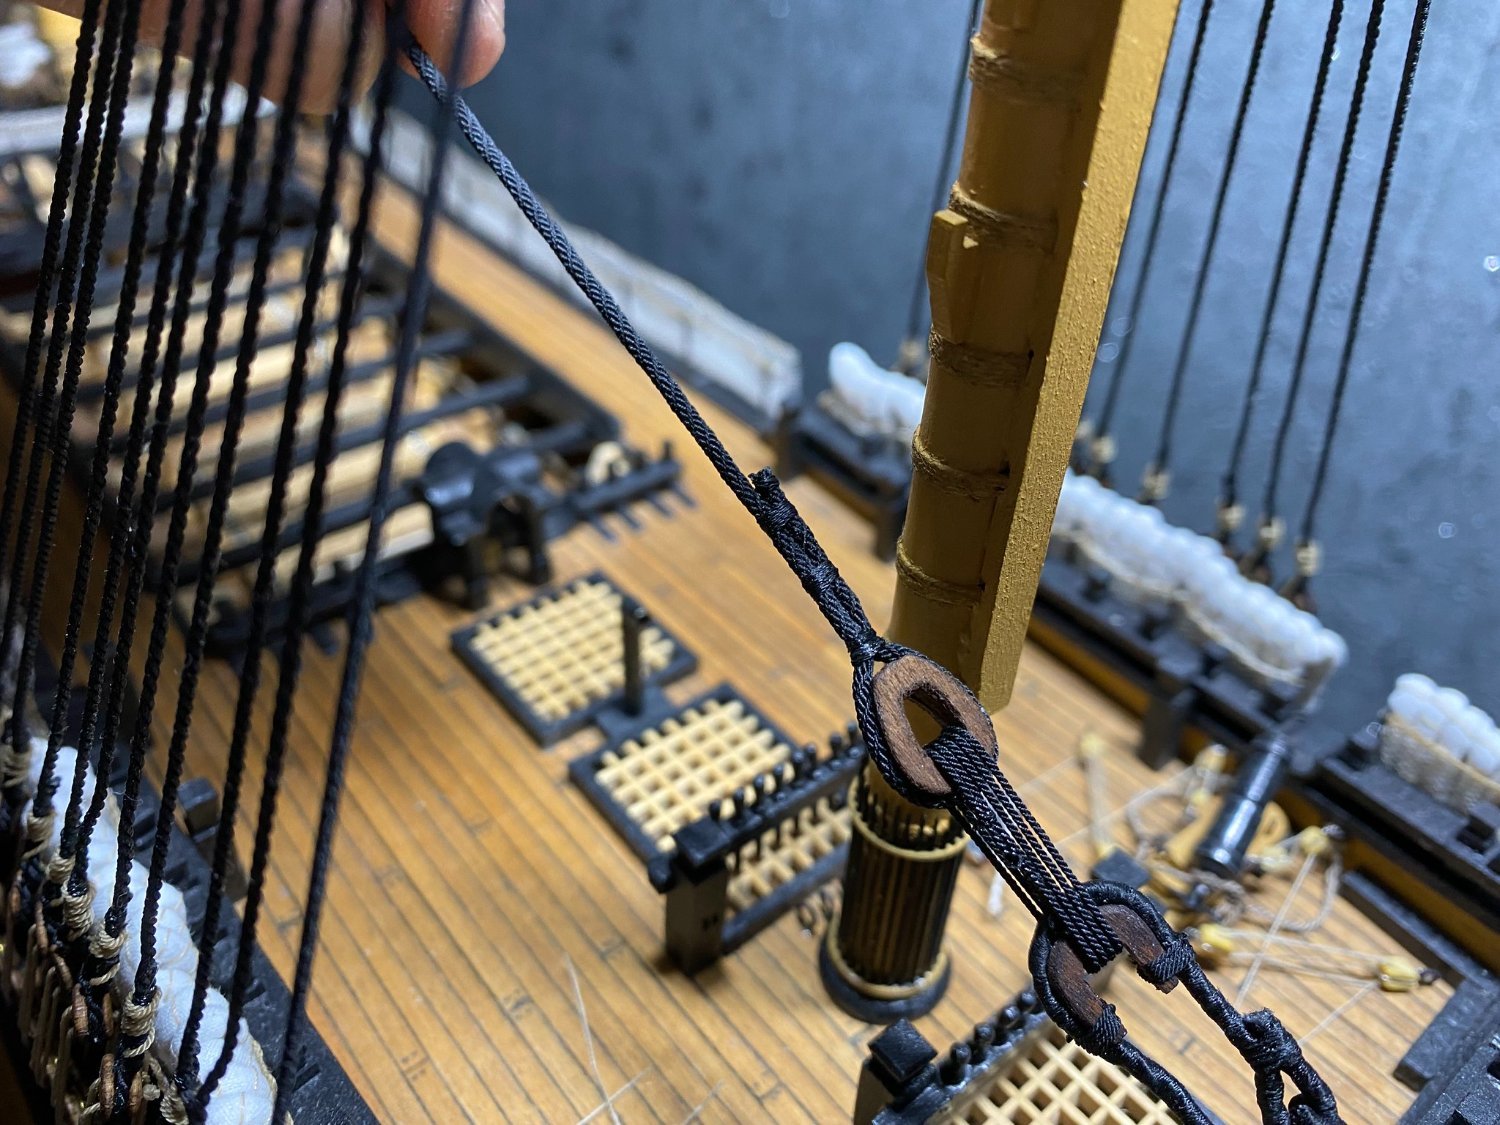
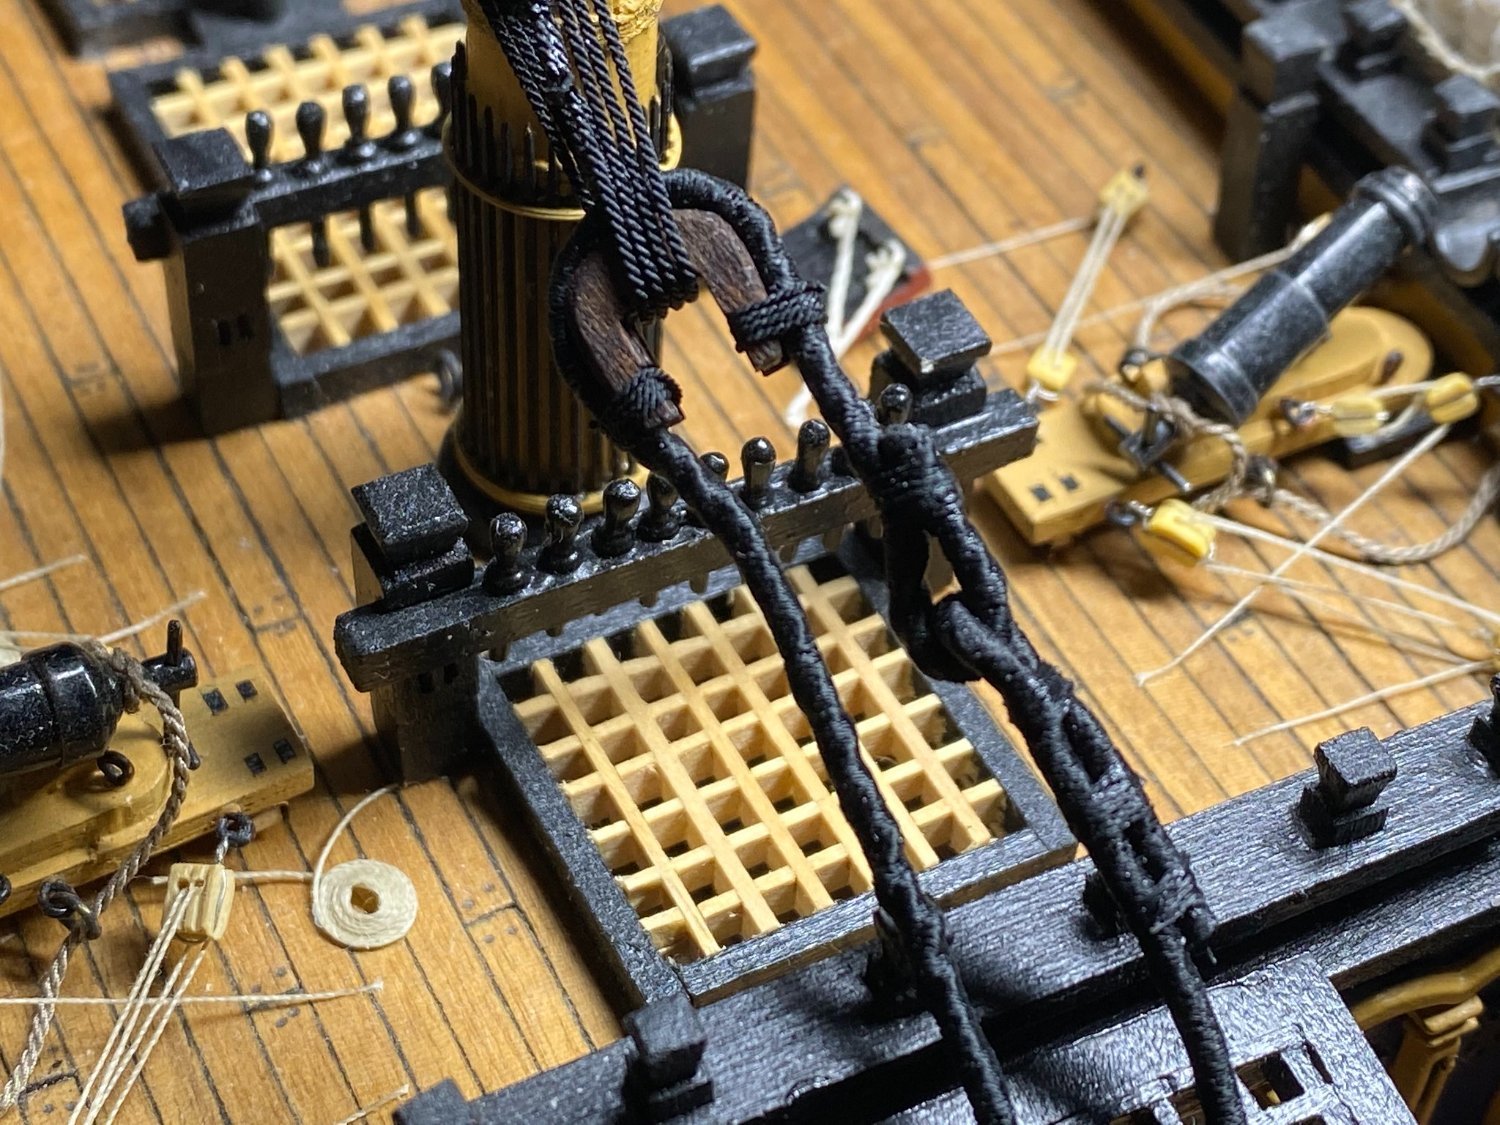
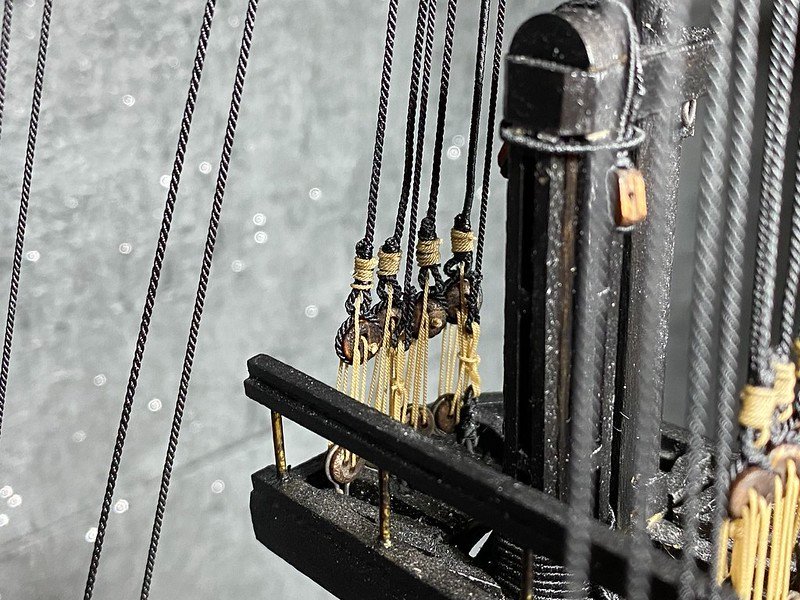
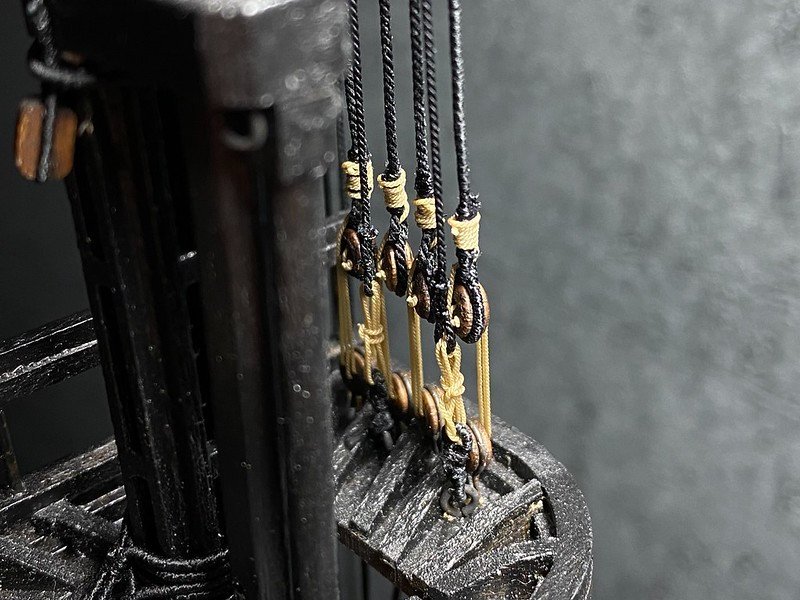
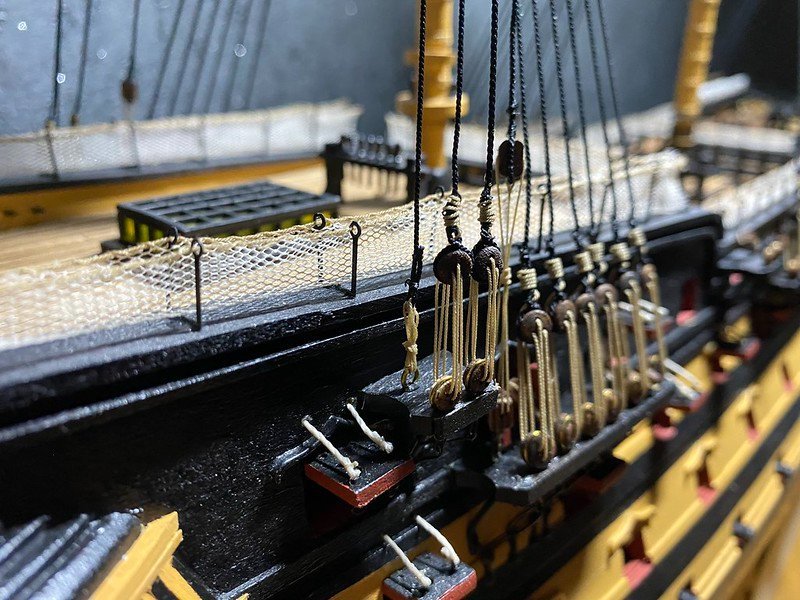
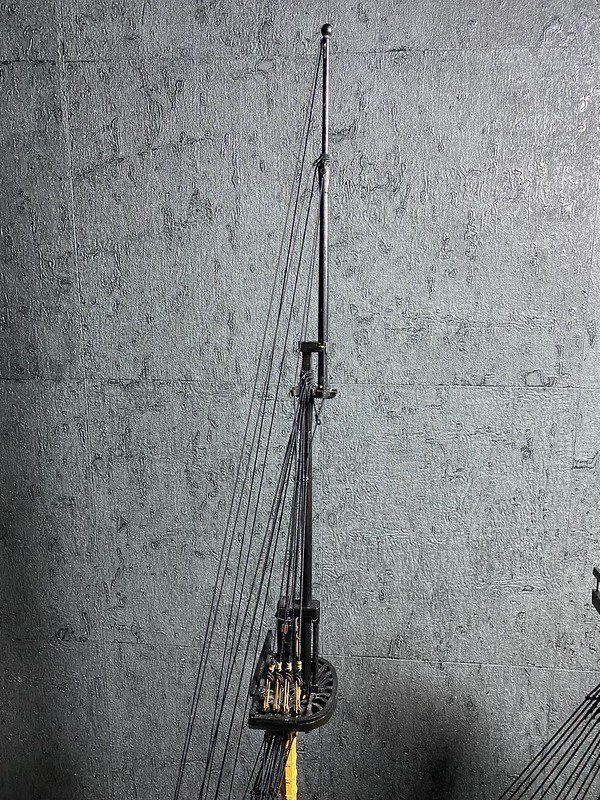
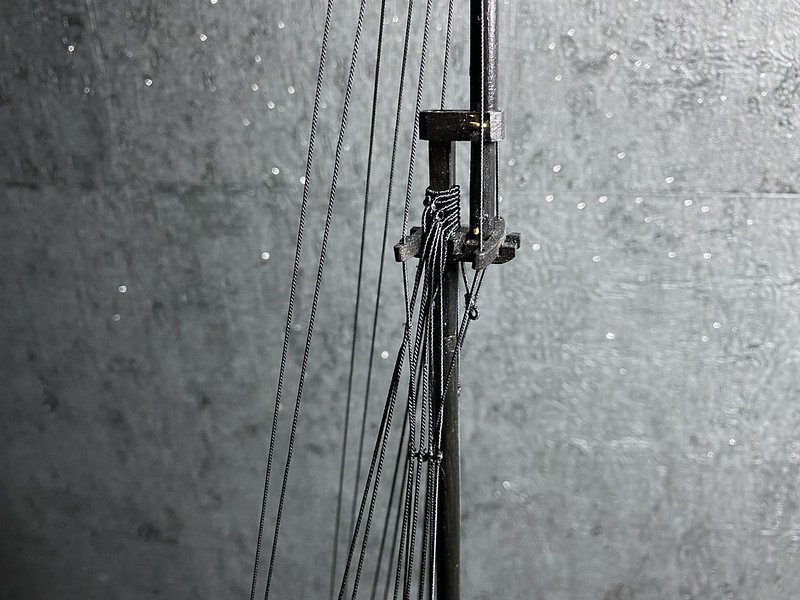
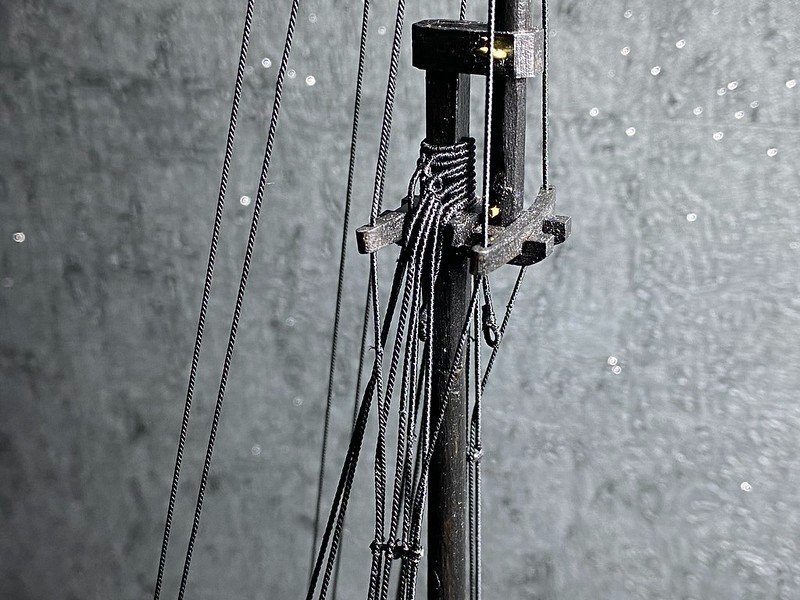
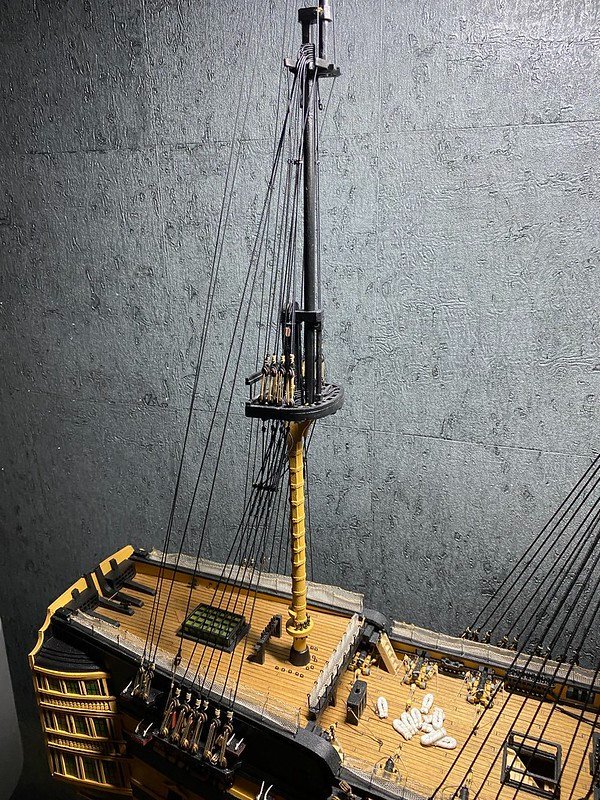
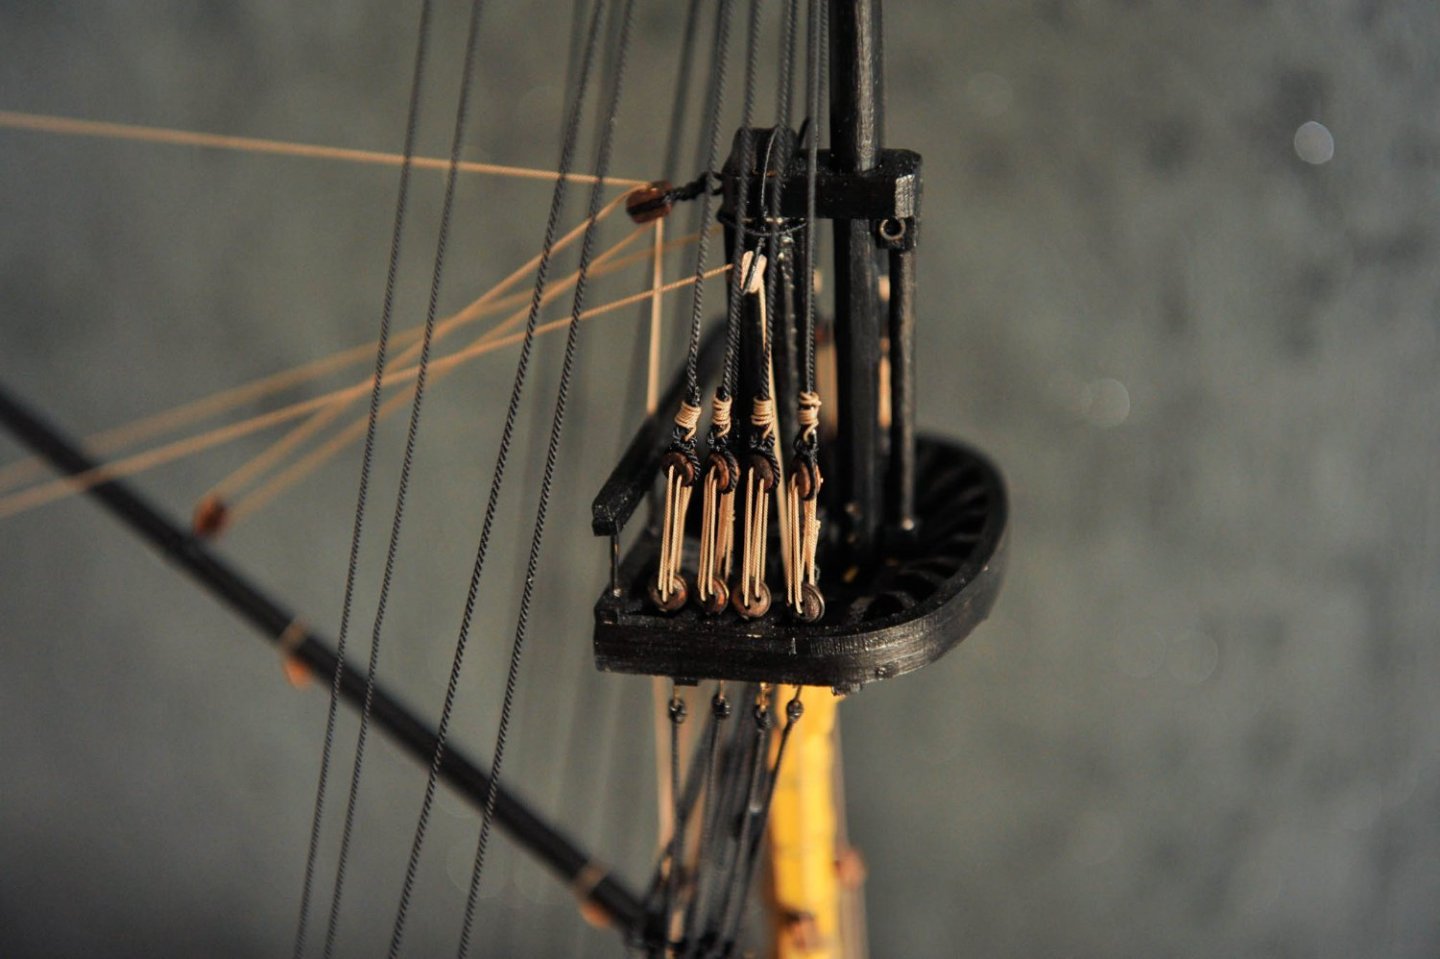
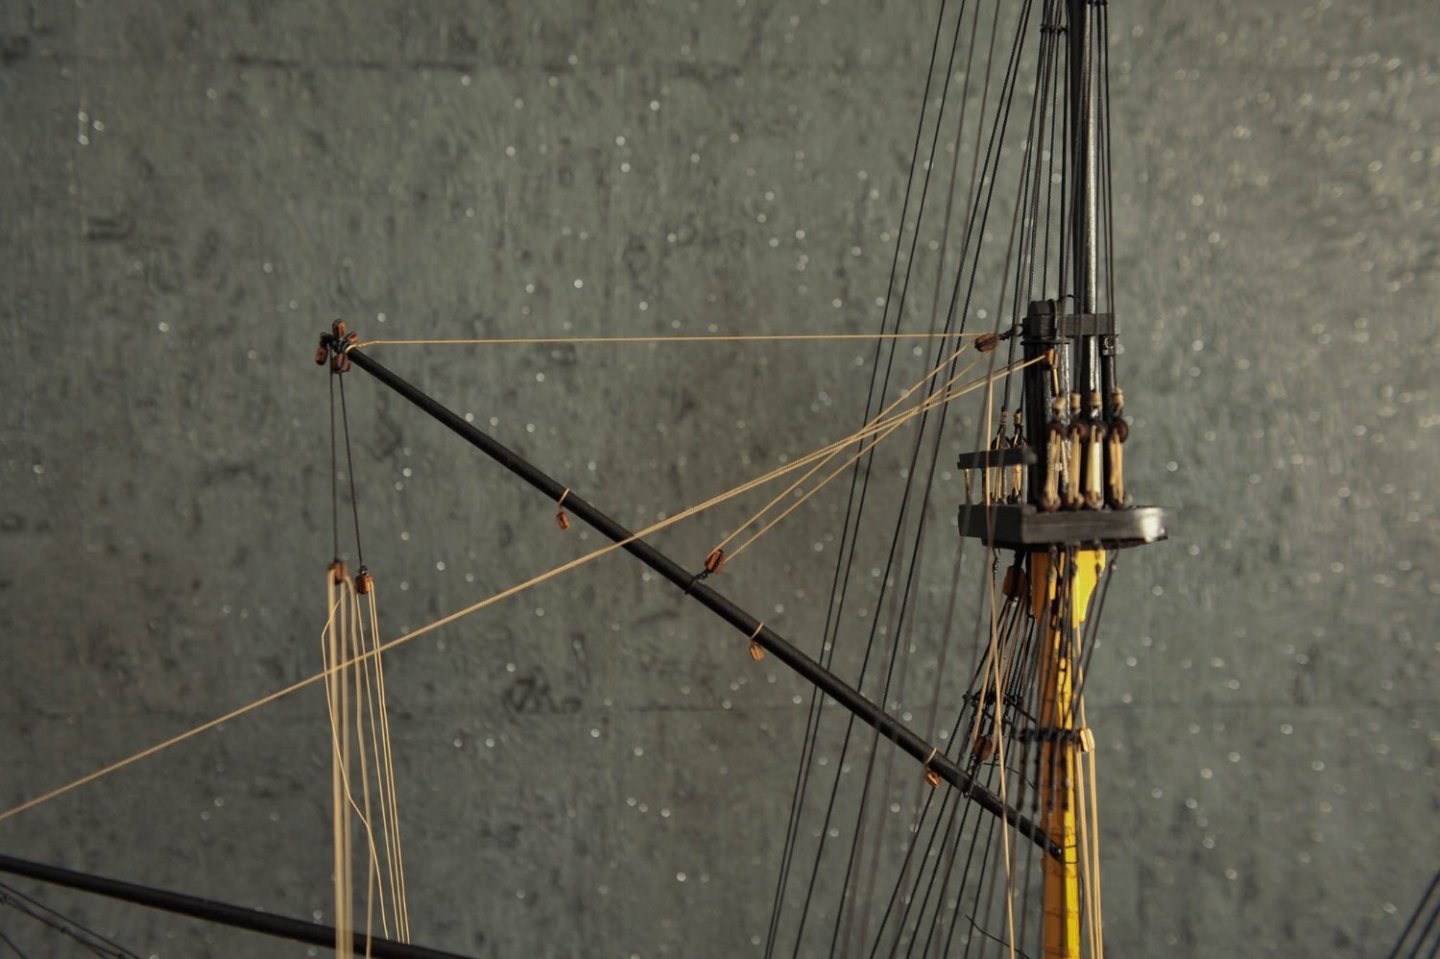
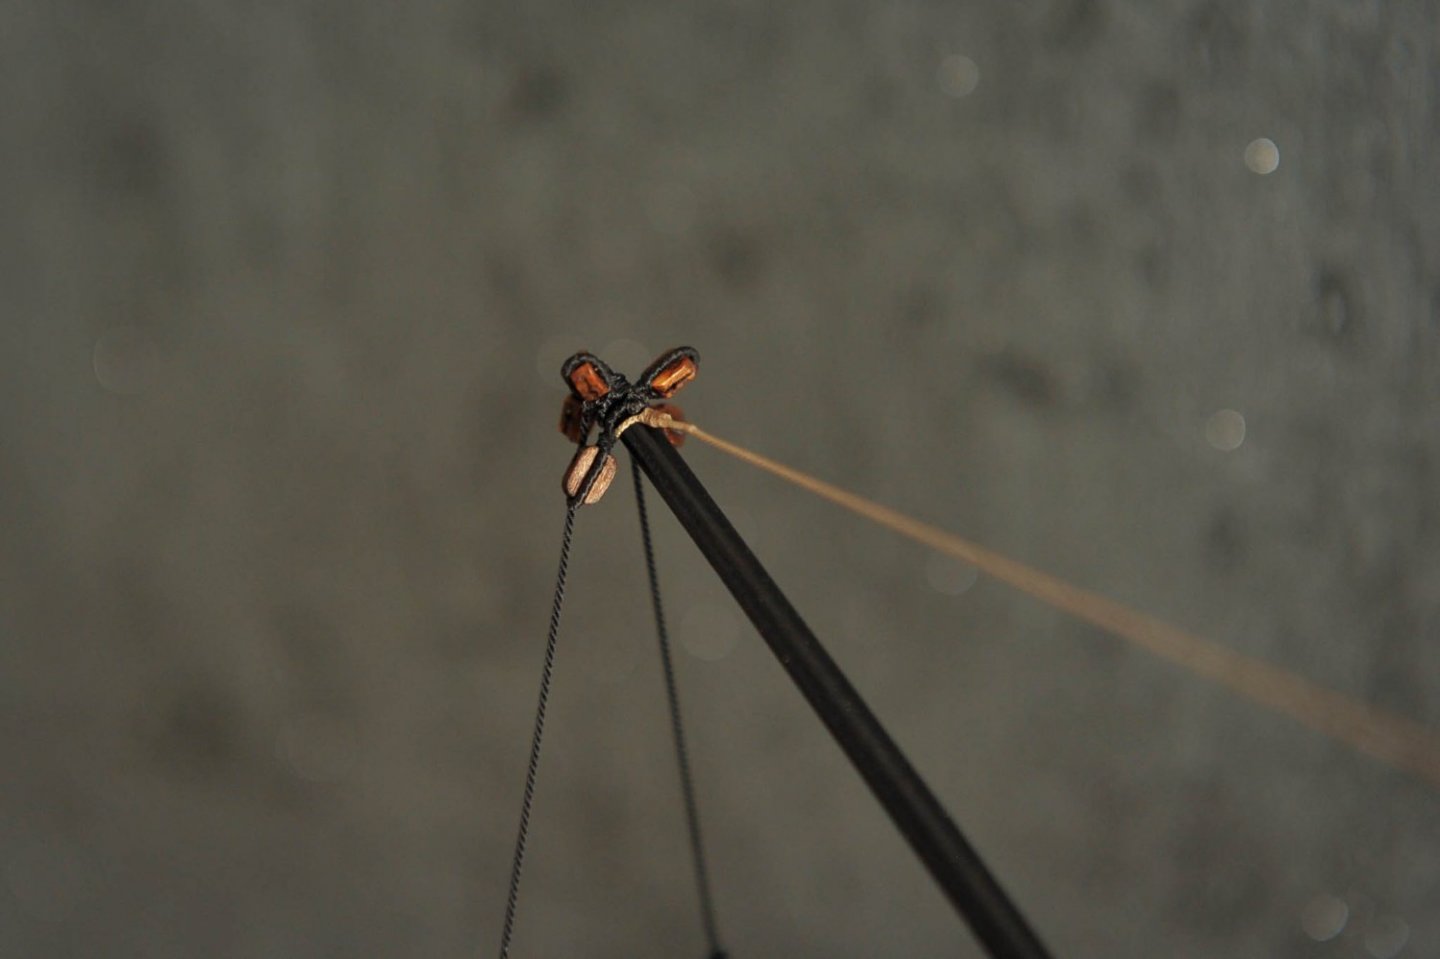
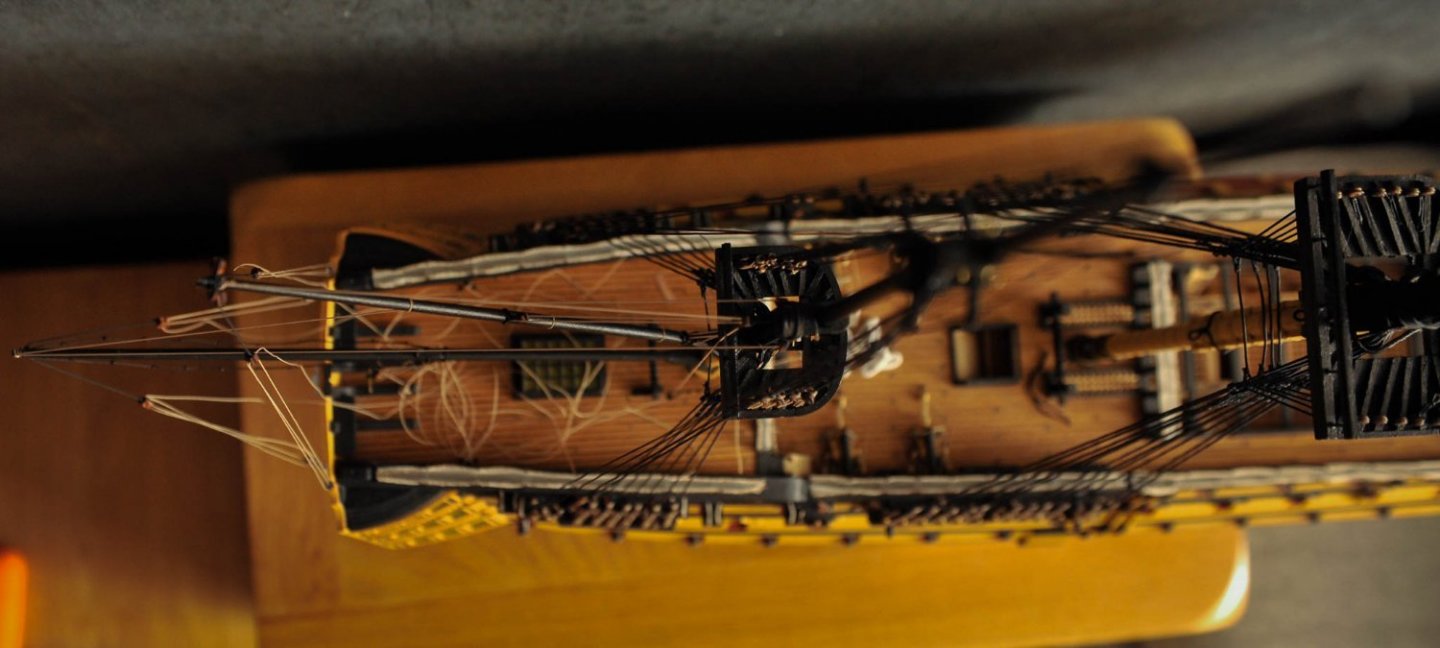
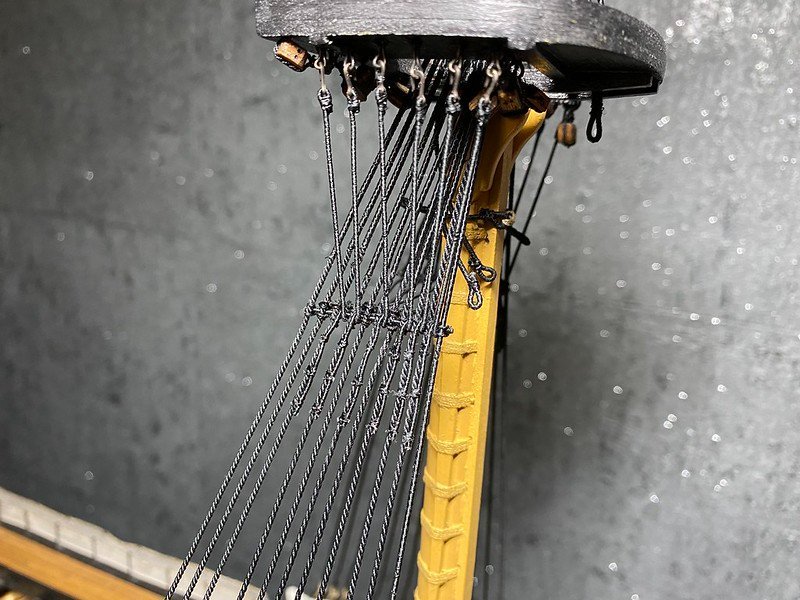
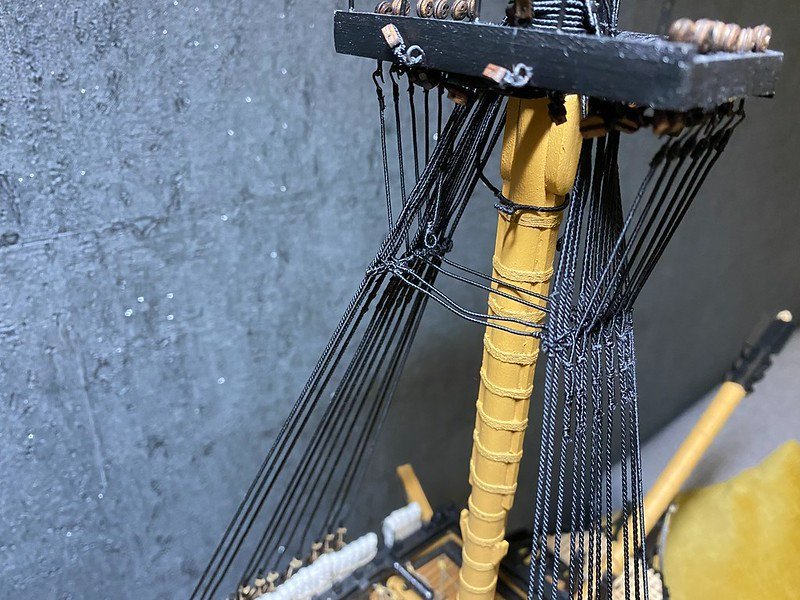
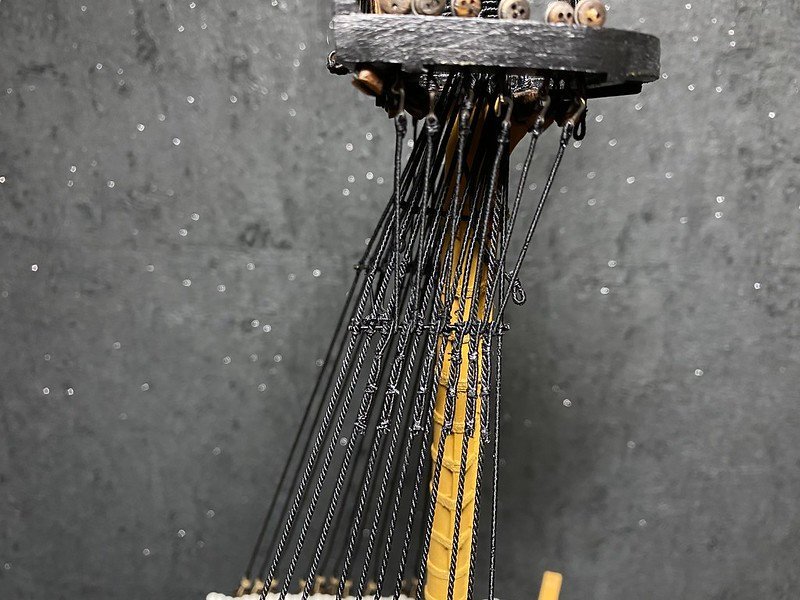
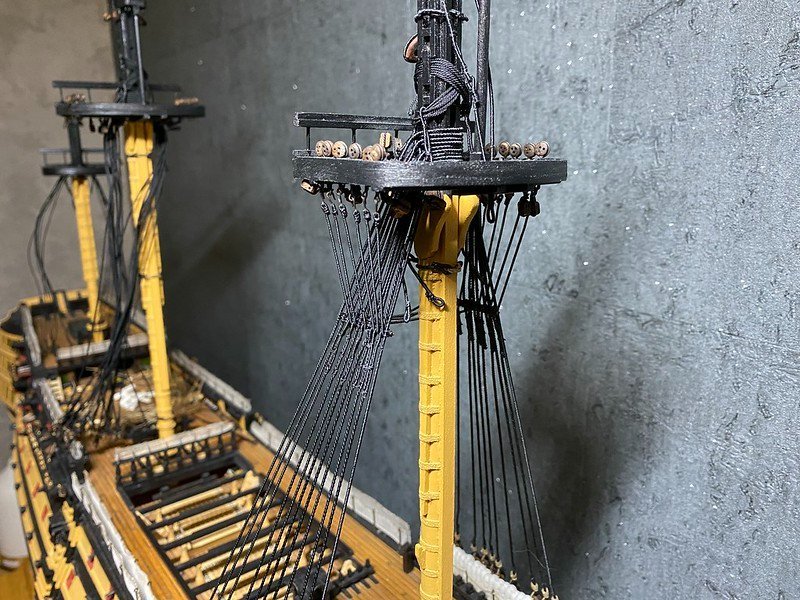
Hello again, I have another update. I had decided to finish mizzen mast rigging so I had a better feel how she looks like and WOW I'm so happy. It took me a while to get all the necessary details but it all looks just great. I've got a question to all fellow modellers as I'm bit stuck with mizzen yards rigging especially the crossjack yard. I can't find any decent pictures of models that have it done closest to the original. How many blocks does it have, I know it is attached to the mast with the sling but I'm not sure about main block used to lift it to its position. In the meantime enjoy the pics


-
Hello, sorry I have missed your comment Thank you for kind words and I'm glad you like my build. I have some pics to upload as I have done quite big progress since this post. To reply to your question I had black netting supplied in the kit but it was black, and as you know the real Victory has white netting. I had a little reseatch and I went into Etsy to get this (https://www.etsy.com/uk/listing/965753581/ivory-off-white-extra-soft-italian-tulle?click_key=49482354e64f9a5323afe1180f9292d156ef17b9%3A965753581&click_sum=faebdaba&ga_order=most_relevant&ga_search_type=all&ga_view_type=gallery&ga_search_query=tulle&ref=sr_gallery-1-4&organic_search_click=1&frs=1&pop=1) I had to stain it a little as white was just too white I hope it helped. Regards Tom
-
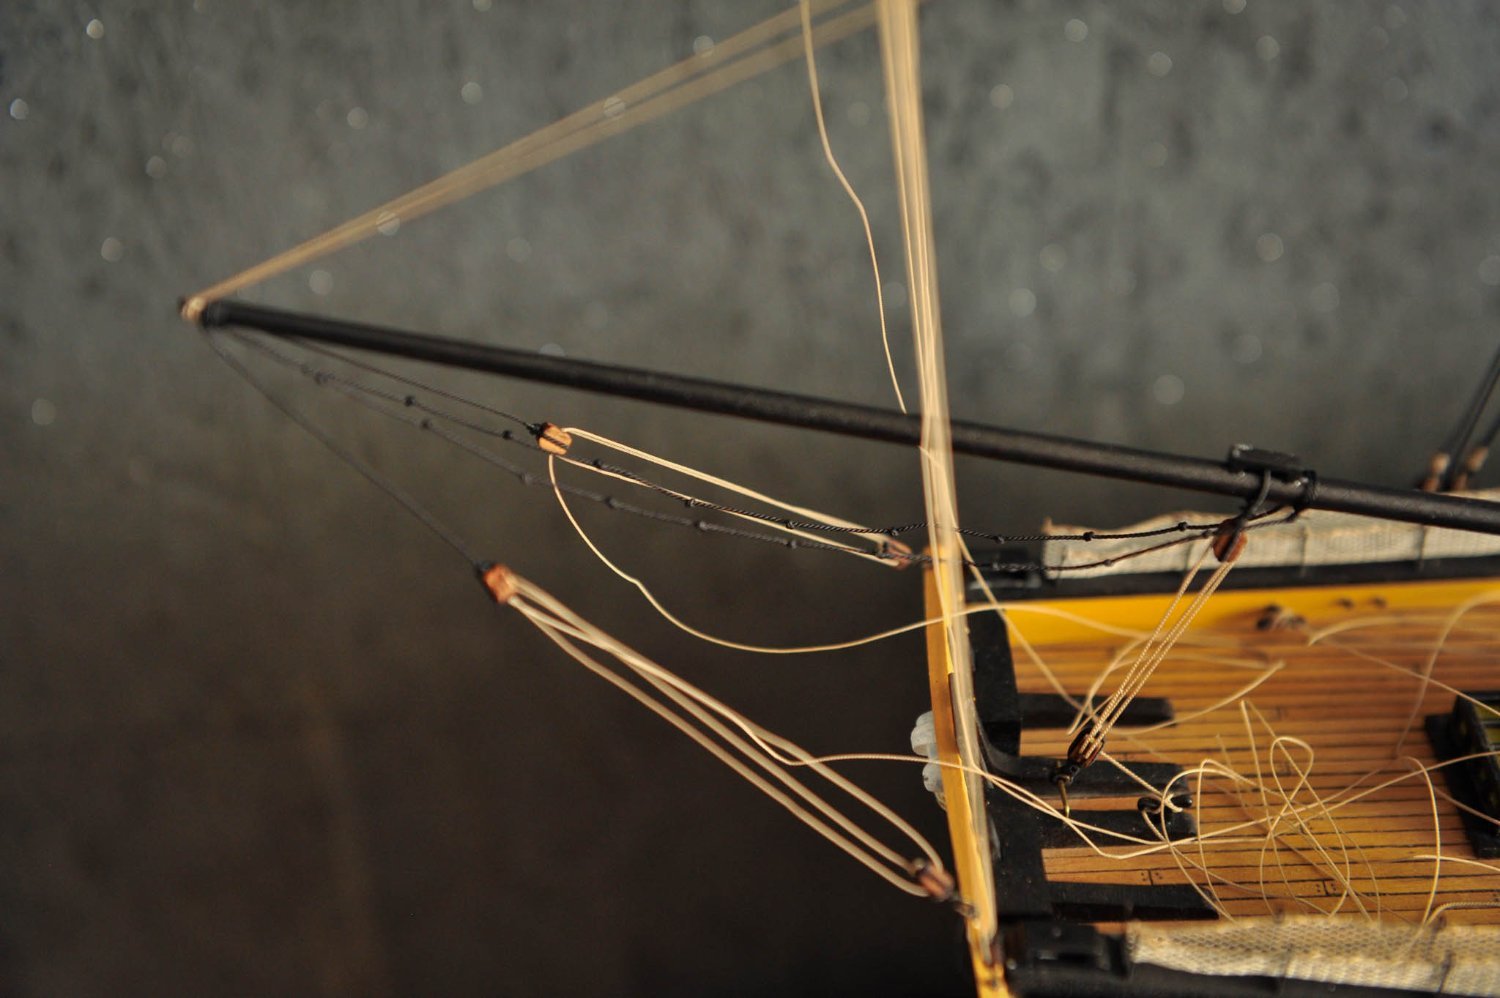
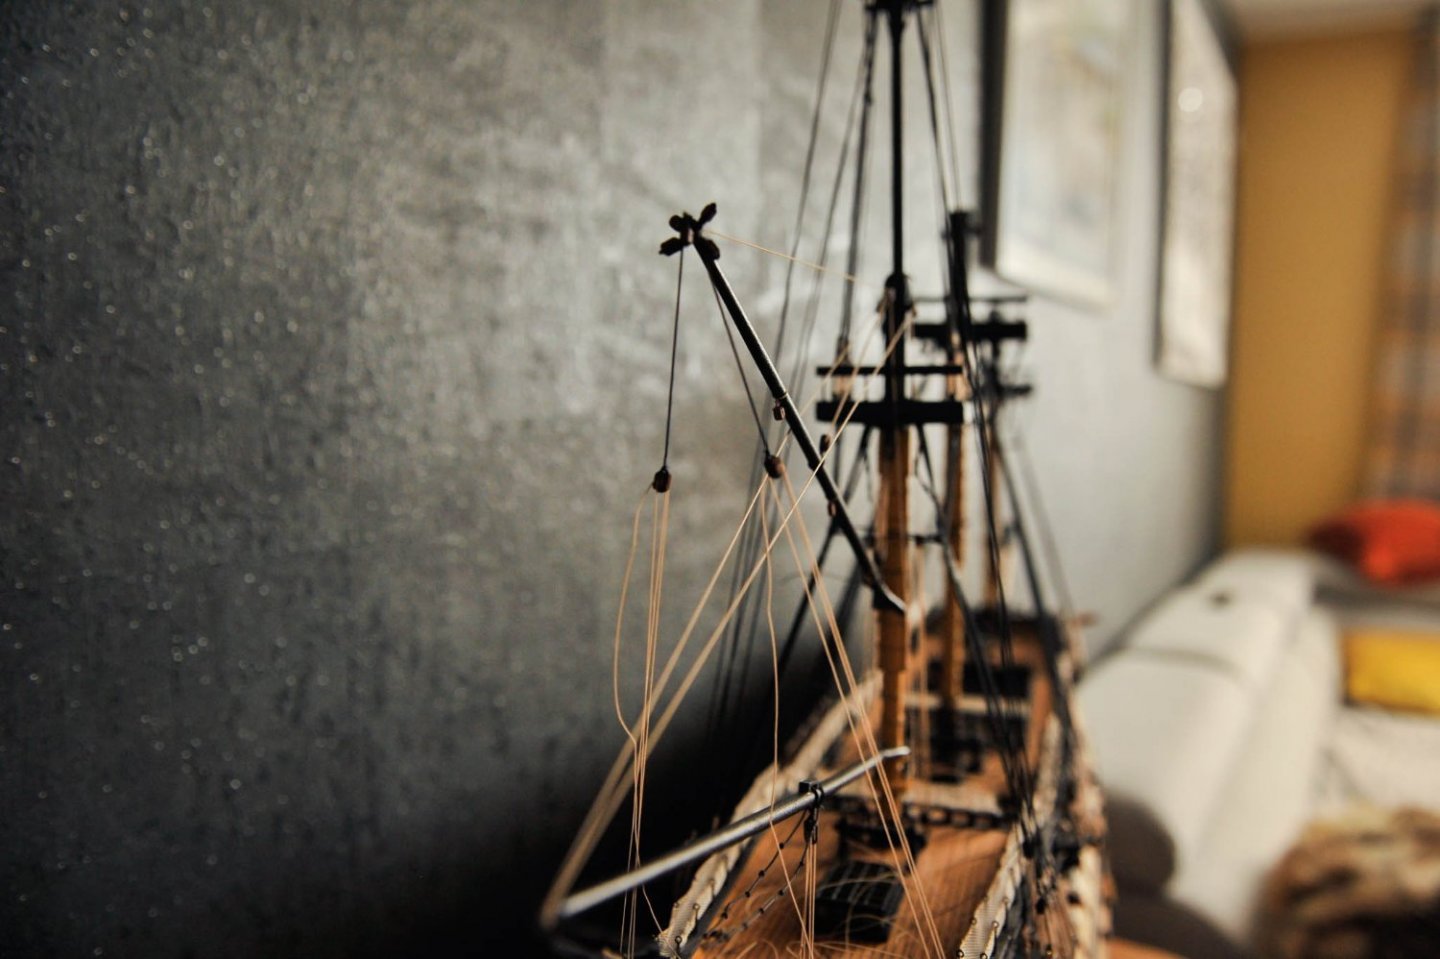
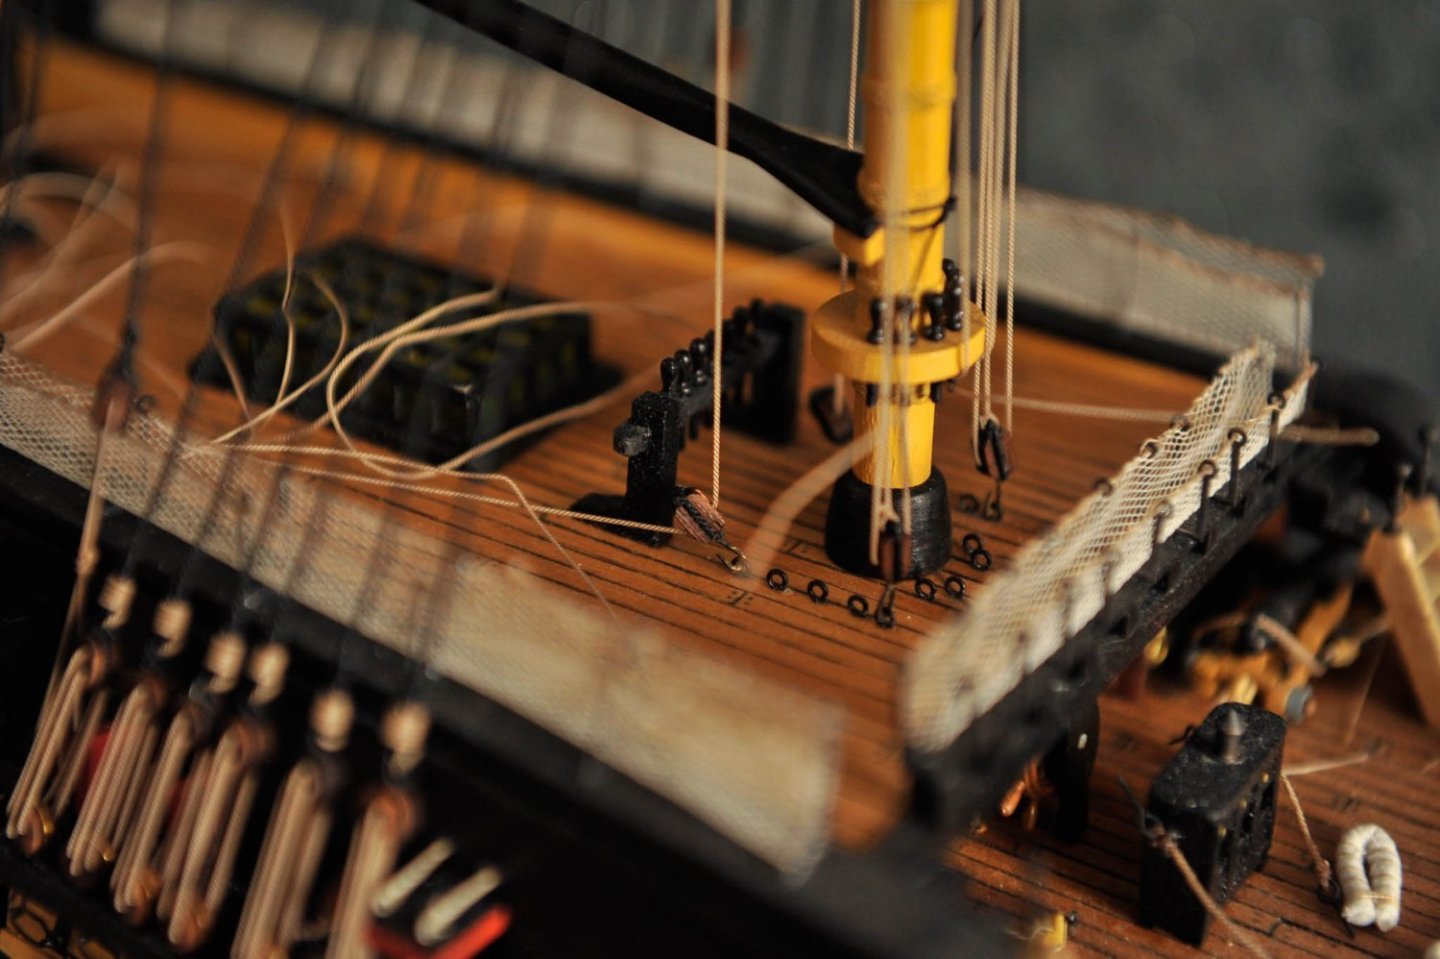
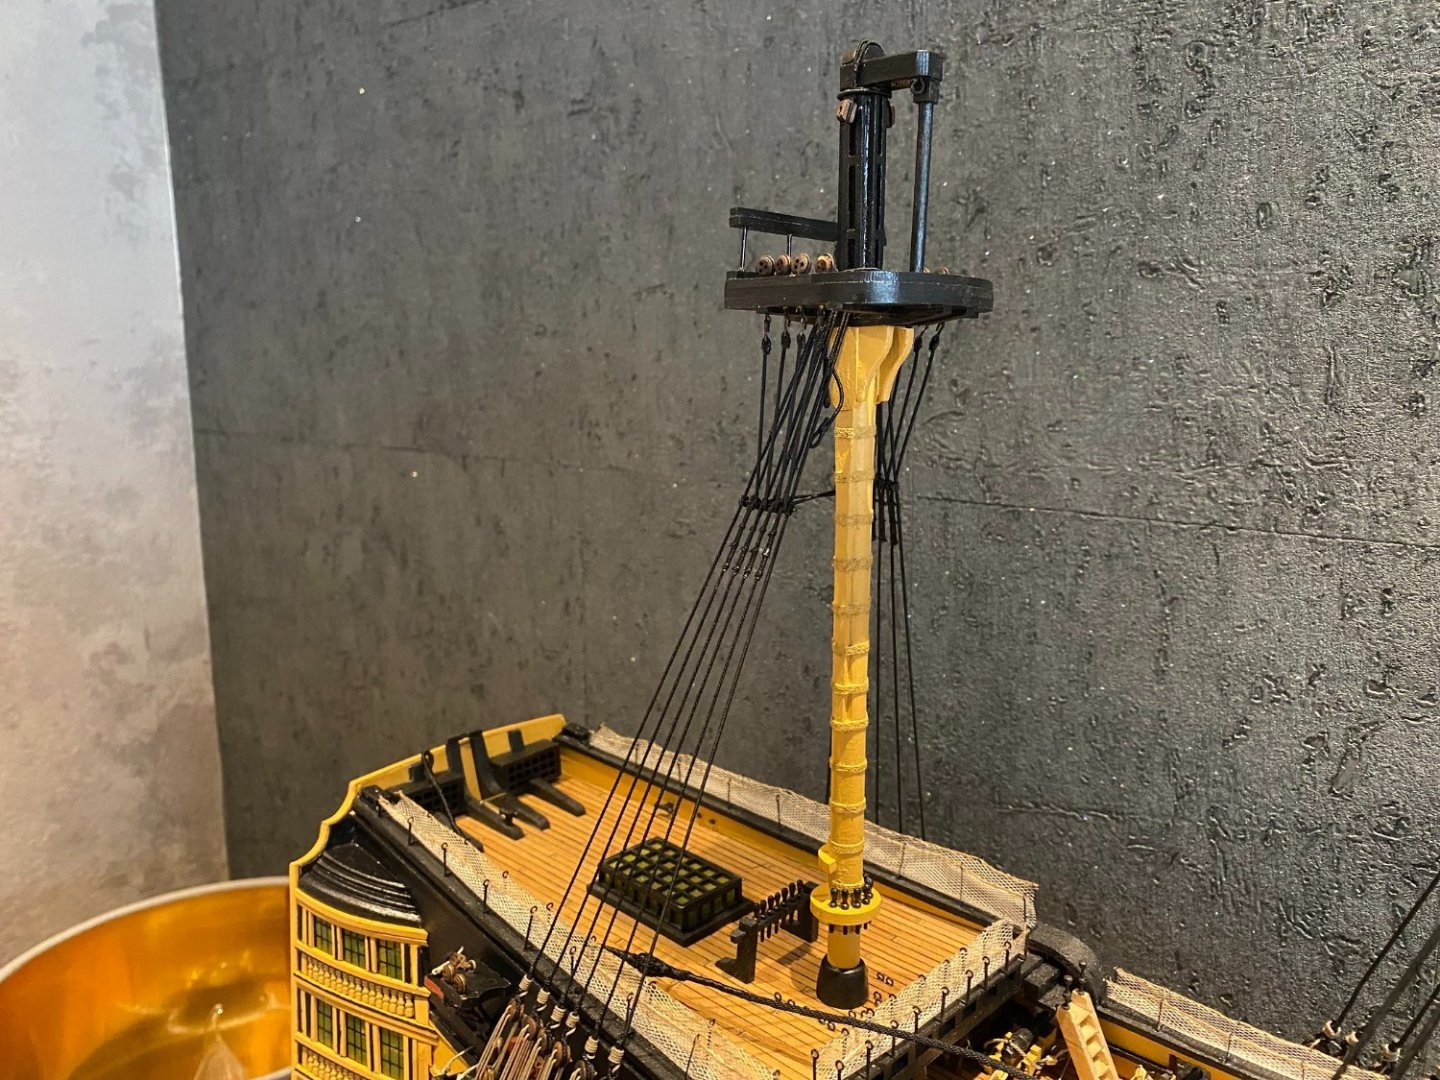
Hi again fellow builders! Another update on my log, I managed to successfully finish few things. 1. Finished rigging of lower mizzen mast. Getting all the lower masts done was a long process but luckily I have it done. As you know I wasn't following the instructions but I used proper literature trying to mimic the original as much as I could. Have a look The big achievement last night was finalising main stay with all its rigging. I had to order new heart blocks from Vanguard Models (https://vanguardmodels.co.uk/product/pearwood-open-and-closed-heart-blocks/) They fitted perfectly, the main stay was using two largest blocks from their set. Rigging it was extremely tricky but I got the result I wanted and I'm so happy with the outcome Have a great modelling Regards Tom


-
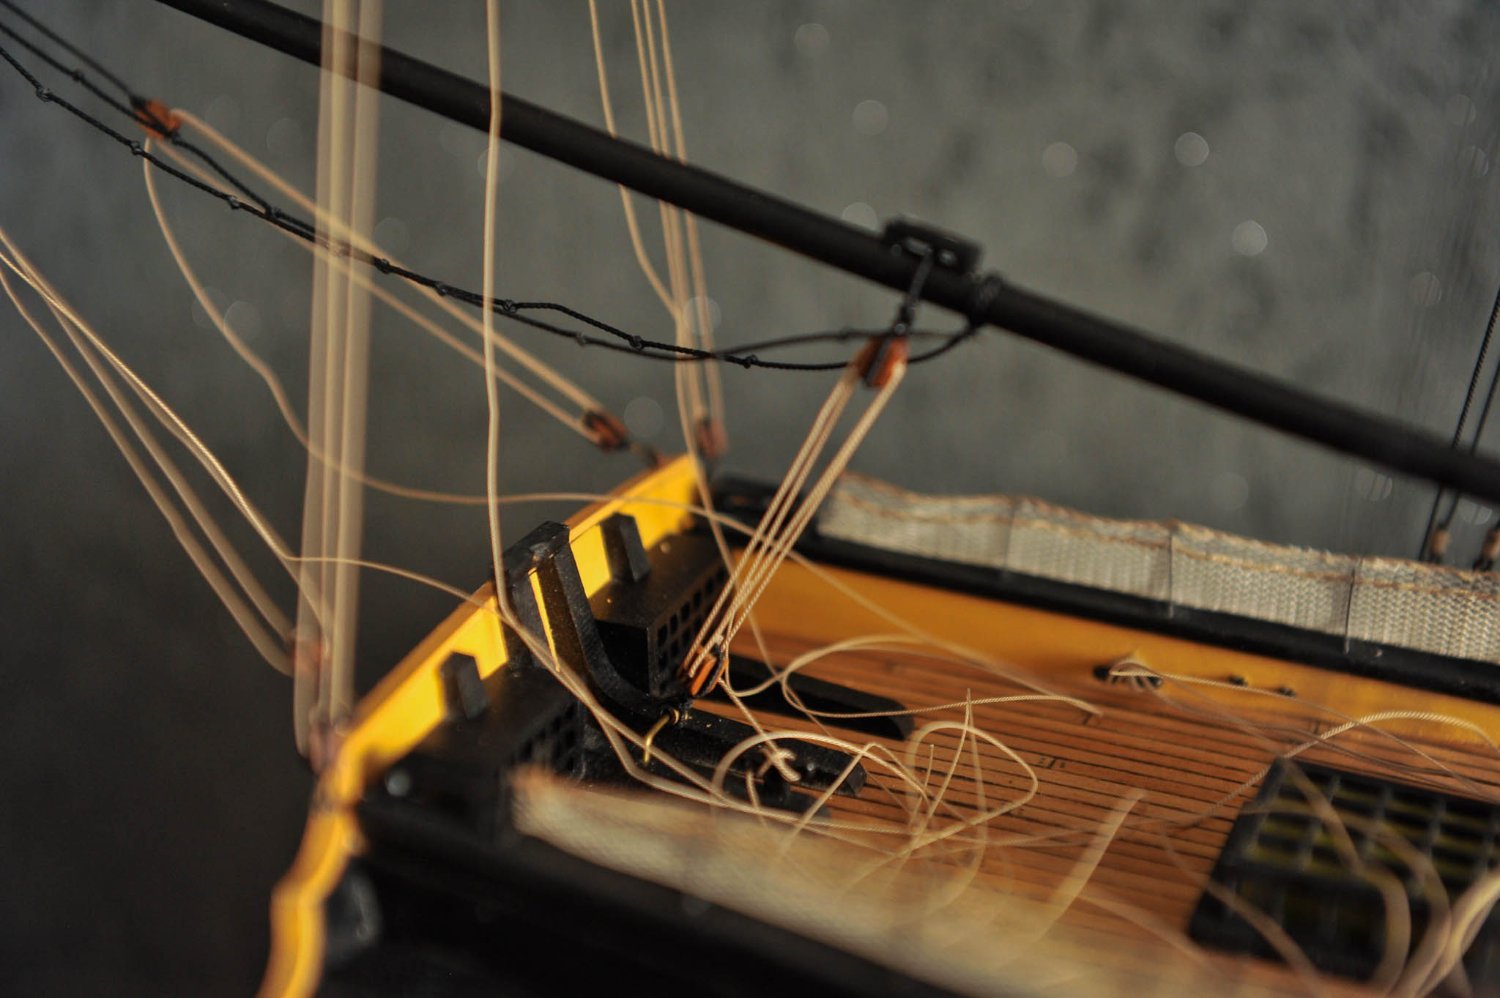
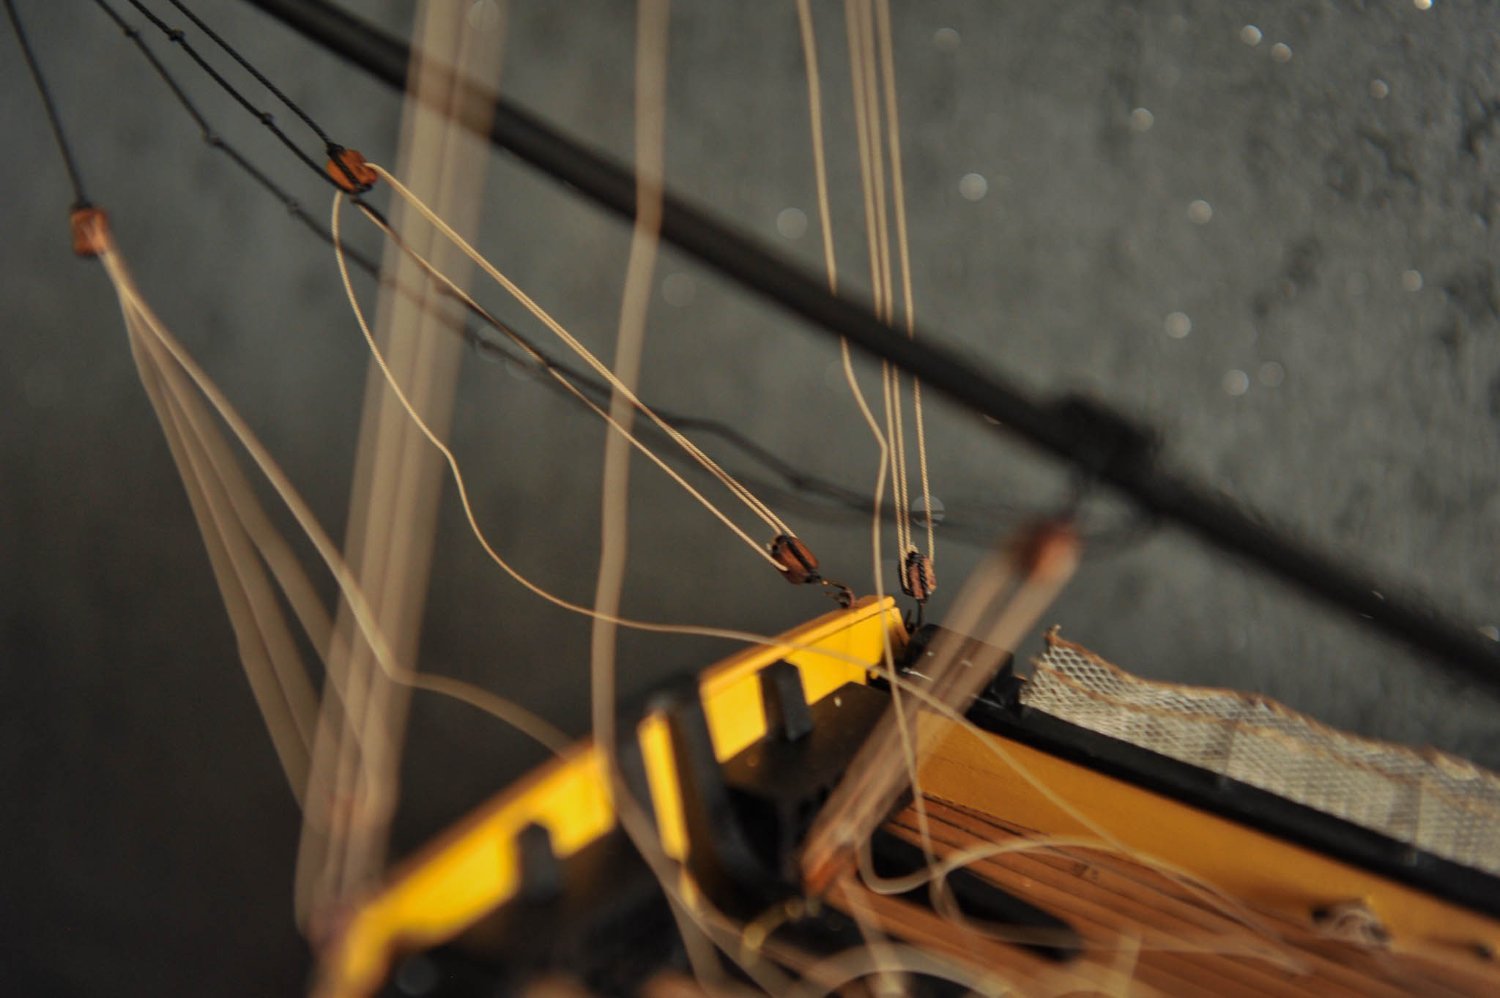
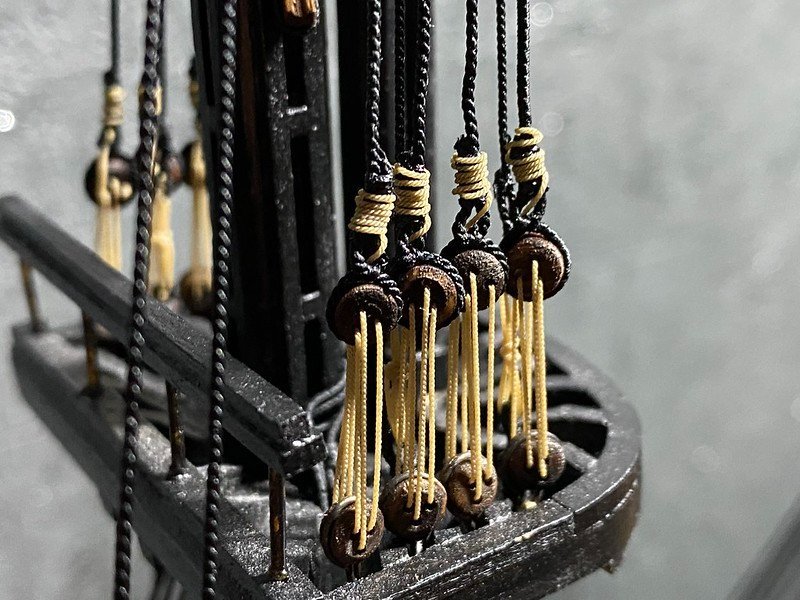
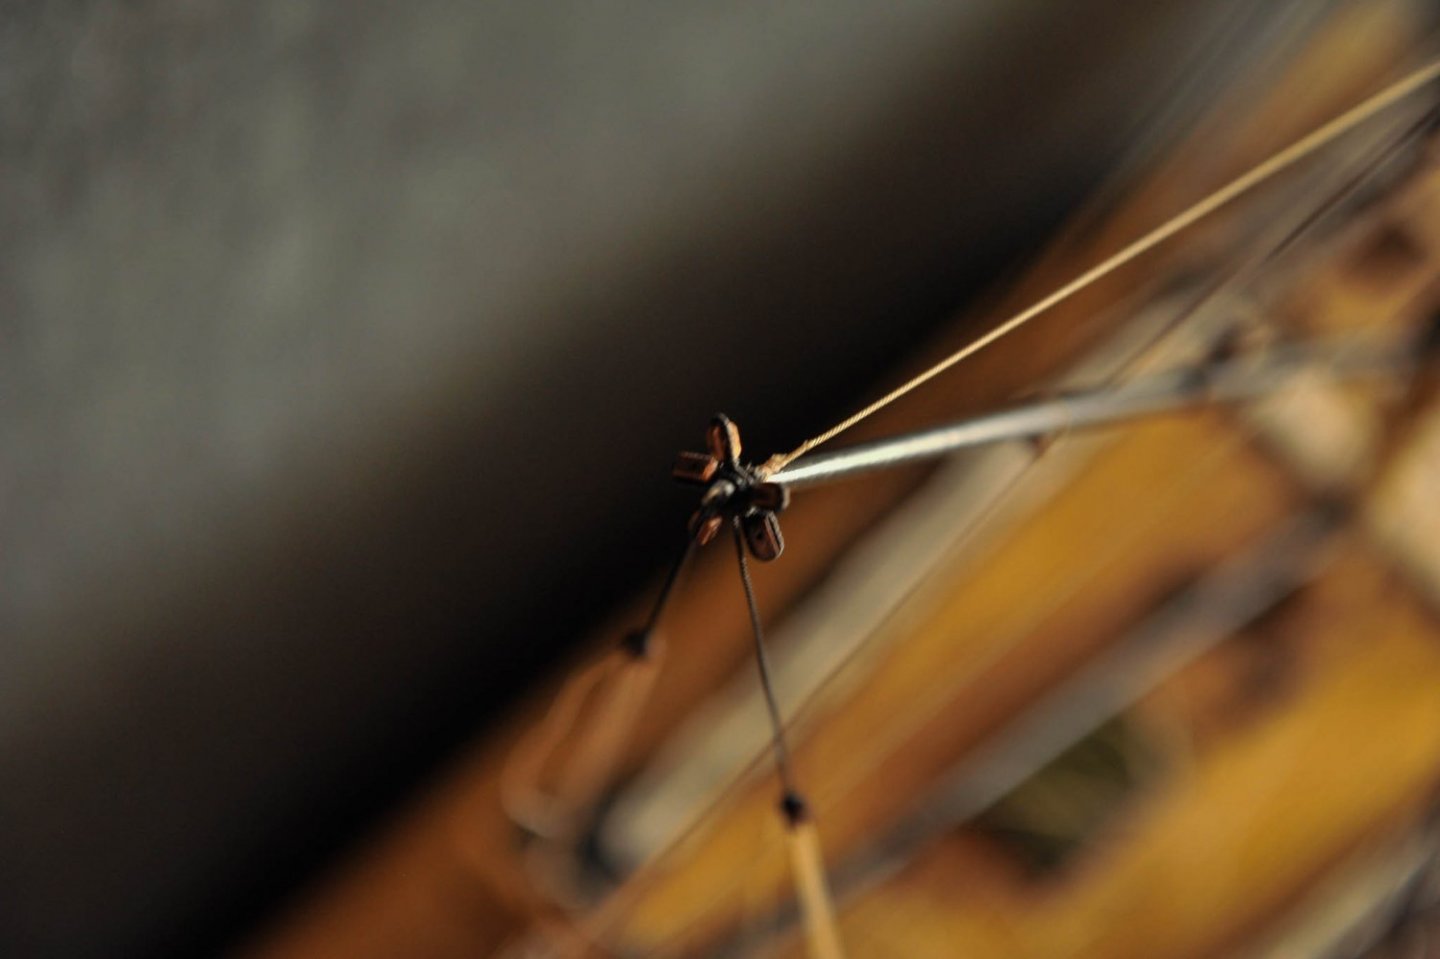
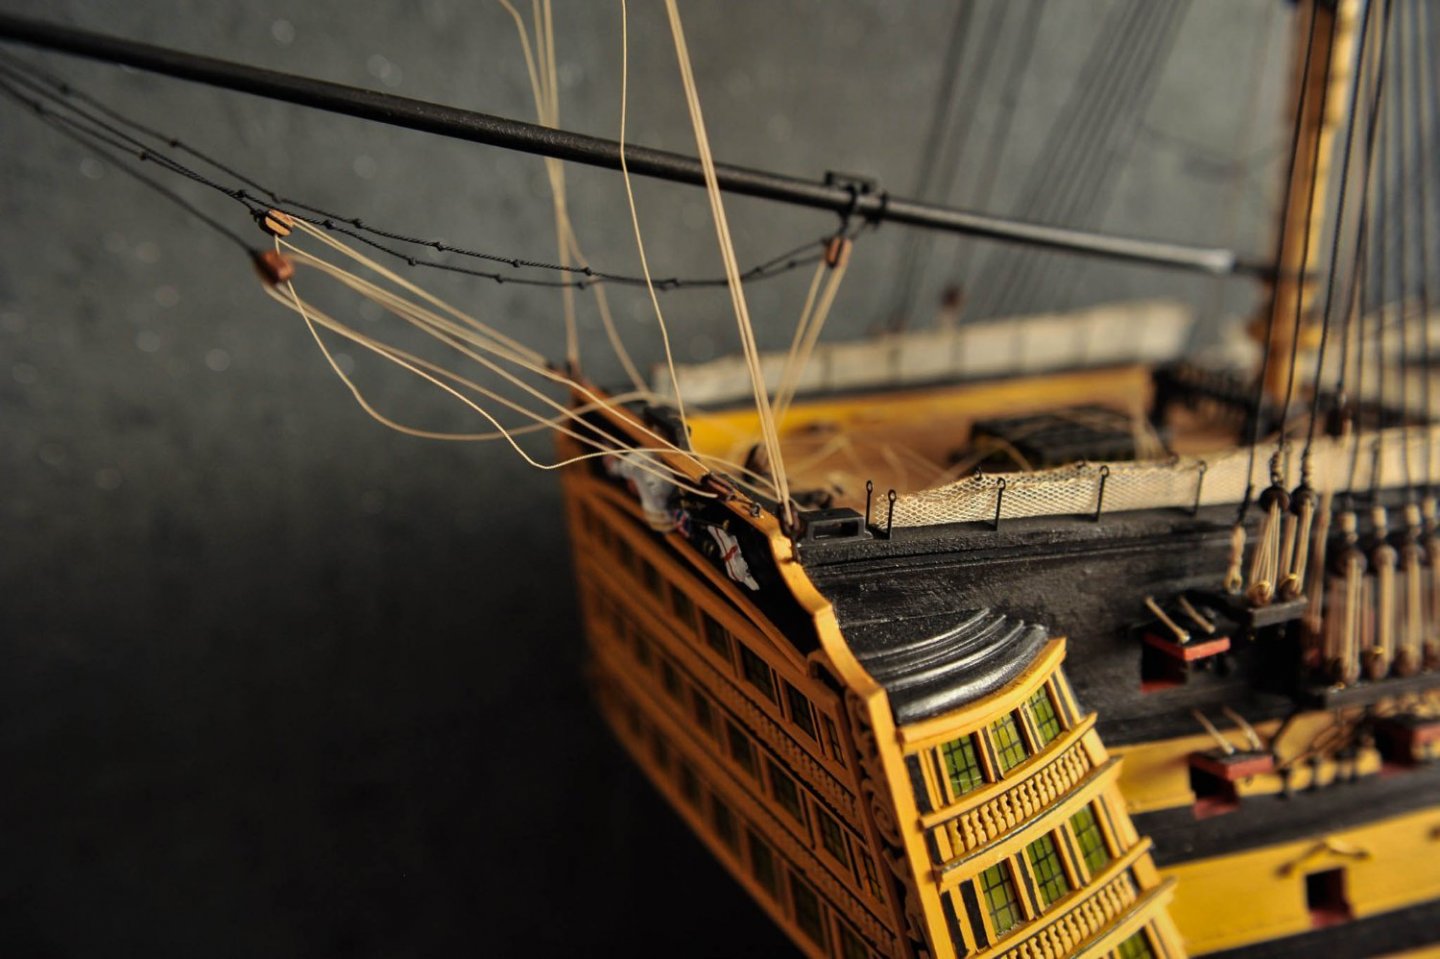
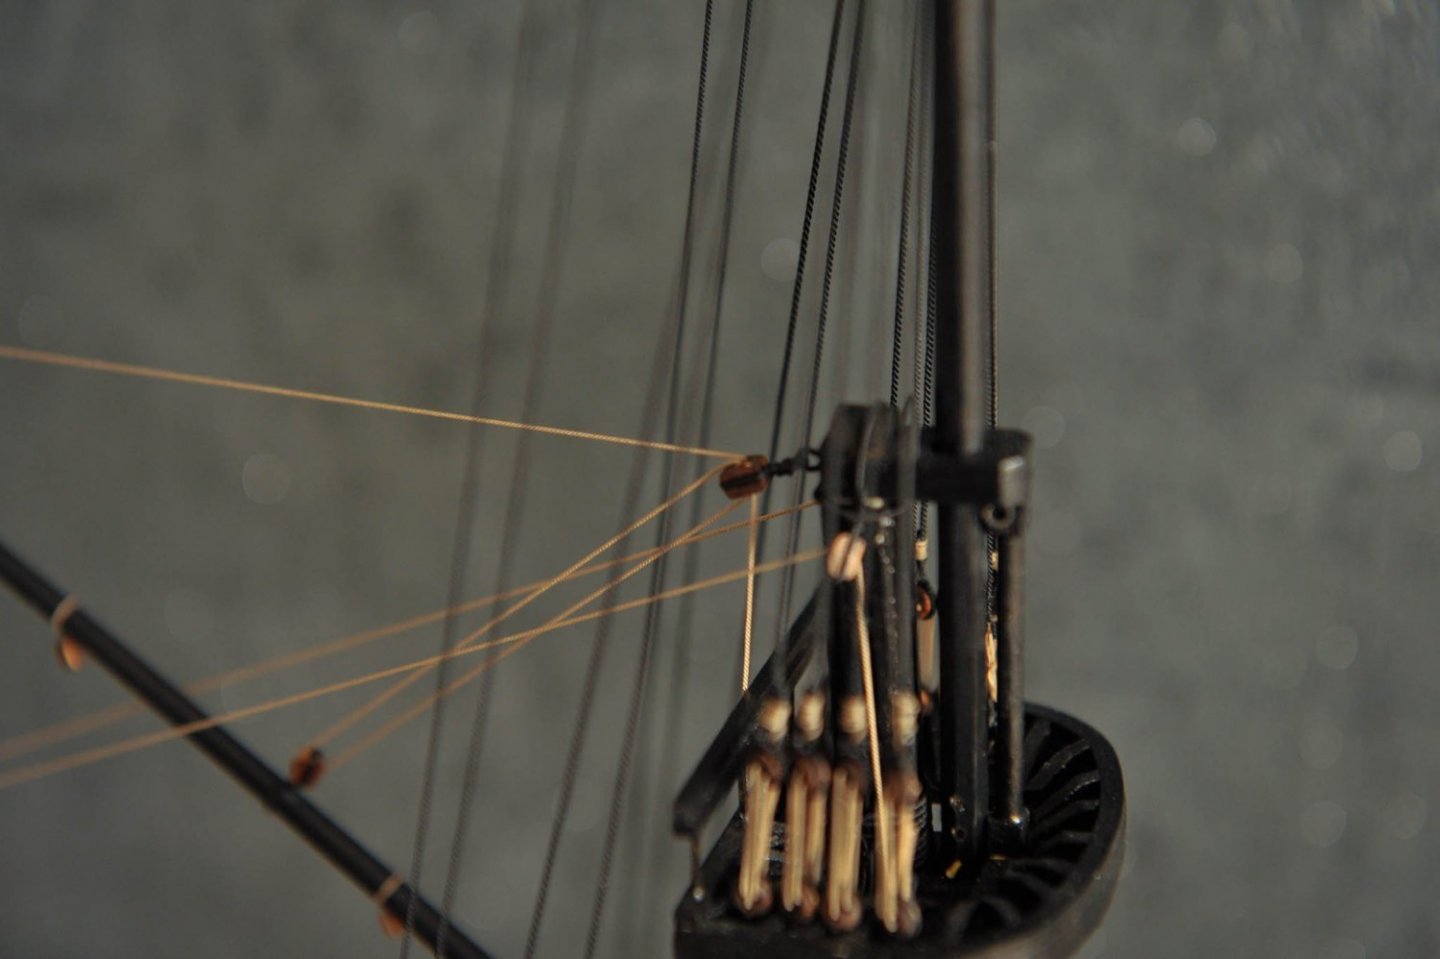
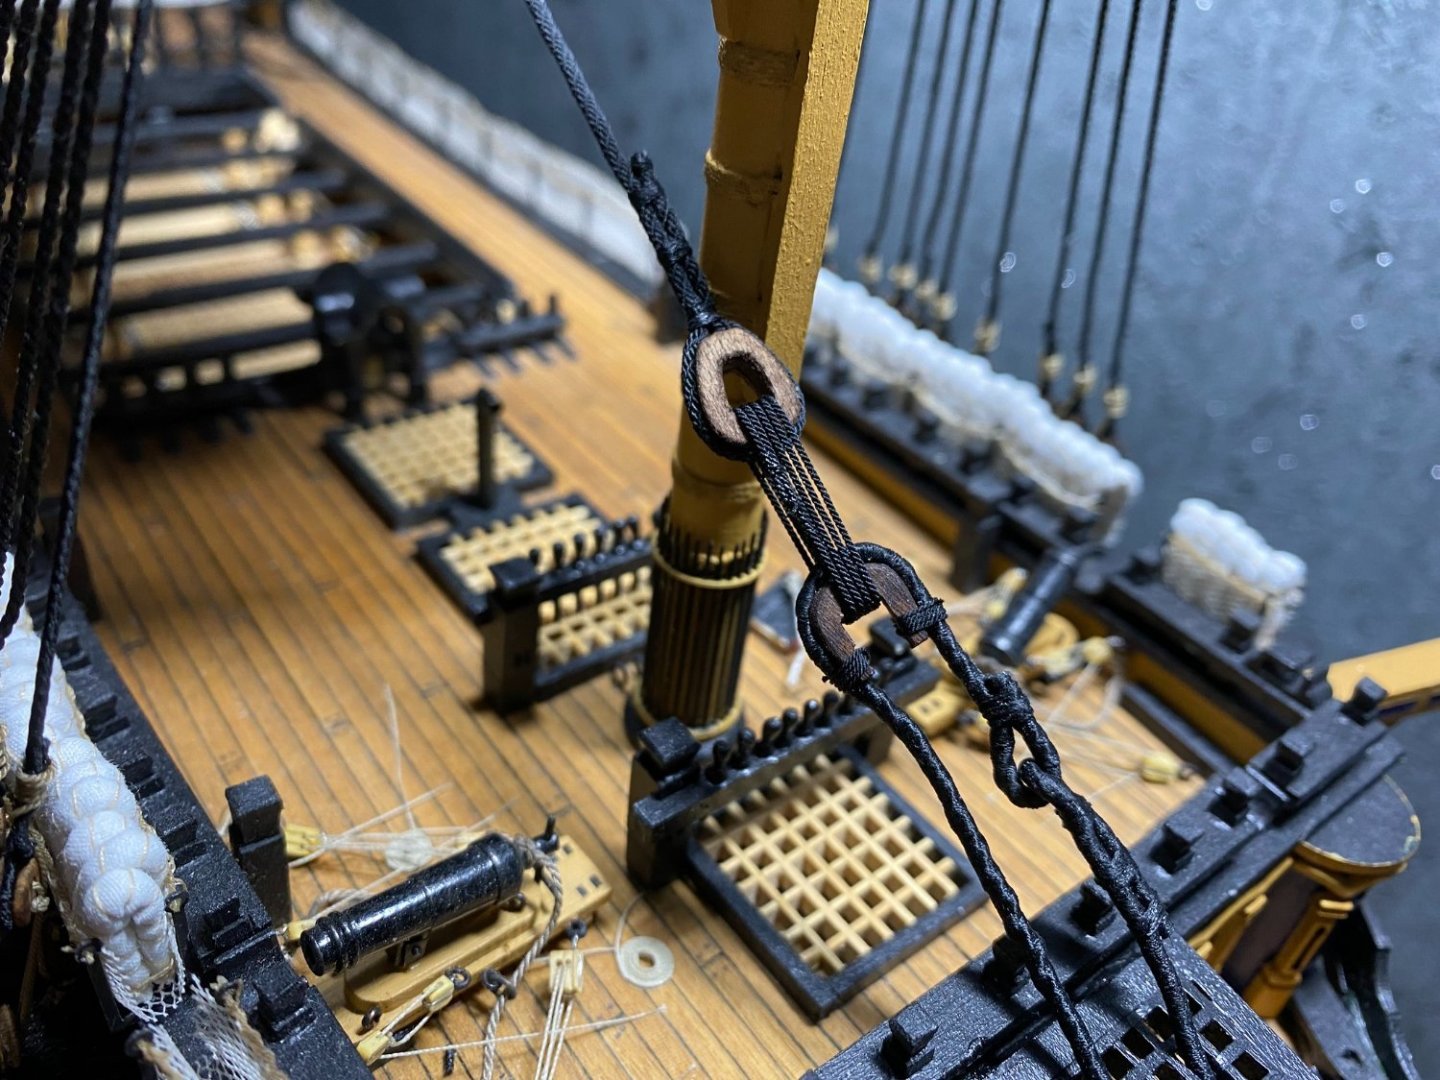
Hiya, thanks for the input. I'm glad you find my build interesting and inspiring. I've gone quite far away from original instructions but I knew it at the beginning that as soon as I start that route it will be no looking back In terms of rope colour I use black for standing rigging and I have Gutermann Skala 240 (colour 464) for running rigging. There isn't any other colours (Apart from the guns rigging which I did way earlier but too late to change them). I have seen some versions that standing rigging was done in dark brown and running much lighter than mine but I like the combination. I wasn't really looking to get anything different than black for standing rigging as this is the way the real thing is done. Colour of running rigging on real Victory though depends on the age of the ropes, condition, available stocks when replaced, etc. You will see many shades of these ropes which is quite normal. Right now I'm getting to the stage of fitting bowsprit but I need to time it with attaching the stays. The order of install matters here as gammoning covers up the stays anchor point on the bowsprit. It will take me a while before it's done though. Right now I managed to do main stay's mouse and loop, serving it and worming too. Have a look below.
-
Looking fab, well done with the shrouds. All the time to get them nicely served and prepared is definitely paying off now Can't wait to see more... Regards Tom
-
She looks great, well done. You have bulk of the work done but once you start doing small things the effect will be amazing. I'm loving my build and each time I accomplish something it just looks spectacular. I can't get enough of it Regards Tom
-
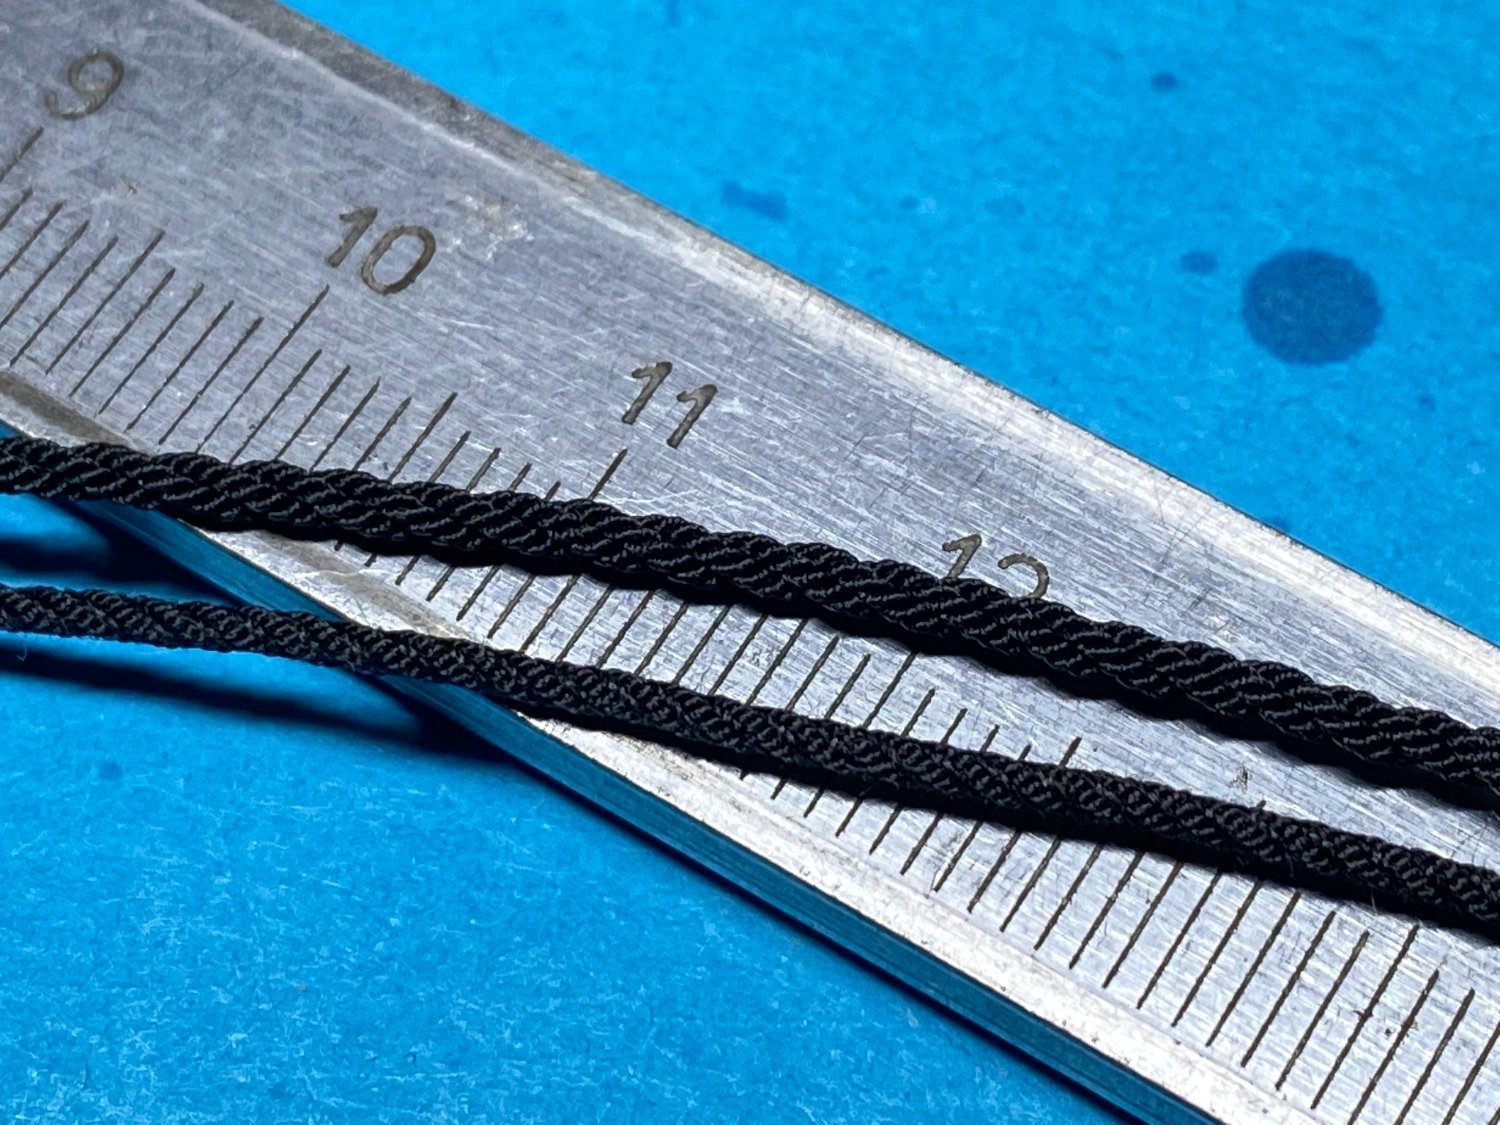
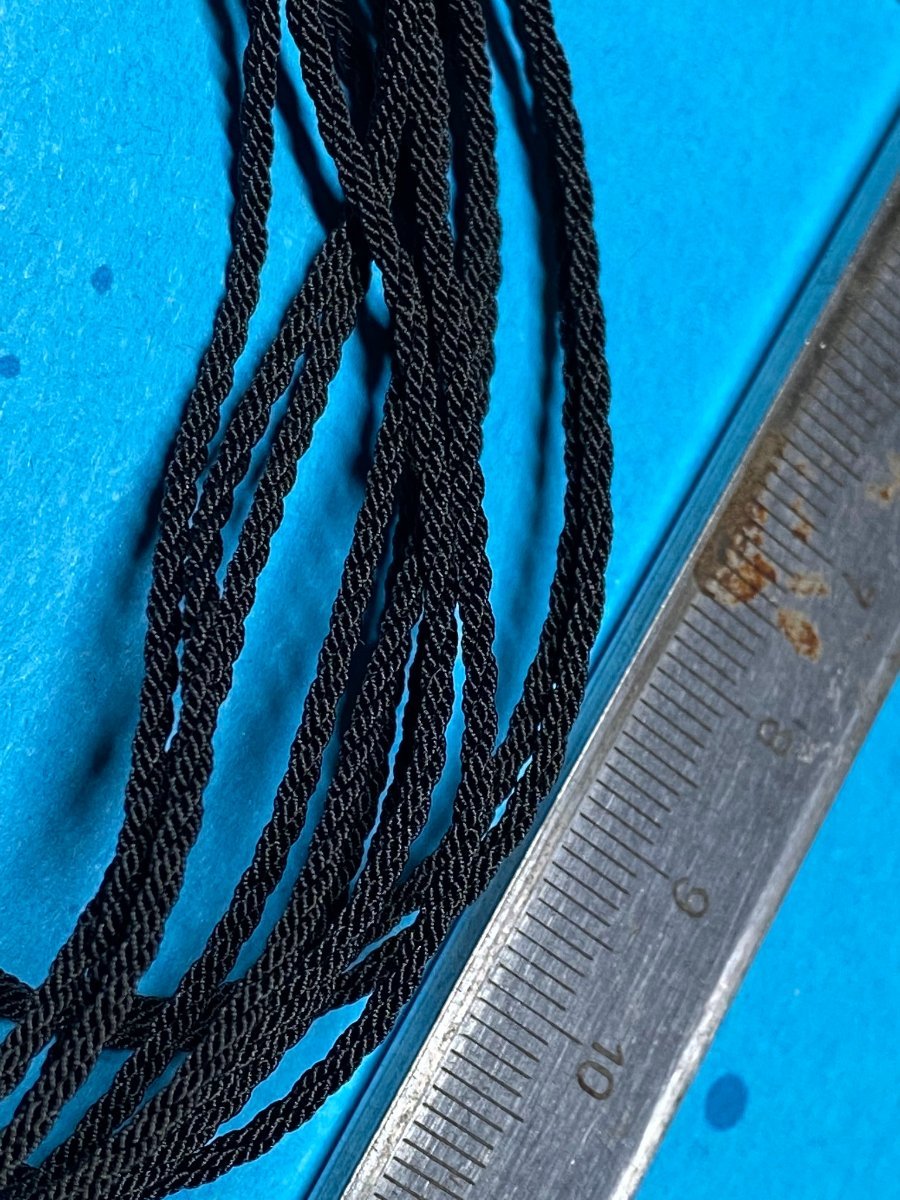
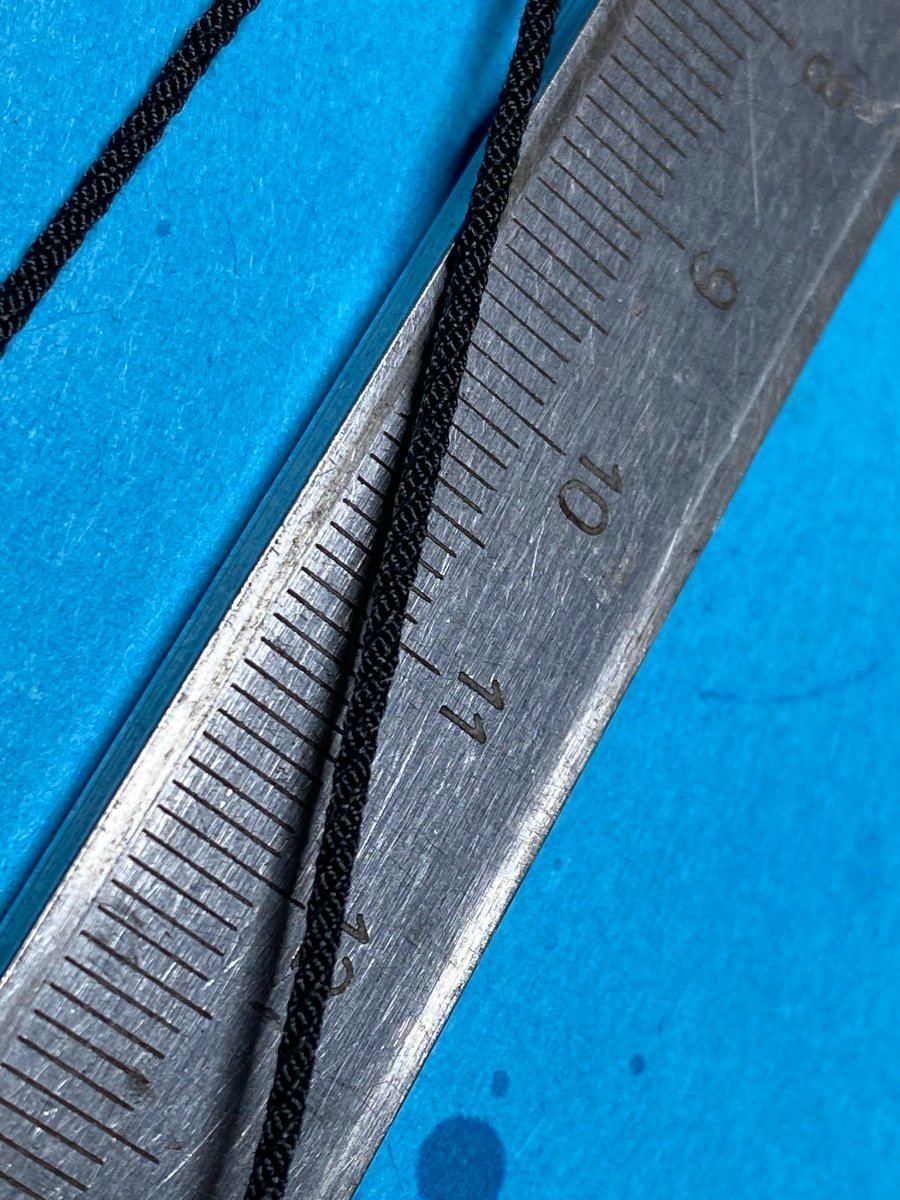
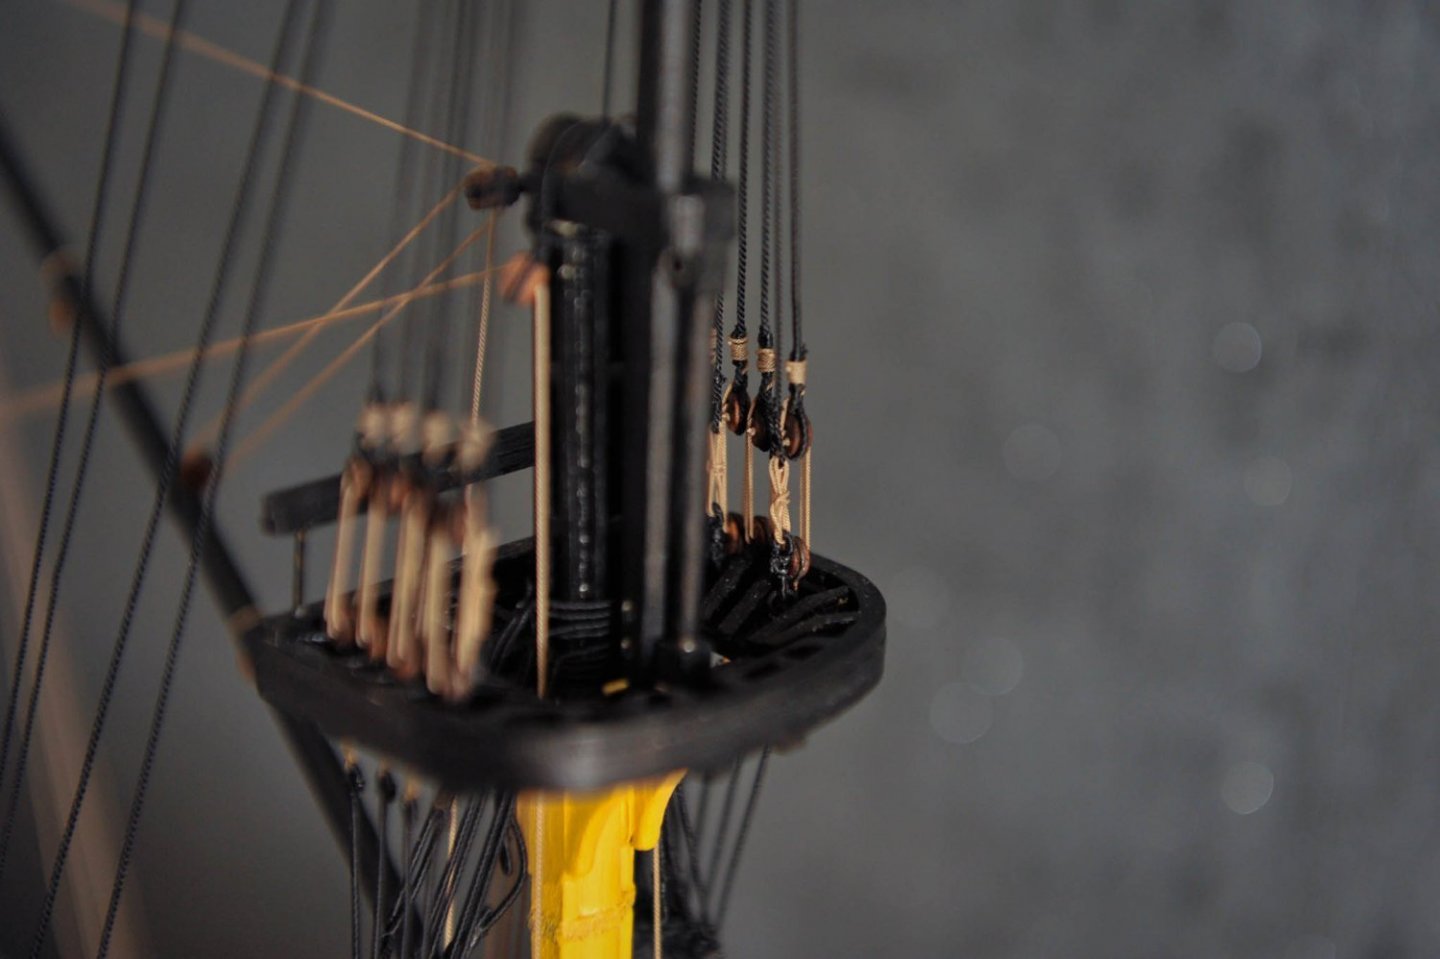
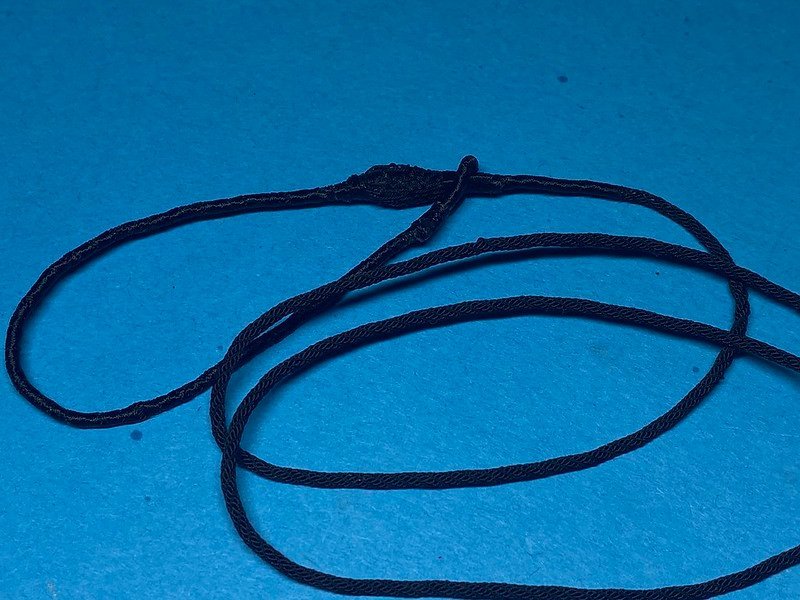
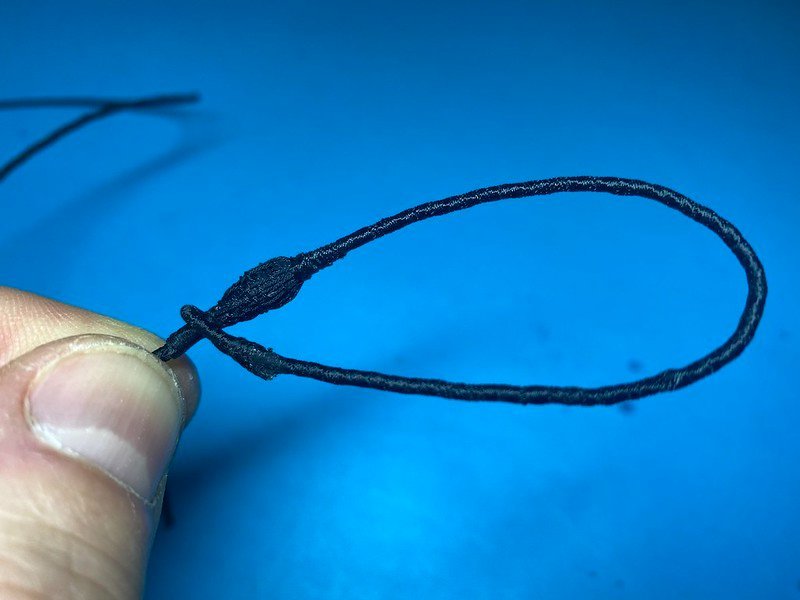
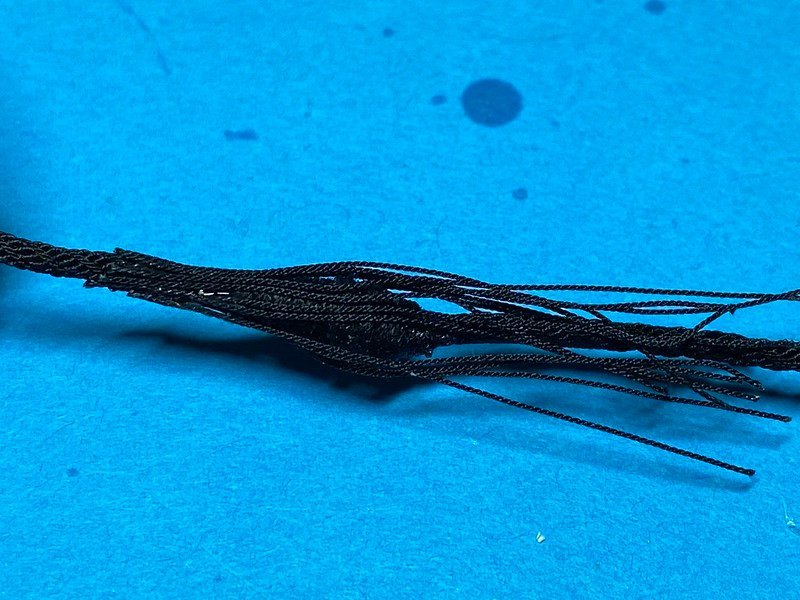
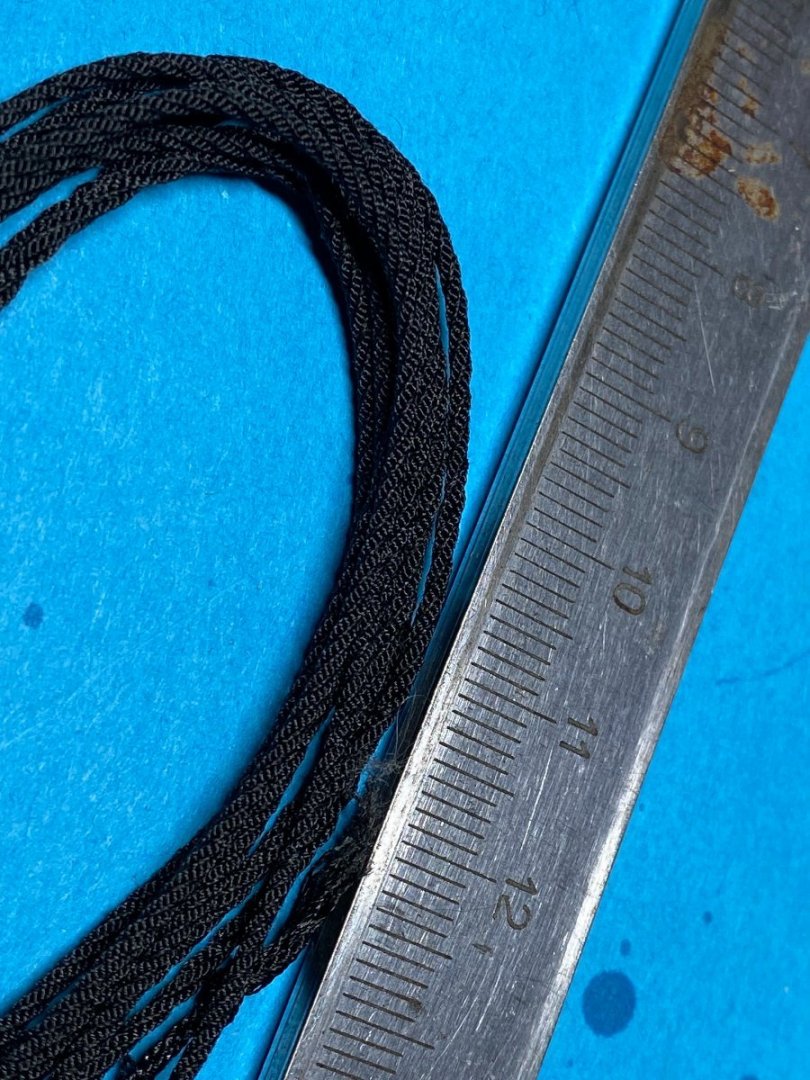
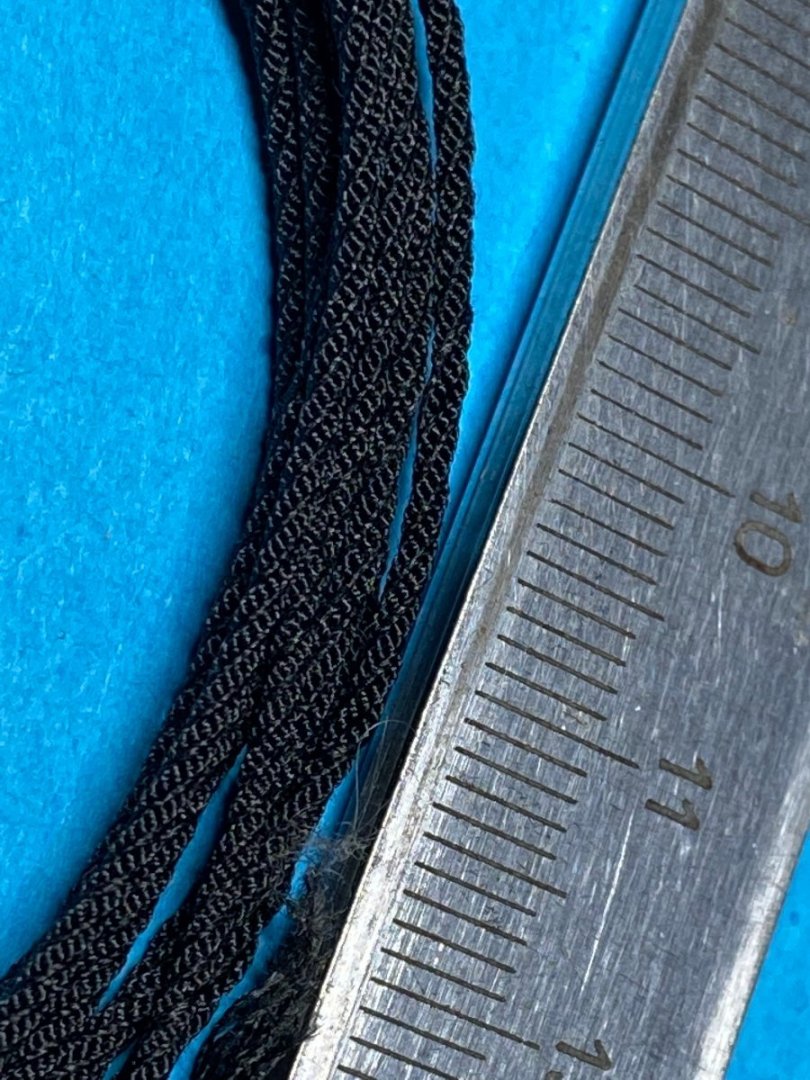
Hello again I had a productive night with stays making and I'd like to share it with you. I made main and preventer stays for fore and main mast. I twisted is as 3x (3x4) for 1.1mm2 and 3x (3x6) for 1.6mm2 of Gutermann Tera 180. The result is superb, nice and crisp. I also did sneaking on the smaller cable. It was a pain as this are really small ropes but my eyes managed. I even stayed away from magnifying glass which is quite good I think Right now I need to make mouse and an a loop with splicing which will be a task on its own Have a look... Regards Tom


-
Hi Everyone Time for another update, I have finished lower fore mast. It took me a while but results exceeded my expectations. Love the details and I have already started main mast which should be ready by next week. This is fantastic adventure and experience and I can't get enough of it. The pic quality isn't the best but I'm going to take some pro shots over the weekend and will definitely share it with you. Happy build Tom
-
That's a great result for sure. It took me quite few tries to get it the way I like but it's really rewarding. Once you fit that rope and compare it with others there is no way bac Well done Regards Tom
-
That's nice looking start. I saw bit of the discussion regarding the planking. I can share my thoughts on this after planking my Victory many years ago. I'm nowhere near being an expert in this but during my build there was plenty of discussions on DeAgostini forum regarding the planking. It all boils down to two aspects - measure 5 times, cut once. Do it slowly and glue the plank in place once you are certain that it is the right way. When it comes to the tapering the planks I always used the method that I didn't go narrower than half width. When two planks taper down to half of their width you just adding single drop plank to continue. Also when you taper them you start gradually so you don't get yourself in the situation that it gets really tight. I would share some of my pics if I didn't loose them unfortunately. What I can remember mine was single planked but I ended up using very little filler at the end. Right now it is all painted and copper plated but my next build will be definitely wood only too show it properly. Happy build and we can't wait for more updates. Regards Tom
- 41 replies
-
- 1
-
-
- OcCre
- Santissima Trinidad
- (and 1 more)
-
Looking great She is slowly taking shape. Apart from the normal issues during the build we modellers have to invent some jigs or other tools to make our life easier and getting job done at the same time. I love this aspect of our hobby. In many cases it is the "how you did it" that makes all the difference Happy build Tom
- 476 replies
-
- 3
-

-
-
- sphinx
- vanguard models
- (and 1 more)