
Ensign Smith
-
Posts
7 -
Joined
-
Last visited
-
 David K reacted to a post in a topic:
HMS Victory by knotty74 - Billing Boats - Scale 1:75 - first ever ship build, wood or otherwise
David K reacted to a post in a topic:
HMS Victory by knotty74 - Billing Boats - Scale 1:75 - first ever ship build, wood or otherwise
-
GrandpaPhil reacted to a post in a topic:
HMS Victory by Ensign Smith - Billing Boats - 1:75
-
GrandpaPhil reacted to a post in a topic:
HMS Victory by Ensign Smith - Billing Boats - 1:75
-
Tomasz B reacted to a post in a topic:
Soleil Royal by AiDi - DeAgostini - 1:70
-
 Hi guys, awesome builds. I use your bulid logs to inspire my own build. I see in your logs, that you are referering to CMB.. What site is it? Regards, Pål
 -
Ensign Smith reacted to a post in a topic:
HMS Victory by Rob S - Mamoli - 1/90th scale - first build
-
Hey there.. Hope your build is going well.. I've started mine just this month...
- 117 replies
-
- 1
-
-
- victory
- billing boats
- (and 1 more)
-
I really love the LED idea.. I have to look into it in one of my future builds...
-
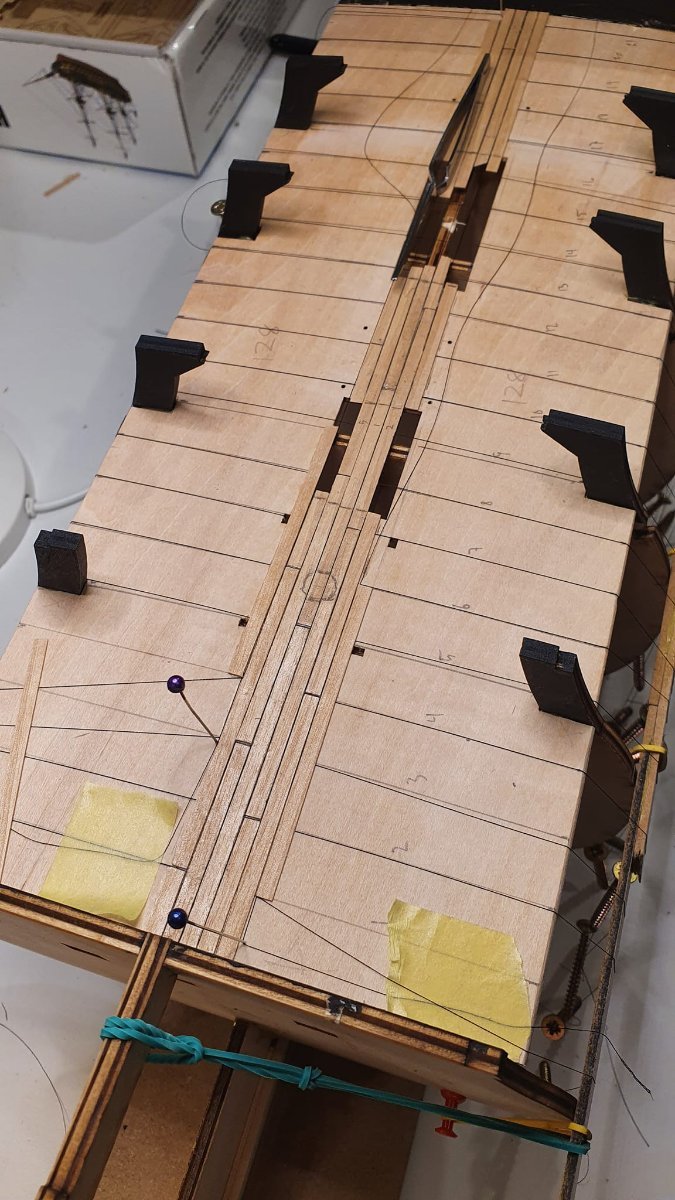
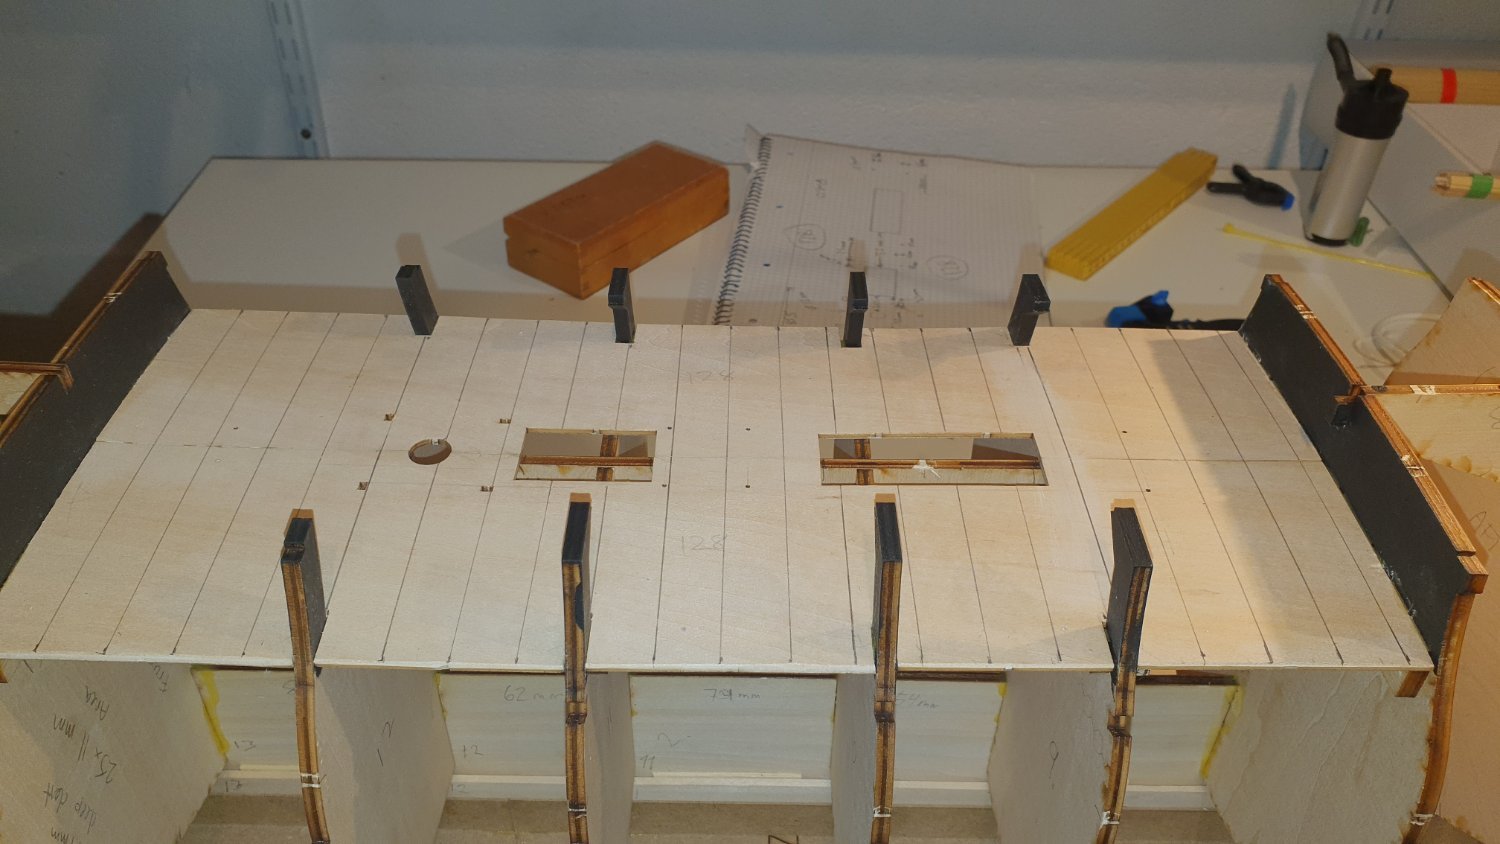
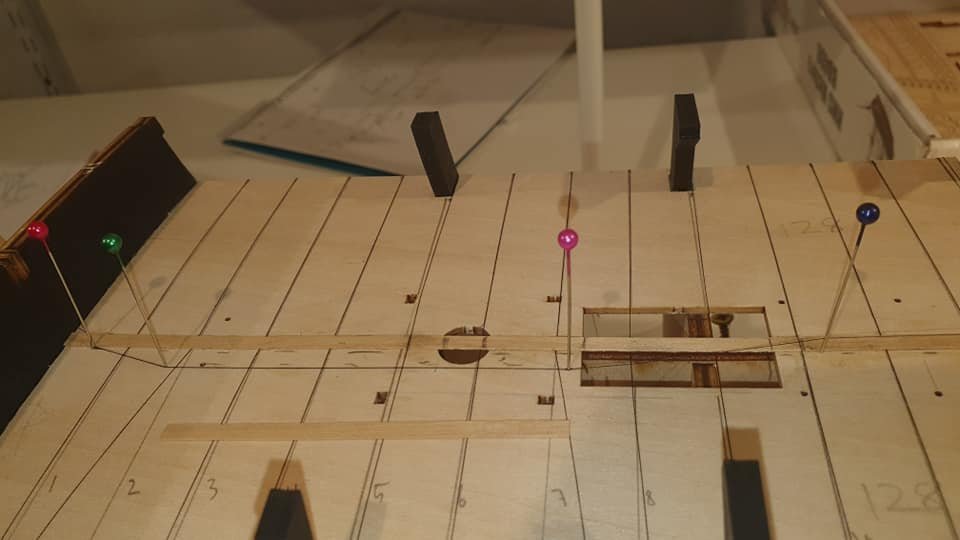
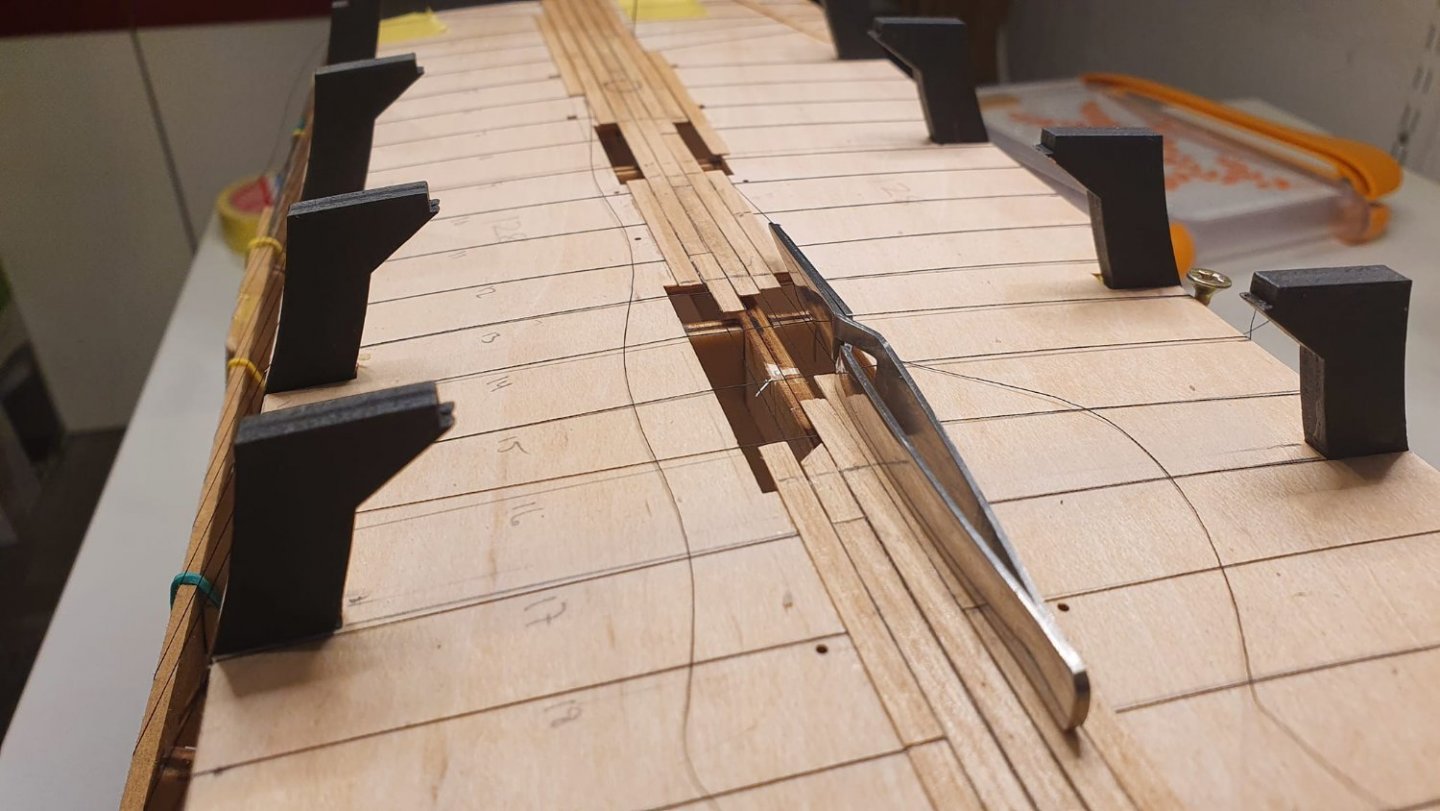
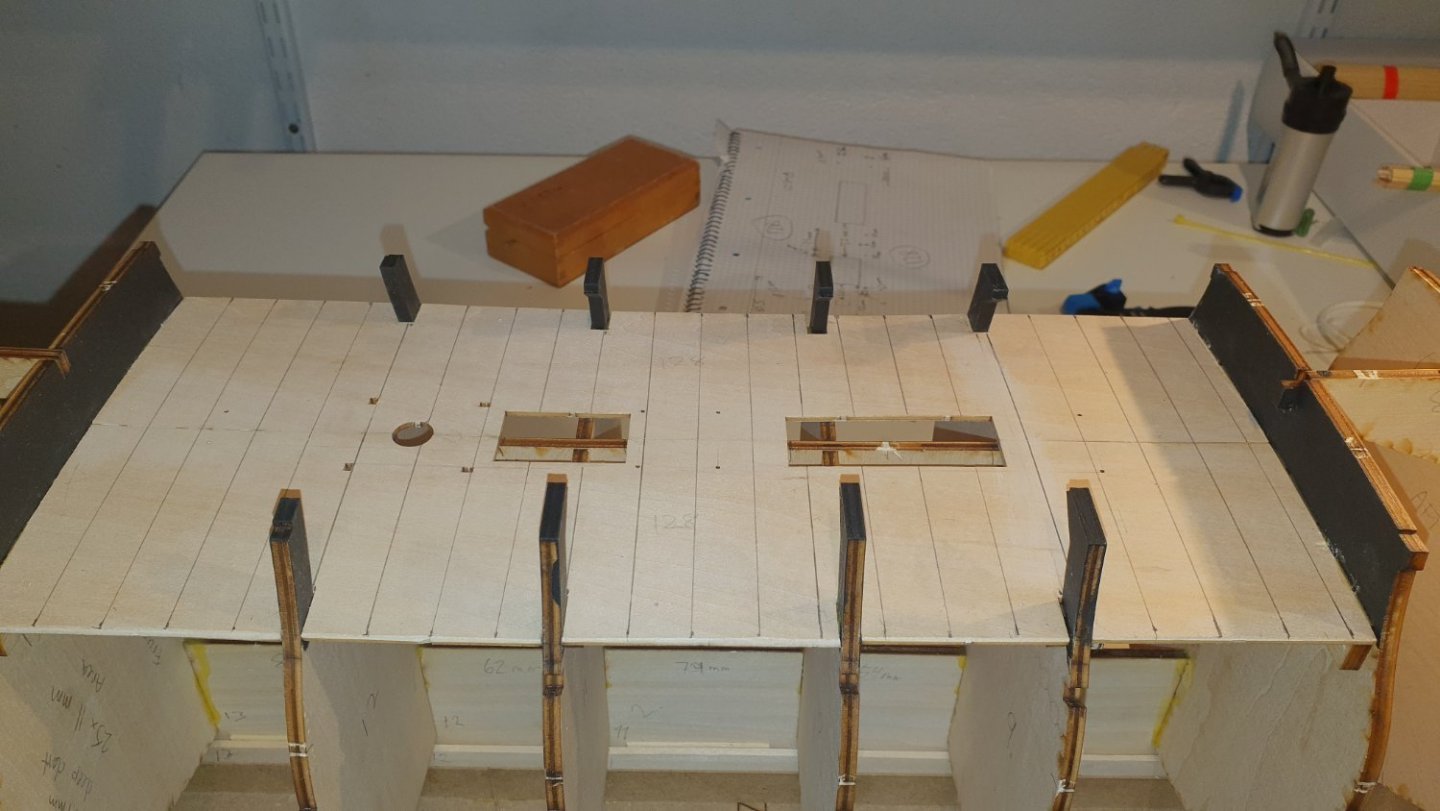
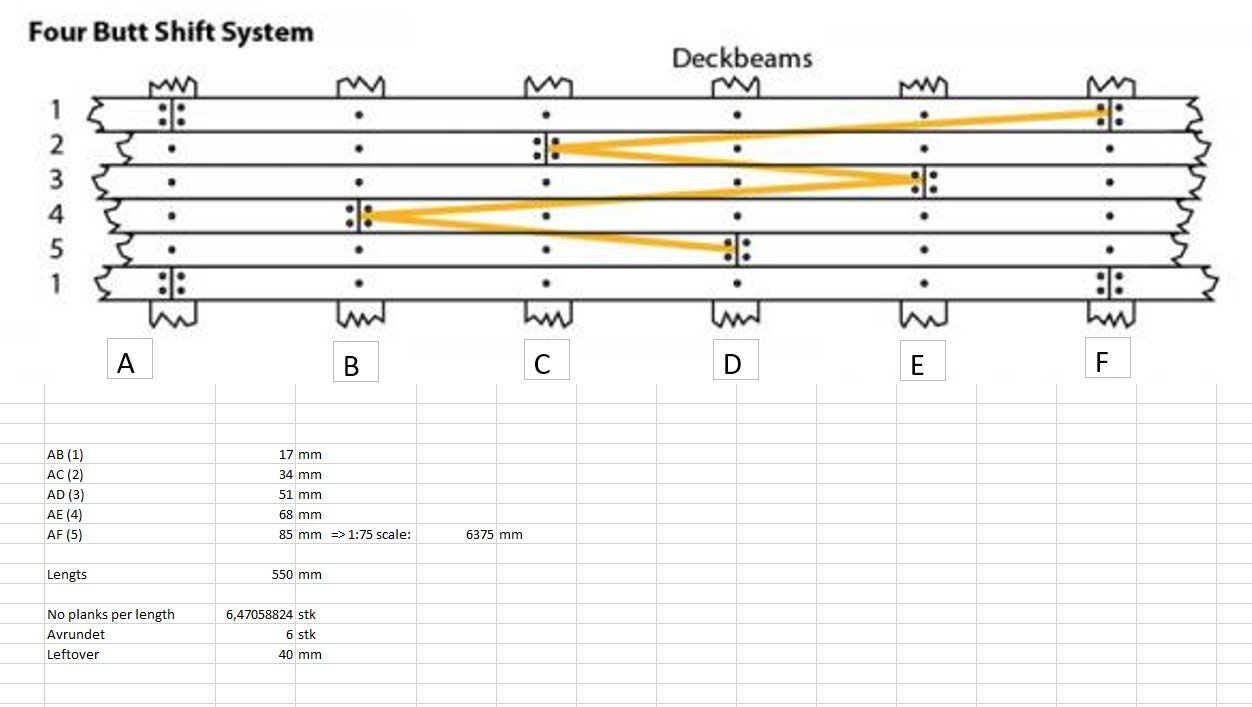
So, I decided to drop the testing, since I didn't want to waste too many planks. I also finally got my copy of the "HMS Victory First Rate 1765" by Jonathan Eastland & Iain Ballantyne. This book is among my recommendations for your research into building this model, as it is a great source of inspiration with the many pictures and detailed history. I found that the deck planking originally used were approx 6100 - 6300mm in real scale lengts. Since the 4 butt shift system needs 5 slots of deckbeams across the length of the deck, I calculated that the closest scale that is dividiable by 5, is 85 mm. That leaves 17mm between the center of each deckbeams. I used a paper cutter and set it to 85mm and cut a bunch of planks. Since I have been very careful and measured, and remeasured my 17 mm shift of the deck planks, it should fit very nicely Next step is to start preparing the 4 shift butt system and the threads to simulate the slant between the deck planks to simulate the space left where they used to tar between the deckplanks. First out is the threads that are to be laid across the deck I measured out 17mm between each "deckbeam". I used some screws to hold them tight while laying down the planks, and still having them flexible when gluing, and stitching the thread that goes along the length of the deck. I have read several logs, stating that you should do "this technique and not that technique". I decided upon doing one full length at a time, shifting from port to starboard every other time. I put the red-to-blue thread under the cross thread no 2 and 7, which would in this case be the correct butt shift, this would help me keeping the thread in place when glue and plank is placed. I also have seen several videos on youtube, and it has been stated on this site as well- the importance to use the correct kind of glue, and make sure that the thread is properly soaked in glue. I use a PVA based glue, which dries clear. When the marine varnish is applied on top, the deck would look absolutley stunning. The buttshift is coming along nicely, but it is real time consuming. This is after 4 days of work, I got 5 full lengths finished, and one half, fulfilling every combination across my thread-deckplanks, and pleased with myself that my decision to precut a bunch of planks at 85mm paid off. I really look forward to see the finished deck. Until next time, have a good one


-
Ensign Smith reacted to a post in a topic:
HMS Victory by Rob S - Mamoli - 1/90th scale - first build
-
Ensign Smith reacted to a post in a topic:
HMS Victory by Rob S - Mamoli - 1/90th scale - first build
-
Ensign Smith reacted to a post in a topic:
HMS Victory by Ensign Smith - Billing Boats - 1:75
-
BobG reacted to a post in a topic:
HMS Victory by Ensign Smith - Billing Boats - 1:75
-
BobG reacted to a post in a topic:
HMS Victory by Ensign Smith - Billing Boats - 1:75
-
Morgan reacted to a post in a topic:
HMS Victory by Ensign Smith - Billing Boats - 1:75
-
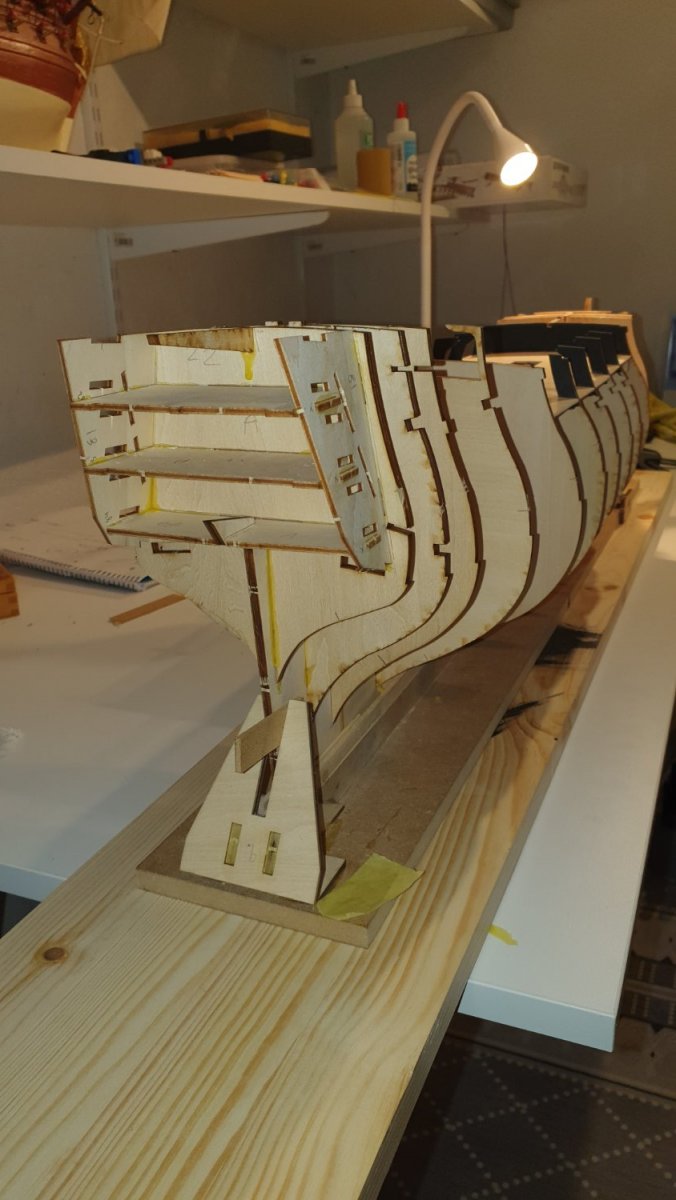
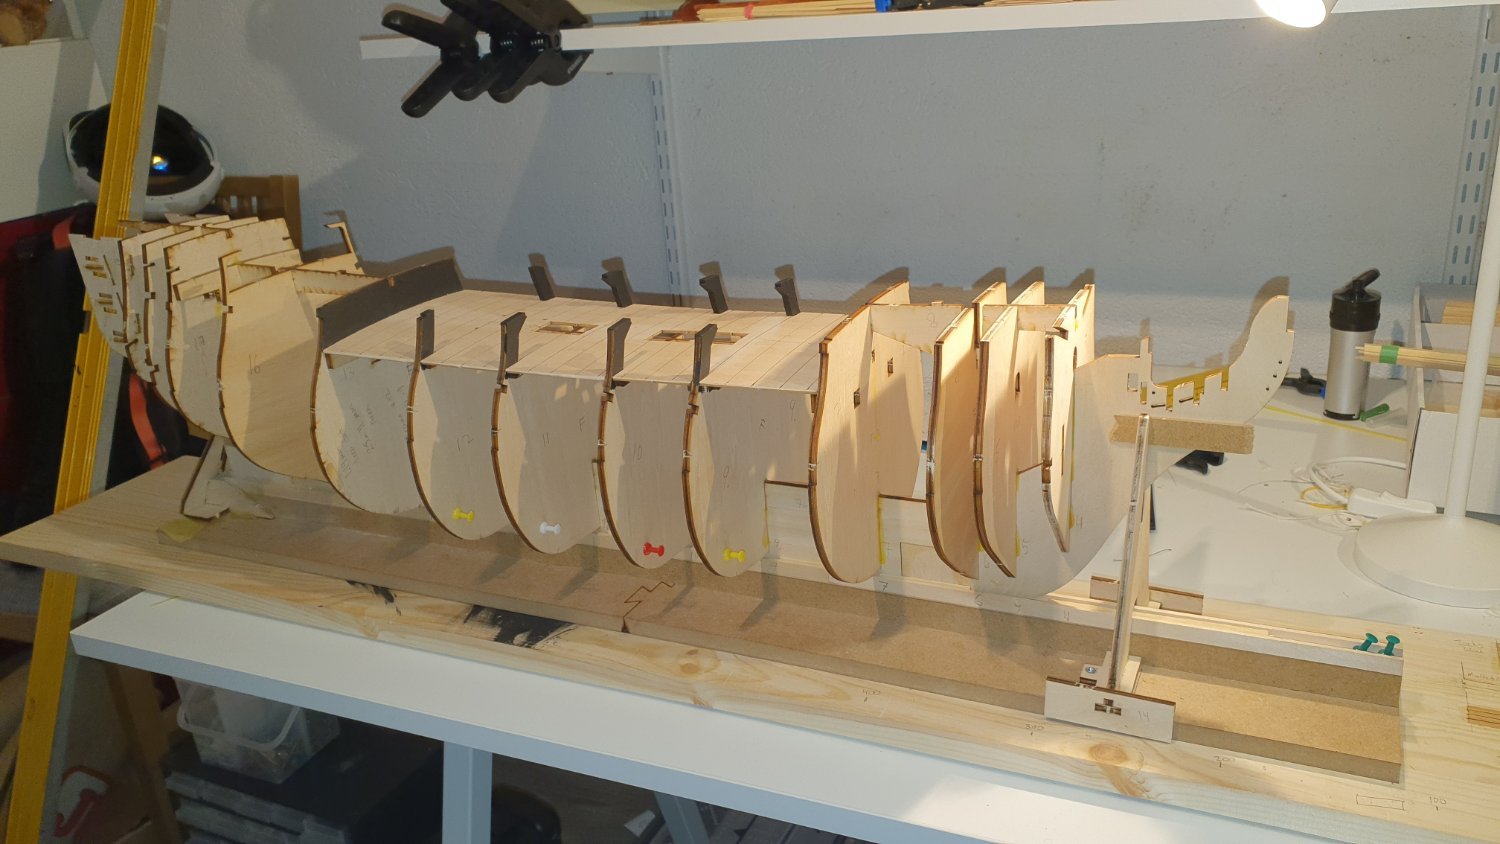
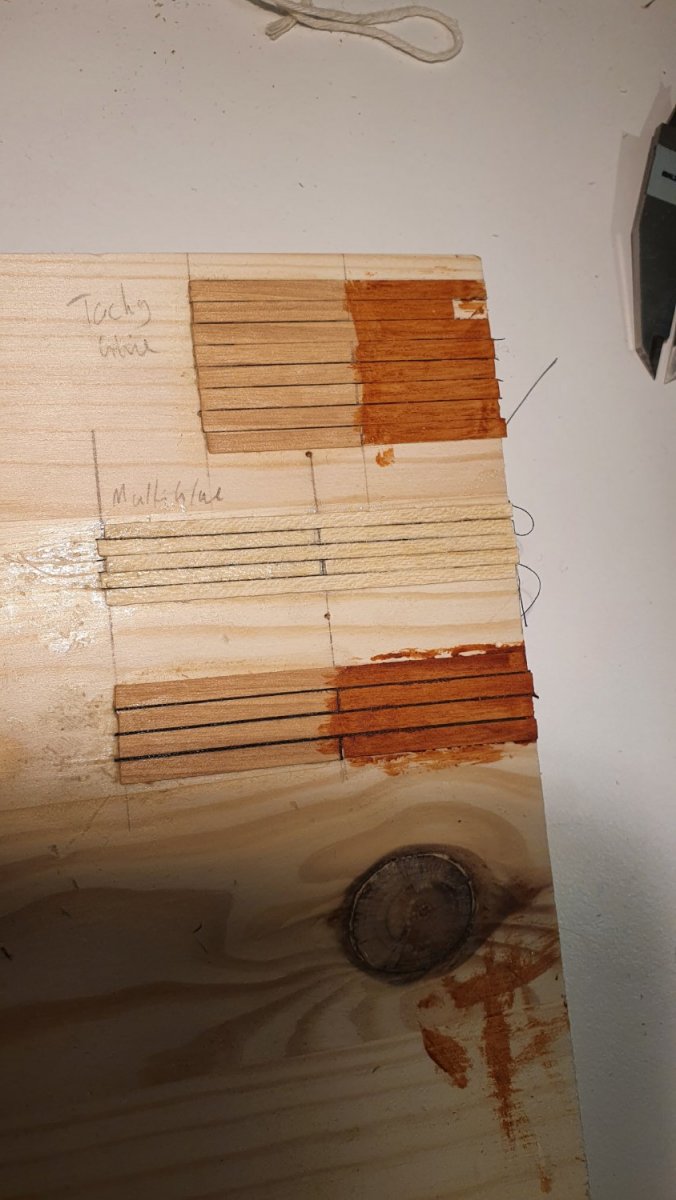
Hello, and thank you for your comments at this point. I'd love to hear your views on my decicions along with the project. So after a long January, dedicated to work and a certain virus, I have gotten to do some long awaited gluing and sanding. The bulkhead is now complete, and the back of the ship is shaping up. Next to do was to glue the lower deck to the model. And that was a lot of work. My previous method of measuring up, and stabilizing the bulkheads before i applied glue wasn't a very accurate method. All the bulkheads were slightly off by a millimetre, but all the bulkheads were parallell to each other.. I daresay this does not matter on the final build The lower deck didn't match the upper frame of the bulkheads, leaving me with alot of sanding to get everything together. A painted the upper frames black, but after aquiring a book with prints from the real HMS Victory, I have decided to repaint them white to match the real model. I have also done some research on the butt shift system. The real Victory seems to have a Four Butt Shift system. The real Victory was built with deck planks with lengts approx 6000-6300mm. My planks on the model would be 85mm, which is the closest to my scale model 1:75 (85x75=6375). Then the length of each deckbeam in the four butt system would be 17mm on my model. Finally, I did some testing. I have laid out some planking and glued it to a big plank. Nevermind the paining to the right wiich is the Mahogany Stain used on other parts. The left is with just one coating of Marine Varnish. The final deck would have at least 2 layers. The upper is the planking with Gutermann Tera 180 thread in between and varnished. The thread is approx 0.02mm thick. The middle is the planking from "The Norwegian Lion" as my dad did it The lower is the planking with the Gutermann M 782 thread in between and varnished. The thread is apporx 0.2mm thick. I would say that I'd like the bottom one best, but I am afraid of the decking would steal a lot of attention of the final build, so I have decided to with the upper test. The middle one was never an option, just me practicing on the leftover from the Lion set. I am having another go at test planking to train on my skills with the leftover pieces from the Lion set. I have already decided to not to go with the long strands of thread across and along the deck., and just adapt a piece of thread next to each plank along one side of the plank and across the short length, and then cutting each thread each time.


-
AlasdairM reacted to a post in a topic:
HMS Victory by Ensign Smith - Billing Boats - 1:75
-
AlasdairM reacted to a post in a topic:
HMS Victory by Ensign Smith - Billing Boats - 1:75
-
Ensign Smith reacted to a post in a topic:
HMS Victory by Ensign Smith - Billing Boats - 1:75
-
chris watton reacted to a post in a topic:
HMS Victory by Ensign Smith - Billing Boats - 1:75
-
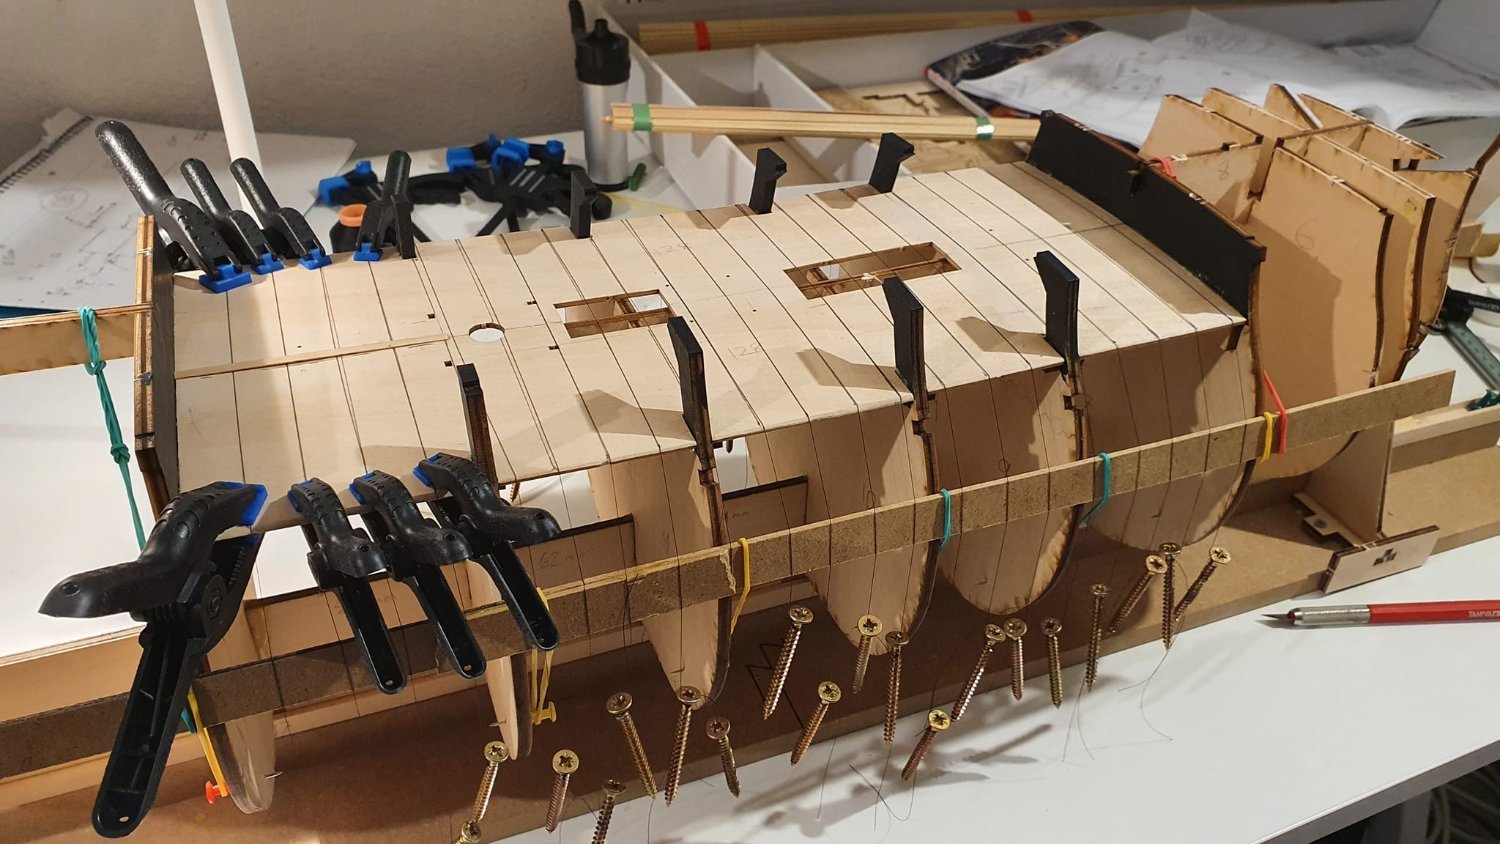
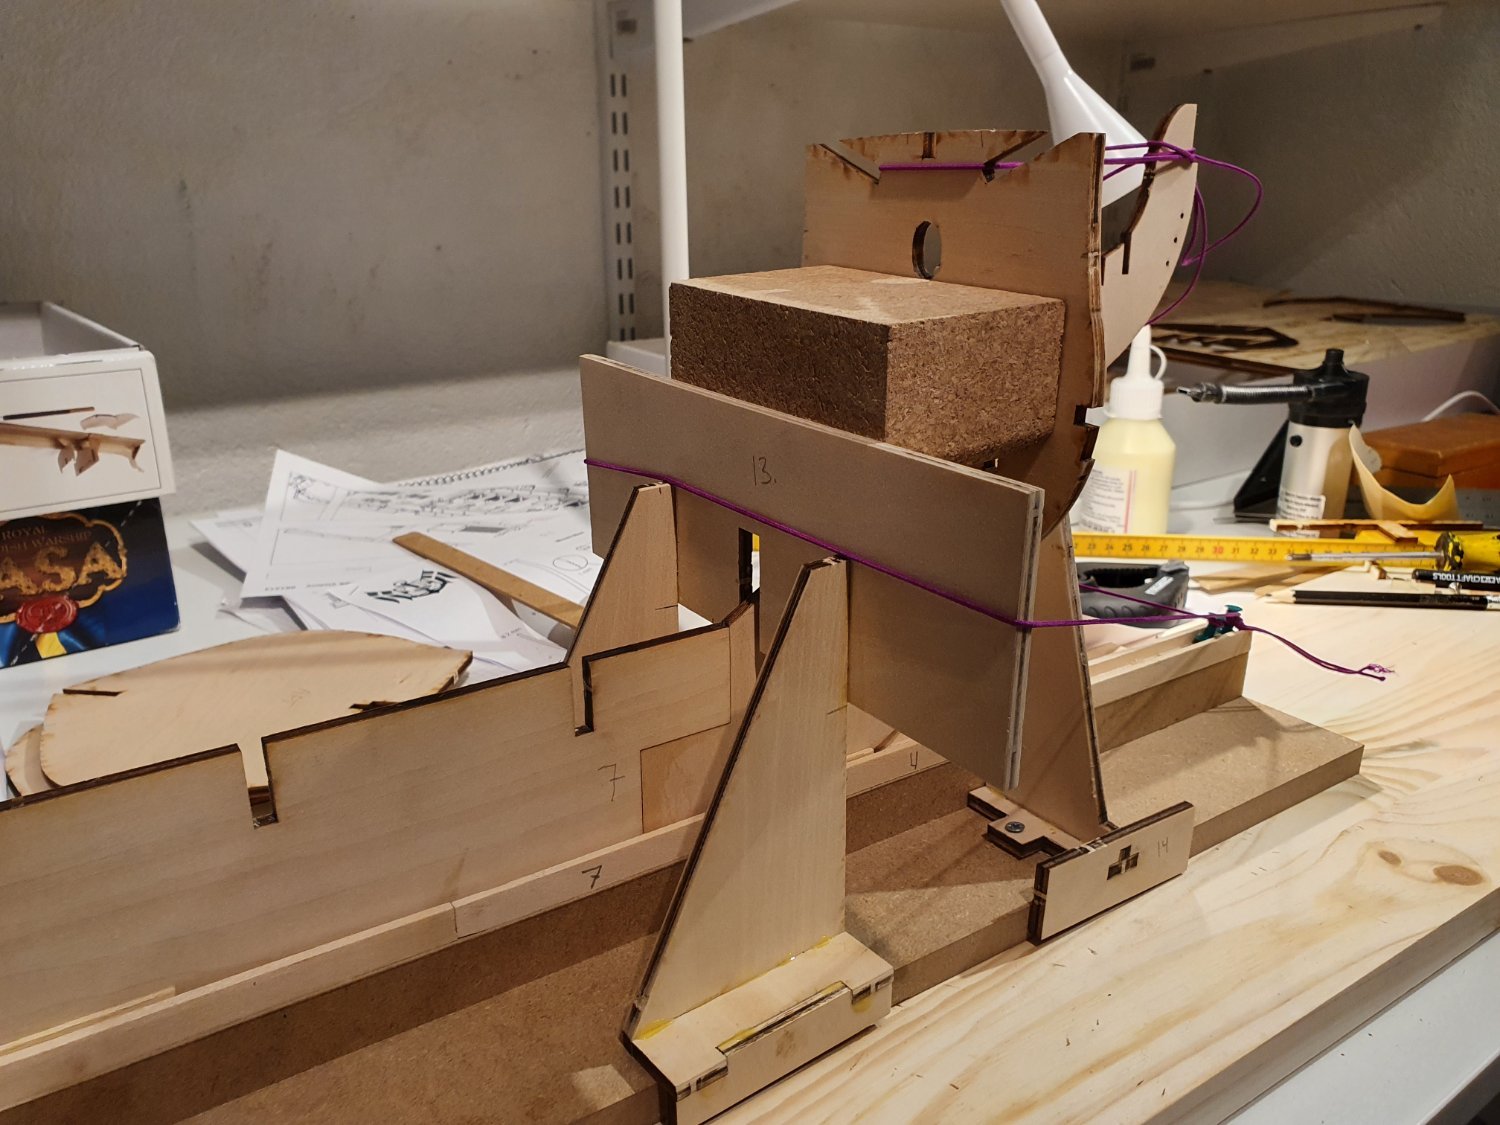
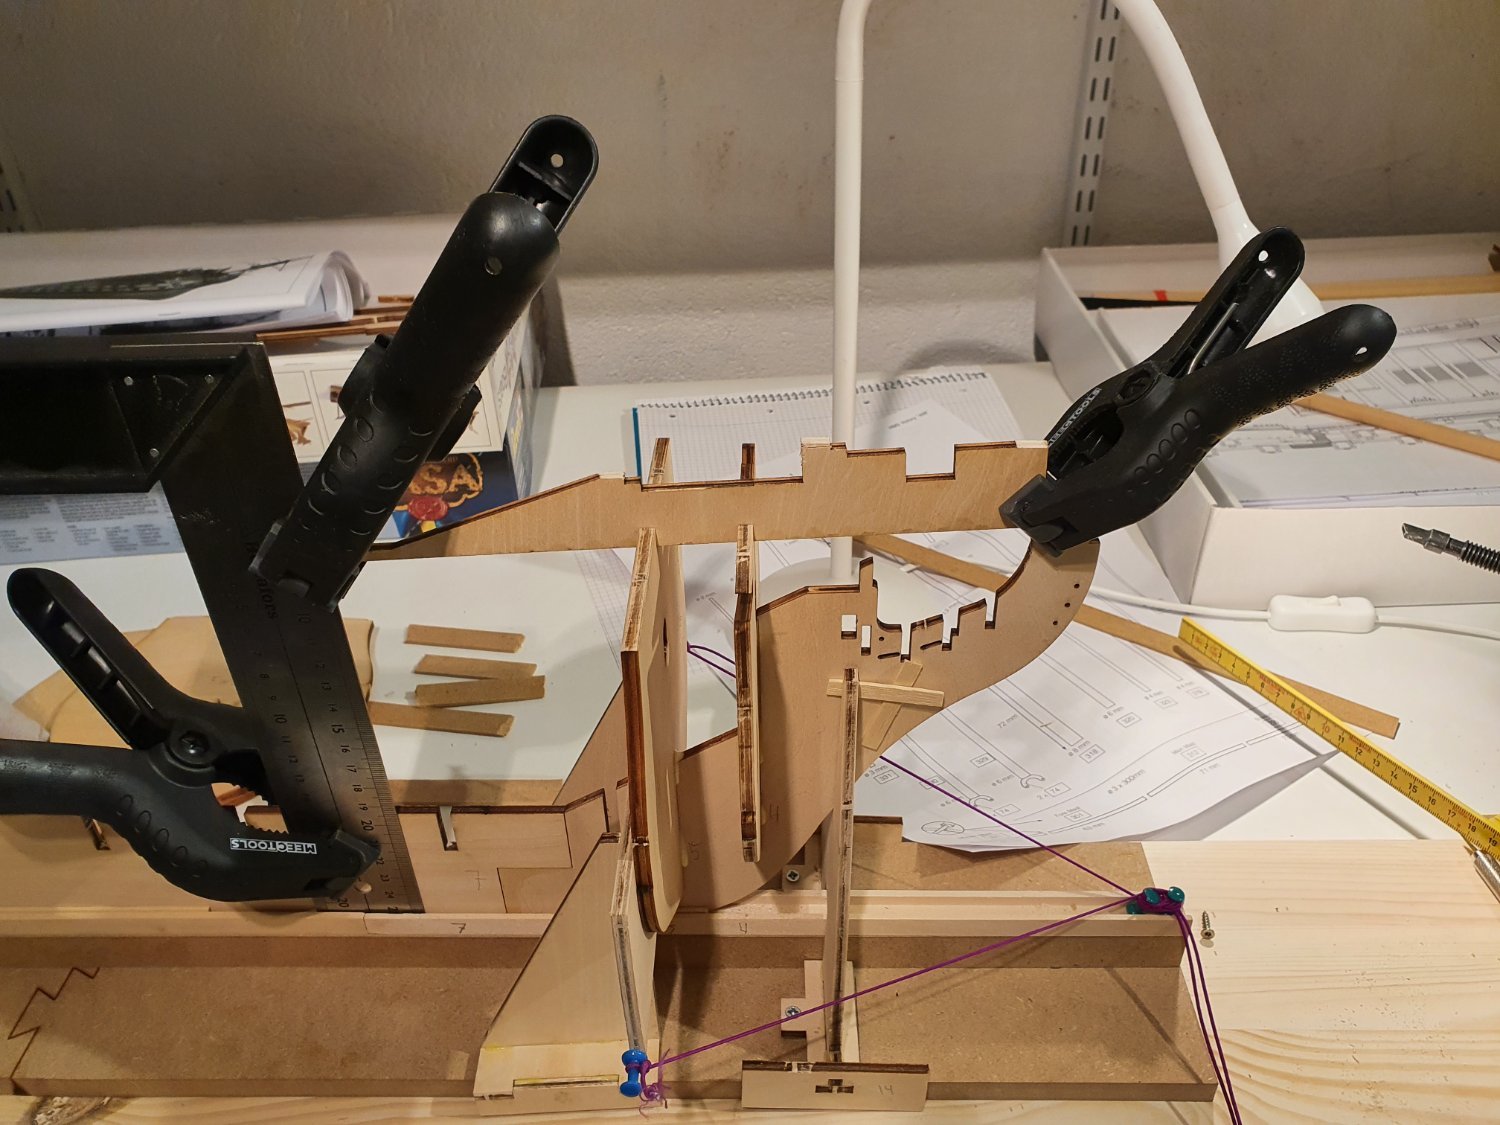
When fastening the frames I discovered that there were some slack when inserting the frame into the kiel. The reason for that I belive is space for the glue to set. So I decided on a flexible approach to use rubber string. I'm not vert impressed whit my work on the Building Slip, so I had to be creative to get the support needed when the glue sets. Again I needed the first two frames to be perfectly alligned, as I would use those for the remaining frames as a guide.


-
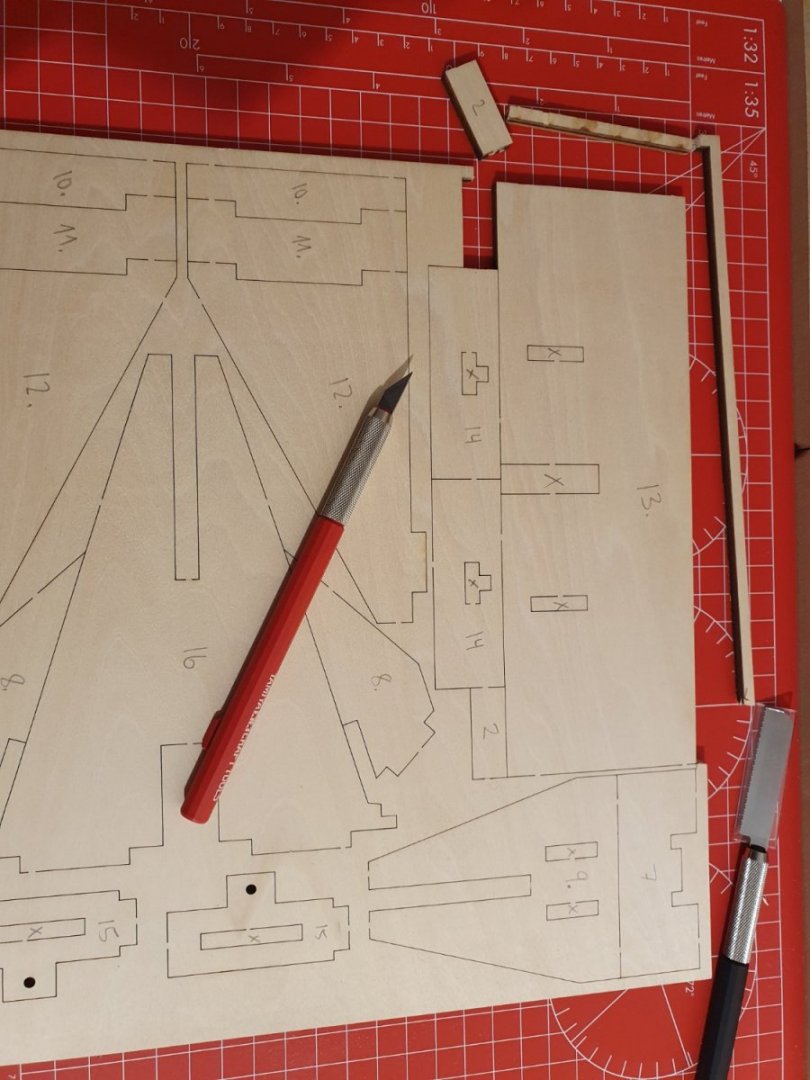
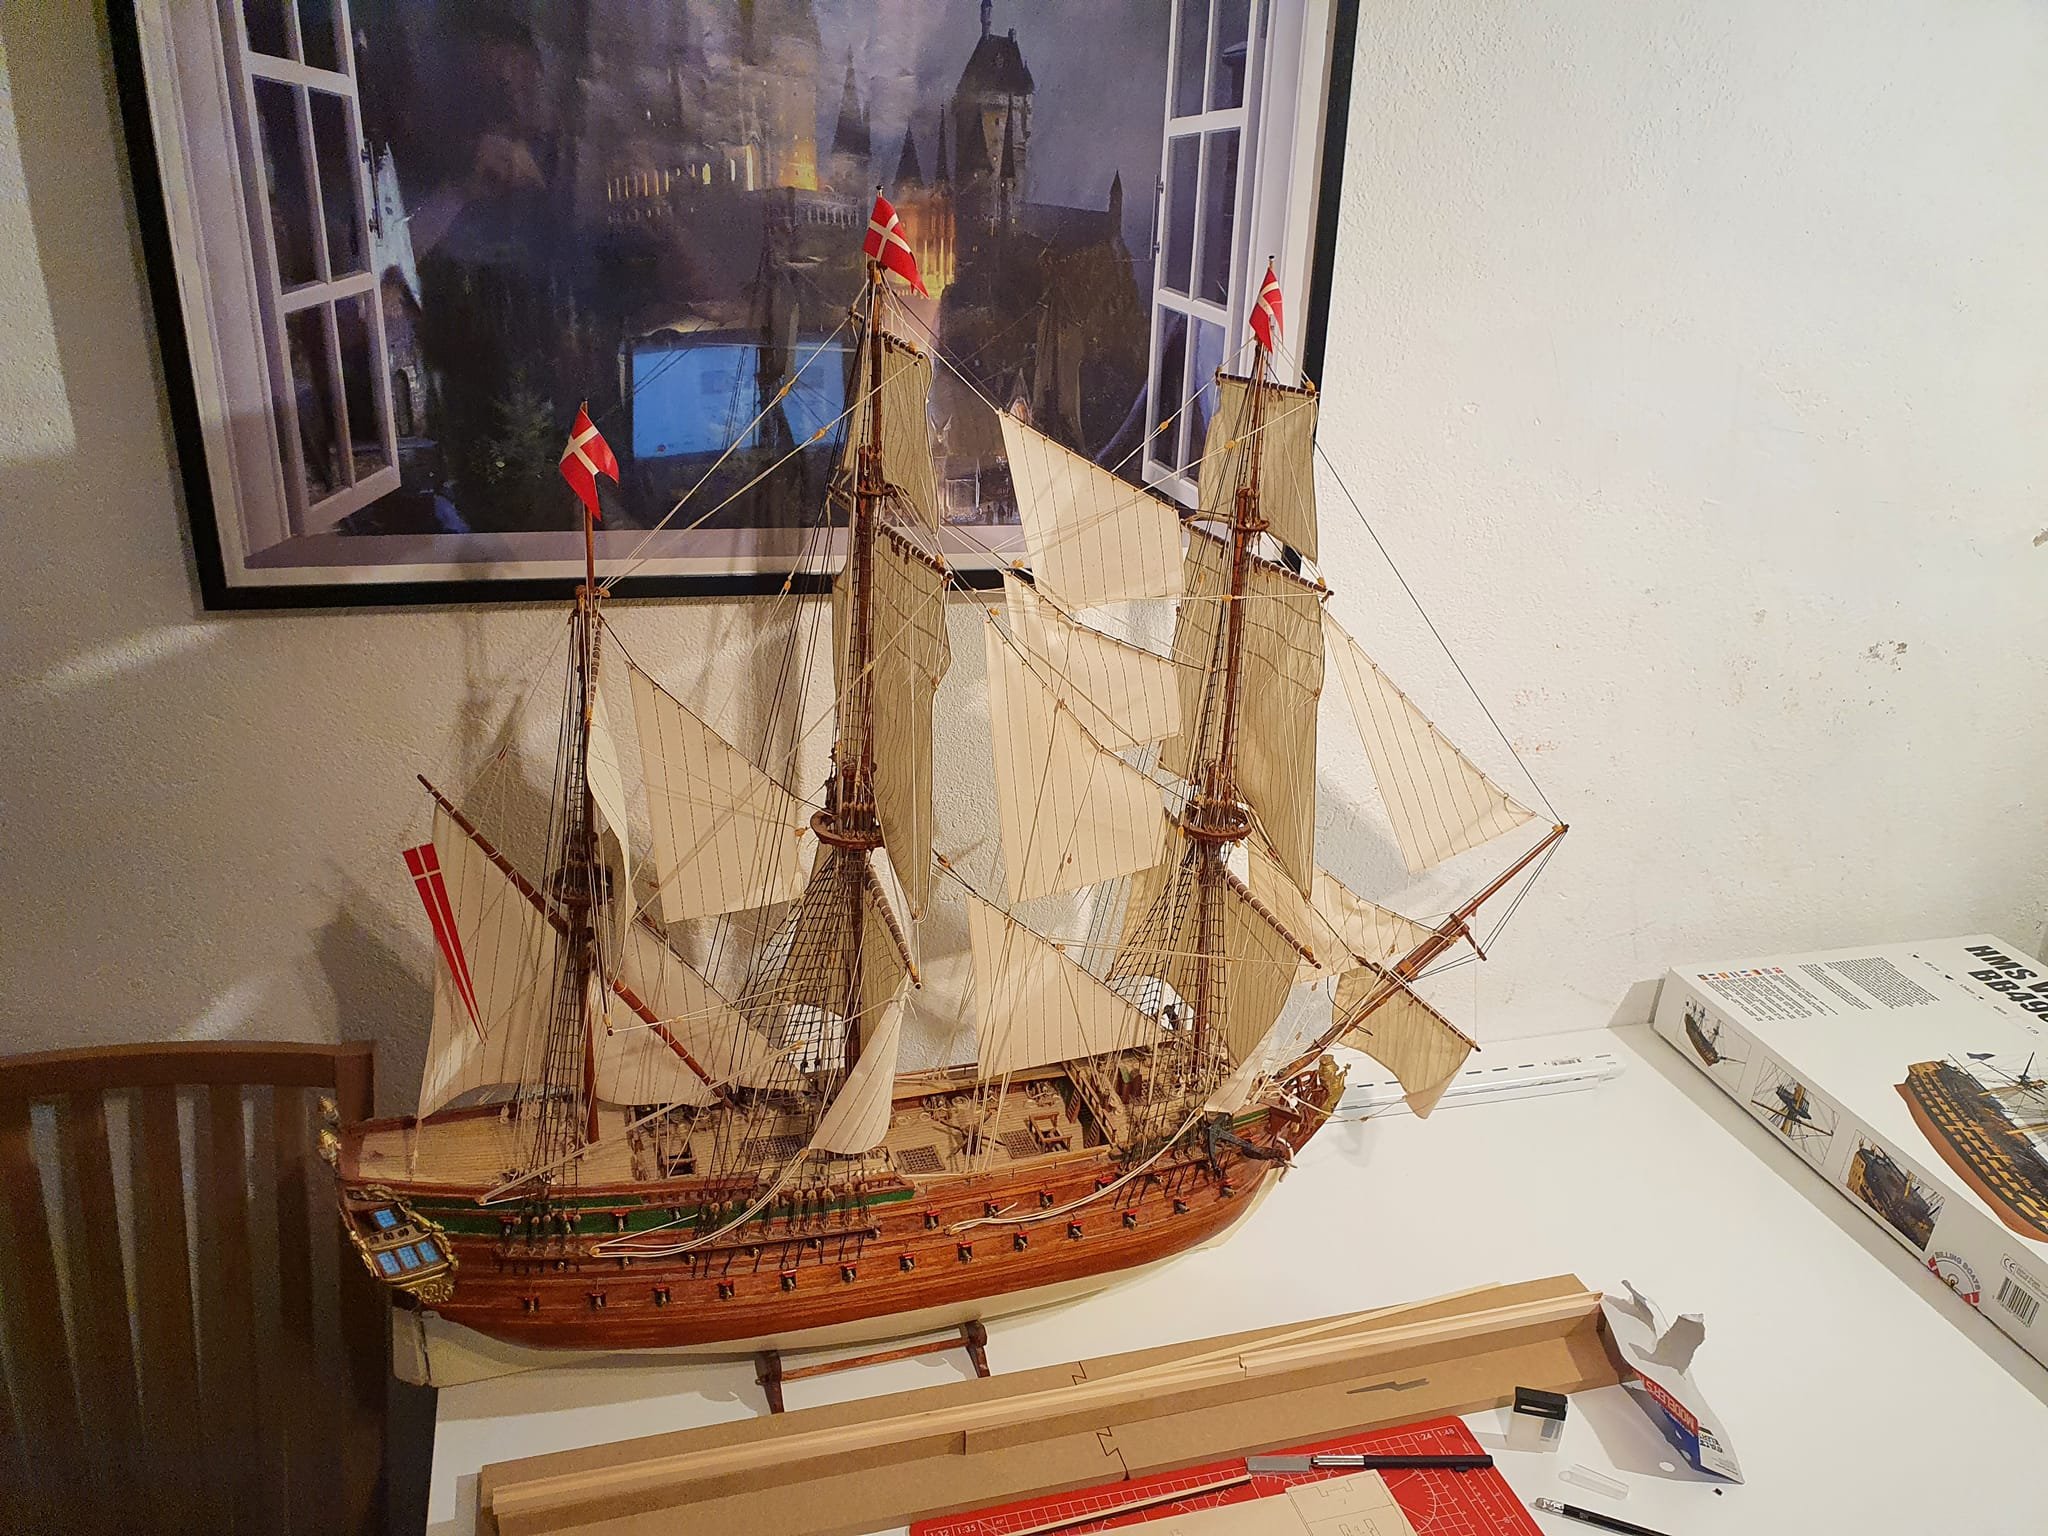
Hello all, and welcome to my "first" wooden build. First I'd like to say, I have read several of the members builds of similar ships from the same era, and most impressive that also several novices like me have undertaken similar projects. It's a massive task to undertake a massive build like this, but I have some experience from the past, I have buildt several builds in my younger days, and now, after my father gifted me his build of the Norwegian Lion (Billing Boats) - I decided that it was going to be my inspiration, as it sits firm on a shelf above my workbench. I plan to do a detailed build log, with my considerations of my decisions as the build progresses. First the inspiration, in front of my view towards Hogwarts, The Norwegian Lion, a project my father finished some 25 years ago, before the laser cut we have now. My first real consideration were if I was to cut or saw the pieces from the wooden panel. I decided after testing on the Building Slip, that cutting was the best way. I may change my decision later when I get to the more detailed cuts.