EvanKeel
-
Posts
28 -
Joined
-
Last visited
Content Type
Profiles
Forums
Gallery
Events
Everything posted by EvanKeel
-
Thanks for the tip, Allan. I'll start looking out for copper brads etc. to add to my supplies
-
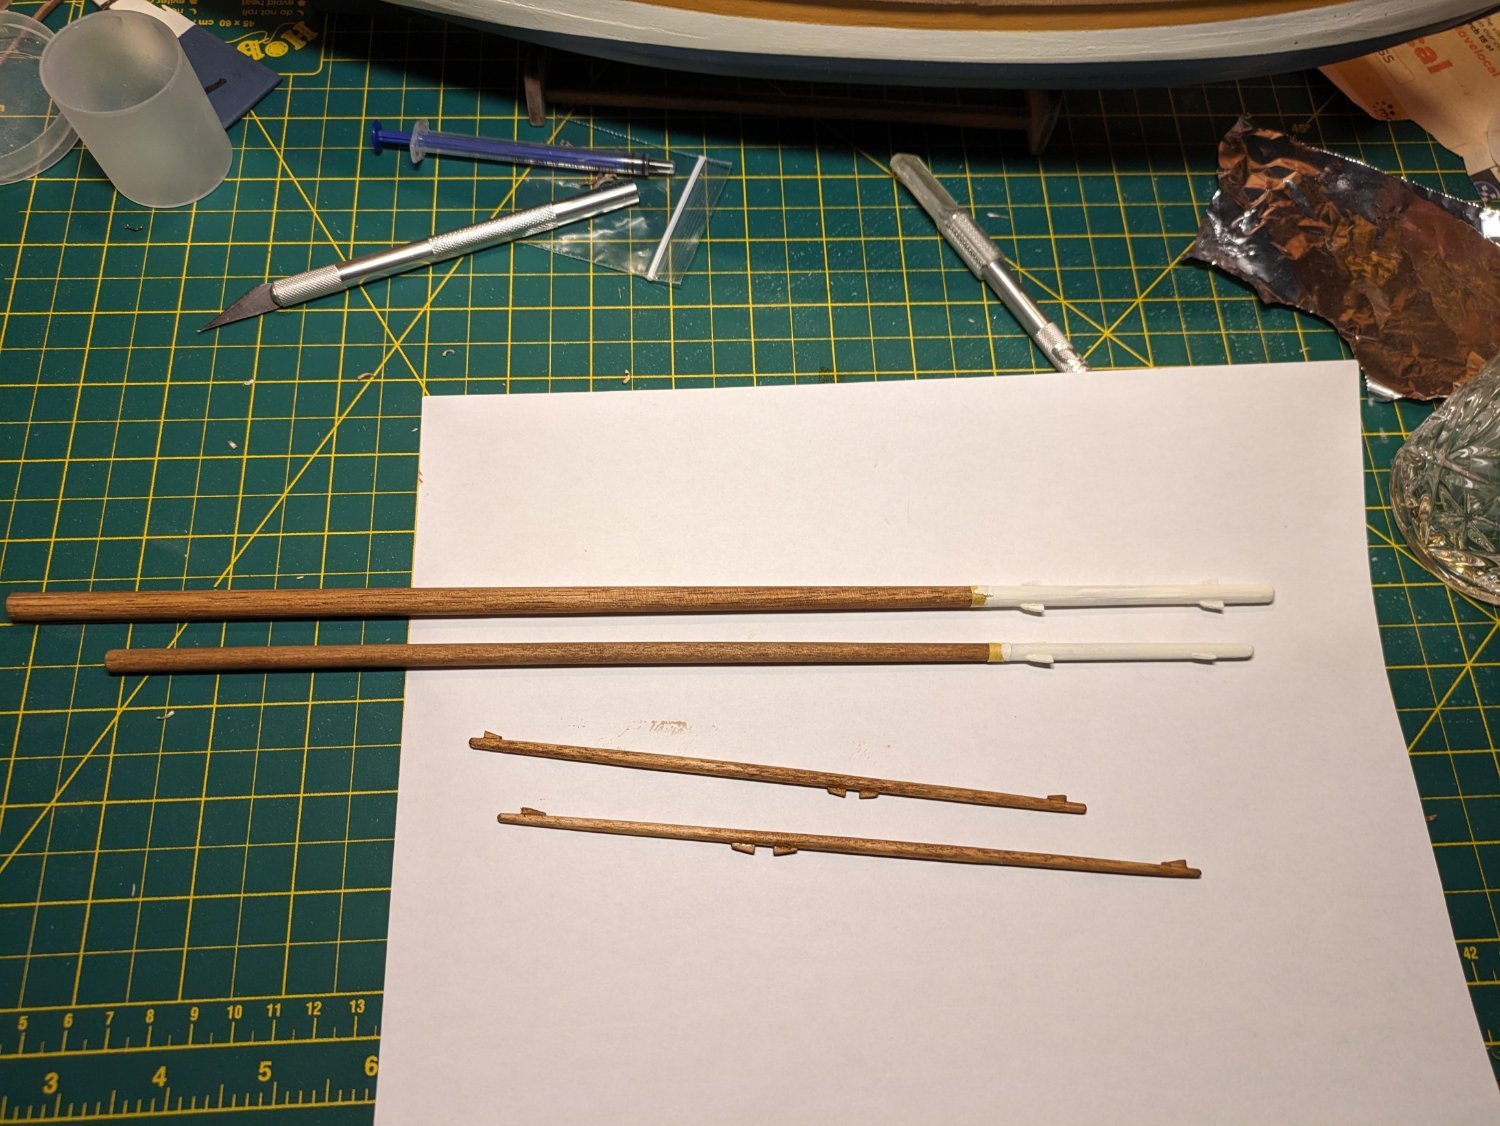
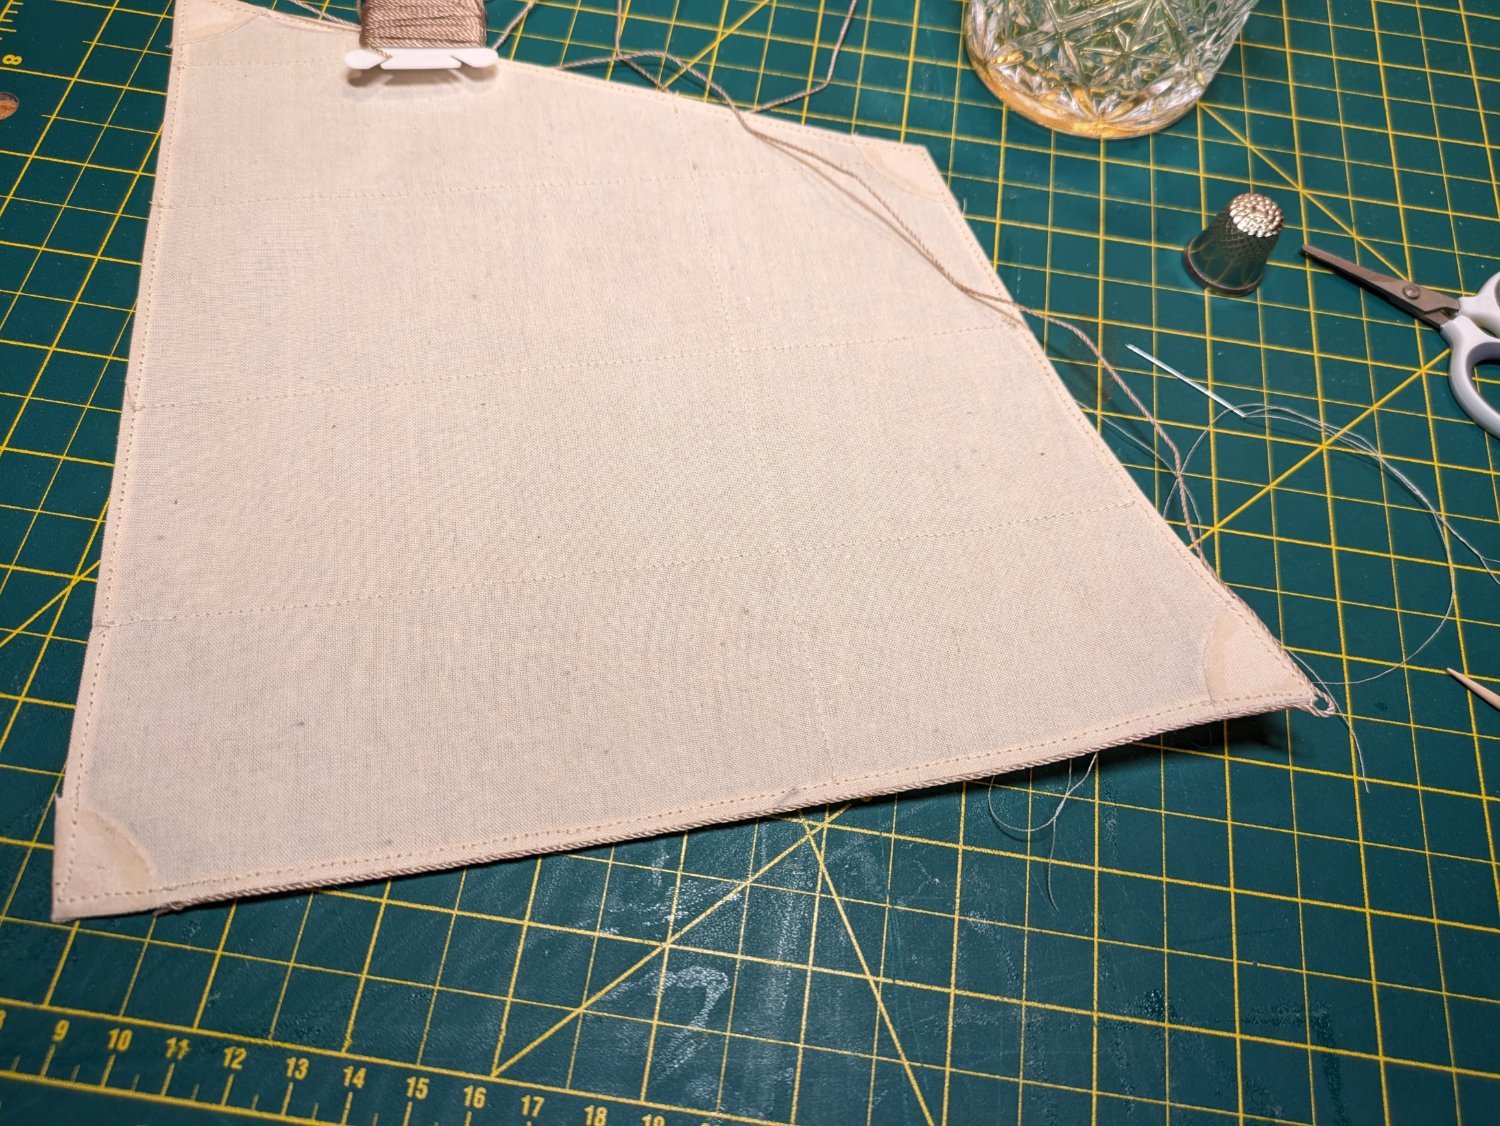
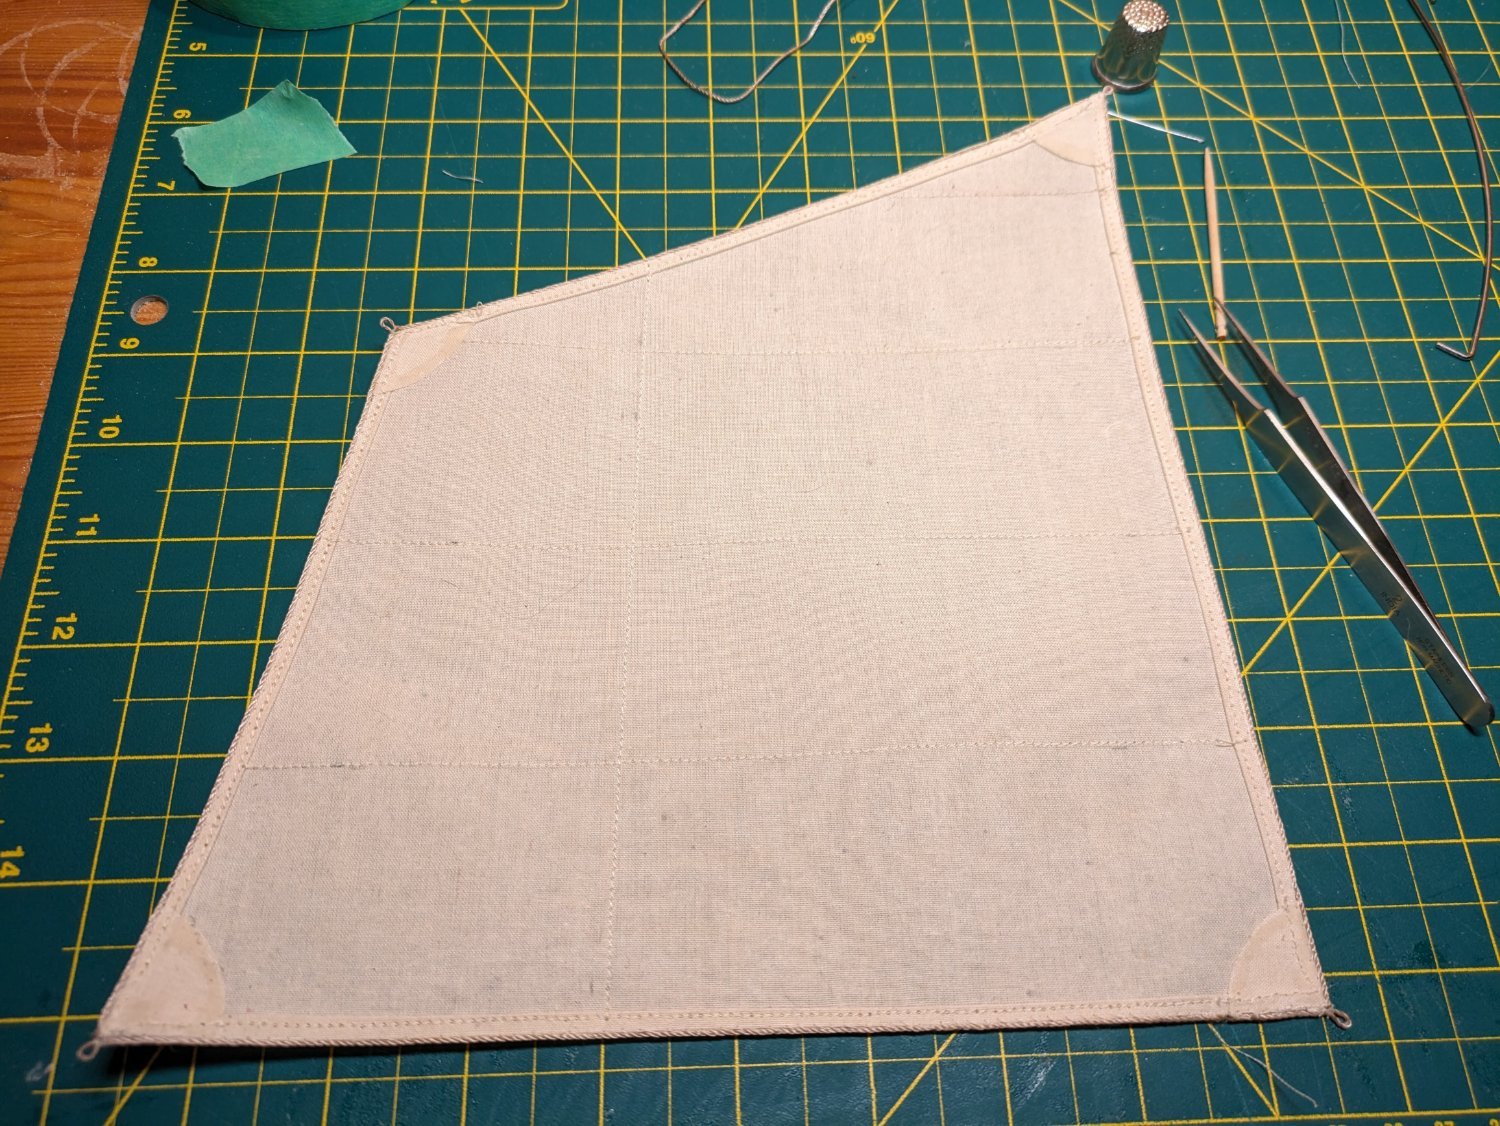
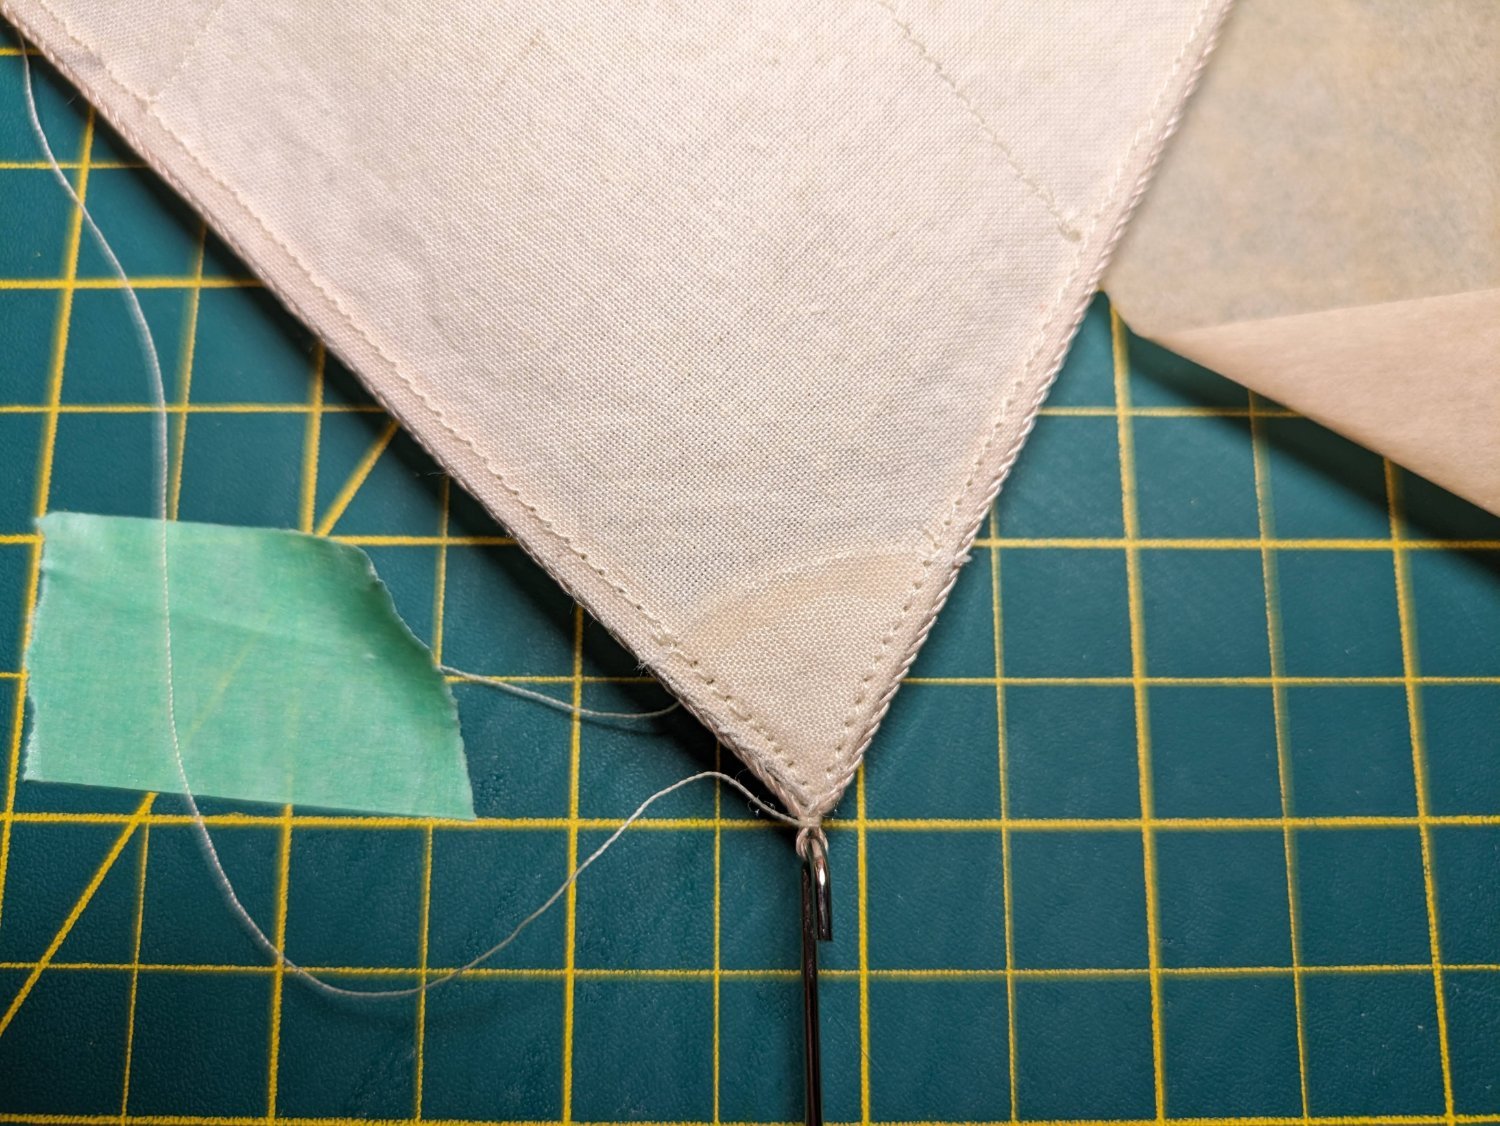
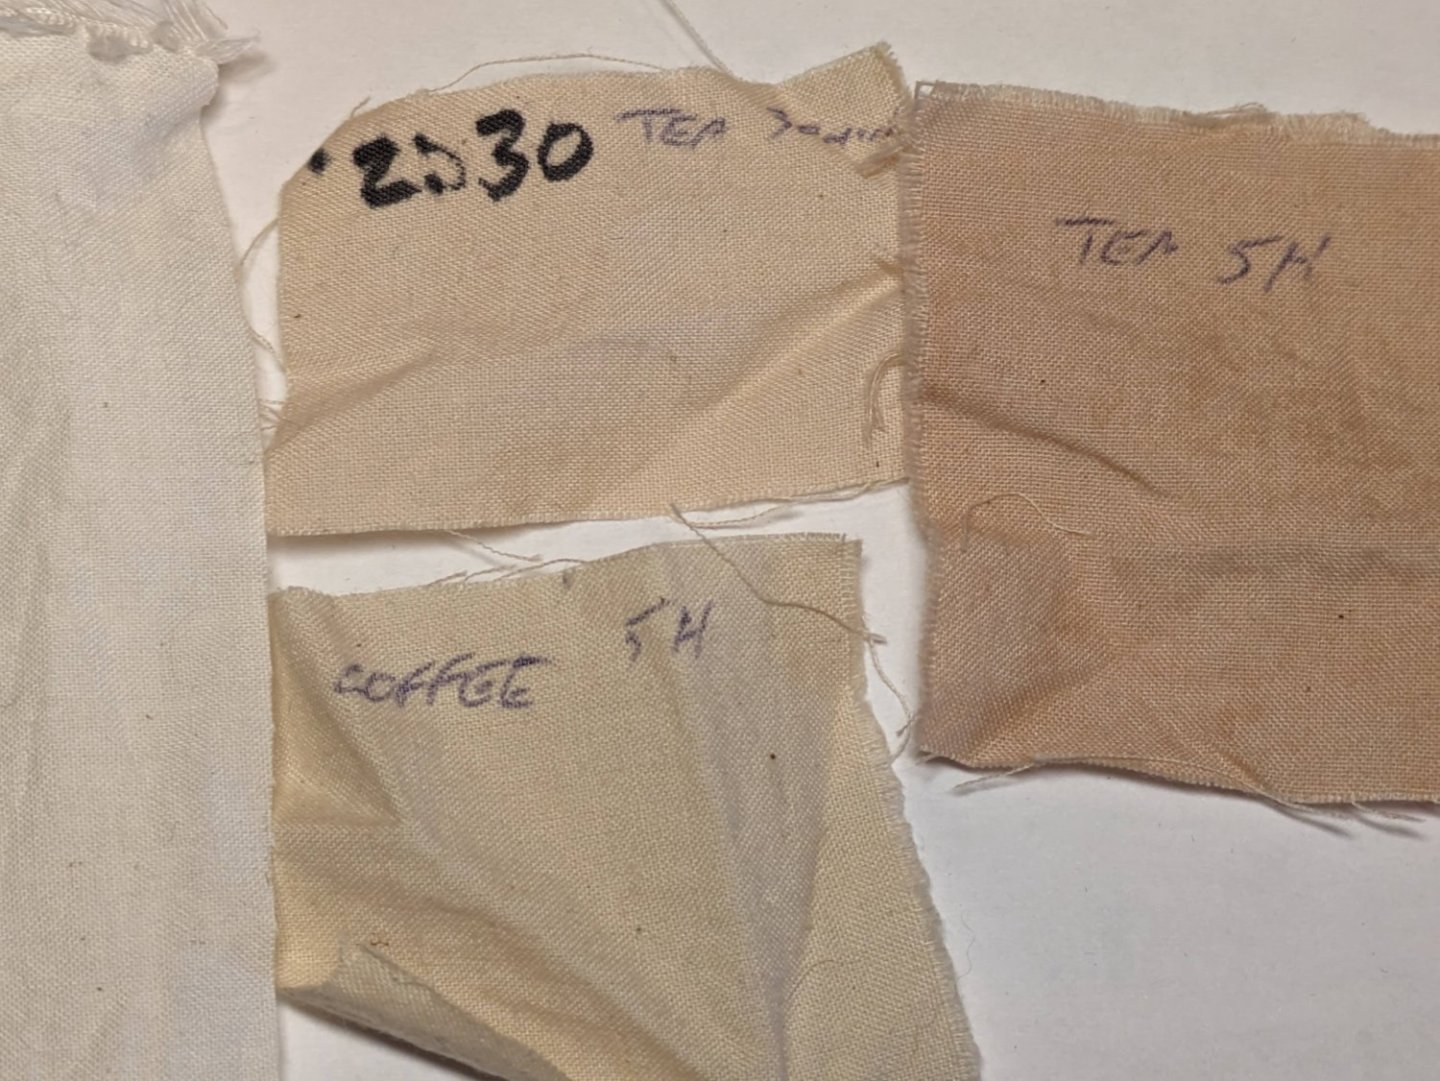
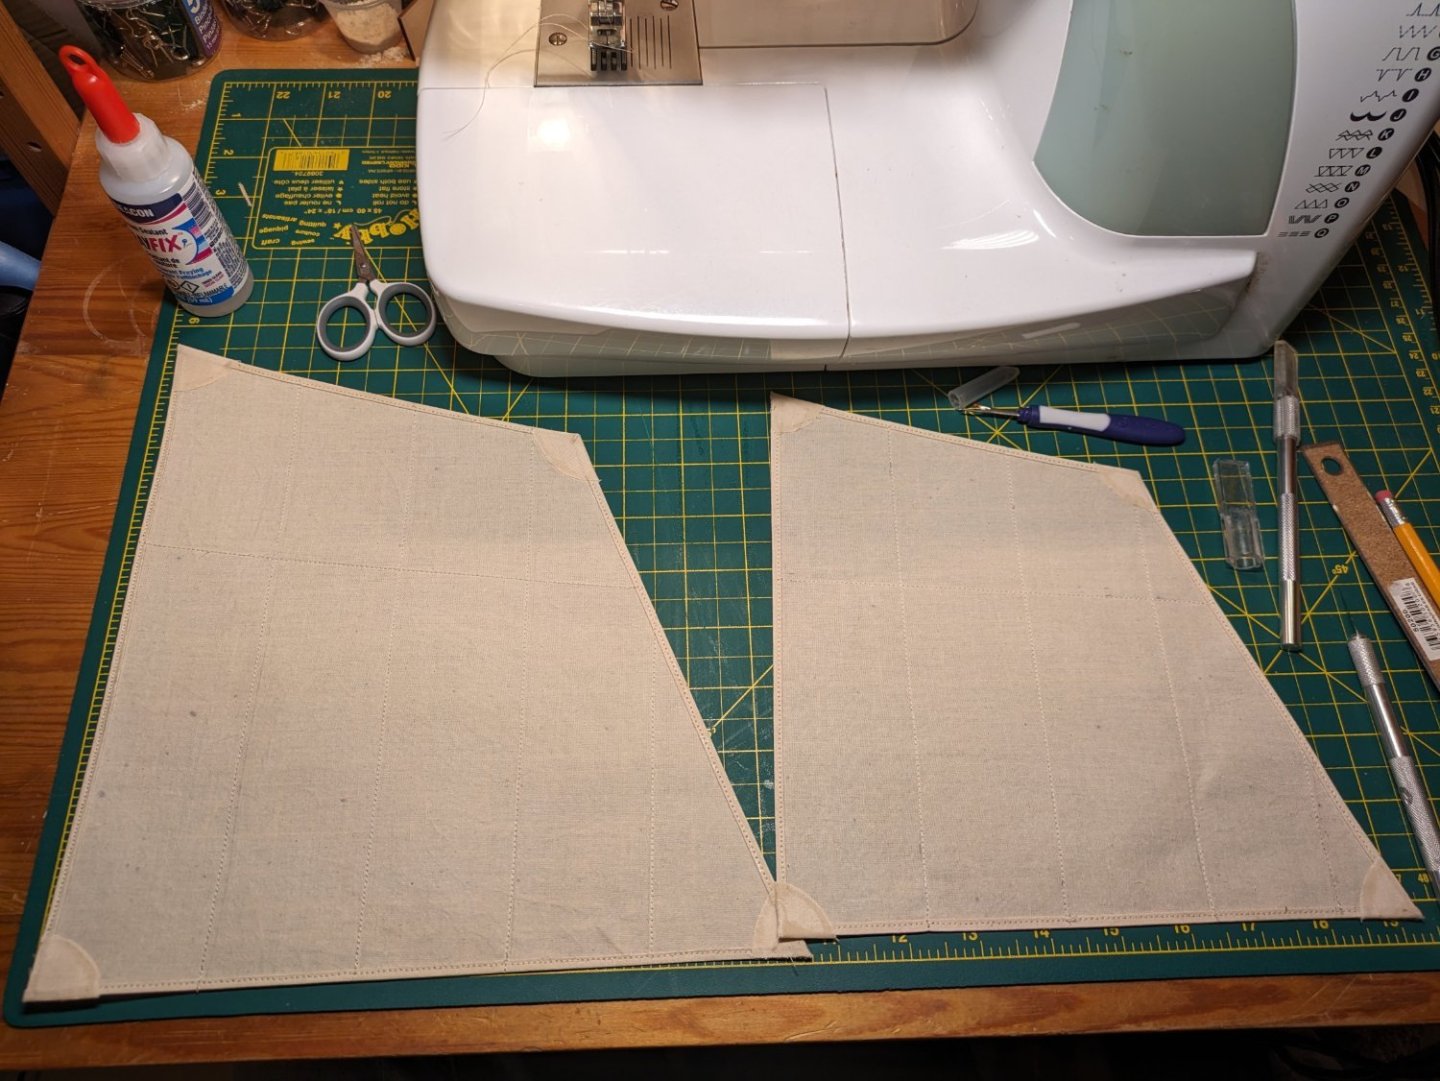
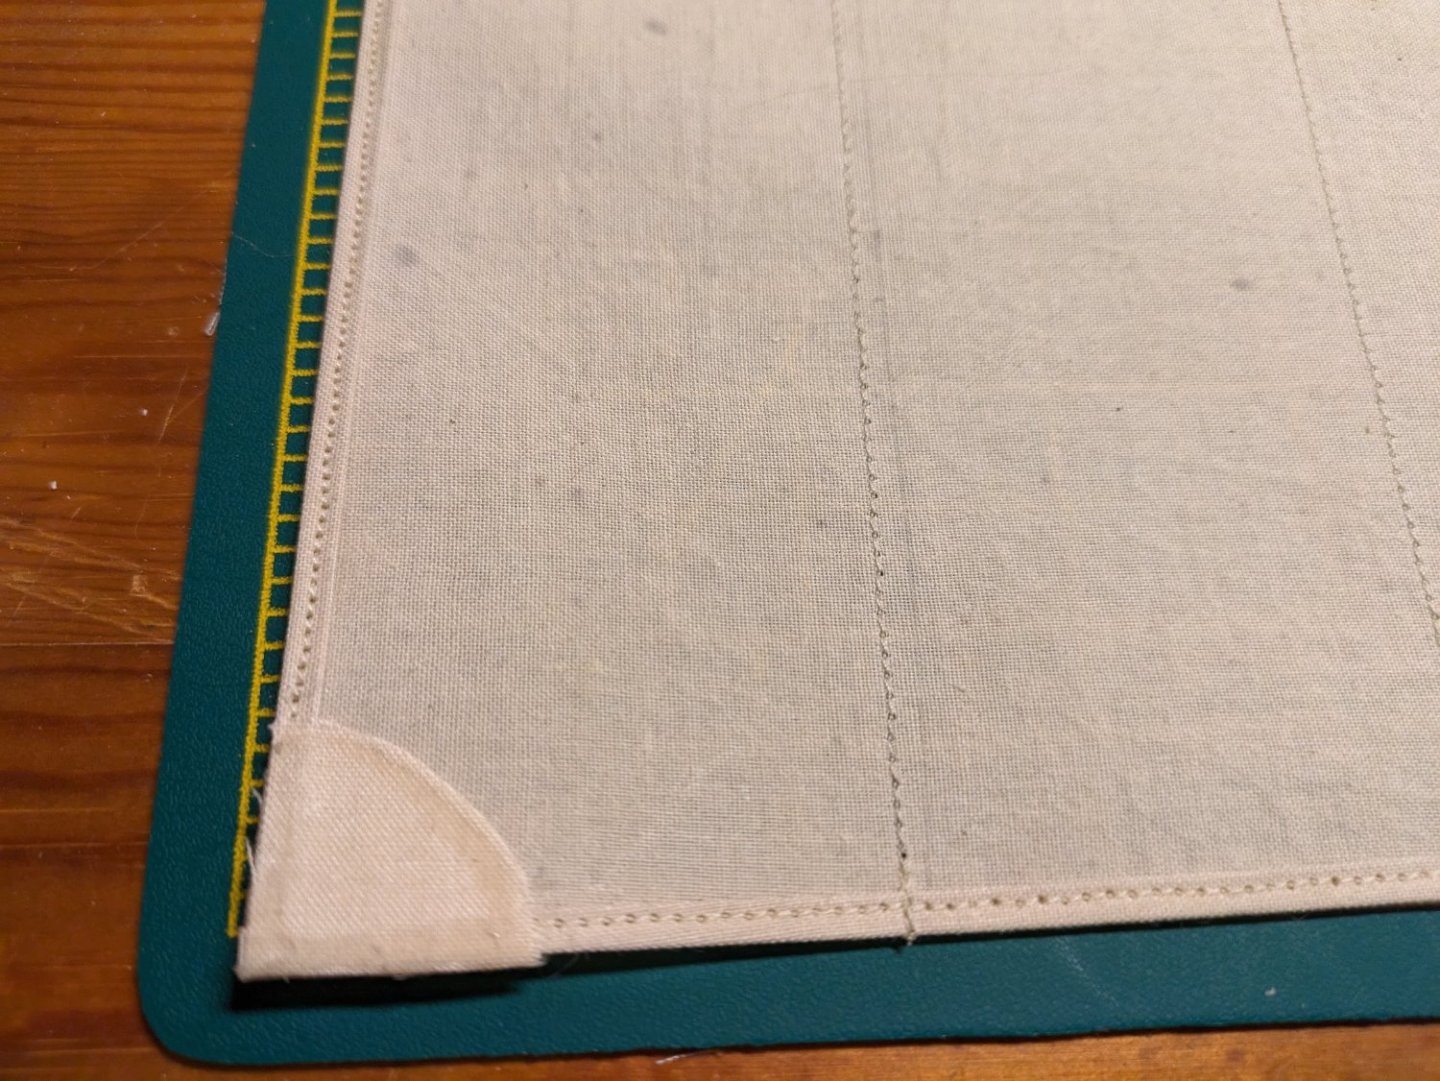
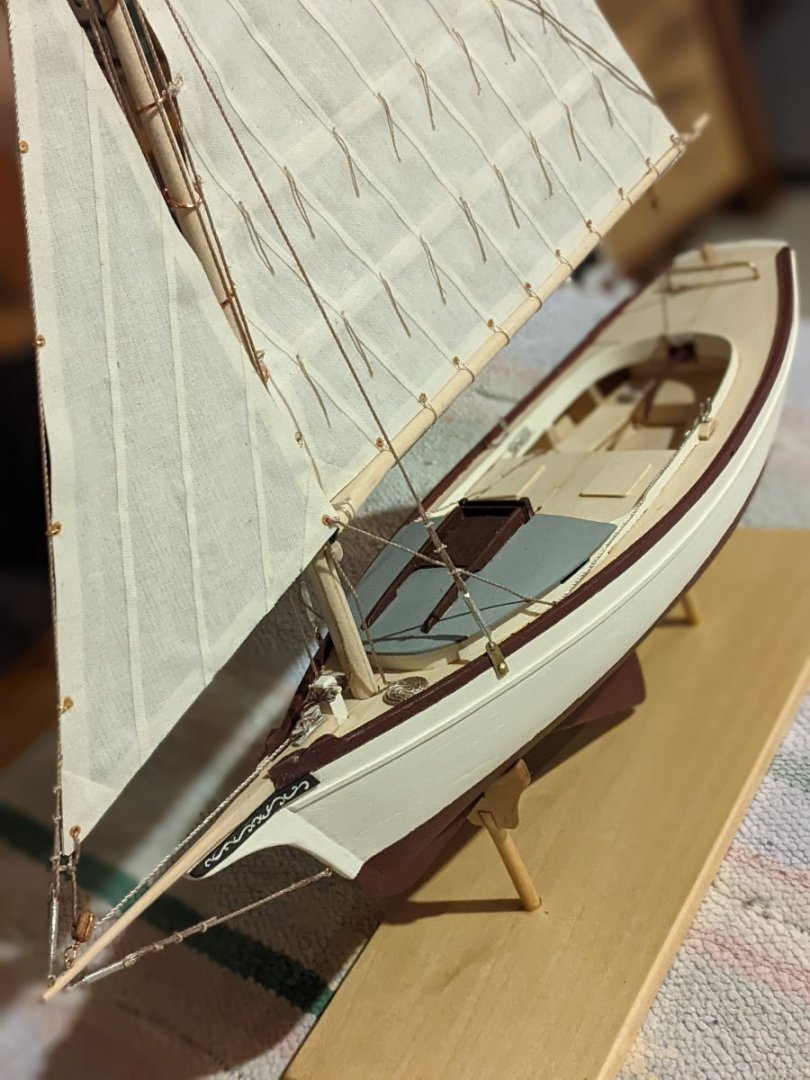
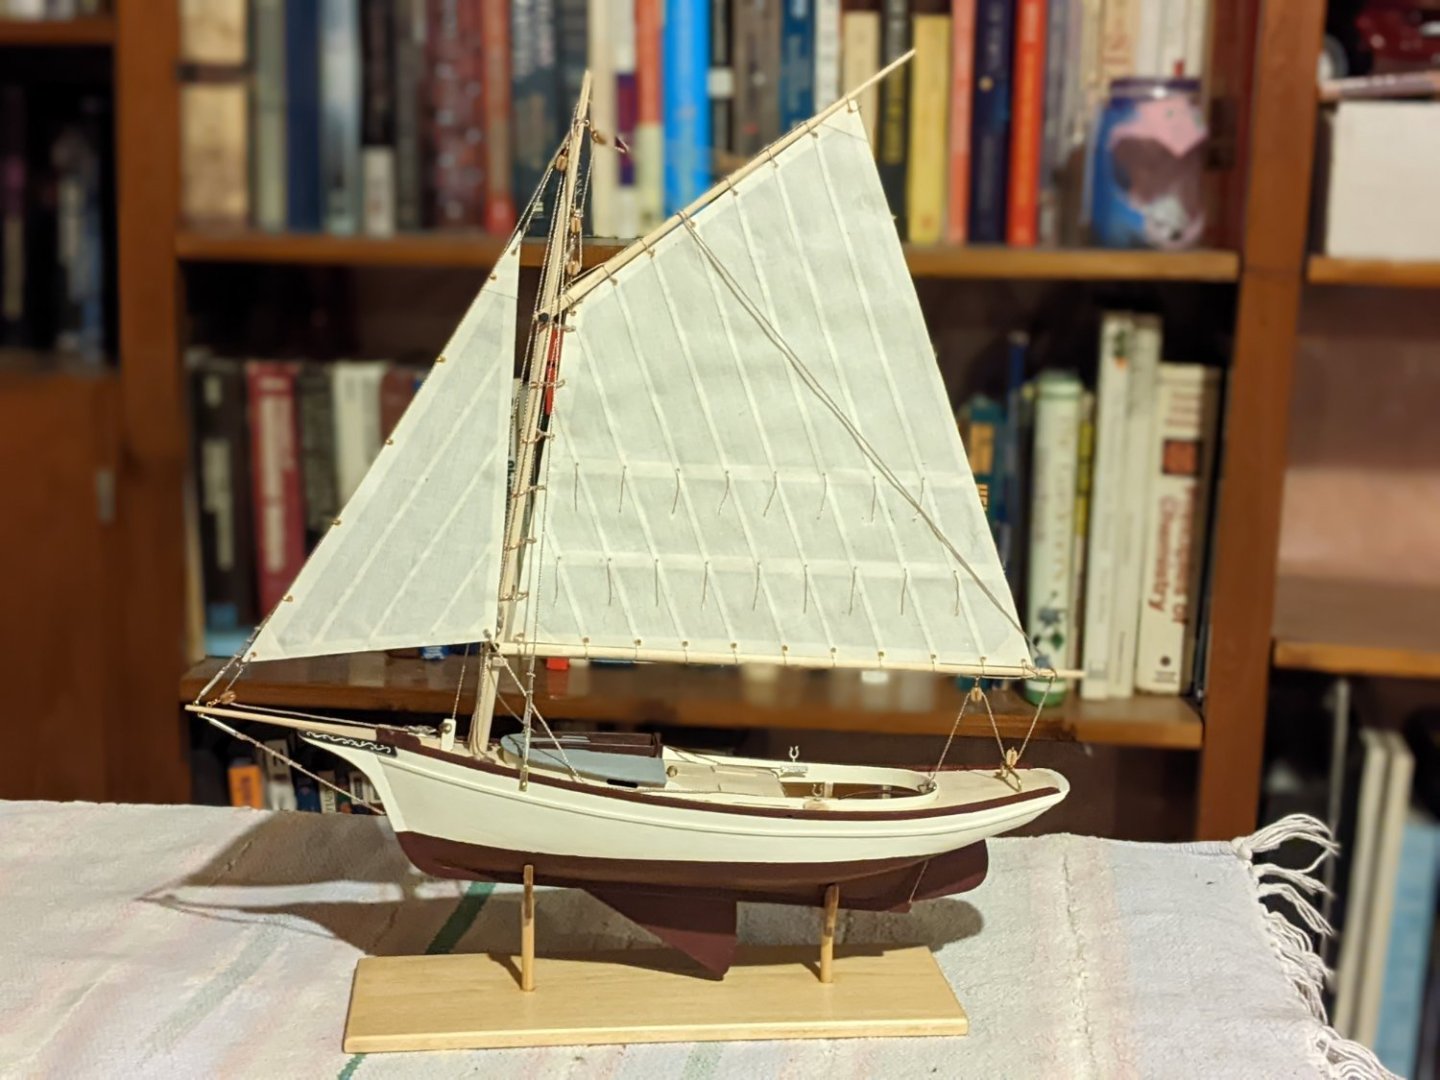
I'm still catching up with my progress in case you think i had a super-productive 2 days. Masts and spars were next and went fairly well. I'm used to making masts out of square stock or 2-ply laser cut wood and this was the first time tapering a dowel. I do not, like most people, have a mini lathe. I didn't know mini lathes were a thing until recently. I also didn't want to have to create buckets (mini buckets) of sawdust samding dowels down to size and so used my mini plane on the dowels much like I would have with square stock. It went well! I tapered the masts and spars and stained them. I also painted the tops of the mast "like the picture". I made cleats out of scrap which was a bit thinner, and hopefully more appropriate, than the 1/16 square stock called for in the instructions. Sails next! I washed and dried the cloth twice before anything. I tried both tea and coffee with a 5h soak for staining the sail cloth. Both seemed dark and so i tried 30 minutes in tea. Both tea stains seemed a little too orange (orange pekoe???) But the 5h coffee sample looked pretty good in my opinion (ethiopian medium roast - delicious!). So I went with that for the rest of the cloth. The original cloth is on the left but I'm not sure that the colors in the pics are accurate. What is these days? After staining and ironing the sailcloth, I traced out the sail pattern from the plans adding enough material for 2 folds on the edges. I then brushed diluted 3:1 clear pvc glue over the cloth to stiffen it. This techniques is from the David Antscherl shipwright series that I just finished. Does anyone else do this? I'm thinking that I might later put shape and or texture into the sails with a spray bottle and strategic hanging. Once dry, I cut out the sails using a knife and straight edge. I purchased some FrayFix, which i assume is the same as Fray-Check, from our local fabric shop. I was the only guy there. I wasn't clear how this stuff was to be used or even if it was intended only for those not 'hemming' the edges of the sails but I used it as an adhesive to help fold over the edges of the sails. It dried slowly but worked fairly well and remained flexible. The sails really taxed my nearly nonexistent sewing skills. I'd once used YouTube to learn how to use a sewing machine to make masks at the beginning of covid. Fortunately, soon after, stores began selling them and we could buy a mask for $2 instead of spending 5 hours cursing a machine who's sole purpose seemed to be making large, complicated knots out of spools of thread. I trudged back down to the fabric store and bought matching thread. They offered me a membership card which I huffily declined. The sewing of the 'hems' and seams went surprisingly well and a minimum number of thread balls were created. My regrets were that 1) I didn't choose a slightly darker thread color so that it would show up better and that 2) my skills (or luck) aren't good enough that I was willing to attempt a second, parallel line for the seams. Why push my luck? Sharp-eyed readers will notice that I added the corner patches (I'm aware there's a proper term for these but it's late) until after sewing the edges. I went back and sewed over these. I then began sewing the boltropes to the edges. Wow! Tedium and pinpricks! Look closely and you'll see actual bloodstains. I think these add character. But the boltrope does look good and is well worth the trouble. While sewing these, I had plenty of time to consider ways to make this task easier. I got nothing. Cheap whisky and a good Playlist helped immensely and I eventually found a rhythm. I wasn't sure how large to make the cringles at the corners so used a toothpick to size them and just made each corner the same size (approximately). These I later tensioned then wound them with thread and fixed with a dab of ac glue. One sail done! One to go! (I'm now rethinking my hope to build the Bluenose next. Surely, those sails are treated differently!) I'll try to update more frequently but we're getting close to complete!


-
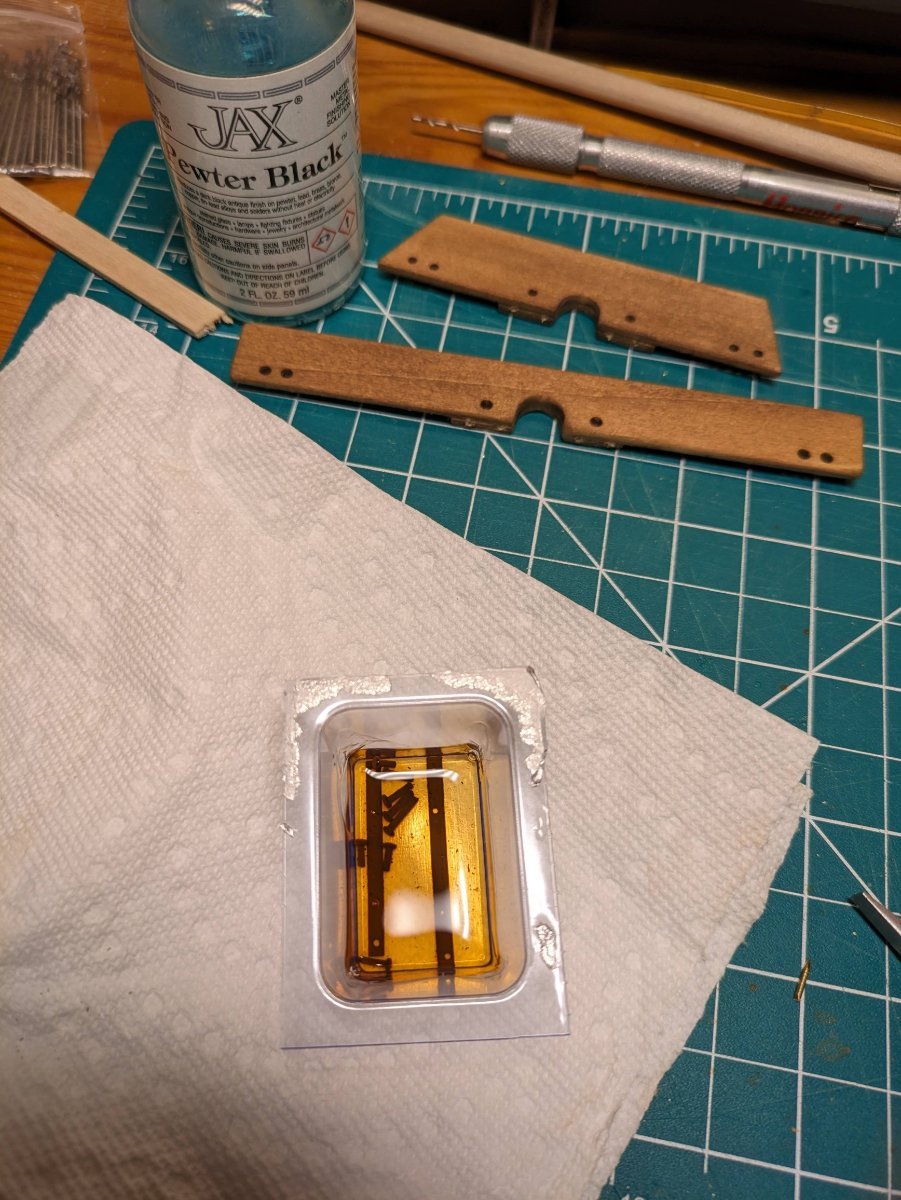
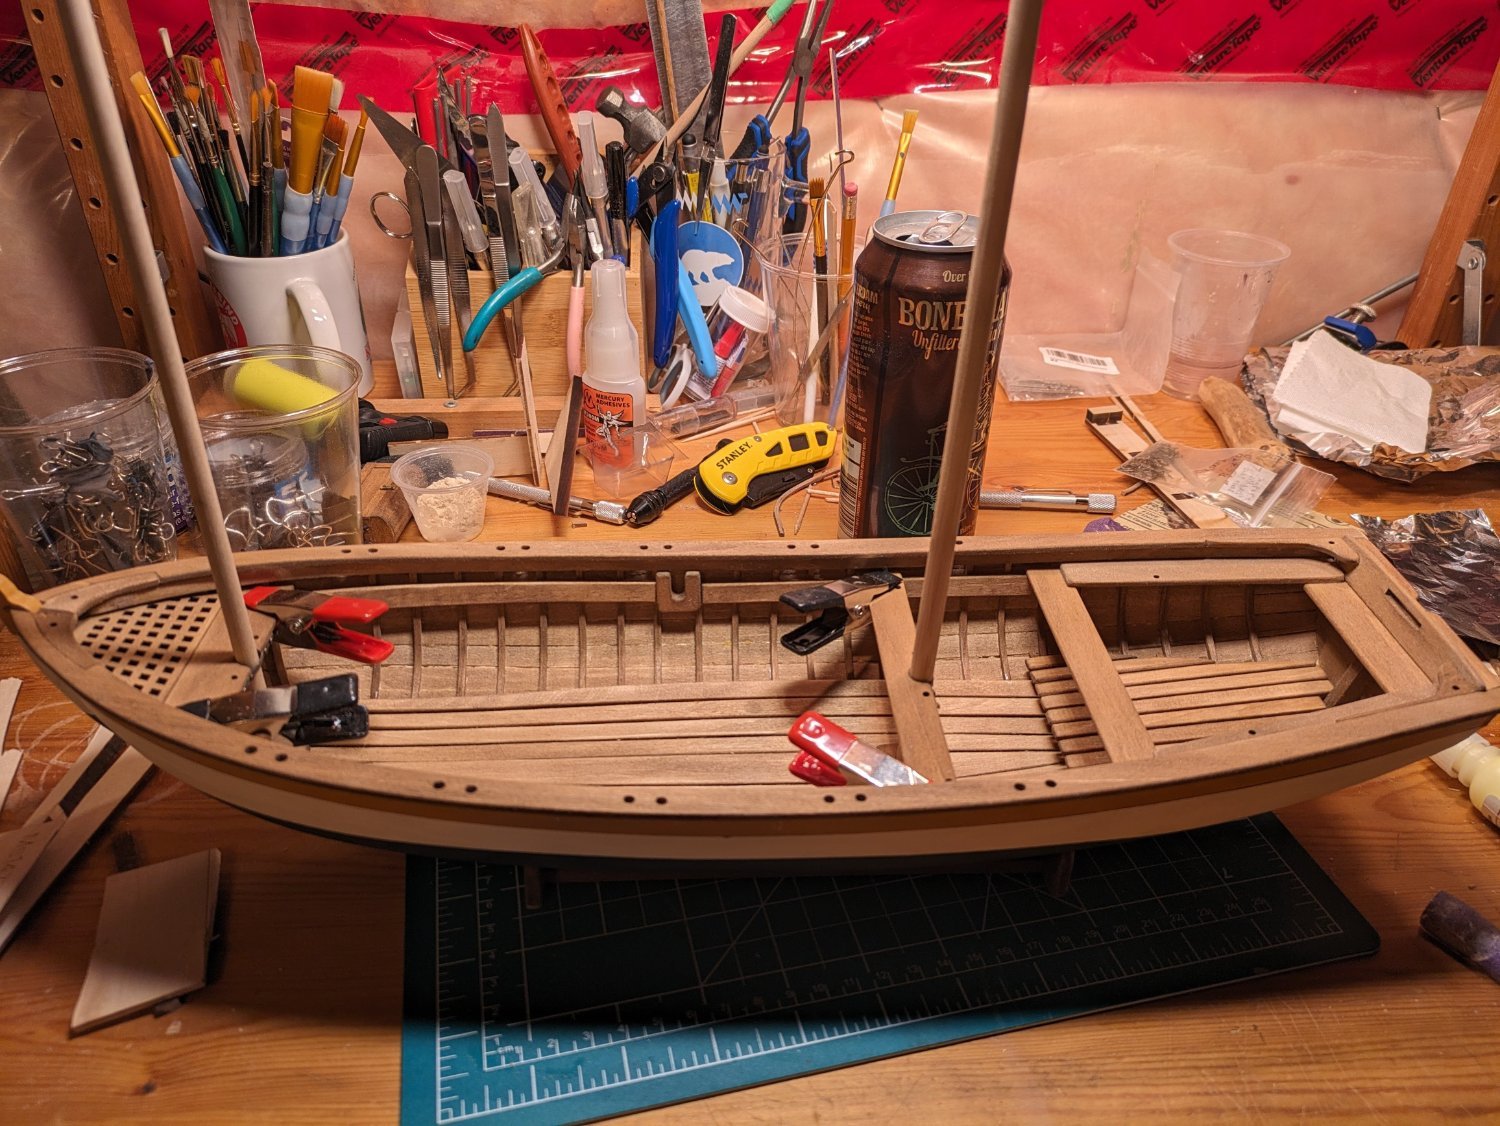
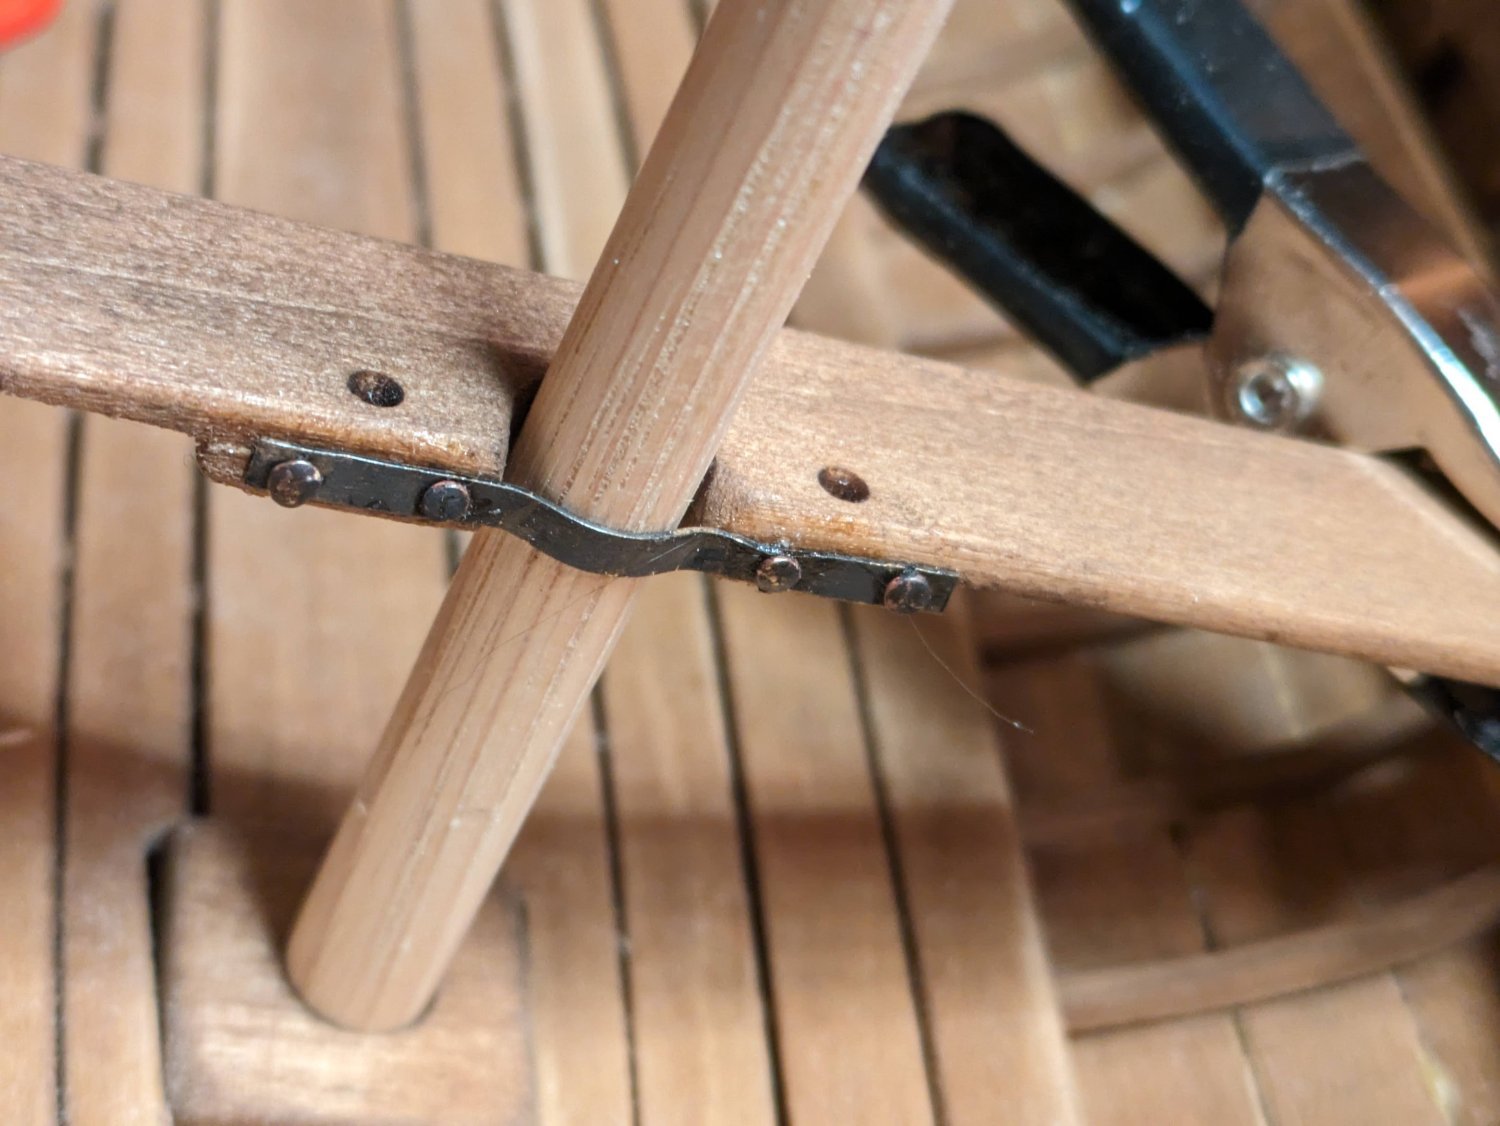
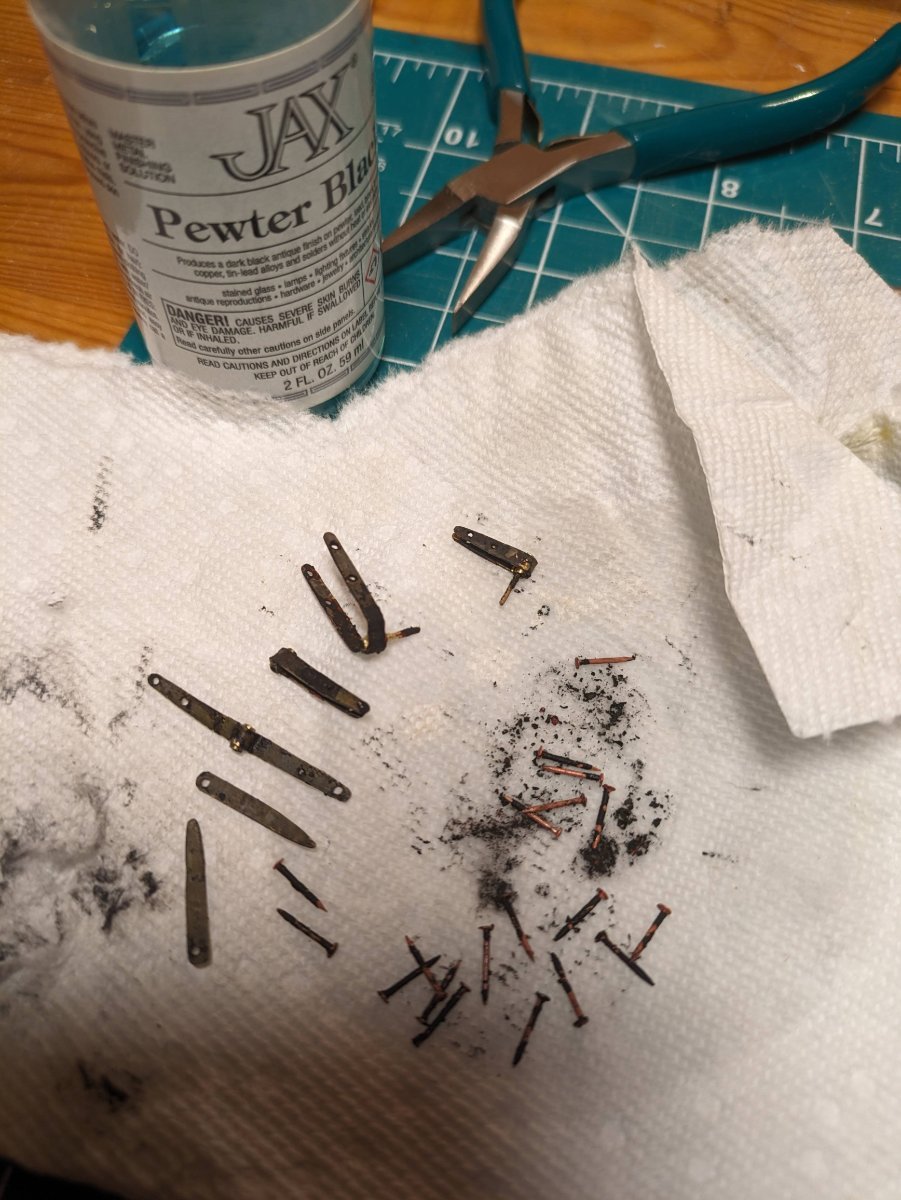
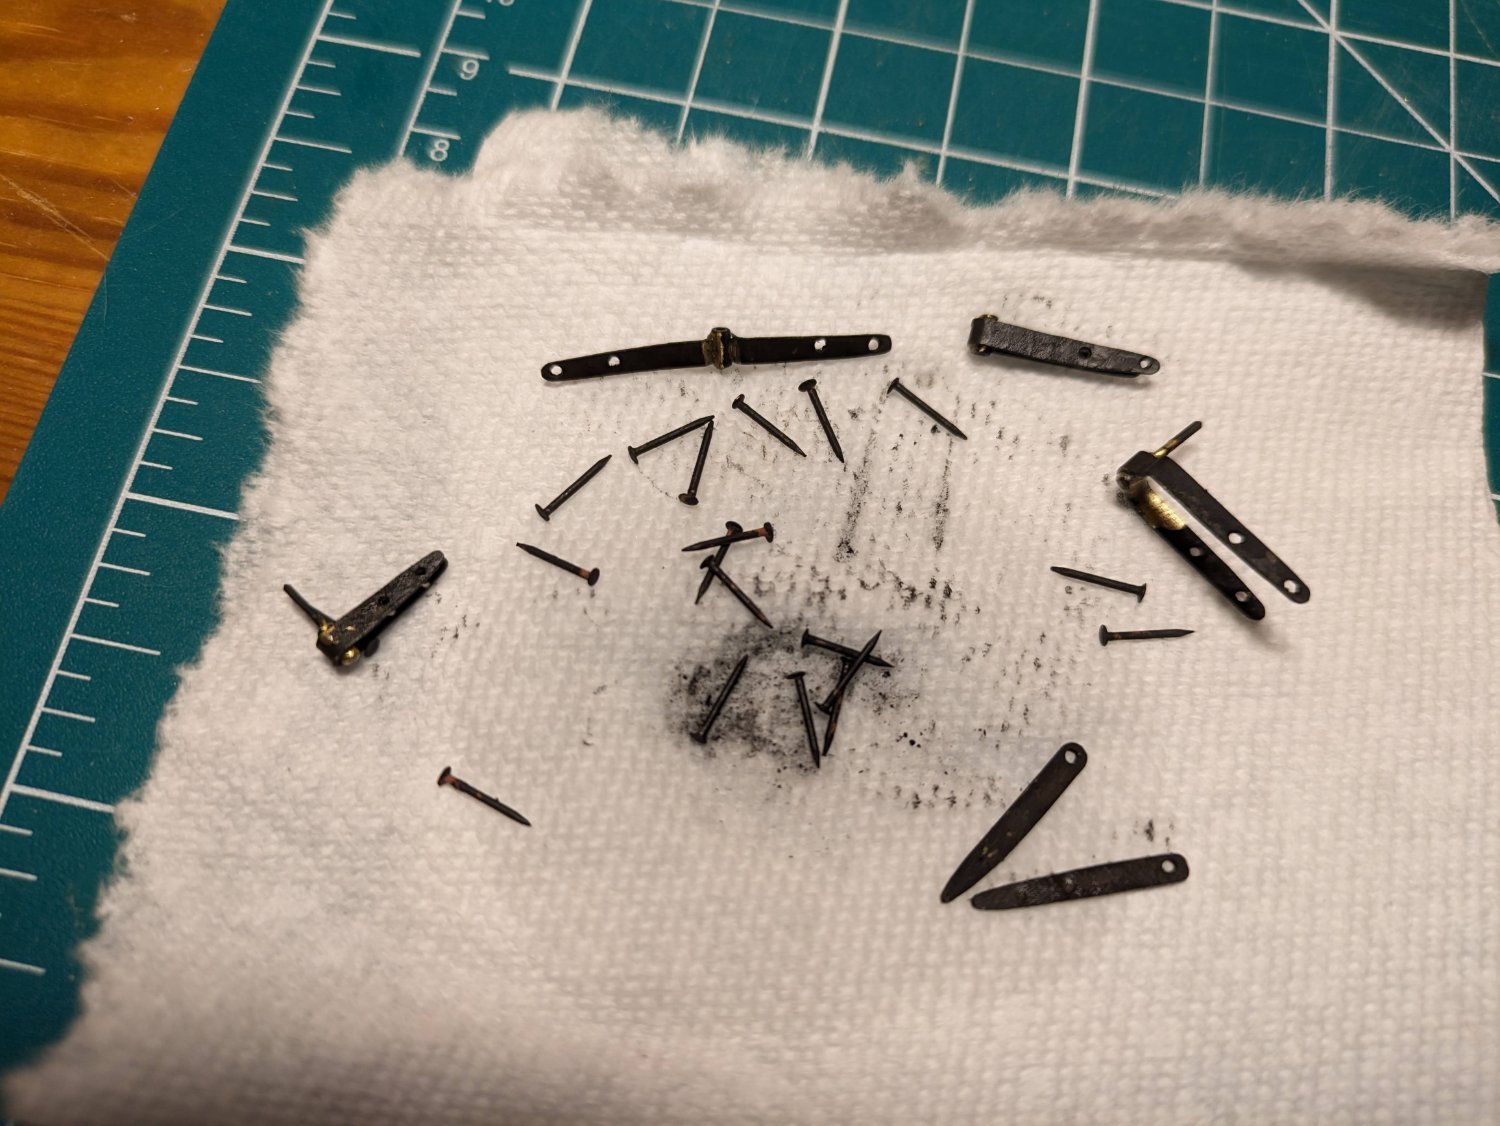
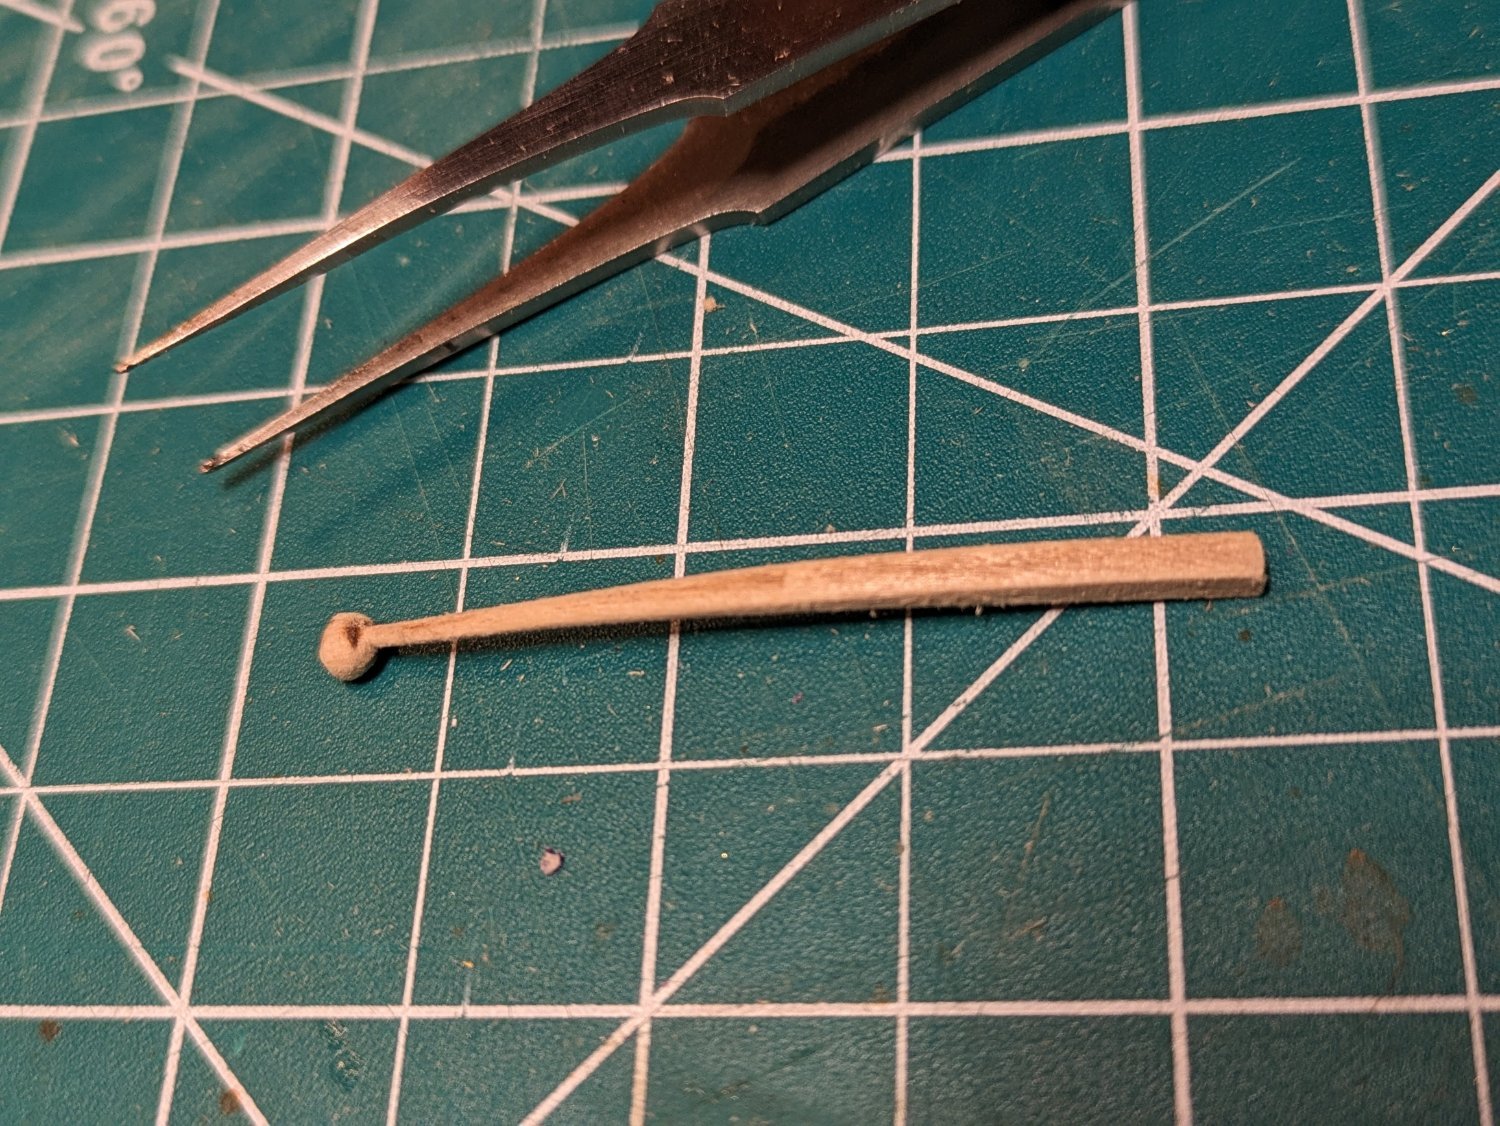
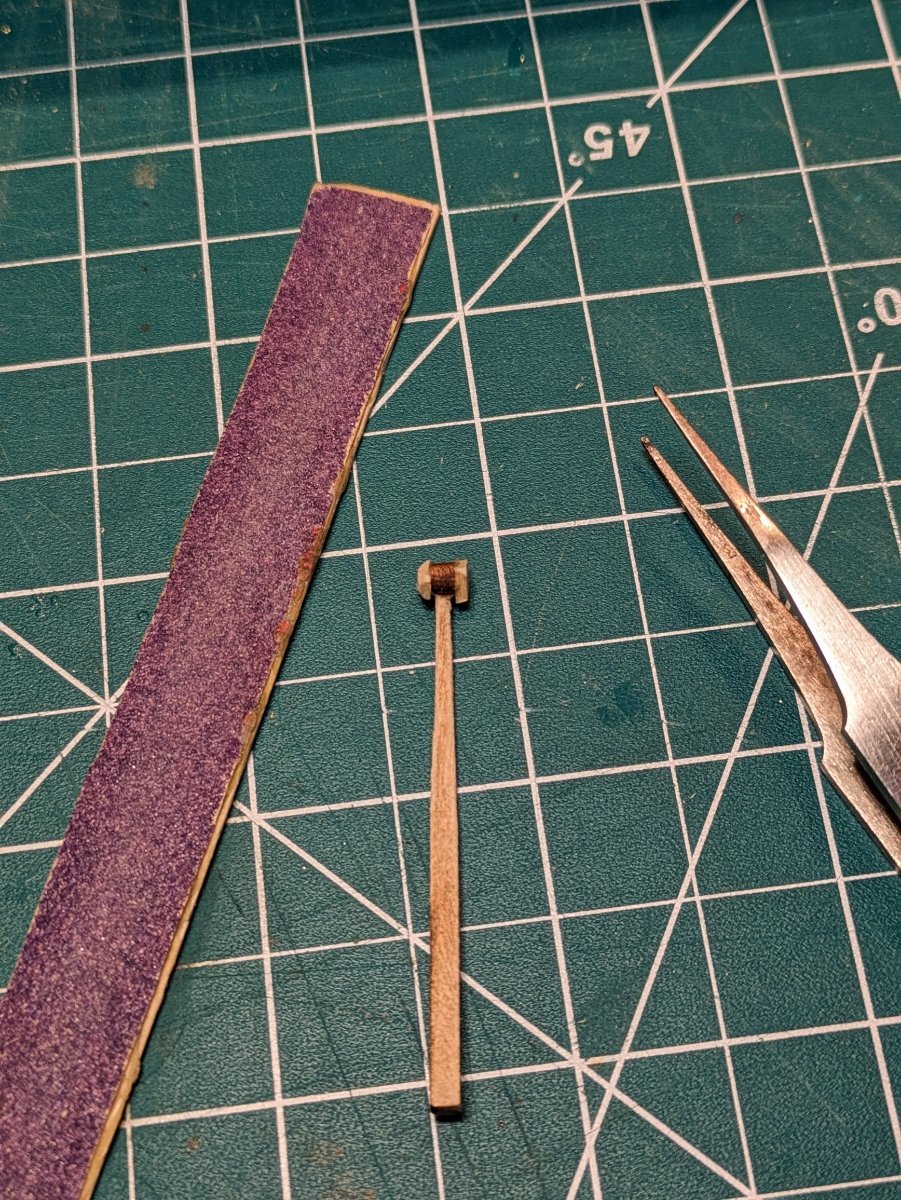
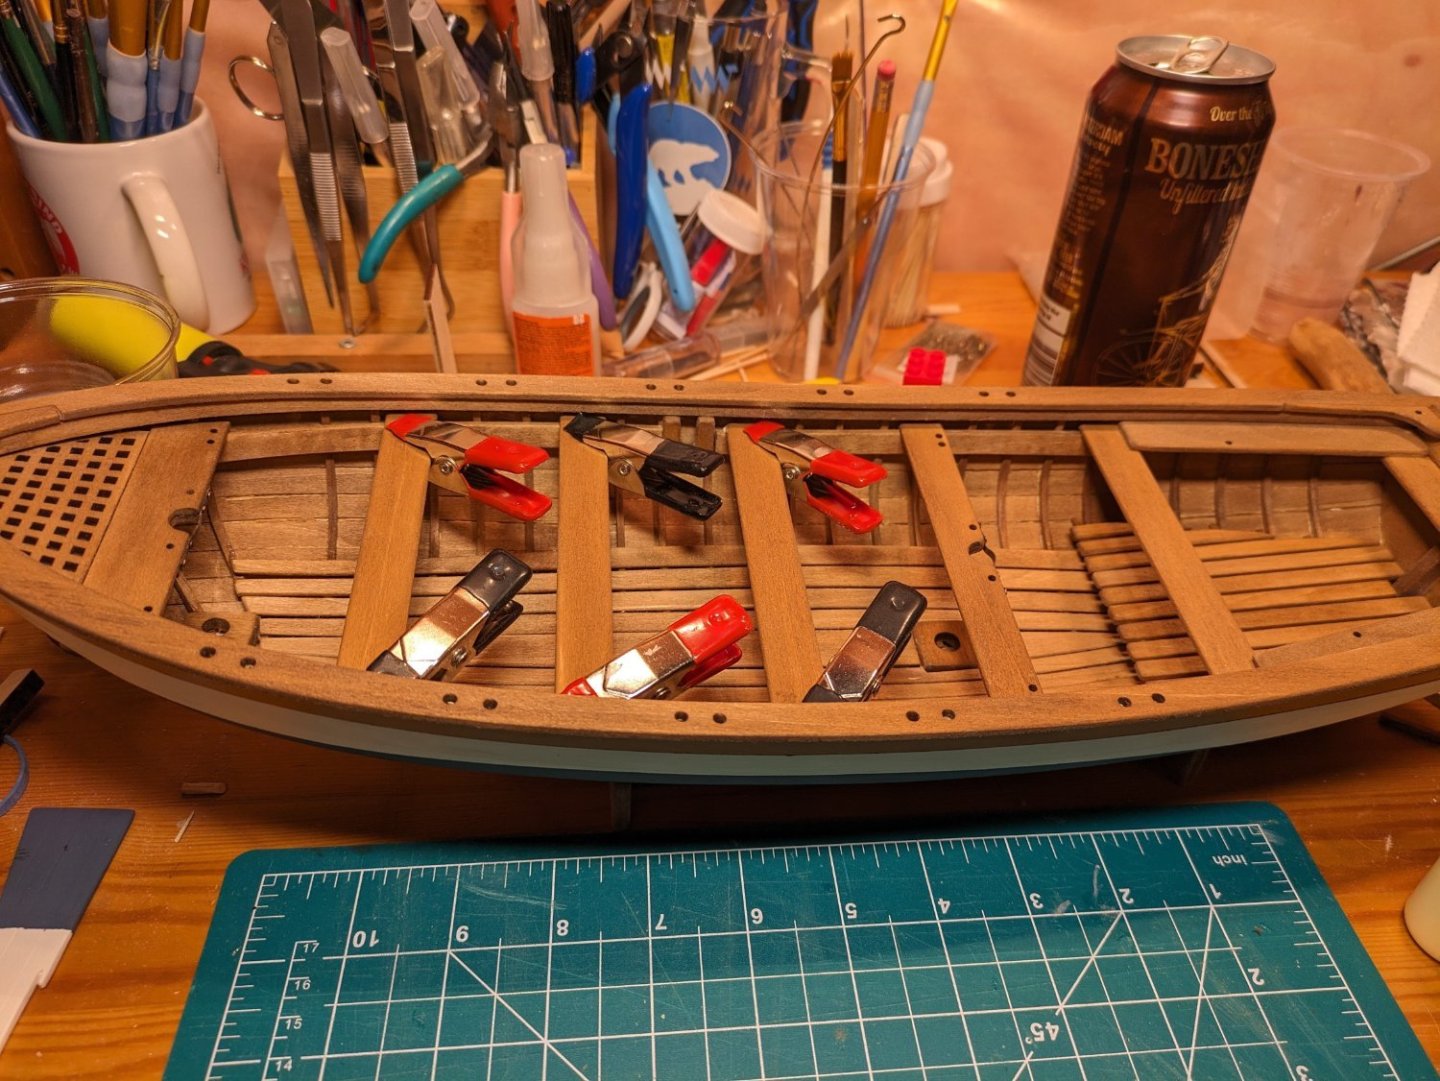
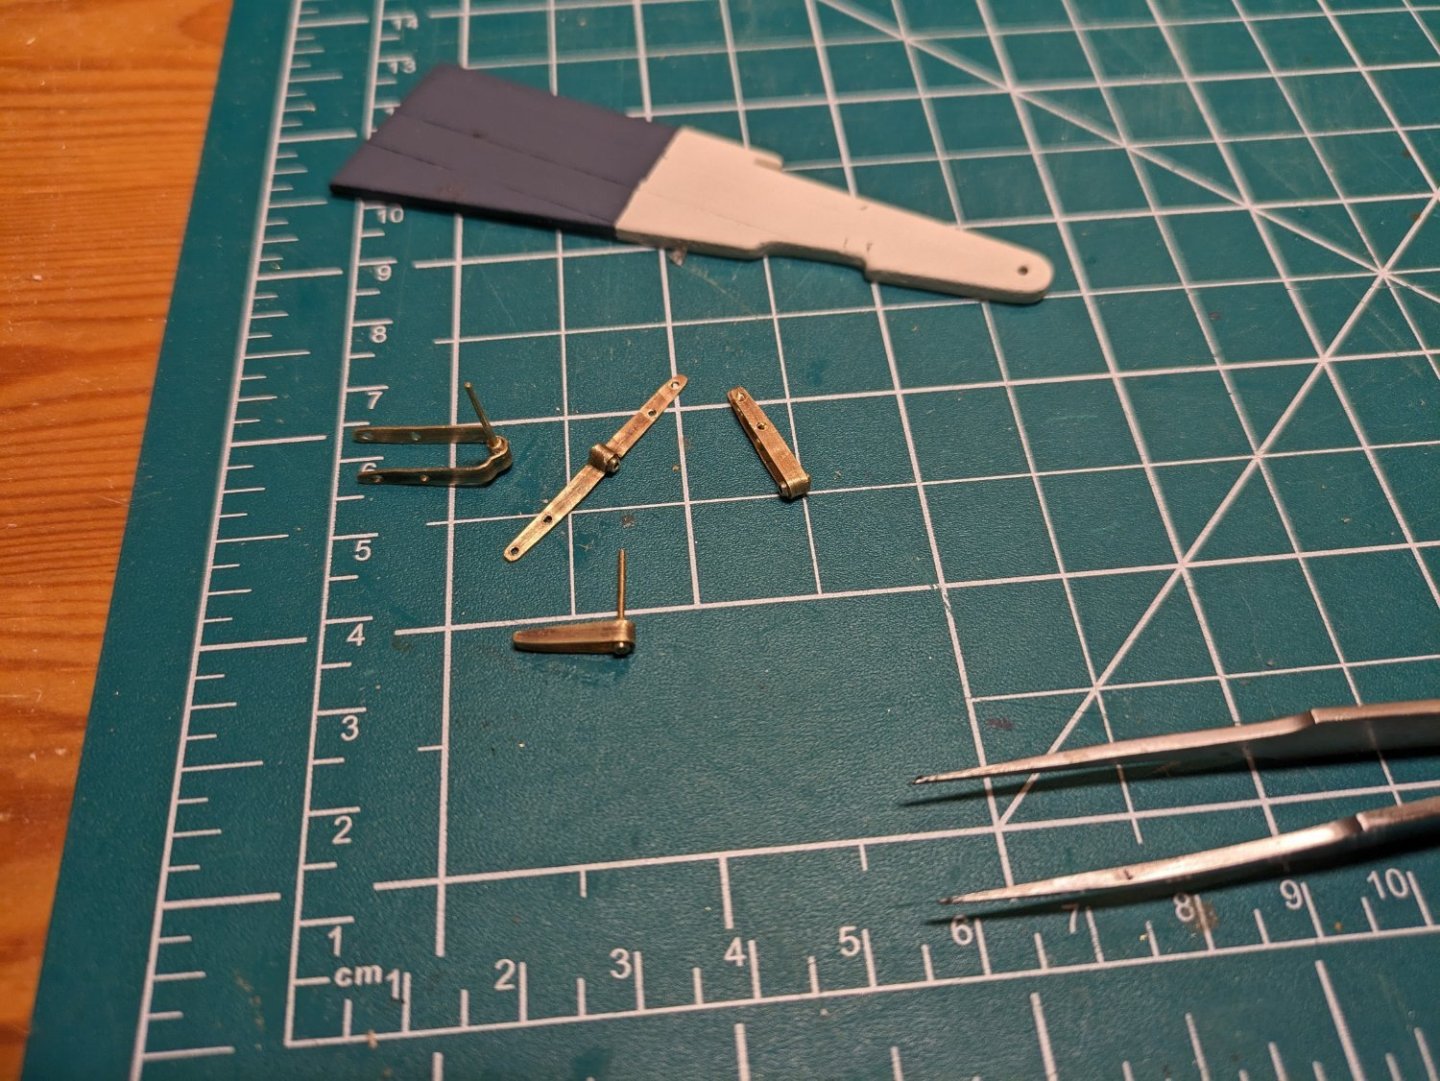
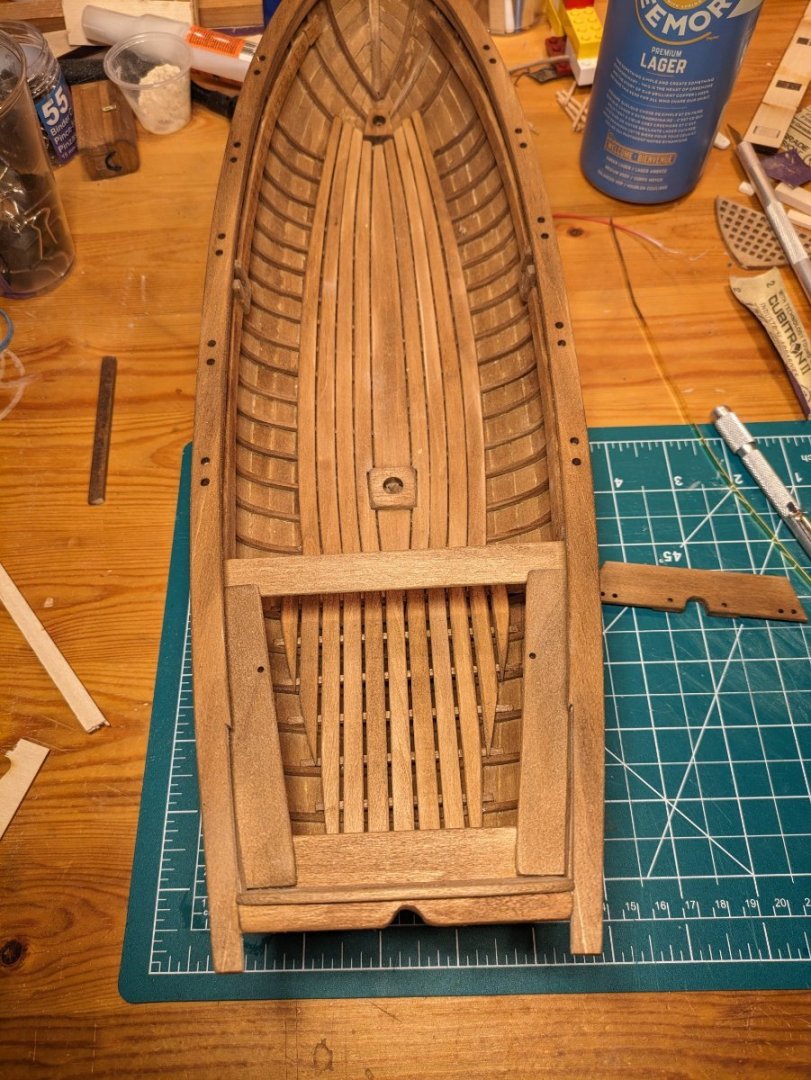
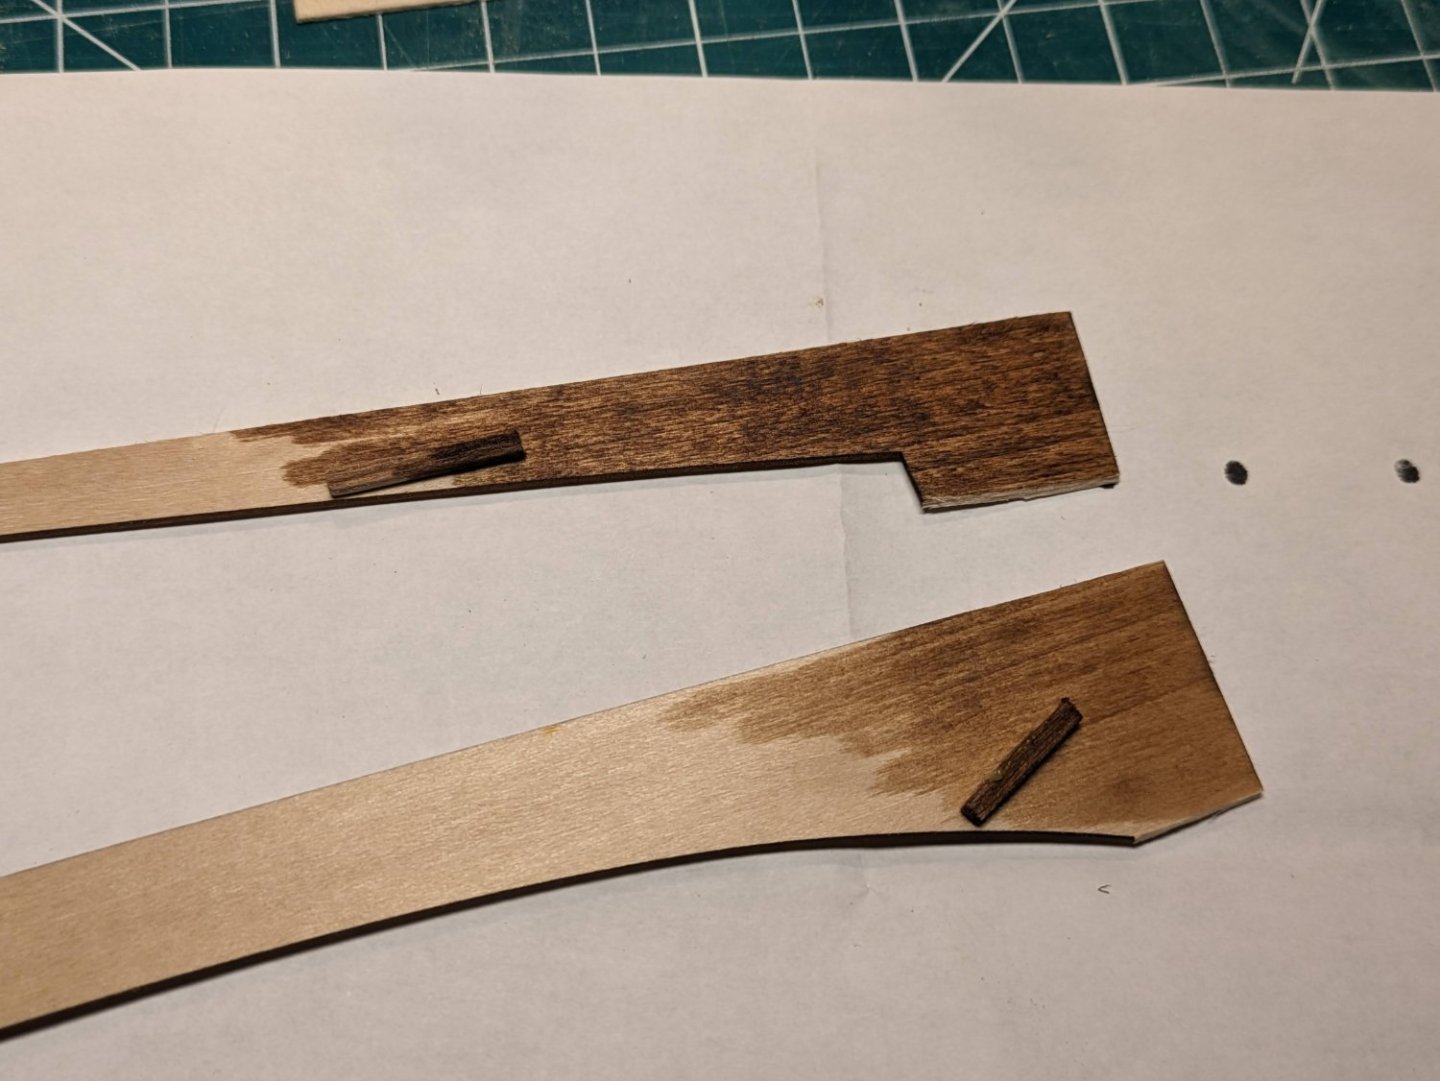
Sorry for not posting sooner but i have made some progress. I did get some brass brads and used these, first, in the mast partners. I blackened the brass parts using Jax pewter black (since the Jax black wasn't available). i guess it turned out okay. I used it full strength and left it in the solution for several minutes. This left a black residue and some of the brass turned copper colored. I realized later that the black residue is a Selenium salt. It was all over my hands. Selenium is not a great metal in terms of toxicity. Ugh! Later, I went to the forums and, of course, all of my struggles had been experienced by many others (except maybe the toxicity worries - oh well, I'llbe more careful in the future). I should have diluted the Jax, exposed it for a shorter time and used at least 2 dips. And worn gloves. A solvent rinse and a acid rinse (vinegar should work) is also helpful. This is getting a little close to industrial chemistry! I did this for the rudder fittings. But I'm seriously wondering if working with Se like this is worth darkened metal fittings for a model. Maybe paint is the safer route. I do love chemistry tho. I clipped most of the pointy end of the brads off when installing the mast partners since I only really need to see the heads. I then CA glued the stubs into shallow drilled holes. (Shhhhh, don't tell anyone) The bow grate required some trimming to fit but not much. I rough fit the grate and the two thwarts with mast partners and set the rake before gluing the thwarts in. There was something important I was intending to show with this picture but I can't remember what: Maybe my lack of a hatch in the floor, which isn't mentioned anywhere except as a dashed outline in the plans? That would have been cool but I'm past that point now. The rest of the thwarts went in after that: On to the rudder! I shaped the gudgeon and pointless tapering the ends using a Drexel. Despite annealing the brass, it used up a lot of grit! Also, you need some brass tube to make these but this isn't included in the kit! Fortunately, I had some from a previous kit but... what the heck? I'm not too impressed. I CA glued the tube to the brass strips as per my previous model, the lobster smack, but I see most people solder these on. This would be stronger and work better with the cursed blackening process. I might try this next time. My first attempt at blackening these wasn't a stellar success being splotches and having copper patches. This is when i read through the forums. I tried a second dip with a more dilute solution and a shorter soak with better success. Also, when shaping the rudder, I went by the instructions for the knobby end and it seemed to work okay. Trying to attach the tiller to the rudder by hammering a mushroom head onto the end of a brad took several attempts before saying " good enough - hopefully nobody looks too closely". What the heck am I supposed to do here? I don't know! Again. Gudgeons and pintles were CA glued and Brad heads glued into drilled holes. At least that part looks okay. Masts, spars and sails are next! I'll update soon. Thanks again for the comments and encouragement!


-
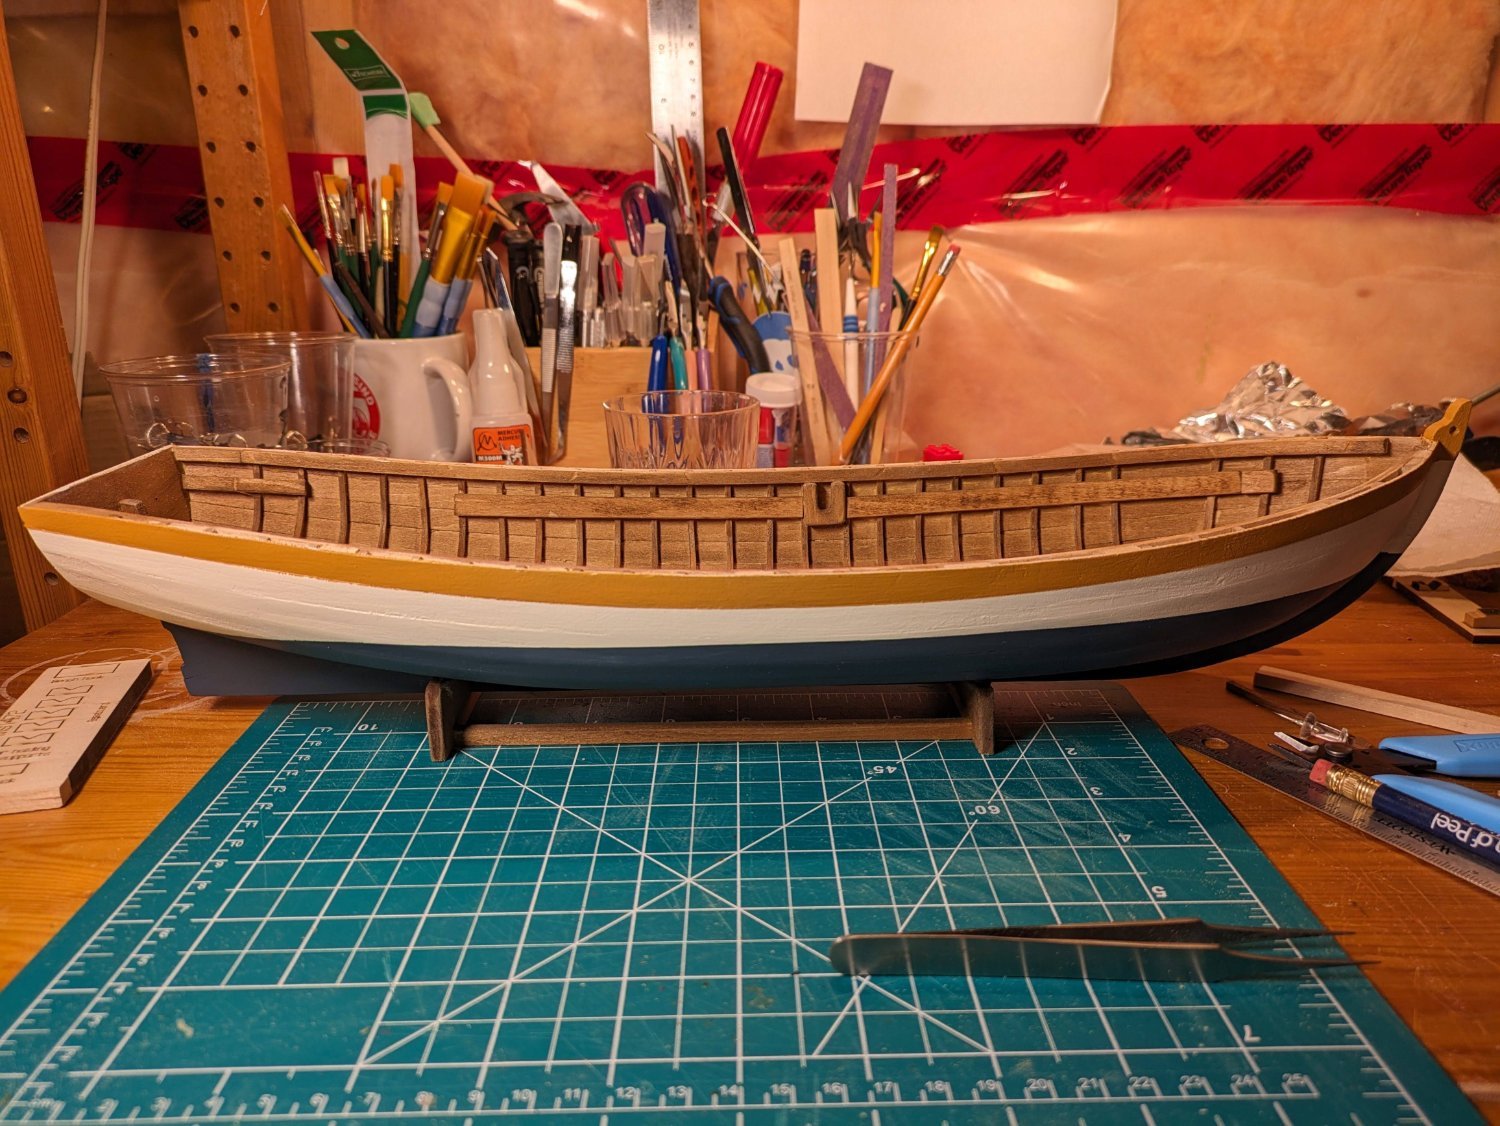
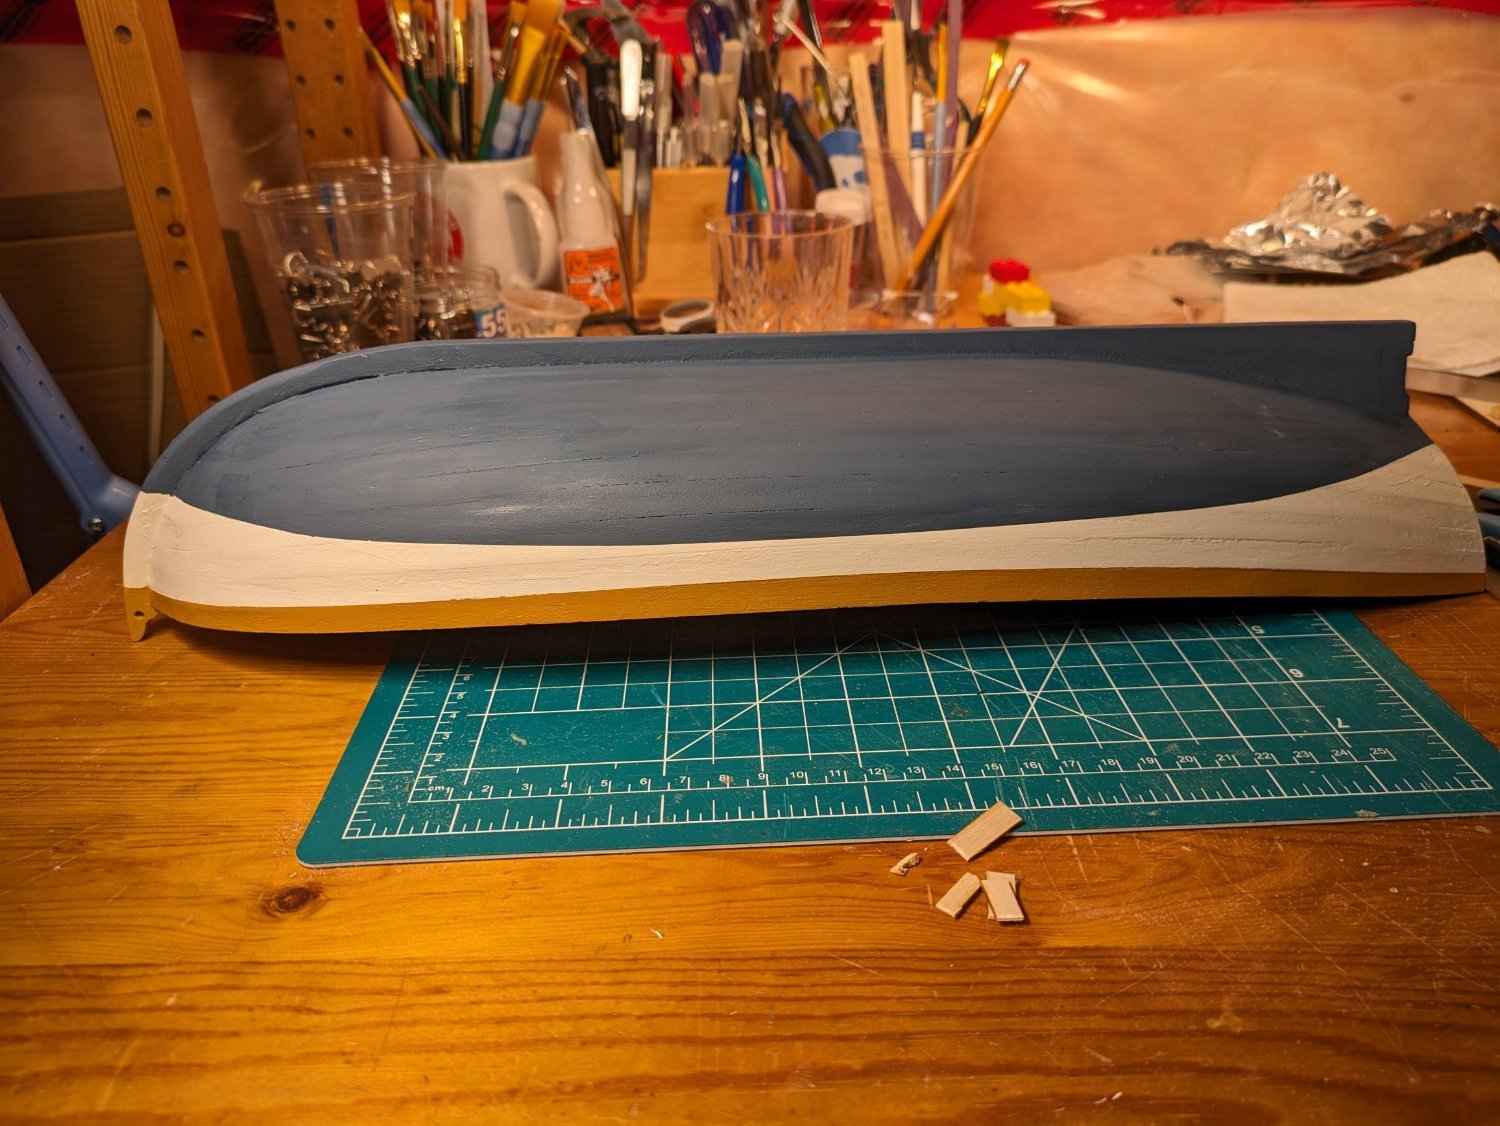
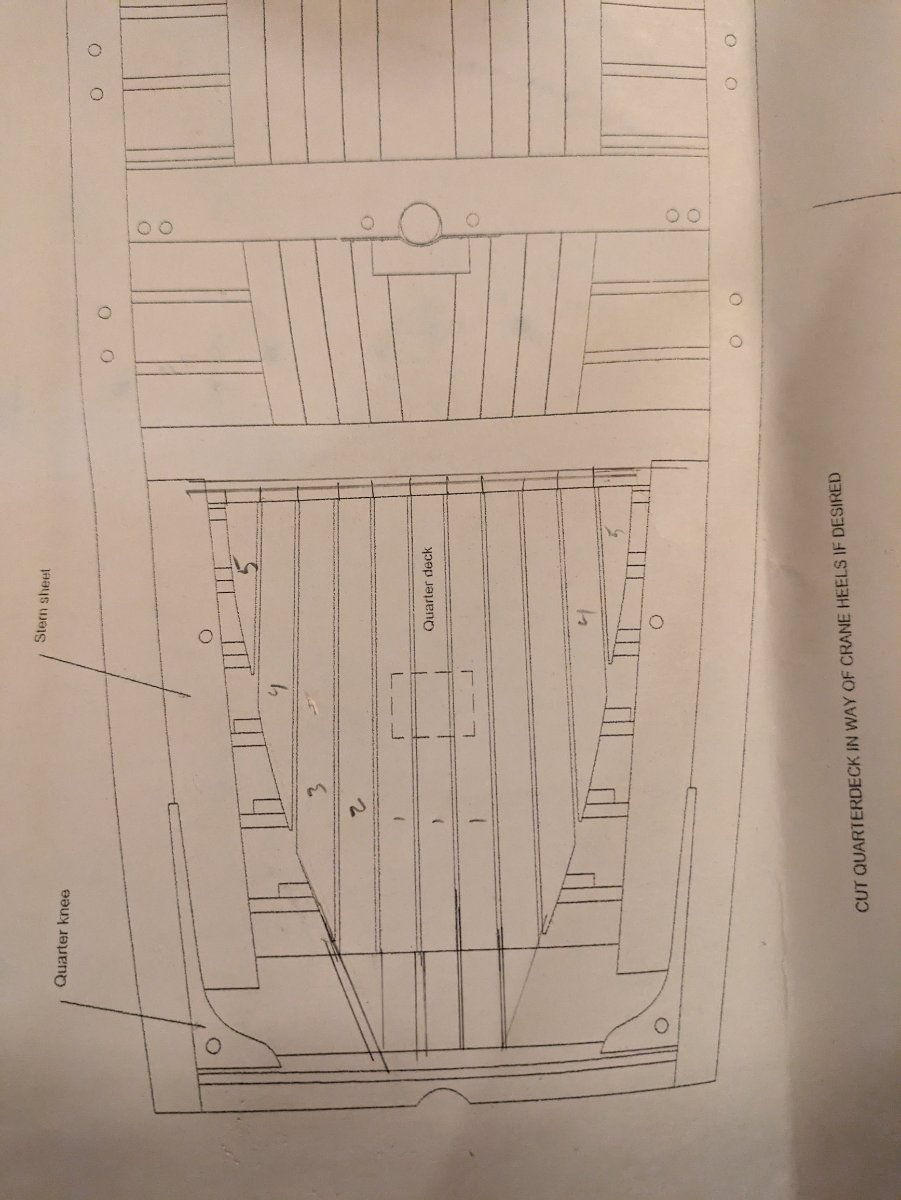
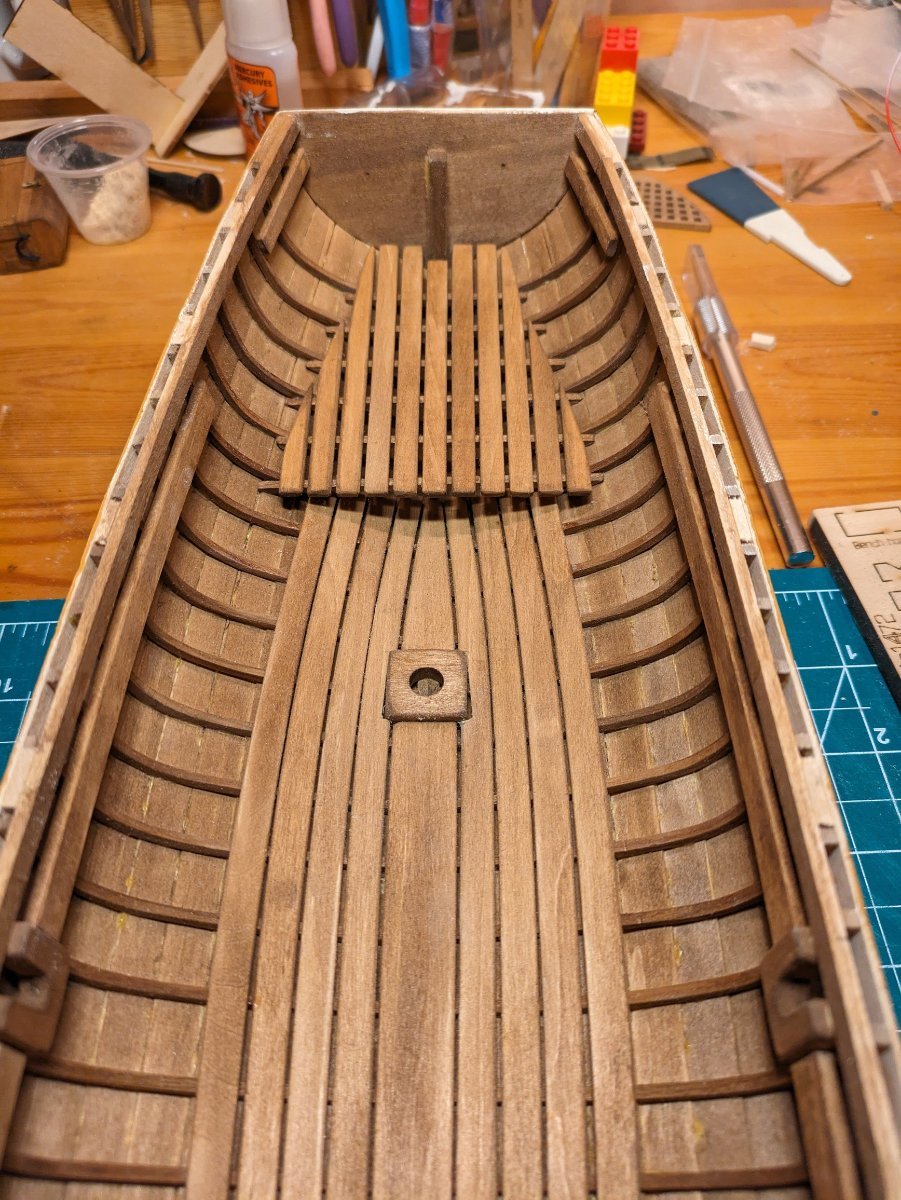
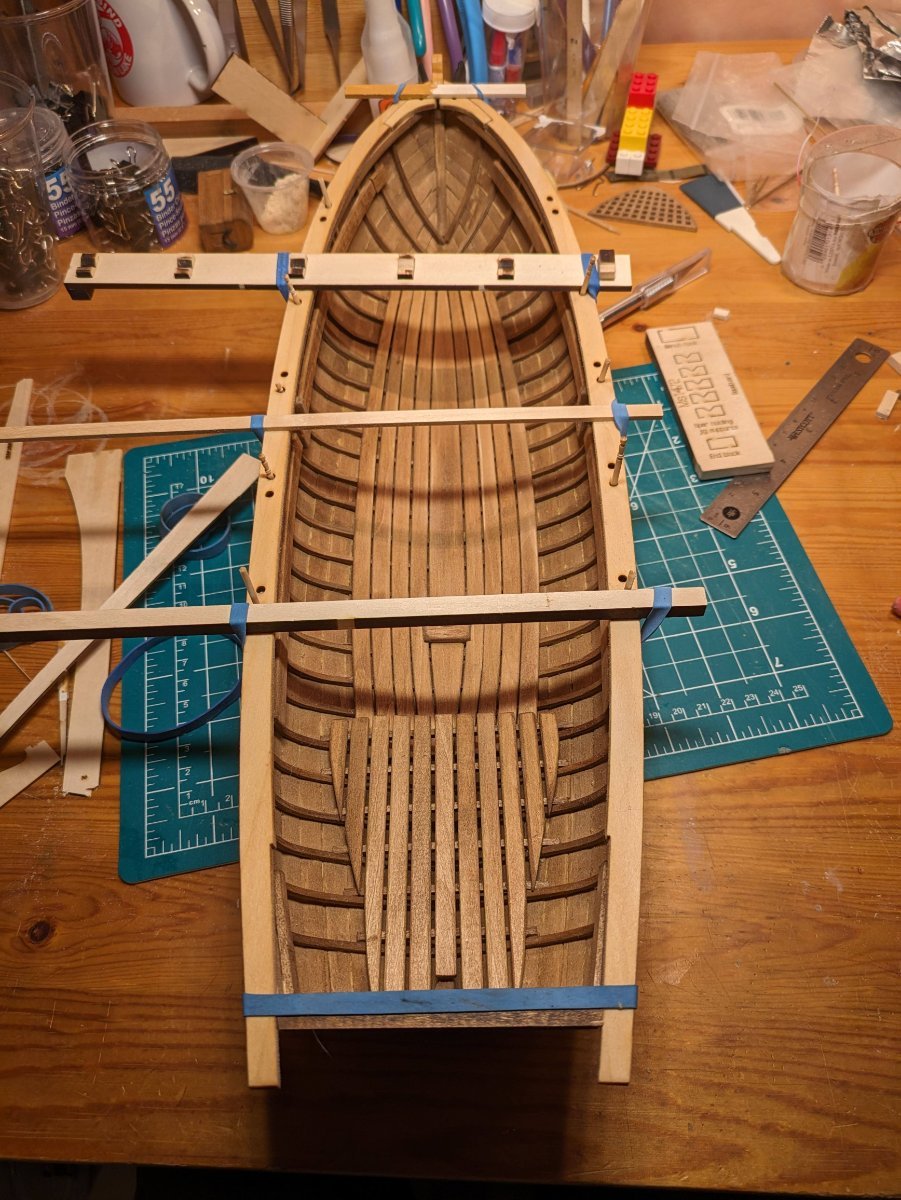
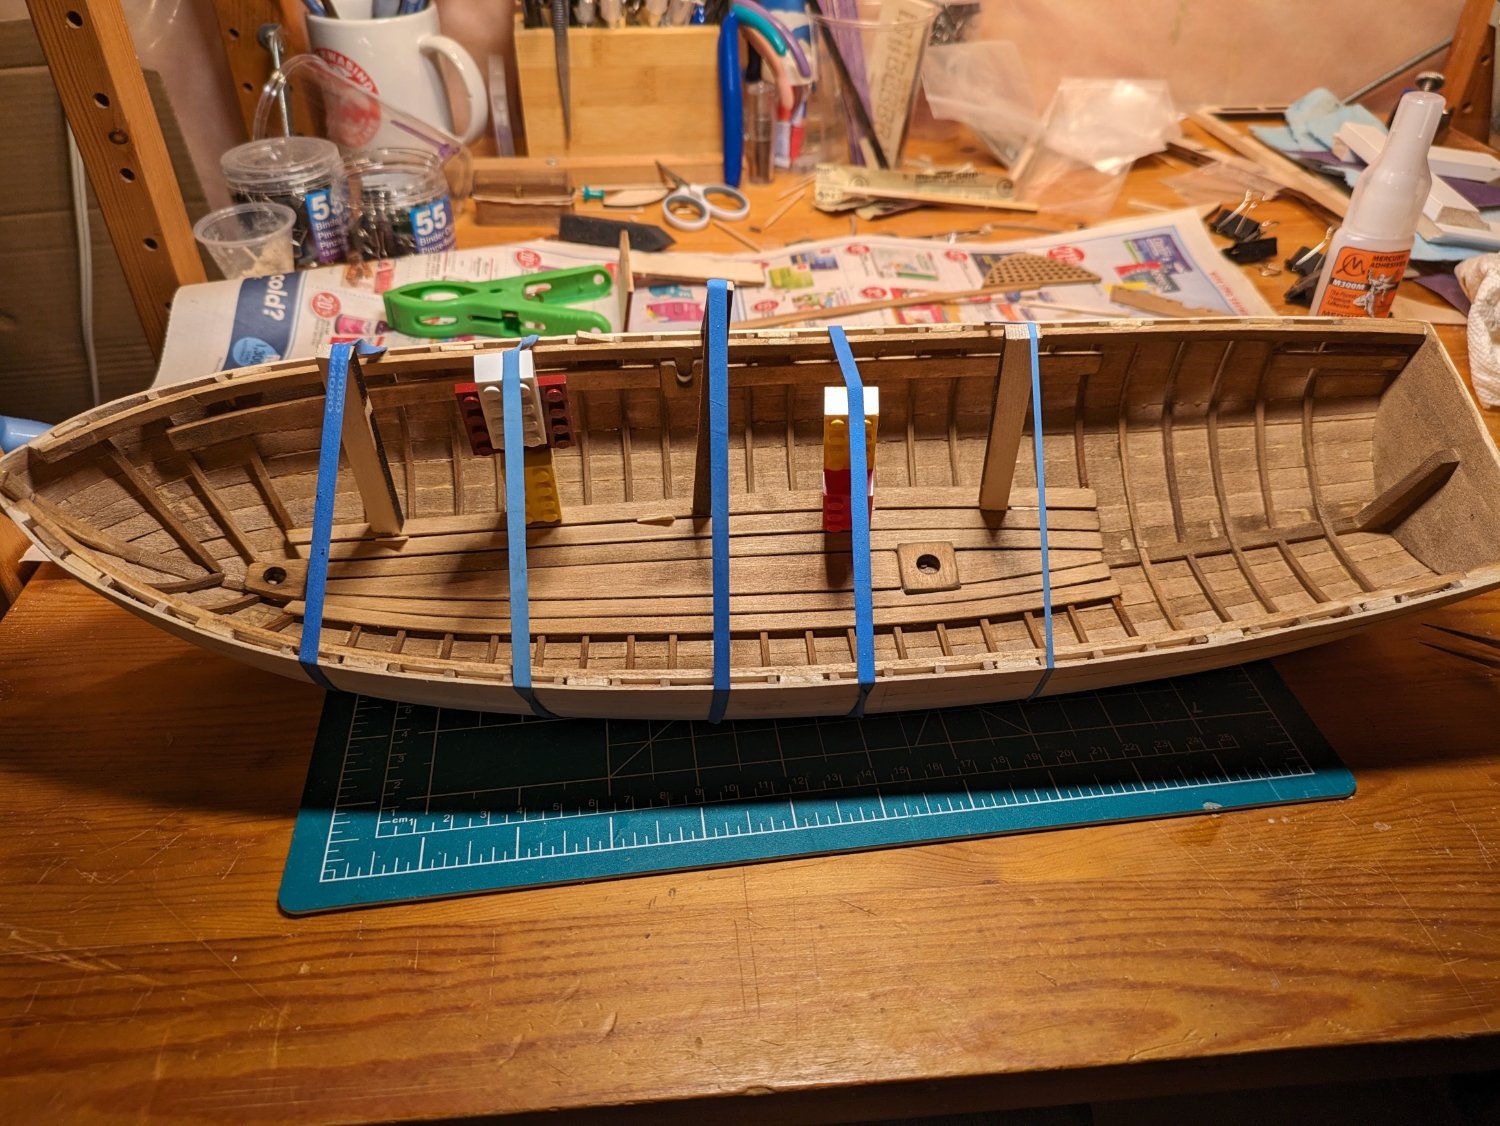
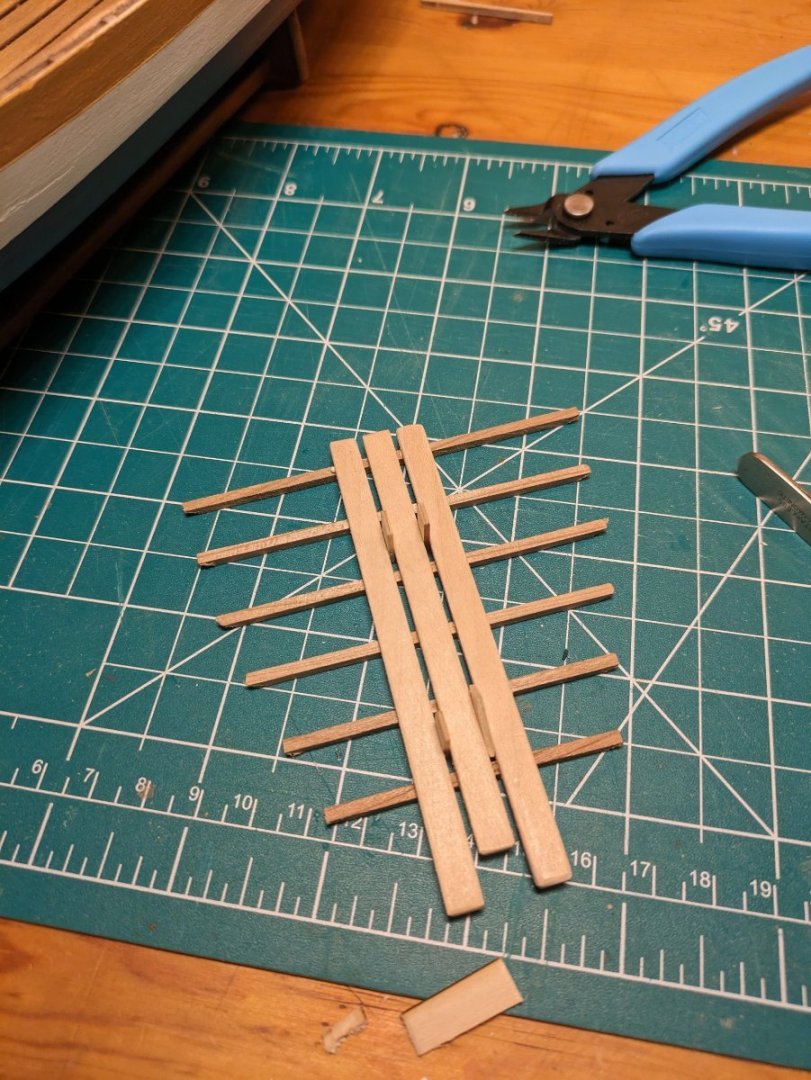
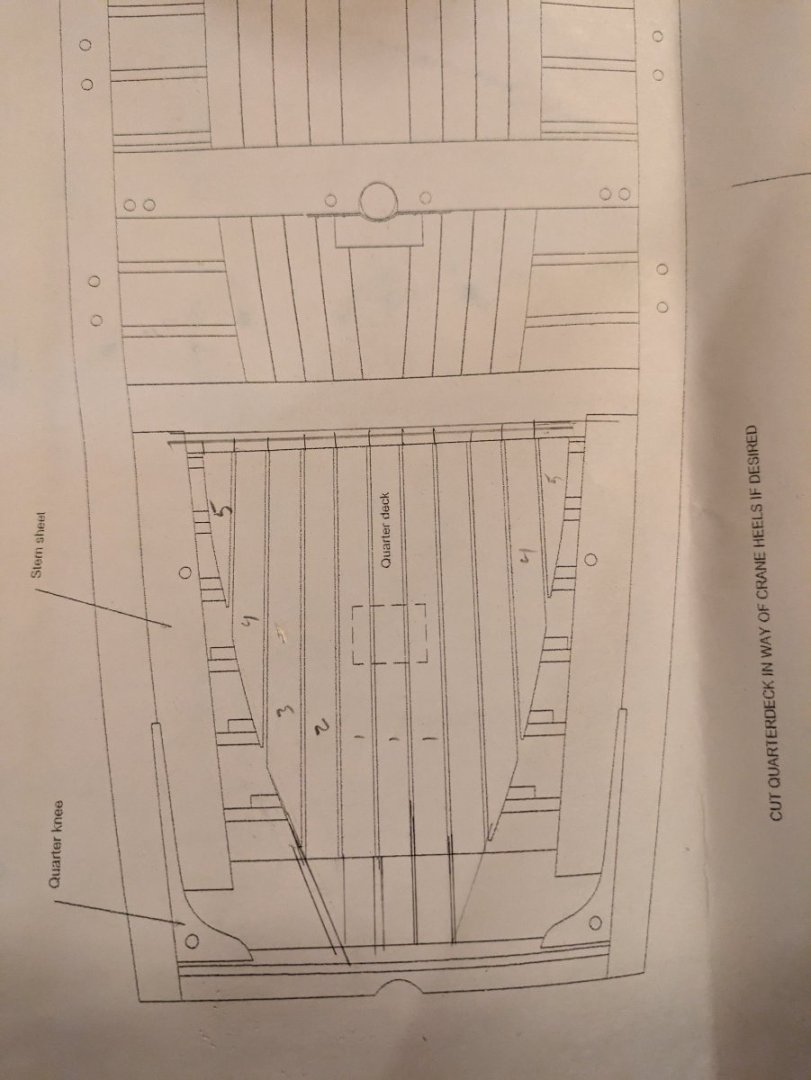
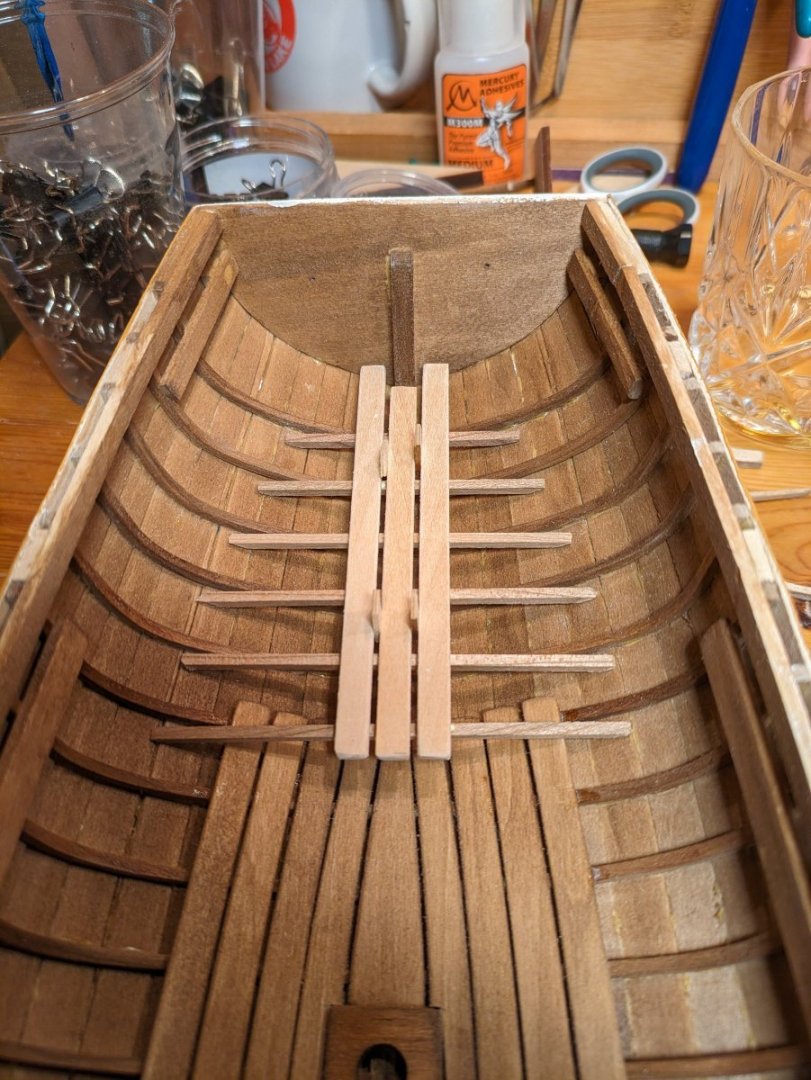
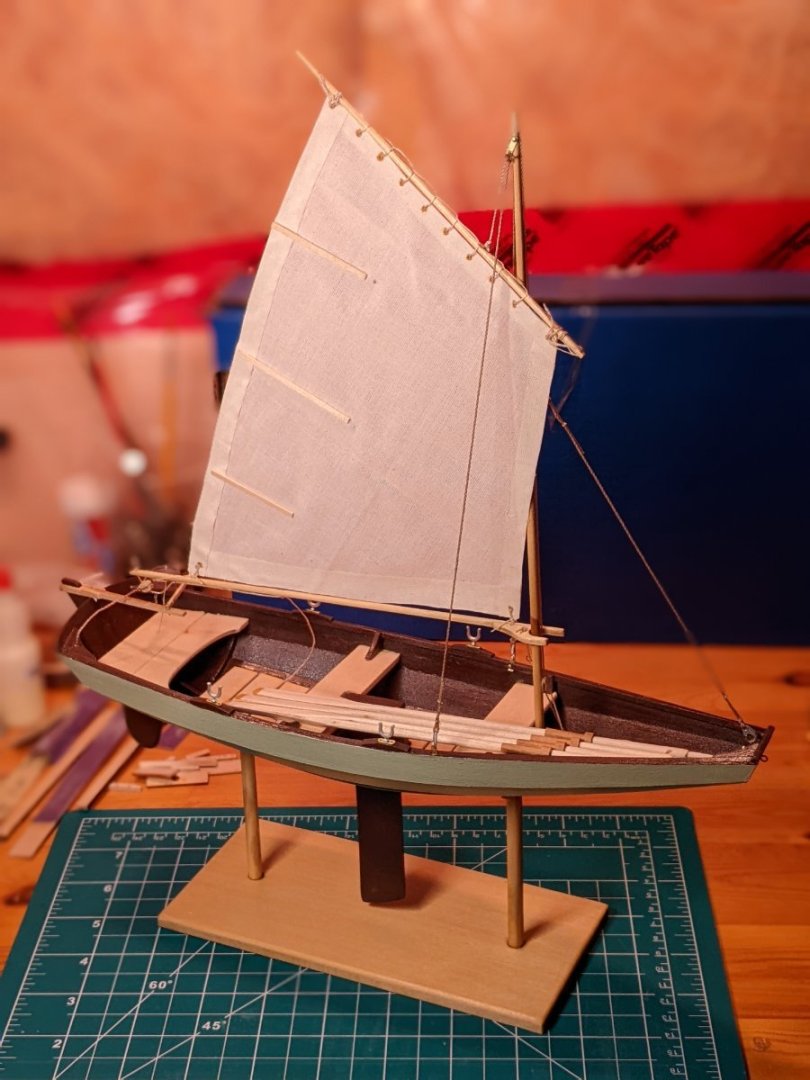
Time for an update....I ended up choosing an ochre (that's not the proper name) for the upper hull and a blue grey for the bottom realizing after painting the cream sides and taping for the other two colors that the kit usually has a white bottom and darker sides. I'm going with this though. It looks good to me. That green strip in the instructions? I'm still thinking about that.... Next was the quarter deck which, oddly, isn't even mentioned in the instructions. It seemed like a good time to do this though. I found usedtosail's build log really helpful here. I fitted the quarter deck frames first, starting with the opposite ends then making sure the middle frames were level with each other and then end ones. Then glued in the center board. Using thin pieces of scrap as spacers, I then glued in the rest of the floorboards. I deliberately left some extra length on the floorboards. Using my cheap Amazon not-really-a-dremel tool, I trimmed off the excess. A coarse sanding board would have worked just as well but taken a bit longer. It fit nicely and looked pretty darn good. I was happy with it. I was confused by the dashed-line rectangle on the quarterdeck in the plans for far too long before realizing that it's probably for the (optional) winch is also shown on the plans. I'm not doing the winch. I fitted the stern thwart and stern sheets realizing that the thwart risers in the stern were a touch too high too fit both the thwart and sheet under the sheer clamps. I really didn't feel like dealing with that at the time, though. So I finished shaping the thwarts and sheets and stained them. I'd already glued the breasthooks to the gunwales. So I soaked and bent the gunwales. Again, rather than go by the instructions, I know that these hulls can spread like a juicy rumor and so I relied on usedtosail's log and bent them directly on the hull using toothpicks and elastics. This meant they matched the shape of my hull even if it deviated from the plans. I did not glue the breasthooks together and used elastics instead. This allowed some fine tuning later for a good fit. Next day at the workbench, I shaved down the thwart risers and glued in the 2 stern thwarts and stern sheets (I thought sheets were the lines holding the foot of the sail!). I also stained and glued in the gunwales. Next up, fitting the remaining thwarts. Guess what! They fit! I even had to shave a bit off #2 and 3. Using those hinky frames to reduce spread after i pulled it off of the mold worked! Before installing the thwarts, I want to make the two mast partners. I have the brass strips, the right dowels to shape around, my Jax brass darkener and the brass pins......the brass pins....hmmm...brass pins.....? The kit doesn't seem to include brass pins. Did i misplace them? They're in the instructions. It probably wouldn't look right without nailheads. They're not that expensive an item. They'll be used in a couple of other places. But they're not listed on the parts list either. I do not have brass nails. I think I want nail heads. My hobby shop might have some. And I think I mushroomed some short brass wire pieces in an earlier model but that didn't go too well. I'm going to call it a night.....


-
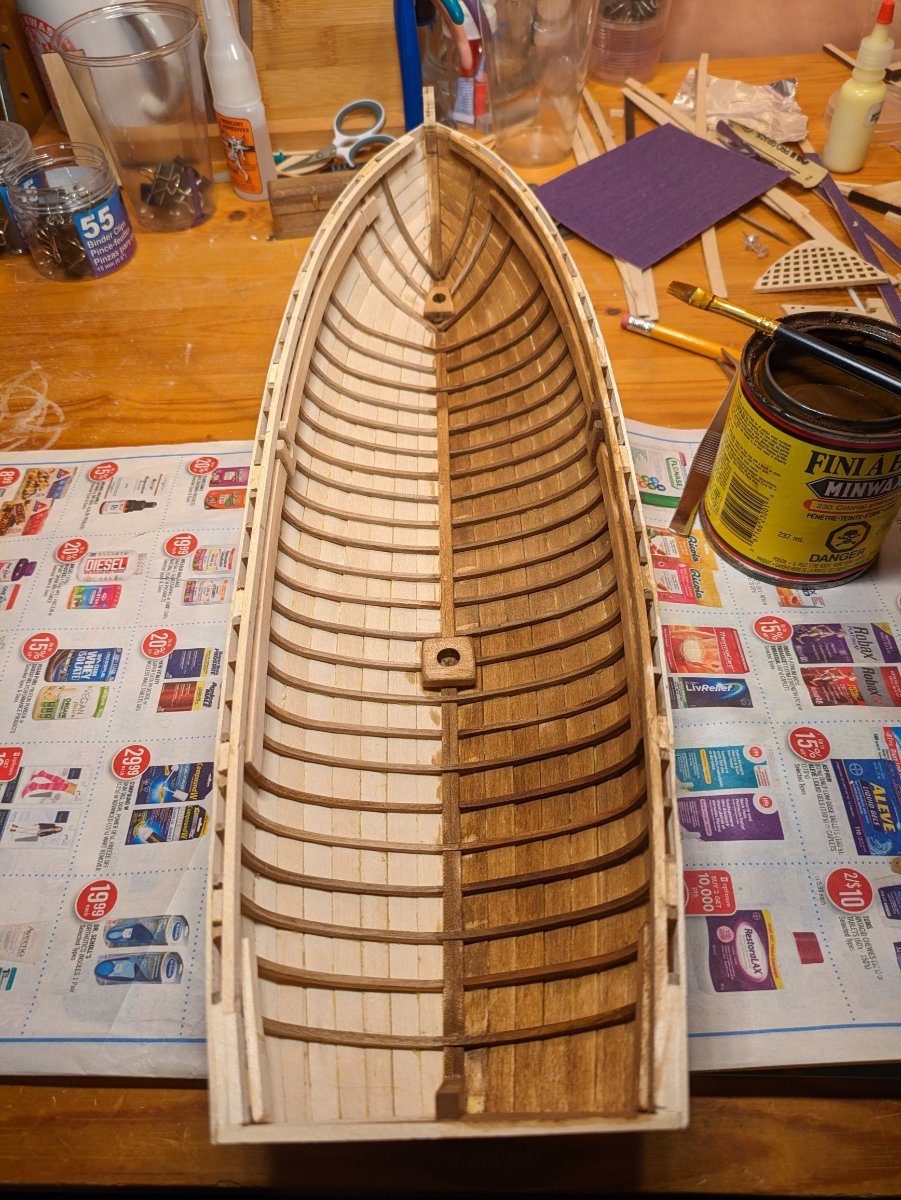
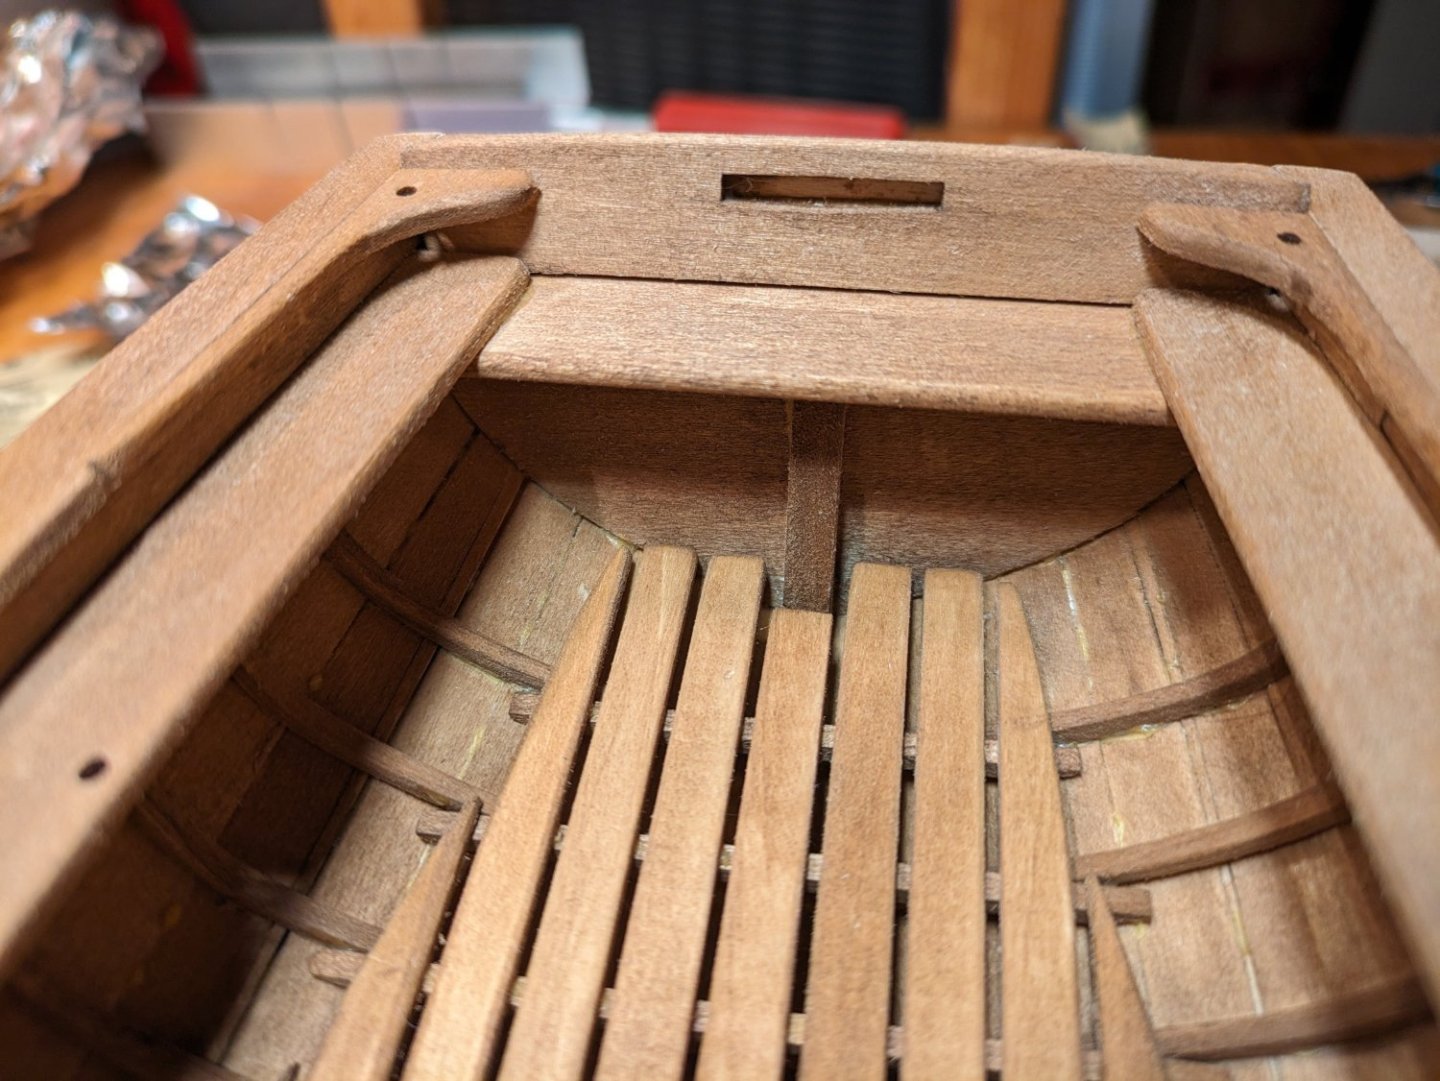
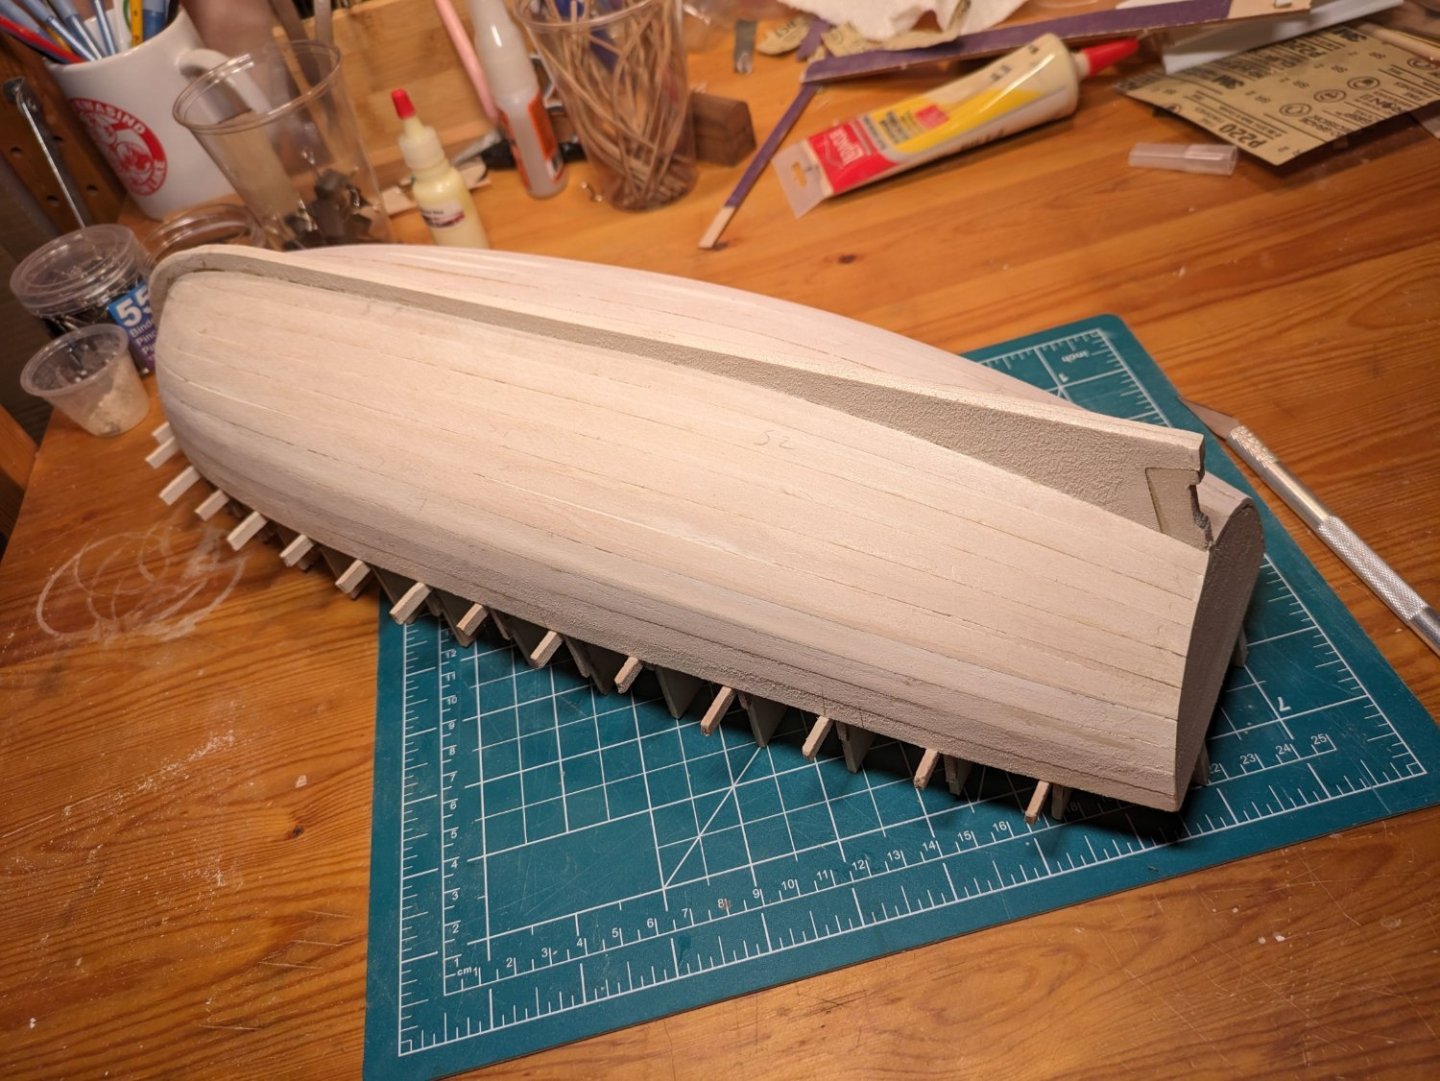
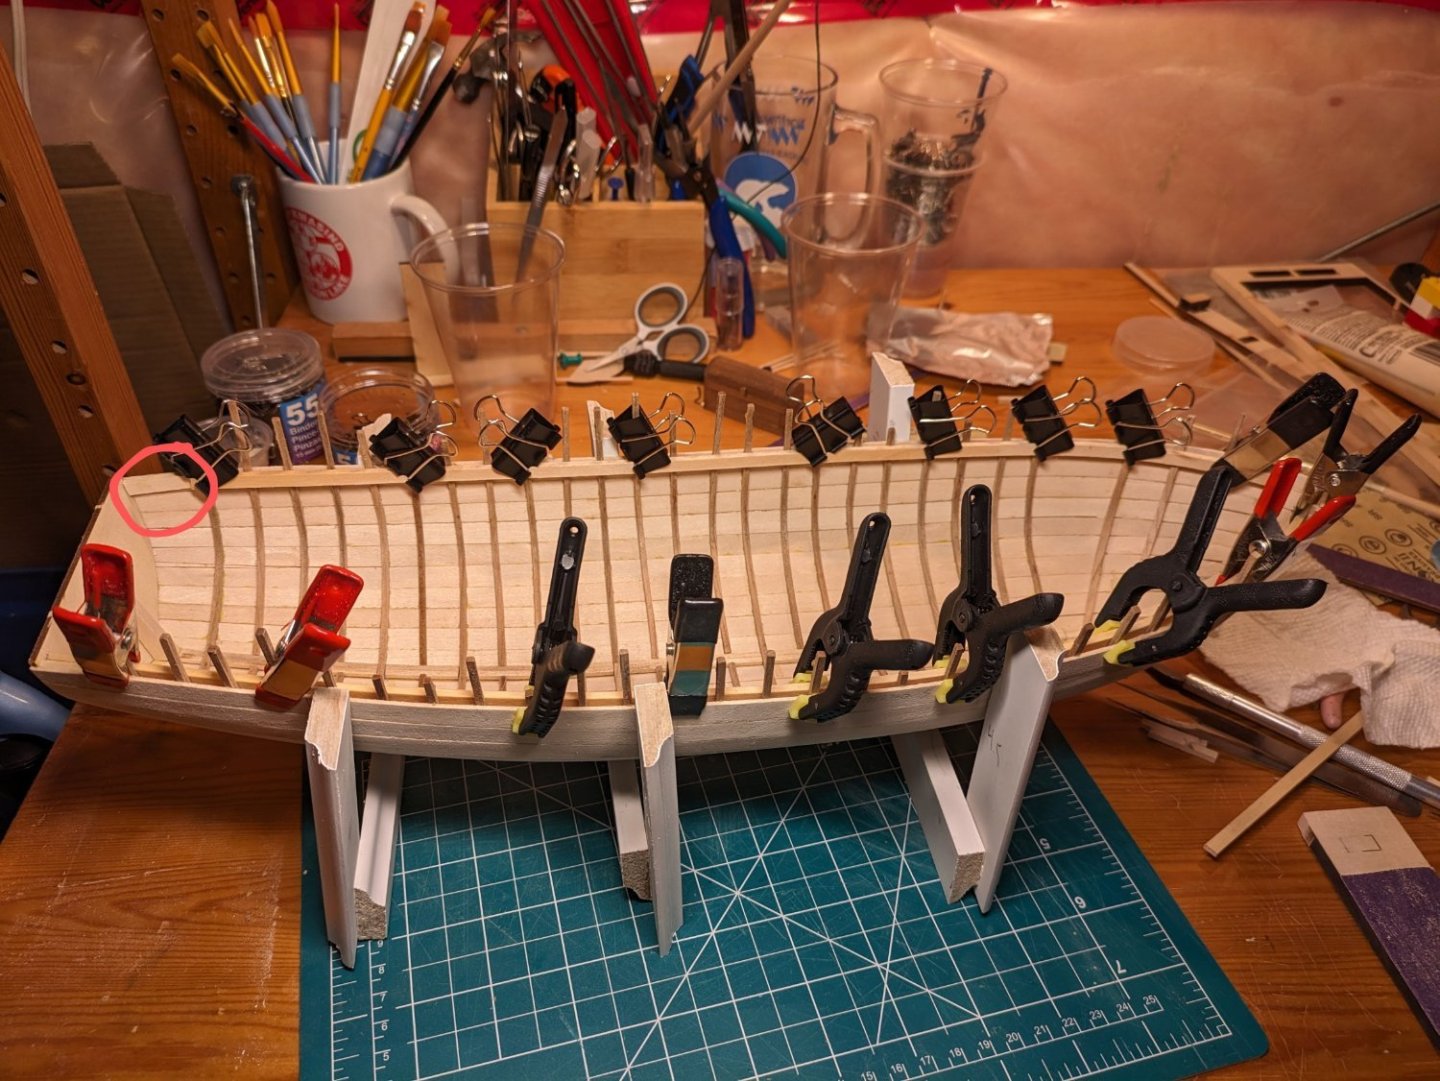
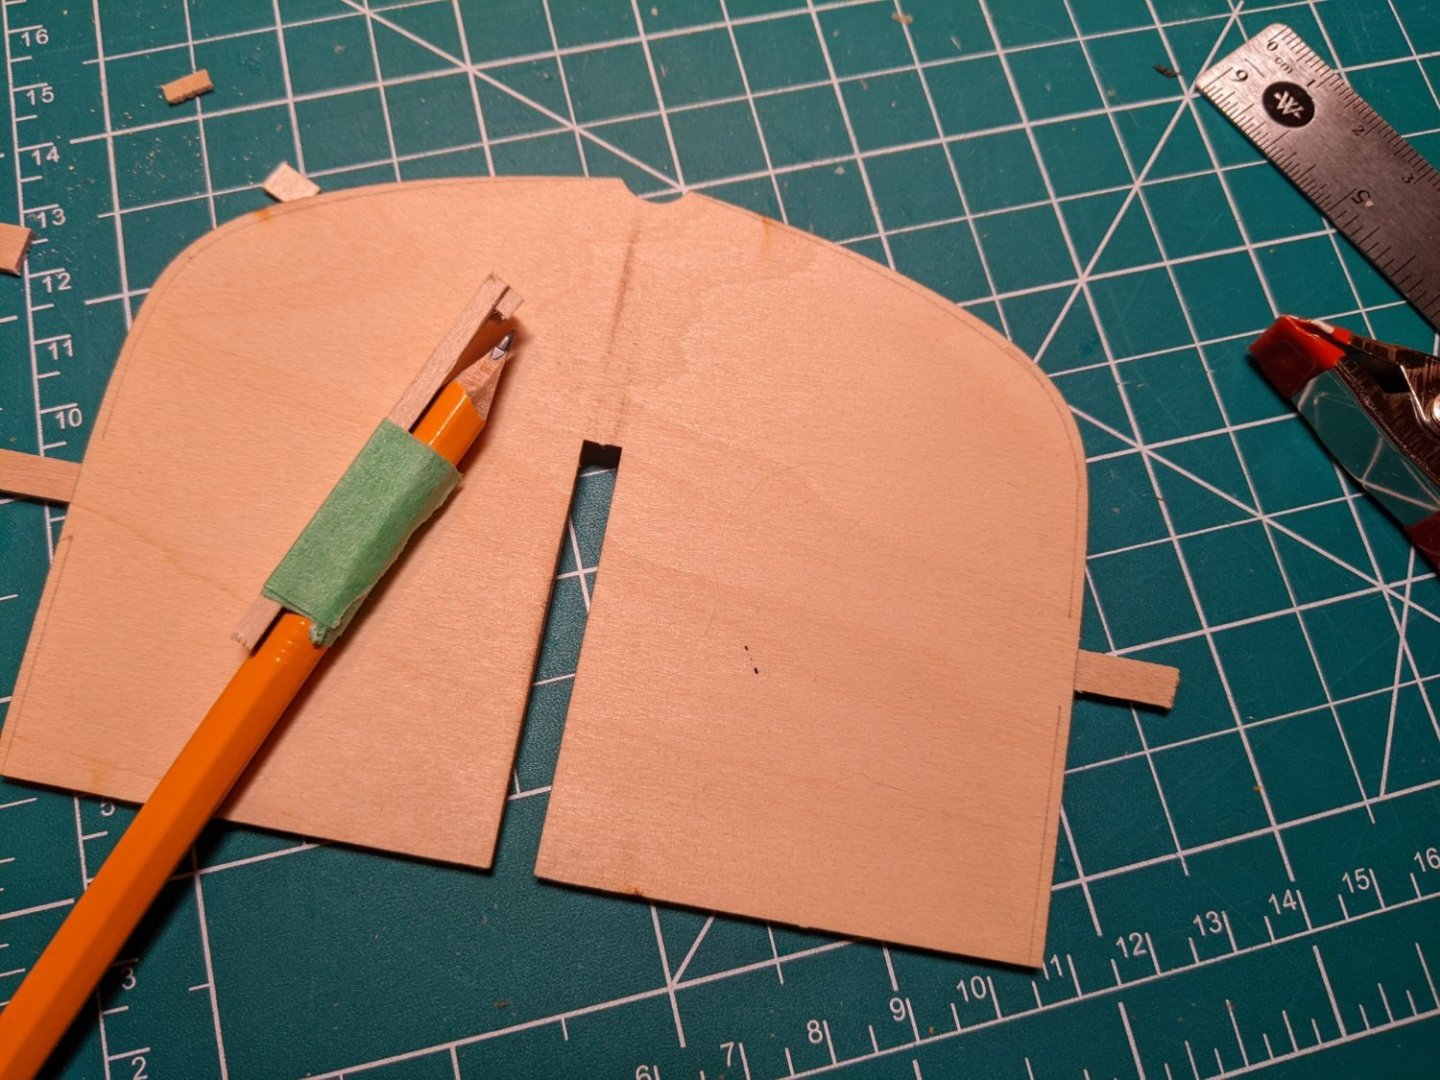
How's it been going, you ask? Great! After shaping the grating and forward thwart to fit nicely in the bow, and then fitting the foremast, the forestep ended up a couple of mm fore of the plans. Hoping this works out later. But it meant that the floorboards had a frame to sit on at the front. Before installing the floorboards, I stained the interior. I half-expected that it'd look terrible and I'd just end up painting but it was surprisingly...okay. My favorite on-hand stain is called "tobacco" and it usually looks great on hardwood. Unfortunately, it came out darker than I wanted on the bass wood and I went with another slightly lighter stain I had on hand. Just as well, as an ex-smoker, I always feel guilty using 'tobacco'. I did expect the cherry to have more contrast for all the trouble bending that infernal wood caused but... whatever. Looks fine. You can see from the light spots that I repositioned the garboard a fair bit at the start. I have no recollection of this but the glue doesn't lie. It should be mostly hidden. I fitted then stained the floorboards before gluing. I did resort to AC for this since I was too impatient to wet and bend them. No need to paint, though, right??? i was about to start on the gunwales, which, despite my low-rent frame intended to limit hull spread, I discovered were 2-4 mm narrower than the hull at center frame. This is somewhat better than @usedtosail experienced but not ideal. They had method of soaking and bending the gunwales directly on the hull that I'm planning to use. But the actual next step was priming the hull, etc. I first assembled the stand - no problemo. It fits nicely. I also cleaned up and shaped the rudder. I then primed the outer hull with 2 thin coats and, when dry, meticulously marked the waterline using a high precision apparatus made from masking tape, a pencil and hope. I then realized that I want to start with the hull paint above the waterline, which I chose as warm white per the instructionss cuz i follow rules. Rather than masking twice, I ended up overlapping the waterline marks I'd so carefully made. So I'll have to mark this again. I'm still deciding on the other hull colors and waiting on some Jax brass darkener so I'll pick this up again in a few days.


-
You're right, Allan. The strake on the model shipways model might be there for modeling convenience more than historical accuracy. I'm gonna say, after bending those cherry frames, I'm not missing trying to bend a 4" scale gunwale. The thin ones in the kit already don't fit well!
-
Thanks for the advice, Keith. Another Aussie helping me! Awesome! As you said, I'm a bit past that but imine seems to look okay. It makes sense though and I'm learning to think ahead and not completely trust the instructions. Can we not trust anyone any more? Then again, that's part of the fun with this, no?
-
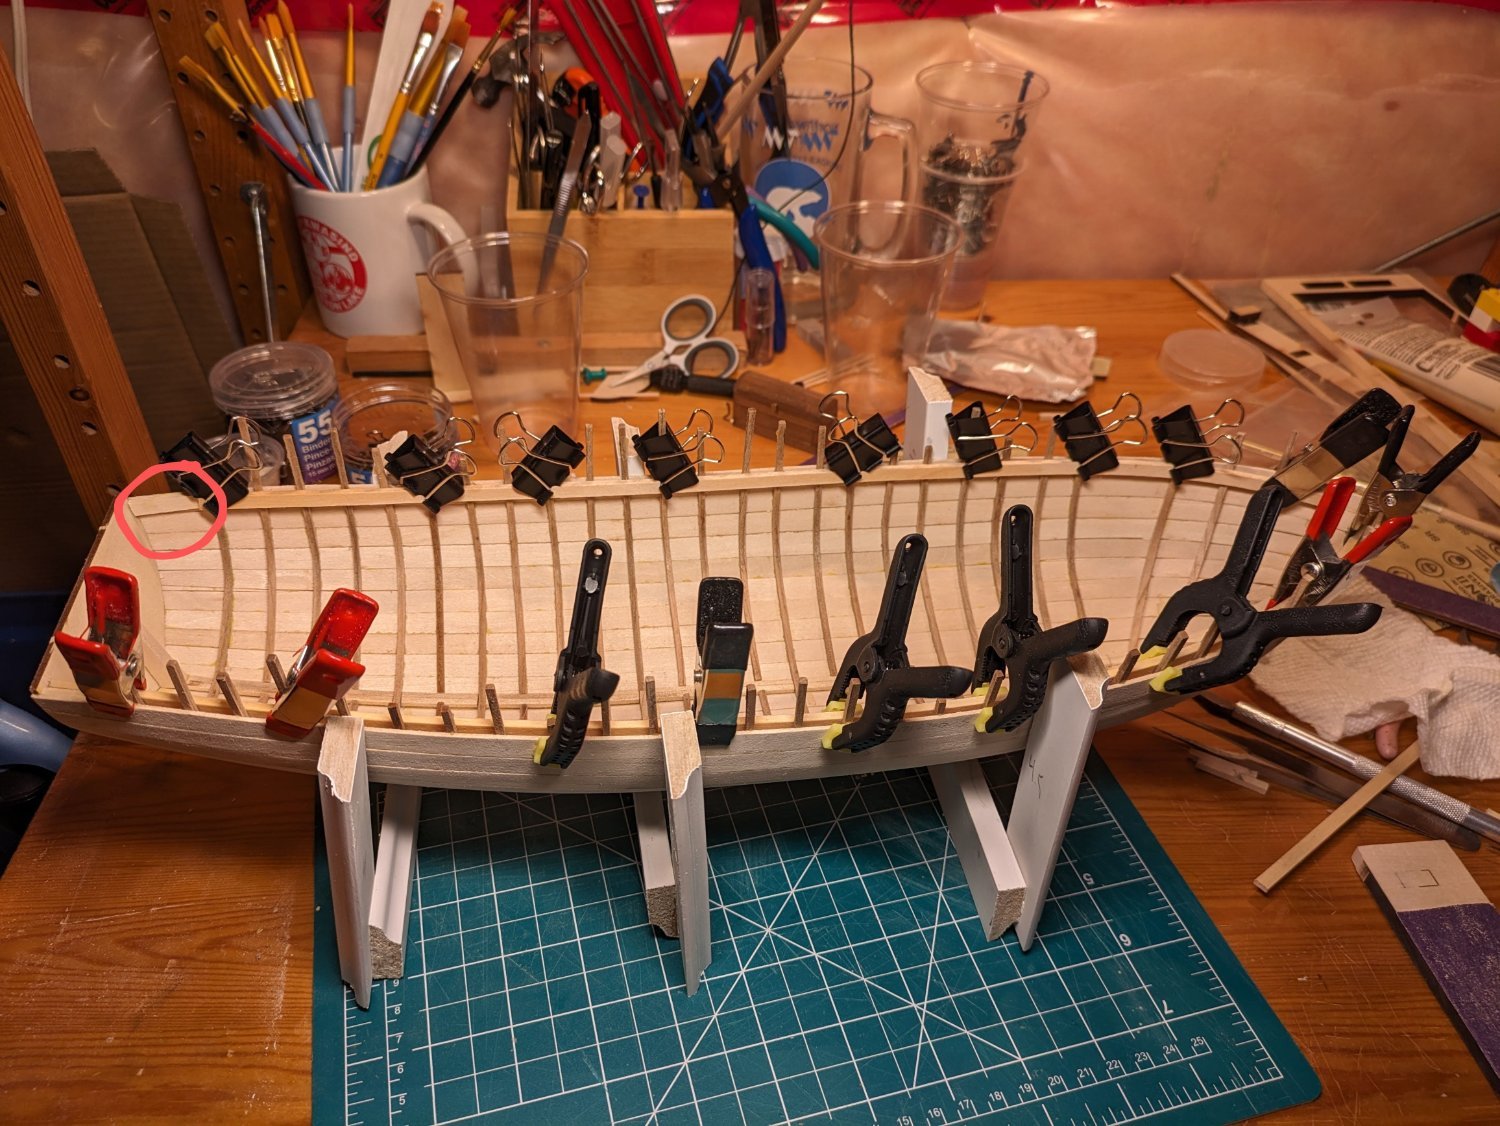
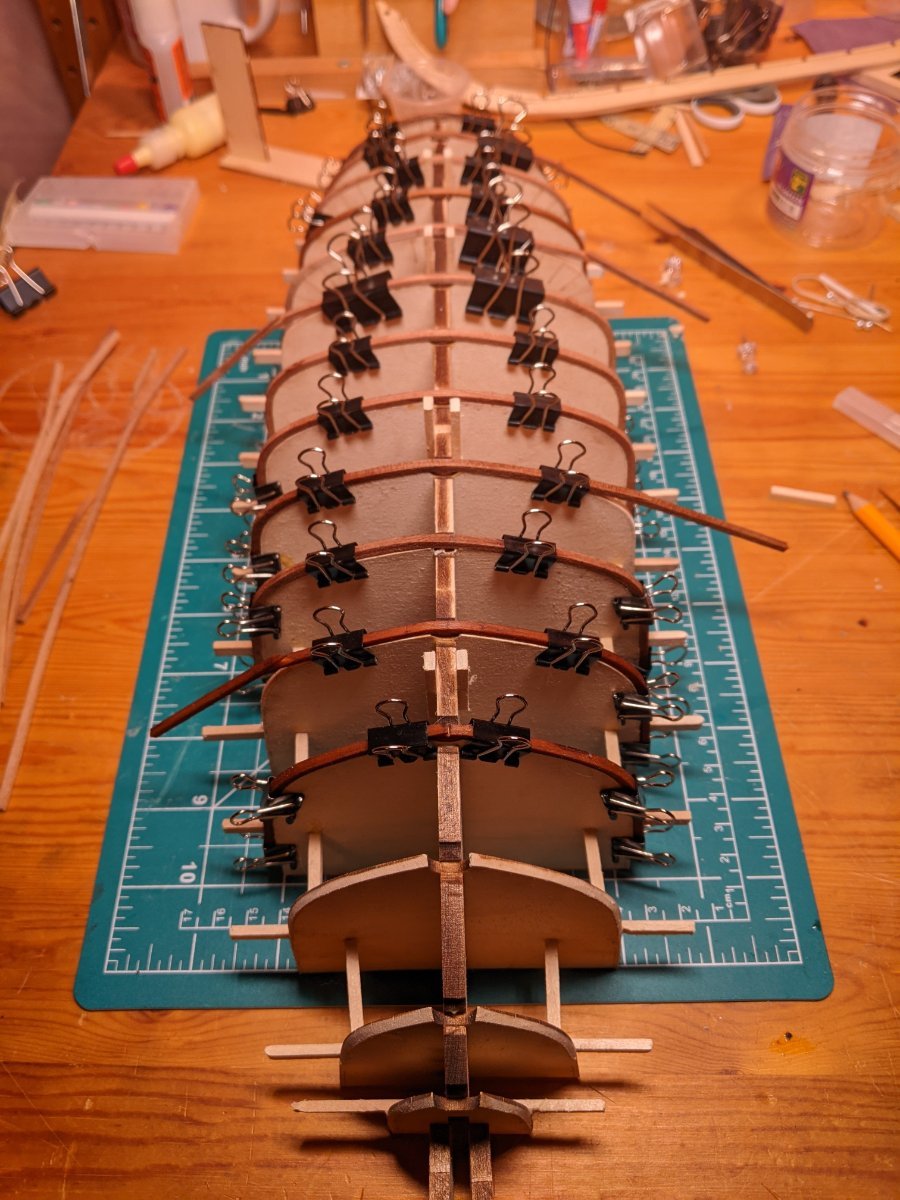
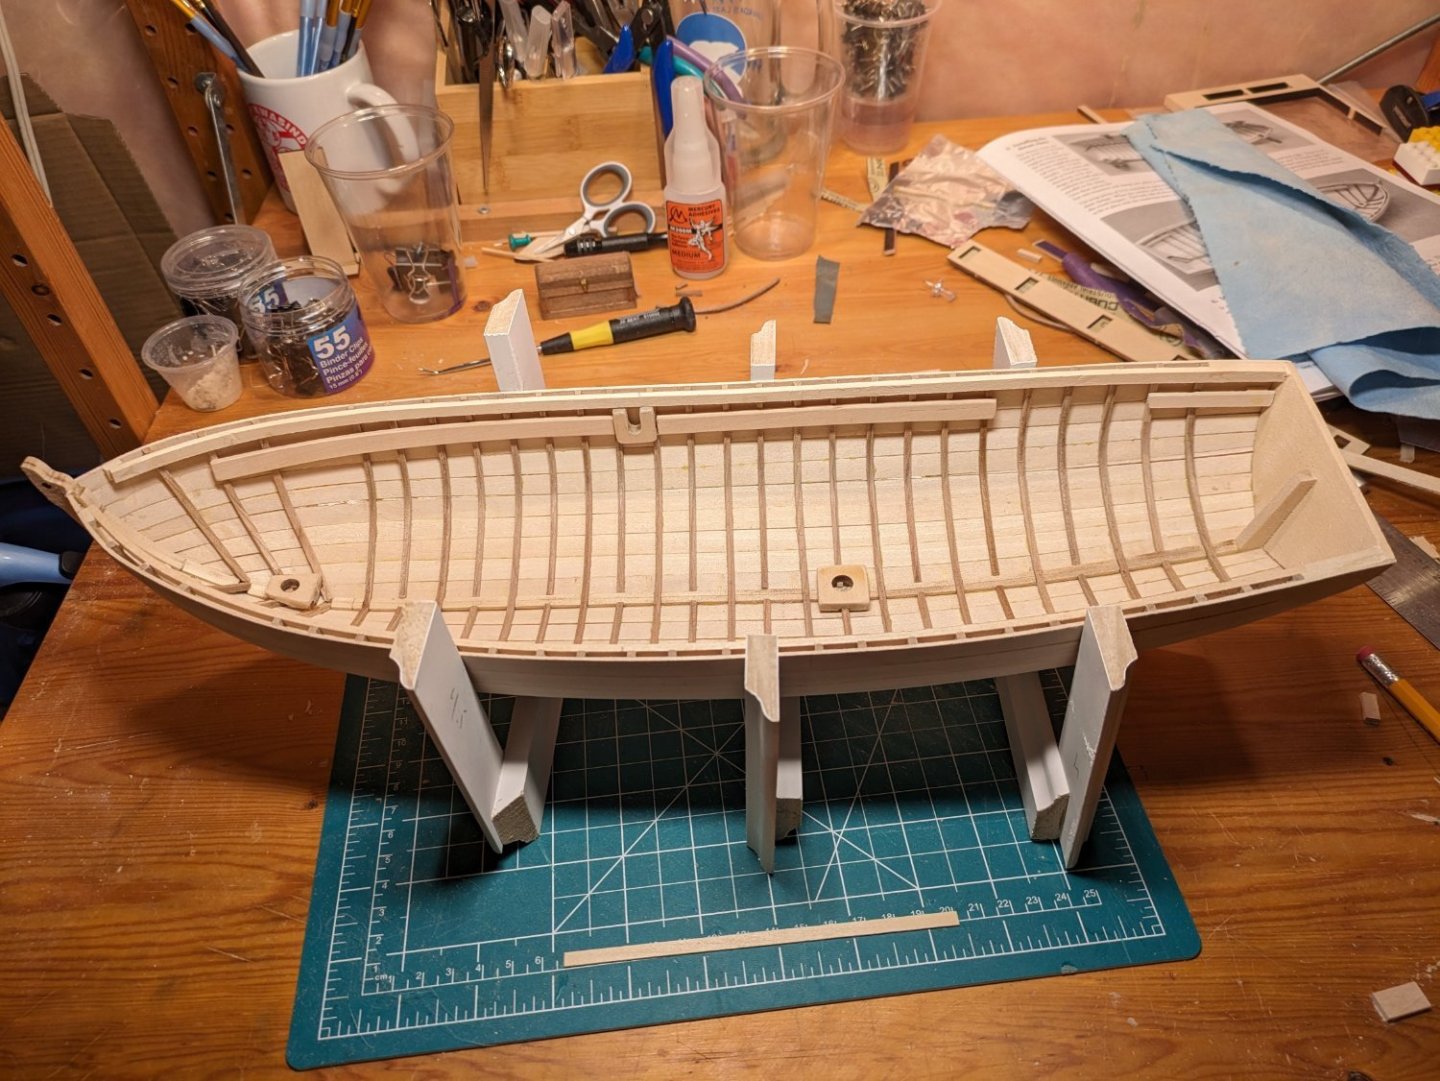
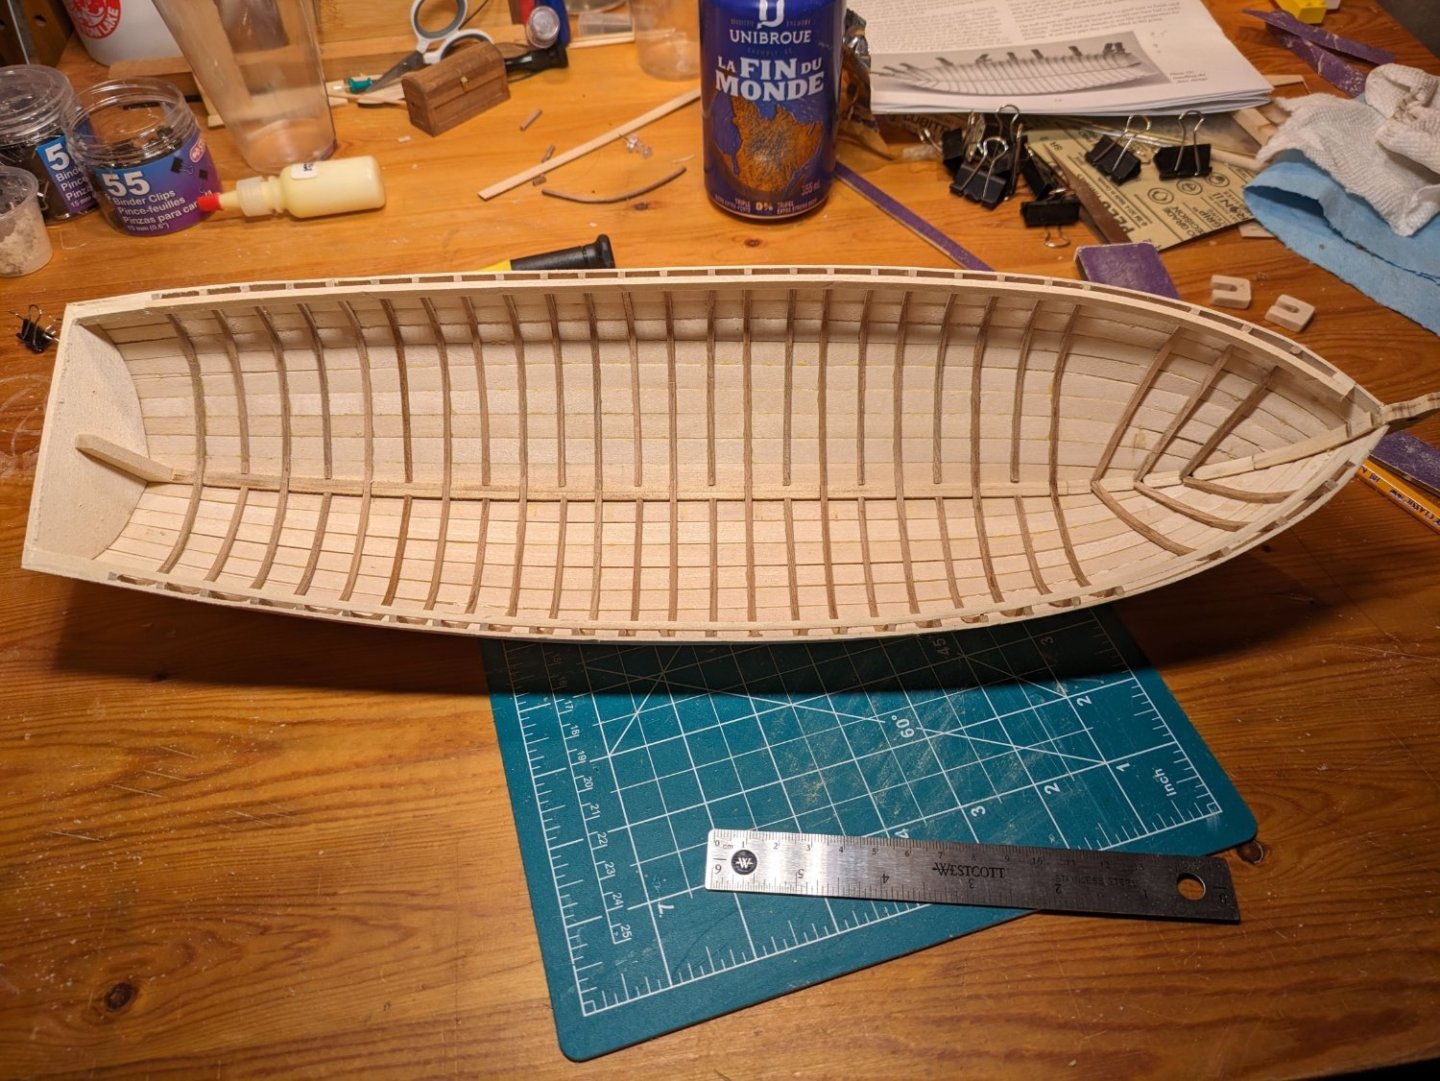
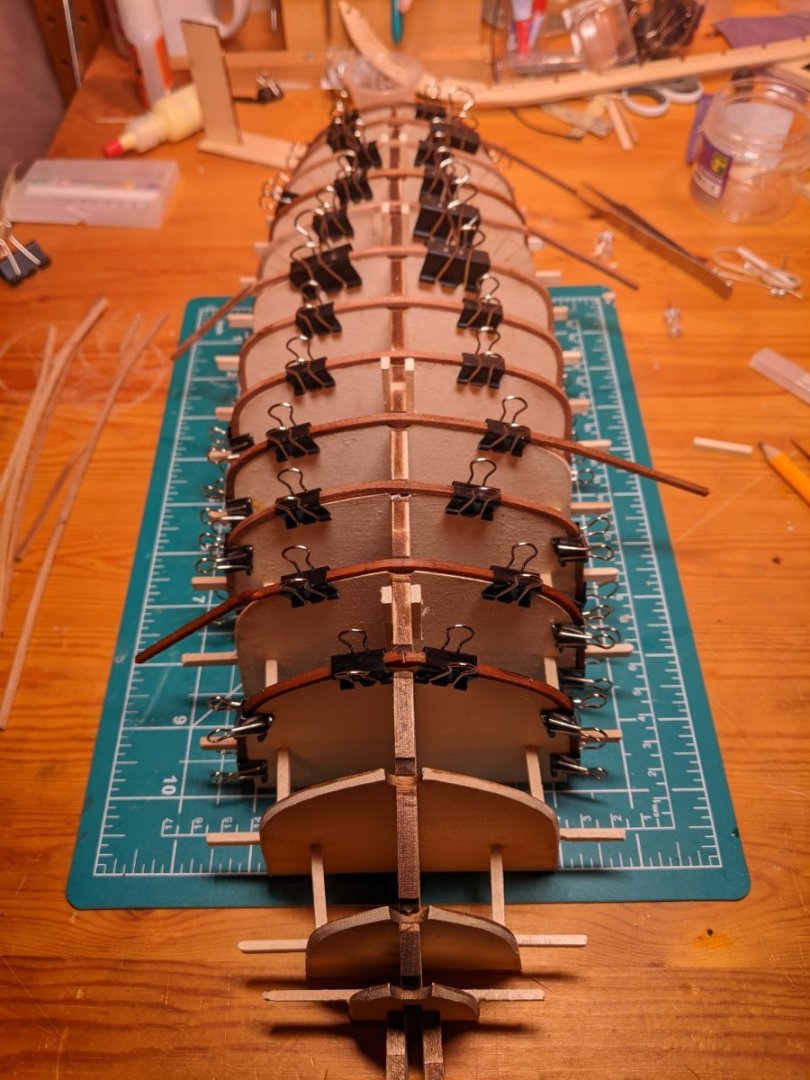
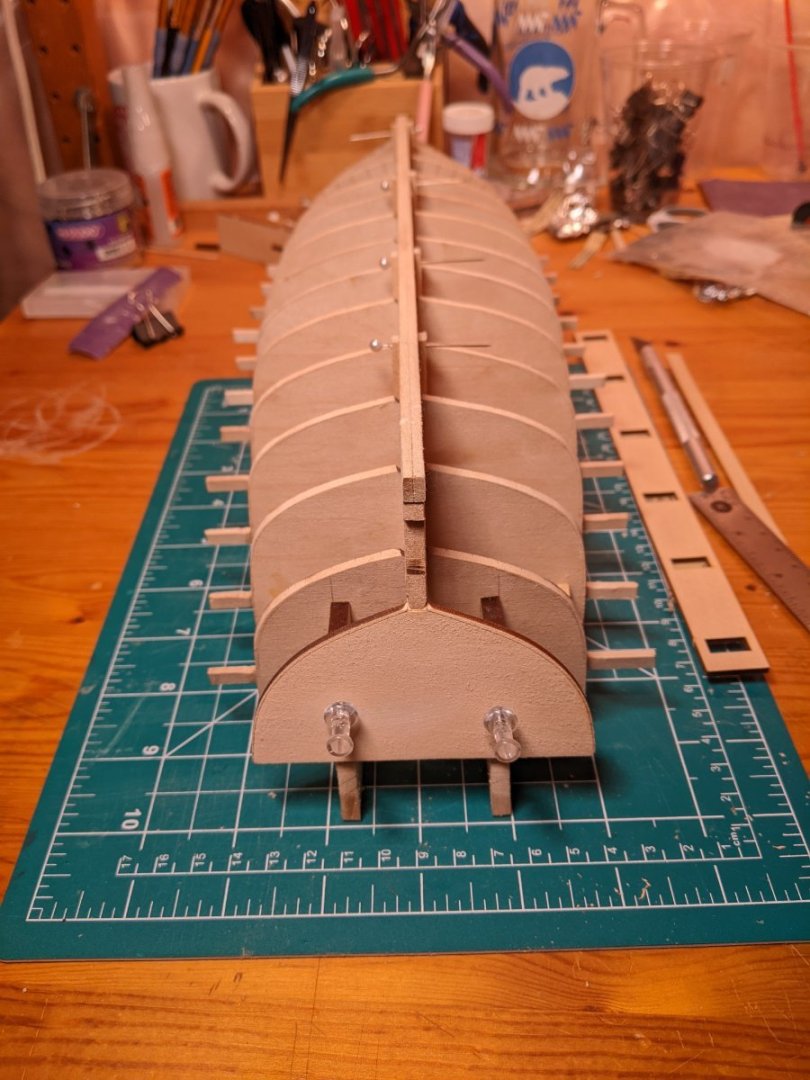
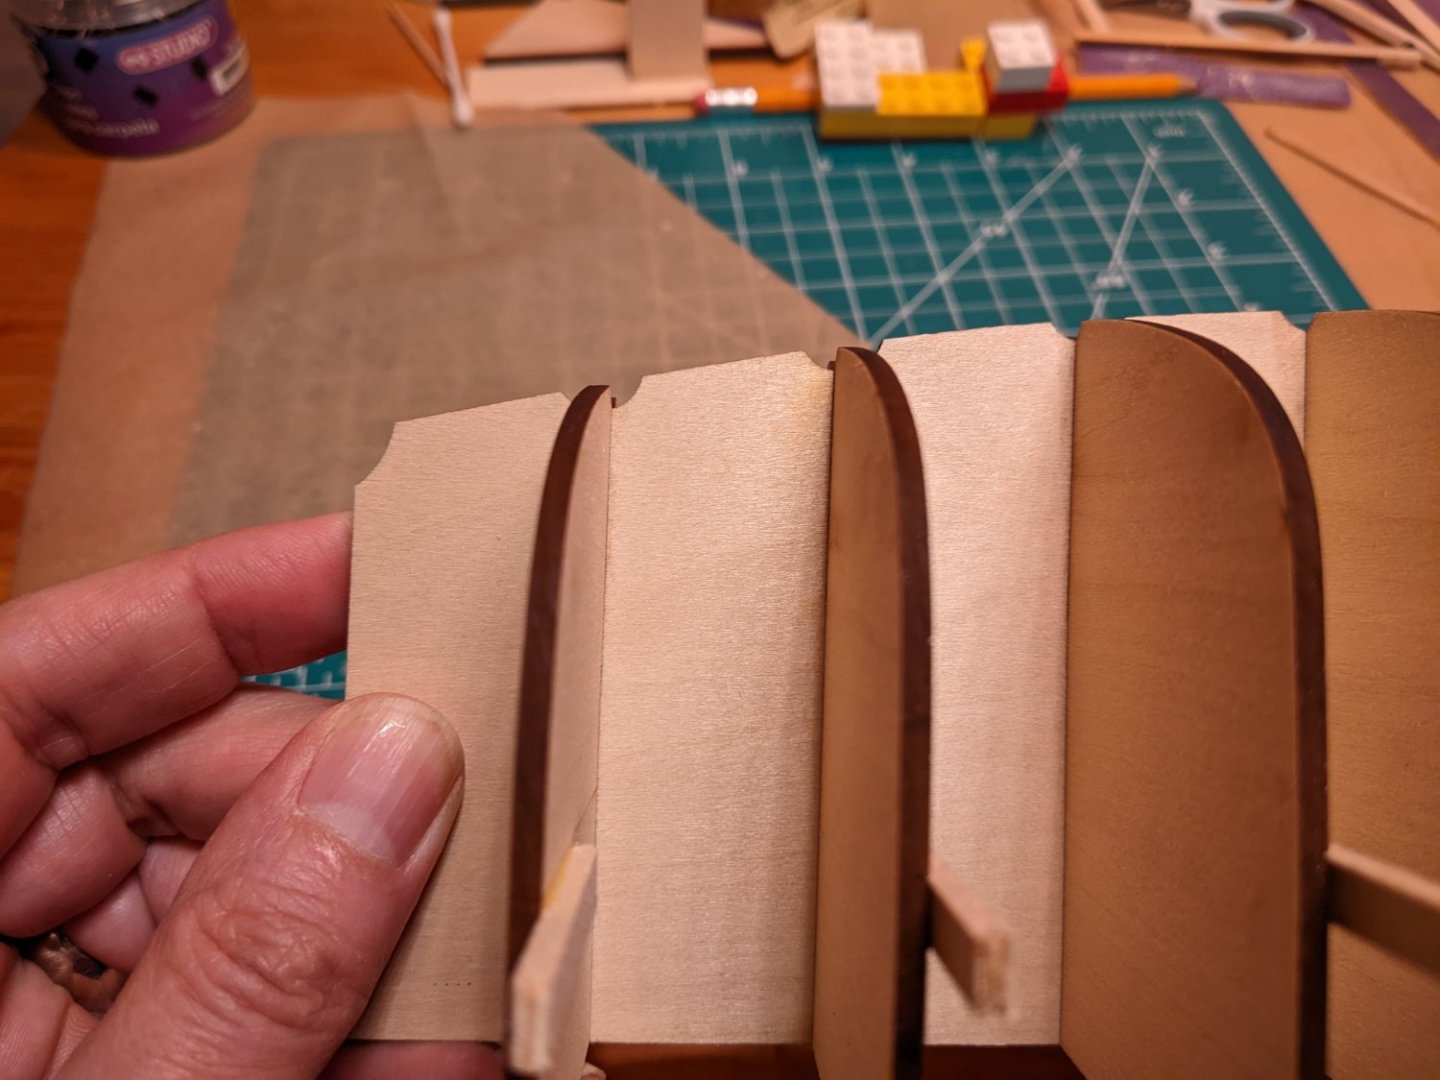
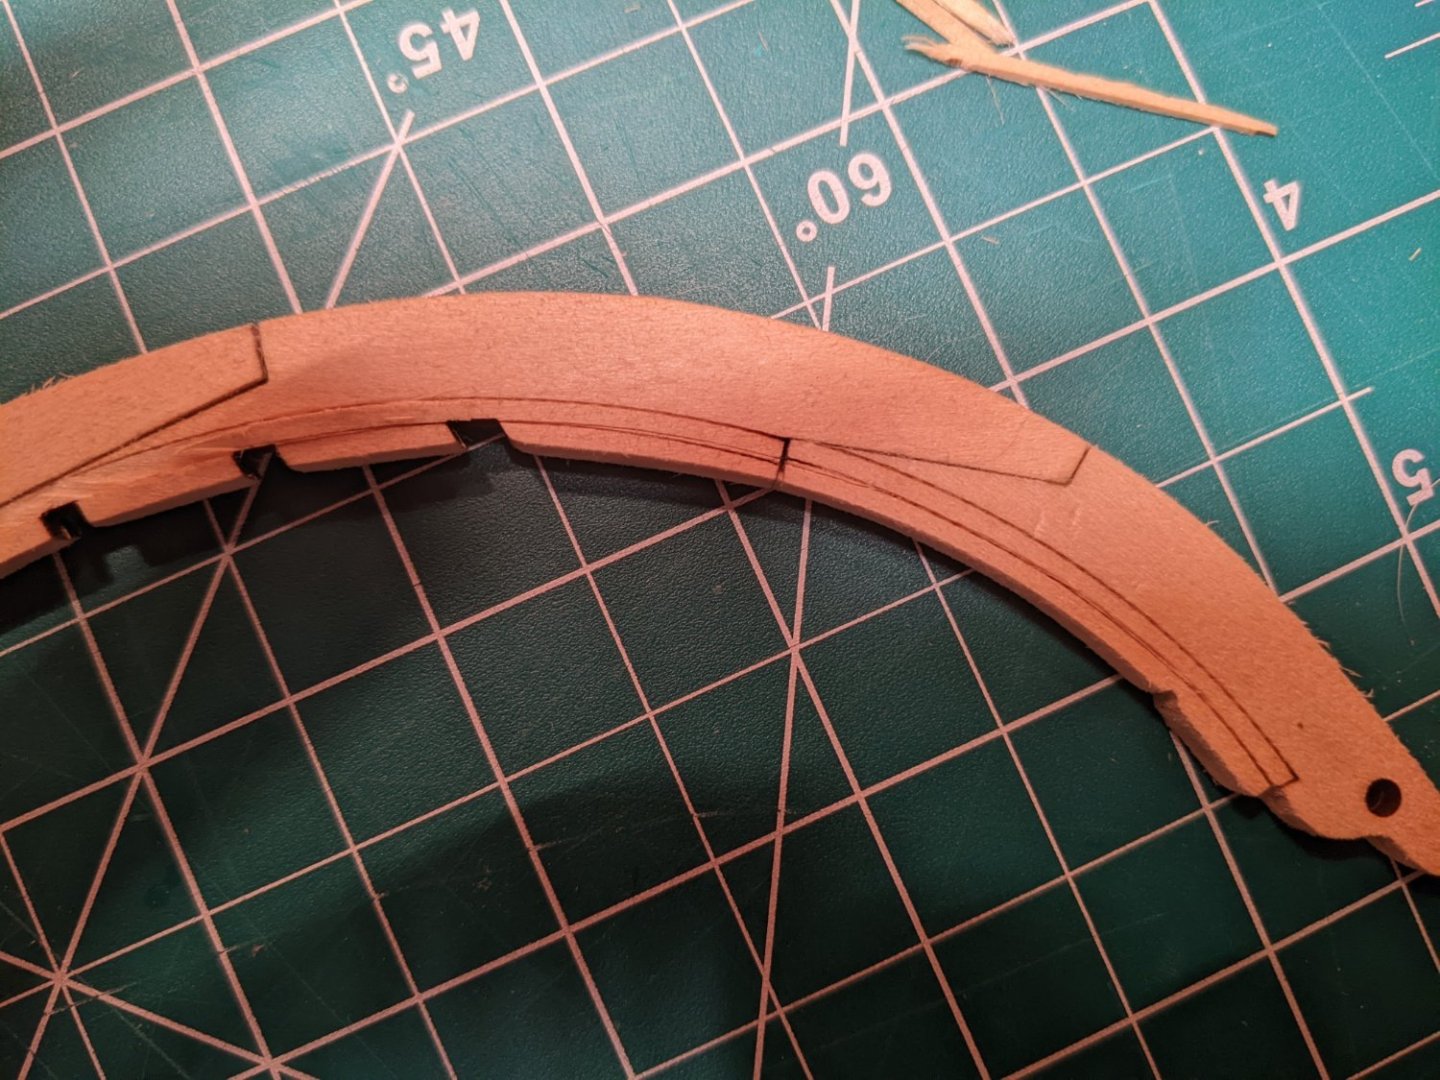
So......i added splinter planks and smoothed out the hull. May or may not have filled in some gaps with some woody substance. And freed the hull from the molds. It came off nicely. I had made a frame for the hull while it was on the mold to prevent it from spreading much and started using these now. It's not pretty but it works. The splinter planks fit well but I can see now on the inner hull where I got a little careless with some of the planking. I'll have to take more care next time. There's not as much excess glue inside the hull as I expected and I cleared that away before fitting the half frames. I'm really glad I bent a second set of frames with the first set! Wait....what? I have to bend more of these cherry strips for the bow?? I thought I was done with that!! Fortunately, I have a technique now and these went.... okay with minimal cursing. Next, the sheer clamps. I then realized that I had 2 pieces of 3/32 x 3/16 strips; one being much longer than I need and one a bit too short. Tip: when making the molds, make sure you save two 36cm lengths of 3/32 × 3/16 for the sheer clamps. Tip 2: end the sheer clamps about 1cm short of the stem to leave room for the belay pins that come later. The plans say to do this but the instructions take the sheer clamp all the way to the stem. I cut off the ends of the frames with my cheapo Amazon rotary tool (which seems to work just fine for now, thank you) And glued in the thwart risers and winch keepers. No issues here. Same with the mainmast step. Easy! After fitting the fore thwart and bow grate, they ended up a little forward than maybe intended. Which meant that the foremast step ended up 3 or 4 mm than in the plans. Hoping this doesn't matter later. I'm getting ready to put in the floorboards now. I'd read in another build log that it's wise to place some spacers under the fore ends of the floorboards to help them follow the contour of the hull and I'll be doing that. Thanks to whoever that was! One thing that bothers me is the frames. The plans seem to show the frames flush with the keel. But mine, especially the full frames, extend a mm or so higher than the keel. i *think* it should be fine? I'm gonna sleep on it.

-
You're right, that would have been the best plan. I don't have spare lumber but might have been able to find enough wood in the scraps from the laser cut pieces. I'll probably do that next time. That said, the splinter planks fit nicely and there's worse transgressions in the planking made obvious once I freed it from the mold. The next one'll be better!
-
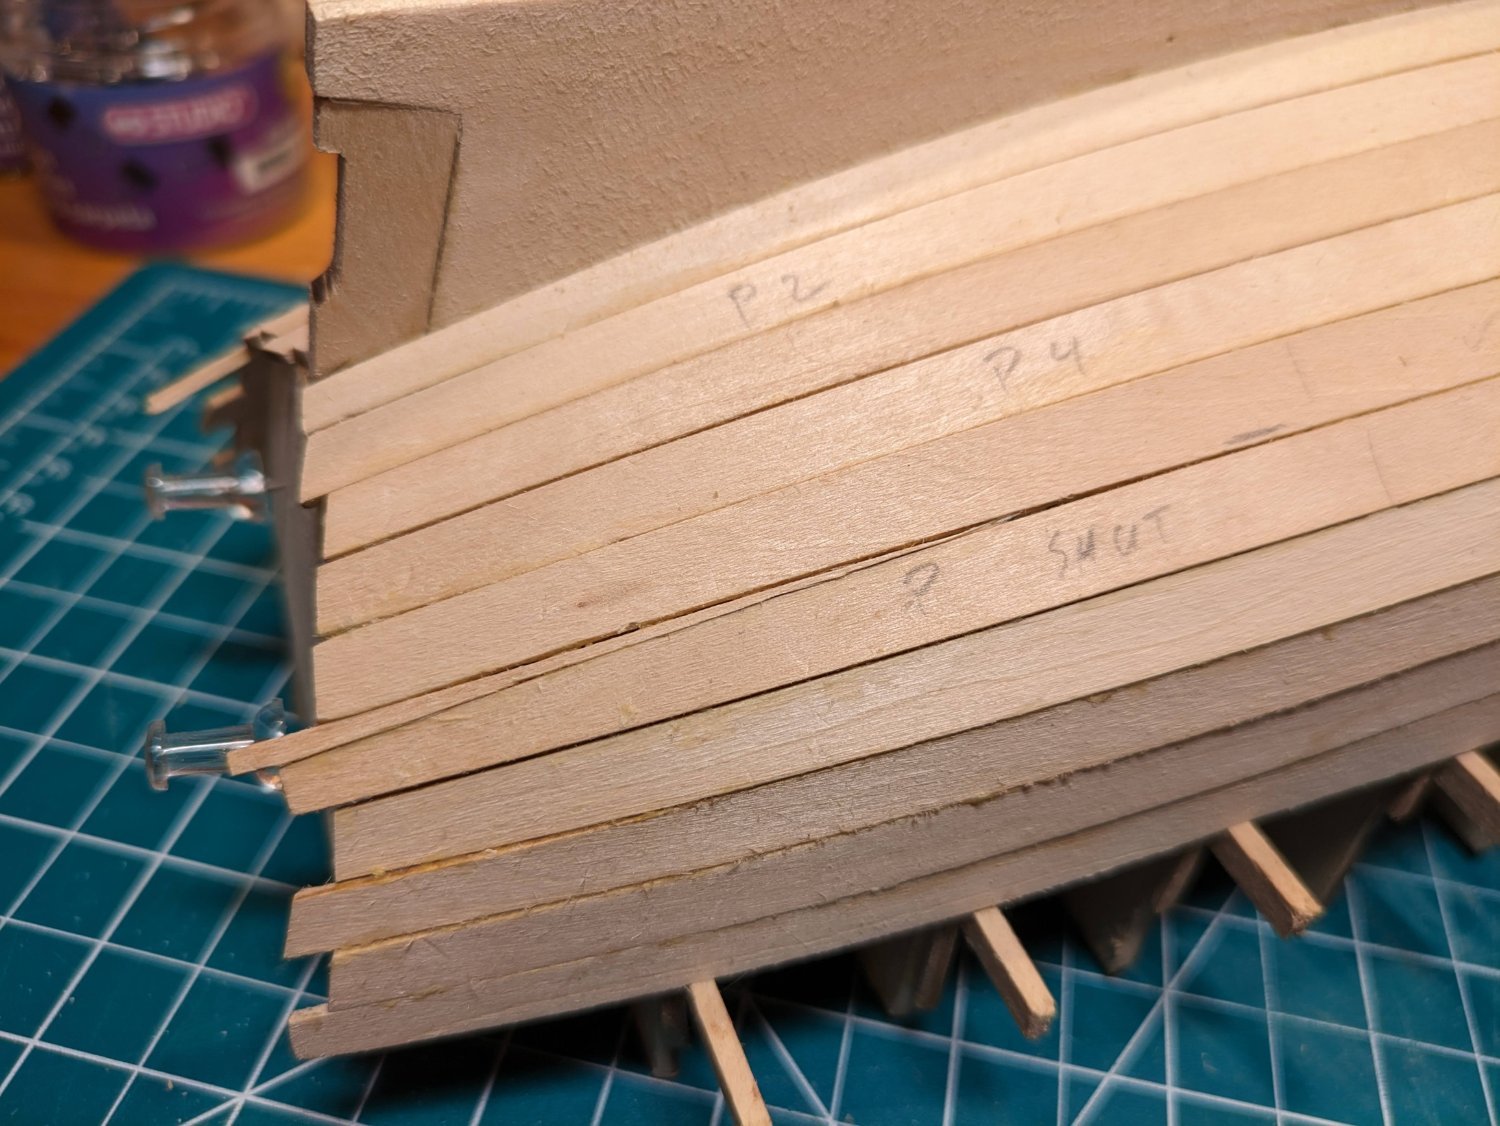
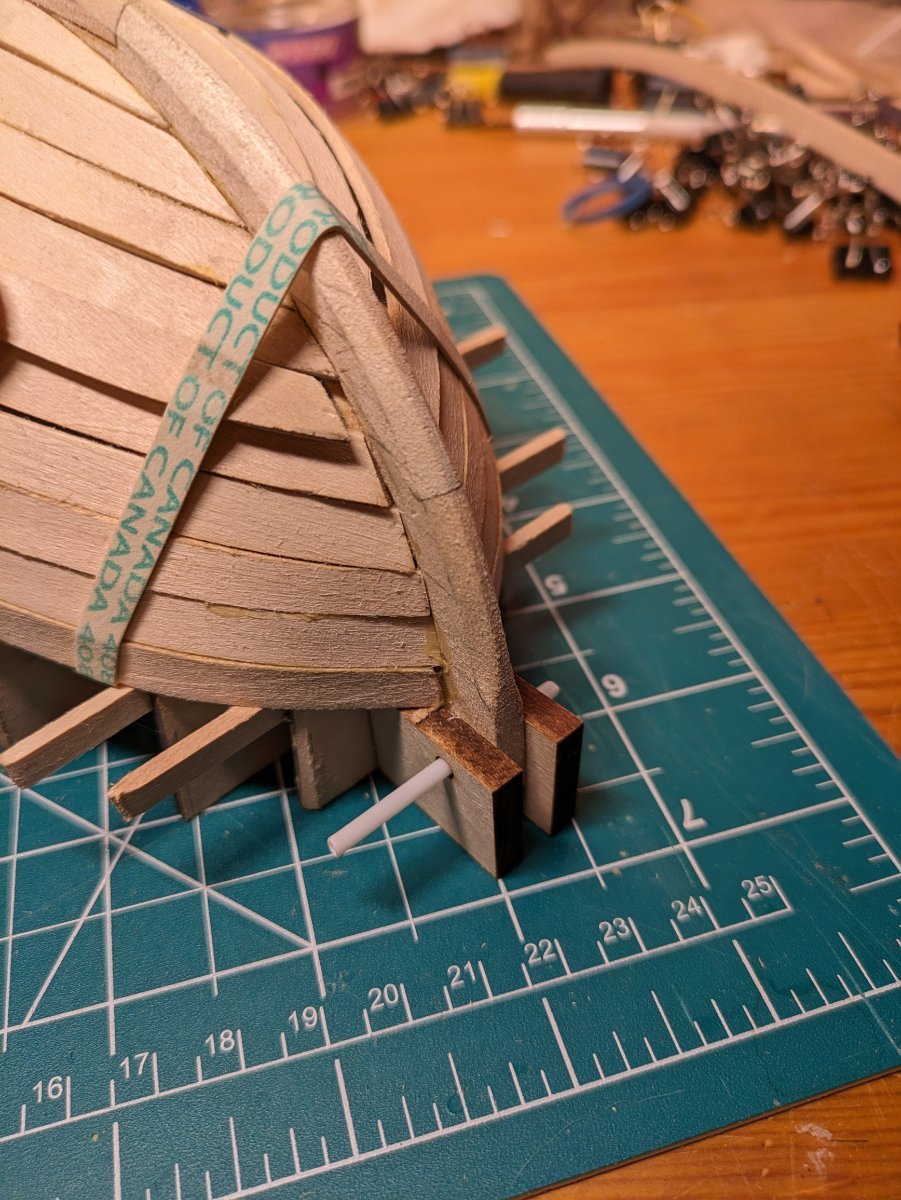
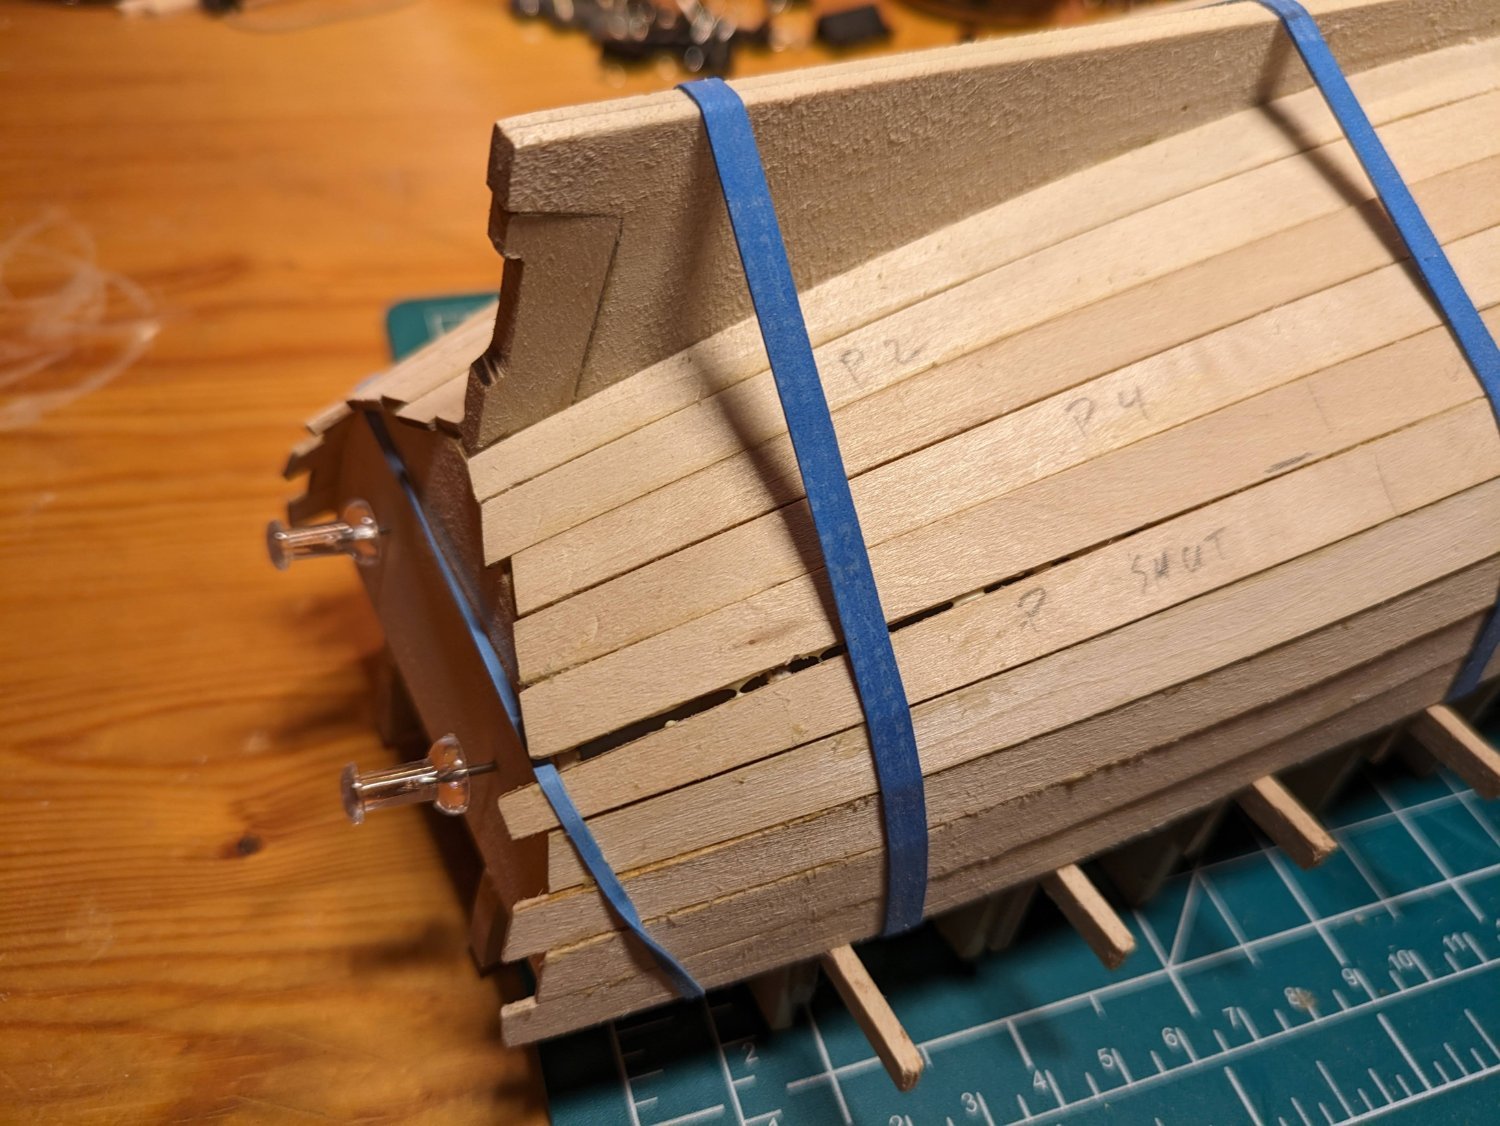
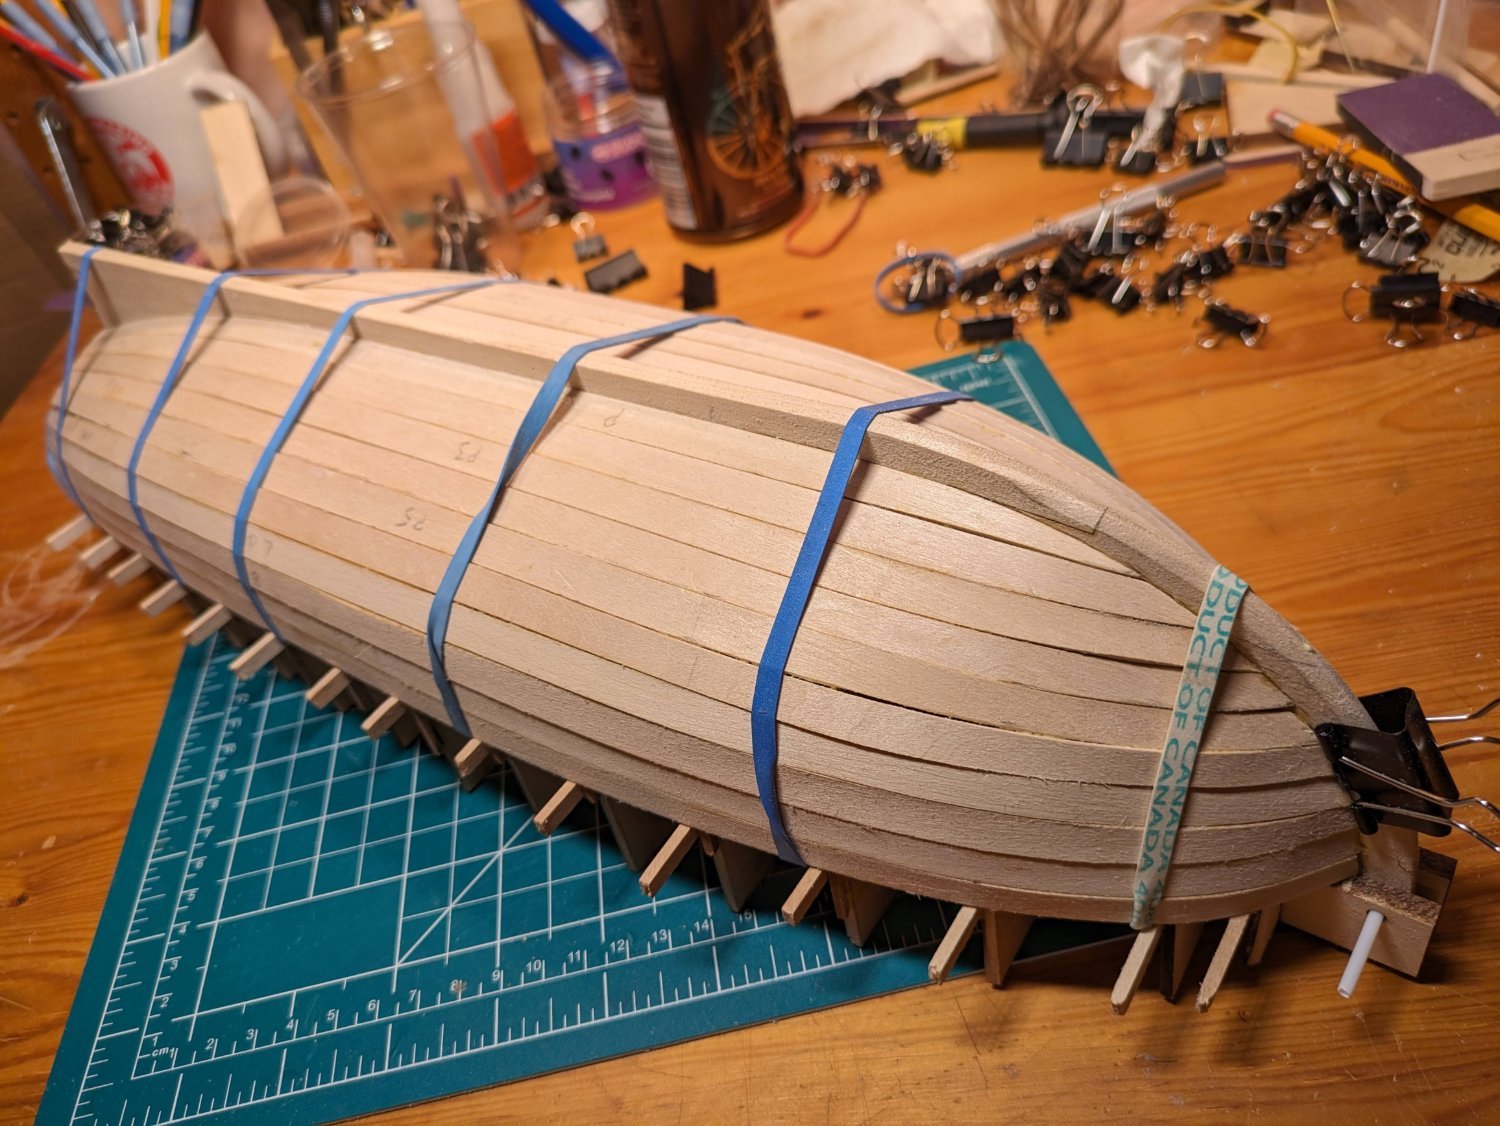
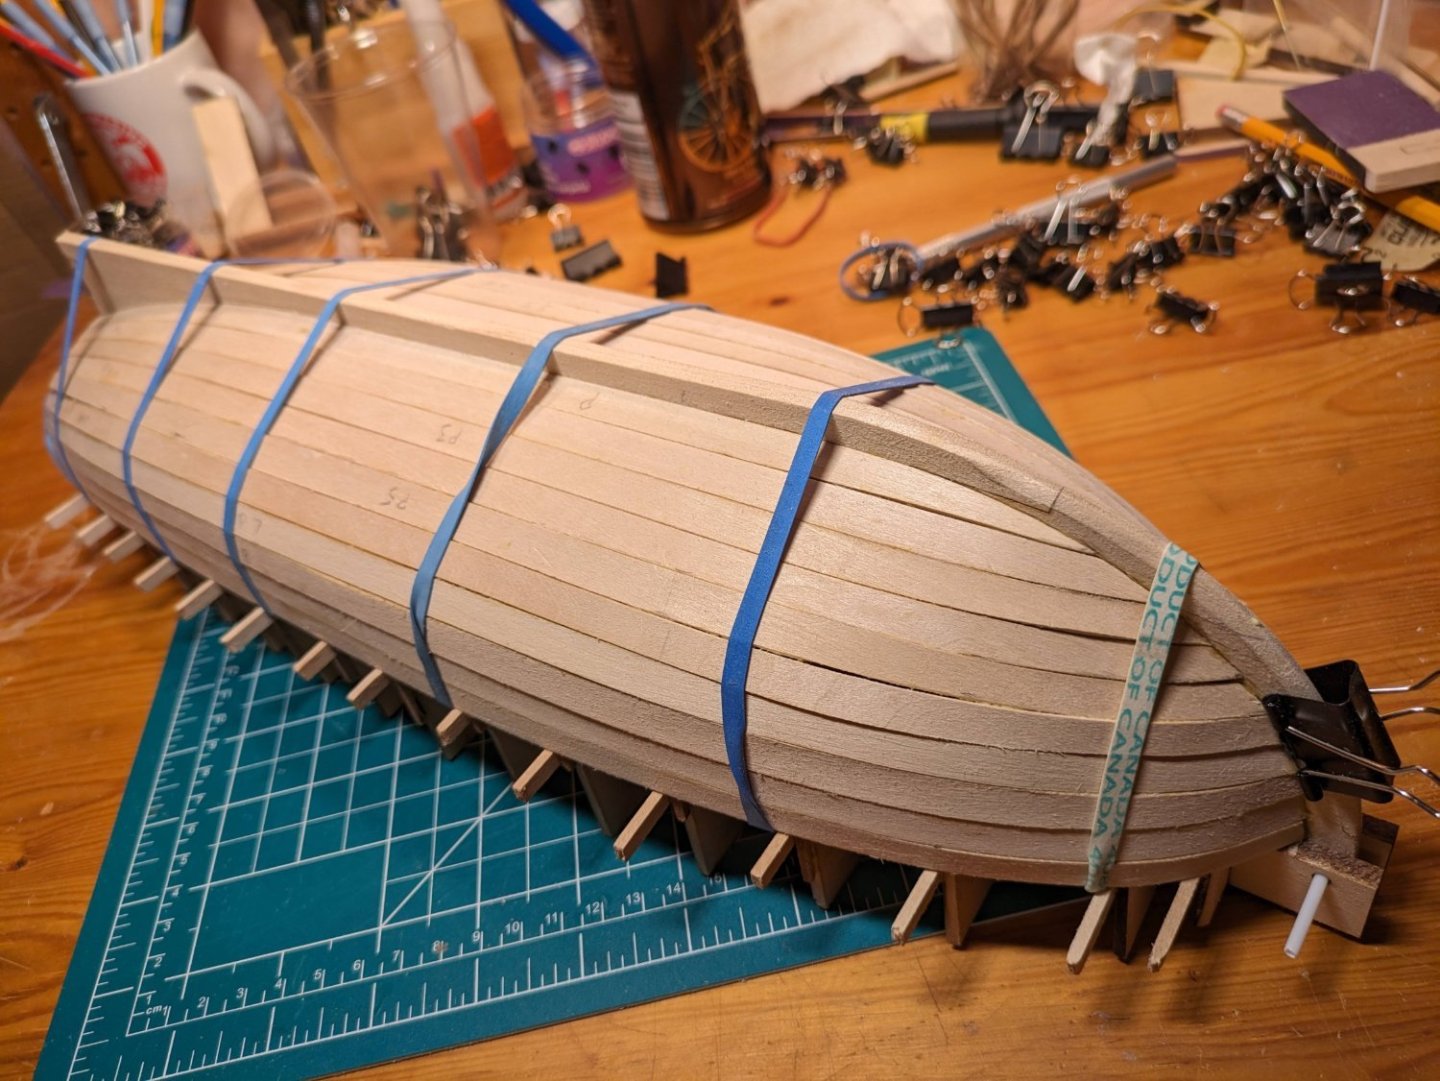
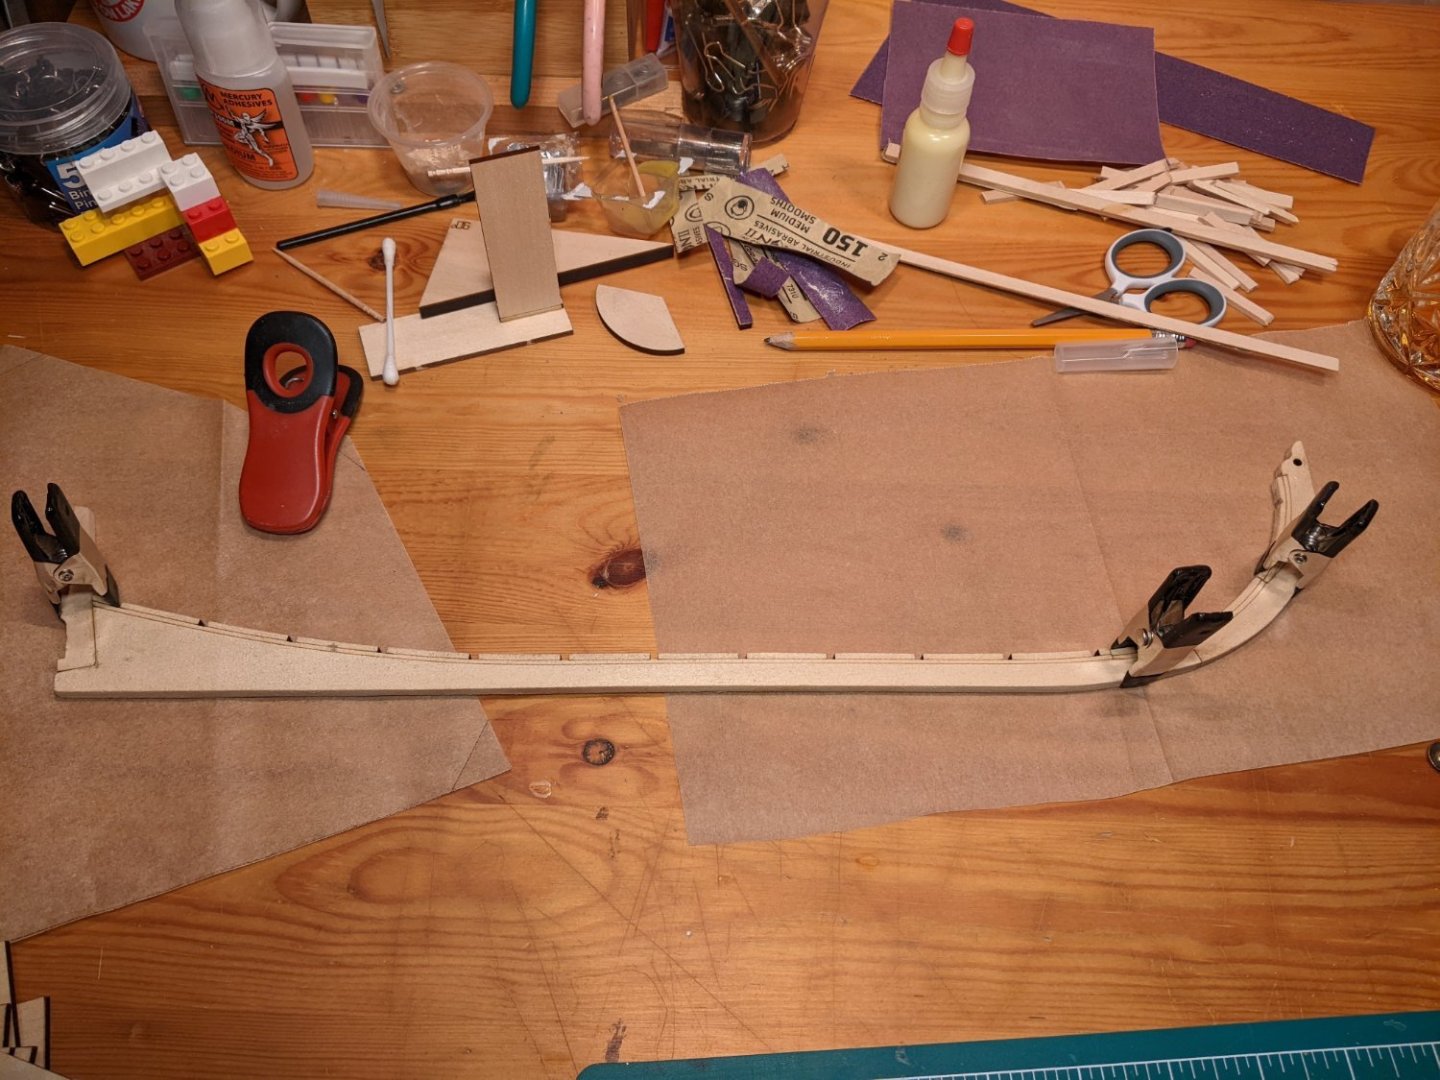
I finished the planking today. Feels good, man! I didn't have a lot of problems but found that I needed to trim the bow end of planks 4 and 5 to align with the guide marks on the mold and on the stem. I wish I'd started narrowing with plank 3 but not a big deal. I bent plank 5 and the shutter plank before gluing either so I could see the fit. Glad I did! I shaved a bit off of both, mainly at the bow end, and glued them in. I ended up with a kinda significant gap at the stern end of the planks. I think I'll attempt some shims to fill in those gaps before pulling out my trusty wood filler. Overall, it seems to have gone okay. I would have liked the planks to lay a little flatter (it looks better in the pics than it is in real life - kinda like Instagram, i guess) but I'll do better next time. Always learning! Until next time, guys!


-
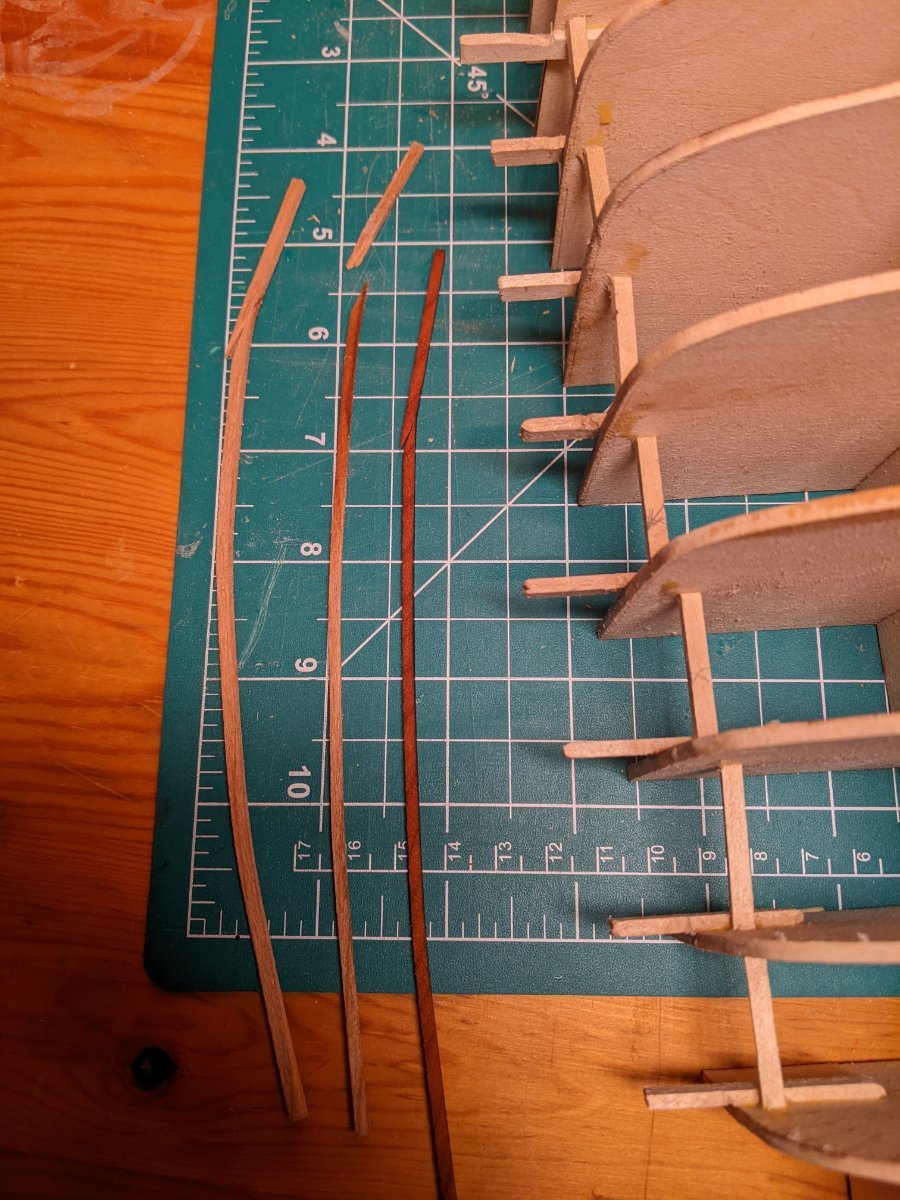
It feels great to be done the frames, Craig! I faired the frames and, while most were fine, there were a couple of high spots and wonky twists. I'll also be building a frame to control the spread. Great tip! Bent the garboards and sheer planks tonight. The bottom planks are a bit thicker than what I'm used to but bent just fine after a soak. So far they line up with the marks nicely. Not much extra length, though. Zero extra on the garboards but ~8mm on the sheer planks? Whatever, I'm goin' for it. I also started the tool chest while waiting. Pro-tip: the interior of the chest is exactly one Lego block wide! I want to believe that was intentional.
-
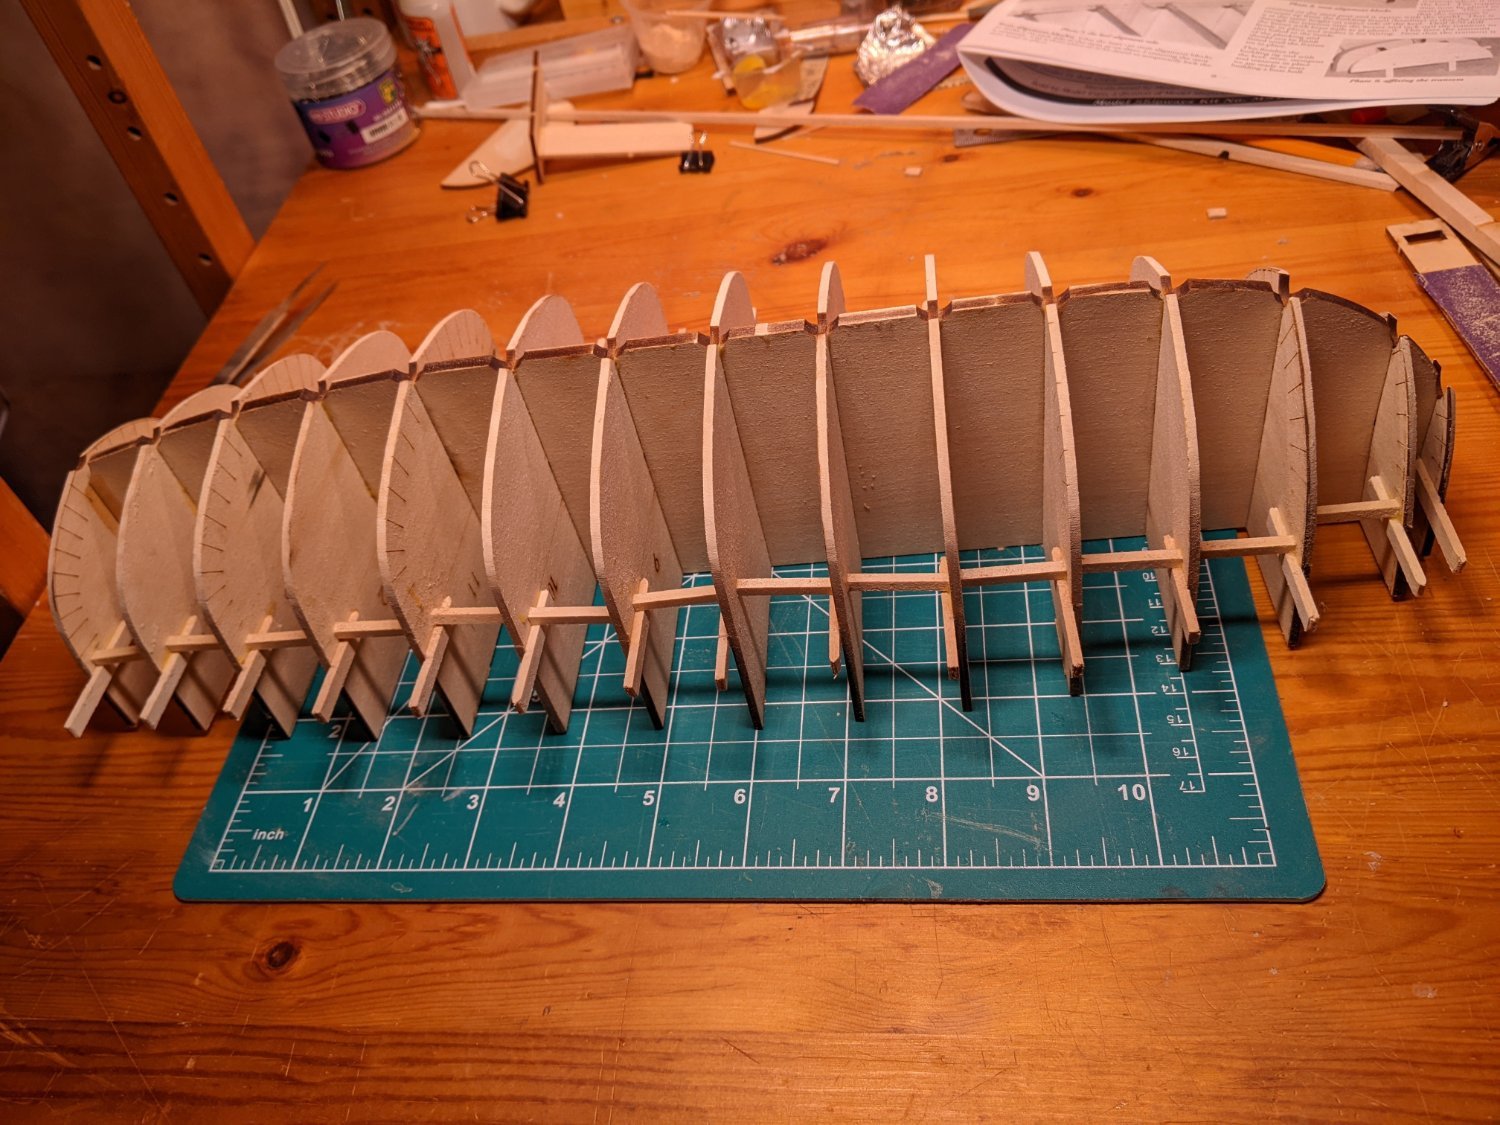
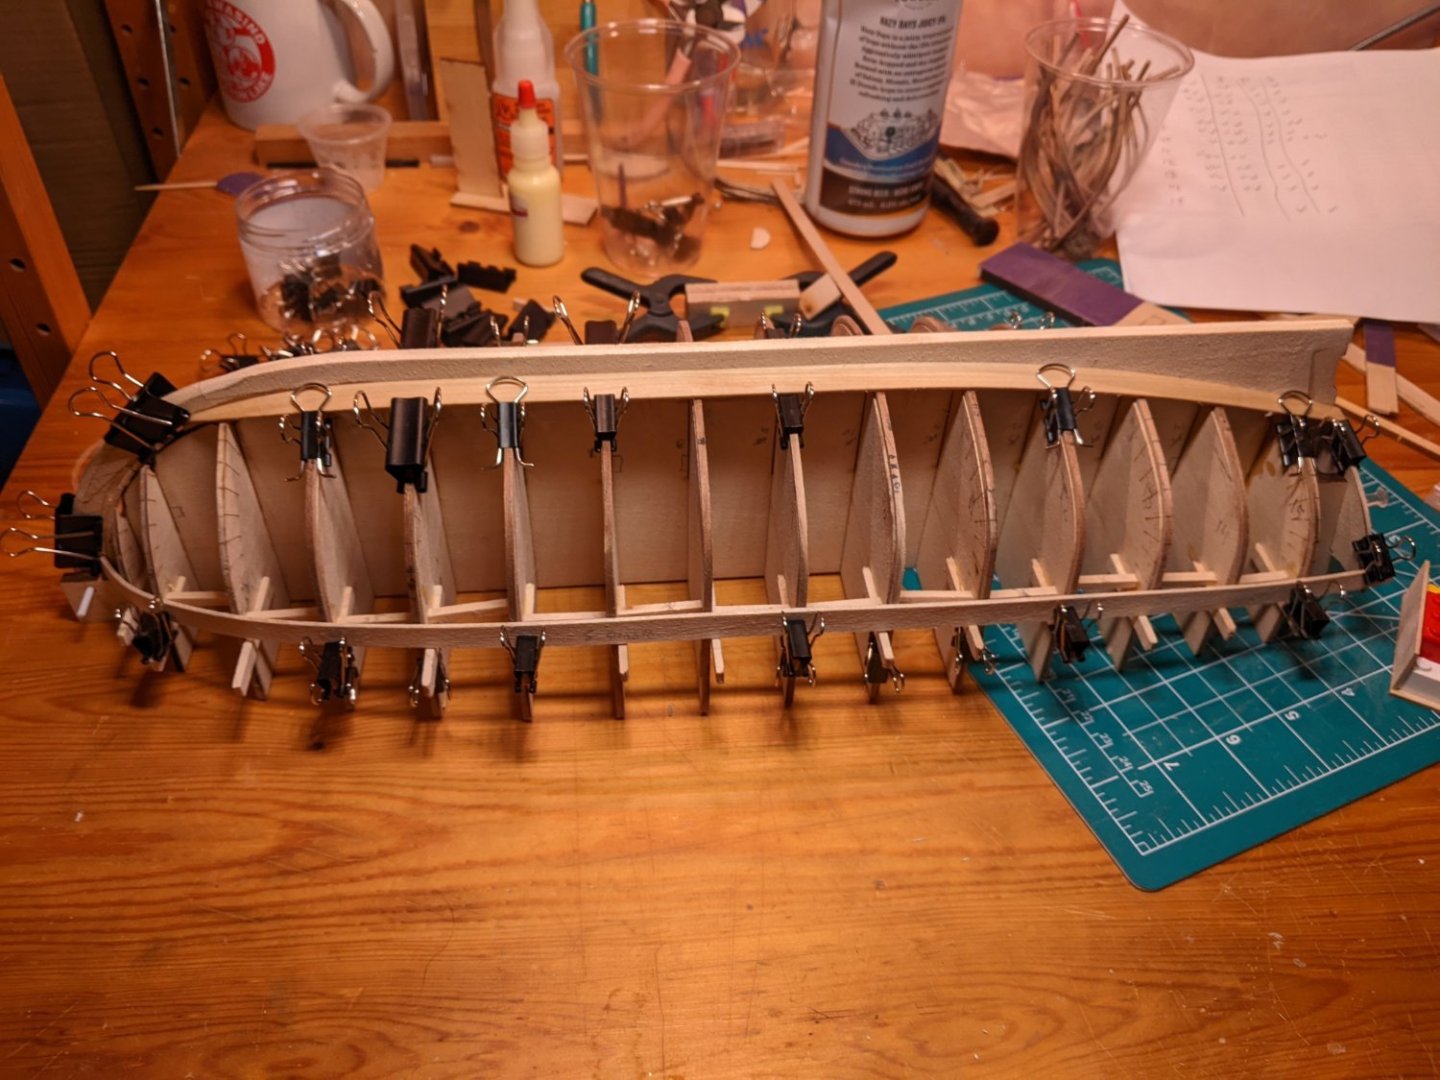
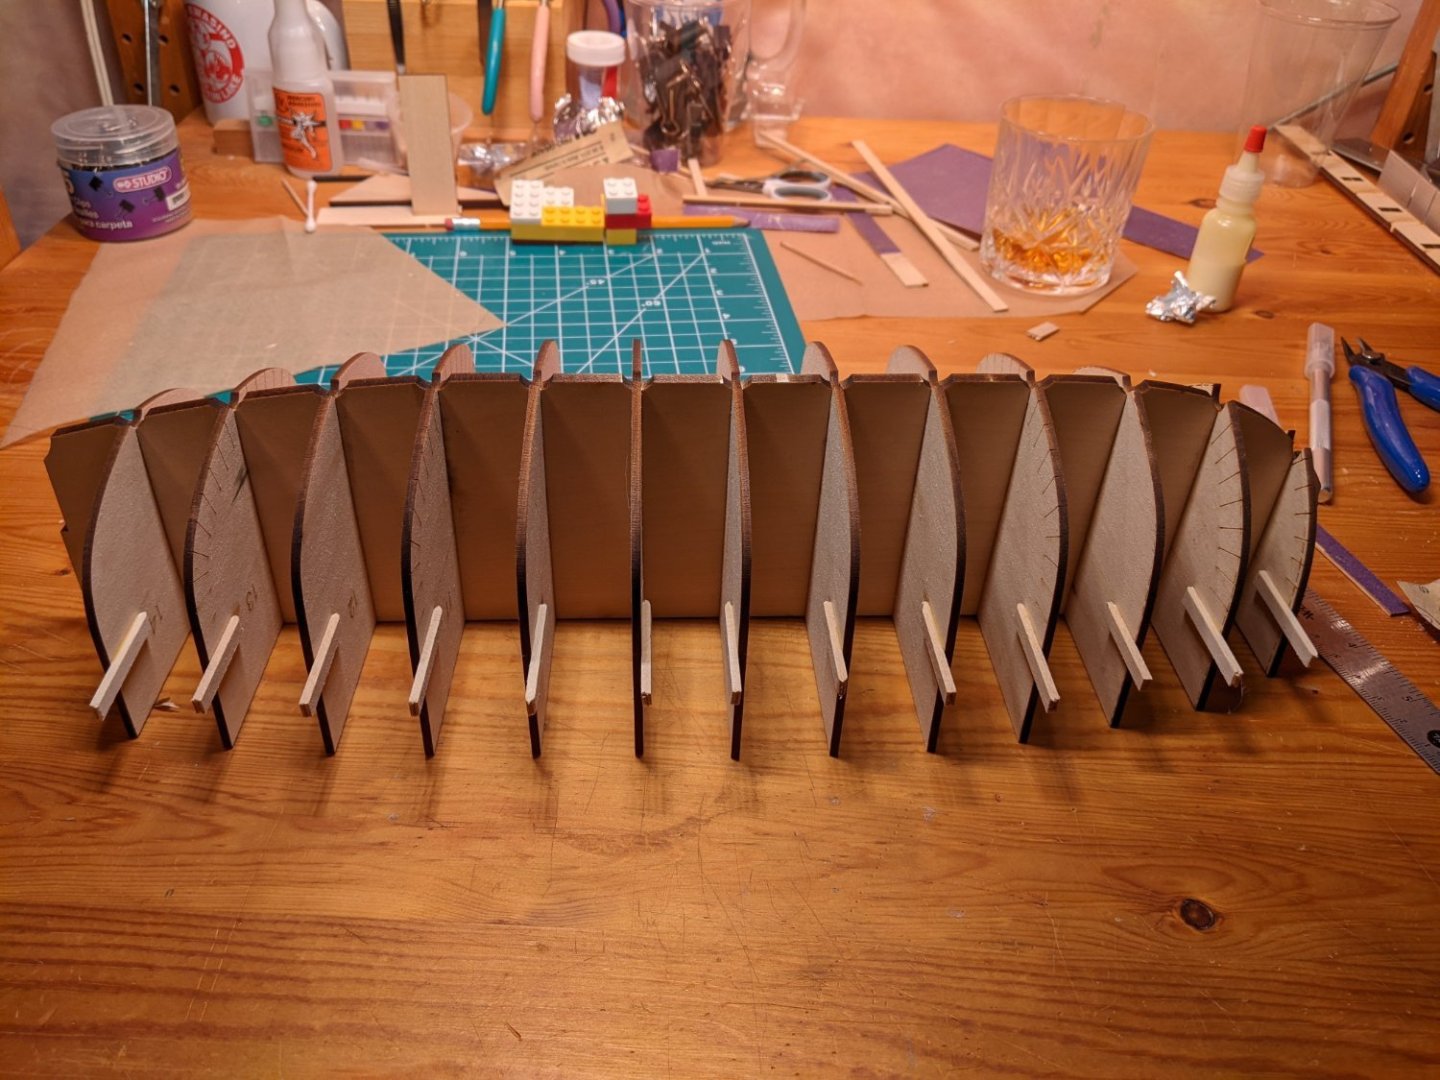
Okay, then. I finally finished the frames. The magic formula for me was simmering the cherry pieces for maybe 30 minutes then shaping the harder bends with a curling iron. I still snapped a couple (~20%, n=12) but far fewer than before and I was able to work more quickly. Once dried, I was a little concerned by the spring-back of several frames but hopefully this won't result in too much spread later on. I've definitely found the frames a little frustrating and it had me procrastinating but hopefully we're past that now. As always, I've learnt plenty. I tacked the frames, squared and faired the transom, and touched up the first 3 molds. Remember that I faired these by eye before doing the frames. It would have been best to have waited but it turned out okay, I think. Planking will tell prove me right or wrong. Looking forward to planking!

-
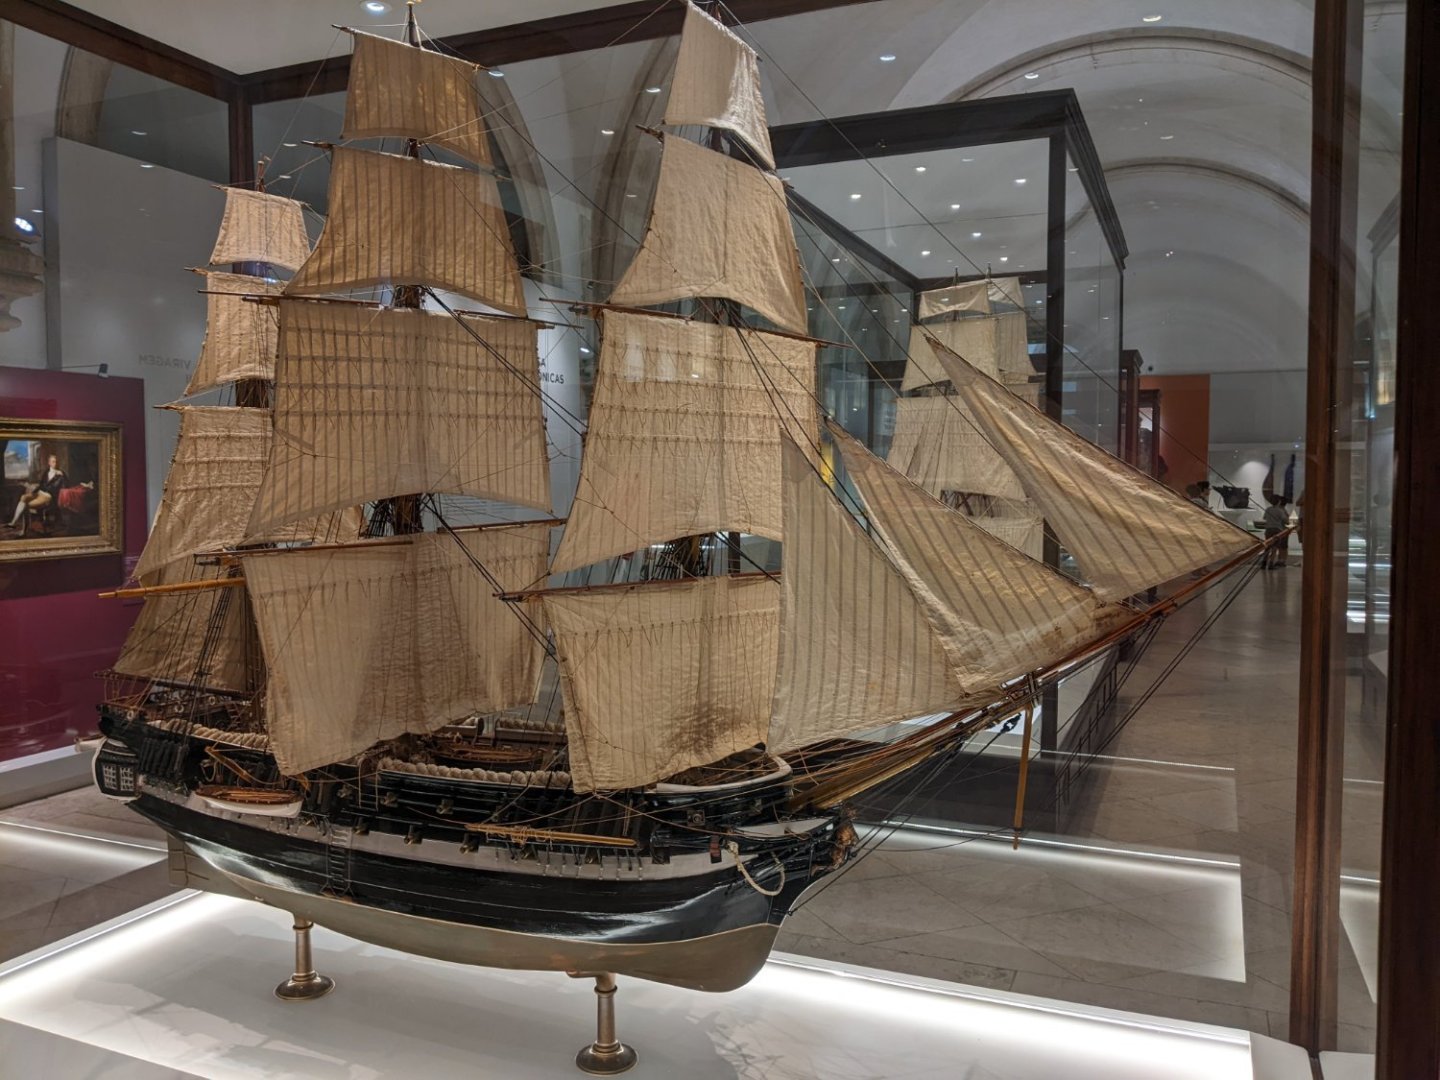
Thanks for the advice and encouragement, Craig. I realized tonight that I missed working on the model but was procrastinating. Just need to get past these frames. So, on with it. I boiled them 40 minutes (!) then started bending and clamping. I'm trying to do full frames, port and starboard, and it seems to be a good approach. For the points where the angle at the keel was more acute, I notched the frame at the center line. Over all, I can't say it wasn't a little frustrating. After successfully bending 2 frames while snapping 6, I started accepting applications from half frames and left the snapped lengths on the mold. I managed to bend on the 12 full frames but snapped 5 of them. I think you're tight, Craig. The grain may be working against me. (There's a pun in there somewhere) 90 degree rotation doesn't help. I'll let these dry and work on the rest soon. Then I guess we'll see where we are. May be pulling out the super glue soon. On a more positive note, I had the opportunity to visit the Maritime Museum in Lisbon recently. Wow! I had limited time but could have spent most of the day there. I was especially impressed by the large models ships originally made as teaching aids for the naval academy. These beautiful 8 ft (?) models were historically accurate, I assume, and demonstrated functions like raising spars or prepping or raising anchors - things I hadn't thought much about before. It made me realize how incredibly complex these vessels were. Anyone reading this forum needs to visit if they're in the area. Highly recommended. Just amazing.
-
I said the same in another post but i echo the advice of @cpddet. The modelshipways shipwright series, in order, were invaluable to me.
-
Thanks for the encouragement, Allan and Tim. Allan, I've bookmarked both those builds. Good reads! And, Tim, l'll look through yours and still take what what i can from it. Thanks! Okay, I'm back from my travels, etc and thought I'd take a stab at some of the dreaded frames. Boiled several of the cursed cherry strips for 5+ minutes and let the evil things soak about 15 minutes more. I snapped the first one. I tried another trying to choose the best grain direction and going very slowly. I snapped that one. I swear i heard it chuckle. So I let the things soak in the hot water for another hour and tried again, noting the grain and going slow, trying to feel for that 'give'. Snapped it. 0 for 3!!! I can take a hint, however subtle, so I'm taking another break to read logs and have a think on it. Boil longer? Steam? Overnight soak? One week soak? Dash of ammonia? Man, I don't know....

-
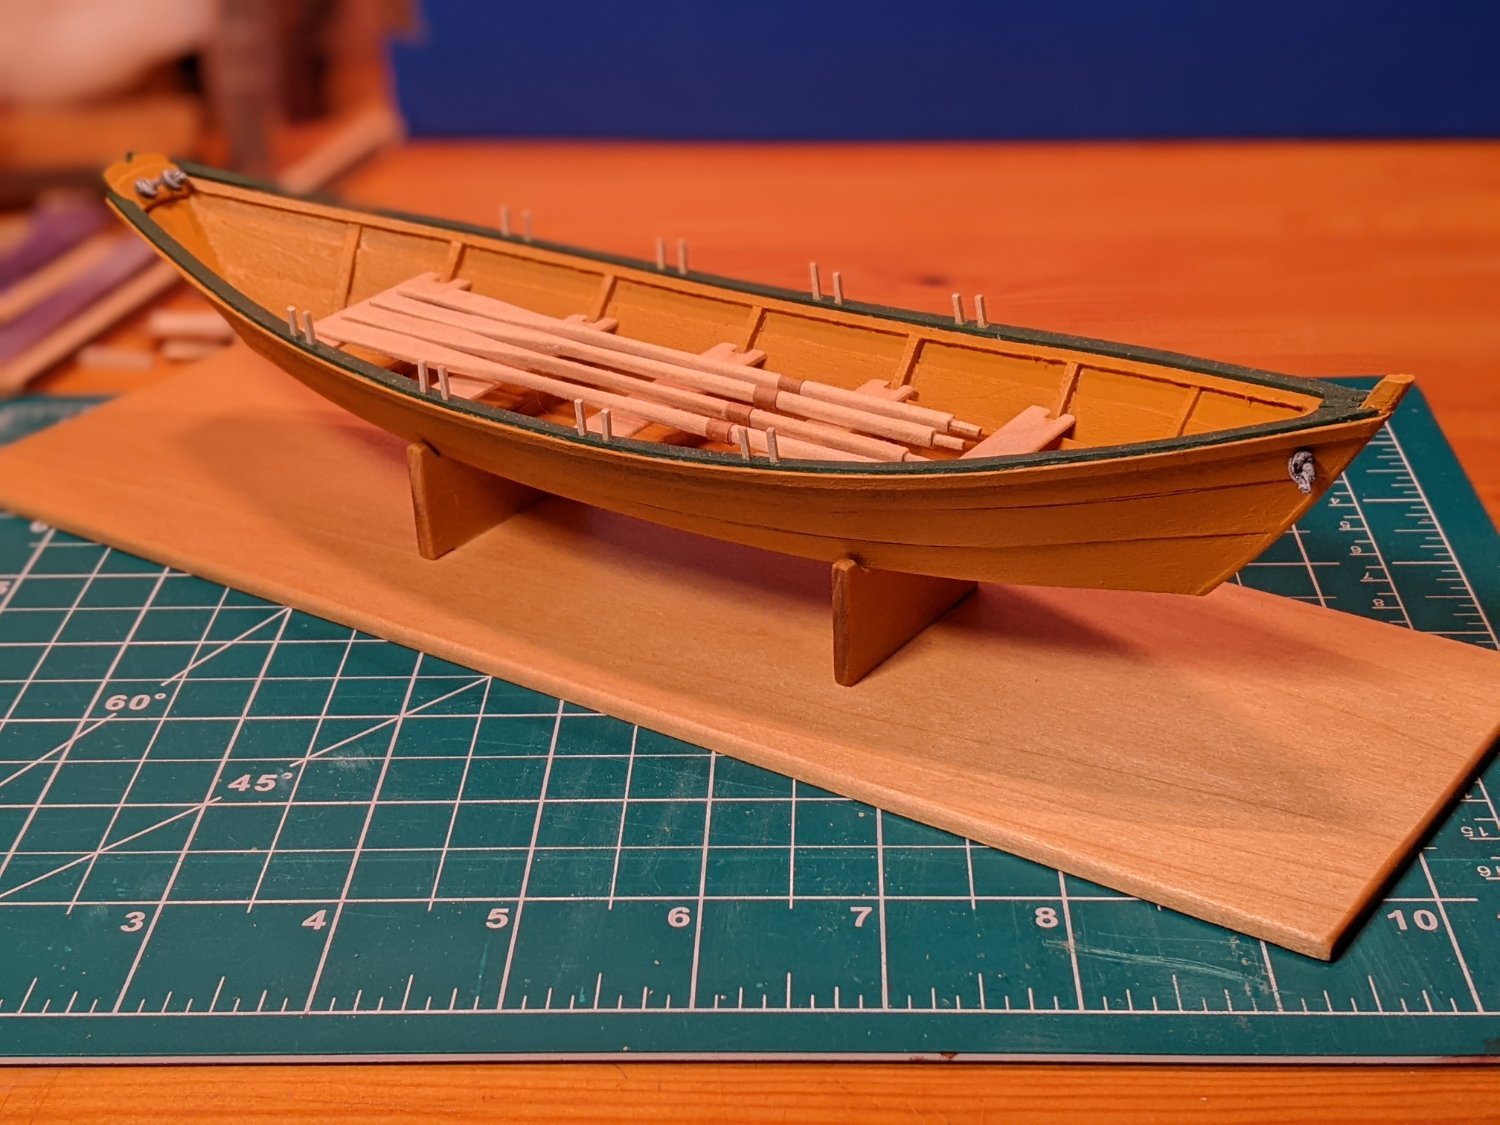
Hi Winter, Thanks! The 2nd and 3rd pics in my first post are the Lobster Smack. It was a lot of fun and my favorite so far. There were a few challenges, some due to slight flaws in the kit or the instructions and some due to new skills or techniques I hadn't needed before. One example of many would be that the rigging is more complicated than in my 2 previous models. My eye splices looked *terrible* using the technique in the instructions (all respect to David Antscherl) but, after much youtubing, I found a Tom Lauria video with a technique that worked way, way better for me. I'd strongly suggest, if you're new to this, starting with the Lowell grand banks Dory and/or the Norwegian sailing pram. Honestly, they didn’t seem too exciting to me at first but, being a cautious fellow who occasionally recognizes when he doesn't know cjack, I decided to start slow and was glad I did. And both turned out to be great starter models, excellent learning experiences and a lot of fun. I would have messed up the lobster smack (much more than I did) otherwise.There's several build logs for both. Good luck and, if you decide to build any of these models and have questions, message me and I'll try to help.
-
I have faired them but to a height where I expect them to line up with the frames. I realized I was jumping ahead and did not fair the transom yet. I'll take more exact measurements and follow this advice. Thanks! And your comments about bending the frames seems to include all of the best ideas I've come across so far and more. I'll likely follow all of this advice as well. Thanks again!
-
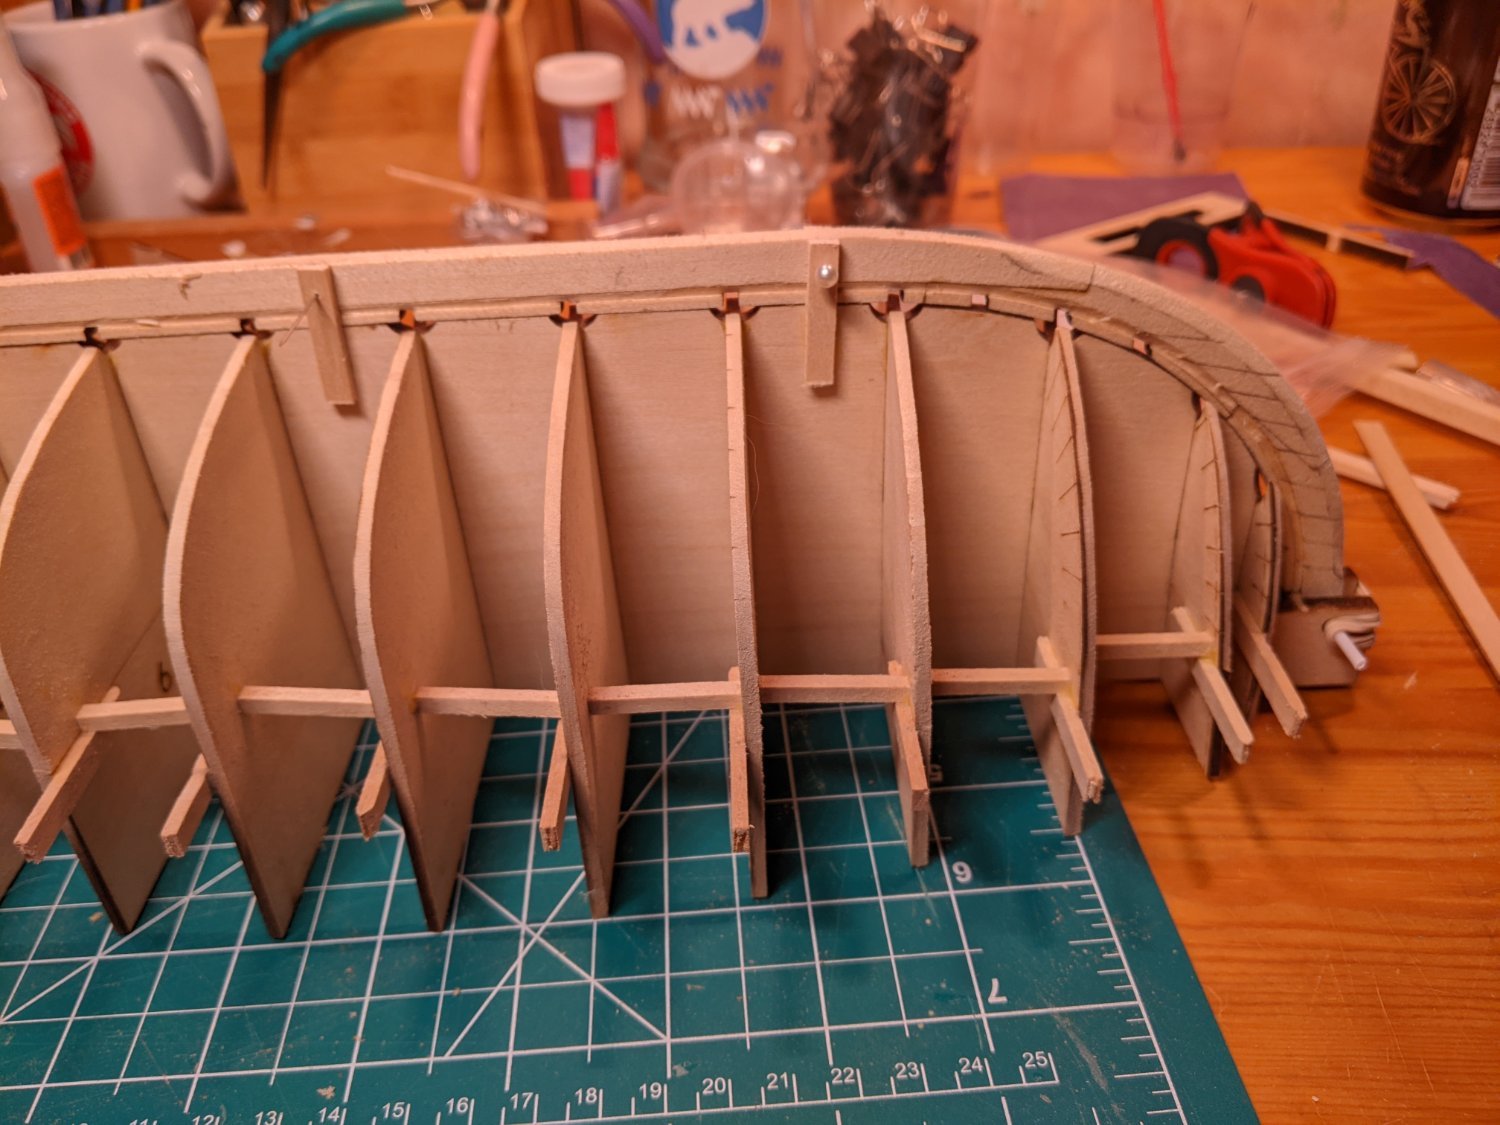
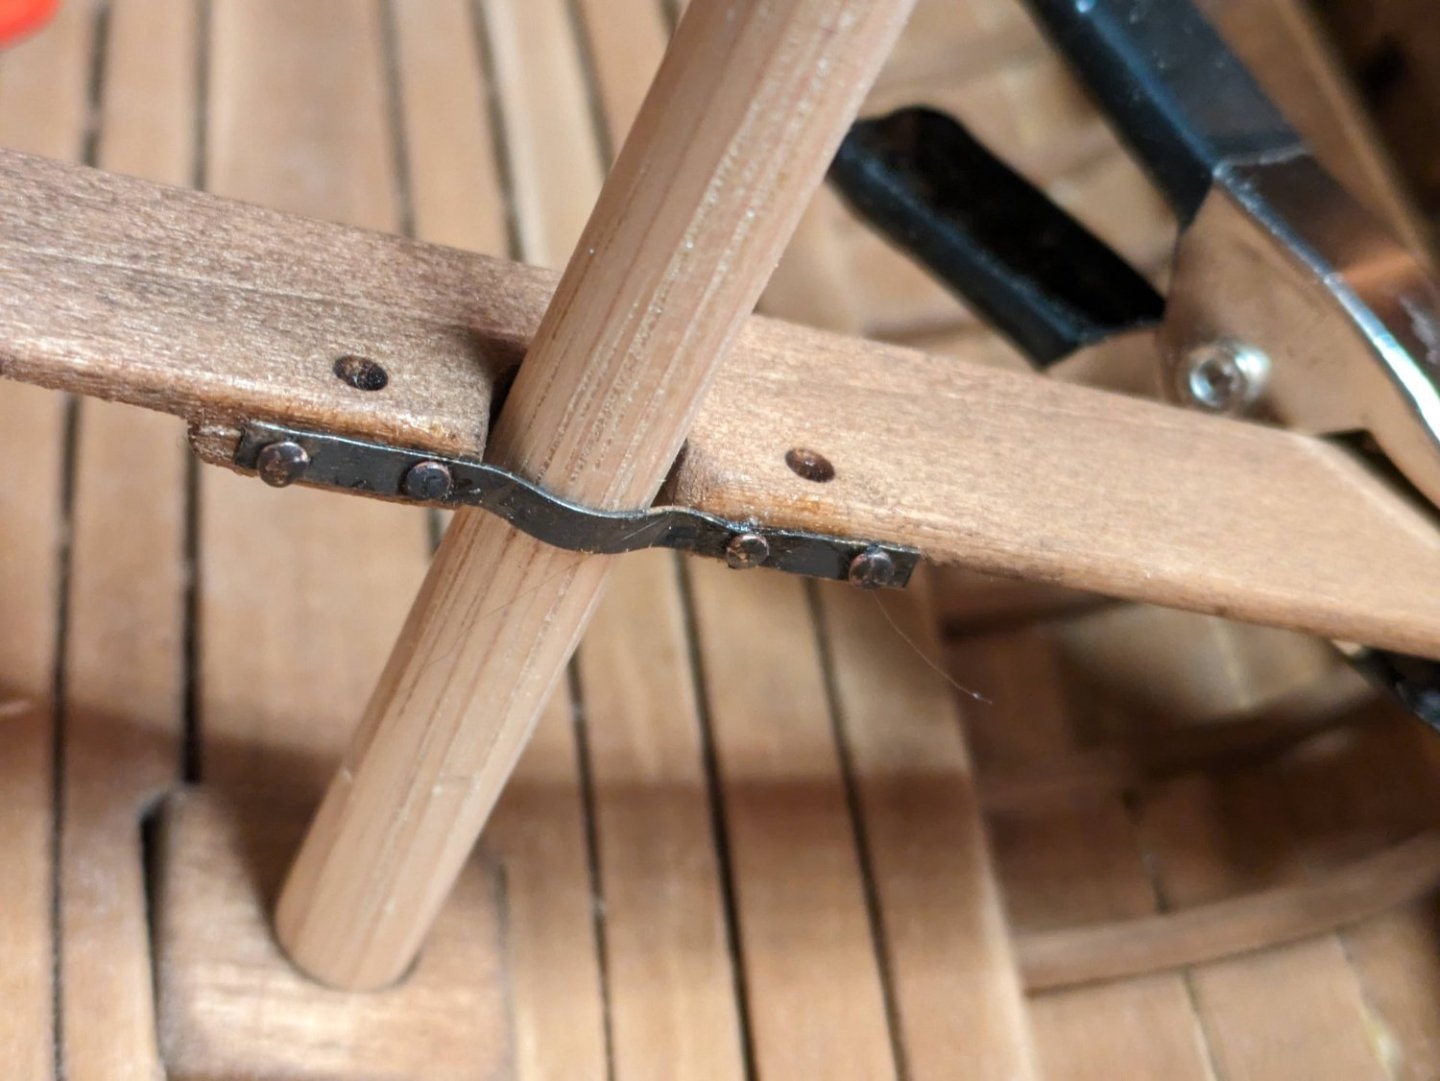
I managed to make a little progress but be prepared for some spurts and pauses. I took your advice, Craig, and marked ~1/2 mm around the molds before installing these. By the way, I read through your Bounty log and I'm a little awed. That's a whole different level of building and very impressive! I decided to add shims and raise the molds that seemed a little low. Later, it occured to me that the spring in the frames probably means this wasn't necessary. Time will tell if this was a mistake, a harmless waste of time or a moment of inspired foresight. I do wish I'd added the sheer tabs after building the frame. When adding the stiffeners, i was a little worried they were slightly too long and there was a bit warping of the end molds (1-2mm max) but I decided this was acceptable. Thoughts? It's not too late to fix this. Next, on to fairing and trying to remove as much of that 0.5mm as my patience allows. So...much...sawdust. It really tests a man's grit. I copied the plank lines onto the stem and installed the keel - it seemed to fit fine. Don't make fun of the size of my cutting mat, please. I clicked the wrong button on Amazon and I'm living with my mistake for now. Next, installed the transom, taking the advice from other logs and taking extra care that it's square 'with the world'. The stern post is indented and doesn't line up with the end of the keel and transom. Fortunately, the keel and transom seem to line up to each other and I'll fill the gap with either thin wood strips or my favorite wood filler. How do you like my picture insertions, by the way? Told ya I'd figure it out! For the giant TRANSOM on the transom, since I'm painting the outside, I thought that I'd try a little concealer. A Iight sanding over the offensive word, mash in some wood filler, let it dry thoroughly, then a final light sanding. I think my Aunt Dorothy, bless her soul, used the same technique. It seems to look fine and, hopefully, a coat of paint will remove all signs of its existence. There's a few dots from the burn on the inside but, hopefully, that won't be a huge problem. Next up would be the dreaded bending of the cherry frames. I'm going to do a bit more reading of logs and introspection before starting these. I may buy one of those soldering iron benders that a lot of you seem to have. I also have an unusual amount of time away from home in the next month so I'm not sure how much further I'll get for a few weeks. Thanks for reading!


-
Thanks for the detailed reply, @iMustBeCrazy! I'd read some of the build logs before starting but see I have a bit more reading to do. The history link is great info. Great discussion! I've decided to keep the keel as is but to shim the cross frames a touch higher to match the false keel. Worst case is I have a bit more sanding to do. And I have lots of sandpaper. The jury's still out on staining the interior...
-
Your grandson is very cute! I love that the sailor outfit his father wore was saved to be worn again by a new generation! I've been reading through your build of the Bounty Launch as I start mine. It been very helpful and I'll be following this build as well.
-
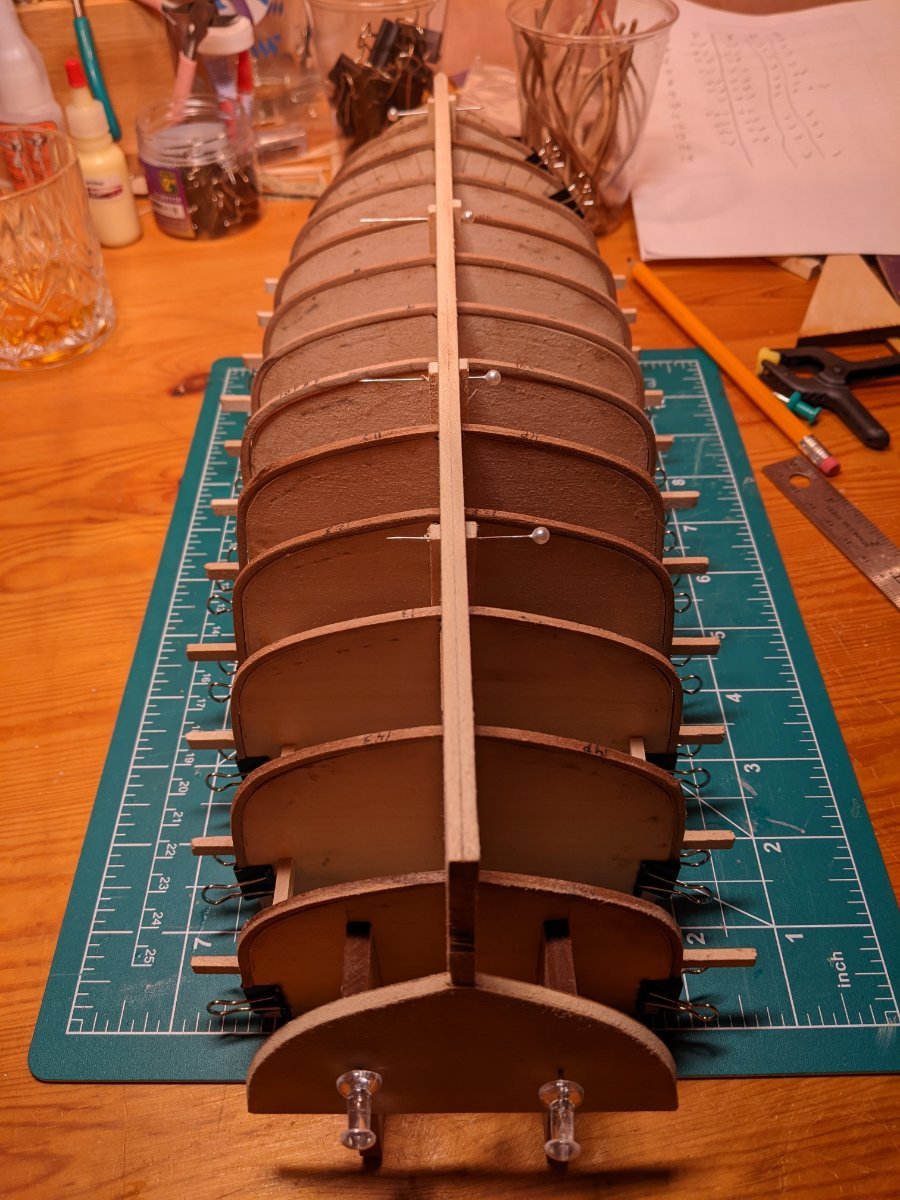
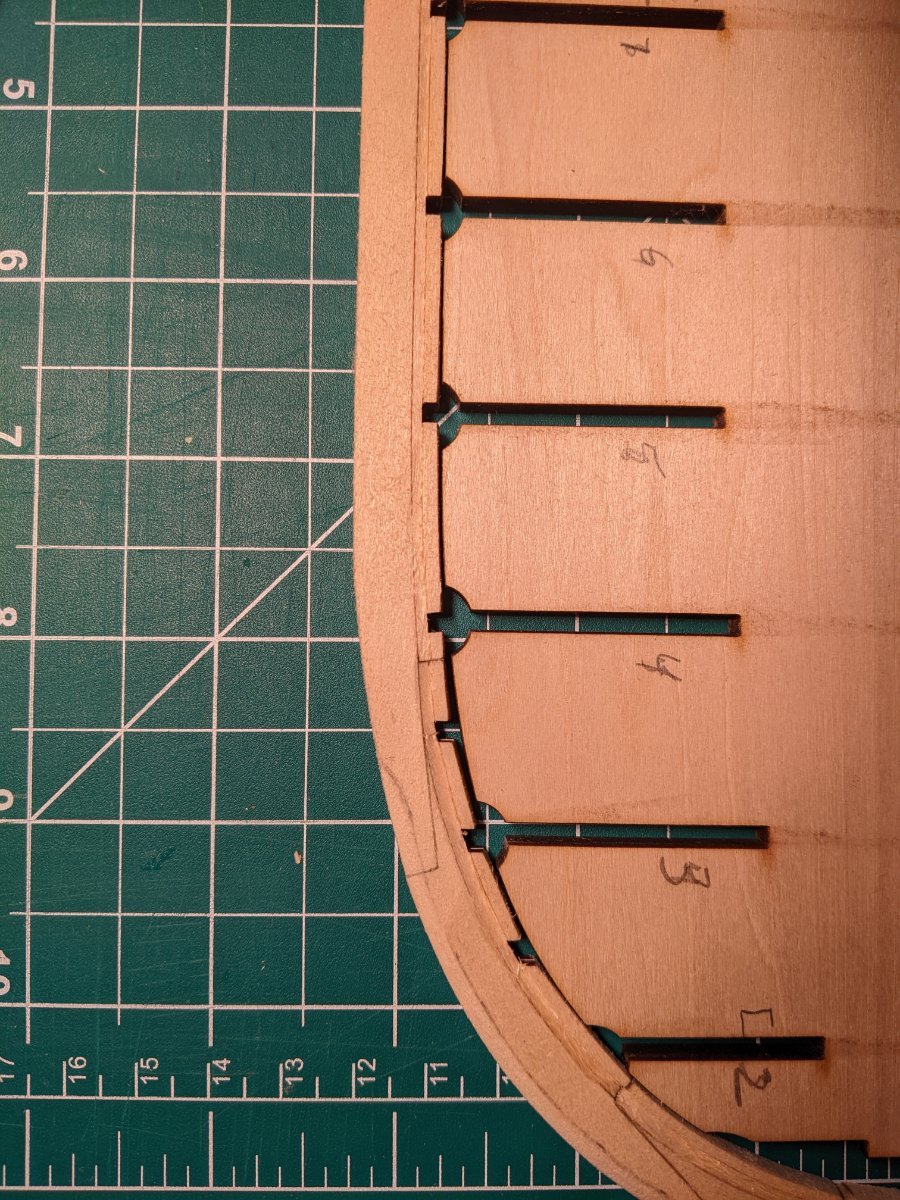
Also, notice in Pic 3 how the notch for frame doesn't line up with frame 3! This worries me....
-
I decided to post a build log for this model. I'm somewhat new to model ship building and modeling in general but I've completed three Model Shipways shipwright series with....okay results. The Dory, the Norwegian sailing pram and the lobster smack. What an awesome idea for newbies! I'm really glad I started with these models as I've learnt so many valuable skills (and made many educational mistakes). (Do they purposely make the models and instructions imperfect so we learn to overcome issues??) I was dreading the rigging on the lobster smack but found a couple of techniques on YouTube and came up with a couple of my own and I'm happier with the results. Still toying with redoing the halyards. Mods, please let me know if I'm not supposed to post my finished models here and l'll remove the pics. I was proud of each as I finished it. The Bounty Launch was a gift and, reading about it's history, I'm pretty interested! Amazing journey that I'll be reading more about. The kit is a bit different from what I'm used to. The instructions are more abbreviated and there are 4 GIANT pages of blueprints that have much useful information on them. After getting more familiar with the format, I love it! I've built the keel etc and am starting to build the molds. I have 3 concerns right off the bat: 1) they suggest staining the interior. Really? I thought staining was a recipe for blotchiness. I kinda count on paint to cover my mistakes. I'll have to decide if I'll stain or paint soon. 2) My keel does not perfectly match the false keel. See Pic. The gap isn't as pronounced on the other side due to the laser etching. I'm considering regluing the keel and stem despite the fact that I've cut the rabbit. Any opinions are apreciated! 3) Some of the molds don't seem to be tall enough near the stern. I'd expect them to be slightly higher than the false keel so that when they're shaped, the lower edge matches the line of the false keel. Should I glue these higher so that the low edge matches the line of the false keel? Okay, I apologize for the order of the pictures. I'll figure out how to post properly eventually!


-
Done. Thanks for your advice, Allan
-
But you can change it. Nice!
-
Oh man, i messed up my title. Hello everyone!