Frodo
-
Posts
53 -
Joined
-
Last visited
-
 Frodo reacted to a post in a topic:
Nordlandsbaaden by Paul Le Wol - FINISHED - Billing Boats - 1/20
Frodo reacted to a post in a topic:
Nordlandsbaaden by Paul Le Wol - FINISHED - Billing Boats - 1/20
-
Frodo reacted to a status update:
Floor-laying thing went very well. Got rid off 2 kg off ugly fatt too! Need to dump 5
-
Frodo reacted to a post in a topic:
Nordlandsbaaden by Paul Le Wol - FINISHED - Billing Boats - 1/20
-
Prowler901 reacted to a post in a topic:
Colin Archer by Frodo - Billing Boats - 1:15
-
Frodo reacted to a post in a topic:
Colin Archer by Frodo - Billing Boats - 1:15
-
Frodo reacted to a post in a topic:
Colin Archer by Frodo - Billing Boats - 1:15
-
Frodo reacted to a post in a topic:
Colin Archer by Frodo - Billing Boats - 1:15
-
GrandpaPhil reacted to a post in a topic:
Colin Archer by Frodo - Billing Boats - 1:15
-
GrandpaPhil reacted to a post in a topic:
Colin Archer by Frodo - Billing Boats - 1:15
-
GrandpaPhil reacted to a post in a topic:
Colin Archer by Frodo - Billing Boats - 1:15
-
Frodo reacted to a post in a topic:
Nordlandsbaaden by Paul Le Wol - FINISHED - Billing Boats - 1/20
-
Frodo reacted to a post in a topic:
Nordlandsbaaden by Ekis - FINISHED - Billing Boats - 1:20
-
Ekis reacted to a post in a topic:
Nordlandsbaaden by Ekis - FINISHED - Billing Boats - 1:20
-
Frodo reacted to a post in a topic:
Nordlandsbaaden by Paul Le Wol - FINISHED - Billing Boats - 1/20
-
Lovely build @Ekis. I do have a coupe of questions as I am about to build the same model: 1) Which technique do you use to nail/clink it? 2) Do you know if the rudder is cut of compared to the original. Again a great build model, thanks for sharing.
- 39 replies
-
- 1
-
-
- Billing Boats
- Finished
- (and 1 more)
-
 Frodo reacted to a status update:
Yesterday it looked like my wife had bought me a giant, ready stained, Colin Archer k
Frodo reacted to a status update:
Yesterday it looked like my wife had bought me a giant, ready stained, Colin Archer k
-
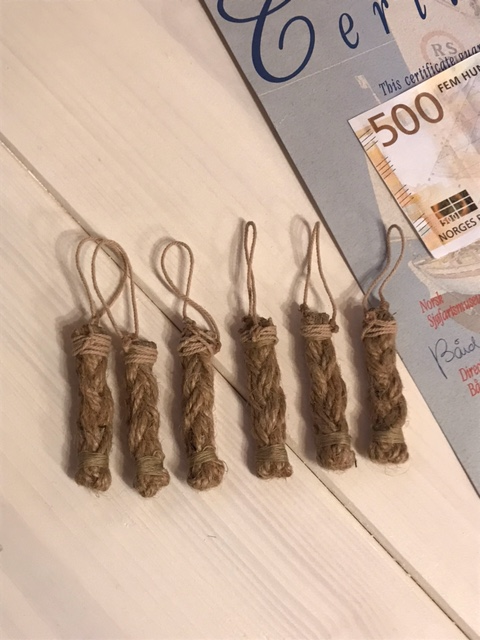
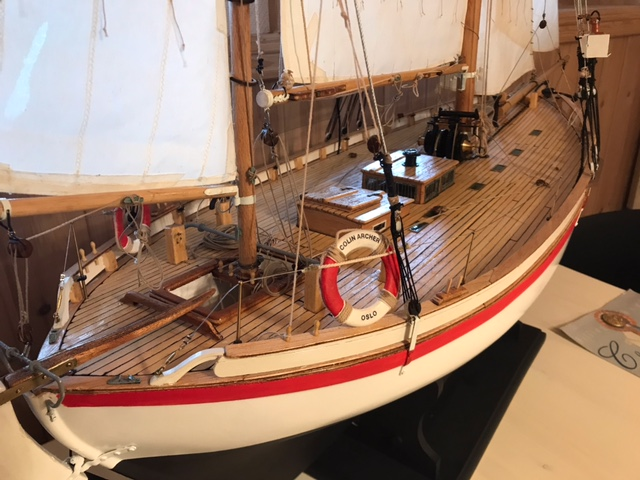
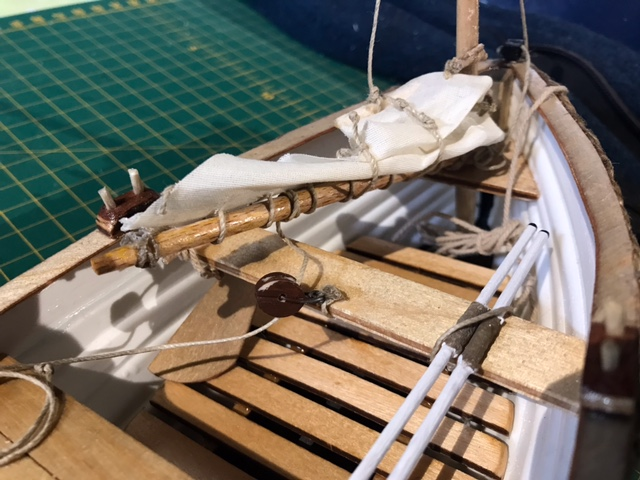
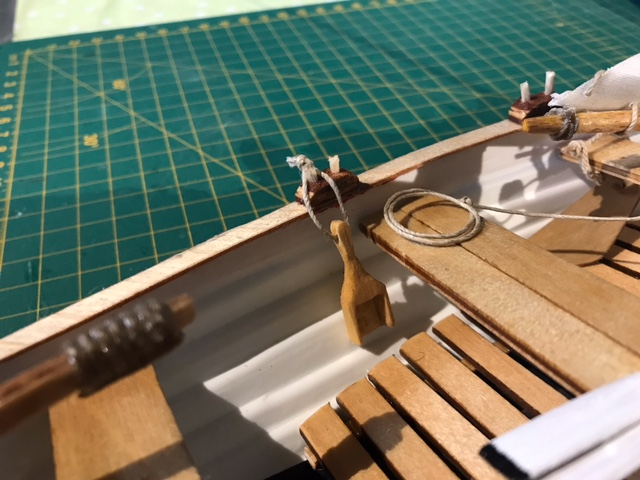
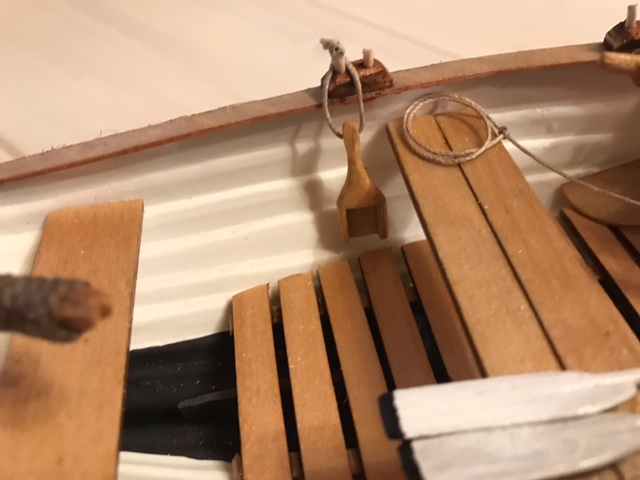
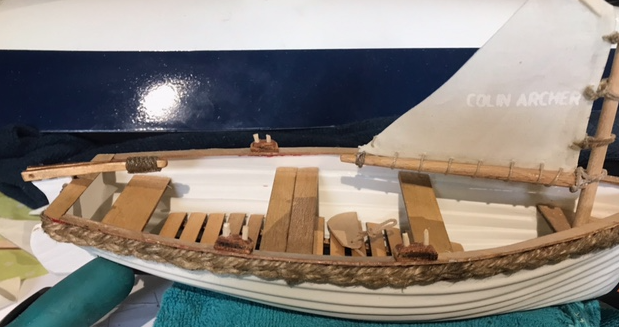
Today I had to create some more details just because it is fun 6 old fashion fenders made from "jutetråd" (from corchorus-speci-plant), a rope made from hemp/hamp ("hampfenders" could be the English word?) A tiny anchor (old fashion grappling hook style), as I remember them from my childhood in small rowboats. And a fishing harp, measures about 17mm x 17mm.
-
 Prowler901 reacted to a post in a topic:
Colin Archer by Frodo - Billing Boats - 1:15
Prowler901 reacted to a post in a topic:
Colin Archer by Frodo - Billing Boats - 1:15
-
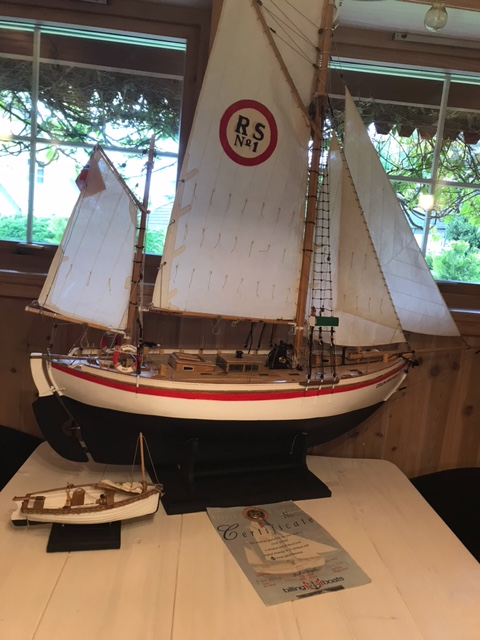
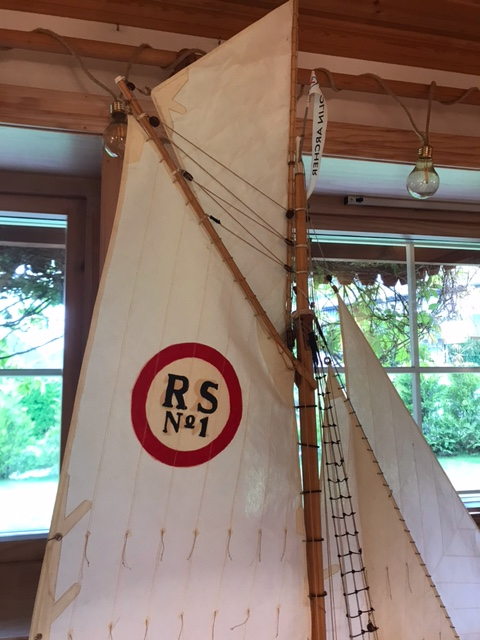
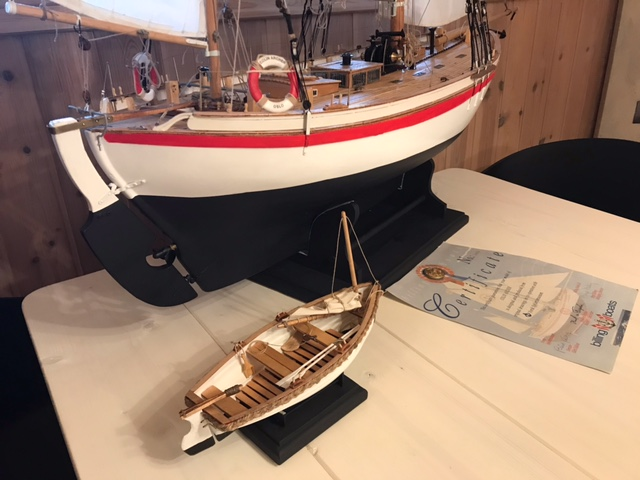
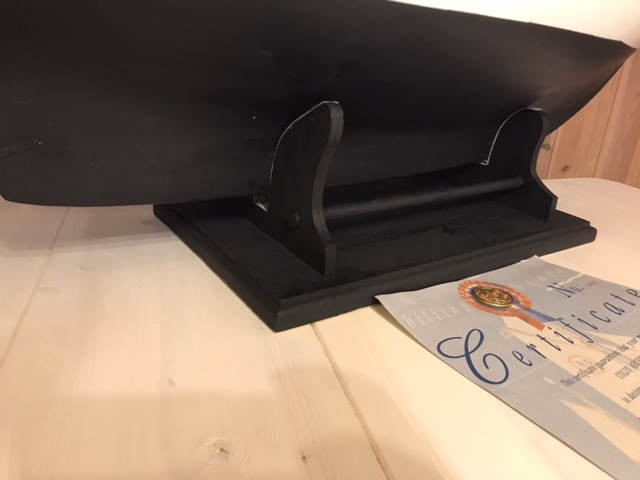
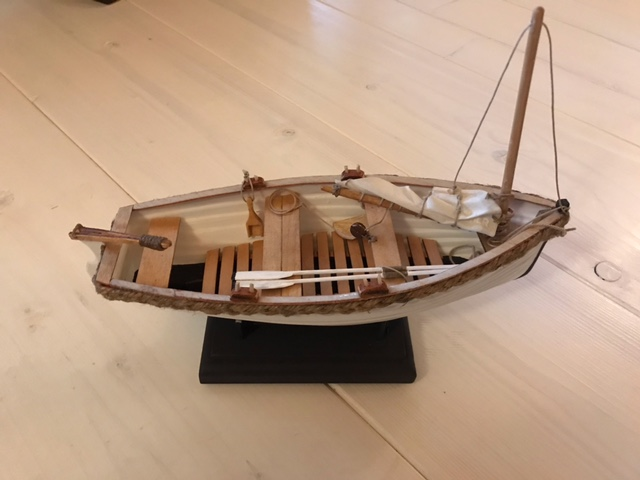
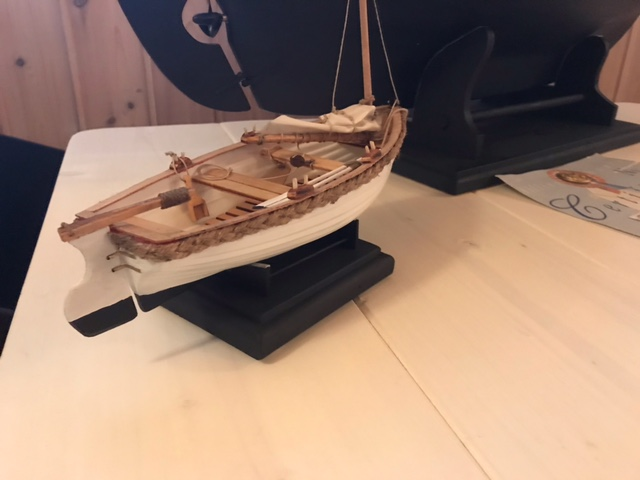
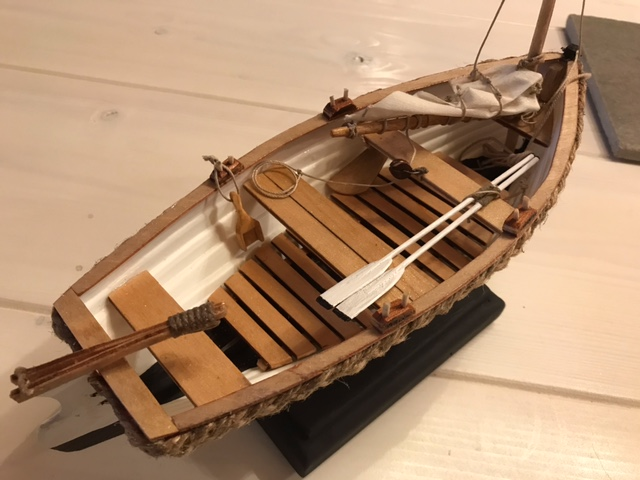
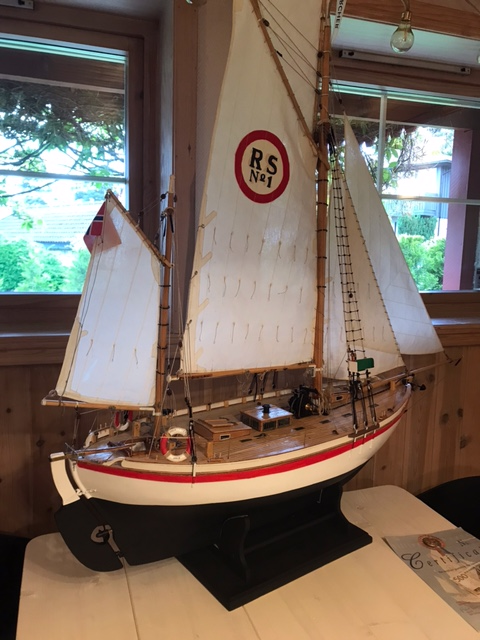
Another update. I guess I'll have to say that both the models now are done "exteriorwise". Still need to do the RC-work and the interior of the Colin Archer, the Sarik "jolle" (dinghy) I consider to be complete. The stands for the boats are painted with same color as the anti-fouling. I do however have a concern that the CA now weights close to 9 kg and it puts a lot of pressure on the hull while in stand, worst case it could "pop" the deck. Guess I will remove the leadballast to avoid damage while in the stand. Rig-top: The baseplate for the stand measures 38cm x 26 cm: The sail is just hoisted for photosession It will be lowered and packed while being pulled behind the mothership or on static display. Thanks for watching
-
ct mike reacted to a post in a topic:
Colin Archer by Frodo - Billing Boats - 1:15
-
Ian_Grant reacted to a post in a topic:
Colin Archer by Frodo - Billing Boats - 1:15
-
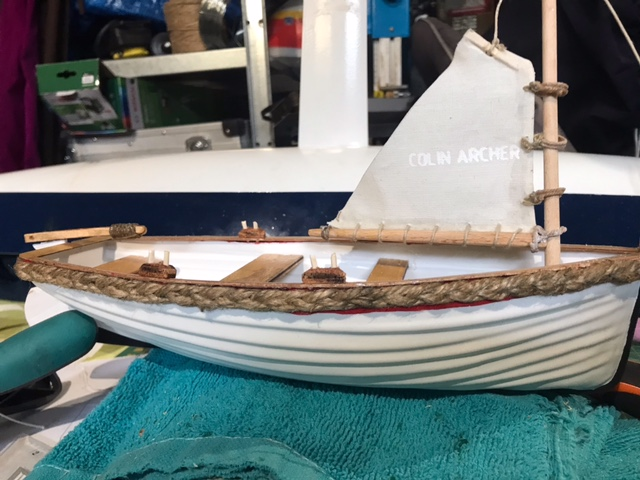
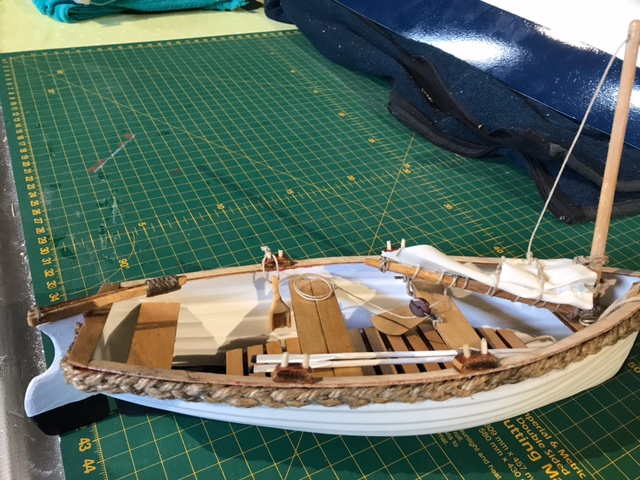
Short update, currently trying to create the Sarik "jolle" (dinghy):
-
Hi Frodo,
I see that I have some other photos of the Sarik dinghy 'conversion' on file which are NOT on the modelboats album. Can you confirm that you can see the photos that I have posted on the modelboats album? There are about 6 more photos of construction detail I can post. Do you want them HERE on your own thread?
George
- Show previous comments 4 more
-

-
-
Yes, went a bit mad from the start in 2019 and onwards! Got a lot of help from many others who have posted on many different subjects. All very helpfull. Especially when scratch-building or building a kit with few instructions!
RS1 up from the 'paint shop'.....posting yet another photo very soon!
George
-
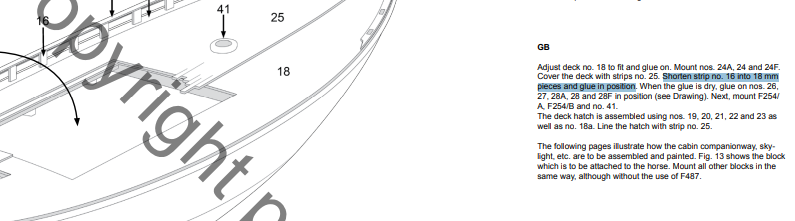
Hi, and welcome. Indeed there is some "forward and backward" combined with trial and errors If you are referring to the wooden support I found this hidden in the manual (nbr 16 into 18mm pieces): Here is also a link to the instructions I found it in (2xpdf): https://www.billingboats.com/index.php/modelboats-footer/1/120/boats/discontinued-models/P-bb414-colin-archer-d
-
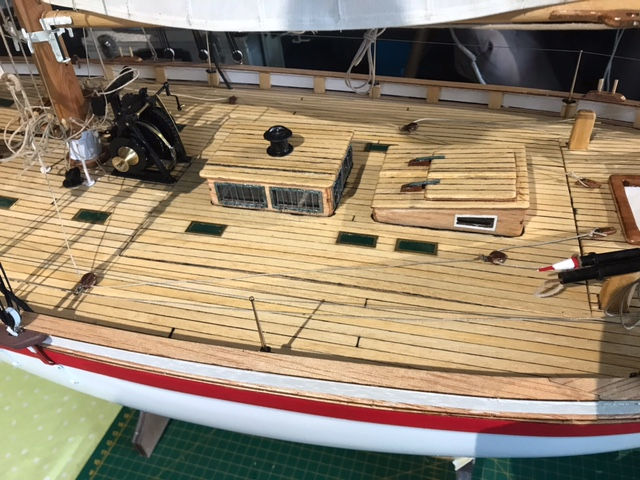
Reconsidering servo setup below deck. I could use a total of three servos incl mainsail if I want to/need to have separate controll of "jib" (flyer) and "stay sail" (inner foresail), however not necessarily... inspired by the "sailtails" youtube video: ... but then I'll most likely will have to remove the cabin/saloon...
-
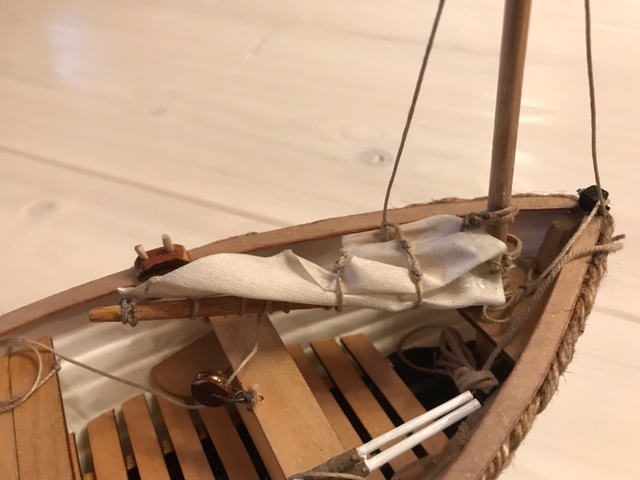
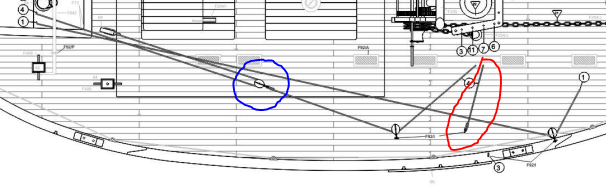
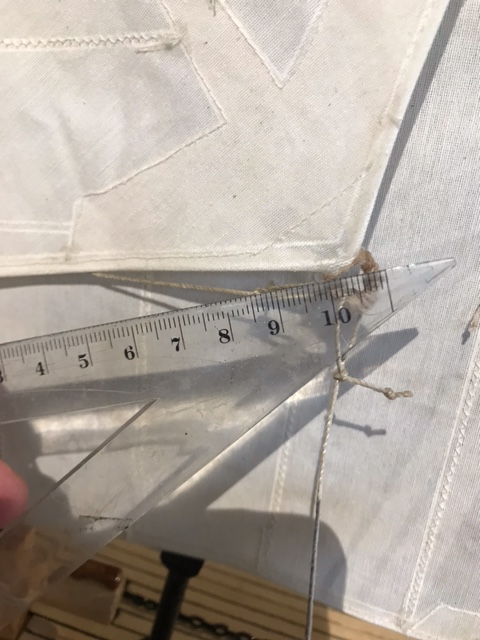
The hole for the rudder linkage will be sealed for sure, hopefully I dont forget to do it... About the distance that the inner foresail and the klyver will move: Rope nbr 4/inner foresail: has a block originally on deck (blue circle), and I've kept it, so it gives a 50% reduction as you mention. The part of rope nbr 4 (in red circle) has been removed. The rope comes back from the a medium block attached to the clew of the inner foresail. However, this is theory... sailing in practice might give another truth
-
Posting some lessons identified so far, might prevent others from doing the same. The two following photos below shows the original setup for genoa sheets, it will for sure not work properly. However, if I skip the "dead-eye" on deck and take the sheet straight from the genoa via the deckblock, then I get approx. the same traveldistance on the servo as with the "klyversail". And I will get rid of the two blocks attached to the cleat on the sail... that could work... in theory. I will give it a try. Another issue: The "loops" I made for sail sheets gets tangled up in other lines when I tackle. Therefore I need to find another solution. I am considering removing the "loops" on genoa and "klyversail", maybe made from eyelets. I also need to make the "harpoon" removable as it gets will get tangled up in the mainsheet.
-
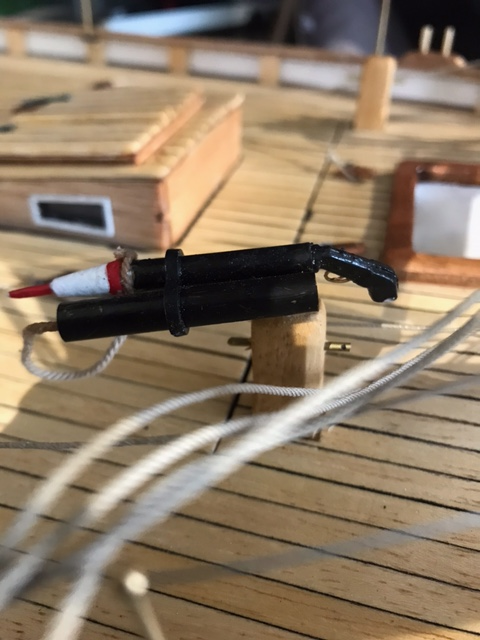
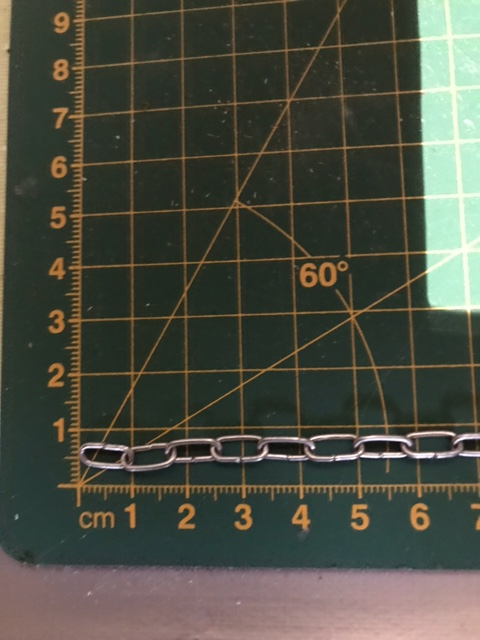
About F697 I saw it in the photo on the box for the kit. The chainlinks I cant remember, think I bought them 5 years ago for a similar project. But I'm a big Clas Ohlson user F92M as rudderhorn is not needed then I guess, I mounted another one I had laying around. But thanks for clarification.
-
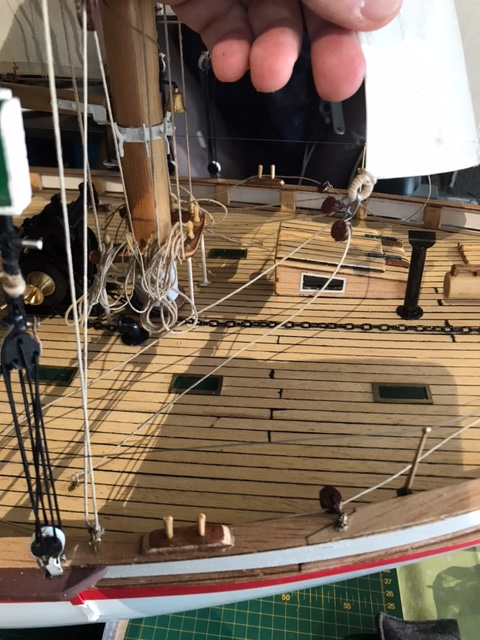
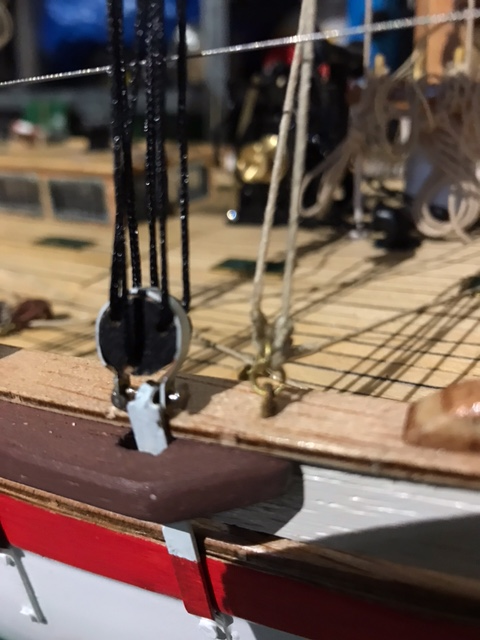
So about the earlier mentioned "dead eye" and rope nbr 3. Here is what I ended up with, however I am not sure if its 100% correct. The rope from the upper most block in the picture is attached to the fall for the "klyversail". The other end of the rope tied to the pinrail on left side of mast.
-
This is the chainlinks that I use for various purposes. By turning one end 180degrees you get a "hook" shape.
-
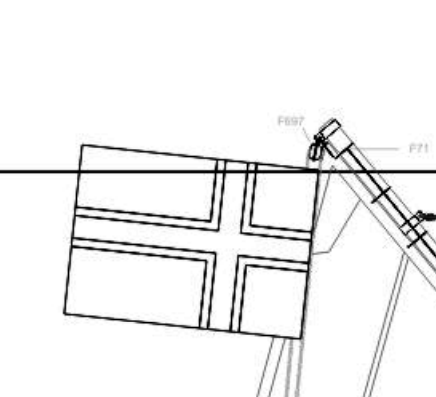
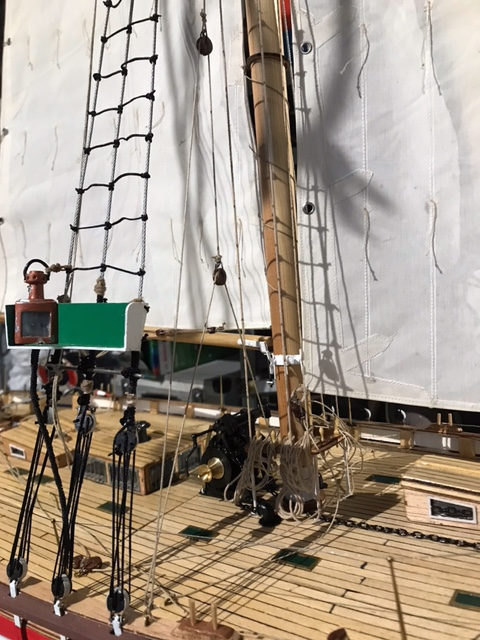
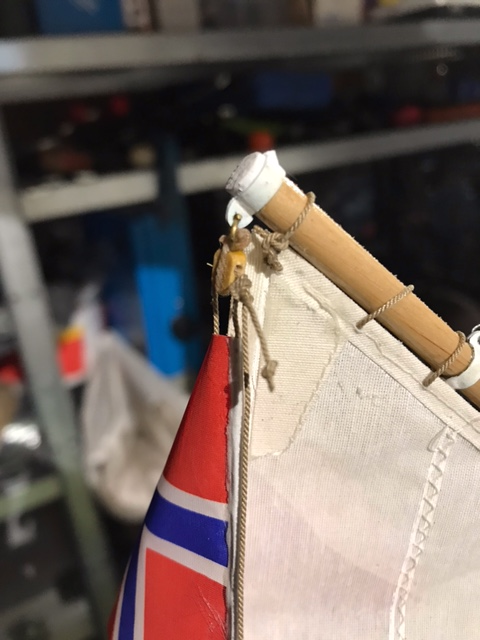
F697 above the flag.

-
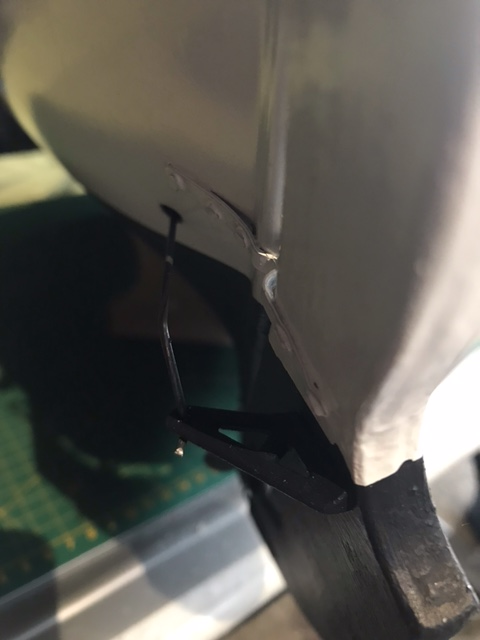
I still have the part F92/M, not sure where it suppose to go. Any ideas?
-
Now I understand, yes it is the nbr F697.. I only had one of those small woodpieces (F697). It goes at the rear end of the mizzenfork to hoist the flag in. I will try to make a photo later.