NavyShooter
-
Posts
435 -
Joined
-
Last visited
Content Type
Profiles
Forums
Gallery
Events
Everything posted by NavyShooter
-
 That looks bloody amazing!!!!
 -
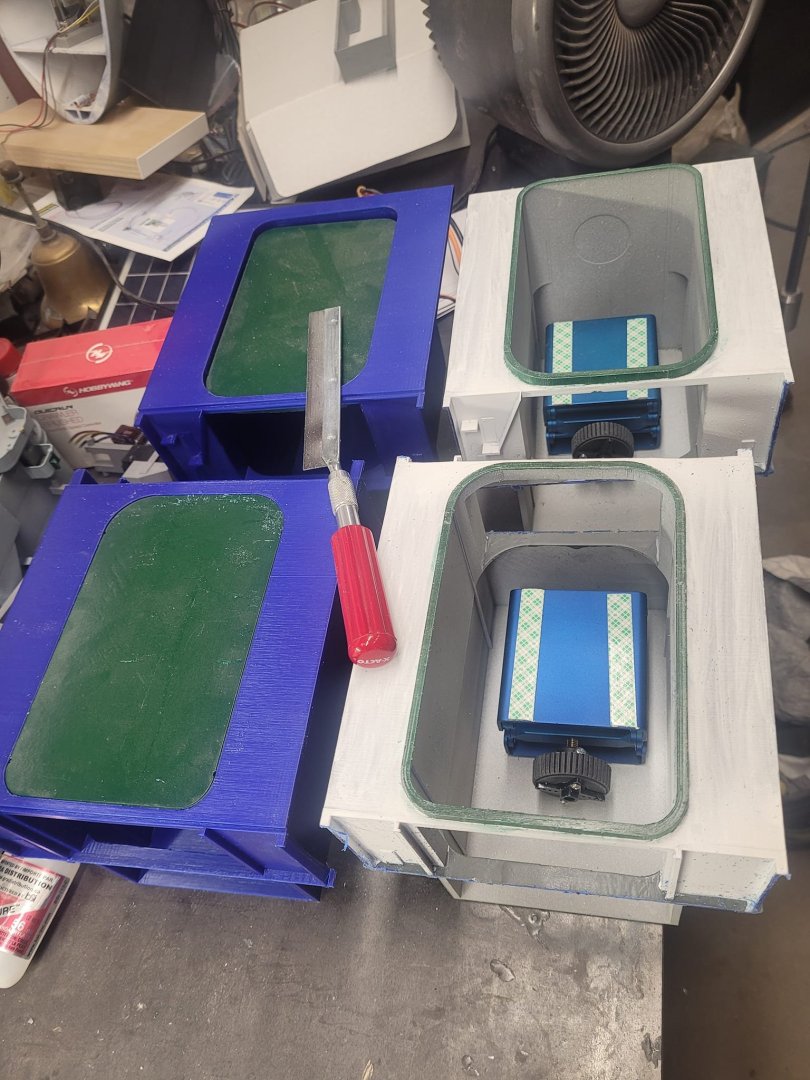
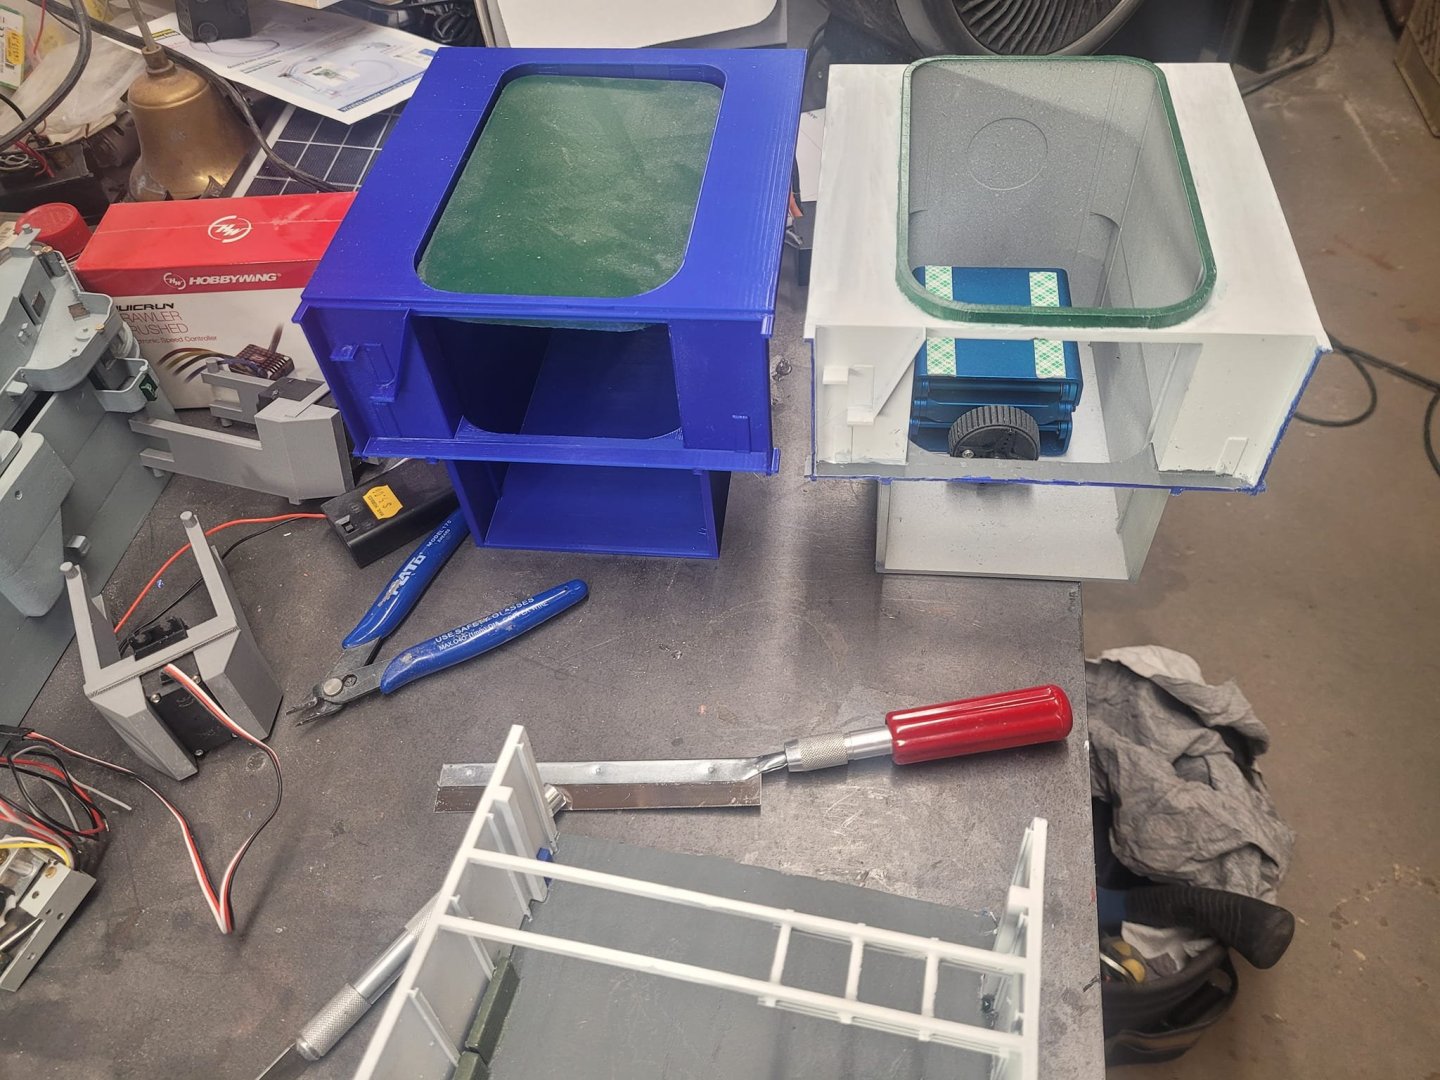
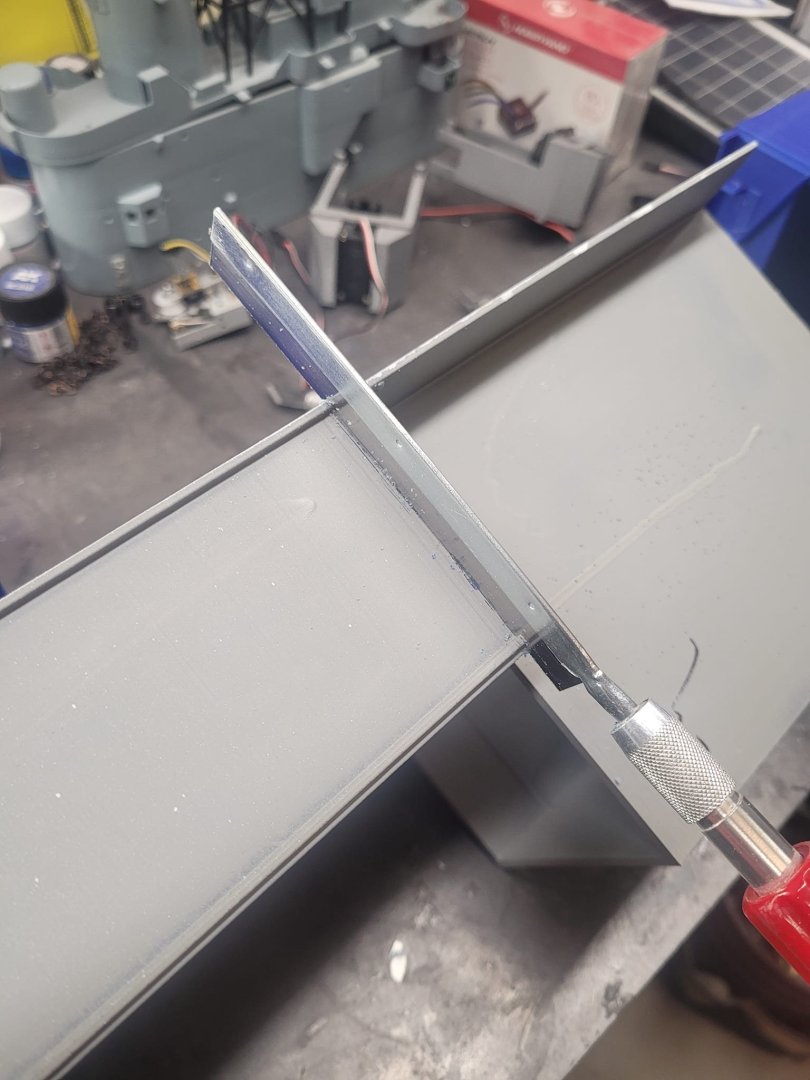
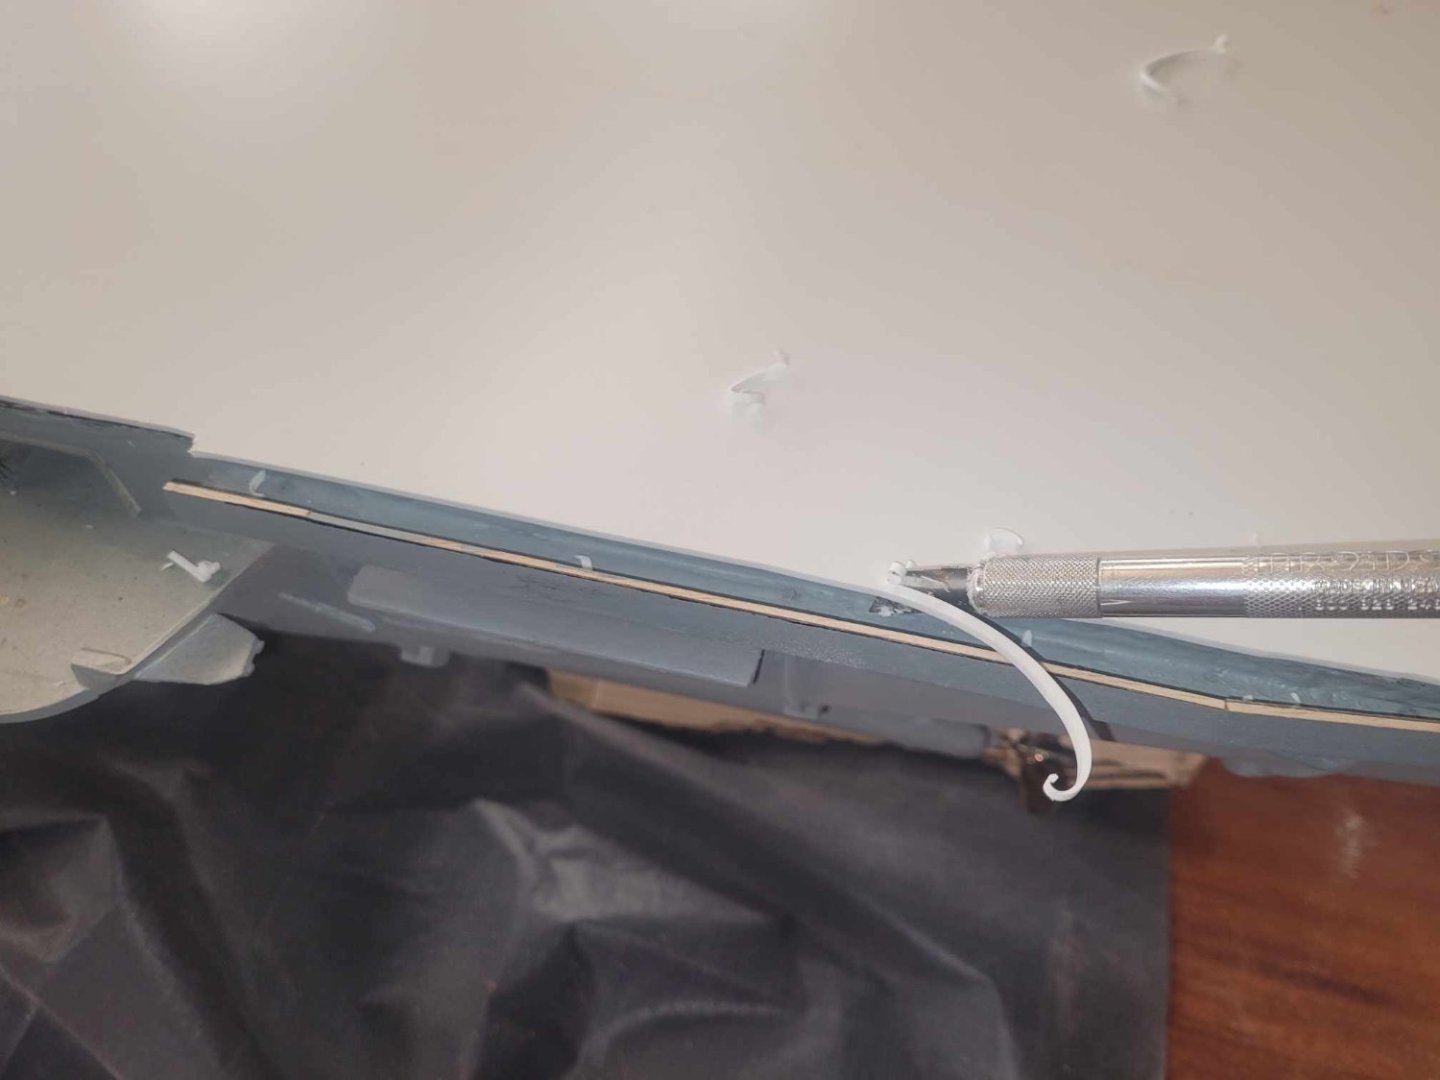
Well, New modules printed over the weekend, last night I finished cutting out the old modules and installing the new ones. A good time to have a nice sharp, fine razor saw! Almost a perfect fit.


-
I ran across a pair of these at a Naval Base in Norway 25 years ago. They were in *rough* shape back then when the NATO fleet dropped in for a visit. I wonder if they've done anything with them since then. It was up near Bergen. Neat build!
-
The movie:
-
Hangar elevator modules #2 finished printing this morning....as I left for work I started printing the accommodation ladders - we'll see how that looks when I get home tonight.
-
As I wait for the hangar modules to print, I'm getting in some 3D design time. I was originally going to have a folding articulated accommodation ladder, but realize that this will exceed the limits of what I can do with my FDM printer, so I went back to basics, got some dimensions, and produced a swappable folded, or setup accommodation ladder. When the Elevators are done printing, and the anchor module, I'll be able to kick a couple of these out to test them out.

-
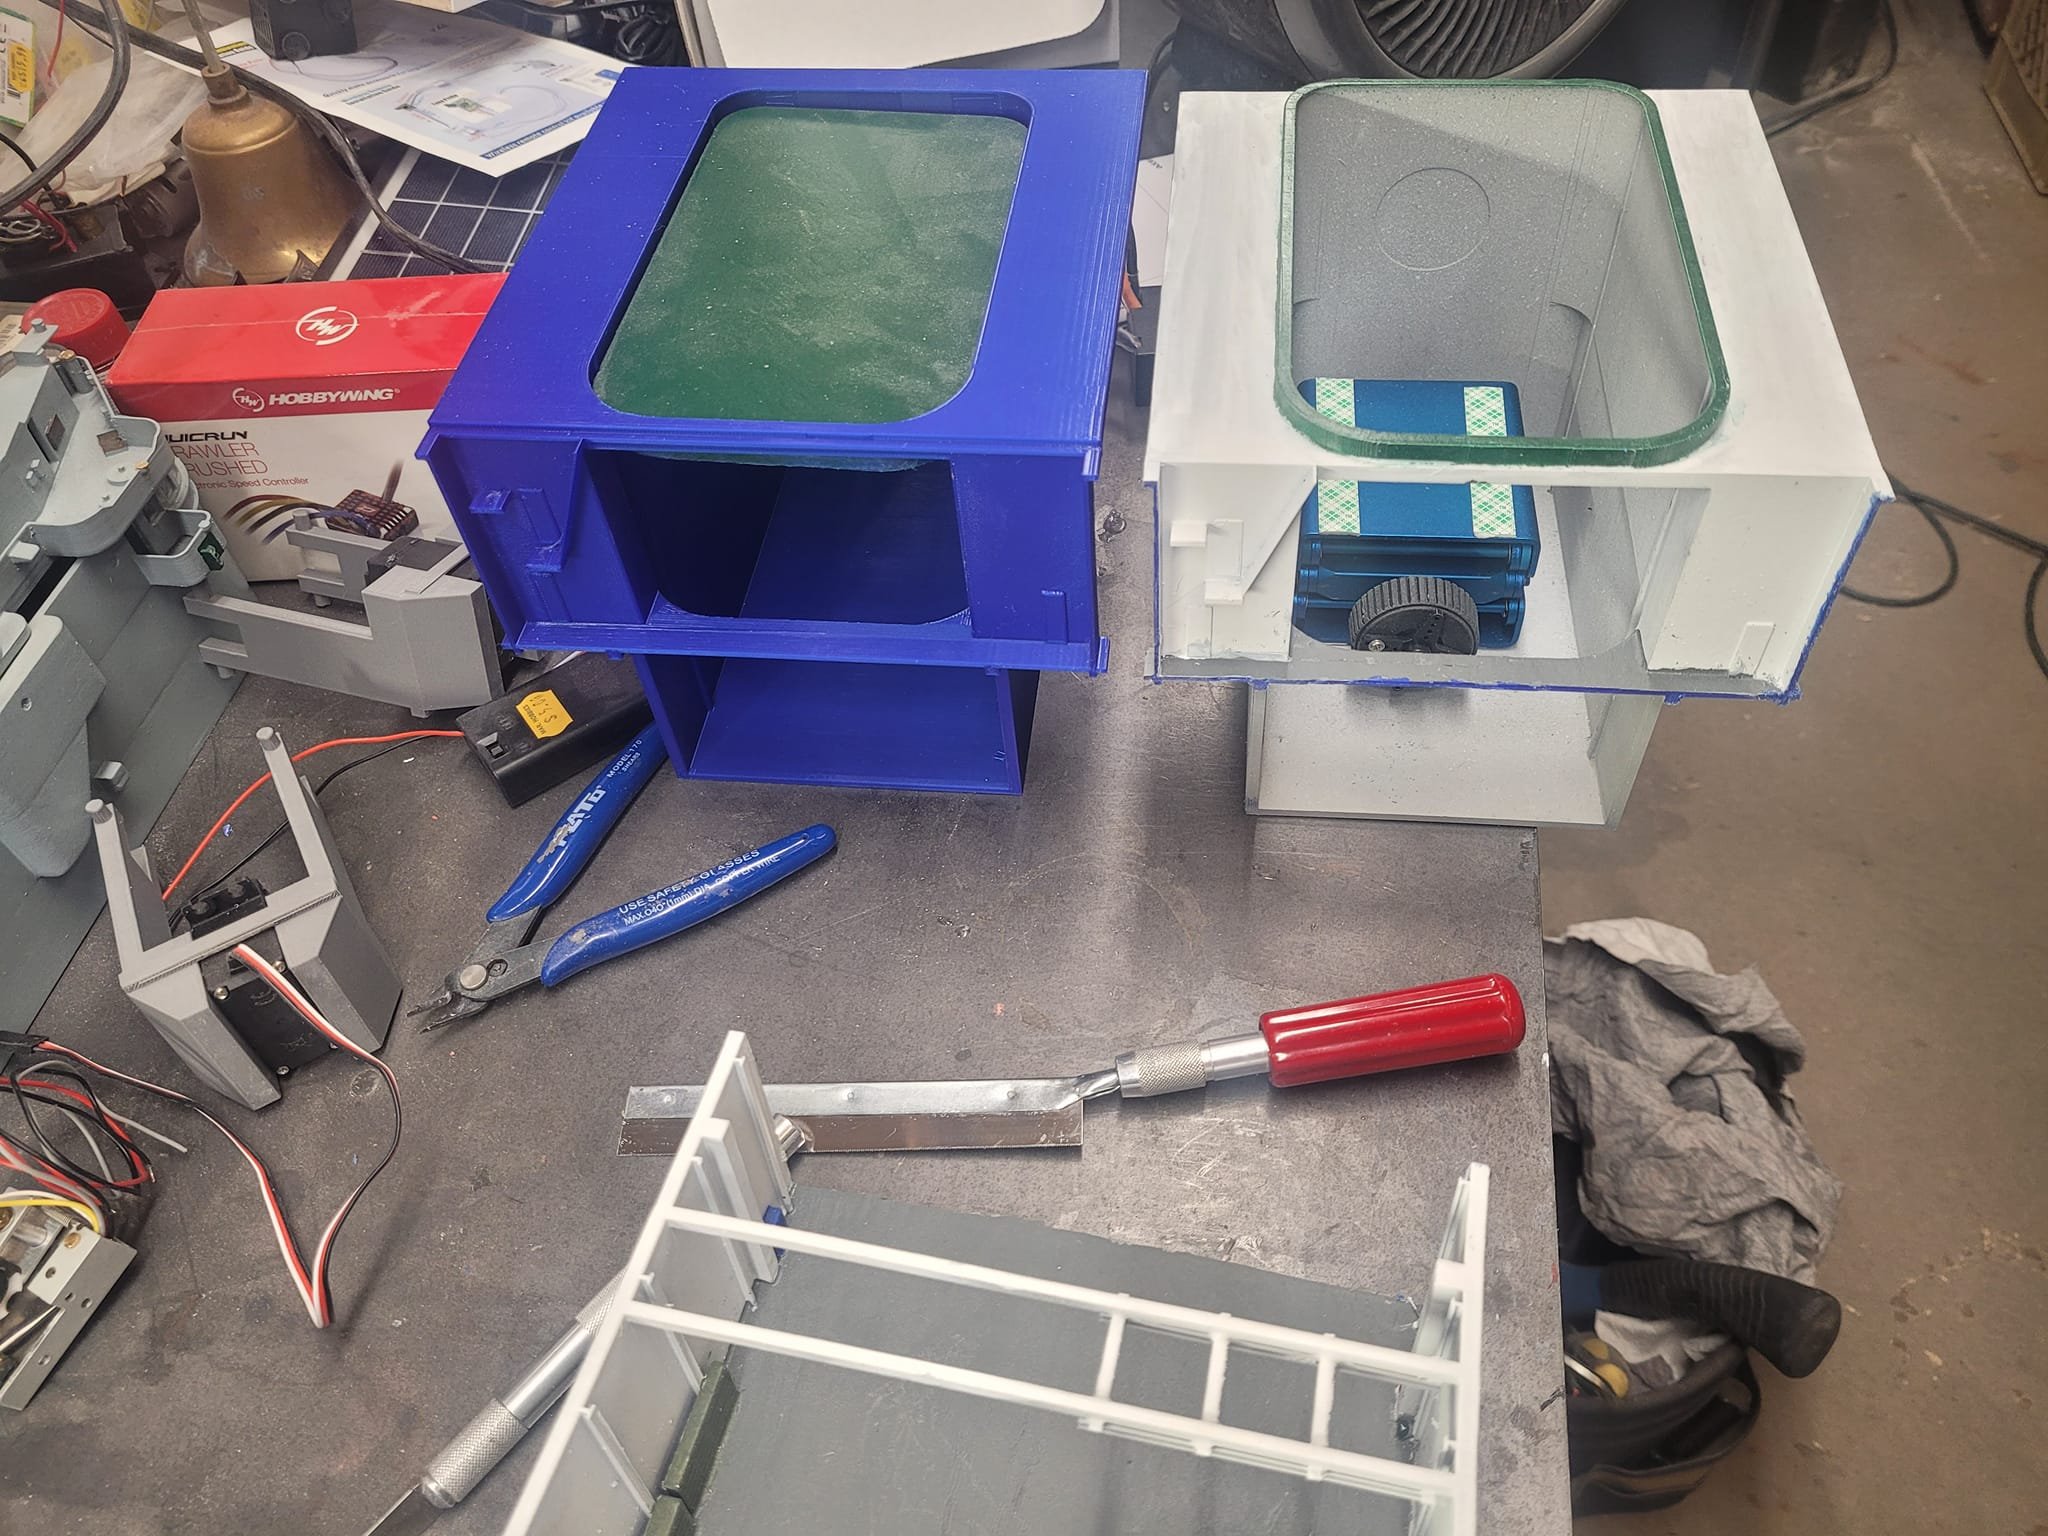
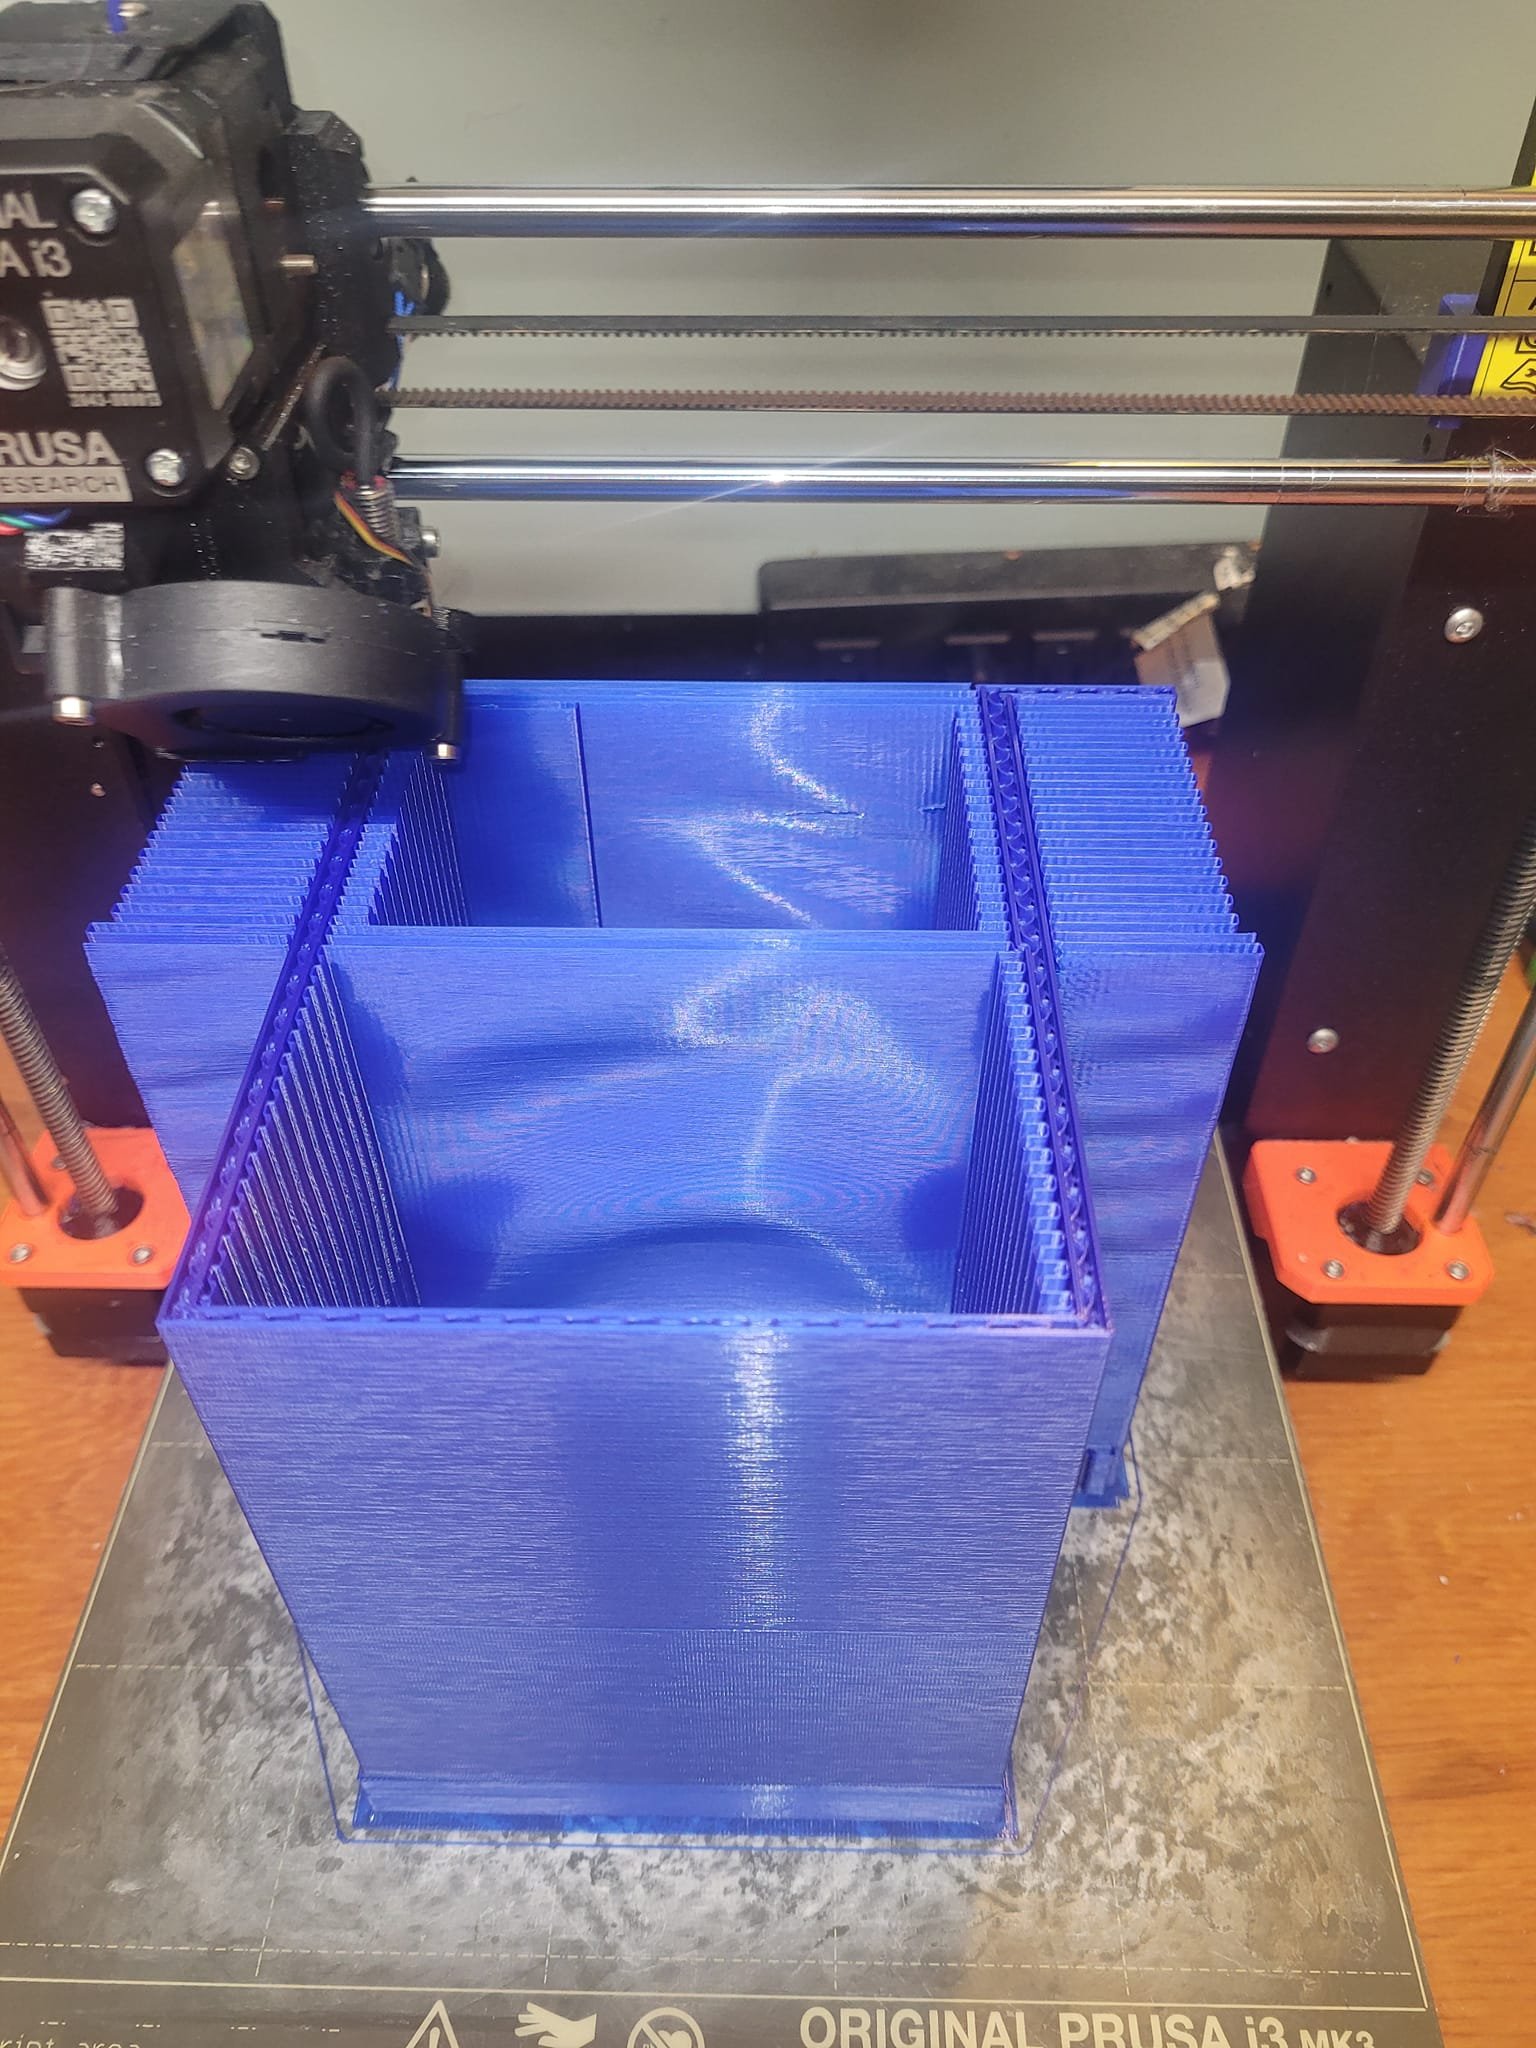
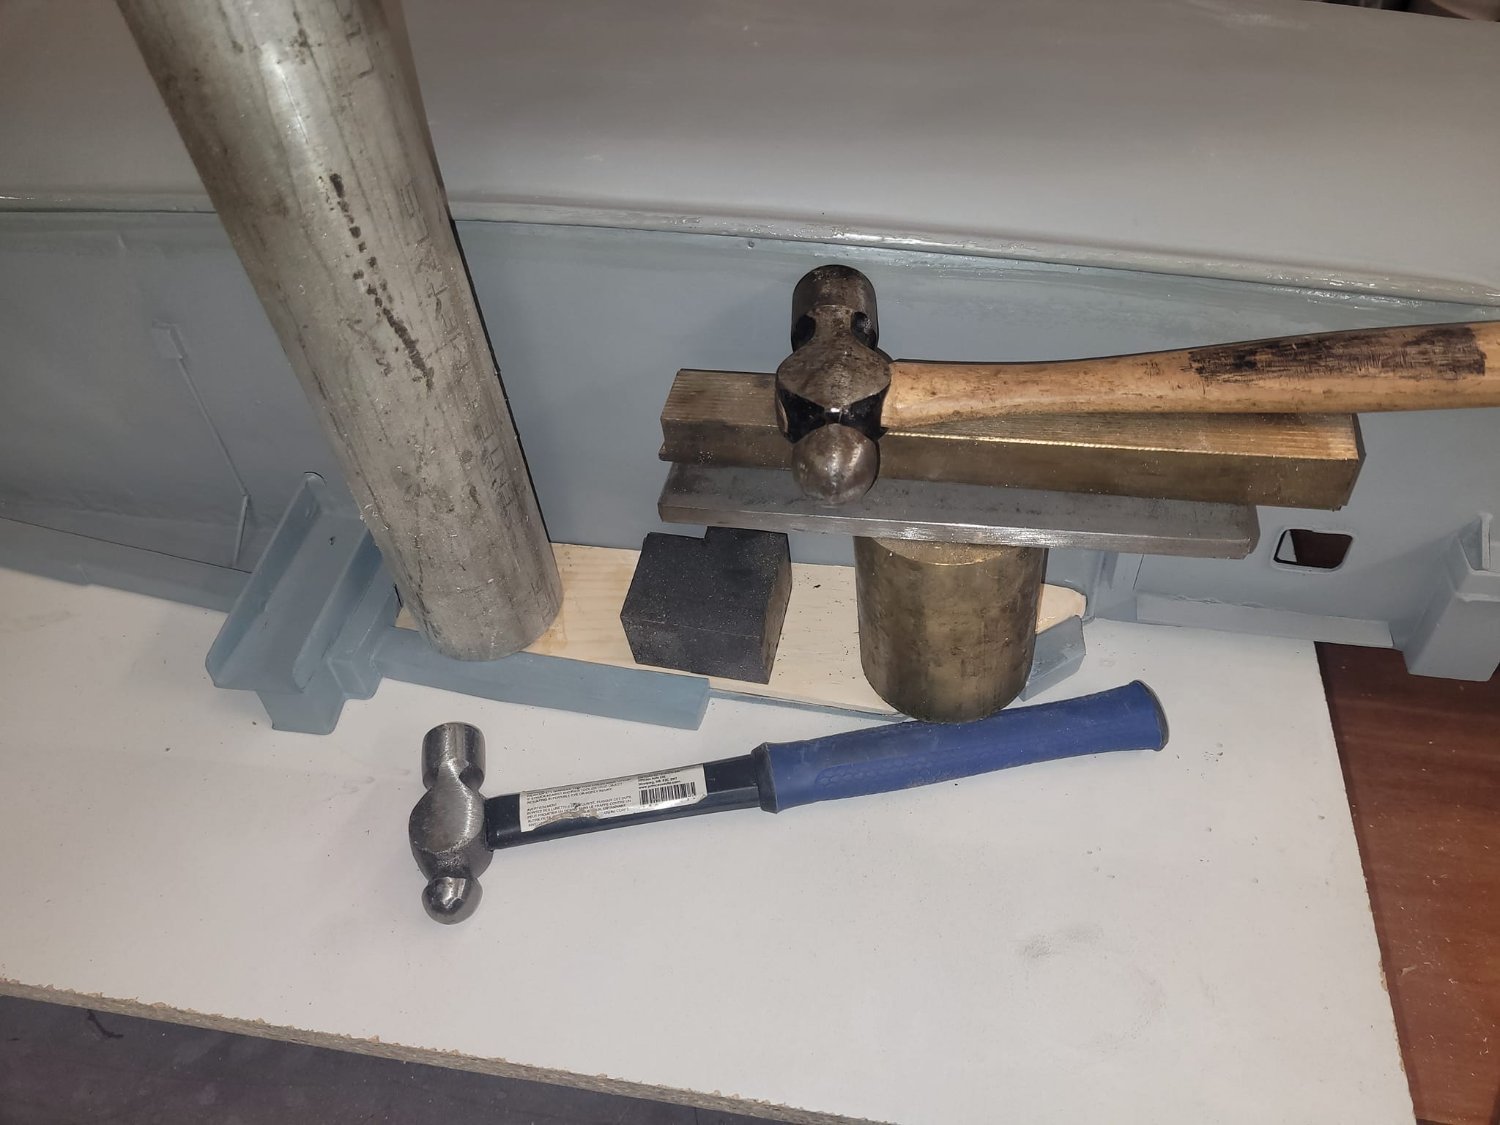
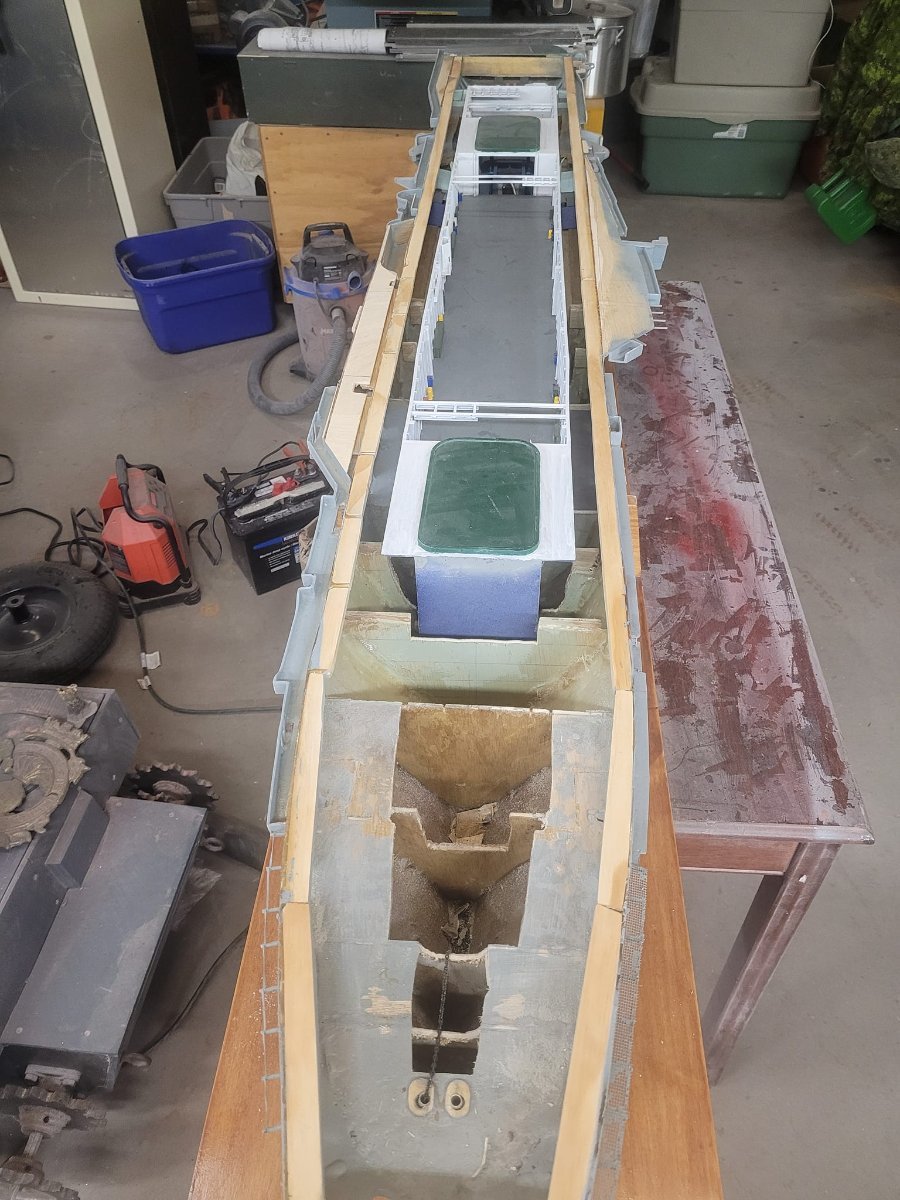
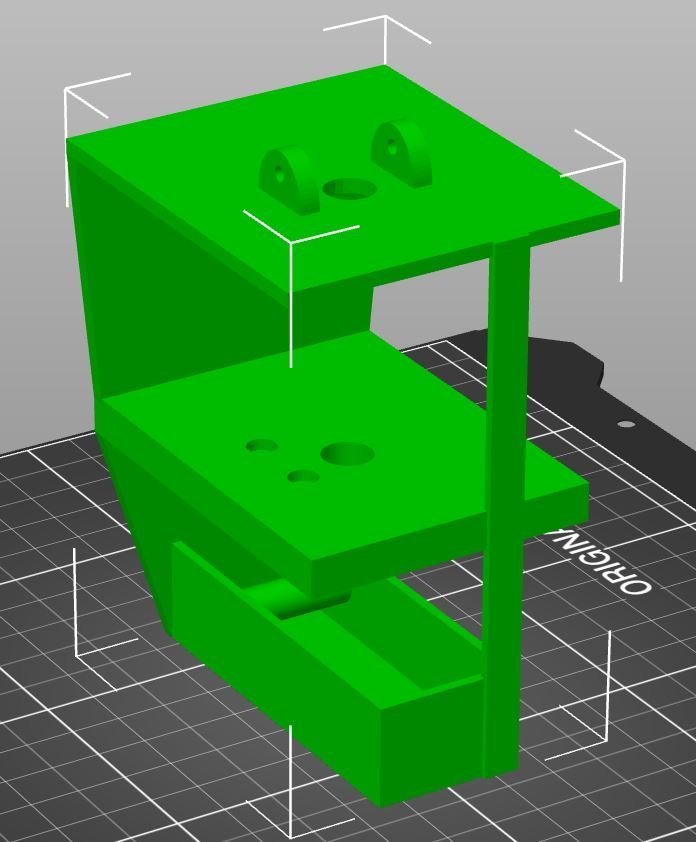
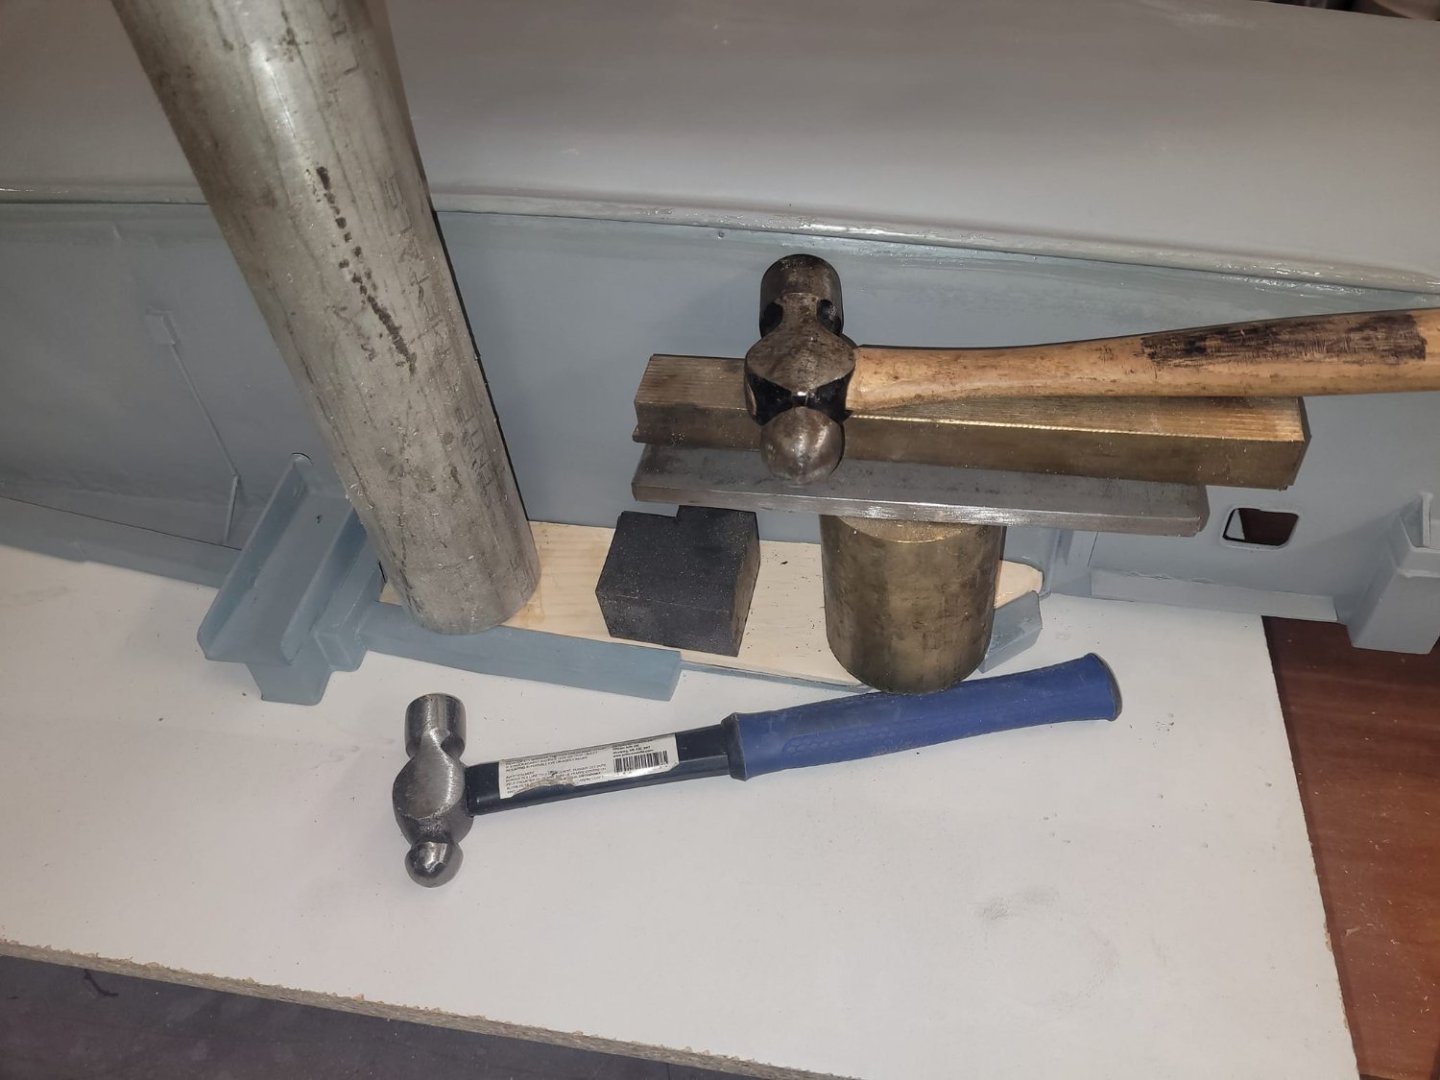
As I await the printer before I do anything further with the flight deck, I decided to have a look at the anchor system. Here's the 'anchor module' that I've designed. This will be about a 9 hour print. You can see at the top the 'ears' which will hold a 3mm brass rod that'll act as a spool for the chain to run across. Below that is the winch deck, and below that at the bottom is the cable well, and there's a solid 'bar' in the cable well to tie the end of the anchor cable around so that it isn't lost by running out all the way. We'll see how version 1 works...
-
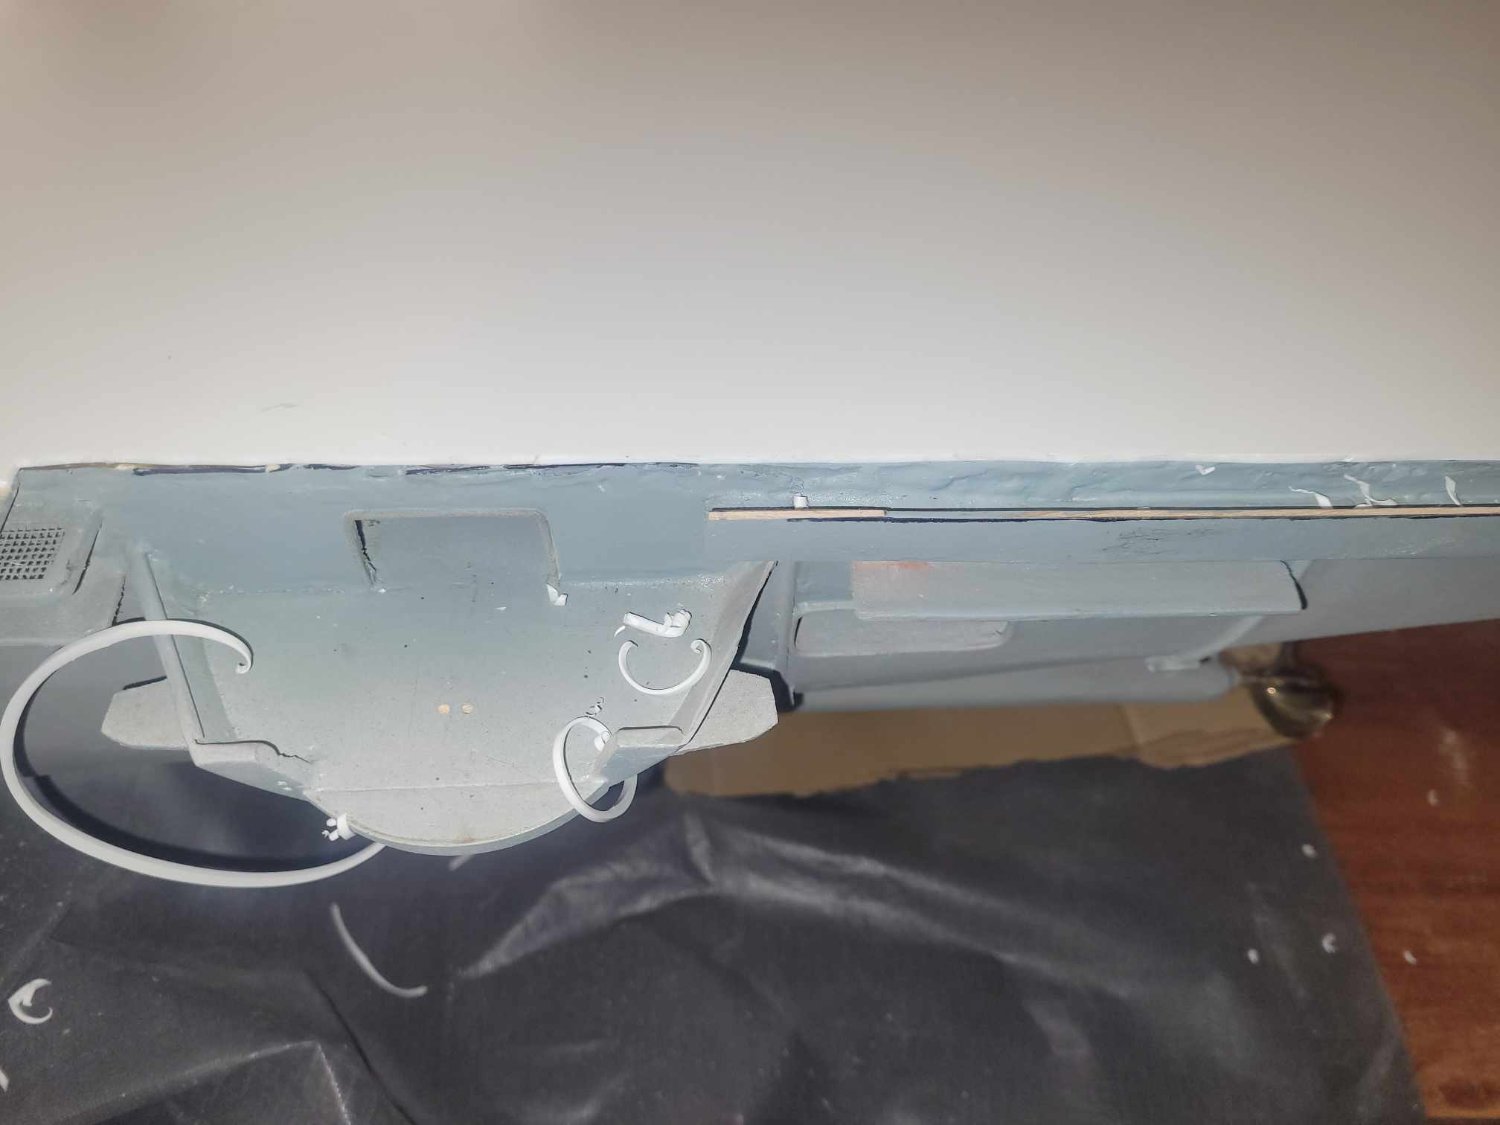
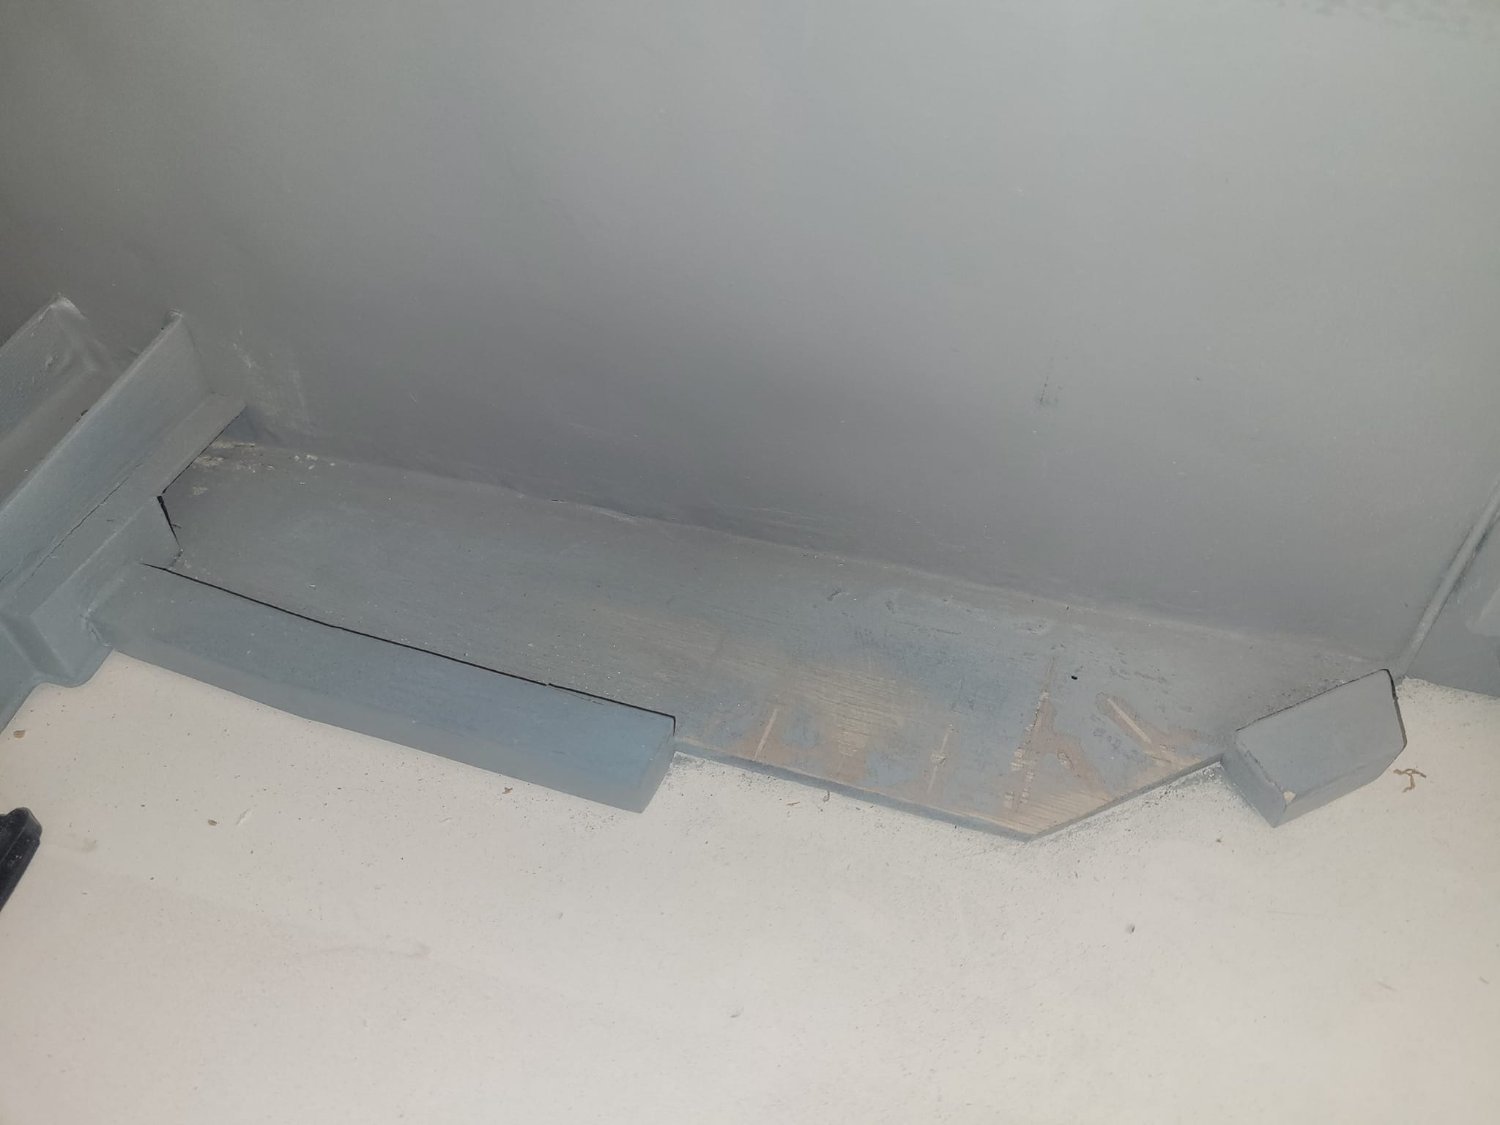
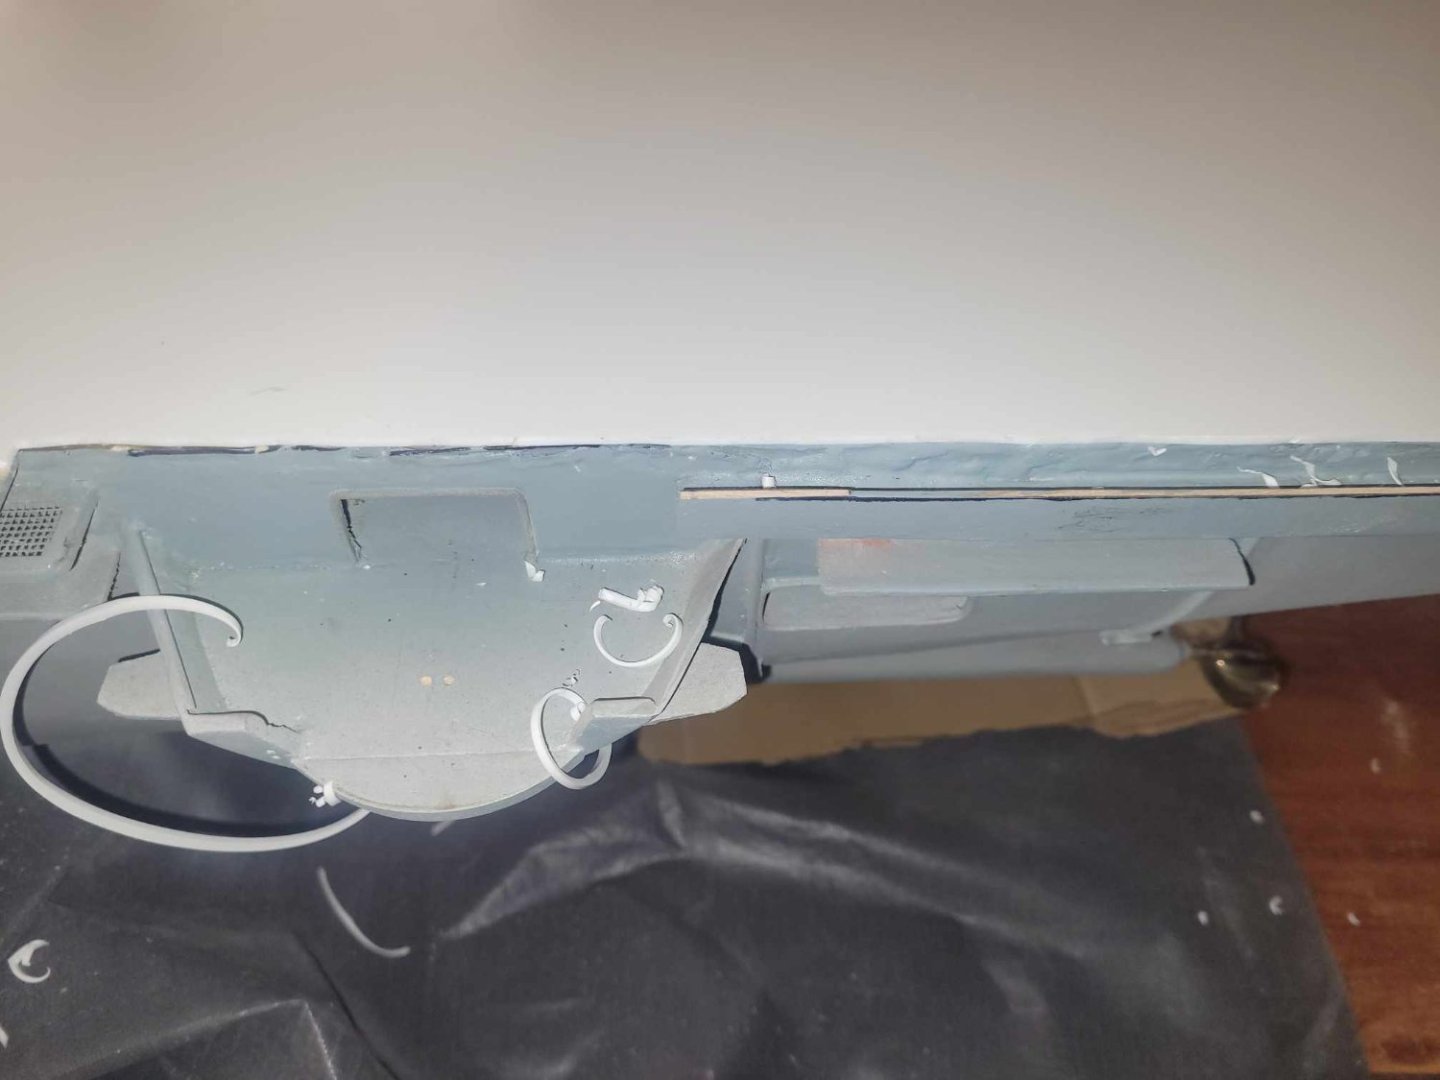
Here's the problem....

-
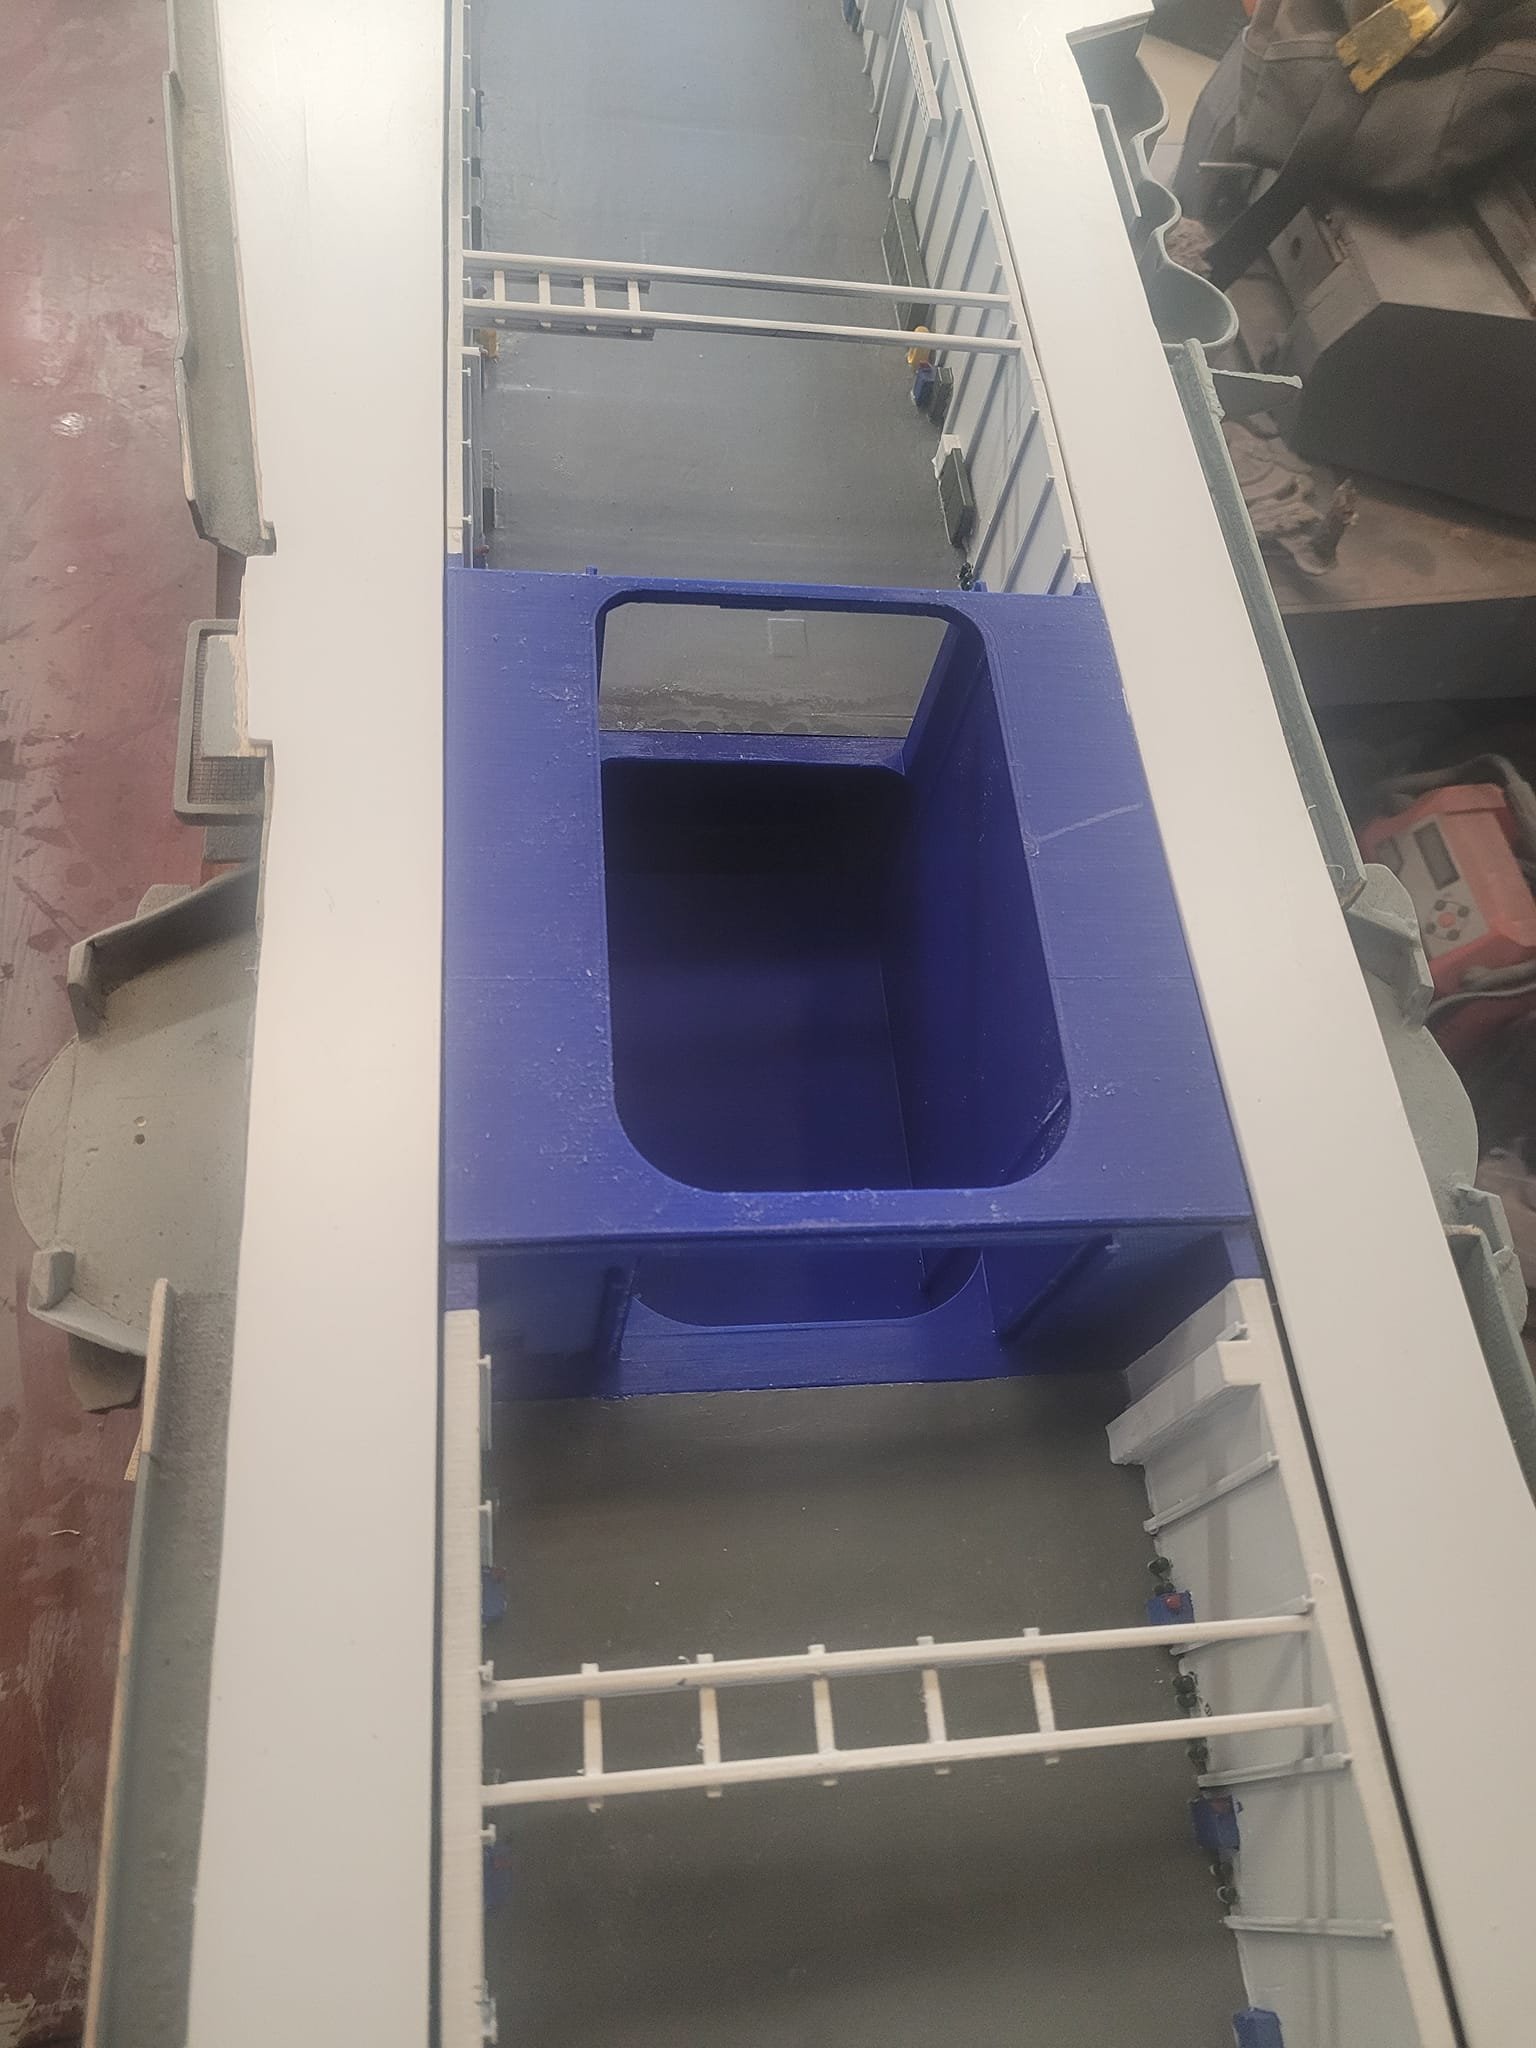
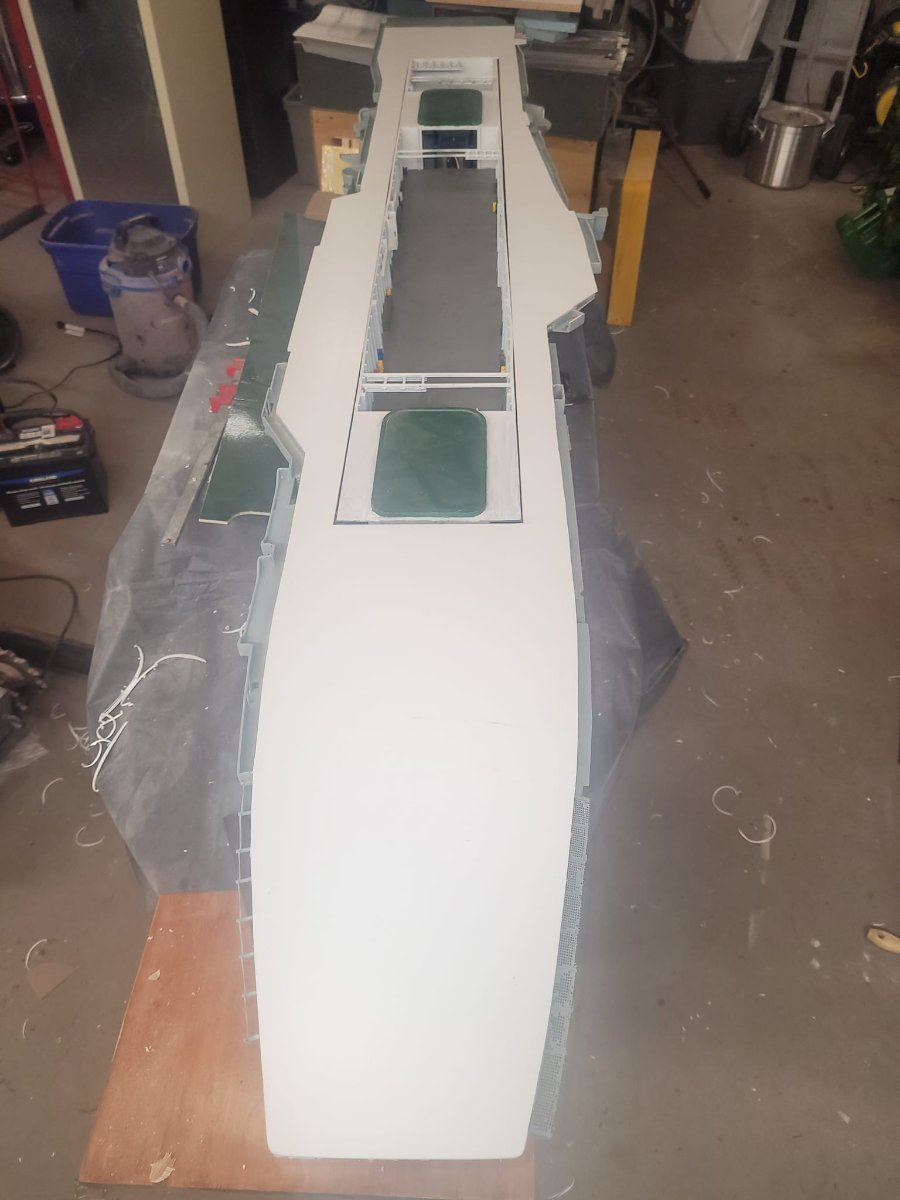
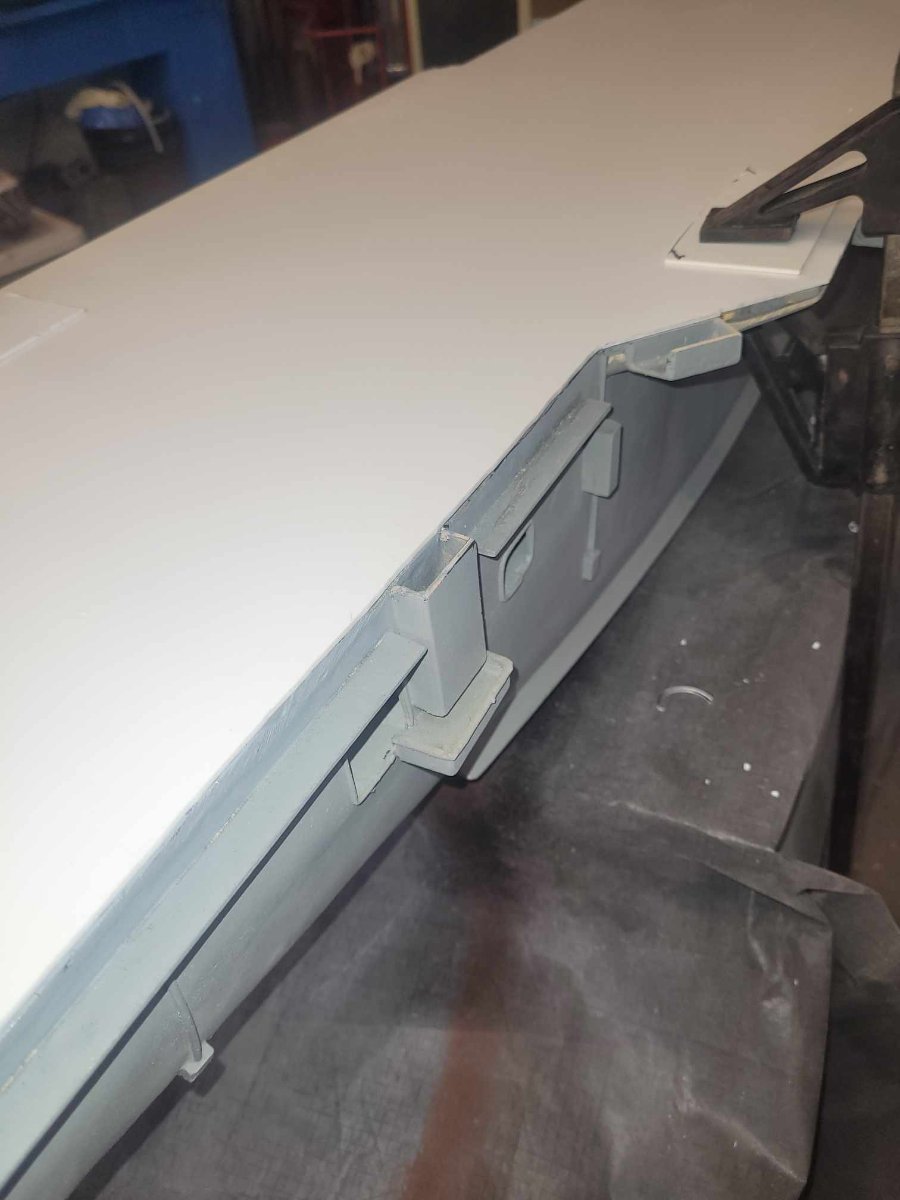
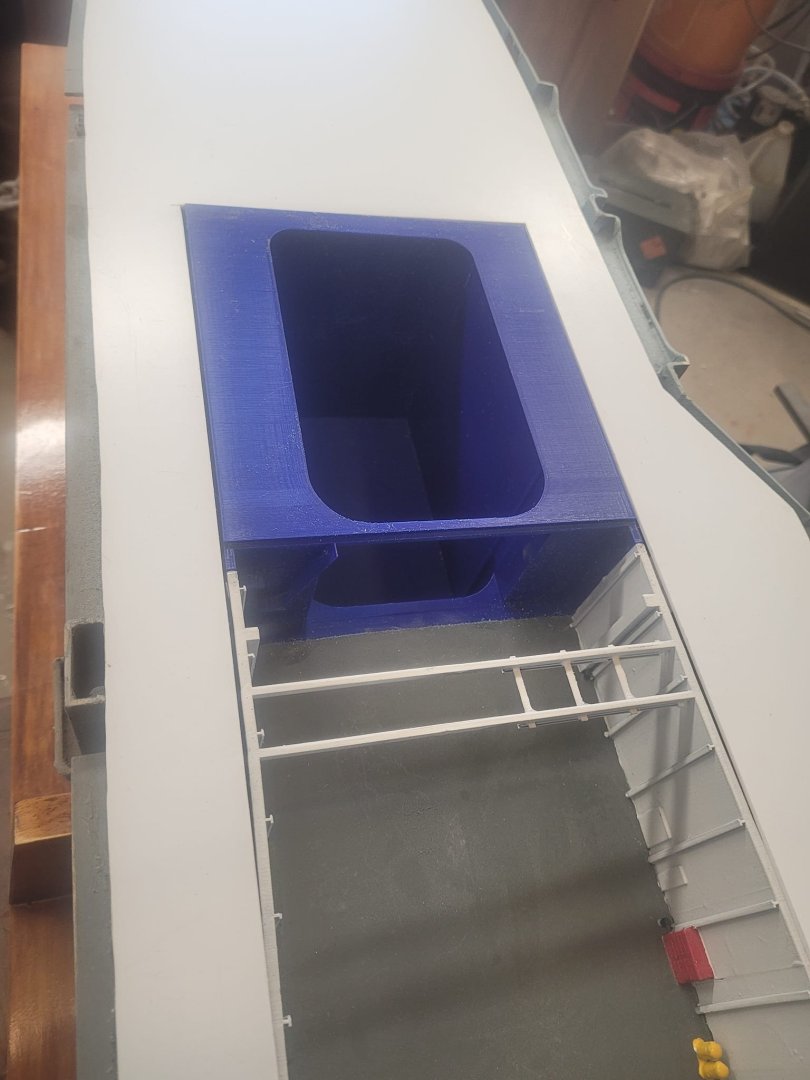
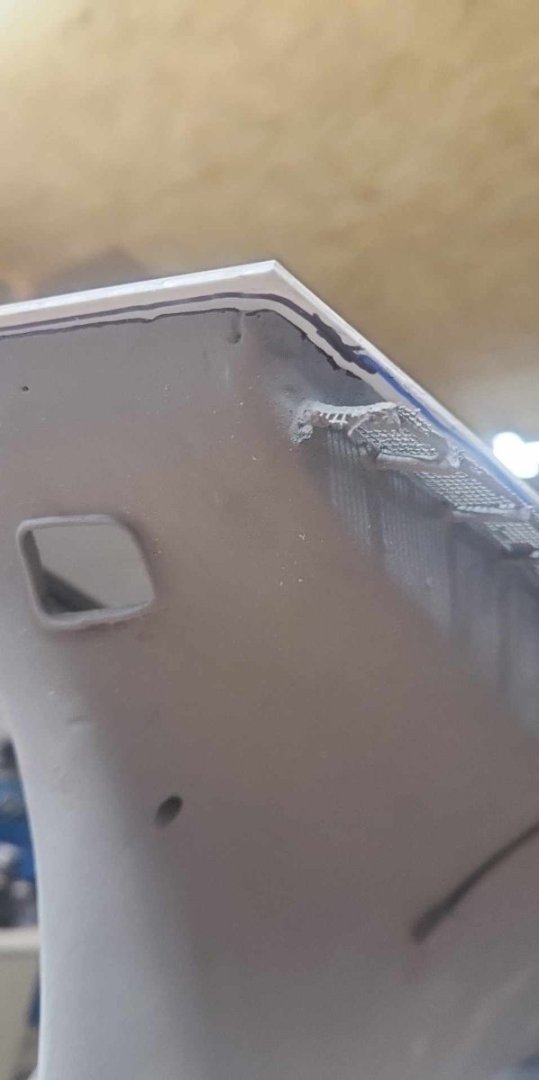
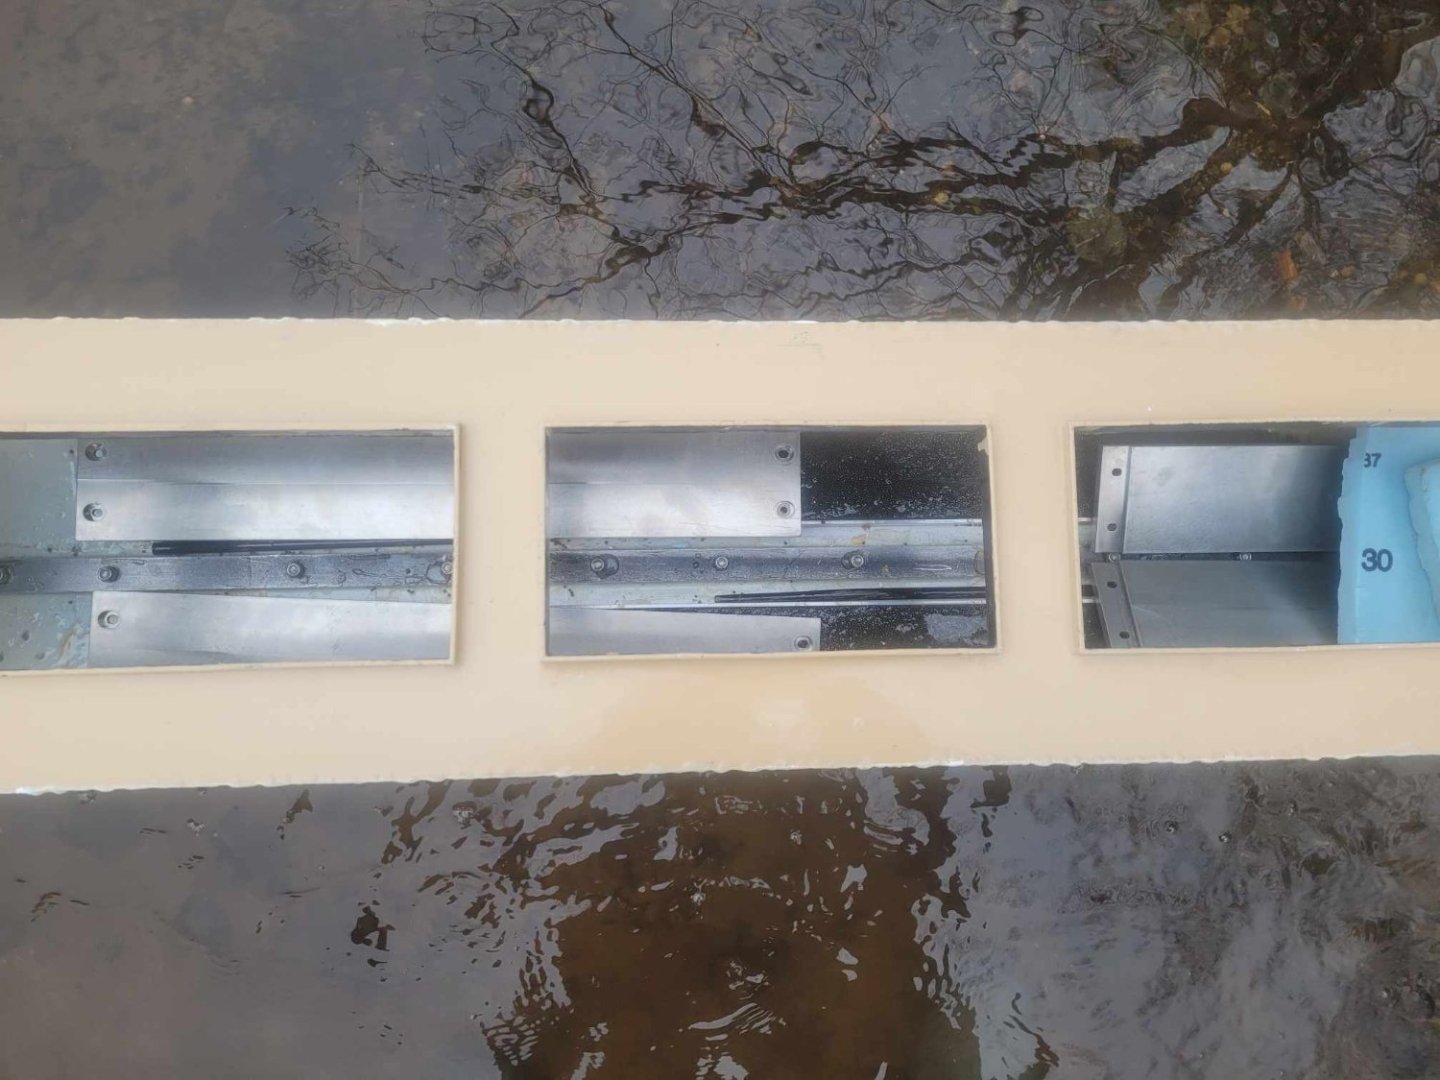
Some careful measuring, scribing, and cutting this afternoon, and I've got the hangar deck cut-out done, and the hangar deck insert fits almost perfectly. That said, I realized that the design I made originally was factored around the 6mm thick wooden flight deck, so the top of each of the elevators actually projects 6mm up above the white 'pad' around it. That is....less than desirable. It means that I have to either do cut-outs around the elevators, or, re-print the elevator modules. So. I'm about to start re-printing the forward and after elevator modules. Again. Version 5 now...?

-
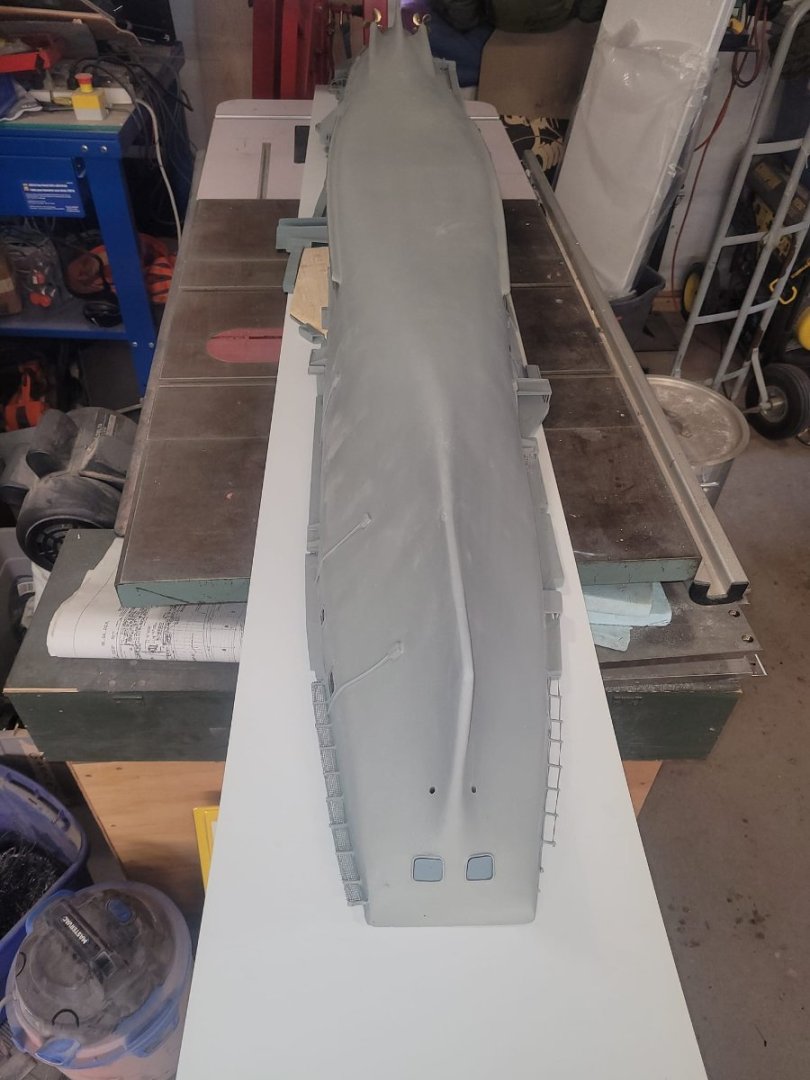
And...there's how she looks at the end of the day! Trimmed to fit, sanded, ready to think about cutting out the inserts tomorrow maybe.
-
It's not done yet....and I am still vaguely concerned about how many fingers I'm actually going to end up with at the end of it.
-
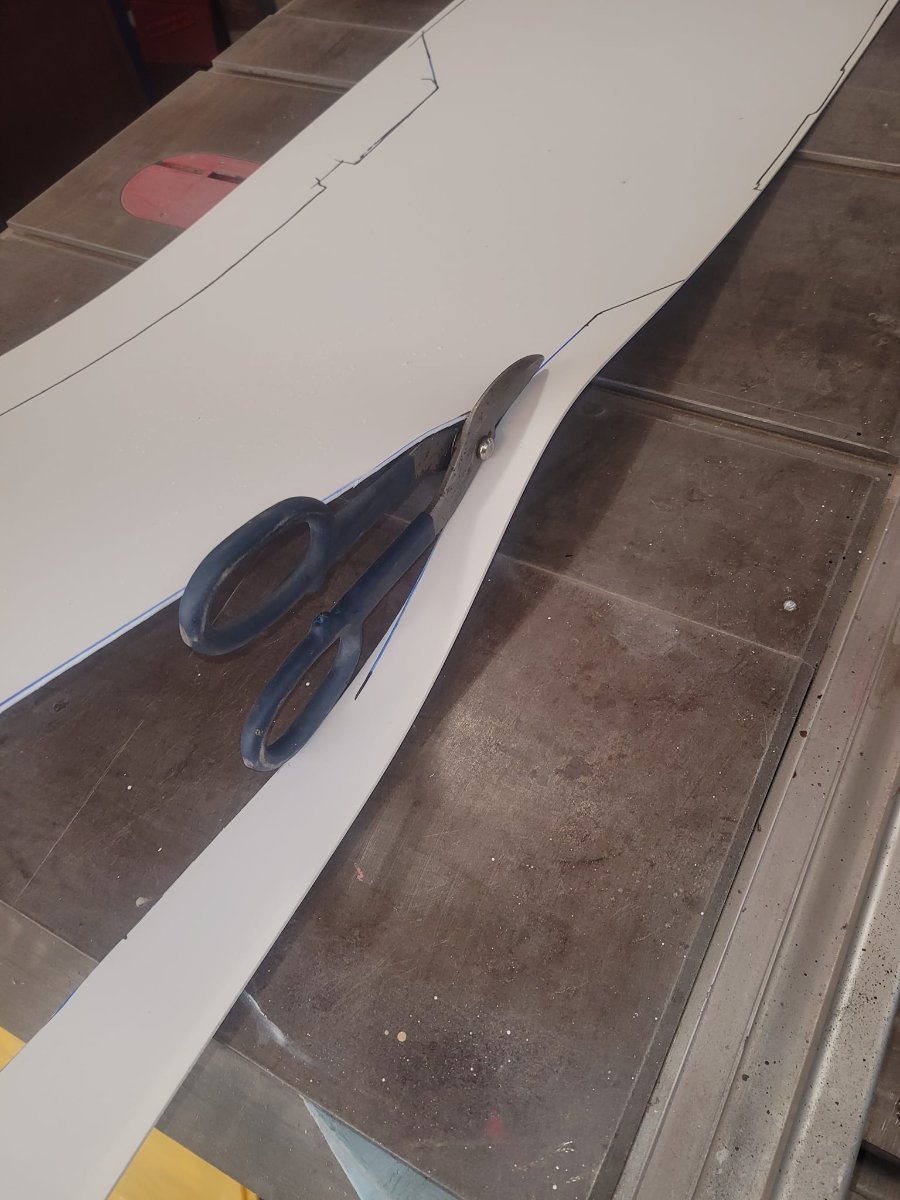
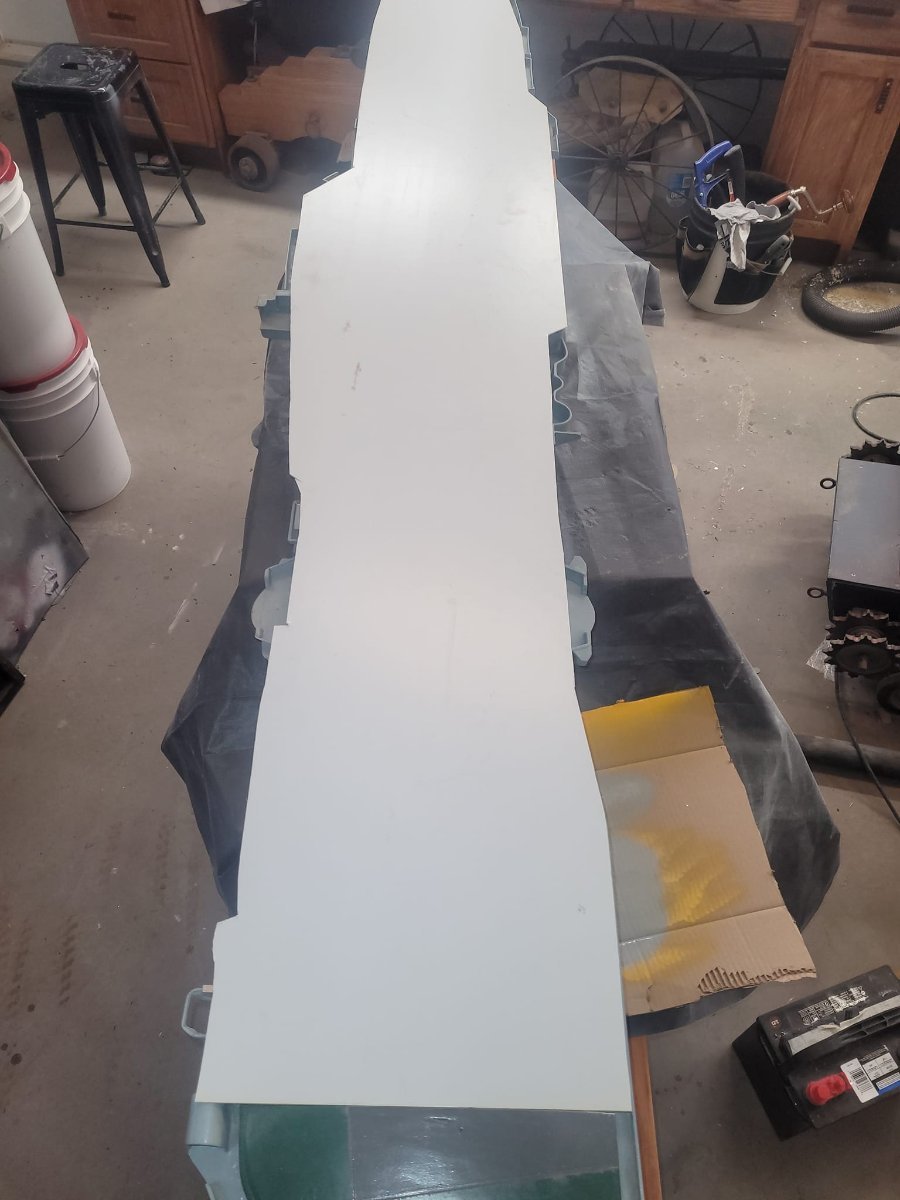
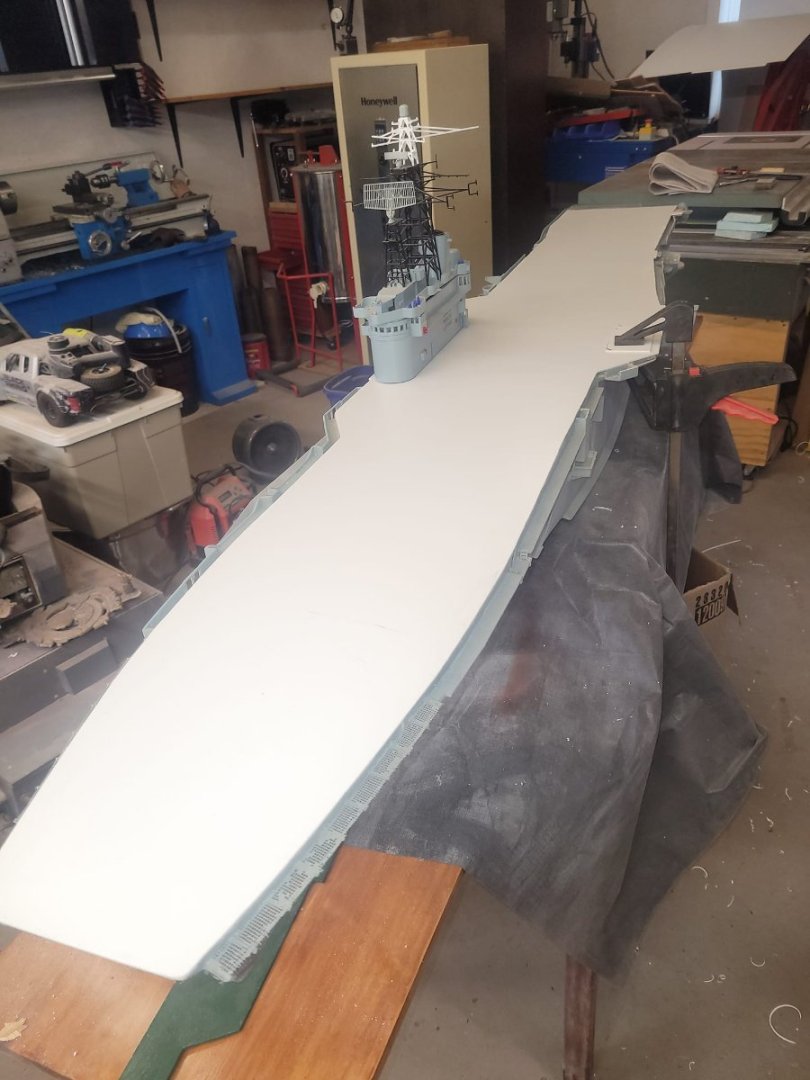
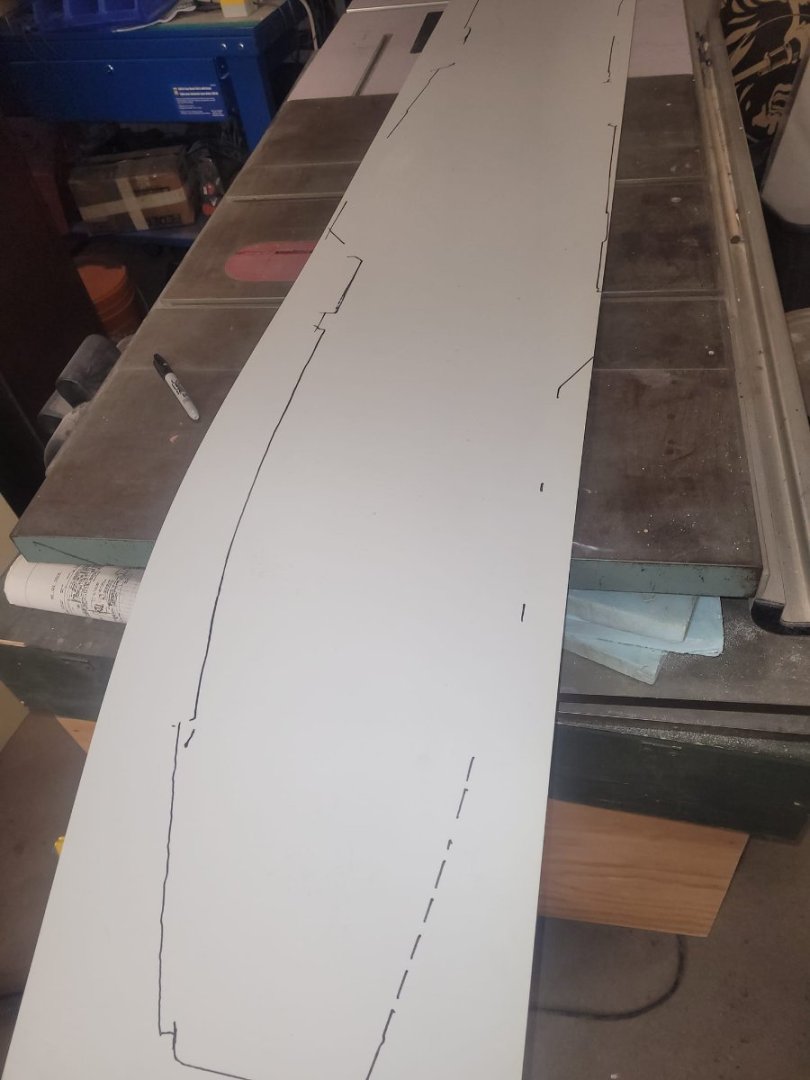
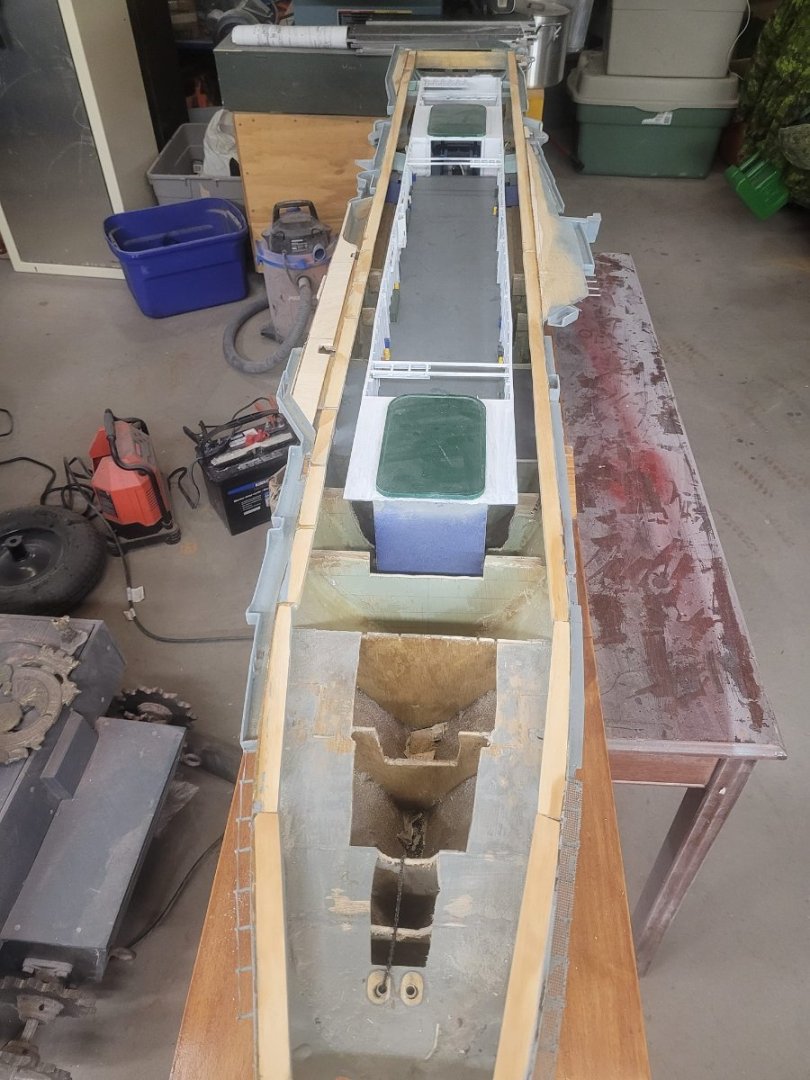
And here we go with the flight deck. 2mm sheet styrene. Flipped the ship up to get a rough profile, cut out with a set of tin-snips, then clamped in place and started trimming. Got about half done - taking a break for lunch and I'll see if I can get this finished up this afternoon. I was thinking this would take a LOT more time than it is. Still need to sand it, but I'm generally pleased with how it's cutting. A sharp/new blade is making quick work of things!


-
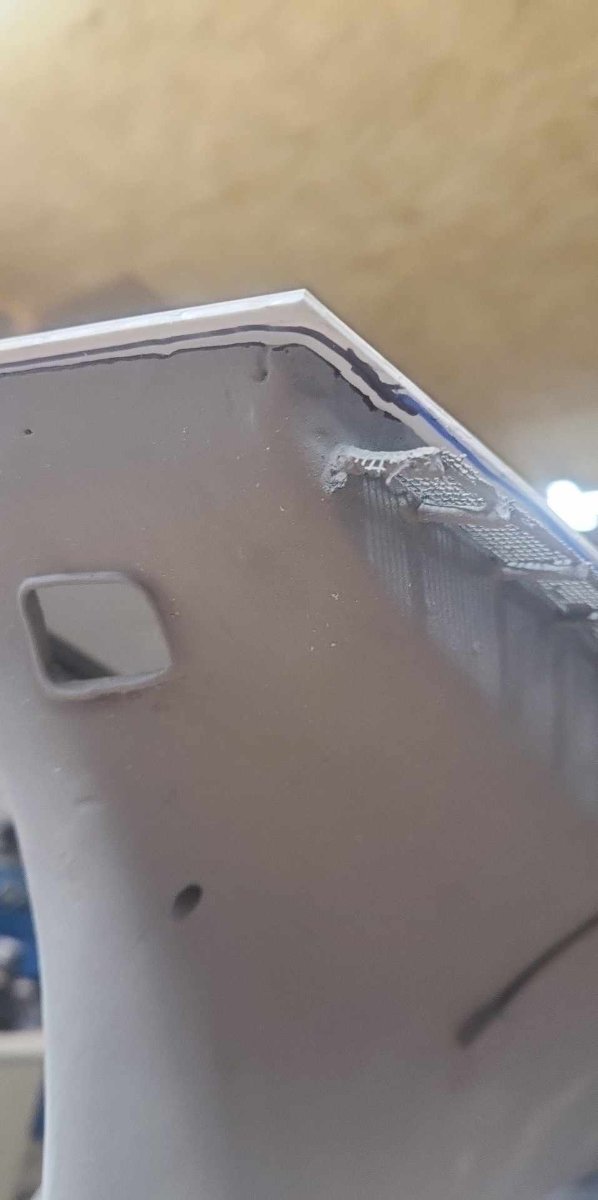
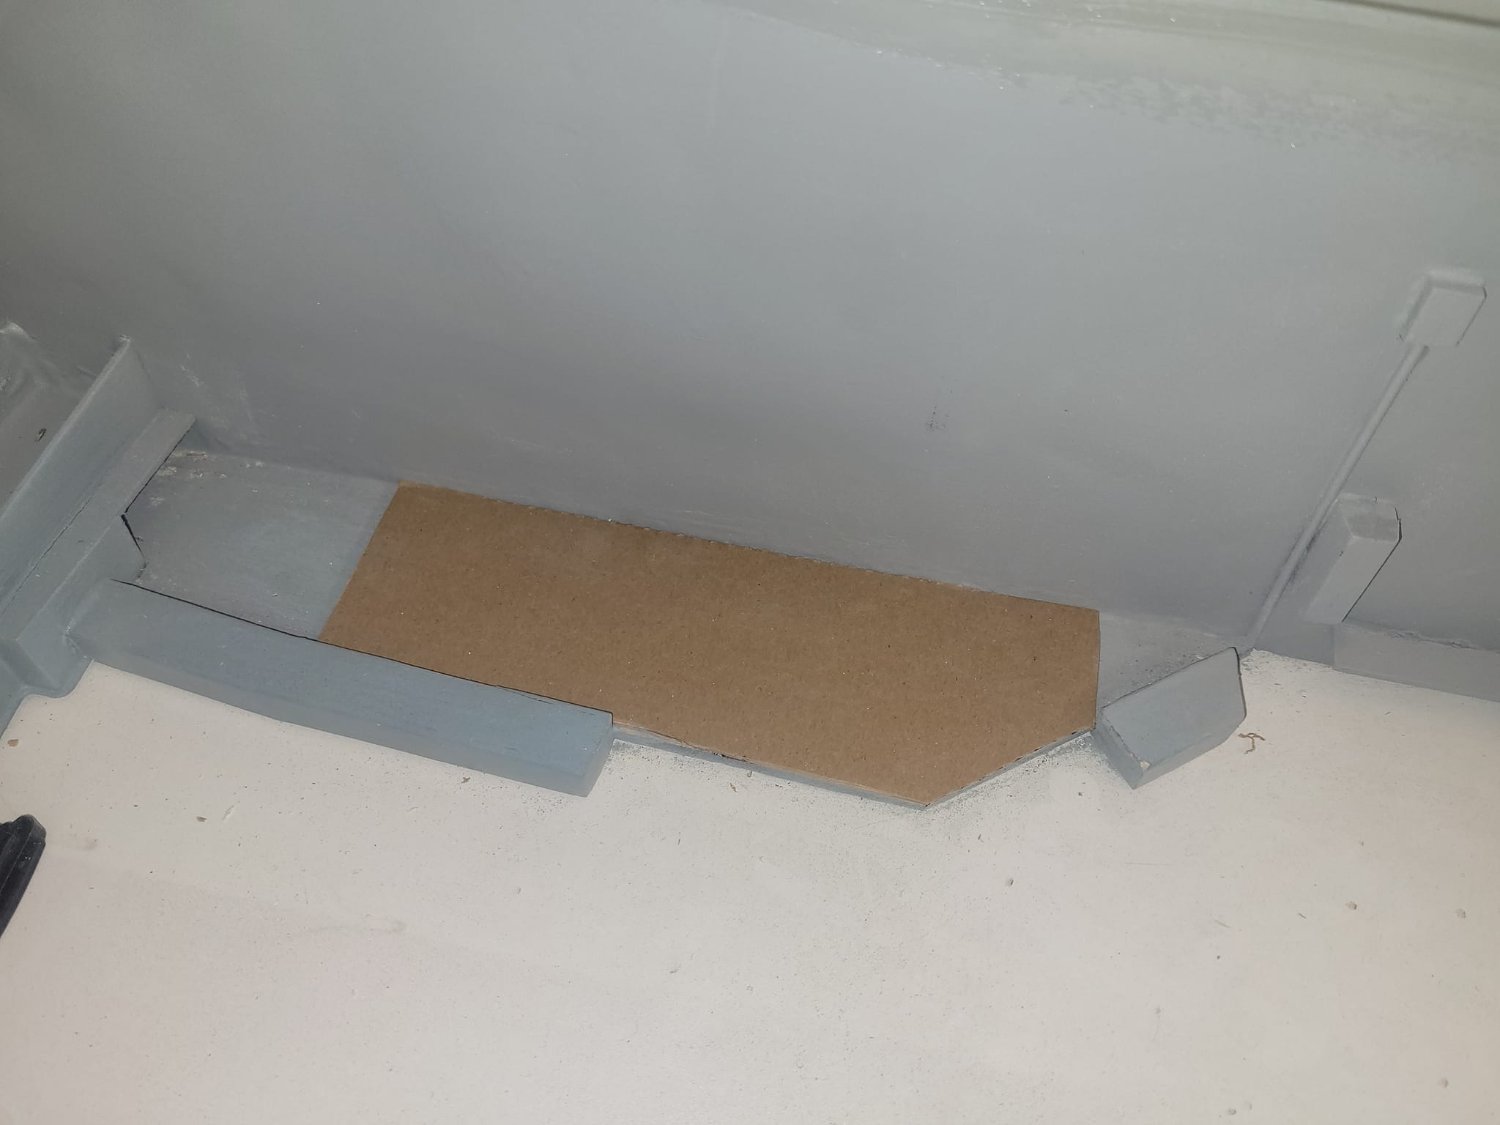
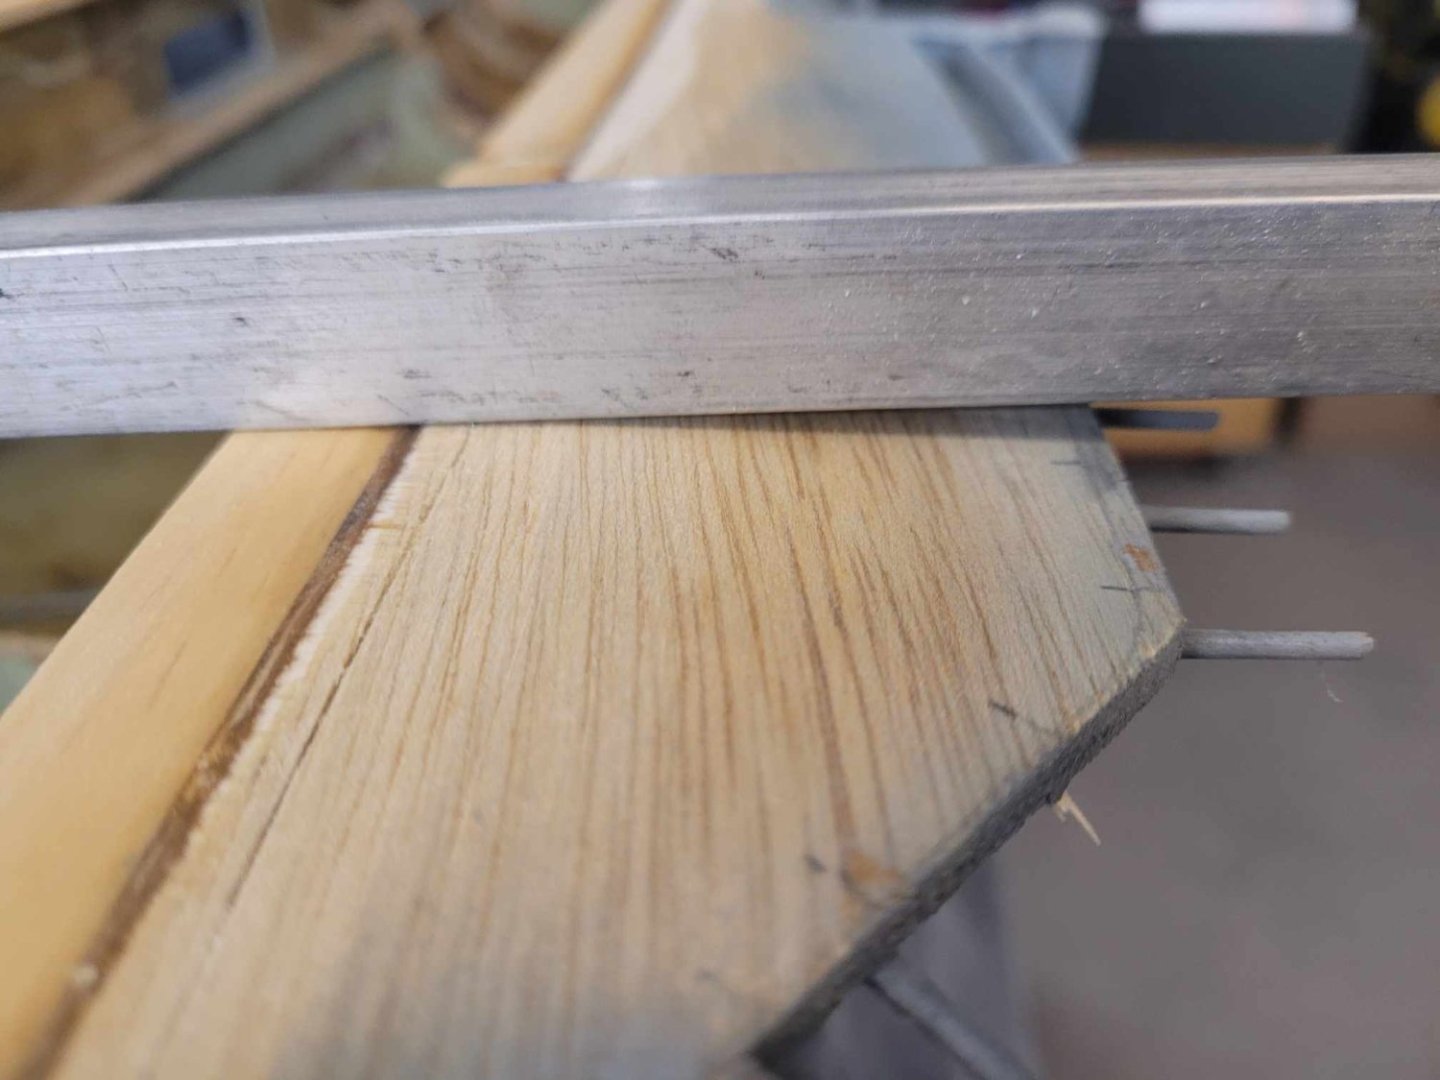
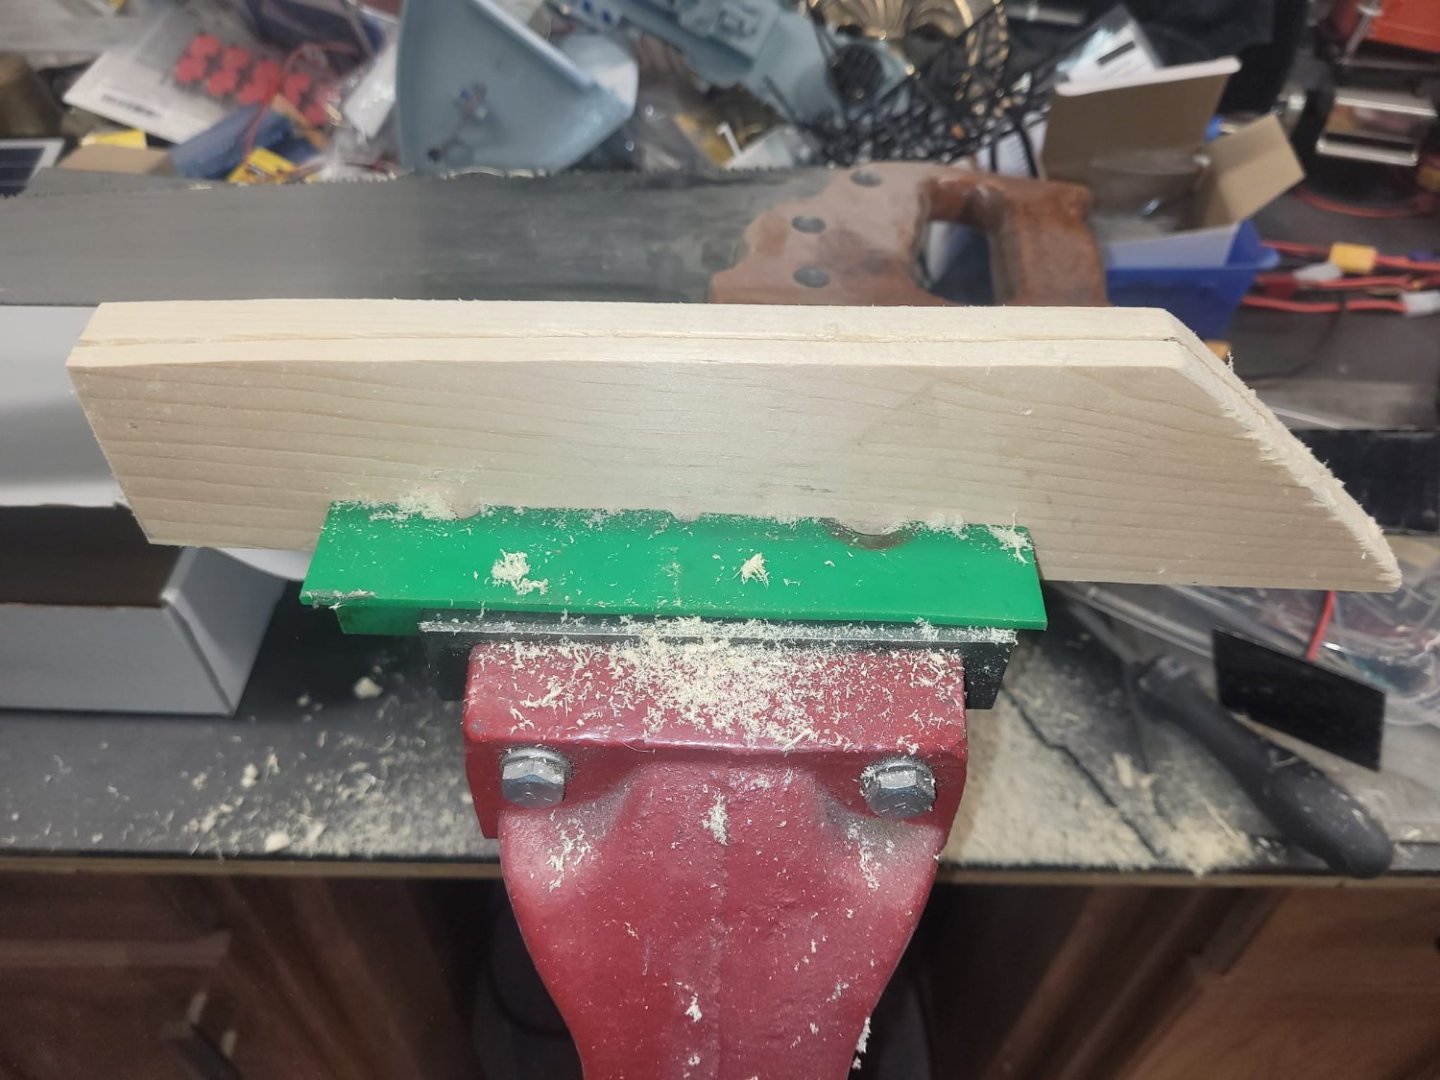
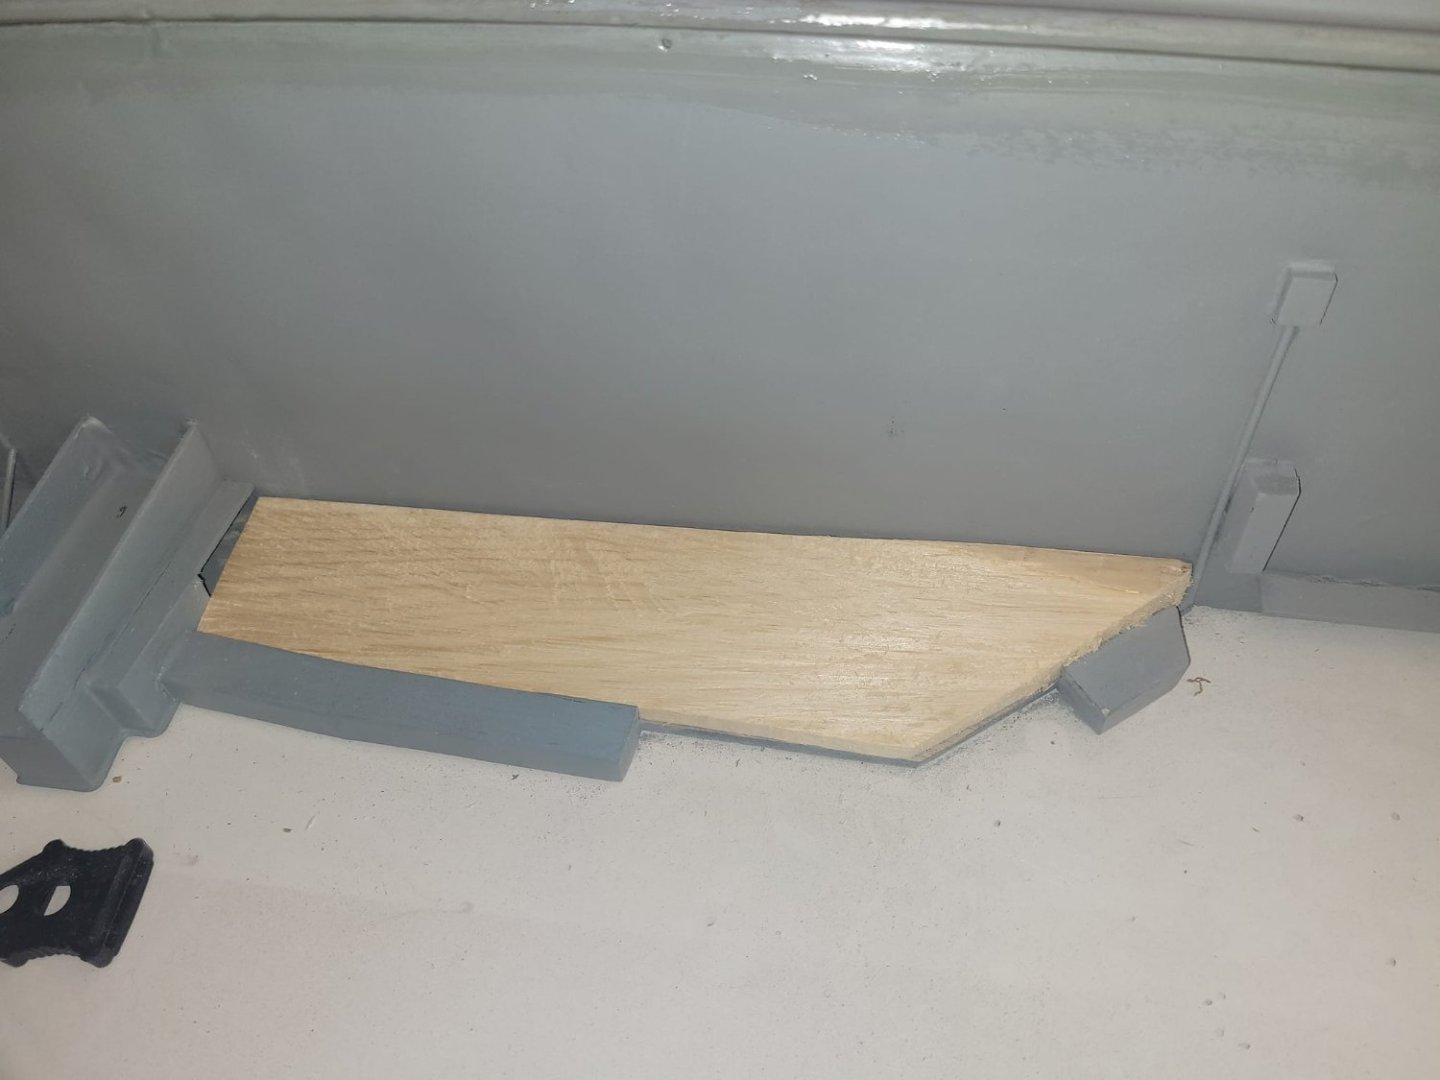
OK, one of the problems noted above was the deck overhang that was, well, hanging low. So. A bit of cardboard as a template, a bit of pine, a bit of saw work, some sanding, and some epoxy, and I think I've got the problem solved. We'll see how she looks later today.


-
That is the plan! Follow the MSMG on the F-Book place and you'll get updates on when we plan to launch her! In other news, I've been testing my LED flashing light circuit, and based on my test results, a standard 9V battery lasts about 4 days of continuous flashing. I tried with a NiMH battery pack, gave it a full charge, then hooked it up to a solar panel circuit and it lasted about a week - so...I'm guessing that the flashing light circuit (which was designed for Model Railroad use) makes use of a lot more power than I thought it would. Which is odd for a simple circuit with just one LED light. So. Does anyone have any suggestions for a long lasting flashing light LED circuit setup I could use? A cheap LED flasher from amazon or something that I could simply add extra batteries to? I could buy a 20 pack of 9V batteries from Costco and rig them up in parallel, letting them run for about a month and a half...but that seems...inefficient.
-
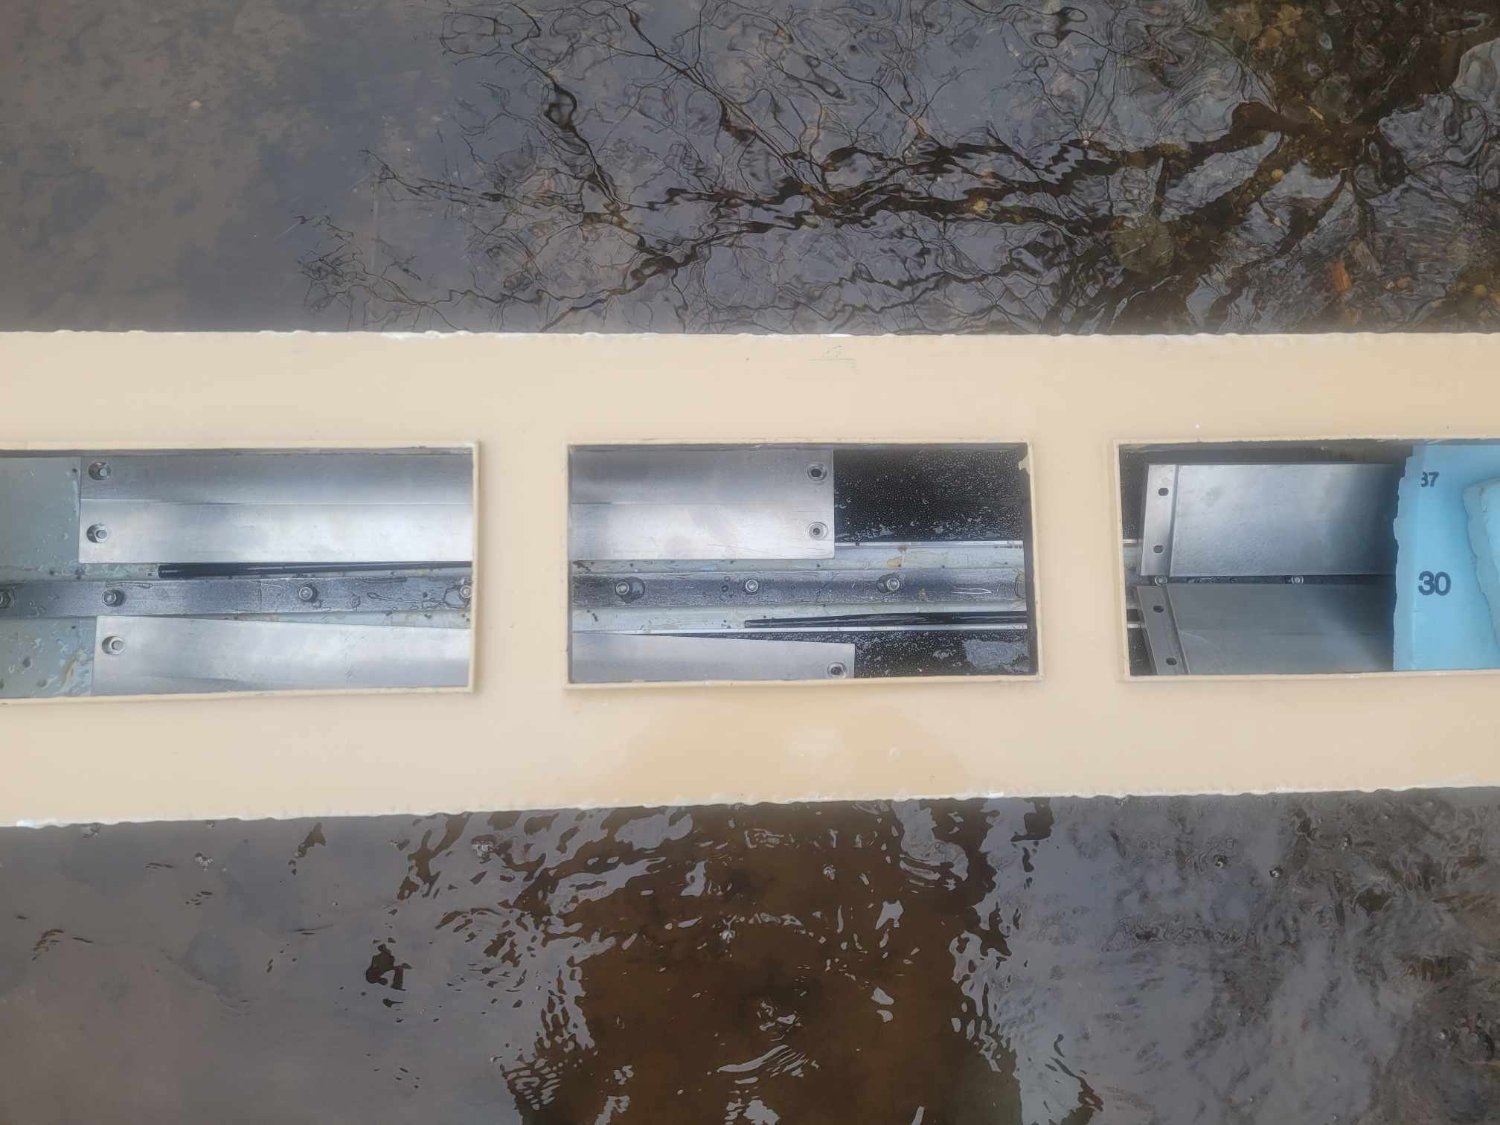
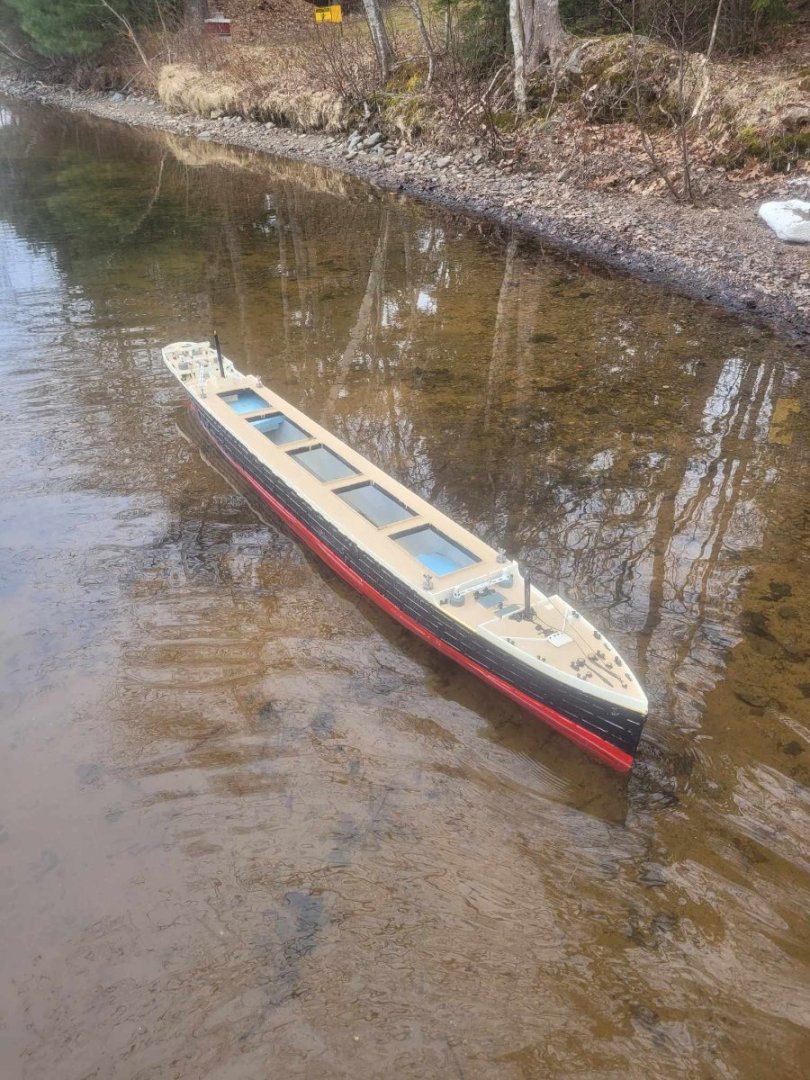
I brought the model into the Guild meeting this morning, and we had some good discussion about the ship. Here's the ballast and leak test from this afternoon. I was concerned about the model going in the lake and going from being warm to being cold (lake is only recently un-frozen) and potentially having cracks in some of the layers - and then I realized that after driving home with her in the bed of the truck that, well, she was already cold...so...off to the lake with some steel plates, and in she went. 20 minutes or so in the lake, some bouncing up and down to test her out, and she seems to hold up well. Most important bit is that there was no water ingress - looks like things are well sealed. Next step will be the 'unofficial' test launch in the near future where I'll put her in the lake here for a couple of weeks to test the ship in a longer term float before we put her into the Public Gardens pond. I will note, I'm updating this site more often than the Guild's official f-book page, so you guys are getting the news before the rest of the world!

-
@Ian_Grant that's something I was told about - and is something we will look at in the fall when she comes out of the pond. The guy who was actually supposed to do the build will be back by then, and he'll be taking her home through the winter to affect any repairs and refitting required. (He's an actual fan of the Titanic - I'm not - I just inherited the work when he went away for a year on a contract.) I am fairly certain that he's going to want to add extra details, correct some colour selections I made, and that sort of thing. He's welcome to do that, and I'll suggest that he add that layer of UV coating on top. We'll see how the ship lasts this summer.
-
As of last evening, the Bonnie is back on the work-bench. I made a list of what I need to get done in the next month (before the hobby show in April) and I'm going to have some work to do!!!
-
I was asked elsewhere about costs and time...well, you can see the timeline for this build in this thread. Basically just over 4 months from start to finish. Here's the blurb about costs that I shared elsewhere: The plastic for printing was $470 - ish. The lead shot for ballast was $60 The fiberglass resin for sealing was $120 The paint was $150 (several cans of spray plus several pots of various colours of other paint) The epoxy outer layer was $200 - West Systems Epoxy is NOT cheap. The Stainless Steel Hardware (bolts/nuts/washers) was about $50. The Aluminum strengthening strips were about $60 (inner and outer) The Aluminum masts were about $10. The Line for the rigging was $25 That all adds up to about $1150 or so, give or take a bit. I bought the printer (used) specifically for this job (and the St Thomas model I did as a test print.) then sold the printer again, so using it for 3 months cost me about $150. Print time was about 6 weeks. Some modules took 50+ hours to print, there were 18 modules in the hull, and 8 more for the superstructure. The lifeboats and Davits were all individually printed too.
-
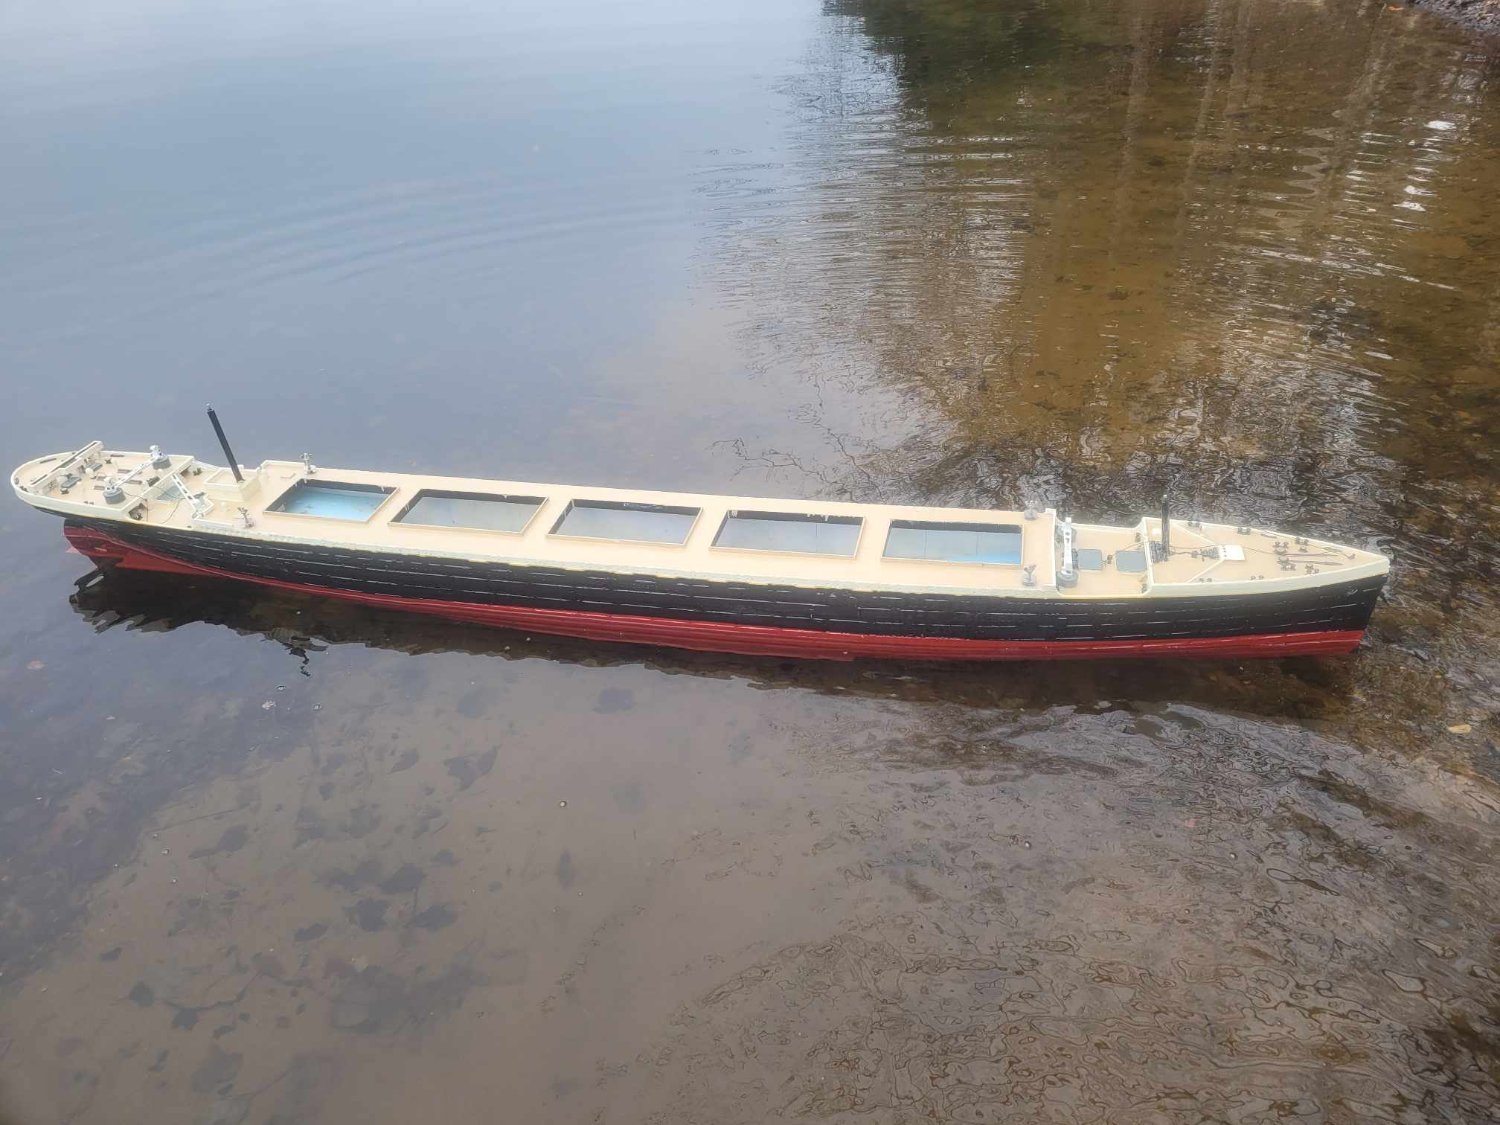
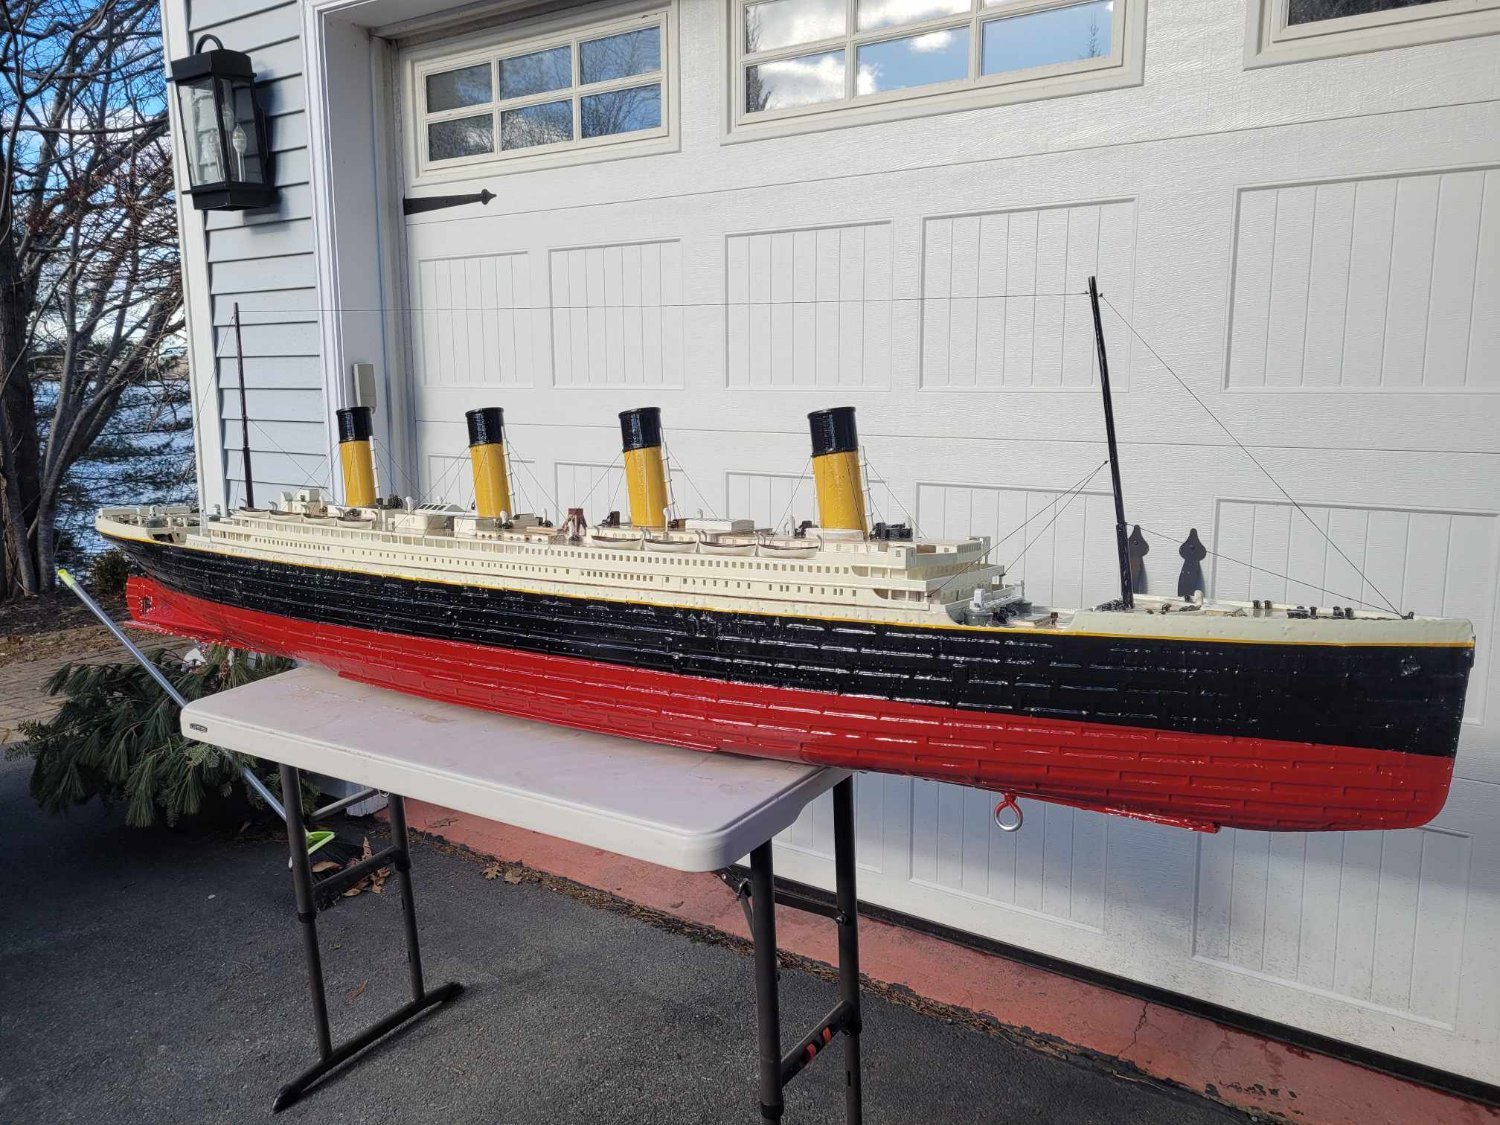
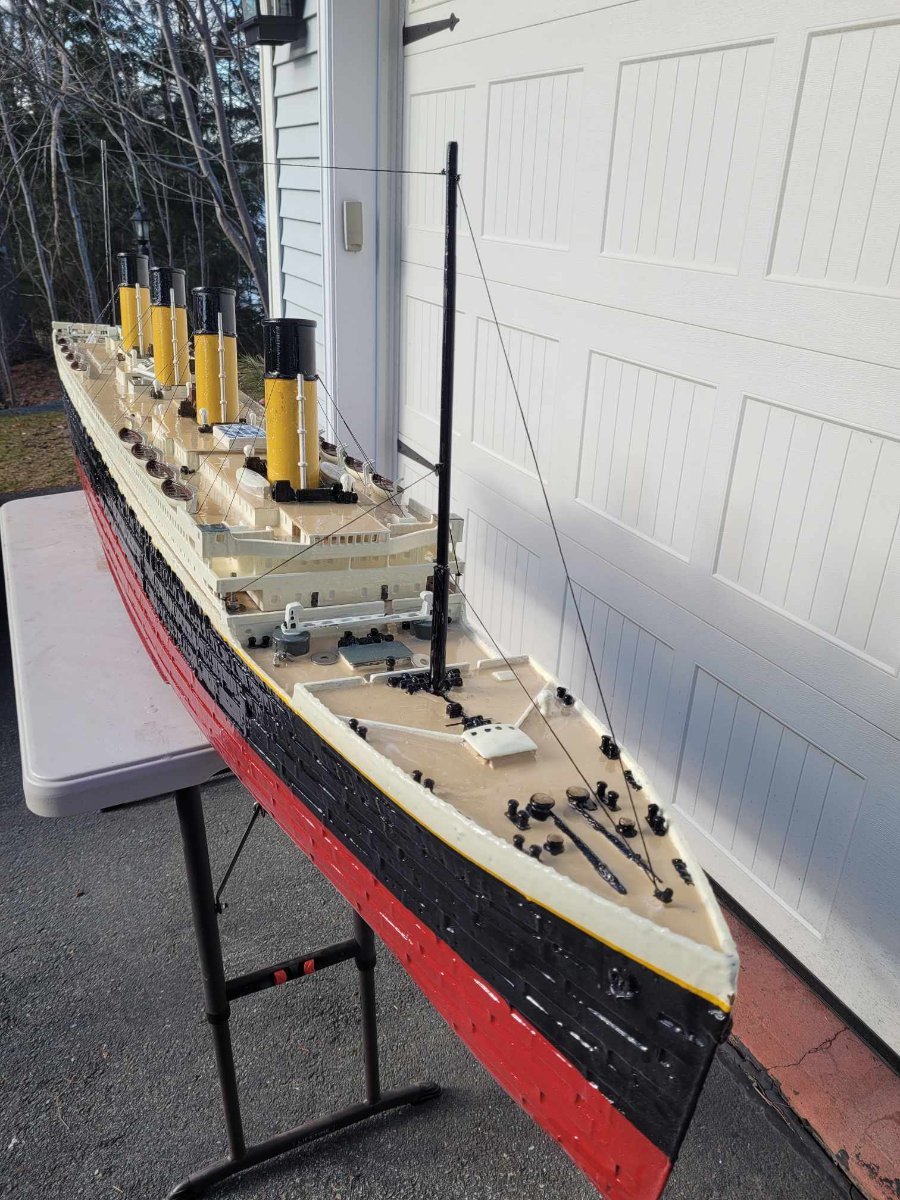
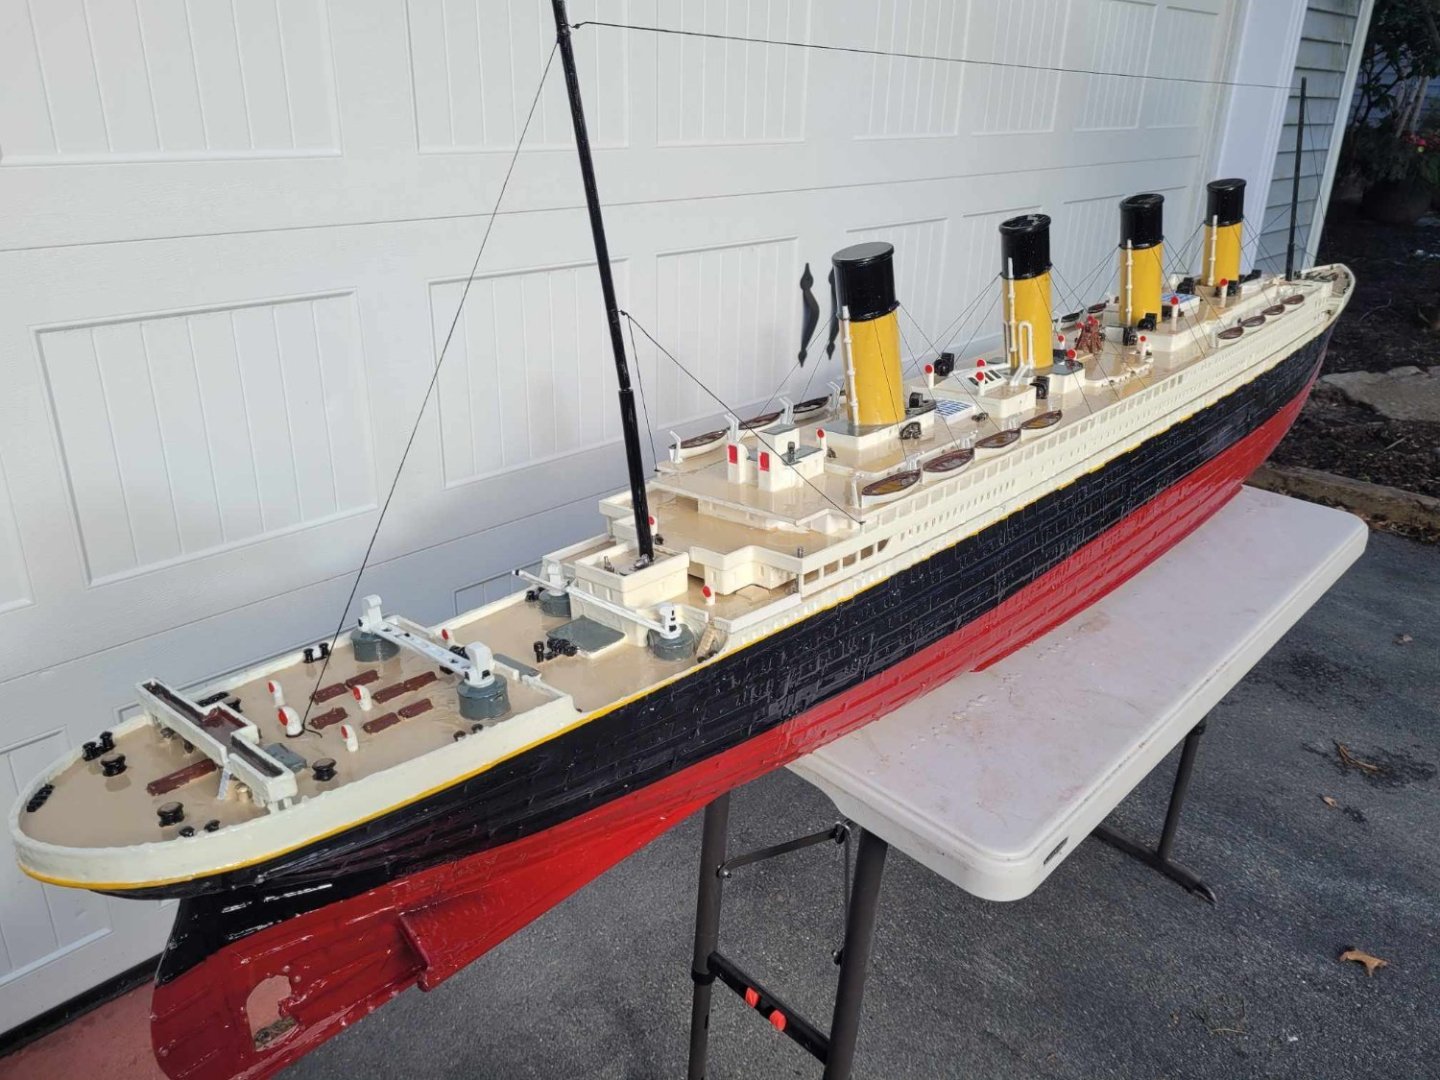
OK, I got her out this afternoon and snapped a few pictures in the sun. The ship is, effectively complete less the LED lights and ballasting/foam/float test. Here's the imagery. Bear in mind - she's sitting on a 4 foot table.


-
OK, I got the masts painted this evening (hopefully they're supposed to be black...?) and I got the last of the rigging complete. I'll see about getting her out of the garage tomorrow if things are nice out and getting a few pictures. All that's left is: - LED Flashing SOS System - Float Test - Ballast installation - Foam installation - Launch.
-
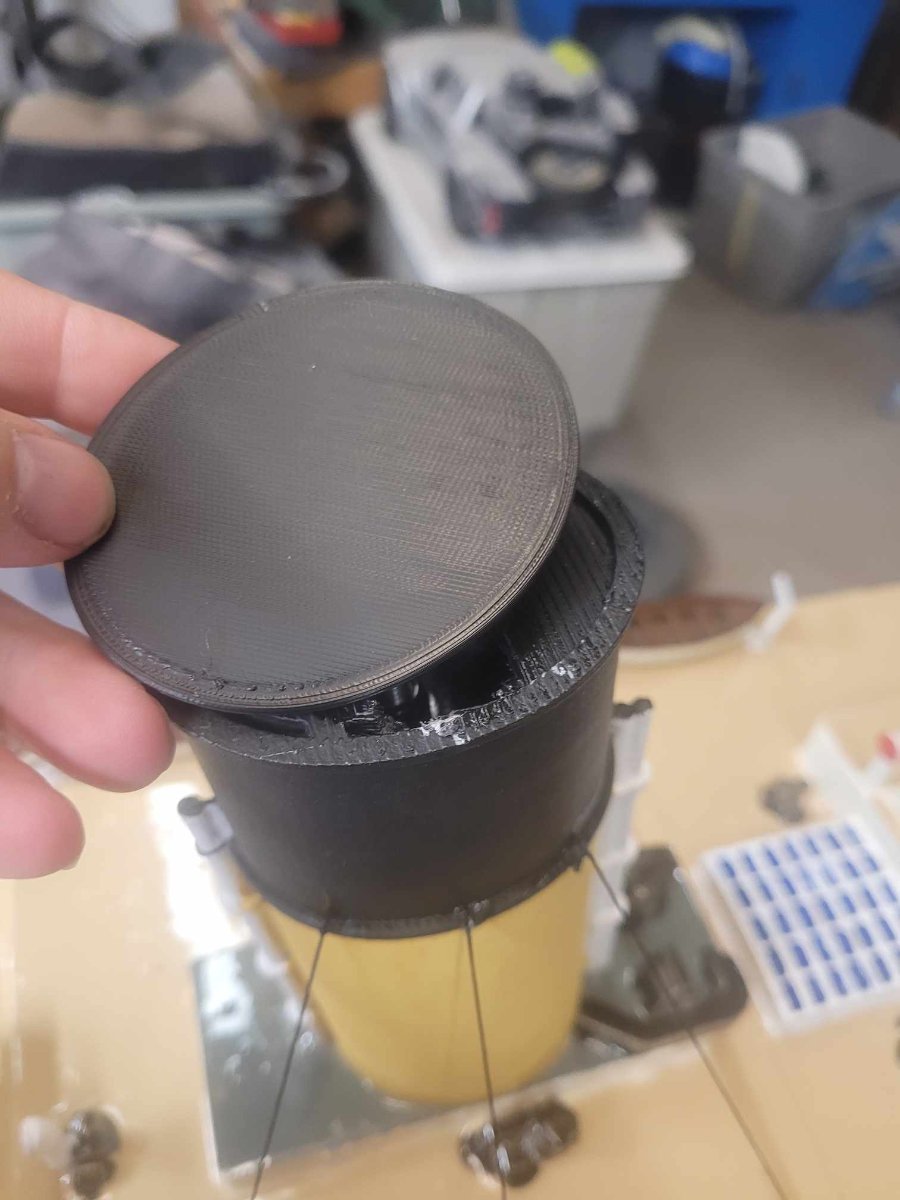
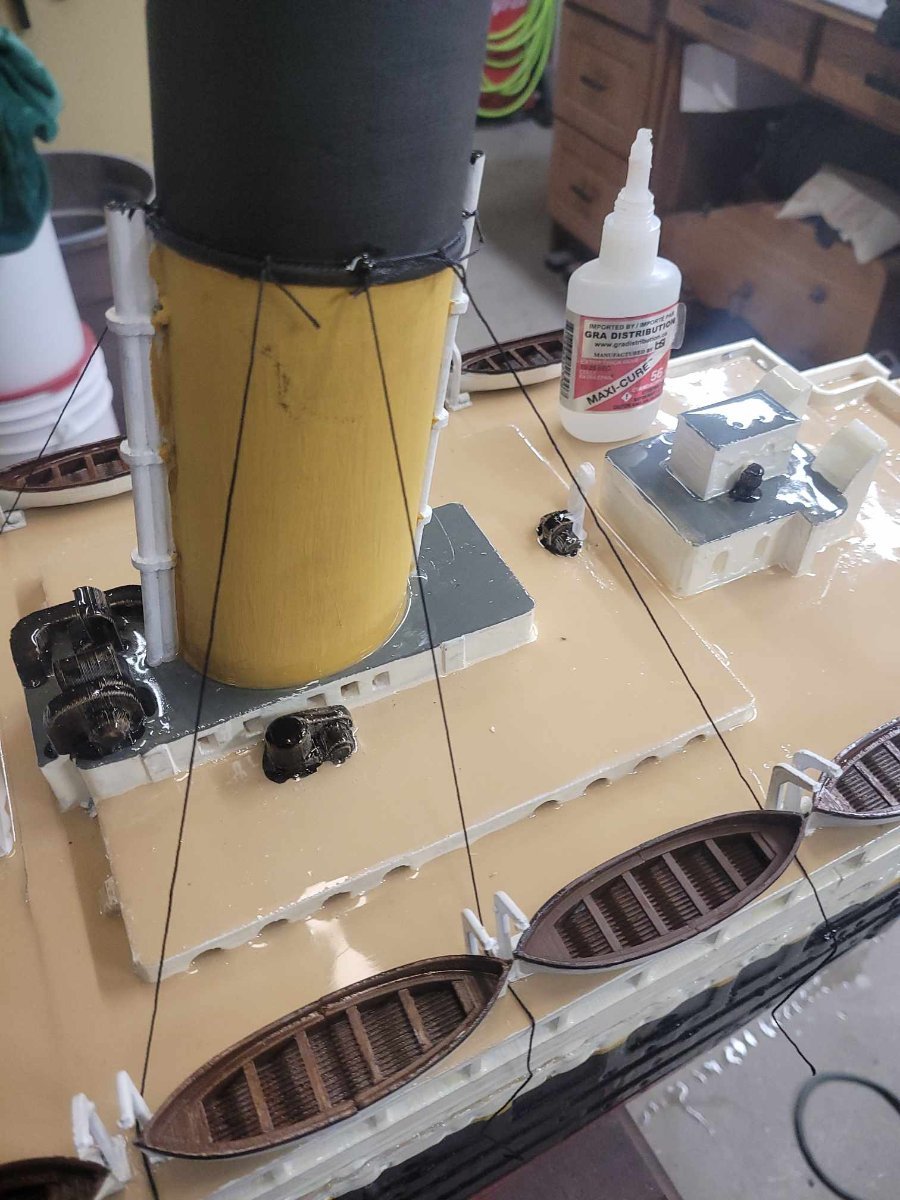
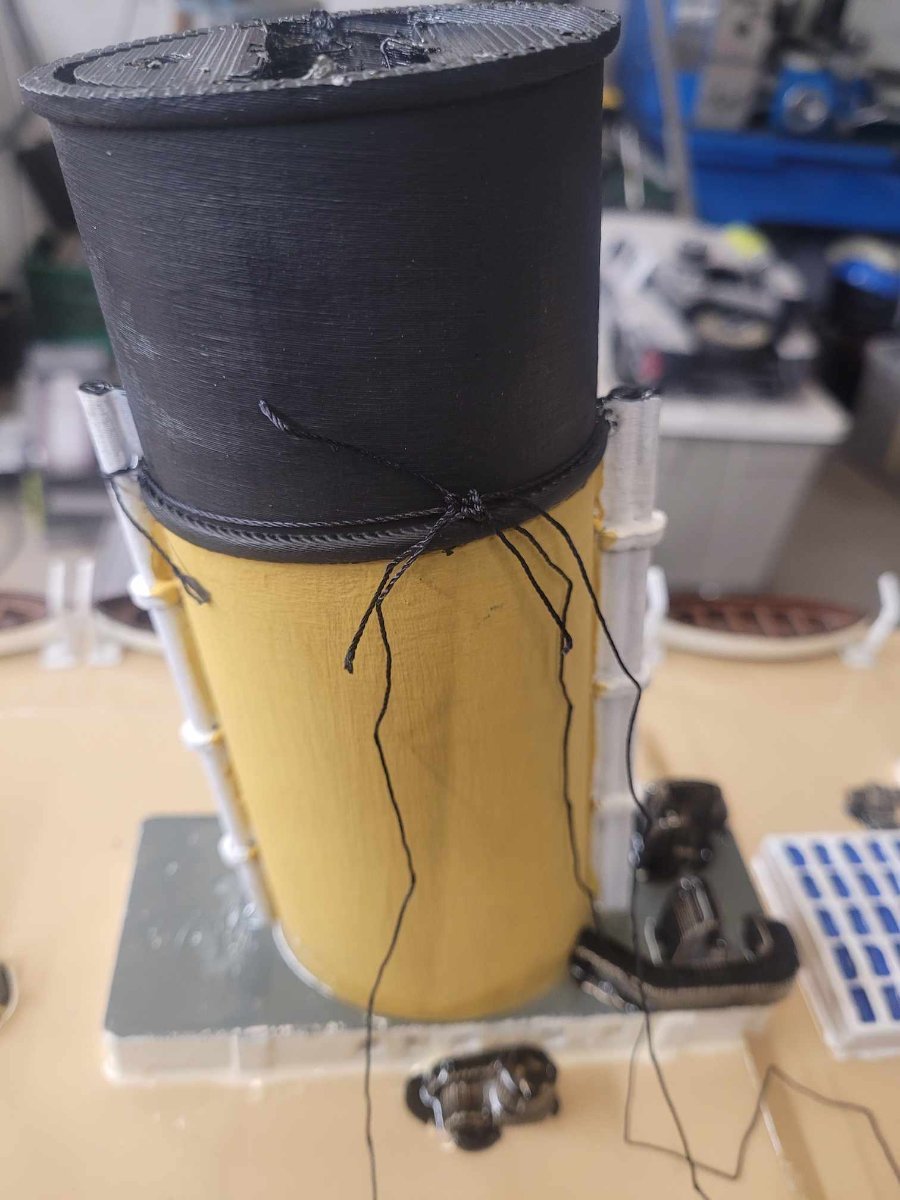
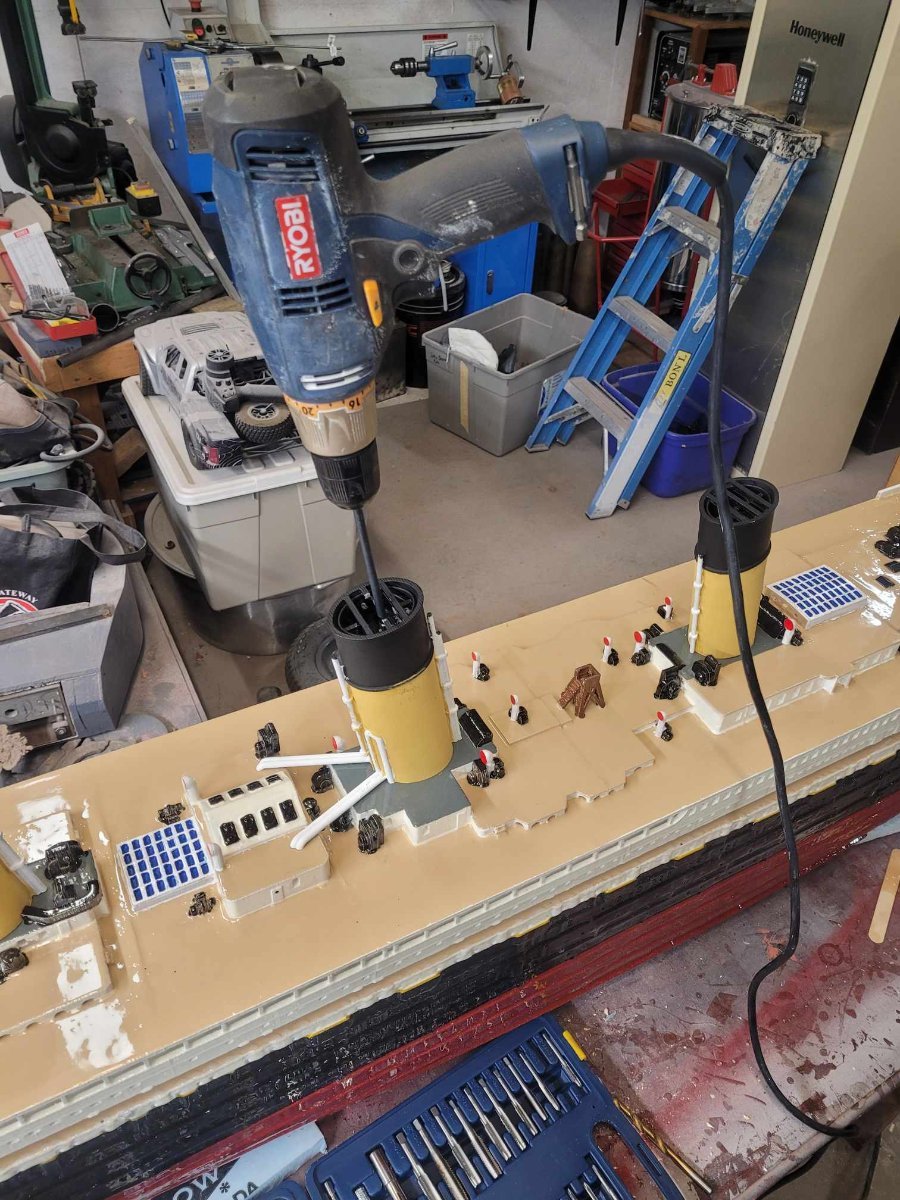
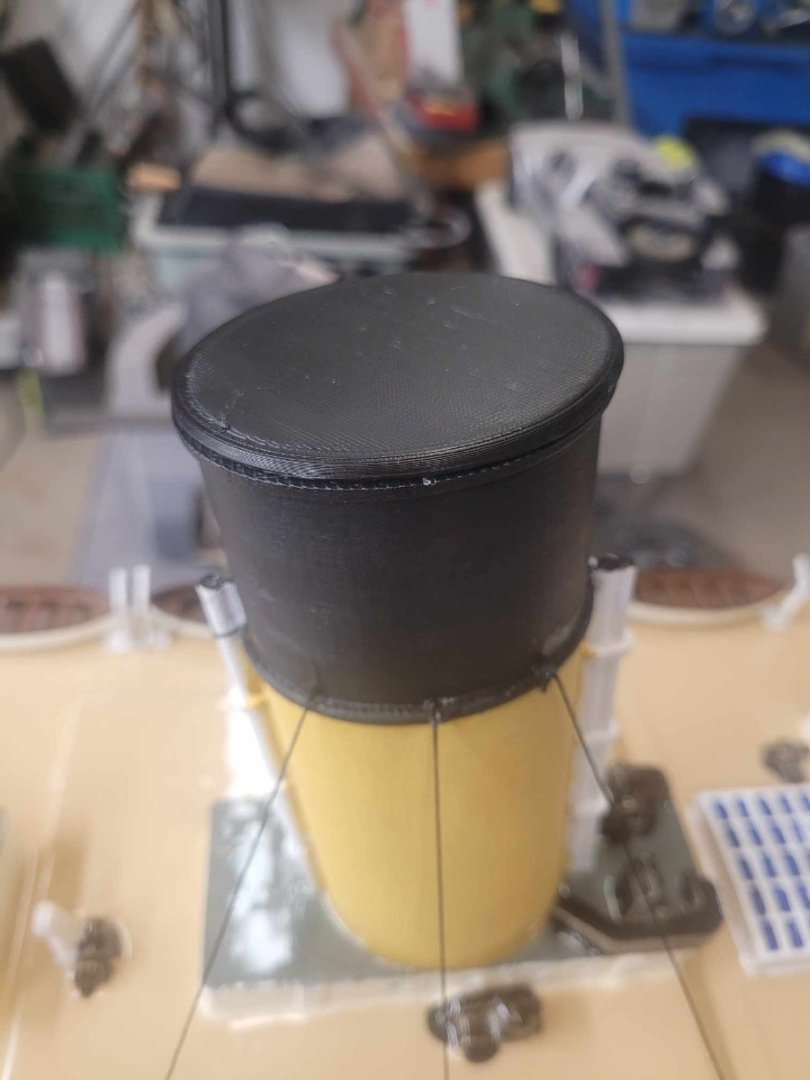
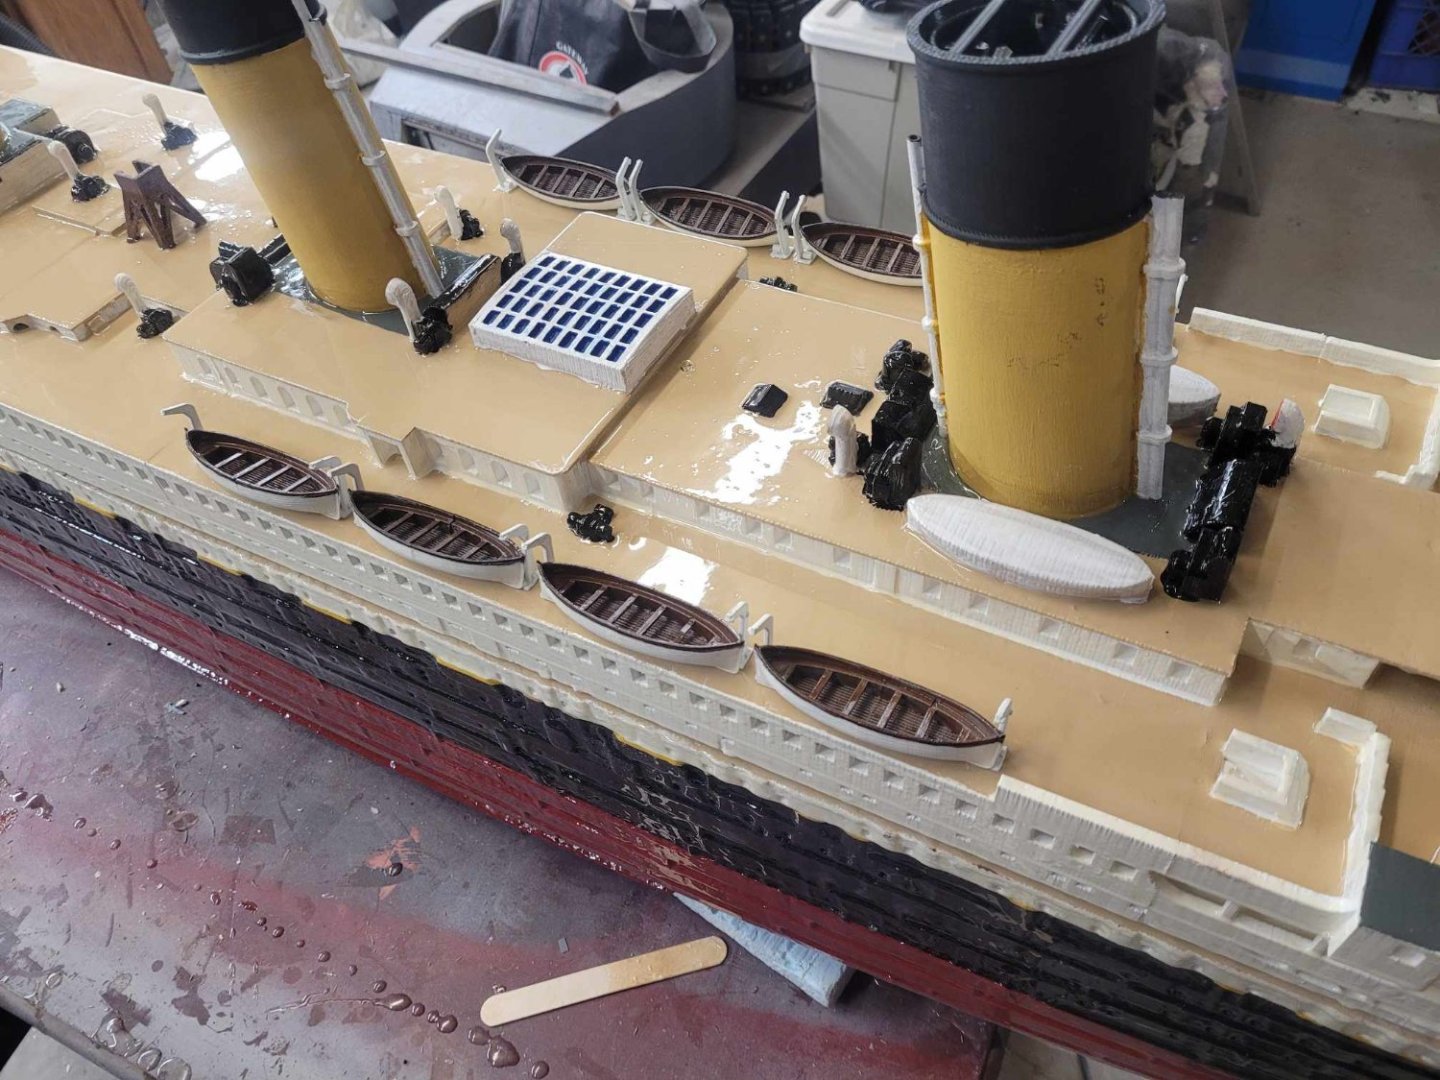
A couple hours of work tonight, and we have everything except the LED light system and the main mast rigging complete. I 3D printed the funnel caps and glued them on. This is hopefully the last layer of epoxy put on. Note - I filled the lifeboats with epoxy so that they wouldn't fill with water when she's in the pond. There were a few bubbles visible, so I took a trick I saw in a 'night shift' video and used a bit of flame to clear them away. Basically - she's ready for launch at this point. I need to get some outdoor photos on a nice day though I think. Here's tonight's work:


-
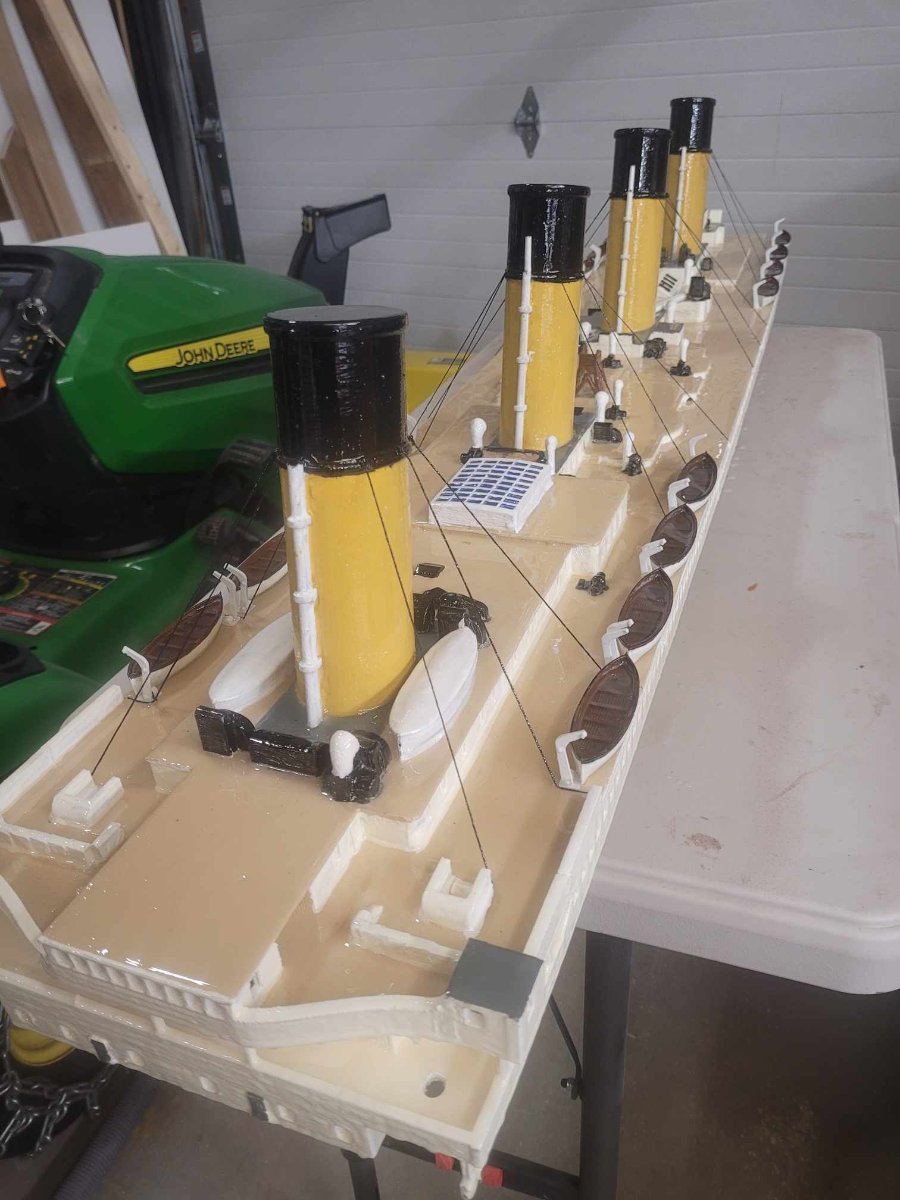
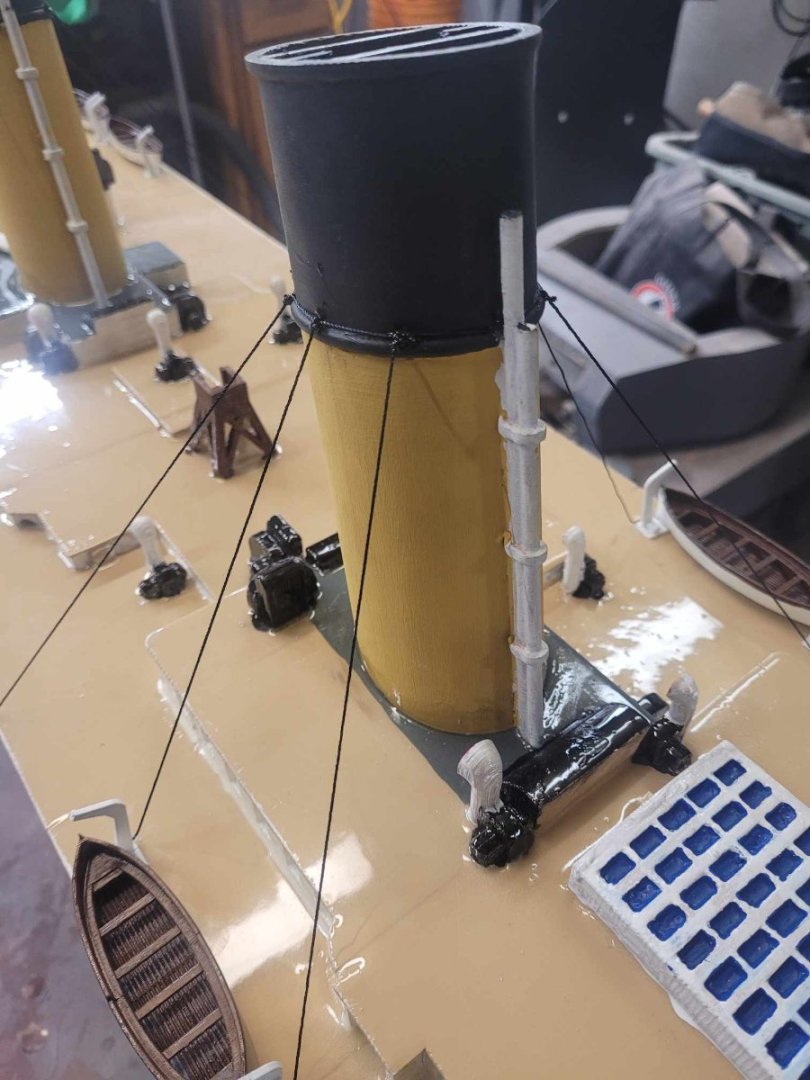
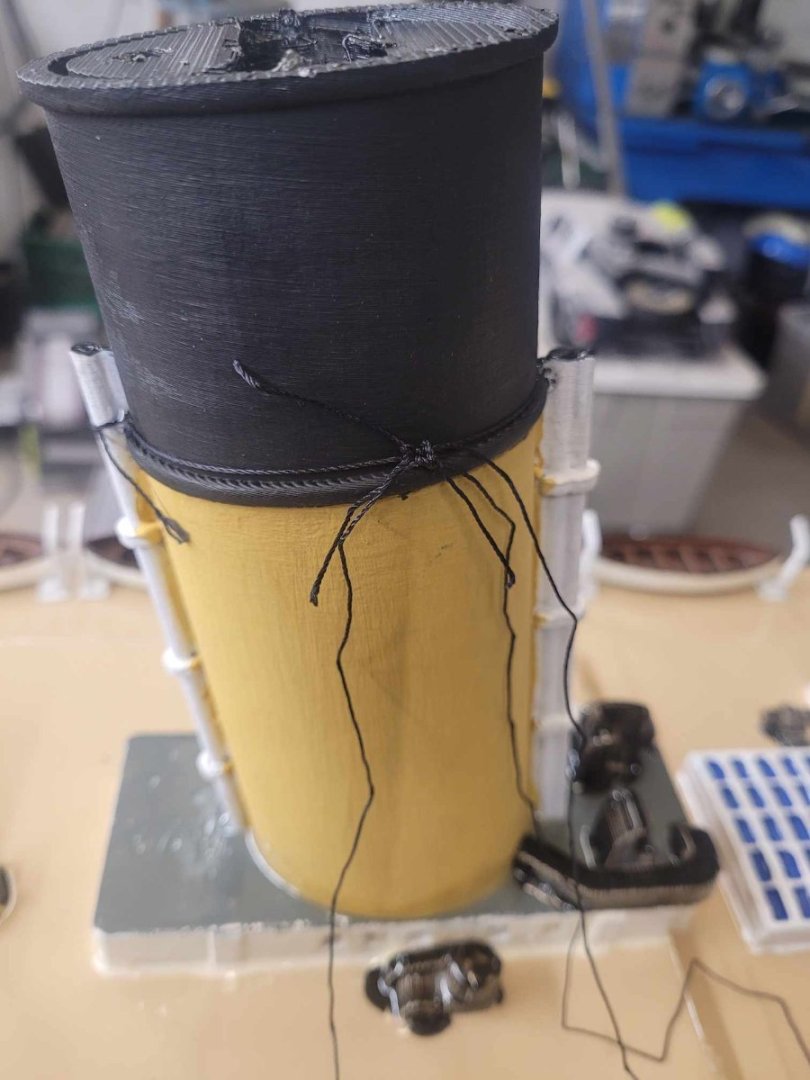
I spent tonight doing the 'minimalist' rigging that I planned to do. Put a string around the funnel band, tied lines to that, then glued the lines down to the deck. There will be a layer of epoxy added over all of this, so the lines will STAY PUT quite nicely. The 'to do' list is now getting quite short.

-
Hopefully you'll get to see the HMCS ST THOMAS with her out on the pond! I'll see what I add to the pond the year after that....I have been engaged by the crew/leadership on the HMCS Sackville - we'll see if I build one of those next.
-
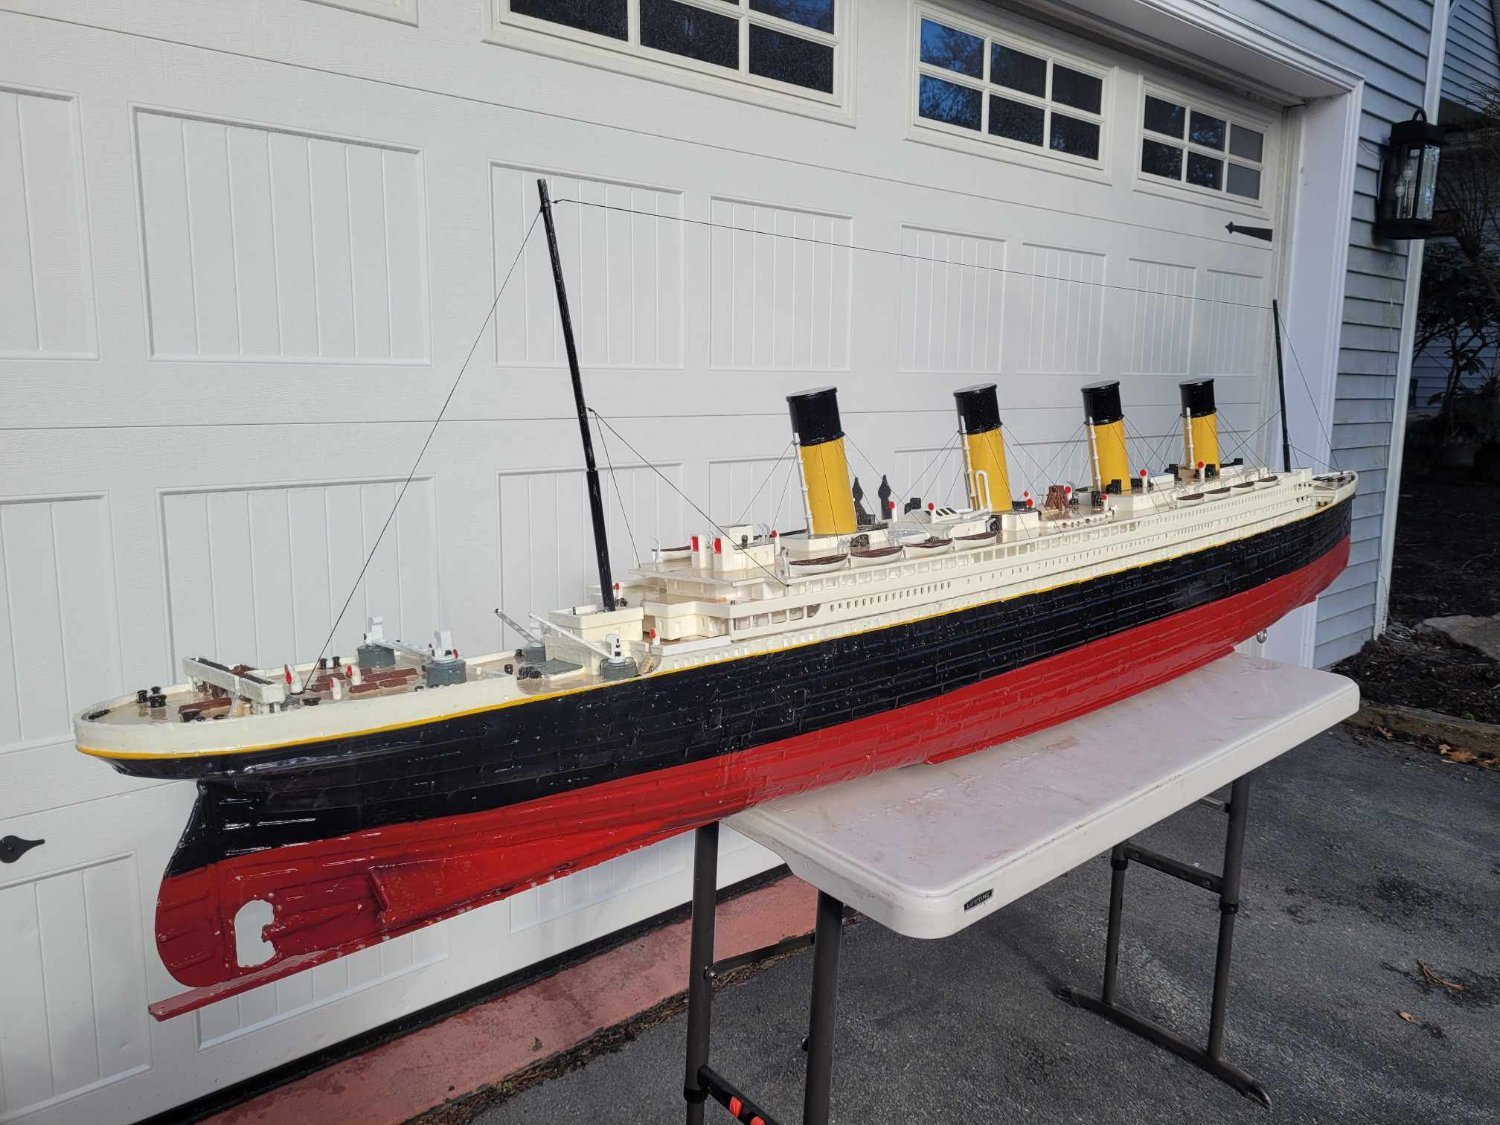
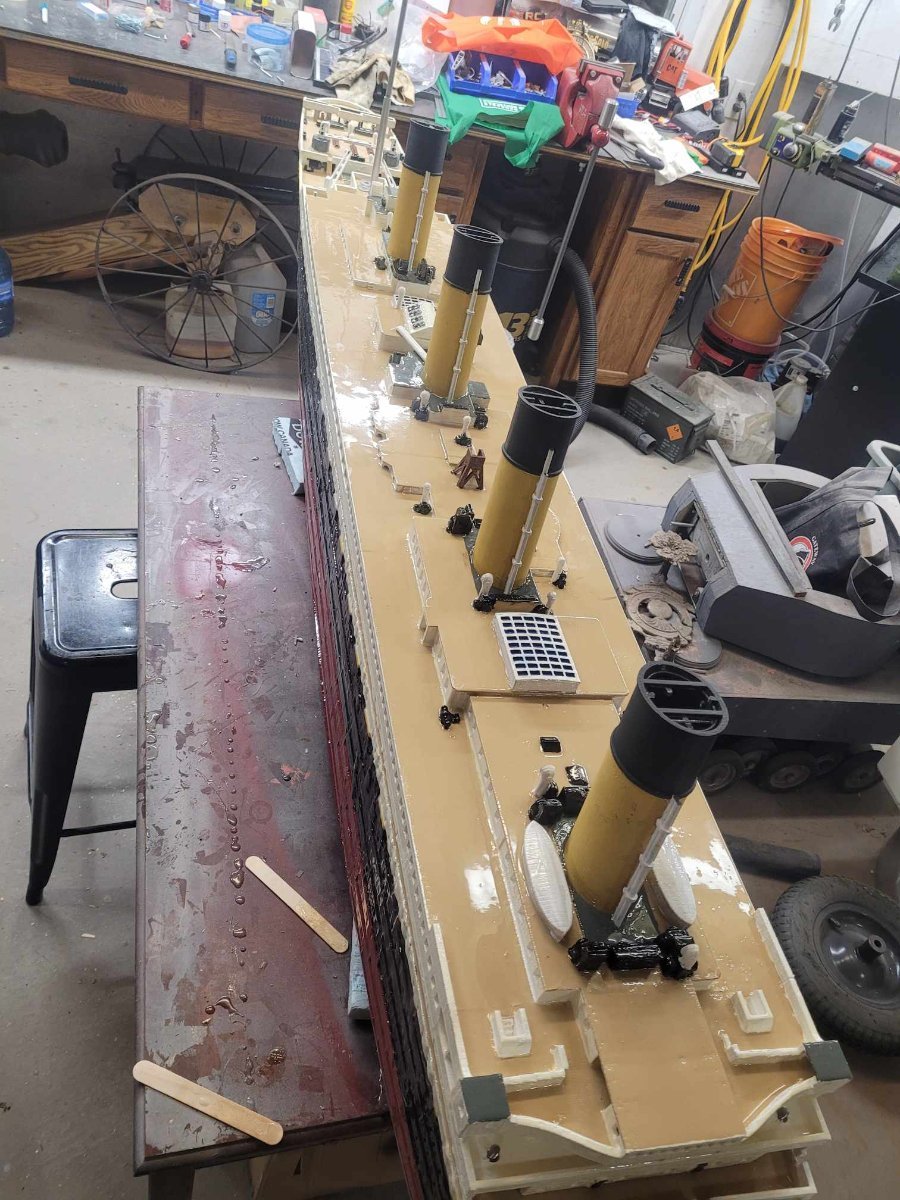
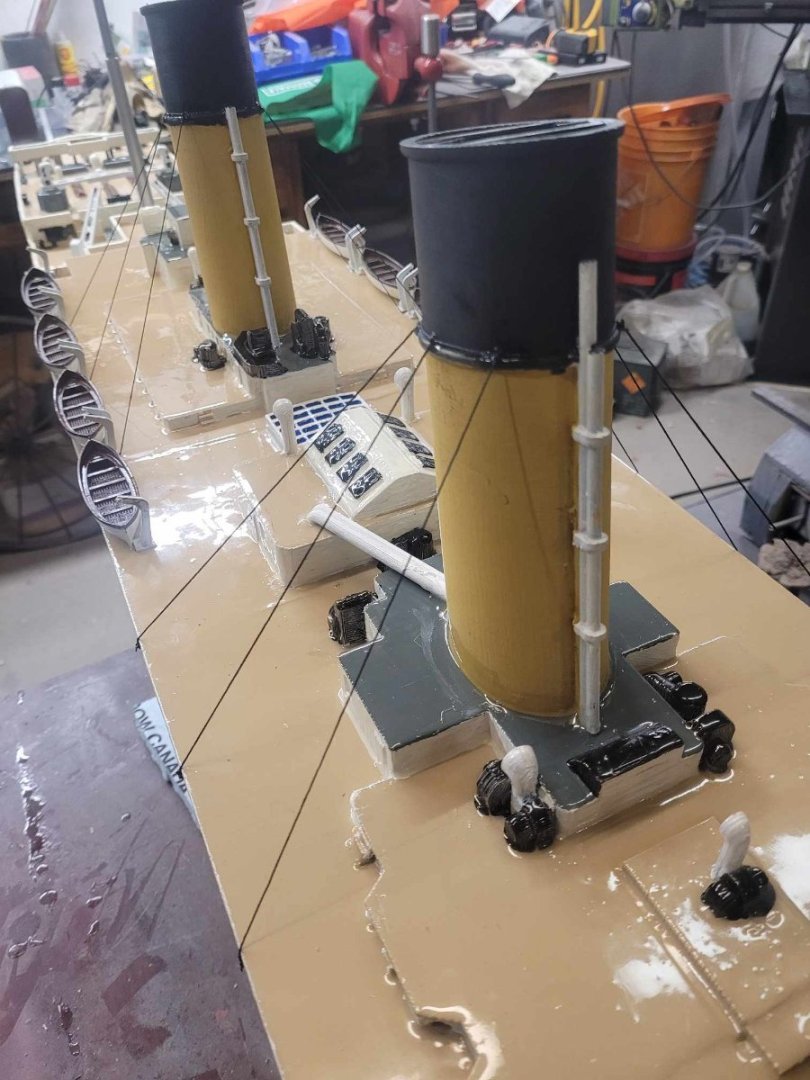
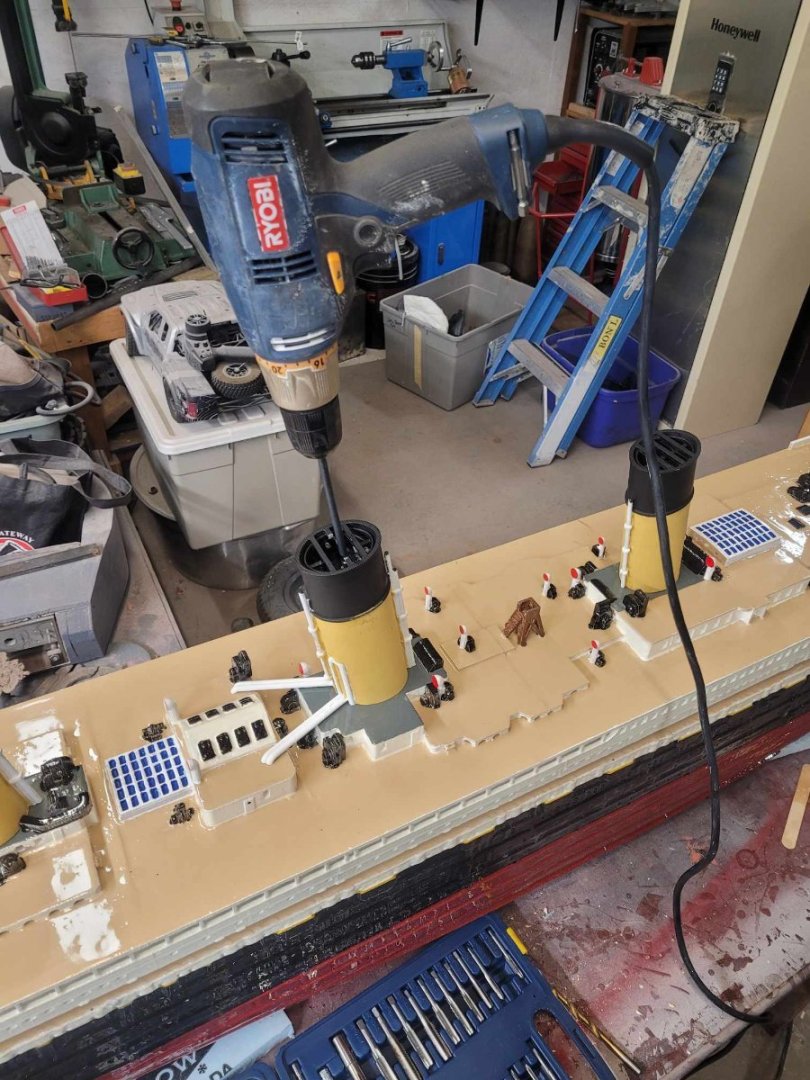
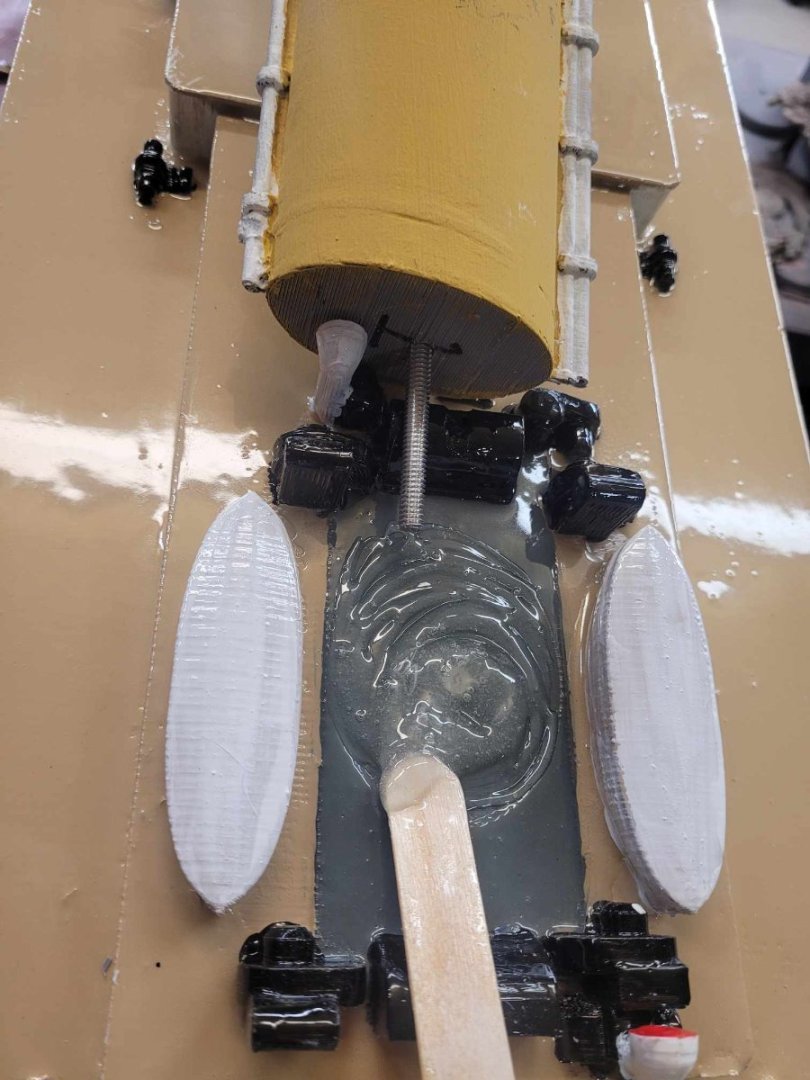
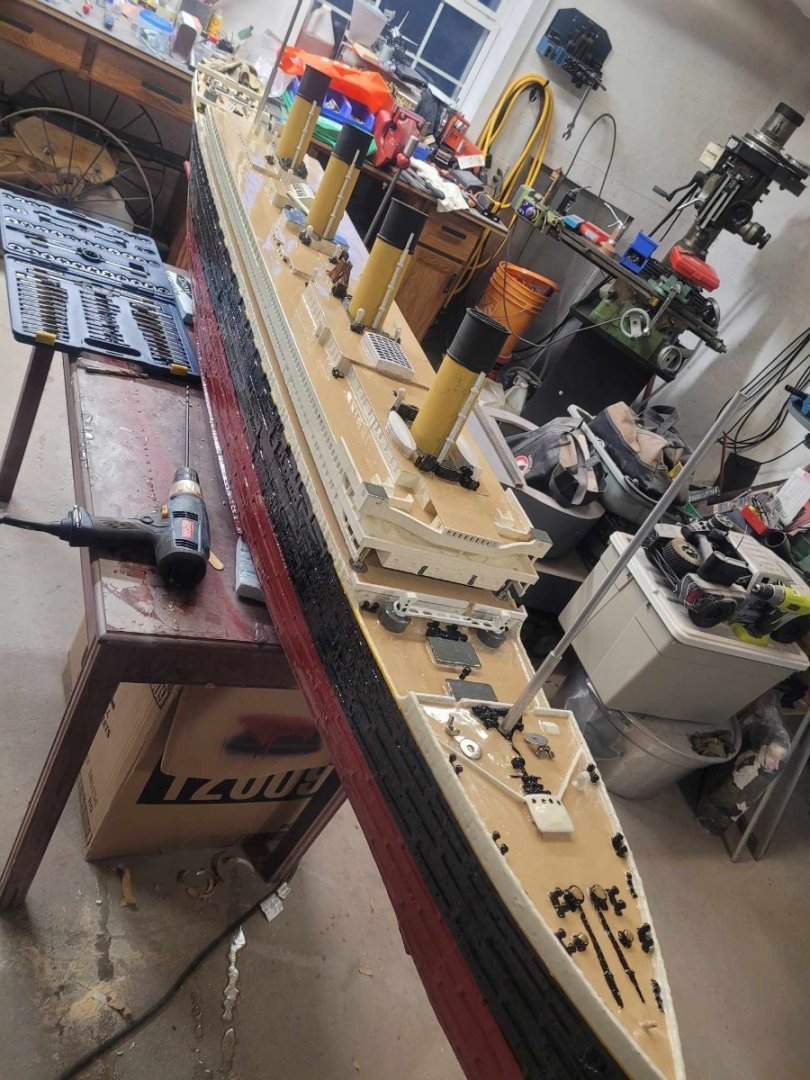
OK, Some pictures - here we go. I got the funnels back from the Guild Member who was painting them for me on the way home from work, and I decided to get them installed tonight. Each of them is both epoxied into place, and bolted into place with a stainless steel threaded rod. Then I lined up the Davits (YES, I KNOW THEY ARE NOT WELIN DAVITS, I DO NOT CARE AT THIS POINT) and glued them in place. Here's my 'to do' list: -Glue down lifeboats -Seal Funnel tops -Epoxy 2nd layer on superstructure -rigging -LED solar light SOS I'm almost ready for a test float as well. I've been collecting some scrap steel to use as ballast.

-
OK, getting down to the details - I knocked off a few things from the 'to do' list. Mast bases installed in the hull tonight (2x4 blocks epoxied in place) Masts installed in bases (epoxied into the wooden block) Upper decks of hull given first layer of epoxy sealant Upper deck air vents painted Skylights painted I have to do some touch-up on the skylights tomorrow - there was some paint bleed unfortunately. No pictures - nothing really major to show....