flutlo6180
-
Posts
139 -
Joined
-
Last visited
About flutlo6180

-
 flutlo6180 reacted to a post in a topic:
Rattlesnake by CapnJack43 - Model Shipways - 1/64 - American Privateer
flutlo6180 reacted to a post in a topic:
Rattlesnake by CapnJack43 - Model Shipways - 1/64 - American Privateer
-
flutlo6180 reacted to a post in a topic:
Rattlesnake by CapnJack43 - Model Shipways - 1/64 - American Privateer
-
flutlo6180 reacted to a post in a topic:
HMS Mercury 1779 by Mr Pleasant - 1:64 - based on Shipyard paper model
-
Cathead reacted to a post in a topic:
HM Cutter Alert by flutlo6180 - Vanguard Models - 1:64
-
ccoyle reacted to a post in a topic:
HM Cutter Alert by flutlo6180 - Vanguard Models - 1:64
-
flutlo6180 reacted to a post in a topic:
HM Cutter Trial 1790 by BrochBoating - Vanguard Models - 1:64
-
 Thanks for the kind words Eric! One of the things I love about this forum is the support and encouragement that keeps me motivated and helps me to improve.
 -
Cathead reacted to a post in a topic:
HM Cutter Alert by flutlo6180 - Vanguard Models - 1:64
-
Cathead reacted to a post in a topic:
HM Cutter Alert by flutlo6180 - Vanguard Models - 1:64
-
Cathead reacted to a post in a topic:
HM Cutter Alert by flutlo6180 - Vanguard Models - 1:64
-
Cathead reacted to a post in a topic:
HM Cutter Alert by flutlo6180 - Vanguard Models - 1:64
-
Cathead reacted to a post in a topic:
HM Cutter Alert by flutlo6180 - Vanguard Models - 1:64
-
Mr Whippy reacted to a post in a topic:
HM Cutter Alert by flutlo6180 - Vanguard Models - 1:64
-
Mr Whippy reacted to a post in a topic:
HM Cutter Alert by flutlo6180 - Vanguard Models - 1:64
-
flutlo6180 reacted to a post in a topic:
HM Cutter Alert by flutlo6180 - Vanguard Models - 1:64
-
Thanks again Allan, What a great suggestion which puts my decision in an entirely different light. I'm going to give your approach a try.
-
chris watton reacted to a post in a topic:
HM Cutter Alert by flutlo6180 - Vanguard Models - 1:64
-
Thanks Allan! I appreciate the explanation and the sketch which does make it much clearer. You are correct, I've installed all the blocks thus far the same way - upside down. As you say, it is a small detail, and I'm not sure if I will go back and redo them, but I will give that some thought, Regardless, I will make the change going forward.
-
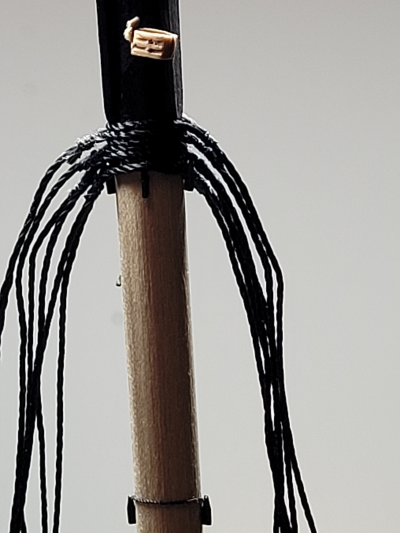
Based on Thukydides guidance, I've started to redo the deadeyes. Doing so did mean I needed to replace several shroud lines and I am finding it less daunting that I originally thought to be working on building the mast while it is stepped. With all the rework I've done on this build it seems like I am building her twice, but I am learning a lot and enjoying the journey.
-
flutlo6180 reacted to a post in a topic:
HMS Beagle by Firs49 - OcCre - 1:60 - First Build
-
flutlo6180 reacted to a post in a topic:
HM Cutter Alert by Thukydides - Vanguard Models - 1:64 - first build
-
flutlo6180 reacted to a post in a topic:
HM Cutter Alert by Thukydides - Vanguard Models - 1:64 - first build
-
flutlo6180 reacted to a post in a topic:
HM Cutter Alert by Thukydides - Vanguard Models - 1:64 - first build
-
Thanks. Your pointers are very much appreciated and are helping to build my catalog of knowledge and repertoire of techniques.
-
flutlo6180 reacted to a post in a topic:
HM Gun Brig Adder 1797 by DB789 - Vanguard Models - 1:64
-
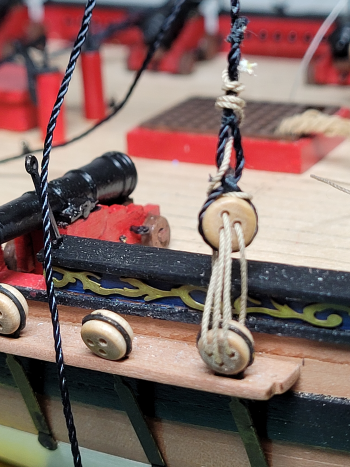
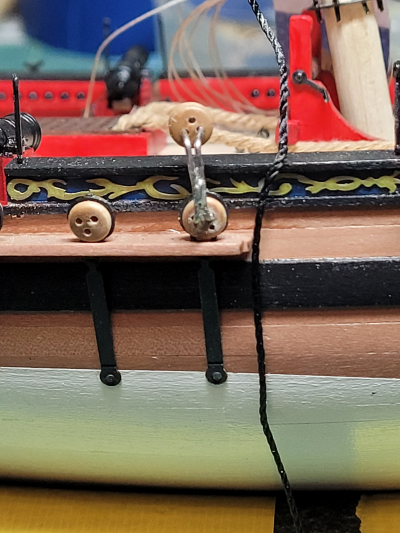
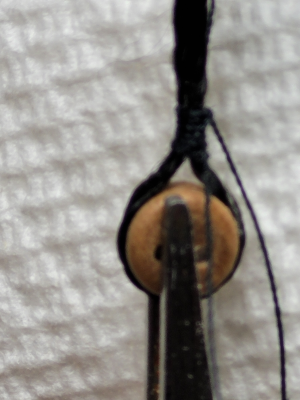
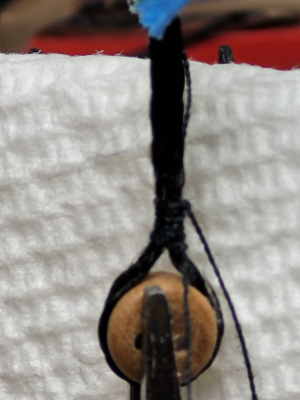
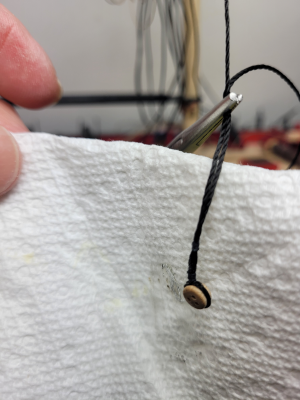
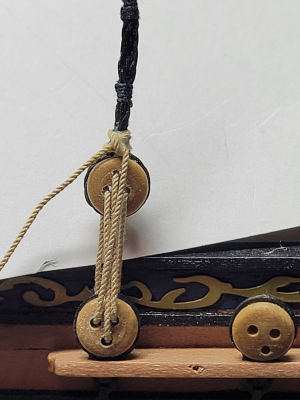
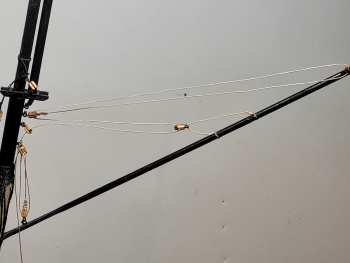
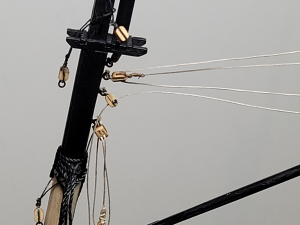
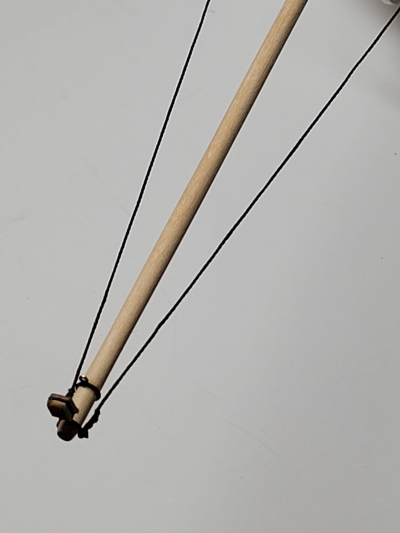
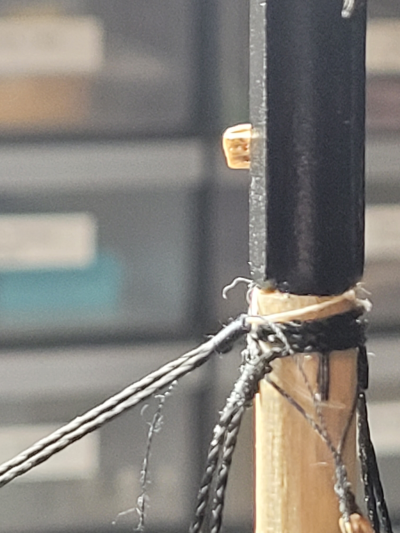
The first item of rigging is complete with the driver boom install. I rigged the boom with the mast off the hull which turned out to be a good idea. During my first attempt at raising the boom I realized that the parrels would not slide above the lower mast cleats and the block for the main yard so I had to remove the block and retie the parrels. With the boom in position, I wound up running the line the wrong way through a couple of blocks and had to pull the line back and rerun through the blocks in the correct orientation. Redoing my work was much easier without the mast stepped. The sheets for the boom are hanging loose for now. I did change my mind and decided to step the mast prior to installing the yards. With the mast seated I am now working on rigging the main shroud deadeyes. The results of my first attempt were dreadful so I did some quick research on rigging deadeyes. That led me to a picture of a deadeye rigging jig in a post in the Masts, Rigging and Sails forum by hornet (https://modelshipworld.com/uploads/monthly_01_2017/post-1505-0-68284800-1483318896.jpg).. I had the materials on hand and made one of my own. Using the jig to place the upper deadeye in to position, grabbing the shroud line with hemostats just above the deadeye and resting the handle base of the hemostat on the chain plate was a much easier approach. The end result turned out much better than I had anticipated. With the deadeye connected to the shroud I connected the two together in 0.5mm rope. I'll clip the rope later. The building sequence in the manual seems to show the shroud cleats installed after all the shrouds are connected. I think it may be easier to install the cleats after I finish connecting each shroud and am wondering if there are any drawback to using this sequence.


-
Thanks. Your craftsmanship is far above my level and I find that wanting to work too quickly is often one of my challenges. Being able to see the finish line has motivated me to find more hours for the build.
-
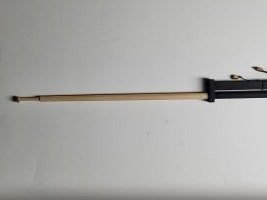
Finished redoing the mast shroud lines. and installed the bowsprit and shroud lines.

-
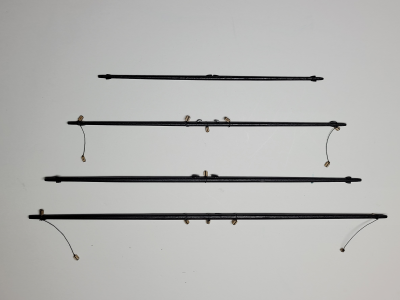
Completed painting the yard and attaching the blocks. I discovered that one of the shrouds shorter than I wanted and I suspect it will make it more challenging to connect the line properly to the deadeyes. Replacing the shroud now seems like my best way forward, and once that step is complete I will start affixing the yards to the mast.
-
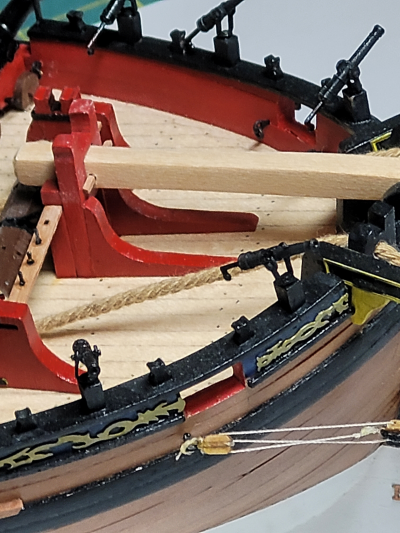
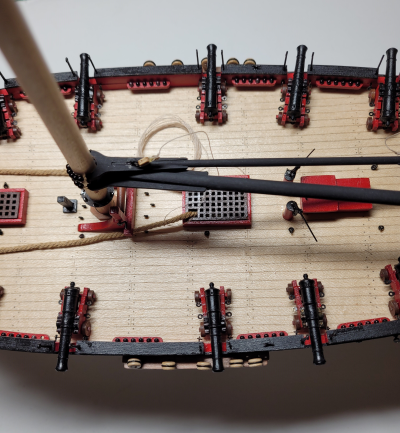
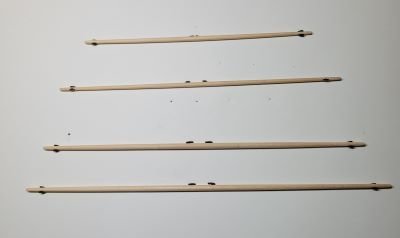
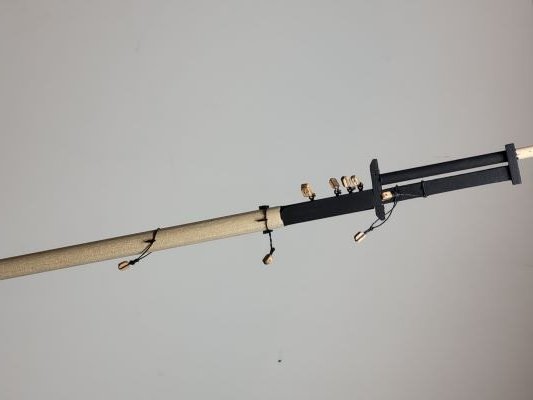
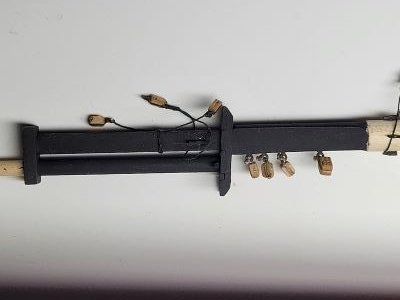
Continuing to make progress with both the main and driver booms complete. Finished shaping the yards and installing the fittings prior to painting. And began installing the shrouds. After having to rebuild the stern, I am concerned about breaking something as I make progress on the rigging. I have decided to build as much of the main mast as possible with the mast separate from the hull as that approach affords more flexibility to get a better orientation for building while I am still working on developing my skills. My intent is to get the shrouds tied to the mast and the yards installed before I step the mast and finish the rigging.

-
You build is looking great.
-
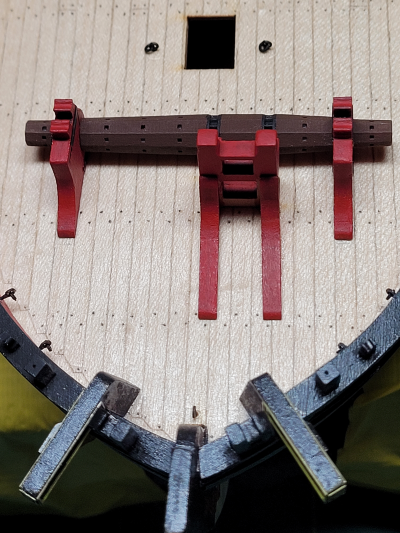
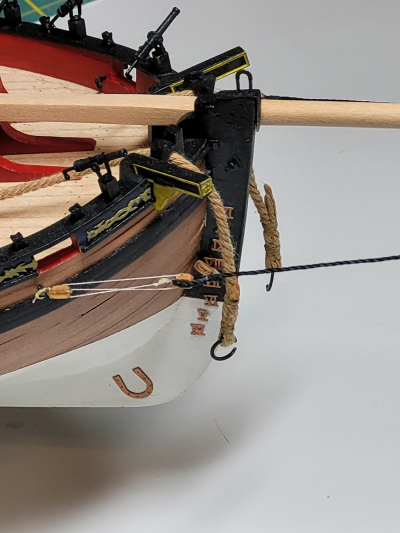
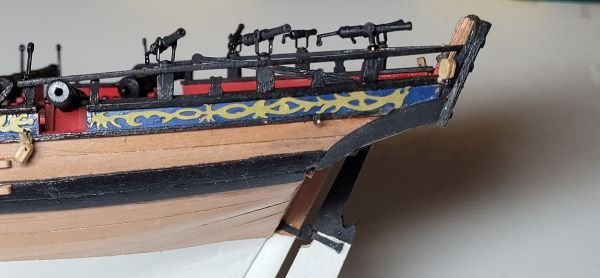
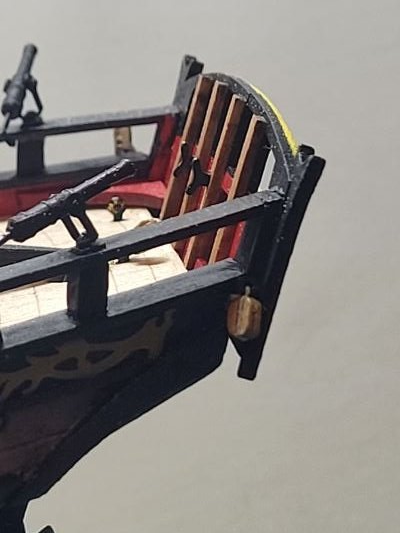
Closed the gap by the port transom crutch, and worked on building the mast. I'm now working on shaping the bow sprit, booms and yards, and looking forward to starting on the standing rigging.
-
Thanks, and good eye. There is a gap which I hadn't thought about before your comment. I will work on addressing the issue - it would be a shame to leave it as is after all the effort on the rebuild.
-
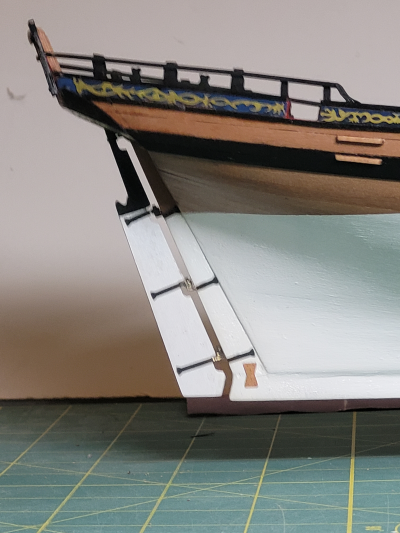
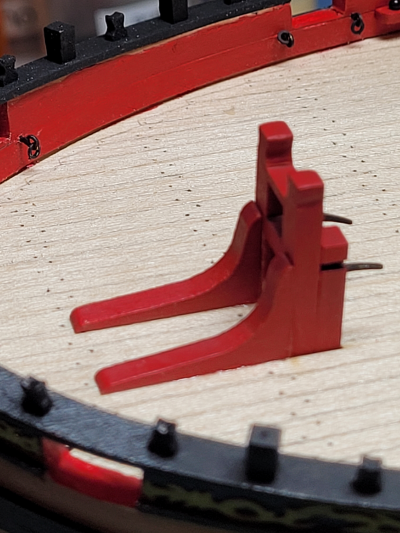
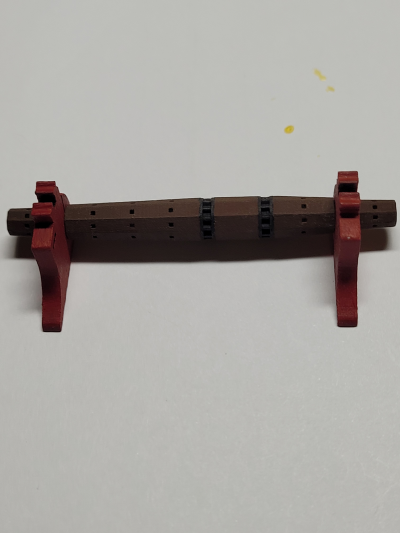
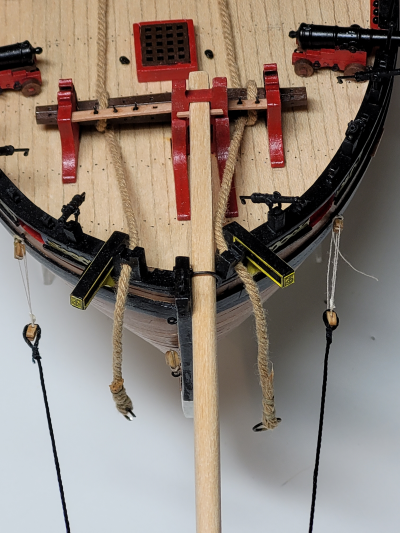
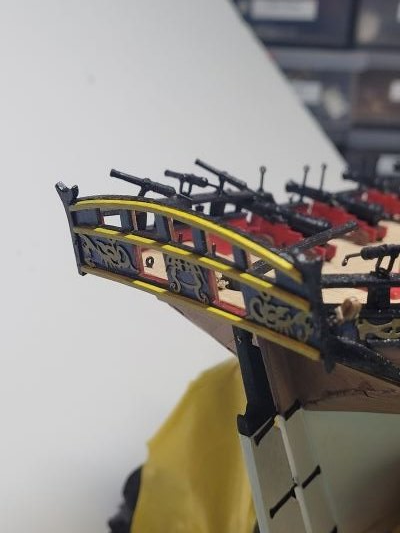
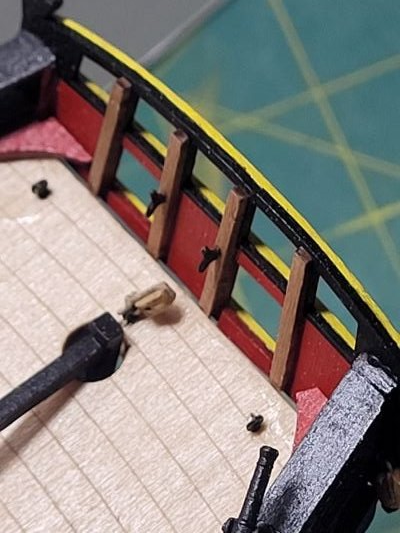
My grandson got to my build last August and broke off the transom, both port and starboard upper rough tree rails, and the transom knees which was quite disheartening to say the least. I had to walk away for what turned out to be an extended break before I got back to the shipyard to rebuild the damaged pieces. I started on rebuilding in late November and am overall pleased with the effort. Here are the photos of the rebuild. Fortunately, the swivels were not installed. I'm glad to say that I am reenergized and excited to be working on shaping the mast pieces, bow sprit, and the main and driver booms (and thinking about the next build).
-
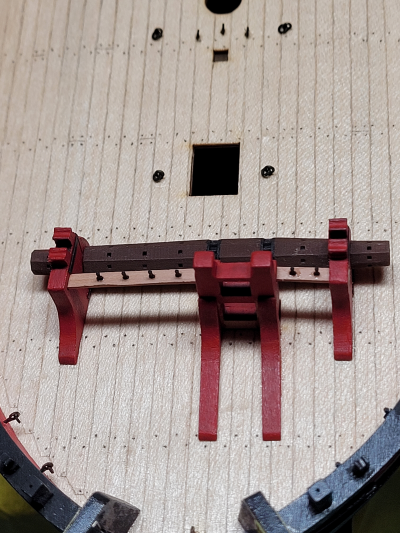
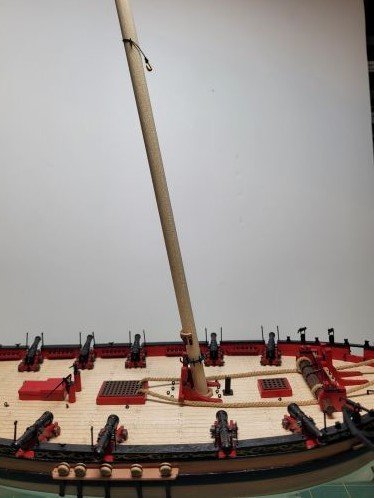
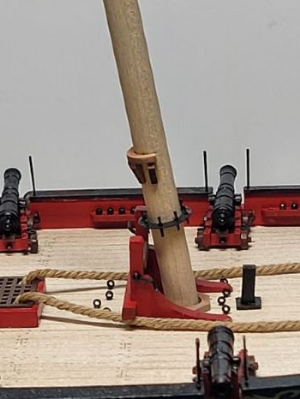
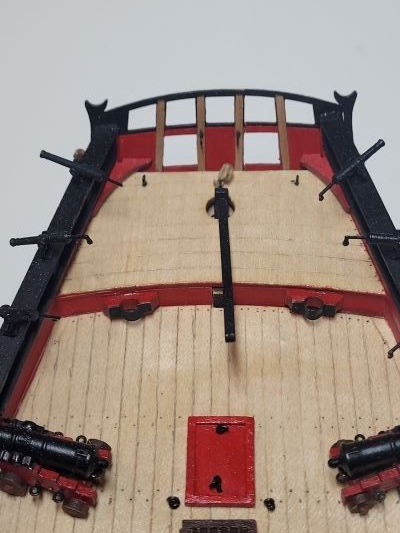
With the rudder installed the outer hull is essentially complete and marks a significant milestone for this build. I was worried about getting a good alignment when installing the assembly but I'm pleased with the final look. Getting started on the deck fixtures starting with the winch assemble. Final installation including the pin rails and pins.