Nautikale
-
Posts
9 -
Joined
-
Last visited
-
 wool132 reacted to a post in a topic:
Lowell Grand Banks Dory by Nautikale - FINISHED - Model Shipways - 1:24
wool132 reacted to a post in a topic:
Lowell Grand Banks Dory by Nautikale - FINISHED - Model Shipways - 1:24
-
Nautikale reacted to a post in a topic:
Lowell Grand Banks Dory by Nautikale - FINISHED - Model Shipways - 1:24
-
Nautikale reacted to a post in a topic:
Lowell Grand Banks Dory by Nautikale - FINISHED - Model Shipways - 1:24
-
Harvey Golden reacted to a post in a topic:
Lowell Grand Banks Dory by Nautikale - FINISHED - Model Shipways - 1:24
-
Cathead reacted to a post in a topic:
Lowell Grand Banks Dory by Nautikale - FINISHED - Model Shipways - 1:24
-
Ryland Craze reacted to a post in a topic:
Lowell Grand Banks Dory by Nautikale - FINISHED - Model Shipways - 1:24
-
JpR62 reacted to a post in a topic:
Lowell Grand Banks Dory by Nautikale - FINISHED - Model Shipways - 1:24
-
Prowler901 reacted to a post in a topic:
Lowell Grand Banks Dory by Nautikale - FINISHED - Model Shipways - 1:24
-
druxey reacted to a post in a topic:
Lowell Grand Banks Dory by Nautikale - FINISHED - Model Shipways - 1:24
-
druxey reacted to a post in a topic:
Lowell Grand Banks Dory by Nautikale - FINISHED - Model Shipways - 1:24
-
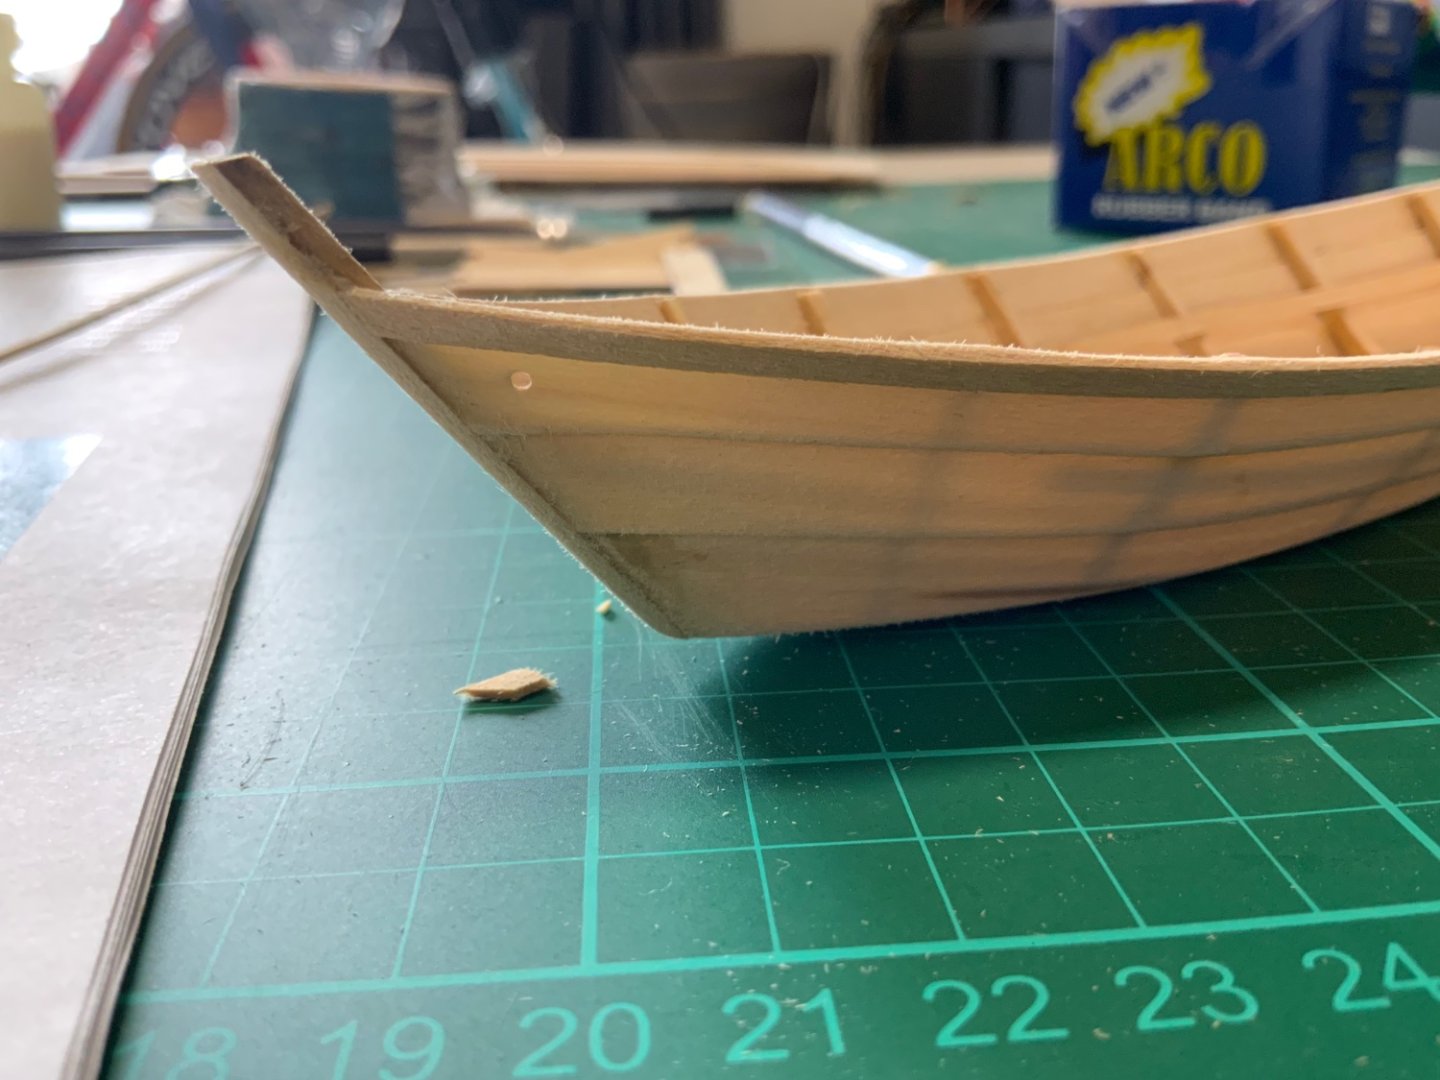
Ah, one more thing. It seems that the breast hook I was provided was too small compared to the breast hook in the pictures provided in the manual. It confused me, to say the least. But I’ll just have to live with it.
-
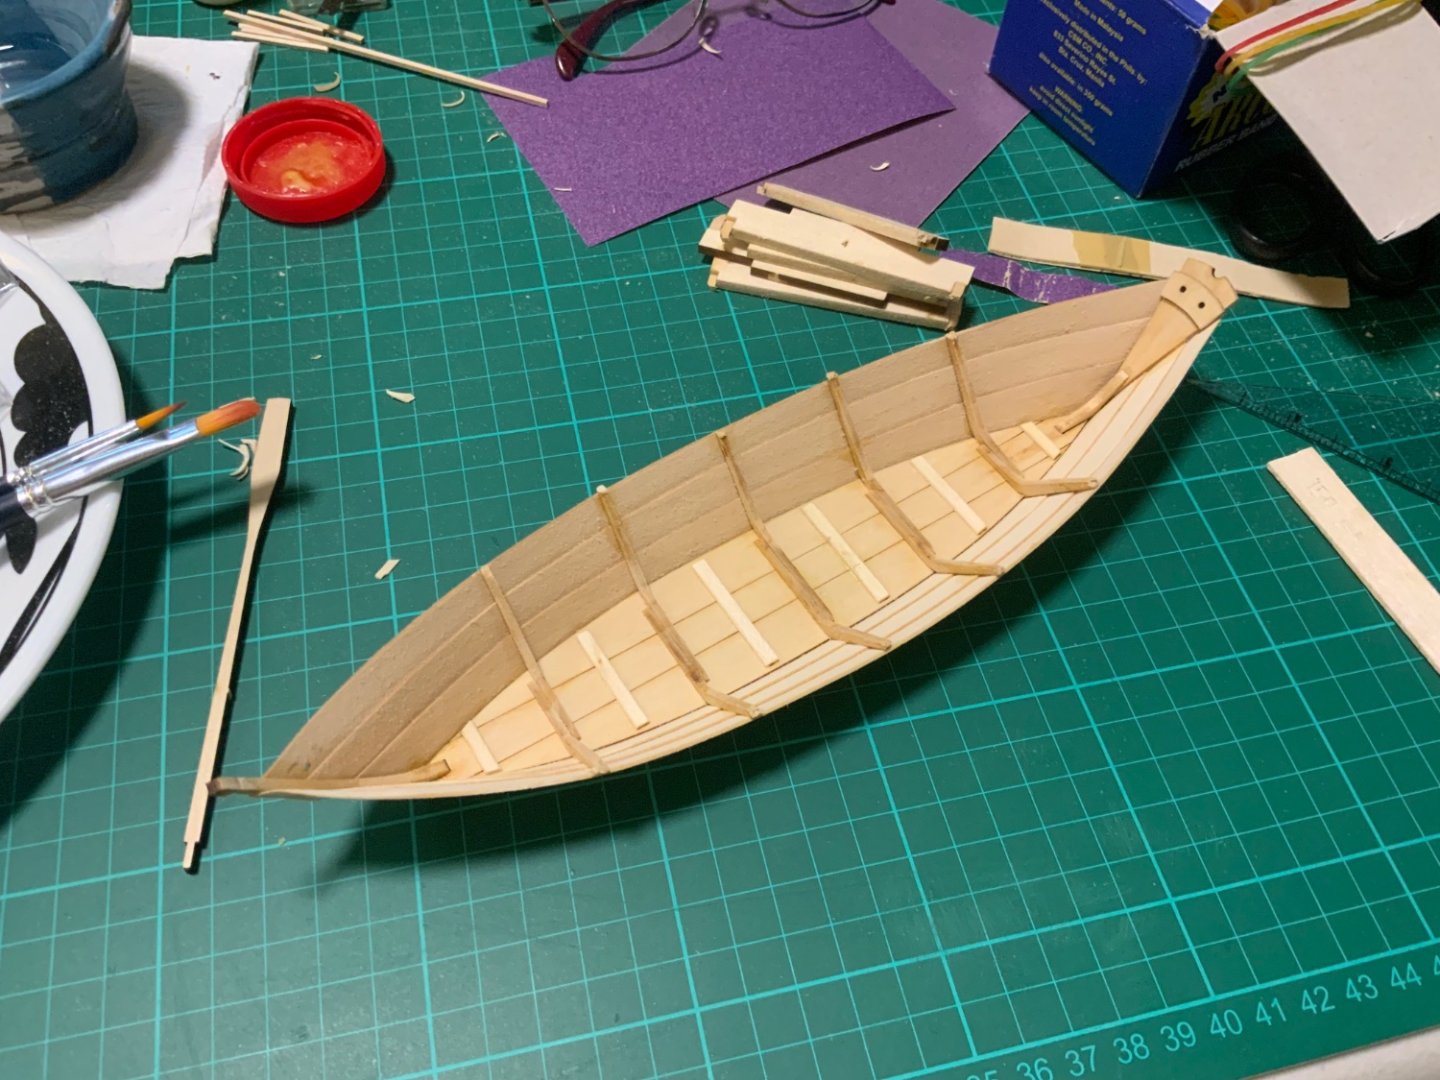
Hi everyone! I finally got the opportunity to finish the model. Used gray primer to seal the wood, and coated it with 2-3 layers of paint. I didn’t have any automotive filler for the bow, so I cut up the extra length of the cap rail and made it fit between the gap nicely. Quite happy with this for my first model, except for how high the transom is—I only noticed now. Must’ve been during the planking process early on. I didn’t also expect the wood to look so rough even after priming it, and I considered sanding it down before painting, but didn’t have any finer sandpaper available. Thank you for following my first build I plan on doing the Norwegian pram next!!

- 13 replies
-
- 7
-
-
- Lowell Grand Banks Dory
- Model Shipways
- (and 1 more)
-
Cathead reacted to a post in a topic:
Lowell Grand Banks Dory by Nautikale - FINISHED - Model Shipways - 1:24
-
wool132 reacted to a post in a topic:
Lowell Grand Banks Dory by Nautikale - FINISHED - Model Shipways - 1:24
-
Apologies for not updating, i am currently busy with schoolwork. Rest assured, I’ll provide more updates once I have the time.
- 13 replies
-
- 2
-
-
- Lowell Grand Banks Dory
- Model Shipways
- (and 1 more)
-
Nautikale reacted to a post in a topic:
Lowell Grand Banks Dory by Nautikale - FINISHED - Model Shipways - 1:24
-
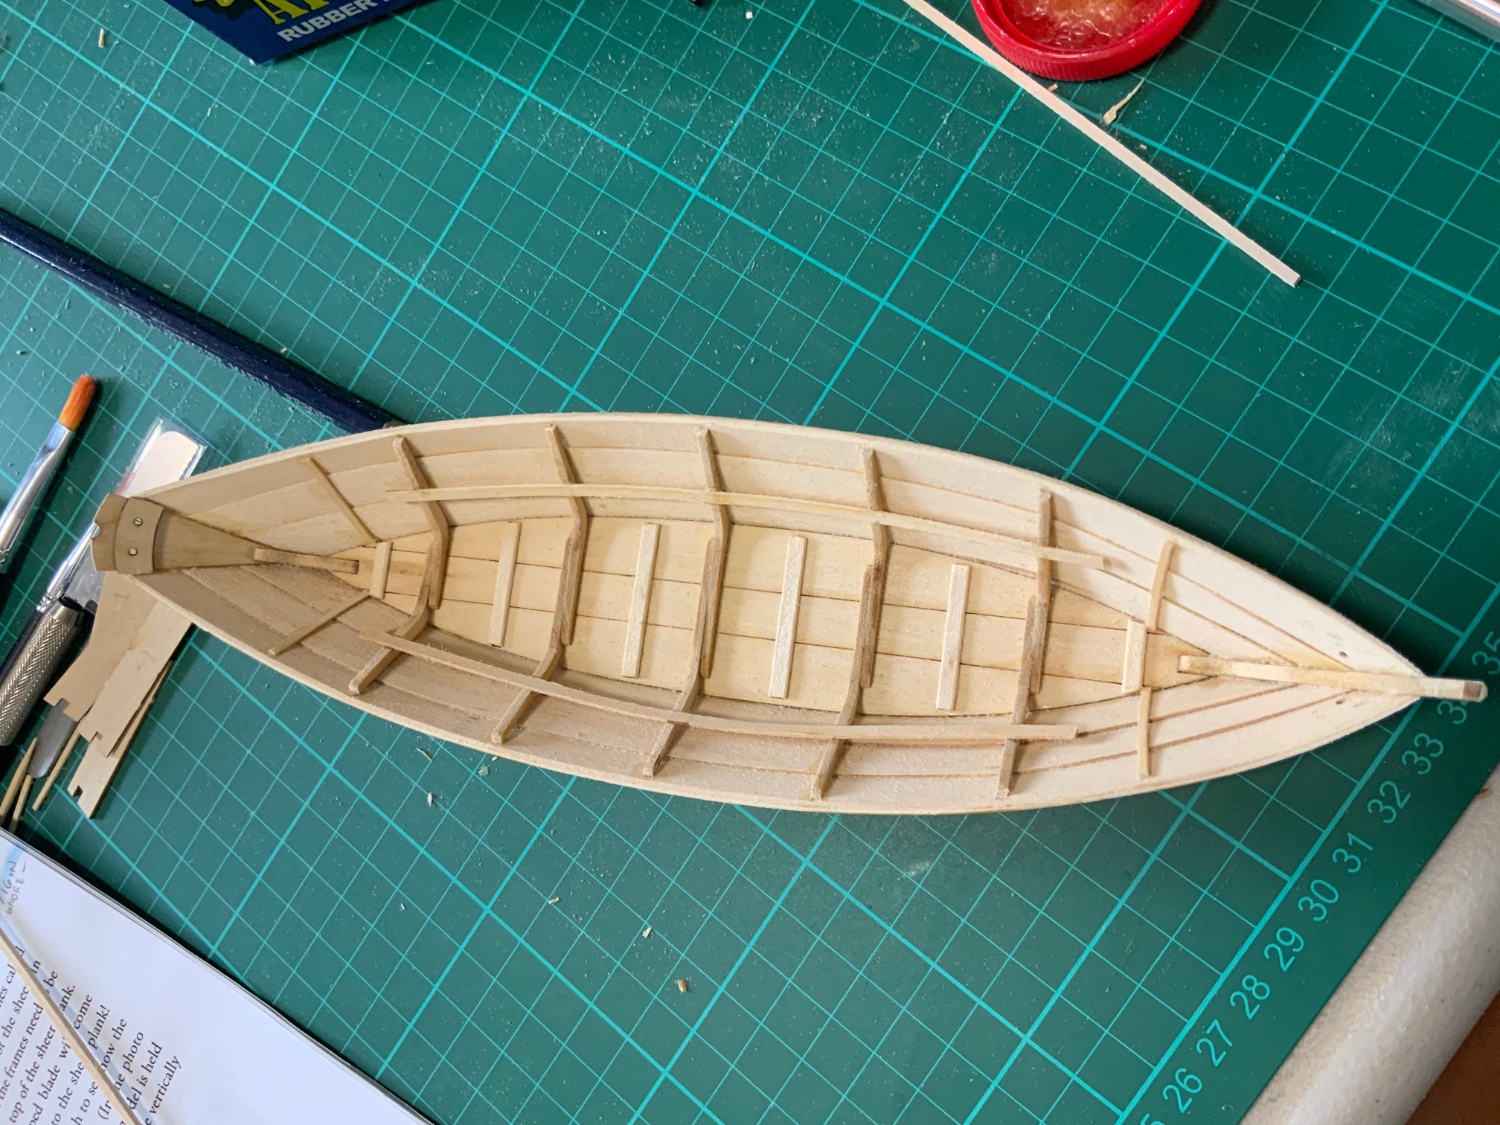
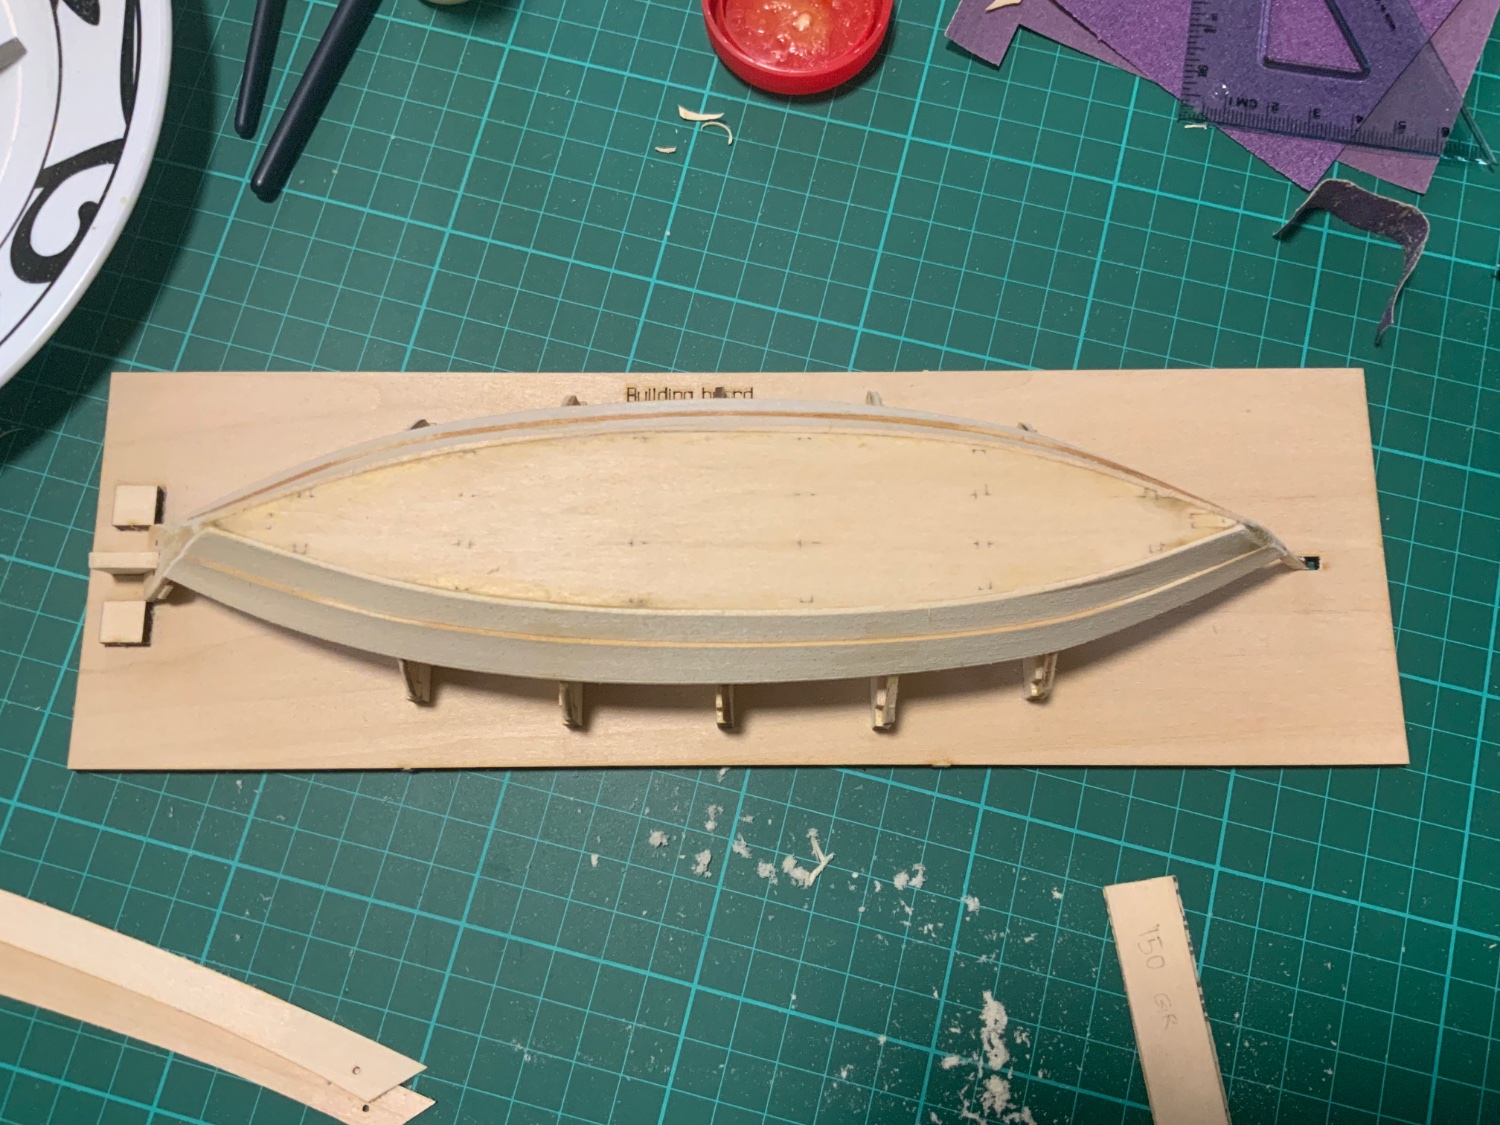
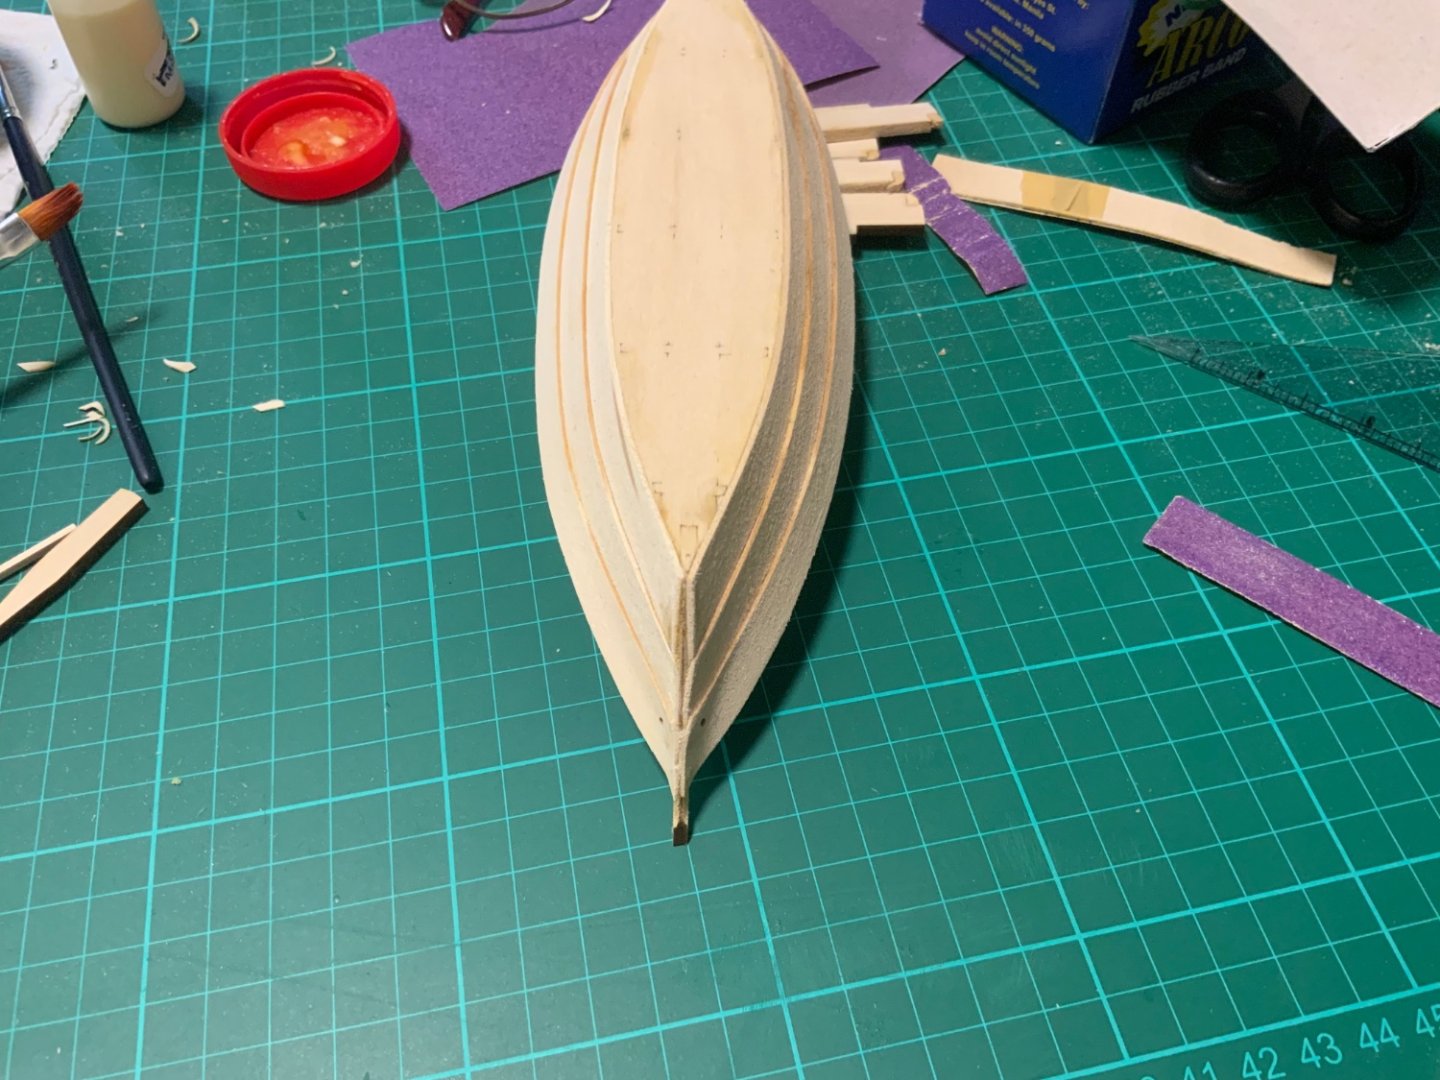
Part 5 The seat risers were a bit of a struggle. Whatever marks were provided on the frames were sanded away in the process, if there were. I popped off the thwarts and put them in to see where I’d be gluing the risers, which seemed to work well. The starboard thwart is shaped a little weirdly, might fix that soon. Next was to stick on the bands. I may have messed up on the bow, since I sanded it to smoothly transition into the false stem, but we’ll see how it looks once I add the cap rail… To patch up some gaps within the planks, (they were heavily bothering me) I took some glue and mixed it with wood dust to try and simulate caulking. Worked well!

- 13 replies
-
- 6
-
-
- Lowell Grand Banks Dory
- Model Shipways
- (and 1 more)
-
Thank you! I’ll see which one I can use.
- 13 replies
-
- 1
-
-
- Lowell Grand Banks Dory
- Model Shipways
- (and 1 more)
-
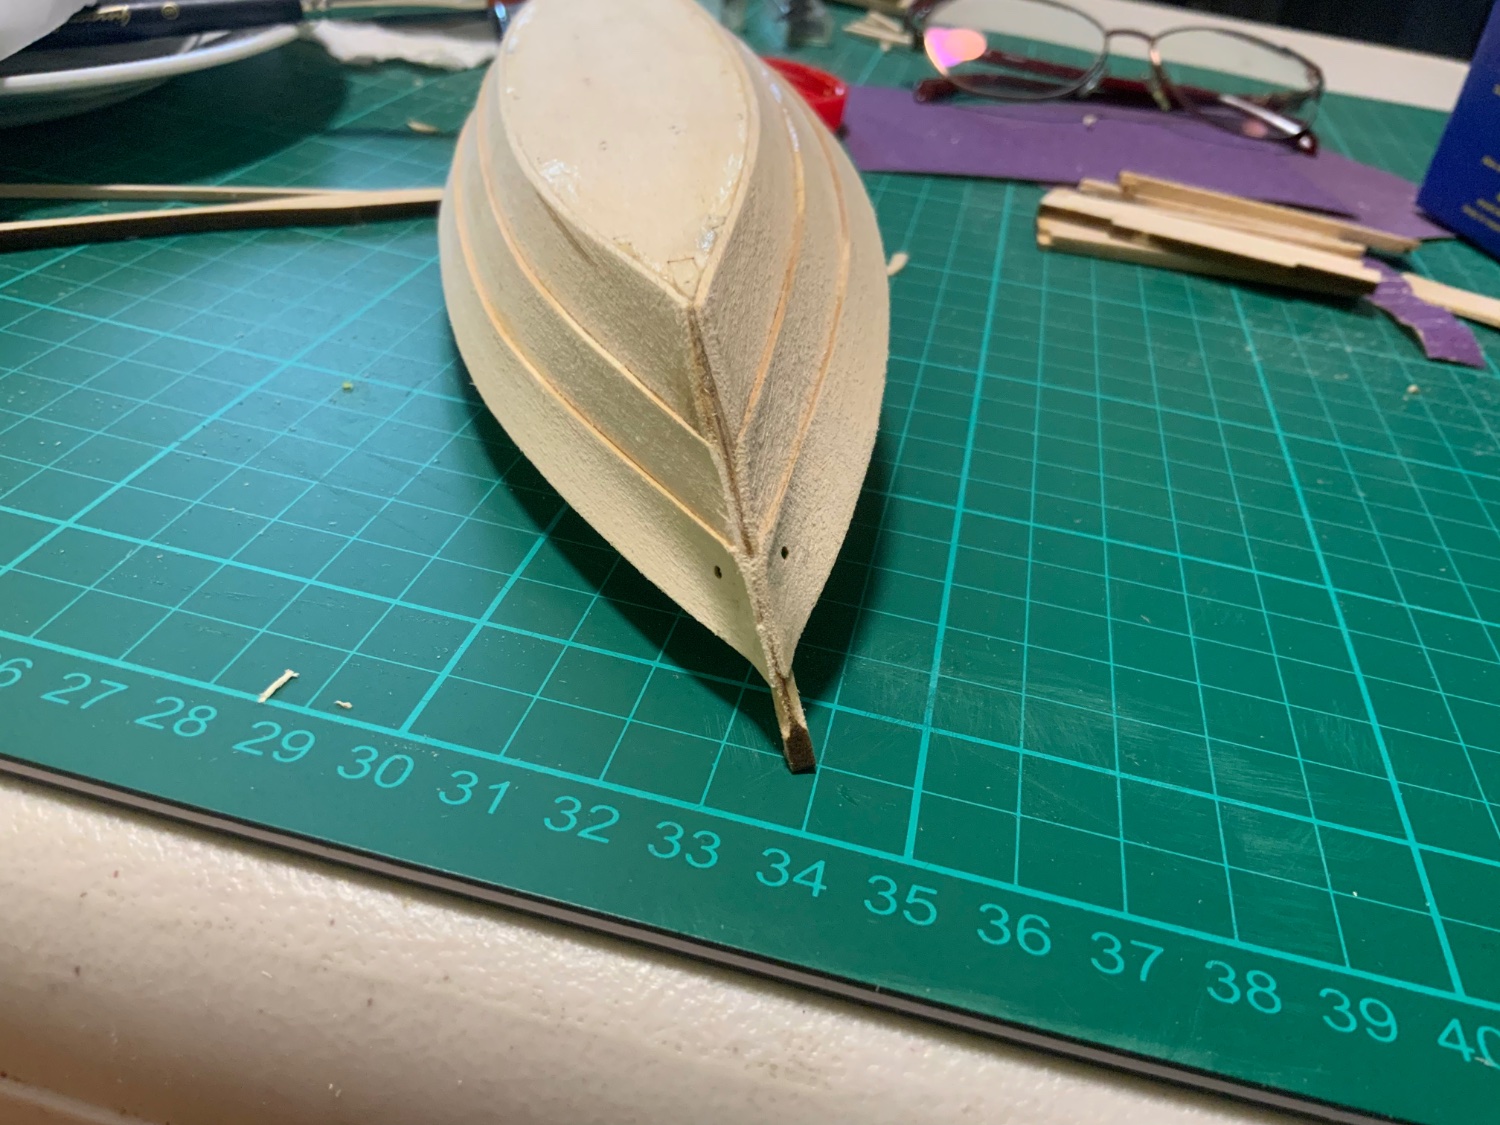
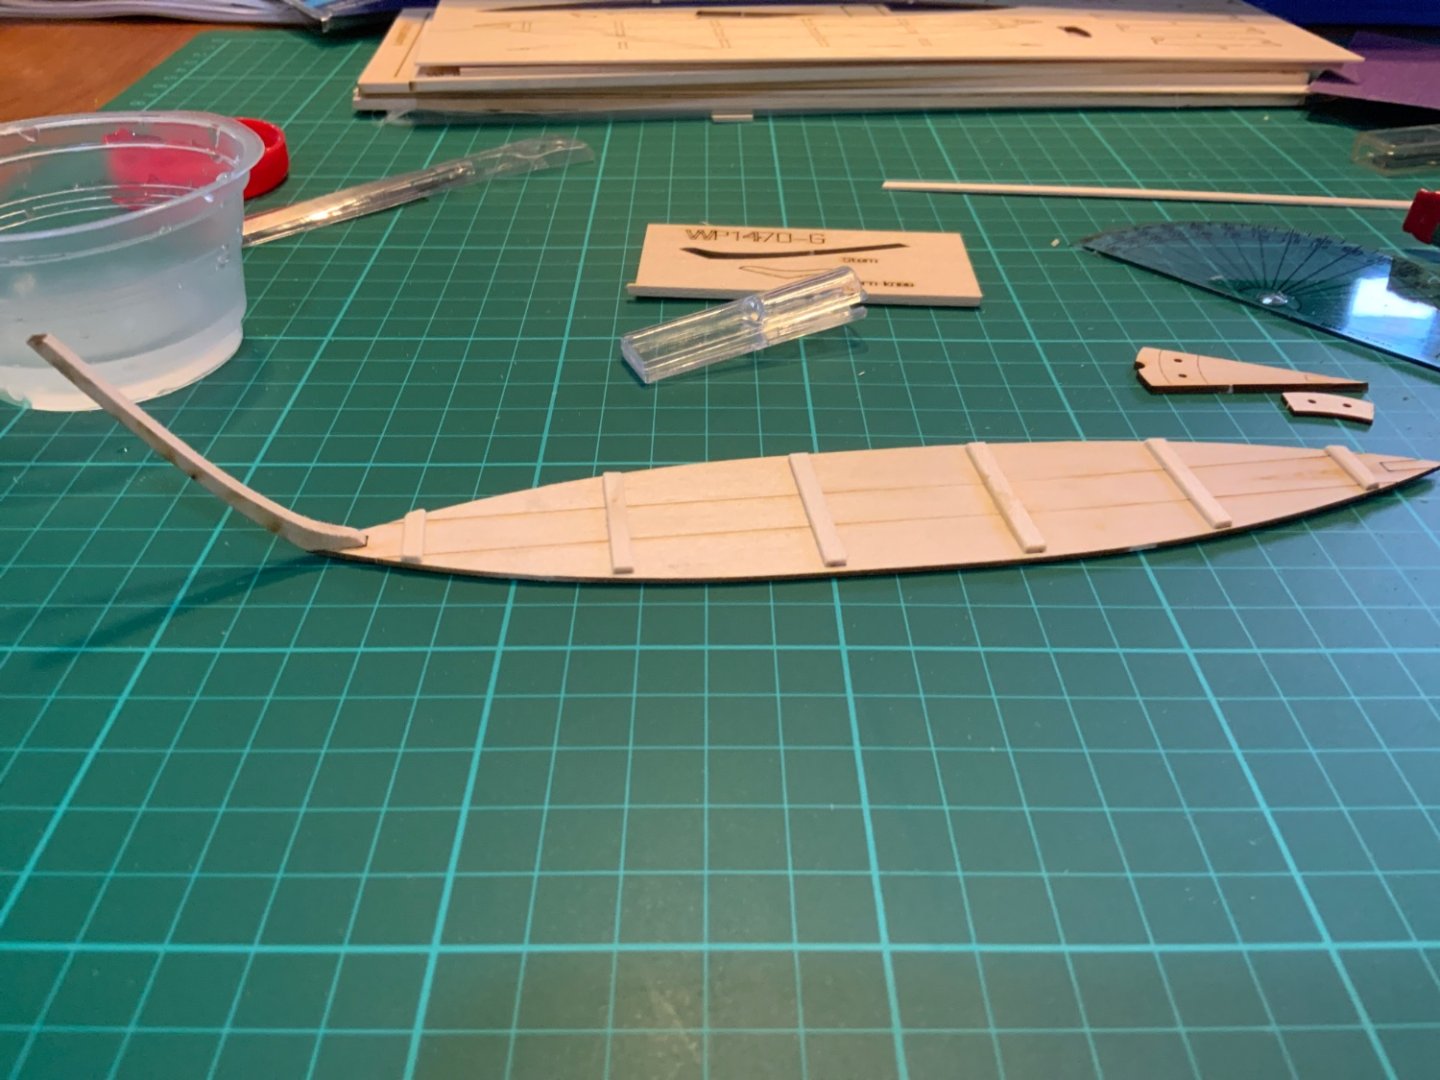
Part 4 I finished up the planking, and realized the sheer plank was quite concaved at the bow from the shaping process. I need to figure out a new way to clamp the ends while letting the planks dry. The bow also looks quite ugly, but fortunately the false stem will hide that. On the topic of false stem, I can’t seem to figure out where it is, or what part I need to use. To those who’ve made this kit: what do I use for the false stem?

- 13 replies
-
- 2
-
-
- Lowell Grand Banks Dory
- Model Shipways
- (and 1 more)
-
Nautikale reacted to a post in a topic:
Lowell Grand Banks Dory by Nautikale - FINISHED - Model Shipways - 1:24
-
Nautikale reacted to a post in a topic:
Lowell Grand Banks Dory by Nautikale - FINISHED - Model Shipways - 1:24
-
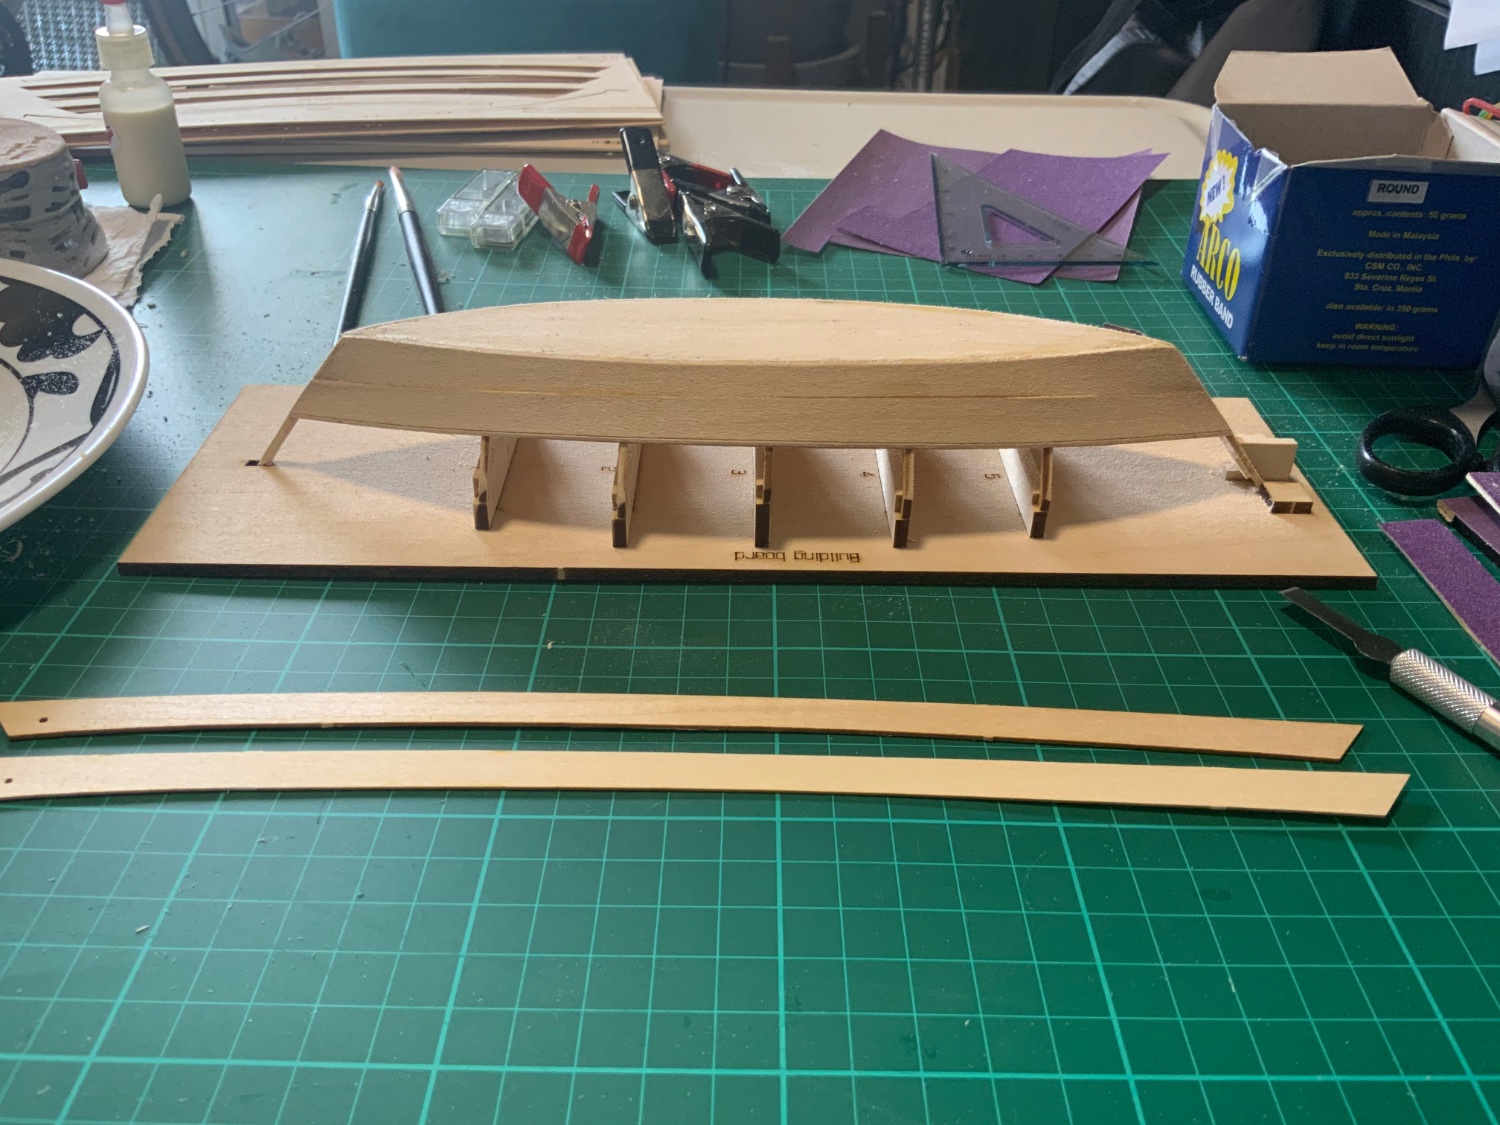
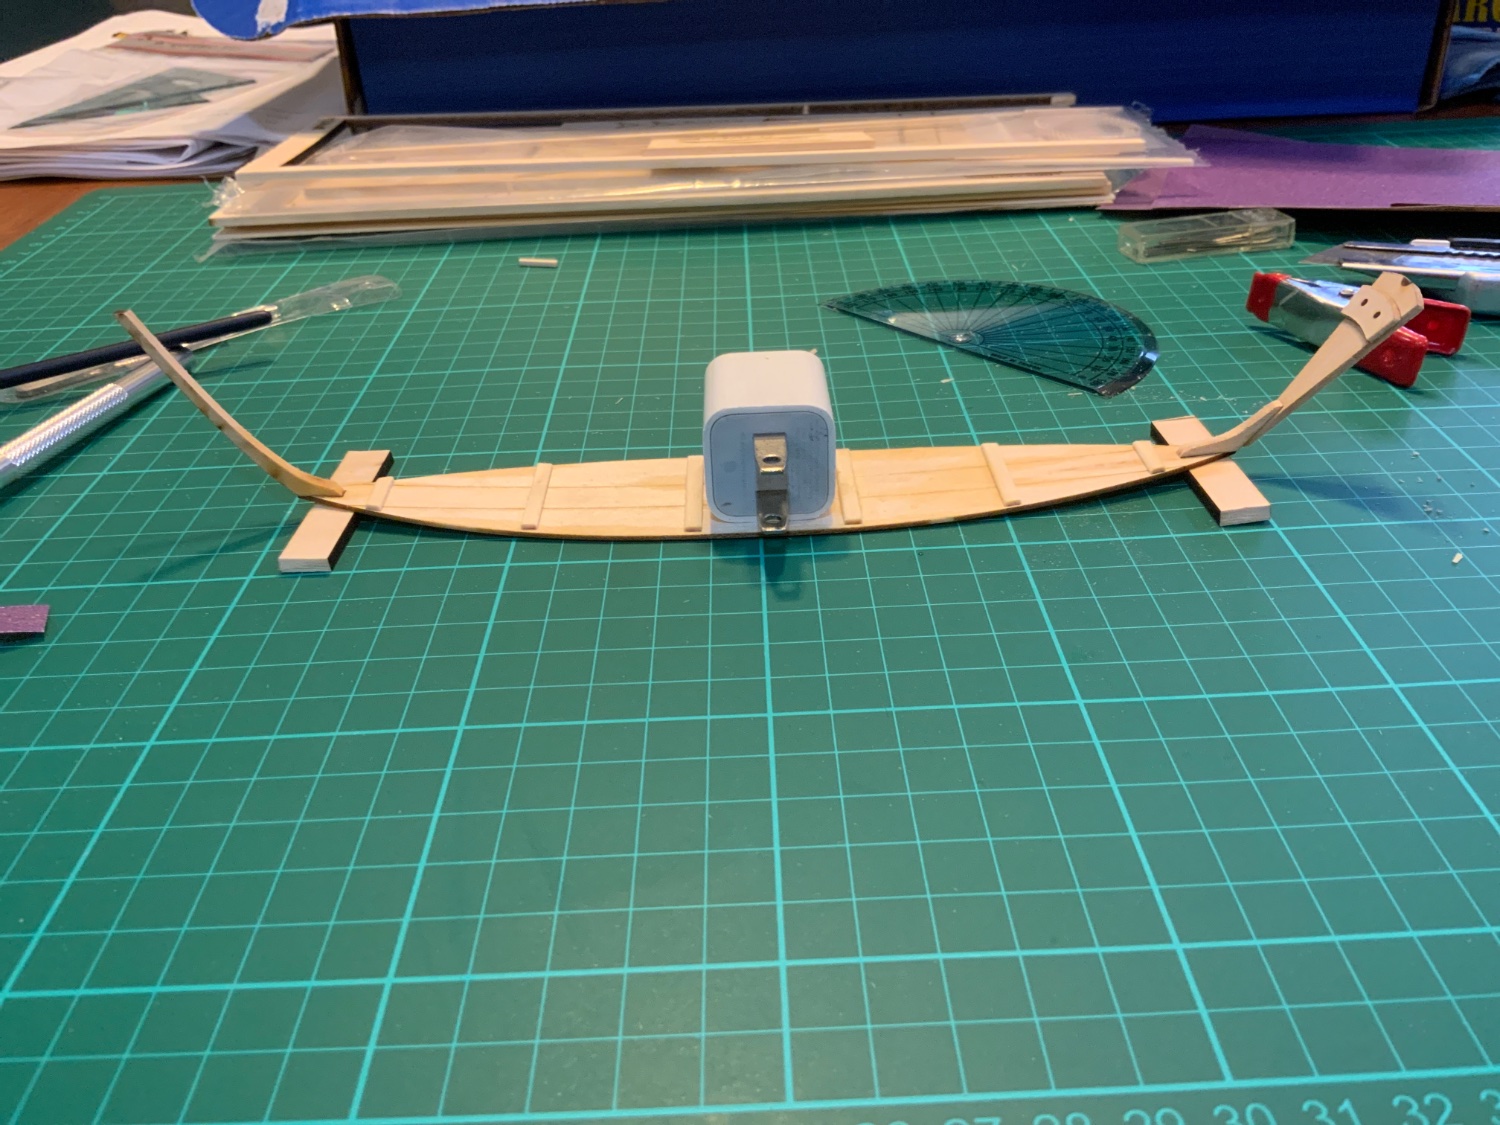
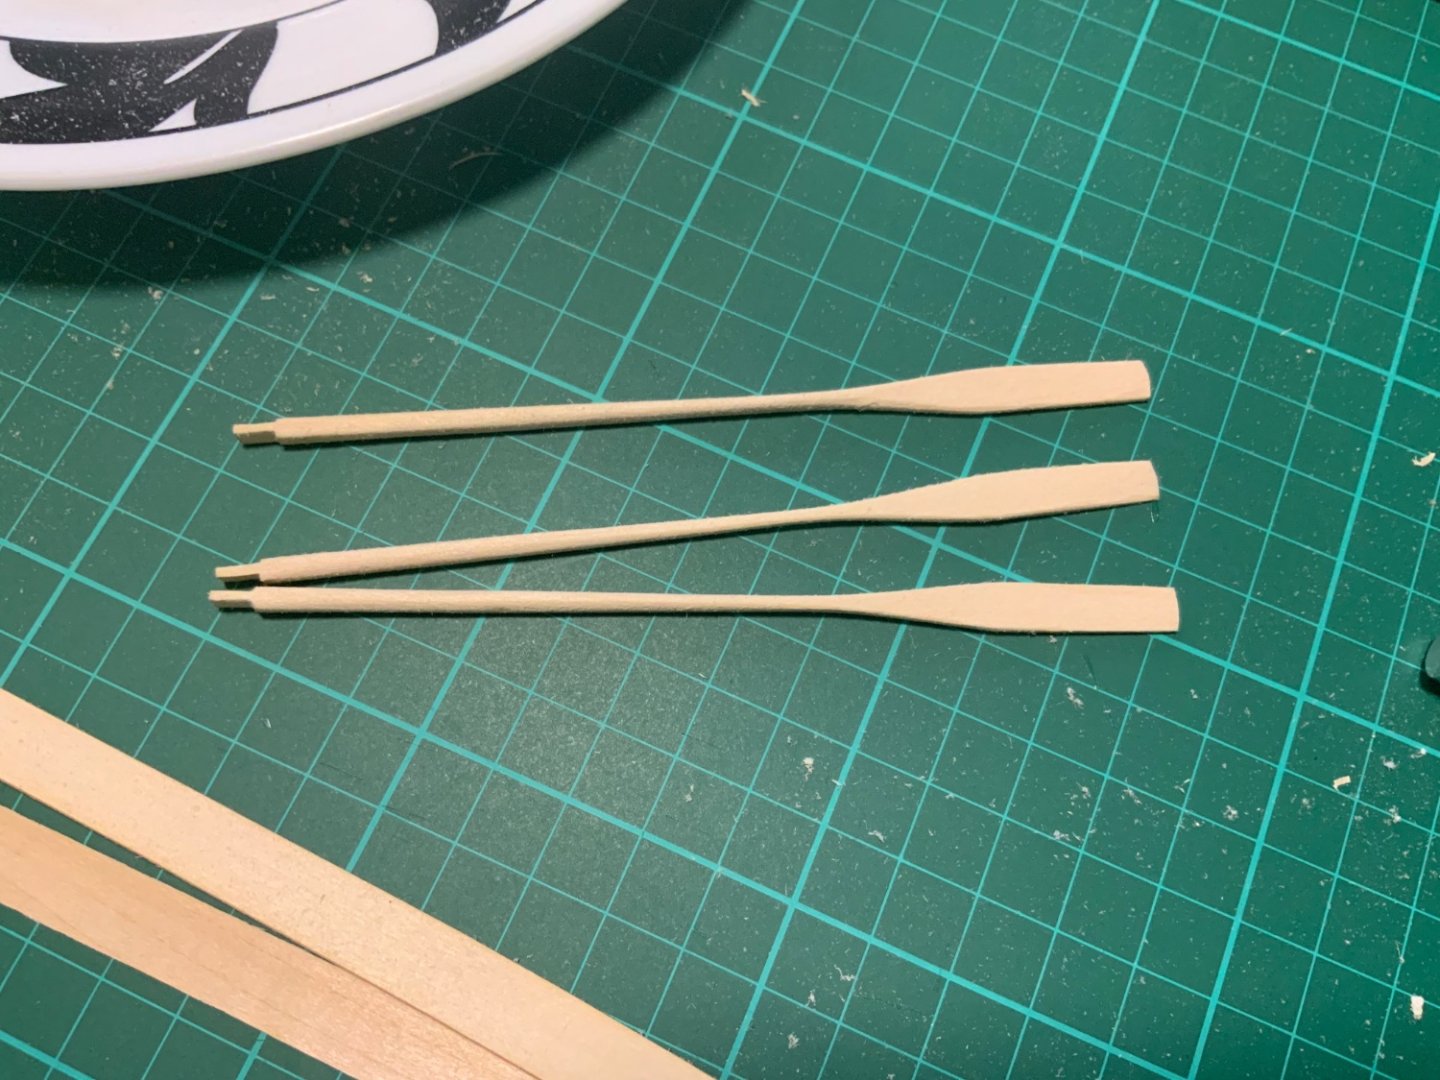
Day 3 While waiting for the planks to dry, I worked on more oars. After that, I glued the garboard planks! I had to remove and reglue them a little to get it aligned like I wanted to. After letting it dry, I began the sanding process, prepared the broad plank, and glued them on.


- 13 replies
-
- 6
-
-
- Lowell Grand Banks Dory
- Model Shipways
- (and 1 more)
-
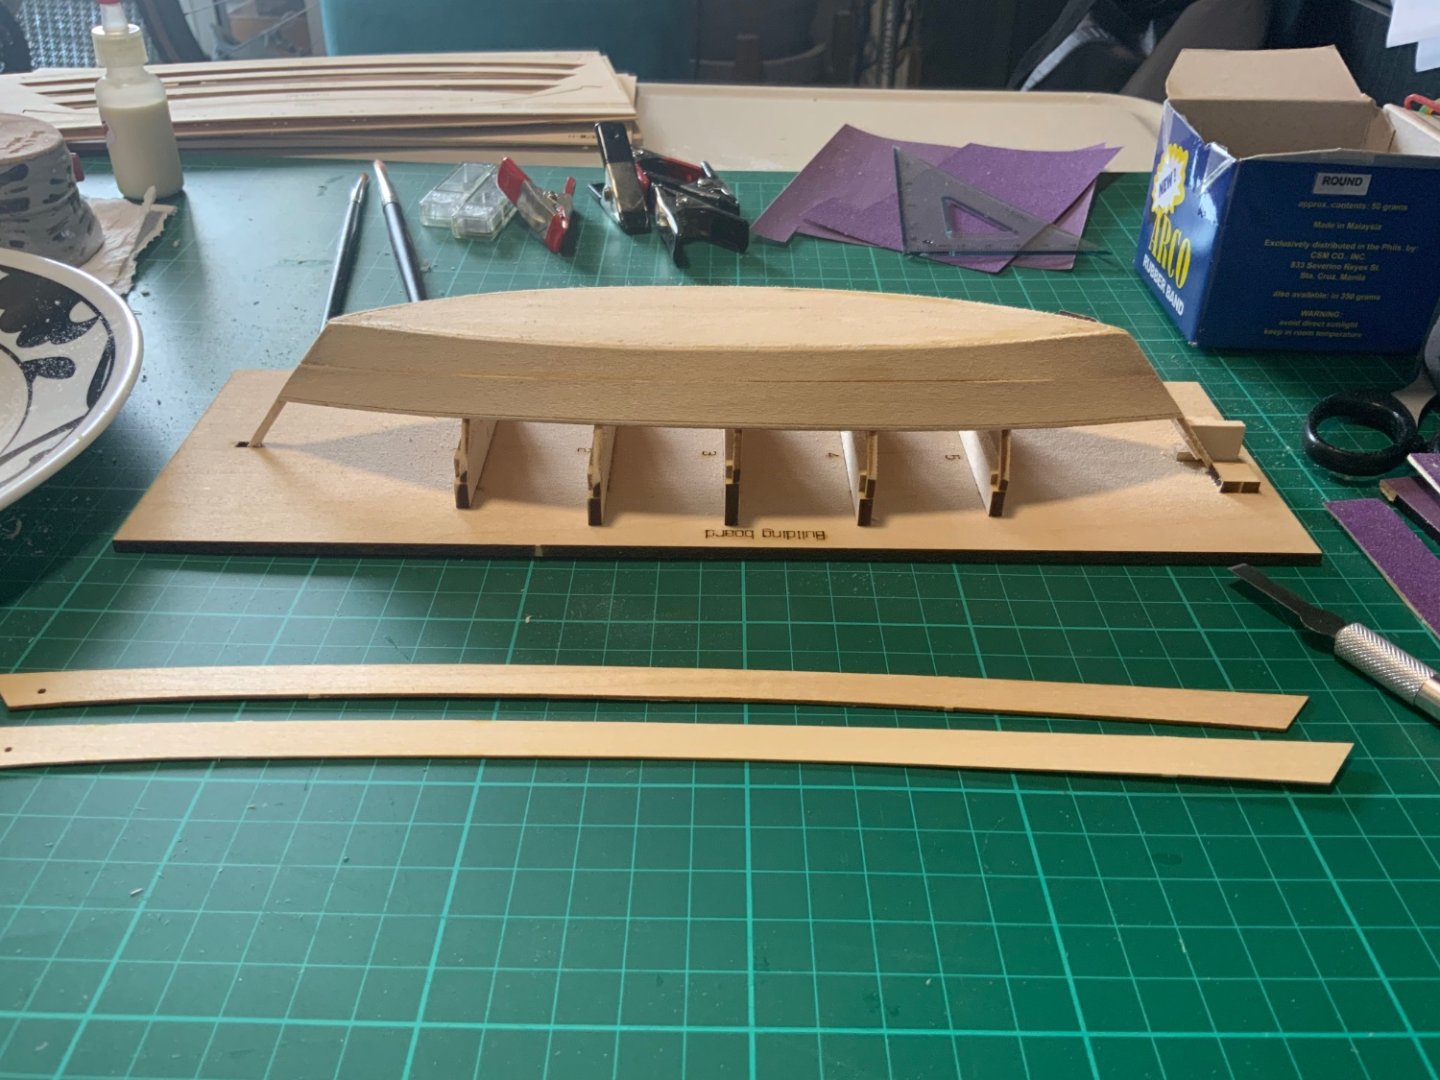
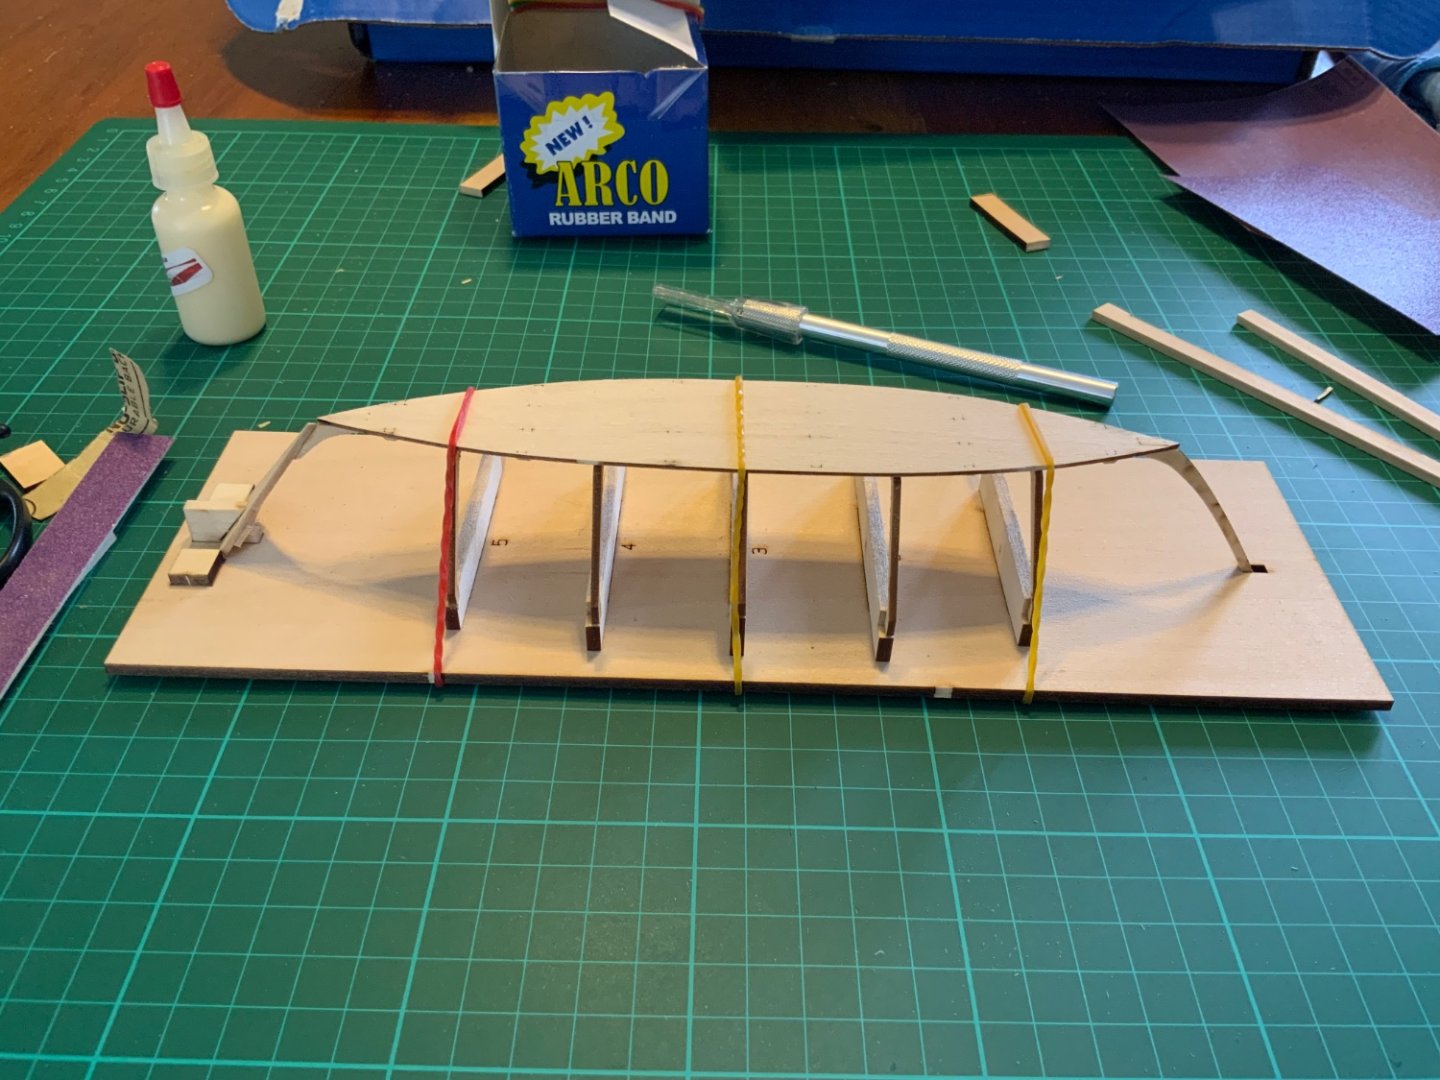
Day 1 Hello everyone! I purchased the Shipwright Series after reading about how it makes a good starting kit for someone who has zero modeling experience. I already started with the dory a couple days ago and forgot to create a log, so I’ll summarize what I’d done in those days right now. The first step was to put together the bottom and cleats. I decided to use the laser cut one piece they had already provided for a faster process and to make sure my patience doesn’t fade since I’m only starting. After cutting out the piece, I began working on the bottom cleats. Unaware, I had already messed up. I was confused at the wood strip measurements, and used the 1/16 x 1/16 strip instead of the 3/64 x 1/8 strip. Oops. Lesson learned. I cut up the correct strip, requested the strips I needed from the Model Expo website, and continued on to glue the stem and transom pieces. Next step was shaping the rocker. I grabbed the correct size of scrapwood, and wet the bottom as the instructions said. I left them to dry for three hours as I went out to do some activities. I returned with the sight of a book originally on top of the cube, now knocked over causing the stem to snap. As I was doing this in my family’s dining table, I should have been more cautious about leaving it there. I fixed the stem with some glue and finger pressure and continued on with making the frames. Day 2 Since the printed outlines of the frames weren’t exactly the measurements of the actual frames, I had to do a little improvising. Lining up one side first, I glued the pieces together. After that, I lined up the other side, ignoring the first side. I’m not sure if I explained that well. The next thing I did was fit the frames into the building board, then sanded, three at a time like what the instructions said. After that I fitted the bottom of the boat over the frames and glued it on. Next step was the garboard application, but not before I sanded and beveled the sides of the frames and the bottom of the boat, as well as the stem and transom. Again, three at a time like before. I beveled and test fit the garboards, then began the bending process once satisfied.


- 13 replies
-
- 5
-
-
- Lowell Grand Banks Dory
- Model Shipways
- (and 1 more)
-
Nautikale reacted to a post in a topic:
hello from the Philippines!
-
Nautikale reacted to a post in a topic:
hello from the Philippines!
-
Nautikale reacted to a post in a topic:
hello from the Philippines!
-
Nautikale reacted to a post in a topic:
hello from the Philippines!
-
Nautikale reacted to a post in a topic:
hello from the Philippines!
-
Hello everyone! I go by Kale, a teenager from the Philippines. I have always liked ships and boats, and after some research on what kit I should purchase for my first model, I bought the ModelShipways Shipwright series. I'll be building them all the next couple months, and hope to continue building more models in the future. Knowing how to sail, I hope that my knowledge with boats will help make the building and rigging process easier, or at least help me in some way. I don't have a solid plan for what I'd like to build after them, but once I have enough experience with kits, I plan on creating ship models out of recycled materials---a goal in the far future. I'm very excited and eager to learn more about modeling as I go through this. Mistakes will be made, all in exchange for wisdom. If you guys have any tips for a newbie, I'd love to hear them.