Cbrand02
-
Posts
36 -
Joined
-
Last visited
-
 ccoyle reacted to a post in a topic:
America by Cbrand02 - FINISHED - Mini Mamoli - Scale 1:140
ccoyle reacted to a post in a topic:
America by Cbrand02 - FINISHED - Mini Mamoli - Scale 1:140
-
Cbrand02 reacted to a post in a topic:
Polaris by Cpt. Jack - OcCre - 1:50 - first build
-
Cbrand02 reacted to a post in a topic:
America by Cbrand02 - FINISHED - Mini Mamoli - Scale 1:140
-
Stevinne reacted to a post in a topic:
America by Cbrand02 - FINISHED - Mini Mamoli - Scale 1:140
-
JacquesCousteau reacted to a post in a topic:
America by Cbrand02 - FINISHED - Mini Mamoli - Scale 1:140
-
Snug Harbor Johnny reacted to a post in a topic:
America by Cbrand02 - FINISHED - Mini Mamoli - Scale 1:140
-
For a beginner they were less than ideal. The translation from Italian was confusing, the line drawings were confusing, the plans were not to scale, etc.. I ended up using a different larger model’s plans that I linked earlier in the build. However as I got more comfortable the plans began to make more sense, so someone going into it already knowing what they’re doing would have much less trouble. I eventually went with the “if it looks good then it’s right” philosophy
-
 JacquesCousteau reacted to a post in a topic:
America by Cbrand02 - FINISHED - Mini Mamoli - Scale 1:140
JacquesCousteau reacted to a post in a topic:
America by Cbrand02 - FINISHED - Mini Mamoli - Scale 1:140
-
Thank you, I’m glad it was helpful. Your trajinera log was excellent! Loved the history and personal touches.
-
Cbrand02 reacted to a post in a topic:
America by Cbrand02 - FINISHED - Mini Mamoli - Scale 1:140
-
 JacquesCousteau reacted to a post in a topic:
America by Cbrand02 - FINISHED - Mini Mamoli - Scale 1:140
JacquesCousteau reacted to a post in a topic:
America by Cbrand02 - FINISHED - Mini Mamoli - Scale 1:140
-
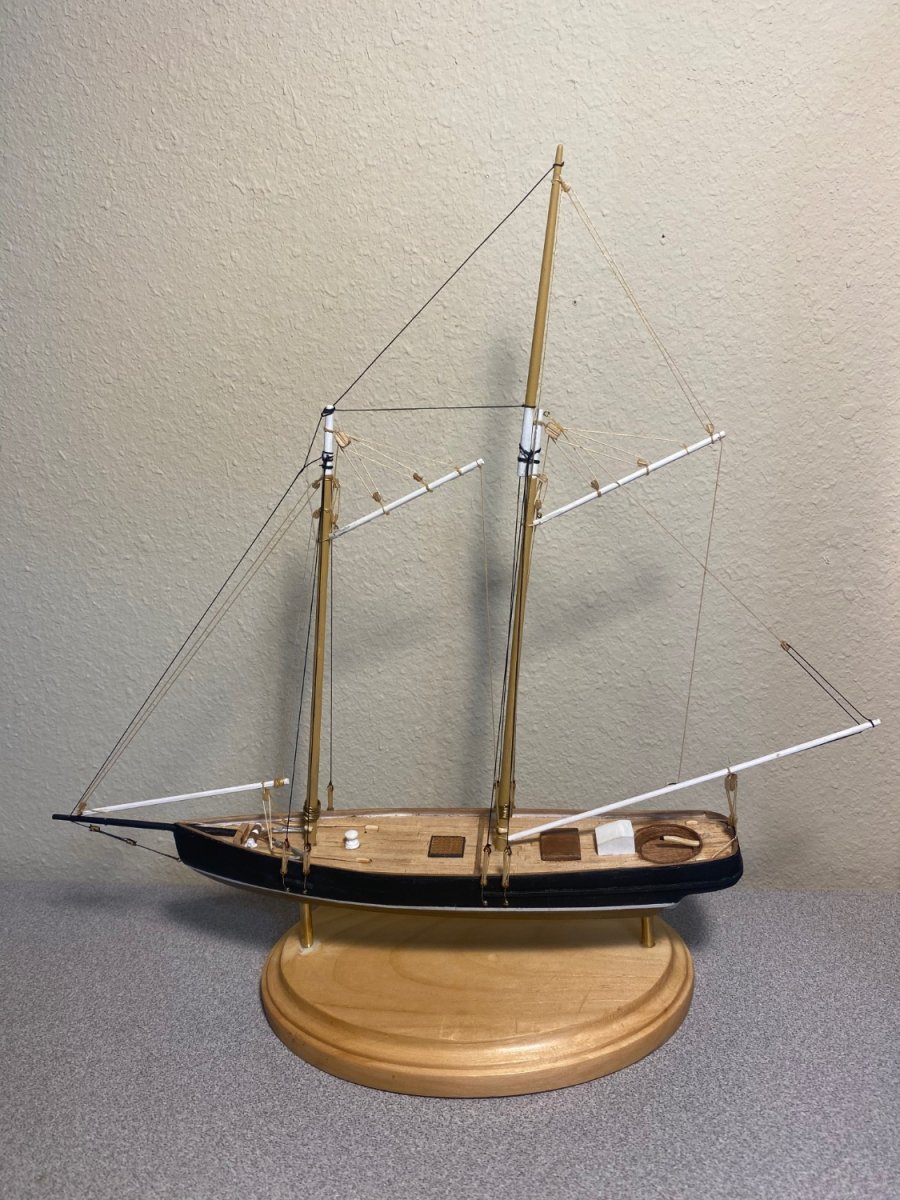
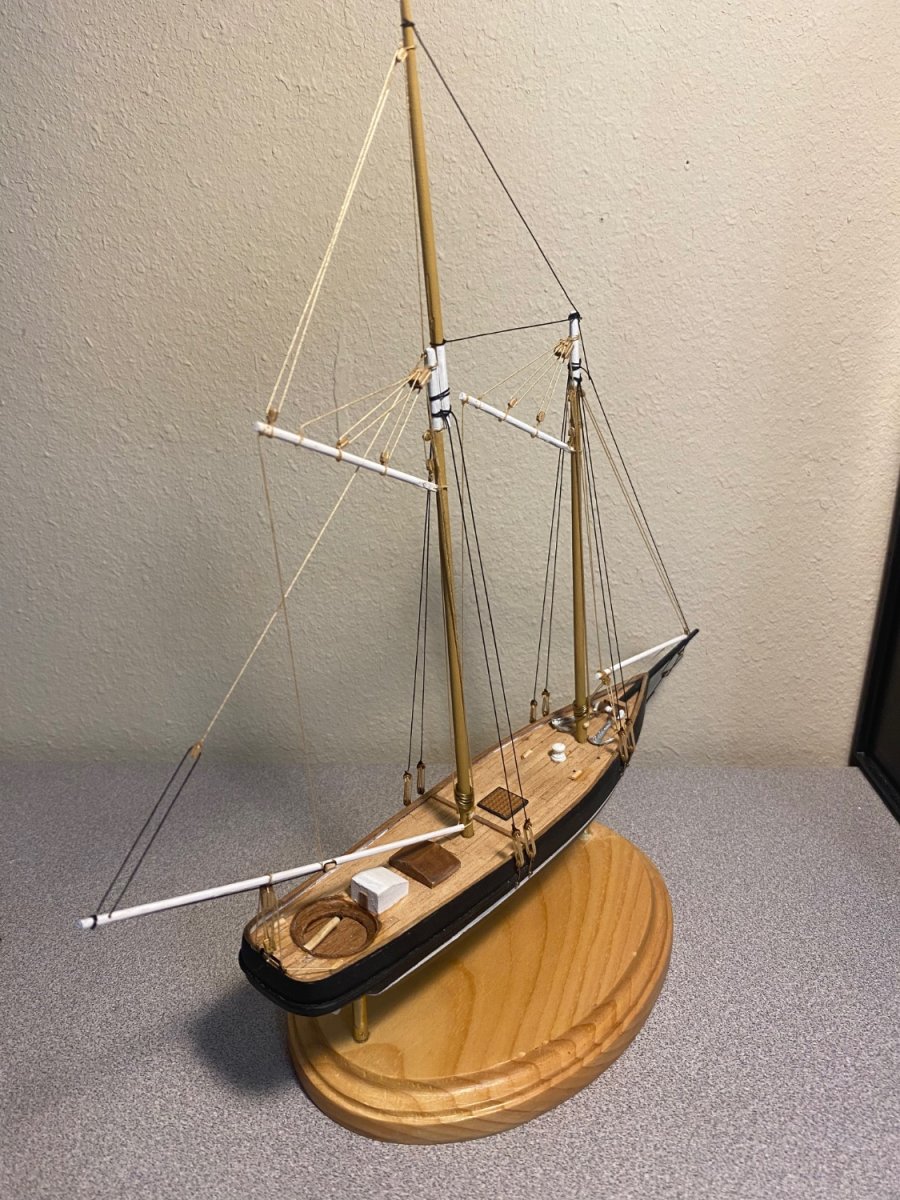
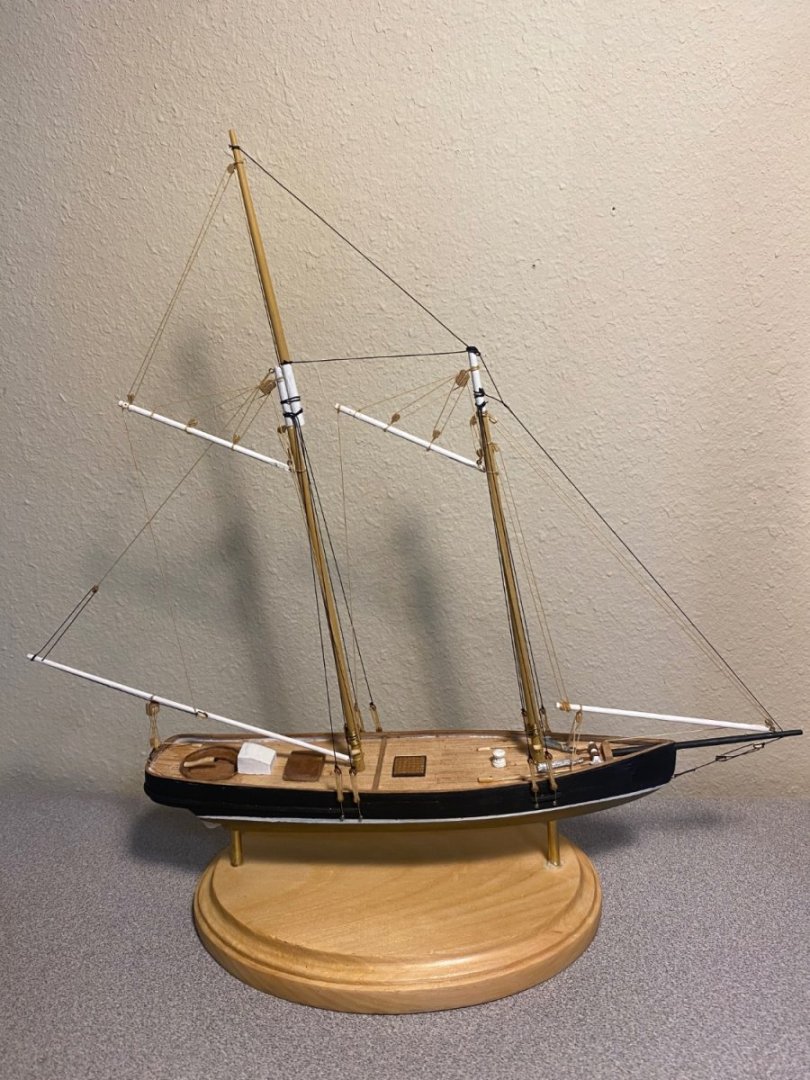
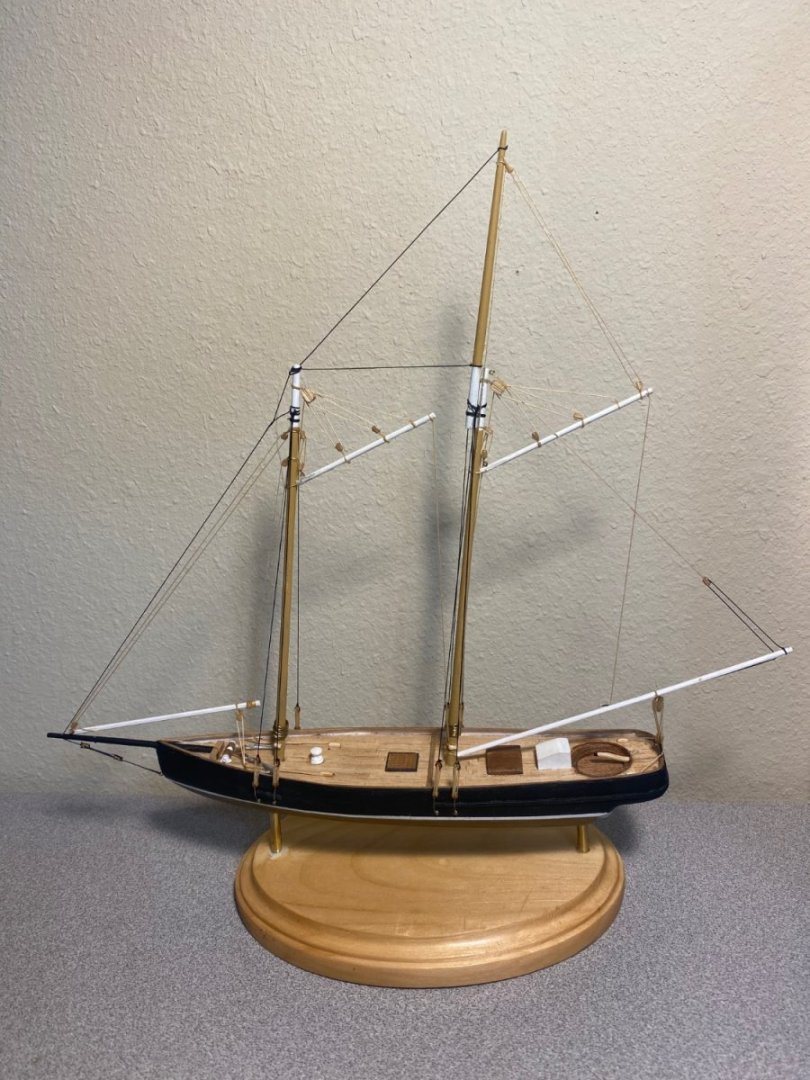
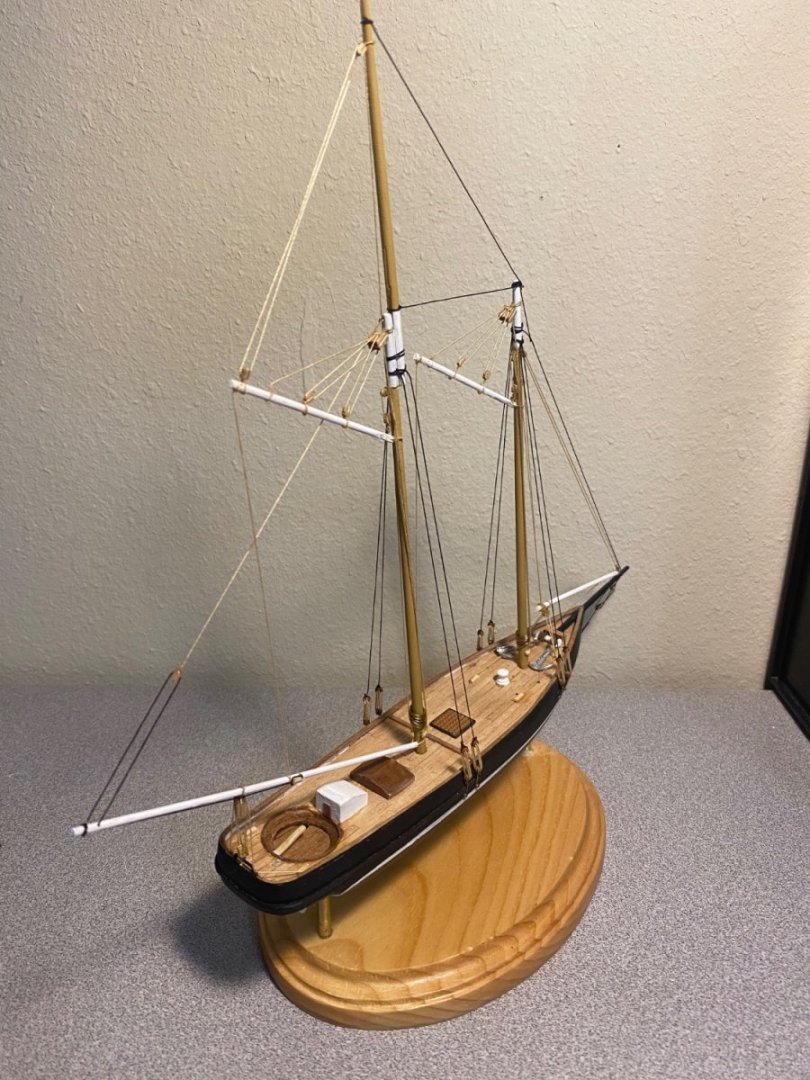
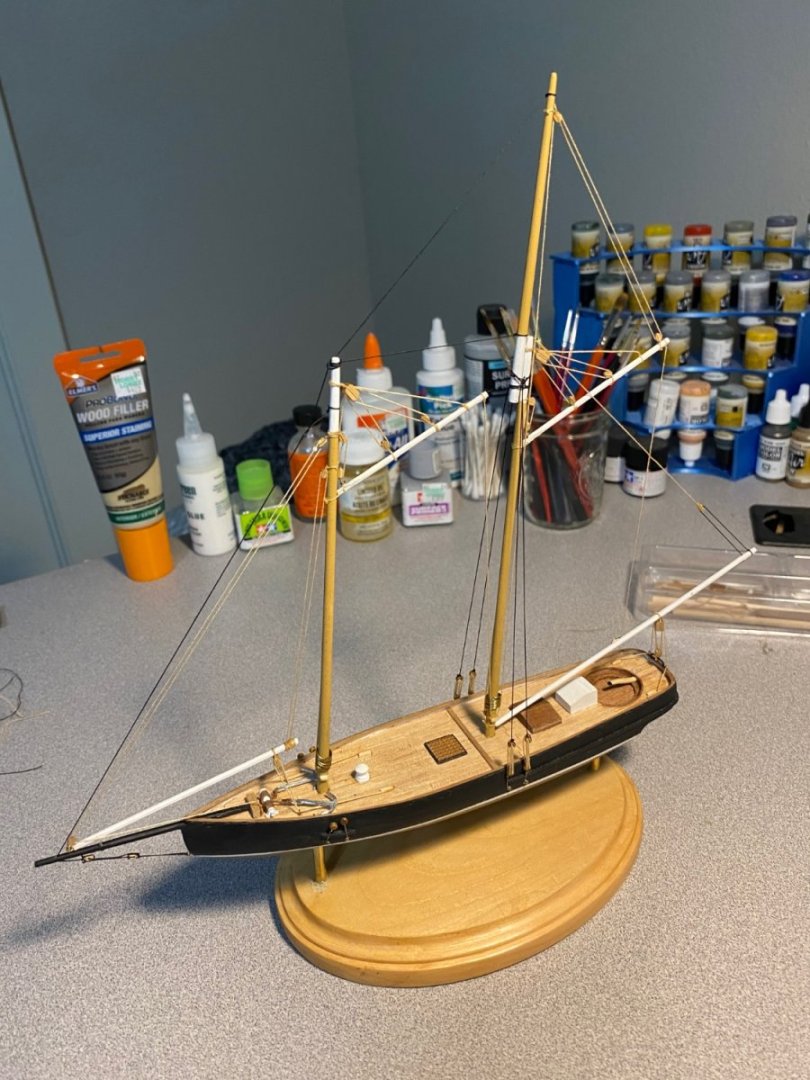
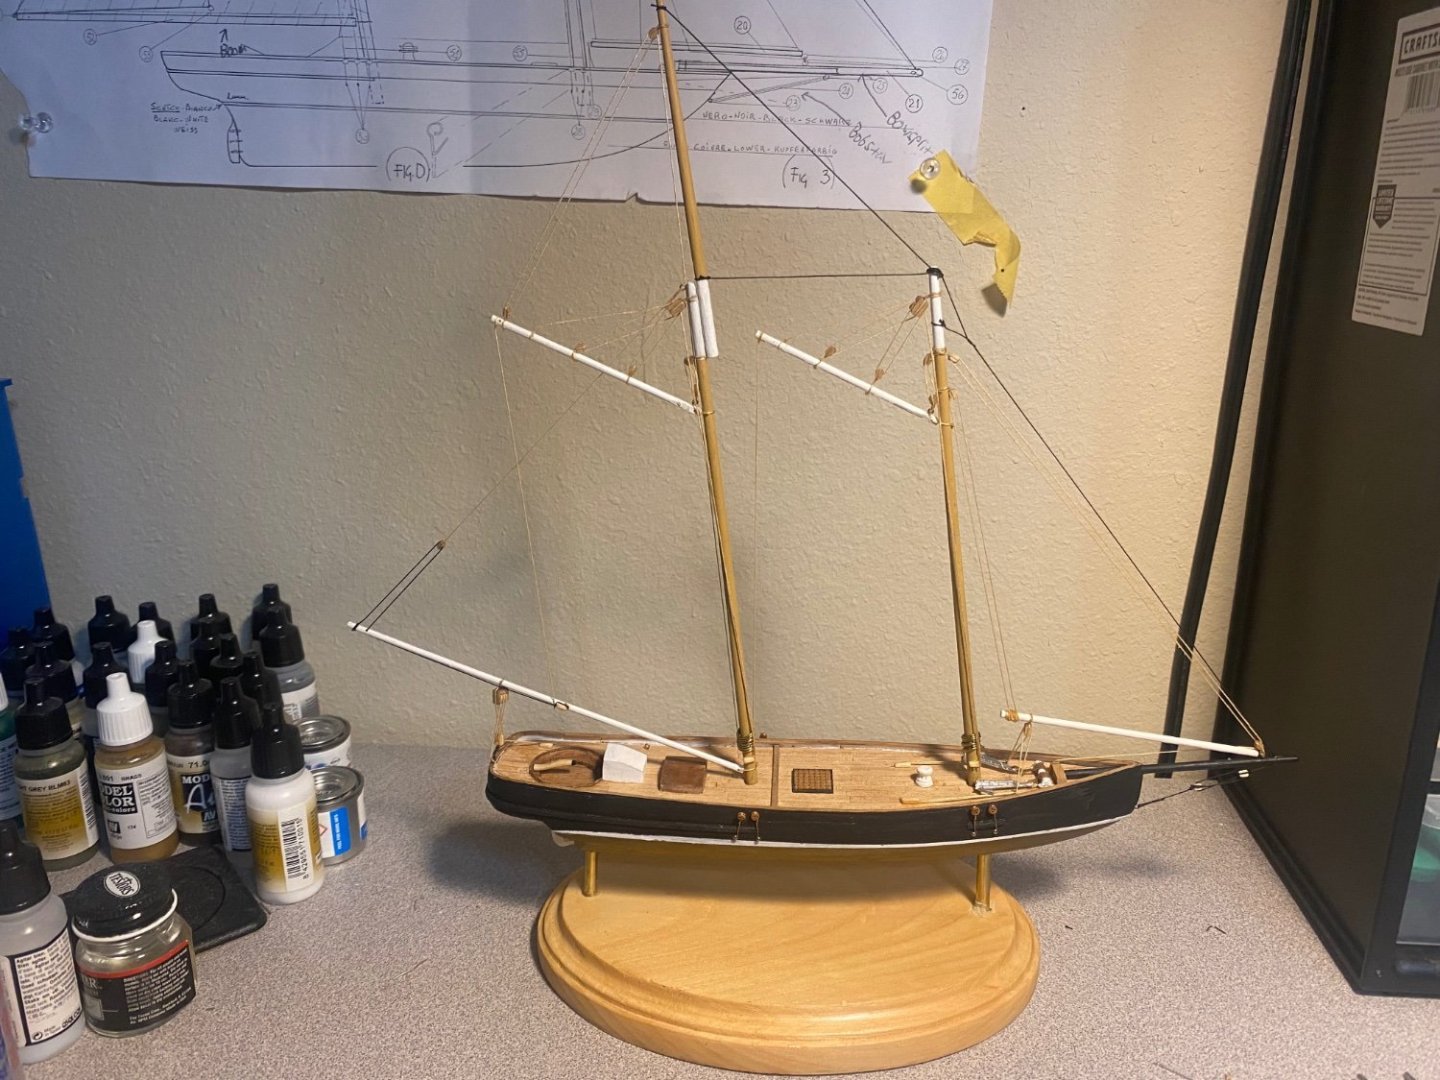
And at that I’m calling my first ship done! HUGE thanks to @Stevinne for the help and posting pics of his build and to everyone else. I was close to calling it done here: But pushing through the fear, taking my time, and messing up and redoing lots of things, I was able to achieve this result: Still far from perfect but that’s part of the process I’ve learned. Now I can move on to other models!


-
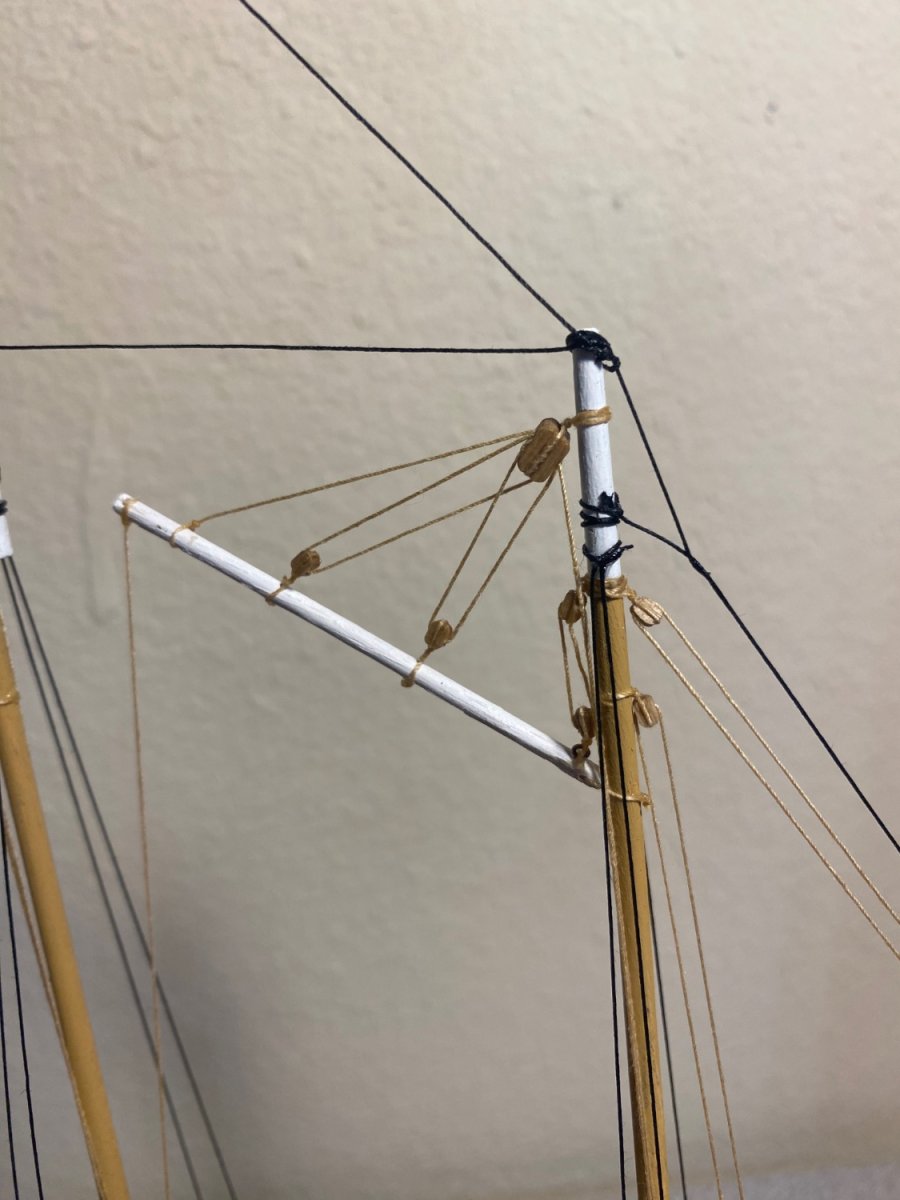
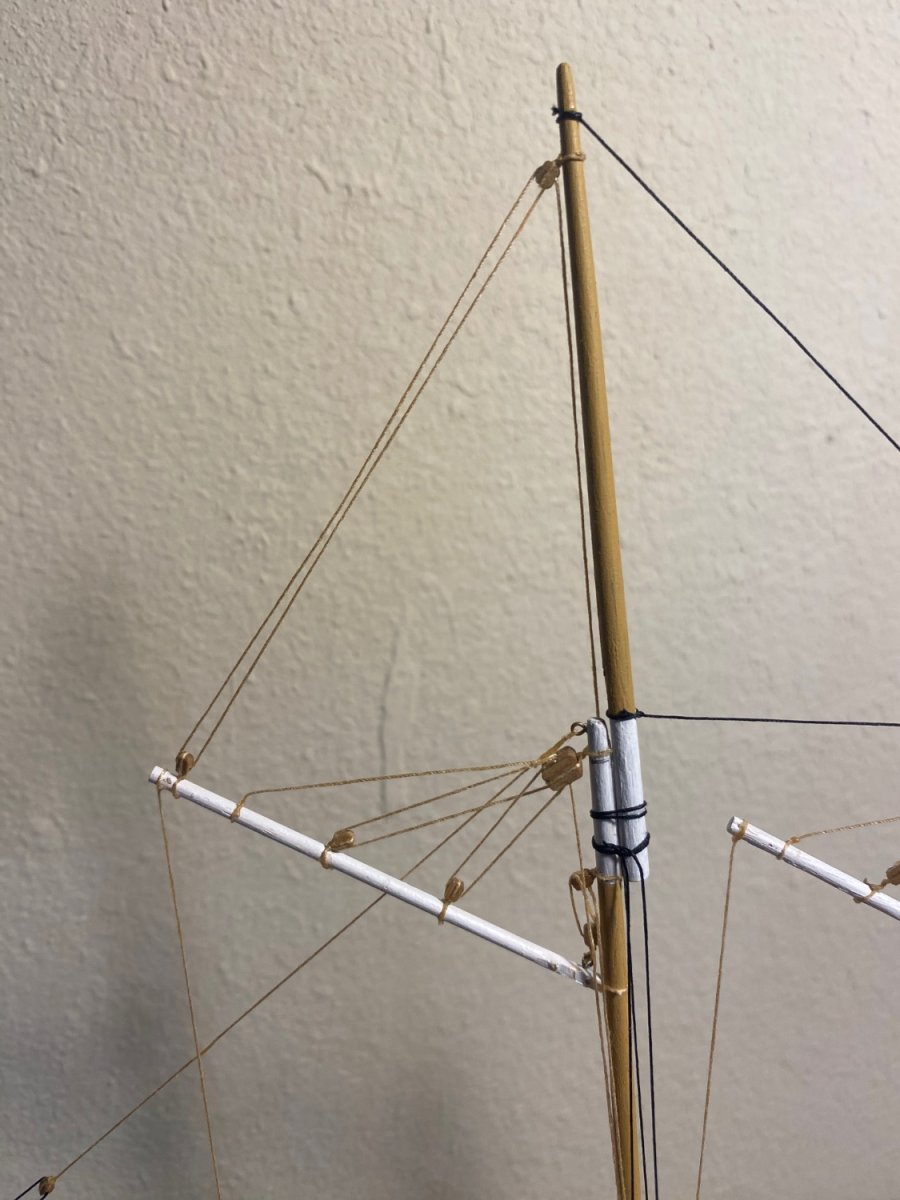
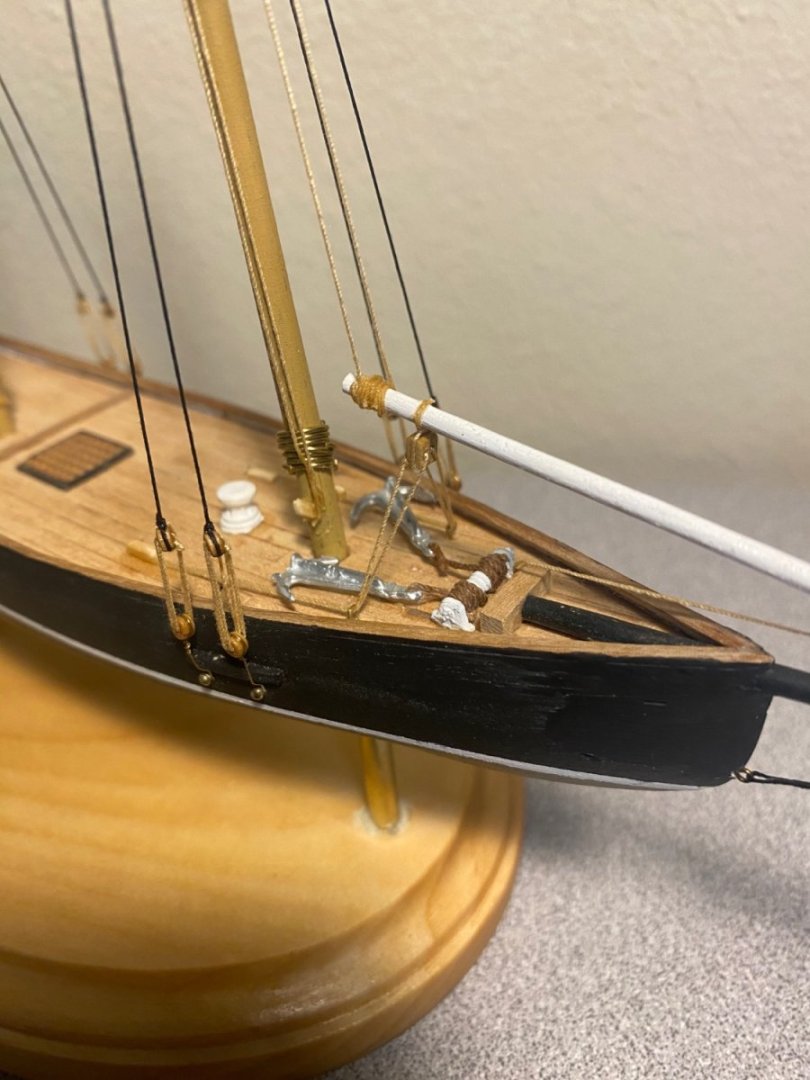
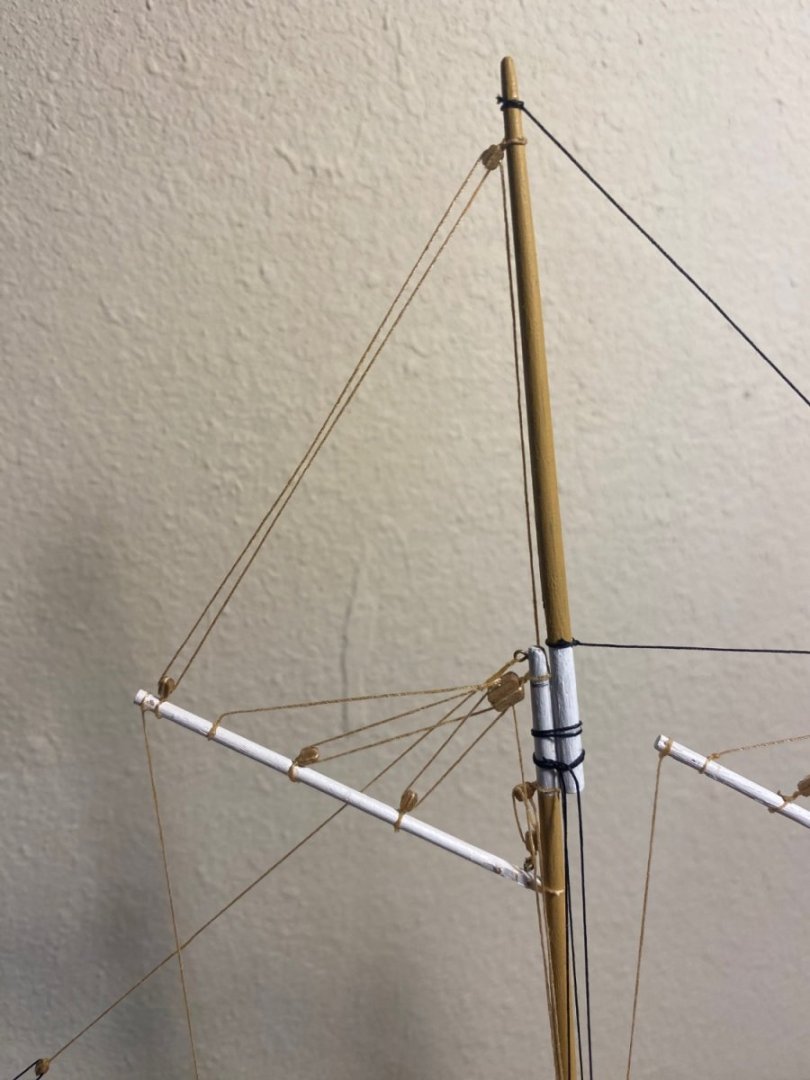
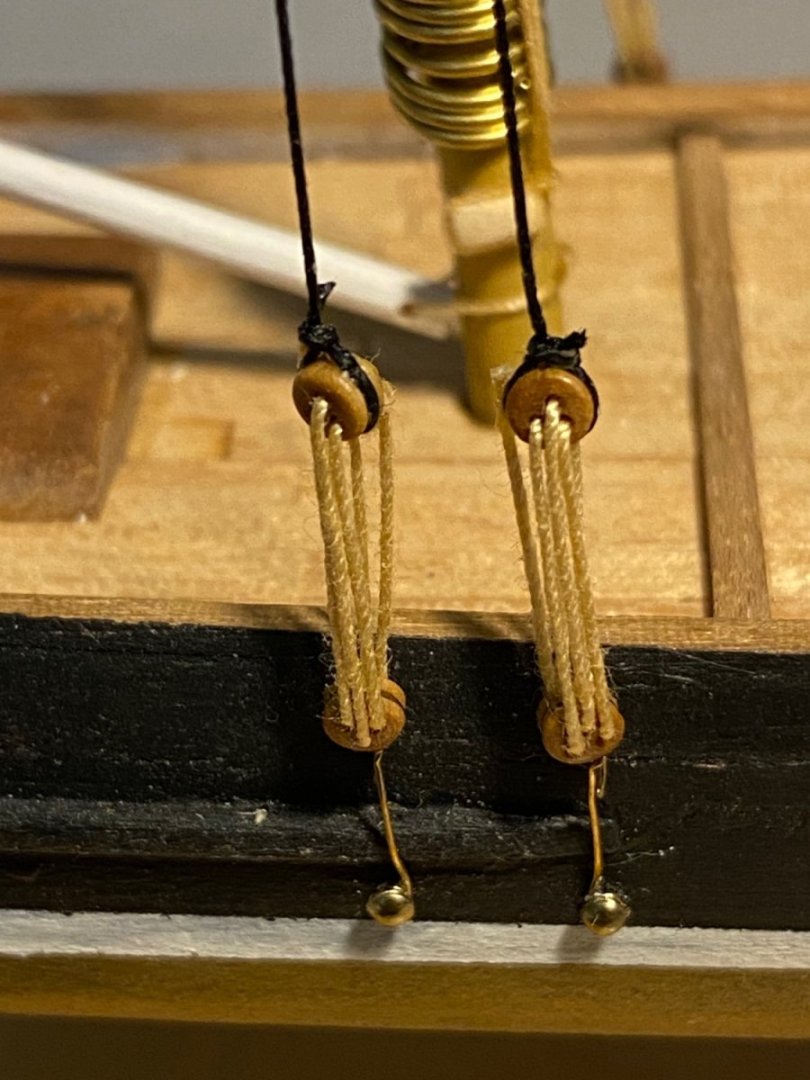
Aft shrouds attached.

-
ccoyle reacted to a post in a topic:
America by Cbrand02 - FINISHED - Mini Mamoli - Scale 1:140
-
JacquesCousteau reacted to a post in a topic:
America by Cbrand02 - FINISHED - Mini Mamoli - Scale 1:140
-
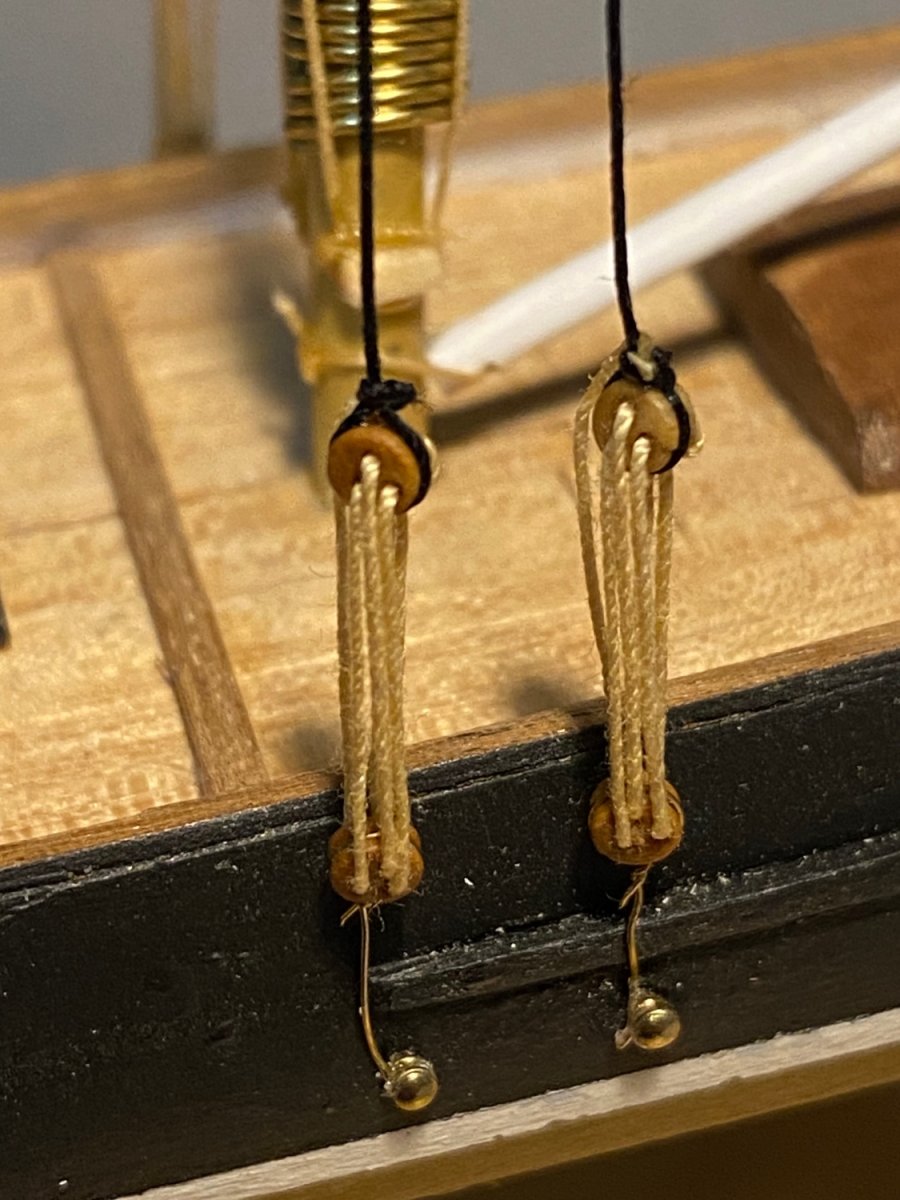
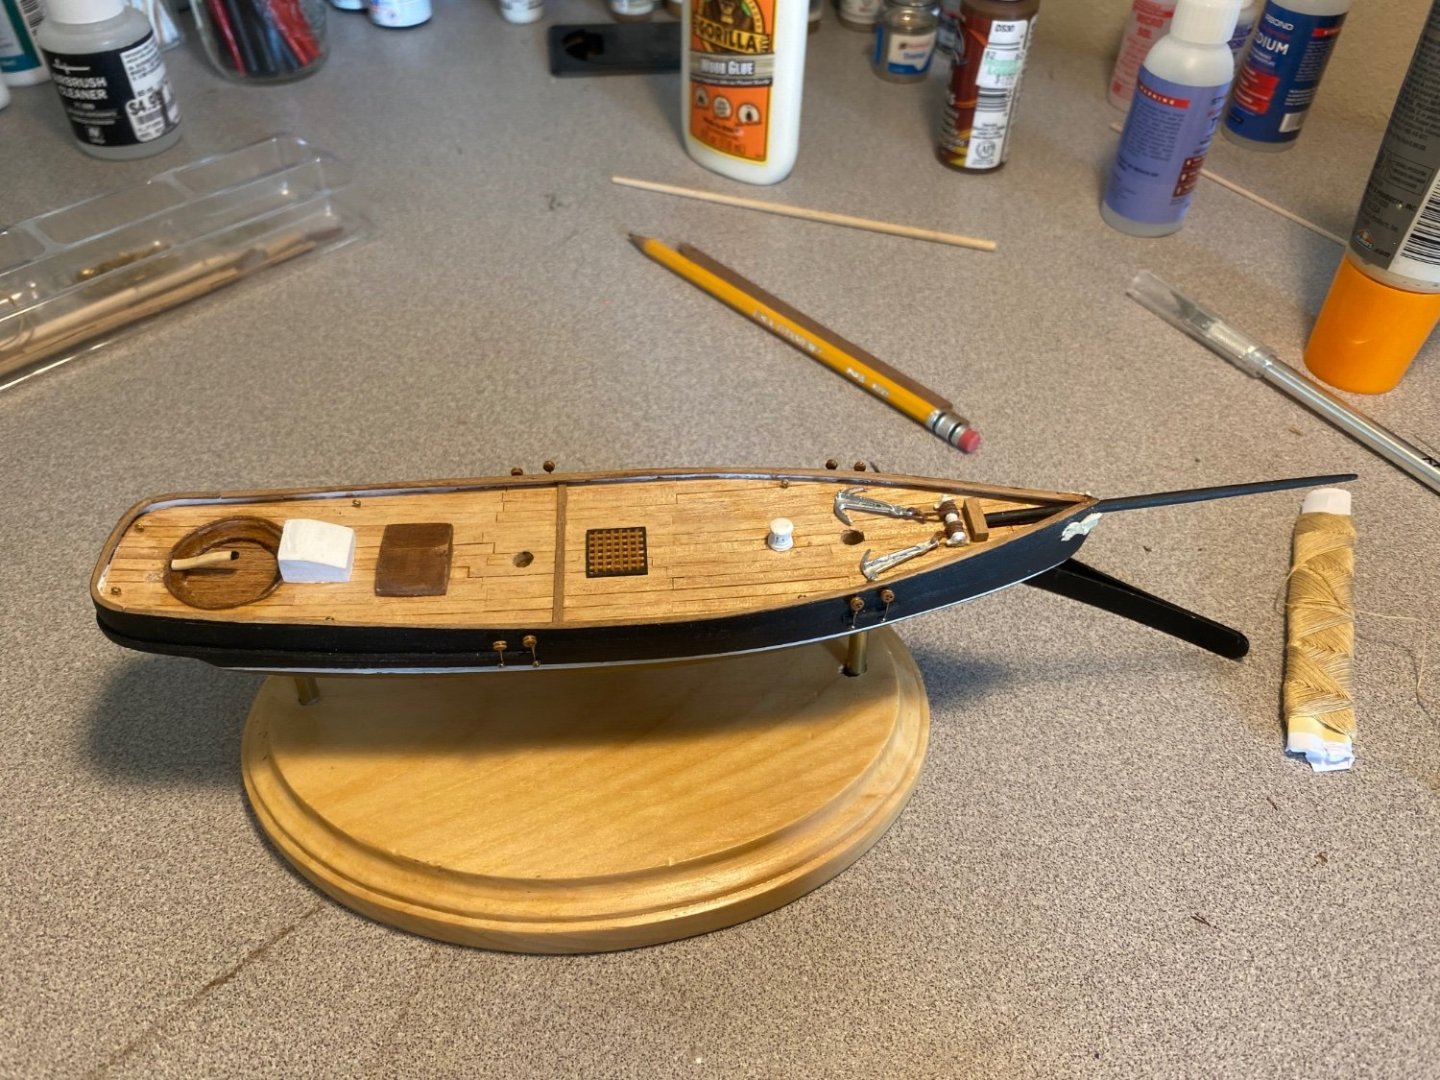
Almost there! Need to do the shrouds and make some rope coils and I’m calling her complete. Took some creative liberty in a few areas, such as cleats becoming small sanded pieces of basswood and some rigging not completely right. Anything glaring that I’m missing? Eager to finish this up but would like to know if I am missing a main piece of rigging or something (other than the shrouds)
-
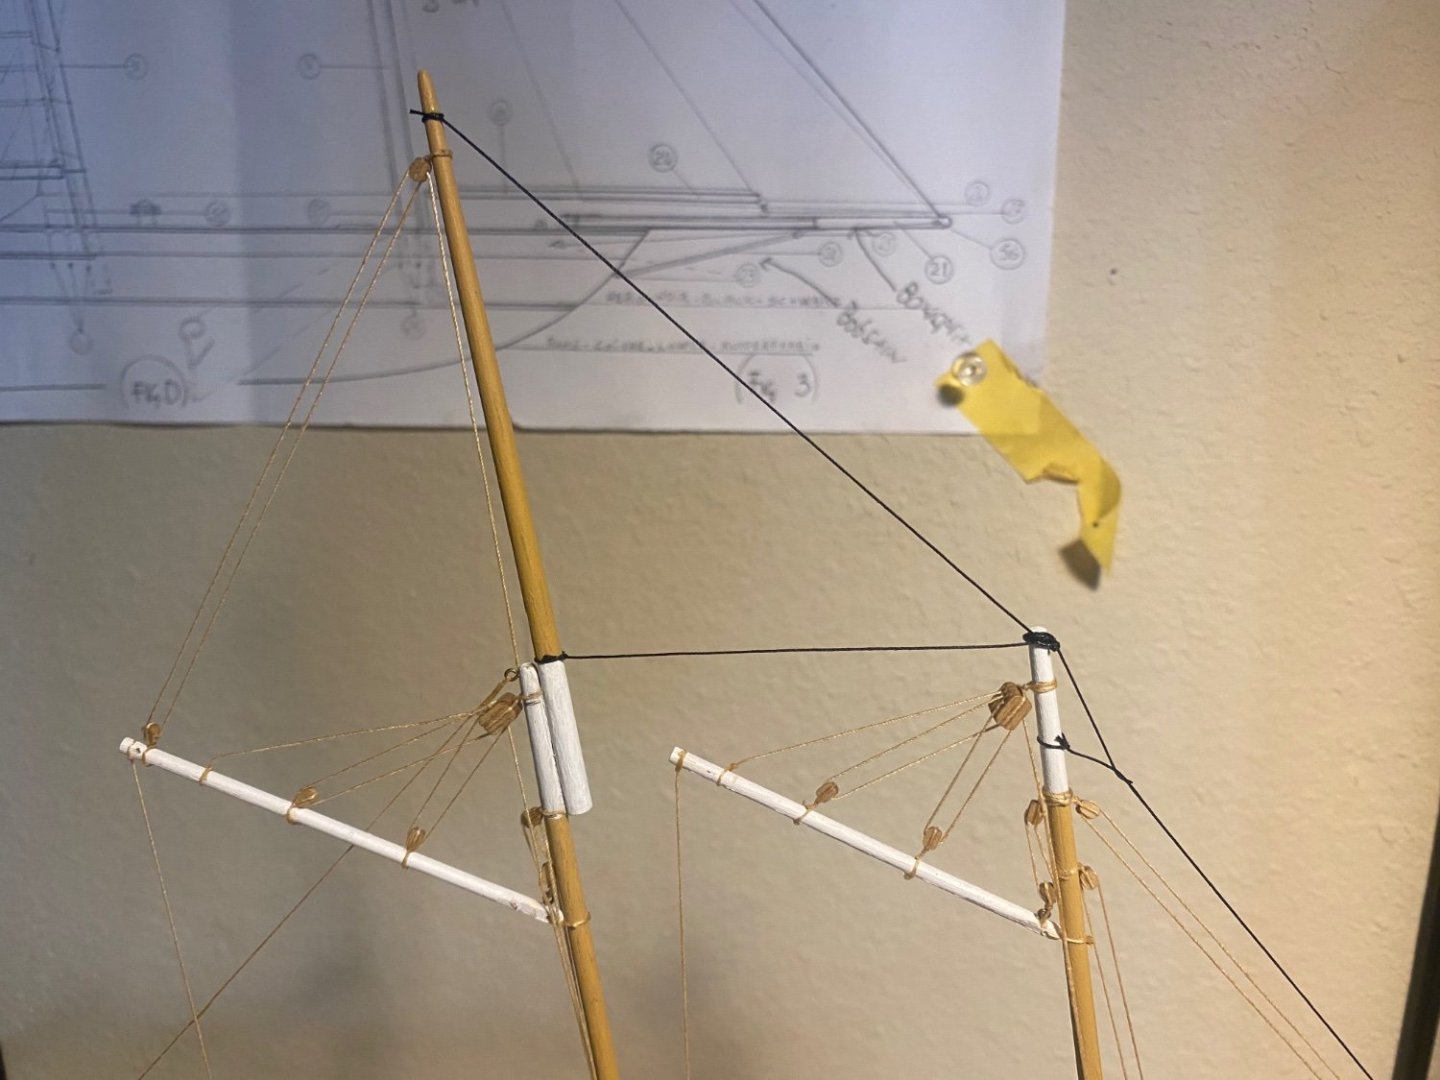
More rigging on the mainmast, about to glue them permanently. Goofed by laying the mainmast in a puddle of thin CA glue, had to redo a large chunk. The joys of modeling!
-
Snug Harbor Johnny reacted to a post in a topic:
America by Cbrand02 - FINISHED - Mini Mamoli - Scale 1:140
-
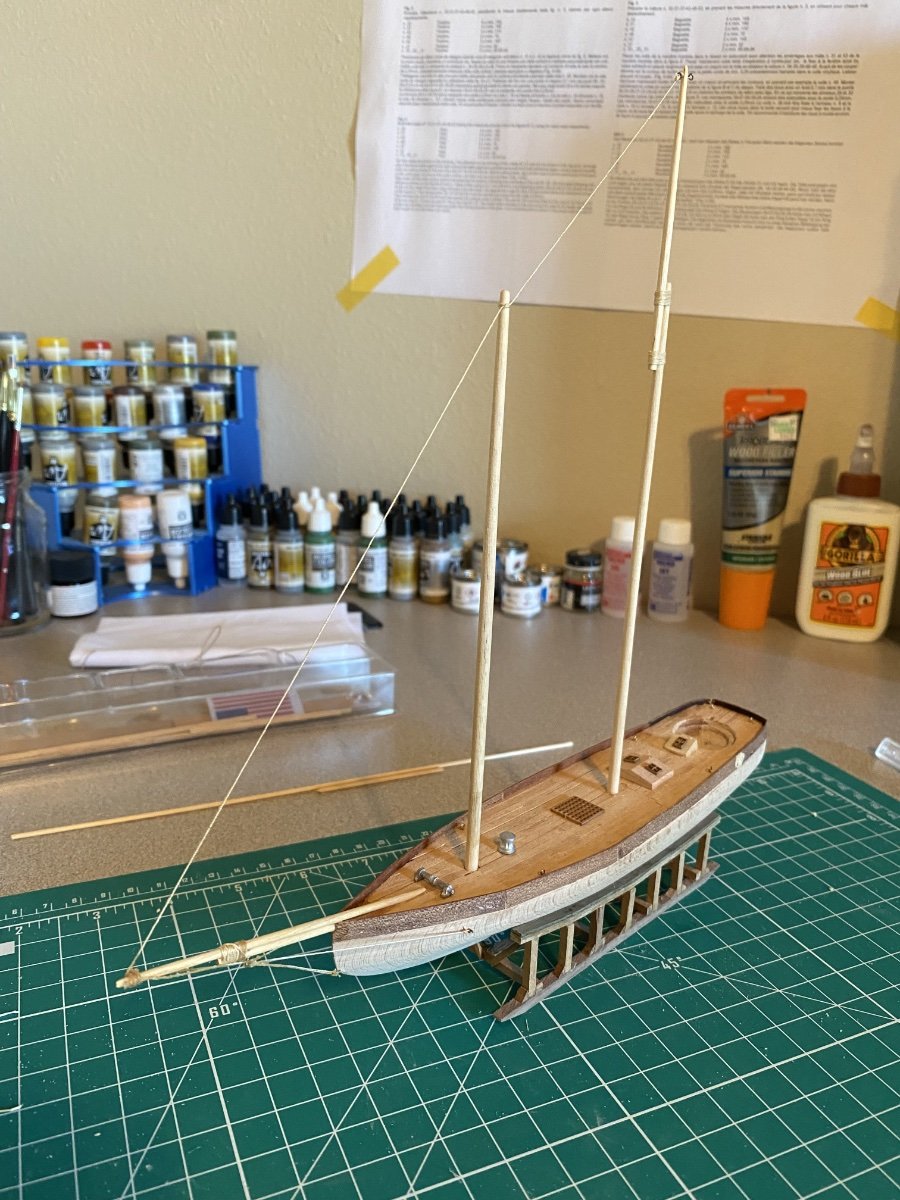
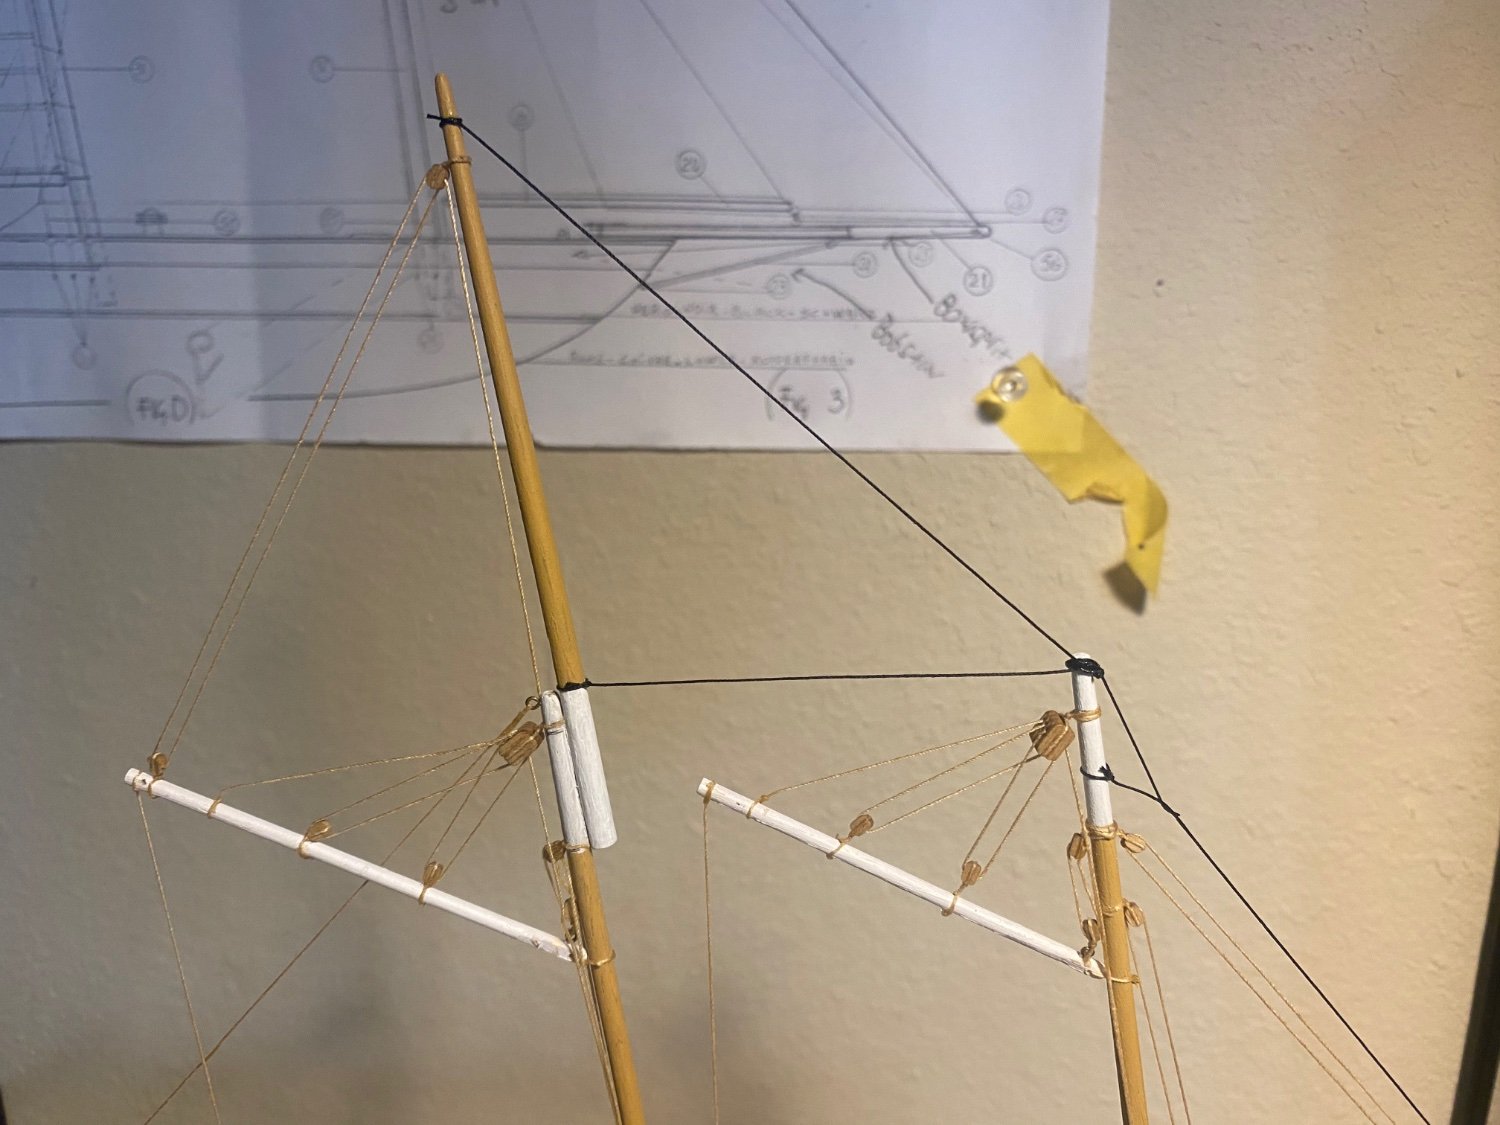
Starting the running rigging. I haven’t glued the masts in place yet as I have no idea how I’d get to any of this more intricate stuff.
-
JacquesCousteau reacted to a post in a topic:
America by Cbrand02 - FINISHED - Mini Mamoli - Scale 1:140
-
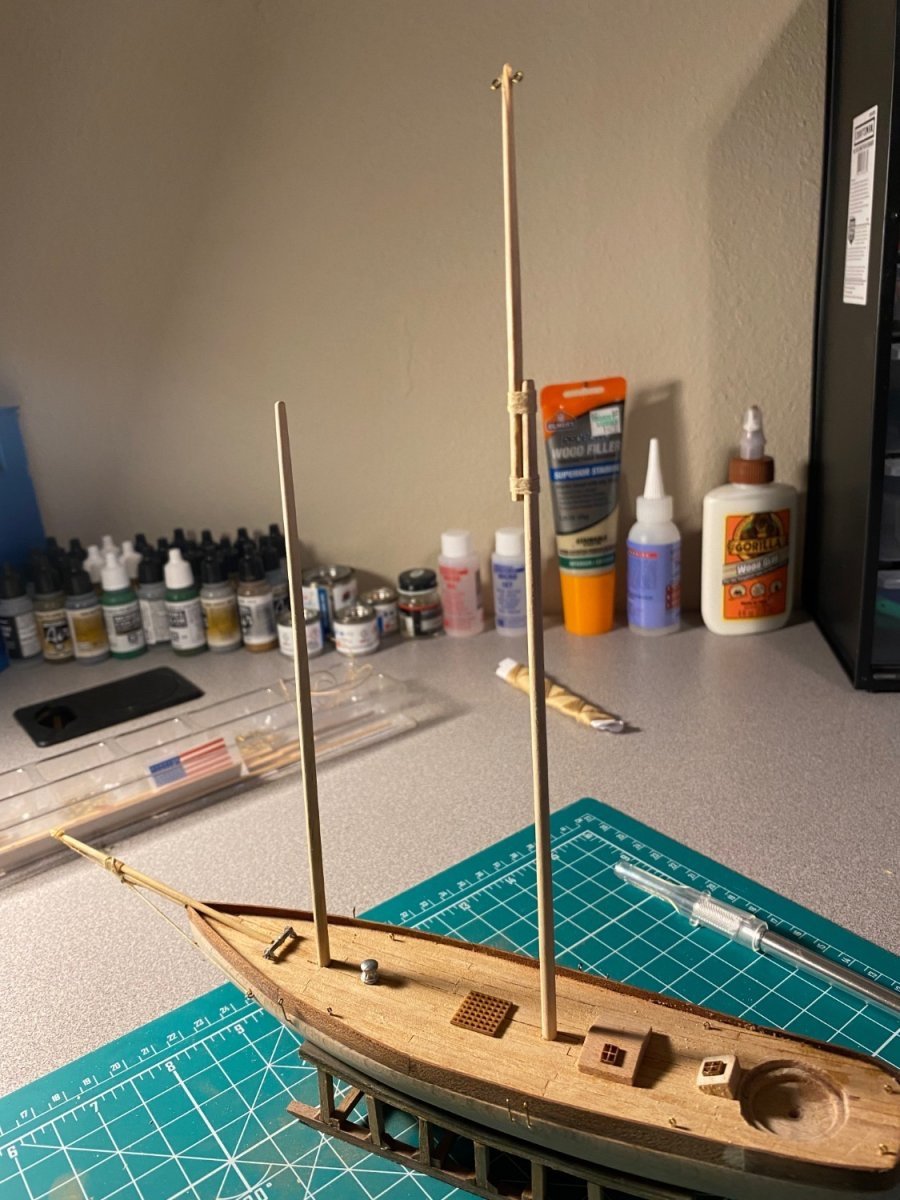
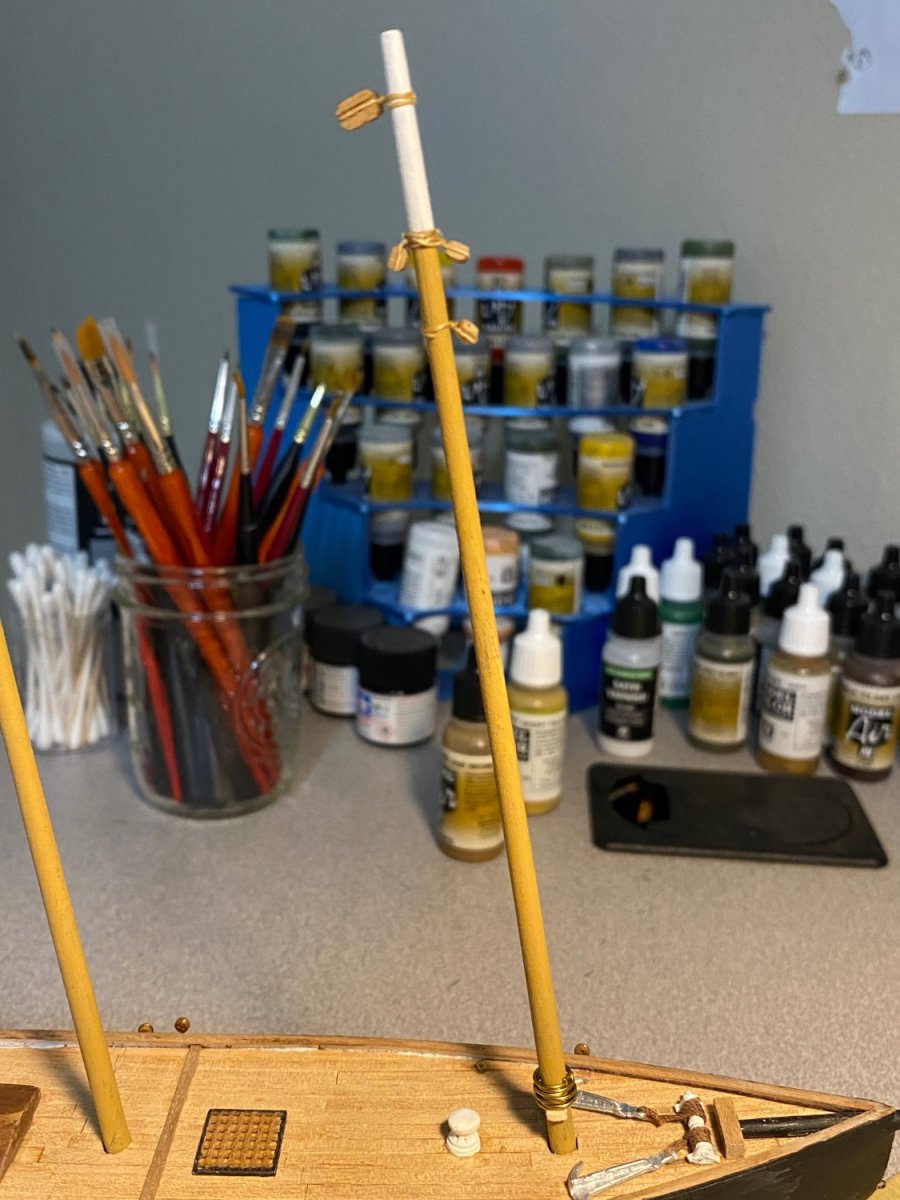
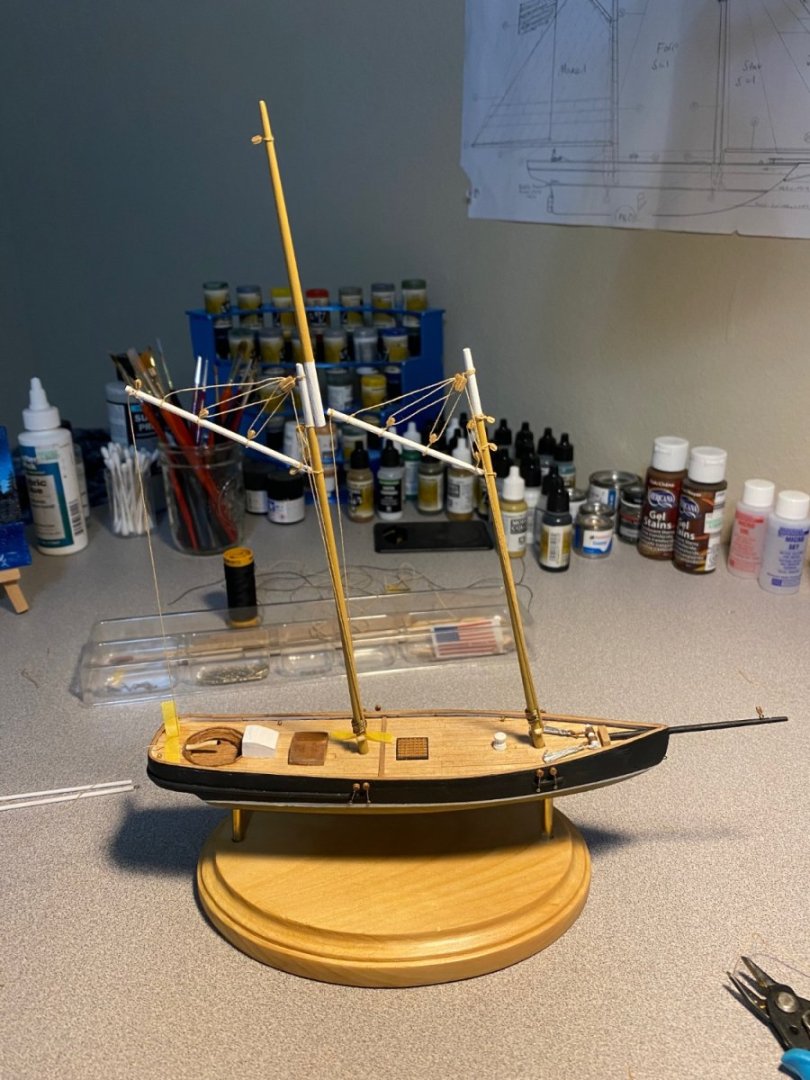
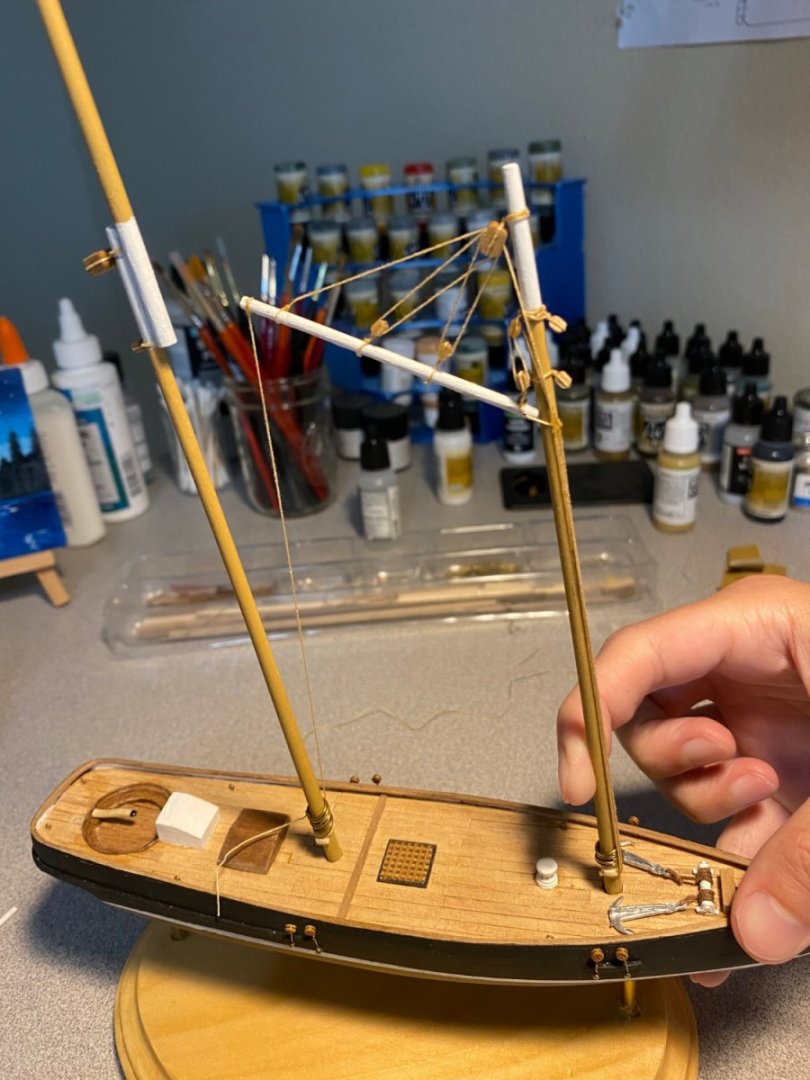
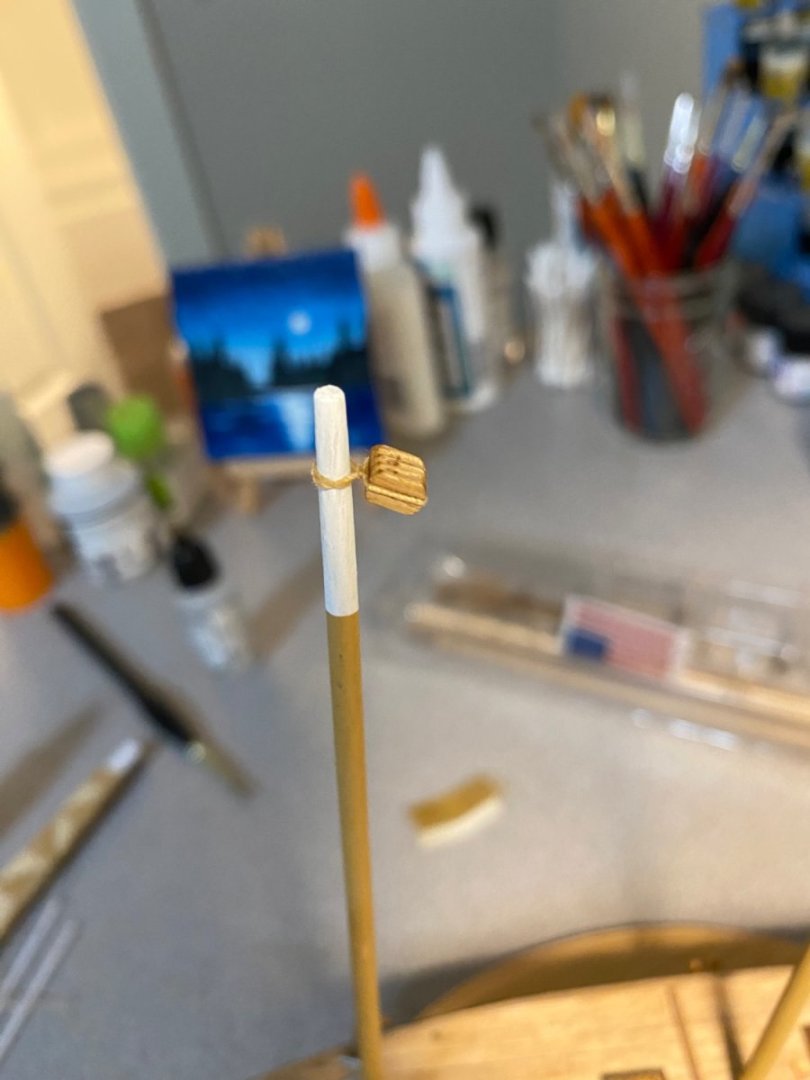
Topmast attached and painted, bow cleaned up after sanding, and first block attached! Masts have not yet been stepped. I’m just looking at pictures and eyeballing everything.

-
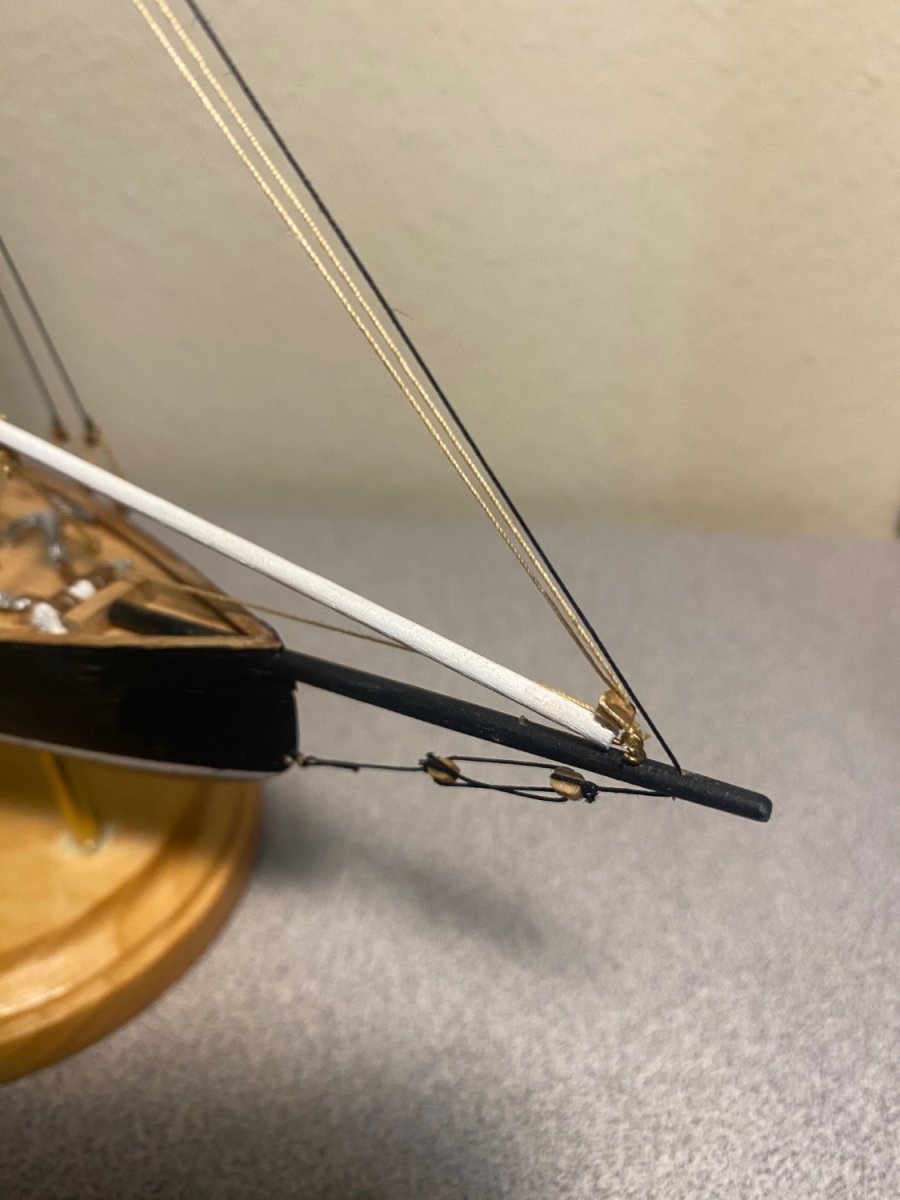
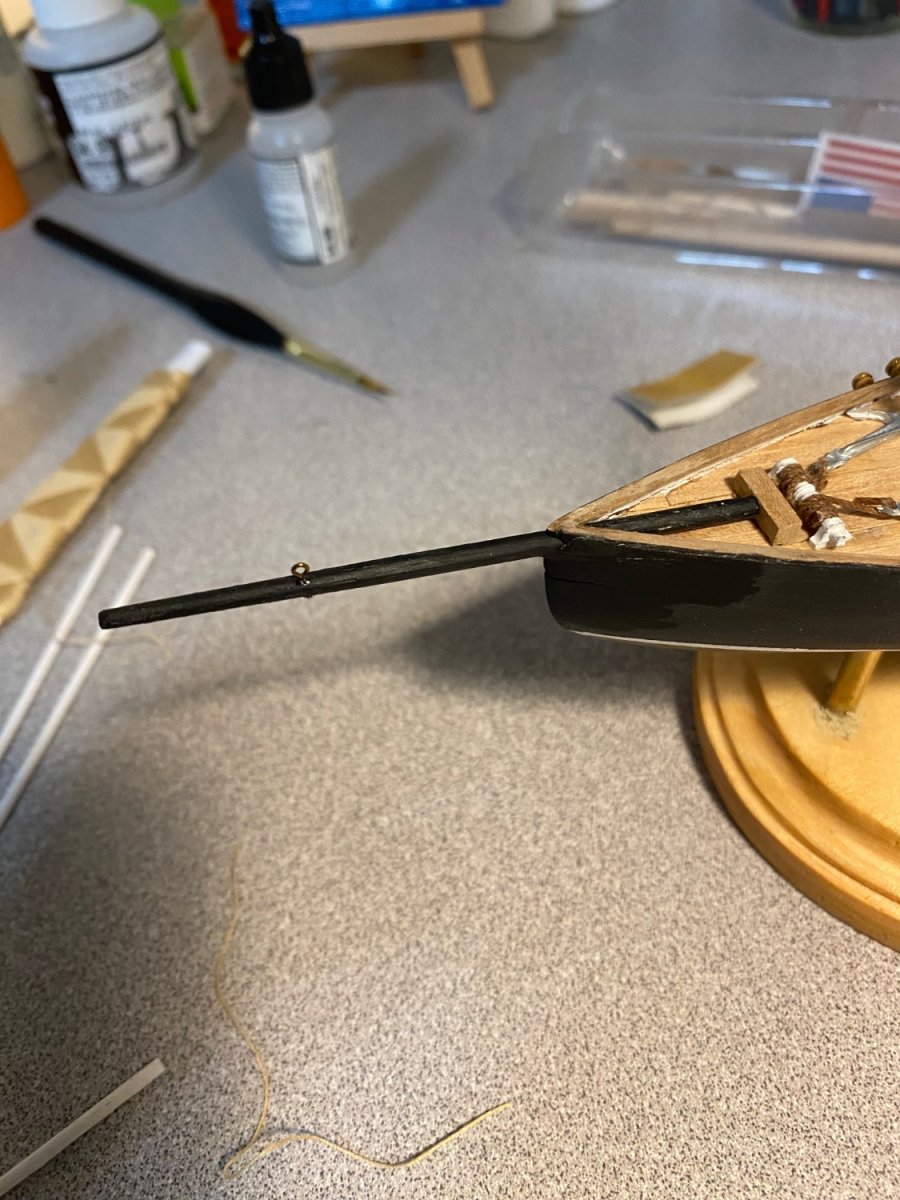
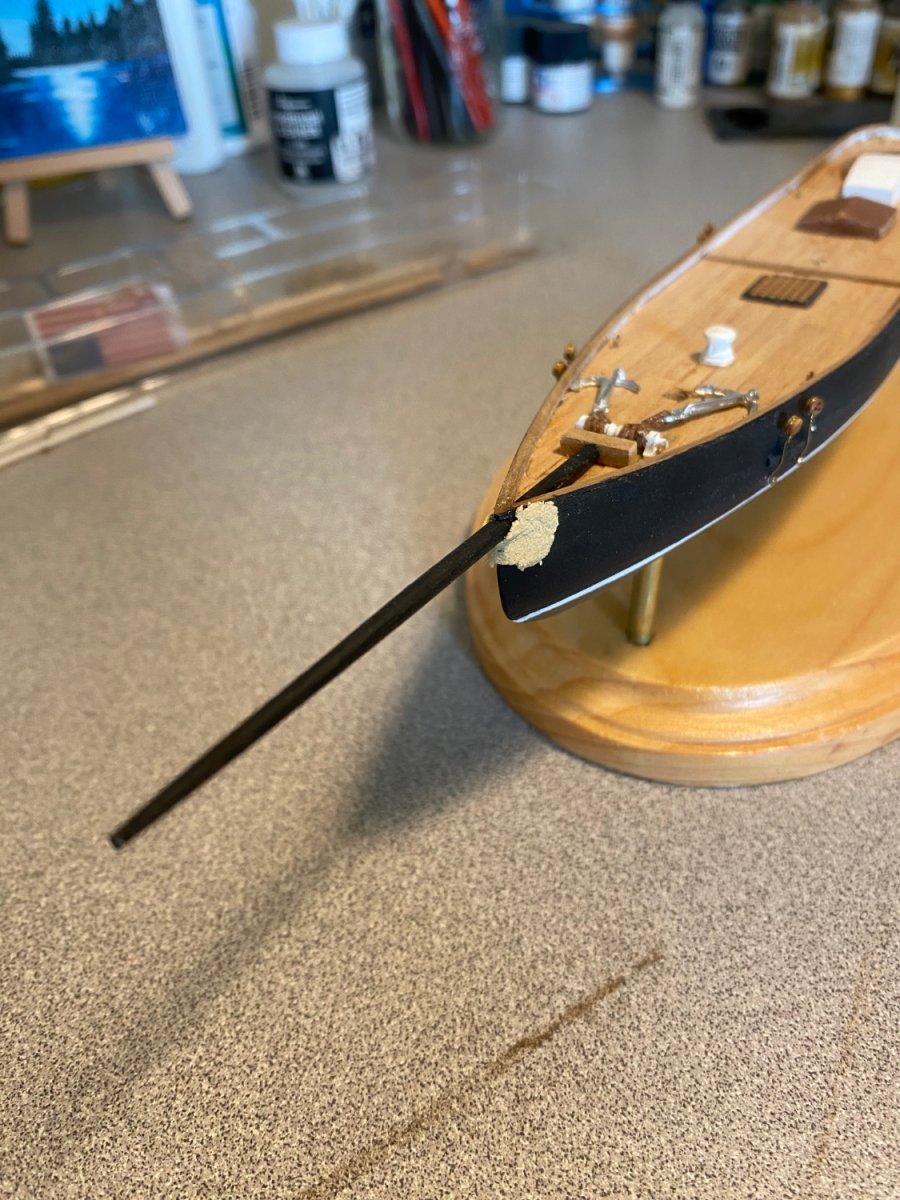
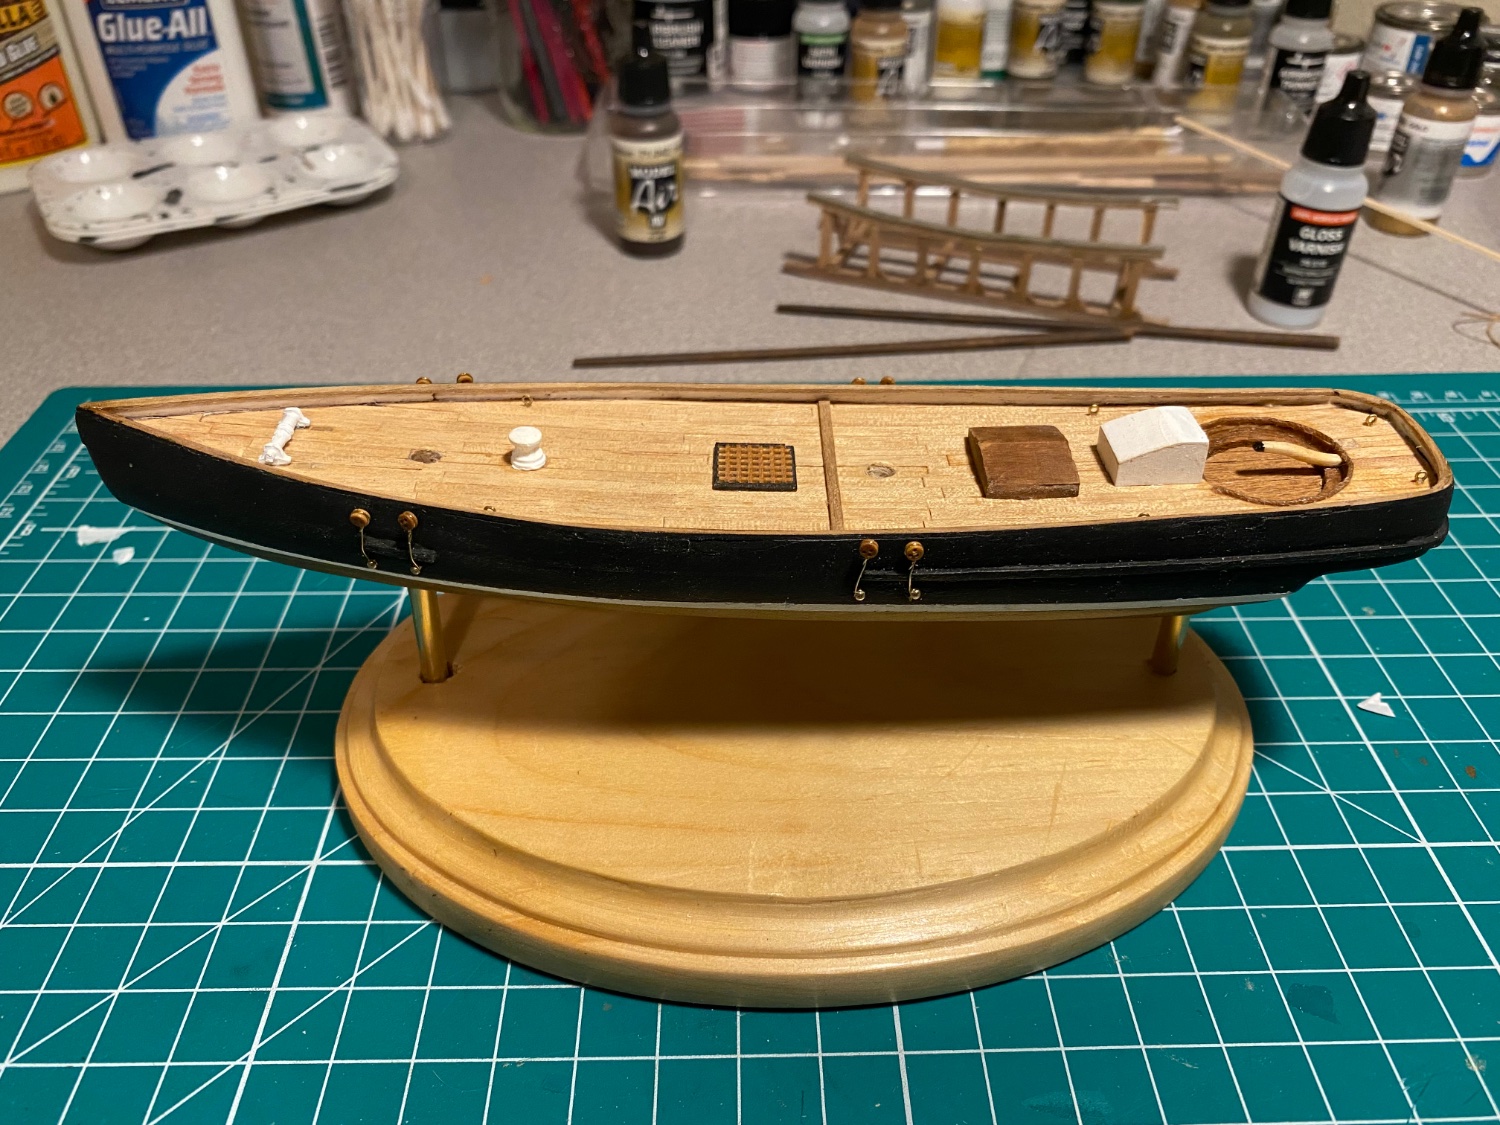
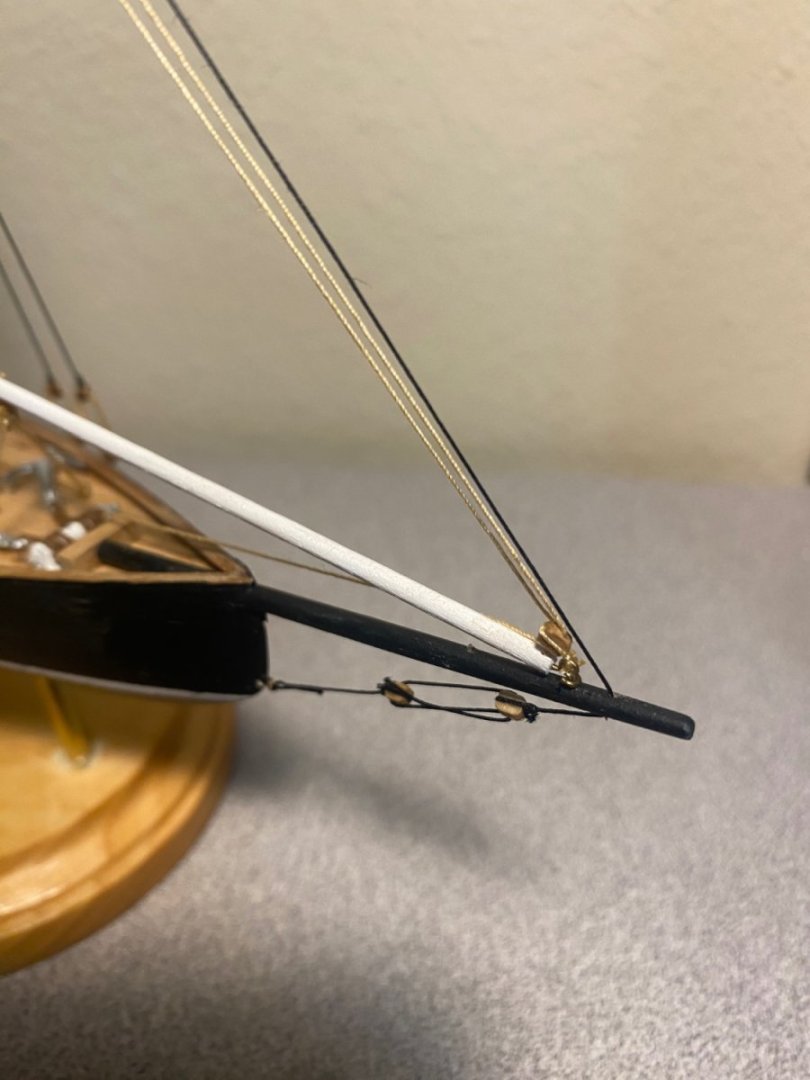
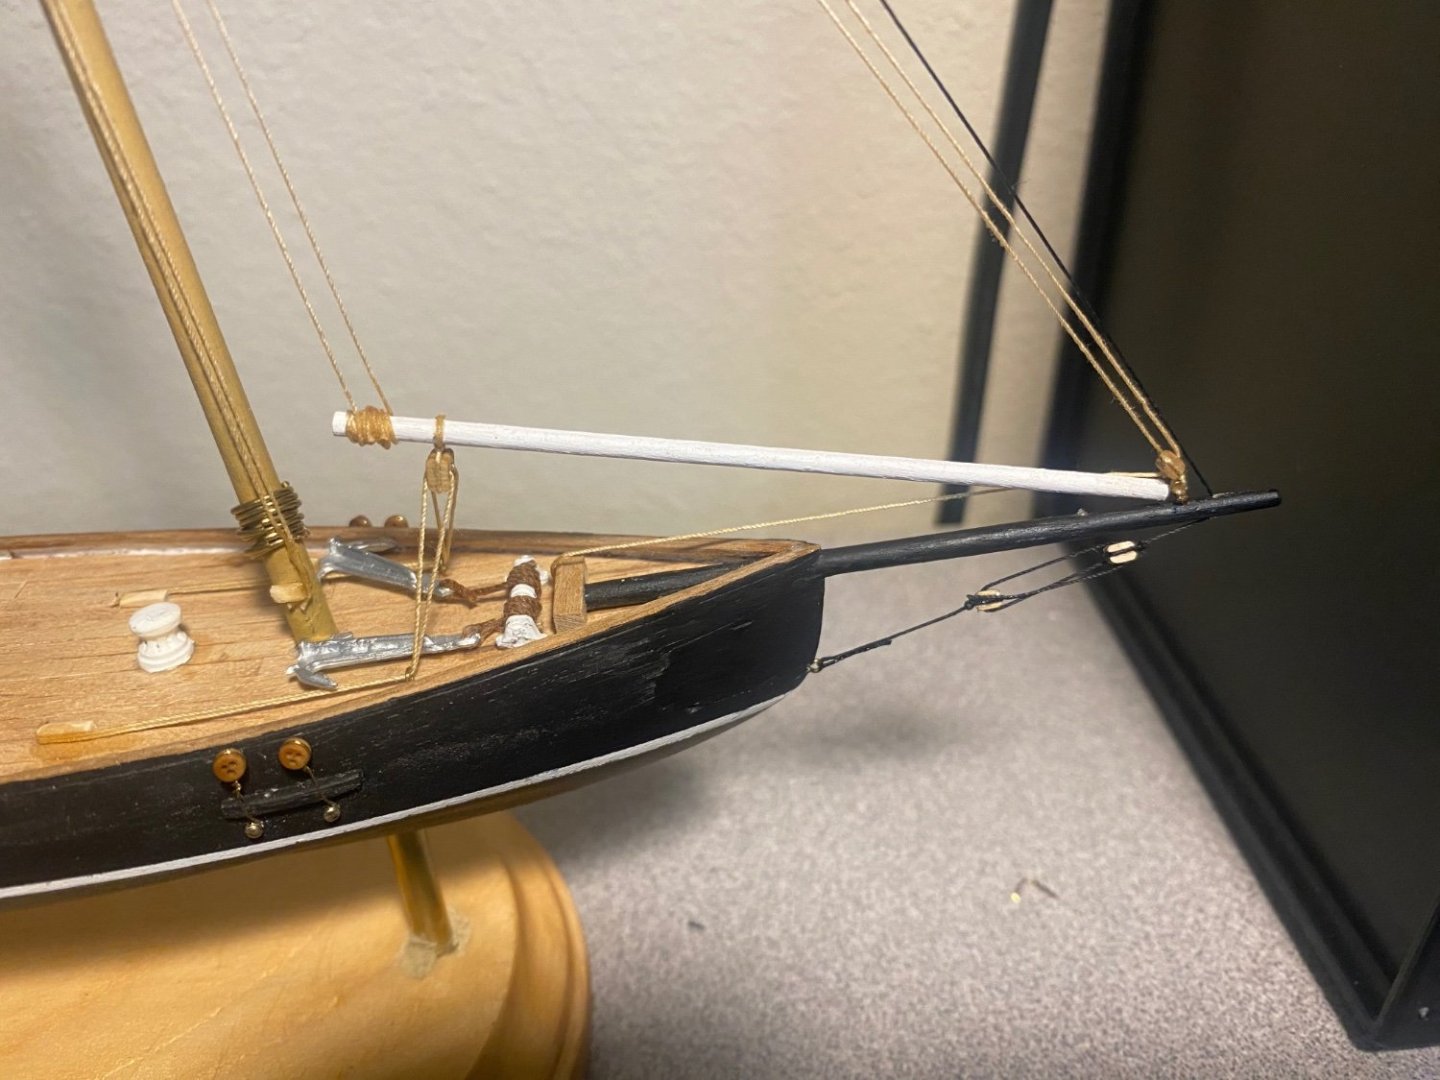
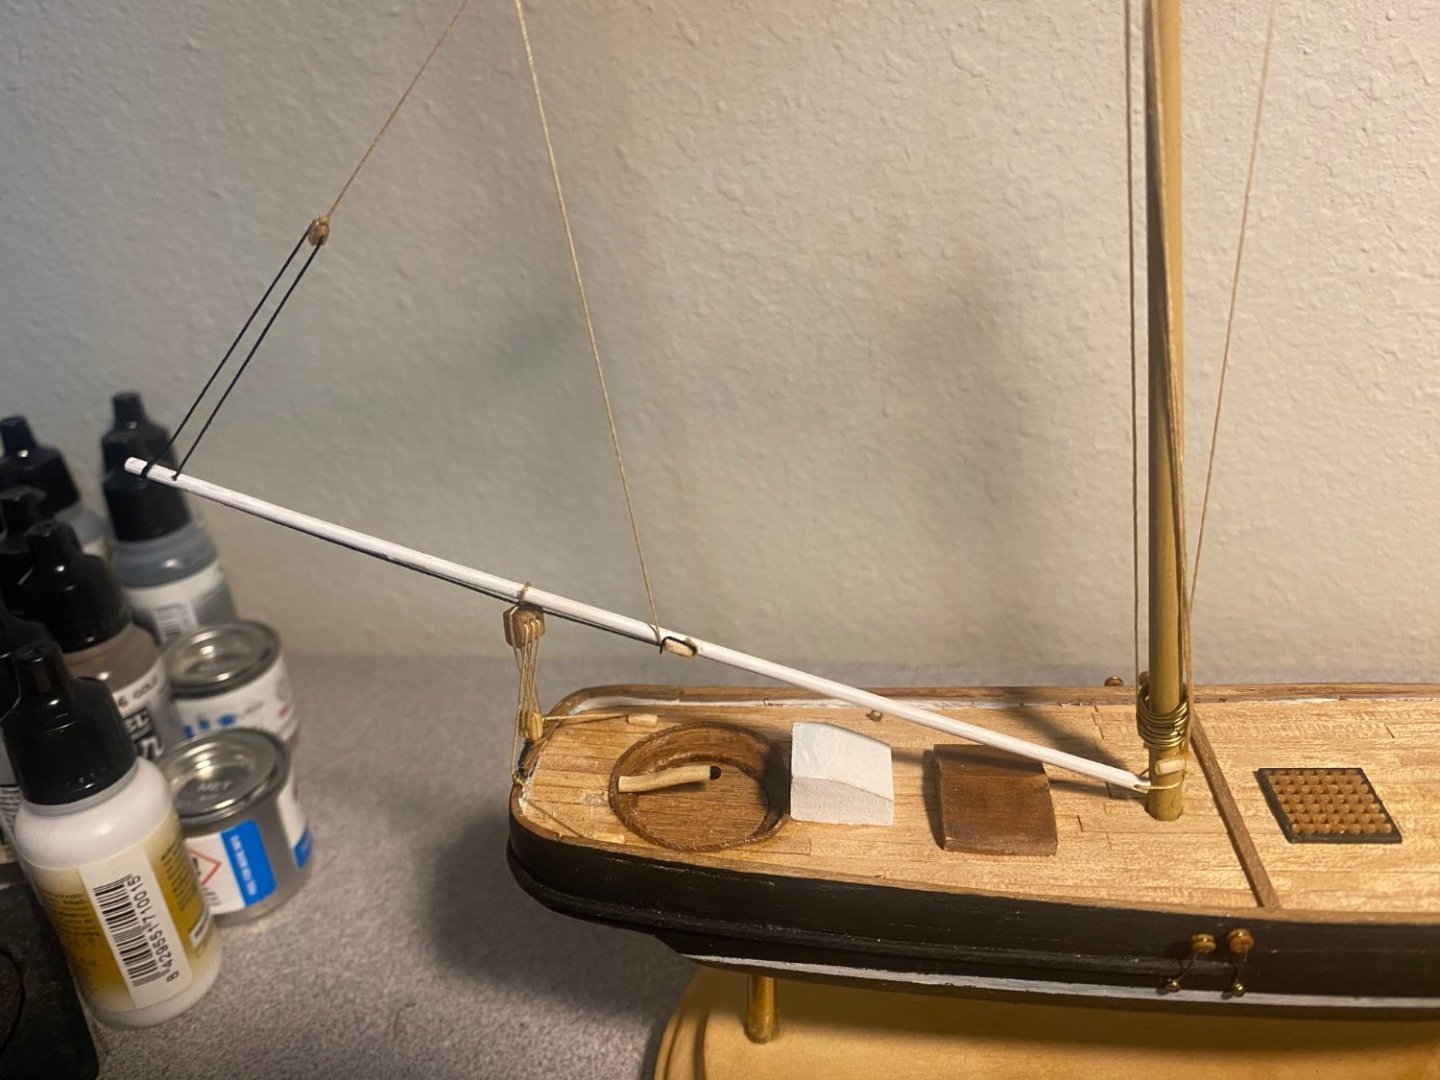
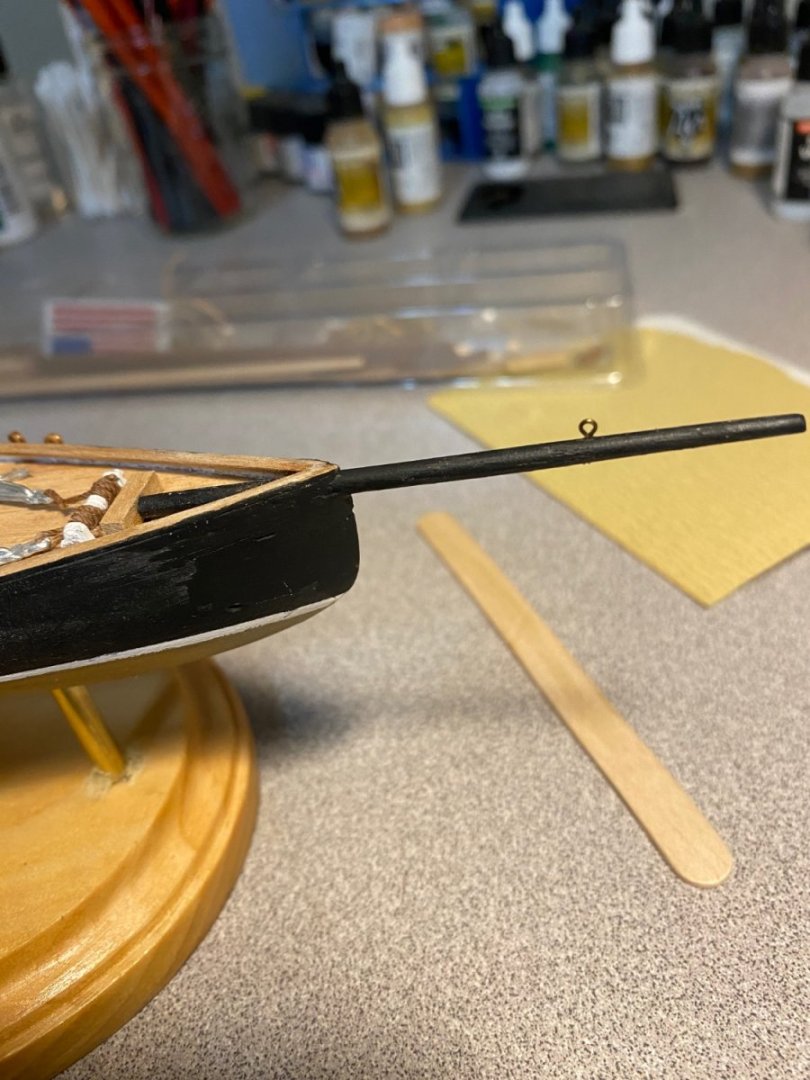
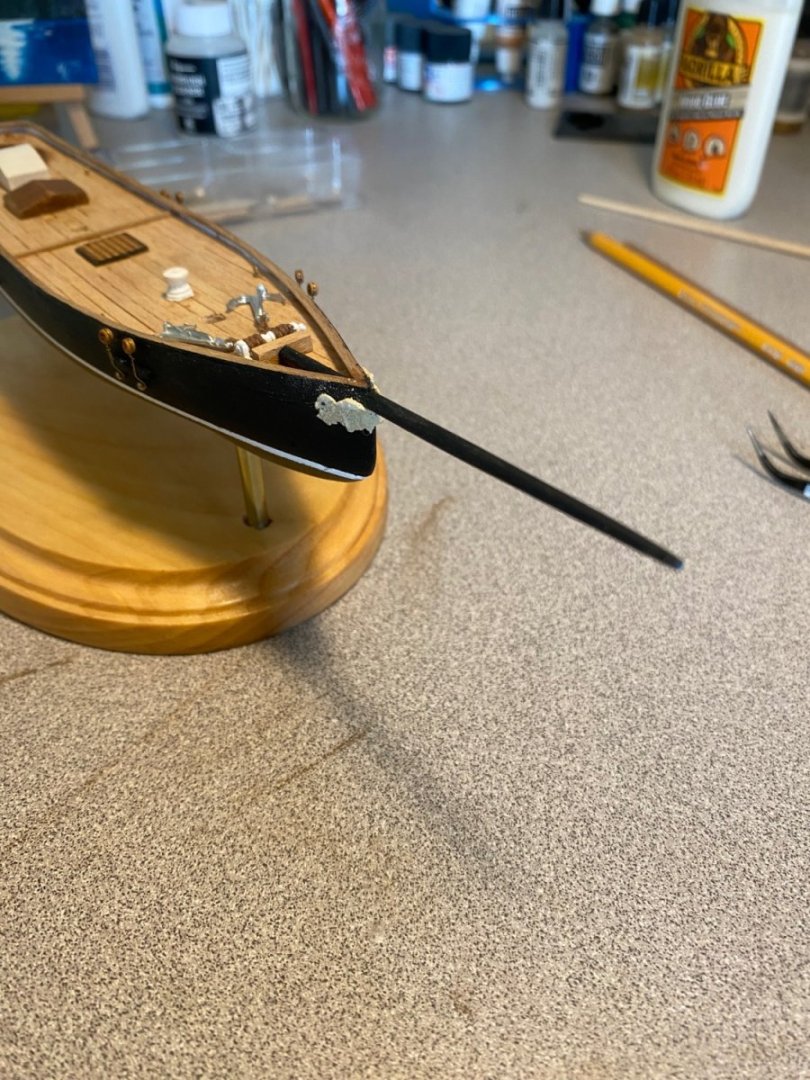
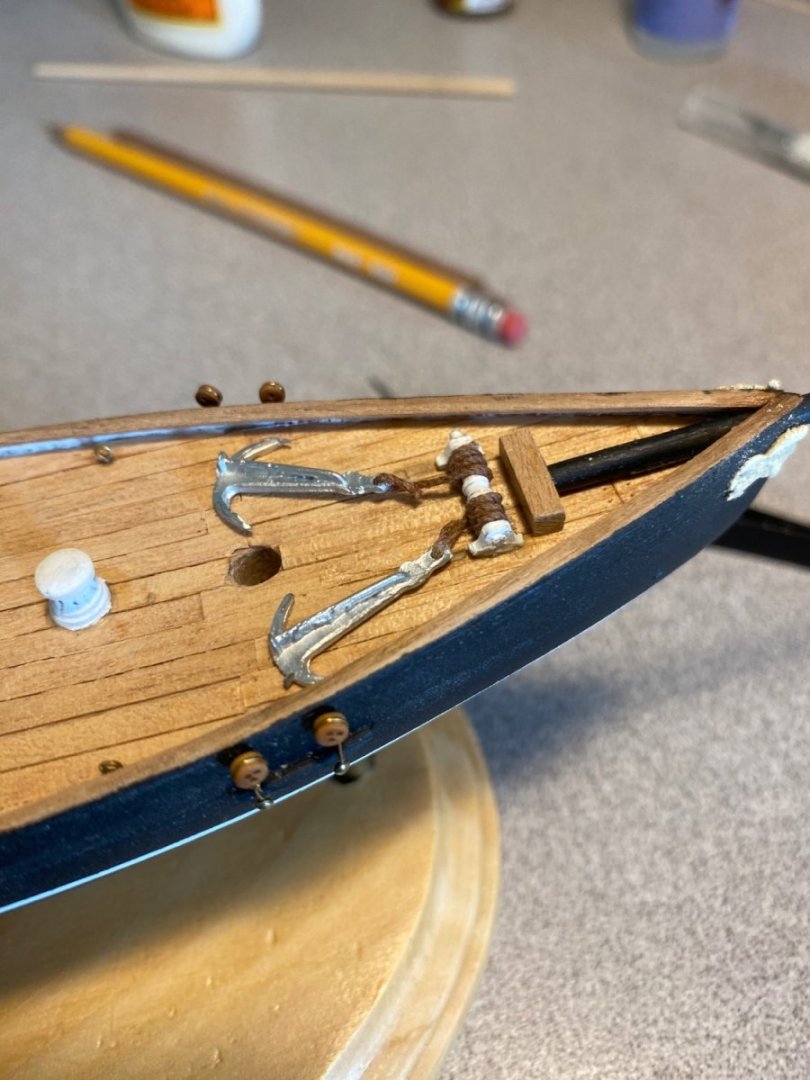
Bowsprit painted and attached along with the anchors. Need to sand down the filler used on the splintered wood created by drilling the hole for the bowsprit. Not a huge fan of the mast staining I did. Tried to sand them down to get rid of the stain but they’re starting to get too thin, so might just paint them.


-
Cbrand02 reacted to a post in a topic:
America by Cbrand02 - FINISHED - Mini Mamoli - Scale 1:140
-
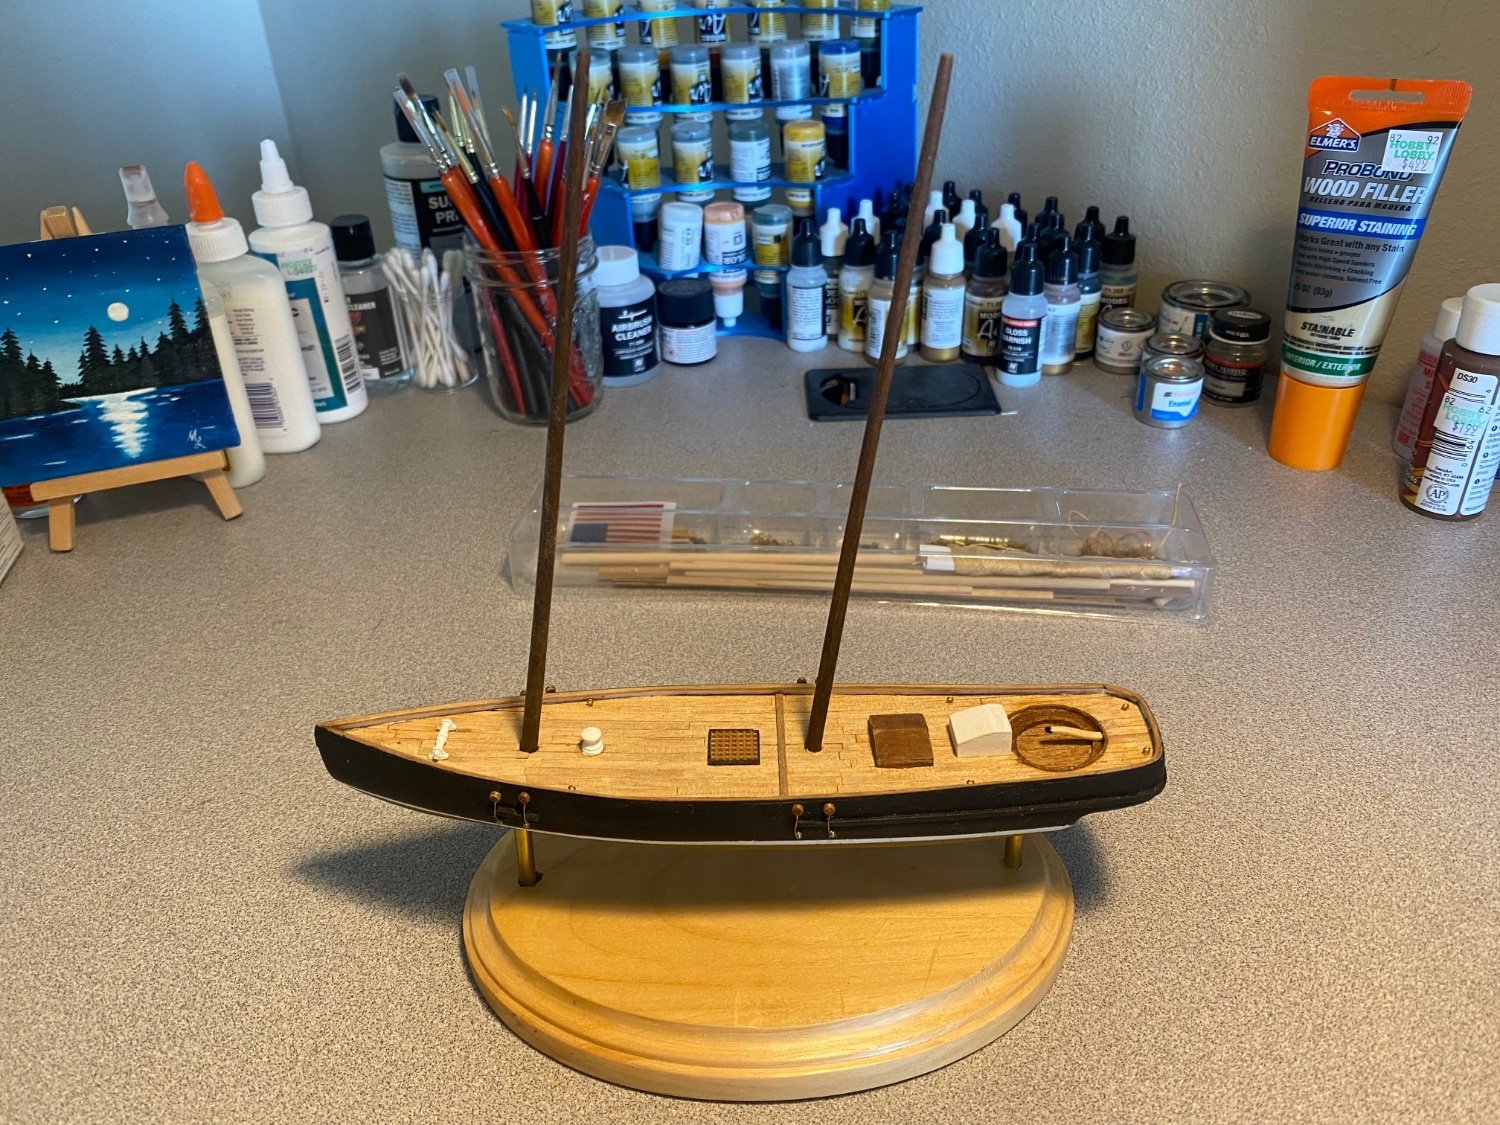
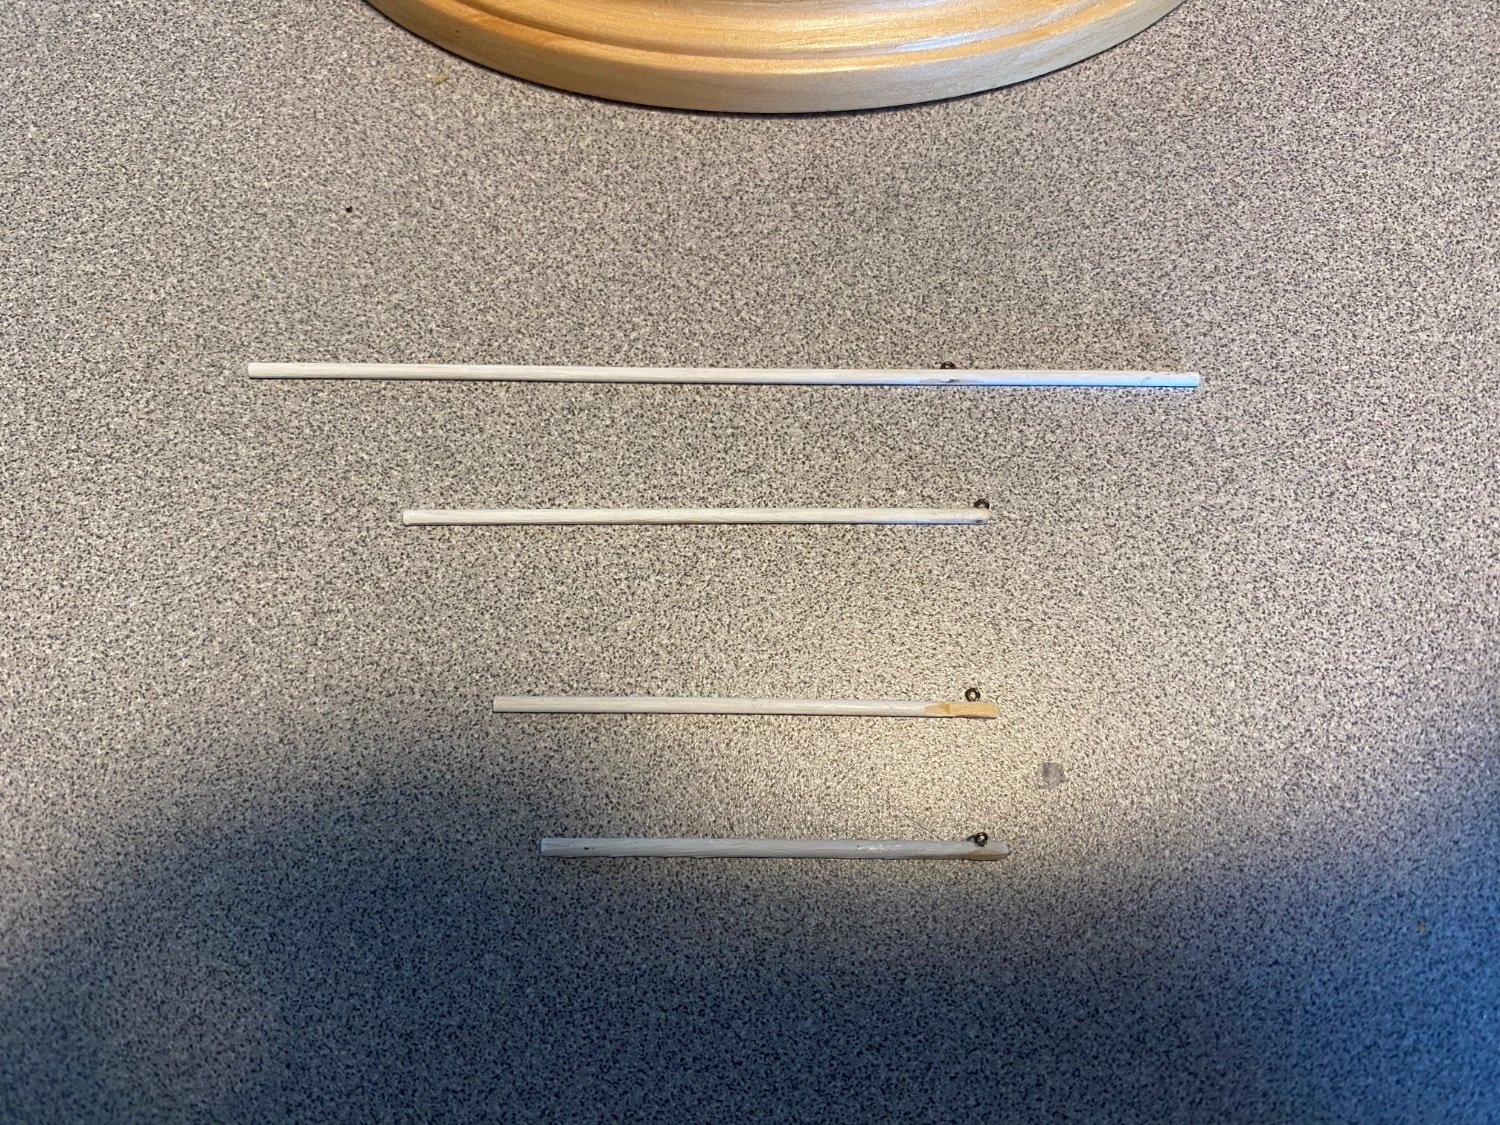
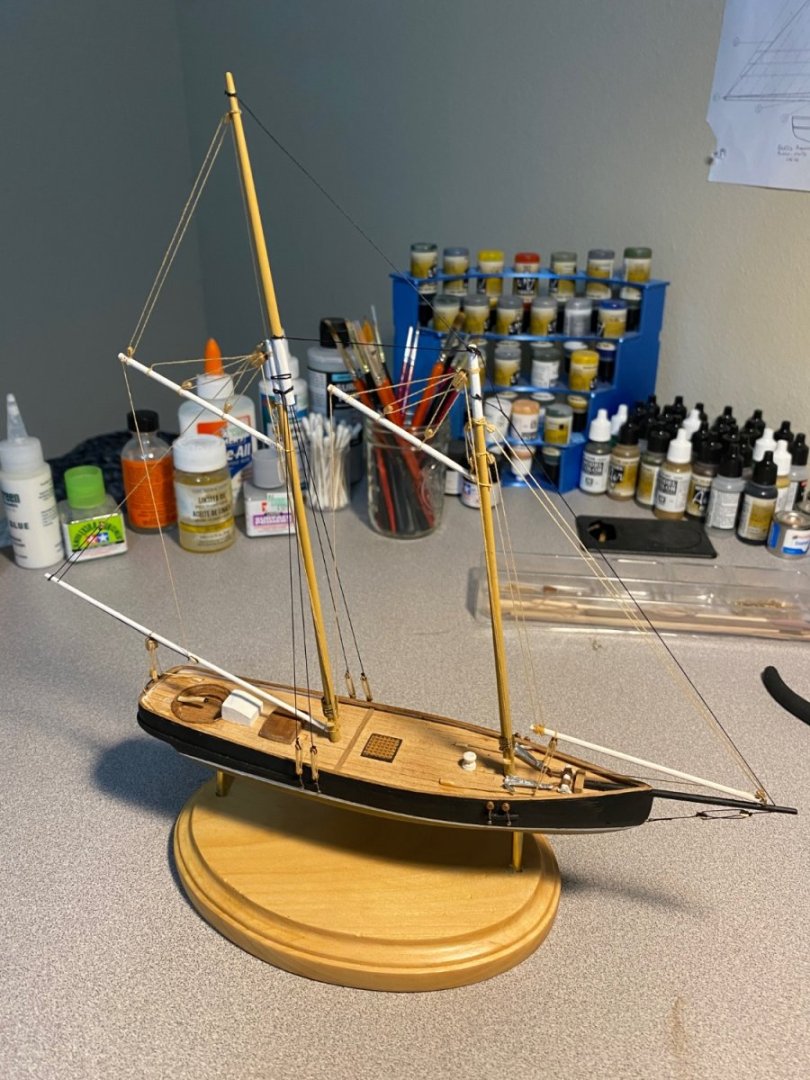
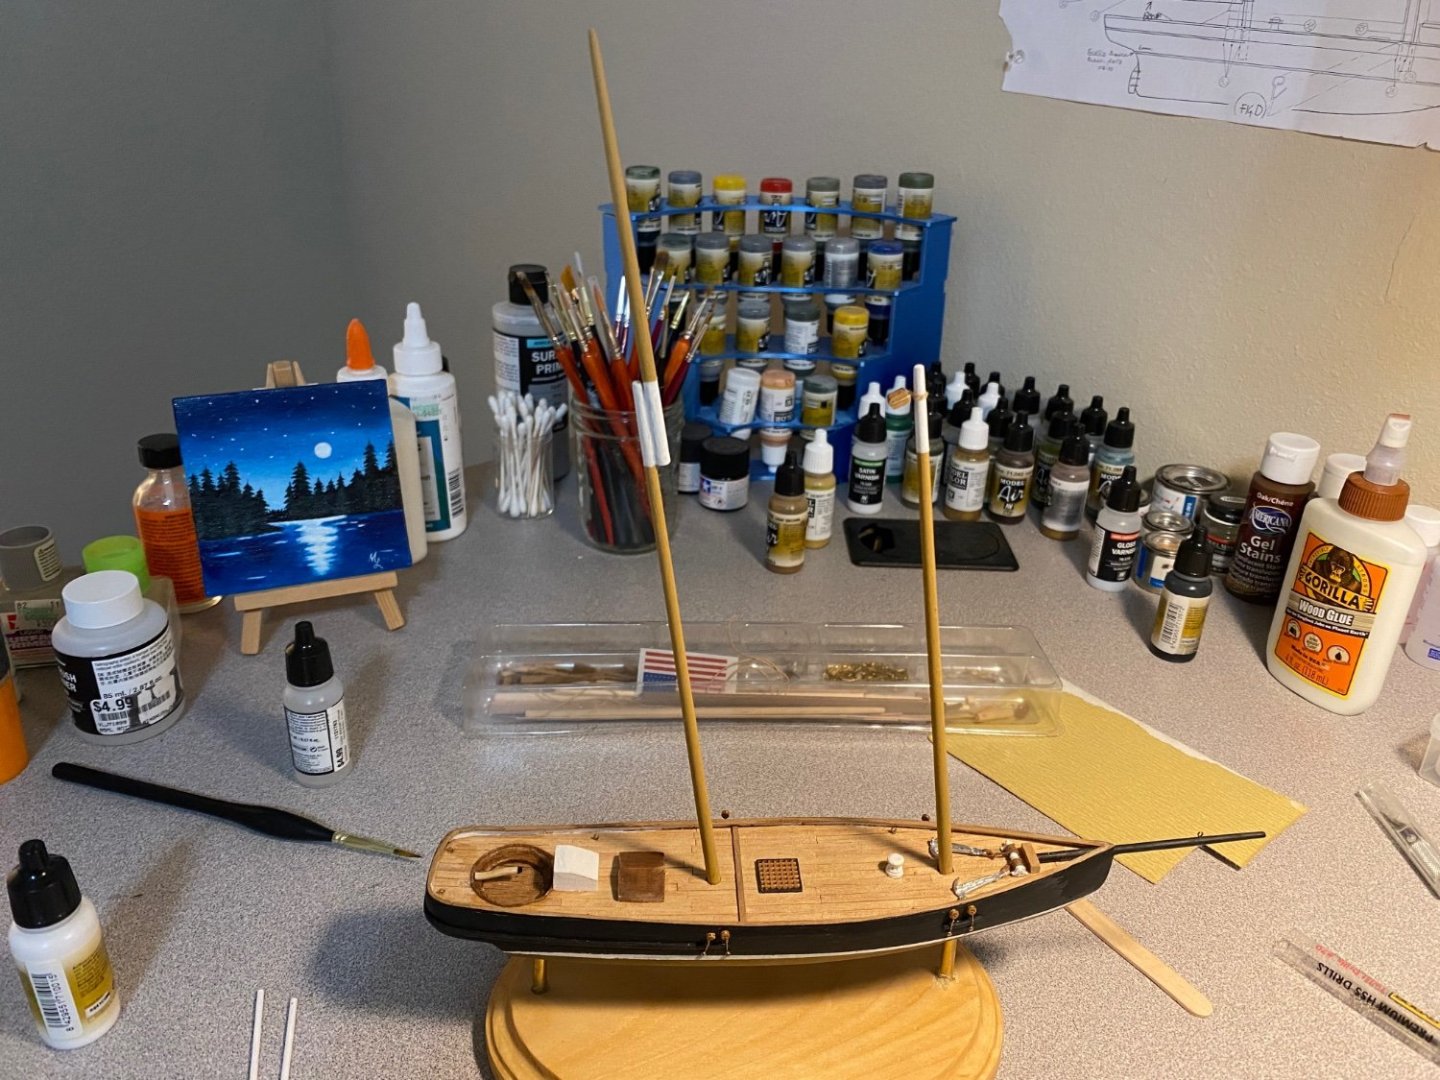
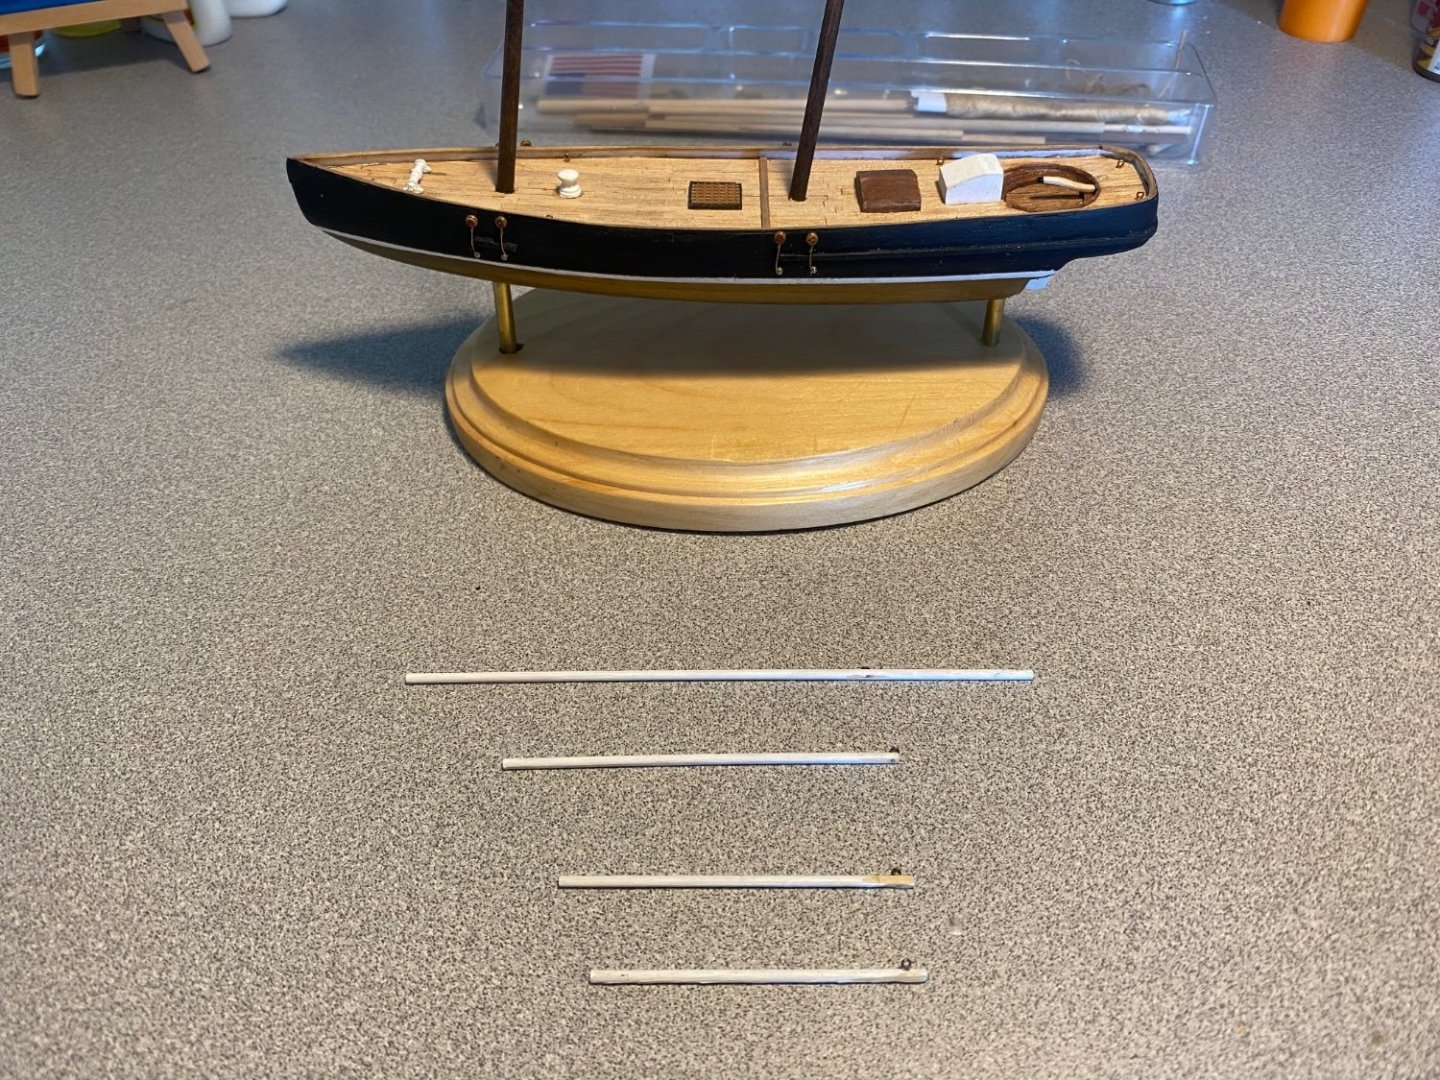
I’ve wondered how other projects were taking around a year, but now I think I understand! Masts, gaffs, and boom created and (almost) painted/stained. The masts aren’t permanently stepped yet.


-
As an update, I haven’t given up on this! I think I got a little too excited with trying to over-detail my first kit with a set of proper rigging at this scale, so I’m going to dial it back a bit. I will report back once progress has been made.
-
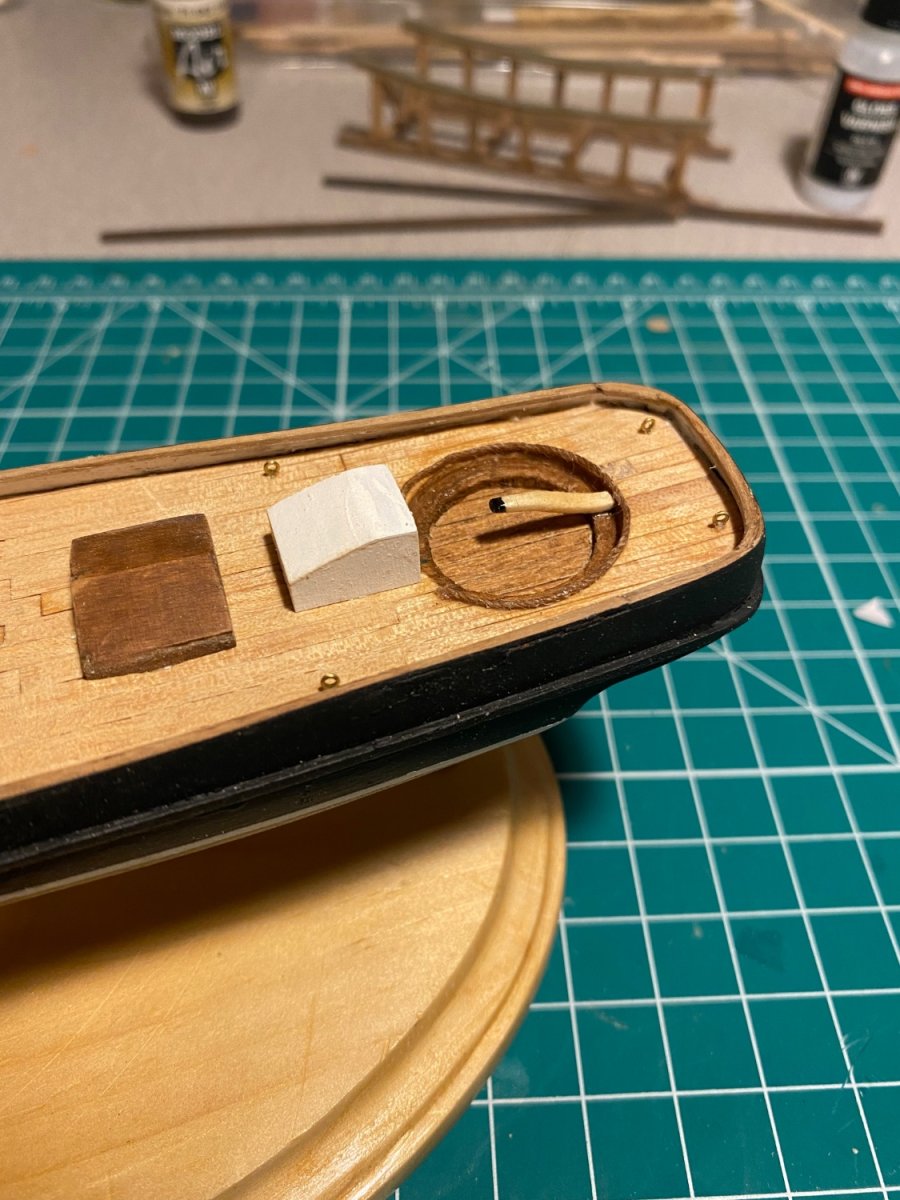
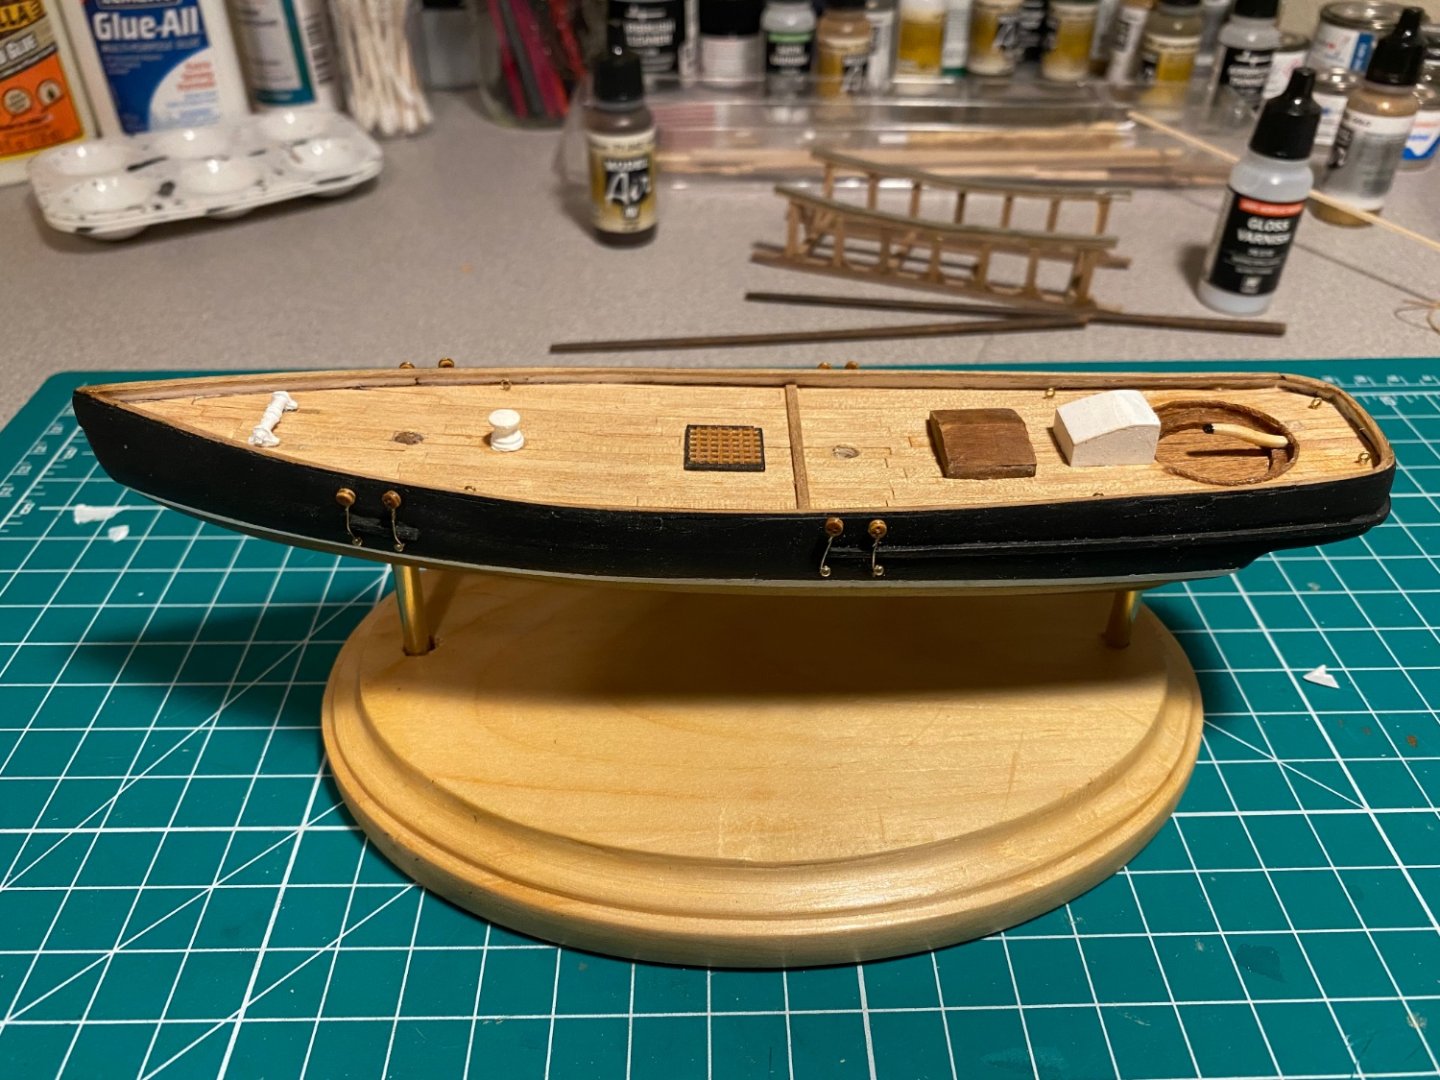
The wooden stand is protected in a poly satin finish and the ship is mounted to it permanently. At some point the old tiller was lost, which I had created by taking a 1x1 and cut notches in to bend the pieces. However, I couldn’t re-create this without splitting the wood, so I decided to carve it out of basswood scraps. It’s my first wood carving and I’m pretty proud of it.


-
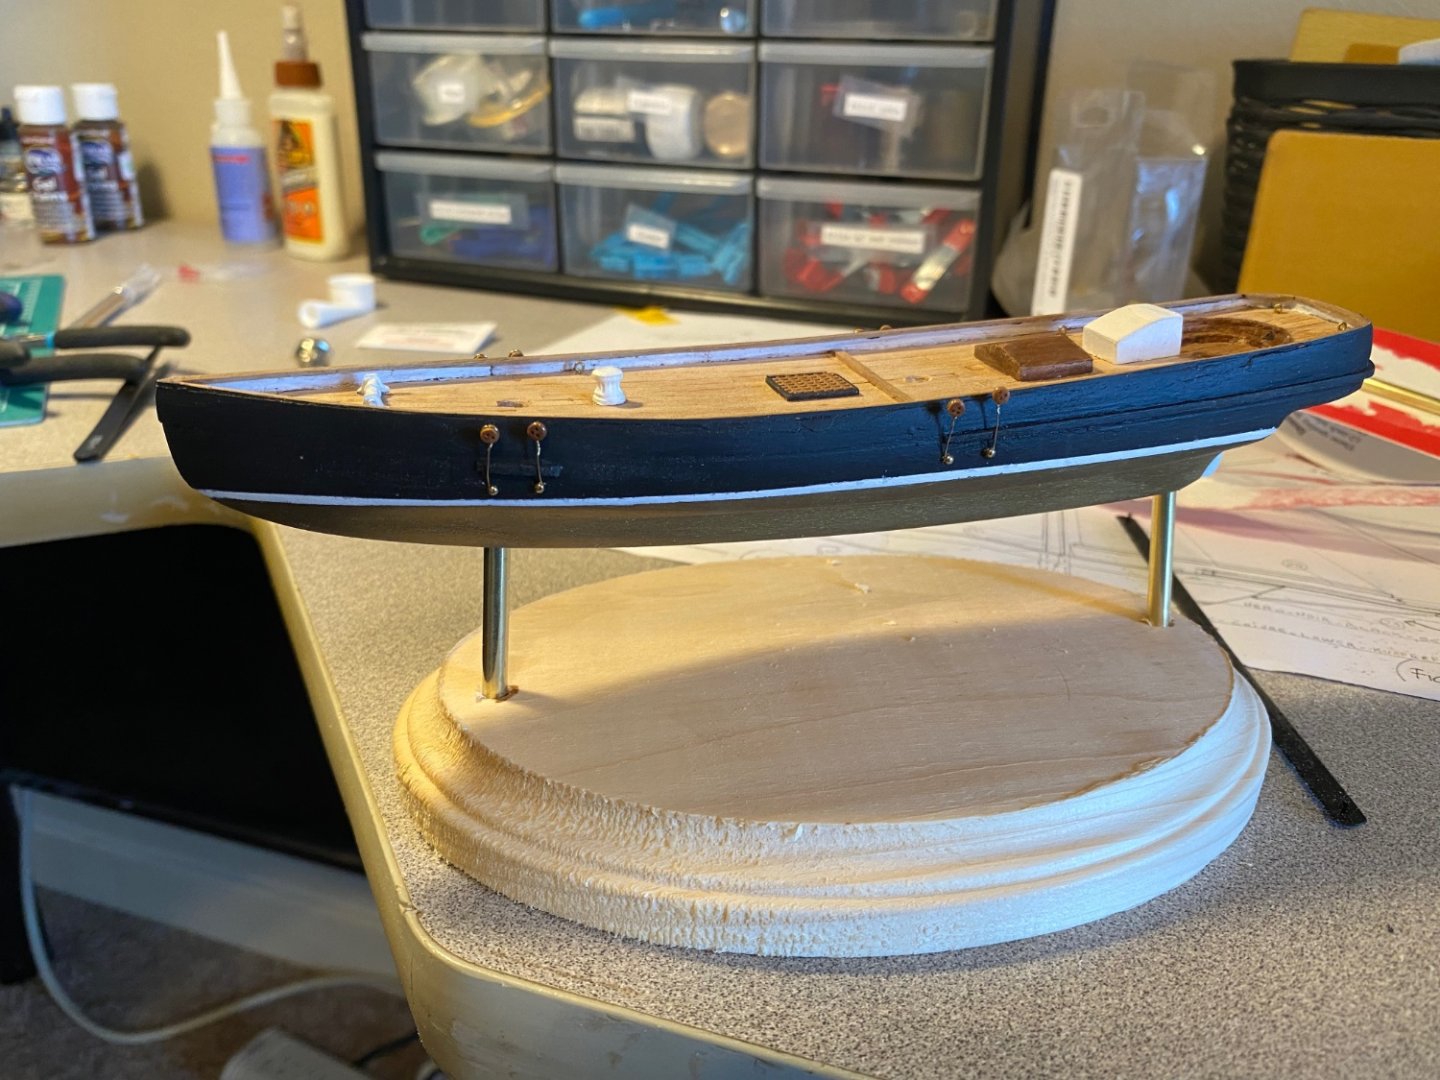
Testing what the ship will look like on a base using a spare.