
Wookiewithacamera
-
Posts
59 -
Joined
-
Last visited
-
 JacquesCousteau reacted to a post in a topic:
Sharpie Schooner by Wookiewithacamera - FINISHED - Midwest Products
JacquesCousteau reacted to a post in a topic:
Sharpie Schooner by Wookiewithacamera - FINISHED - Midwest Products
-
robert952 reacted to a post in a topic:
Sharpie Schooner by Wookiewithacamera - FINISHED - Midwest Products
-
robert952 reacted to a post in a topic:
Sharpie Schooner by Wookiewithacamera - FINISHED - Midwest Products
-
Harvey Golden reacted to a post in a topic:
Sharpie Schooner by Wookiewithacamera - FINISHED - Midwest Products
-
ccoyle reacted to a post in a topic:
Sharpie Schooner by Wookiewithacamera - FINISHED - Midwest Products
-
berhard reacted to a post in a topic:
Sharpie Schooner by Wookiewithacamera - FINISHED - Midwest Products
-
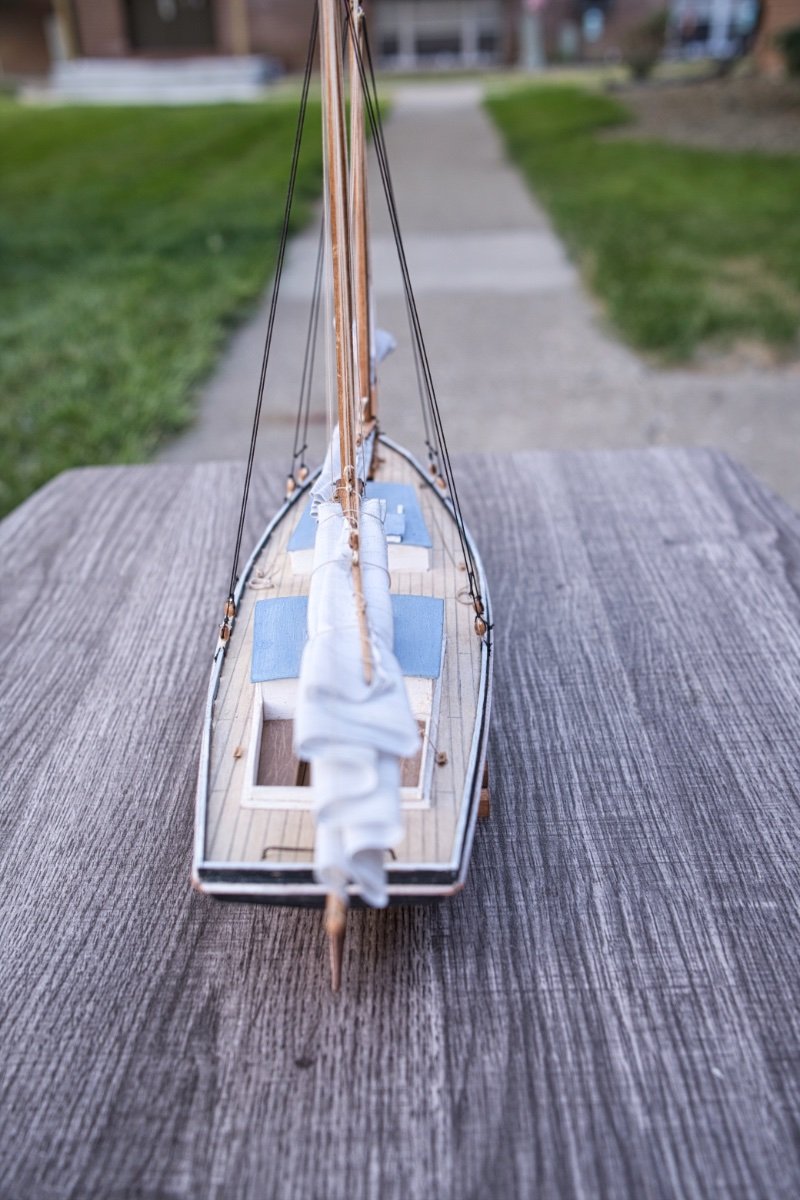
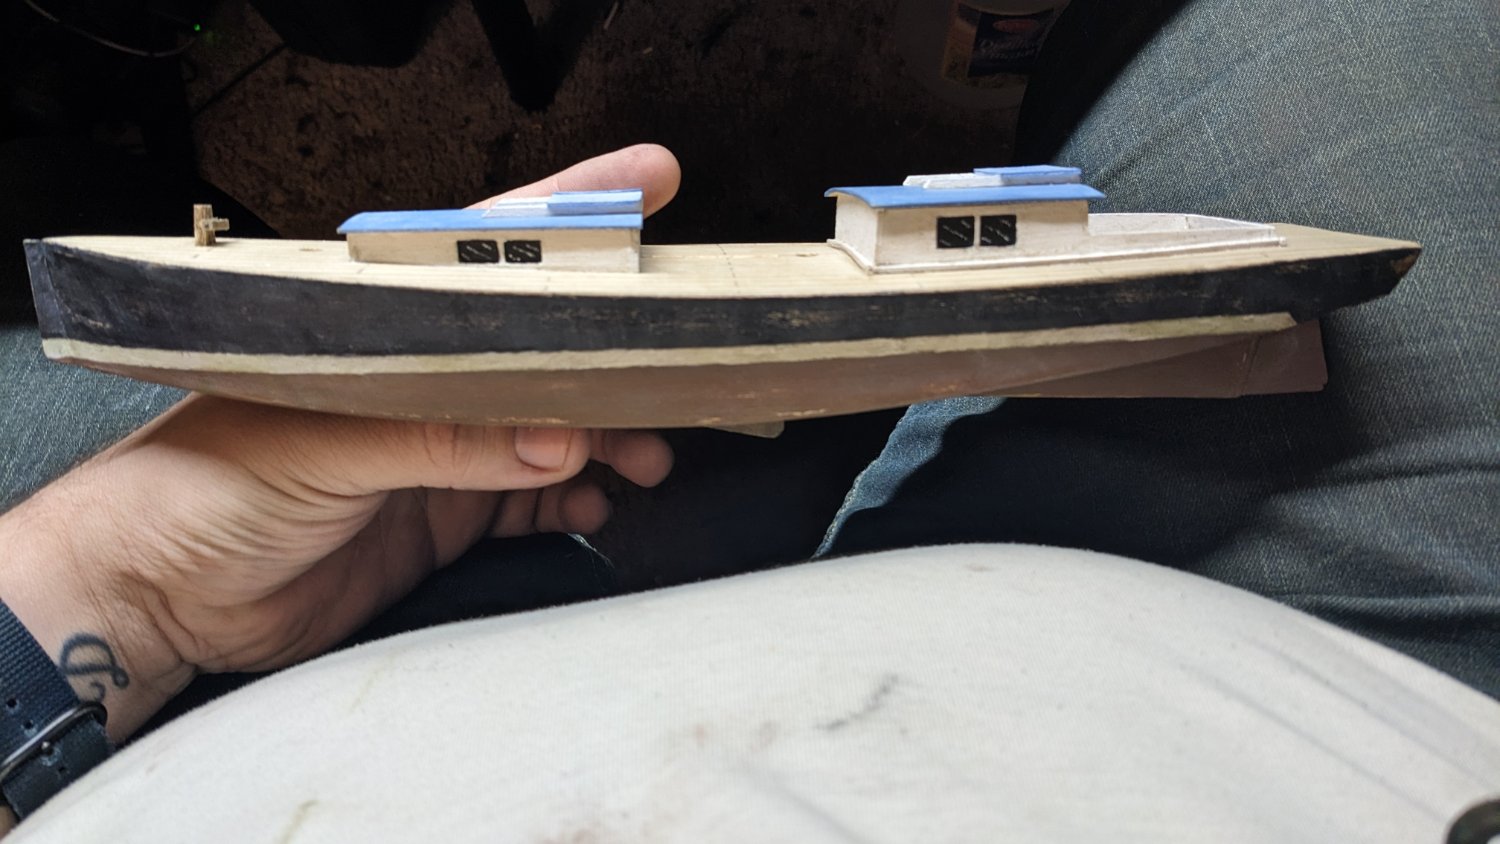
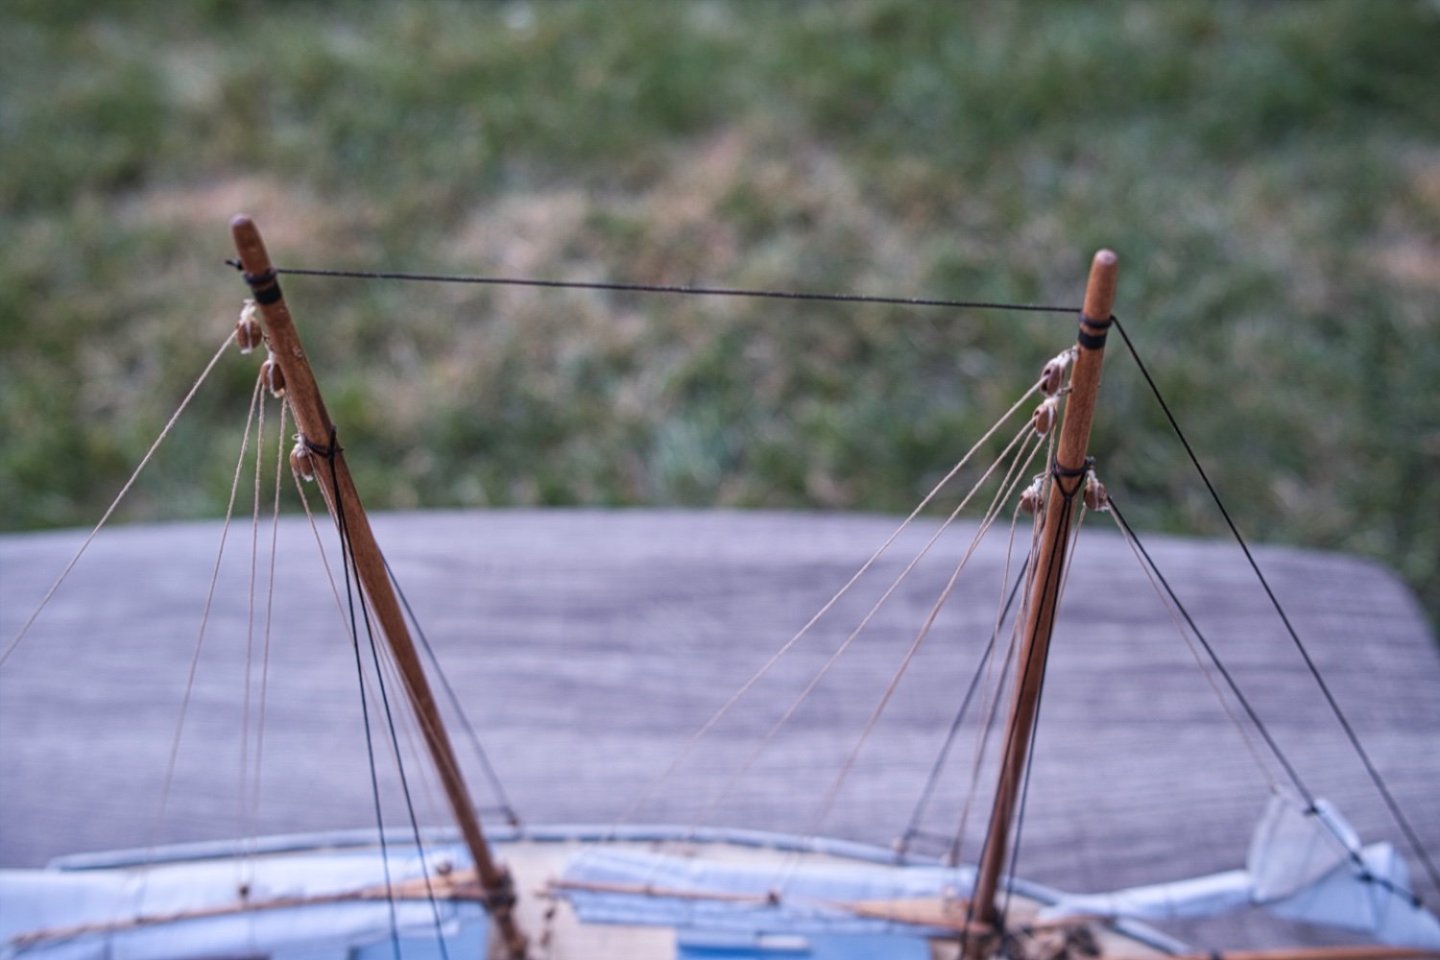
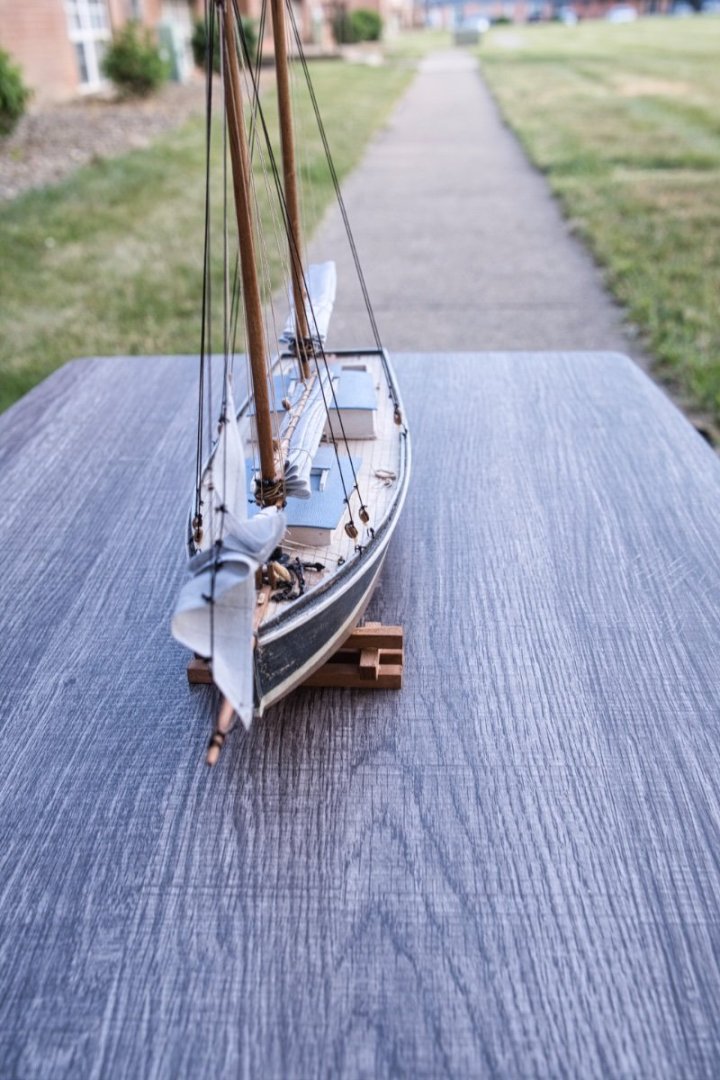
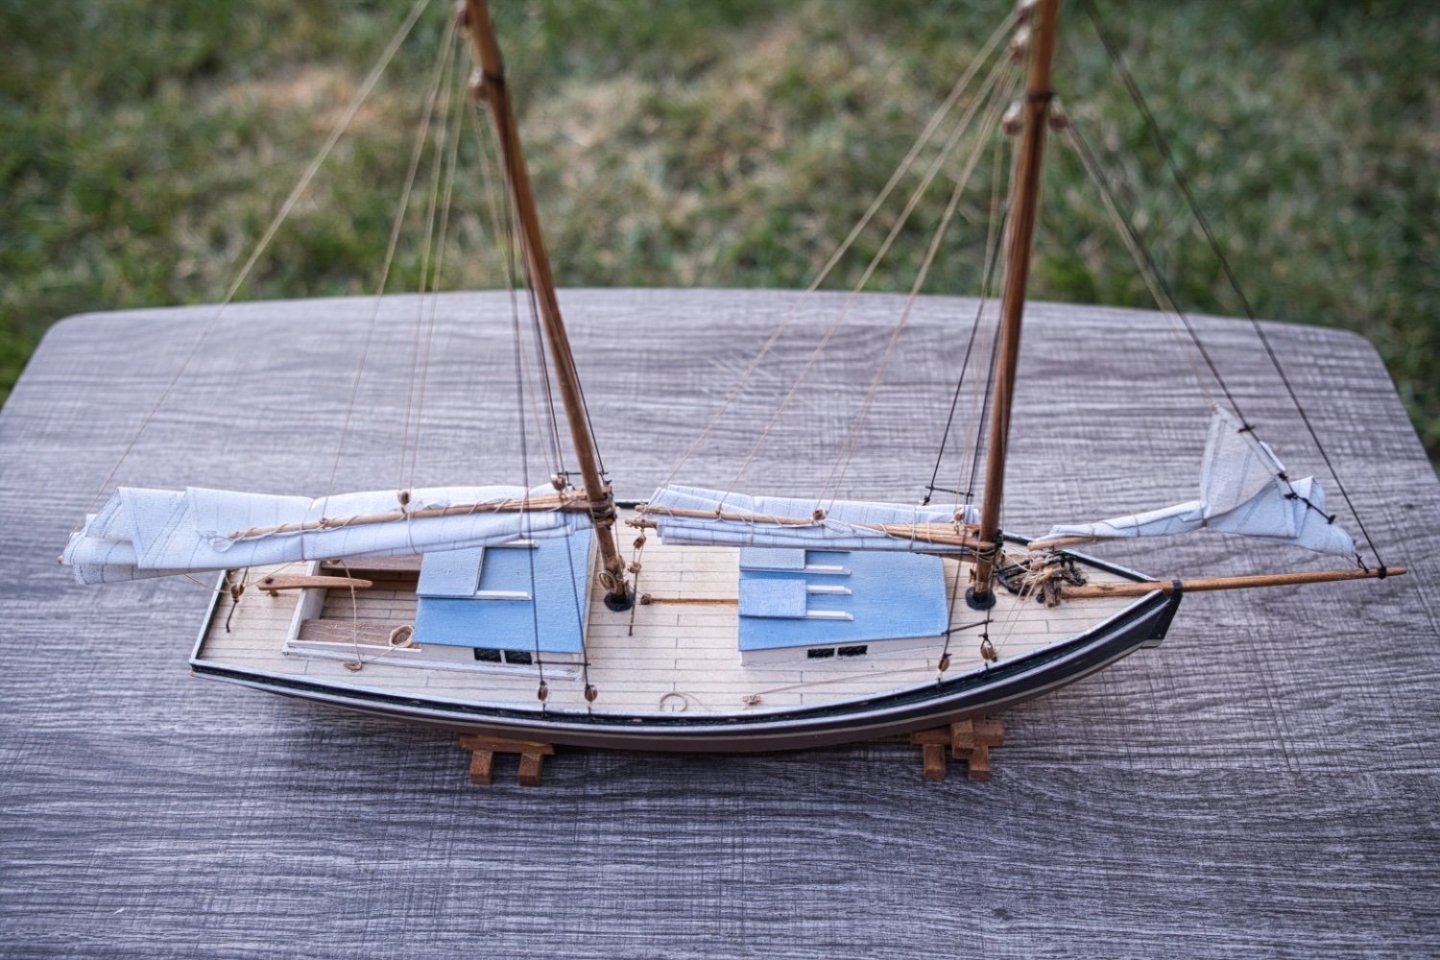
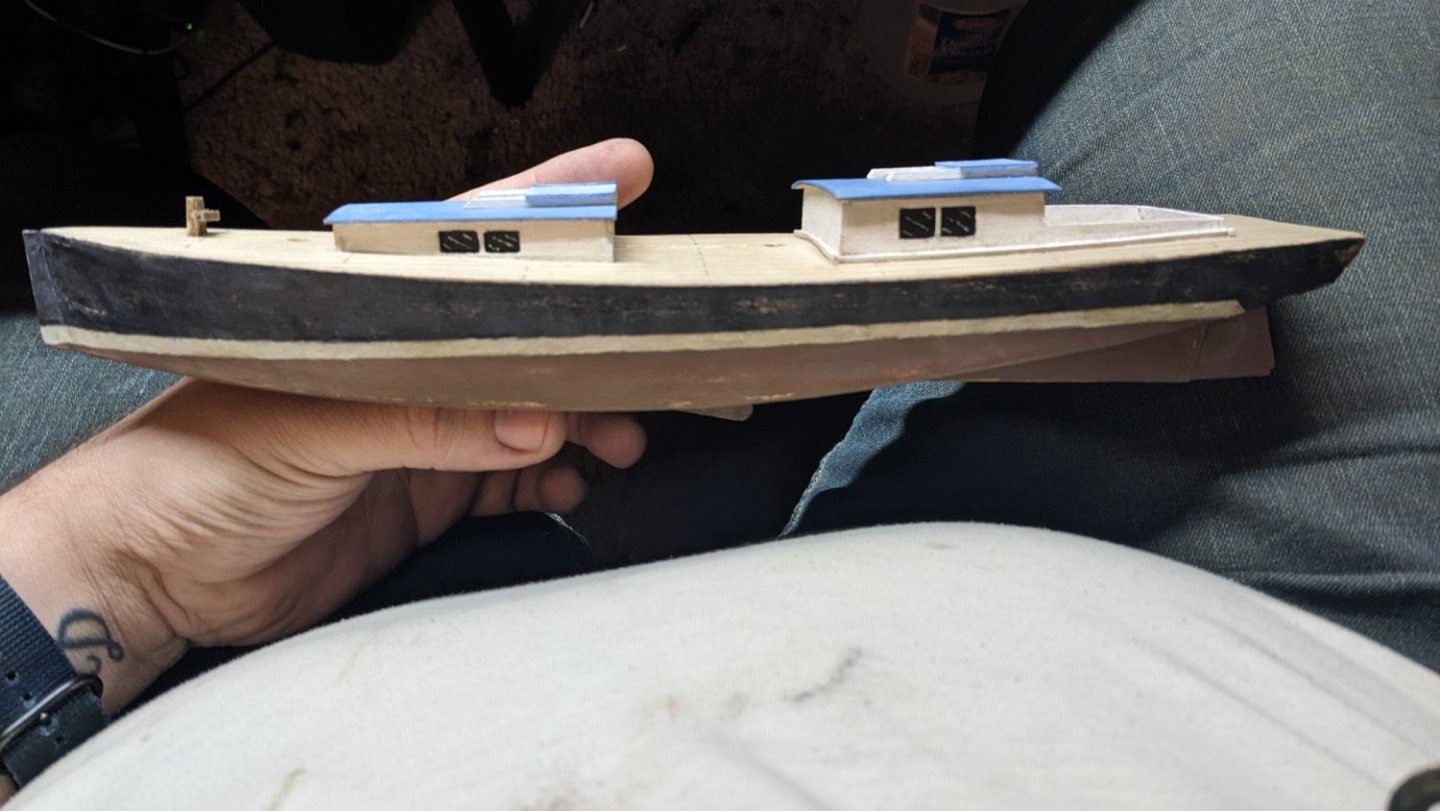
Log 17 I forgot to update this and post my last log. My second batch of running rigging line came in, and I was able to finish the rigging. Every time i tried to string up the standing rigging, the blocks tied to the rail would come undone. Despite my magnifiers and tweezers, I guess I kept tying granny knots, rather than square knots. But I triumphed eventually. I struggled a fair bit trying to get my loops made and eventually settled for less than I wanted. I figured with the sails furled, there wouldn't be as much excess running rigging left to loop off as large as I was trying. I opted for fewer and smaller loops. I did a ton of research but couldn't seem to find any reliable images of furled sails that weren't square-rigged. I oiled the anchor for a bit of deck staining underneath. With 3 hands, and 2 tweezers I managed to get some relatively passable reef lines? I assume the reefs tied/glued to a sail are what are used to furl and tie down loose canvas. That said, I finished some reef tie offs for the sails. So this is my 1888 Terapin Schooner, hull and water line scheme inspired by Van Gogh's Fishing Schooner paintings of the same decade.

- 55 replies
-
- 5
-
-
- sharpie schooner
- Midwest Products
- (and 1 more)
-
robert952 reacted to a post in a topic:
Sharpie Schooner by Wookiewithacamera - FINISHED - Midwest Products
-
Roger Pellett reacted to a post in a topic:
Sharpie Schooner by Wookiewithacamera - FINISHED - Midwest Products
-
Ryland Craze reacted to a post in a topic:
Sharpie Schooner by Wookiewithacamera - FINISHED - Midwest Products
-
Thanks for the advice. The first run of stain was a cheap craft stain from the dollar store. I should have expected what I paid for. After sanding it all off I made my own wood dye using acrylic flow aid from liquitex and acrylic transparent inks. I used raw umber, burnt umber, sienna and burnt sienna. One bottle is a light honey decking color and the other is a darker reddish.
- 55 replies
-
- 3
-
-
- sharpie schooner
- Midwest Products
- (and 1 more)
-
Ryland Craze reacted to a post in a topic:
Sharpie Schooner by Wookiewithacamera - FINISHED - Midwest Products
-
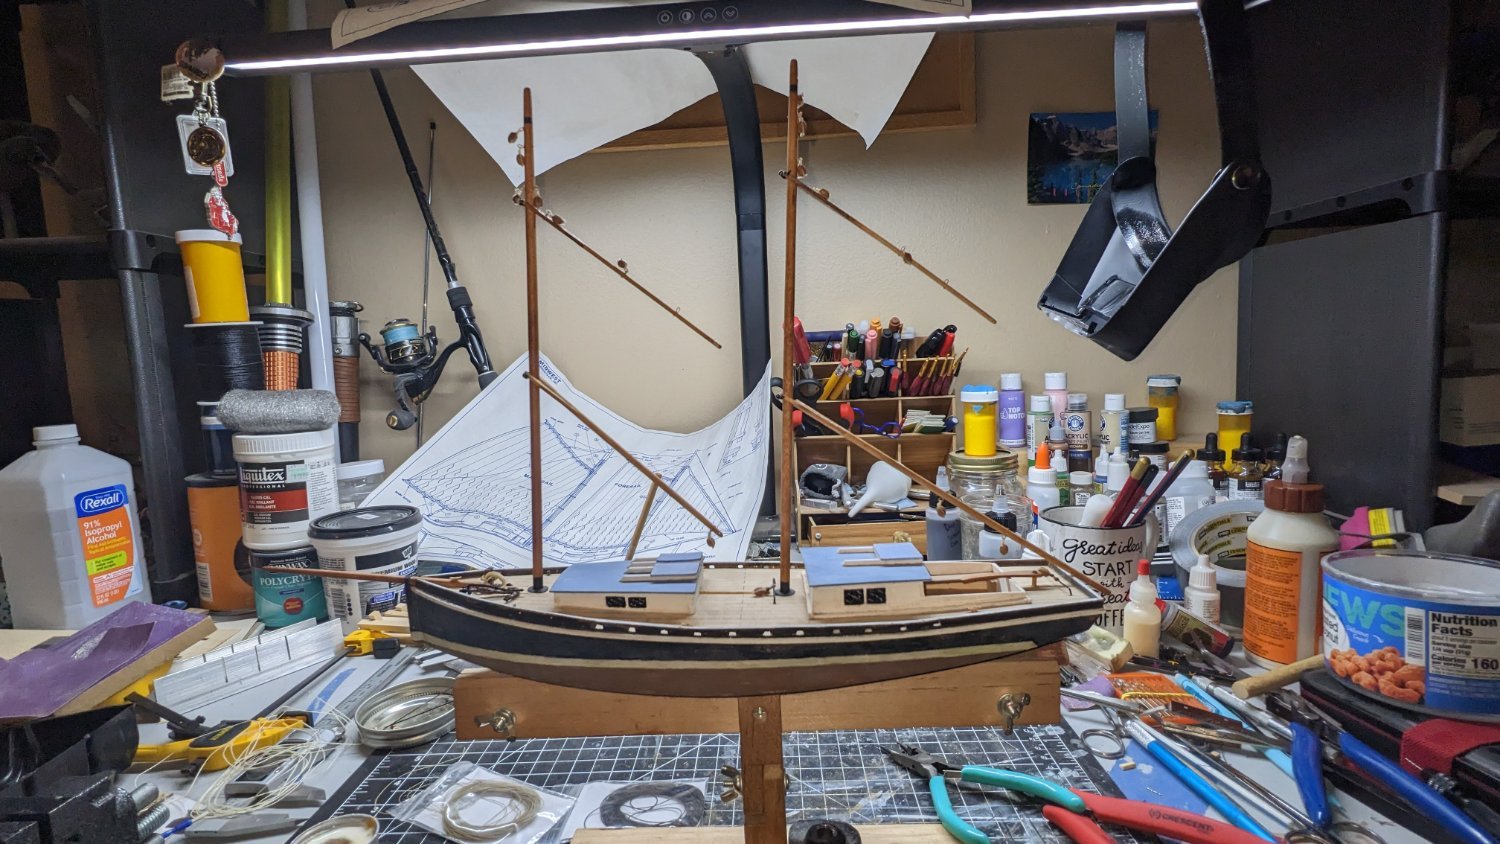
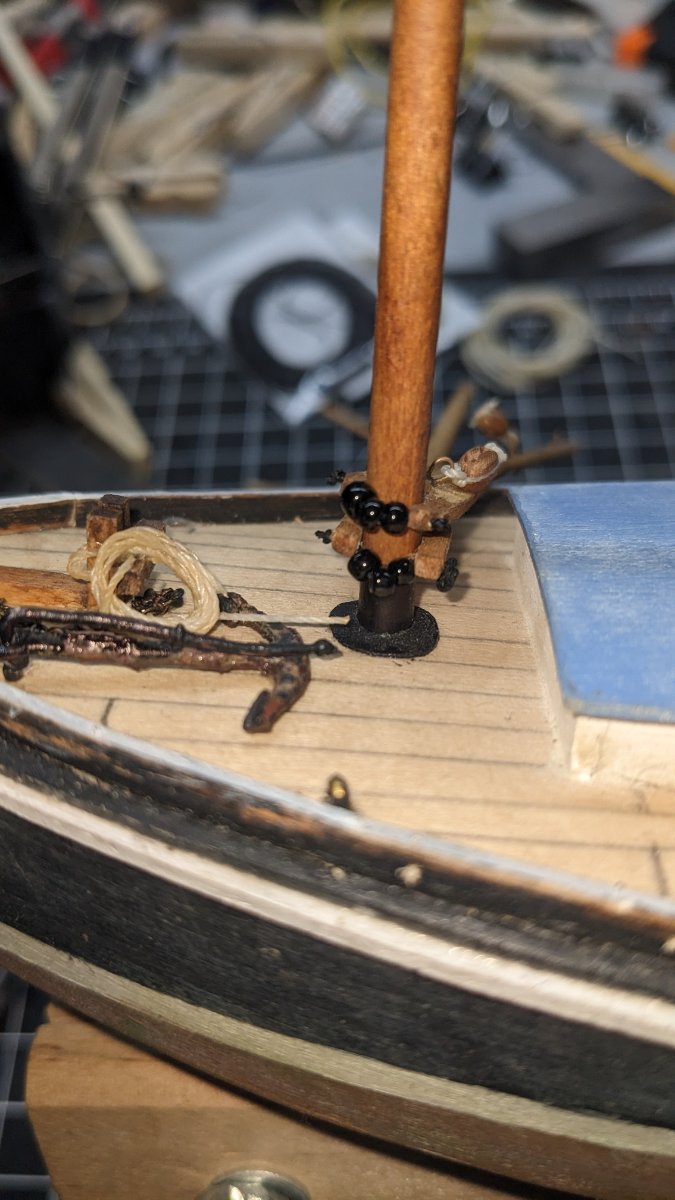
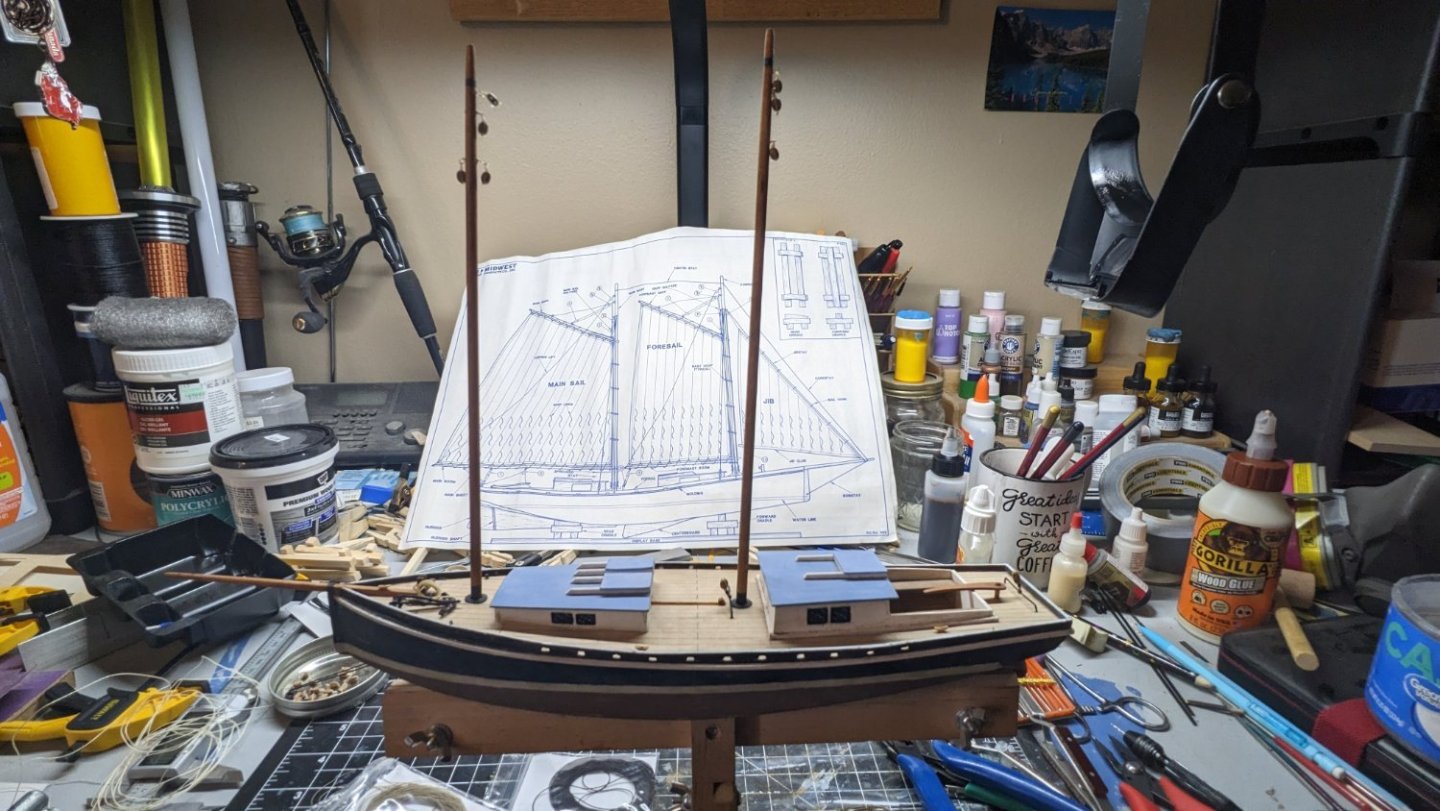
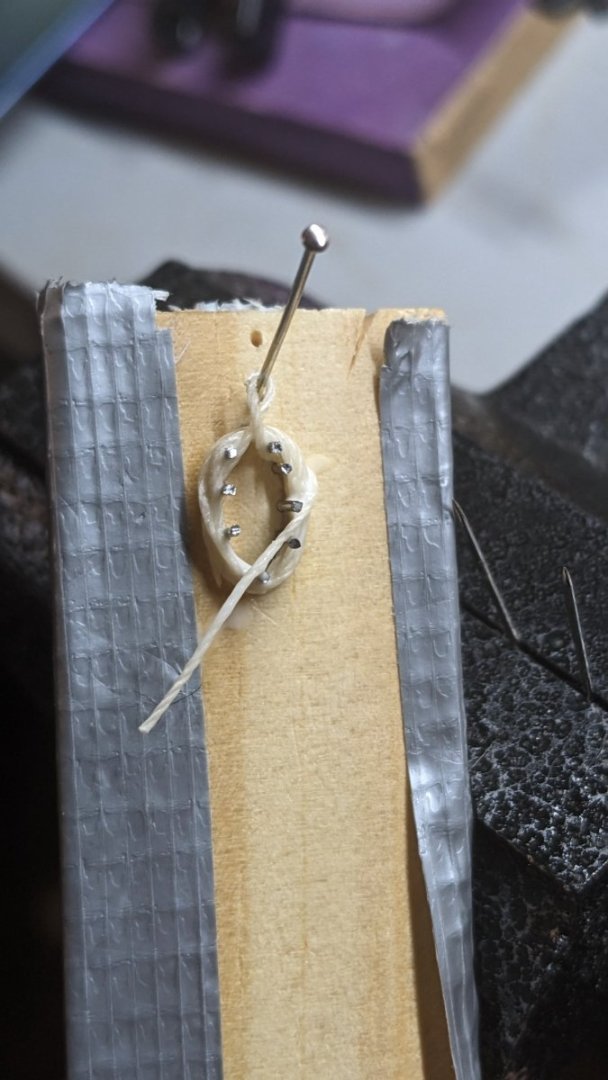
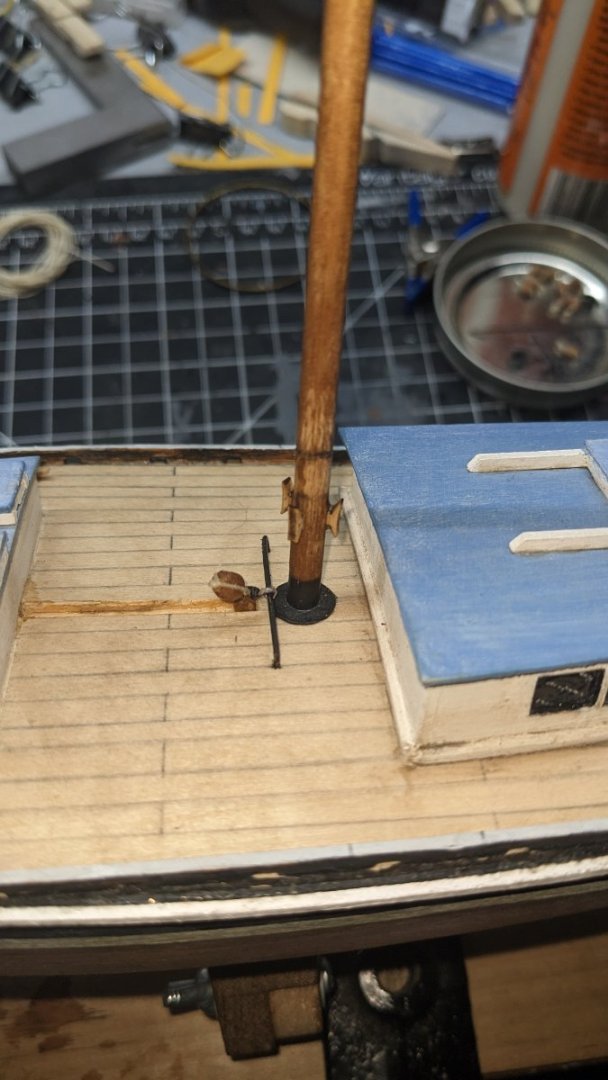
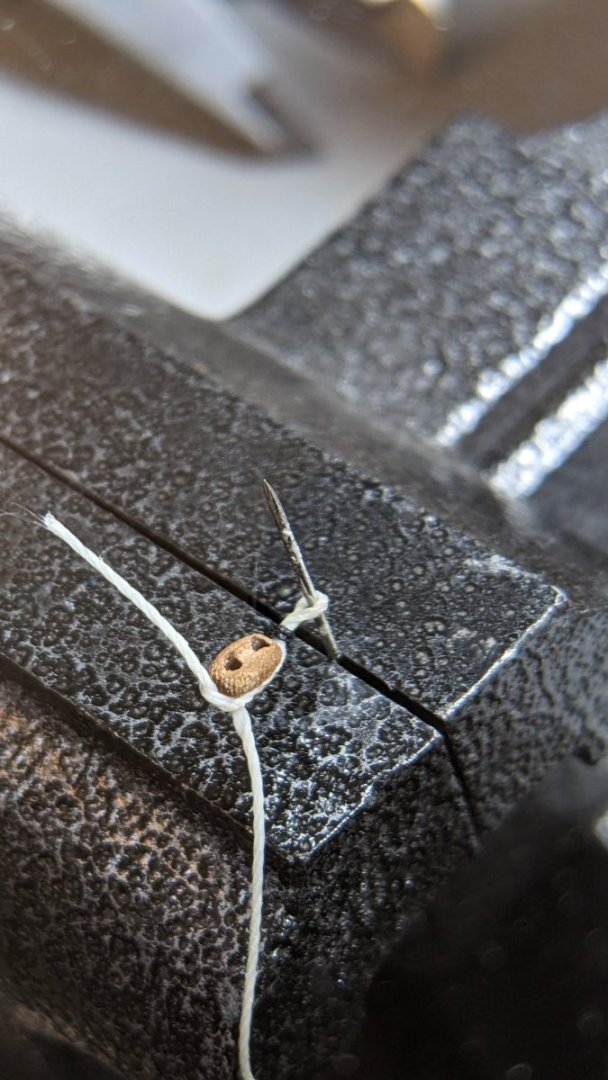
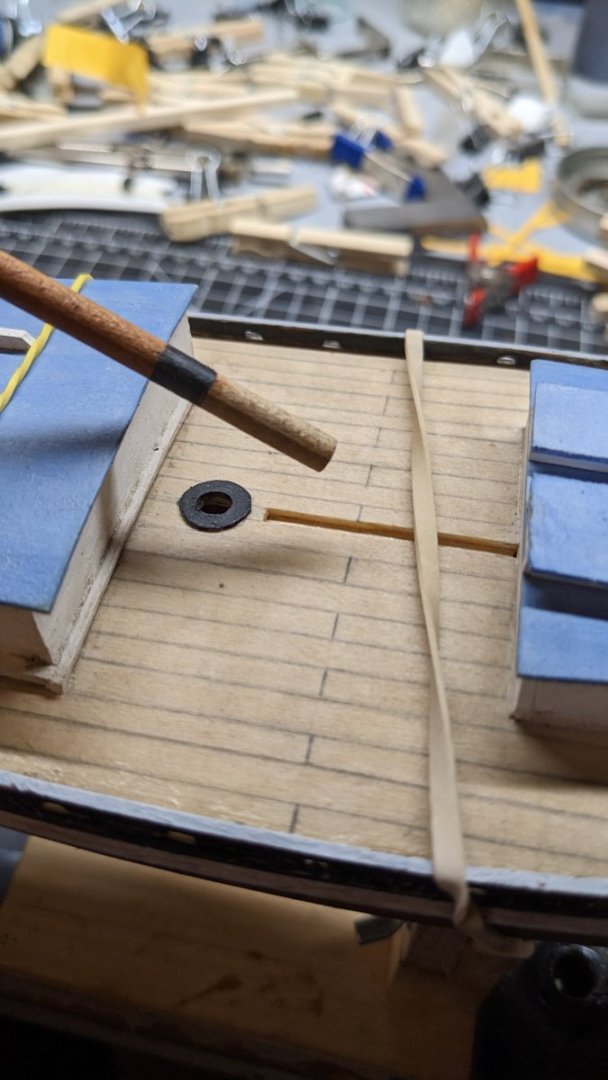
Log 16 I've finished mounting all of the hardware for the masts, booms and gaffs and test fitted them along with my makeshift parrels. I glued on what I assume is the halyard? Cleats at the base of the main mast. I attempted to add a boom rest but failed. The first iteration was far too thick I believe and was a semi circle but would not glue on well. My second attempt was more of a ring shape like a mast collar of sorts. However it snapped while sanding the inner hole. Ive since moved on and deemed it futile for this models scale. After glueing my cleats I later realized I couldn't get the booms and gaffs back on. With all the frustration I went through to find a needle even close enough to fit through the holes in their jaws, I am probably going to strip down all the parrels and move on without them as well. so the next step was to start making the coil? Of rope for the anchor chain. I followed a YouTube video to make a pretty traditional loop for belaying pins and just tucked the upper loop underneath and hid it away. I really liked the way my parrels came out and have been dreading their removal. I have considered cutting off one knot and tying a new knot as a bead stay. Then just glueing the thread back together while it's on the mast. But I believe this may prove difficult later when or if I mount sails, which I am still questioning. The included cloth is pretty thin and nearly transparent as well as fraying badly. Which is why I considered furled. I am wondering 2 things at this point. Do I need to fray stop and hem the sails if I plan to just display as furled and skip all the other prep steps (reefs, other attachments). Second, I am not very confident in the hardware (eyelets, and cleats) which are only held on by glue to hold the tension of the rigging. the deck cleats were pinned and glued, I am fine with those. But I was unsure about drilling 4 directions in the same spot on the mast. In fear it would splinter or weakened the integrity of the small mast dowel. My brand new drill sets . 039 bit has, in one day of hardware installs, gone dull. Later it snapped when I had to add more pressure to get it through after it had stopped progressing. This is the second time I've had to replace a bit or bit set due to dulling. I can't seem to find a reliable brand for microbits anywhere. The first set was from a cheap modellers kit on Amazon that included nippers, tweezers and a pin vise. The second was from the woodworking section of my local hobby lobby. Which also included a much better free spinning pin vise. As the other one was an excel brand stationary pen style. I am hoping that this weekend I can make a bigger dent in the rigging, but I can't move forward until I decide on what to do for the sails. The included ones are in need of ironing, and I'm without an iron as well as a sewing machine. I have done my best to try and stick to the order of operations so I don't miss anything important. Additional Notes. I'm still not entirely satisfied with the color of the thread i used for stropping. As my kits included thread was too out of scale for anything else, and was larger then the new Syren thread, i used it for stropping and the anchor rope (lanyard?) I attempted 2 stains, tea and coffee; to darken it. I understand the need to scale match for the ropes used in the reeving, but what about this practice applies/or doesn't to stropping threads? I assumed because the included thread fit into the slots on the sides of the blocks that it was an adequate enough size for strops. But recent google searches show some outrageously large diameter rope being used on blocks in 1:1 scale. So now i am second guessing what i thought, looked good.


- 55 replies
-
- 5
-
-
- sharpie schooner
- Midwest Products
- (and 1 more)
-
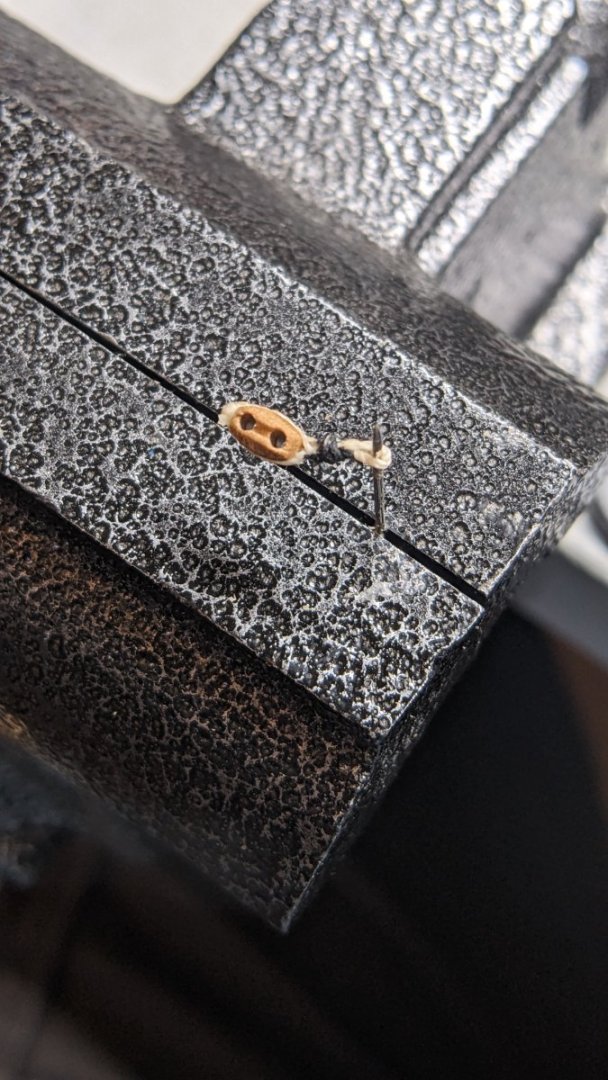
Hm after further looking around it seems I found may have better ways to strop small-scale blocks. Now I'm fighting with myself to tear down and redo my blocks or not. The little exposed edges of the lines really bug me. I wasn't able to cut them very close to hide them.
- 55 replies
-
- 1
-
-
- sharpie schooner
- Midwest Products
- (and 1 more)
-
Wookiewithacamera reacted to a post in a topic:
Sharpie Schooner by Wookiewithacamera - FINISHED - Midwest Products
-
No, you're fine. I appreciate the information. Is there anything historic in there? Did they always use deadeyes? I don't doubt that i could probably make a handful myself, i just presently don't have any. But i don't want to do the rigging without deadeyes, if there was no documentation illustrating something commonly used before the first recorded use of deadeyes in the rigging. I can't imagine what it would be like to build a 44 foot sharpie, that is quite impressive. I've never been on a sailing vessel that was underway. I've been on a spanish galleon (El Galeon), and the Brig Niagara at the Tall Ships Festival. But i've never been able to afford the Day Sail pass to actually get a ride.
- 55 replies
-
- 1
-
-
- sharpie schooner
- Midwest Products
- (and 1 more)
-
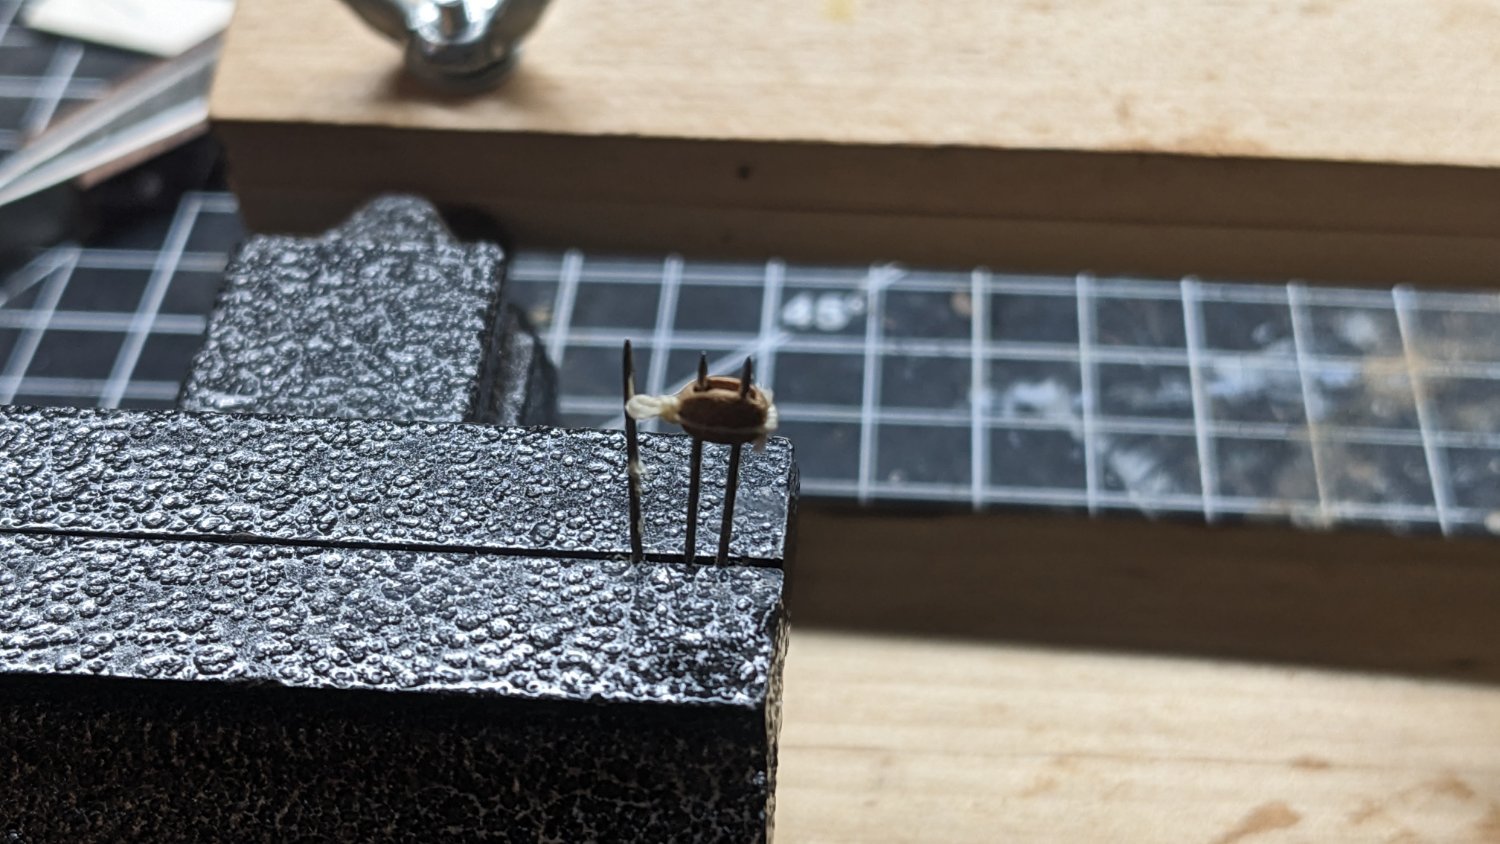
Log 15 A question about Deadeyes? I can't seem to find any material online on this topic. Is there anything the pre-dates the use of deadeyes? I am questioning the accuracy of the Sharpie without deadeyes being used. I know it's a little late now, but i figured at the bare minimum, deadeyes could be bolted or lashed to the railings. Seeing as they are already installed, and it was a chaotic mess, i wouldn't want to have to lift or remove the side rails to install chain plates. Just to reiterate. I am shooting for an 1880-1890, heavily worked fishing vessel, pre-refit. A question about Jibs/gaffs? I also can't find any ressources on how to Furl sails, in detail, for Gaff rigged vessels with jibs. I can only seem to find instructions for full/square rig sails. I have looked at @Senior ole salt final images. It appears to be rolled around the Jib Club. This is my first rigged model and have been going back and forth on whether i should rig her with sails, without sails, or furled. Personally, I find rigging it for underway without sails, looks silly. I would rather go full sail install or fully furled, not in between. I only have the included material from the kit, and also question its texture detail for this scale. I learned to strop my own blocks, as I needed all the blocks with Beckets. So after a bit or fighting I made a temporary jig. The first step of the rigging process was annoying. Bending my traveler rails and getting them straight and the right length was more annoying then expected. Now that all the blocks are stropped the sails prep is next and am I curious how much of this I actually need to do if furling.


-
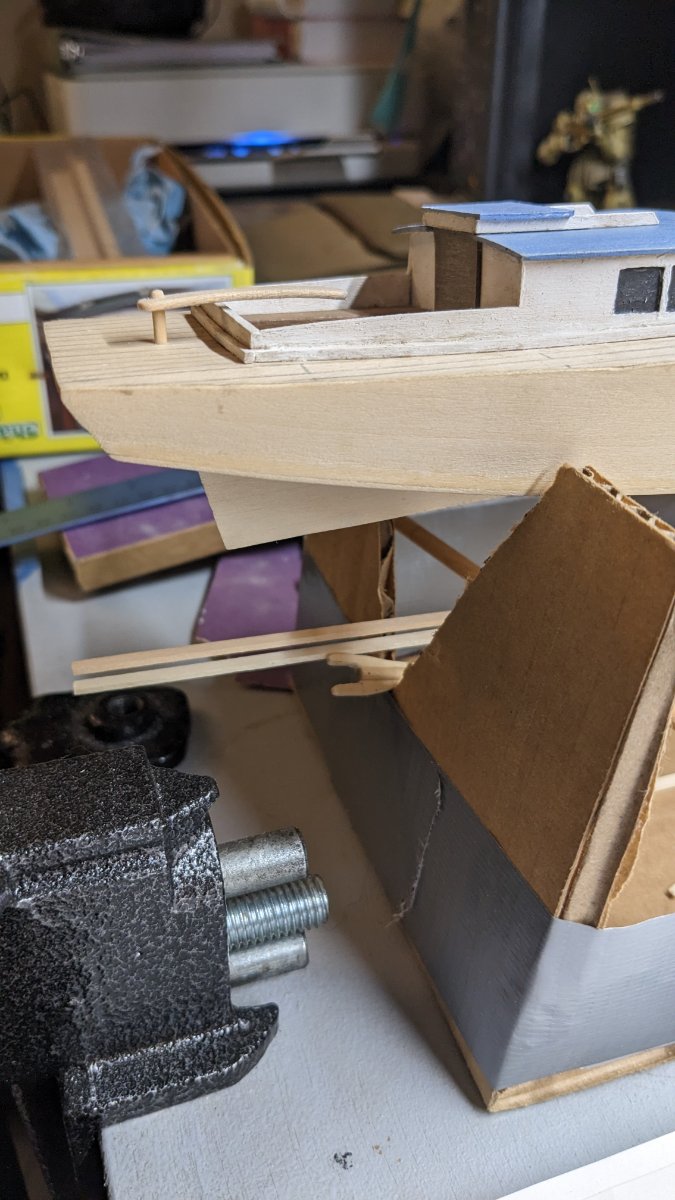
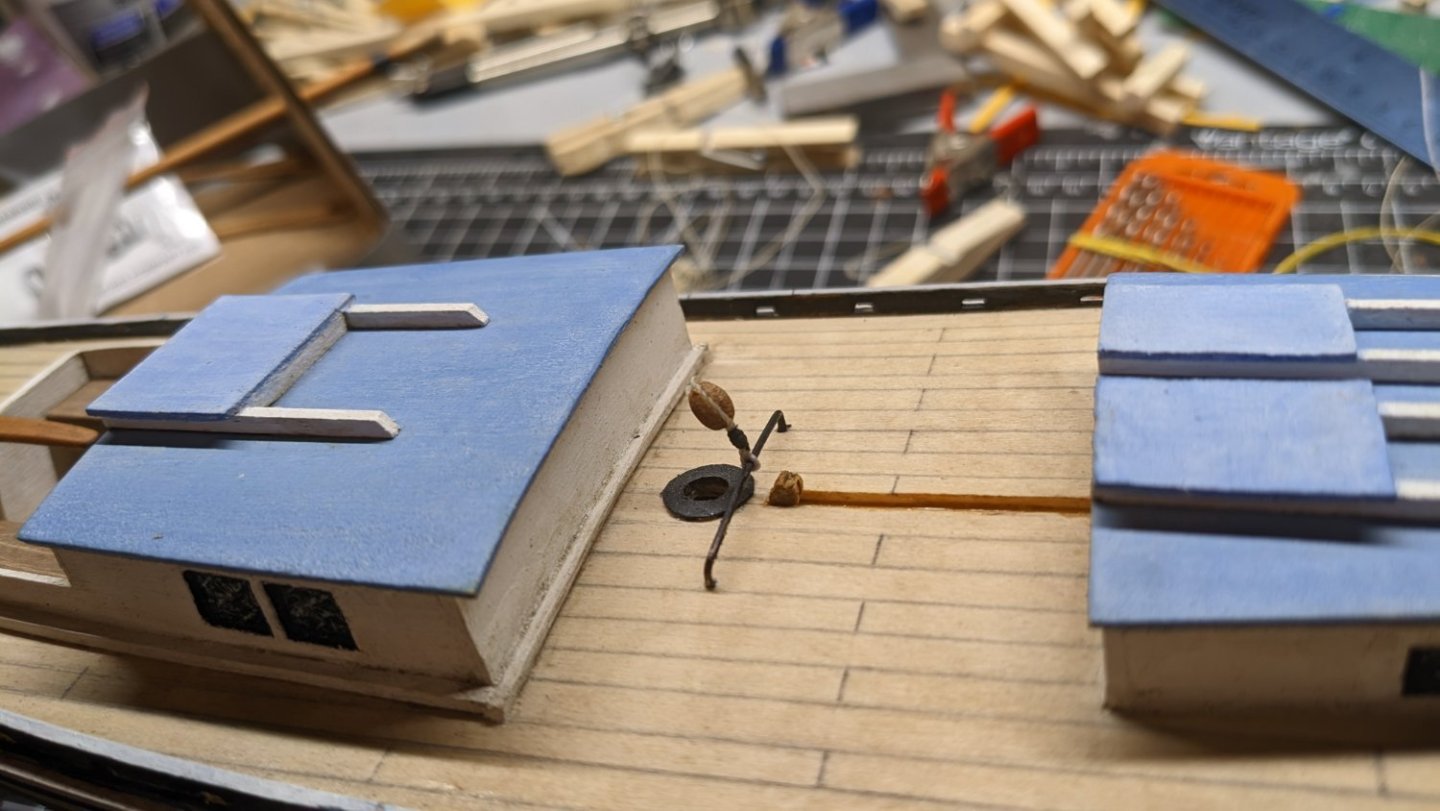
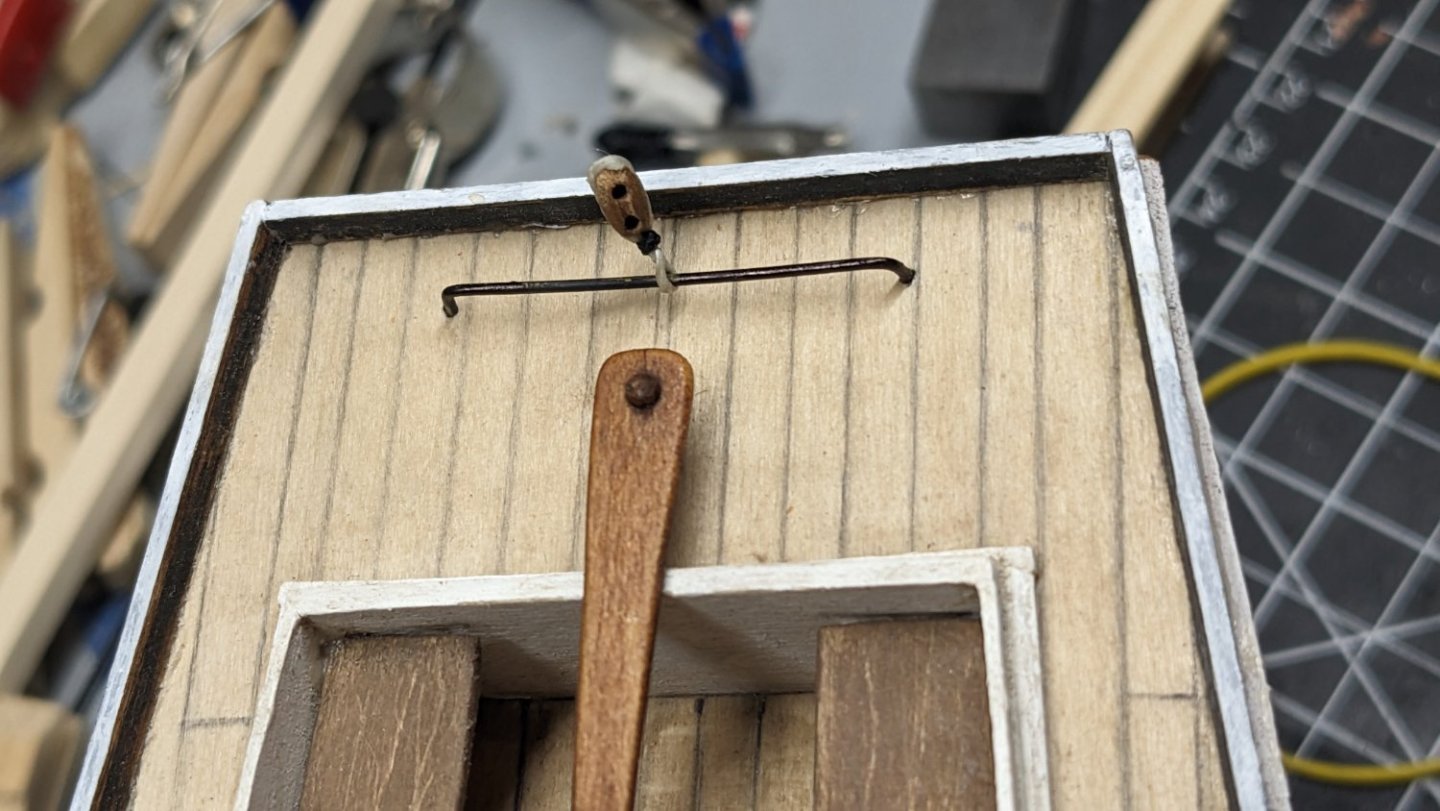
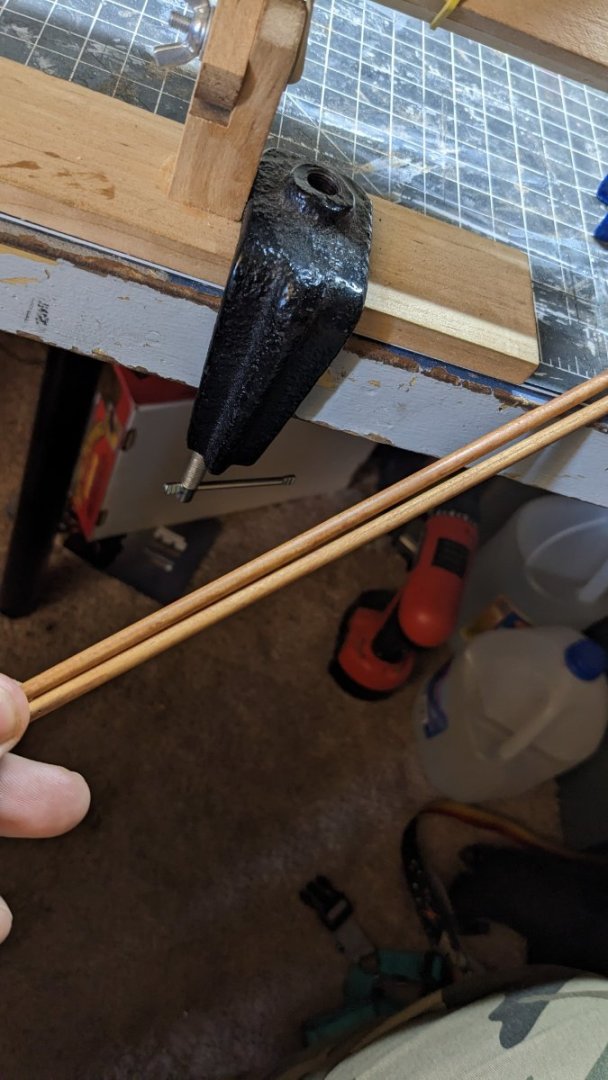
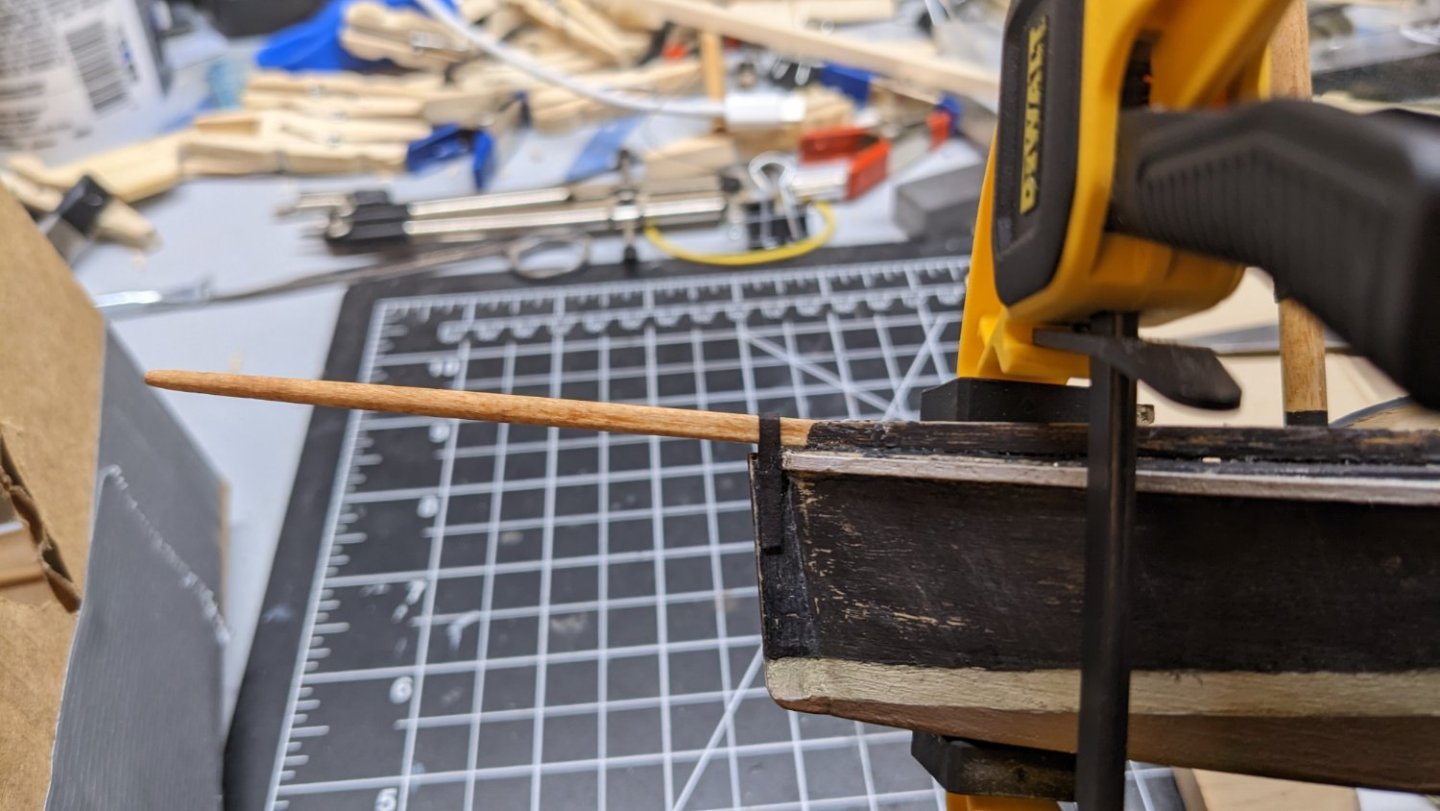
Log 14 After much frustration and many off and on breaks, I am back at the work bench. Things were on hold for a time as we sorted out if we were moving. We have been forced to stay in the subpar apartment, for a little longer, while we continue our search. We have high hopes that this spring we will find a house where I can have a proper workbench, and ventilation. But back to the project. I bought 2 different types of pins and they all failed to be strong enough to handle pushing or hammering. This is my fault for not just paying for the more expensive modeling pins for railroading. Cut corners, cut quality. I've had all my ordered rigging parts for many weeks, and got the materials needed to fix the terrible stain I used on spars. I've since began making my own non-toxic acrylic wood stain and had more consistent results. Some imperfections remain, as the first attempt at staining left some odd spots to cover. But with a bit of diligence and critical thinking, the spars at passably acceptable to my eye. Going forward I will avoid this issue. In the end they look a bit aged, and I am happy with that. Meanwhile... My battle with the side rails* continues. After alot of patching, hobbling, sanding and shaping. I have passable port side rail. The starboard side rail has been going down over the past few days, an inch at time, with 24 hours in between. Not taking chances. In between this and the last log I improved the stain on the Sampson post, and remounted it. I also restrained the bowsprit and mounted it, prior to the side rails. I took a manila? Envelope and cut strips out of the bottom flap, so it ended up 3 ply thick, and "painted" it with a matte Gundam black marker. This was then mounted as a makeshift "gammon" for the sprit as seen. In reference images and page 64 of my "Ship Modeling Simplified" manual from Amazon. I felt rope was too early period and chain was a bit too much for my level of skill, at this point. So I opted for a plate. This also came about because I had also started working on matching "woolding or mast bands" as it was another suggestion from Frank Mastinis' manual. Everywhere I've found these labeled as different terms. I also painted black around the bottoms of my masts, and made some Deck Rings? So far I am becoming less upset with my recent work, as I've compensated in a sense. Once the railing has dried for its last 24 hours, work will begin on the fittings and cleats. Before the mass of the rigging begins. I just wanted to update mid step here, to show that I am still going. I haven't lost hope in this vessel.


- 55 replies
-
- 3
-
-
- sharpie schooner
- Midwest Products
- (and 1 more)
-
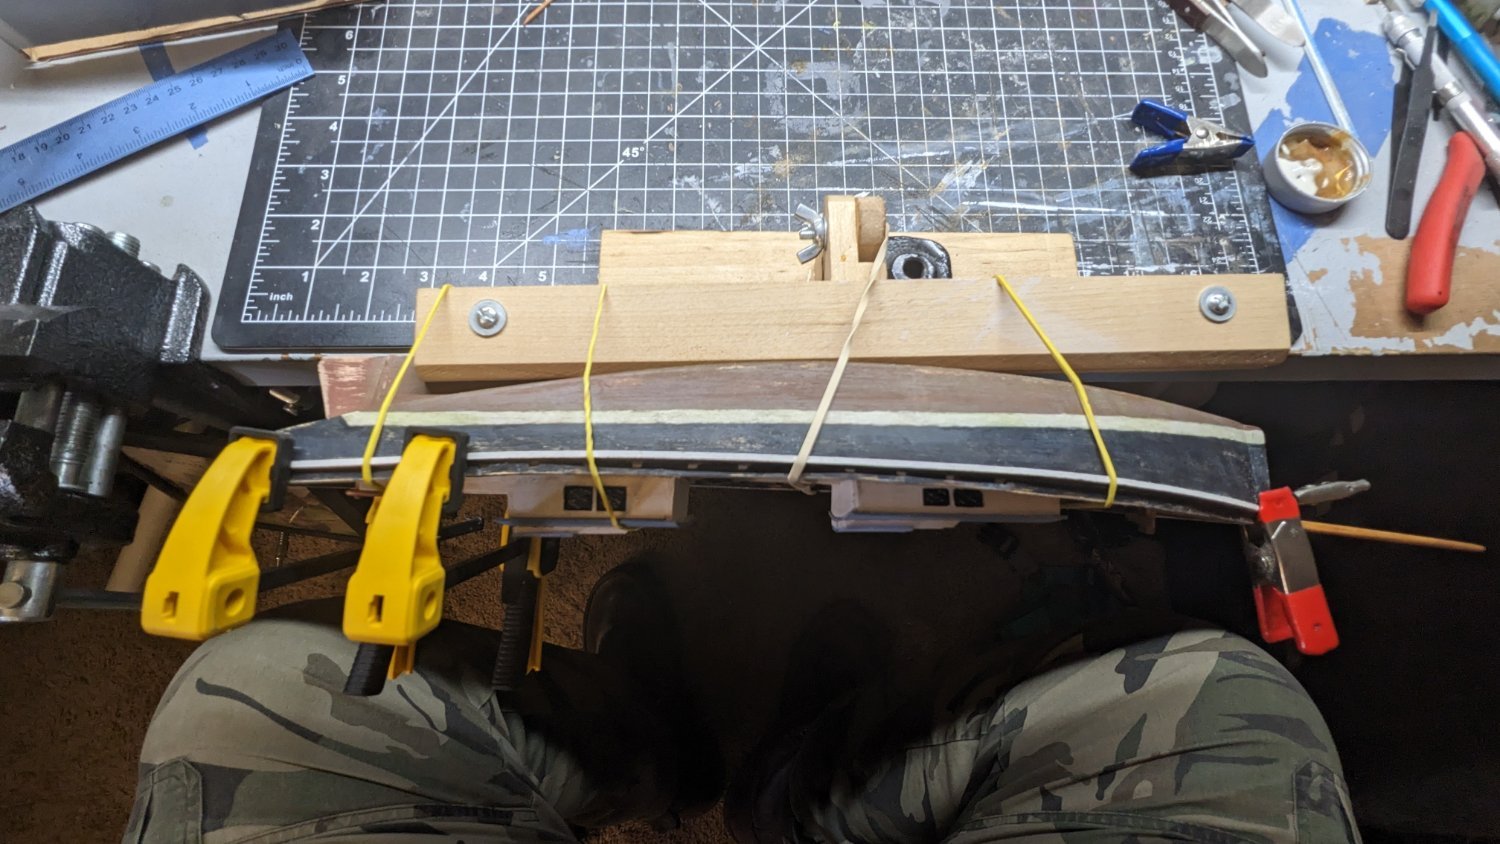
So today I am devoting strictly to applying the rails. I've seen images of others pinning the rail to bend it. I can't do that apparently. I keep bending all my straight pins, so I won't be able to pin. I tried to forcefully glue it down in a bend, that didn't work. I attempted to soak it a few seconds and use my curling iron to bend it around a mason jar lid, that only led to my port side rail snapping 3-4 times. So now it's going on in pieces. I am so disappointed. This hobby is great. But so punishing if you don't have hundreds of dollars invested in tools and excess wood scrap. I guess I need to invest in that wood bending jig from model shipways, or try and hobble one together with popsicle sticks. This is so annoying and upsetting.
- 55 replies
-
- 1
-
-
- sharpie schooner
- Midwest Products
- (and 1 more)
-
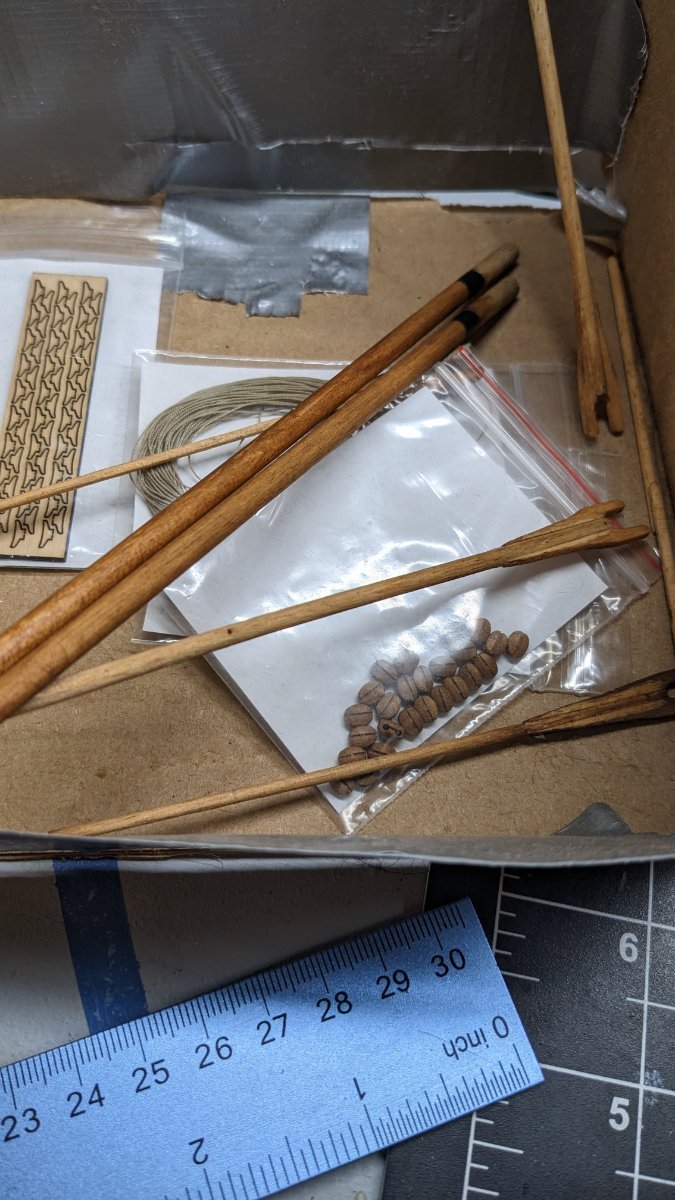
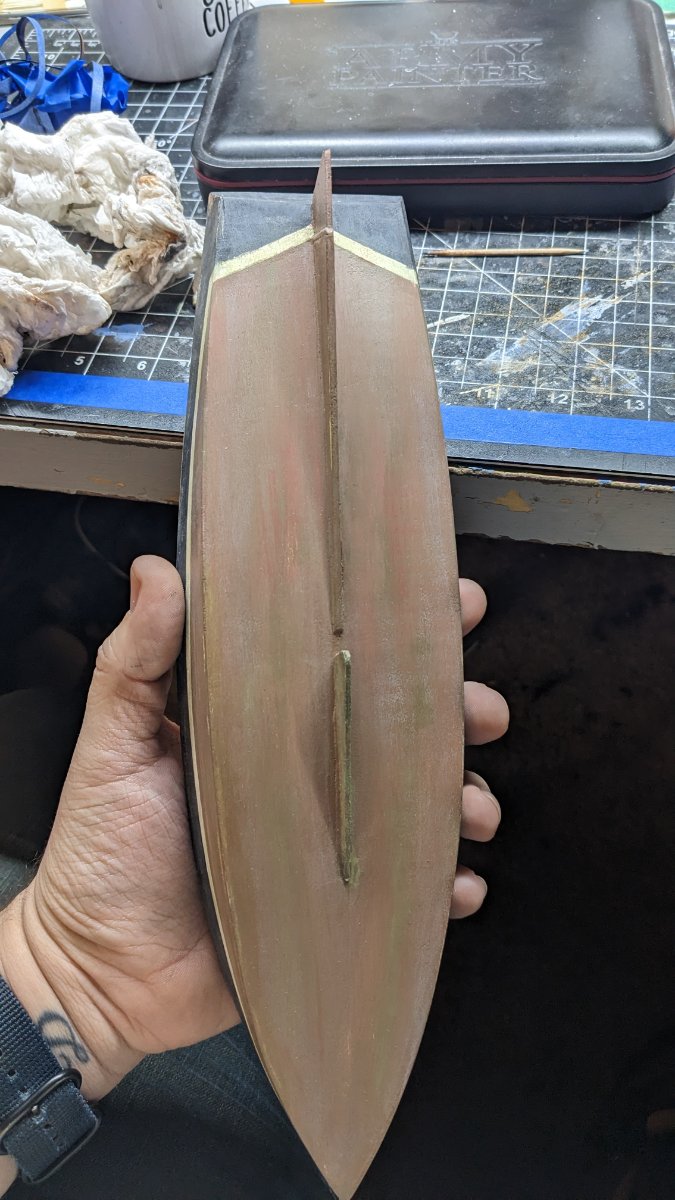
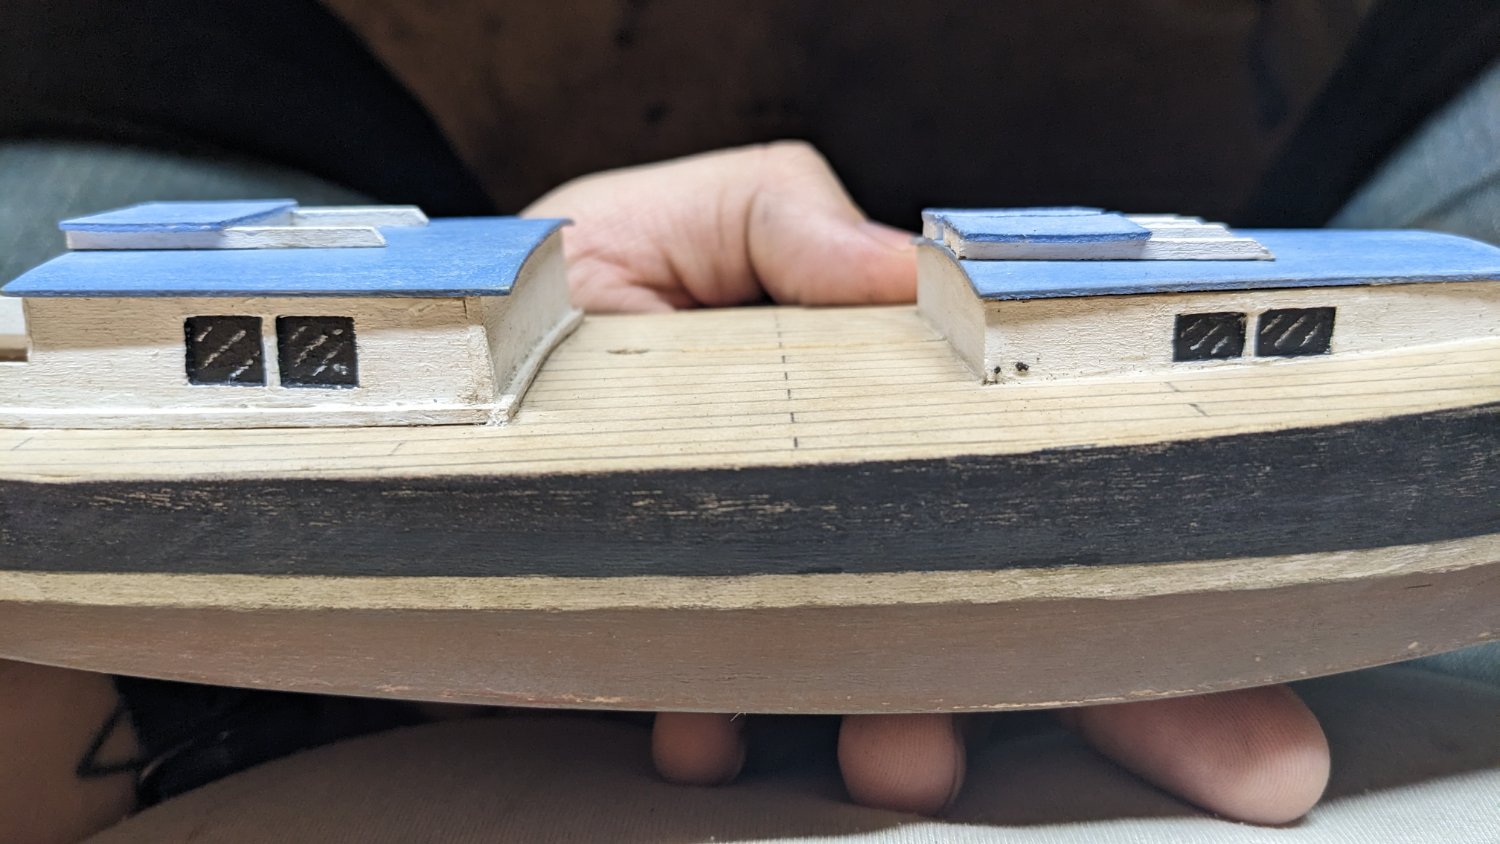
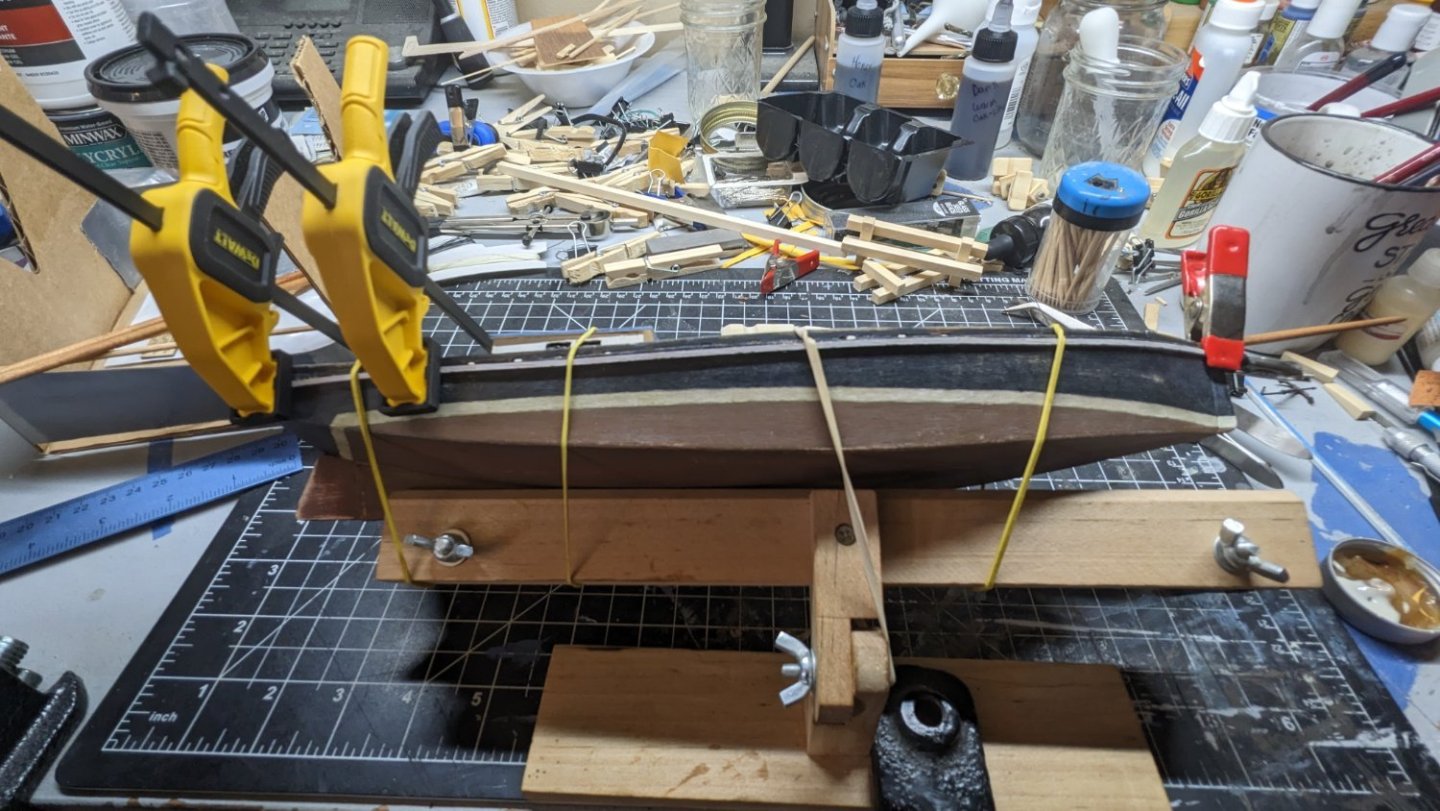
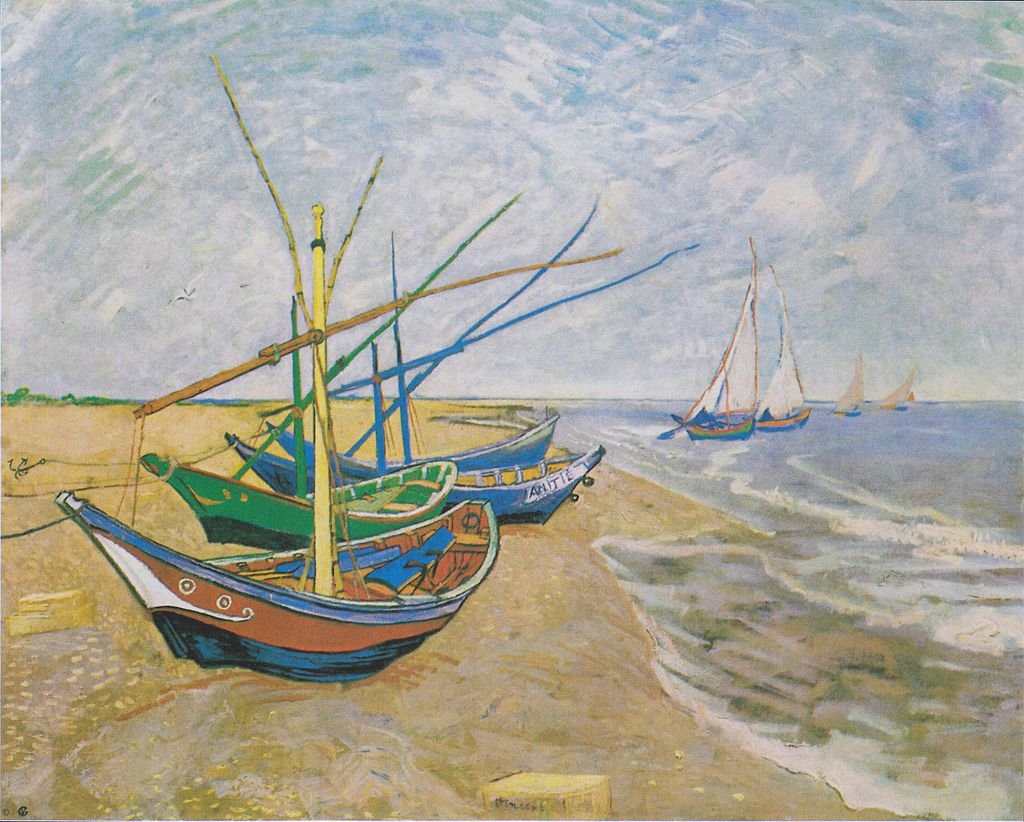
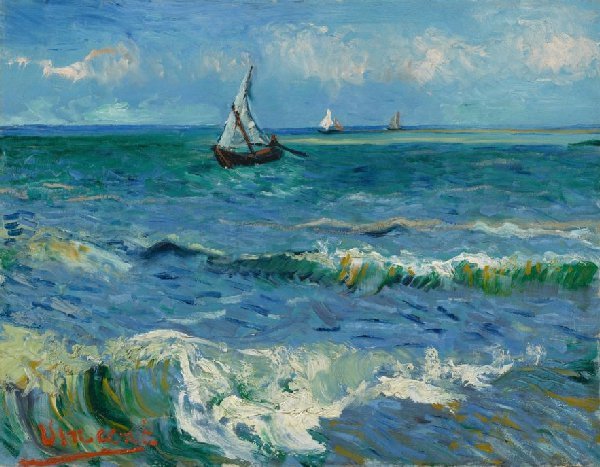
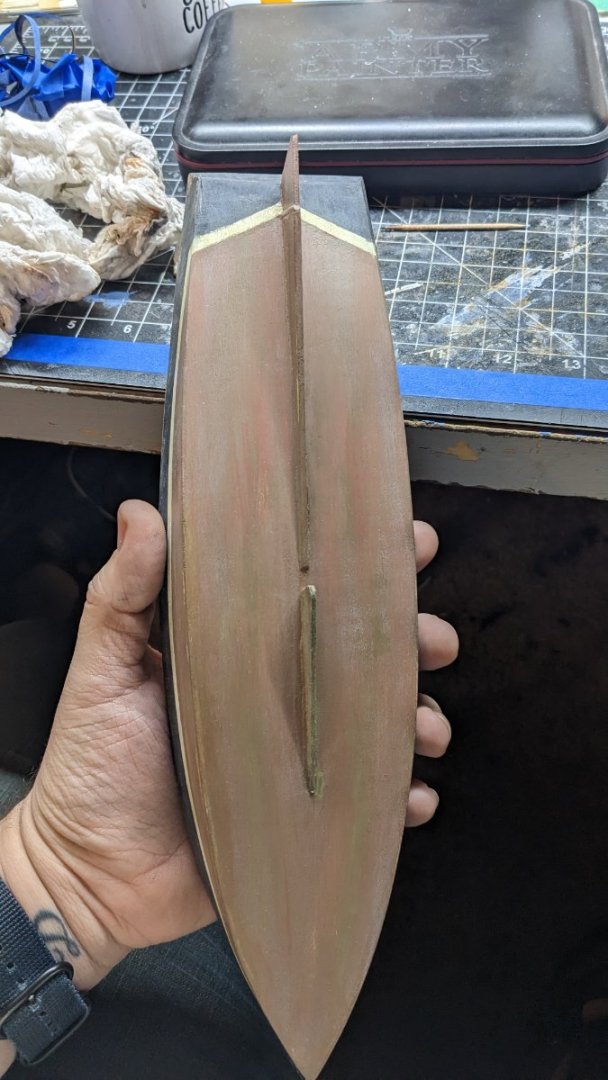
Log 13 After much frustration over my staining issues, I've taken a break to paint the hull. Originally I was going to stain below the waterline in walnut, and above in oak. Seeing as my stain isn't cooperating despite following the directions on various YouTube videos, I've decided it is just a poor batch of stain or a bad brand. To combat this without starting the spars over, I will just paint as best as I can. The toe rail will be black with white trim, and I'm unsure if I'll paint the bowsprit. I'm not really a fan of painted masts or bowsprits. I've sanded the bowsprit to an acceptable color and may just leave it. My inspiration for this model is Van Goghs' Seascape. Dark hull fishing sloops dot the horizon. Some have red waterlines and black upper, some are black and brown or dark green. Van Gogh painted this and many others, while on a visit to Les Saintes-Maries-de-la-Mer in June of 1888. All of which depicted the coastlines and beaches of both berthed and working fishing boats. I started with an undercoat of red, before top coating in leather brown. The top and stripe I undercoated in a light brown (new wood) shade. Top coating black and white. The waterline itself was probably the hardest step of the entire project. As I my building board did noth hold the hull firmly. This led to a lot of fighting with sliding while trying to mark the hull. But I believe I got it pretty close. I didn't really understand the stripe that alot of images have. My instructions had me taping for green and black, but made no mention of filling the gap in white. Seeing as the stripe on all waterlines seem to be white, I played it safe and followed suit. After I did heavy white salt wash over the entire hull. A green-yellow wash over the white stripe, and bottom of the vessel. The centerboard and keel were heavily washed with this sickly green hue to simulate some minor fouling build up. After the washes were done I followed up with a 220 grit sanding, using just the edge of my sanding block. This rubbed off the top coat and dulled the washed to an acceptable level. Revealing bare wood streaks in the black and white, and red peaking through the brown both in a random streaking pattern. I also added a touch of white streaking with a sanded toothpick, to off some depth and glinting on what "should" be glass windows. Later I will gloss coat the windows to accentuate. Next I will be tackling rigging and sails. Which should be interesting. As this is my first sailed vessel I want to take it easy on myself. I plan to display her with her canvas furled and stowed, anchored. I may make a water base, but I'm unsure at this time. I don't want to display her at a fishing grounds as I have no crew models. But instead moored. I want to do this mainly to display the rigging I ordered. I also will make a gill net to place at midship on the deck, as part of my furniture. I don't know a whole lot about early fishing crews or vessels. I've tried to Google info on terrain fishing along the Bermuda islands, to no avail. I am curious if they did traditional rod fishing for other species or if they only hunter turtles. So I can decide to display a few scale fishing rods, along with the net. Harpoons seem highly likely, as well as long hooks? This boat didn't come with a long boat, and my searches only turned up images of tribal people spearfishing turtles, and Englishmen fishing from longboats. If anyone has some info to share, it will would be most appreciated.
.jpg.cb8940e242e2fd1184a5a8f17e715931.jpg)

- 55 replies
-
- 5
-
-
- sharpie schooner
- Midwest Products
- (and 1 more)
-
Log 12 I have come to the conclusion that staining wood is not as easy or straightforward as I thought. I tested all of my stains quickly, on a piece of scrap kit wood. After a few days of drying it looked great. It was consistent, and completely dry. Now that my respirator has been delivered I started staining my parts. I left them to dry all day yesterday and overnight. The stain is streaky, inconsistent and sticky. I read online to scrub with water/vinegar solution. That did nothing but break my toe rail. Once it dries I'll have to glue back together. Another site said to apply another heavy coat and wipe it off, and it would fix any prior stickiness and splotchiness. All that did was completely removed all of the first layer. Online YouTube videos say to paint it on, and wipe it off with a paper towel. The paper towel sticks to it, and then I drop parts on the dog hair covered carpet. Leaving me with a clean up job. I tried using a shop towel that doesn't stick as easily but just removes all the color. So I coated all the parts again that were still on paint clamps, and started to restain the mast that had all it's color removed. Its still just all coming off when I wipe it. The only good part is my foremast, which was done after shaking the can of stain. Its consistent in color, but still sticky from yesterday. I'm about to scrap all the spars, and toe rail if I don't figure out how to stain. I hate the idea of leaving everything bare basswood color. I have always sucked at painting, as it never stays on. But that's with plastic models. So far, my wood painting experience has been good, as it absorbs. But I'm really regretting buying stain and an expensive respirator. What am I doing wrong? I bought water-based stain to reduce the toxicity and vapor off gassing in the house. With this stain I still open all windows in the back of the house to create a through breeze, run a small fan beside me, and open the front door, on top of the respirator.

- 55 replies
-
- 3
-
-
- sharpie schooner
- Midwest Products
- (and 1 more)
-
As the standing rigging? Still use a . 012 " for running?
- 55 replies
-
- 1
-
-
- sharpie schooner
- Midwest Products
- (and 1 more)
-
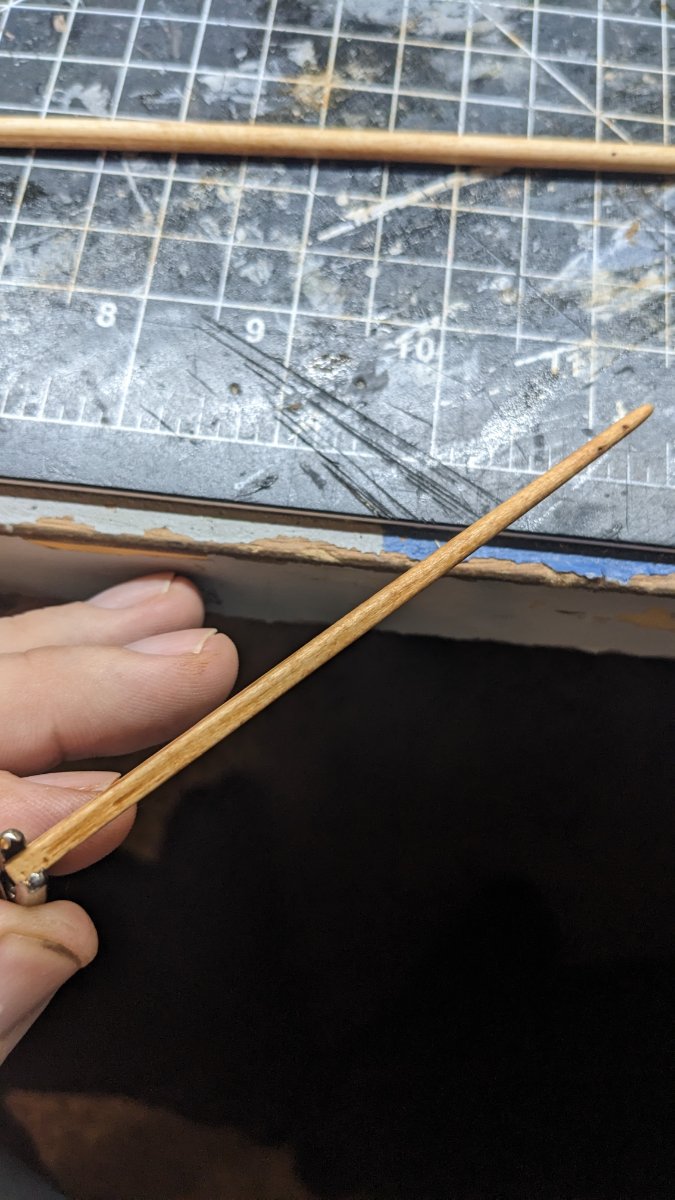
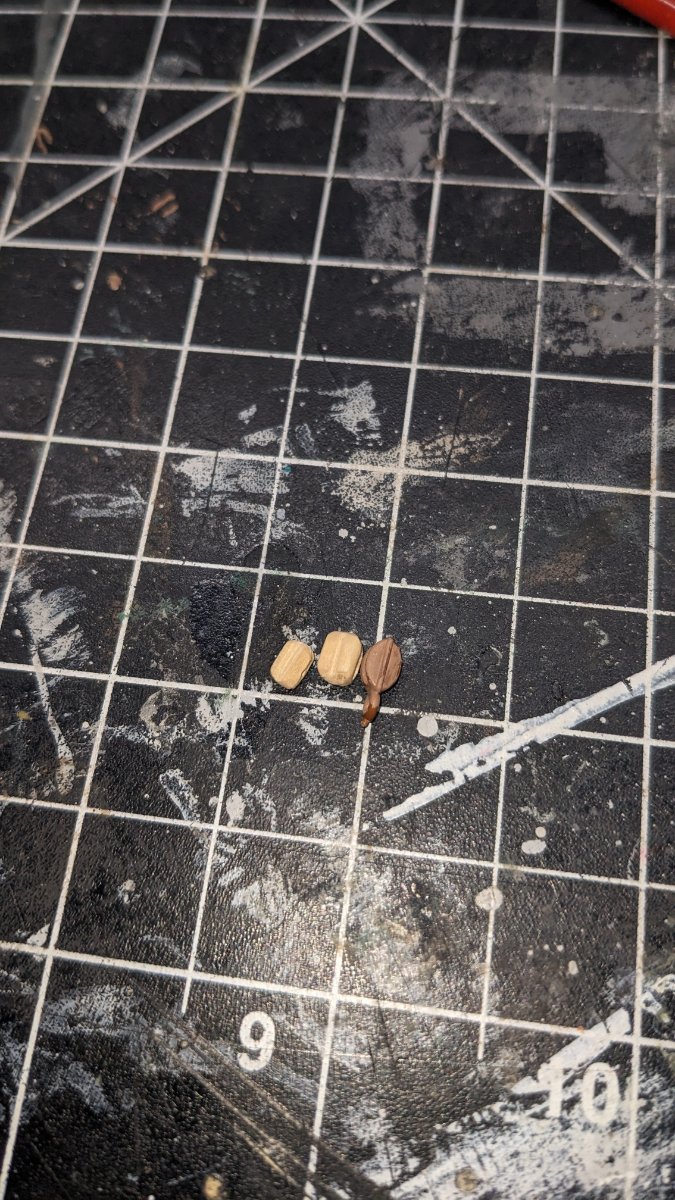
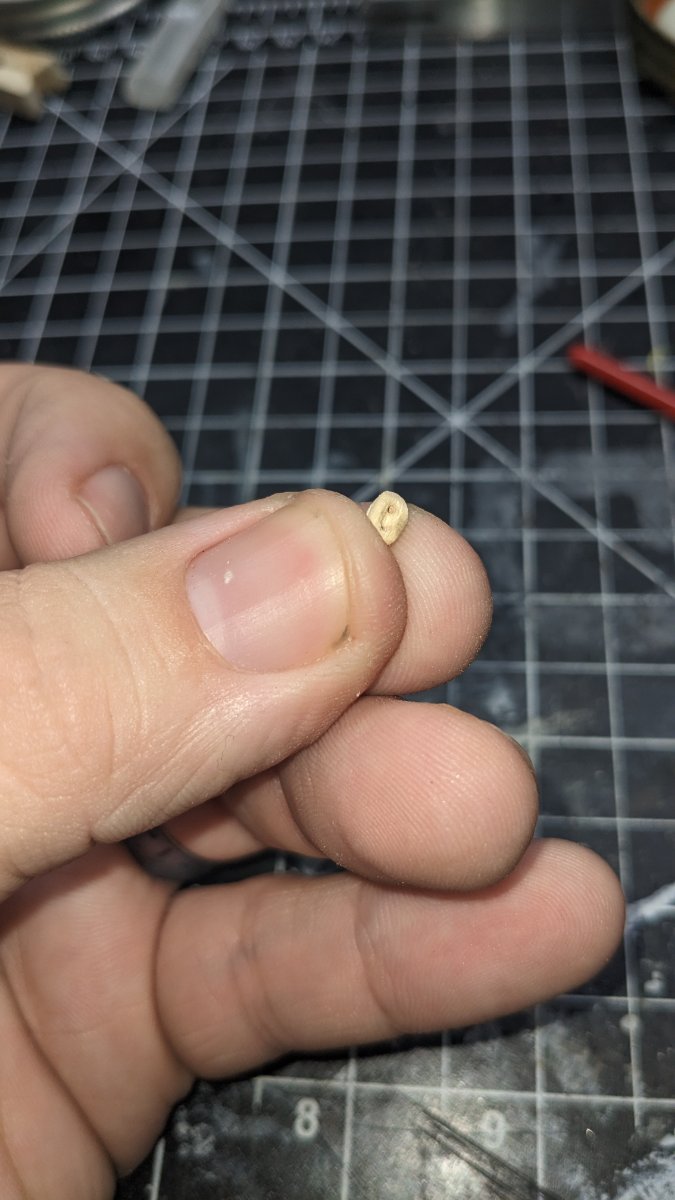
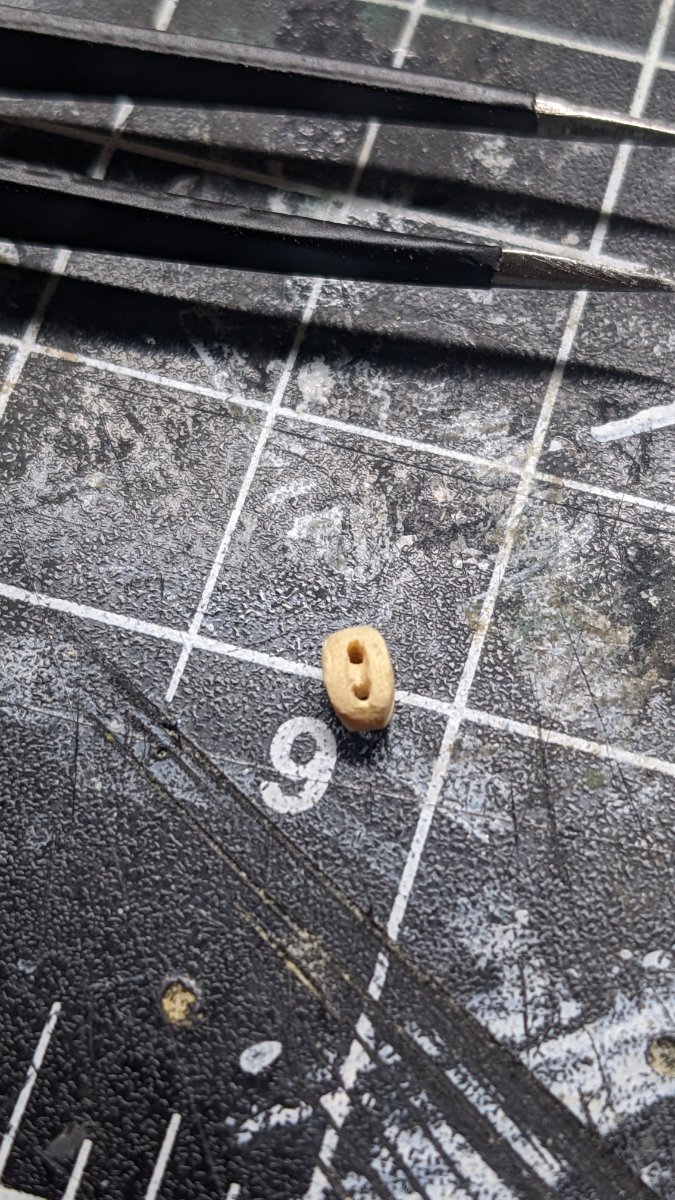
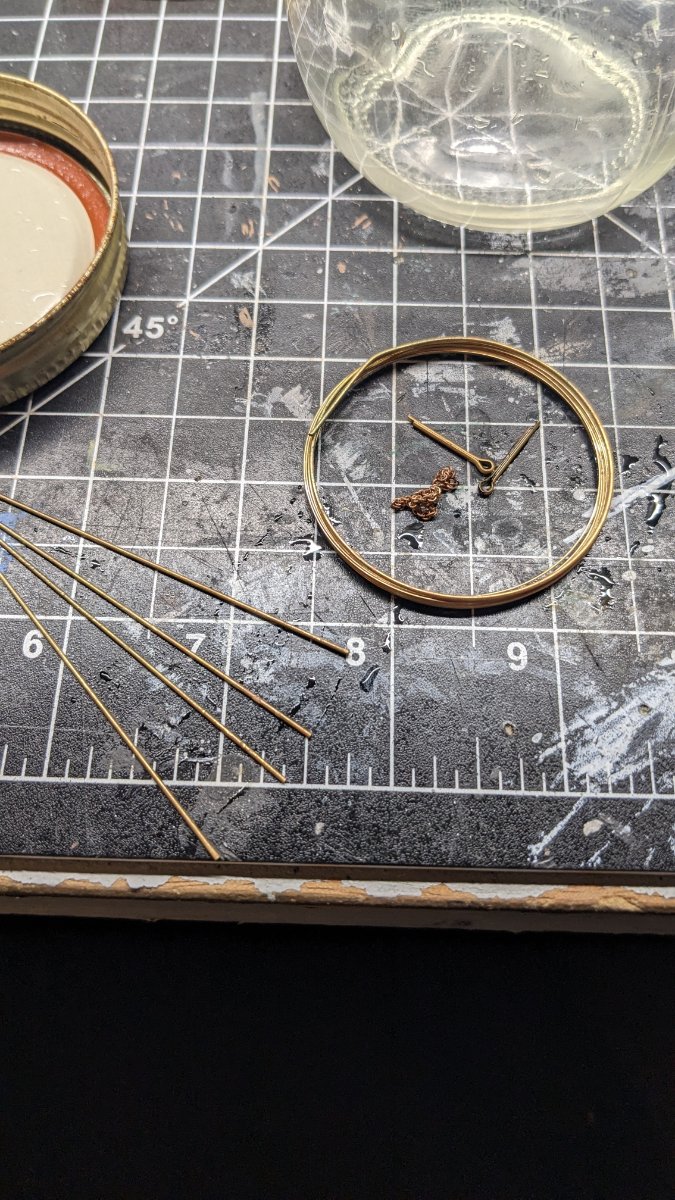
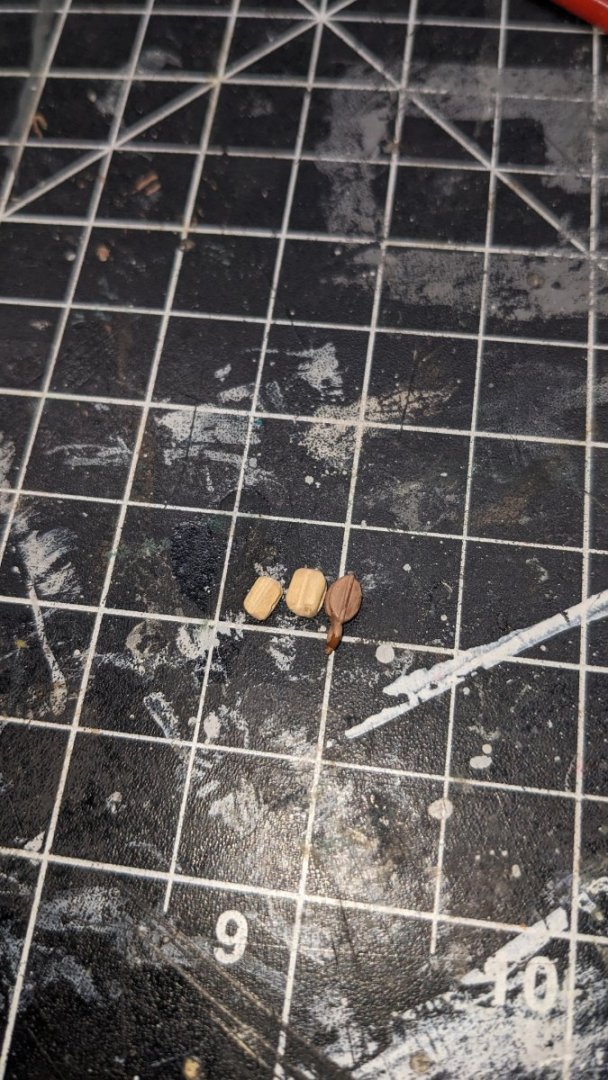
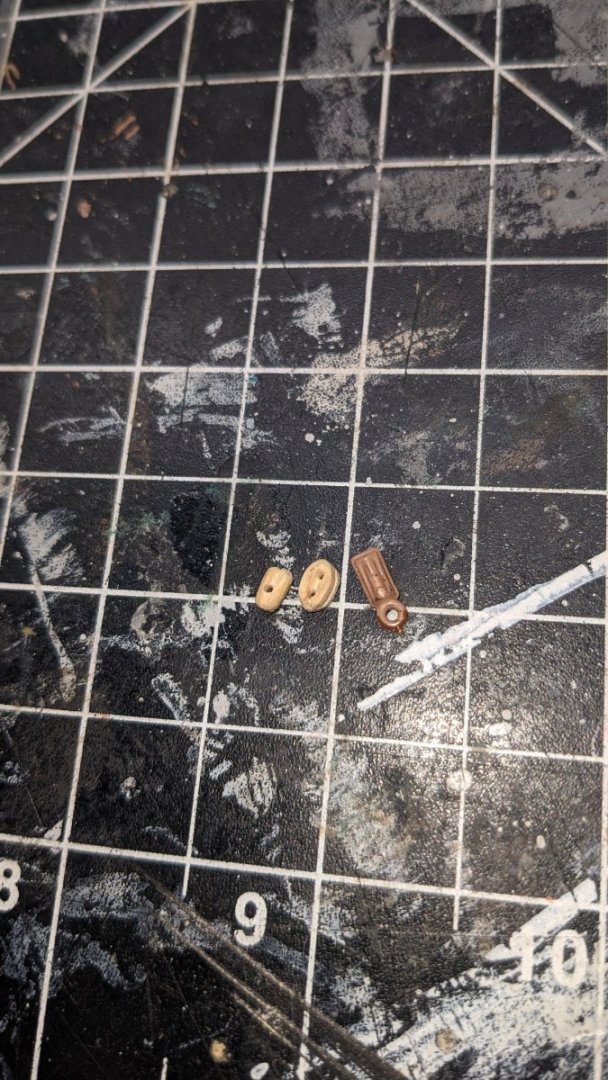
Log 11 Seeing as I have no good ventilation, I've been forced to get a respirator for staining anyway. Since syren is out of stock on 3/16" single sheaves. I tried to make my own, just in case. Seeing as I lost one of the plastic kit blocks already, while painting, it shot across the room out of my tweezers. I took measurements from the included block, and took the info from online that most kits blocks are oversized and inaccurate. I rounded all the measurements to the nearest whole mm or half mm. The originals are painted, but still bad. I made one typical boxy style, the cheap ones from model shipways, with the single hole. Then I looked at images of blocks and made another, more rounded, and has two holes so I could file out the opening to resemble more of a inner pulley look. I like the second outcome, but both are an improvement over the plastic. I can't exactly say what type of wood it is. They were carved out of a single piece of a thick paint stick. Home depot had entire bags of a type of paint stick I'd never seen before. Im familiar with thin, floppy wood paint sticks. These are thick and rigid with a tight grain, and doesn't cut as easily as bass and balsa. But it sands nicely, and doesn't splinter as much if at all. I am hoping to get cleats, rope and blocks. I hate the look of this included thread, and the blocks are terrible. I'll need to get some smaller gauge thread for serving the Beckett loops later. But I am learning as much as I can while I'm away from my desk. Original Plastic Blocks 3.35mm x 6.16mm x 3. 03mm. Cheapo style block 2.75mm x 4.59mm x 2.52mm Better accuracy block 3.20mm x 5.18mm x 3.68mm Still needs work. But not bad I feel for a first time. Filed the good one down a bit more on depth and width, and cleaned up with fine grit to a more oval shape.


- 55 replies
-
- 4
-
-
- sharpie schooner
- Midwest Products
- (and 1 more)
-
I was mainly trying to use 1 something on hand I didn't have to buy, 2 anything that was a serious chemical. Online showed people needing gloves, goggles and a respirator... All to blacken some brass? Is that stuff really that dangerous
- 55 replies
-
- 1
-
-
- sharpie schooner
- Midwest Products
- (and 1 more)
-
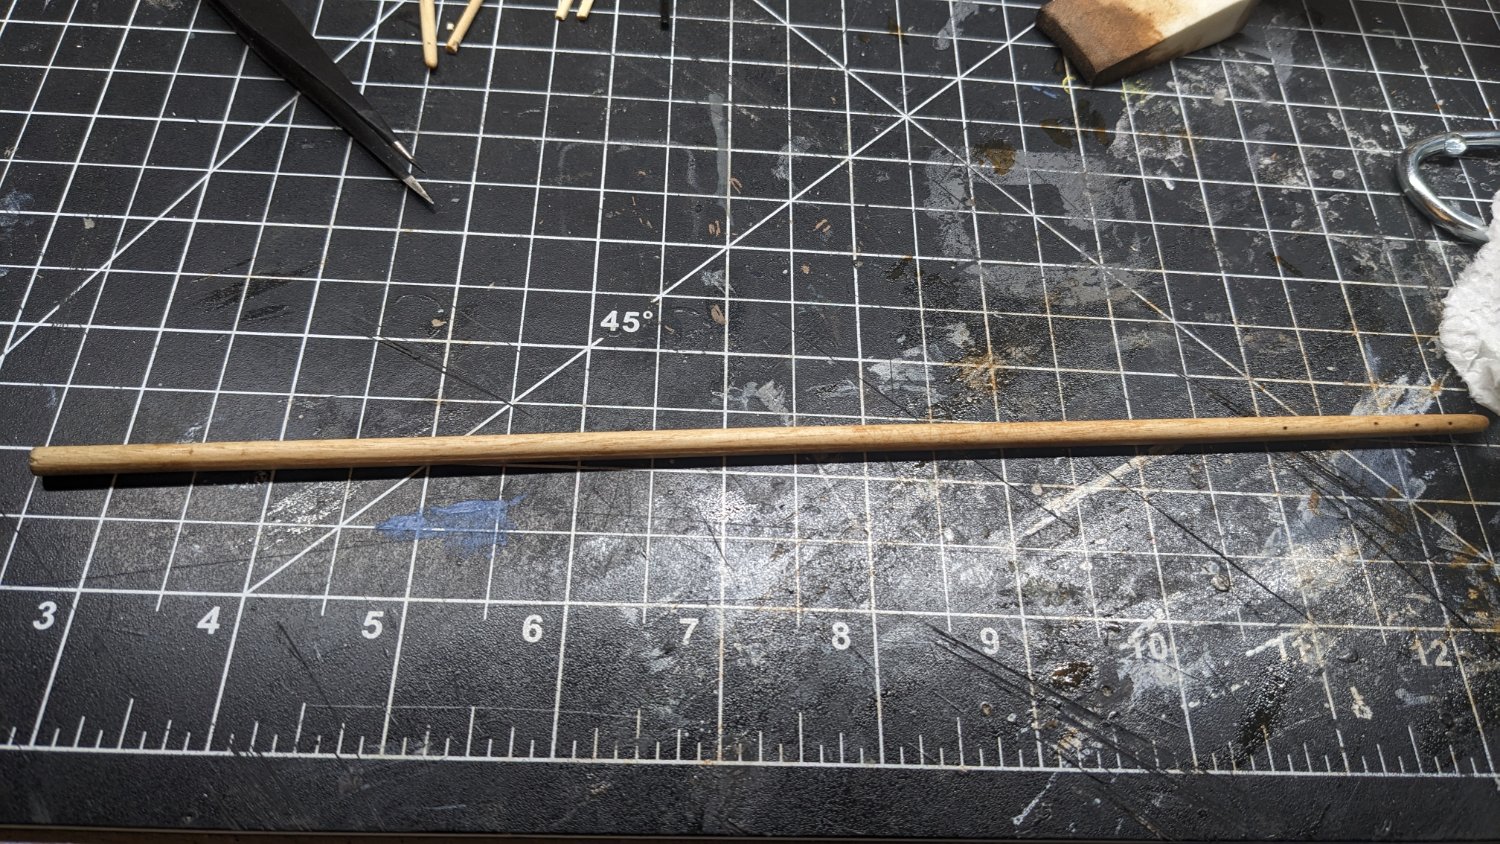
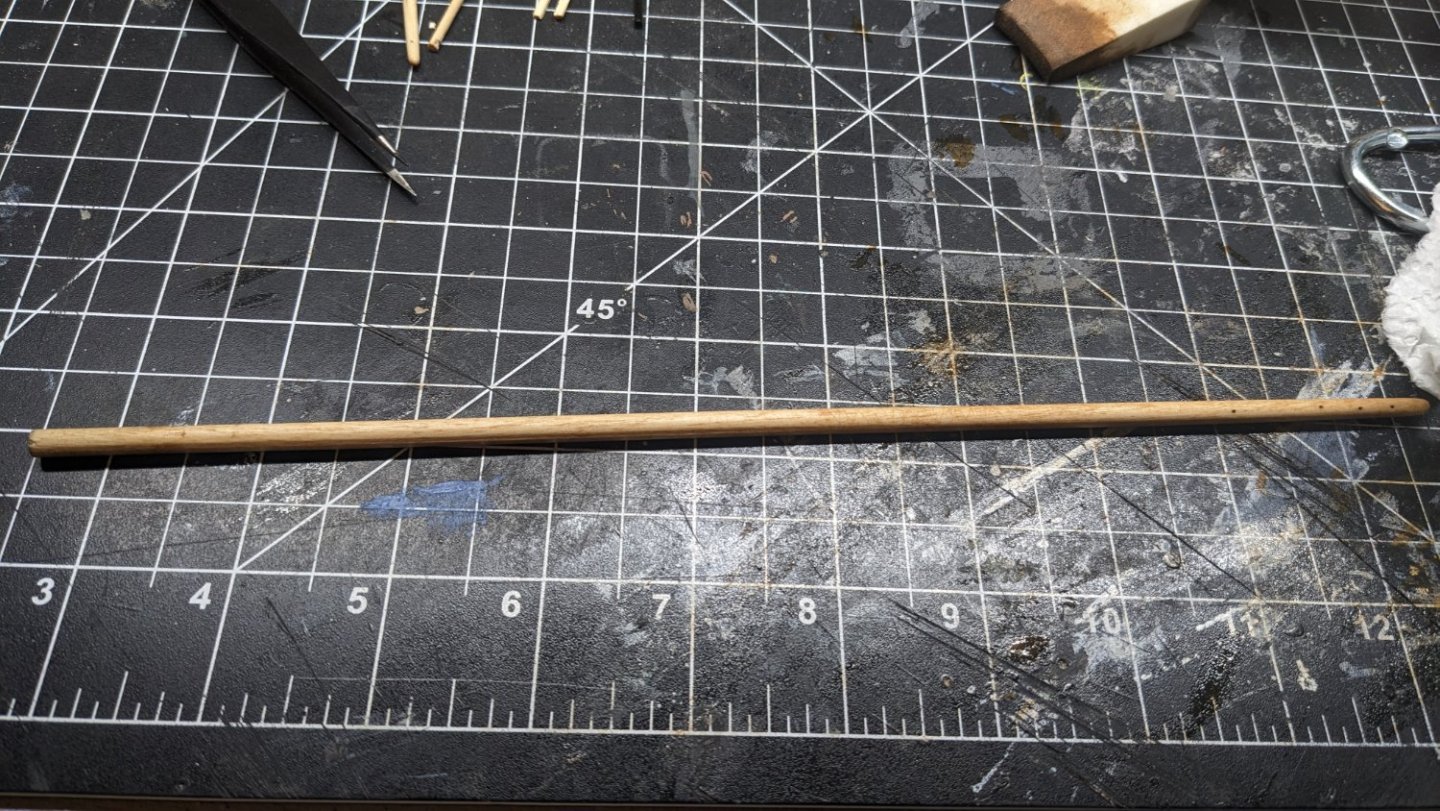
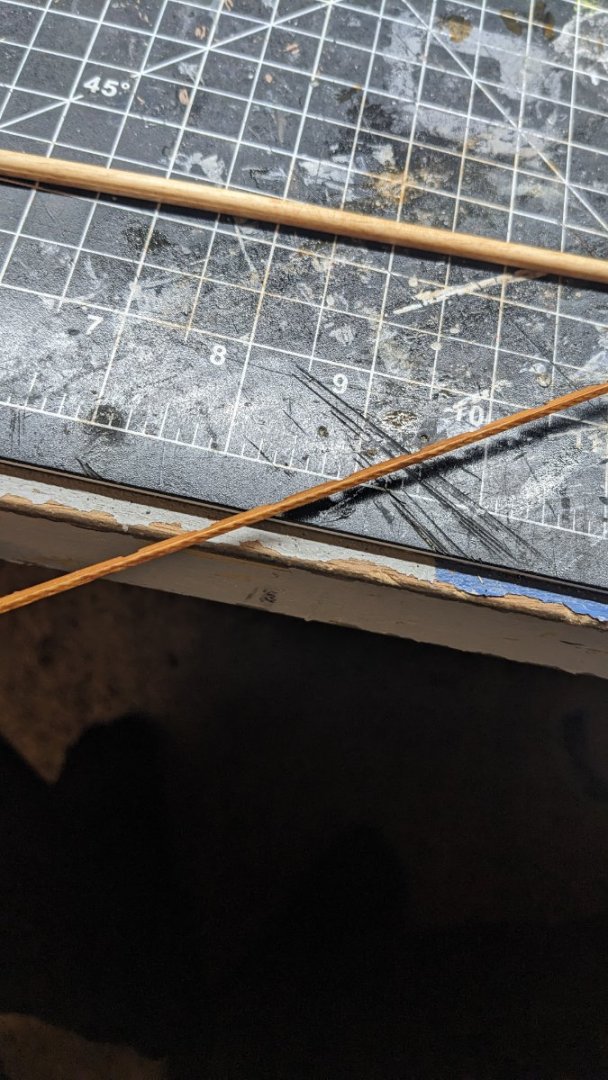
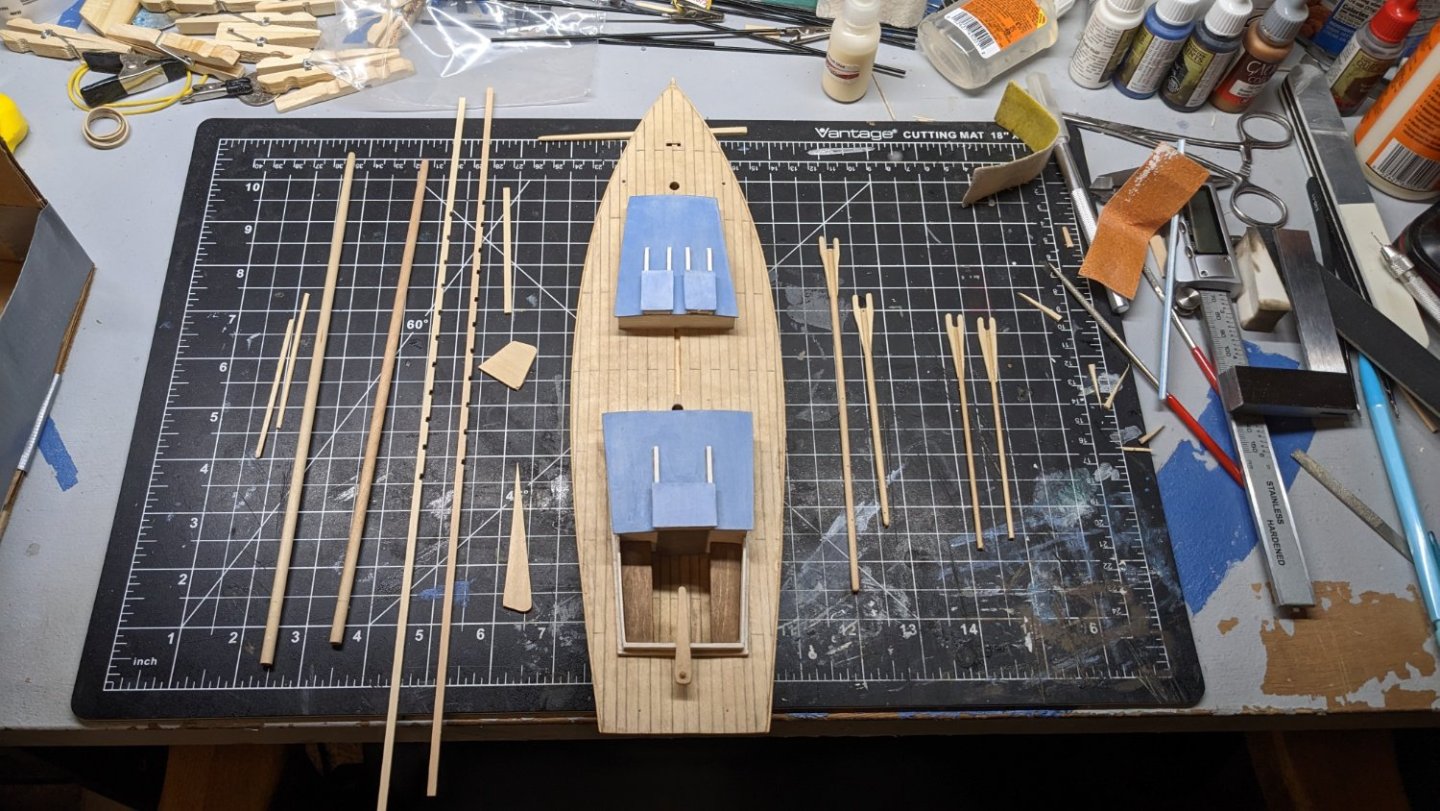
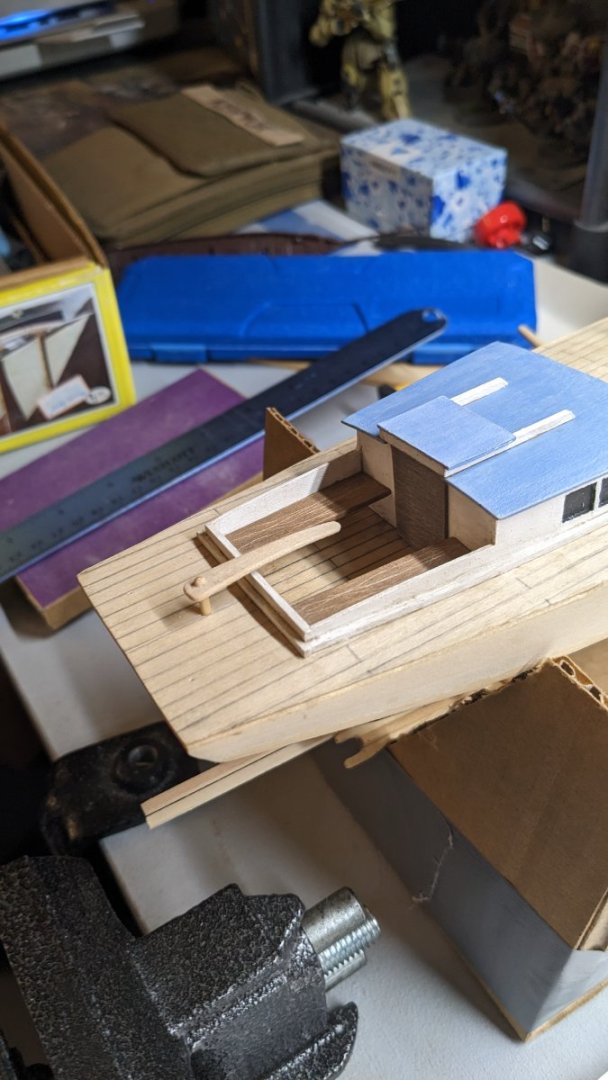
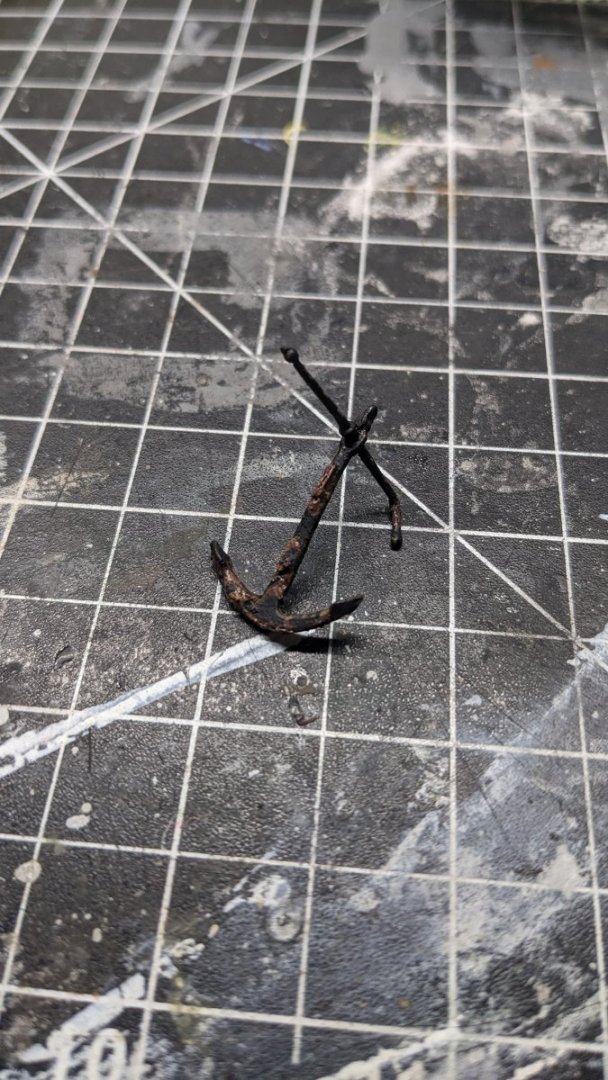
Log 10 I Finished all of the spars for the rigging. I attached my centerboard, rudder, and Sampson post. I sat down yesterday and carved out my tiller and gave it a slight bend, and some nice rounded edges. It turned out nice. Everything else is ready to go and waiting for paint/stain. I ordered a respirator and it will arrive next week, as I missed my next day shipping window. As far as rigging it looks like it will have to wait till next month some time. I've put parts of my list, as the included ones are terrible. But I don't have the funds at this moment to order them, and half aren't even in stock. I need to get 0.012” Tan rigging line (qty. 2) 0.008” dark drown rigging line (qty. 1) 3/16” single sheave blocks (qty. 1) 5mm cleats (qty. 1) @VTHokiEE and I appreciate it. I sat down and painted my anchor black, and gave it a little weathering and rust texturing. I like it. So far it's the best miniature detail paint work I've ever managed. After a little research I tried to blacken or age my brass fittings. I read online that it could be done by applying a mixture of vinegar and salt, or salt water. One site said submerge for 20 minutes. Another said brush it on every day, a third suggested putting just tiny bit of solution in the bottom of a jar and closing it. Giving a shake every hour until desired. However, none of these methods have worked. I submerged in salt water for hours, brushed vinegar mix on for an hour, and I tried the airtight jar trick. I am seeing no change in my brass. at this point I questioning the material. Was I given fake brass parts? I will approach this issue again tomorrow.


- 55 replies
-
- 3
-
-
- sharpie schooner
- Midwest Products
- (and 1 more)
-
@VTHokiEE that . 008" black line. Did you have enough left over for becketts? Or will I need to buy some sort of brass round stock too?