Massimodels
-
Posts
17 -
Joined
-
Last visited
1 Follower

-
 RGL reacted to a post in a topic:
HMS Hood by Massimodels - Flyhawk (Deluxe) - 1:700 - PLASTIC
RGL reacted to a post in a topic:
HMS Hood by Massimodels - Flyhawk (Deluxe) - 1:700 - PLASTIC
-
Old Collingwood reacted to a post in a topic:
HMS Hood by Massimodels - Flyhawk (Deluxe) - 1:700 - PLASTIC
-
Old Collingwood reacted to a post in a topic:
HMS Hood by Massimodels - Flyhawk (Deluxe) - 1:700 - PLASTIC
-
Old Collingwood reacted to a post in a topic:
HMS Hood by Massimodels - Flyhawk (Deluxe) - 1:700 - PLASTIC
-
mtaylor reacted to a post in a topic:
HMS Hood by Massimodels - Flyhawk (Deluxe) - 1:700 - PLASTIC
-
mtaylor reacted to a post in a topic:
HMS Hood by Massimodels - Flyhawk (Deluxe) - 1:700 - PLASTIC
-
mikegr reacted to a post in a topic:
HMS Hood by Massimodels - Flyhawk (Deluxe) - 1:700 - PLASTIC
-
Canute reacted to a post in a topic:
HMS Hood by Massimodels - Flyhawk (Deluxe) - 1:700 - PLASTIC
-
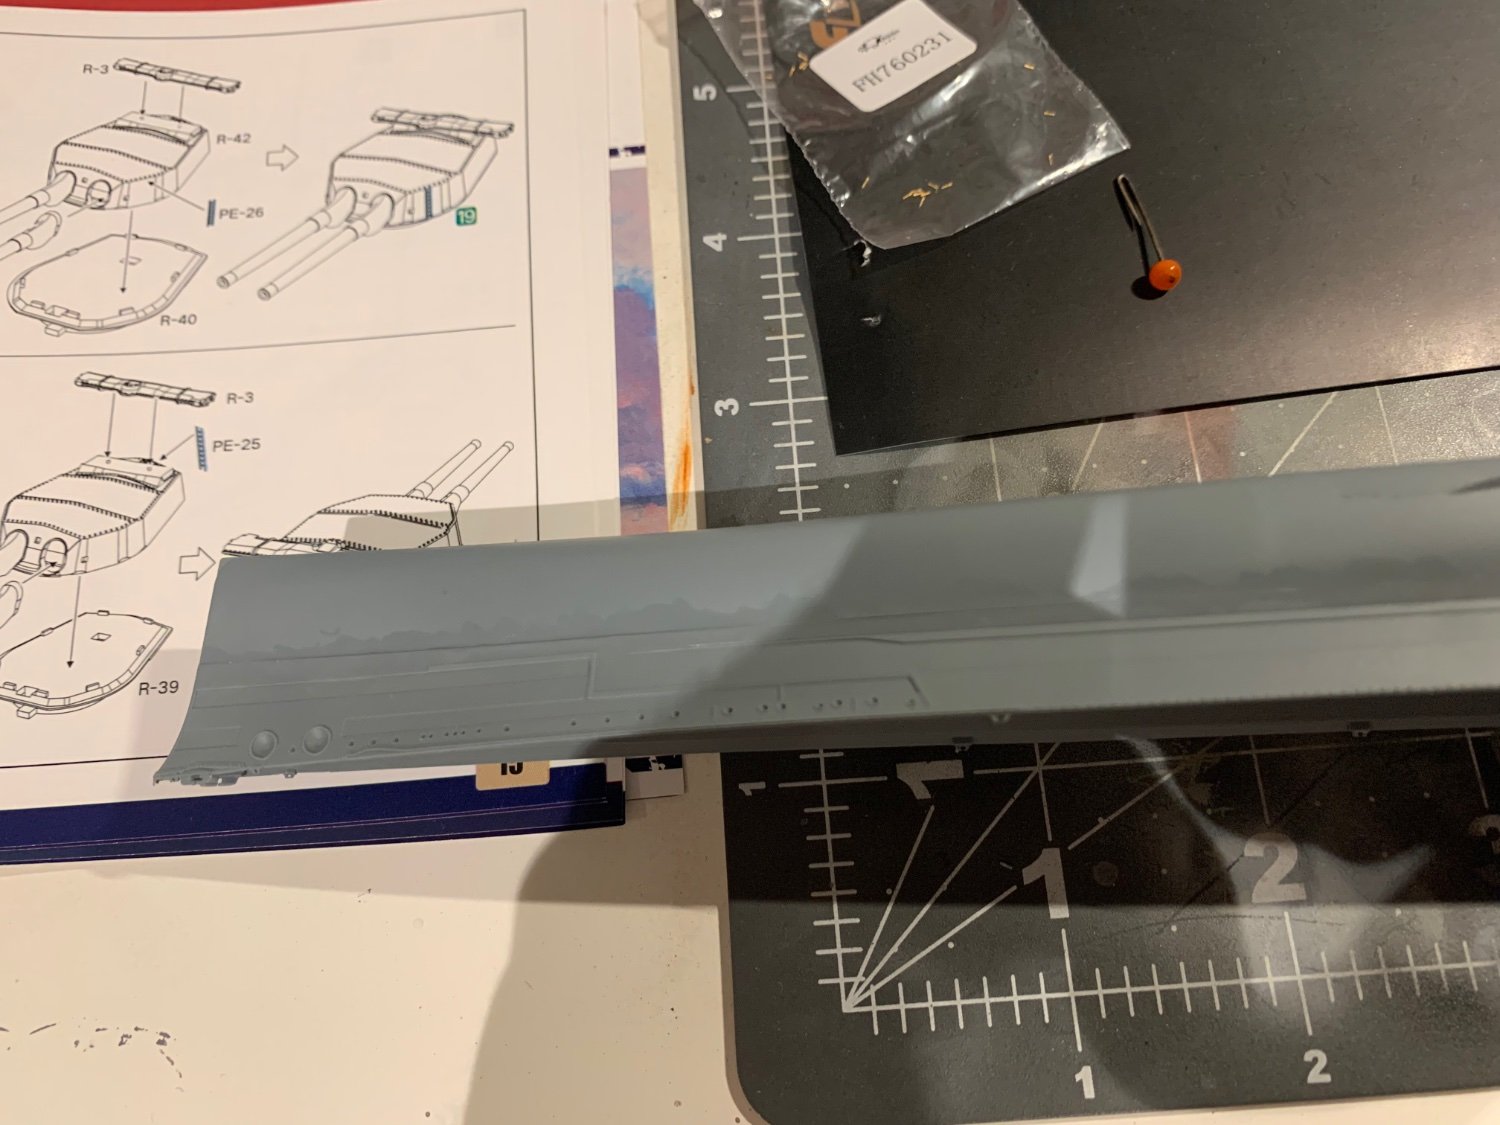
Yes I’ve done some research and it seems like this is fair; albeit less so on the turrets, as they seem closer to accurate, but the funnels definitely. But still in my opinion the best and most efficient kit of this scale.
-
Tigerdvr reacted to a post in a topic:
HMS Hood by Massimodels - Flyhawk (Deluxe) - 1:700 - PLASTIC
-
mikegr reacted to a post in a topic:
HMS Hood by Massimodels - Flyhawk (Deluxe) - 1:700 - PLASTIC
-
I actually took a look at @CDW's Hood by I Love Kit. It seems that the plastic detail in most cases is inferior, so the Flyhawk may be the better choice. Also, what did you mean by the overscale effect of Flyhawk's models?
-
Both are good kits, but chose this one simply because it was available to buy. I did however see that kit at a model show for $90 or so, but didn’t pick it up because I had this one already.
-
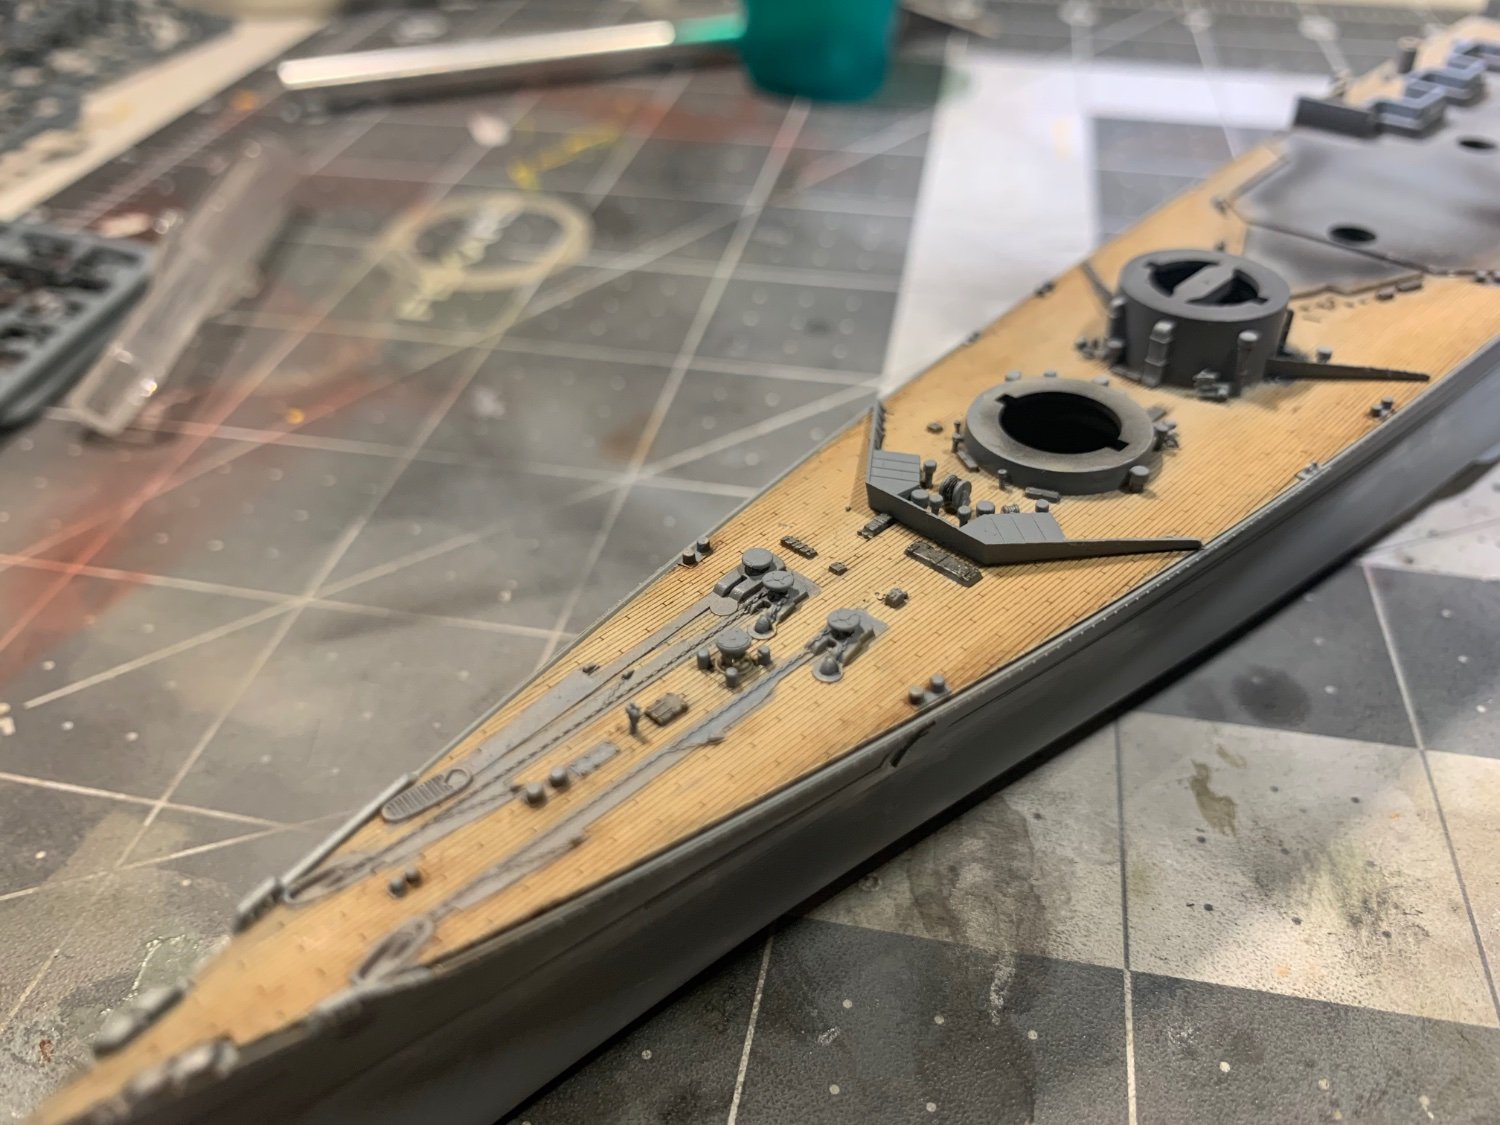
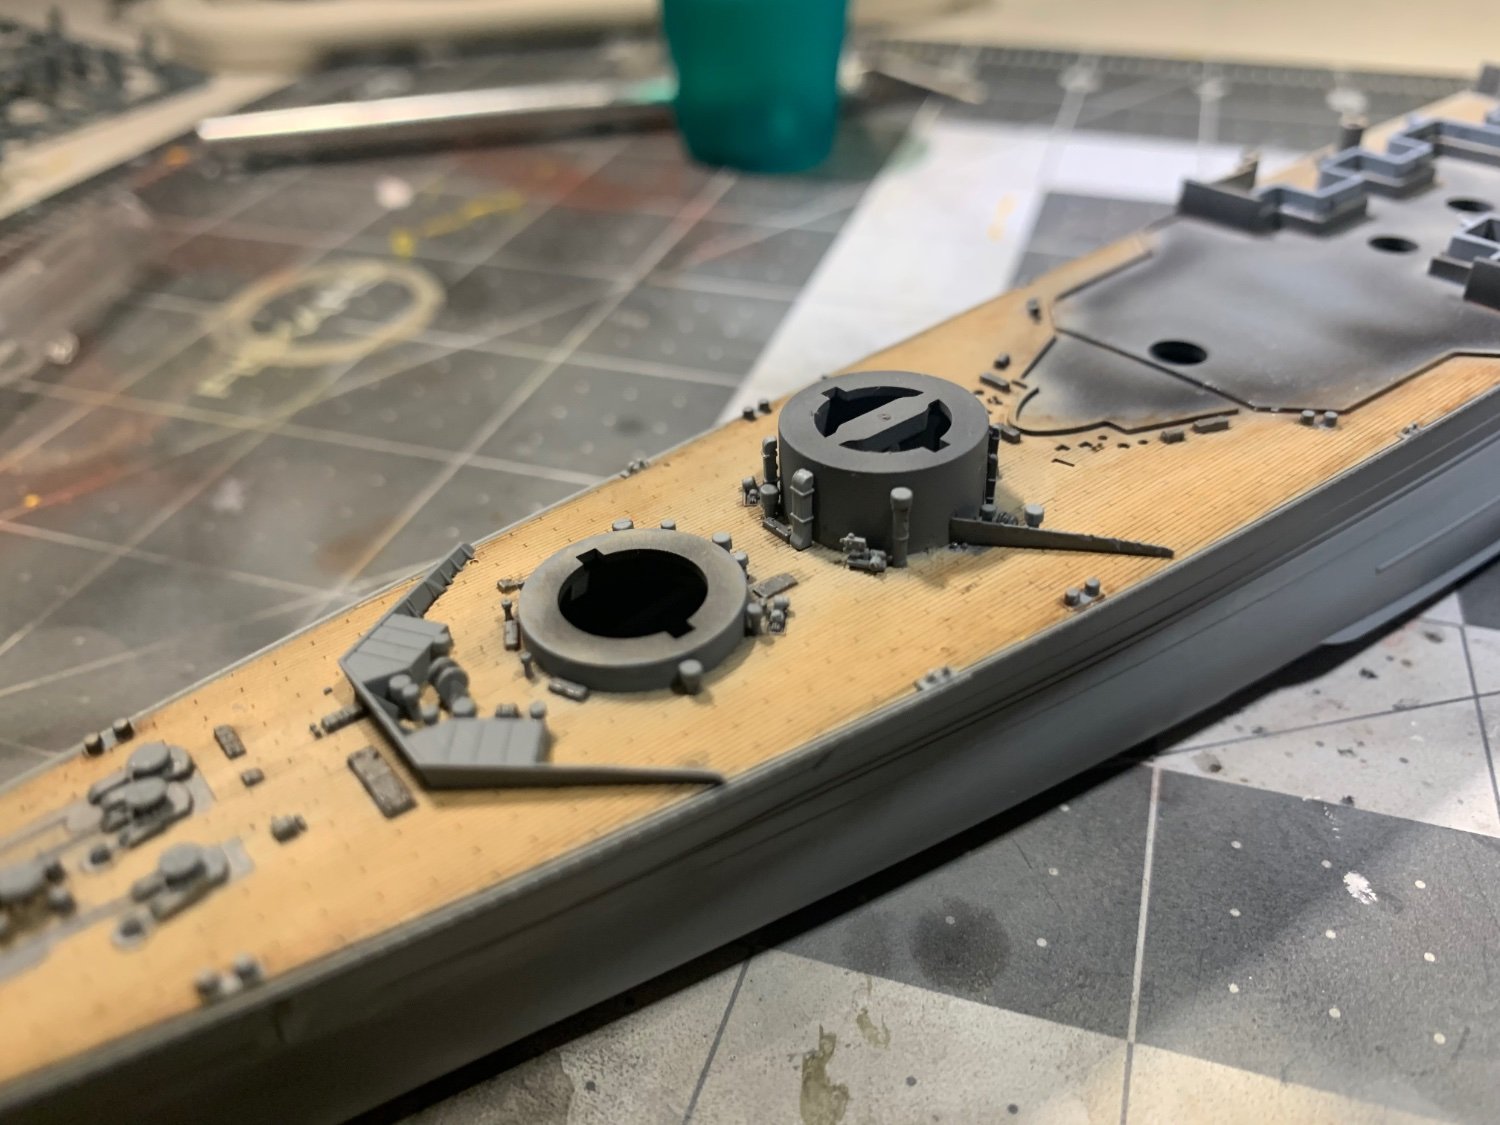
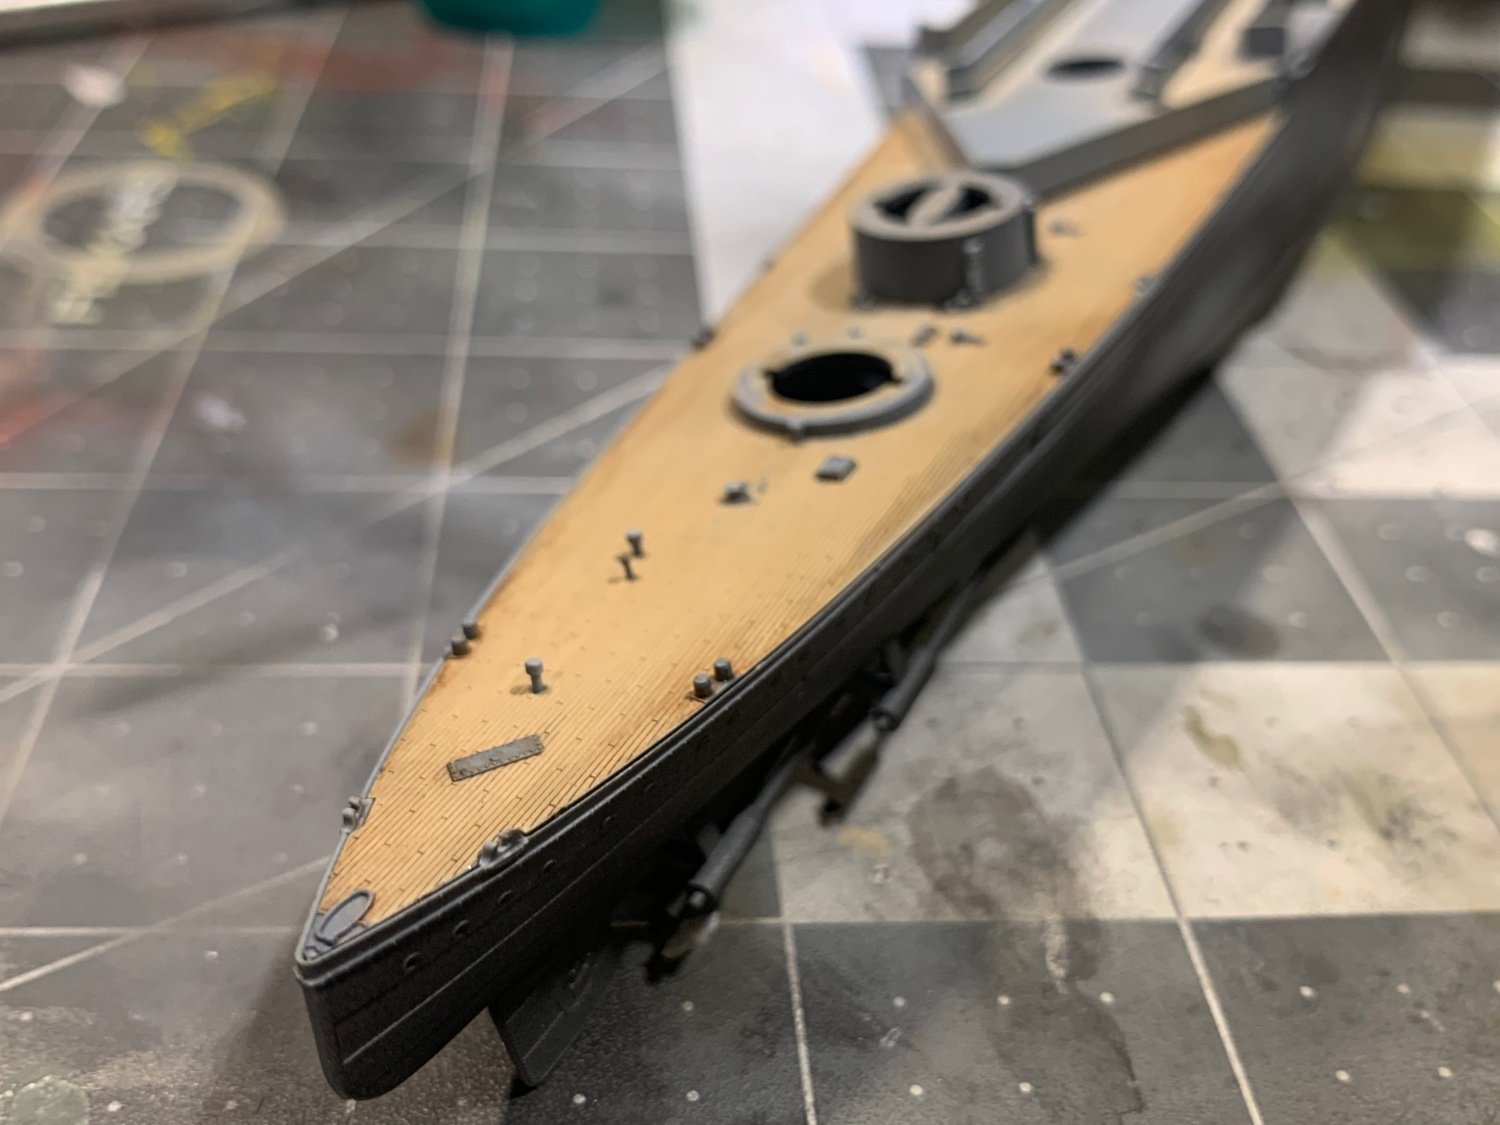
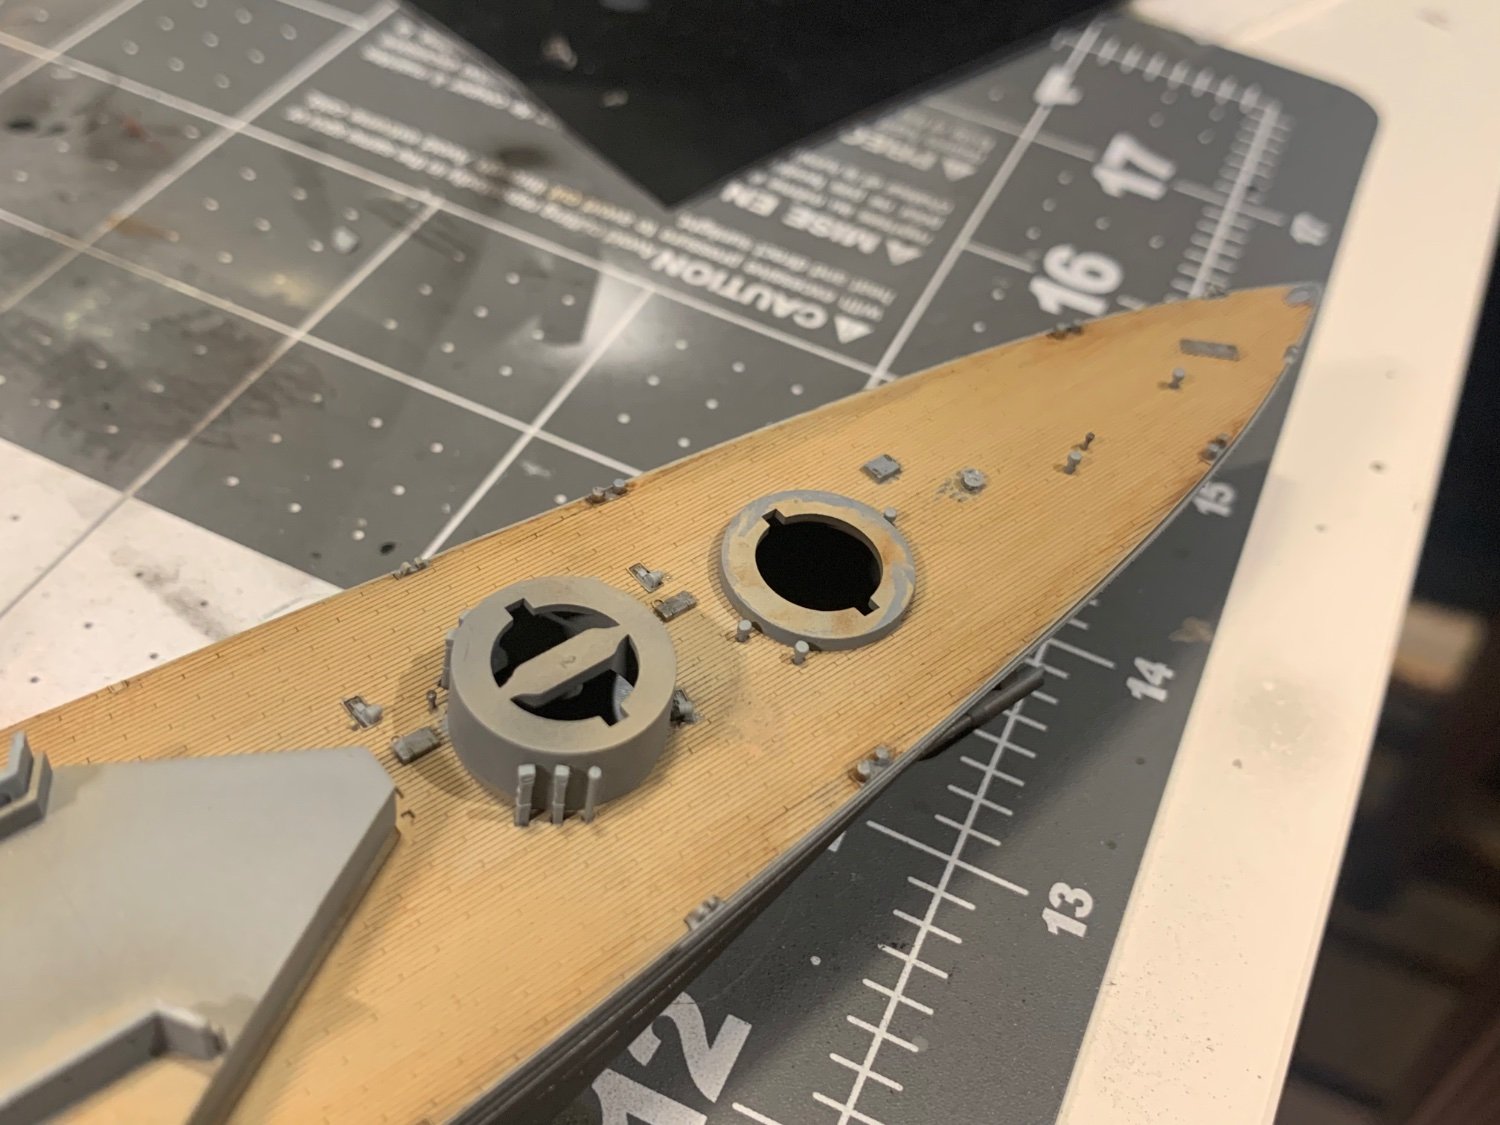
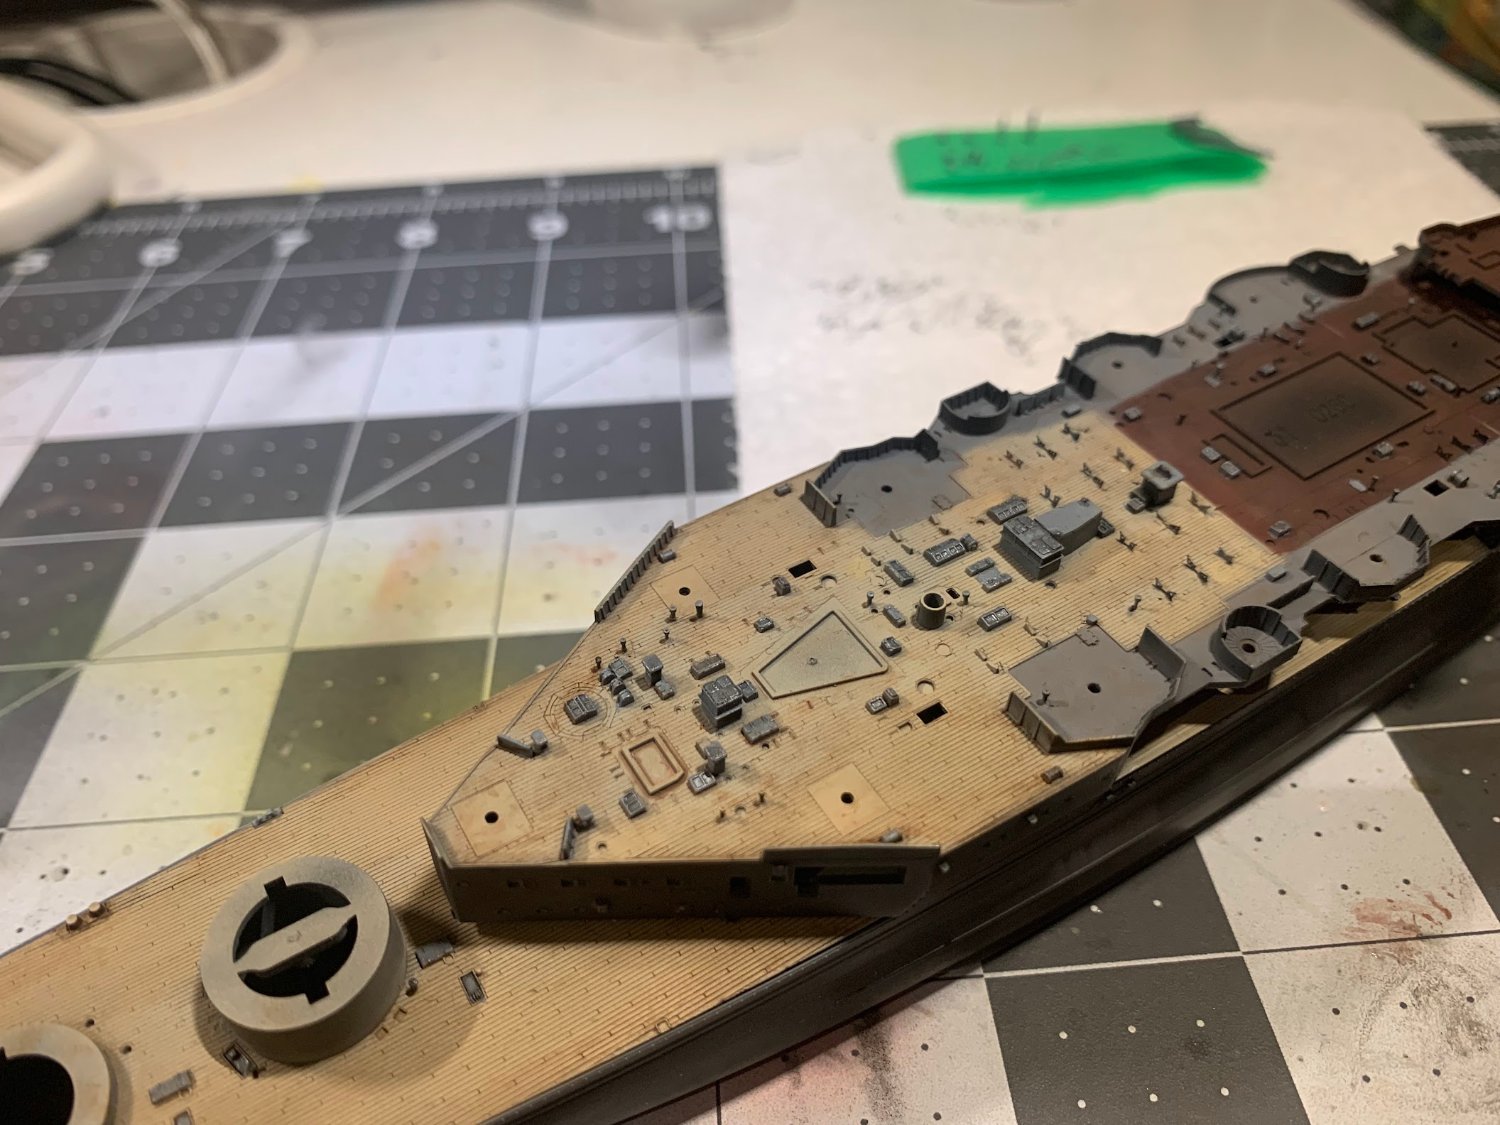
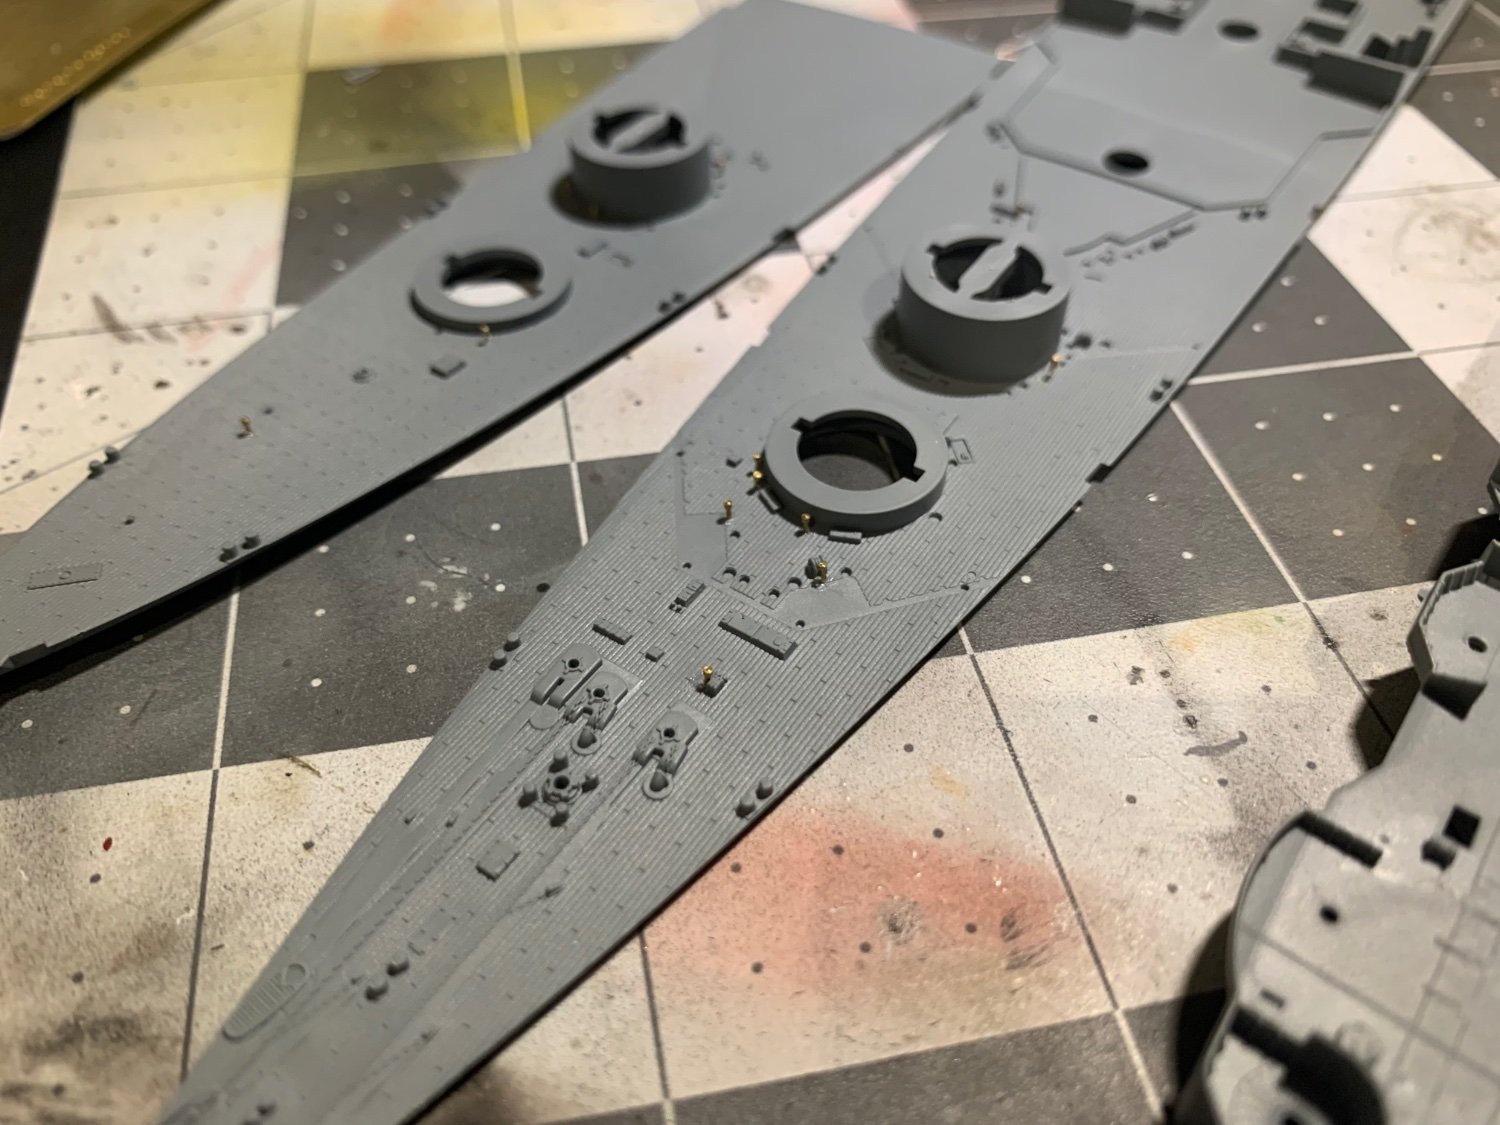
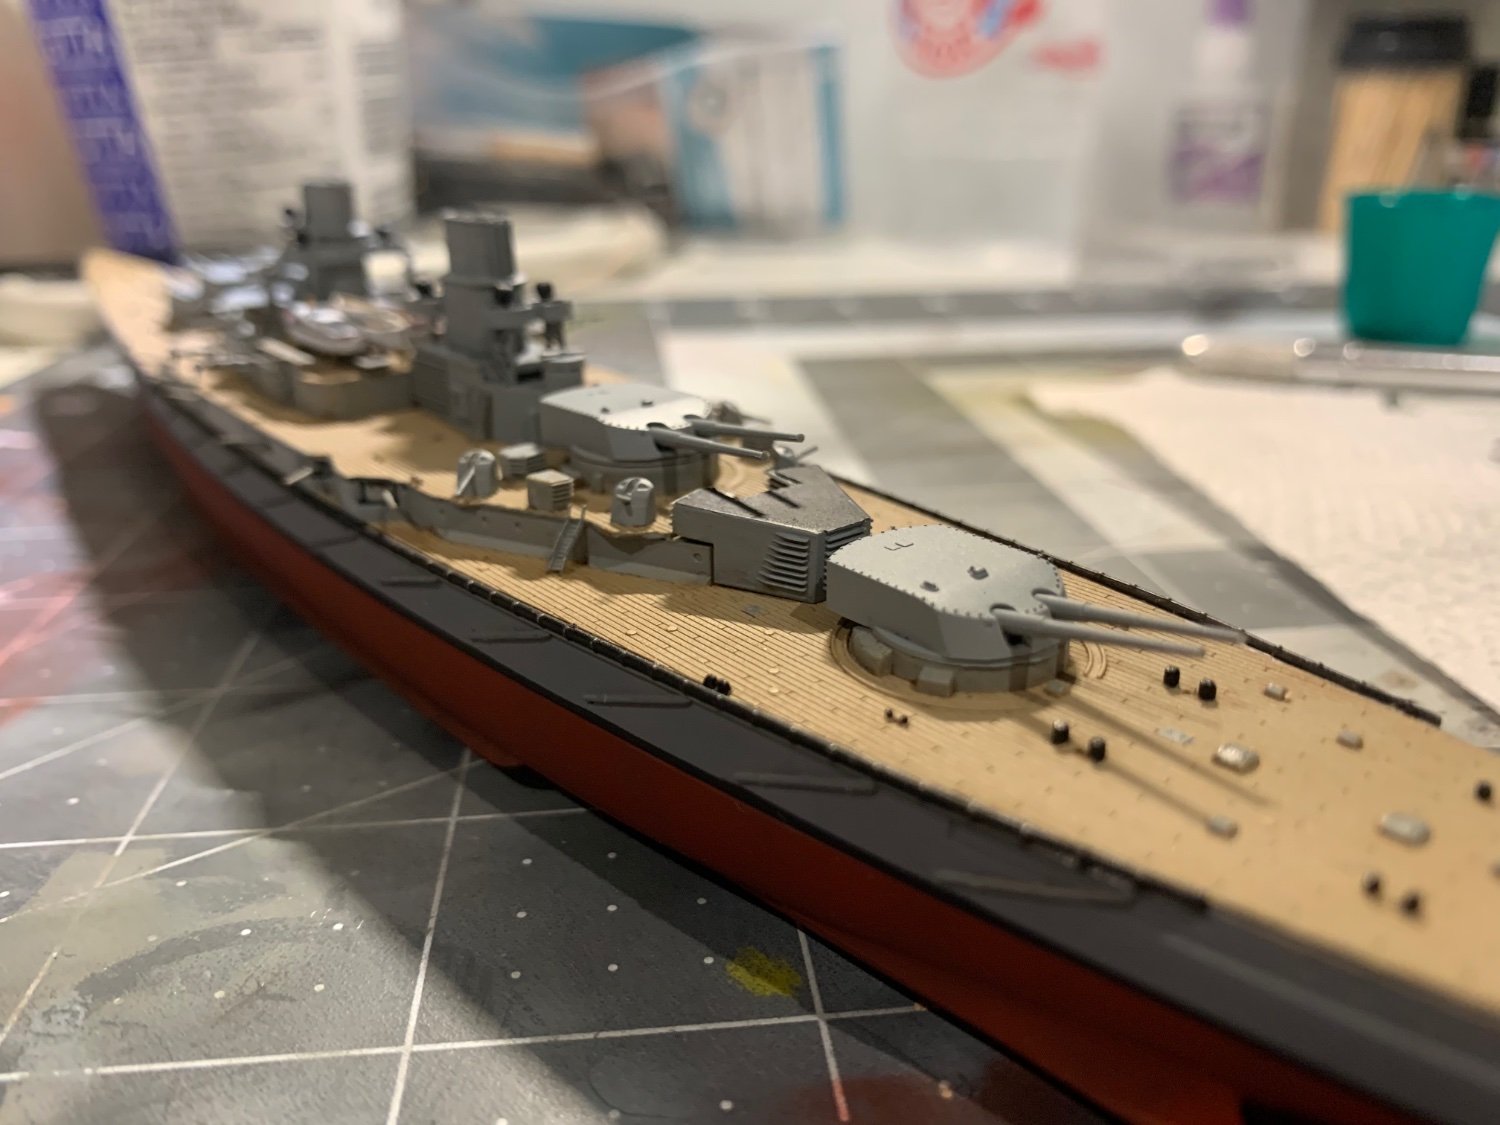
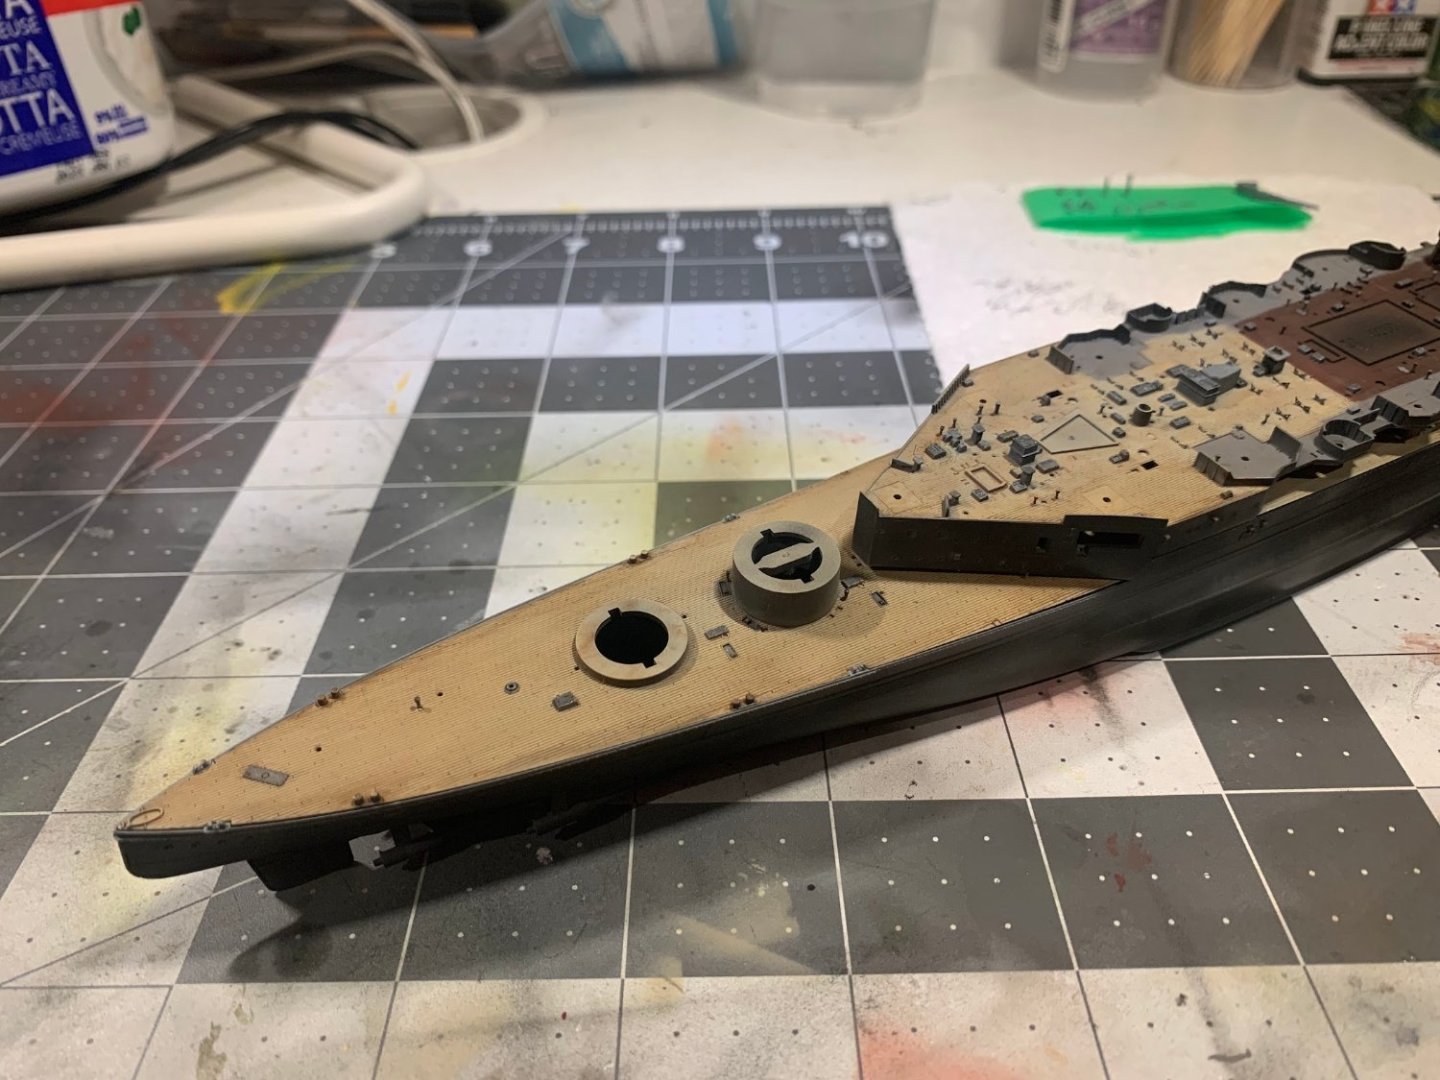
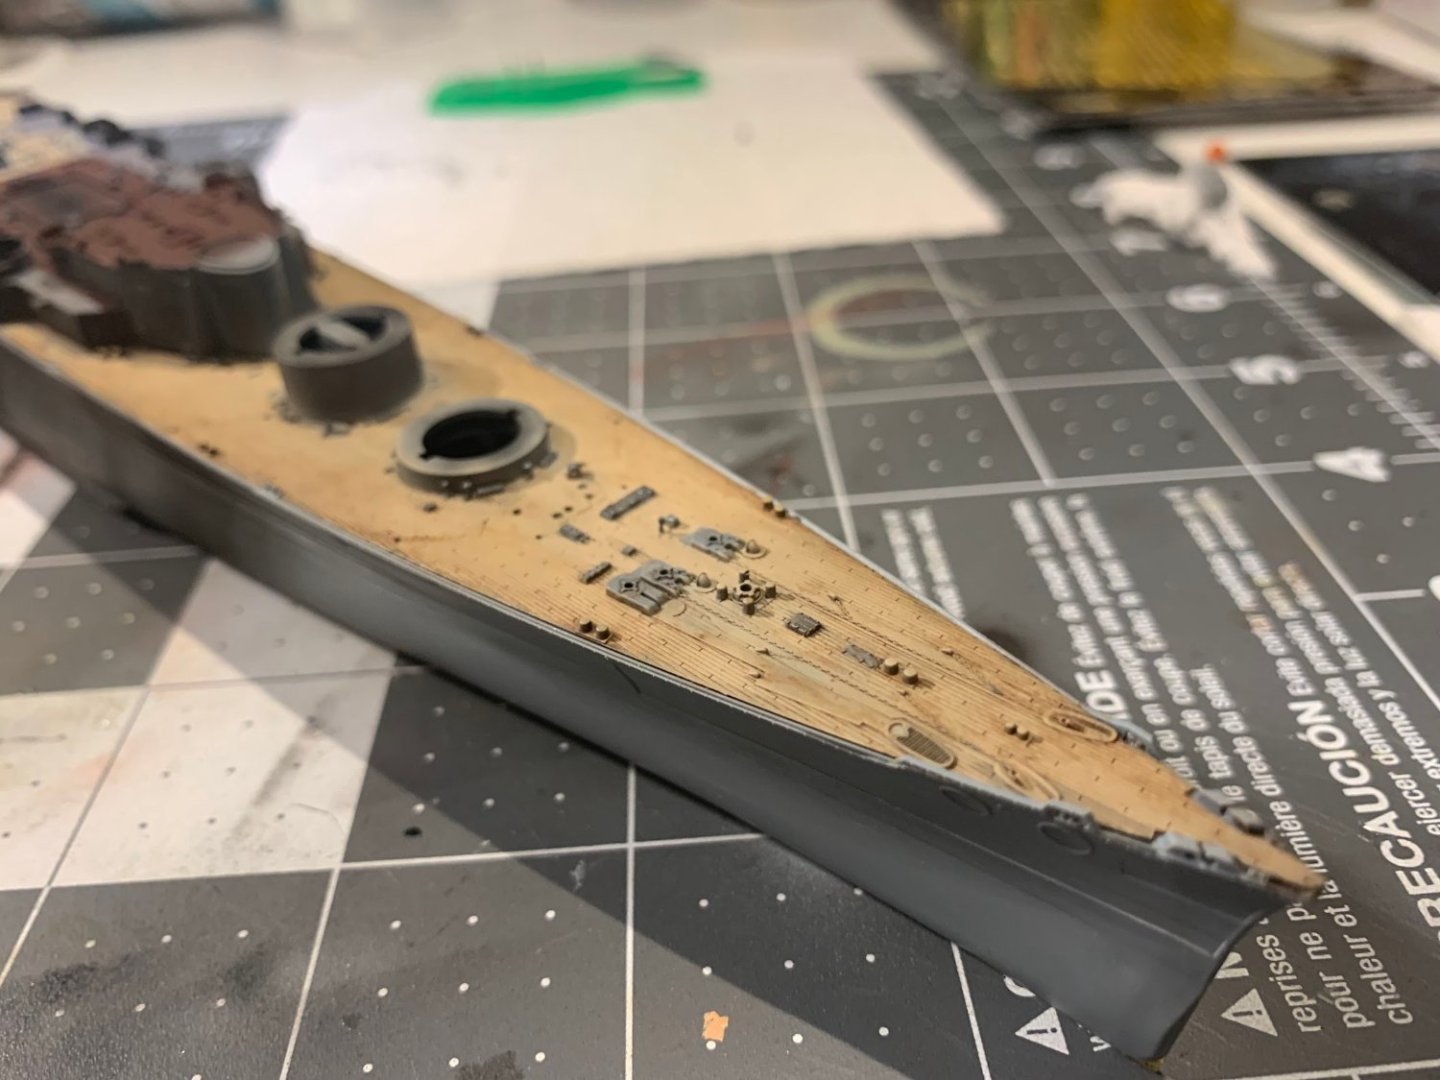
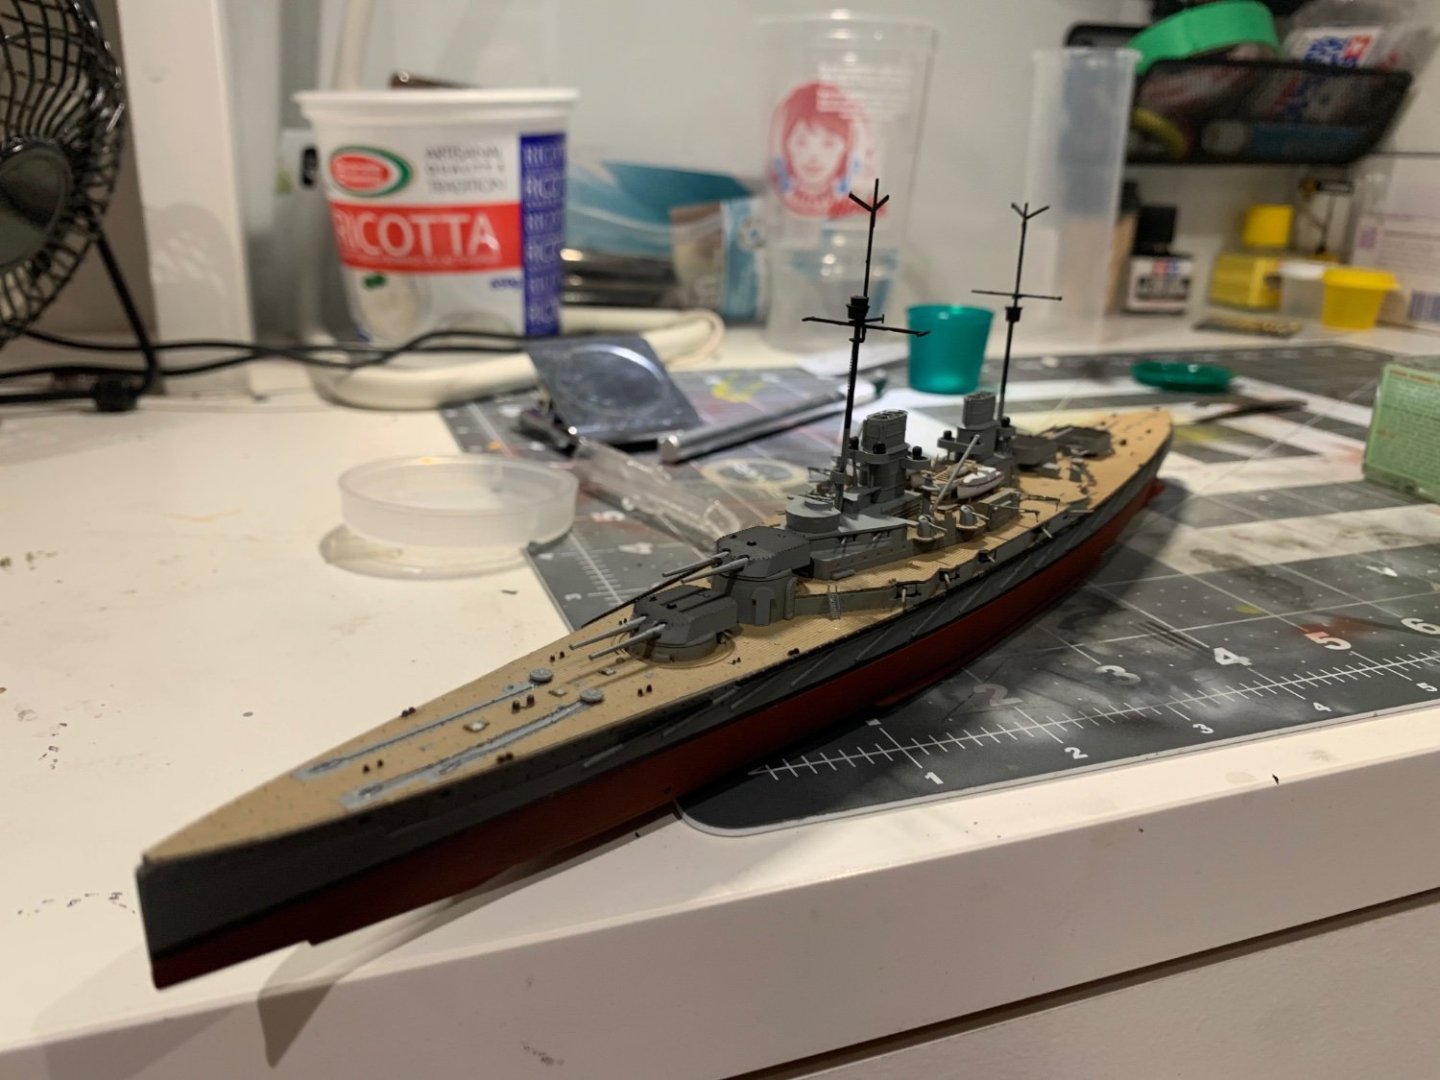
Before littering the deck with all the detail, I thought it best to do the oil wash on the deck first. Simply used some burnt umber with some spirit, and laid it on in straight strokes (bow-stern) with special attention to heavily used areas and to darken the edges. It's such a simple thing, but comes out so nicely. I firmly believe no one needs wood deck stickers! This is the best way to do it. I think this is going to be a good build.


-
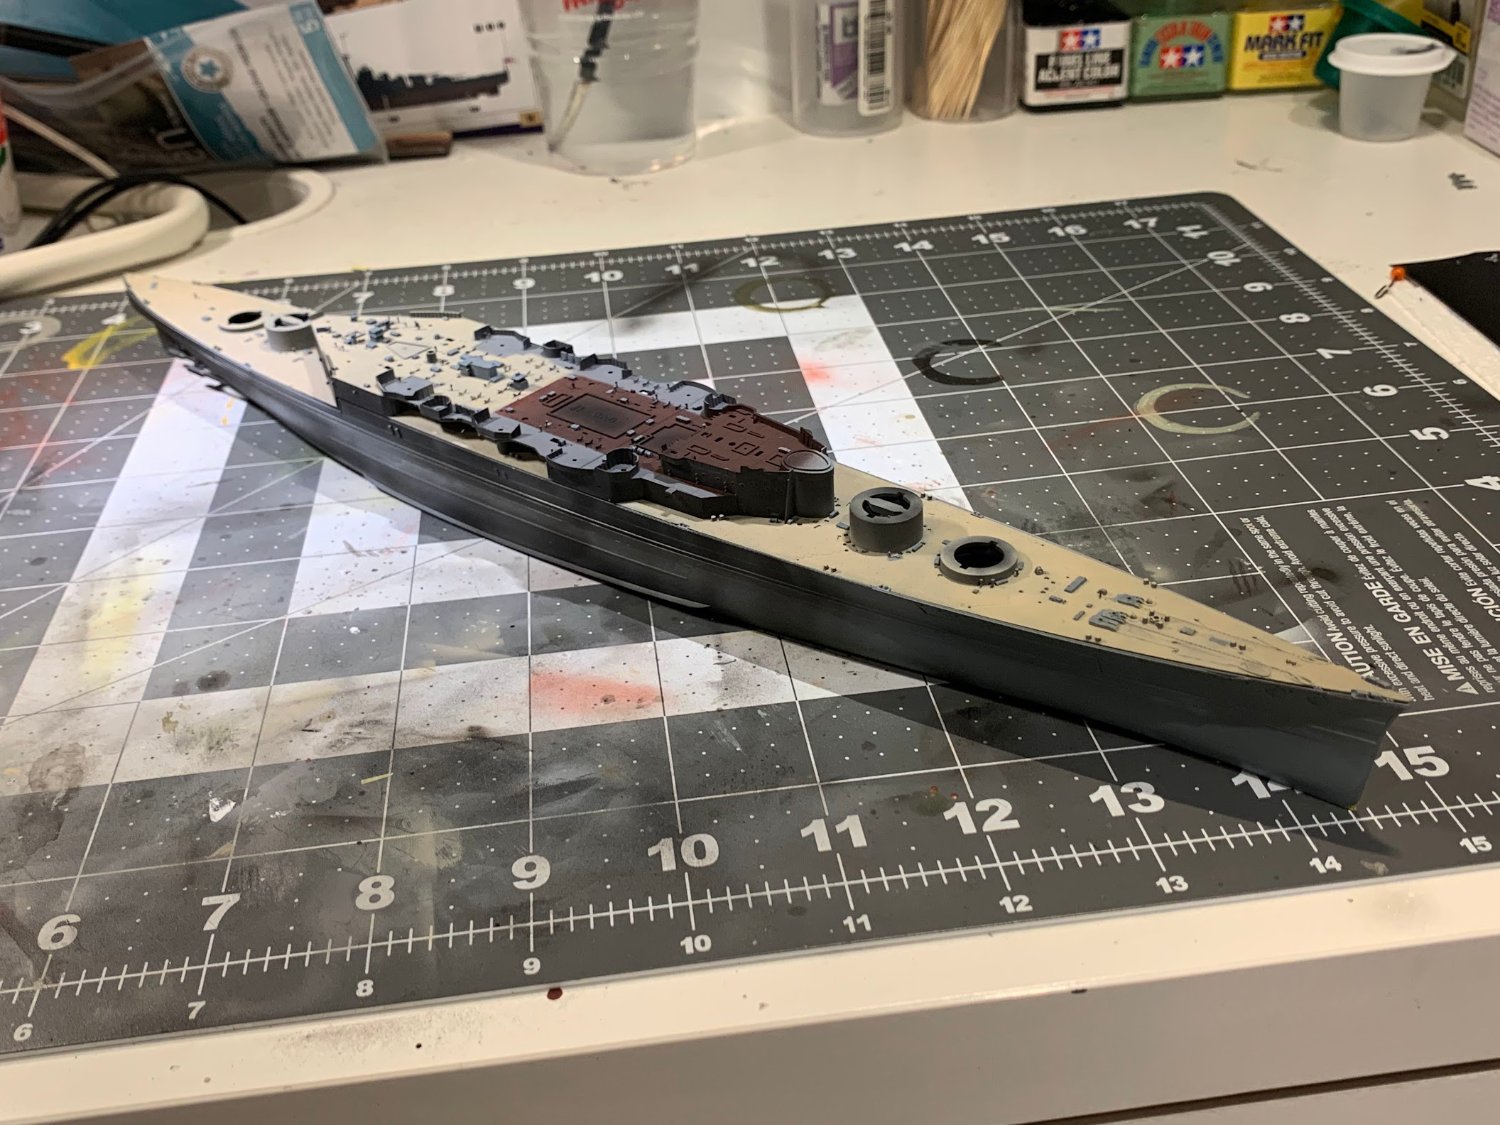
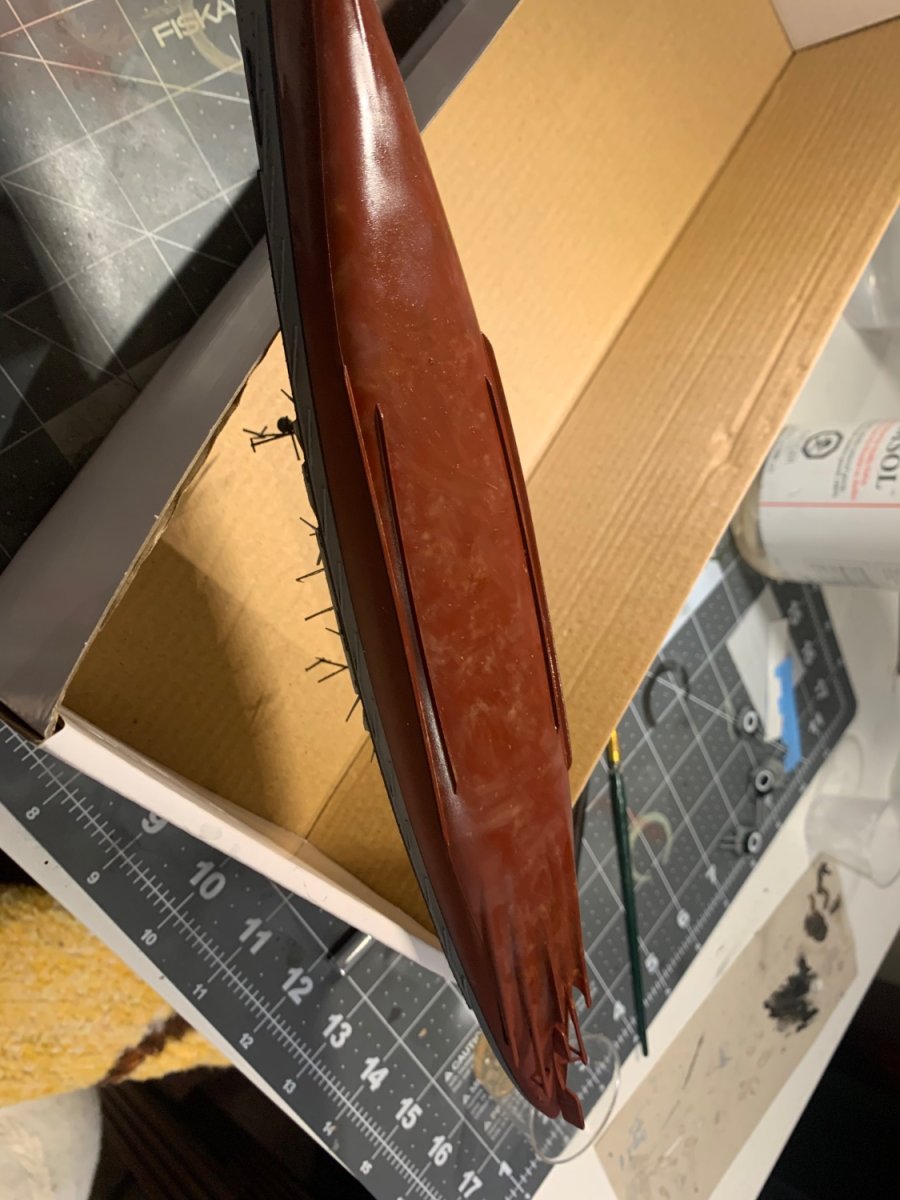
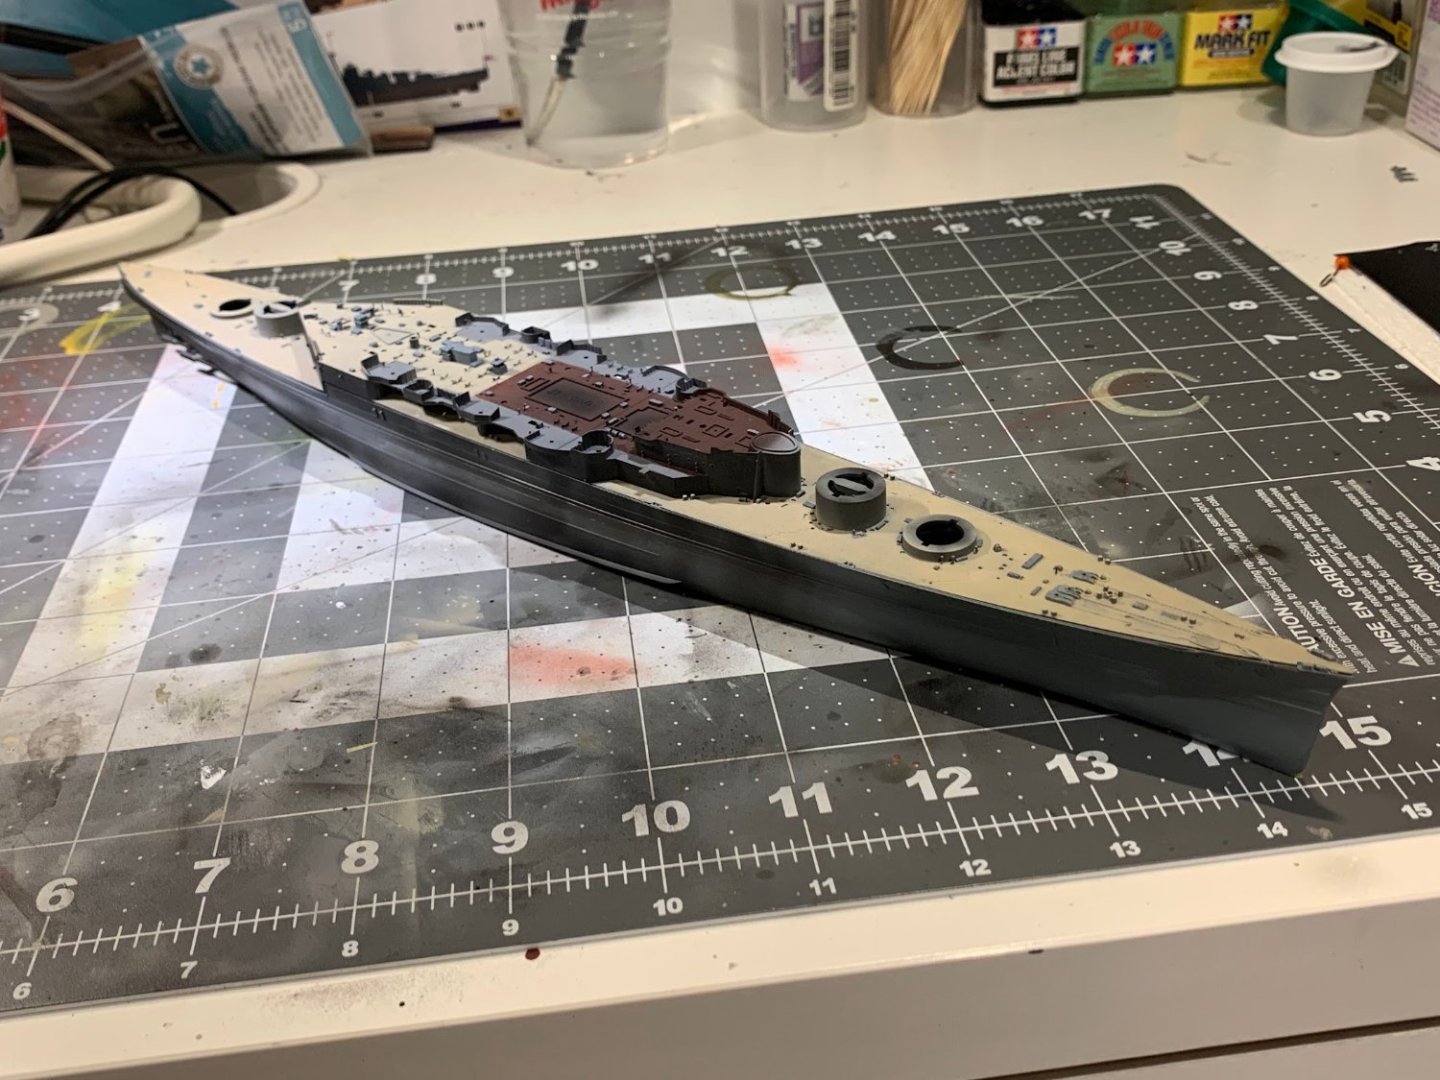
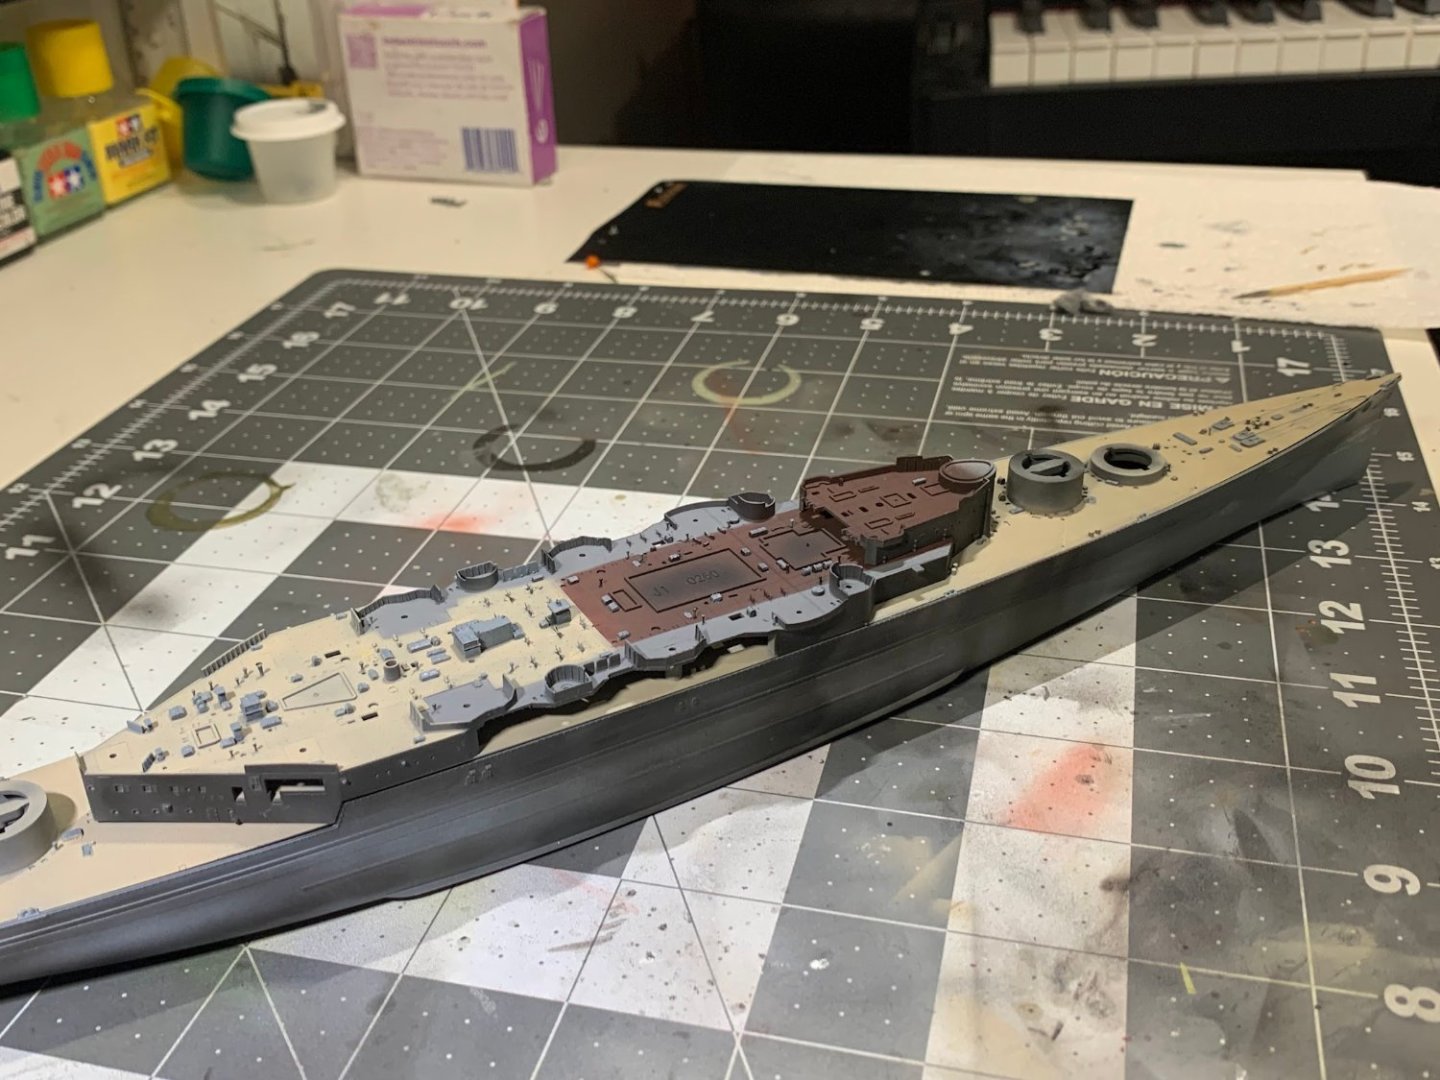
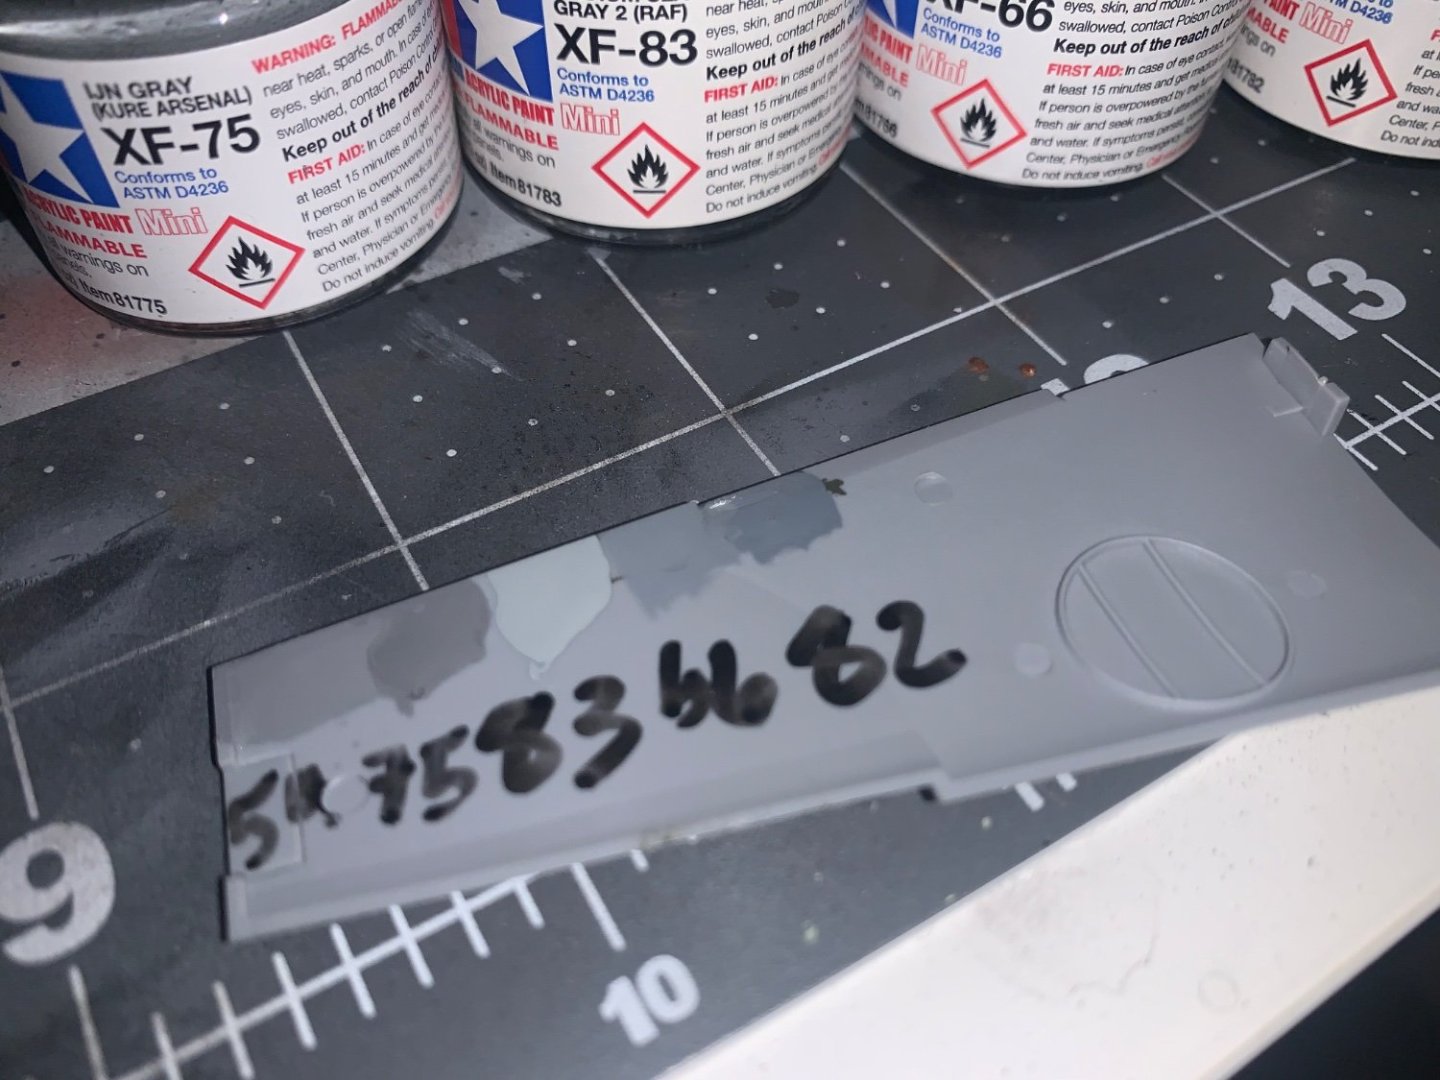
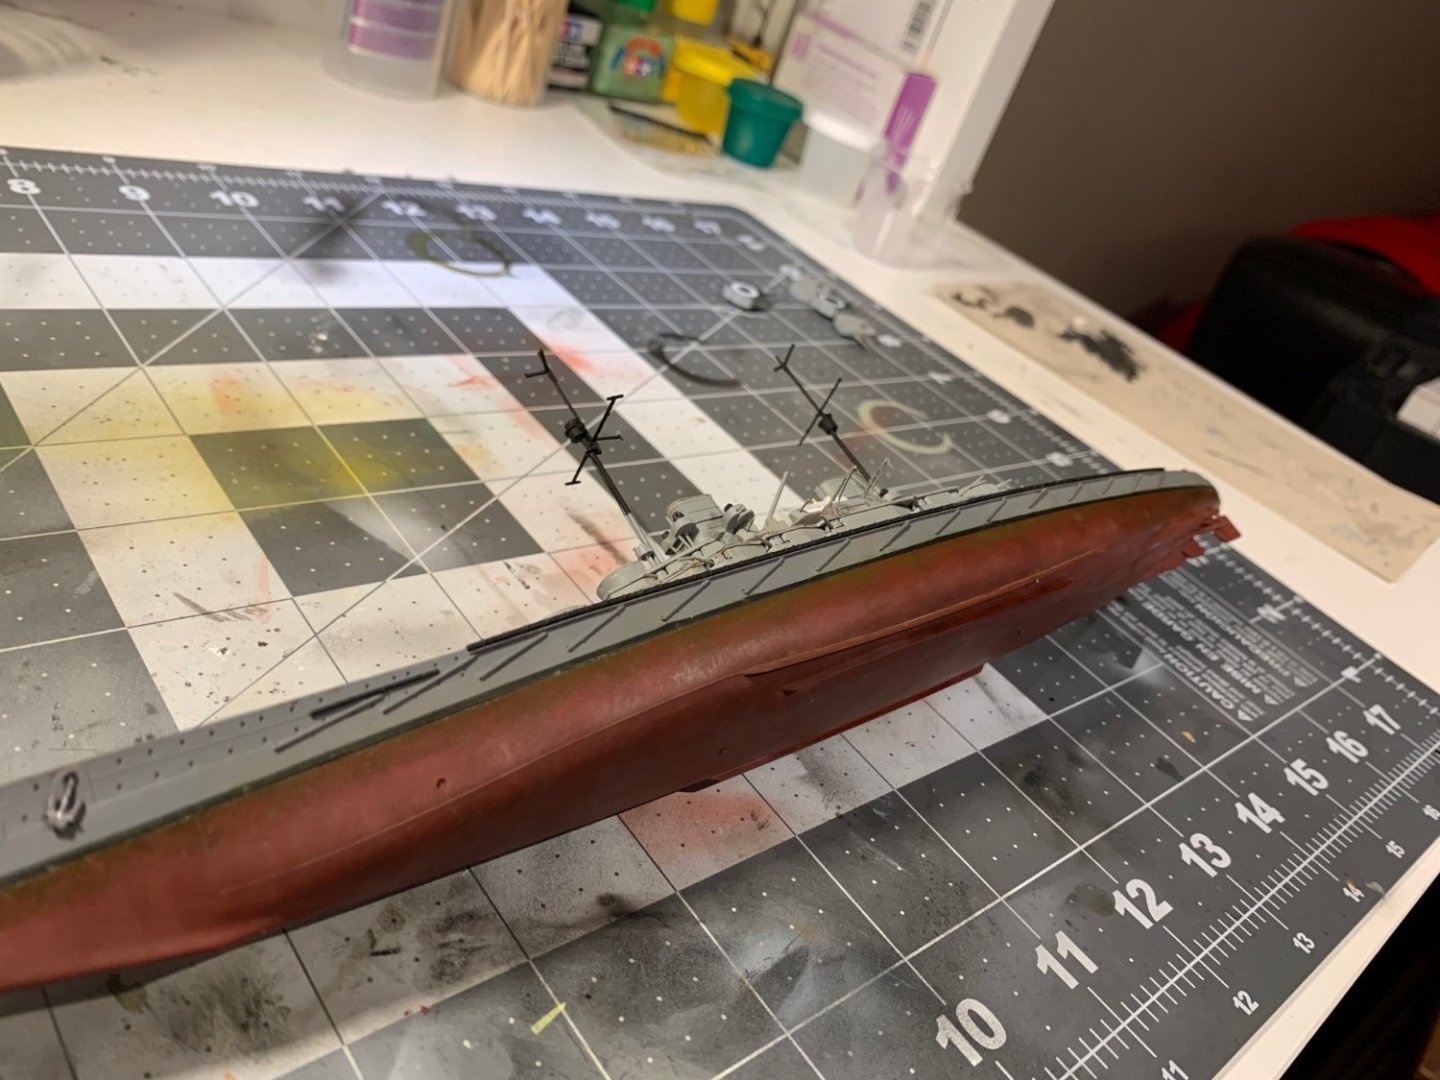
Painted the decks with my go-to XF-57, considered using XF-20, but thought it too washed out, perhaps on the next ship for some variation. Painted the burgundy with XF-9 hull red and grey deck with XF-75. Then painted the little detail bits with my Tamiya (extra thin) paintbrush in XF-66 (the superstructure colour). Next is adding more deck detail and painting the hull. Not sure when the best time to attach the hull and decks are, but will find out soon.


-
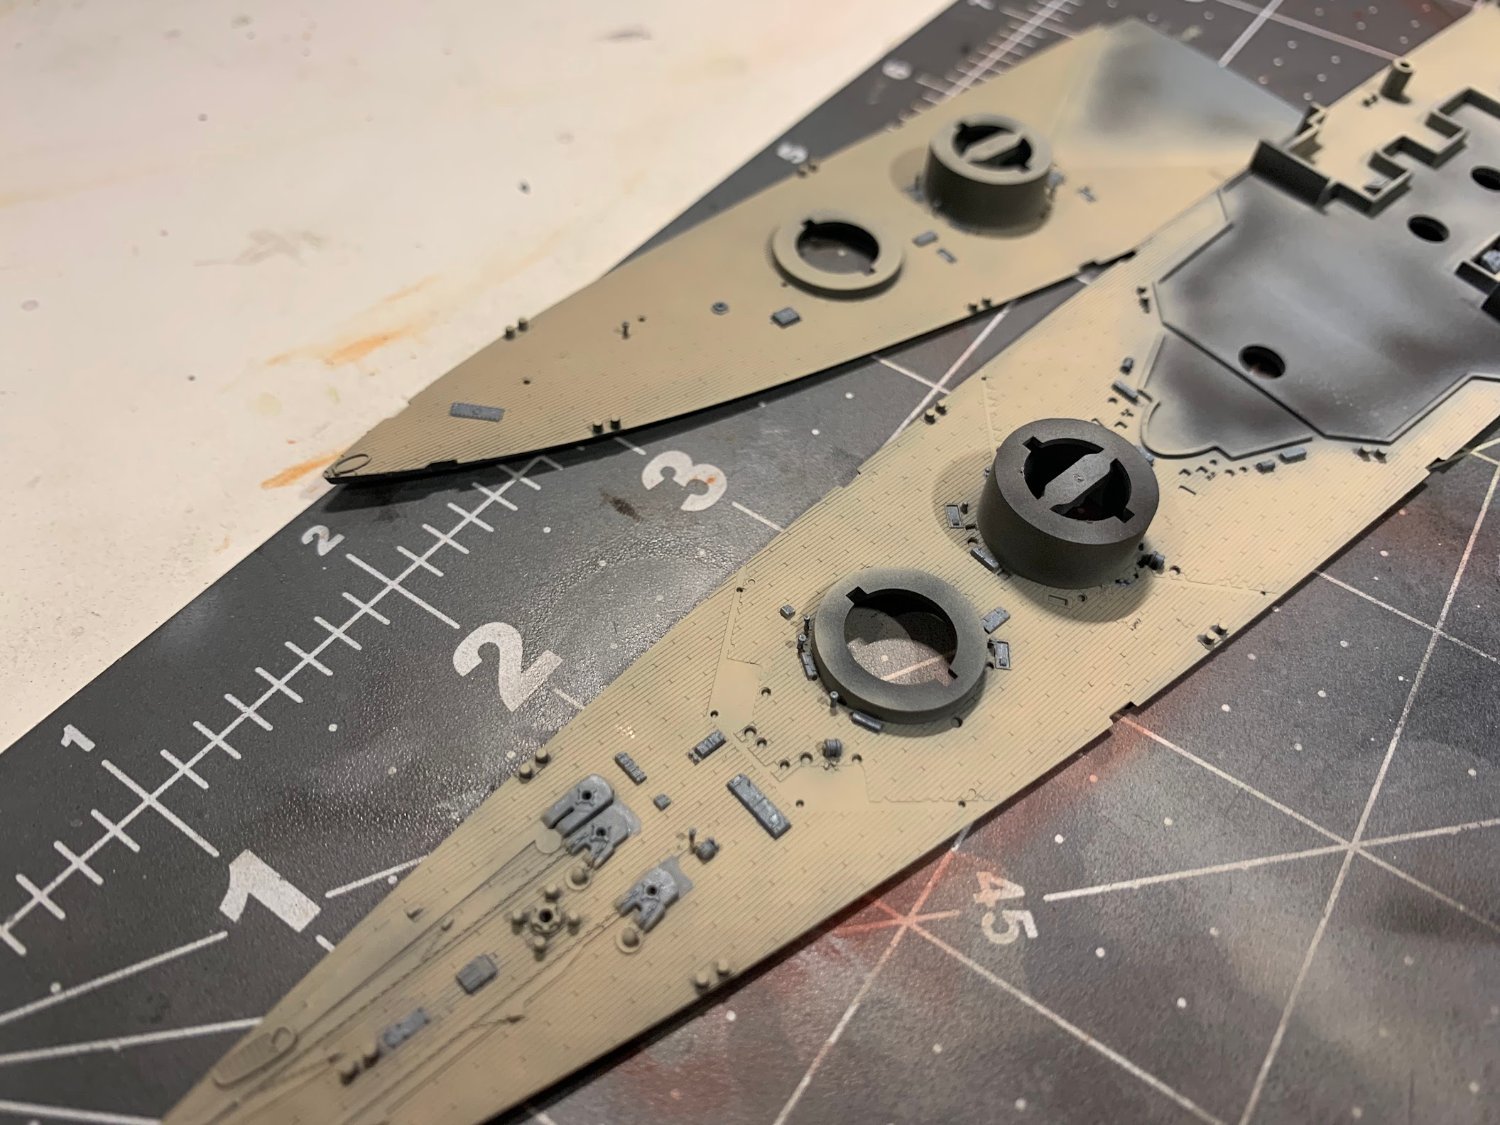
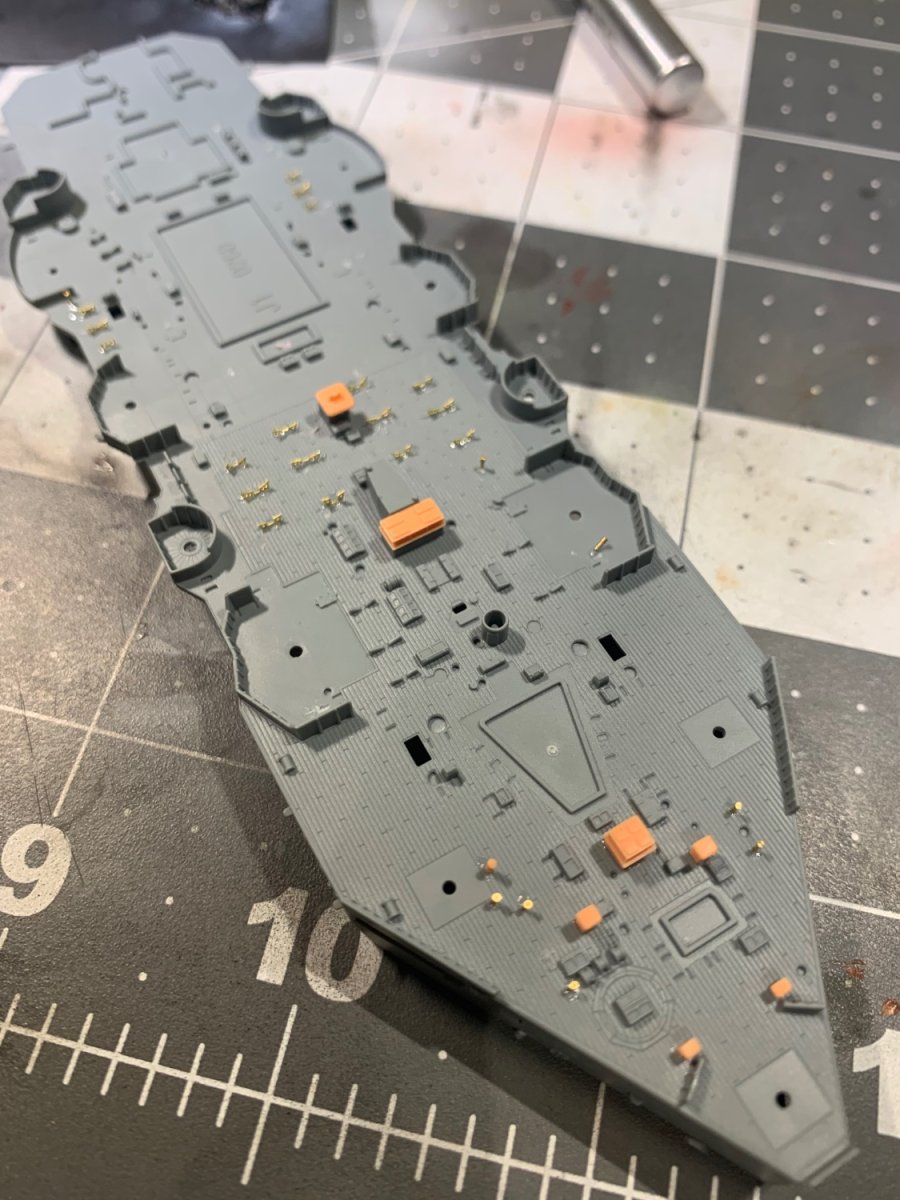
Oh yes that’s probably reasonable. First seeing the detail the deck part has default is intense, but after seeing the PE, truly insane, but very cool.
-
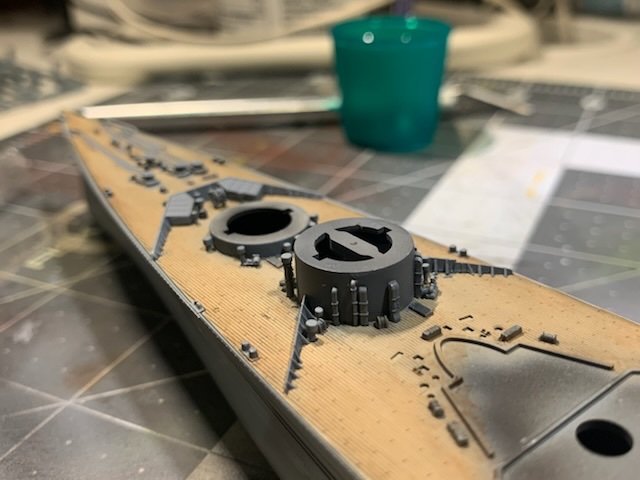
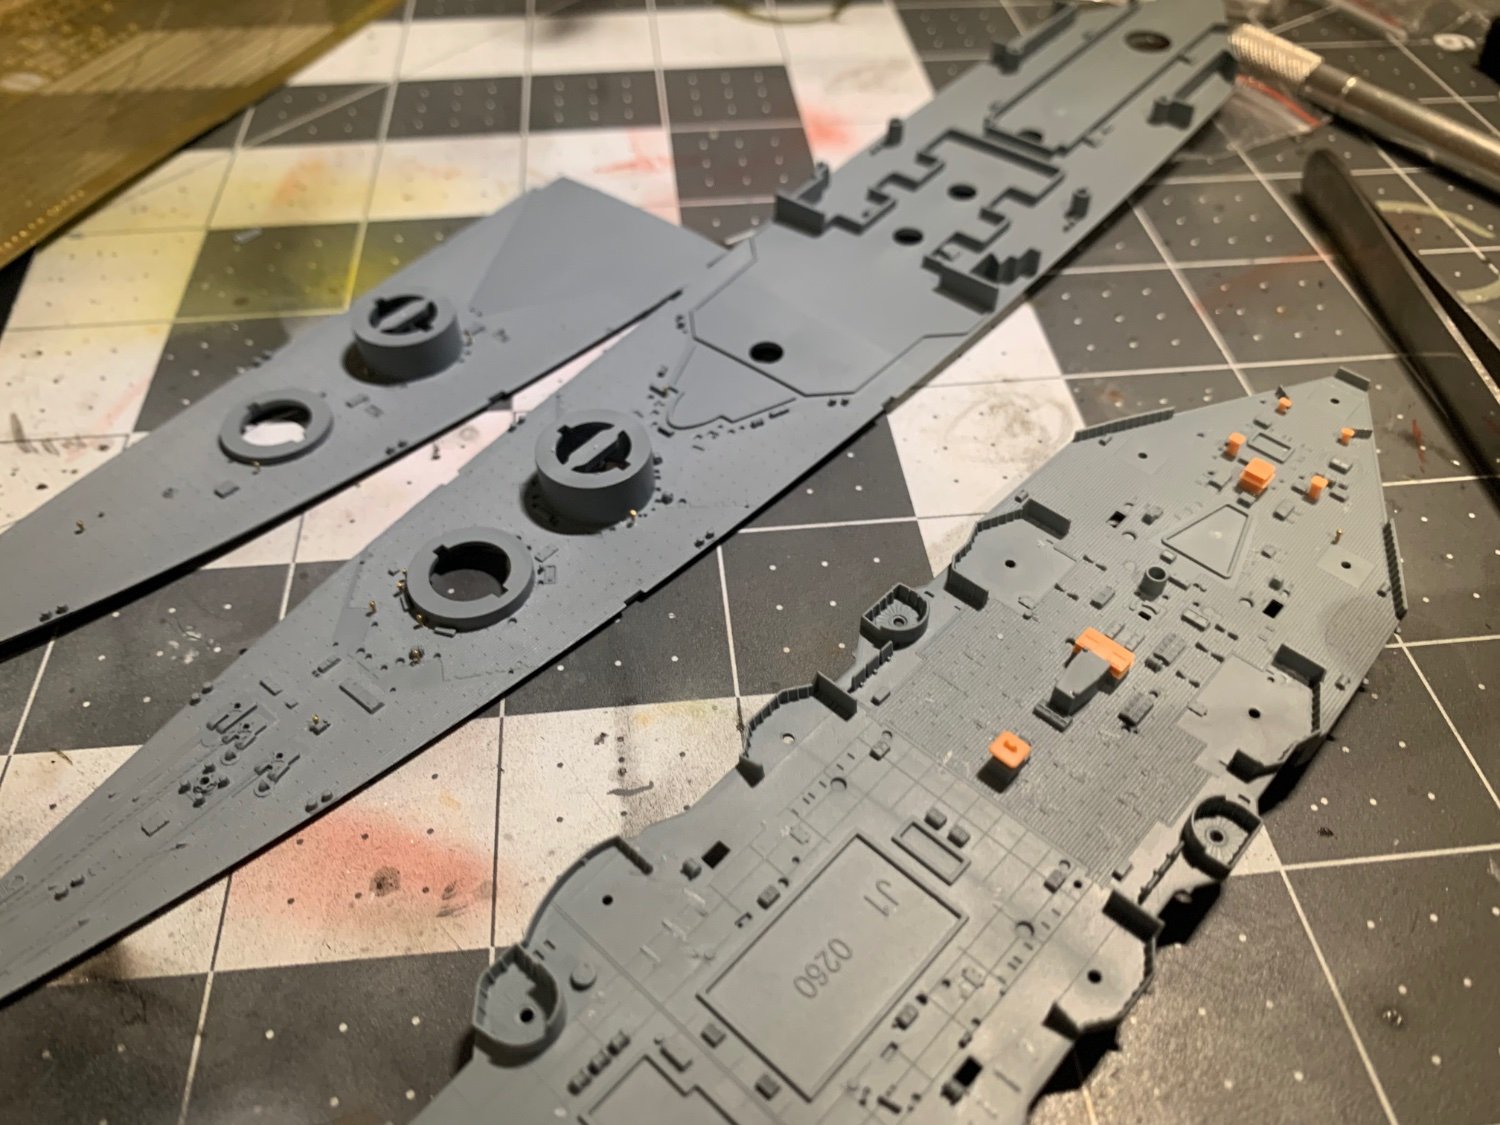
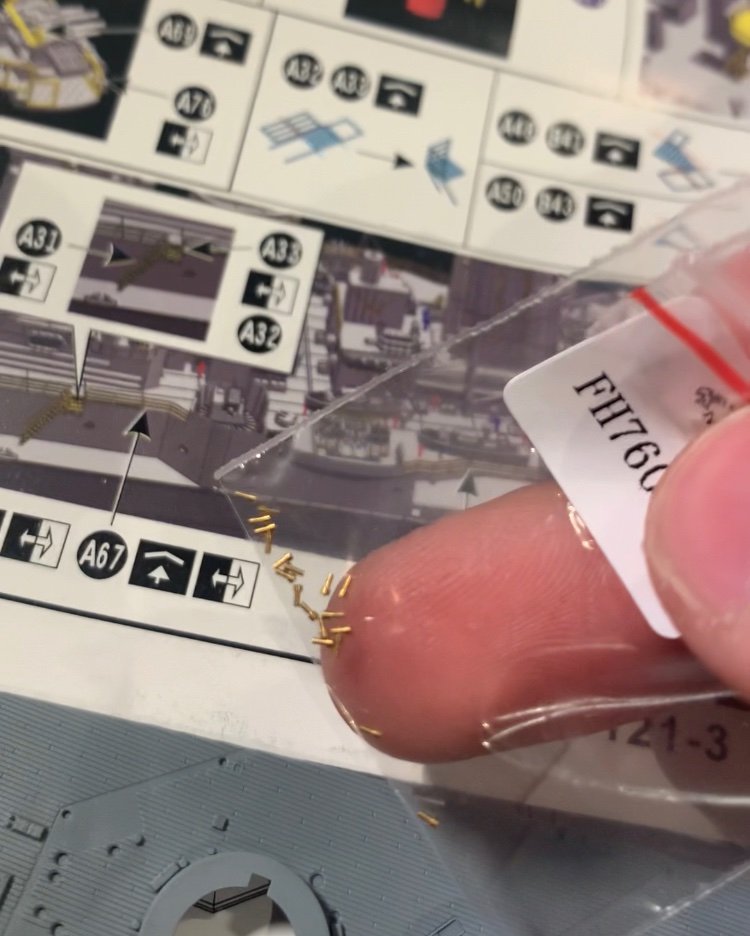
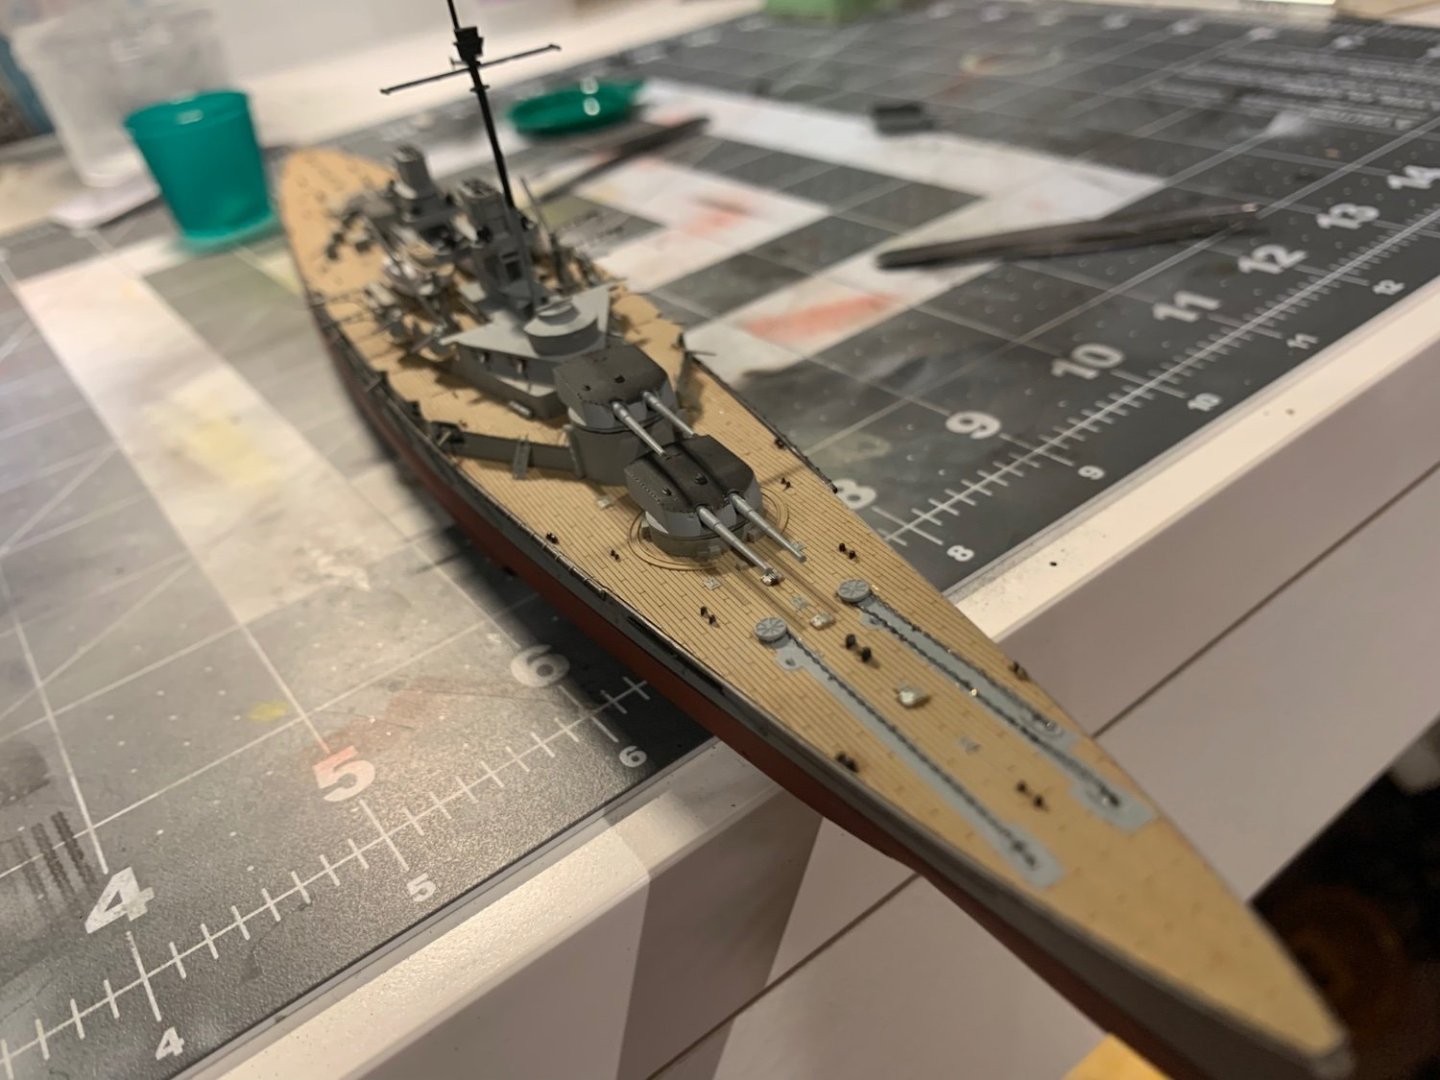
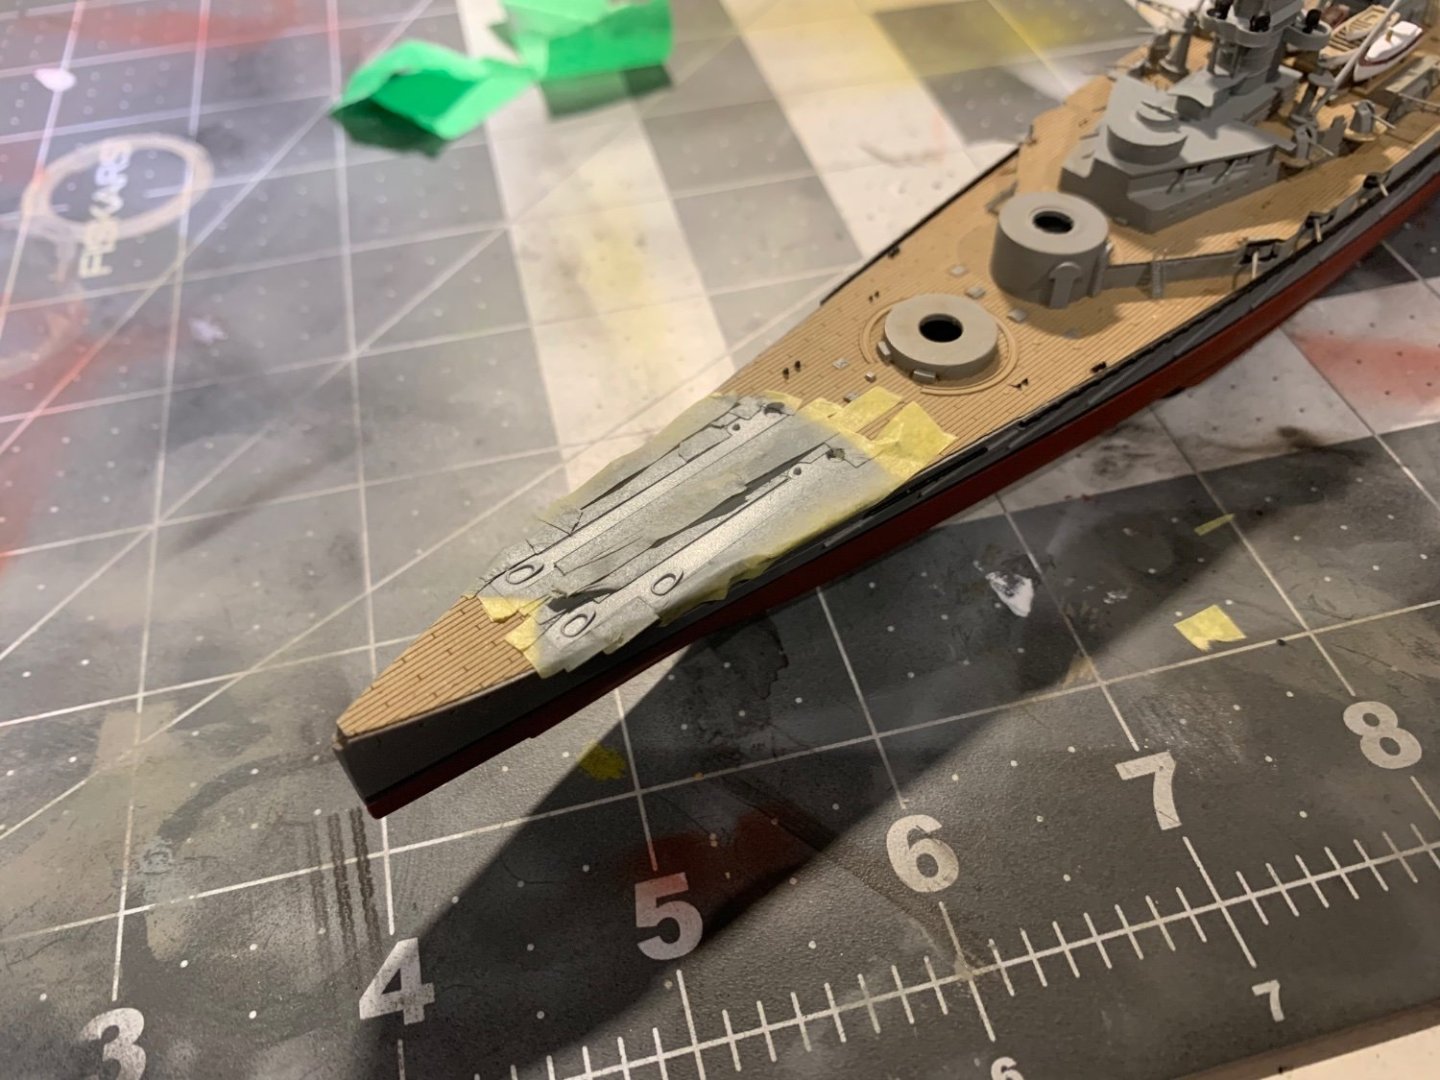
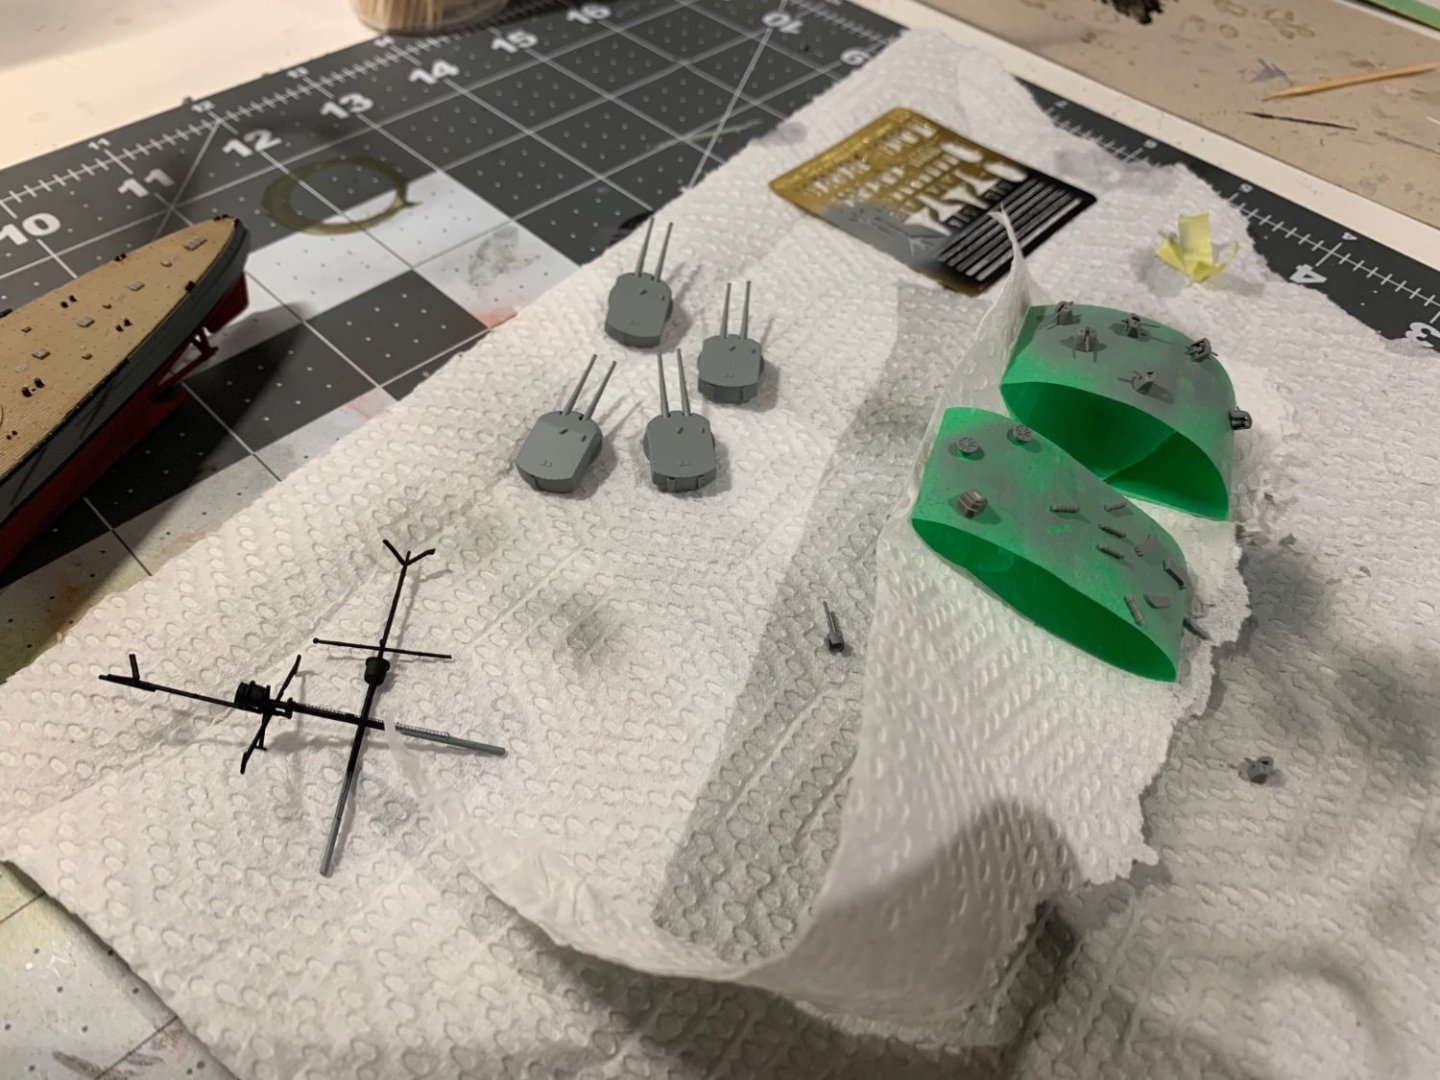
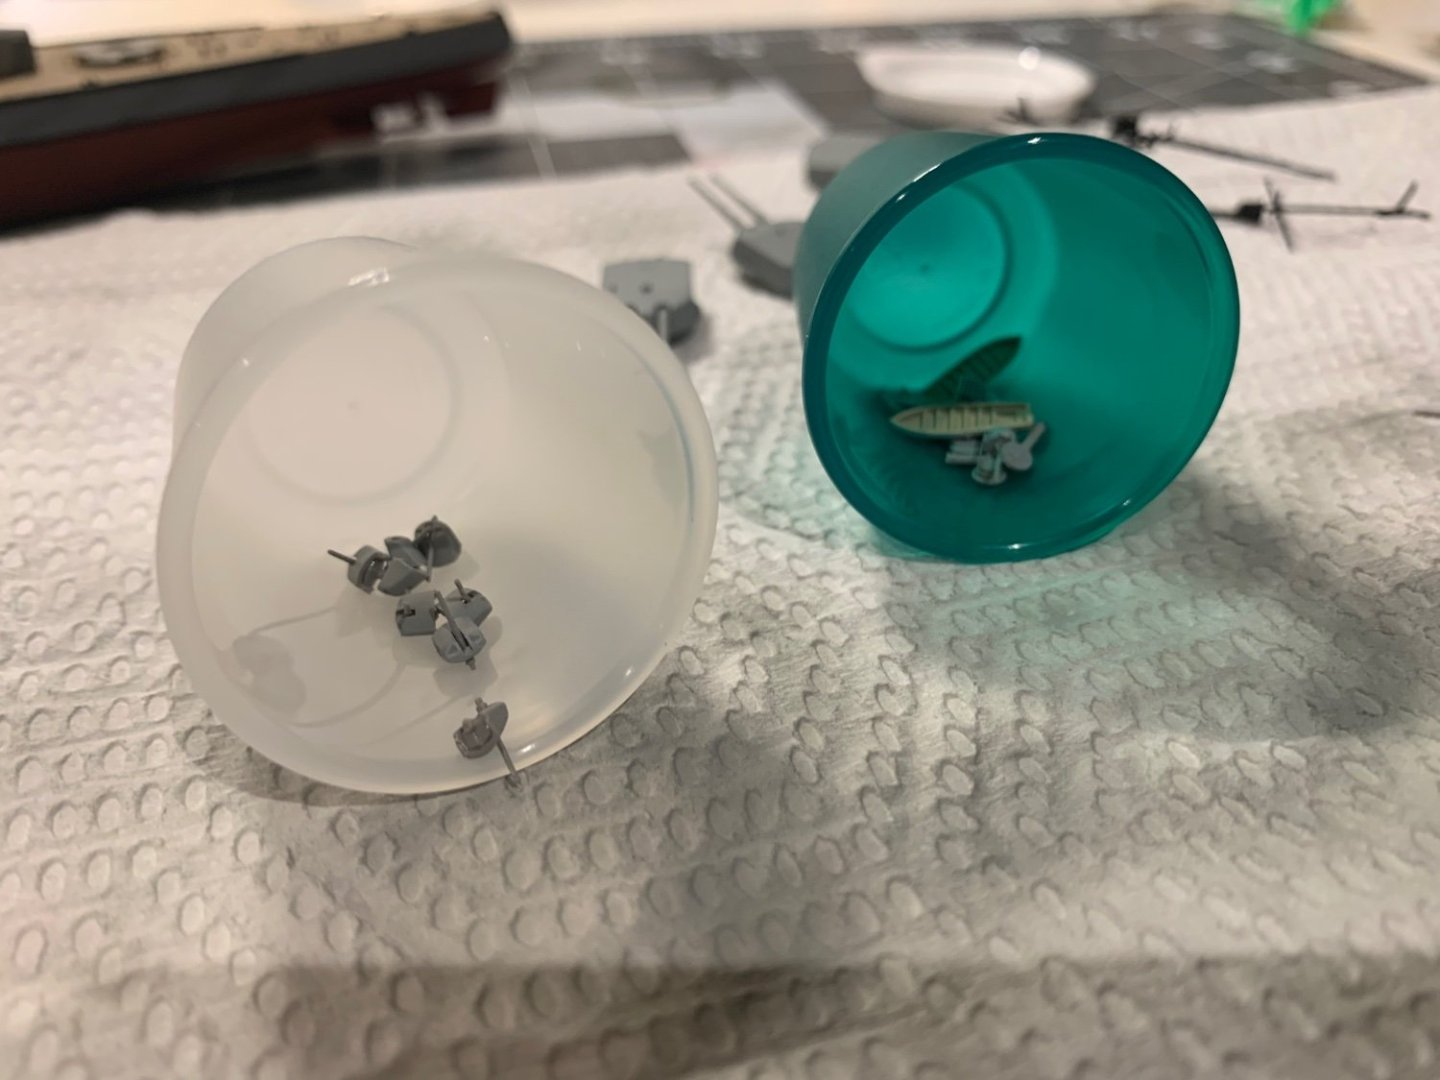
Progress on deck detail, lifeboat holds and these little pokey bits went on okay. Does anyone know what these pieces are meant to be? Very curious.

-
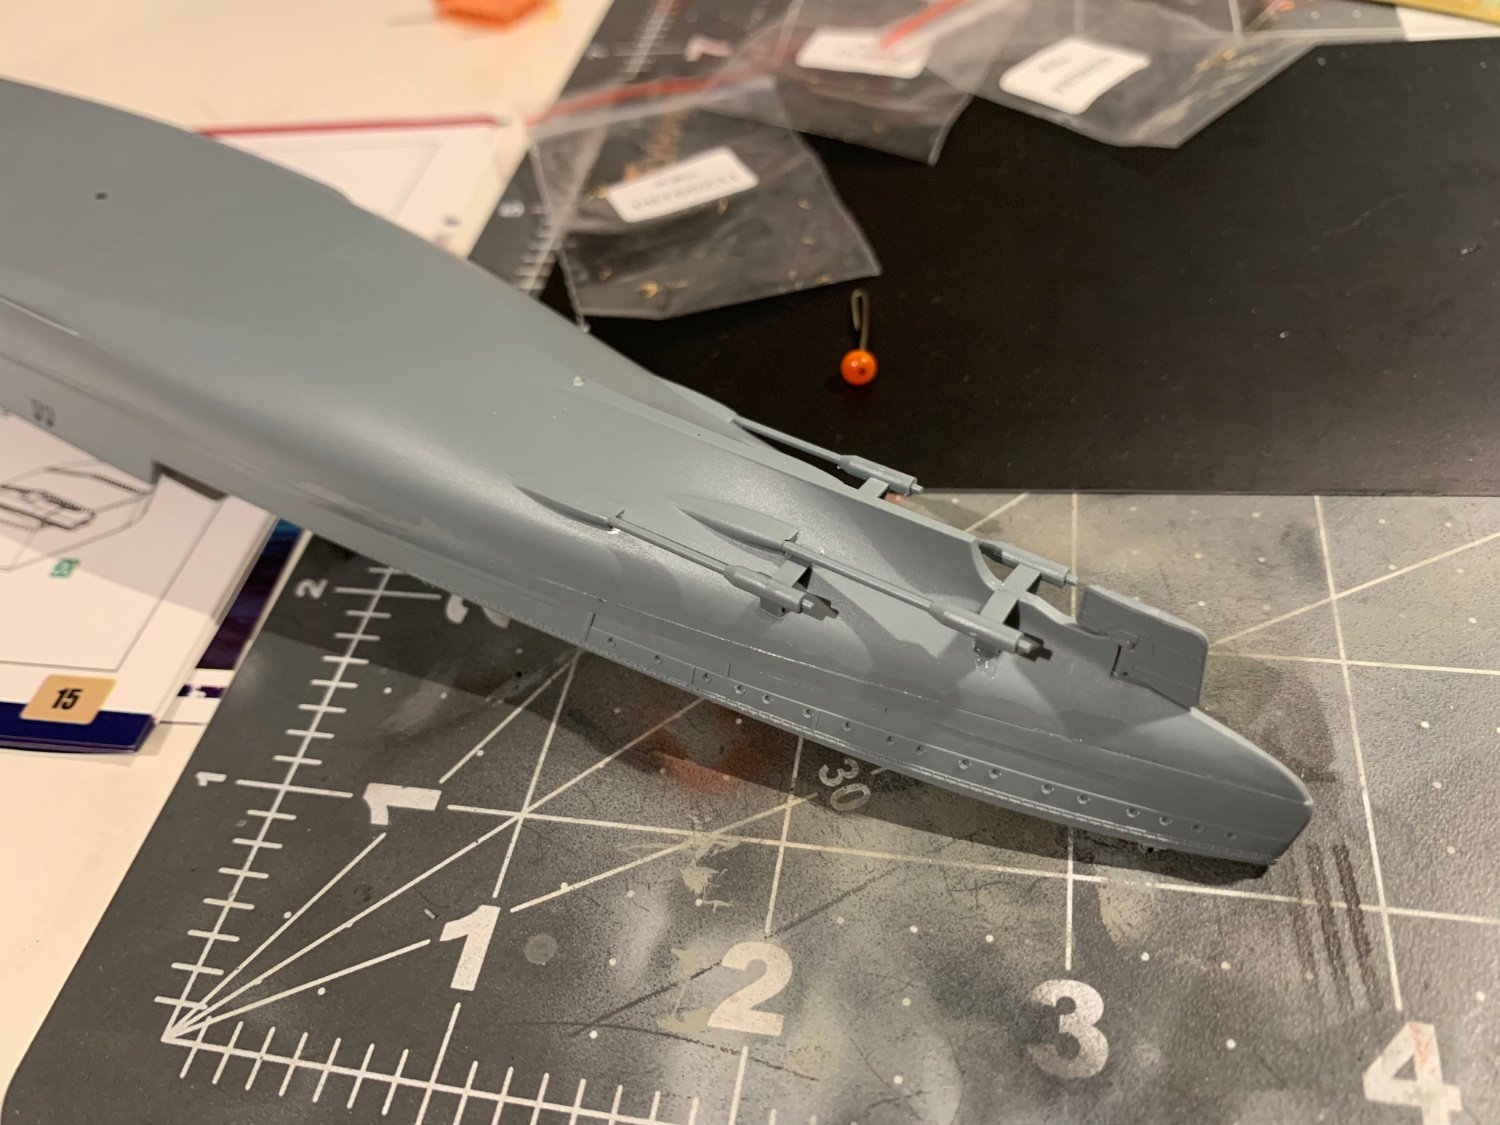
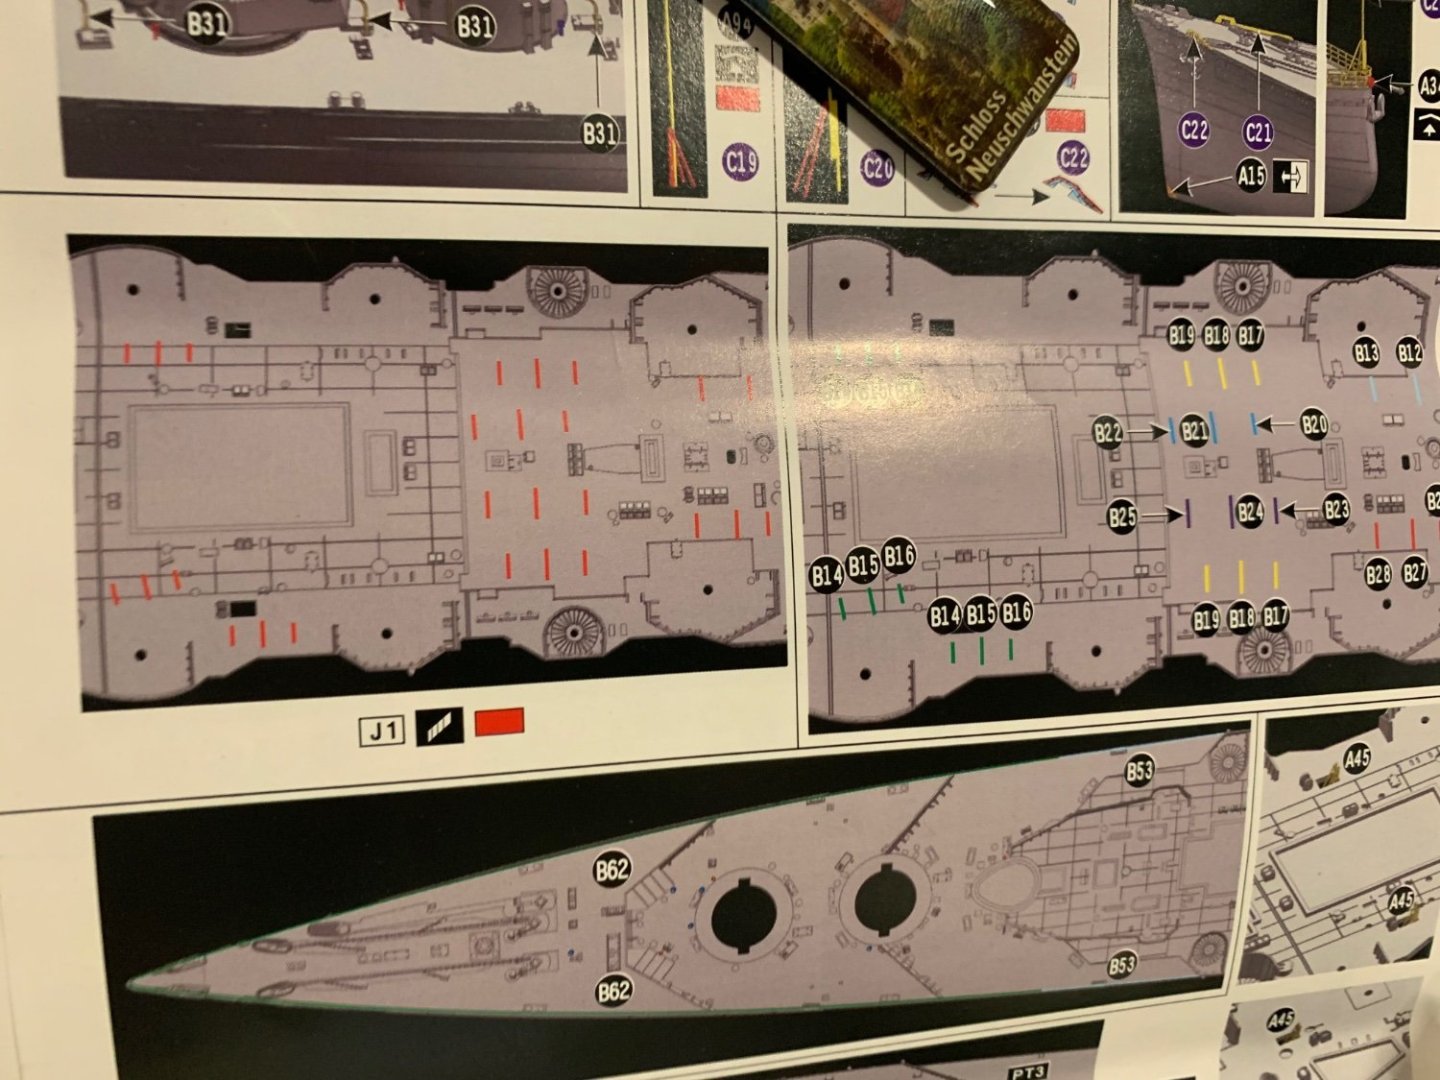
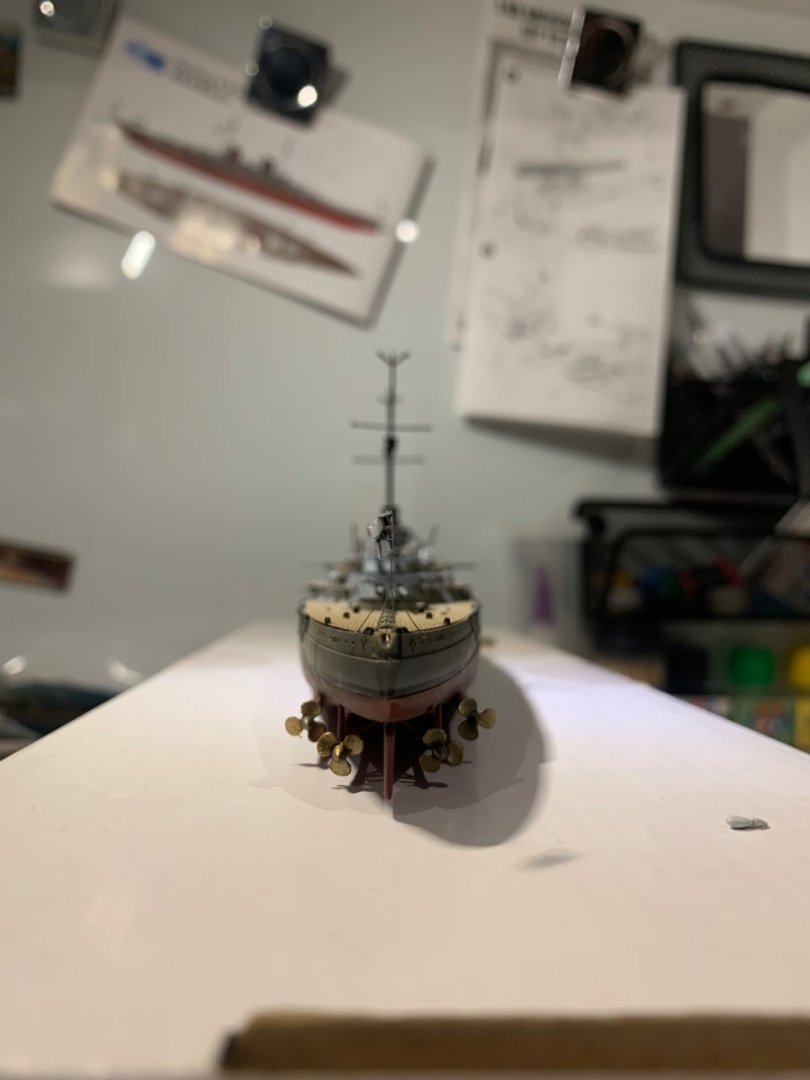
Hello all, after completing the Derfflinger I decided that wasn’t torture enough; this begins the build log of the Flyhawk 1:700 HMS Hood with the deluxe detail set. First and foremost, I intend to adhere to the “recent“ findings that she was indeed finished with a grey anti-fouling paint job below the waterline, with this we can assume she most likely had a similar colour in 1941. For this, I will use XF 82, and 66 for the superstructure/upper hull. I have begun by attaching the hull, which seemed to go on quite nicely, I will have to do some priming to see if things need to be filled. Next, starting with the deck detail (feeling like I’m in over my head here), slicing off small deck detail only to attach smaller photo etch parts! This will truly be a test of patience and I do look forward to it. Does anyone think I can finish this by September? I hope I do, but now truly understanding the kit’s complexity - will be a grind.


-
I’ll probably do it for my next ship, but the line I was using was too thin and the spool it was on was wound badly, kept ripping the thread apart trying to get it off. Will get a different kind and try again next time. I’m glad you like it.
- 8 replies
-
- 2
-
-
- Derfflinger
- Snowman Models
- (and 3 more)
-
Massimodels reacted to a post in a topic:
SMS Derfflinger by Massimodels - FINISHED - Snowman Models (Flyhawk) - 1:700 - PLASTIC
-
Massimodels reacted to a post in a topic:
Condorcet by Spooky spoon - HobbyBoss - 1/350 - PLASTIC
-
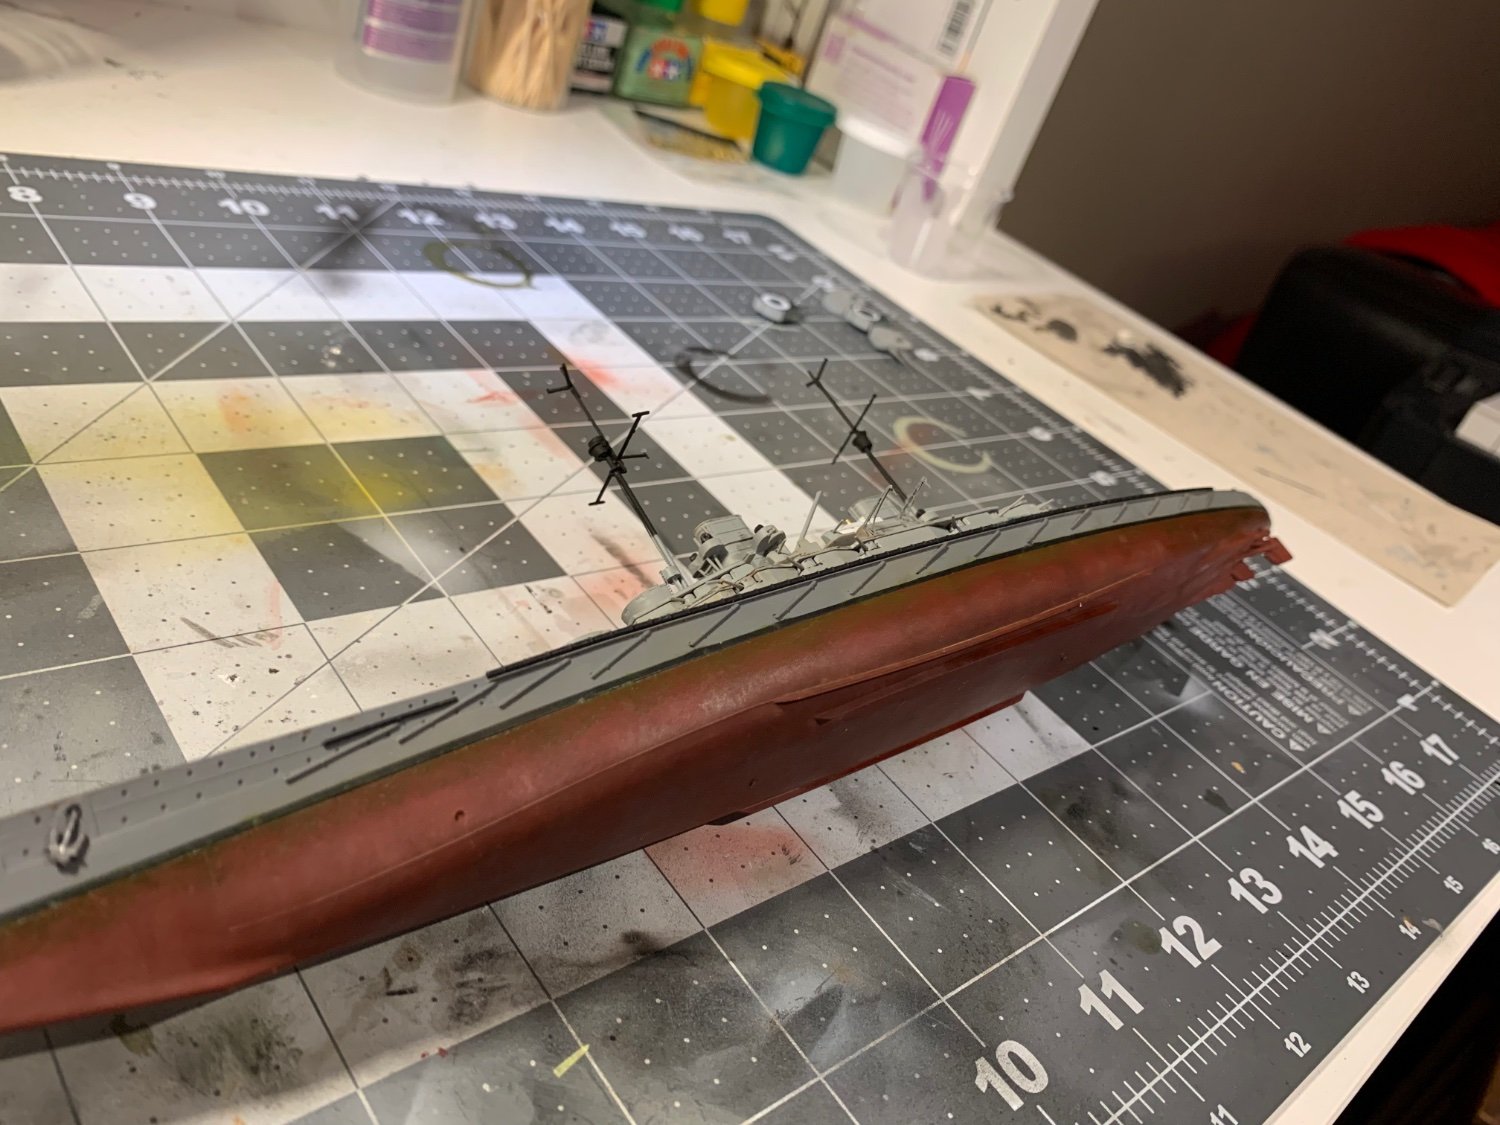
Alrighty. To my displeasure, the preliminary rigging was quite awful and decided to call it quits on this one after I had finished everything else. This is as far as I’m willing to go. I have learned a lot from this kit, and hope to apply this knowledge soon. This is the finished product. Any feedback is much appreciated, and I hope to retain some people for my next project (whatever I decide that will be).

- 8 replies
-
- 4
-
-
- Derfflinger
- Snowman Models
- (and 3 more)
-
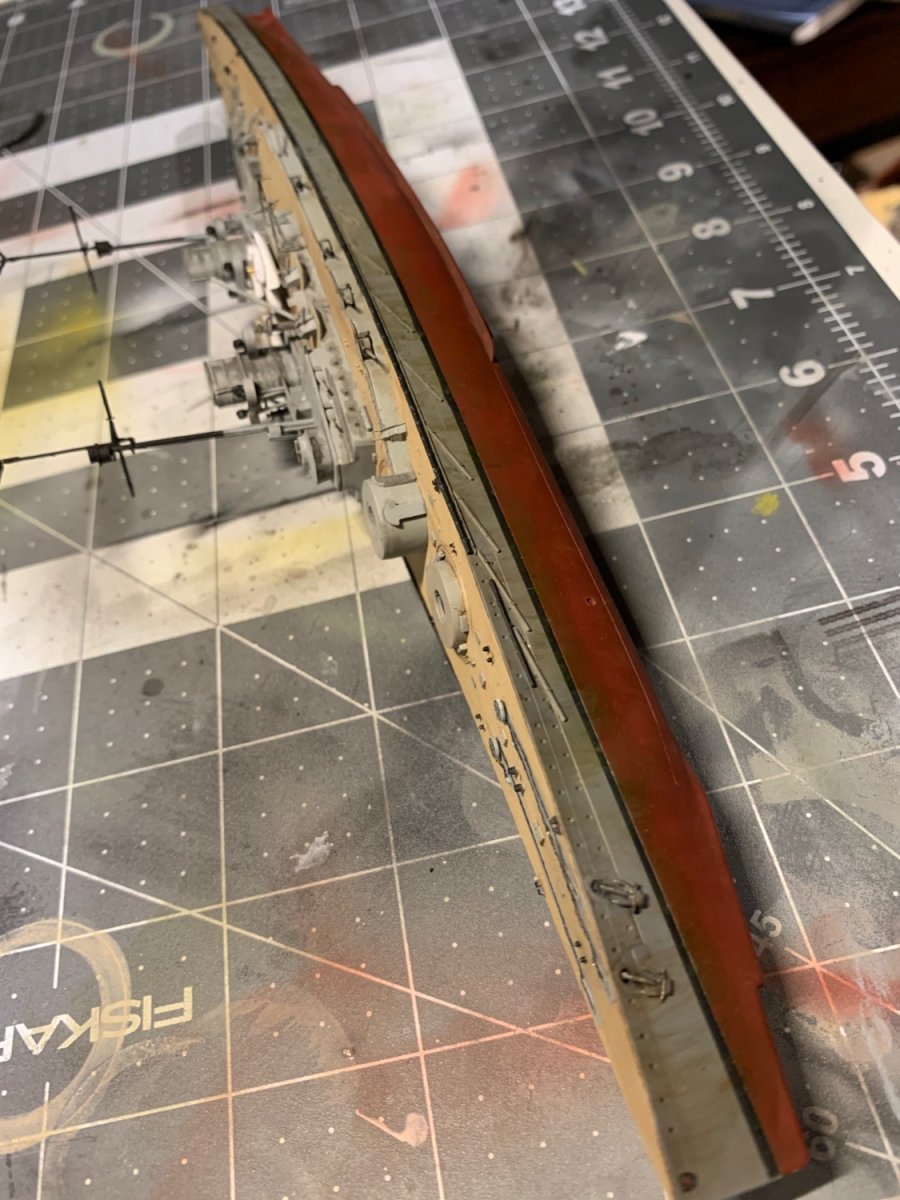
Below are some pictures of weathering at different stages of completion (still not complete). Used oils but made the mistake of working down-up letting the bottoms mix (and practically disappear) into the tops. Next time the opposite is definitely preferred but a little too lazy to do it all over again, I think it looks okay anyways. Next is finishing this off and then rigging? Not too sure what I’ll do for that but I’ll figure something out. It’s almost done, and the Prinz has almost arrived. Should start that when this is done; I think based on my progress with this “trial model” I’m more confident about it than when I started.


- 8 replies
-
- 4
-
-
- Derfflinger
- Snowman Models
- (and 3 more)
-
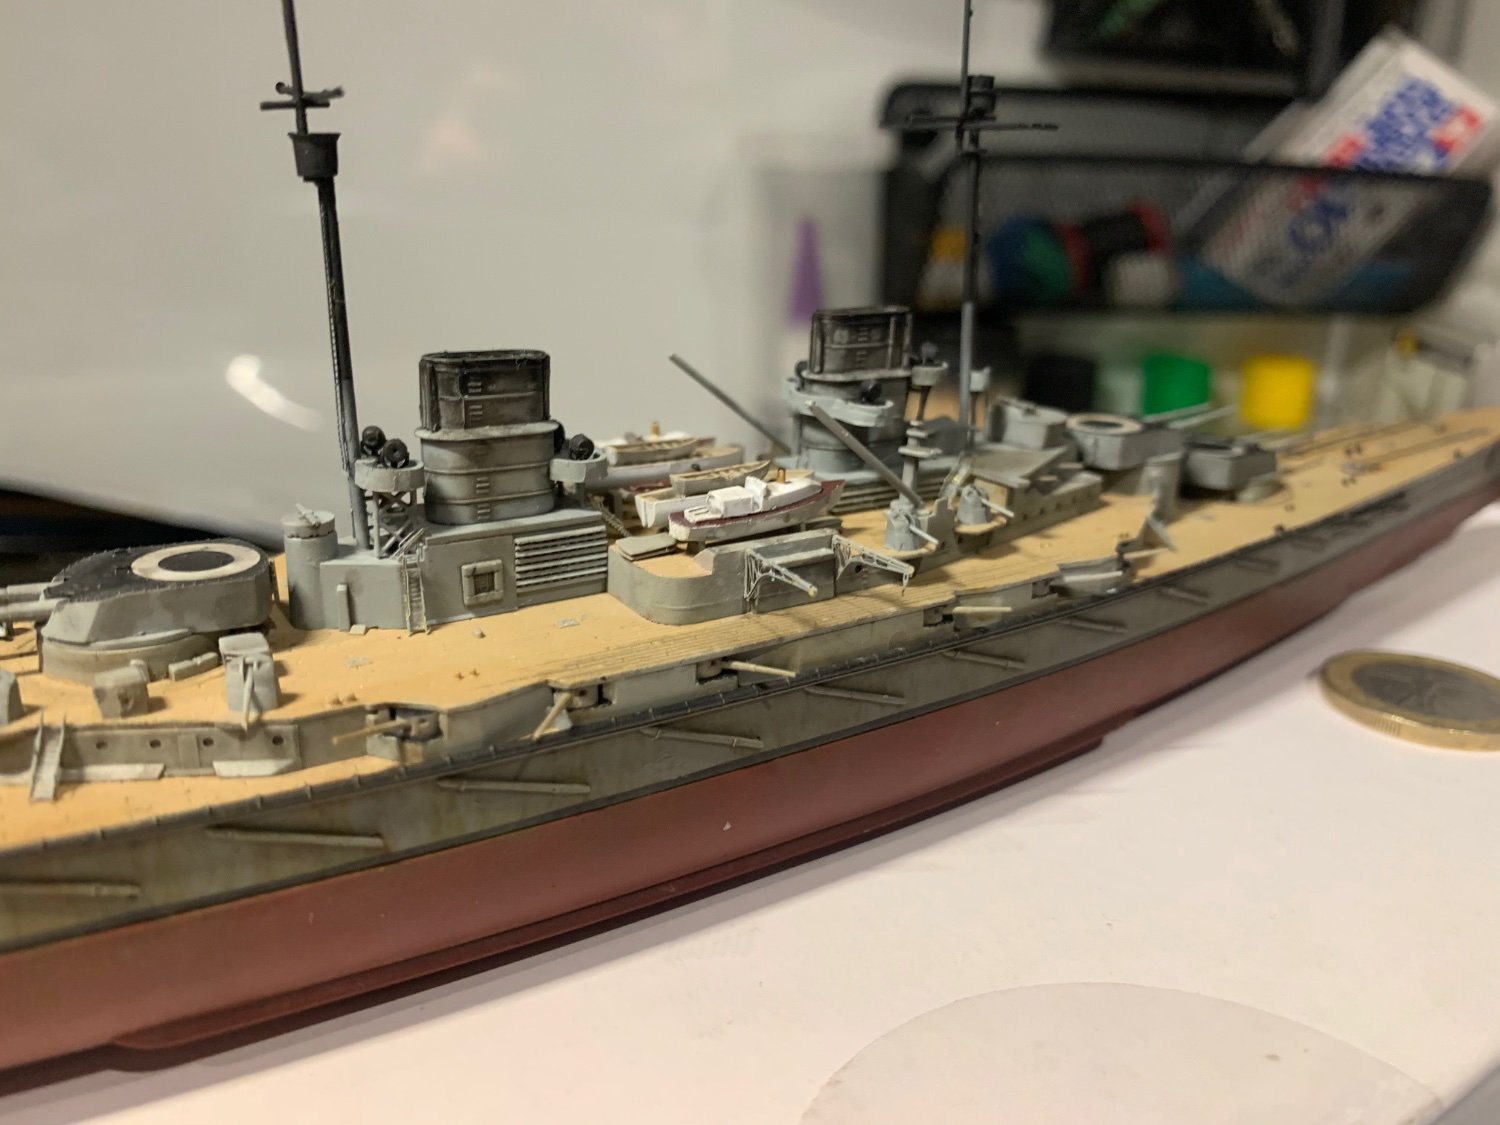
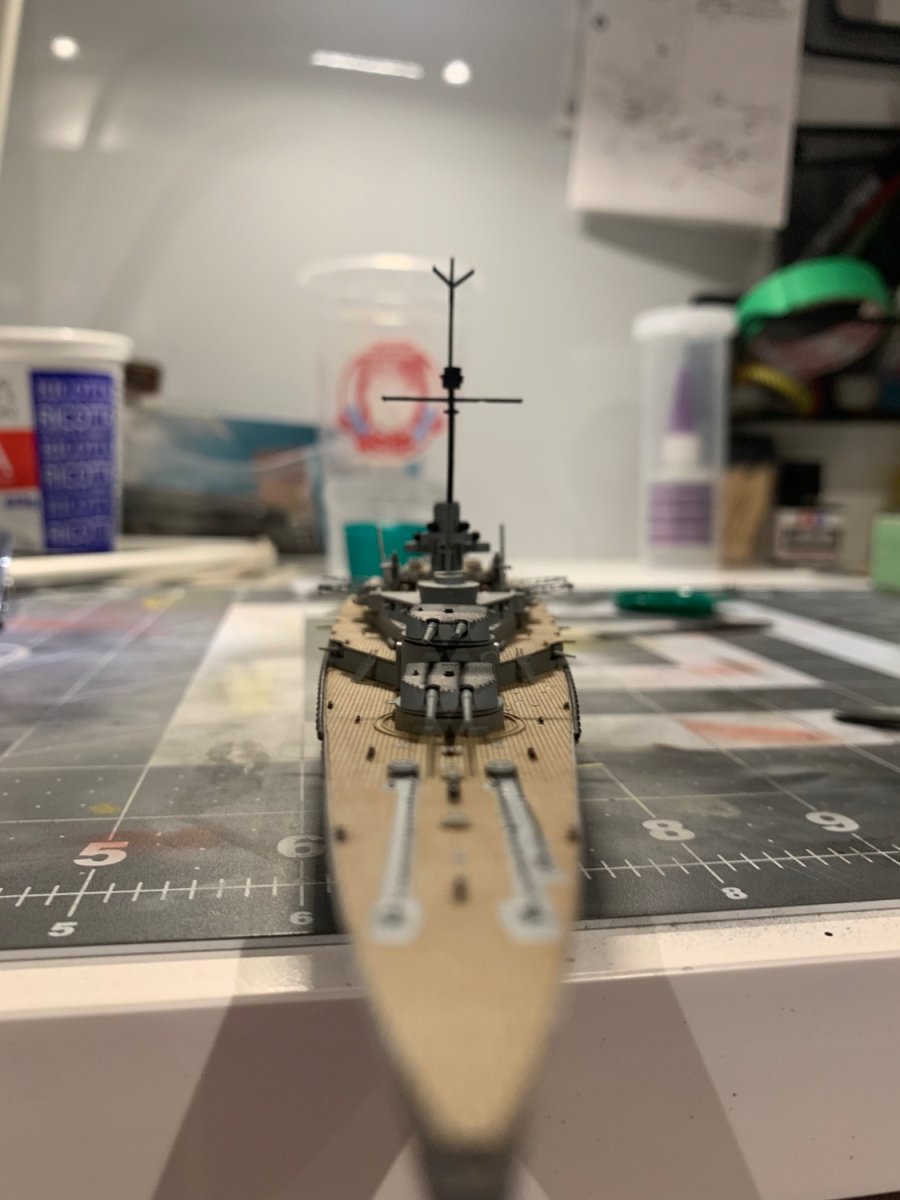
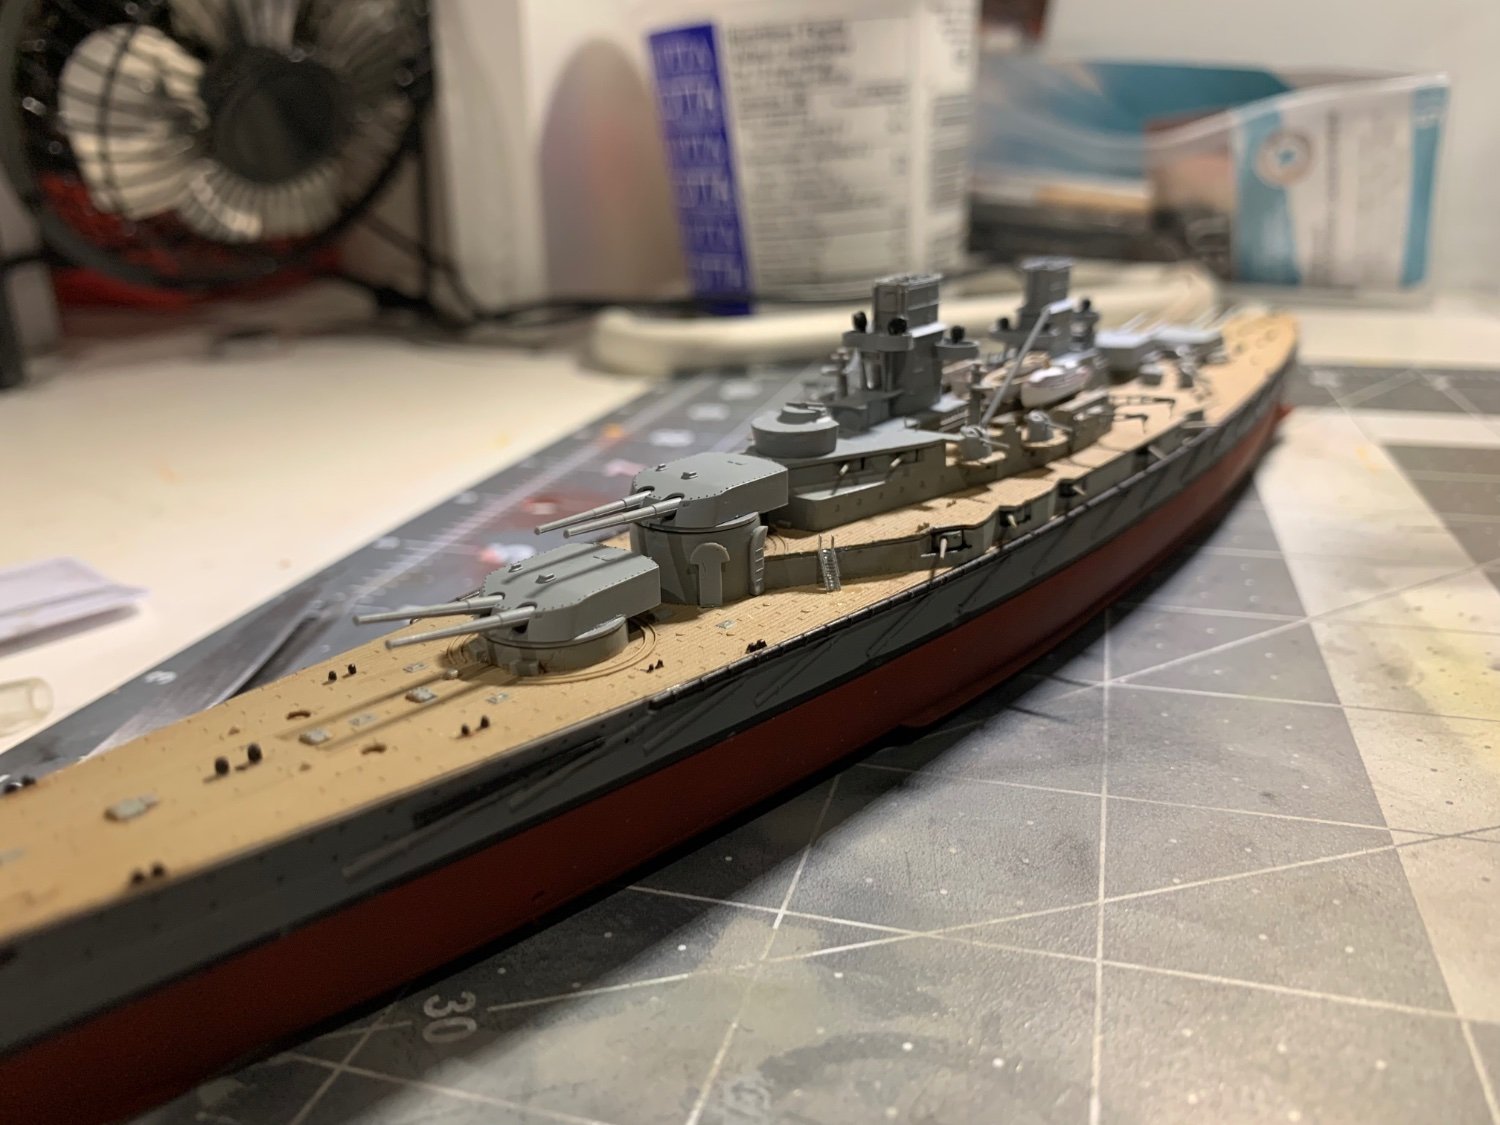
Have kept at it through to today, with lots of progress. Forgot to paint the top of the main turrets black, so I did that. Finished the anchor chain area and attached the masts. Coming together nicely. Will attach anchors and propellers next, put decals on, and then give it a matte coat to prepare for weathering.

- 8 replies
-
- 6
-
-
- Derfflinger
- Snowman Models
- (and 3 more)
-
Exams are done and work has resumed. Worked on painting and placing all the bits and bobs along with the masts and main turrets. Also assembled the secondary turrets. There are more bits to go, but after attaching the masts and other small things, the building is close to done. The kit is not that extensive.


- 8 replies
-
- 6
-
-
- Derfflinger
- Snowman Models
- (and 3 more)
-
Massimodels reacted to a post in a topic:
Hello from Canada.
-
Massimodels reacted to a post in a topic:
Hello from Canada.
-
Thanks for the suggestion. I have also considered joining IPMS Toronto as it’s closer, but don’t think I have the time. How does it compare?