


Loracs
-
Posts
181 -
Joined
-
Last visited
Content Type
Profiles
Forums
Gallery
Events
Posts posted by Loracs
-
-
Thank you for the picture and recipe. This is a great way to display the ship. Something I will strongly consider doing too ;_)
- thibaultron, Canute and mtaylor
-
 3
3
-
Just.... WOW. I wish I had a third of your skill and knowledge. This is very impressive build... something to be very proud.
- mtaylor and Keith Black
-
2
-
@TurkSailor I look a long time for a convenient building slip... The one I like was out of order and manufacturer did not even reply about possible availability in the future. Link here:
SO... I build a working table. Not quite a slip to guide you in the build but mostly to hold the ship in place. It was a lot of work to make and rather expensive. I choose to do it for fun (I wanted a woodworking project to spend time on). At the end NOT a slip... but a close second/third. Beside that... nothing else. You can get by with a lot cheaper alternative since it just holds the ship on place, nothing more. Lastly, it is heavy, very heavy. So, I place the table on a large Lazy Susan to rotate it.
Here the link for the table:
-
-
Another Question on RATLINES: I often see the cross section (horizontal segments) in light colored rope rather than dark like the vertical section. Is it a preference from the builder (for contrast) or those were never coated with Tar back then?
Same for the rope between the two deadeyes... always light colored or they were coated with tar usually?
-
Question: Likely one of many as I started thinking/working on rigging the ship. I'm reading that the fore-most shroud on the fore and main mast are typically served the whole length of the rope while the others only at the portion around the mats... why only the first? there must be a practical and/or functional reason it was done that way.
-
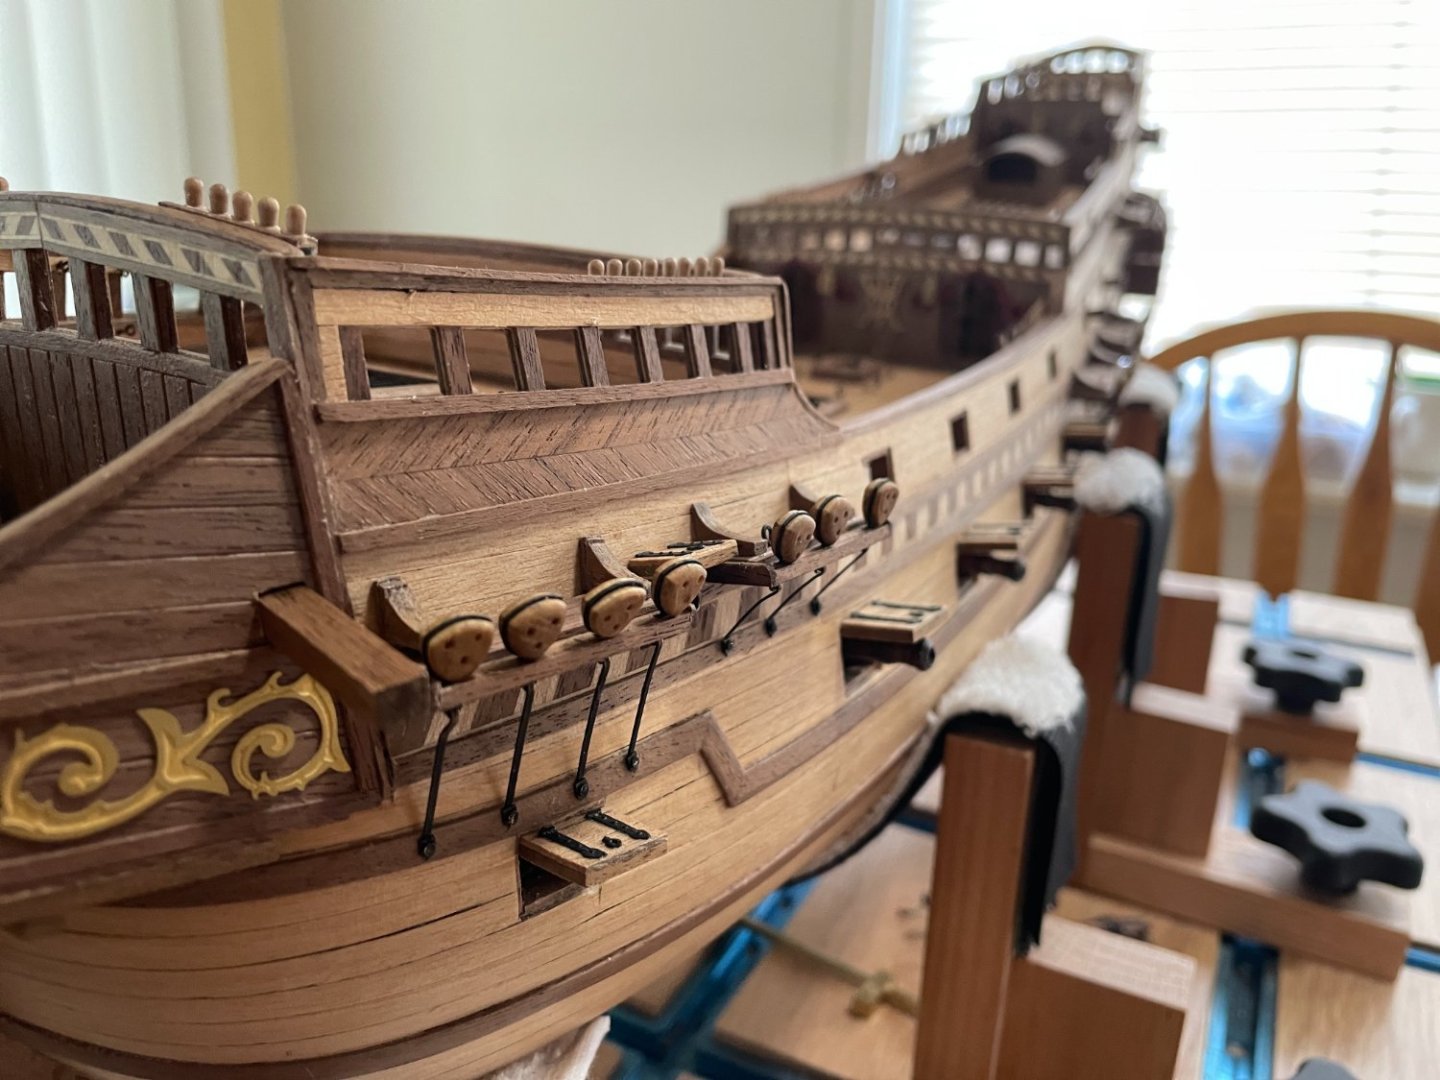
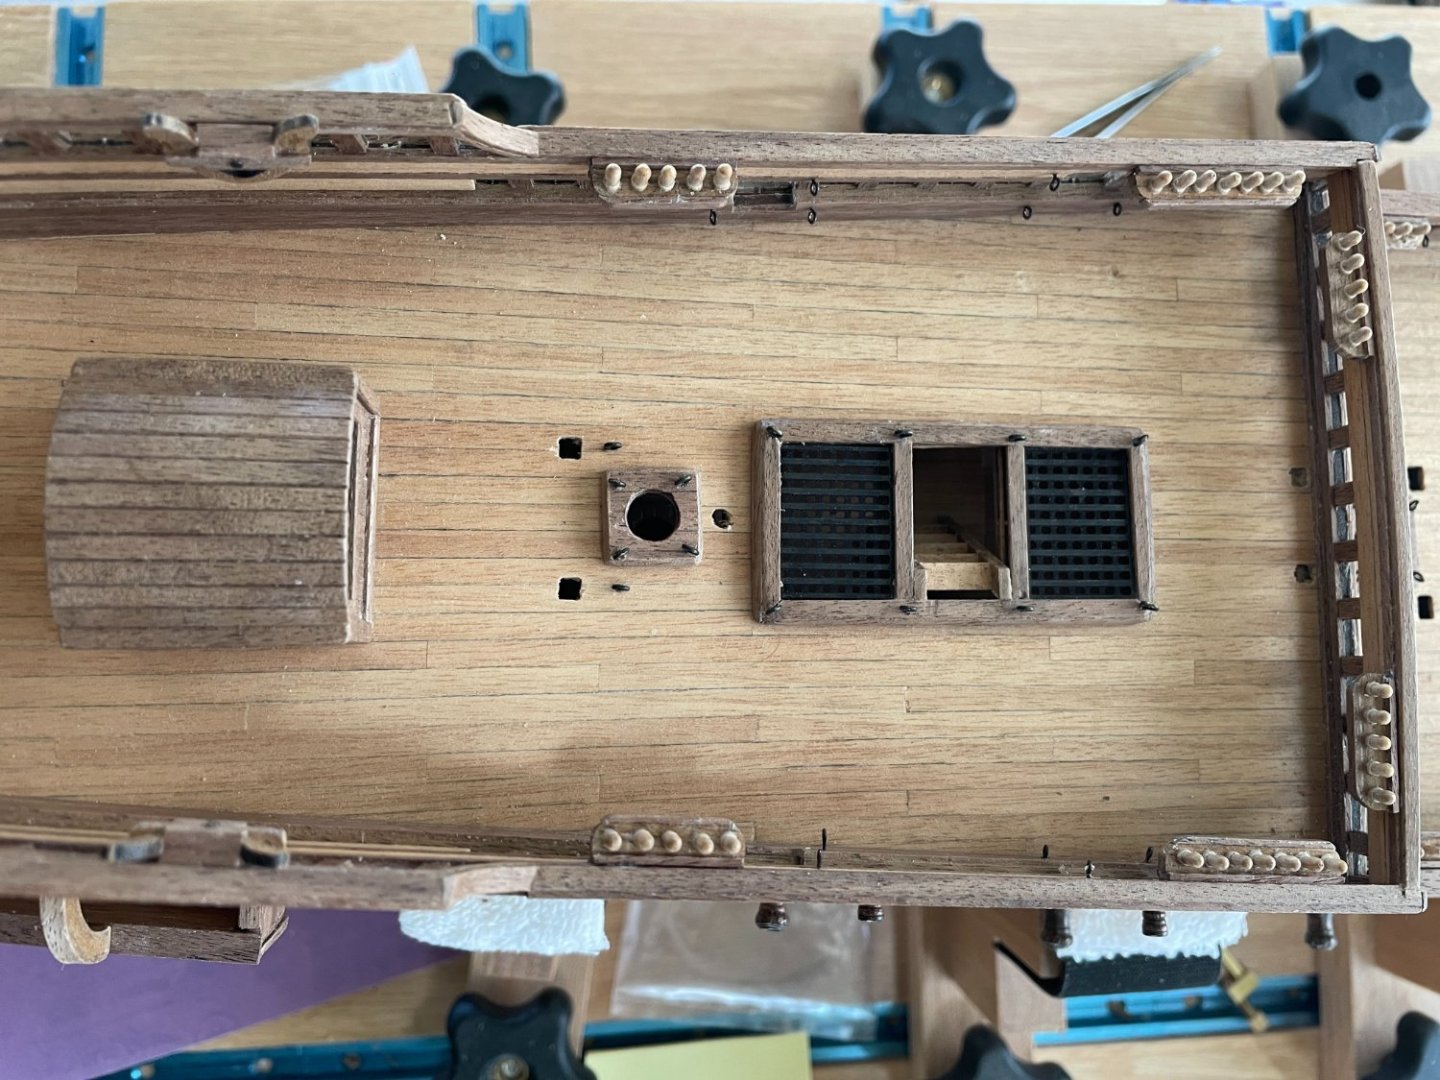
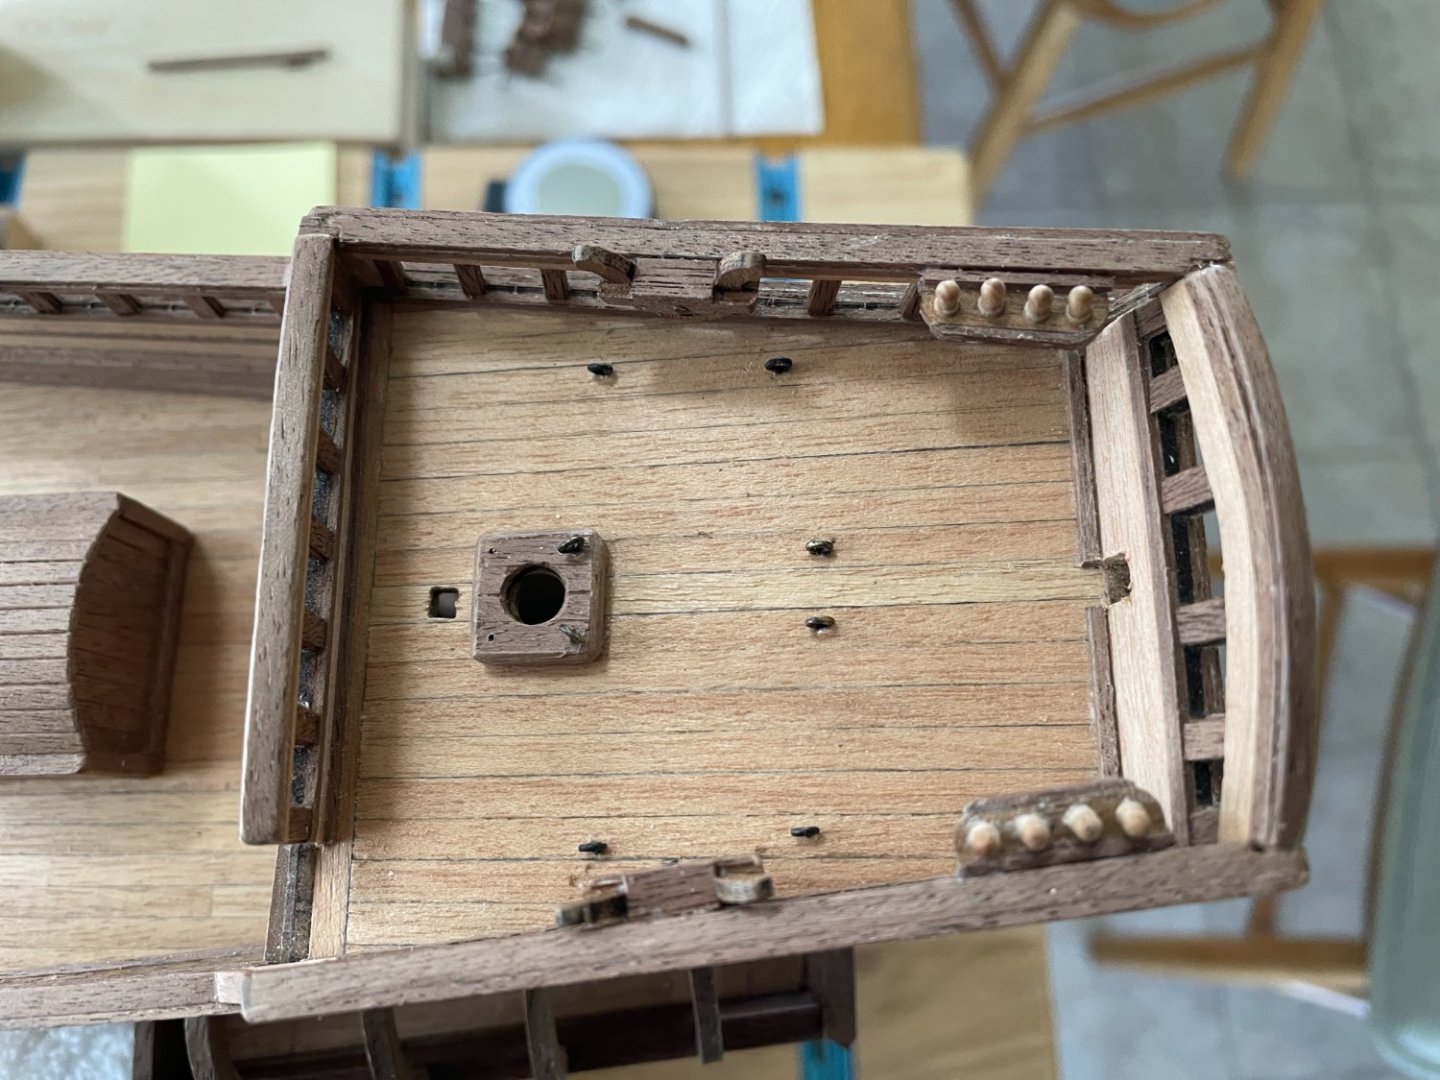
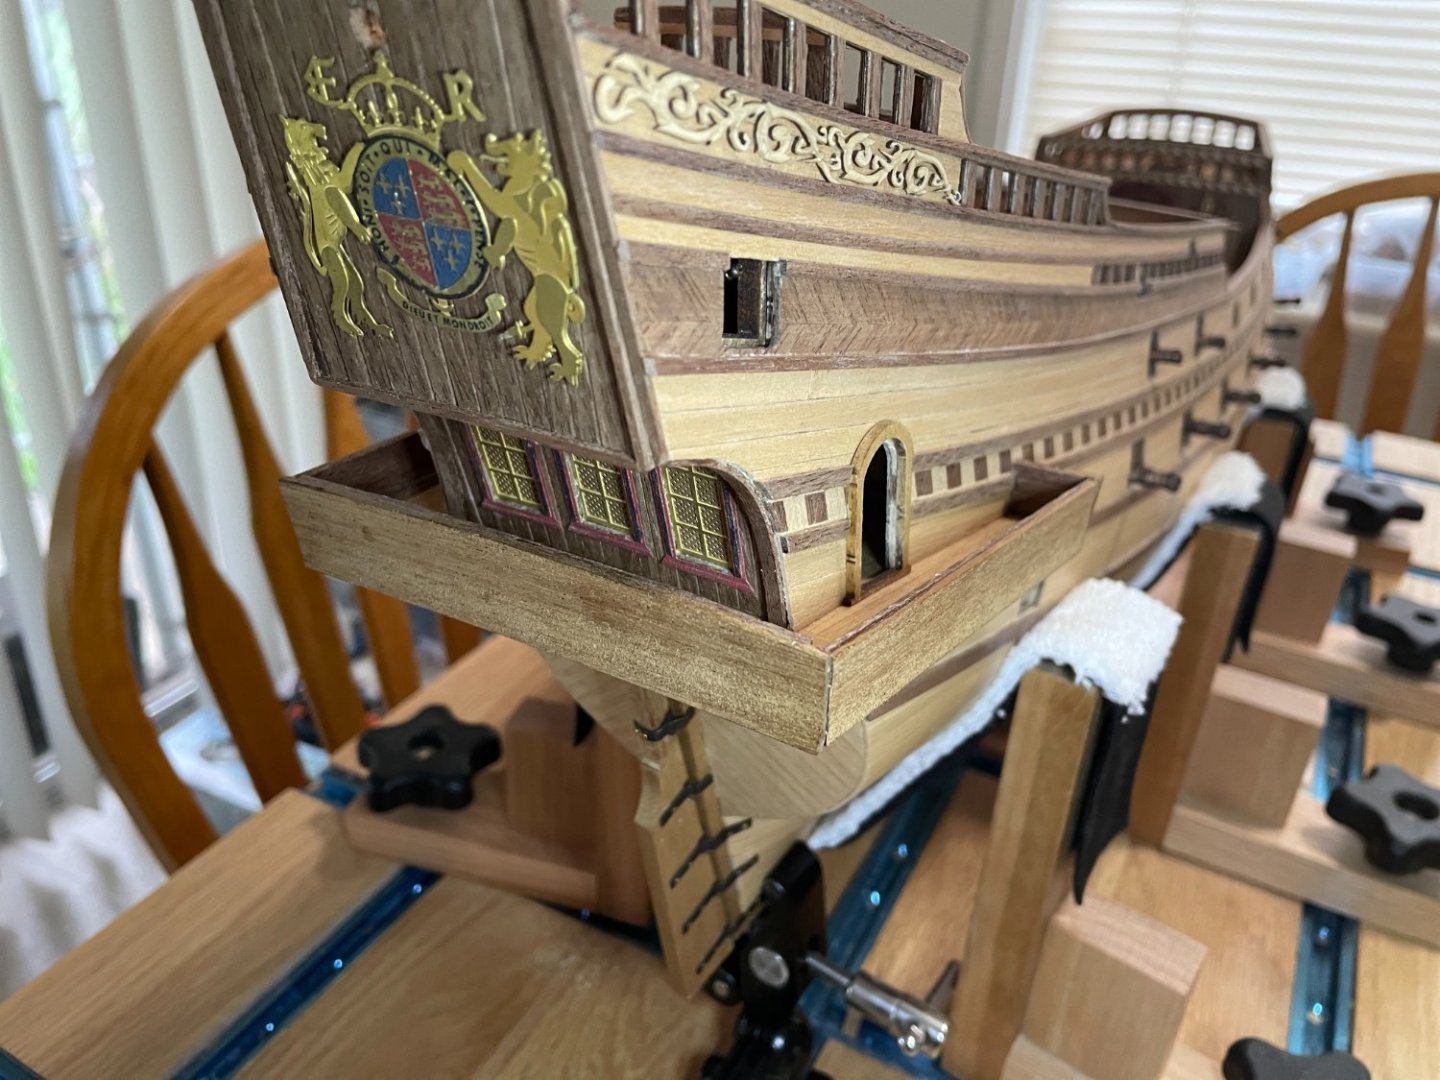
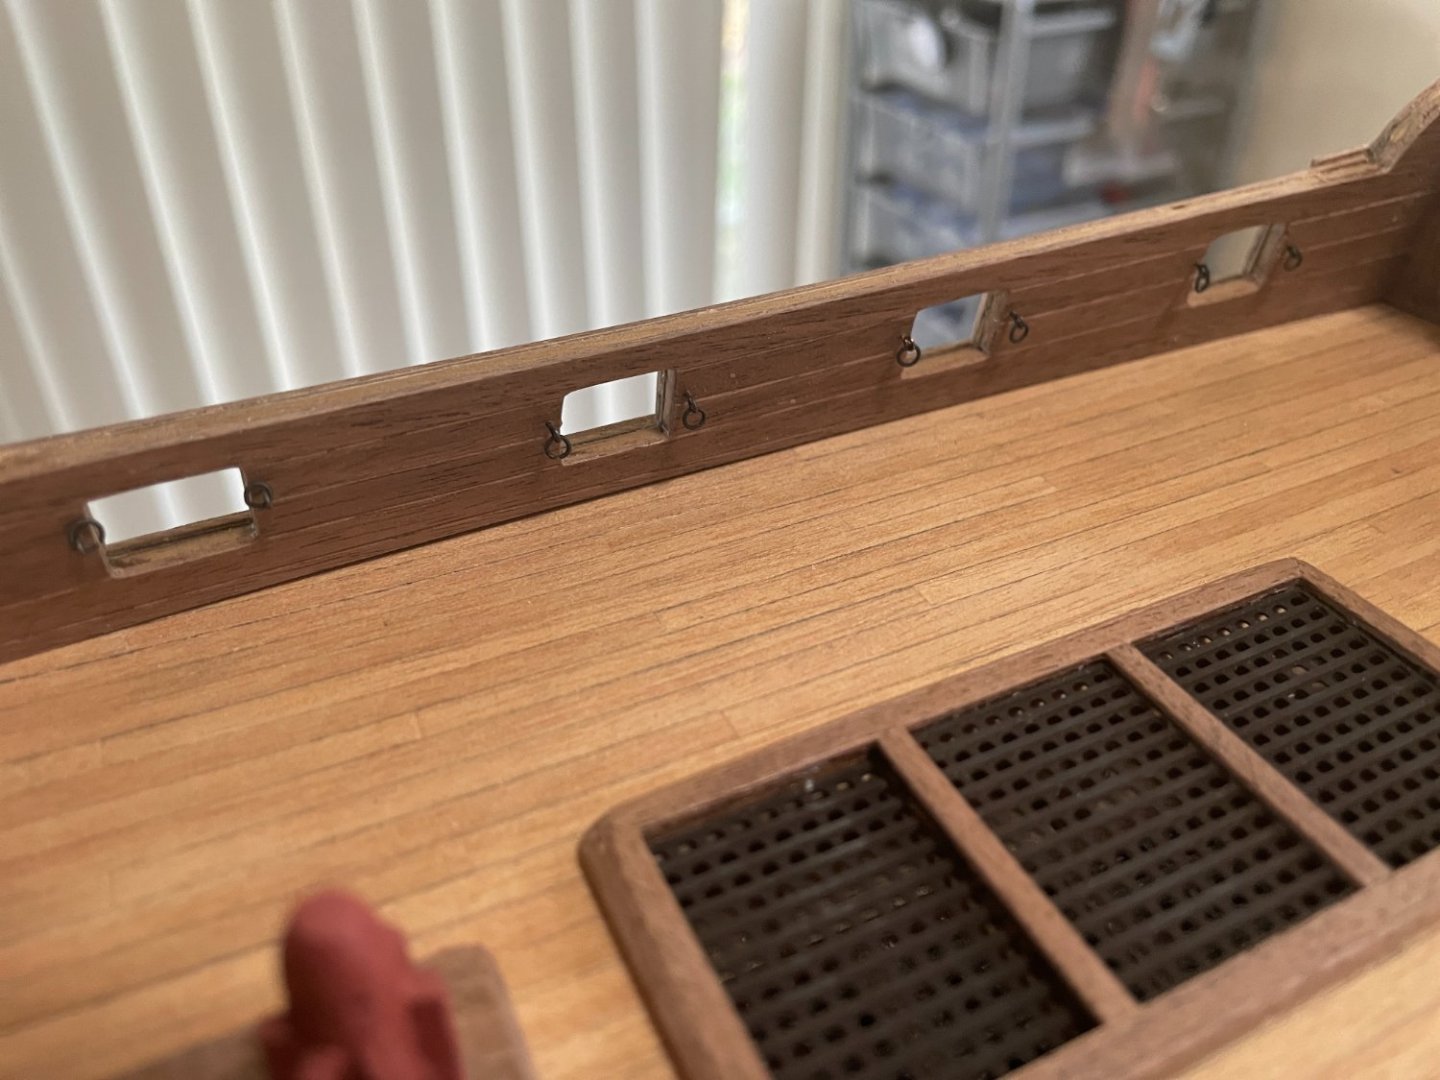
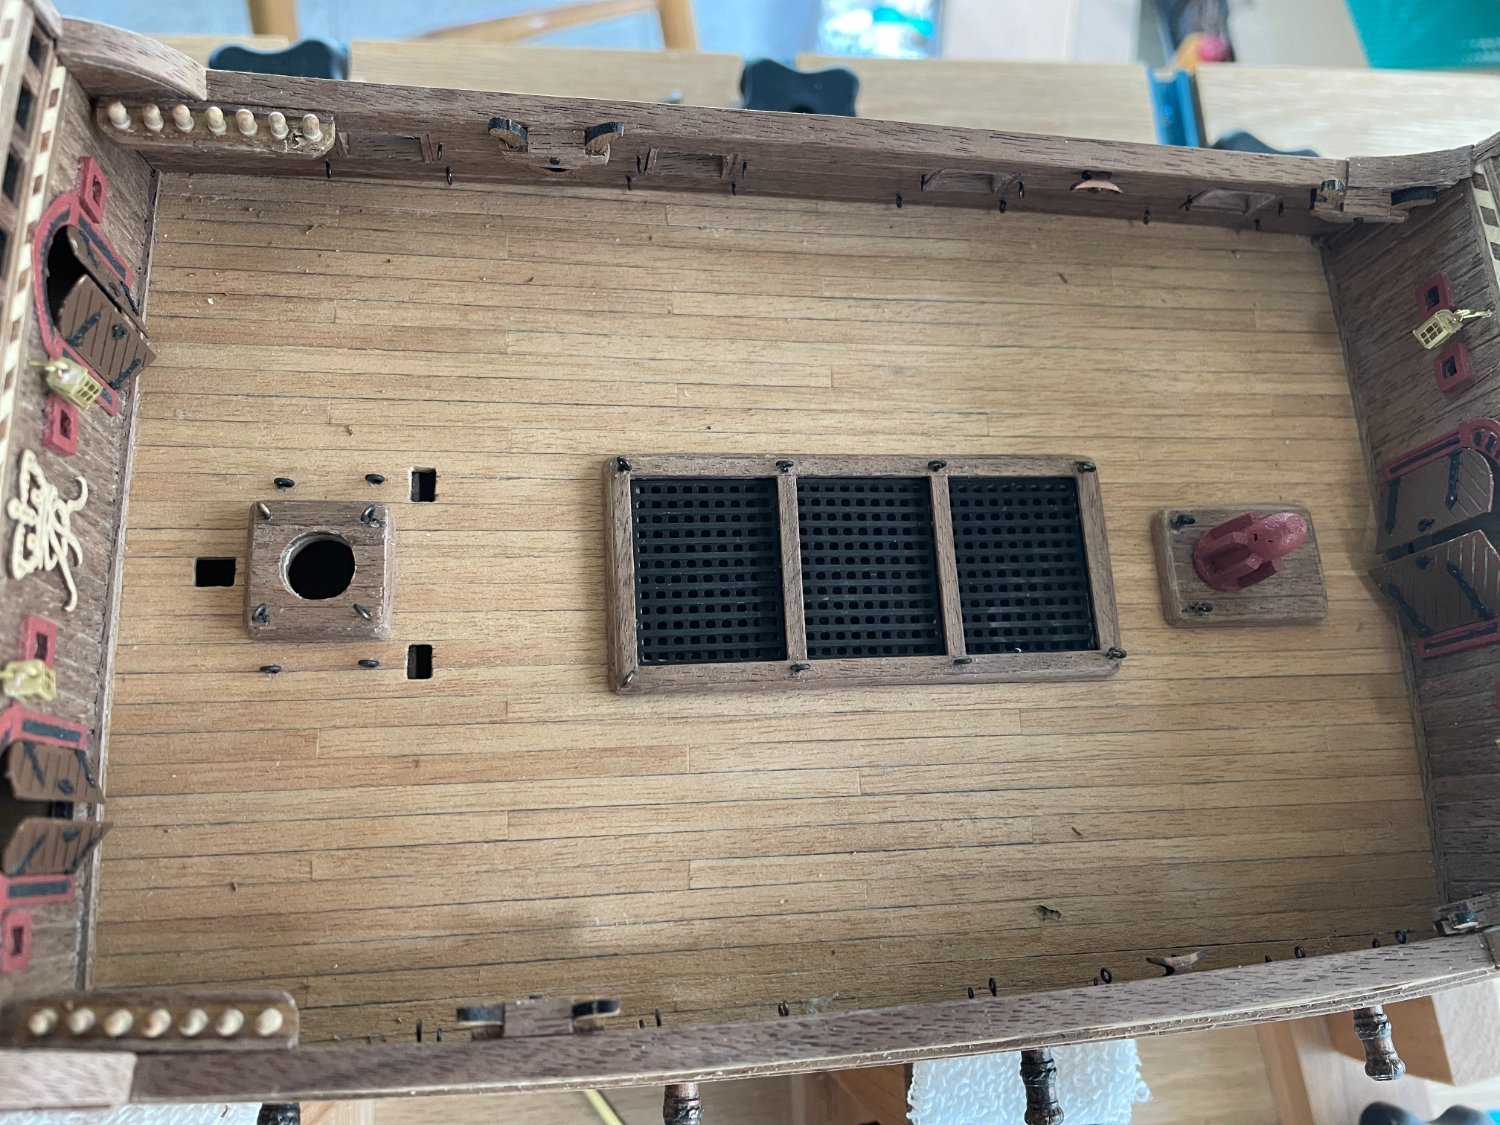
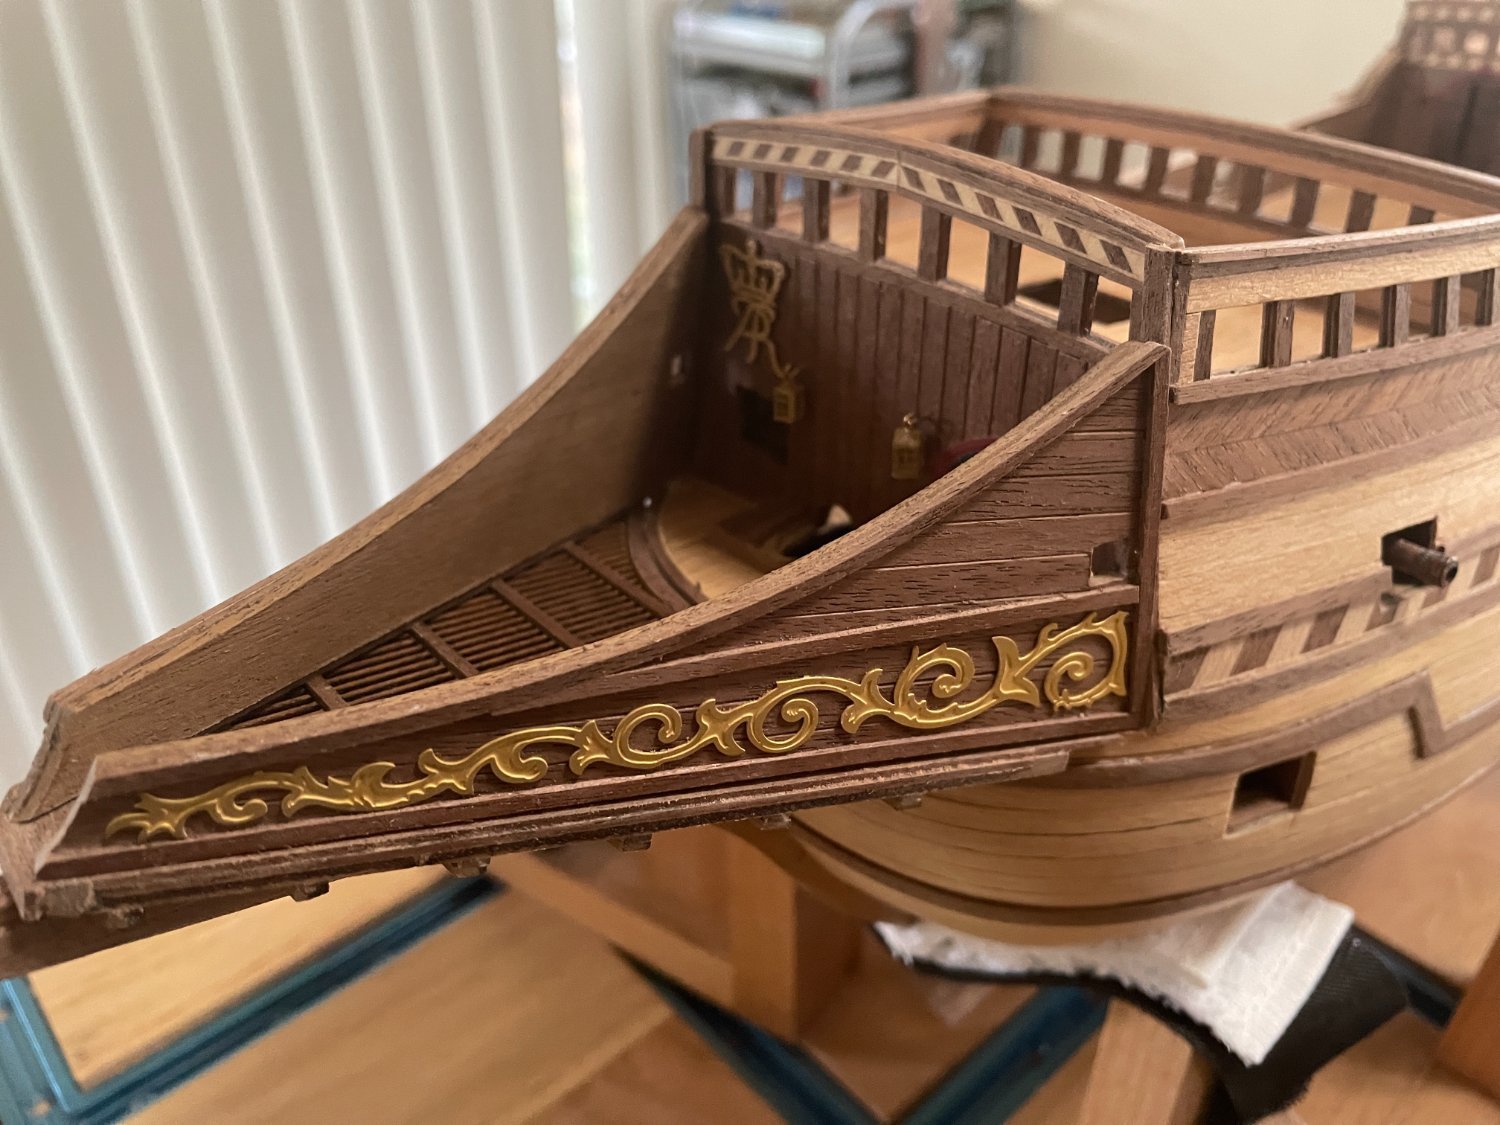
Deadeyes racks and gunport doors installed to the ship. This is no small task... amazing the number of little parts... all having to be fixed with nails. The good news, it is done and no major break (couple of minor ones though). Mark, drill and push in... all the while holding my breath that nothing fall apart. And those little corner parts on top of the racks!! each need to be adjusted to fit, what a pain.
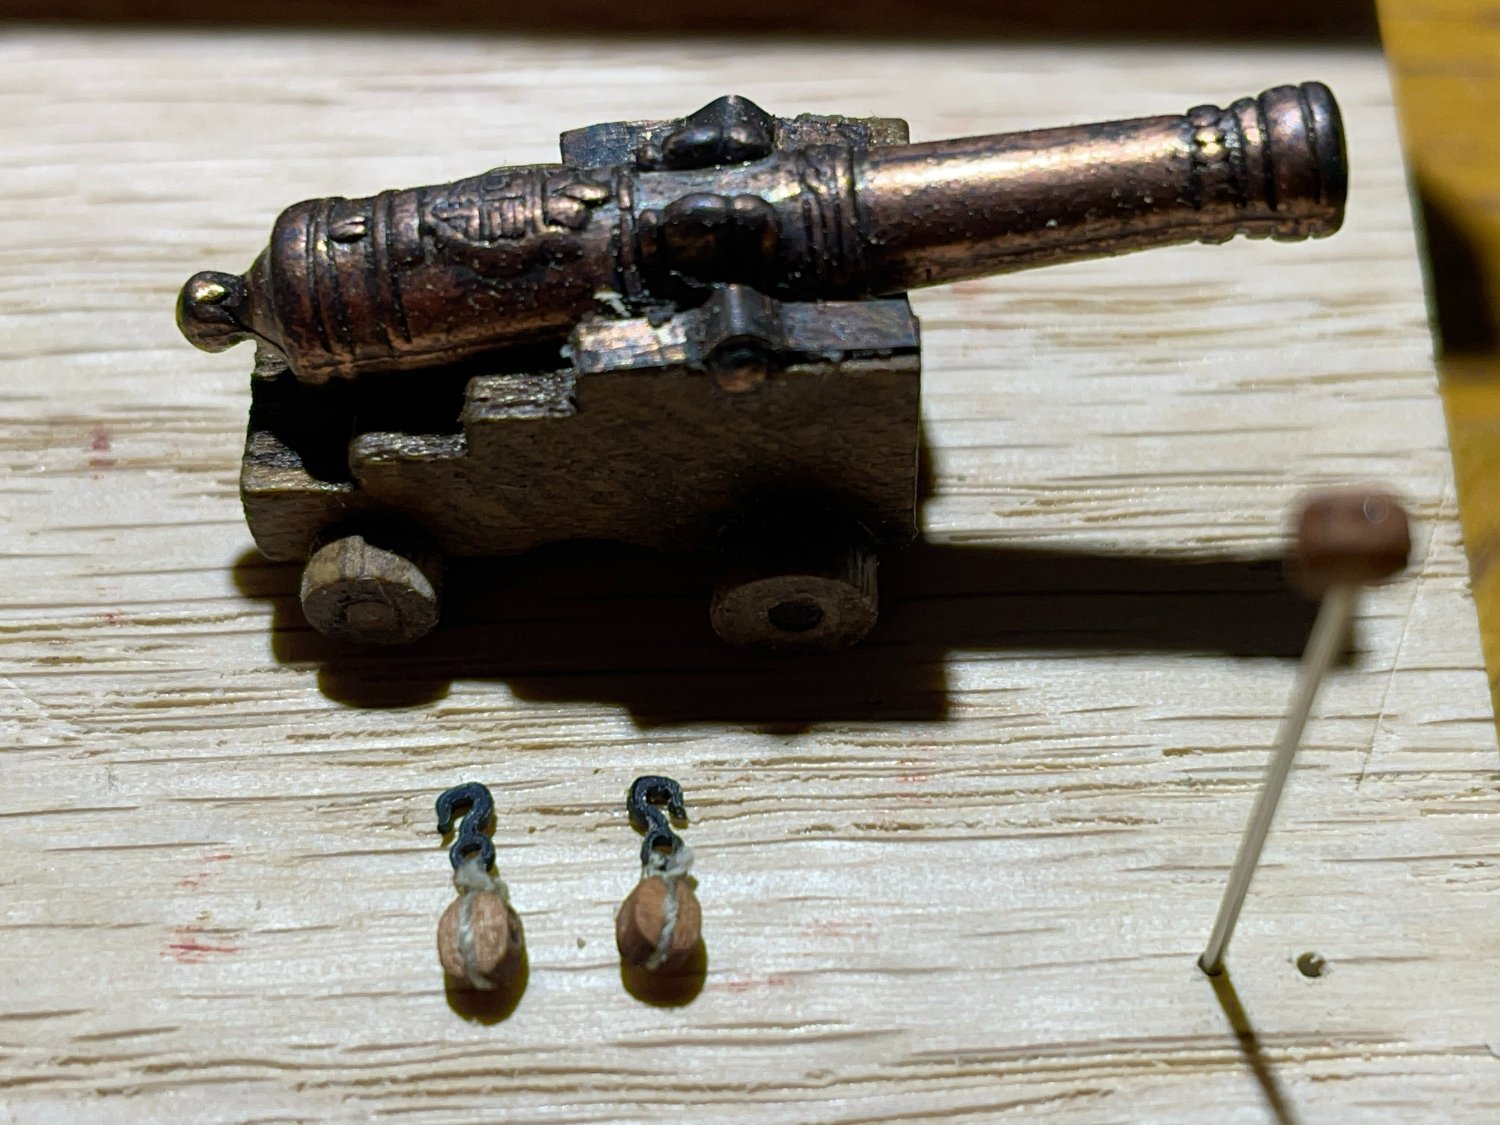
With this done, this officially start the rigging segment of the build, starting with the deck cannons.
-
-
-
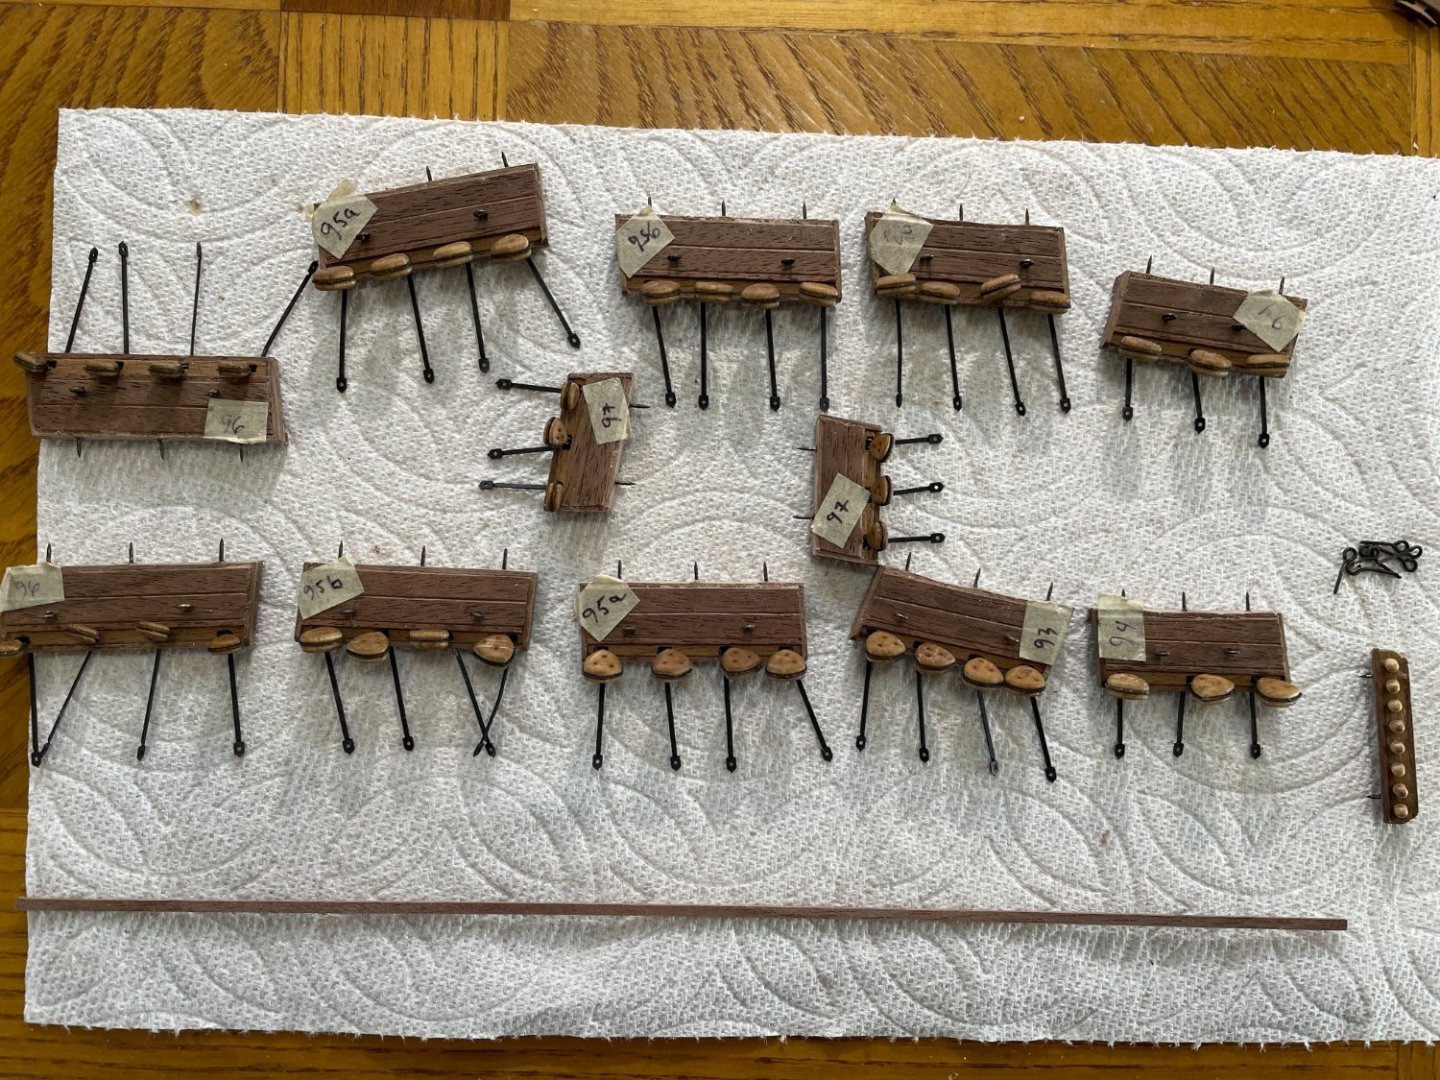
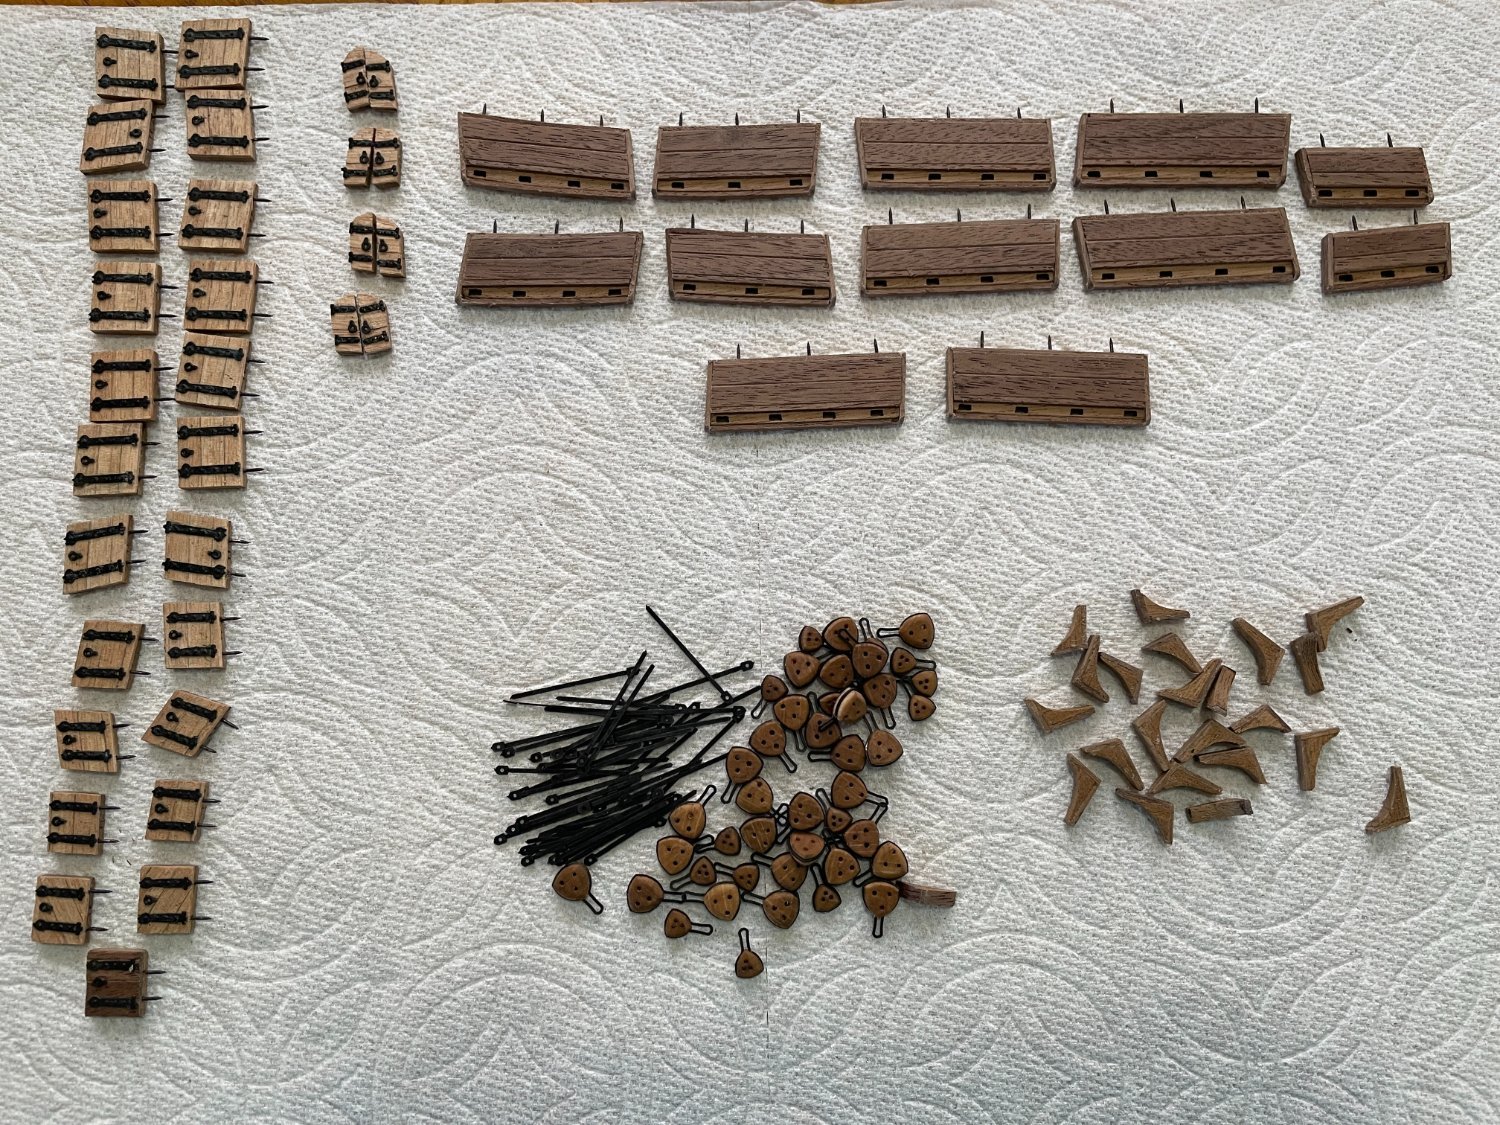
Triangular deadeye platforms are ready to be installed. A little messy with the label... but they will go away.
-
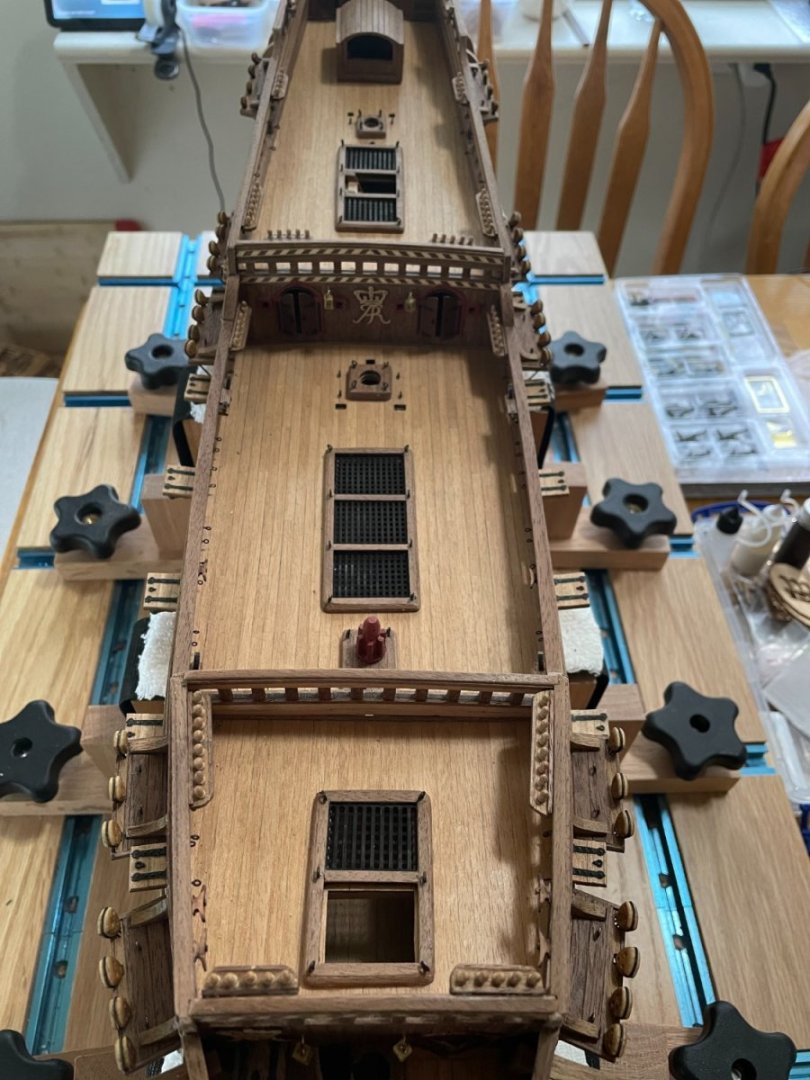
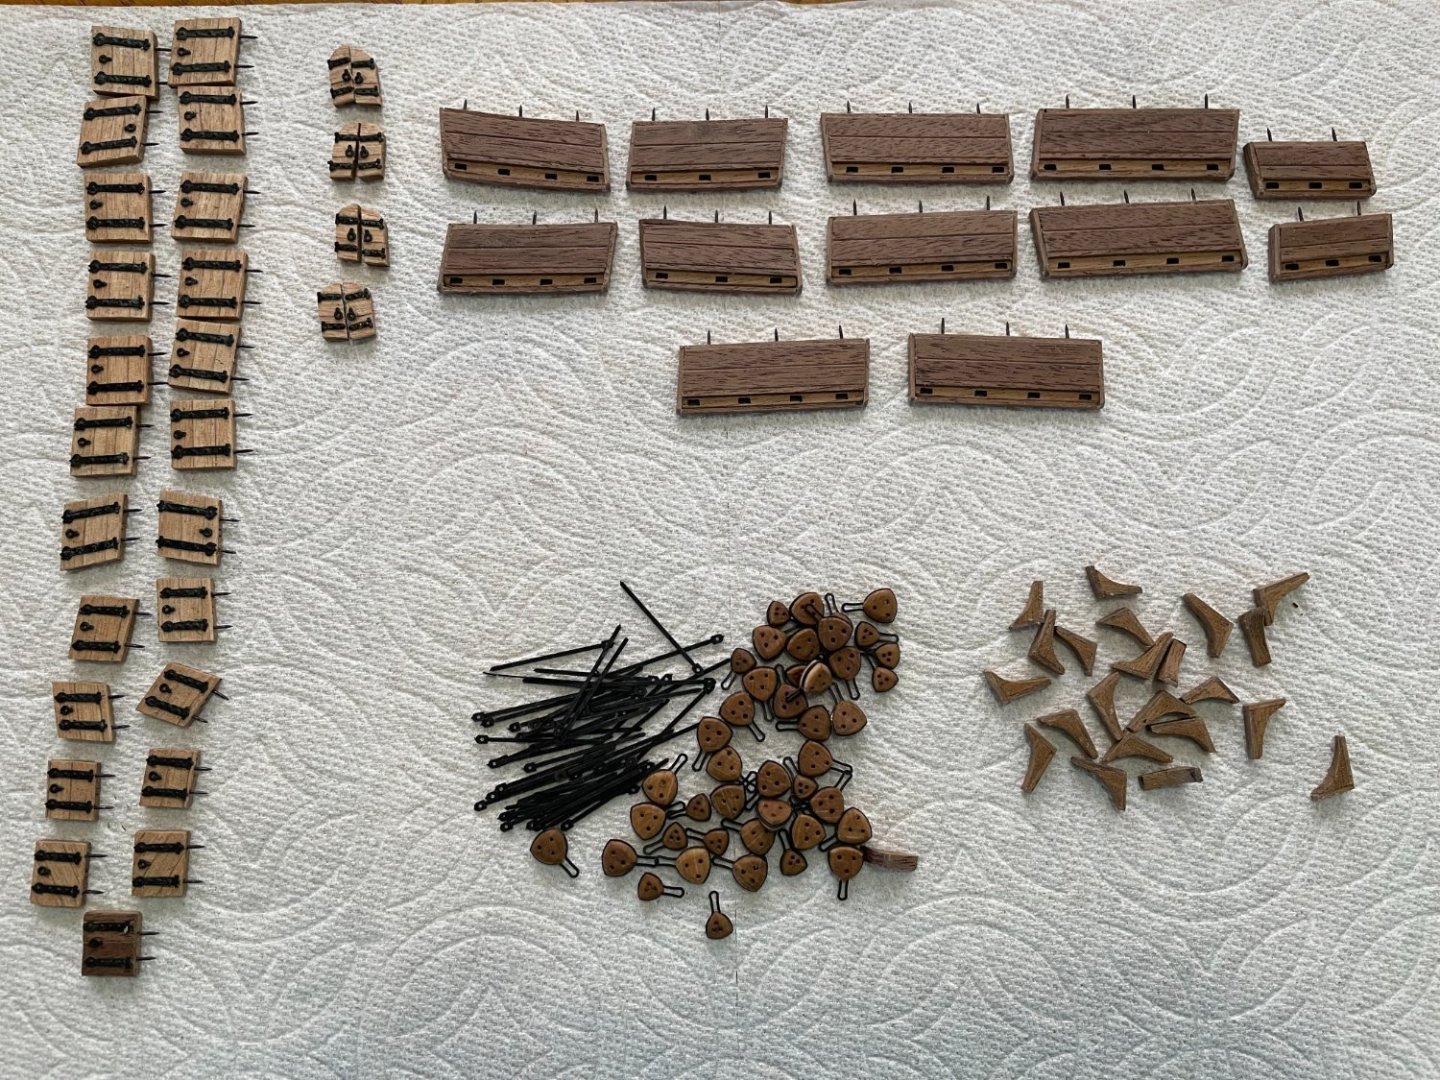
Eyebolts, Racks and Cleats: Various small parts are installed on the ship. Those are quite a challenge. Each is re-enforced with nails for stability. A comment on Bibetou: I seriously hate this wood. It is far too fragile to be used as construction material. So far each piece has been strengthened by planking it with walnut strips... it is almost a requirement.

-
Hey Patrick, you have a nice eye. Thanks for the catch. It is a lot easier to fix now than later. hehe
- GrandpaPhil, Baker and The Gimps Chimp
-
2
-
 1
1
-
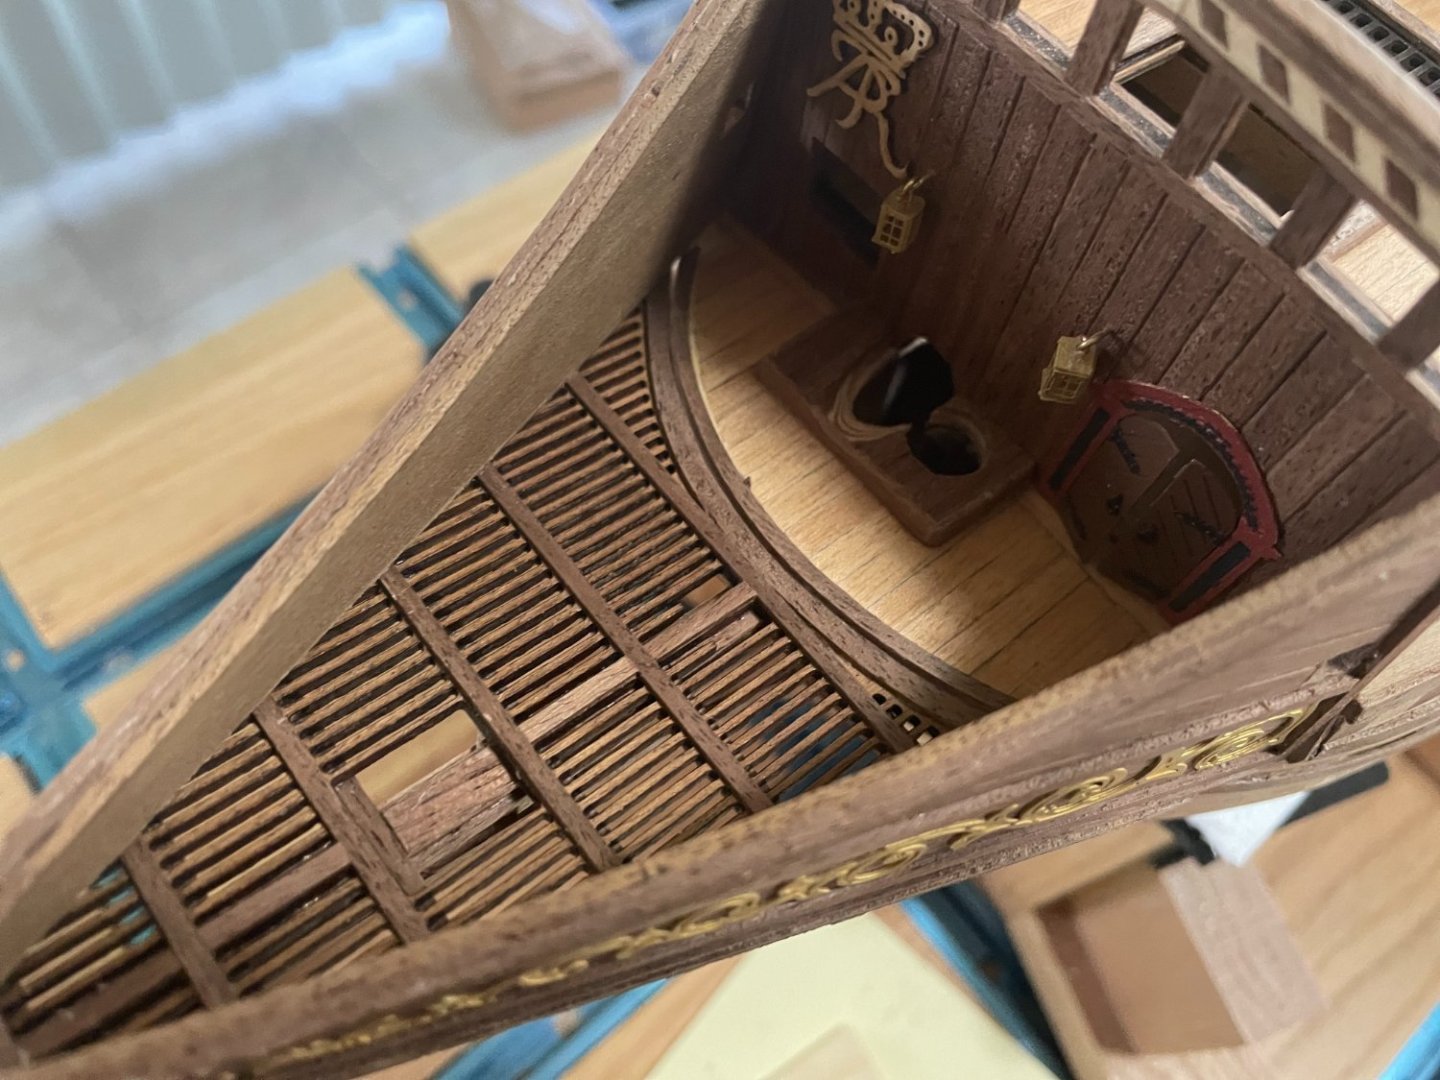
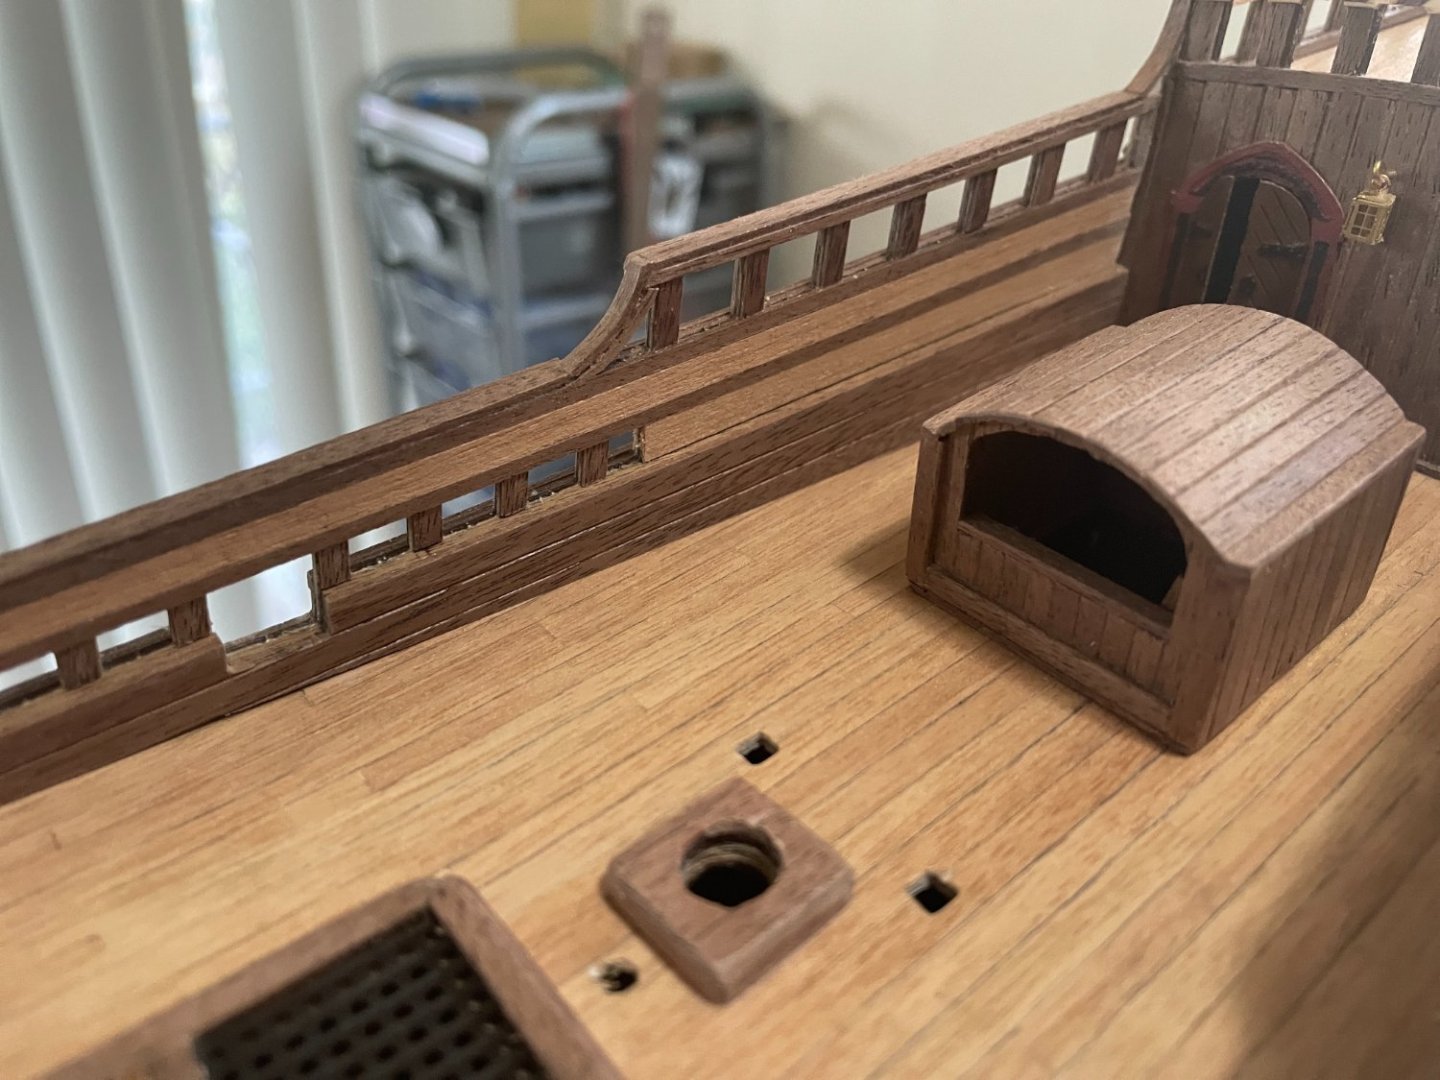
Small Palissade is finally done... only a few cosmetic touches once the glue cured.
Made more progress but only in building small pieces to be fixed later.
Gunport doors look tricky to place and remain put on the ship.
There are times like now where not much is "seen" to be happening but it is advancing slowly.

-
Small Palisade: This turns out to be a real pain. It's hard to align and provides only a small surface area to set in place. This is a recipe for a disaster down the road. So, I decided to modify my approach. I planked the side facing inward with interlocking sections to act as a guide to keep everything straight and increase strength when fixing later. Pictures show the design. Dry fit (no glue) is reasonable. Time to finish planking outside.

- GrandpaPhil, BobG, Knocklouder and 1 other
-
3
-
 1
1
-
Hello Cleat, a very nice build. Quite a different ship and stylish. I'm curious where did you get that height-adjustable plane? Quite interesting!
-
Rigging Cannons: A year ago, I could not deal with less than 5mm blocks and 0.5mm rope. Fast forward 2.5mm block and 0.25mm rope are now manageable. Start rigging the cannons. Using a 3mm hook from Syren. Seen ok in terms of proportion, 30% less would be great but may not hook very well. It is still a go as is. First two blocks done... 54 more.
Patience Loracs, Patience.

- Baker, GrandpaPhil, Knocklouder and 1 other
-
4
-
-
-
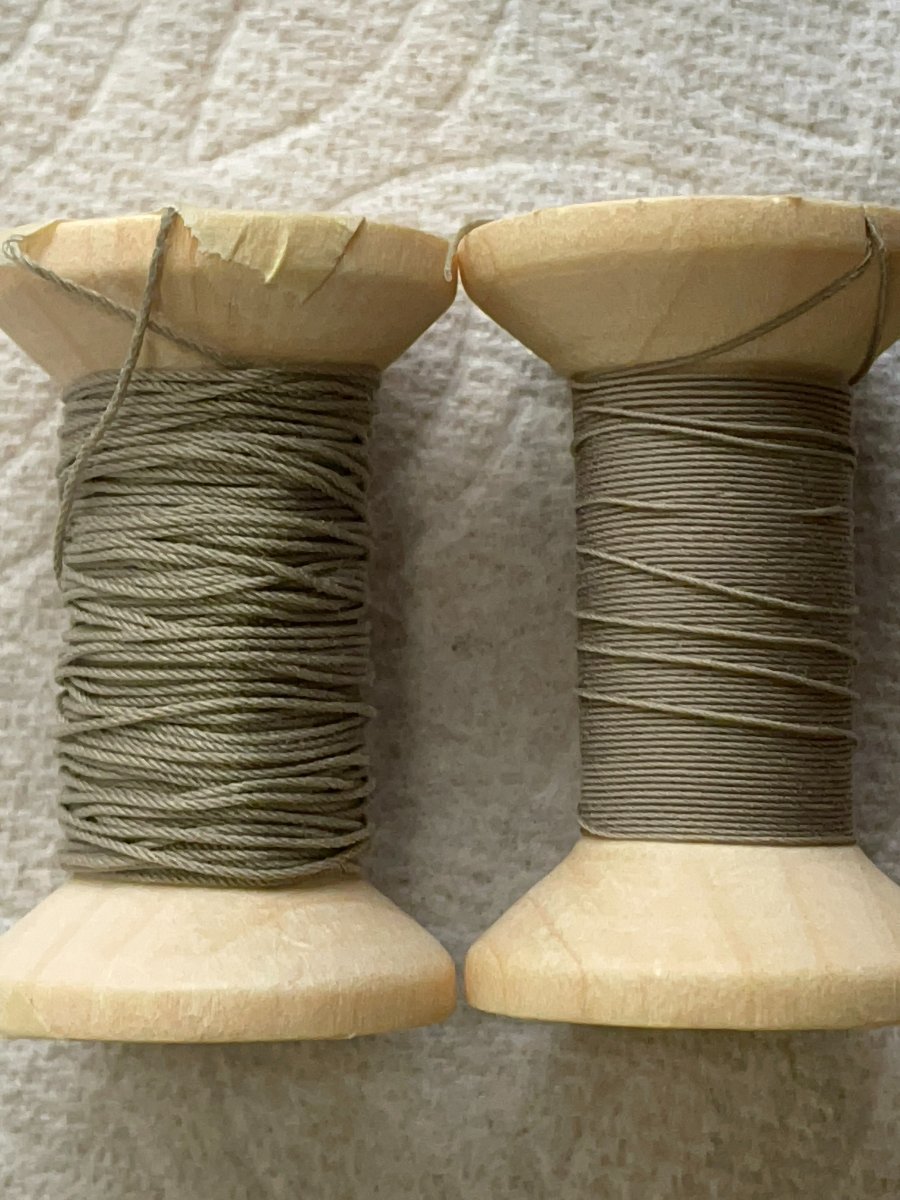
I figured out my unraveling mistakes. The successful ones were likely the ones I forgot to do, roughly 1 in 5 I'm guessing. A pretty bad fails rate (80% or so). The more careful I was, the worse it seemed to get. I realized my mistakes today and ET VOILA! 100% successful. I'm almost too proud to admit it... but HEY! If I make a mistake someone else may one day. Here it is:
My Syren version 2 did not have arrow(s) pointing which way to twist. For some reason, I put in my head that I had to reverse drilling orientation (flip the reverse switch on the drill) when going from one stock to the other. Big mistakes... I basically keep adding tension to the rope without releasing it. If I was not careful when cutting the rope at one end, it would twist on itself aggressively.
Then I read one of Chuck's comments on rope making: that when you carefully balance the tension from the first and second twist, the rope would just lay flat (without much curling, unwinding) when you cut it from the stock post. That was the clue.
Corrected the mistake and BANG, released one end and the rope just lay there. Did 5 other ropes of different sizes, and YES!!! each almost seen better than the previous. A nice sight.

- Ryland Craze, druxey, scrubbyj427 and 5 others
-
8
-
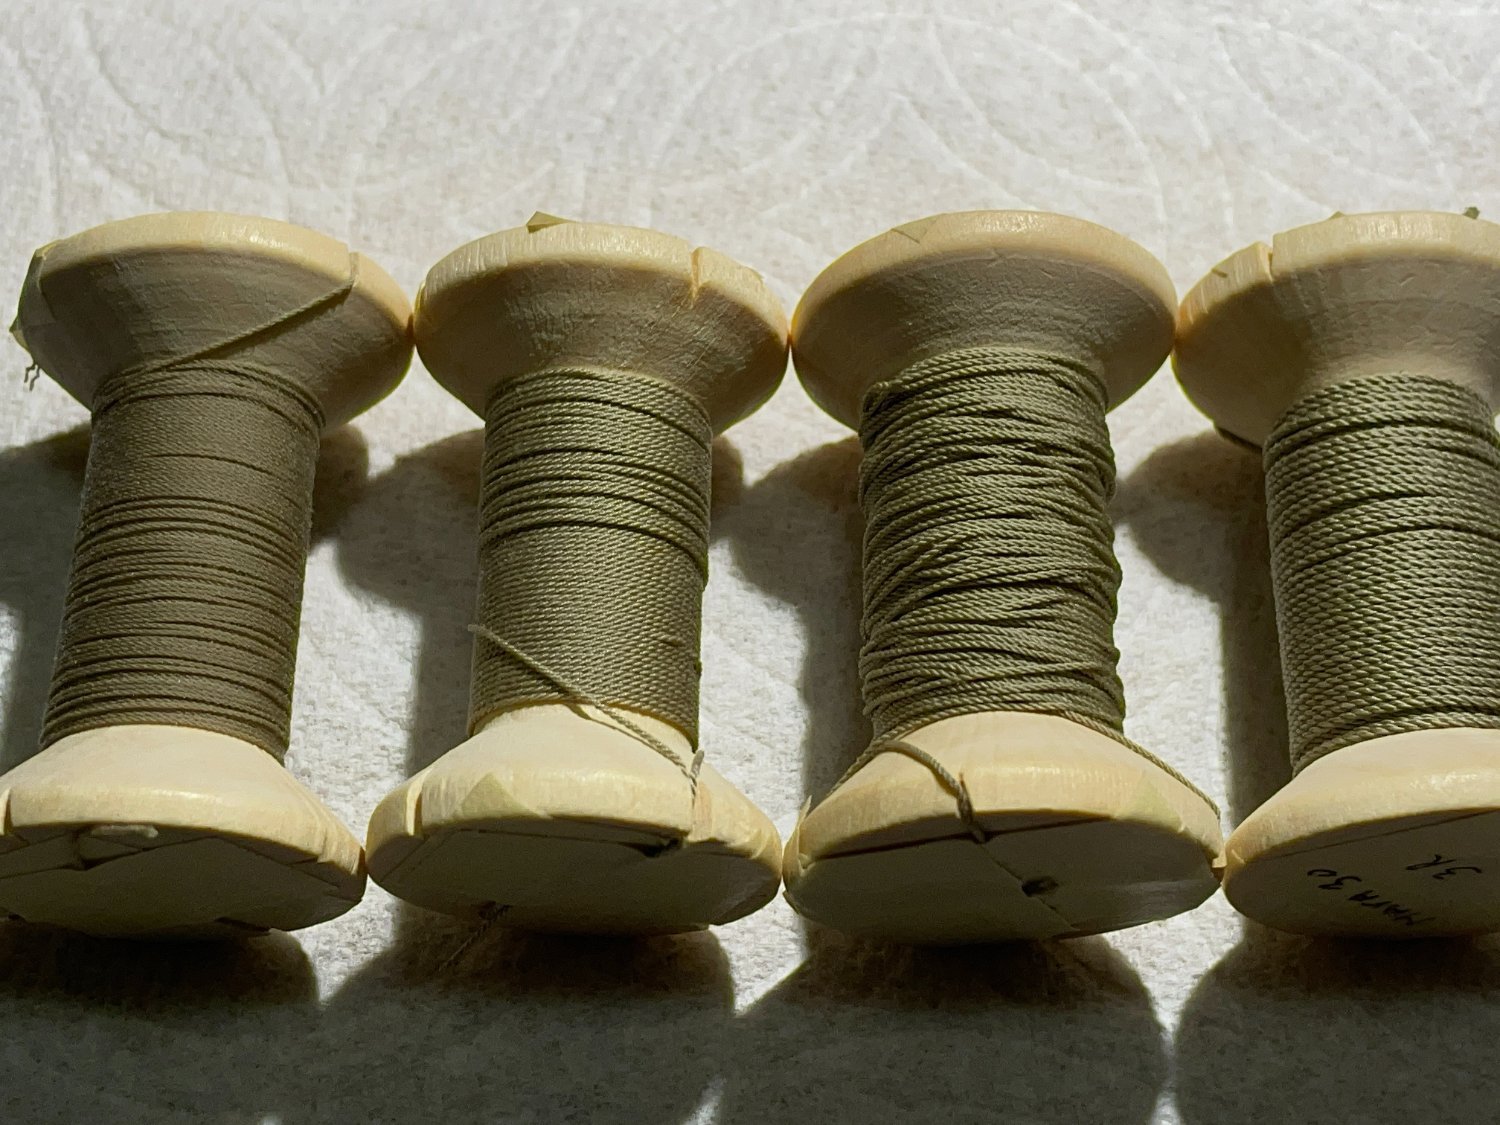
This Mara 120, 4 strands was still under tension when you replied... so I increased the temperature to 400 degree/5 min. It did quite ok this time. However, I will be switching to 3-strands with more twisting on individual strands, as you suggested. I may be more forgiving ;_)
Here are the Mara 70, 4 strands and the Mara 120, 4 strands. I think they are ok.
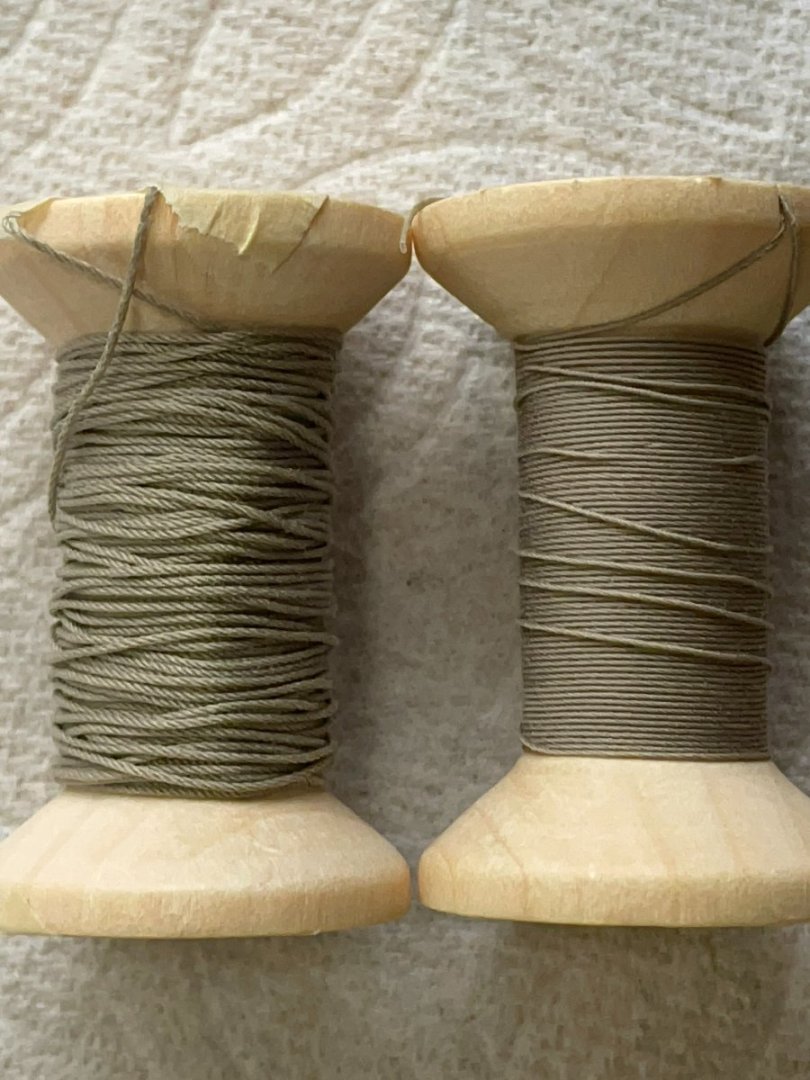
- Ryland Craze, ERS Rich, mtaylor and 2 others
-
5
-
-
Hello, first few times with the Syren ropewalk. P.S. beside my inexperience... I like Chuck ropewalk a lot! Looking for suggestions on the following:
Using mara 70, 4 strands (0.7mm or 0.025 inch): having no real issues twisting and after 4-5 min at 350 degrees ===> no unraveling.
Using Mara 120, 4 strands (0.25mm or 0.008 inch): The final rope keep unraveling, even after 5 min at 350 degrees. Not sure which variable to look to resolve this issue. Longer cook time or raise to 400 degree? Anything else I may oversee, such as
a) twist more tightly or less?
b) more/less tension while twisting?
c) or longer time under tension after watering?
a thousand thanks for your help!
-
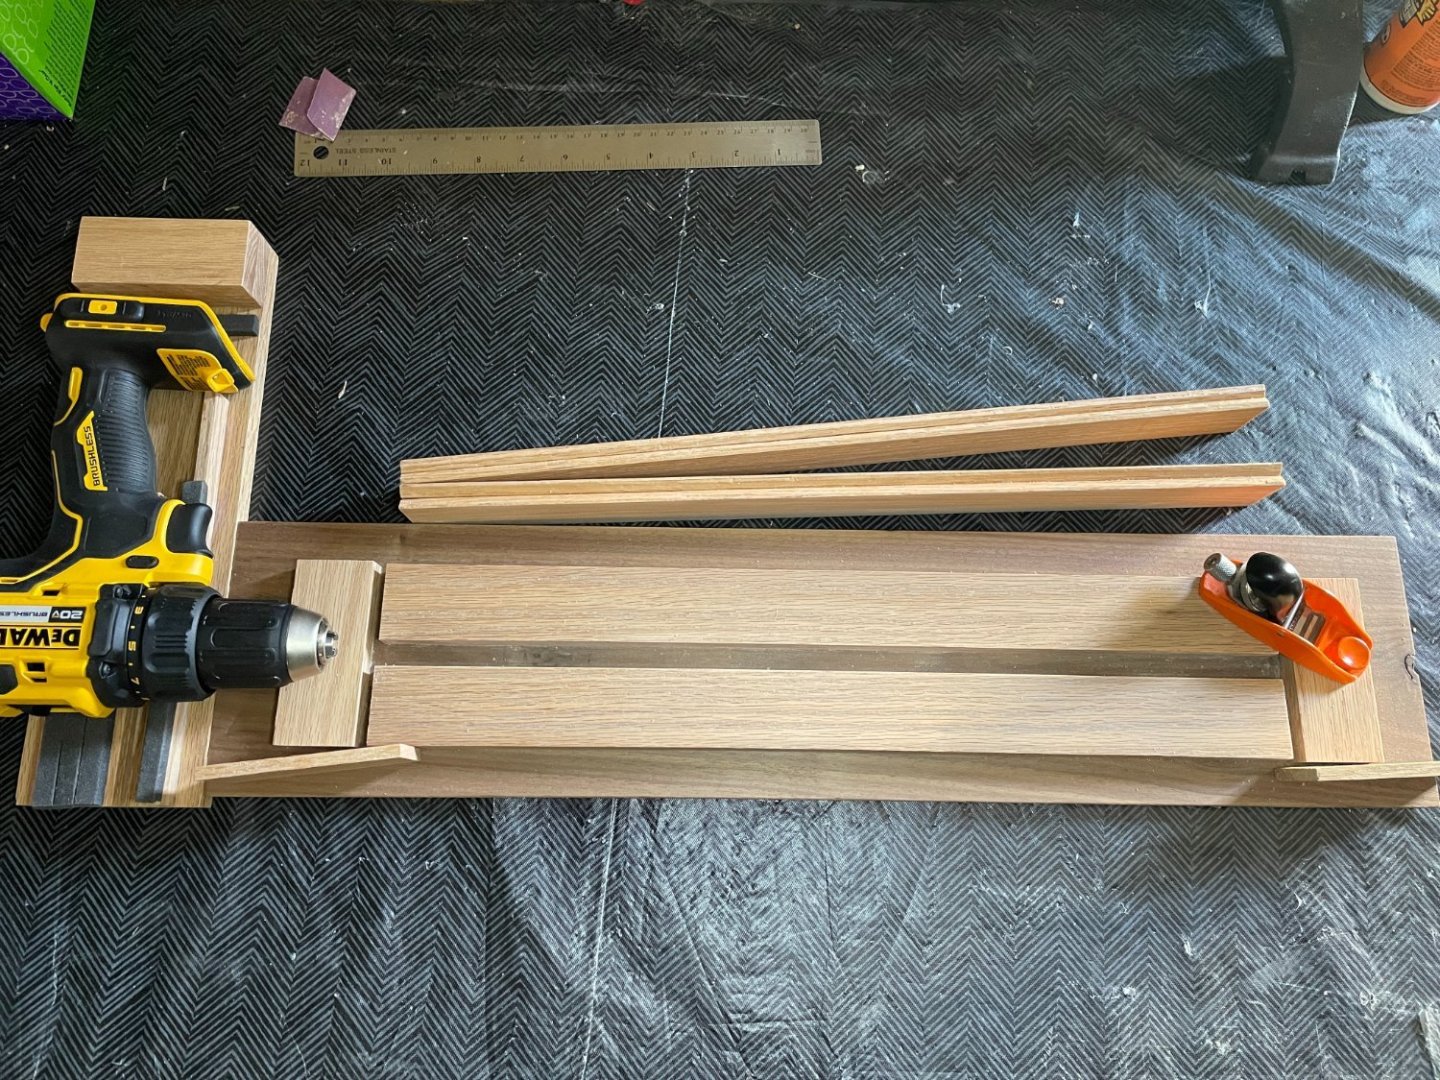
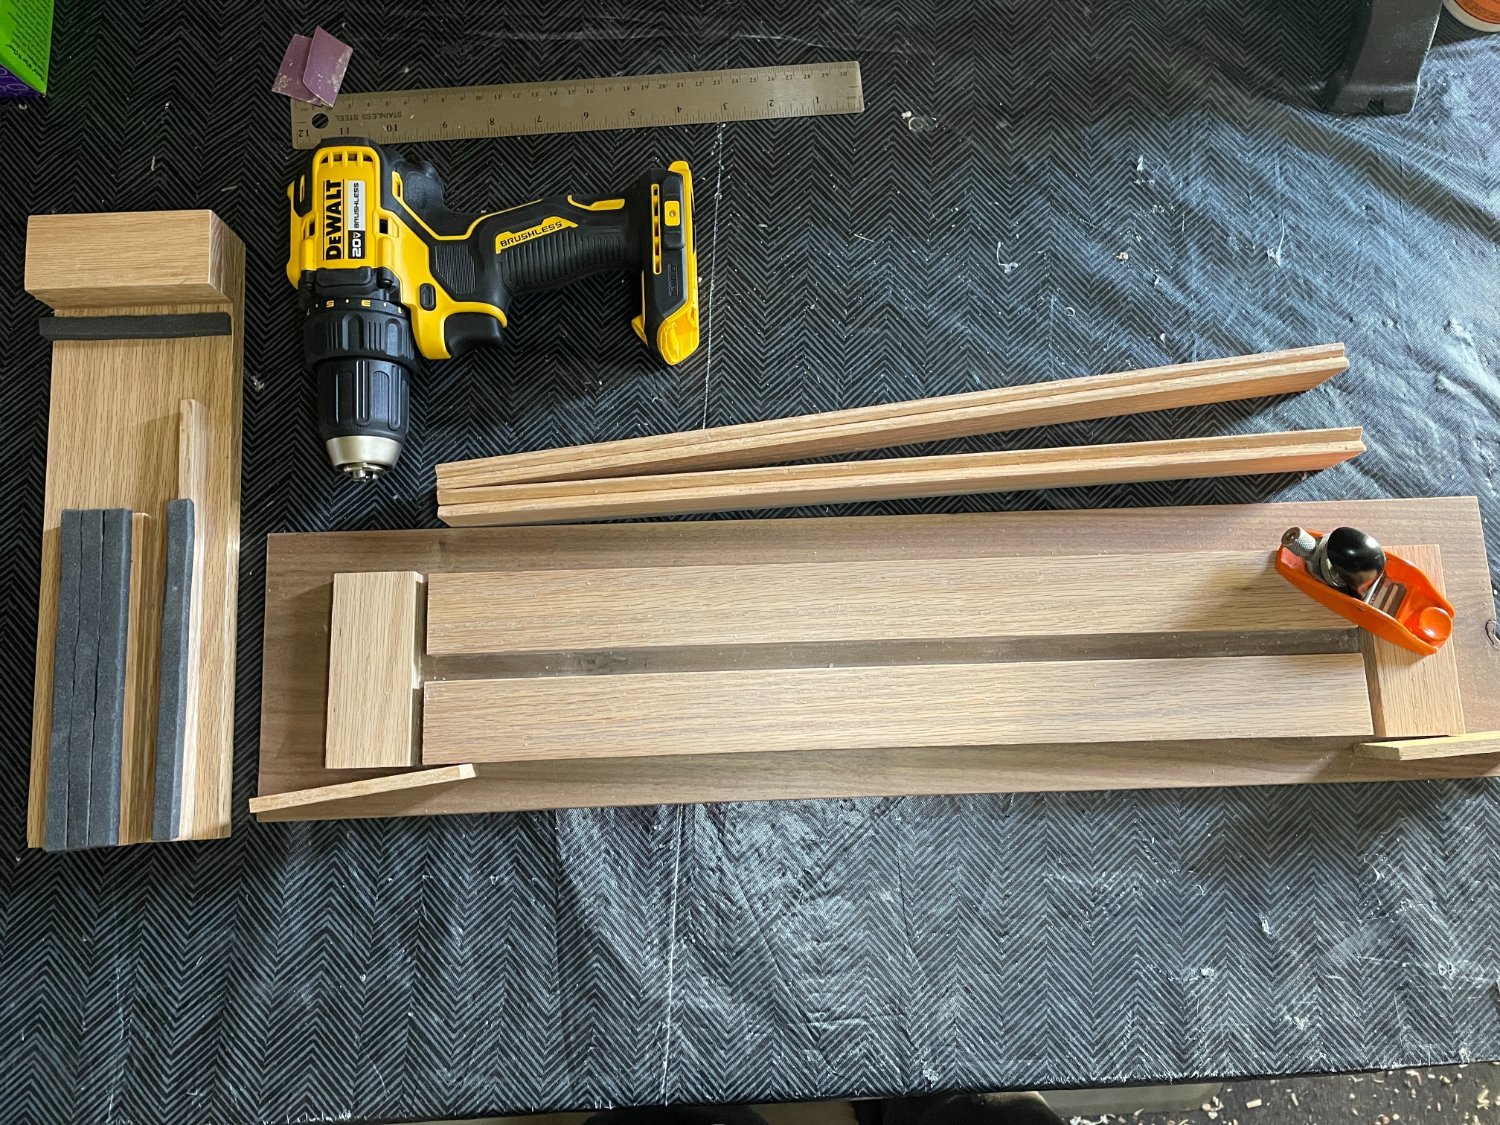
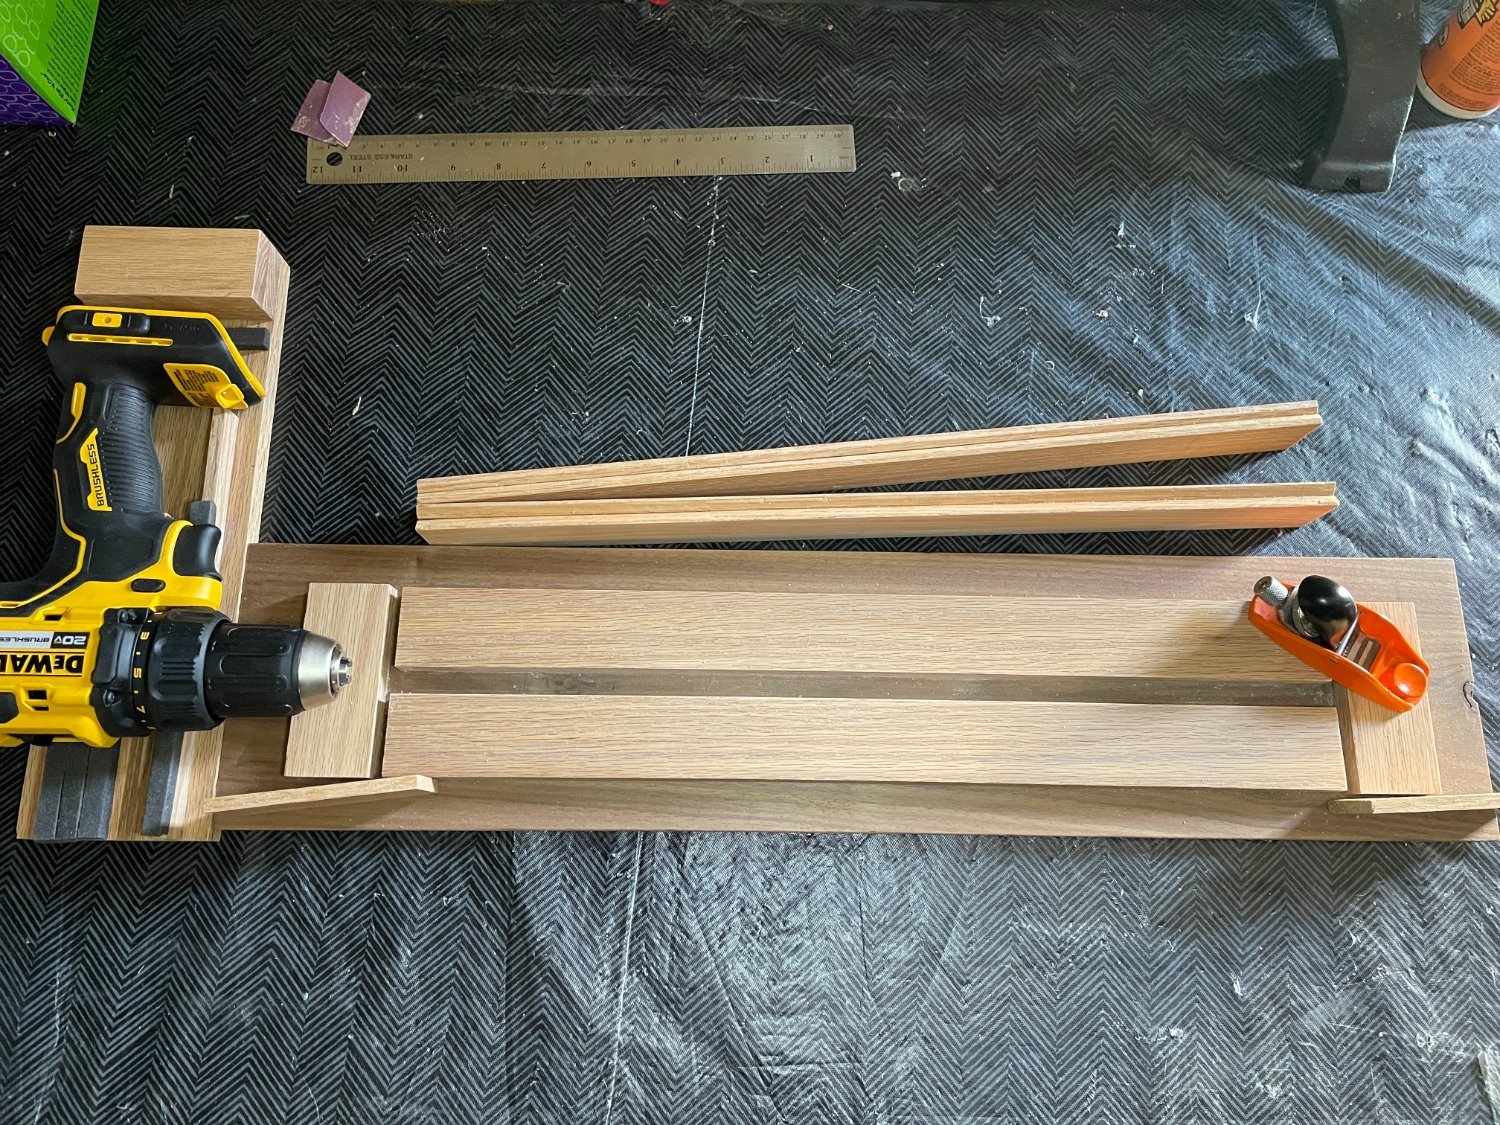
Shaping Mats: Build a rig for shaping mats. It is basically a holder for interchangeable v-groove pieces (a couple with different depth/width) for shaping using a plane or rounding off with sandpaper using a variable-speed drill. Hope it works... first time shaping round dowels. Now, I have to figure out how to accurately square the end of the dowel (likely a little table saw).

-
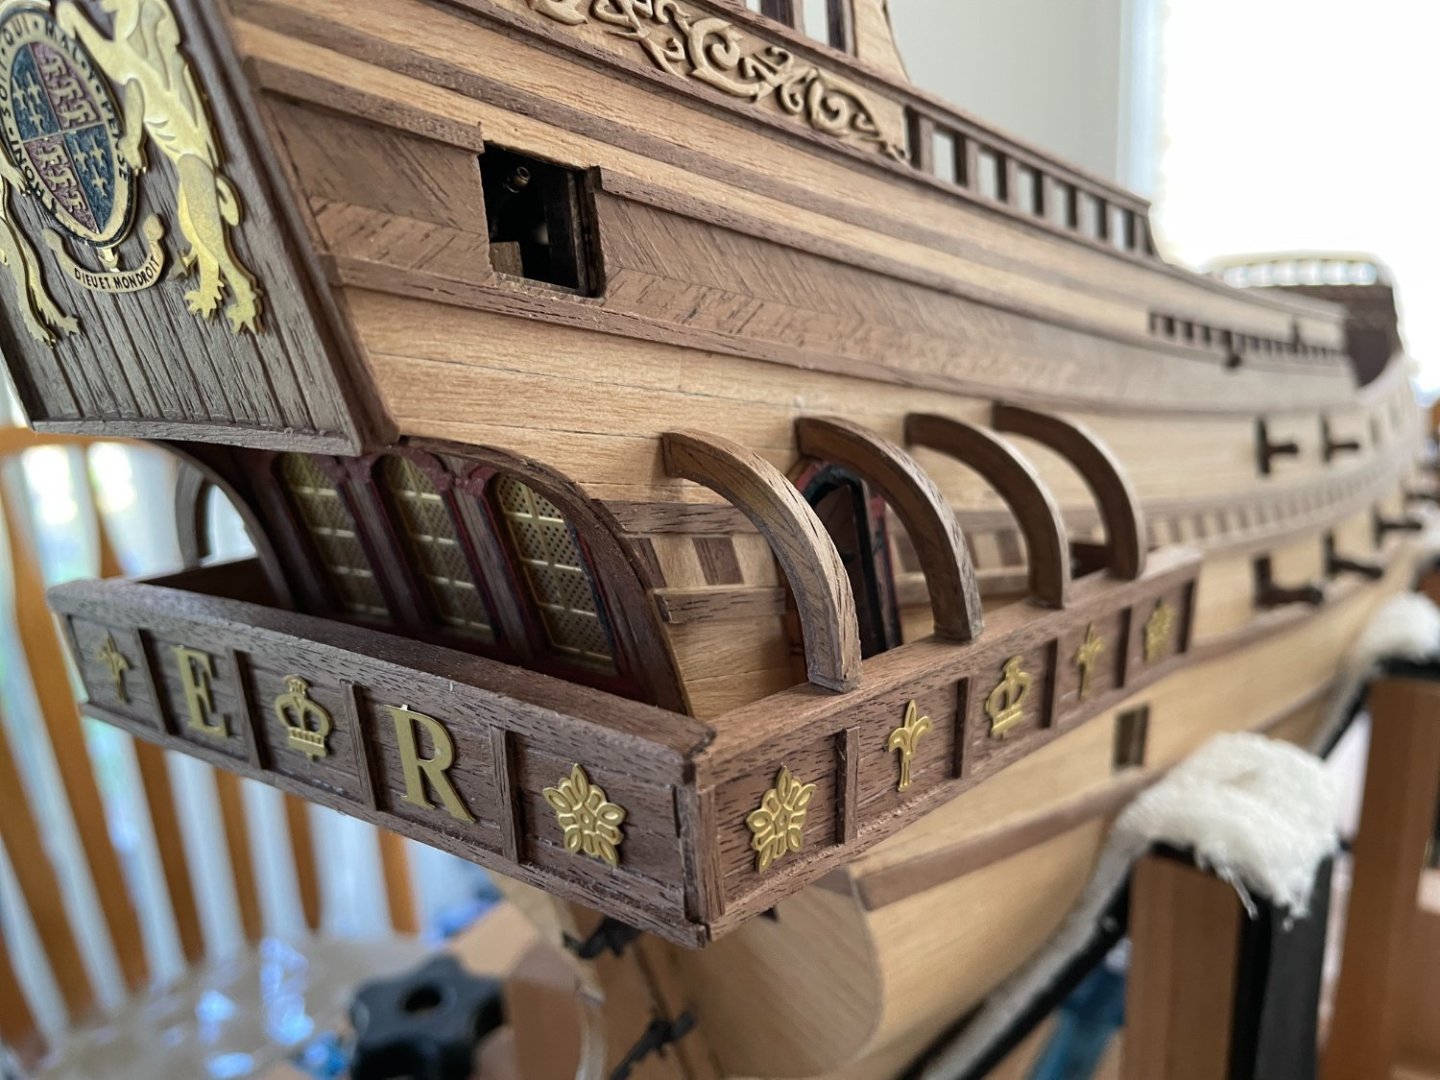
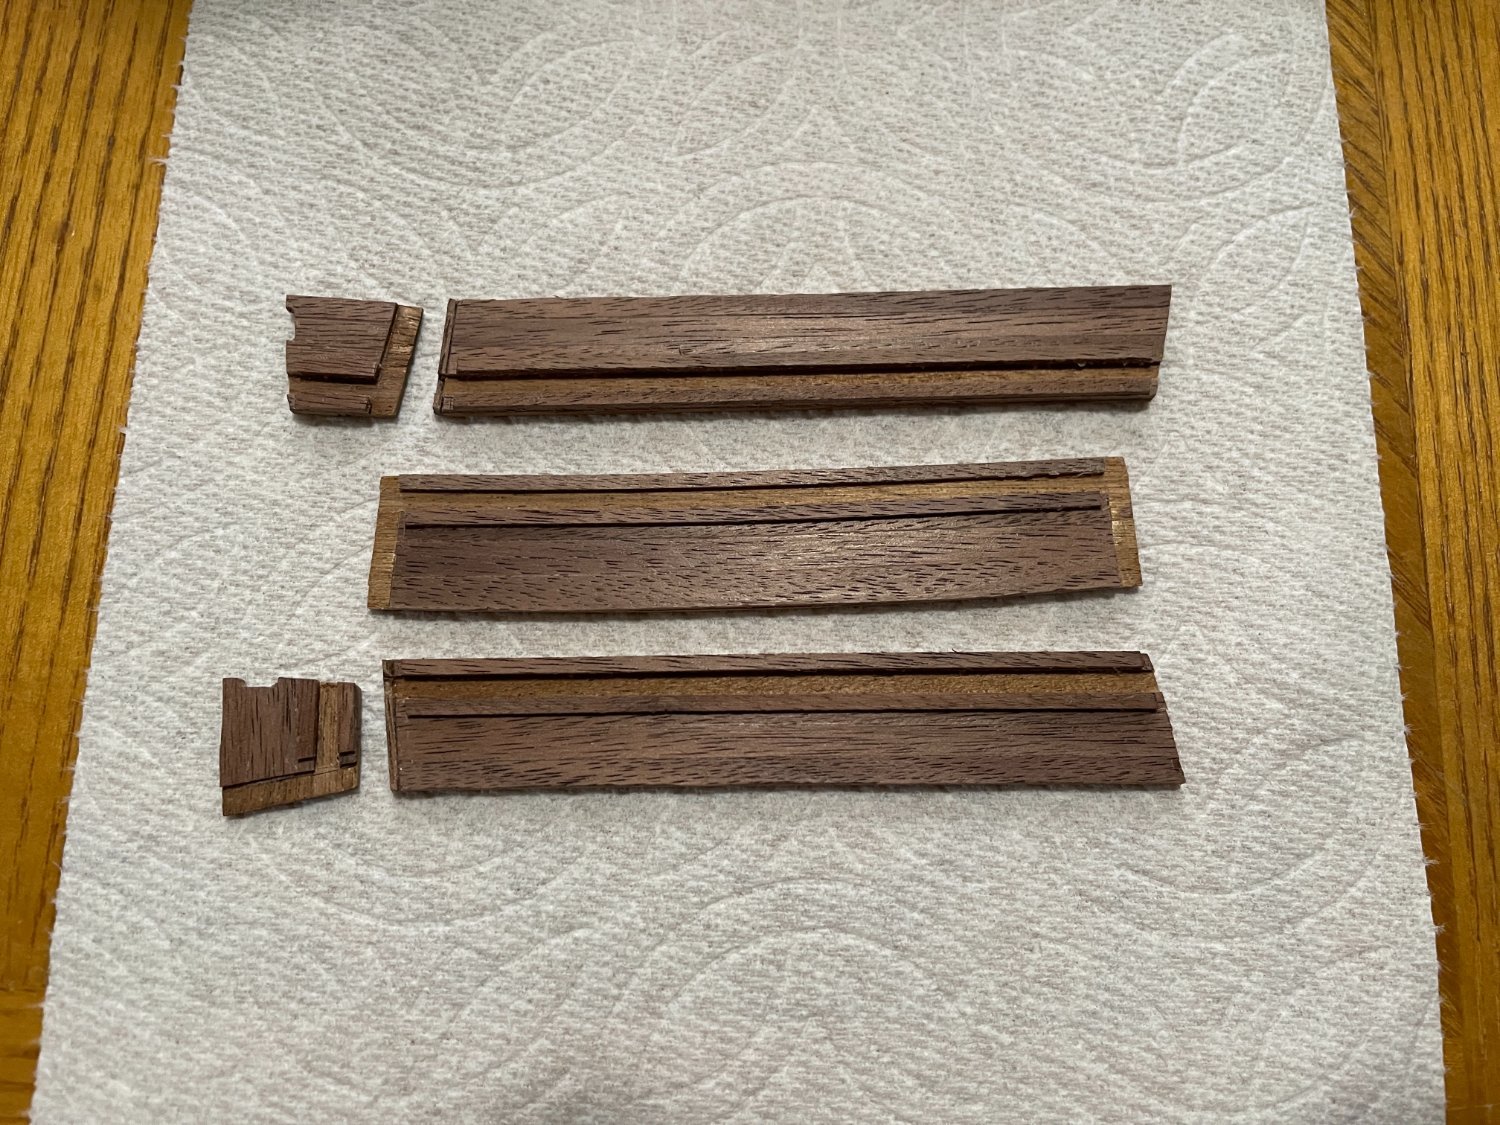
Completed planking inside the deck and stated to tackle the bow. In keeping with the color theme, both areas were planked using walnut strips. The bow was quite fragile... and thus was reinforced underneath, above and on the sides. Here's what it looks like so far.
Note: the bow side panels are not glued yet. I still need to add the canon door first.


Revenge 1577 by Loracs - Amati - 1:64
in - Kit build logs for subjects built from 1501 - 1750
Posted
22 ft Yawl (Vanguard Models): I'm adding a 22ft Yawl and 18ft Cutter (later) to the Revenge Build. Both are made by Vanguard Models and of excellent quality and design. Since we don't see those often, I'm adding pictures below. The model has matte clear coat only (except at the bottom of the yawl because it has photo-etch parts - dark brown). Wood choice (pearwood and something else) is excellent and the laser burn is very minimal. Overall, a wonderful small kit, worth every single pennies. Note: A few photo-etch accessories still need to be added.