MariusMi
-
Posts
12 -
Joined
-
Last visited
-
 SiriusVoyager reacted to a post in a topic:
Esmeralda by MariusMi - OcCre - 1:58
SiriusVoyager reacted to a post in a topic:
Esmeralda by MariusMi - OcCre - 1:58
-
SiriusVoyager reacted to a post in a topic:
Esmeralda by MariusMi - OcCre - 1:58
-
SiriusVoyager reacted to a post in a topic:
Esmeralda by MariusMi - OcCre - 1:58
-
mtaylor reacted to a post in a topic:
Deck plank size for Cala Esmeralda
-
 I've looked at photos of Santa Eulalia's deck and tried to estimate plank lengths. - when put to scale, plank width seems to be close to the 5mm width of the strips provided in the kit - plank length on the main deck photos was tricky to find. I found it difficult to identify full planks. I ended up with 5,4m (17,7') -> 93mm in scale. So I increased this to 100mm to make it more convenient. - for the quarter deck planks seem smaller. I ended up with 4m (13,1') -> 69mm. I increased this to 80mm. I sketched this in FreeCad to have an approximate view of how this would look like. I used the central axis of the deck to place first planks. For this, I started with a full plank from the intersection with the quarter deck and placed the rest until the bow. Then added the rest of the planks based on a pattern I found in the forum (set of 5 planks). Same procedure for the quarter deck with a modified pattern using only a set of 4 planks. I didn't use symetry (left - right) from the central plank row placed on the central axis. I'm not sure if this is correct or should I make the deck symetrical in terms of plank pattern?
-
Canute reacted to a post in a topic:
How do you make your hull look wet?
-
mtaylor reacted to a post in a topic:
How do you make your hull look wet?
-
I would also experiment some paints on separate wood parts to see if this could bring something. Having some colour gradients could accentuate the shift from wet to dry. I'm not talking here from experience, just some ideas. I see 2 cases: - painted hull: use a darker tone of the colour for the wet area and you might even want some lighter tints on parts of the dry zones. I would also dry brush some light greys on the dry areas to mimic sun decoloration and dried salt. Then experiment with varnishes (gloss, matt). - bare wood hull: paint doesn't really apply here. So probably only option will be the varnishes. Acrylic gels to mimic splashes but I wouldn't exagerate with them: due to the scale the thickness of the layer will probably not be realistic to render the wet effect. A light dry brush of greys on the dry areas would not hurt. Marius
-
mtaylor reacted to a post in a topic:
Deck plank size for Cala Esmeralda
-
OllieS reacted to a post in a topic:
Deck plank size for Cala Esmeralda
-
Finding no real ship reference on the internet for Cala Esmeralda, I was also thinking that it could be a finctional ship. But I wasn't able to find the Santa Eulalia with my search. So, thank you Ollie for leading me to this information! I will do my investigations starting from this real ship.
-
MariusMi reacted to a post in a topic:
Deck plank size for Cala Esmeralda
-
mtaylor reacted to a post in a topic:
Deck plank size for Cala Esmeralda
-
Hi, I'm trying to define deck plank sizes for my current build, Cala Esmeralda, from OcCre. This is 1:58 scale. This schooner was built in Spain between 1916-1919. I'm trying to find information on what plank size would the spanish shipbuilders have used in that period. The kit provides 5mm wood strips. For this scale, it would end at 290mm (11,4'') in full size. This is my first kit so I will not modify the provided width. For the length, without any reference, I was thinking about 100mm. So: 5,8m (~19') in full size. I'm not looking for exact match with real sizes, but would this 100mmx5mm plank make sense on the model? Also, were shipbuilders using the same plank dimensions for quarter deck and main deck? This is in general, I can imagine that they could adapt to available material, but were they starting to standardize sizes in that period? So if I keep the same plank size between the decks, will I get close to a good result or will it be a big mistake?
-
hof00 reacted to a post in a topic:
Esmeralda by MariusMi - OcCre - 1:58
-
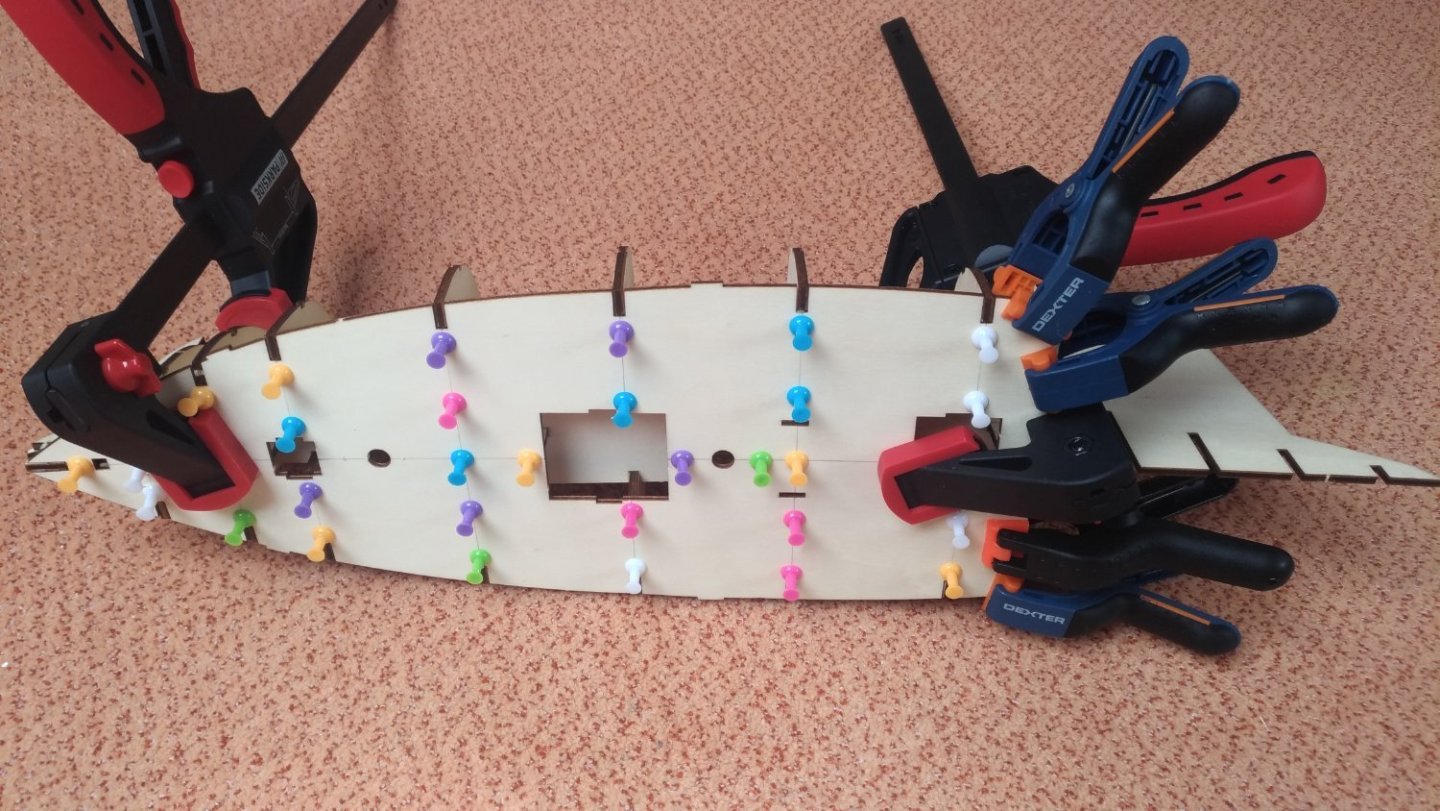
First deck element is glued. I used some colourful pins to bring the deck into shape. It worked quite well there are some areas where this fixation was not strong enough to shape the material: I have a few gaps between deck and frames of max 1mm. Nevertheless, the frames are not cut that precise and when fitted to the false keel, they go 1-2 mm lower and are not flush to the false keel. So, I suppose that the lower position of the frames is compensating these gaps I created during joining. Next step is to glue the remaining frames and the last deck element. I see now that the front frames are not that accurately positioned using my placement method. For the remaining frames, I am thinking to to do some markings on the false keel based on the ship's drawing and guide the frames into position. I will try this approach and hopefully have a good positioning, despite the dimensional issues of the precuts.
-
MariusMi reacted to a post in a topic:
Esmeralda by MariusMi - OcCre - 1:58
-
Thanks Chris for the tip. This worked well to disassemble.
-
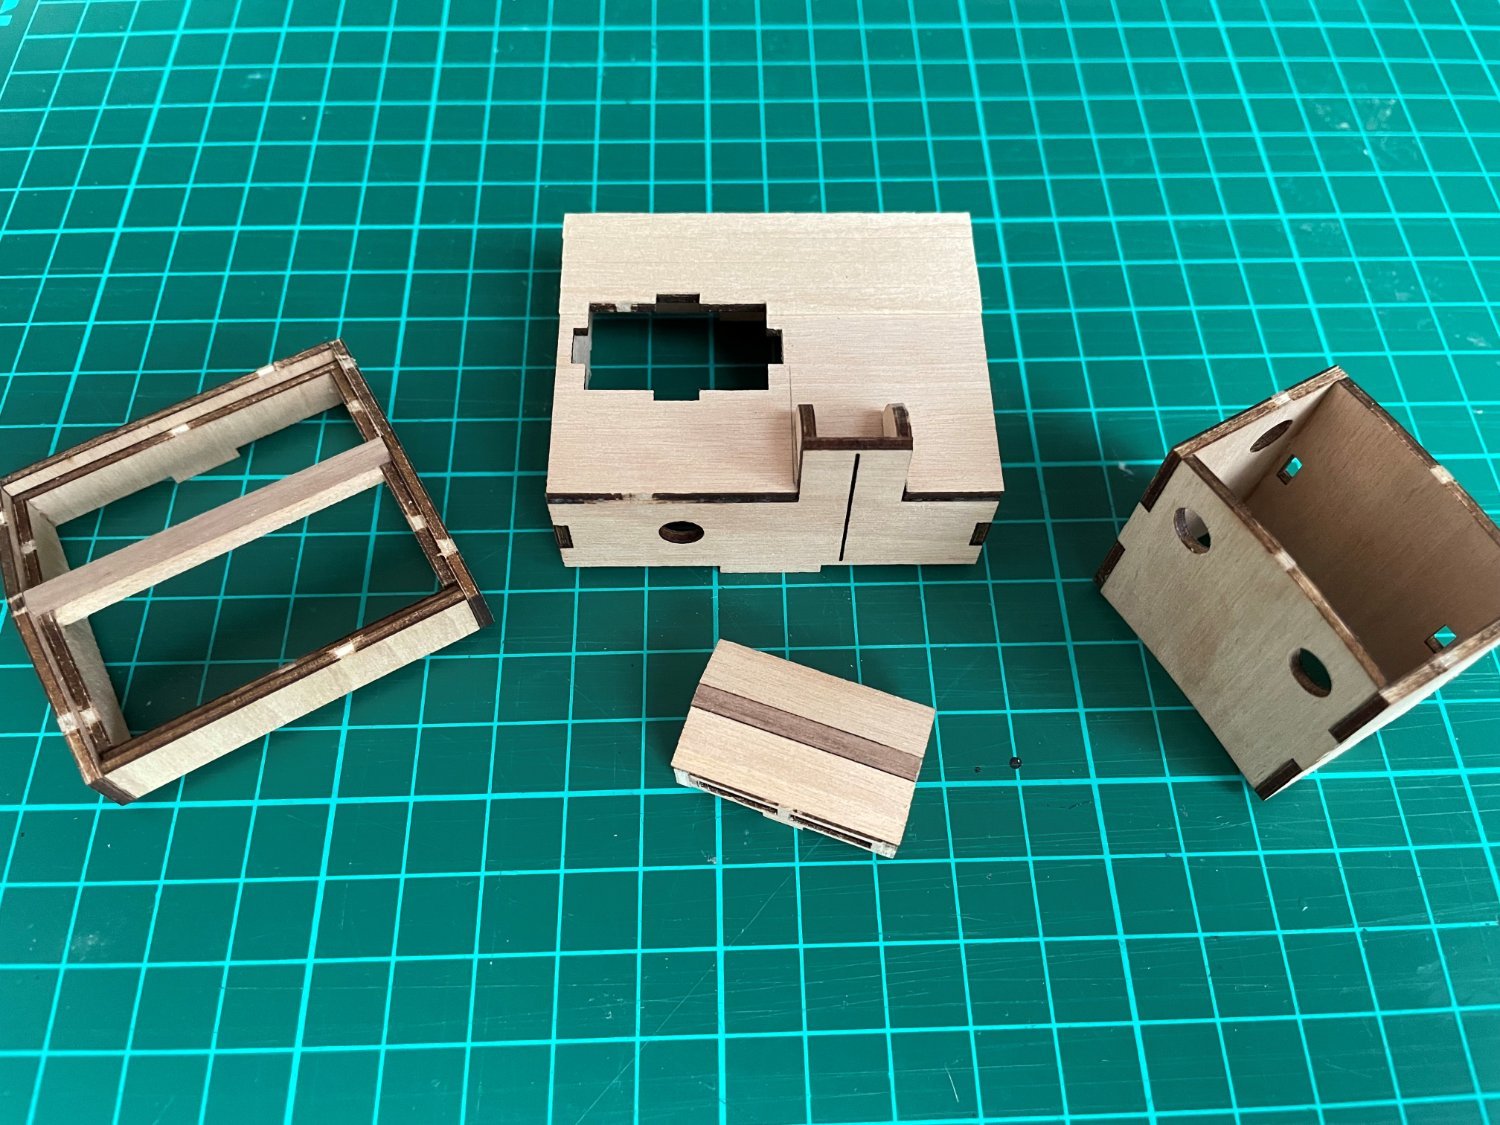
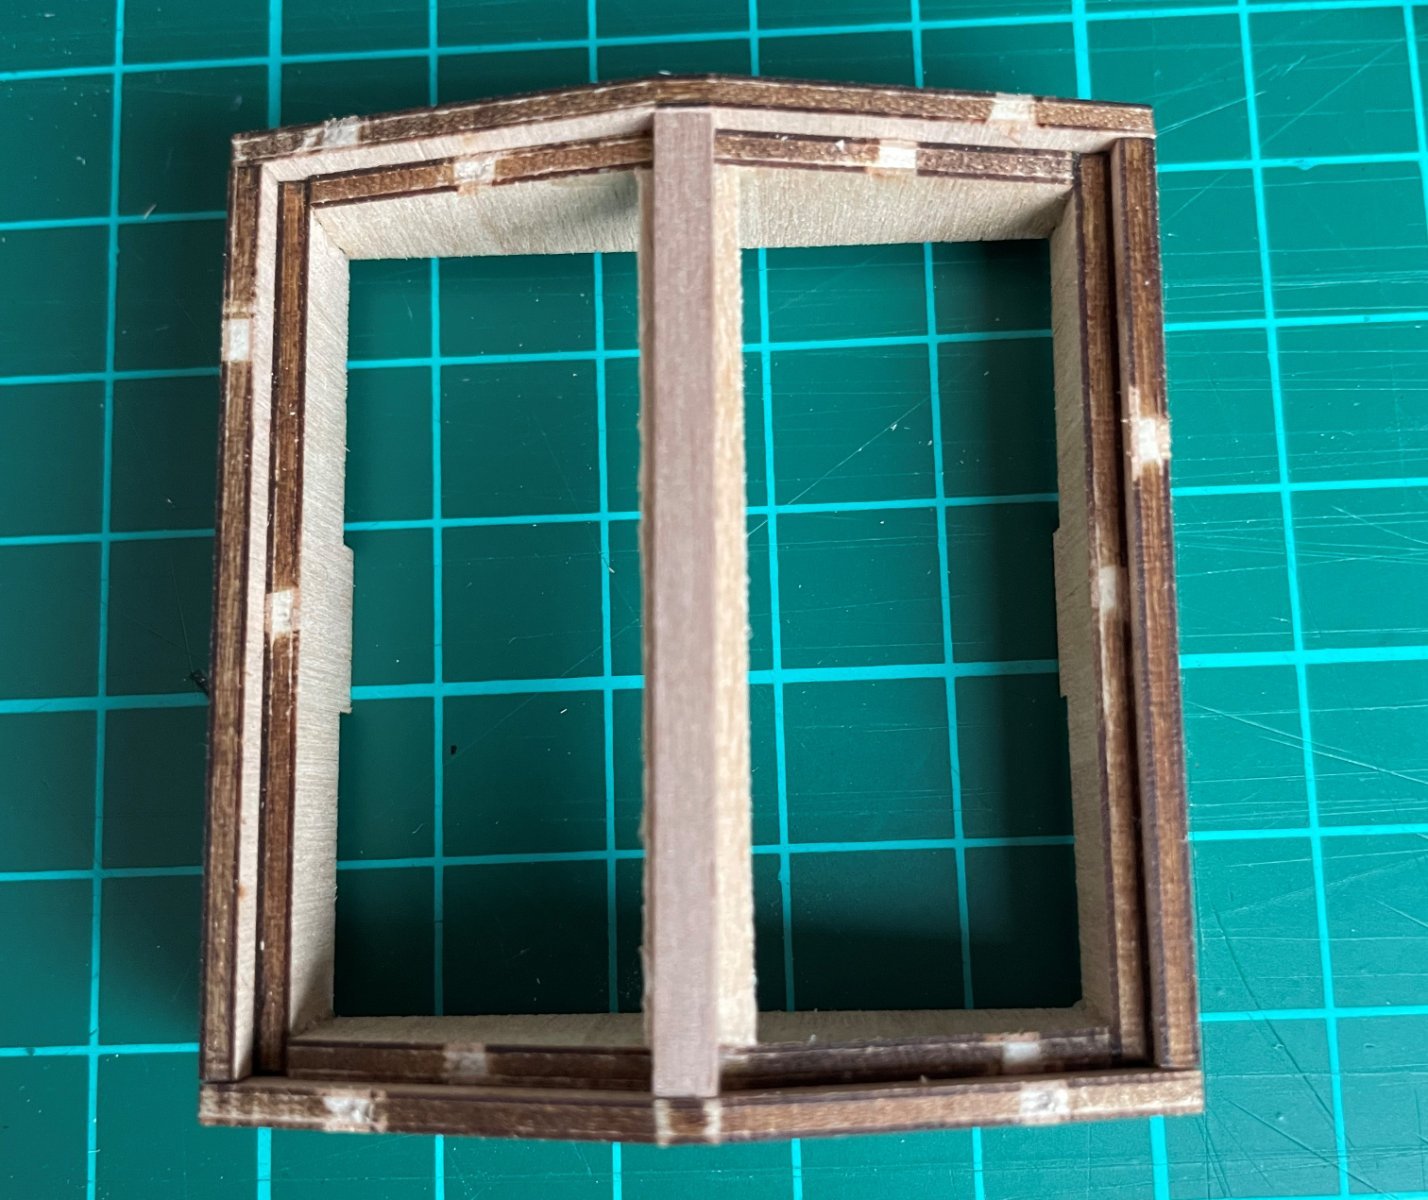
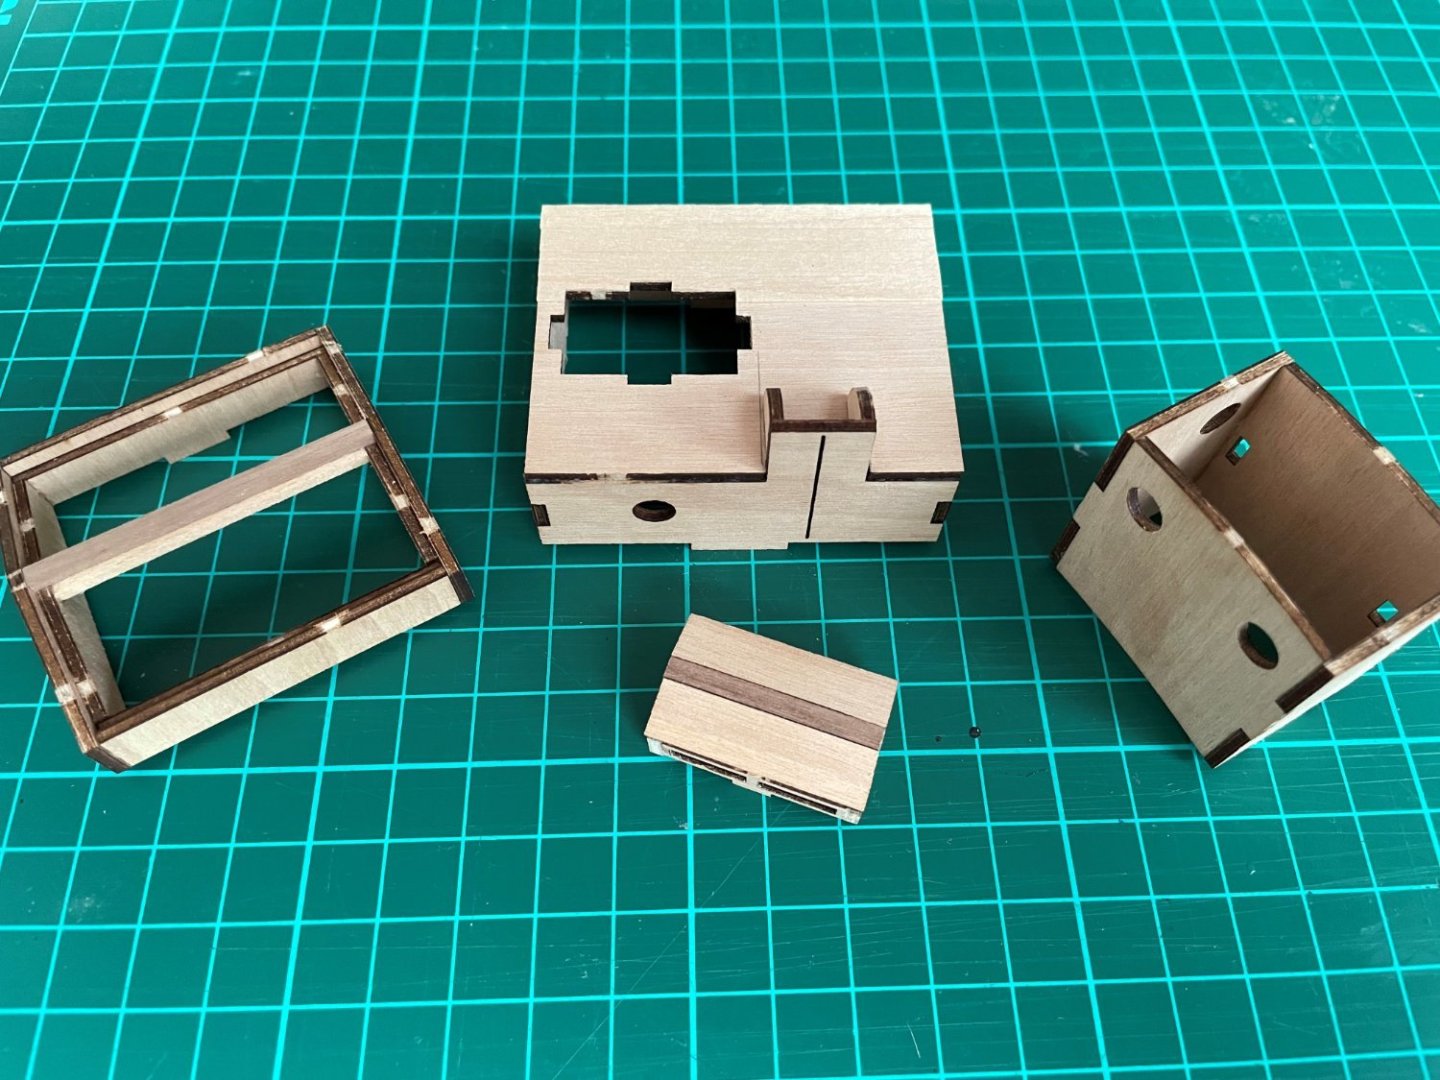
The hull build needs some thought, so I am looking to build a stand for the ship. I am also working on some parts for the superstructure. In the photo on the right you can see that there are two beams that I couldn't center. I glued the beam below (lighter color) first without measuring. I then centered the top beam on the structure and it seems the previous one wasn't positioned correctly. This will no longer be visible once the next parts are added above. However, if someone is building the same kit and reading this, I would recommend starting with the top beam, which can be easily positioned based on the surrounding volumes. Then the bottom beam can be added from below and centered on the existing top beam.

-
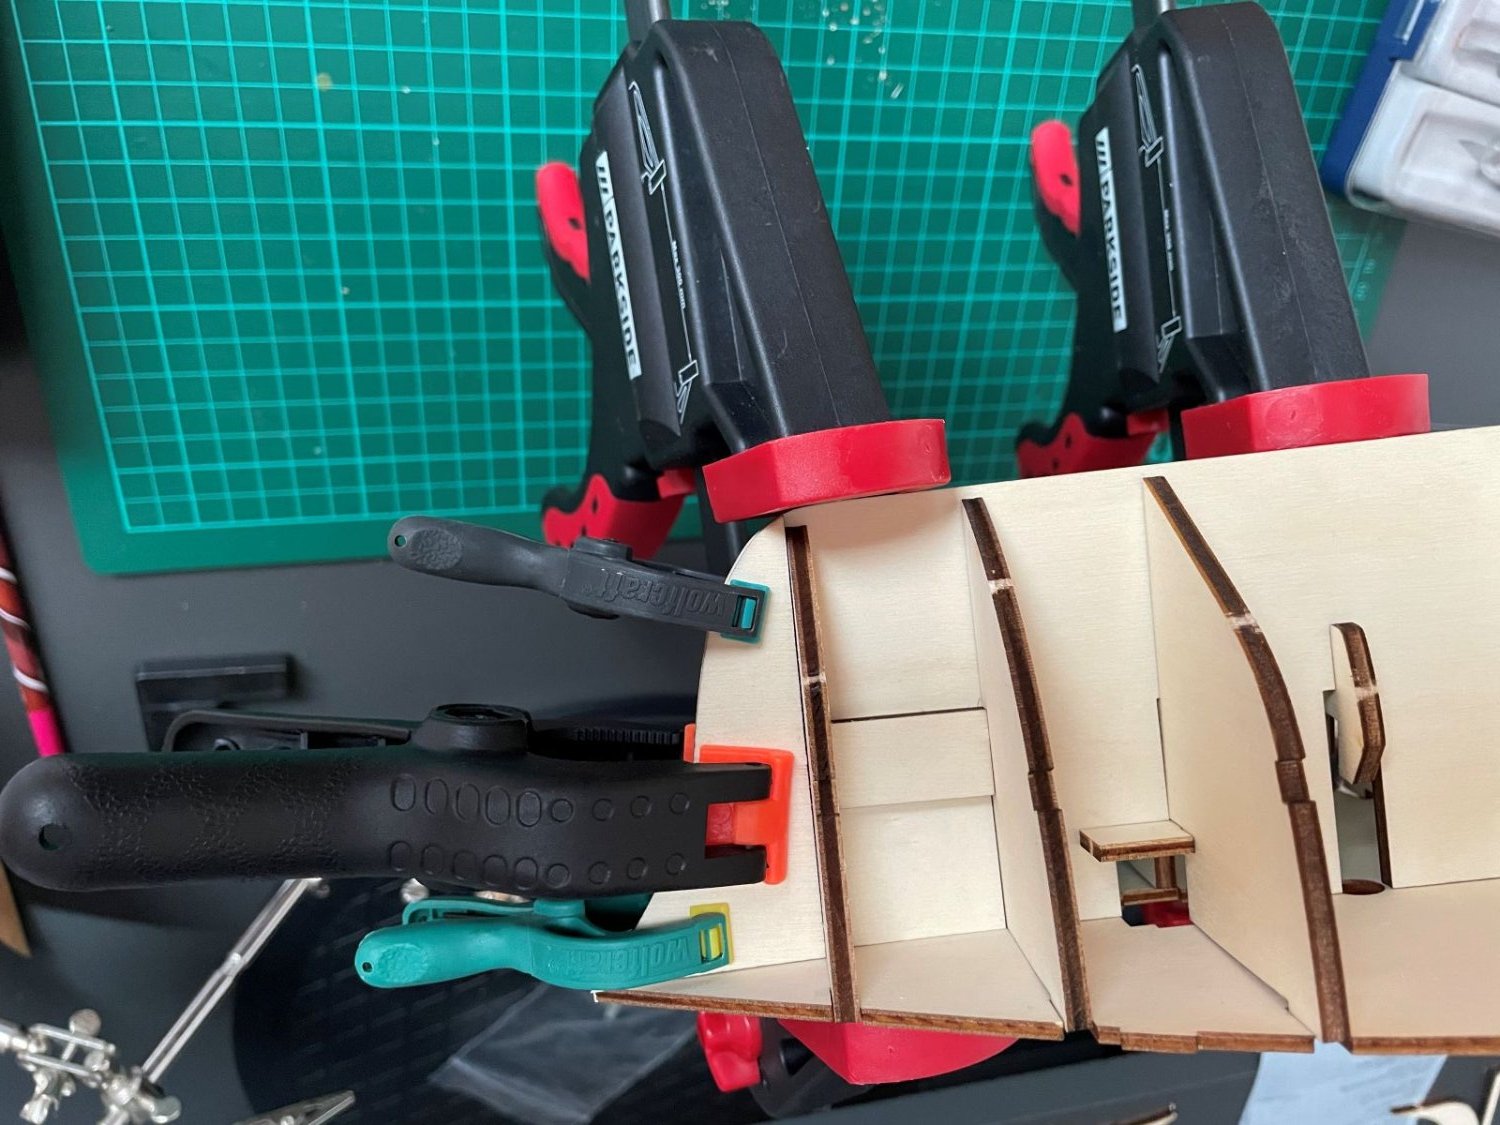
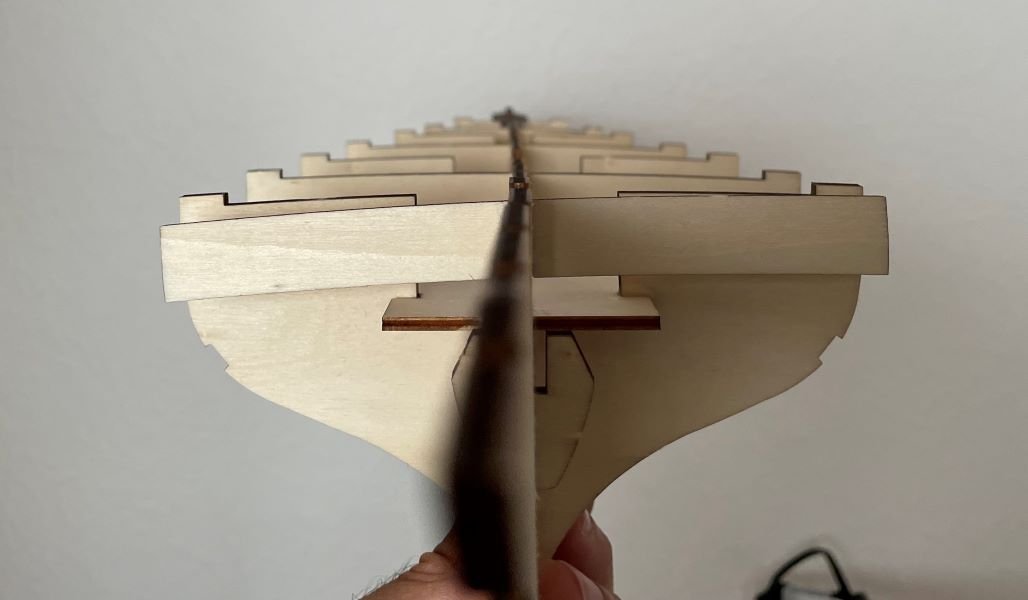
Most of the frames are glued followed the technique above. This is how they look: The keel has a bend but I'm hoping the deck will straighten everything once in place. I will have to check afterwards if it really did or if corrections are needed. I dont think this comes from my way of attaching the frames, they are roughly perpendicular. It is probably the initial stress in the material. I noticed that my technique was not that reliable on the last frame which has a huge angle. When dry fitting the deck, I see that it can be brought into position (plywood is quite thin and flexible) but I worry that the rotation will deform the false keel and bring trouble later. Now I'm thinking about my options for next steps: 1) brake the bond and replace, with the unavoidable damage; 2) correct by adding material on one side and cutting on the other; 3) not yet found
-
MariusMi reacted to a post in a topic:
Esmeralda by MariusMi - OcCre - 1:58
-
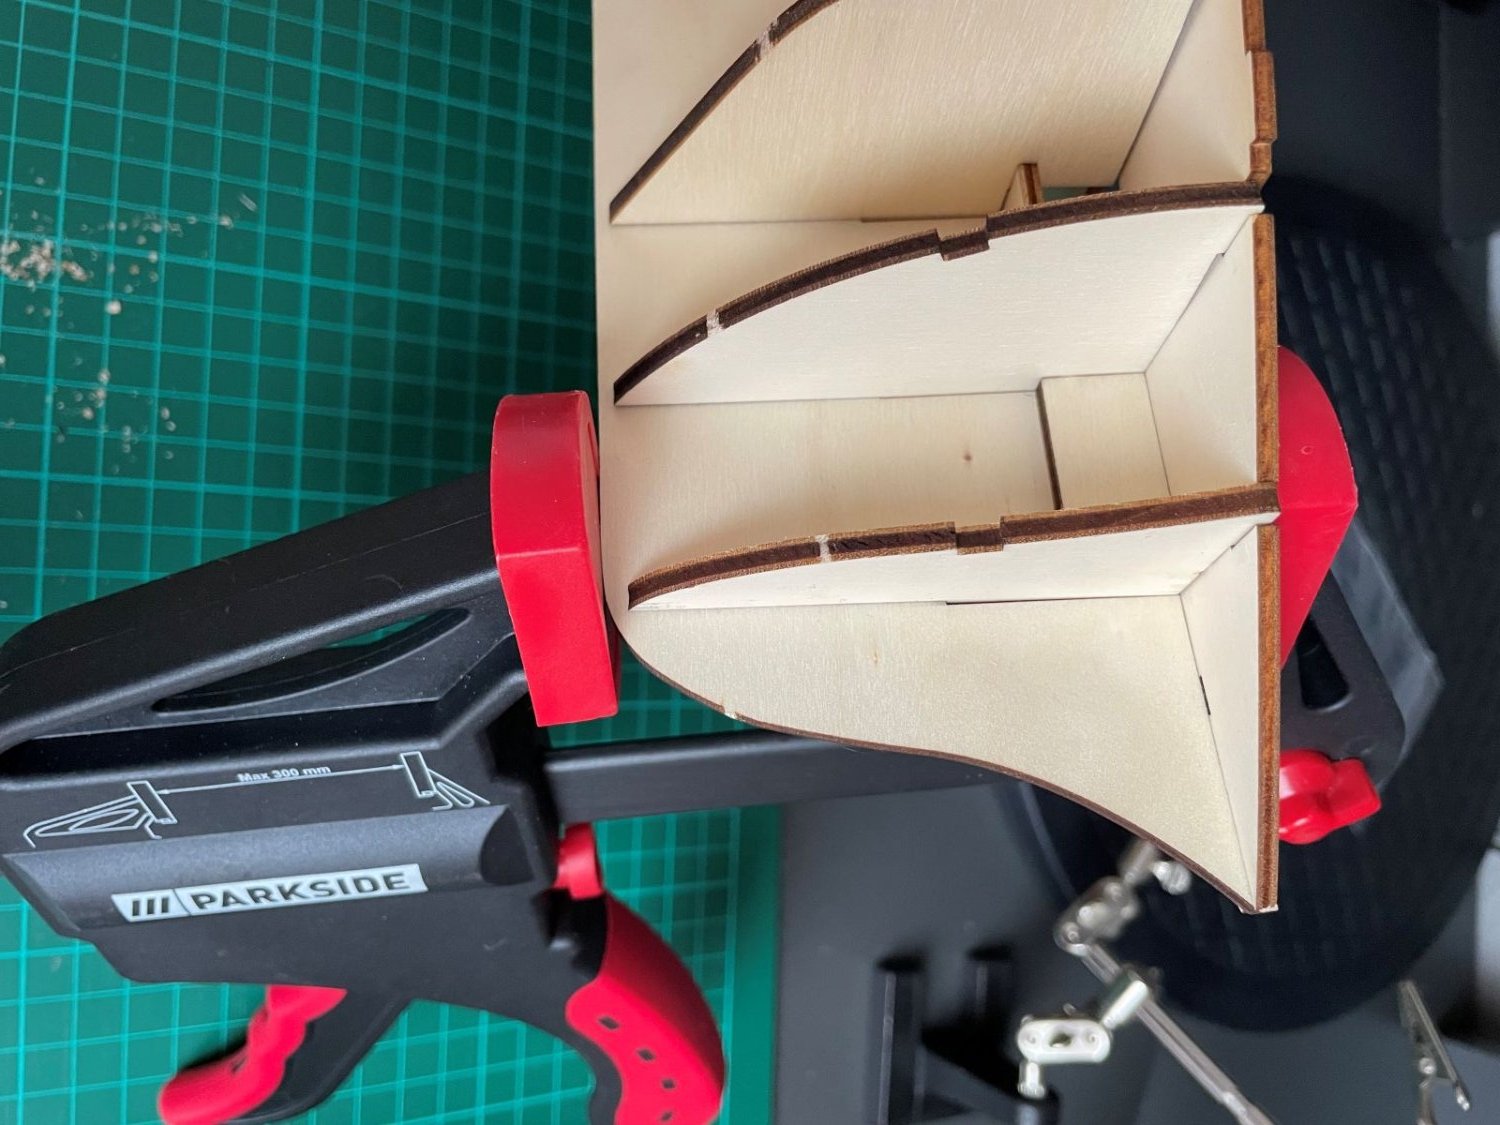
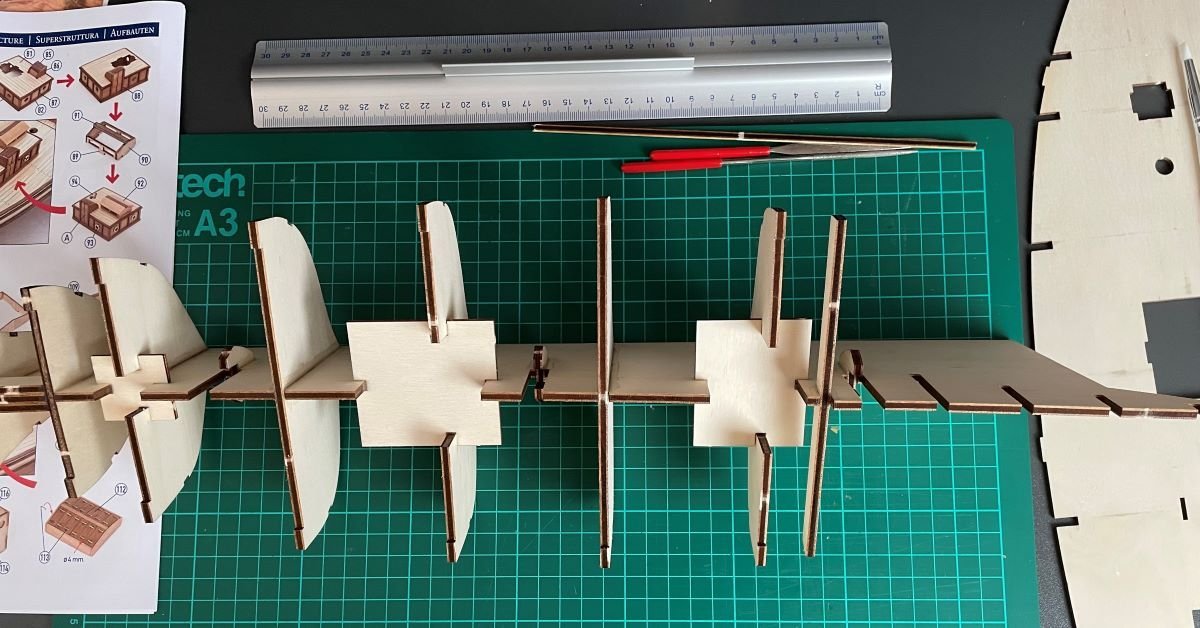
The instructions are quite nice with detailed photos. I didn't follow them to the letter because I faced some questions from the beginning. The frames have a lot of play once fitted on the false keel. With at least 1-2mm of translation in every axis, rotation is quite big and I was not sure about them falling in the correct position. So I didn't glue them all on the keel as instructed but I tried to use the front deck to align and hold these ribs in position while gluing them one by one on the false keel. I am thinking that there could be en error here because the deck is curved and I placed the frames perpendicular to the deck. So I probably have a slight angle for the frames against the vertical. In the photo we see the technique I used to align the frames. The idea in my head was that multiple parts would constrain the assembly and bring the frames in a good position.


-
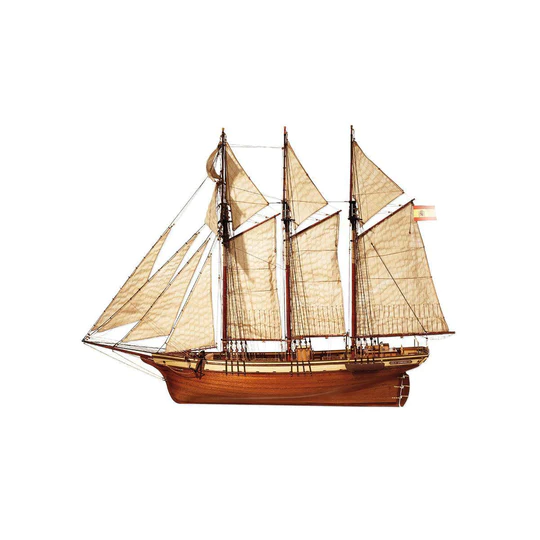
Welcome to those passing by on my build log of the Esmeralda. I will consider this my first build of a wooden ship kit. I acquired the kit end of last year but started it only a few days ago. I hope it will be interesting for others. It will certainly be interesting for me to look at it later to see progression when I tackle new projects. As a disclaimer, my nautical vocabulary is not that extended. I do my research but I am sure I will use some wrong words. Corrections will bewelcome and highly appreciated. I didn't find much information on the ship itself on the web. So here are some facts from the manufacturer: "The topsail schooner "Esmeralda" was built in Majorca between 1916 and 1919. With an American style in terms of her figure and a most elegant line of sail. This schooner was one of the largest and most beautiful to be rigged in Majorca." I certainly agree with the words above. I find the ship very elegant and this is what made me select the kit. Below is a photo of the finished kit I took from the manufacturer's website.
-
Hi everyone. Thanks for the warm welcome!
-
MariusMi changed their profile photo
-
Hello everyone, I just registered and wanted to pass by for an introduction. I'm Marius and living in Germany. What brought me to this group? The main reasons are ship modeling and search of ship knowledge. I've always enjoyed watching ship models and wanted to build a sail ship. I've aquired last year a model kit from Occre (Cala Esmmeralda) for later, but it was always reaching out to me so I decided to start it. The first steps raised many questions and I paused a bit to look for more information on building techniques but also on ships in general. I seem to find little information on this ship and also my general knowledge on ships is limited to be able to quickly connect the dots. I think that taking part in the community here can help me raise the skill in these areas. I remember my dad had a small wooden sail ship. He allowed me to play with it and, being quite small at that time, you can all imagine the end result. After a few decades, I still remember that ship and many of its elements. I also worked on some ship models as a kid in a club, but not consistently. I will start a log of my Esmeralda build to show the progress and certainly ask questions as work advances. I don't plan to finish it fast as this project gets a small amount of time from the daily available time. With this wooden ship kit, I took a break from my military plastic kits in 1:72. Changing scale and material is highly noticeable. Being a kit with all elements available it's quite a help compared to a scratch build but I suppose this remains a complex project. I will certainly run in parallel some small projects of fantasy miniatures while taking breaks in search of information and ideas on the ship build. I wish you all a great day! Marius