


flyer
-
Posts
1,006 -
Joined
-
Last visited
Content Type
Profiles
Forums
Gallery
Events
Posts posted by flyer
-
-
Thanks Nils.
Photo etched, yes, and they are also available in 1/72. BTW, your planking on KWdG looks fine as it is. I remember Queen Mary in long beach having quite prominent rivets as well.
Cheers
peter
- Elijah, Mirabell61 and Martin W
-
 3
3
-
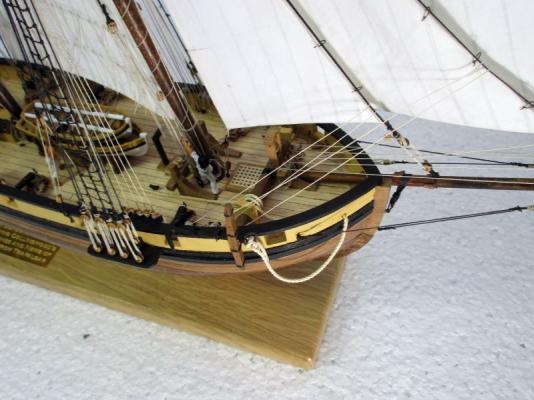
Finishing the hull
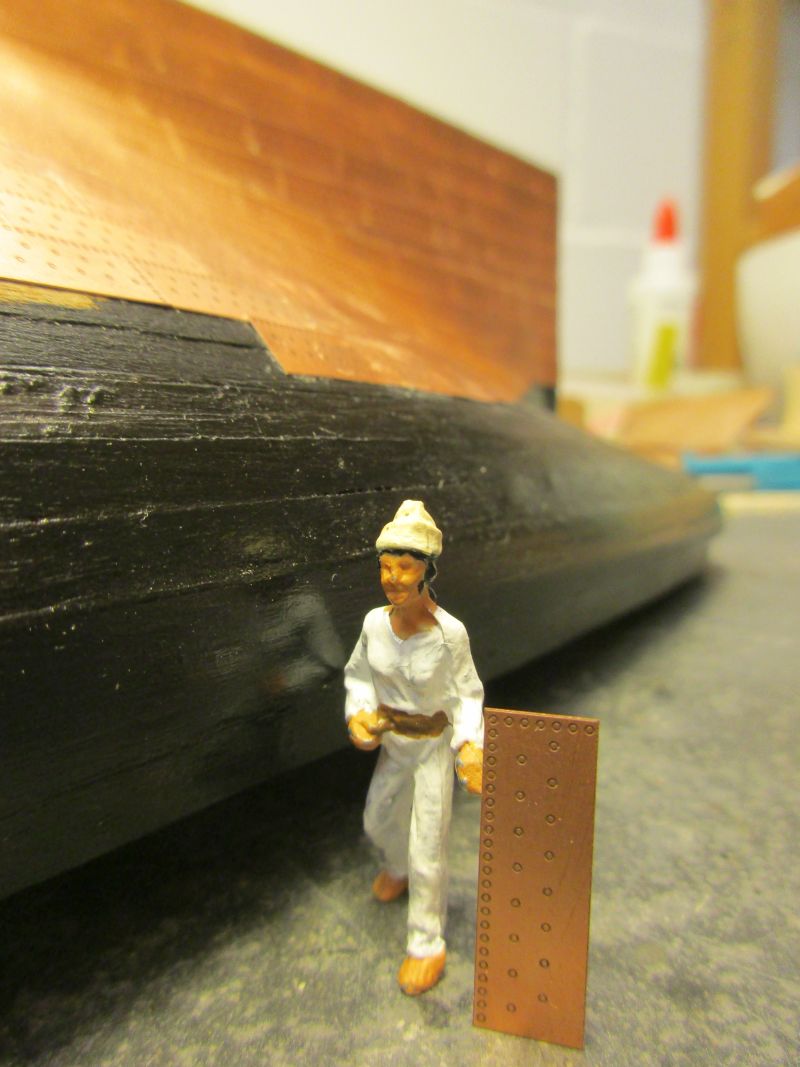
The upper part of the hull was painted black and the coppering started. I use Amati copper plates. They come in sheets and the single plates can easily be broken off by bending them a few times both ways.
Starting at the lower stern the plates were glued on, overlapping from stern to stem and from the keel to the waterline. Along the waterline a single line of plates gives a clean termination. This pattern follows the one used on USS Constitution and I think it should be adequate for America.
Those Amati plates are meant to overlap. That's the reason for them being left and right. One line of nails on the upper and forward side is provided by the next plate overlapping the bald edges. The handicap of that system is the unfinished look of the terminating plates.
I also like the way the nail heads are shown flat, running smoothly with the copper. I think the prototype should have looked this way (Constitution does) and not with those heavily protruding nail heads of the Caldercraft plates, somehow creating the image of a badly shaved hedgehog.
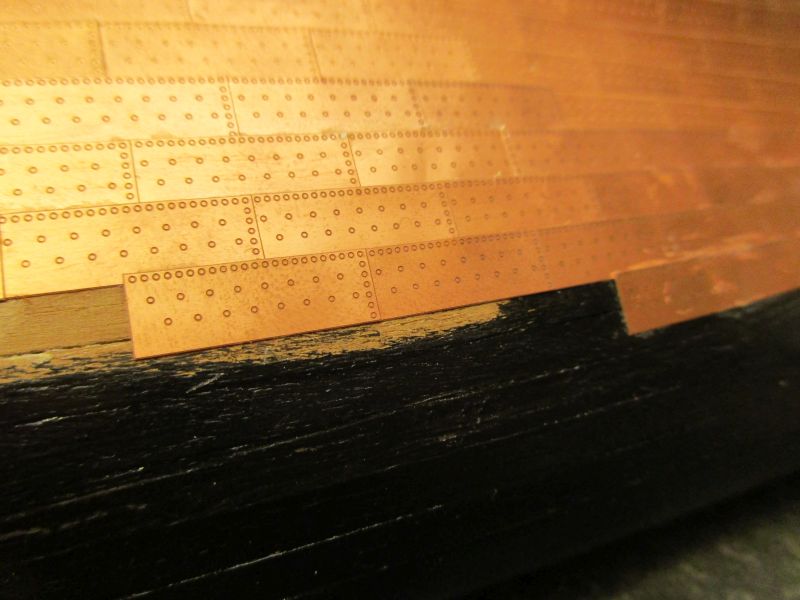
overlapping of the plates, viewed from the bow

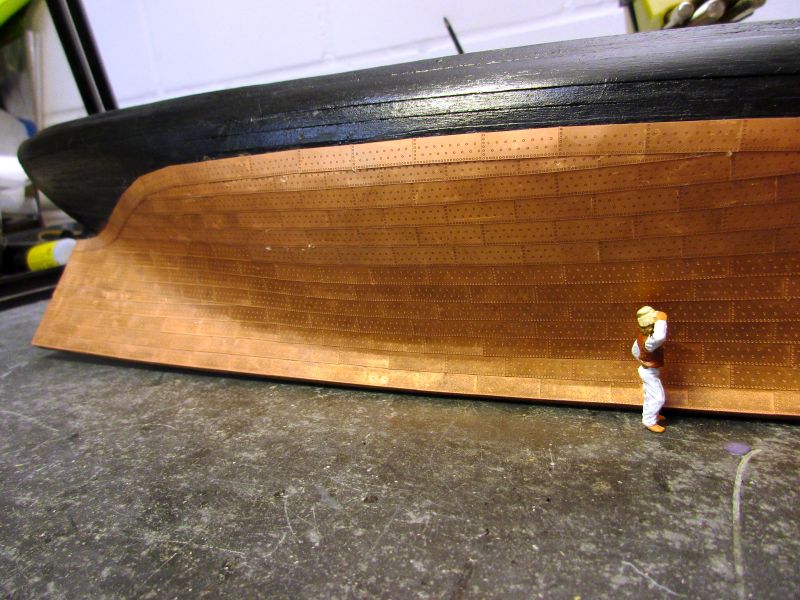
the waterline has to be followed only roughly
the plates are brought on in stripes, running aft to forward, each upper overlapping the lower one

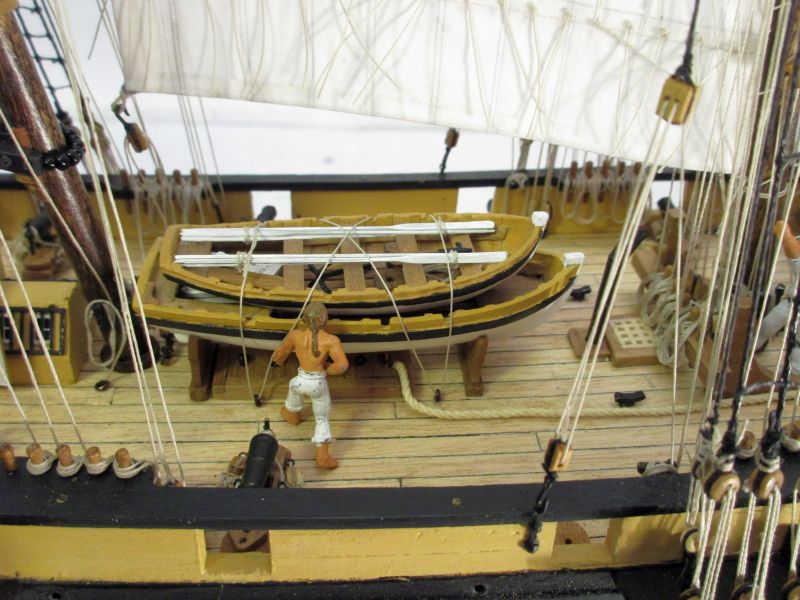
a dockyard worker holds one copperplate
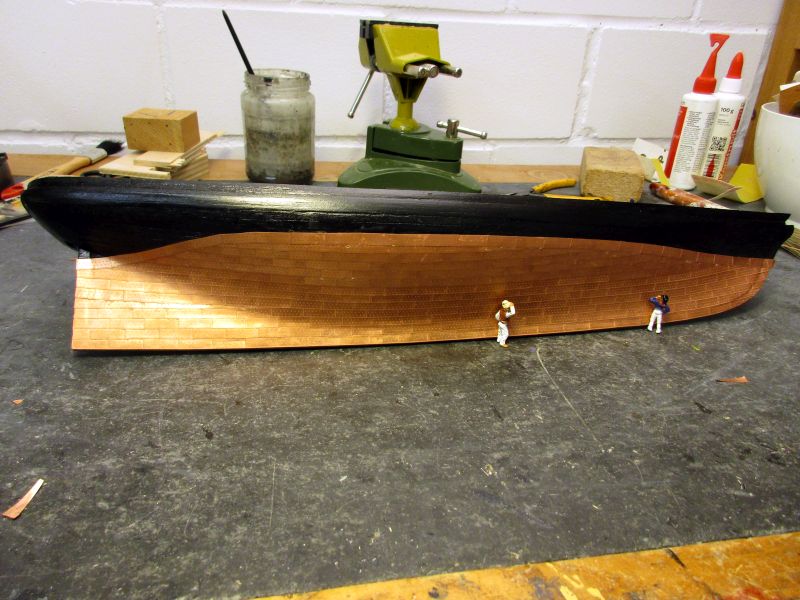
one side is finished - now the work starts all over again
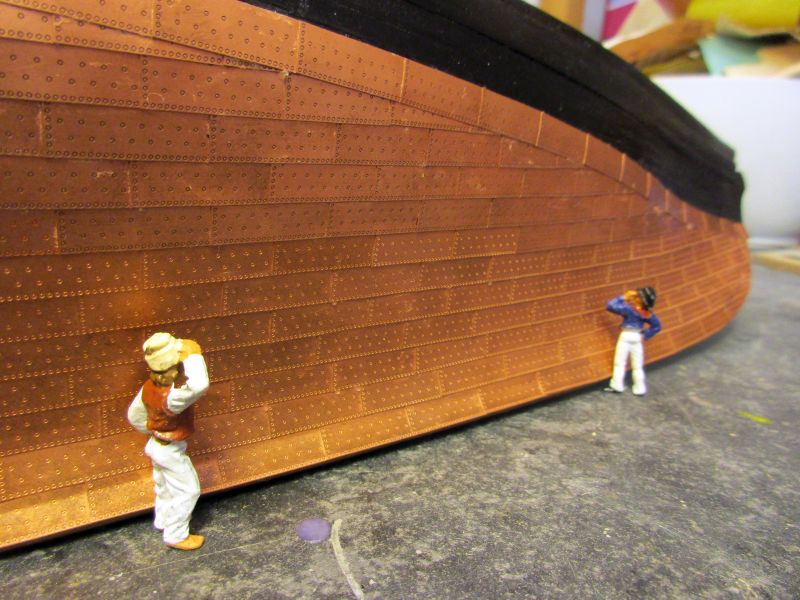

After finishing the larboard side as well, I will have to clean the plates to remove glue drops and fingerprints.
-
-
-
-
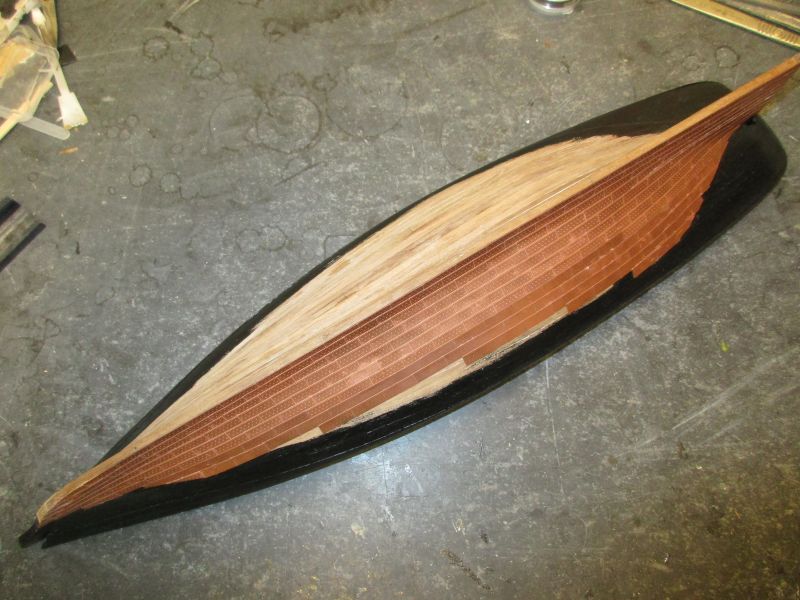
The second planking is now finished. It took some time because of the fine weather. Also my immune system resented somewhat the use of CA glue and I had to make some breaks as well as use a mask. I did stick to a nose-friendly glue but this did not fully prevent some cheerful sneezing.
The form of the hull was a bit of a challenge to follow with regular planking. In the lower part I used a lot of - rather simply formed - stealers to allow the plank a natural run. This will be covered by copper plates anyhow.
The keel was also planked with 5 x 0,5 mm strips to bring it up to its full strength of 5mm before coppering the whole lower hull.
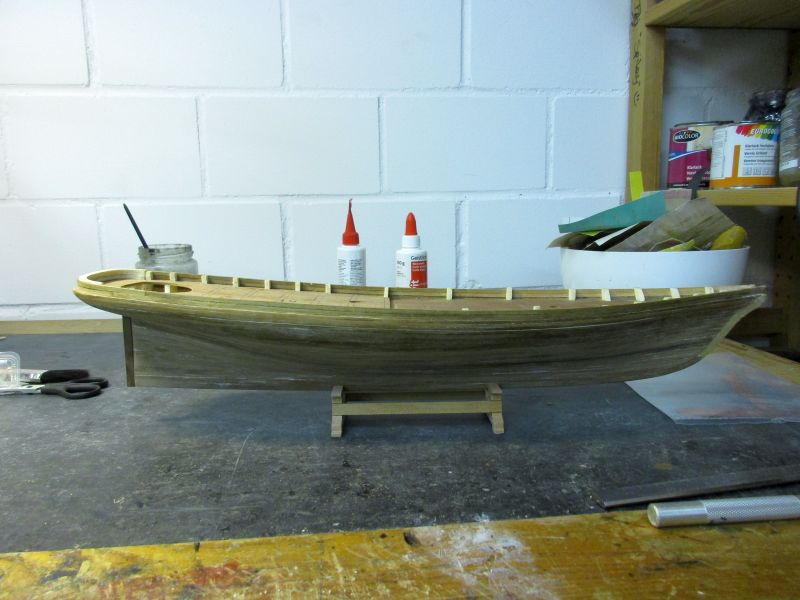
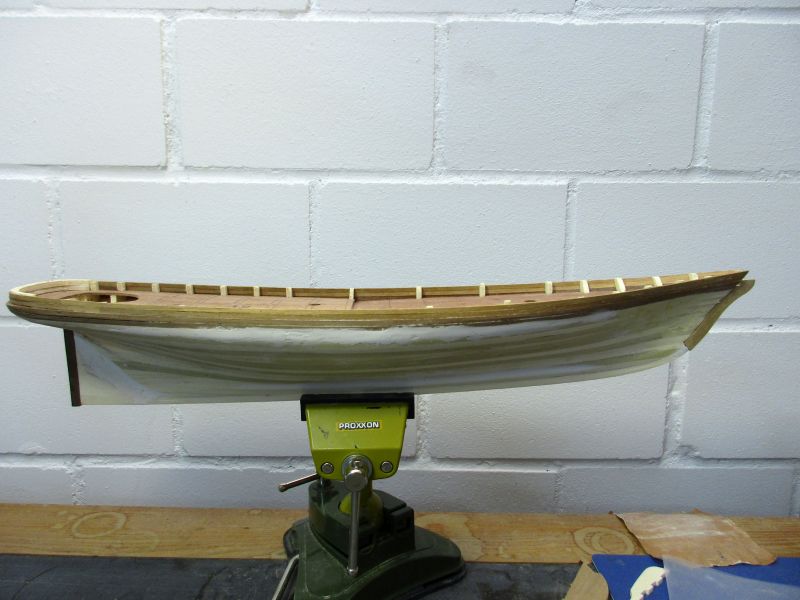
some more sanding is needed before starting painting and coppering.
-
-
Hi Martin
Between HMS Victory and Pickle were about 50 years. About the same age difference as between Pickle and America. While the first two follow approximately the same construction principles, the second two show a huge step forward in understanding hydrodynamics and hull forms. Fascinating. But America is still a schooner with that relatively simple rig which asks for full sails to be set.
The build has already started - just follow the link on the bottom of my post. And I will most probably travel back in time again after America.
Cheers

peter
-
Gentlemen,
While checking that log I found several unanswered posts. Sorry.
Thank you all for the compliments. Pickle really came out quite fine. She now has a fine berth in a book case in our bedroom - with the full support of the admiralty!
I'm already struggling with my next project - Mamoli's America. This is on a quite different quality level but fun nevertheless.
Cheers
peter
- Martin W and Landlubber Mike
-
2
-
second planking
The second planking was started on the stern. Then the wales and the rail were glued on. While continuing below the wales I noted that some tapering was necessary already for the lower part of the wales and the first plank. I think that trying to use straight planks as far down as possible is one mistake occasionally seen here and I try hard to overcome my laziness and continually form the planks in a way that they may follow a reasonable 'natural' run.
-
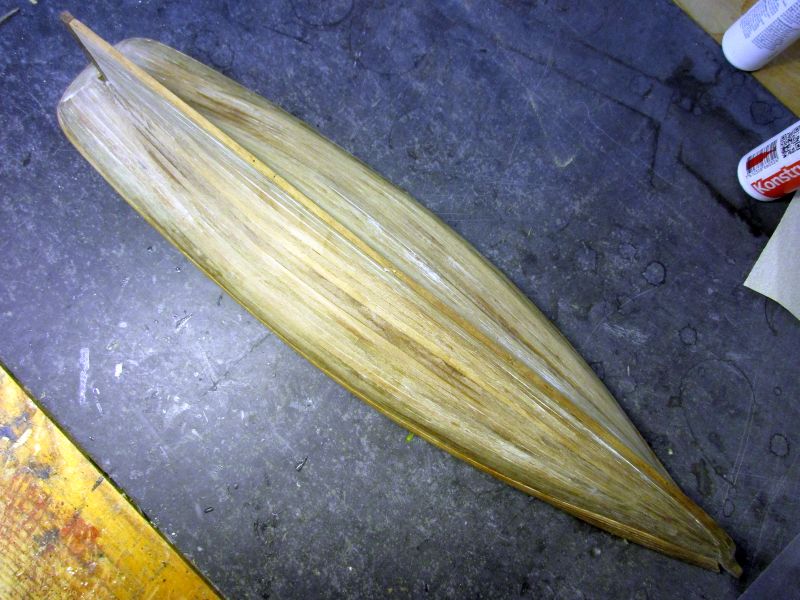
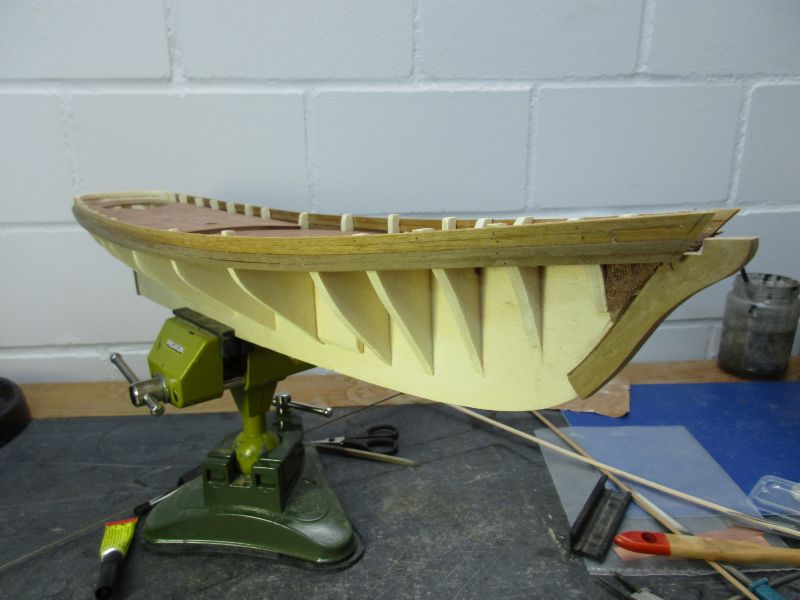
The first planking is now finished and the sanding done. The definite form of the hull was given by eye and a few hours of filling and sanding. For the stern I decided to have a convex, roughly triangular counter from the rudder up to the taffrail. It will have horizontal planking similar to traditional counters of the early 19th century. The decision came after looking at several of the different America's stern pictures in the web.
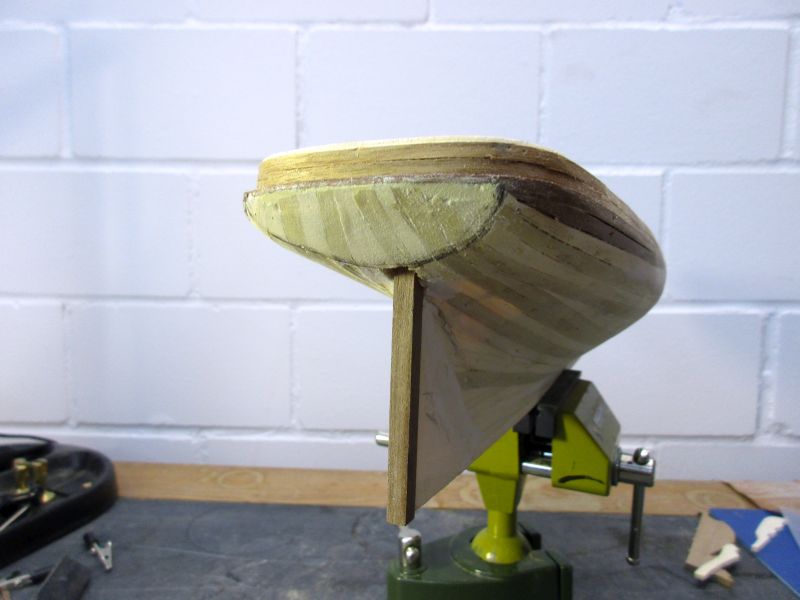
The form of the stern as a rough sketch on the first planking
- Mirabell61, Martin W, dgbot and 4 others
-
7
-
Hi Andy
Nice to have had you back! And then you are afloat again - seems you won't have to change your tag after all.
All the best for the next 38 Years!
peter
- WackoWolf, realworkingsailor, Piet and 2 others
-
5
-
Hi Martin
Those hatchways don't look that bad to me. I wonder if sanding all flush and giving the top a convex finish (parallel to the cross section of the deck) and perhaps slimming the frames by sanding on the outsides would make the whole arrangement more acceptable to you.
Please, give my regards to that gun-toting old lady in Boston and don't forget to visit the museum-shop - I found some useful books there. Enjoy the trip!
peter
-
Hi Bob
That's a very fine Granado in the making. The kit itself is excellent and your work improves it further.
Do you plan to make openings for the quarter lights? (I did but am not sure if it's noticeable at all.)
peter
- Mirabell61, Canute, WackoWolf and 2 others
-
5
-
Although I live the metric system I still find it difficult to think of flight altitude and -speed other than in feet and knots. The only finicky thing is to transmit speed in my head from knots into mph (have to work via kmh). It all depends what you are used to.
However, it doesn't need different measurement systems to screw things up. Some 10 years ago they built a bridge across the Rhine river with one end in Germany and the other one in Switzerland. About to meet in the middle they found a difference in deck height of 54cm (21 1/4 ")! After some hard head scratching and deep recalculating they found that Germany and Switzerland indeed use different reference levels - Germany using sea level based on the North Sea and Switzerland on the Mediterranean. Now the good thing was that somebody realised in the planning stage that this difference exists and is exactly 27cm (10 3/4"). Unfortunately the correction was added on the wrong side...
Cheers
peter
-
Perhaps I should explain why I did only partly replace the keel and the sternpost with those 5mm walnut bits. The kit instructs to build up those parts from the 4mm plywood to the full 5 mm thickness by adding 0,5mm wood strips on each side. These will partly represent the copper plates and above them the keel itself. Originally keel and sternpost were massive timbers. A few years ago I built Mamoli's La Gloire where they do basically the same doubling up. The look of the finished keel is much less satisfying than that of Pegasus or Granado where a massive 5mm keel is used - even if you cover it with paint. The copper plates will mask the exact construction of the lower keel; so the kits way will do for this parts. Therefore only those parts above the copper were replaced. Additionally the whole rudder will be replaced.
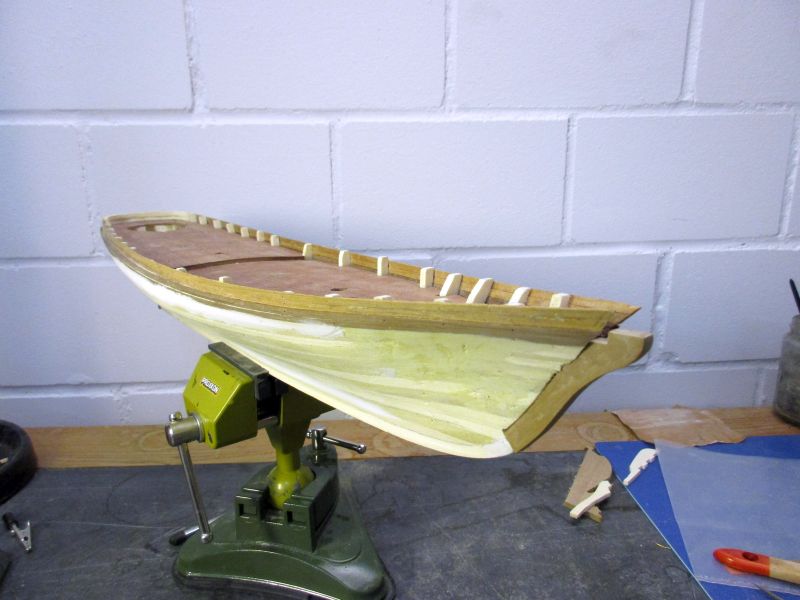
first planking
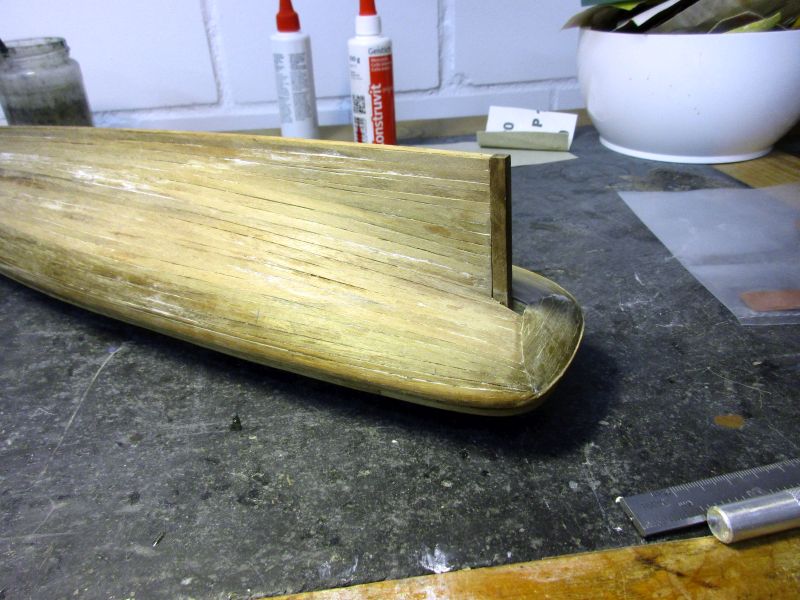
A big question was how the planks should run on the stern. Unfortunately I didn't find any information on that for this or other vessels of the same time with a rounded stern e.g. Le Hussard. The kits plans look strange and I don't think the planks would have run vertical. I will try to form something like a convex, oval, rounded counter where the planks run horizontally with the planks from the ships side merging into it on an imaginary frame.
It took some time to realise that the wood strips for the whale and upwards are made from a rather brittle walnut. I formed the stern with the filling parts and filler and let the walnut stripes run as far aft as possible. The definite form of the counter should become clear after the first planking is completed.
There are several variants in the internet for the form of the bulwarks on the bow. The kit lets them merge in front of the bow but this looks rather strange. I will continue the line of the plank ends from the lower bow leaving a gap which should be filled by the bowsprit.
It's quite some guesswork needed and some try and (hopefully not too much) error compared with the excellent instructions in a Caldercraft kit - but it's still fun.
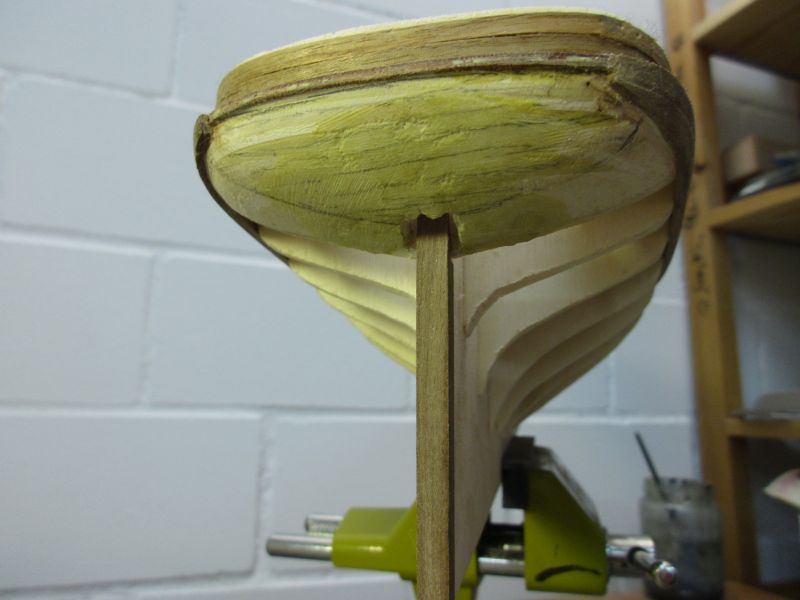
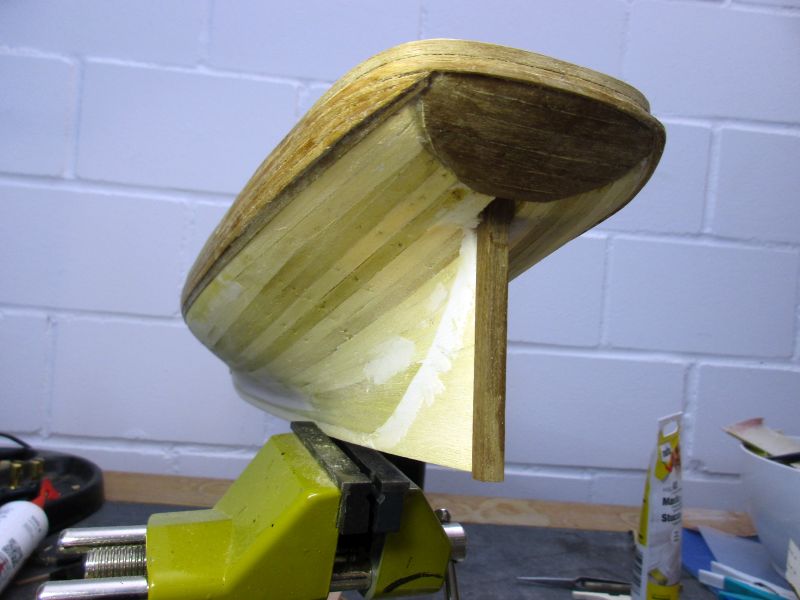
possible form of the lower counter
very elegant lines and a rather low bulwark top
-
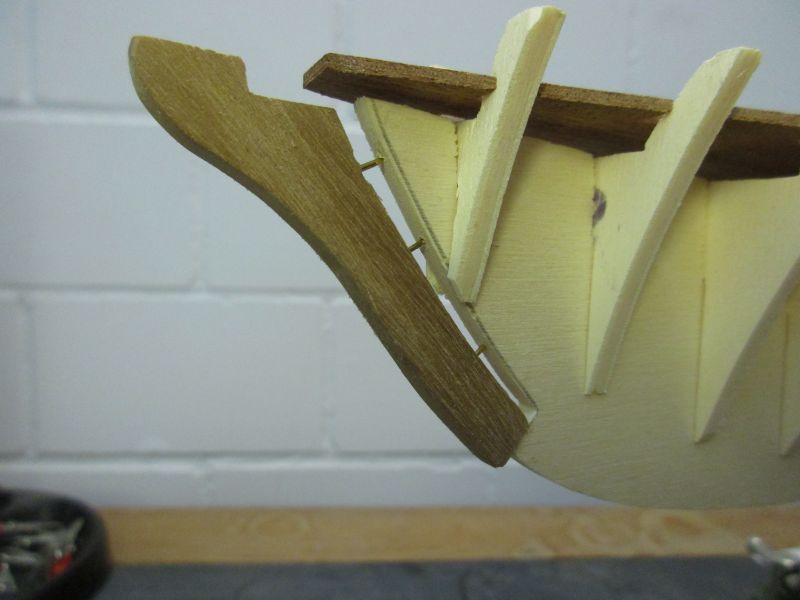
A piece each of stem and stern are cut out and replacement pieces, made from leftover 5mm walnut wood, fit into place.
Fixation with a few nails is provisionally only to permit removal for sanding.
Now the keel, bulkheads and deck as well as the filler pieces have been glued. I'm presently scratching away with sanding paper while trying to find out how that stern should look. There are different variations in the internet and the kits plans treat that problem with a certain Latin liberality. I should find a somehow sturdy and elegant form...
-
Hi Nils
Did you notice? My projects are getting closer to the steam age!
Hi Scott and Elijah
Thanks for the visit. I'll do my very best to entertain you.
Hi Tim
Thank you. I'm aware of your and Hamilton's build and follow those logs, shamelessly profiting and hoping to avoid thus the largest blunders.
Cheers
peter
-
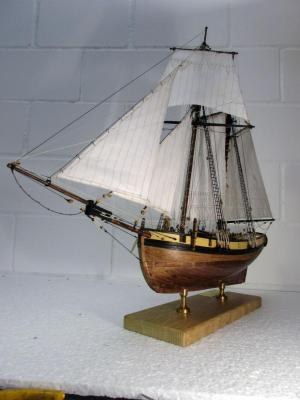
Build log schooner America
While working on HM Schooner Pickle I started to look out for a next project. As I really did like the simple elegance of the schooner and a friend of mine had long reserved some space in his office for a dust catcher in form of a model ship the decision to build another schooner was taken. This friend has family connections to the US and I always liked the elegant, innovative design of America and so this vessel was chosen. Also the Mamoli kit comes in scale 1/66 which is close enough to 1/64 to make all fittings in this scale available for a bit of kit enhancement. A decade ago I had built Mamolis La Gloire and found the kit of good quality (...for that time - I had never seen a JoTiKa kit yet).
Mamoli seems presently to be out of service but I was lucky to find a kit in a Swiss model shop.
The Kit
The first impression was quite good. A tidy box with cleanly separated parts in various compartments. The quality of the wood is only average but the cast parts look good. The plans seem to cover the whole build although the written instructions are meagre and sometimes a bit difficult to understand. The original is Italian, which I don't speak, but by combining English and German translations (by Google?) and some educated guess I should be able to get the meaning of it.
The coppering
Mamoli uses an ingenious simple way to imitate the coppering of the lower hull with small wooden tiles. The same method was used in Keith Juliers earlier books and looked to be an clever approximation.
However as the excellent copper plates of Victory Models are available I will use them. This asks for some re-planning as 0,5mm strips will be replaced by thin copper. Therefore lower hull and rudder will have to be different.
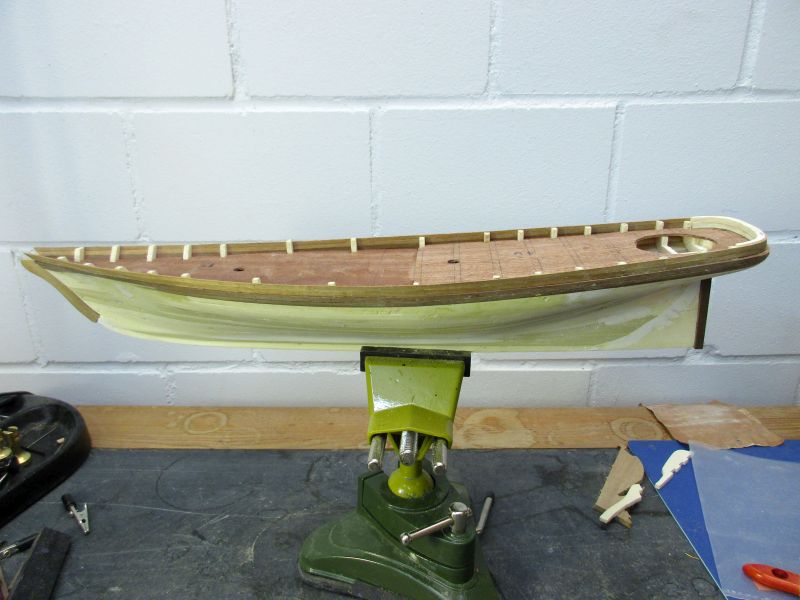
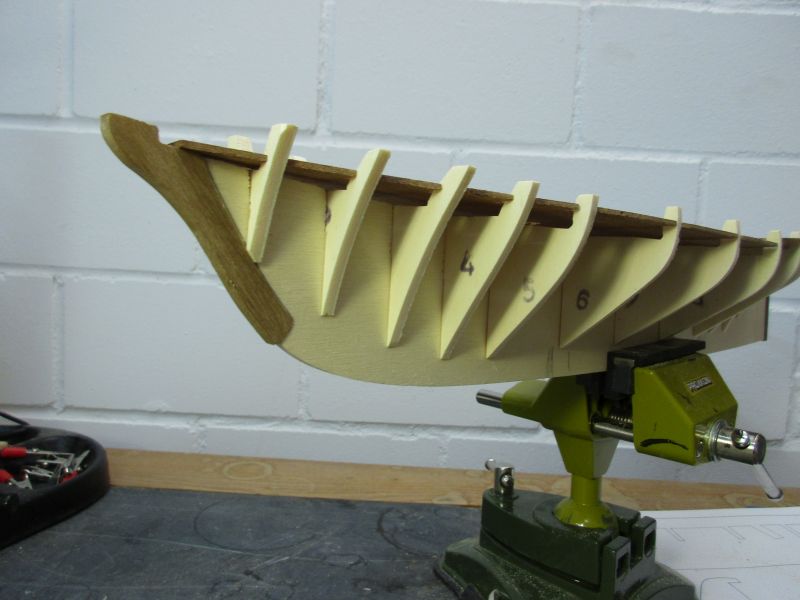
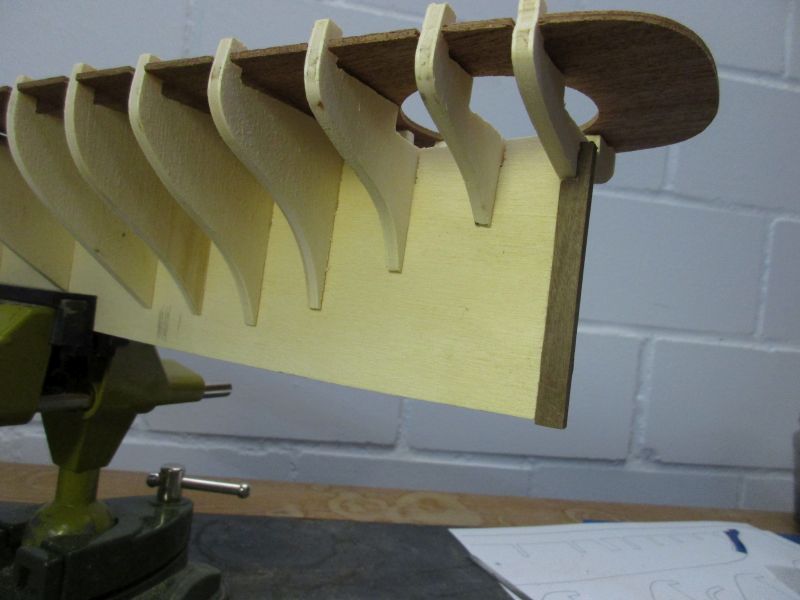
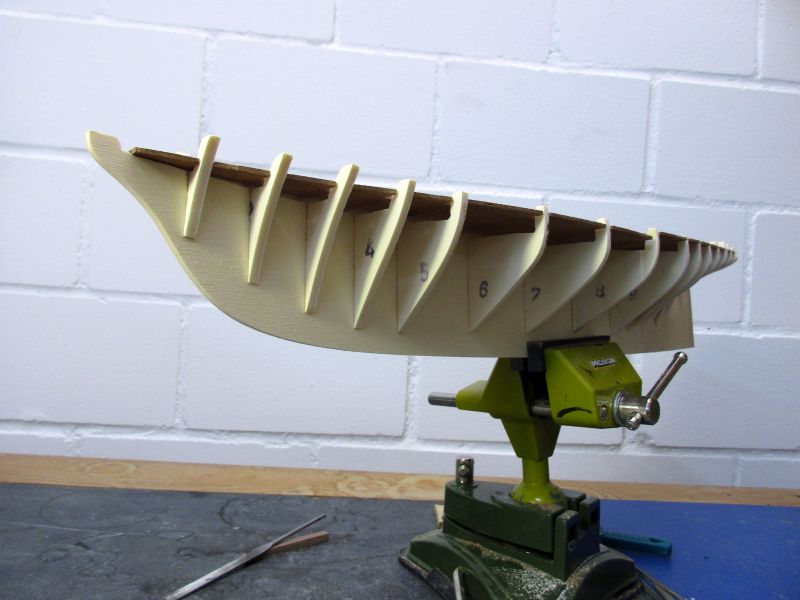
The skeleton
Keel and frames are of quite soft 3,5mm plywood and need some reworking to fit. The two deck parts equally need a rework but altogether a skeleton is quite easily formed. The slender elegant lines are now visible and I'm definitely hooked - a beautiful design.
Visible is also the that stem and sternpost need to be made as separate new parts with a strength of 5mm. Also the rudder will need a similar replacement.
Some additional wood strips are necessary to cover the lower hull and at the same time I can adjust the deck planking.
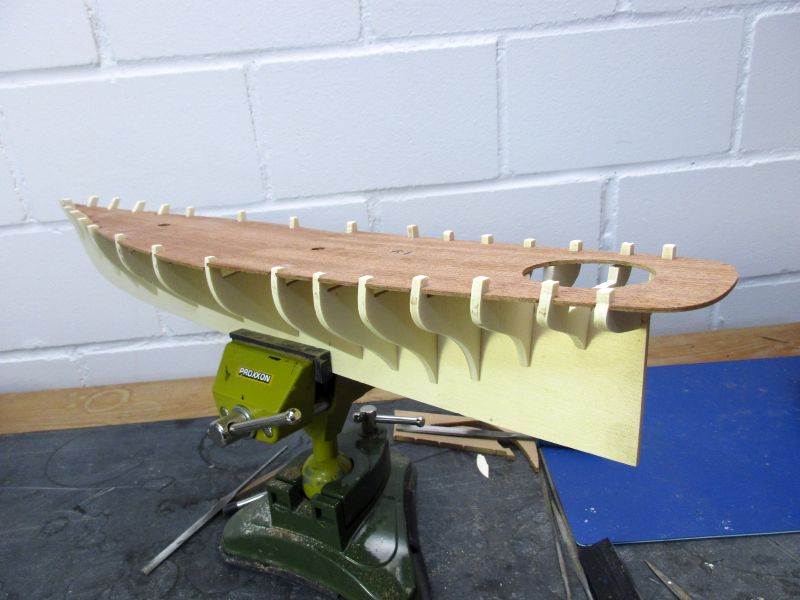
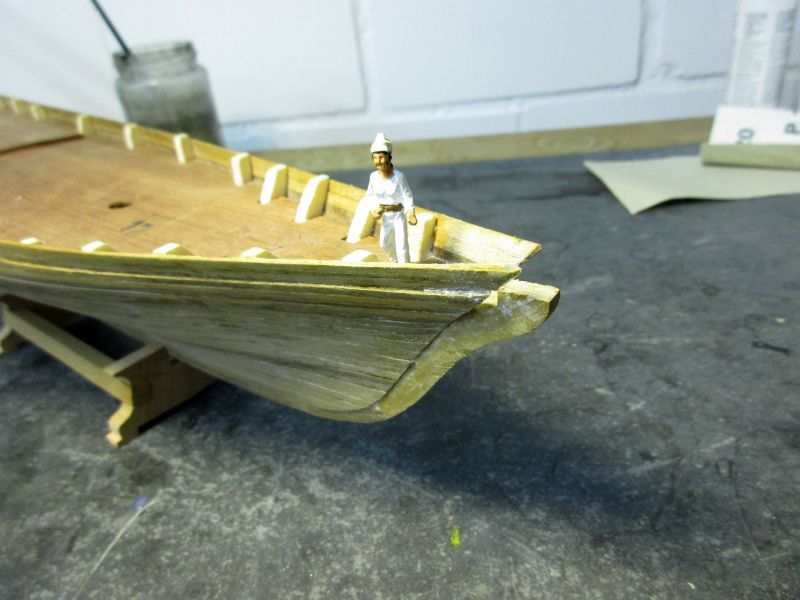
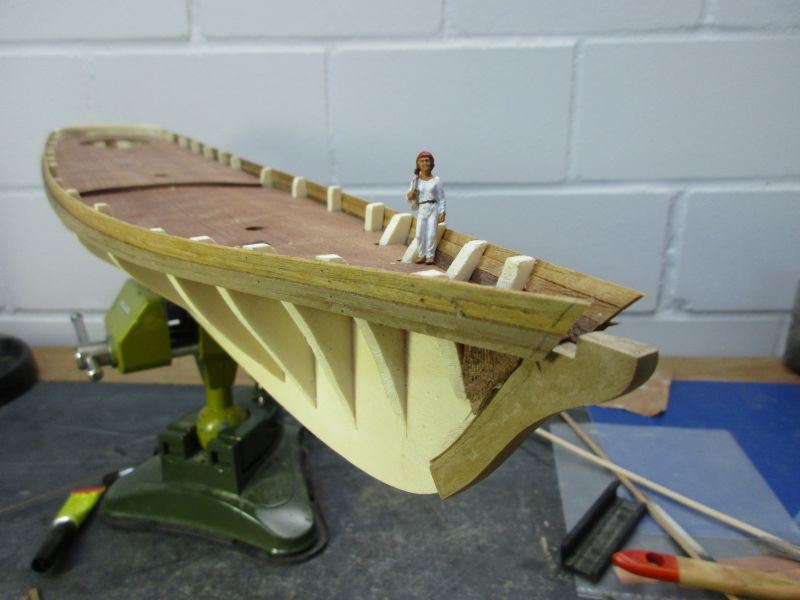
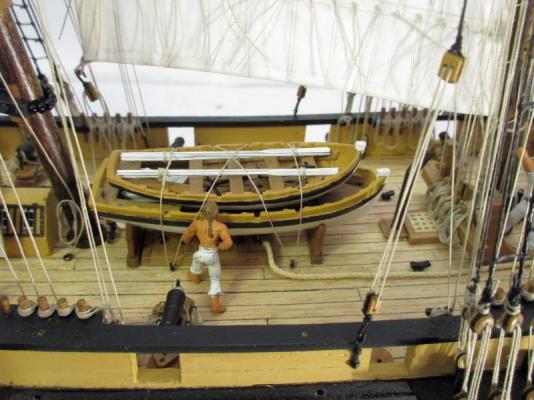
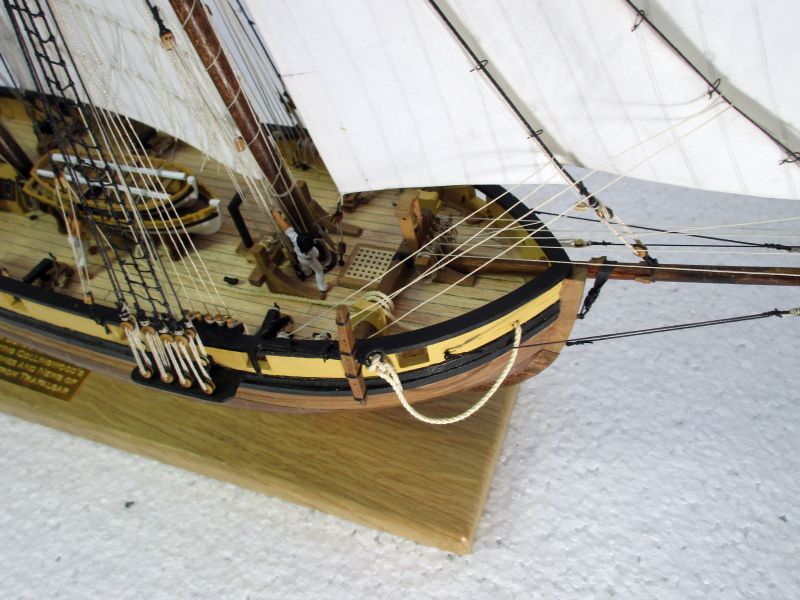
dry fit of the skeleton
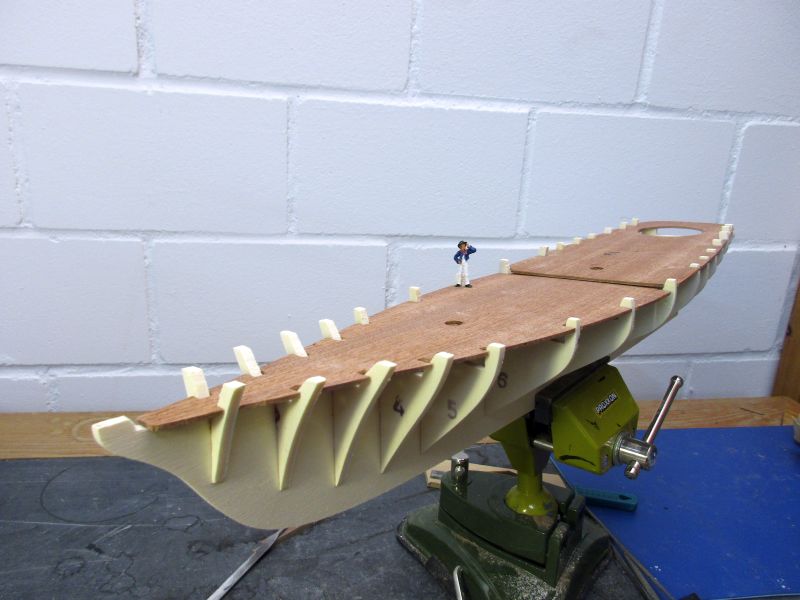
Pickle's bosun standing on Americas deck is a bit overwhelmed by the sheer size of this modern schooner
- GuntherMT, Martin W, mojofilter and 7 others
-
10
-
Hi Nils
Thank you very much. Quite flattering comment from the scratch-builder of such a beauty as 'SS Kaiser Wilhelm der Grosse'.
 :blush:
peter
- Martin W and Mirabell61
-
2
-
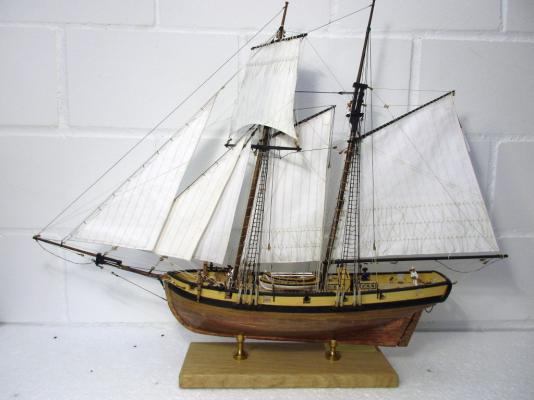
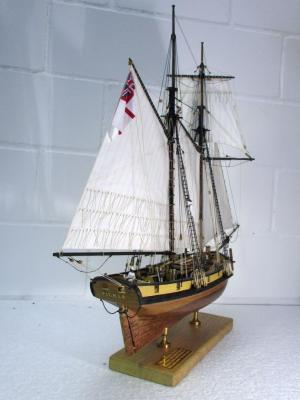
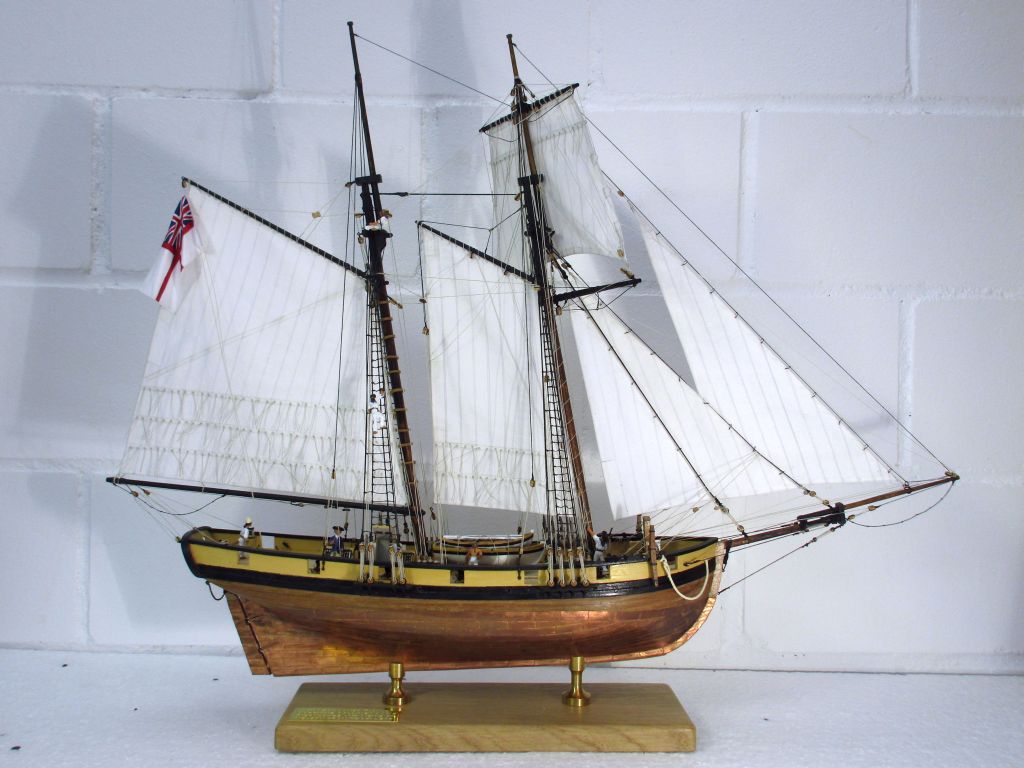
Pickle finished
It was a pleasure to build that schooner. The kit has a great potential and is generally of good quality. Although I do not fully agree with Caldercraft's interpretation of that rather sparsely documented historical vessel I am glad for the great opportunities that kit presents.
While shooting those pictures I had again a fight with my camera. The previous one broke halfway through the build and the replacement from the same company (starts with C...) is hardly usable - even when the pictures are reworked. I'm considering a replacement from another company.


- Dfell, davyboy, CharlieZardoz and 18 others
-
21
-
-
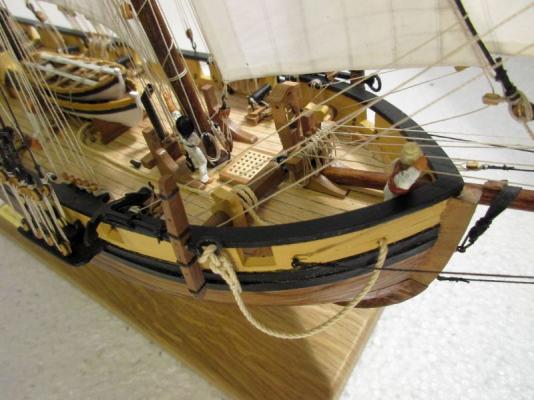
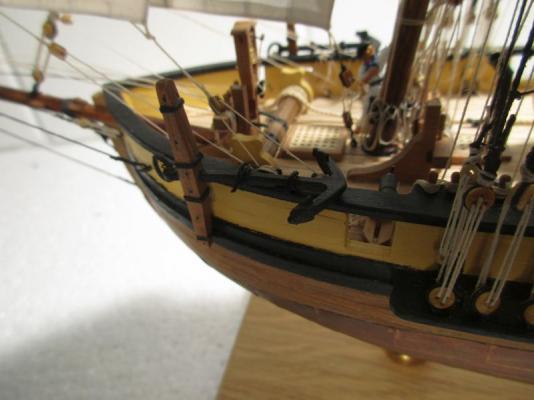
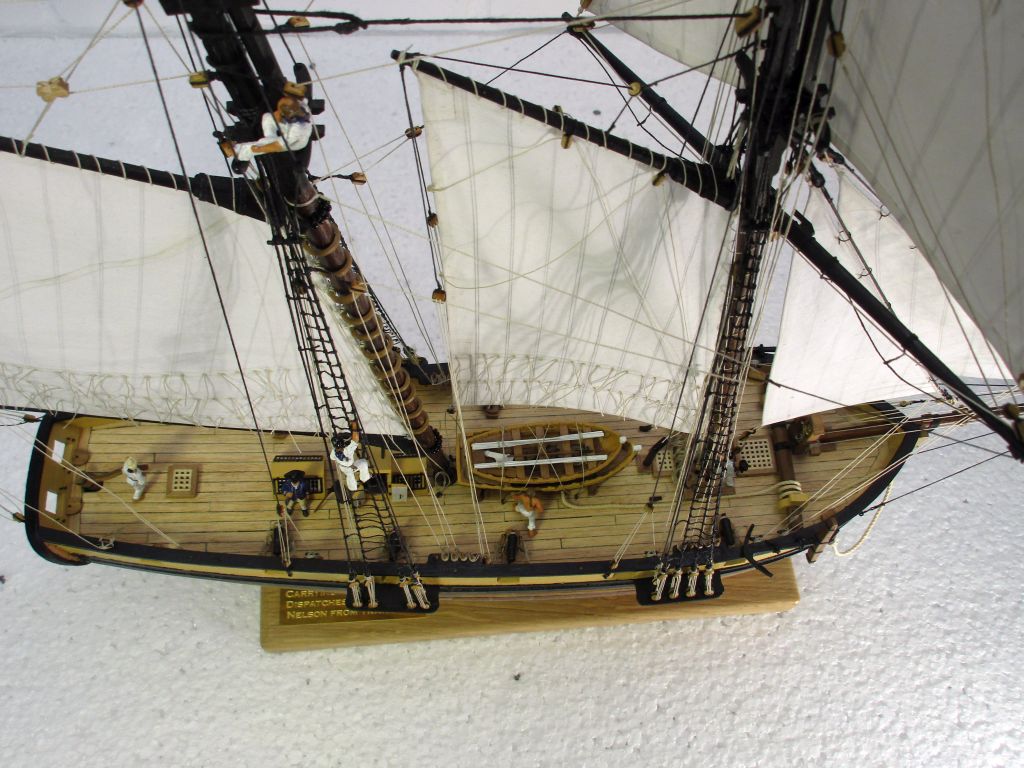
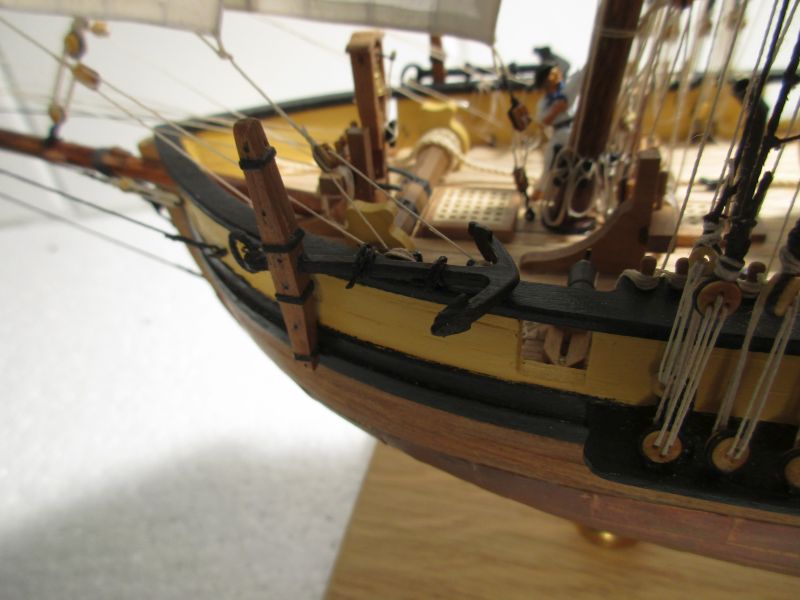
anchors
I forgot to mention the anchors (I bought a second one from CC. No responsible skipper would sail with only one anchor. There is even a smaller third anchor but it's stowed below deck.).
The anchor cable thread really was too bright. I dyed it with the same mixture of black and sage tea I use for the sails. Unfortunately it was only long enough to provide one anchor with it. The cable for the other one is stowed below deck and will be brought to the anchor when near land again. The anchors lie on the bulwark capping rail which carries the whole weight of 175kg (3,5 cwt) each. Therefore the two simple 0.25 mm threats should be able to hold one.
-
Hi Michael
Thanks. Your spectacular Vasa would look fine with sails!
Hi John
If ever you need some additional information to help you to make the best of your limited time please feel free to ask.
Cheers
peter


Yacht America by flyer - FINISHED - Mamoli - scale 1:66 - with some alterations
in - Kit build logs for subjects built from 1851 - 1900
Posted
The weather is still too fine for long working hours and I spent some time travelling in Iceland and hiking in the Swiss alps. In both places the air is rather fresh and the beer fine. On Iceland most places are at sea level and easily accessible but the country is expensive and some flight hours away. In the Swiss alps on the other hand glaciers are at 2500m the air is rather thin (you need to cook your soft eggs for 7 minutes instead of 3 and hiking is a bit straining but I can reach most nice places with a 3 hours scenic train ride. But back to serious business...
where America meets Europe...
part of the Mid-Atlantic-Ridge on Iceland