


flyer
-
Posts
1,006 -
Joined
-
Last visited
Content Type
Profiles
Forums
Gallery
Events
Posts posted by flyer
-
-
Nobody offers 0,1mm black thread, don't know why.
However if you stick to the principle that standing rigging was tarred and running not, then the lanyards probably should be natural. Today's historical ships show them usually black but I'm not altogether sure about that. Mine nevertheless are died black.
Another point - which might come a bit late:
Having the deadeyes all exactly on the same level looks nice and tidy but for an efficiently working support of the mast it's more important that all the shrouds have the right and an equal tension. So I put this in first priority and if after retying about two times a height different remains but the tension on all the shrouds is about right I leave it like that, hoping that on en efficiently run prototype it was done the same way. I guess if there was time in harbour the skipper would have the deadeyes levelled out again but while sailing there would be a continuous adjusting of the tension but no time for adjusting the deadeyes as well.
The tension also helps when tying the ratlines and when you have to attach blocks for running rigging to the shrouds.
Keep up the fantastic work!
Peter
- Old Collingwood and Ronald-V
-
 2
2
-
Hi Mort, Martin and Nils
Thanks to the compliments and encouragement.
Martin, this seems to be contradictory but by reducing superfluous details I hope in fact to get greater historical accuracy.
And many thanks for all the 👍's.
Peter
- Martin W, Old Collingwood, egkb and 1 other
-
4
-
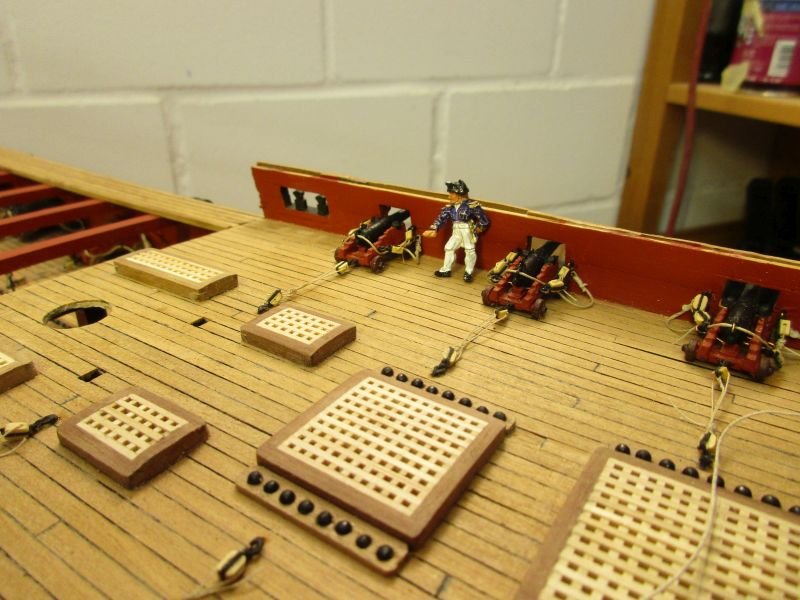
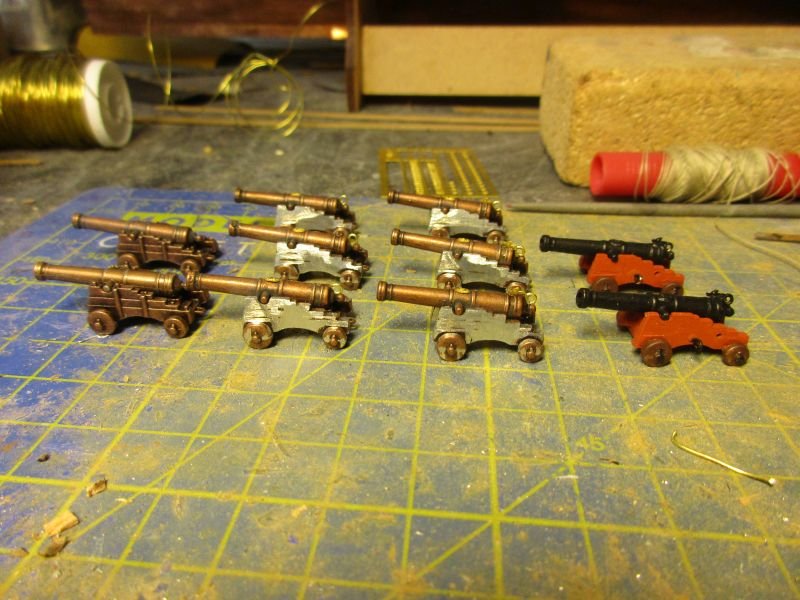
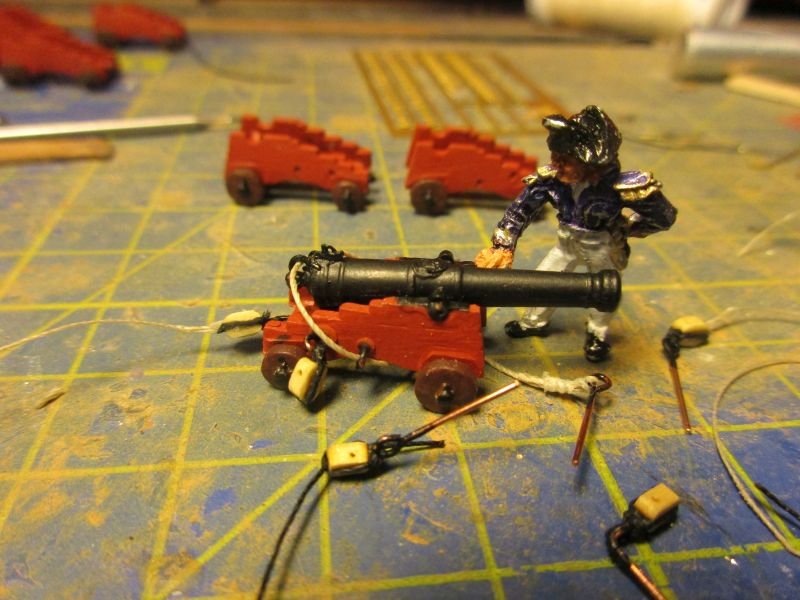
There are 6 carronades mounted on the poop deck. Again the kits pedestals and carriages were highly detailed cast but of a strange design and unusable. Replacing them with Caldercraft parts would have been rather expensive and (according to RMC's log) difficult also because of the scale difference 1/64 versus 1/72.
Therefore I tried to rework the kits parts similar to the gun carriages. First I glued the pedestal onto the chock. Then I filed flat what was possible and filled unnecessary details with superglue. The forward ringbolts on the carriage came off as well as the forward guide pin below the carriage. Now it is possible to put the carriage into a realistic run out position. All the remaining cast ringbolts were drilled out and two rings put into the ringbolts beside the barrel mount. They will guide the breech rope. The barrel had a ring for the breech rope glued onto the pommel. There was not enough space in front of the elevation thread (the pommel is too short) and I had to glue it of centre, overlapping the thread. Everything was painted and I think it looks acceptable.
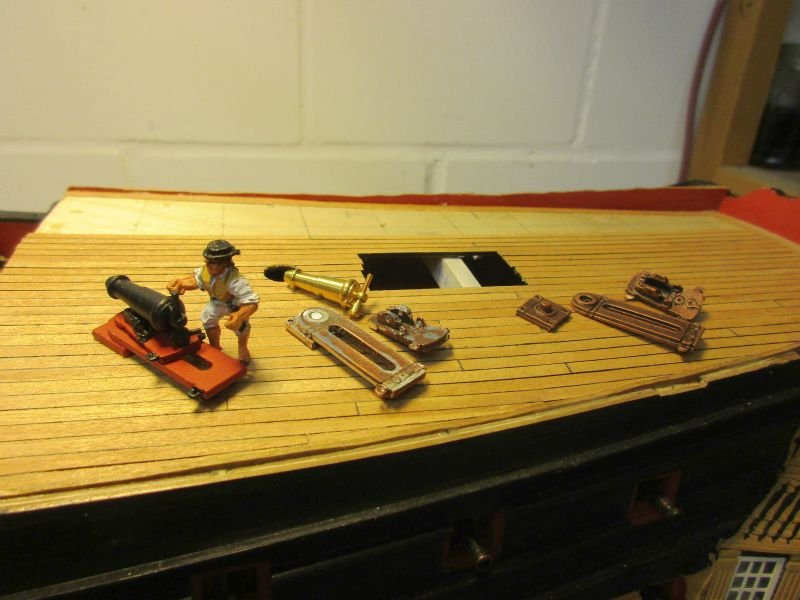
3 stages of carronade reworking (that seaman only showed up after the work was done!)
-
The quarterdeck rail was also completed. The rounded bit on the aftermost part is a piece of water soaked, bent, dried and adapted 5x1mm boxwood strip. There is also a length of 1x1mm strip on the outer hull in continuation of the upper, after end of the rounded rail. It's not mentioned anywhere in the instructions but visible on the overall plan.
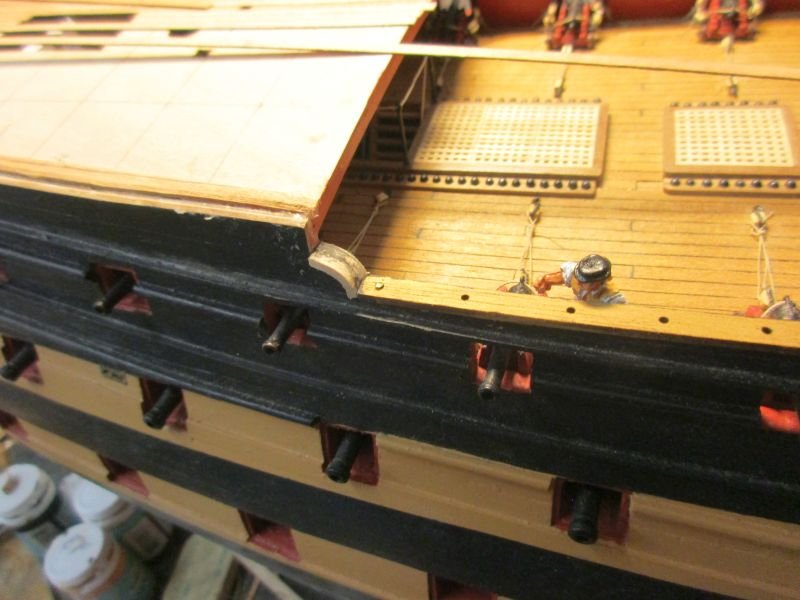
quarterdeck rail in place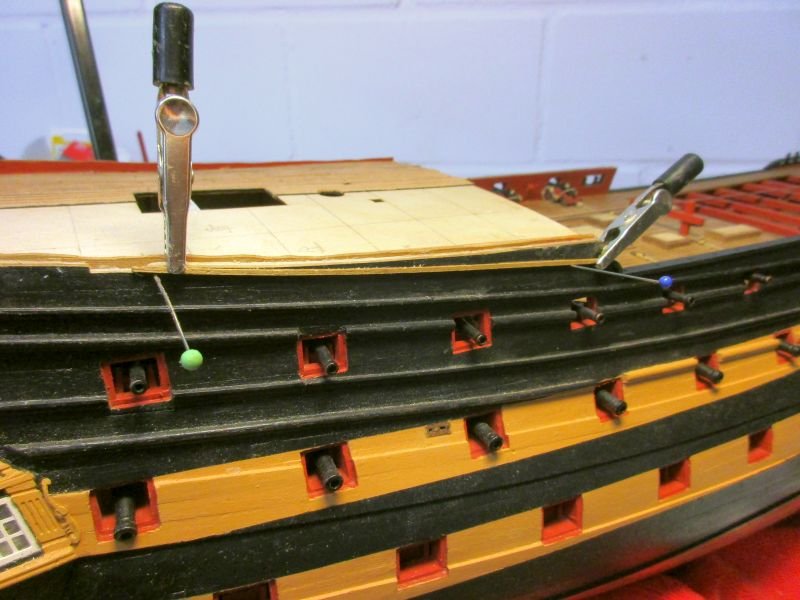
additional decorative strip on outer hull
all painted
- Tigersteve, Edwardkenway, egkb and 9 others
-
12
-
The decision about how to paint the ship mainly lies with the skipper, especially if you pay the paint out of your own pocket. Some Admiralty instructions existed and certain details seem quite clear, such as the Nelson chequer in its time, but others aren't - even if contemporary paintings or models exist. The artist may have used some artistic freedom. So may you and as skipper of your Pickle you may paint as seems logical or as you like. Of course you still have to respect eventual Admiralty wishes or instructions.
I whitewashed the inside of the companionway too to reflect some more light into the dark interiors and because sources mention whitewashing. Additionally the skipper will keep his crew clean and proper for their health and that also reduces dirtying of the paintwork.
And I liked it better that way.
Cheers
Peter
-
Hi Mark
That's a very interesting build. I notice, that the kit is produced under Amati's licence with some changes. I'll be most interested to hear how the new guns look, the Amati gun carriages being a major weak point in their kit. I really like the Amati copper plates and hope you'll get an equally satisfying result with that tape.
Question: Are the Bellerophon and Elephant variants also included?
Enjoy your build!
Peter
-
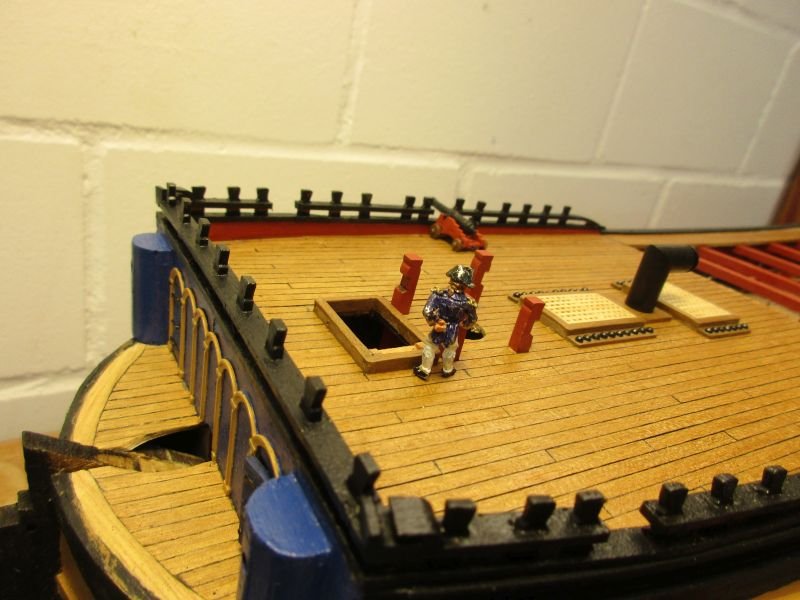
The forecastle is now finished with the guns installed and that treacherous ladder way has provisionally got a protective rope rail.
The skipper visited the build quite often but didn't actually do much work. As a reinforcement of the actual workforce (me) I hired two additional crew. The might look tiny in scale 1/72 but they are nimble and able to go into the most constricted places - especially if you look for them to burden them with actual work.
finished forecastle
that ladder way needs the rope rail
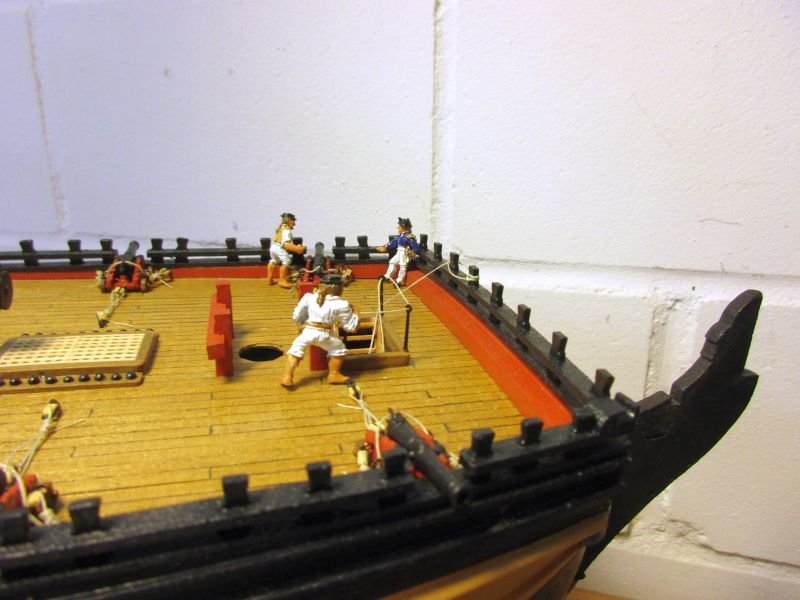
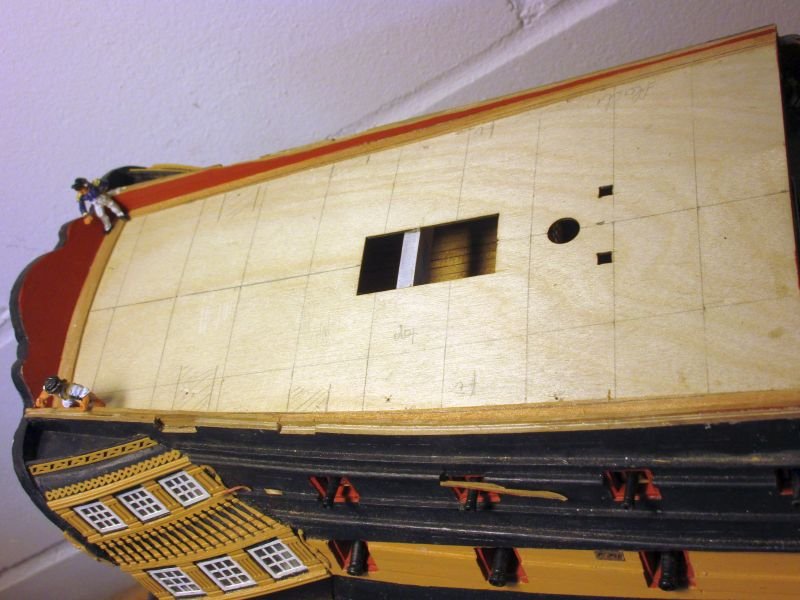
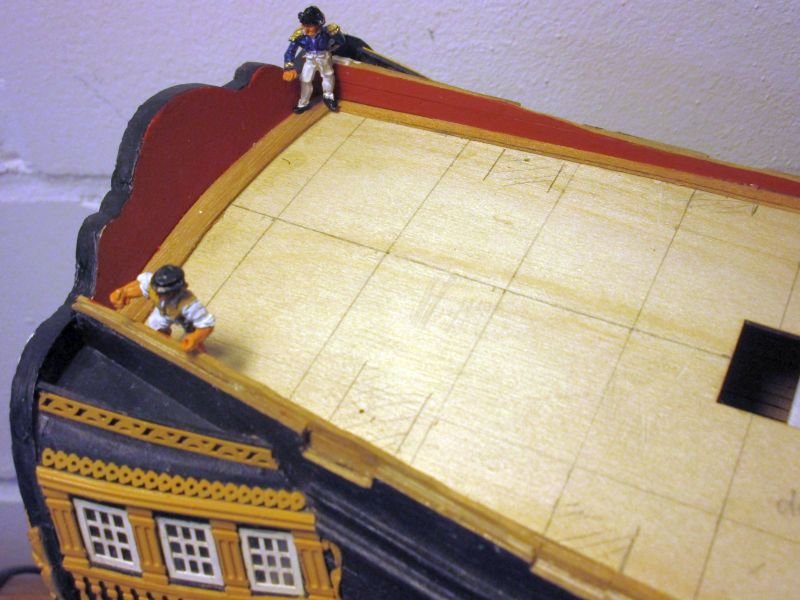
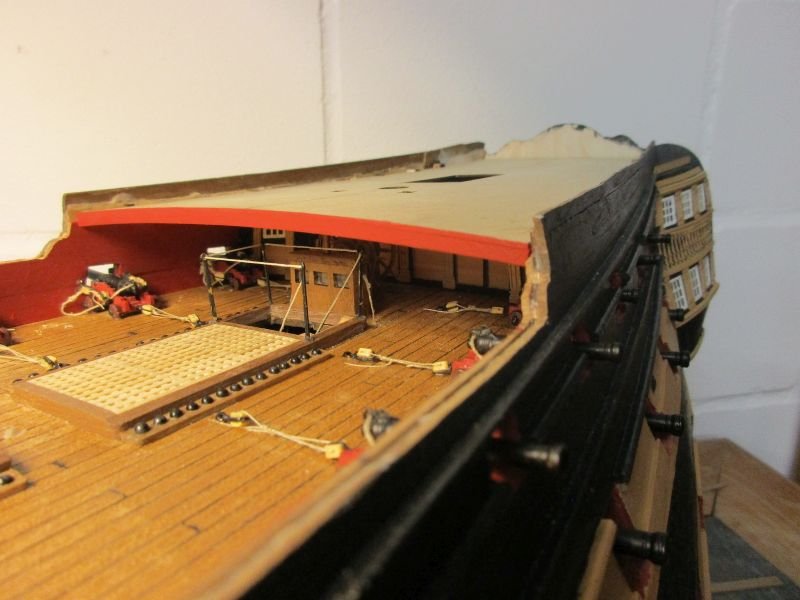
poop deck
The deck was marked for planking and glued in place. Waterways from 5 x 0,5mm strips are installed. They will be trimmed to maximal 3mm with after putting the inner bulwark planking in place and while fitting the planks into it. The lowest inner bulwark planks were painted before attaching them, the others added, everything painted red and roughly trimmed to the right height.
poop deck with roughly trimmed bulwarks
waterways in place, planking will start now
-
Hi Mugje
This is an excellent first build. I like the precision of your work, especially the painting.
Just don't forget to paint the rudder hinges copper. Because of the electro-chemical reaction between copper and iron they were made in copper or bronze in those parts where the hull was coppered.
Cheers
Peter
-
Hi Michael
Thank you. I wish I had the patience to work all the details the way you do - but I'd like to finish Bellerophon before I turn ninety which means within the next 25 years. Your cross section is coming along nicely. I can't wait to see your next project: the entire Santisima Trinidad.😉
Hi Jason
Thanks. The (mostly) great quality of the kit has much to do with the way the stern looks now.
Hi Martin
Oh yes, we are all mortals, aren't we. Also his uniform suffered a bit and looked threadbare. I asked able seaman Preserved Killick to mend it. Would you believe, he just took brush and paint for the task, the rogue?
And thank you. I must confess I'm rather fond of the build myself, despite the flaws I built in.
Cheers
Peter
- Martin W, Old Collingwood and md1400cs
-
3
-
The fore castle deck is now fully planked and galley chimney, hatches and ladder ways are in place. The shot garlands were quickly done - experience starts to make tasks easier. A strange detail is, that there is no rail to protect landlubbers (and others) against falling down the forward ladder way. But the skipper agrees with me, that a rail probably should be added.
The fore castle rails were glued on and the aft ends of the upper rails made with a pre-bent piece of boxwood strip. The gun carriages are reworked and I'm afraid I have to start gun rigging again.
The balcony is finished and the skipper can now take some fresh air in relative privacy during his visits to the build.
The skipper fell down this ladder way during his inspection tour. Only his dignity was hurt because he had to be extracted with the help of tweezers. Now he is thinking about adding a rail with some leftover stanchions and rope.
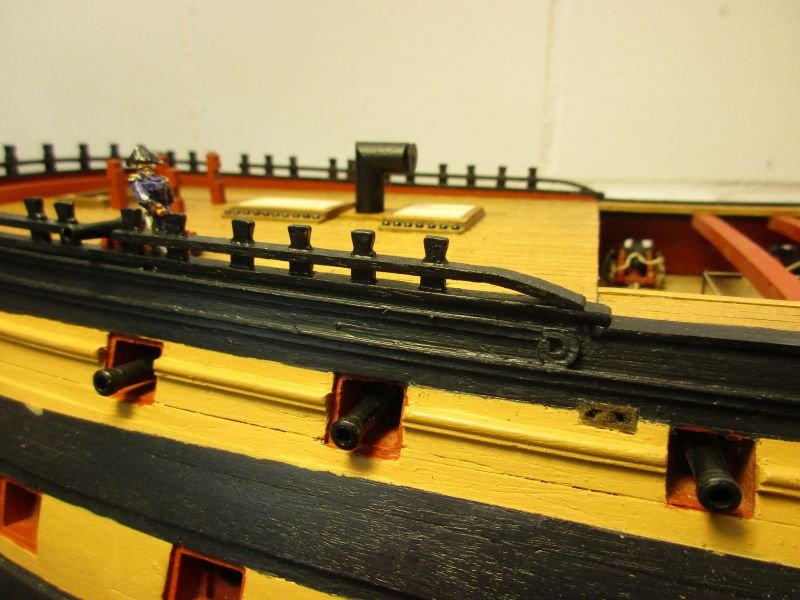
aft end of upper forecastle rail
the skipper takes some air on his finished balcony (and tries to regain his dignity)
- KARAVOKIRIS, gieb8688, mtaylor and 9 others
-
12
-
Well Martin, it seems you definitely took another plunge - this time past the boundary separating 'normal' modellers from those practising the dark arts of scratch building. Wonderful work.
Your Granado is going to be a unique piece of art. 👍

Cheers
Peter
- Martin W and Mirabell61
-
2
-
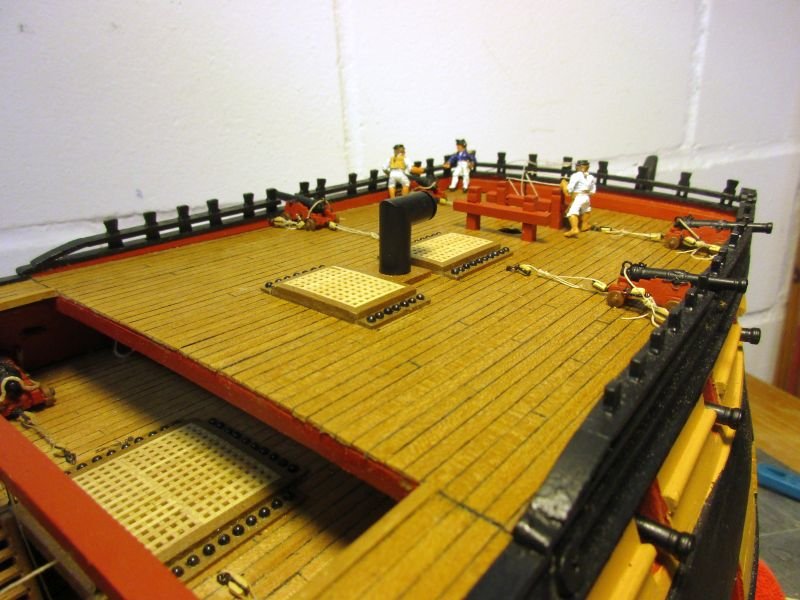
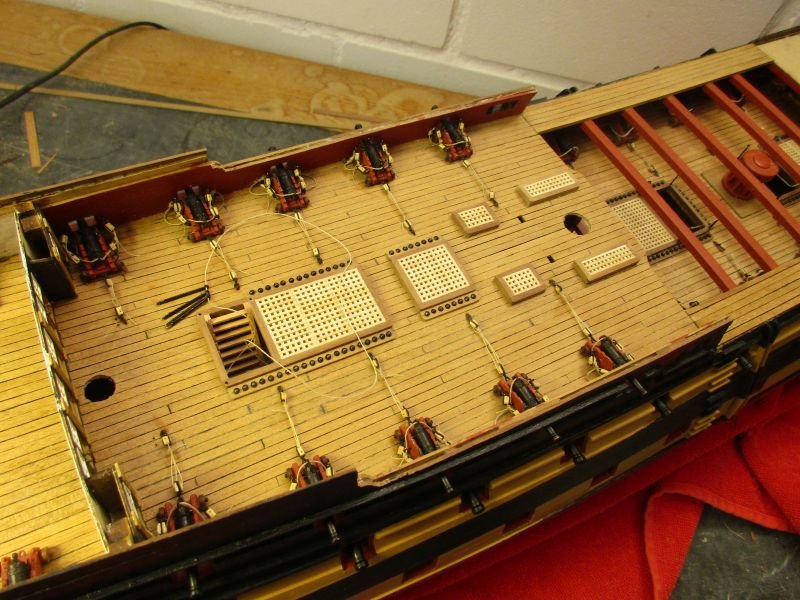
To complete the quarterdeck I installed rudder stand and binnacle. The rudder stand has a tiller rope and the binnacle got a chimney roughly made from wood and painted copper. The binnacle was tied to the deck.
Planking of the fore castle was started. Waterways, made with 4mm strips, were installed first. I put the joints below the future gun positions. They will not be visible and are not detailed. The poop deck is prepared to be glued on.
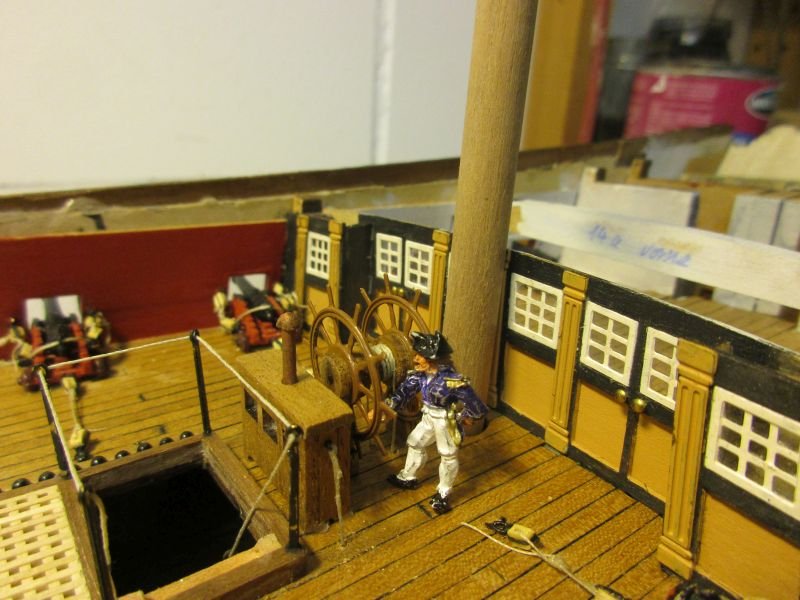
mast position marked with a dowel
quarterdeck nearly finished
not many details of the latest work will remain visible after installing the poop deck - however I must change the lower ends of the binnacle straps and fix them to eyebolts
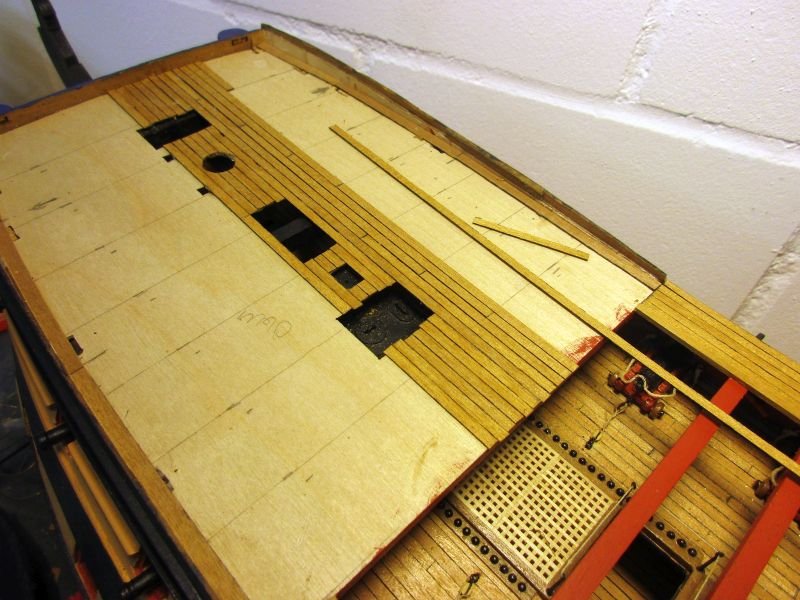
waterways installed and planking in progress
- mtaylor, J11, GrandpaPhil and 7 others
-
10
-
...or you could make your own, more realistic, stern fascia.
Hey mugje, great work so far.
I think that schooners and other small craft in Pickles time usually had a more elliptic stern, similar to what I tried with my Pickle.
Have fun!
Peter
-
Hi Nils
You are really building an exquisite model.
One would like to rent her for a holyday cruse but on second thought it might be a bit cramped - it probably is even on the prototype. BTW some crew bunks on long haul aircraft aren't much more spacious but at least have some standing room.
Cheers
Peter
- Martin W, mtaylor, FriedClams and 2 others
-
5
-
Hi Alan
It must have been terrible. There have been 'conventional' bombings of cities (Guernica, London, Dresden or the bombing of Tokyo march 9-10 1945 which left an estimated 100'000 civilians dead, more than in Hiroshima) but at least they had not those hidden long term effects.
You probably heard also the story of Sadako Sasaki and her 1000 paper cranes.
Only a very small minority of idiotic politicians, profiteers and soldiers really want to start a war but it happens again and again. Is mankind stupid?
But let's go back to building pretty little models of machines for organized mass killings, aren't we shizos?
Take care
Peter
- mtaylor and Ferrus Manus
-
2
-
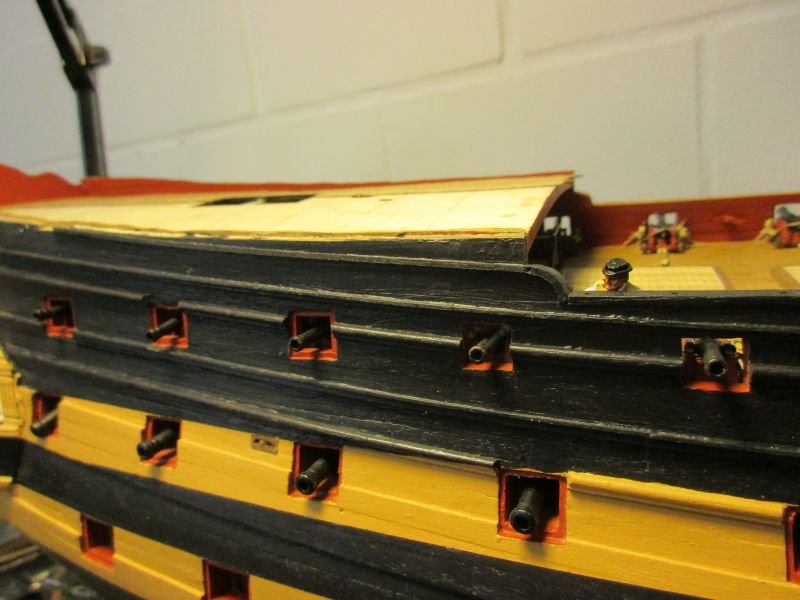
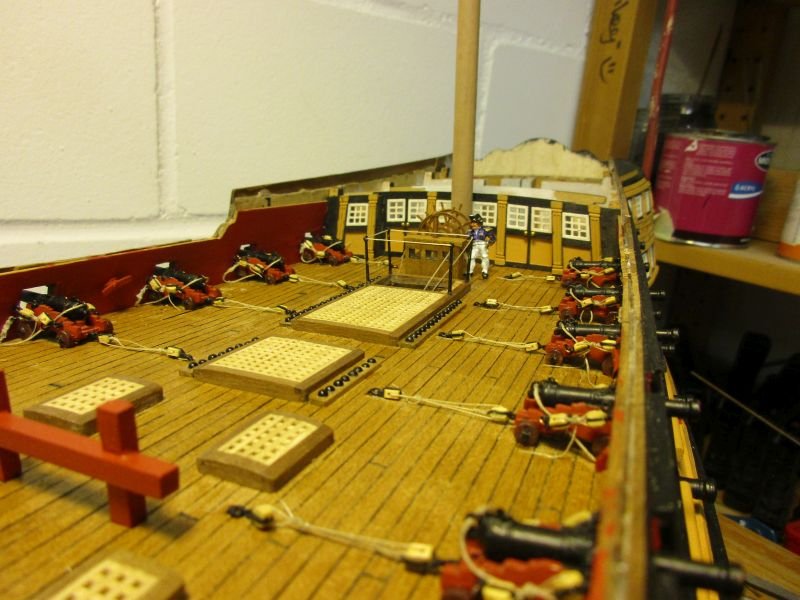
Finally all of the quarterdeck guns are installed. While working on them I came to the decision to build the quarterdeck bulwark as per kit. Such a heightened bulwark was probably in place by the time Napoleon travelled on her (I'm trying to represent the status she probably had then), I was getting used to those proportions during the work on it and it's sensible to give the crew that additional protection.
quarterdeck guns are in place
the captain checks the guns...
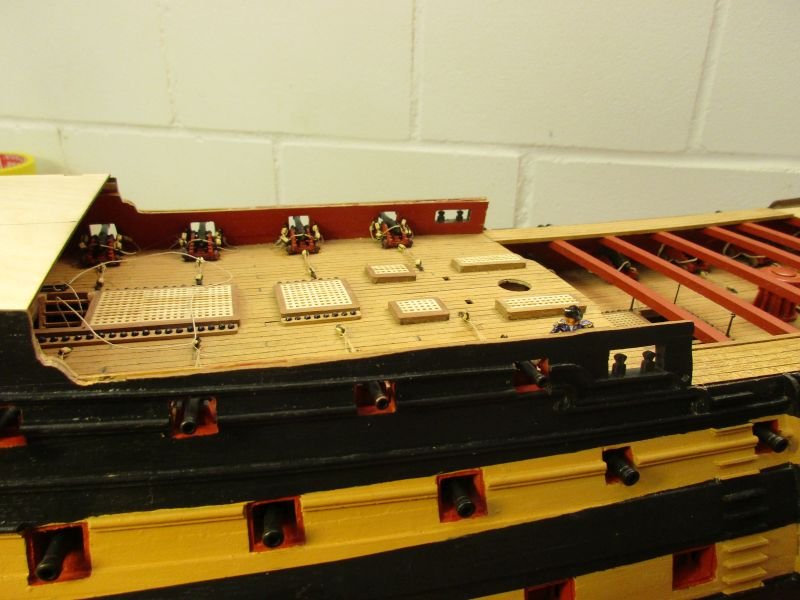
...and he approves of the additional protection by the heightened bulwarks
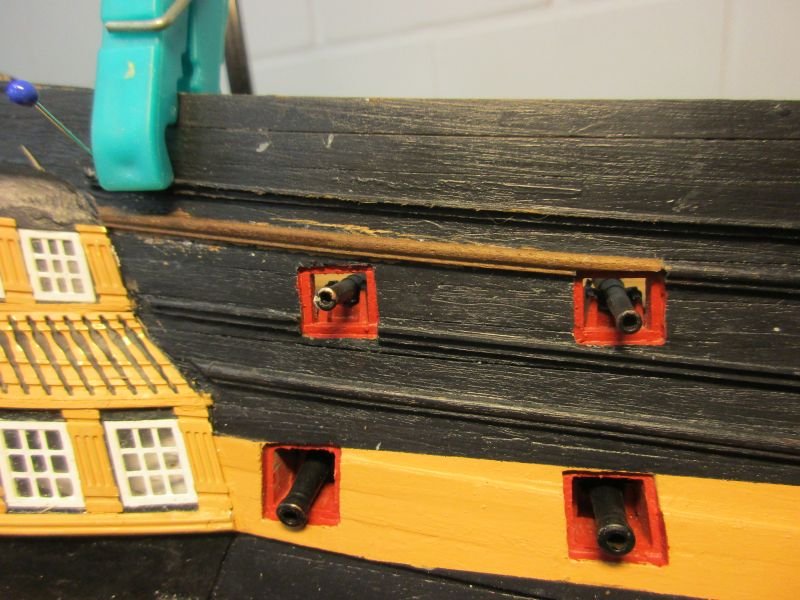
Also 2 more sheave blocks per side were worked into the hull. Next time I'll try to make them before closing the decks...
sheave block for the main sheet

sheaves for the fore sheet (left) and the main tack (right)
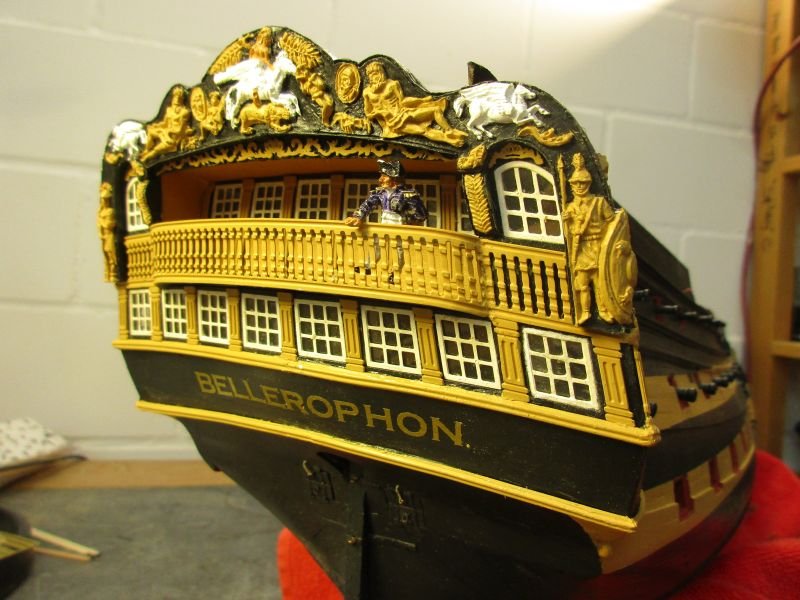
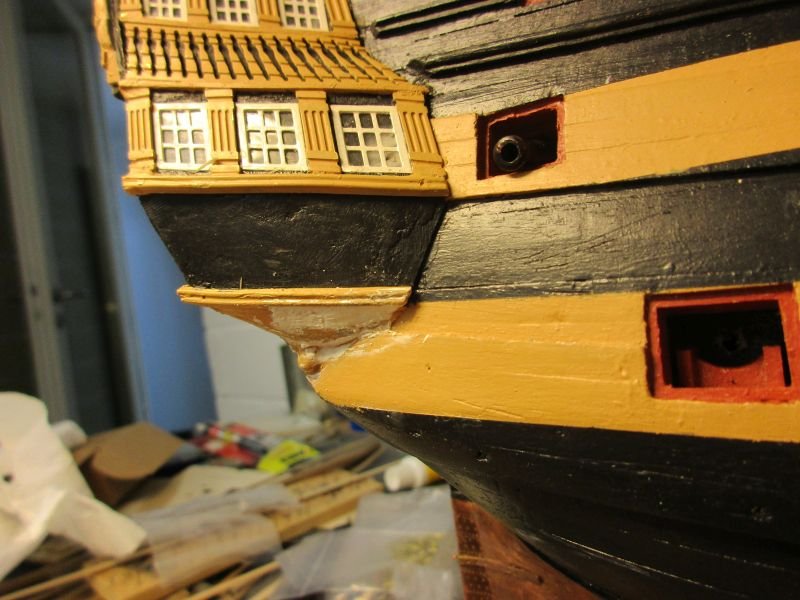
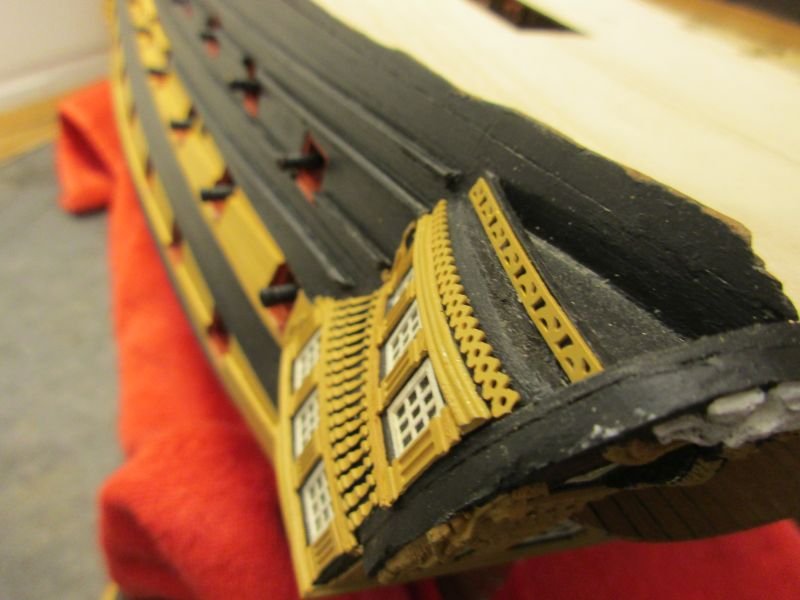
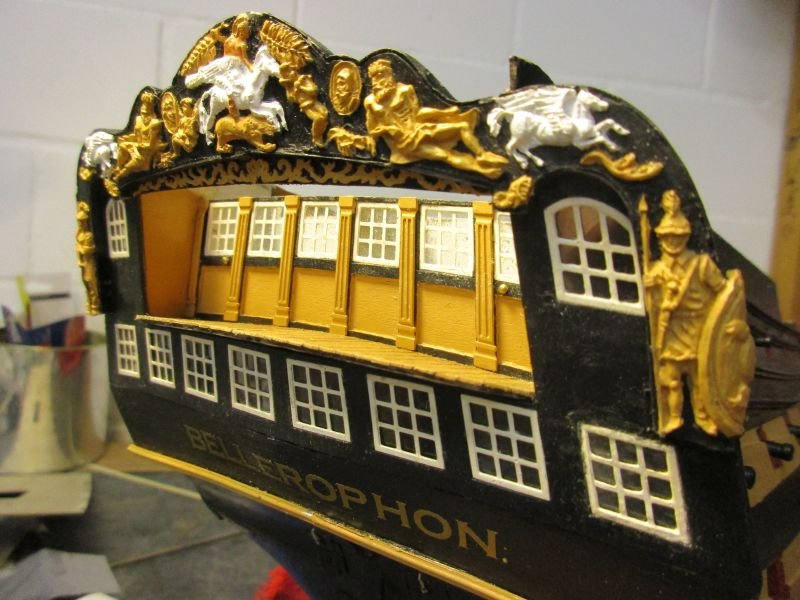
In the meantime work on transom and side gallery decoration went on. First I finished the transom but left off the delicate balcony rail. The decorative strips above and below the name were spaced evenly and - as I realised later - a bit too wide apart.
All the decoration parts on transom and side galleries as well as the decoration stripes on the hull and even the colour separating lines are connected to each other. Sometimes by luck it fit as I added part by part and sometimes I had to rework and repaint again and again to match a smooth transition from transom to side gallery to hull.
I started with the parts adjacent to the balcony balustrade and the equivalent parts on the side galleries and worked downwards and upwards. This was a good decision and made all the fitting easier.
Some decorative parts (parts #377 and #434) didn't fit into their place and were left off. Also the side decoration on parts #445 and #446 were filed flat as they seemed too elaborate and somehow didn't fit to the rest of the decoration around the side gallery stern window.
On top of the side galleries cisterns as suggested earlier by paulsutcliffe were installed. Paul, the skipper will ever be grateful for his flushing toilet. Thanks.
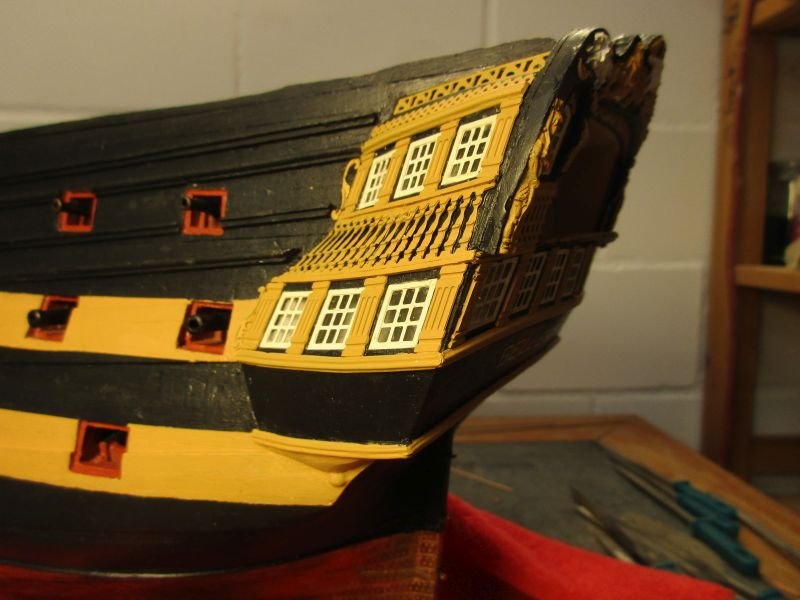
I'm quite happy with the appearance of the stern as it is now, with the few colours used and the slightly reduced decoration. I think it looks rather clean and elegant.
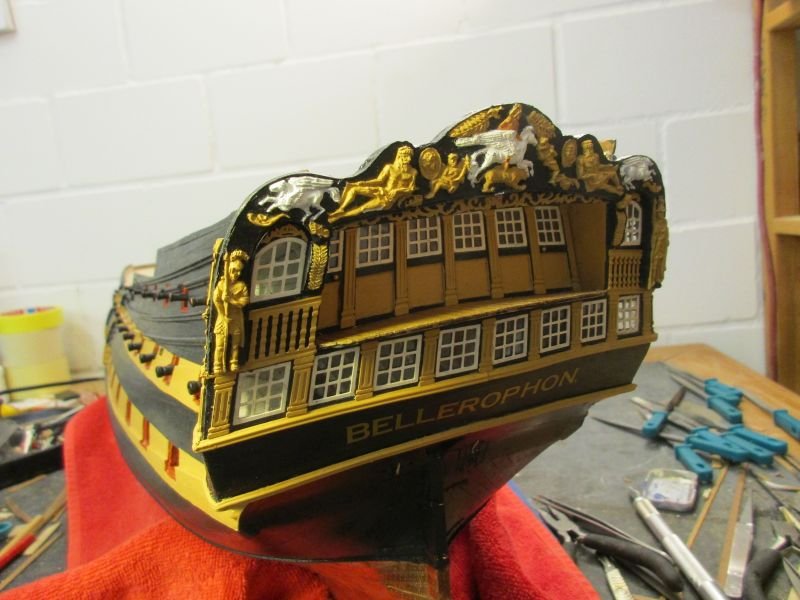
transom finished
part 446 with side palm leaf filed flat
part of the decorative strip on the hull was replaced...
...to give a better fit with the side gallery decoration
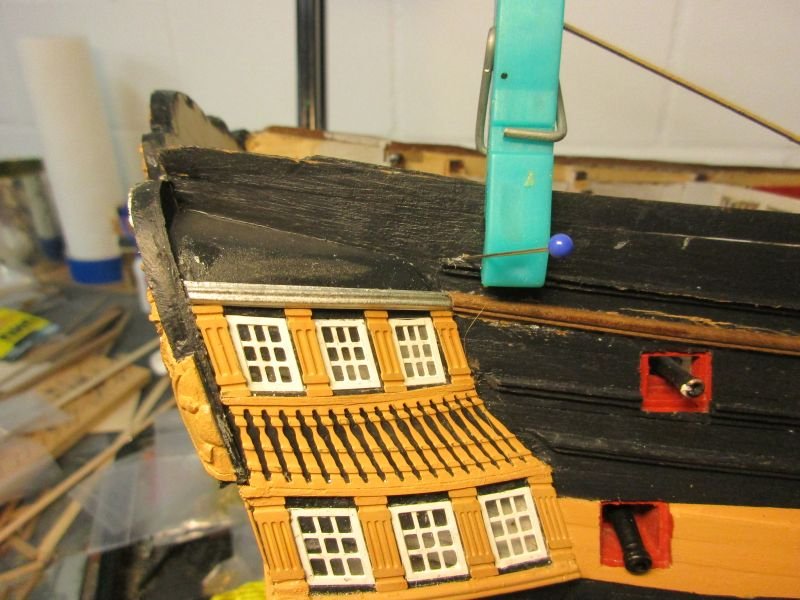
the lower ends of the side galleries needed some filling
the captain likes the decorative work
...and the cistern for his flushing toilet
- paulsutcliffe, Ronald-V, mtaylor and 10 others
-
13
-
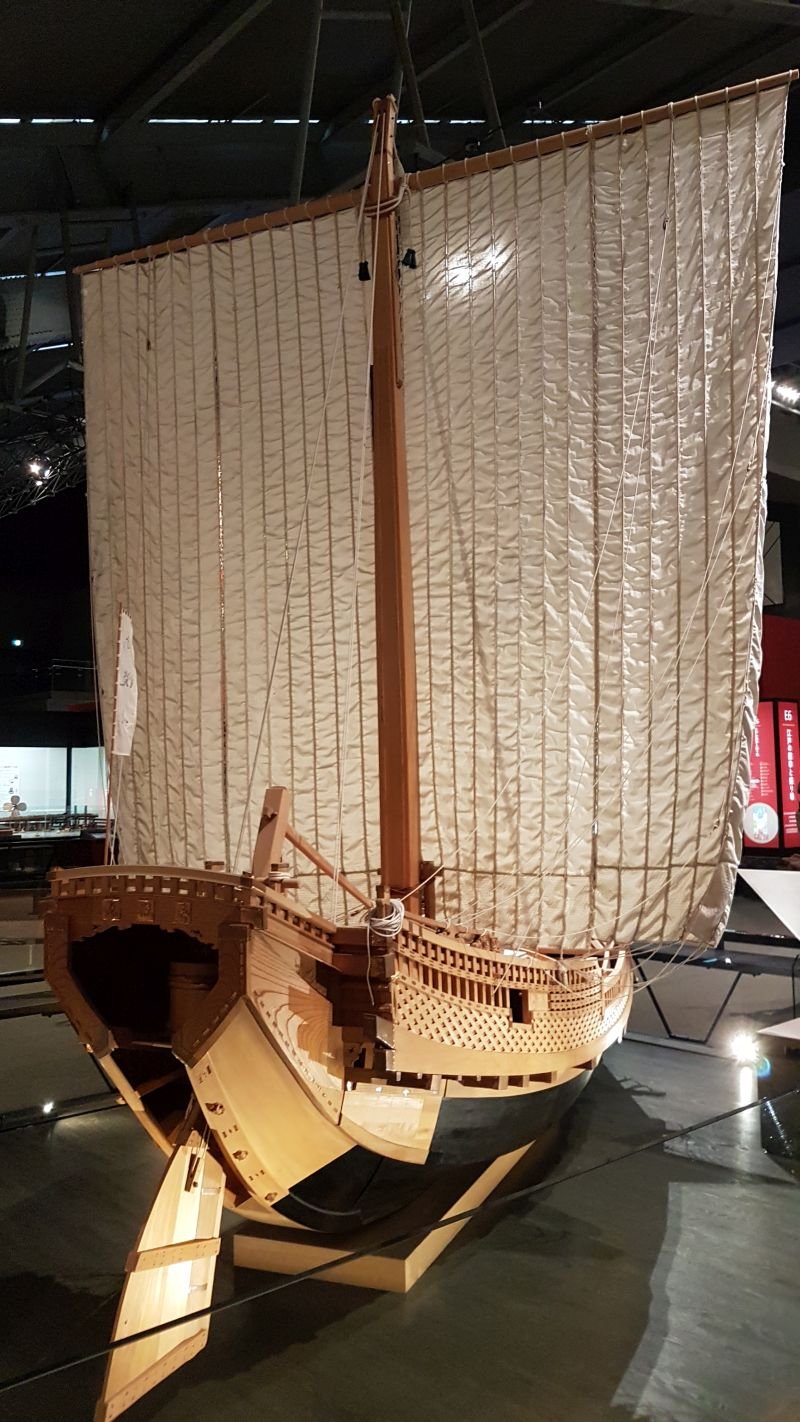
It has been quiet in the wharf lately, because I paid a lengthier visit to my daughter which was spending some time in Japan. It was a most interesting journey in a different, beautiful world. Shipbuilding was only of minor interest (but I might build a Woody Joe model of a Japanese vessel like I saw in the Edo museum). Visited woodworks were mainly temples and shrines and one very impressive visit was to Hiroshima - where you see what happens if generals are allowed to play unrestricted with their war machines...

model of a Higaki-kaisen ship in the Edo Museum

never again!
- GrandpaPhil, davyboy, Ferrus Manus and 2 others
-
5
-
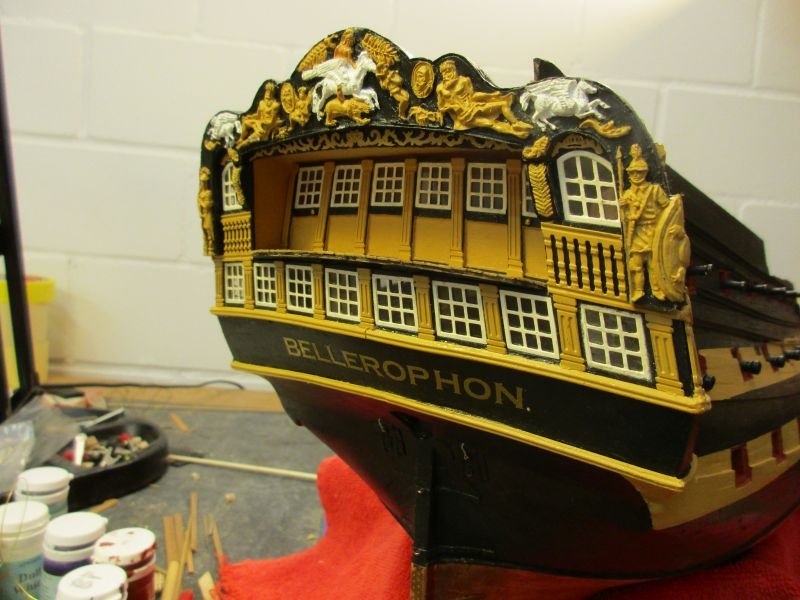
Because I still was reluctant to continue with gun rigging, I put the transom in place and started on its decoration. While trying to fit the flexible decoration part I found that it was too wide and would not fit around the quarter galleries stern windows. As it was already mutilated after scratching away the elephant I brought myself to cut it in half, taking out about 1,5 mm in the middle. (A similar operation had already worked for Pickles boat so I did it again.)
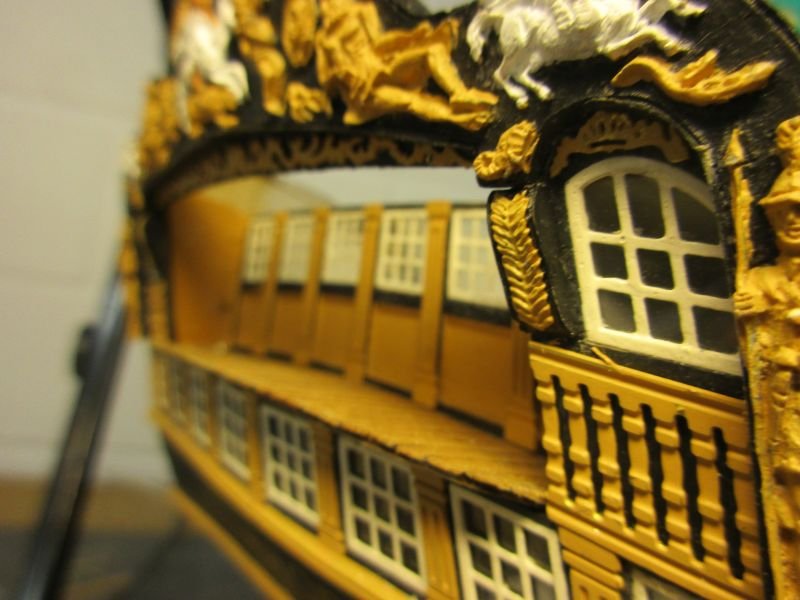
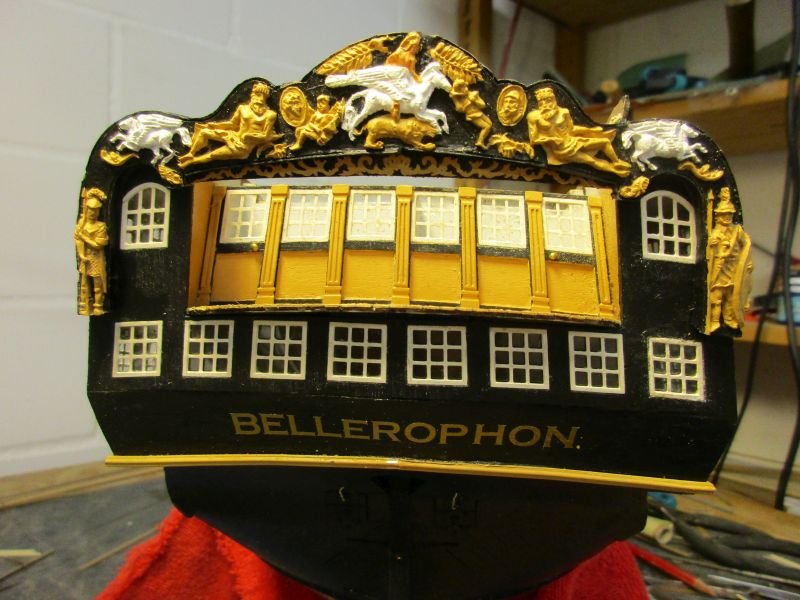
The now 3 parts were painted and glued onto the transom. After much re-gluing, light sanding, touching up again and again with the 4 colours used (black, yellow ochre, white and flesh) and mending Pegasus' broken wing I achieved an acceptable result which even for once looks better on the pictures than in reality. Using only 3 basic colours and just a little more on the central image of Bellerophon on Pegasus looks right to me - not pretentious but with a simple elegance. Again, less seems to be more.
After closing the side galleries I could see what benefit I gained from the extra work with hollowing out the gallery frames to give a view into the lower part of the side gallery: Well, not a big one, but I'm still glad I tried it. Next time I should radically cut away as much as possible of the part where it touches the hull.
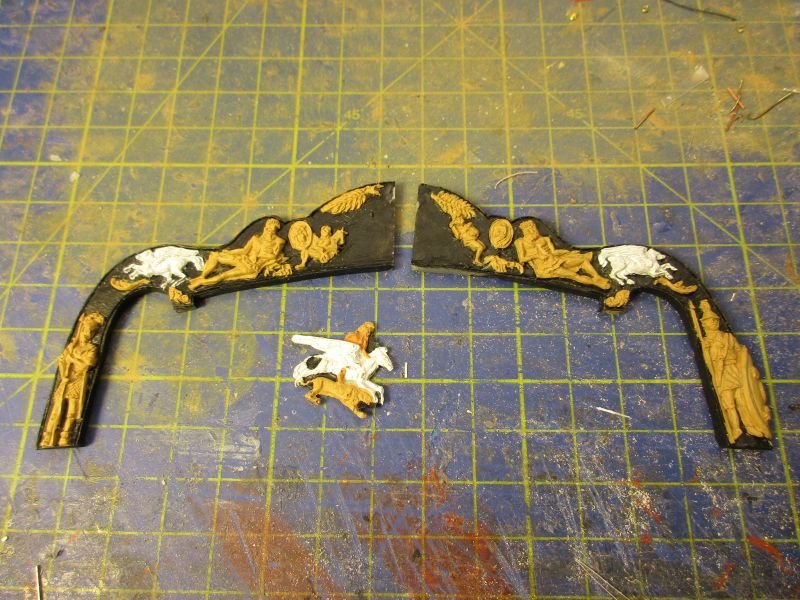
3 parts of the transom decoration ready to be glued on
the yellow ochre looks a bit more golden than in reality
the transplantation of Bellerophon was quite successful
- Henke, GrandpaPhil, Dwight and 12 others
-
15
-
Hi Martin
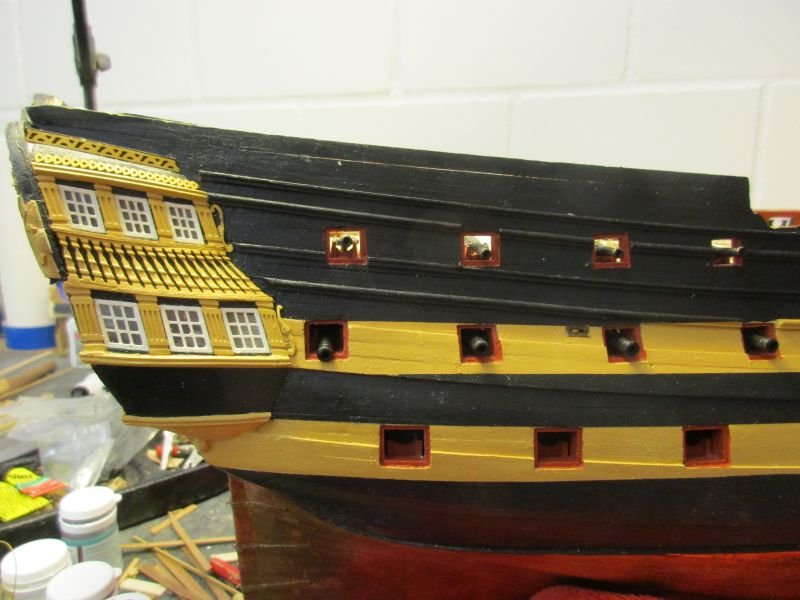
As far as I understand were those window openings in the hull constructed in a similar way to the gun ports - in this case about the size of the middle field of the 'glass case'. Wider openings would unnecessarily weaken the structure and deprive protection against enemy gun shots. To use the glass case for a view forward or aft you would have to put your head through the opening. For me, those openings visible in post 471 seem about right.
On my models I try to open all windows through the hull. You may not always note the difference to a just black painted hull but for me a real opening just feels better.
Cheers
Peter
-
Hi Jose
What a marvellous build! I love sail ships with sails and your presentation is a masterpiece.
Would you mind telling me how you fixed that behemoth on those two small pillars? I'm planning to mount my Bellerophon on three but I still wonder if the PDF can take the strain although I doubled it up in the region where those 4mm woodscrews through the pillars should hold the ship.
Cheers
Peter
-
Hi Martin
Great work!
I hate to say it but I would go with a rounded side badge. As I understand both versions exist in contemporary sources but for me the 3 windows panel setup only makes real sense if you build a small, conservatory like glass house to give the skipper some forward view from his cabin...
Cheers
Peter
- Martin W and Landlubber Mike
-
2
-
Hi Martin
Thank you. Yes it is adhesive vinyl lettering with a thickness of 0,1 mm - stable but thin enough to still show the wood structure below the material (BECC made it).
And I'm afraid lawyers are a plague in any language and every culture however simple it may seem...
(Very sorry if I just trod on the toes of any lawyer in this forums - but if you are here, you are most probably an exceptional lawyer!)
Cheers
Peter
-
In the meantime the arming of the quarterdeck continued. The 9-pounder guns forward of the cabin bulkhead will be 'fully' rigged. To simplify the process the tackle blocks are directly attached to the eyebolts, bypassing the hooks. I use black thread which could be taken for iron binding and hook - considering the scale and my eyes.
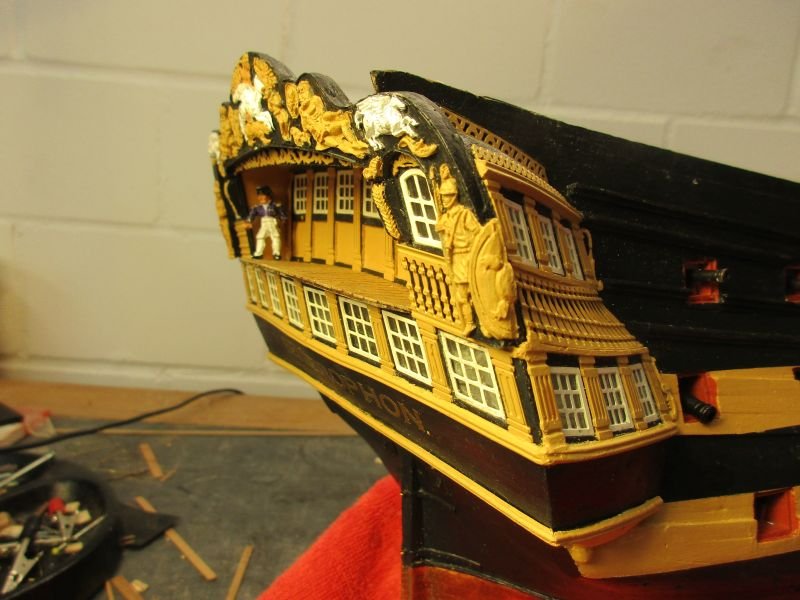
When I'm fed up with rigging the tiny blocks I work a bit on the stern. Bellerophon got her name (or is it his name? - a female ship with a male name - the English language can be confusing). Instead of the kit's photo etched letters I tried 6mm gold gothic font letters. A full stop was added with a dot of gold paint. (There was a discussion in this forum about how the ships were named and it seem the names ended with a full stop. ) I think the result looks quite acceptable.
step by step reworking of guns and carriages
the skipper checks a gun which is ready to be hoisted on board

port side of the quarter deck
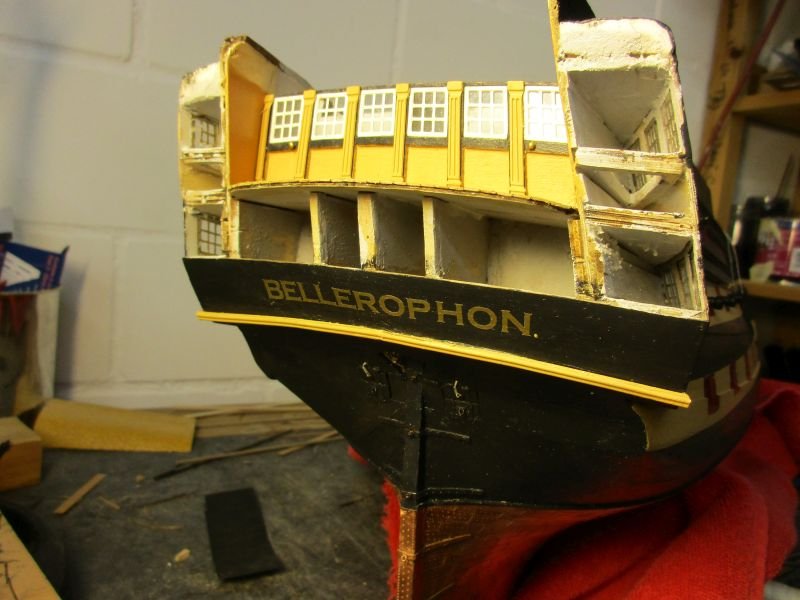
although the name is already there, I didn't break a bottle of champagne on the bow (yet)
- BenD, mort stoll, Sea Hoss and 9 others
-
12
-
Congratulations B.E.

Also the presentation with that group of blackened figures - showing quality but not drawing away attention from the main object - is another stroke of genius.
Cheers
Peter
HMS Vanguard by marktiedens - Model Shipways - scale 1:72
in - Kit build logs for subjects built from 1751 - 1800
Posted
Hi Mark
Great work.
Just a small hint although I might be a bit late: Parts of the lower gun deck will be visible from above where in the waist the two open companionways will lead from the partly visible upper deck down to the gun deck. I would recommend to put in some small planked false deck parts of the gun deck (I mean the one with the dummy guns) as long as there still is some limited access.
I forgot it on my Bellerophon and had to do some keyhole surgery to put the planks in place.
Cheers
Peter