Sailcat
-
Posts
157 -
Joined
-
Last visited
Recent Profile Visitors
830 profile views


-
 ccoyle reacted to a post in a topic:
Cutty Sark by Sailcat - FINISHED - Revell - 1/96 - PLASTIC - Rescue kit bash morphed to Dame Tisane
ccoyle reacted to a post in a topic:
Cutty Sark by Sailcat - FINISHED - Revell - 1/96 - PLASTIC - Rescue kit bash morphed to Dame Tisane
-
popeye the sailor reacted to a post in a topic:
USS Constitution by RadMan – Revell – 1:96 – PLASTIC
-
popeye the sailor reacted to a post in a topic:
USS Constitution by RadMan – Revell – 1:96 – PLASTIC
-
GrandpaPhil reacted to a post in a topic:
Cutty Sark by Sailcat - FINISHED - Revell - 1/96 - PLASTIC - Rescue kit bash morphed to Dame Tisane
-
GrandpaPhil reacted to a post in a topic:
Cutty Sark by Sailcat - FINISHED - Revell - 1/96 - PLASTIC - Rescue kit bash morphed to Dame Tisane
-
GrandpaPhil reacted to a post in a topic:
Cutty Sark by Sailcat - FINISHED - Revell - 1/96 - PLASTIC - Rescue kit bash morphed to Dame Tisane
-
jct reacted to a post in a topic:
Cutty Sark by Sailcat - FINISHED - Revell - 1/96 - PLASTIC - Rescue kit bash morphed to Dame Tisane
-
jct reacted to a post in a topic:
Cutty Sark by Sailcat - FINISHED - Revell - 1/96 - PLASTIC - Rescue kit bash morphed to Dame Tisane
-
docidle reacted to a post in a topic:
Cutty Sark by Sailcat - FINISHED - Revell - 1/96 - PLASTIC - Rescue kit bash morphed to Dame Tisane
-
 When I was searching for threads of various sizes I had good luck at jewellery/craft stores - not pre-made jewellery but the 'make your own' places. They are also called Bead Shops as well. Couldn't always find the correct colour but that just meant some home modification. Hope this is of some help.
 -
Hey dafi, checking in on some build logs after my absence - I have to say, Holy Cow!!!! I am stunned and I also can't wait to see what happens next
-
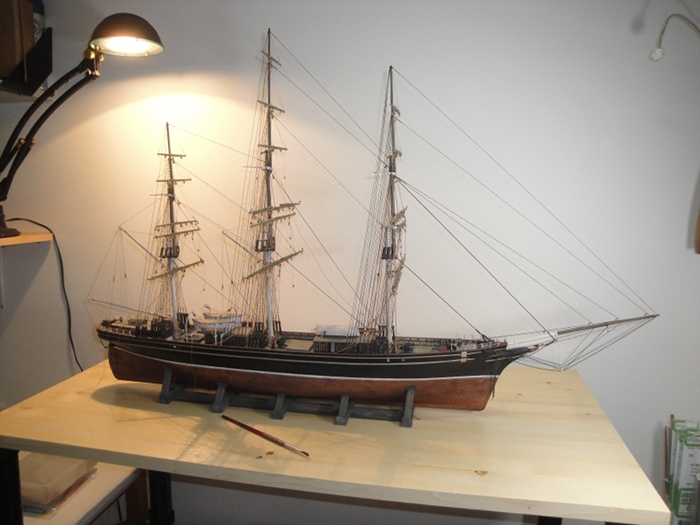
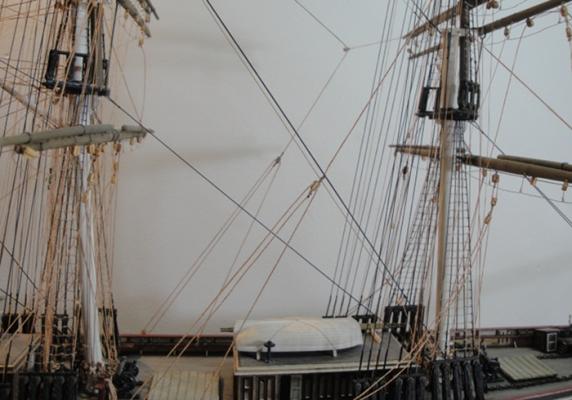
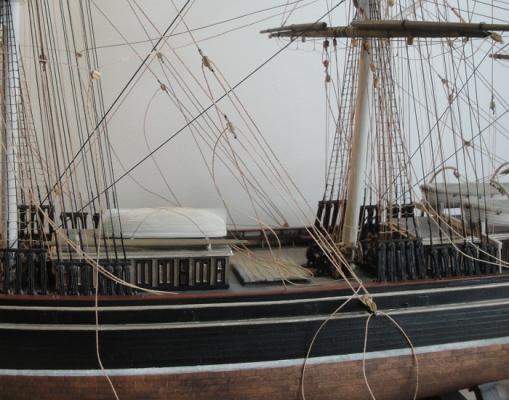
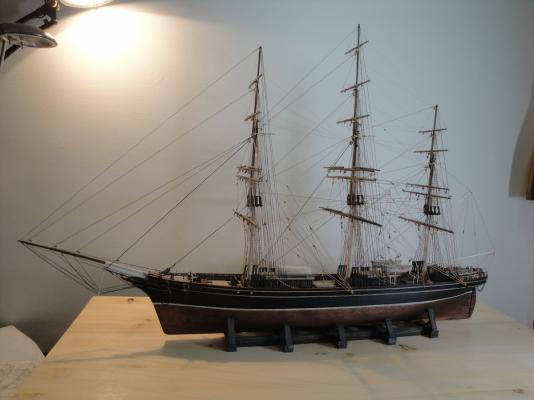
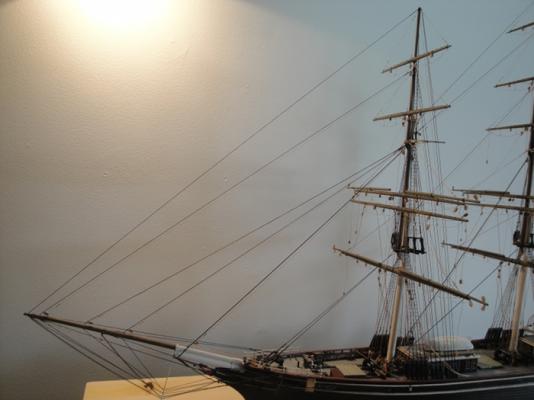
Thanks for the kind words and encouragement once again The display case is planned but I haven't really looked into it yet, soon though. And that's because this is my last post for this Build Log ... yes, it's finally 'done' in the sense that the work on the ship itself is as complete as planned. There's still the case as mentioned, plus little tweaks for the final appearance adjustments. But for now I'll just get on with the last photos. Fore Royal braces in place. Fore Topgallant braces. Fore Upper Tops'l braces. Fore Lower Tops'l braces loose fit before tying off. Fore Lower Tops'l braces tied off and Course braces loose fit. Fore Course braces tied off. The last of the decorative rope coils in place and the finish line is crossed. The Dame Tisane. And the rest I'll save for the Completed Model Ship thread. Many thanks to everyone who looked in and provided much needed advice and information. Special thanks to Jim, Dan, Popeye, Dafi and likely others who've slipped my mind, for helping me out repeatedly when I was struggling with stuff. It's because of you folk that I was able to get to this point And as to what may come next - I've been feeling the itch to do other things hobby wise but I also can't stop thinking about the next nautical adventure. Perhaps the New Bedford whale boat, I really like that kit ...


- 237 replies
-
- 17
-
-
- cutty sark
- revell
- (and 2 more)
-
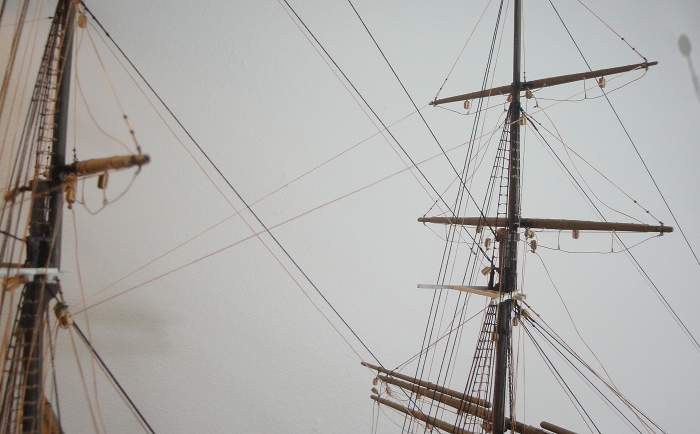
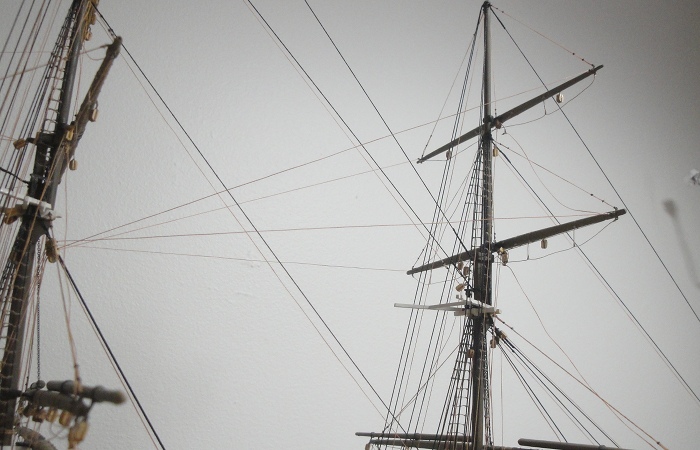
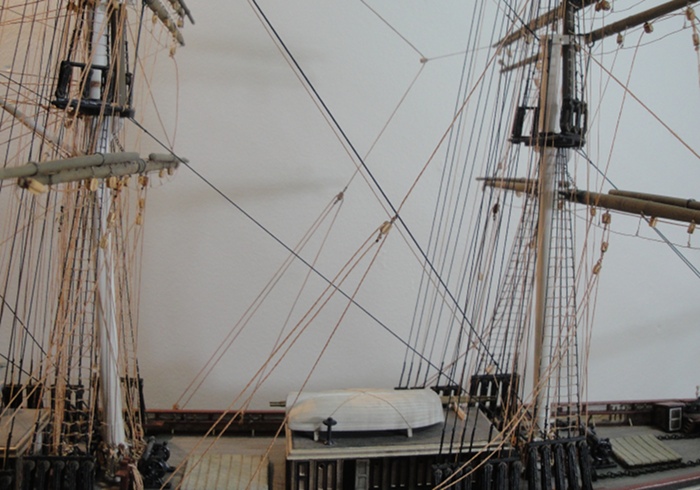
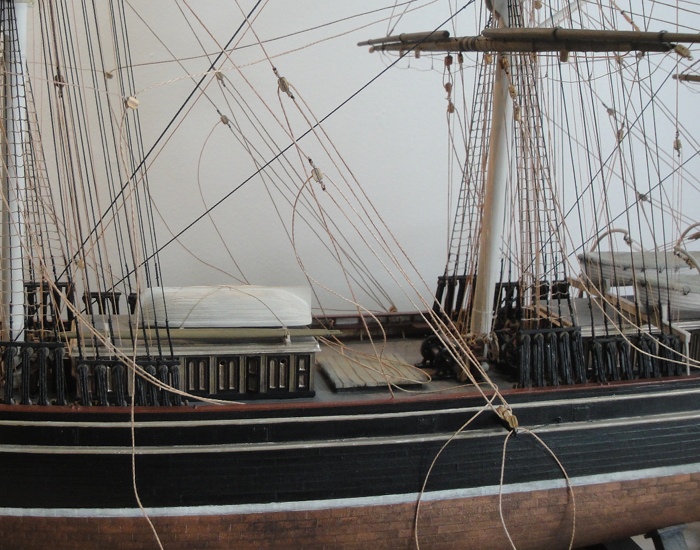
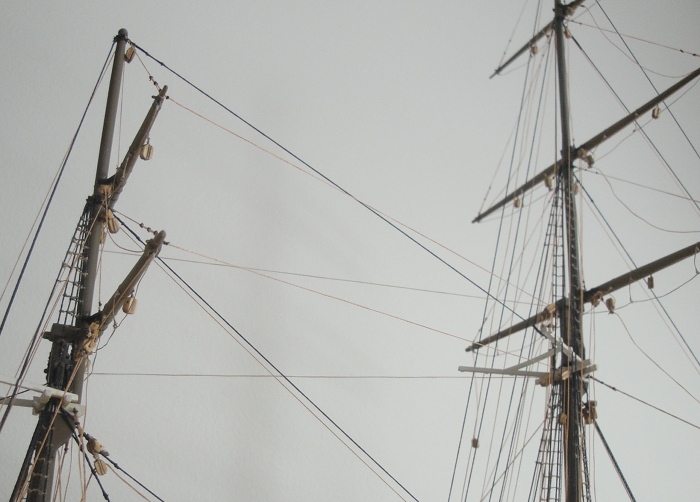
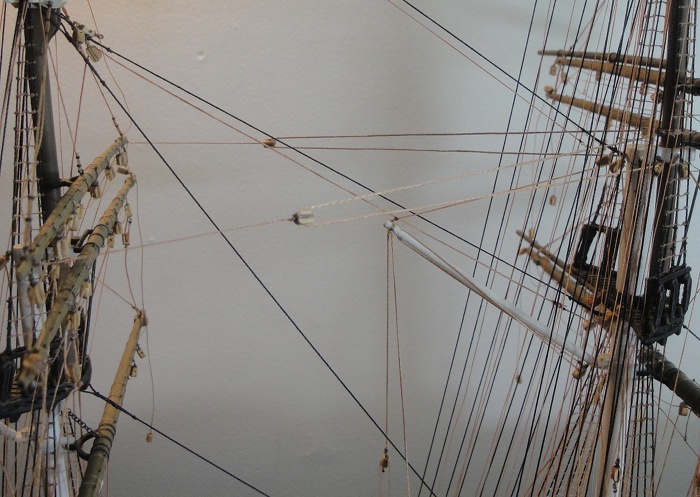
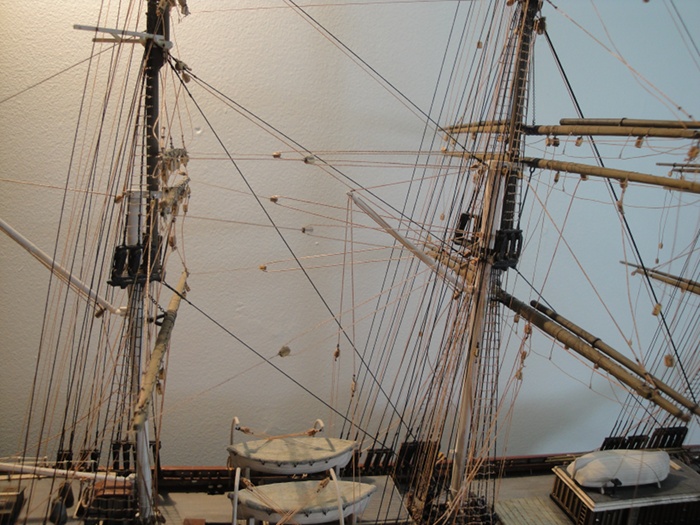
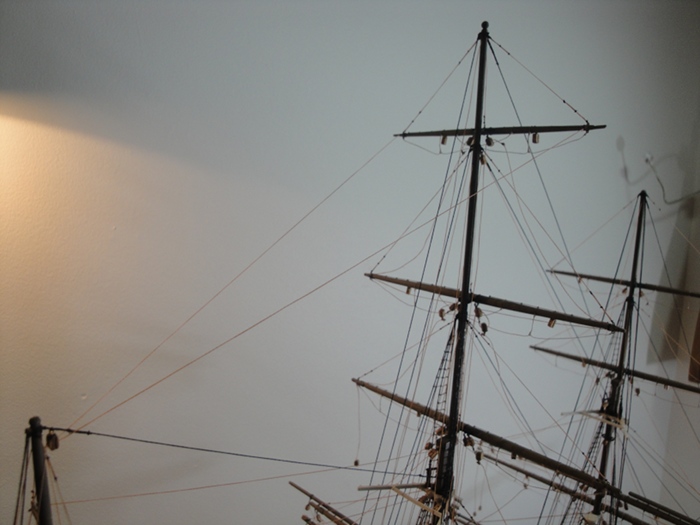
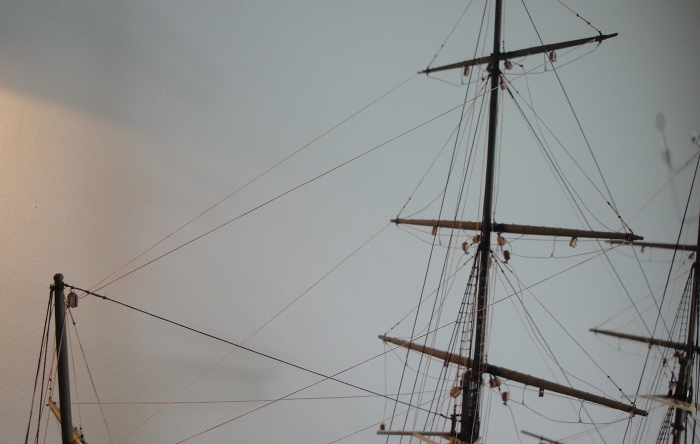
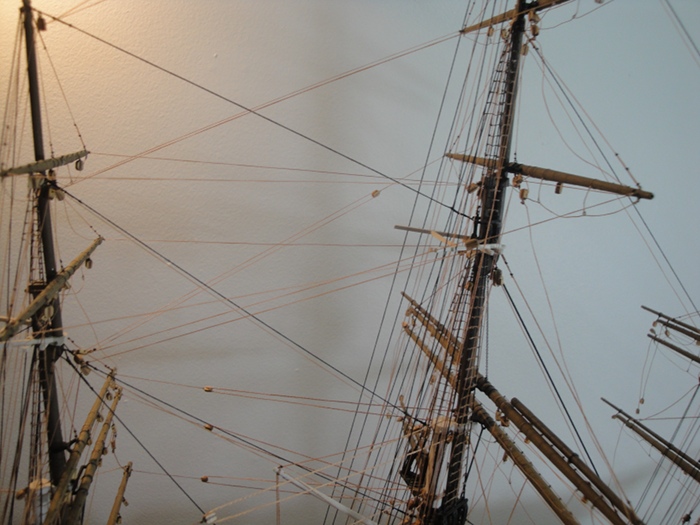
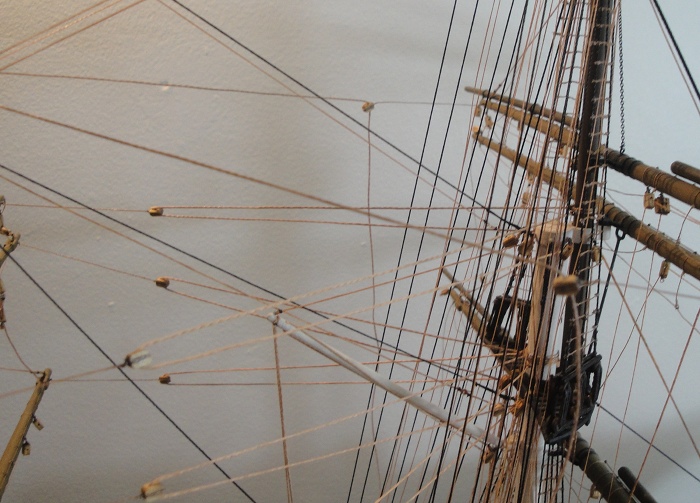
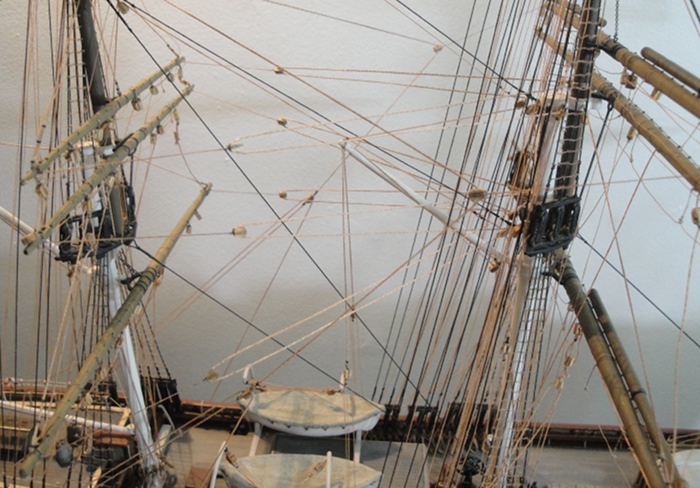
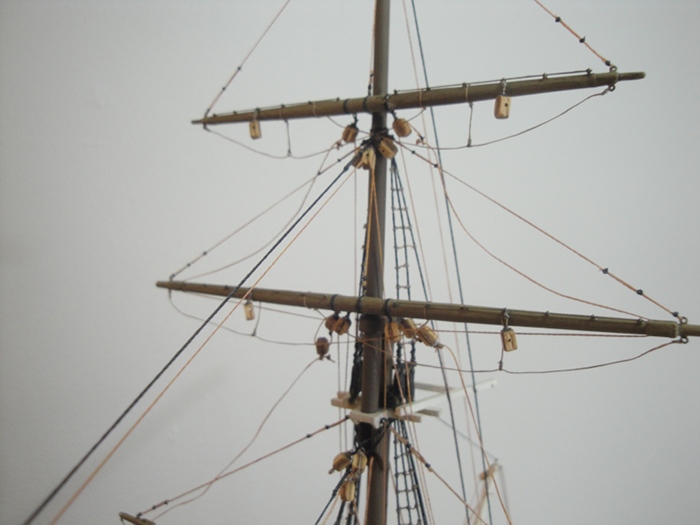
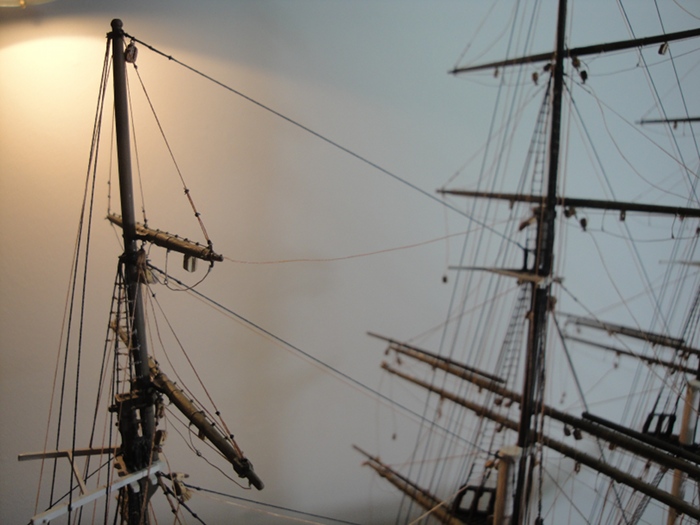
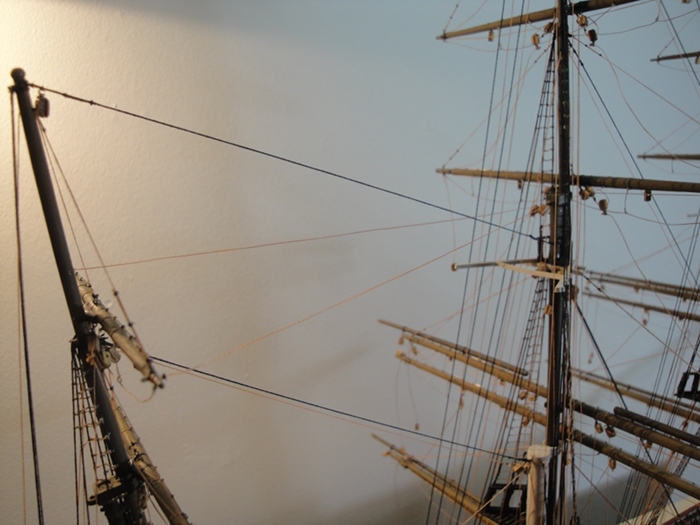
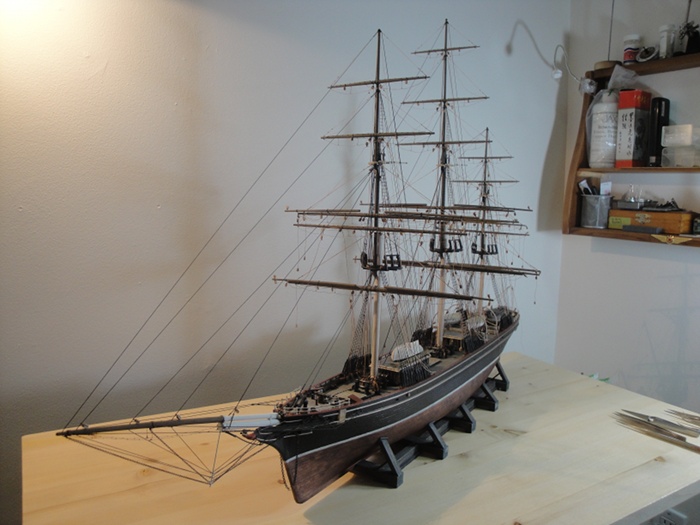
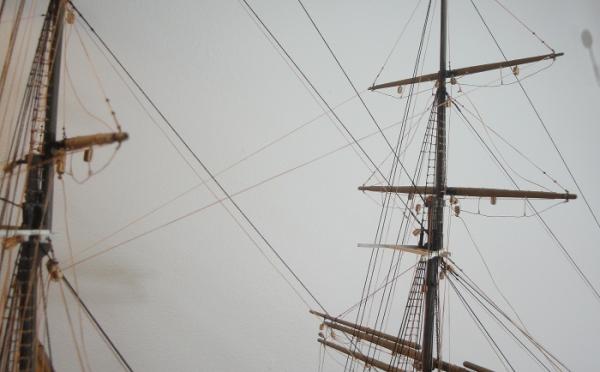
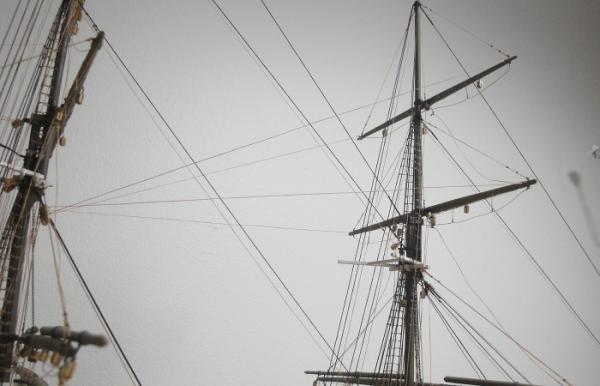
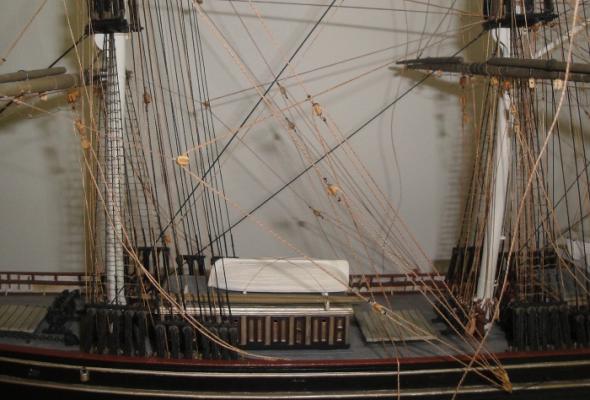
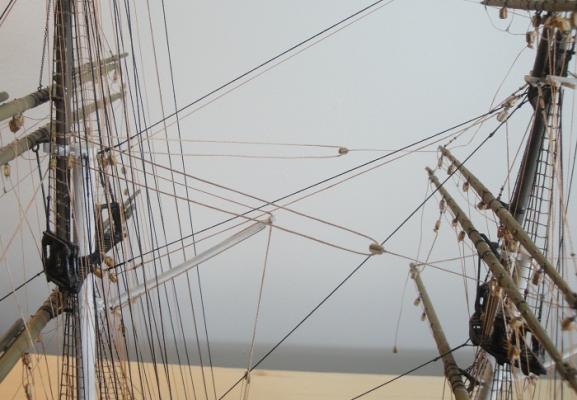
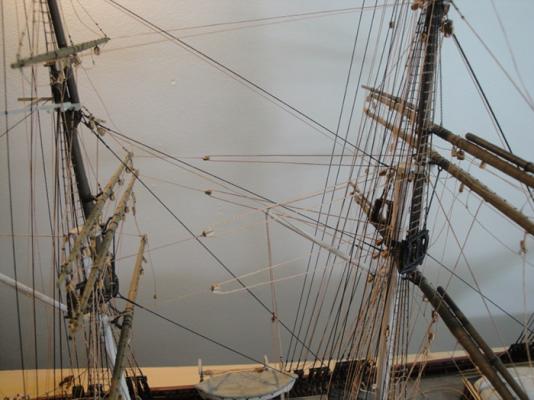
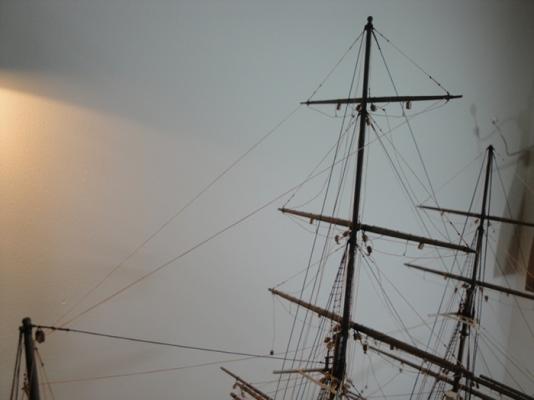
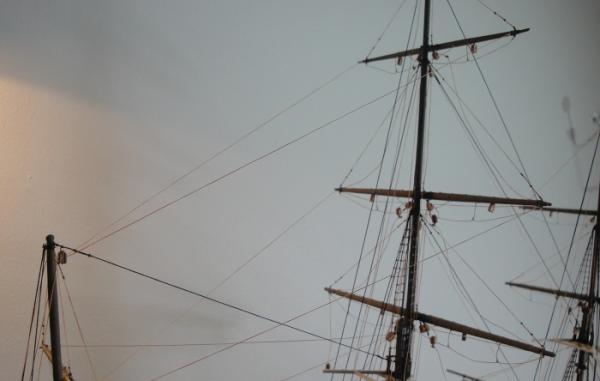
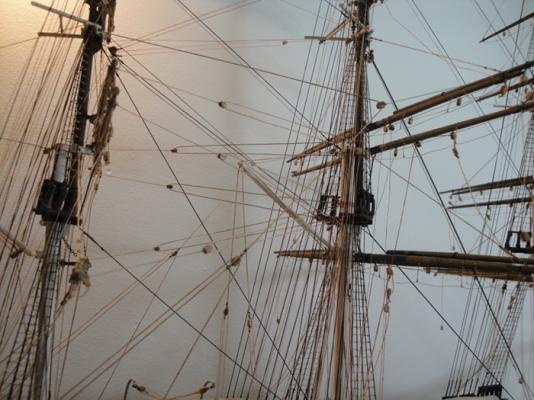
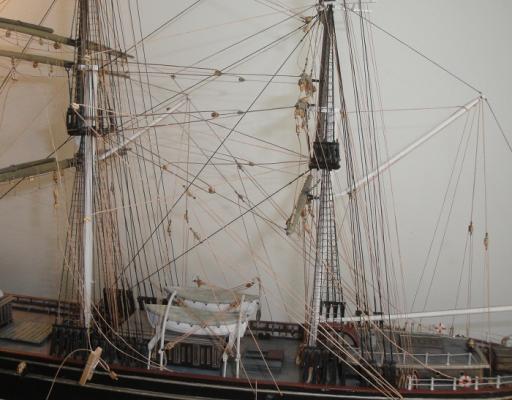
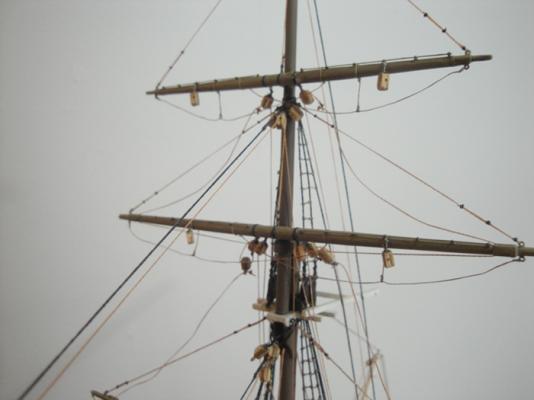
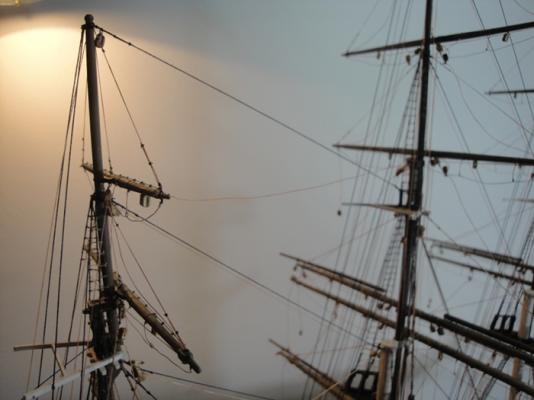
A Big Thank You to all of you for your kind words and encouragement And at the risk of sounding like a TV Commercial - It's All About Braces! Last post I ended with the beginnings of the mizzen braces being set up. Since that time I have been puttering away at it, a bit at a time, and remembering to take a few photos along the way. With that, here we go. We start with the mizzen Royal and Topgallant braces in place - view is from starboard. These next two are the start of the Mizzen Upper Topsail braces from both sides for perspective. And now the Mizzen Lower Topsail braces. Finally the Cro'jack (or Crossjack) braces. A view of the tie-off's for the braces - I'm going by the 'incorrect' kit instructions at this point because it's how the model is set up and the thought of trying to research and adapt to be more realistic is very, very, very intimidating, lol. Do the next thing ... which in this case involves the Mainmast Skysail braces. Followed by the Royal braces. And the Topgallant braces - again all of this is as per kit instructions. The Upper Tops'l braces being rigged - you can see the dangling line from the upper tops'l pendant. The Upper Tops'l braces in place now. The Lower Tops'l braces being rigged. Hard to see for all the rigging now but trust me, they're there. And we end with the Lower Tops'l braces in place. What I haven't gone on about, nor shown, is the 'fun and joy' of the tying off of the braces to their respective pins on deck. I can say that I accomplished it with no breakage or snapping of lines in place - how I did this is a mystery to me though So almost through with the Mainmast braces which will only leave the Foremast braces to complete. And at that point I will call this adventure over, which is probably why I have been procrastinating a bit. Funny and contradictory, but for these last 4 1/2 years all I could think about was the perceived impossibility of actually 'finishing' this re-build, yet now that the finish line is within reach, close enough that all I have to do is reach out and grab it, I find that I don't Want to, not really. Oh, there are always more things to do, like build the display case and find a home for her, but I am now getting the full realization of Why people put themselves through the seemingly Herculean effort of building and rigging these kinds of ship models - repeatedly. Before now if I'd been asked if I'd ever do something like this again I might not have had an easy answer. Now though my answer would be, "Of course I will. The only questions are How Soon and What Kit." And on that note I leave with the bittersweet certainty that this is the penultimate post in this Build Log - unless I find a way to draw it out even longer, lol.


- 237 replies
-
- 9
-
-
- cutty sark
- revell
- (and 2 more)
-
I use two kind of liquid plastic cement, the regular and the super thin. For long seams like a hull I prepped the edges then clamped and ran the thin cement along the seam on Both sides (inside and out). After curing for 2 days I then ran a bead of 2 part long set epoxy along the inside seam for extra strength. Normally I don't take the extra step with the epoxy but my personal experience with plastic models has been, "The longer the seam the more likely the glue will fail eventually." I used to use excess 'sprue' from the parts trees to add reinforcement but the epoxy bead provides more strength I found. Hope this is of some help.
-
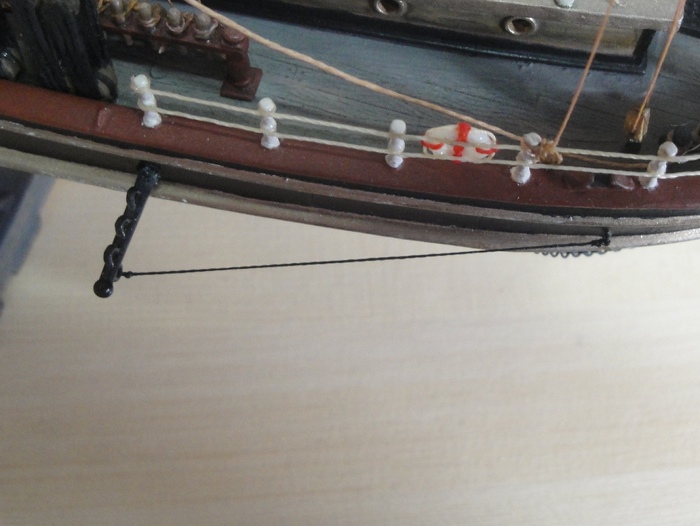
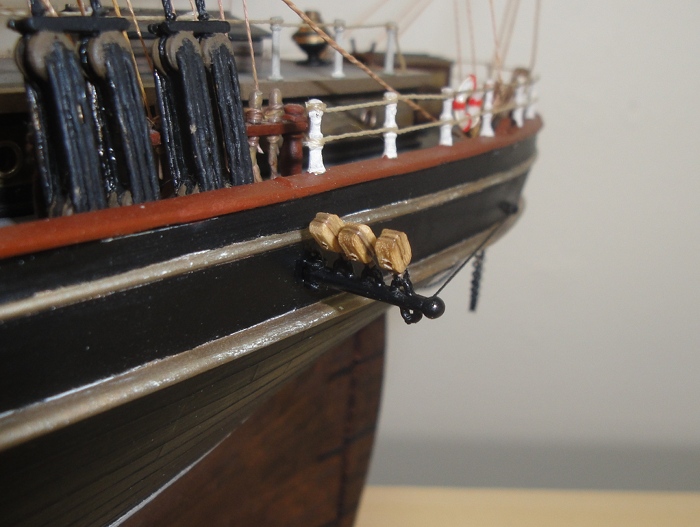
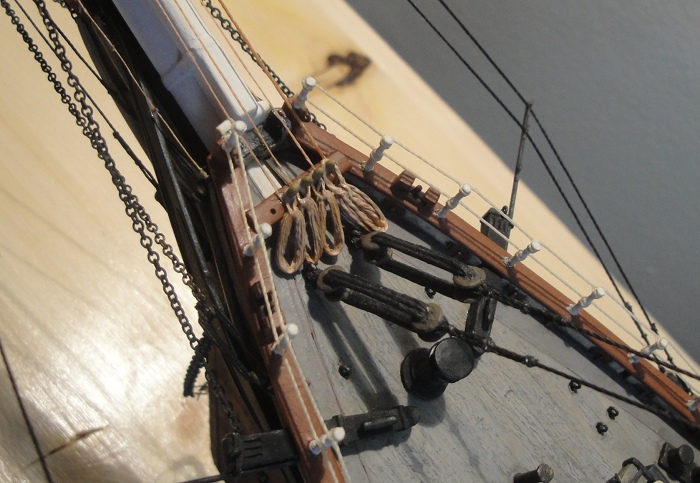
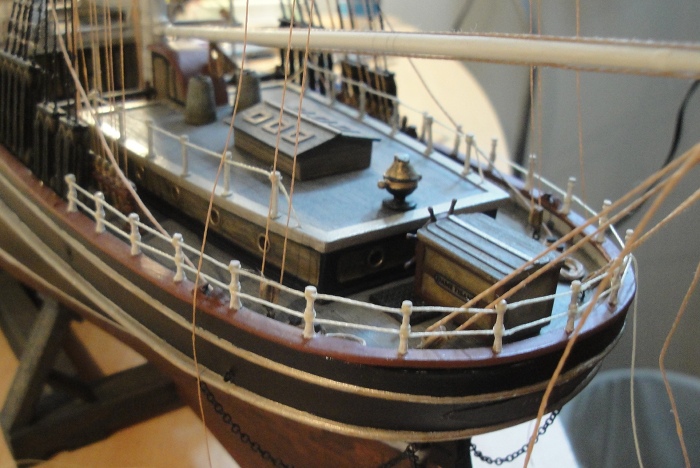
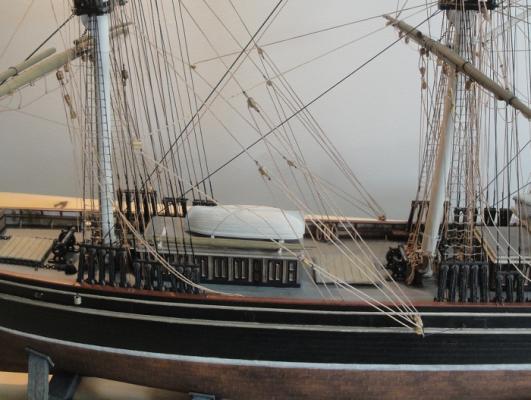
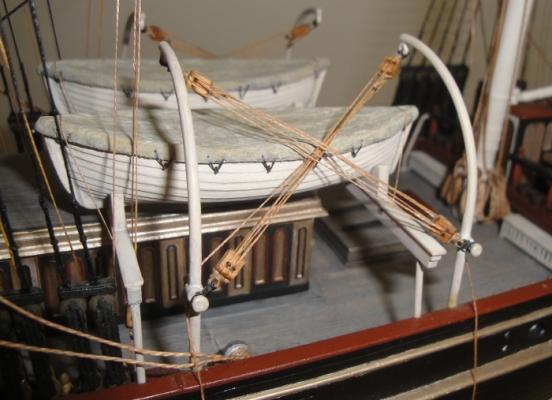
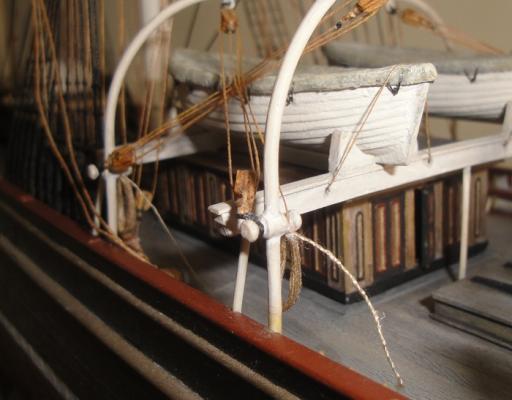
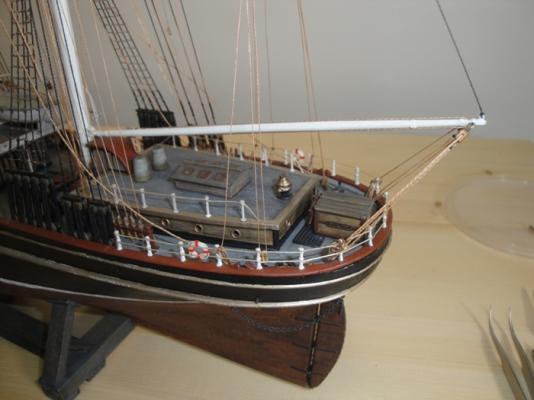
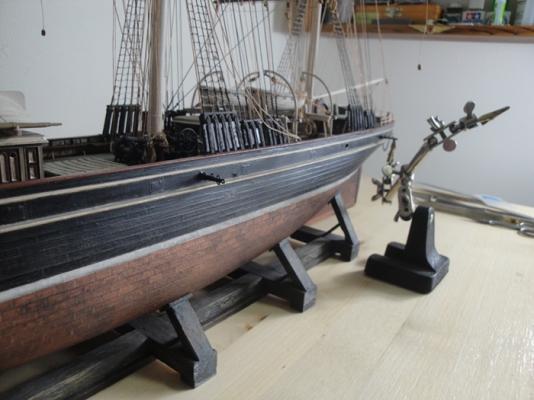
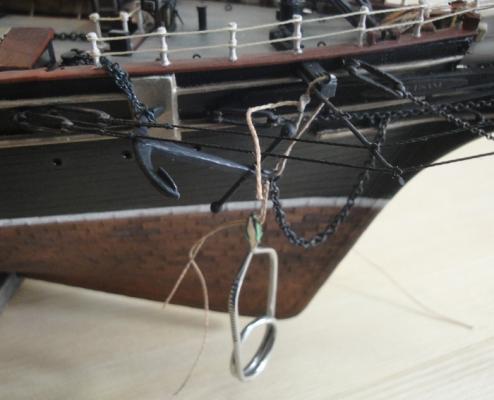
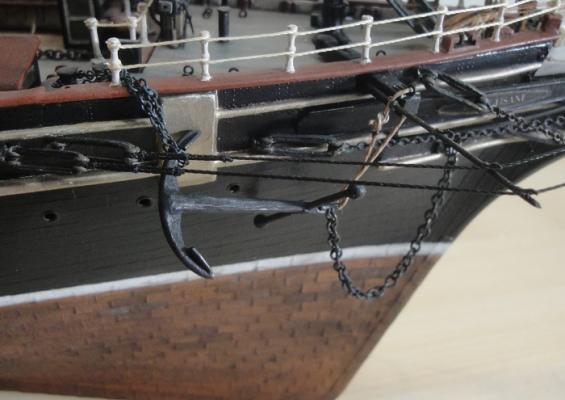
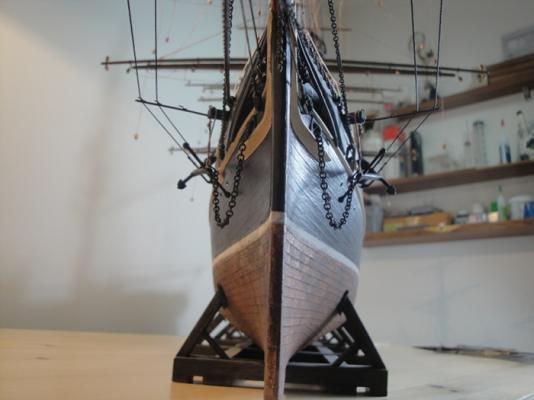
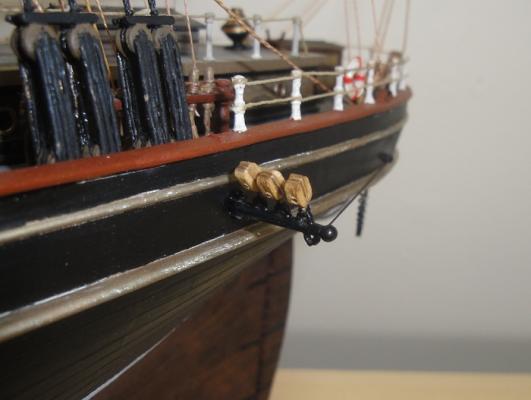
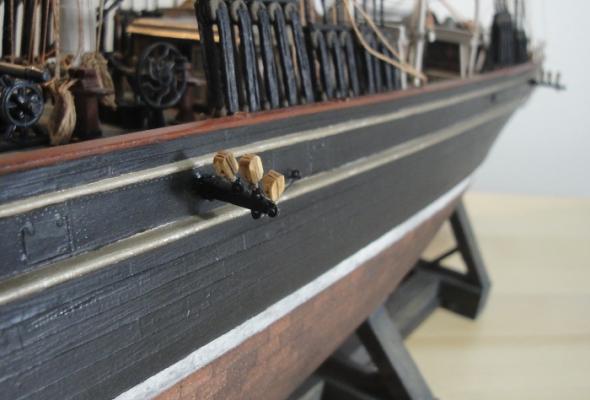
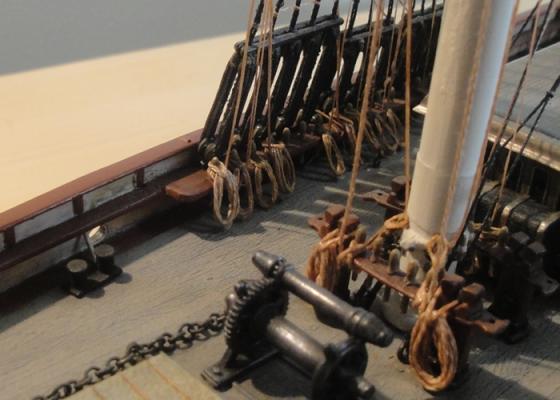
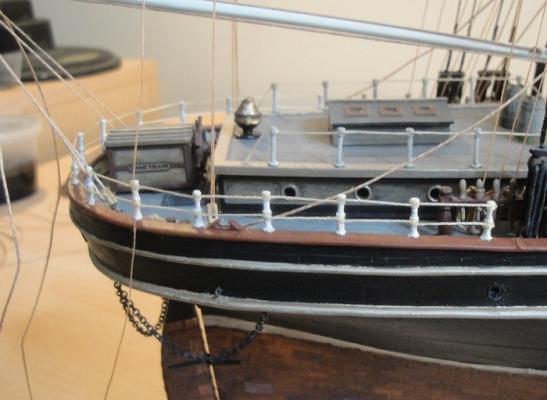
Thanks for all the kind words and thanks to Jim, Popeye and Sailor123 for your answers to my questions Advancing forward now, dealing with the occasional bout of disbelief and trying not to get impatient had resulted in some more work, go figure, lol. Here we go with a batch of progress photos. After all this time I have finally tied off the lines for the boat davits, which had been hanging loose. Here I applied the 'zero tension' strategy by dabbing diluted PVA into the blocks to lock the lines in such a way as to simulate tension. I chose to simply hang the rope coils off the davit 'cleats' after perusing images on the Internet, it seemed like the common method. Attaching the life rings onto the aft rails, just a dab of GS cement. Bumkins (aka bumpkins aka boomkins) being affixed to the hull. At first I had planned to modify these but instead I left them as is in order to represent the kit origins - something I have done here and there through the build. Hanging the anchors ... here is where I was applying weight to the forward end and then soaking the line in diluted/tinted PVA to give the illusion of weight tension. The result with the anchor canted more realistically. The tint in the PVA is diluted black China ink, not a lot, to give the lines a dirty look when the glue dries. A bow view shot of the anchors in place. Attaching the 'chains' to the bumkins, some thin black nylon in this case. This is the midships bumkin. And here's the aft bumkin. While I was attaching the blocks for the running rigging I consciously chose not to attach the blocks for the braces with the fear that I'd wind up getting confused and use the wrong ones. Sage forethought as I would have made more mistakes ... but now comes the time to attach all the rest of the blocks for the braces. A look at the mizzen mast with additional blocks in place. Putting the blocks on the bumkins - this is the port aft bumkin. And the port midships bumkin. Here we go with the first brace, mizzen royal starboard, loosely in place. Both mizzen royal braces in place with slight tension. And a not too clear view of the mizzen royal braces tied off - additional detailing like rope coils yet to come. So now there's just the rest of the braces to do ... just ... This is the part that I never thought I'd get to in times past. Getting here fills me with mild disbelief and moderate elation, but also there is the growing concern of what happens when I tie off the last line and glue down the last rope coil. The question of who gets the Dame and where she will stay is still up in the air, thought I now have a place for her to reside temporarily while I figure this out. However, such concerns I am putting aside until such time as they become the primary ones, right now I just have to concentrate of making sure I do the braces correctly. Stay tuned for more ... but hopefully not a Lot more


- 237 replies
-
- 11
-
-
- cutty sark
- revell
- (and 2 more)
-
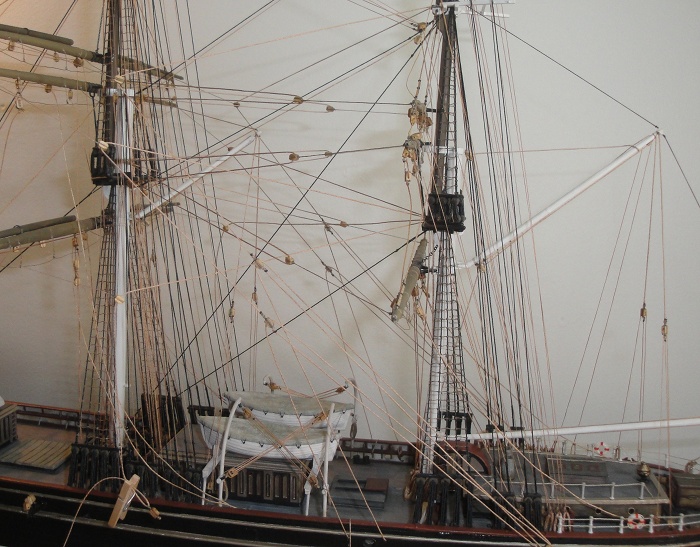
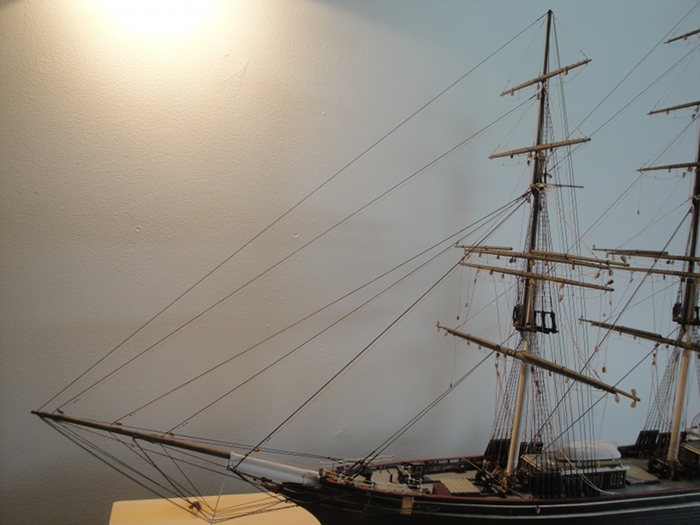
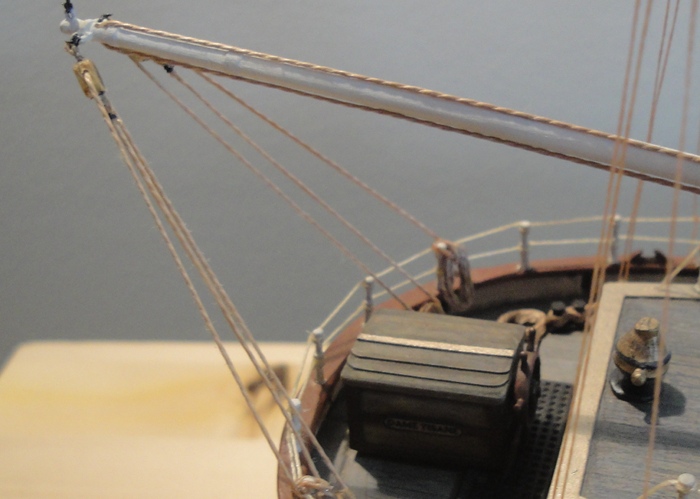
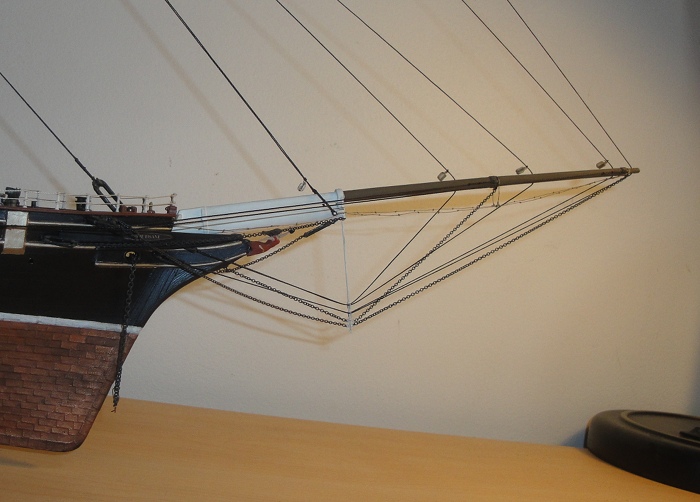
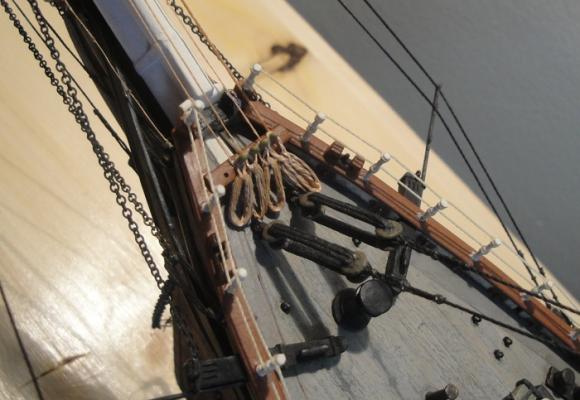
Thanks for the kind words and I'm still having a 'geek-gasm' over how quickly the old reflexes and data set have dropped back into their places. I believe I mentioned before that this new arrangement makes 'on deck' rigging a lot easier in terms of angles, approach and access ... enough so that I can now proclaim, "The Fore And Aft Running Rigging Is Complete!!" (cue marching band, cheerleaders and confetti, lol) But as with many things in life the completion of one stage leads to yet another, with the accompanying questions and pleas for advice - but that comes after the pictures First of is the best shot I could get of the halliards and downhauls for the Fore Topmast Staysail and the Flying, Inner and Outer Jib sails. The set isn't as 'perfect' as I would like but the geometry here has been determined by the size of the blocks I used, which were too large for scale. I did manage to set them with almost no tension so the standing rigging still looks taut - that took some finicky finessing let me tell you, lol. Here's where I admit that in my enthusiasm for progress I neglected to take as many photos as I usually do, but I did remember to take a few. This one's of halliard tie off's with rope coils emplaced. The rope coils I made for these were a bit smaller then the average as with the no-sails set up most of the halliard is run through almost to the bowsprit. And finally the downhauls tied off and with thicker rope coils to reflect that there would be more line stowed here under these circumstances. Somehow I don't think I put enough coiled line here to properly reflect the 'real' situation, but that can be corrected easily enough - these coils are easy to get at unlike many of the others behind the deadeyes and such. With a great sigh of relief I can now let go of the anxiety of leaving the fore and aft rigging for so long. This leaves one major final stage rigging adventure and that is the Braces and this is the final stage for me because I am not rigging for the stuns'ls. But before that can happen there must first be an accounting of all the little details which I have left incomplete for various reasons. One of these details is the placement of the bumkins which can now be fixed in place - I left them off until now on the advice of many who told me not to put them in place until I had to, sound advice which I'm glad I took. As well are certain finishing touches which bring with them a foreshadowing of the completion. Finally setting and tying off the boat davits will be accomplished soon and I'm planning to simply make more on my rope coils and attach them as seems appropriate - Question Number One; Is this correct or is there a different way that these lines are coiled? The anchors which I scratchbuilt so long ago can now be linked to their chains and stowed, which leads to - Question Number Two; can anyone give me a link or photo which shows how this is done? I know the basics but it's been so long since I thought about it that I do no want to depend on my flawed recall. Life rings will be attached as well, I had considered omitting them but they add a nice touch to the look. I never did attempt to print out the ships name small enough to label the life rings ... and I doubt I will at this point, lol. Holy wow ... it feels weird to be talking about the completion after all this time ...
- 237 replies
-
- 7
-
-
- cutty sark
- revell
- (and 2 more)
-
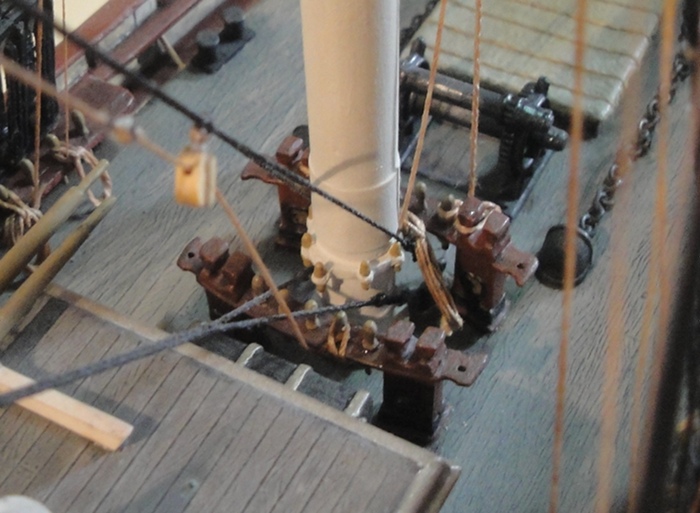
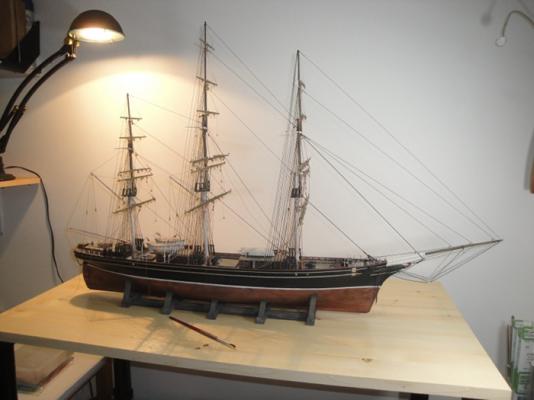
Thanks again for the kind words and support, everyone. It certainly helps ease the struggle of trying to remember, recall and reinvigorate while trying to get the old brain to play along, lol. Something that occurred to me during this return process is that though I've been away from the build for months at a time, in the olden days of wind sail that span would be considered a medium duration at best. Sometimes ships and crews wouldn't return for years and along with the uncertainty of if they would return at all family and friends would simply hope for the best, and this was the normal shape of things. These kinds of thoughts kept my chin up during the hiatus, not knowing if I'd ever be able to return to the shipyard is a downer to say the least. And with that preamble out of the way ... SHE'S BACK! What is mercifully not easy to see in these photos is the accumulated fine dust and thin cobwebs - you can see the little brush I was using for cleaning up process. That plus a modified 'foot' pump were enough to deal with the evidence of time sitting. And the next pic is after the meticulous go-over was completed. When last I left off the Vangs, Boom Sheets and Signal ensign had been attached, awaiting finishing touches. Months later the loose ends have been clipped and rope coils have been placed for the boom sheets. The Main Topmast Staysail halliard had been tied off but the downhaul was hanging loose. Finally got around to tying that off. Here the ends of the signal ensign and the starboard vang have been clipped and rope coils placed ... hard to see but this is the best my camera can do. One of the things I discovered immediately upon the return to the threadwork was that it was easier for me to accomplish the tying off to the on-deck portions. With that, and bolstered by enthusiasm and frantic energy, I set up, ran through and tied off the halliards and downhauls for the main topgallant and royal staysails. Here are the halliards tied off at the spider band and rope coils in place. It might look inaccurate because it is, yet another instance of doing the best I can with a kit rebuild. Finally the downhauls tied off and rope coils in place, again hard to make out clearly and I probably could have left some details, like the rope coils, out and it wouldn't have been noticeable ... but I felt compelled. That let's me know that I'm finding the groove once more


- 237 replies
-
- 7
-
-
- cutty sark
- revell
- (and 2 more)
-
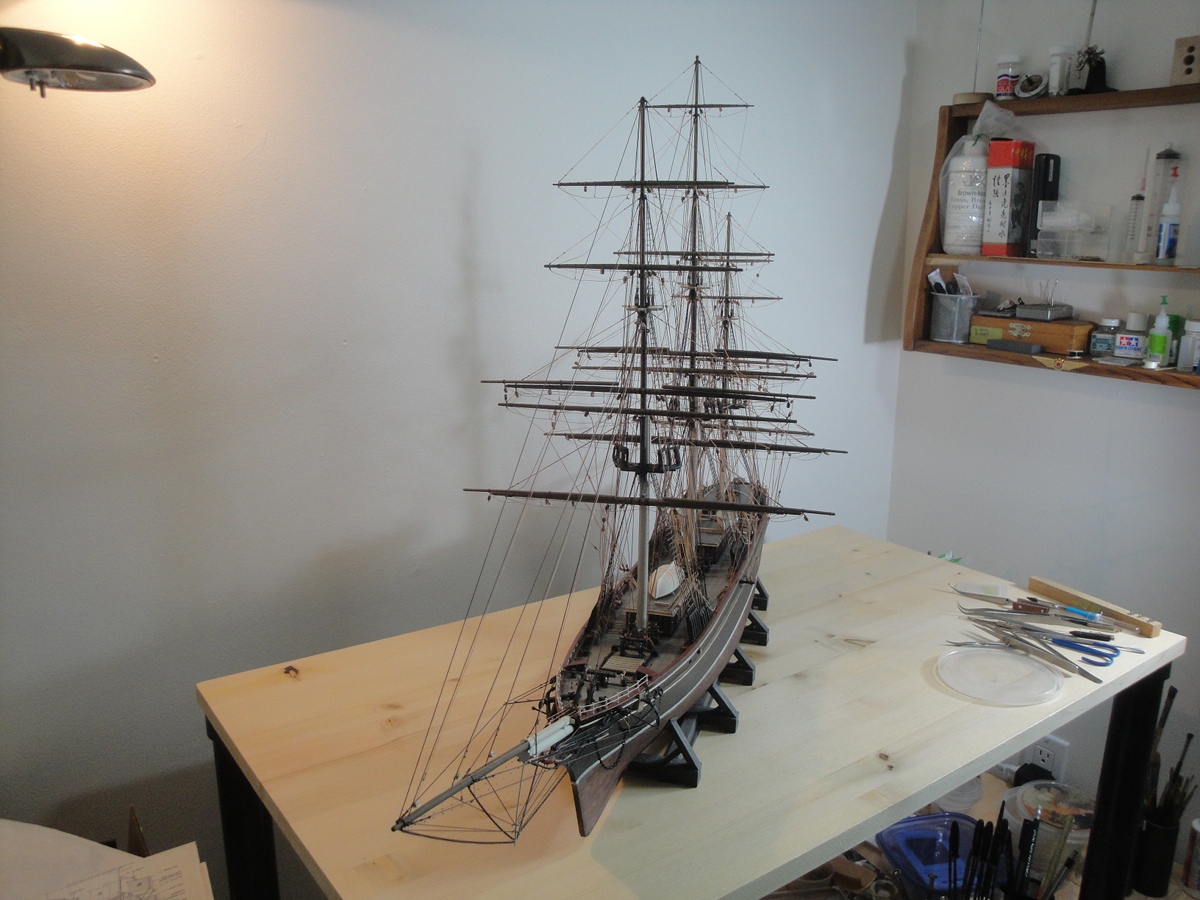
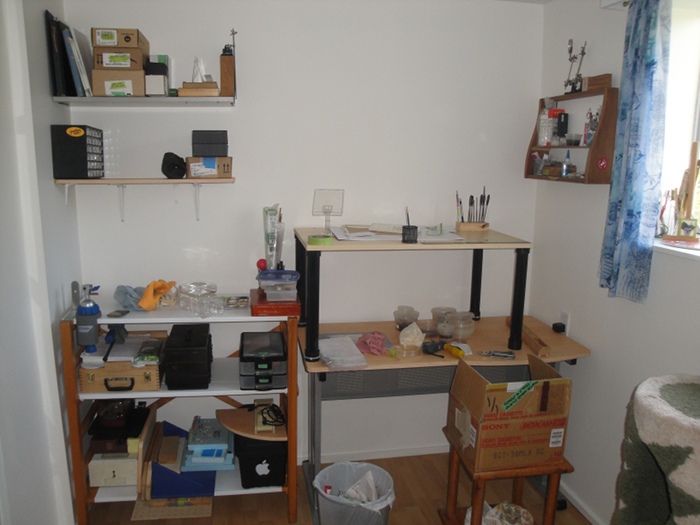
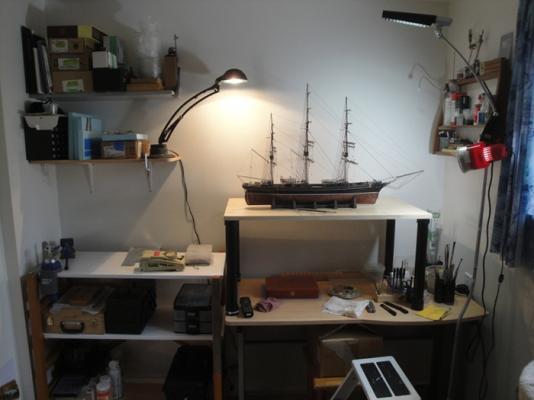
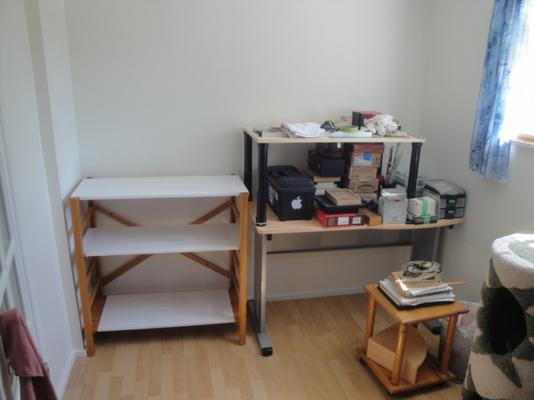
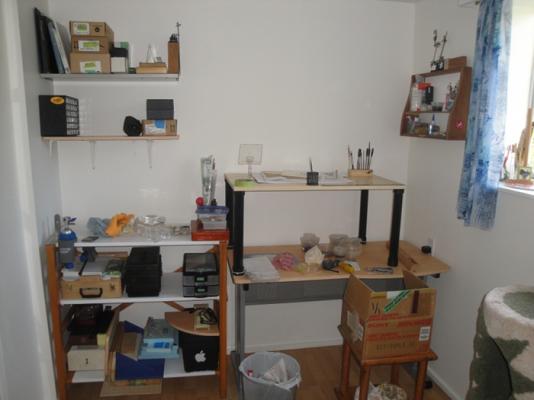
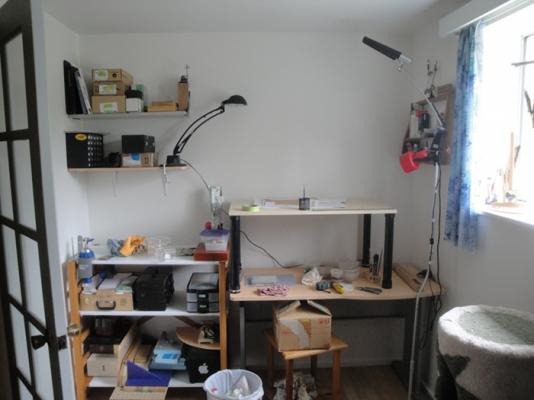
I just realized that I neglected to thank everyone for their kind messages and good wishes - so an extra big Thank You to everyone for your support. When last we left I had completed the raised work area - this opens the door to the next bit of fun which is the rest of the big re-think of the workspace. The first bit of business was to move a shelf and re-purpose it. This was done at the Admiral's insistence, she didn't want the shelf where it was anymore so this worked for both of us. The shelves were open slat design so I laid some shelf liner to protect the wood and to close the gaps. Next up came the installation of wall shelves but in a new position from their previous layout. Then the installation of a small stuff shelf to the right of the work area, similar to the one I had before but a little prettier. This is for stuff like glues, thinners and other regular use small items. Then began the process of unpacking and arranging and re-arranging. Plus assessing what I have, where it is and trying to recall th einventory and so forth. And of course the lighting. I'm using a couple of the old lamps plus an even older lamp which I had stored away for some future purpose. The where of placement will likely evolve as well but the set up as it is seems to work pretty well. And here we come to another stop. Along with the re-think of the set up is also a re-think of how I store and array my working tools and supplies. I realized that I was utilizing old patterns from my previous set up working off the couch in my living room. Given that I am now in a truly different situation it's time for me to change things up, from where and how I store my brushes and paints all the way to the placement of the waste bin. One of the ways in which I took the new set up for a test drive was to disassemble, repair and reassemble a little 3 tier wooden jewelry box I had once used for paint storage and is now returned to that task. As well I am in the process of fabricating a new brush holder and figuring out where I stored all the little bits and pieces of repurposed stuff, not just rigs and jigs but basics like my toothpick container and the 2 part epoxy, lol. So things are going well. Once I have a bit more of the basics nailed down I hope to move the Dame back to her berth and then begins the process of figuring out not only where I was in the rigging but What It All Means once more ... after this much time away from it all my brain can process looking at the Dame is, "Holy cow, lookit all them threads ...."

- 237 replies
-
- 5
-
-
- cutty sark
- revell
- (and 2 more)
-
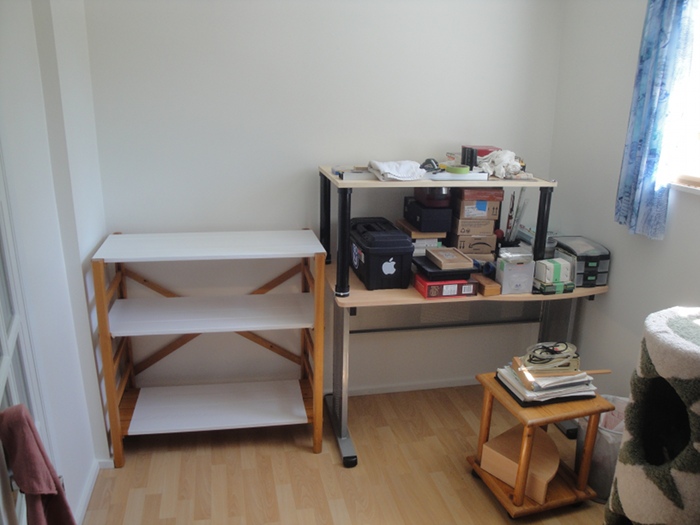
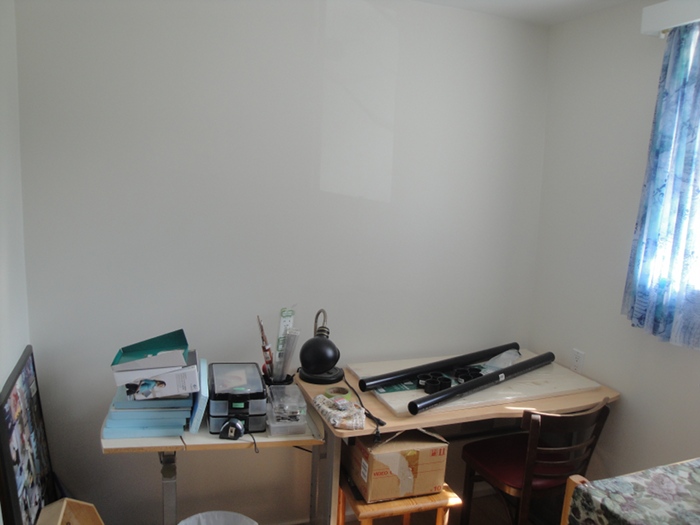
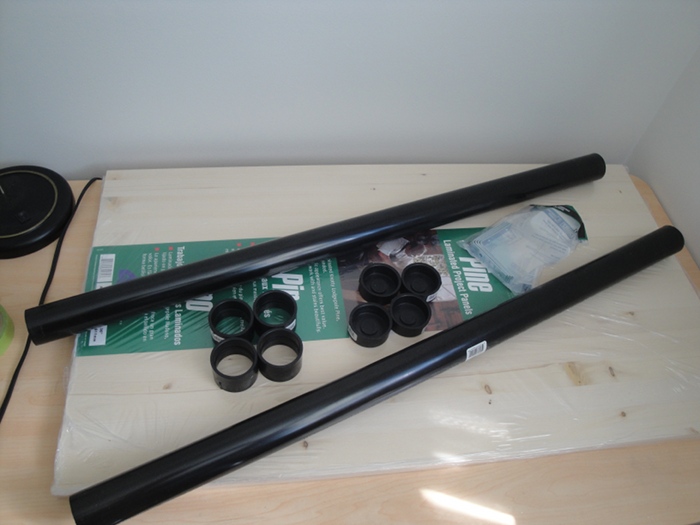
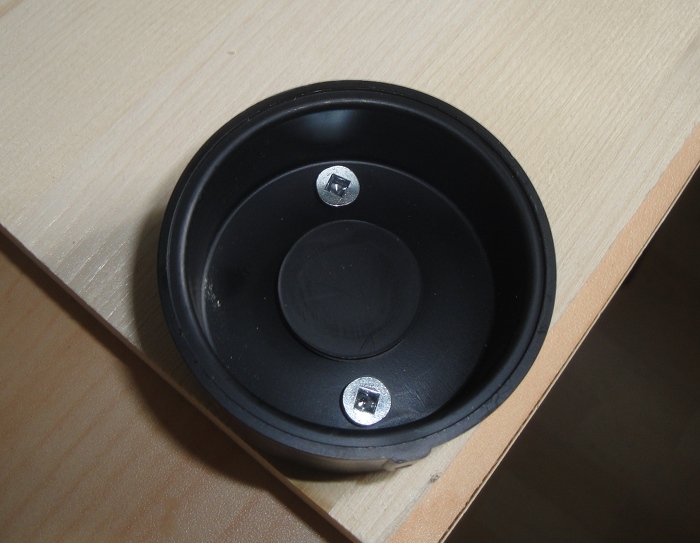
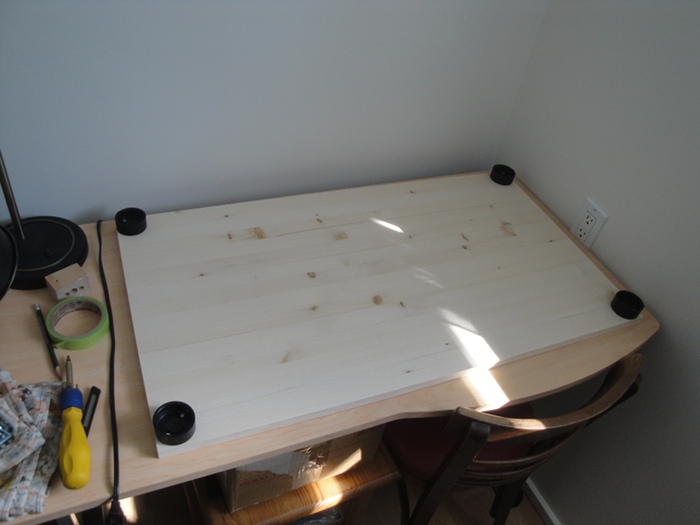
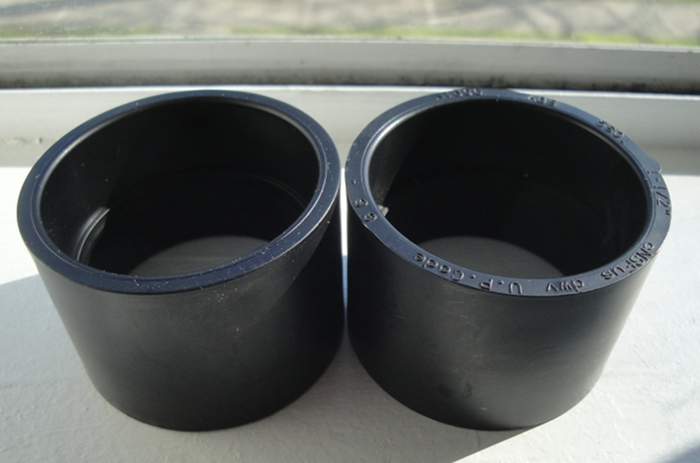
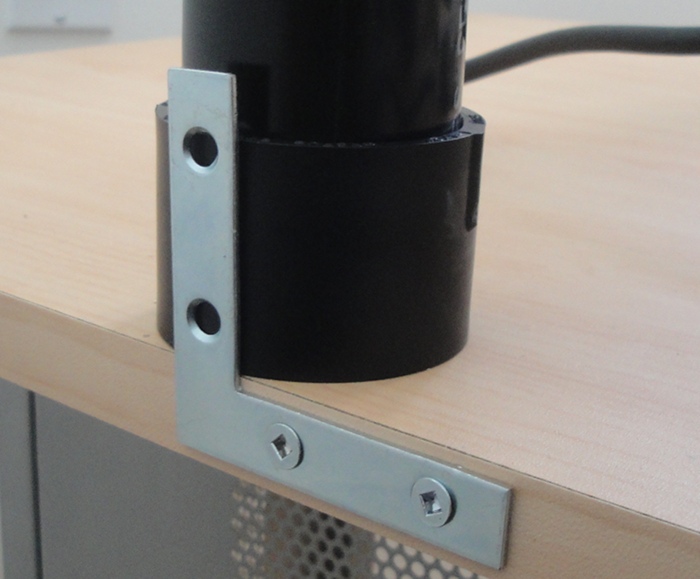
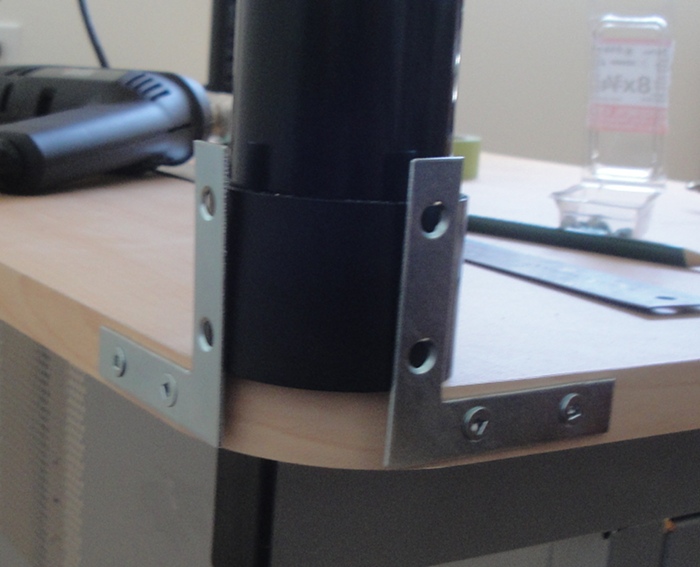
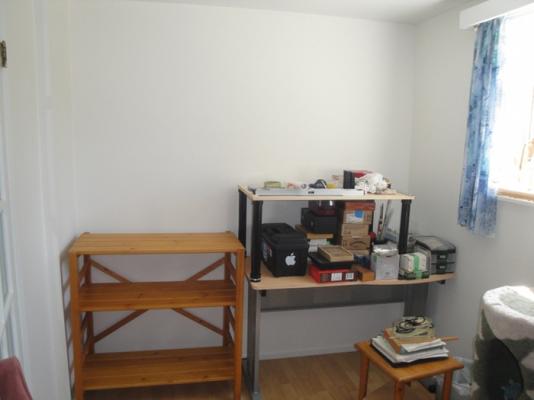
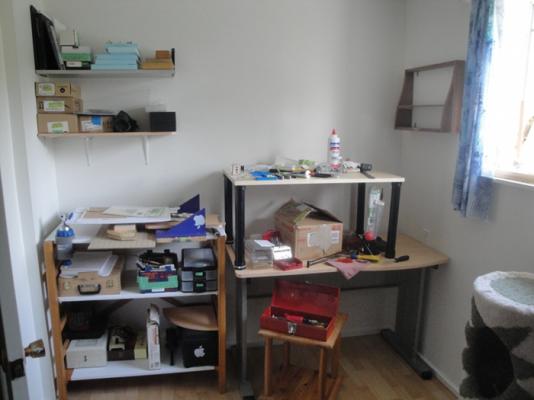
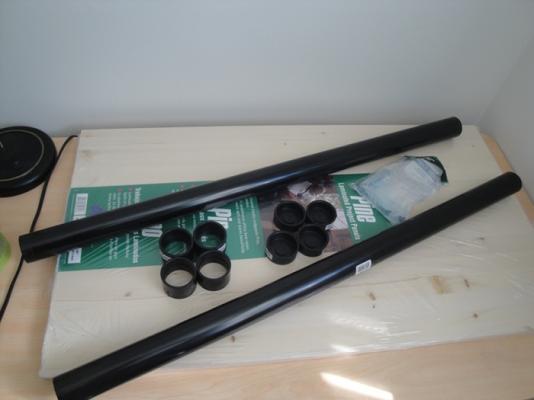
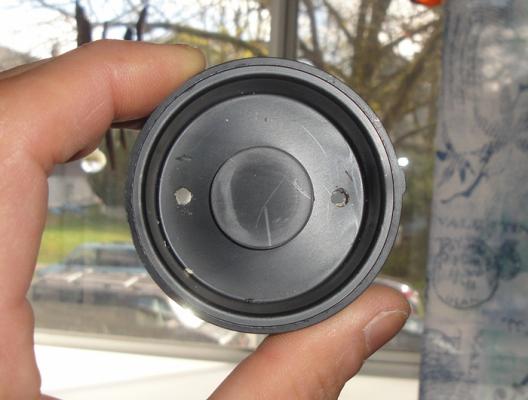
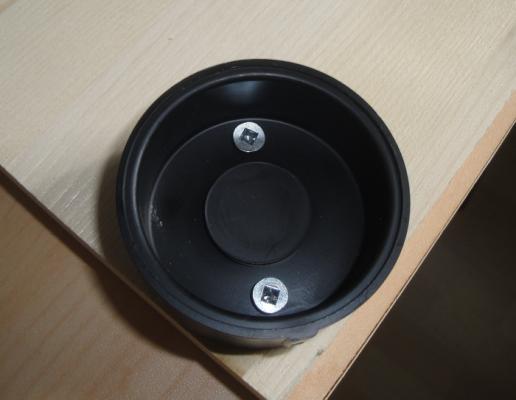
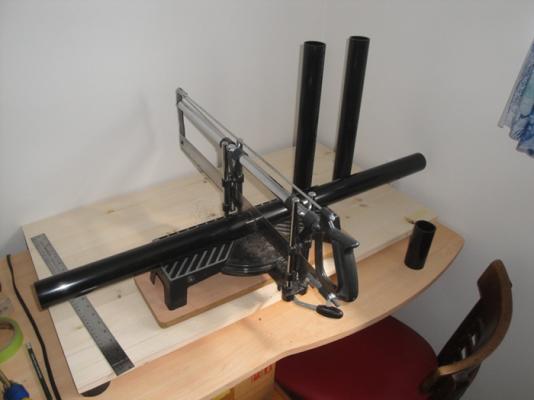
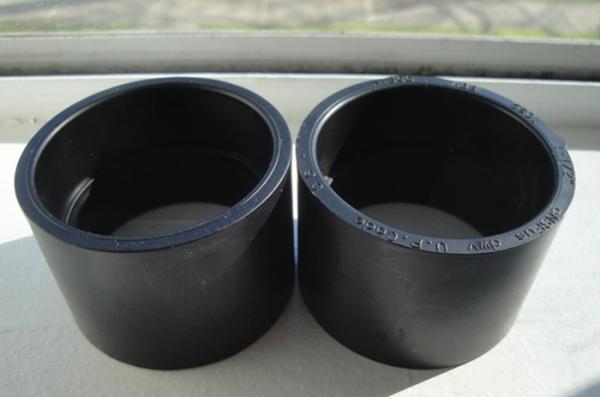
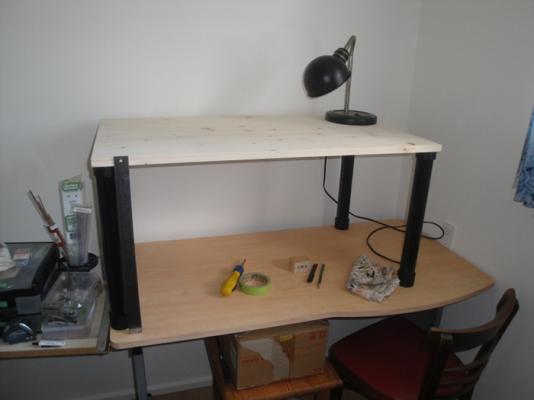
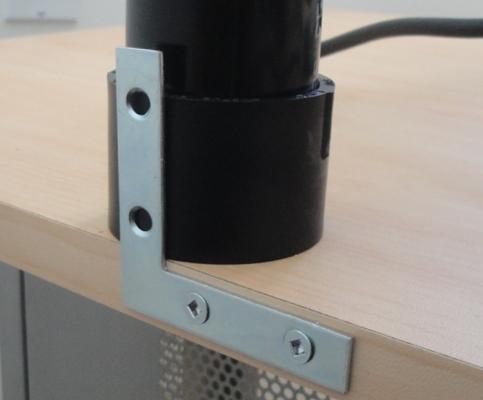
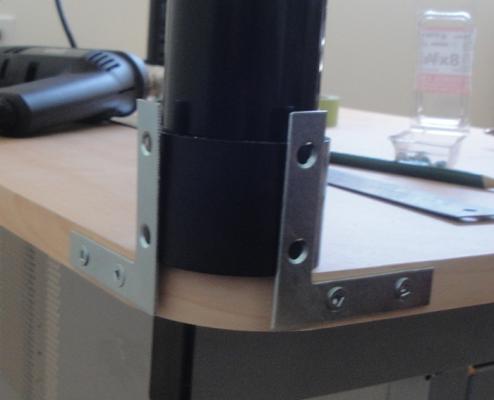
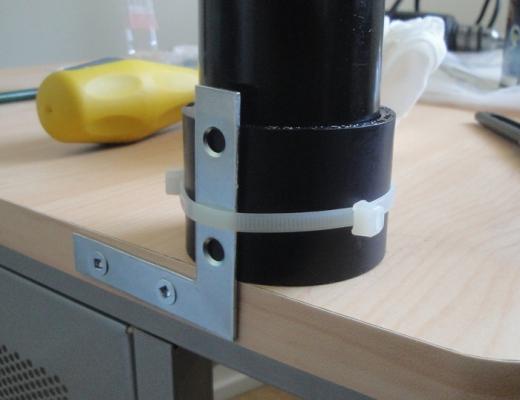
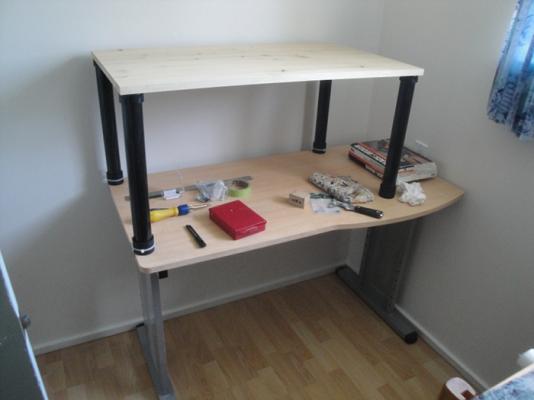
And so it begins ... (Long Post Warning ) After many weeks of thought, research, mulling and otherwise I have finally begun the process of converting the workspace into a form which is suitable for my altered physical requirements. I thought about posting this in another thread but the Build Log is my chronicle of my grand nautically related adventure and this is just another part of that, after all So - lower back issues which prevent me from long periods of sitting or contorting myself whilst sitting required that I rethink where I do the work. Research into this issue provided a deluge of info - it seems that there are a Lot of folks out there with issues as far as long term sitting goes. I won't go into the details but if anyone out there is looking into this and doesn't want to spend a few thousand dollars on a manufactured variable height desk or work bench I suggest Googling the term "IKEA Bashing" as a great place to start. Very inspirational. Before I chose how to do this I set out my parameters and thought them through repeatedly. The primary requirement was Variable Height but I didn't dwell on issues of fine calibration or the like as these complicated things way too much. Stability is also important but how much stability was something I had to redefine as I tend towards the extreme overcompensation school of thought. Size was easy enough to determine, limited to the footprint of the desk which remains the base, so to speak. And so, armed with a rough idea I went forth and procrastinated after buying the plank, eventually getting to today, well yesterday really but also today. The wide shot of the Before look. All previous modifications (shelves and stuff) were removed when I painted the room recently. The Stuff. ABS pipes, caps and connectors for the legs (1 1/2" dia.) and a pre cut, factory sanded Pine plank that just happened to be the dimensions that I wanted for the workspace (36" x 20"), a case of lucky serendipity or something. Drill two holes through the caps in order to affix them to the bottom of the plank. Affix the caps thusly. All caps affixed to corners. The default height I had chosen was roughly 18 inches. Taking into account the thicknesses of the plank, cap and the connector which would act as the foot I cut the pipe into 16 inch lengths. The previously mentioned connectors. Please note that one side has raised lettering on the rim so I was careful to make sure the flat side was down. Putting it all together for view with the 18 inch metal ruler for reference, the workspace is 1/16" shy of 18" height, lol. Because plastic pipes of this nature can tend to self-weld I rubbed a bit of powdered graphite around the ends of the pipe. Next thing to do after I get things in the room set up is to get more 1 1/2" pipe and cut sets of legs at different lengths. Currently I want sets at 12 inches, 8 inches and 4 inches, but I'll wait to see what kind of height range I wind up needing. Because the legs are wobbly from not being glued I thought to install anchor points (L brackets) on the base desk itself. This turned out to increase the stability quite a bit, though it's still wobbly both from the dry fit situation and the free fourth leg. The rounded desk corner required 2 brackets. For now I'm using zip tie's to secure the feet. Perhaps I'll change that up later. And here ends the first part of the conversion. I didn't get into the sealing of the plank but that was basically 2 coats of Varathane brand water based 'Diamond Finish' in semi-gloss. I prefer water based anything if it performs well and this stuff has served me well in the past for interior application. I may put a third coat on the plank given it's intended use, or I may not. So in summary, this isn't a 'rock steady' workspace but rather a good, sturdy surface set at a level which won't compromise my injury. It can support more weight than I am ever likely to set upon it and is large enough for the stuff I do, anything bigger would require me to go outdoors anyway, lol. Keeping the base desk as clear as possible was also important, because when I go to change the height it would not do if the workspace was covered in all sorts of loose clutter so all that stuff needs a place to go. Next up are the other modifications and resets for the zone based on the new stand up version of things. There's still a way to go before I can finalize the last little bits of the Dame but it feels good to be rolling on the track again, finally


- 237 replies
-
- 2
-
-
- cutty sark
- revell
- (and 2 more)
-
Sailcat reacted to a post in a topic:
Cutty Sark by Sailcat - FINISHED - Revell - 1/96 - PLASTIC - Rescue kit bash morphed to Dame Tisane
-
Sailcat reacted to a post in a topic:
Cutty Sark by Sailcat - FINISHED - Revell - 1/96 - PLASTIC - Rescue kit bash morphed to Dame Tisane
-
Sailcat reacted to a post in a topic:
Cutty Sark by Sailcat - FINISHED - Revell - 1/96 - PLASTIC - Rescue kit bash morphed to Dame Tisane
-
Sailcat reacted to a post in a topic:
Cutty Sark by Sailcat - FINISHED - Revell - 1/96 - PLASTIC - Rescue kit bash morphed to Dame Tisane
-
Sailcat reacted to a post in a topic:
Cutty Sark by Sailcat - FINISHED - Revell - 1/96 - PLASTIC - Rescue kit bash morphed to Dame Tisane
-
Sailcat reacted to a post in a topic:
Cutty Sark by Sailcat - FINISHED - Revell - 1/96 - PLASTIC - Rescue kit bash morphed to Dame Tisane
-
Sailcat reacted to a post in a topic:
Cutty Sark by Sailcat - FINISHED - Revell - 1/96 - PLASTIC - Rescue kit bash morphed to Dame Tisane
-
Sailcat reacted to a post in a topic:
Cutty Sark by Sailcat - FINISHED - Revell - 1/96 - PLASTIC - Rescue kit bash morphed to Dame Tisane
-
Sailcat reacted to a post in a topic:
Cutty Sark by Sailcat - FINISHED - Revell - 1/96 - PLASTIC - Rescue kit bash morphed to Dame Tisane
-
Well, months go by and I suddenly realize I've been out of the loop and have not addressed my absence ... Basically, I managed to re-injure myself near the end of August (at work) and the resulting rounds of exams and physio have revealed that I have some issues with the L4 and L5 vertebrae (the last two at the bottom of the stack) which prevent me from sitting for any length of time. Not only does this mean 'goodbye couch' for the time being but it also demands that I rethink my workspace - call it a paradigm shift. Well, between recovery, therapy and life I've been very distracted. The 'almost complete' Dame Tisane sits on my mantle awaiting the workspace adjustment and the issue of the changing of the space has been consuming my thoughts and such. Plus I also painted the den where I work which is a combination of 'test run' to see if I'm physically capable and also allows for a reset of the area for the rethink and so on, lol. Pretty soon now (I hope) I will be 'back in the saddle' once again and posting but for now I'm still hammering out the details of what I want to do. The Plan is to create a raised 'deck' where I can work in a standing position. I wanted to utilize my existing desk instead of spending a whole bunch of coin on a singular useage specialty desk and try to develop it in such a way to allow flexibility in set up so that it can become a hobby/art/craft/etc. arrangement. This has proven to be tricky as there isn't a lot out there for this sort of thing. But I believe I have a solution which is simple, inexpensive and requires only moderate building to accomplish - basically build a raised deck like a short table. As this develops I will be posting photos (in case anyone else out there with similar back issues needs some ideas of their own) and with any luck I will be able to complete the rigging on the Dame before the next Winter Olympics. So, hope to return to the dry dock soon and spend some time catching up on all that I've missed. Best wishes to everyone and Happy Building!
- 237 replies
-
- 3
-
-
- cutty sark
- revell
- (and 2 more)
-
CA glue and metal fittings
Sailcat replied to cdogg's topic in Metal Work, Soldering and Metal Fittings
One thing I do for metal to 'other' joining is use 2 part slow cure epoxy but as well I also try to 'roughen' the surface of the metal part which will contact the glue - sand or file to give the surface more 'tooth' for the glue to hold onto. -
I love the New Bedford whale boat and have been trying to keep up with the various versions here. I am also thinking that this will likely be my first 'serious' wood build (after I 'train' myself on a dinghy or something similarly simple). I am looking very forward to seeing what you do with yours. Hmm ... we might need more popcorn ...
-
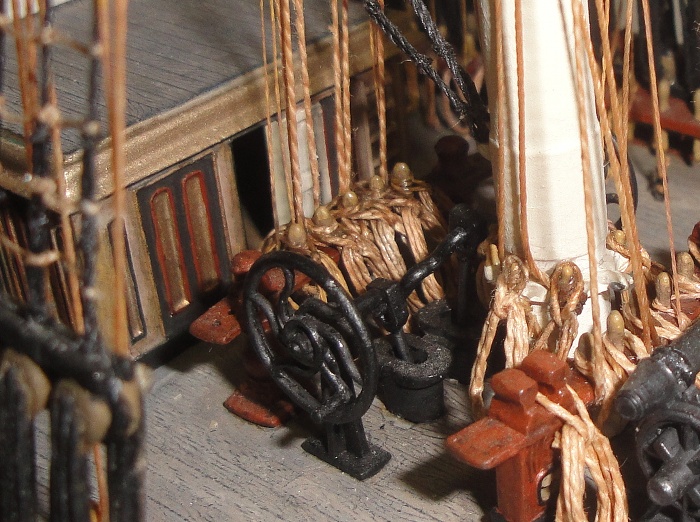
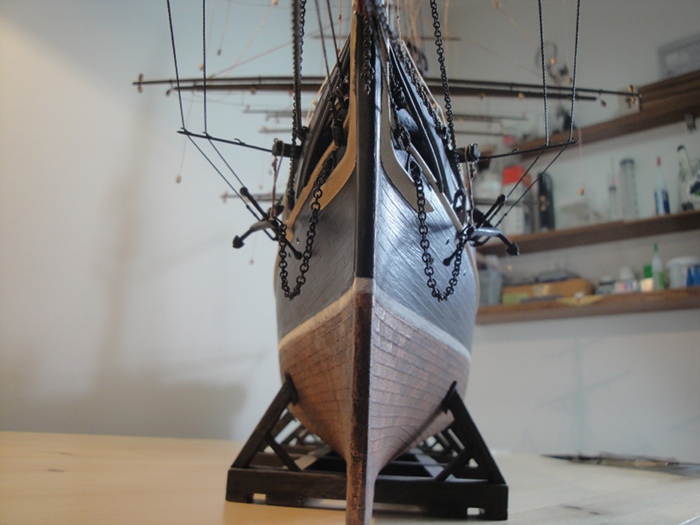
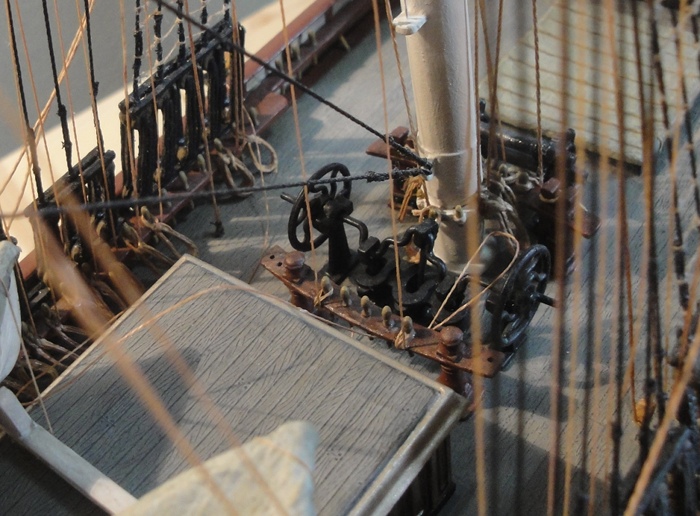
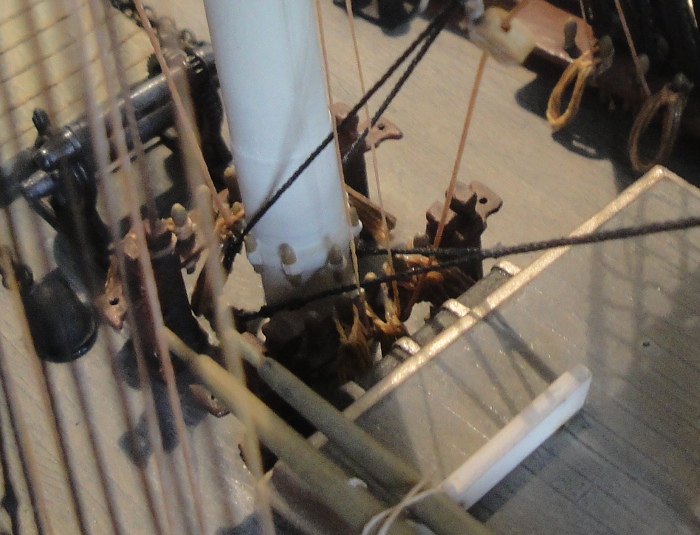
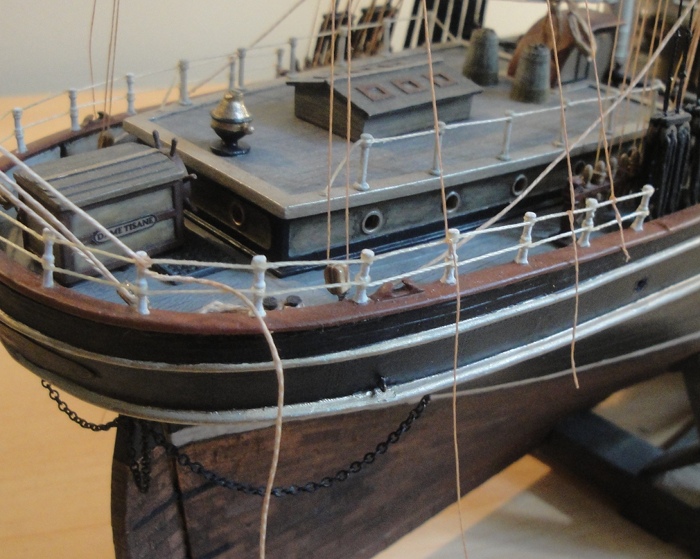
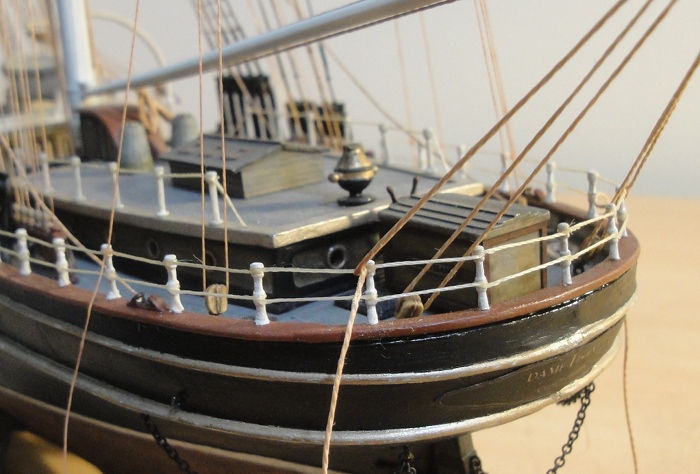
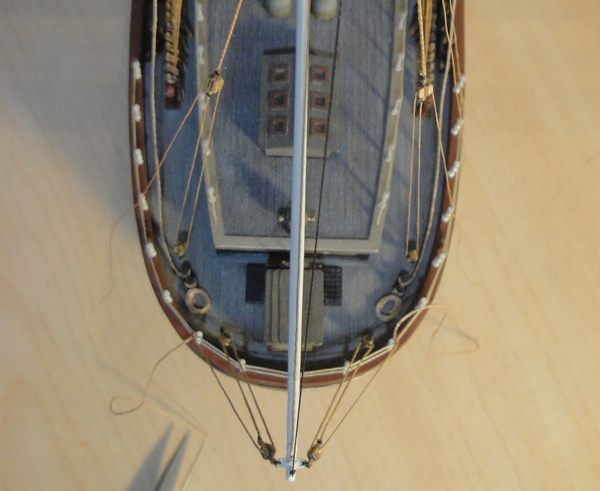
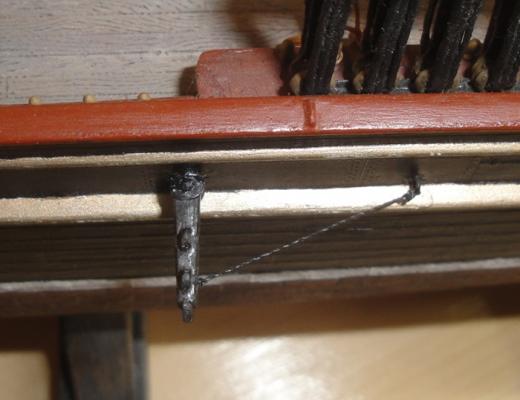
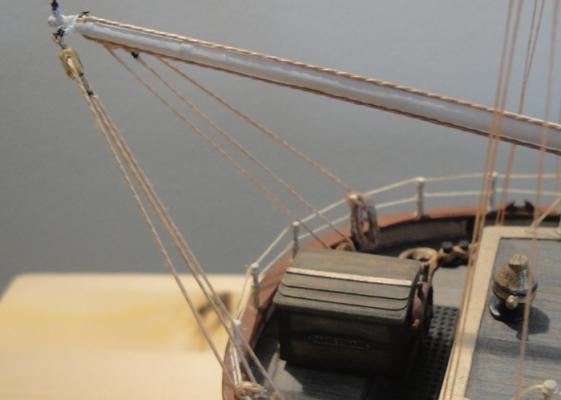
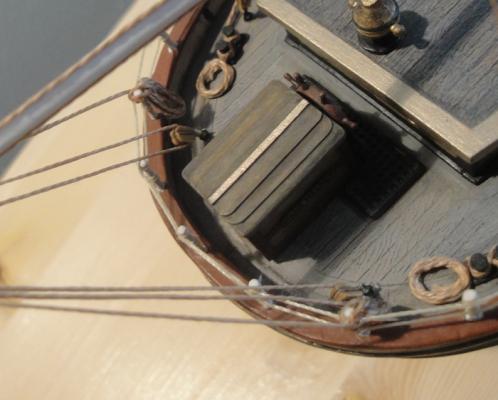
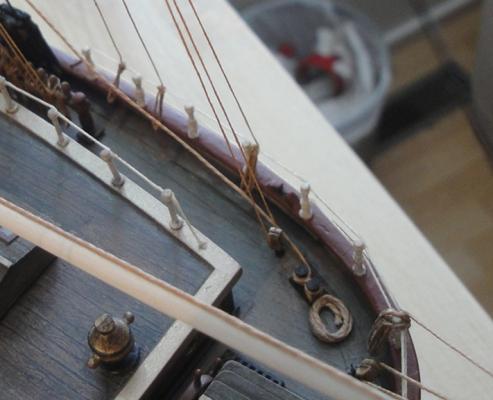
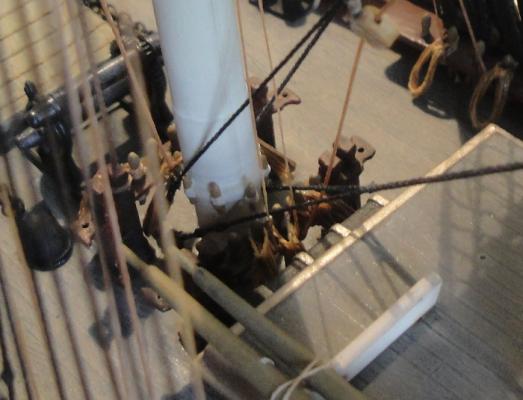
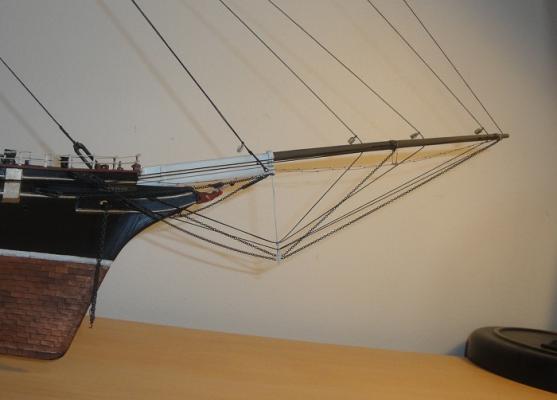
John, Anya, Michael, Danny, Popeye & Mark - Thanks for your kindness and support everyone. The Issue hasn't been resolved yet but I have begun developing options and I have determined that there is a 'home' for the Dame in a worst case scenario that the original intended recipients cannot take her. So, still some loose threads but not nearly as many, or as entangled, as I had first encountered. Will - Popeye's suggestion is the best and simplest but if that fails then my suggestion would be to scratch build what you need. If you go through the Dame's Build Log you will see that I have done that with the windlass pump and many of the stanchion posts ... along with too many other parts to remember. The thought of scratch building might 'seem' intimidating but once you try and fail and try again and succeed it becomes clear that it's not so much 'talent' as practice that matters in such things. And always keep in mind when you're scratch building that the point is Not to get it right the first time but simply to eventually get it right, or as Dory says in Finding Nemo, "Just keep swimming." Well I'm back at it after yet another hiatus. The stoppage was partially due to my realization that I kind of pushed myself to get started again (my back is still recovering, much better now but there are those minor issues which keep cropping up). This impatience led to the snapping of the bowsprit and so I stepped back and let myself, and the Dame, heal and rest some more. Then, once I felt ready to get back at 'er, Life threw me curve balls in the form of unseasonably hot weather, changes in the work I do at work in the heat, the opportunity to paint the interior of our place and so forth. But today I got back to it in a small way, just a taste in order to dip my toes. And speaking of 'so forth' I thought I'd start this photo posting off with an image of one of the distractions ... For anyone interested the band is Rush and the song they are playing is Caravan. And now here we have the repaired bowsprit - and I just noticed my photo has that weird 'bending' thing where it looks like the bowsprit is bent but rest assured that to the eye is looks straight. Here I finally attach the upper 'rail' along the aft posts, or stanchions. And now I can finally 'tie off' the ensign halliards, vangs and sheets for the Spanker set up. In order to prevent 'bowing' as I was using nylon line for the rail I stiffened the portions where the ties were going with dabs of 'super thin' CA. And ending with a top down view, I was trying to show off the symmetry but I could not get the correct camera angle for that effect, so this image is slightly 'oblique' as they say. Now onto the remaining fore and aft rigging and after that the braces ... the sense of impending completion is starting to make me grin randomly. Back soon with more - I promise


- 237 replies
-
- 7
-
-
- cutty sark
- revell
- (and 2 more)
-
Popeye, John, Anja, Marc and Mark (I hope I got that right) - Thanks for the kind words, humour and support - it did turn out ok, but ... ... after an unexpected hiatus due to 'Everything Else Besides Model Ship Building' popping up I thought I'd drop a quick post to let everyone know I'm not in hiding or abandoning the Dame ... I'm just busy and the odd bits of spare time I have seem to occur when I can't see straight from fatigue - not the best time to get into rigging, lol. This is also why I haven't been lurking as much - I'd like to comment more on other threads but the mental fatigue also takes a toll. I'd rather not 'say' anything instead of babbling incoherently (which is a change from my younger days, for sure, lol). But the itch is there and she sits patiently. However, for those who have been following this saga I have some troubling developments as to her eventual home. The tea shop (and owners) to whom I was going to give the 'cased' Dame as a gift have been doing very well for themselves, so much so that their store is now quite crowded and all available space has been committed to their business. There are fewer and fewer 'decorative' zones and even those are shrinking. I'm not about to ask them to sacrifice valuable space in order to display a purely decorative item. Hopefully there will be a way for me to get the Dame to the owners, if not in their store then in their home, but a casual conversation revealed that they are in the process of 'clearing house' themselves (think; decades of collecting stuff from their travels) ... and so the fate of the Dame is now kind of 'in limbo.' It's sad to consider at this point but it seems likely that I may not be able to fulfill my original intent And there is nowhere I can 'display' it in my own home, lol. One of my old email signatures comes to mind (I got it off a t-shirt), "This would be funny if it weren't happening to me." Anyway - as further developments arise I will of course make more posts. Hopefully of the build, with photos