

Sailcat
-
Posts
157 -
Joined
-
Last visited
Content Type
Profiles
Forums
Gallery
Events
Posts posted by Sailcat
-
-
Mark, John, Popeye and Geoffrey - Thanks for looking in and for the kind words

The return to the workbench (coming back) after an injury to the spine (having hurt my back) is a slow thing, I must observe. There is not only the new aspects of how to sit, how to crouch and limiting the time I work in order to prevent a re-inujry, but there is also the overwhelming aspect of having to re-exercise the 'other' muscles of reflex, skill and the mind. Still, things go well and I am pleased to be back (pun intended).
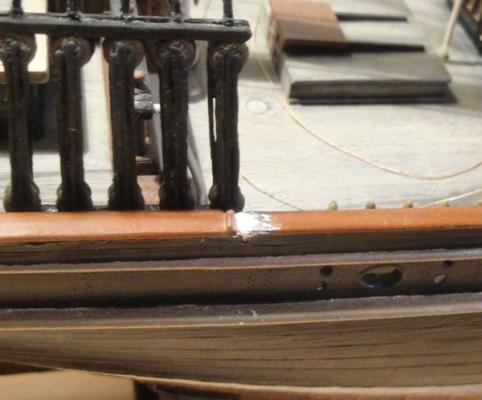
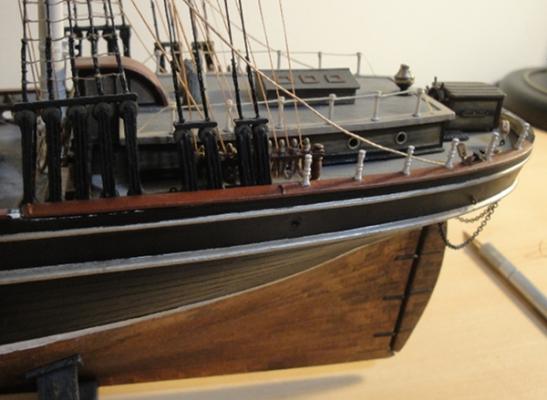
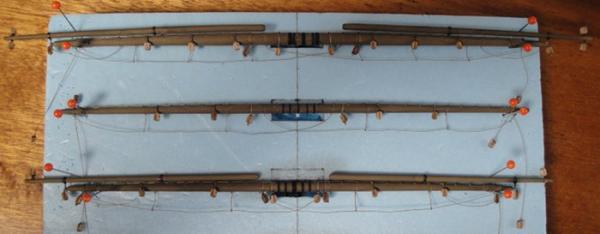
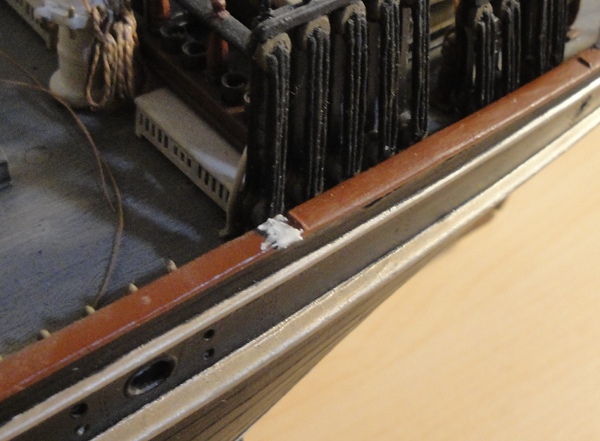
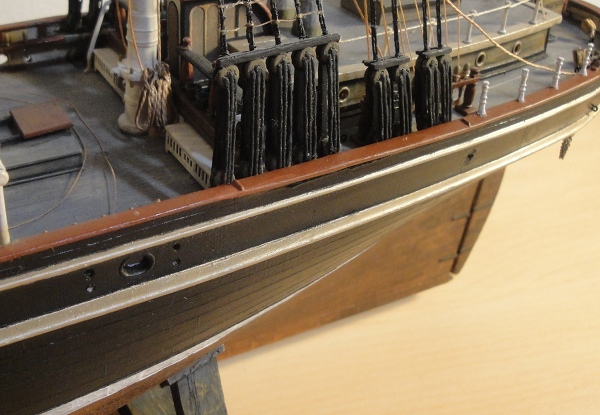
Having attached the rails the next step is to fill, sand and paint. The putty I used here is the 'grey' grade Testors contour putty - fine enough for small work and it dries nice and hard.

After the first sanding there are always little spots for the second fill and smoothing.
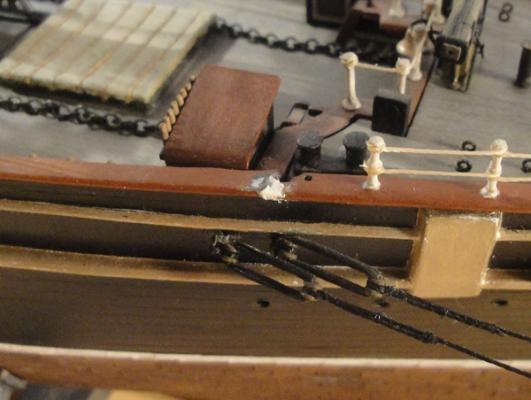
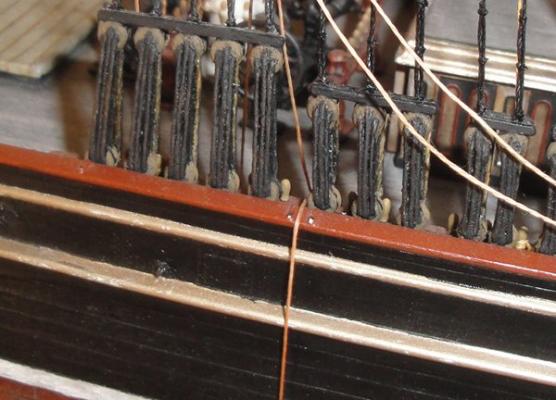
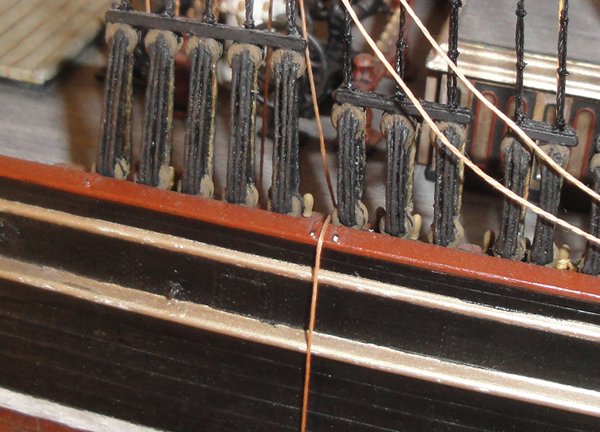
The comes the base coat of paint - in this case Testors 'rust'. I am pleased with the initial result.

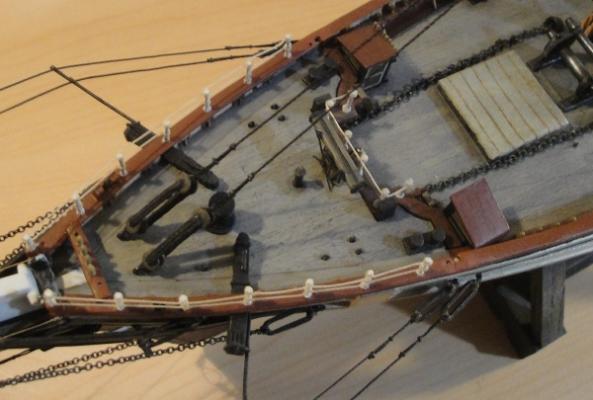
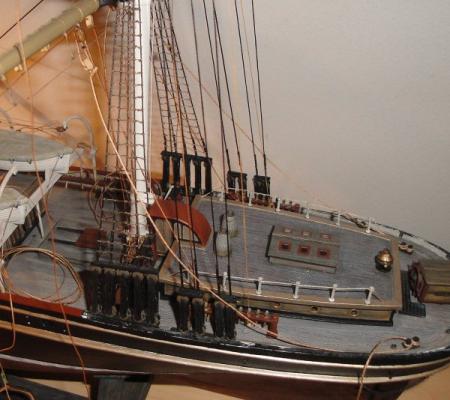
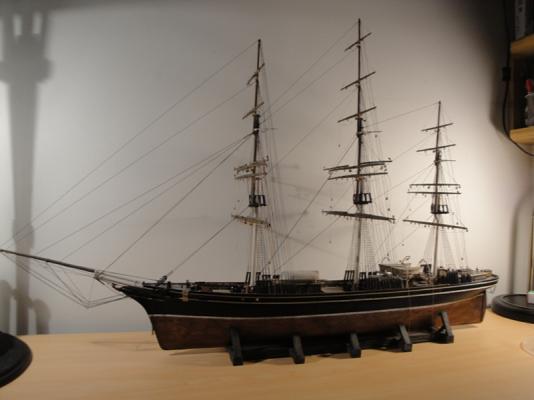
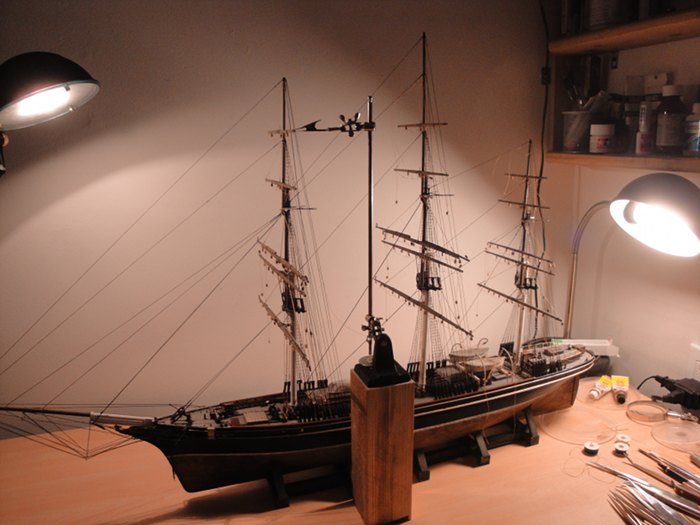
After the paint will come some 'unifying' wash coats and tiny touch ups here and there. But for now here is a view of the current state.
Coming Soon - More Rigging!
-
John, Popeye, Hakan, Daniel, Kevin, Anja, Druxey, David, Tim, Tophog and Frank - Thank you all for looking in and for your kind words of support and encouragement
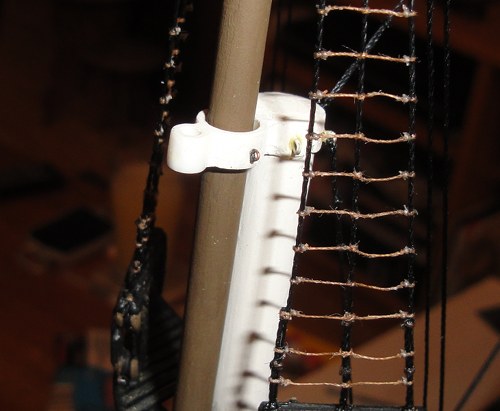
Kevin - the issue with the mizzen pinrails is that there aren't enough pins for the lines yet to be affixed. In this case the Braces are supposed to be belayed to the pins there and they're already full. I plan to deal with this by 'doubling up' the necessary pins and likely only the 'knowledgable' will be able to notice the discrepancy.
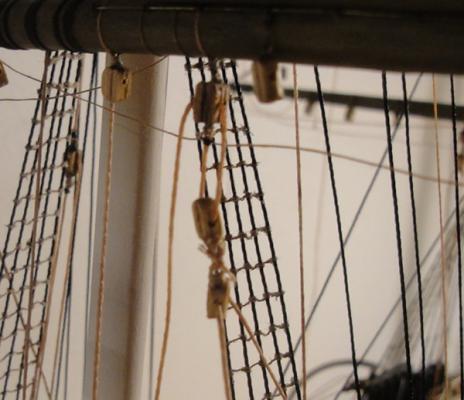
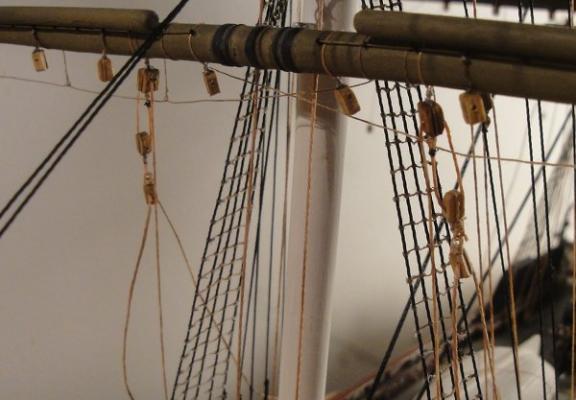
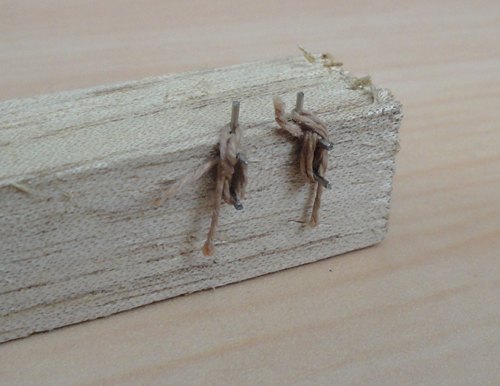
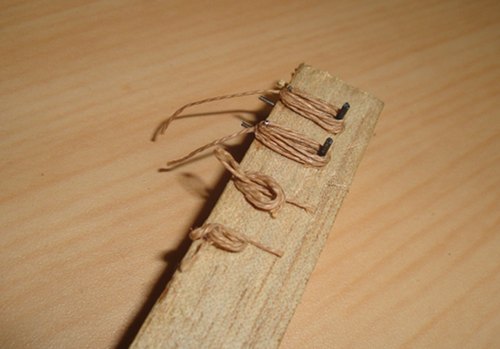
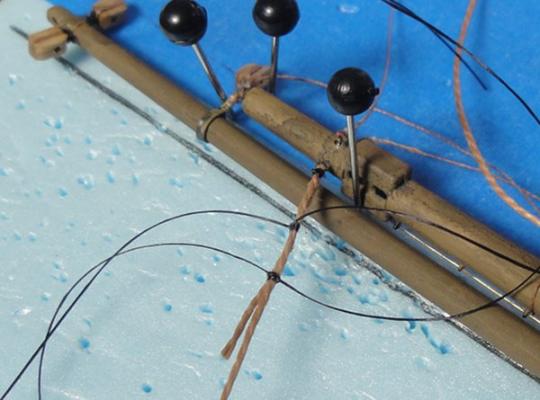
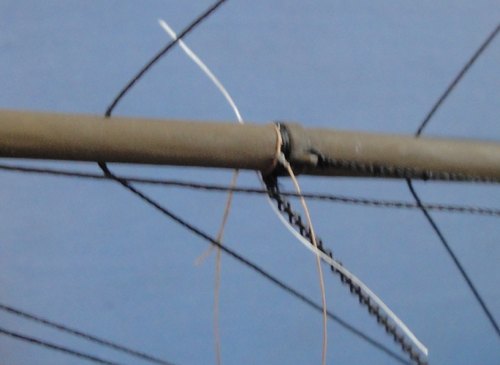
Tim - I'm tying the ratlines to the shrouds using a method detailed in Dan Vad's HM Supply build log from times past. I am not sure if he has reposted this one yet so I'll describe it for you. Start by tying the ratline to the middle shroud using a clove hitch. This type of knot holds well but is also 'loosenable' in case of a need for adjustment. Continue out and leave enough 'slack' for the ratline to hang slightly. On the outer shrouds I looped the line around the shroud and used a needle to 'splice' the end through the line and then seized it with thin white thread. This method is time consuming but it provides good looking results.
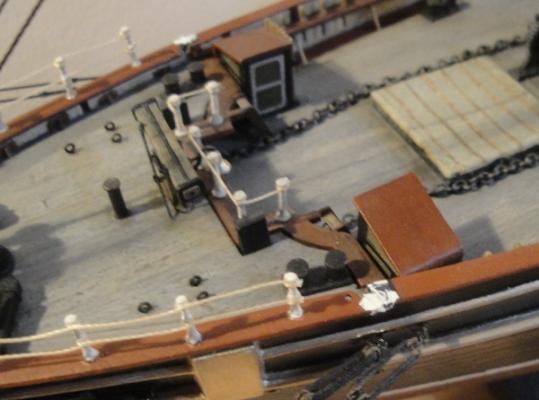
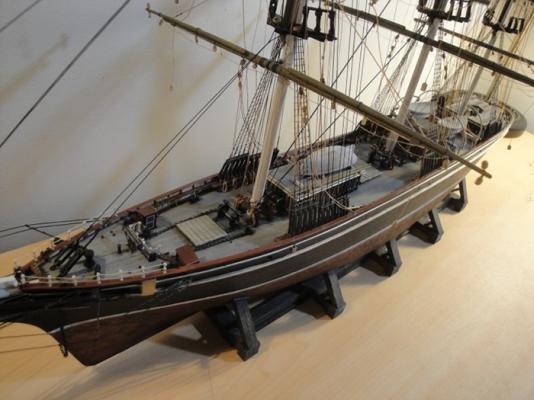
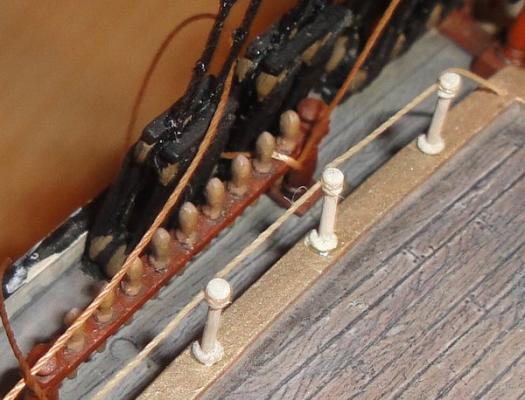
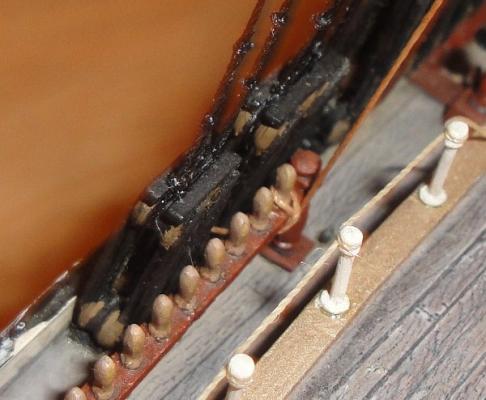
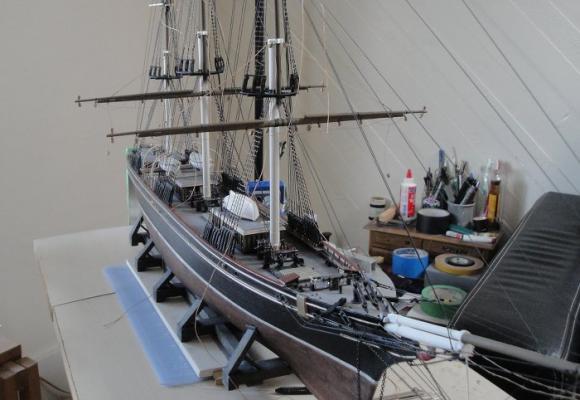
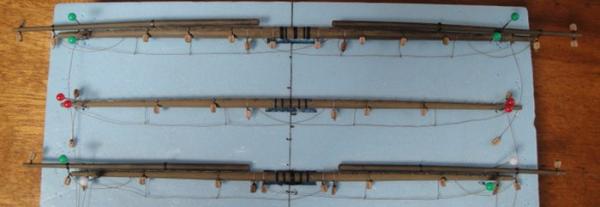
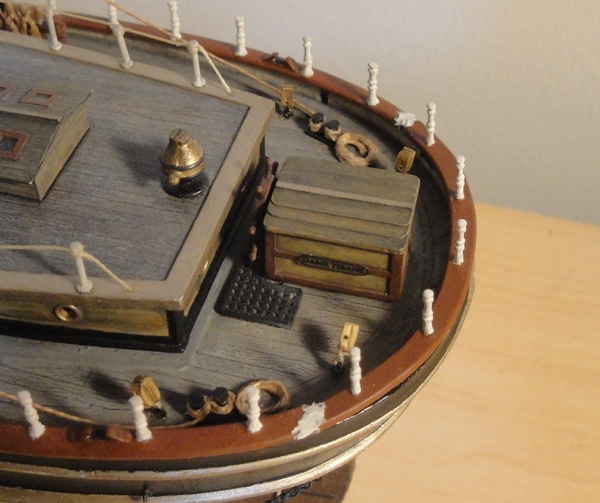
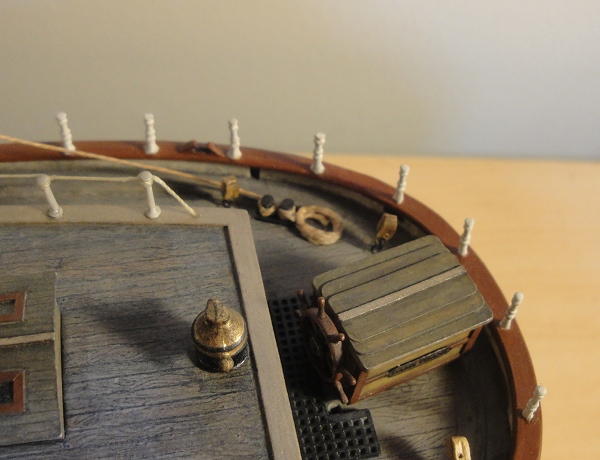
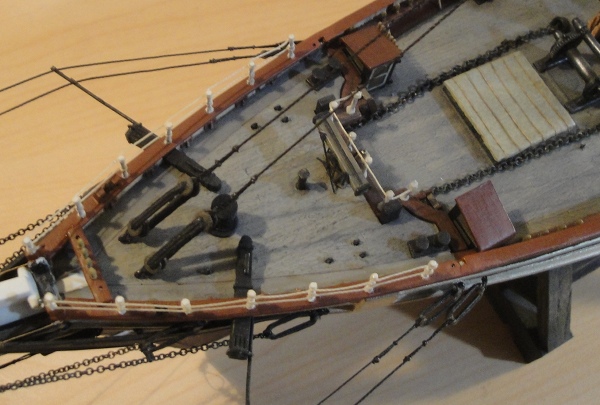
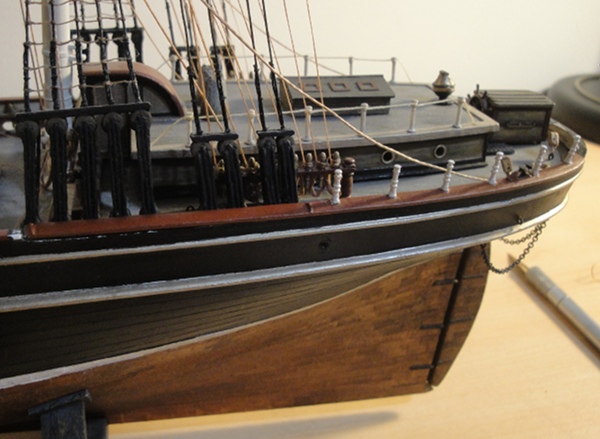
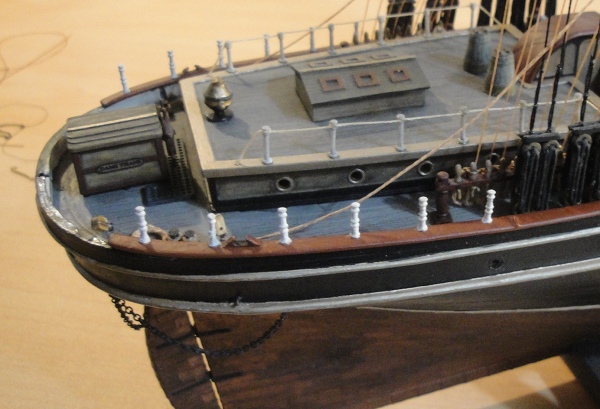
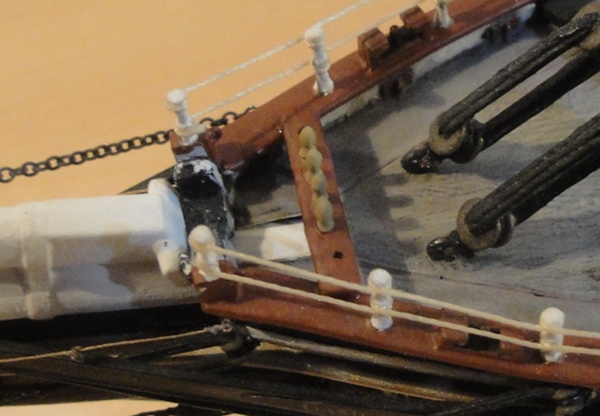
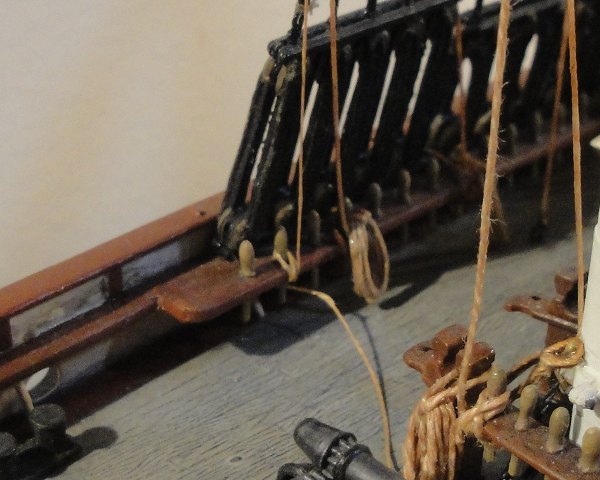
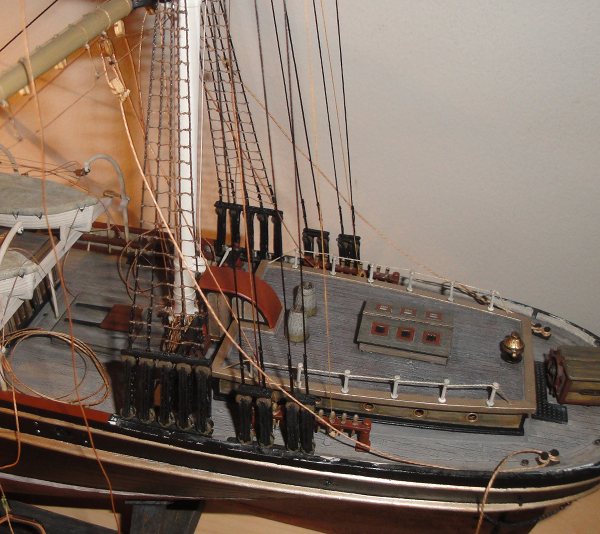
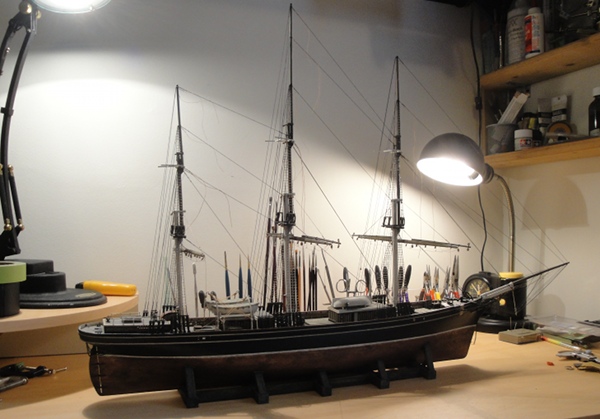
Well, I can happily report that I am now able to get back in the saddle, if only for short periods of time. So I started by reading a lot and catching up on everything I had forgotten in the time. After this initial perusal I realized that it was time to attach the 'stanchion rails' fore and aft - the 'final part' of the Dame which I had been leaving off in order to facilitate rigging. So before starting the last aspects of the fore-and-aft rigging I have taken the plunge and 'finalized' this last 'structural' part of the build. And I've been taking photos ...
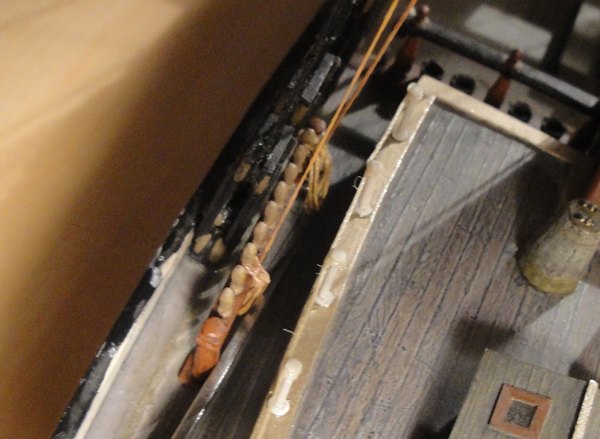
The aft stanchion rails being put in place.

The curved portion on the end is a scratchbuilt replacement ... I think it blends in nicely.
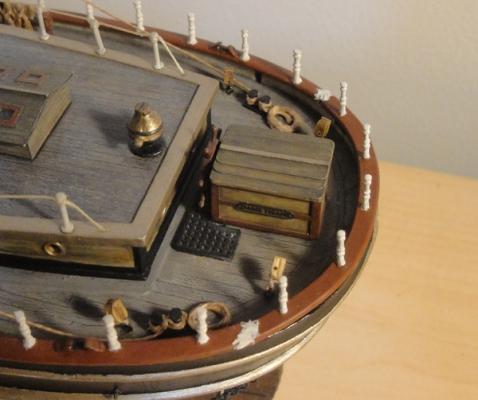
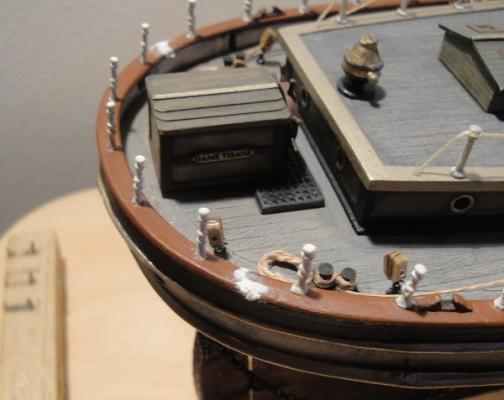
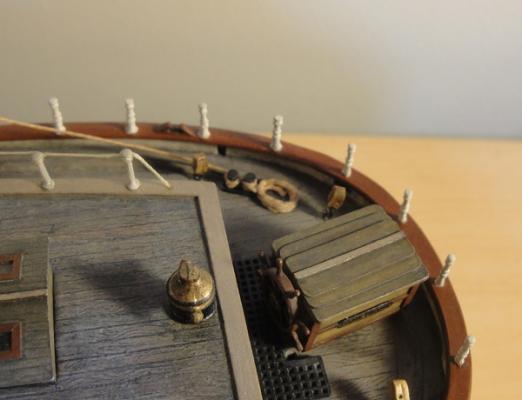
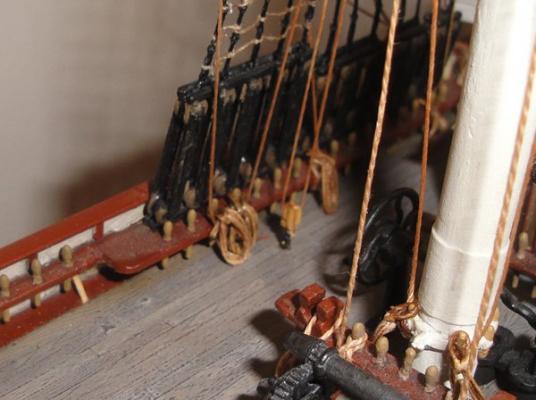
The fore stanchion rails and the mini-pinrail attached.

I still have to fill the seams, sand and paint over the joins. But it feels really good to be back at it after these months of recovery. And it feels good to be able to say, "Be back soon with more!"

-
Basically agreeing with everyone else - back in the 'old' MSW my build log had many sections where others posted images that I used for reference. For me it was an invaluable resource, not only were my questions answered but when it related to the 'look' of a part or portion the picture is definitely worth any number of words.
-
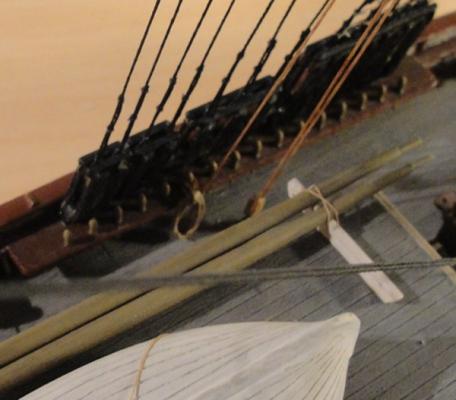
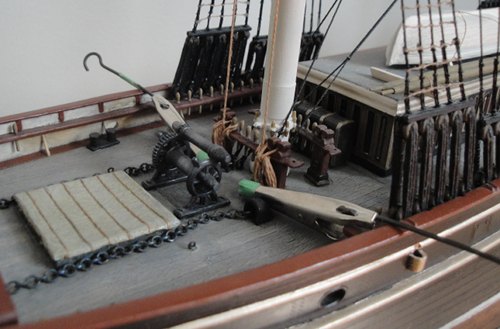
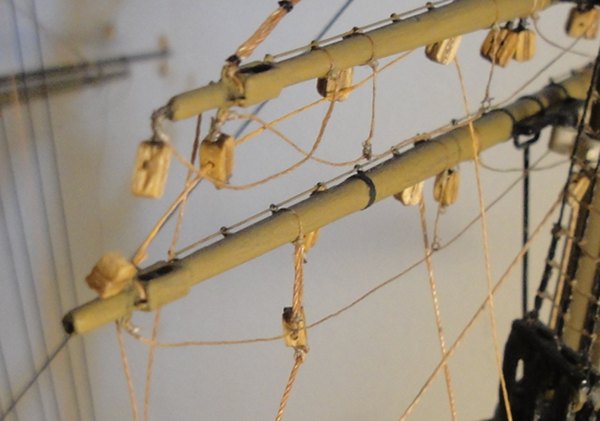
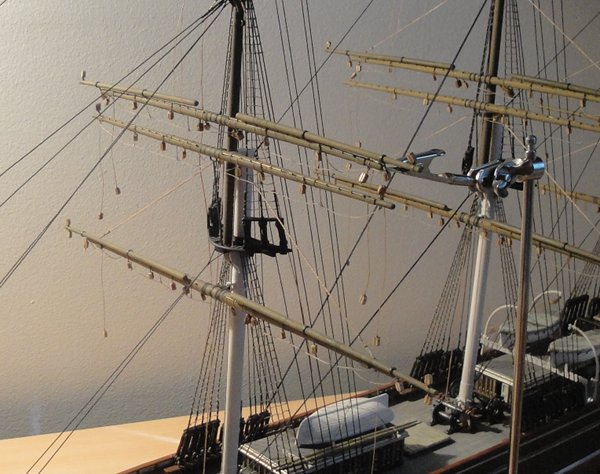
The kit would have had me simply tie the lines to the ends of the boom/gaffs. I dug out some 'leftover' ringbolts and modified the ends of the boom/gaffs to better reflect the 'real thing.'
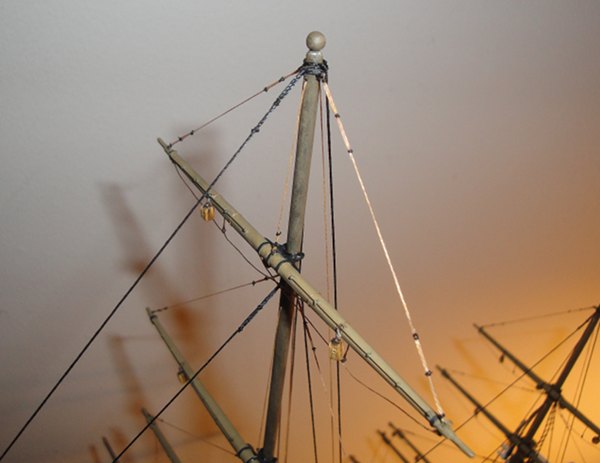
The Gaffs with Vangs attached.


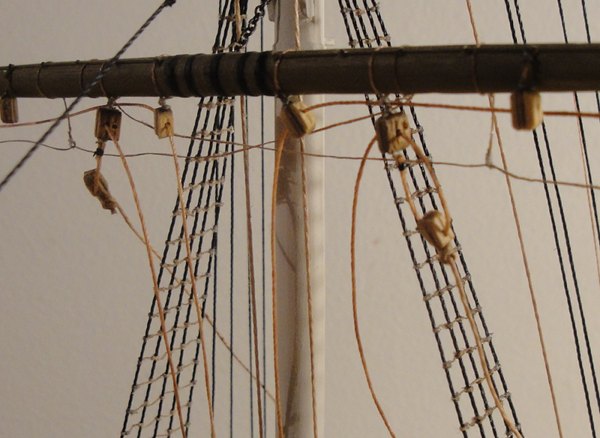
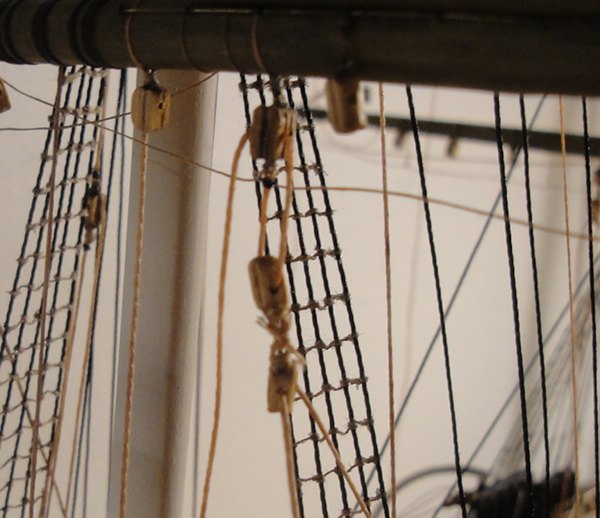
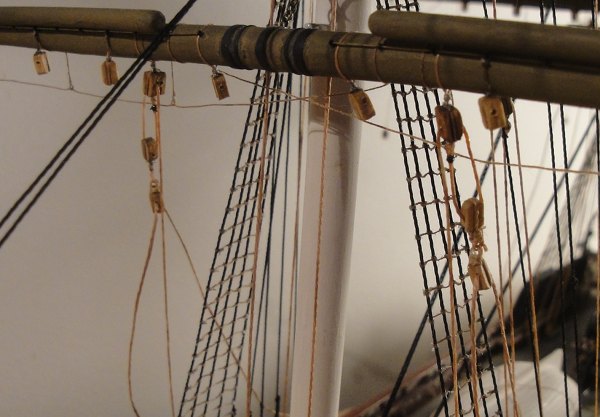
Attaching blocks to the Stays for the Fore and Aft Running Rigging.


And at this point I have 'caught up' to myself. Soon after these photos were taken I suffered a slipped disc with accompanying sciatica and I am still recovering from that. Thus I have not been able to continue rigging as I cannot sit for extended periods and to accomplish rigging requires just that. This might have been more frustrating but the Great Crash gave me a focus to divert my creative need to rebuilding the Build Log. Now that the Log has been restored I can focus on not going crazy waiting to continue the rigging.
- druxey, tarbrush, popeye the sailor and 1 other
-
 4
4
-
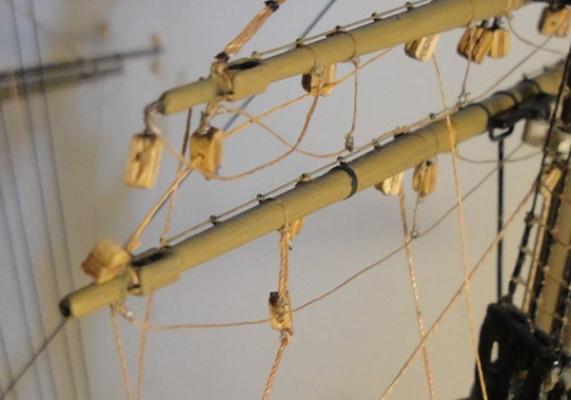
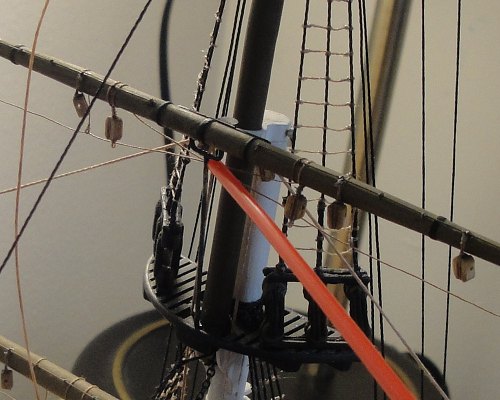
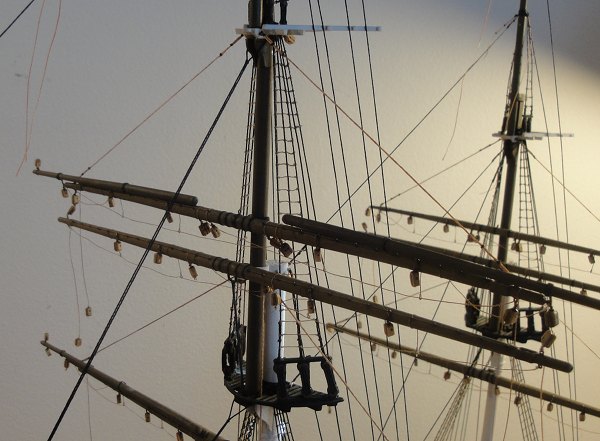
The Main Royal Yard should have had a sheave hole for the Skysail sheets. As I didn't notice this discrepancy until long after I had rigged it I started considering a cheat ... namely I'd glue the sheet lines to the Yard in a manner which 'faked' the look.
The Mizzen pinrails are full ... this presents an issue which I will discuss later ...
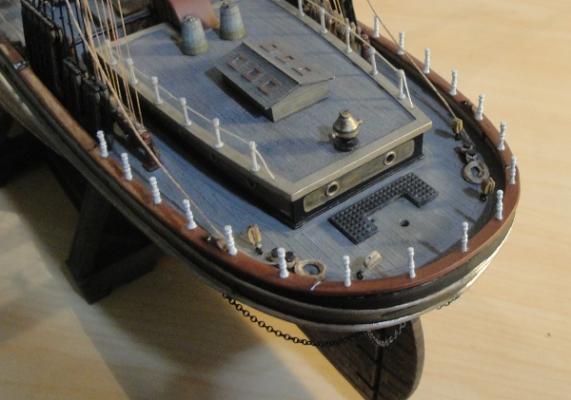
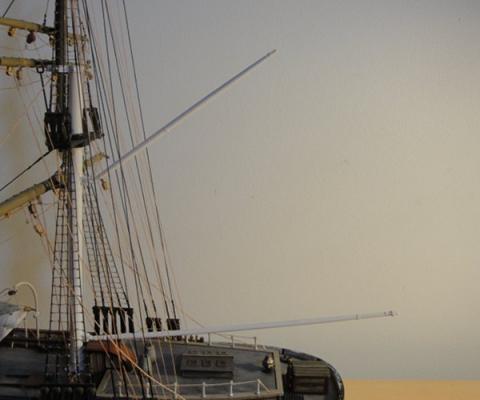
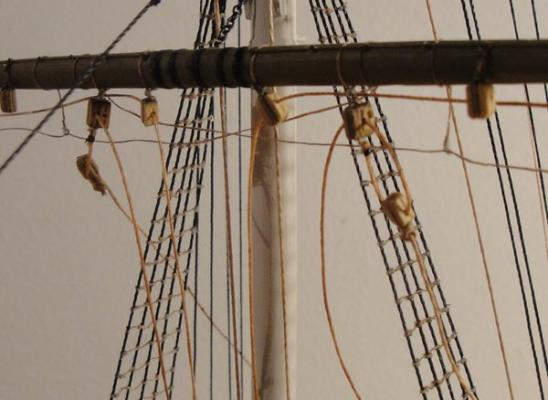
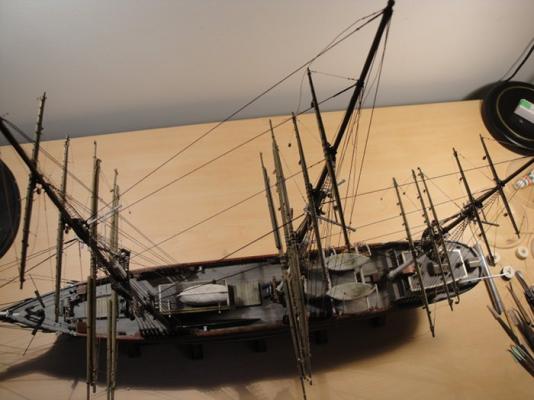
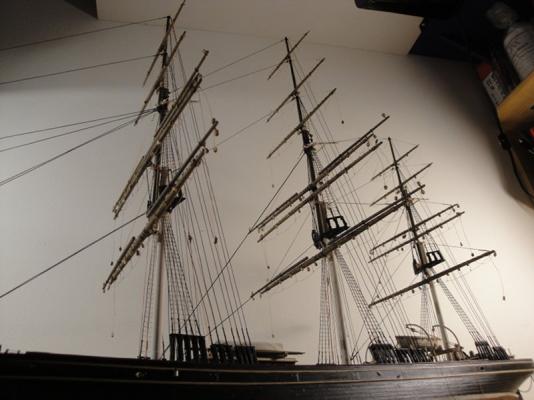
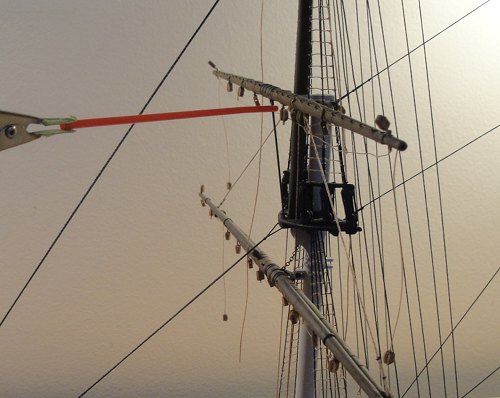
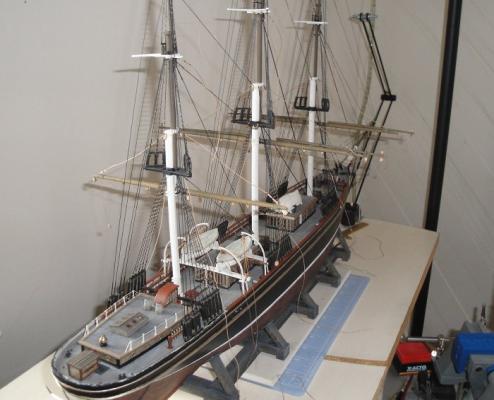
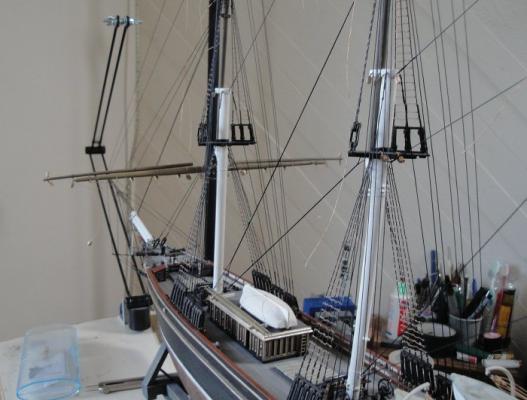
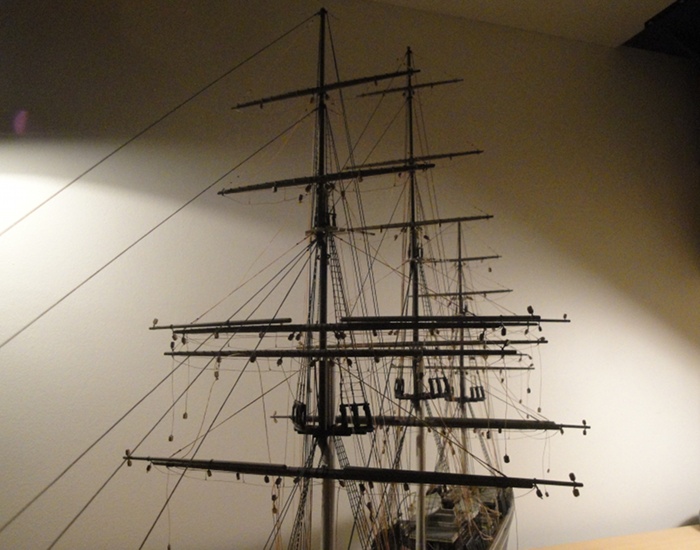
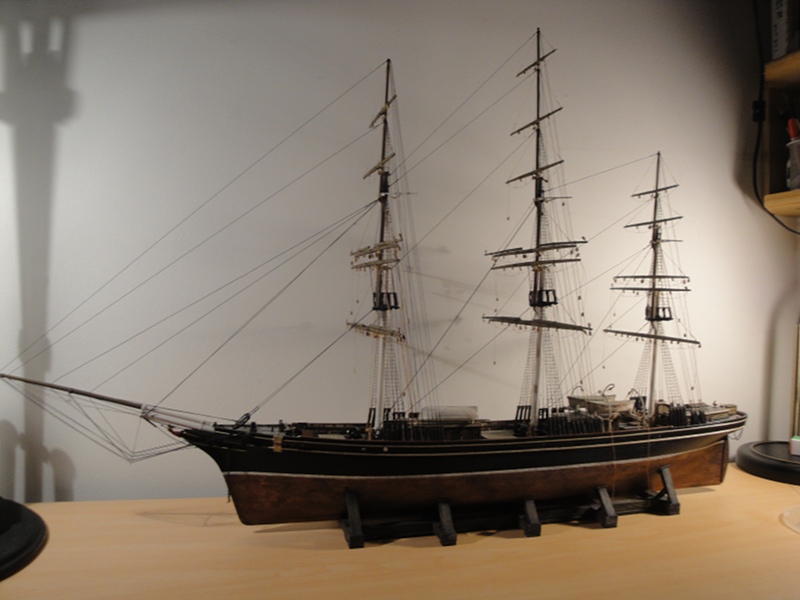
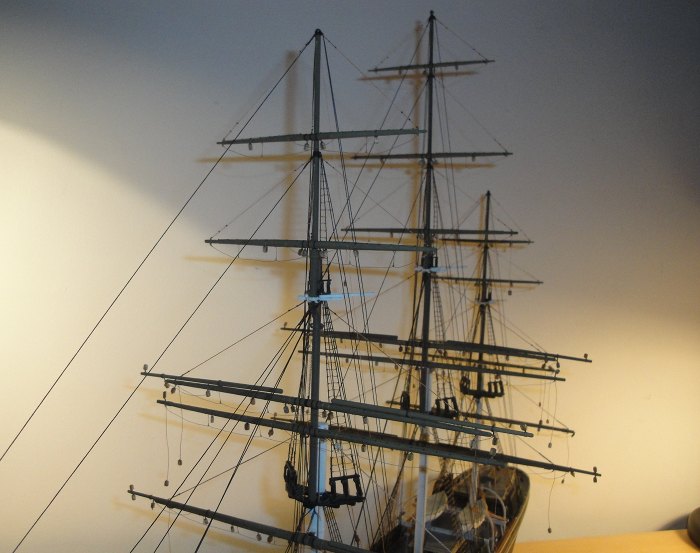
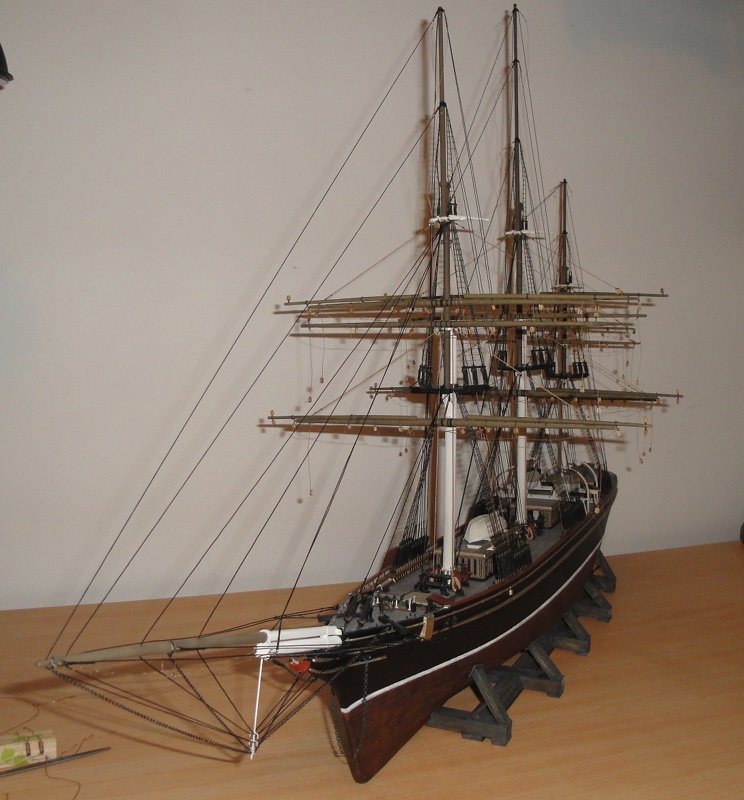
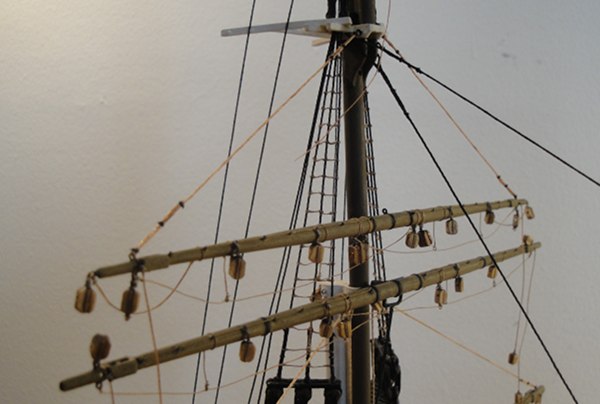
Silhouette shot.

More and more lines belayed to the pinrail.

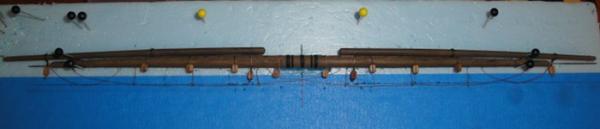
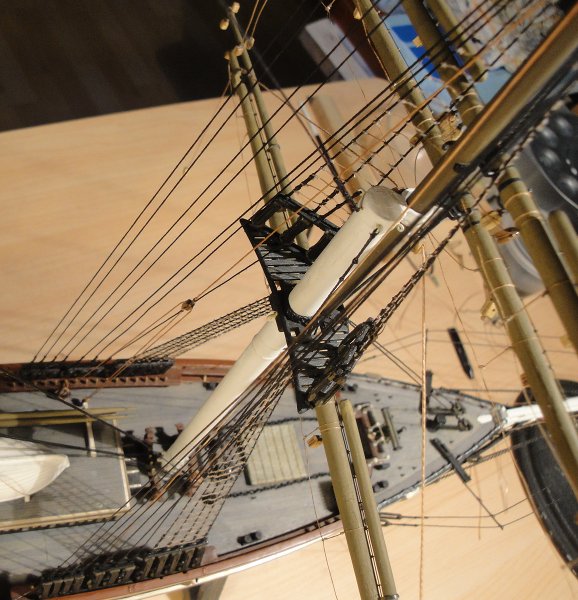
Test fit of the Spencer Gaff.
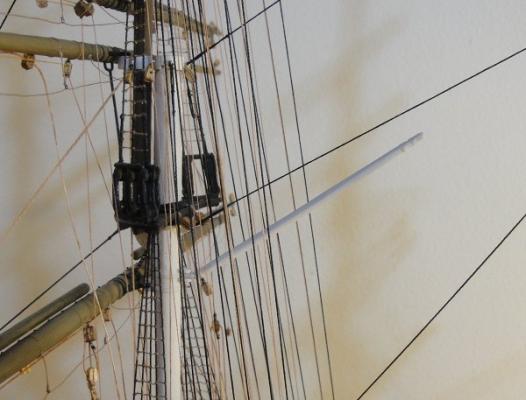
Test fit of the Spanker boom and gaff.
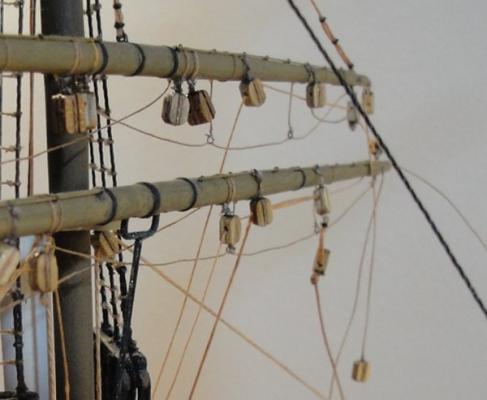
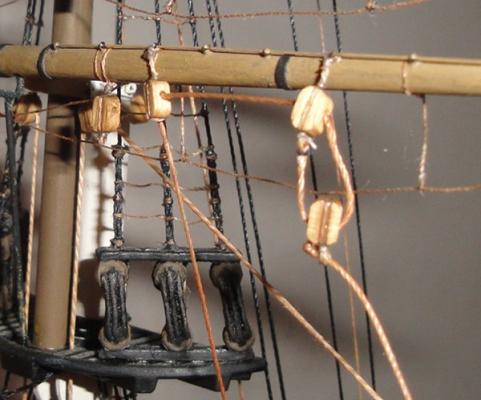
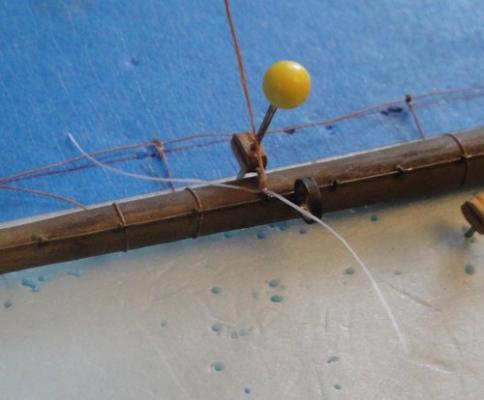
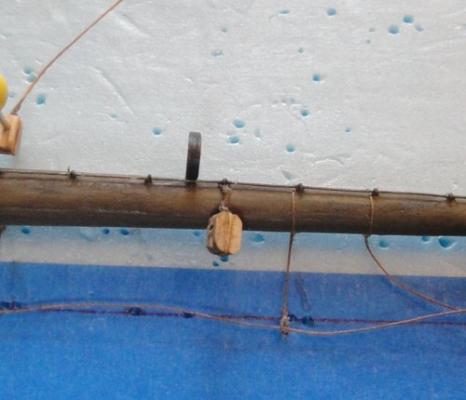
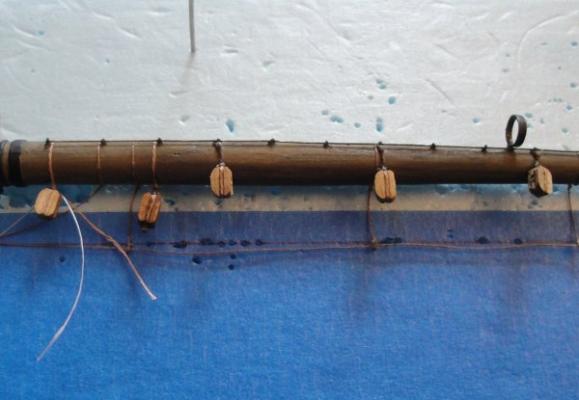
Blocks for the boom sheets.
Blocks for the boom sheets and vangs.
Attaching the sheets and vangs.

- avsjerome2003 and tarbrush
-
2
-
Kevin - Thanks for the kind words
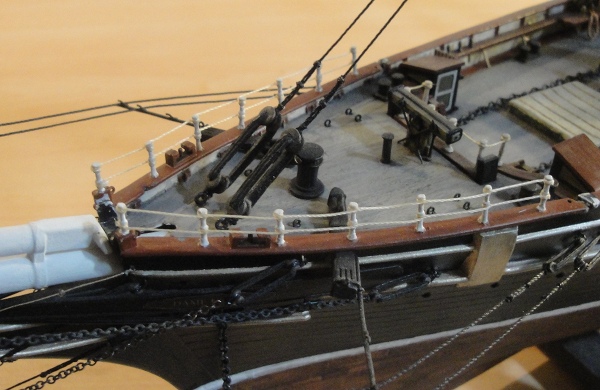
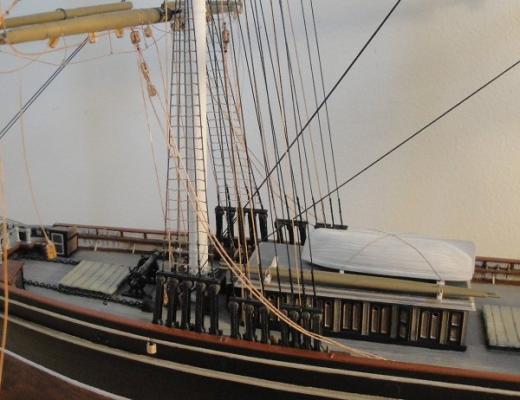
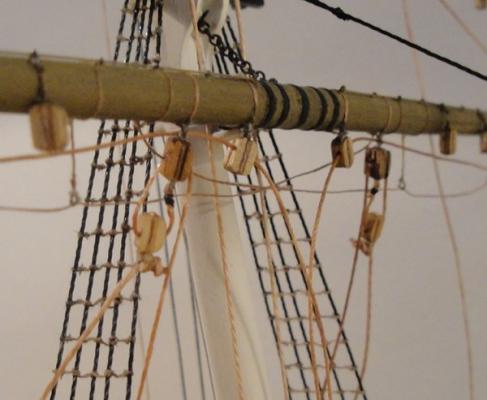
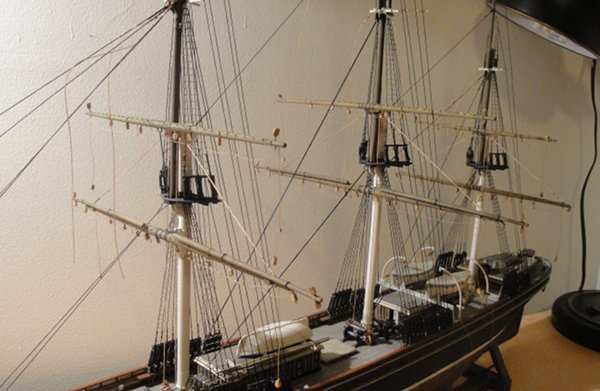
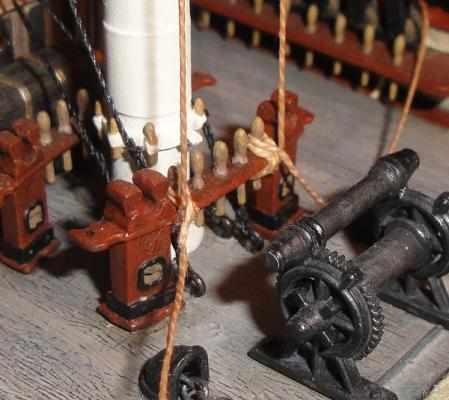
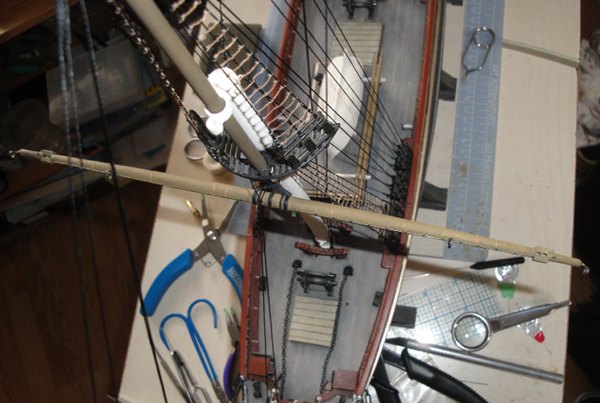
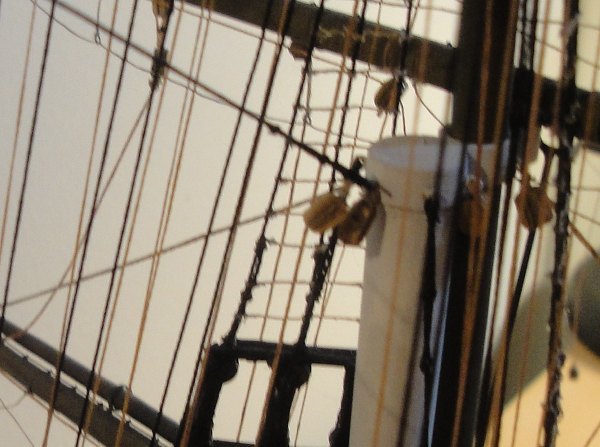
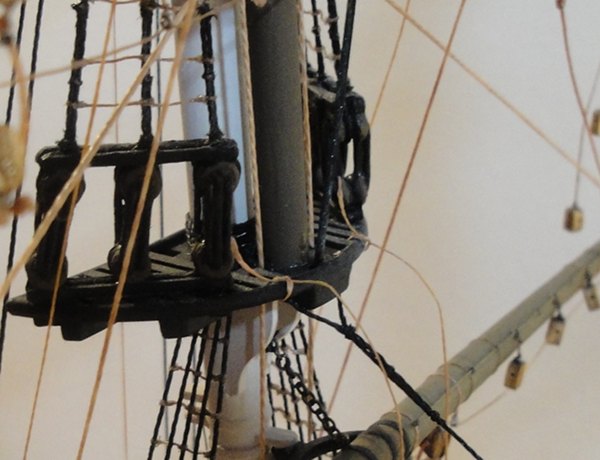
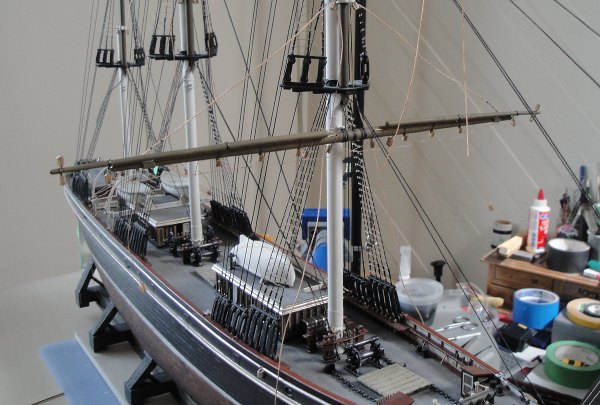
We start this post with a view of the rigging in progress.
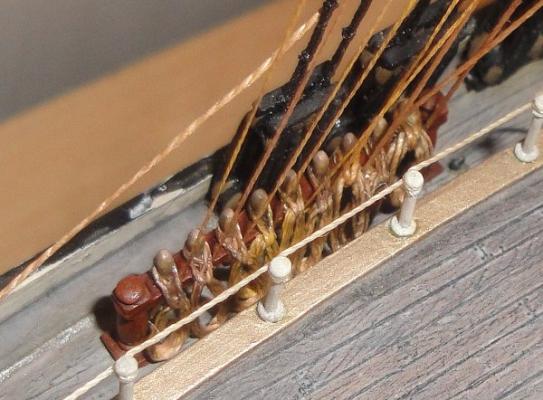
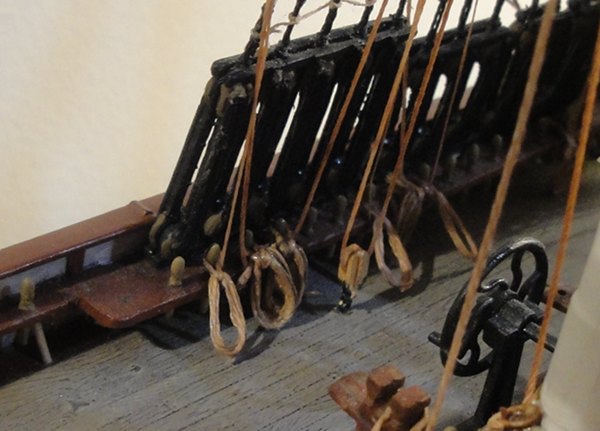
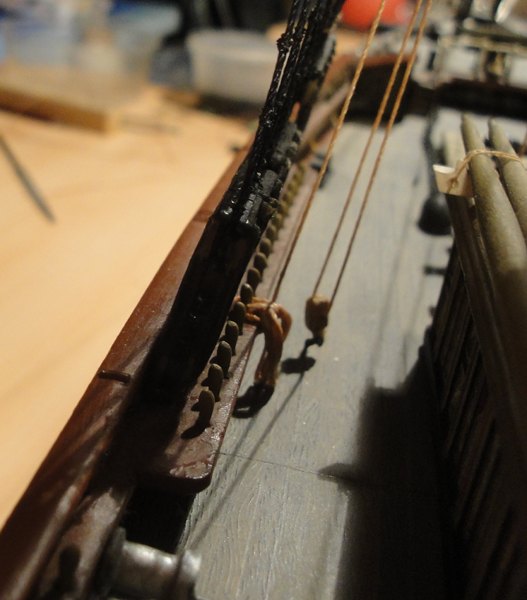
The pinrails start to get more crowded.

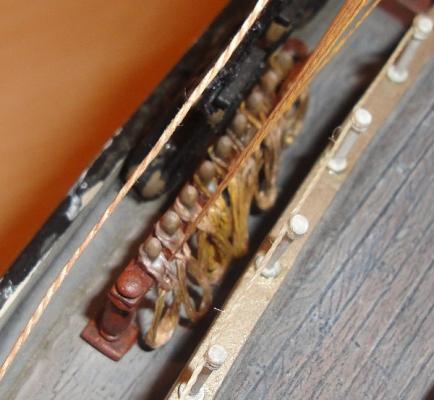
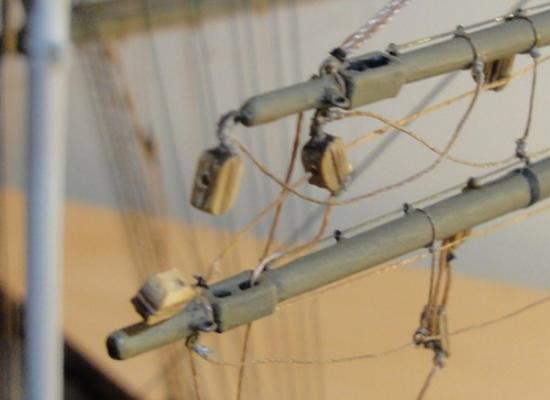
Lines and blocks.


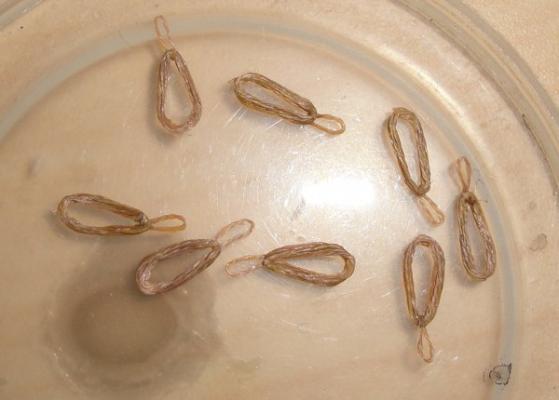
Rope coils ready for placement. Just for reference I use PVA diluted with a bit of ink and water, to 'fix' the upper loopover I use a touch of CA to hold it then it's locked with more PVA.
Starting to prep the Spanker boom.

- avsjerome2003 and tarbrush
-
2
-
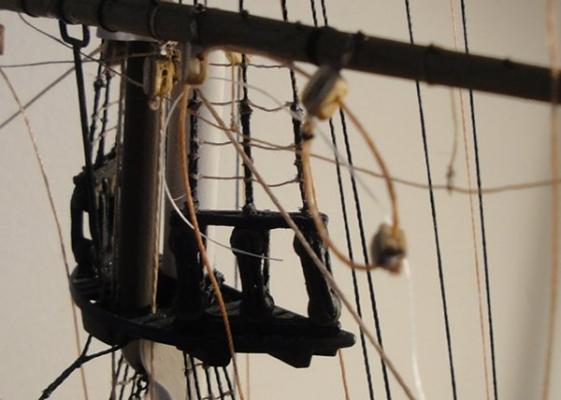
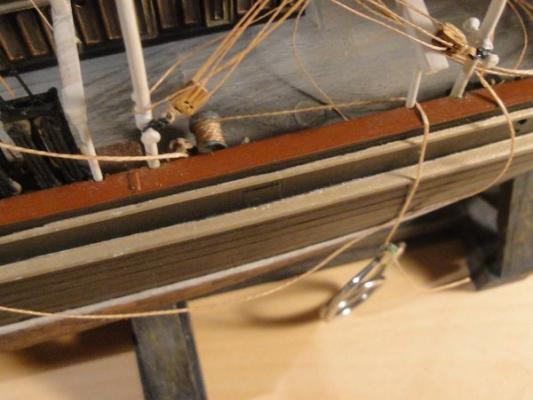
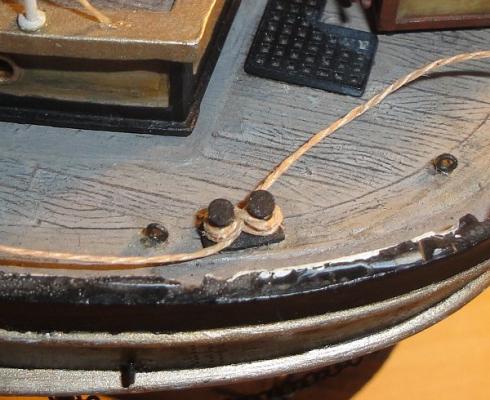
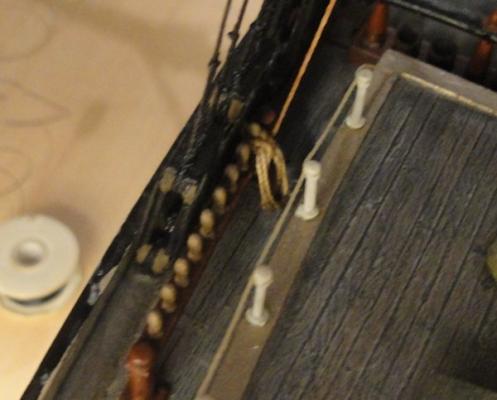
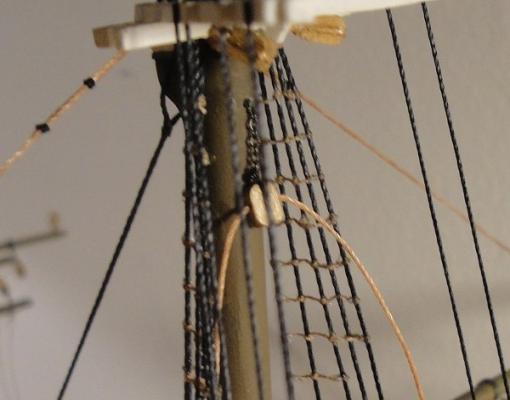
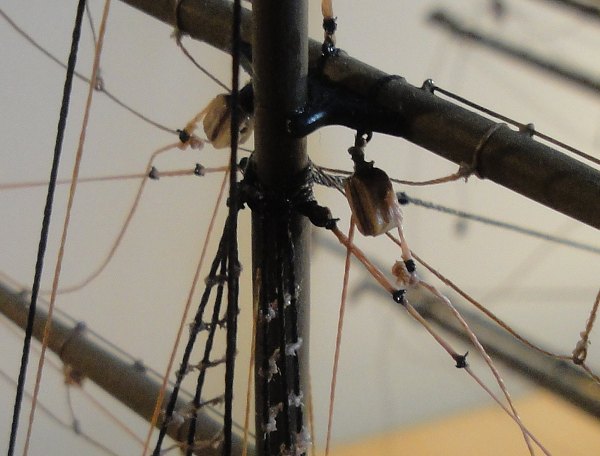
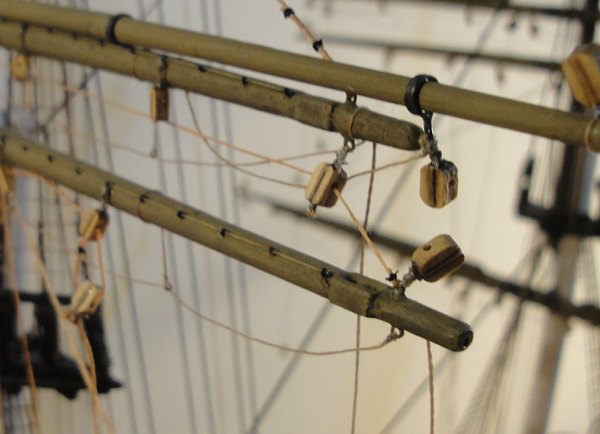
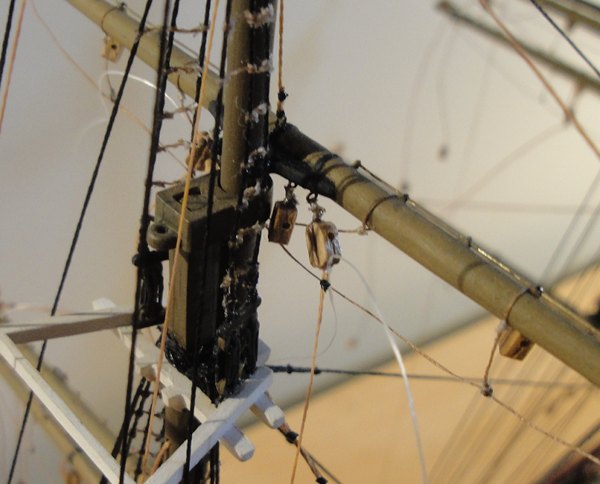
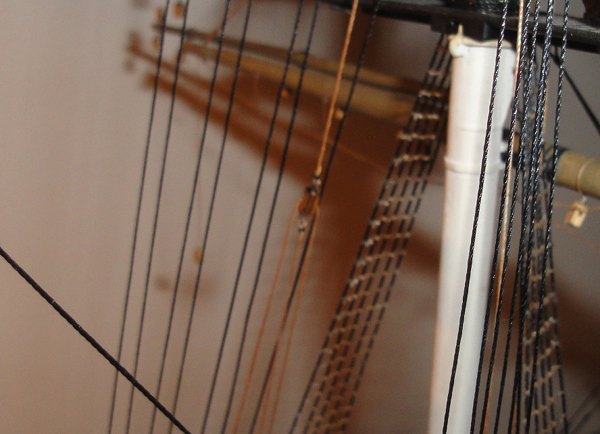
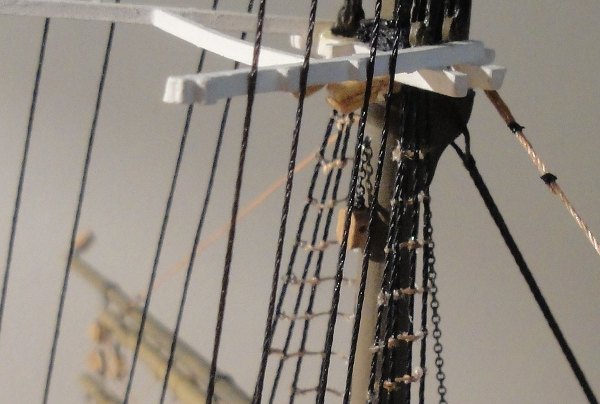
The downhauls get belayed.


In 'reality' there would be a 'purchase' set up on the mast top for these lines. But as the kit wasn't set up for that I chose to use rope coils to help disguise the inaccuracy.

Close up of the downhauls.
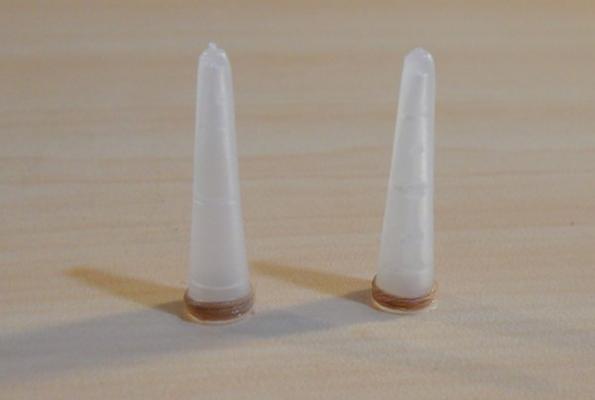
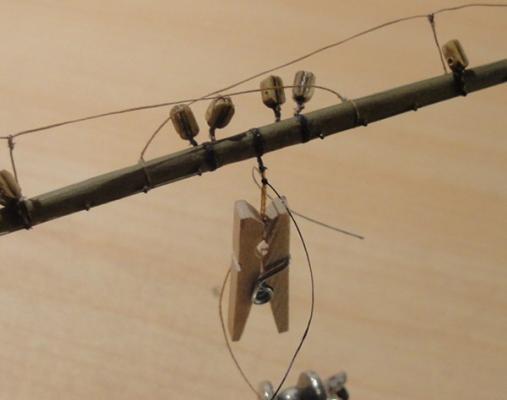
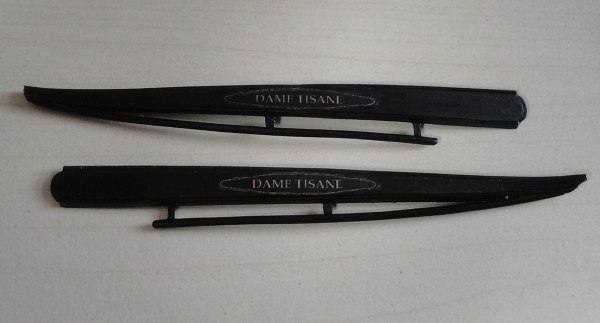
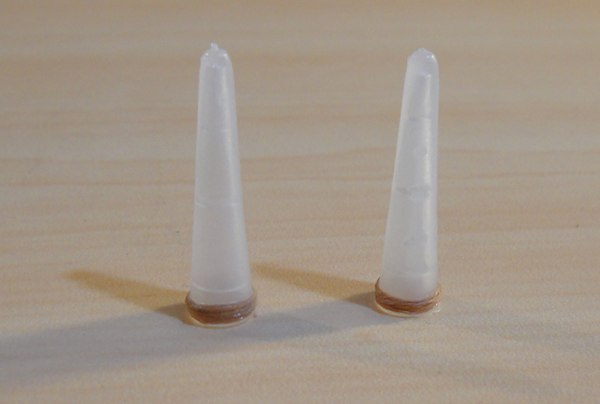
Making hanging rope coils is one thing, but for the 'flat' ones I used these tweezer end caps. The conical shape allows for variable sizes if required.
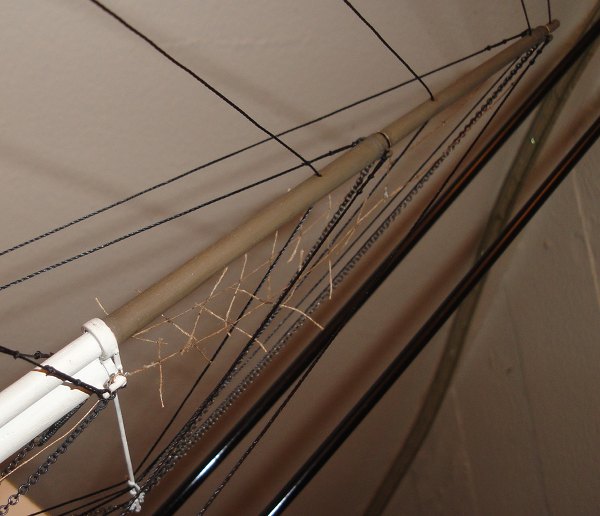
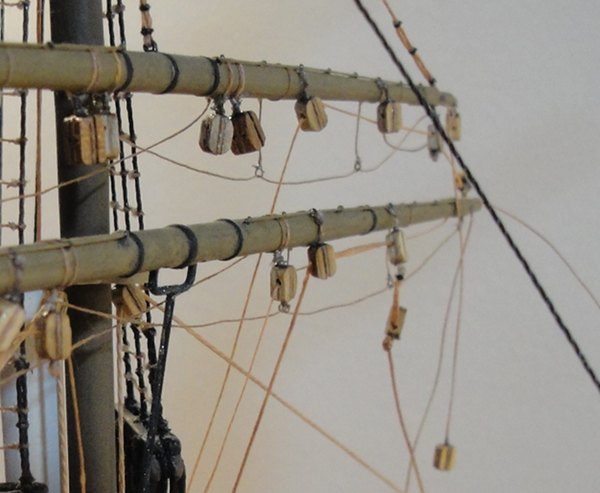
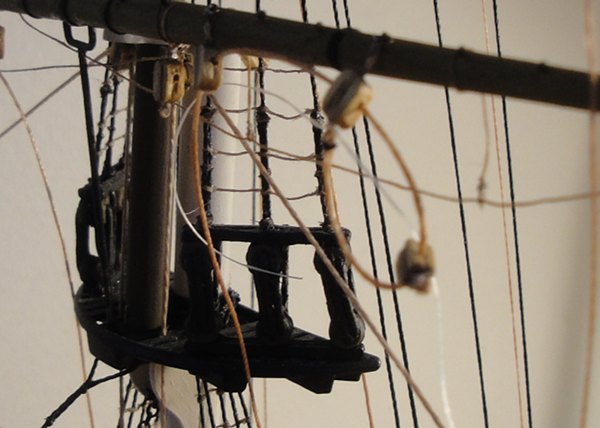
More and more lines get belayed ...
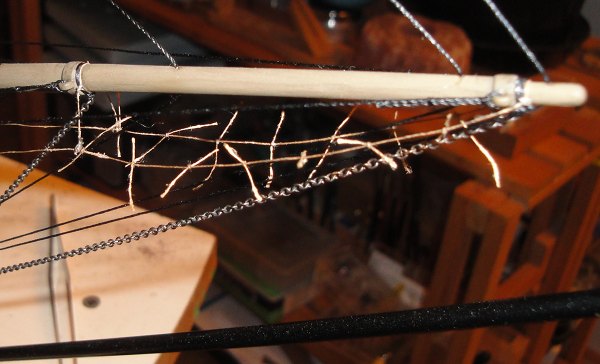
The 'spiderweb' continues to form ...
Yet again 'faking' an 'eye' on a block to attach a line.
- avsjerome2003 and tarbrush
-
2
-
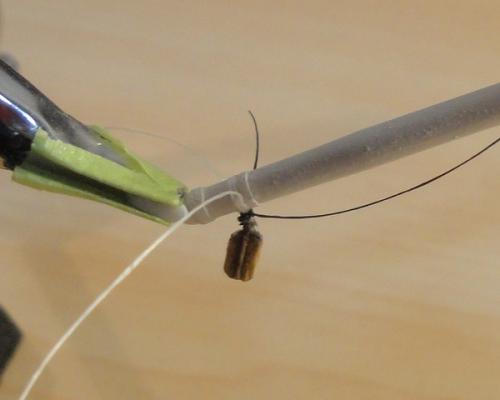
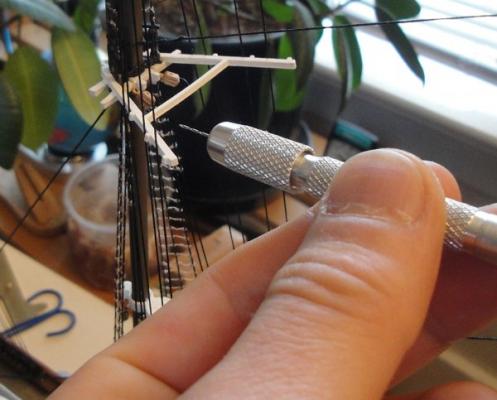
Using self closing long tweezers to brace a rope coil while it sets up.
I erred in the blocks I placed on the Yards in some cases. Here is a shot (sorry it's blurry) of how I faked the second 'eye' on the end of a block in order to attach a clew line.
Main lower sheets 'draped' across the shrouds.
Lower sheet passed through the eye on the end of a clew block, then knotted.

Belaying the Clew lines.
Starting the downhauls for the Upper Tops'l Yards.
-
You can see the Clew lines with the Sheet running up to it and through the 'eye' on the end of the block.
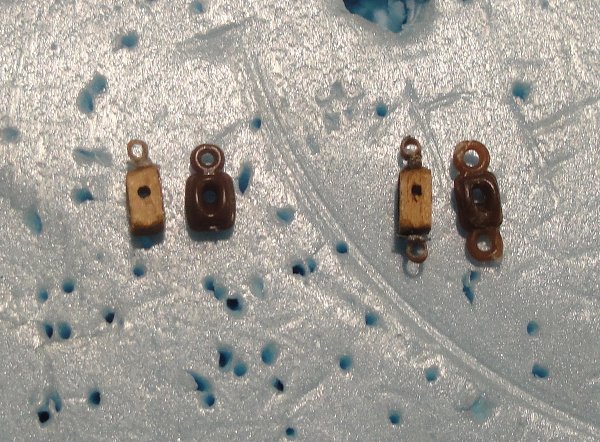
A comparison shot of the wood blocks and the kit ones.

Sheets and Clews.
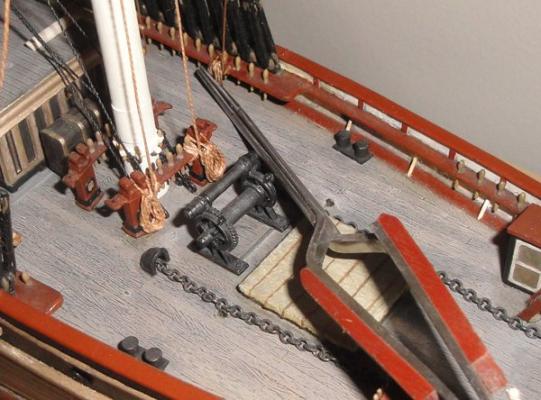
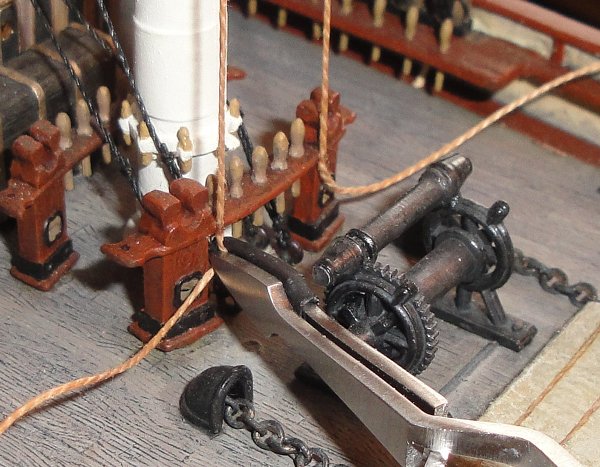
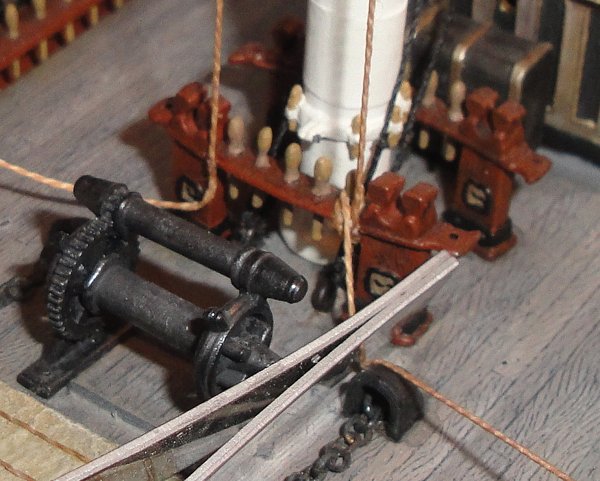
Main lower sheets wound round the winch drum.
Mizzen lower sheets run to the bitts.
Tying a Sheet block to a Clew block.
More lines belayed, more rope coils in place.

This is just the beginning yet I already felt confused by it all, lol.
Mizzen lower sheets belayed about the bitts.
Rope coils in place.
- tarbrush and avsjerome2003
-
2
-
'Hauling up' the Royal Yards.


More and more lines get belayed.
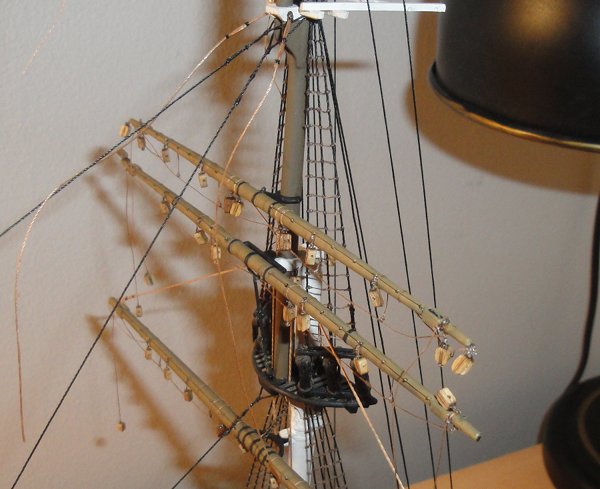
Perspective angle.
The last Yard, being the Skysail, in place.
Close-up of Skysail Yard.
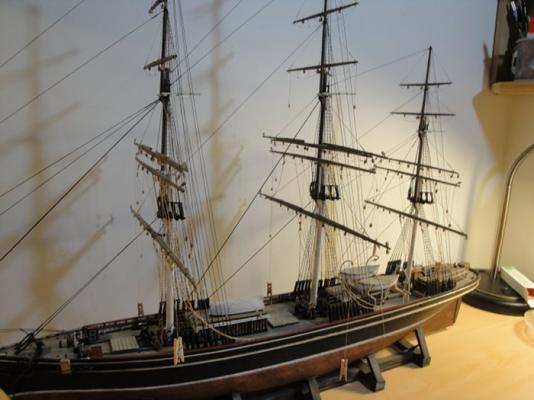
All Yards in place.

The production line to 'set up' the blocks for the next stage.
Sheets and Clew lines now appear.

- avsjerome2003 and tarbrush
-
2
-
Harvey, John & Popeye - Thanks for the kind words
I'm still catching up at this point and I'm sad to say I have nothing 'new' to add yet as I'm still unable to sit for long enough to work on the Dame. Frustrating, yes, but the coincidence in timing (slip a disc, the Great Crash occurs) makes me feel like some Greater Force is at work and I'm just getting caught in the undertow

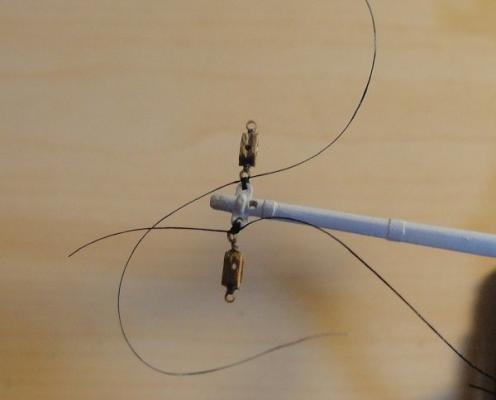
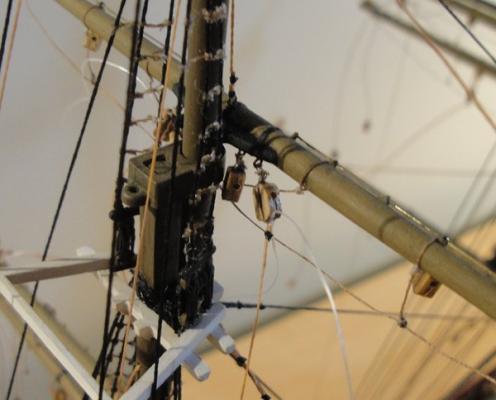
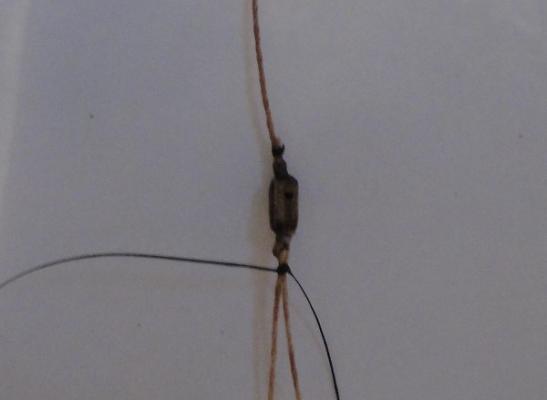
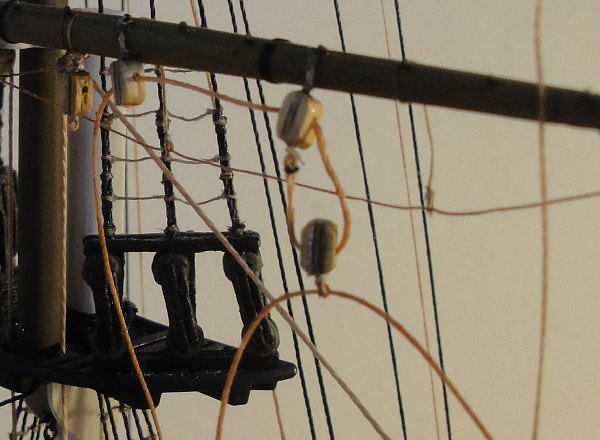
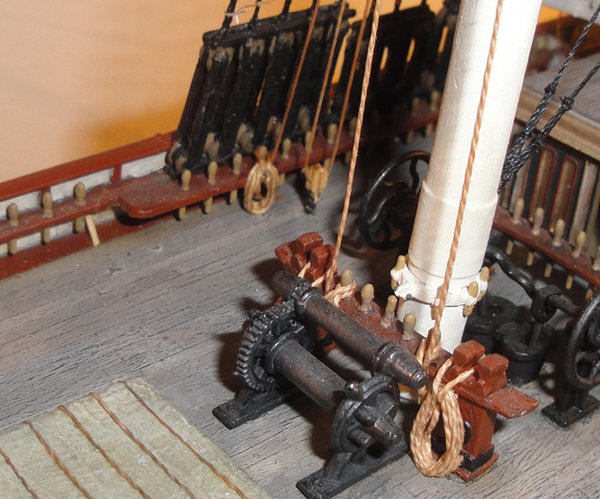
Here's some views of the Purchase for the Halliard.


A couple of reference photos, I think I used one of these on Facebook for a while ...

Attaching a 'single line' Halliard - I think is one of the Topgallant Yards.
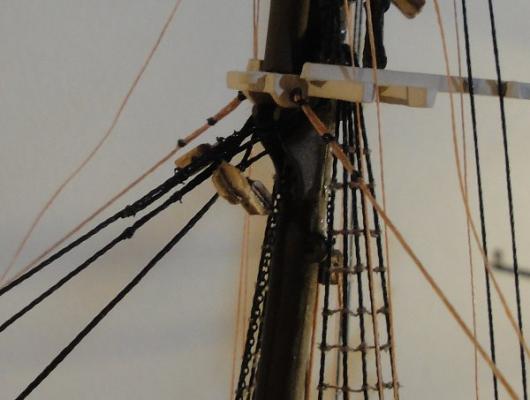
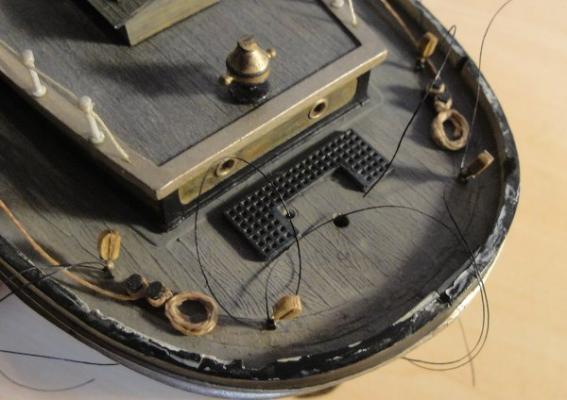
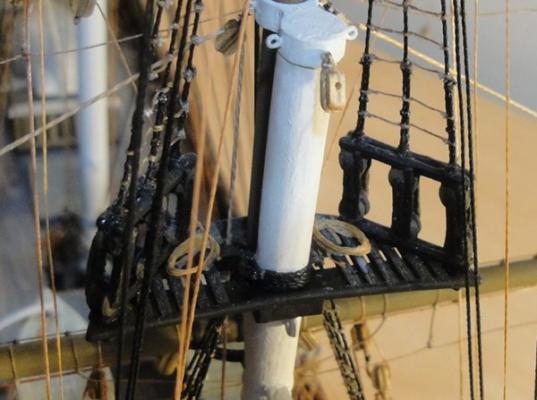
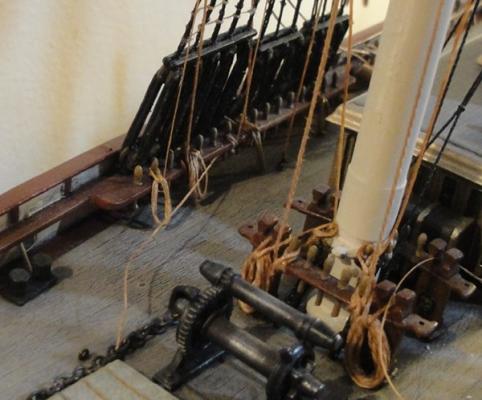
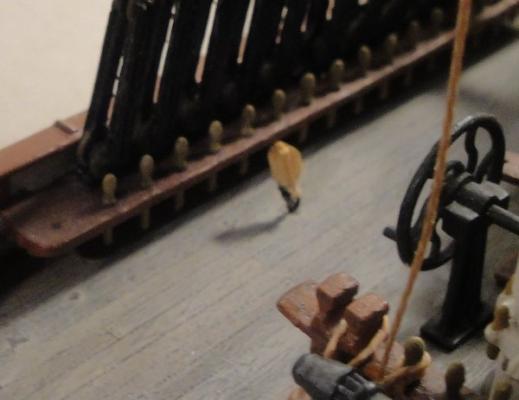
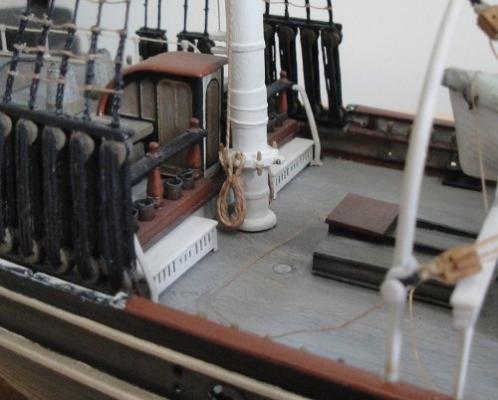
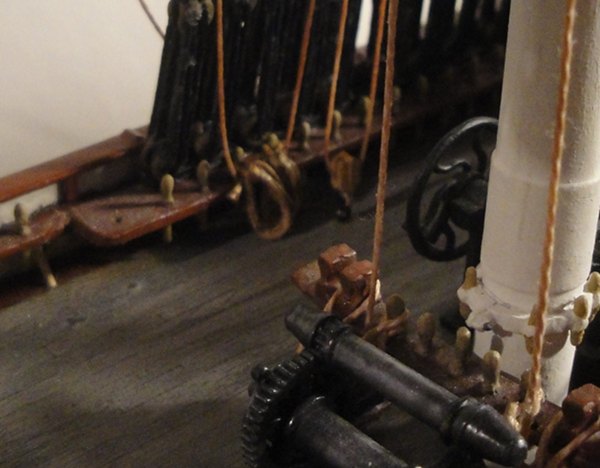
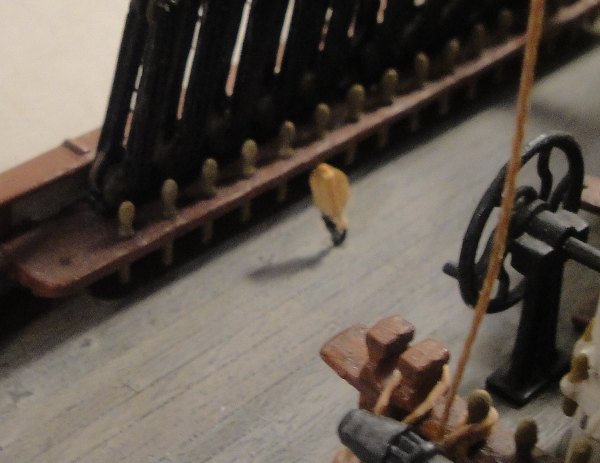
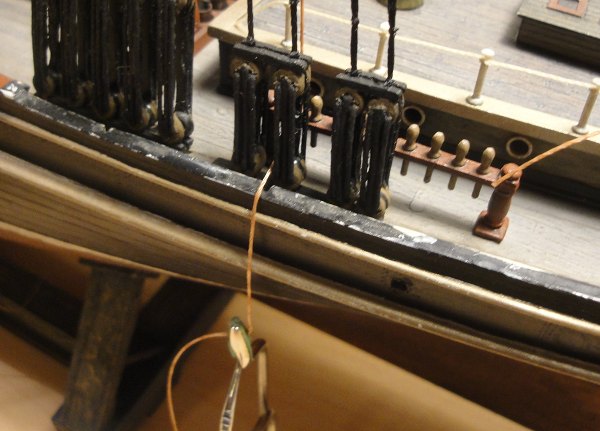
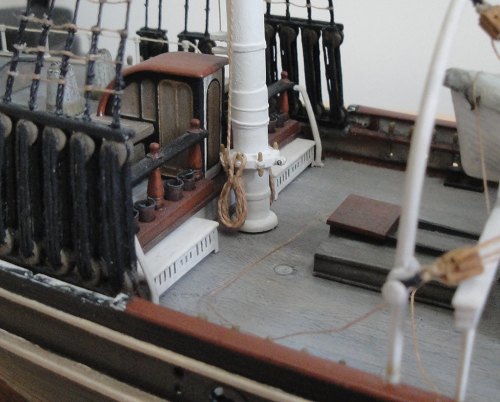
A shot of the belaying point for the Purchase with rope coil in place. I framed this to also give a nice view of the fife rail in the foreground.

The Cro'jack Halliard belayed - as mentioned before this is a single line Halliard.
A view of the Main Upper Tops'l Yard Halliard where it is belayed.
Here I was trying to mimic the angle of a photo of the real thing that I found on the Net.
-
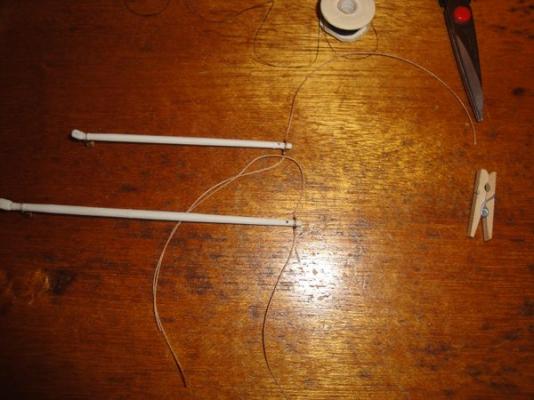
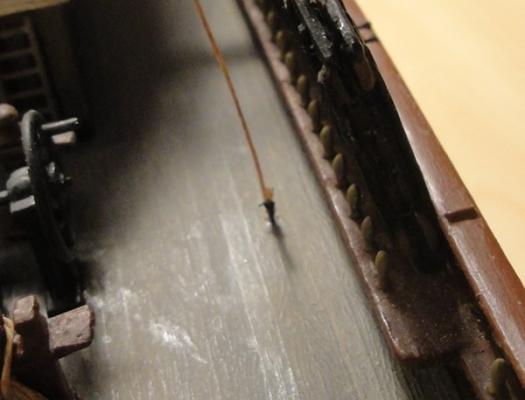
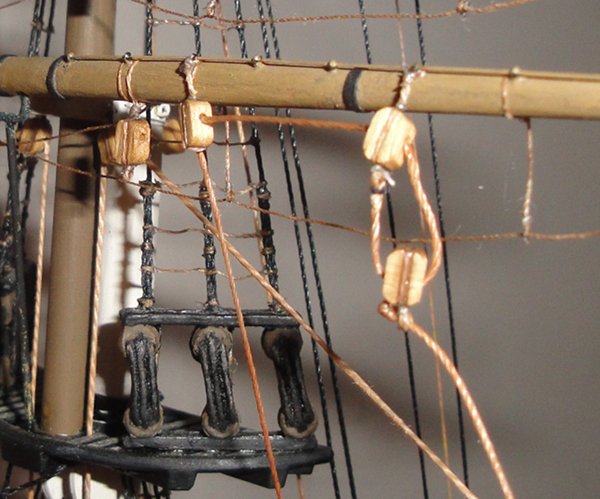
A few shots of the Tye being set up.


Running the line for the Purchase.
The deck block for the purchase.
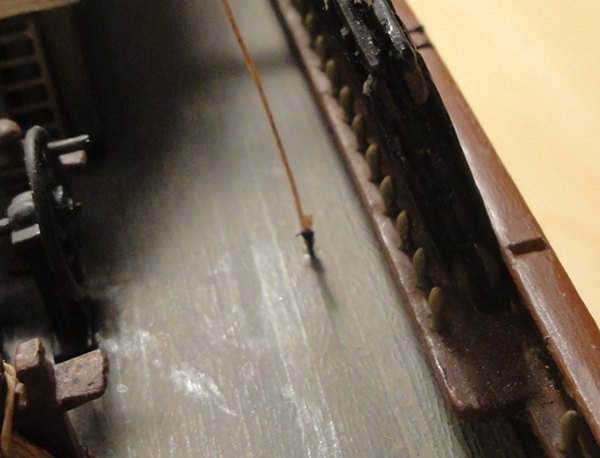
The other end of the Purchase tied to a deck ringbolt.
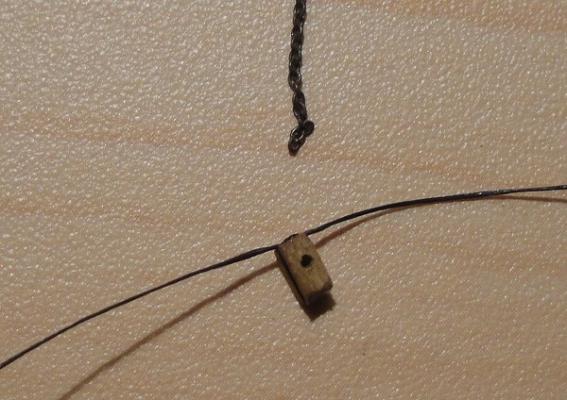
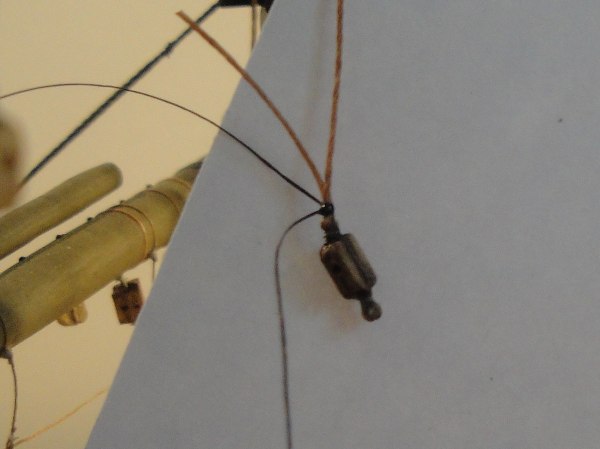
The 'two eyed' single sheave block for the Purchase.

Tying off the single 'rope' Halliard for the Mizzen Upper Tops'l Yard.

-
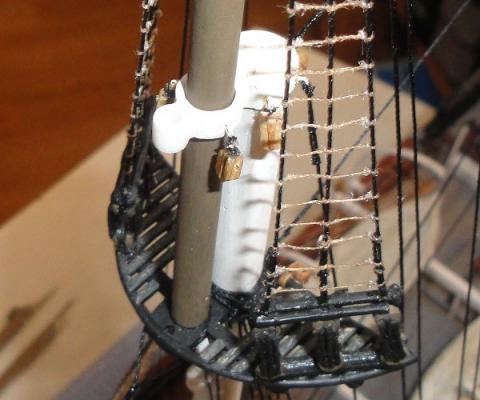
Another shot of attaching the crane. I don't have photos but I fabricated the cranes from 20 gauge brass wire and blackened them. I used 2 part slow cure epoxy for the affixing.
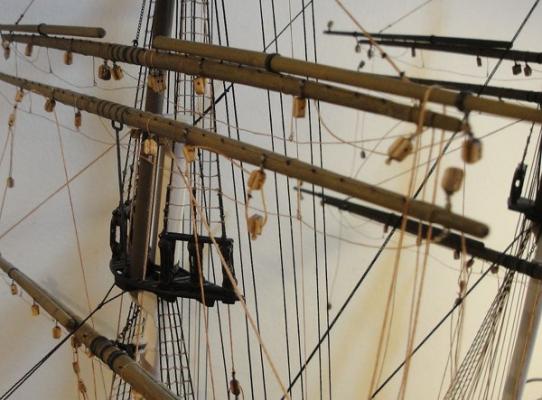
Lower Topsail Yards in place.

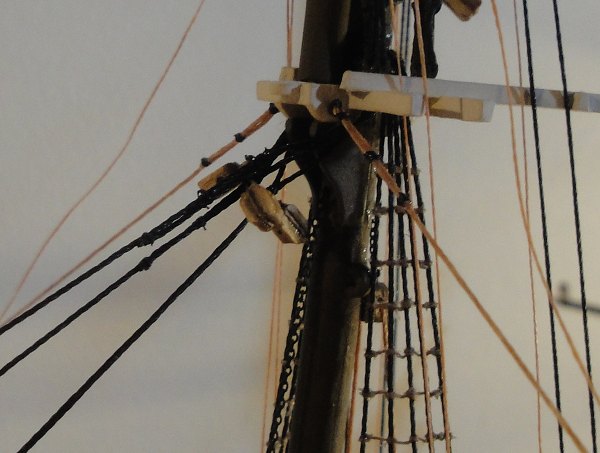
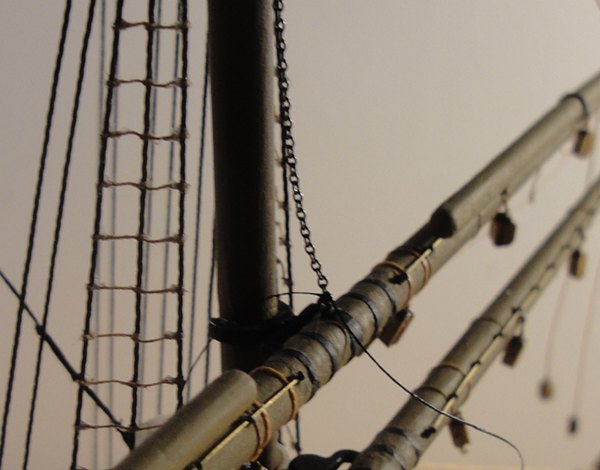
Now for the Upper Topsail Yards. Affixing the Mizzen Upper Tops'l to the mast - you can see the Lifts have been attached and seized to the mast top ringbolts.
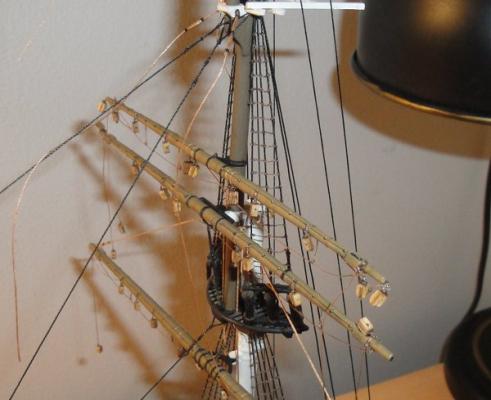
Lifts attached and seized to the Yards.
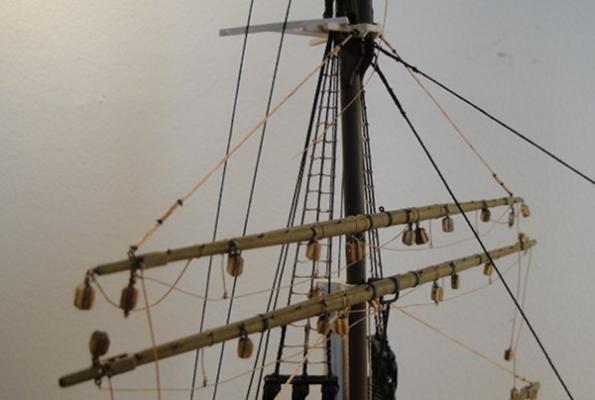
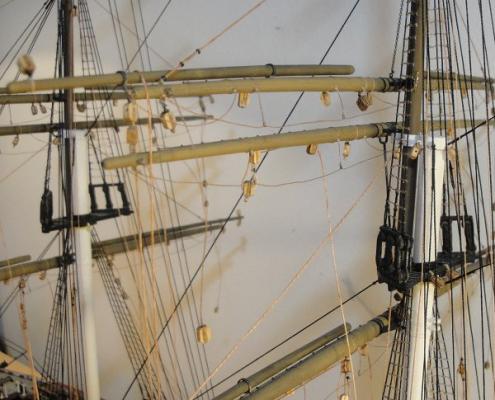
The Main Upper Tops'l Yard - repeat procedure.

The Fore Upper Tops'l in place ... awaiting the Lifts.
Attaching a block to a chain for the Halliard Tye.
The Mizzen Upper Tops'l wasn't set up for a purchase and chain tye so it's just a 'rope' passed through the mast sheave.
-
Frank - thank you for the kind words
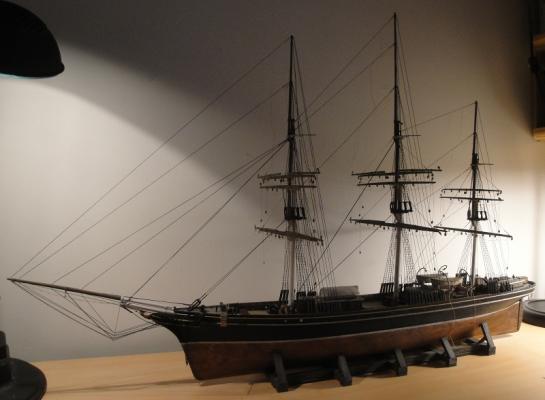
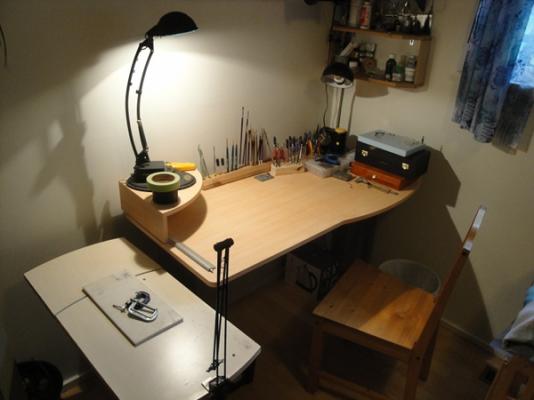
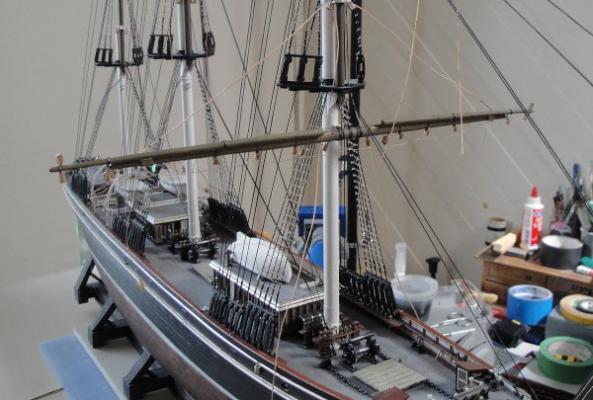
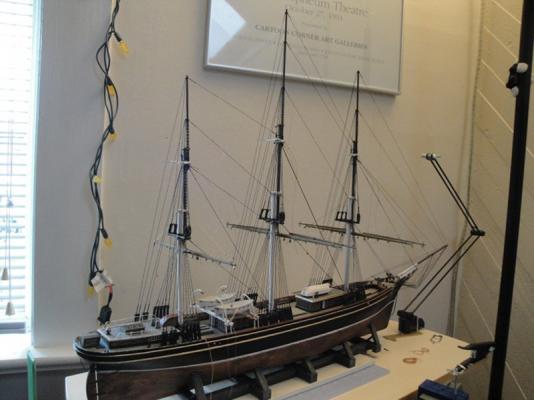
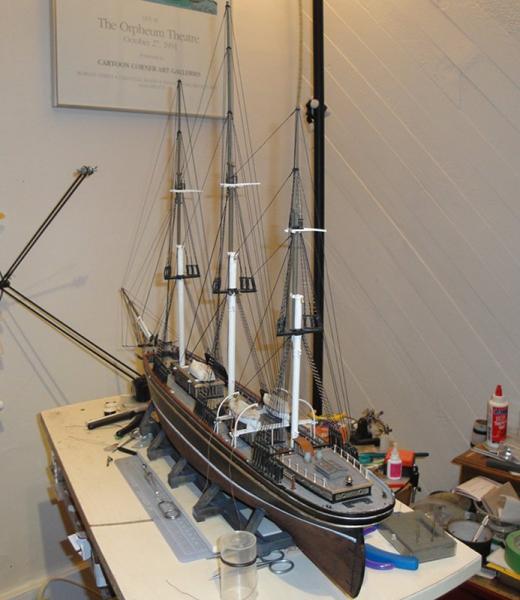
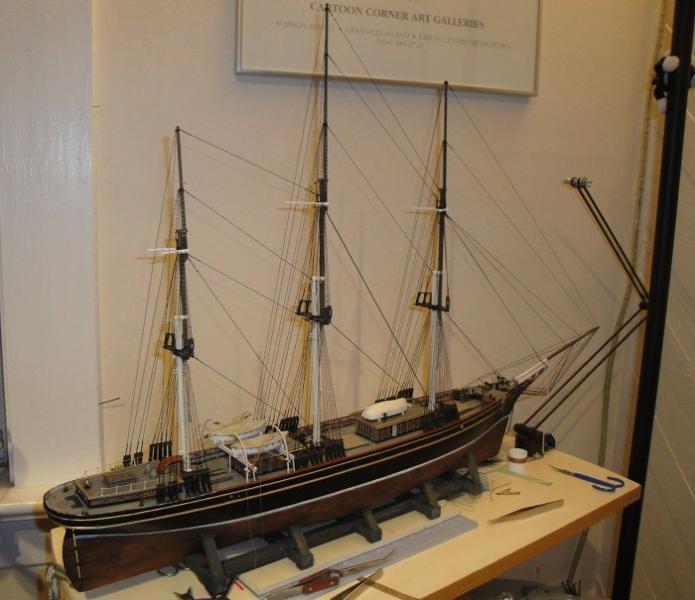
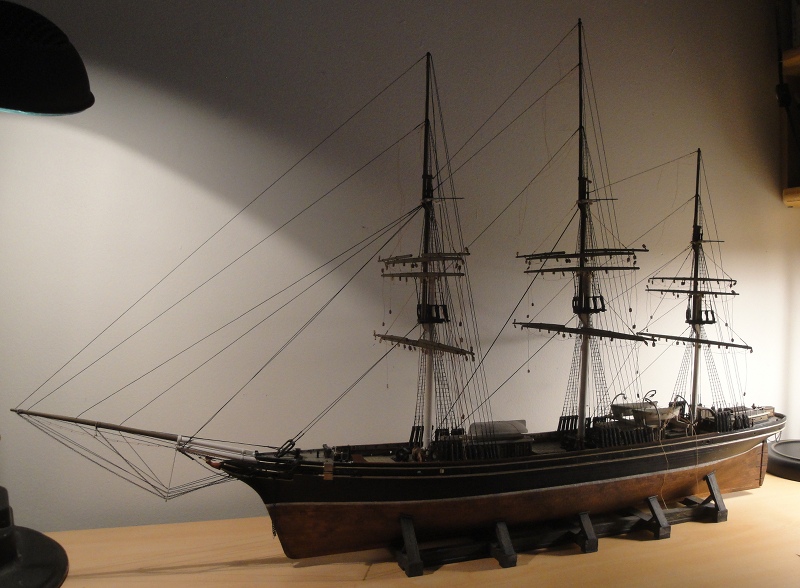
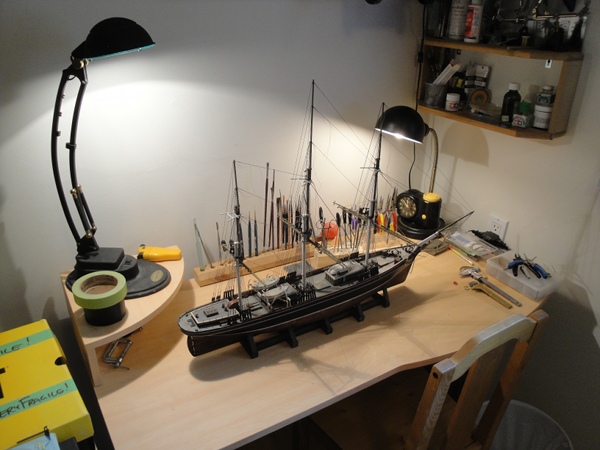
And to be honest, I had no idea what I was getting into and any preconceptions of how far I'd be going on this have been tossed aside. Of course with all the knowledge I've gained through this there's absolutely no way I'd ever try something like this ever again, lol.Well, here we are approximately 6 months later - new abode settling in enough for me to stake out a claim on a corner of the 'den' to set up my workshop.
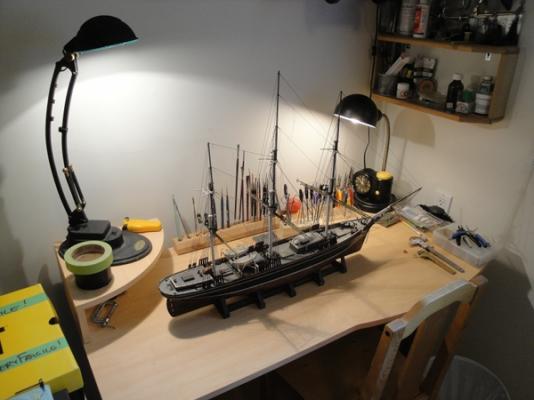
Having set the stage it was time to get the Dame back from her temporary berth on a friend's mantle.

Playing around with rope coil jigs - again thanks to the members of MSW for doing a lot of the legwork in advance.
Placing the rope coils ... I know some prefer to do them all at once after the rigging is complete but as a newbie I chose to put the coils in as I went along.
'Bracing' the coils until the diluted PVA cured.
Affixing the Lower Topsail Yard and attaching the crane.

-
Roger - I am currently 'on hiatus' in the final stages of rigging my re-build of a Revell Cutty Sark kit (renamed as a different ship) and can offer some recent experience ...
I am rigging her with no sails but as if the sails were sent down for a short time. What this means with this build is that the Upper Topsail, Topgallant, Royal and Skysail (on Mainmast only) Yards are in their 'lowered' positions. The Lower Topsail Yards and the Courses and Crossjack are 'fixed' in that they do not raise or lower. The Lifts and Halliards are rigged to account for this, i.e., the Lifts are taut instead of slack. I also accounted for this in the 'belaying' of the lines and the sizes of the rope coils, the coils would have less 'loops' in this case.
I have chosen to include the Sheets, Downhauls and Clew lines. I have not included the Leech or Bunt lines due to two factors; 1. I do not have enough blocks to account for this aspect of rigging and 2. I wish to retain at least a small portion of my sanity, lol.
The sheets, downhauls and clew lines are rigged as close to 'real' as I could manage - this is to say that they have been 'set up' as if the crew were ready to re-hoist the sails any time now.
I haven't gotten too far on the Fore and Aft running rigging yet so I can't offer too much advice there.
One thing I have noticed during this is that although I could have omitted a lot of the running rigging I am pleased with the general 'effect' of having it there. Even if it isn't something that pops out, just the presence of all those little lines adds to the overall feel of 'complicated cats cradle' which is the hallmark of tall ships.
-
Hoisting the Courses and Cro'jack.
Belaying the lifts.


A little 'doctoring' of the footropes for the proper 'hang look.'
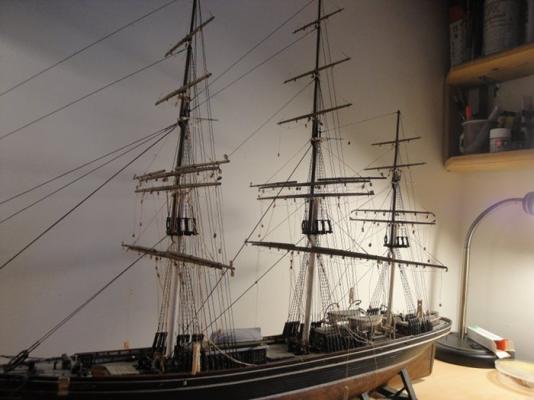
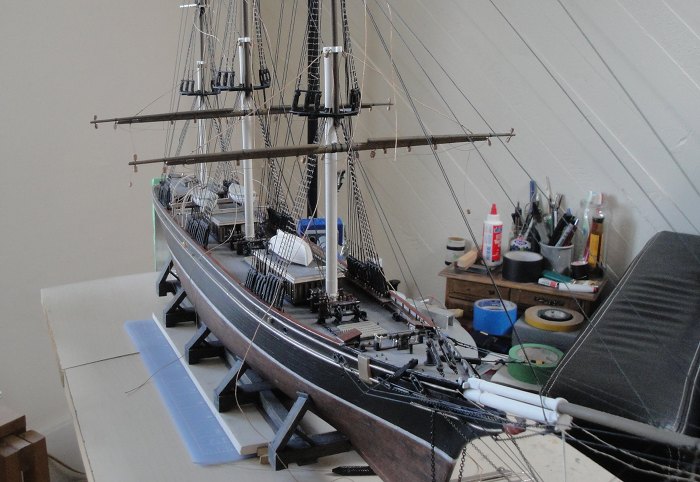
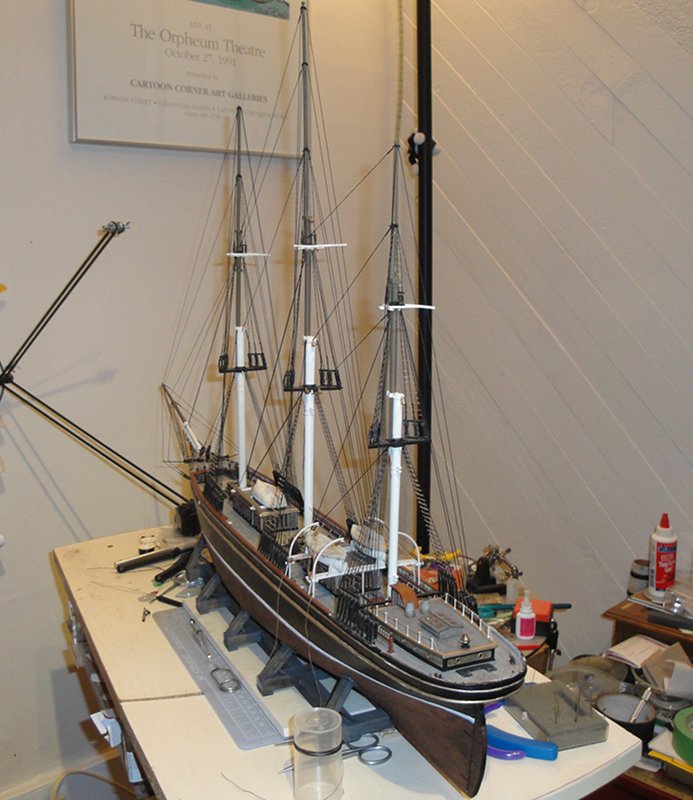
And here is where I was suddenly informed by the Admiral that we were moving ... 'suddenly' meaning this was a spur of the moment decision and I had not been consulted in the matter. The story of this saga can be summarized as, "A mad dash to prep for moving, finding new tenants for the mid-month to try and save a full month of 'double rent', the revelation that the new place would not be available until the next month due to a clerical error on the part of the landlord, finding alternate accommodation and storage for all our stuff, moving in and discovering how much work needed to be done to make the place liveable, counting the days until I could set up a workshop area for myself." The discontinuity in building due to this was about 6 months. And here's the last shot of the Dame in the old place.
-
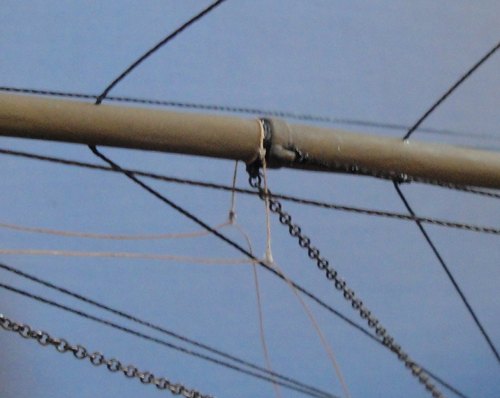
Somehow I had forgotten to drill a 'sheave hole' for the Halliard through one of the mast portions. This is an image of the delicate process of correcting that error.
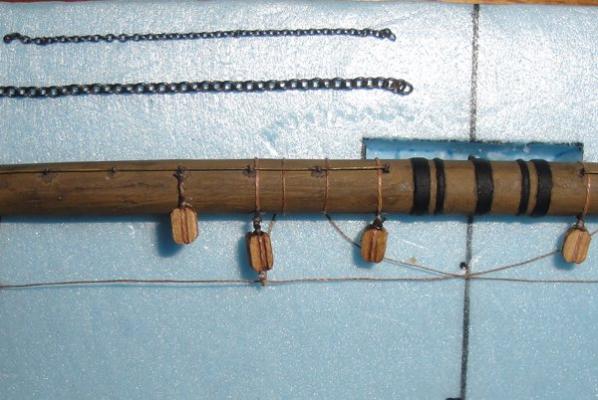
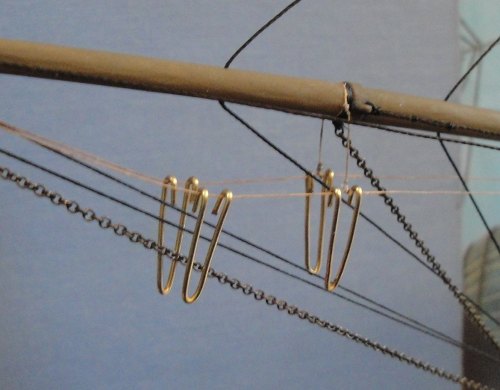
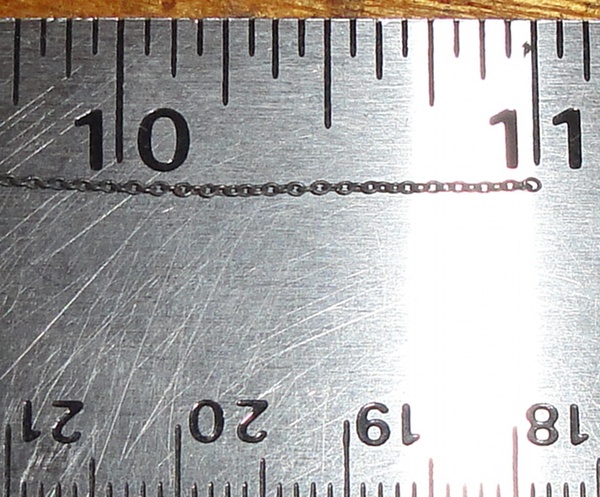
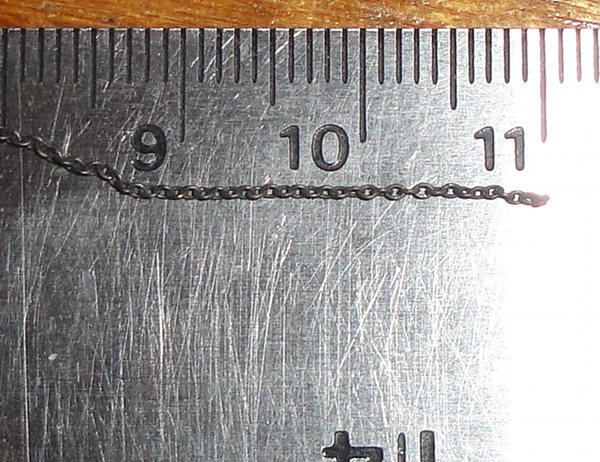
The original kit came with only two sizes of chain but the first builder of this one had added very thin chain which I recovered and chose to use for the Topsail yard Halliards. On the kit only the Fore and Main Topsail yards had the set up for chain halliards attached to a purchase.


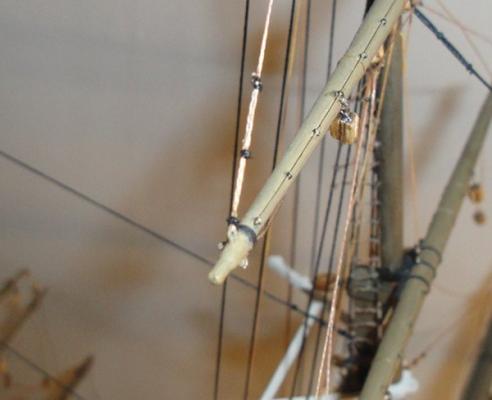
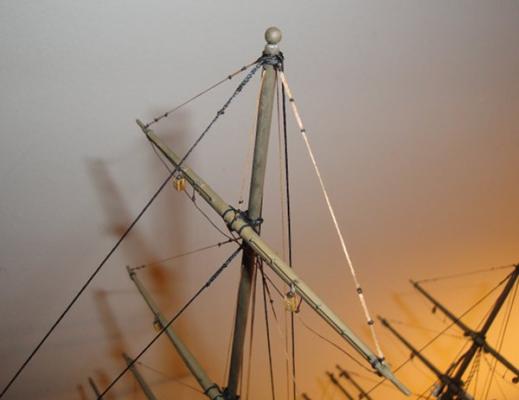
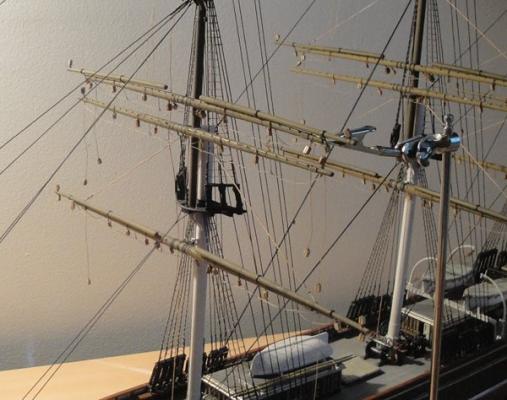
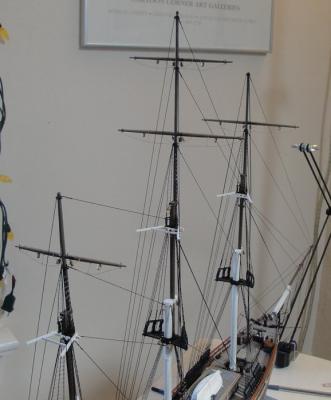
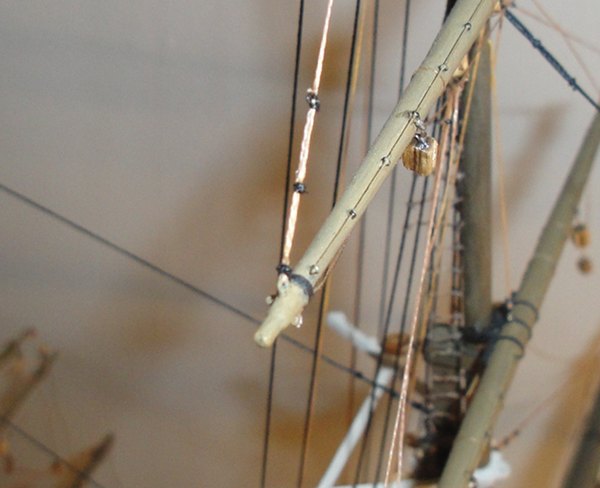
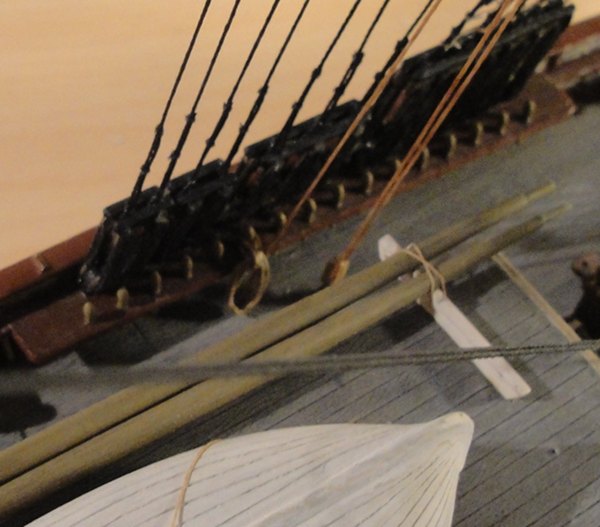
'Test fit' of the Skysail and Royal masts.
Setting the Stuns'l booms in place.
Test fit of the Fore Course.
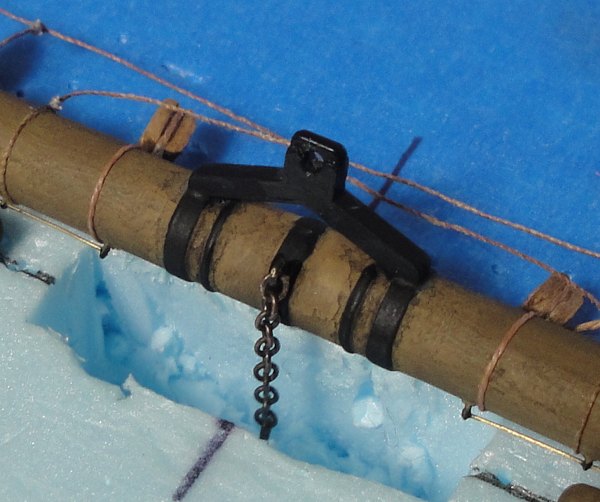
Affixing the chain sling.

Attaching and seizing the lifts.
-
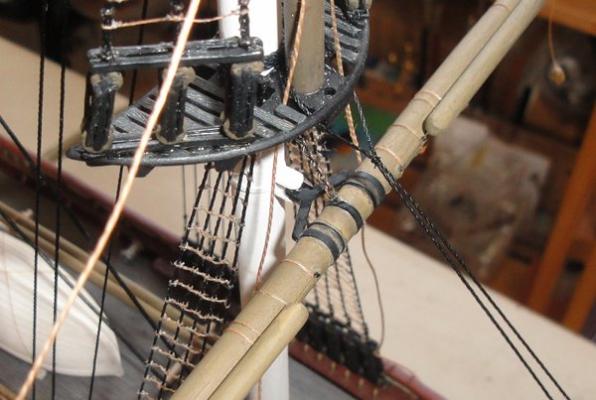
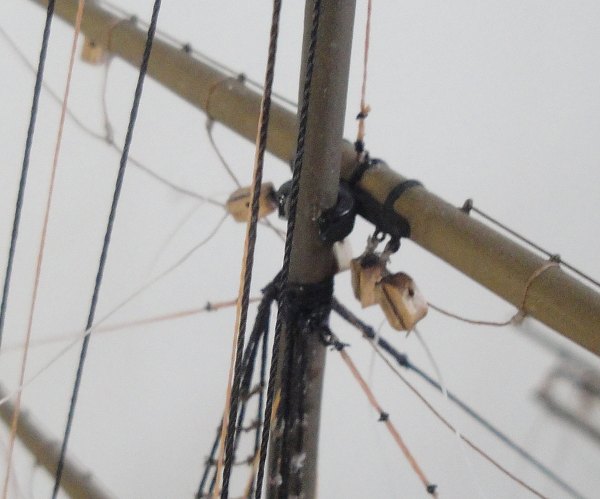
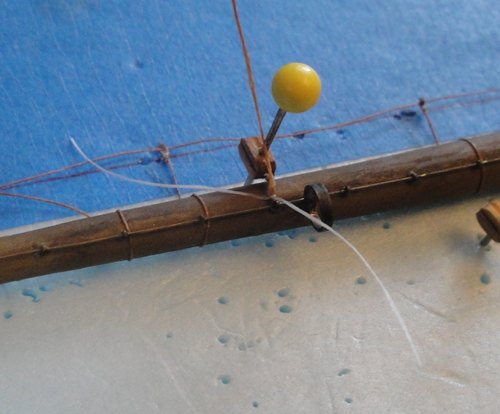
Close up of the ringbolts attached to the hounds (?) which I should have put in earlier.
Someone asked me to post pics of how I 'tied' the blocks for attachment. Basically I secured the line around the block with diluted PVA first then seized the lines atop the block.

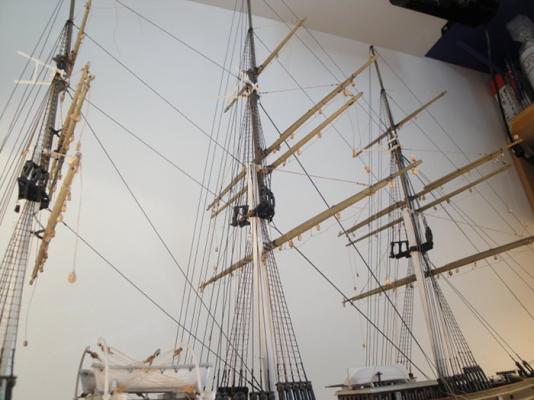
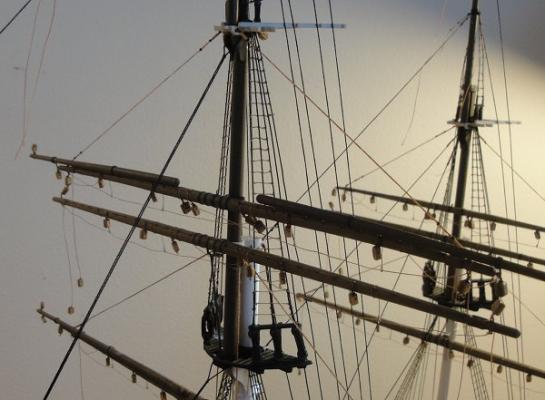
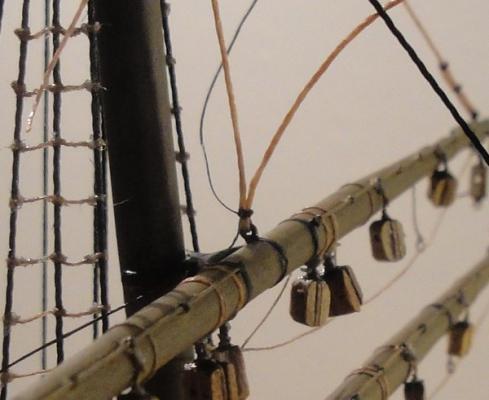
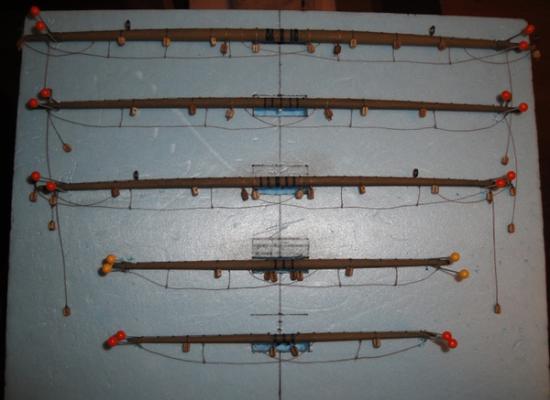
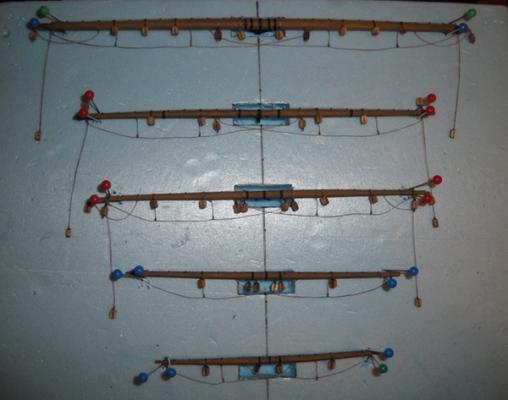
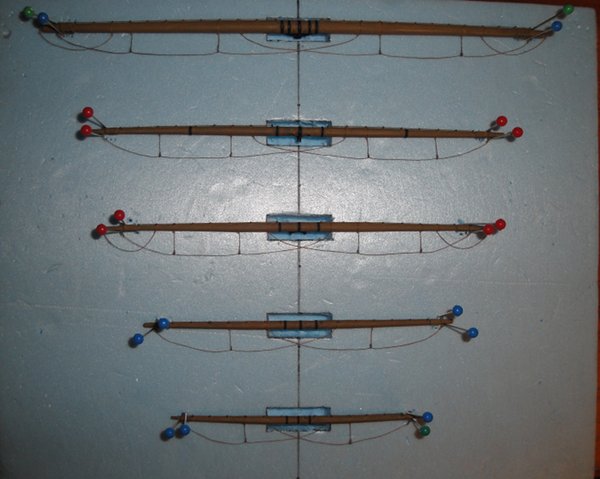
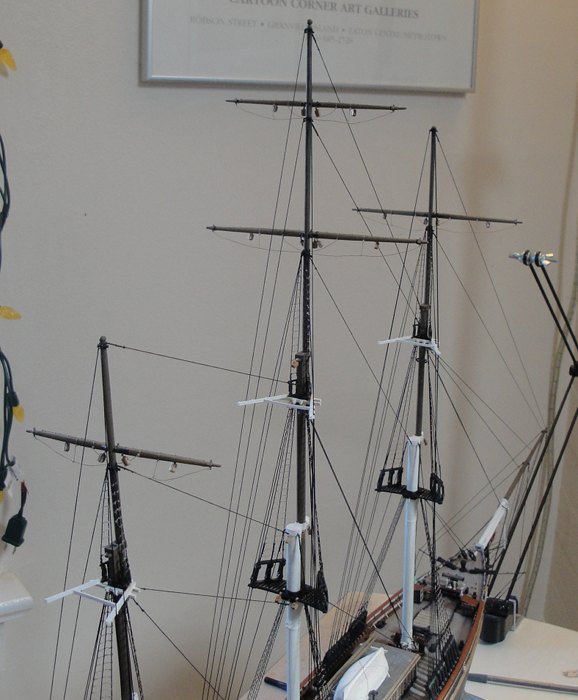
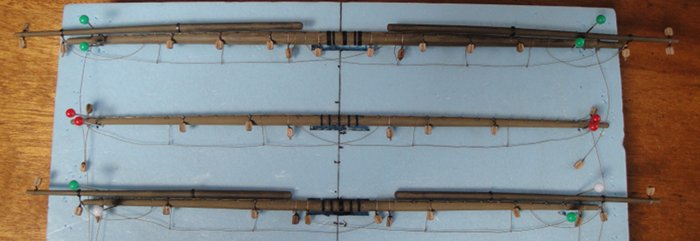
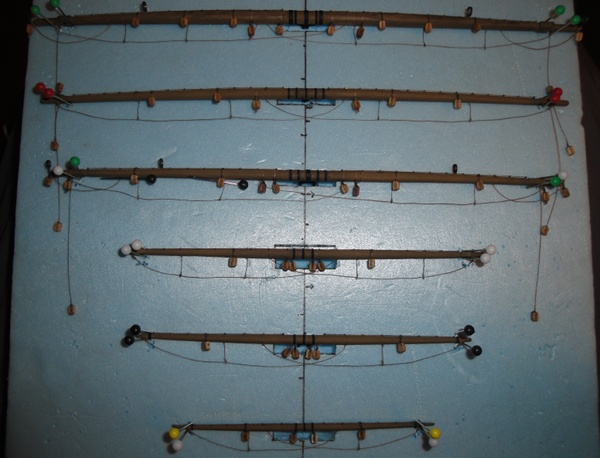
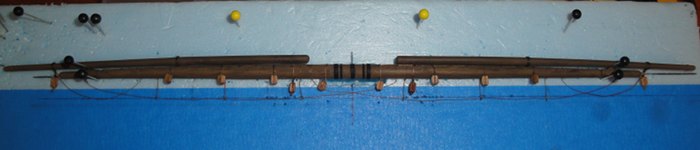
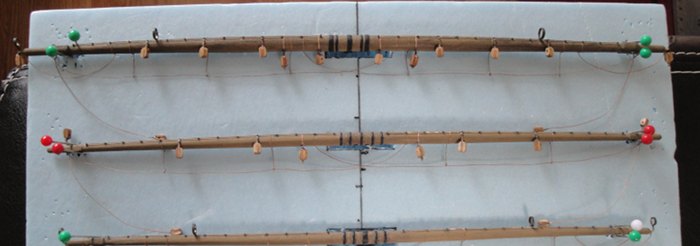
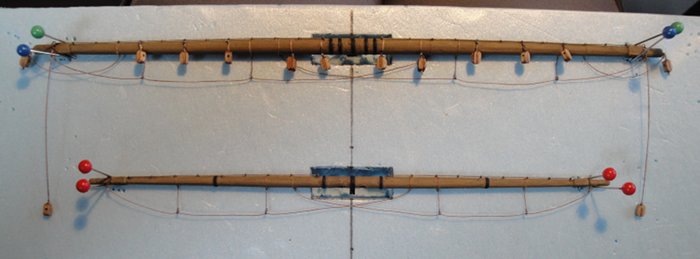
The pretty much complete Yard sets - Fore, Mizzen and Main. The Stuns'l booms are still not attached.

The ringbolt for the Chain Sling.
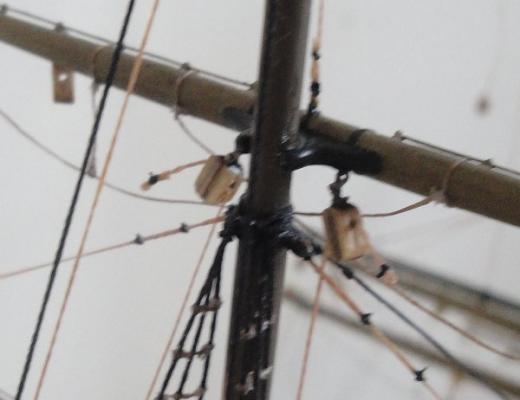
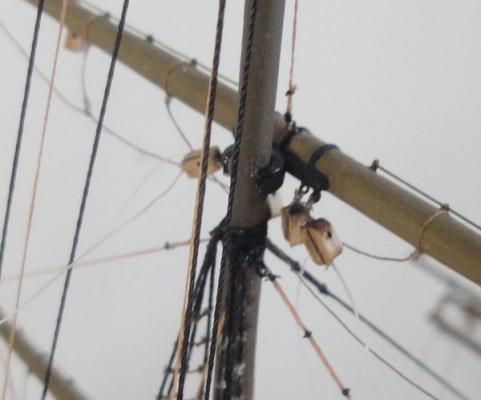
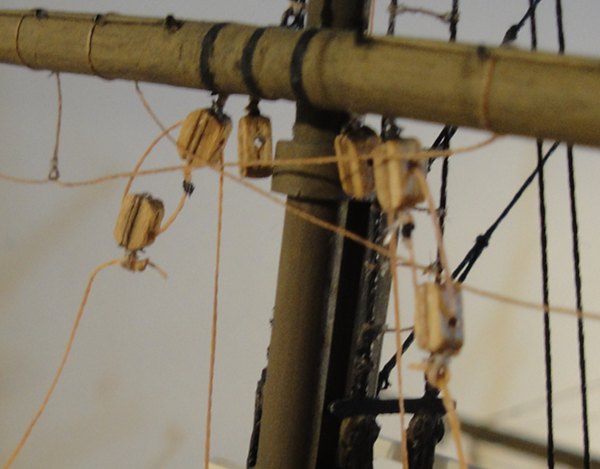
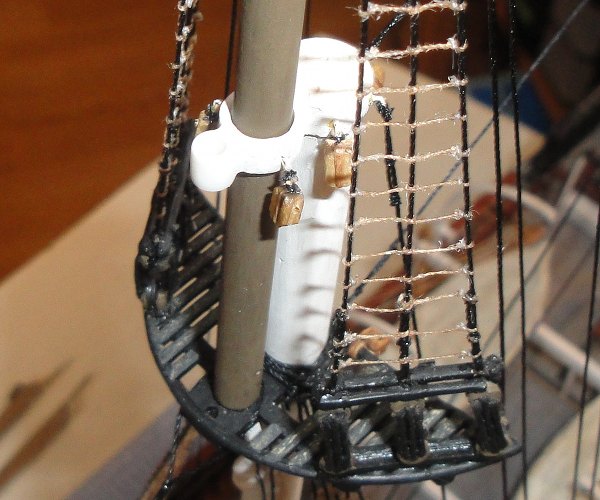
Tying blocks to the mast top.
-
John & David - Thanks for looking in and for the kind words of support
As for my 'Loud Shirts' I have chosen to stow them for a time ... I was receiving complaints from Chris Hadfield on the Space Station that I was glaring out their cameras

And here we are at the stage where I started attaching the blocks to the Yards. Some were tied around the jackstay lugs, others were tied around the Yard itself.

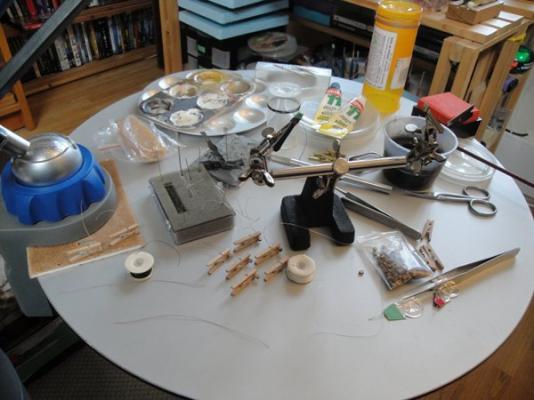
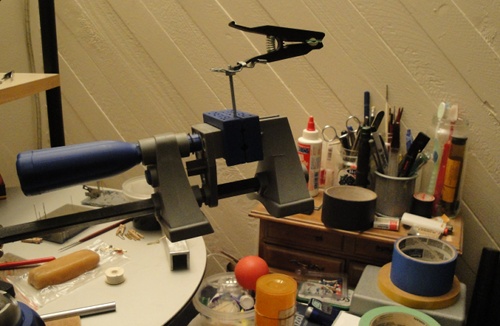
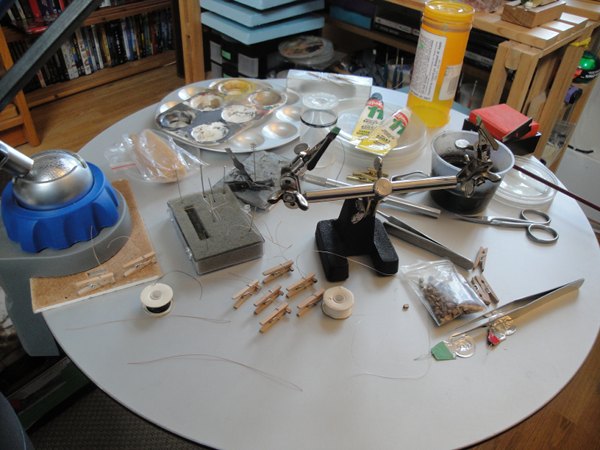
A view of my little 'rotating' table work area (this table has since been re-assigned as my nightstand).
So many little blocks. I was working off the diagrams in Underhill's book so I went for the whole 'shooting match' including blocks for bunt lines ... which I didn't need to add in retrospect ...


-
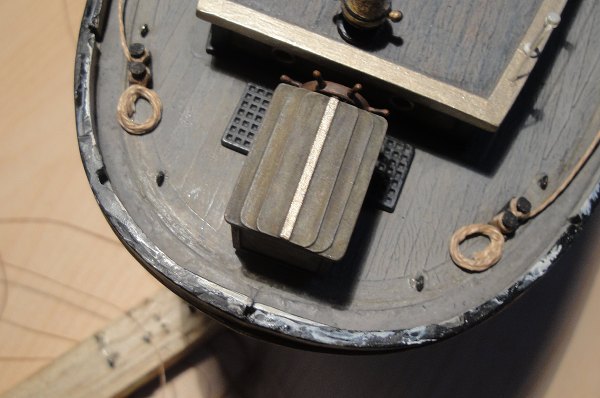
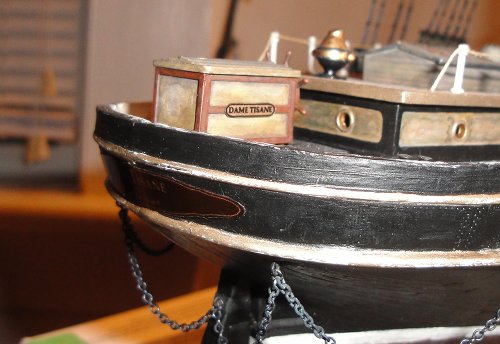
Views of my placement error on the breadboard decals.


Additional rigging 'eyebolts' attached to the mast tops.
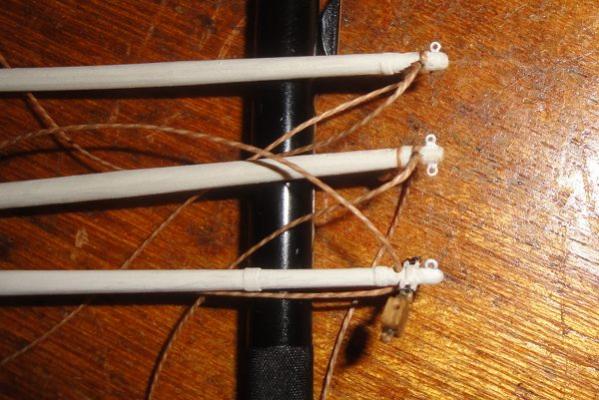
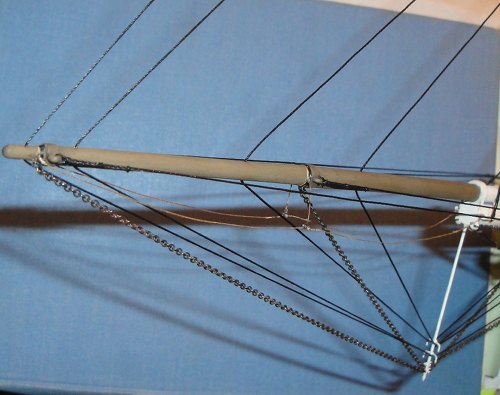
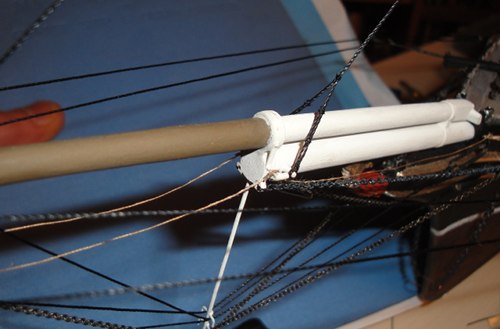
Putting on the 'footknots' for the bowsprit footropes.
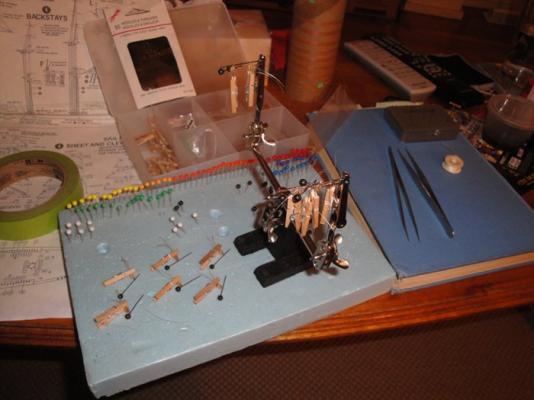
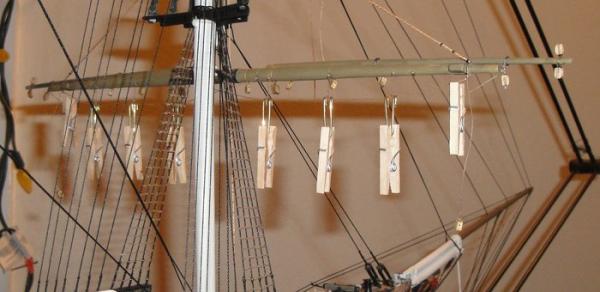
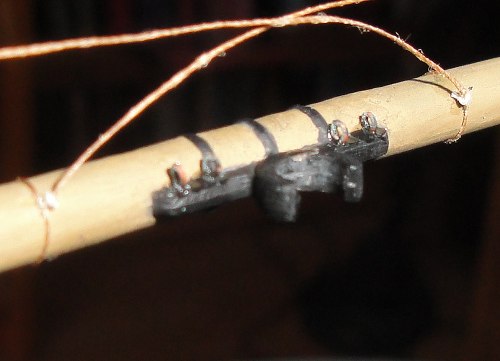
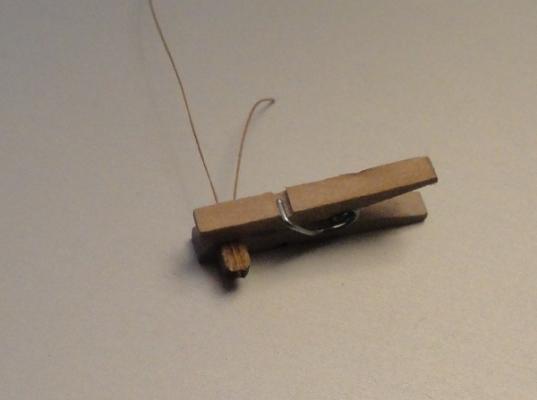
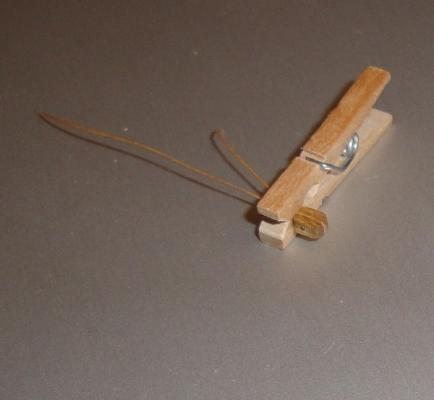
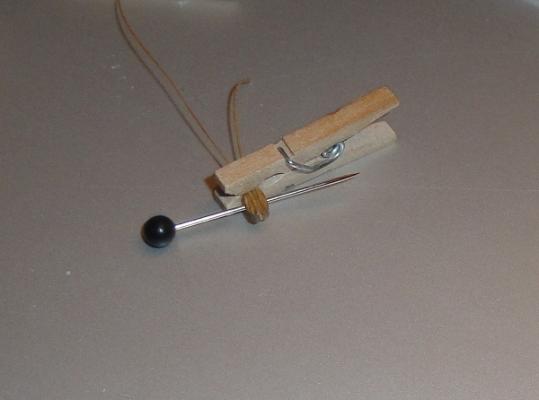
The 'Yard Rigging Jig' which is a platic clothes pin affixed to a bolt clamped into a Dremel vise.
Blocks ready to be tied and seized to the Yards.
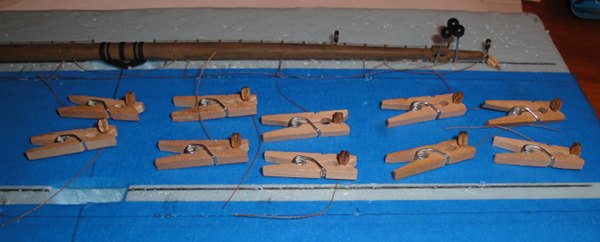
Attaching the blocks to the Yards.
-
Starting to think about Yards and the rigging attachments.

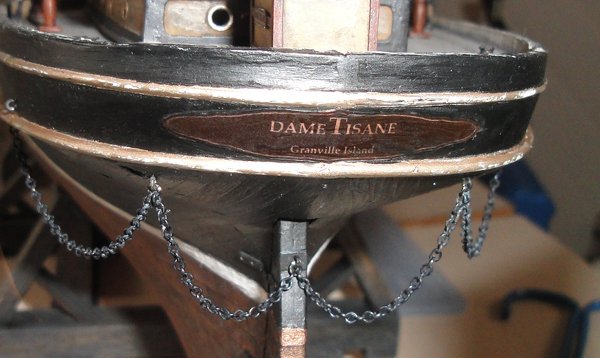
Stern decal in place.

The 'misaligned' breadboards once again.
A 'natural light' shot of the Wheelbox.

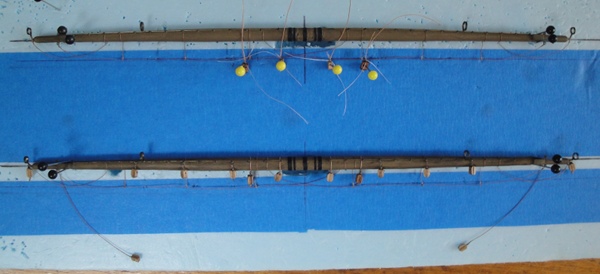
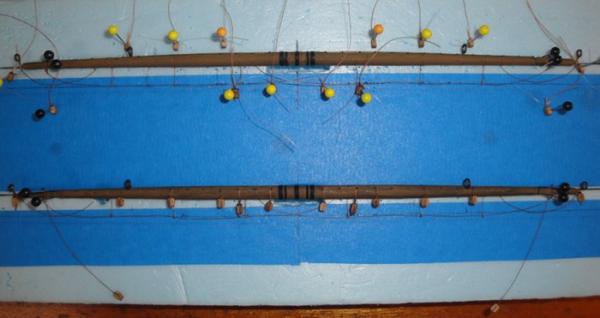
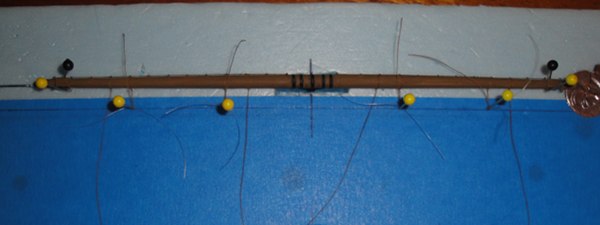
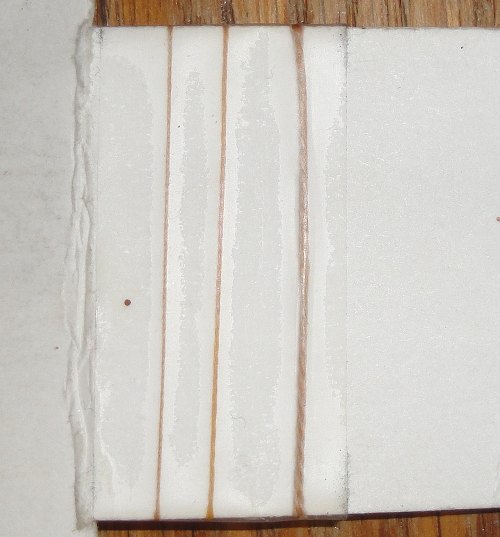
The re-do of the footropes on the Yards (these are the Mizzen yard set). The blue stuff is 'hard' insulation foamboard - kind of like 'dense' styro and it proved to be a great working surface for this kind of stuff.


'Flash light' shot of the stern decal to highlight the difference between the ink jet and the paint. Somehow this contrast disappears in natural light - a 'Happy Accident' which was not planned at all.
-
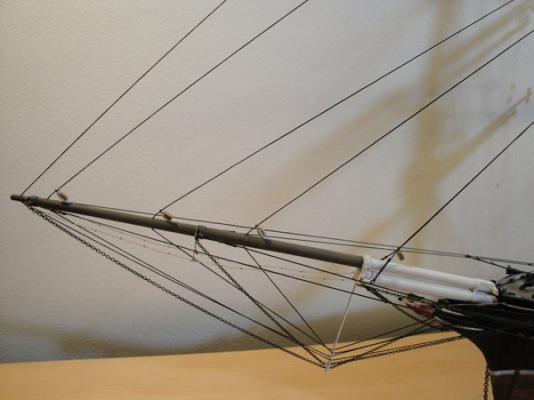
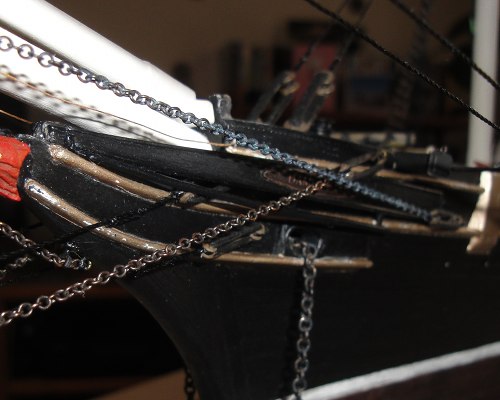
The Bowsprit Footropes in place but I have yet to add the 'foot knots'.

Working on the 'name plates' on the sides of the Wheelbox.
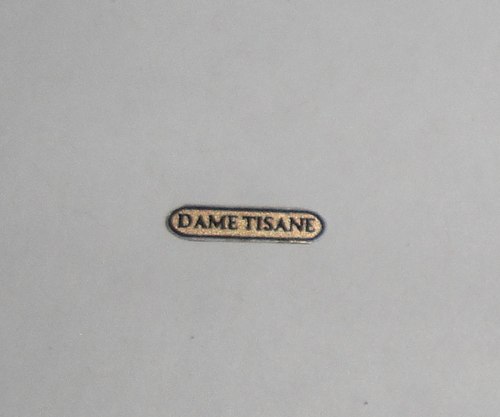
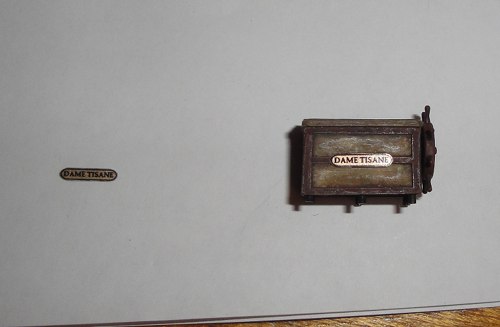
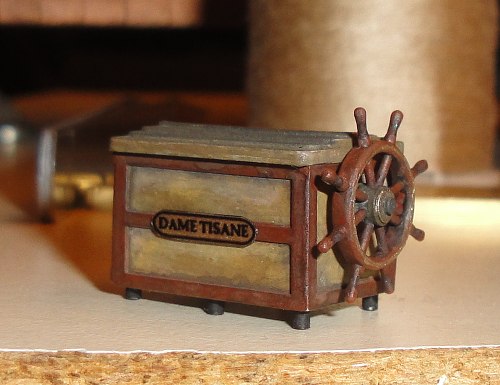
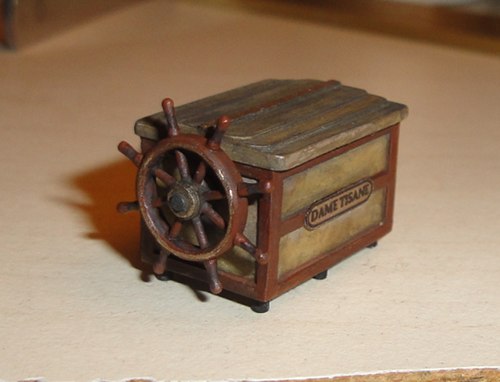

And affixing the nameplates on the breadboards. This is where I made the Huge mistake of Trusting my first set of measurements and Not doing a 'dry fit' test ... big oops but one which I was not able to correct. You will see later why this is a mistake.
-
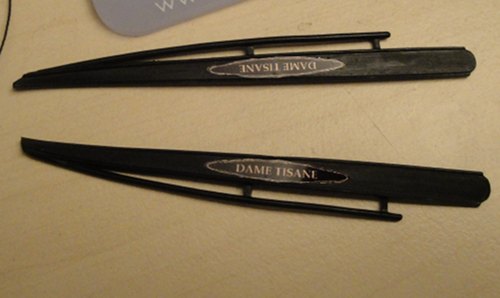
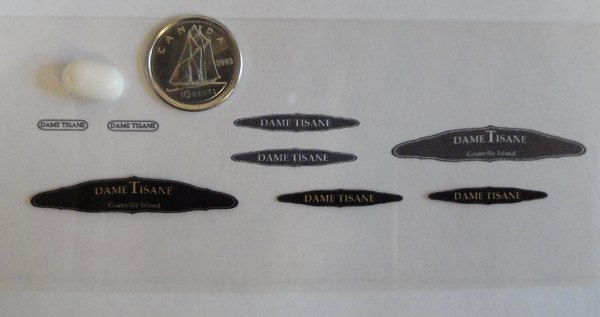
Producing 'home made' decals turned out to be involved but not impossible. I first 'set up' the images using GIMP (a freeware version of Photoshop) and this involved lots of printing and checking. Once I was satisfied with the 'templates' I then printed them onto 'printable' transparent plastic sheets (available at stationary and craft shops).
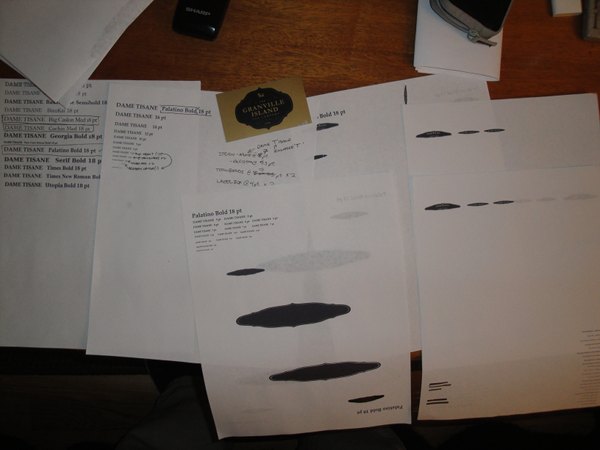

Because I was dealing with 'gold' and ink jet printers have issues with gold I chose to utilize the transparency and add the gold colour behind the printed image.


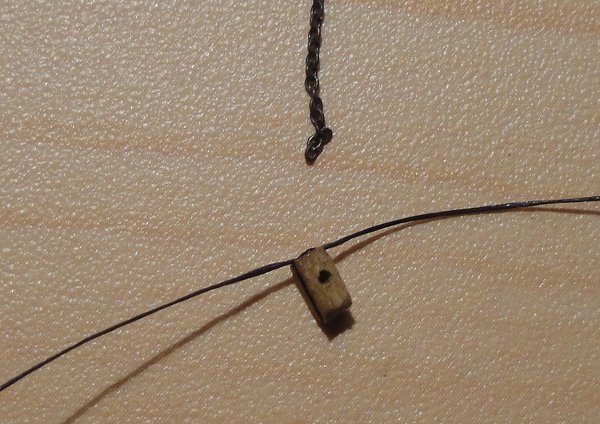
Scale view using a Canuck dime and (what else?) a Tic Tac. For reference purposes - the 'surface' of the transparency where the ink jet ink was printed was 'sealed' with a carefully applied coat of clear matte.
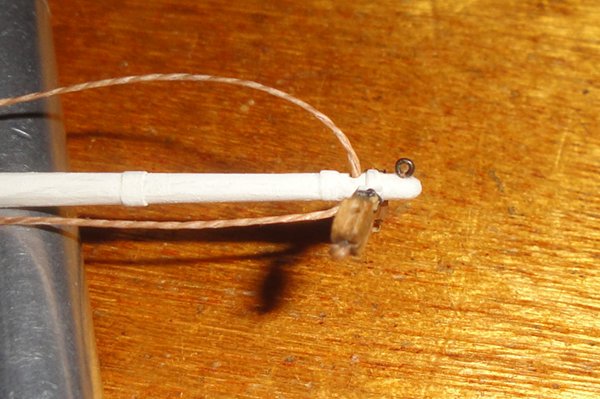
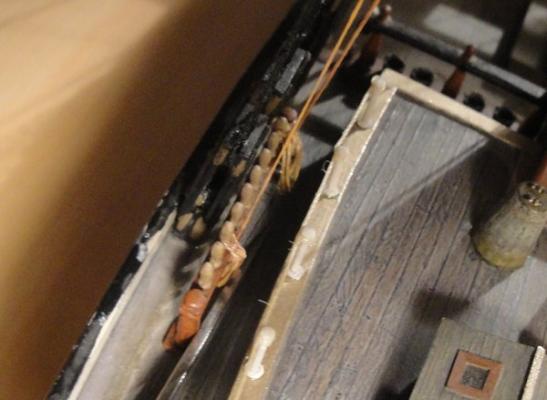
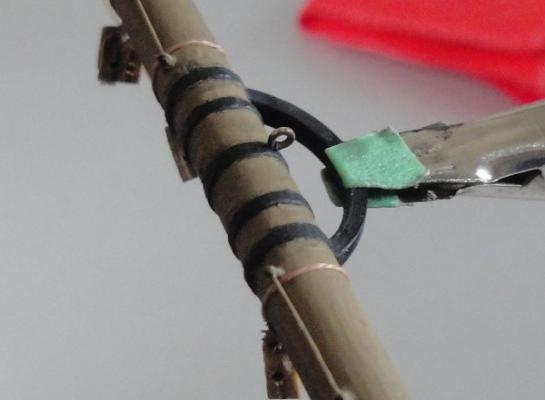
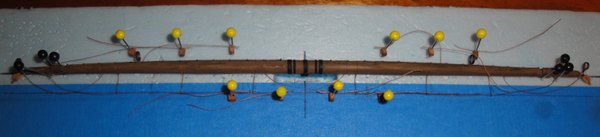
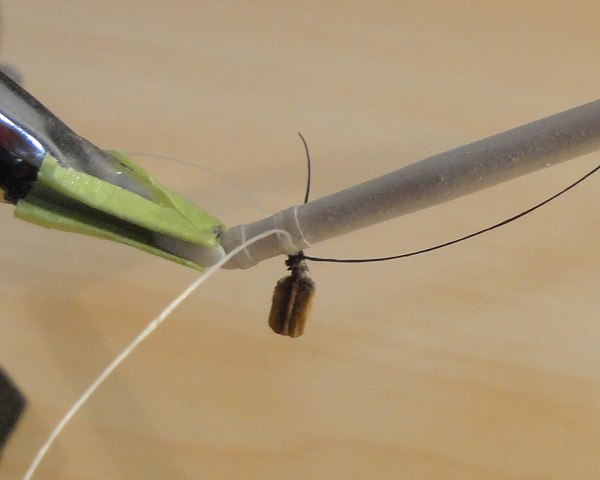
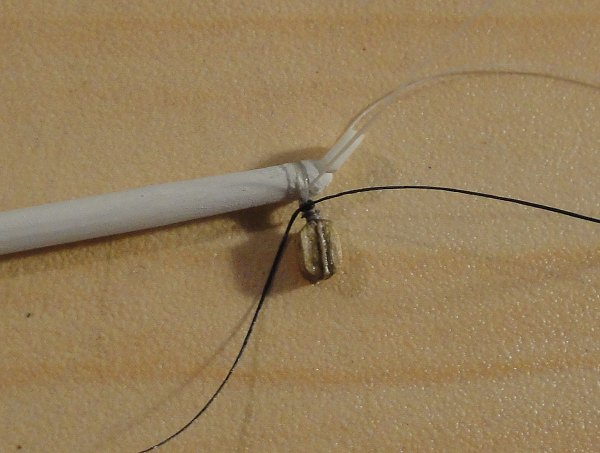
Somewhere along the line I decided I wanted to include the bowsprit footropes. At first I was worried but it turned out to be not too difficult, just touchy. Here's the stirrups being 'tied on.'
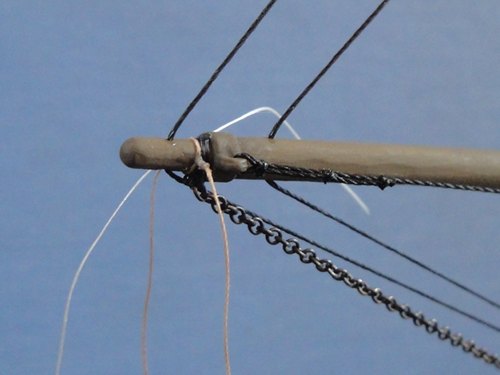
"Seizing' the 'eyes' in the ends using needles.
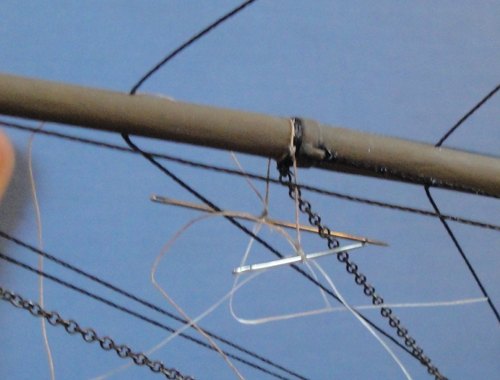
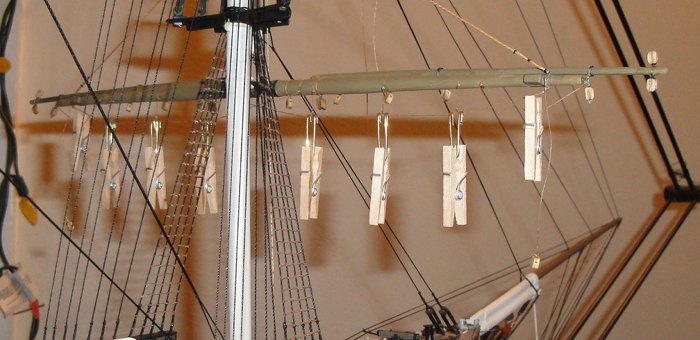
Footropes passed through and then 'weighted' to create the proper hang effect.
- avsjerome2003 and 3qq
-
2
-
David, Popeye & David - Thanks for your kind words and support
And thanks for the photo 'Sid' David - it is an inspiration.
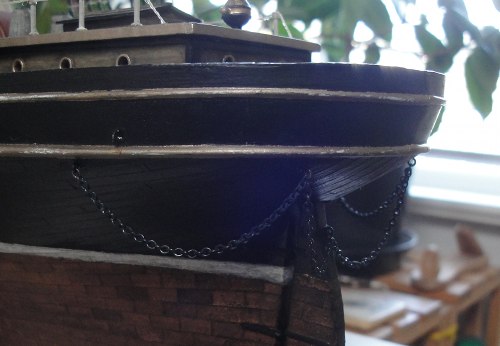
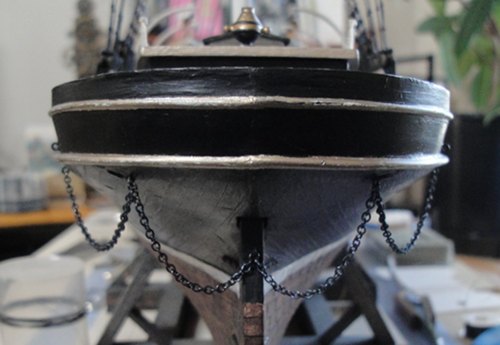
To continue with the reposting ... here are some views of the Fore and Aft standing rigging.
Attaching the chains aft ... these turned out nice.
Rigging lines in process, before dyeing and after in some cases.

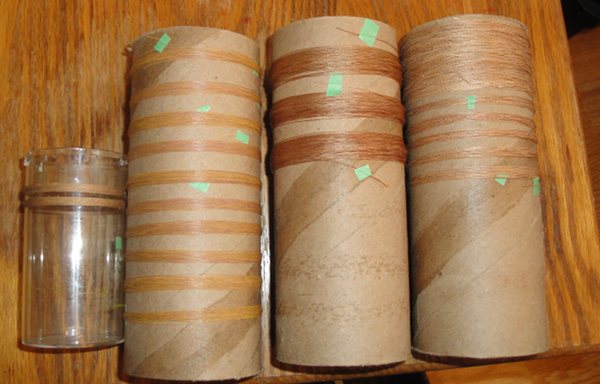
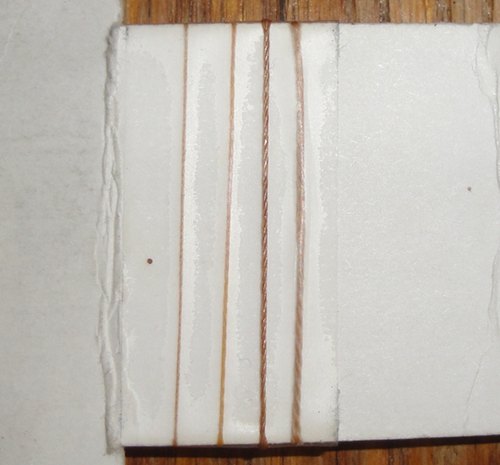
Comparison of the sizes of the rigging lines.
- 3qq and avsjerome2003
-
2


USS Constitution by RadMan – Revell – 1:96 – PLASTIC
in - Kit build logs for subjects built from 1751 - 1800
Posted
RadMan - I had a situation with my build where the copper was already painted by the previous builder and had been somewhat 'beaten up' by time and being wrecked. What I chose to do was to 'selectively weather' the copper plates by going in with washes, first wide and then after the detail 'plate by plate' wash to create the effect of different alloys and also the look of 'repairs' done over time.
If you still choose to go for the 'plate by plate' weather effect I recommend this method as being less 'involved' than trying to create the effect right off the bat. What this would entail is doing the whole of the copper first and then adding the details after. This might seem like a lot more work But ...
By working on the 'complete' coppering you get a view as it goes of the weathering itself, giving you the control to adjust and modify the look as you go along the hull. Also, the taping of individual plates might not seem as unified as the distinct tones and shades would be a bit too contrasty.
The wash I used was a simple mix of matte black enamel or very dark matte grey diluted with thinner. I mixed up batches of it at a time and then gave the whole a thin wash to cut down the shininess of the copper paint. Then I went in with a small brush and started 'shading' plates here and there. Part of the process was to let the wash 'bleed' along the edges of the copper to add the 'depth contrast' effect. Then I repeated the procedure on a spot by spot basis, trying to imagine a history behind the weathering ('this section was re-coppered recently, it won't be as dark ... this part is old and is darker ... the 'water darkening' extends here ...'). I also 'wiped down' the odd place here and there with a thinner-dampened cloth.
Here's some links to my build log. This one shows the coppered hull before weathering - http://modelshipworld.com/index.php?/topic/272-cutty-sark-by-sailcat-revell-plastic-196-rescue-kit-bash-morphed-to-dame-tisane/?p=9023
This post has images of the weathering in process - http://modelshipworld.com/index.php?/topic/272-cutty-sark-by-sailcat-revell-plastic-196-rescue-kit-bash-morphed-to-dame-tisane/?p=13571
This post has some close-ups of the coppering detail - http://modelshipworld.com/index.php?/topic/272-cutty-sark-by-sailcat-revell-plastic-196-rescue-kit-bash-morphed-to-dame-tisane/?p=13578
I hope that some of this is of some use to you