Panagiotis
-
Posts
73 -
Joined
-
Last visited
Content Type
Profiles
Forums
Gallery
Events
Everything posted by Panagiotis
-
 Dear all. I feel the need to ask for your apologies because, although your wide acceptance and your kind words on my models, I can't be as much I would like in touch with you. You see I can speak and write only in German and I feel bad unable to respond direct and in personal on your comments, besides I might present myself at least as snob on other mates' models... So, I'm here, I watch and admire your models but I have to rely on the help of my good friend Thanasis to write you in English. Thank you all Panagiotis (by Thanasis)
- 116 replies
-
- 4
-

-
- kilkis
- mississippi
- (and 2 more)
-
... ... ... Thank you all who had the kindness to follow me in this journey. I'm leaving you for now but keep in mind, I have already something else in my mind... Thank you Panagiotis


- 116 replies
-
- 12
-
-
- kilkis
- mississippi
- (and 2 more)
-
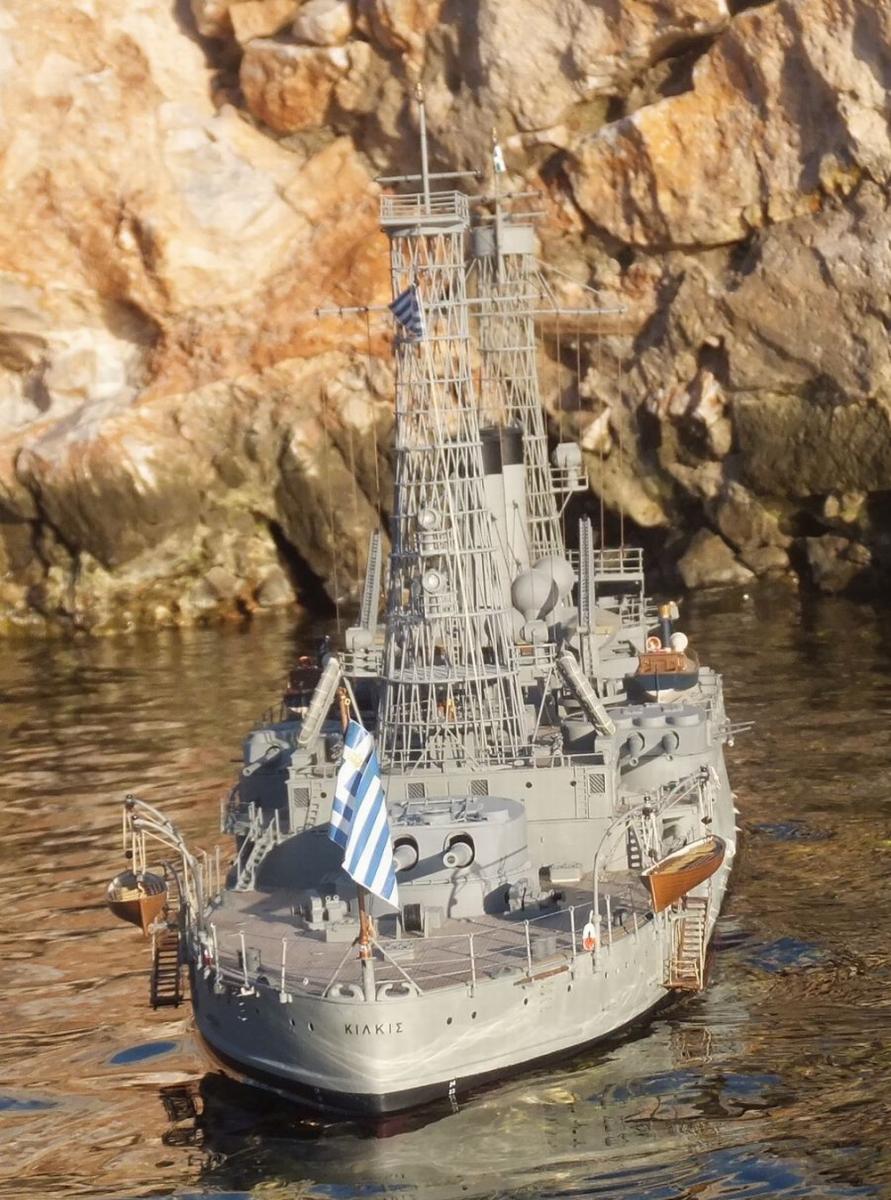
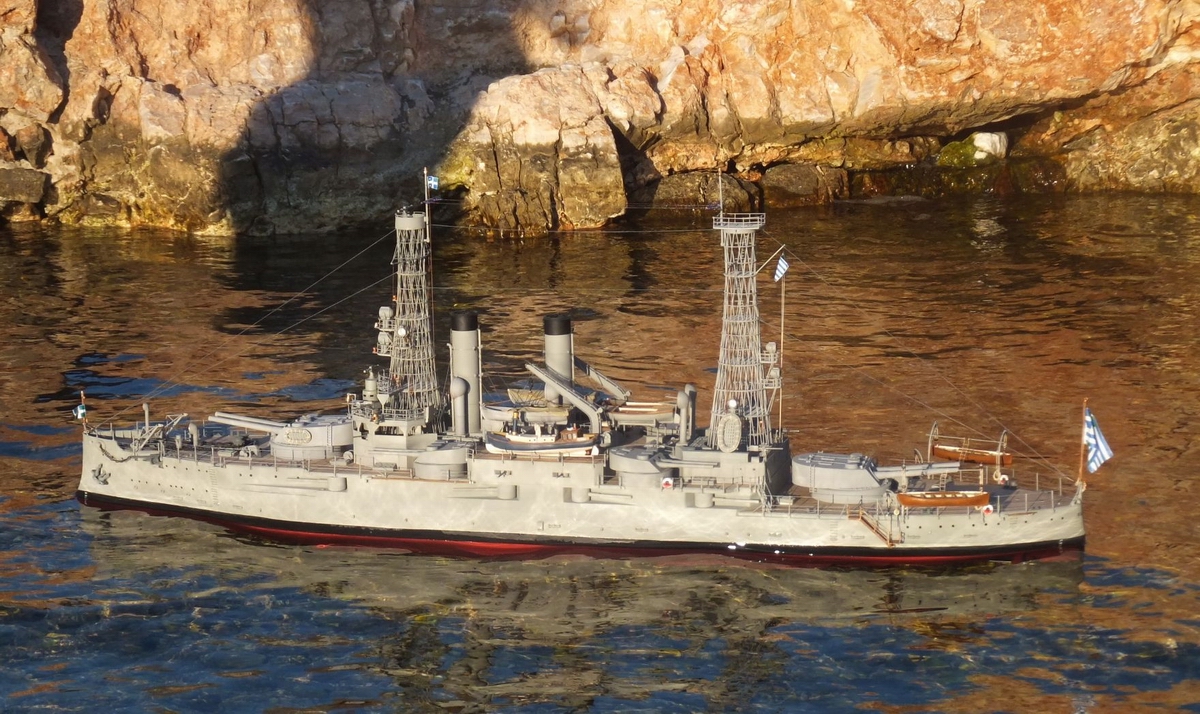
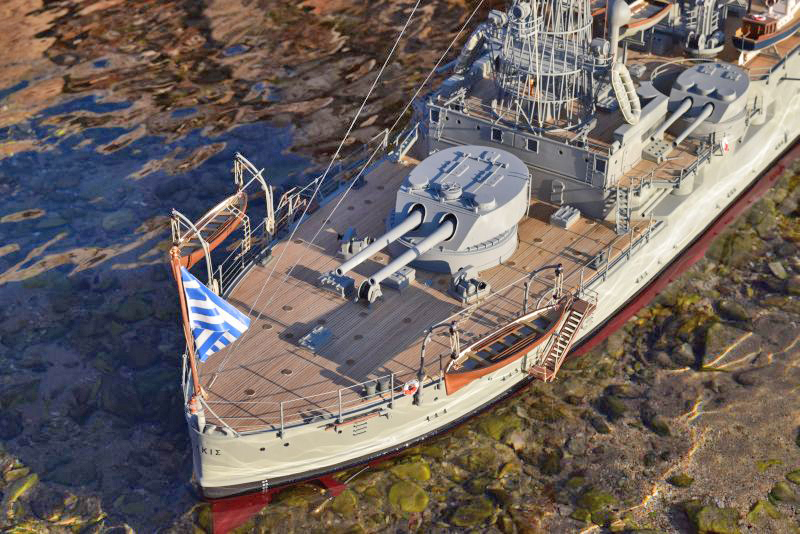
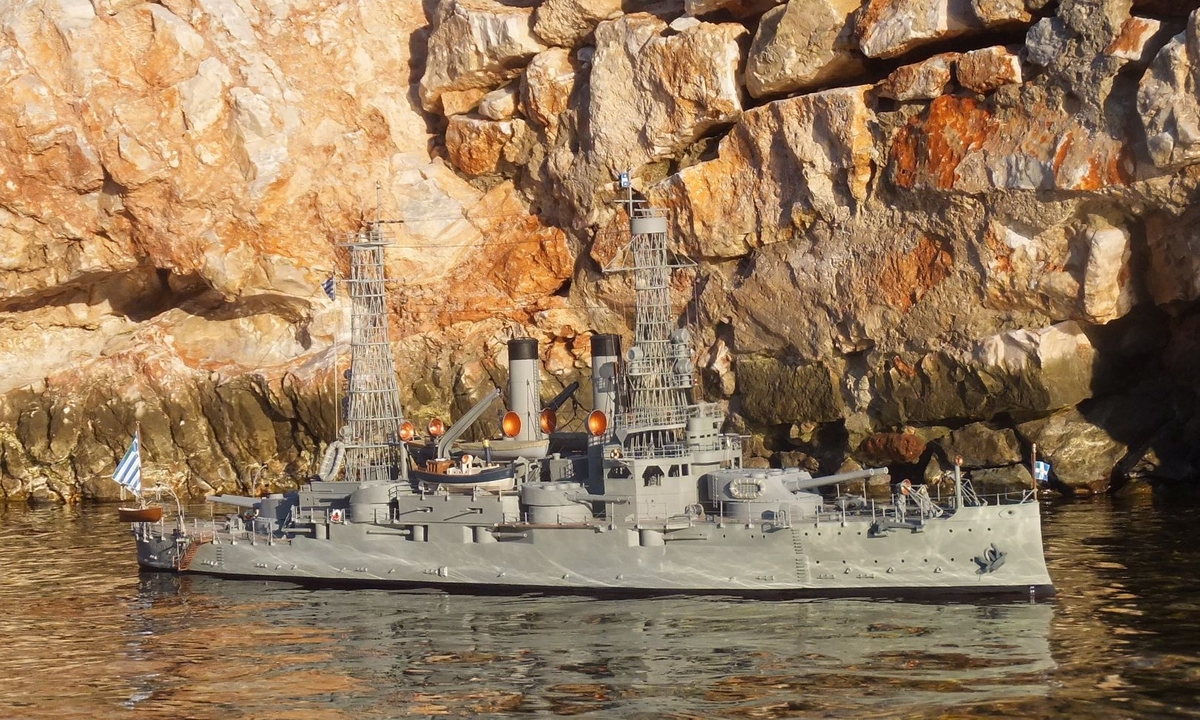
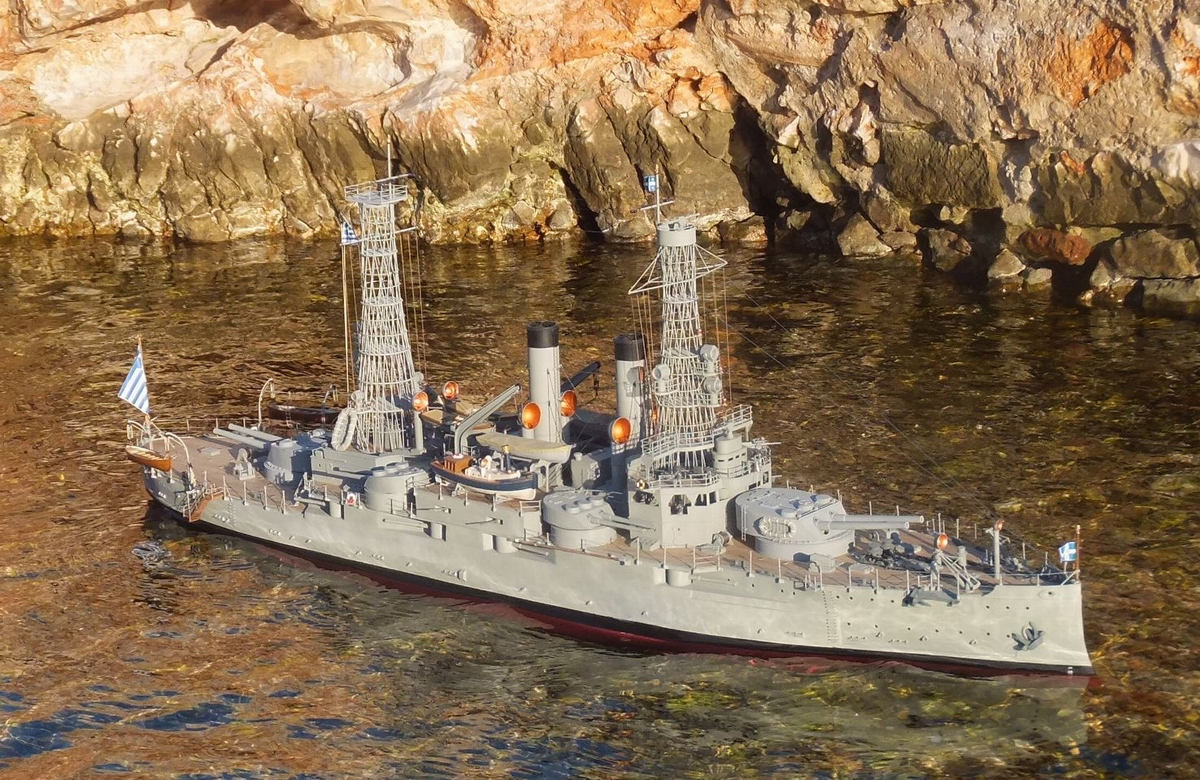
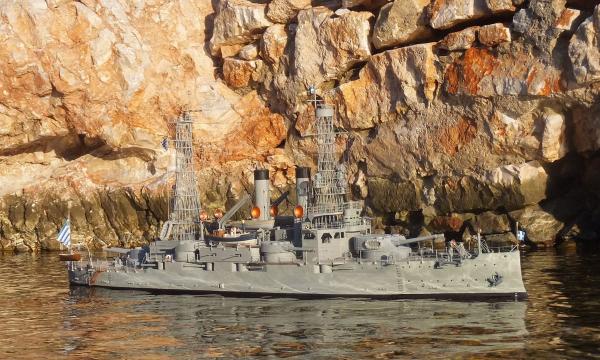
Hi all mates. I don't know about your countries but here, even some days before Christmas the weather seems rather like starting autumn... So last week I had the chance to test my model in the sea and as I had promised you, you can see the results in the below photos. Home and seashore preparation ... And here she goes…. ...

- 116 replies
-
- 11
-
-
- kilkis
- mississippi
- (and 2 more)
-
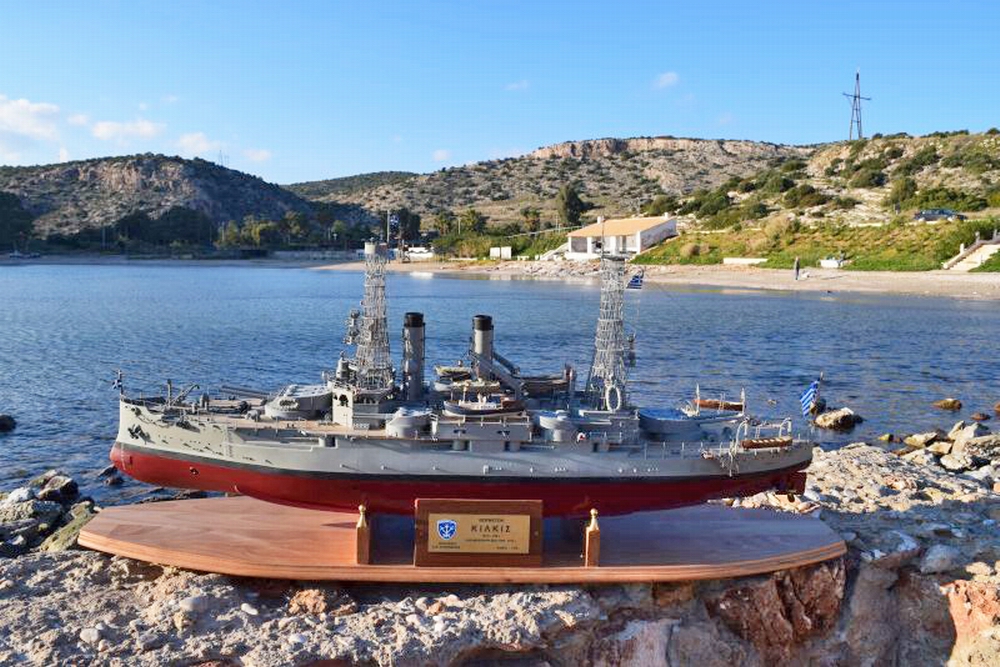
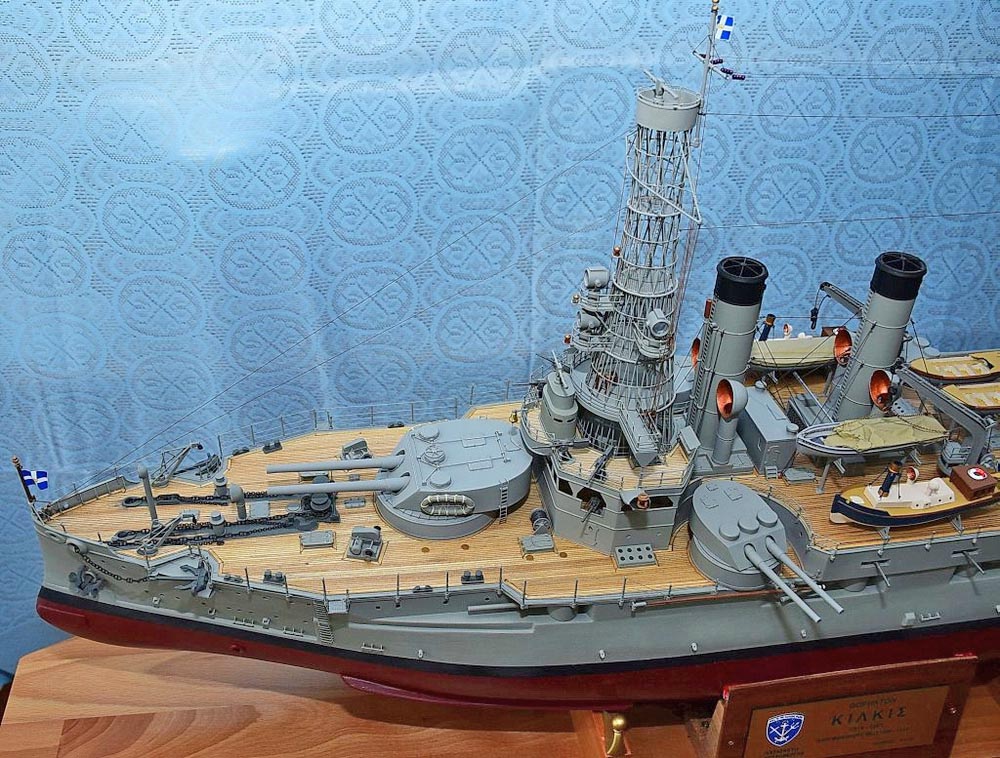
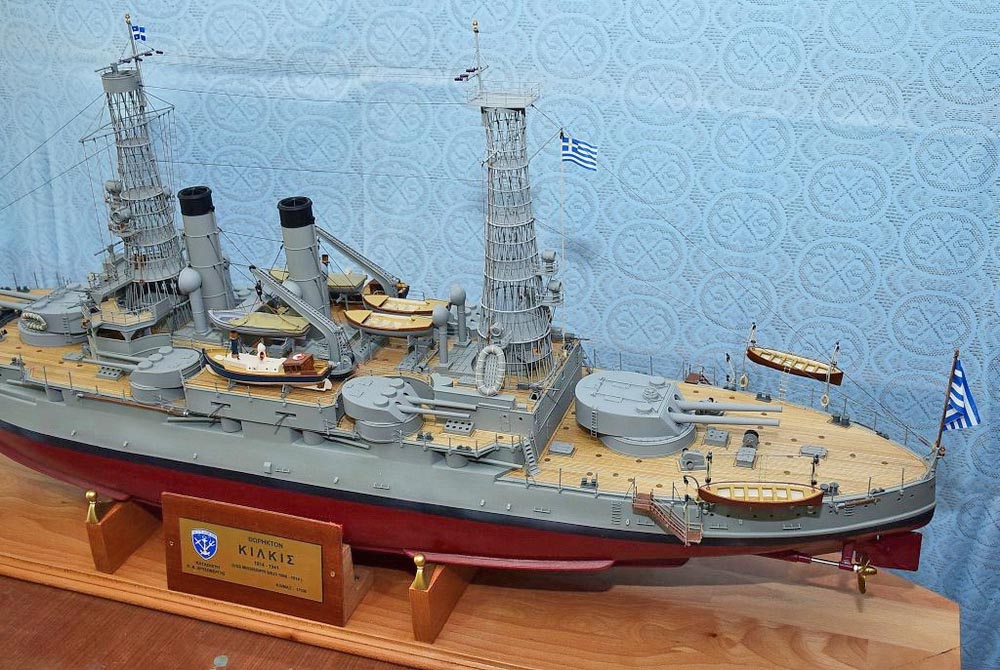
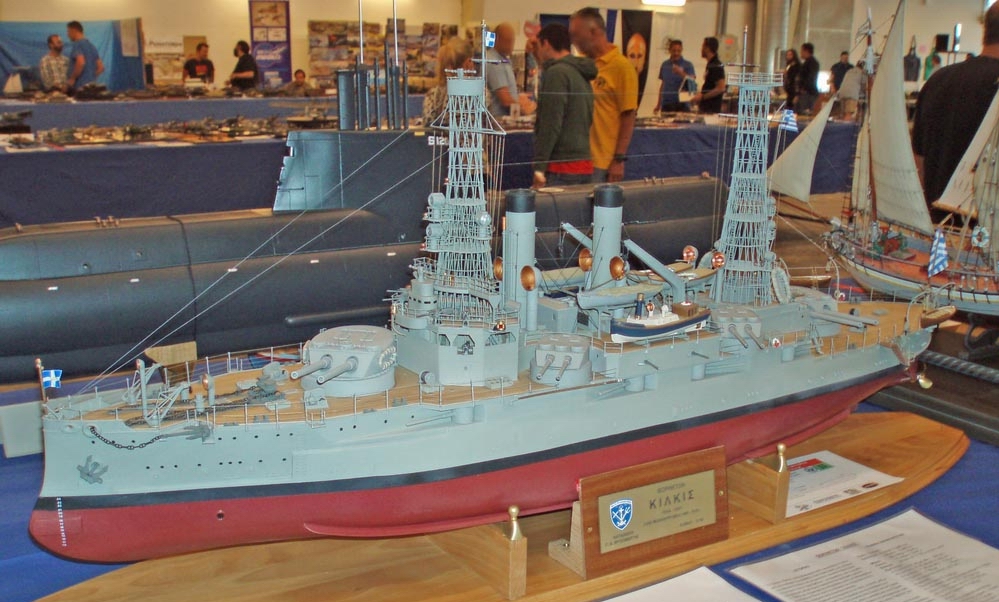
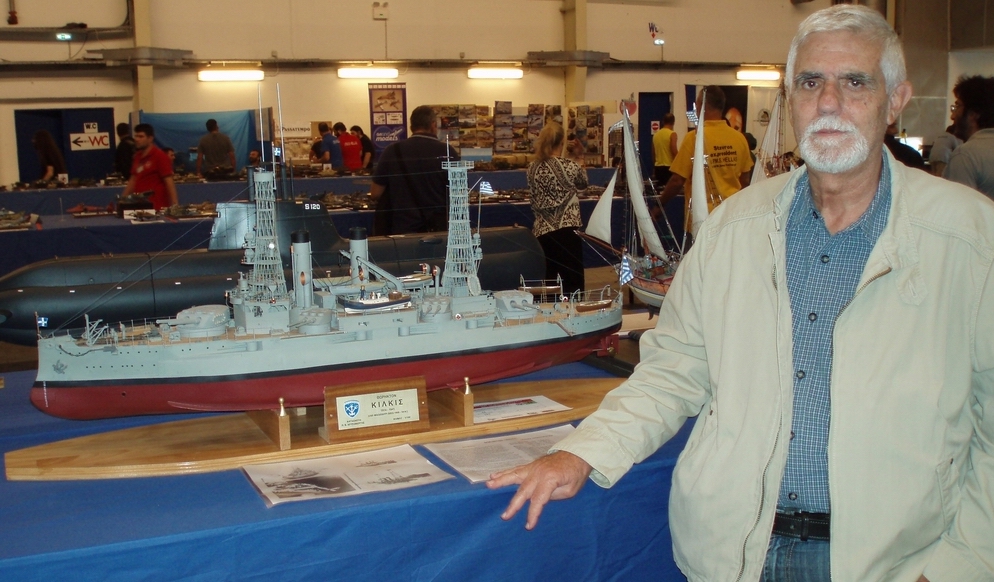
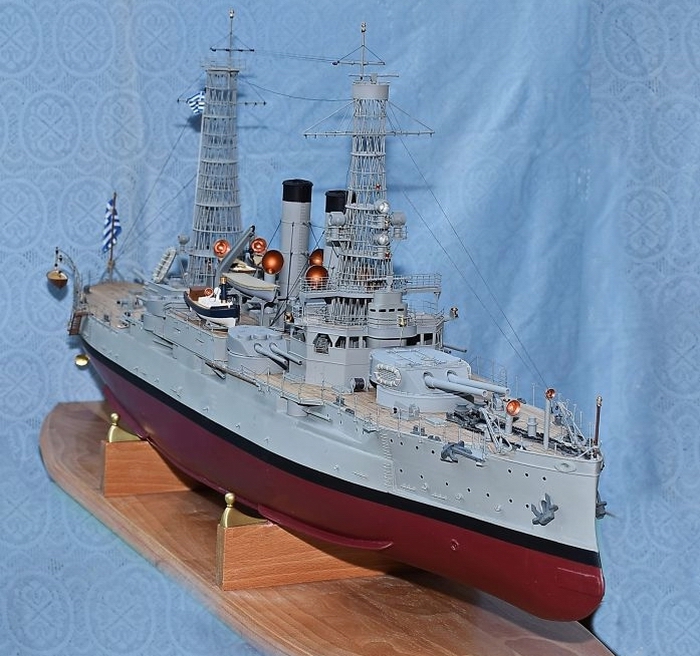
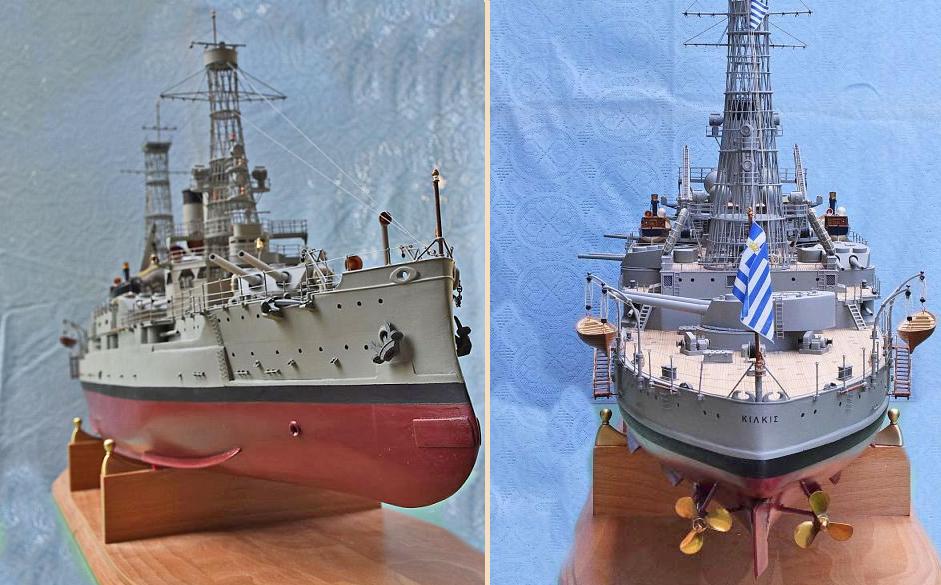
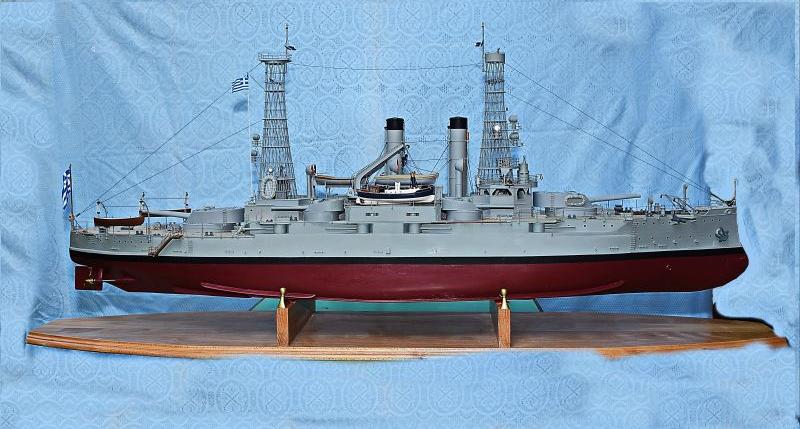
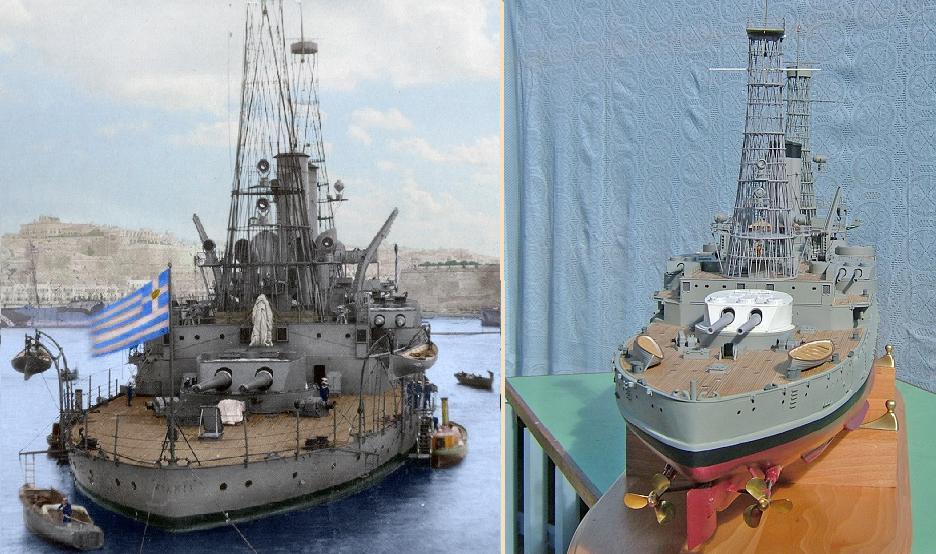
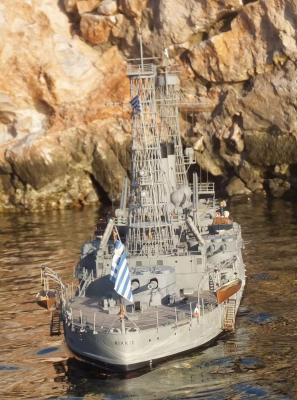
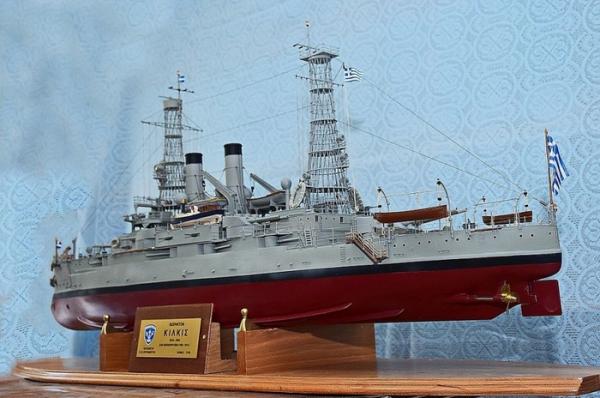
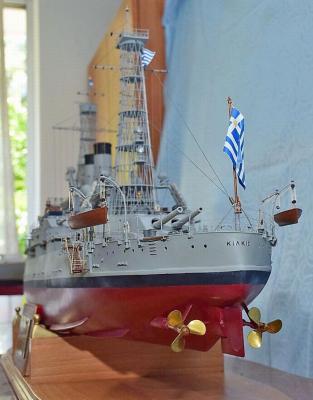
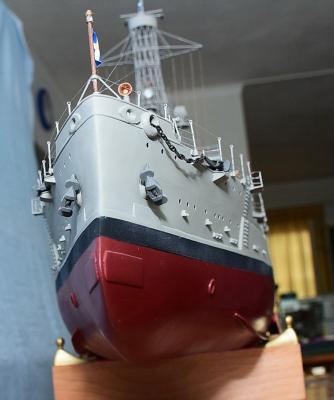
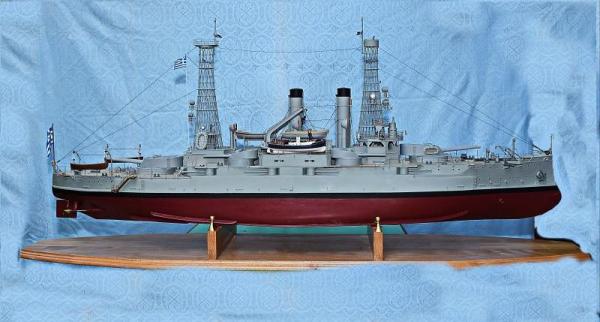
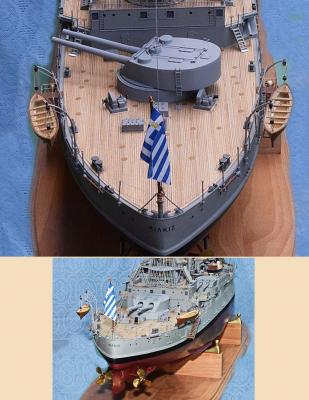
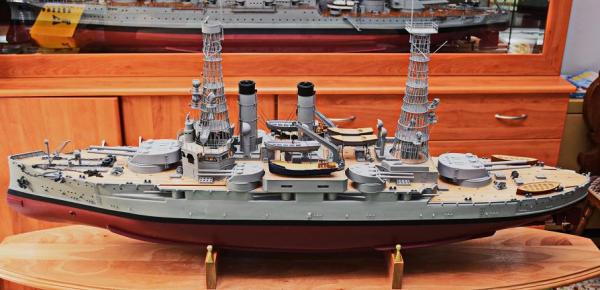
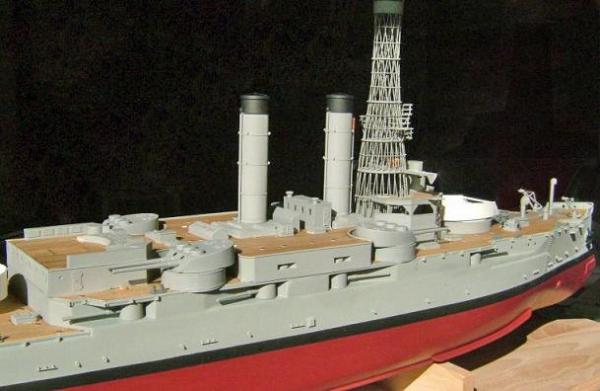
Hi all mates. Thank you for being here all this time but unfortunately I'm not coming back with a test in the water. I spent summer with family and grandchildren and by the time the model was ready, the winter had already started. I don't know when a good day will let me see my model in the water but I promise you'll be just the next ones who will join my joy. For now I post some photos of the completed model and from my participation in an exhibition. Many thanks

- 116 replies
-
- 10
-
-
- kilkis
- mississippi
- (and 2 more)
-
Thank you all for your comments. Patric, it's safer to look the things on my model...In a nudist beach you might get yourself misunderstood... Thanks
-
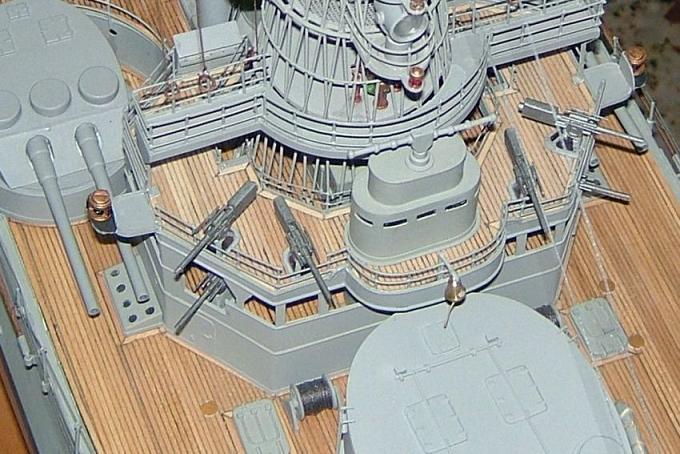
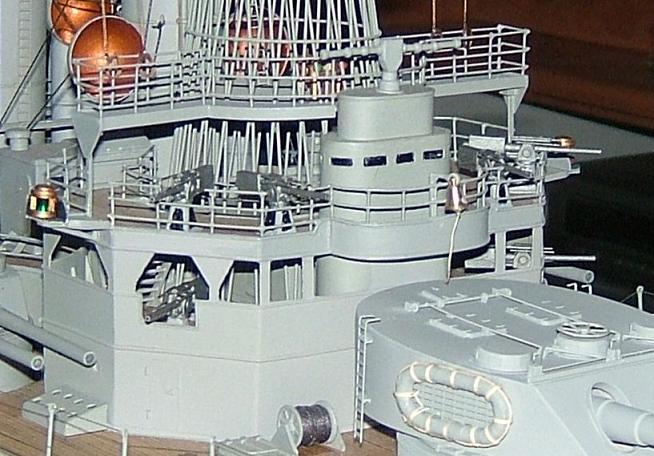
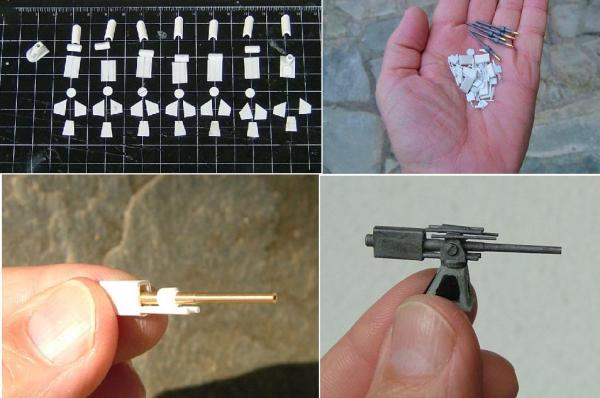
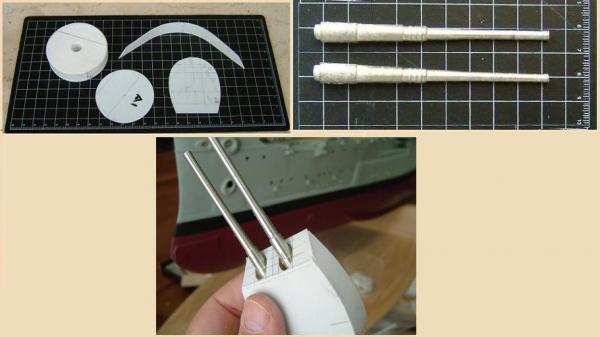
Hi all. Secondary weapons….The last difficult build… There were 12 x 3-inch guns on the real ship, from which 8 were being exposed at the superstructure, while only the rest 4, were being covered… At first I had to build their stands at a truncated cone shape with an extension at the rear. Those stands were made by gluing seven small pieces of plastic. In a second try was constructed the body of the gun with the barrel. The barrels were bought from the market. They were barrels for 6 inc gun in 1:200 scale, which perfectly matched as barrels for 3 inc gun in scale of 1:100 (as the model). The rest of the parts were made by pieces of plastic 12 for each gun… The result... ... What has left for the model to be finished, is only details here and there and certainly a test in the water… I’ll be back with the results, hopefully good. Thanks


- 116 replies
-
- 11
-
-
- kilkis
- mississippi
- (and 2 more)
-
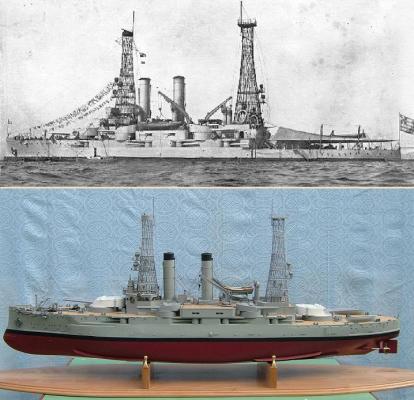
Thank you all for your comments - Likes. Tim the model in the case is the USS ARIZONA and you can see it in my gallery. http://modelshipworld.com/index.php/gallery/member/5339-panagiotis/ Thanks
-
There are still some details to be placed as rails ropes wires but mainly the secondary weaponry. But that will be done when I come back from UK and my granddaughter's christening... Thanks

- 116 replies
-
- 8
-
-
- kilkis
- mississippi
- (and 2 more)
-
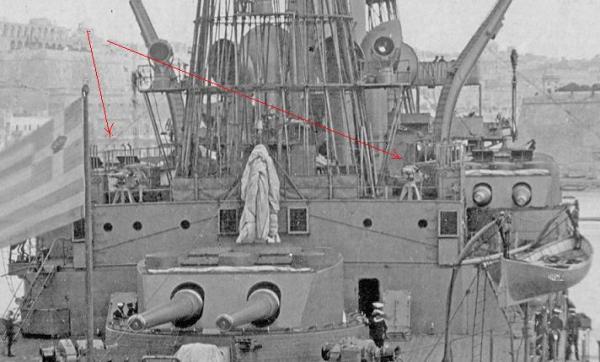
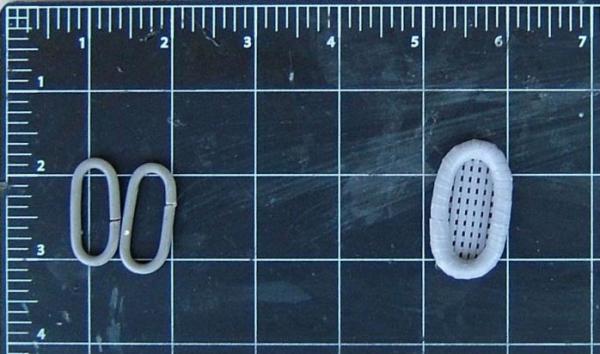
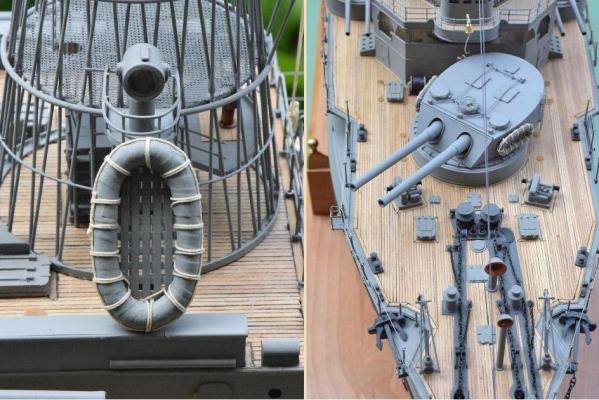
It is not showing in many photos of the real ship but there were also four (4) large life rafts. Two were placed on the sides of the turret in the prow and two others on the sides of the rear cage mast. Those old life rafts used to be constructed by pieces of cork, while they had a wooden floor or a net. A piece of a thick wire gave me the shape of those rafts while the filling of the frame with tape and a wooden floor, took me to a decent (I think) result...

- 116 replies
-
- 5
-
-
- kilkis
- mississippi
- (and 2 more)
-
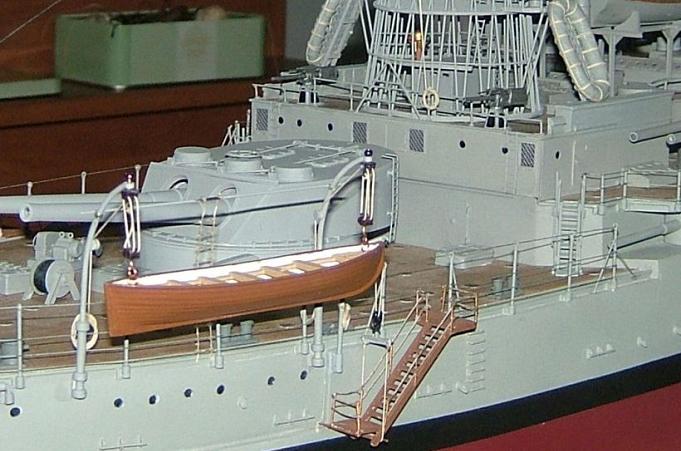
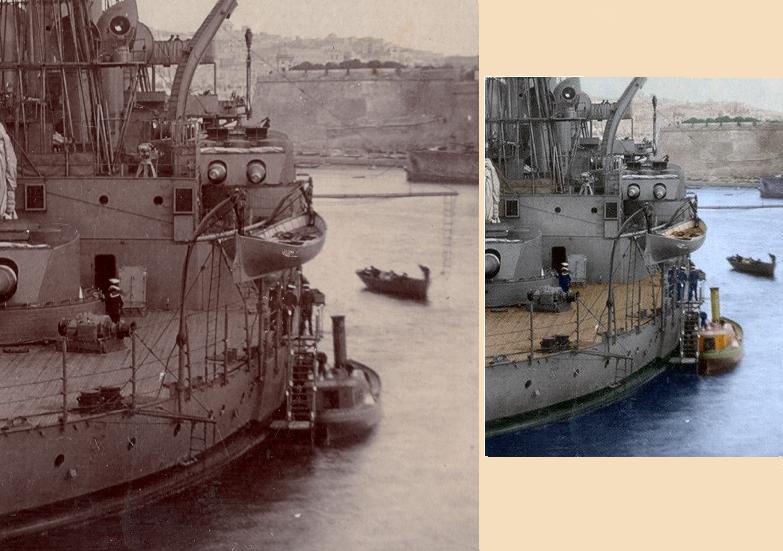
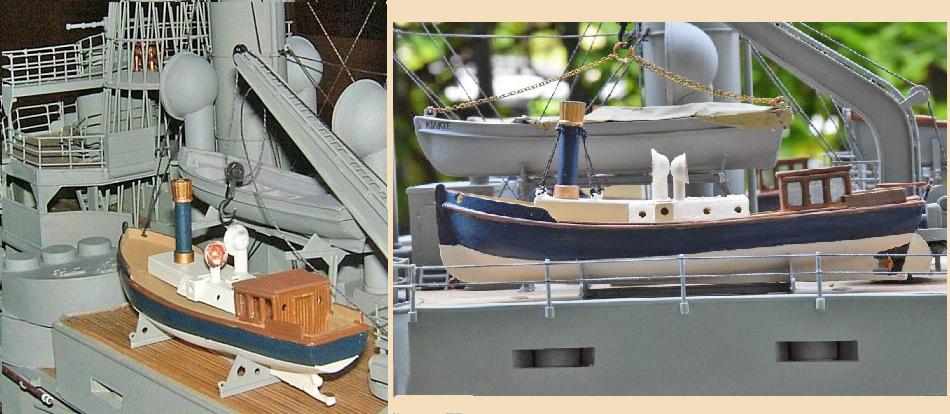
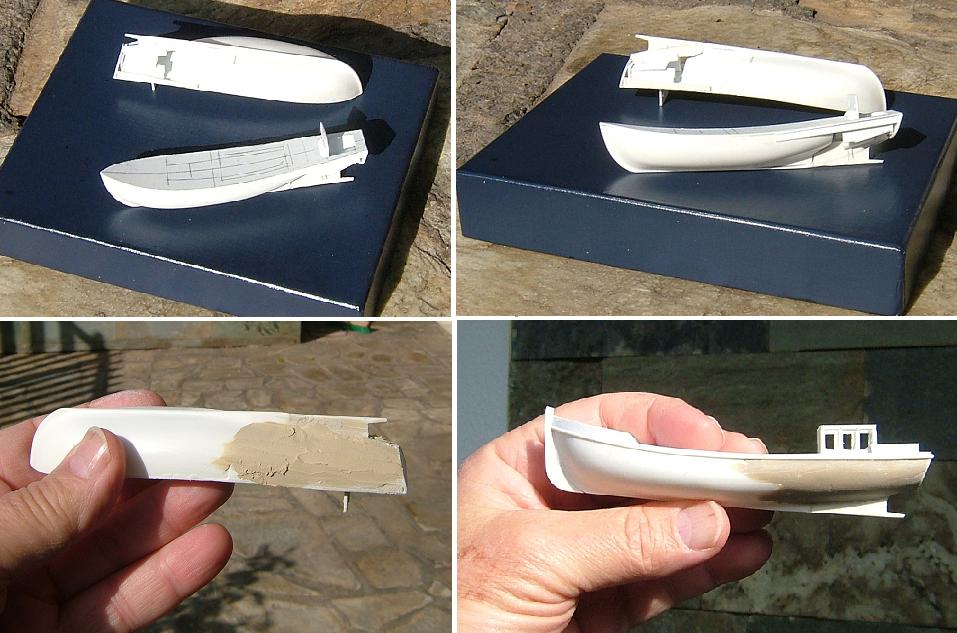
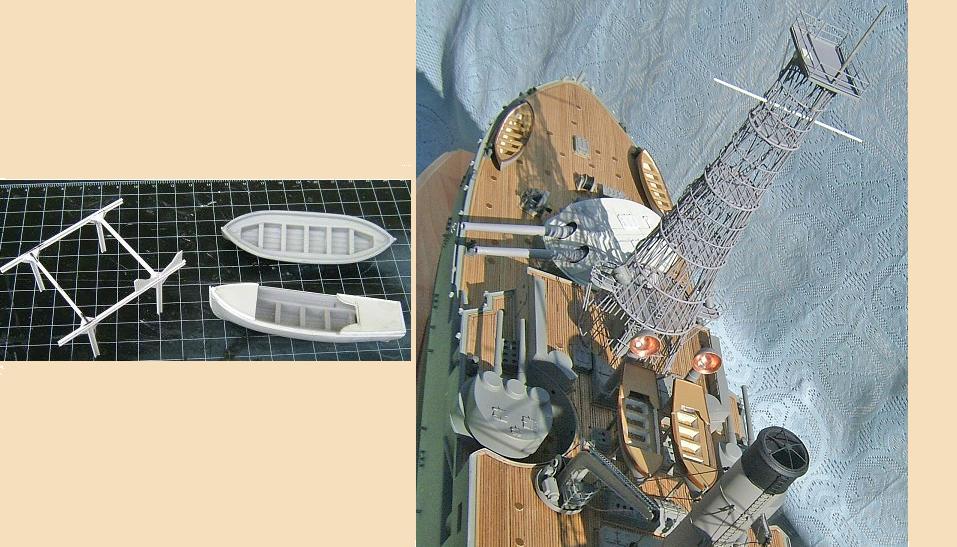
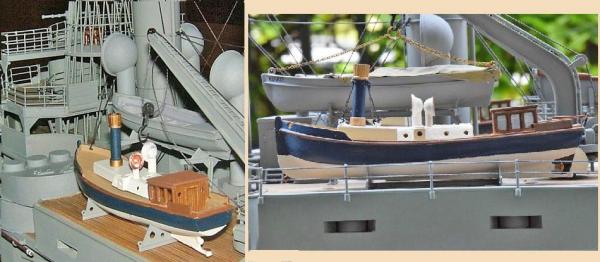
Hi mates and thank you all. I'm almost there but still... As I'm reaching the end, it keeps moving further... Some more progress on details. Again by the help of real photos, I completed the two steam launches, some detailson the upper lifeboats and I set up the stern lifeboats on their cranes. ..............................
- 116 replies
-
- 6
-
-
- kilkis
- mississippi
- (and 2 more)
-
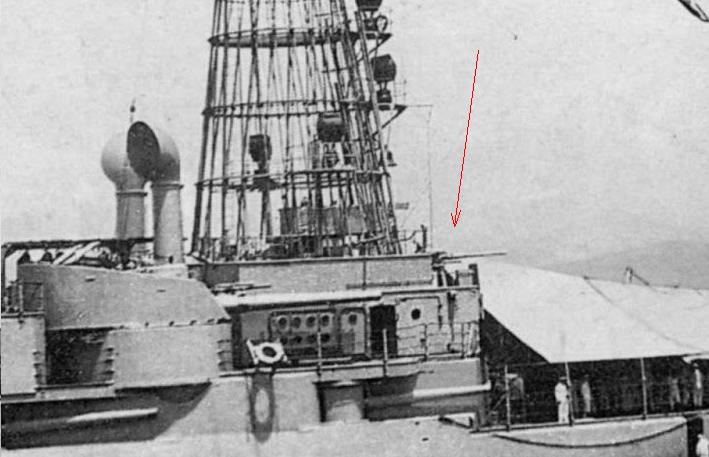
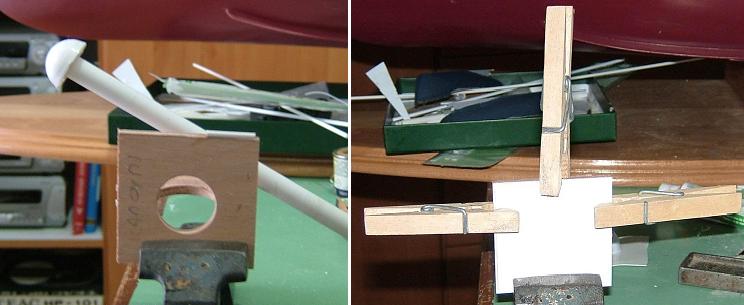
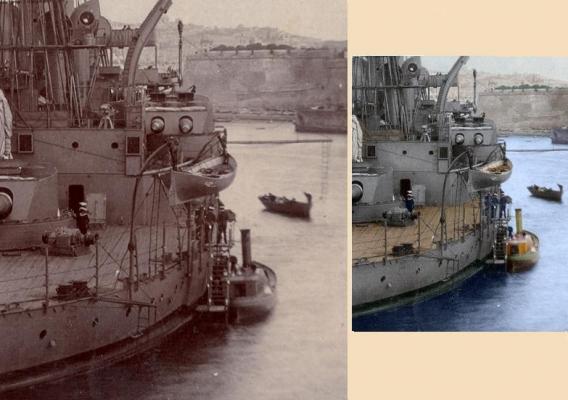
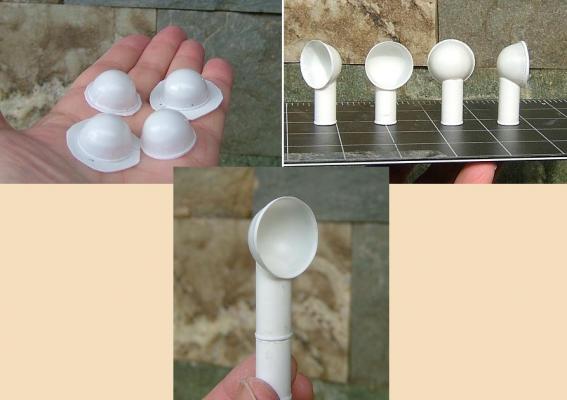
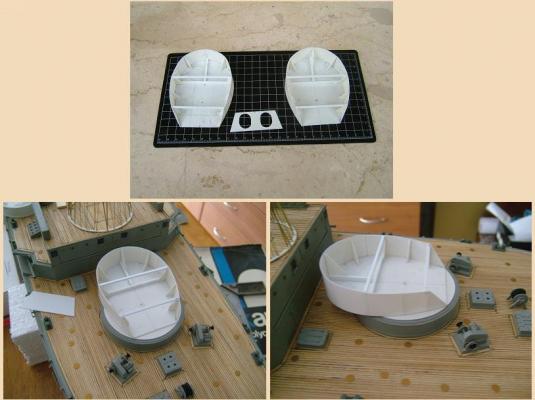
Hi Again. Making progress, I had to build some more cowl vent heads. As you can see in photo of the real ship, there were four more of them in the upper deck. Having noticed their turning ability, I also accepted the challenge. Determining the diameter of the heads I firstly made a curved form from plastic and a related hole on a wooden plate. Then, I shape them by the help of a hot air gun (hair drier wasn’t strong enough) and by pushing thin pieces of plastic with the curved form, on the plate's hole. Eventually I cut the cup shaped pieces and I glued a piece of plastic tube on everyone but only at the half size of the final high. The rest of the tube's high was made from a smaller in diameter tube so in a final combination, the heads have turning ability. Using thin piece of plastic and some putty, I extended two model boats from my spare box and I built the two steam launches of the ship. I have left some details for later... Additional progress on the top of the cage masts, by painting parts (like 12” gun turrets) and by making some small parts, that can’t be placed at this time on the model (like flag poles-boat davits). Hopefully, I think she should be ready by the end of the year. Thank you


- 116 replies
-
- 12
-
-
- kilkis
- mississippi
- (and 2 more)
-
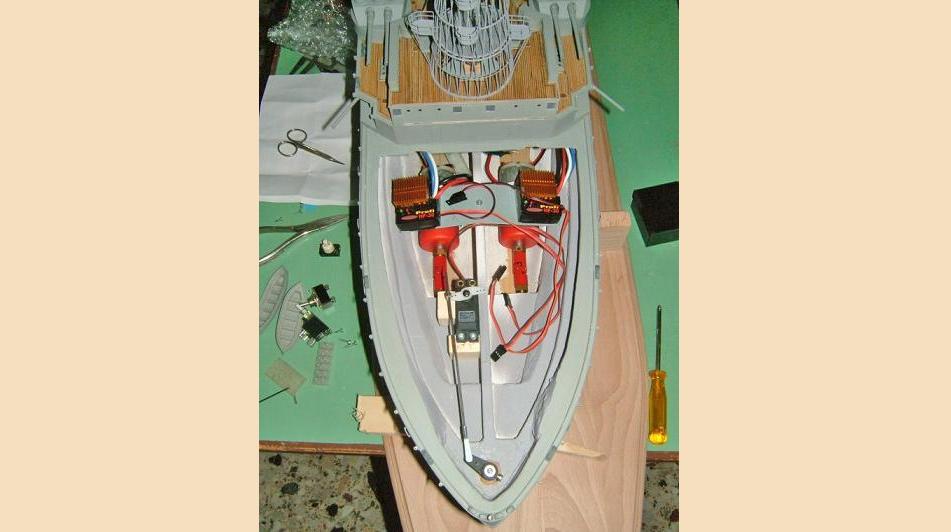
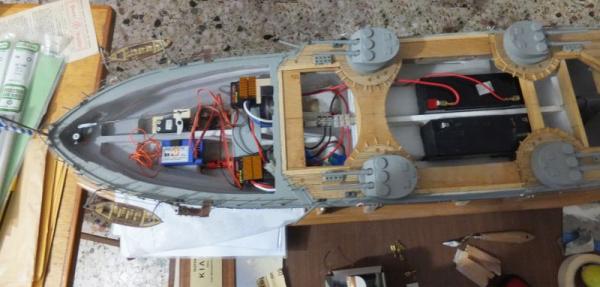
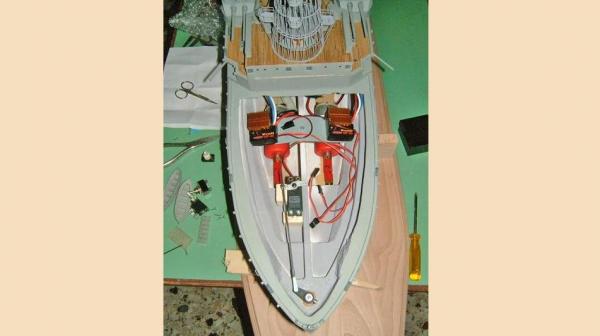
Again by modifying some metal parts of an air conditioner unit (caps) I managed to represent the cowl vent heads. I made also some hard work, placing the RC mechanism inside the hull. That’s all for now… ............................ Thank you

- 116 replies
-
- 13
-
-
- kilkis
- mississippi
- (and 2 more)
-
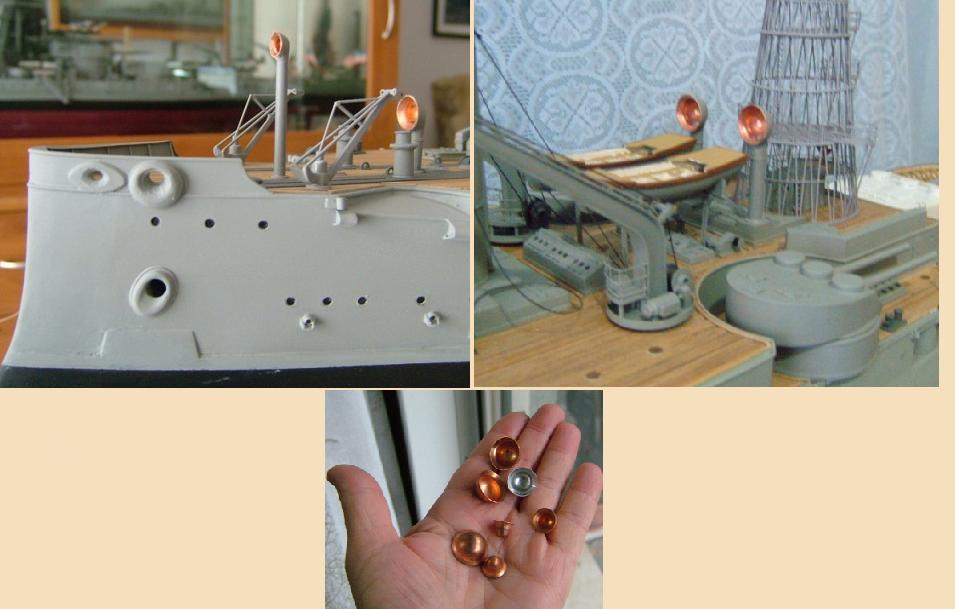
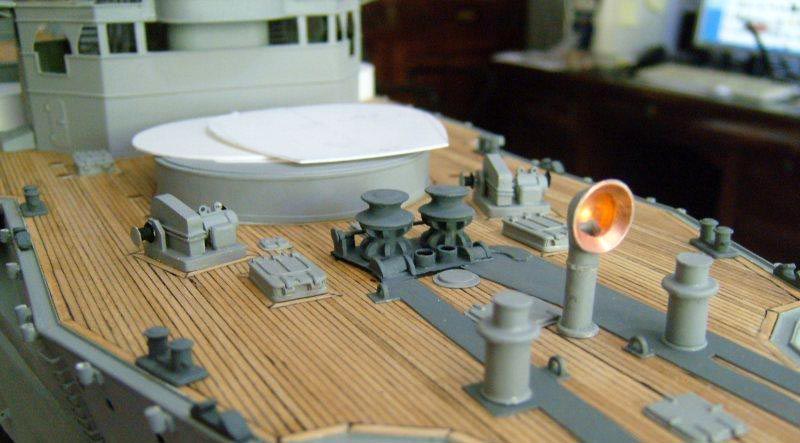
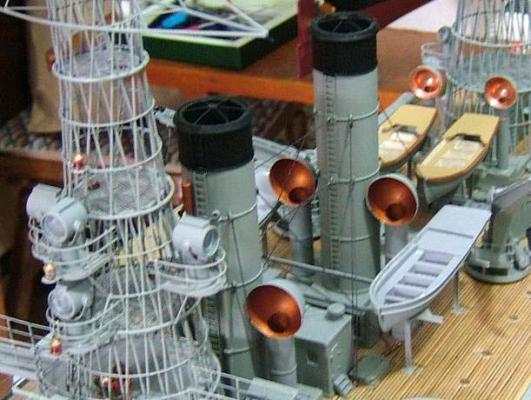
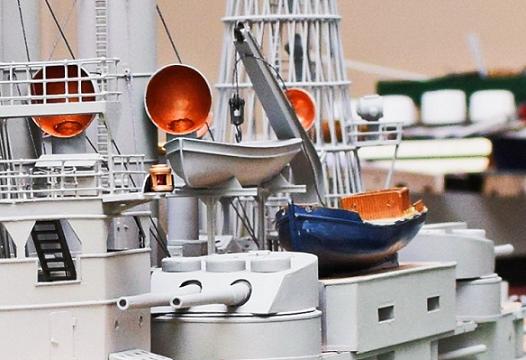
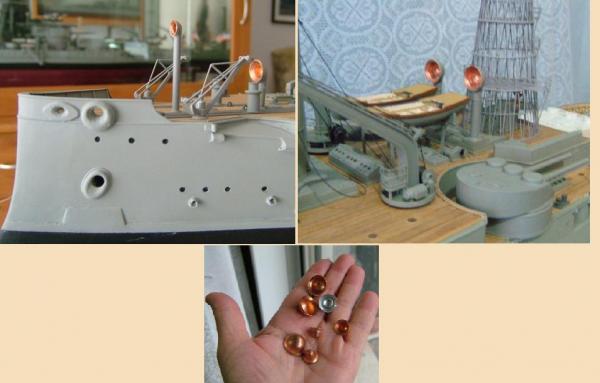
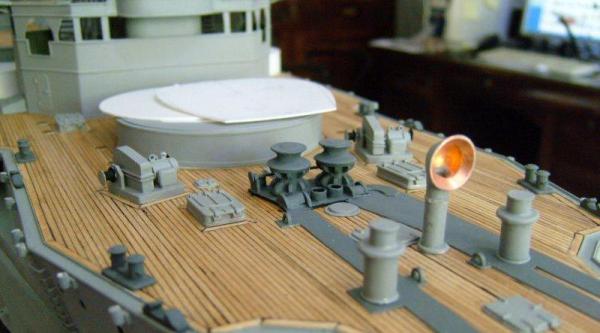
Hi mates, I'm late, but I’m back… It’s been a long summer, visiting family members in Europe…but there is some progress though. So I managed to build the searchlights (four on every mast) and the other navigation lights. I also made the lifeboats, by modifying some others from my spare box.

- 116 replies
-
- 8
-
-
- kilkis
- mississippi
- (and 2 more)
-
Thank you all for your kind words... I just remind you that is as long as to fit exactly in the backseat of my car... Yes, she is a big baby.... Thank you
- 116 replies
-
- 3
-
-
- kilkis
- mississippi
- (and 2 more)
-
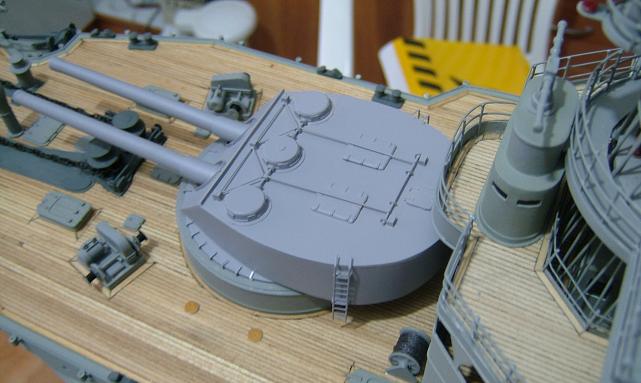
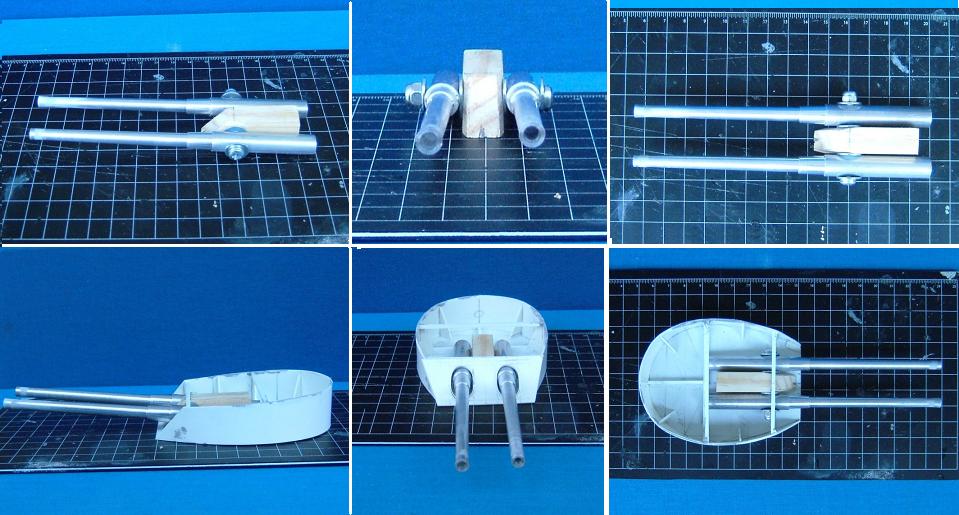
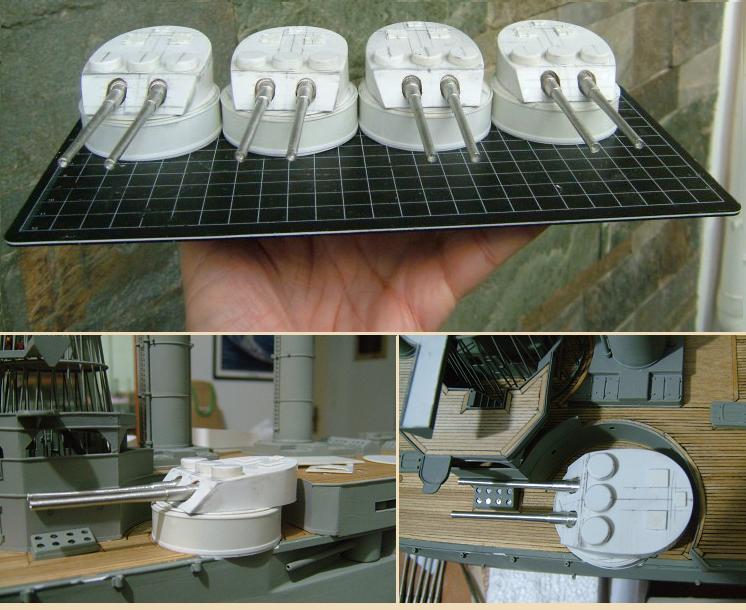
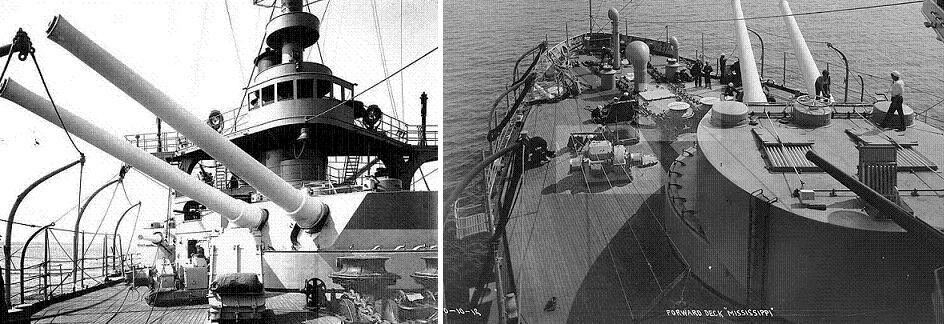
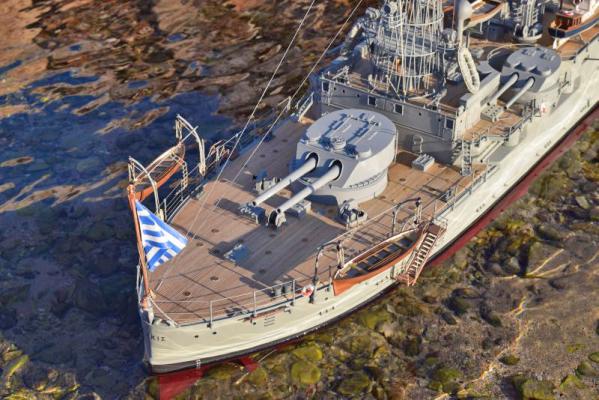
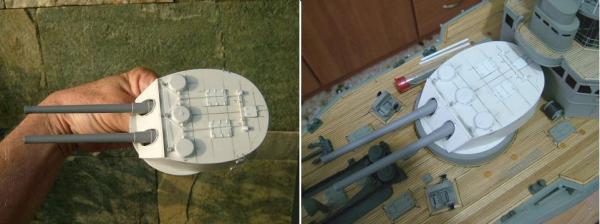
Having received the gun barrels of the main turrets, I build also the pairs of them and I would say that the result satisfied me a lot... ....... Thanks

- 116 replies
-
- 14
-
-
- kilkis
- mississippi
- (and 2 more)
-
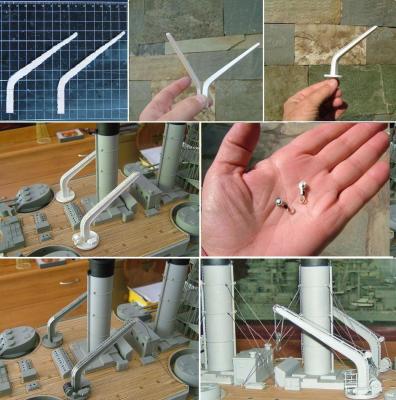
Well, I haven't forgotten you….so here I am. Some progress before the summer heat, hit Greece… I built the cranes, covering a proper shaped pieces of wood, with thin layers of plastic and by modifying clothing material, I reproduced the hooks. ............. I built also the second (to the rear) cage mast by knitting thin wire using a jig and as I did for first one.
- 116 replies
-
- 6
-
-
- kilkis
- mississippi
- (and 2 more)
-
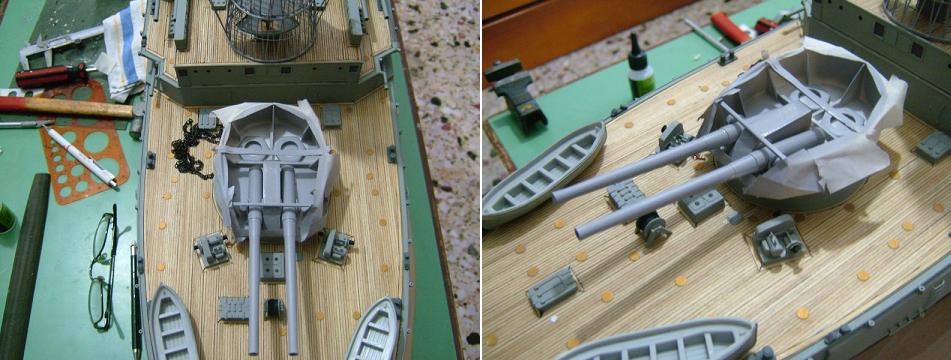
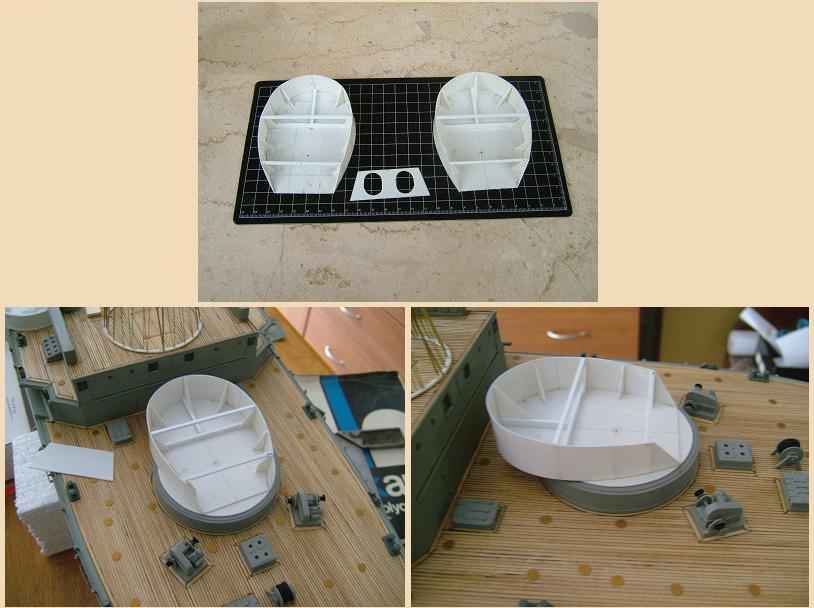
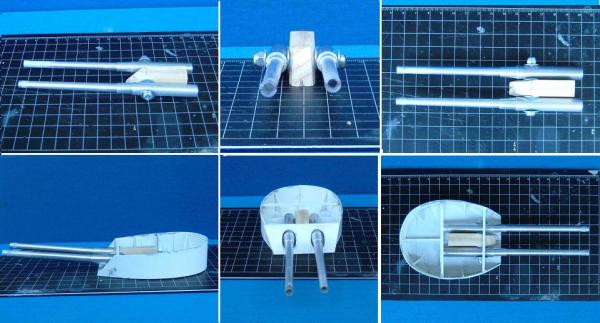
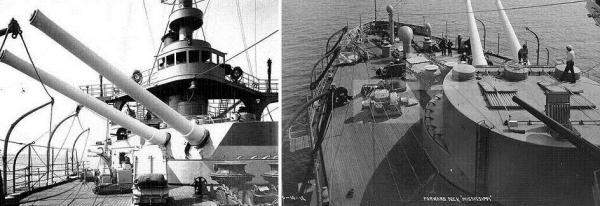
Hi all. After some time of absence, I'm back with the construction of the turrets. I started with the big ones (12") on prow and stern, making the shells of them from proper shaped plastic. I was counting on some spare gun barrels that I thought it would be suitable to finish them but I was wrong... I soon realized that I had to make or buy new gun barrels. I didn't want to waste more time, so I put them aside and start making the side turrets (8"). I had to make all four of them. Again, I made the shells with plastic and finished them, by placing those gun barrels I had in my spare box. After some modification by a lathe, I think the final result is quite good. Thanks ..........

- 116 replies
-
- 11
-
-
- kilkis
- mississippi
- (and 2 more)
-
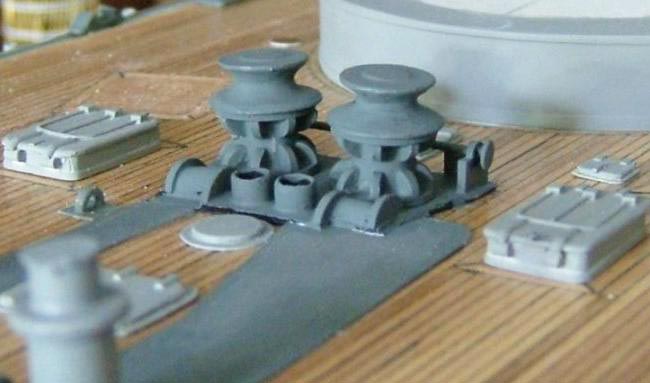
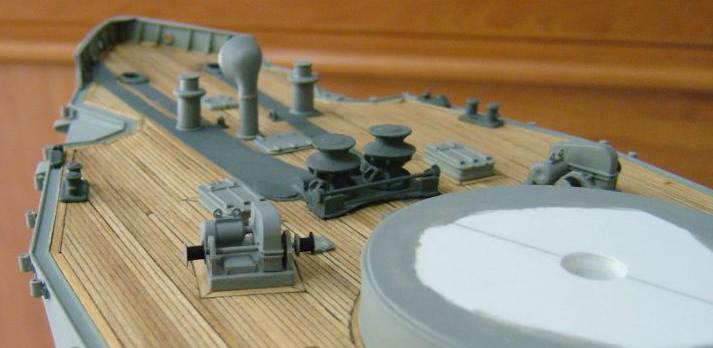
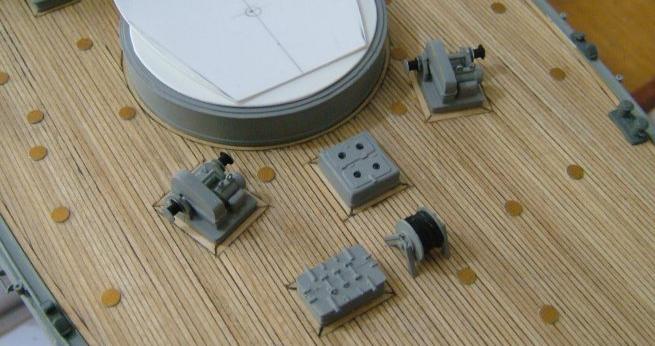
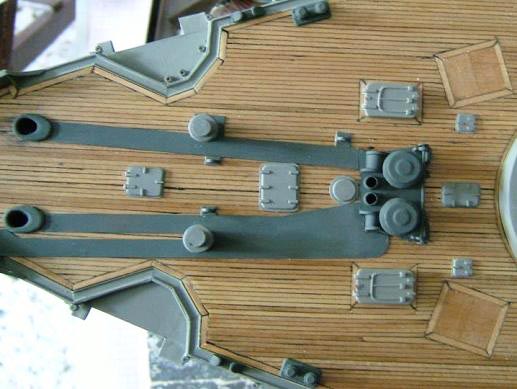
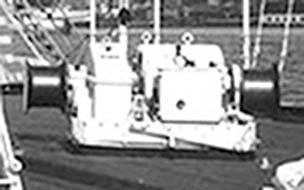
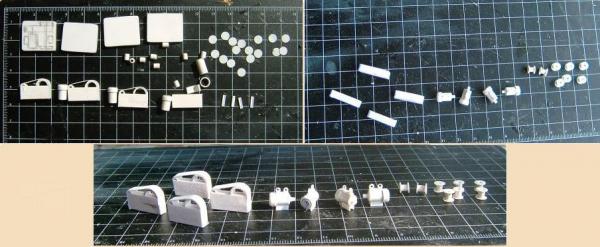
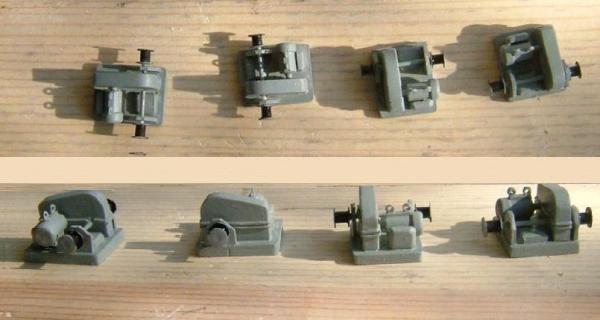
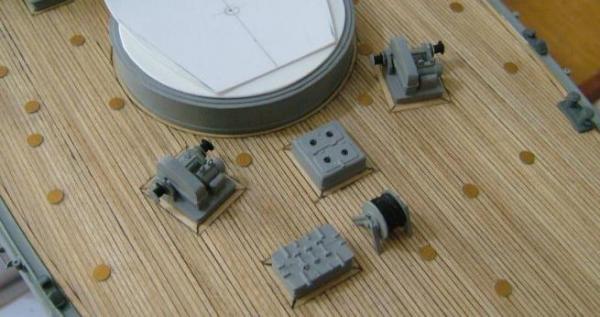
Hi all and thank you for your kind words. I was dealing with the ship’s windlasses all this time… She had two main for the anchors and four smaller ones for ropes. I started constructing the main ones using pieces of plastic in proper shapes. Every anchor windlass is consisted from 25 pieces... ............ The windlasses for ropes was another story... They seemed to be much complex and I had no any good view of them in some photo. To be honest, I tried to find something ready from the market, thinking to modify it but eventually and haven't found something close to them, I constructed them also from scratch. Finally, I placed them all on the deck. Thank you. .....................


- 116 replies
-
- 13
-
-
- kilkis
- mississippi
- (and 2 more)
-
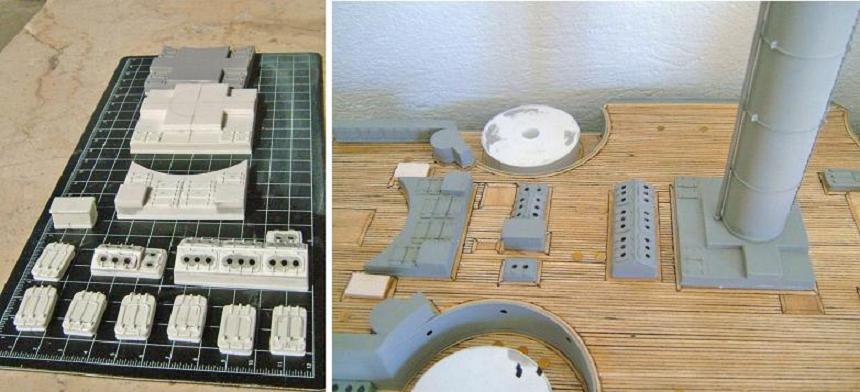
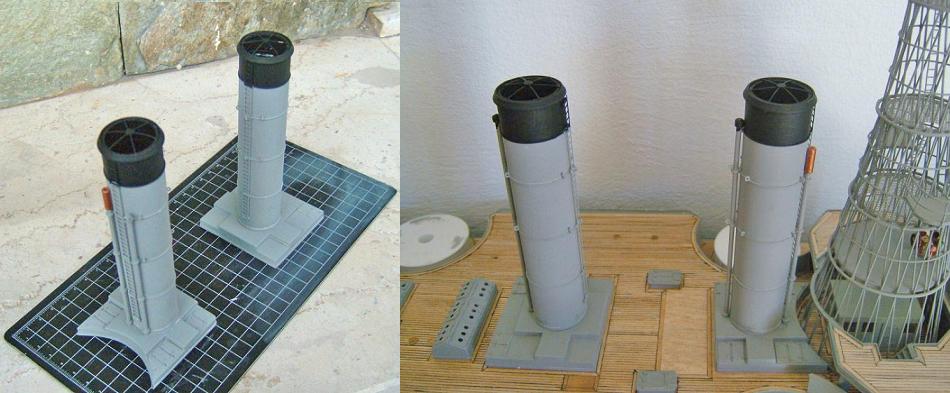
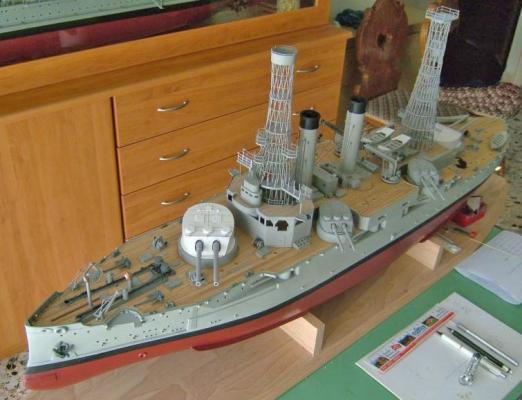
Hi all. Some more progress making fittings, (doors, hatches, skylights and deck bases for the funnels) out of plastic. I made also the two funnels much easier that I expected, I found and modified two empty medicine container tubes... that were perfectly matching in scale. ............. Thanks


- 116 replies
-
- 7
-
-
- kilkis
- mississippi
- (and 2 more)
-
Thank you all for your wishes that I became a grandfather... Because of a misunderstanding of the middleman (who translates the presentation...) actually it's granddaughter. Thank you

-
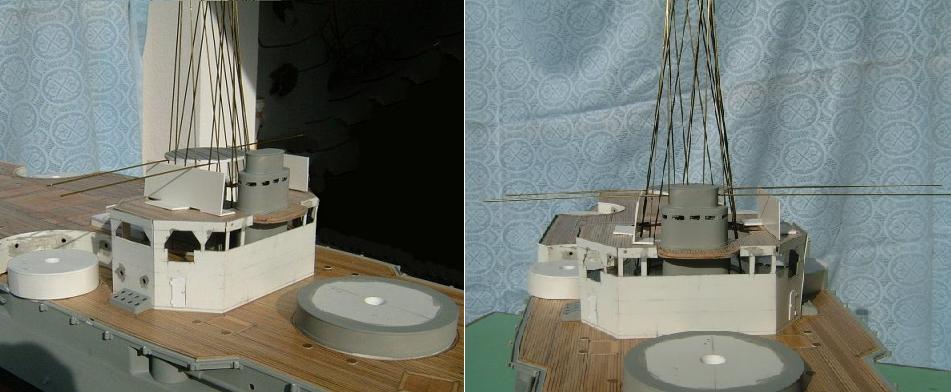
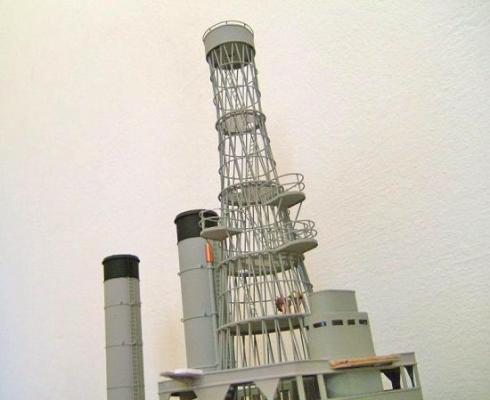
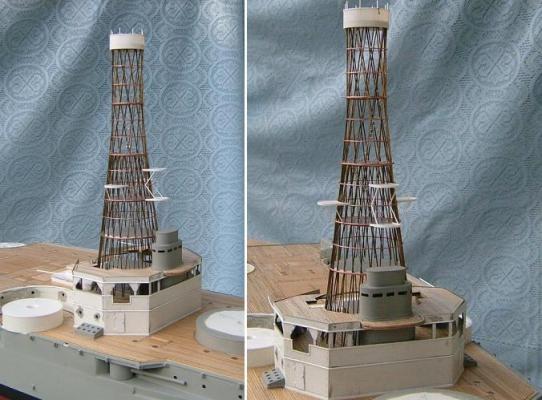
Thank you all for you're still here. Sorry for this delay but I had to travel to UK to see my new grandson. You see, I became grandfather for a second time. Back to work now... Soon as I got back I painted the cagemast and I placed the fitting of the open bridge. I must admit that this cagemast is a model by itself... Thanks

- 116 replies
-
- 8
-
-
- kilkis
- mississippi
- (and 2 more)
-
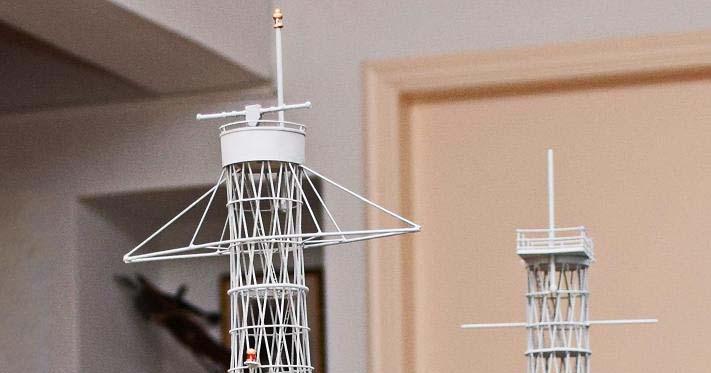
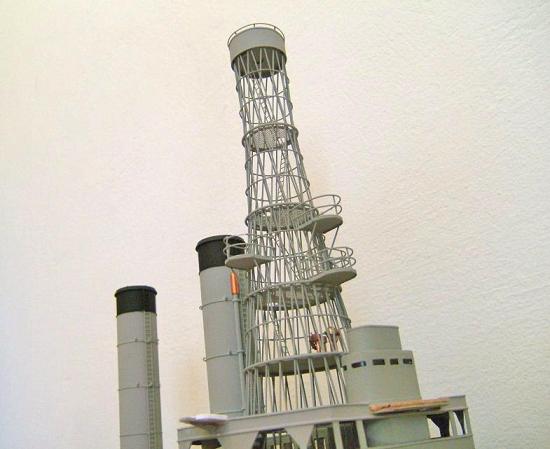
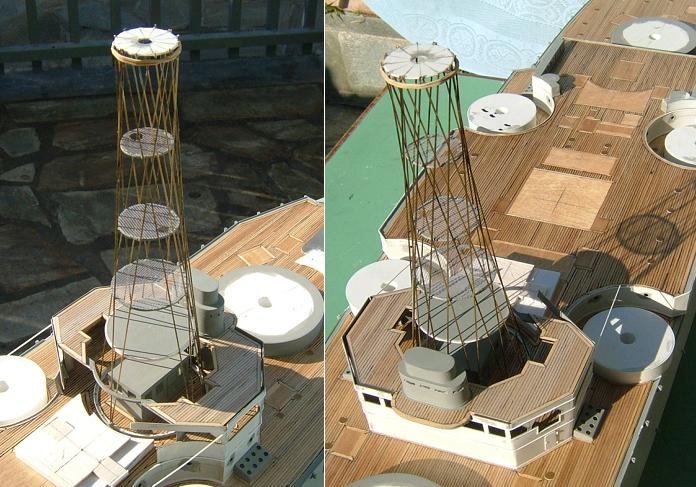
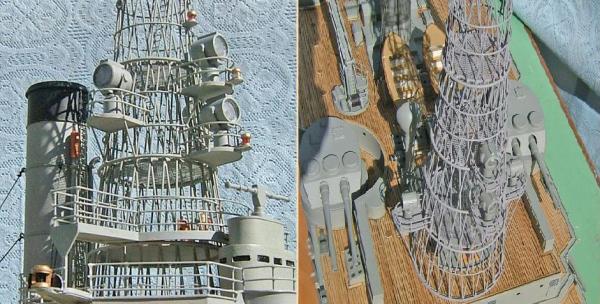
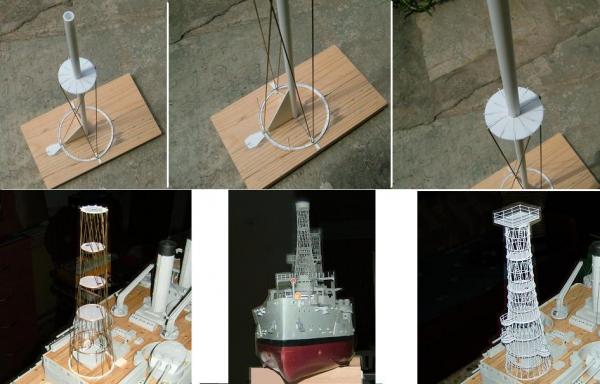
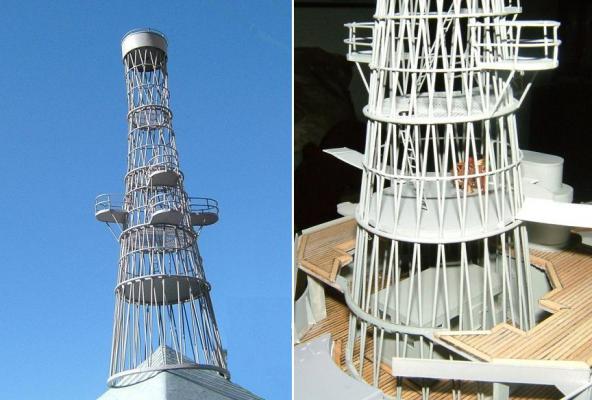
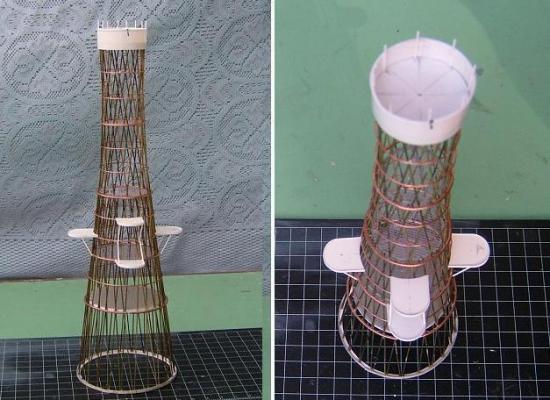
Happy New Year to all. Well the ladders have arrived and have been placed between the floors. It's hard to be seen in the photos inside a room, so I took the chance to use the Greek sky as a background even in January... I think you can see two ladders between the first and third floors. I placed also the shelves for the searchlights and the observation post at the top of the mast, all made by pieces of plastic. It can't be seen but I haven't placed one last wire because I need an open, through which I will place some fittings of the open bridge (a ship's wheel, compass). As some other items, they have to be waiting the painting of the mast. Thanks

- 116 replies
-
- 12
-
-
- kilkis
- mississippi
- (and 2 more)
-
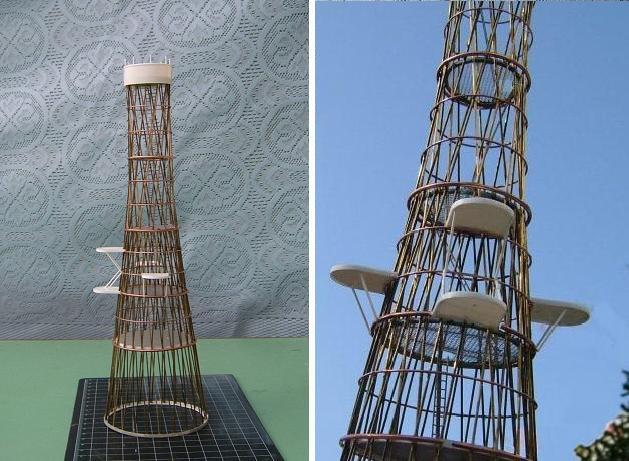
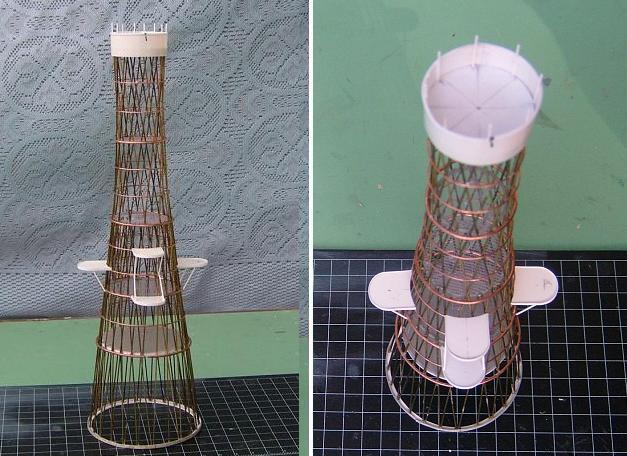
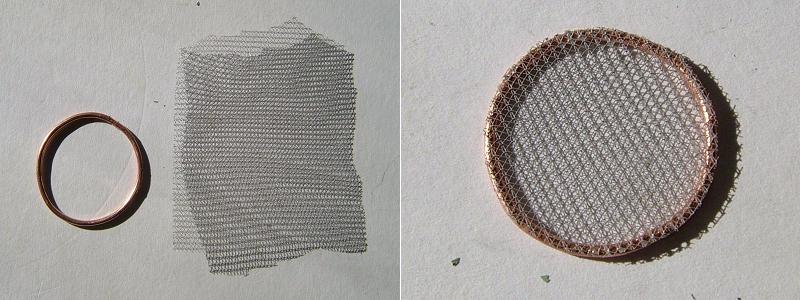
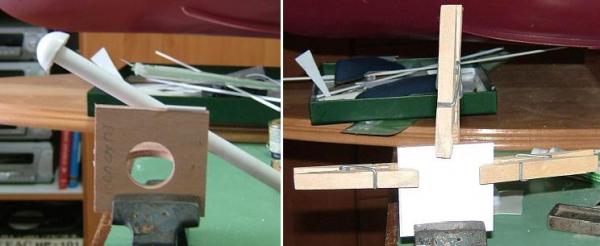
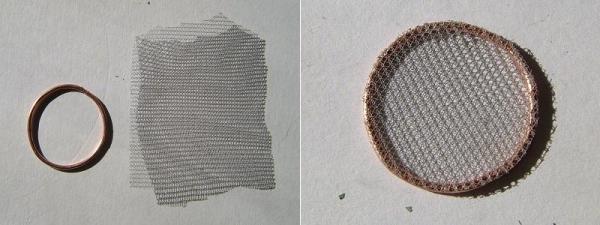
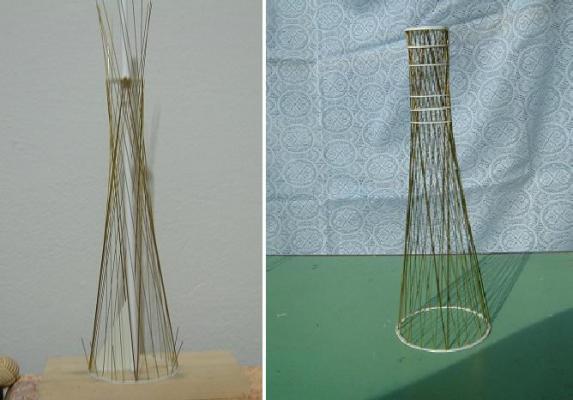
Eventually I came to the 1mm and 0,5 mm metal (bronze) wires which were responded well. Because, the first to the prow cagemast, had to be built through the deck of the bridge I had to build also some of the upper structure of this area… I started building the cagemast, placing only some wires (rods) leaving that way the spaces through which I placed the floors. The floors were made by metal ring on which I placed painted tulle representing, the metallic gratings… That’s all for now, I’m waiting for my order of the photo-etched ladders… Merry Christmas to all.


- 116 replies
-
- 10
-
-
- kilkis
- mississippi
- (and 2 more)
-
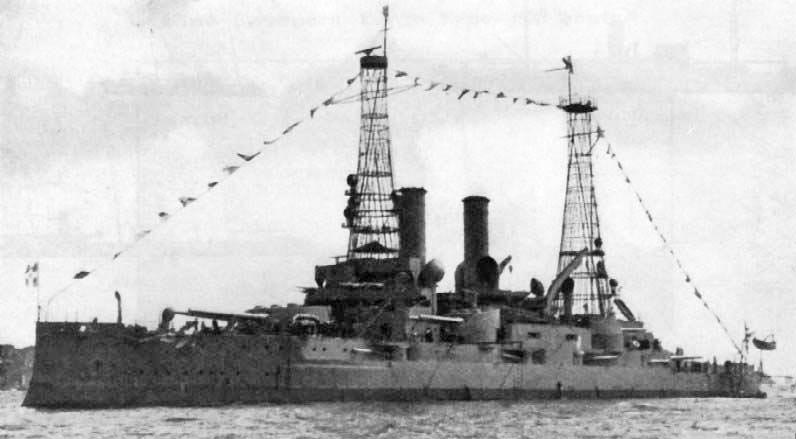
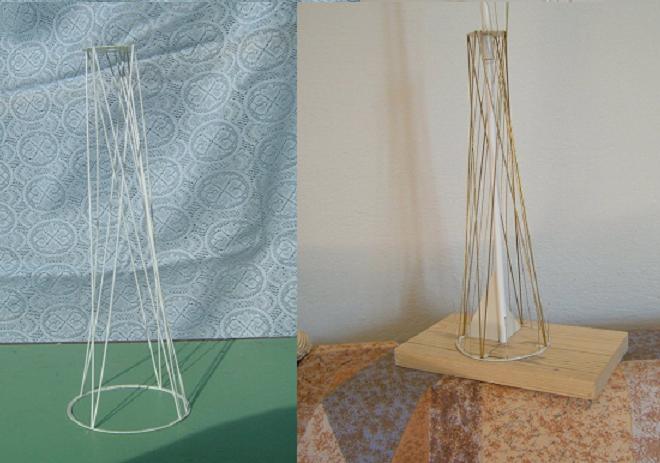
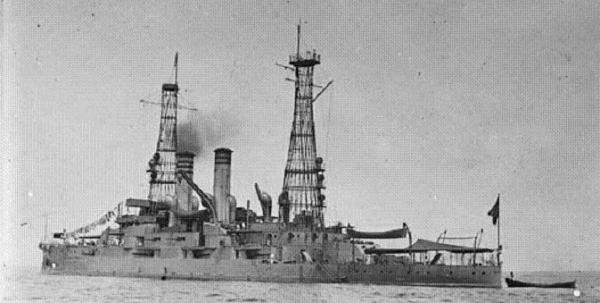
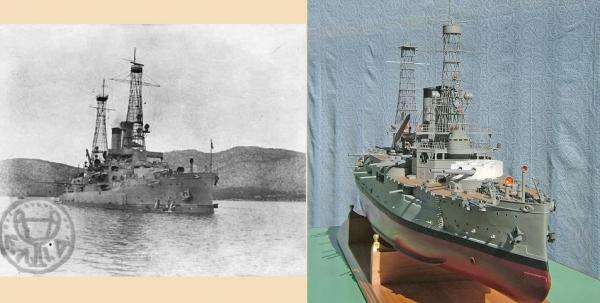
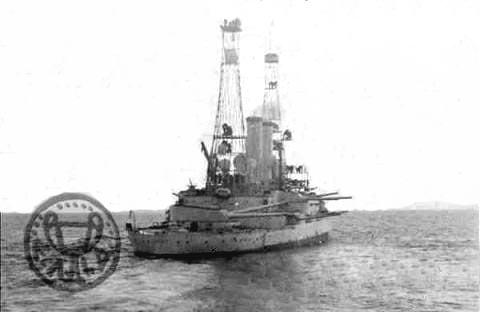
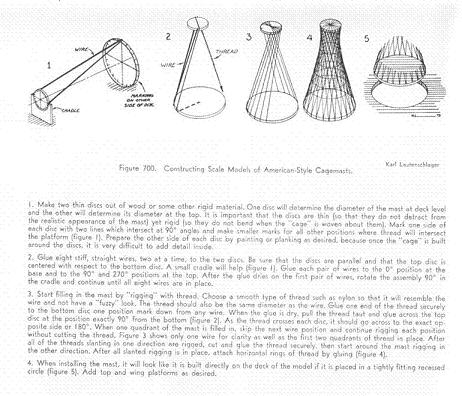
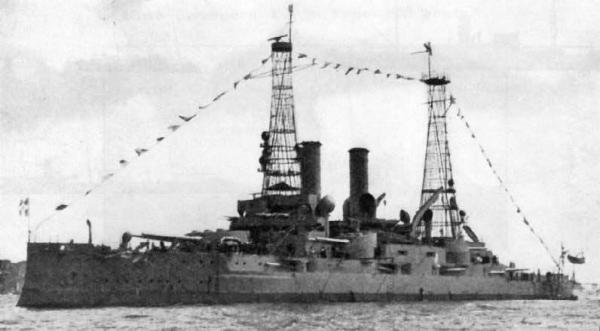
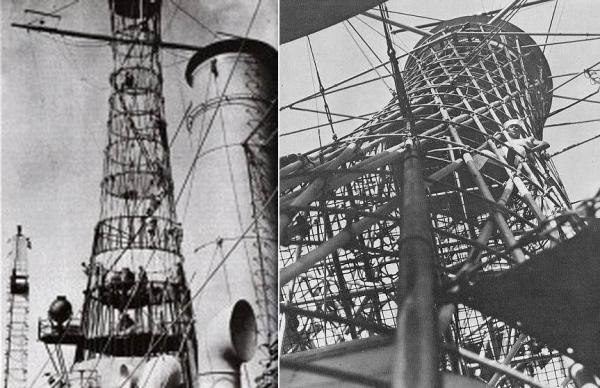
Hi all, Merry Christmas and happy New Year. Here I’m again back to the Kilkis model and thanks for have been waiting …. One of the challenges of the model are those cagemasts of the real ship. I was wondering how this could be possibly built but as most of the times, the help came again through the web. I found that some other mates have also been challenged and they had found a solution through the pages of an old book, titled as “BUILDING WARSHIP MODELS by P C Coker III” and to my joy, they had published the following picture in a forum… I started experimenting with different materials (plastic-wooden rods-strips) but I was led in a failure. Consider also the time, when an almost ready cagemast, was dropped down by a mistake of mine... and the time when I had built a cage mast forgetting to build internal structures (floors-ladders) … Here are some of my tries…


- 116 replies
-
- 4
-
-
- kilkis
- mississippi
- (and 2 more)