Mayohoo
-
Posts
189 -
Joined
-
Last visited
Recent Profile Visitors
992 profile views


-
 BenD reacted to a post in a topic:
HMS Surprise by Mayohoo - Artesania Latina - Scale 1: 48 - after Aubrey-Maturin series - First wooden ship build
BenD reacted to a post in a topic:
HMS Surprise by Mayohoo - Artesania Latina - Scale 1: 48 - after Aubrey-Maturin series - First wooden ship build
-
GrandpaPhil reacted to a post in a topic:
HMS Surprise by Mayohoo - Artesania Latina - Scale 1: 48 - after Aubrey-Maturin series - First wooden ship build
-
GrandpaPhil reacted to a post in a topic:
HMS Surprise by Mayohoo - Artesania Latina - Scale 1: 48 - after Aubrey-Maturin series - First wooden ship build
-
MESSIS reacted to a post in a topic:
HMS Surprise by Mayohoo - Artesania Latina - Scale 1: 48 - after Aubrey-Maturin series - First wooden ship build
-
Dutchman reacted to a post in a topic:
HMS Surprise by Mayohoo - Artesania Latina - Scale 1: 48 - after Aubrey-Maturin series - First wooden ship build
-
billocrates reacted to a post in a topic:
HMS Surprise by Mayohoo - Artesania Latina - Scale 1: 48 - after Aubrey-Maturin series - First wooden ship build
-
zappto reacted to a post in a topic:
HMS Surprise by Mayohoo - Artesania Latina - Scale 1: 48 - after Aubrey-Maturin series - First wooden ship build
-
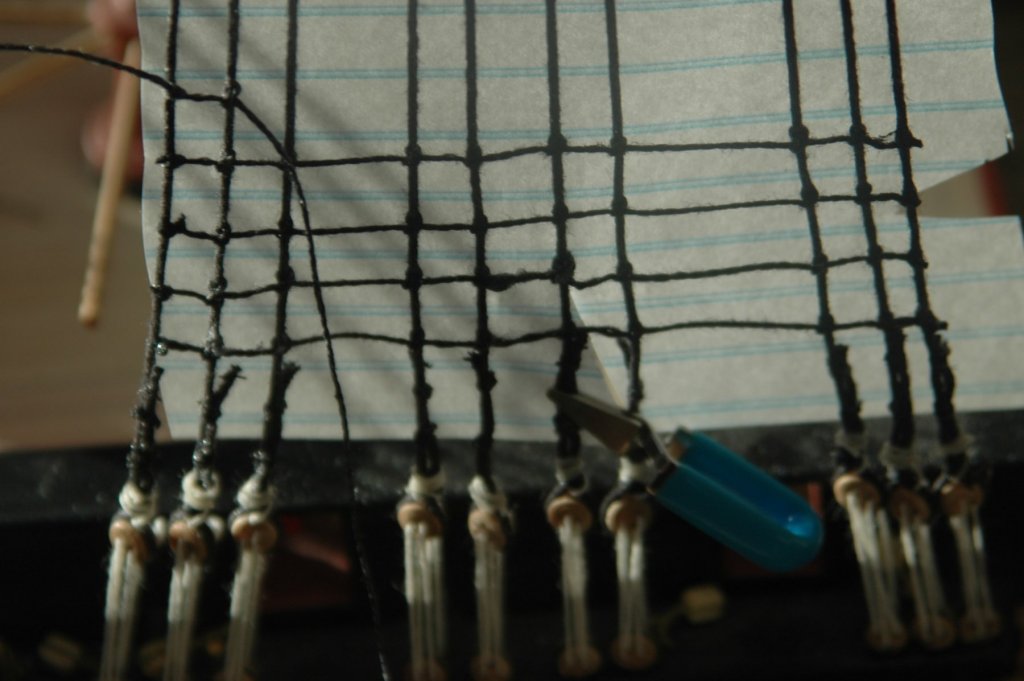
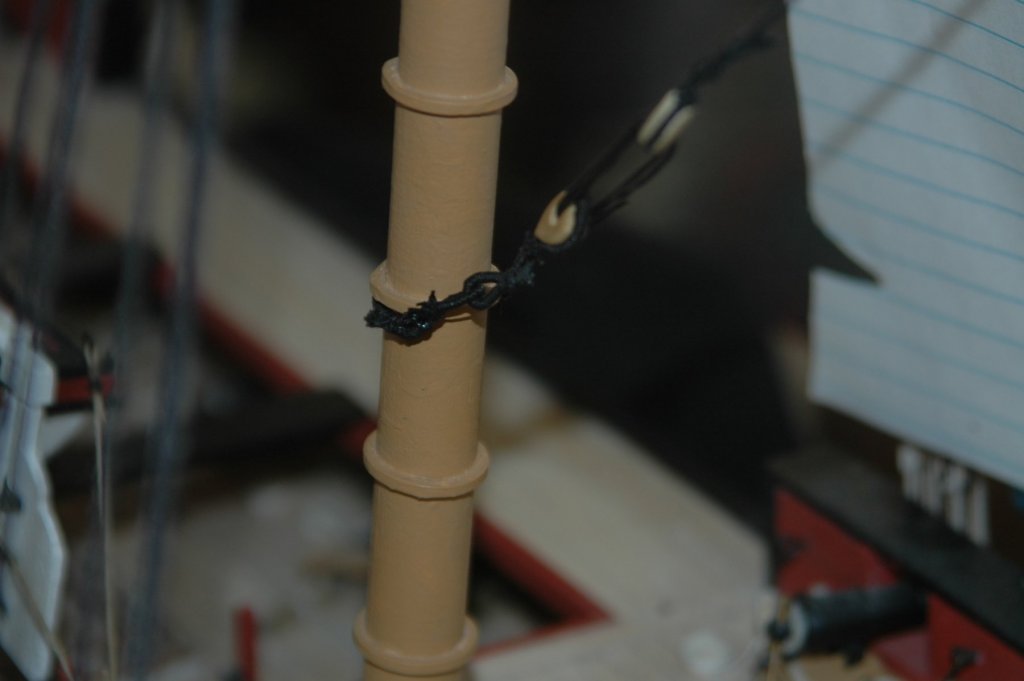
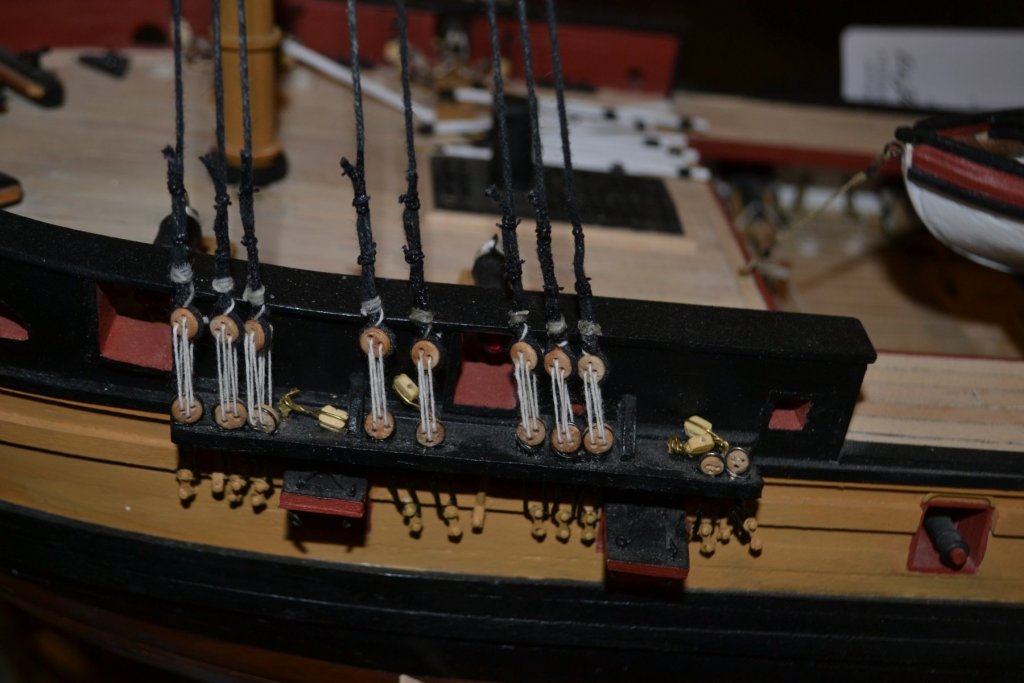
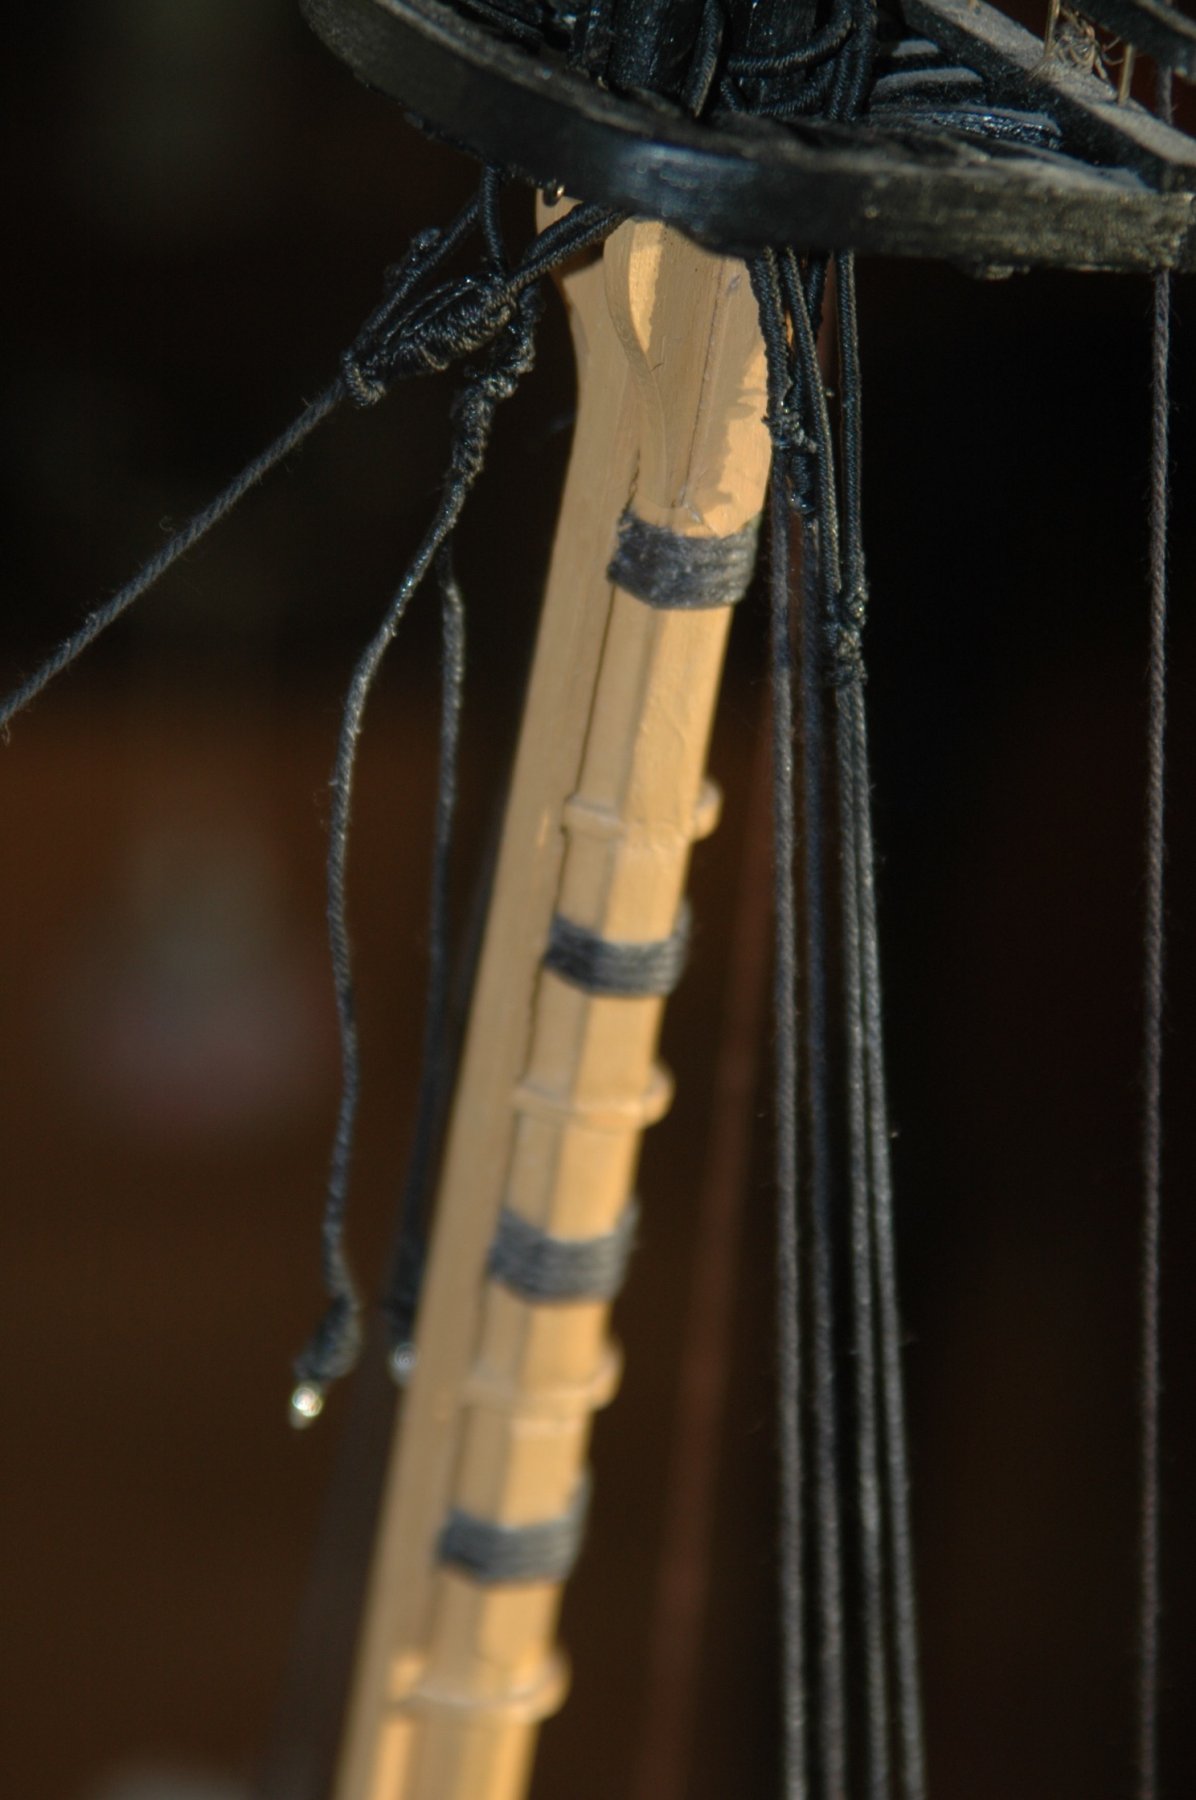
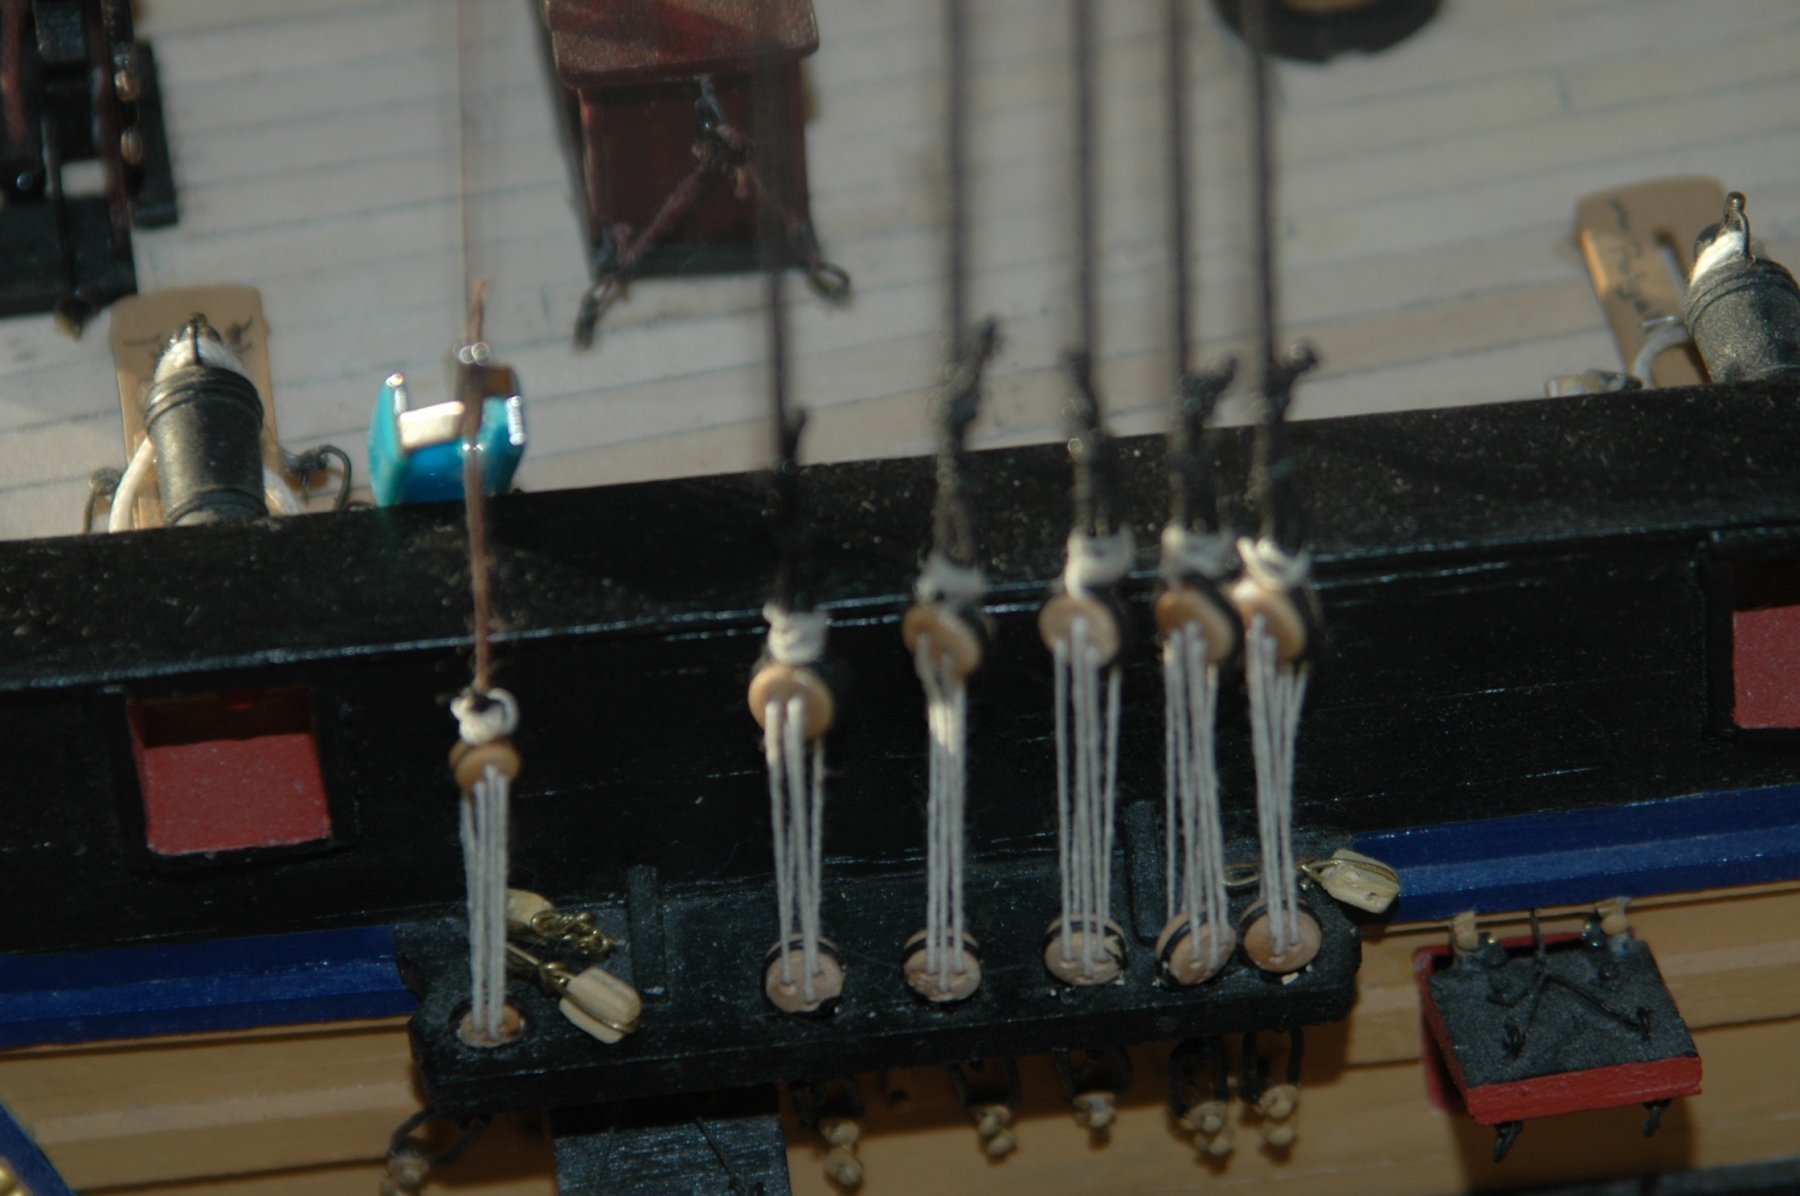
 Hrs 1111-1150 So have started the rigging. Burton Pendants (2 to foremast, 3 to mainmast, 2 to mizzen mast), Fore, Main and Mizzen channels and shrouds, Mizzen backstays and Mizzen Stay. Working on the Ratlines.

- 188 replies
-
- 6
-
-
- surprise
- artesania latina
- (and 1 more)
-
mtaylor reacted to a post in a topic:
HMS Surprise by Mayohoo - Artesania Latina - Scale 1: 48 - after Aubrey-Maturin series - First wooden ship build
-
lmagna reacted to a post in a topic:
HMS Surprise by Mayohoo - Artesania Latina - Scale 1: 48 - after Aubrey-Maturin series - First wooden ship build
-
billocrates reacted to a post in a topic:
HMS Surprise by Mayohoo - Artesania Latina - Scale 1: 48 - after Aubrey-Maturin series - First wooden ship build
-
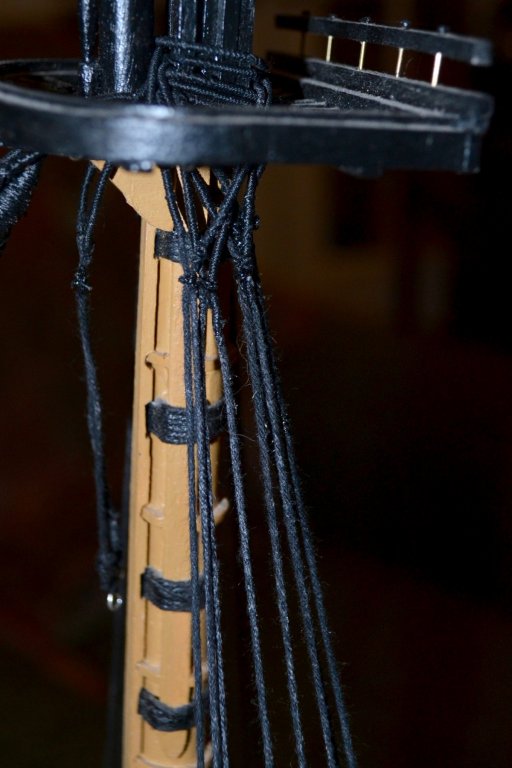
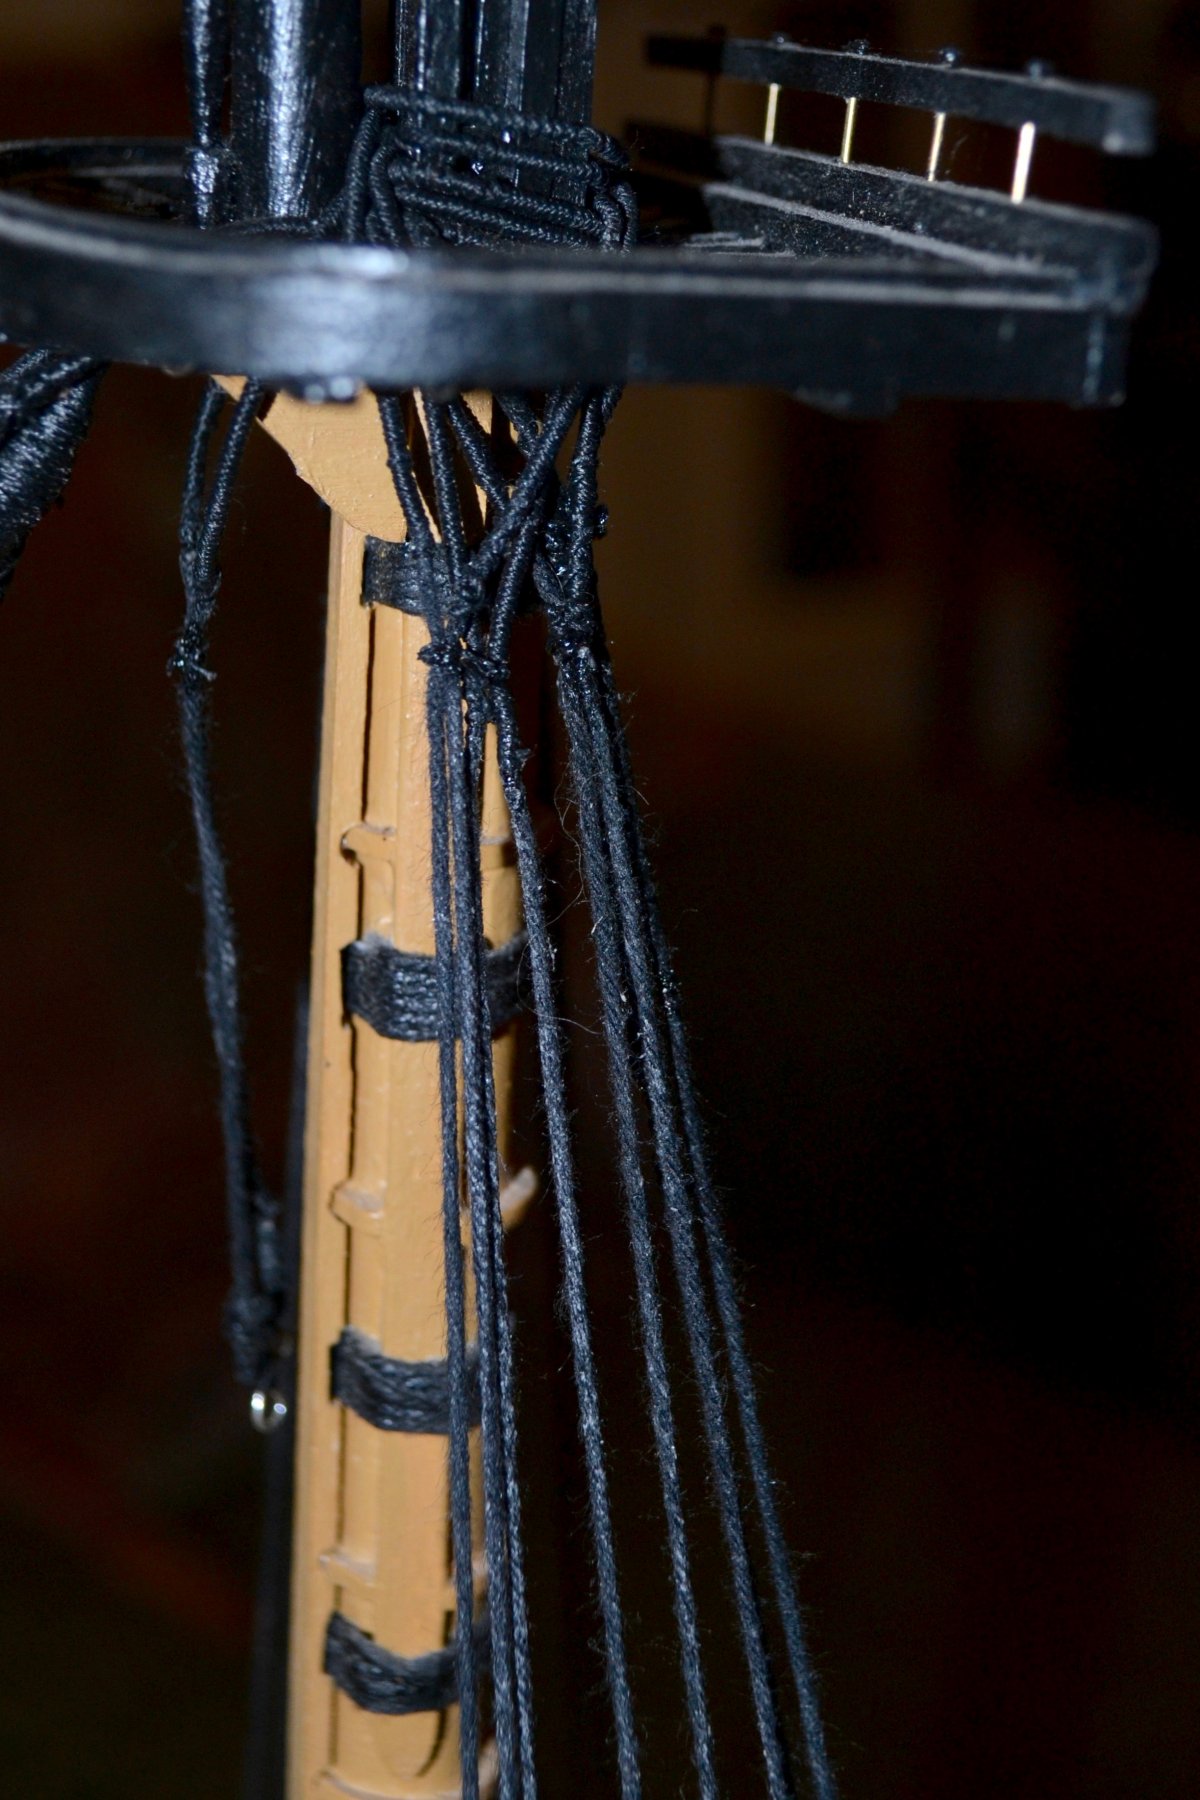
So here is the update. Have finished the foremast channels and am working the mainmast. Note the Burton pendant. Finished boat hooks and boarding pikes. Also, the kids and I went to Japan where we went to the Ghibli museum. We are big Miyazaki fans, so here is Captain Totoro...

- 188 replies
-
- 4
-
-
- surprise
- artesania latina
- (and 1 more)
-
Thank you for the kind words. Am working on rigging now which is slow work as this is my first attempt at doing it. Will post some pictures this weekend.
- 188 replies
-
- 2
-
-
- surprise
- artesania latina
- (and 1 more)
-
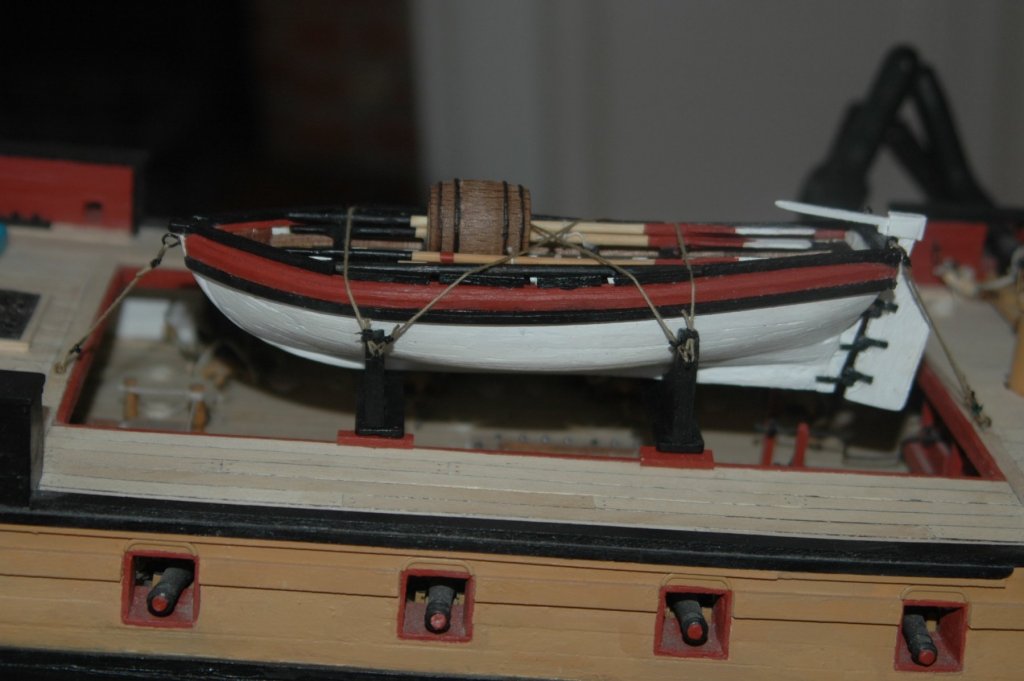
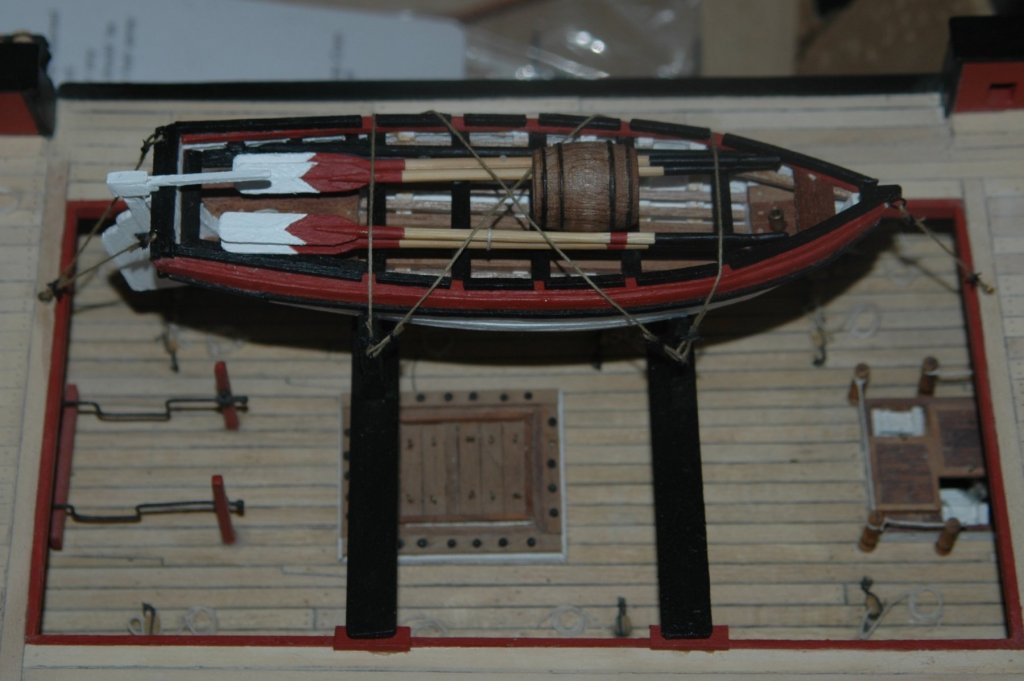
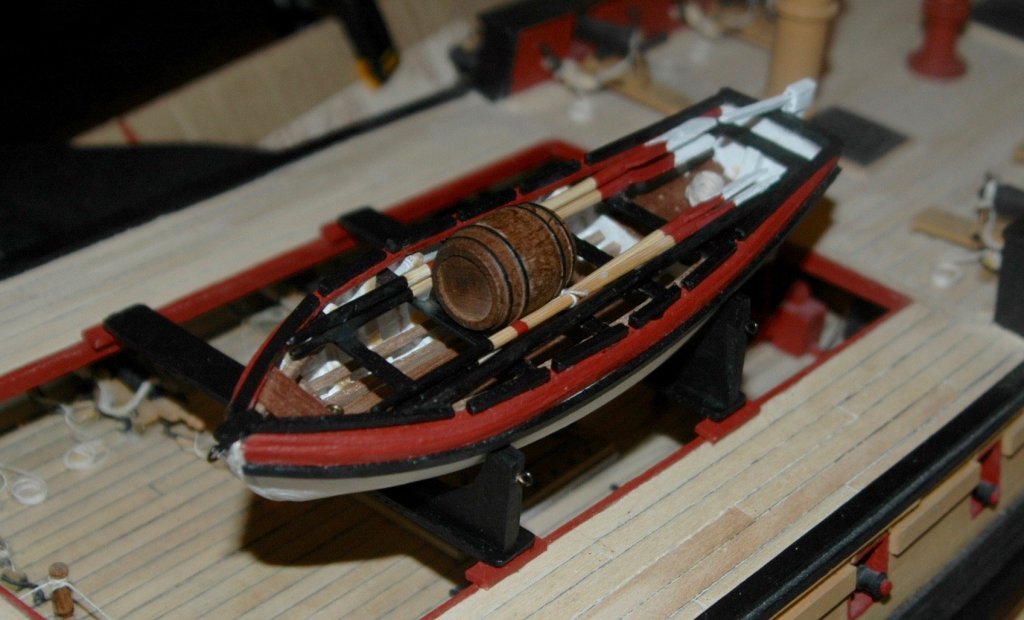
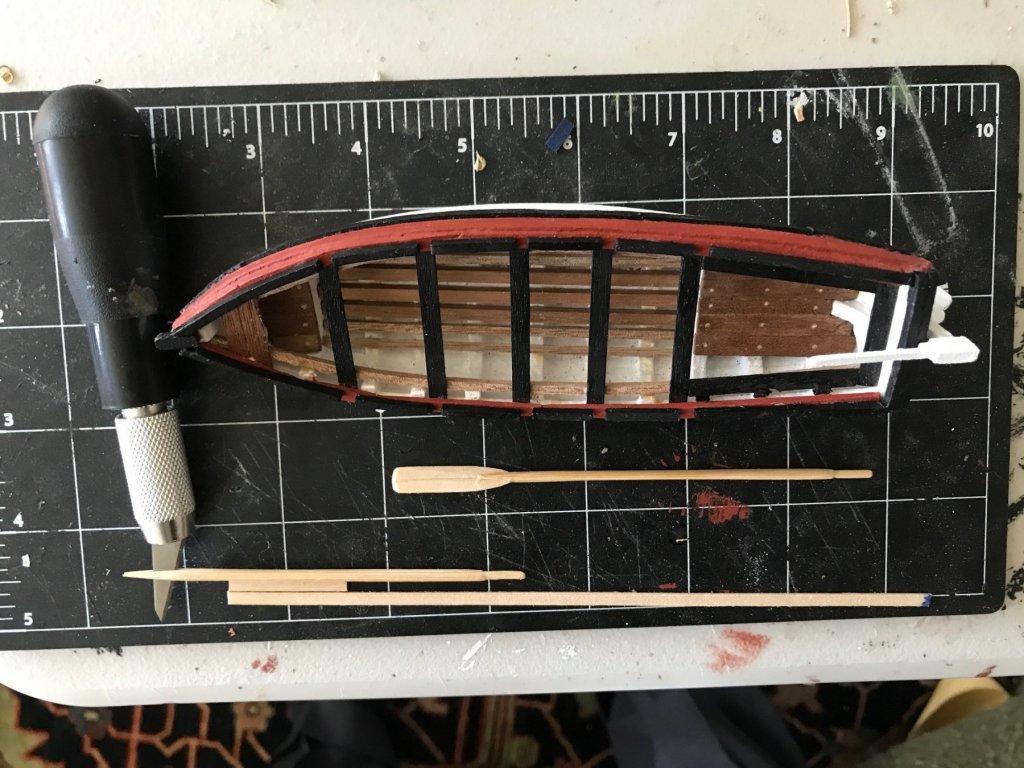
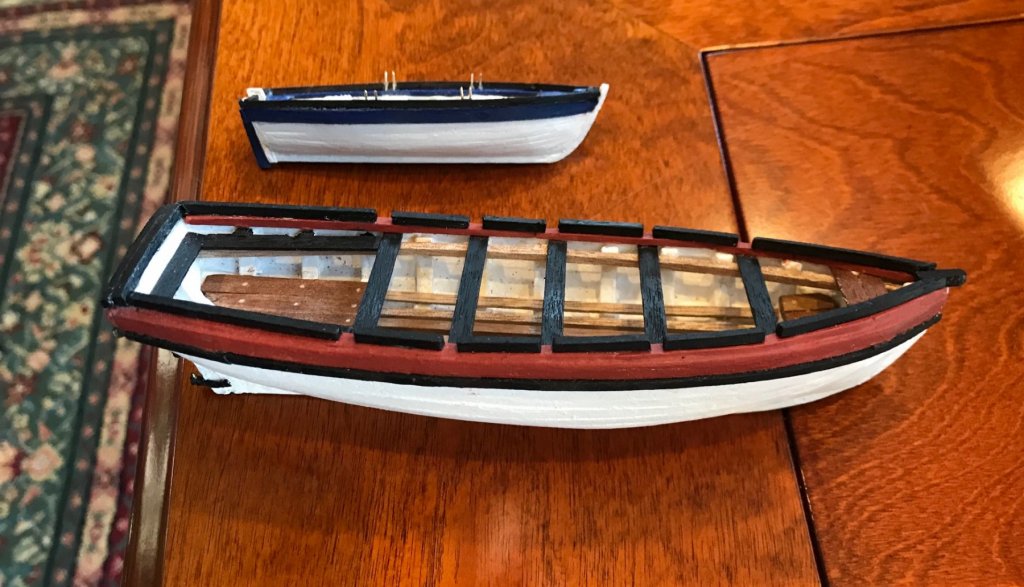
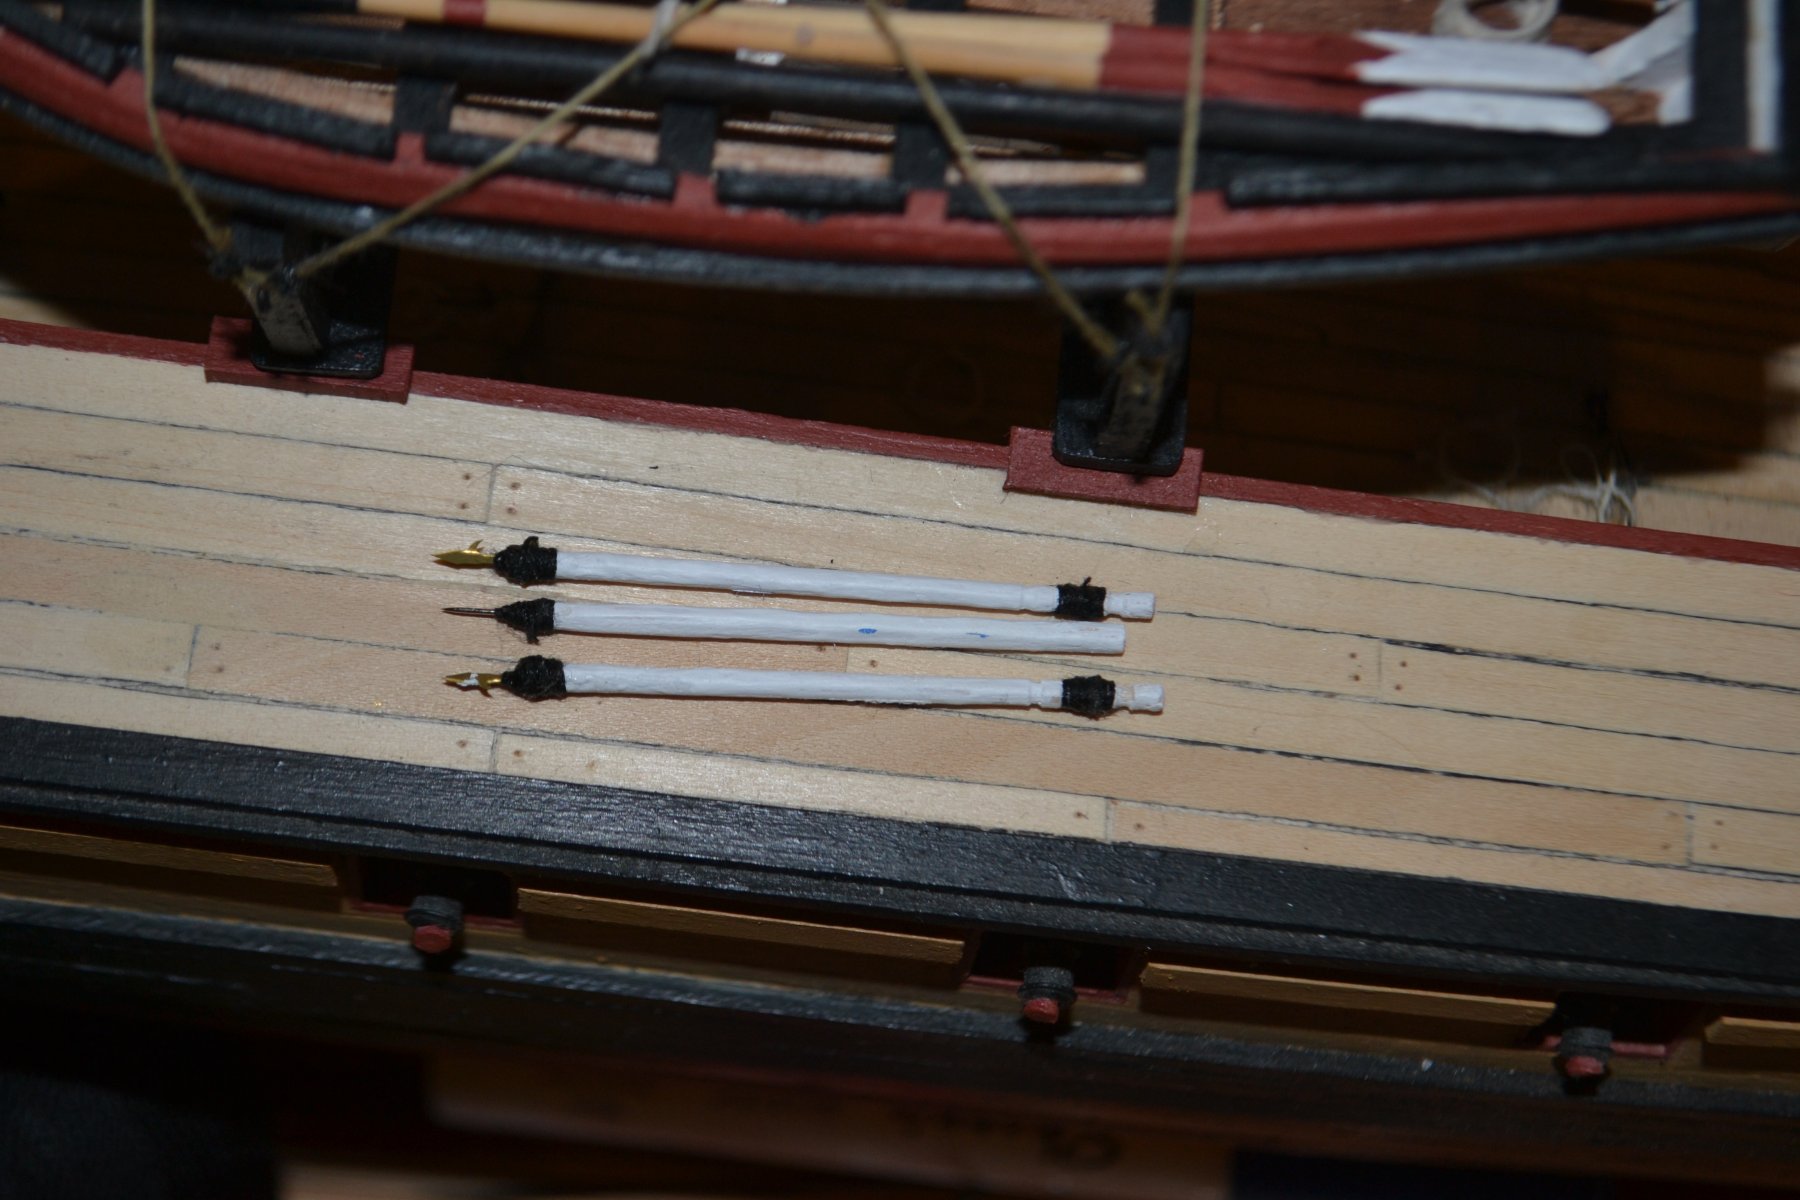
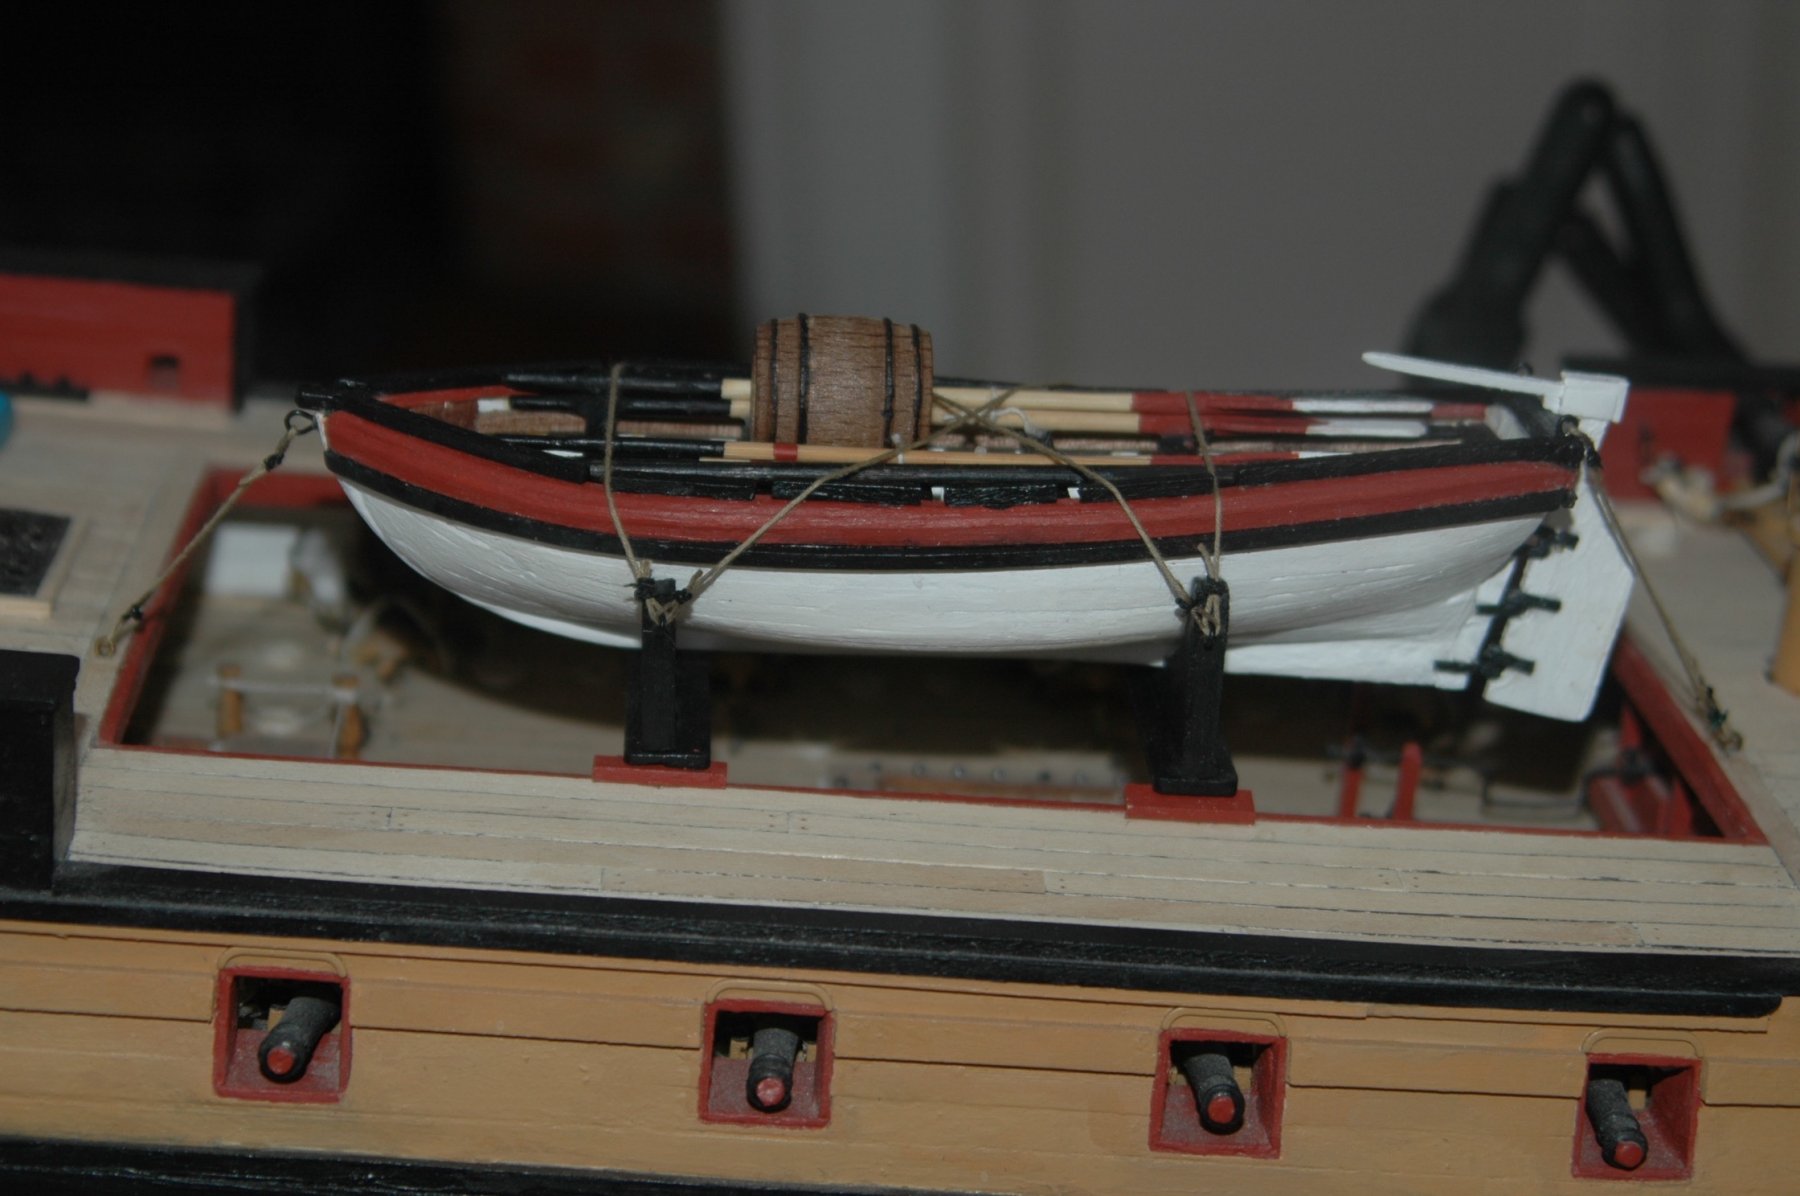
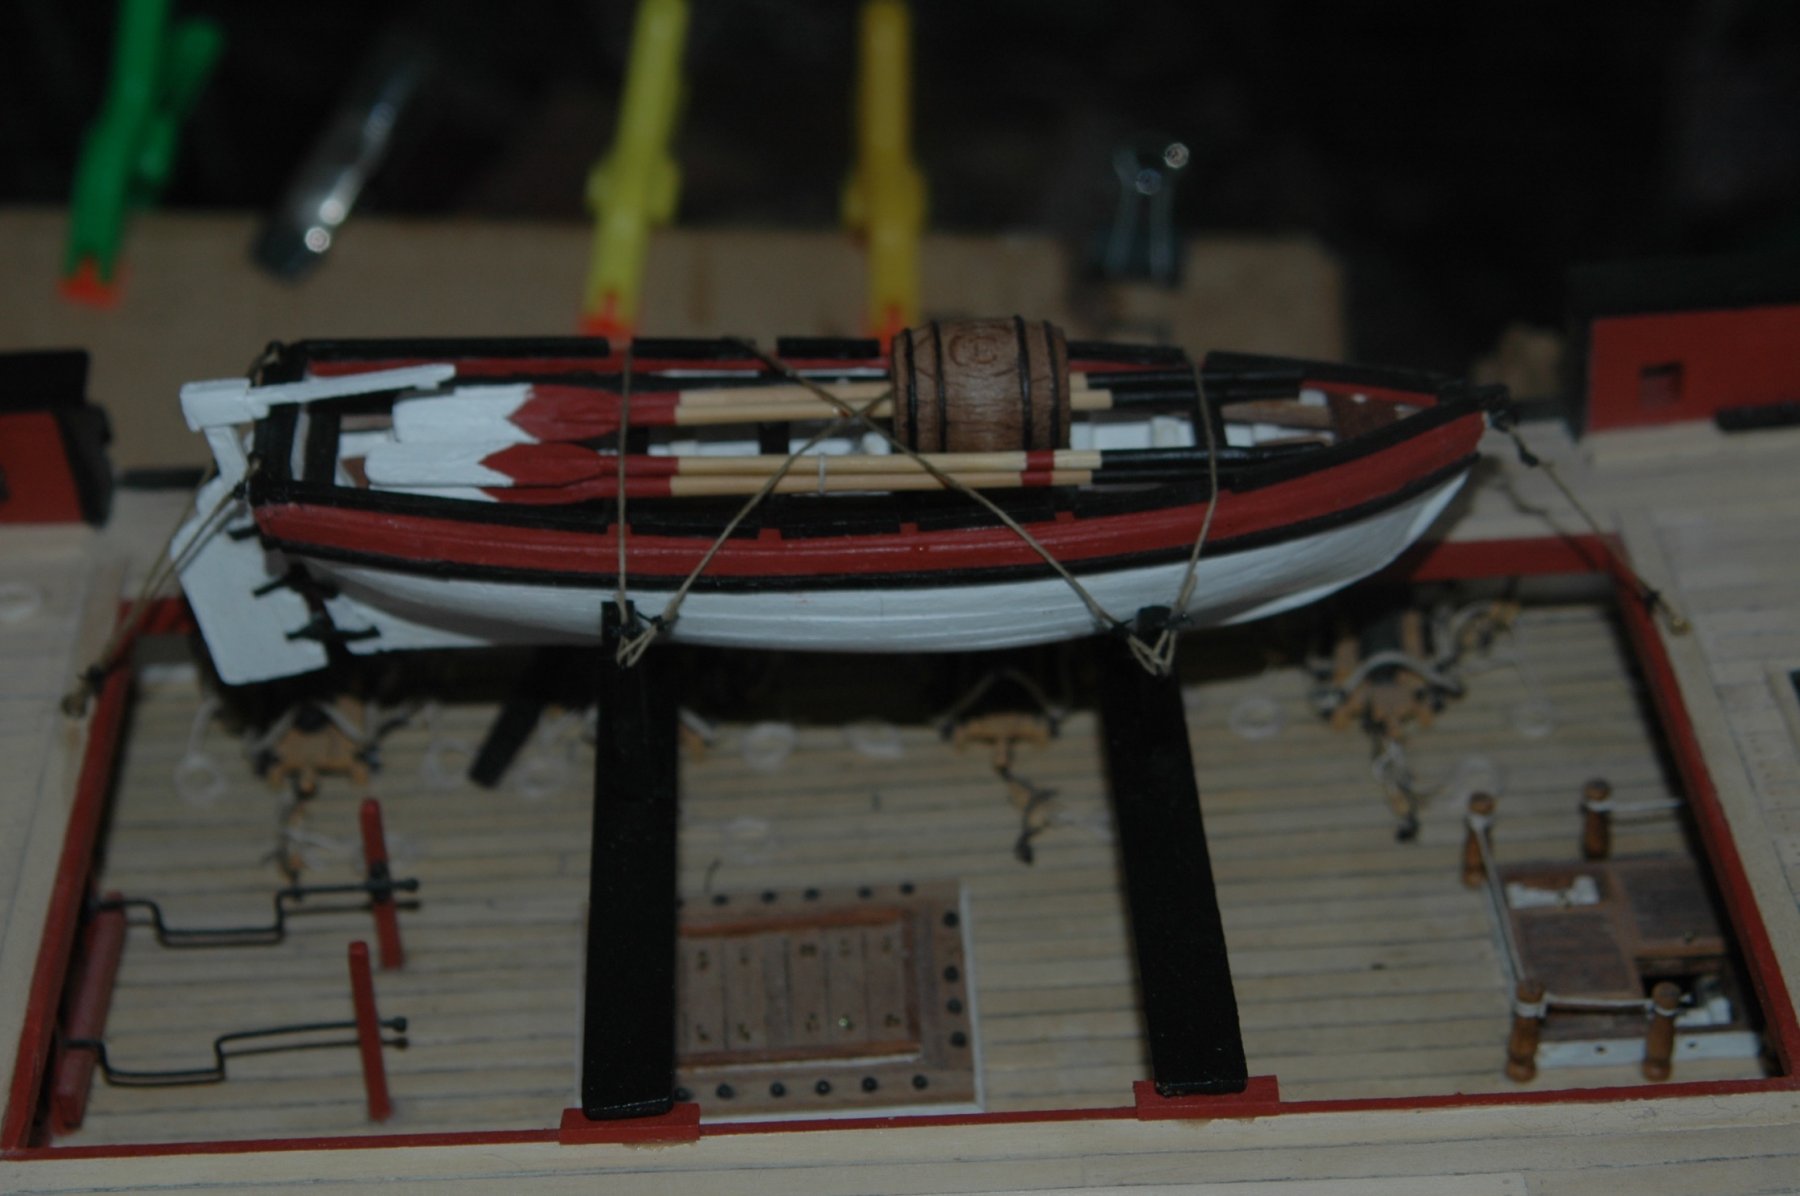
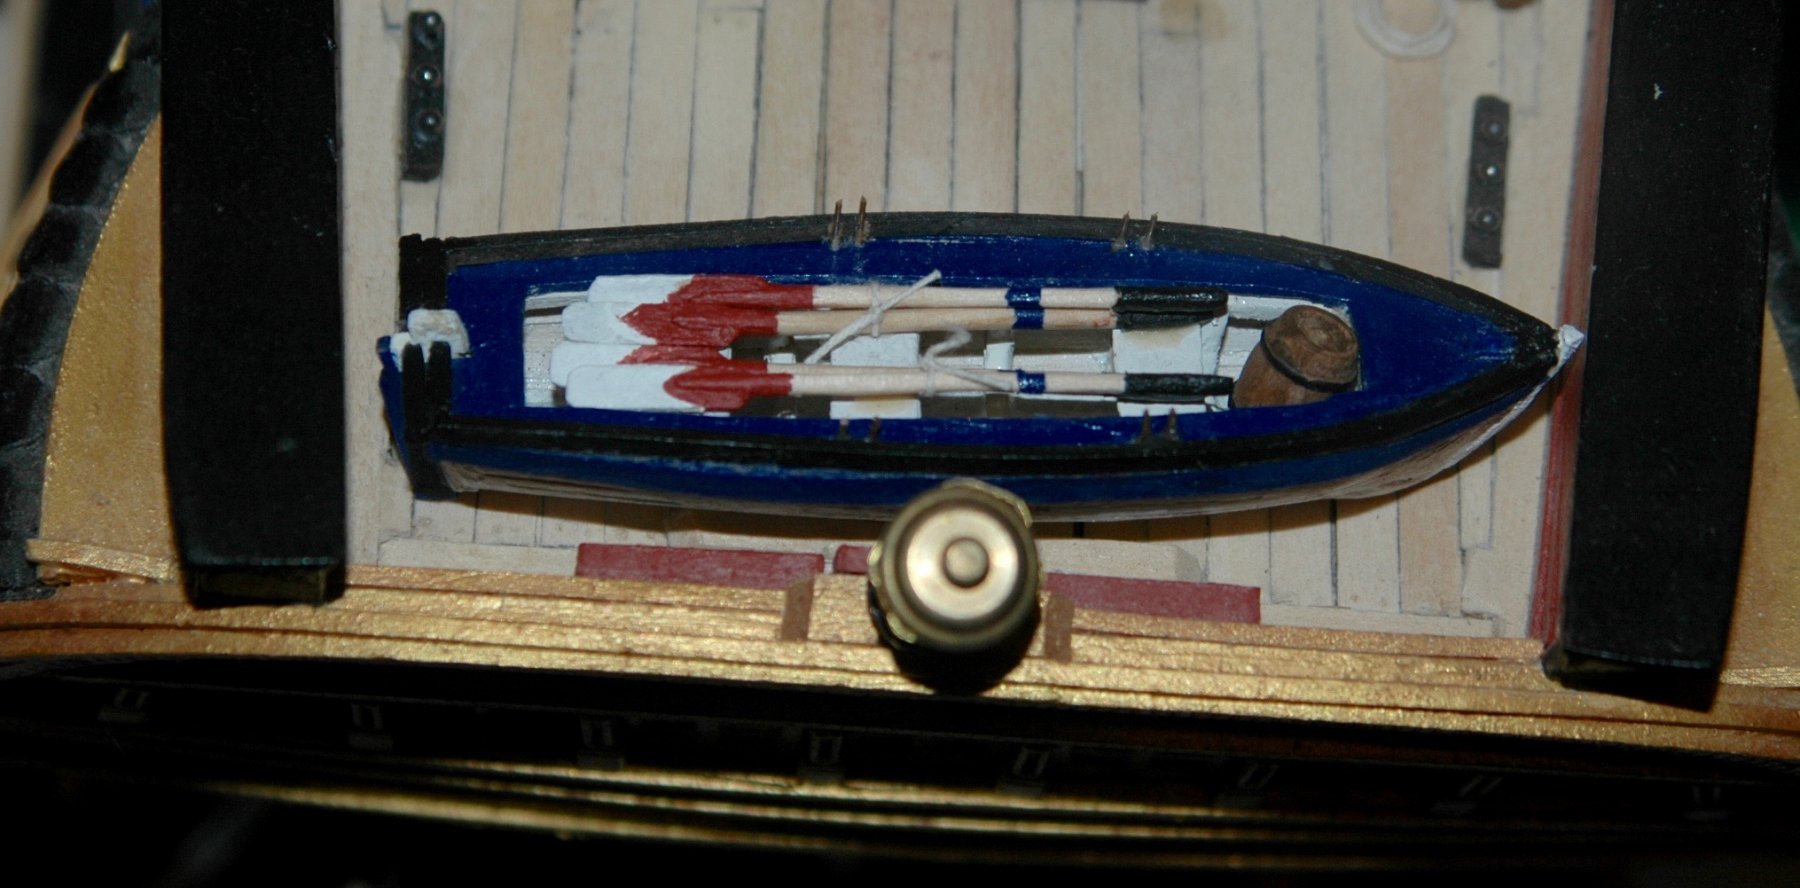
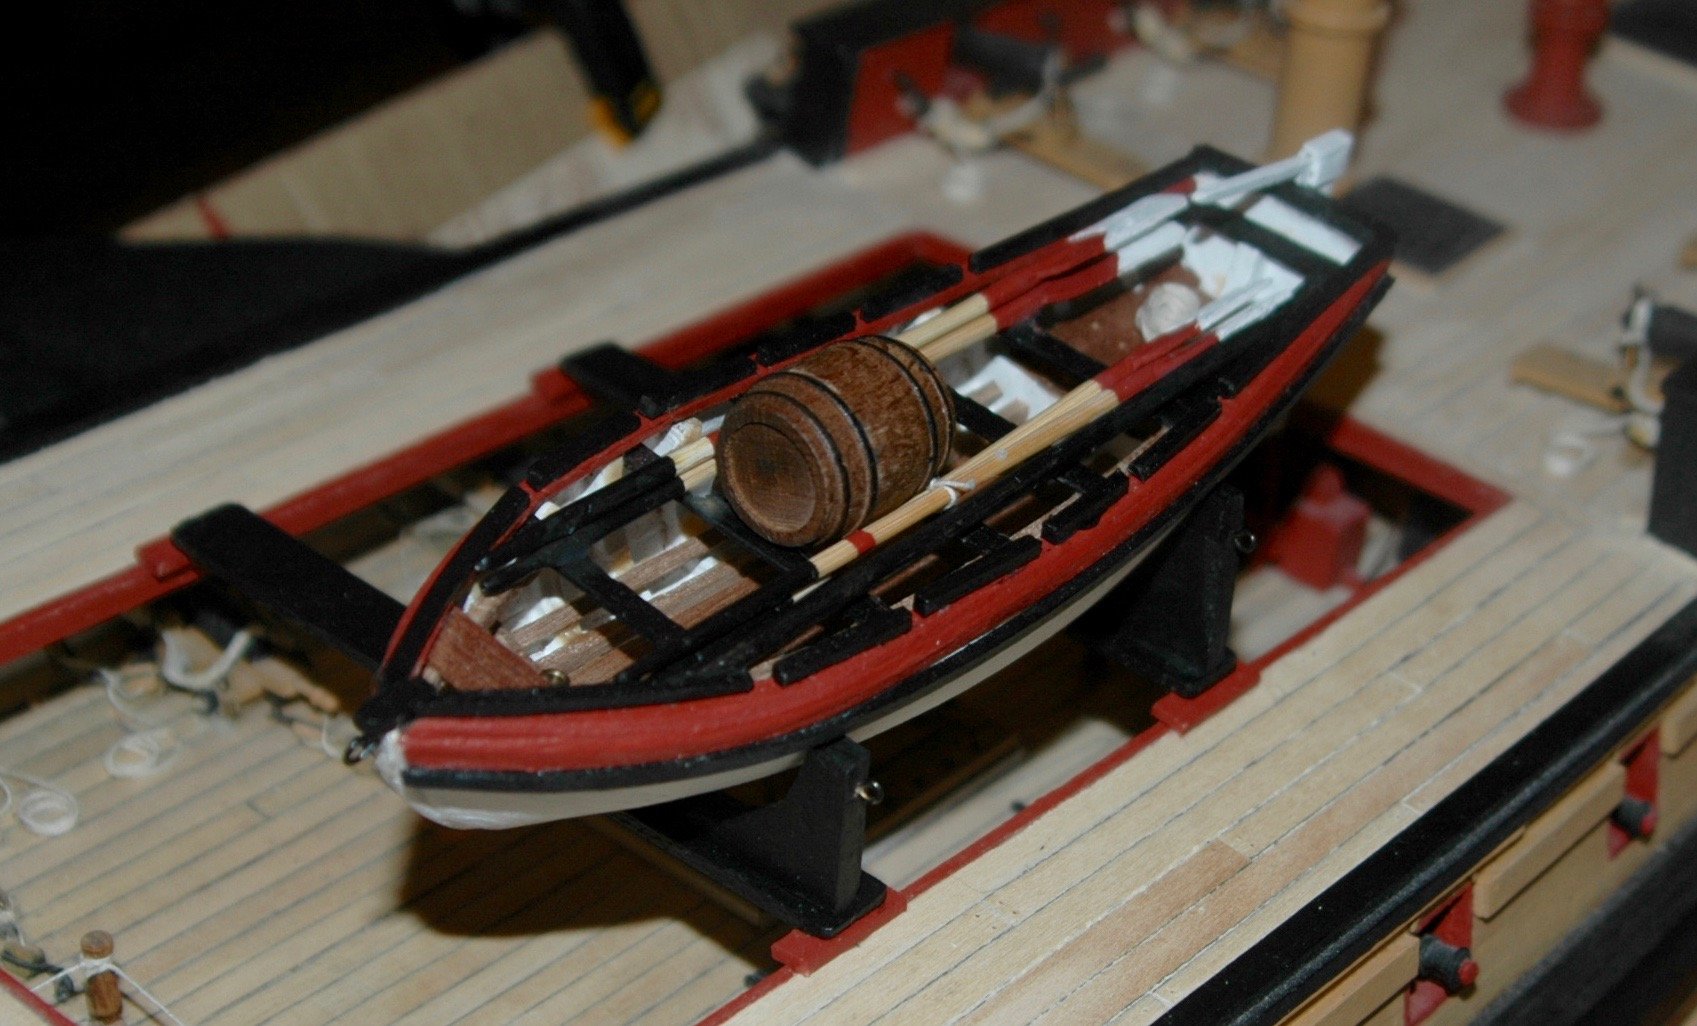
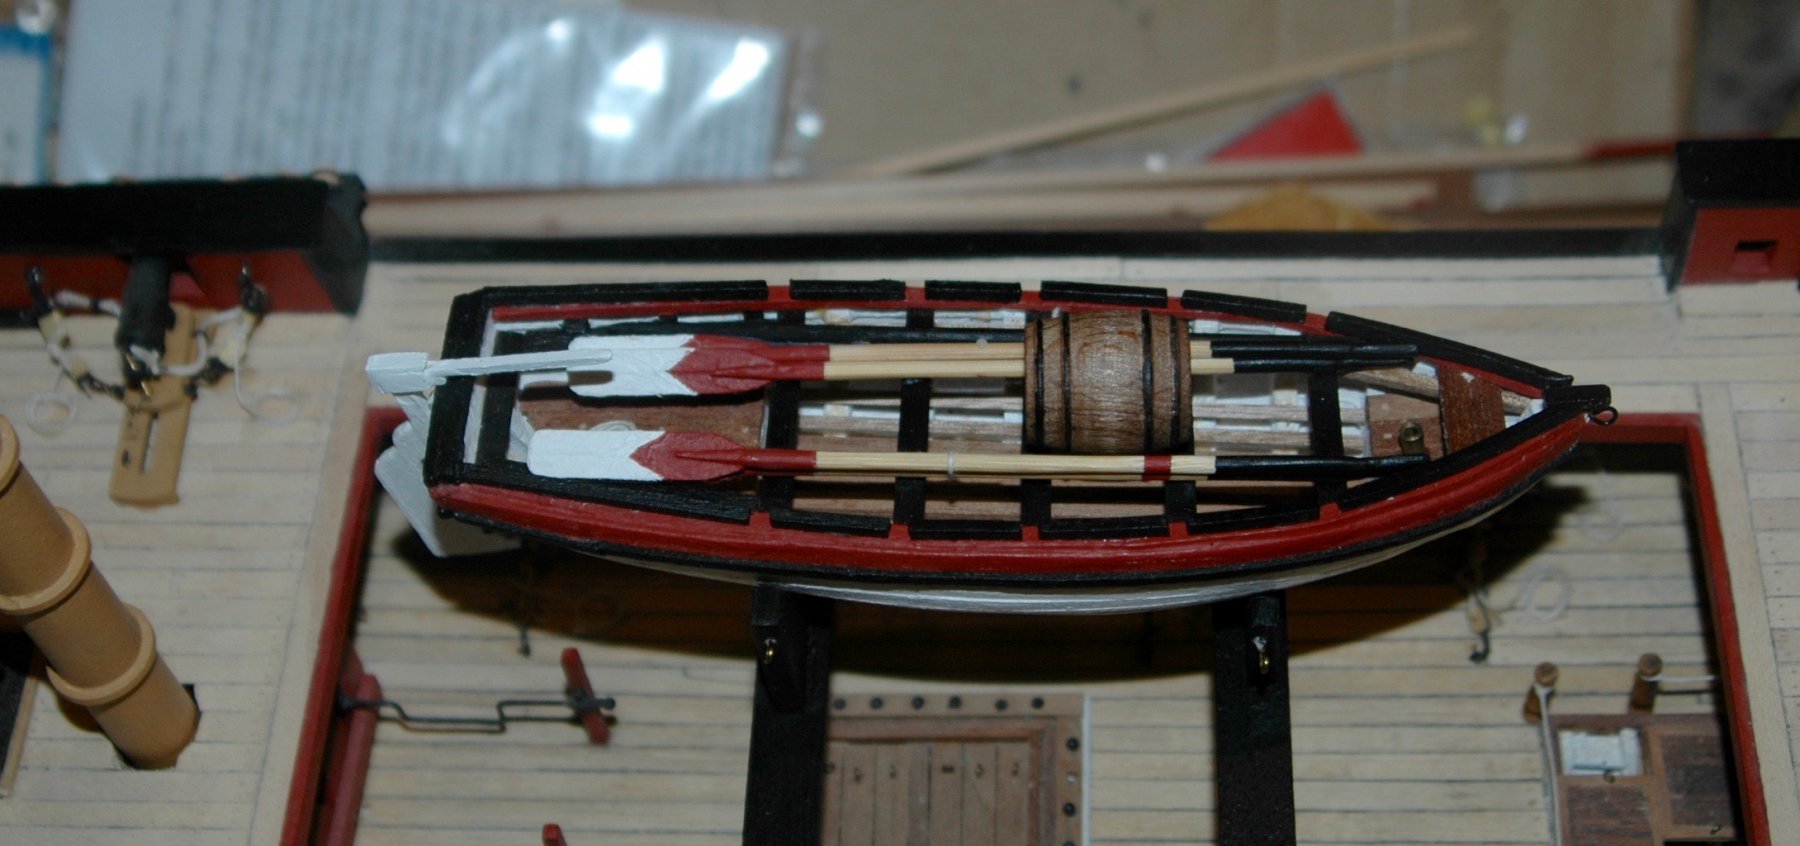
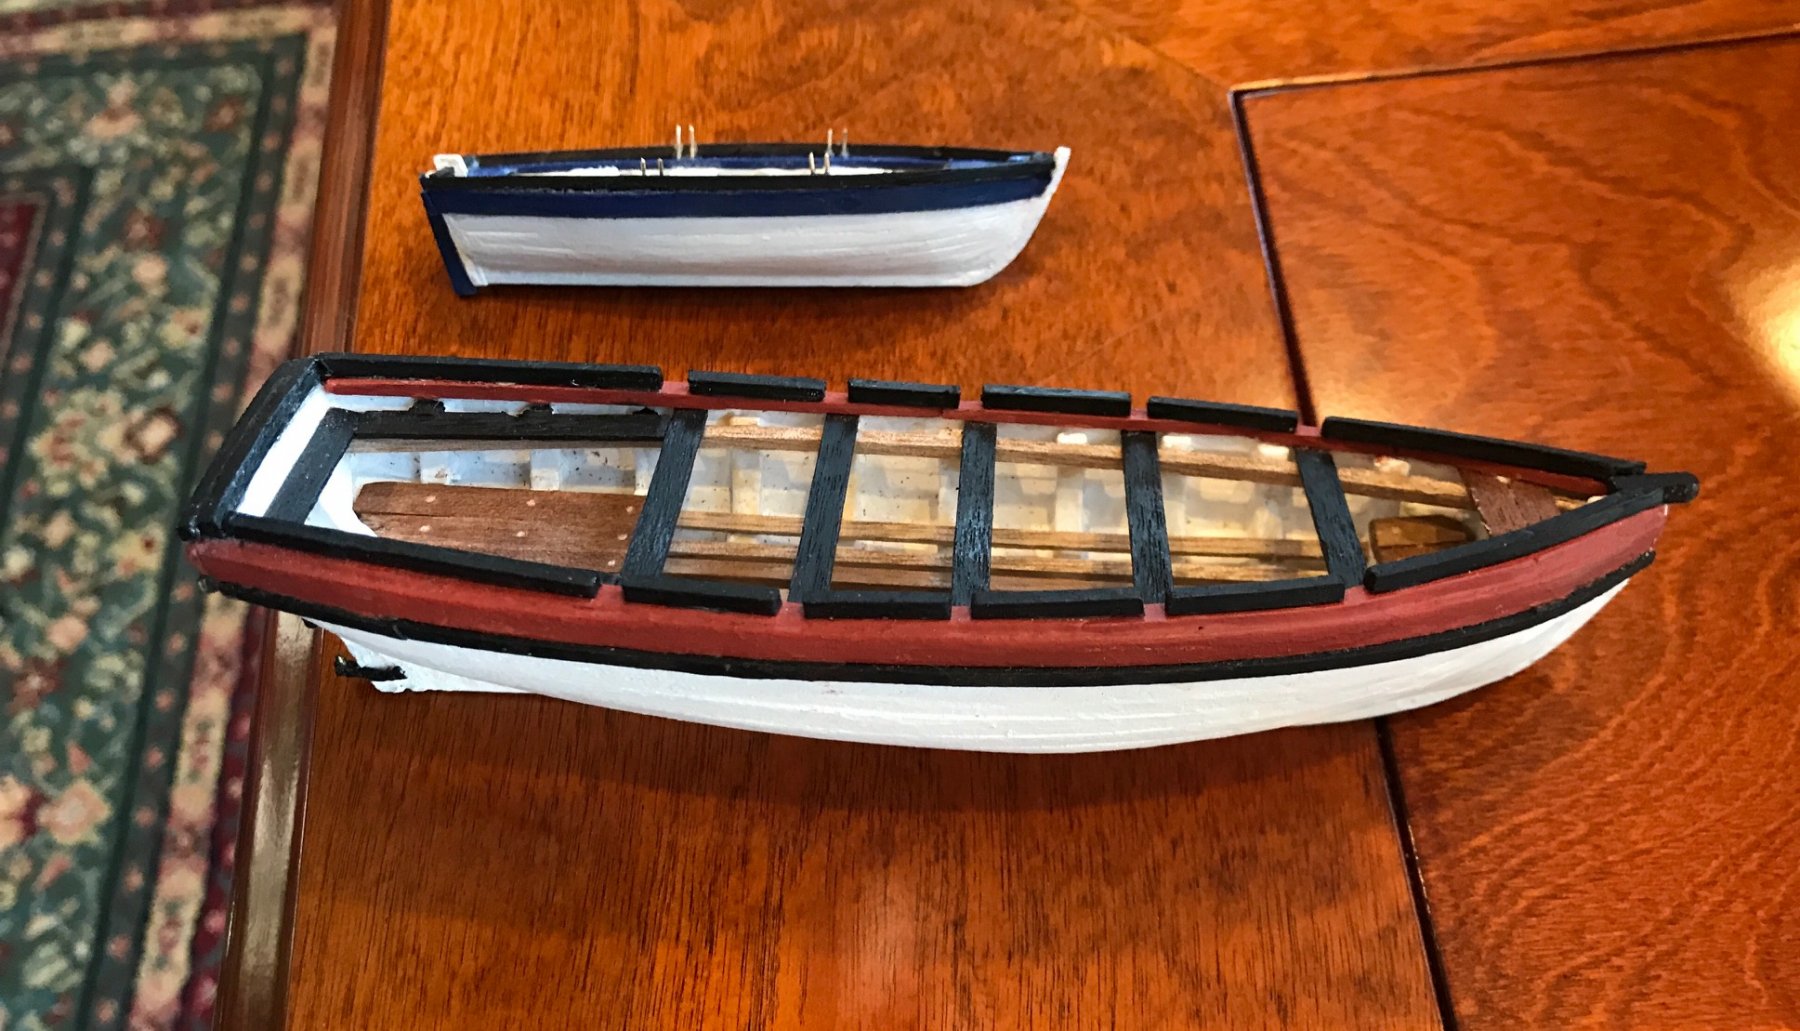
Hr 1101-1110 Finished red cutter and mounted in the waist. Loaded with a water barrel, oars, bucket and a spare boom. Also capstan with copper flashing and squared inserts. Needs a little clean up, but making progress... Next up, boat hooks and boarding pikes.


- 188 replies
-
- 6
-
-
- surprise
- artesania latina
- (and 1 more)
-
Tower has a $50 coupon on it 011/6 so that might drop the cost more. I bought mine on eBay a long time ago for $350 or so
-
Hi Mods, I must be an idiot, but I can't make the duplicate go away. Sorry...
-
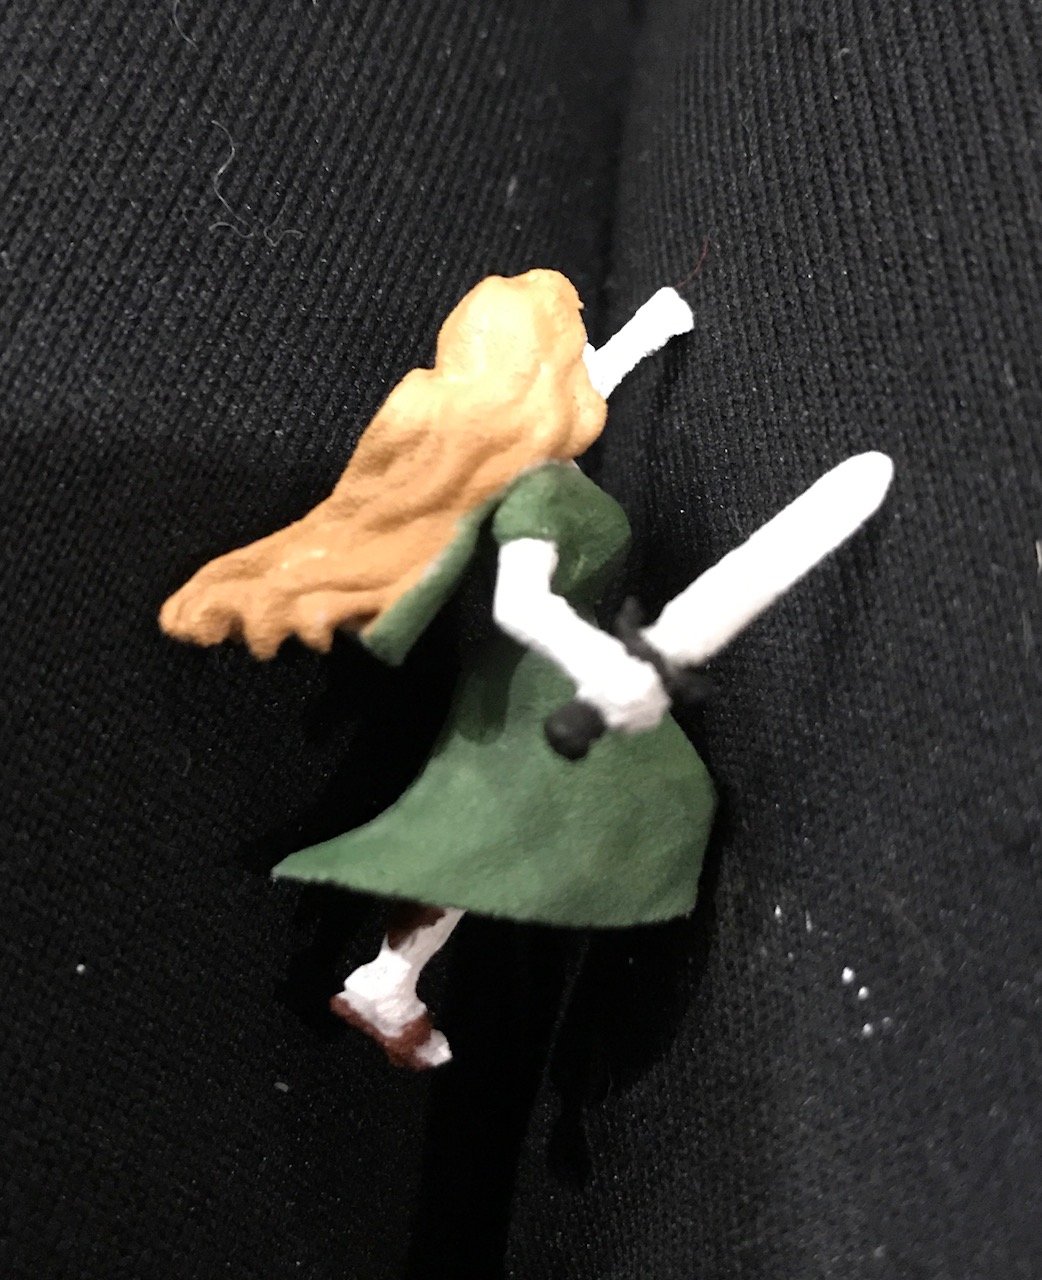
Hrs 1076-1100 An update is in order. Finished the red cutter and blue cutter. Note gunpowder or water barrel, buckets, and coiled rope in the boats along with sweeps/oars. Am securing the red cutter in the waist with lines and the blue cutter along the stern with davits. The oars are in my sons university crew pattern. Also finished and mounted the figurehead. She is blindfolded and armed with a gilded sword, then sealed with shellac.


- 188 replies
-
- 3
-
-
- surprise
- artesania latina
- (and 1 more)
-
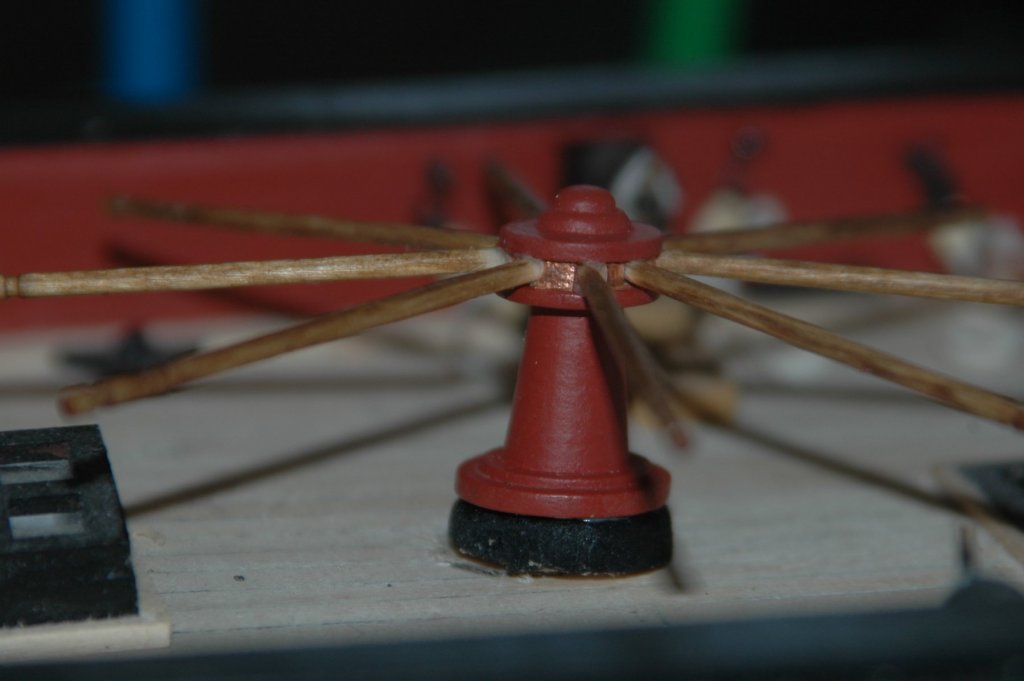
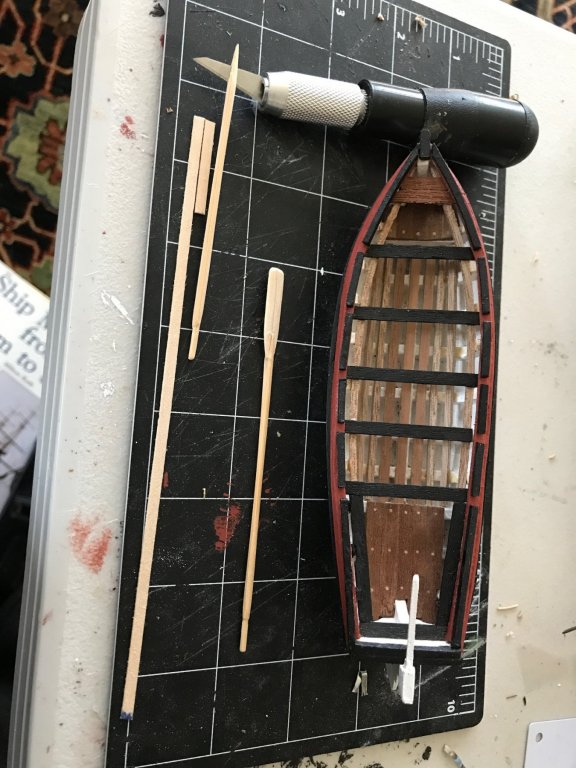
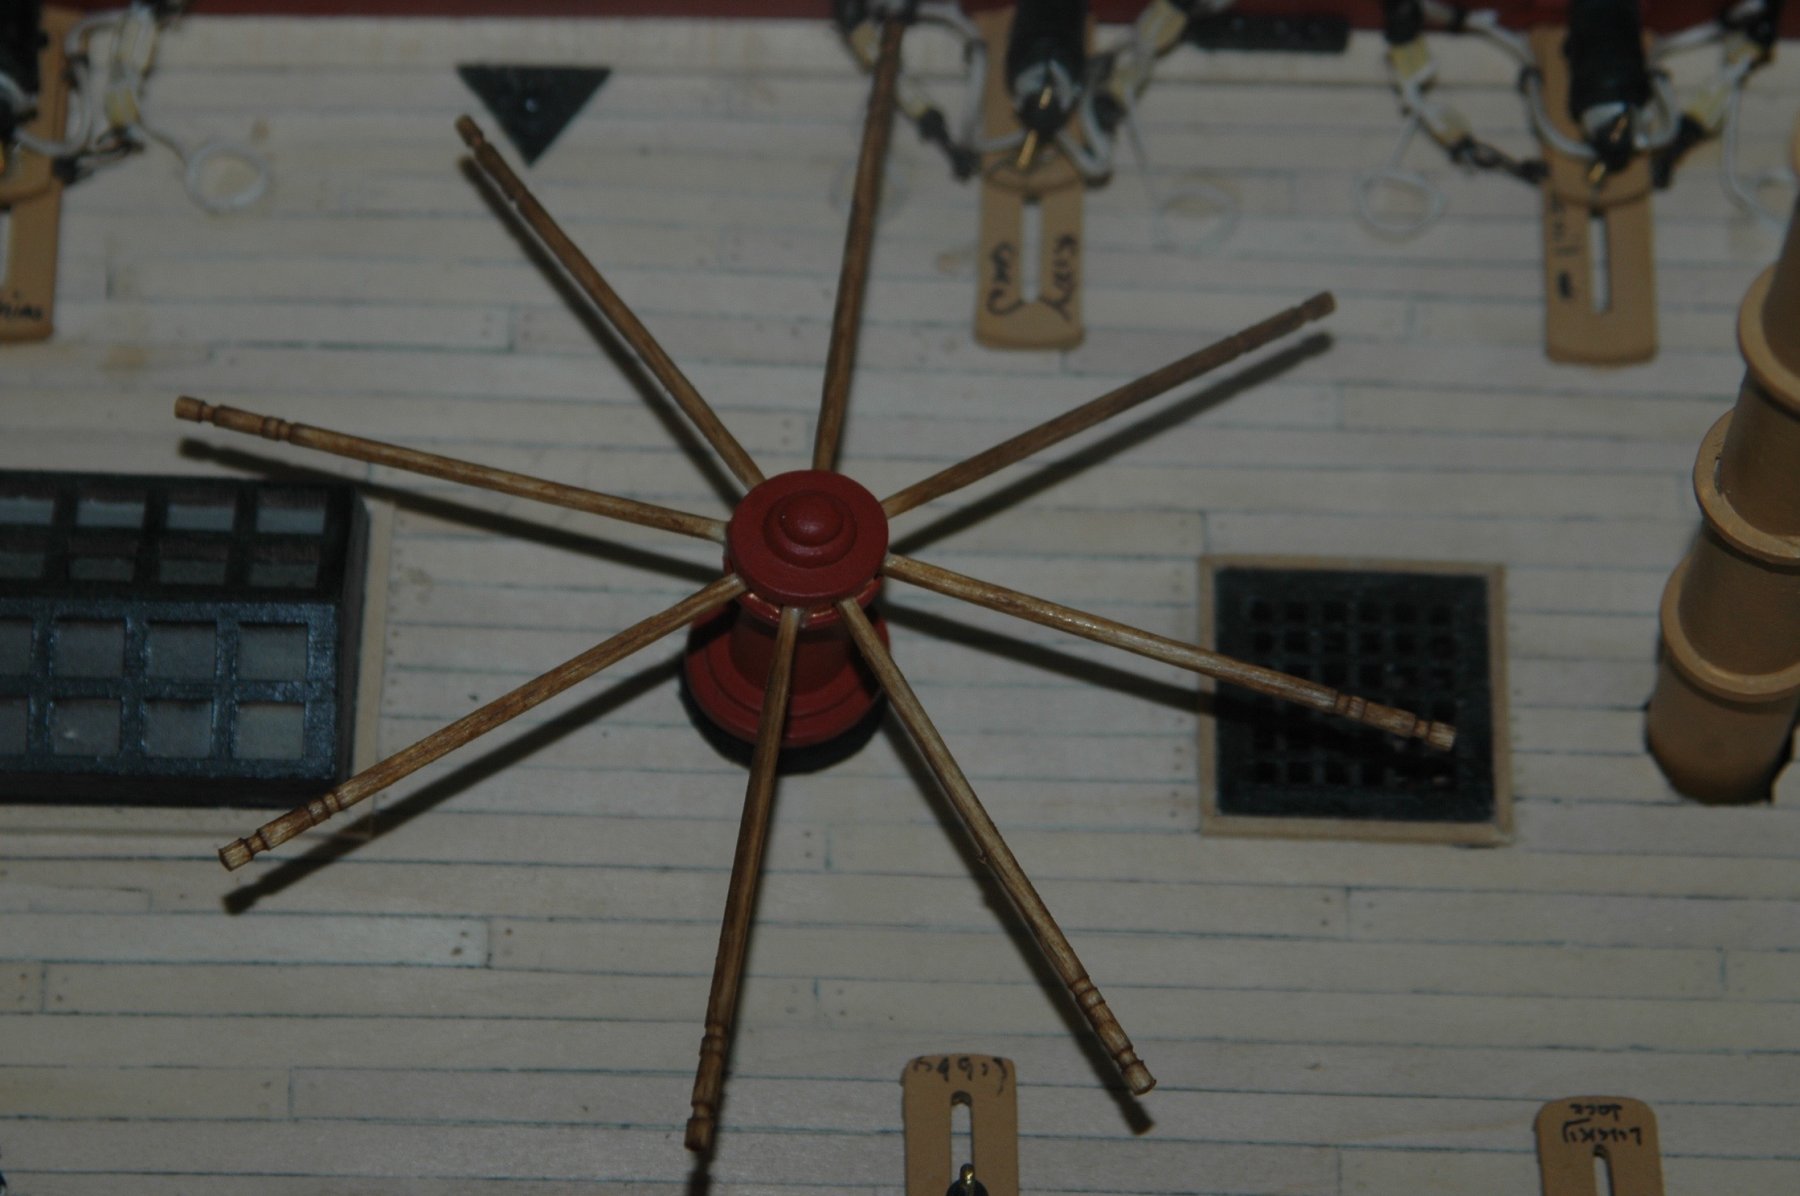
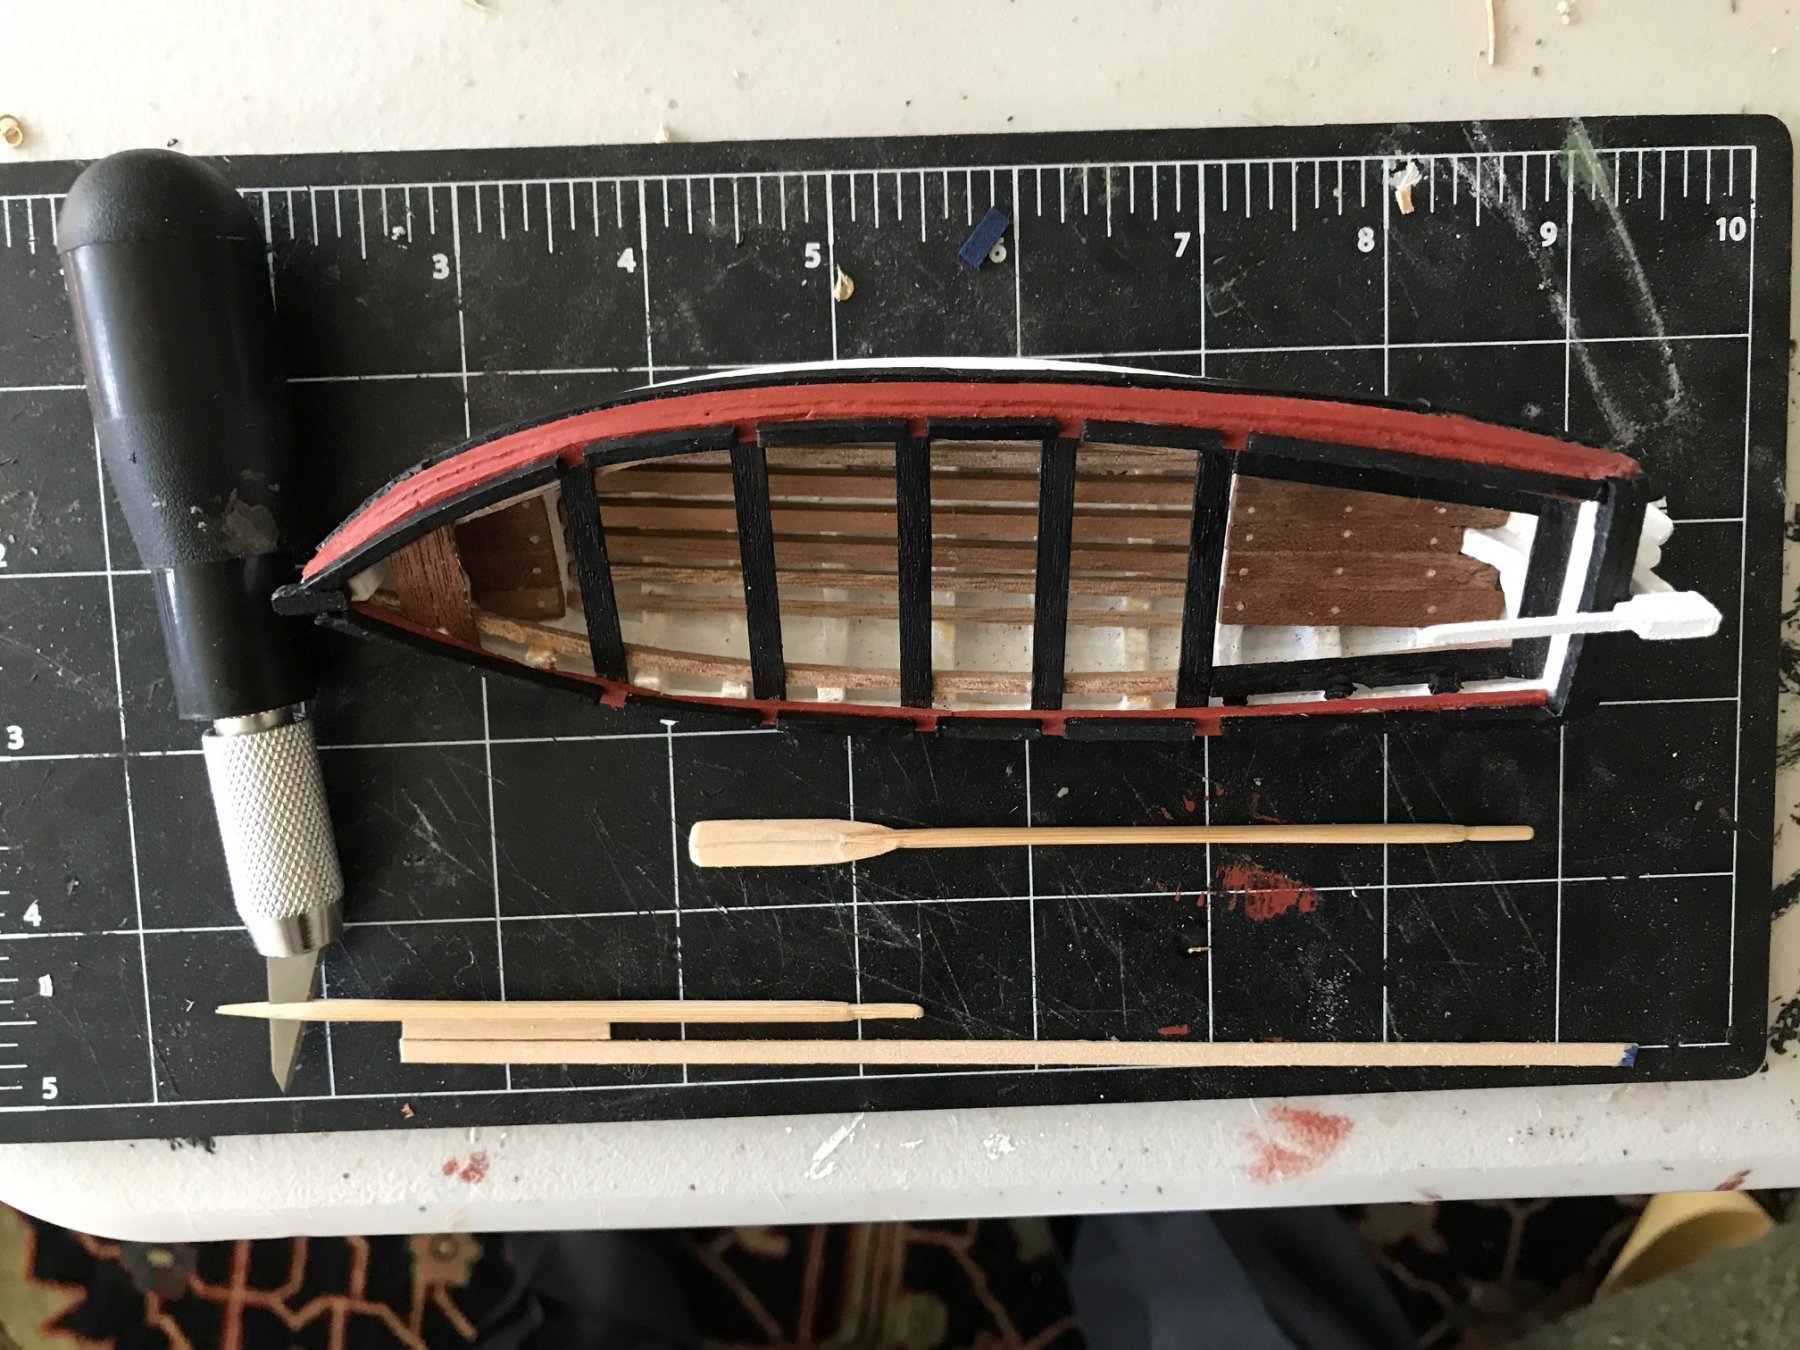
Hour 1073-1074 Learning to make oars to row de boat. There is a formula based on the beam of the boat so calculating from that. Using bamboo skewers and toothpicks for the shaft and planks for the paddle area. Need some thinning of the shaft but looks pretty good so far. Stabbed my finger though...ouch.
- 188 replies
-
- 4
-
-
- surprise
- artesania latina
- (and 1 more)
-
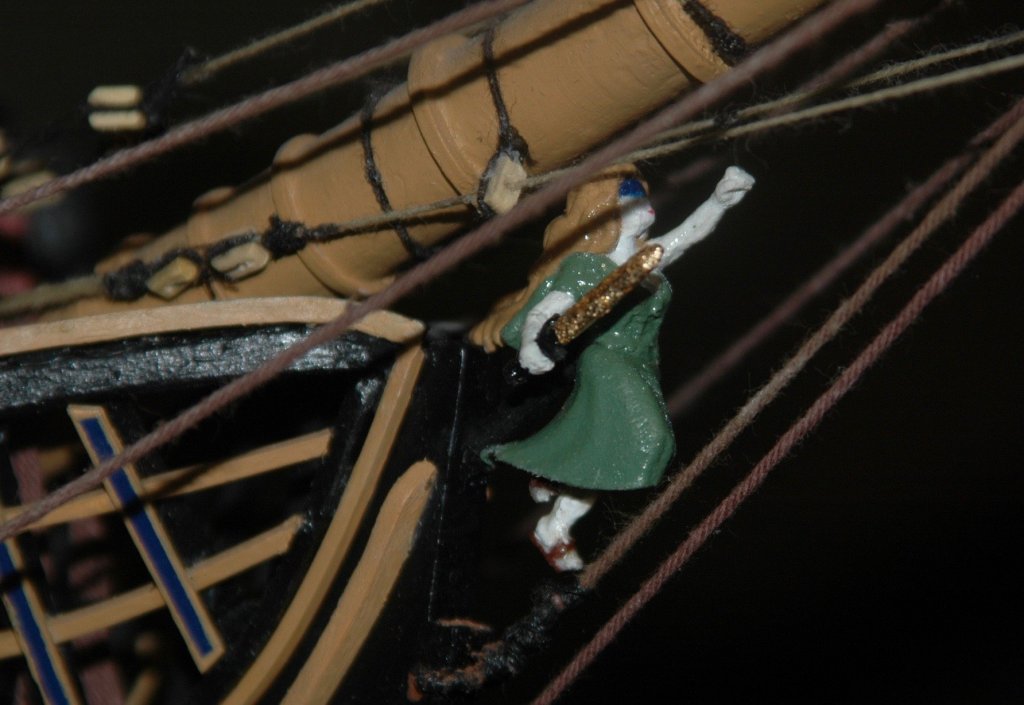
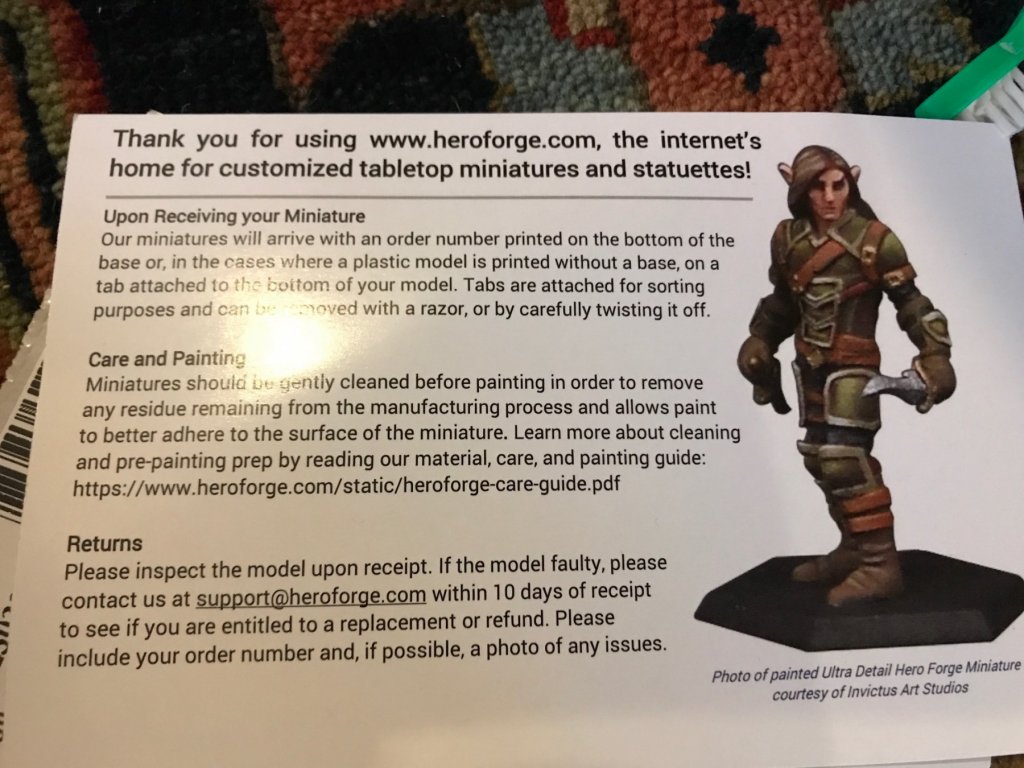
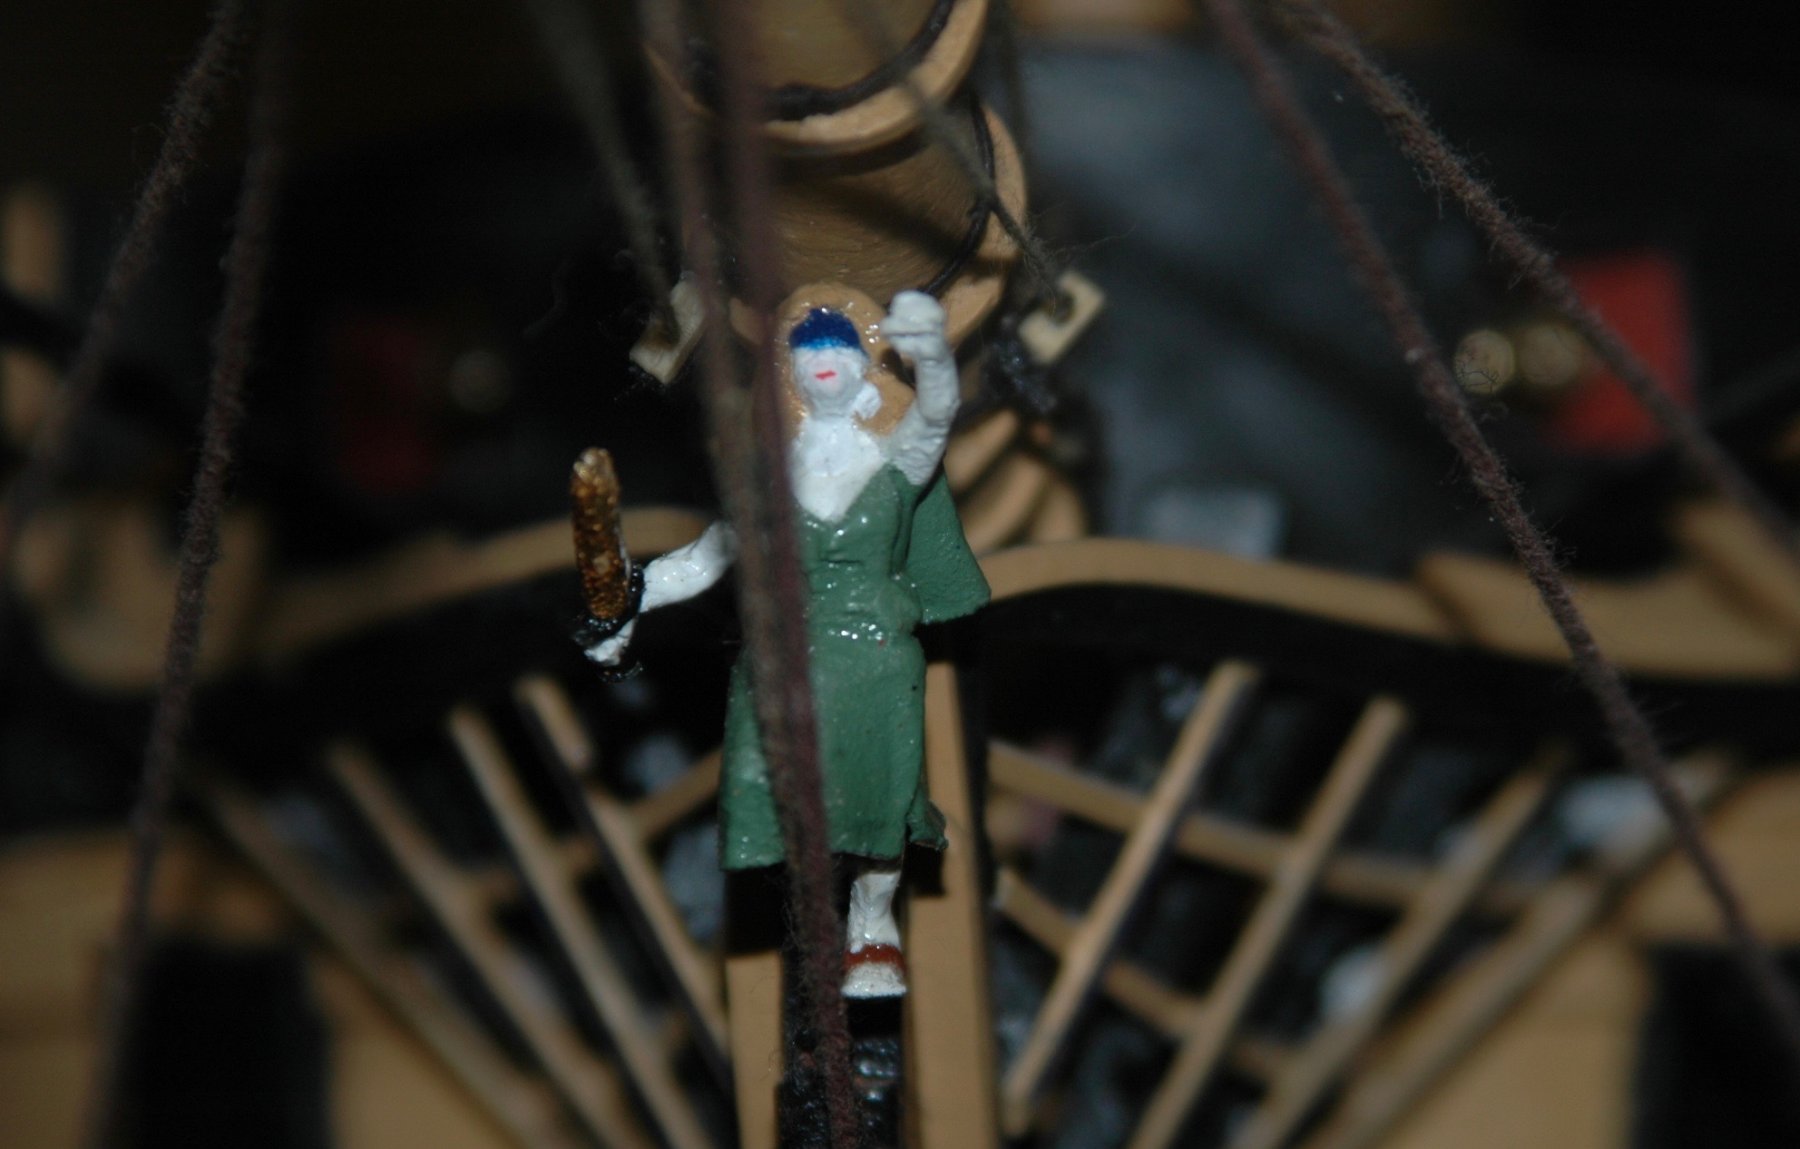
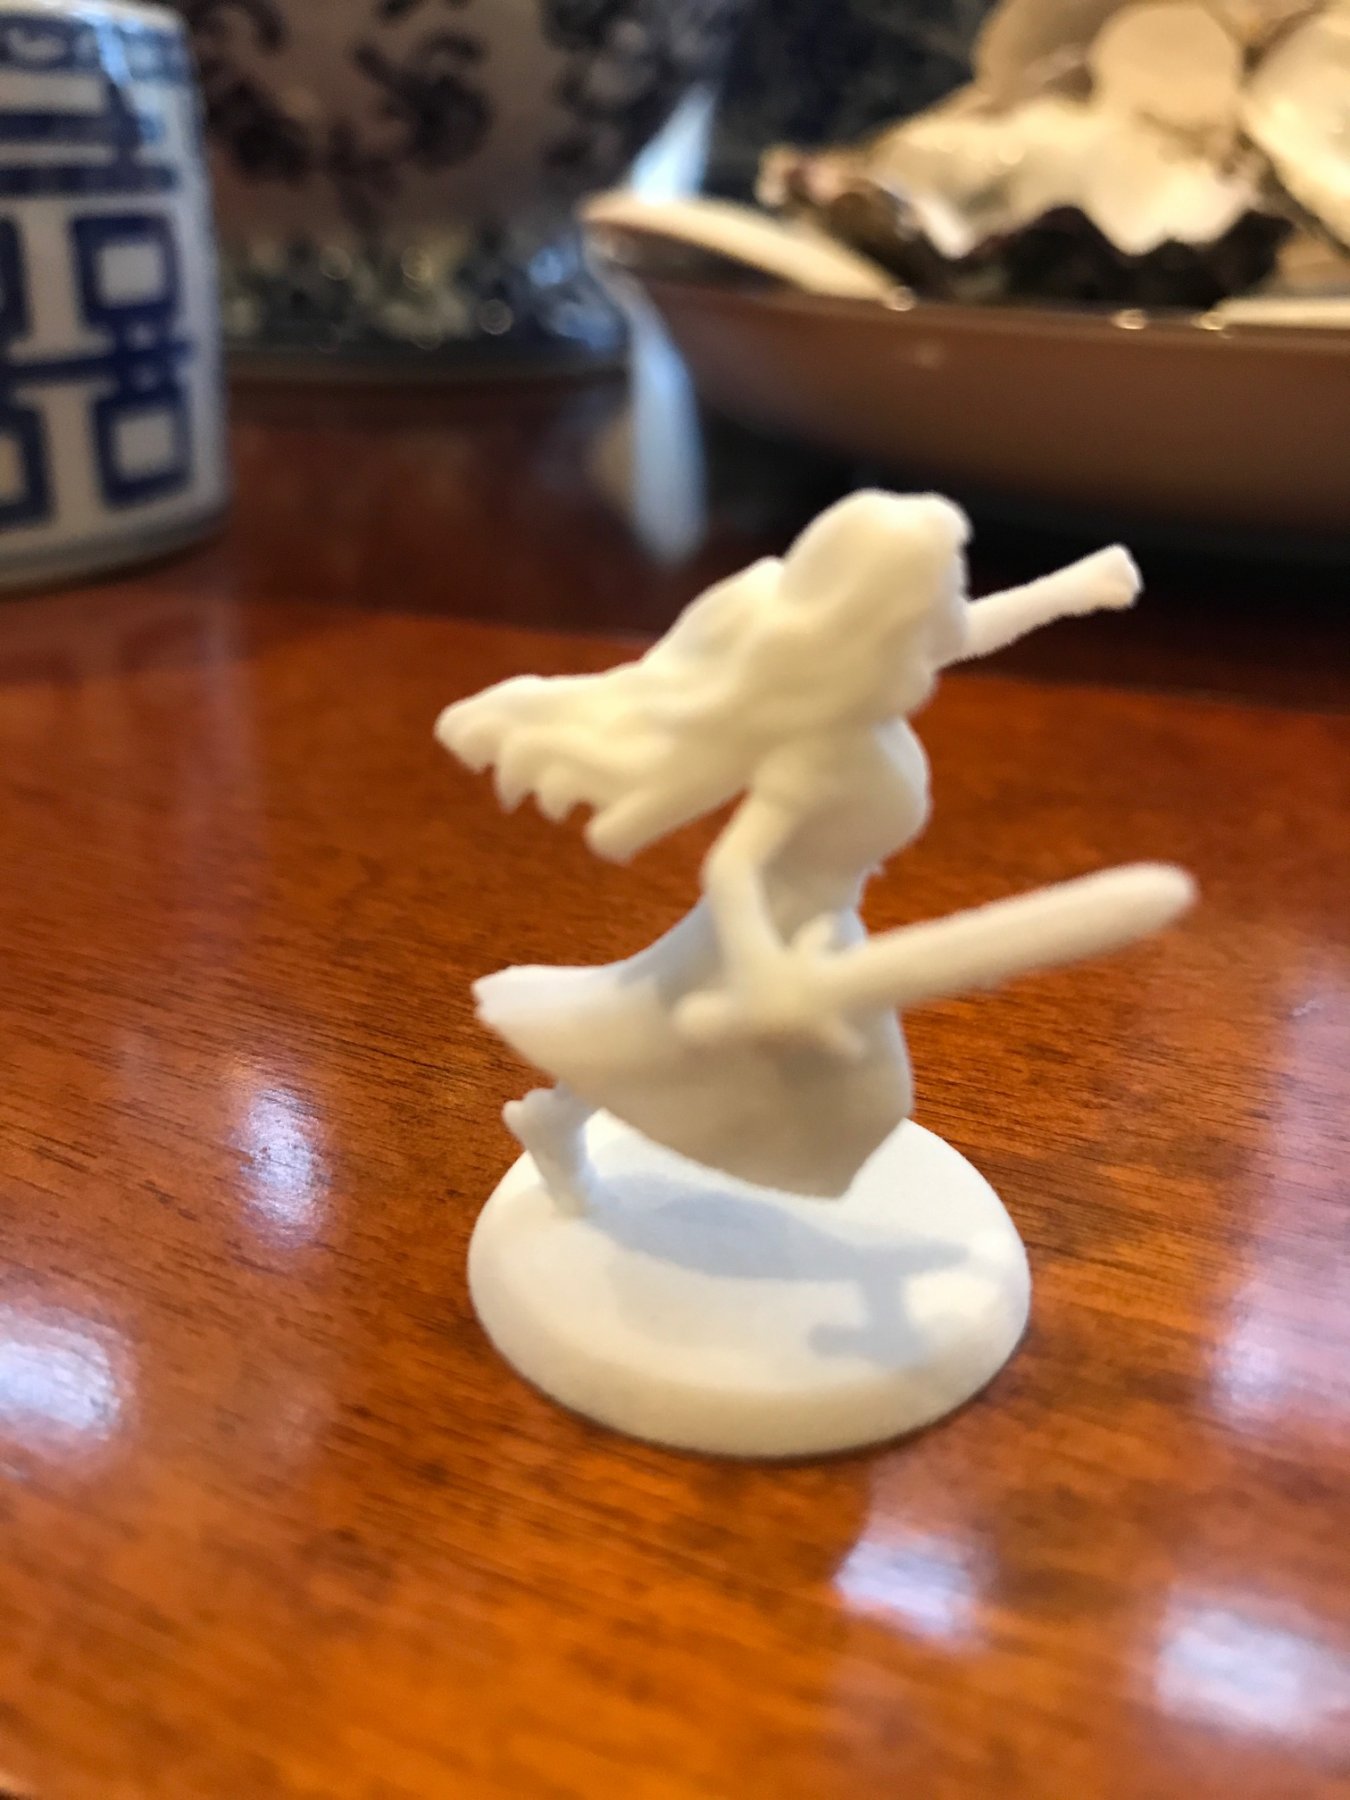
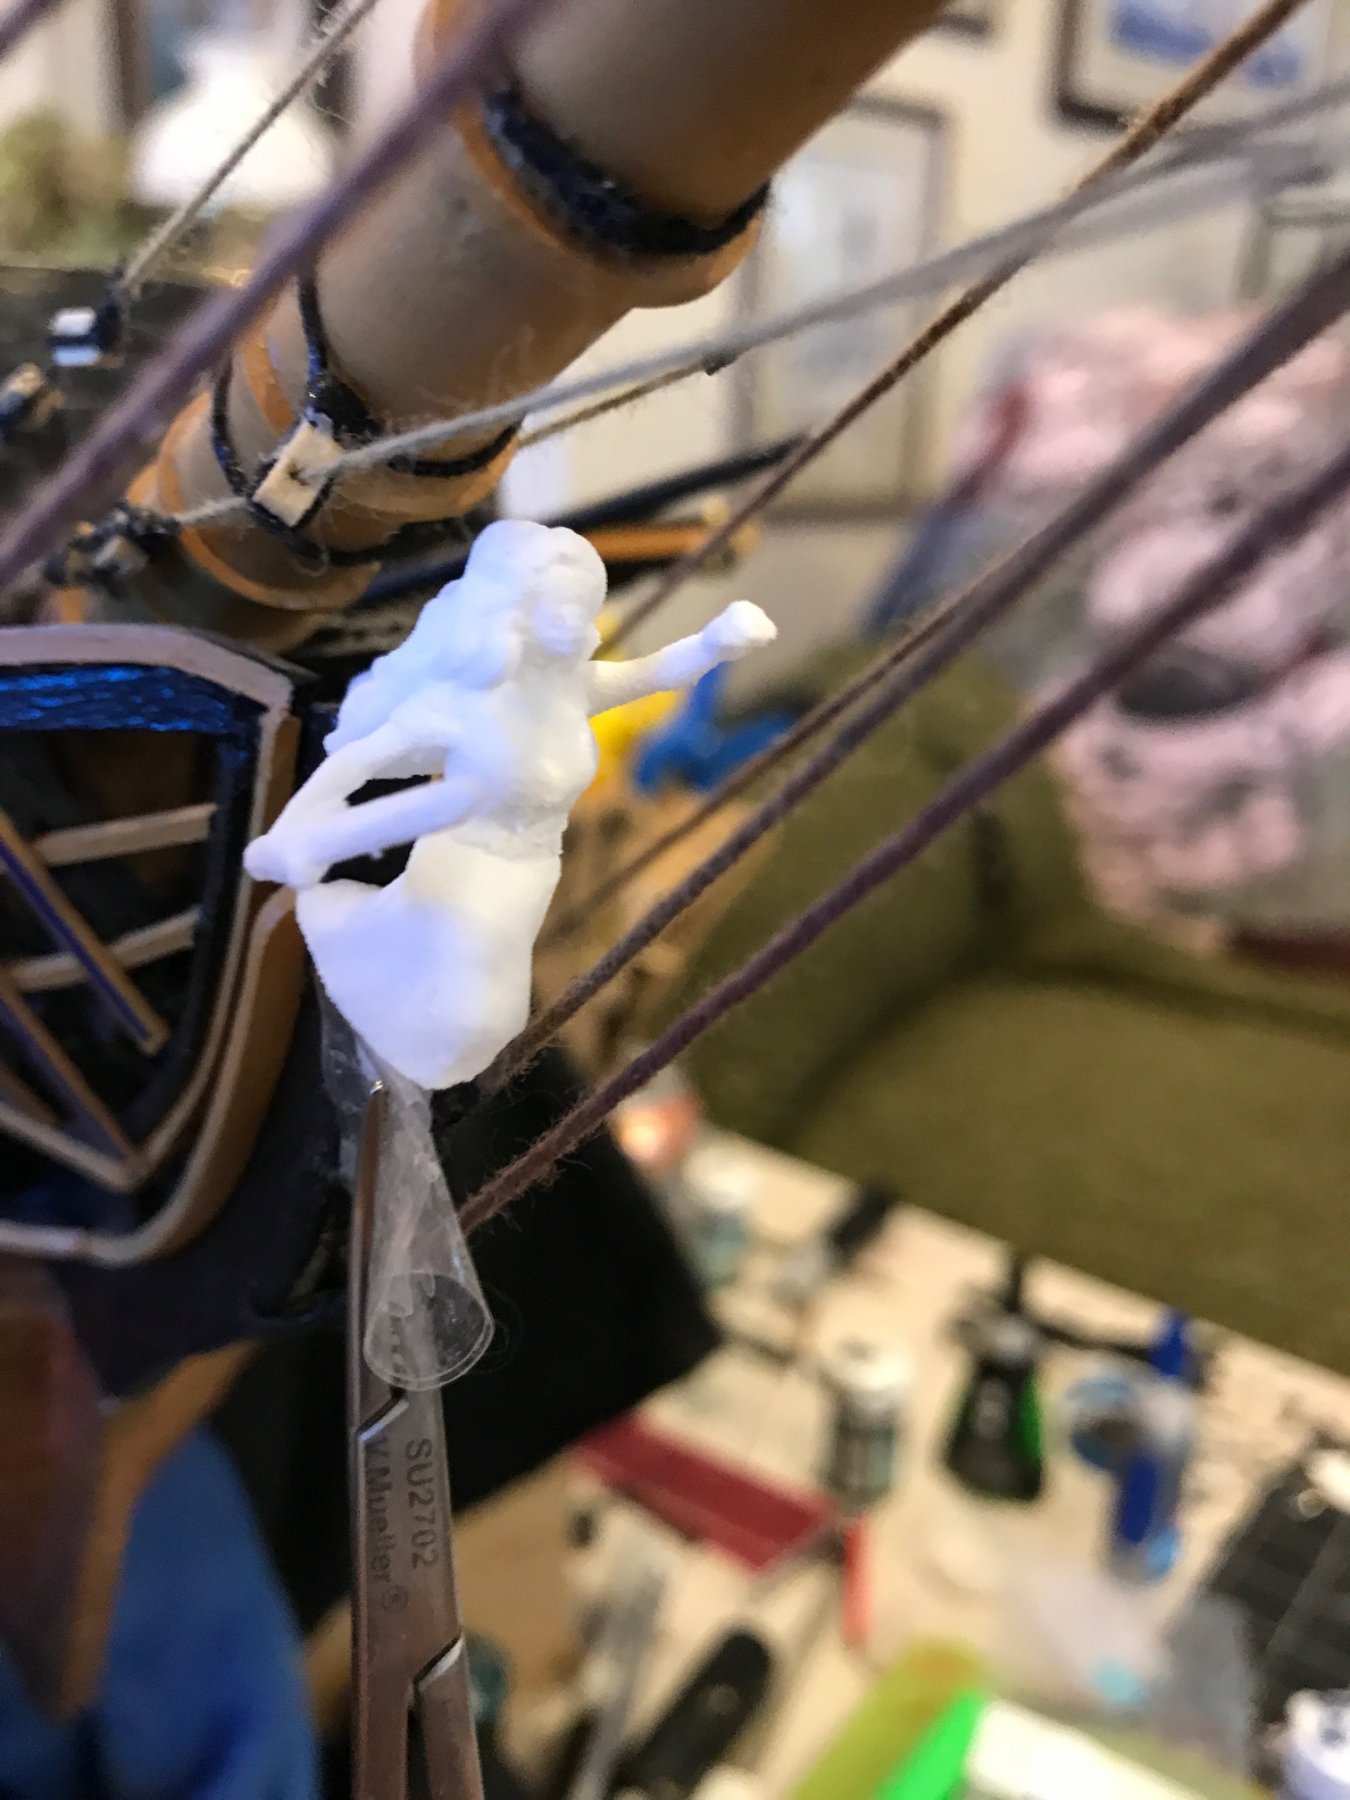
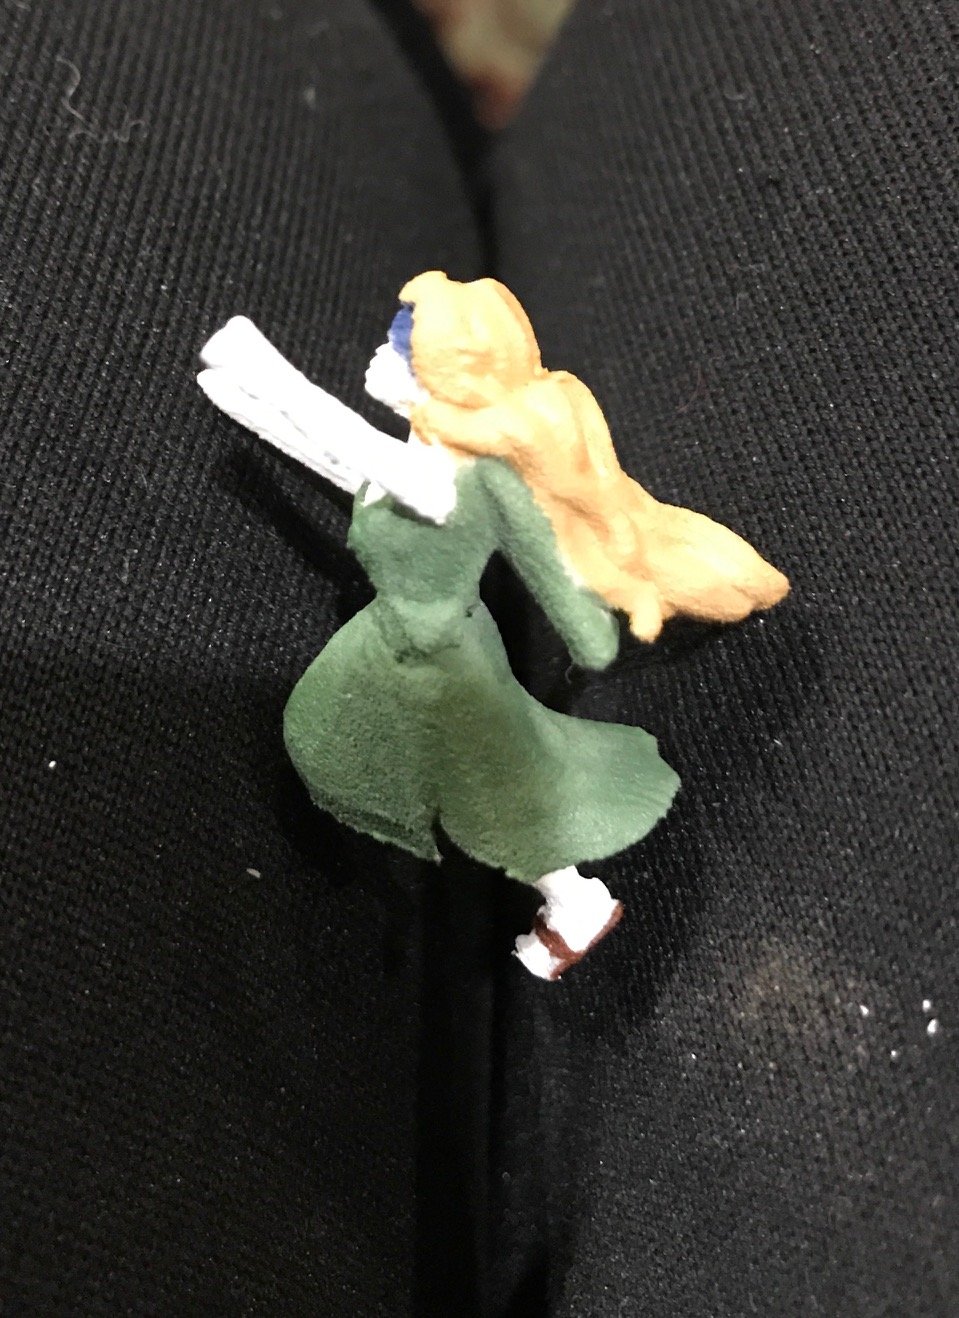
Hrs 1070-72 Found a source for a figurehead called Hero Forge, They make customized miniatures in a variety of poses using injected plastic. They seem to be perfect size so I chose a figurine with long flowing hair carrying a sword wearing a blindfold ("Surprise": get it?). Attached are my attempts to paint the figure. Will gild the sword at the end.


- 188 replies
-
- 4
-
-
- surprise
- artesania latina
- (and 1 more)
-
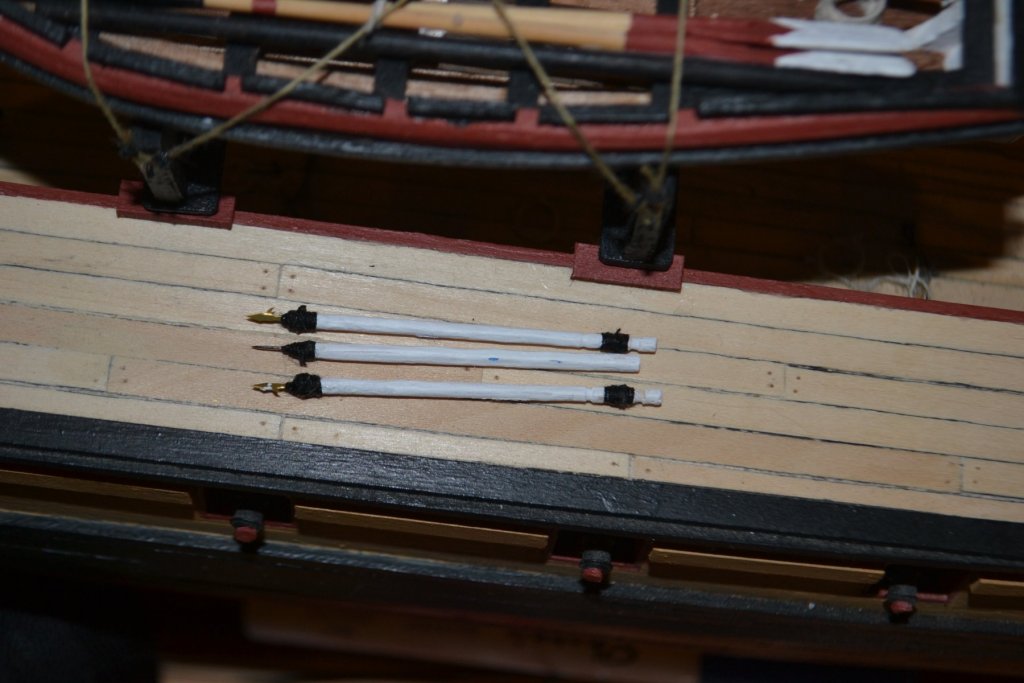
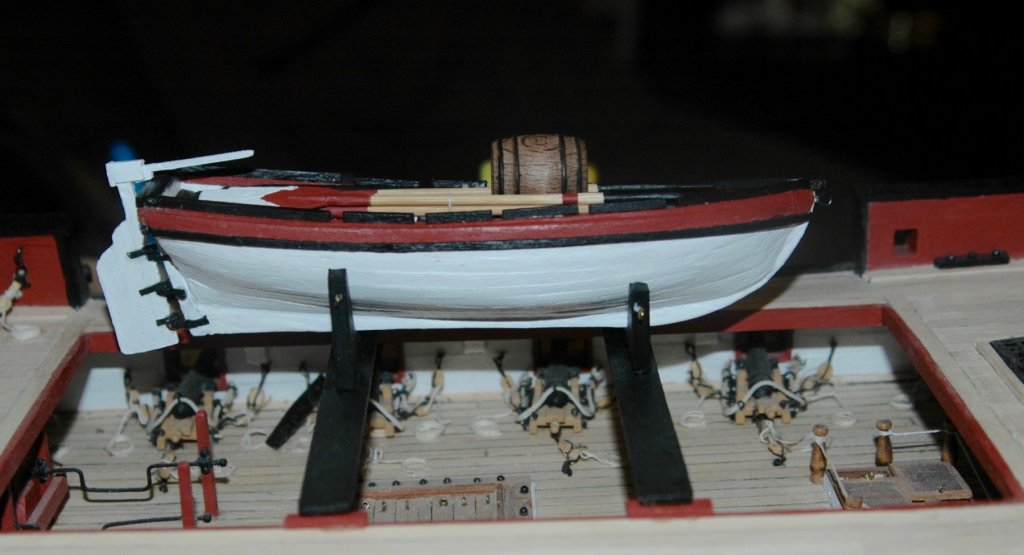
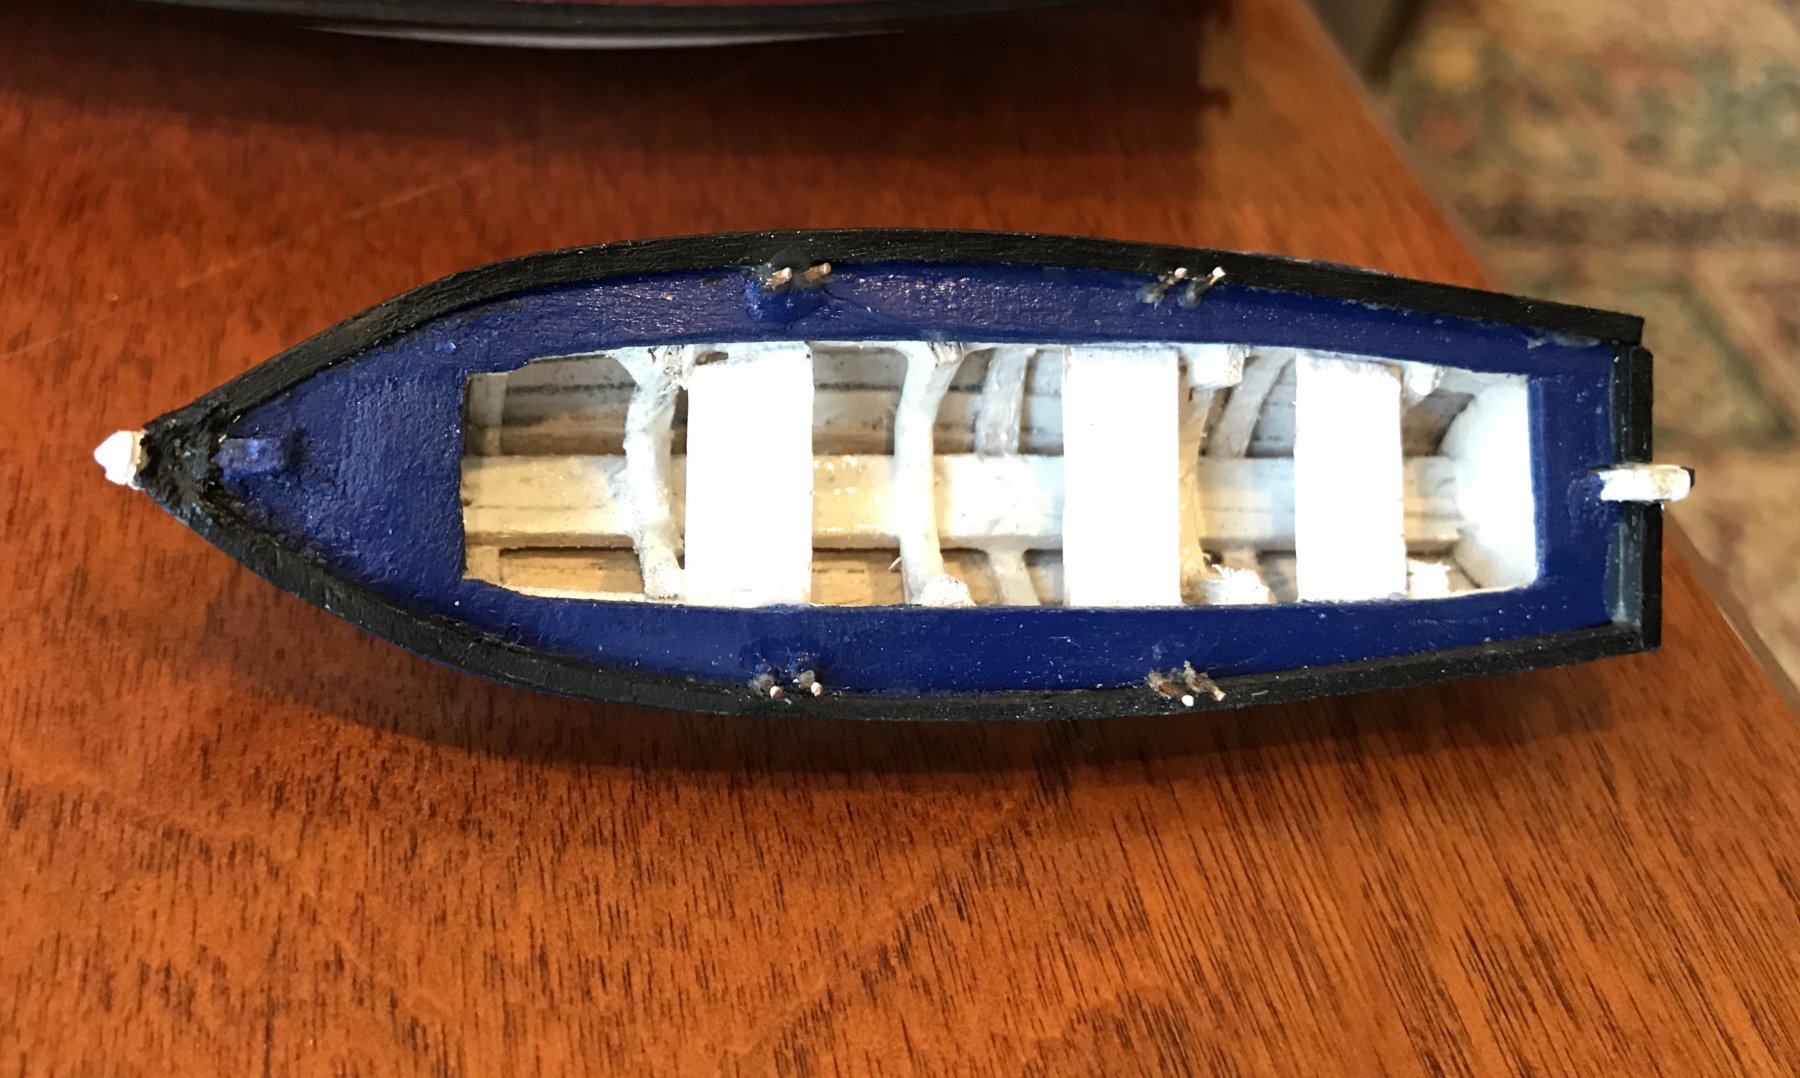
Hrs 1066-1070 Finishing off the red cutter and captain's gig. Needs a bit of clean up. Note thole pins on the blue gig. Working on the rudder and then the oars...

- 188 replies
-
- 2
-
-
- surprise
- artesania latina
- (and 1 more)
-
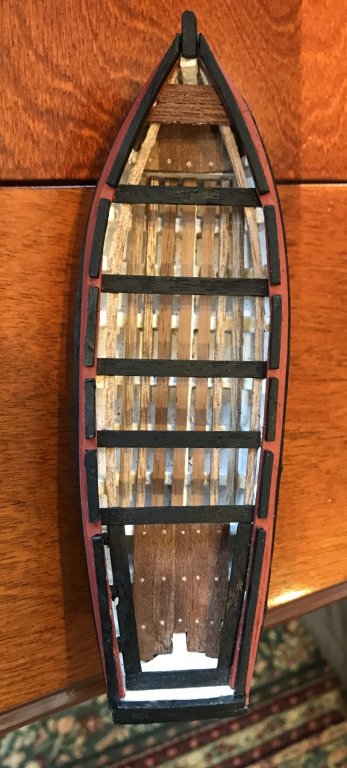
Hrs 1053-1065 Getting there... Finishing the Red cutter, 28 feet to scale. Plank on frame with cutouts for oars. Working on rudder assembly now.
.thumb.JPG.7acce16ce3d6bb00e6216bcebe099ff5.JPG)
- 188 replies
-
- 5
-
-
- surprise
- artesania latina
- (and 1 more)
-
Just saw your note on stern windows problem. I think it’s going to require some ingenuity. There are seven windows going across so you will need to find the center and then place the three columns evenly across each side to create the gaps for the windows on each side. The columns are at a slight angle. Once you delineate the gaps you can add decorative trim painted gold on top vertically or maybe cut out the metal from the kit to lie on it to create a 3D effect? Then you can build individual windows. I used microscope coverslip glass to get the effect I wanted but have seen cellophane used. I hinged some of my windows to open. See bottom of page 1 of my build. Sorry, I’m on vacation using my phone so can’t transfer pics in...
-
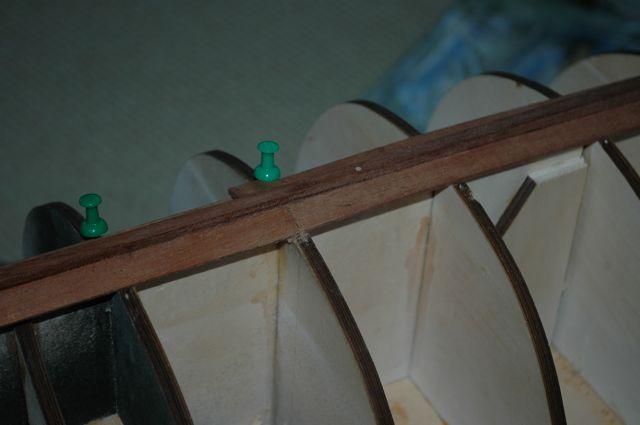
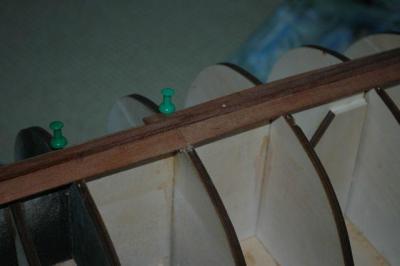
And using push pins (different location, but the same idea). The holes will go away with sanding or a drop of water.


.JPG.3cb38392f72fb7d1dec95309a9ff84c7.JPG)