Moo
-
Posts
32 -
Joined
-
Last visited
Content Type
Profiles
Forums
Gallery
Events
Everything posted by Moo
-
 Just catching up. Great re-do Grant! At the end of the day you've got to be happy with your own work and we get to enjoy the process (and output). Cheers Leanne
 -
the hammer is the smallest one I have at the minute, was my grandfathers from when he was a mattress maker. It's pretty light, only about 3in wide. As for name, it's Leanne... 'Moo' has no connection to Alf Garnet rather my last name - Cowan... Took some wag at University to finally pin me with a bovine reference!!
-
Looks great Pete. There'd be few Australians who remember the day 'we' won the cup who wouldn't get a smile on their face just by hearing the name Australia II or see the boxing kangaroo flag... I was only 9 and it was BIG news at the time. Bob Hawke is 84 and can still skull a 'schooner' of beer with the best of 'em (likely to be a few videos on YouTube) - a skill he honed in his University days, a Rhodes scholar I think. A schooner of beer? There's a bit of history to the actual amount, but these days is a glass of 425ml... "...the origin of the term, although unknown, is suggested by the comments of a magistrate in a 1931 Sydney court case. A city publican was proceeded against for supplying a schooner of beer instead of a pint. The aggrieved customer was found to be legally entitled to a full pint in a stamped measure if he asked for a pint; he should receive a ‘full-rigged ship’, not a lesser fore-and-aft rigged schooner." From http://www.brewsnews.com.au/2011/01/schooner-wars/ (fws) Cheers Leanne
-
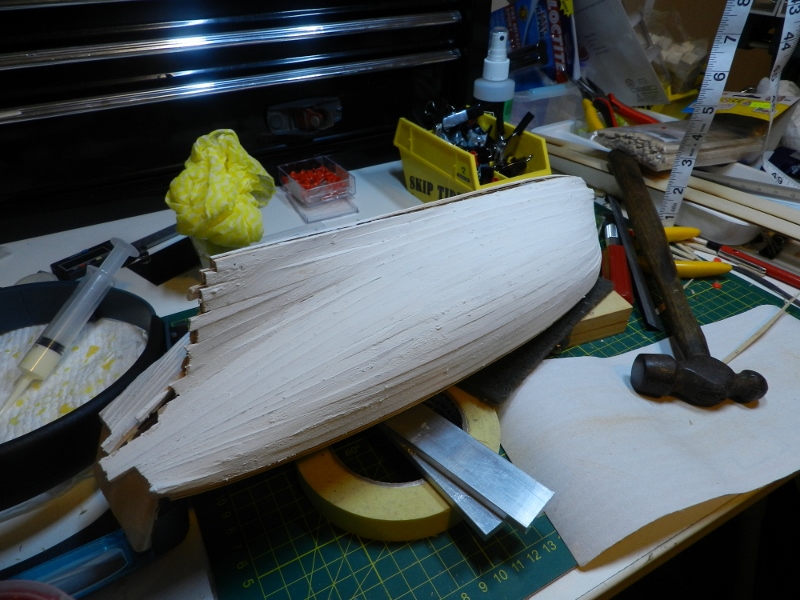
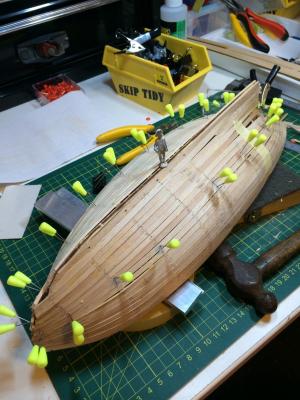
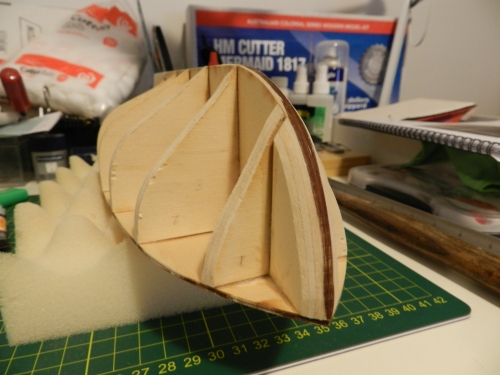
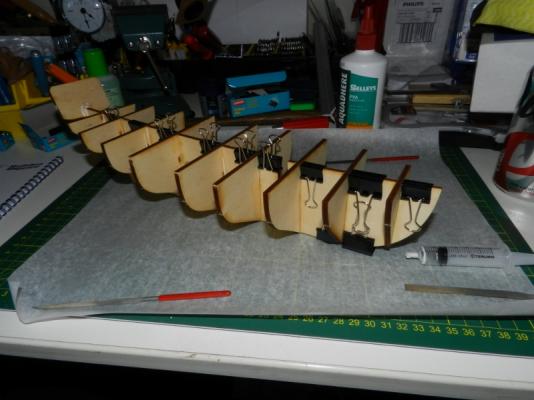
All filled... now for sanding...

-
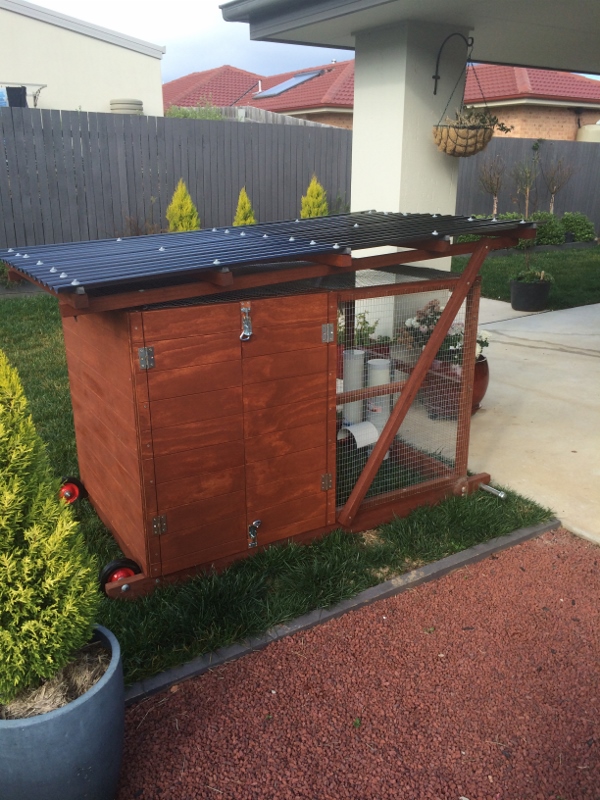
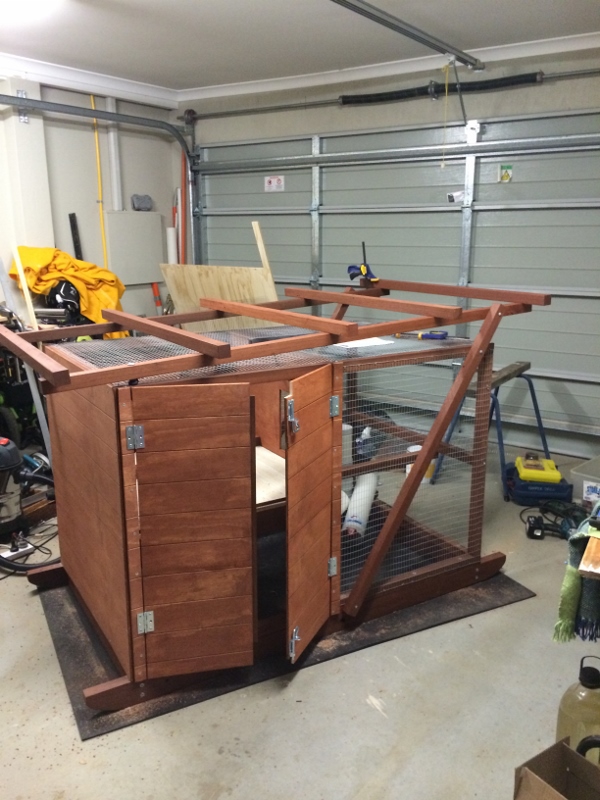
They're still too small... still getting their adult feathers so can't keep warm outside yet. Won't be long though, the Taj ma Chook awaits...


-
Not really. Neither the written instructions or the DVD indicate when/how to plank the rear of the transom... will see how we go.
-
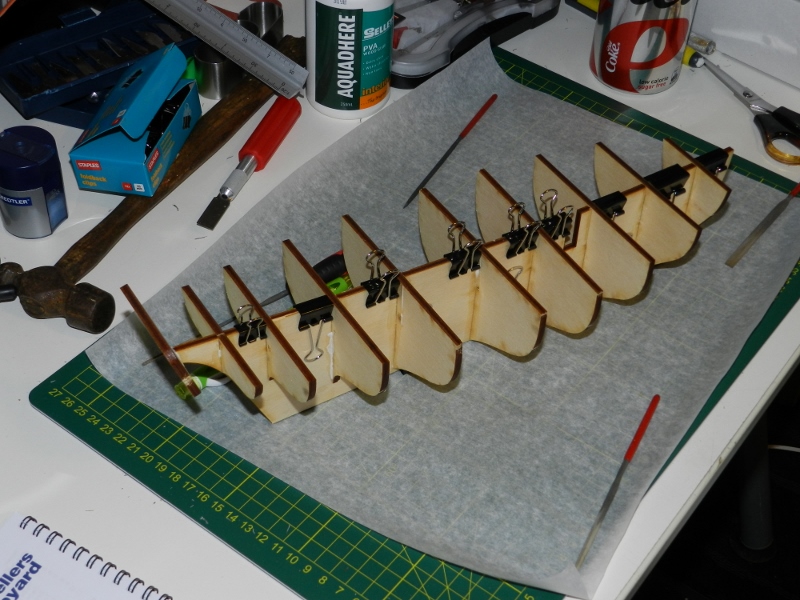
A few steelers to go and then sanding/filling begins... Yay!
-
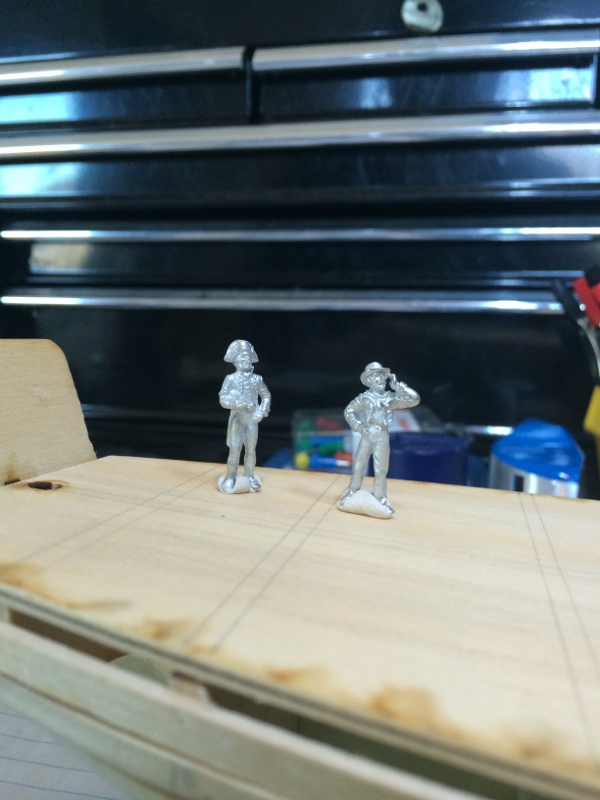
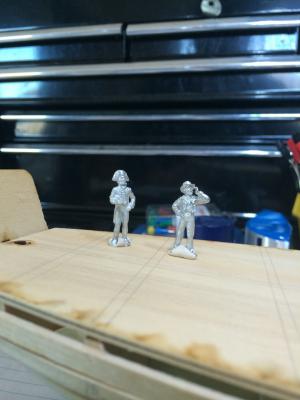
Thanks Ollie. The figures are the 25mm/1" Amati ones, though I think they might be a bit short for 1:48 - think I got my scales mixed up. Probably better with the 35mm versions for a 5'5" standing height... 4' is likely a bit too short - might end up being a cabin boy or powder monkey... though I doubt the Mermaid had the latter
-
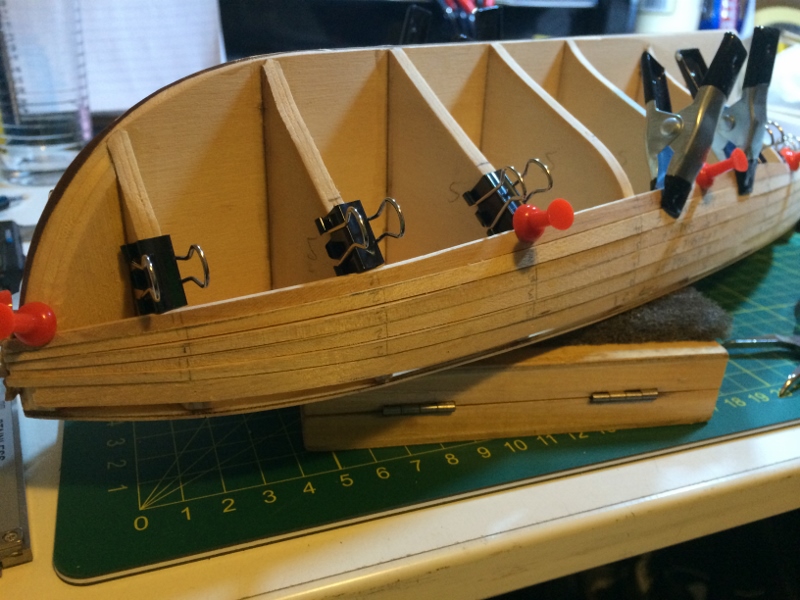
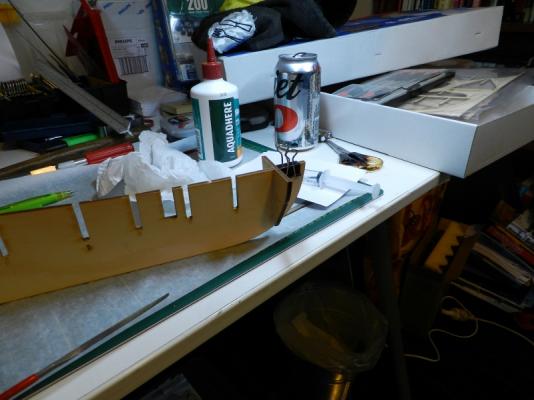
A bit more progress... The building instructions that came with the kit suggest using the crimping method for shaping bends, but I found the timber was more prone to snap at the ends. So I'm soaking each plank in water for about 15-20min before pinning in place, waiting for it to dry and then gluing-up/reclamping. Seems to be coming along... The Captain and some of the crew arrived recently from cornwall model boats in the UK (you were right Grant, cost and postage very reasonable). Came aboard for a quick review of progress - the boatswain is giving me the hurry up. Cheeky! All ahead...


-
There is another large model of the Sirius on display in a case in the foyer of the Commonwealth Dept. Health & Ageing 'Sirius Building' in Woden (suburb of Canberra). I'll have to remember to get some photos next time I'm over there. Leanne
-
Hi Richard, just tried rcbuyers, but didn't seem to have them listed. Found them at: http://www.hobbyexpress.com/pins.htm Cheers Leanne
-
I've ended up going for a Donegan Optivisor 2.5x mag 8" focal length to start. Went for ground glass lenses rather than plastic to help prevent scratching $47.44AUD including shipping to Canberra, Australia. Yay Amazon! Now for the mail to arrive....
-
Finally, underway again... have been a bit side tracked on other projects for a few months - most recently building a chicken coop in readiness for chicks arriving in the next few days. Just got the roof to go... But back to the shipyard. 1st layer of planking begins... Onward...

-
Even though in Grant's hand above, they LOOK tiny - I have to say, up close and for real, the Cutters ARE tiny and paper thin. Though to touch, they feel surprisingly rigid, for their size. I had the pleasure of paying Grant a visit at home on Saturday and left with an even higher appreciation for the Victory's build journey and level of detail... and not a small dose of Byrnes/Sherline tool envy As soon as I finish the Chicken coop... I'll be back at the shipyard
-
Hey Ollie - it's all looking so great. I started at the beginning of your build log and have been copying & pasting all your posts and the various pieces of advice from other members to form a kind of 'practicum' for the Mermaid... leaving out most of the 'attaboy' type posts (as well deserved as they are), so far it's around 240 A4 pages. It's going to be such a useful reference as I work on mine thank you to everyone who has contributed, your input has just added to the value of the quality work Ollie has displayed and achieved in his own right.. Now, just to find some time to get back to my own build...
- 803 replies
-
- 3
-

-
- colonial cutter
- modellers shipyard
- (and 1 more)
-
I've been thinking about getting a dental loupe - happened to go to the dentist yesterday and the hygienist was wearing a pair that I got a good look at close up during the 6-monthly clean. Searching today, I came across a 2-page online article about dental loupes by a 2nd yr Dental student in the UK. Part 2 gives a good explanation of all the features and the various specification considerations such as: Magnification Field of View Resolution Field Depth Angle of Declination Thought it might be useful... http://thedentalstudent.co.uk/a-guide-to-dental-loupes-part-1-the-basics/
-
Just catching up after an unplanned hiatus from the forum and my own VERY modest 1st build. It's high quality craftsmanship work like yours that in some ways intimidates, but certainly always provides a fantastic benchmark to aspire to! Awesome stuff Grant. Cheers Leanne
-
Just catching up on your log - fantastic work Ollie. Though not expecting to achieve quite the same level of skill as you are working at, you've prompted me to consider resurrecting my own stalled Mermaid build. Thanks for taking us on this awesome journey with you. Cheers Leanne
- 803 replies
-
- 2
-
-
- colonial cutter
- modellers shipyard
- (and 1 more)
-
The cool part is that if you get stuck at any point of the build, the MSW members are the ultimate resource - there is always someone about who can set you in the right direction
-
The Mermaid is certainly a kit recommended for a first timer, so I took that advice in selecting it. Because it is my first, hard for me to tell in terms of the quality of the manuals, DVD or materials. So far things seem to be going ok. I would say though that it seems most of the photos in the manual tend to be stills from the film, so they appear grainy and the finer details a bit hard to see. But I wouldn't really dismiss it on that basis as usually the narrative either in the manual or film explains well enough. As with most things, there is more than one way to skin a cat... I have no doubt that the methods presented are just one of many, albeit presented by a well-respected master ship modeller in Leon Griffiths. So for the time being I'm happy to follow the guide Hope this helps Leanne
-
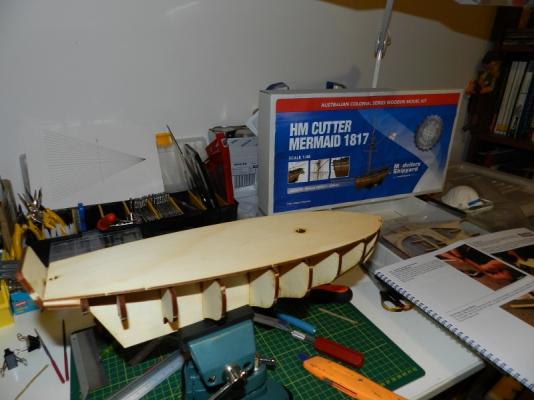
Just a quick update... Finally got the fairing underway... planking next (in a week or two). The written instructions talked about removing the deadwood area on the keel at the stern, but the 'how-to-dvd' didn't mention it at all. Went ahead and did it anyway, figuring the written instructions are likely more up to date.

-
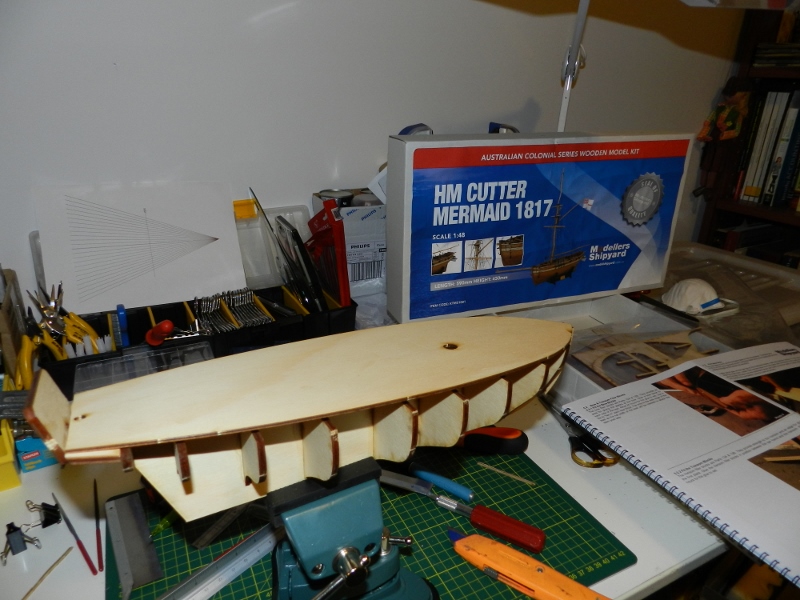
Thanks, Brian - when do I use the keel clamp? it looks like I'll be moving it about a bit it the next week or two as I start sanding bulkheads and fairing before getting to the planking (which I think I start with the keel up). Is the clamp best for when the planking gets underway and it's sitting deck-side up again? Or once the false keel is attached? Have been caught up on a few other projects over the last few weeks, hoping to start sanding bulkheads this week before attaching the deck... But you're right about the deck being over-sized, I think I trimmed about 5mm from the stern end to get the mast hole to line up with the corresponding slot in the keel.
-
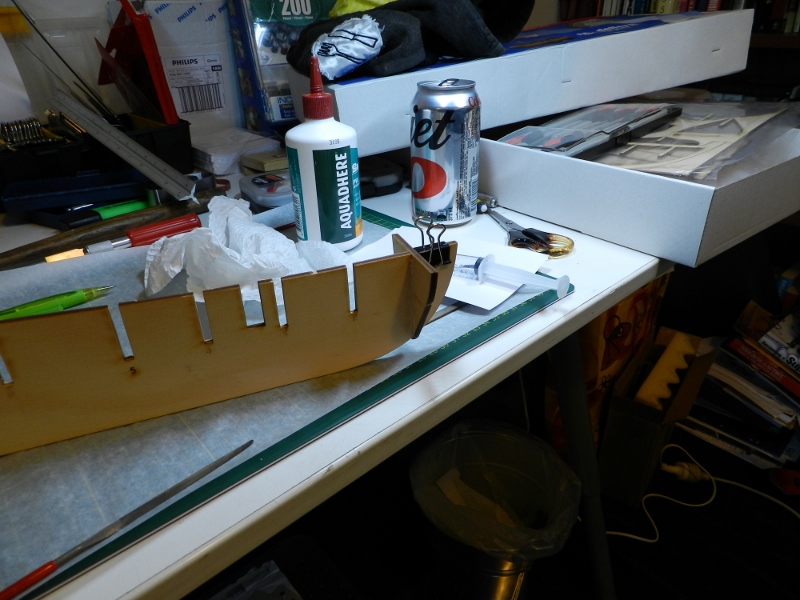
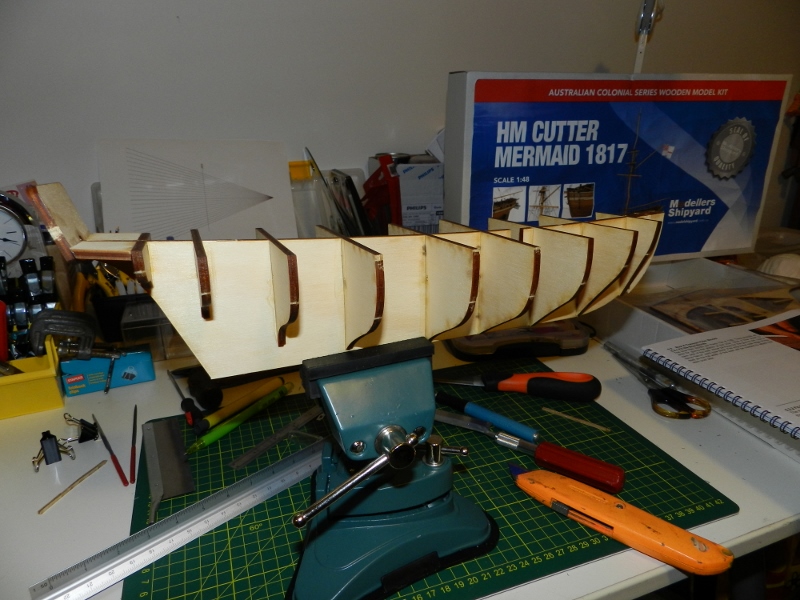
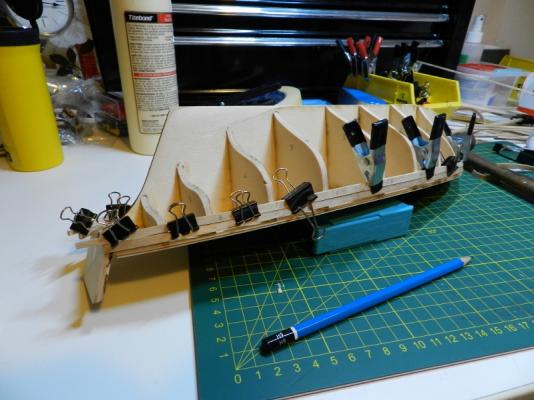
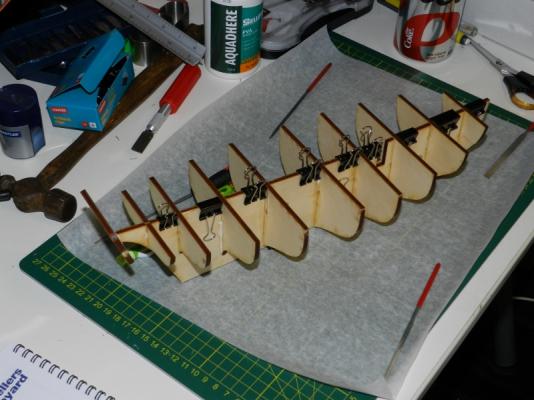
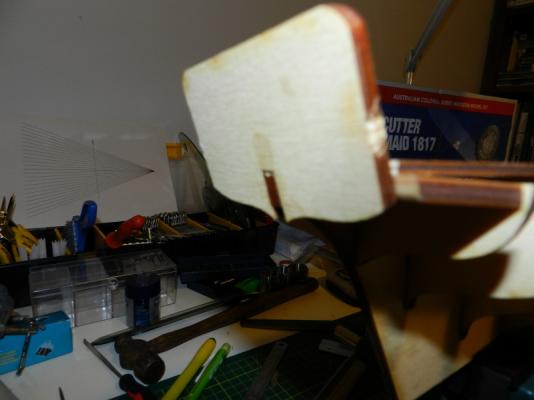
So, after week one things are progressing reasonably well for a first-timer! Gluing in the first bulkhead was a little nerve wracking, but once I got going the other eight plus transom were progressively added. Left them all overnight to dry and added the bow and stern filler blocks this morning. The stern blocks needed a bit of trimming and shaping to fit in the available space and angle of the transom itself. I've started to dry-fit the deck and needed to trim 5mm off the stern to get the mast hole in the deck to line up to the pre-cut slot in the keel. Will dry-fit again to be sure once the filler blocks have finished drying. A couple of issues arose as I was progressing. First related to the bulkheads. The written instructions indicated a firm but not loose fit is needed, but in the DVD Leon's example build looked quite loose. I went for firm, but not pinching the wood as the slots met Second was also bulkhead related, well transom, really. I wasn't sure what to line it up to. I ended up making it flush to the end of the keel, following its angle - looks right, I think. Tried looking at pics of other Mermaid builds, but often the angle didn't show quite what I was looking for. So hopefully I got it right. All in all, I'm happy.

-
That's great John, Thanks Leanne
-
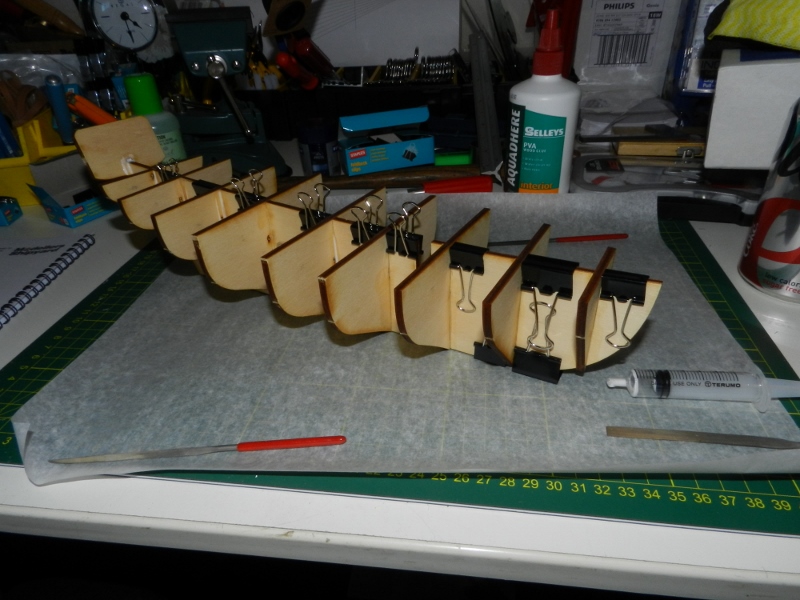
Yes, most of the bulkheads are sitting nice and flush with the top of the keel, but two are sitting low. I'll have to sort that before I start glueing It's probably a bit hard for me to judge the quality at this point - it's my first model of any type since I was a kid about 30yrs ago doing my brother's plastic model kits that people would give him for Christmas, yet he was never real interested in! But so far it has a reasonably good feel, no gaps apparent in the ply which is pretty clear all round. The instructions seem reasonably detailed, the DVD useful to see how they work in practice (DVD bought separately, but heavily discounted when purchased at the same time as the kit). So far so good!