BassicBill
-
Posts
96 -
Joined
-
Last visited
Content Type
Profiles
Forums
Gallery
Events
Everything posted by BassicBill
-
 Popeye, thank you so much for your kind words! I do appreciate them, as I've appreciated your help along the way. I very much want to do the billings St.Roche, however, that will have to wait. What I've done is to get a great deal on a full scale kayak kit (I'm a little nuts about kayaking). Although it's partly finished already, there is more than enough work to be done on it that the remainder of the summer has consequently been fully booked! Probably all next winter as well, for that matter. In the end I'll have myself two wooden kayaks, both of which will be head-turners in the meantime, onward and upwards!!
 -
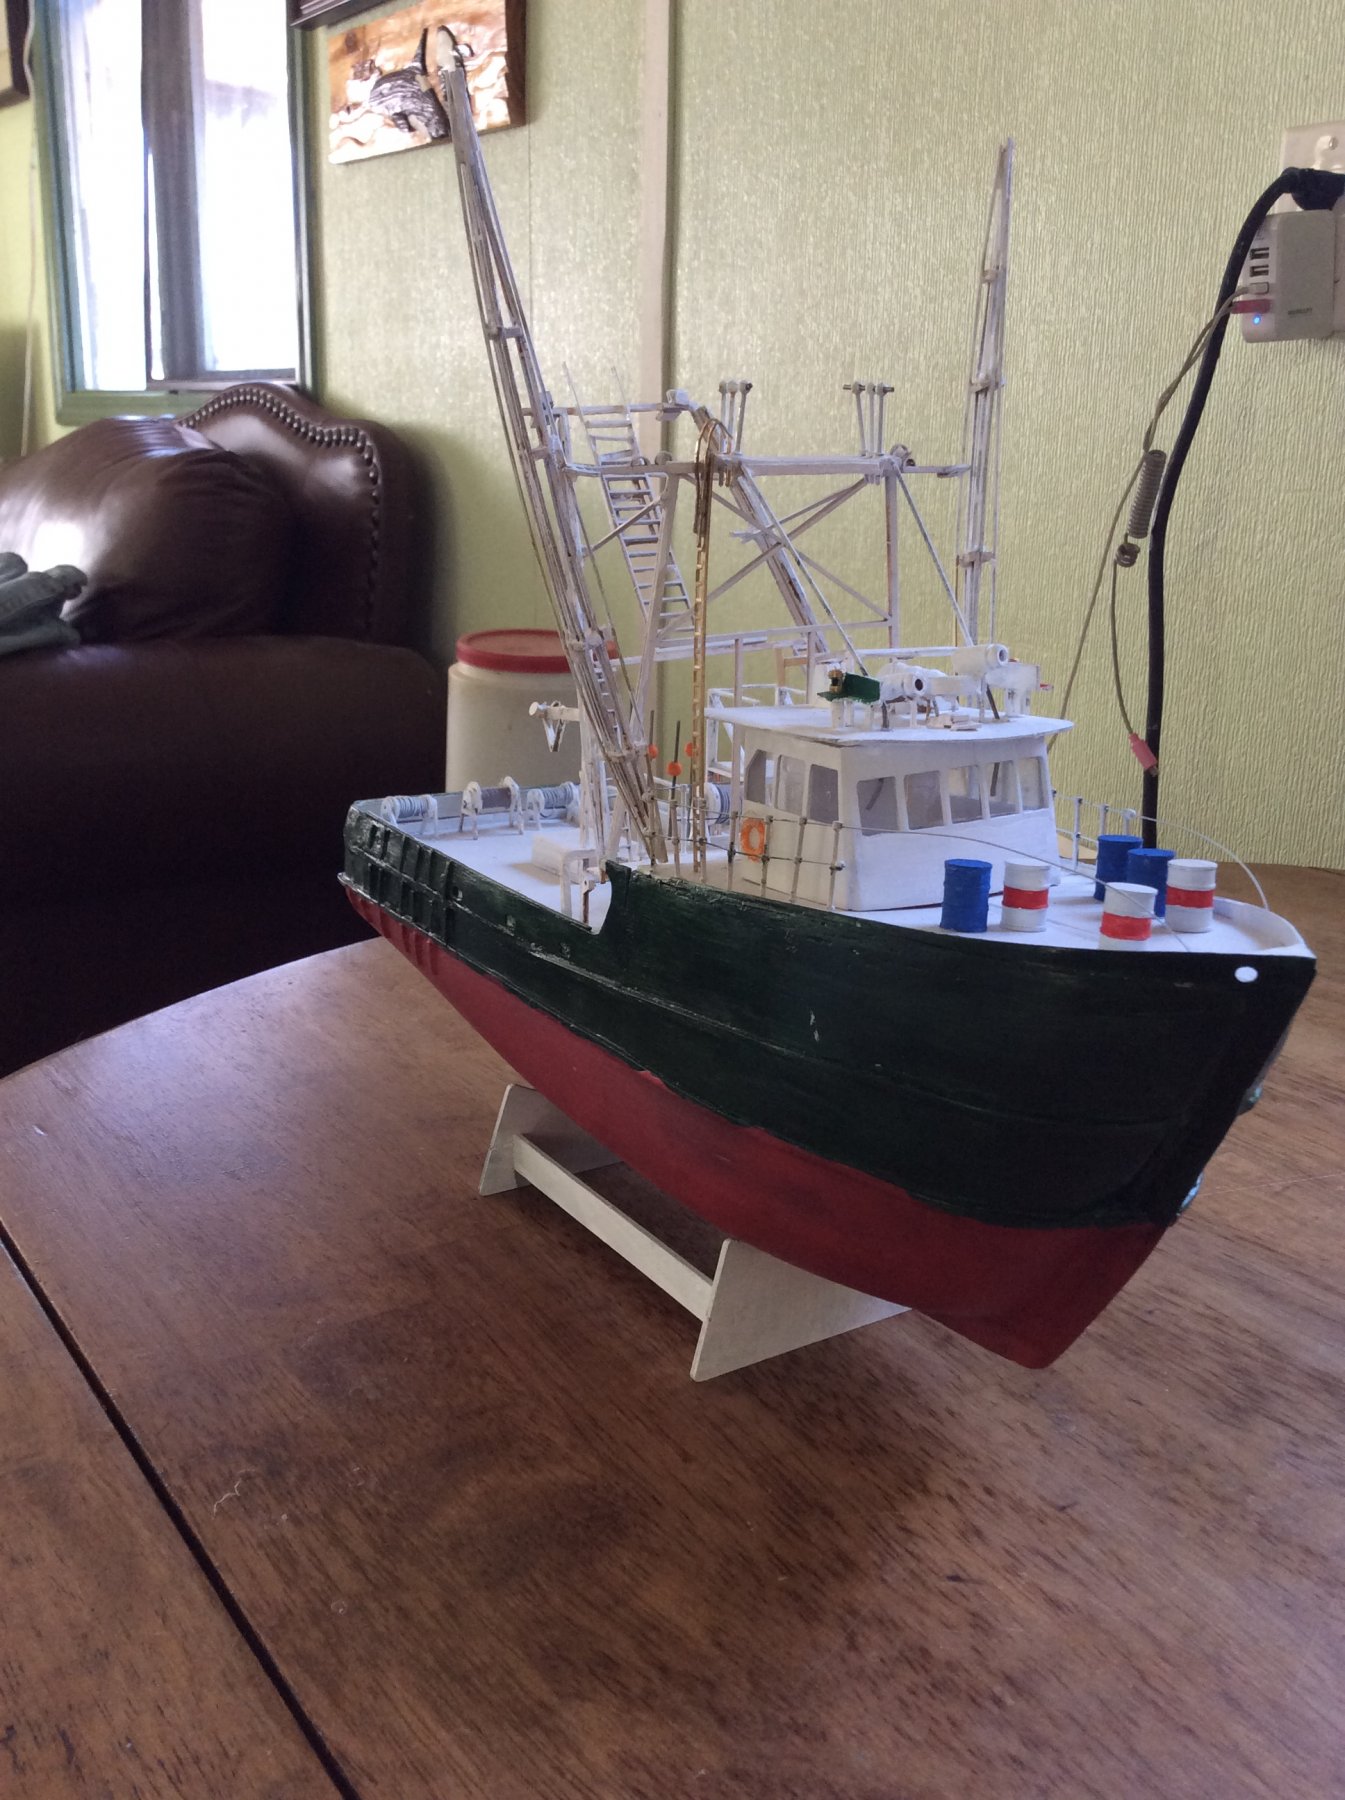
I know it ain't pretty, but I'm calling this model finished. I'm well aware of most of the flaws and ugly bits but in the end, given my current capabilities, I'm satisfied. I'm especially impressed that I've actually stuck with it as long as I have, considering the many hurdles I've had to work through. With respect to maintaining this ' build log', I'm disappointed in that I believe I should have contributed more posts on my progress. Completion occurred yesterday but already I feel quite lost, having "nothing to do!" If my budget allowed, I would be ordering a new kit now, but such is not currently advisable. Therefore I'll continue just "being retired" a new whine about how we retirees never get a day off! Same thing, every day, "be retired ", over and over.

-
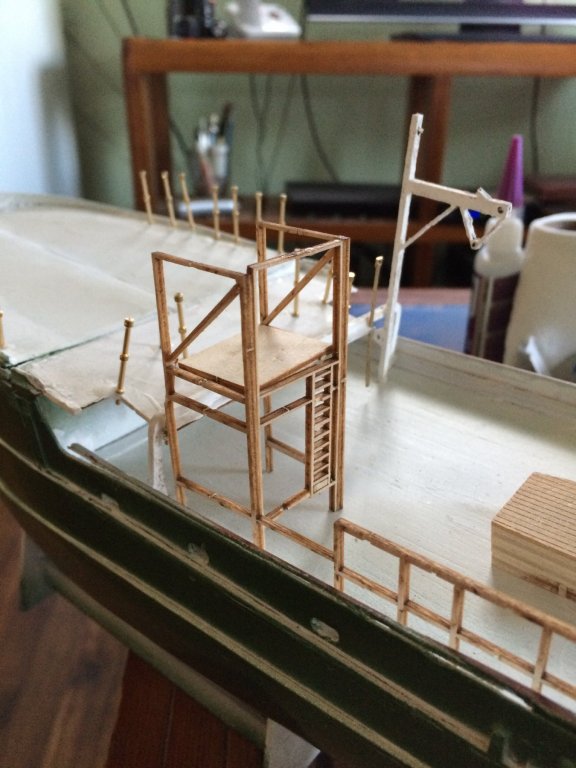
I caused another coat of white paint to be sprayed on the upper deck, after installing a few details including in part, the stanchions and guard 'rails' on each side (As is the case with a great many vessels, the 'rails' fitted on our destroyers, were in truth, vinyl covered cable which we were forbidden to lean on, lest they be stretched or fail, (thereby creating an inconvenient and awkward). 'man overboard' situation For my guardrails', I used a length of small dia. Piano wire (actually guitar string). On the after ends of these wires, I added a wee 'seed bead' to give them a 'finished' look. I guess the winch reels now need a coat of light grey paint before I go much further. Instructions now direct me to begin construction of the Wheelhouse, which I hope to tackle on the morrow. While I mess with that task, I intend to also begin painting the lower hull with red oxide paint. Happily, the separation between that and the "green "ships side" paint is quite simple, possibly being accomplished without the stress of fooling with masking tape, etc.
-
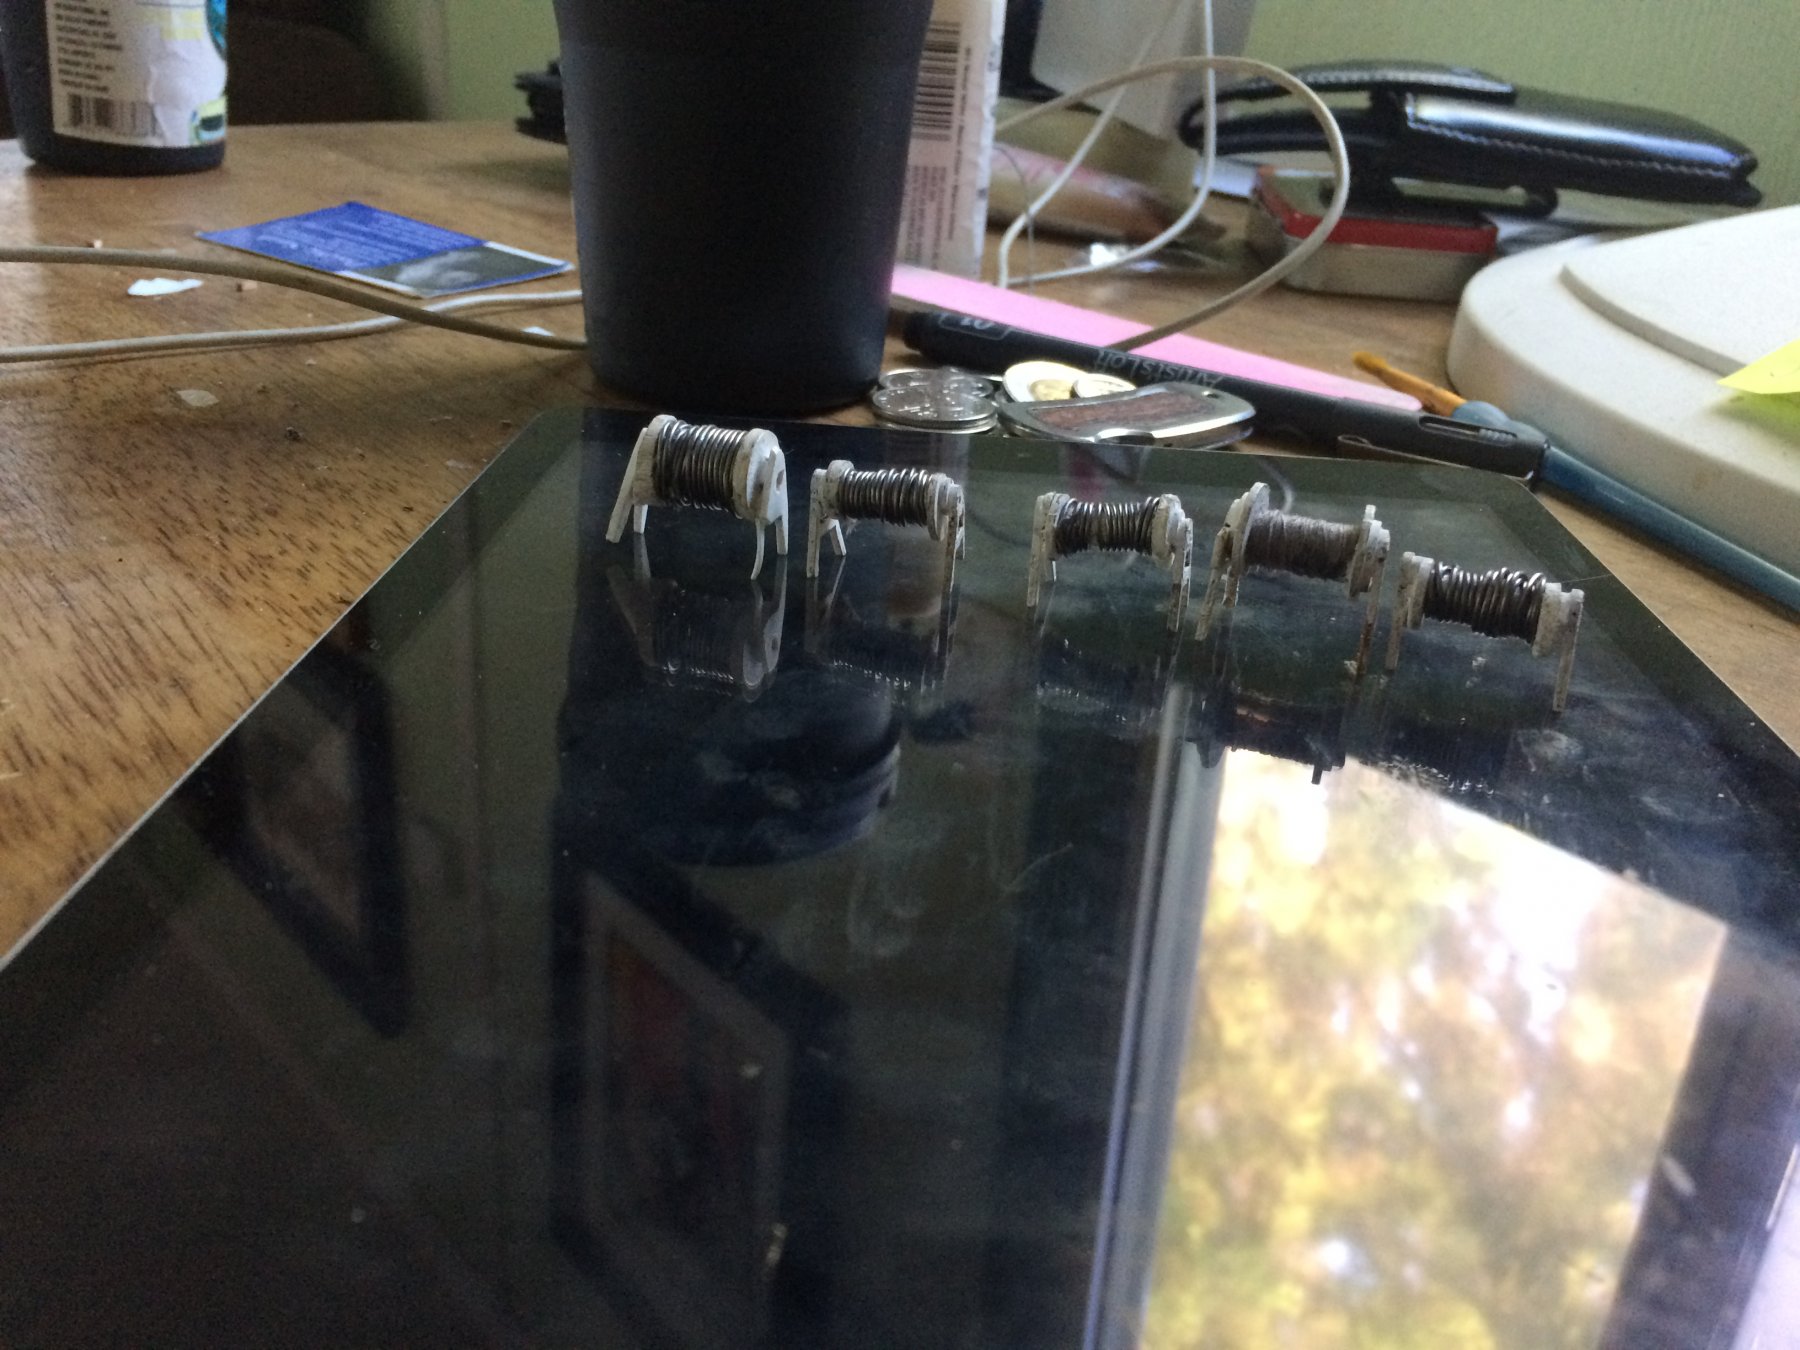
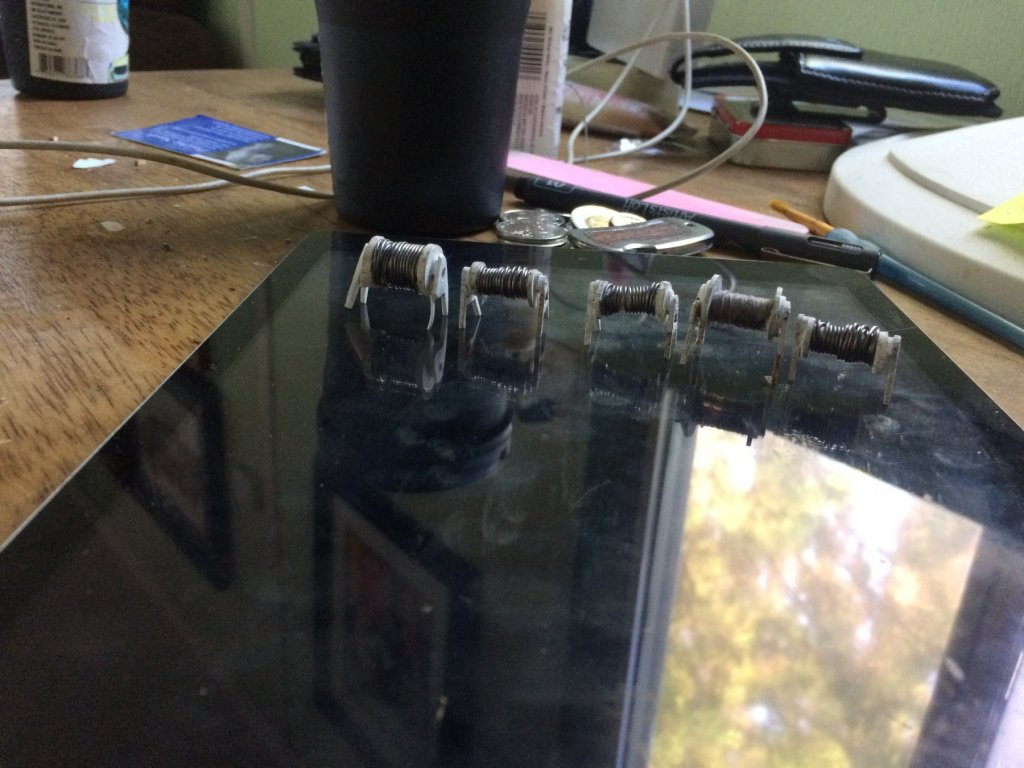
My small herd of winches, finished today. Somehow I got it in my head that I needed 5of these things, why is not important. 4of them have .75mm solder wrapped around the spools while the other is wrapped in grey thread to simulate cable. Not pretty but they oughta do the job.
-
My Cage and "Deck Box" , awaiting glueing and paint. I'll need to level out the Winch Deck (sadly glued in with quite a slant to it). Also need to add pulleys to the davit before I tackle all of the winches.Kind words indeed, Popeye! With significant relief, I Have more or less decided that I'm satisfied that the hull is pretty much finished. Armed with this little bit of arrogance, I have now launched into adding "fittings" to the upper deck, beginning with the larger Davit which hangs off the foredeck extension (is this the 'winch deck?) just now I'm trying to sort out the spacing of stanchions on the foredeck. Not a big deal; I've got enough drawings of the vessel to use as a guide. I "do" fear for the longevity of the Davit, however, given my knowledge of my clumsiness and frequent lack of attention where 'handling is concerned. For that reason, I've also foregone ( for now) the addition of the rudder and screw - As I know very well that both would be broken off in short order should I be so foolish to install them prematurely. I also blew a coat of green paint on the hull last night, for the purposes of perspective. Having done so,I see now that I'll be forced to "brush" on the finishing coats, due in no small part to my refusal to spend the remainder of my retirement in messing about with adequate "masking." In other 'news, after browsing through a LOT of model ship kits online, I find myself strongly drawn to the Billings version of the RCMP St.Roch; a historic vessel indeed (where we Canucks are concerned. Imagine, if you will -The RCMP -A gaggle of Mounties transiting the Northwest Passage with NO horses whatsoever, on which to mount themselves! (No doubt the space saved through not needing additional space for the transport of forage was a great relief! This boat holds special meaning for me, because when she first went on display in Vancouver, B.C. In the very late 50's, at the age of 10, my dad took me down to see her. Her story is quite remarkablet! TheSt.Roch display was declared a National Heritage (site) in 1962. Evidently, that wee visit made a lasting impression on me, and (I have to admit) quite probably helped to fuel my obsession with history! (Who says Canadian history is boring???
-
Kind words indeed, Popeye! With significant relief, I Have more or less decided that I'm satisfied that the hull is pretty much finished. Armed with this little bit of arrogance, I have now launched into adding "fittings" to the upper deck, beginning with the larger Davit which hangs off the foredeck extension (is this the 'winch deck?) just now I'm trying to sort out the spacing of stanchions on the foredeck. Not a big deal; I've got enough drawings of the vessel to use as a guide. I "do" fear for the longevity of the Davit, however, given my knowledge of my clumsiness and frequent lack of attention where 'handling is concerned. For that reason, I've also foregone ( for now) the addition of the rudder and screw - As I know very well that both would be broken off in short order should I be so foolish to install them prematurely. I also blew a coat of green paint on the hull last night, for the purposes of perspective. Having done so,I see now that I'll be forced to "brush" on the finishing coats, due in no small part to my refusal to spend the remainder of my retirement in messing about with adequate "masking." In other 'news, after browsing through a LOT of model ship kits online, I find myself strongly drawn to the Billings version of the RCMP St.Roch; a historic vessel indeed (where we Canucks are concerned. Imagine, if you will -The RCMP -A gaggle of Mounties transiting the Northwest Passage with NO horses whatsoever, on which to mount themselves! (No doubt the space saved through not needing additional space for the transport of forage was a great relief! This boat holds special meaning for me, because when she first went on display in Vancouver, B.C. In the very late 50's, at the age of 10, my dad took me down to see her. Her story is quite remarkablet! TheSt.Roch display was declared a National Heritage (site) in 1962. Evidently, that wee visit made a lasting impression on me, and (I have to admit) quite probably helped to fuel my obsession with history! (Who says Canadian history is boring???
-
Hey, the ice machine cratered (according to Hollywood). Your comments are a Long way from criticism!! Really, really helpful stuff and each suggestion is very much appreciated! Most recent shot of my hull, showing the blunt end. I've spent the past two weeks in tweaking the rub rails et al. Tain't pretty and tain't righ' lots of cleanup to do, but still &all, this is what I have; most, the result of a bevy of life challenges (not the least of which includes a serious falling out withAdmiralty (life happens!!). Aside from the necessary cleanup and despite the extra lumber inserted, I'm getting closer and closer to a point where I am personally satisfied.

-
Thanks again, Popeye! I've seen your build log a iMessage or three, but I am about to go and ingest it once again! Calm seas and quiet watches below
-
Hey, the ice machine cratered!! (according to Hollywood). Your comments are a Long way from criticism!! Really, really helpful stuff and each suggestion is very much appreciated! Thank you for these photos! Valuable stuff indeed! You must be (deservedly proud of your beautiful work! I want only for my model to look "nice." I have never been one to accomplish much beyond 'acceptable, in those things I pursue (with the possible exception of a few of my artistic pieces. On topic; I'm spending pretty much the entire long weekend in getting these 'fenders remade and installed. Using styrene scrap and pretty much ALL of my limited patience:D
-
Hey! Thanks for those observations , Popeye! Easily remedied and important corrections to make. I have the rub rails on, but this morning Admiralty pointed out a couple of unacceptable 'features'in their placement that require a few more corrections. Overall, I am greateful for this interest and ensuing intervention. I've also closed the passageway at the stern which I had mistakenly cut (a result of misreading the instructions).
-
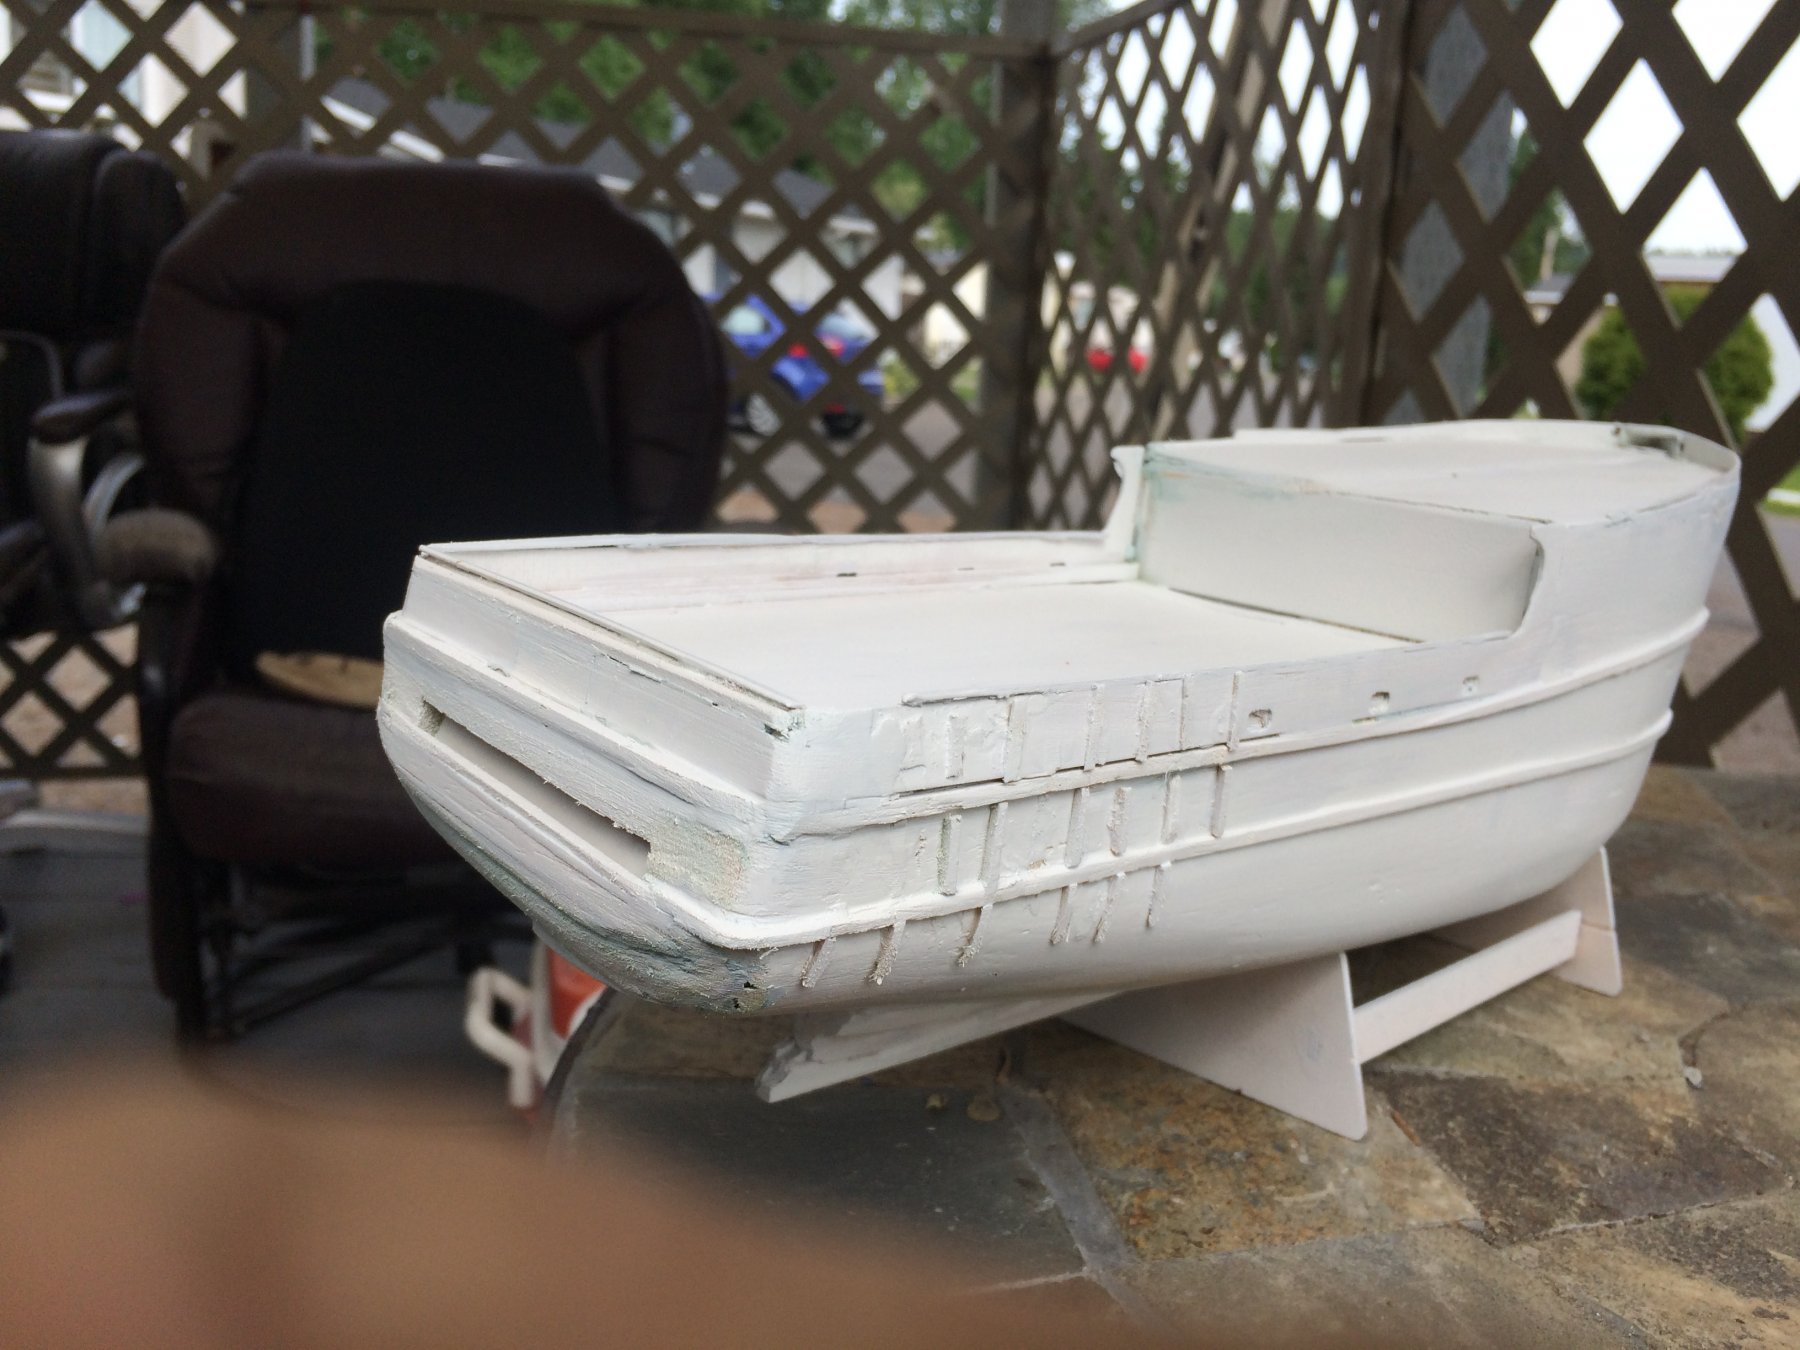
A second coat of flat white, after sanding off the first; finishing off the transom, installing the bulwarks, and foredeck rails. Next up is bending and attaching the rubbing strikes.

-
But Thank You!!
-
Yo, Popeye! Another question please! Not surprisingly I discovered that I am missing a couple more parts that I'll need to fabricate myself. #27, the two strips that form the Prow after running up the foredeck then meet at an angle, creating the 'point' of the bow. My question is, how tall are those pieces at their highest? From the photos, I have, I'd guesstimate somewhere between 3/8 and 1/2 inch. They then taper down to about 1/32"high at the after end of the foredeck, right? Thanks in advance for your help!! NEVERMIND!! Immediately after punching the 'submit 'button, walked into my studio/shop, peeked in a kit box for no particular reason and what should appear but the sheet of parts that I've been lamenting the loss of. Bulwarks and foredeck rails plus a few other goodies! This after just today gluing my homemade bulwarks! They aren't nearly as pretty as the proper pieces, so, it's all good!
-
After careful consideration I've decided that there won't be any new planes in my future. The deciding factor being that, if one glances at my hull Really quickly, it looks quite marvellous! Hey, it's My fantasy, leave me to it, please!" I do thank you all for your advice and guidance!
-
I thank you, Jack! I did a search on their Canadian Online Catalogue site, it appears that they are either denying that they sell them,- none found. I then checked their US site. Lovely little fellers, but at $50 a pop, also light years out of this old pensioners grasp! But again, thank you for the suggestion! I actually had a low-end mini plane at one time) Part of a hobby/modelling tool kit. However, it proved to be better suited to butchering wood as opposed to smoothing, lol. Such a shame, seems to me like a very valuable addition to any modellers stock of tools!
-
It is appearing to me that a post of mine is missing, nothing of significance but odd. I posted a photo of my hull after putting a coat of flat white on it.a heavy (too heavy). That photo and the short ramble with it just aren't showing up here. Just as well though- not a pretty picture. No white primers (in spray) are available here, no surprise to me, but I'm not convinced about that. Currently working on building up the transom, as per the instructions.
-
Despite today's weather offerings, I have been able to apply the second (and presumably last), coat of resin to my hull. I'm hoping that it cures as quickly as advertised (manufacturers claim 90 minutes). I'll believe that when I see it. In messing about trying to make progress on the P&S bulwarks, I find myself using up more lumber than I can afford to use. I'm a little frustrated over the shape of the cutouts where the bulwarks meet the foredeck rise. Although I'd rather have it resemble the real boat, I've decided to go ahead and make mine a little simpler. Such decisions, as always, are subject to change. Tomorrow I'll pick up a can of primer if what passes for a LHS here, has something of the sort.
-
Thank you, Popeye, for all of this information and advice! I have a hard copy of the 608 instructions (I think I printed them from a PDF file, over a year ago. I also found a PDF of them which I found about a month or 2 ago. My beef with them is the lack of information. So, I think I'll go with 3/4" high bulwarks. The piece of decking that rests against the after end of the foredeck is in my possession. Having that is helpful in preparing to cut out the replacement bulwarks/bulkheads. I wasn't able to get my second coat of resin on last evening but will do so today. The gaps: they have been adequately filled, however, a few "dips" will benefit from a wee bit of filler. I'm pretty much obsessed with recreating a pair of Piece #25's, just now. That, the second coat of clear resin and then a coat of flat white in order to convince myself that all is as it should be. I didn't know that one could resin over paint, actually believed that it couldn't be done. That's good to know! Bill.
-
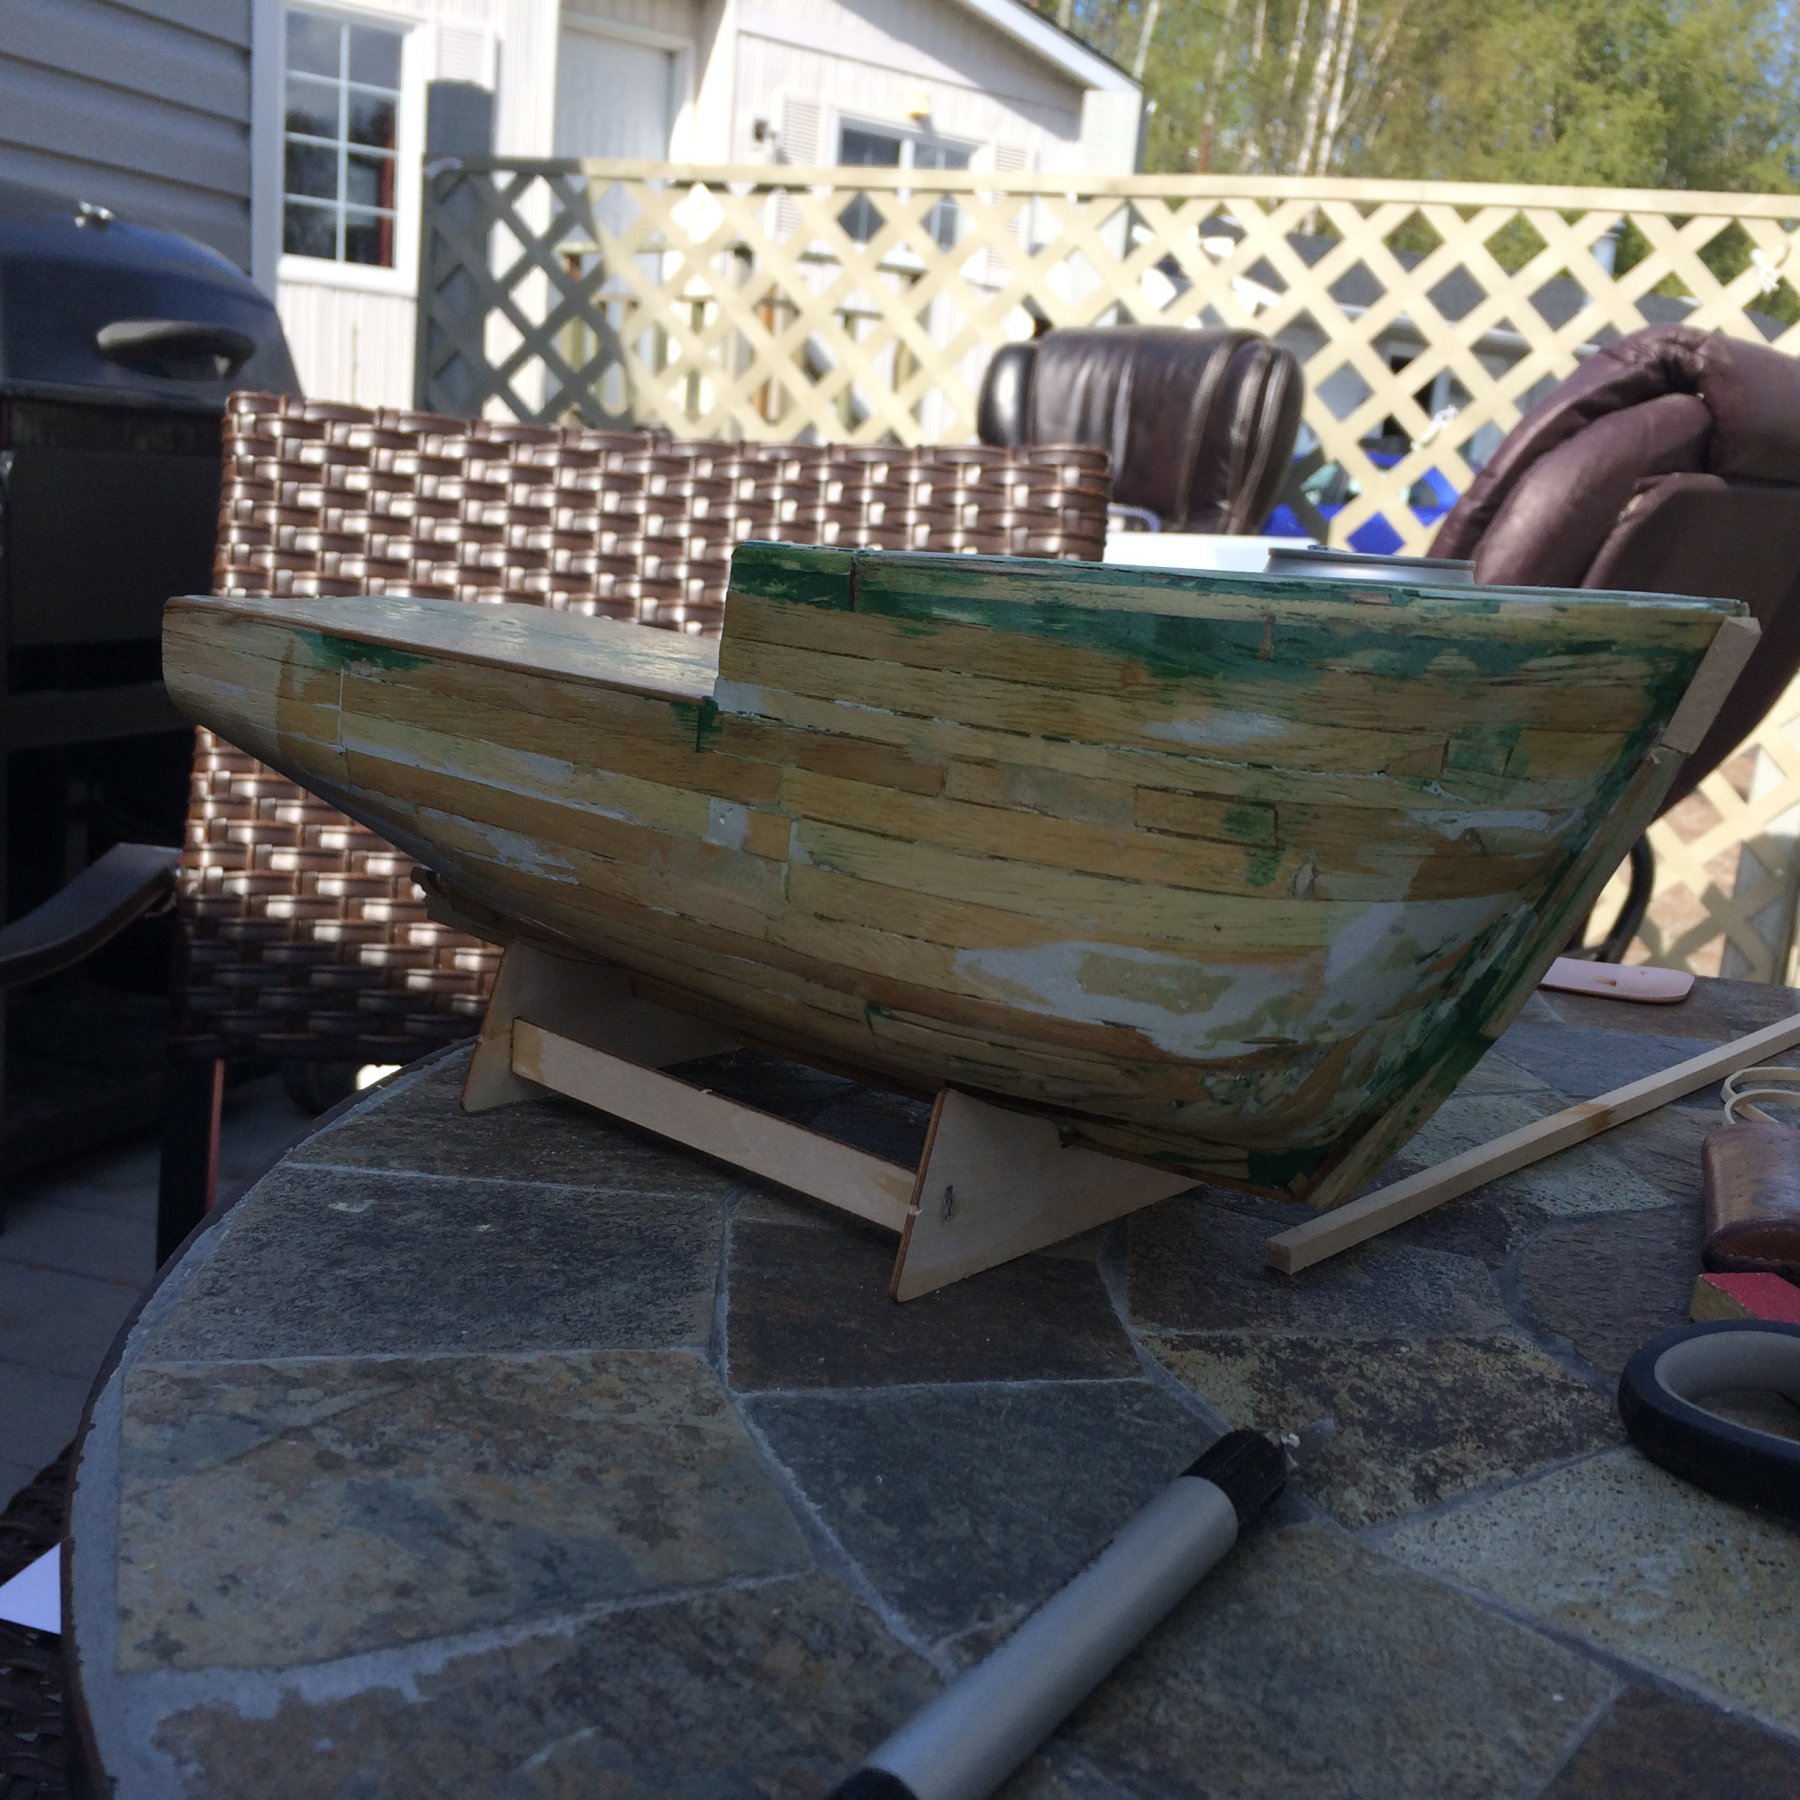
Not pretty, is it!? But here she is, thus far, bearing a single coat of resin. Had an hour or two of anxiety while the resin teased me when it didn't cure as quickly as I had expected, lol. As youve likely surmised, the green is the remains of Squadron Green filler. I daresn't sand too aggressively on either side, lest I break through my very thin planks. I hope to add a 2nd coat this evening. Tomorrow I'll give it an appropriate buffing with my 220 sanding stick before, ("possibly") giving the whole a coat of paint. Afterwards, the finishing of the transom and the fish ramp). All in all, I like to think that despite the ugliness depicted in my photo, the hull does bear a certain resemblance to a marine vessel of the floating device.

-
Popeye, in thinking about your observation that a part of me Stbd side was missing, I wanted to note that such was not the case. Still there; not pretty, but all of it is there (unlike myself, lol). Aquestion or two for you please. I'm sitting here waiting for my 1st coat of resin to cure on what I believe to be my largely finished hull, and I'm planning ahead. First, do you happen to have a finished version of this model in your possession? Through all that goes on in my chaotic life; I have apparently lost two important pieces (#25 X2) The Bulwarks on the Aft deck (Port &Stbd). what I need is the height of the horizontal (fore &aft) sections.(I can sort out the fwd ends and cutaways On my own.).I'm guessing about 13mm or 1/2" is about right but being something of a coward, I hesitate to start hacking up my materials without having a better idea. I thank you kindly in your he even that you are able to help! Bill in Prince George, British ByGodColumbia, where the trees have just turned green overnight.(and where yesterday we came within a hairs breadth of electing a Socialist Provincial government.whew! Close one.)
-
Almost ready for Resin once again, just a little filling and sanding to finish tomorrow. If the weather holds, I may be able to get that smelly stuff on, as well. I'm pretty satisfied with the new cut water, but hey! I'm easily satisfied;)
-
I may be making this up on the fly, but in my experience, Starboard sides are largely overrated Yes, Popeye, 1/4" square stock. In this case, against all convention, Balsa, because that's what I have. After studying the problem carefully it became obvious to me that I have built the bow (in general terms), quite badly. Probably the greatest issue or error has been in the way the stem put everything out of whack. The only viable solution I could/ can see is to eliminate a significant amount of the leading edge of the stem. (In order to achieve symmetry at the deck level and overall). And of course, the bow deck pieces had to be replaced (happily I had enough sheet styrene handy from which to make them)., once that symmetry had been achieved. Took off the deck pieces then aggressively attacked the stem. That 40 Grit sandpaper sure is a time saver! I then repaired the damaged planks (only one of which sprung loose after my stem reduction. I am currently piecing together the new-improved cut water, confident (so far) that a few coats of resin will make the balsa tough to enough for my purposes. No, not giving up. Plugging away but wondering if someone out there will steer me towards an "app" that will allow me to calculate my ever growing "fun quotient)"?
-
Yes, Popeye, 1/4" square stock. In this case, against all convention, Balsa, because that's what I have. After studying the problem carefully it became obvious to me that I have built the bow (in general terms), quite badly. Probably the greatest issue or error has been in the way the stem put everything out of whack. The only viable solution I could/ can see is to eliminate a significant amount of the leading edge of the stem. (In order to achieve symmetry at the deck level and overall). And of course, the bow deck pieces had to be replaced (happily I had enough sheet styrene handy from which to make them)., once that symmetry had been achieved. Took off the deck pieces then aggressively attacked the stem. That 40 Grit sandpaper sure is a time saver! I then repaired the damaged planks (only one of which sprung loose after my stem reduction. I am currently piecing together the new-improved cut water, confident (so far) that a few coats of resin will make the balsa tough to enough for my purposes. No, not giving up. Plugging away but wondering if someone out there will steer me towards an "app" that will allow me to calculate my ever growing "fun quotient)"?
-
Here I thought that I'd added a post earlier, along with a photo. Dunno where that ended up, but no matter. I've run into a serious, possibly a project emder this time. Somehow, without noticing at all, I've ended up with a seriously asymmetrical now ("beamier on the port side than the stbd. The issue is such that my confidence with respect to my ability to recover from this mess is fading fast. Just now, it seems I may need to hack off a slice from the stem. I can only imagine the effect of all or most of my planks releasing from the stem, simultaneously. I've got admiralty involved in researching acceptable solutions, preferably one that doesn't include a trash can.
-
Not the right forum, I know, but I'm looking for thoughts on the Billings HMS Renown kit, please?