
Rail and Tie
-
Posts
63 -
Joined
-
Last visited
Content Type
Profiles
Forums
Gallery
Events
Everything posted by Rail and Tie
-
 Here is a little review I did on a couple of very handy tools for the hobby. I did this as part of my weekly segment "The Art of Detail" Mainly focused towards model railroaders, but these tools are very handy for any modeling. I hope you find it useful.
 -
Absolutely brilliant work! Don't forget the Ben Hur sound track to be added... "Thump, Thump, Thump, Thump..... RAMMING SPEED!.... Thump Thump..." This certainly opens up a lot of possibilities for a realistic RC ship.
- 502 replies
-
- 3
-

-
- Quadrireme
- radio
- (and 1 more)
-
Very interesting build project. I love what you are doing with it. Slot and tab construction. While I love it and use it quite often in our own kits, I have come to learn that moisture levels, "nominal milled thickness" and precision fit, can all work against each other. For example we use a lot of 1/32 and 1/16 basswood sheet which varies in thickness from the mill by as much as 1/64 or more. While that does not seem like a lot for wood, it is a lot when it comes to a precise laser cut slot! Looks like you are overcoming these minor roadblocks though. Happy Modeling and very much enjoying this thread so far. BTW, the Tiger Moth is one of my top 3 favorite aircraft of all time! My uncle was an instructor in the RCAF and spent a lot if time around them. I have most of an instrument set, compass, and propeller that I covet!
-
The rest of the model went according to the original cad model and fit fine the first time. Simple rigging and some 3D printed parts like the original.

- 4 replies
-
- 6
-
-
- Gene
- Interaction Hobbies
- (and 1 more)
-
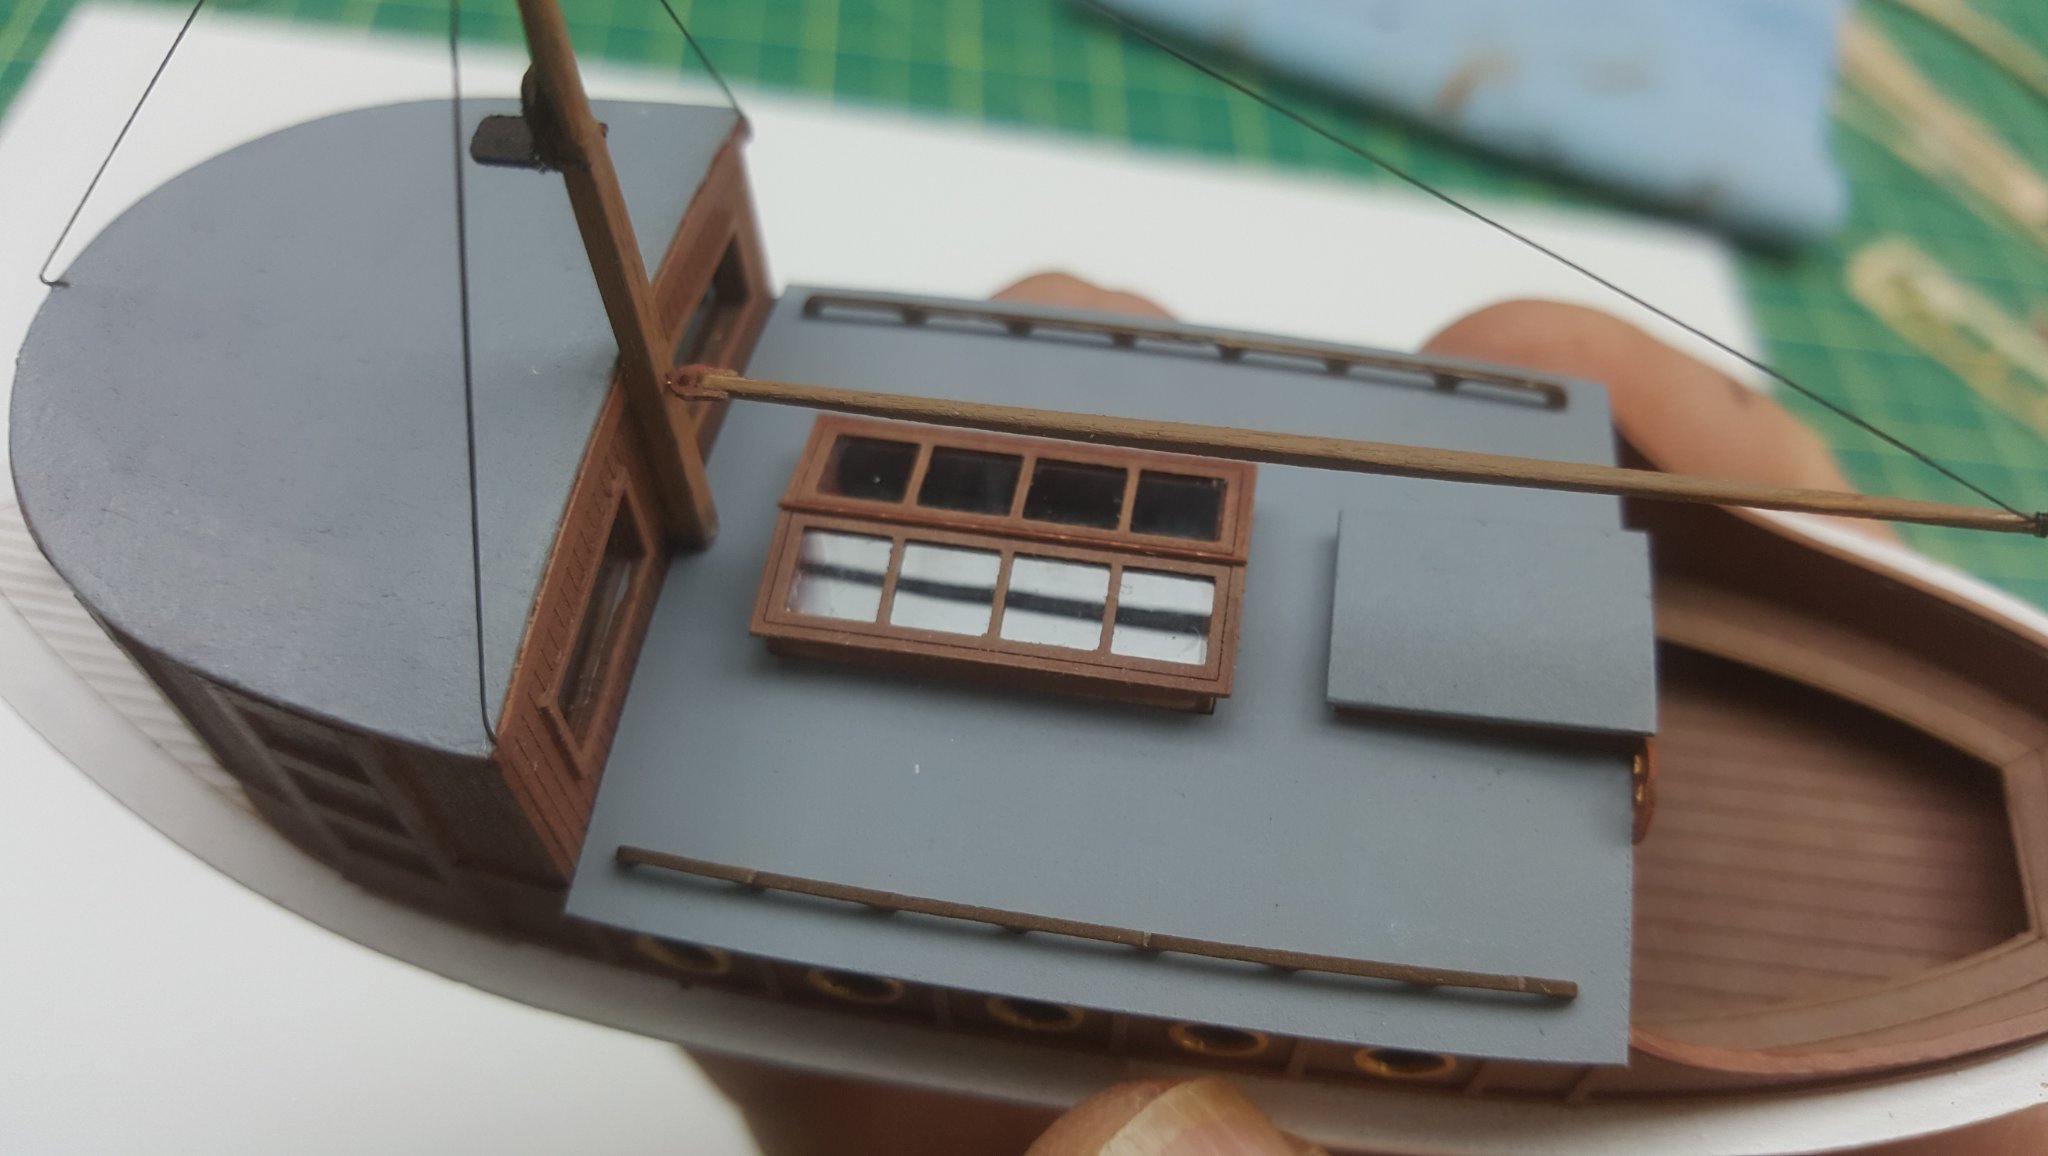
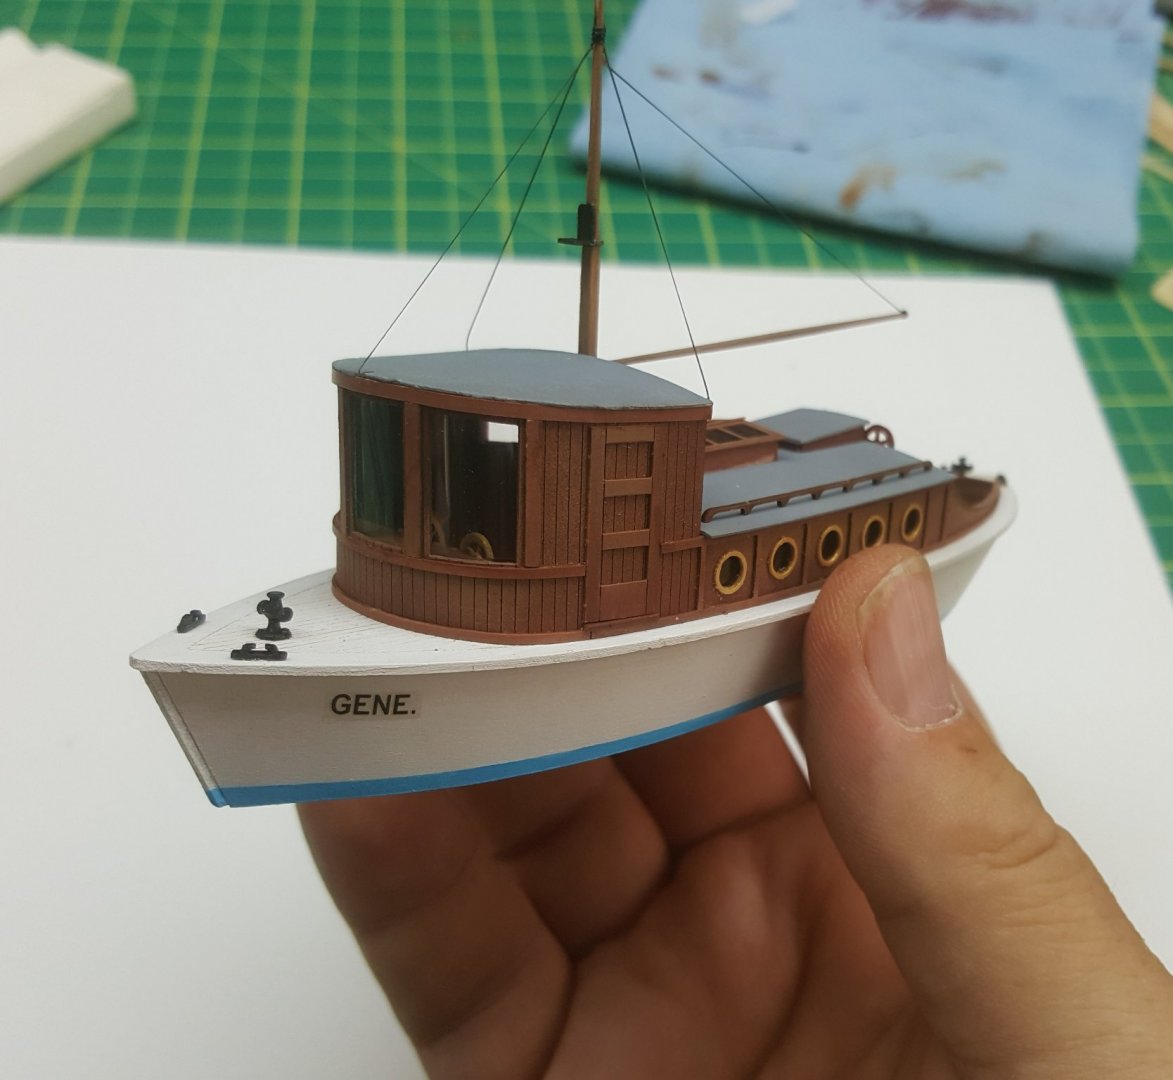
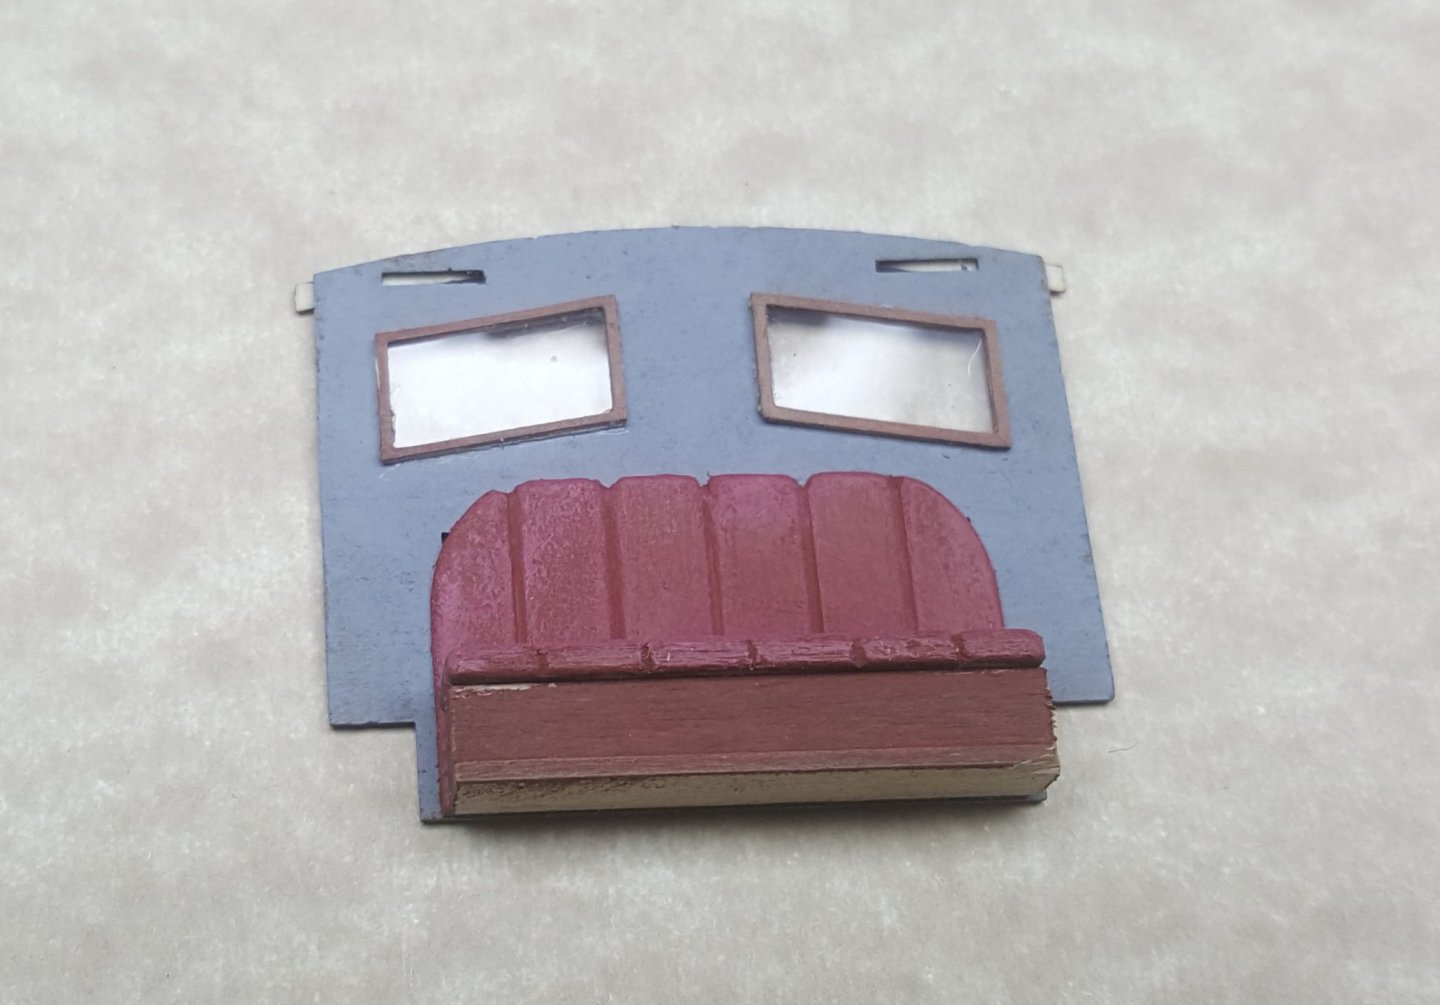
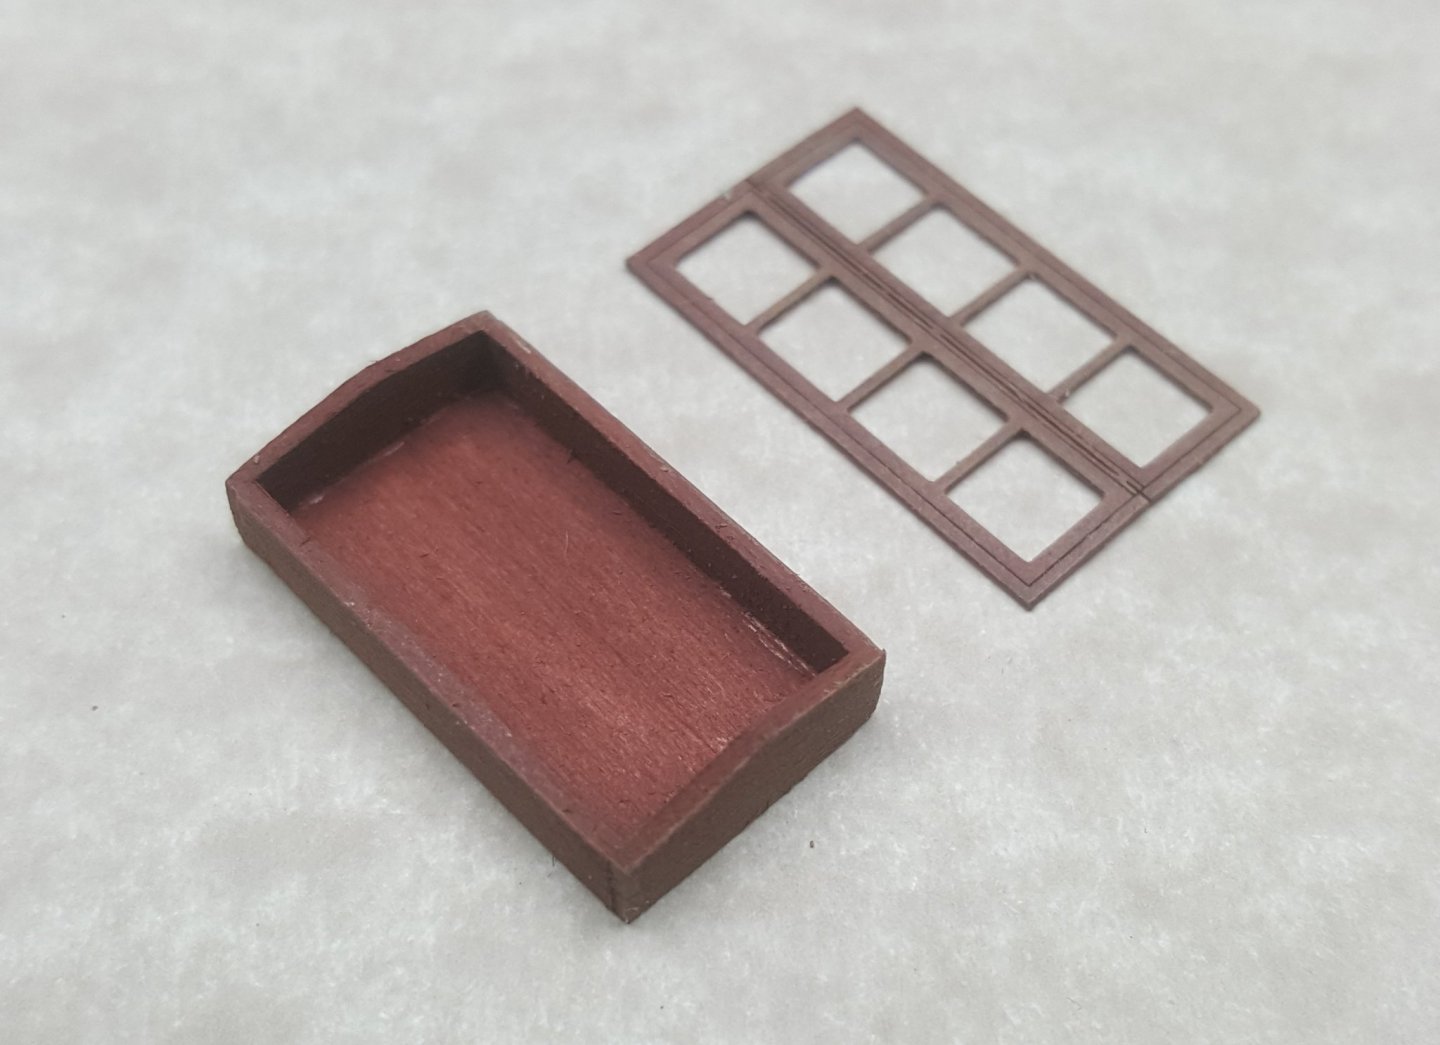
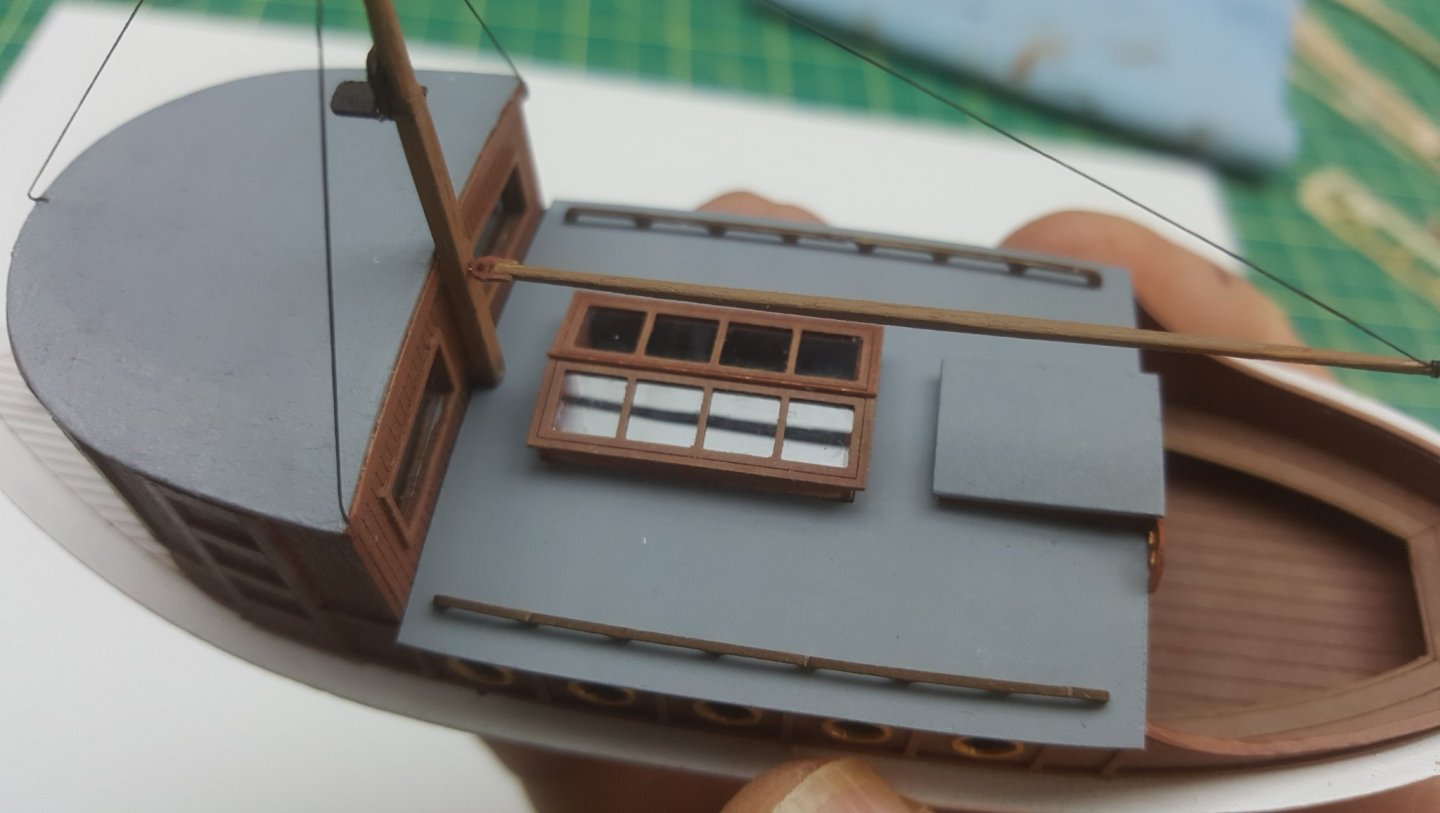
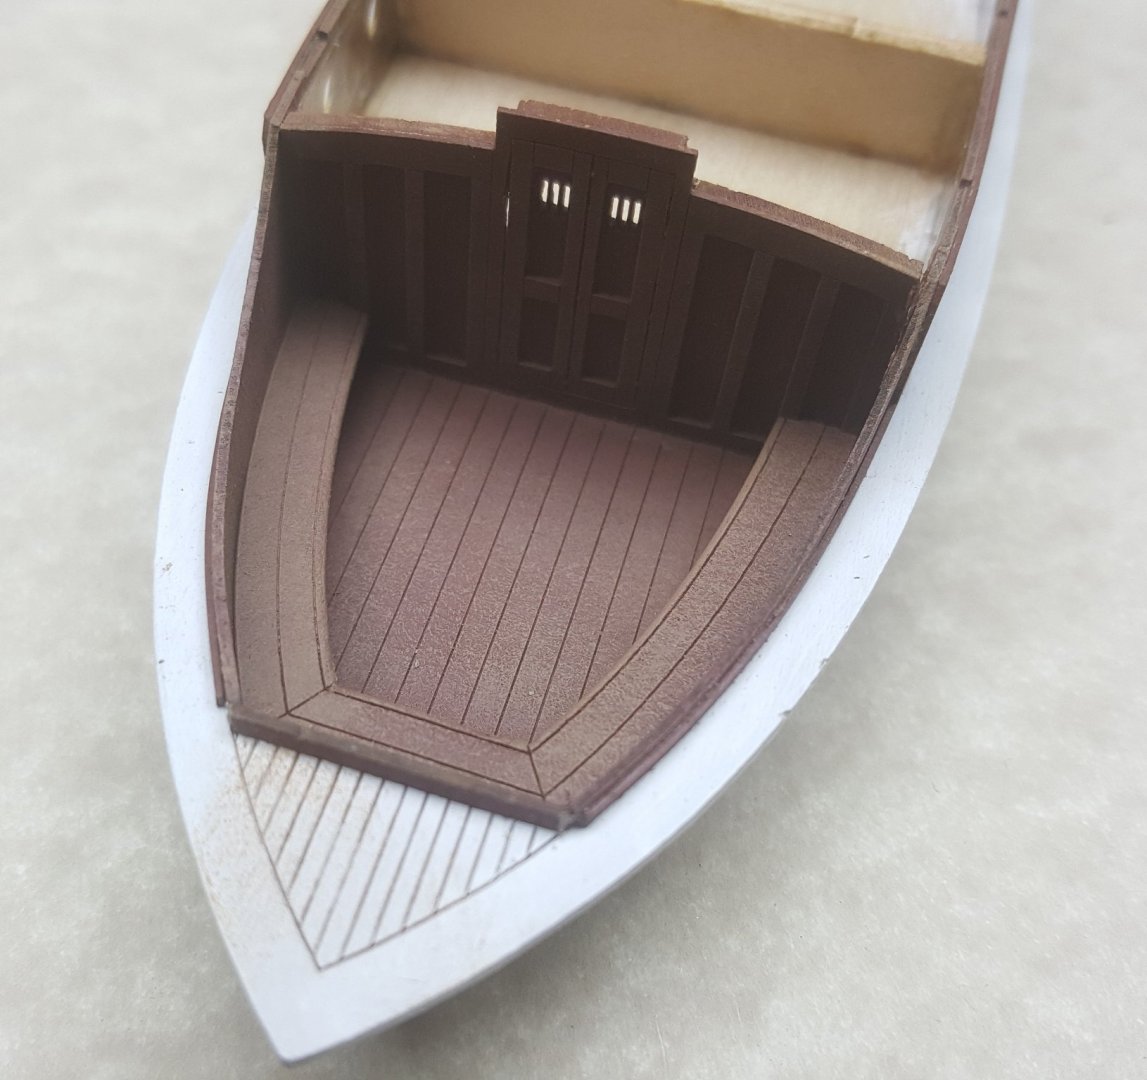
The wheelhouse aft wall is made from polybak which is engraved and then layered with the window frames, both inside and outside. The bench is crafted from polybak and basswood base. The skylight box is made from basswood and the skylights are added along with a phosphor bronze wire for the center hinge/seal. Fitted skylight into cutout in cabin roof.

- 4 replies
-
- 3
-
-
- Gene
- Interaction Hobbies
- (and 1 more)
-
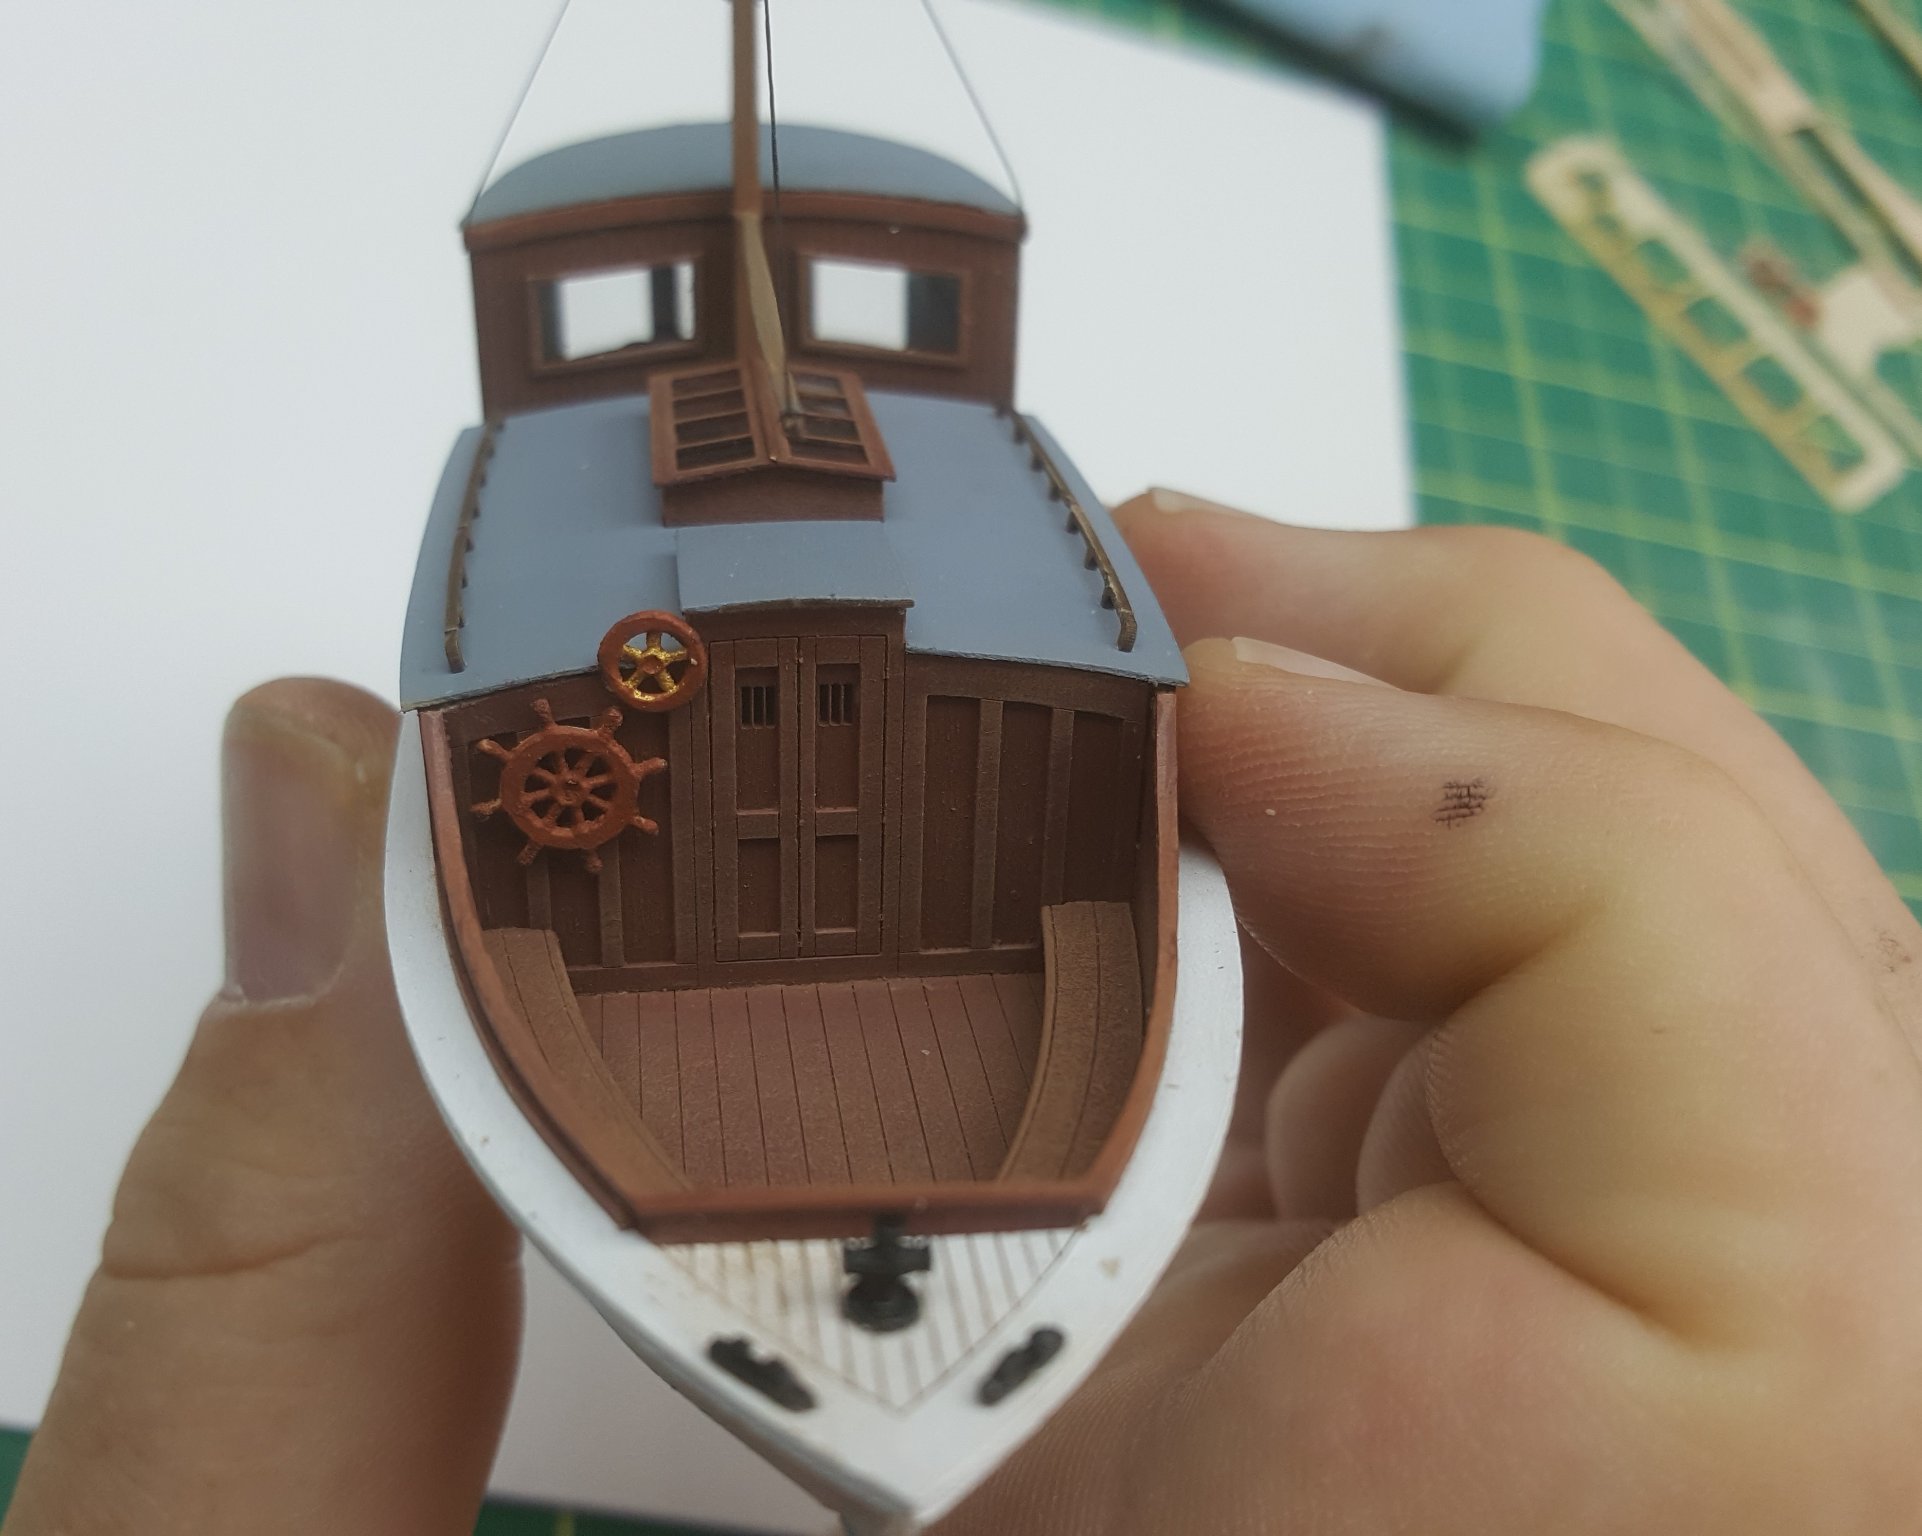
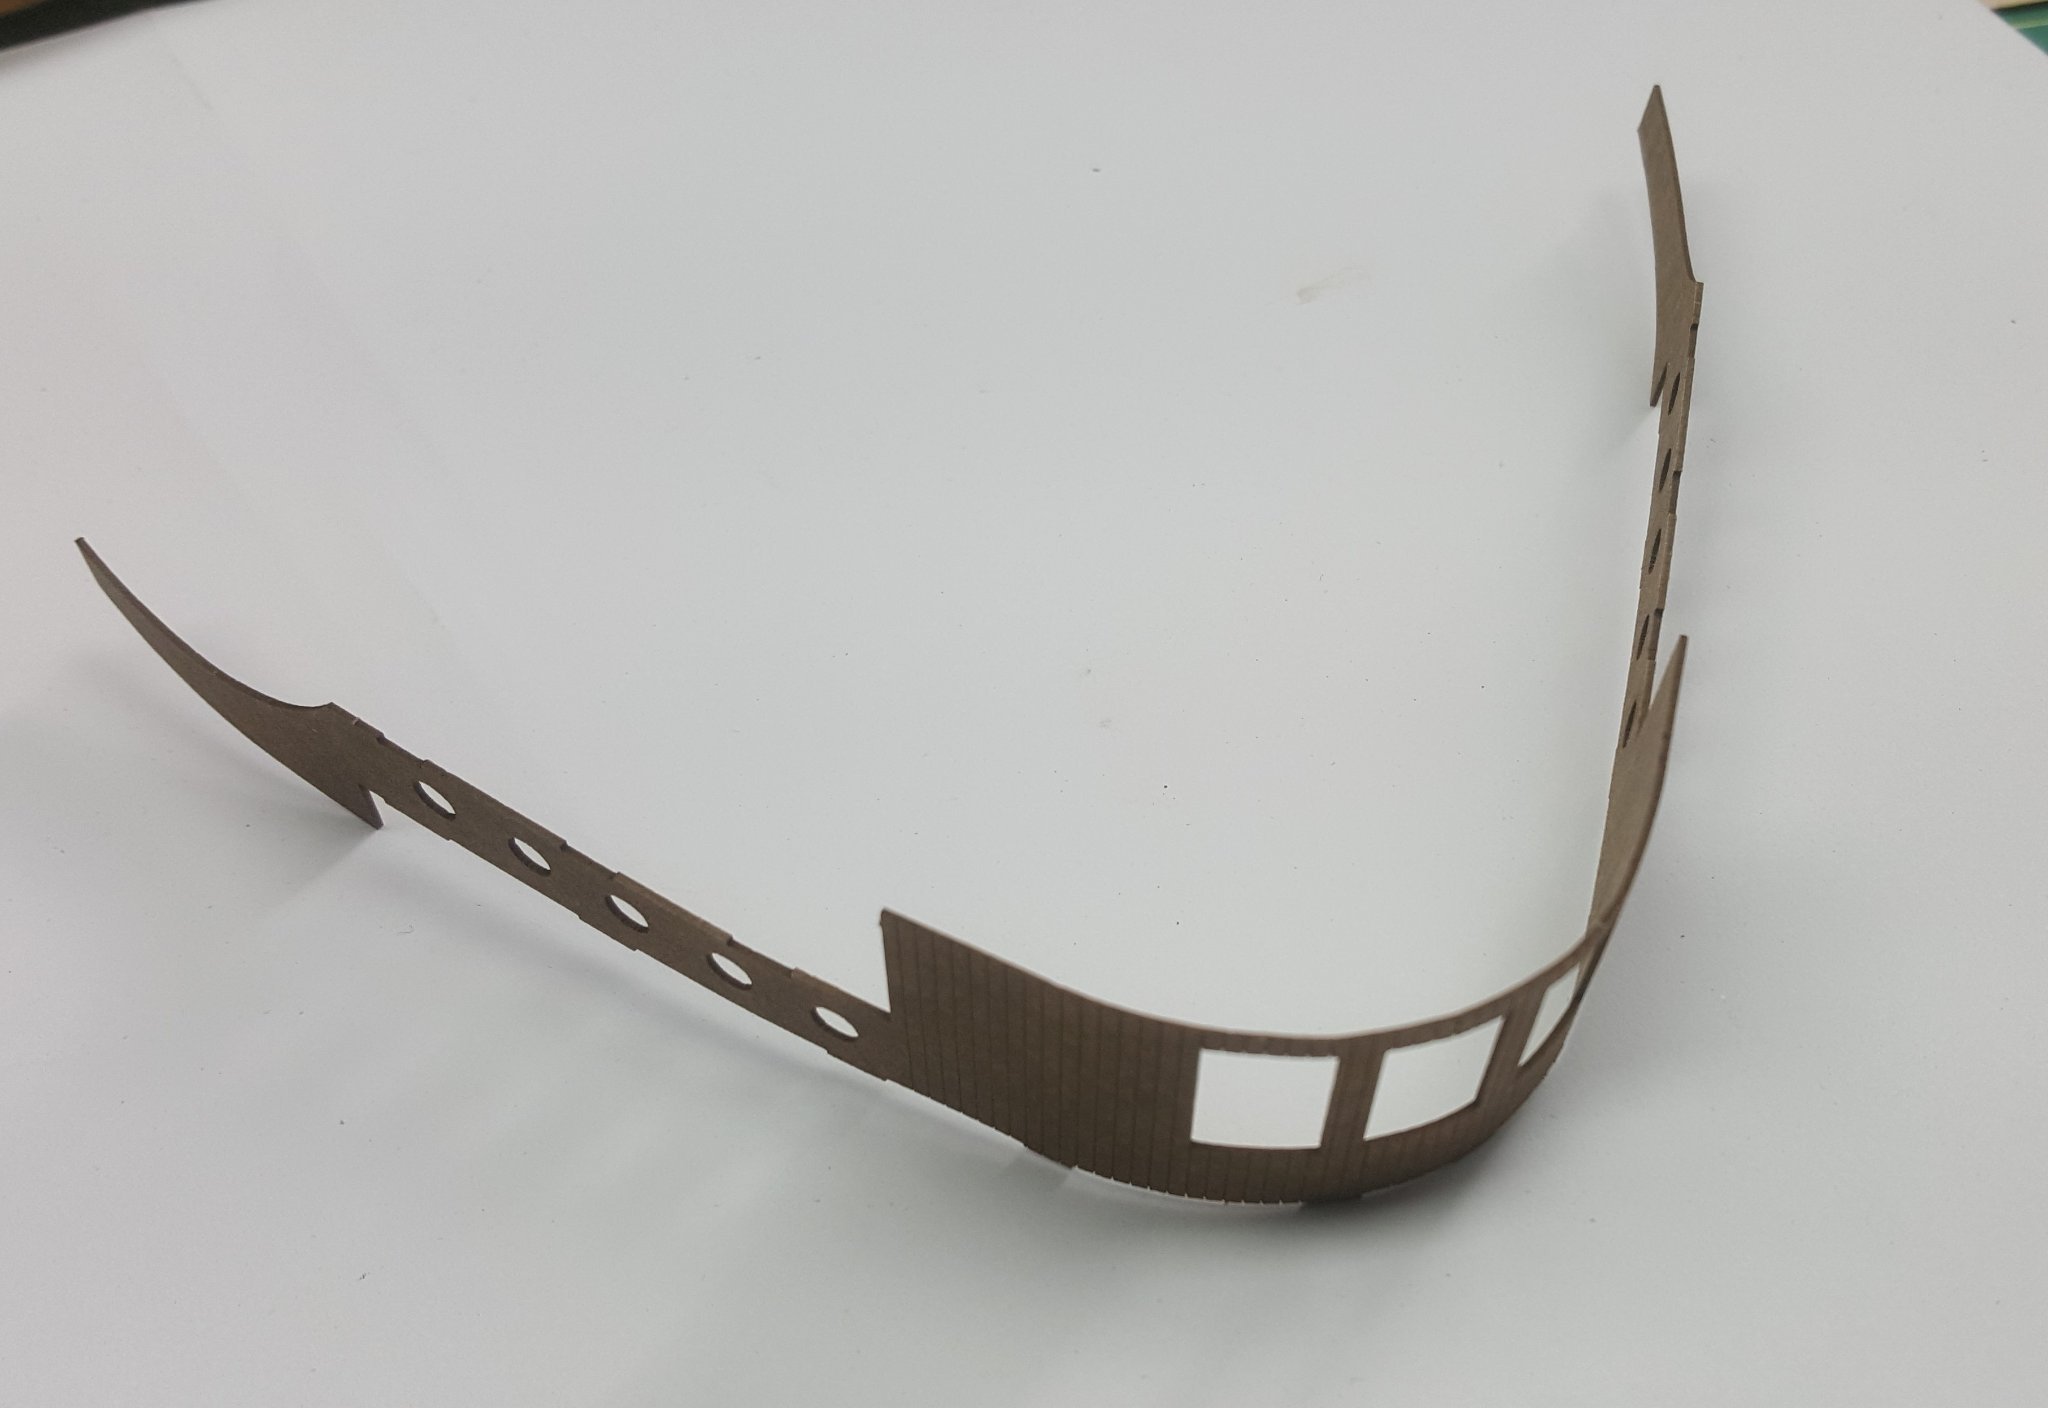
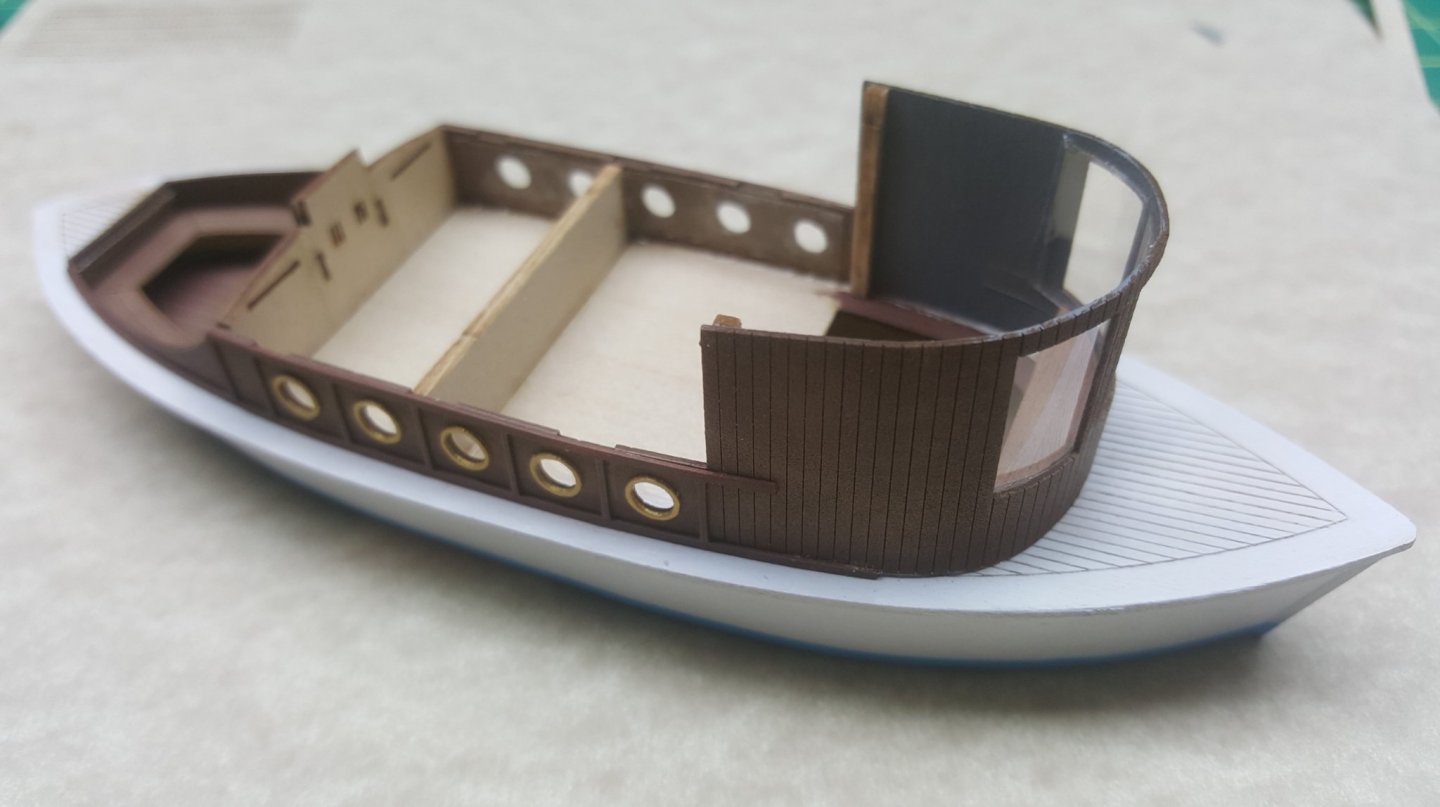
The cabin walls are made from 1 piece of polybak and rolled to fit the slots in the deck. This makes for a nice tight fit . Spacers were added to keep the curvature of the cabin correct. Porthole rings are added to the outside of the sidewalls along with a frame doubler panel, framing each port hole. The aft Cockpit bench is installed, keeping the cabin sidewalls tightly in place. Perfect fit!
- 4 replies
-
- 4
-
-
- Gene
- Interaction Hobbies
- (and 1 more)
-
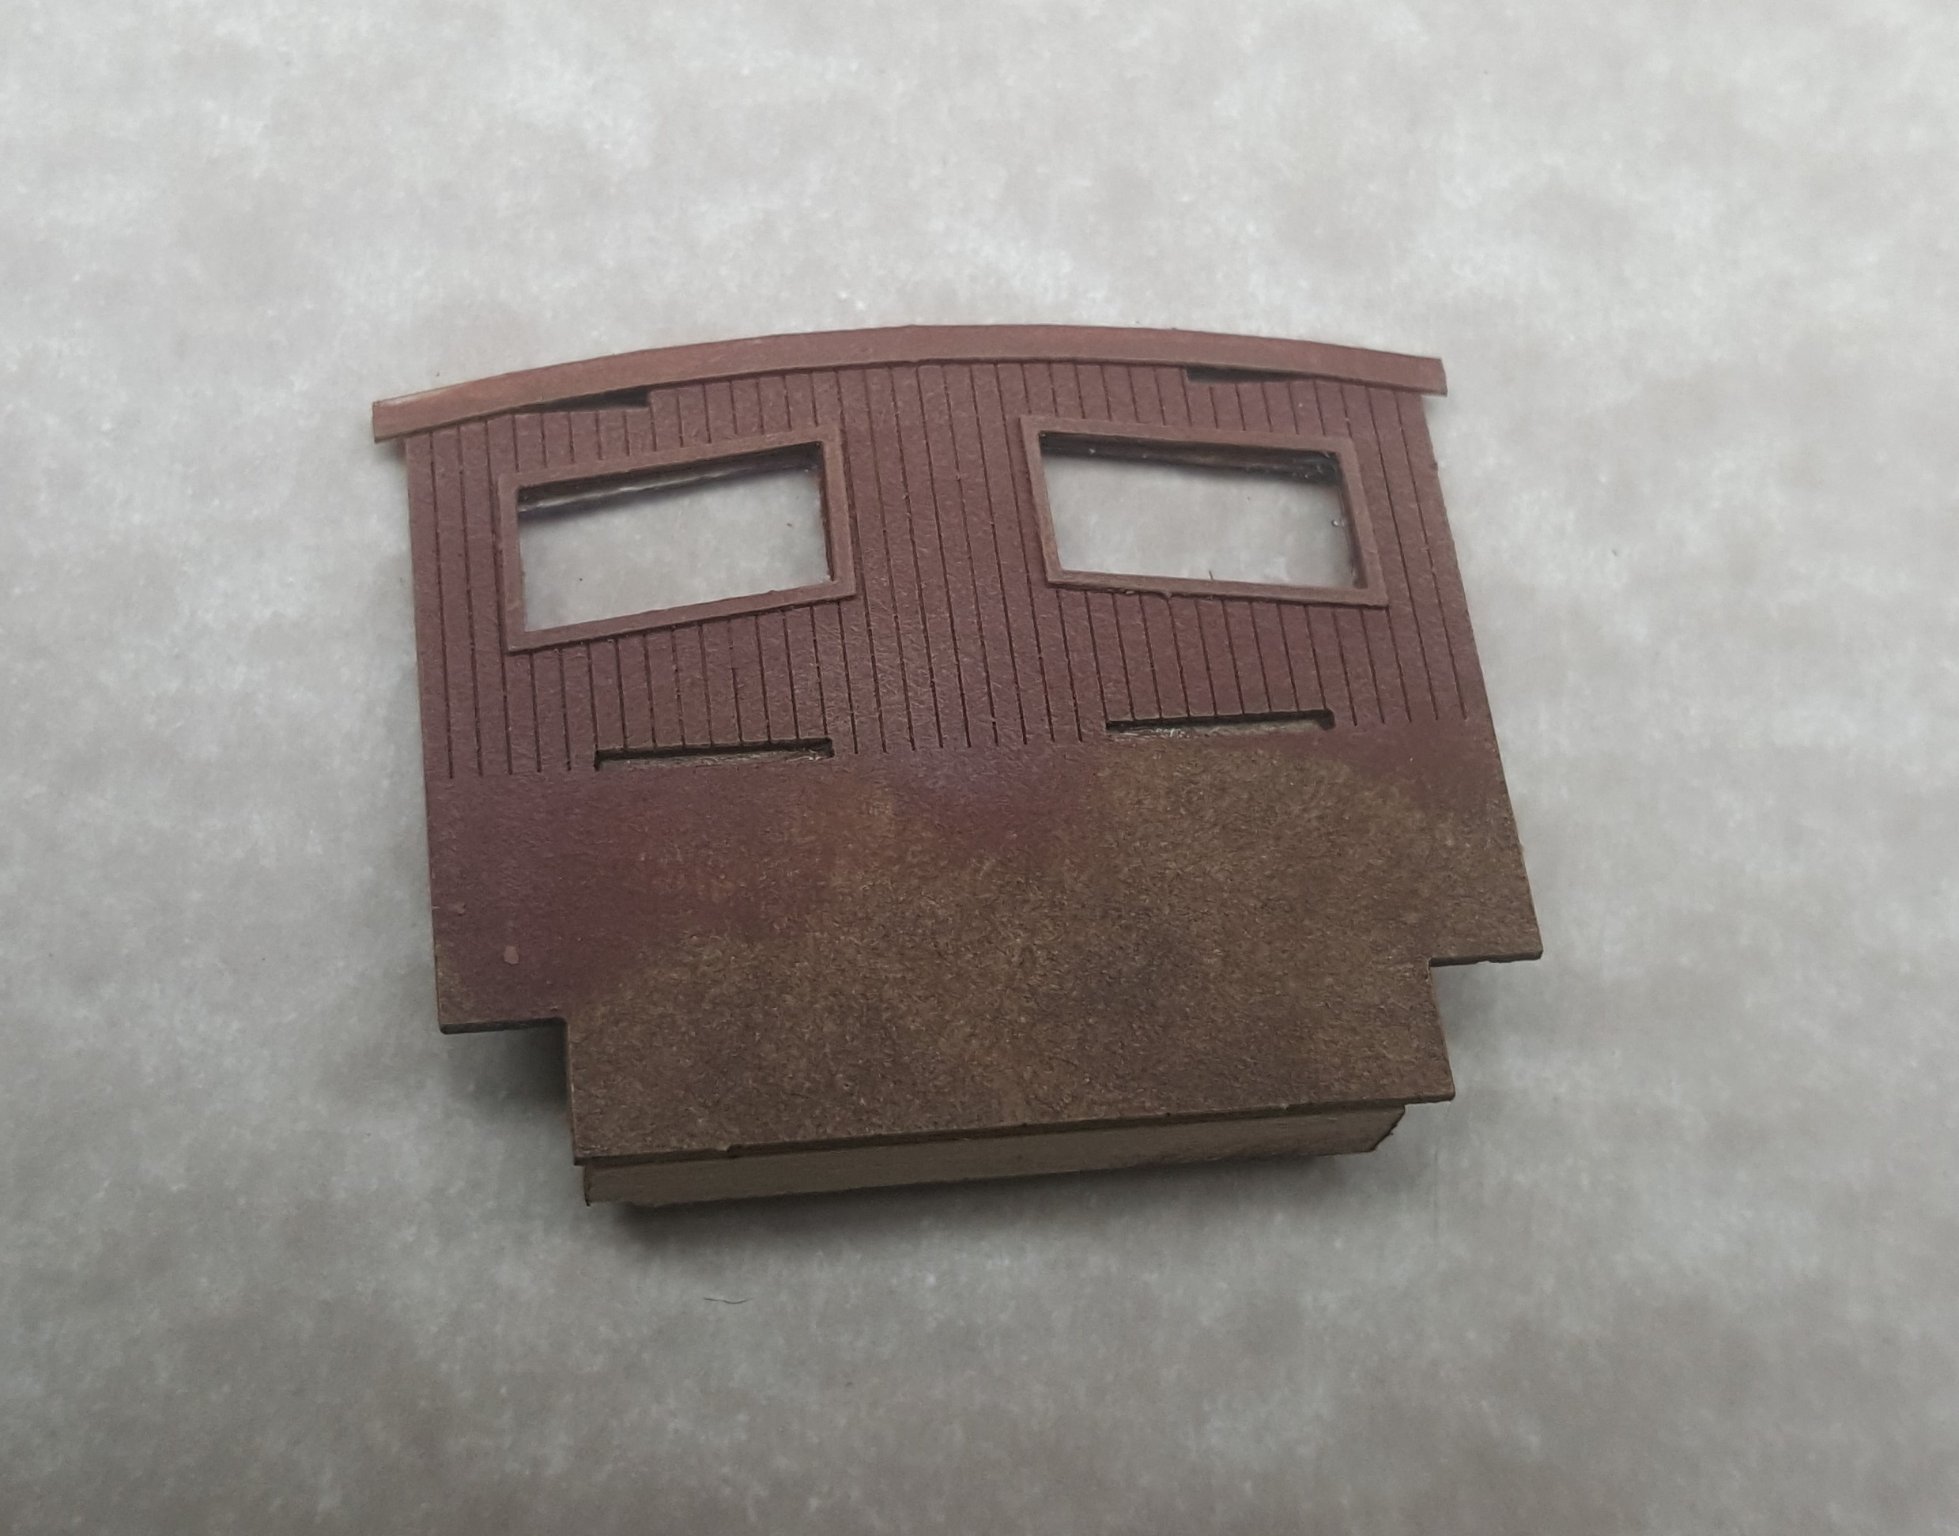
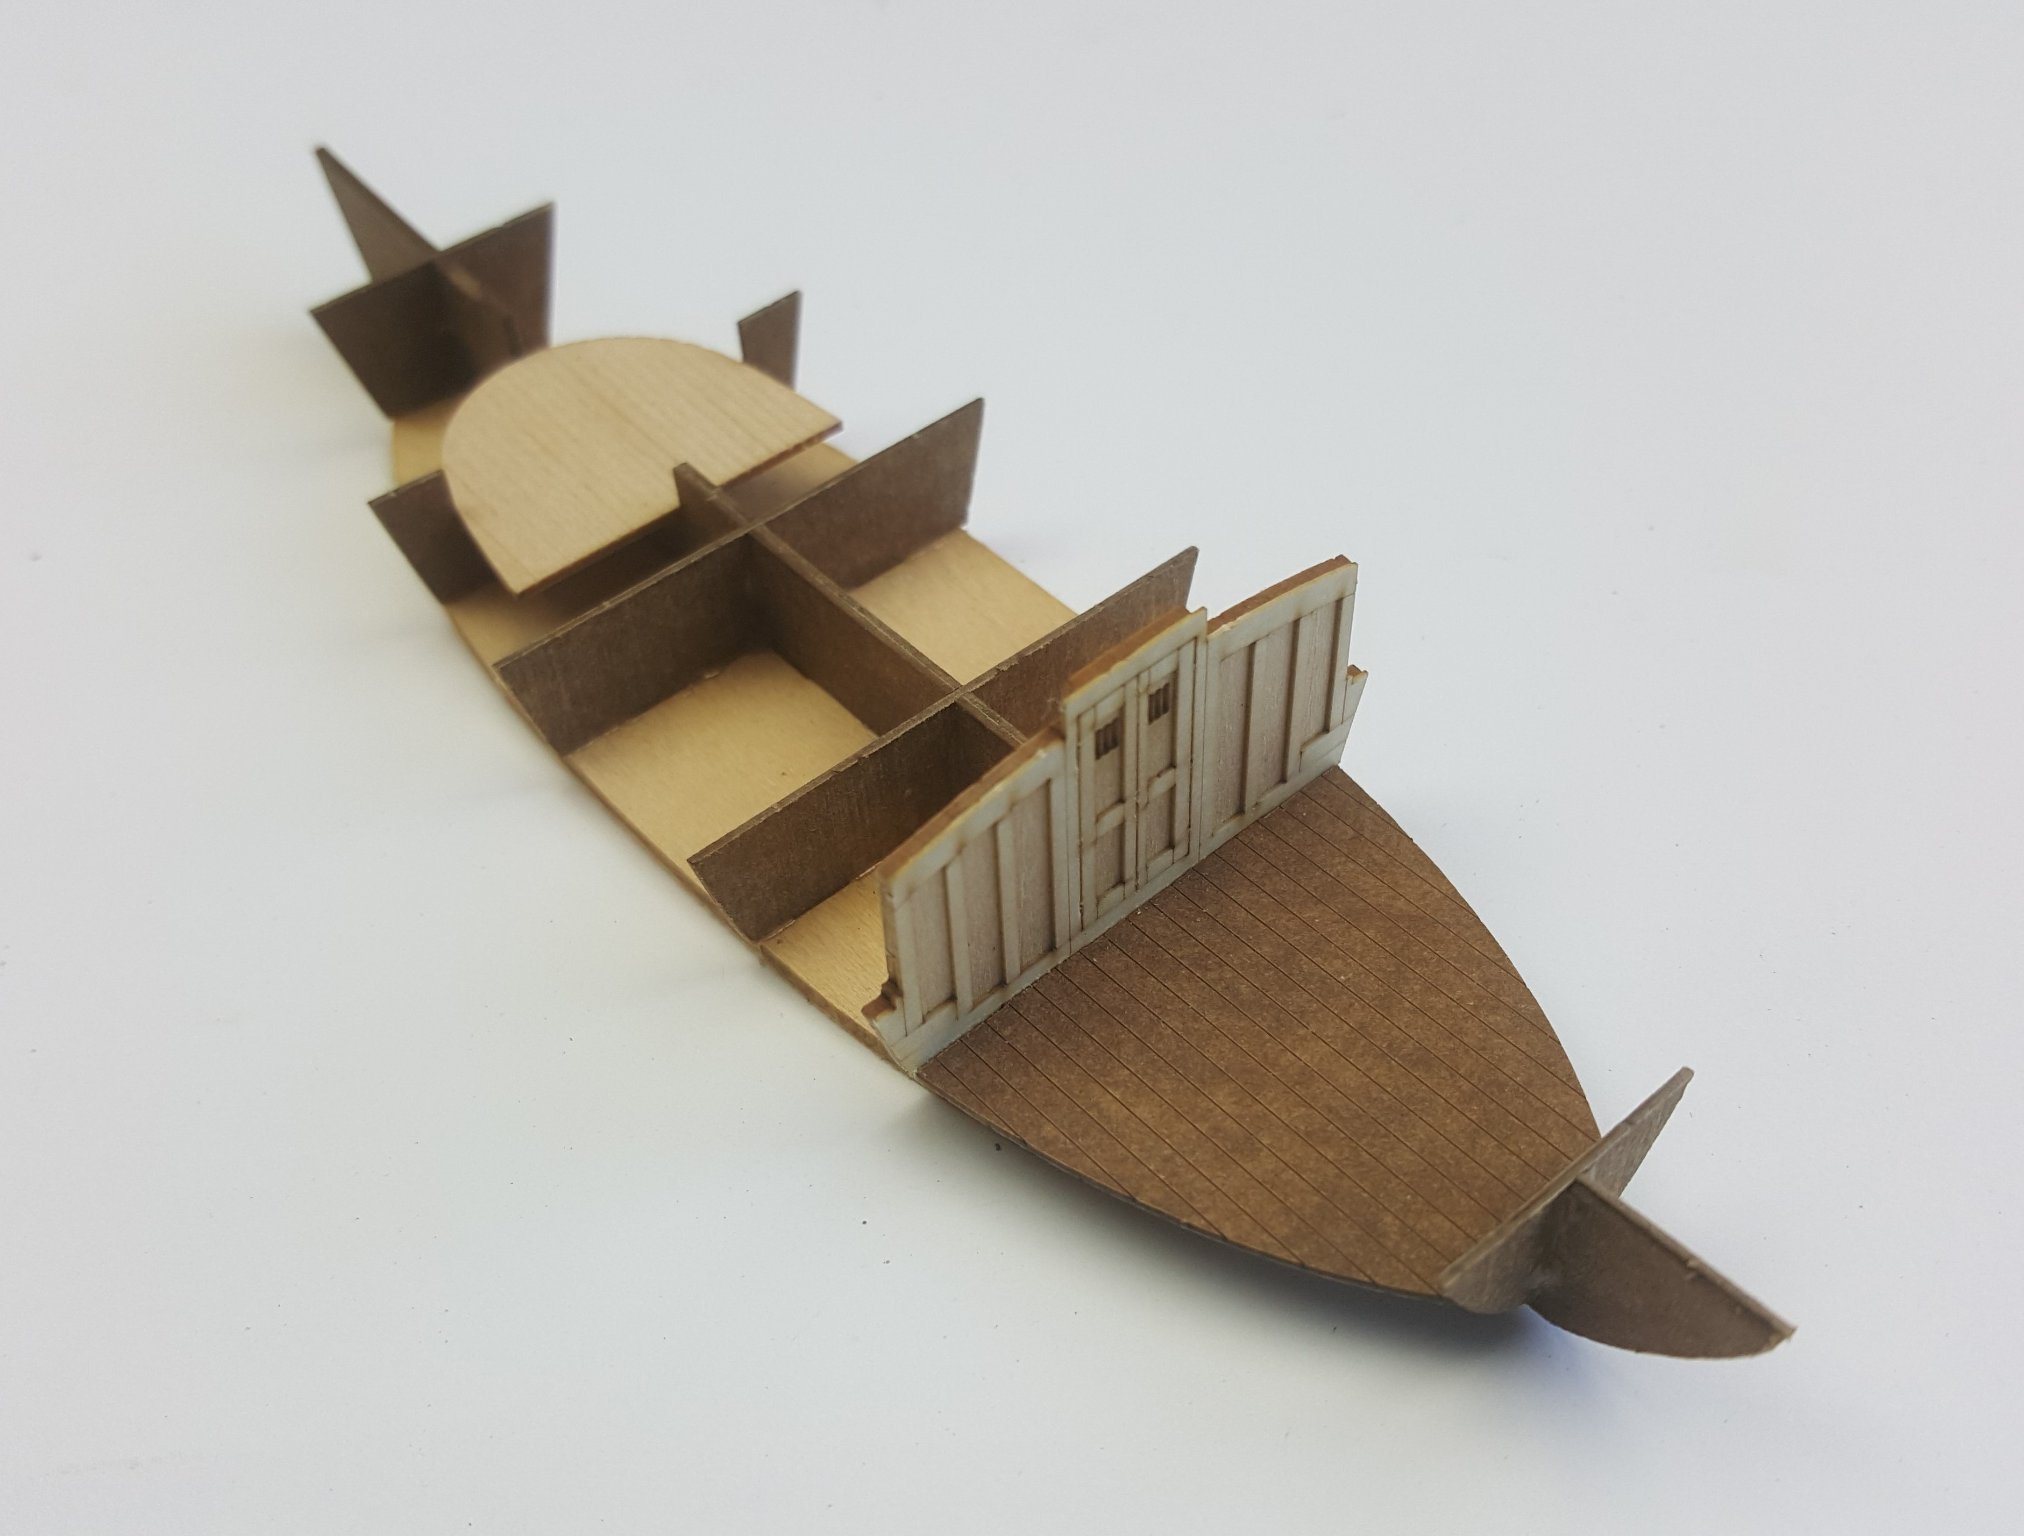
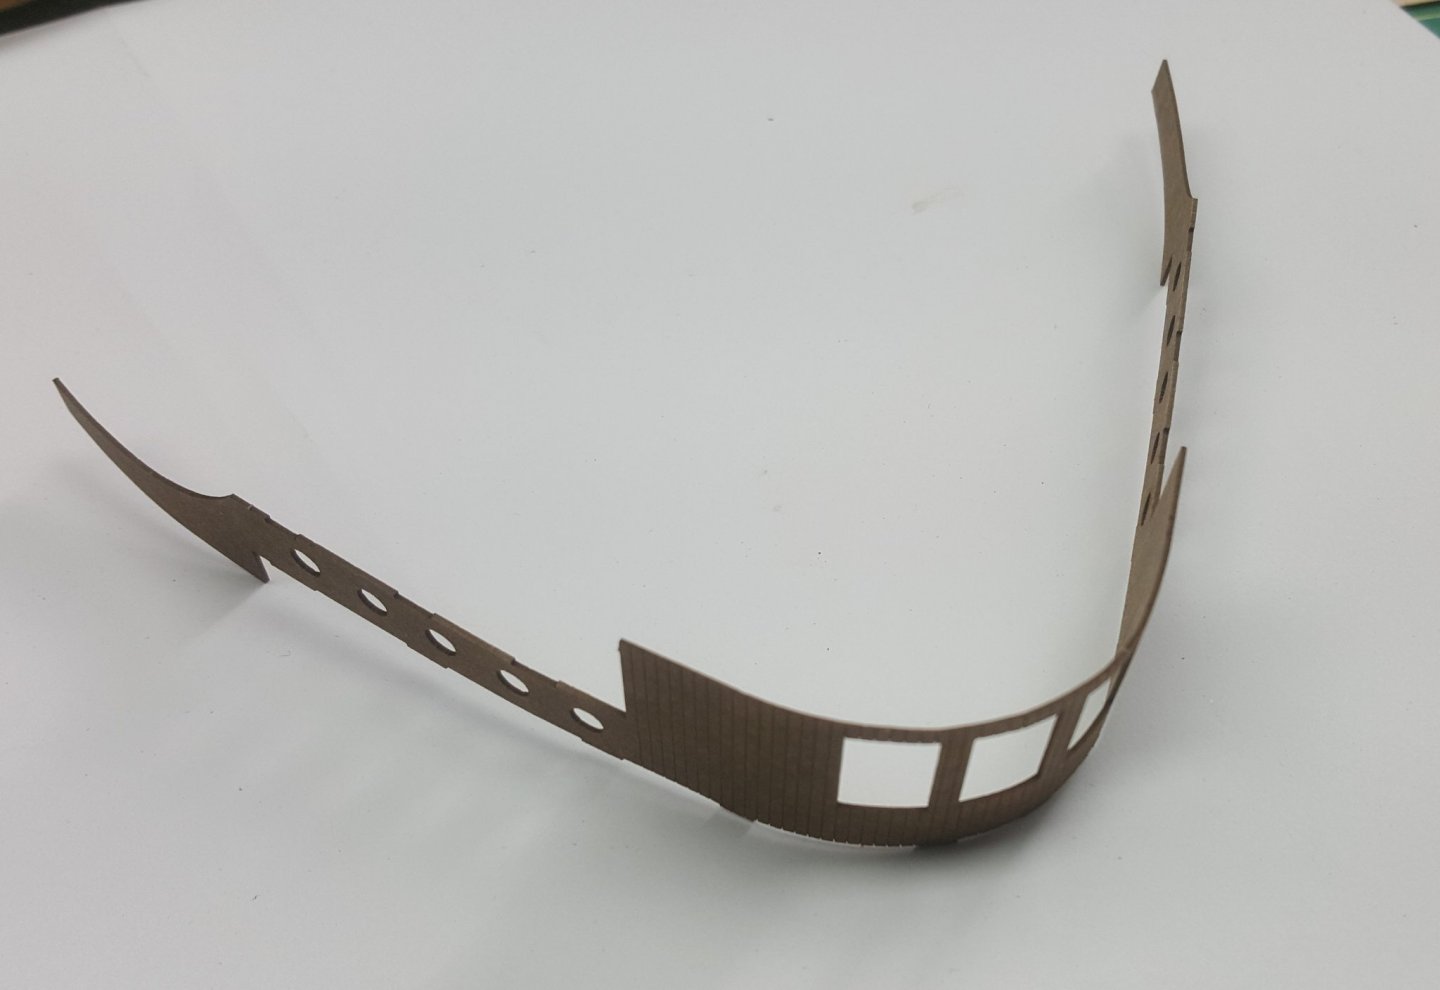
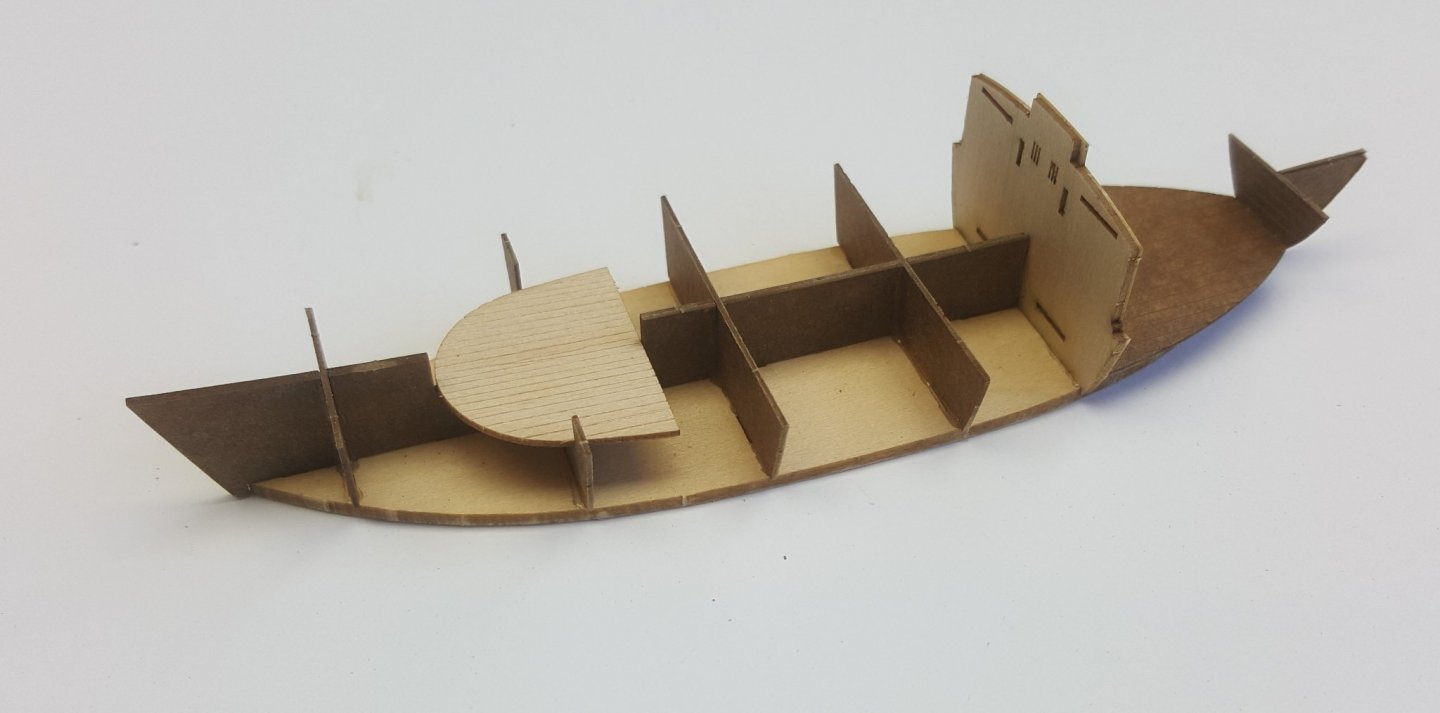
The keel, bulkheads and floors are installed over the waterline hull base. The aft cabin wall is made up from layered basswood and ivory polybak, that has been lasercut and engraved. This makes for a very rigid structure to attach the hull panels and deck Here we are using a little weight to glue the deck to the hull and maintain the appropriate curvature.

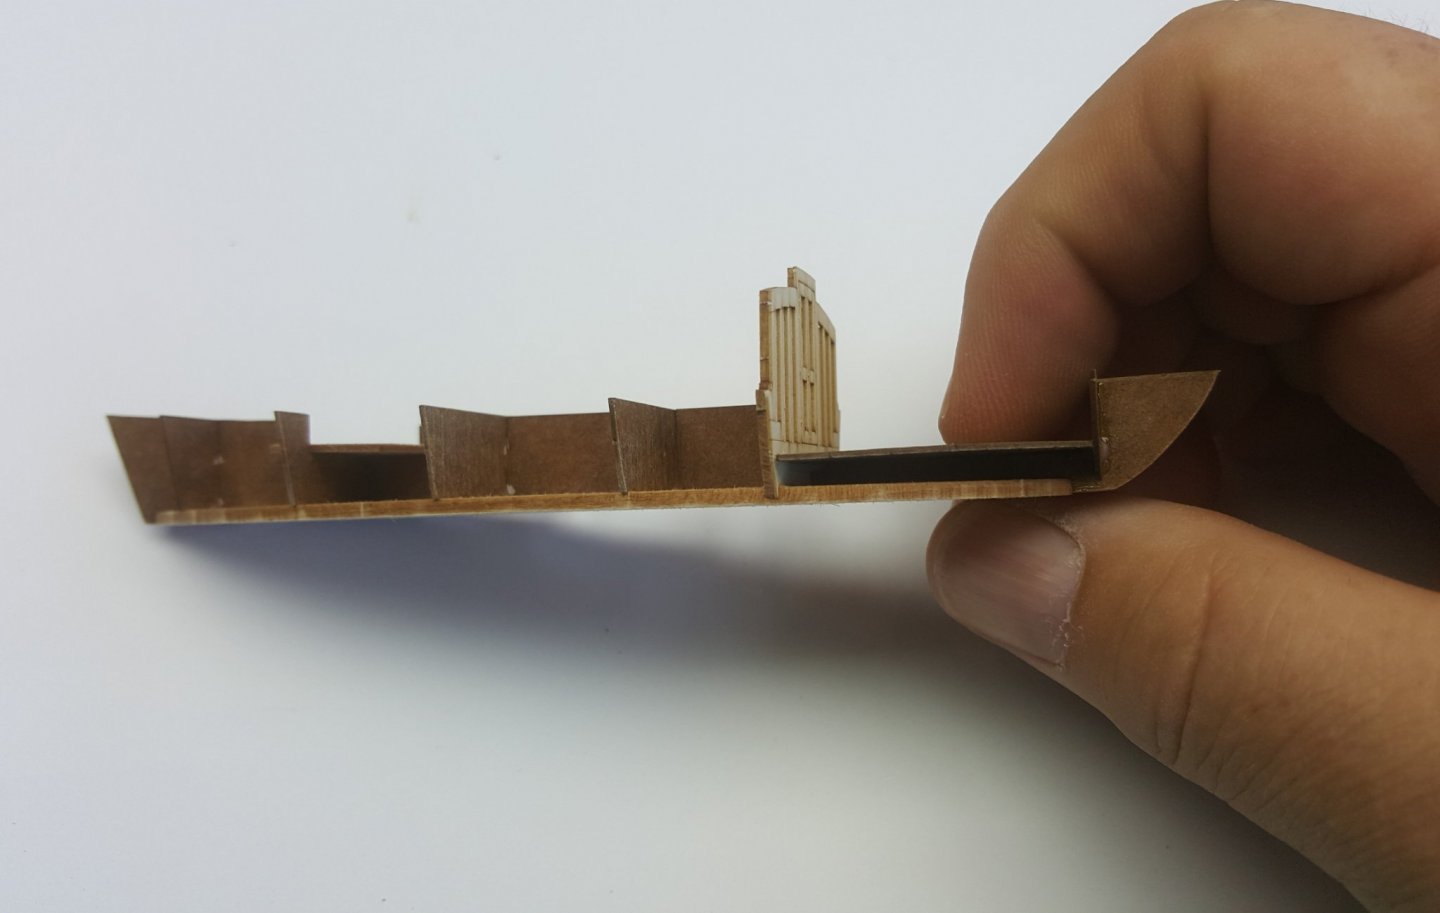
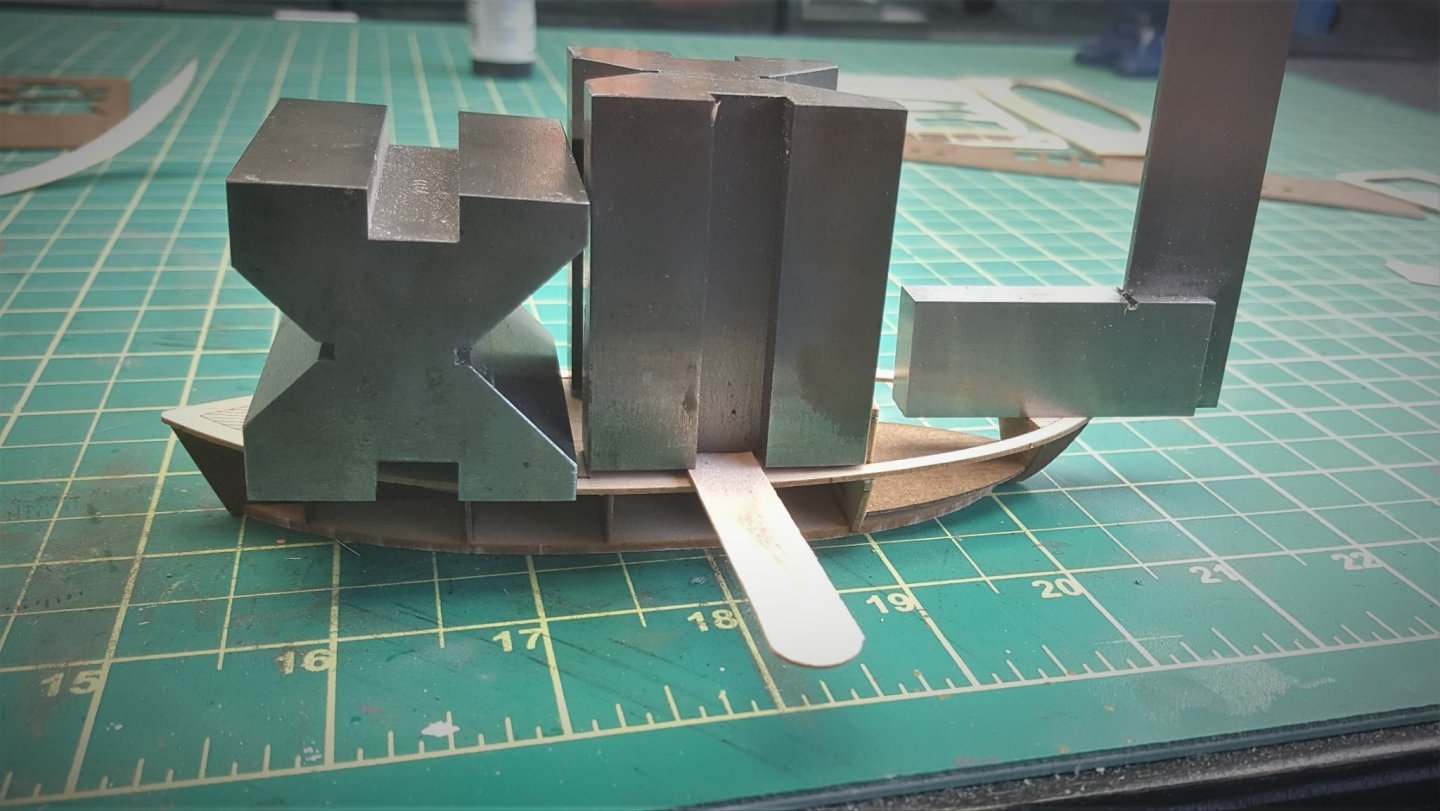
- 4 replies
-
- 4
-
-
- Gene
- Interaction Hobbies
- (and 1 more)
-
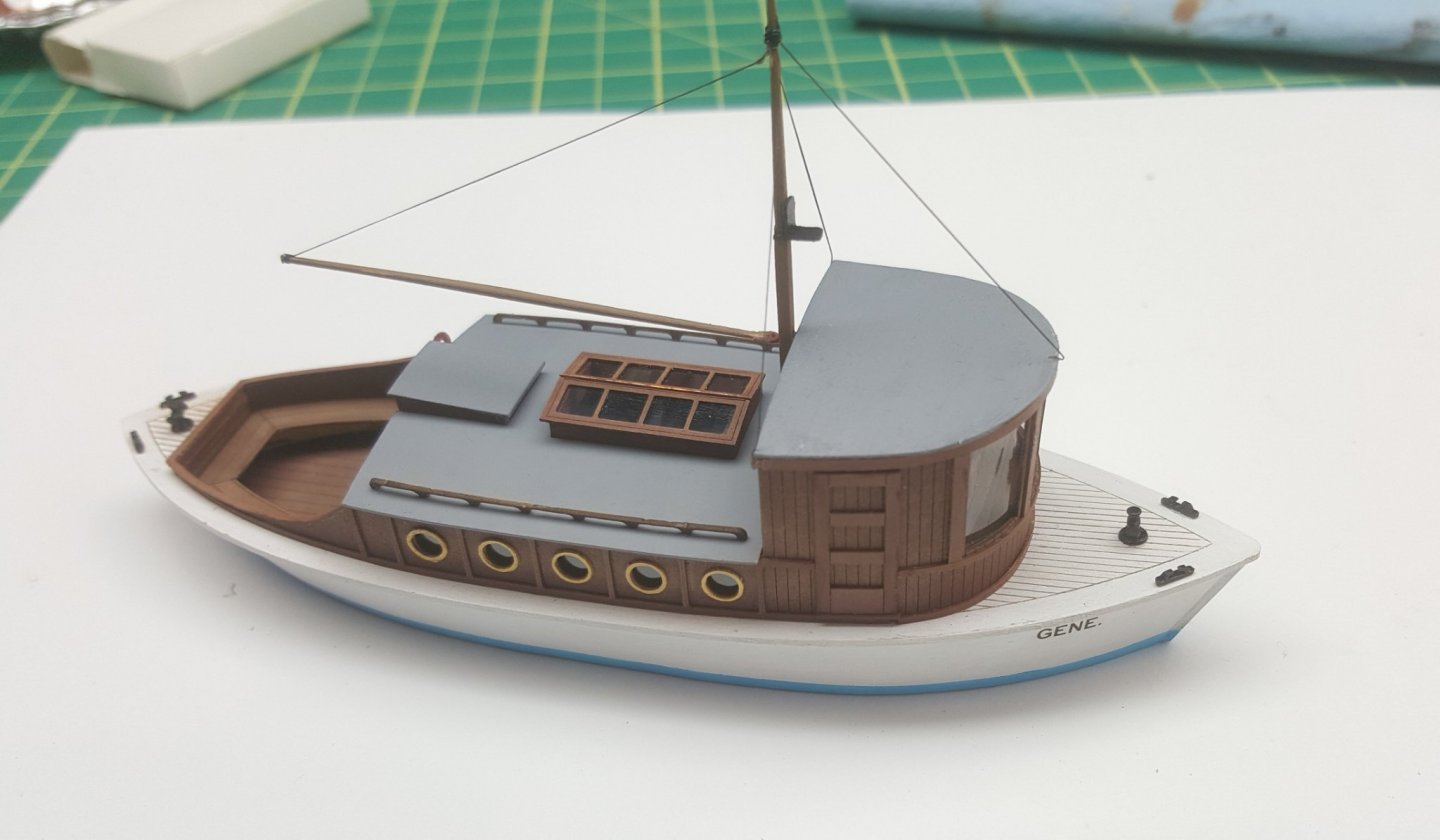
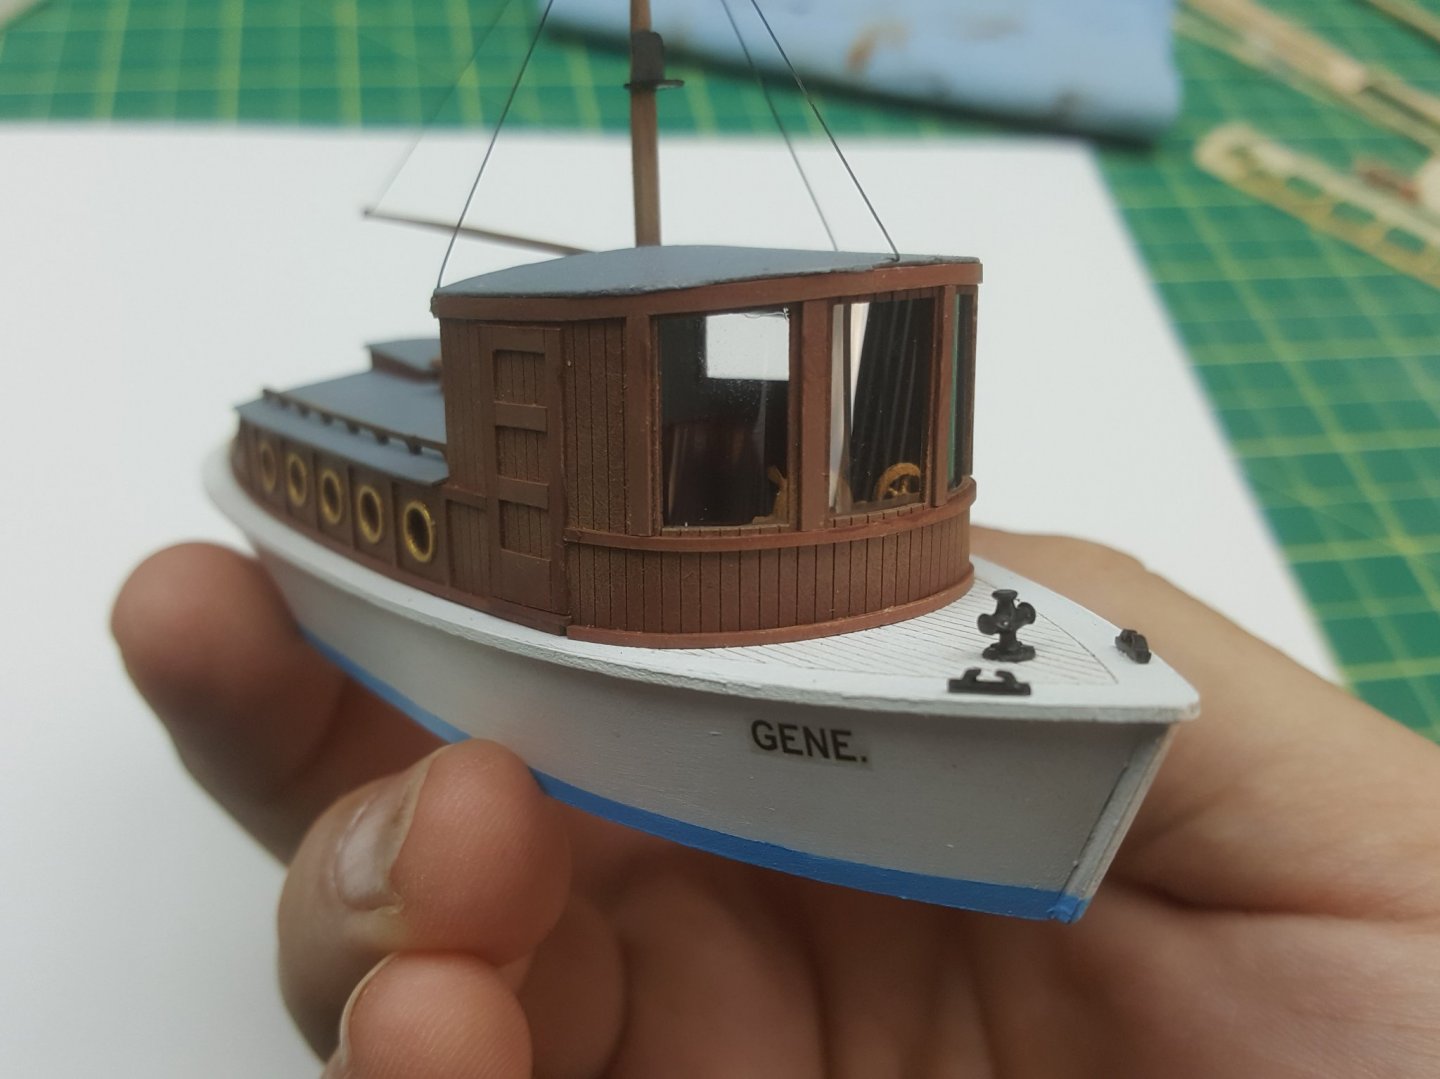
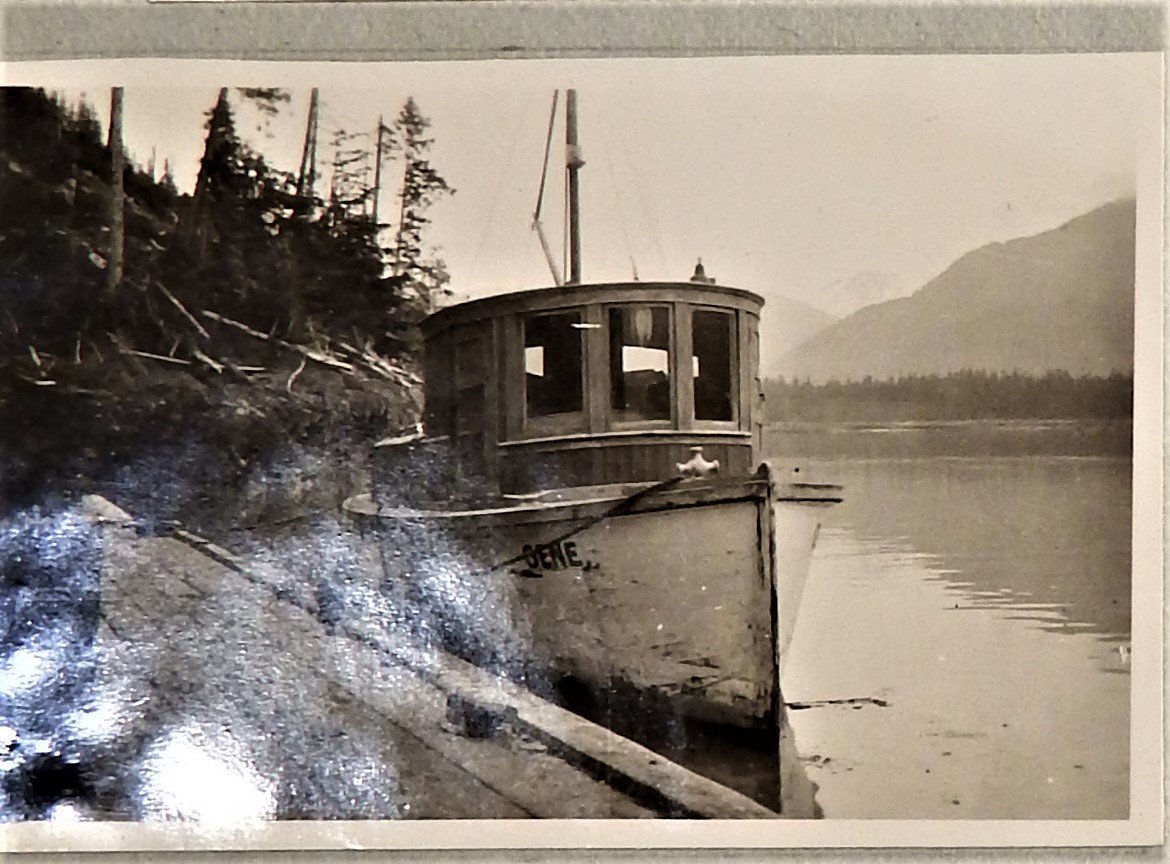
Thought I would share the prototype build of a 1912 West Coast work boat. In 1912-1915 she was owned by Clarence Wakeley, Vancouver BC. In 1918-1921 she was owned by Dolly Varden Shipping Co. Ltd., Victoria BC, and used to supply the Dolly Varden mine and railway. In 1926-1930 she was owned by Walter C. Hanson, Butedale BC. On July 10, 1930 she was destroyed by fire in Deep Cover, on the North Arm in Burrard Inlet, BC, Canada. This is a waterline kit made from Basswood, Polybak, and some 3D printed details. I will probably get around to releasing this as a kit and possibly another version in 1/4" scale (1:48)
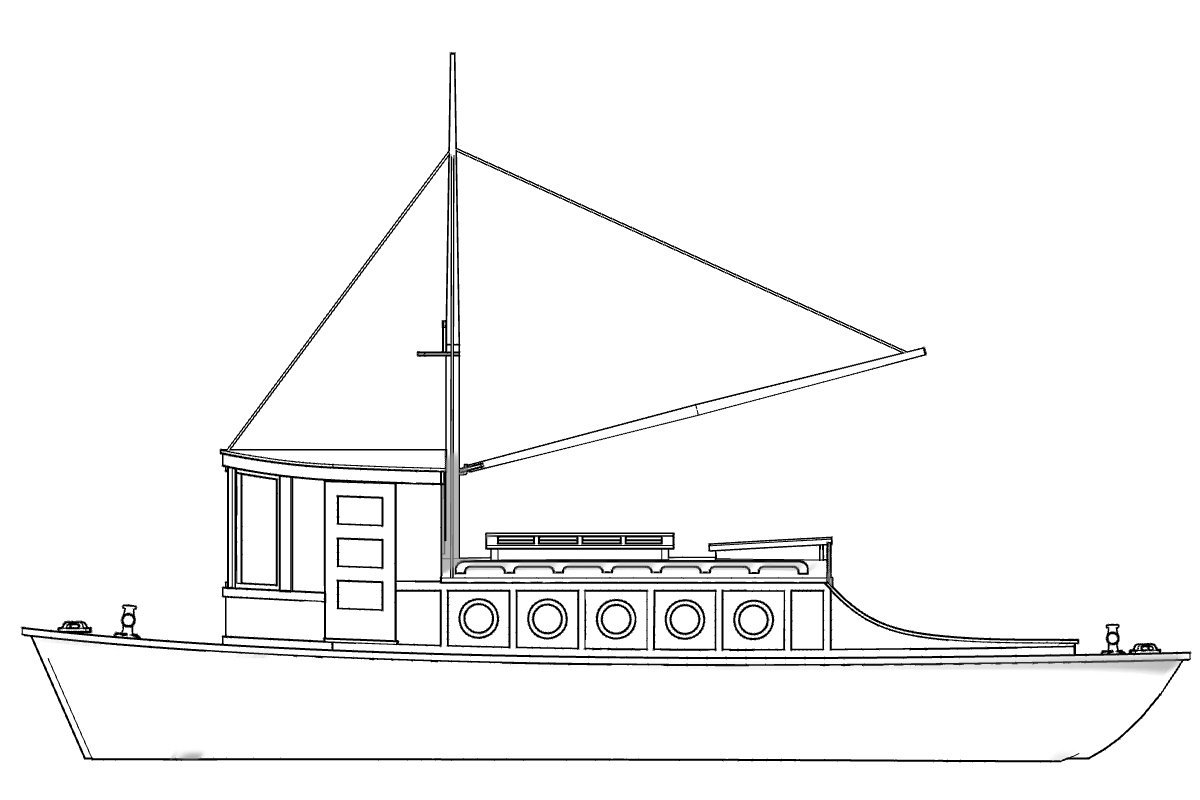
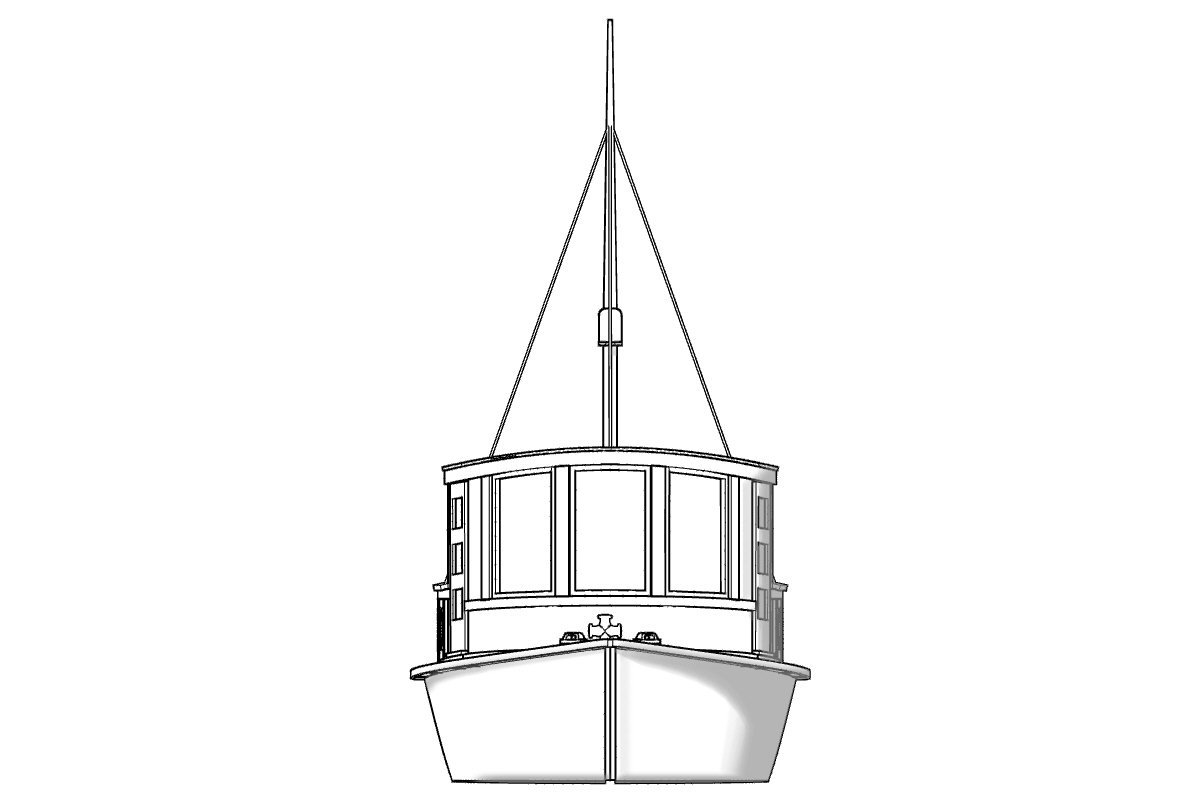

- 4 replies
-
- 4
-
-
- Gene
- Interaction Hobbies
- (and 1 more)
-
Trumpeter Scharnhorst Battlecruiser 1/200 is coming soon.
Rail and Tie replied to yvesvidal's topic in Plastic model kits
Darn You Chris! Now I am ordering one too! I don't need it, I don't when it will get built, but I wanted it! I hate you! LOL😁 -
A little late to the game on this one, but what a wonderful build and a fantastic finish. Congratulations on such a great job. I clearly have a weakness for sternwheelers you did a great job on this one.
- 133 replies
-
- 2
-
-
- chaperon
- model shipways
- (and 2 more)
-
Here is a short video on the sternwheeler kit and a summary of Interaction Hobbies. Enjoy!
-
I agree with druxey, if you can manage the electric Stand/sit desks, it would probably be the best. I am just in the process of redesigning my workspace to be able to stand or sit on a tall stool because of growing back issues. Sitting at a standard desk height and an office chair does not cut it with lower back pain and knee pain. I am considering one of these (amazon and Ikea have them). BEKANT Desk sit/stand - black stained ash veneer/black - IKEA There are crank ones that are cheaper that the electric ones ...
-
Hi Folks Happy to be aboard. There are some fantastic modelers on this site and lots of detailed information and great models. We are pleased to support Model Ship World and the NRG and look forward to contributing to the preservation of history in miniature. We have a number of highly detailed and unique ship kits in 1:48, 1:87 and 1:160 scale and will be adding more as we go along this venture. Here are some of our current nautical offerings


- 11 replies
-
- 17
-
-

-
This is going to be great. I have been slowly (snail pace-2) working towards a 1:87 waterline version of this boat for a while. I will be watching with great anticipation. I don't know if you have seen Magnus Andersson's 3D model that he did of this or not. Might be of some help for reference. I am not sure how accurate the hull is, but he has captured a lot of the details. ArtStation - Orca 3D model, Magnus Andersson Cheers!
-
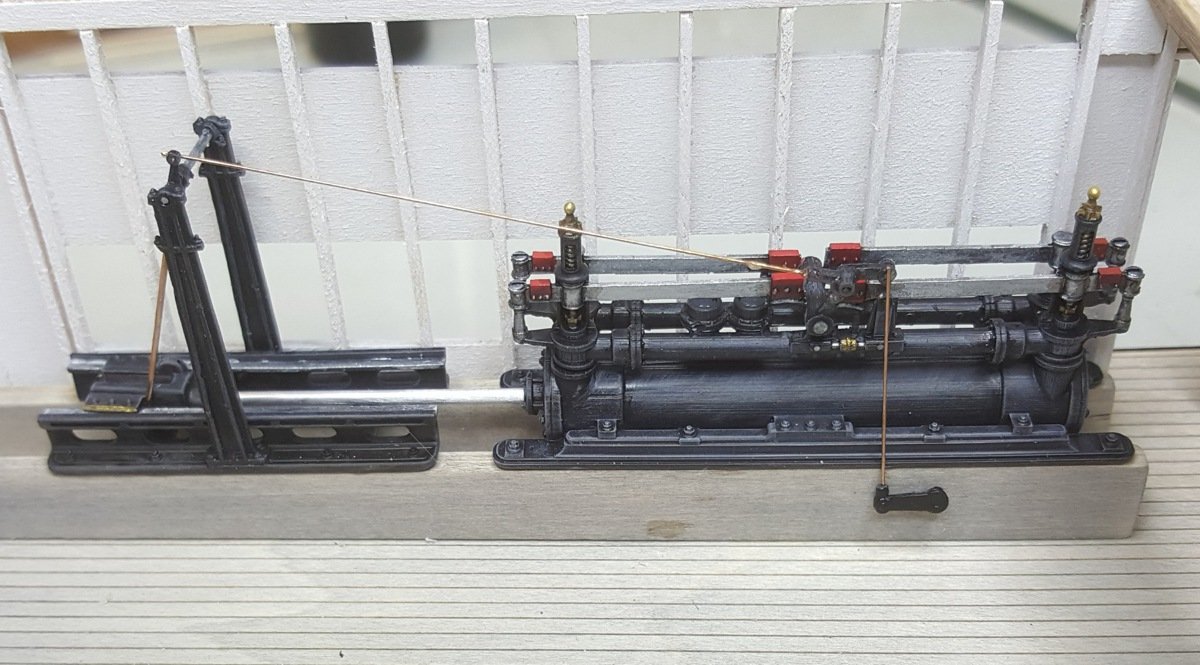
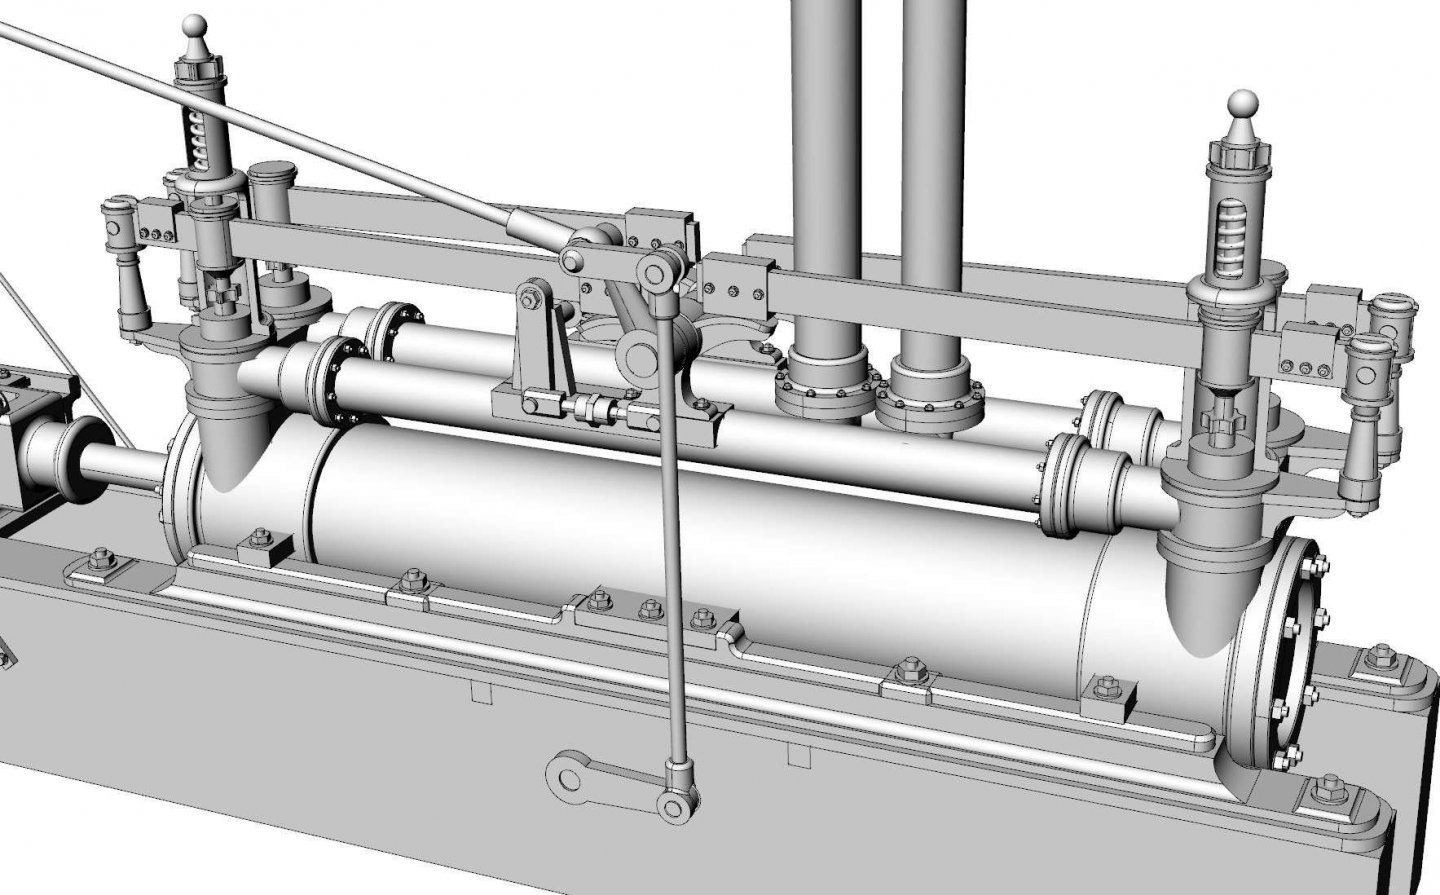
The history in this thread is very interesting. I started with 3D printing back in 2011 using shapeways and other services. Since then we now have a projet and an Fabpro printer and have been having some pretty good success printing parts for our kits and prototypes. Though I have a history with Solidworks and Autocad, I really prefer Rhino as I found it much easier to use (though still similar to Autocad in complexity overall) It was also developed as a ship design tool. 3D printing has really opened up the ability to provide some interesting parts that would have been quite difficult to provide in resin or pewter castings. There is still the issue of supports to deal with, but with some clever designing, these are somewhat easy to hide. As mentioned here it is well within the reach of the average modeler to have their own 3D print capabilities, but the time investment comes from doing the 3D designs themselves, which can compete with just scratch building a single physical model that is needed.
-
Wow, what a great build. I have been away from this forum for a while and have missed a lot! I too hope you meant 2021 and not all the way to 2022!!
-
Very nice build so far! Looks like a great kit and great work on it.
- 19 replies
-
- 5
-
-
- schnellboot type 38
- italeri
- (and 2 more)
-
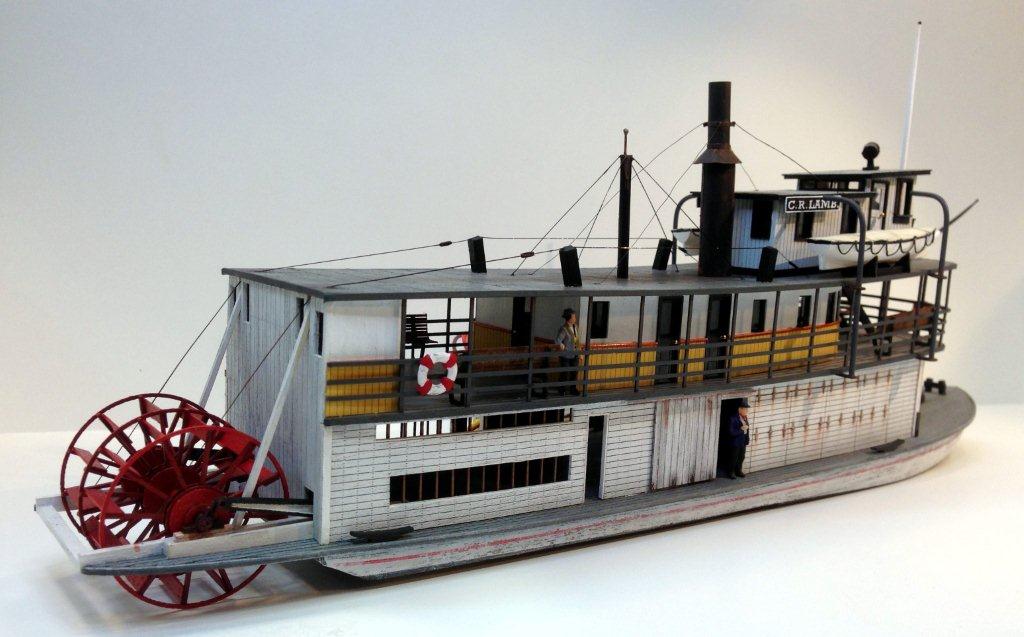
Great news. I was contacted by the Louie family when they found this thread and the thread over on mmrforums and are sending me a bunch of stories and photos of Cptn. Louie and the Sternwheeler!! I am very happy to have made contact with them and am going to meet them in a few weeks at a show in Chilliwack BC. Still trying to get this mode finished up along with work and life in the way!!!
-
Thanks for the thanks folks! It was a very fun build and is turning out to be a very popular kit now too!! I am just finishing up the navigation lights and will post some pics once I get that completed. I plan to display it on the water and hope to power the paddlewheel with a geared motor and foam wheel under the base. Darryl
-
WOW!
-
Hi Adriaan, I just found your build. What a fantastic job and a lot of work. It is looking very very nice! Hi have read of your pain and problems, I sincerely wish you well in your recovery and coping. Sounds like a long road ahead, but treat it like working on a bad kit.... take it by the horns and make it work for you the best that you can! Cheers! Darrryl
-
Hi Mark, Yes this will be travelling with me as Carry On luggage!! This is the first conference that we are flying to so we will see what the ramp rats can do to our cargo of other buildings for our booth!! The Show is at the Hilton in Pasadena from Wednesday evening to Saturday noon. 33rd Annual Narrow Gauge Conference Cheers! Darryl
-
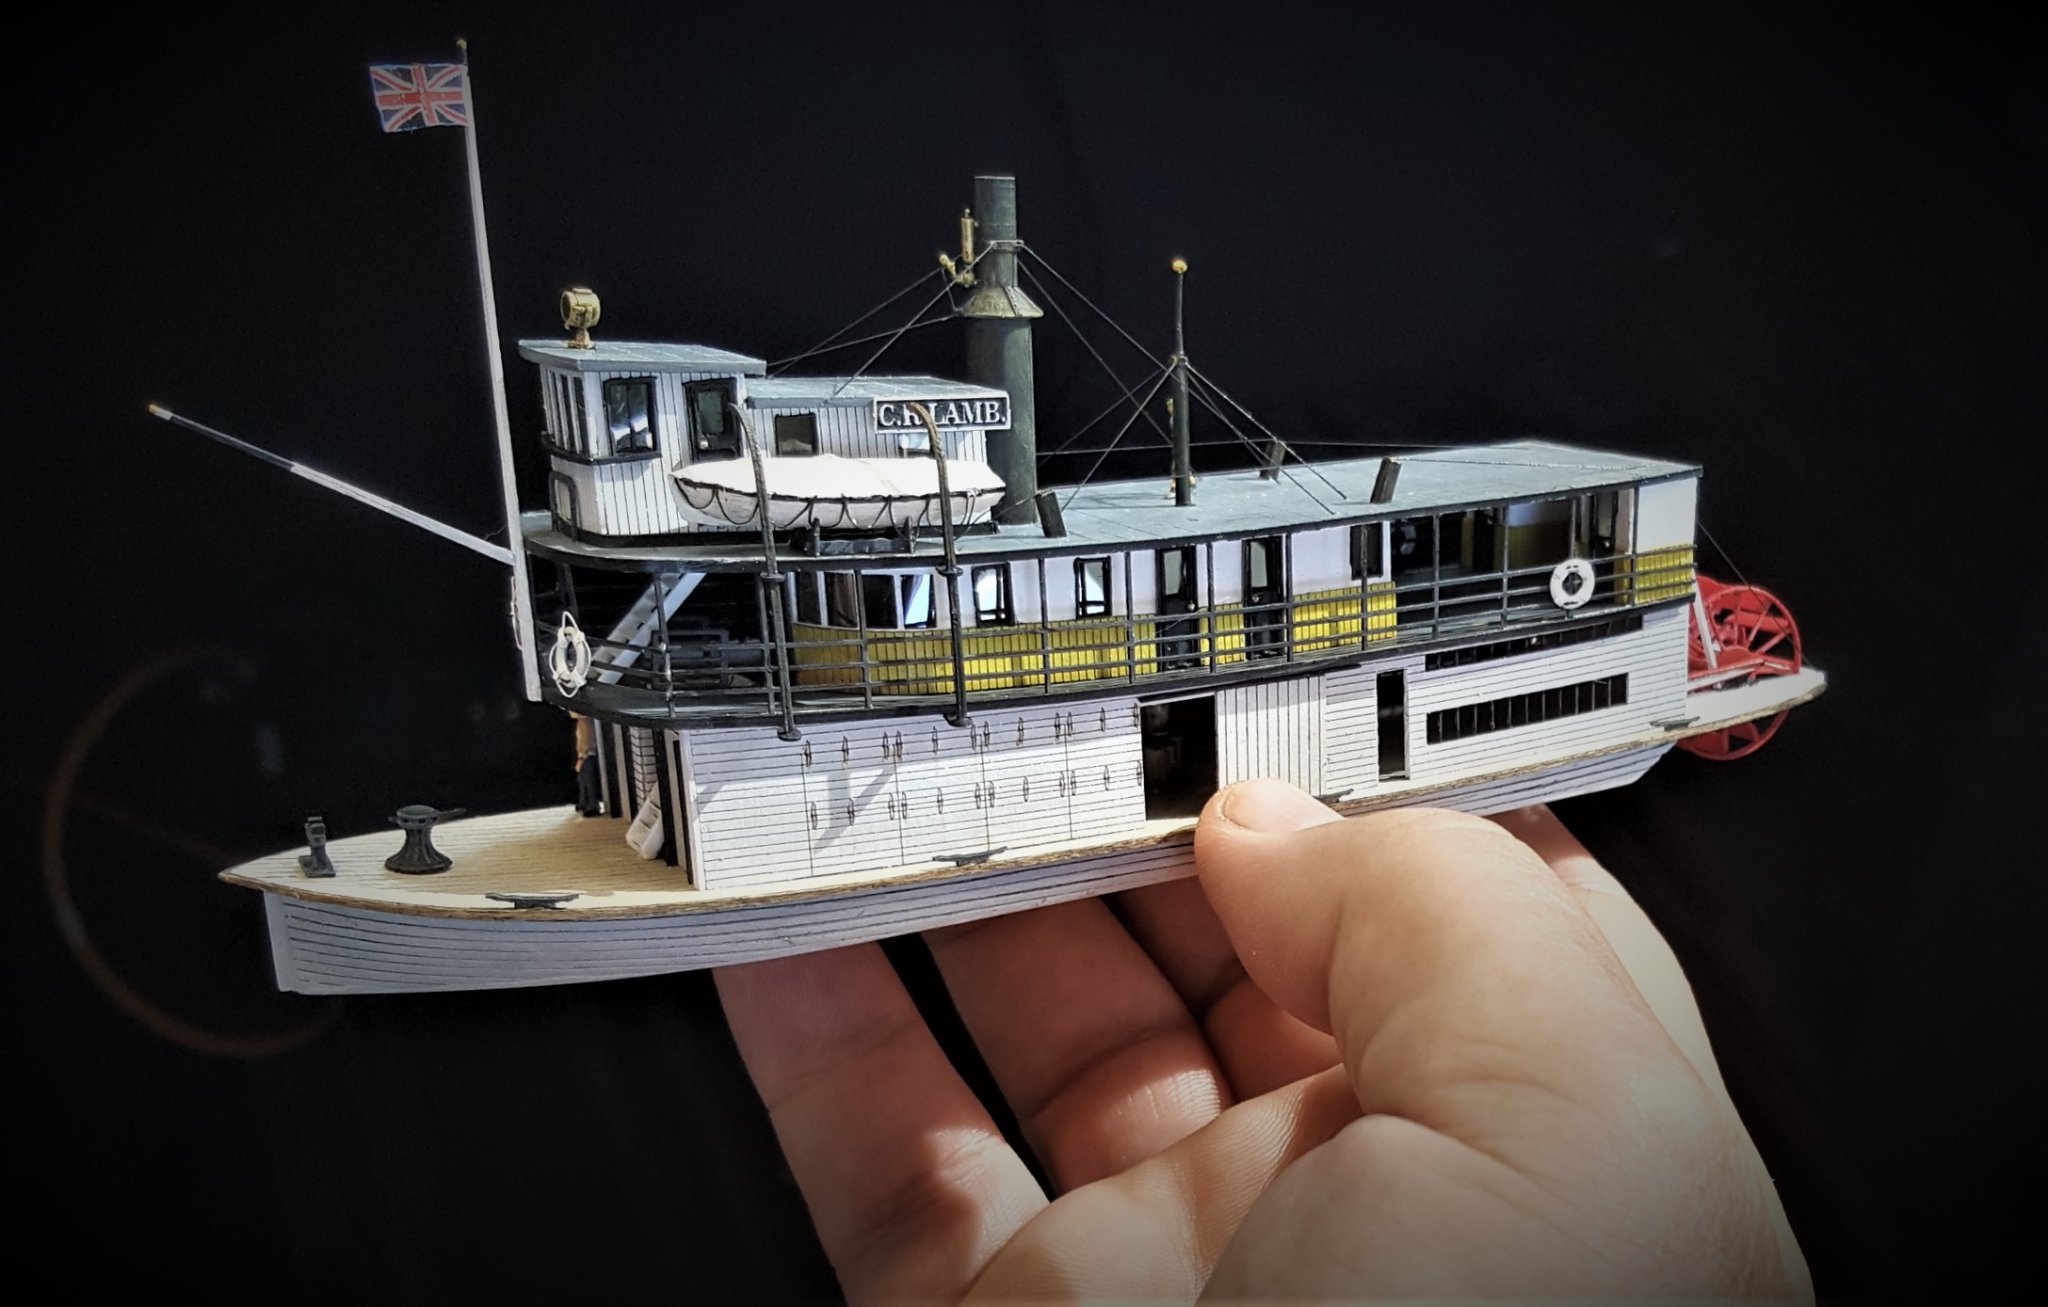
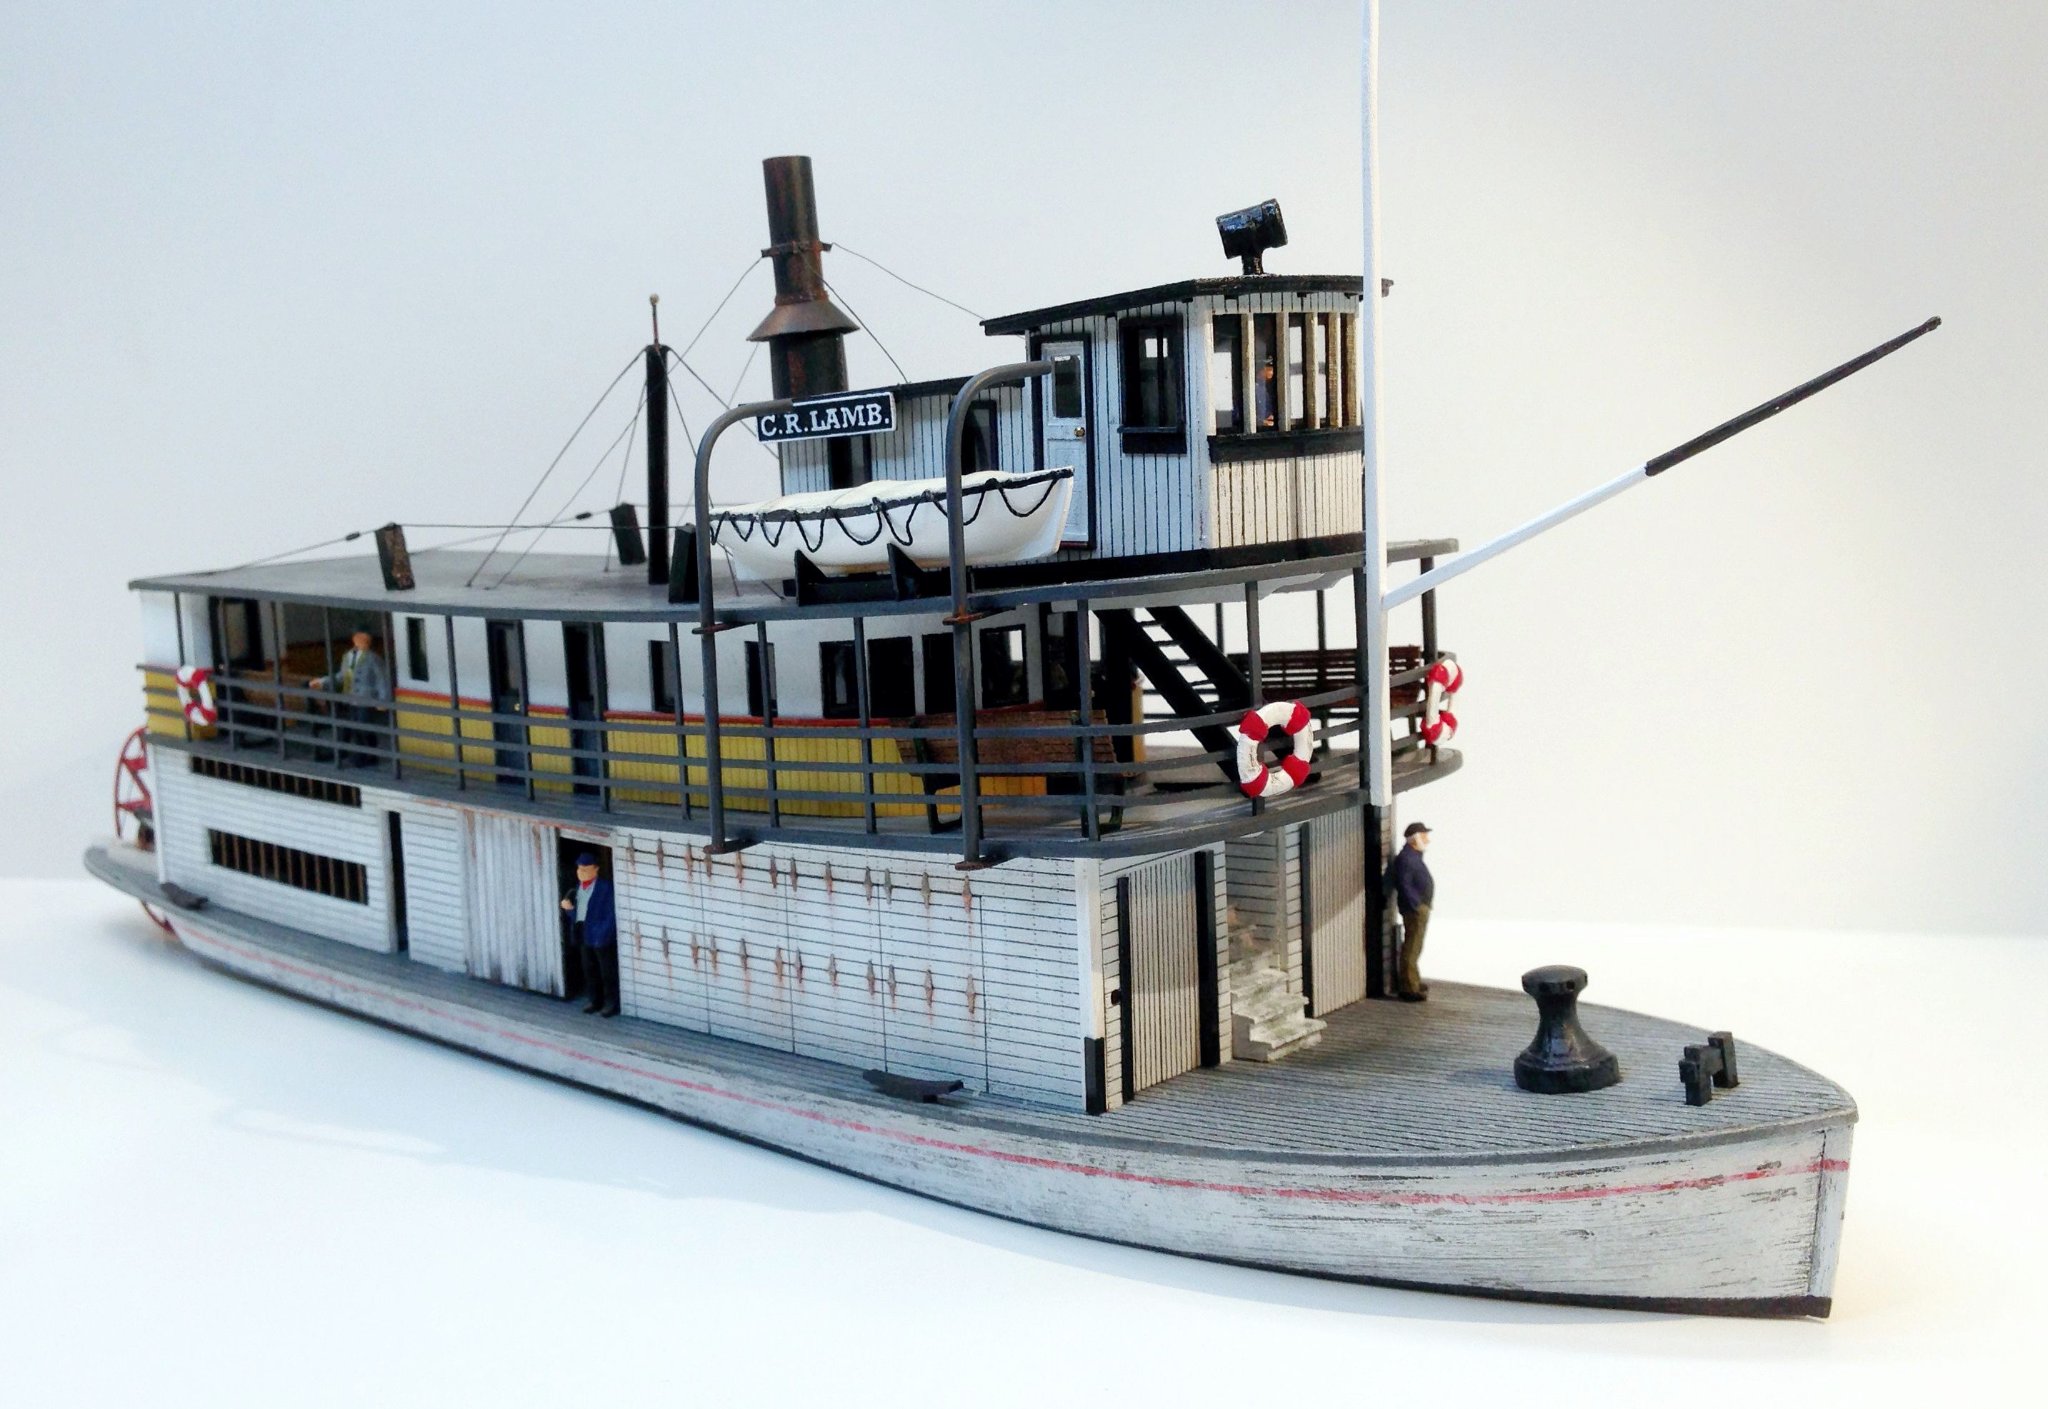
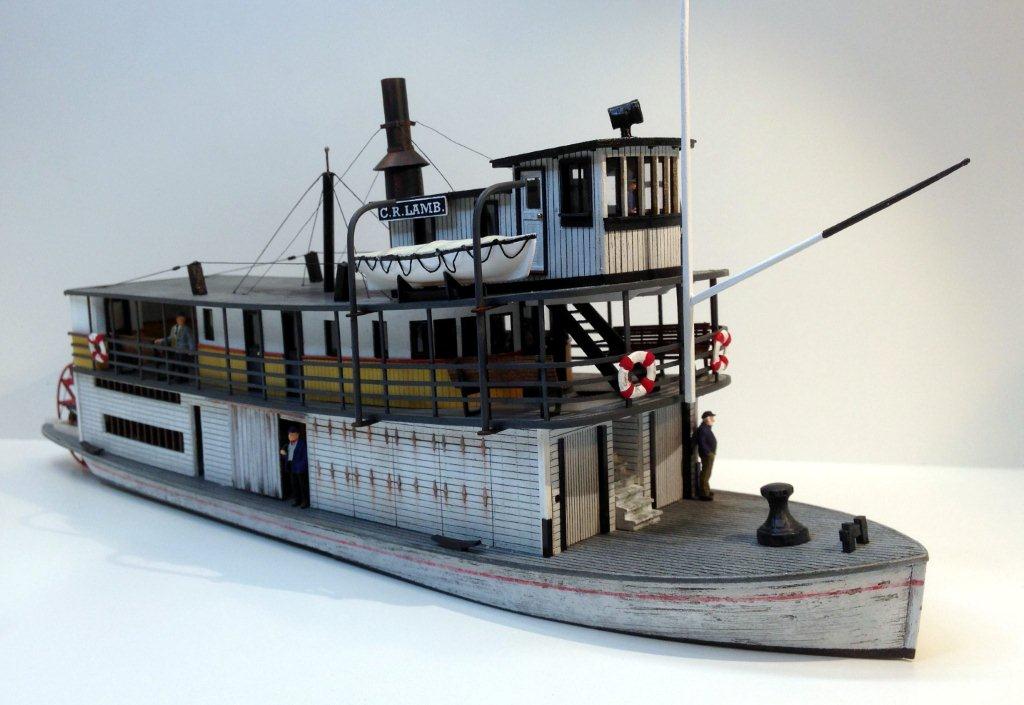
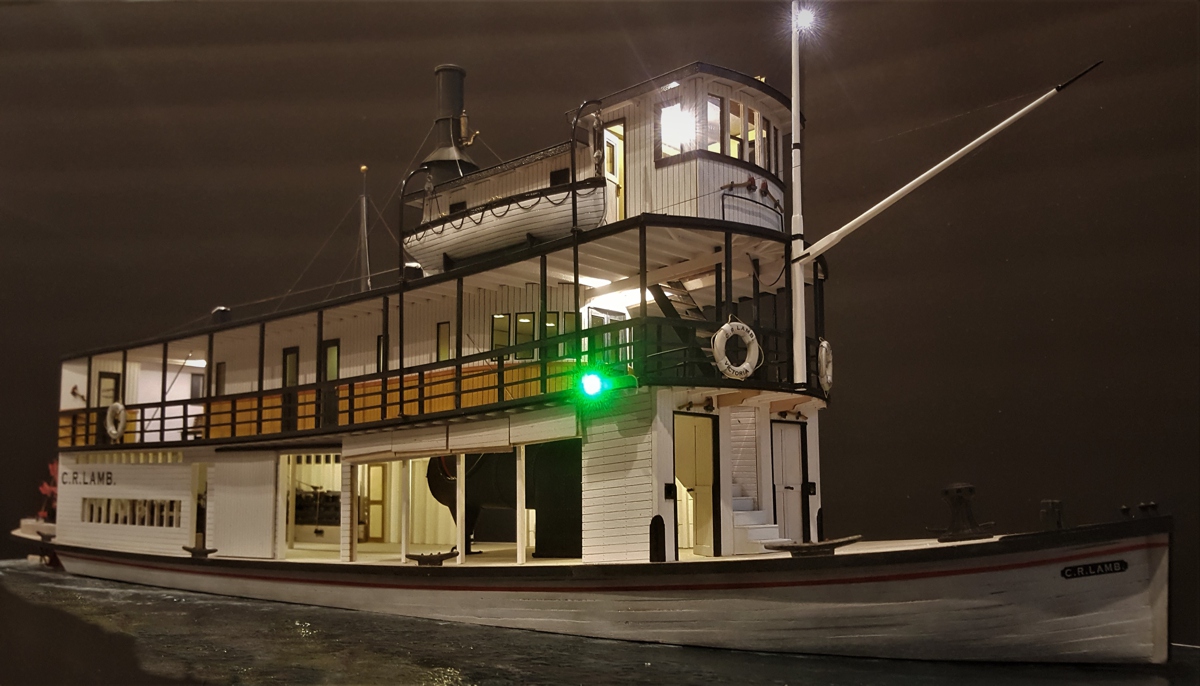
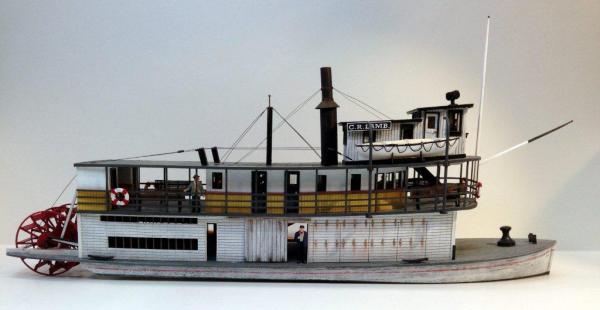
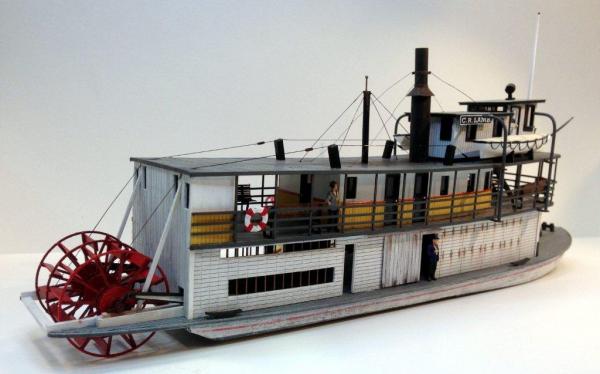
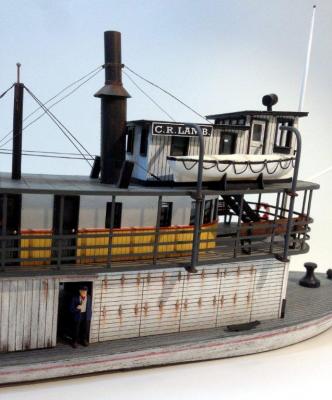
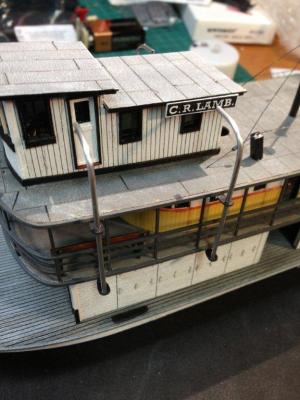
Thanks Cap'n Bob, I am liking the 3D printing thing more and more and the detail is getting very good. Well, I am calling the build almost done and I have to get ready for the 33rd Narrow Gauge Conference in Pasadena next week. We are releasing this one as a kit for October. I still have the marker LED's to put in and rig the davits for the lifeboats, but here are some shots of the mostly completed ship. Cheers! Darryl


- 32 replies
-
- 12
-
-
- interaction hobbies
- c r lamb
- (and 1 more)
-
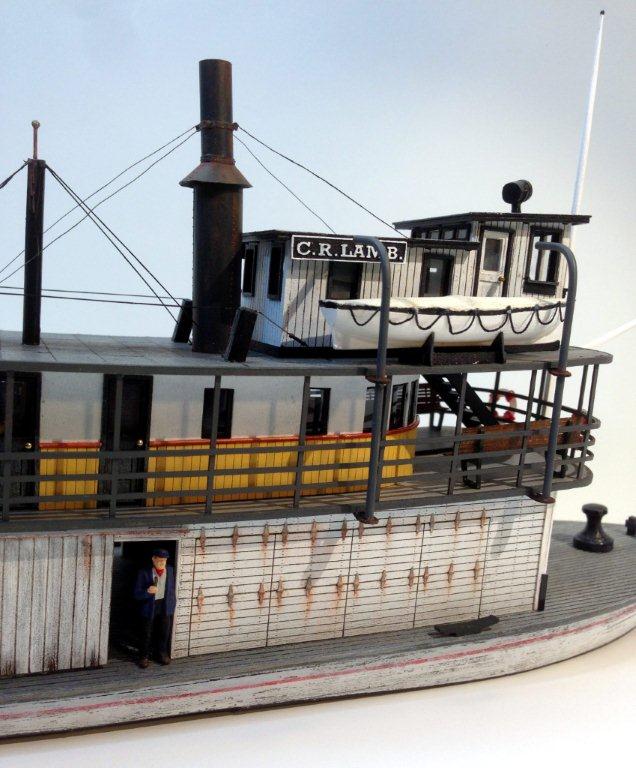
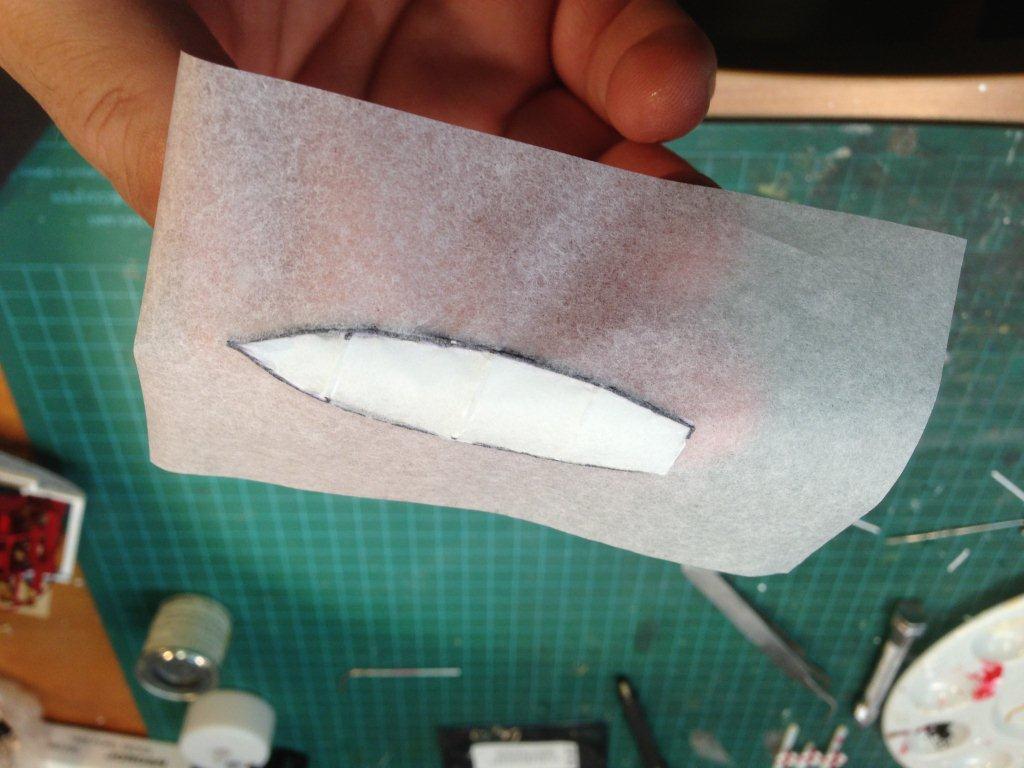
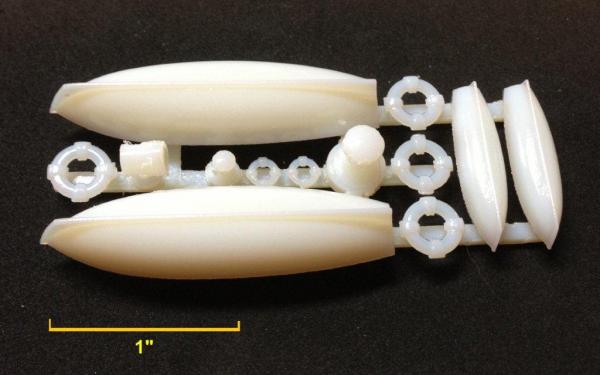
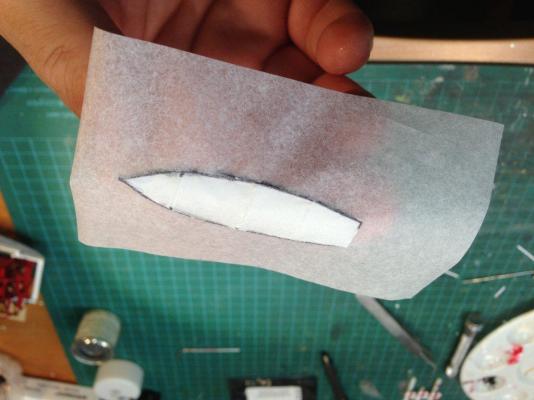
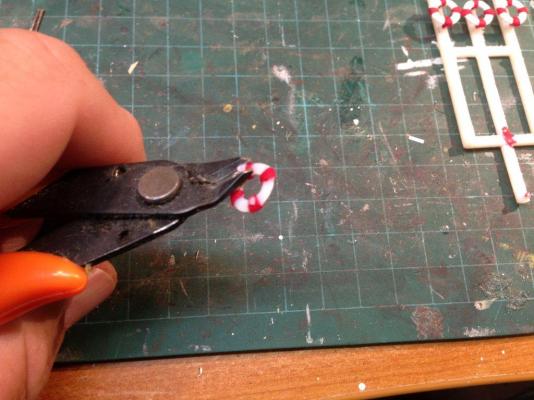
I designed up and had some detail parts 3D printed. the service I use uses an OBjet 30 printer that gives excellent resolution and surface finish. I did up the lifeboats, liferings, searchlight and Capstan. (also seen is the same parts in N Scale) I glued some tissue paper over the top of the boat to represent a canvas cover. Then using some Matt Medium painted over the tissue, it shrinks the tissue as it dries to tighen the canvas. I also added some grab ropes along the gunwales of the lifeboats. The liferings and 3D printed parts have sprues to be trimmed after painting. The Davits for the lifeboats are bent from 1/16 aluminum tubing.
- 32 replies
-
- 2
-
-
- interaction hobbies
- c r lamb
- (and 1 more)