Basic
-
Posts
18 -
Joined
-
Last visited
Content Type
Profiles
Forums
Gallery
Events
Everything posted by Basic
-

Lynx by Basic – Panart
Basic replied to Basic's topic in - Kit build logs for subjects built from 1801 - 1850
Thanks for all the info! I've been working on her a little bit today, started sectioning out the hull for the second planking. I think I'm going to go with a 20ft plank length, which is just over 6m on the real ship. It seems somewhat reasonable. That would make the individual planks on the model to be 98mm (scale 1:62), which I think it reasonable. Any thoughts before I take the plunge? -
Lynx by Basic – Panart
Basic replied to Basic's topic in - Kit build logs for subjects built from 1801 - 1850
Hi guys, I've been MIA for awhile now, work keeps piling up and has to be dealt with, so I have little time for making progress! To date, the first layer of planking has been completed and the filling/sanding work is almost done. I'm currently trying to reason out the correct (accurate) plank lengths for the outer planking layer. The kit is 1/62 scale, however I have been unable to find the actual plans for the Lynx to figure out her plank lengths. Does anyone have any ideas where I might be able to find this info? Thanks! -
Lynx by Basic – Panart
Basic replied to Basic's topic in - Kit build logs for subjects built from 1801 - 1850
Thanks for the advice Floyd! I think that this will be a much better method, I will definitely give it a shot! I`m just worried that any existing deformations in the hull will result in a finished product that is distorted.. But I guess at this point it is a "do the best you can, with what you have" situation. As for the pins, I will not use them on the outer planking layer, for those exact reasons. I find them pretty useful for the inner hull planking though! -
Lynx by Basic – Panart
Basic replied to Basic's topic in - Kit build logs for subjects built from 1801 - 1850
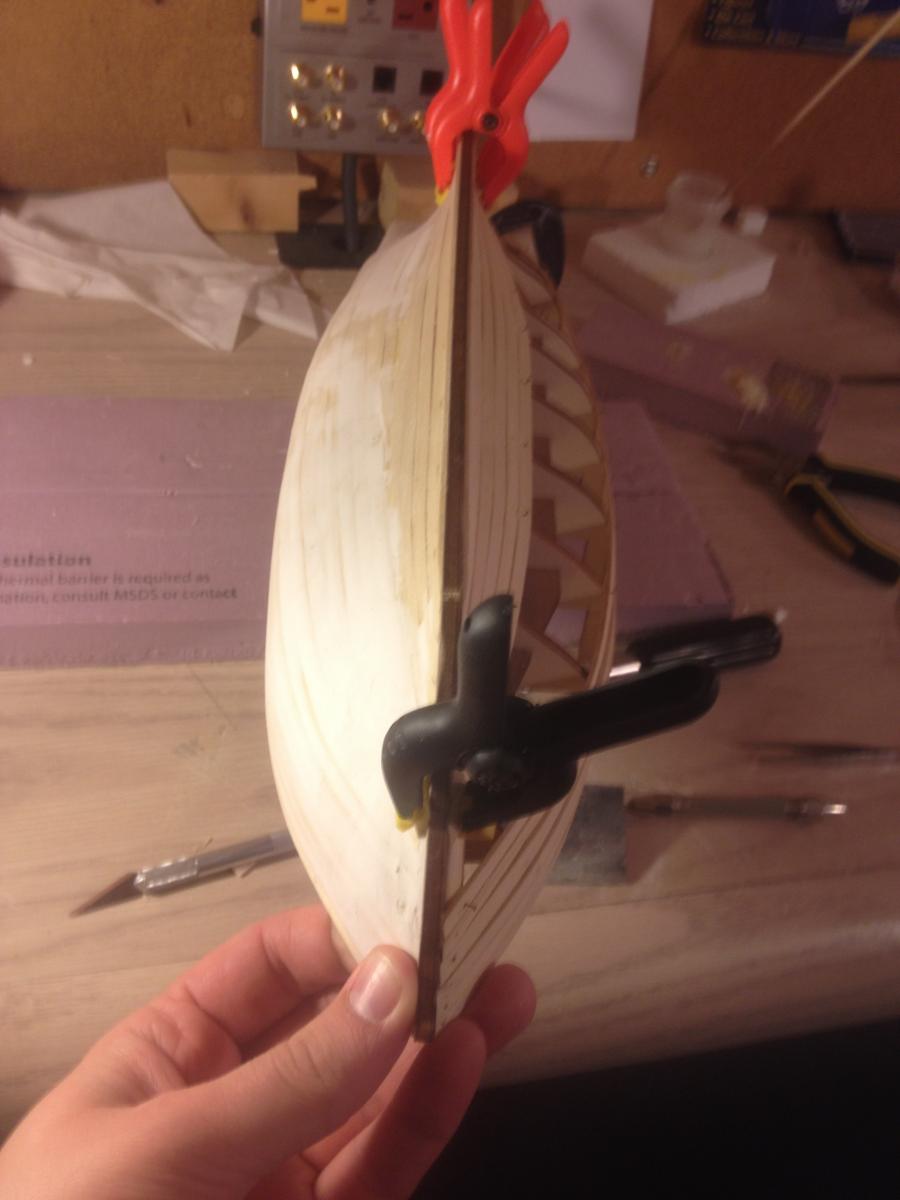
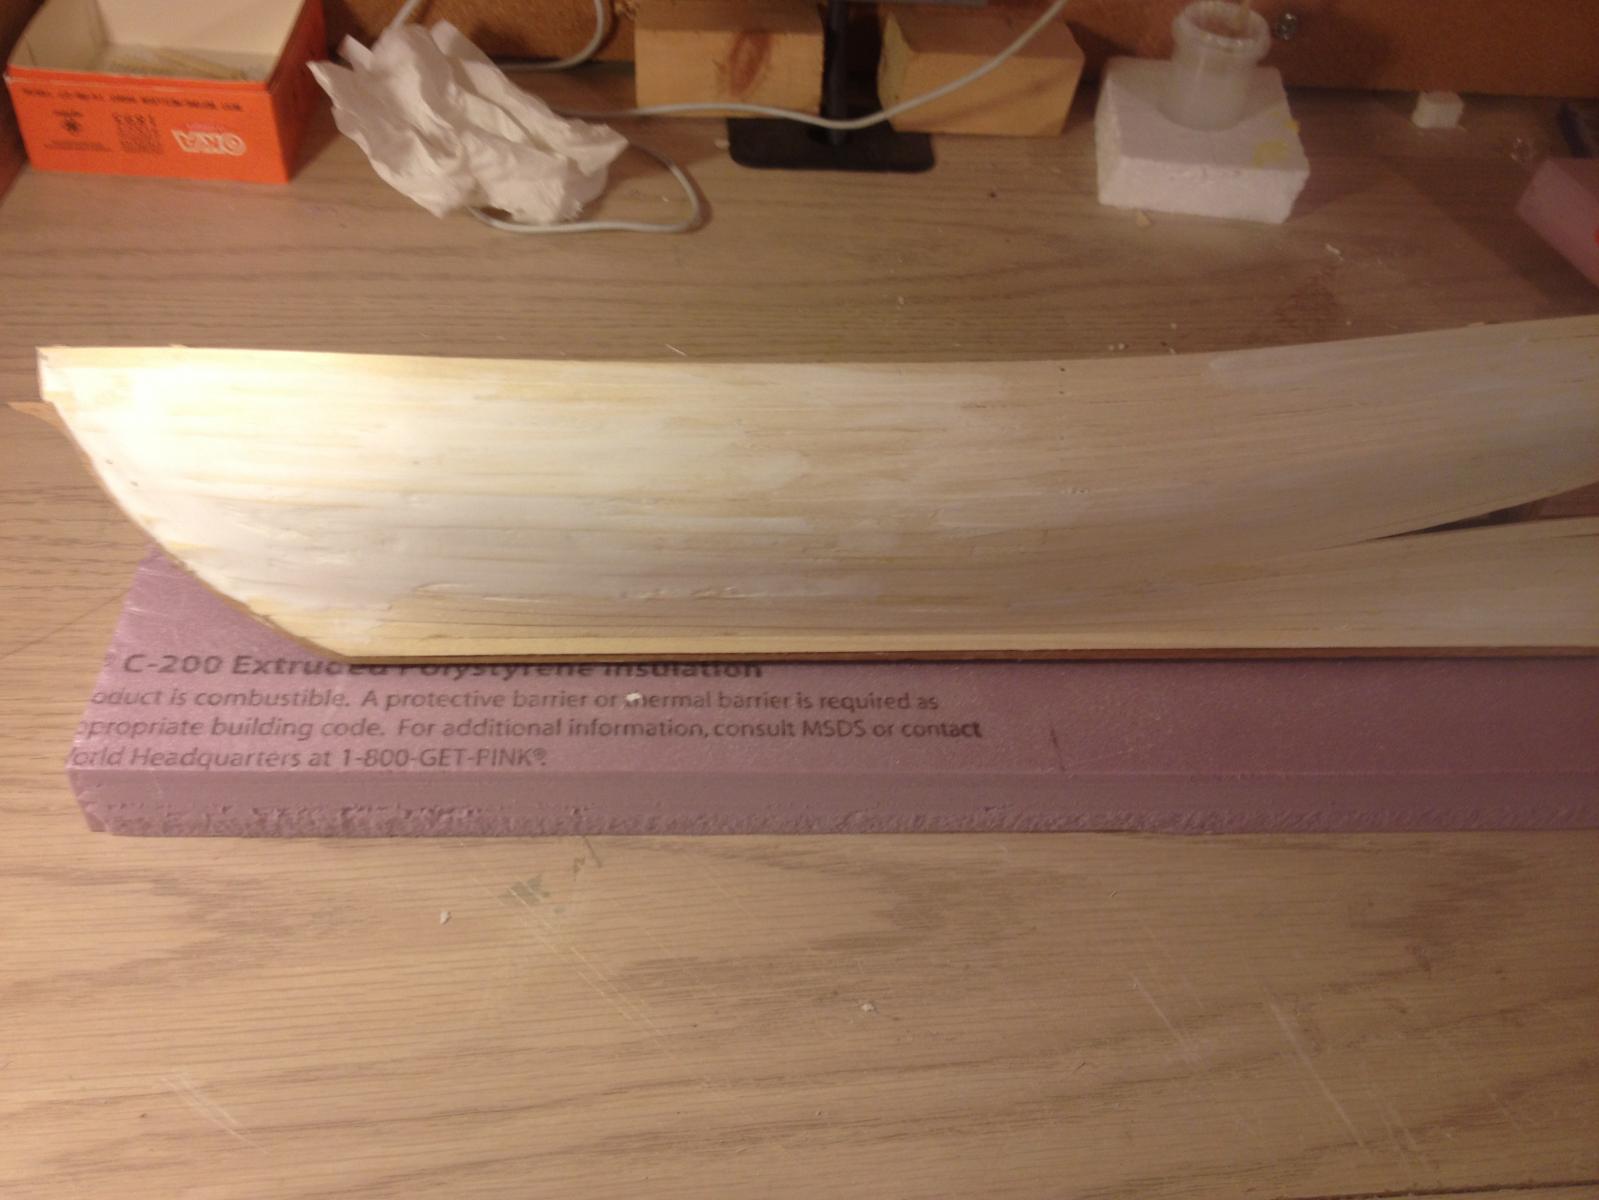
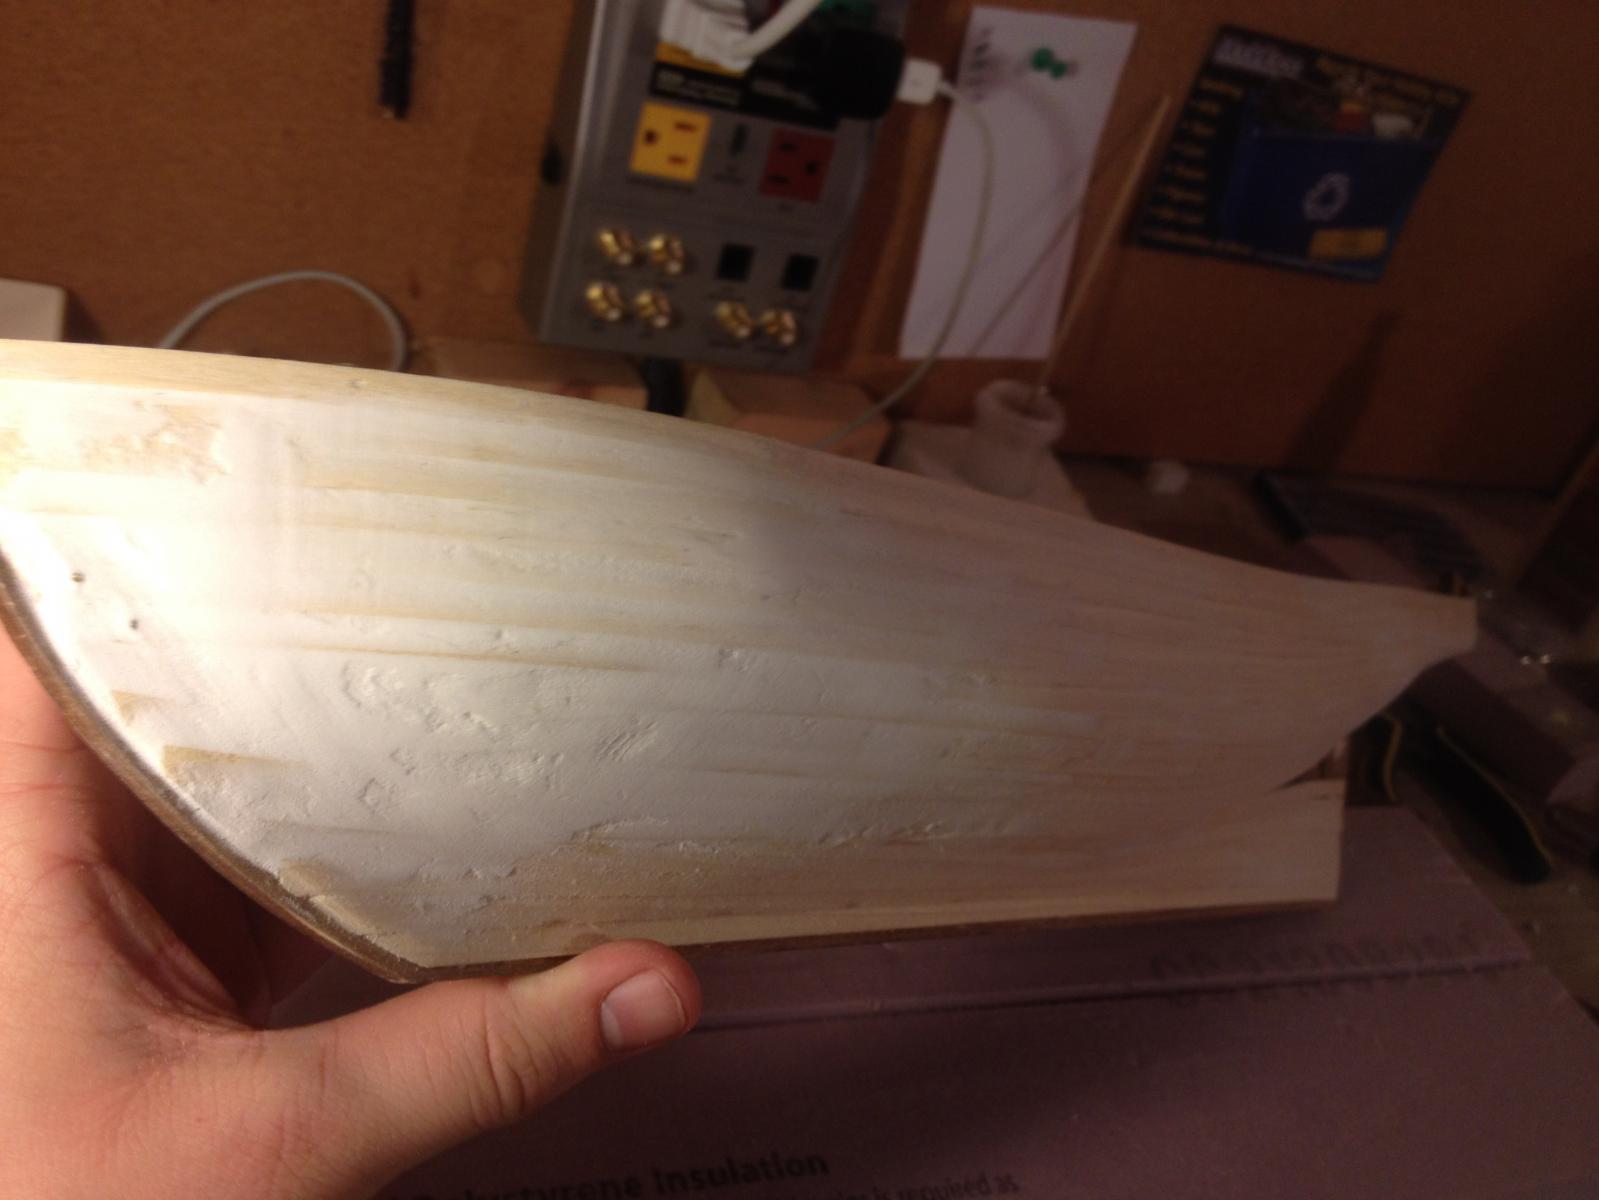
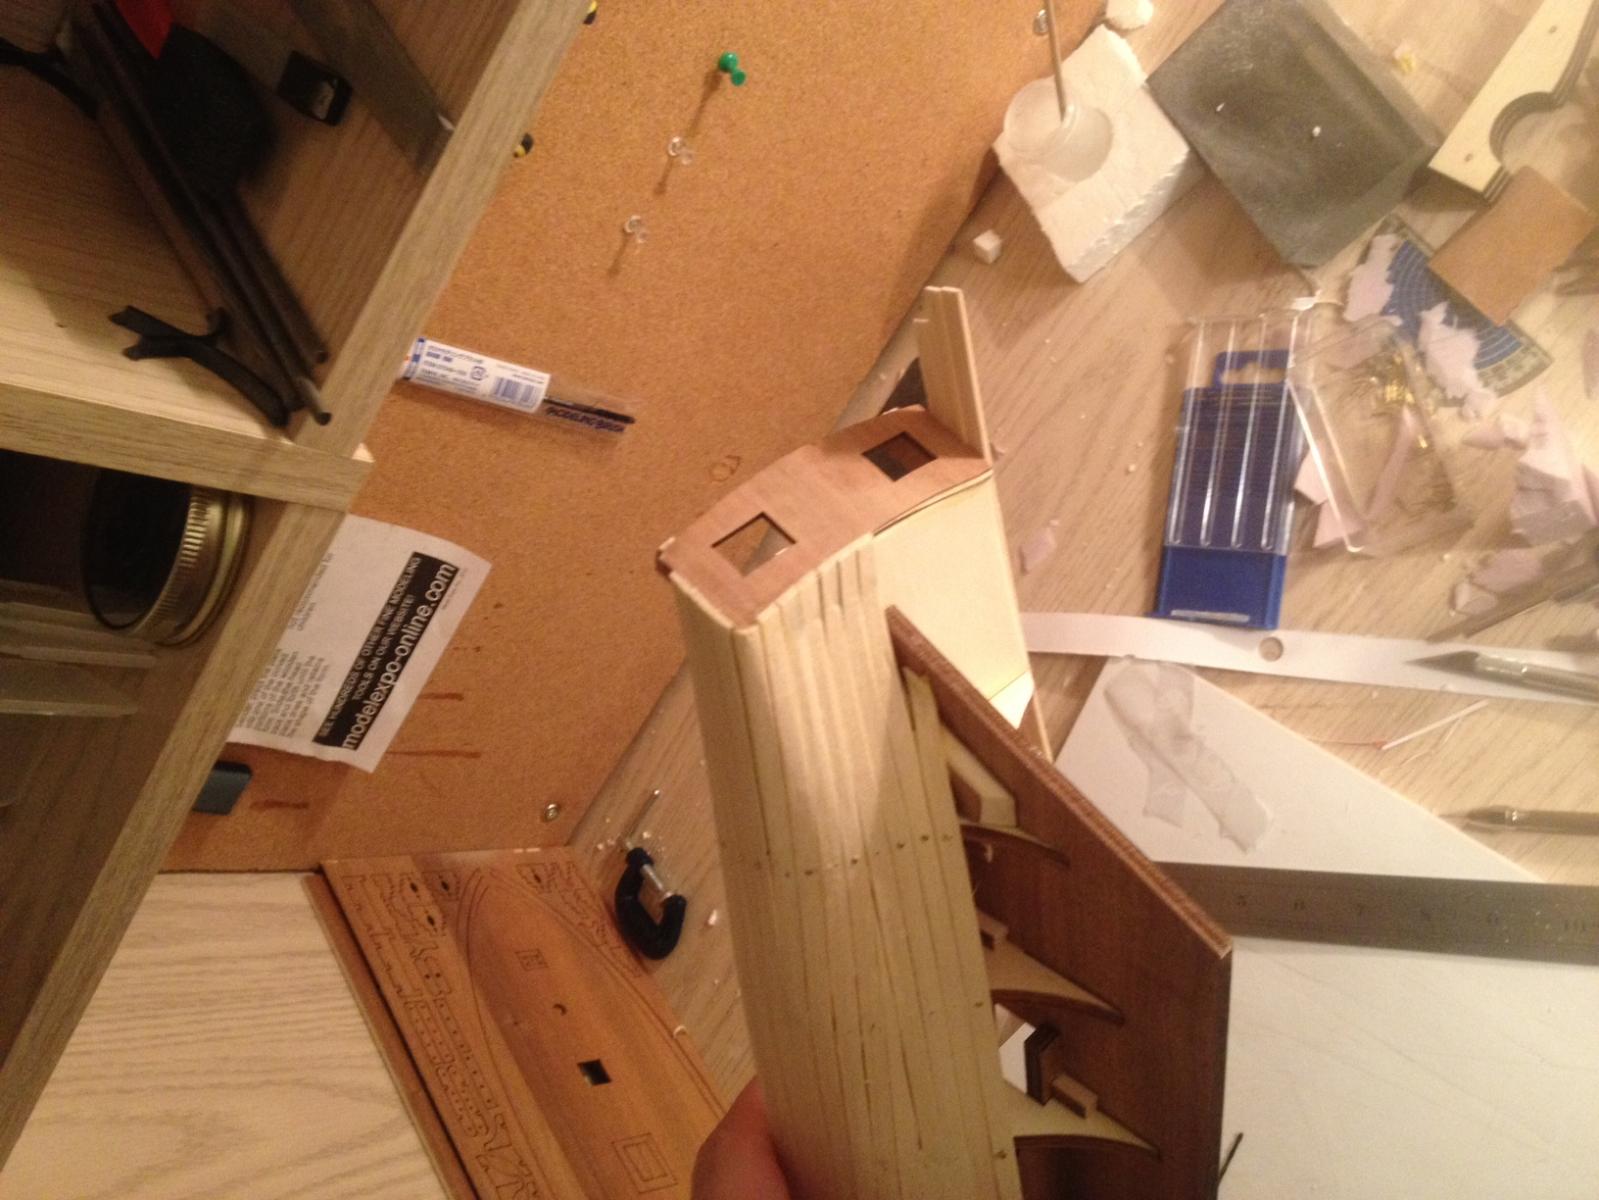
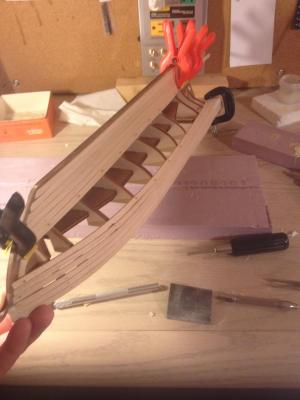
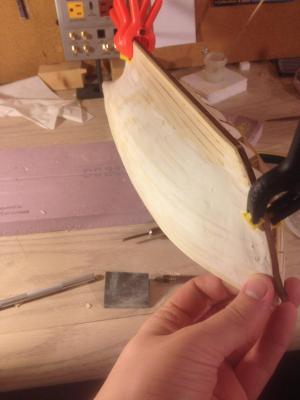
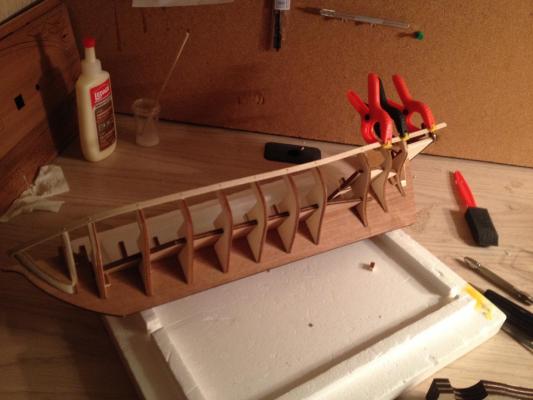
Afternoon Ladies and Gents, After a long shore leave, I've been putting in a little more work on the Lynx. It can be difficult to find time to work on it for long periods, with university and all, but nevertheless, I have made a bit of progress! As you can see in the attached pictures, I've managed to complete the first layer of planking on one side of the hull, as well as made some progress on the other. I've taken the advice you guys have offered me and used the drywall filler to level off the imperfections that I was talking about in a previous post. As you can see, I have applied the filler and sanded it in layers, and I still have some more filling/sanding to complete before the contours of the hull are perfectly smooth. I'm aiming to get them as smooth as possible, in order to provide the best possible bonding surface for the outer planking. On a somewhat related topic, I've been reading up on planking tutorials and it seems that my method for planking is not ideal for the outer layer of planking. To date, I have been soaking the planks and bending them to the contour of the hull and using the brass pins to hold them in place while drying to the desired shape. Based on the planking tutorials I've been watching/reading, it seems like the best way to do the outer planking is to use string as a guide and sketch out the planks onto the inner hull, as a sort of diagram to follow while planking. Then, using the correct ratio to ensure that the plank sections are to-scale, to use the electric plank bender to perfectly contour the outer hull planks and just fit them in place, gluing with carpenter's glue. I'm just worried that the orientation of the planks will not look "real" once the final planking is complete. I don't know where the tapered planks should go, if I should start from the top and work my way down, or alternate between the top and bottom as I go. I'm just worried that I'll end up having the tapered planks in the wrong location and the final product won't "look right". Any ideas/tips? To answer your question, my Panart Lynx kit did not come with any dye powder, however it did come with two different types of wood for the two hull plankings; lime tree for the under layer and walnut for the outer layer. EDIT: If you look at the second attached picture of the unfinished side of the hull, near the bow, you can see another example of the planks not adjoining properly due to the excess sanding that I was talking about in my previous post. The amount of filling for this side will be roughly the same as for the other side of the ship, and I think that the drywall filler did a pretty decent job of correcting for those imperfections.


-
Lynx by Basic – Panart
Basic replied to Basic's topic in - Kit build logs for subjects built from 1801 - 1850
How well will the PVA glue adhere to the wood filler? I'm just worried that it won't create a strong bond, although I'm pretty sure you can glue it without any problems. -
Lynx by Basic – Panart
Basic replied to Basic's topic in - Kit build logs for subjects built from 1801 - 1850
Ah perfect, I think I might even have a tube of wood filler in the garage. I still have to finish my first planking though; with classes starting up again, the work has started to slow down -
Lynx by Basic – Panart
Basic replied to Basic's topic in - Kit build logs for subjects built from 1801 - 1850
Juhu: I too would like to see this material that you are referencing! It can never hurt to have more historical and background reference material!! All: What type of filler would you recommend? A wood filler I assume, but just checking to make sure. Thanks! -
Lynx by Basic – Panart
Basic replied to Basic's topic in - Kit build logs for subjects built from 1801 - 1850
Thanks for the tips Floyd and Augie! Floyd: I agree with your point about the 1st layer of planking is a good practice for planking the outer hull, believe me, I have learned A LOT just from what I have done so far. I think I will start the bottom planking from the keel up and meet in the middle like you suggested, I have a feeling this will save me a lot of headaches in the near future! As for the nails, I use them mainly as pins to prevent the planks from moving, in conjunction with the clamps wherever possible. I take the nails out as I go (as you can see in the upper layers of planking in the above pics) and sand the planks smooth afterwards. The nails that you see in the picture are there because I had just finished planking those sections and the glue was not completely set at that point. Augie: I think that the filler will end up being my saving grace. I've been mulling the issue over in my head recently, and the only other solution I can think of would be to remove all the planking and restart from scratch, but I would like to avoid this as much as possible. I think that with sufficient filling and sanding I can make the profile of the hull more or less uniform, as the shims were added on both sides (although the gaps are slightly larger on the port side, if I must be honest). -
Lynx by Basic – Panart
Basic replied to Basic's topic in - Kit build logs for subjects built from 1801 - 1850
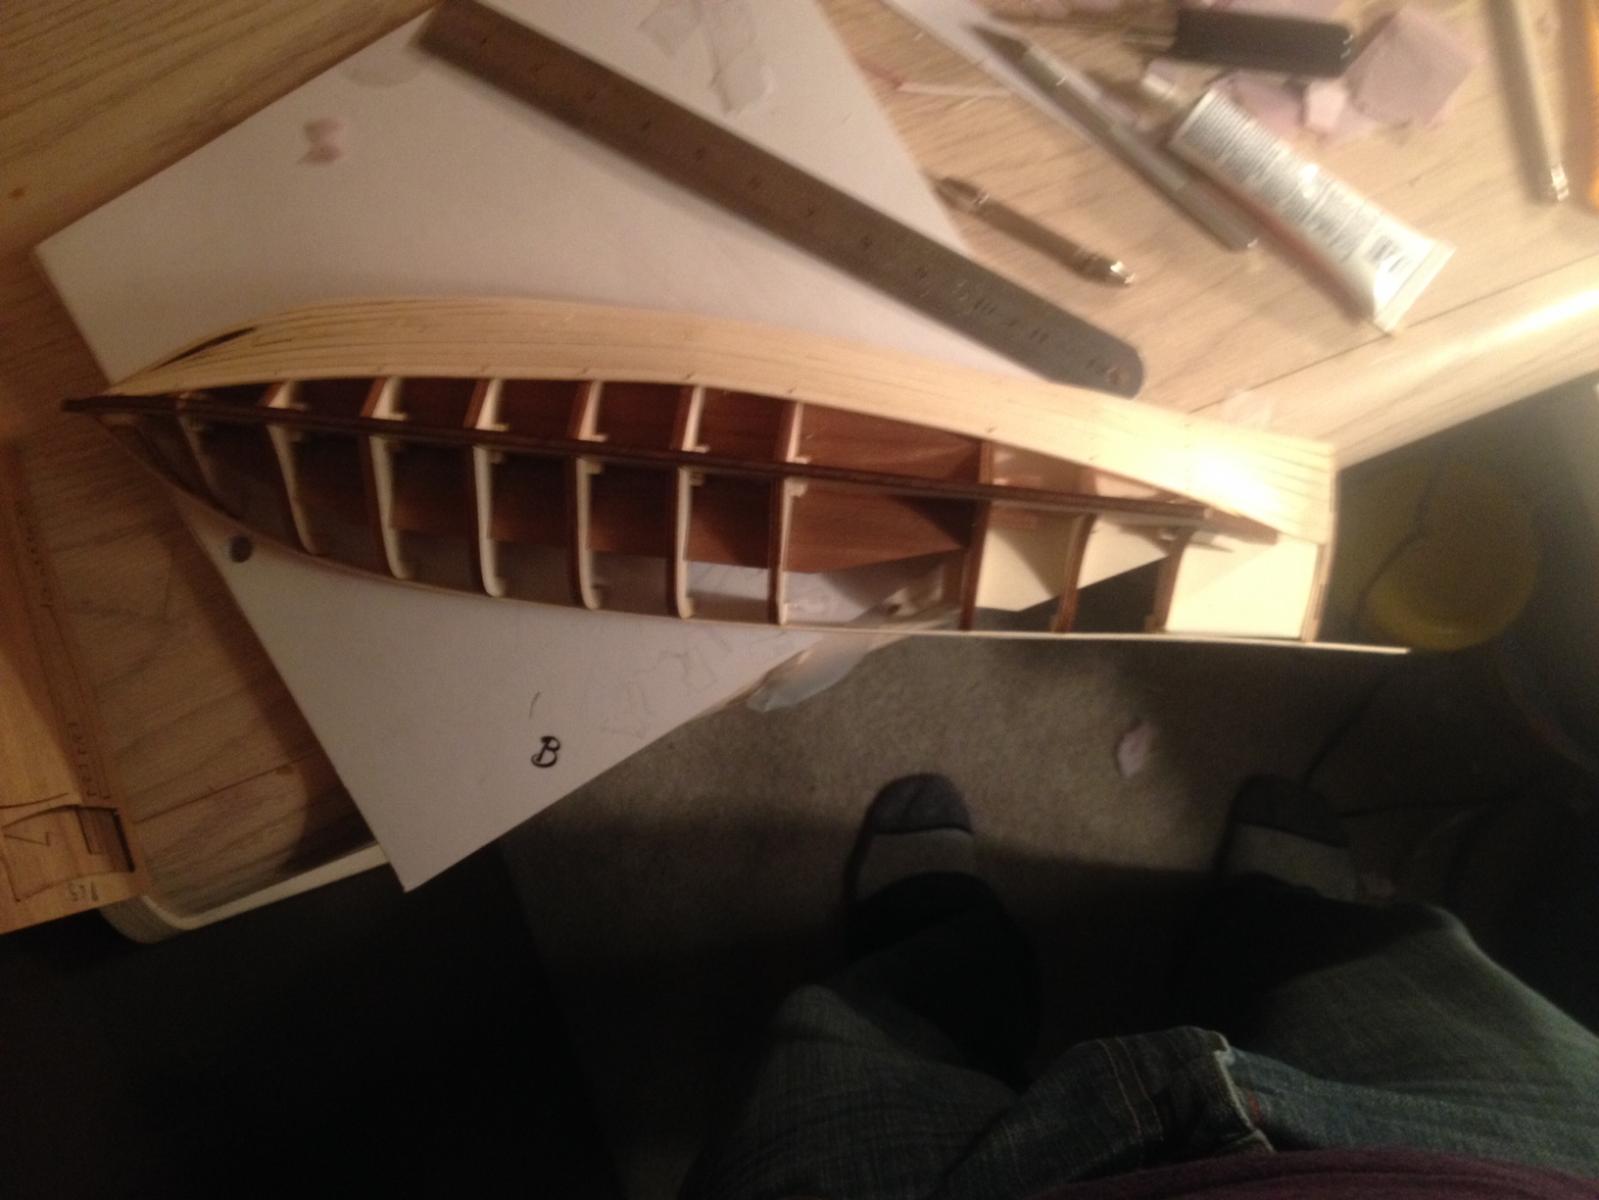
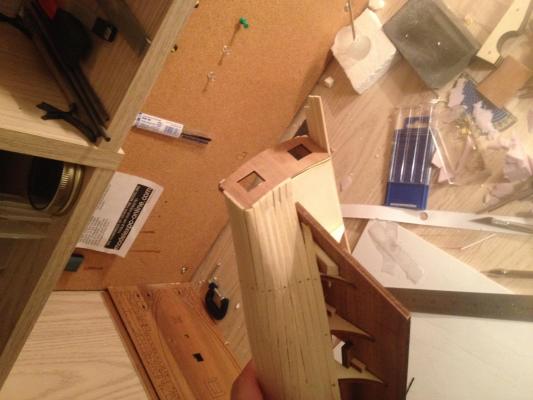
On the third picture, you can see what I was talking about earlier with the distorted planking. I'm working on figuring out a solution to this, but so far the only thing I think might work is to just sand the crap out of it and try to smooth the surface enough that this mistake won't show with the outer hull planking... -
Lynx by Basic – Panart
Basic replied to Basic's topic in - Kit build logs for subjects built from 1801 - 1850
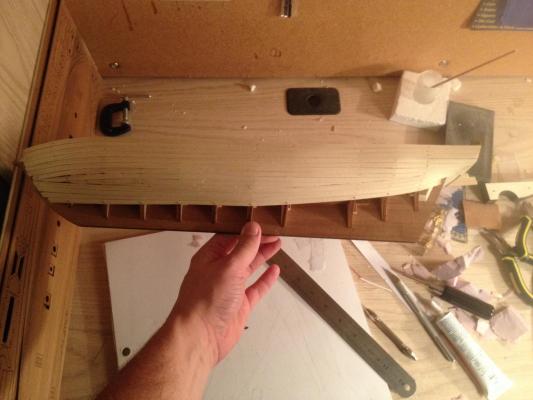
Here are a few quick photos to show the progress over the last month or so on the Lynx. The planking isn't the prettiest, but its definitely taught me a lot of lessons about what to do and what not to do! Haha
-
Lynx by Basic – Panart
Basic replied to Basic's topic in - Kit build logs for subjects built from 1801 - 1850
Hey everyone, its been awhile! Yes, I am still out here, and I have made a bit of progress on the build. The last few weeks have been quite hectic with finals and the holidays! I have made some progress since my last posting, mainly just continuing the planking of the hull. I have ran into a few issues along the way and I'm working through them as I go. The first one was an issue with oversanding one of the bulkhead sections. The instructions were somewhat unclear concerning the sanding of the front three bulkheads, and due to my lack of experience, I made the mistake of oversanding them by a significant amount :S. To solve the issue, I ended up gluing on a few "shims", small pieces of wood to fill the void between the inner hull and the bulkhead frame. Unfortunately, through attempting to fix this problem, I inadvertantly introduced another problem, where I didnt sand the shims enough, and didnt realize this until halfway through planking the port side. This led to a distorted front hull section, which I an still trying to figure out how to fix. Unfortunately I am posting this from my mobile, so I don't have the pictures with me to show you exactly what i'm talking about, but i'll post them later on when I get home. Hopefully with a view of the issue, you guys might be able to give me a few pointers on how to fix this!! To respond to your comments (sorry, on my phone I can't see/link your username!), I find that I use the plank bender less and less every time I sit down to plank the Lynx. At first I tried to use it exclusively, but I found it just got tiresome and I ended up just reverting to soaking the planks and being patient, with the exception of a few cases where I needed dramatic reshaping of the planks. Its not that it doesnt work well, it really does, I just find that sometimes its easier to just use the soak method instead of guessing the amount that I need to bend the planks with the electric plank bender and checking against the frame of the ship. In terms of my location, I have found a few really good suppliers in my area, that sell pretty much anything that I would need for this hobby, at really good prices. Out of curiosity, do you know the usernames of the talented ship builders in Montreal that you were referring to? Might be useful to have some local modellers to ask questions in the future! Thanks guys! I will update with new pictures soon! -
Question about Model Expo's Electric Plank Bender
Basic replied to Basic's topic in Modeling tools and Workshop Equipment
Hmm Yeah, that may be my best bet. I think I'll try it one more time (this time with an extinguisher handy!) and if it does the same thing, I'll call Model Expo. Thanks!! -
Hey ladies and gents, I have a quick question about my electric plank bender, made by Model Expo. I bought it new from a local hobby store, everything looks in great condition, no wear and tear, etc. The first time I plugged it in, however, there was a pretty strong odor of burning plastic, as well as some smoke being emitted from where the base of the metal rod meets the plastic guard on the handle. I unplugged it immediately, for fear that it would catch fire. My question: Is it normal that on the first use of an electric plank bender there is an odor of burning plastic and smoke being emitted? If so, does this usually go away after the first few uses, or do you think the plank bender is defective? I asked in another thread but haven't gotten any concrete answers. Thanks! John - Attached is a picture containing the plank bender, just in case!

-
Hmm... Well Quebec and the US use the same voltage, so that can't be it... Maybe I should just leave it on an monitor it with an extinguisher nearby, just in case it flares up.
-
Was going to post a question about this plank bender but a quick search of the forums led me here, so instead of starting a new thread, I'll just ask it here. Essentially, I purchased an electric plank bender from Model Expo (same one seen in the pics on this thread) and I noticed that the first time I plugged it in to use it, it started smoking from where the metal rod meets the plastic handle. I'm just wondering, did this happen to you guys when you first plugged yours in? I'm a little concerned that if I let it heat up fully it will set itself on fire. Thanks, John
-
Lynx by Basic – Panart
Basic replied to Basic's topic in - Kit build logs for subjects built from 1801 - 1850
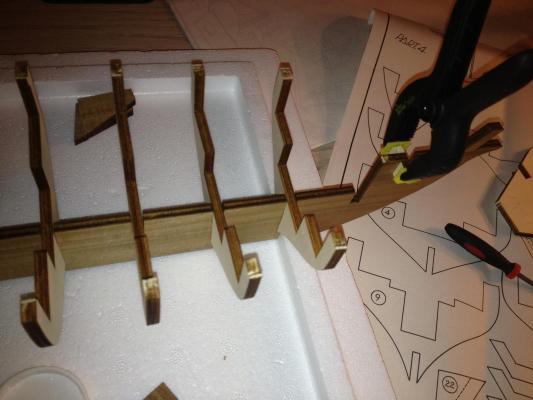
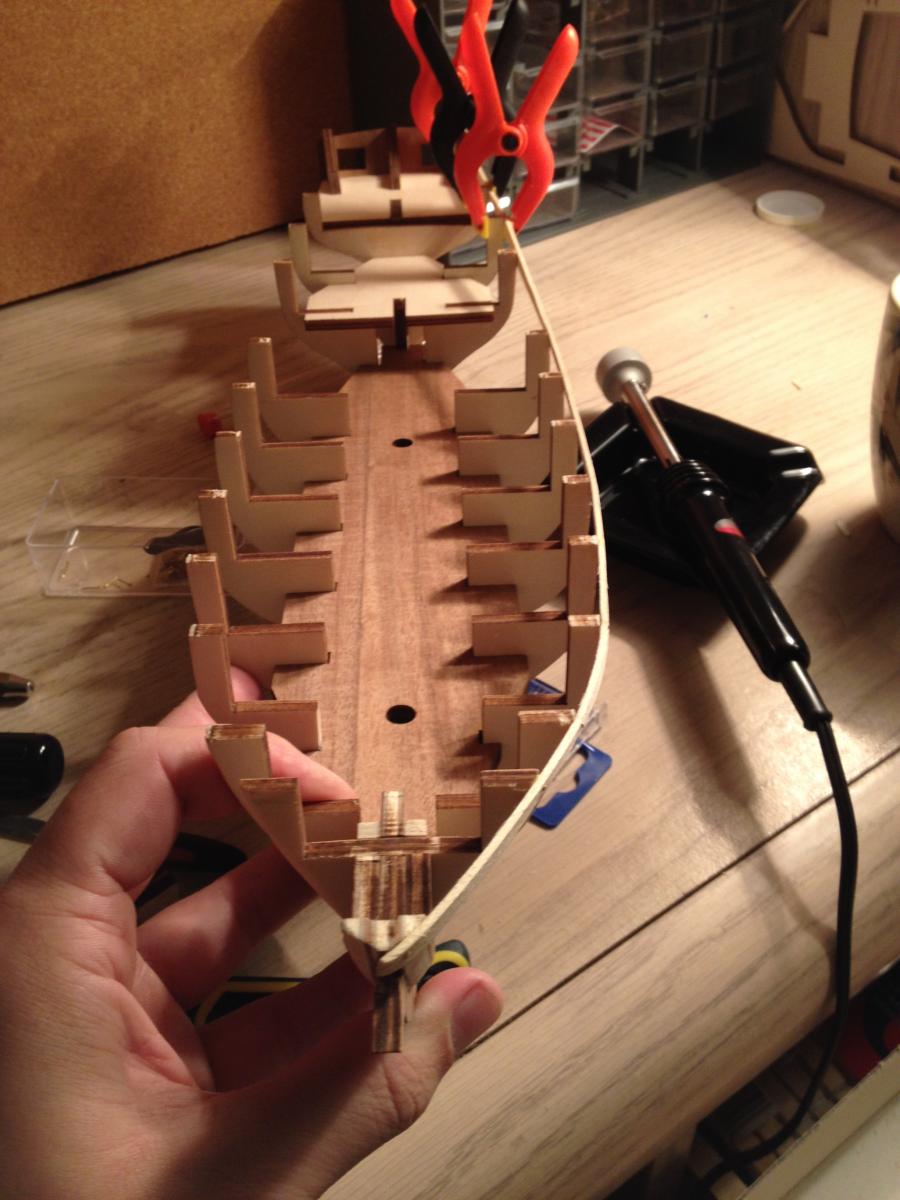
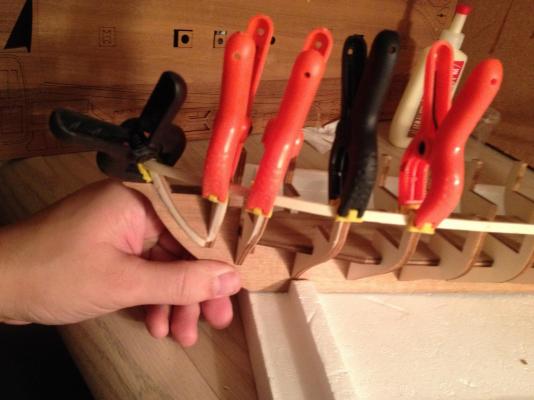
Finally, some time to work on the Lynx! I've made some small amount of progress since my last log update, life has been pretty hectic recently with midterms and everything. I have finished assembling the bulkheads to the keel, including the support blocks that help steady each bulkhead. The aft deck has been installed, including the transom, and the fore and aft supports for the hull planking have been sanded and installed. I just started the planking of the hull this morning, starting with the wale on the port side of the ship. I have run into a bit of an issue with my electric plank bender, however. I purchased the plank bender from model expo, it is new, in great condition, etc. I noticed that when I plugged it in to start bending my hull planks, it started smoking around where the base of the metal wand meets the plastic handle. I was wondering, is this normal for the first time use of an electric plank bender?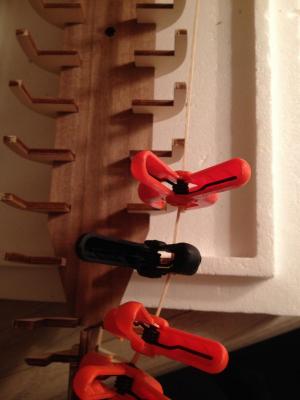


-
Lynx by Basic – Panart
Basic replied to Basic's topic in - Kit build logs for subjects built from 1801 - 1850
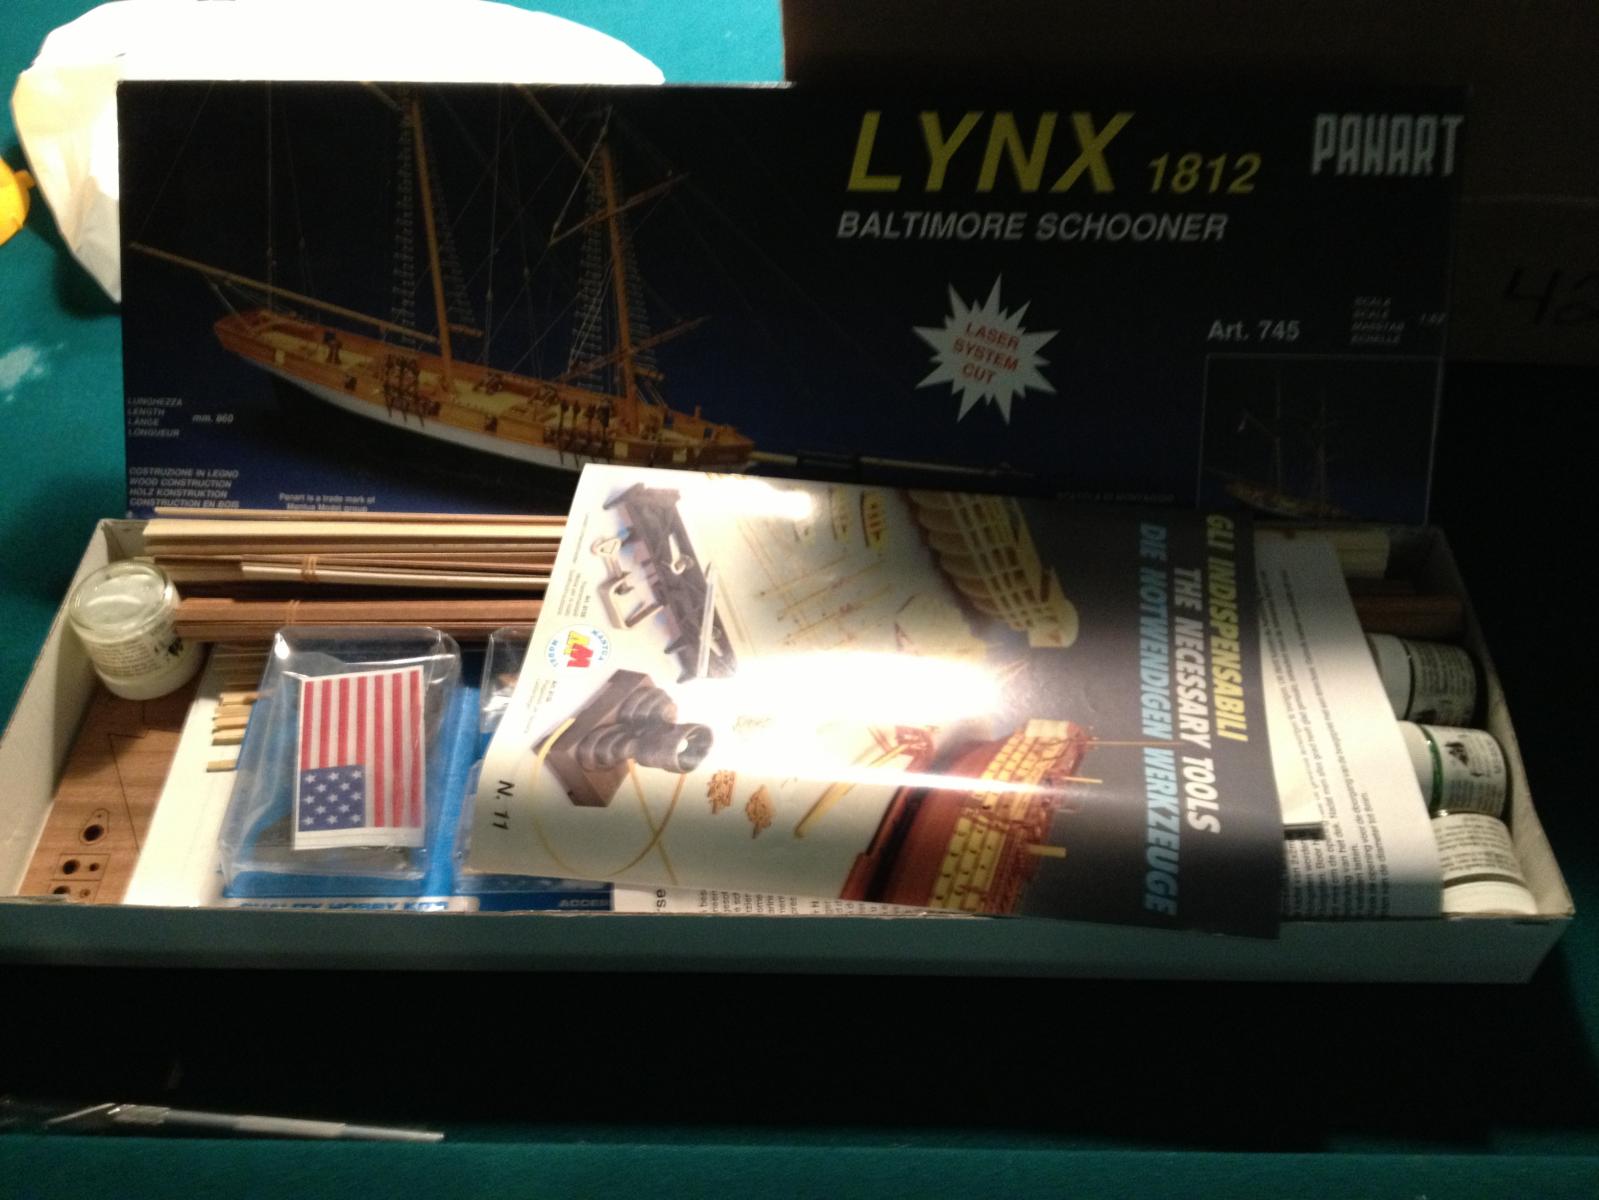
- Aliluke Attached is a picture of the kit, please excuse the poor quality lighting of the picture, it was taken awhile ago just to show my buddies the kit. If it is not discernable, I can upload a better quality picture when I get home! - Augie I'm quite proud to be the first then! I will try to keep you all updated with my progress of the build as often as I can! Thank you for the kind wishes! As for a small progress report, I have continued to assemble the bulkheads to the keel, and have completed 3 more bulkheads since my last post. I unfortunately do not have a picture of this, as I completed it with moments to spare before having to run out to catch the train to class. Once I have all the bulkheads installed, as well as the joints properly sanded and ready for further construction, I will post another updated picture!
-
My first foray into these foreign waters, a Build Log by Basic. After much thought and research, I finally decided to jump head first into the hobby and buy my first kit. (Hoorah!) To begin my selection, I spent quite a good deal of time going over reference materials, posts on these forums and advice given by some of the more experienced members of MSW (Thanks ladies and gents, you know who you are!). I came to the conclusion that the single, most important factor in selecting that all important first kit is this: It MUST be a kit that you find personally interesting in some way, which will significantly help you through the first build. I chose the Lynx in part because I find her rather elegant and graceful, and also because I really like the schooner class of ships. I picked her up off an eBay auction, and within a few days she was sitting on my desk, waiting for the build to start. The first thing I must mention is that I was pretty intimidated when I first opened the box; there were so many pieces and it all seemed rather daunting at the time. After a few deep breaths I plunged in, and started going through the parts, instruction manual and schematics. The first thing I noticed was that all the schematics were in Italian, a language that I am not very familiar with. My saving grace, a small instructions manual, was quickly discovered at the bottom of the box and I breathed a sigh of relief. After going through all the documents, I came to realize that the one thing that was hindering my ability to discern if all the parts were included was that I had very little working knowledge of the terminology of the ship building world. After a bit of research, I managed to piece it together well enough to be fairly confident that all the parts are accounted for. I managed to work around the sheer number of pieces by picking up a small cubby box, one of the ones commonly used to store small nails, screws, etc, and set it up on my desk. This helped me organize all the small parts into their own compartments and greatly relieved the clutter on my work surface. Unfortunately, as was explained in my introduction post to MSW, I have not yet managed to liberate my basement from the snooker table which currently lurks down there, so my work surface is not ideal at the moment, but I’m working on that. The work has started off rather slowly, considering that I am constantly checking and rechecking each task, and quite frankly I’m okay with this. I want to make sure that I avoid the common mistakes by thinking and planning ahead, which I’m sure will help save me a few headaches down the road. So far, I have dry fit all the bulkheads to the keel, as well as the sub-deck and the aft platform. I have begun to glue shims to the bulkheads to correct for the play that these parts have within their slots on the keel, and glue the bulkheads into place. I have also glued a set of reinforcing blocks to each side of the keel by each bulkhead slot, to ensure that the bulkheads are correctly positioned and have more surface area to create a strong adhesion. In the photo below, you can see the dry fitting of the bulkheads to the keel, as well as the first set of reinforcement blocks being glued & clamped to the keel. Excuse the poor lighting, I have yet to properly set up my work area!