.jpg.9661a2c9e16913814c19c3c5f3400b8e.jpg)
ronkamin
-
Posts
100 -
Joined
-
Last visited
Content Type
Profiles
Forums
Gallery
Events
Everything posted by ronkamin
-
.thumb.jpg.1da981e493a7fe8bed83bce0fbcfa3c4.jpg) Just an update to the progress on the build. I have been having some medical problems over the last several weeks, keeping me from working on the model. I hope to be feeling better in the next several weeks so that I can get back to the project. Ron
Just an update to the progress on the build. I have been having some medical problems over the last several weeks, keeping me from working on the model. I hope to be feeling better in the next several weeks so that I can get back to the project. Ron -
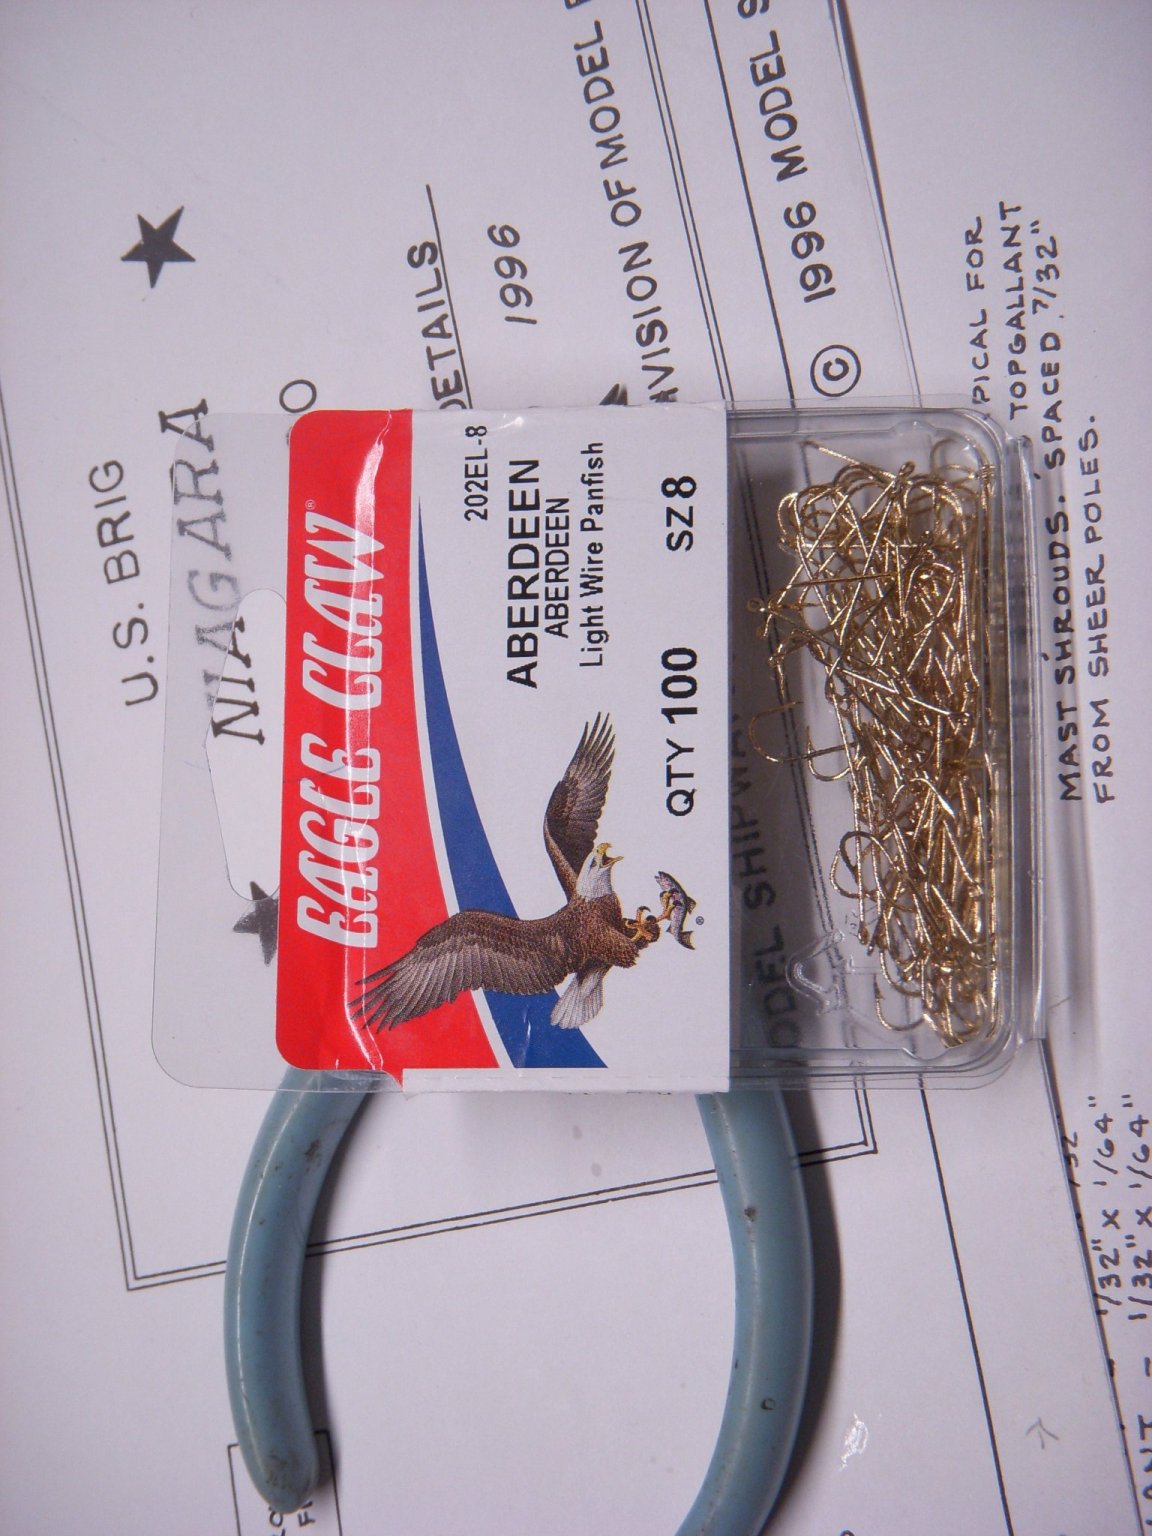
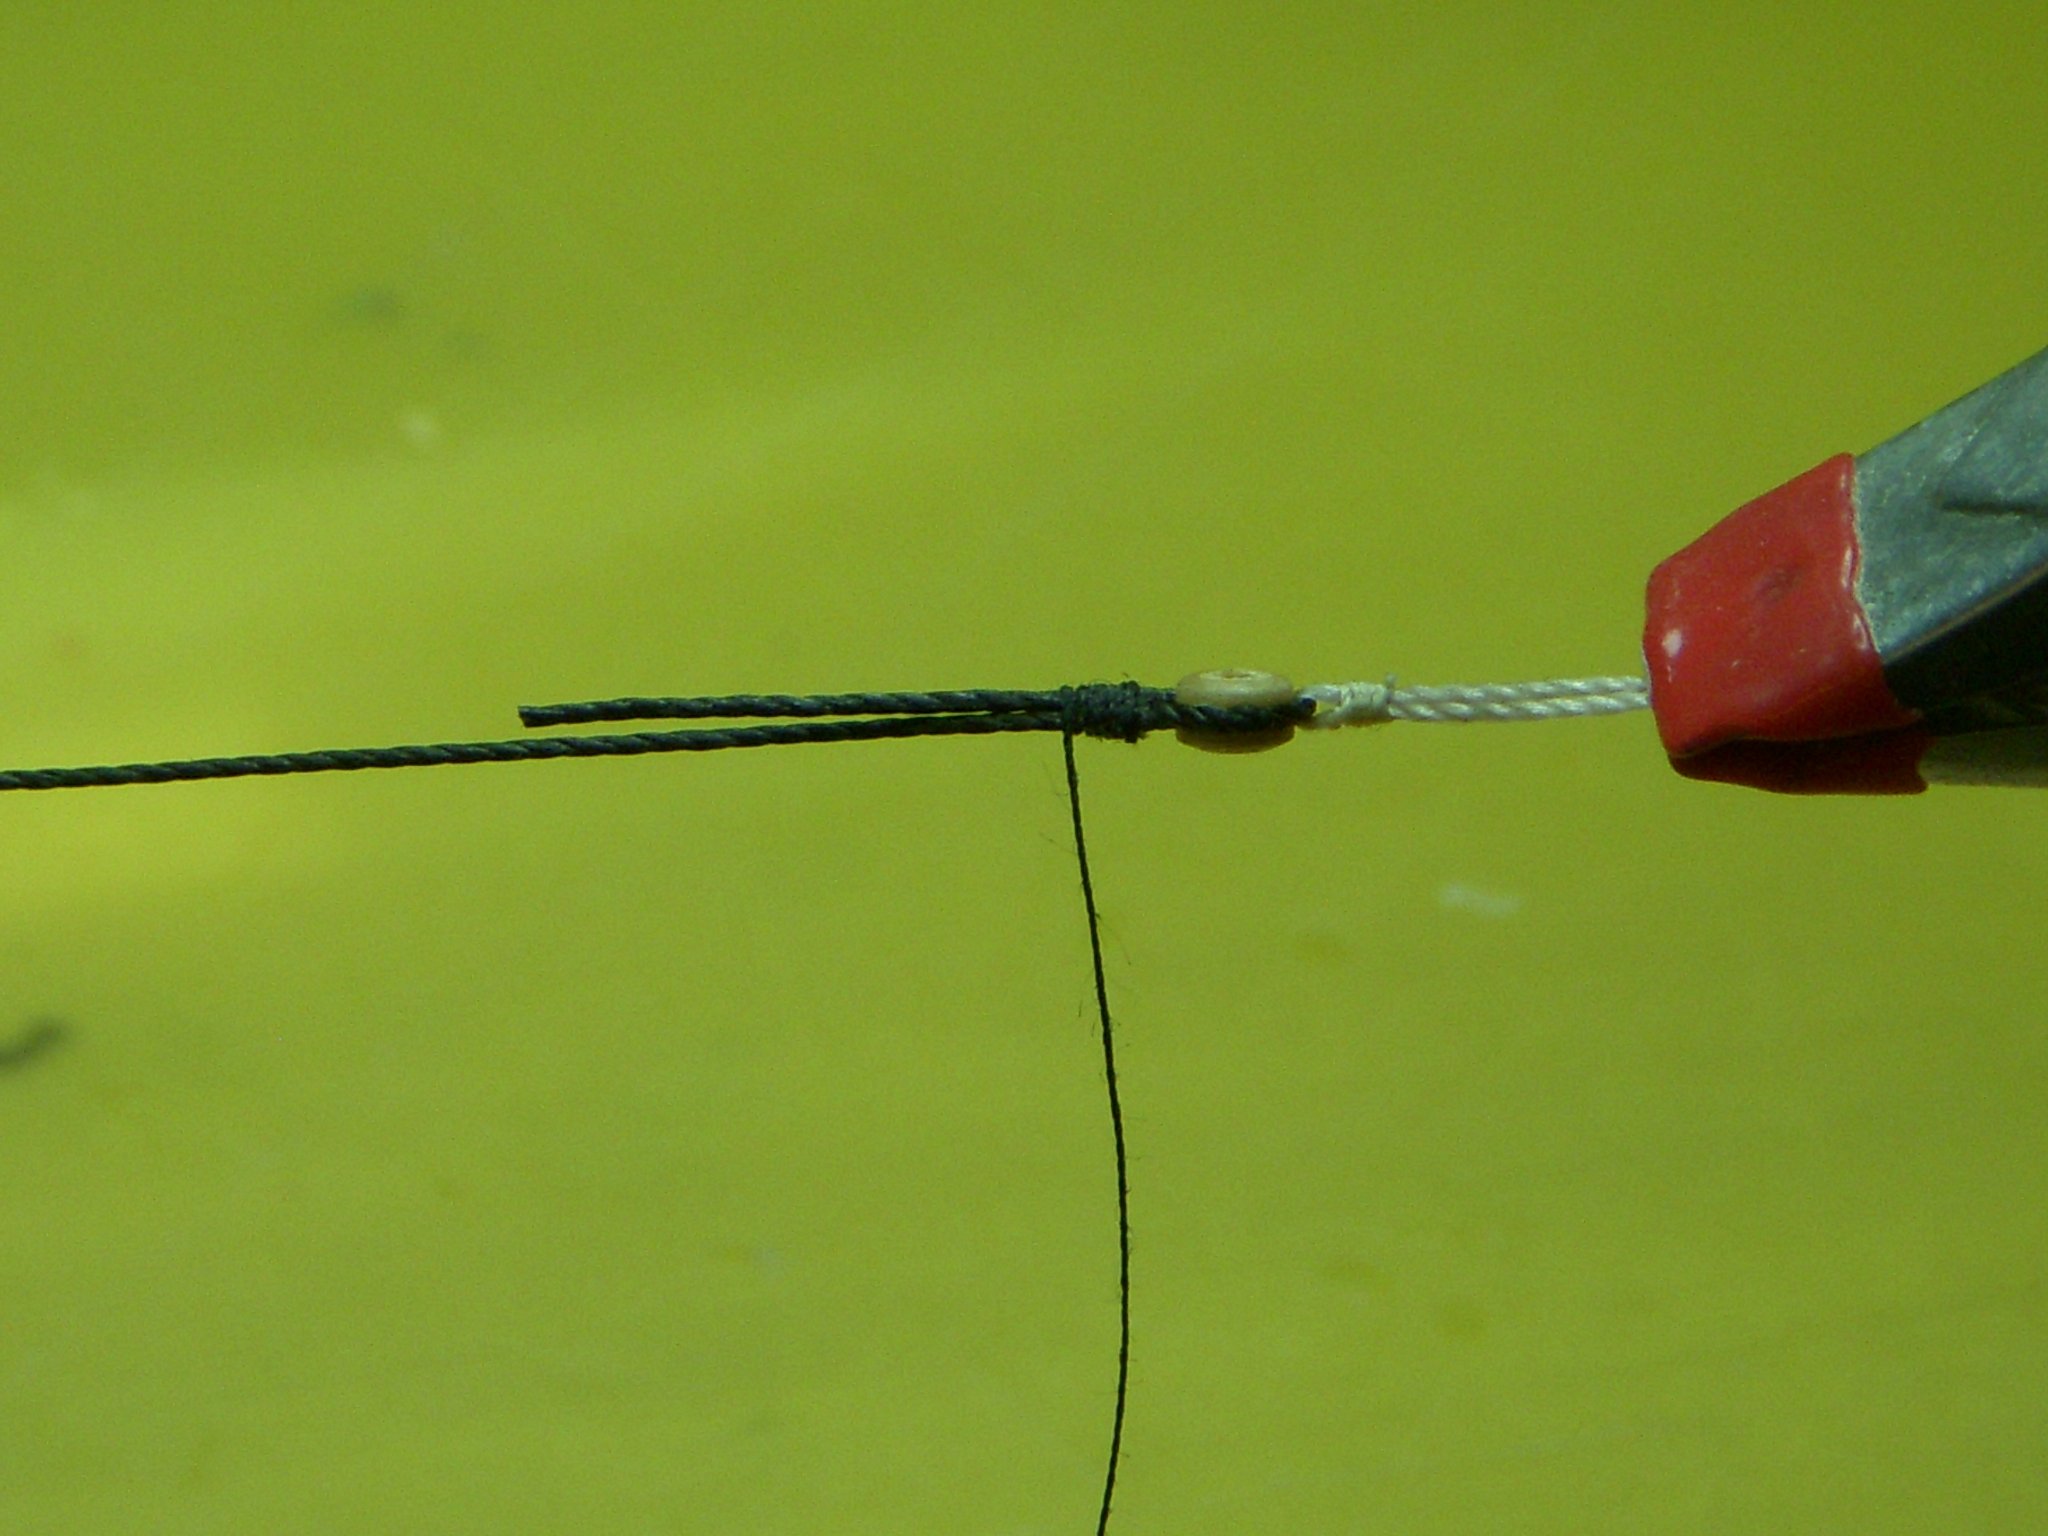
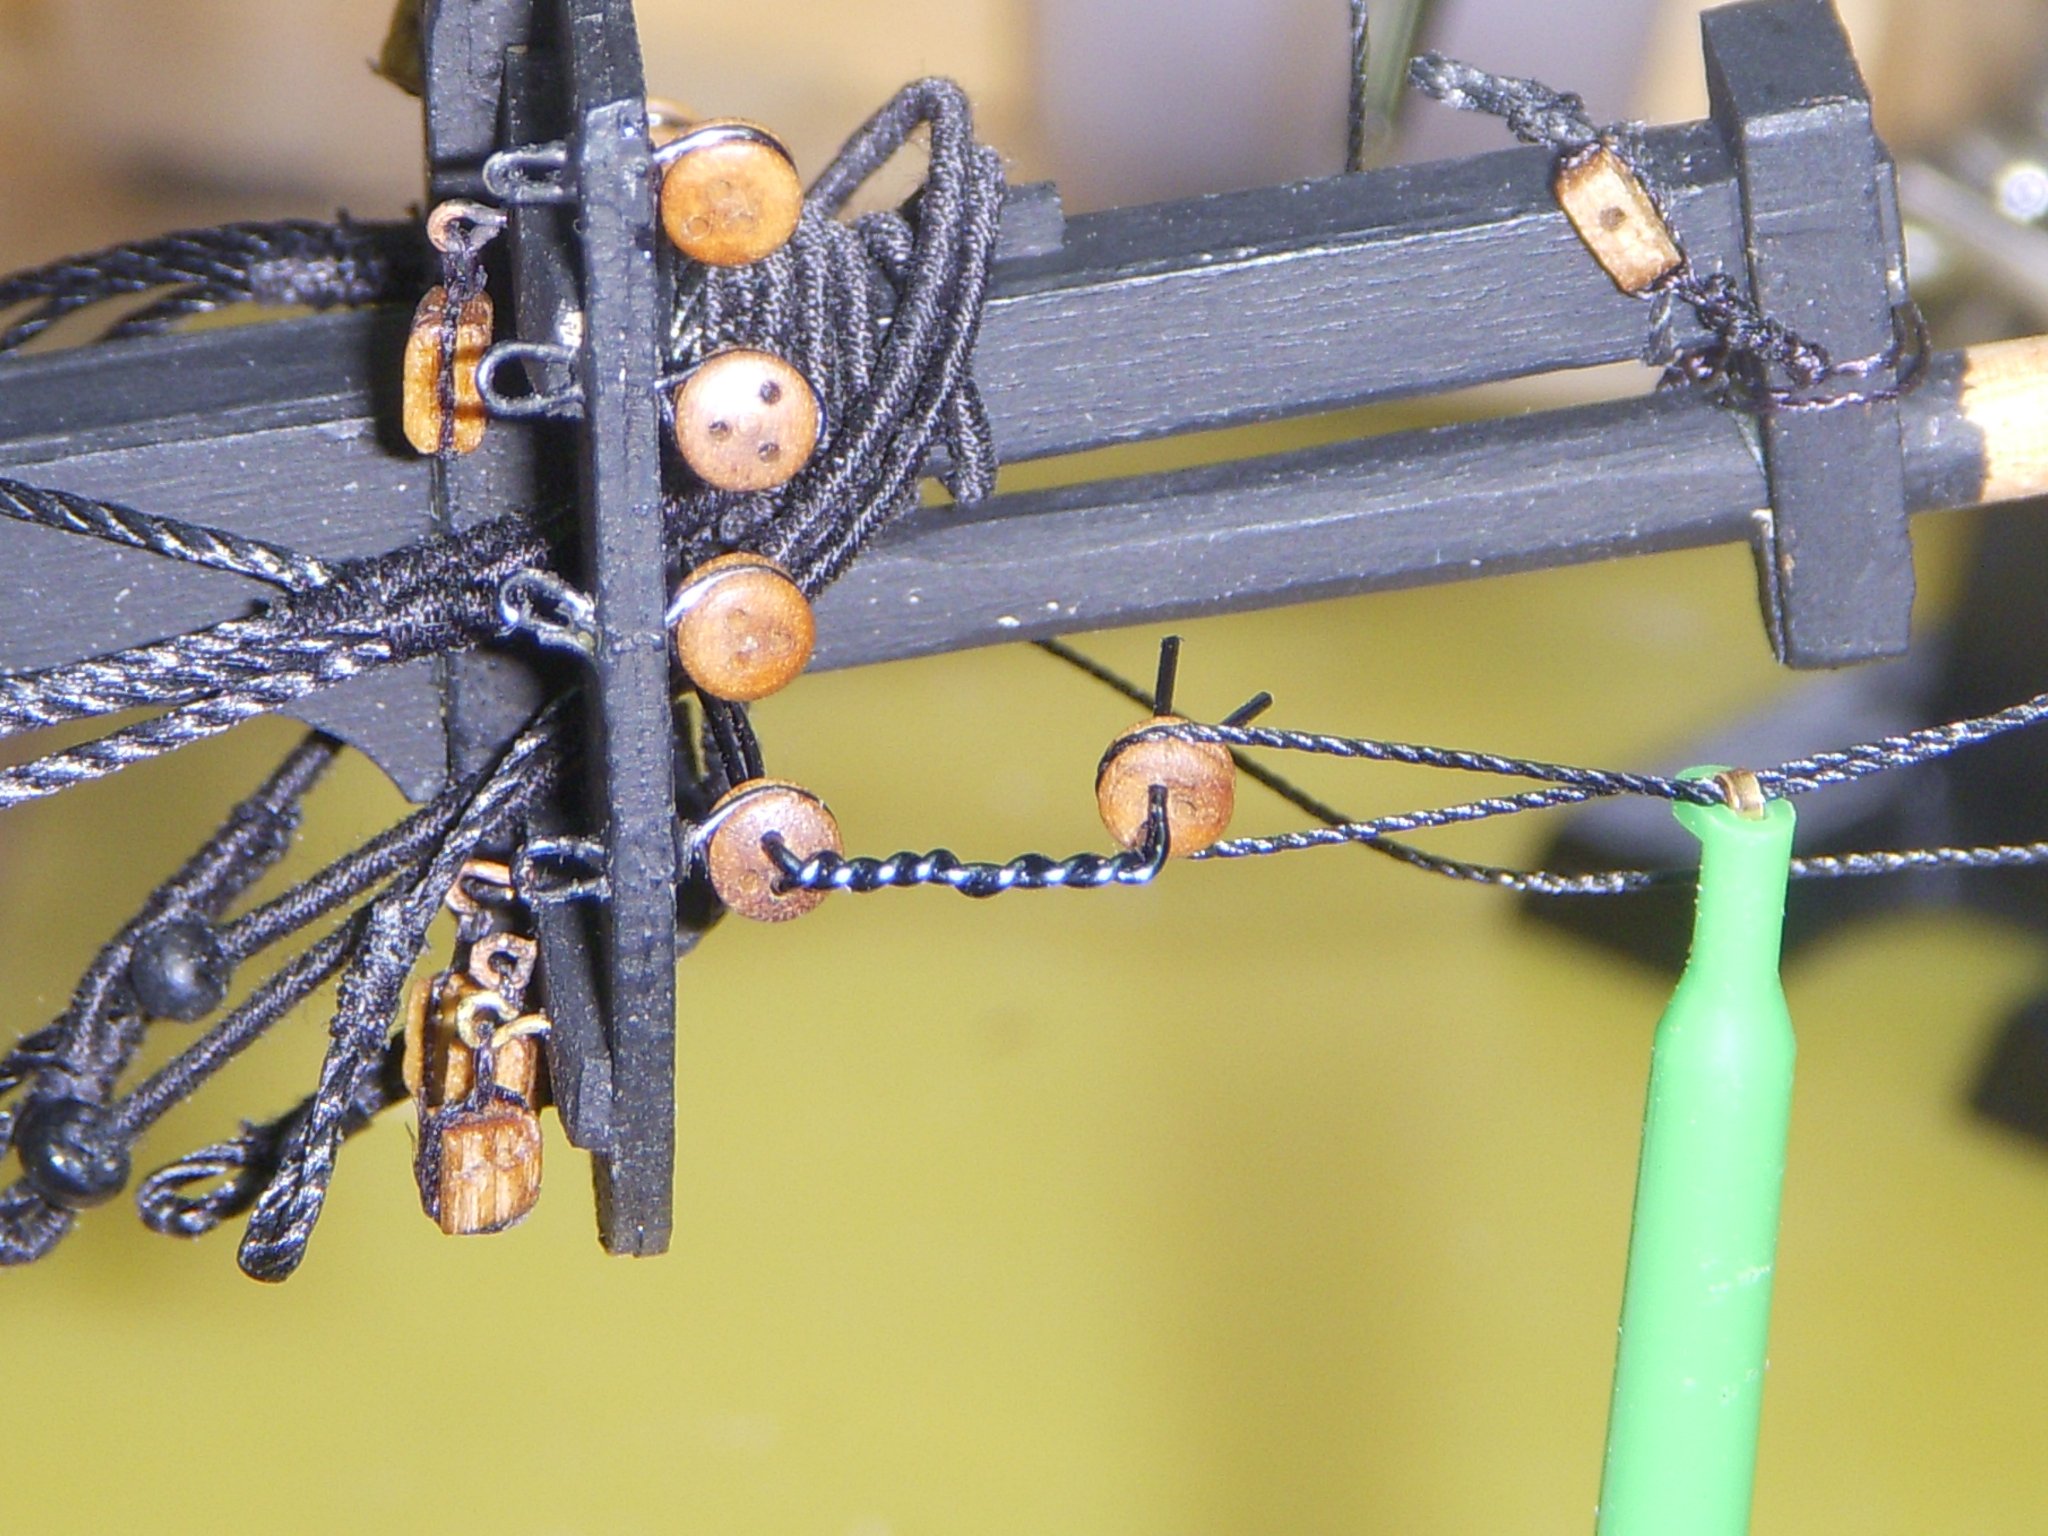
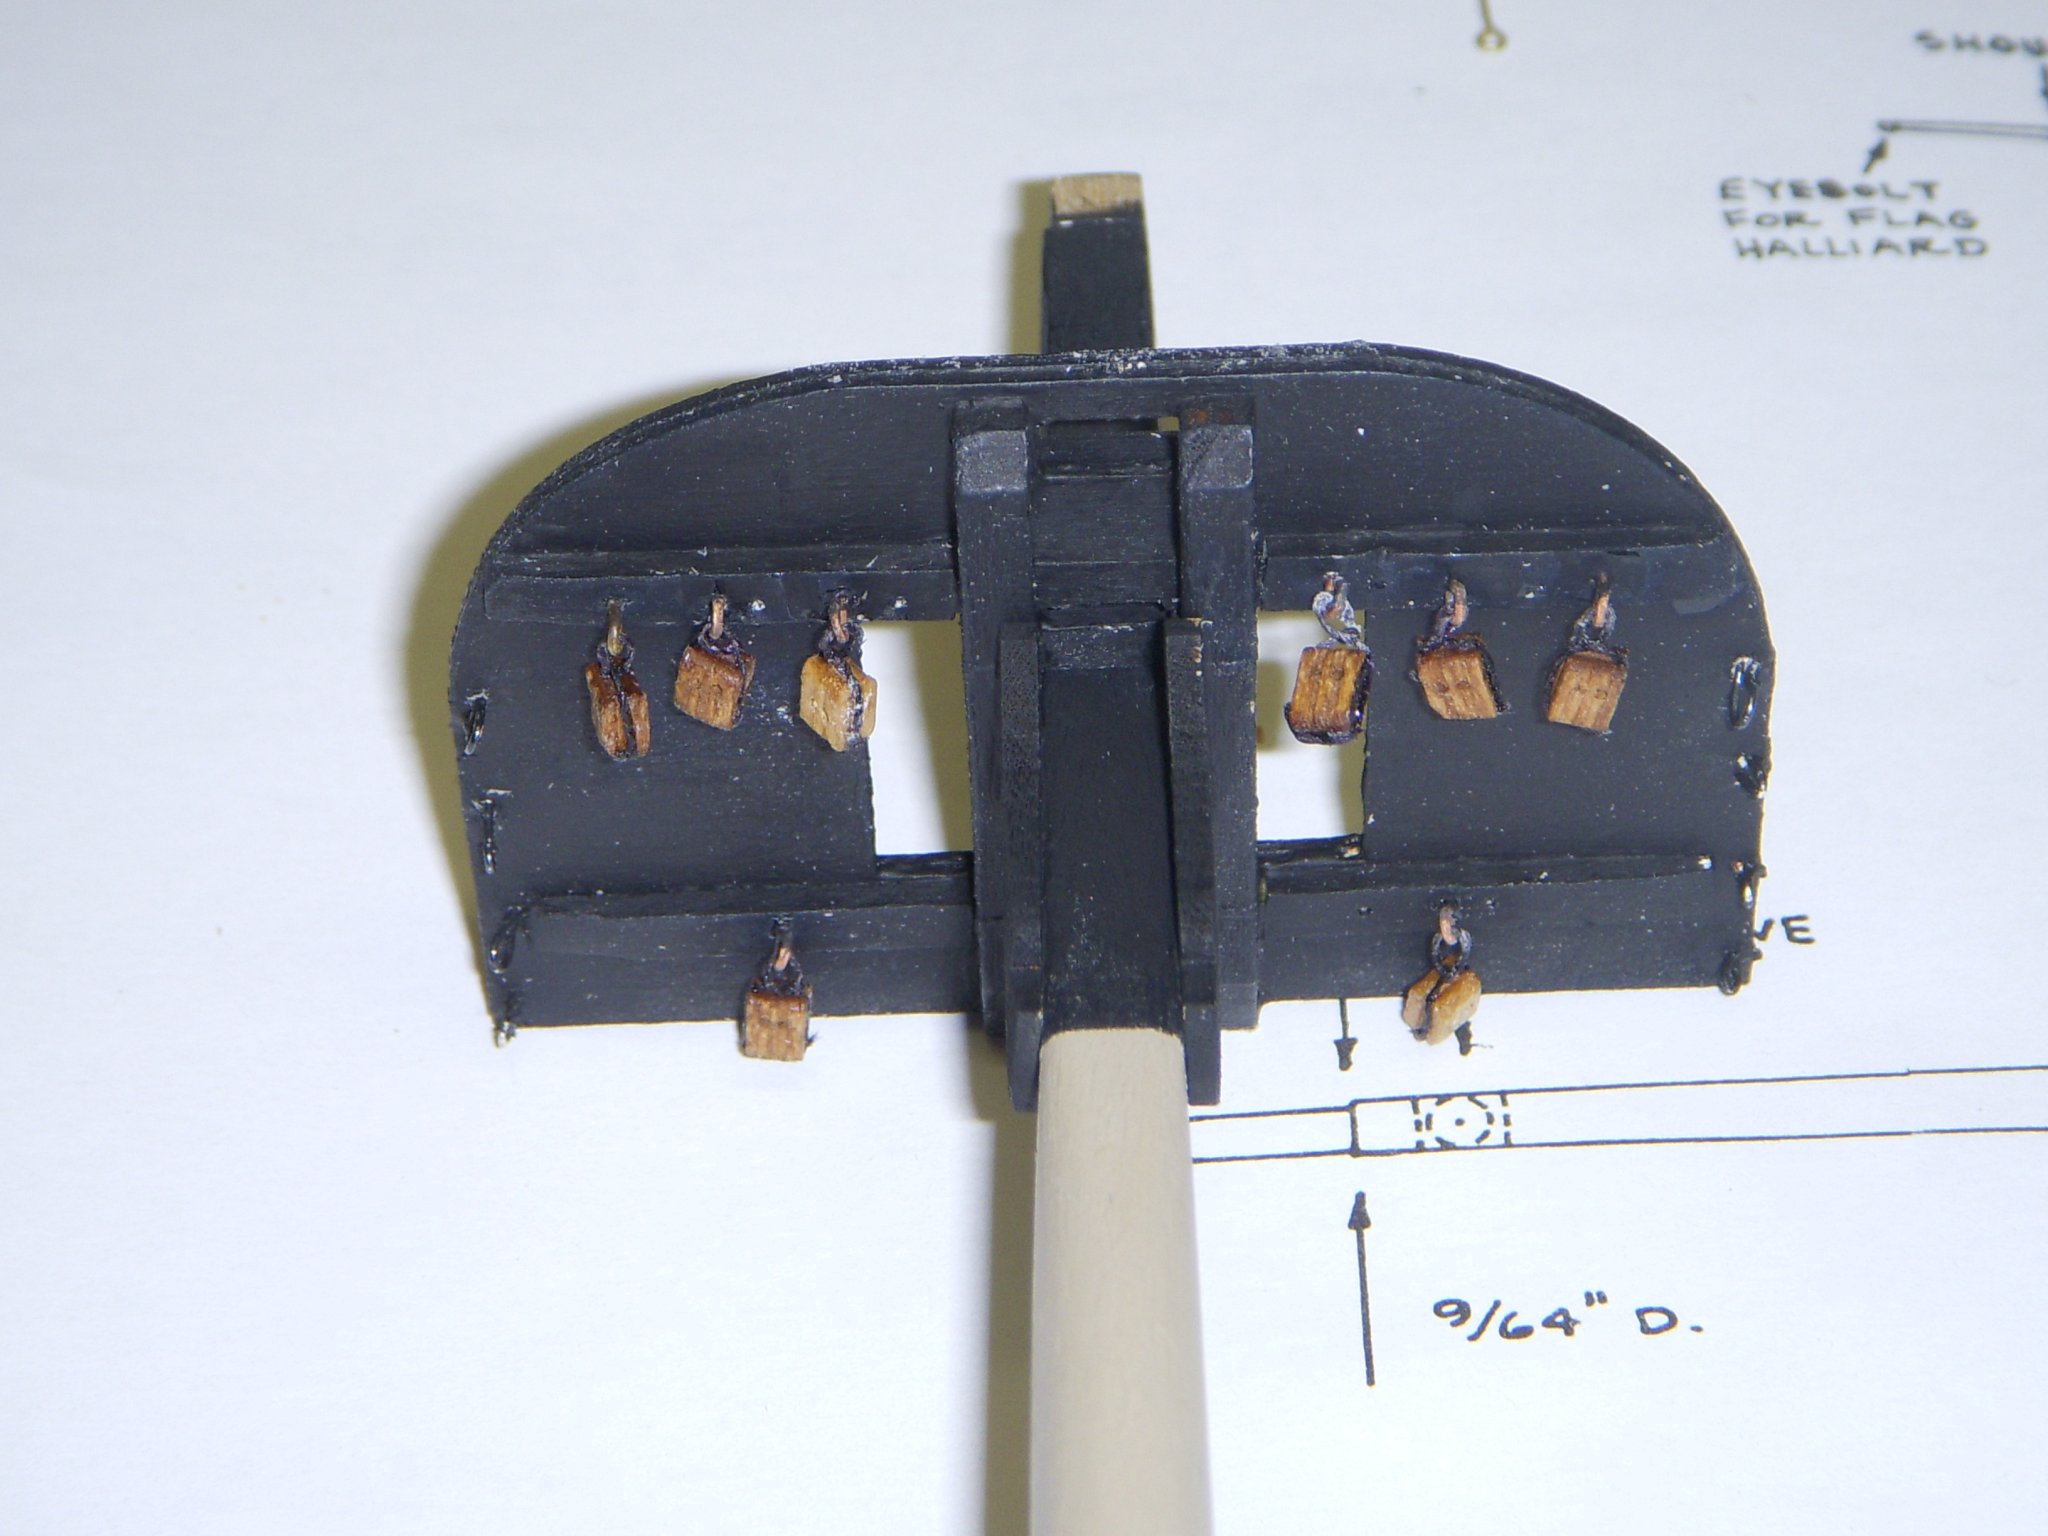
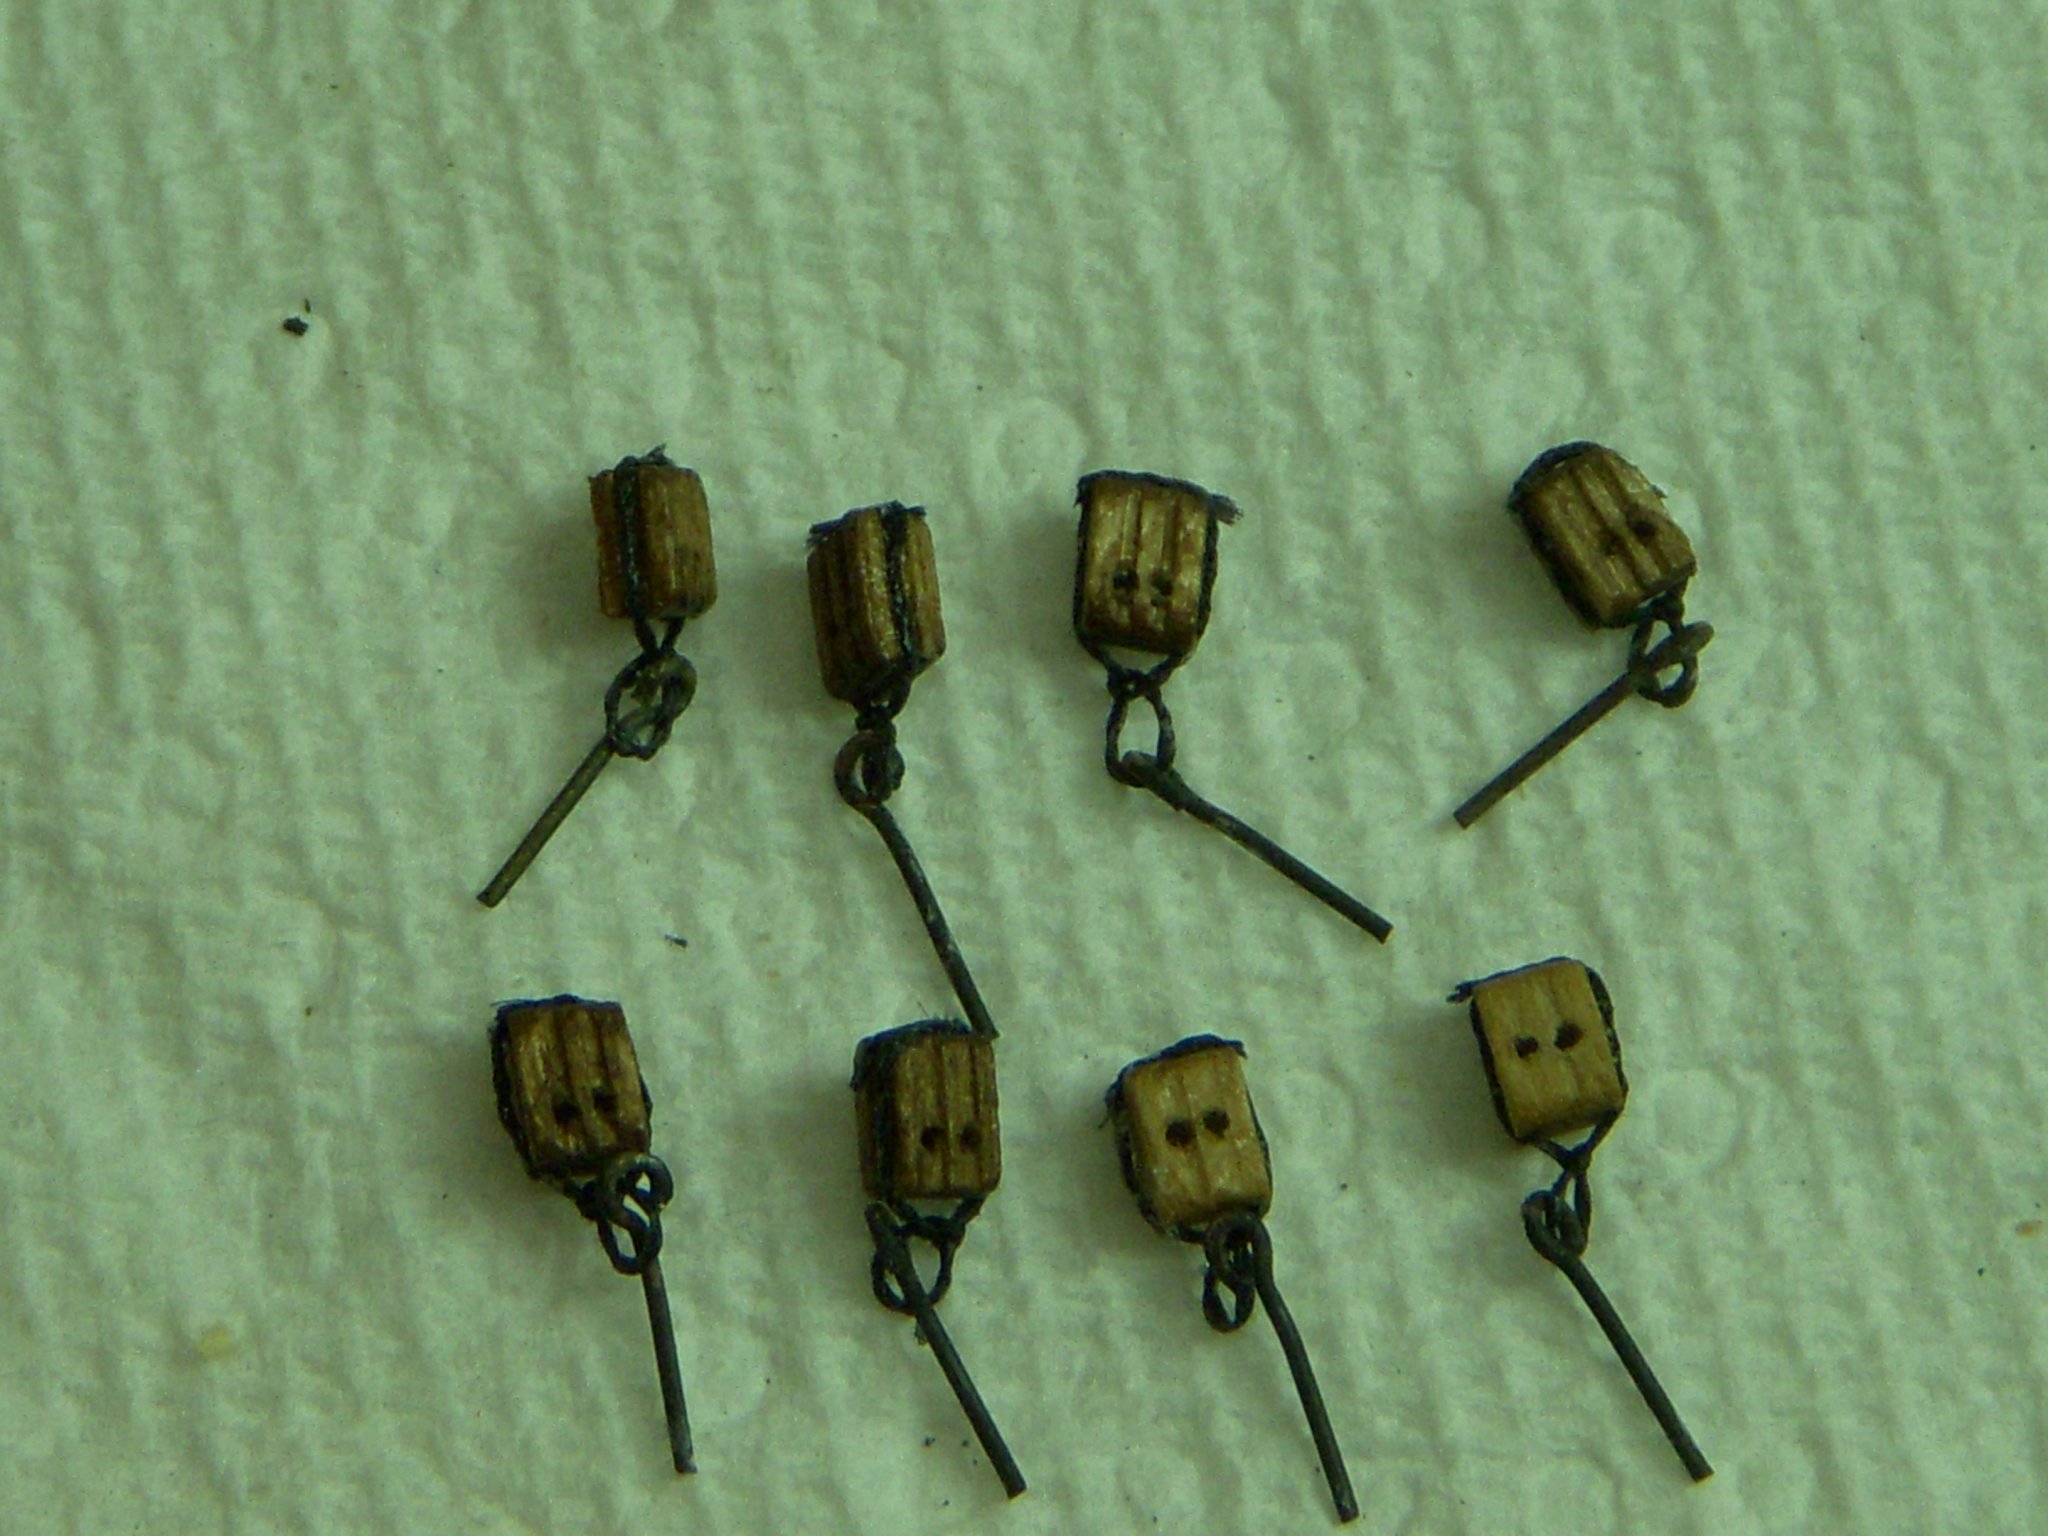
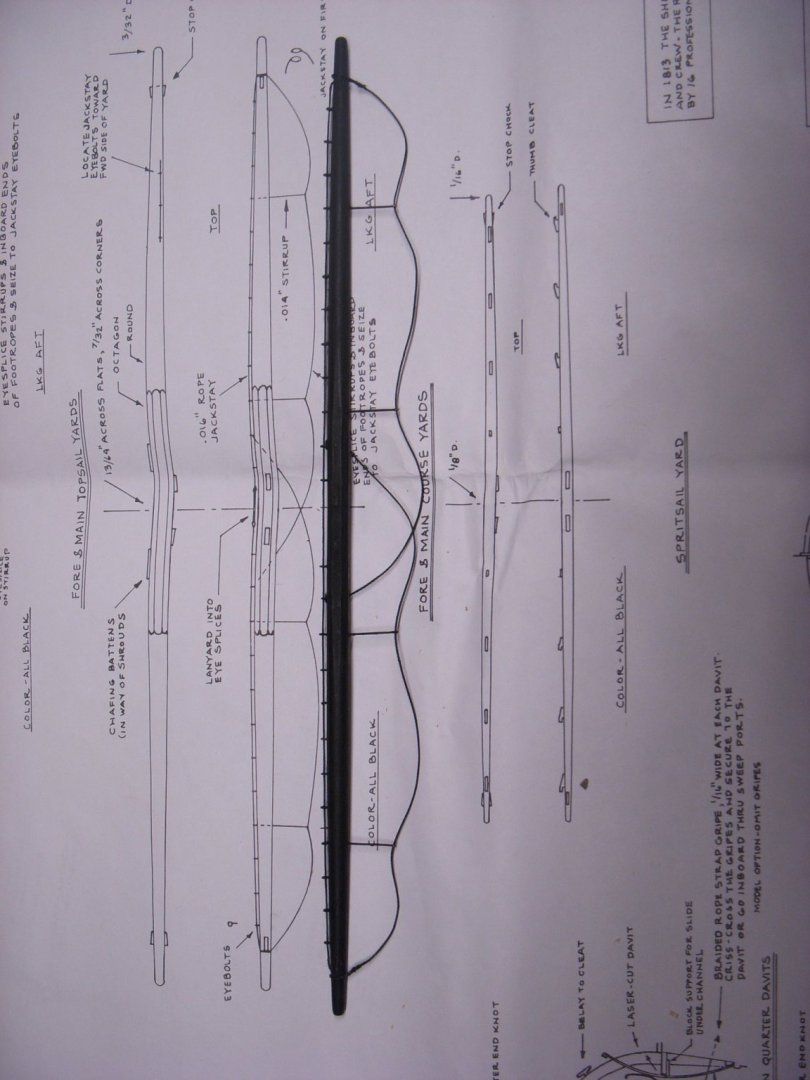
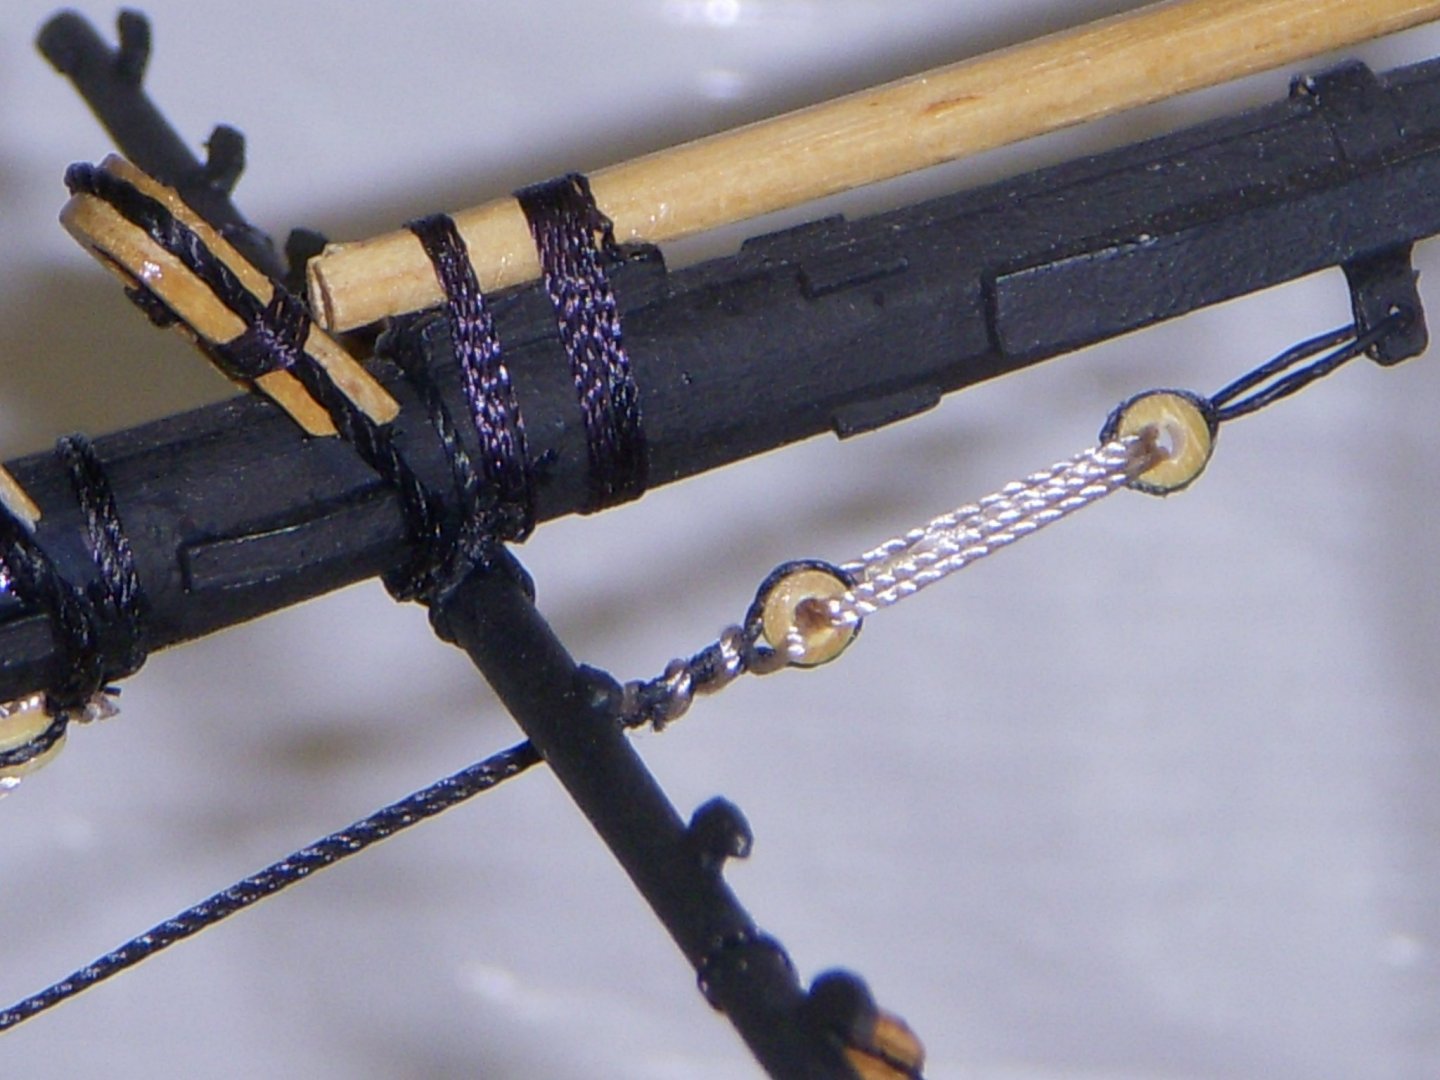
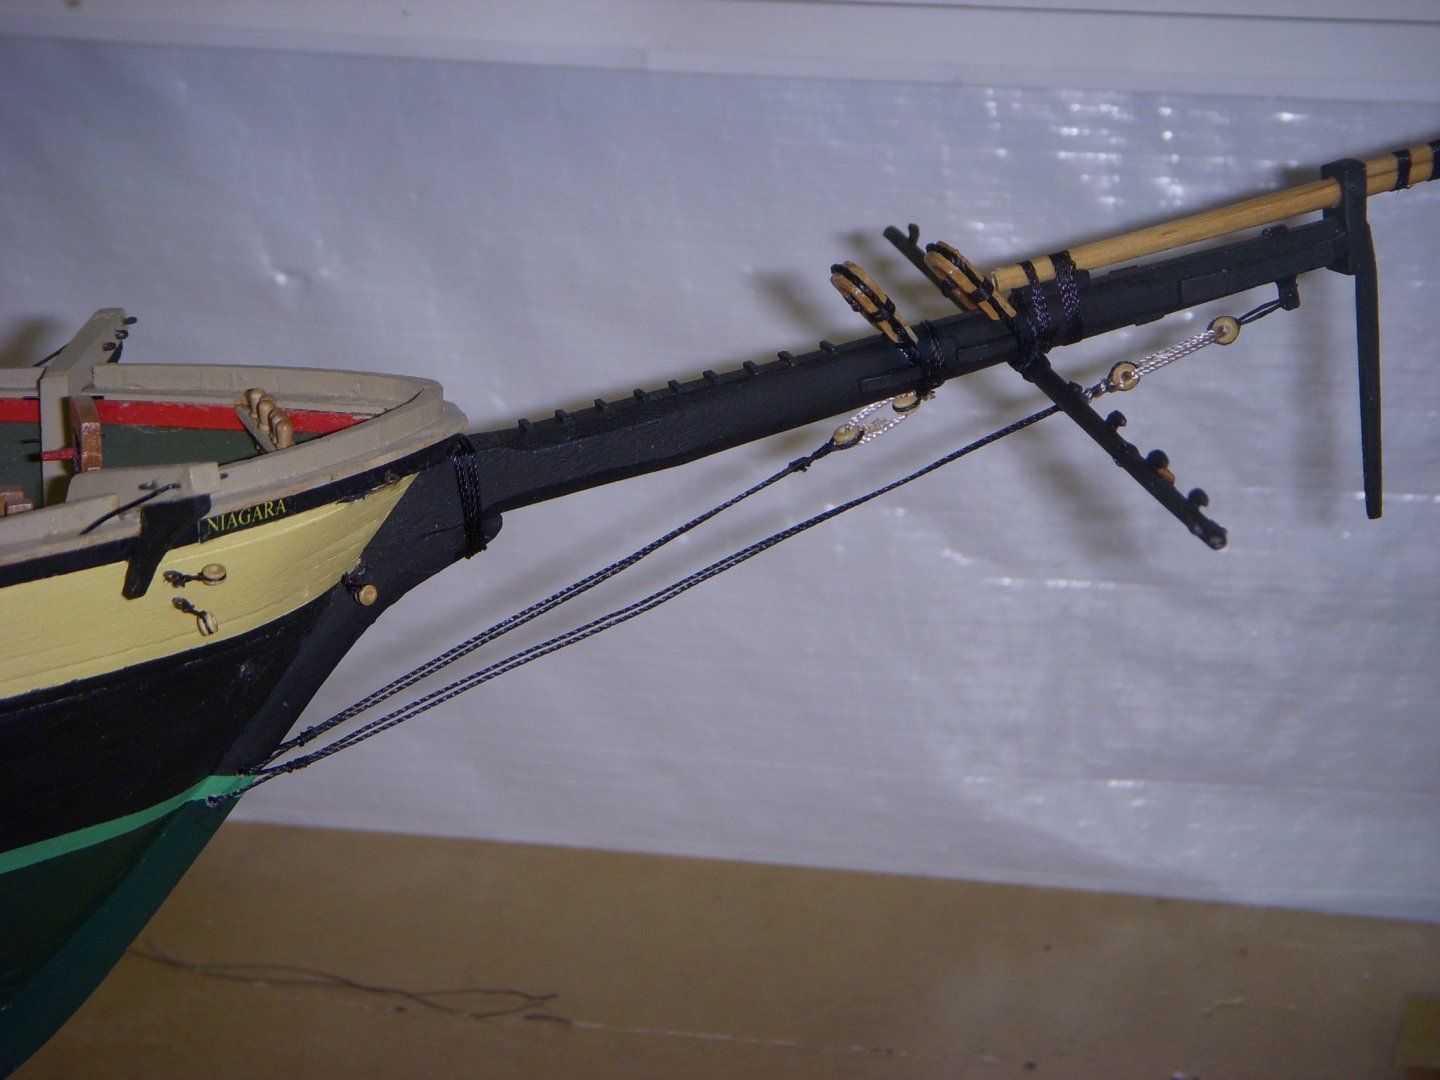
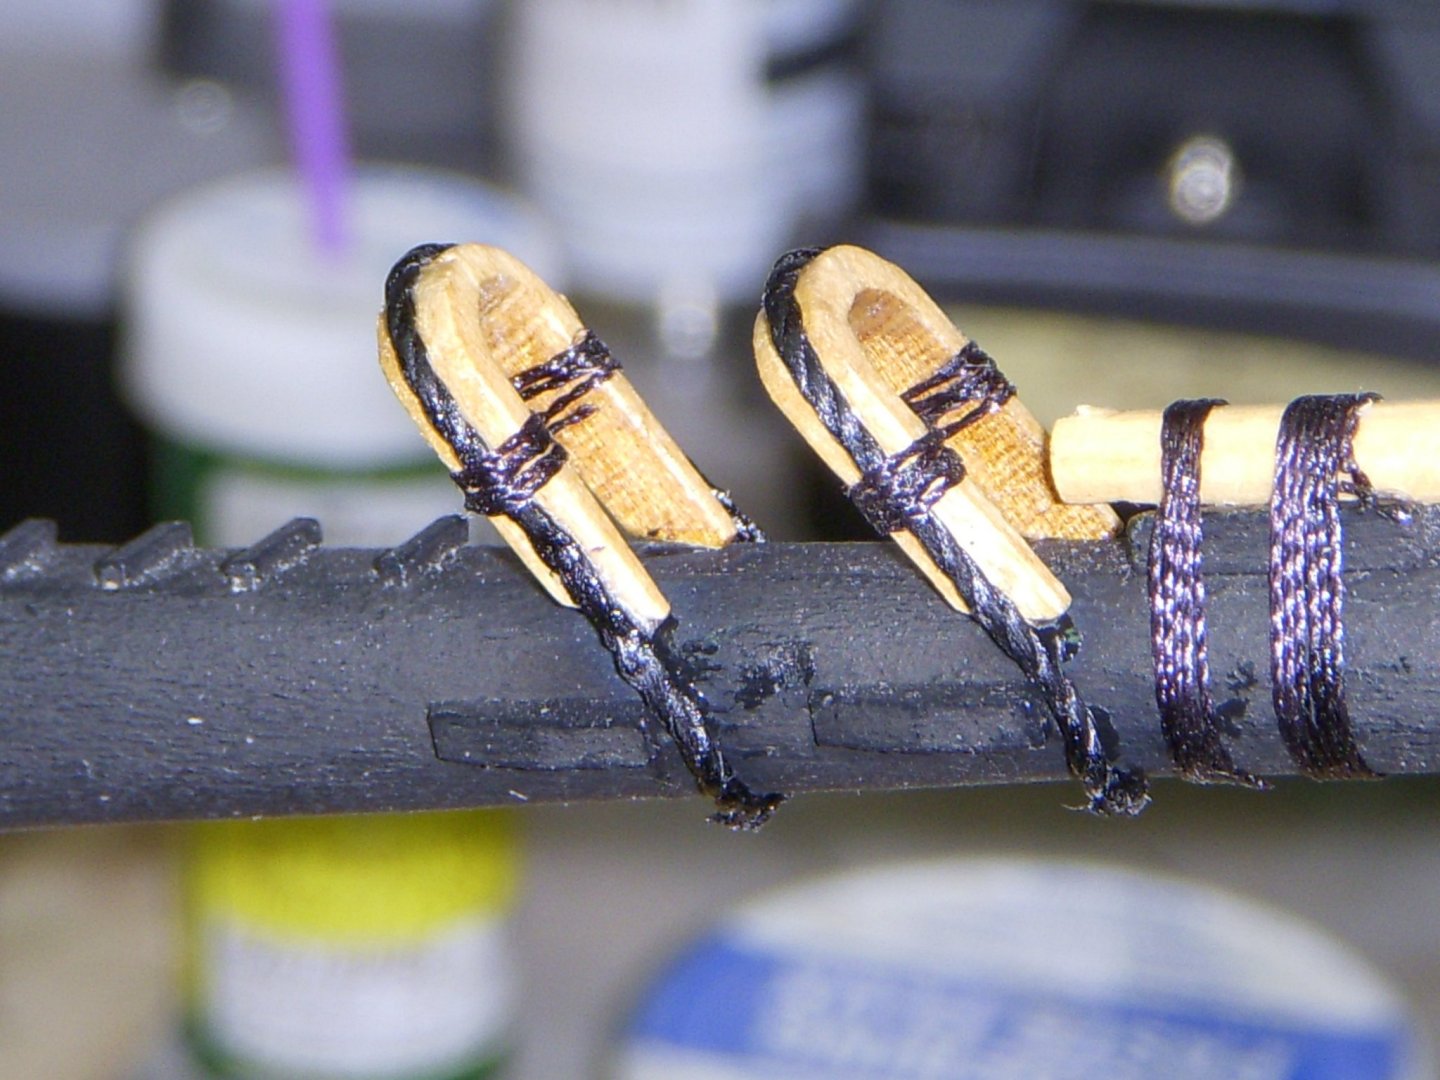
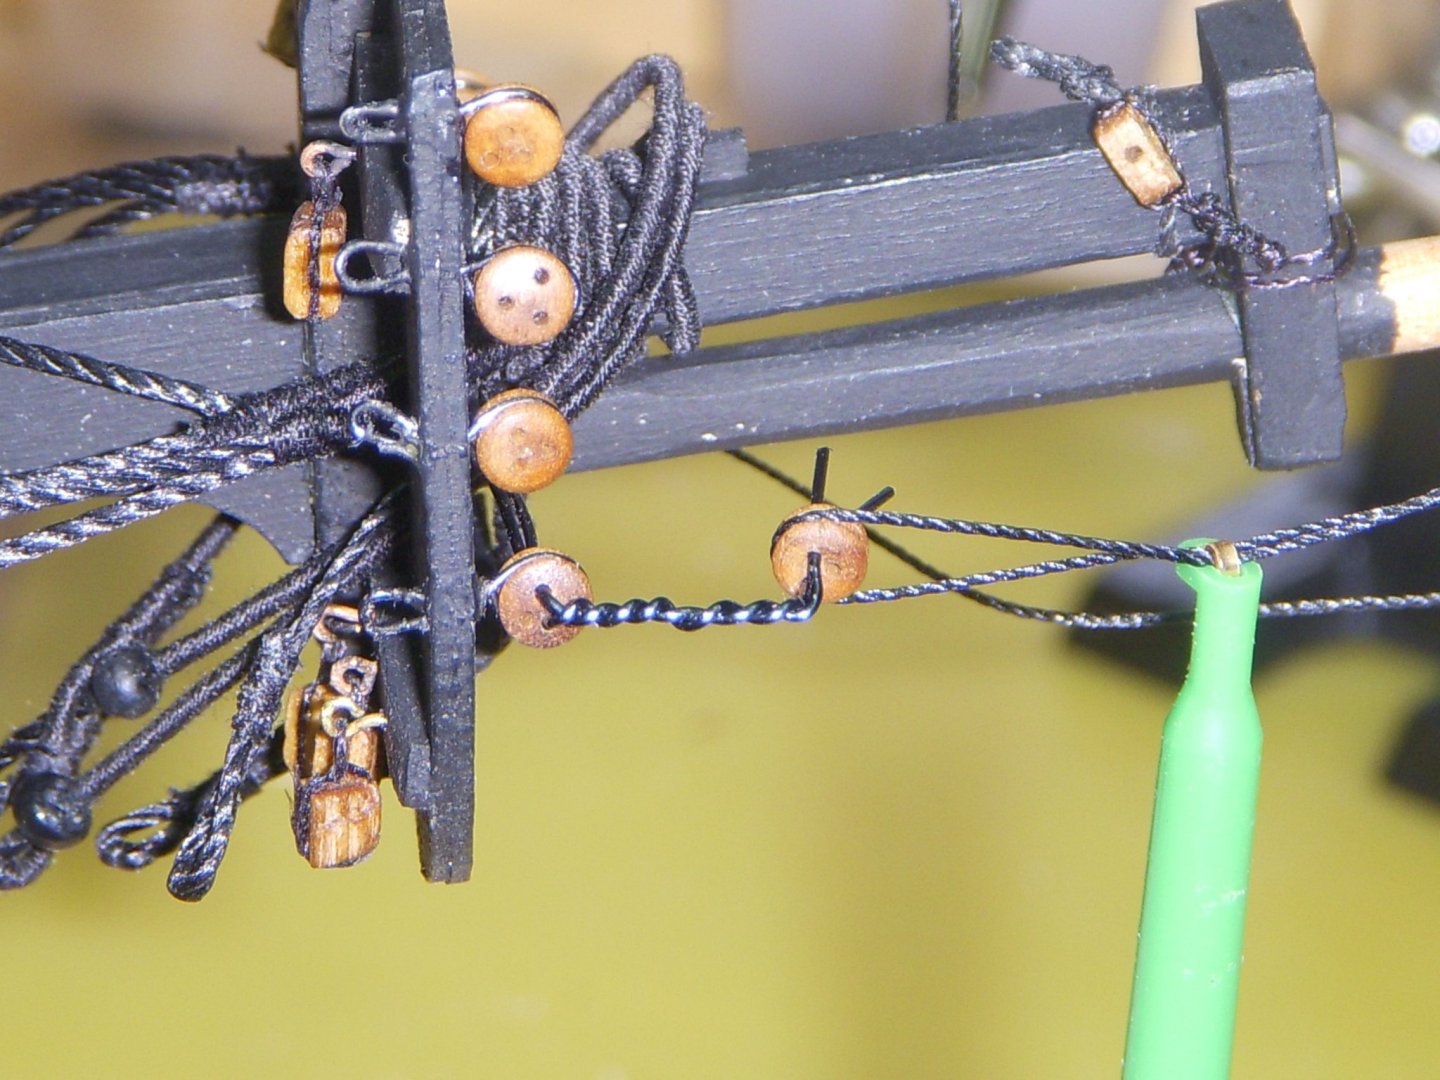
Finished up the fore main course yard. Used the supplied eyebolts on the yard, and modified small fish hooks to make the stirrup. I cut the hook end off a size 8 fine wire fish hook, the only issue was it would not blacken so I painted them. The bullseyes came in so I started doing the rigging on the bowsprit. I found seizing the lines off ship if possible made the job a lot easier. Here are a few shots of how far I got. Ron


-
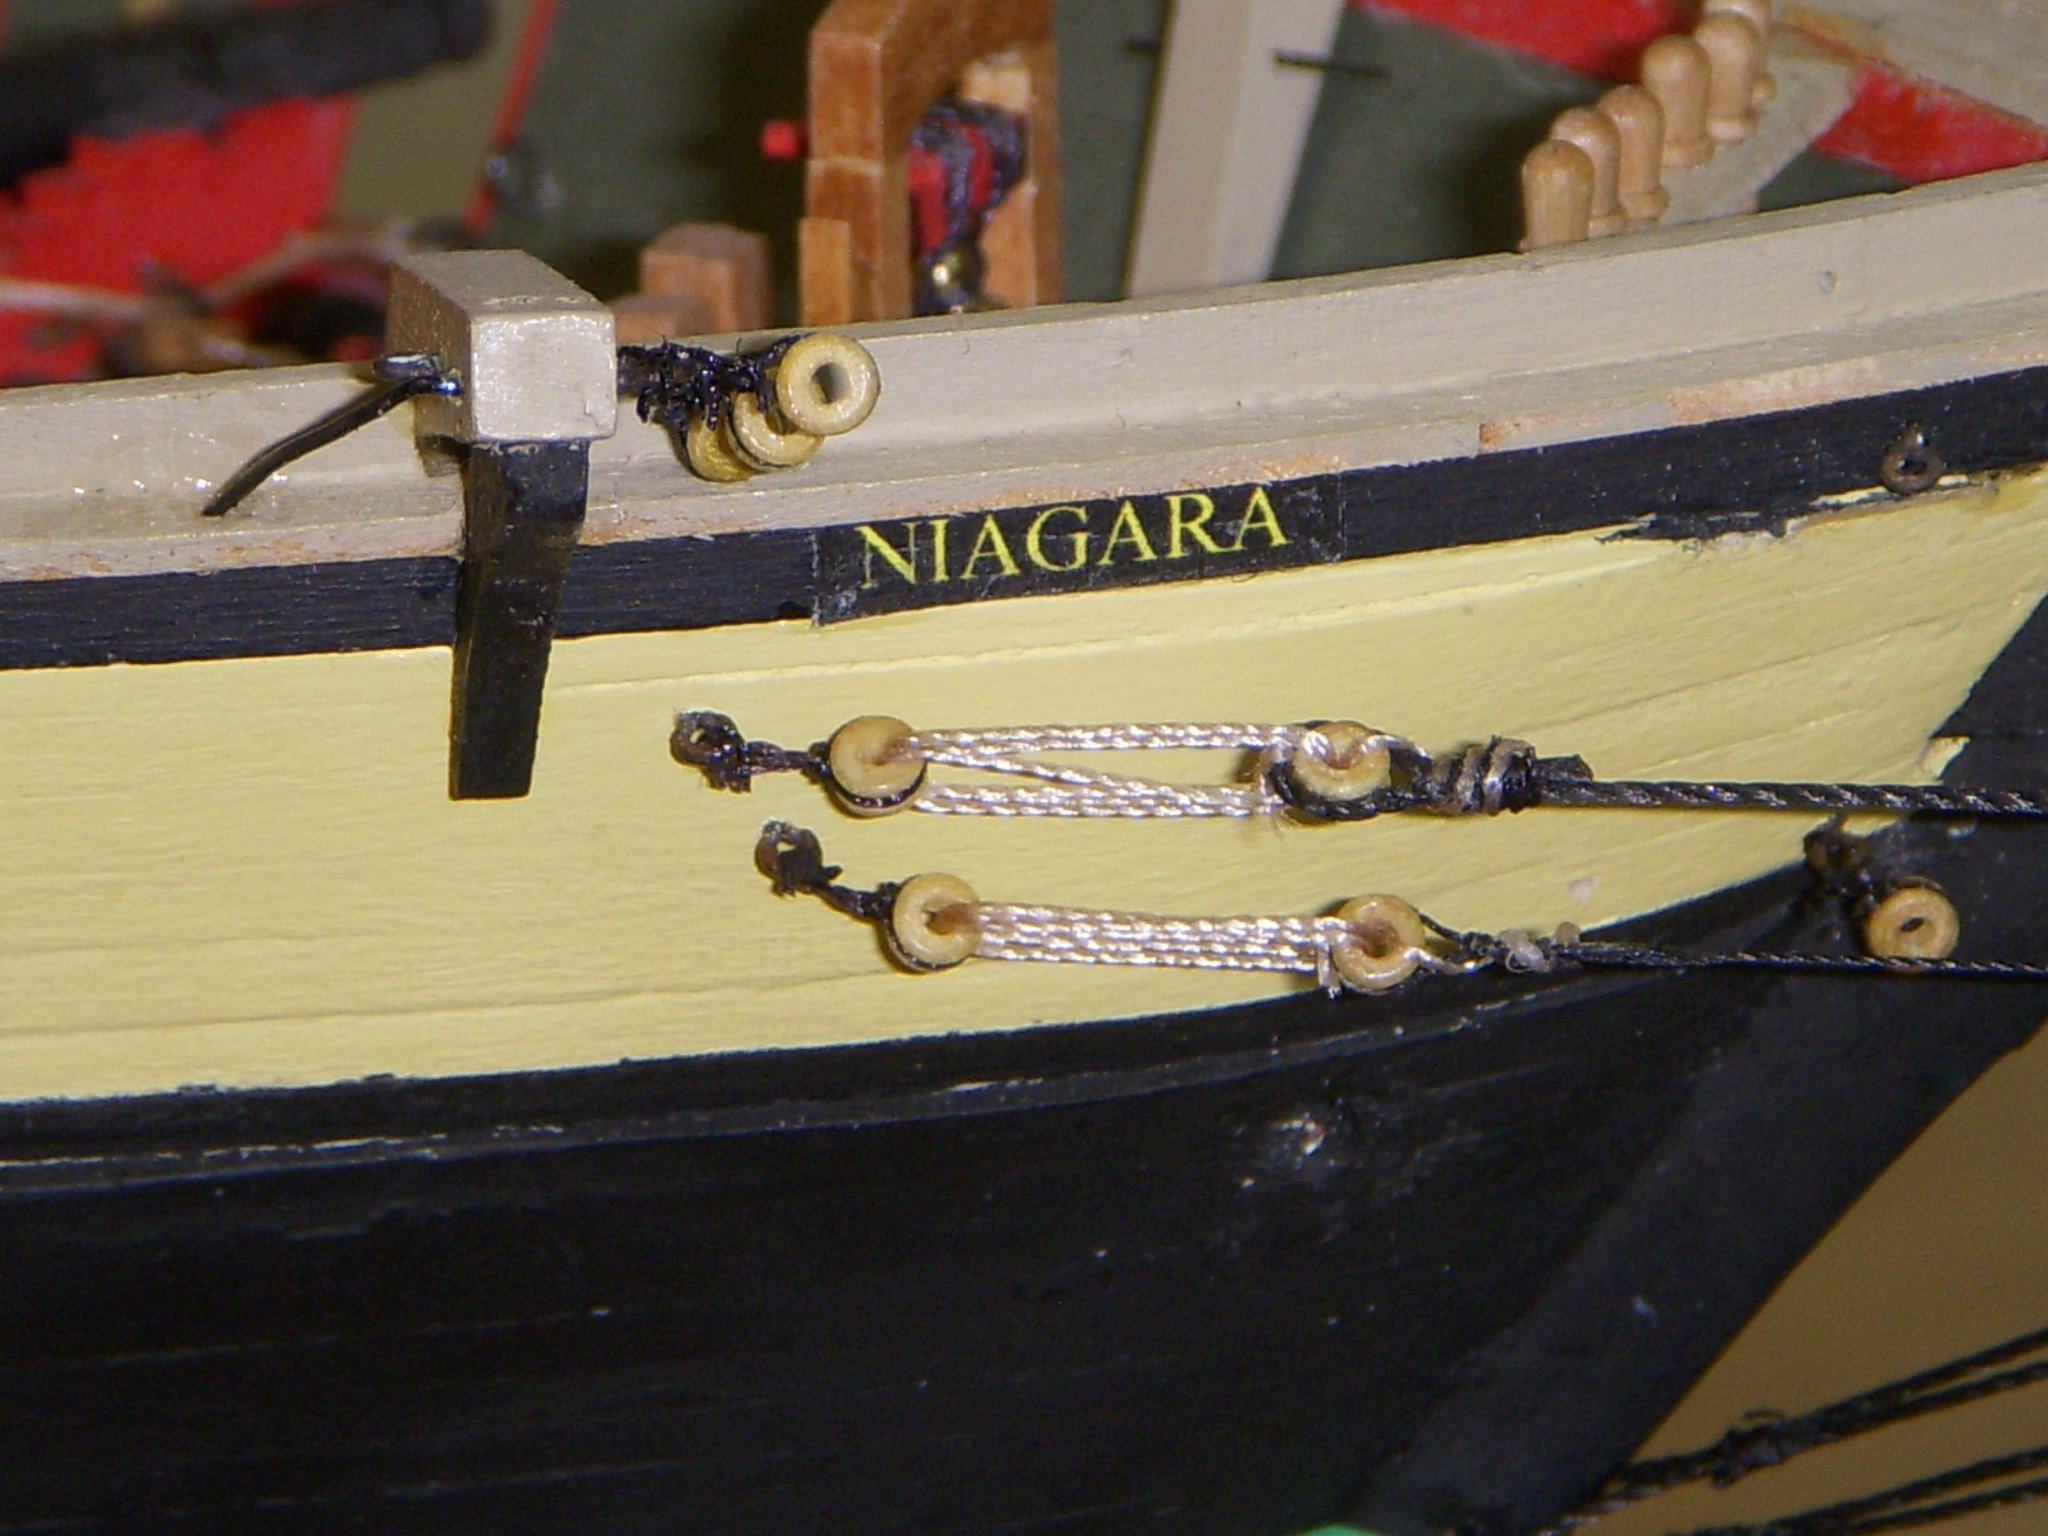
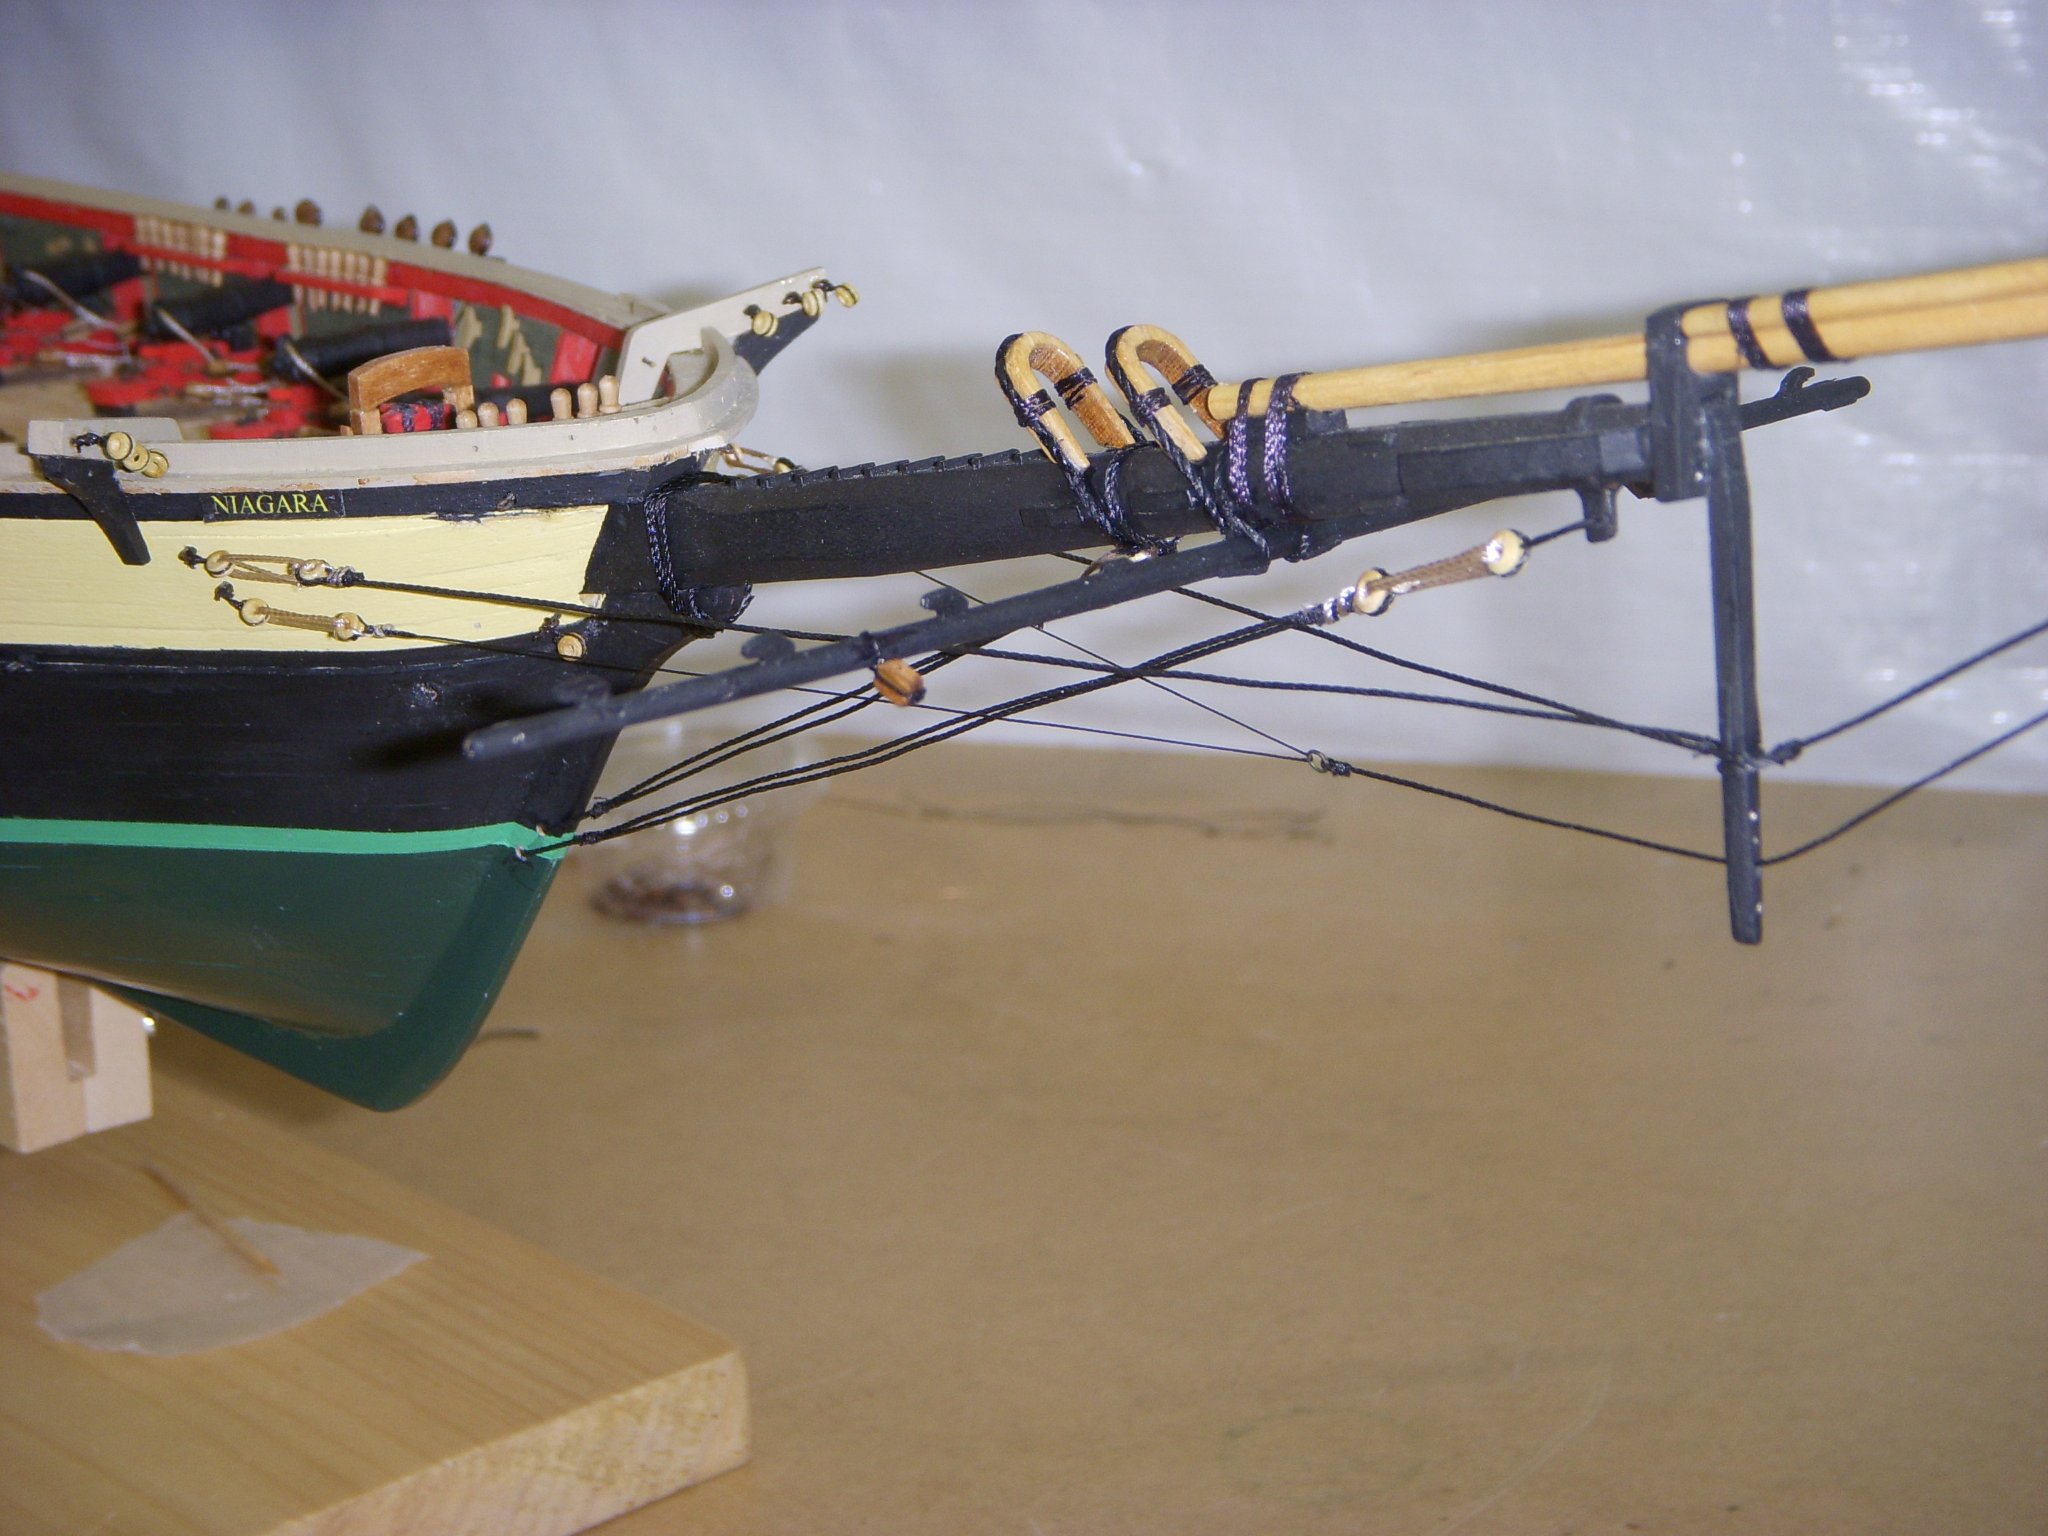
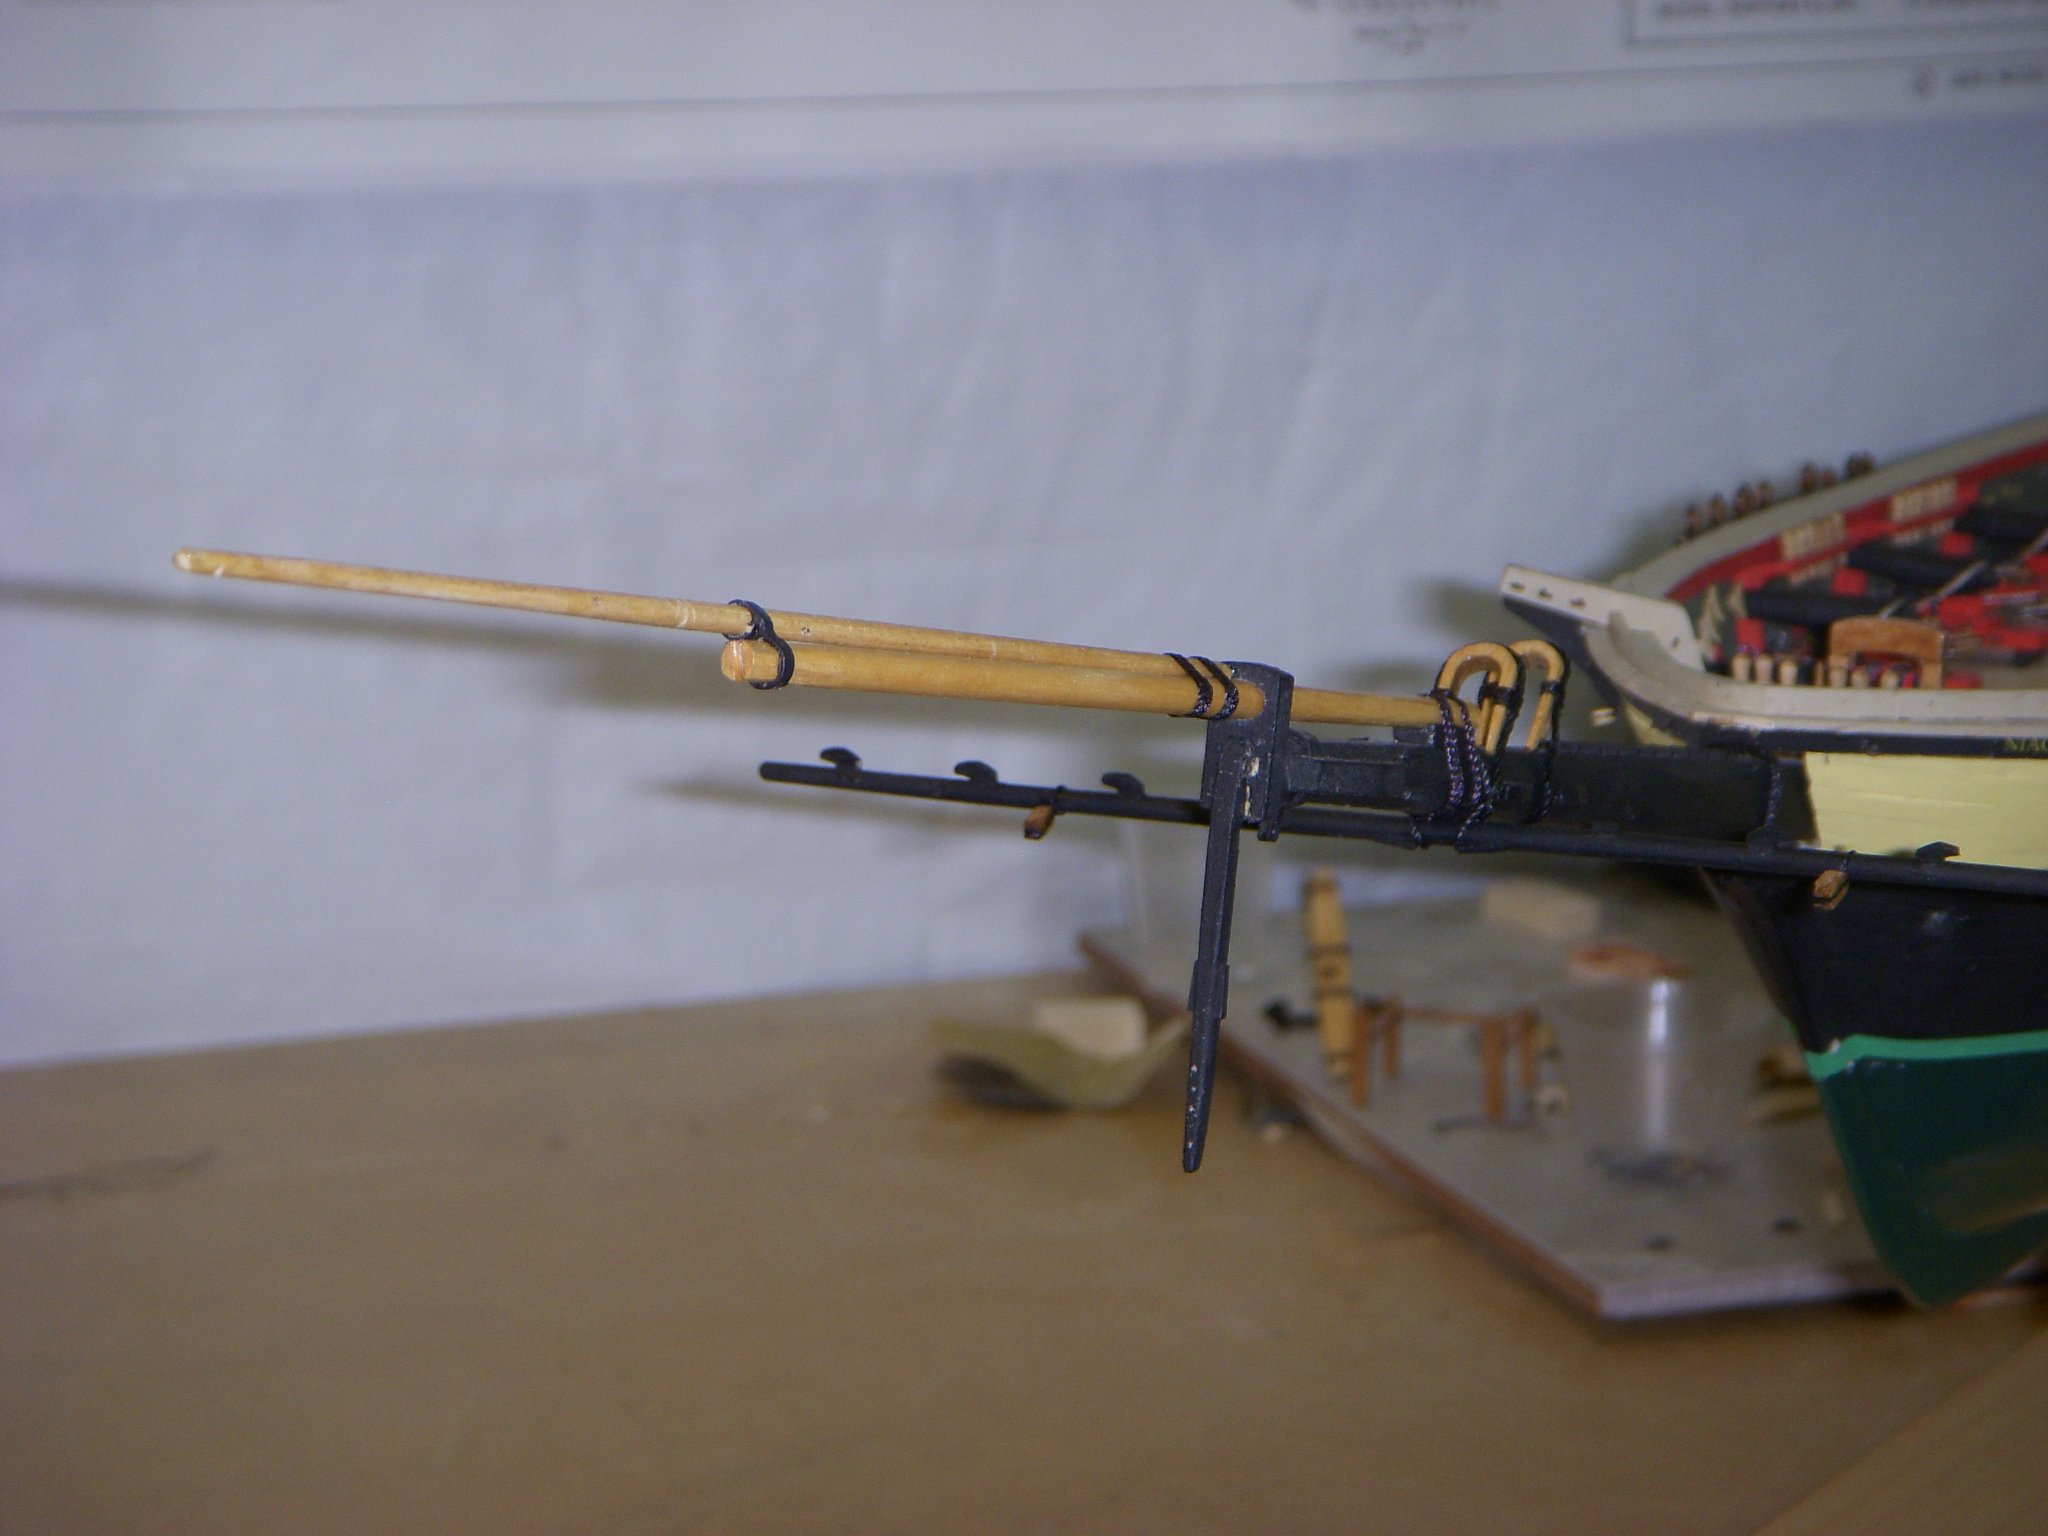
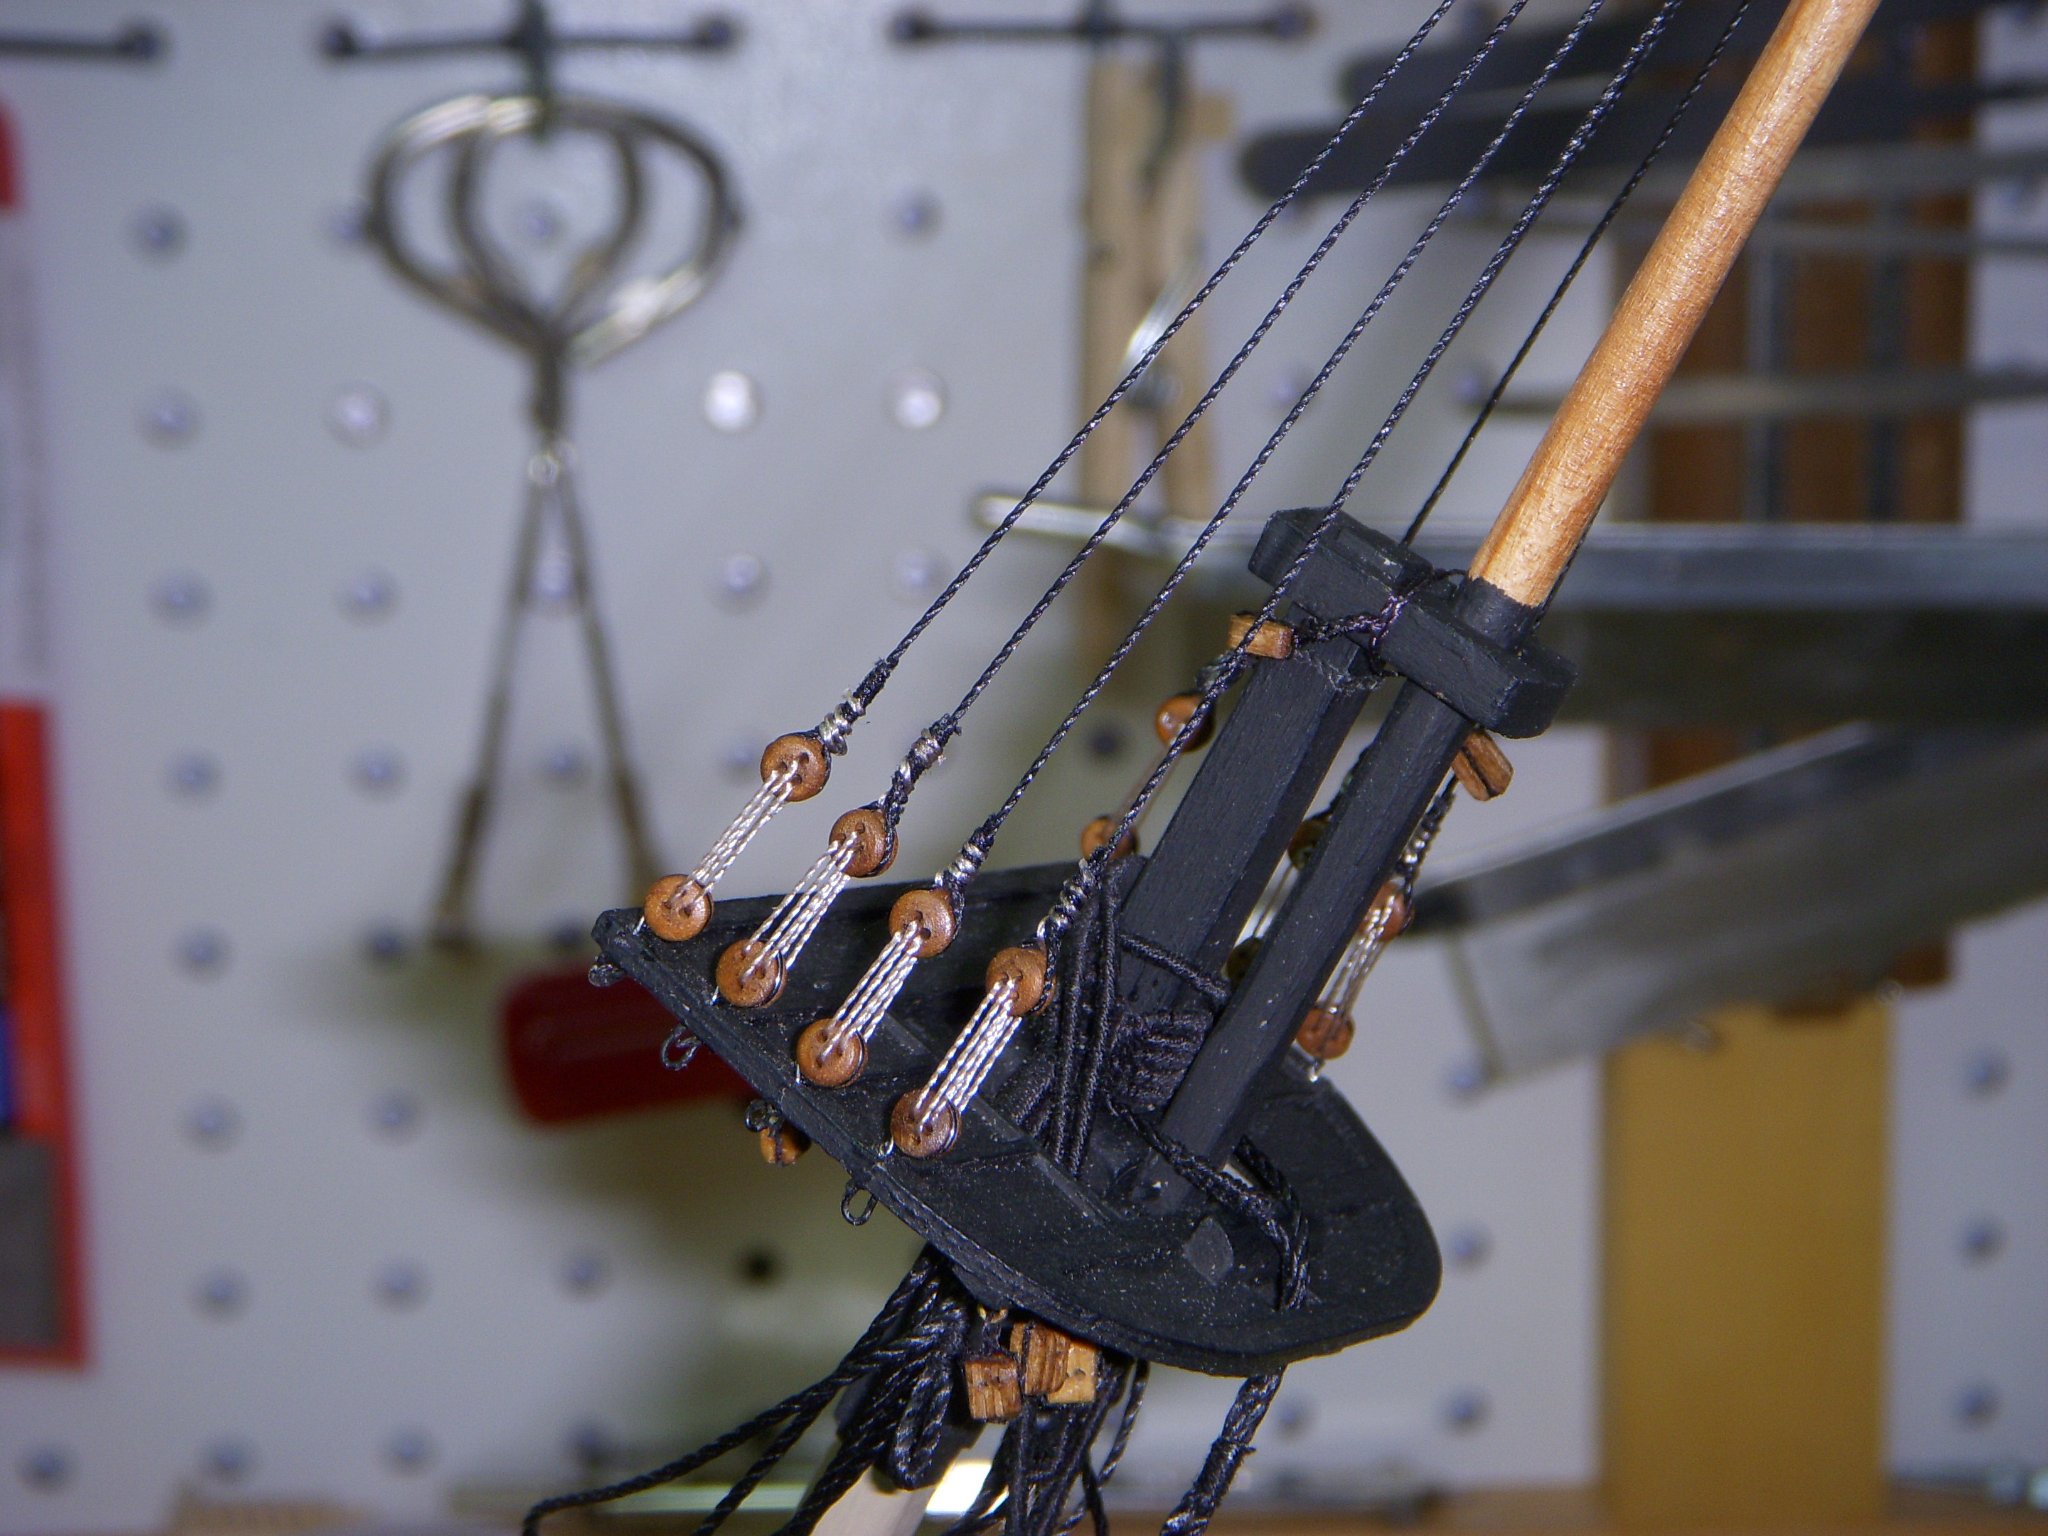
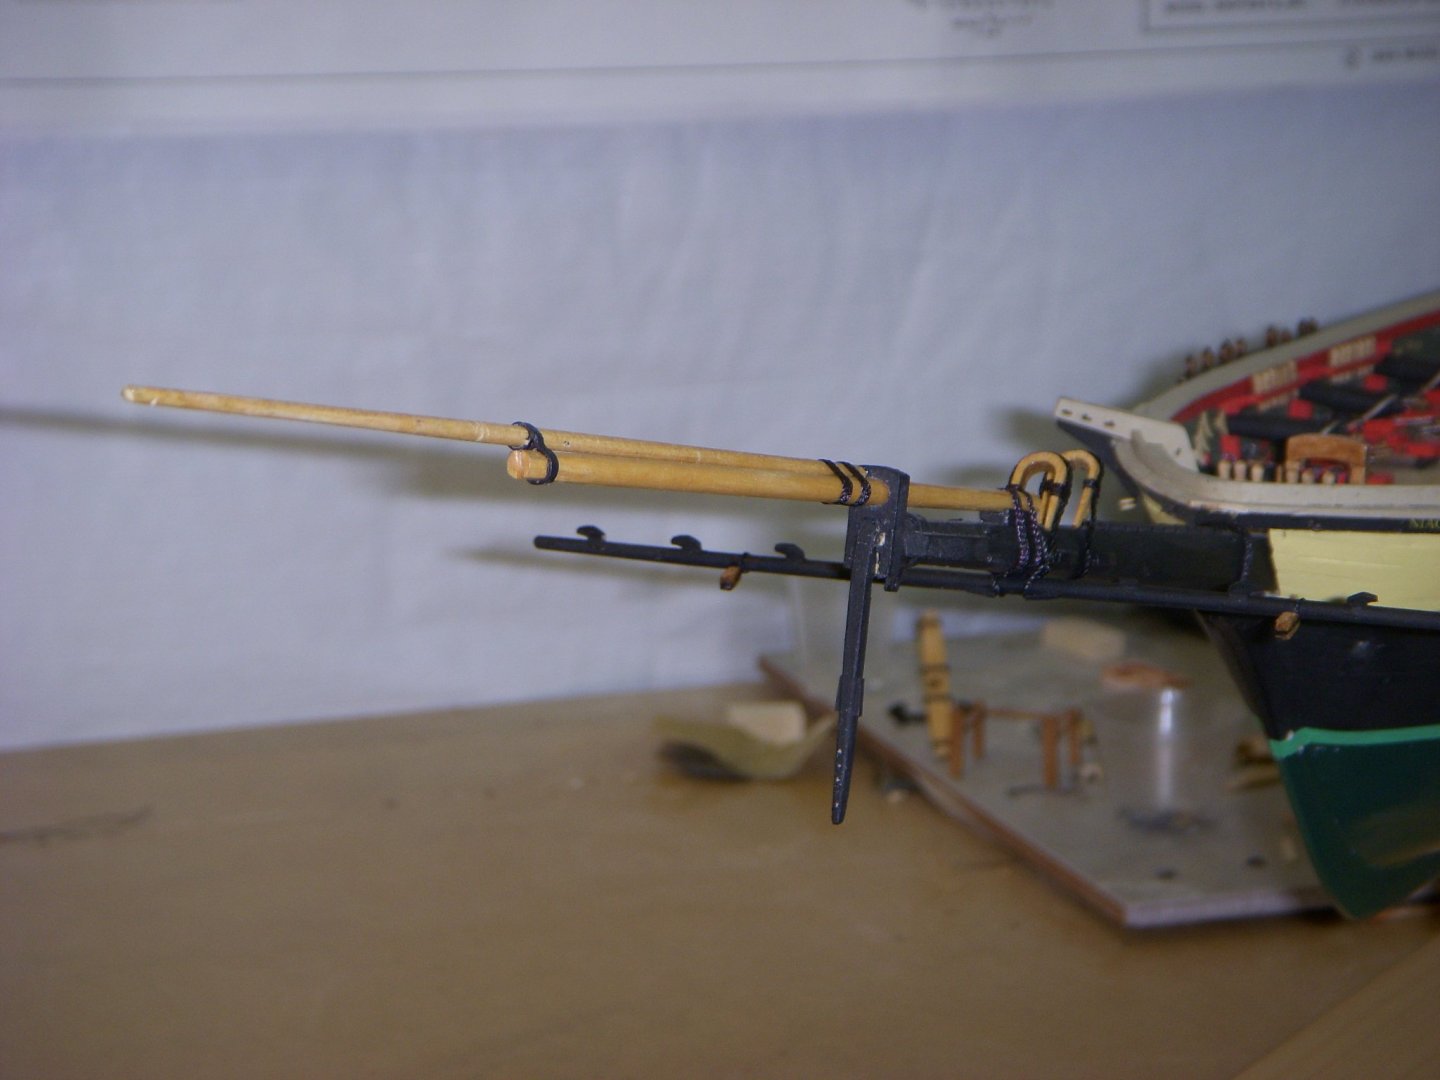
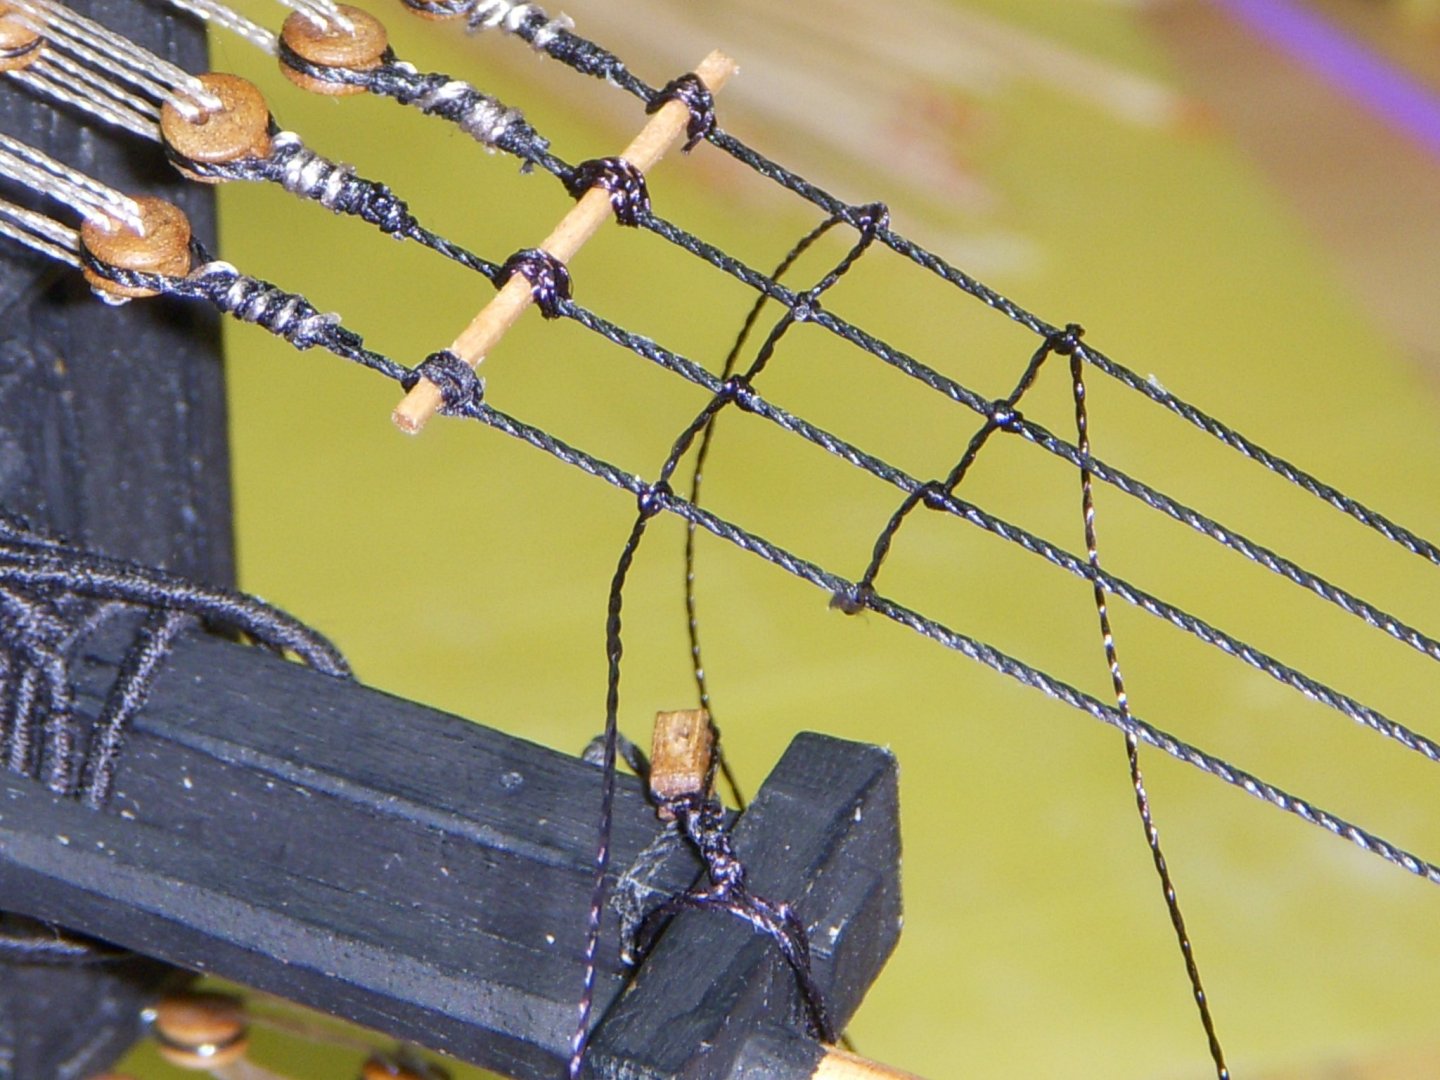
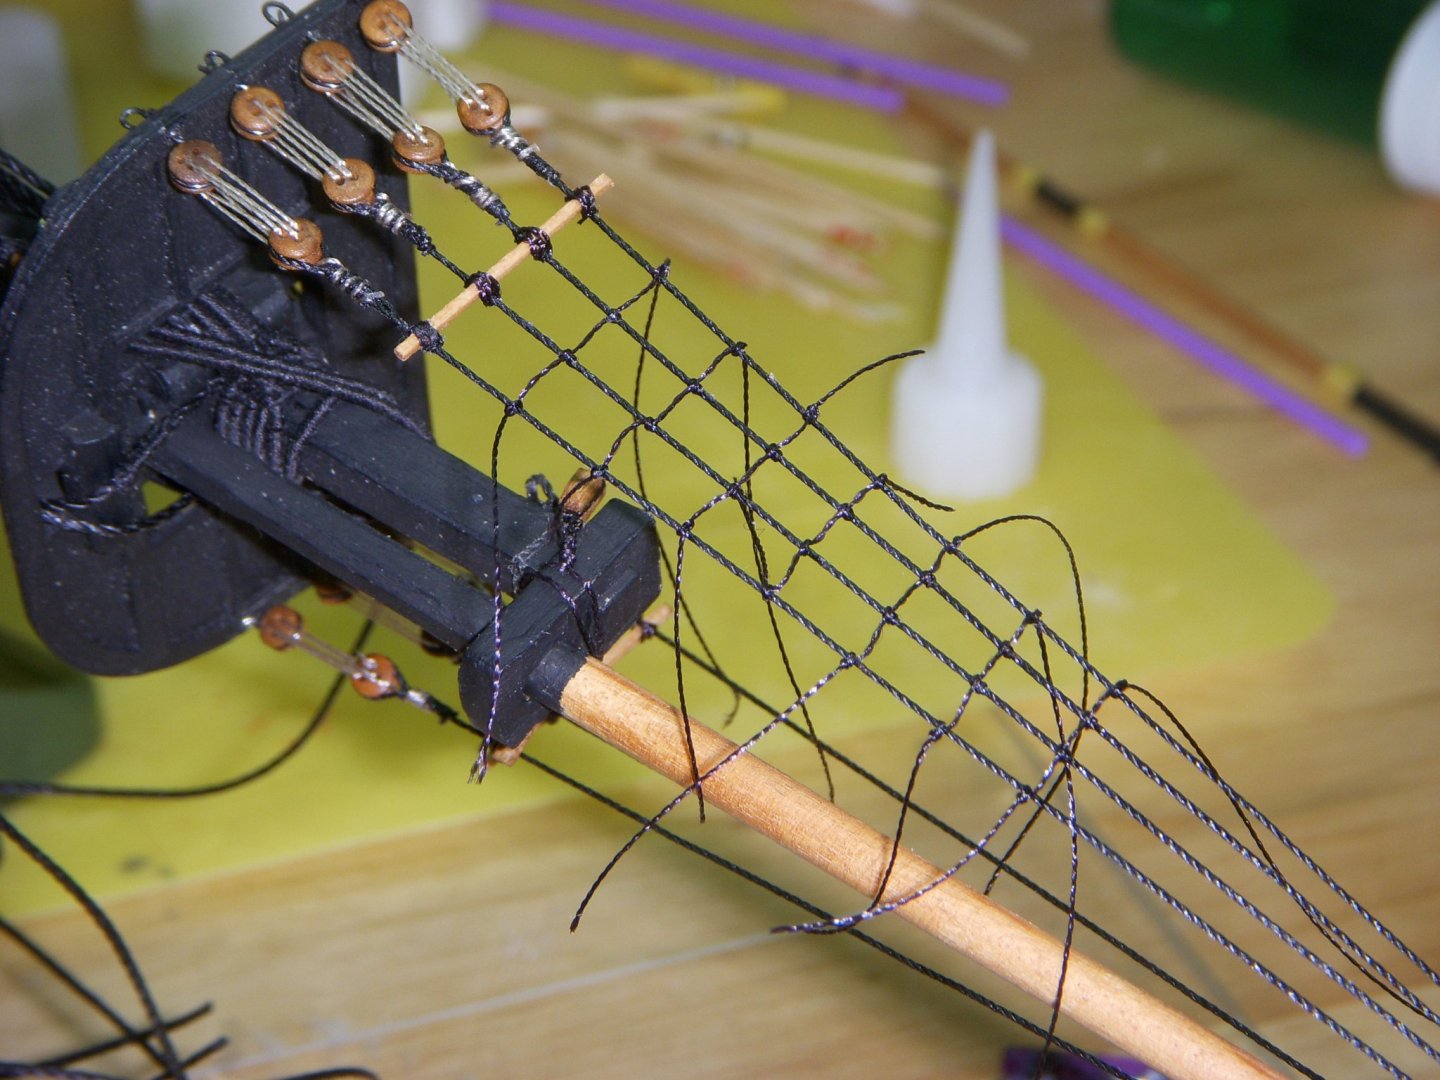
Before installing the foremast I decided to finish installing the jib boom, flying jib boom and the spirit sail yard. I installed the forestay and preventer ends. I then made the flying jib boom iron from a piece of 1/64 x 1/16 brass. Needs to be cleaned up and the gap filed in. This is what it looked like installed. I moved on to installing the bobstays. The instructions said to make the bullseyes by drilling out a deadeye. After several attempts using my drill press, I either broke the deadeye or ended up drilling it off center. Going on-line and purchasing the parts seemed like a good idea. Expect to see the parts in a few days from Ages of Sail. While waiting for the parts I began making the yards. Ron

-
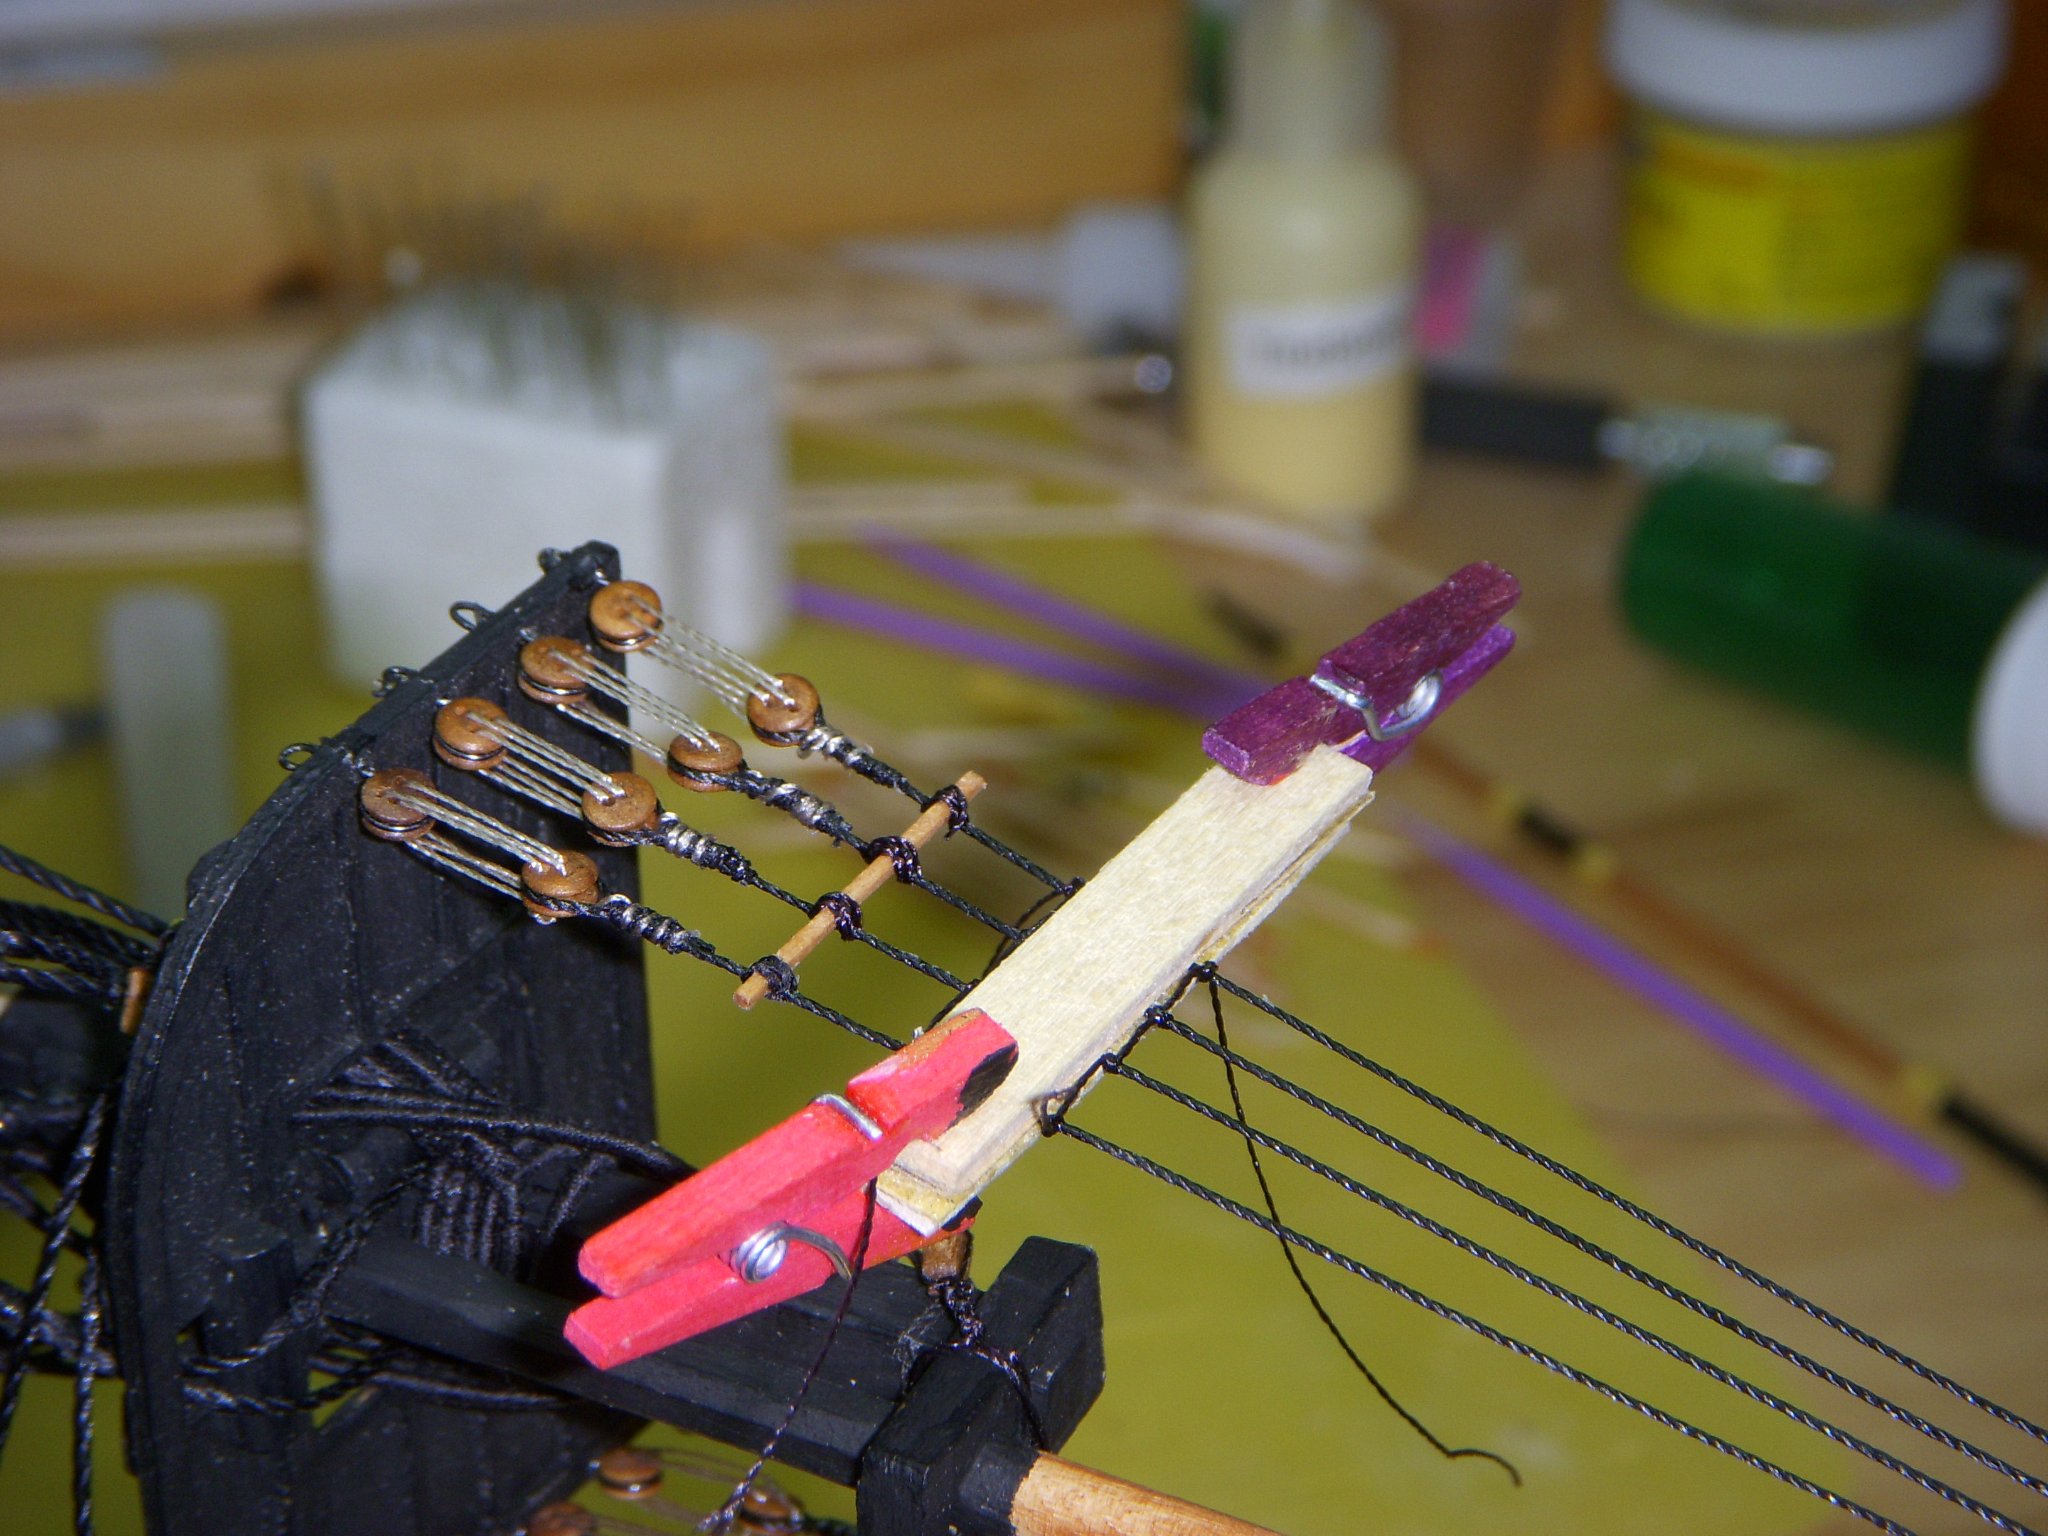
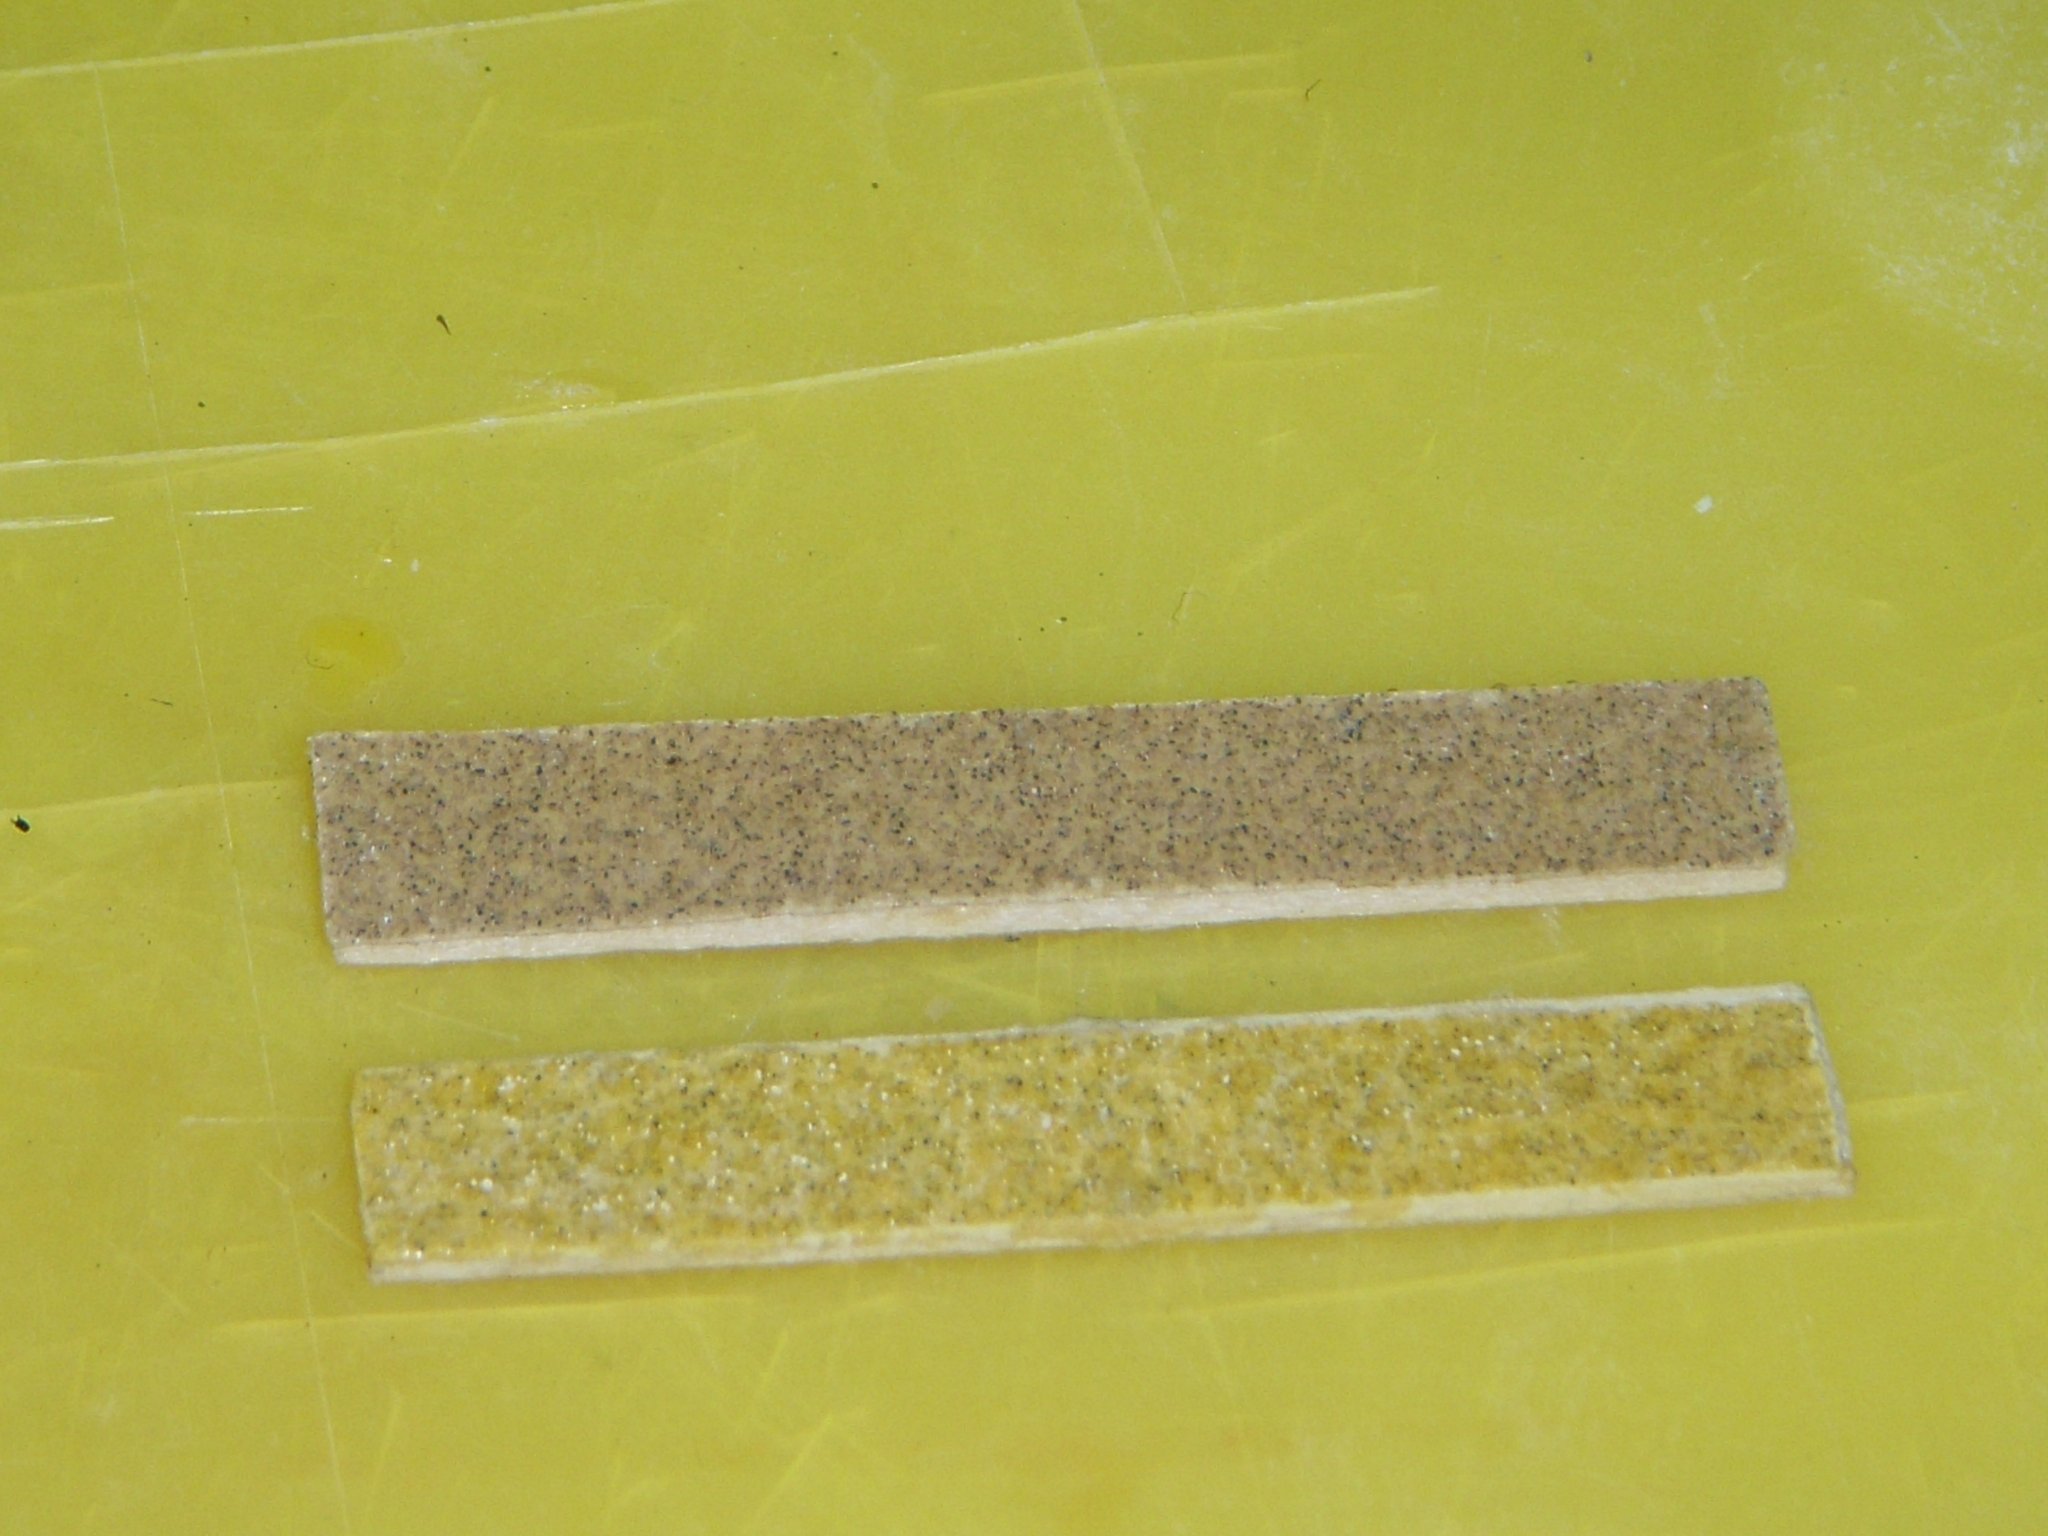
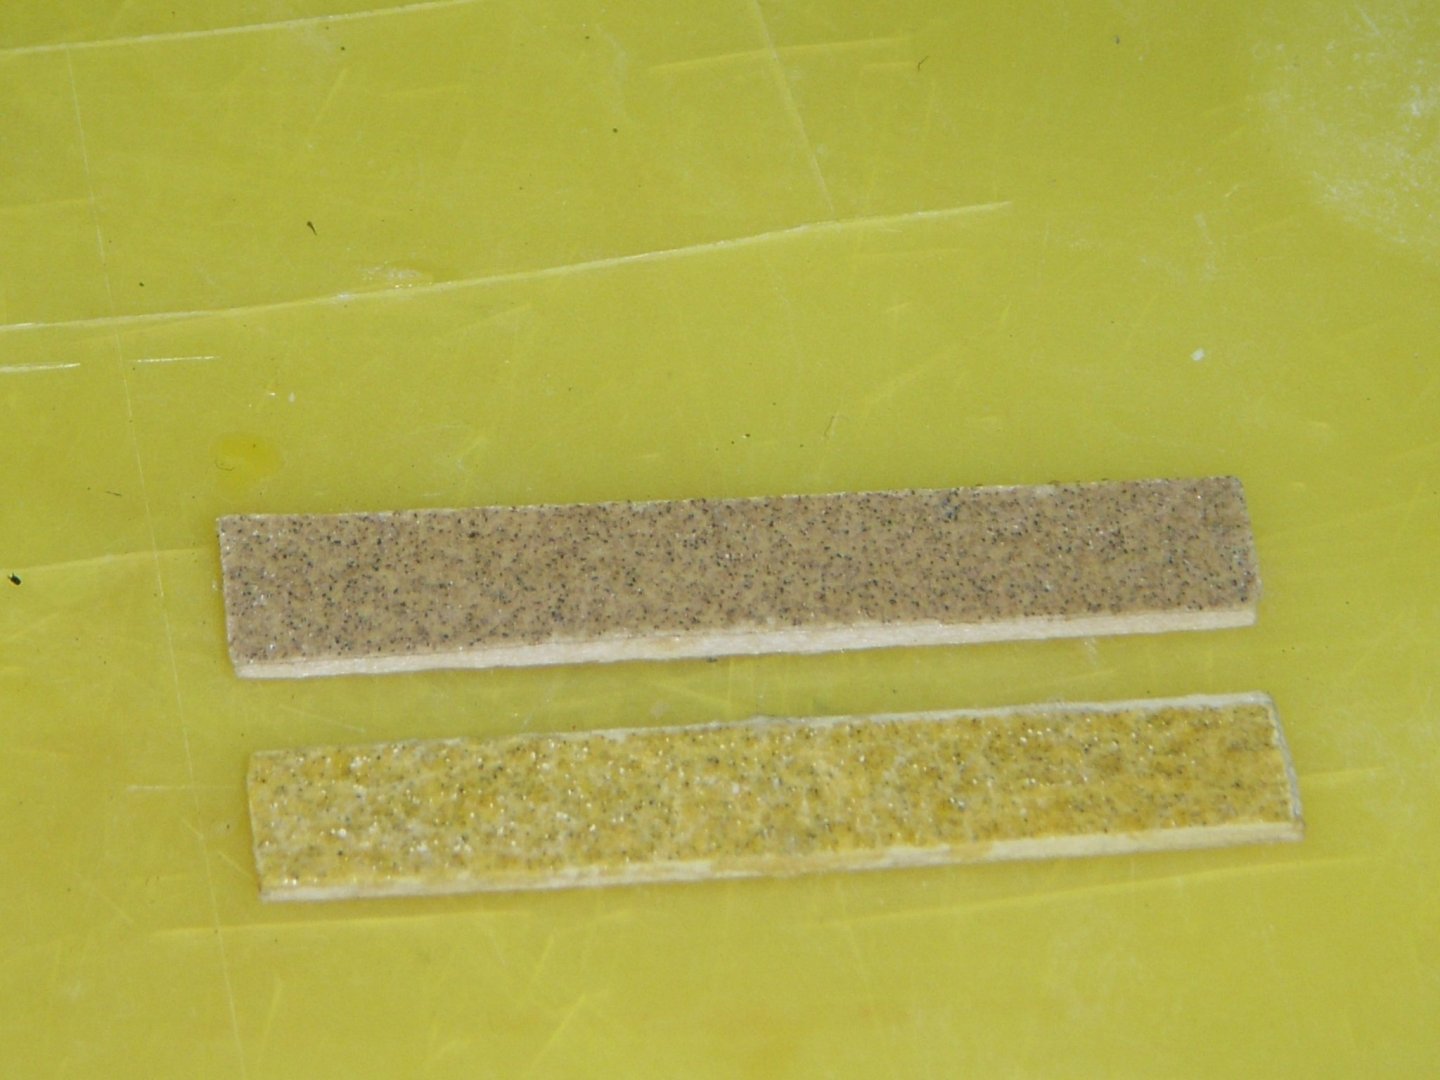
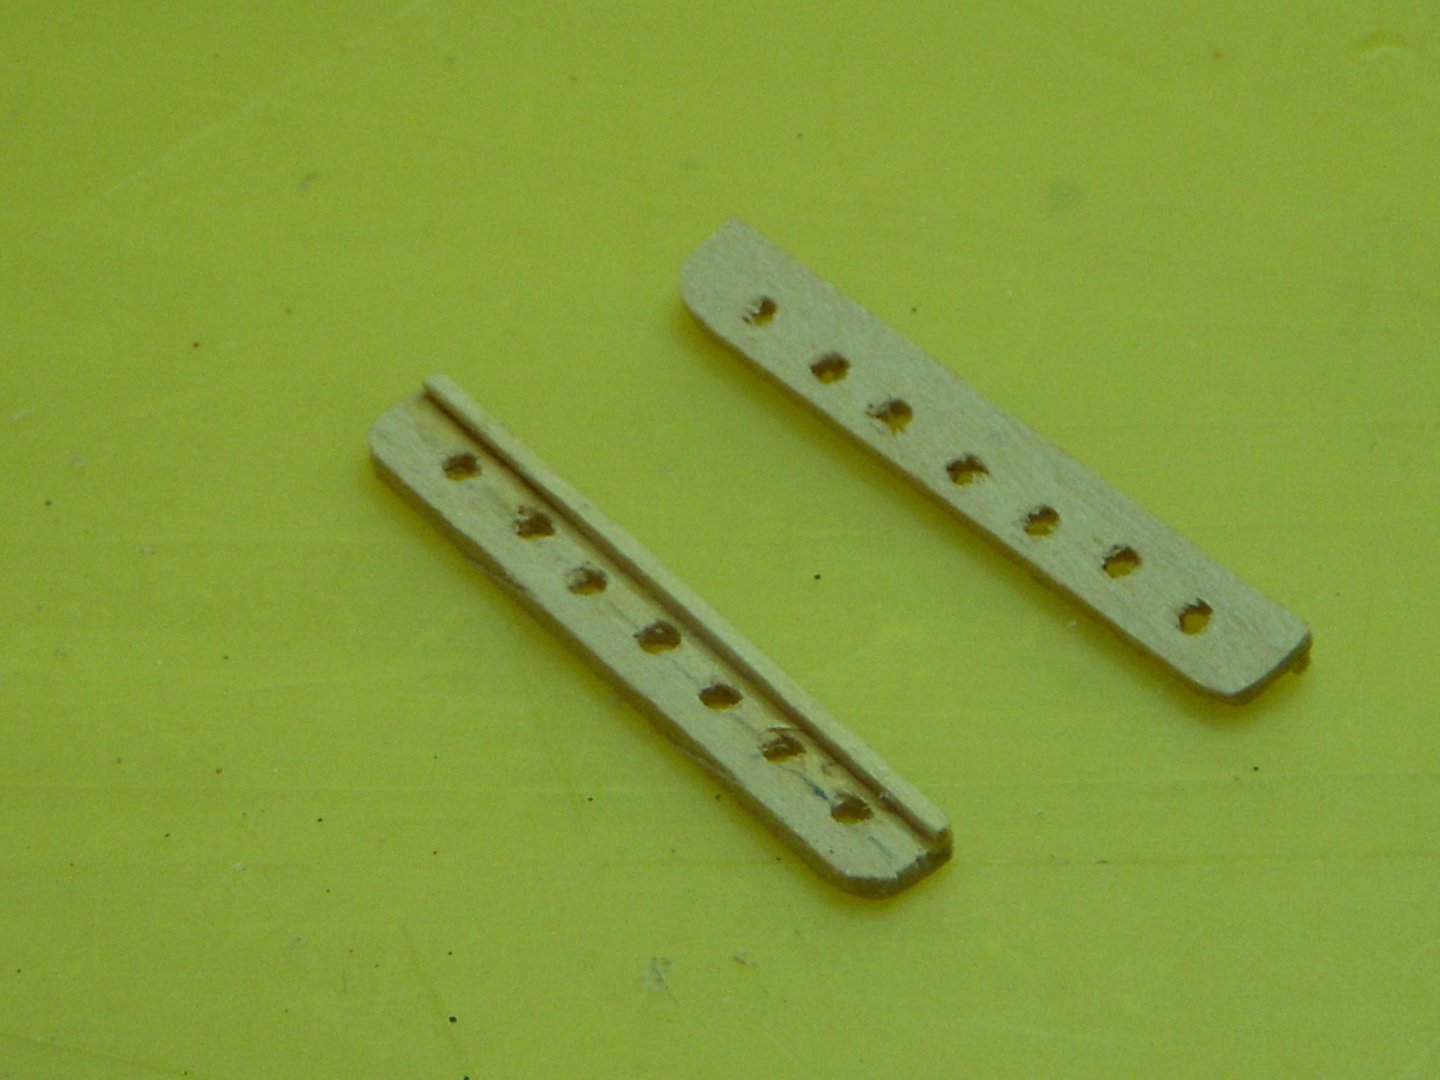
I know installed the shrouds to the deadeyes.. I used a bent piece of wire (as shown in the instructions) to keep the shrouds and deadeyes at a proper length. Once all the deadeyes were installed I began reeving the deadeyes trying to keep them all in line. I then installed the shear poles and began installing the rat lines. To ensure I kept the ratlines evenly spaced I clipped to pieces of scrap wood. These pieces of wood had some fine sandpaper glued to one side to keep them from sliding on the shrouds. Here is a better shot of the clamp. I used two pieces of 1/16 x ¼” of scrap wood and glued some 220 sandpaper to one side. The sand paper helps to keep it from sliding on the shrouds. I found this hint on the forum several years ago, I can’t remember who posted it. Here are a couple of shots of my progress installing the ratlines. Ron


-
Great thanks Ron
-
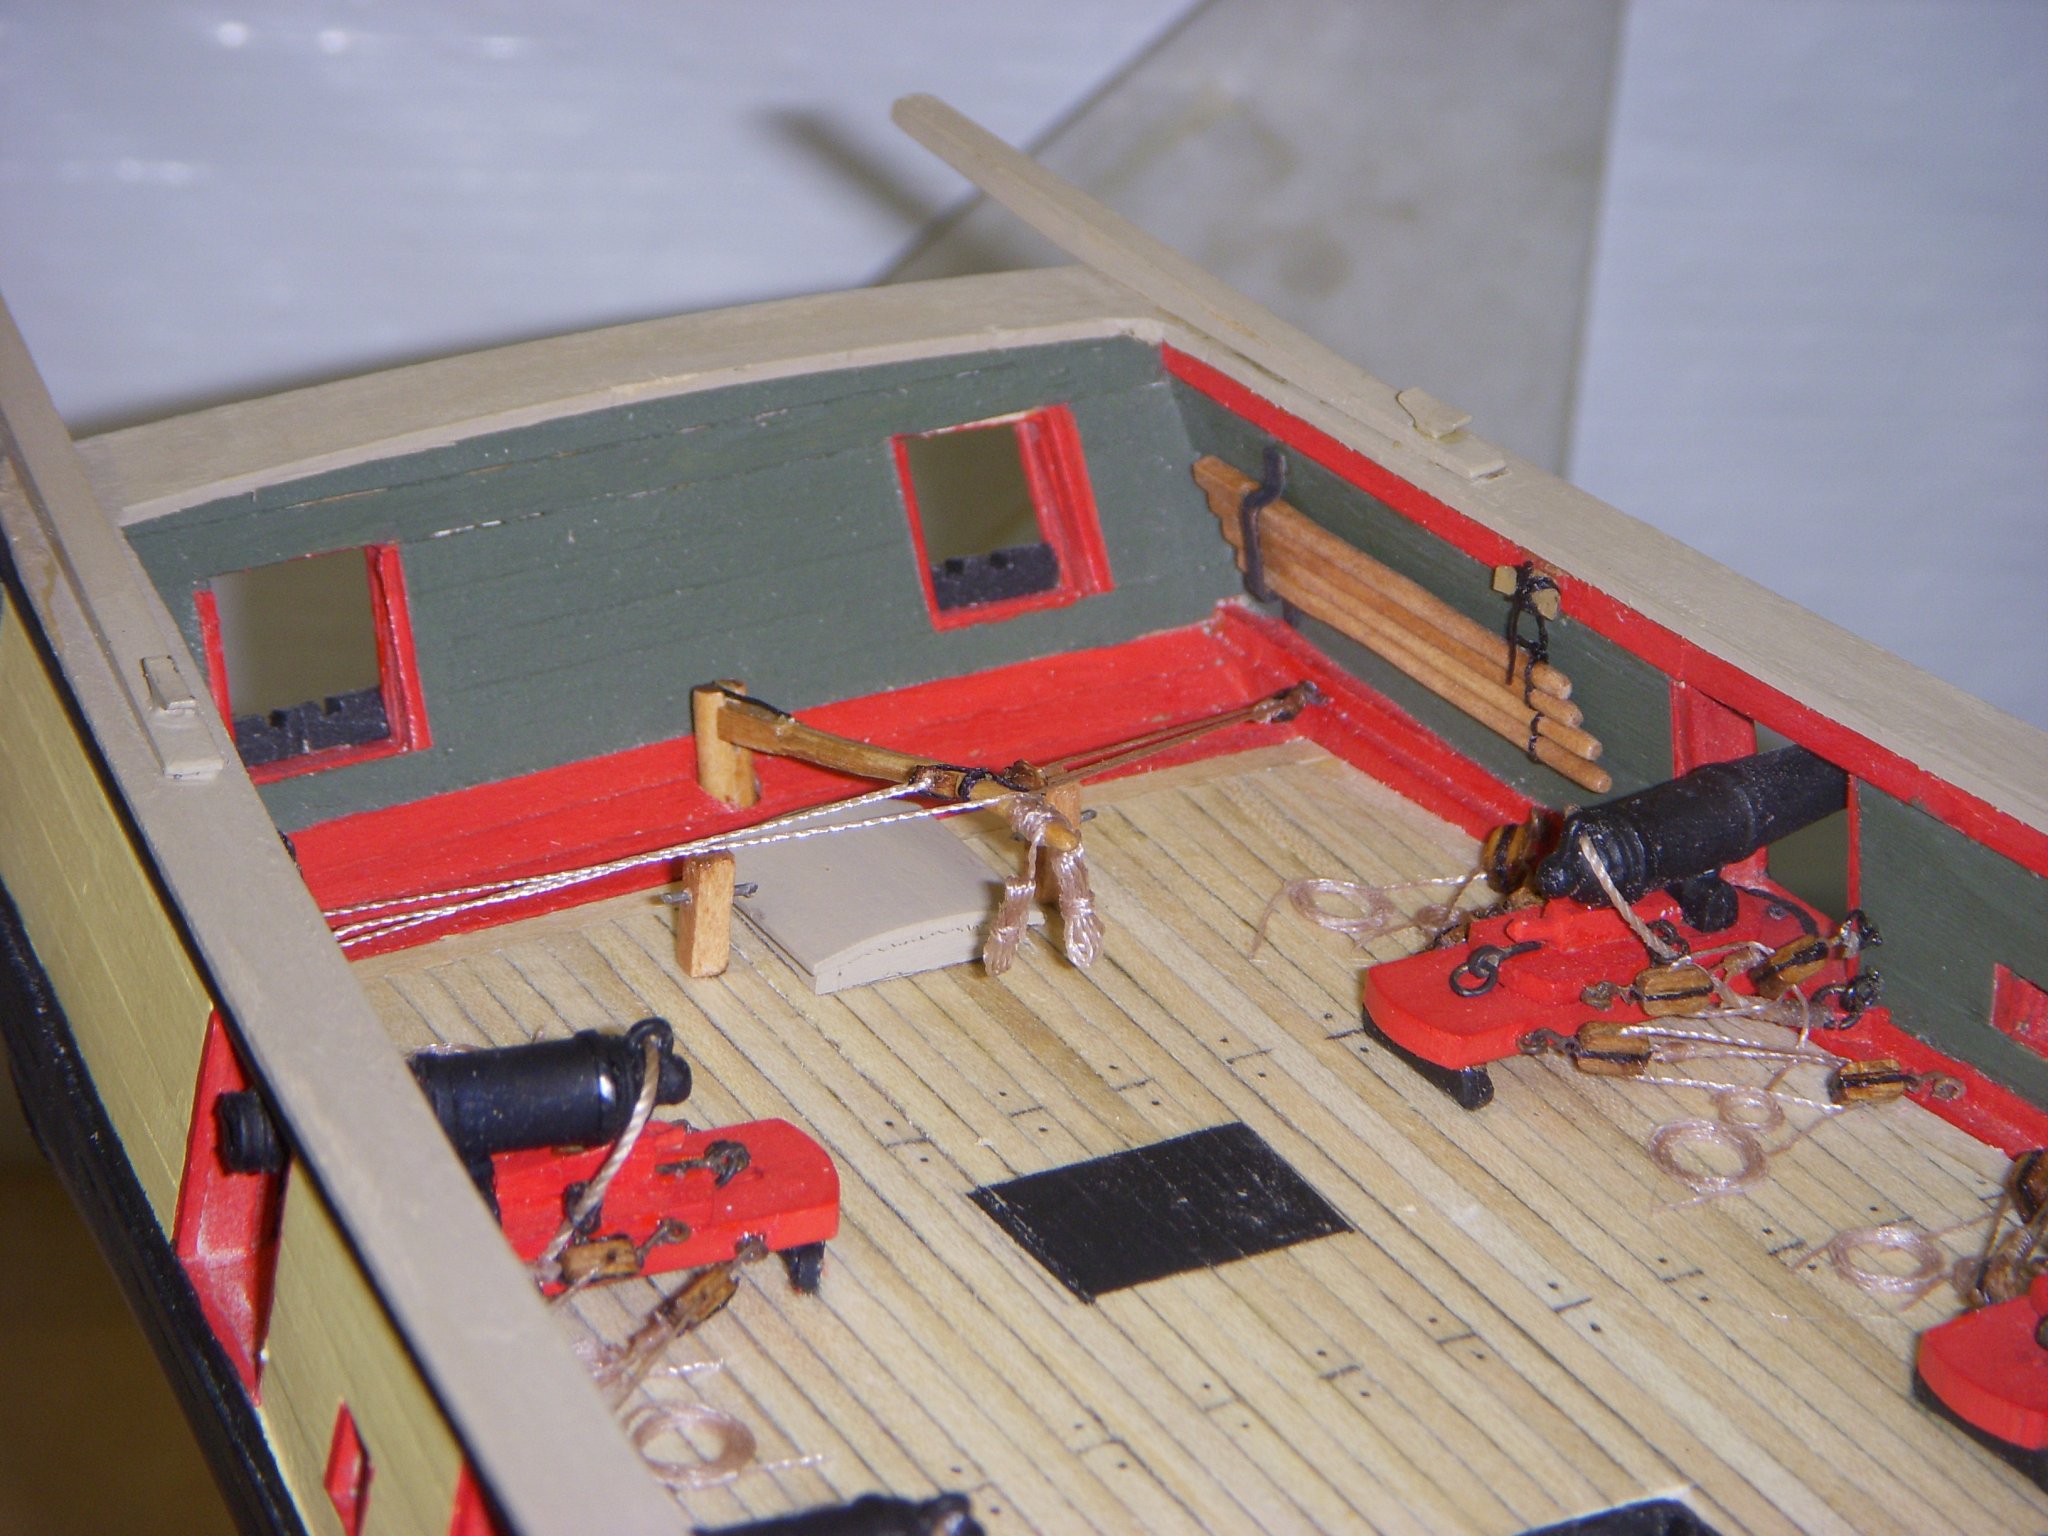
I am in the process of building the Bring Niagara from Model Shipways. I do not plan of installing sails. There are several buntlines shown on the plans that are connected to the sails. Since I will not be having sails how do you store the ends of these lines. The alternative is not to install the lines at all, which means there will be several blocks left empty. I am just wondering how everyone else deals with this problem. Ron
-
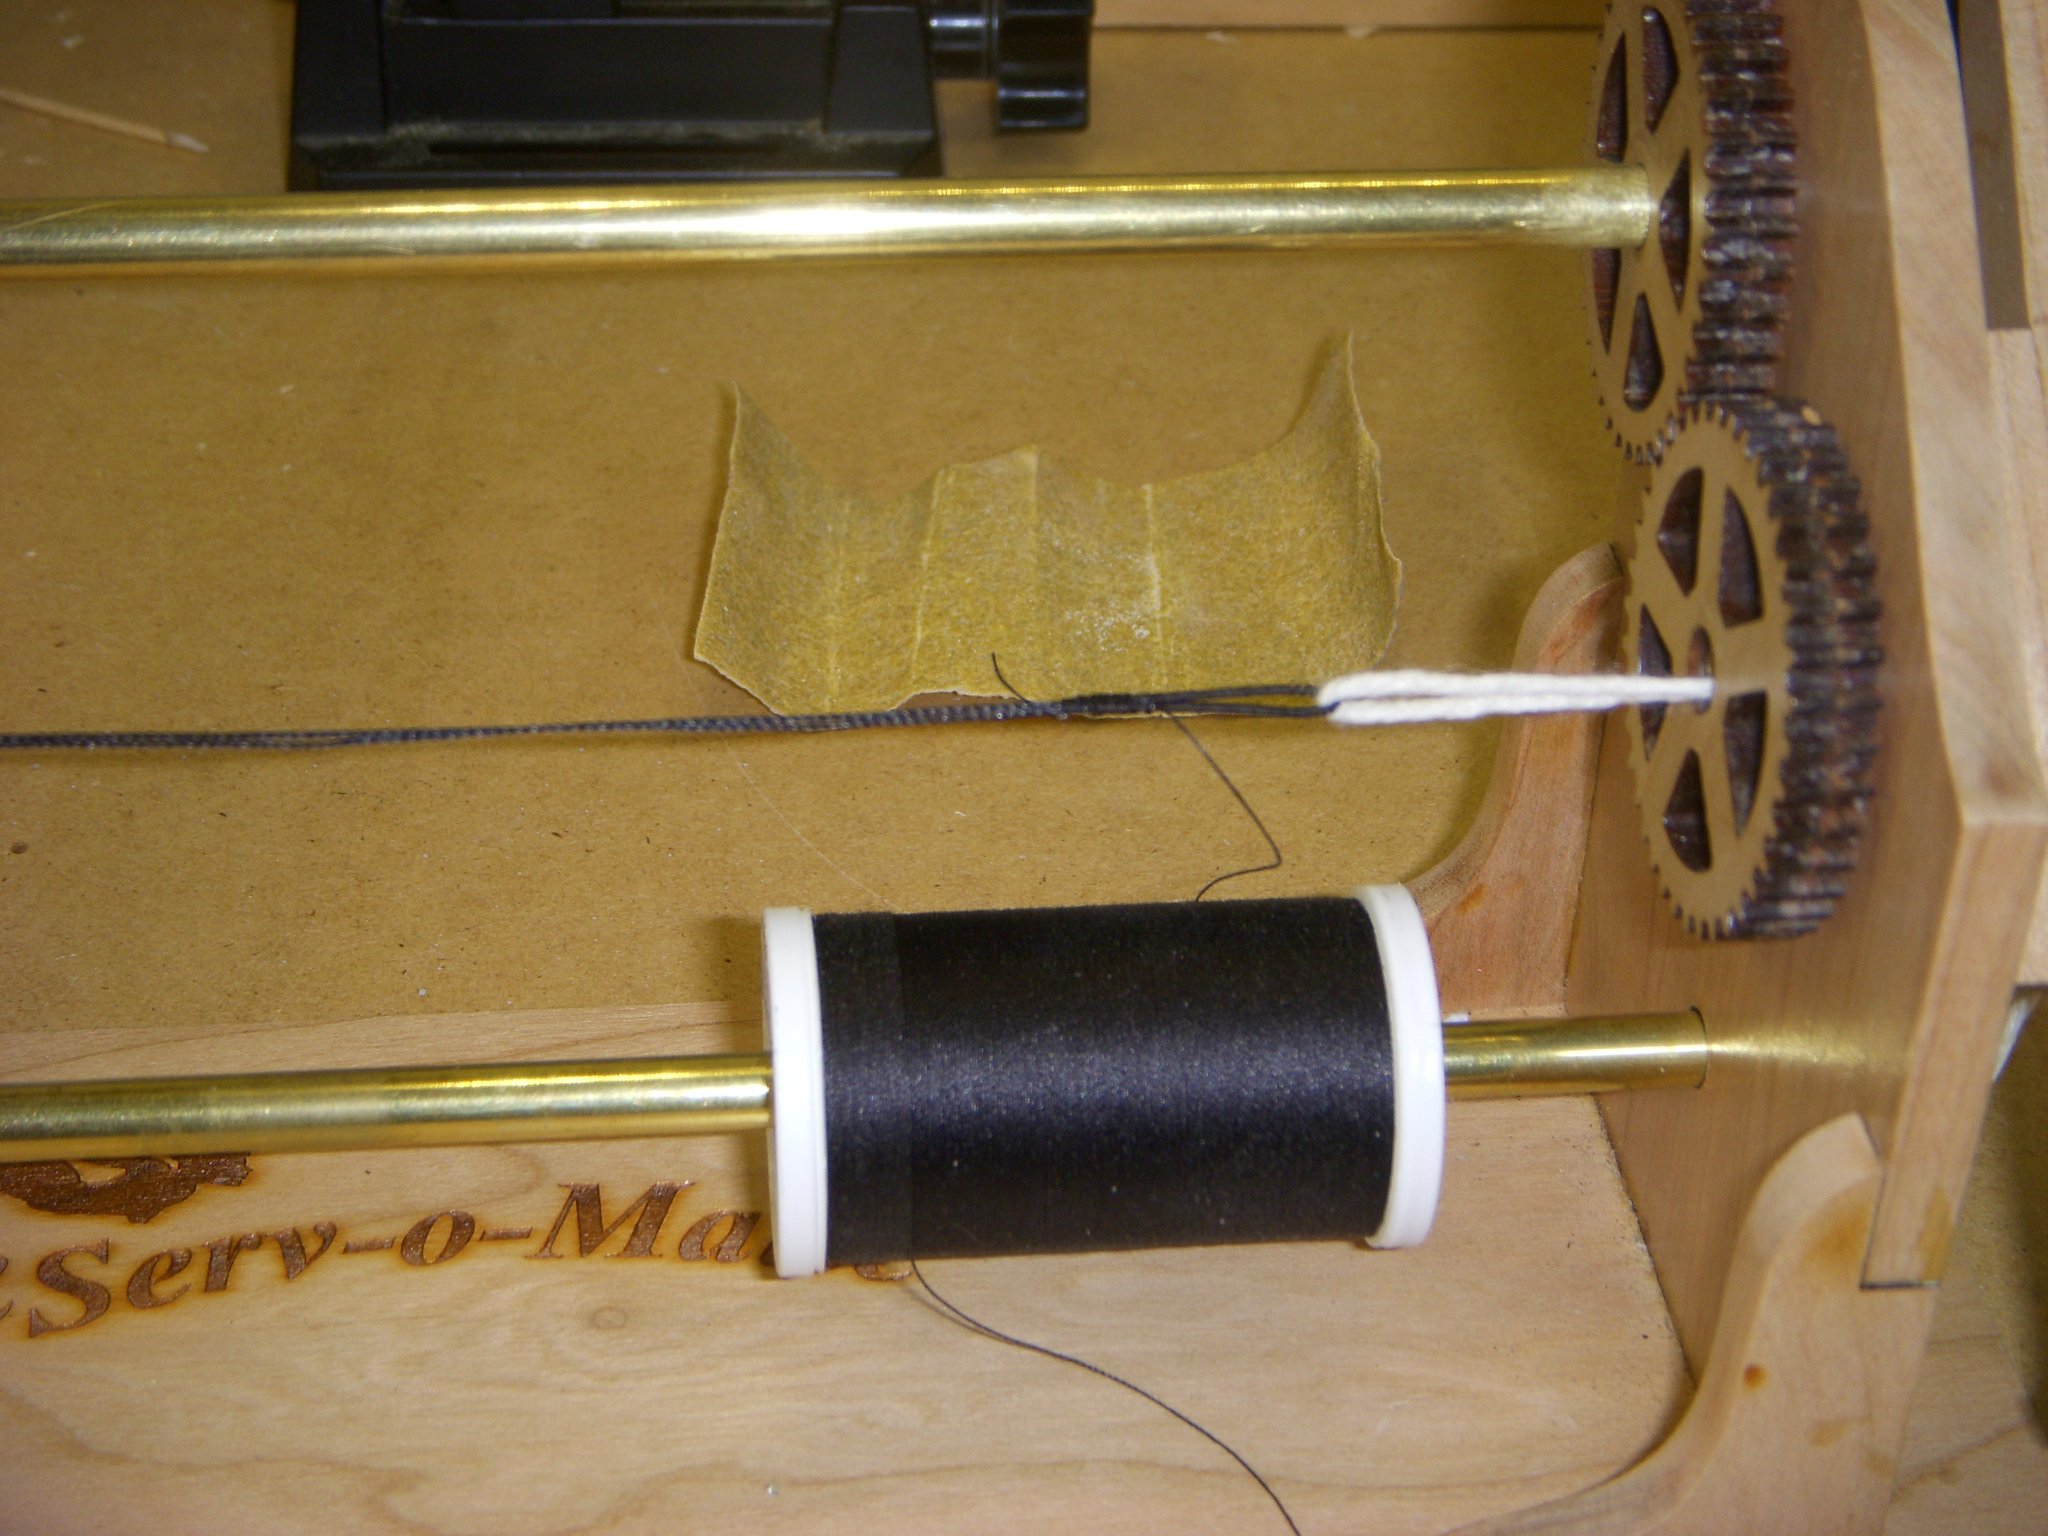
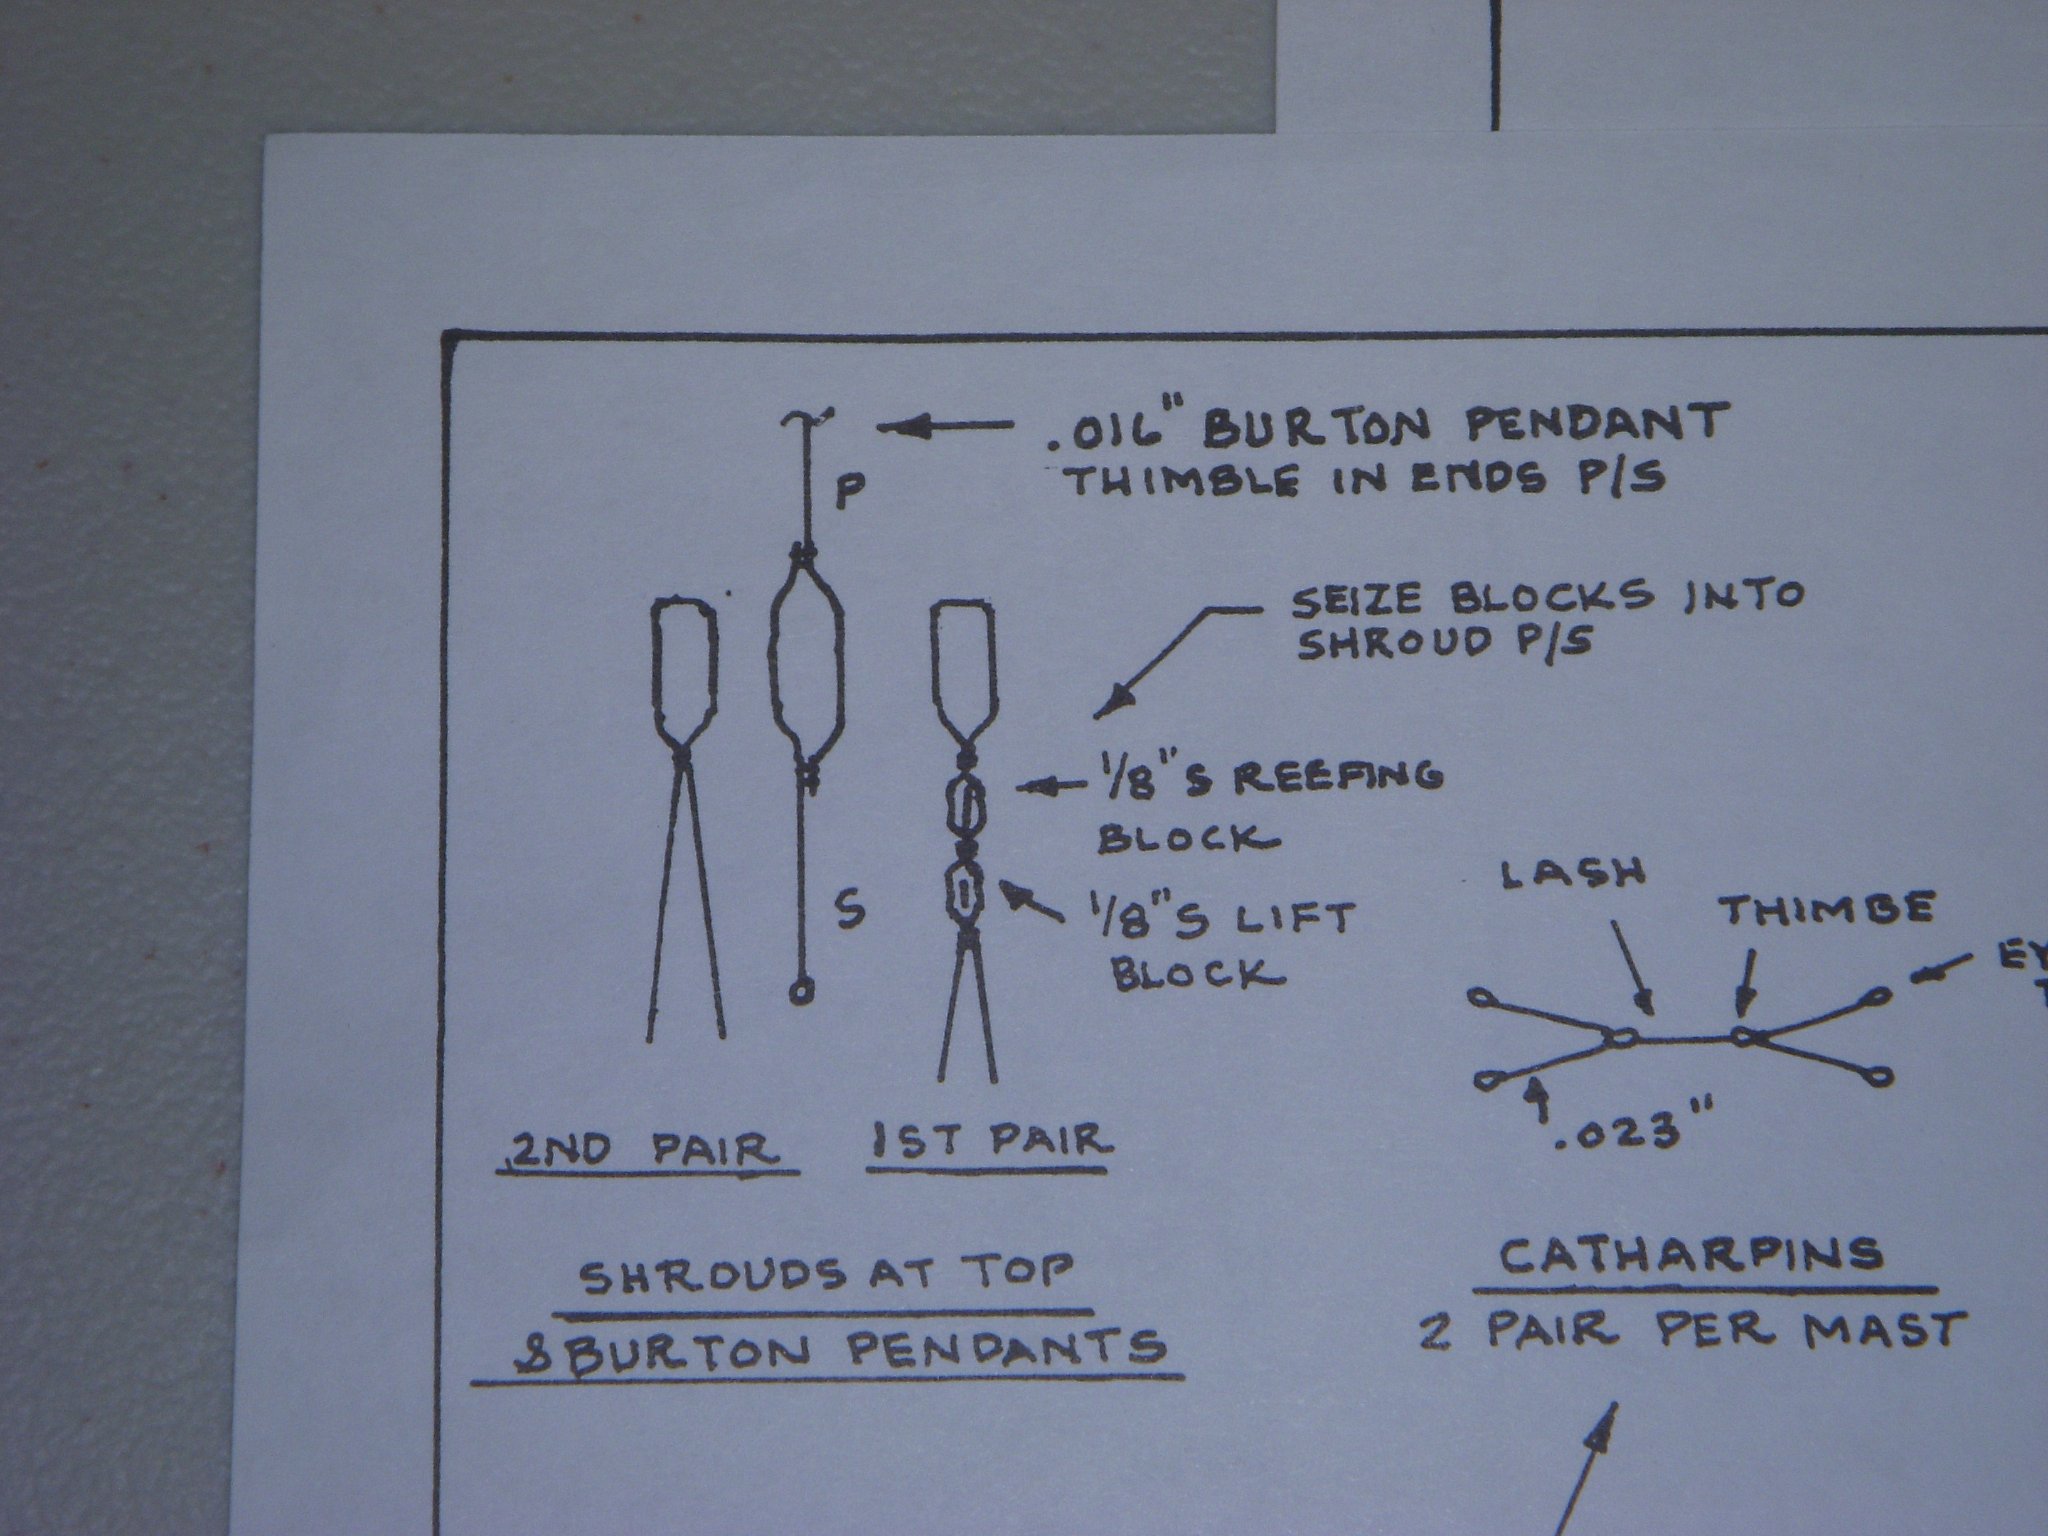
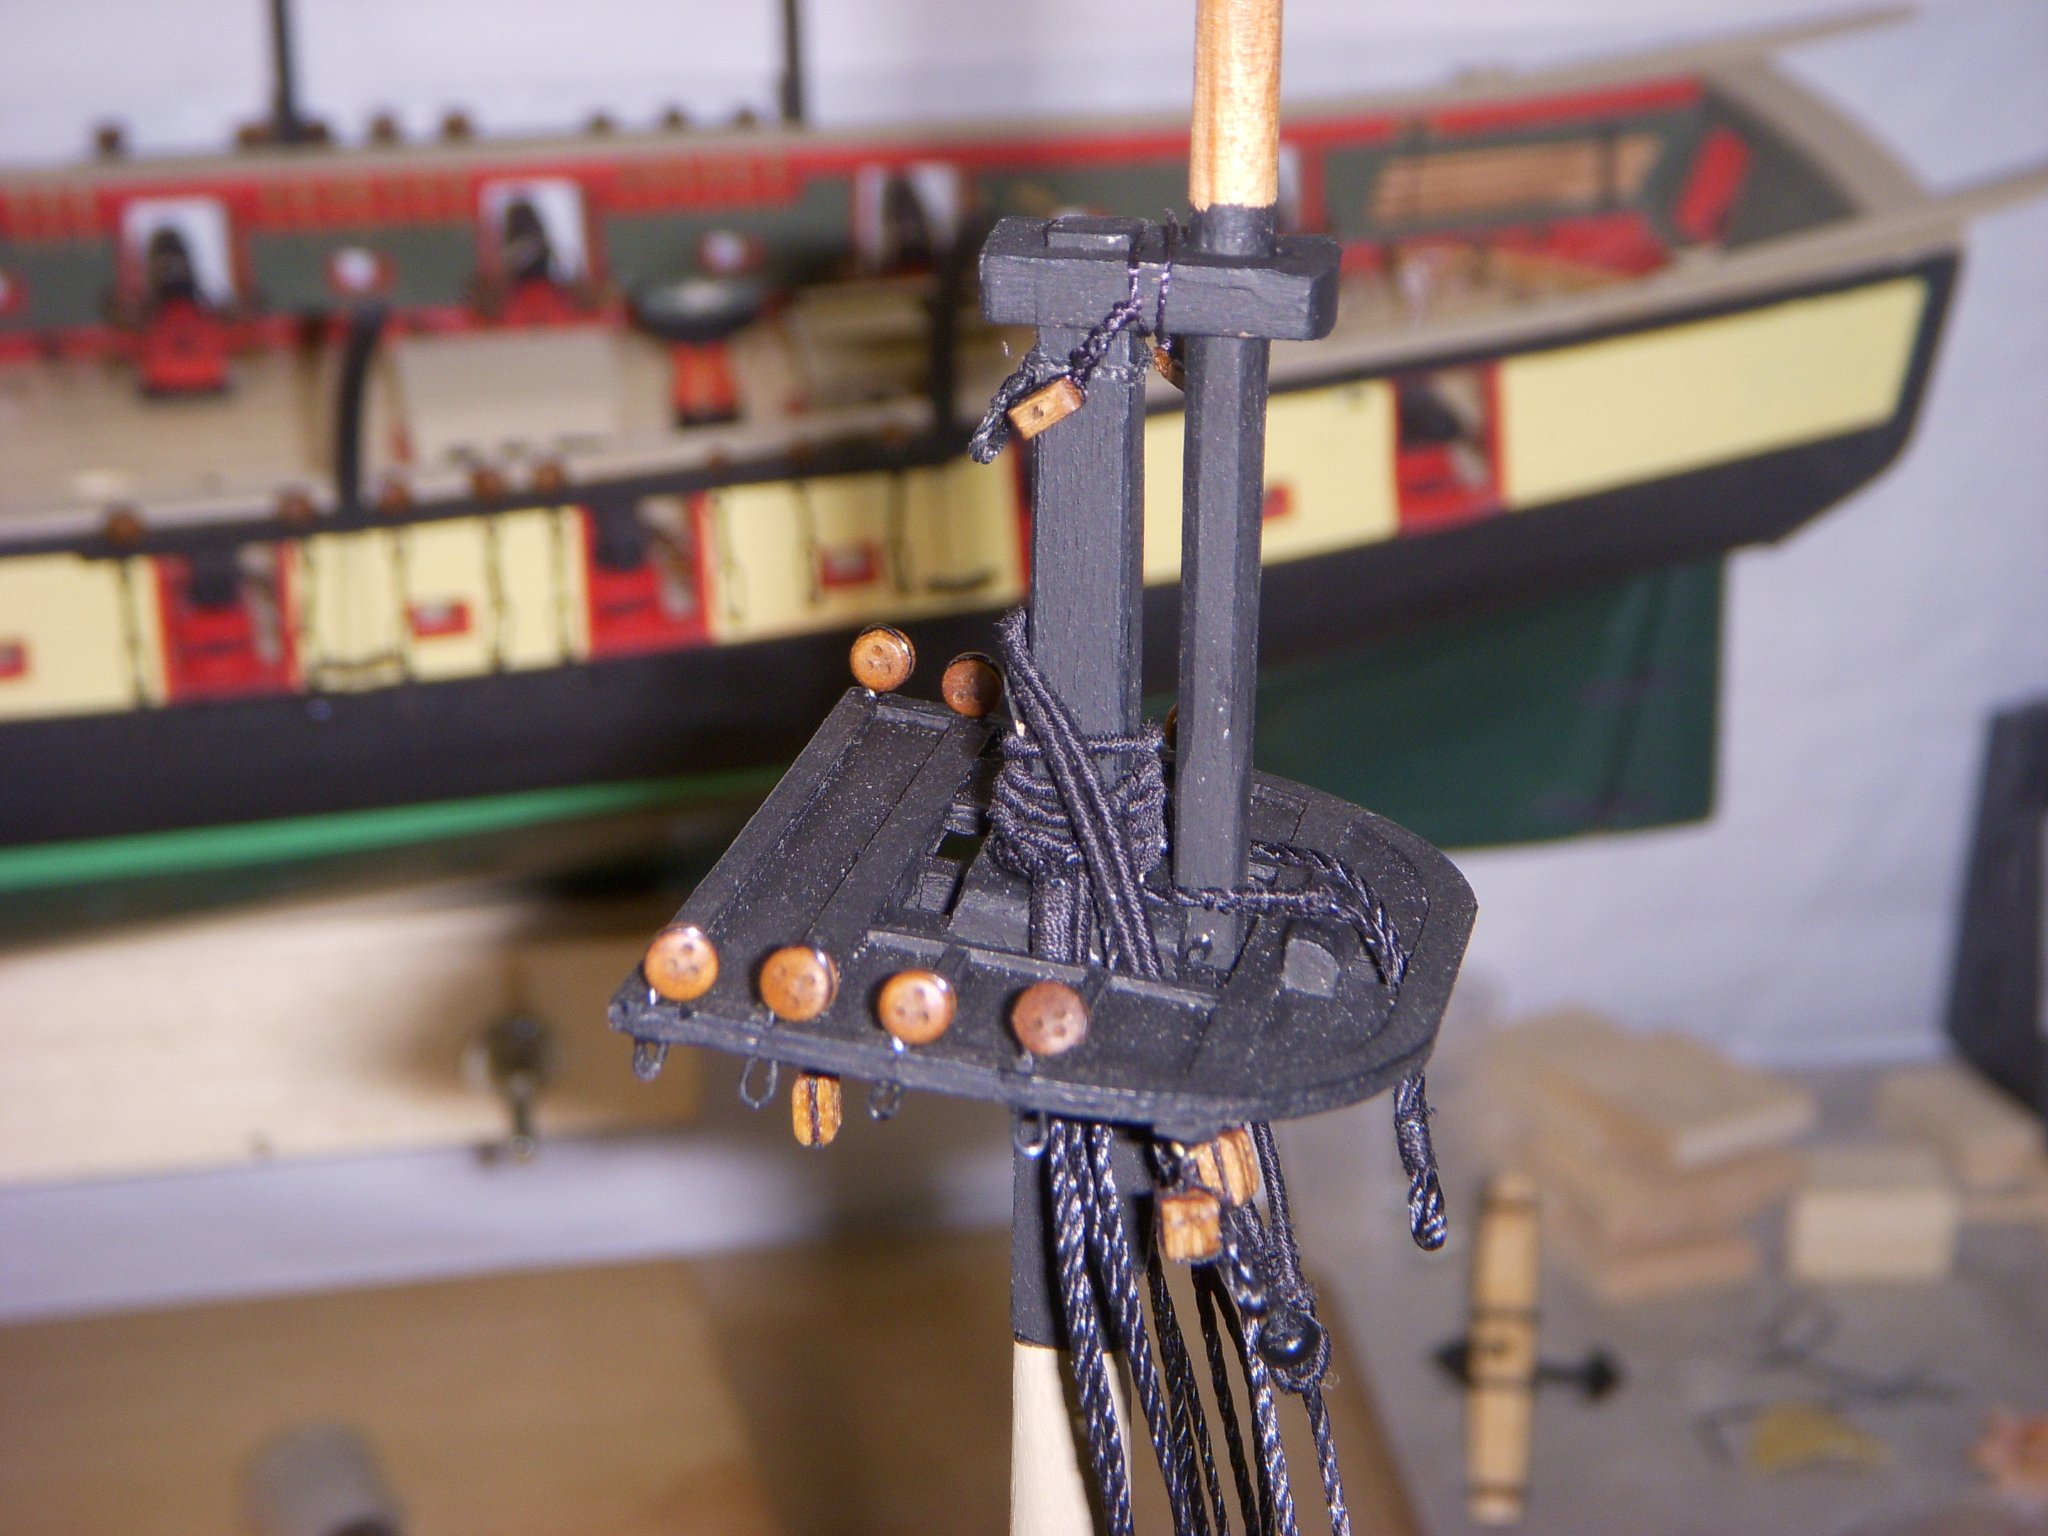
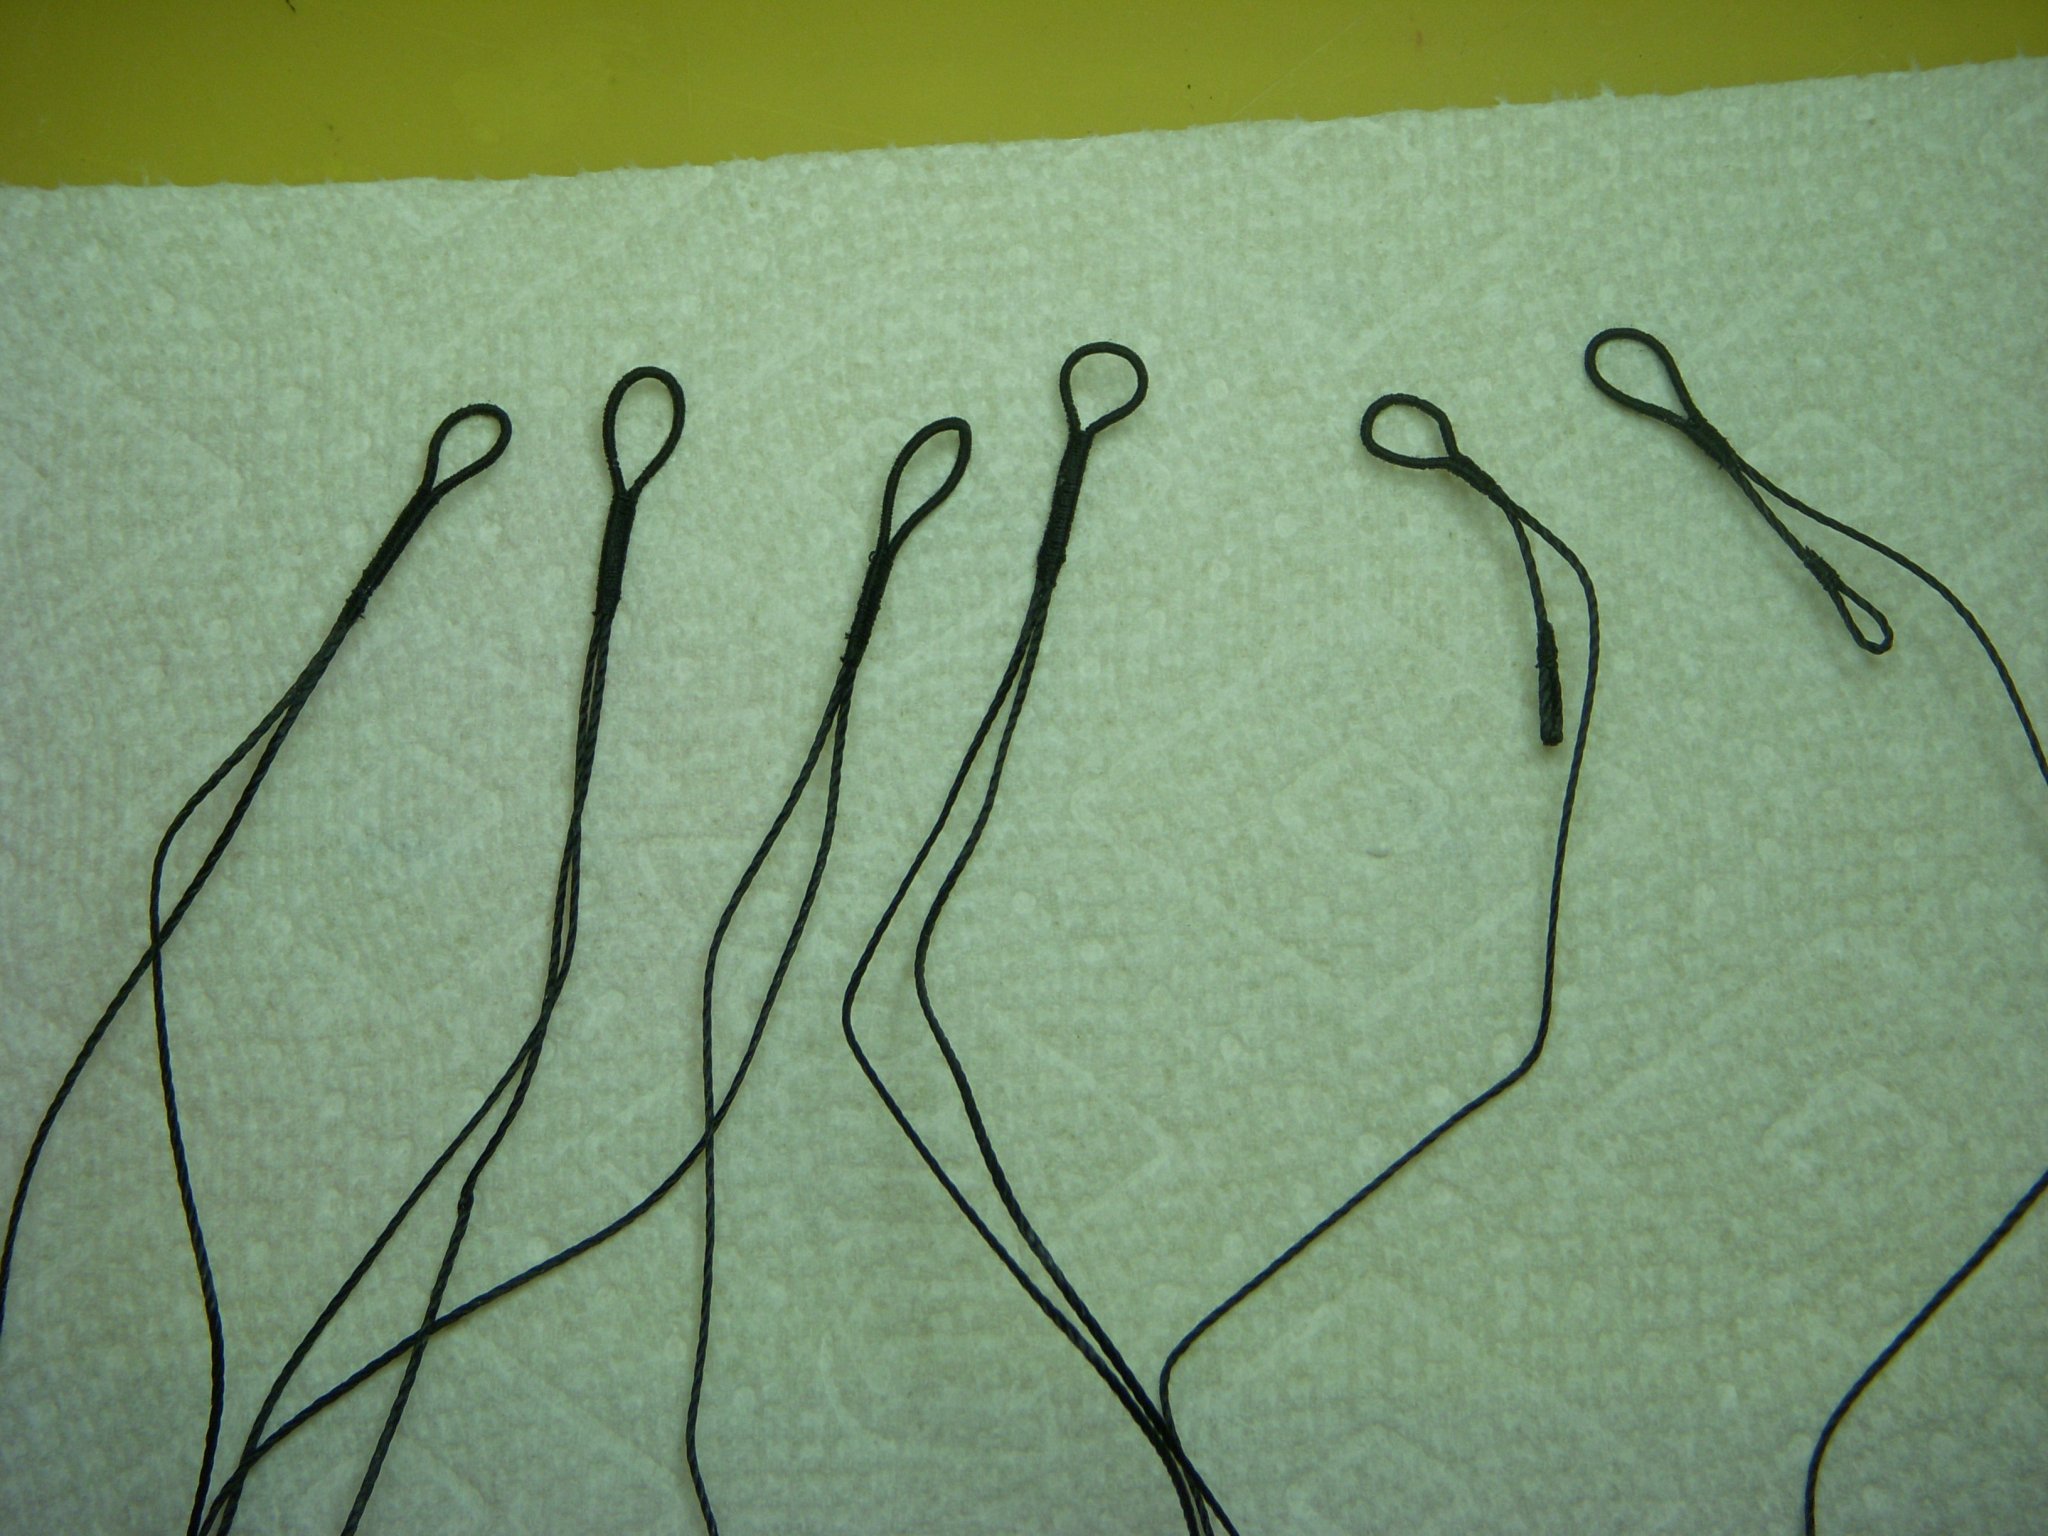
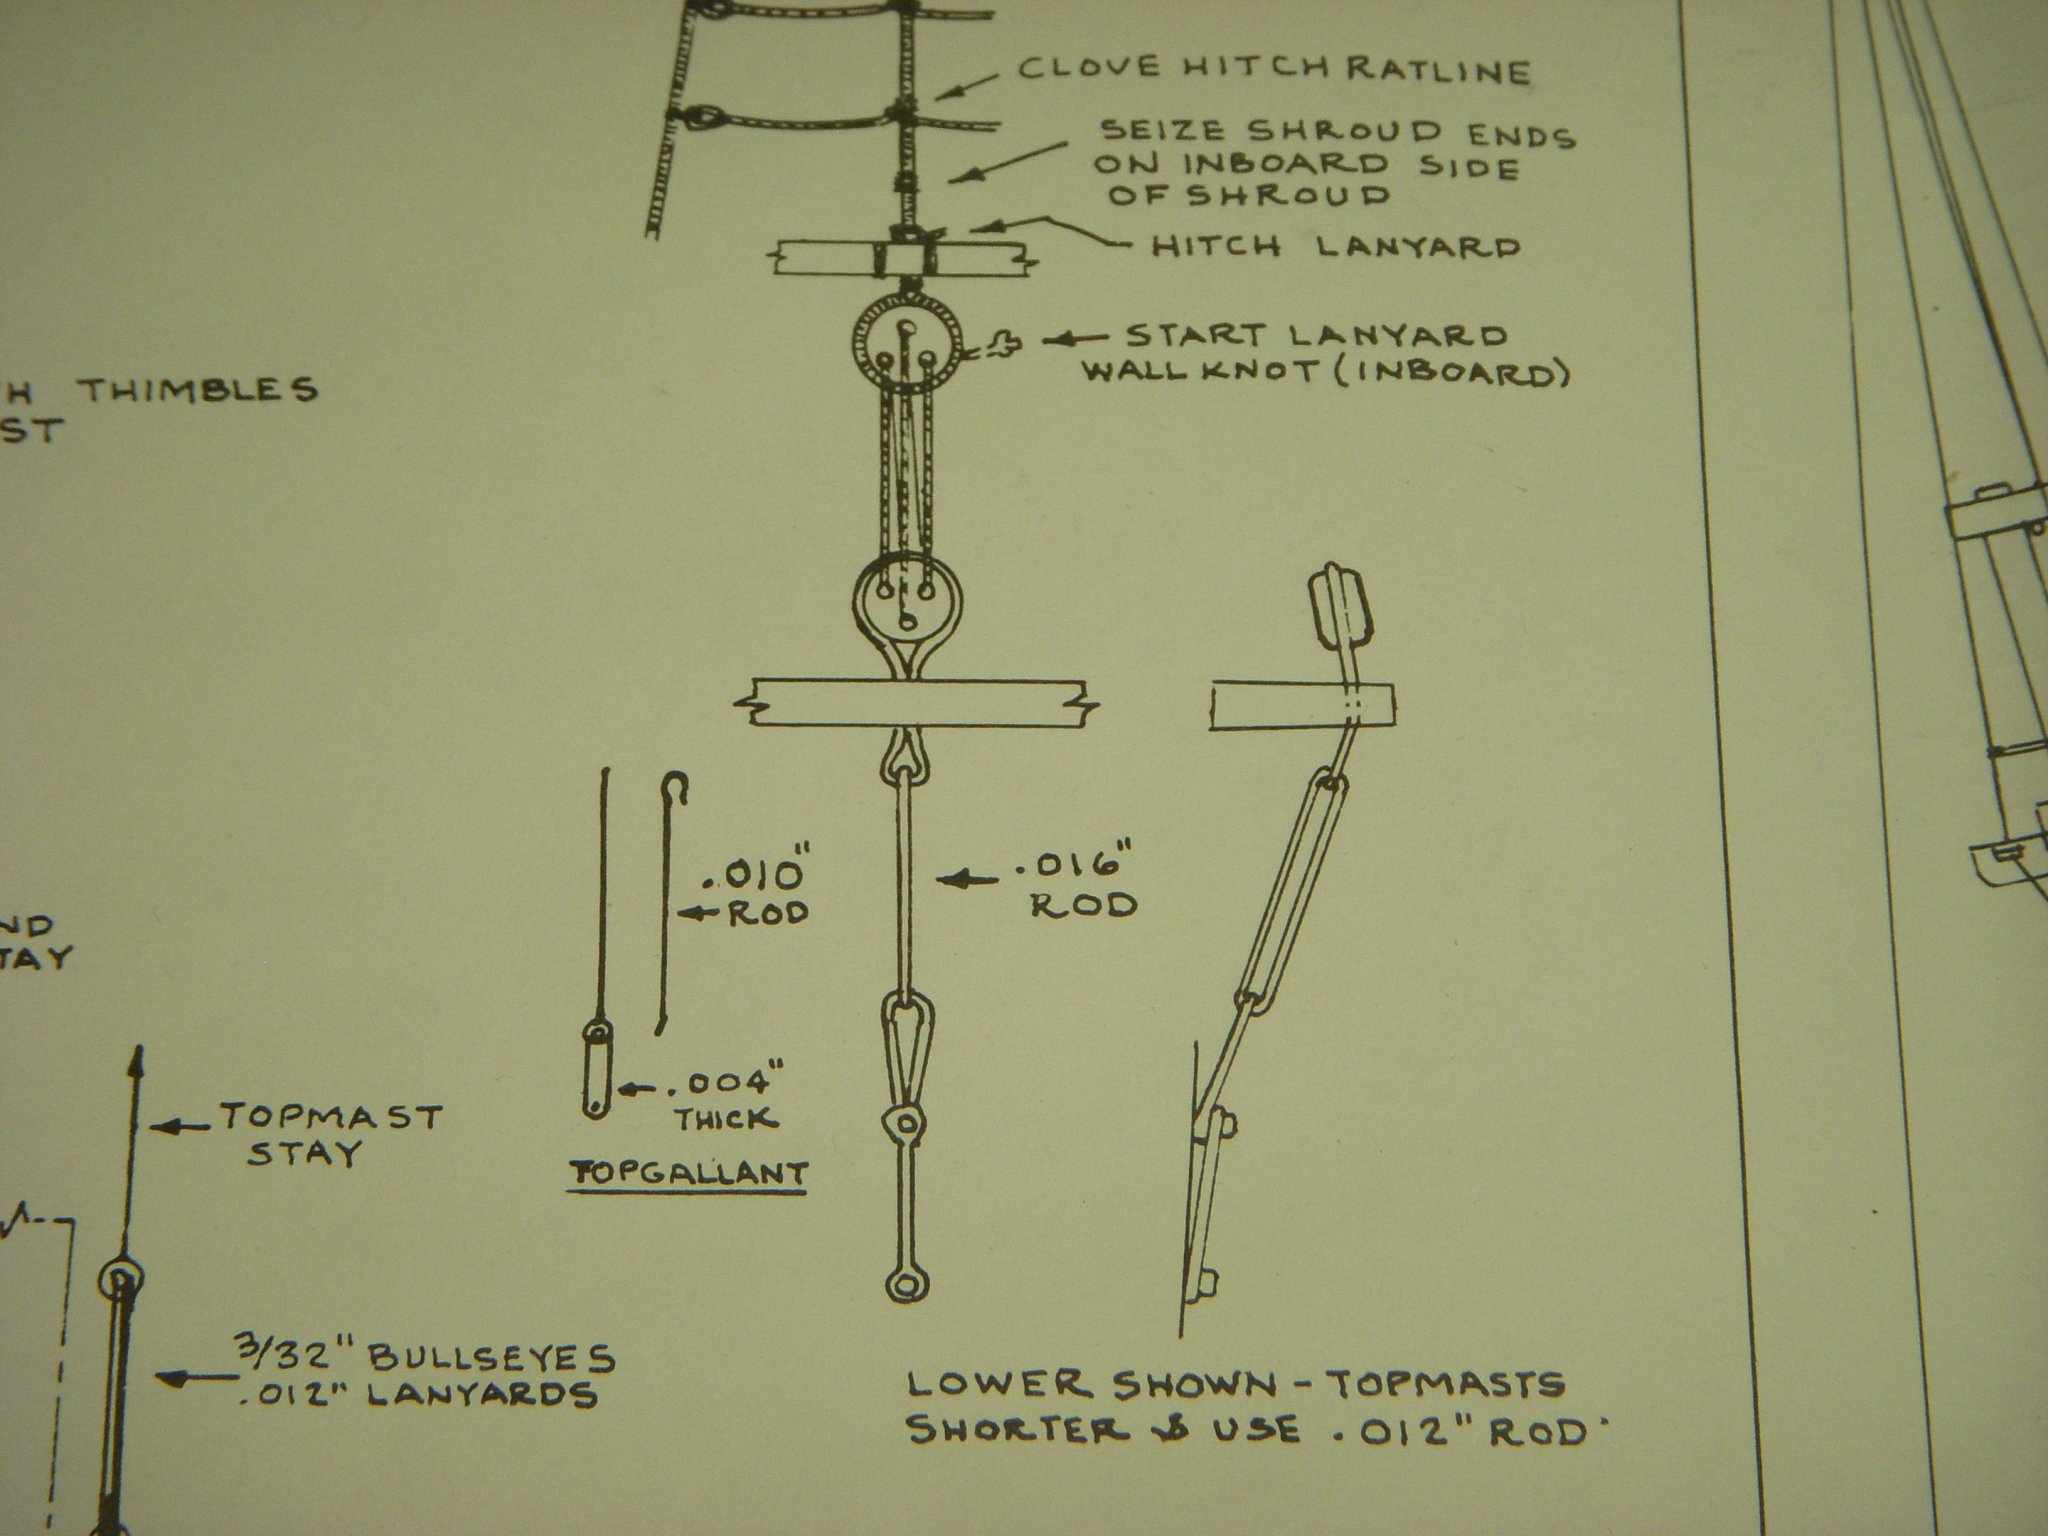
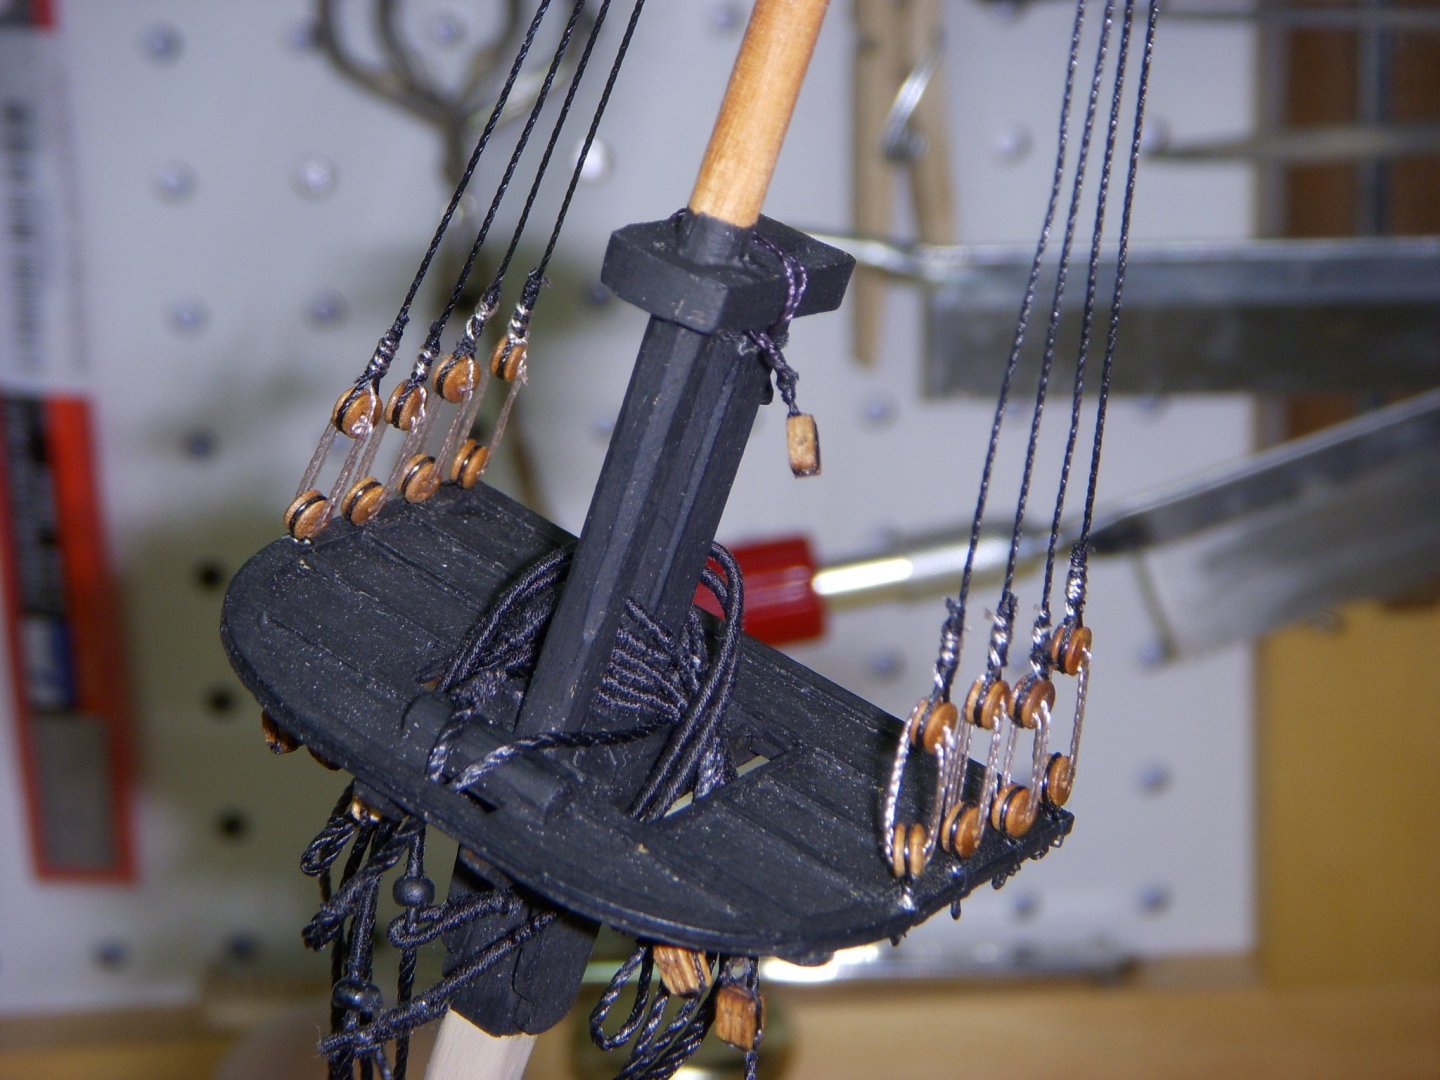
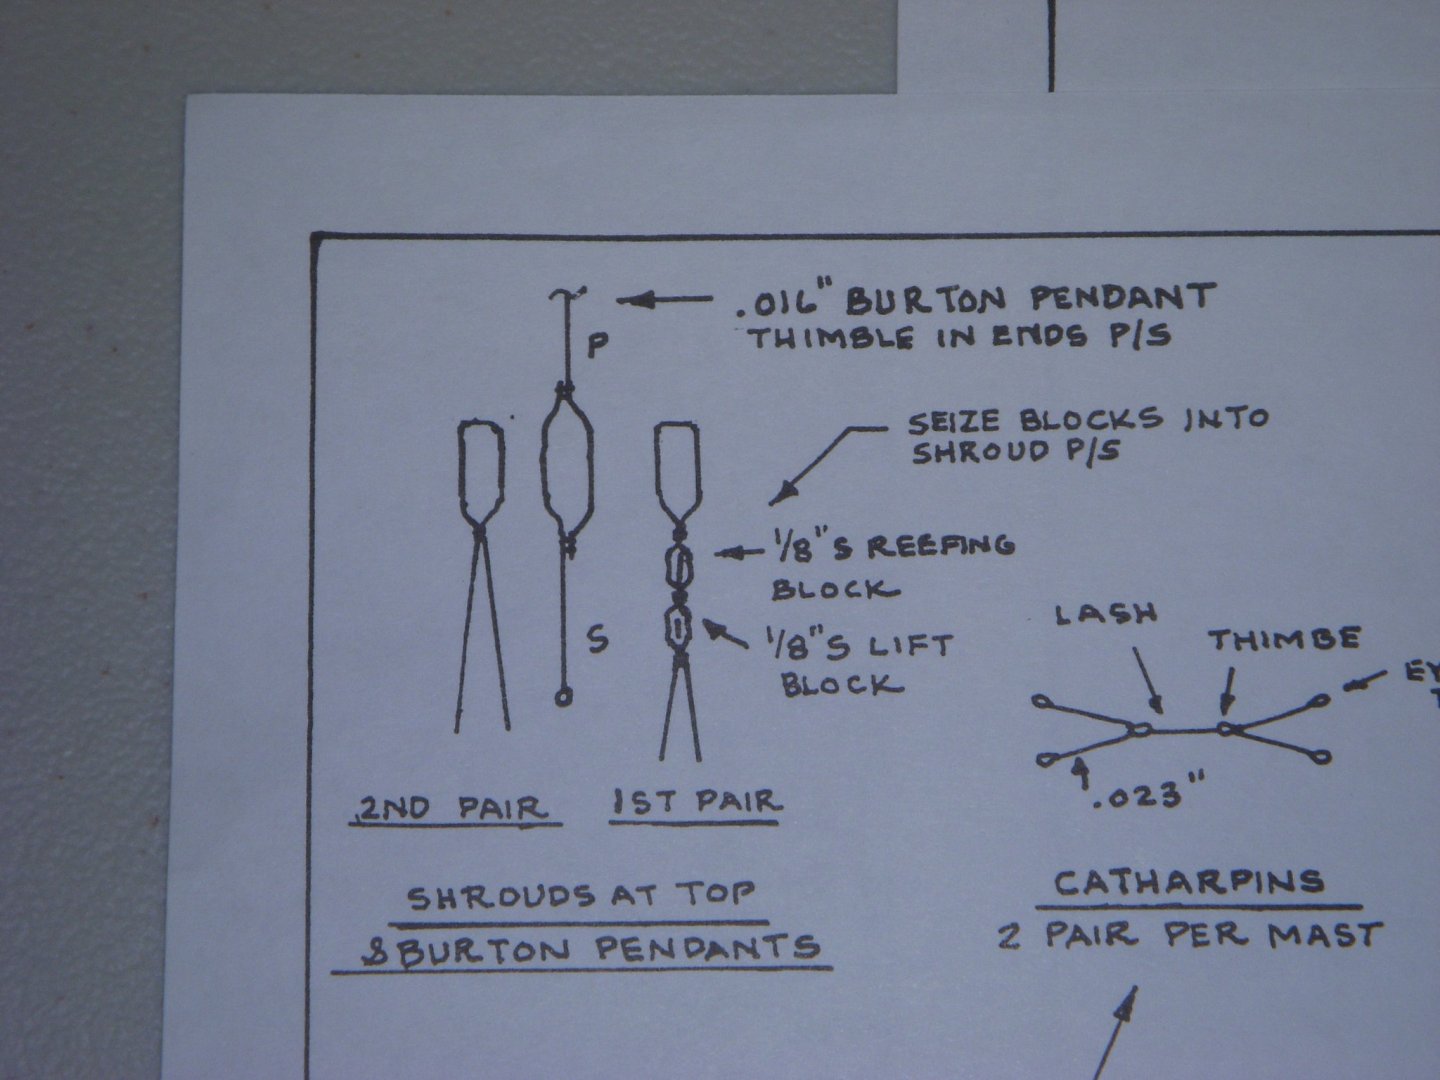
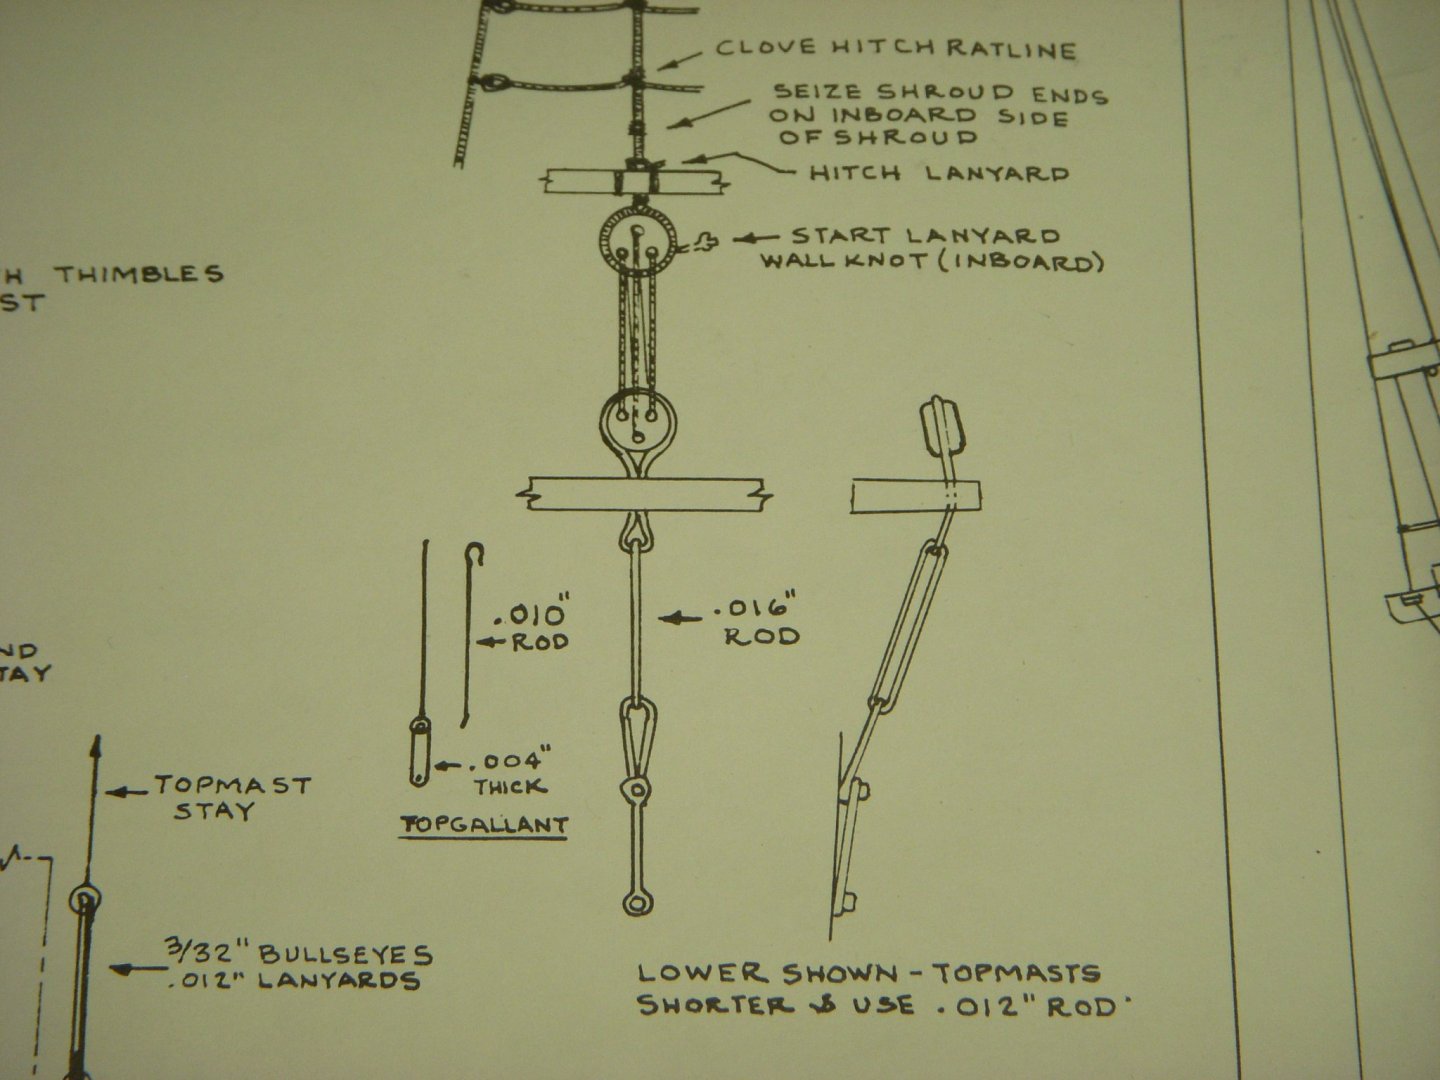
I next installed the shrouds, fore and preventer stay and yard sling. I also installed the yard lift blocks before I installed the mast cap. This was a lot easier serving and seizing on the bench than trying to this on the mast. I found seizing the shrouds on the serv-o-matic was easier than trying to it on a bench vise. I used a piece of string to hook the shroud to one end of the jig, see pic. I plan on make a small hook that would fit into the brass tube of the serv-o-matic. I then installed the fore topmast. The next project was making up the topmast shrouds. Used the same procedure as the lower shrouds. I did come up with one question. I spent two days trying figure out what the Burton pendant thimble is connected to the middle drawing. I went over the plan several times and could not find the answer. I even went through several books I have and none of them refer to Burton pendants. I plan on making the pendent and installing it and hopefully find its use as I continue the build. Ron


-
Thanks for the tip. I found that I need a lot of time checking and double checking that I have installed all the parts while I have the parts on the bench. Drawings are on several sheets, requiring double checking. Thanks for the heads up. Ron
-
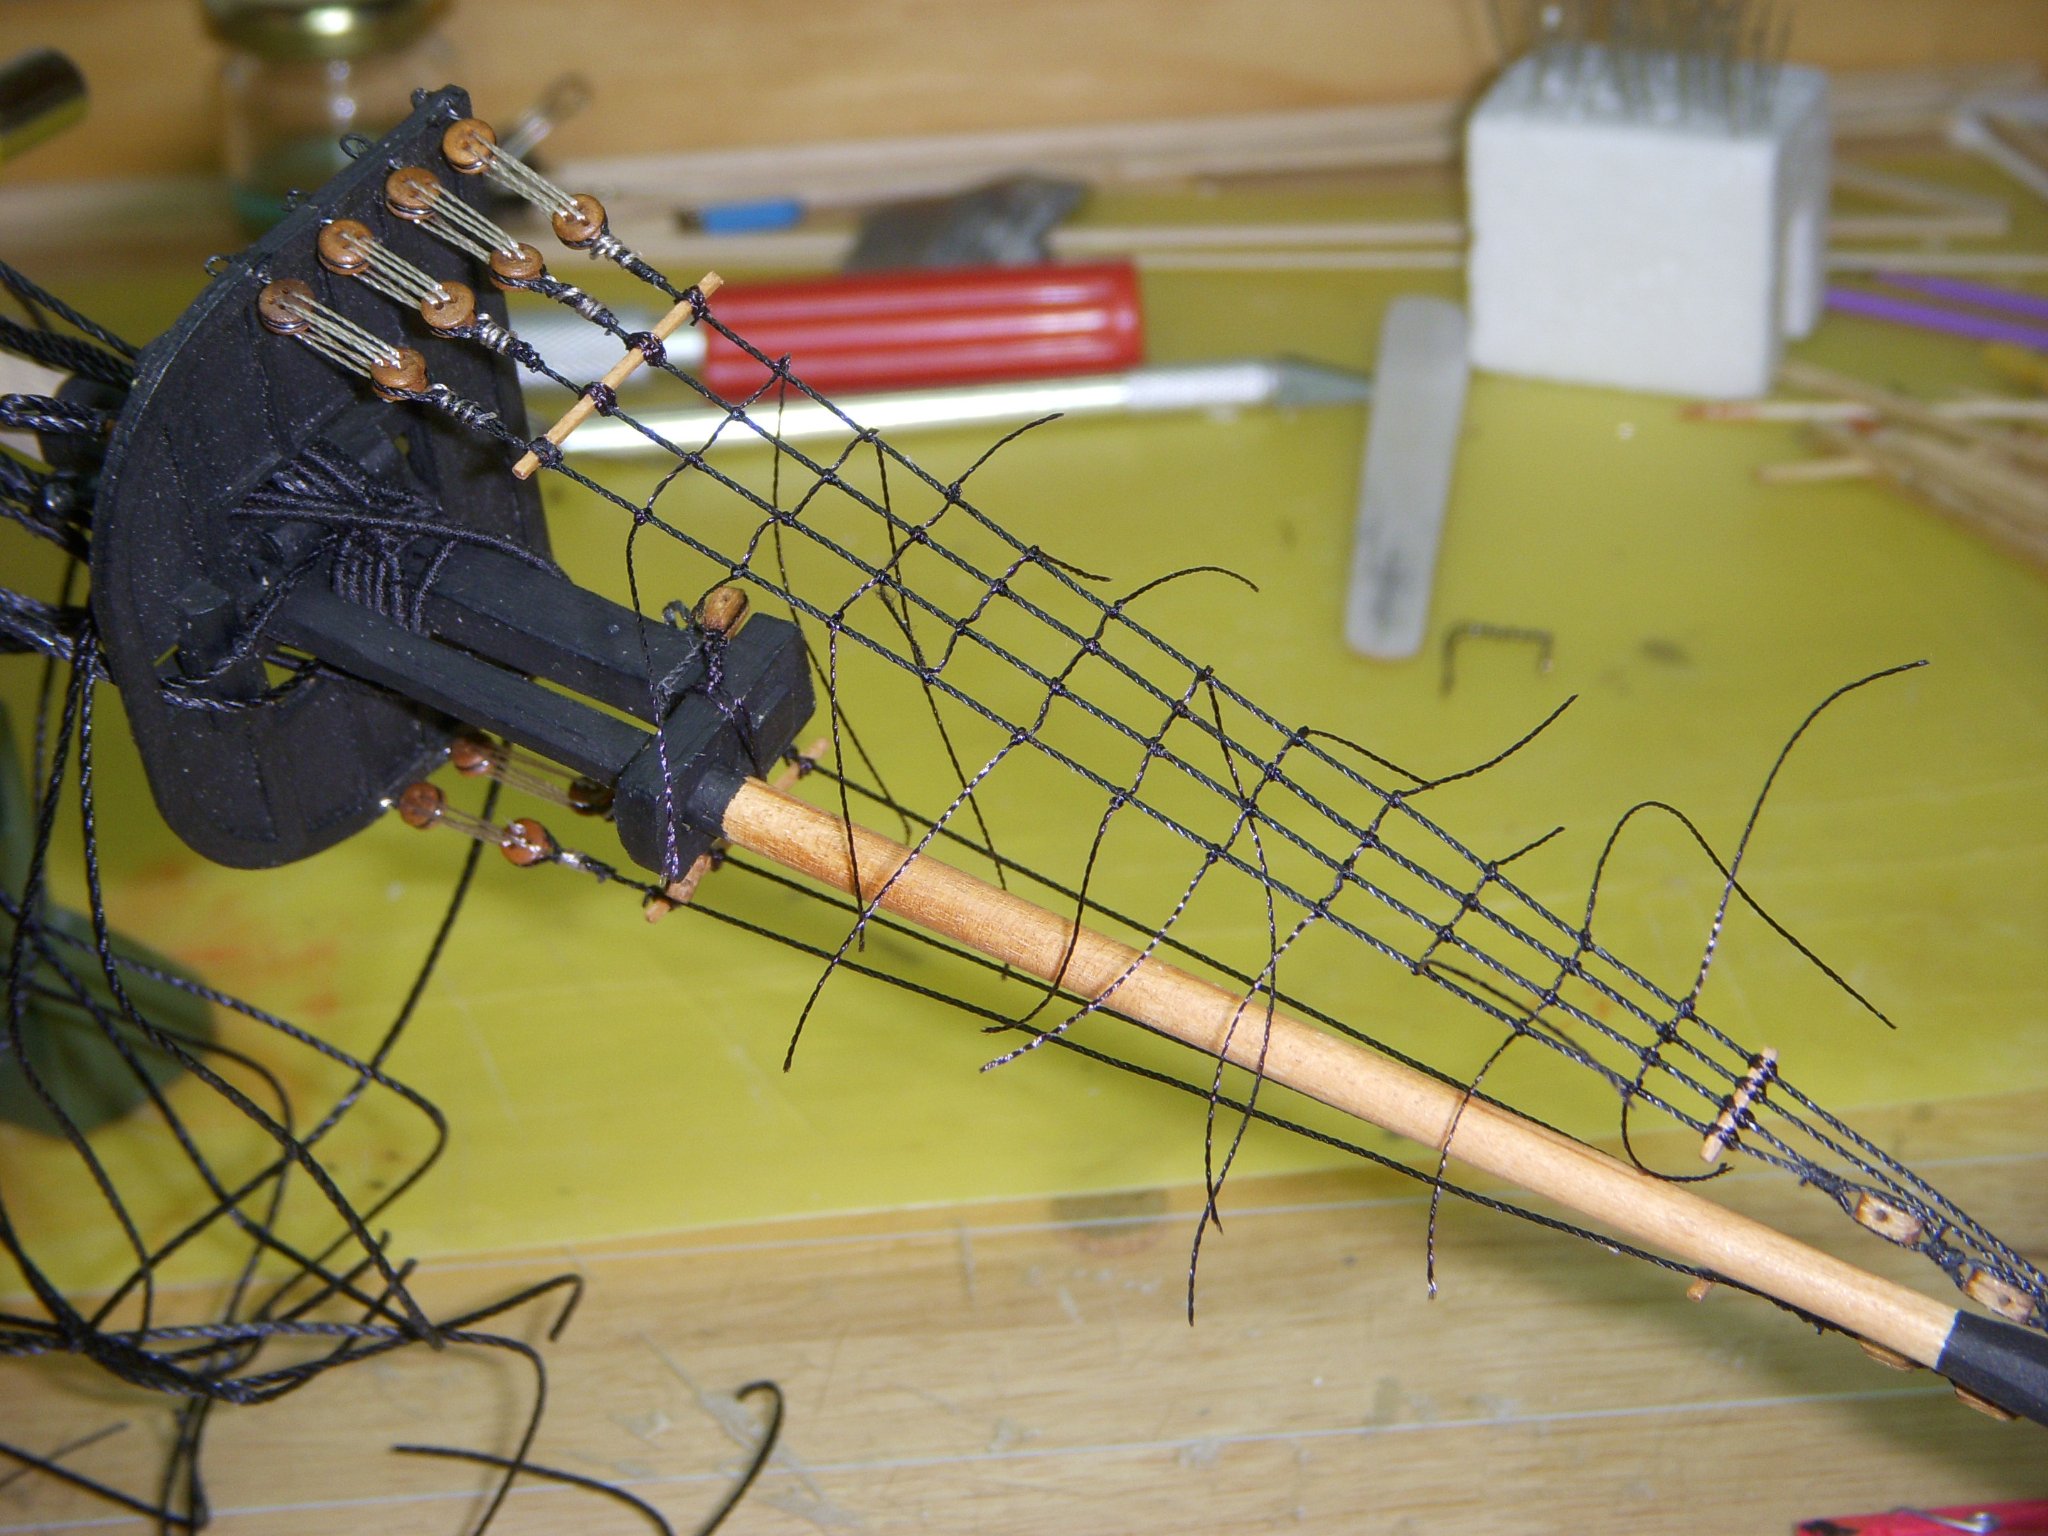
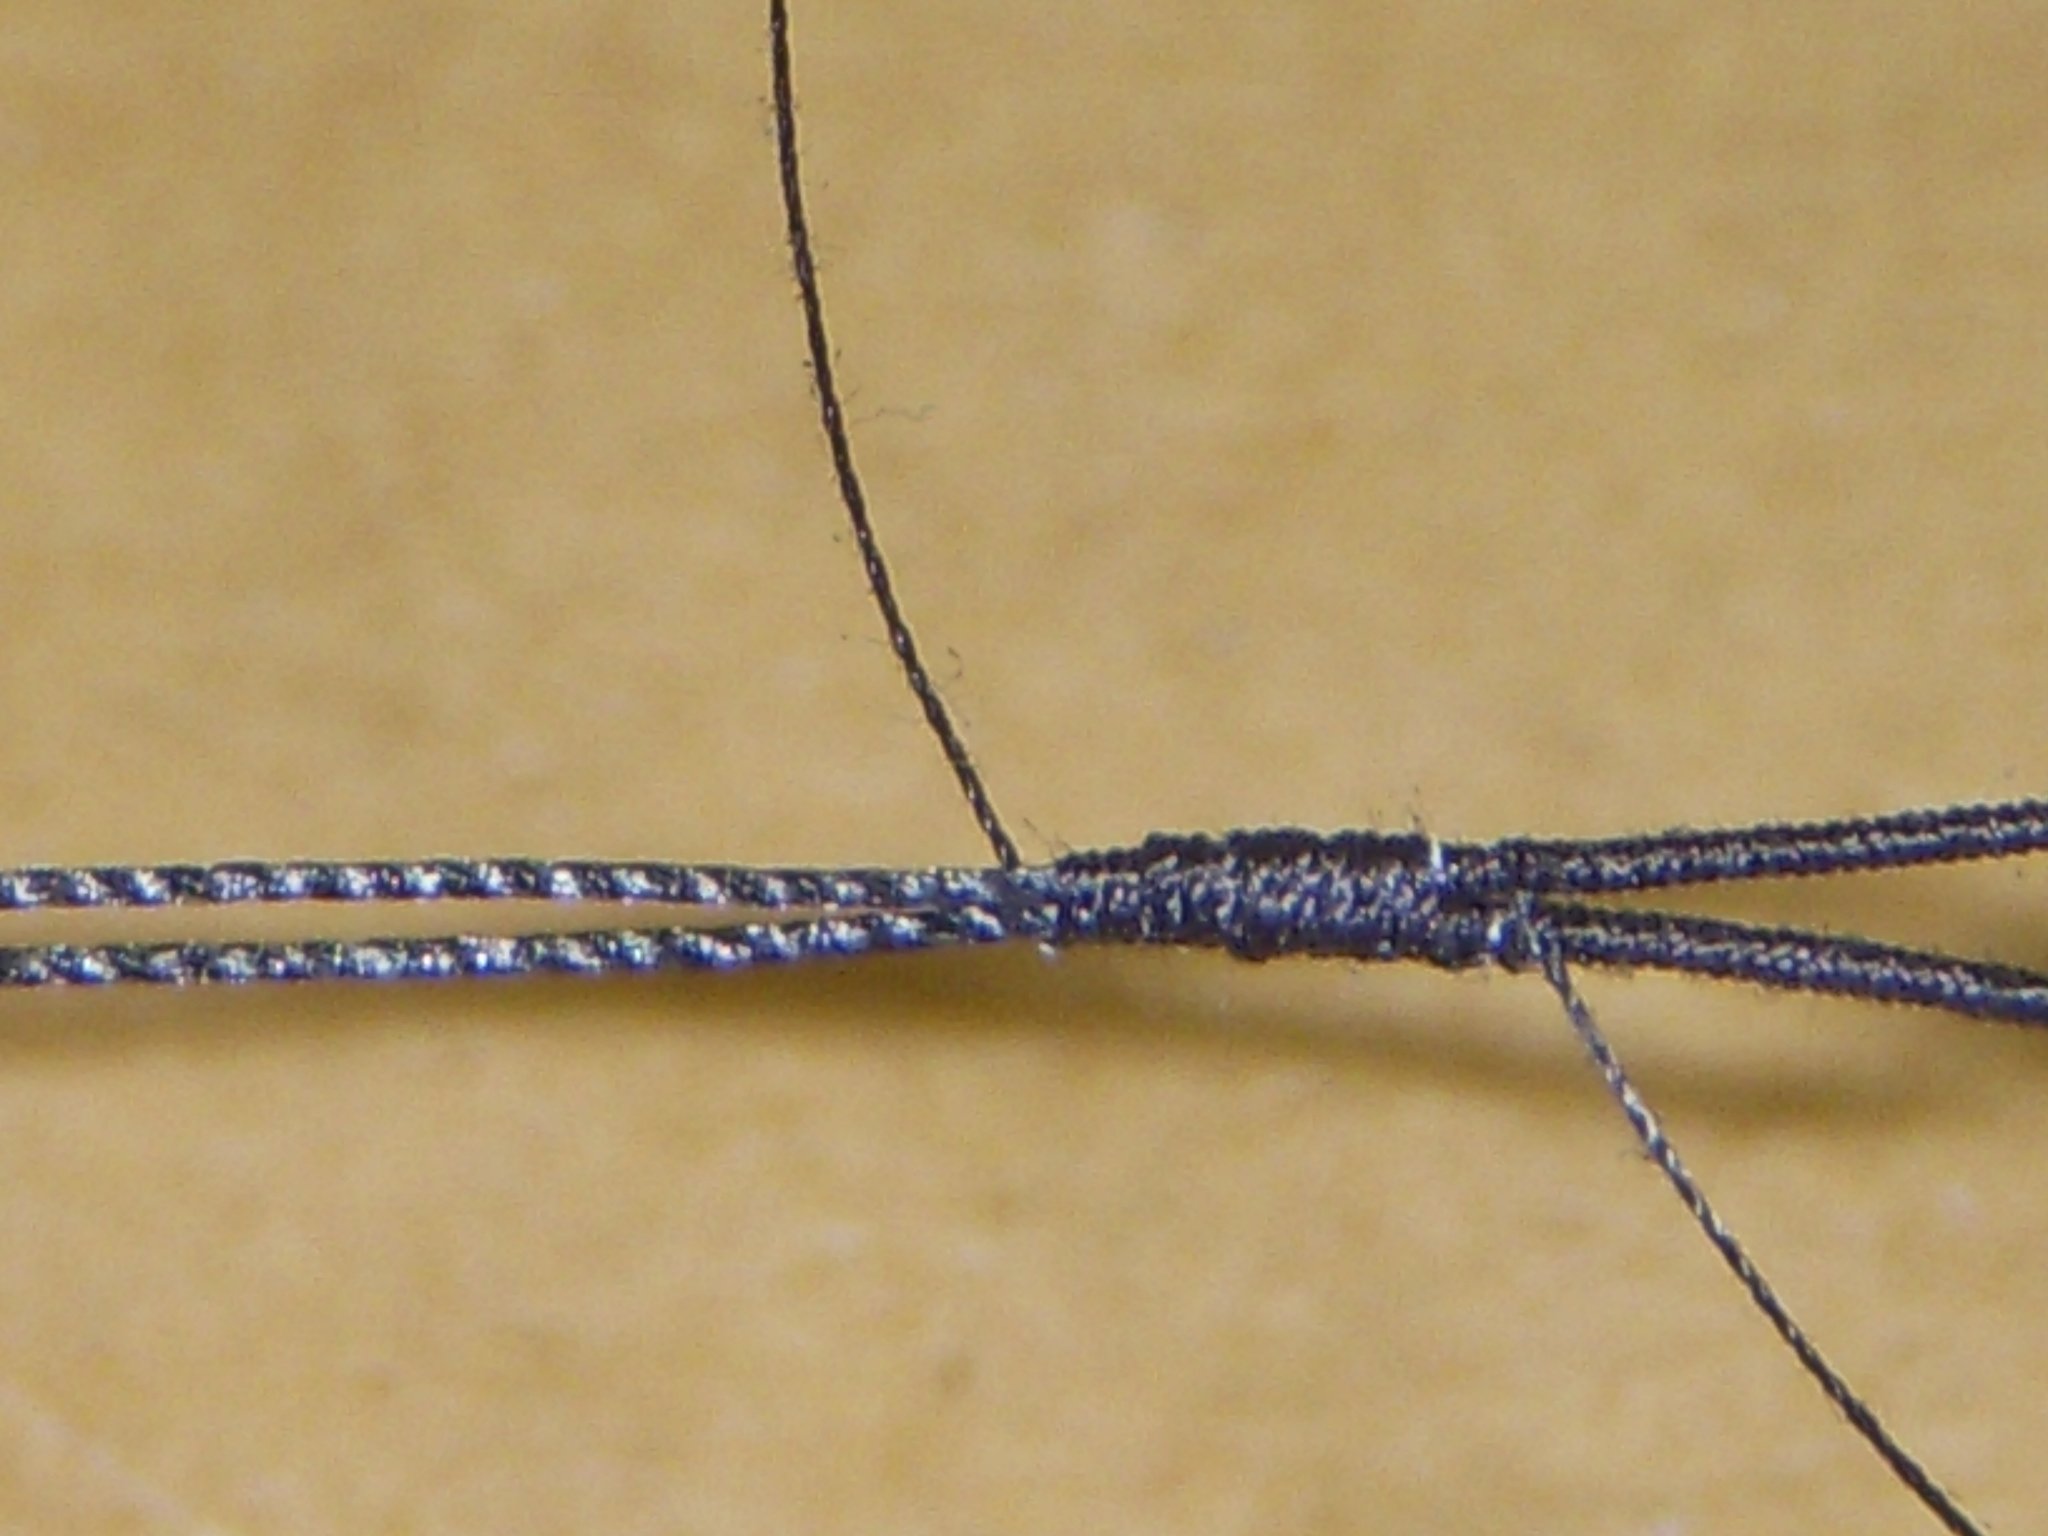
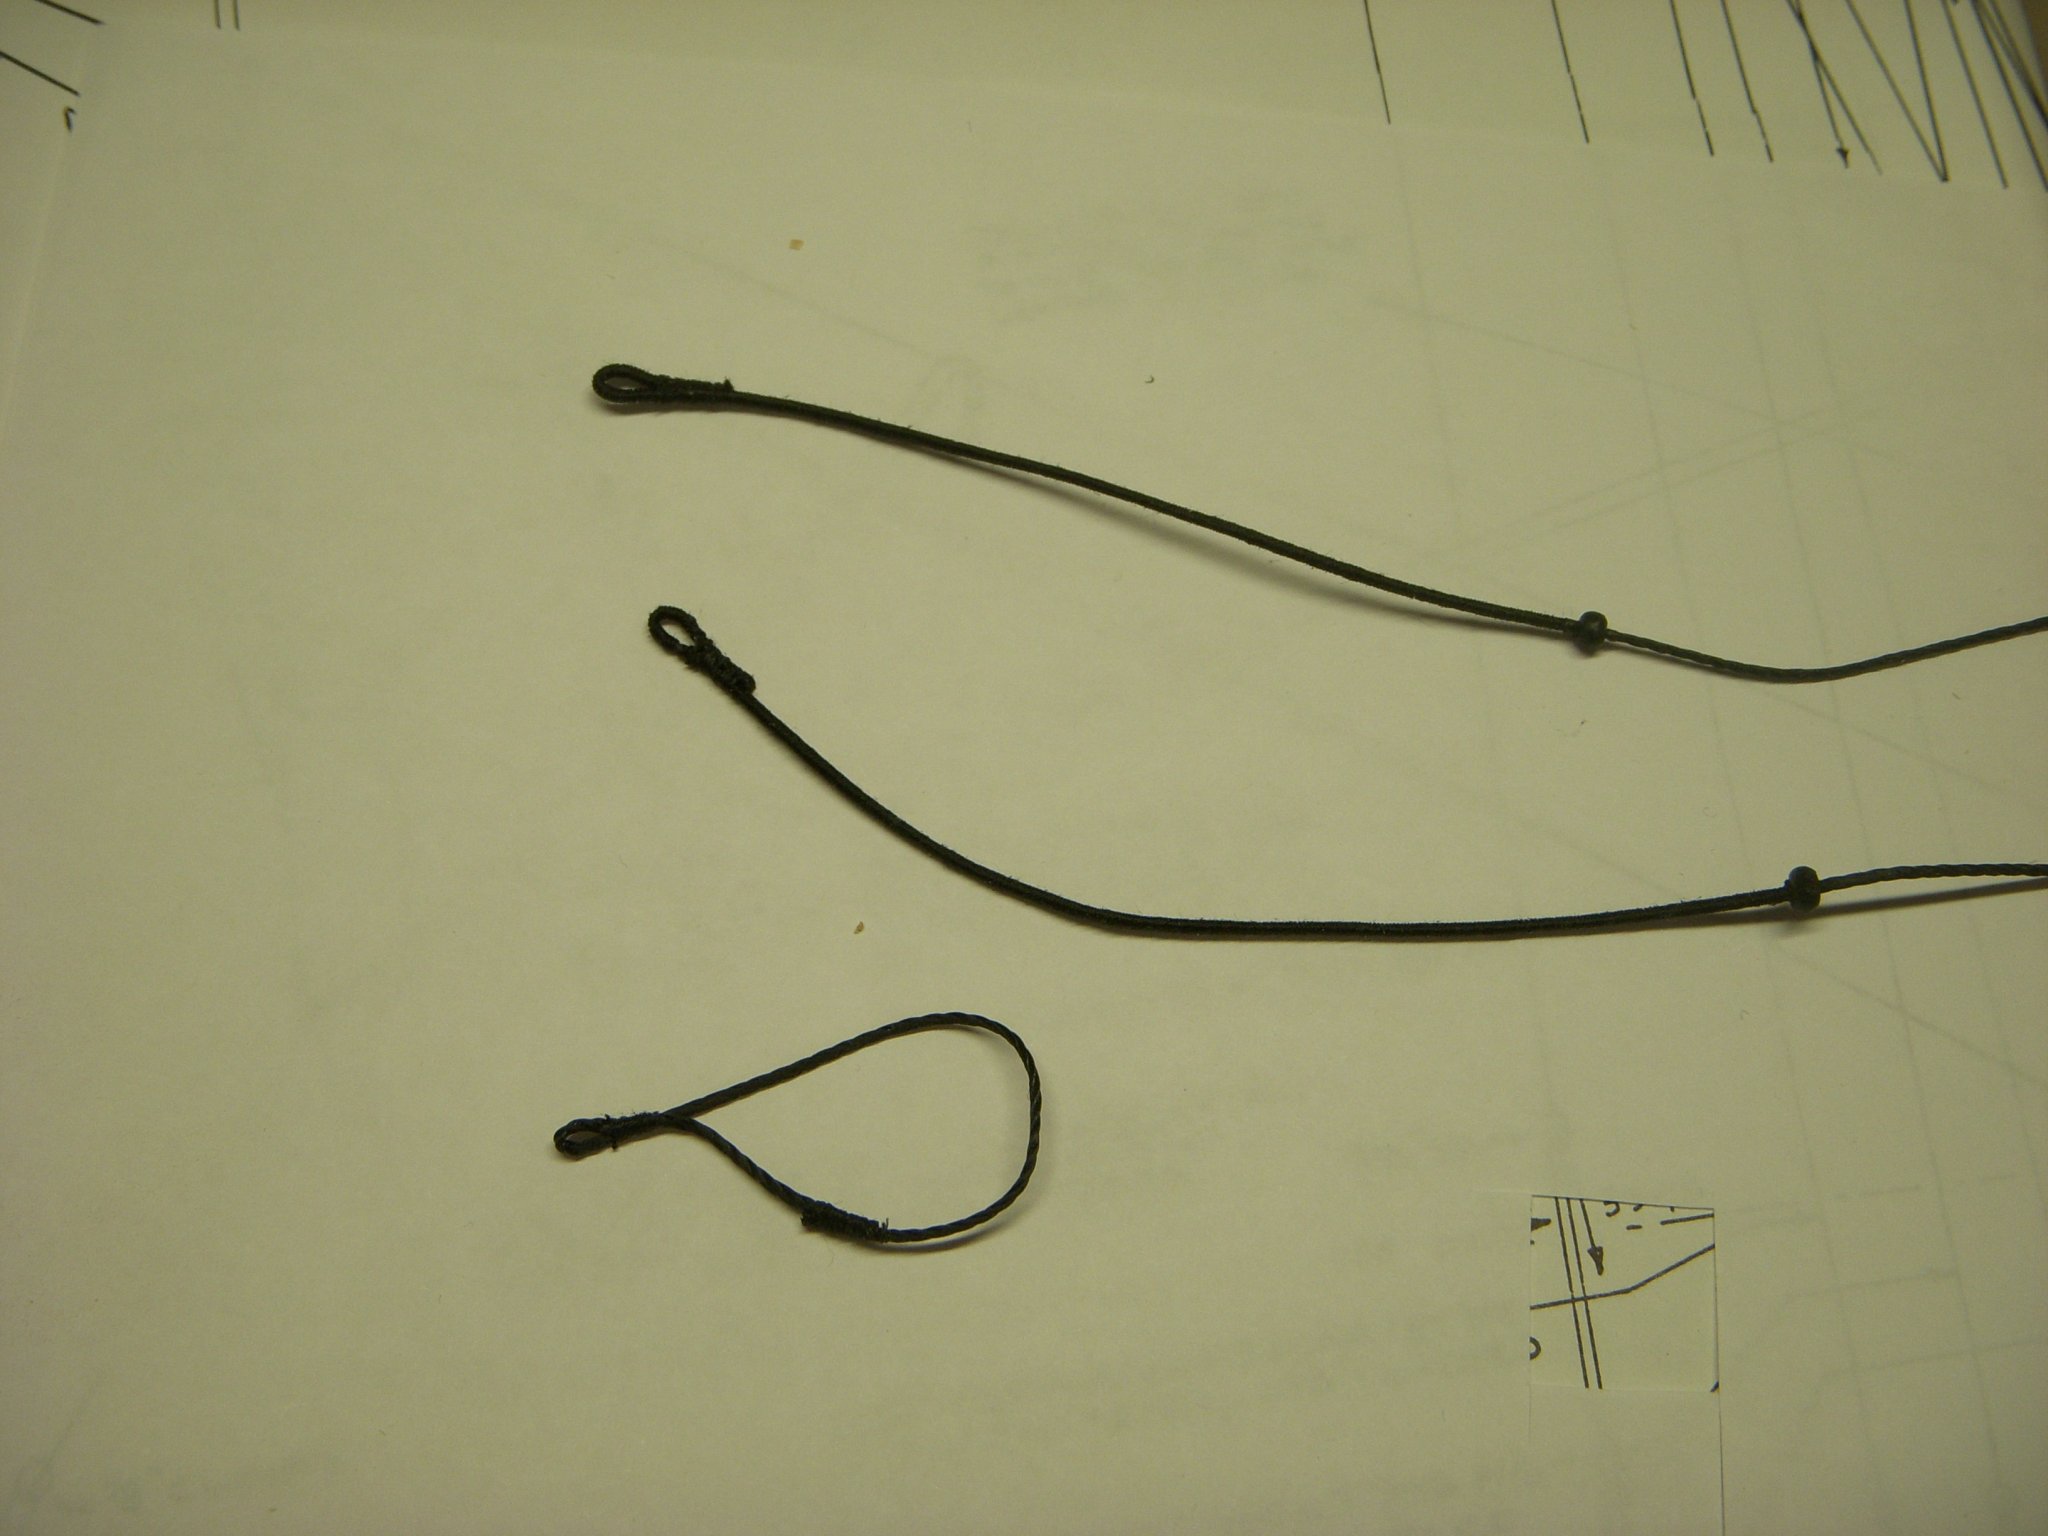
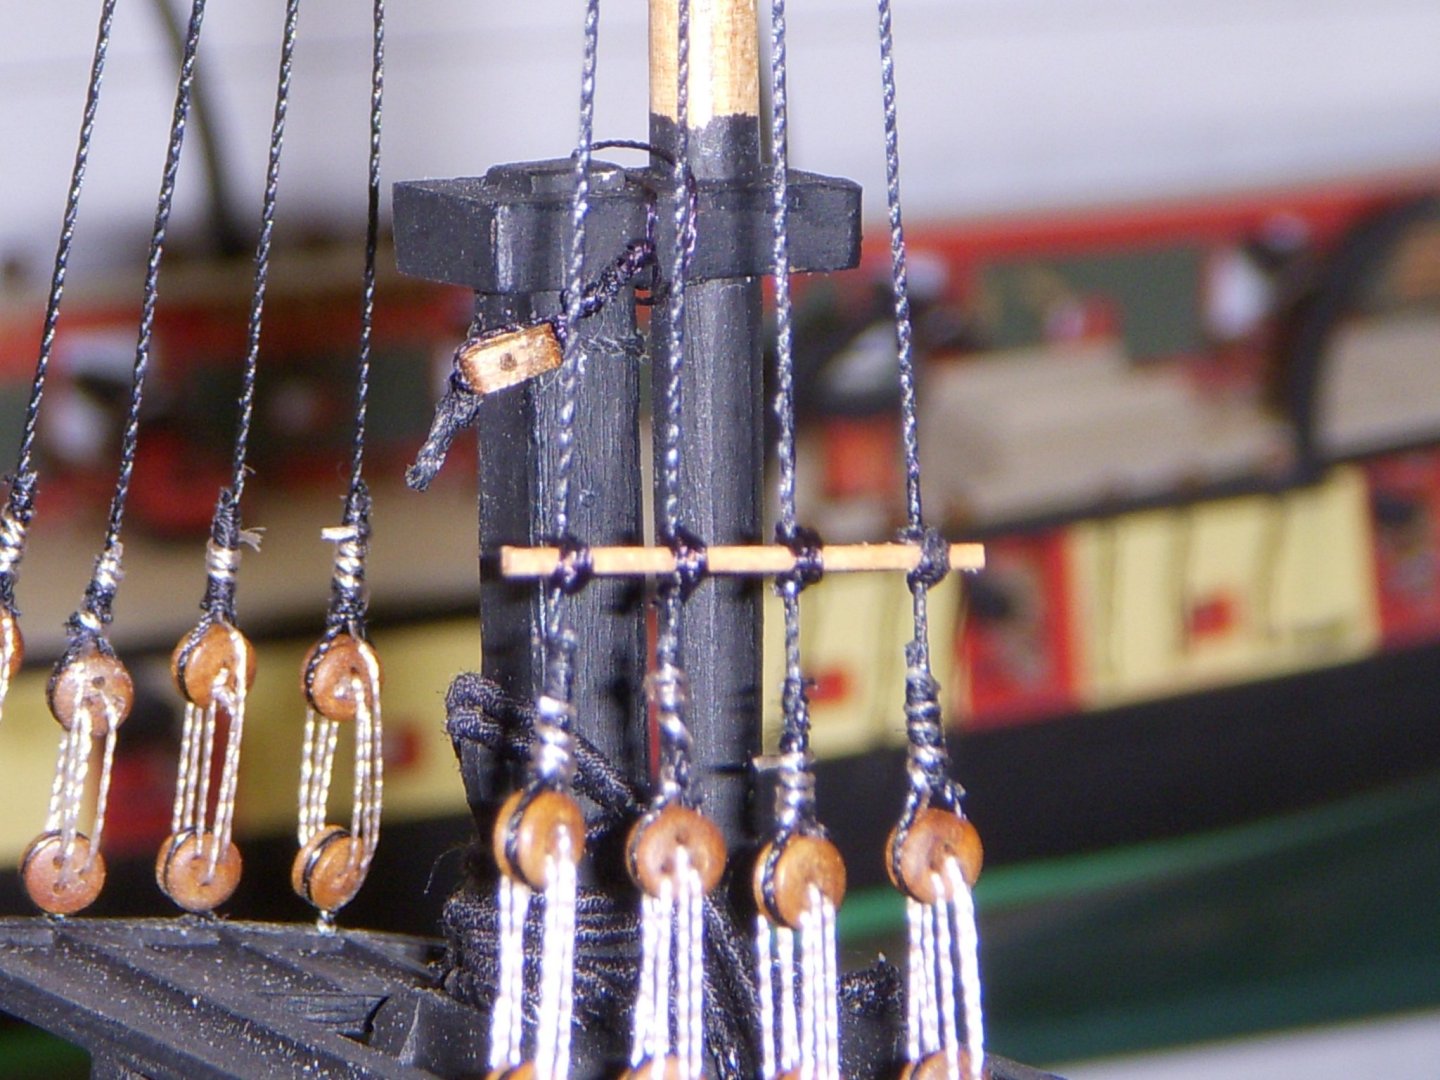
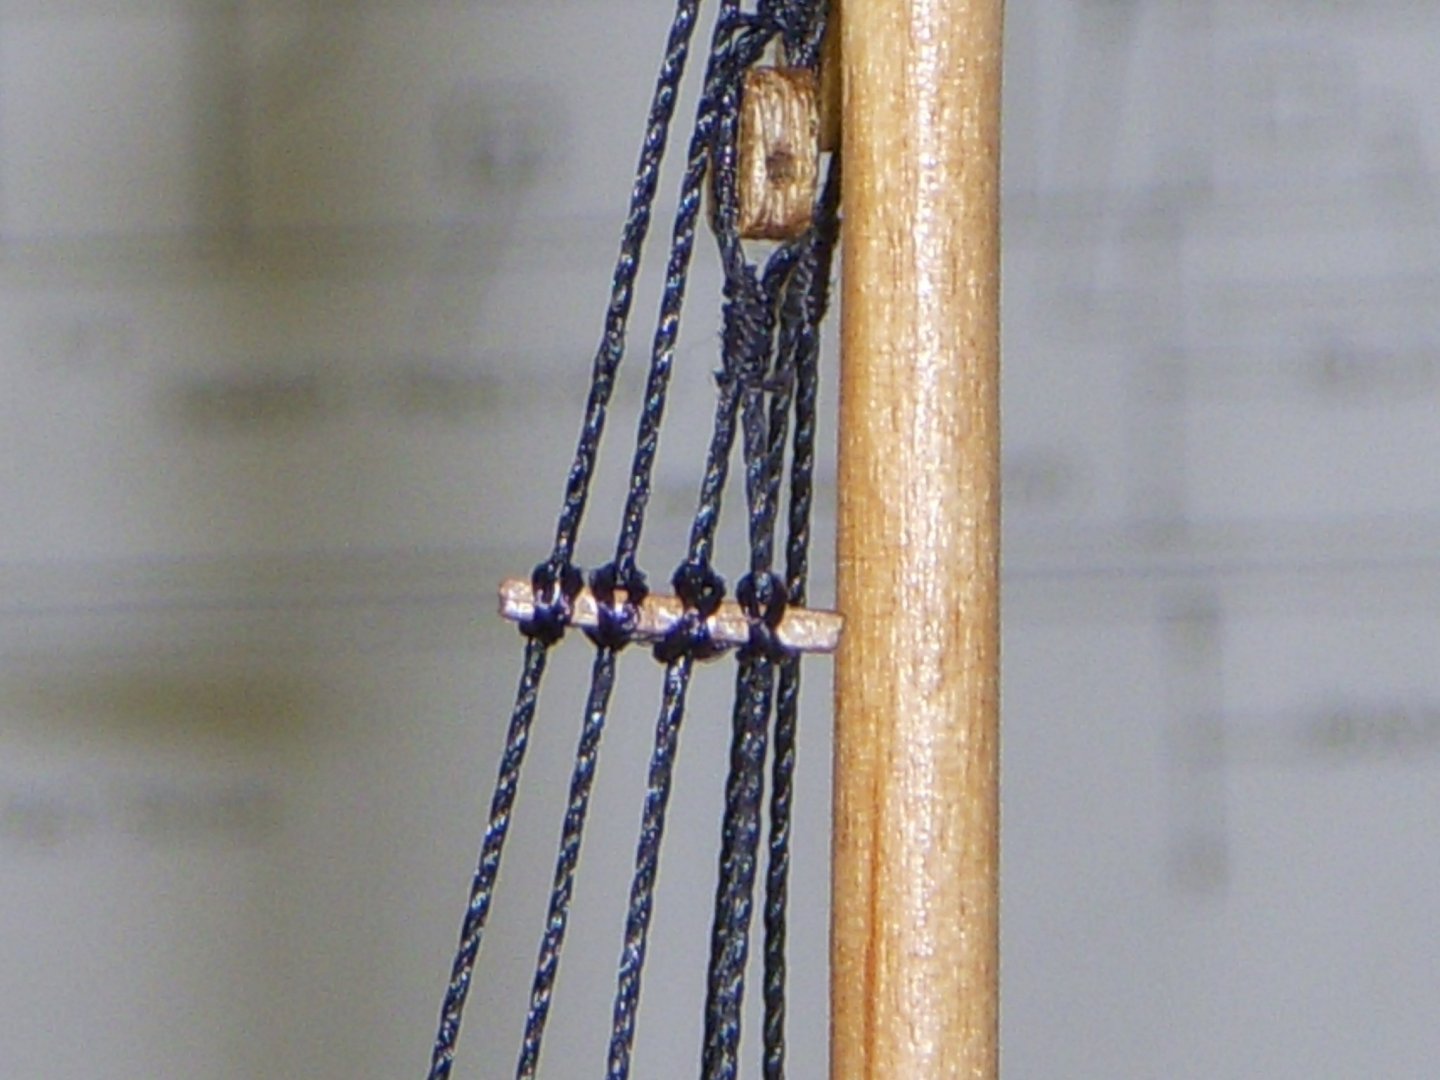
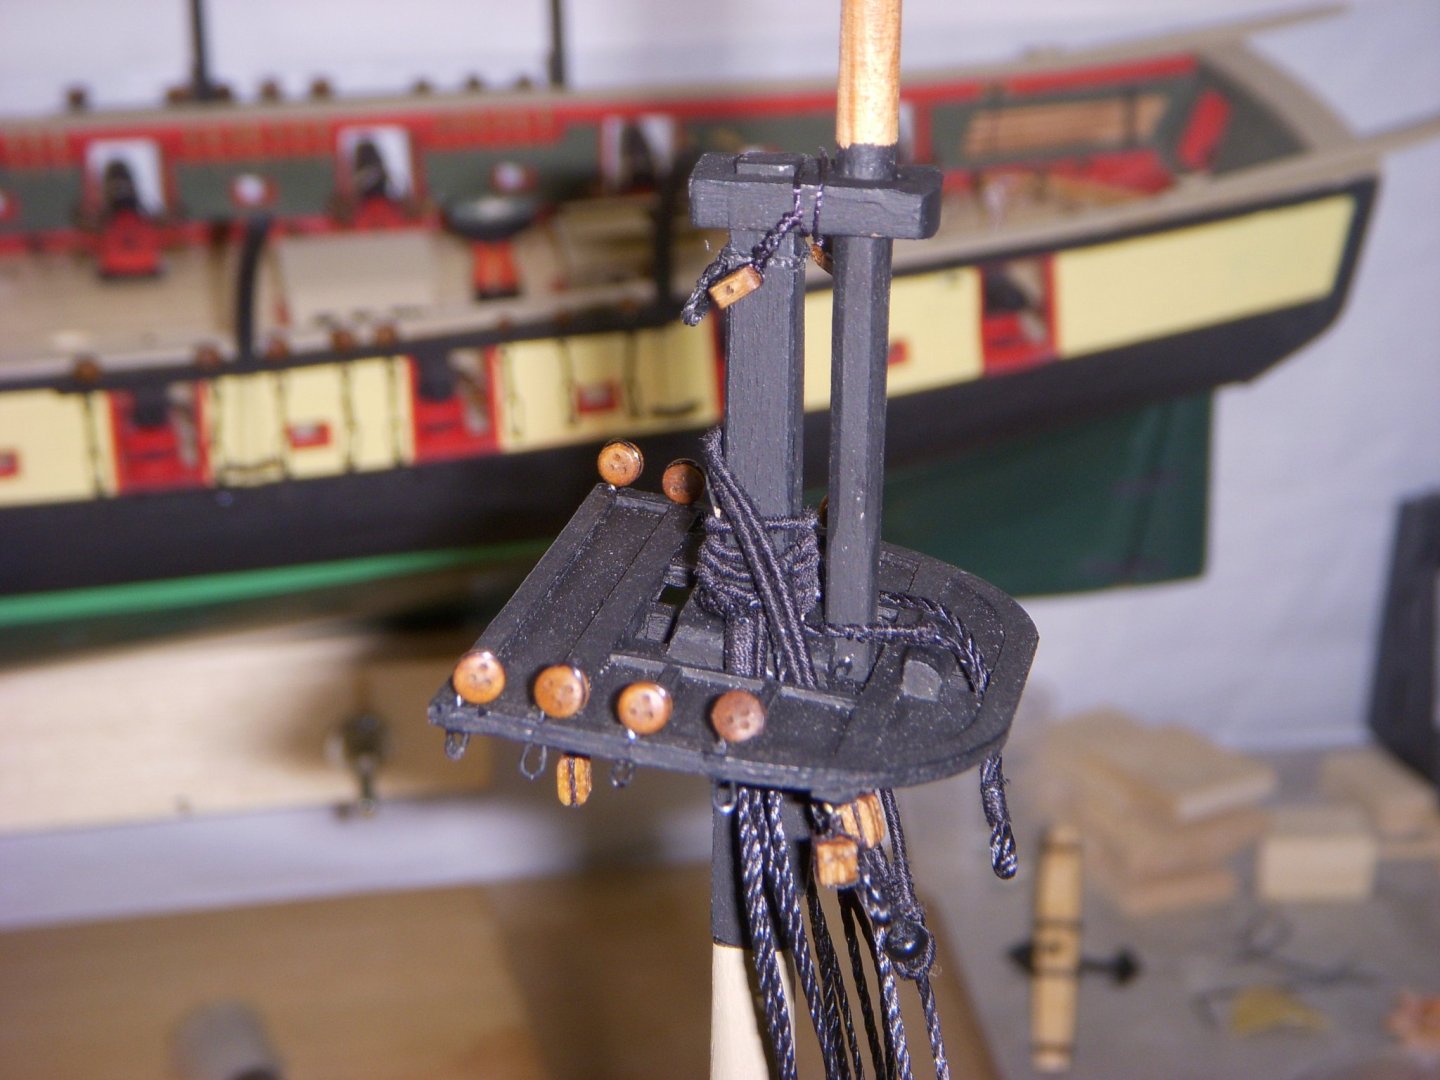
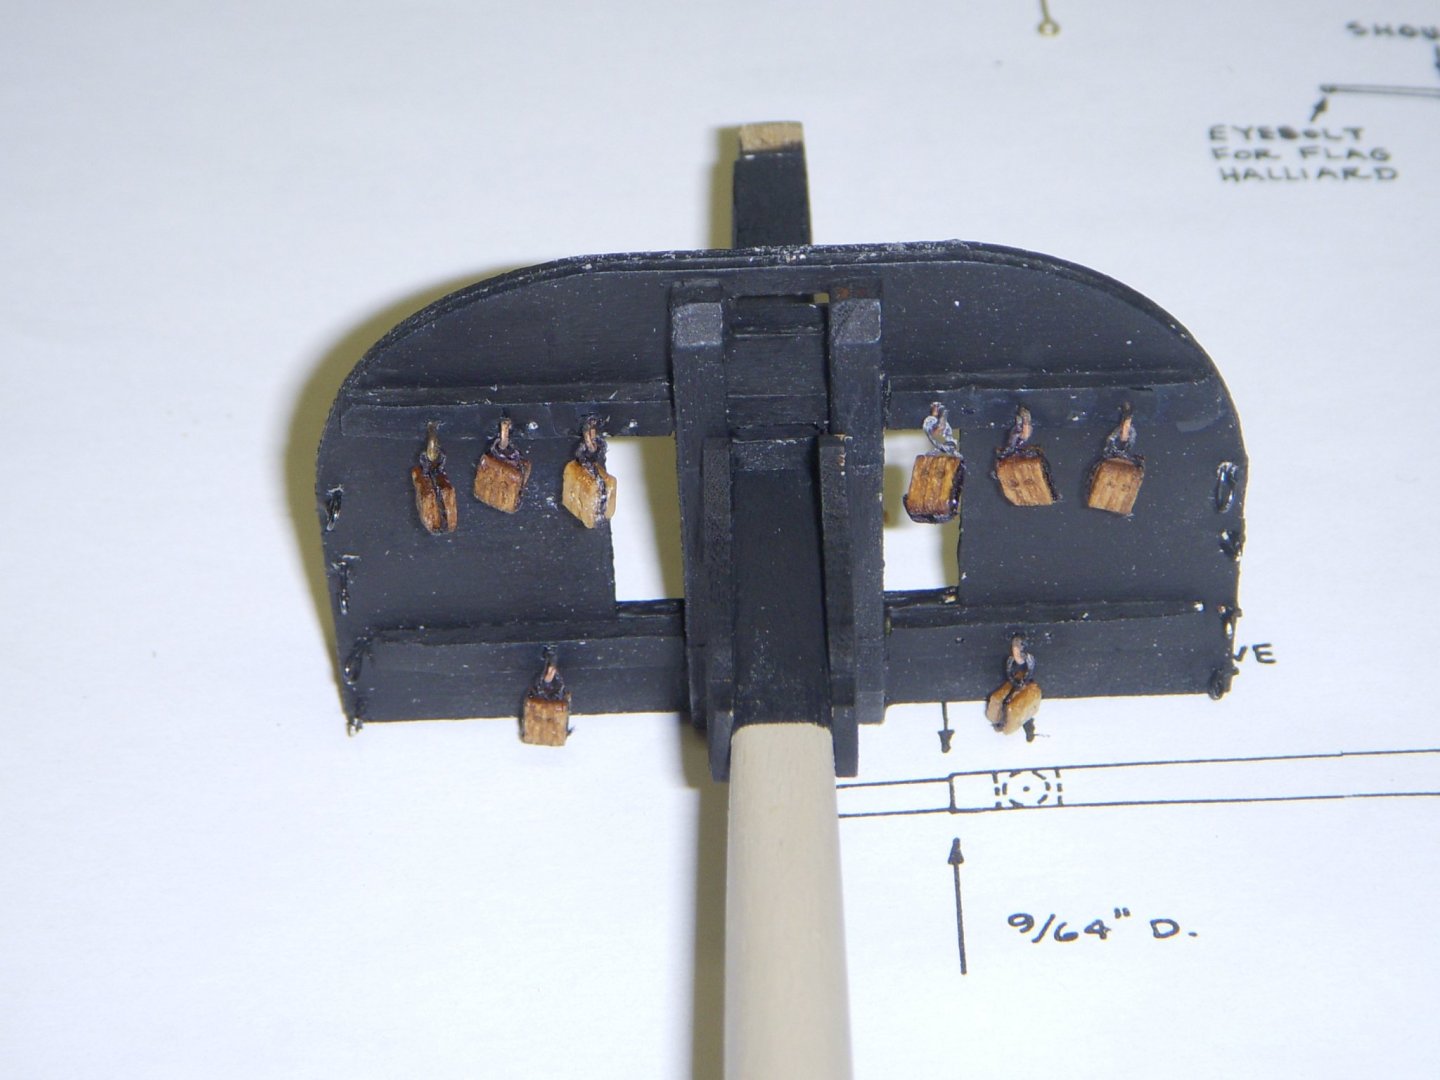
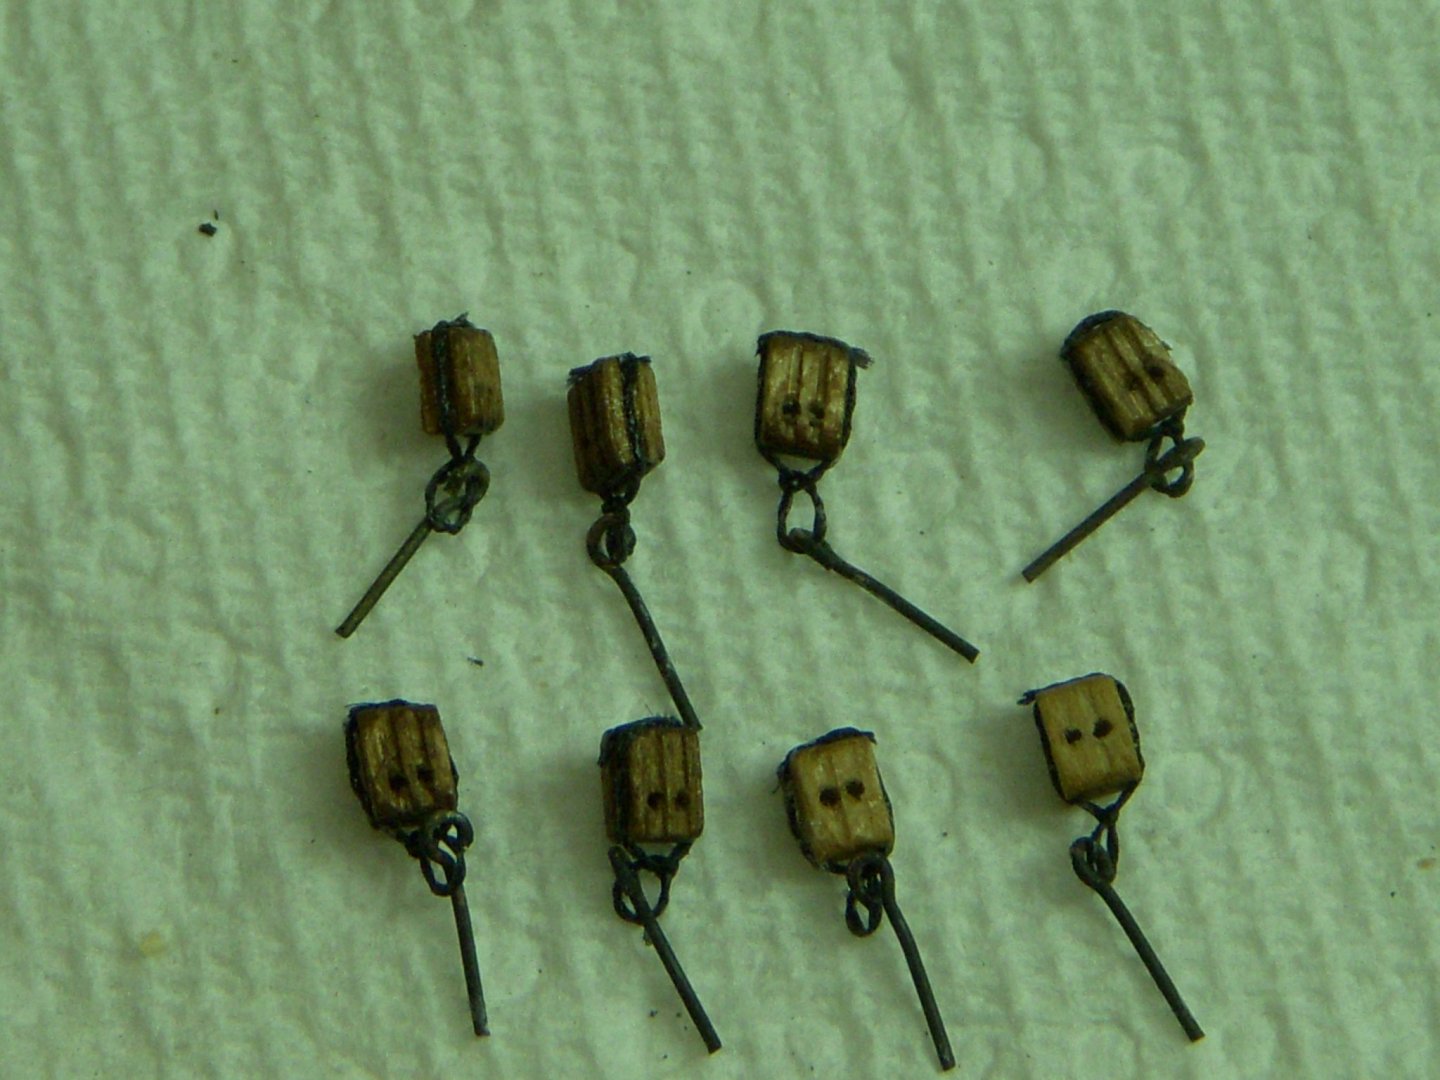
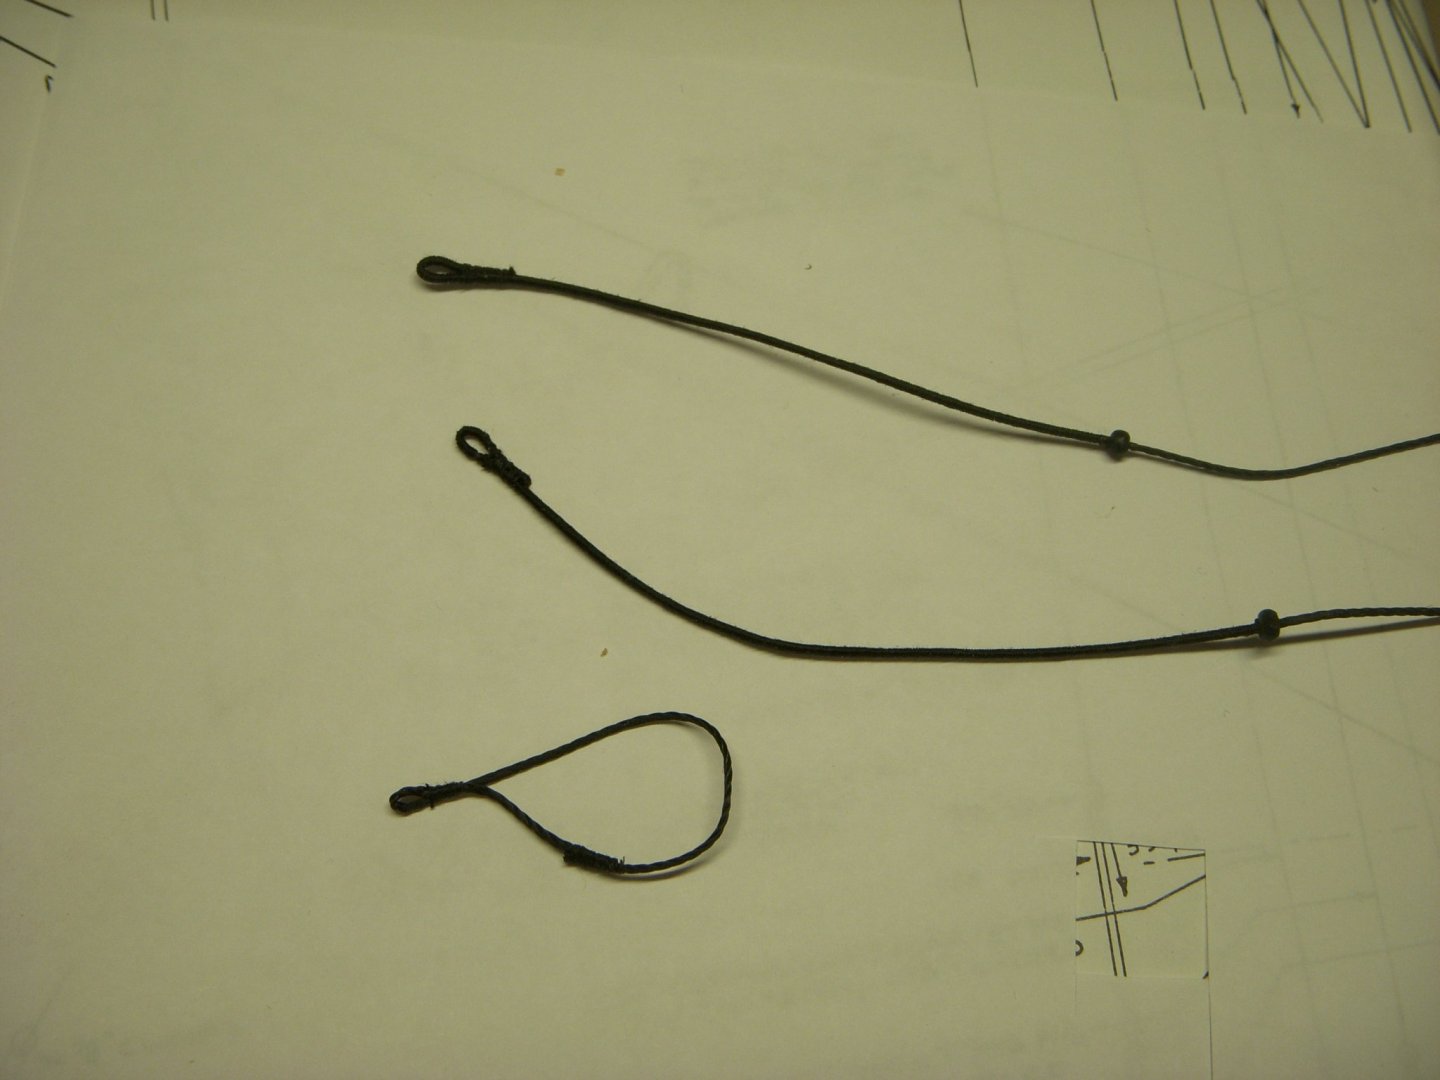
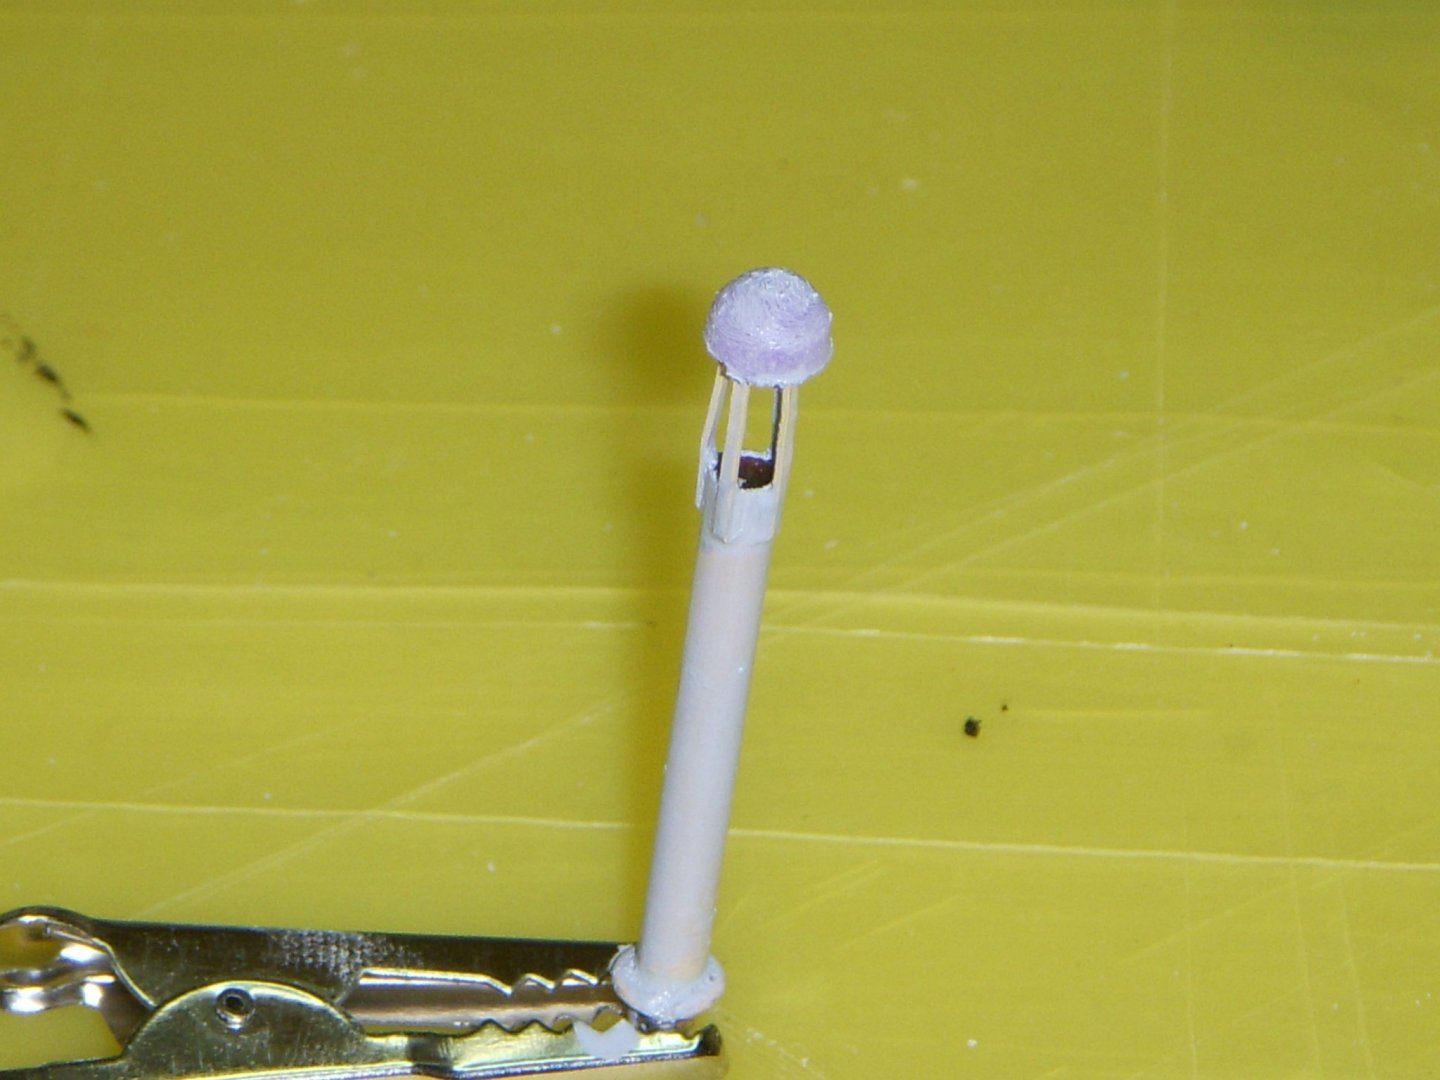
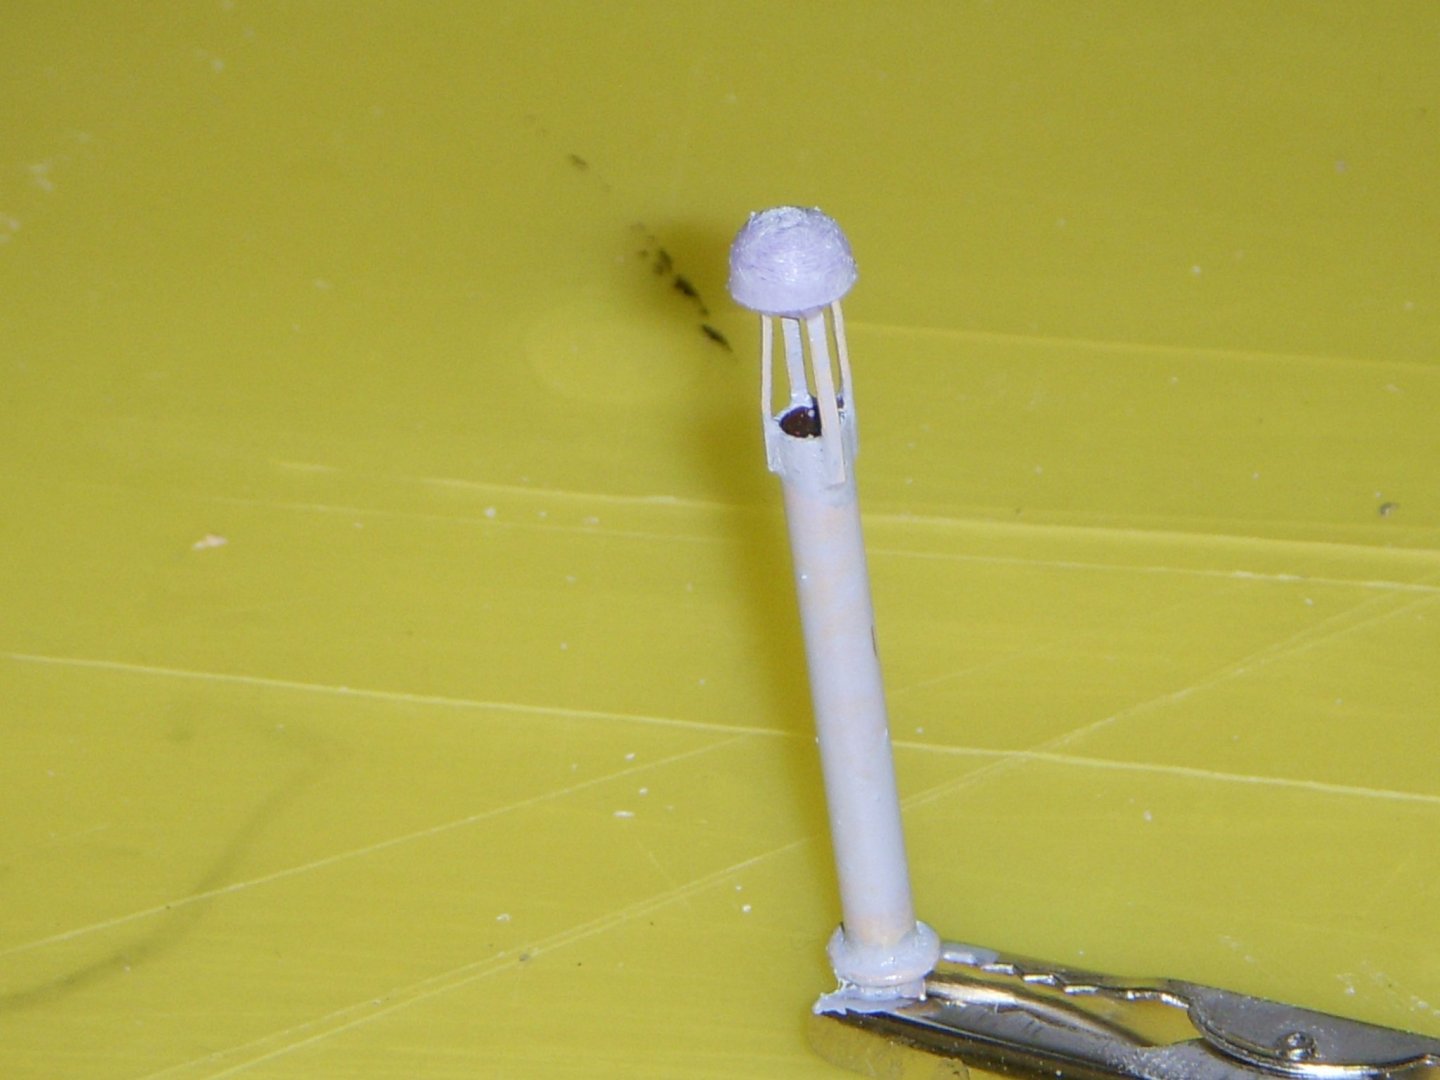
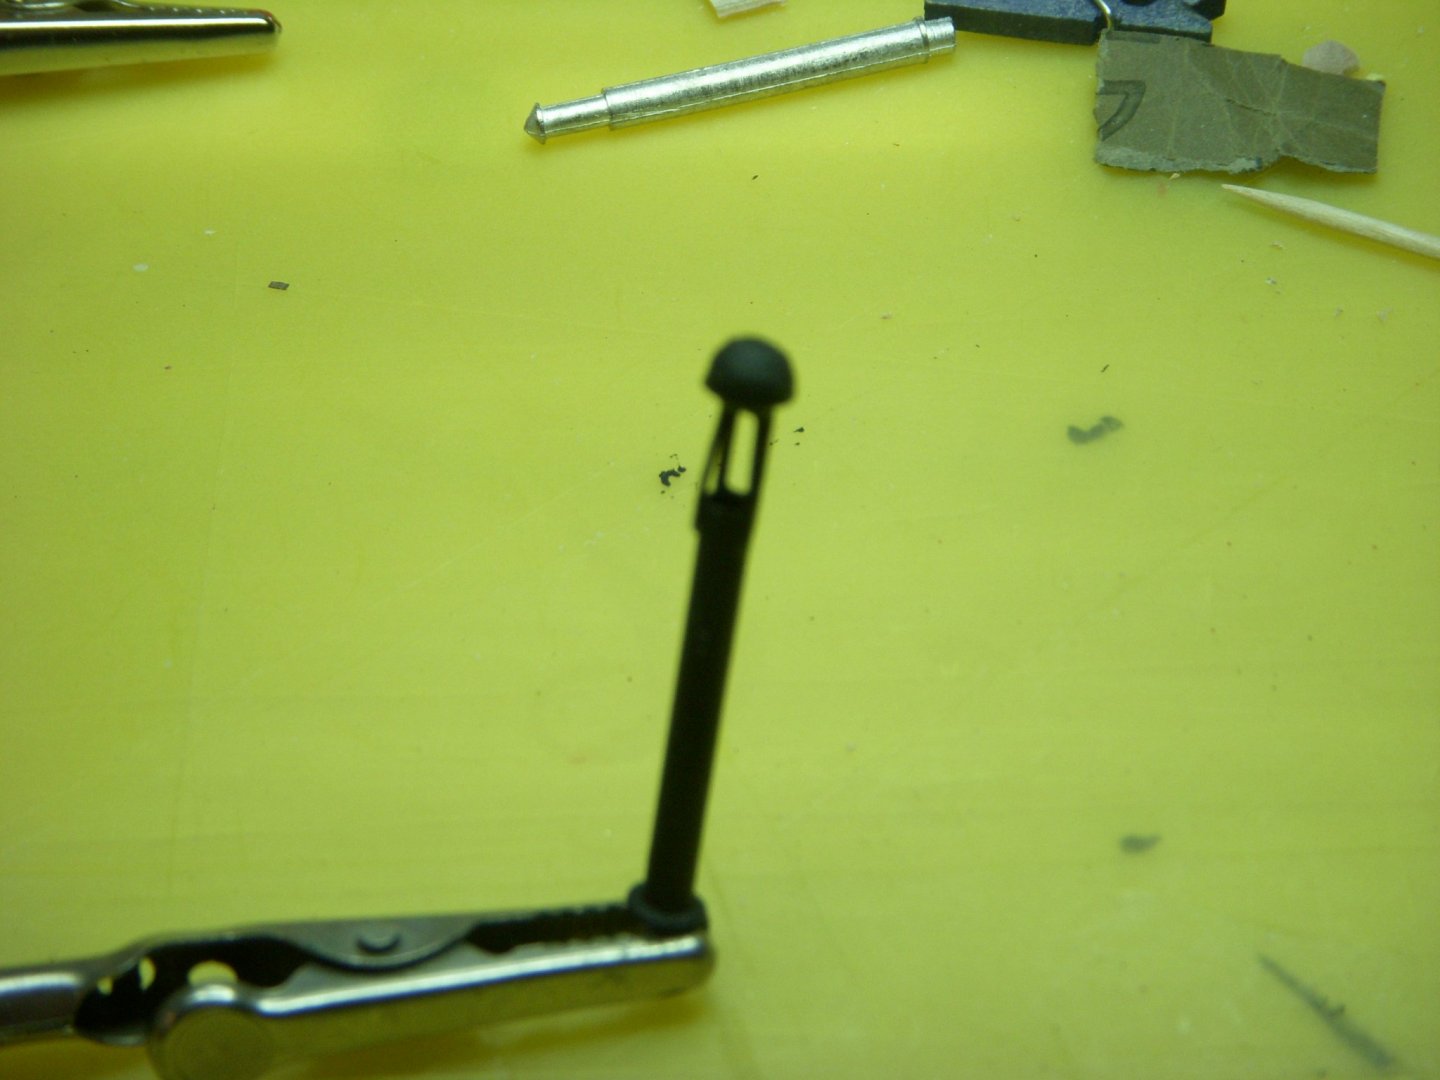
Finished up the assembly of the trestle tree, built up the blocks, then added it to trestle tree. I then mounted the trestle tree to the mast. The server was assembled and ready for use. I started with the shrouds. Using the serving jig, made this job really easy. The first (forward) shroud took a little more time, figuring out the lengths so that the burton pendent worked out correctly. I next tackled the Fore and Preventer stays. I served the line down to where the raised mouse was positioned. This was my next challenge, how to create the raised mouse. I tried wrapping several layers of serving line, this did not turn out as expected. I then tried drilling out a small deadeye, and wrapping it with serving line, again it did not turn out well. I finally tried using a small bead on the line and it turned out a lot better. I put a couple of coats of flat black paint on the bead and it blended in to the line. I also made the course yard sling. Next project is to install them and move on to the fore top mast. Ron
-
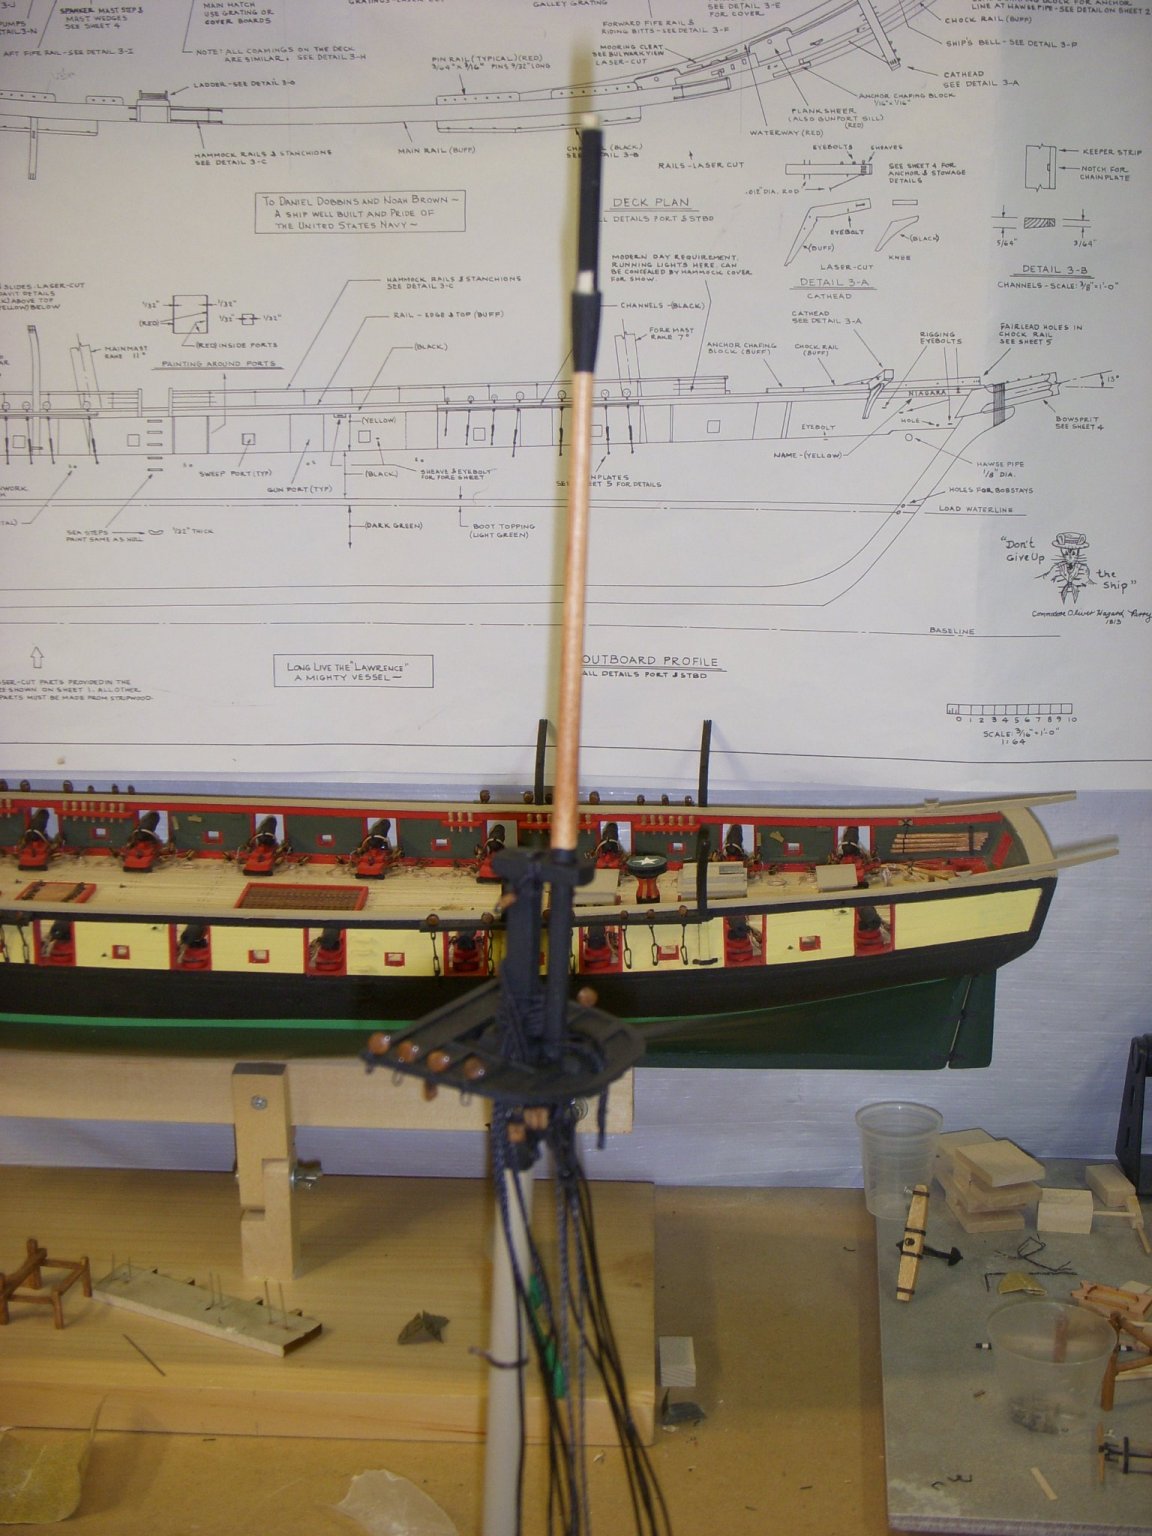
The Fore top mast was started. Not quite completed but am happy with the results so far. The octagon swell near the top was a challenge. I finally ended up by adding material to create the swell. I installed the metal band on the fore mast, and started assembly of the trestle trees. I also started assembly of the deadeyes and felt it would be easier to install them before the trestle tree was installed. I made the strops with 26 gauge black wire, wrapped around the deadeye and twisting the end. I ended up making the lower loop once in inserted. I decided to make all the stays and install them before installing the top mast. There is a lot of serving on the stays so I decided to buy a serving jig. Syrens Serv-o-Matic came in today. Needs to be assembled before I start that task. Ron


-
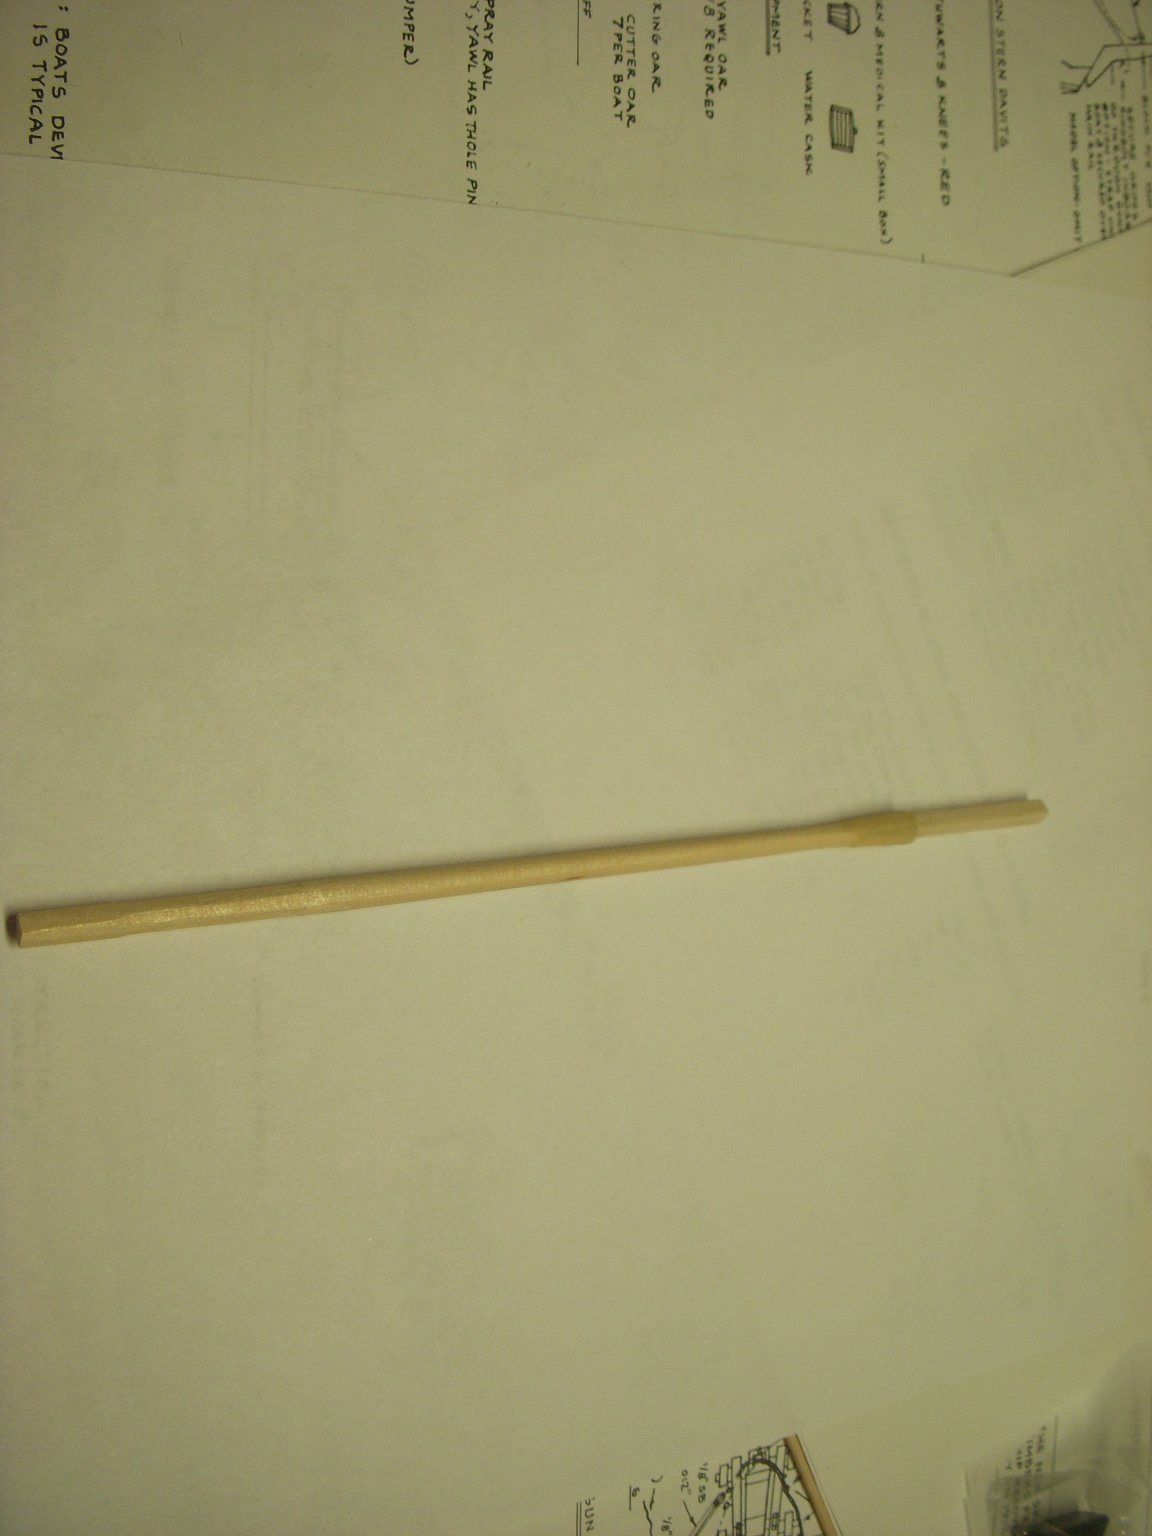
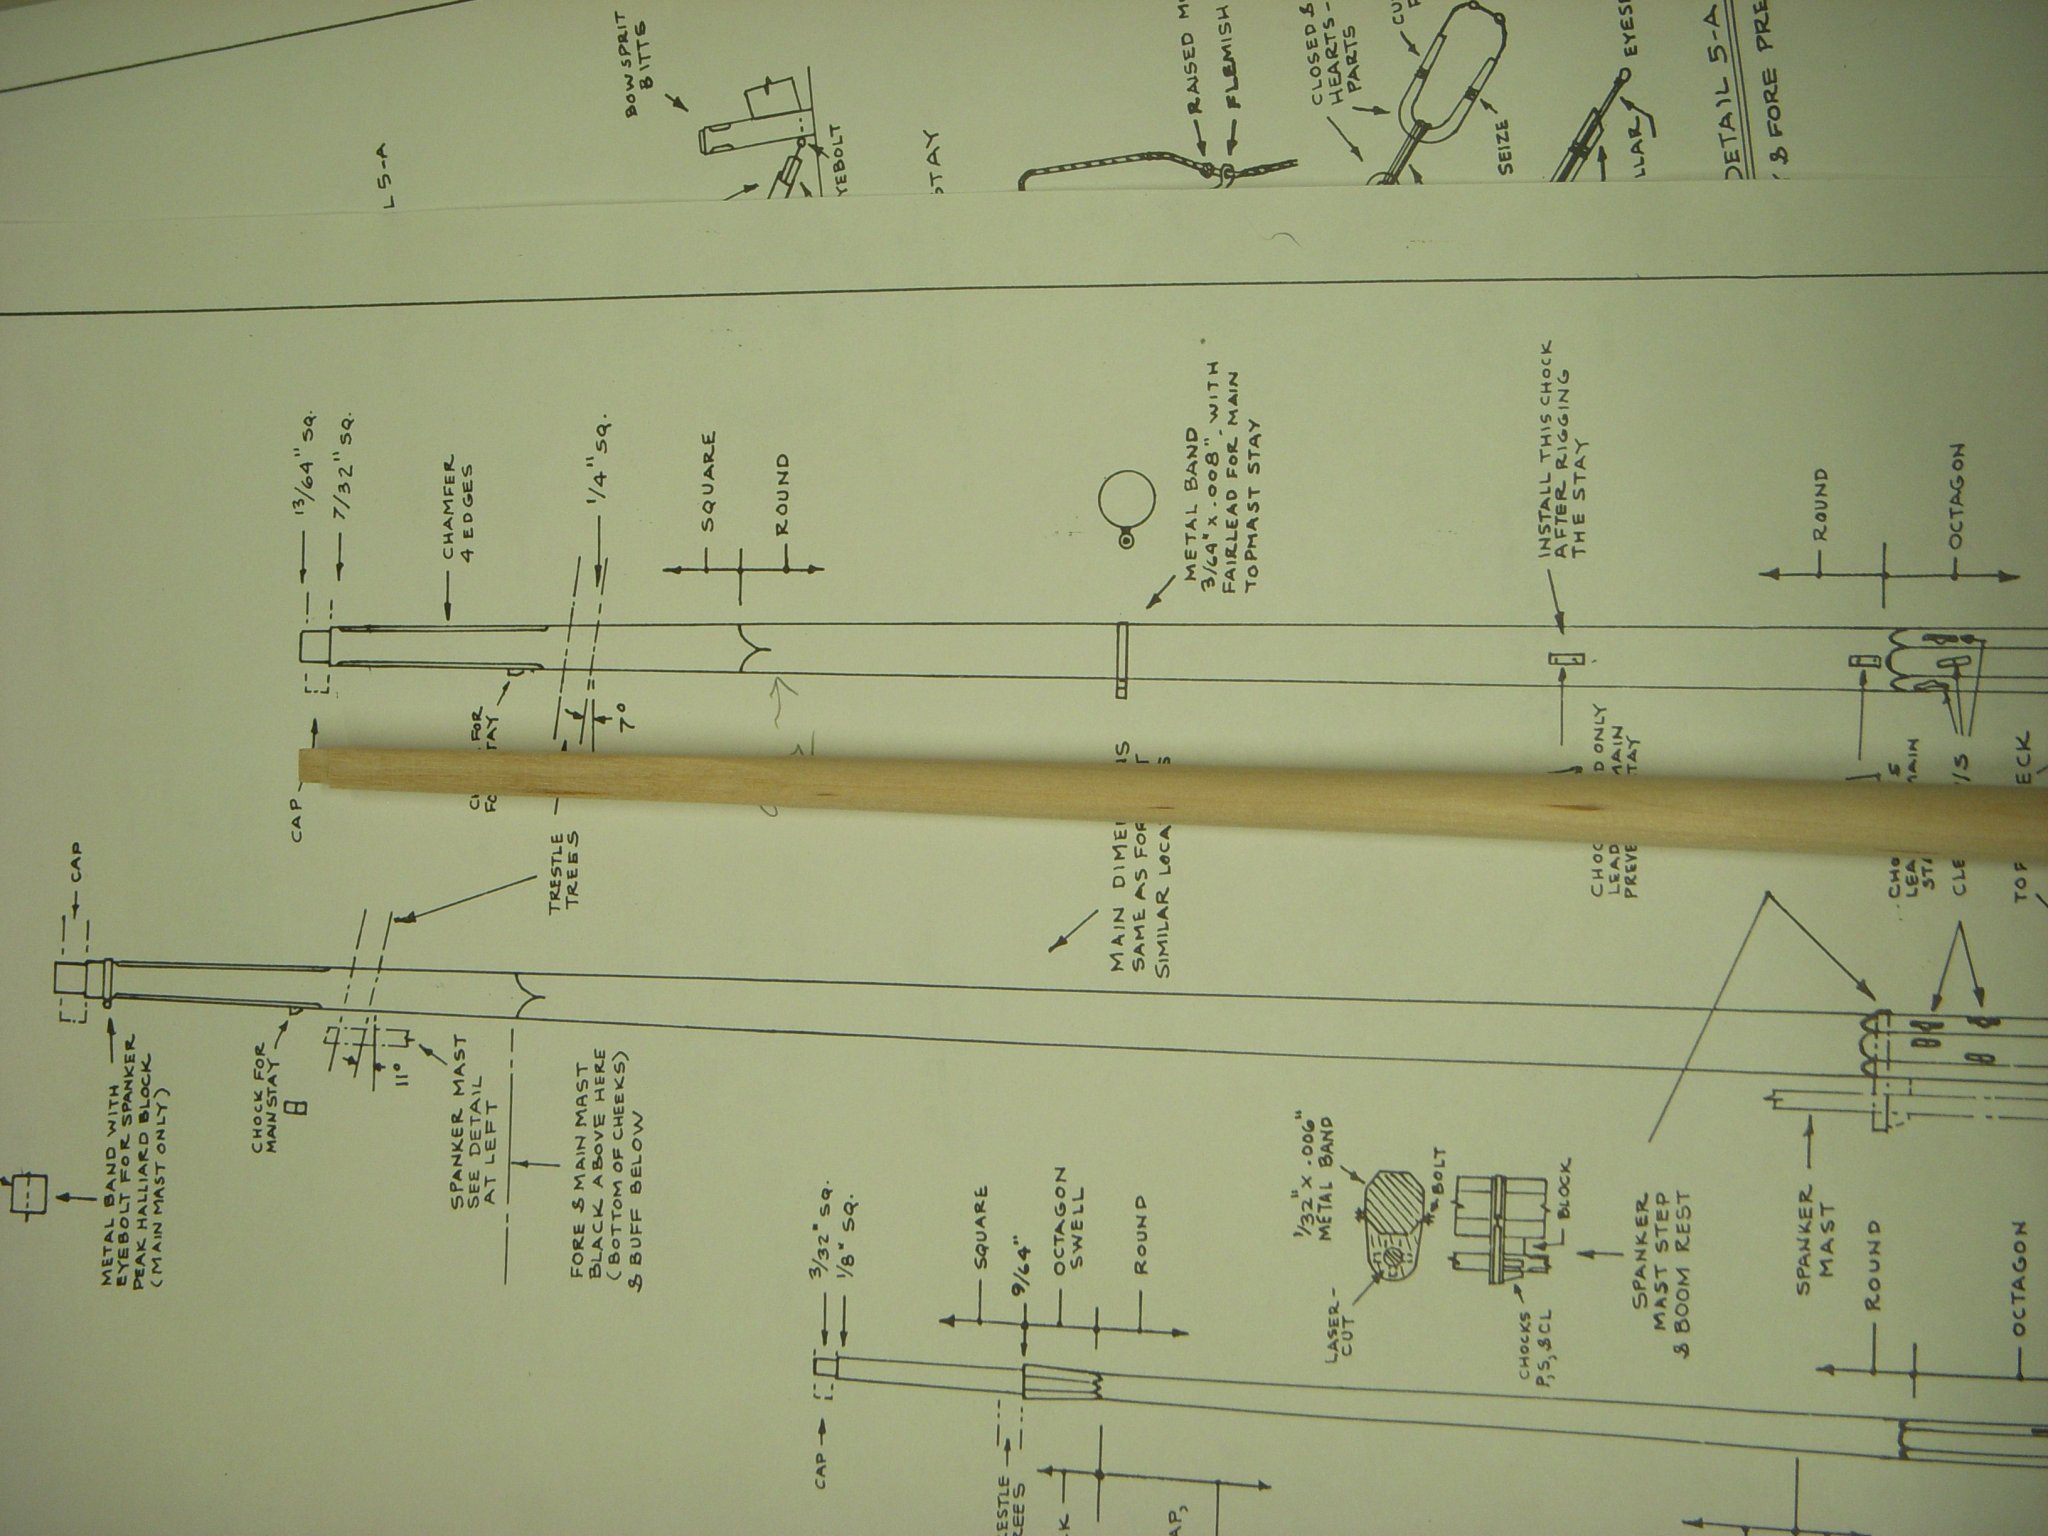
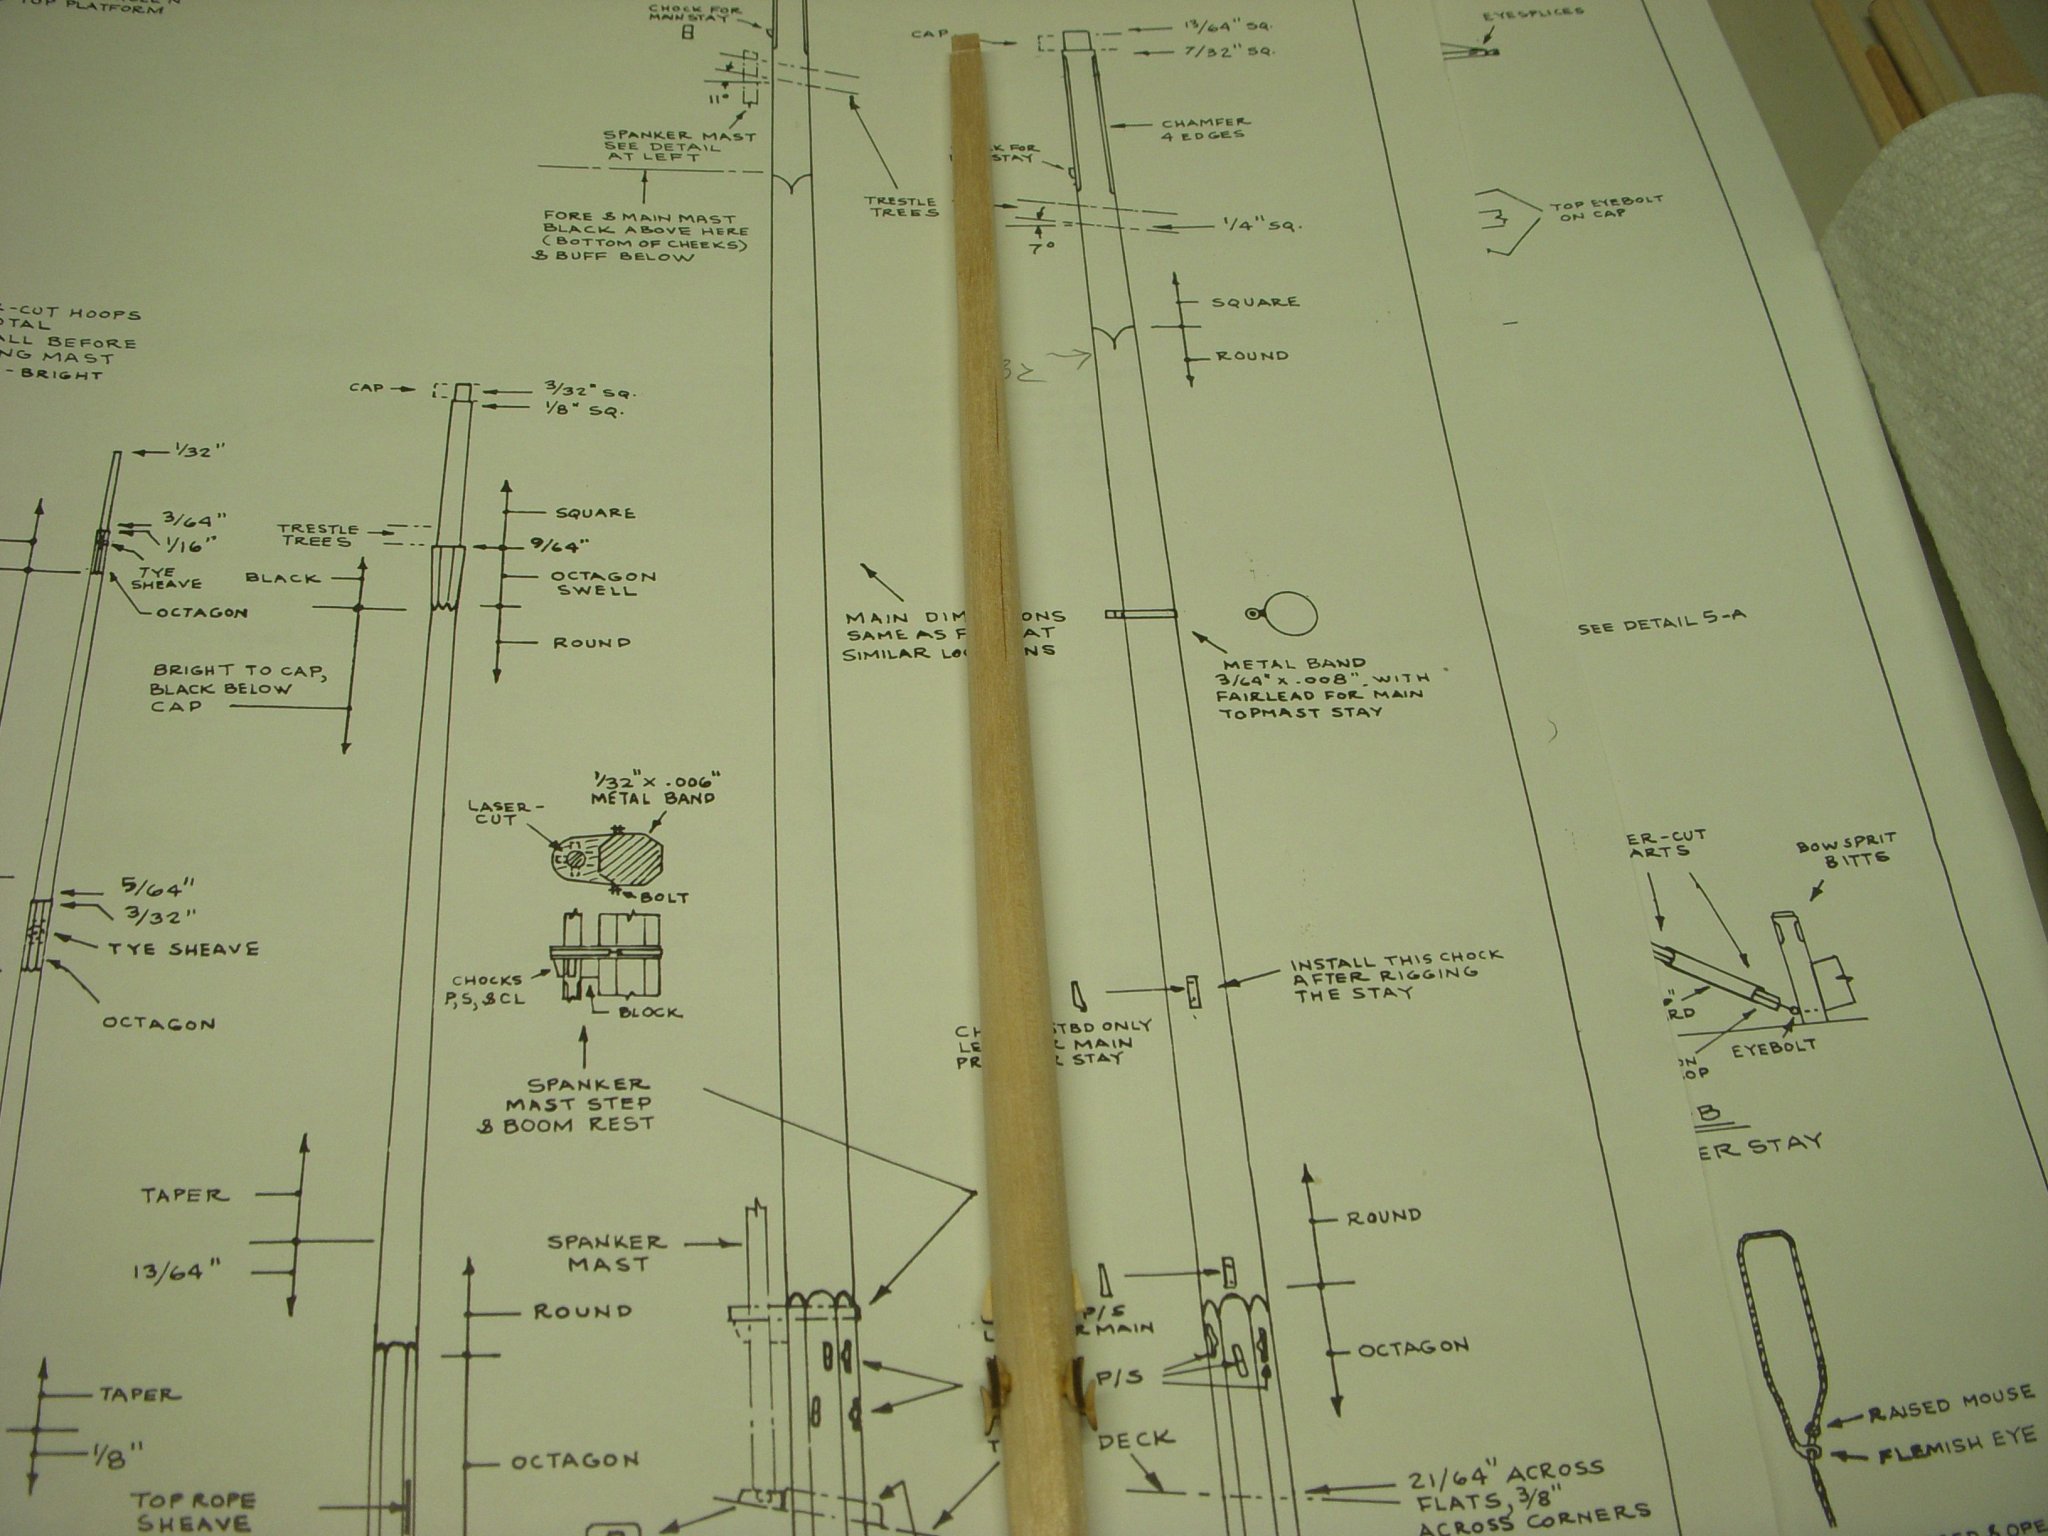
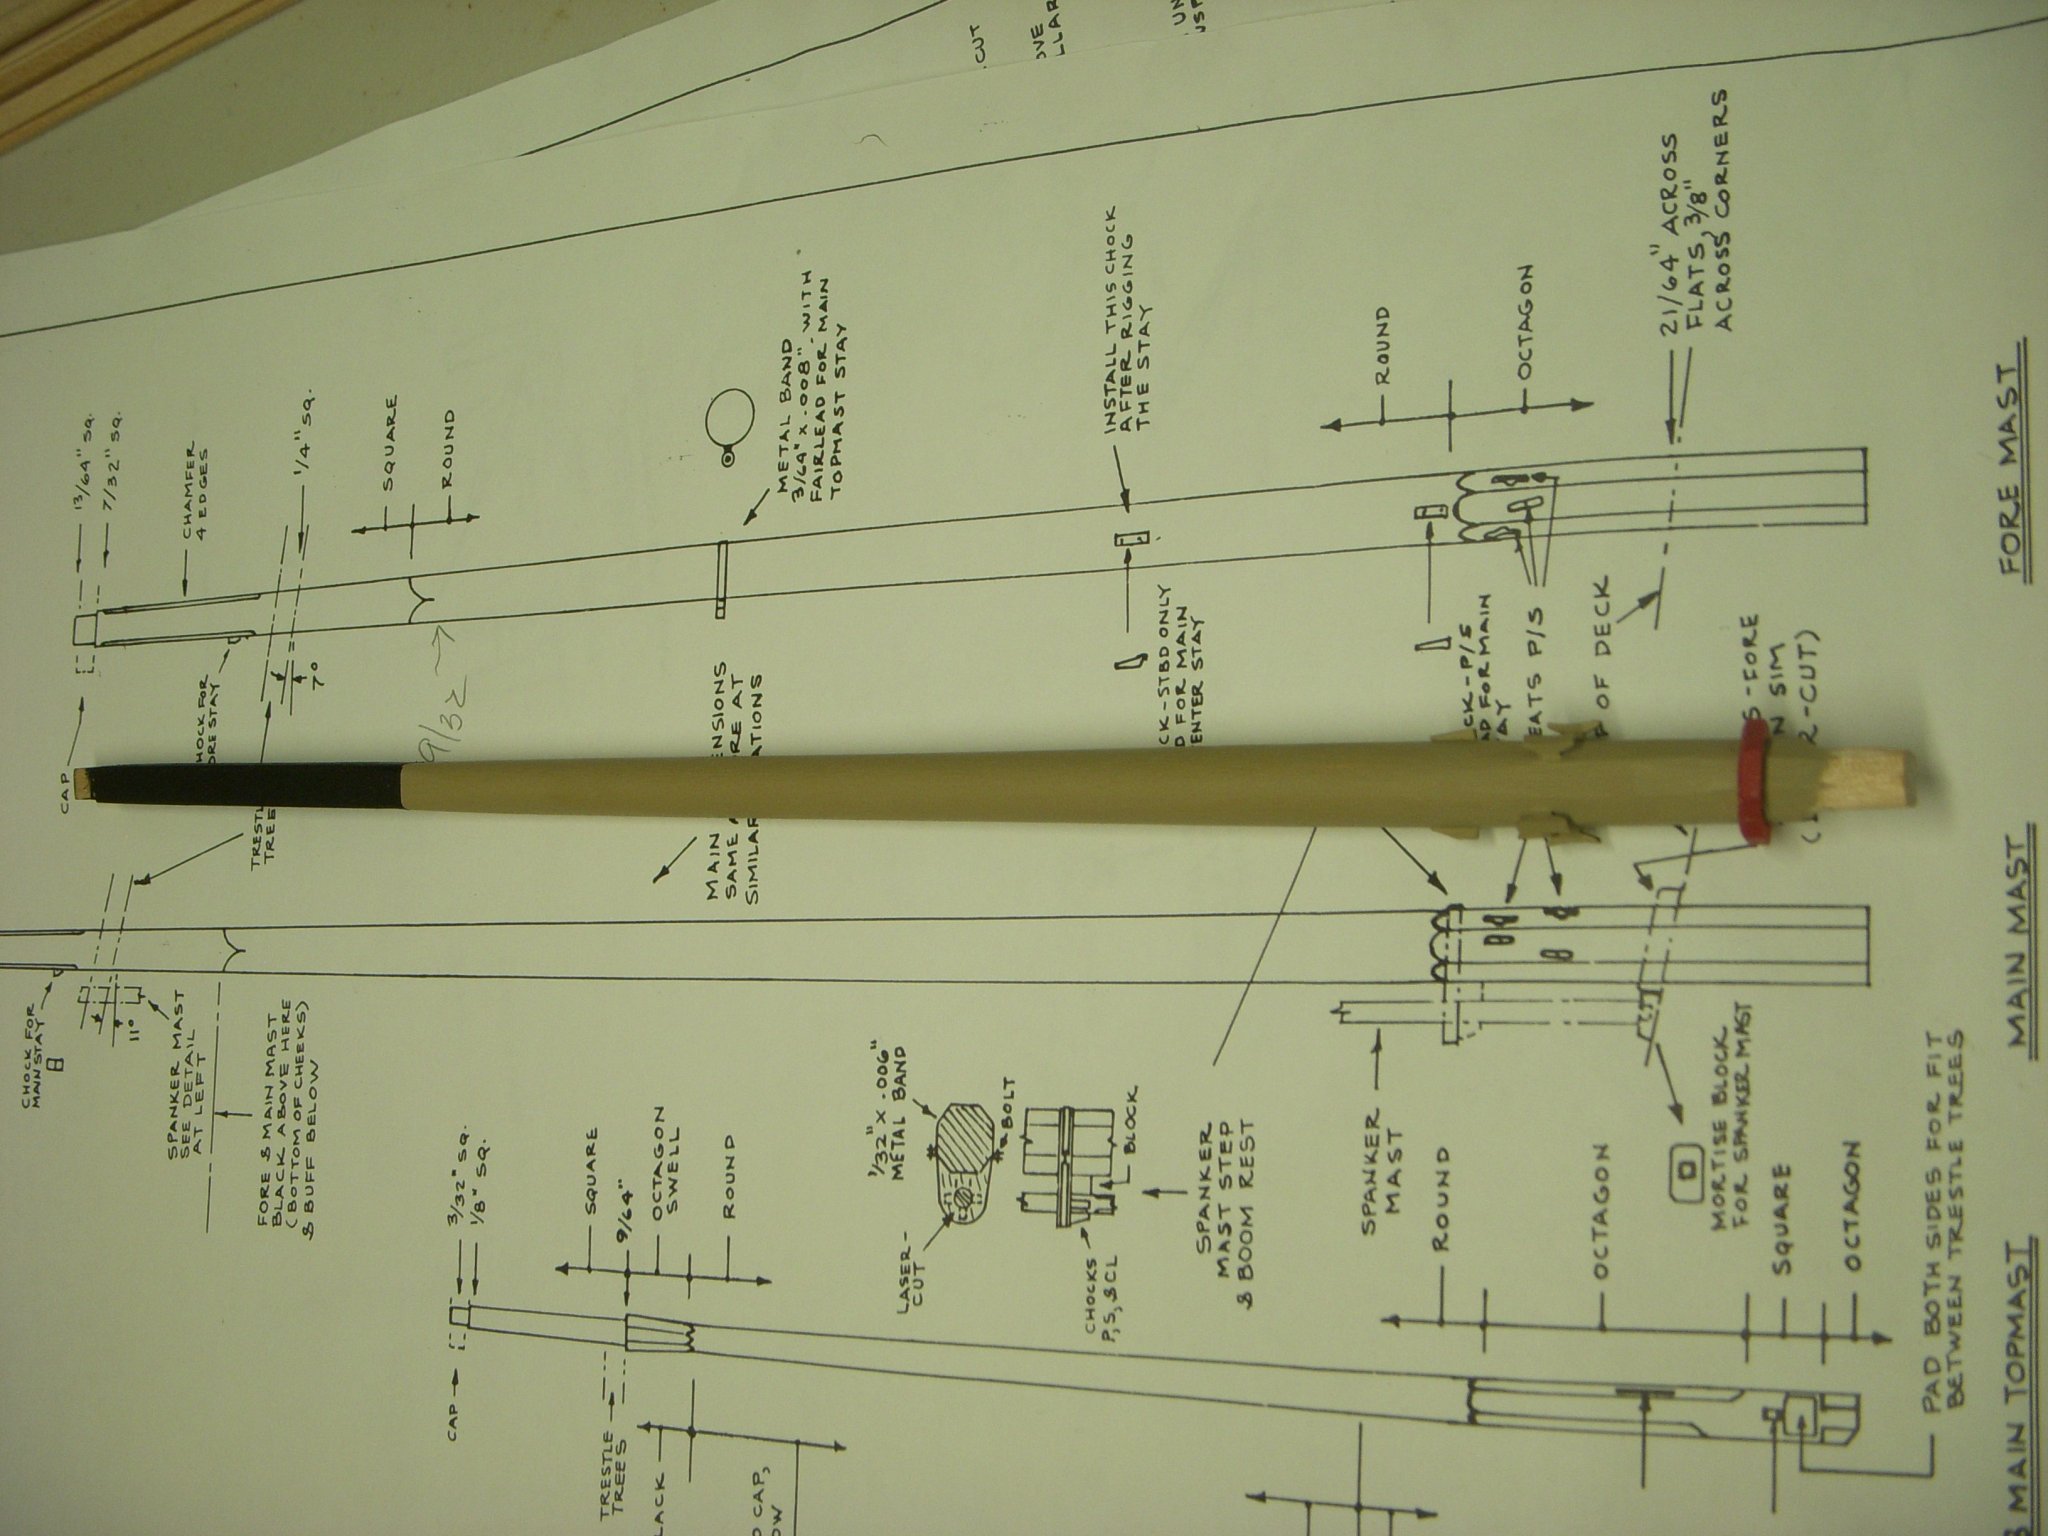
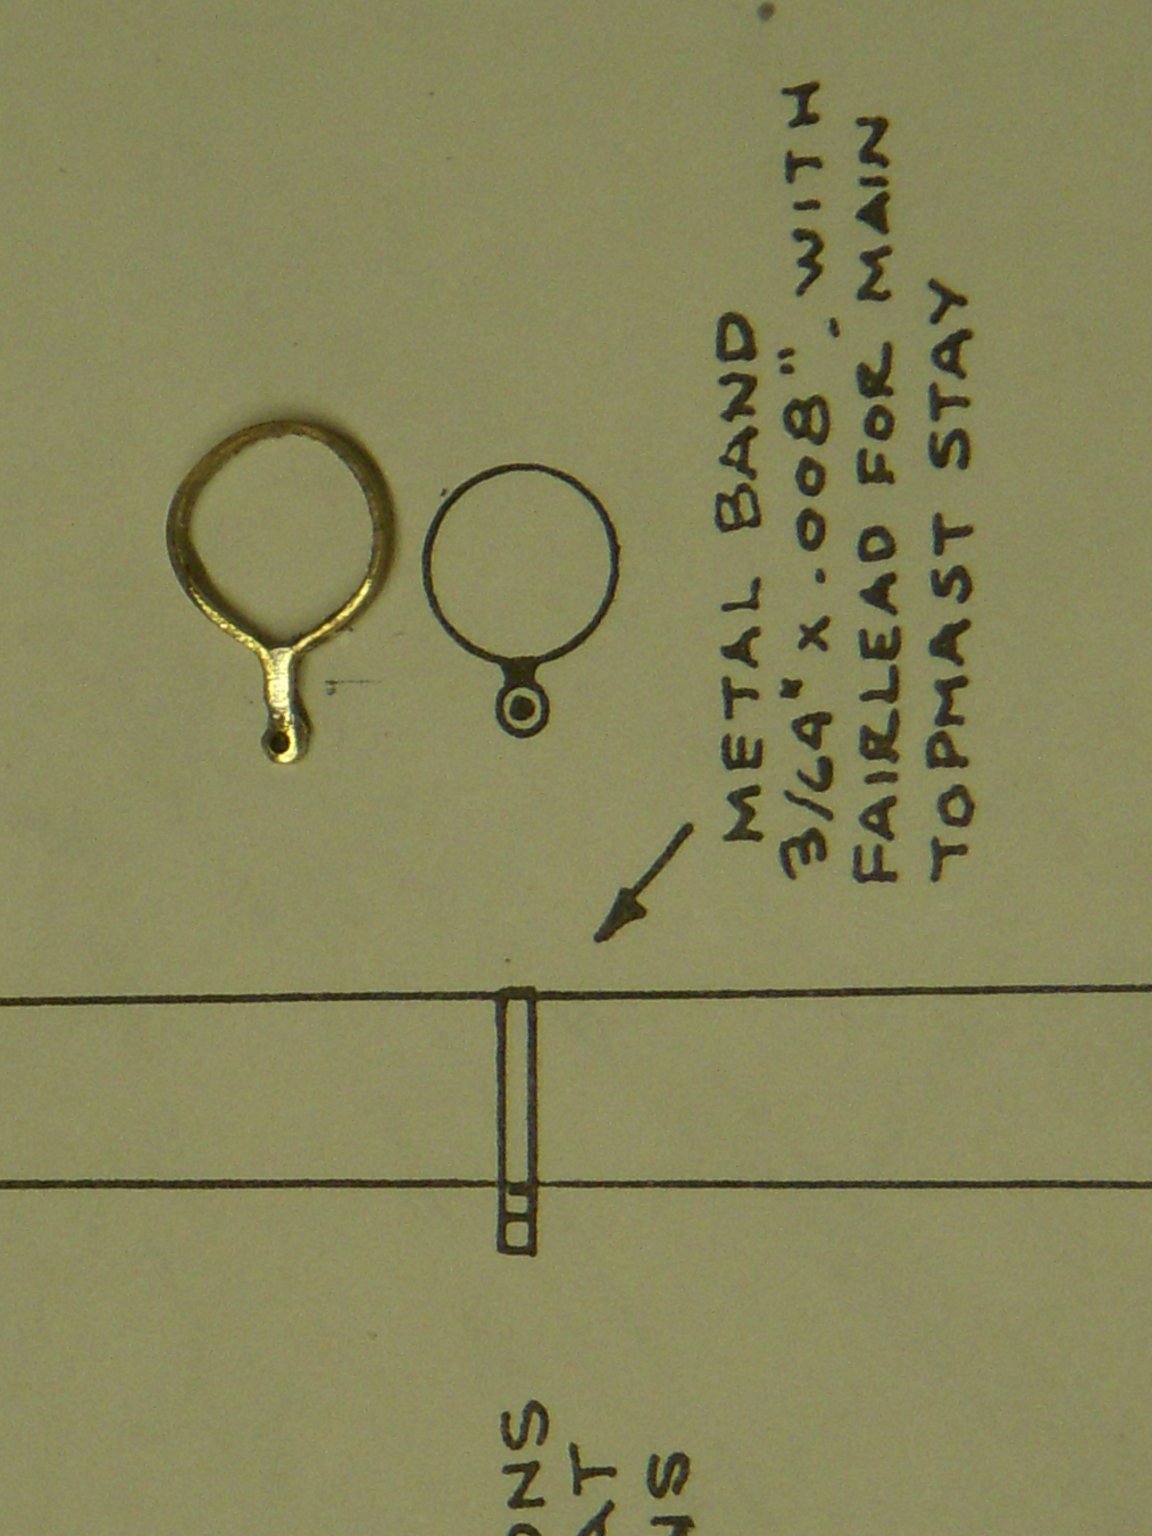
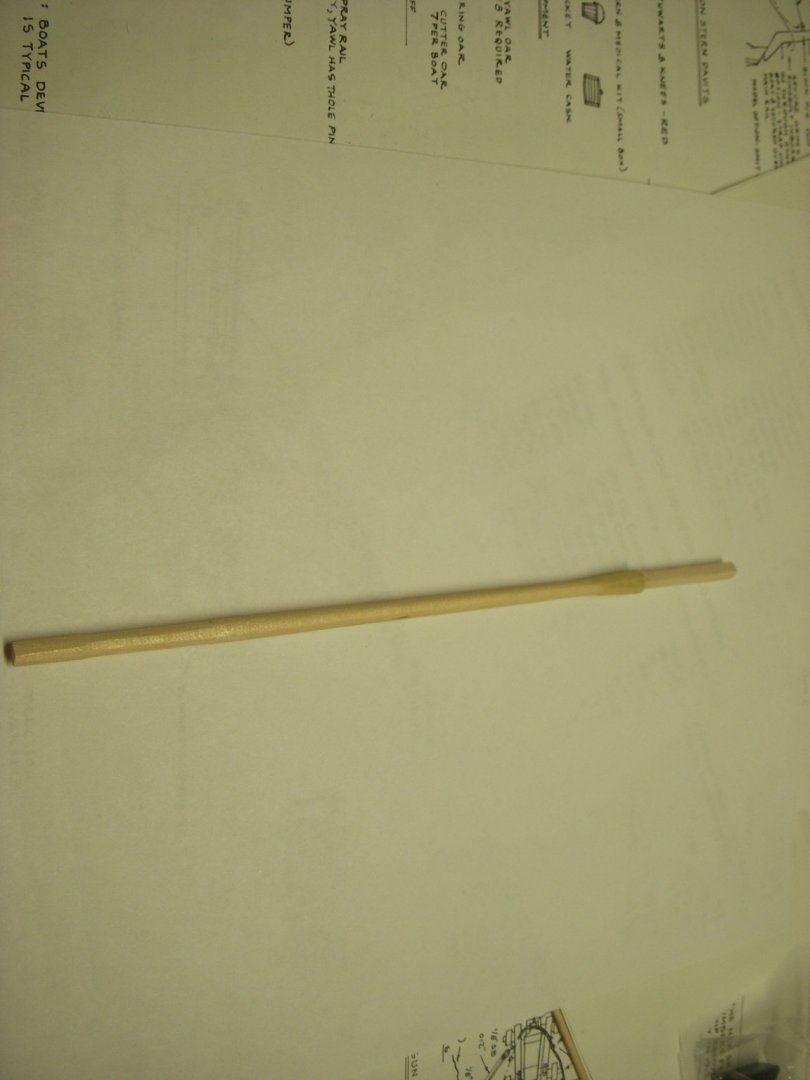
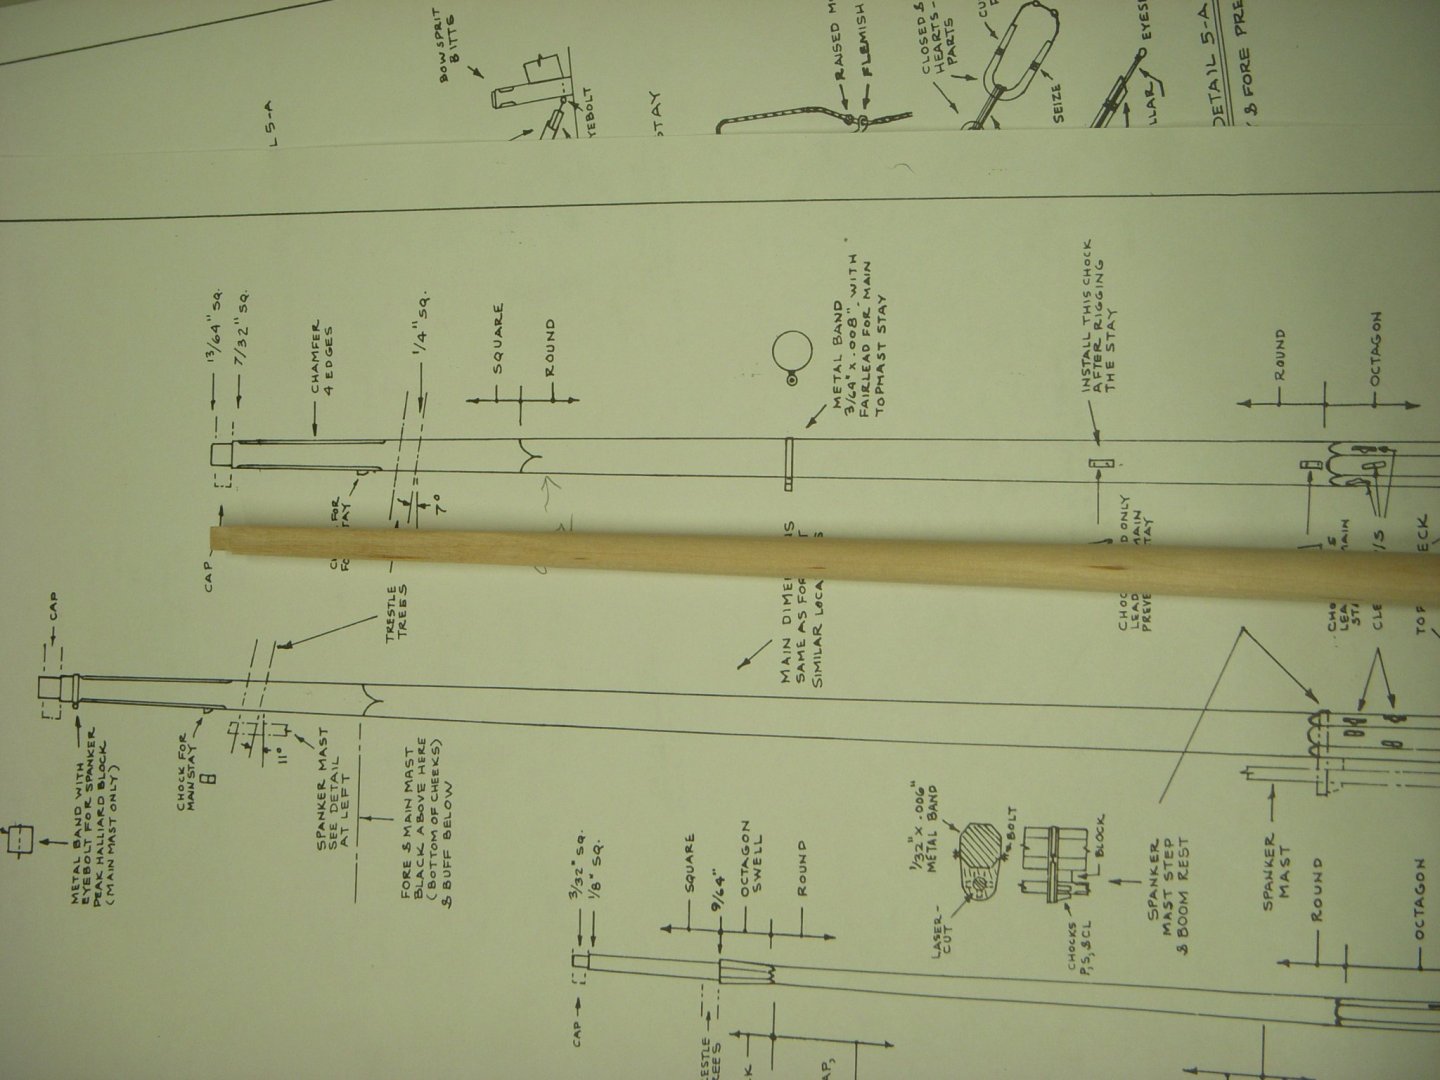
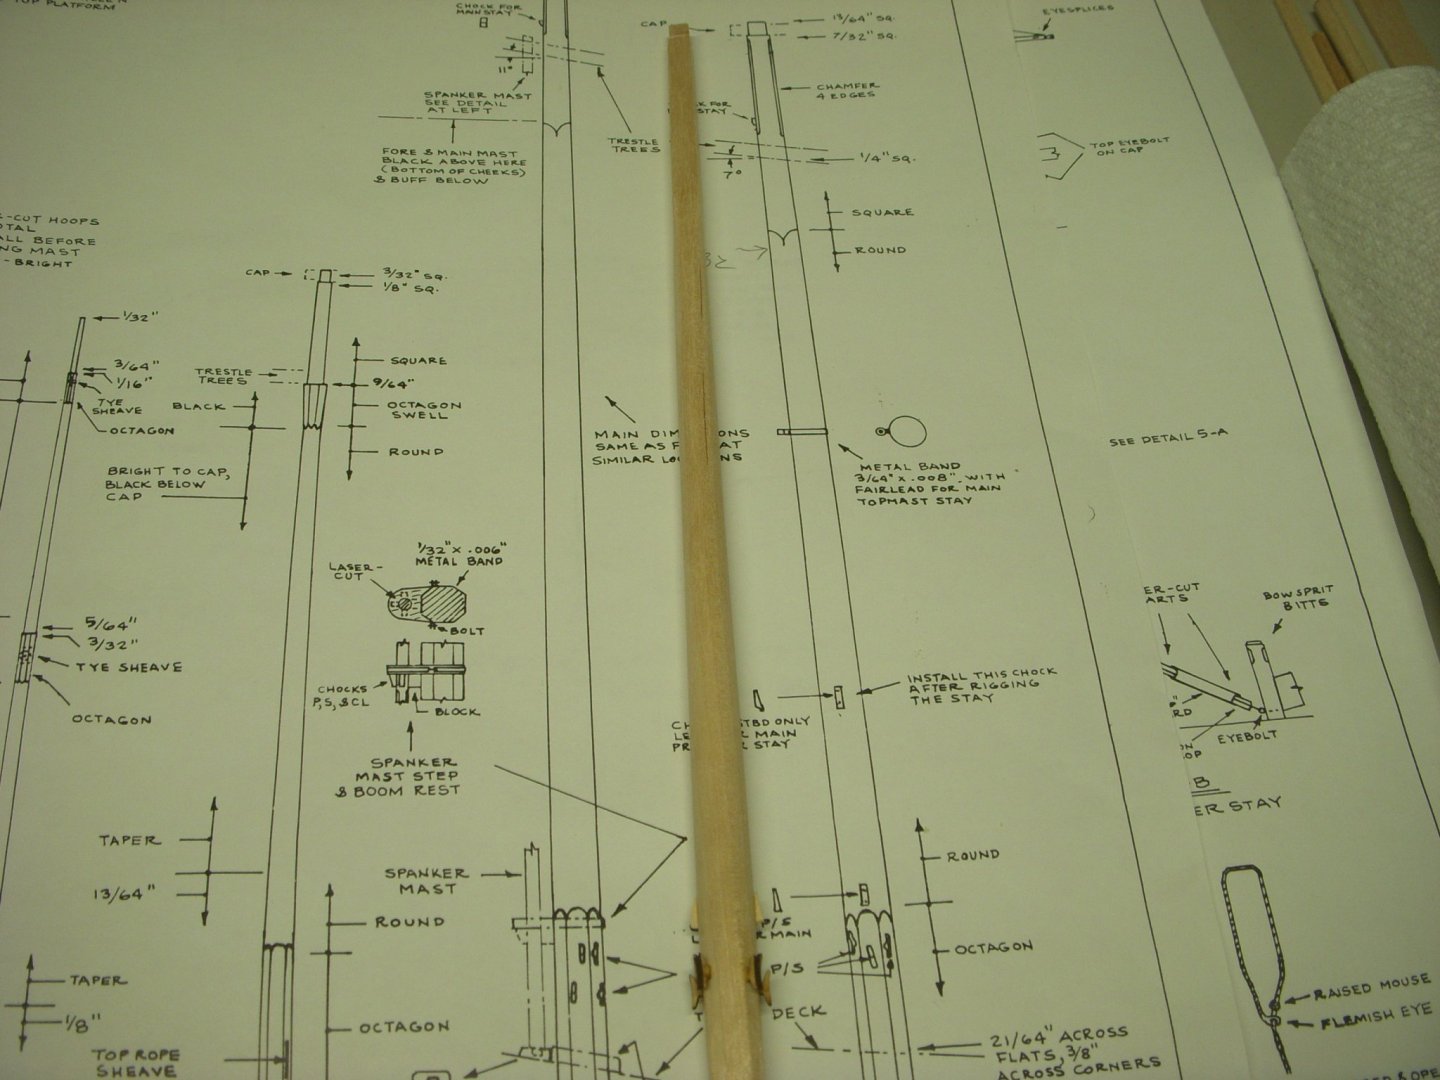
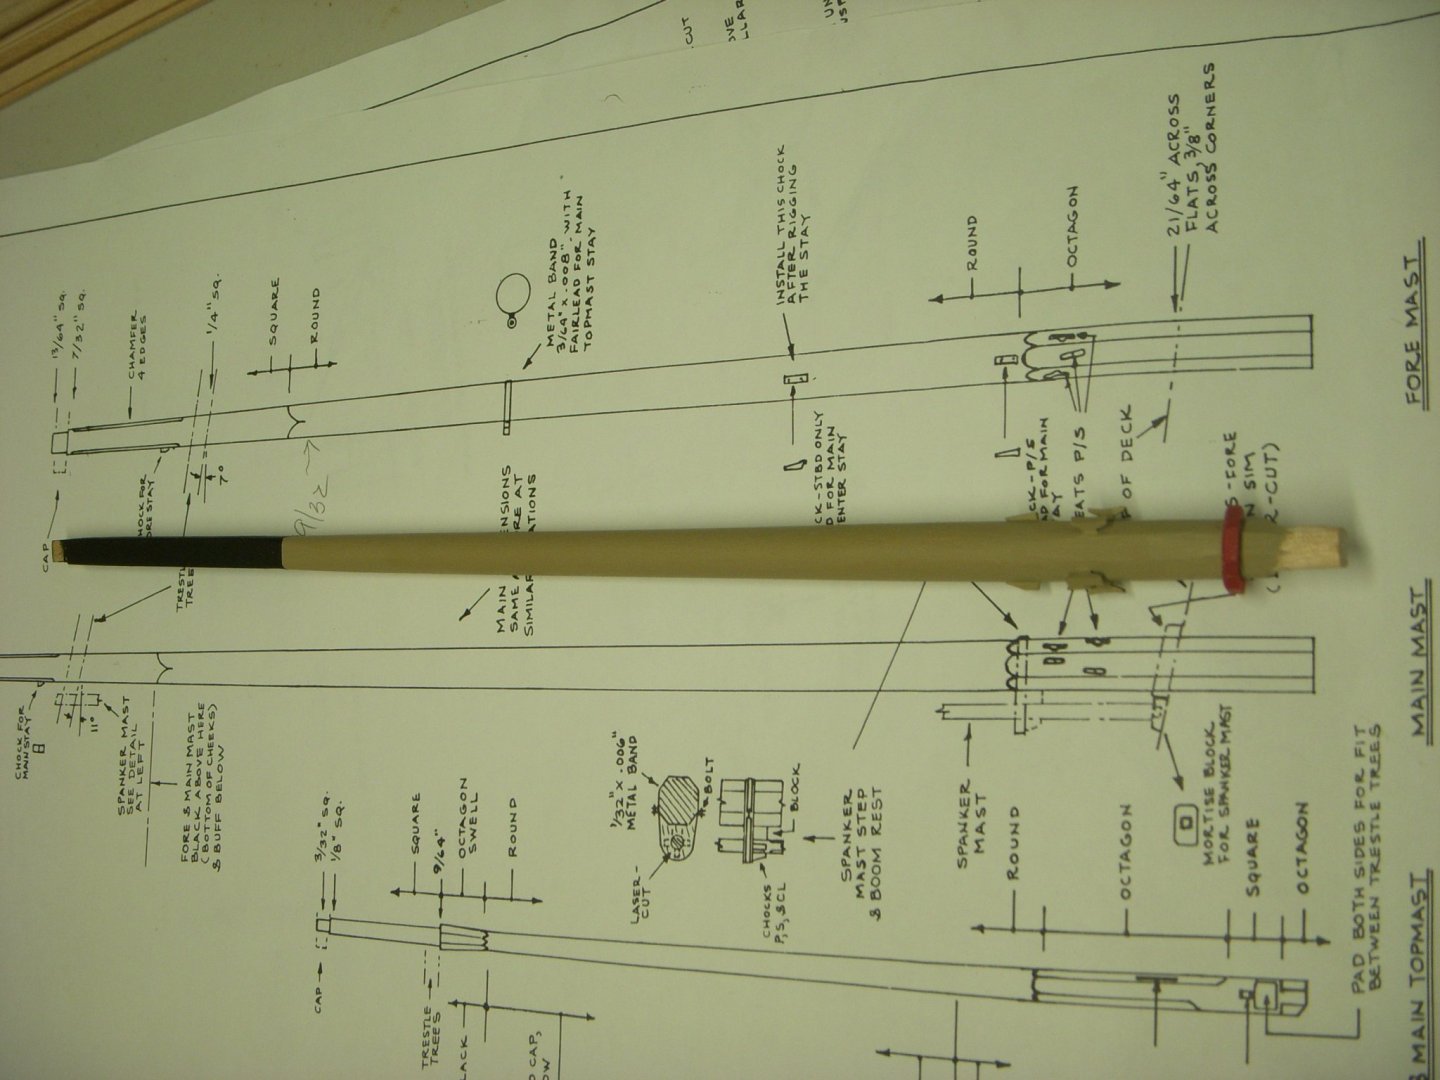
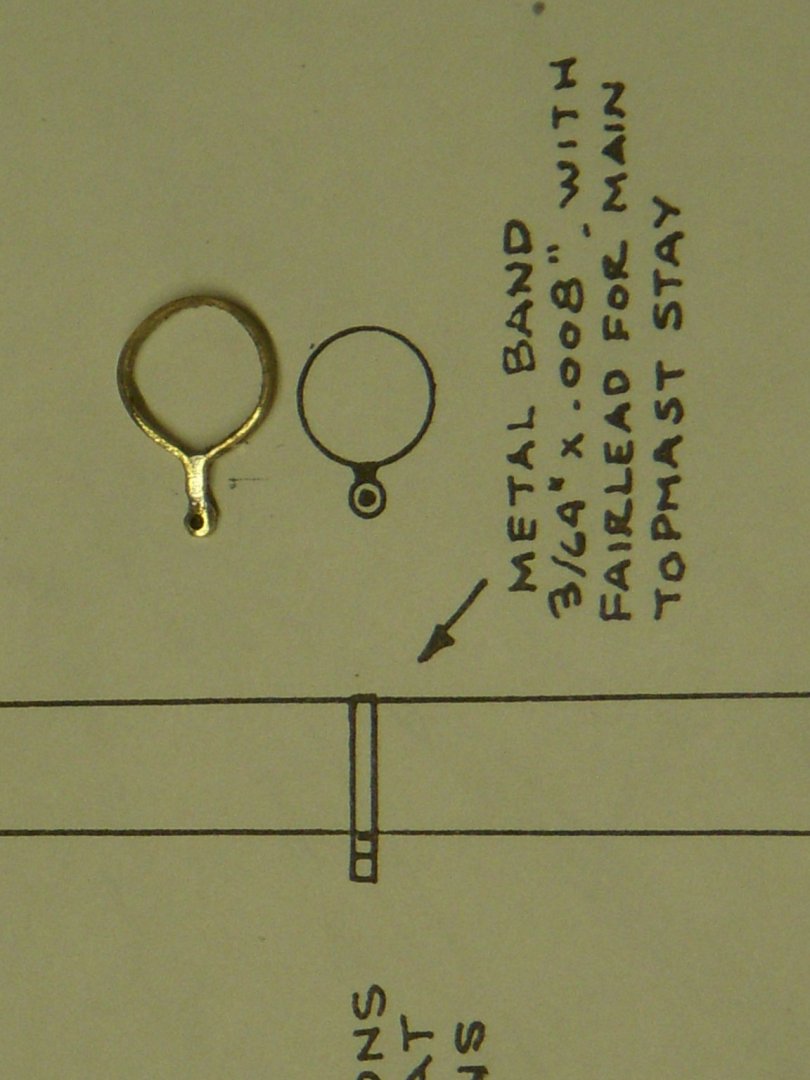
Well I took a few weeks, no maybe a couple of months off for the summer. The weather was really great this year so instead of working on my ship I decided to work on my yard. Now that the summer is coming to an end so I decided to get back to the ship. I stared by working on the foremast. I am doing the taper by using my drill and sanding it down to the proper dimensions. I did find one tip on the forums that helped a bit, I put a piece of plastic tubing on the dowel before inserting it in the drill chuck. This saved, almost eliminated the chuck of the drill marring up the end of the dowel. Next I worked on adding the square and hex part of the mast. The upper square portion was fairly easy to do, but doing the hex portion was a bit of a challenge. Lining up the upper and lower portion was the part that I found difficult. I ended up making this part twice. The first attempt did not turn out as expected. The second attempt turned out better, not great but passible. The biggest problem was getting the mast wedges to slide on to the mast without leaving gaps. After some sanding, filing and adjusting it turned out acceptable. I started painting the mast and it covered up the irregularities in the lower hex portion. Next I made the metal band that is installed half way up the mast. I used 3/16” brass for the band and then soldered a length of 1/16” tubing. I made the band first and soldered it with silver solder, then added the ring using a soft solder at a lower temp. I filed it smooth and its now ready for blackening. Ron
-
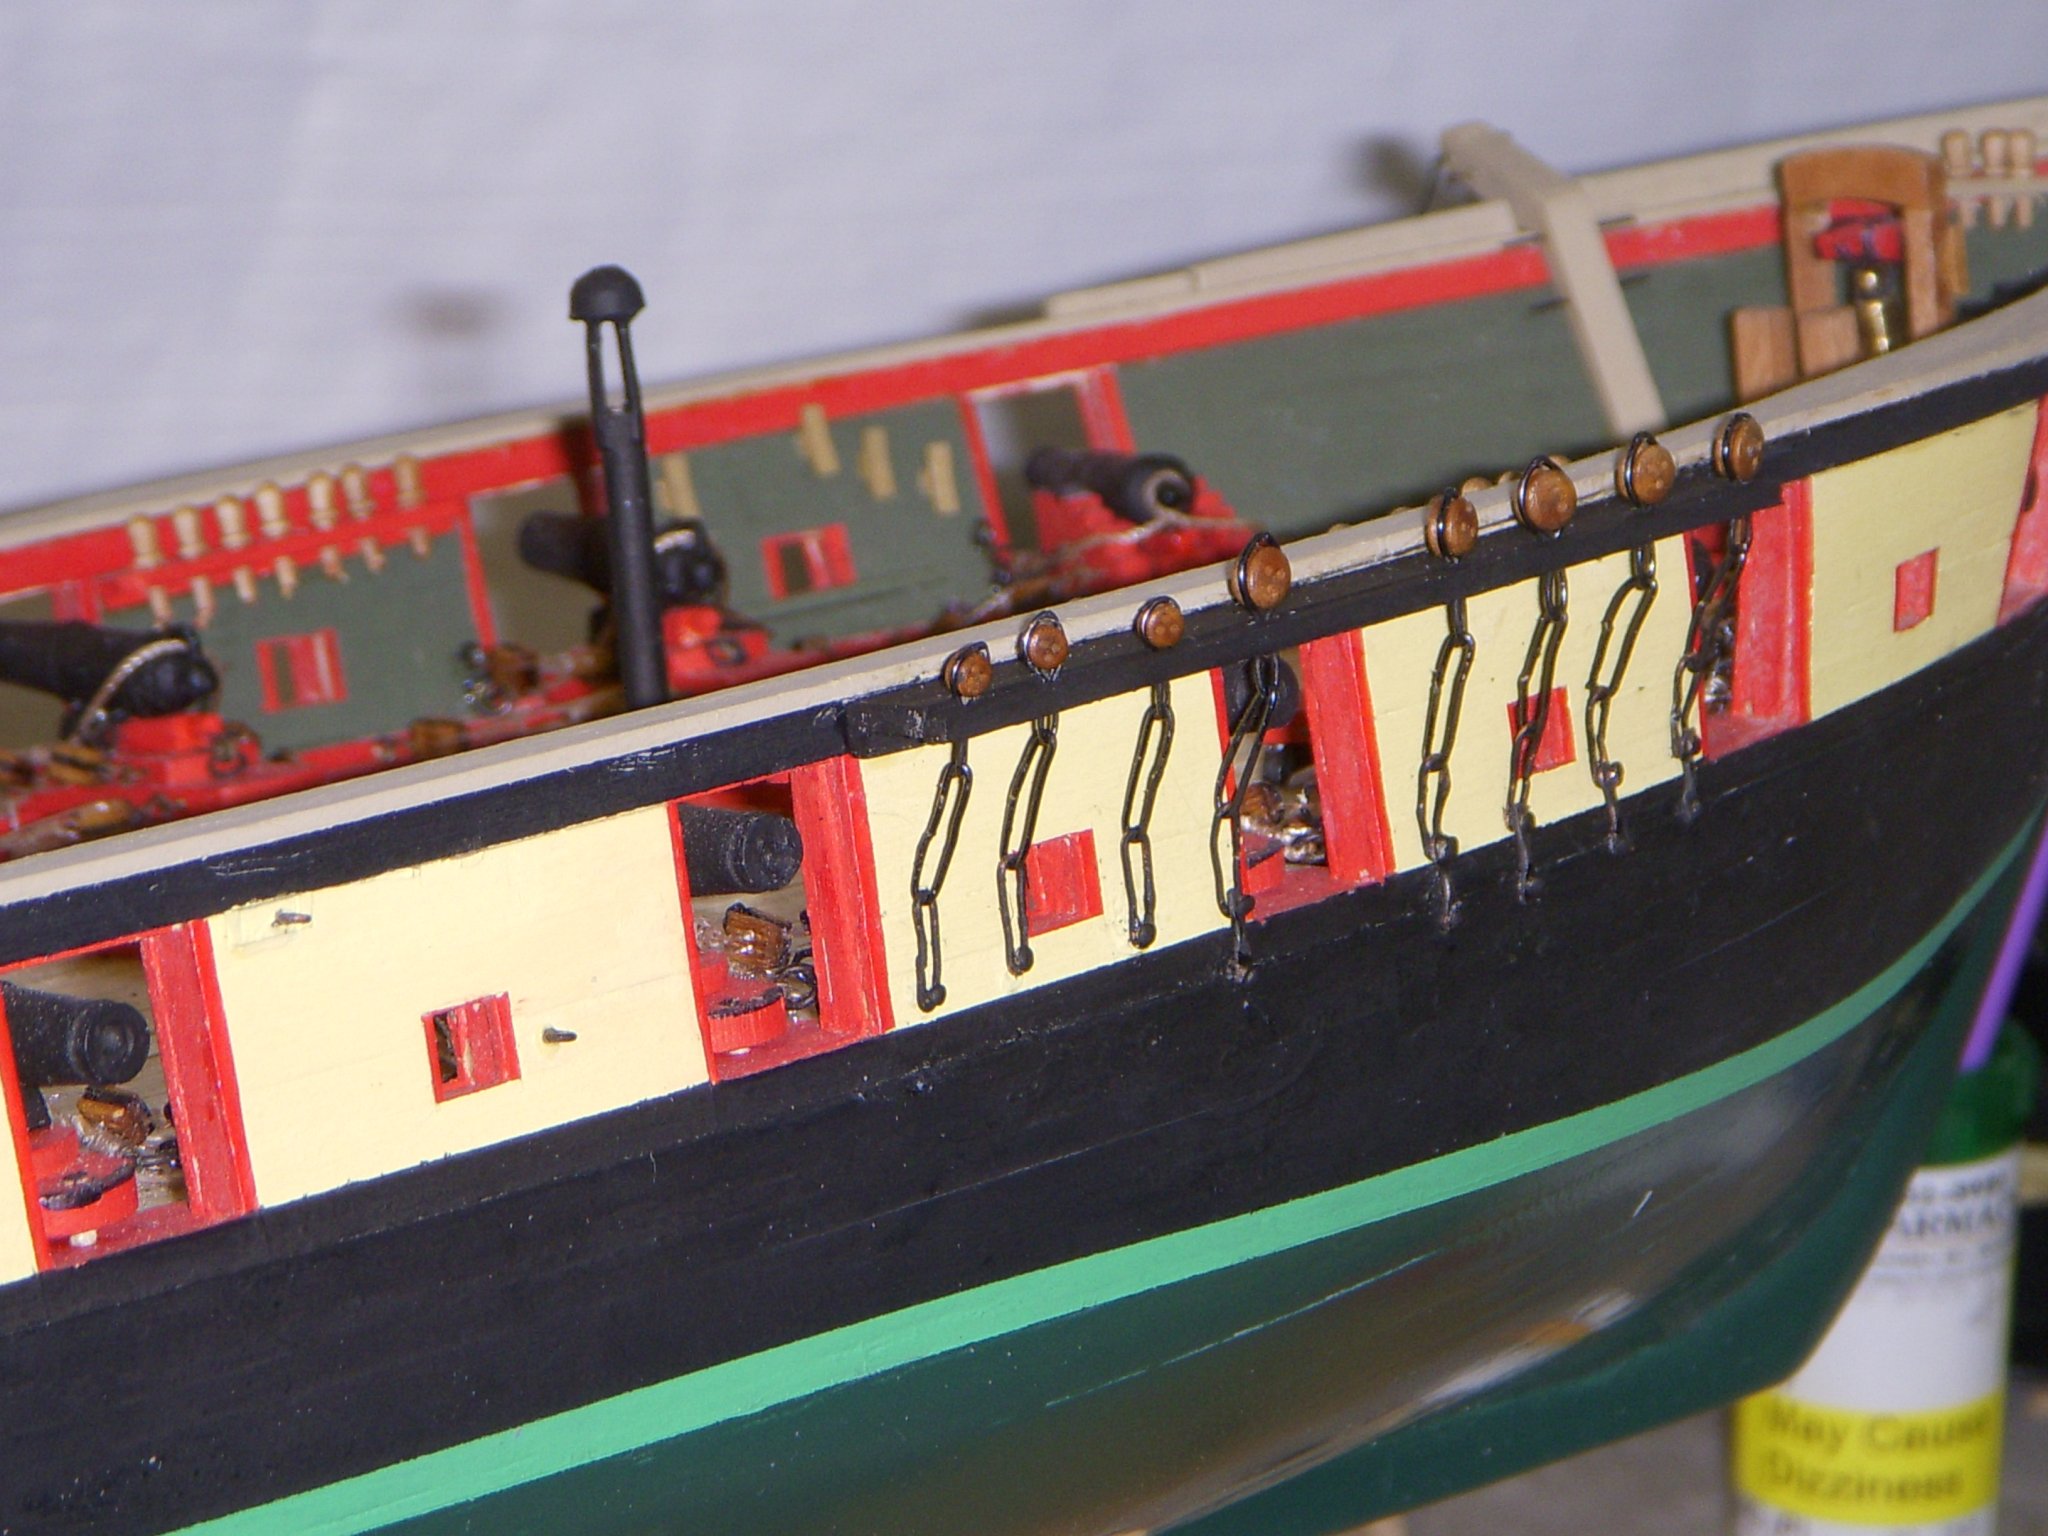
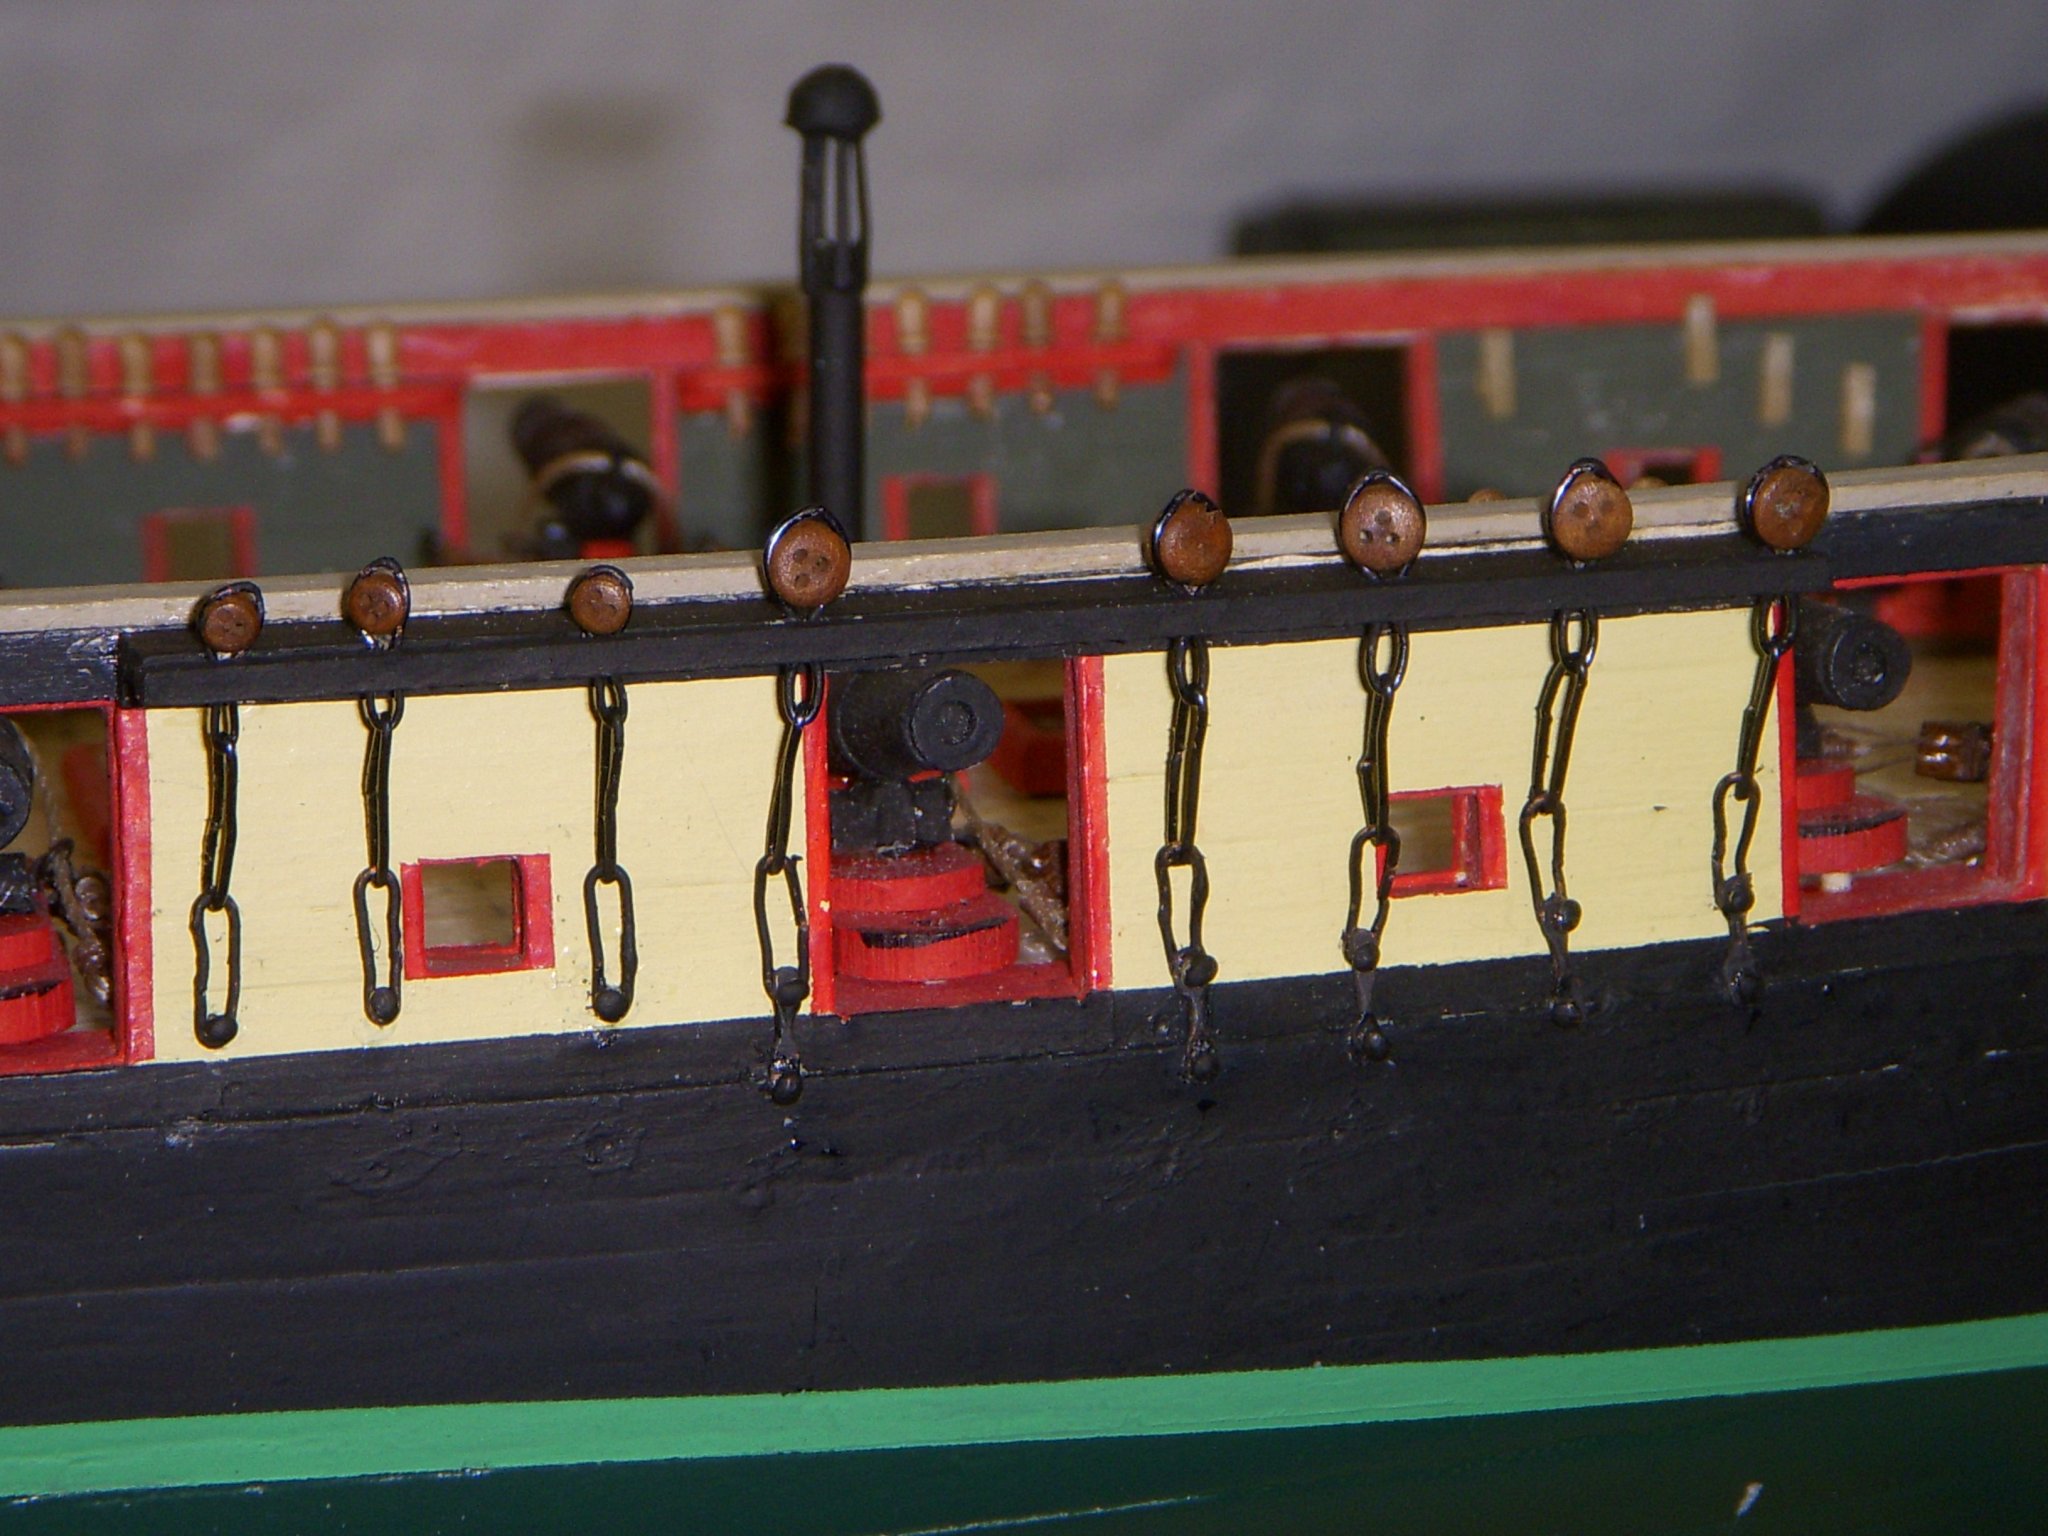
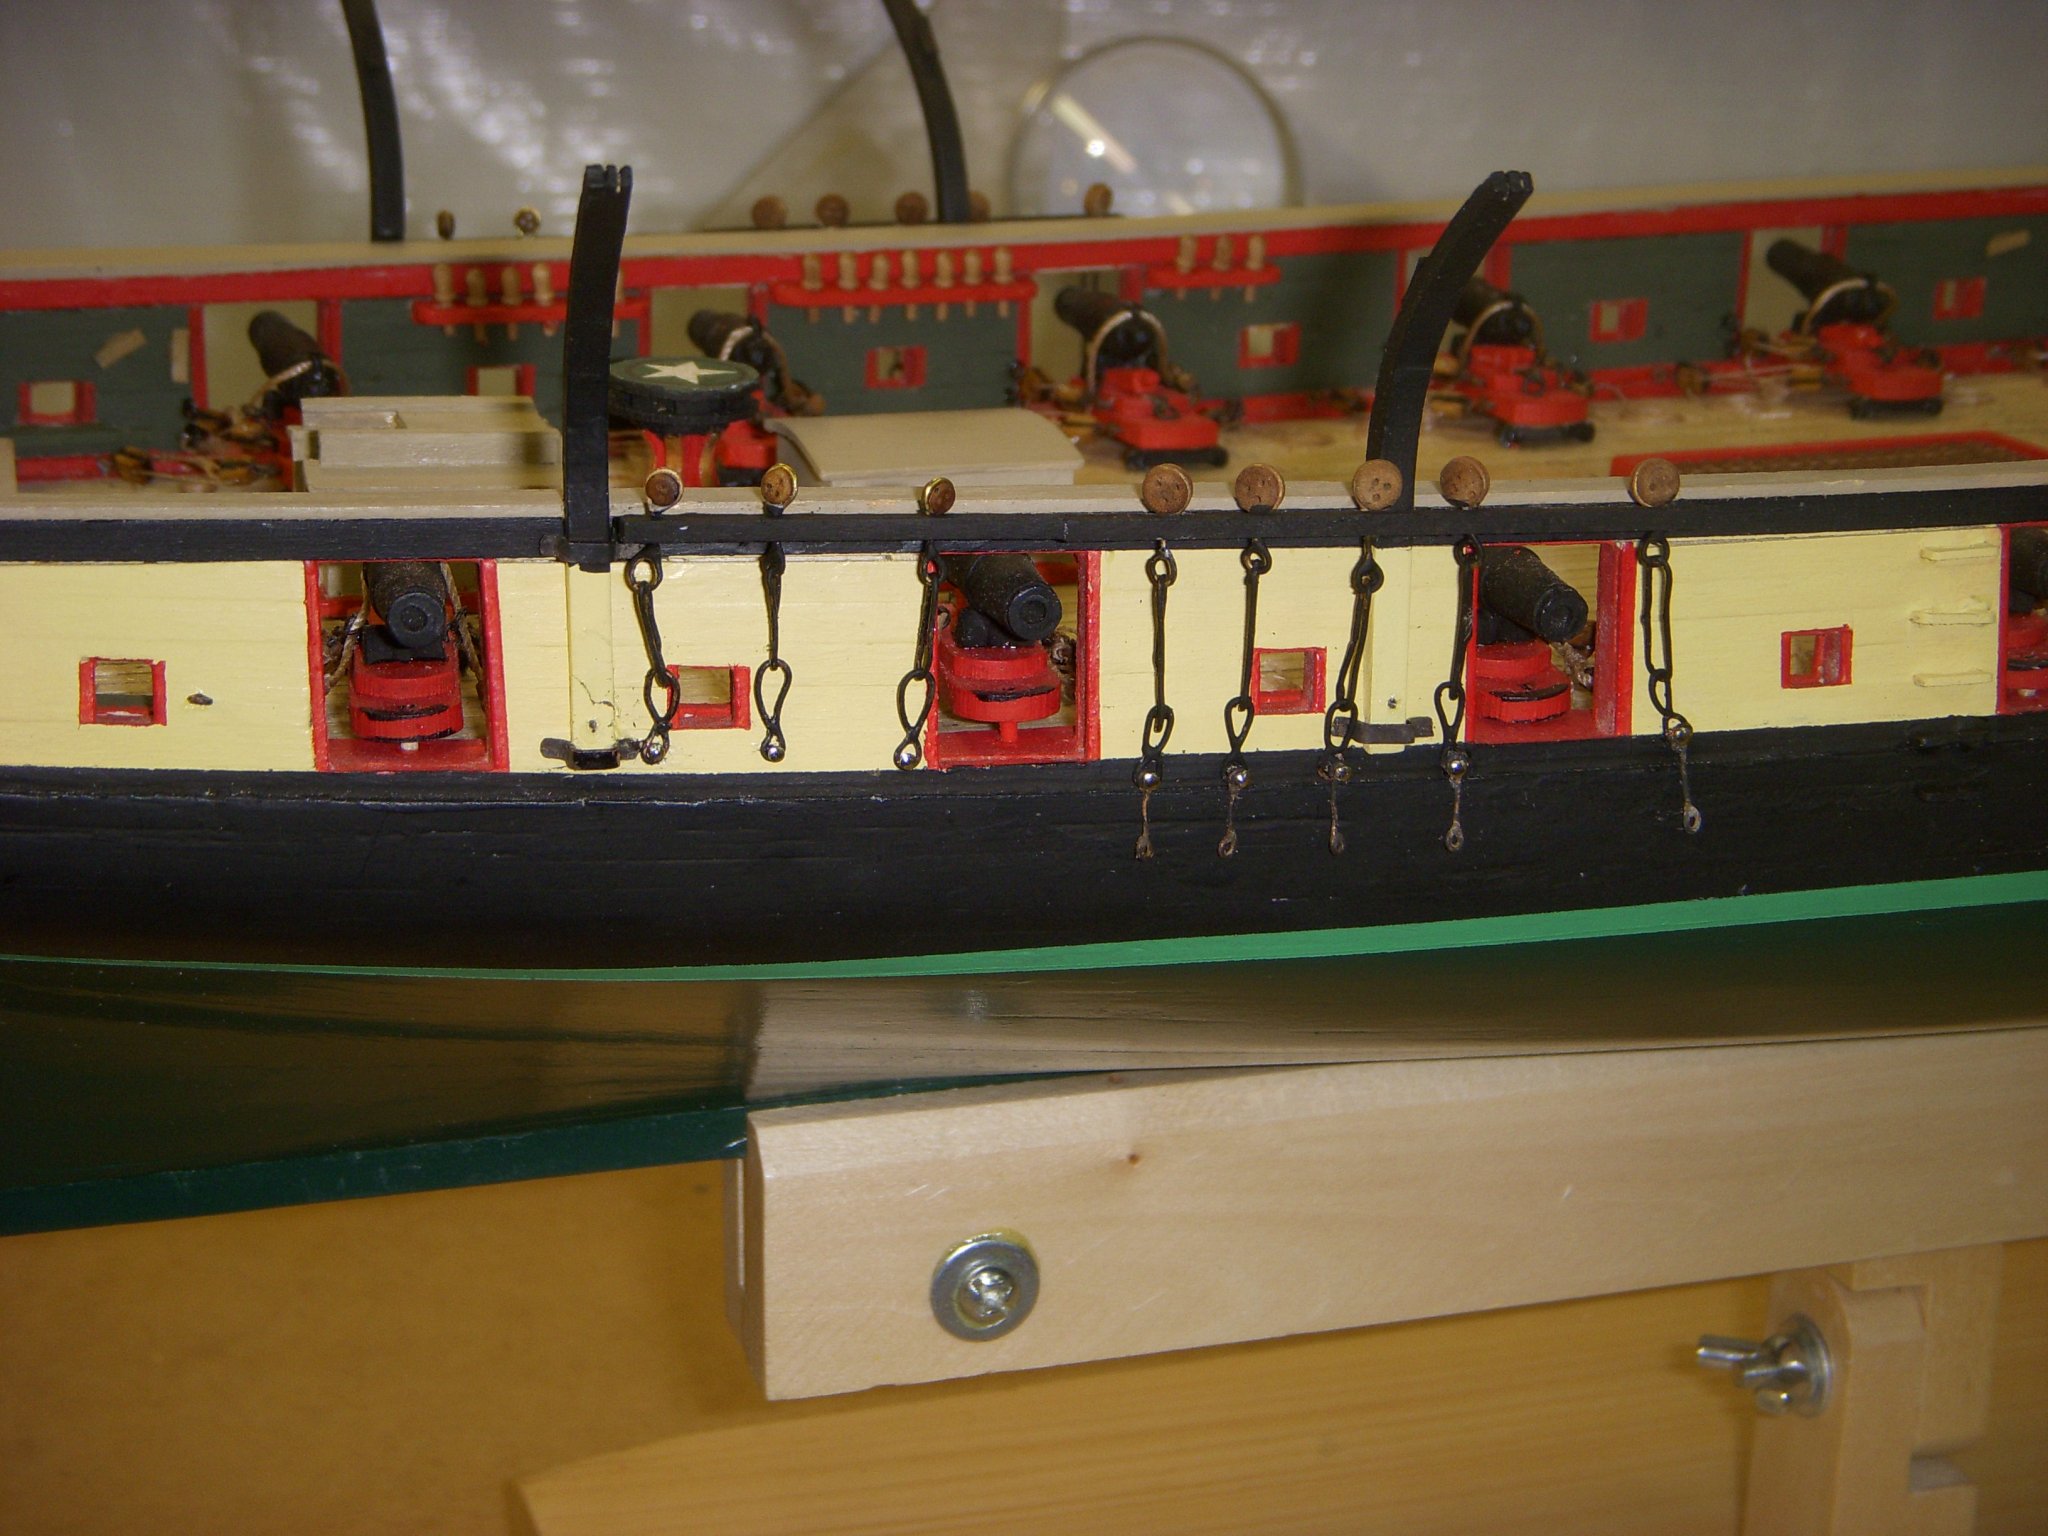
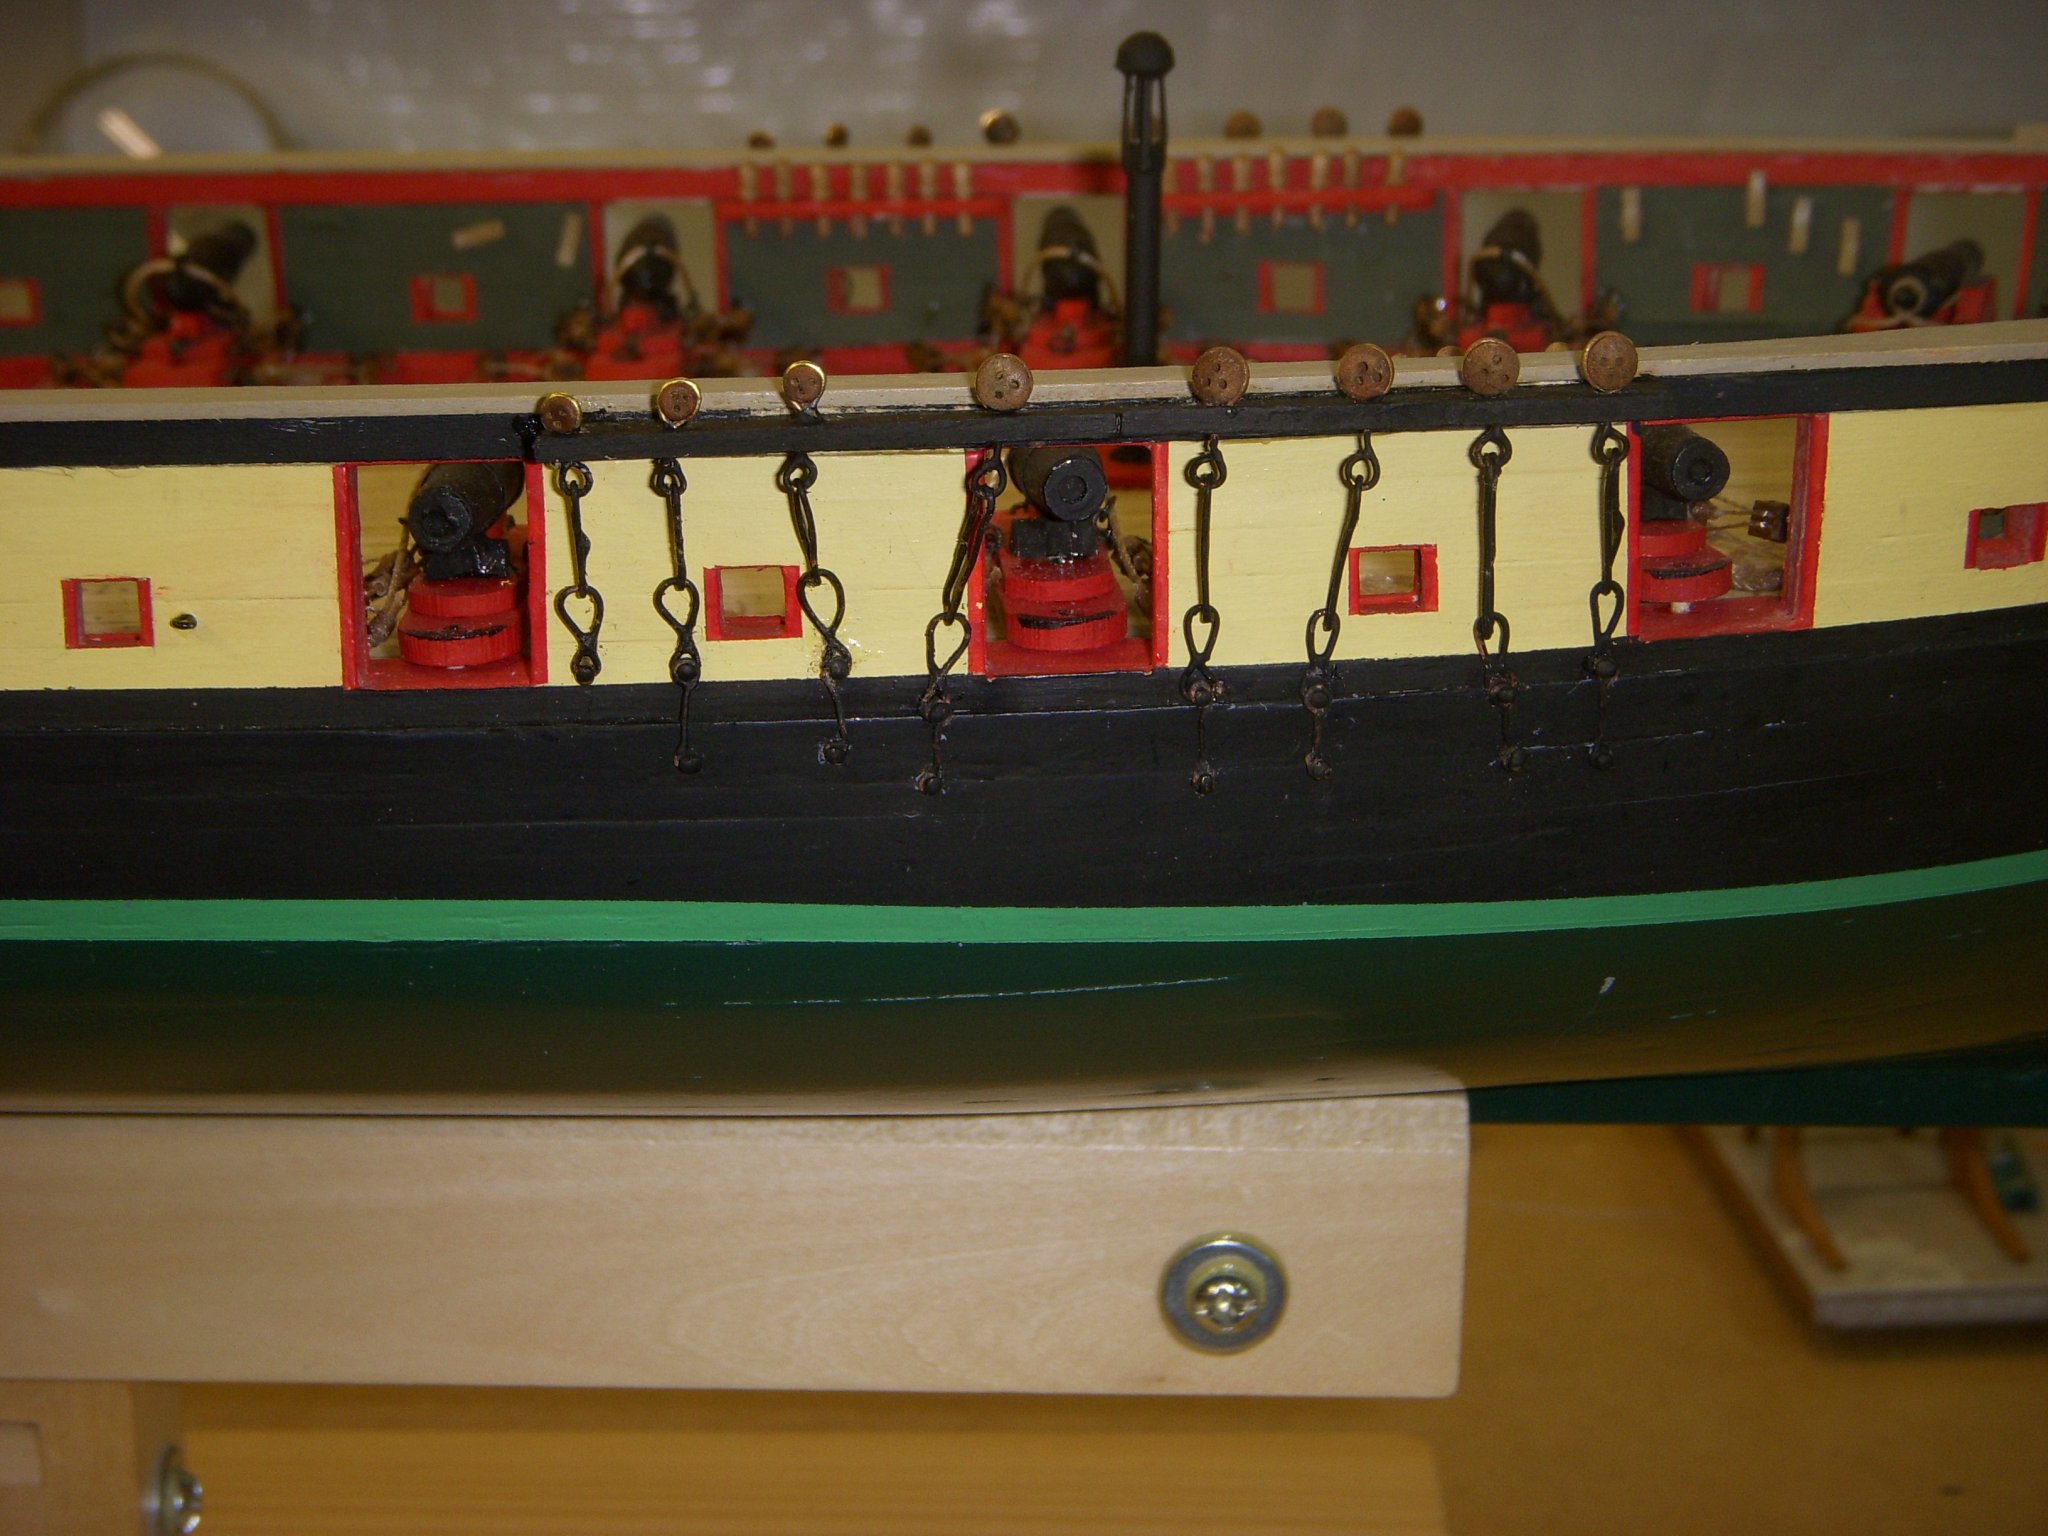
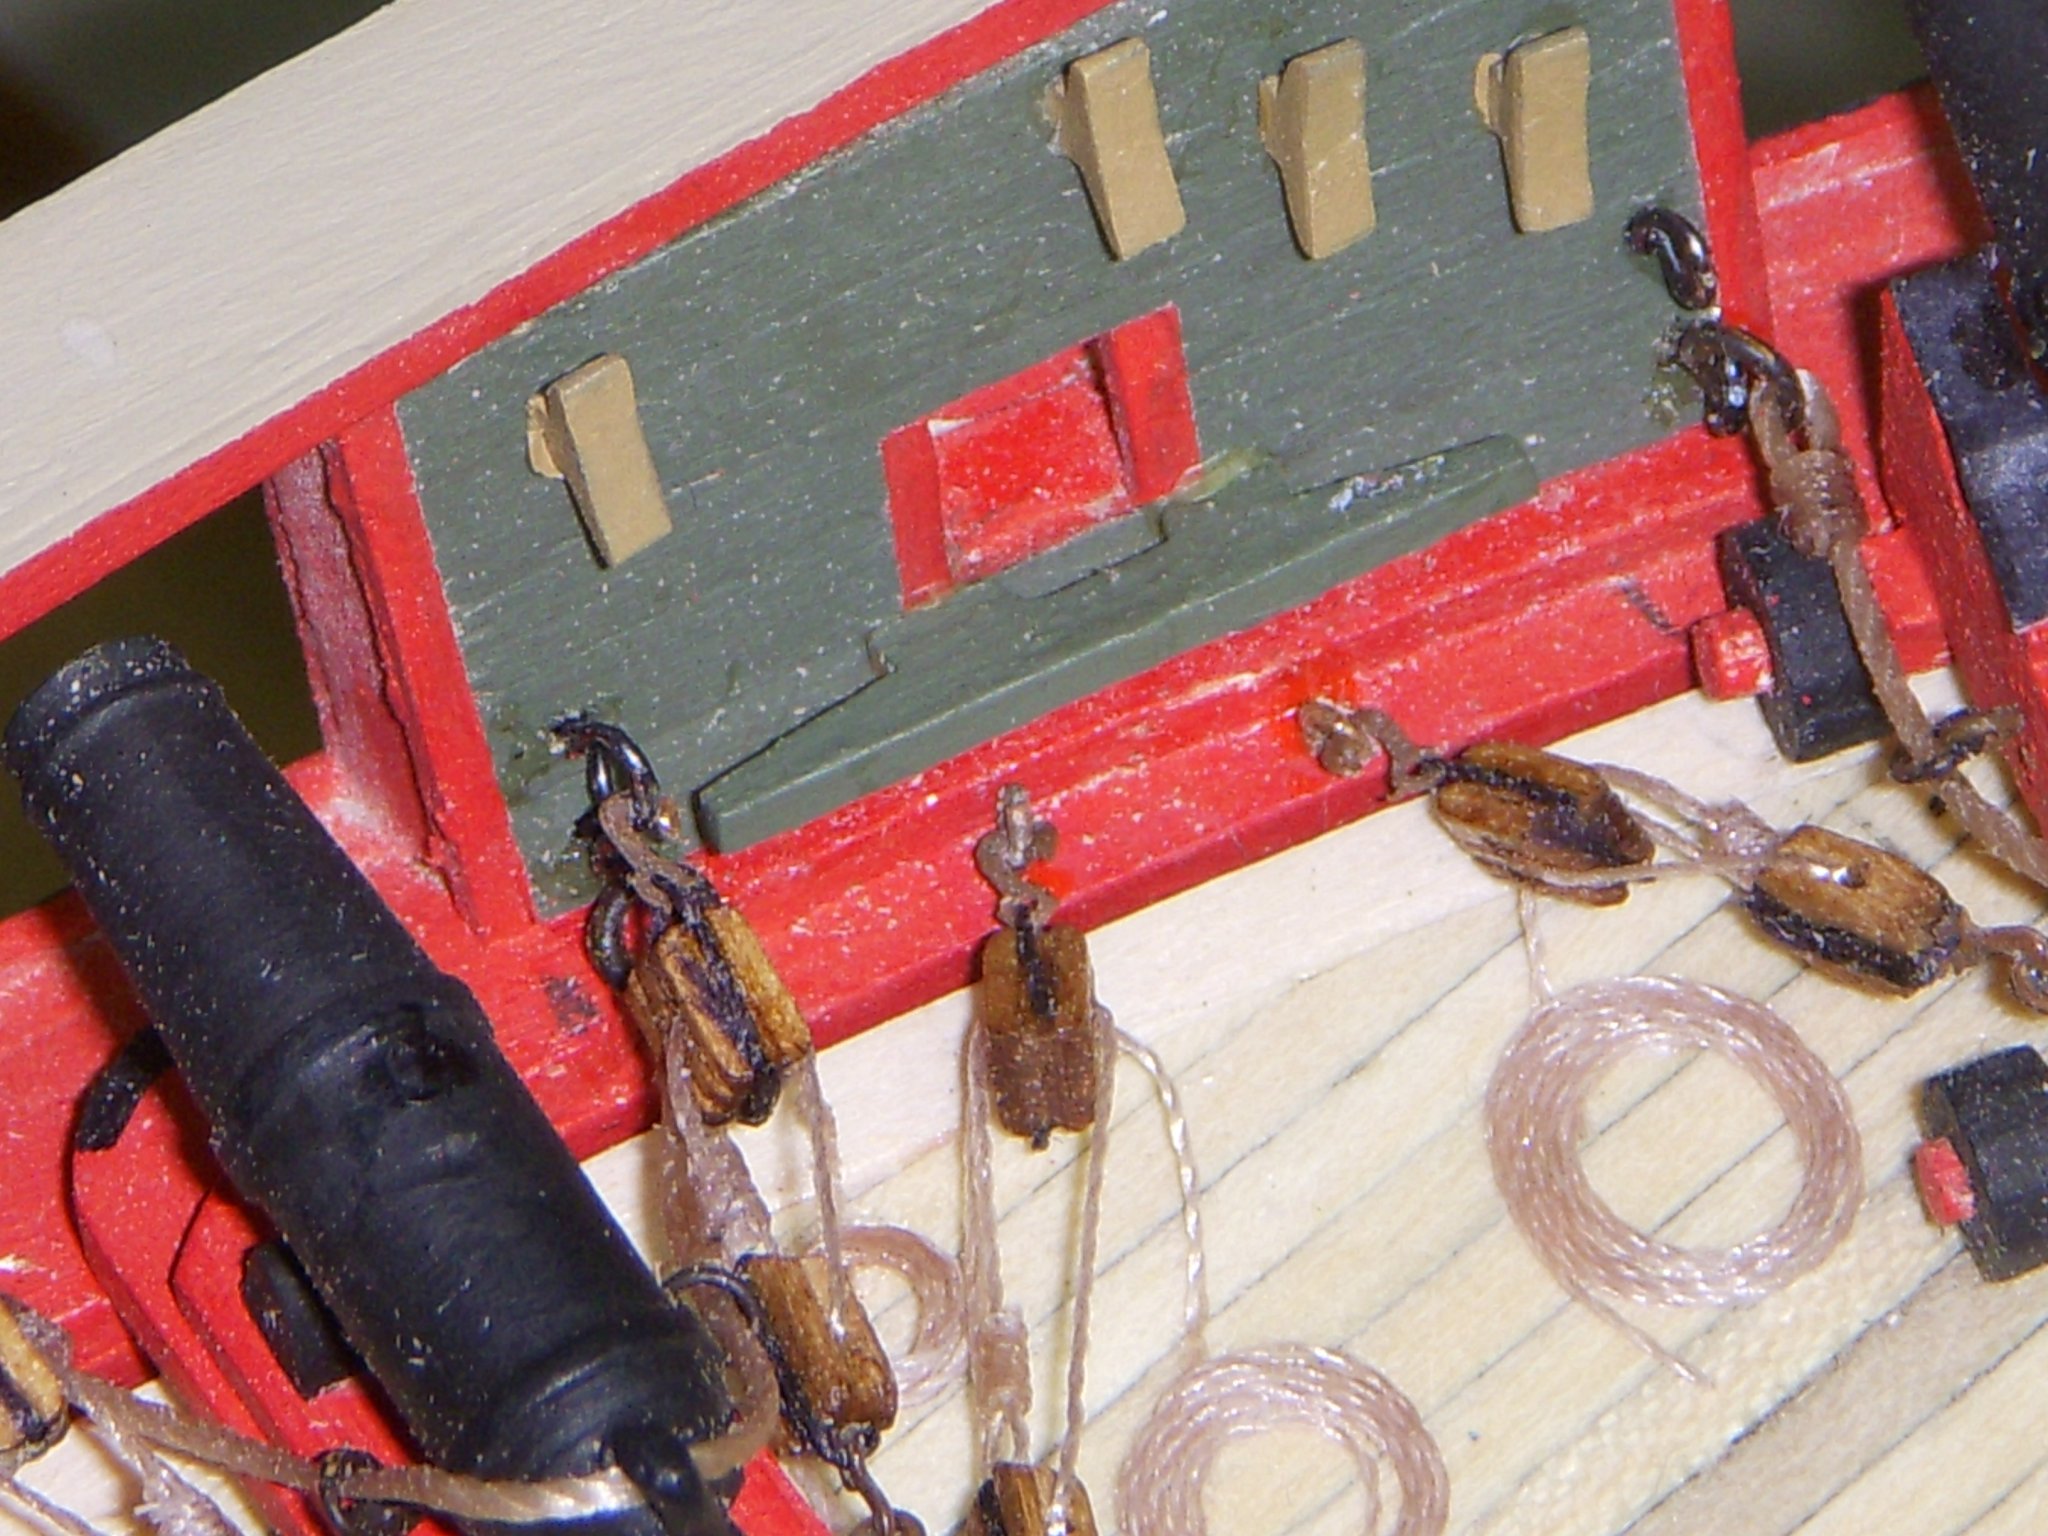
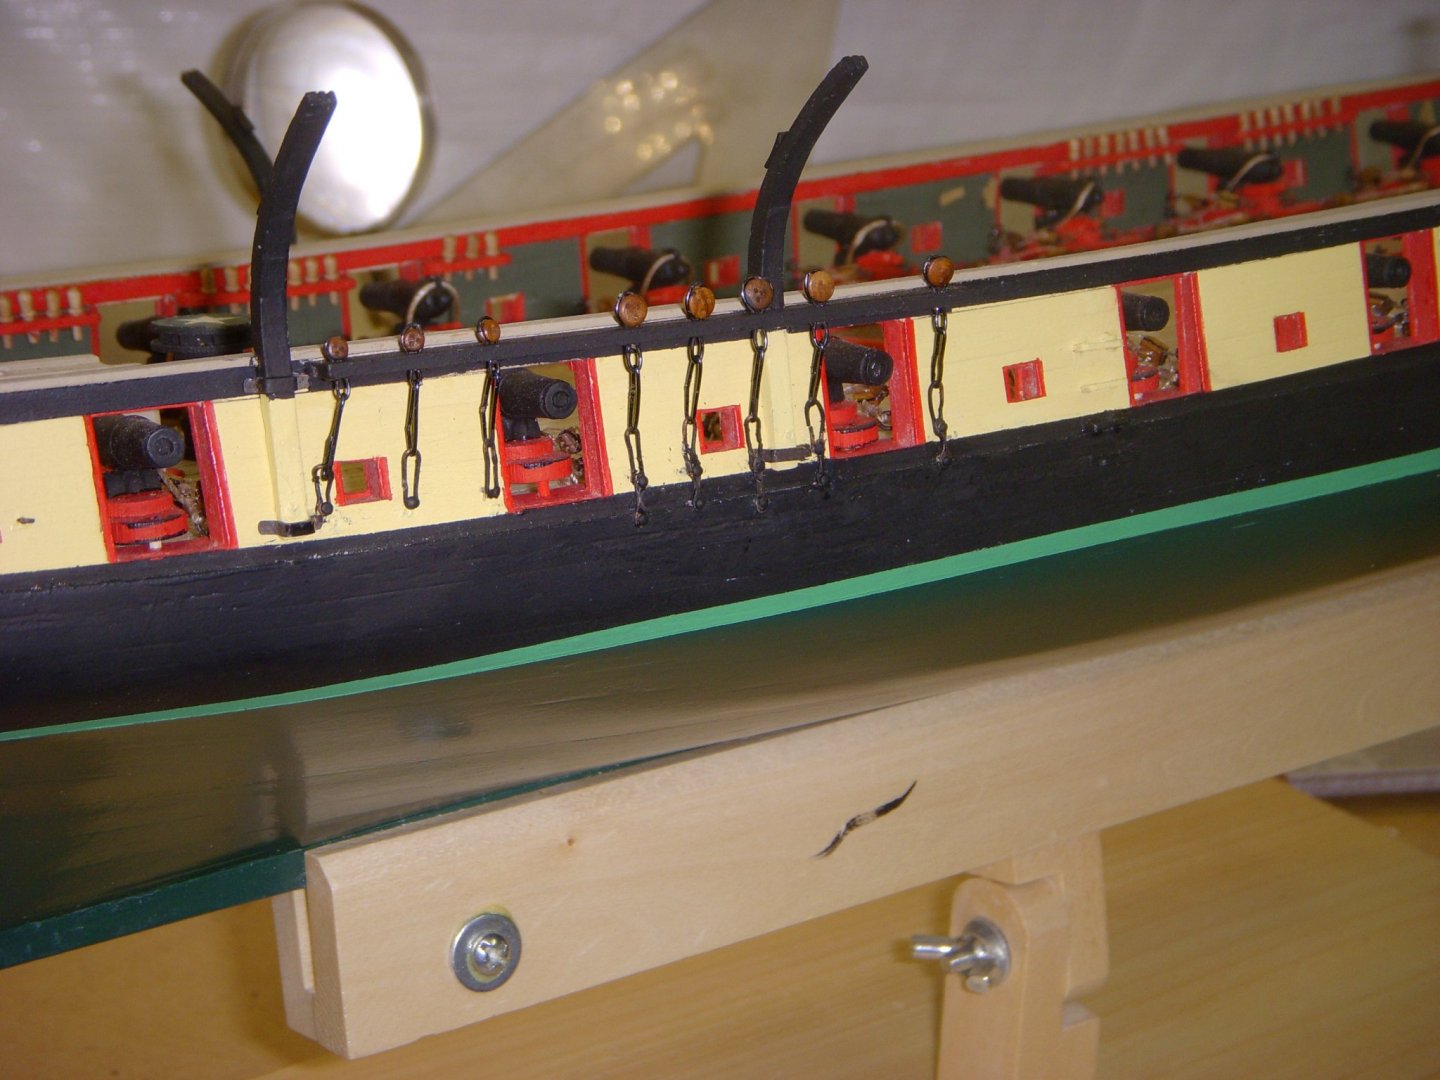
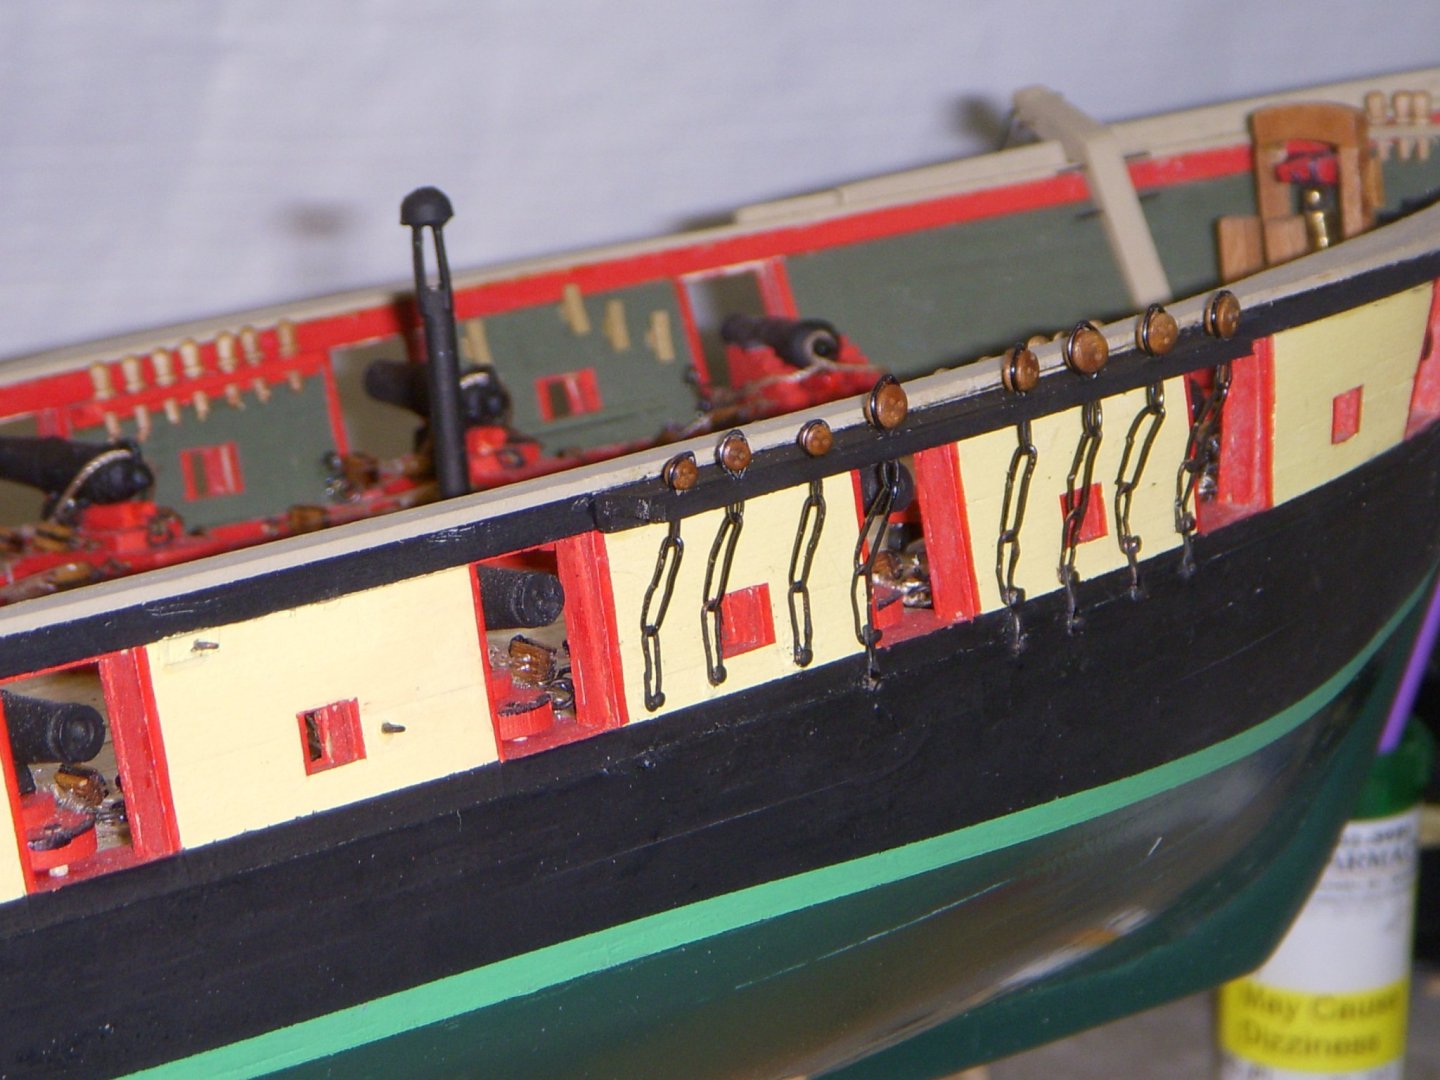
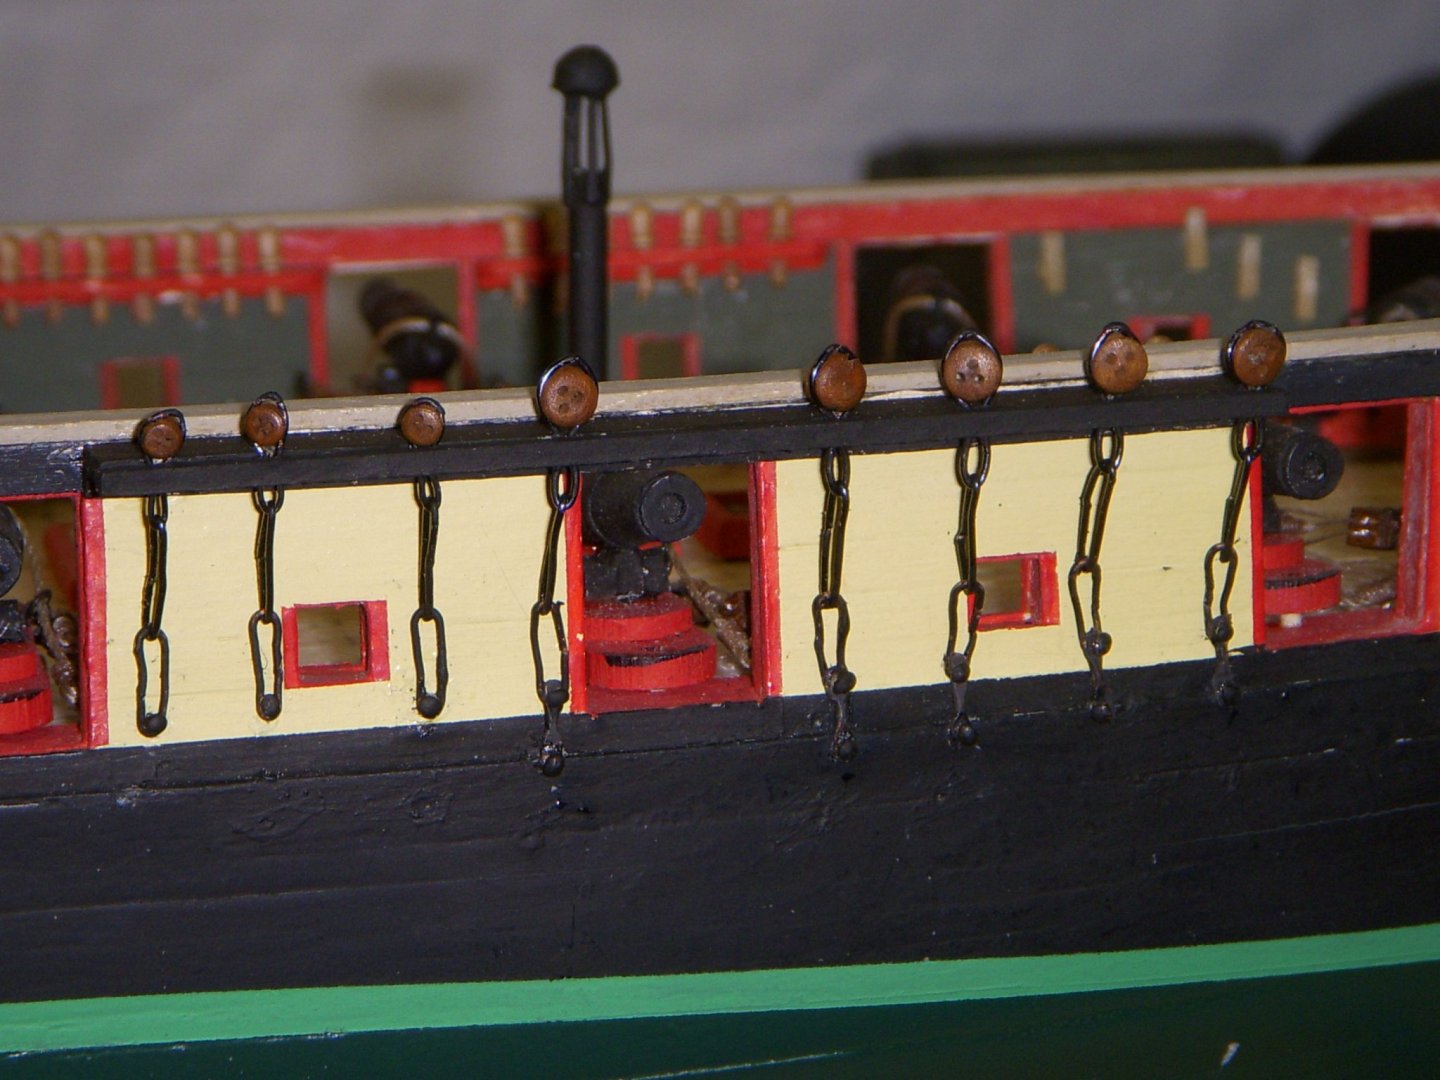
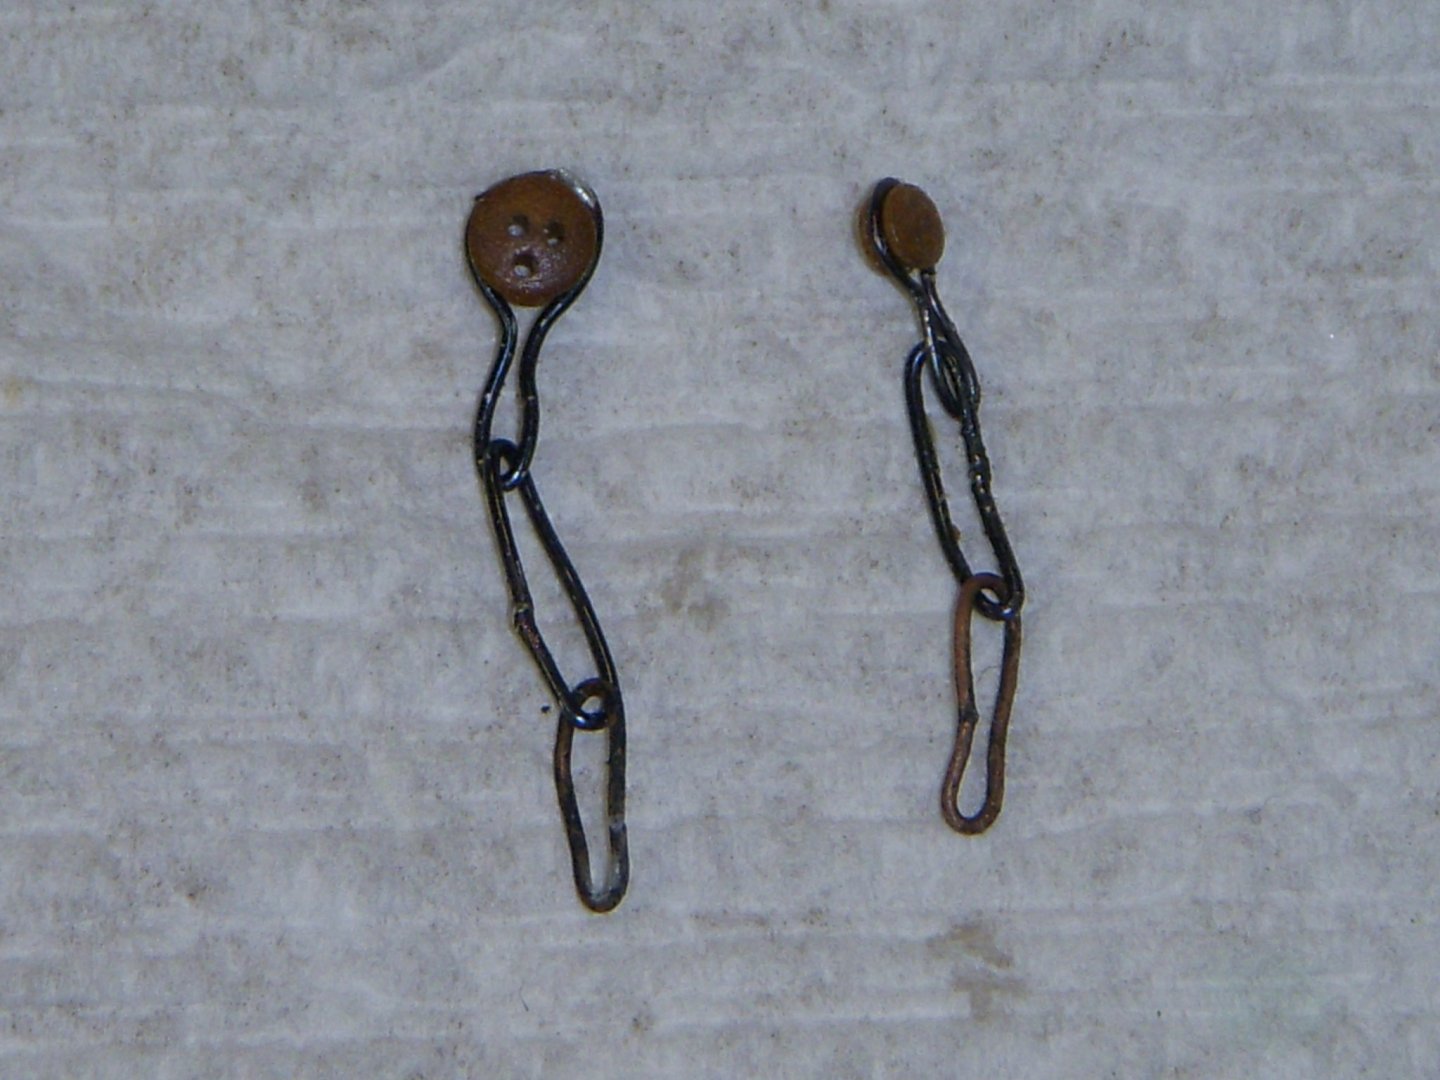
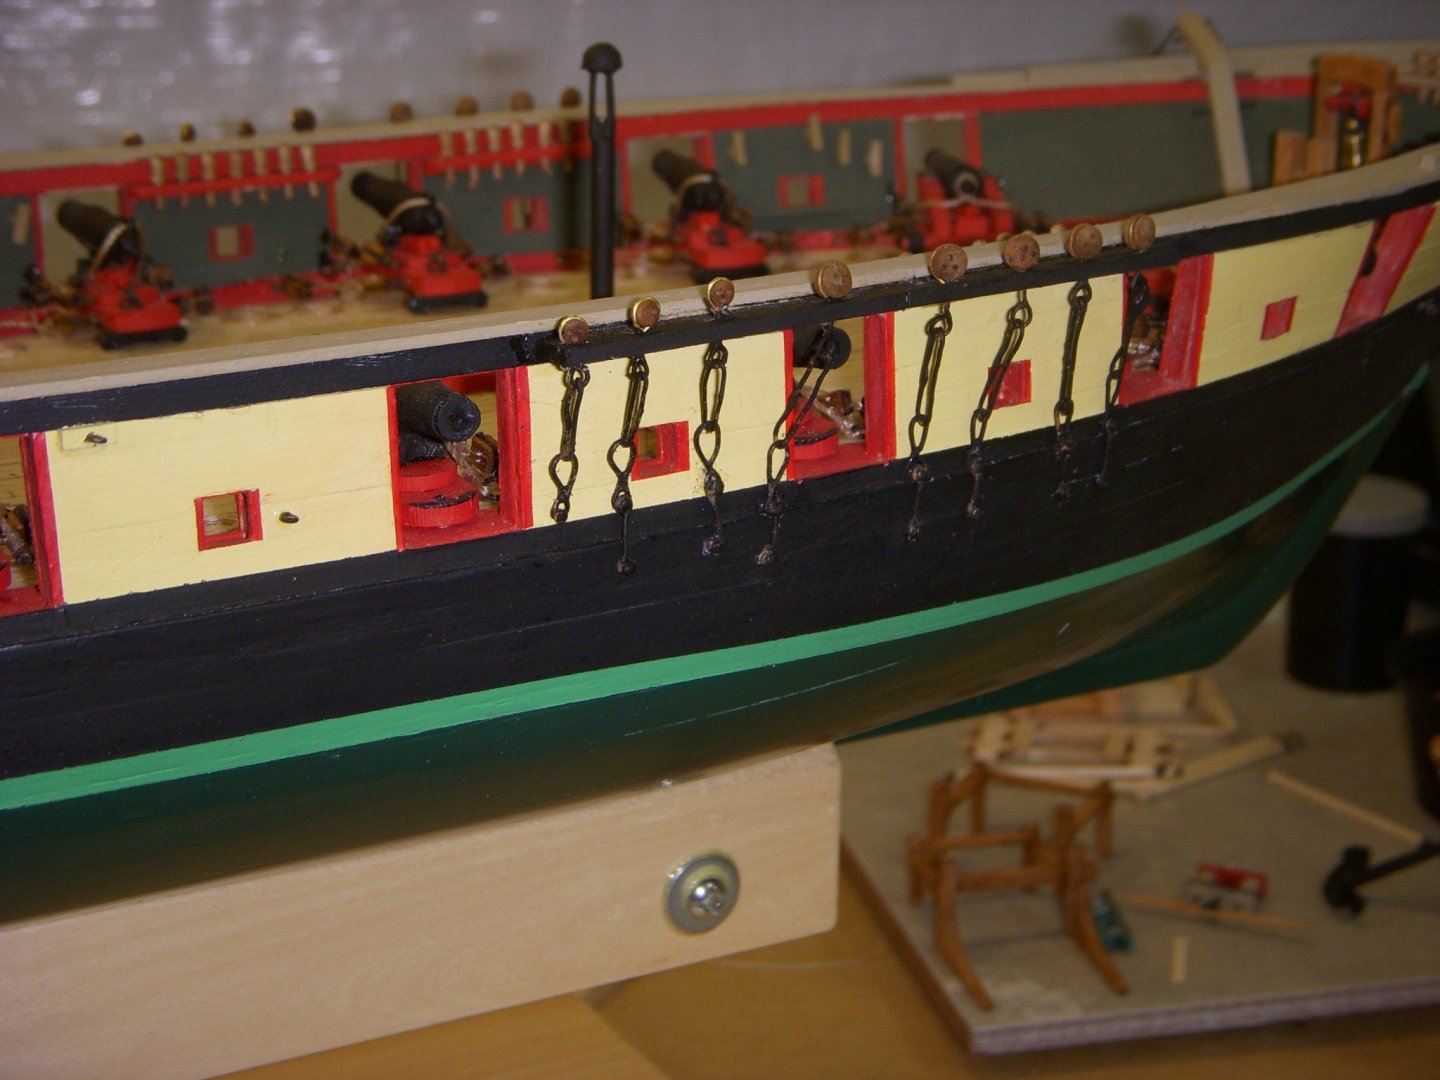
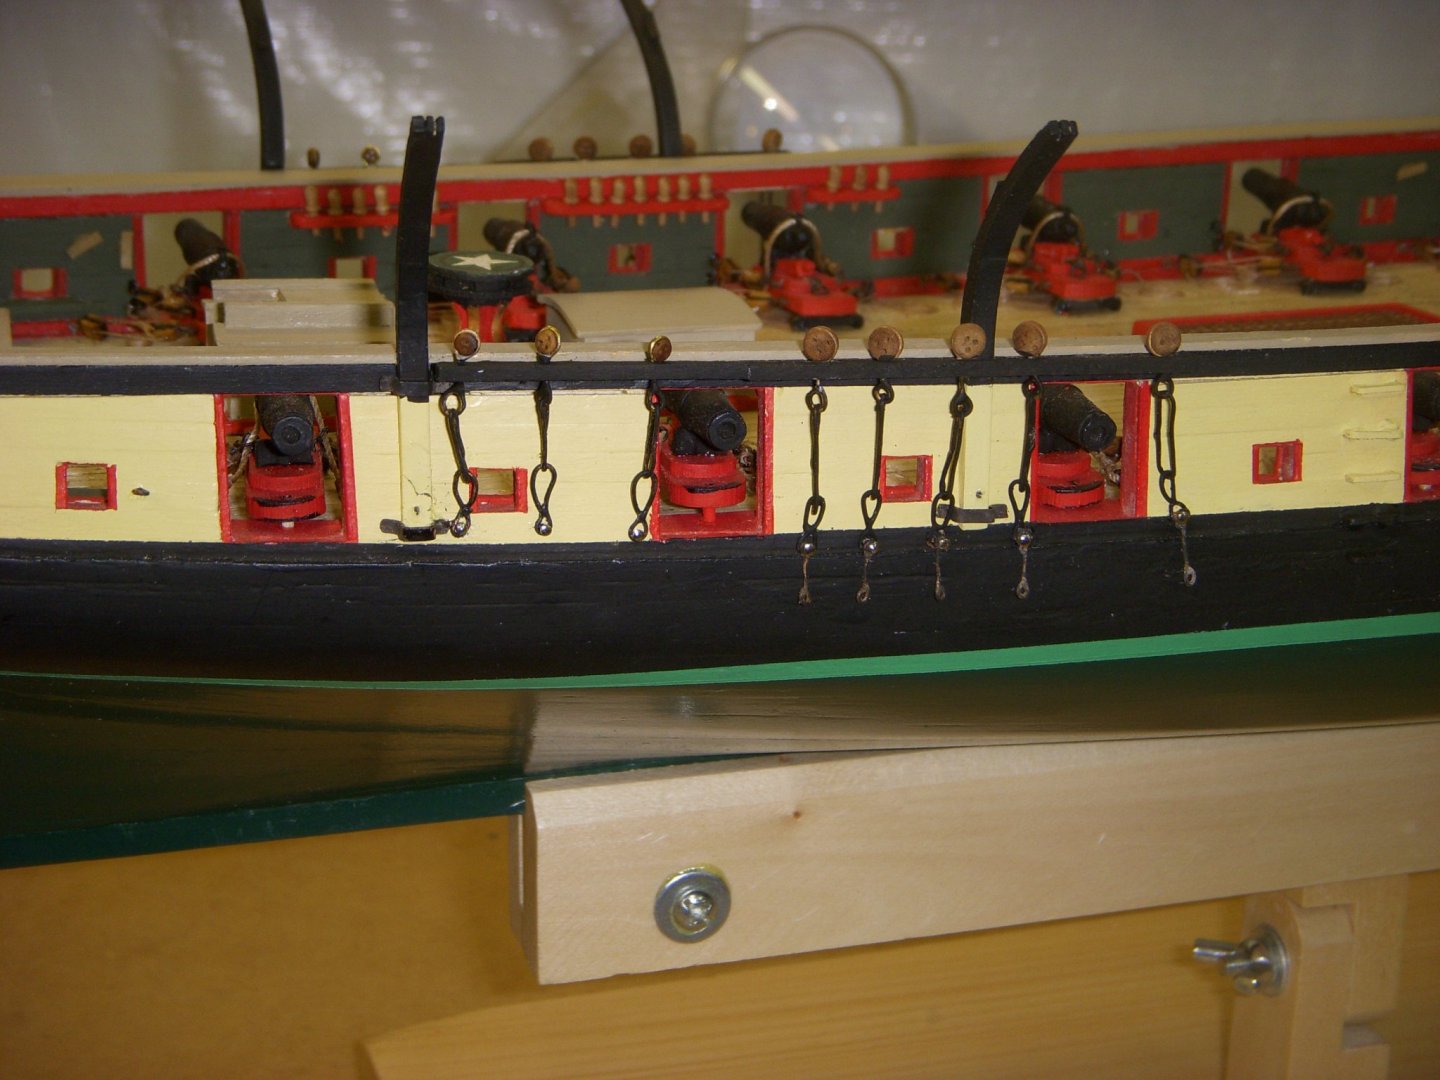
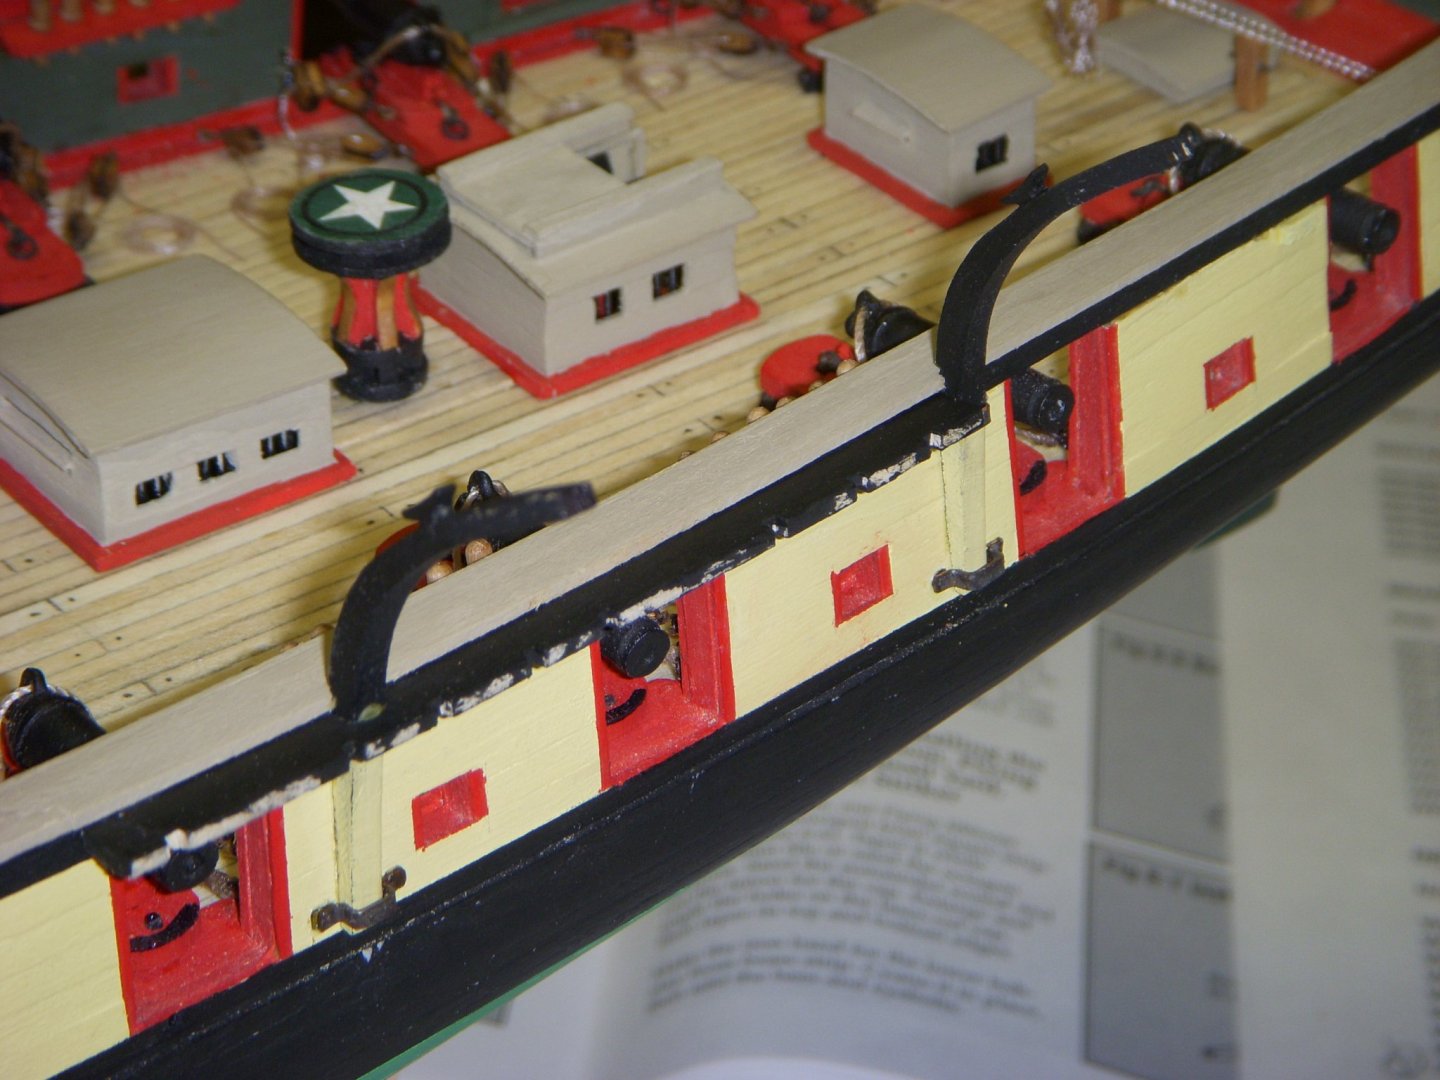
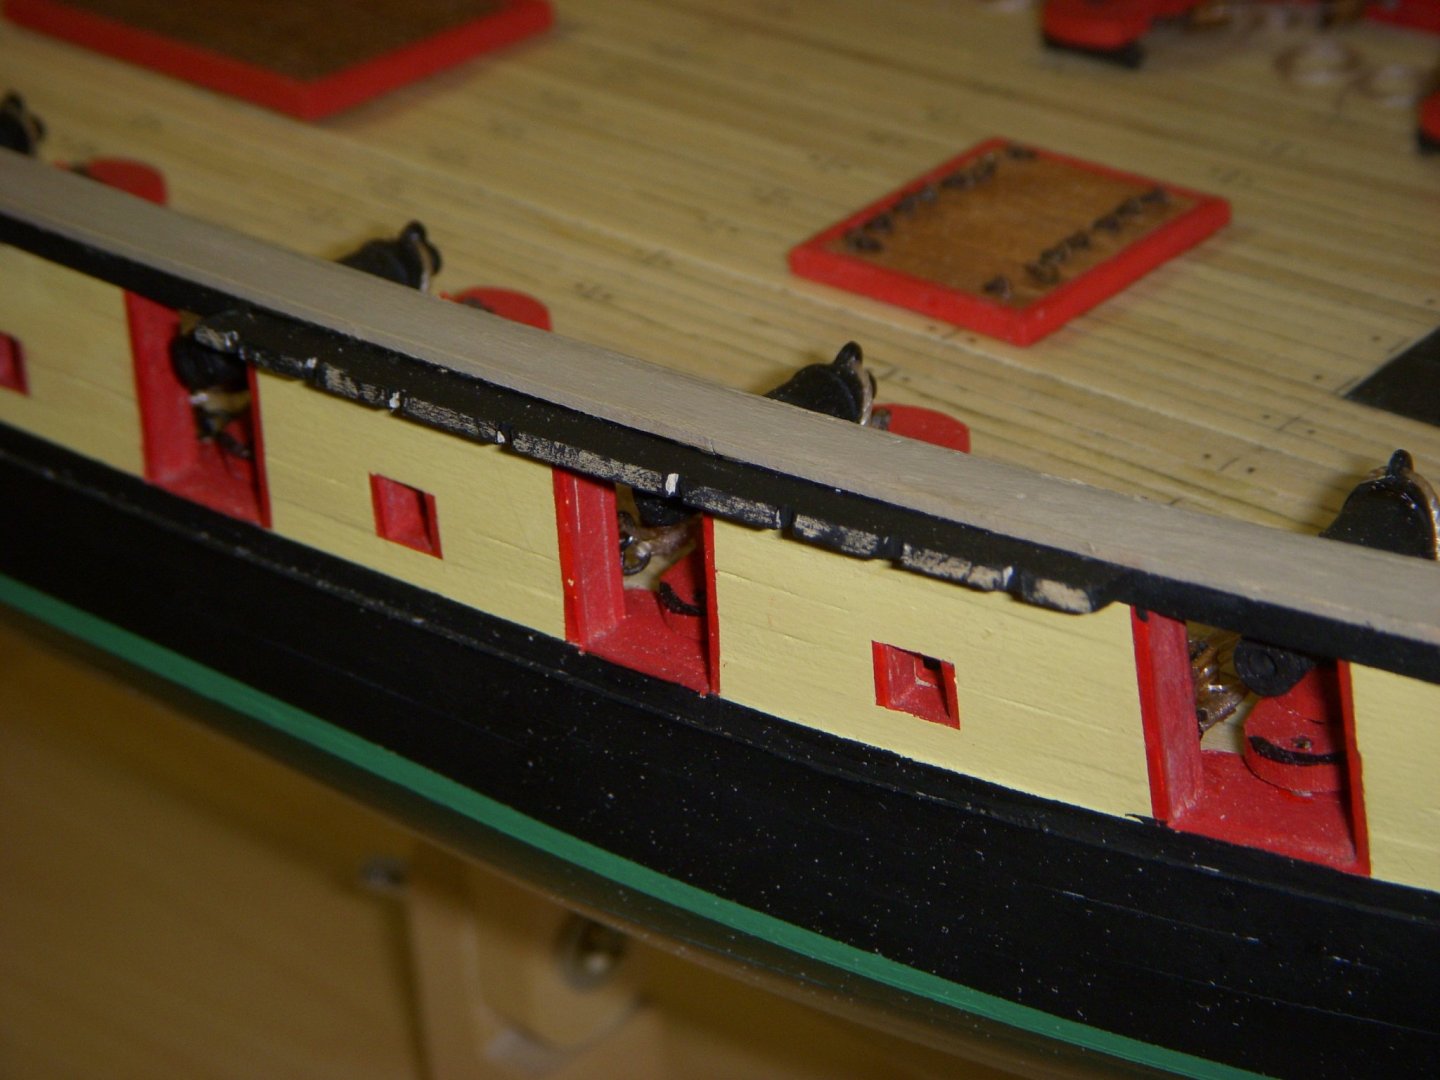
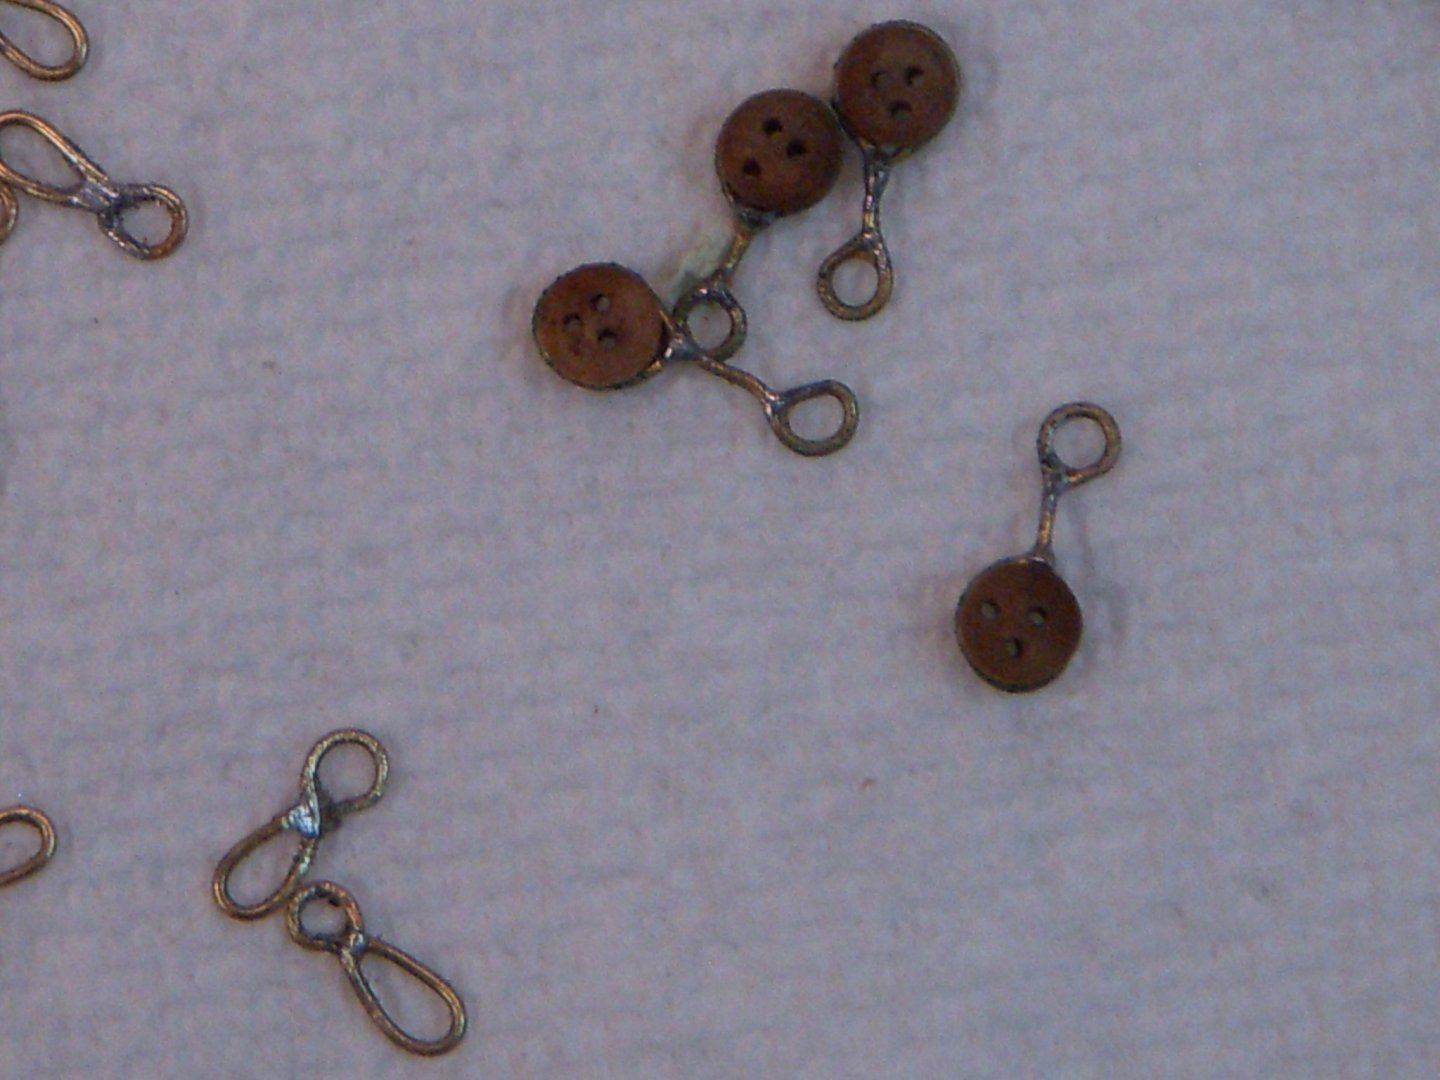
Here is what the Deadeye and Chain plates look like before installation. I then proceeded to install them on the starboard of the ship. I used cutoff dressmaker pins (straight pins) as the nails holding the lower plate. The pins are about 27mm long and I only needed them to be about 6mm. Once they were installed I use a dab of black paint on the head of the pins. Here is what the starboard side looks like once completed. I am happier with the outcome. Now to do the Port side. One point I found, when you cut of the head of the pin to make the nail, it makes the cut off end pretty jagged. I found I needed to file it down slightly to make insertion a lot easier. Ron
-
Drafting instruments
ronkamin replied to Kurt Johnson's topic in Modeling tools and Workshop Equipment
This looks like the one I have that I bought when I was in College, many tears ago. Still use it today, mine was German made. Ron -
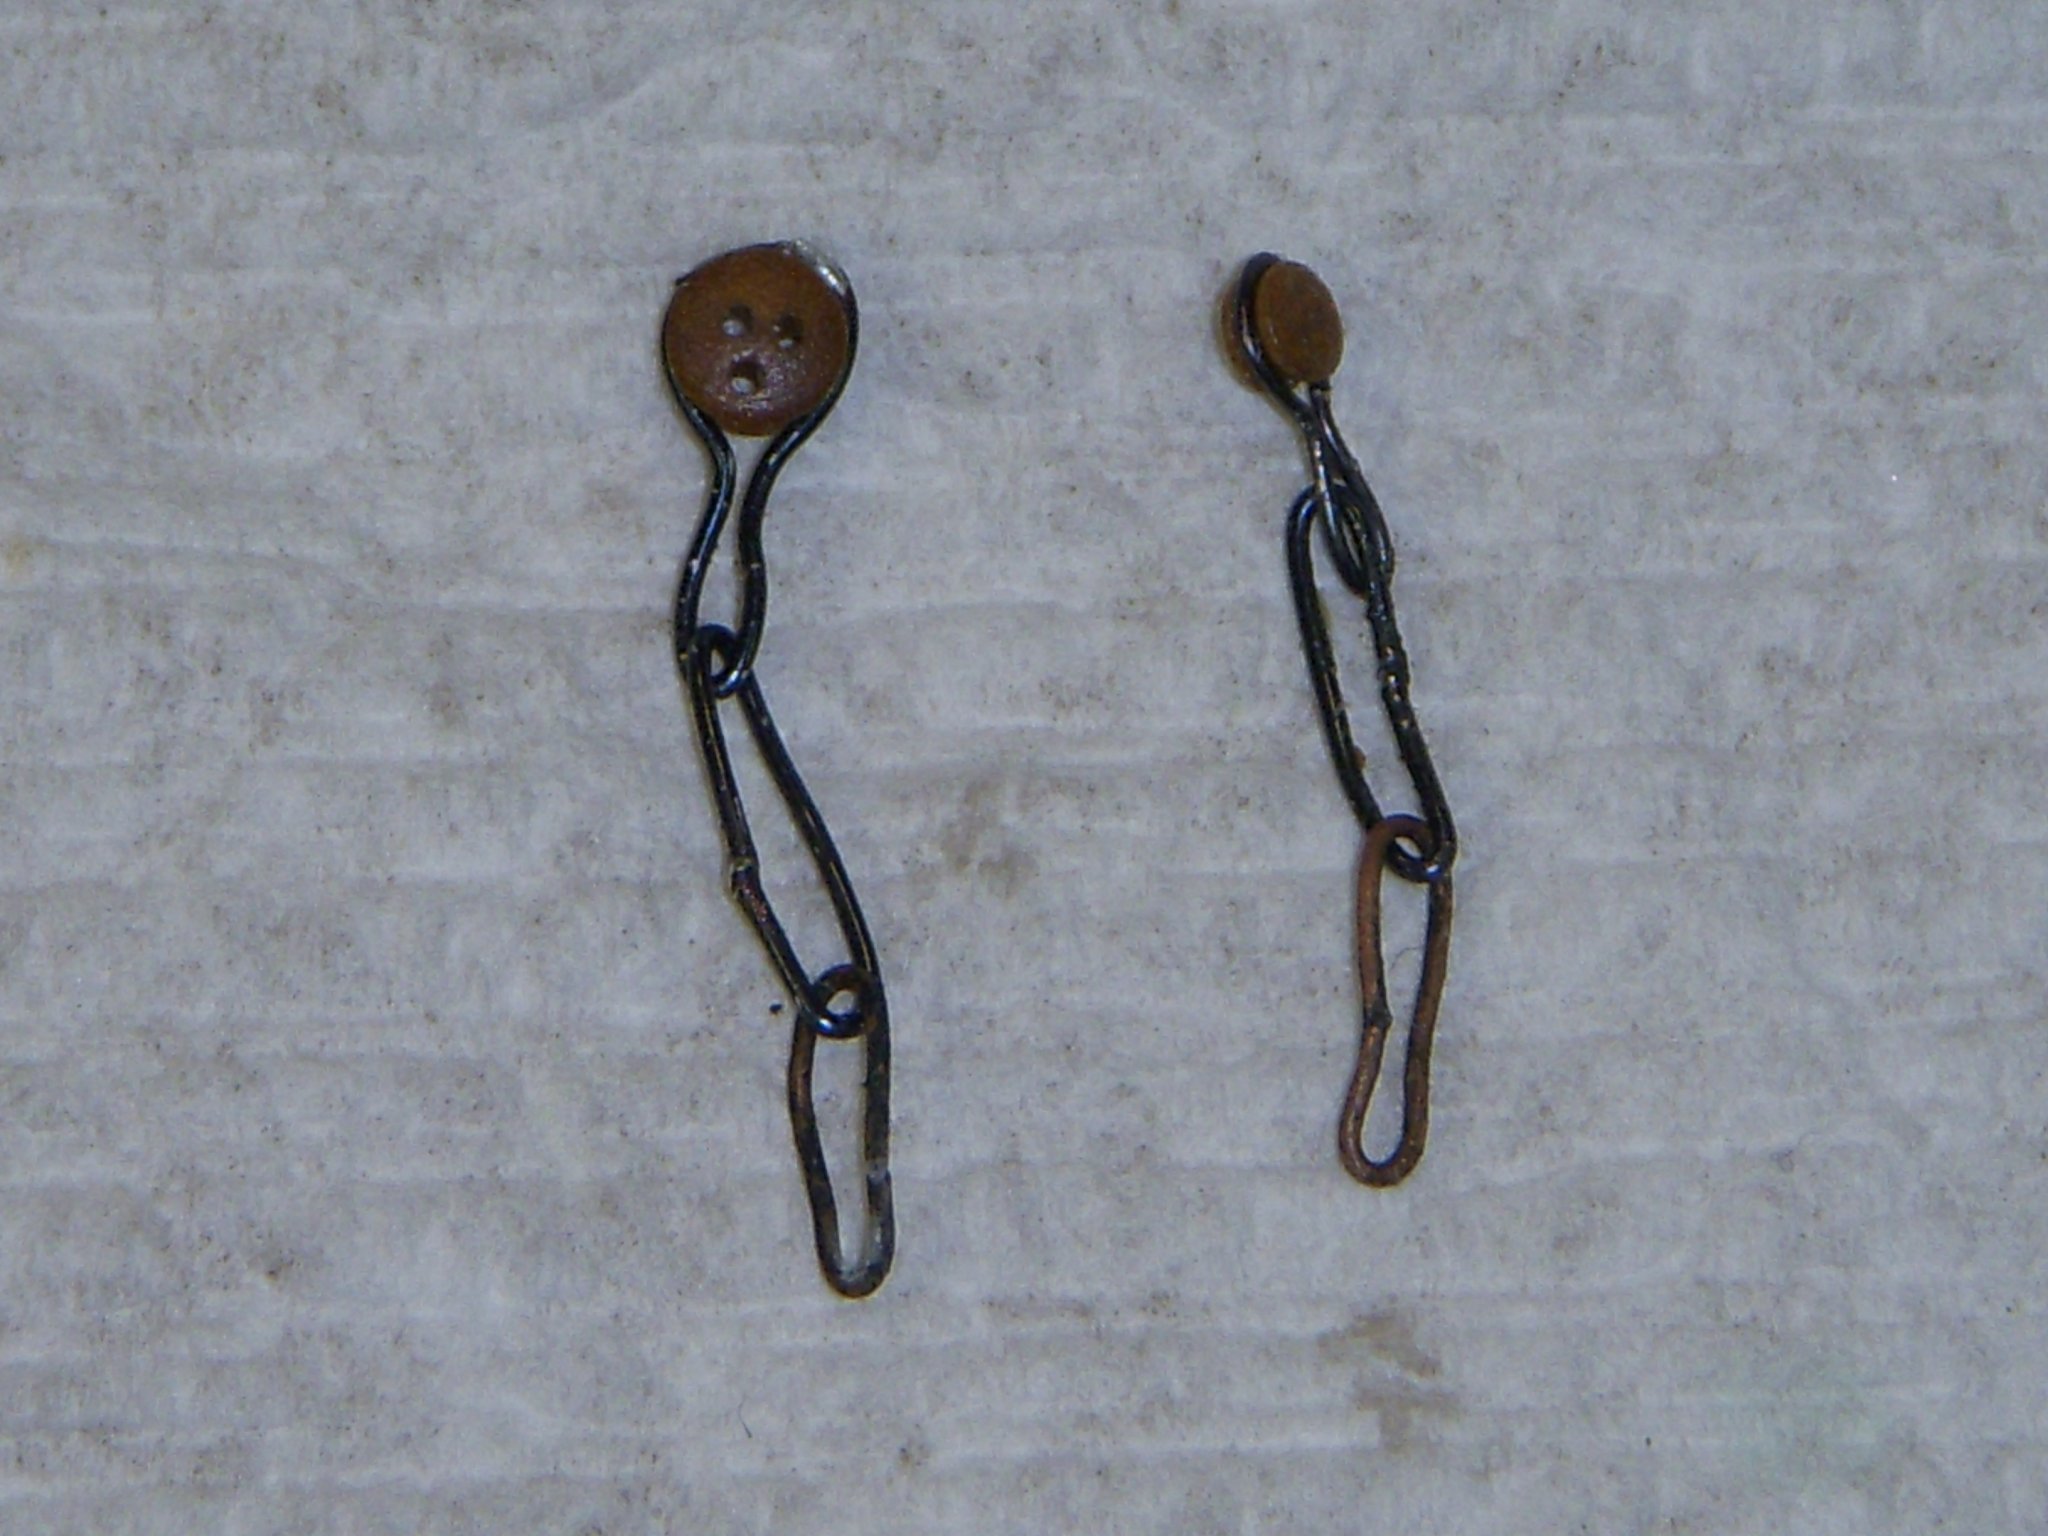
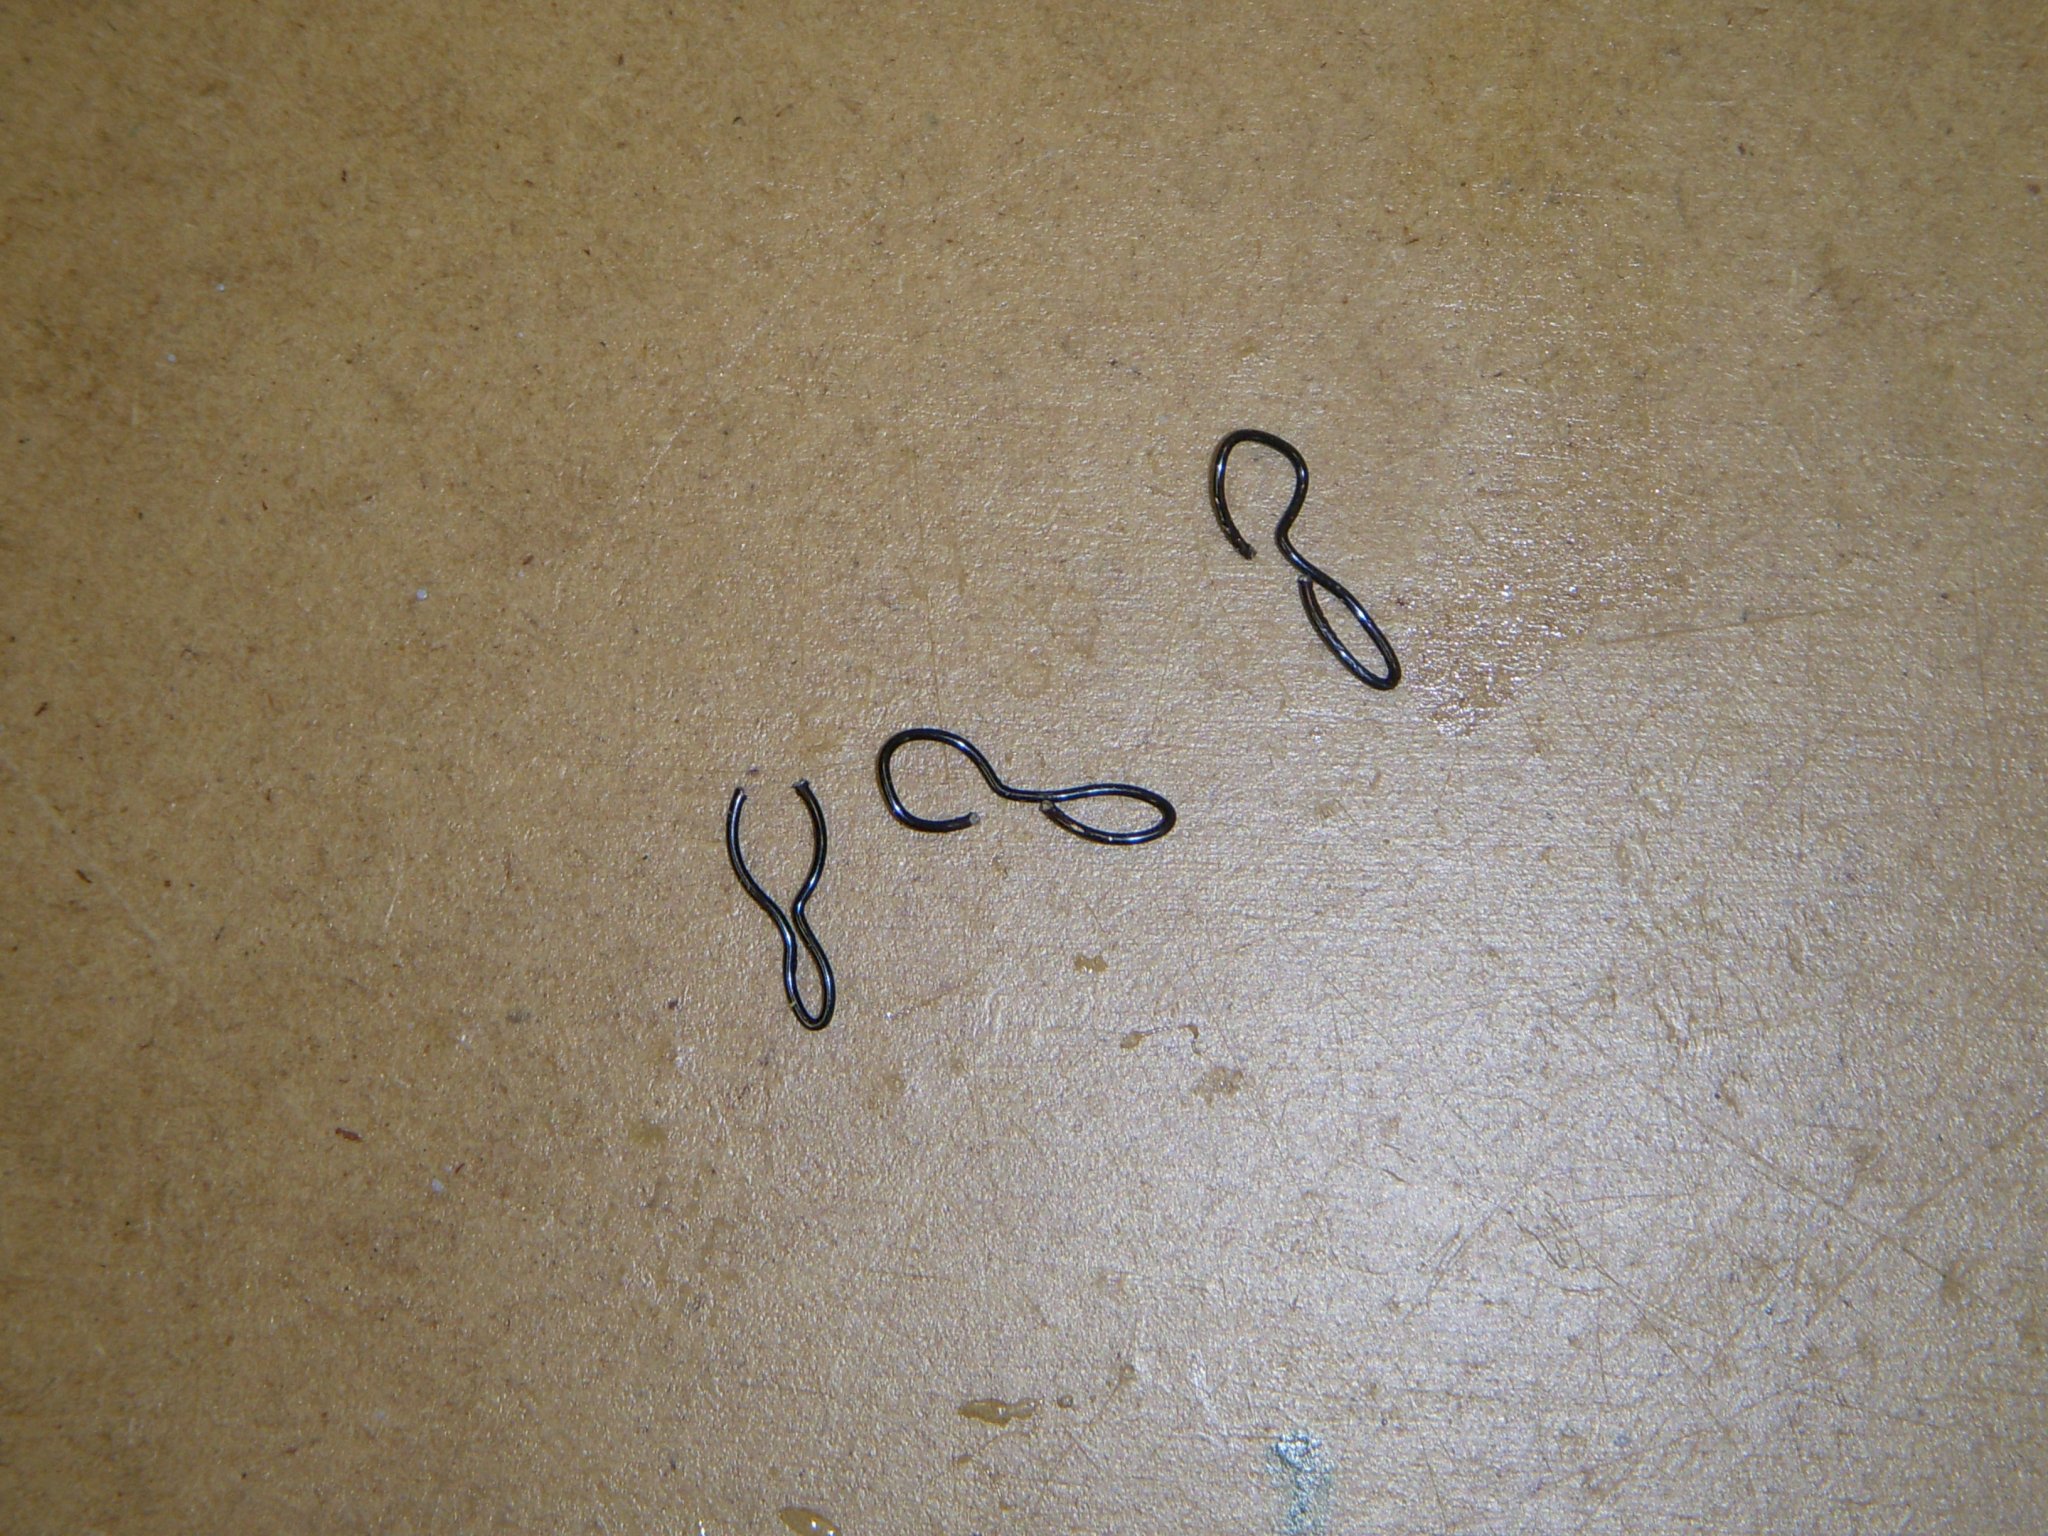
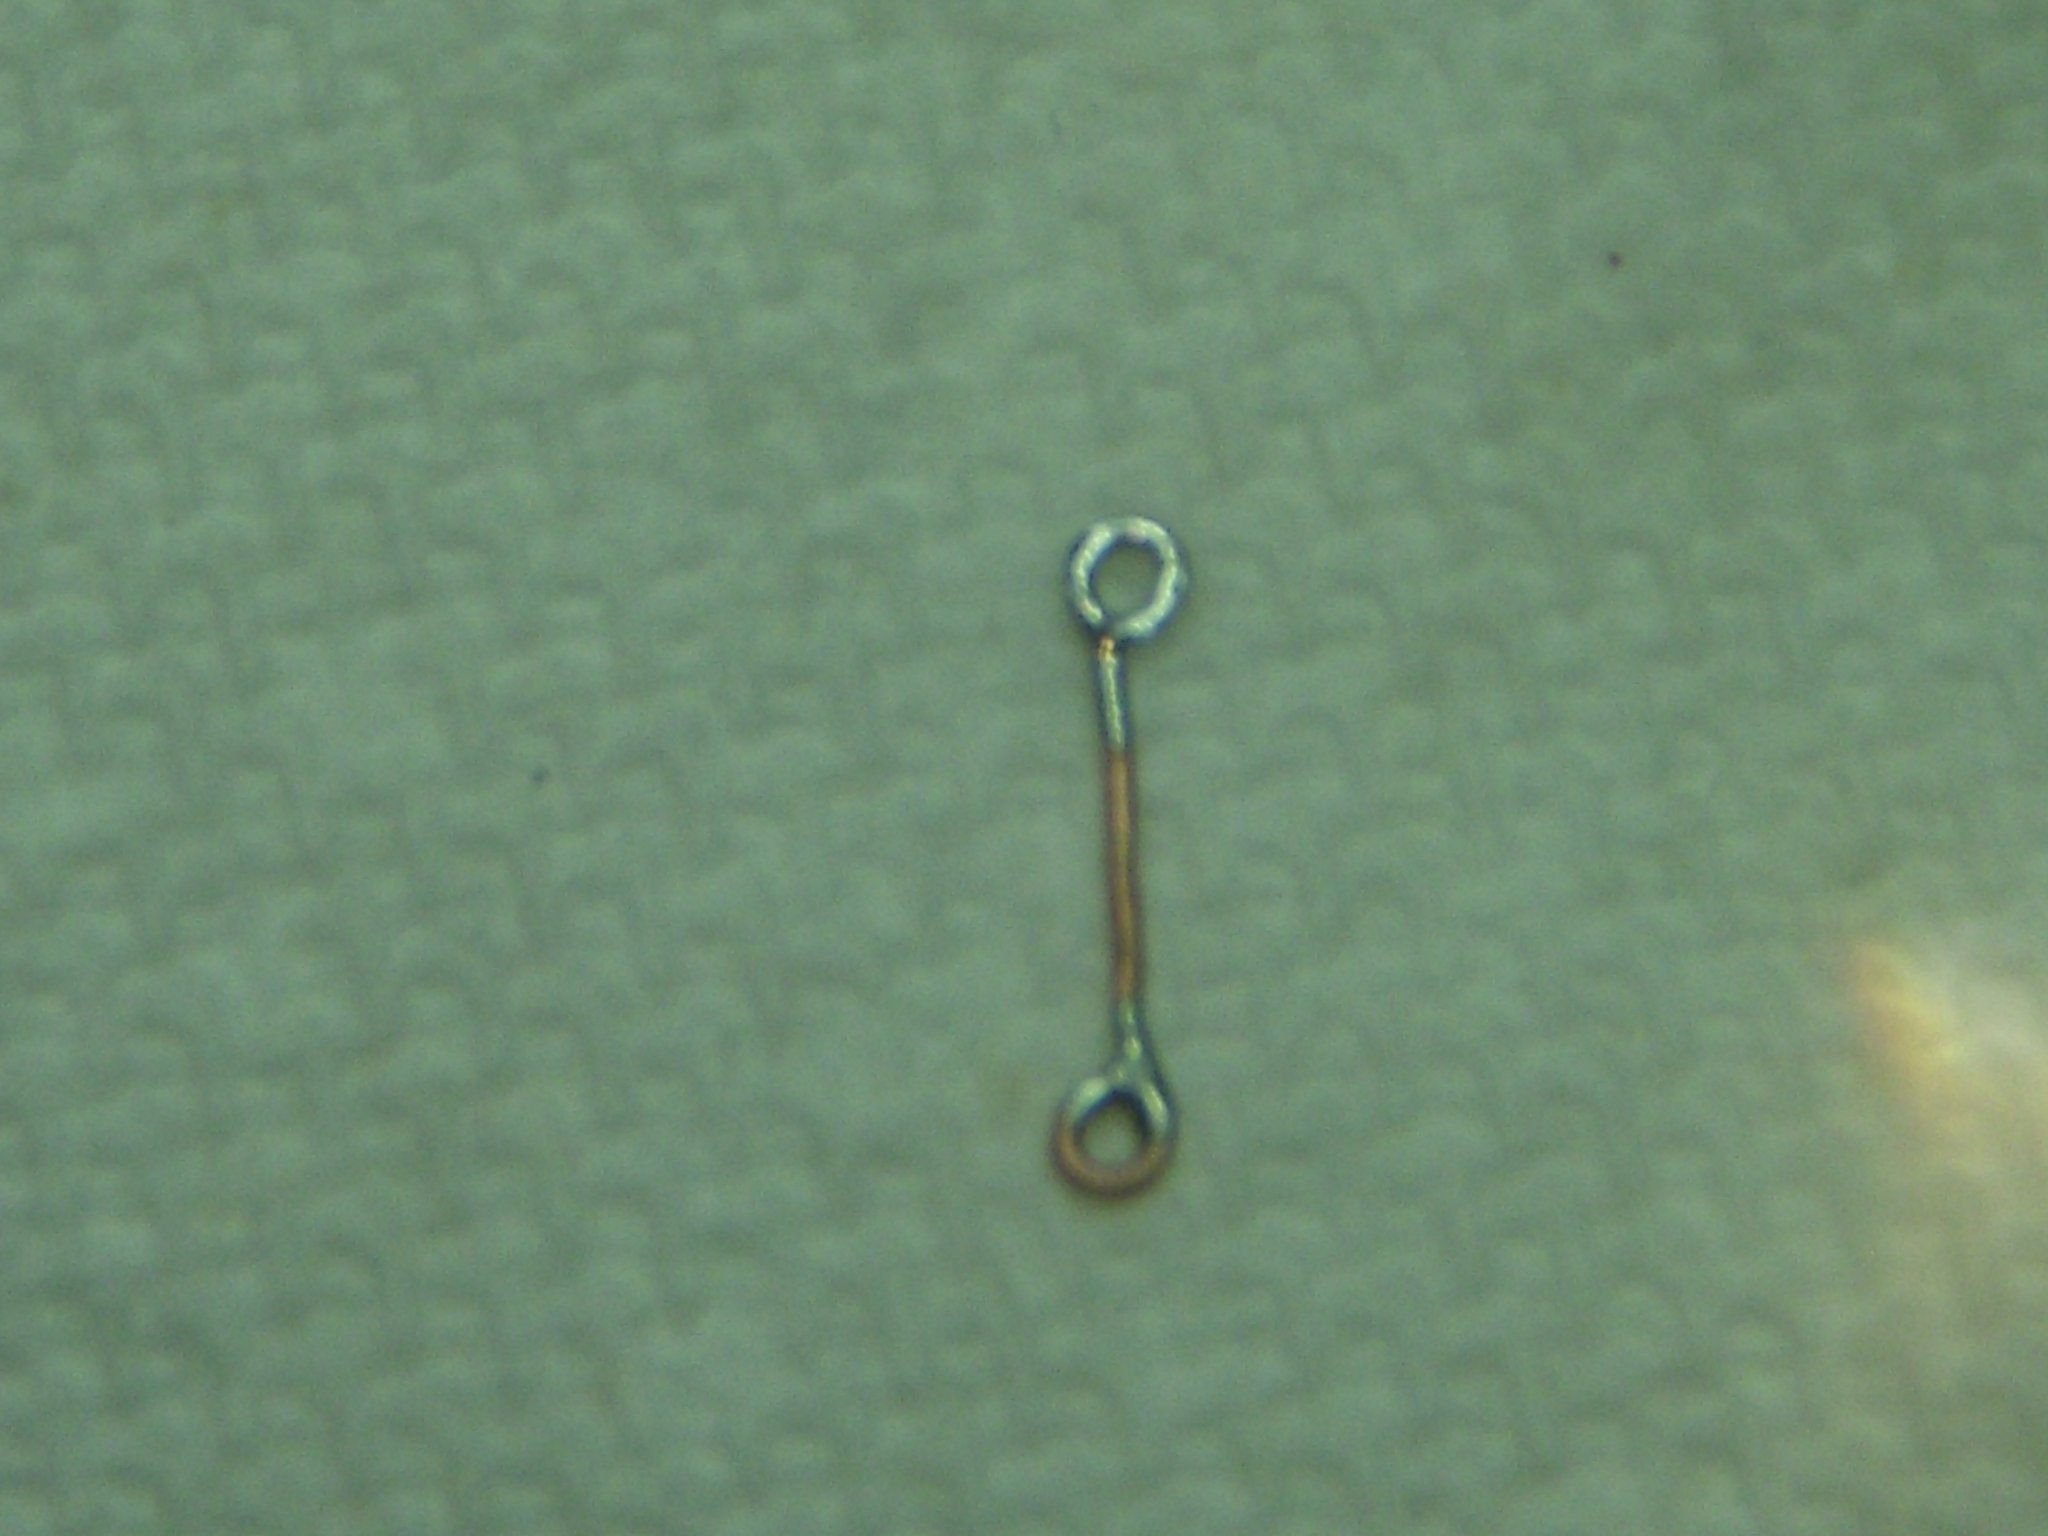
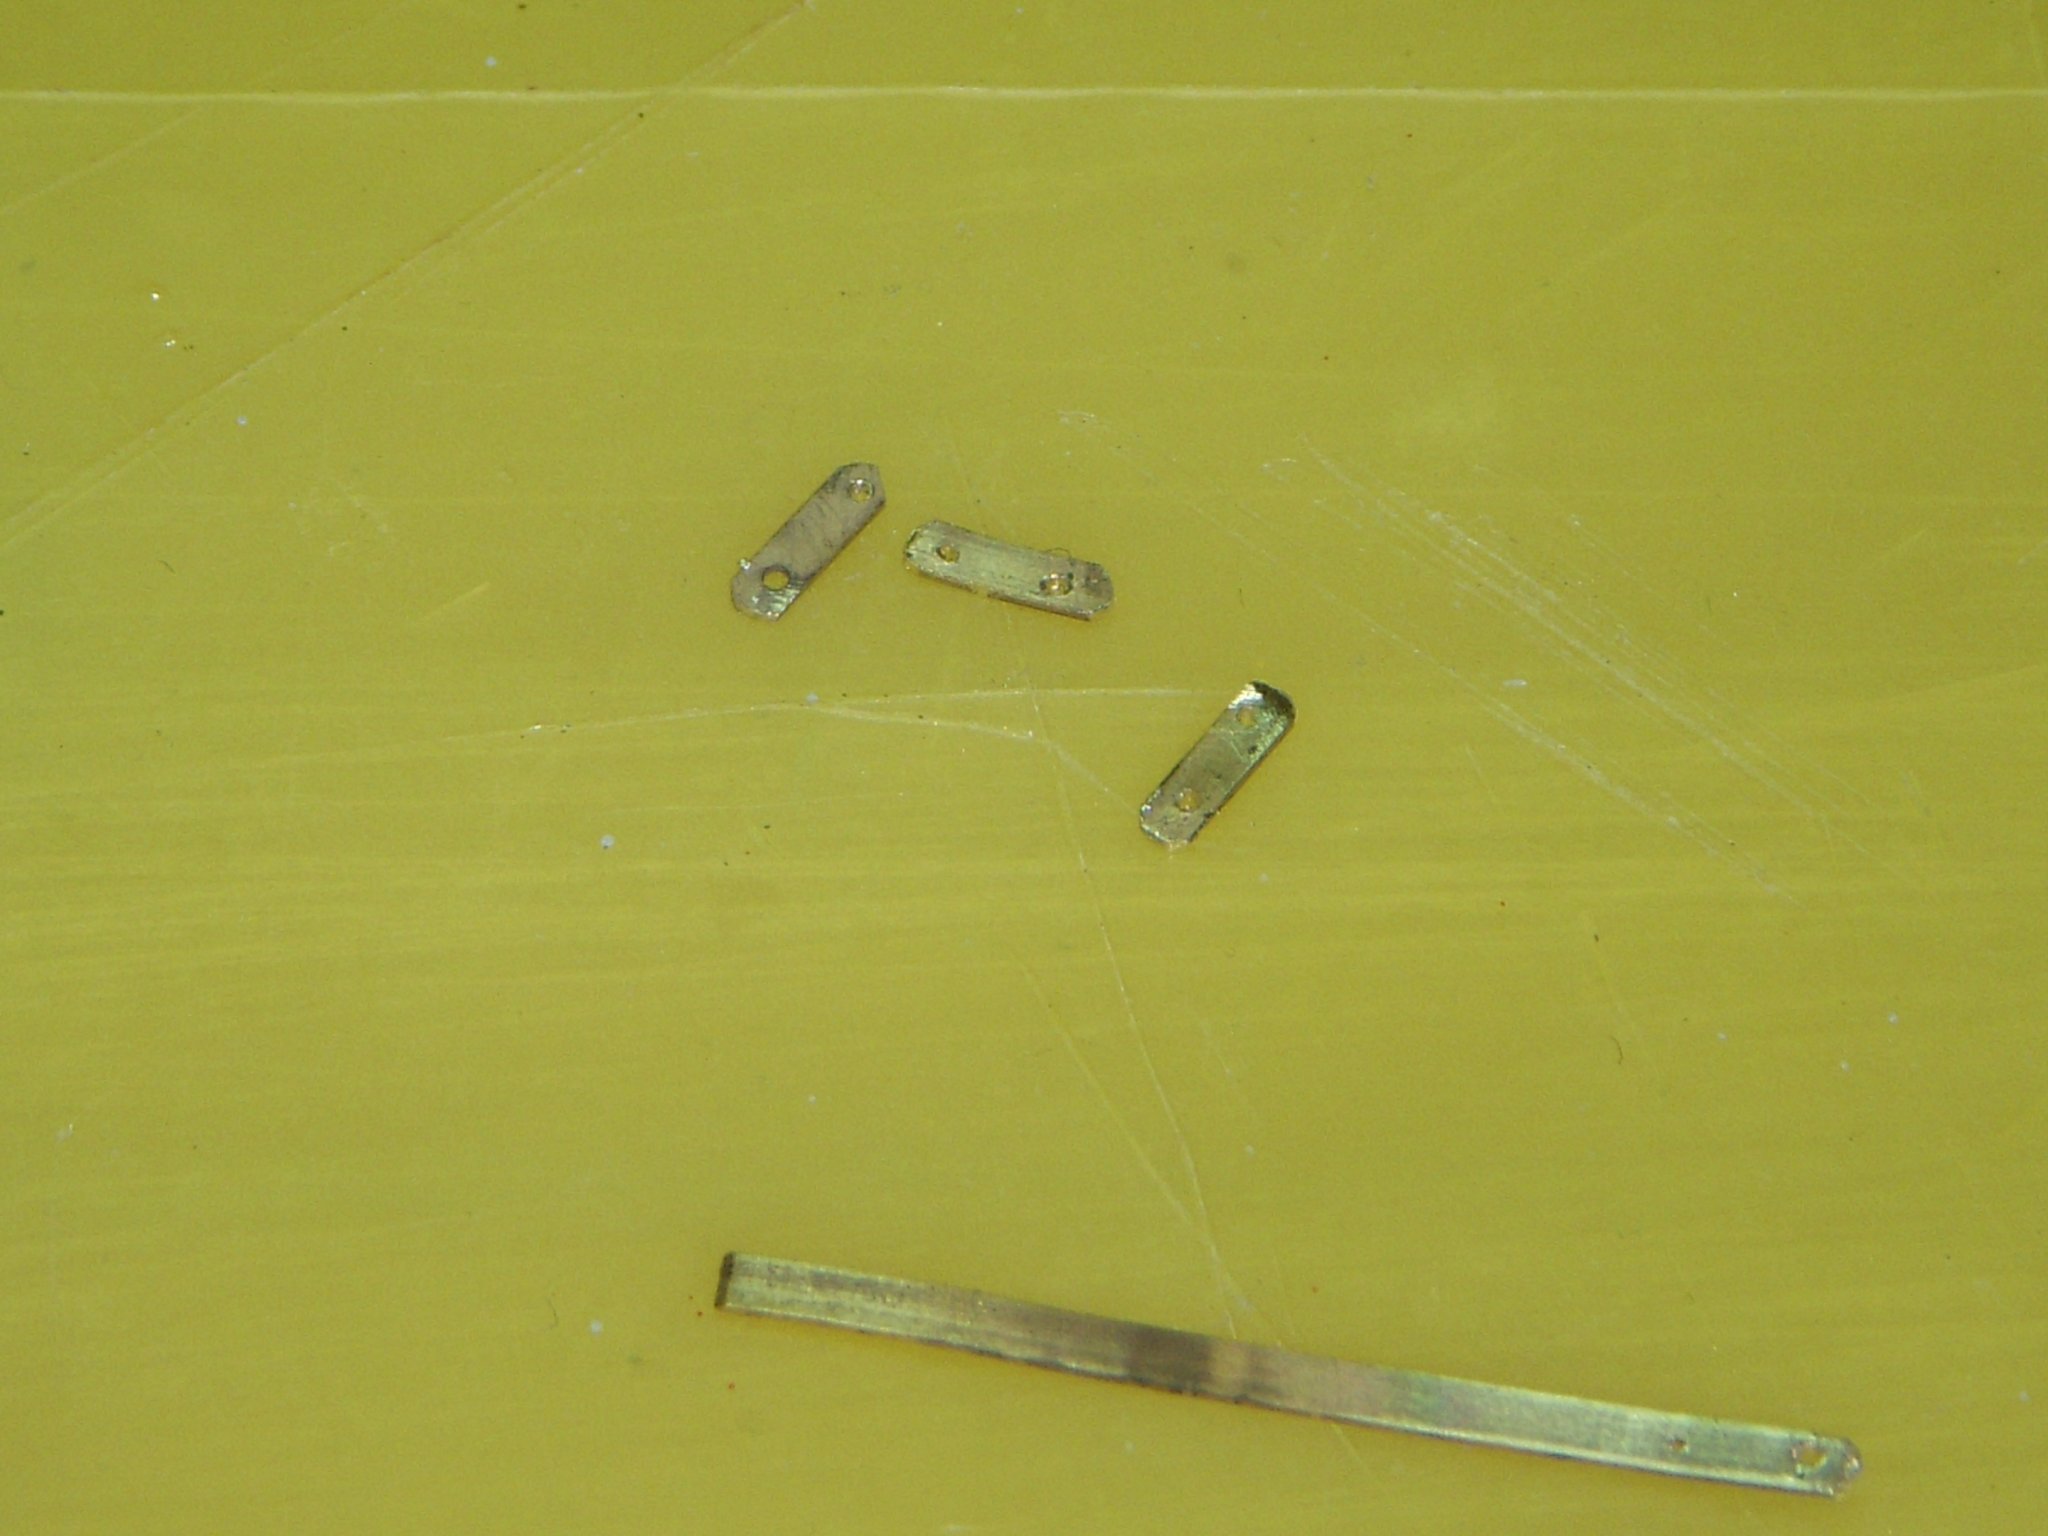
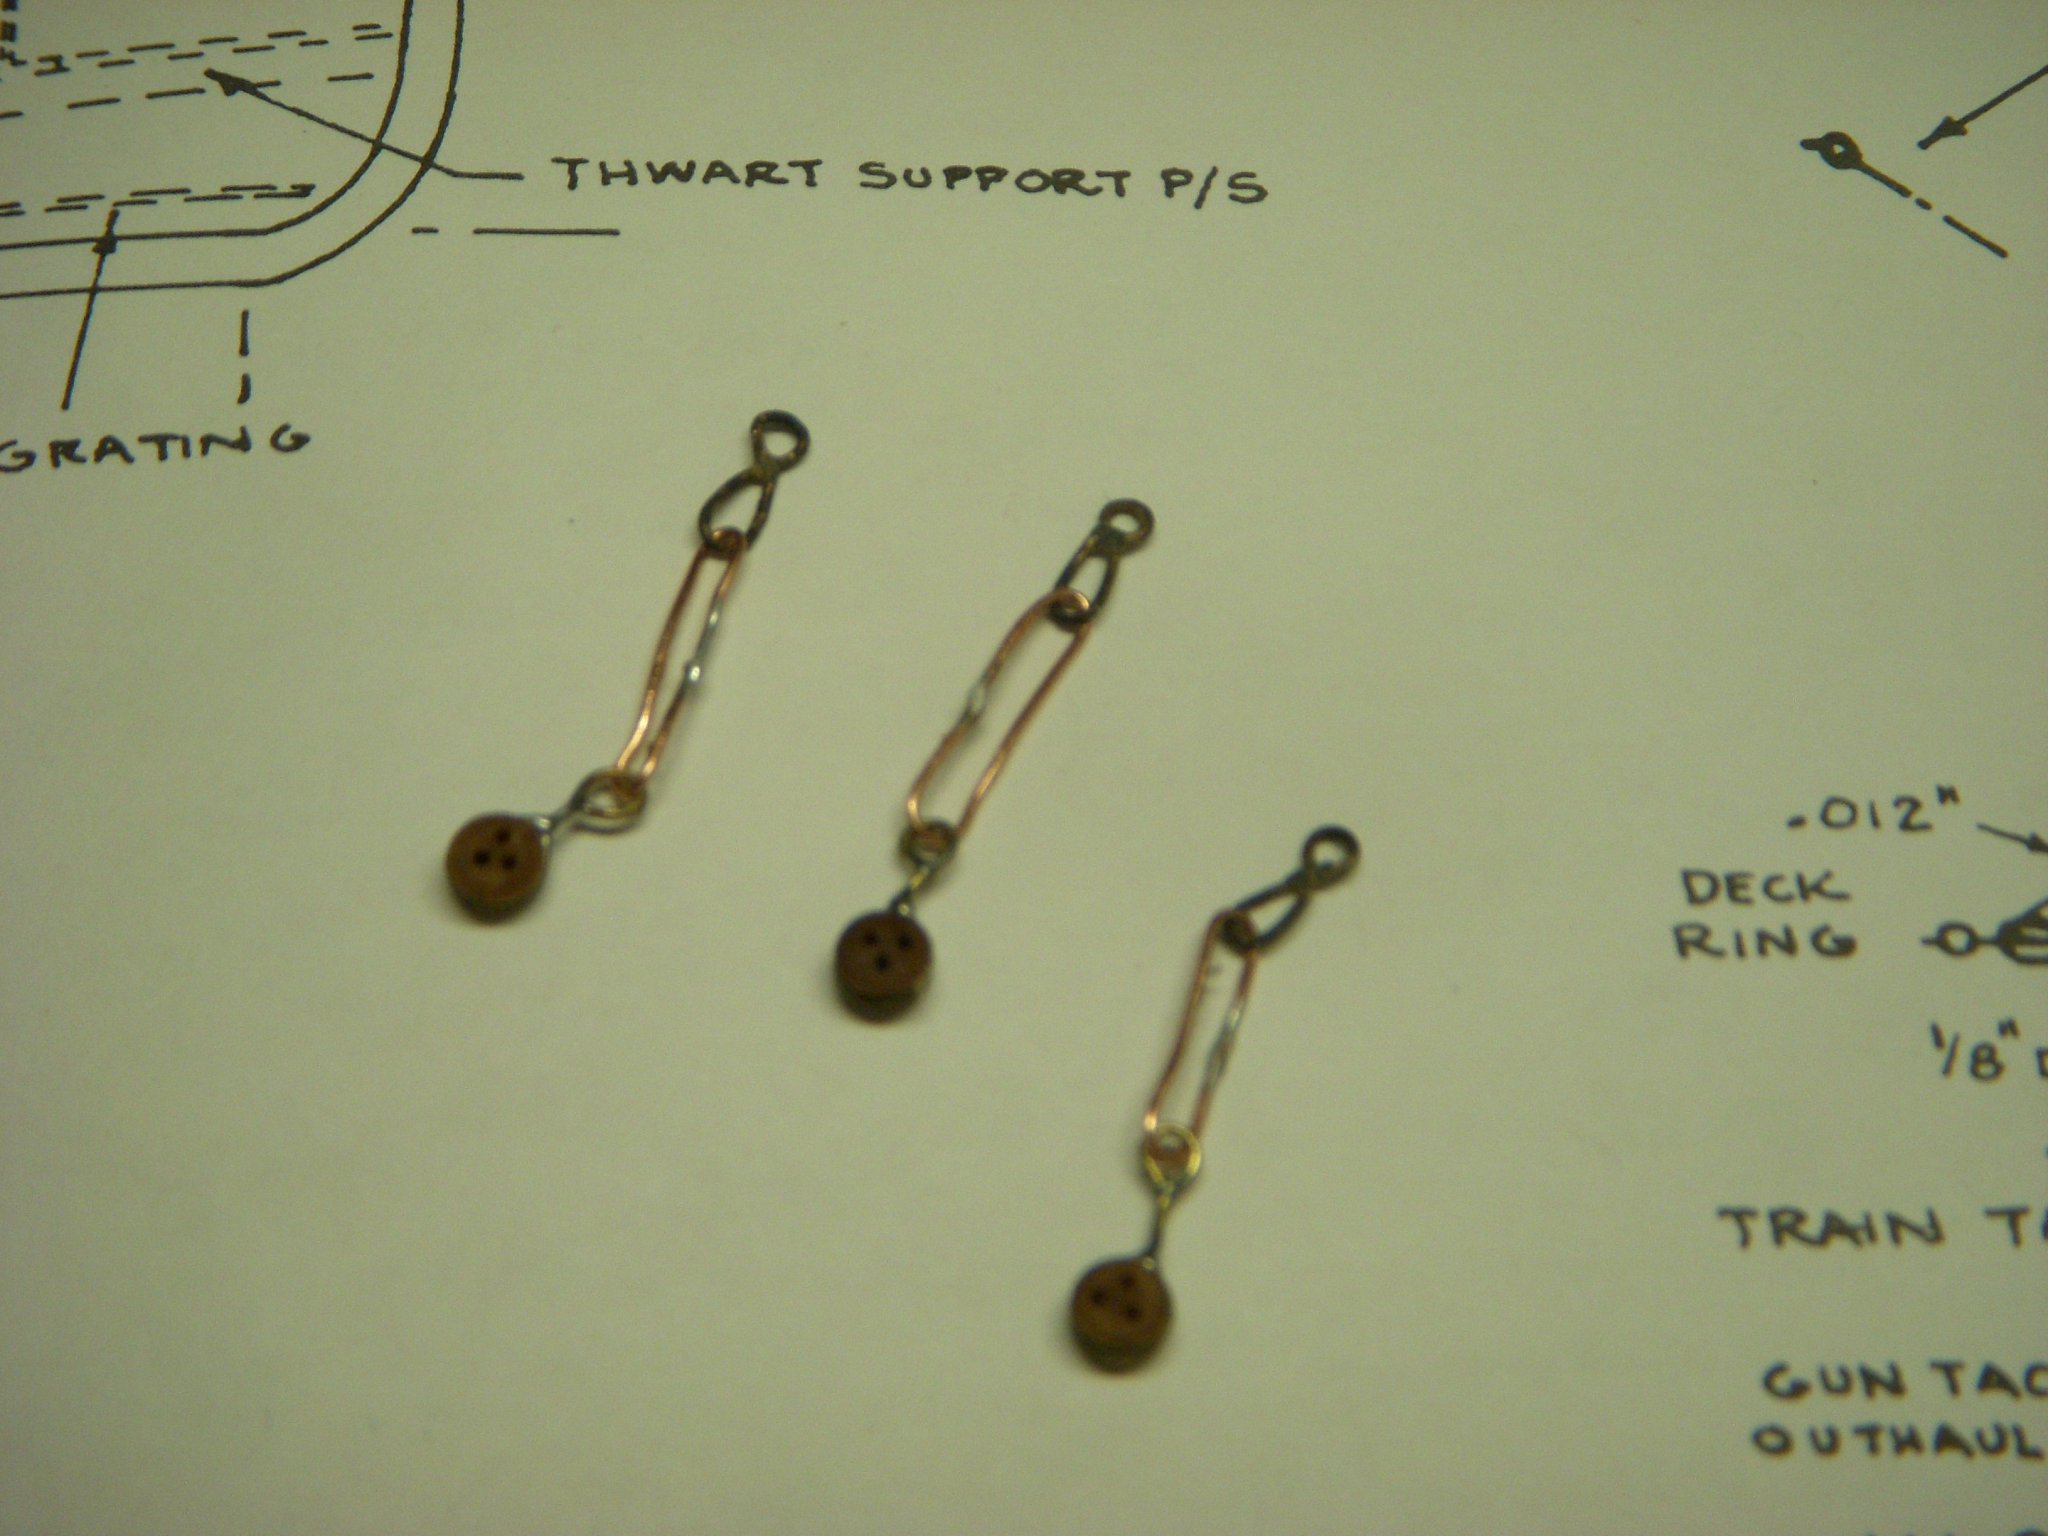
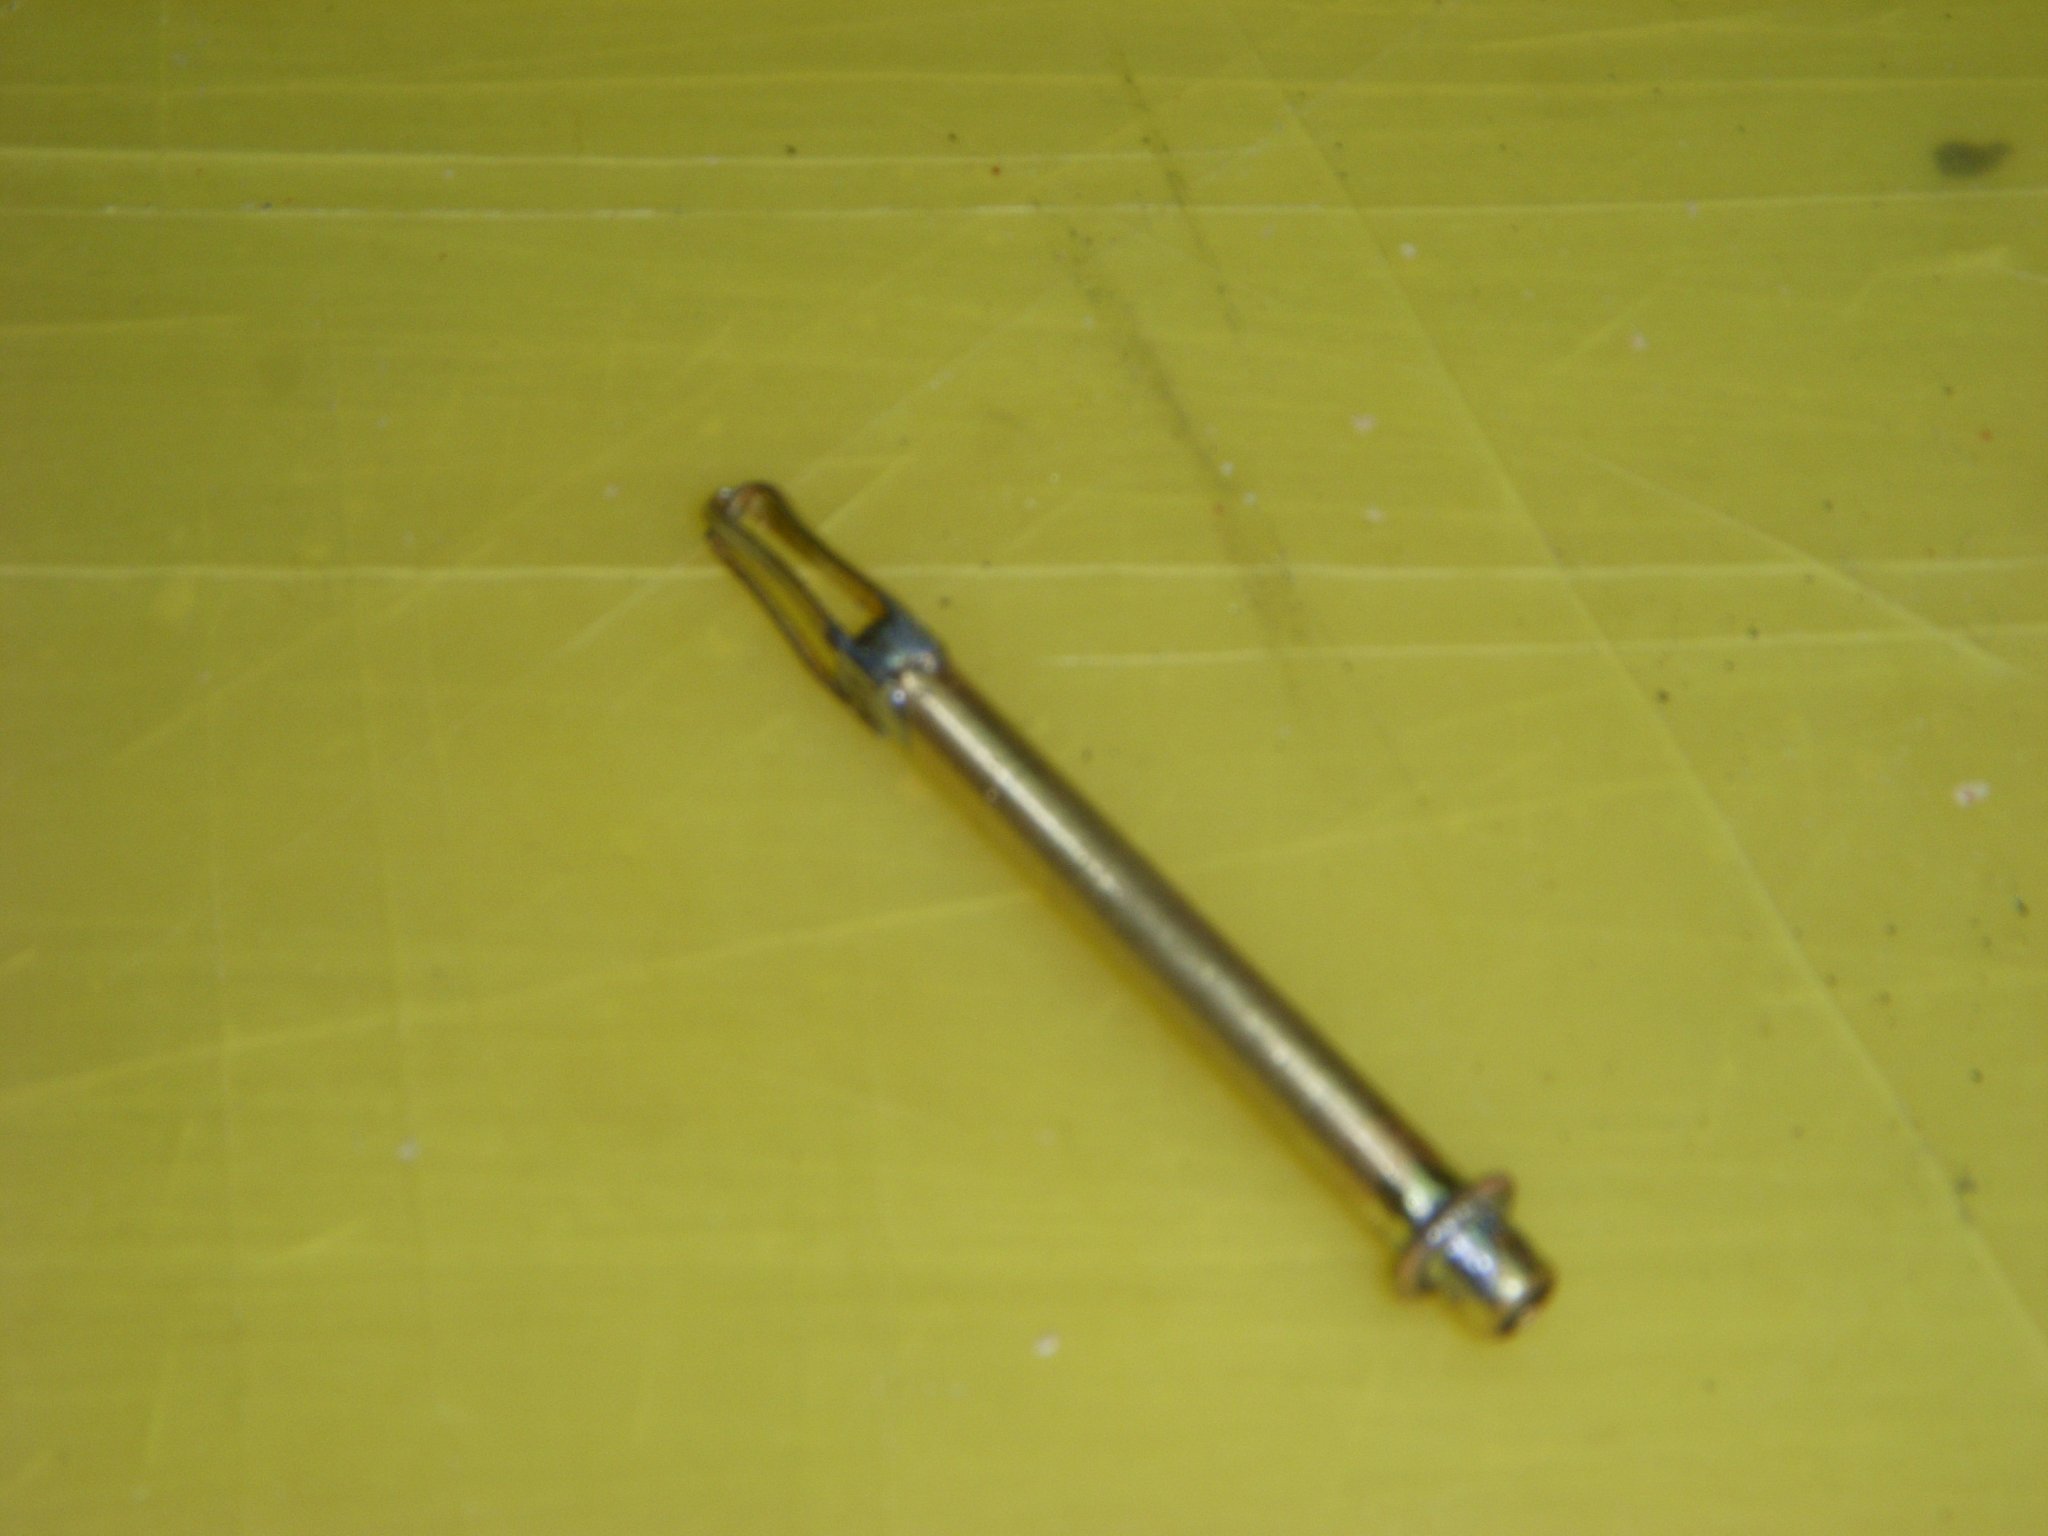
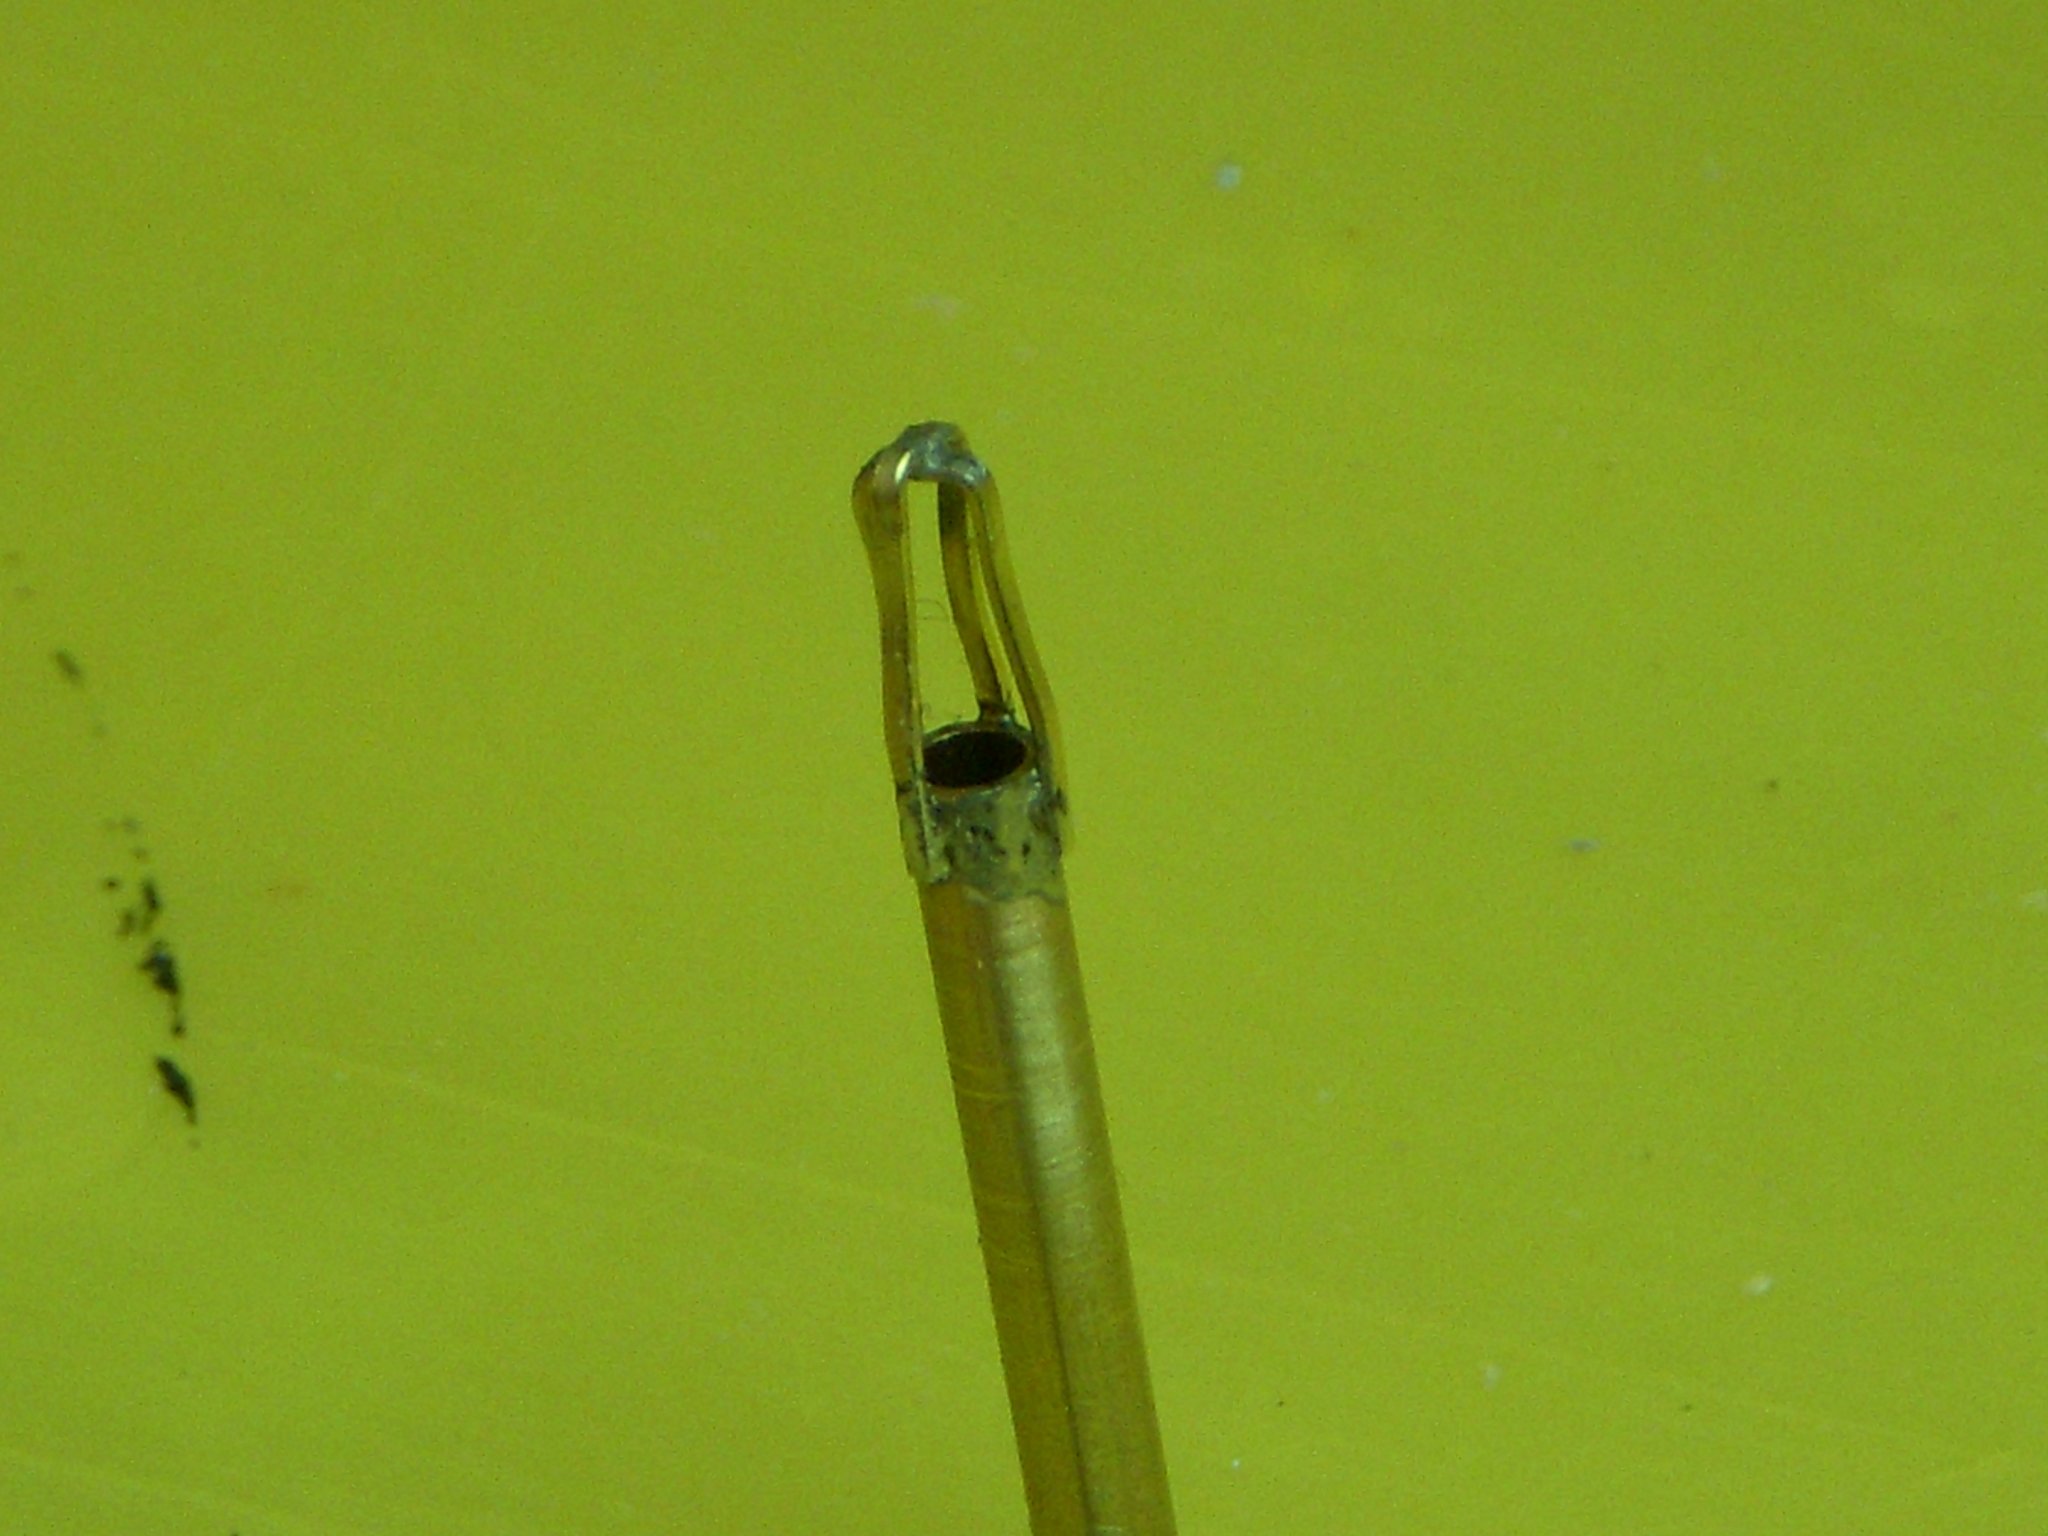
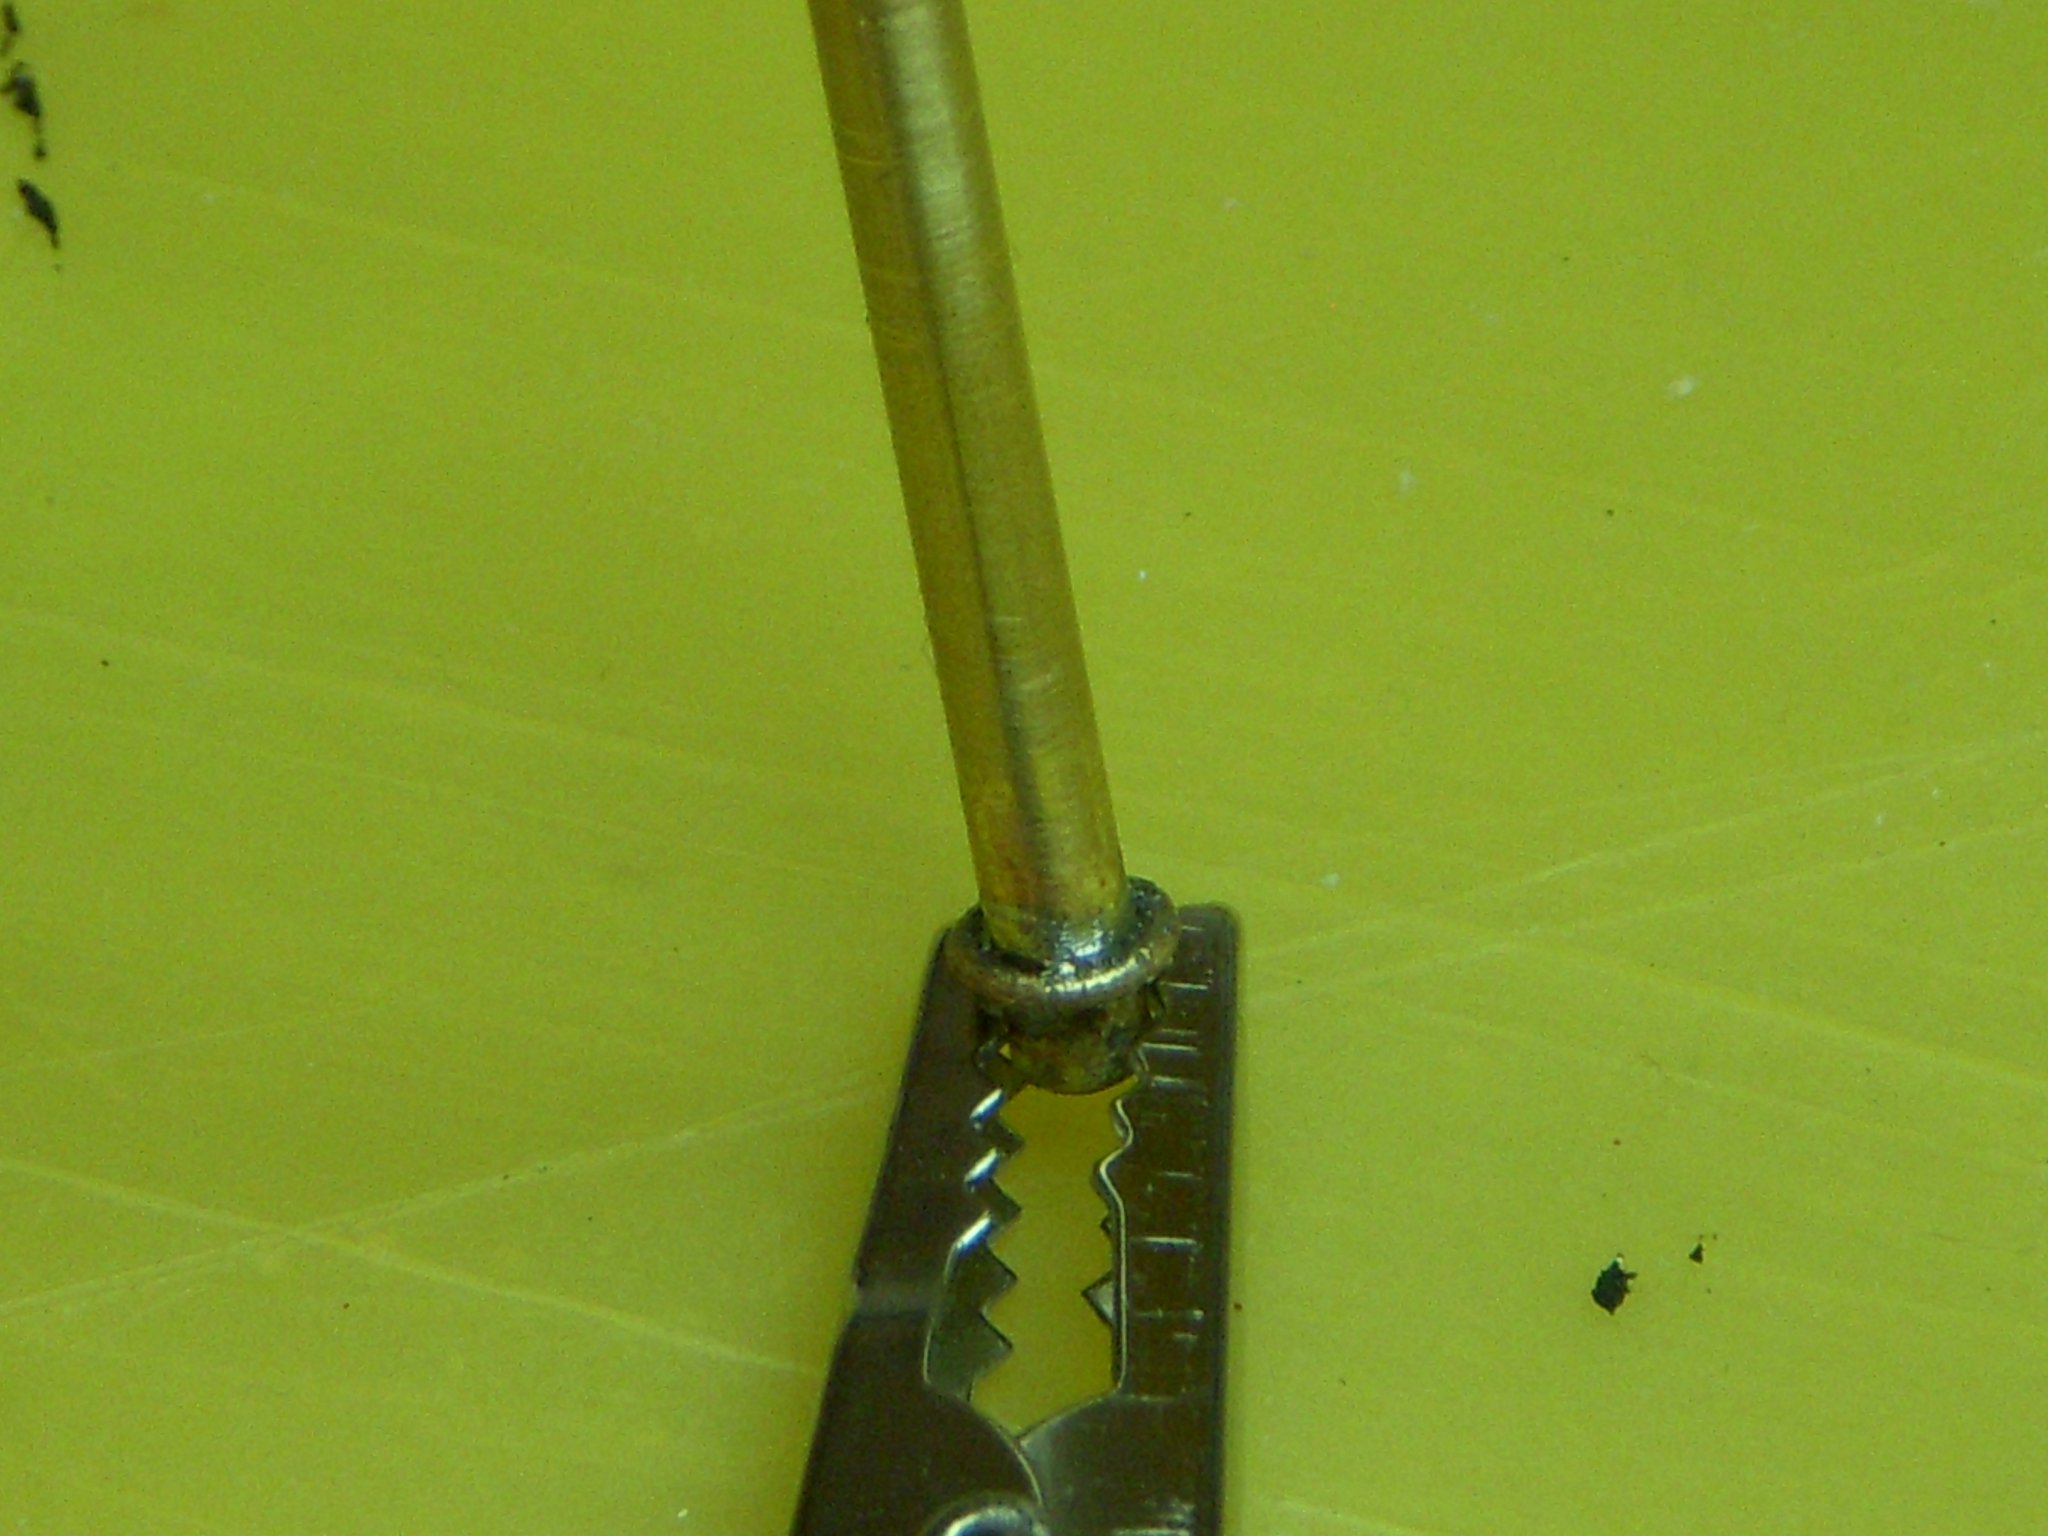
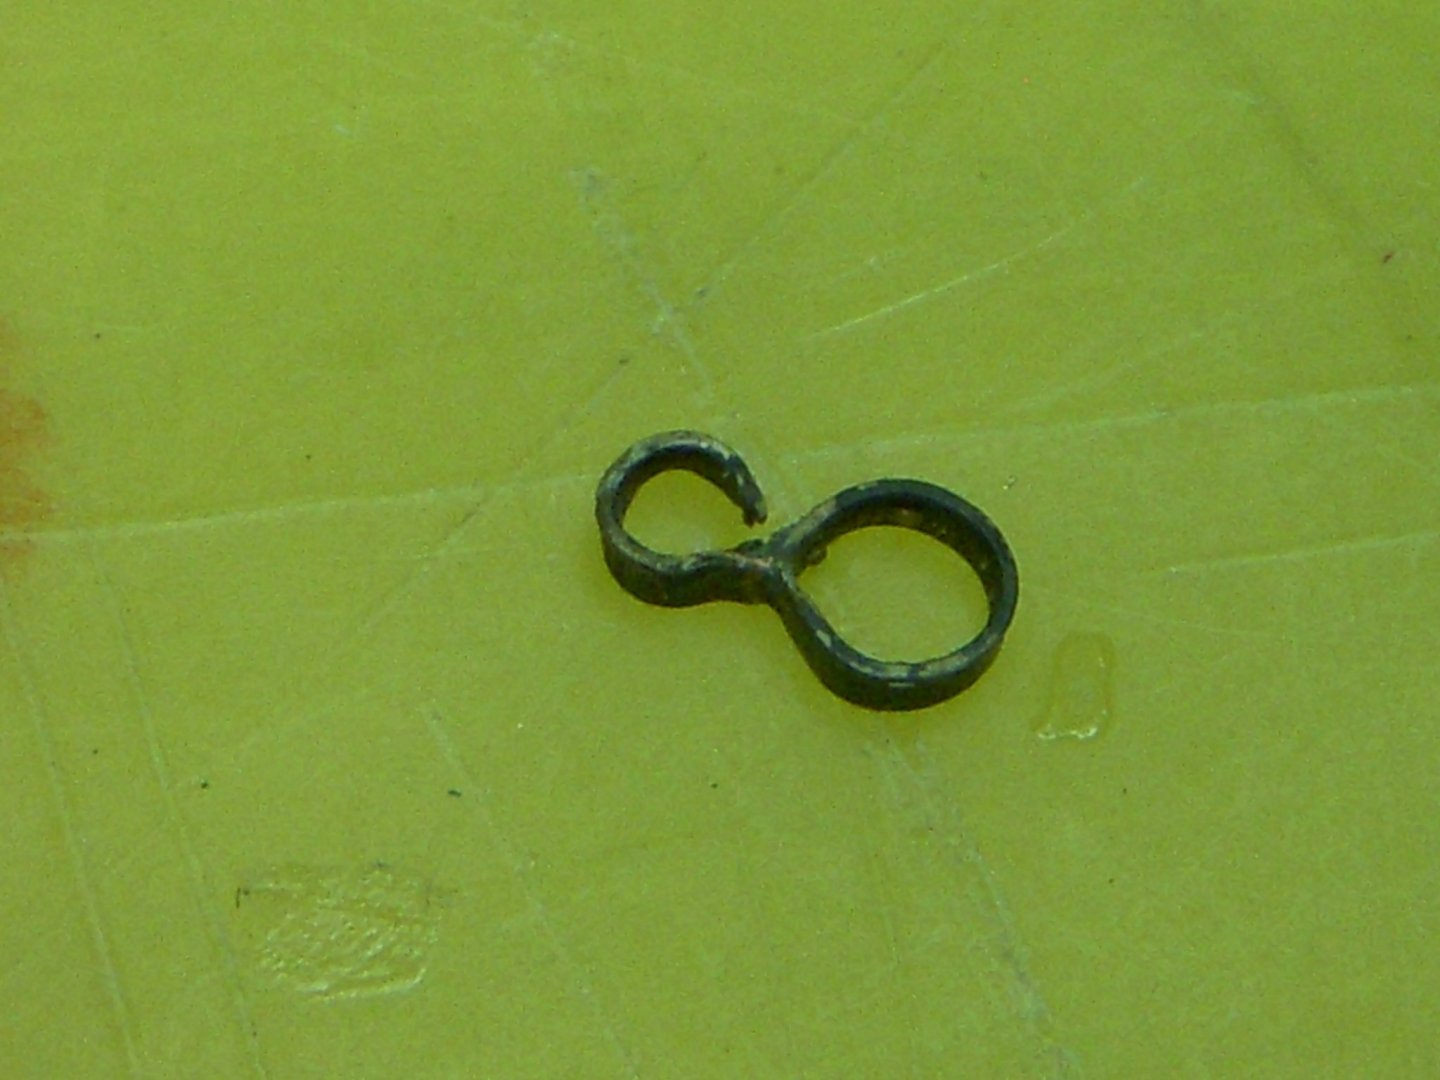
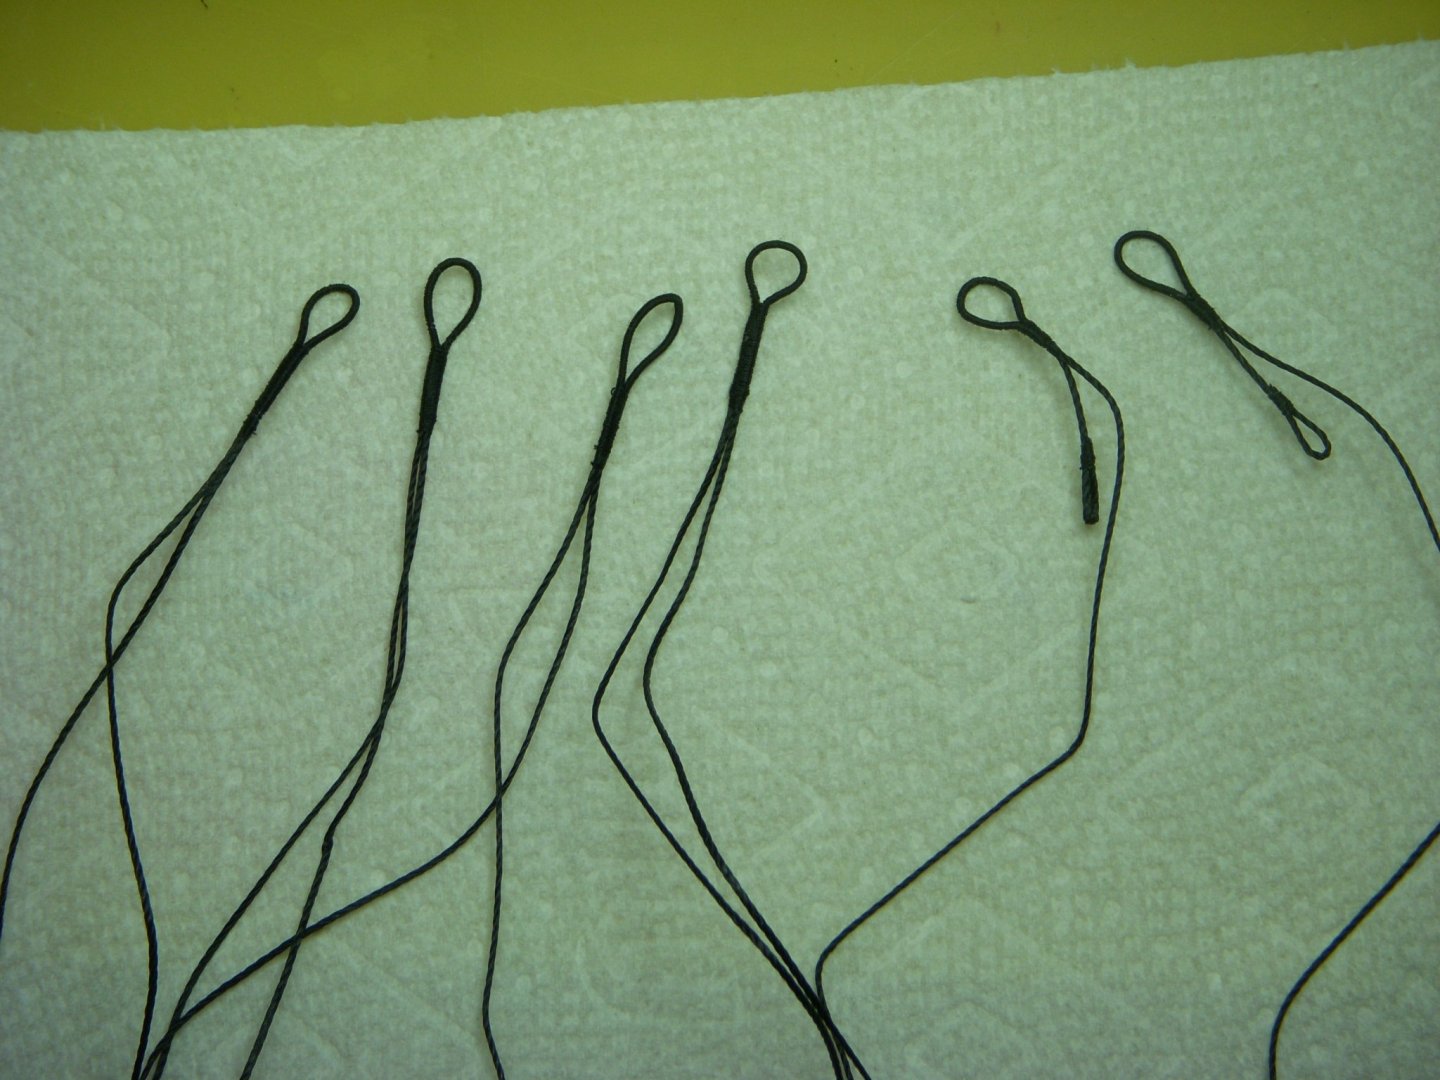
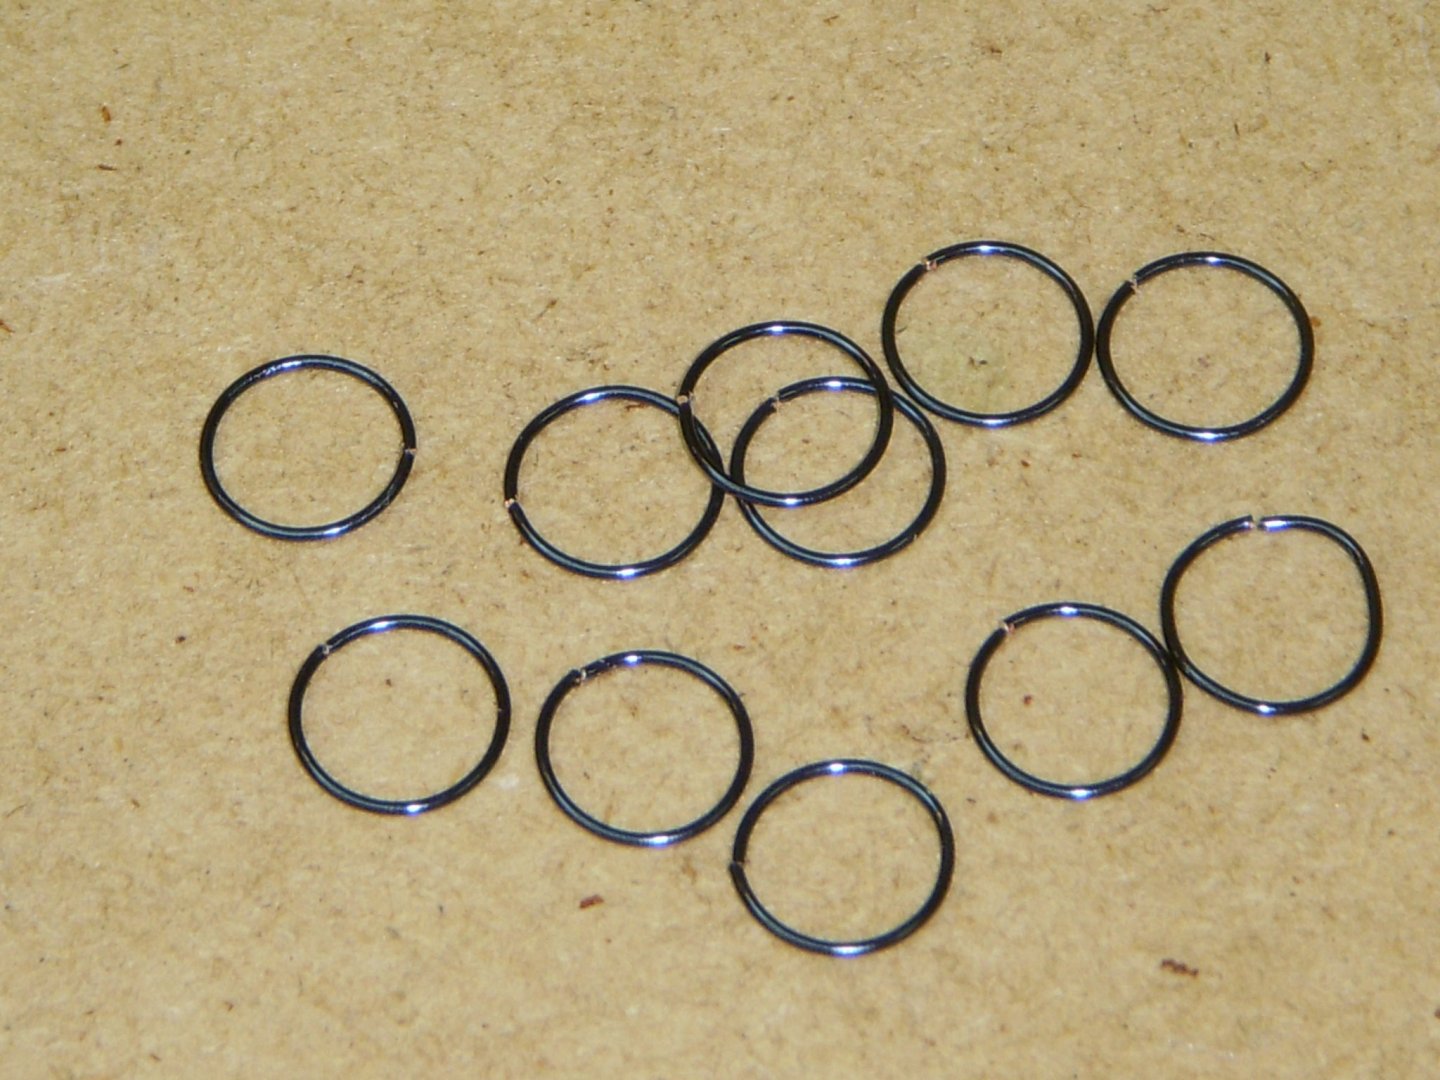
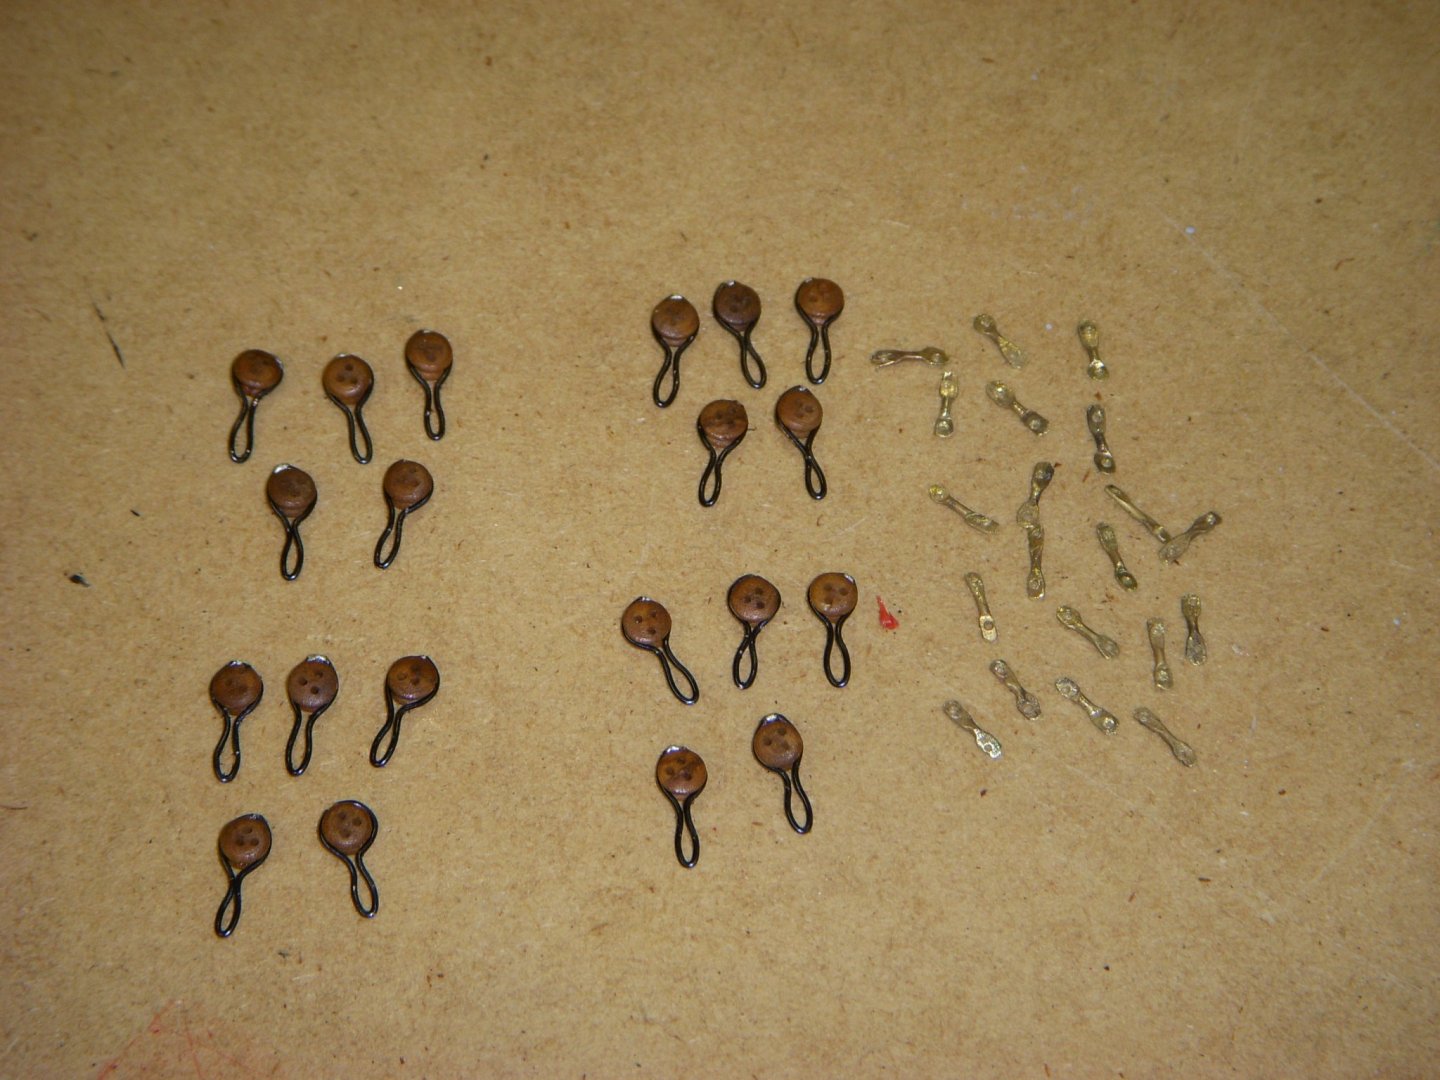
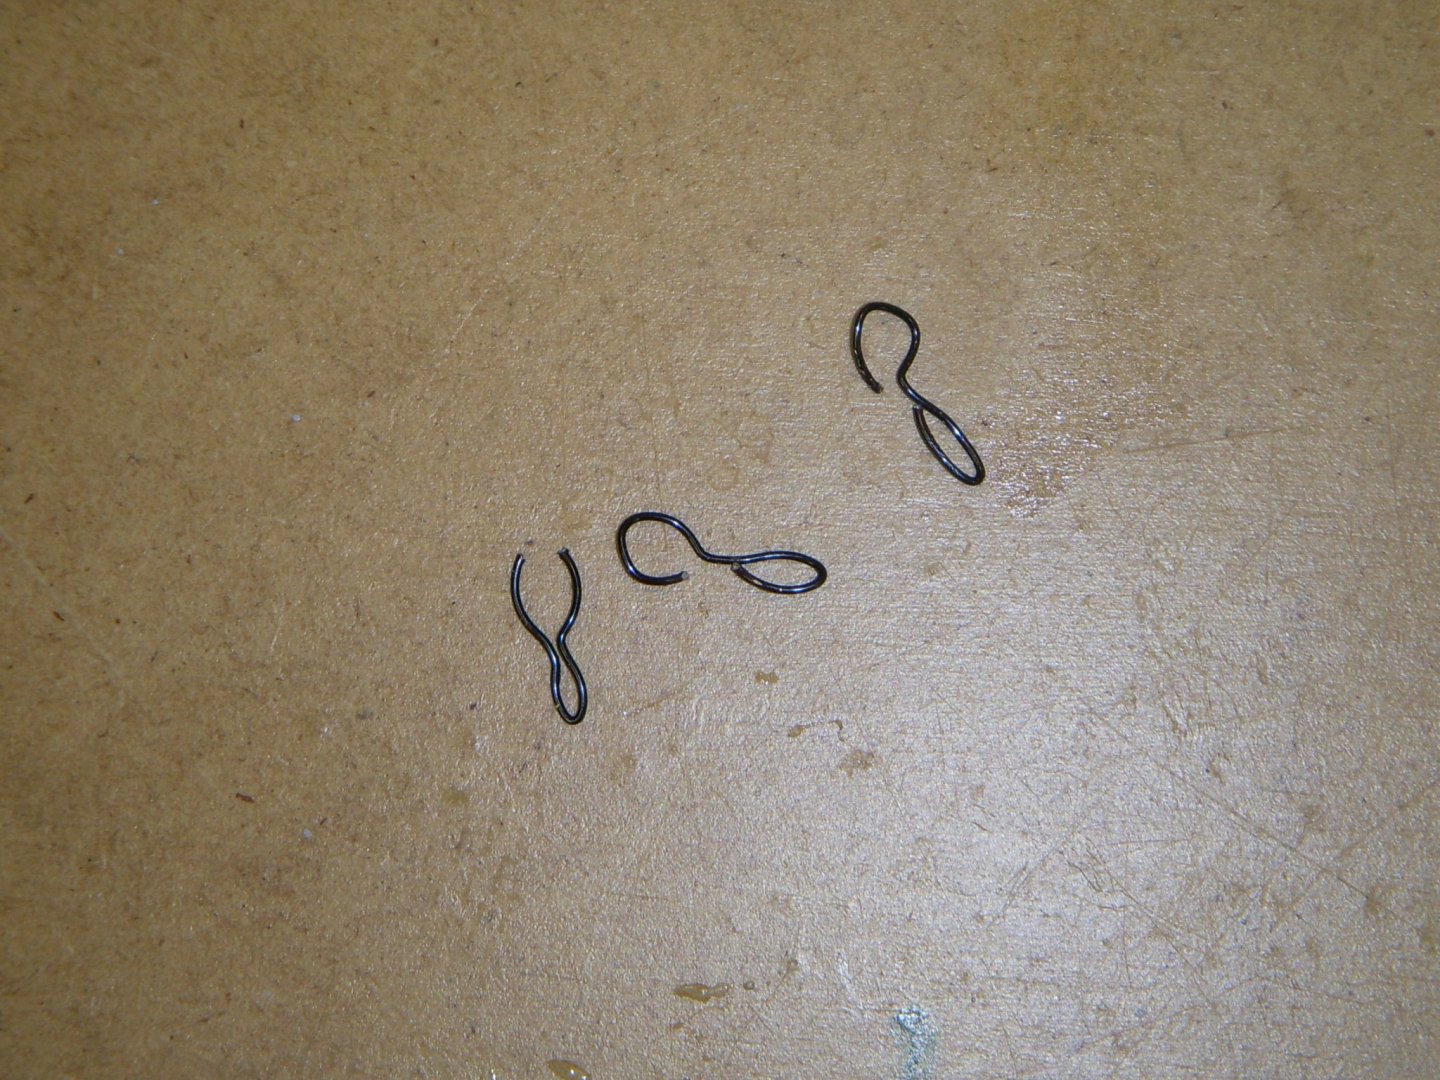
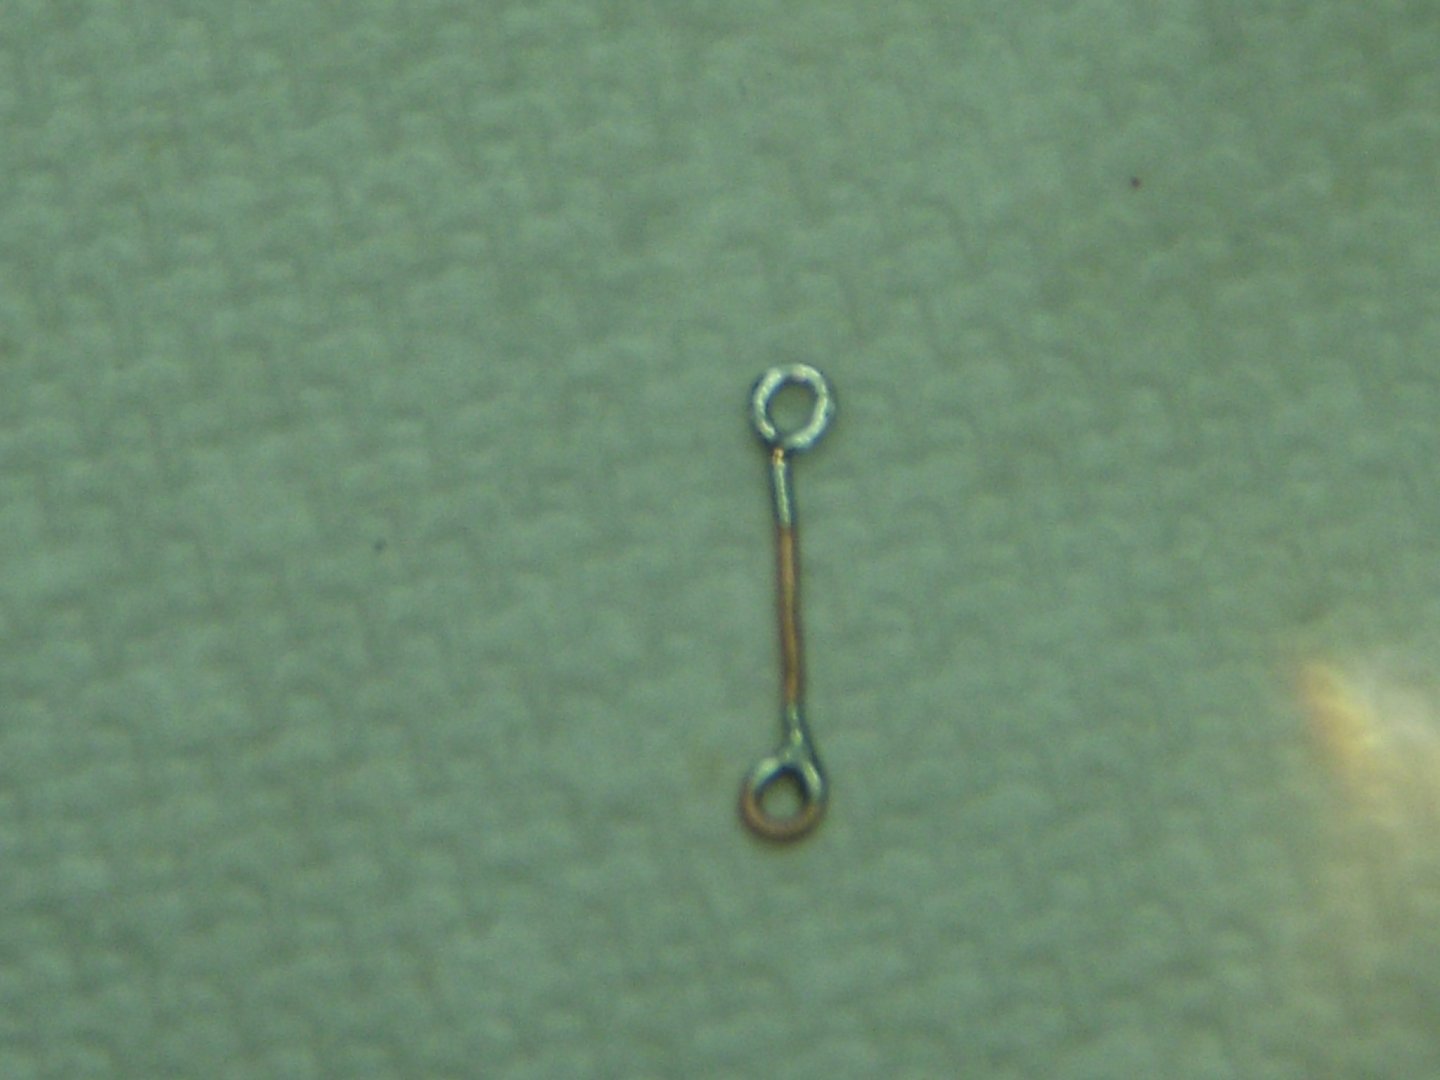
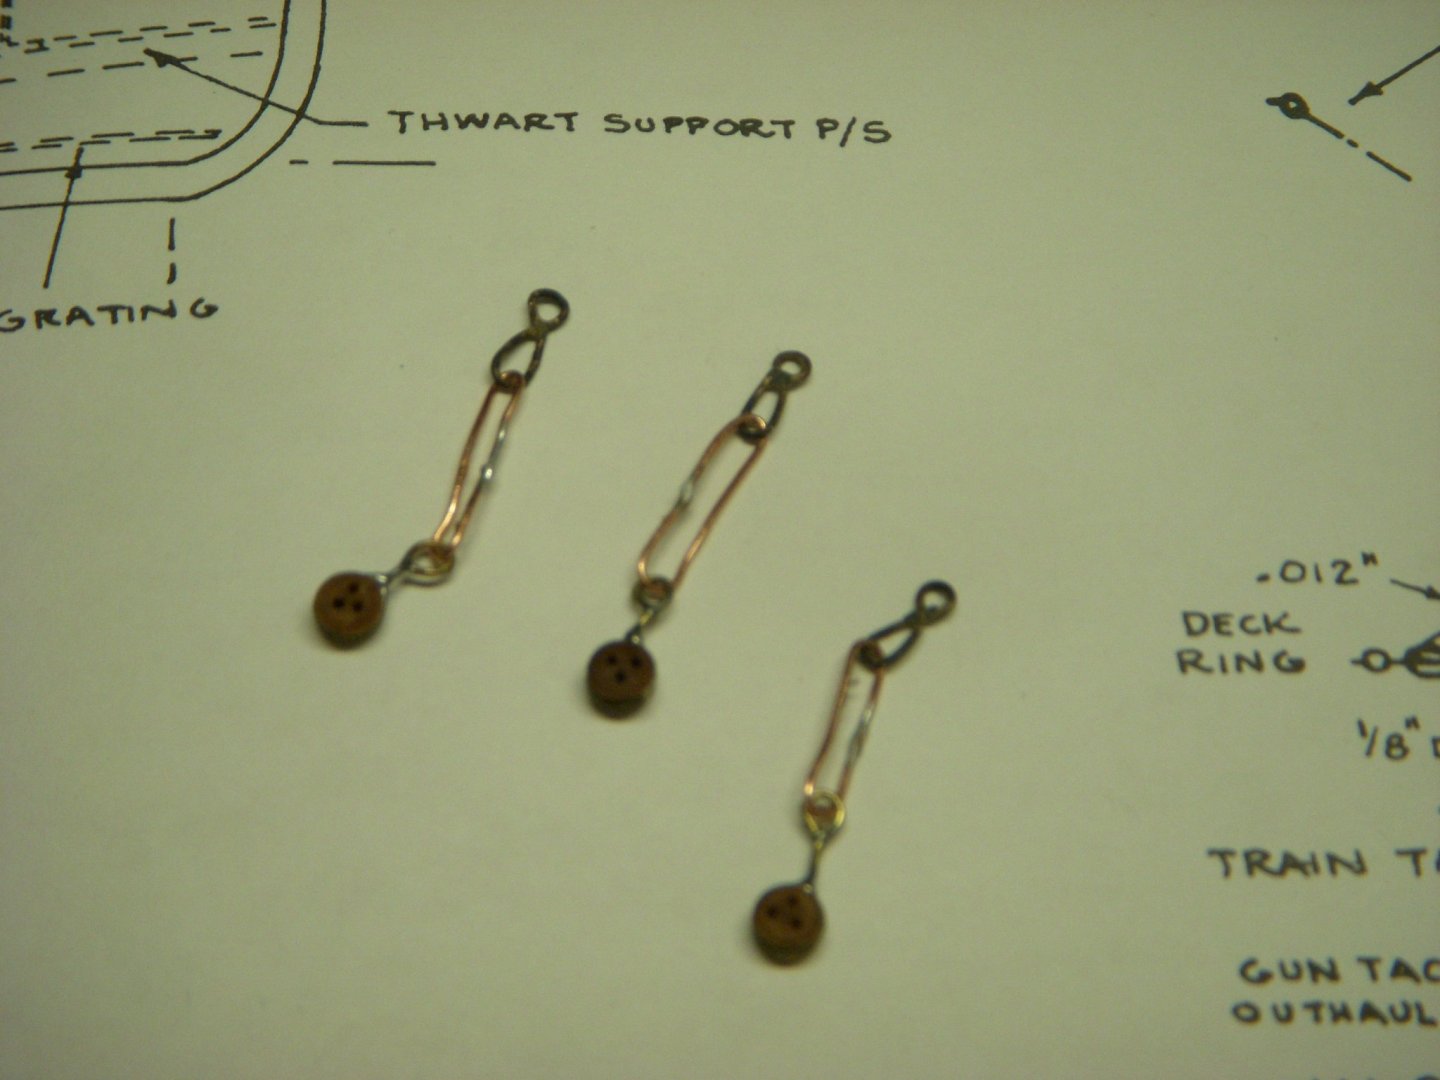
Well I went back and started making new parts for the deadeyes. This is a trying process. I took some hints from 6ohiocav (Darrell) on making the ring around the deadeyes. Started with a ring and then formed it around the deadeye. I kept breaking the solder joint when I was forming the wire around the deadeyes. I tried the joint at the top of the deadeye and at the 7 o’clock position. I formed only one out of 7 or 8 without breaking the joint. I went back and looked at the break, it seemed clean so since the deadeye came out easily I went back and formed the wire so that the bend was smooth and the joint was close, I re-soldered it. There was enough give in the wire that I was able to reinsert the deadeye. Problem solved, there were only a couple that I could not salvage. Below are picture of the broken parts and the final assembly. They still need to be touched up at the solder joint. As for the lower mounting bracket, I followed 6ohiocav suggestion on his build. Flatten the end of brass rod and drill a hole. Worked fairly well except for breaking drill bits. Using my Dremel drill press helped a lot, better than trying to using a pin vise. The only difference was that I started out with a copper rod at .81 mm. I am blackening them as I type this. Ron
-
Fantastic job, my hats off to you. I only hope to get this good. Ron
- 647 replies
-
- 2
-

-
- niagara
- model shipways
- (and 1 more)
-
Darrell After I made my post yesterday I went back to your build log for inspiration. I tried your suggestion of using 24 gauge wire wrapped on a 1/4" dowel. I ran into a couple problems, The ring was a little bit too big, so I went to a 3/16" dowel, that seemed to be the right size for the dead eyes I have. The second problem was I broke the solder joint on most of the rings when I tried to form them. I broke 8 in a row before I got one to hold. I am using silver solder on the joint. I plan on trying a few more options to find one that works better for me. One question for you, the 24guage black wire you were using what hardness was it? Mine is medium, which may be my problem. I do have some bare copper wire I may anneal and give it a try. The issue then is how to blacken it once it is on the deadeye. Thanks for your encouragement Ron
-
I have installed the starboard deadeyes and chain plates, forward and aft. This took some time and I do not feel the final results are acceptable. They ended up at different lengths and do not line up properly. I am contemplating removing the assemblies and starting over. Spending a little more time in alignment and spending more time on the rod length and shape. If I am spending this much time in building the model I want to be sure it is the best, I can do. I will spend the afternoon making some new parts before I remove the old the parts and reassembly. Here is how it looks currently . Ron

-
Mike Thanks for the tip. I tried that the first attempt and it did not turn out well. I believe my copper wire was to stiff to wrap around the nails cleanly. I went back and annealed the wire and it worked a lot better. The only problem I ran into on the first couple of samples was I wanted put a touch of solder on the joints, but the solder would not adhere to the wire once I annealed it. I believe annealing let a film on the wire that the flux would not clean off. I am now sanding the wire before bending and then putting it in a bath of Sparex for a few minutes before soldering. That seams to solve the problem. Now make the rest and blacken them. Ron
-
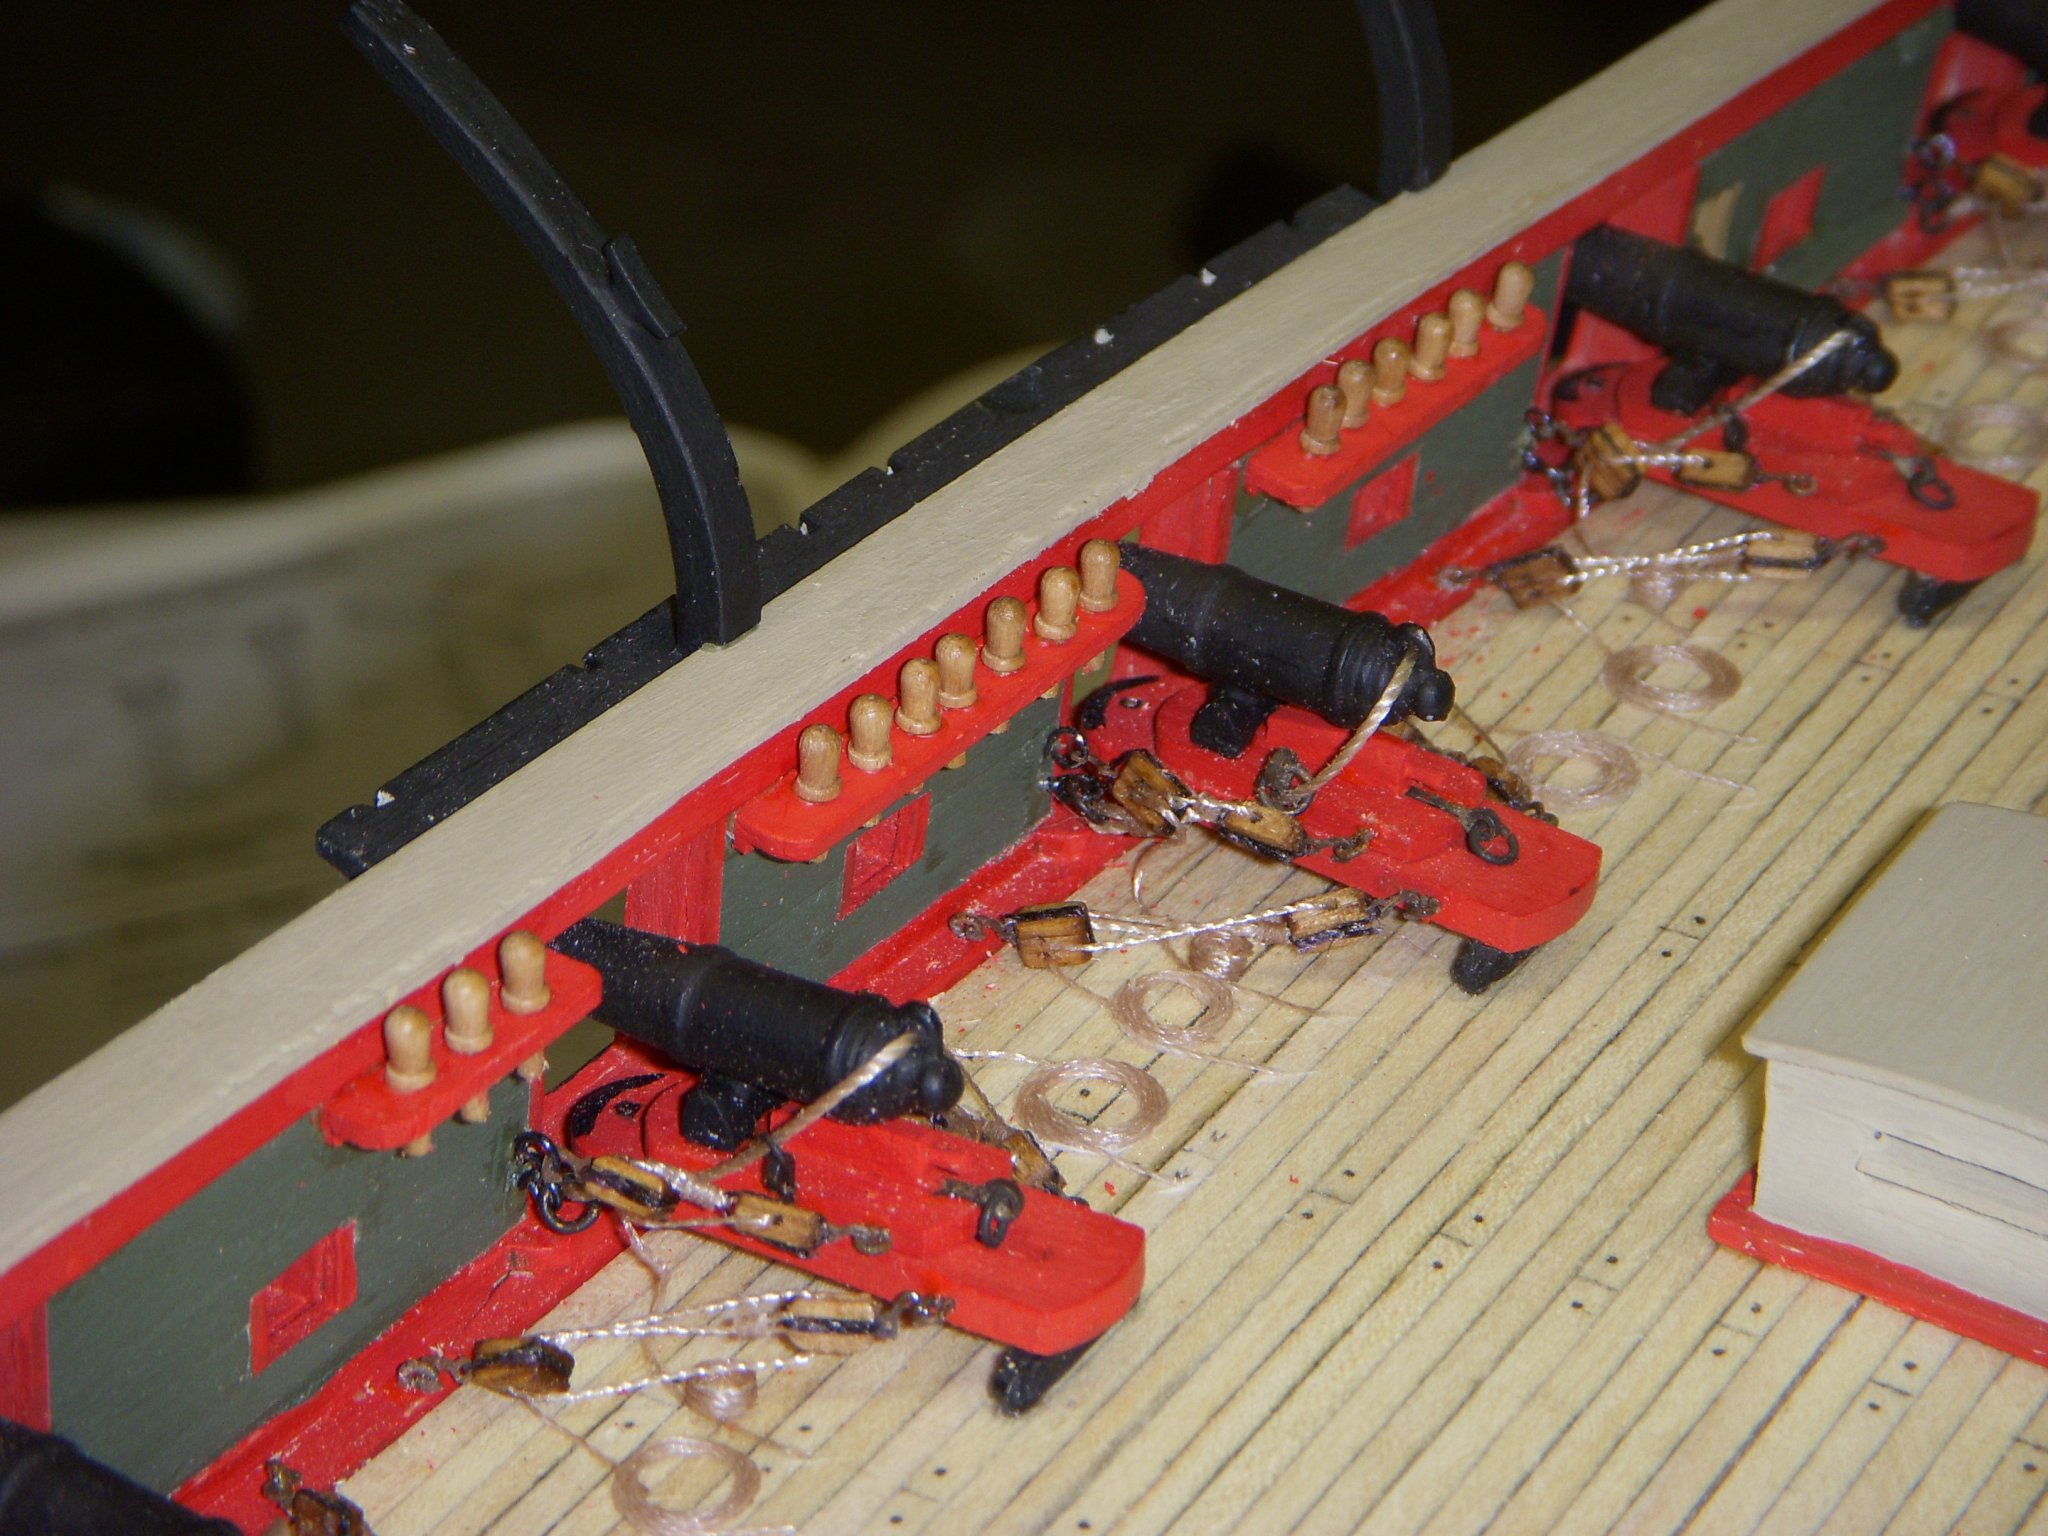
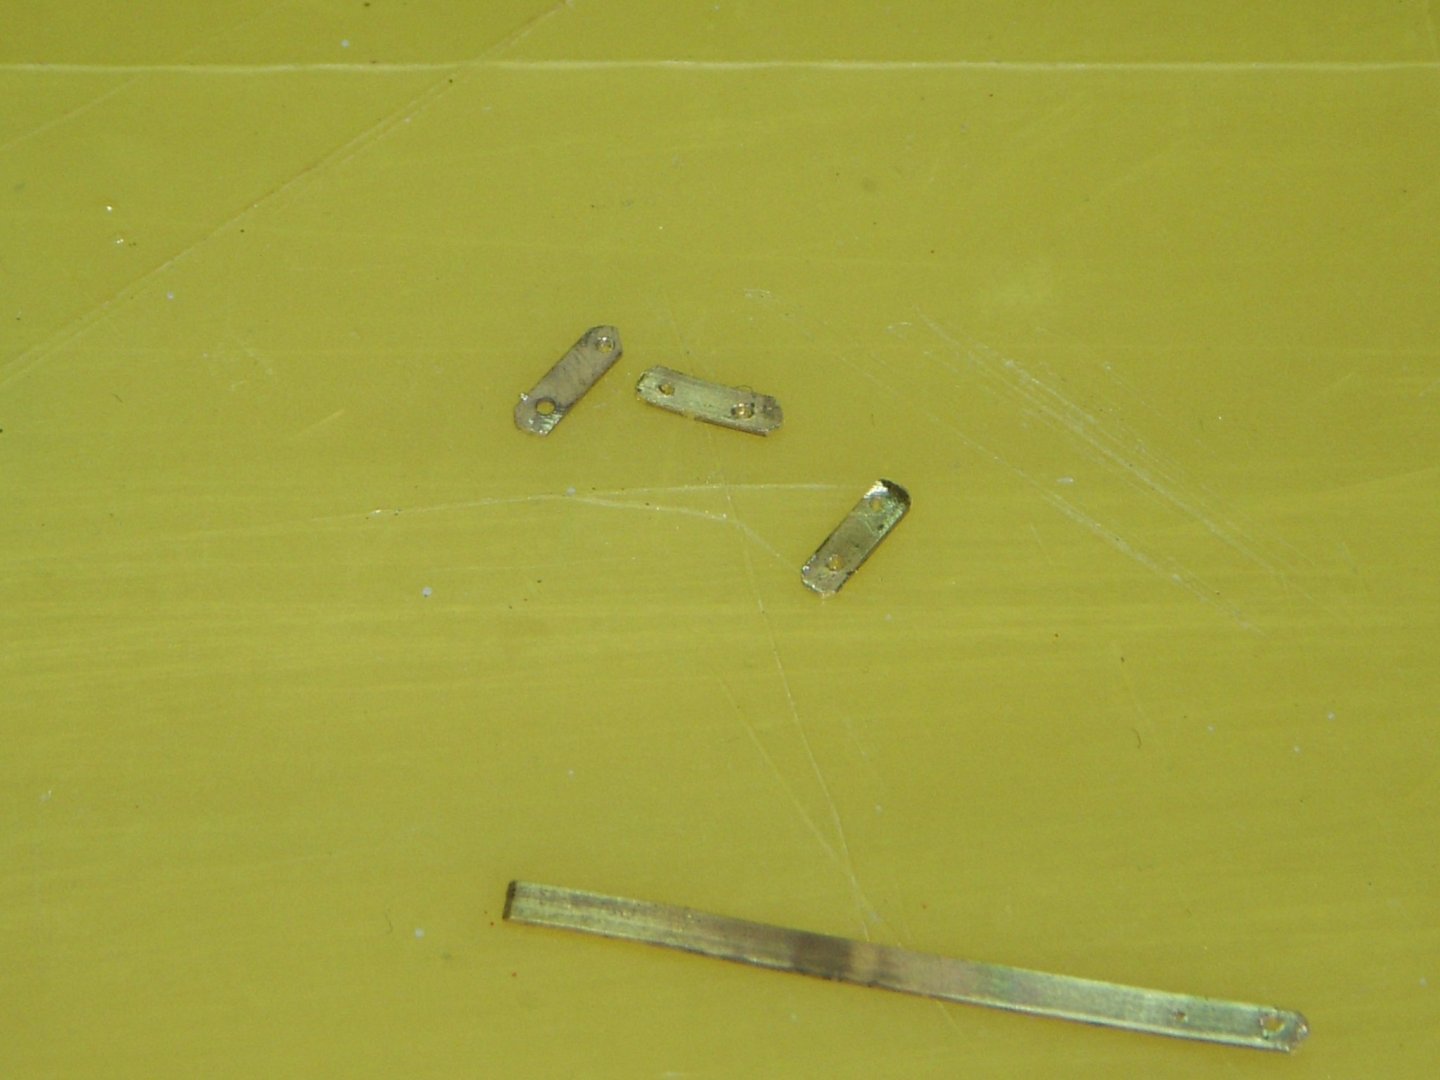
I removed the damaged Quarter Davits and replaced them with new ones. I need to be a little more careful when working on the ship, I don’t need to be replacing parts that have already been installed. The Belaying pins have been installed on the Pin Rails. I went and updated the belaying pins to wooden ones. The supplied cast pins that came with the kit just did not look good. Started assembly of the chain plates. Made these from 24-gauge copper wire, formed and soldered. I will start installing the forward larger ones first and then install the outer portion of the channels. The lower mount for the chain plates looks like it was made from a small gauge wire. I tried bending the different gauge wire I had and could not make the loops small enough. I decided to make these parts form a 1/64’ x 1/16” copper bar. I found that annealing it first it was easier to cut and drill the holes. This is what my first attempt looks like. These need to be cleaned up and blackened before installation. Ron

-
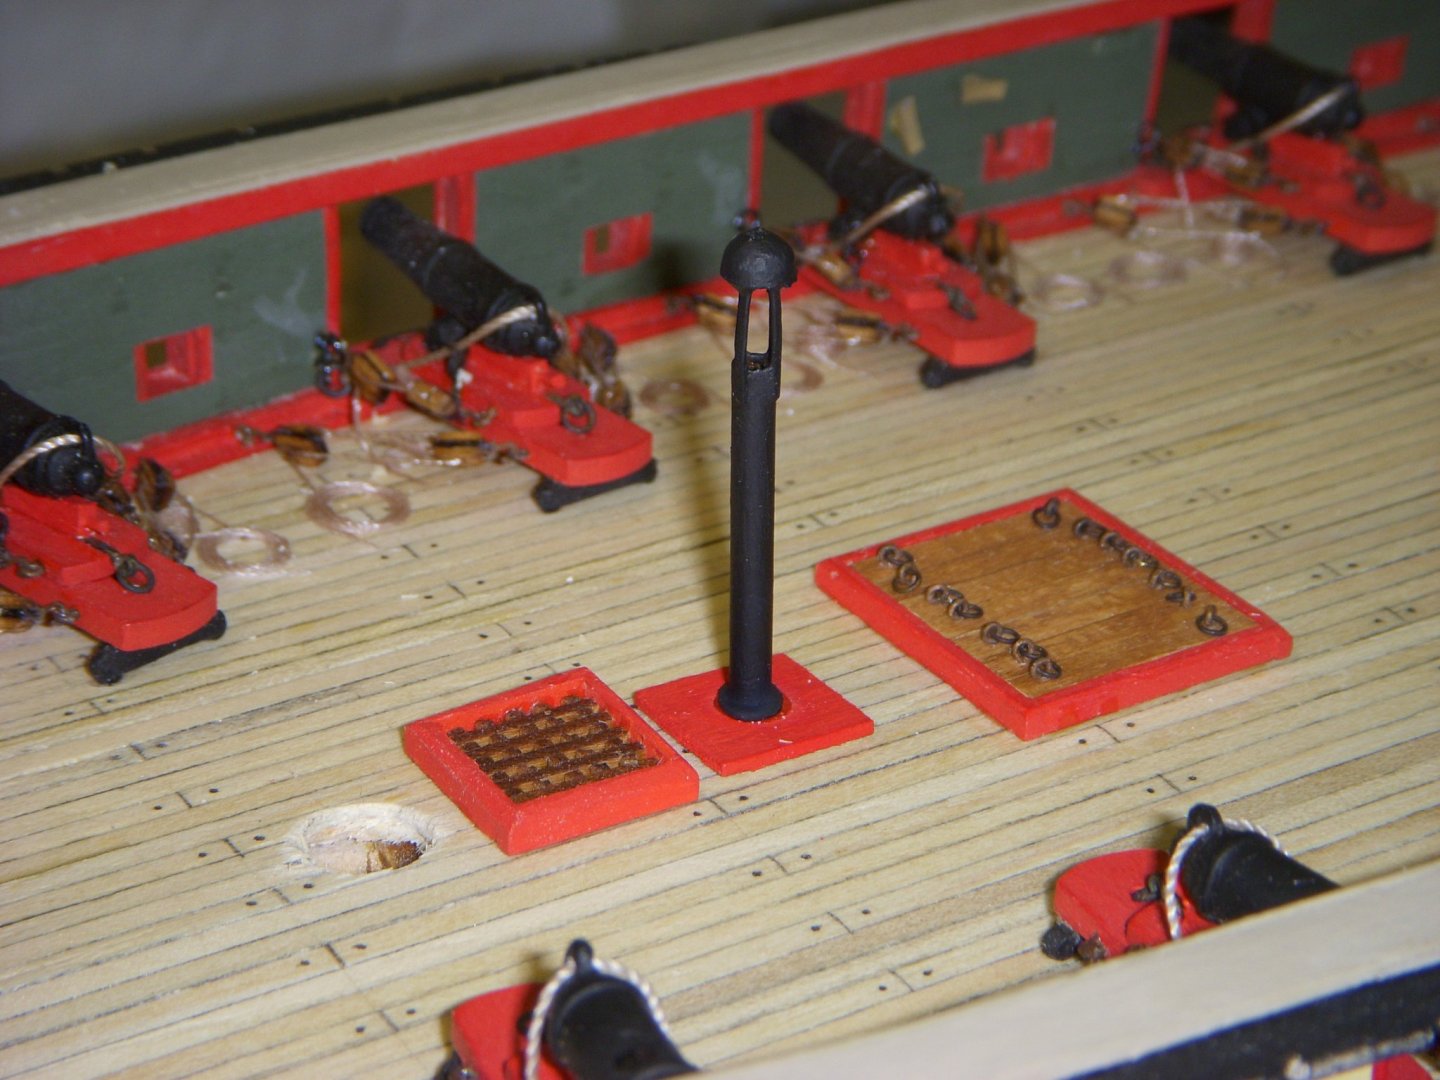
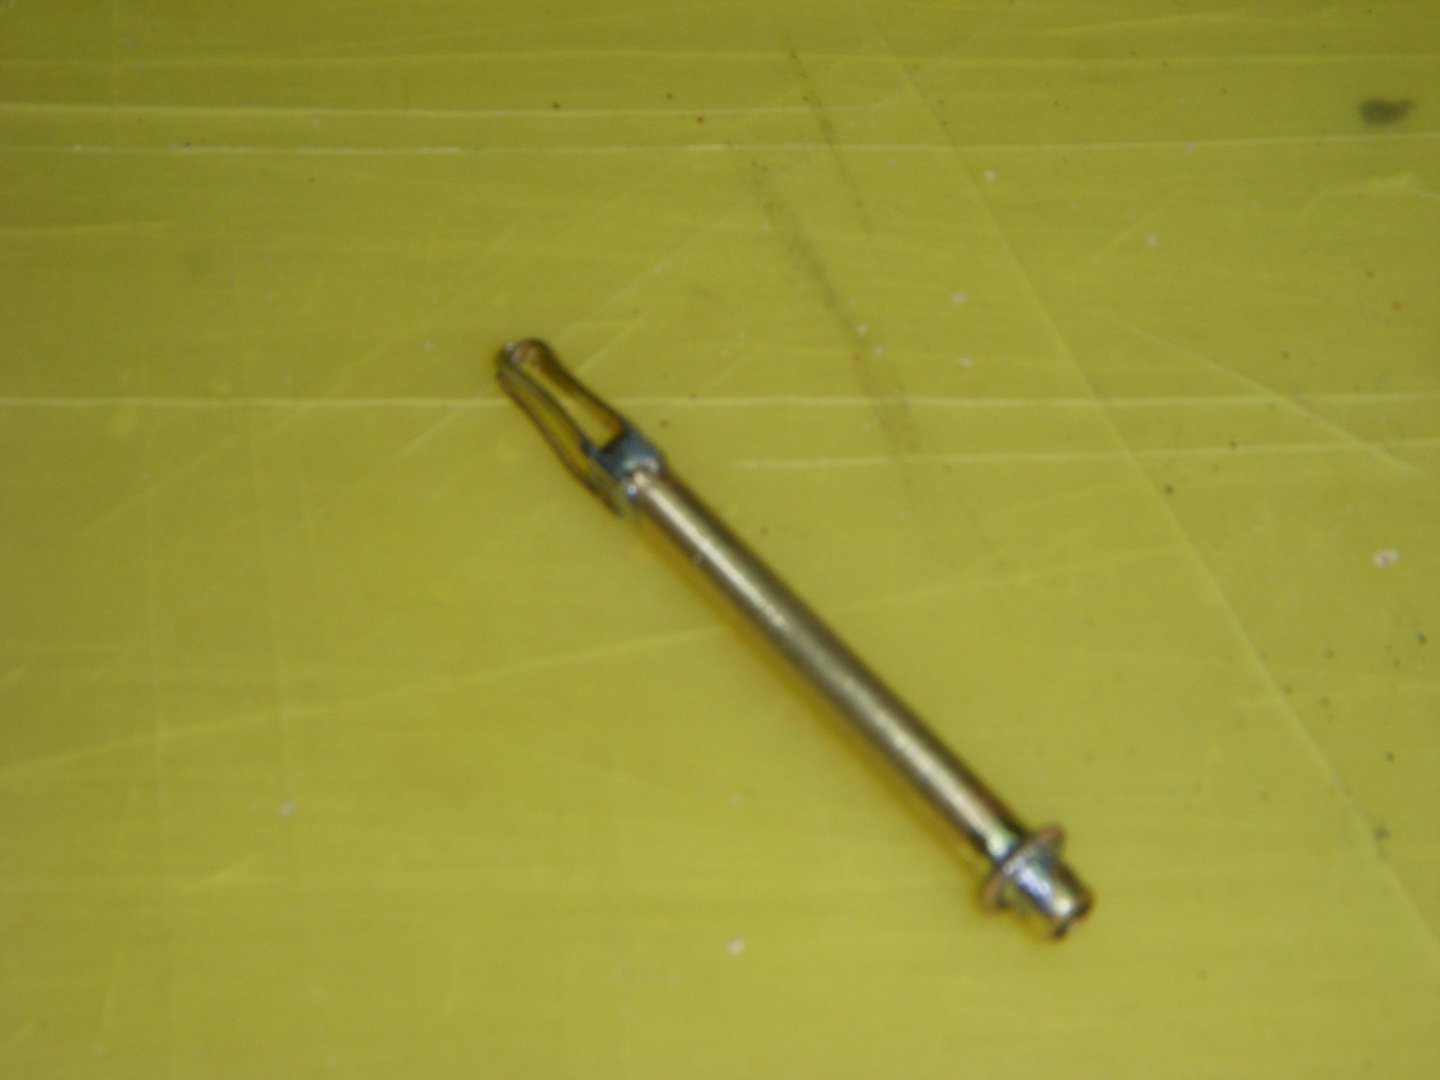
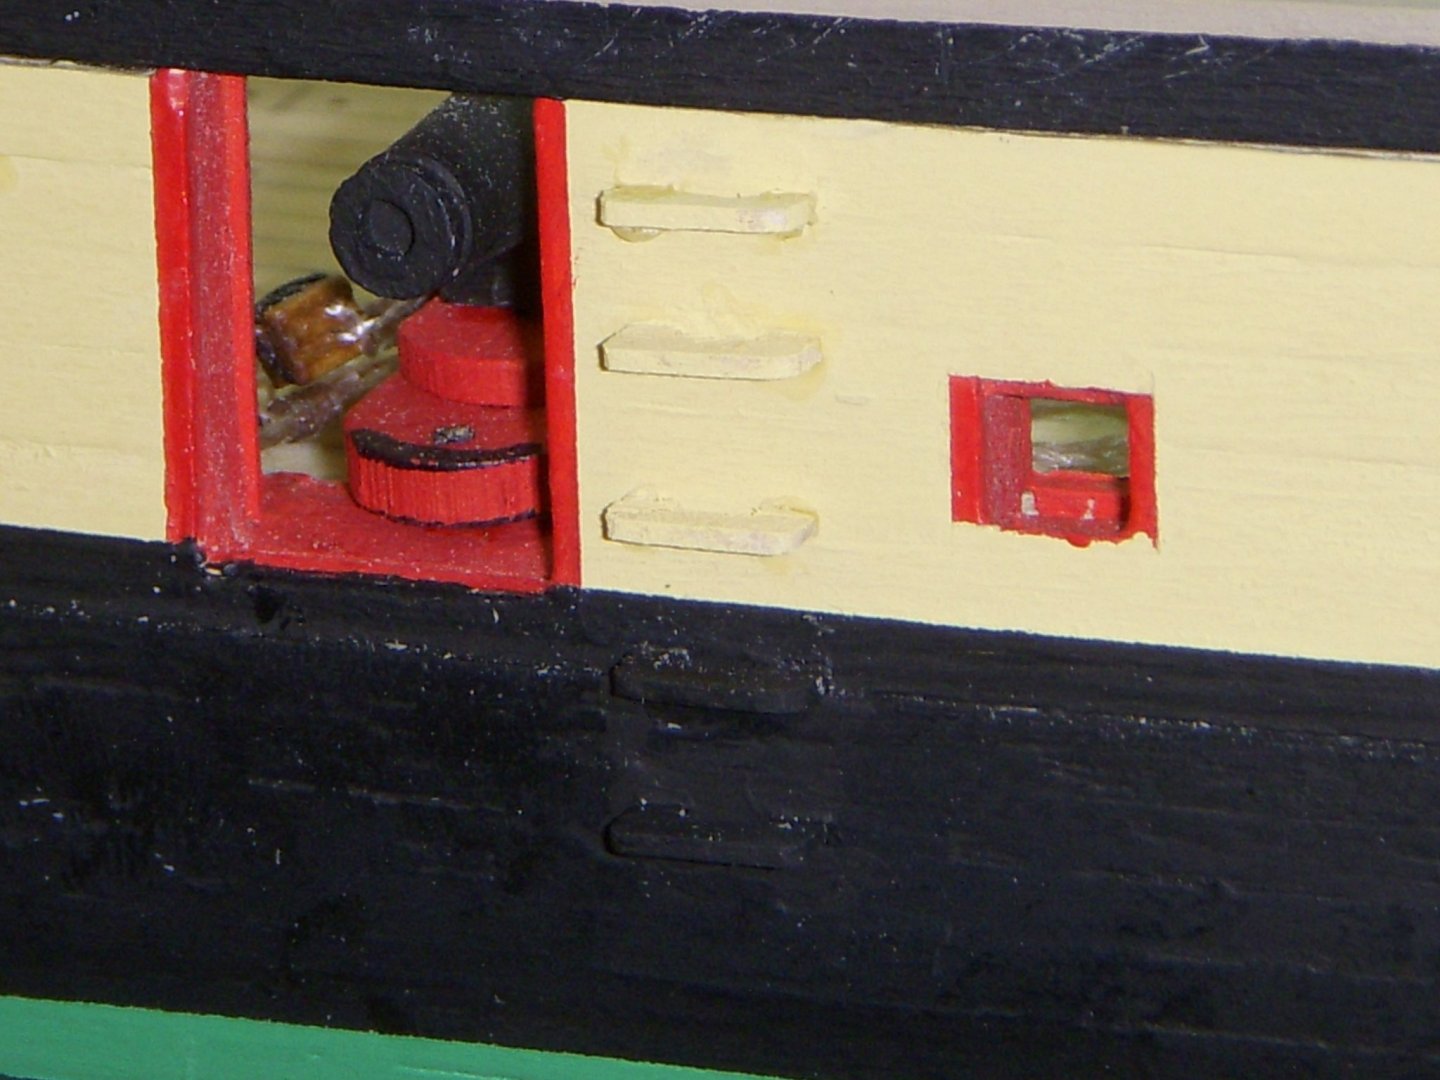
I was ready to install the Galley stack when I noticed it was deformed. Rather than being a niece round pipe it was oval. I thought I might be able to sand it to make it look better but realized that I would need to remove more material and it would look out of proportion. I decided to make a new stack out of 1/8” brass tubing and some brass strapping. Shown below is the process I went though. One point was that I needed to use two different solders with different melting temps to attach the strapping. I used I higher temp solder where the strapped crosses at the top, and used a lower temp to attach it to the tube. I found that attaching the strapping to the tube melted the crossed section if I used the same temp solder. The base flange was just a piece of wire wrapped and soldered to the tube. A little fine sanding finished the job. A couple coats of primer and a finished coat of black paint completed the job. Now for my big error, during installation of the stack I inadvertently broke off the two port side Quarter Boat Davits. I tried gluing them back on but they did not look right. I tried making new ones using the pieces the laser cut pieces were removed from, but they did not come out to my satisfaction. I contacted Model Shipways, and they were kind enough to send me a new laser cut piece, thanks. I am now in the process of remove the broken pieces and reinstalling the new parts. I will need to be a little more careful in the future. Ron


-
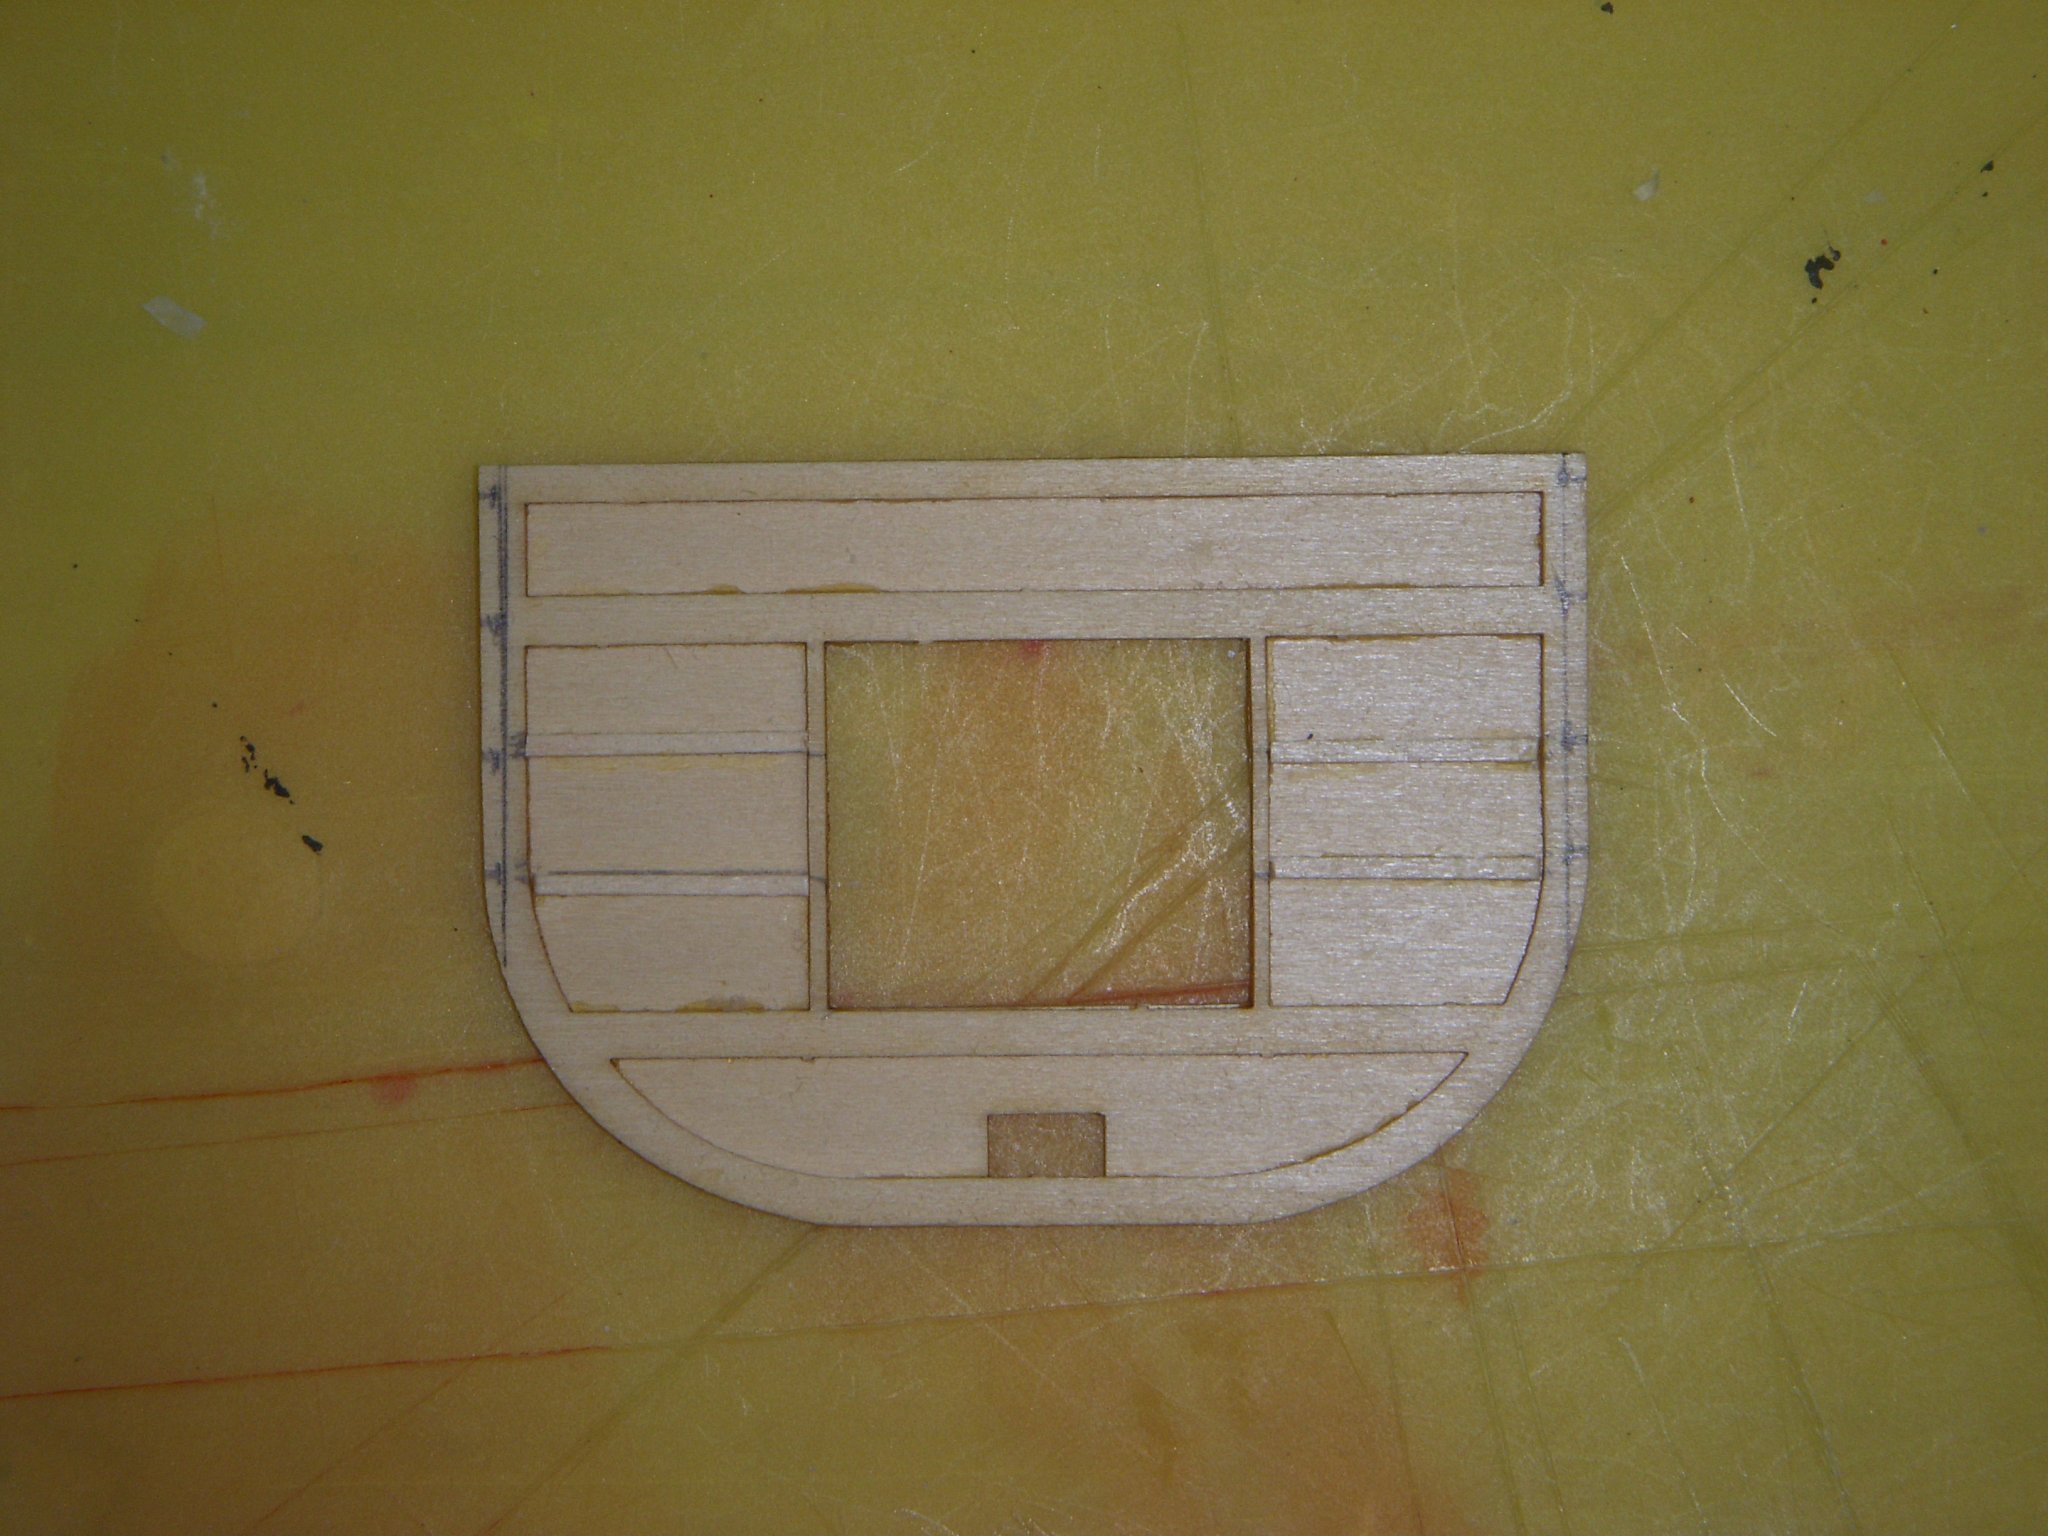
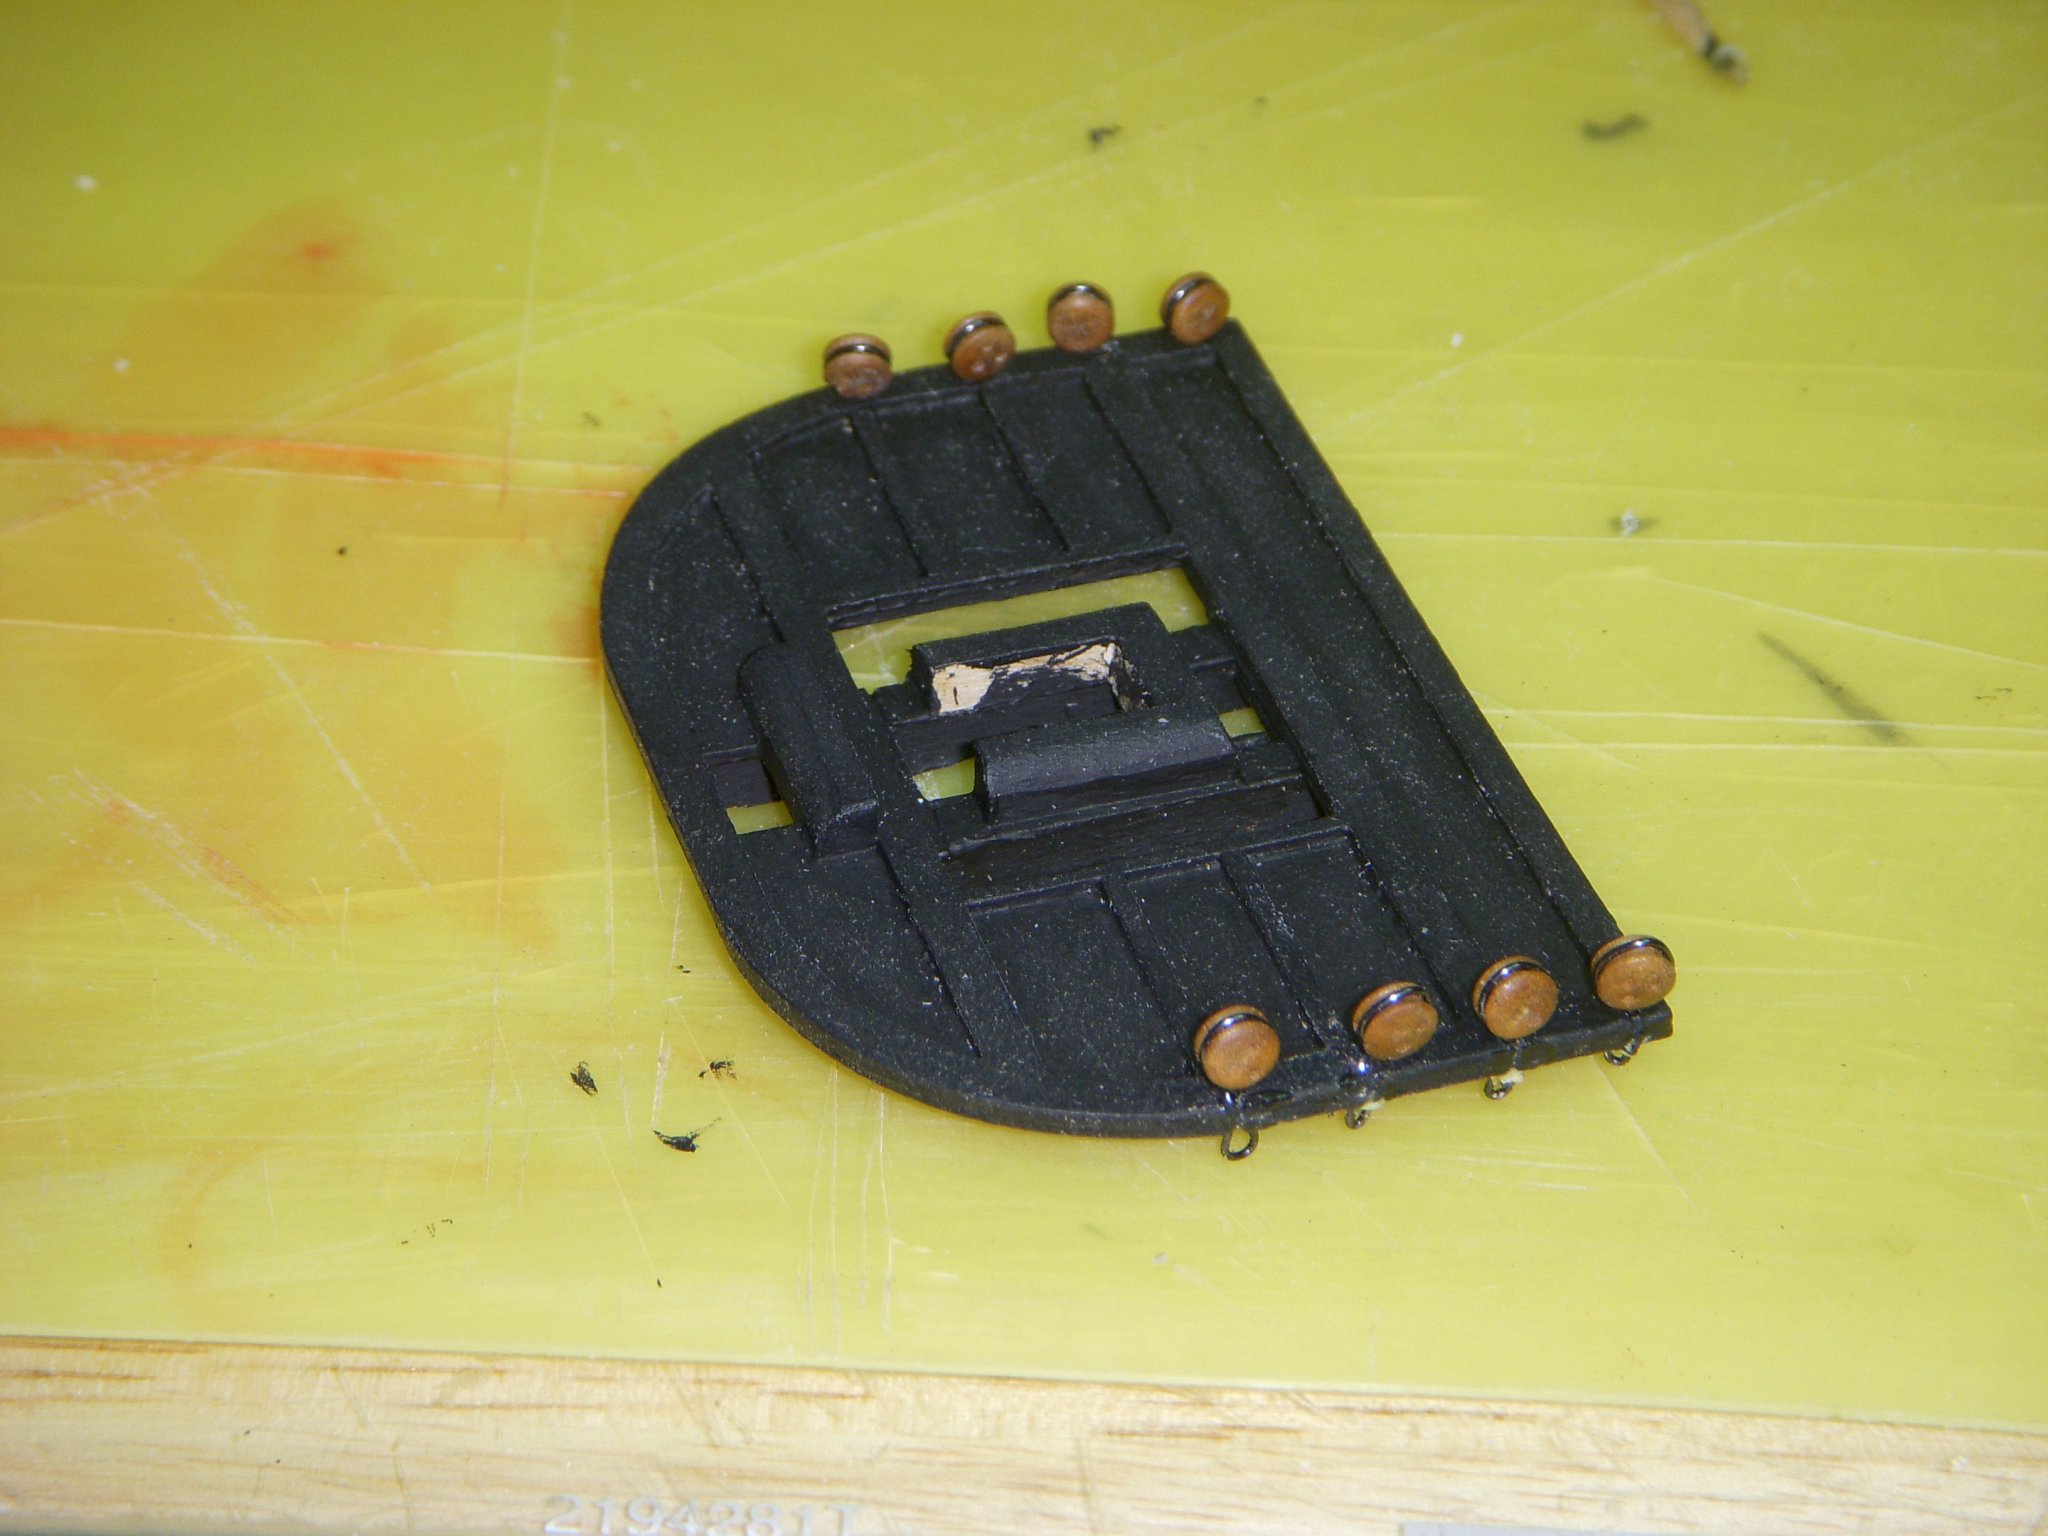
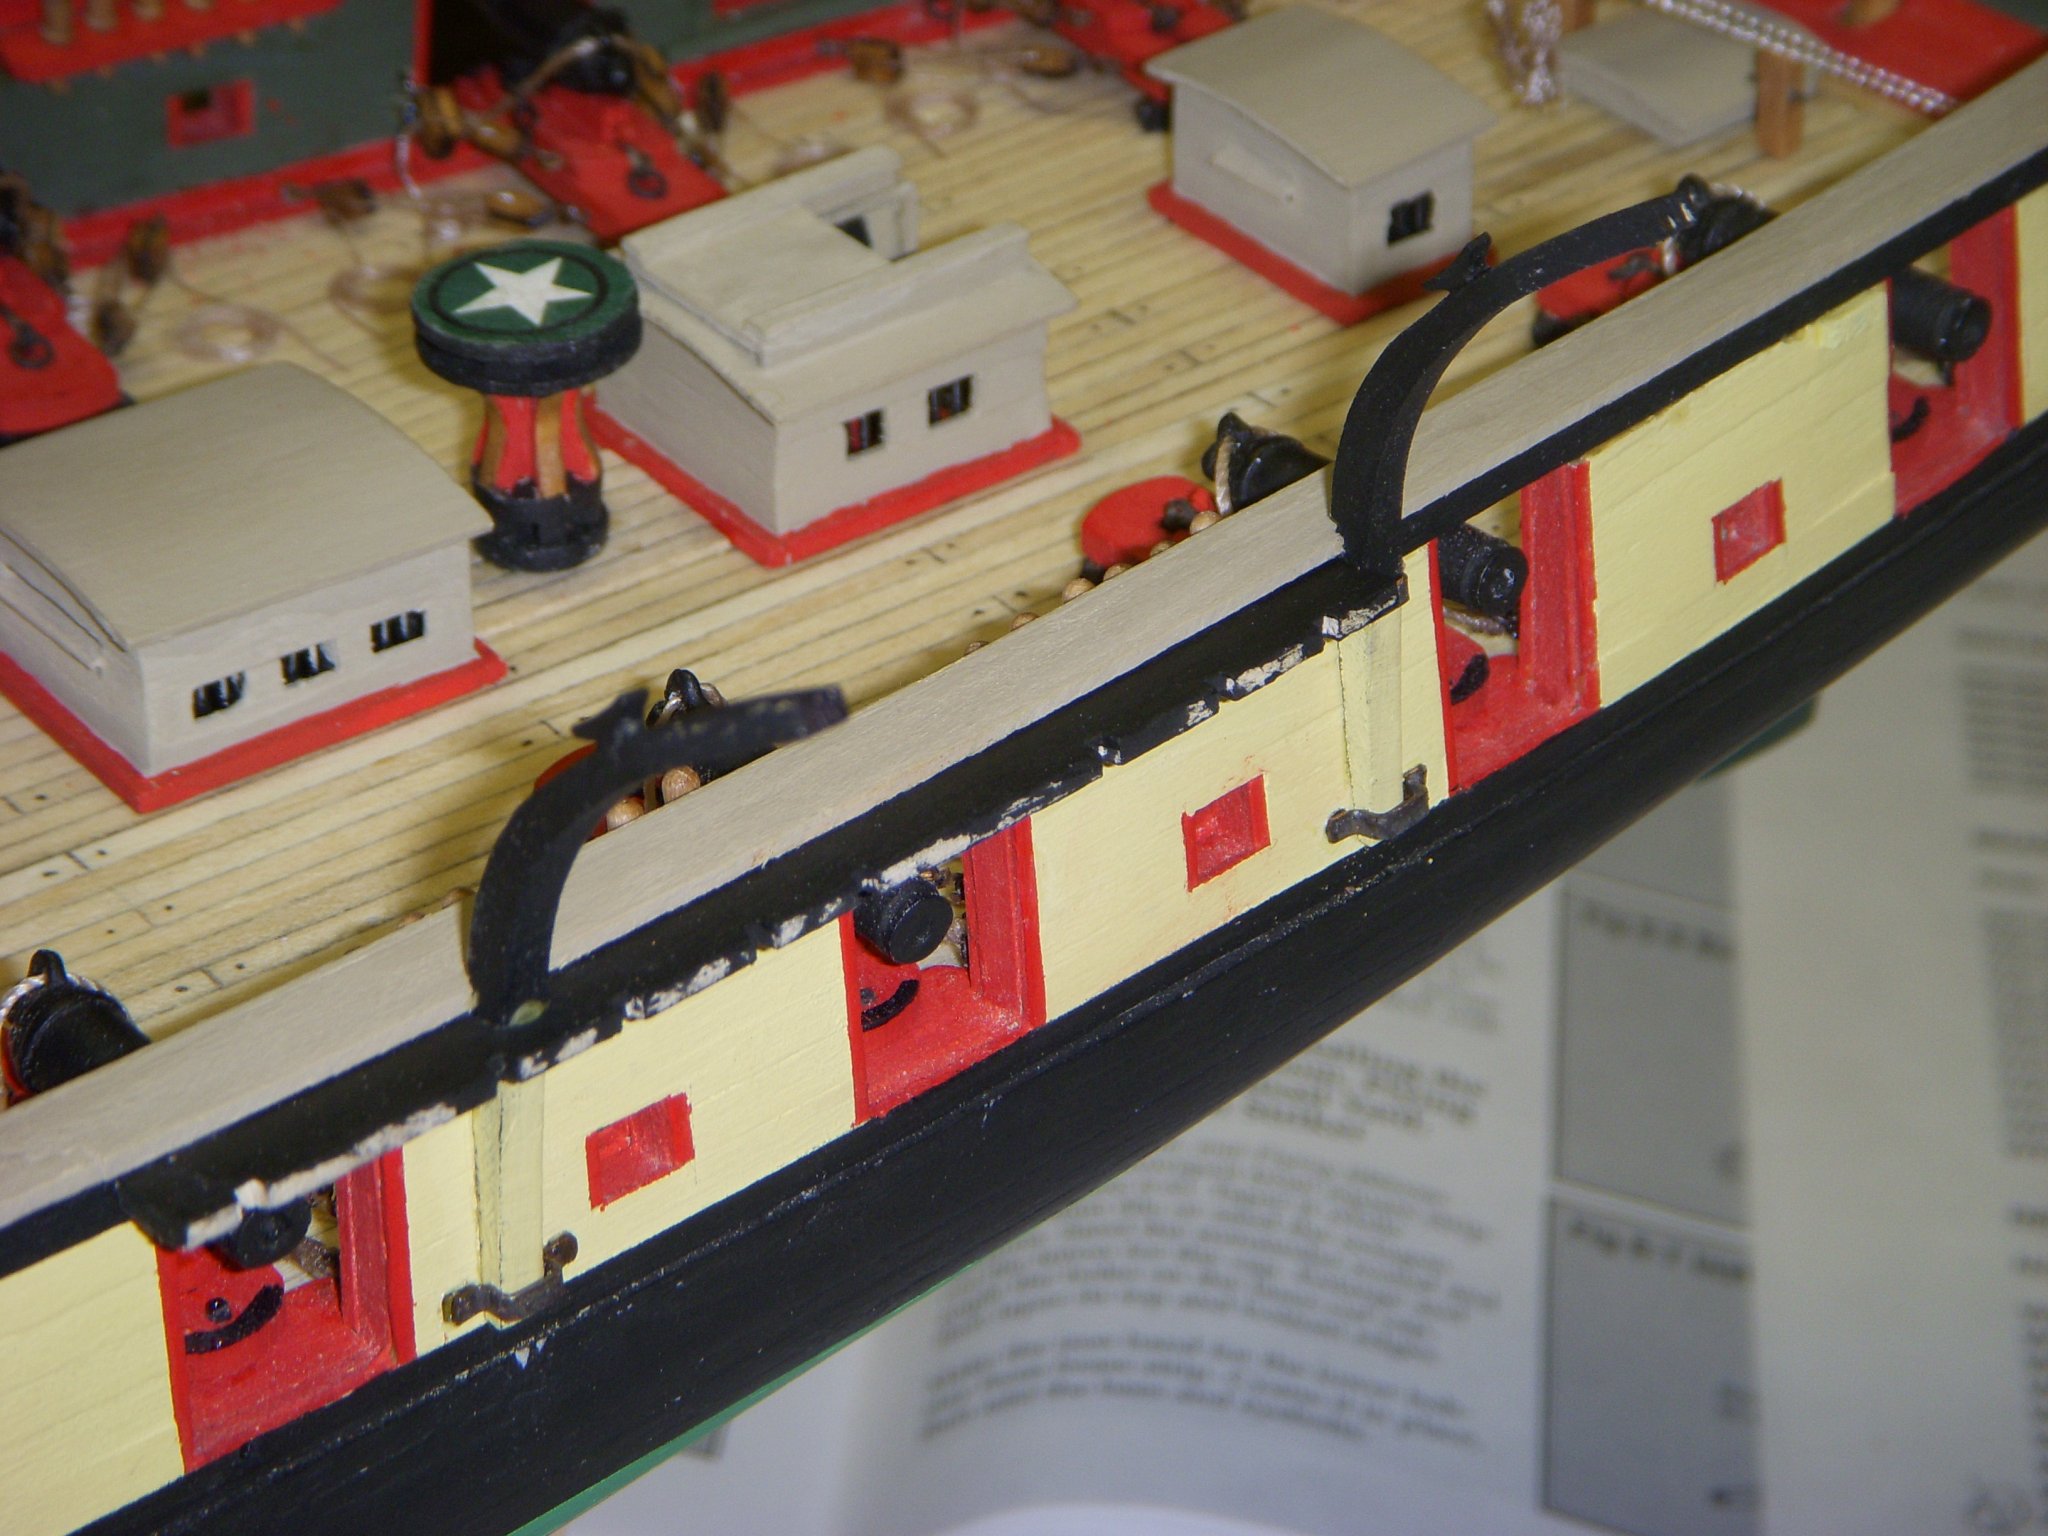
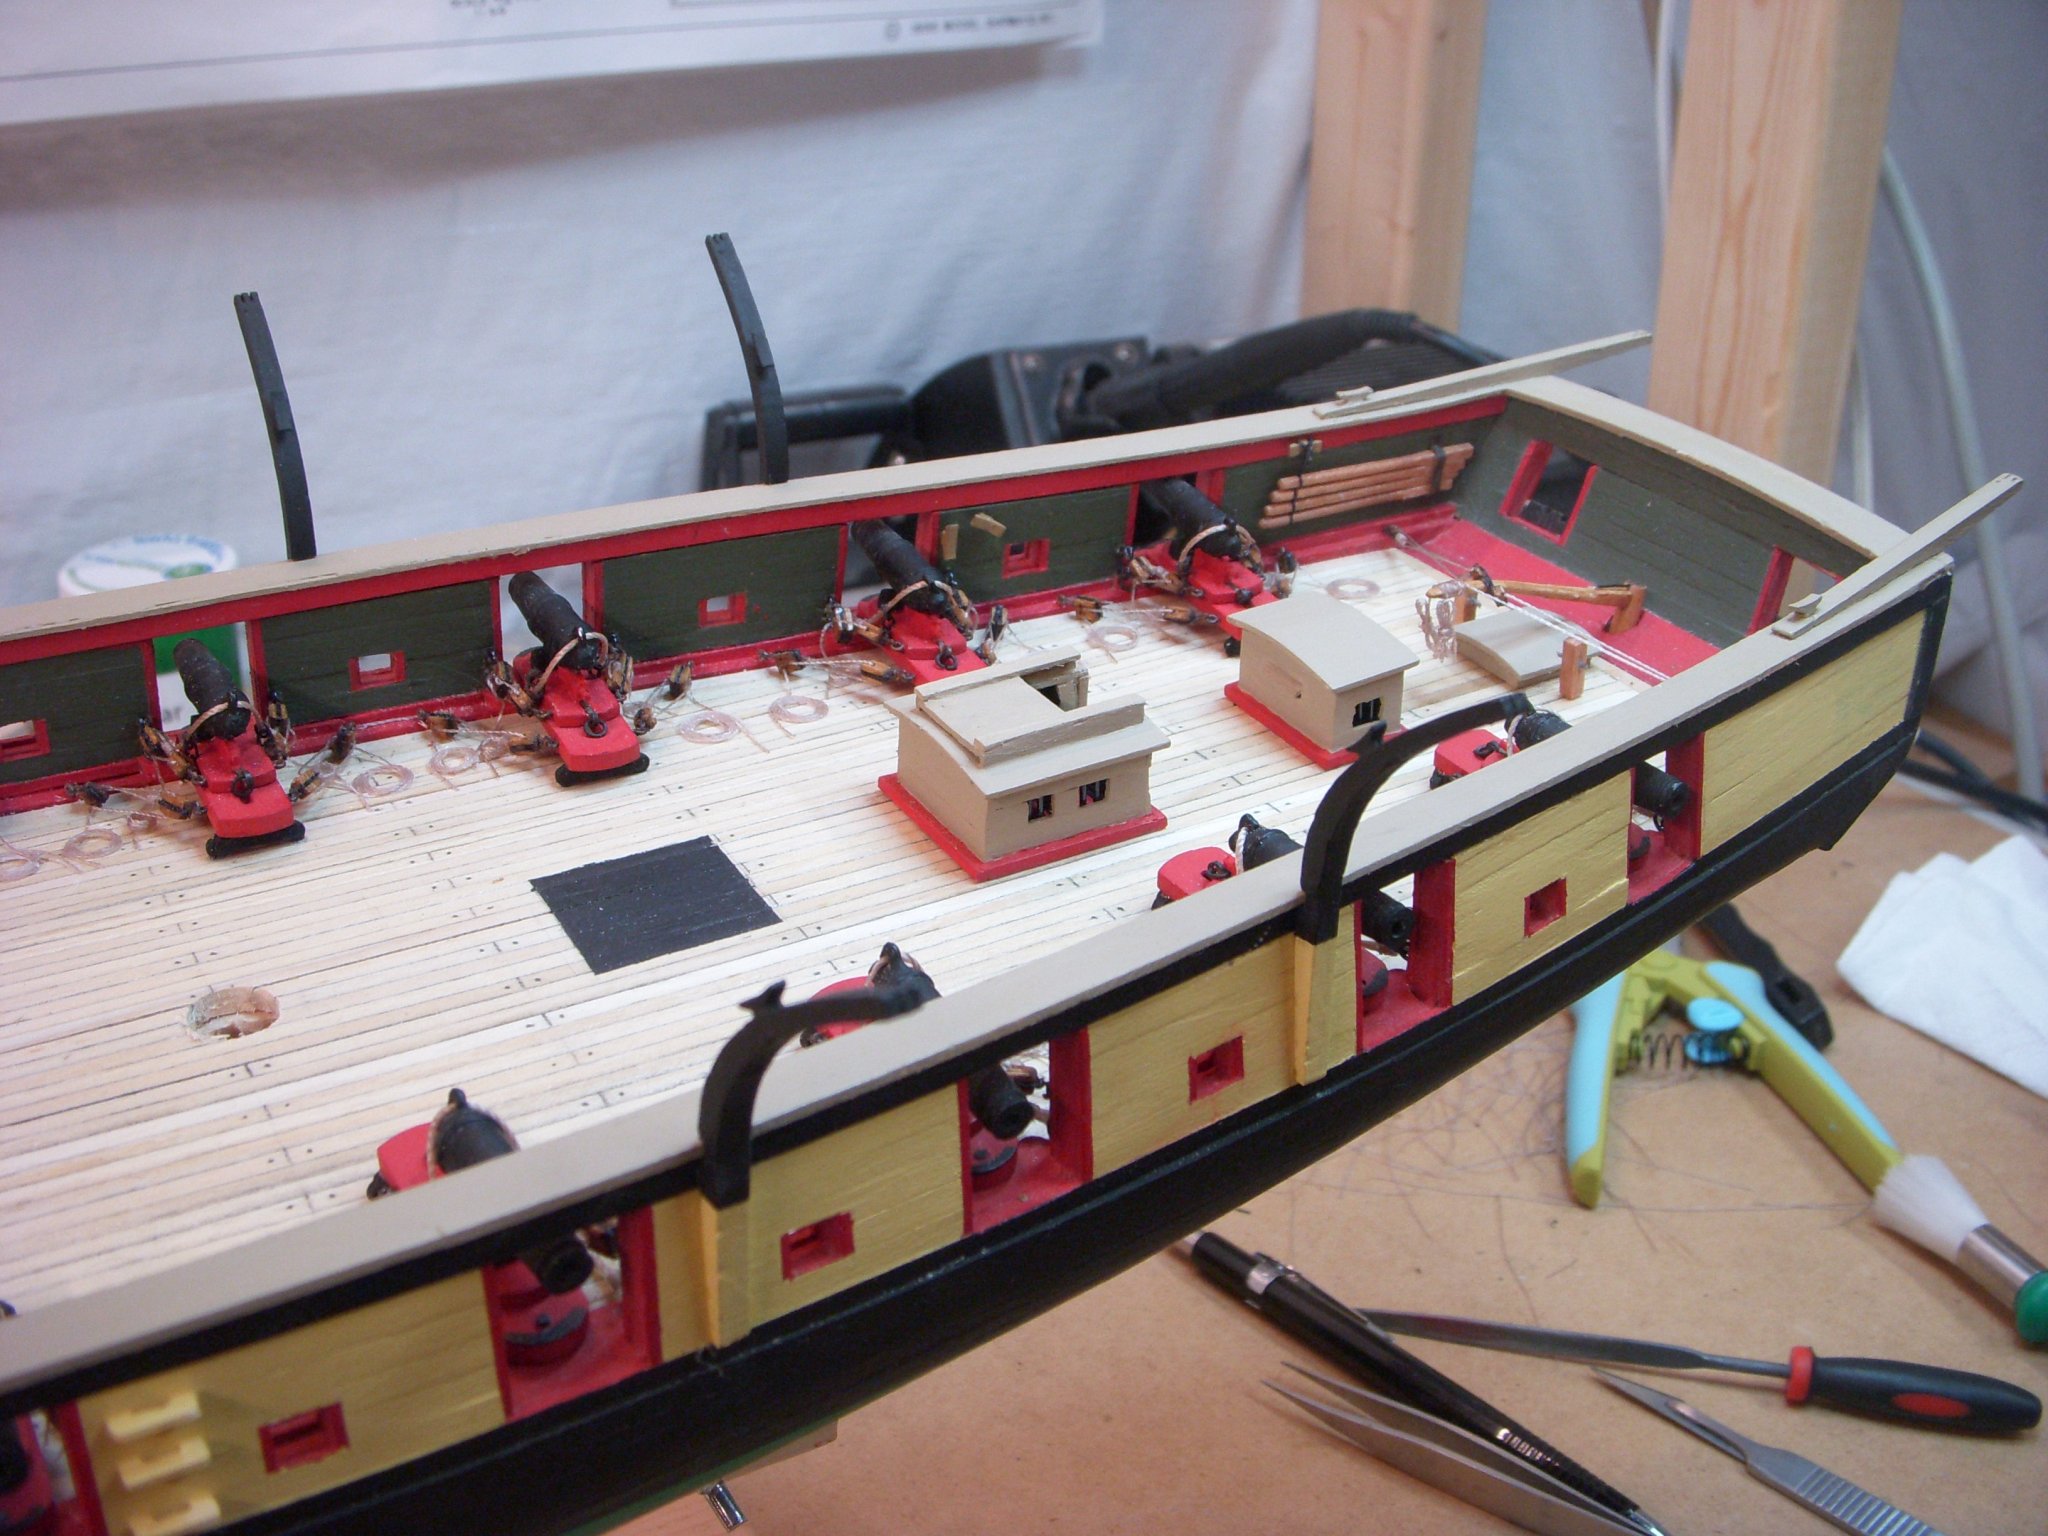
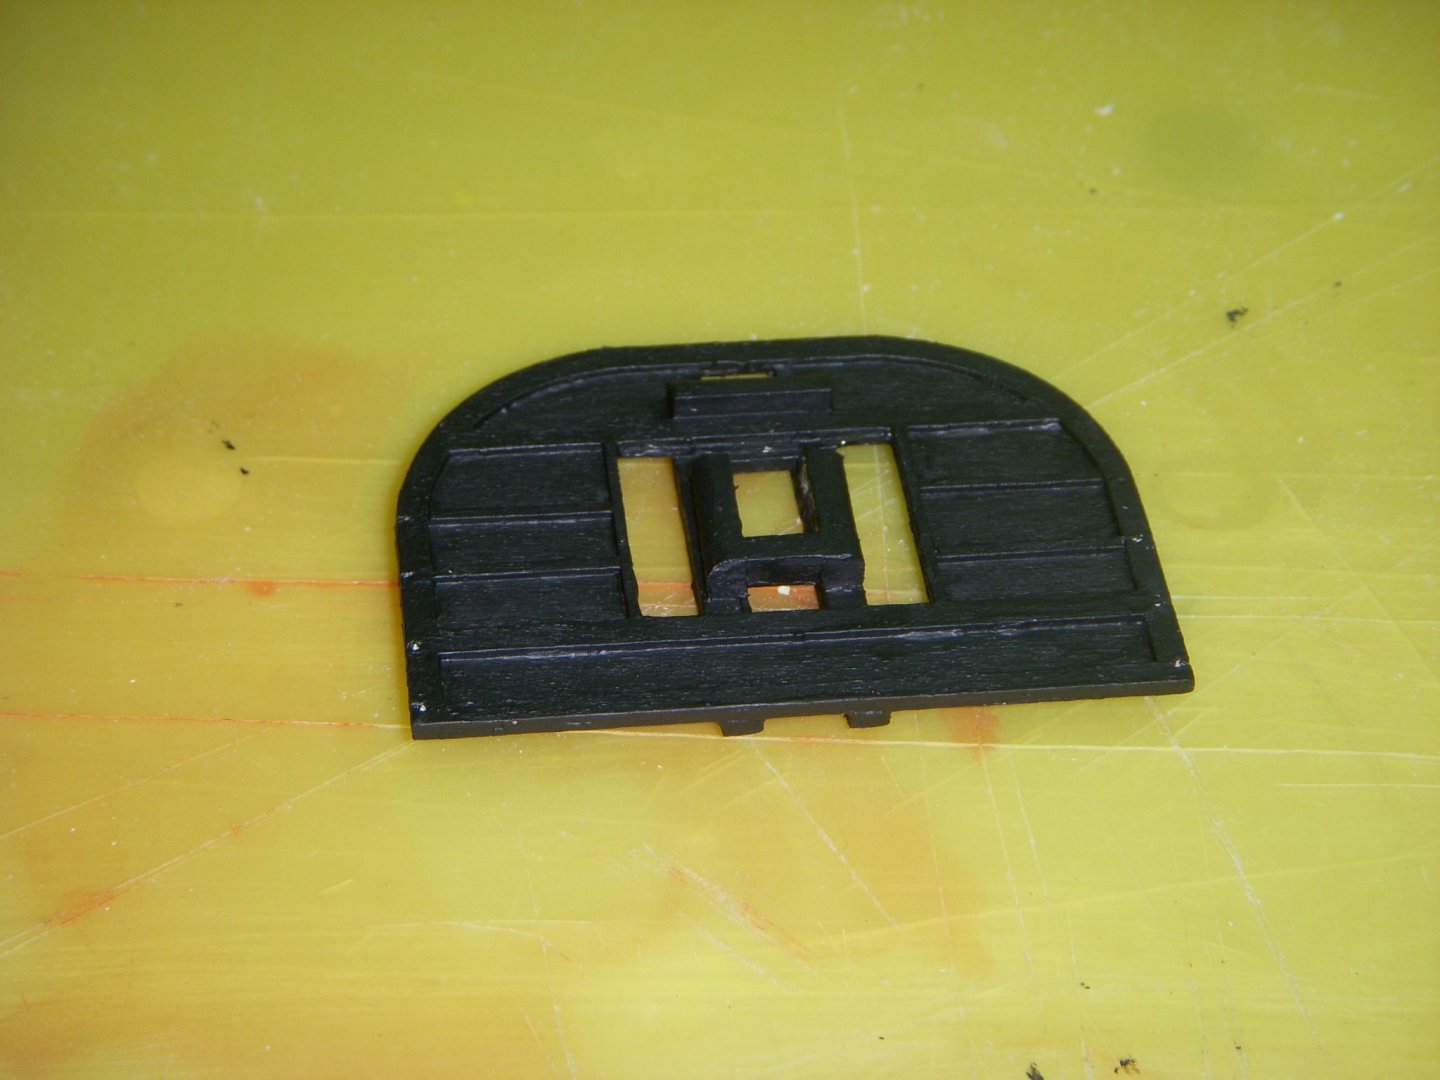
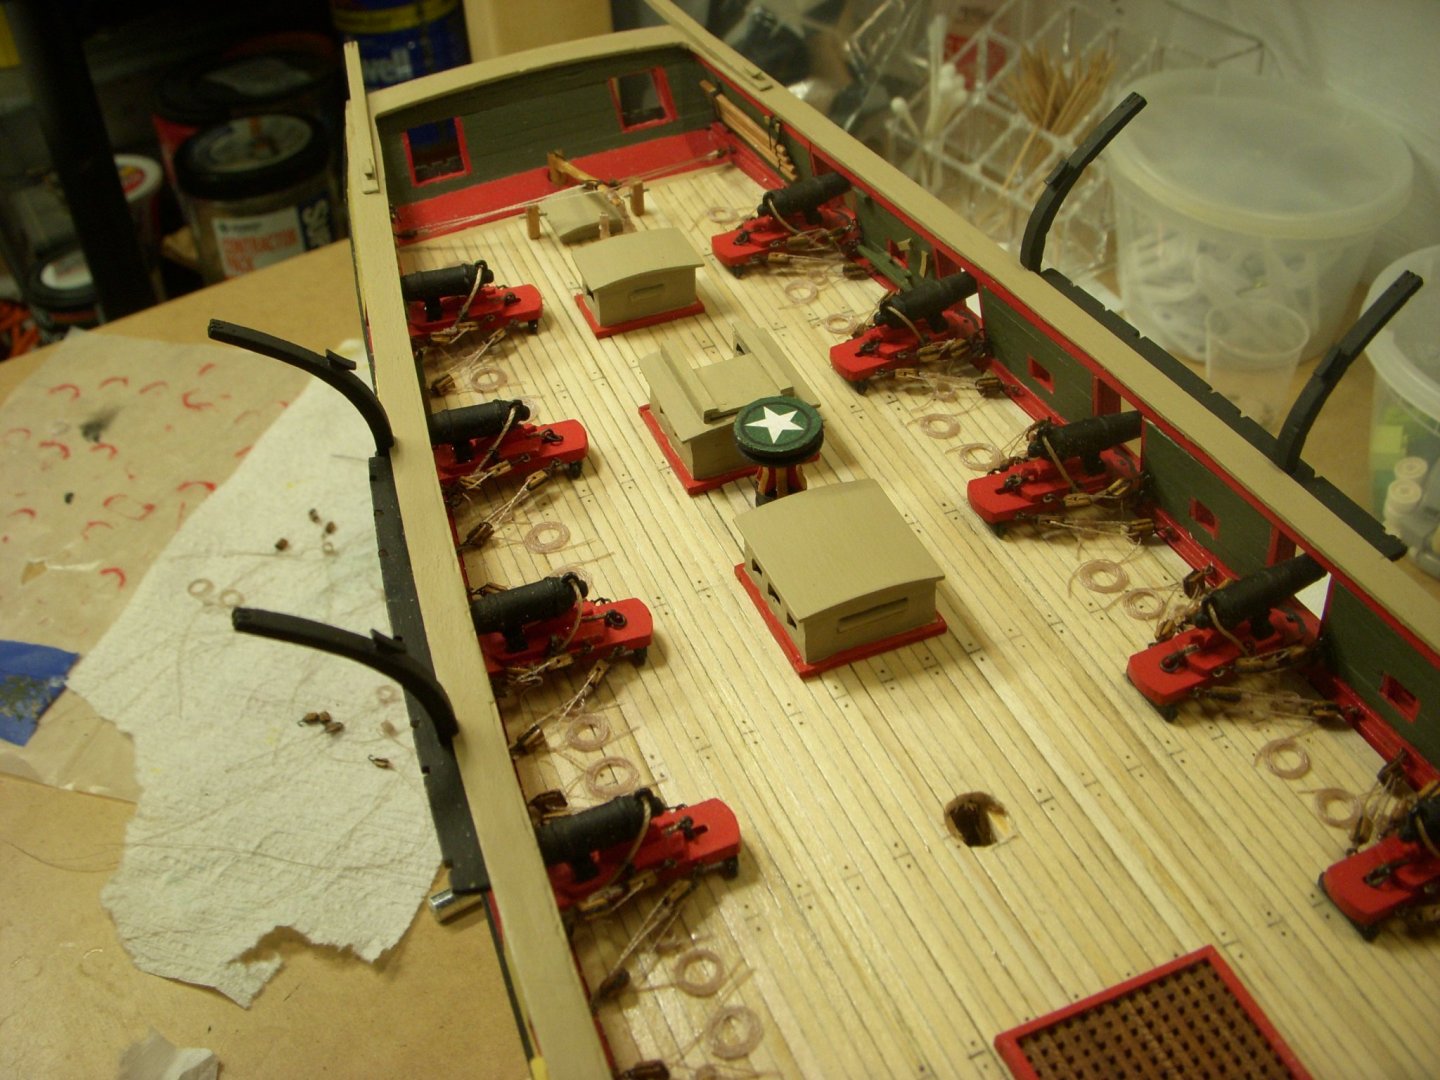
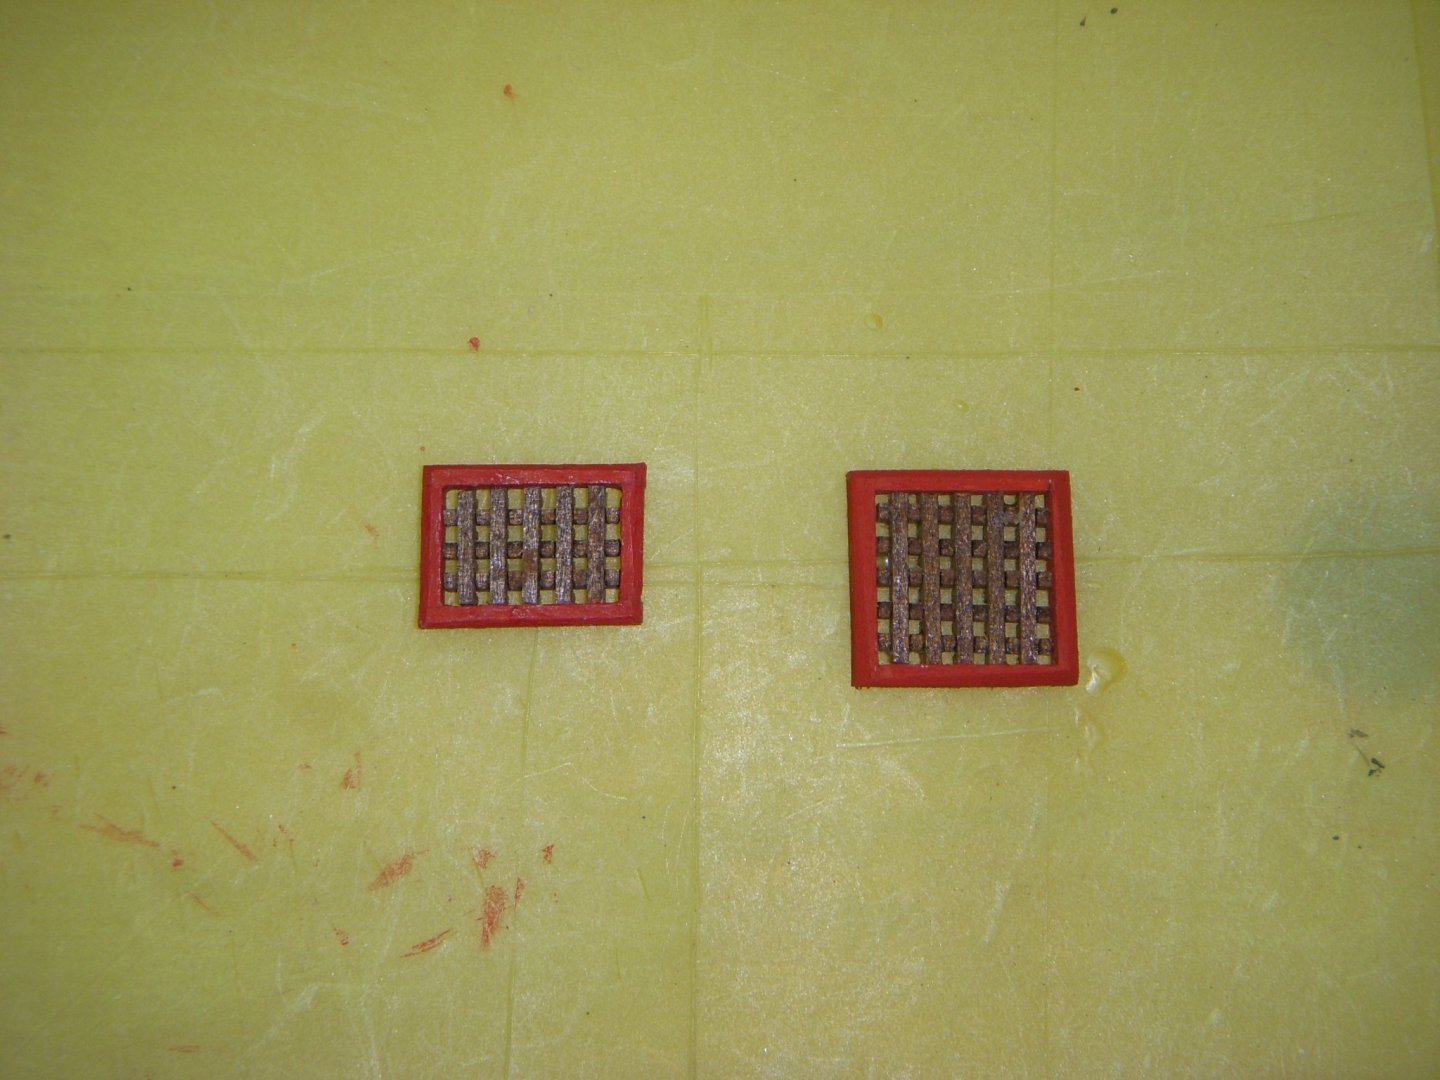
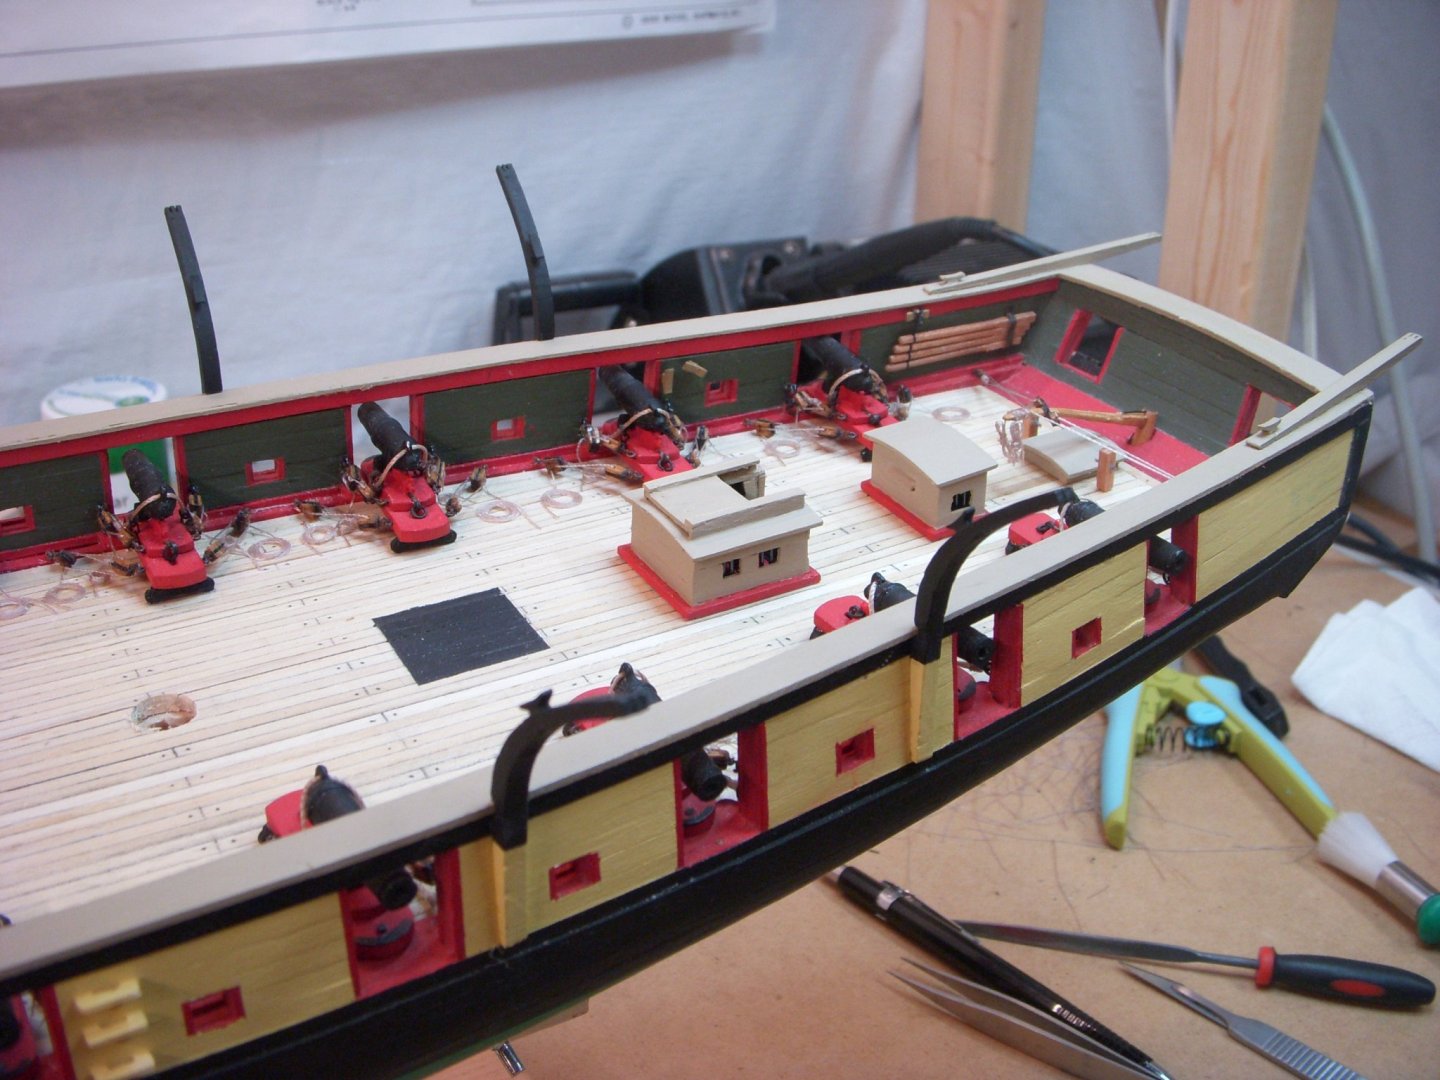
Here is a pic of the channels that have been installed. The outer section will be installed once I get the chain plates installed. I have not spent any more time on the deadeyes and chain plates. I was waiting to get my pickling pot and Sparex to clean up the brass prior to blackening. I have been working on the deck furniture. Been installing them and found the Galley grating was built to the wrong size and needed to be rebuilt. See pic below, grate on left was too small and was rebuilt to the proper size on the right. One of the many oops that have been made so far. Deck is starting to look like it should. Installed the mooring cleats and started cutting and drilling the Pin rails. I made one change, I added additional gluing surface to the bottom of the Pin rails. When building the Baltimore, I found this was problematic once I started doing the rigging, they came loose when any pressure was applied, such as tightening the rigging. They need to be cleaned up and painted prior to installation. Ron

-
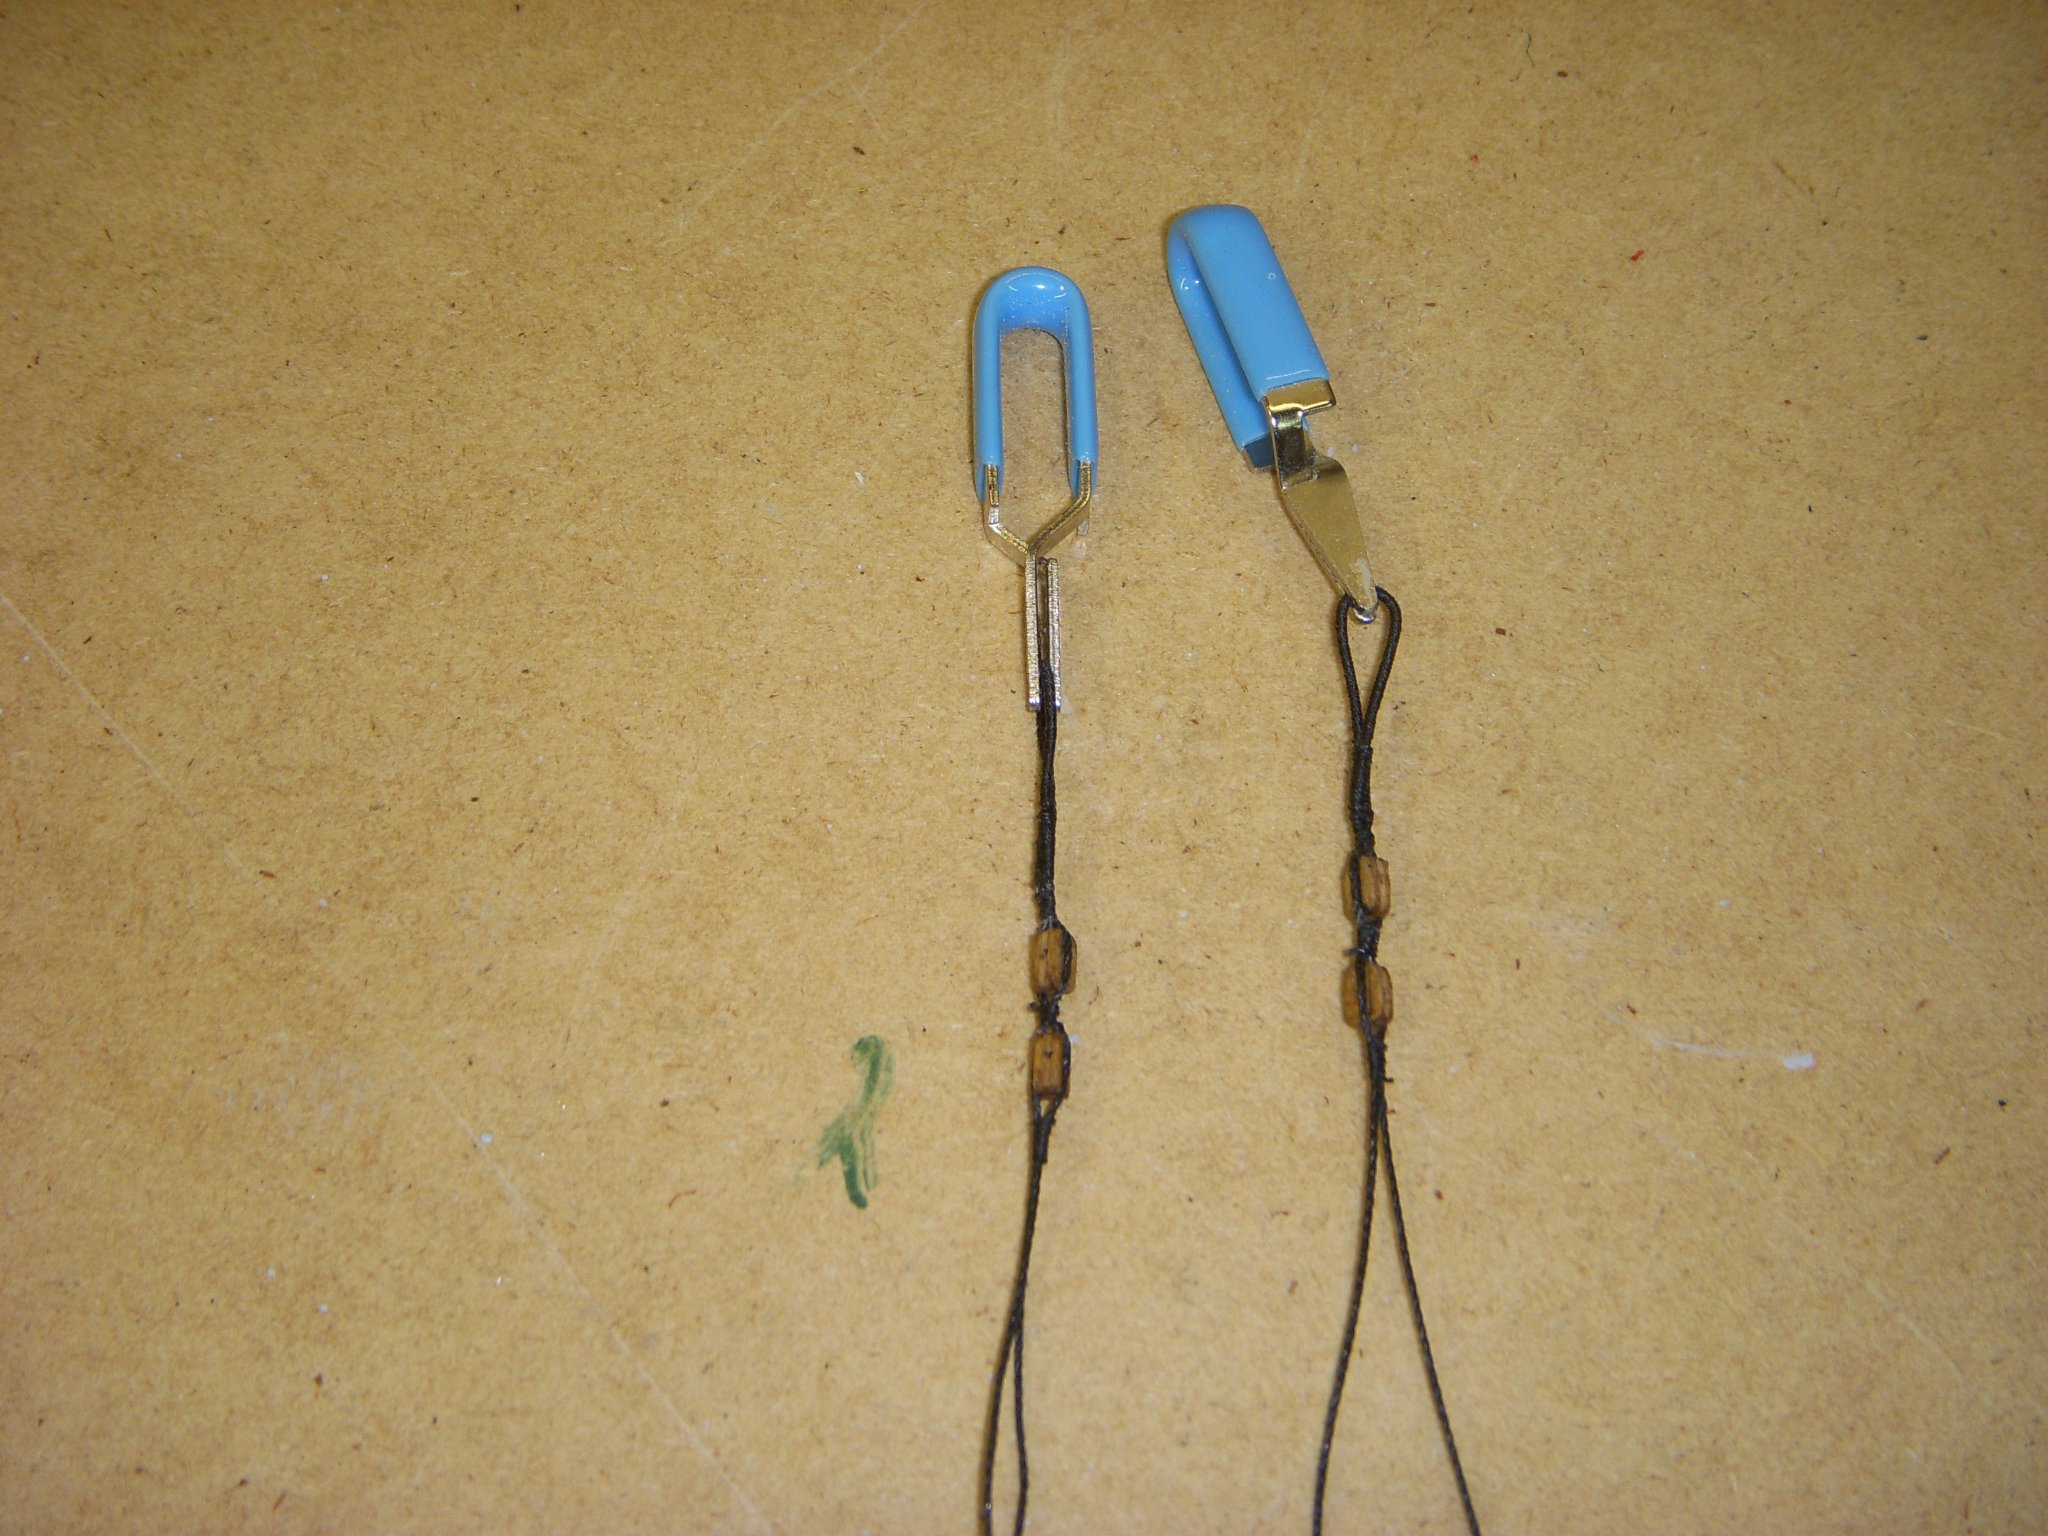
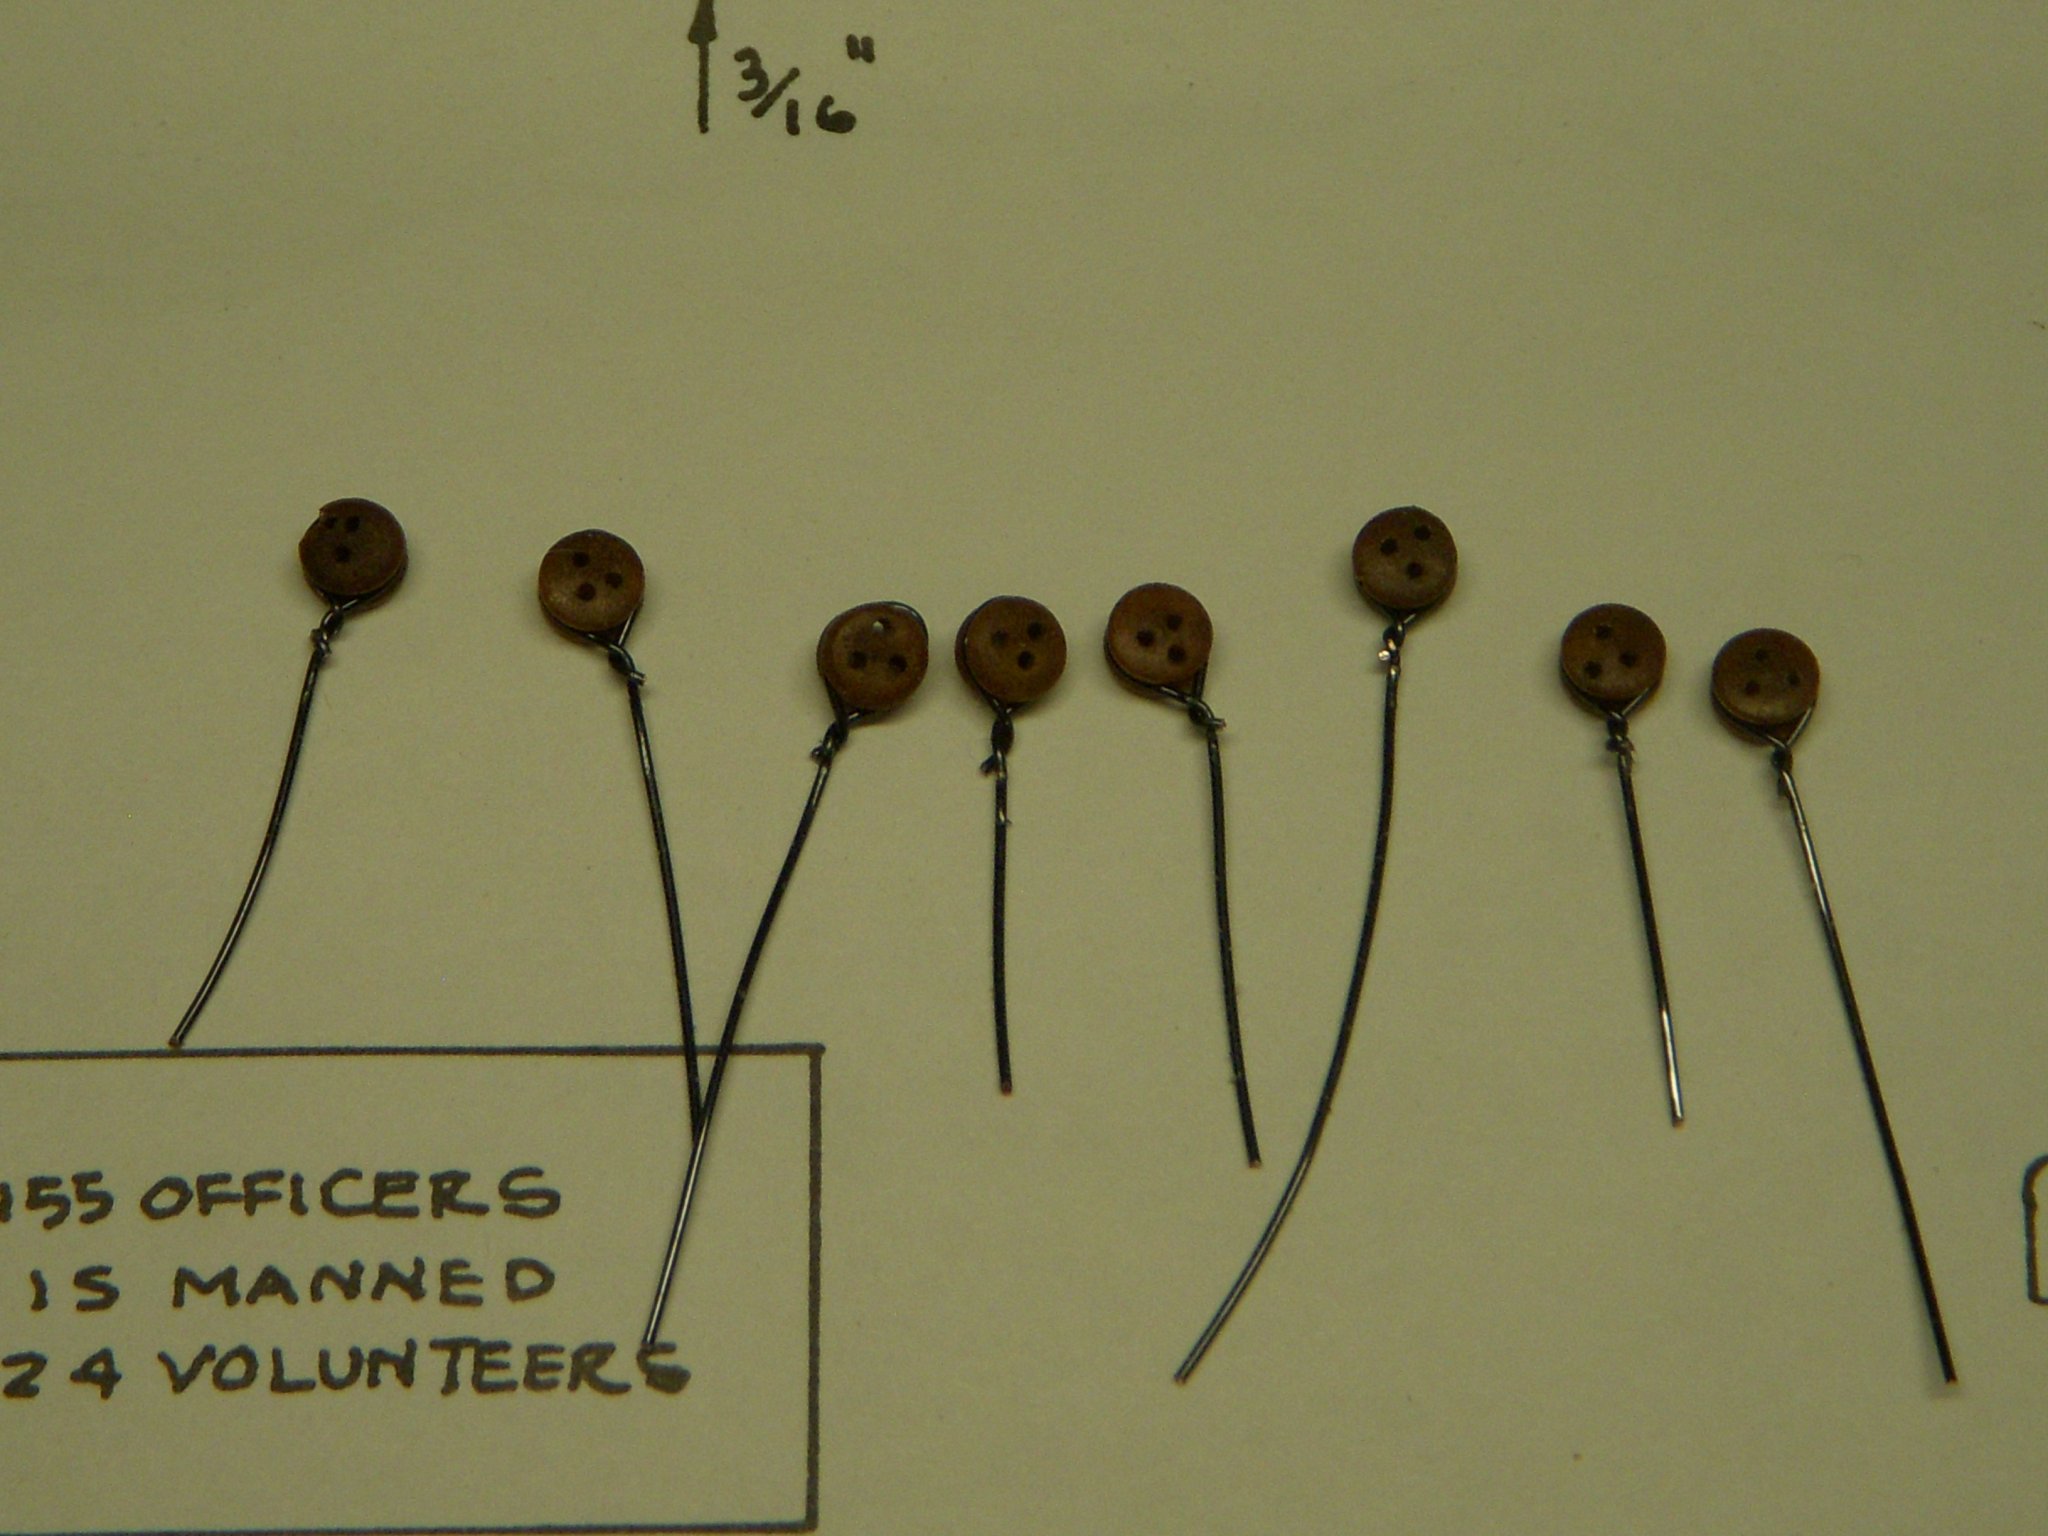
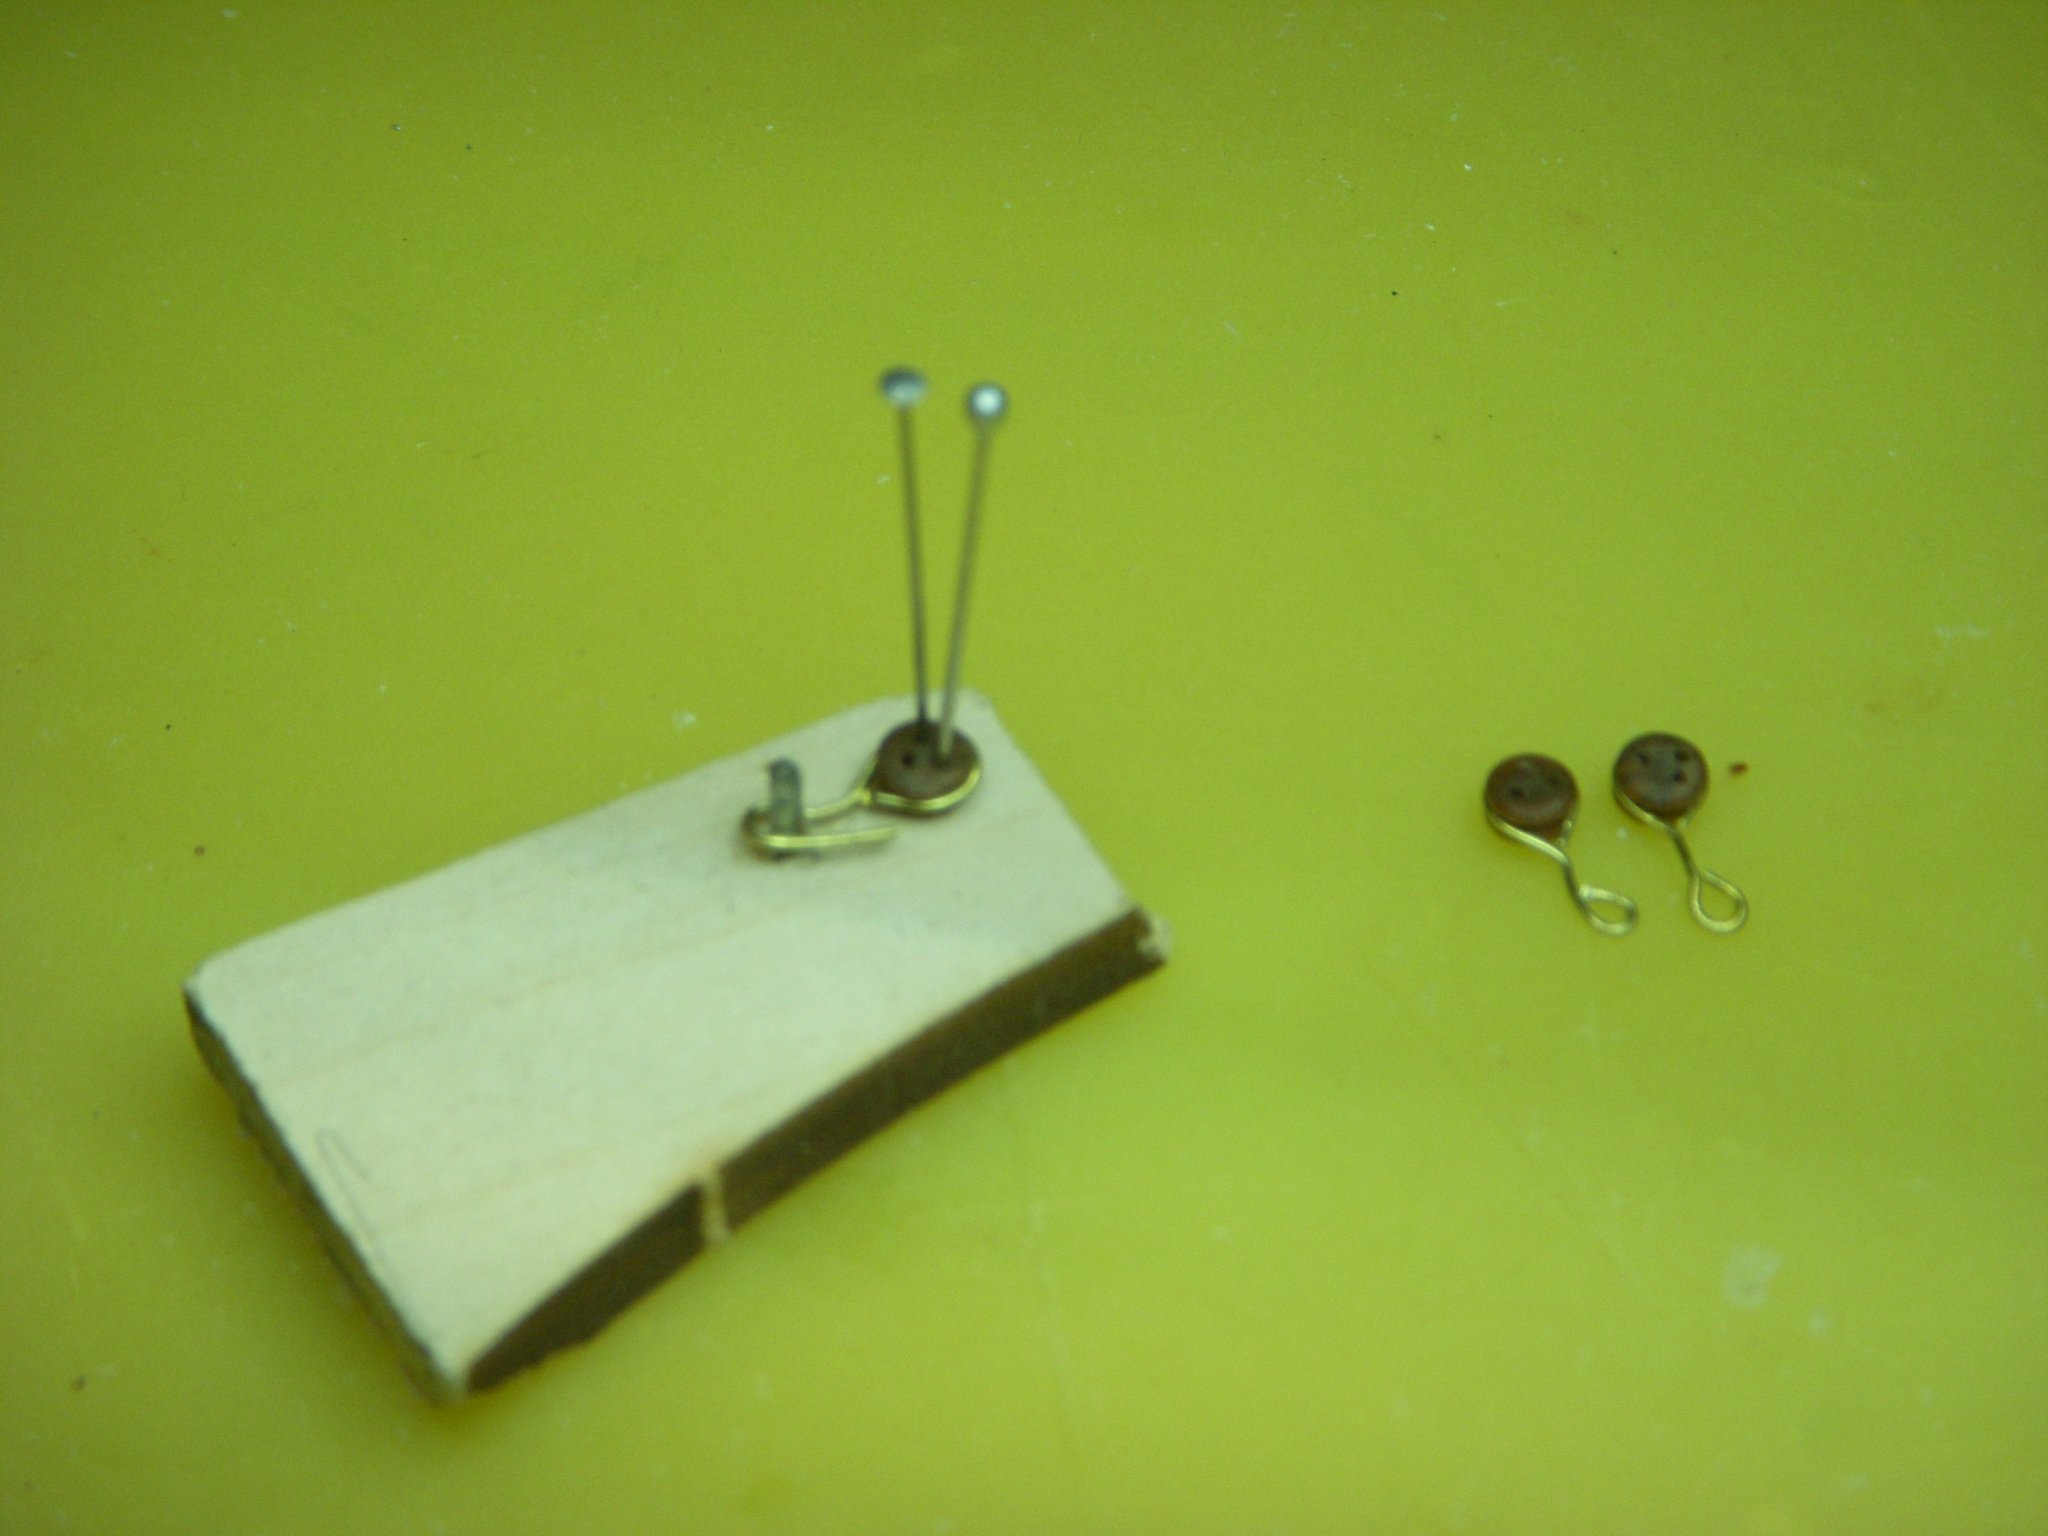
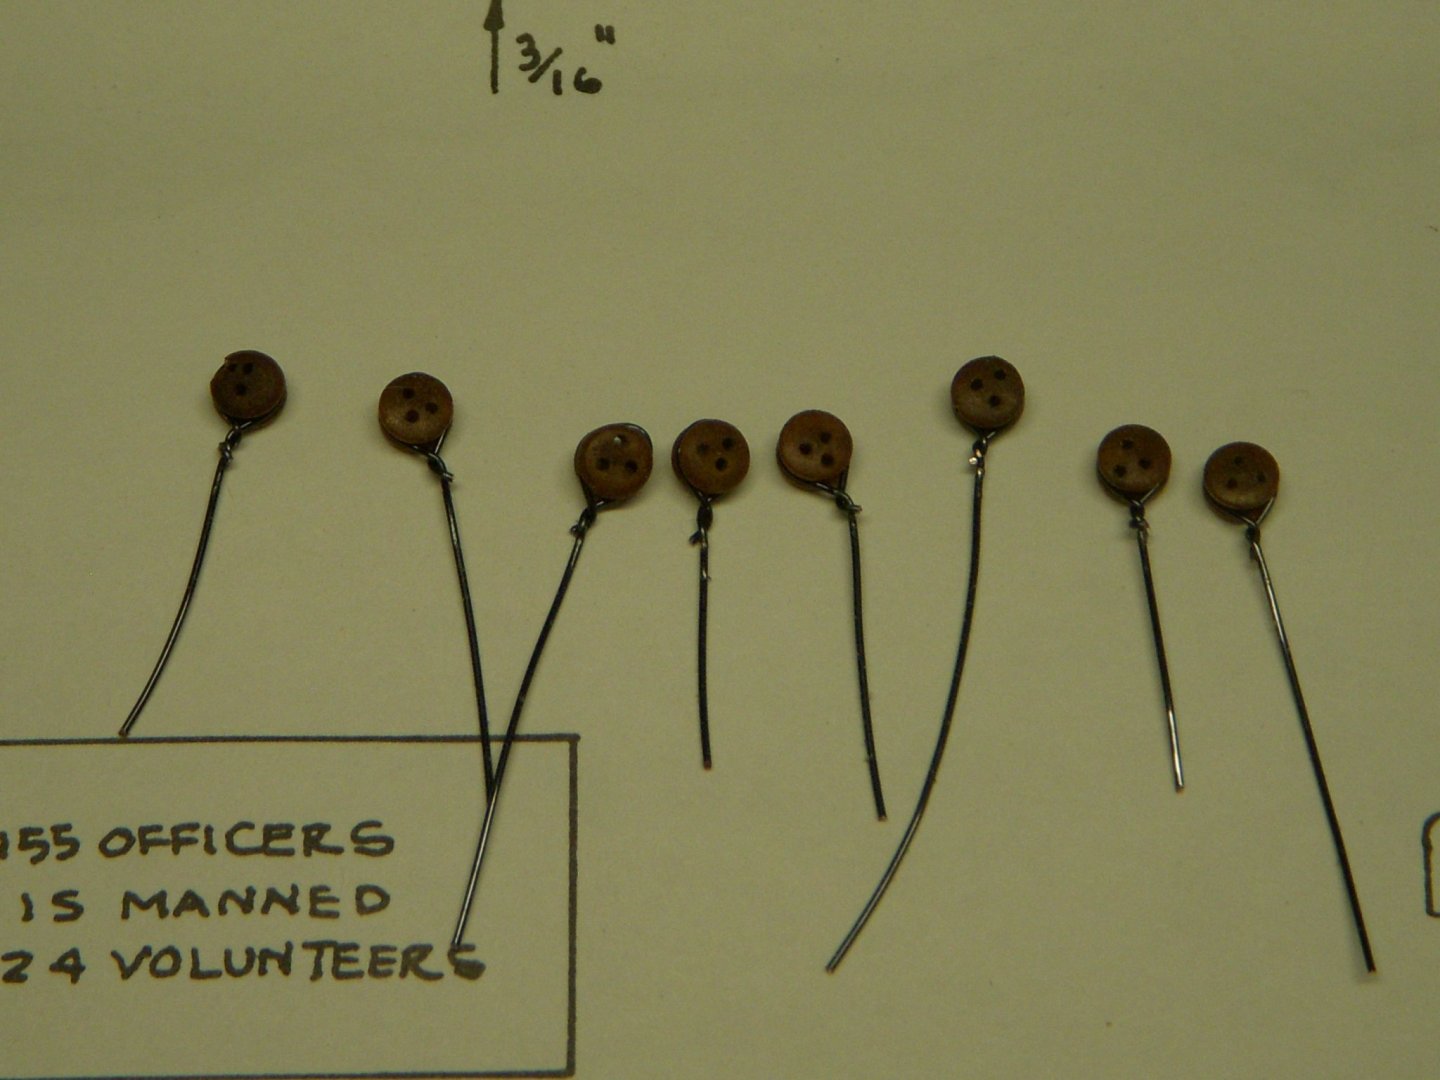
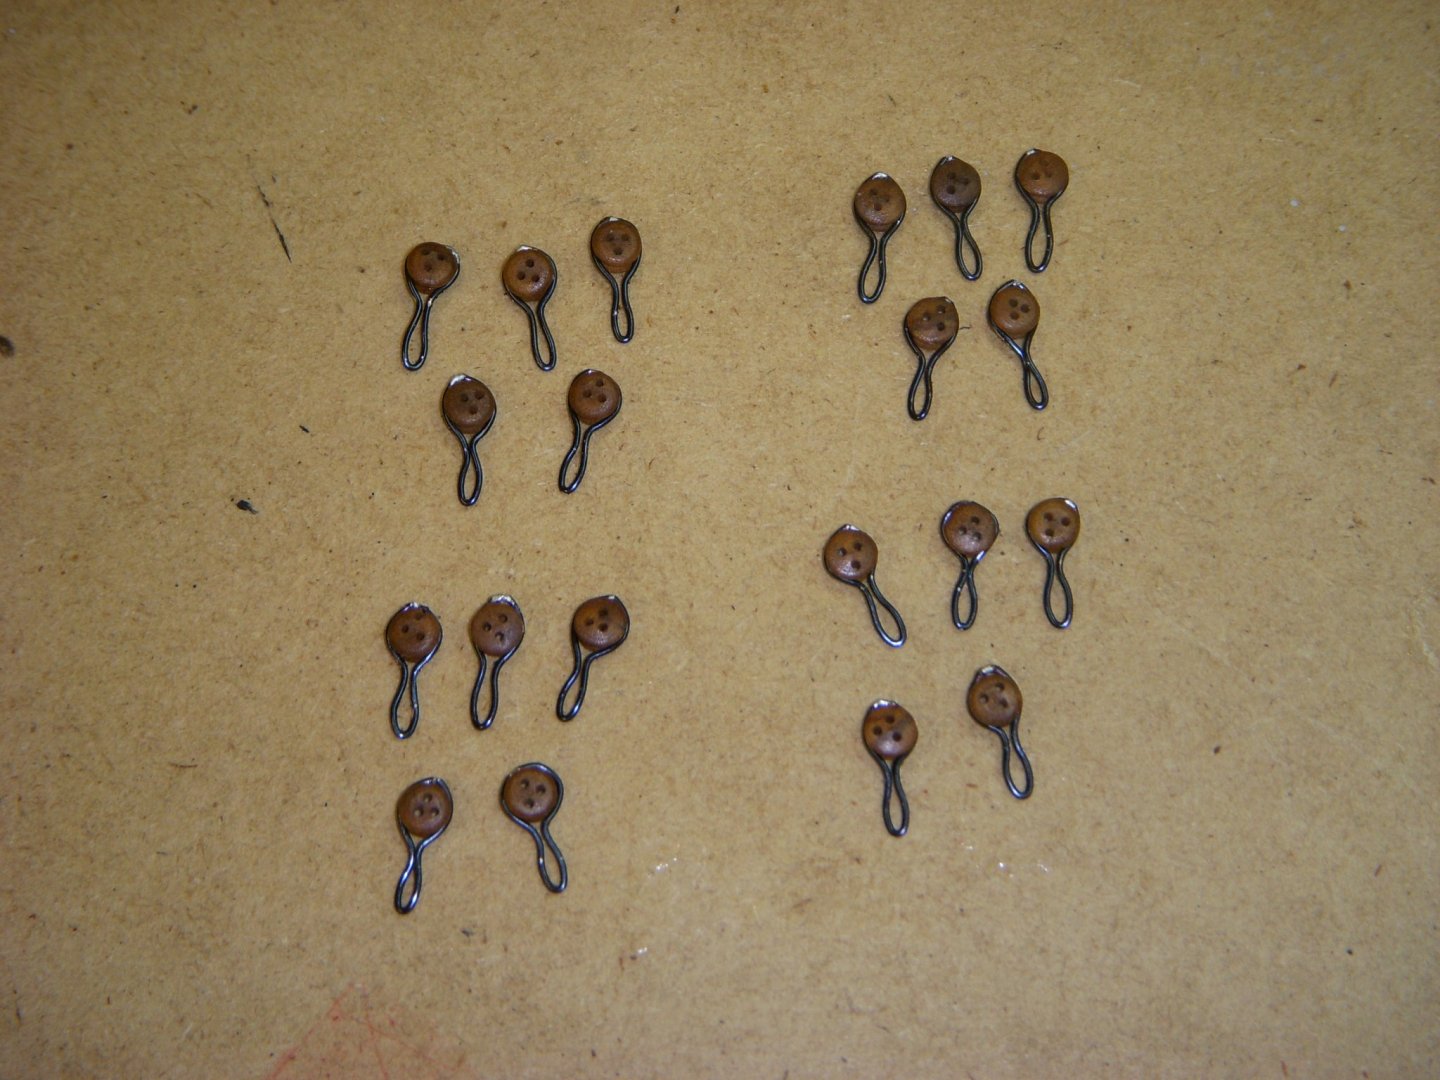
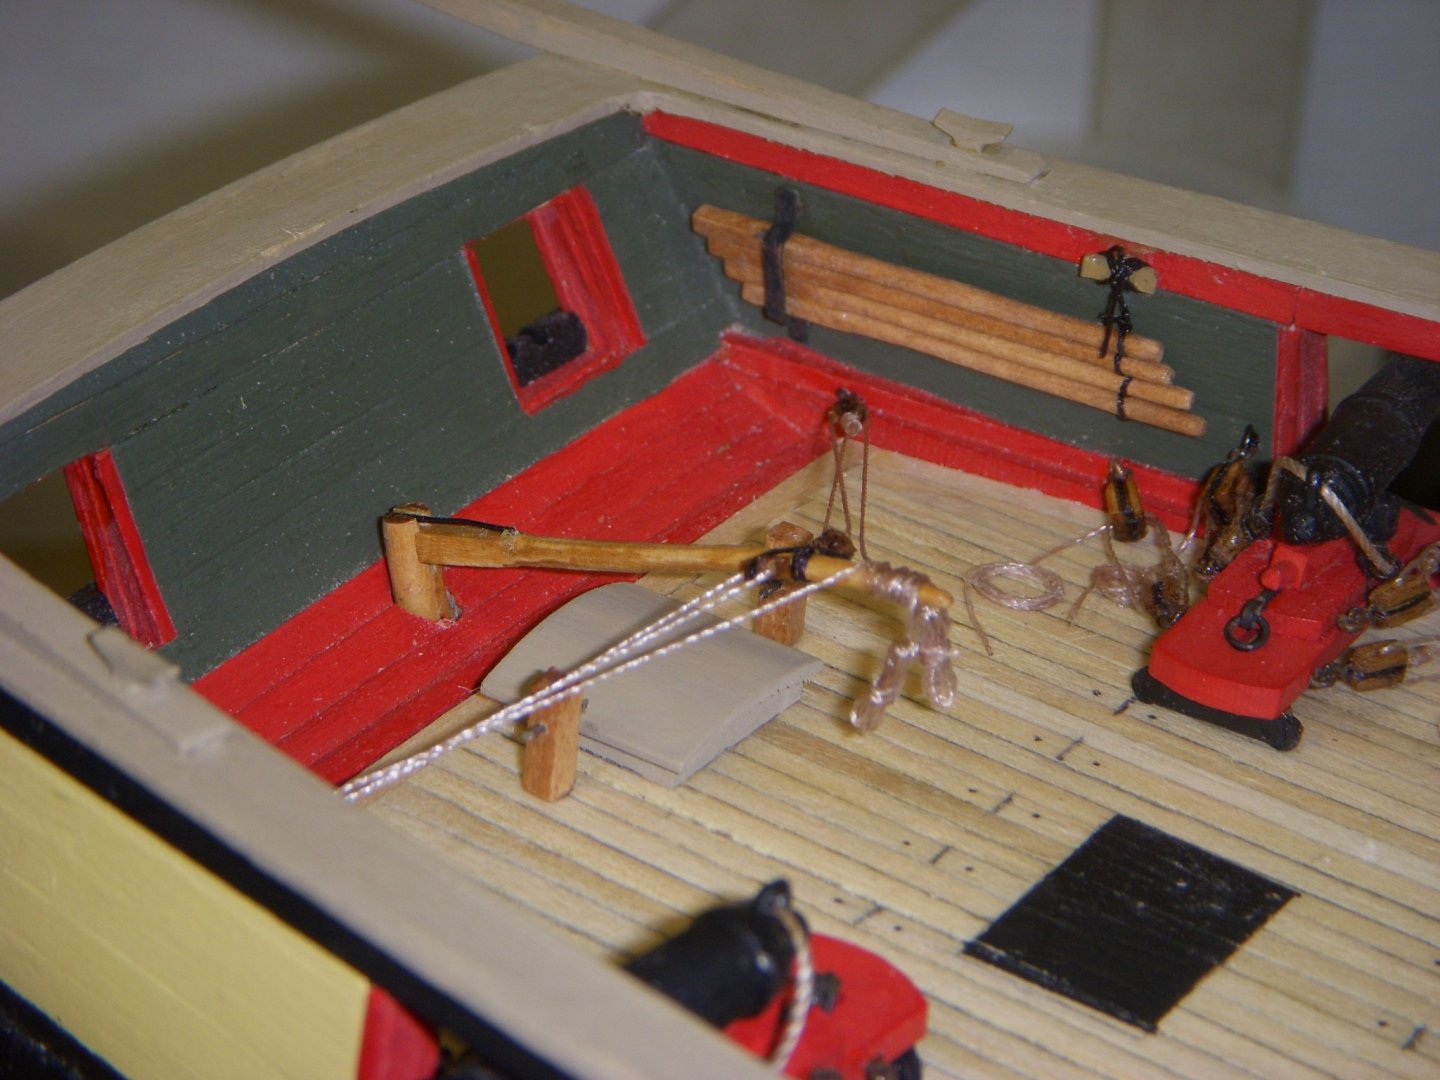
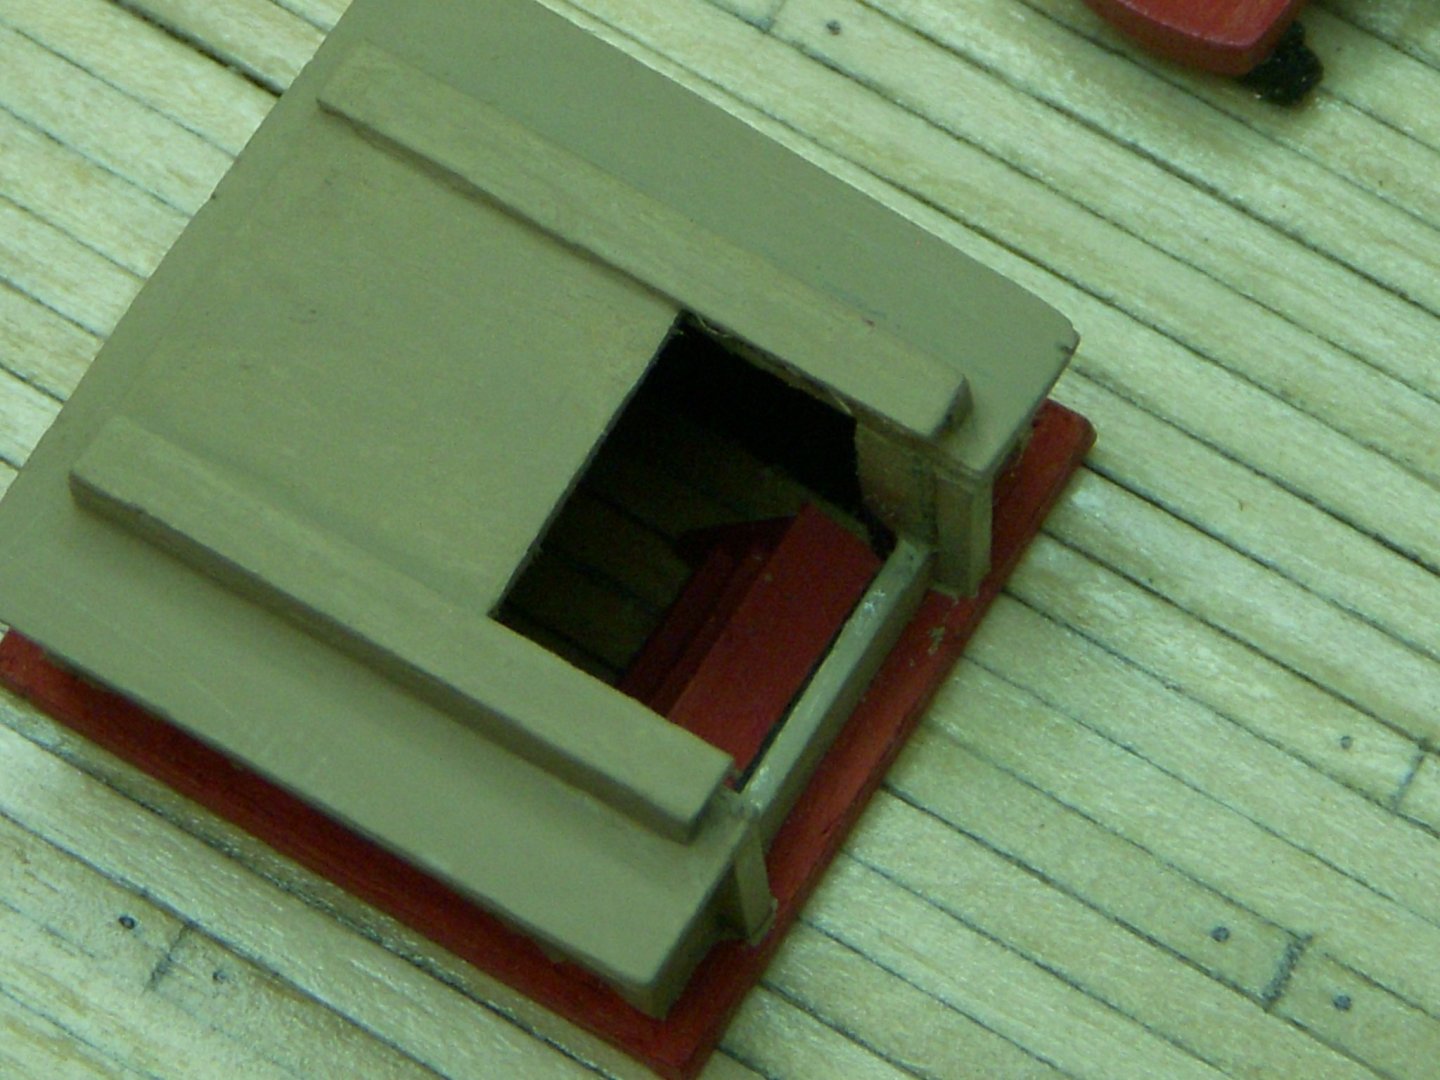
Now that the tackle lines were installed I started working on the tiller tackle. I then started installing the quarter boat davits. These were painted before installation, it seemed easier that trying to mask so as not to overlap the paint. As I was going I started installing some of the deck furniture. I built the companionway open with stairs going down below deck. I thought it would be more visible, but as the picture shows it is not as dramatic as would have liked. Sea steps were installed and painted. Trying to glue these steps to a painted surface does not yield bonding as well as I would have liked. It seems that the slightest bump and they pop off. I tried scraping the paint before glueing but this only helps slightly. I am using Titebond II, if anyone have suggestions I would appreciate it. I started assembly of the deadeyes and chainplates. I am using brass wire and soldering them. Here is a shot of me using pins as a tool to ensure each one is the same size. I hope blackening works well on these. I understand blackening may not work well on the solder. In that case a touchup of paint may be needed. The channels are cut and painted. I will be adding the deadeyes shortly and then add the out section of the channel. Pics will be in my next post. Ron


-
Thanks for your quick response. This is exactly what I was looking for. I really appreciate the help. Ron
-
Could you please give a link or better description of the WEB site. I tried a search on 'dafi' and it did not come back with any results. Thanks, Ron