k0oky
-
Posts
19 -
Joined
-
Last visited
-
 EricWilliamMarshall reacted to a post in a topic:
USS Missouri by k0oky - Tamiya - 1/350 - PLASTIC - 1945 post signing of Japanese surrender
EricWilliamMarshall reacted to a post in a topic:
USS Missouri by k0oky - Tamiya - 1/350 - PLASTIC - 1945 post signing of Japanese surrender
-
EricWilliamMarshall reacted to a post in a topic:
USS Missouri by k0oky - Tamiya - 1/350 - PLASTIC - 1945 post signing of Japanese surrender
-
EricWilliamMarshall reacted to a post in a topic:
USS Missouri by k0oky - Tamiya - 1/350 - PLASTIC - 1945 post signing of Japanese surrender
-
GrandpaPhil reacted to a post in a topic:
USS Missouri by k0oky - Tamiya - 1/350 - PLASTIC - 1945 post signing of Japanese surrender
-
GrandpaPhil reacted to a post in a topic:
USS Missouri by k0oky - Tamiya - 1/350 - PLASTIC - 1945 post signing of Japanese surrender
-
GrandpaPhil reacted to a post in a topic:
USS Missouri by k0oky - Tamiya - 1/350 - PLASTIC - 1945 post signing of Japanese surrender
-
cristikc reacted to a post in a topic:
USS Missouri by k0oky - Tamiya - 1/350 - PLASTIC - 1945 post signing of Japanese surrender
-
billt reacted to a post in a topic:
USS Missouri by k0oky - Tamiya - 1/350 - PLASTIC - 1945 post signing of Japanese surrender
-
justsayrow reacted to a post in a topic:
USS Missouri by k0oky - Tamiya - 1/350 - PLASTIC - 1945 post signing of Japanese surrender
-
mtaylor reacted to a post in a topic:
USS Missouri by k0oky - Tamiya - 1/350 - PLASTIC - 1945 post signing of Japanese surrender
-
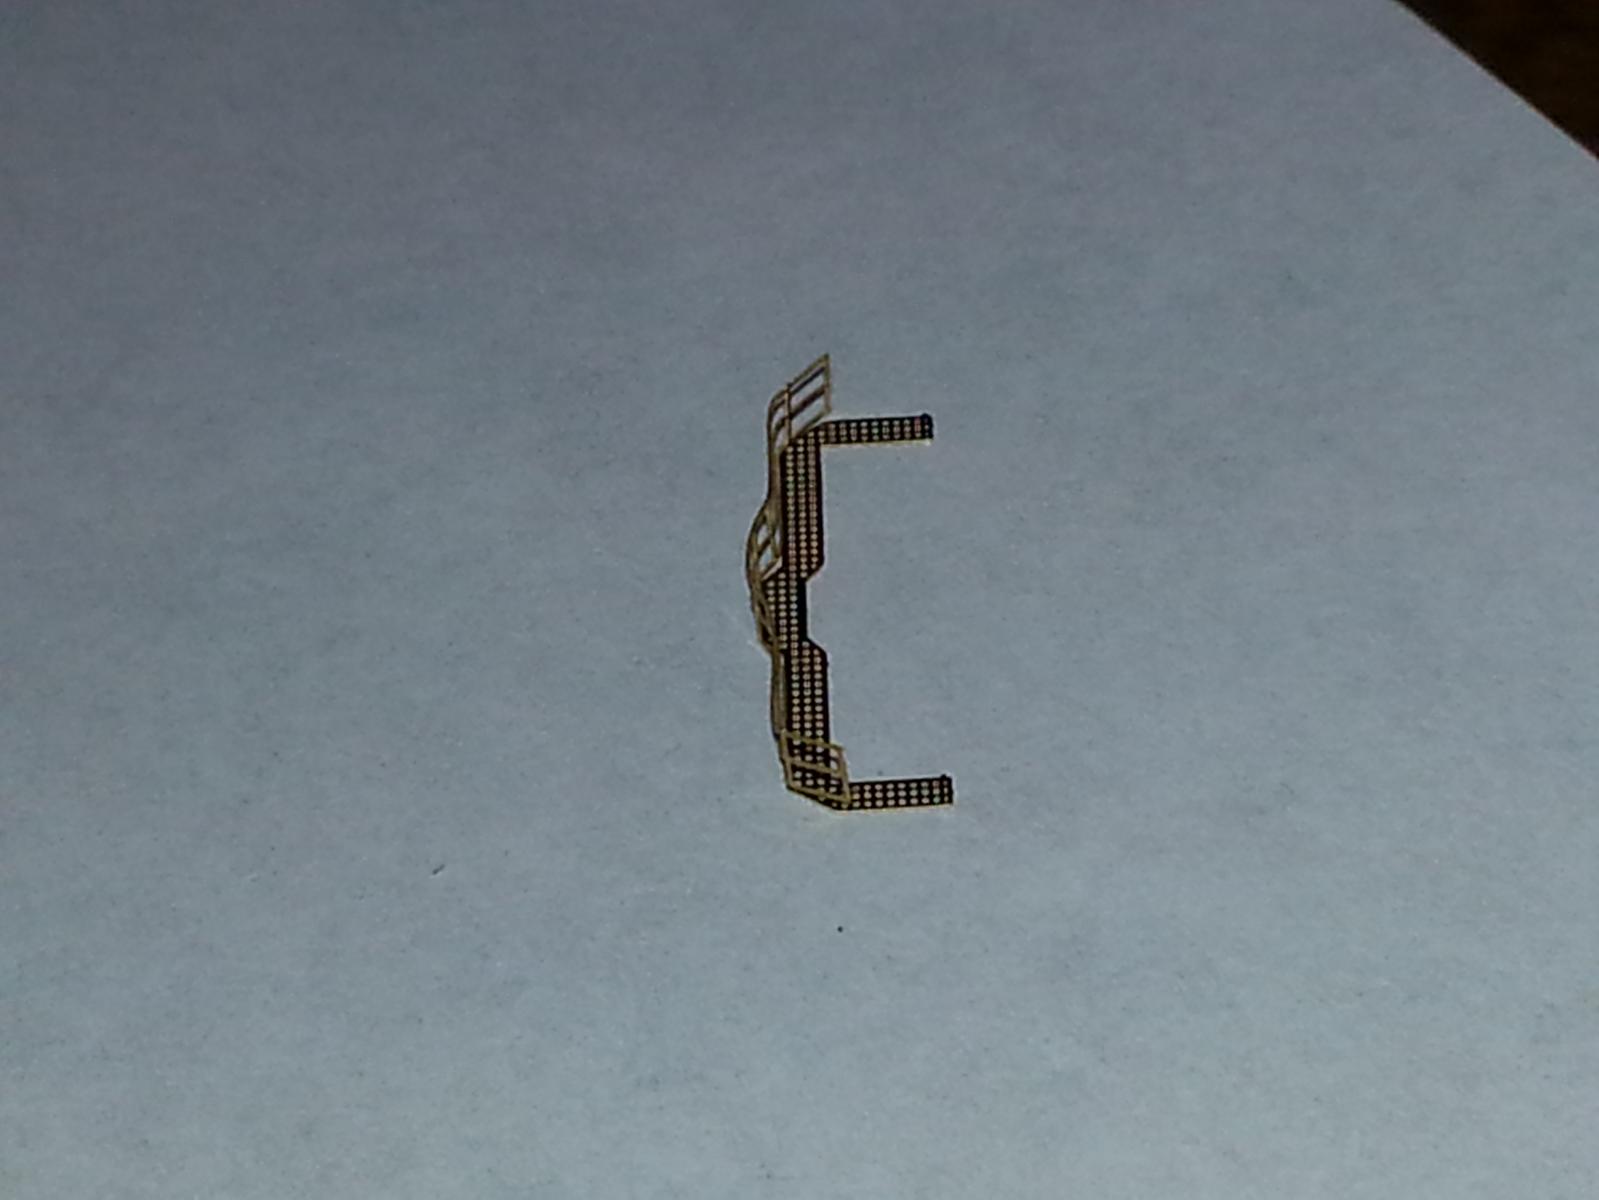
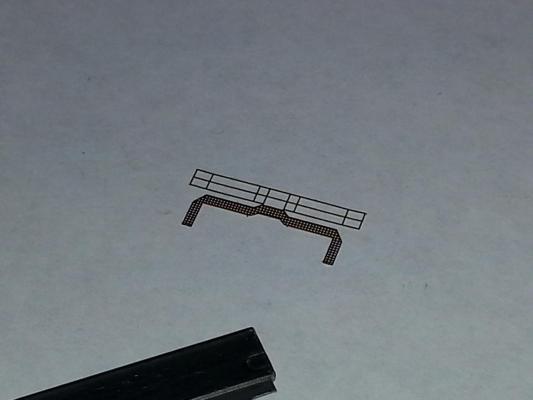
 thanks Mark. does anyone know anything about white ensign's PE for the Missouri? They don't have any instructions on what railings to use for what section of the ship. am i just supposed to cut a section of railing that i need and bend it? what about ends, shouldnt there be posts? if i just cut a section of it then there wont always be a post at the end of the railing? Just looking for some clarity. thanks. Stay Moto
 -
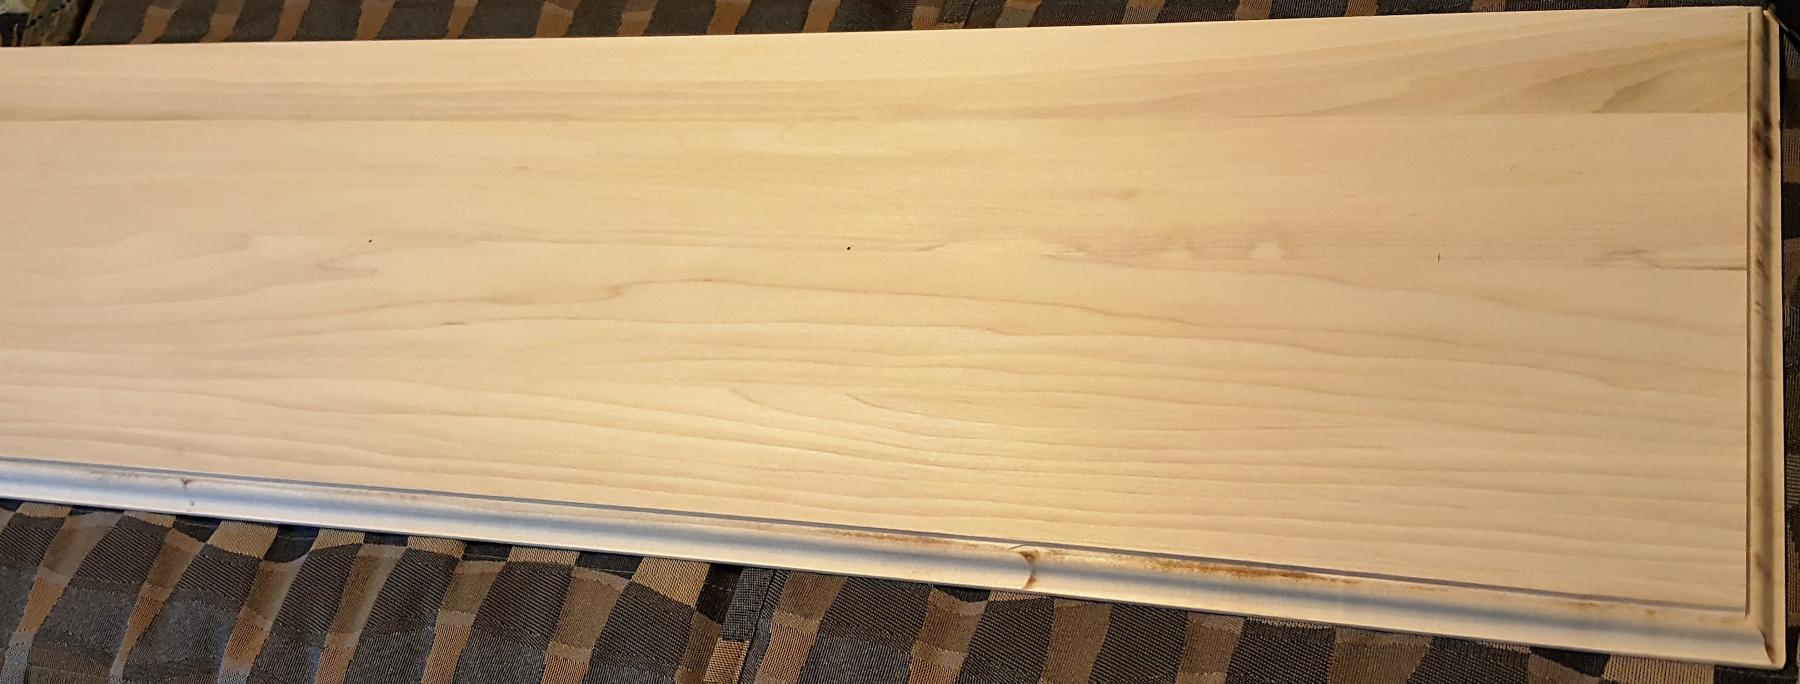
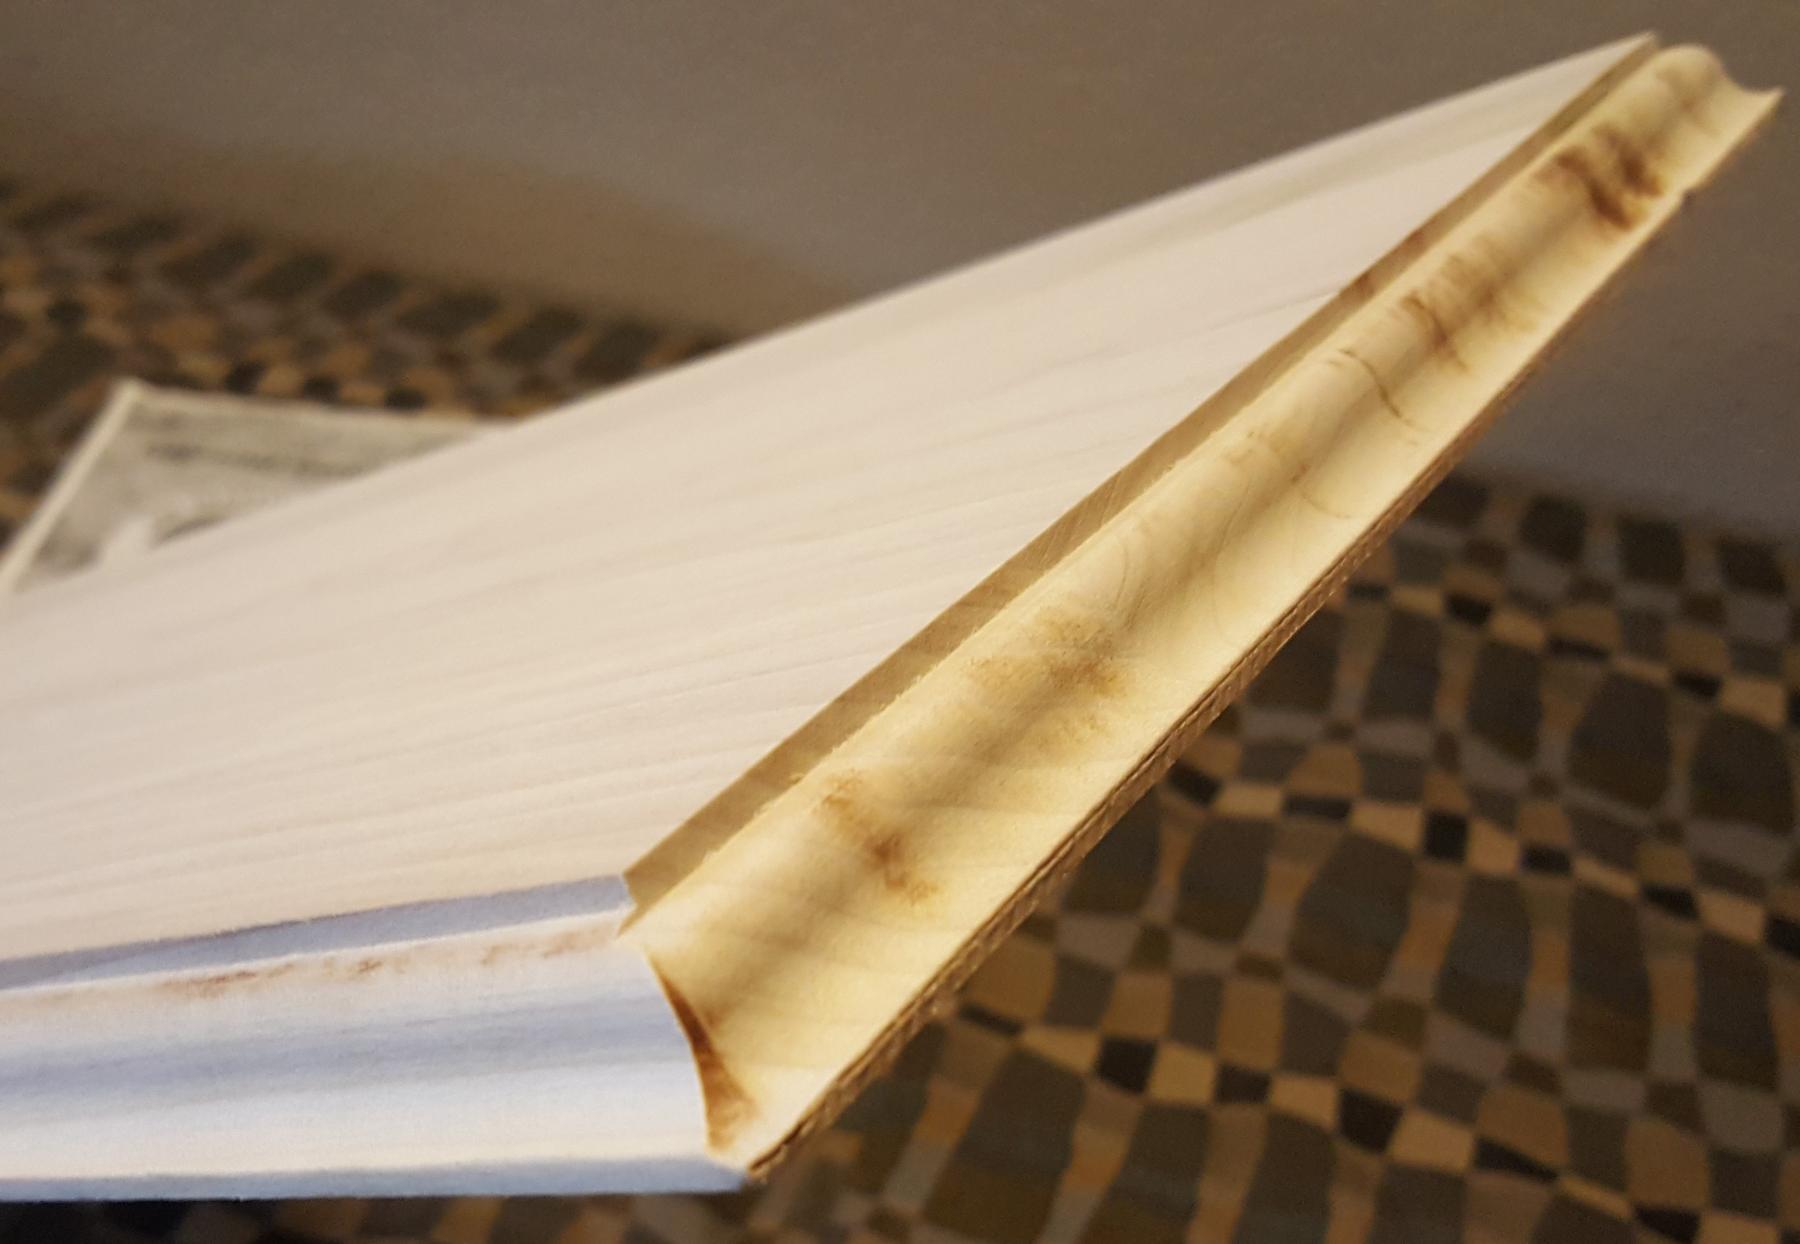
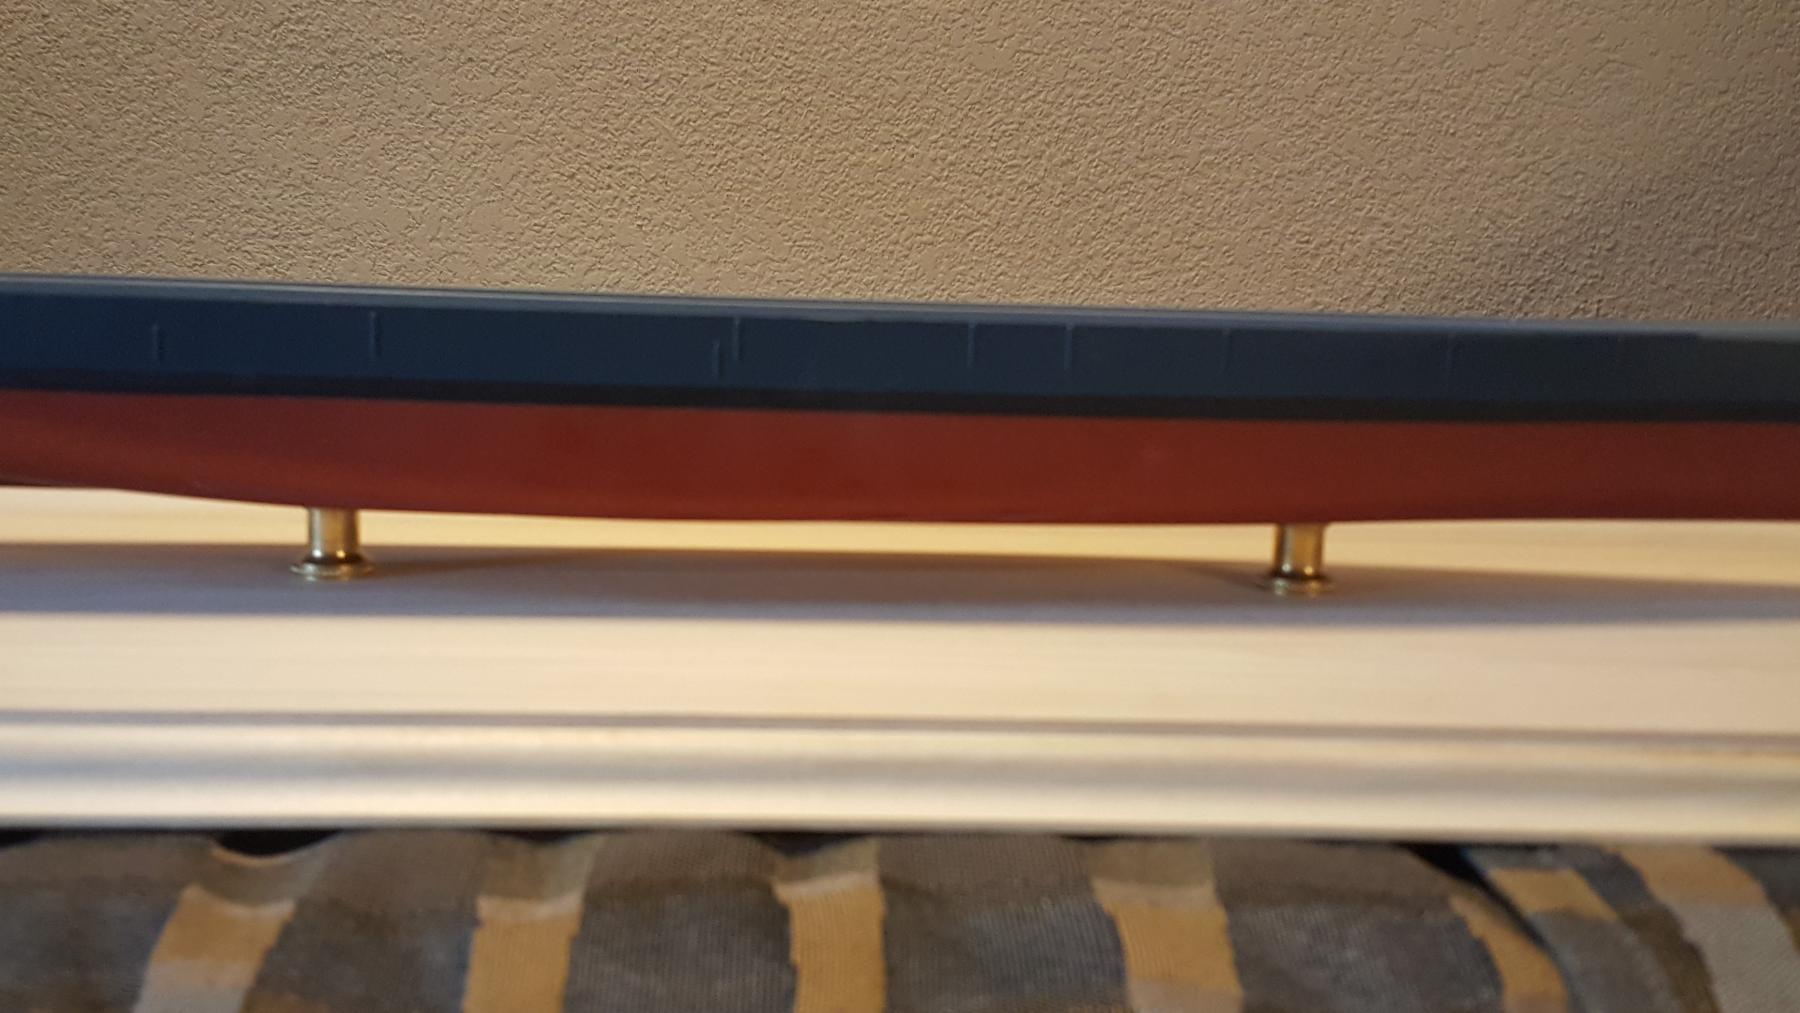
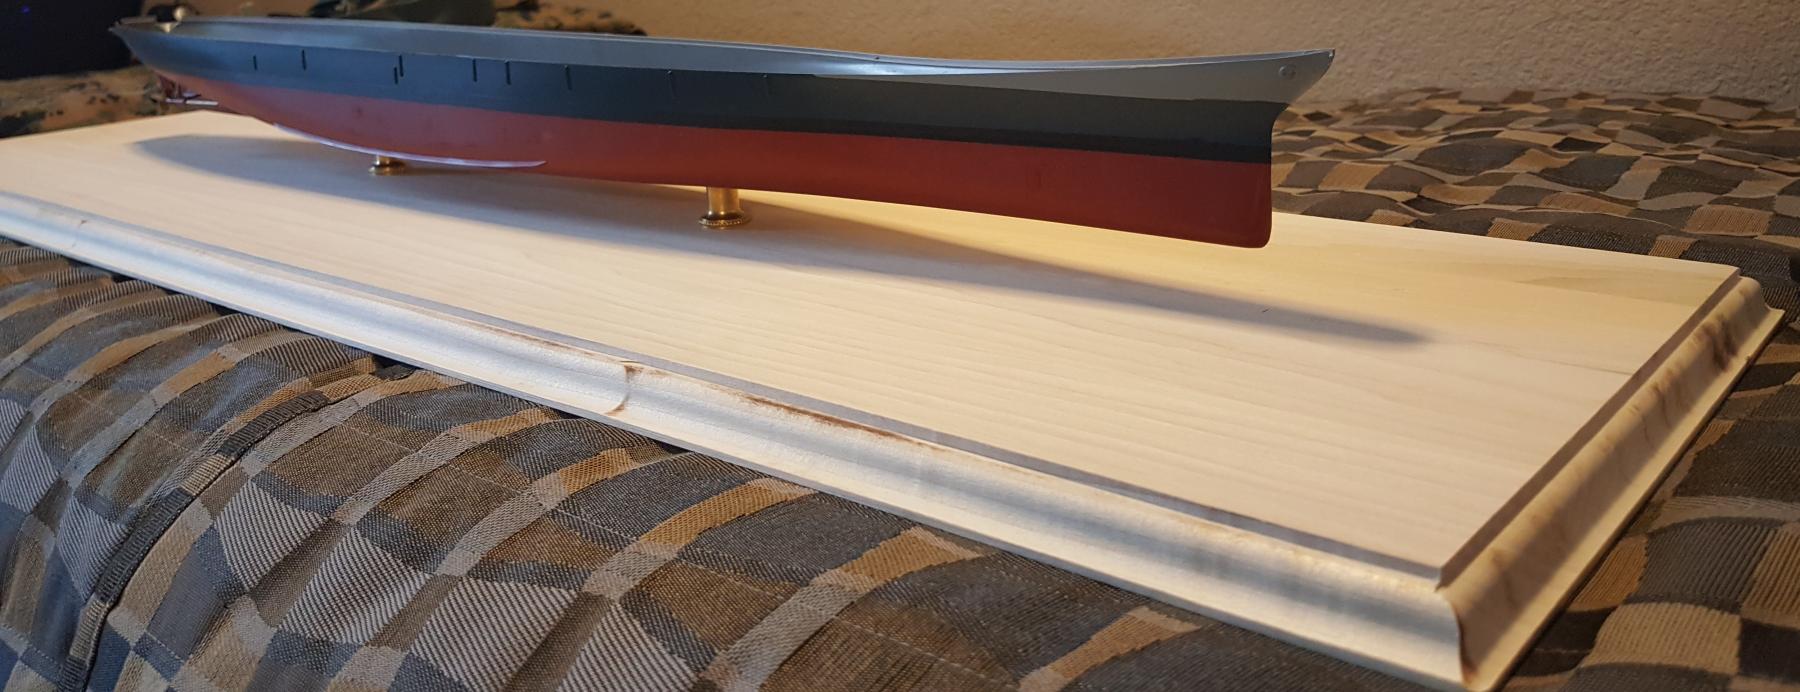
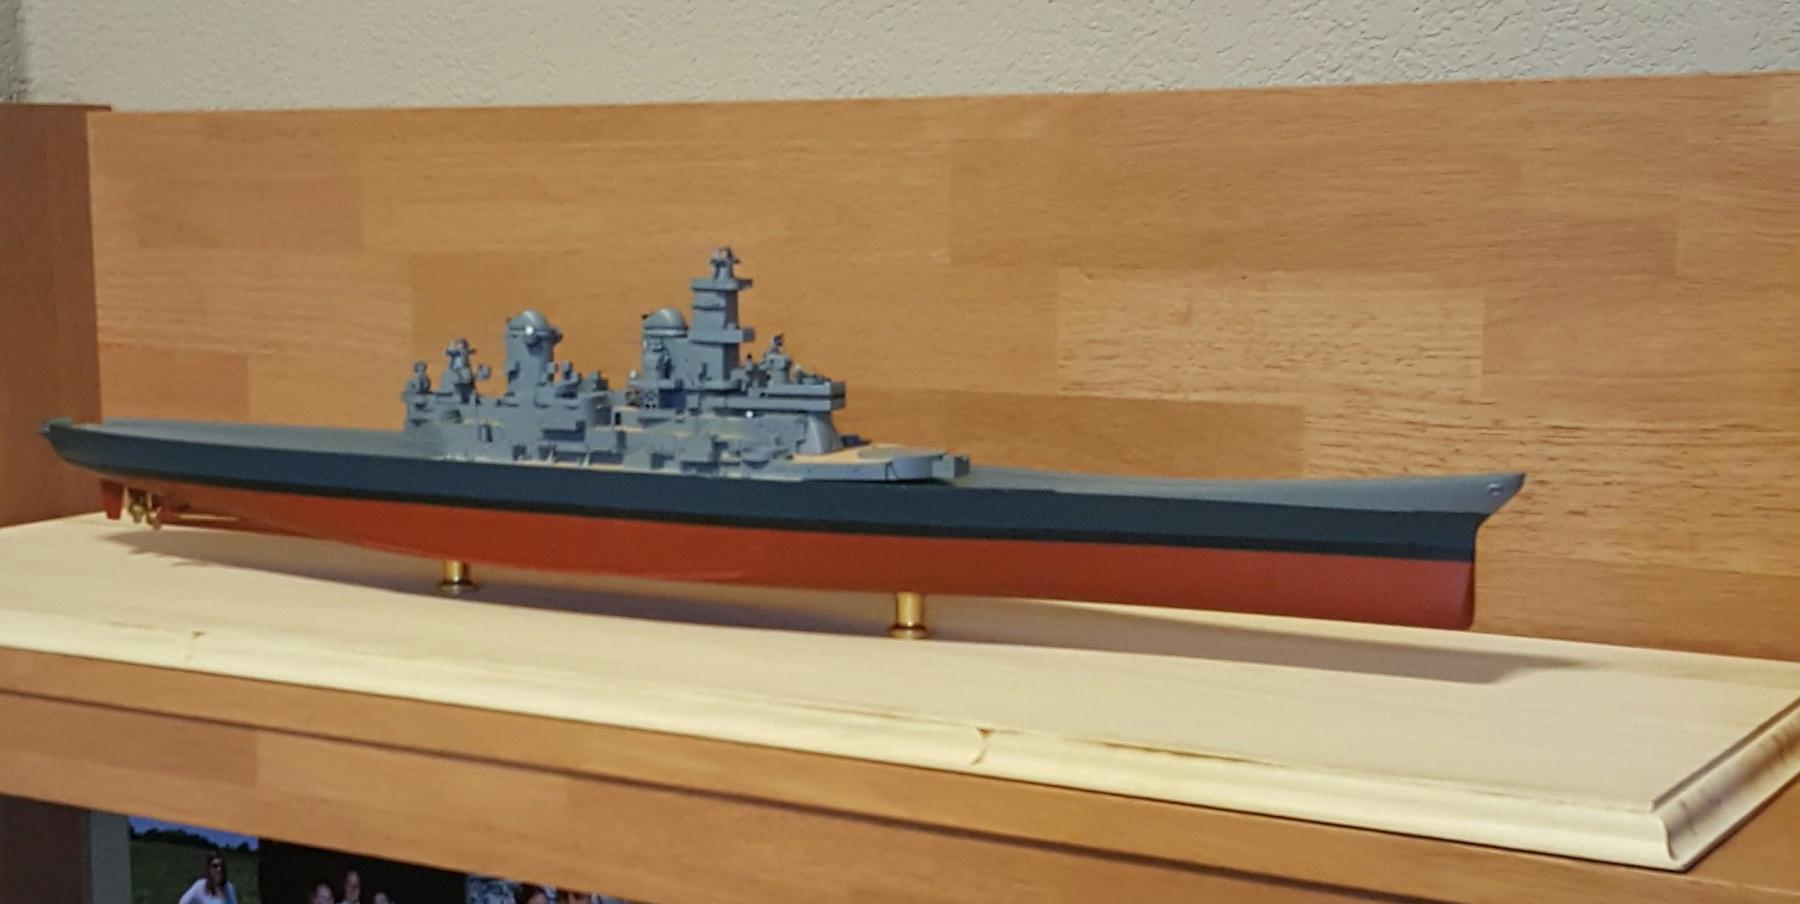
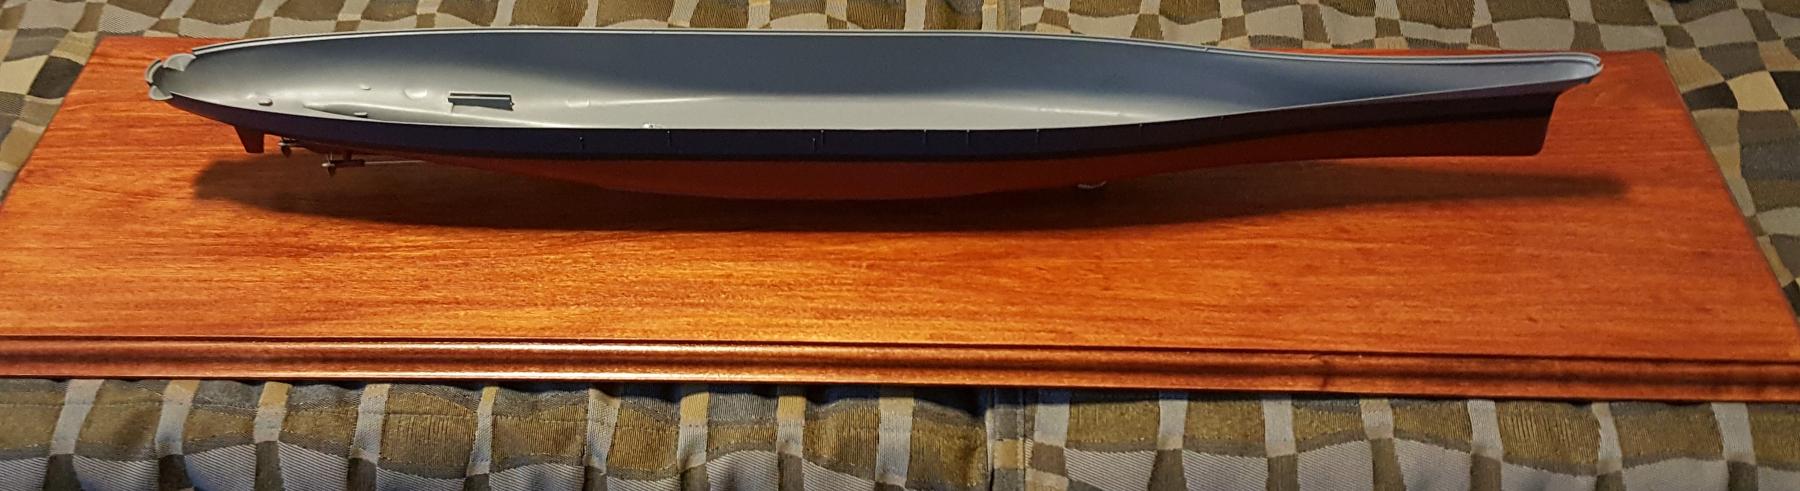
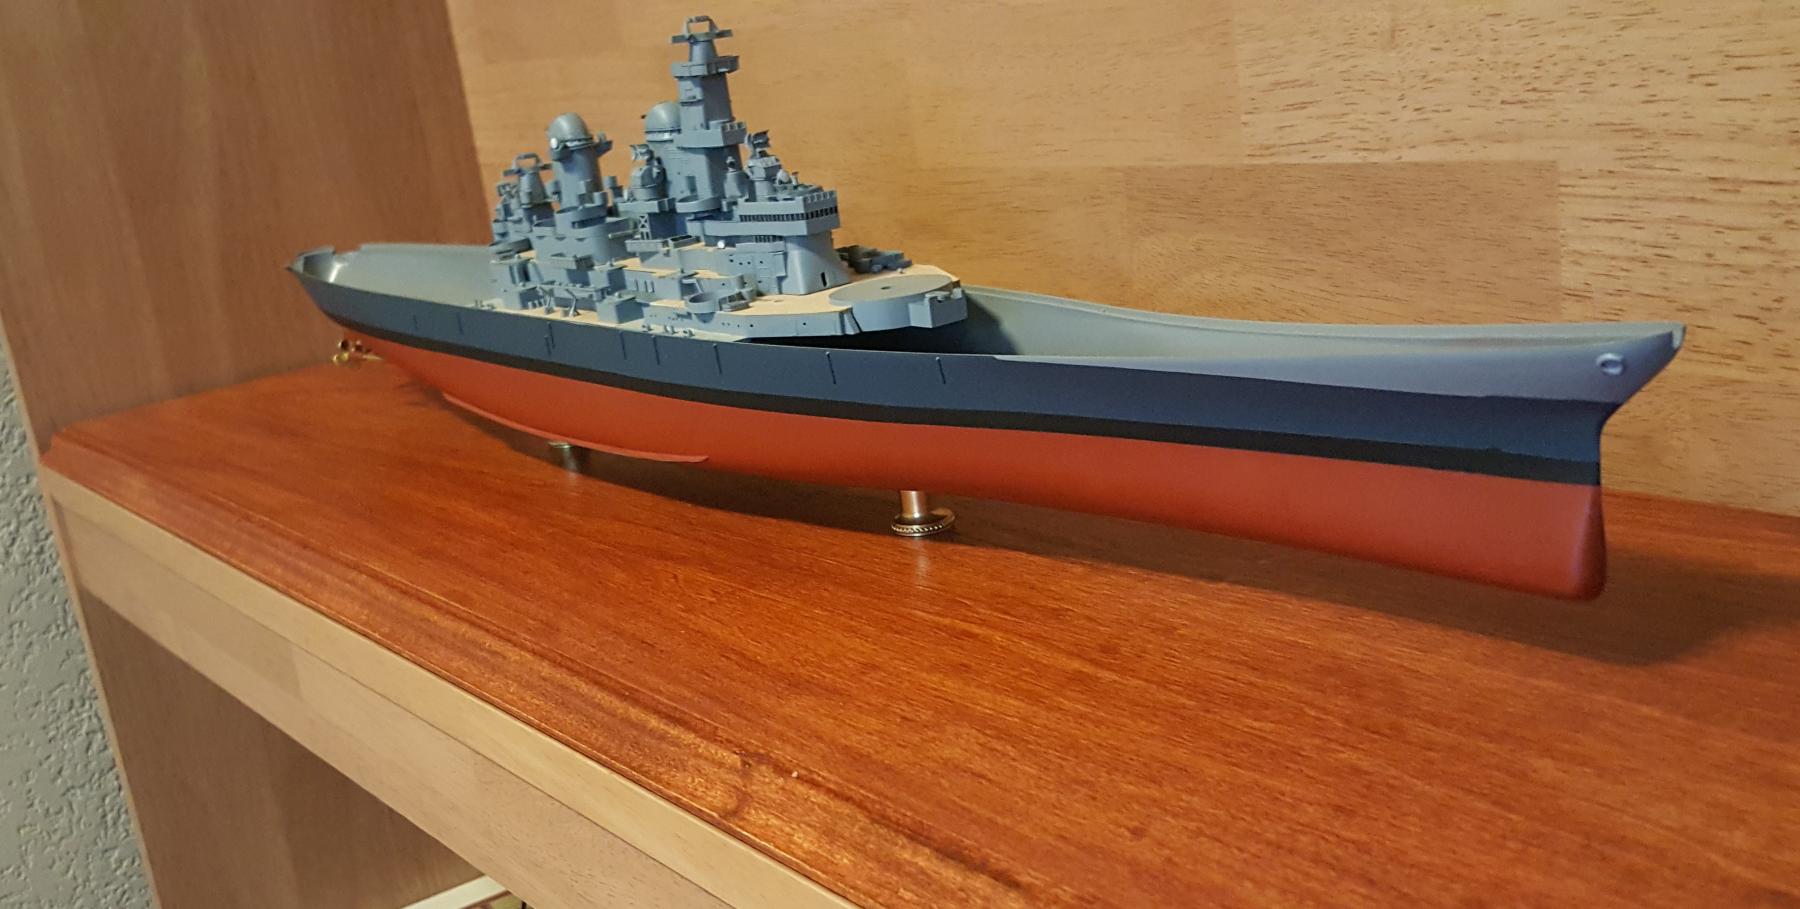
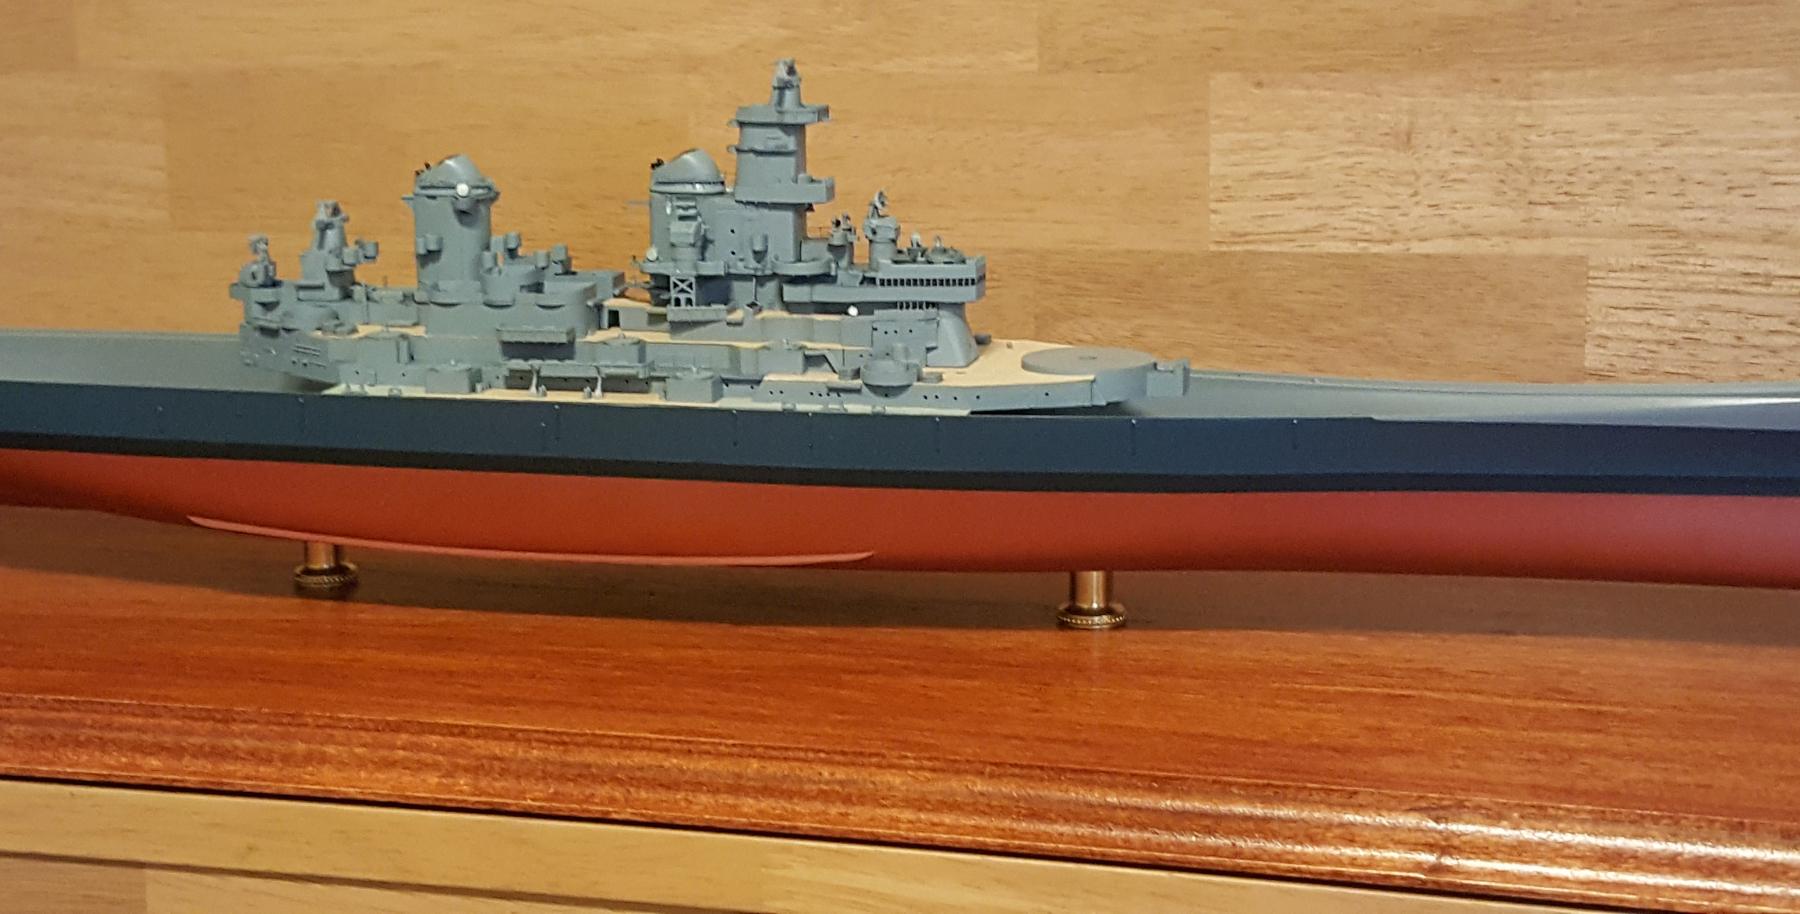
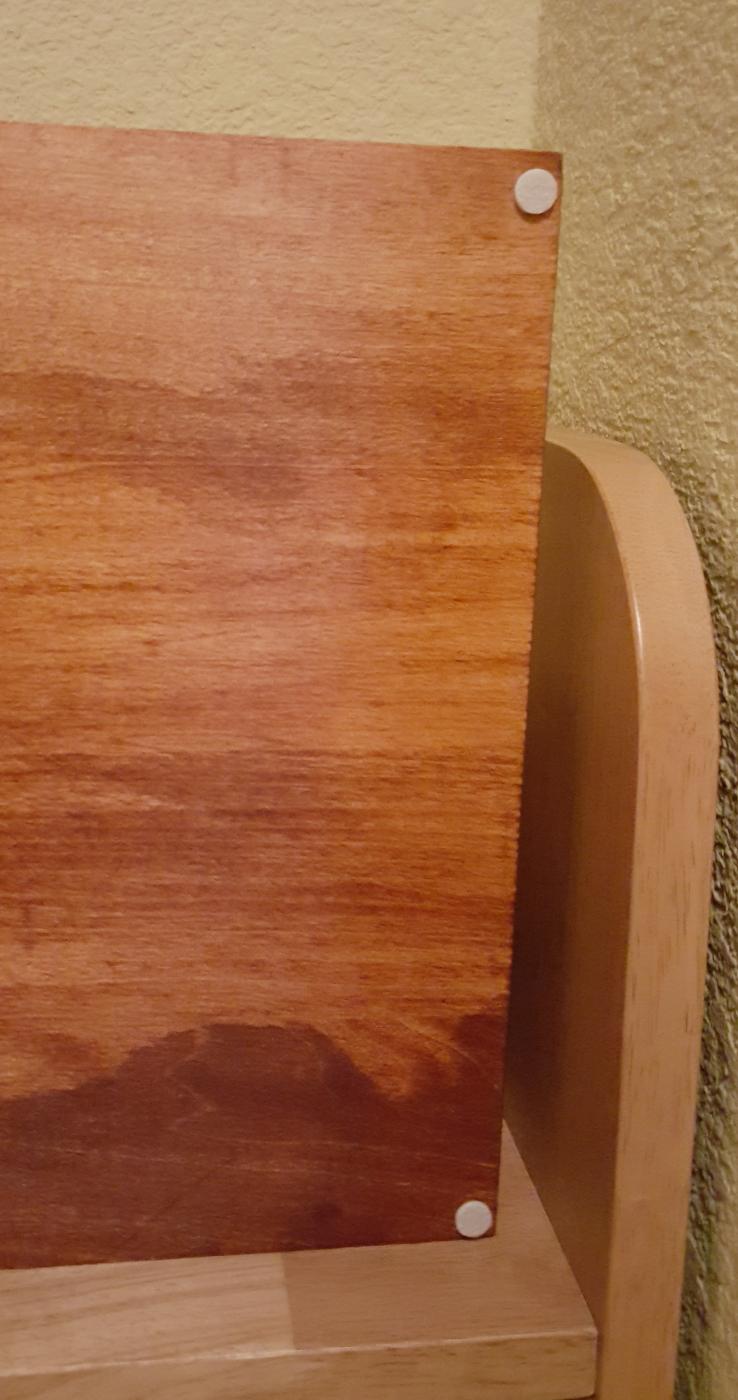
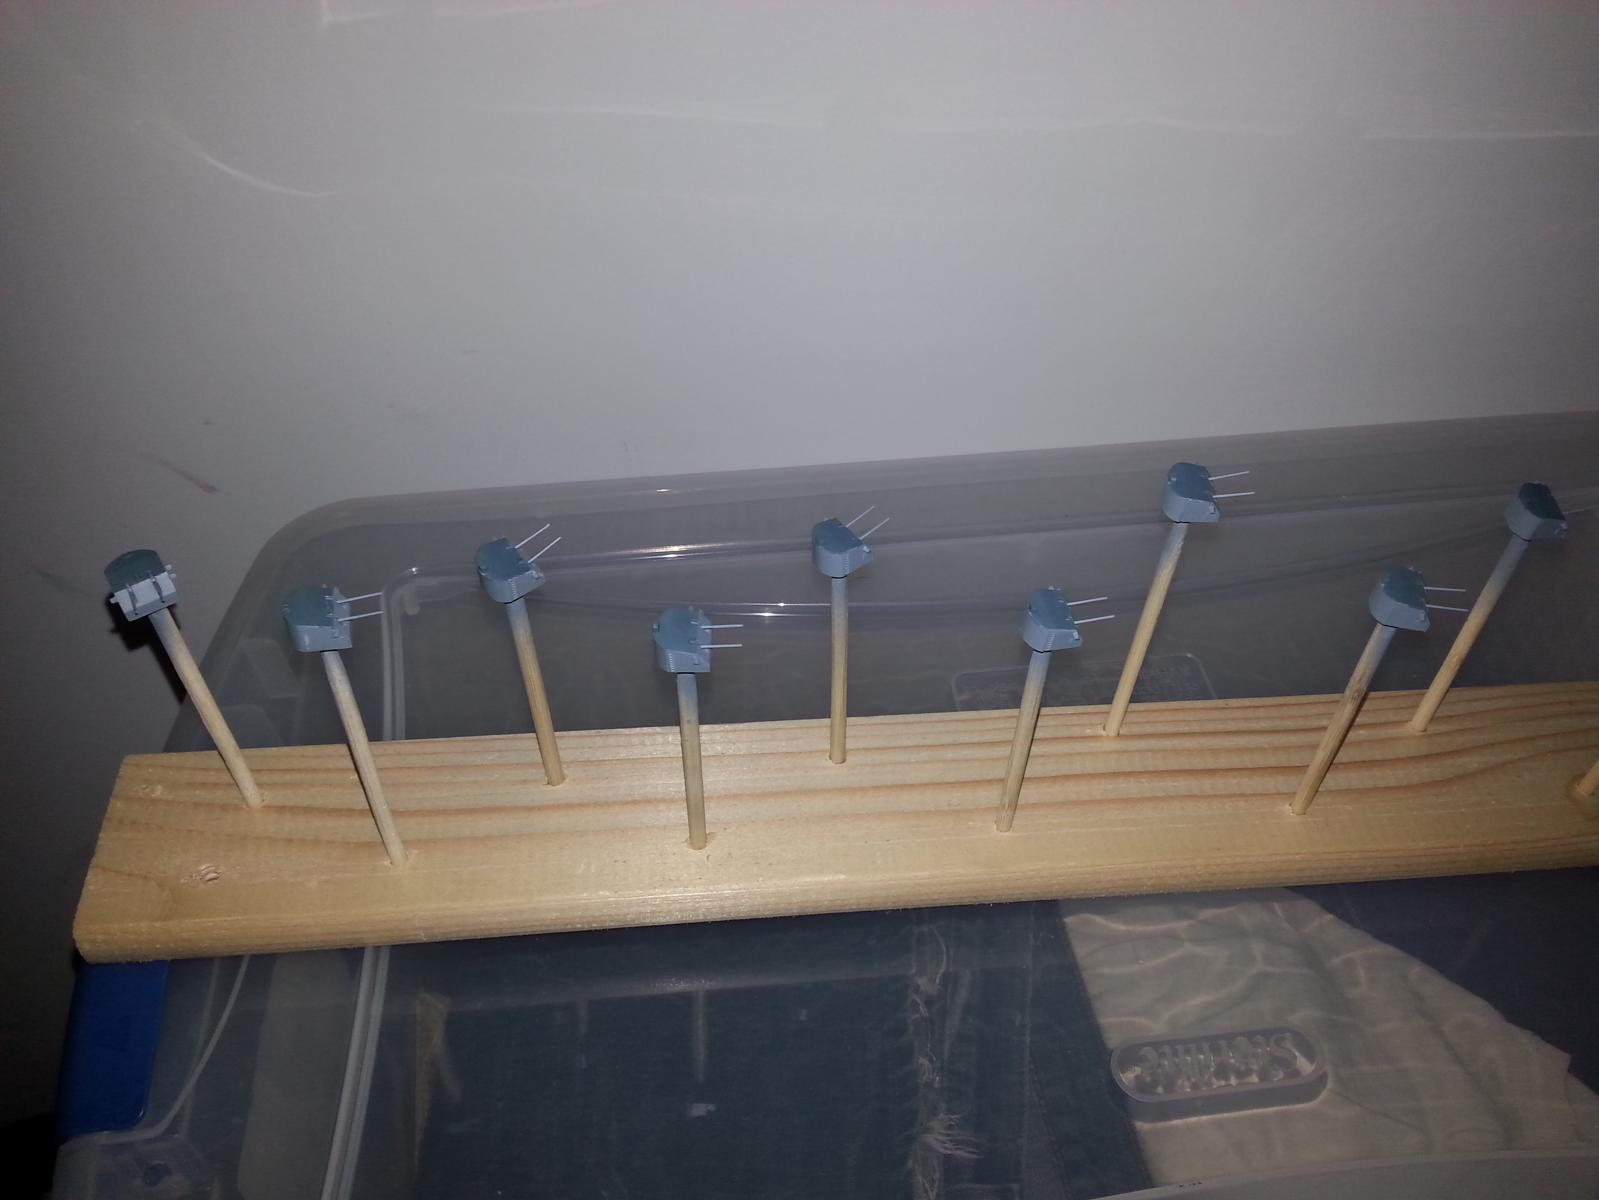
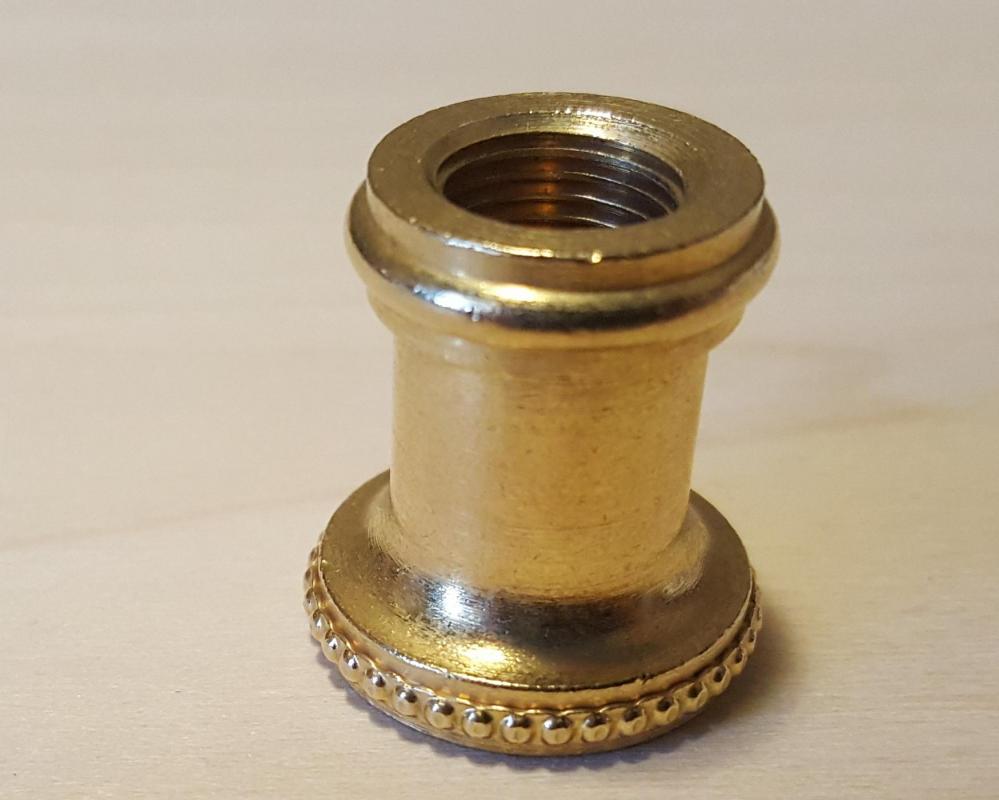
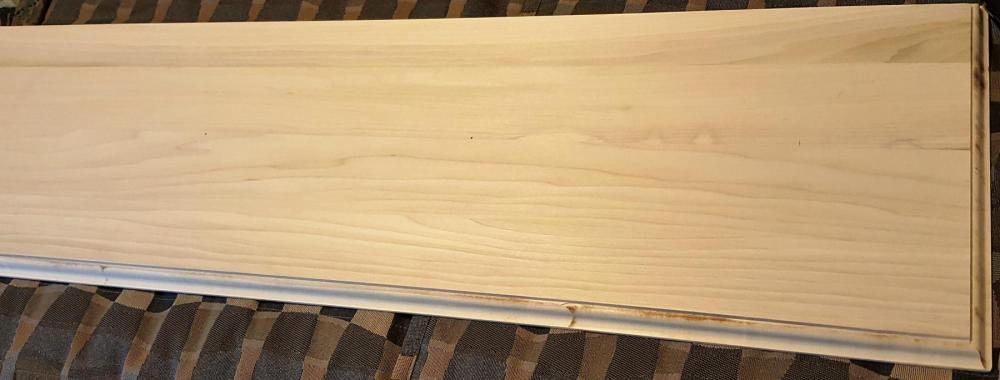
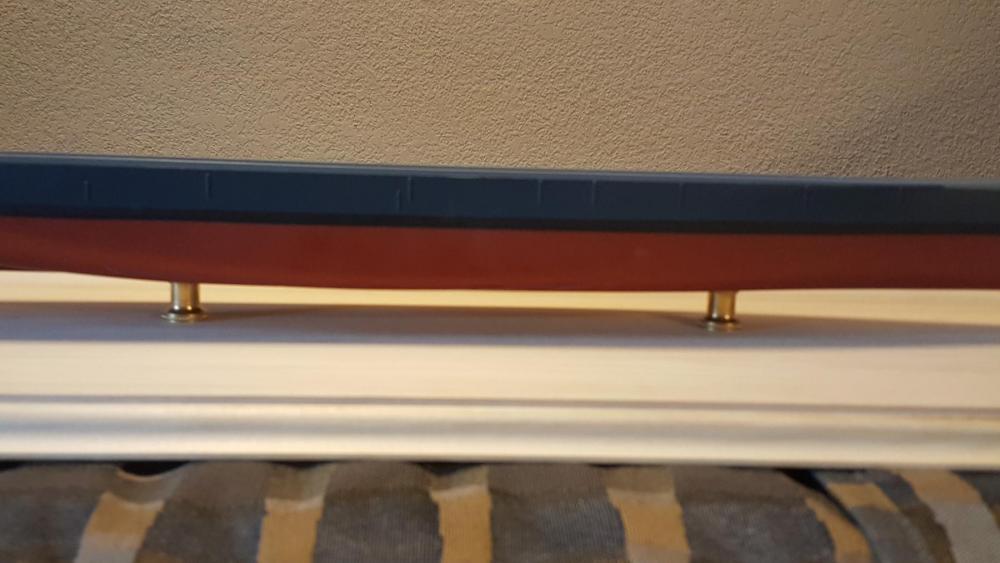
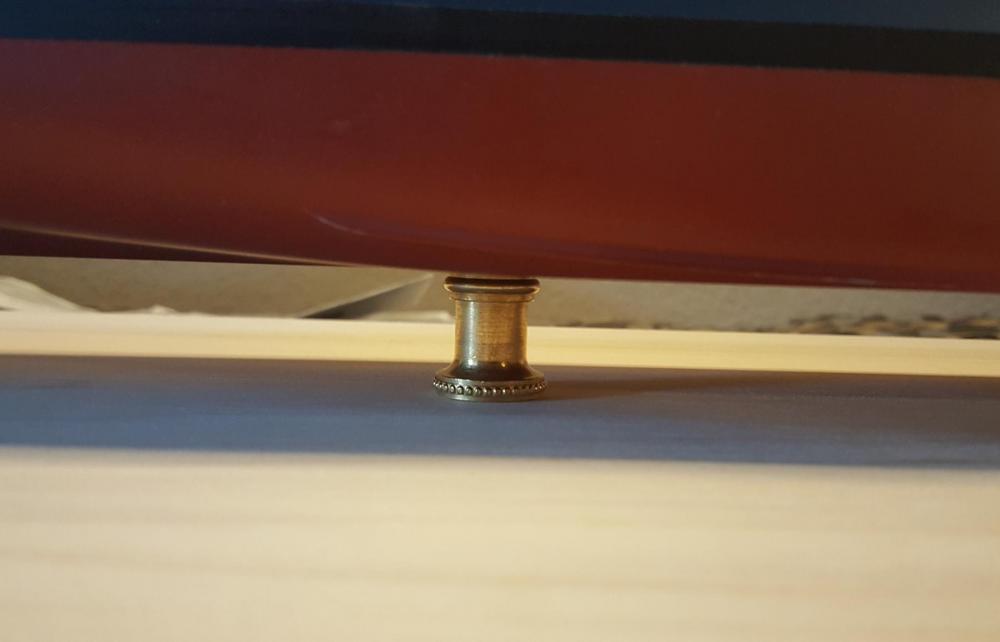
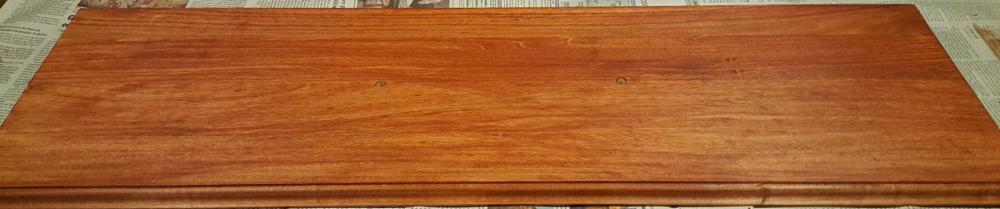
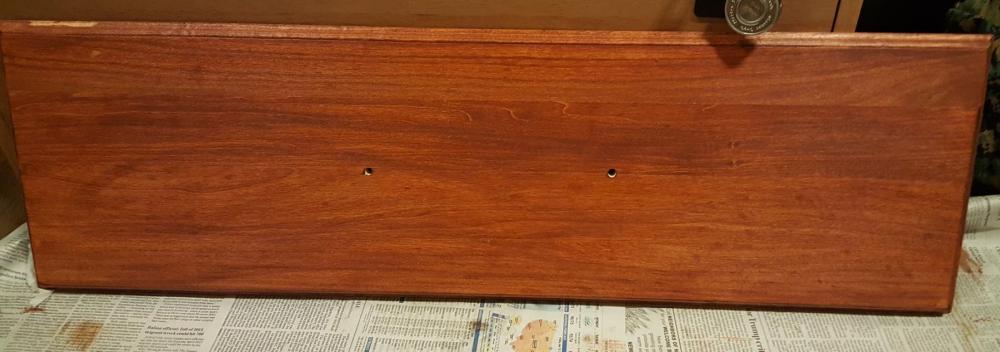
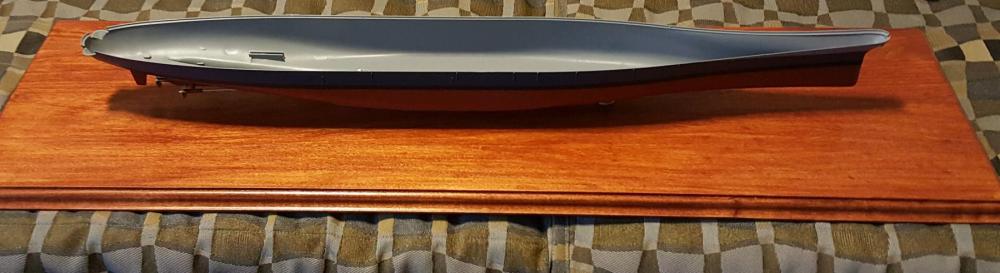
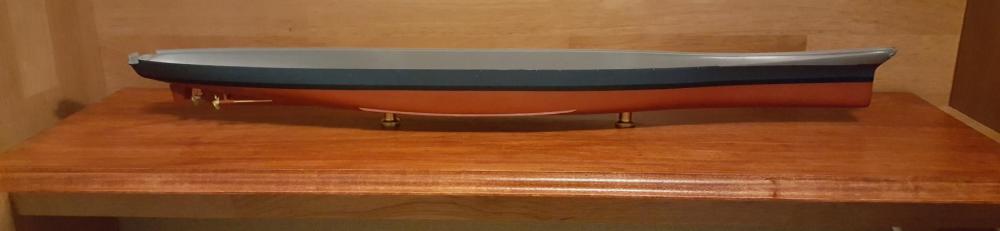
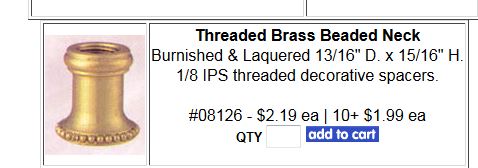
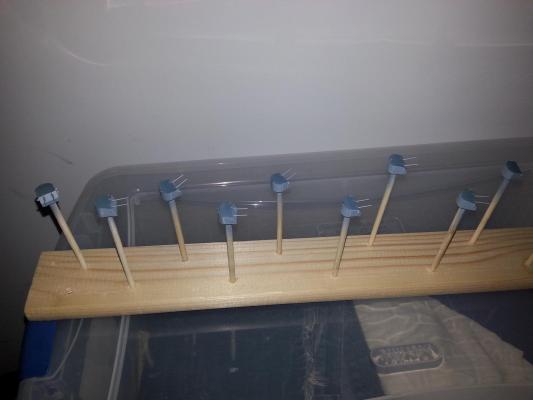
So.... i know it has been a while since i have posted and have done much on the Mighty Mo. But i don't have the room or the actually that much time being in the service. We recently had an Air Show on base and i was a bad boy and bought a few airplane models. Now i have 4 models waiting in the wings and the Mighty Mo to finish. haha. That being said, i have made some progress. I decided to go with the Threaded Brass Beaded Neck. I thought it was a little more fancy. I bought the pack of 10. saves me a little money for the next ship i do and need stands for. haha. here is what they actually look like. So i knew i wanted a nice wooden base and then a plexiglass top to protect and keep dust of my model. and it adds a nice little touch to it. So i went to the Lowes and got a nice piece of poplar. Trimmed it down so that i would have enough space on either side. So i cut it down to 38" from the 48" that i bought. The tricky part was now getting a nice edge on it and figuring out how to get the plexiglass to stay in place. I originally thought about putting a notch in the board with a router but wasnt sure how to do that and how good it would turn out. So i decided to worry about putting a nice edge on the board first. This was my first time using a router, it was a learning experience. Thankfully i had the common sense to try it on a few test boards to see how it would react. after a few trial and error runs i figured it out and jerry rigged the crap out of the router bench. Wish i took a picture of it. here is what the edge looks like. i kinda liked the way the bit burnt the wood a lil and thought it added a little character. So i decided to keep it. After i finished routing the edges i centered the boat on the board and drilled pilot holes through the hull and board so i would know where to drill the holes for the bolts. Drilled the holes and then got a wider drill bit so that the bolt heads would be recessed into the wood and not be scratching any surface that i place it on. Here are a few of the stands on the wood with the boat. i just wanted to see how it might look. I wasn't quite sure what kind of stain i wanted to put on it. I knew that i didn't want it to be as white as it was. i was thinking more of a walnut color. Sophisticated and classic. lol. when i got to the store however i ended up going with gunstock by Miniwax. has a similar color but a little more red i think. I also got a clear Poylurethane to protect the wood. I put on 2 coats of each. I am very happy with how the base turned out. what do you think? the first coat of stain: after the second coat: felt feet on the bottom: Stay Moto


-
good news. i just got in touch with tamiya and they have a rudder for me. so crisis averted. lucky me i guess. now i just need to remember where i left off. I have been thinking of how i want to display it and my enterprise when i get to her. I want to do a plexiglass case so i can keep the dust off and not ruin her when i move it. i have seen many wooden bases build and i think i want to go with that. now the stands that the actual ship will go on i am torn, here are the two options i was thinking. or what do you guys think?

-
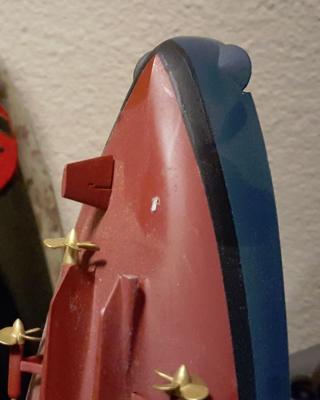
Well hello there. After being in training for almost a year i can finally get back to modeling. I am now at my permanent station for the next couple of years so hopefully i can finish my Mighty Mo. I have a slight problem tho. in moving the model to my new station i broke one of the rudders off and can no longer find it. does anyone have any suggestions on how to build a new rudder. Or if anyone has one or knows where i can find one. that would be awesome. looking forward to finishing this and bringing you all along for the ride. On a side note i got a new model. the USS Enterprise CV6, 1/350 scale. it is a 1942 build at the battle of santa cruz. It should be a good build. Stay Motto
-
so i can't seem to find one book that was all pictures of the iowa class battleship. So i have to ask, does anyone know what kind of hatches go where on the ship? i have 3 kinds on my PE sprus i think and i don't know what ones go where. i have only used one kind so far. anyone have a reference they can point me to? thanks. Stay Motto
-
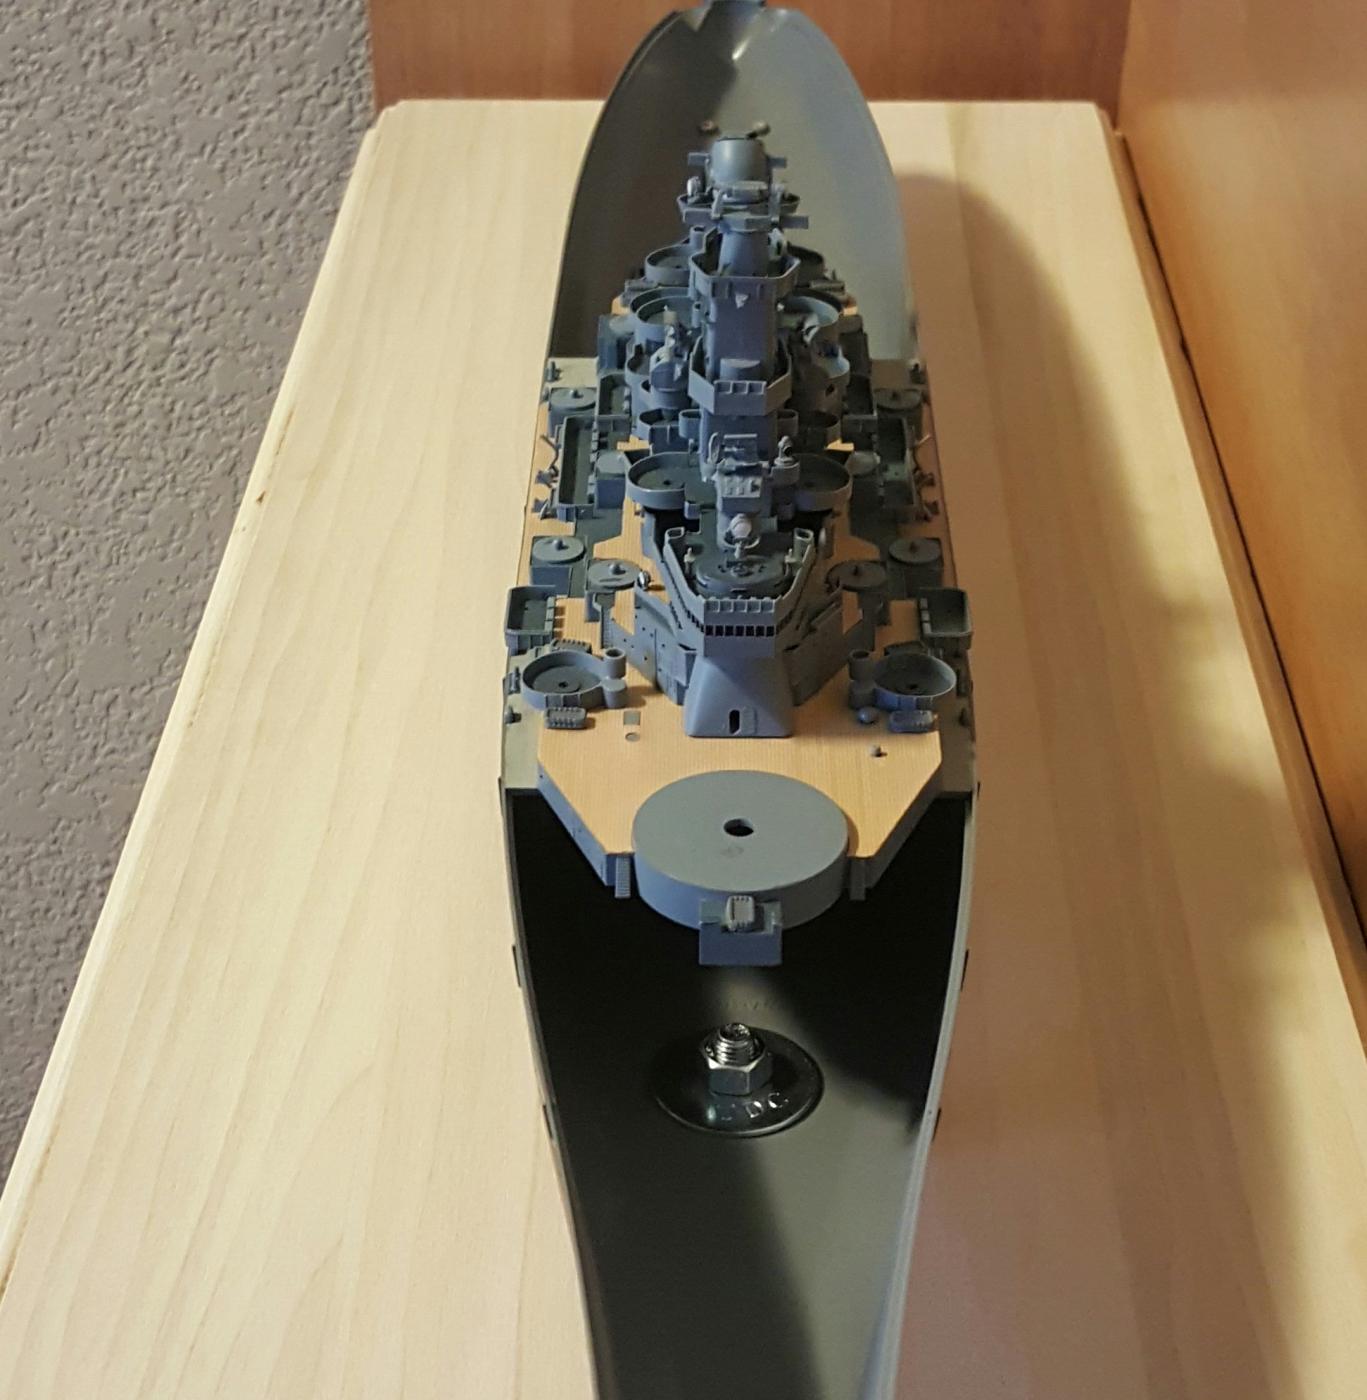
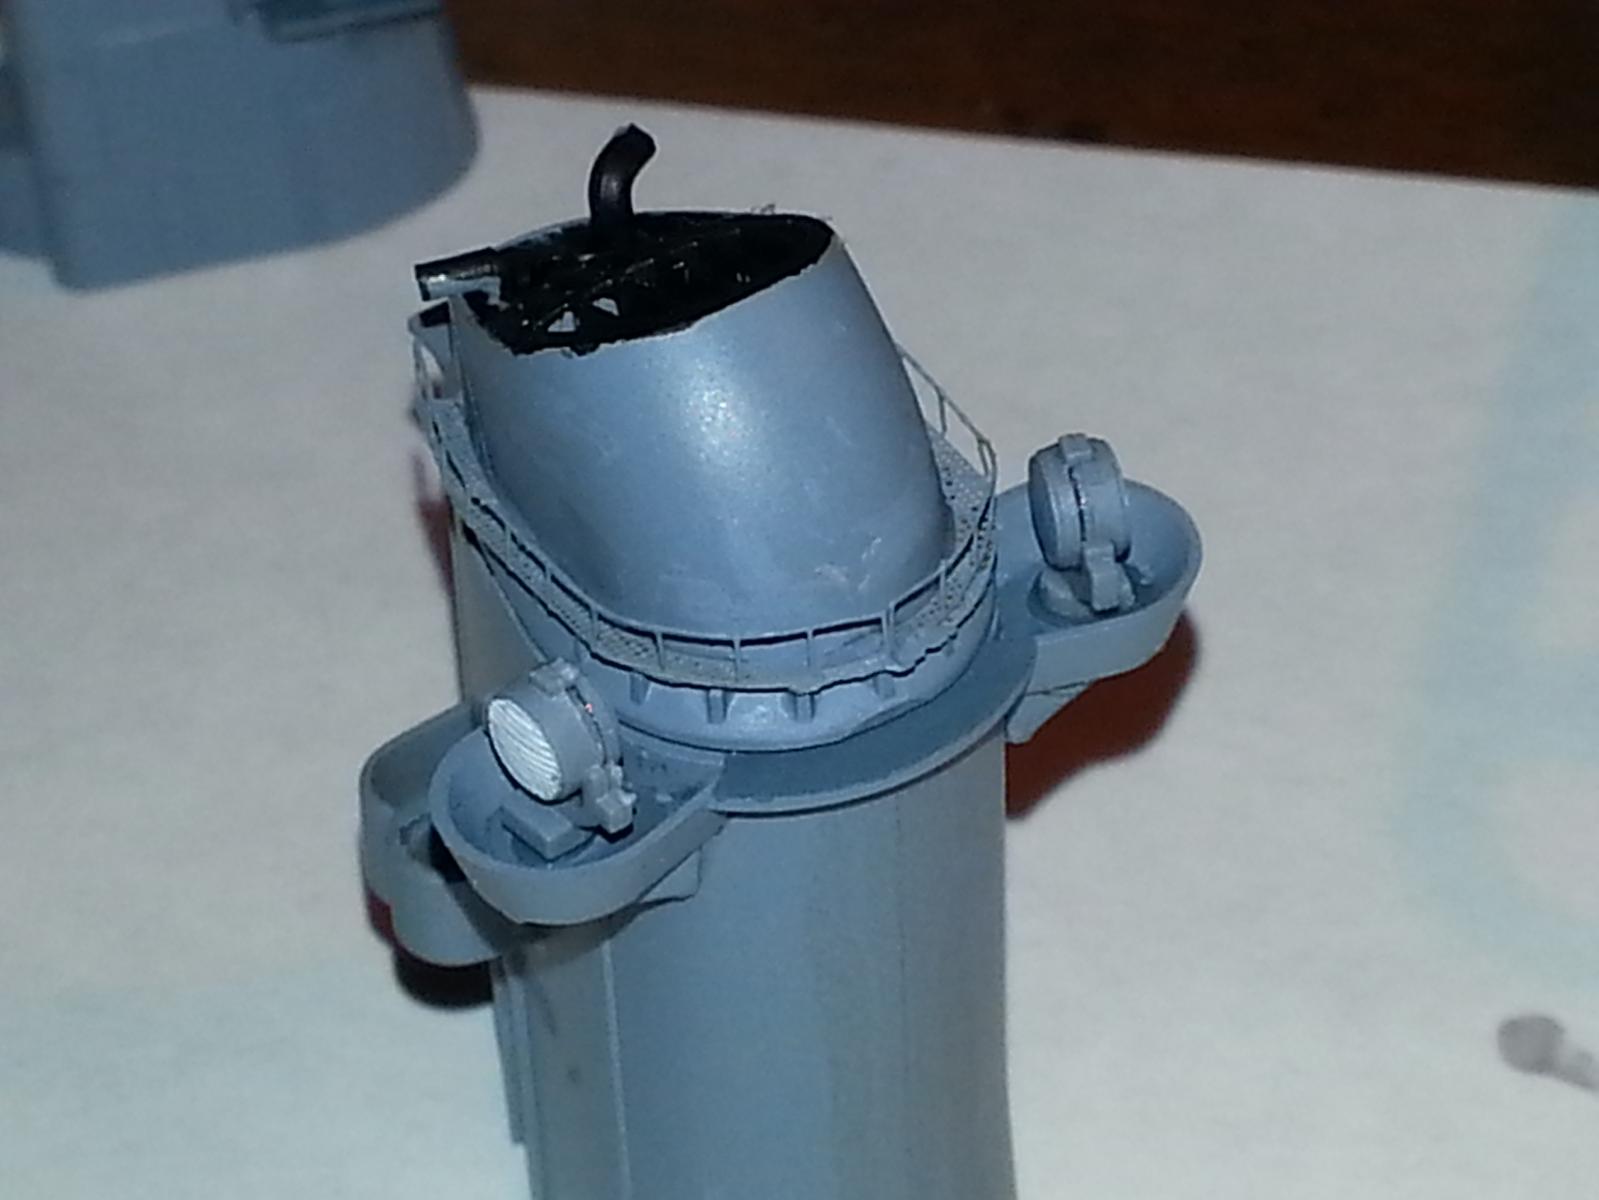
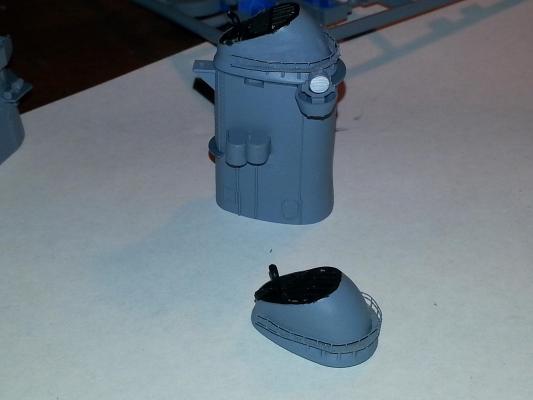
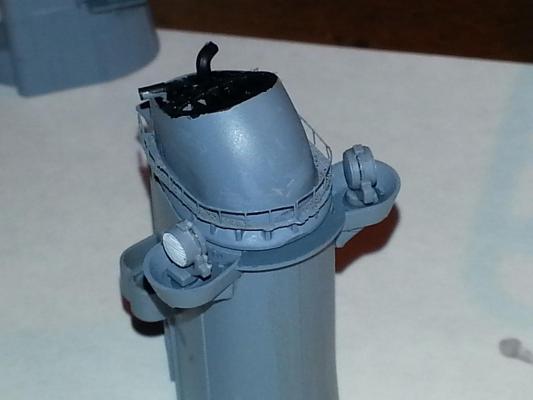
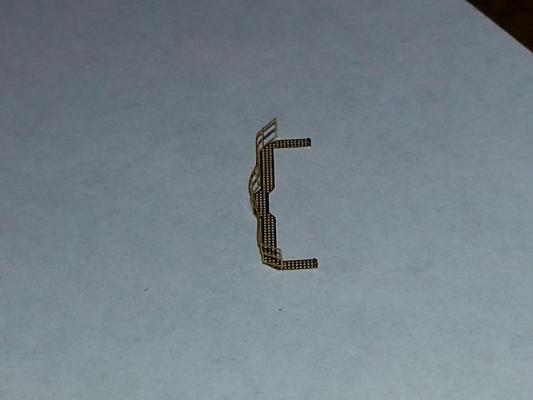
I have attached the catwalks along the top of the exhaust funnels and almost completed the aft exhaust stack. they cat walks don't look half bad. there is alot of touch up painting to do. hopefully i will be able to do this tonight. if not it will have to wait till next week because this weekend is busy. I also started on folding the Mk8 catwalk pieces. these were a little easier to bend because they are supposed to be hard angles rather than a nice gentle bend. i painted these last night and hope to get one more coat of paint and then attach them as well. I still have to drill the port holes and place on all the hatches. I'm nervous about doing this, guess that is why i haven't tackled it yet. but i have to do it soon because i have to start attaching railings and can't be man handling the model much longer. haha. Stand by for updates. stay motto.
-
k0oky reacted to a post in a topic:
USS Missouri by k0oky - Tamiya - 1/350 - PLASTIC - 1945 post signing of Japanese surrender
-
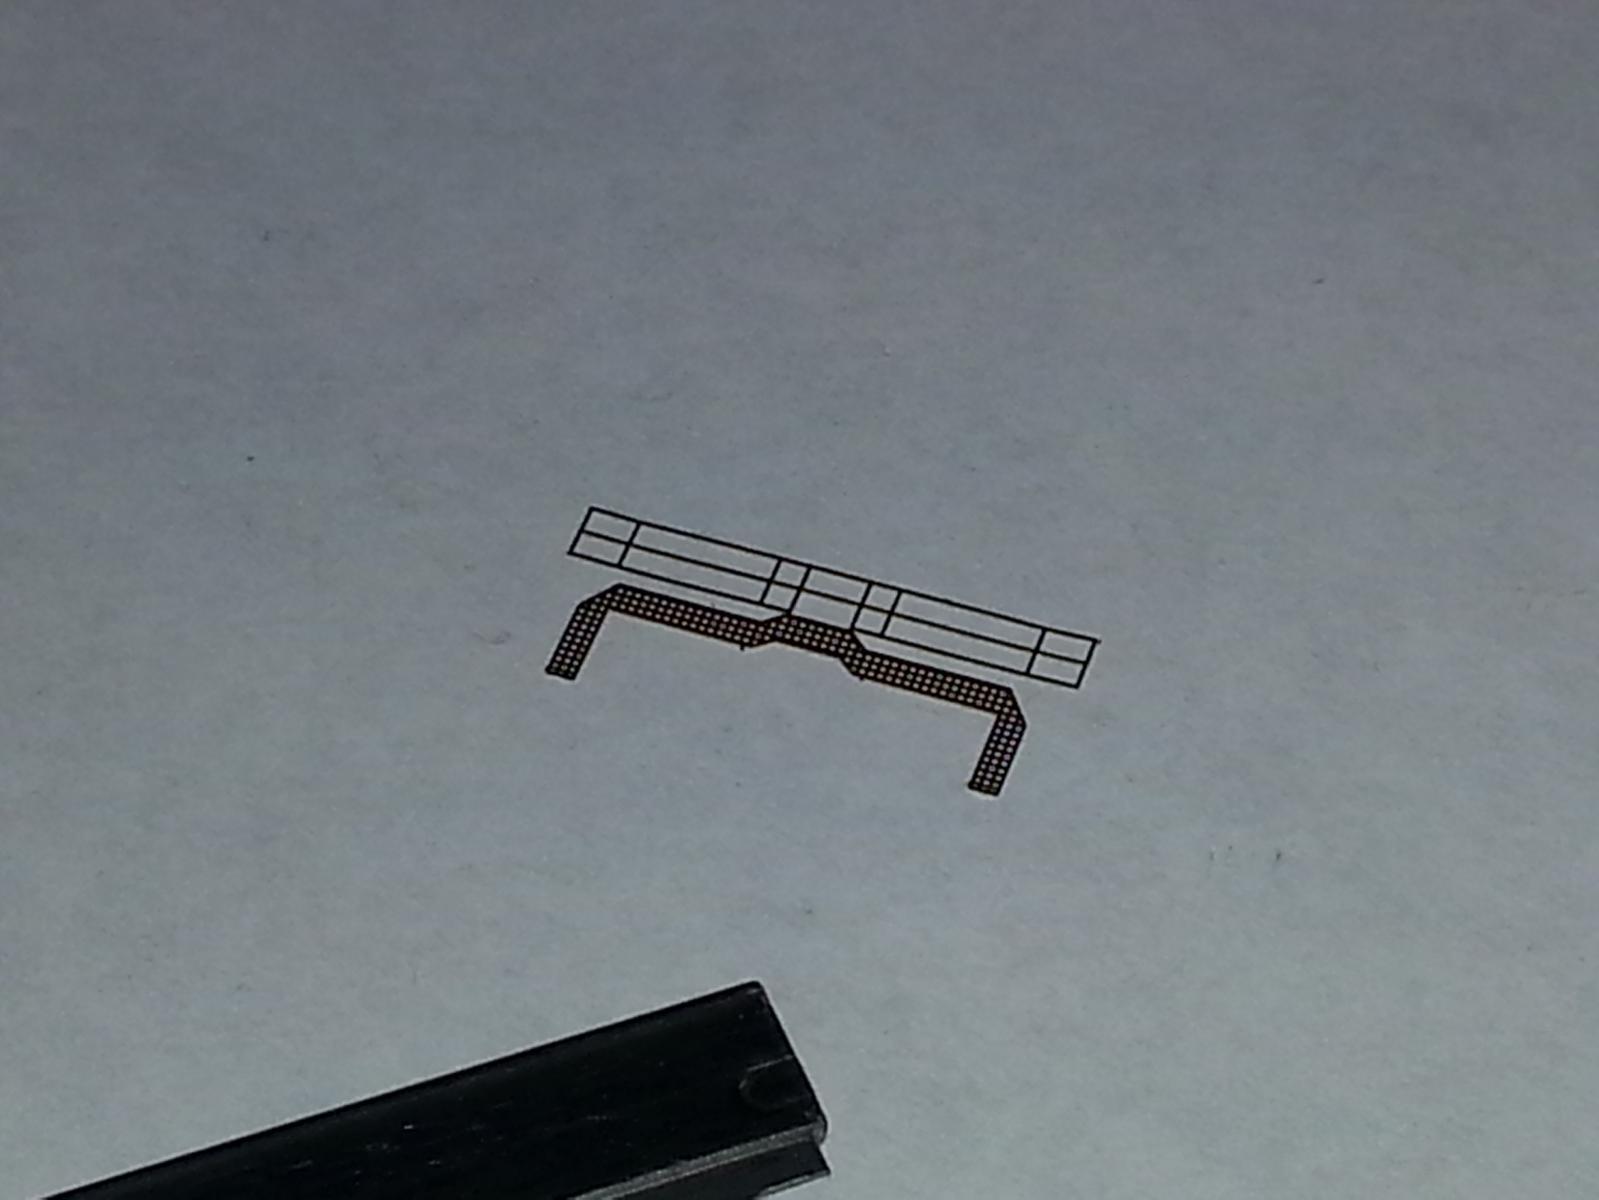
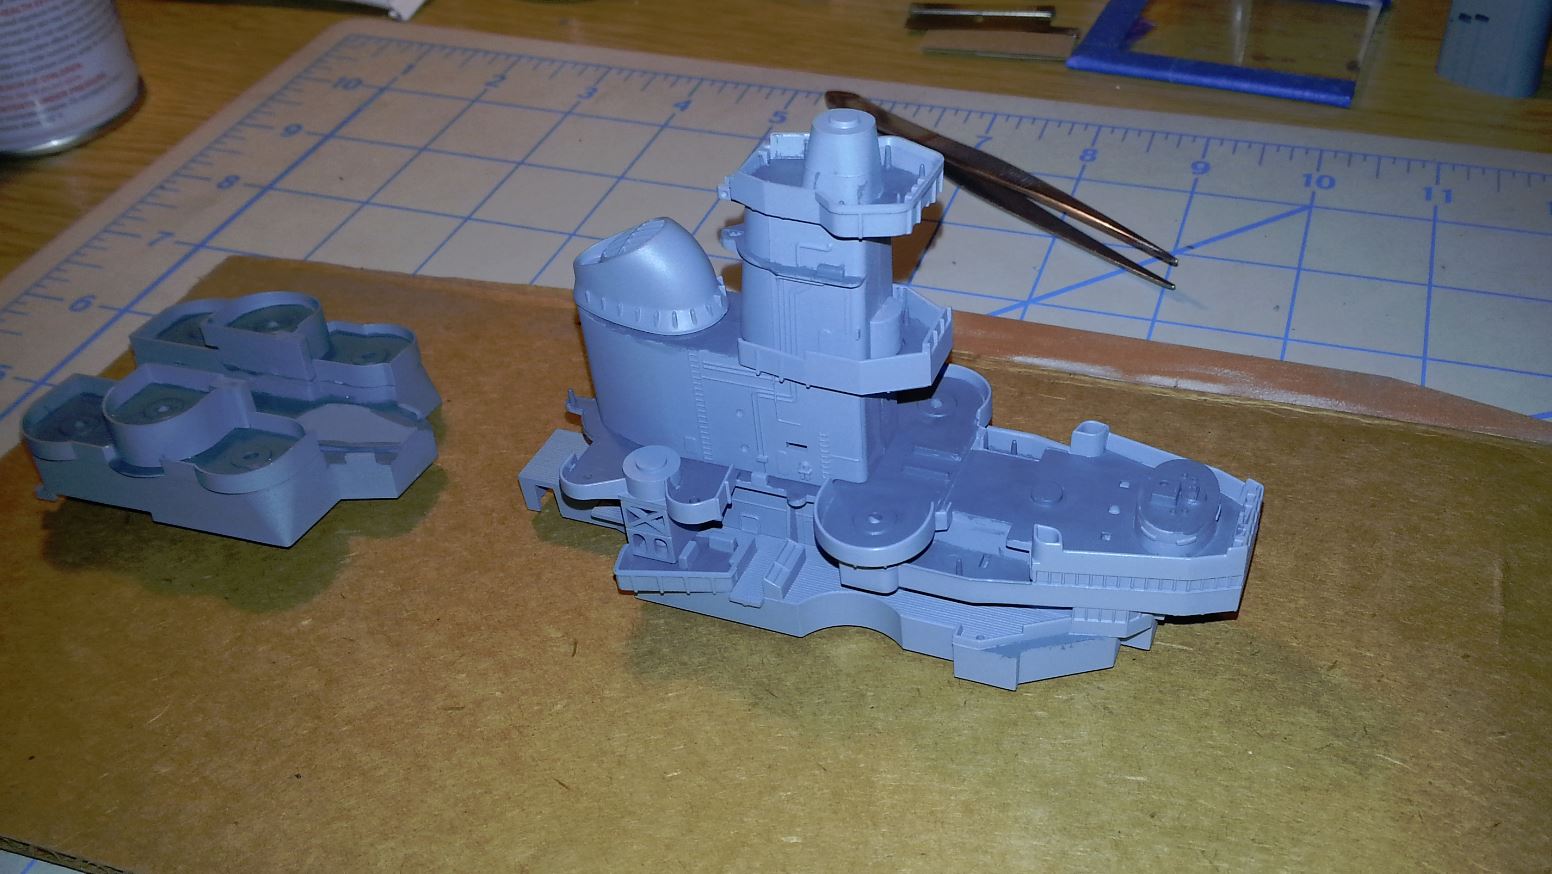
I got almost a full day of model work in yesterday, Yeah! although i felt like i got little done, i did make progress. i started by working on the catwalks for the funnels. As the plastic one does not have a railing on it i used the photo etched parts. This was my first taste with railings and i have to say, they suck. bending them up to 90 degrees with the catwalk was easy. making them curve and glue in place was a pain in the butt. i think this took me an hour to just do one. they got a little bent up in the process. but for my first time doing these, they don't look to bad. i painted them but still have yet to attach them. while those were drying i moved to base of the super structure. This need to be painted and so that the wooden decking could be glued on at a latter time. after attaching the second level wooden deck i finally felt like its starting to come together. i hope to finish the funnels tonight and start drilling the portholes along the fist and second decks. Stay moto.


-
Alas, i ended up going to a hockey game instead of working on the model. This weekend i should be able to get a good long session in and ill post an update afterwards. stand by to stand by..
-
Thanks, well it decided to cut away the decking that i put on so i could get that piece to fit properly. it fits better now (better, not perfect) and i pretty happy with the results. I did this before the holidays but just never posted it up. here are the result. I just am getting back to working on her because i did some moving over the holidays. i really need to get better at putting time into getting this done. with that being said I am now working on completing the photo etching on the top parts of the super structure. At this point i have to pick and chose what photo etching i want to attempt and what i have time for. I don't want to sacrifice quality for speed. I hope to post some more pictures tomorrow of the progress that i make tonight after work. I am also trying to accurately drill port holes in the lower parts of the super structure. i figured out the spacing, just need to come up with a way to place it on the model. straight up measuring it out on there is not easy since the tools slip on the plastic. im thinking of placing paper on the model and measuring out all the measurements on said paper first. ill let you know how it goes.


-
@helmsman, could you see if you have any pictures of the area of the super structure that i show? I would like to compare it to what i have currently. What wooden decking did you use?
-
You mean the ones in the pic from the 10th of sept.? yup. just painted the ones that came with the kit. never did buy actual metal barrels for the 16" guns but i did drill the ends to give them that little something.
-
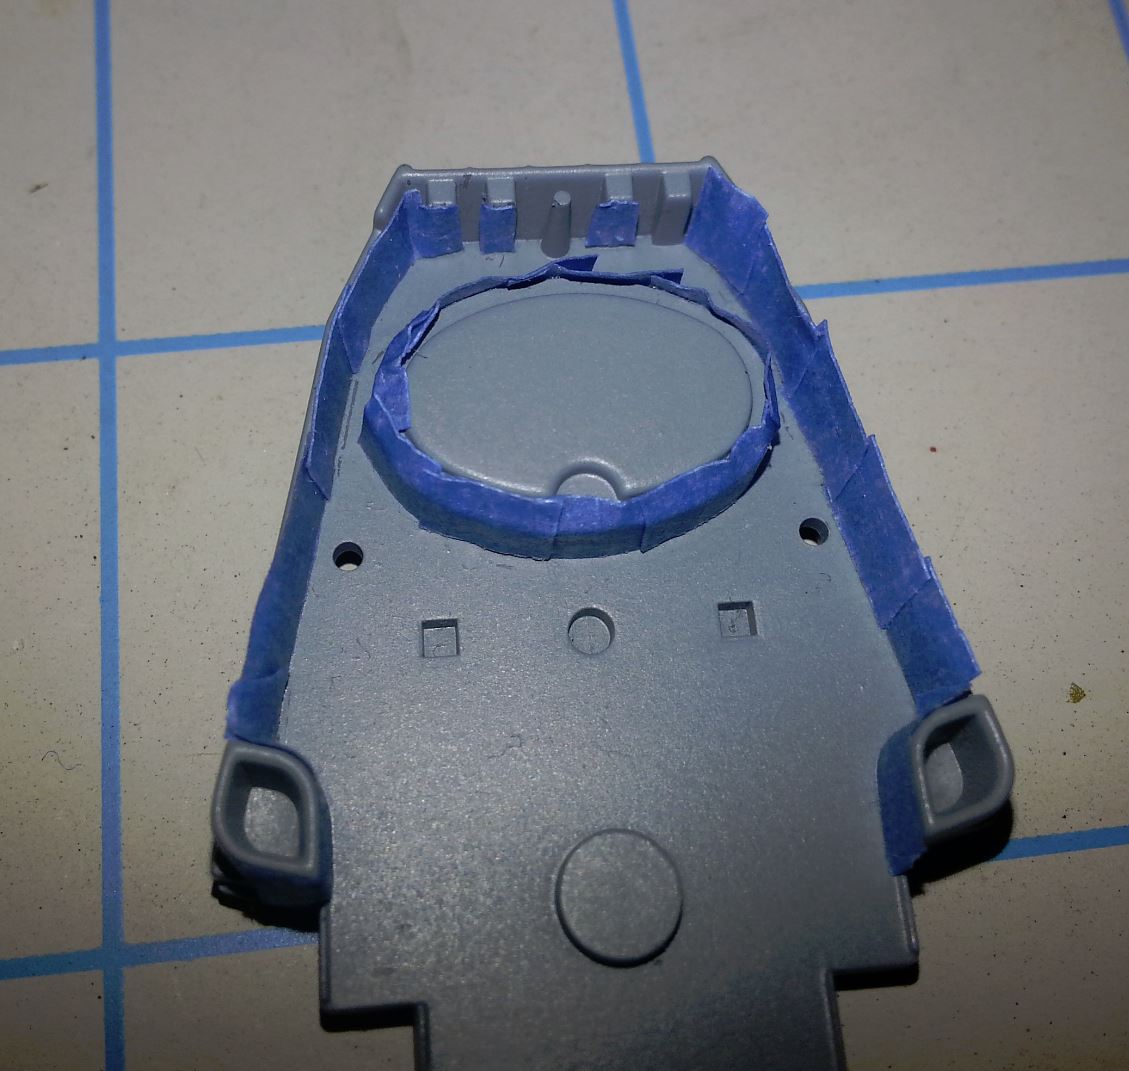
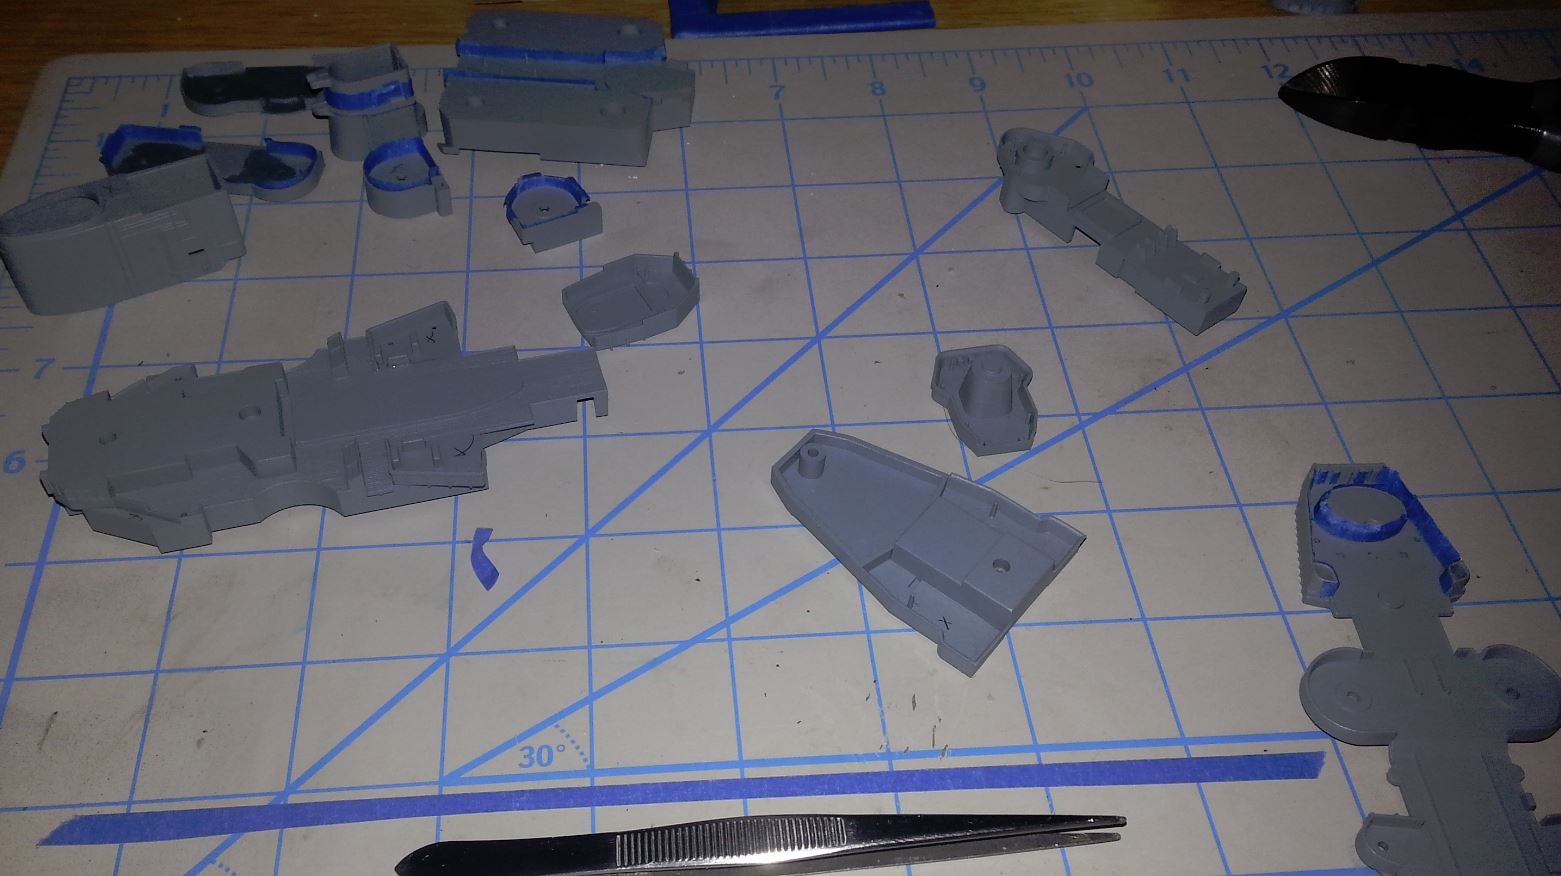
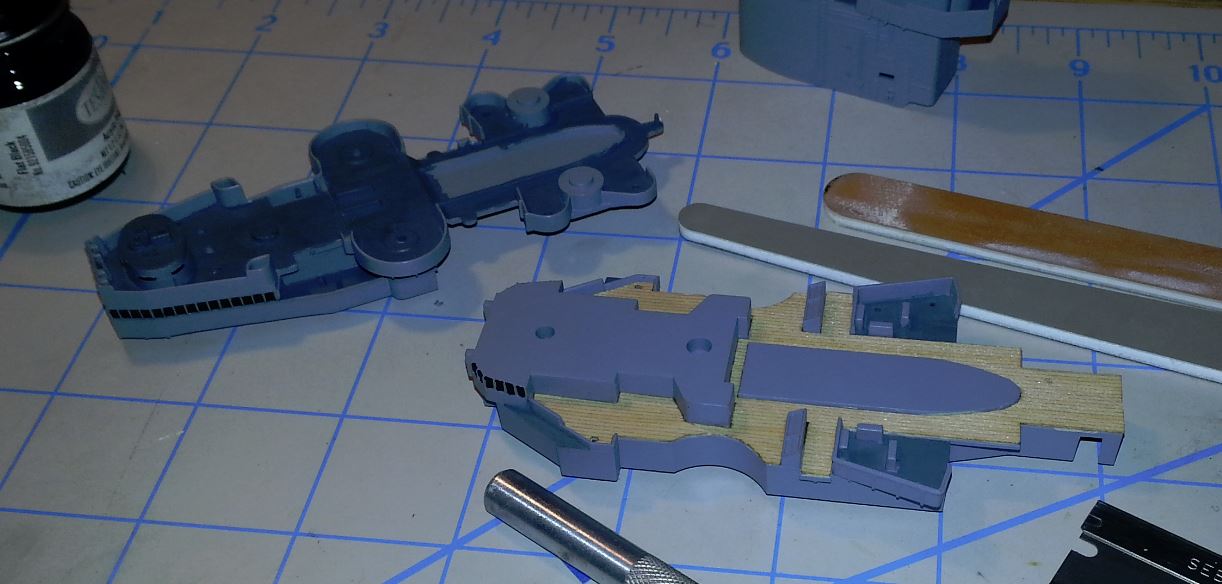
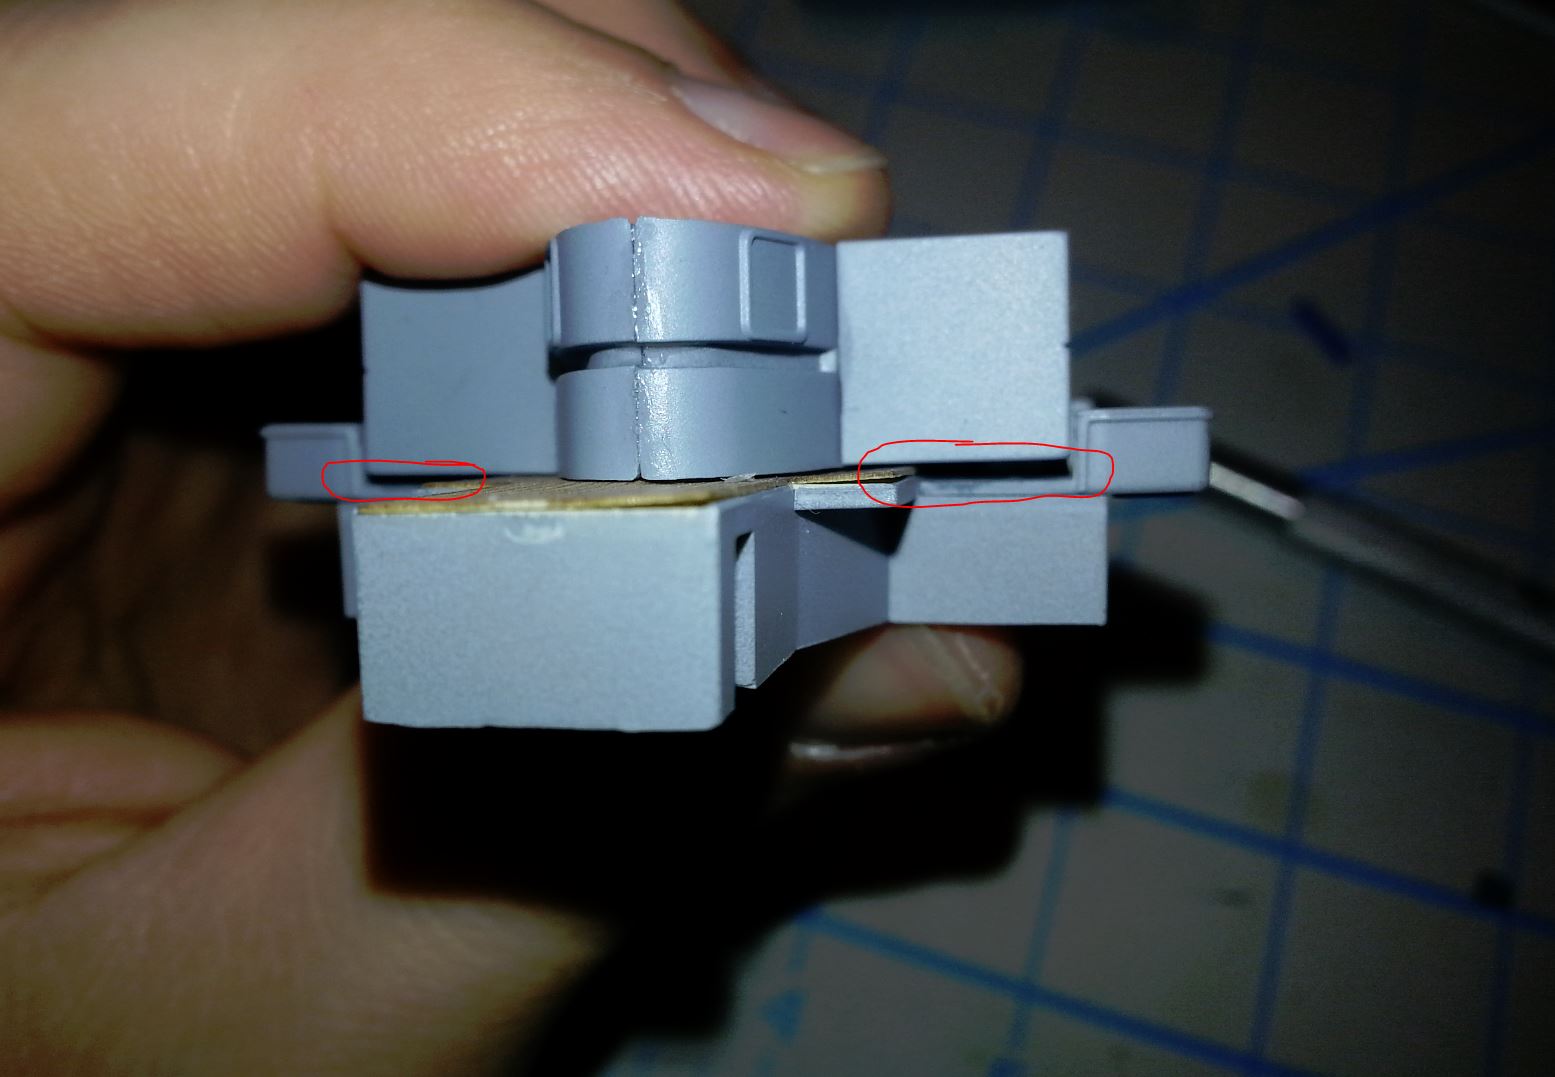
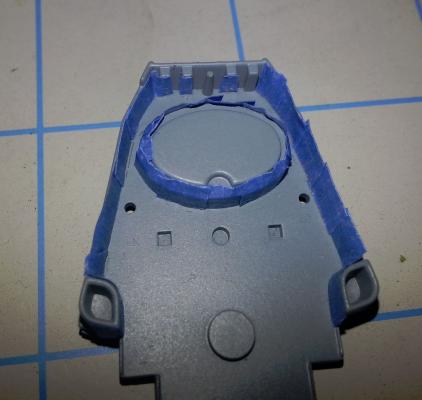
so after taking some time off i finally got back to working on the Mo. again. I have decided to try and finish the main batteries and all of the twin 5" batteries. I think if i finish some things up it will feel more like i'm completing the model. I spent some time taping up the edges of the 5" batteries to get that nice, crisp line of paint. all in all, i am very pleased with the out come. just needs a few minor touch ups and they are good to go. since i was taping and going to paint the darker blue i decided to go ahead and tape the rest of the supper structure and do all the painting at once. this turned out to be a big task. tap had to be cut into small pieces and then placed along all the edges that i wanted to remain the light grey. as you can see it took awhile to get all the inside edges taped. but again, it was well worth taking the time to do that. i could have never gotten close to the edge and not gotten paint on the walls. there a few minor touch ups with the grey that has to be done but not nearly as bad as it would have been if i had done it all free hand. here is dry fit of the super structure after i painted and removed the tape. as you can see below i painted the bridge windows black, and im very pleased to say that i did them free hand and did not screw them up to bad. i think they look really sharp. I also attached the wooden decking that i bought for the model. it was a tight fit but it turned out pretty good. I have read that people sometimes have problems with the glue showing up through it but i didn't have that problem. take a look. now here is where i have a question. I noticed that when i place the piece that goes over top of the decking there is a small gap. now this gap kinda throws everything above it slightly off. I could still glue everything down and get it to sit well enough but i am not sure if i want to cut the deck so the piece sits flush with the plastic. this would take a lot of time to cut and i don't know if that would look right because the hatches would then be to close to the deck. What do you guys think?


-
anyone have any ideas on getting the spacing for portholes on the super structure? im still at a loss. the PE set and the standard instructions don't have them.
-
ah, ok. thanks. i was thinking that but its not labeled on the spru at all so i wasn't sure.