


SkerryAmp
-
Posts
809 -
Joined
-
Last visited
Content Type
Profiles
Forums
Gallery
Events
Posts posted by SkerryAmp
-
-
On 9/1/2020 at 1:05 PM, Egilman said:
Hey brother, not a big fan of veneers here either, always seemed to me like twice the work....
Good work, looking good... will pull up a chair if you don't mind....
Thank you kind sir! By all means pull up a chair, beer and popcorn in the corner.
It is a little slow going as I am spending a LOT of time trying to figure out ways around some holes I put myself in, so there may be delays between posts, but it will get there - by hook or by crook it will get there!! -
On 8/27/2020 at 8:17 PM, Louie da fly said:
Looking good, Adam
Thanks Louie - it is a trip!
-
-
Great start - nice and straight - interested to see this play out. Looks like I have the first seat - yay for me! Guess that means I am responsible for the beer and popcorn!
Carry on good sir! -
Welcome Guy! You came to the right place - no shortage of good advice and encouragement around here. As for your first build, a lot of good advice so far the only thing I would say is make sure it is something that interests you, that will keep you engaged! Looking forward to whatever you start with!
- Ryland Craze and mtaylor
-
 2
2
-
On 8/27/2020 at 3:05 PM, popeye the sailor said:
well hello there stranger! it's so good to hear from you! yea.........just going back to my roots. I grew up with plastic models....built quite a few in my day. I took a period of time off to deal with life........back in the '90's I got the bug back. here is a picture of me building the U.S.S. United States.......
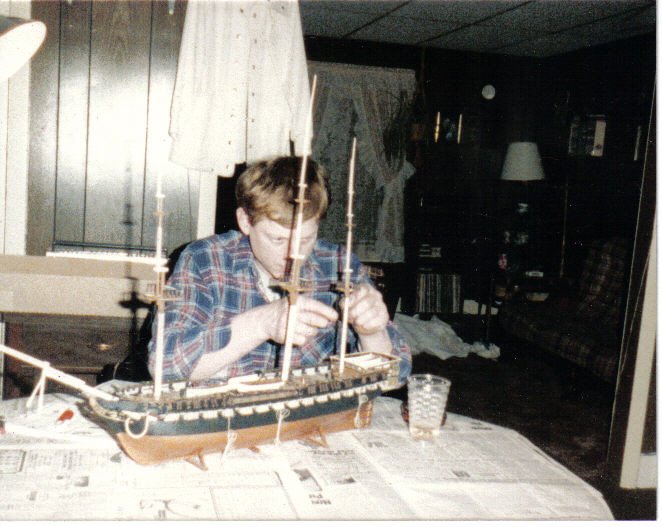
....so long ago ~sigh~ the wood model bug bit me in 2009....wish it would have bitten me sooner. I like to think I've gained some experience.....but there are folks here that show me that more prep is needed
")
 have you added to your active projects? I'll have to check! thanks for the kind word.......hope you follow along
Oh, fear not you have certainly gained some experience - your work is awesome! One thing this little hiatus has given me is patience - a lot! So it is with a new look on life in general I re-approach the hobby! Let's see if it pays off.
I have added to the Santa Maria for now. The Harriet Lane and Willie are DOA. Time was not good to them at all and neither kit was in a state to recover from with any form of grace - very sad really. The Santa Maria is the most open to picking back up on once I cleaned it up a bit - had a spider living in the hold of all things! The mayflower is near done but I can't find the instructions or the parts I had for it, so will need to figure out what to do there and the mamoli will also be picked back up once I get the SM chugging along!And of course I will follow along! 😃
Trying to get caught up on all the work and all the crafters I was following and the new ones is quite the challenge! -
On 8/27/2020 at 5:20 PM, Egilman said:
Had to be something a might powerful to get you to leave like that...... It couldn't have been boredom..... {chuckle}
I'm relatively new here not even a year.... But more is better as they say... Welcome home.....
+1
It's always good to see old timers come back, (even if you don't know them) makes you feel even more like your not alone in the world.....
Thank you sir!
Yeah - just a rough 3 years where life set it sights on us and just kept sucker punching - but (knock on wood, throw salt whatever it takes) looks like it is behind us, for now at least 😃
-
I have found that sanding it out and using the pre stain conditioner you mentioned is a must, especially on basswood. I have never had it go evenly without it.
I have the syren, but have not dared to start building it but as for the reference photo - that looks like it is either a natural stain or a very lightened golden oak. I use Golden Oak a lot but always cut it with natural stain to lighten it up and take that dark edge off. That all being said your photo does not look that bad at all, especially since it will be obfuscated some what by the hatch.
I think you are doing great and only hope I can come close to what you and others have done with this subject. -
-
-
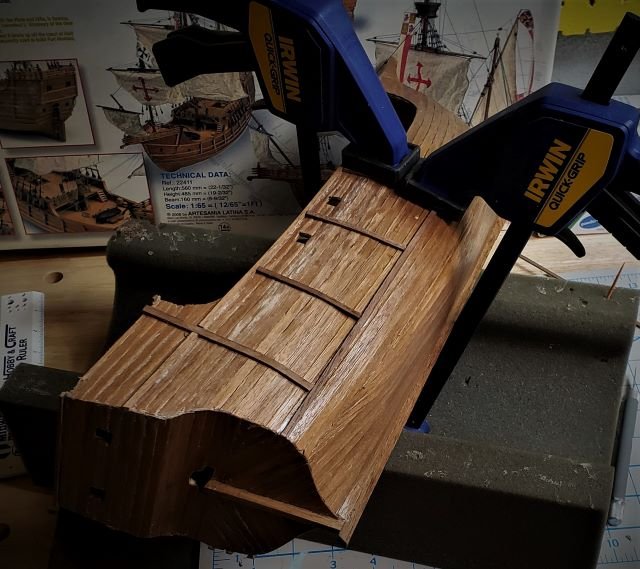
So next up we have the forward arch. Of course the plywood is not pre formed so it is very stiff and while it could be muscled into place I no longer apply brute force - so soaking, bending and strapping it is!
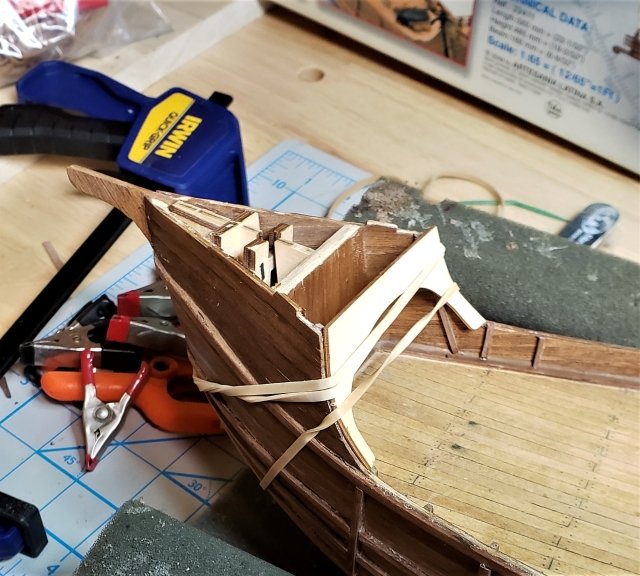
That part went surprisingly well, so once dried and formed I slapped on the veneer (I think in the future I am going to stay away from veneer - something about it is odd)
And then - after carefully trimming - we attach it to the forecastle and things are starting to move forward!
Next up! The forecastle deck!
Enjoy!
-
Thanks Louie - appreciate the kind words. That is my ultimate goal, make this better than I would have back then and then continue that momentum forward! So far so good - I think
")
-
POPEYE!
So, I come back after 3 years and see you have decided to dominate not just the seas, but the land and air as well! Damn my friend - busy busy busy!I have so enjoyed going through your work - I grew up in the plastic world, worked in a hobby story around here even - Eric Fuch's, managed the one in Nashua and Burlington for several years. That is where the bug hit - loved the plastic world and it just brings me such joy to see work being done there. Sometimes makes me sad that modelling overall has diminished in popularity but love that people like yourself and others on this site are keeping it alive!
Love it!
-
Lou - just came across this and boy what a beaut! I am always amazed at the craftsmanship of you all, and am just loving following along - you are now on my list of inspirations for clean work! Dunno how you do it - but am glad I get to see it done 😃
-
-
Looks like quite the project Sam - off to a good start with those replacements, they look good!
-
Okay, so we are back at the bench.
I am going to restart this log with one giant secret - I struggled with it. The Santa Maria was perhaps in the best stage to return to work, however it turns out it was in pretty rough shape as well. Some had to do with time but some had to do with me.
Ever go back to something and spend time saying to yourself - what the heck was I thinking? Well - that was me.
I even spent time deliberating over whether to even do it or to buy another kit and start all over.
After some deep soul searching I decided I would pay my penance so-to-speak and do the best I can with it. There are SO MANY mistakes, errors and face palms - but I will just move on through and do what I can to fix what I can and live and learn from the rest.
I will say one thing - DON'T USE HOT GLUE TO BUILD A WOODEN SHIP MODEL - IT JUST ISN'T WORTH IT - trust me, learn from me - let me be an example for others 😃Basically a lot of pieces popped off as I was handling it.
It was the result of pressure. I was working a lot and felt I had to do as much as possible in what little time I had and well, rushing NEVER works out in the long run.
Anyway, enough lamenting, enough belly aching - on with the show.____________________________________________
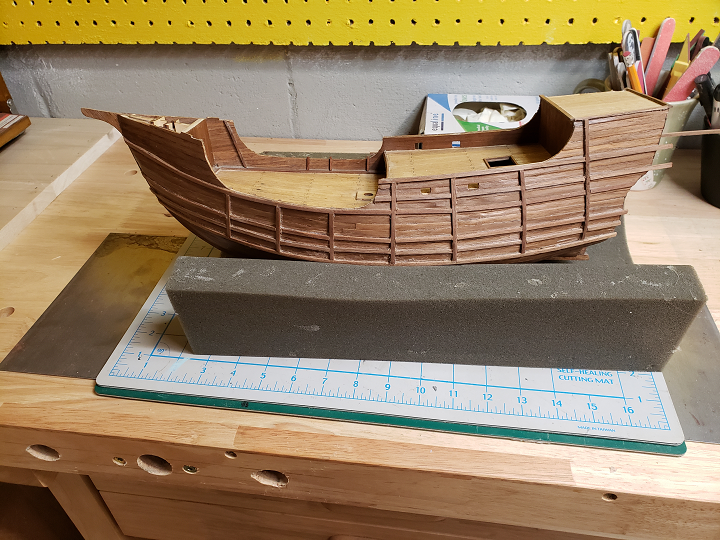
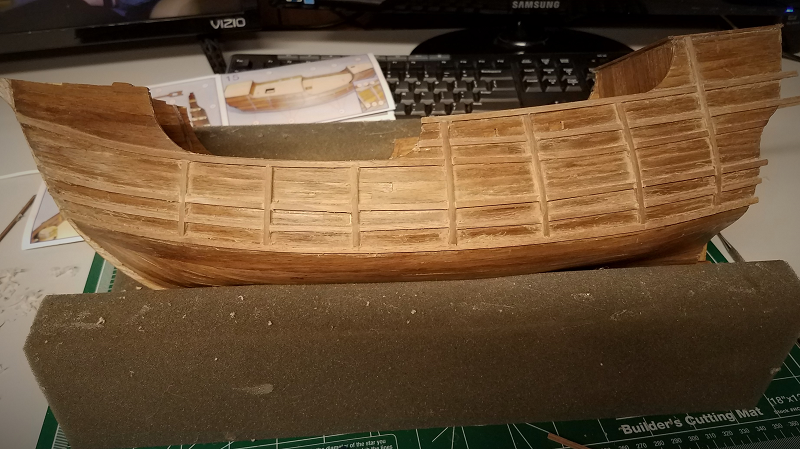
The first thing I decided I had to do was to "catch up" to the directions. I had begun to put the side battens on the ships hull and left kind of in the middle. Some had popped off and some were loose so I pulled off the bad ones, left the good ones and started to go at it.
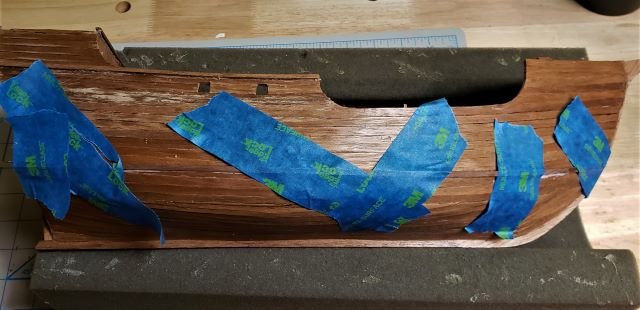
I made several changes in my approach to this task, as well as to modelling over all - go back to my plastic modeling days.
1- Patience: It is okay to put a stick or two on at a time and wait!
2- The little things: BENDING!! These battens went on SO MUCH EASIER when I bent the wood - not a lot mind you, in most cases I was able to wet it and affix it to the hull to dry and it was bent just fine.
3- Wood glue - put the glue guns out of sight, shelved the CA and went with good ole fashioned Titebond.
Ahh, things are getting enjoyable again!
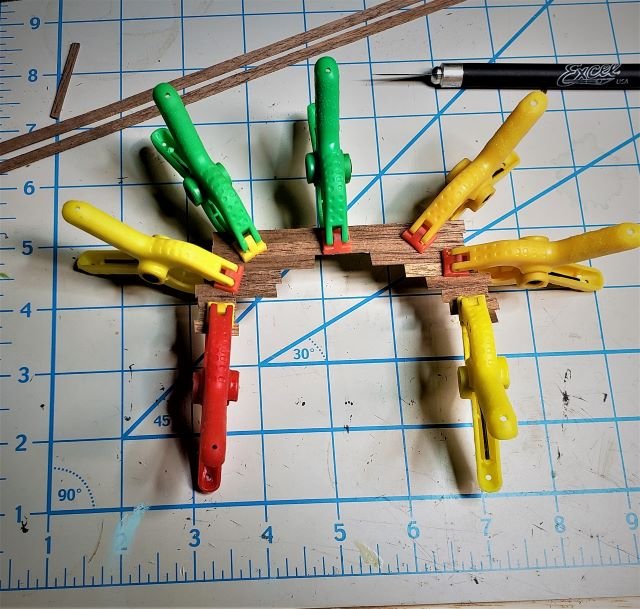
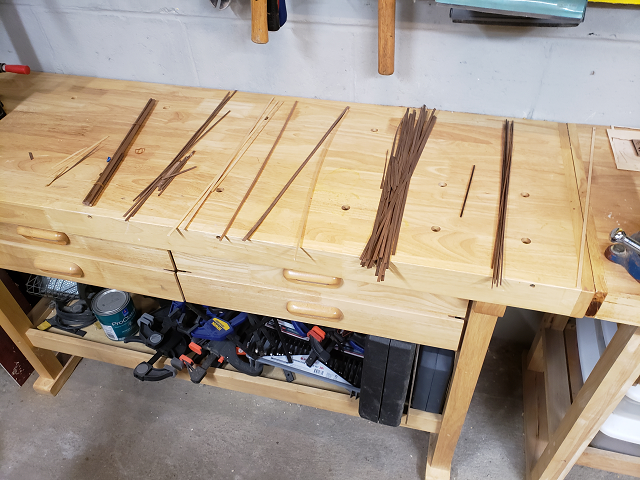
Once I was happy with the battens - or as happy as I felt I could be I decided to end the session by soaking and prebending the forward framing so I would not have to fight with that next time I am at it.
Oh look - the inside stanchions decided to pop off -

Until next time - Happy Modeling!!-Adam
- Ryland Craze and GrandpaPhil
-
2
-
Well hello Sjors, nice to see you as well and good to be remembered! Please tell Anja I said Hi right back!
I have been spending the last week or so going over where I am at. Sadly 2 of my builds have not survived time - they are in such bad shape and the materials themselves have been ruined =(. I am just not talented enough to recover from that. However, the Santa Maria is still going. In fact, going to post about that right now!
-
Thanks all, good to be back.
Will be updating some work soon - had to get through the "Let's see what we have to work with" phase - boy oh boy... it is going to be interesting!
- BobG, Ryland Craze, James H and 2 others
-
5
-
Hey all,
I was wondering whether I should post here or what exactly the protocol was for coming back after a long break. Once I saw the new member after a long break thread I figured - what the heck, I'll follow suit.
Was pretty active here at one point then, as many I am sure know, life gets in the way. Seemed the longer I was away the harder it was to get back to it. My poor kits in progress have suffered greatly over the last 3 years. Moved here, stacked there, stowed over there and again moved to over here. Two of them did not make it - my willie bennet and harriet lane got very damaged in all the shuffling and are just not in a spot to pick up where I left off. The Mayflower, nearly finished, is in a wierd spot - I can't find the plans or the mats for it, the box seems to be awol - so not 100% sure where to go with that one at the moment. So, I am picking up where I left off with the Santa Maria.
I have already poked around to re-familiarize myself with the site and find names I remember, good to see many of them still around. Moreso, great to see so many new faces - awesome to see such a wonderful hobby still alive and well in the age of bits and bits and bleeps and boops.
I look forward to getting caught up on the builds you all have in progress as well as getting to know folks once again.
Until then! Enjoy!- Ryland Craze, Duanelaker, JeffT and 7 others
-
10
-
Walking through the doors brought a familiar, comforting feeling. Some of the decor had changed but the overall atmosphere remained. The smell of sawdust and glue, paints and lacquers drifted softly in the air as the murmur conversation filled his ears. It had been a long time since had taken a seat at the table or pulled up a chair to a viewing. Three years, in fact, but never a day had passed that he didn't think about the camaraderie, the talent, the build, and being a part of it all. Chaos and neglect had left the work shop in shambles, the husks of neglected projects gathering dust and cobwebs taunted him daily. Three years before today, the day he said enough - it was time.
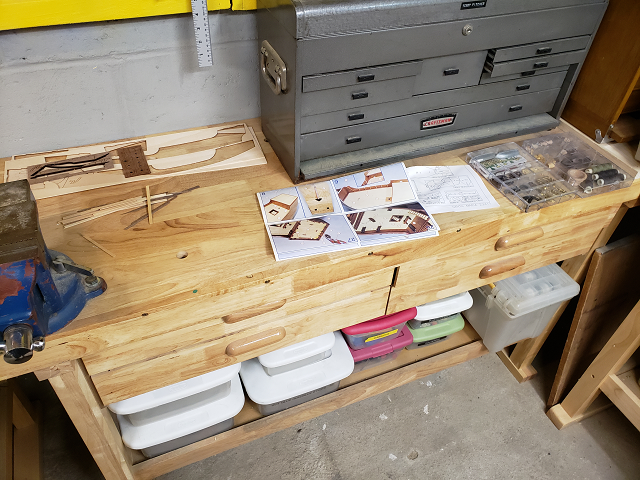
He took the Santa Maria down from it's shelf where it sat. Out of sight enough to not be a daily reminder, but not so much that when passing by it didn't glare at him, judging his dereliction. Looking it over he carefully dusted off what he could, removed the cobwebs and evicted the house spiders so as to see what he had to work with.
It wasn't horrible, but it wasn't pristine. Mistakes made now obvious with time, wear from being moved from shelf to shelf, minor damage and some wood swelling at first made it feel lost. But not today, today was the day - it was time.
Here is where he was starting from.....

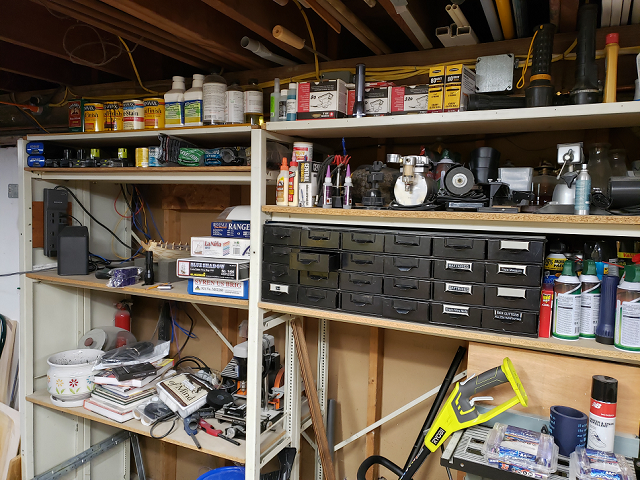
He spent days and nights working cleaning the rooms which had been so badly forgotten. In a matter of time the work room took shape. It was a new room, a different room than before, but that made it fresh. Fresh paint on the pegboard, tools large and small neatly organized on peg, on shelf and in drawer. New lighting put in and new benches lined the walls. The floor swept, the room was ready - ready to rekindle that joy and excitement of creation, of learning and of improving.

So - away we go! Again.
- GrandpaPhil, Louie da fly, tarbrush and 1 other
-
4
-
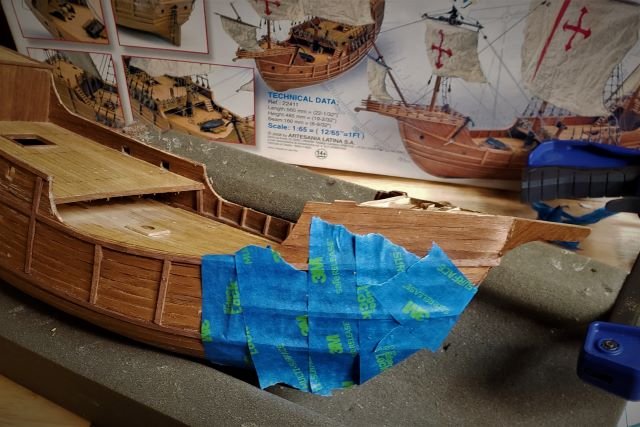
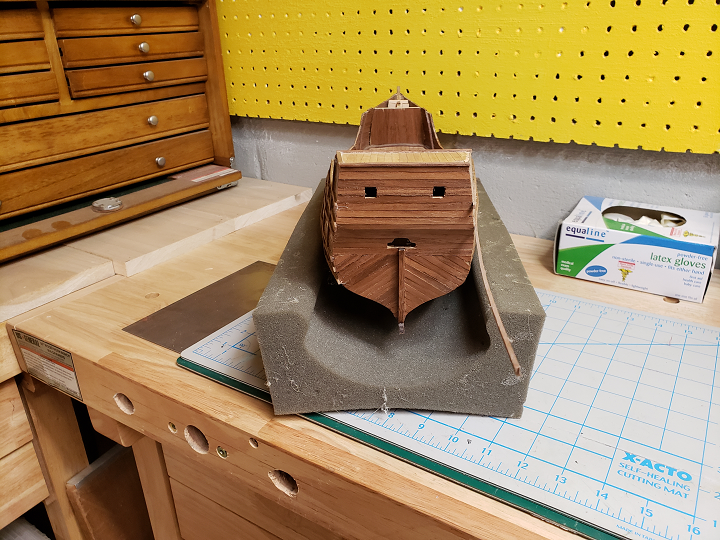
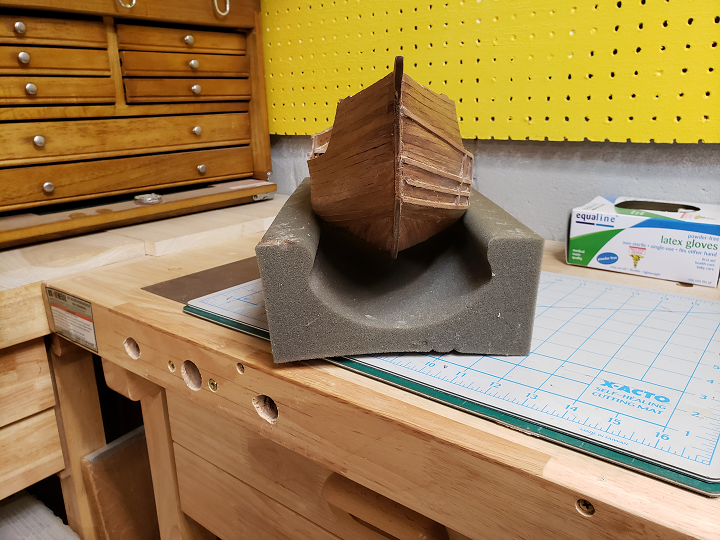
So, we continue trudging along. Working solely on the outboard trim at the moment and have one side all done and in place
These took a bit longer than the horizontal boards. The verticals required a bit of cutting and aligning. To do it I went down one board at a time.

This way I was able to control the alignment going down along the hull. Worked out pretty well, just had to trim out enough to fit it in the slot, slide it down to meet the board below and repeat.
After much toiling and fixing a few booboos along the way we have one side completed.
Once I finish the other side and the transom I will go over it with a couple of sanding sticks to clean up the roughness, a quick wipe with poly and she should be good to go!
Thanks all for stopping in, have a great day and happy modeling!
- popeye the sailor, mtbediz, russ and 4 others
-
7
-
The deck and timberheads look good. The outboard trim seems like it has a nice even curvature. That looks good as well. Nice work.
Russ
Thanks Russ. Tis tedious work, but I am liking how it is going so far.
Coming together nicely Adam!
Thanks Moonbug!
It's looking really good. She'll look nice with the Mayflower. I will have to get a curling iron now. Lol
Steve
Thanks Steve, it is funny - my dad and comment often over the years how every so often you get a tool and it is just perfect, awesome even. Sometimes it is the strangest or surprise tool. In my case, my most recent is that curling iron.
PLUS being able to tell my wife hands off my curling iron is kind of fun.
- CaptainSteve, trippwj and mtaylor
-
3
-


Santa Maria by SkerryAmp - Artesania Latina - 1:65 - PoF
in - Kit subjects built Up to and including 1500 AD
Posted
Well here we are again!
As I continue to try to get all the exterior battens back into place I hit a spot where it felt time to get the forecastle deck done. I figured this part was in very good shape so let's git r done.
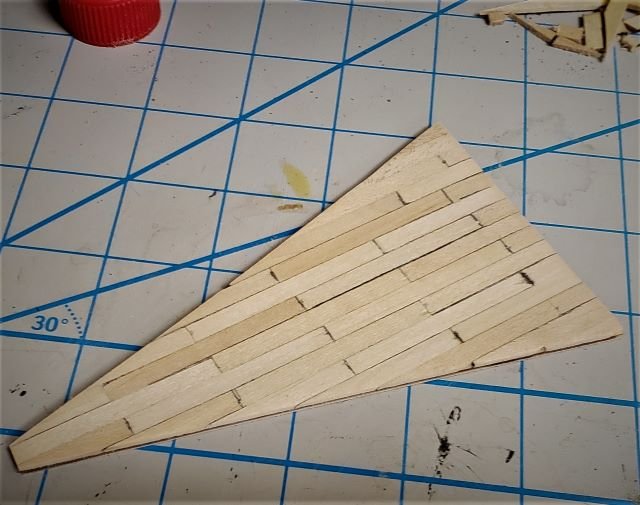
I started by popping the false deck out of the sheet and then cutting strips to be used as the actual decking. Very simple stuff really.... thank goodness I still had my Chopper!

Before I put the decking on I wanted to simulate the caulking. I know there are many different ways to do this and just as many "tastes" as to what people like. I kind of like a nice black line which varies a little bit between pieces (some darker, thicker than others etc). So my preferred method which I picked up from the mayflower is to use archivist ink pens.
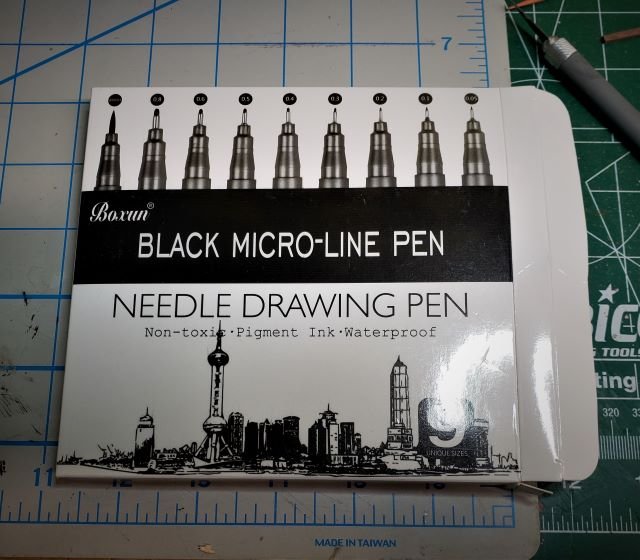
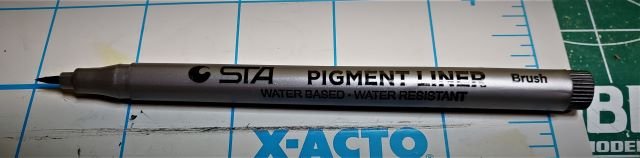
These are the ones I am currently using as they come in a set of various size tips (for various size jobs!) including a brush pen which is perfect for the caulking while the others are good for nails. That is, of course, my humble opinion.
The brush, as I mentioned, makes it easy to vary the strength and depth of the caulking lines - for example
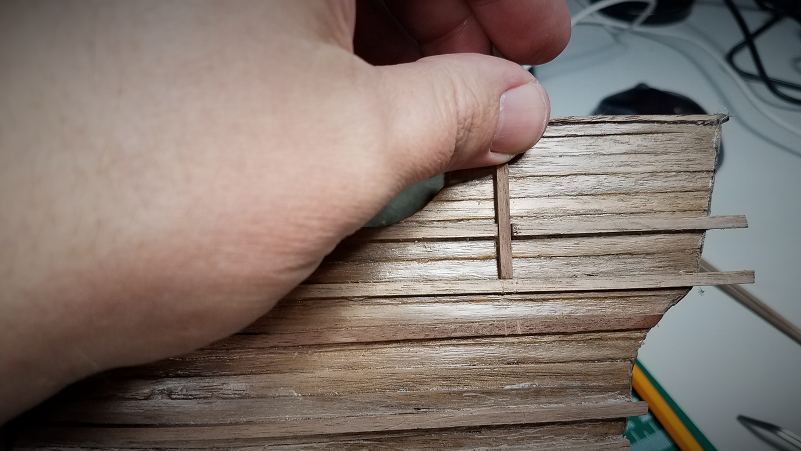
So, without further delay I "caulked" the edges and lay the deck
WOOOOO boy is that rough lookin! One issue I did have was making sure all the decking was pressed tight and flat and even. Wasn't completely sure what to do or what to use and then it hit me!
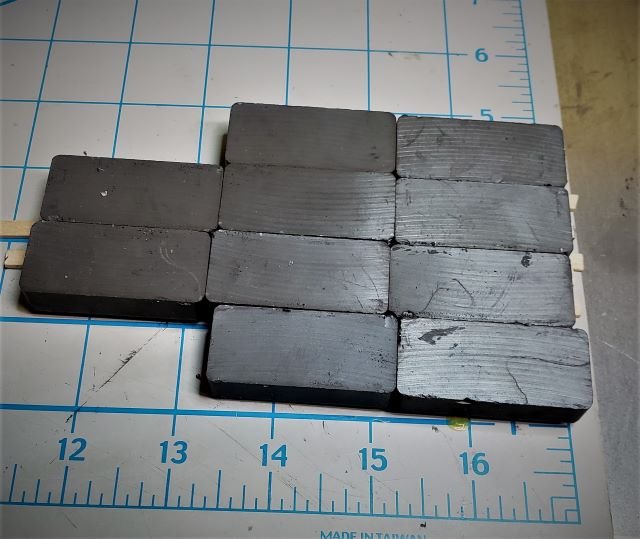
Under my mat is a sheet of metal I use for using magnets as jigs, squares and braces.. why not - a press!!
If this didn't flatten it - nothing would!
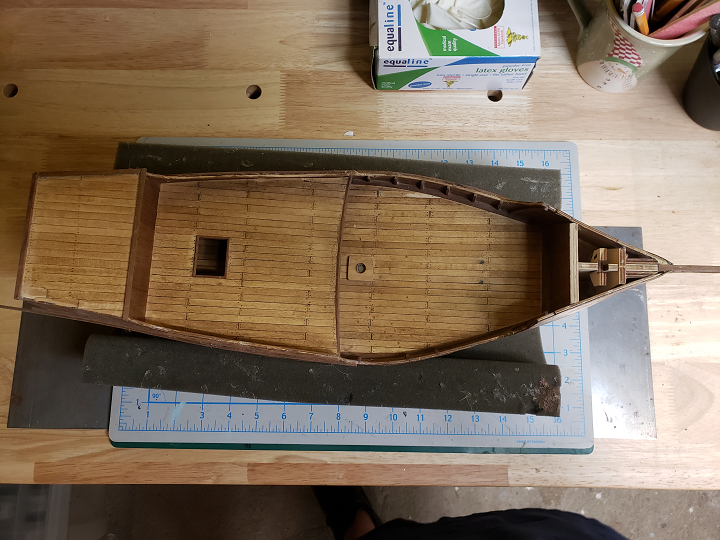
And it did! NICE and flat - still rough. So, trimmed the edges of course to fit the shape of the deck and then after a quick round of sanding... whalla!
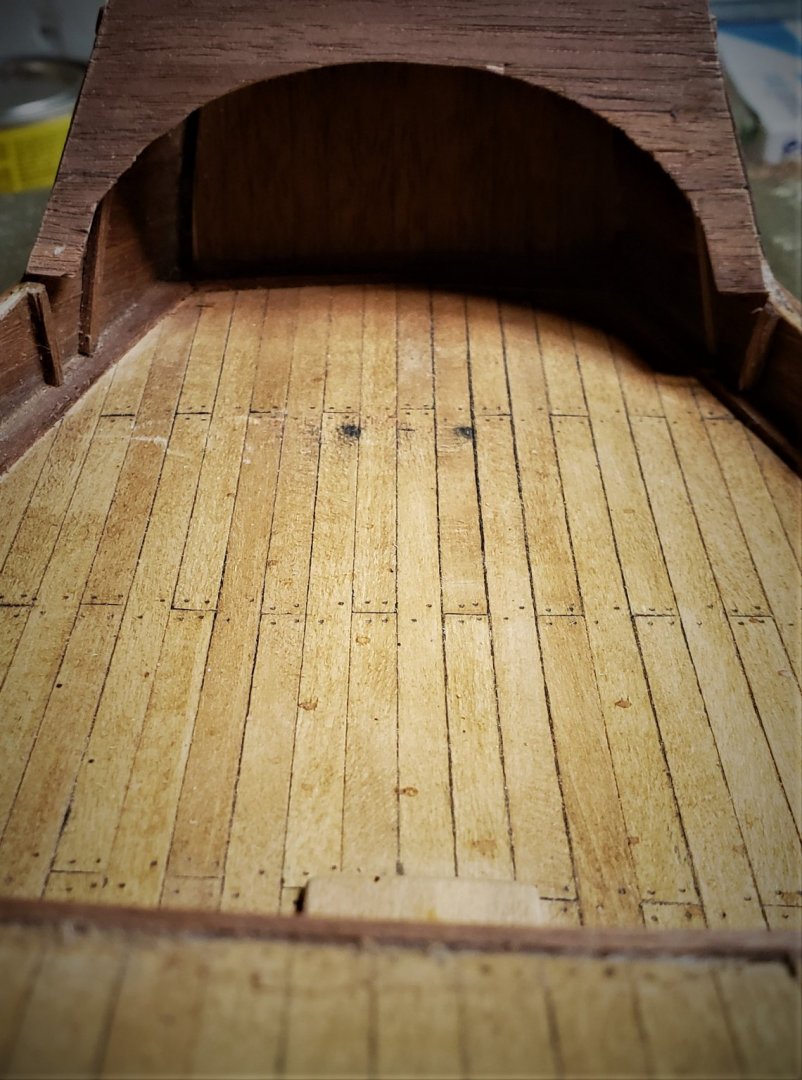
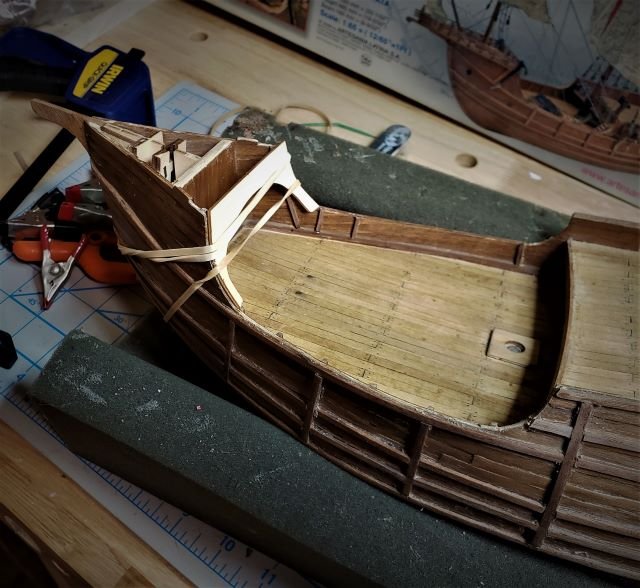
One deck! Still wasn't quite right though - better, but not what I was really after. So I cut out the hatch and the mast hole and sanded some more!
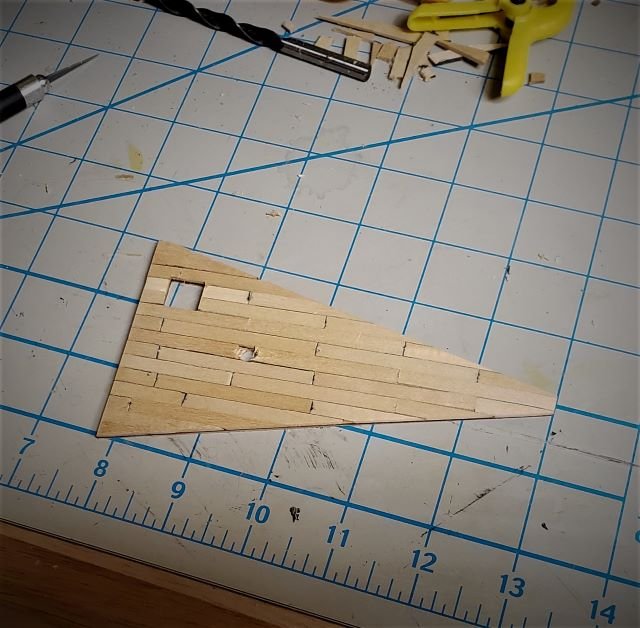
Ahhhh, much better - now lets see if everything still lined up! OOOOOH the tension!
Now that made my day. The battens were good, especially getting more on and feeling like things were moving in the right way, but putting this deck on was a bit more of a move forward - very encouraging. Although....
the color. It obviously does not match the other decking - then it hit me, I use mixes a lot - not straight stain (tends to be too rich or dark) so i cut it with natural to lighten it up or even with a gray to soften it a bit. What on earth did I use for the deck!
Took some time but turns out it was 5:1 Natural to Golden Oak - or at least close to it
I think I matched it up pretty well. I applied that after wiping it down with the conditioner which prevented a LOT of blotching (Basswood blotches something fierce). There is a little, but nowhere near what it would have been.
At first I was like OH NO the color is not even, but after it dried I like the varying depths of color on the woods, makes it look like different deck boards were used.
So, that is where we are at now. I still have more battens to finish as well as the forward veneers but have to also work out the caps - I seem to be out of the walnut so have to find wood that is a reasonable replacement and a stain mix to come close to match it - this will be interesting! FUN but interesting!
Until later - happy modeling!
-Adam