joef
-
Posts
9 -
Joined
-
Last visited
Content Type
Profiles
Forums
Gallery
Events
Everything posted by joef
-
Syren by joef - Model Shipways - US Brig
joef replied to joef's topic in - Kit build logs for subjects built from 1801 - 1850
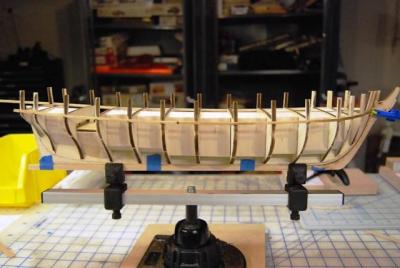
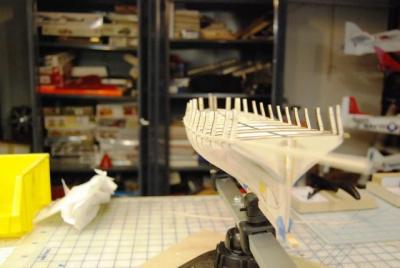
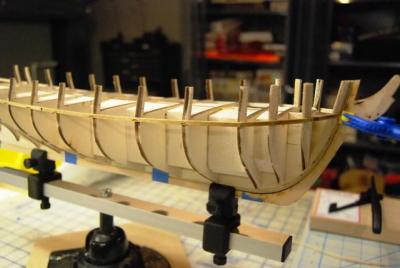
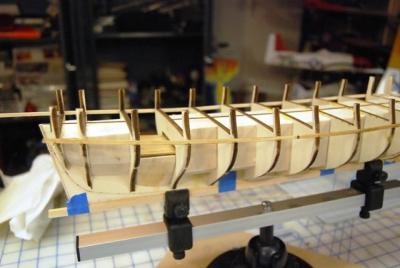
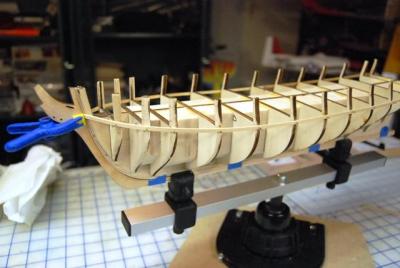
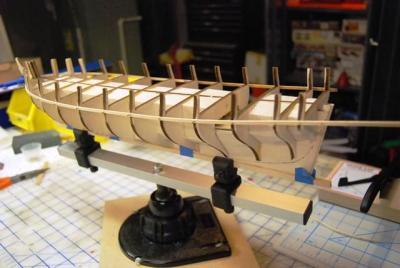
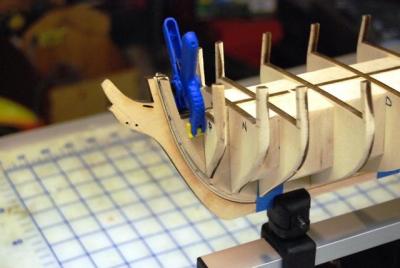
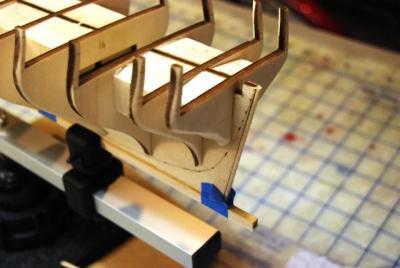
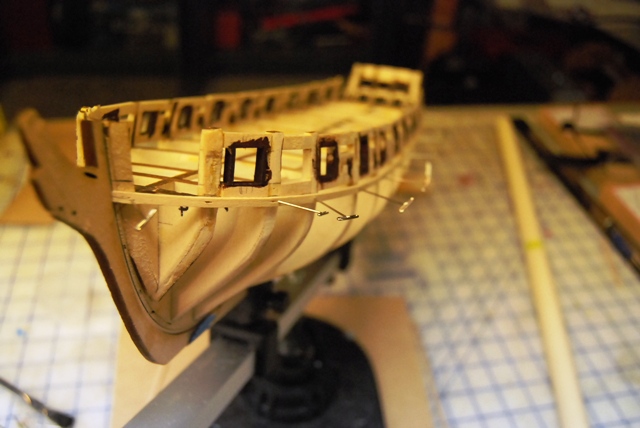
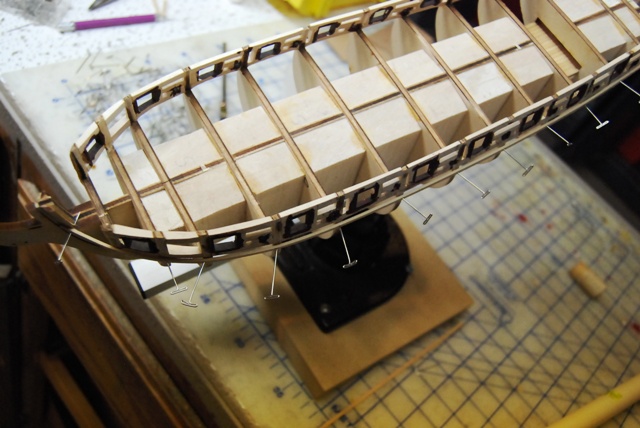
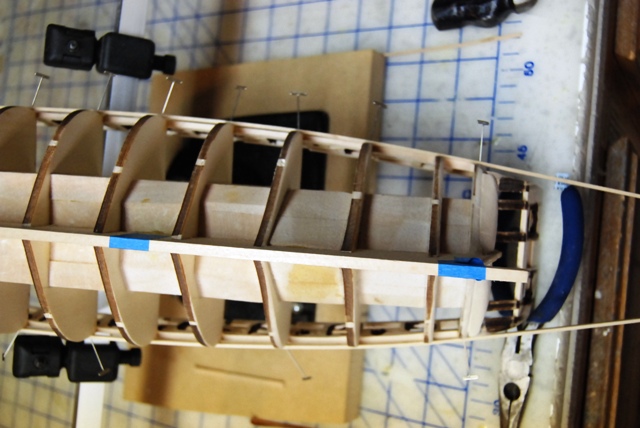
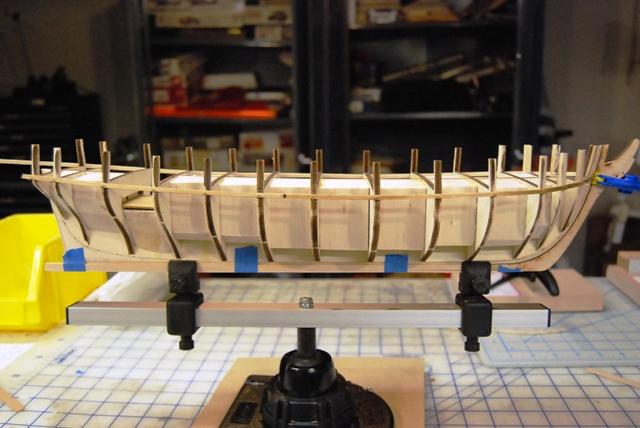
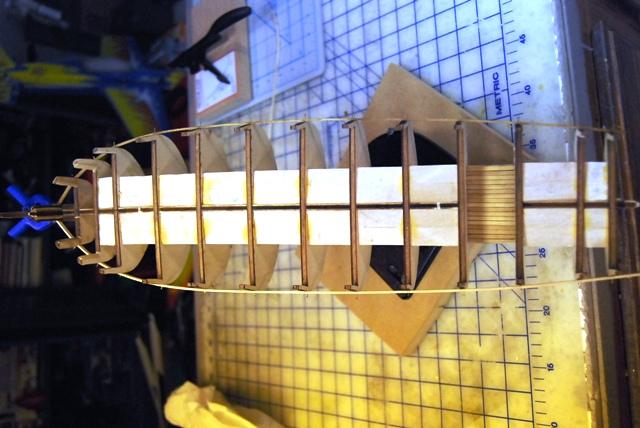
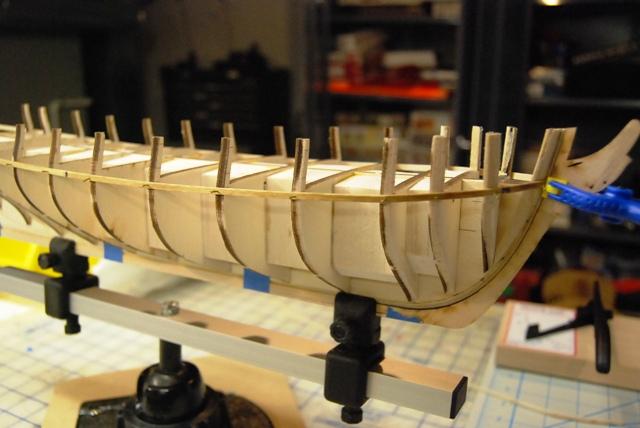
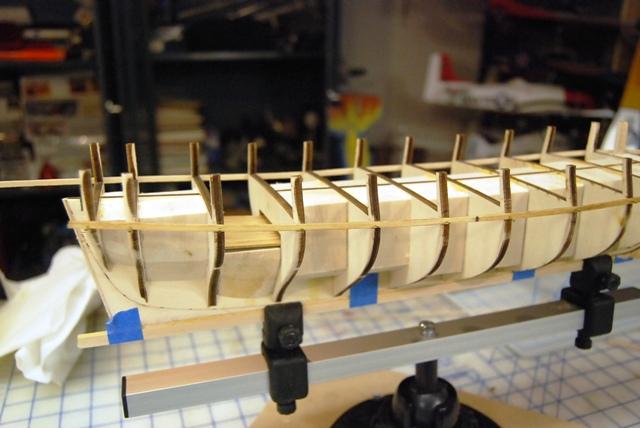
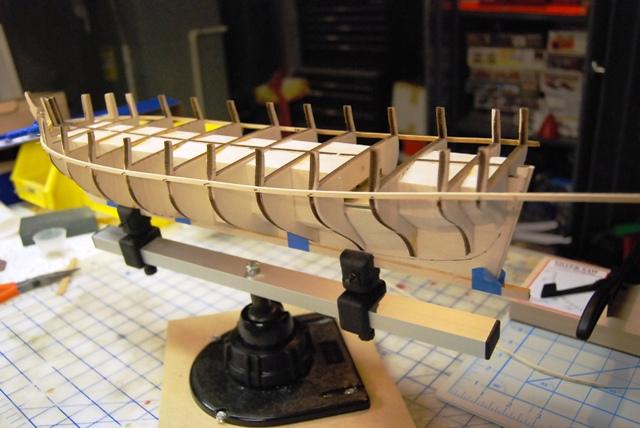
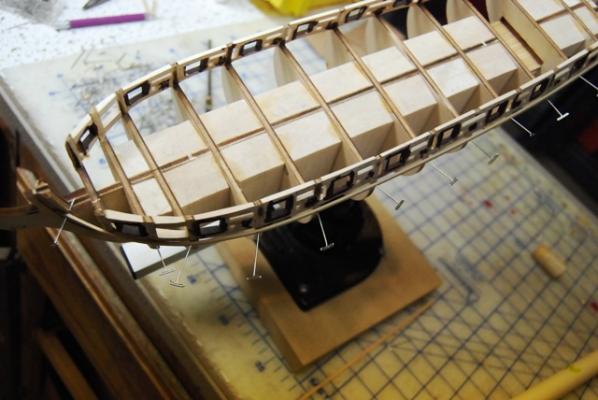
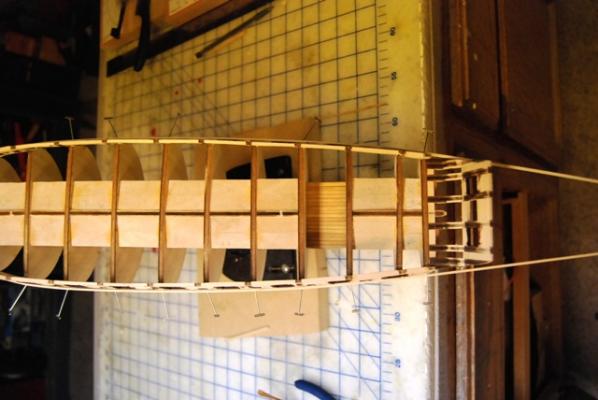
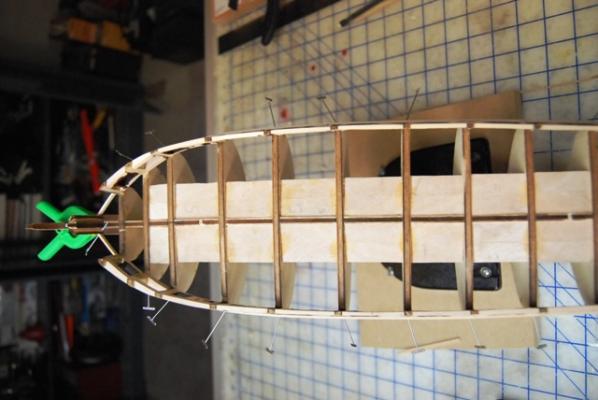
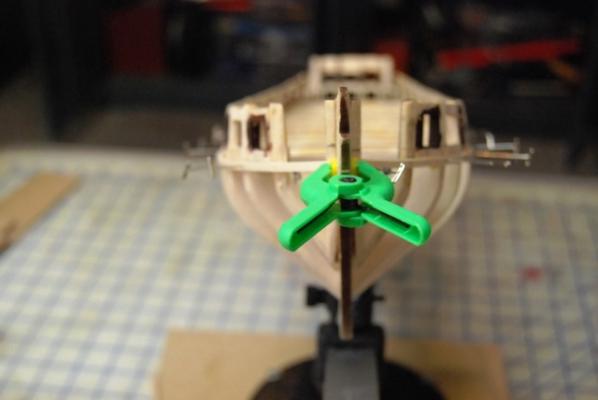
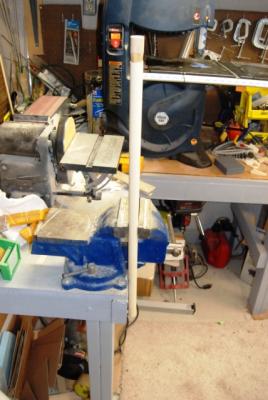
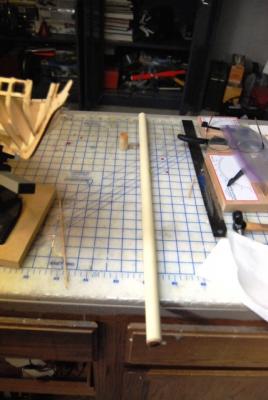
Hi All Well, I am near the no turning back point now. I have put two battens on the hull, per instructions in preparation for the whales. I have taken many snapshots to allow those of you with more experience and a more critical eye to help me judge if my hull is fair and true and ready to replace the two pinned battens with 5/32" whales. I looked for the following and would appreciate additional help and suggestions Each batten made solid contact at each former - no bulges, dips, or partial contact Run of the batten looked good from all angles I could see - no sudden changes in direction, no dips or bulges between formers Battens were symmetrical on each side - they converge at the same height at the bow and stern Nothing is glued in place, as I wanted some feedback before I glue the whales. The whales are however ready to go, as I made a plank bending Jig as per Chuck's suggestion in the instructions. I thought I would also share my plank soaker design. I stole an old trick from my RC days, when I had to bend many stringers to fit a long double curvature fuse. I started with a 3/4" diameter PCV tube and epoxy in a hardwood dowel at one end and let is cure overnight. On the top end, I made another plug of dowel, but tapered it so it was removable. When it was time to soak the battens and whale raw stock, I filled up the PVC tube most of the way in the sink, put the wood in and let the excess water run into the sink, then while pushing down the sticks, slid the dowel stopper on the top - I then help the whole thing vertical in my big vise for about 10-15 minutes and it worked like a charm - My original idea of borrowing one of the admiral's cookie pans was not a well thought out idea and I was ordered to stand down. I've attached a few images of my soaker - I would greatly appreciate feedback if I have more work to do, or if she is ready to have my very first planking laid down. Thanks to all who respond and sorry for so many images, but I don't know any other way to show all the views Joe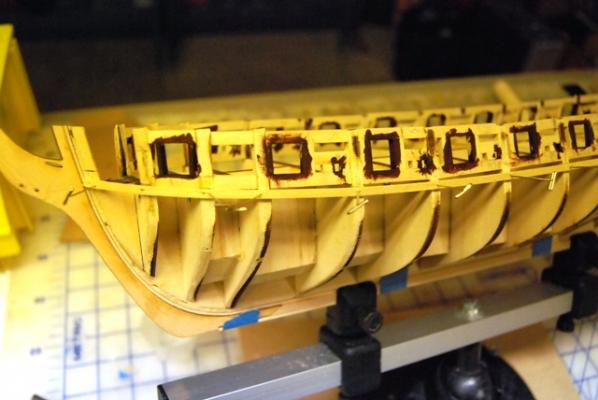


-
Syren by joef - Model Shipways - US Brig
joef replied to joef's topic in - Kit build logs for subjects built from 1801 - 1850
Hi Augie Thanks for the reply. As I study up on planking by reading the suggested text by Chuck and everything else I can find, I was wondering if I should expect to have to spile, drop plank, or stealers above the whales. I am not expecting to have to do drop or stealer, but should I plan on spiling any of these planks? - I certainly understand the need for them below the Whales, but initial planking as you know, starts above Thanks for the help do far! Joe -
Syren by joef - Model Shipways - US Brig
joef replied to joef's topic in - Kit build logs for subjects built from 1801 - 1850
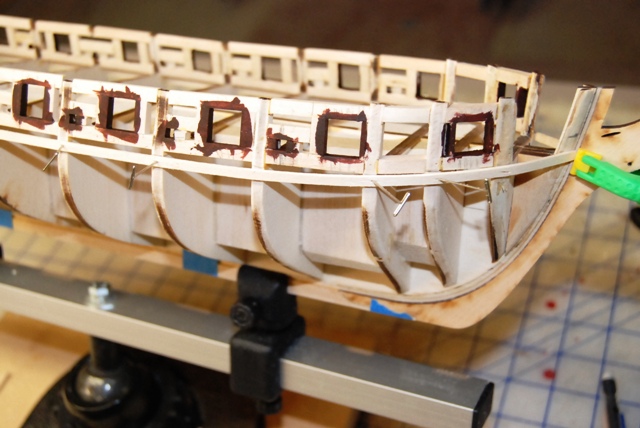
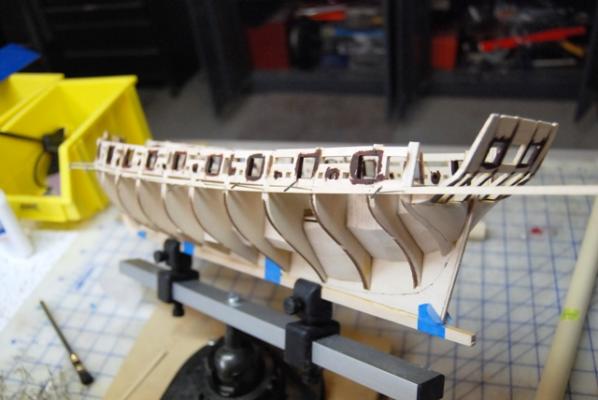
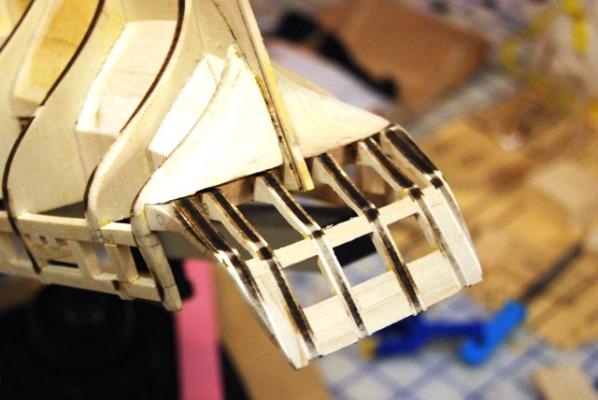
Hi all, Well, I have completed all ten steps of Chapter 4 and completed the Transom work. I decided to use blocks for the final steps to make a bit more surface for the planking to glue to as the curvature looks pretty big in this area. I hope I have faired it well, but I frankly have zero experience in planking and of course, that is the next chapter - planking the upper hull and gun ports - time to take a deep breath and expand my skills... I have posted a couple of images to show my complete transom and the blocks I formed under the counter. I heavily used sanding sticks on this operation and they were quite handy. I was still in my comfort zone to this point, as shaping clocks like this is common in building RC planes, but planking is next - this should be fun!
-
Syren by joef - Model Shipways - US Brig
joef replied to joef's topic in - Kit build logs for subjects built from 1801 - 1850
Hi All, Well, I am now into chapter 4 - building the transom and I certainly see Chuck's warning about the starting frames being fragile. They also presented a challenge to me in that they require careful placement in multiple planes - I was careful as I can be for my skills, but it is still a challenge. I will see if my framing here is any good soon I suspect in how everything else fits. I also show a starboard shot of the Syren showing my recently completed gun port framing. It also was a bit of a challenge for me . I should remind all reading this build thread that I represent the type of builder that makes many mistakes and accept the fact that I won't always get everything correct. I learned several years ago that the enjoyment for me in this hobby is the journey and not necessarily the end product of my work. I am enjoying the build and if I make it acceptable, that is icing on the cake - I think my thread will serve those like me who can sometimes be a bit intimidated by the large number of superb builders here - We mere mortals can also build. While the transom frames glue dries, it is time to change gears and begin the Me262 plastic jet I have waiting to build - I will be switching between these two all winter Joe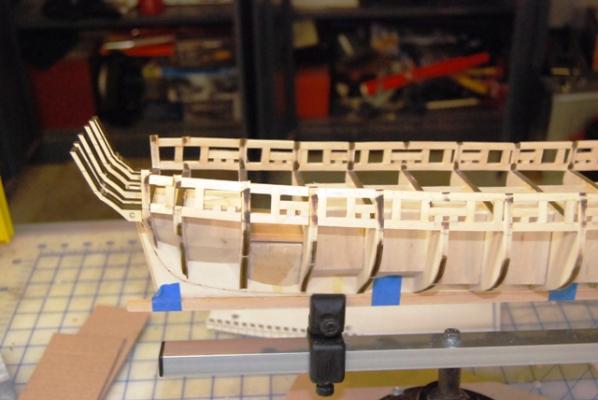

-
Syren by joef - Model Shipways - US Brig
joef replied to joef's topic in - Kit build logs for subjects built from 1801 - 1850
Hi All, Well, after a long recess I am back at my Syren – I am guarding the rear flank of the fleet, but it feels good to be back. I took a while off in the summer to fly radio control, and then some family and work issues kept me at bay. I have that stuff all resolved now, and it is back to the Syren. I also like building WWI and WWII scale planes and armor, so I will be alternating between the Syren and whatever I have on the plastic bench I will take some images and post where I am by this weekend, but I am now into chapter 4 – working on the transom – It had been so long being away that I forgot how much I like working with wood and this vessel – Feels great to be back. One good thing about being so behind everyone else is I get lots of great build threads ahead of me to read again and note how to do things right! Permission to come aboard captain! Joe -
Syren by joef - Model Shipways - US Brig
joef replied to joef's topic in - Kit build logs for subjects built from 1801 - 1850
Hi Anja Thank you for your post. Life has indeed got in the way, but in a good way. I also build and fly Radio control and I took on much more than I normally do during the season and have been thrashing some new designs for a long time now. My Syren is sitting on its table calling me and I will soon return to her. Someone needs to sail at the end of the Armada and My Syren will bring up the rear! Joe -
HI Eric Welcome aboard - I am just a little in front of you on my Syren build - I am in the gun port framing chapter a few pages way from you - Augie and Chuck have been very helpful to me so far - glad to see another build - I always get good ideas from others Joe
-
Hi Richard Your progress looks great so far. As far as heading up the rear - That is my domain. I am still in chapter 3 on gun port framing - I am taking a small break whilst I get my RC fleet ready for the summer, but will soon put my shipwright hat back on Joe
-
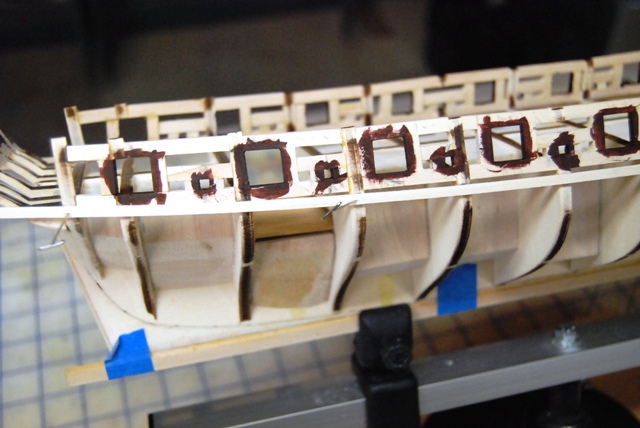
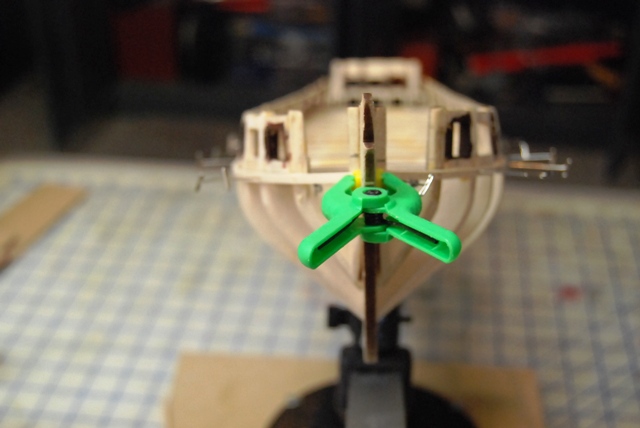
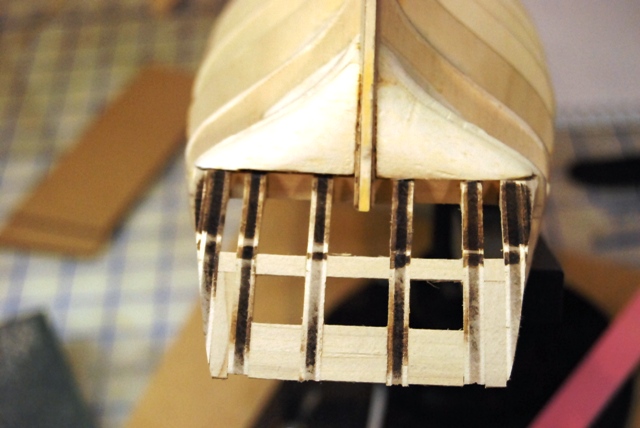
Hi All, Well, my log was also lost, but I was not that far in, so I feel fortunate, as compared to the many who had magnificent builds logged. First, let me re-introduce myself. I have been an active RC and plastic modeler for many years and finally decided to tackle a tall ship. I looked over the instructions of the Syren and this was my deciding factor to make her my first try. I understand she is not recommended for a first timer, but I am hoping my experience on building RC and other scale will help me a bit, and I have already asked for help on many occasions in the brief amount of time I have been building. I am currently in Chapter 3 - gun port framing and I will add back some of my original posts now, which will catch me up to where I actually am at currently. here is the first set of files, although not in original order though - I was working on framing and fairing the hull asking if things looked OK. As some of the images also show my first attachment of the batten to check for a good and fair run. I also put on the sub deck and stained the planking with a combination of MinWax natural and Oak. For those of you ahead of me ( I.E. everyone), I will be asking lots of questions and studying every log I can take the time to read, especially when I have a free moment at work This is my first post to the new site, so please excuse my images if they don't space correclty - I'll figure it out soon enough